Check out our new MSW Sponsor Innocraftsman
×

knightyo
-
Posts
525 -
Joined
-
Last visited
Content Type
Profiles
Forums
Gallery
Events
Everything posted by knightyo
-
 I agree with this recommendation as well. Alan
 -
Welcome from Oregon, land of eternal sunshine. What? Alan
-
Chuck, just brainstorming here, but I loved the look of the framing/shadowbox you had on the Confederacy. If you provided that as an option on the POB, that might appeal even more to builders, as it could still have the look of a fully framed model as well. Kind of the best of all worlds for a lot of modelers. Alan
-
It almost feels like someone who is confident enough to tackle a POF would also be the type of person who would loft and cut their own frames. I'm thinking you might have a larger pool of potential customers if you don't supply the wood, but do offer all of the templates needed for someone to cut their own frames, with very detailed instruction on how to cut/shape the difficult areas (full-color photos/instructions, sexy book cover, etc). I'll bet you could net out higher if you sold books at 300 bucks a pop (and low time investment in printing) instead of full kits at 2 grand (and a lot of time burned in creating material).. I could also see a lot of modeler's requesting a book (or set) as a Christmas gift from their spouse at 300 bucks a pop, but would not have success in asking said spouse to drop a couple grand for a kit. If you found the right publisher and right mailing list, you might hit the jackpot. I've got a number of expensive books in my collection, but have no intention on creating the models; I just love having the books, looking at the photos, and knowing I could build the model some day if I ended up with an unexpected bonanza of free time. If I were to tackle a POF, I could see myself paying for instructions/templates, but not the actual wood that I could cut/sand/shape myself. The wood type is a limiter as well. There would probably be people who might be interested in the kit, but only if it's in swiss-pear, etc. At this point in the game, if it were me, I'd create one or two kits and market them here and on your website, knowing that they would probably eventually sell, and then just replace them in stock one at a time as they do sell, so you could eventually recoup your investment, and also have a nice, random income source for as long as you want. I think that in theory, with the right marketing, you could go either way; it would just be far less time consuming to create books than kits. EDIT: I would also absolutely offer this as a POB kit. 2nd EDIT: Also as a miniature navy board project. lol Alan
-
I hear that. Over in Brownsville, the air has cleared considerably; it was absolutely disgusting for a while tho. I hope your other life things are able to resolve. It's frustrating when life mandates that no modelling can be done. Alan
-
The Pacific Northwest is pretty easy living. We escape (mostly) most of the natural disasters the rest of the U.S. has to contend with, and it's pretty laid back. Alan
-
To me, only about one out of every hundred models looks better with figures unless exceptionally well painted/placed. Even then, it seems like figures on a model take away from it's elegance. I'm probably in the minority however, and fully acknowledge that I have strange tastes. I also admit that I've just purchased figures from Chris at Vanguard Models; not sure if I'll ever place them on a model, however; they were just too cool not to purchase. Alan
-
I was initially surprised at the depth of oil canning effect in the photos, but now that I think about it, with sides that are basically flat, the waves hitting them head on would definitely have more of an impact as opposed to hulls which are more rounded/curved; just such a strange ship. Greg, I love what you did with the internals in the hangar; the flag looks great in there. Alan
- 47 replies
-
- 4
-

-
- Zumwalt
- Snowman Model
- (and 2 more)
-
Thanks Steven
-
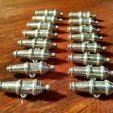
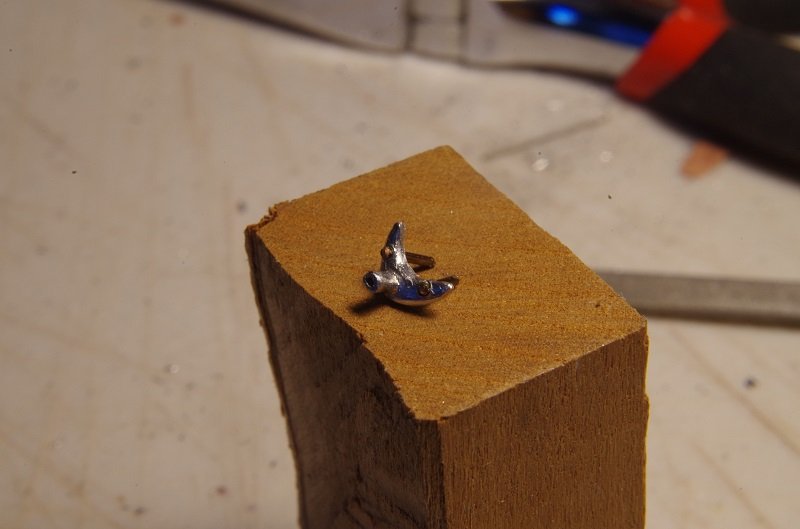
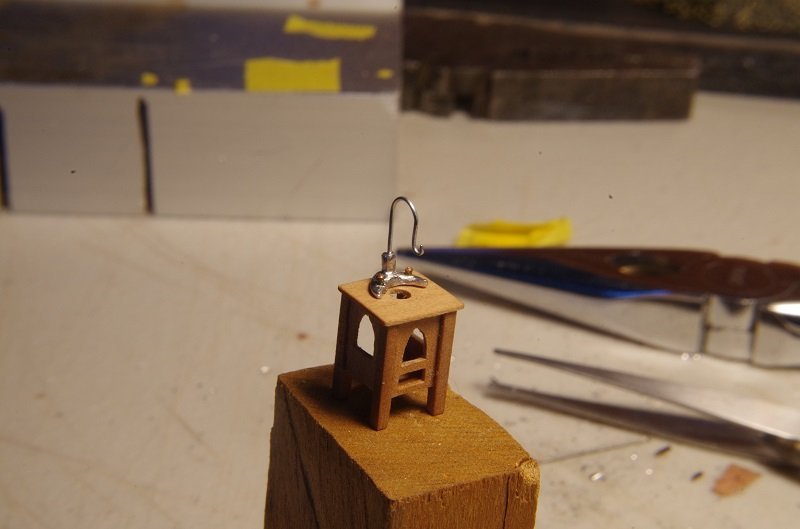
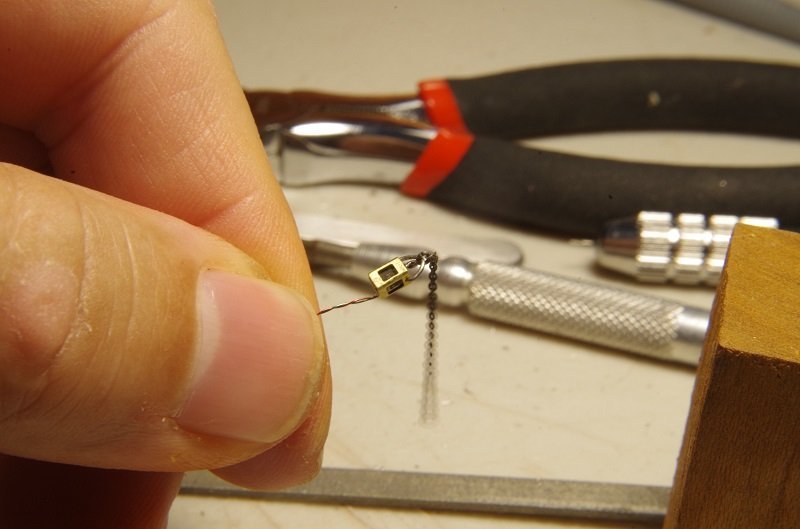
Still working on the binnacle project. The below is a contraption I've basically carved out of pewter which I figured could plausibly pass as a lantern base. the "bolts" loosely resting in each end are just pieces of wire that have been rounded off/compressed to simulate round bolt heads. Once the piece is finished, I'll blacken everything. As I'm looking at the photos however, it feels like the piece might be too thick, and overpowering the cabinet. I might work on reducing the thickness of the piece as a whole. The lantern hook is just small gauge wire. I have a little concern about the strength of this hook over time, however; it feels like something should be added before final installation. The lantern shouldn't actually be pulling the hook down a lot however, as the lantern will also be supported by it's own wires coming in from the backside of the cabinet. The last photo shows the fairly complete lantern. I just need to snip some excess wire off on the handle/chain. The light itself looked like a supernova emanating through the panes when activated; to try and remedy this, I've applied some back acrylic to the panes which will hopefully dim the light quite a bit and maybe make the light look more authentic; sort of a candle-blackened look. Alan
-
I agree with the coffee table idea. That is too awesome to be placed in a box. Alan
- 200 replies
-
- 4
-
-
- Transport No. 103
- Hasegawa
- (and 4 more)
-
The build would be more exciting and memorable for you if you skipped the labeling process. It's really looking great so far! Alan
-
I've found that this also applies to yardwork as well as modeling. Alan
- 93 replies
-
- 4
-

-
-
- santa maria
- amati
- (and 1 more)
-
This model looks fantastic! It's stunning to hear that this is your first model. Alan
-
This was absolutely fantastic information, Bob. Thank you! Alan
-
Hi Bruce, I'm in the same boat. Also using swiss pear, also going to shellac and nervous about the strength of some of my very small yards. Alan
-
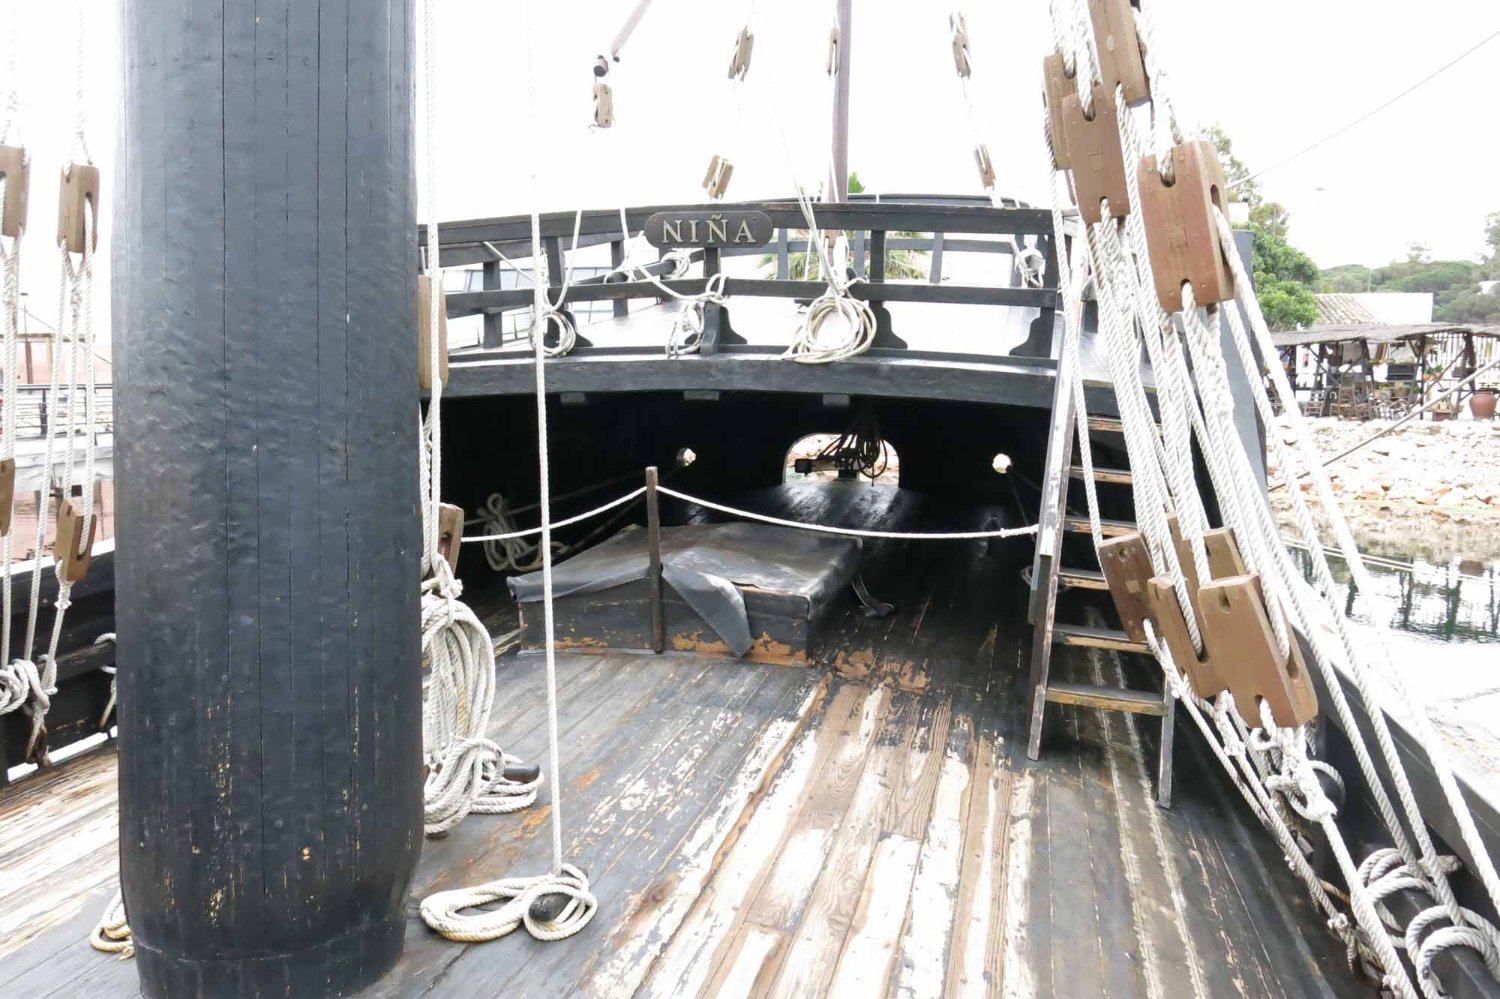
I can already feel myself doing the same thing on this build. I've made a lot of fairly sketchy assumptions on this build, and instead of "Nina", I should probably call it "Fanciful Representation of a Ship and Hypothetical Components from the 1400's, 1500's, 1600's and 1700's". I'm still working on the binnacle section of the model. The drawer and actually entire front of the binnacle have been remade in order to accommodate a compass. The compass still needs to be filed down a bit more in order to allow the drawer to close; that little piece of brass round stock is hard to handle. It's too small to be able to be held between finger/thumb, so I've been holding it as tightly as possible on the tips of tweezers while gently running my smoothest file along the bottom to reduce its height. I'm shocked it hasn't fallen prey to the carpet monster yet. I'm still planning to print a very tiny compass rose to insert into the housing, with a drop of acrylic over the top to mimic a slightly convex glass top. We'll see how that goes. I've also been able to file a piece of brass square stock into the shape of the lantern which will illuminate the surface of the compass via the mini light below at the end of the wire. I'm planning to cut small slivers of clear acrylic, securing them to the inside of each "window" in the lantern with super glue and leaving the back of the lantern windowless, as that's where the light is going to be coming into the lantern from the back side. My plan is to fill the lantern with hot glue and then to insert the light from the back which will hopefully secure the light permanently into the lantern. The wires for the light will extend through the back of the binnacle to the mast directly behind and down through the deck right down through the keel and out through one of the hollow round brass stand tubes to the light switch. My hope is that the wire will be completely invisible to the viewer no matter what angle they are viewing from. That's the theory of this section, at any rate. I have to admit that the little brass pieces are just unbelievably hard for me to work with, even under magnification. At least I'm about done with each piece now, and just need to create a top for the lantern from which it can then hang from a chain coming down through the top of the binnacle. In looking at the photo, I see that I also still need to make another handle for the new binnacle drawer, and probably enlarge the front window a touch more as well. I'm really looking forward to seeing what this little piece looks like after it's been cleaned up and layers of shellac applied.

-
This is going to look spectacular after you've applied your washes. Alan
- 2,689 replies
-
- 3
-
-

-
- heller
- soleil royal
- (and 9 more)
-
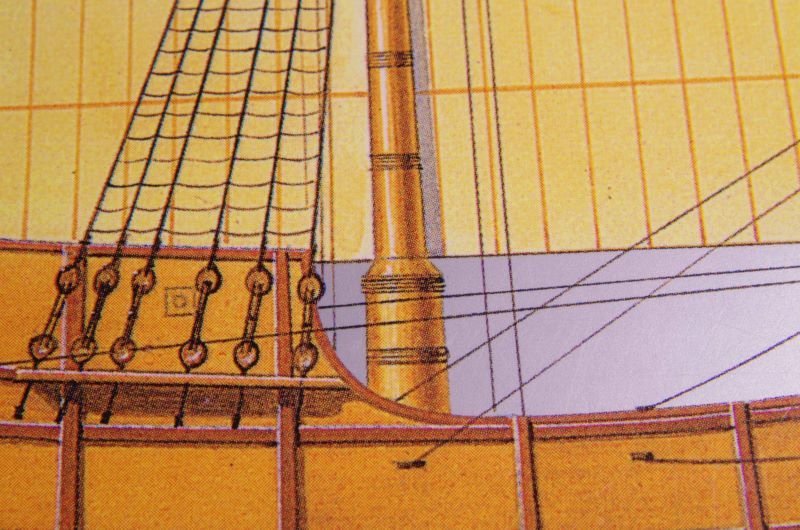
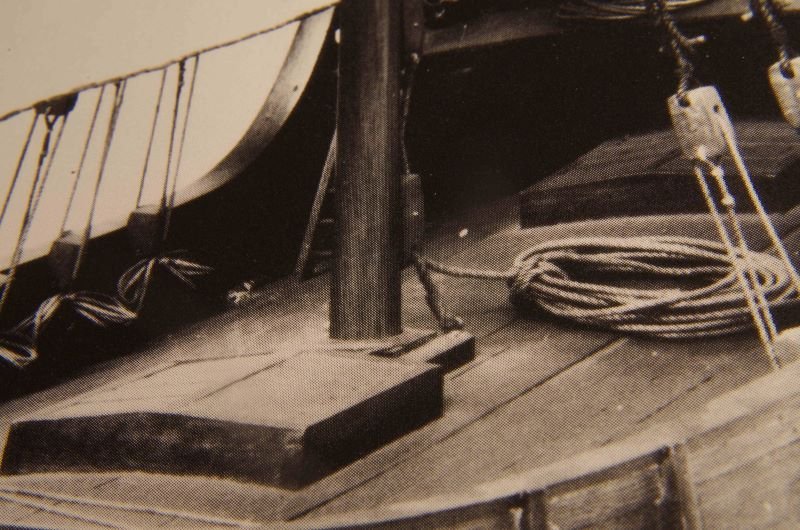
Thanks Steven, and as you say, it will be hard to prove I've done wrong if installing these, due to the scarcity of reference material! I'm pretty sure if the original Nina suddenly appeared, a viewer would just laugh comparing my version to the original. I also agree with you Bob, in that this vessel probably shouldn't be relied upon as a historically accurate example. I've already made a few decisions/guesses on my model which I'm pretty sure would be frowned upon by a researcher in the field. I might incorporate the look as below. This (Santa Maria) is from the cover of the Anatomy of the Ship's series "The ships of Christopher Columbus". However..... In the same book, is the 2nd photo below, which is a model of the Nina built by a researcher, which shows "bare" masts, which made me wonder if the lateen rigged Nina didn't have these reinforcements at the bottom, whereas the larger Santa Maria did have them. (Perhaps since the Nina was a smaller vessel lateen-rigged and originally used up and down the coasts of Mediterranean, reinforced masts weren't necessary?) Or if it was just a matter of the researchers taste, not to add them. I admit that the mast without the reinforcements/wedges looks a little more elegant. Alan
-
That's exactly what I needed to see, Steven. Thank you Alan
-
Thanks Jaager, Below are the types of wedges (now that I think about it, I might be using the wrong term) that I'm referring to. I'm creating a replica of the Nina, except as she was when she still had lateen sails. And now I'll reveal the true nature of my question. I fouled up the mainmast while shaping it; it is a perfect cylinder, but too thin at the base! I was thinking that I could hide my error (and making the mast stronger) by incorporating the wedges around the mast as in the below photo to hide the fact of it being a little skinny at the bottom, but wasn't sure if that would be appropriate to do for a mast with lateen sails.

-
Whoops.... You aren't missing anything at all. I totally worded my question wrong, and will go back and fix. Thank you for your response tho! I'm building a 1490's Spanish Caravel, and intending to portray the ship with lateen sails, but just wasn't sure about the wedges around the mast(s). Alan
-
In general, would ships rigged with lateen sails have wedges around the masts, or were those not usually used on fore-aft rigged ships? I'm referring more to the types of wedges which extend up pretty far out of the deck around the mast. Alan
-
Thanks Steven! Montaigne has made me think about adding perhaps two chests or maybe even a small side table. One with a scroll of my name/build date, but perhaps the other with a scroll with a funny/inappropriate limerick or such. That would sure be a surprise to a future viewer. It would destroy whatever thoughts they had about the builder, however. lol Decisions, decisions...... Alan
-
Chuck, I'll bet you've been cringing wondering how long it would take someone to ask you if you were also going to create a mini-Winnie as well, yes? It even rhymes. Alan