


Glenn-UK
-
Posts
2,662 -
Joined
-
Last visited
Content Type
Profiles
Forums
Gallery
Events
Posts posted by Glenn-UK
-
-
3 minutes ago, allanyed said:
Hi Glenn,
Based on your build I find this kit to be interesting and well thought out with some nice attention to detail. Does the kit supply the rigging line and does it explain about the foremost shrouds being served for their entire length to protect them from chafing?
Many thanks for sharing your build with us.
Allan
Hi Allan
The kit provides all the different rigging threads. As with most kits there is no reference to serving shrouds, that is an option for the more talented builders who like to enhance the builds.
- Dave_E, chris watton and mtaylor
-
 3
3
-
Just now, Dave_E said:
Your work of excellence is inspiration to me for my next build! (I’m sure many others also). 👍😀
Many thanks Dave for your very kind words, they are much appreciated.
I am always striving to improve my skills so I can do these wonderful designs the justice they deserve.
Glenn (UK)
- chris watton and mtaylor
-
2
-
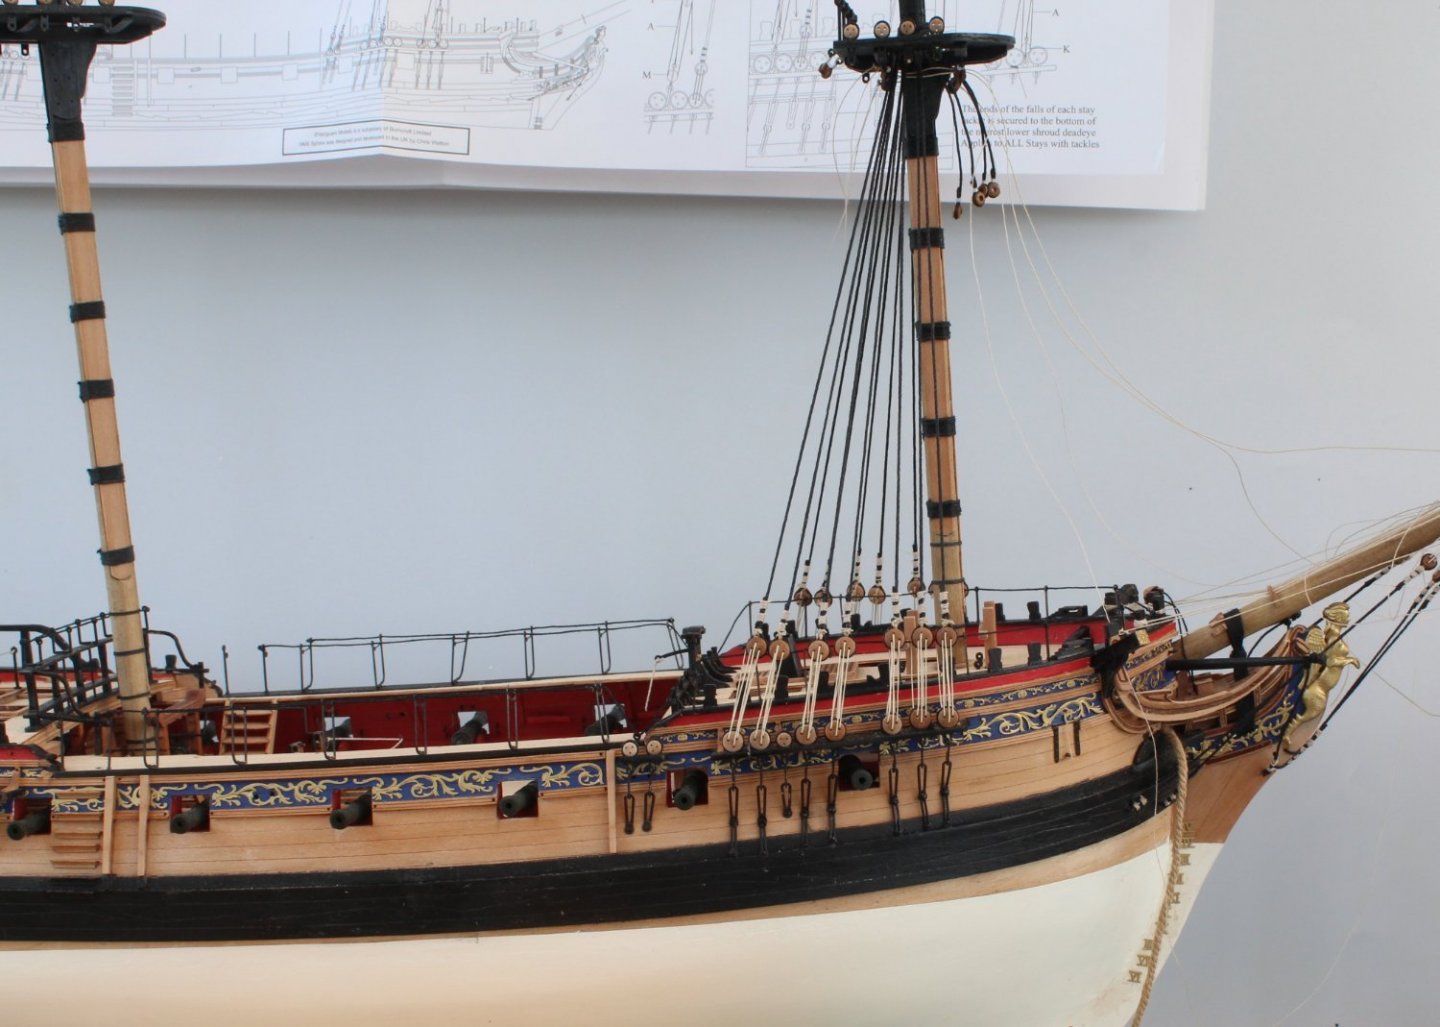
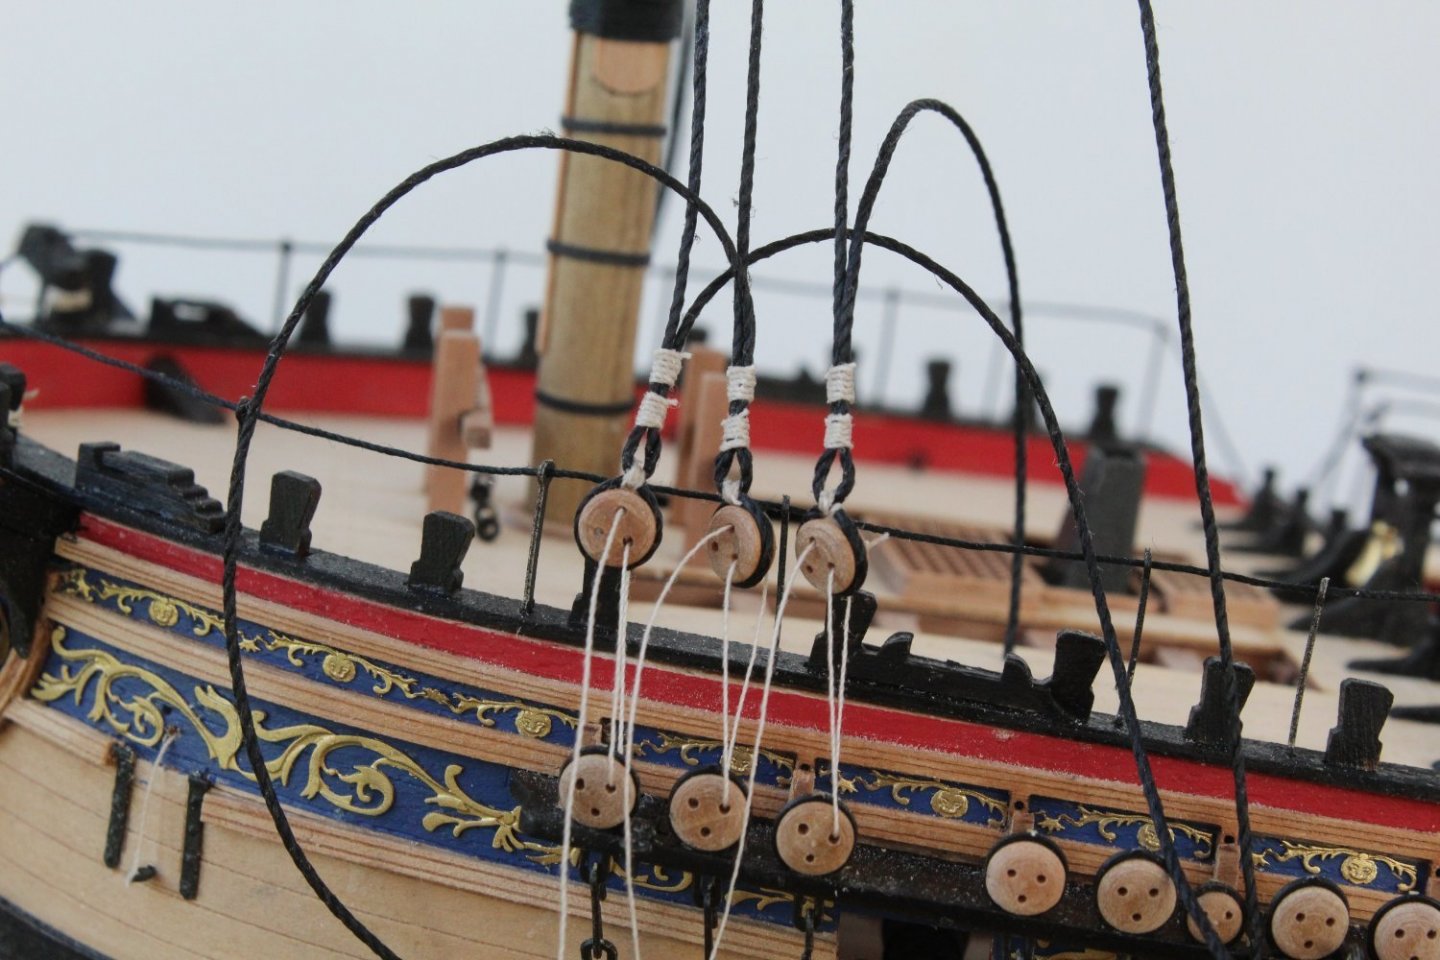
Foremast Shrouds - Complete
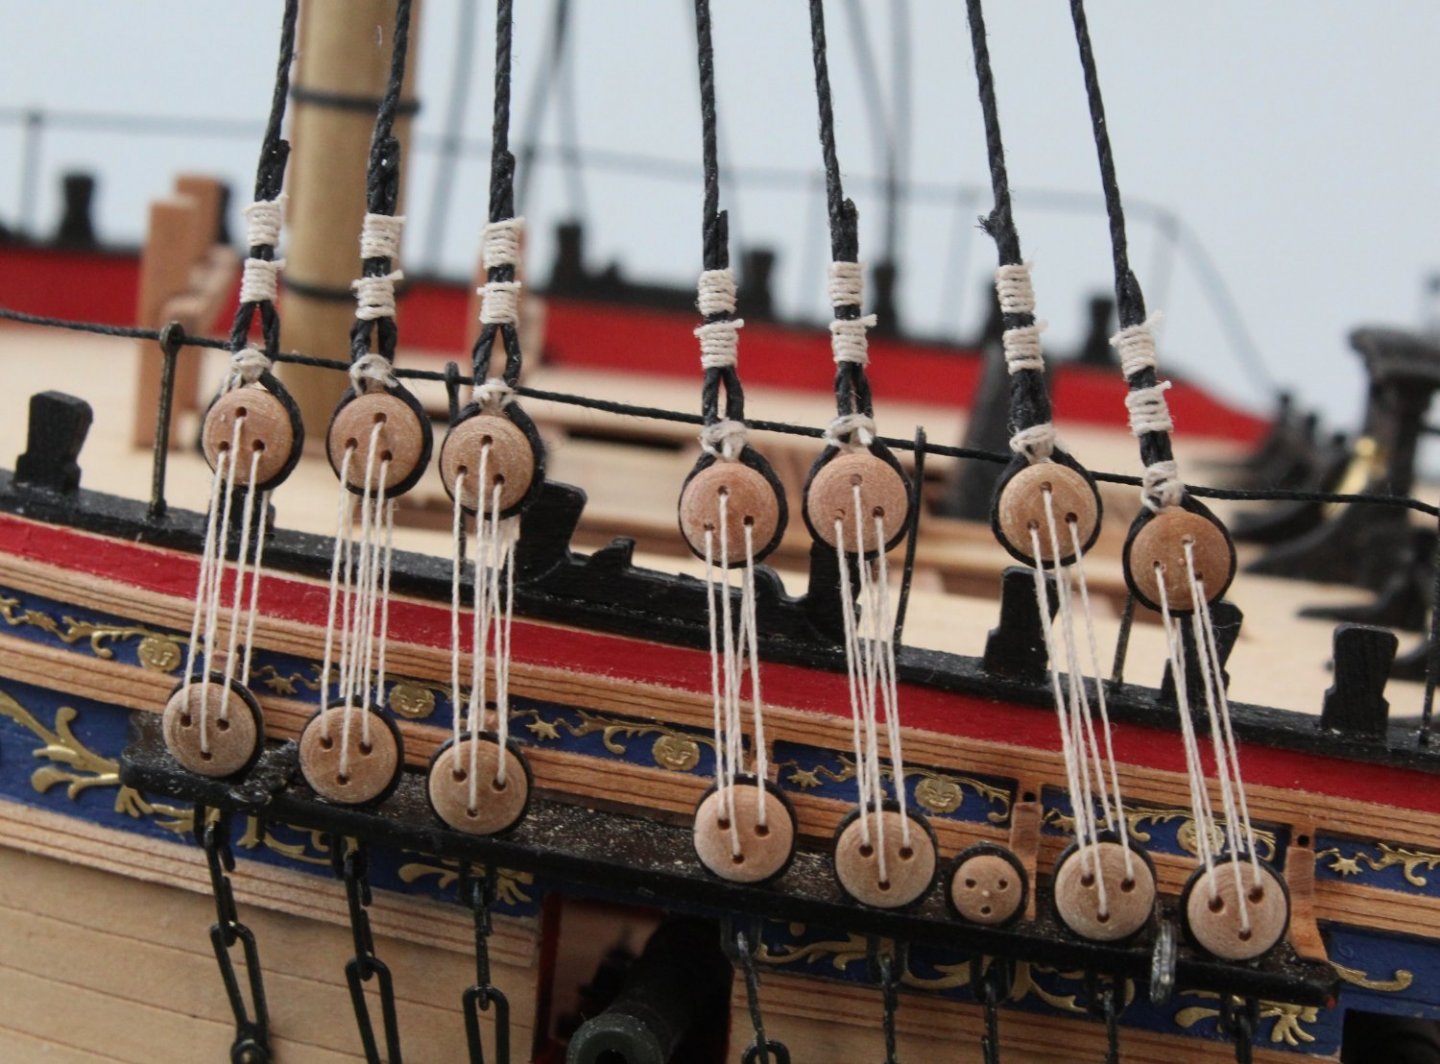
I have finally completed adding the foremast shrouds at the third attempt. The shroud deadeyes are still a bit uneven but overall I am happy with how they are looking. My technique has improved immeasurably compared with my previous builds but there is still room for improvement. Hopefully the main mast shrouds will look even better.
The seizing will look much better when they have been dyed black with Indian ink.
They look a bit better when view from afar!
-
4 minutes ago, allanyed said:
Lovely build Glenn,
Your photos bring up a question for which I have no answer at all. The seizings on the shrouds in the photos are untarred.
Allan. I prefer to seize with a different coloured thread. Natural thread can be dyed black using Indian ink.
-
-
1 hour ago, Dave_E said:
Nice! You essentially made the same kind of aid that others use with a piece of wire or two. However, after doing the wire jig thing myself (and struggled), I really like what you have constructed. Don’t mind if I copy your work do you? 😁
Please feel to copy, its working really well.
-
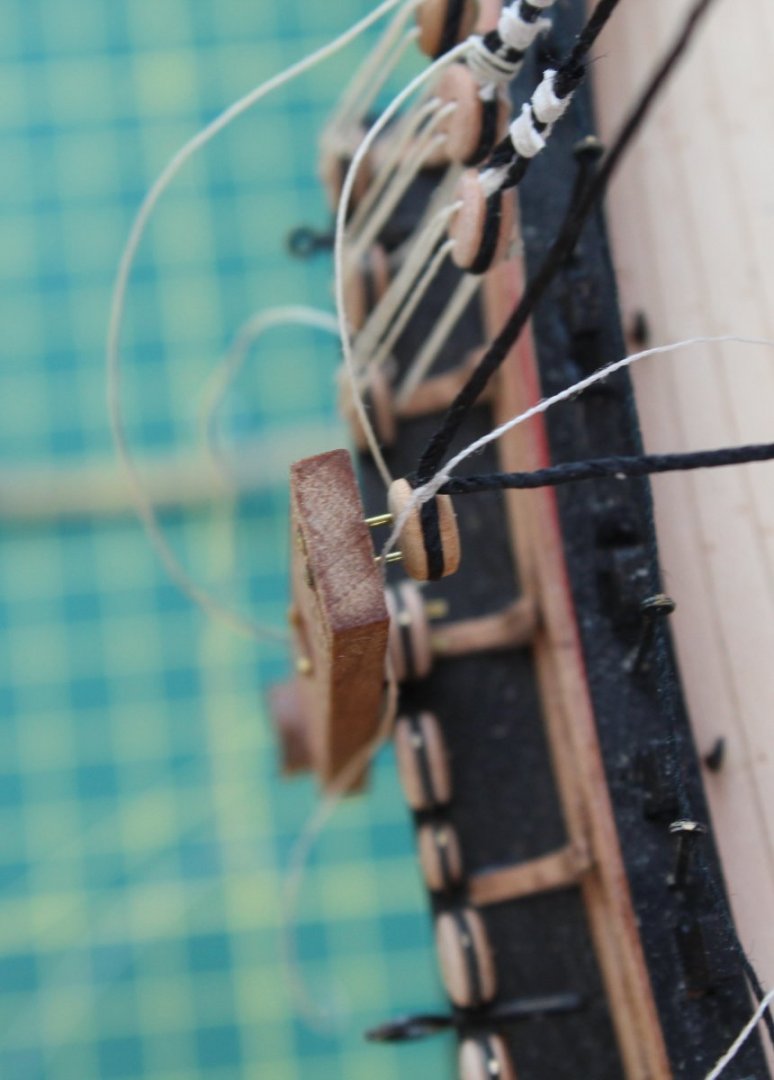
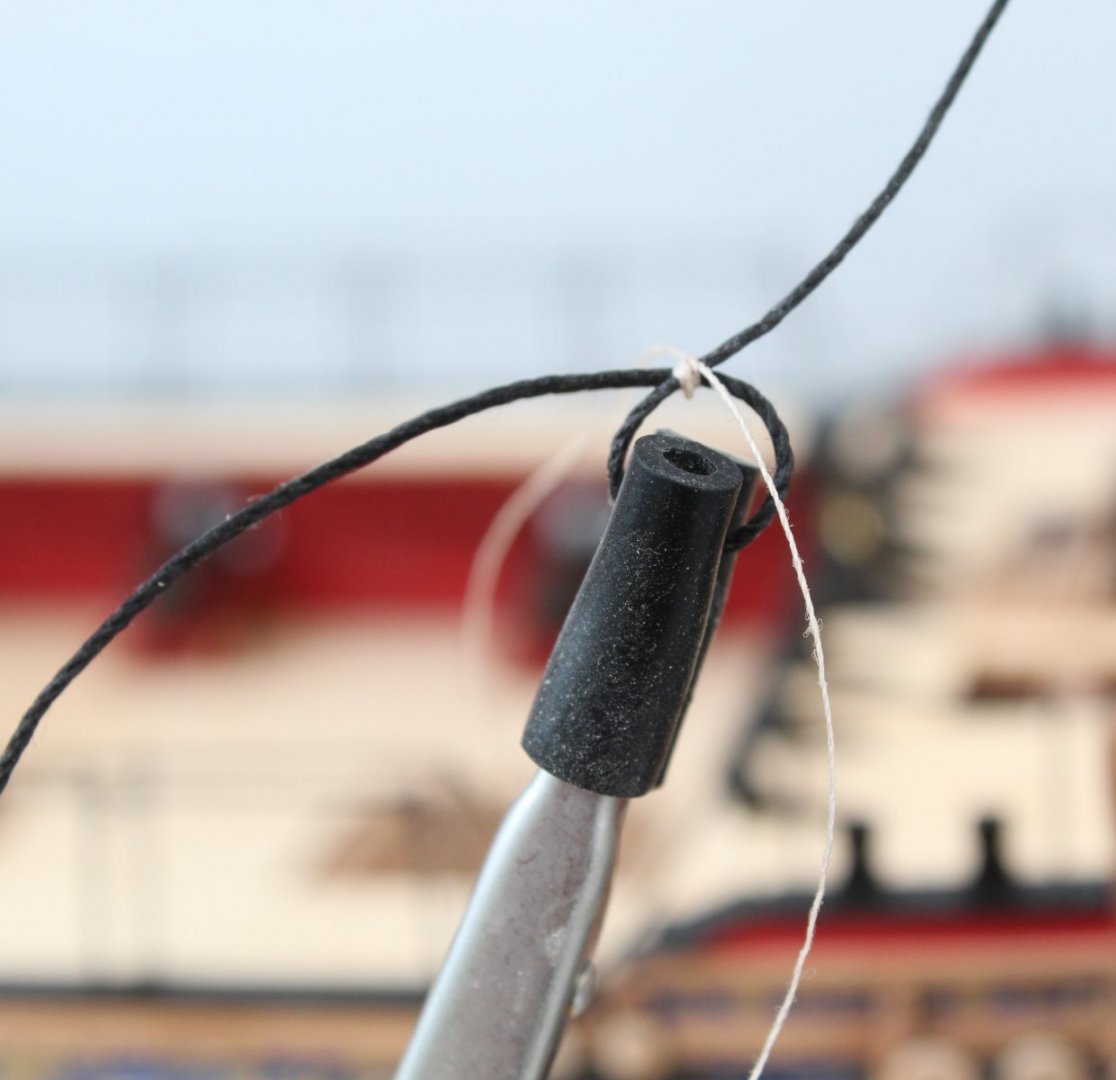
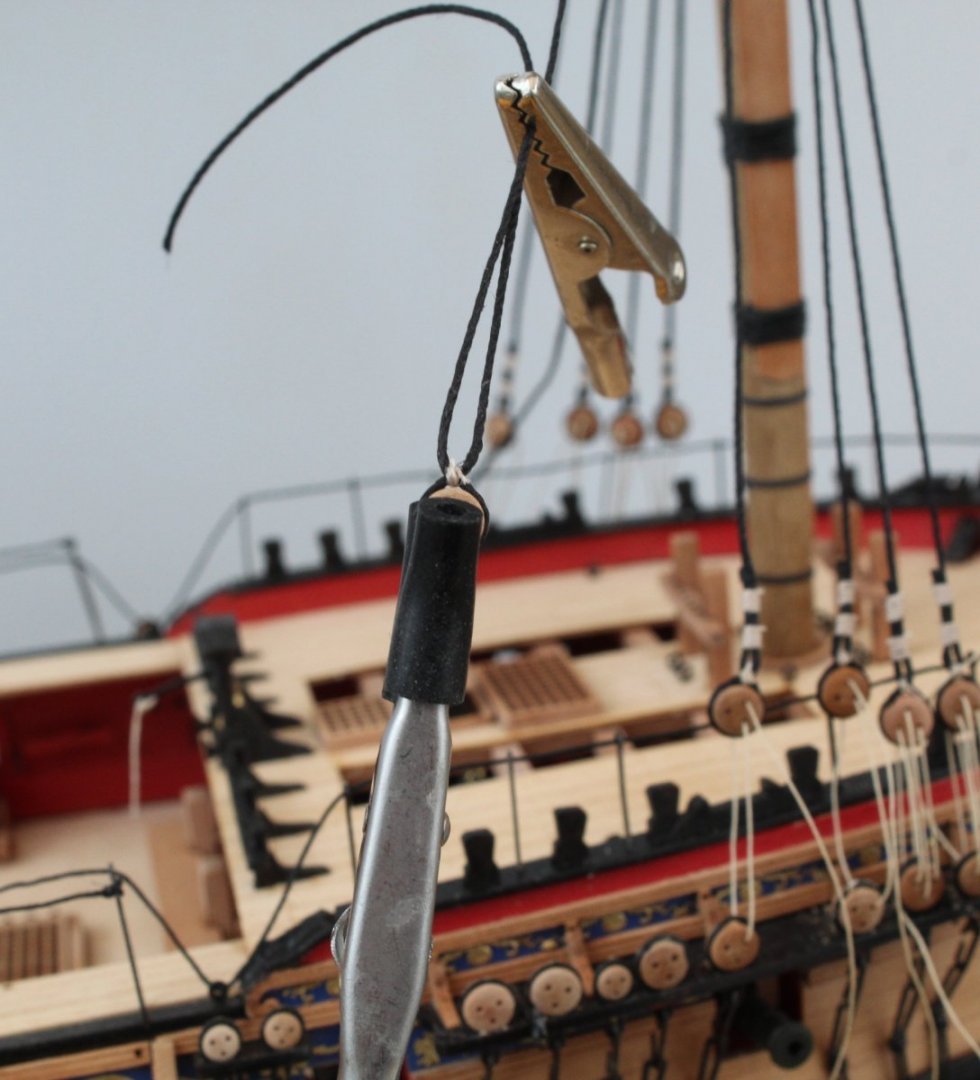
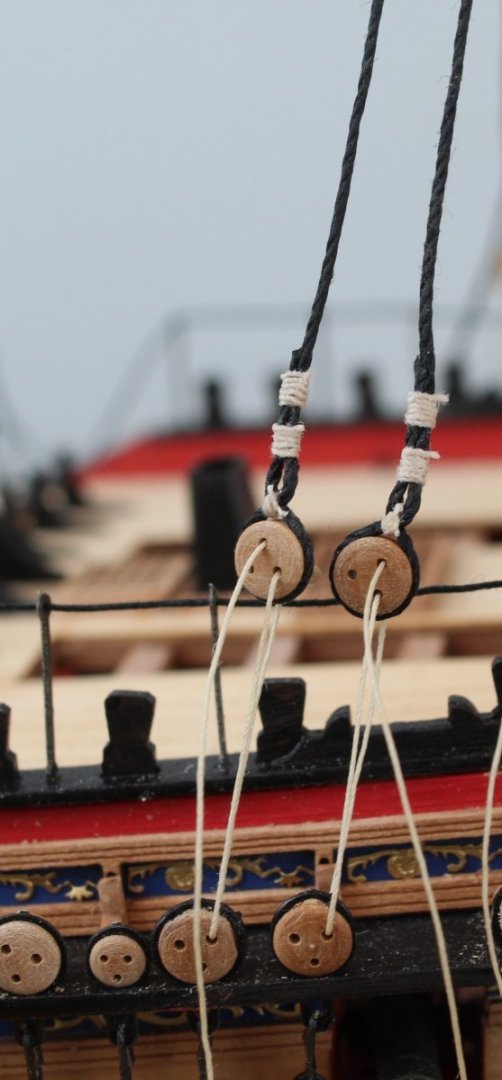
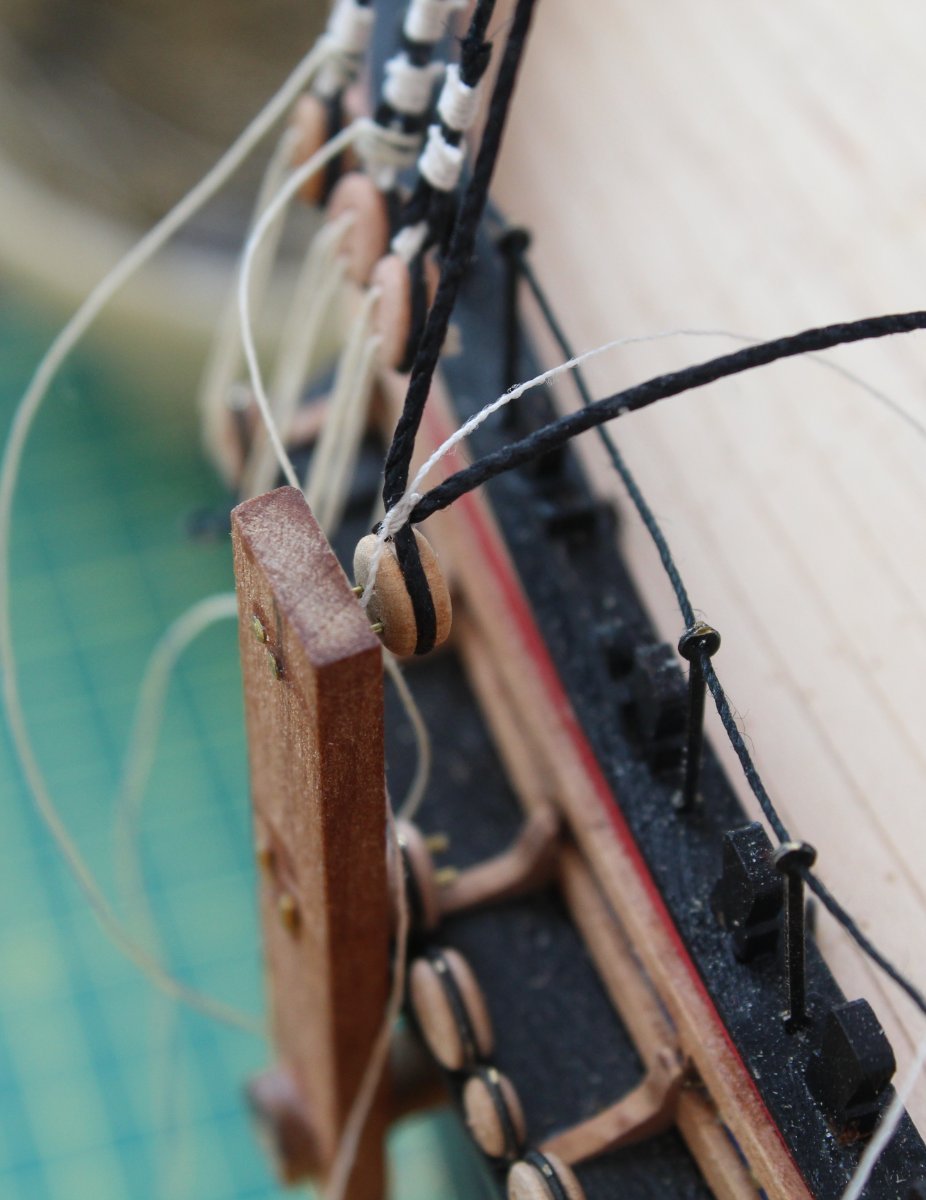
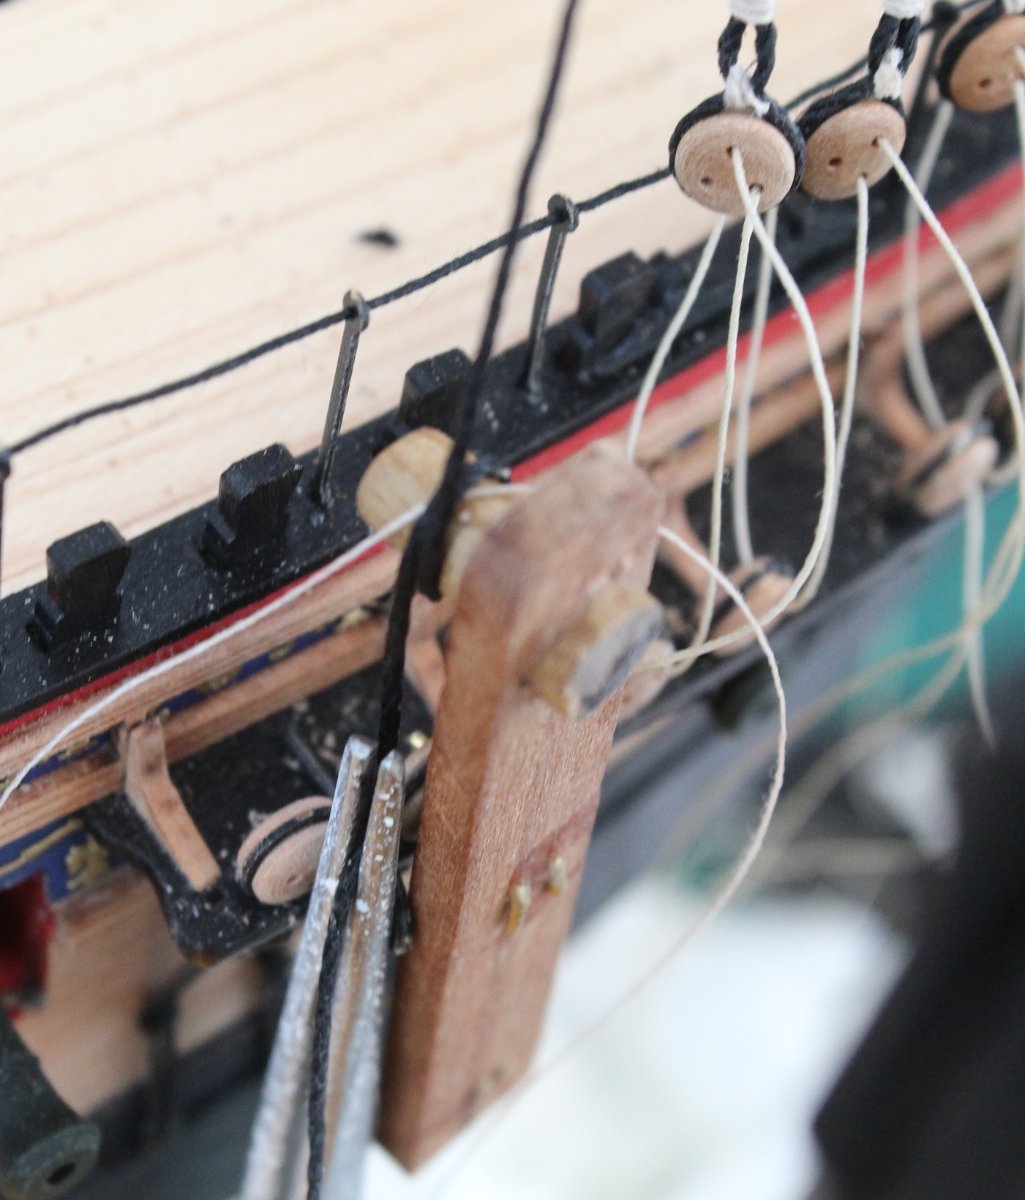
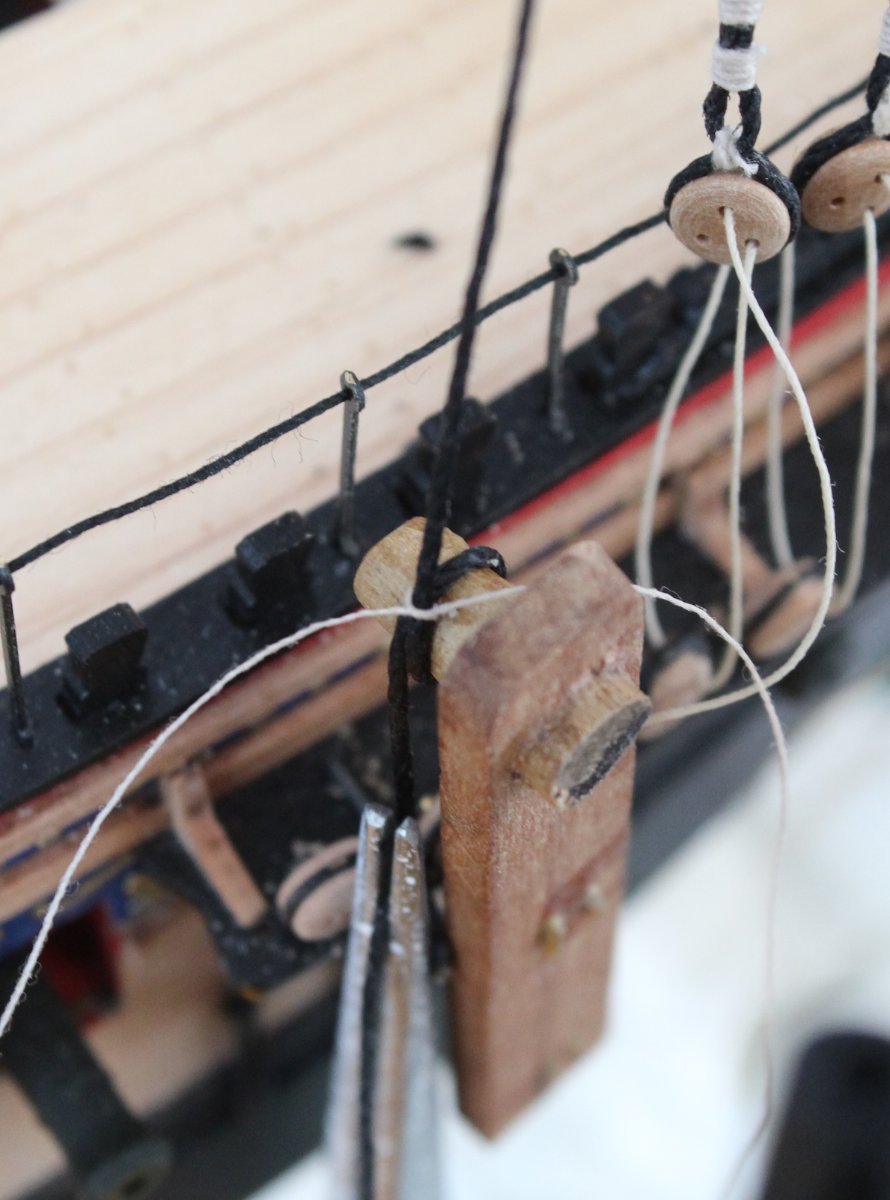
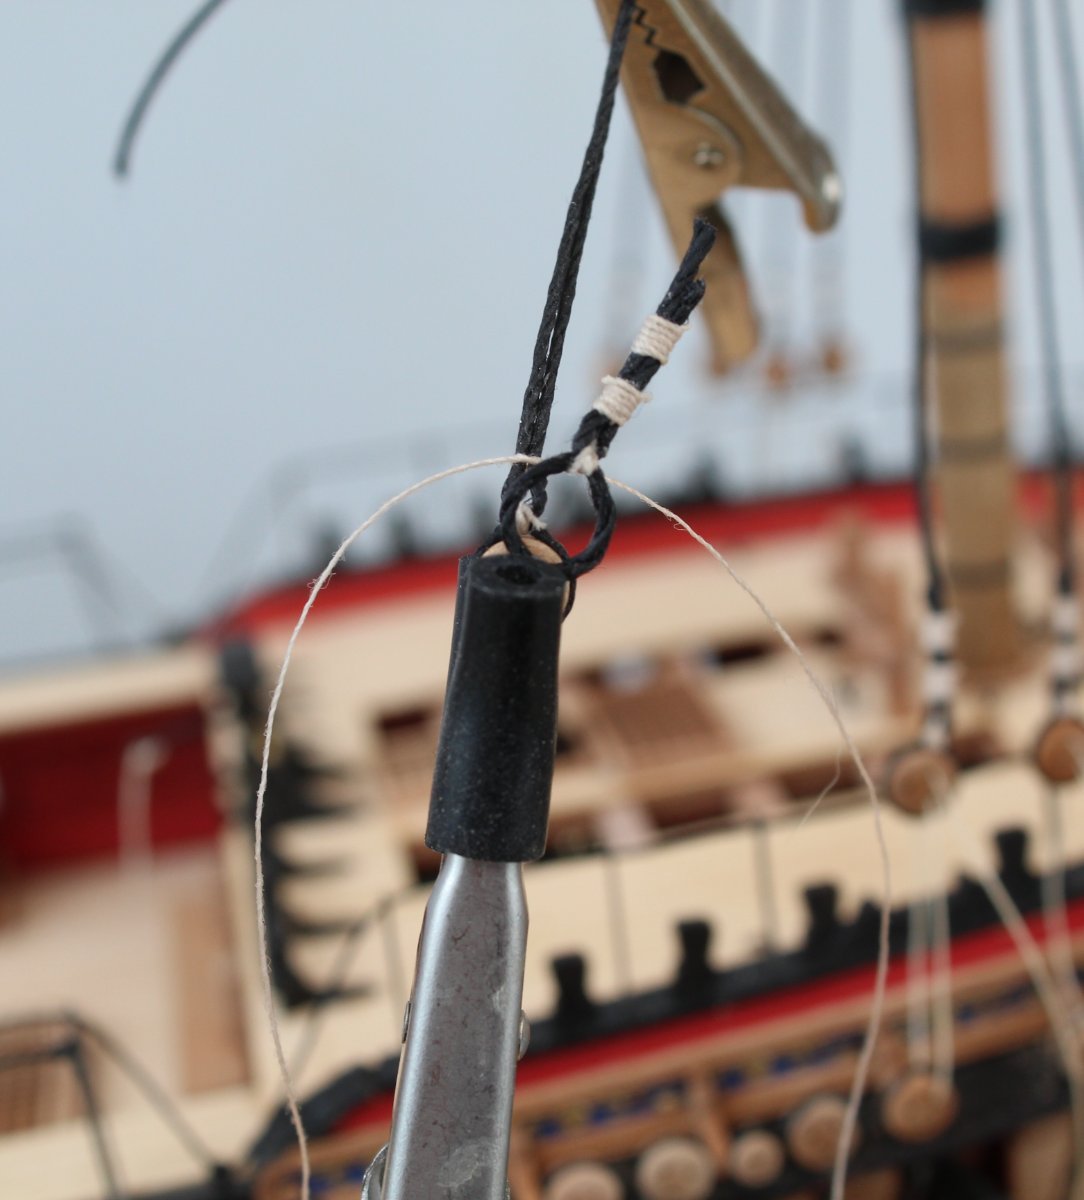
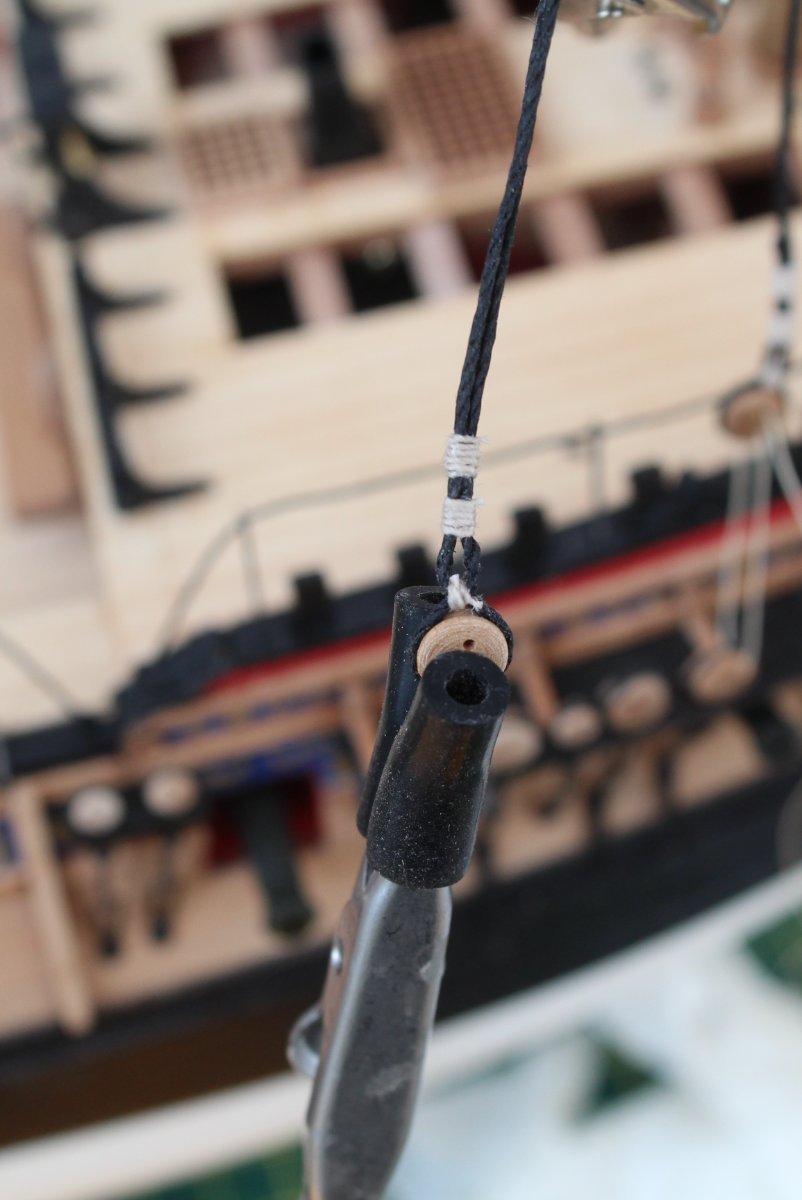
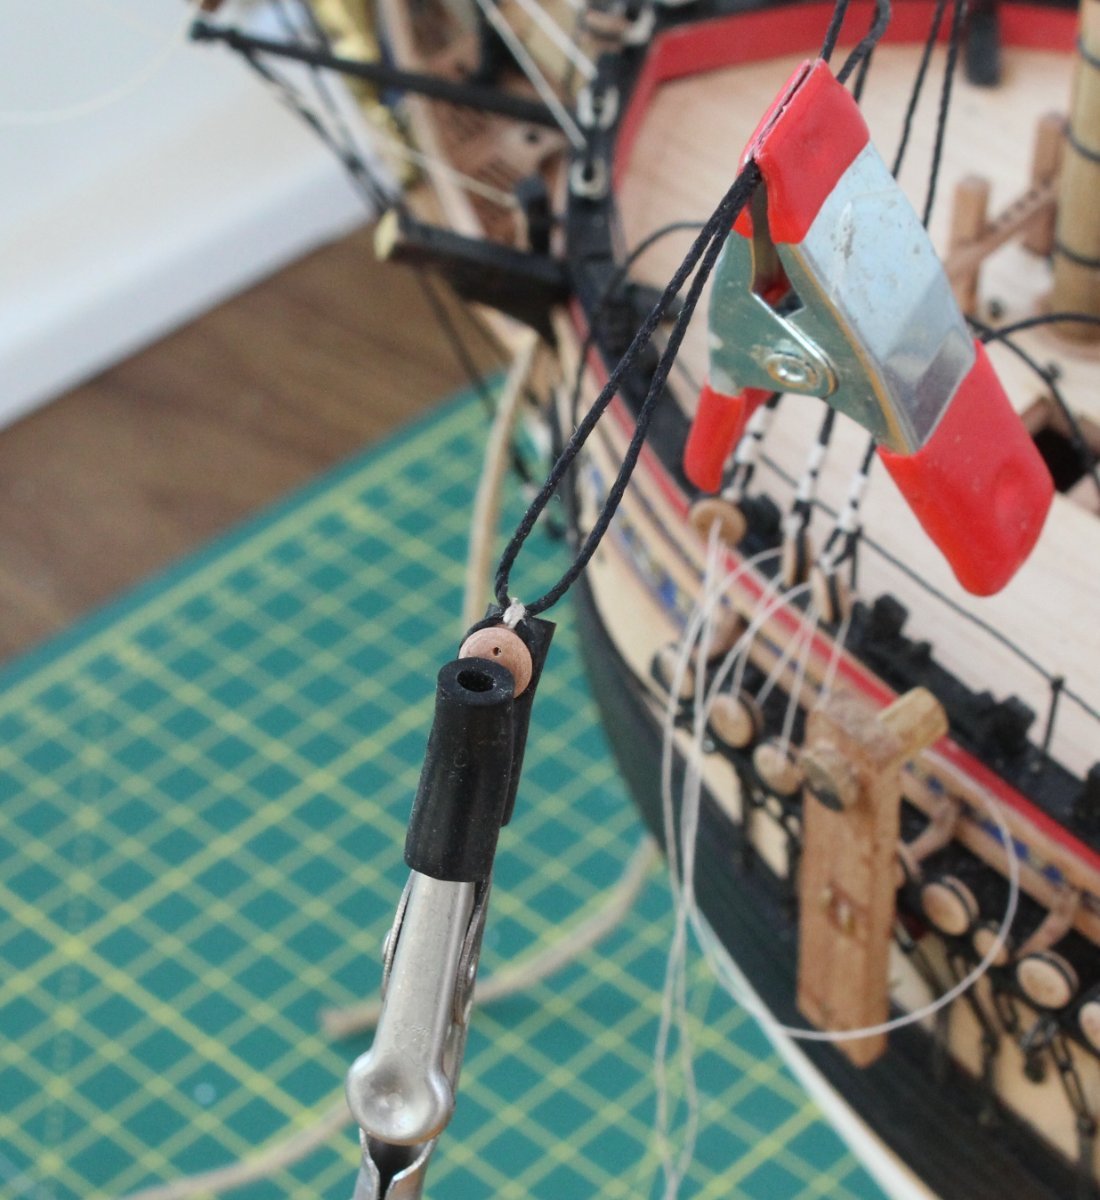
Following on from my last post where I decided my foremast shrouds (take 2) were still not up to the required standard I had a light bulb moment when having the tea break. I recalled that @DelF used a similar jig to mine but his had two sets of pins set in a piece of wood. The top pair were used to hold the shroud deadeye and the lower pair was located in the channel deadeye.
It was a simple task for me to add a second set of pins to my jig. I used the same method as detailed in my post for adding deadeyes to shrouds. I added an extra step after adding the deadeye to the shroud loop where I simply inverted the jig and then adjusted the position in the shroud line so the deadeye would located on the two pins.
In the first two photos below the deadeye has been adjusted and is now located on the top jig two pins.

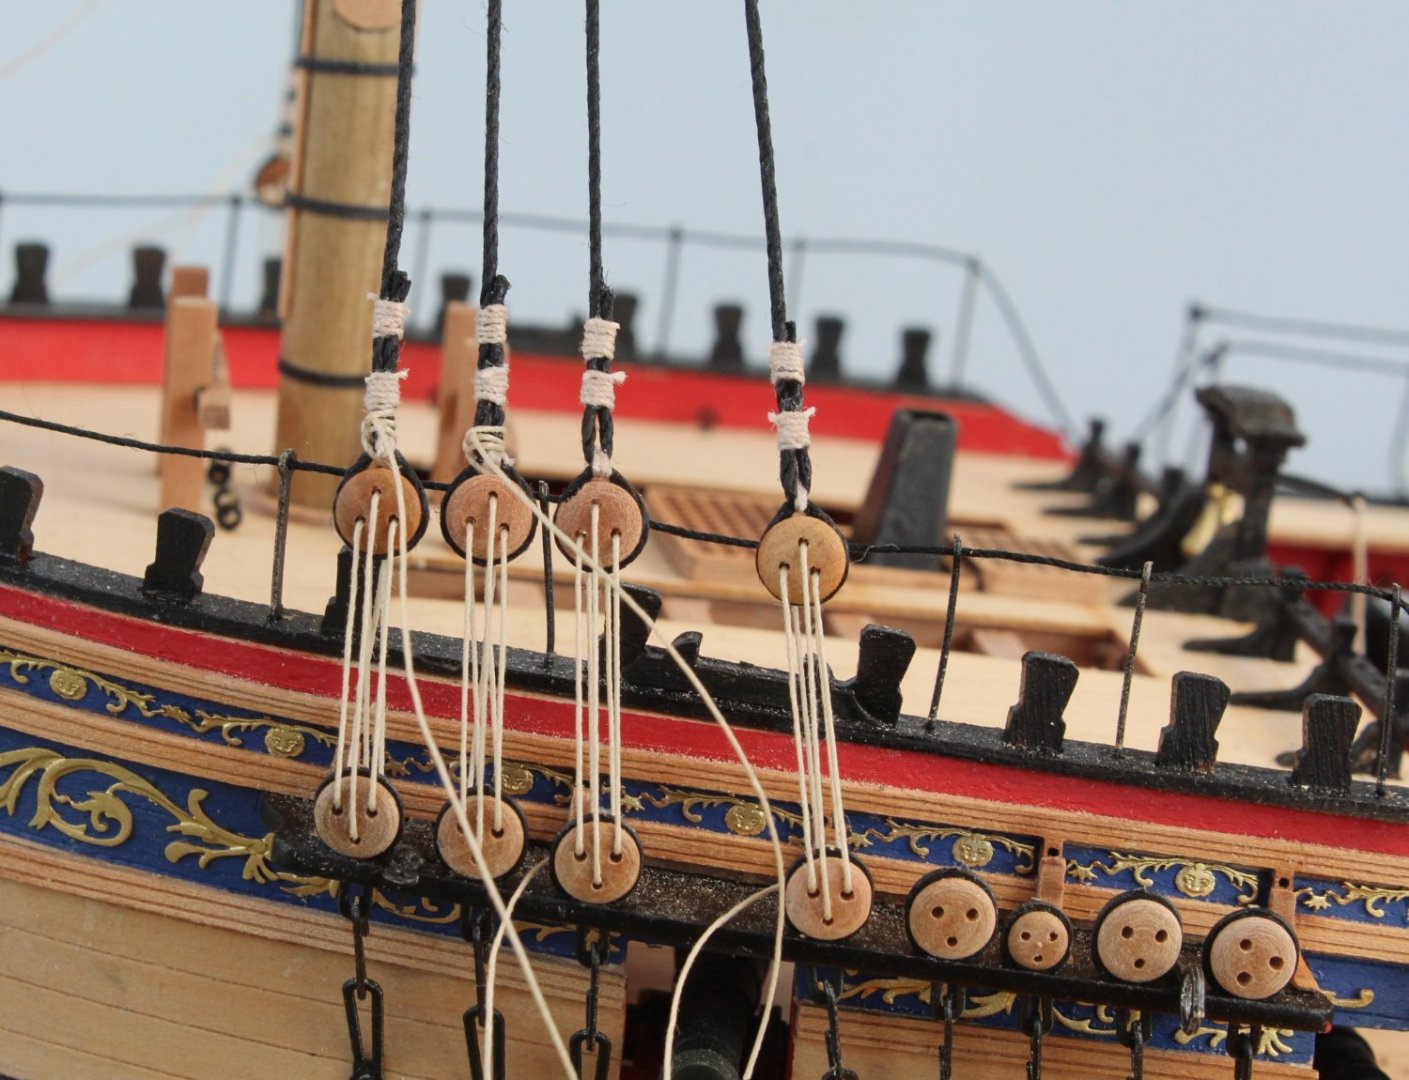
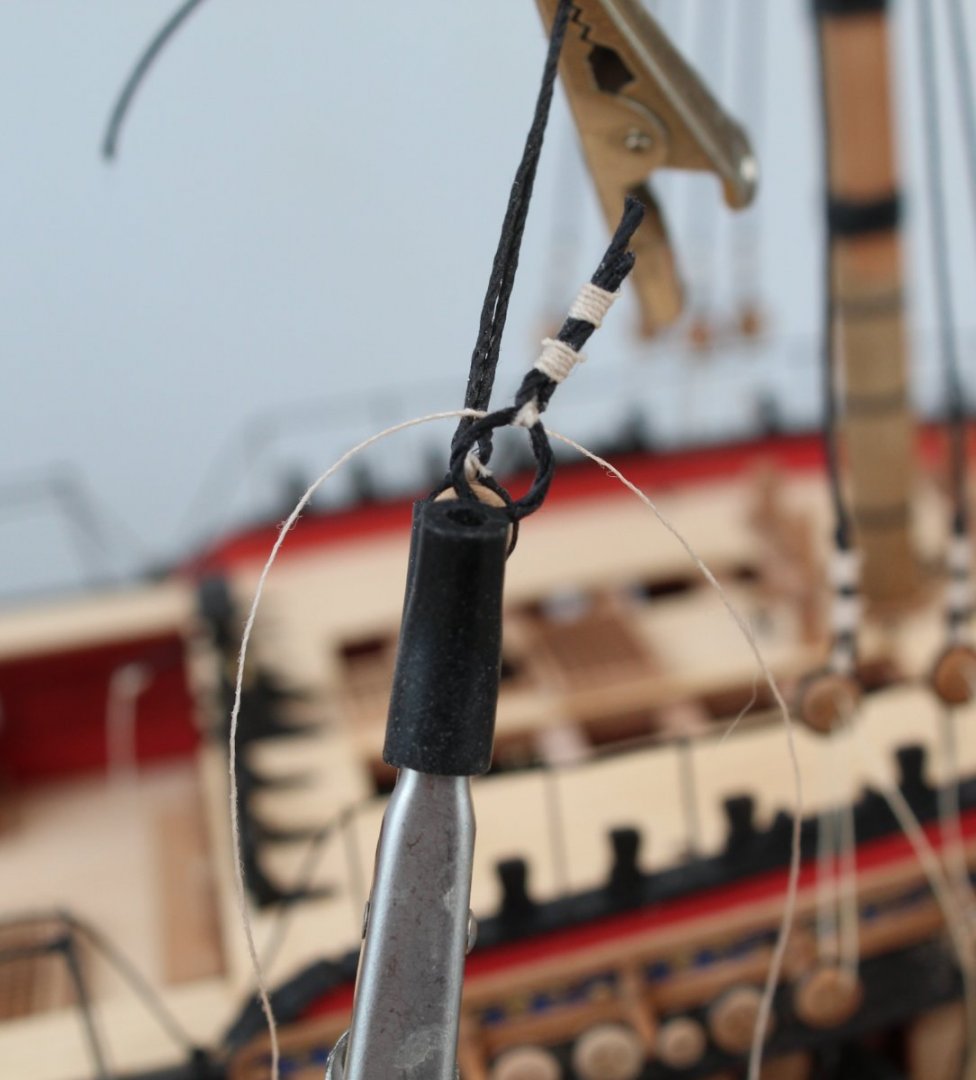
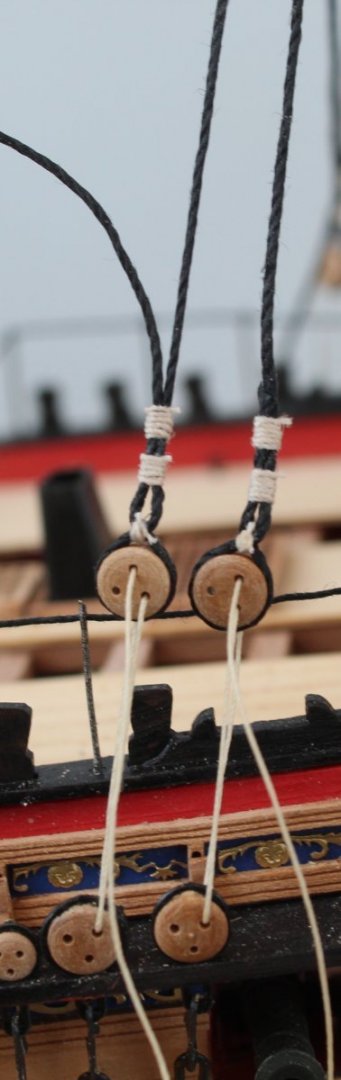
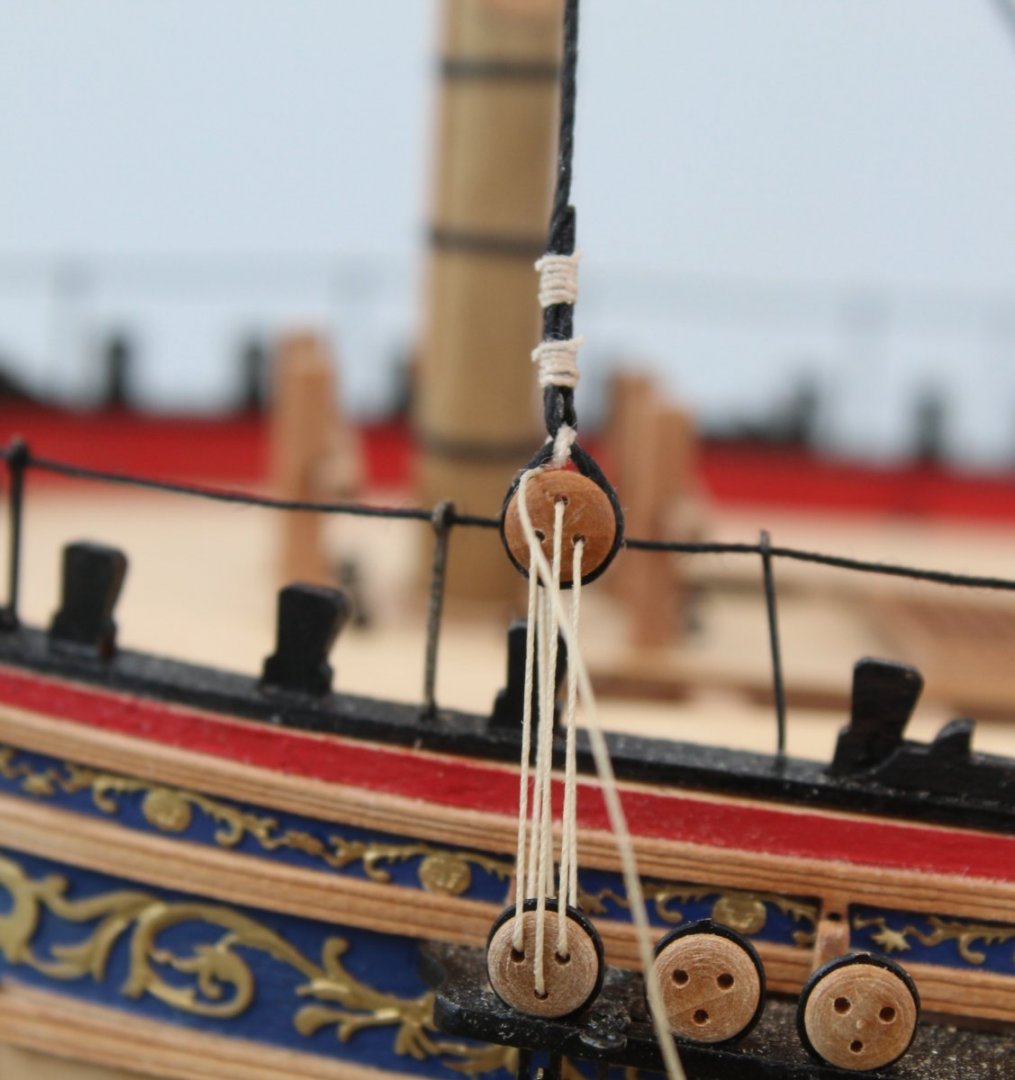
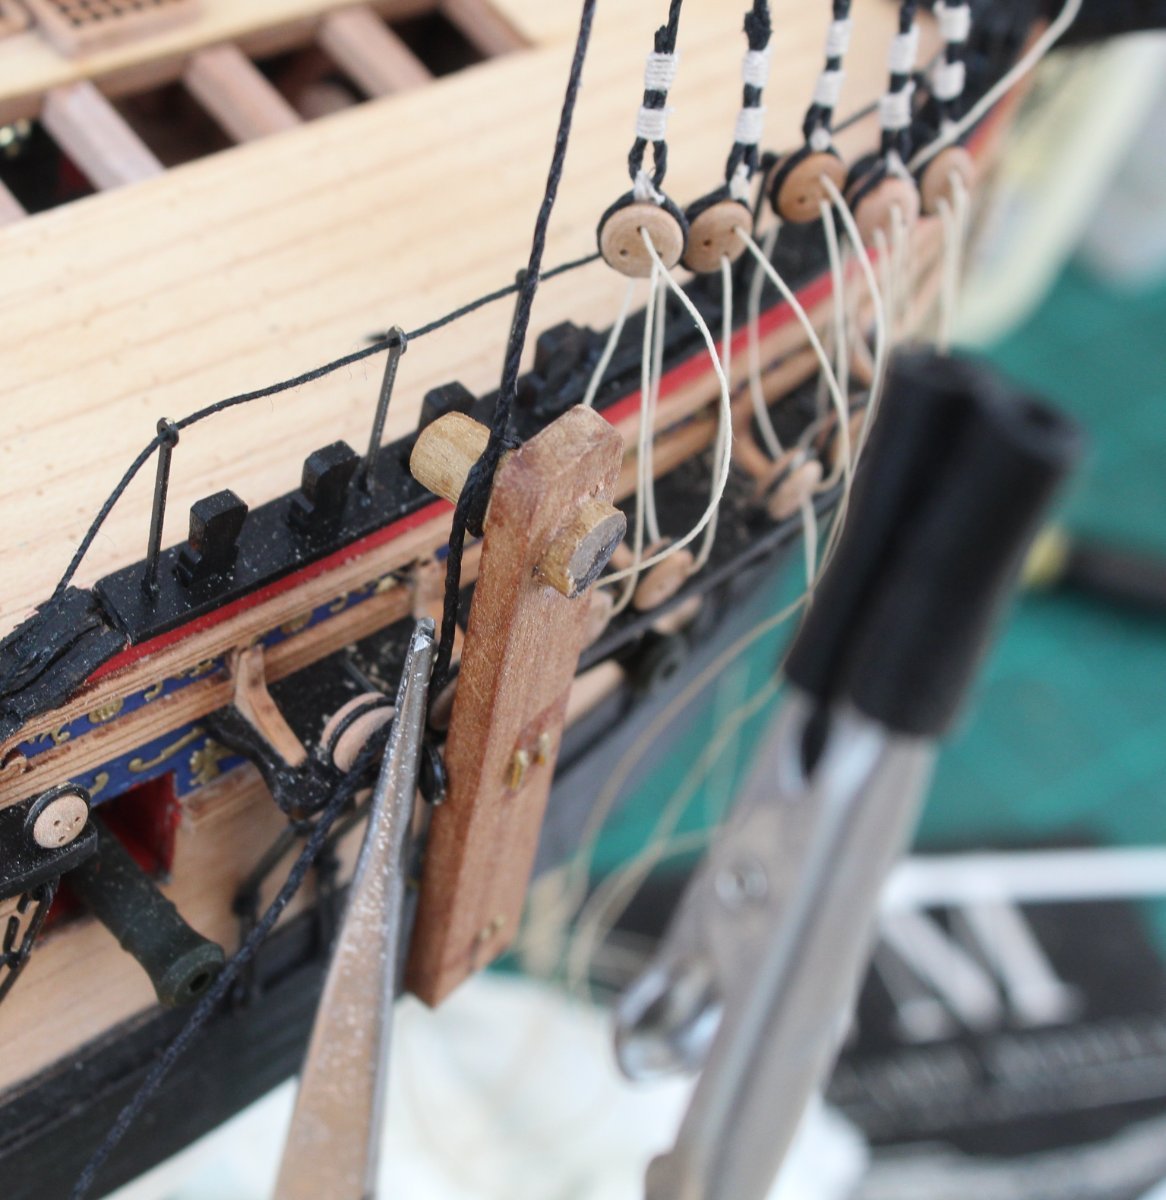
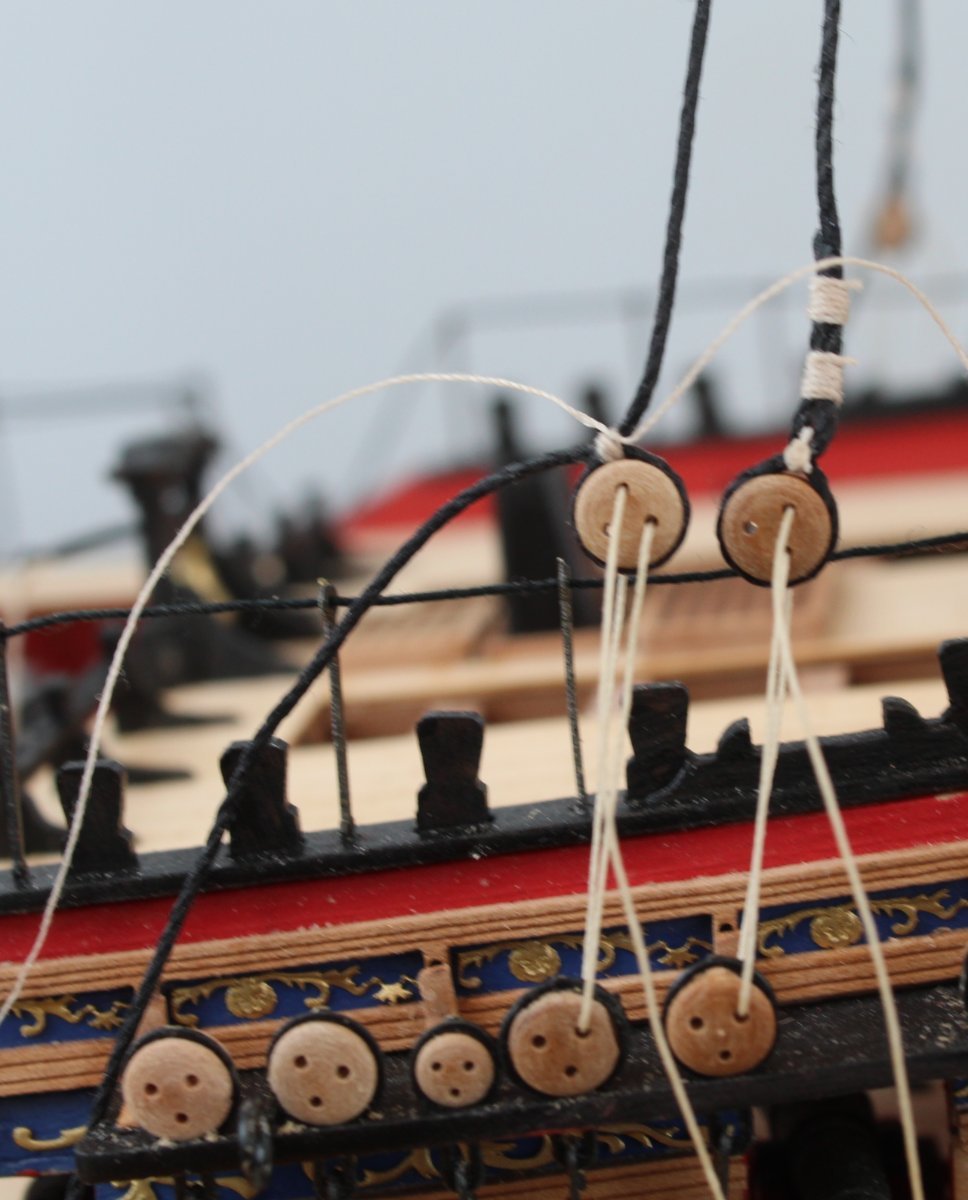
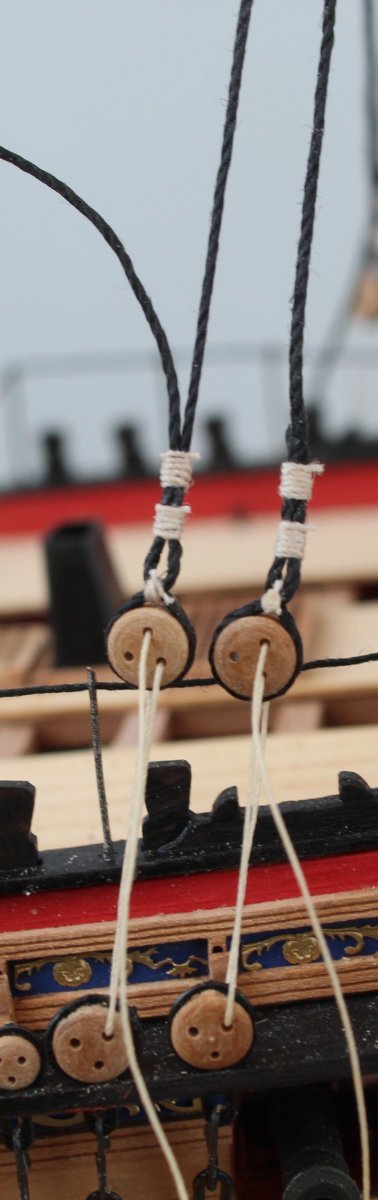
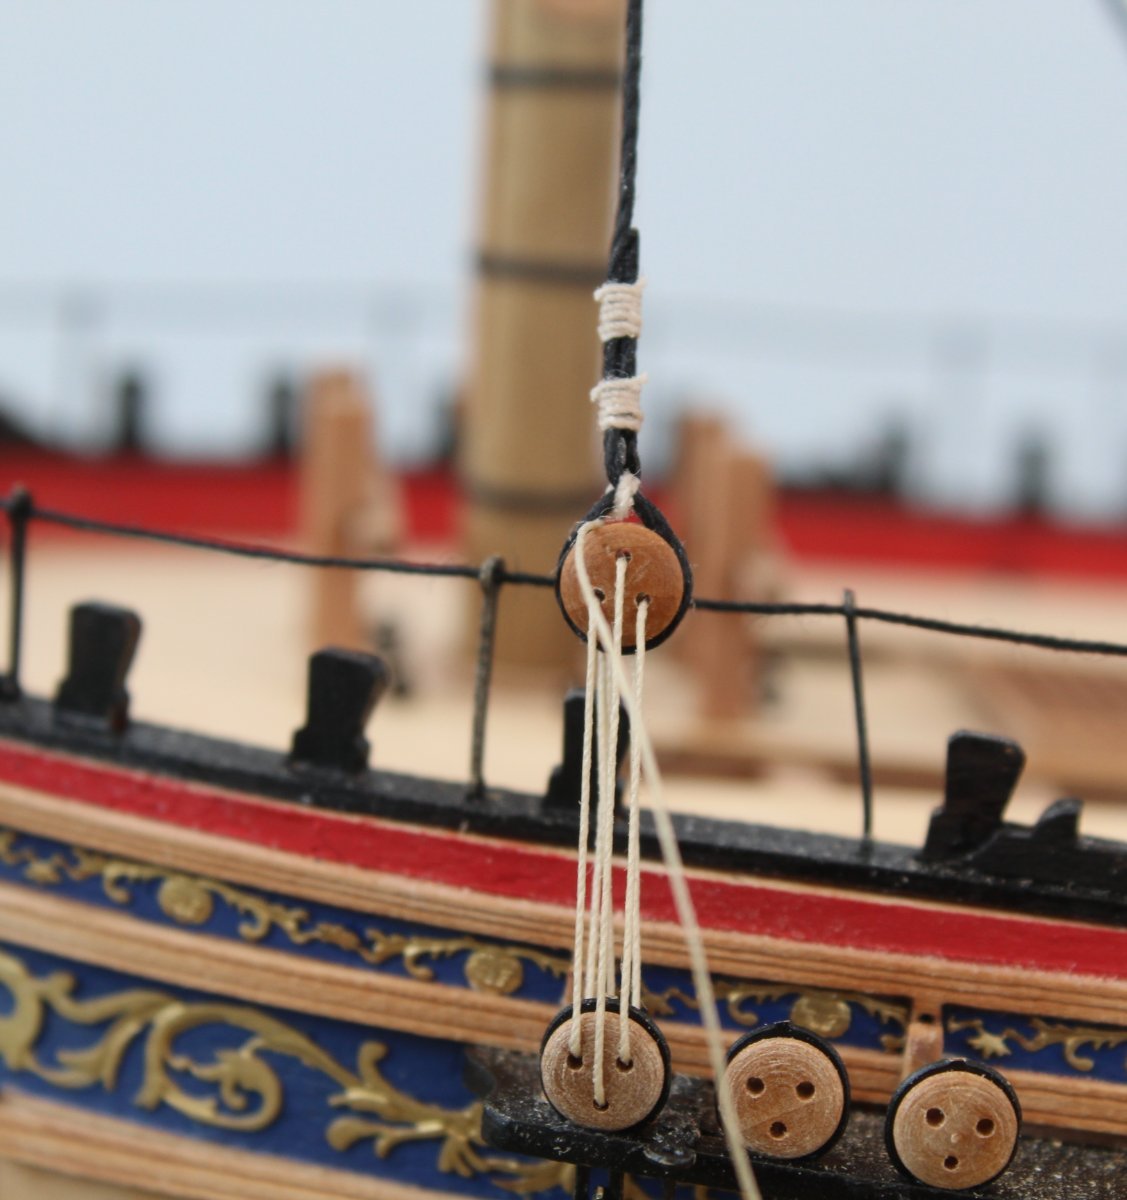
With reference to the next photo the first two shroud lines have been set, the next shroud pair are currently work in progress, the lanyards have been adjusted and I'm much happy with how the shroud deadeyes look. They are still far from perfect but they are so much better than my previous two attempts. I might dye the top two shroud seizing's with some black Indian ink
- mtaylor, BenD, chris watton and 6 others
-
9
-
I will watch Jim's build with great interest.
- Canute, Rik Thistle, thibaultron and 4 others
-
7
-
The nightmare which has become the foremast shrouds / deadeye continues as I have decided that my take 2 attempt did not pass muster.
The distance I have set between the channel and shroud deadeyes is approx. 20mm. I am happy with the first two dead pairs both port and starboard. As I started to tighten up the lanyards on all the shroud lines it became apparent the distance between the channel and shroud deadeyes was getting greater towards the stern. I could have lived with 1 or 2 mm difference that was not the case as there was a significant upward slope with the position of the shroud deadeyes toward the stern.
Time for a tea break and a rethink before I start again - third time lucky?
- Dave_E, Oldsalt1950 and mtaylor
-
3
-
-
-
-
Adding Deadeyes to Shrouds
I thought I would detail the method I am currently using to add the deadeyes to the foremast shrouds. The process detailed below takes me around 15 minutes per shroud line to complete which is not to bad. I am now working on adding the shroud lines pair 1/2 to the starboard side, then pair 3/4 to the port side, 5/6 pair to starboard, etc.
Step 1 - Creating the loop
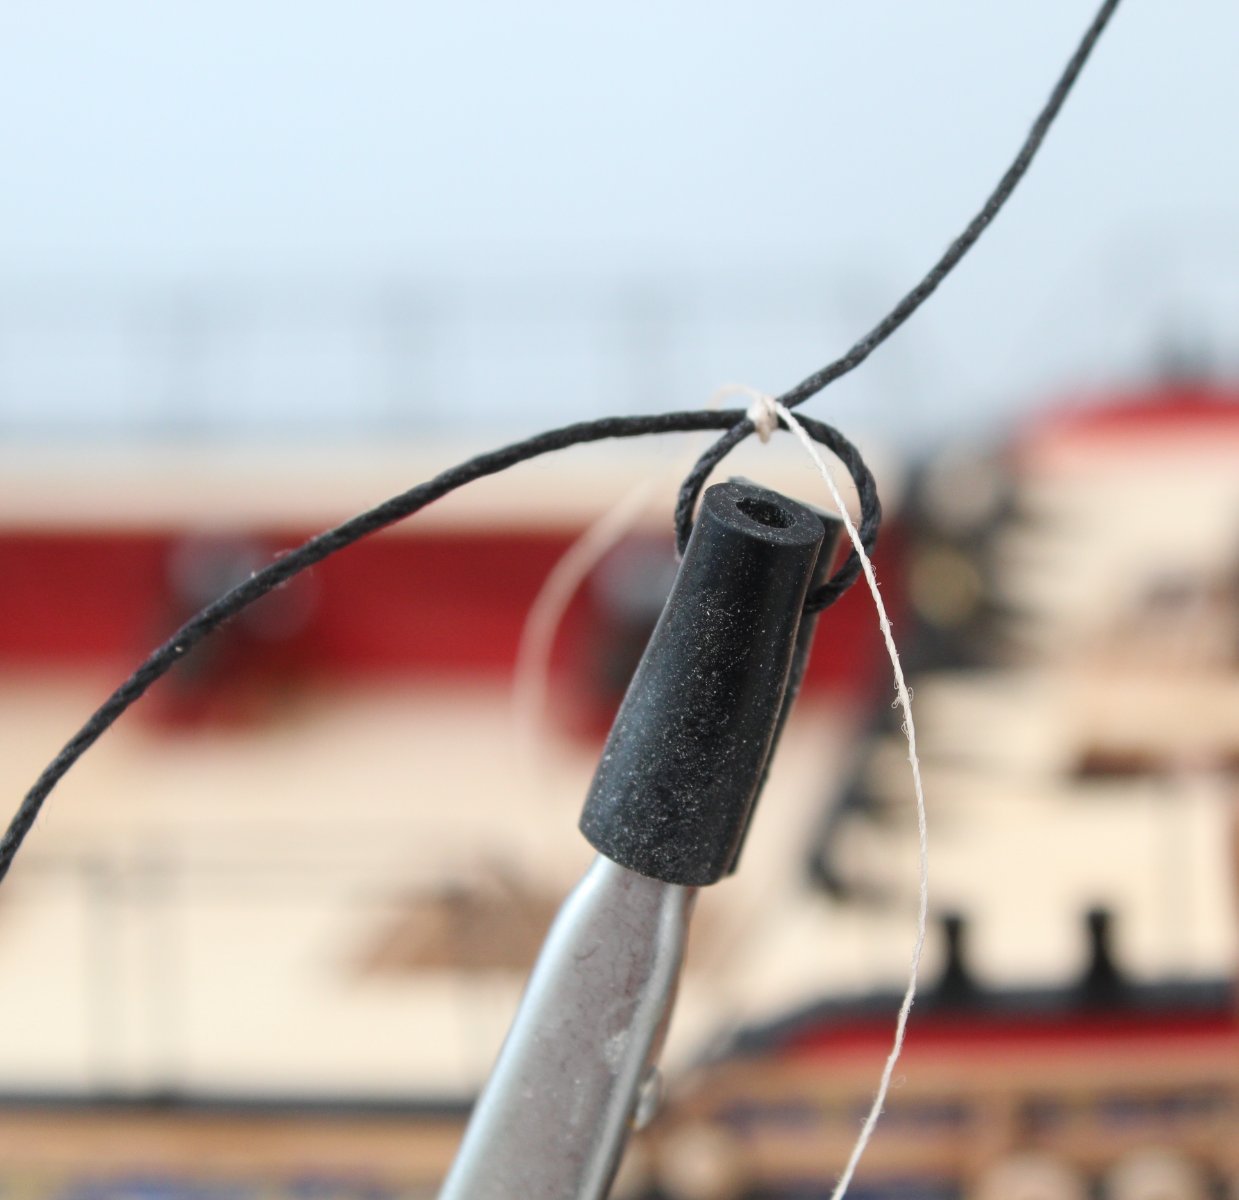
With my jig added to the channel deadeye the shroud line is wrapped around the dowel and, using some reverse action tweezers, is held in place under a bit of tension.

A length of seizing thread is then carefully fed under the shroud crossing point.

A simple half hitch knot is used to create the loop.

The tweezers are then released and the shroud carefully removed from the jig and positioned in to my quad hands where I complete the initial seizing by adding three half hitches to the top.
Step 2 - Checking the deadeye position
The deadeye is now inserted into the loop which is closed up tight by pulling the free end. It is still possible to adjust the length of the shroud so the deadeye is at the same level as the other deadeyes as the cross seizing has not, as yet, been secured with ca. Once I am happy with the initial deadeye alignment a length of thread is cut for the lanyard and the deadeye is partially rigged so I can check the alignment when the shroud has been slightly tensioned.

Step 3 - Completing the seizing
Once I'm happy with the deadeye alignment a touch as ca is used to secure the crossing seizing knots and the excess thread is also trimmed. The shroud line is then returned to the quadhands for the next phase. The shroud line ends are pulled tight and a crocodile clip is used to hold the threads in place. The shroud line is now ready for the next seizing's.
The first seizing is started and I check it's position with a template seizing jig.
Each seizing comprises 5 bottom and 5 top half hitch knots. It does not take very long to complete this aspect.

With the work almost complete it is time to recheck the alignment of the shroud with a partially rigged lanyard.
The excess shroud thread is then trimmed and the job is now complete.
-
13 minutes ago, mtaylor said:
Thanks for clarifying that. I guess I got a bit confused somewhere.
I did install all the shrouds on my first attempt and then added all the port side deadeyes and lanyards which I've done on all my previous builds. On take 2 I decided it would be better to rig each shroud pair in turn as it may help seat the shrouds better at the foremast platform.
-
6 minutes ago, mtaylor said:
I think the second go is much better. I am surprised though, that you're doing one side first and then the other side. Seems that this might cause some unwanted "tilt" in the mast.
I am working on each shroud pair. Pair 1/2 port side has now been installed. Pair 3/4 is currently WIP on starboard side, 3 has been rigged and 4 will be done when I next visit the shipyard. The mast was glued in place prior to starting work on the shrouds.
-
27 minutes ago, Blue Ensign said:
Not quite sure about how you have got the lanyard, the photo appears to show the line running over the deadeye strop and down again.
The running end after feeding thro' all the deadeye holes in the right order should feed up and thro' the deadeye strop from the rear, and then be secured around the running end of the shroud.
Fortunately I'm spared the pleasure of rigging deadeyes on my build, but when I do I'm never in a hurry to permanently secure the Lanyards, I leave it as long as possible before trimming the ends.
B.E.
I have not tied off the lanyard just yet. It has been fed through the back of gap at the top of the deadeye strop and will then looped around the shroud a couple of times. I want to get the next deadeye in place so I can adjust the tension of the shroud line pair before I do this
-
22 minutes ago, glbarlow said:
Good call on changing the lanyards and moving the top seizing up so it’s just short of the stubbed end of the shroud, I don’t thing the bottom seizing needs to be any closer to the deadeye than you have it now. Your latest phot looks great.
Thanks, much appreciated.
-
Portside Shrouds, deadeyes and lanyards
I have taken the bull by the horns and decided to start again. As pointed out by @Blue Ensign the lanyards were rigged with the wrong sized thread in my previous attempt.
I have now slightly refined my method when adding the deadeye to the shroud (and seizing's) which I hope will means all the deadeyes will be bit more even this time around. The first deadeye looks good to my eye. There is a nice amount of tension of the shroud line. Fingers crossed I can get the others to match this one.
-
20 minutes ago, Blue Ensign said:
Removing the shrouds seems quite drastic to me, can you not remove the seizings and the lanyards and adjust?
It was the lanyards between the deadeyes that I was querying as to line size?
B.E.
I did remove the seizing on a couple of shroud lines and readjusted before I trimmed the 1mm thread end as I went along, it is not possible now the ends have been trimmed. I have already remade the shroud lines which didn't take long. You are right I should have used 0.25mm natural thread for the lanyards, 0.1mm is for the 3mm mizzen mast lanyards.
I'm still unsure about the position of the first seizing above the shroud deadeye. I think it needs to be nearer the deadeye.
-
1 minute ago, Blue Ensign said:
Hi Glenn,
What size line are you using for the Shroud lanyards, it looks a little thin to my eye.
B.E.
Hello Maurice
I am using 1mm black thread as per the plan sheets for the foremast shrouds. I am using 0.1mm natural thread for the seizing's.
Do you think I should remove the shrouds and start again to see if I can make it better?
Also do you think the first shroud seizing needs to be positioned closer to the deadeye?
Thanks
Glenn
-
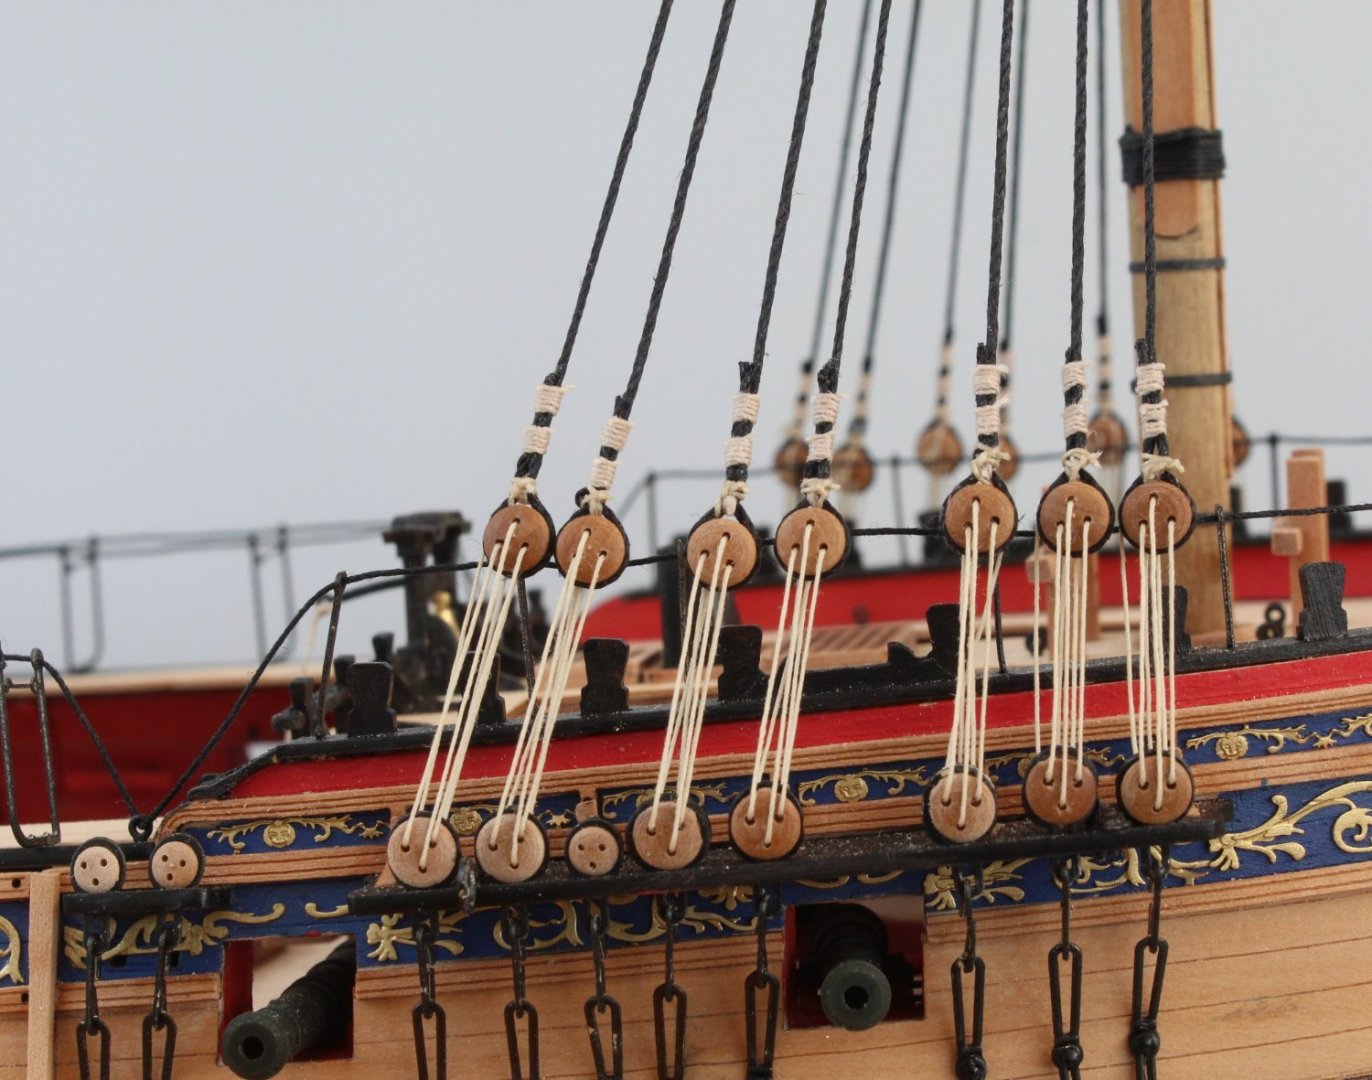
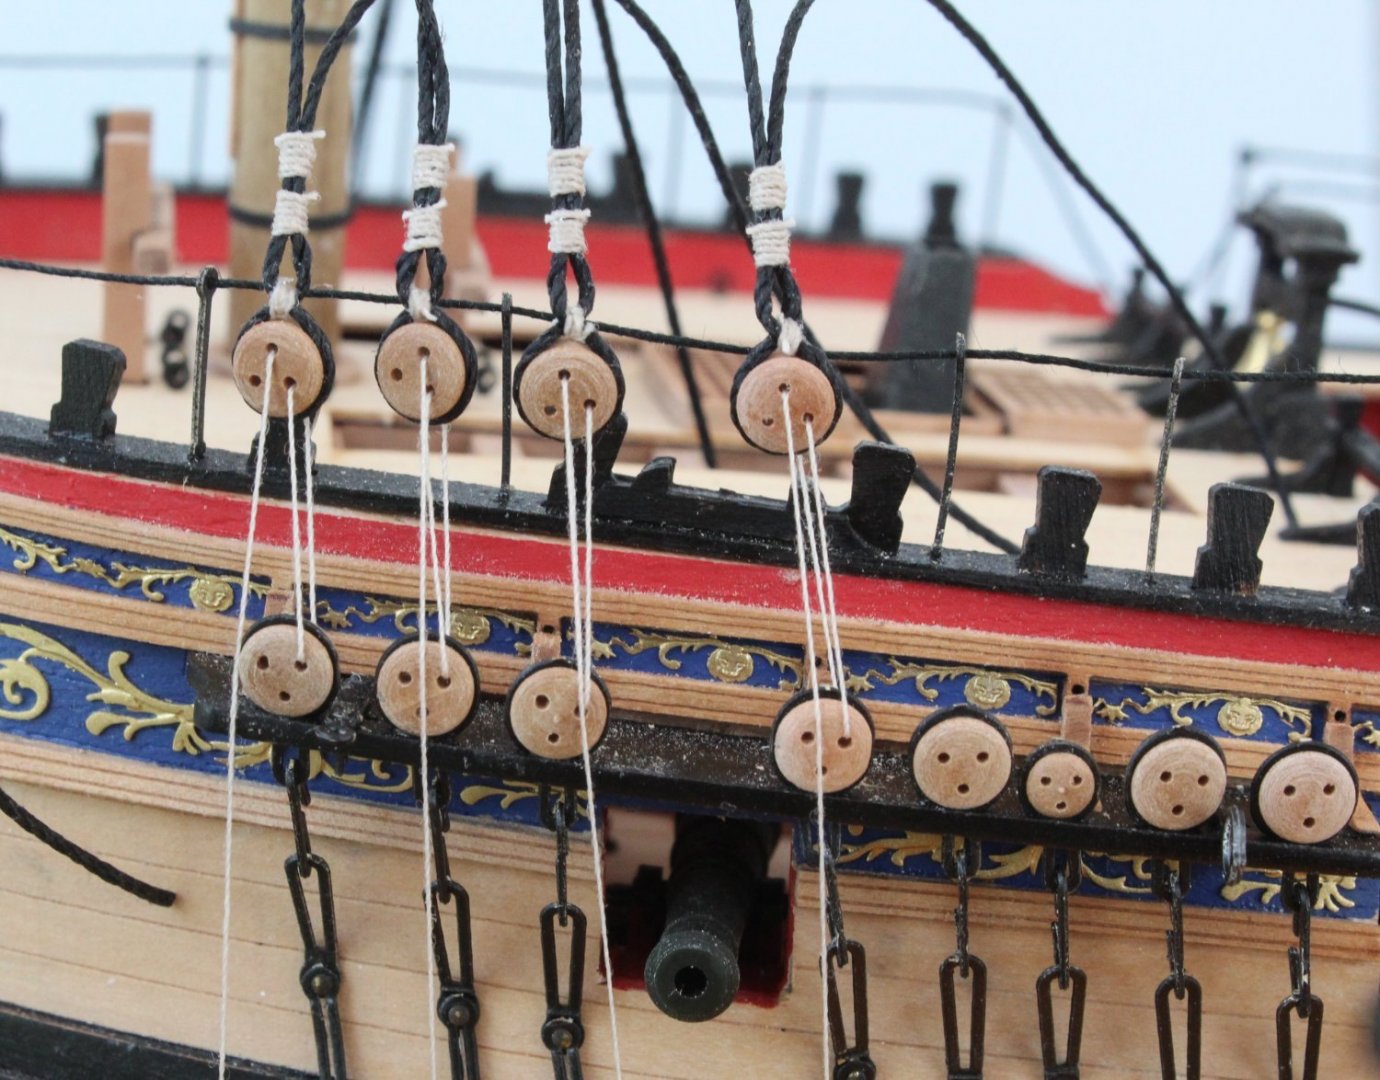
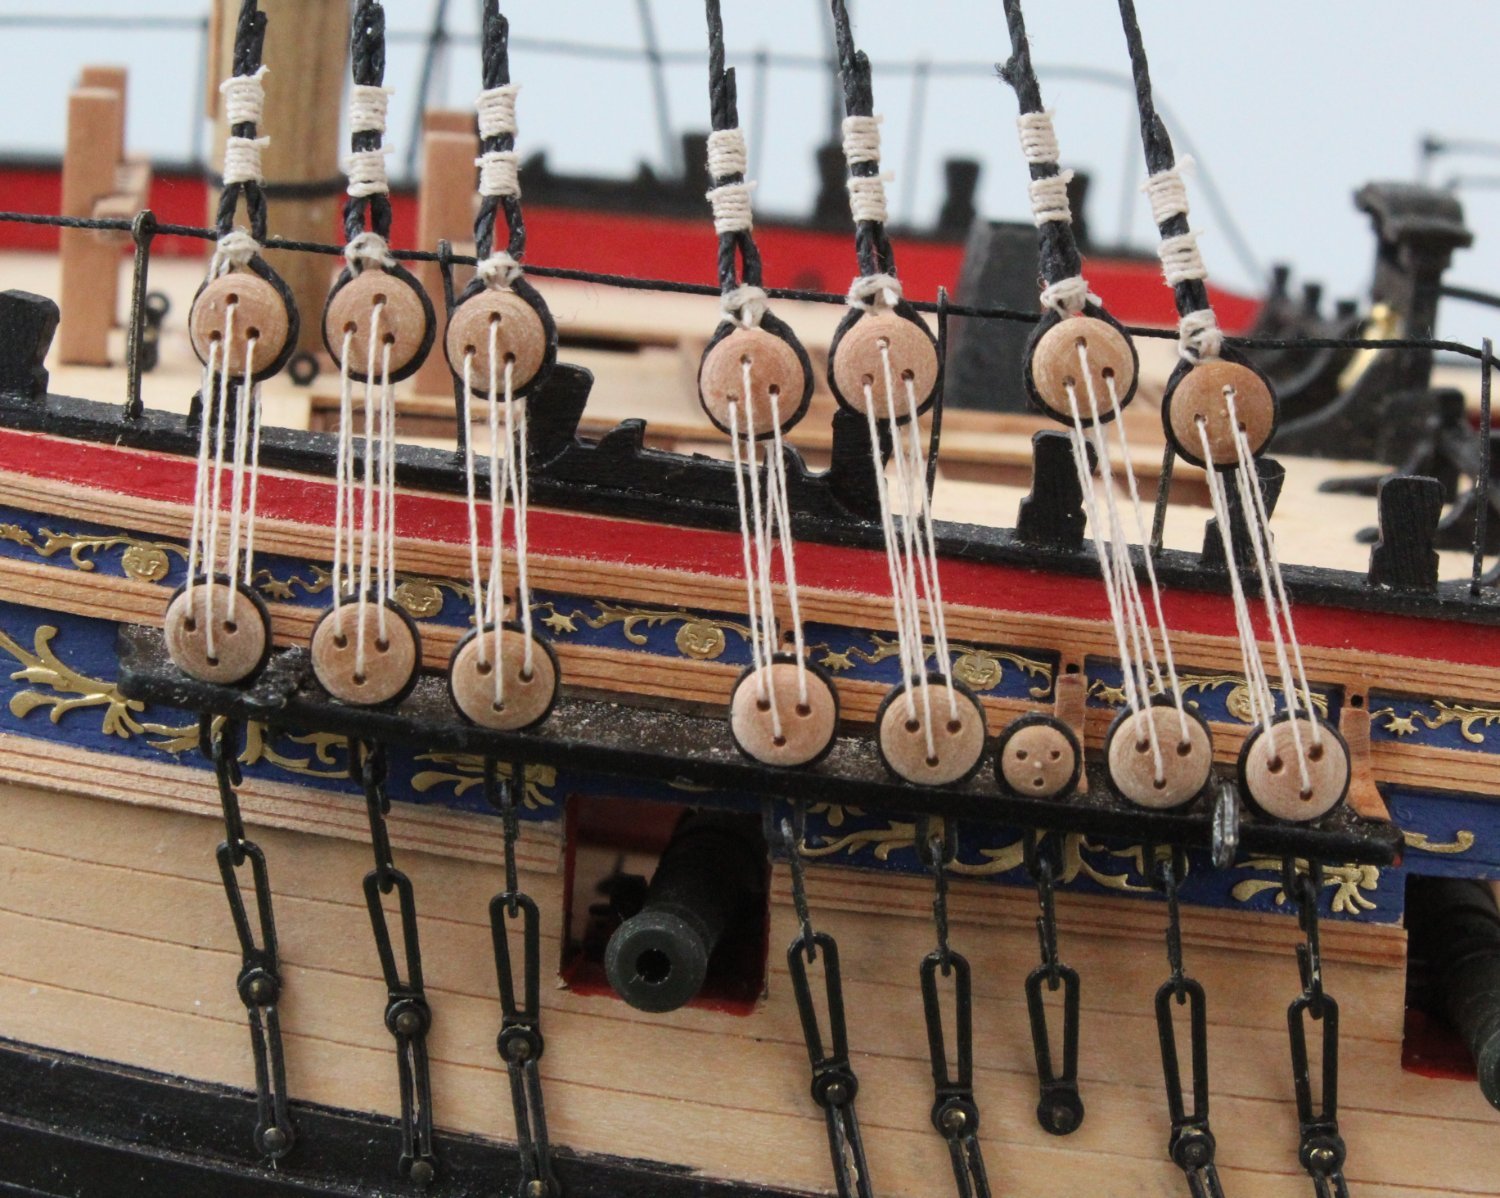
Foremast Portside Lanyards
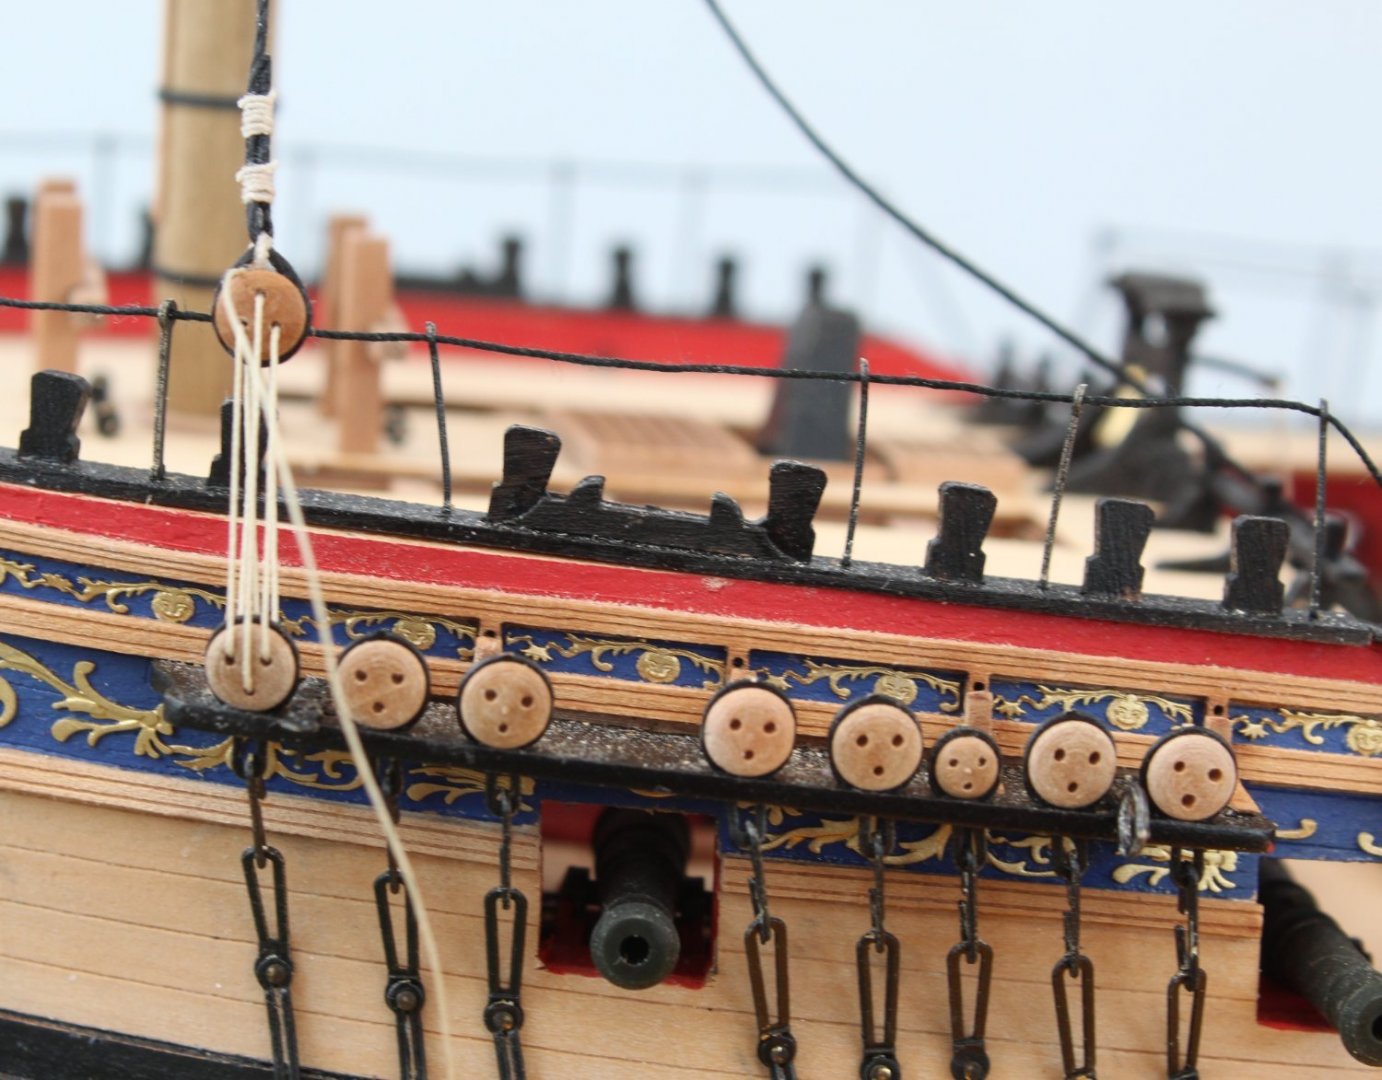
I will start this post with saying this is the best I have ever done a set of shrouds with deadeyes and lanyards. The method I used certainly helped me improve my technique. When looking at the attached the two photos the first 3 shroud lines (nearest the bow) are not too bad and look reasonably even. The next 4 shroud lines however not so good, especially the last one.
I am now in a quandary as they have not turned out quite as I hoped. Can I accept this standard of workmanship and move on as there is a marked improvement compared with my previous builds. This is what I would have done in the past without a moments thought. The new me is now thinking I can do so much better and I am now very tempted cut my losses and start over, refining the method slightly to get even better results.
The shroud deadeyes tend not to be at an even level on a real ship which is another consideration. I would welcome some comments before I finally take the plunge and start over. With regards to the seizing above the shroud deadeye, does the first one need to be nearer to the deadeye? I used a some 2mm tape to to set the same distance for each line. I think it would have been better if I had used 1mm tape.

-
Foremast Shrouds - Port Side Start
After the false start yesterday with adding the deadeyes to the foremast shroud lines I have been able to refine my method which seems to be working well so far. I must admit I do not enjoy the task of adding deadeyes to the shrouds, but it does become slightly less onerous now I have my refined method to a set of repeatable steps.
I am still using my jig to form the loop for the deadeye, but I have discovered the position of loop can be adjusted. Once I am happy a touch of ca gel is applied to the loop seizing and the excess thread trimmed.
The shroud line is then held in one of the quad hands,. A clamp is used to hold the thread in place, as shown in the photo below.

It is an easy job to then add the seizing's. Each seizing consists of 5 bottom and 5 top half hitch knots.

I then add some test lanyards to the first pair of shroud lines. With the partially rigged lanyards held under a bit of tension the deadeyes are reasonably level. I am not going to worry too much if there they are slightly uneven once then proper lanyards are rigged, as that is normally the case for the actual ships.

The picture below is shows the first three deadeyes in position with a bit of tension applied to the test lanyards.
The second shroud line is now complete, and looks good when a test lanyard is added and held under tension.
I have one more pair shroud line and one single shroud line to add to the port side foremast before I will repeat the process for the starboard foremast shrouds. It should be noted that the starboard shrouds lines are being added to the foremast in turn, as per the instructions in the rigging plan sheets.
I will continue to take my time with this aspect until all the lower shroud lines have been added for the three masts. I will post some more pictures as I progress with this task.
- chris watton, mtaylor, Dave_E and 7 others
-
10
-
-
9 minutes ago, Oldsalt1950 said:
Glenn, what Dave is refering to is known as a "deadeye claw" . It is two pieces of wire twisted and soldered together and used to keep the deadeyes spaced properly while you are setting your shroud line length up and seizing it. Once the line is seized around the upper deadeye, the claw is removed and you can than rig the deadeye. It will look like an 'X' with legs on the ends
I have tried the deadeye claw before before moving on to the jig I made with two pins and dowel which has served me well for my last three boat builds. I could never fully get to grips with the deadeye claw method. I modified it by replacing the top pins with a dowel. I am going to experiment with a few different ideas.
- Ryland Craze, Dave_E and mtaylor
-
3


Chris Watton and Vanguard Models news and updates
in Traders, Dealers, Buying or Selling anything? - Discuss New Products and Ship Model Goodies here as well!!
Posted
That is an option I would add