archjofo
-
Posts
1,505 -
Joined
-
Last visited
Content Type
Profiles
Forums
Gallery
Events
Everything posted by archjofo
-
 Hi Ed, your metalwork is very admirable, but not only this.
- 3,618 replies
-
- 5
-

-
- young america
- clipper
- (and 1 more)
-
Hello everybody after a short break here an update of the report for the construction of the masts.
-
SOLEIL ROYAL 1669 by michel saunier
archjofo replied to michel saunier's topic in - Build logs for subjects built 1501 - 1750
Hello Michel, I have been watching your building on the Internet for some time. I am glad that you are here now in MSW. Your model is fantastic. -
Hi Ed, I am impressed by your performance. This precision at this scale. This is model construction at the highest level.
- 3,618 replies
-
- 3
-
-
- young america
- clipper
- (and 1 more)
-
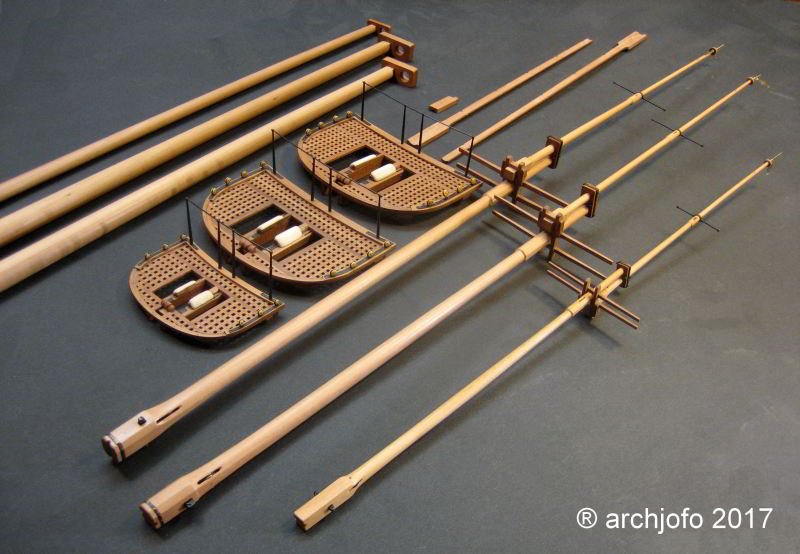
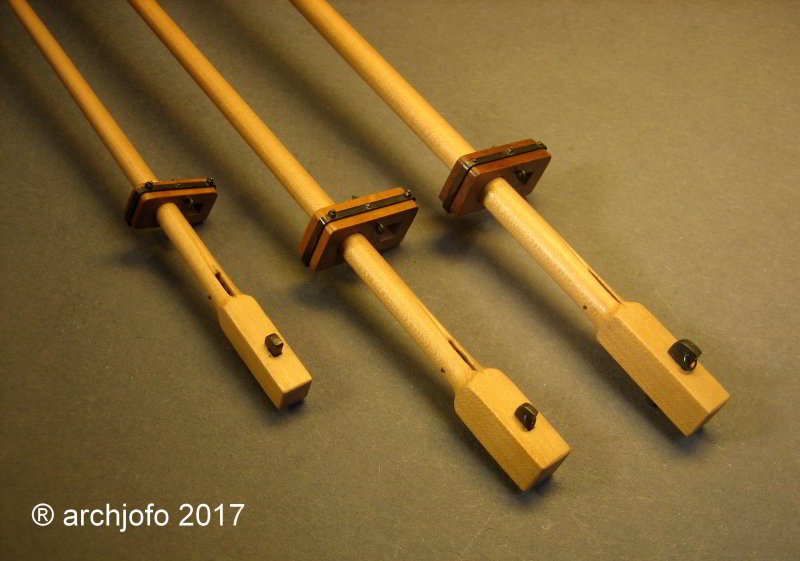
@cog Thanks for your nice comment and @all the others for the LIKES. Here is another update. The topgallant masts were equipped with the remaining sheaves and the fids. Similarly, the trestle trees still received sheaves. The last picture shows the parts of the masts that have been produced so far.

-
Hi, thanks for the nice Comments and here is a short supplement.
-
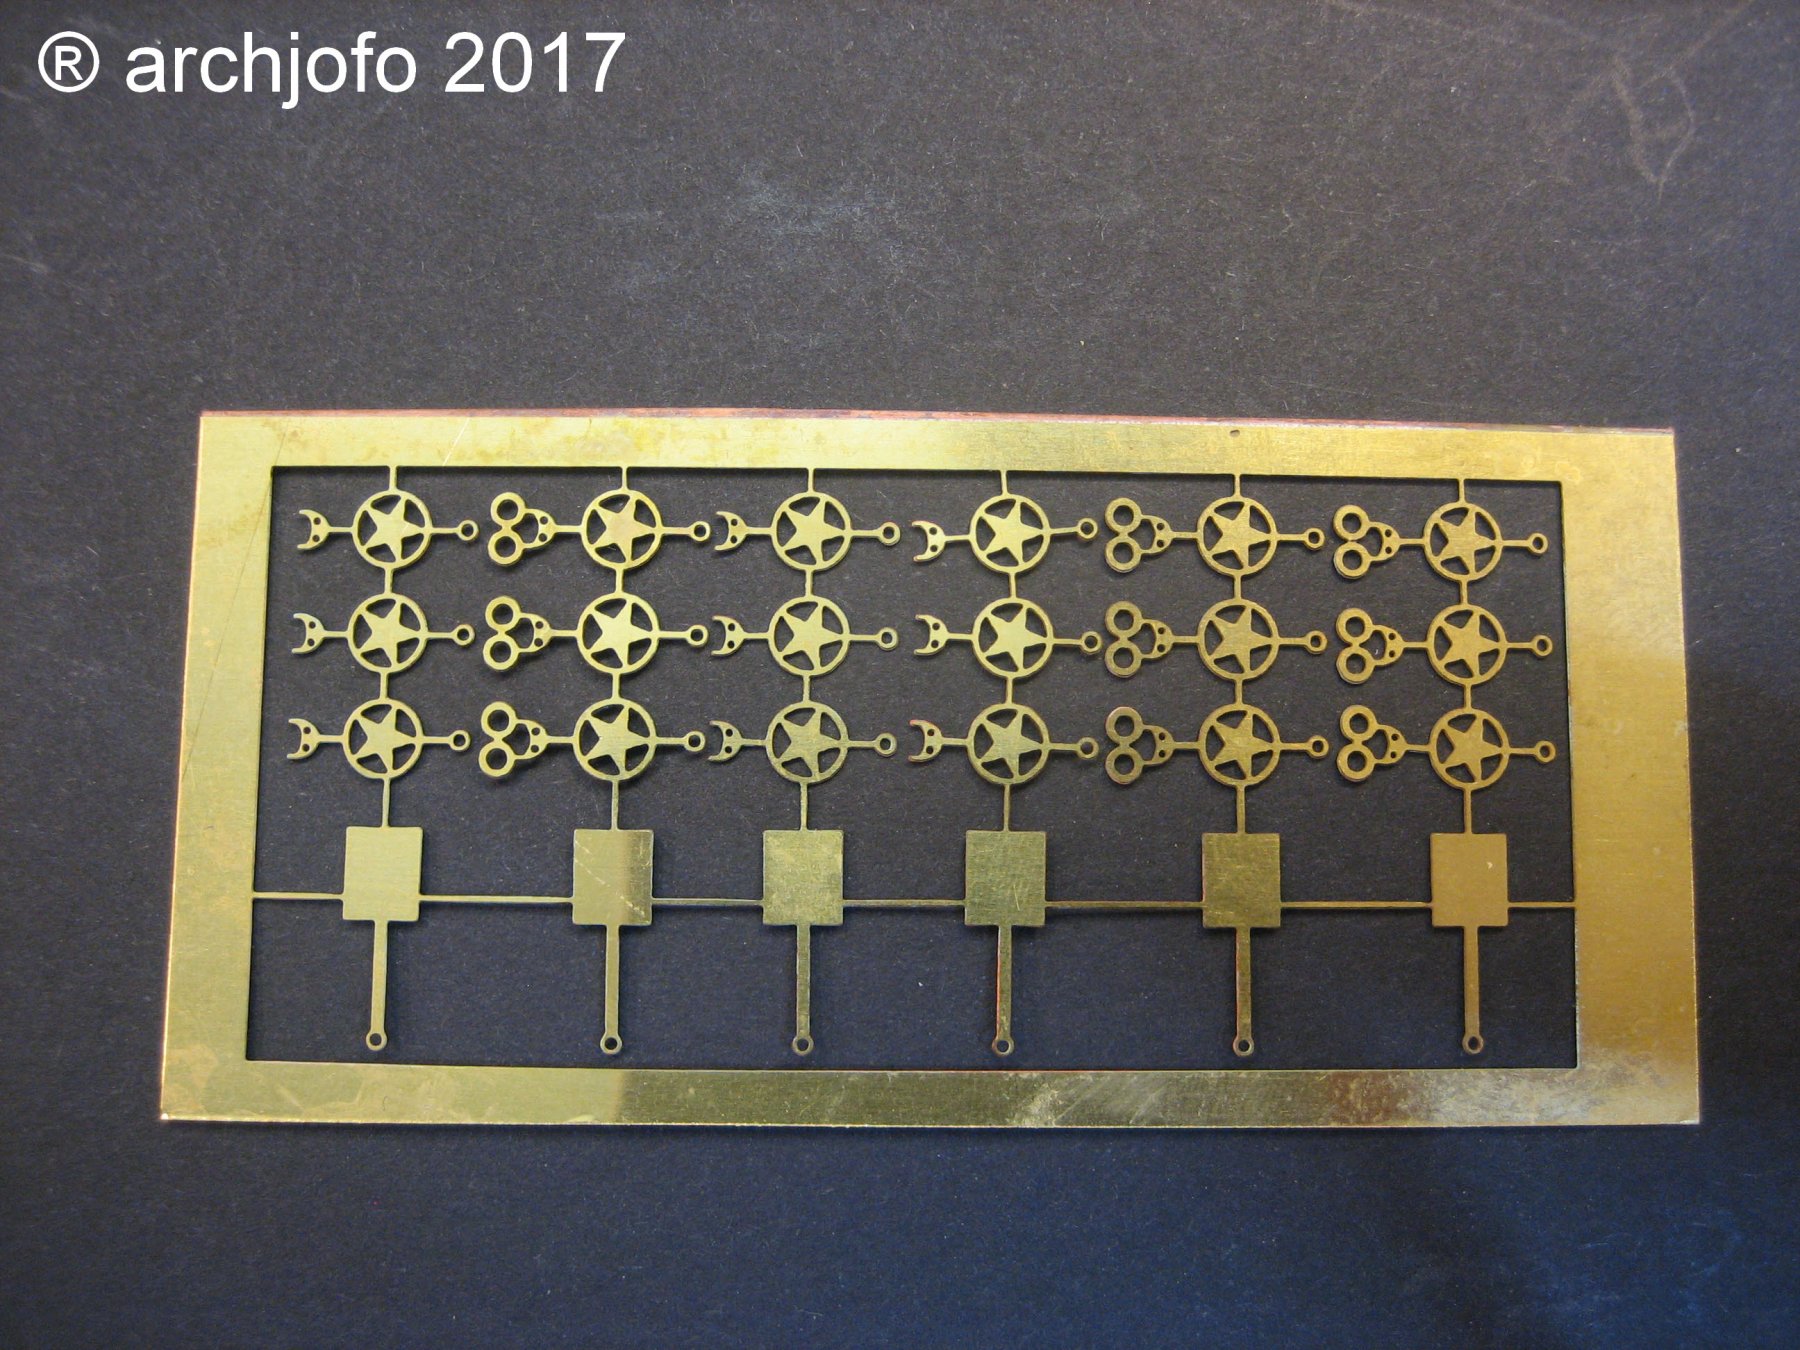
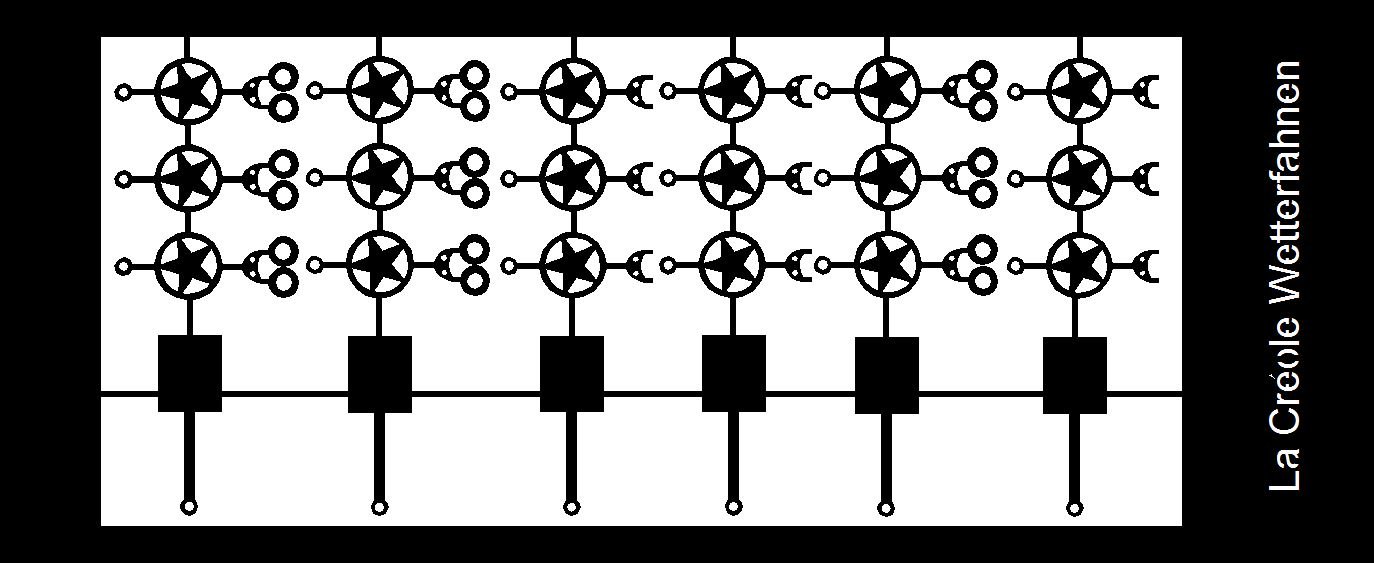
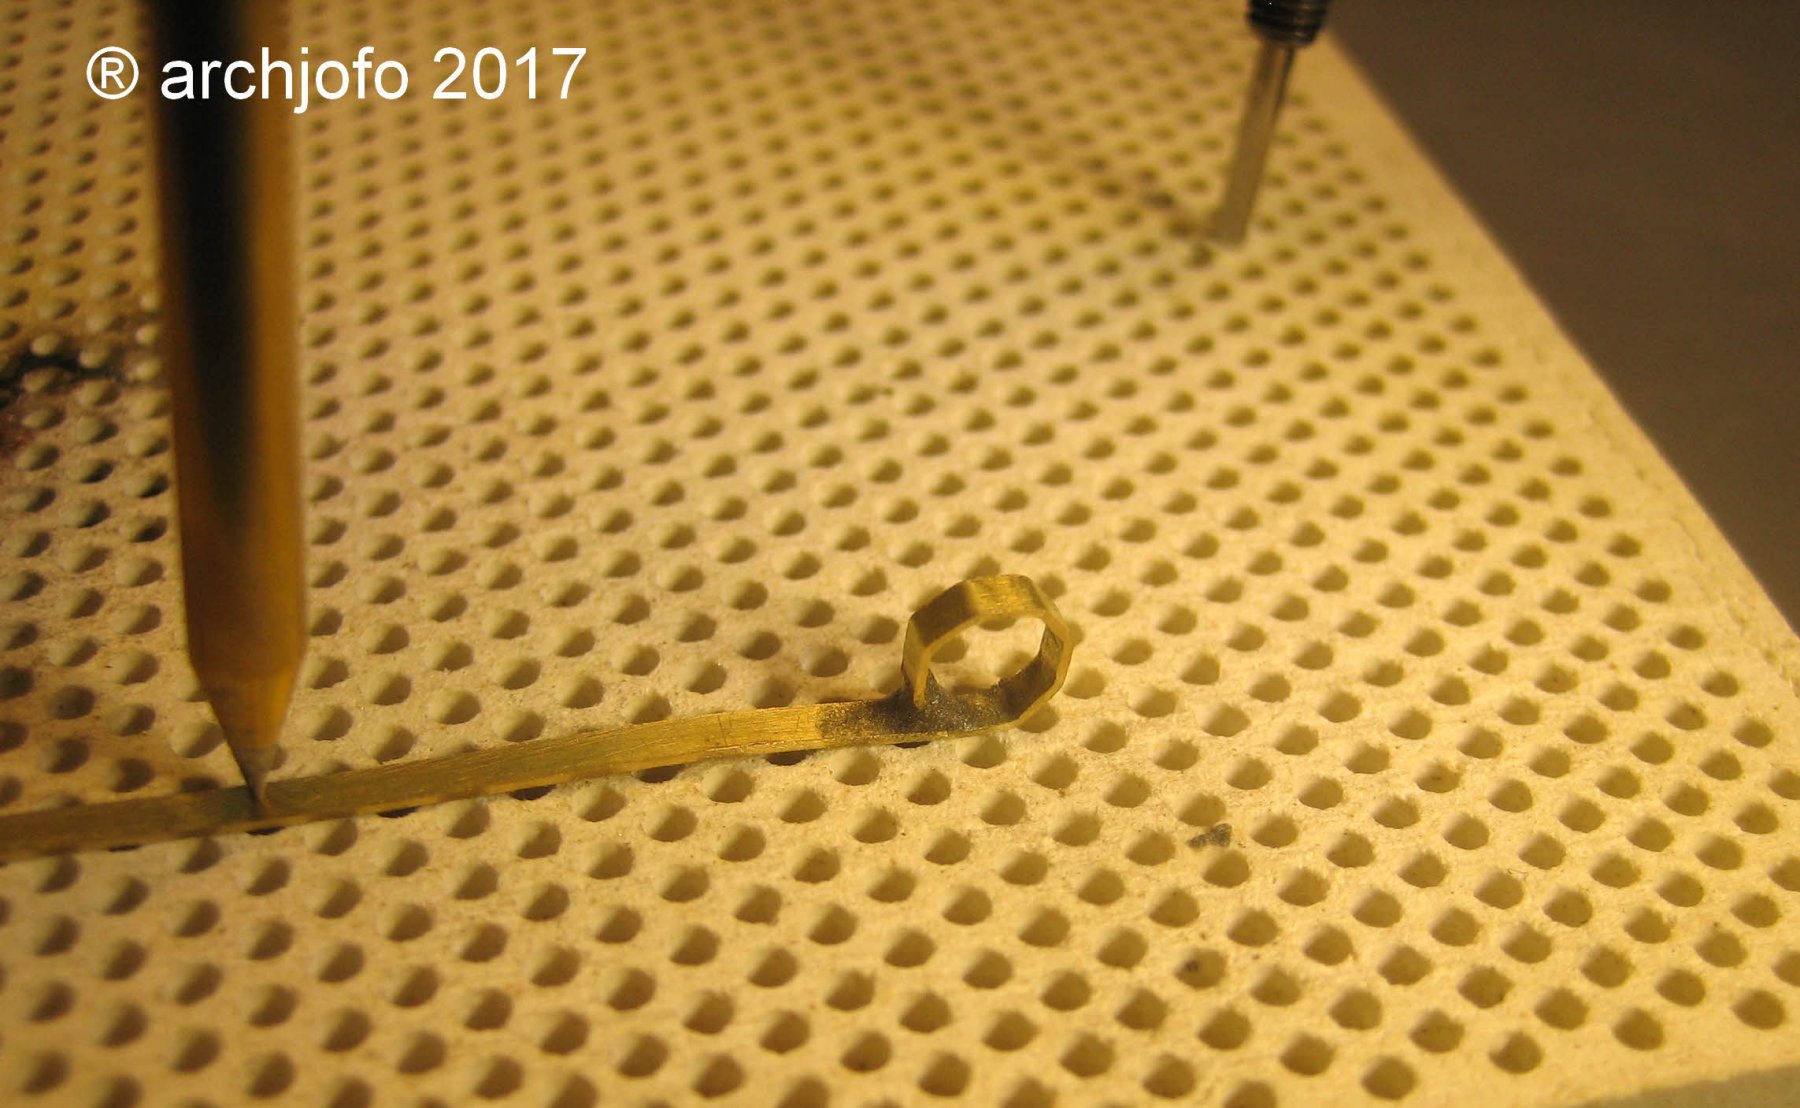
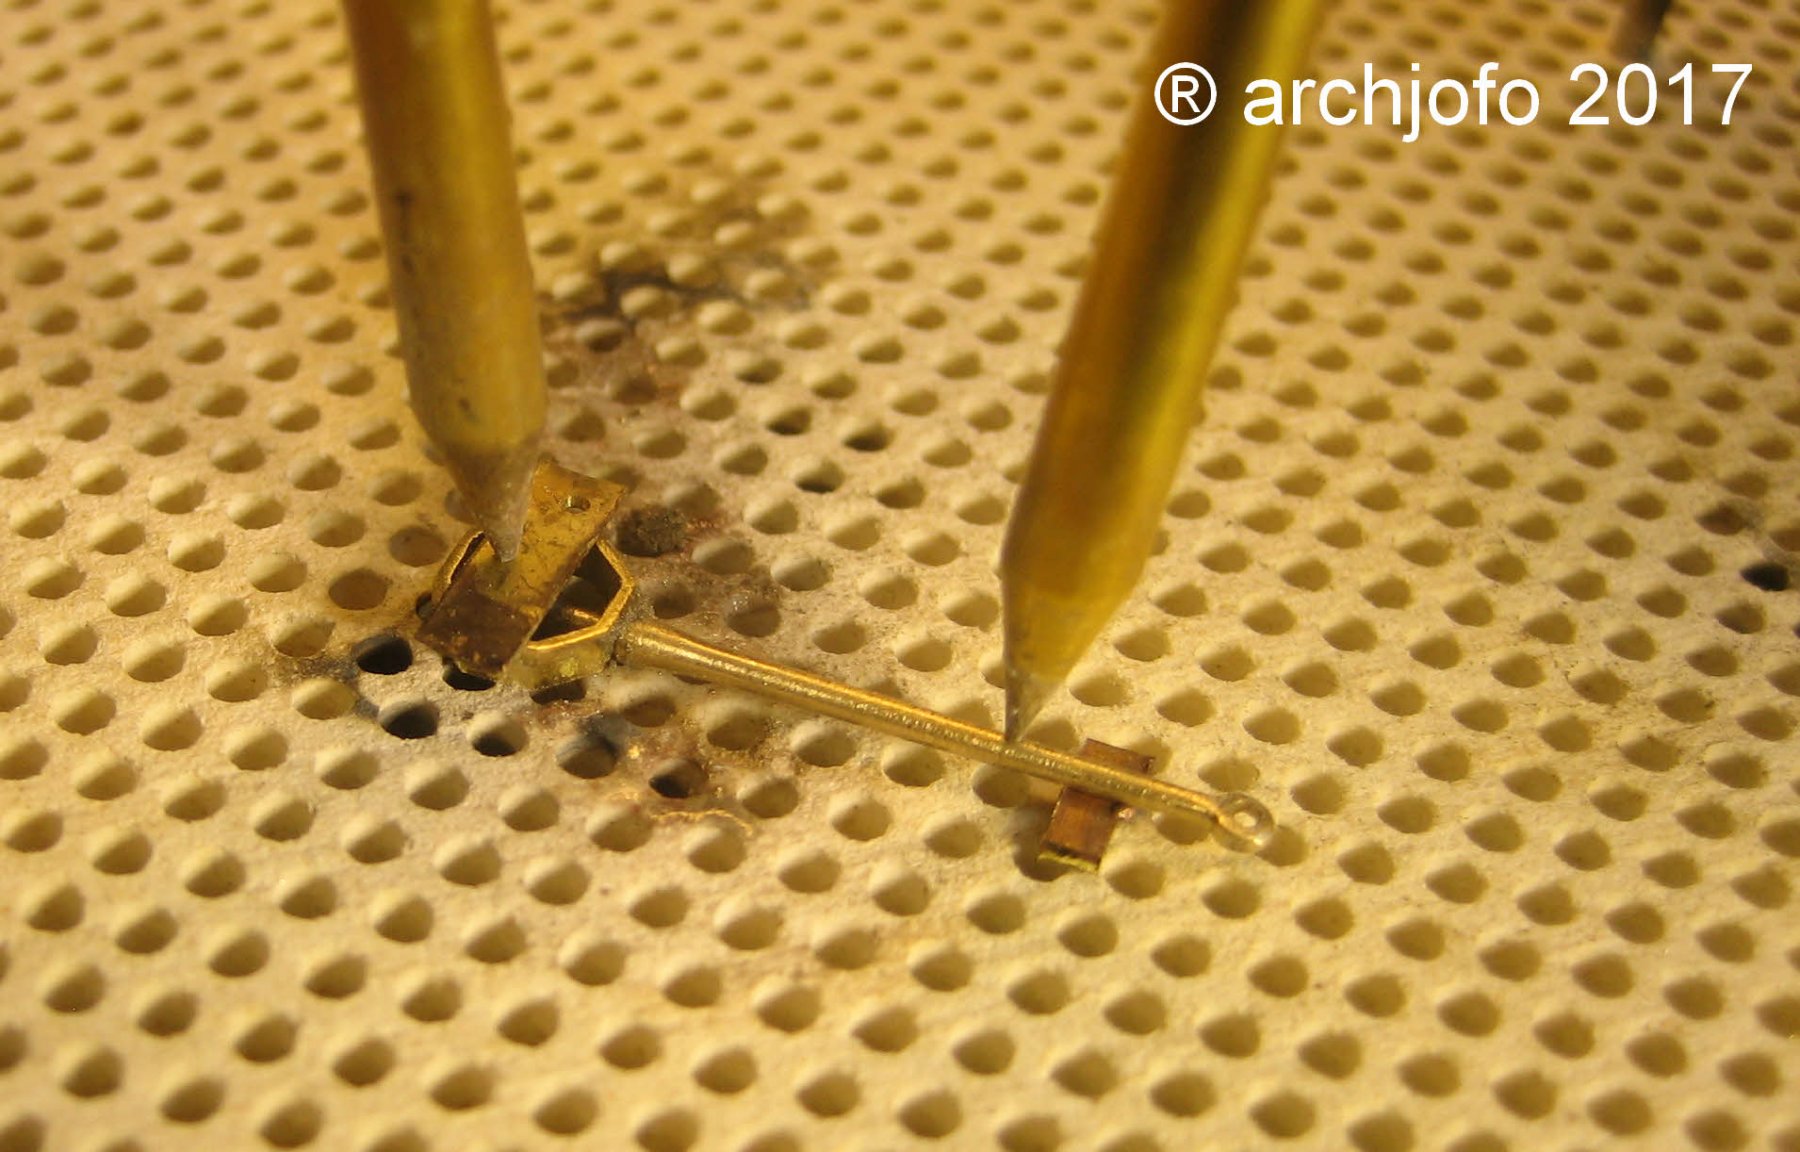
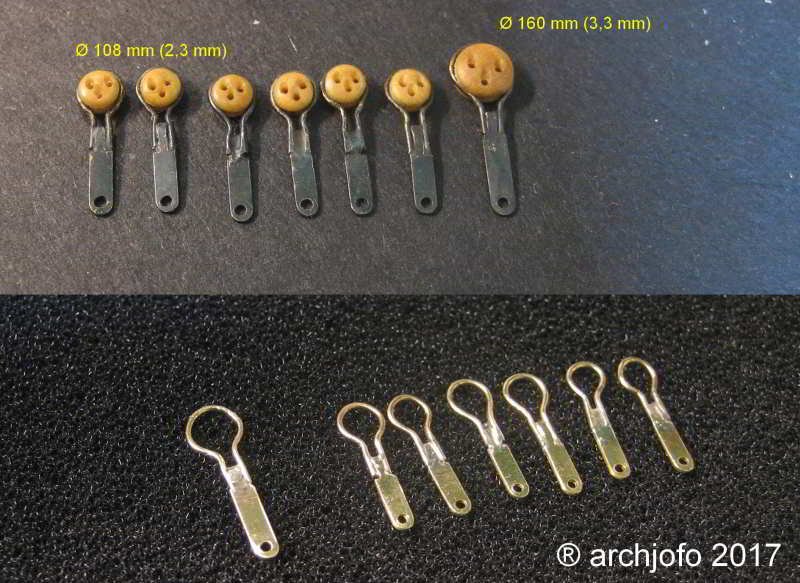
@dvm27 Hi, the La Creole carried max. 3 weather vanes. These etching parts are extremely filigree. The soldering of the mounting rings is very difficult, so some of them are damaged. So I had to produce more than I need. The etching board with the 18 weather vanes cost only 6 € including shipping in Germany.
-
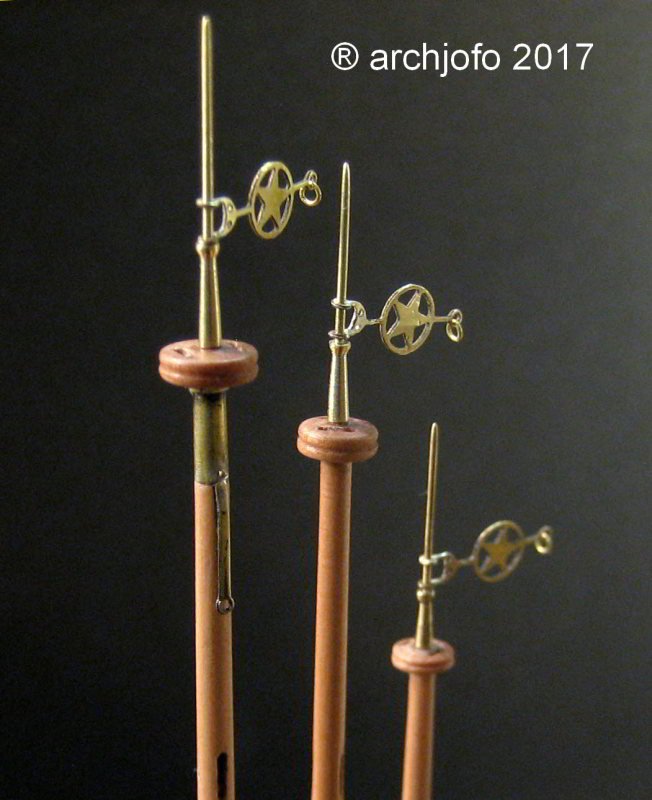
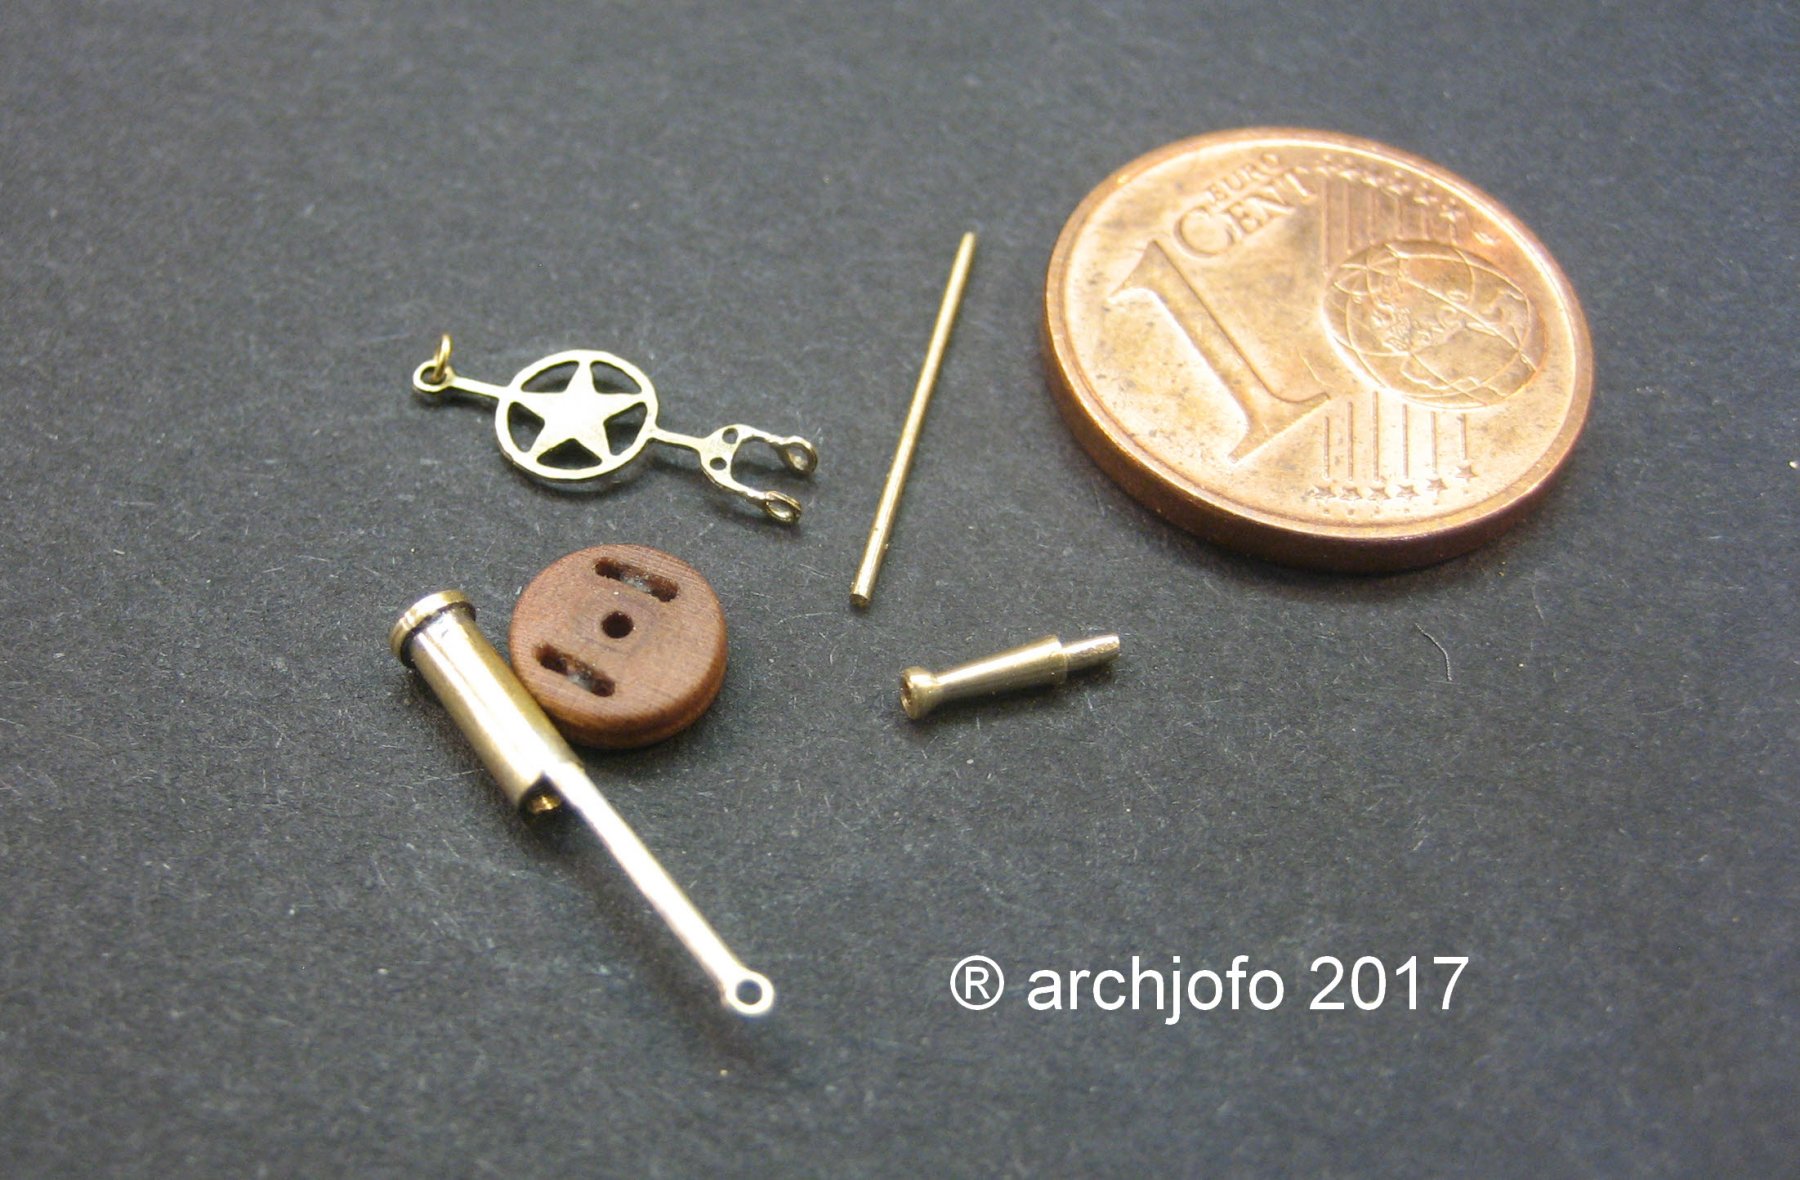
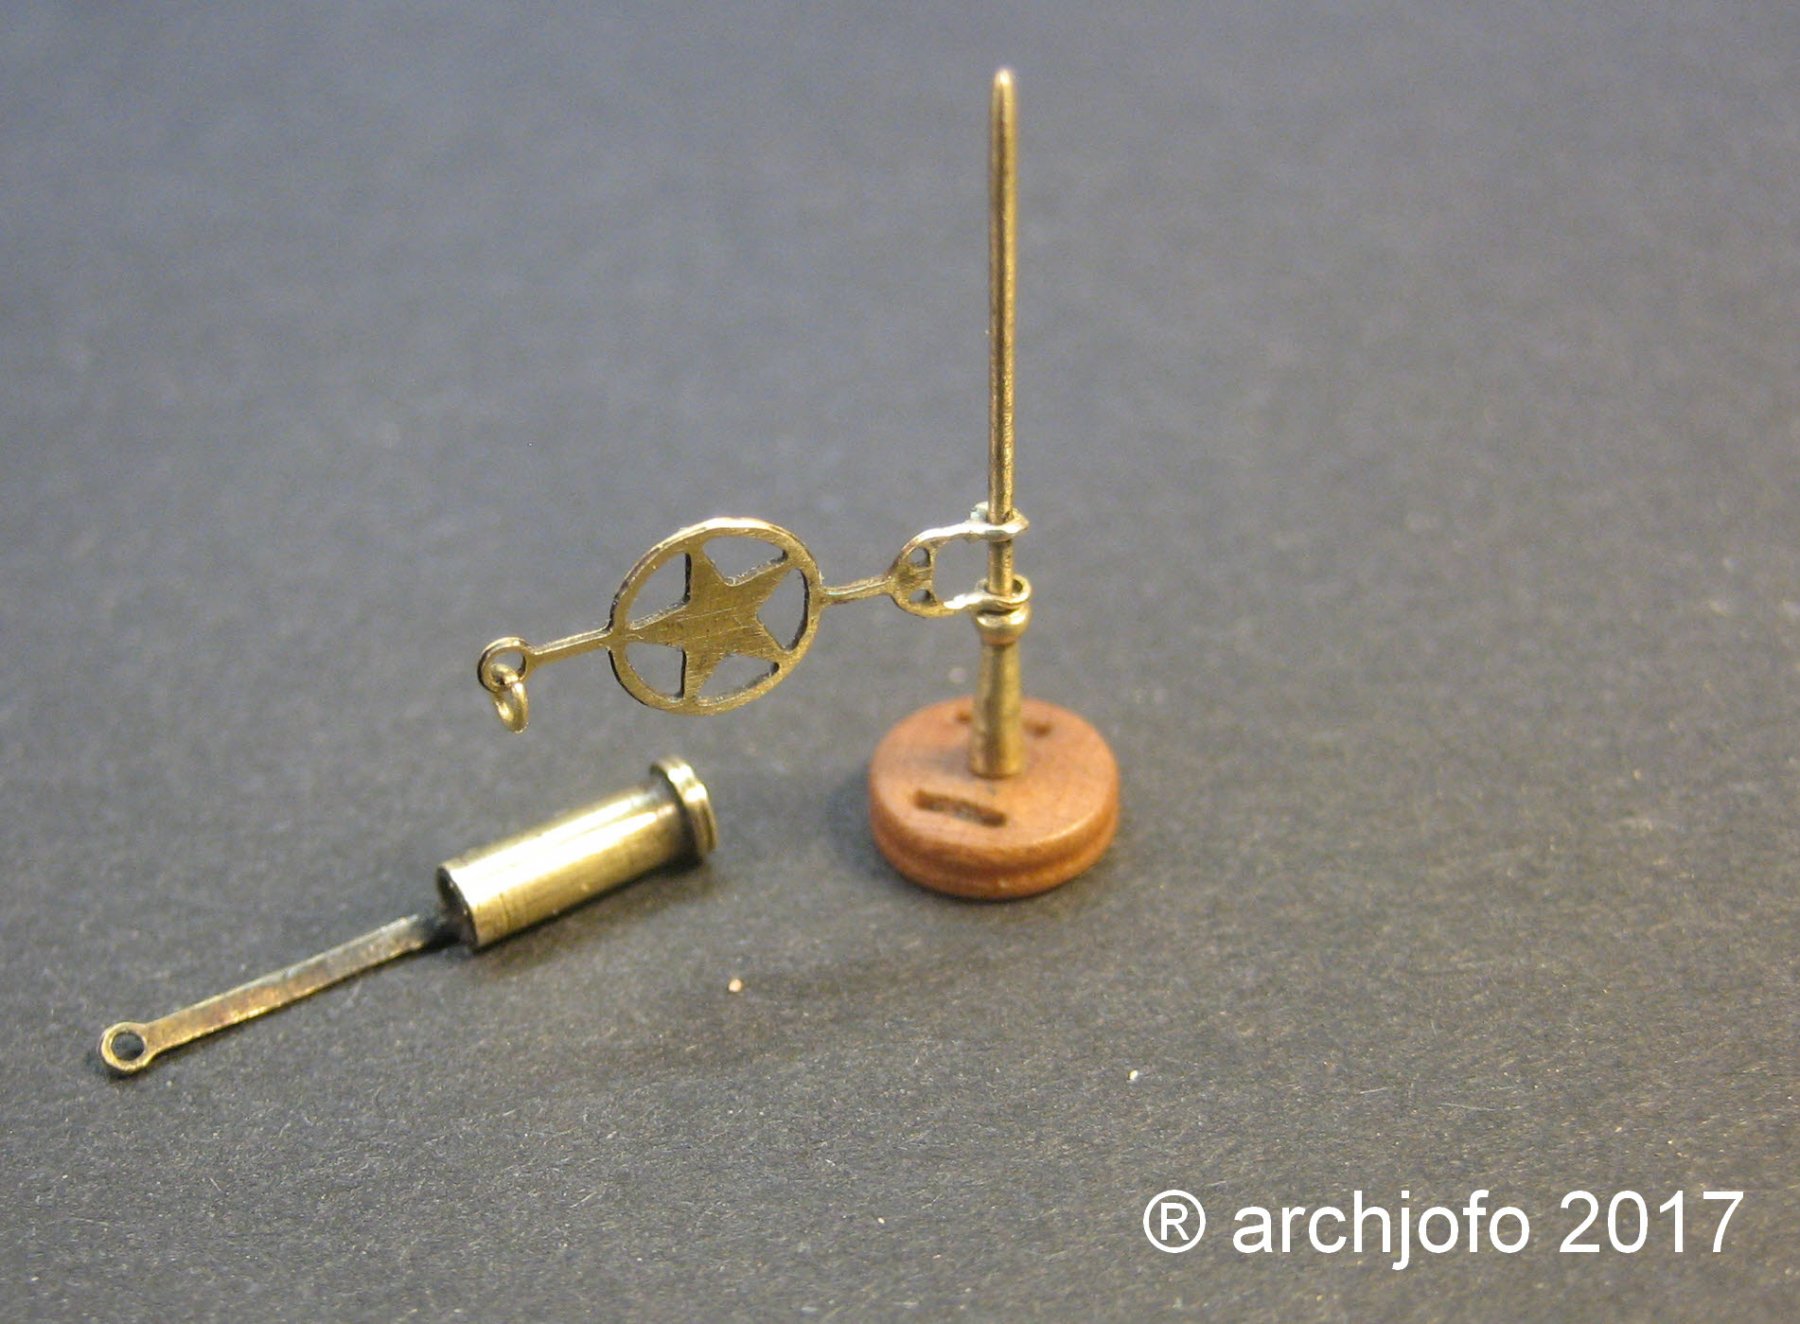
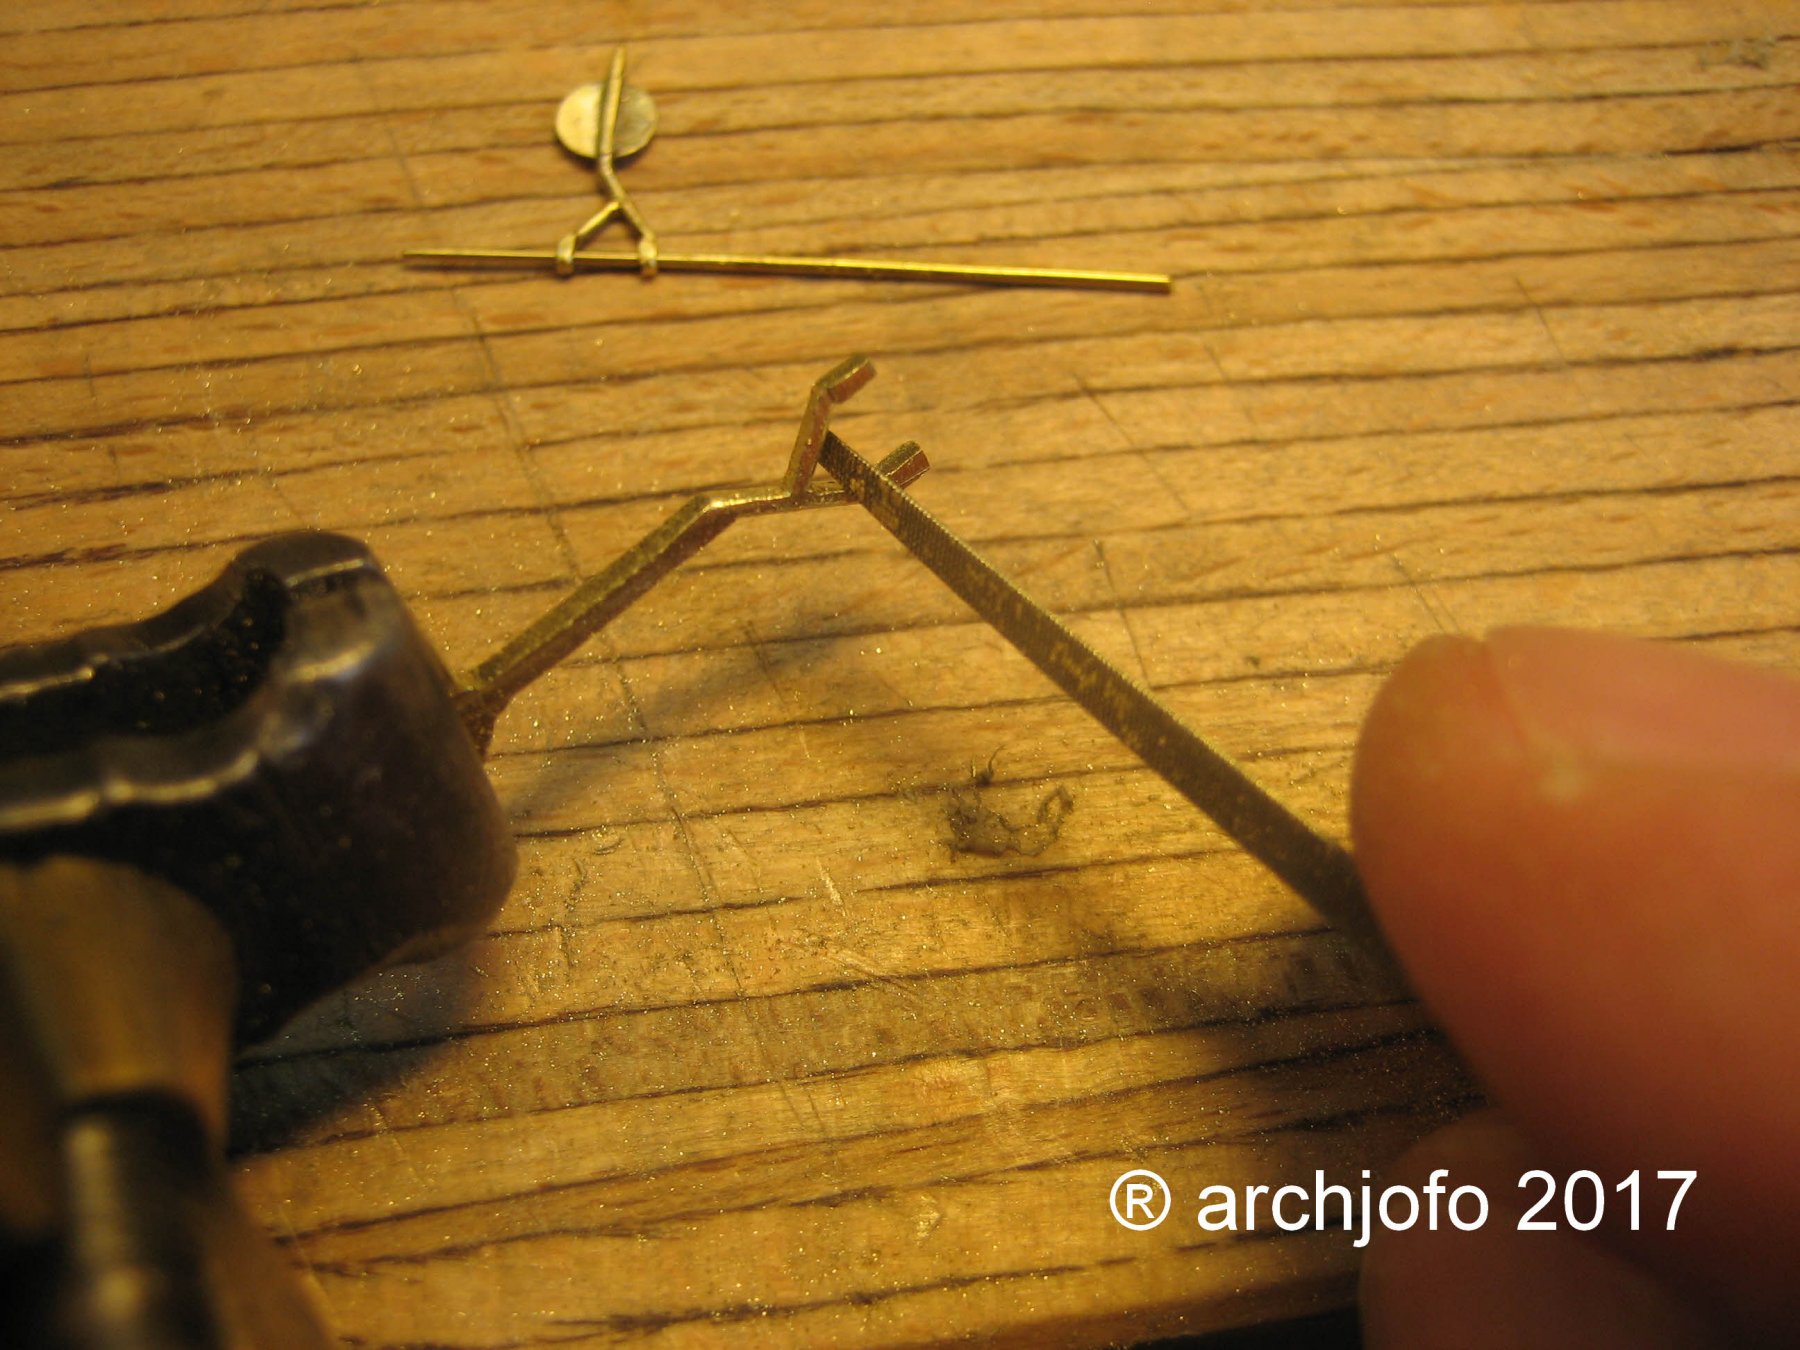
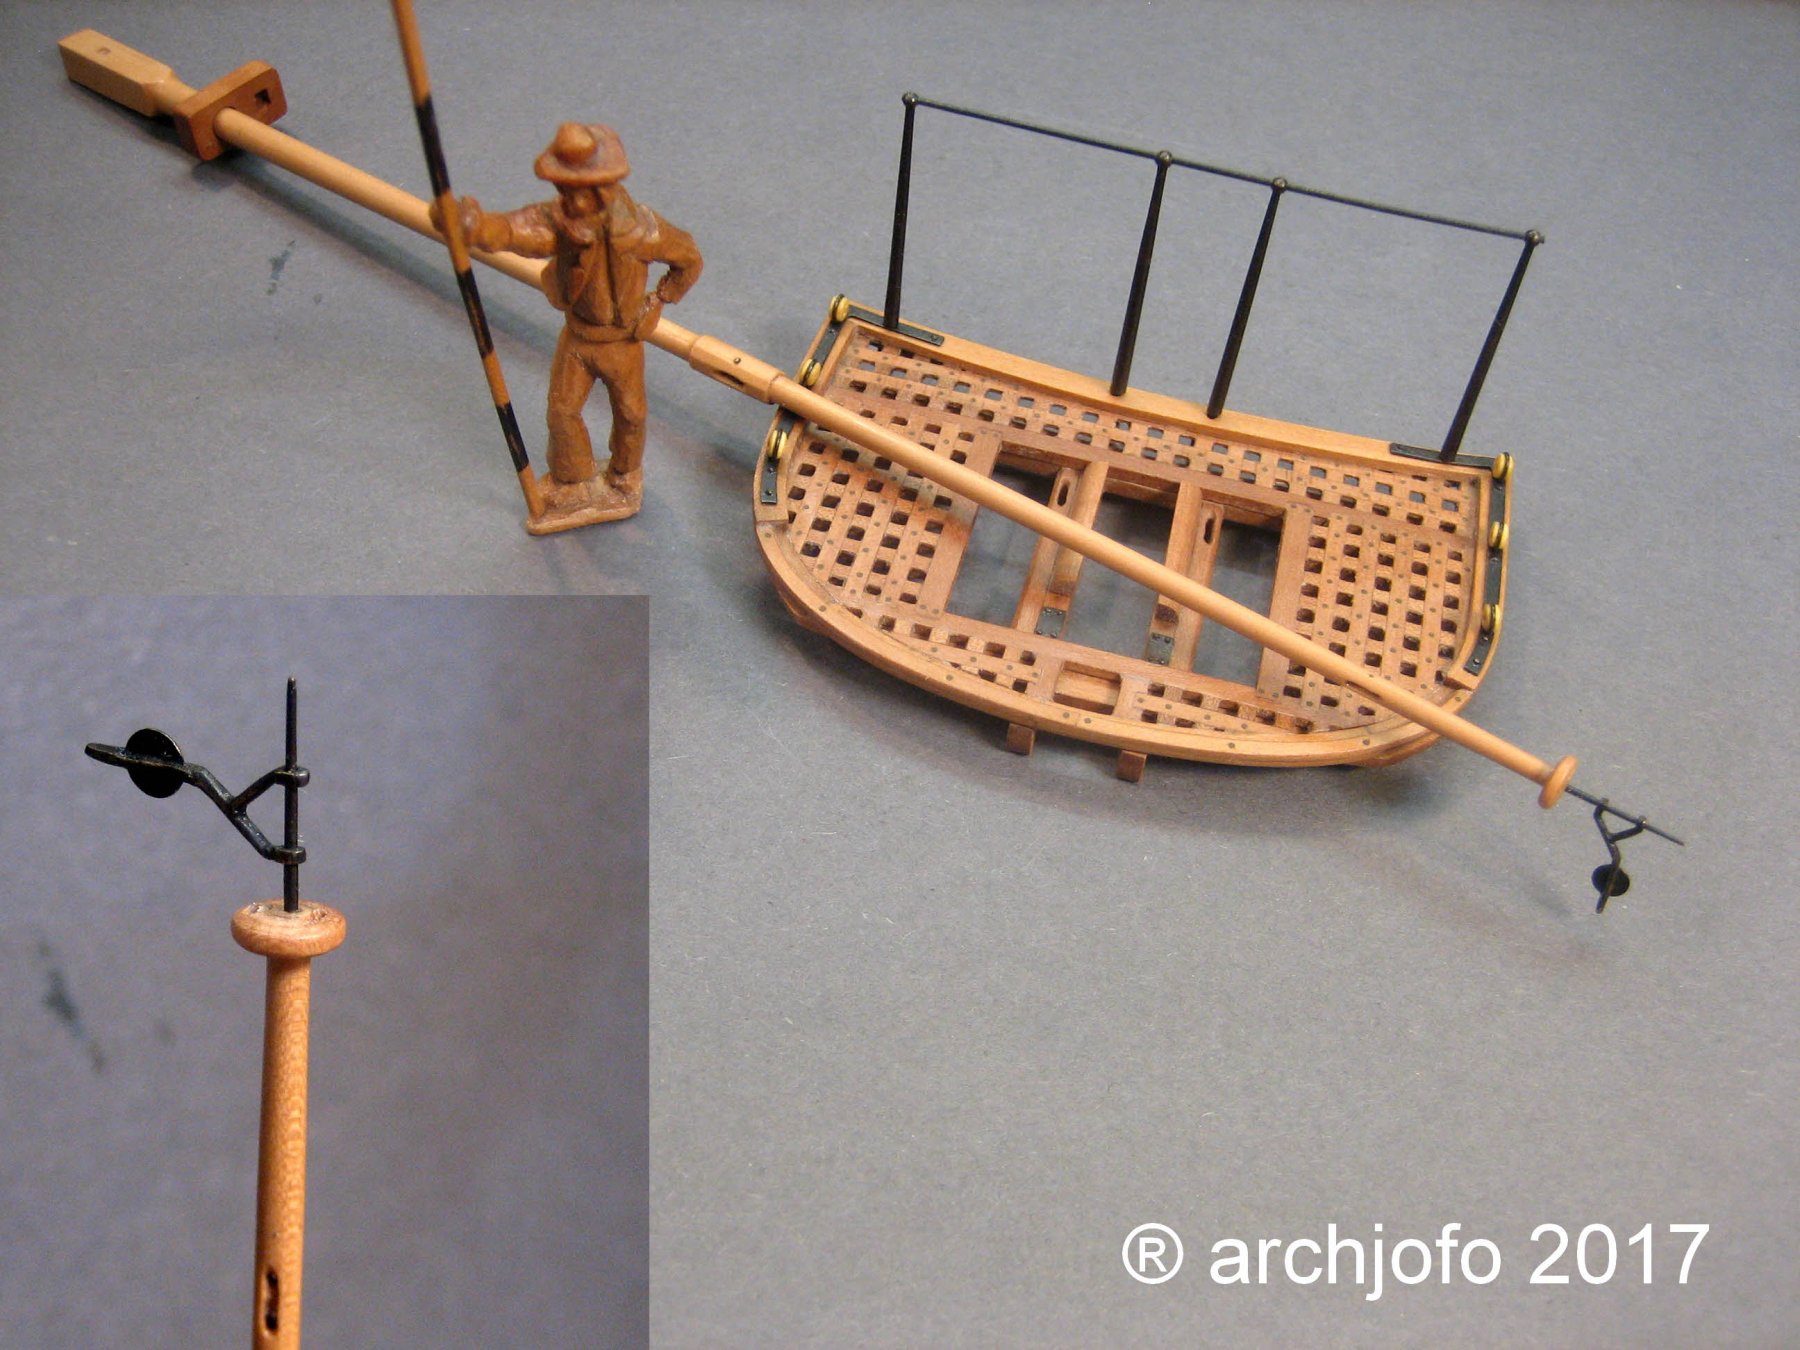
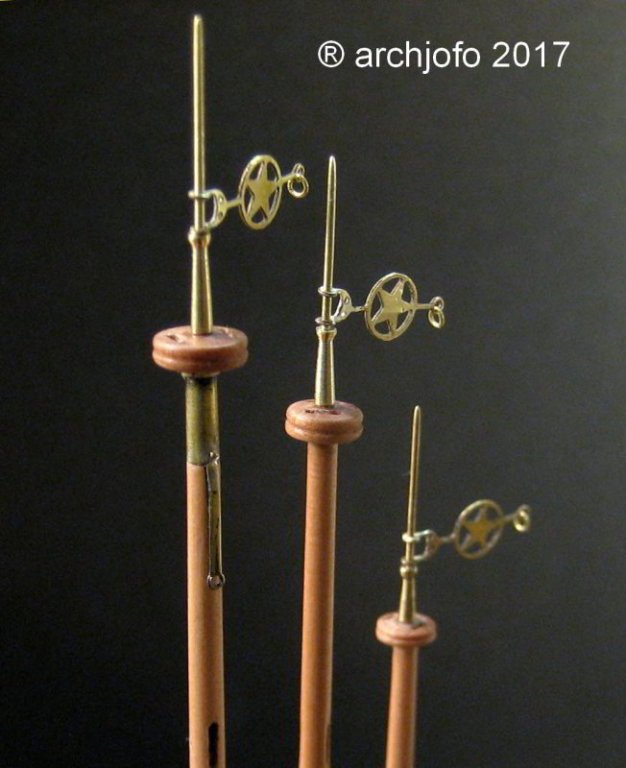
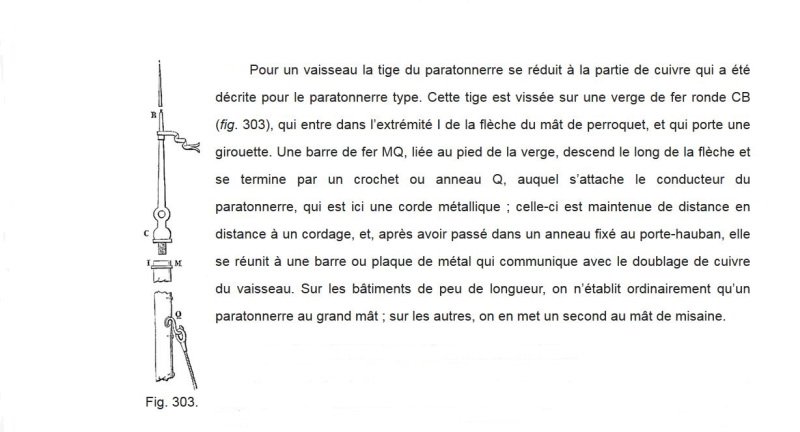
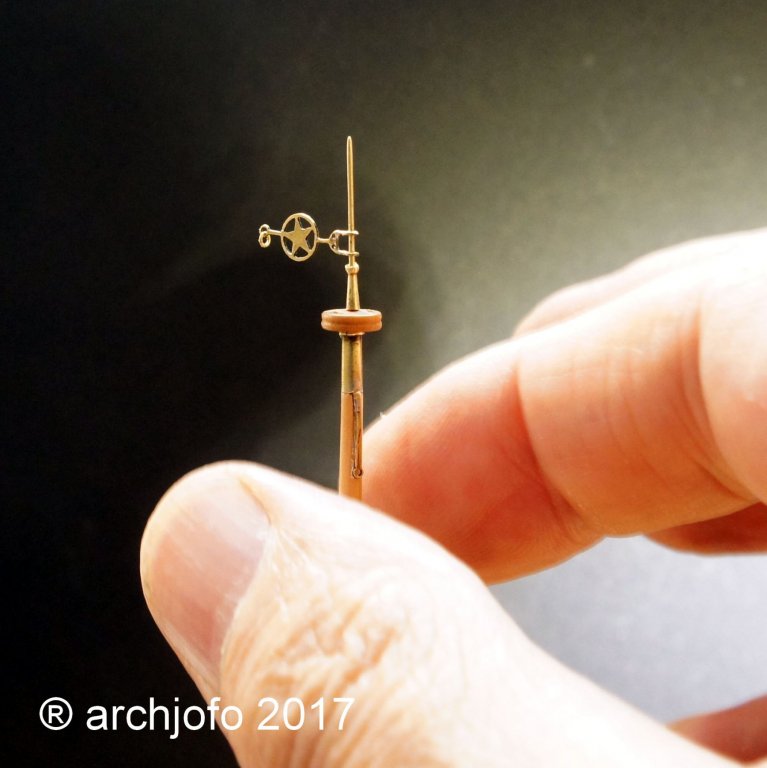
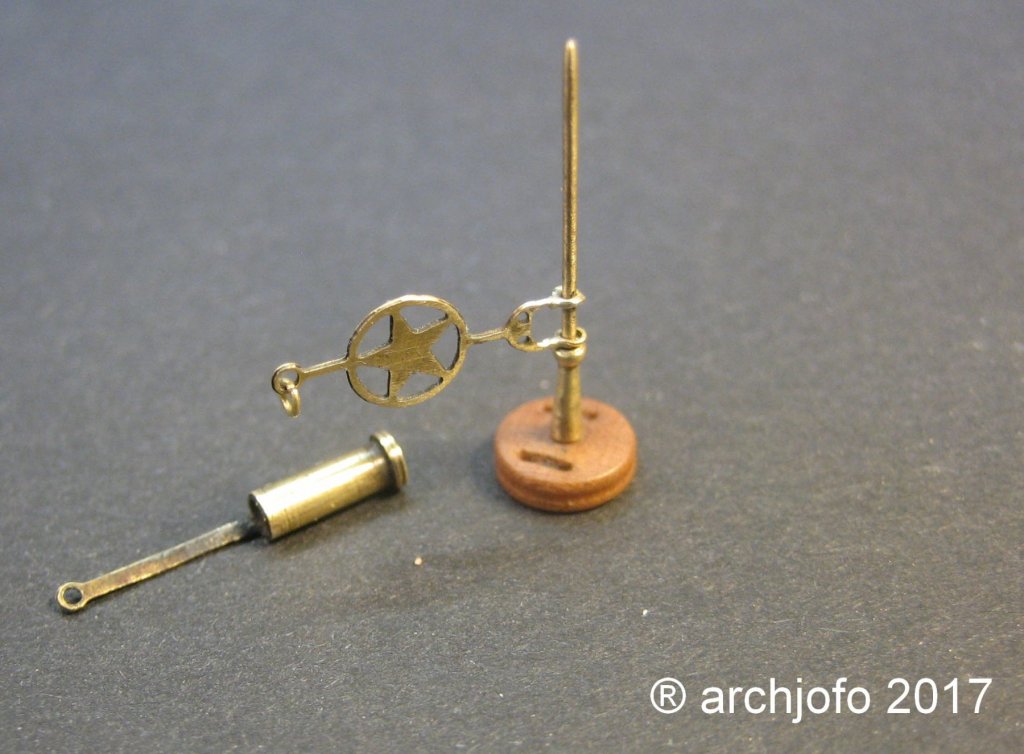
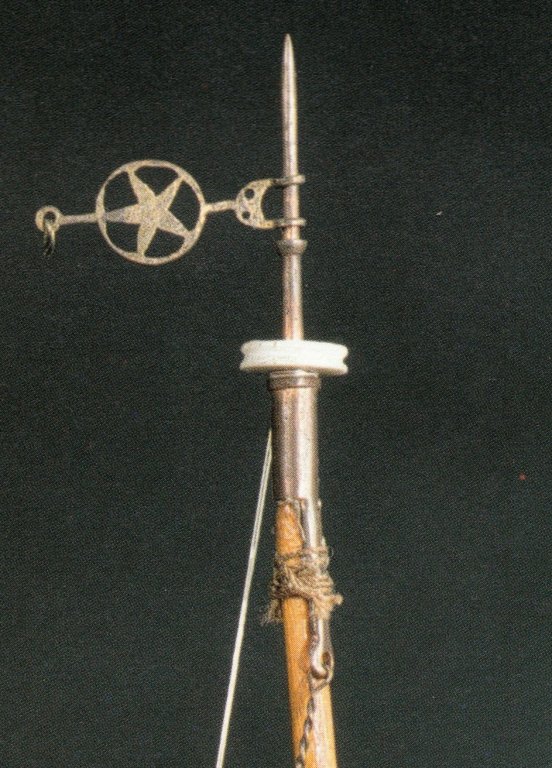
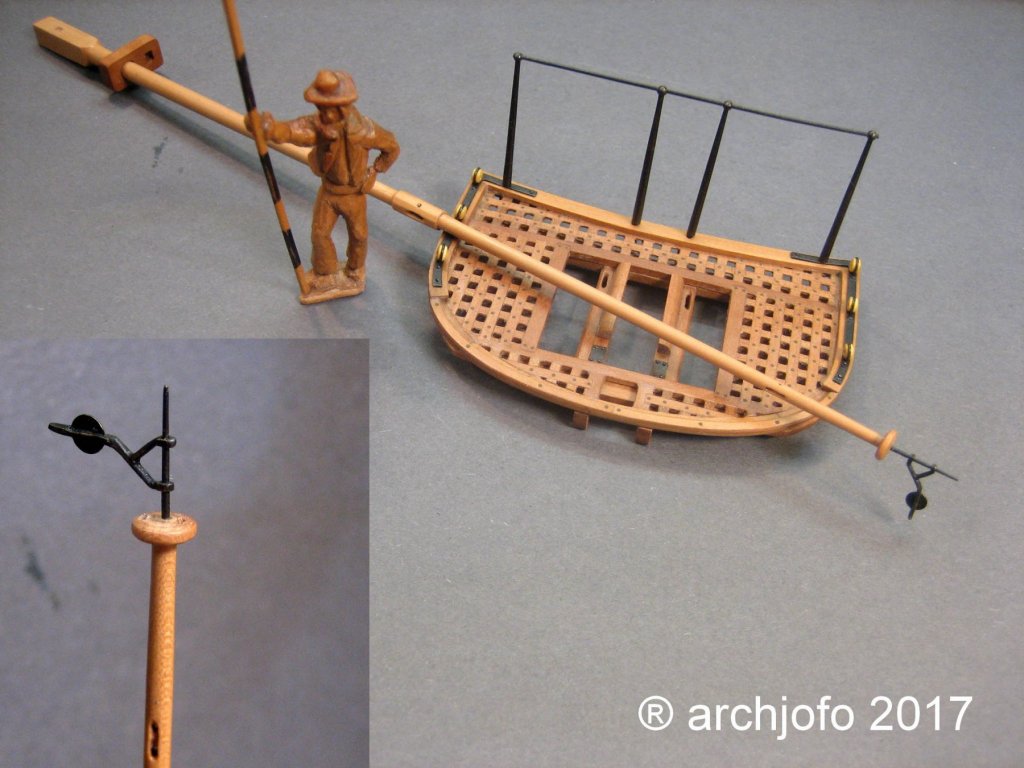
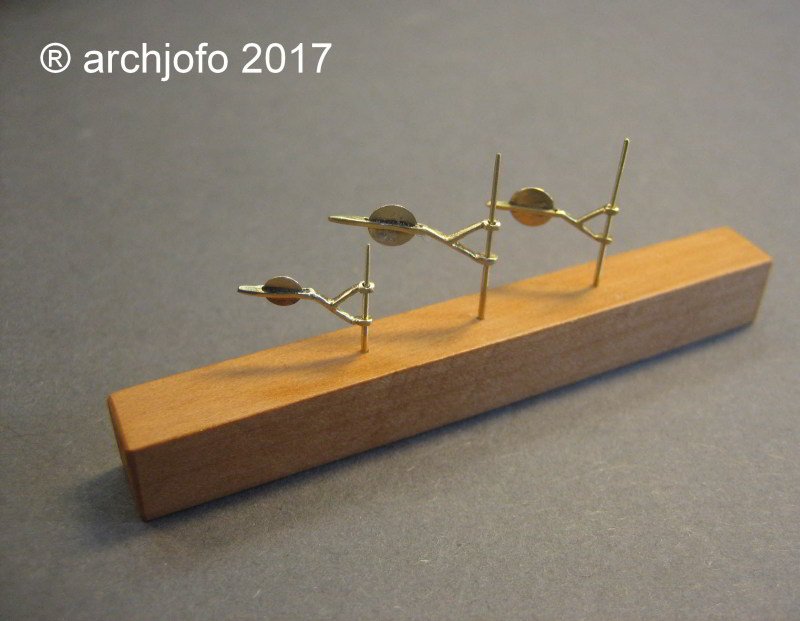
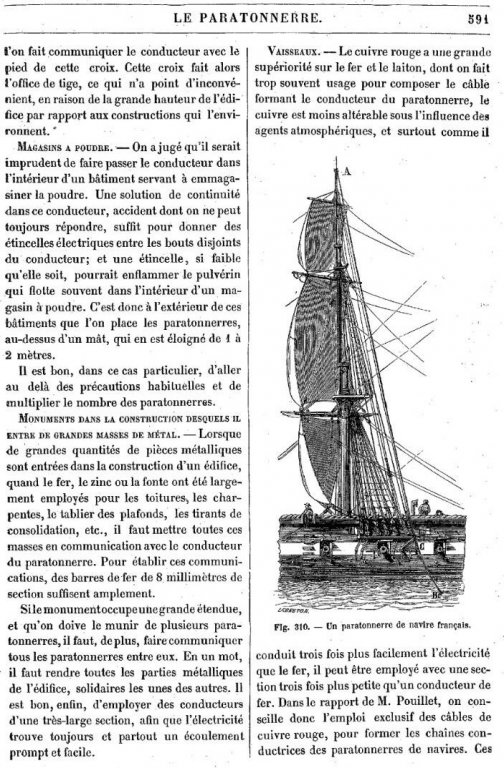
First of all, I would like to thank you for your supportive comments and for the LIKES. Let us remember LINK Meanwhile, I got the etched parts for the weather vanes delivered. I immediately went to work, and built the weather vane with lightning conductor for the mainmast top of the La Creole. In this context, I would like to mention this report on the lightning control of sailing ships. There are many parallels to the lightning conduction of the La Creole. I have also worked on the topgallant masts. Here are the results.


-
The etching parts for the weather vanes have not yet arrived. Meanwhile, I continued with the fittings for the topmast caps.
-
Hello, thanks for the nice comments and the LIKES. My previous interpretation of the weather flags and the lightning conduction for the La Creole is completely wrong. Our forum colleague Dirk @ Dubz showed me a picture from the book "Modeles Historiques" by J. Boudriot from the top of the main mast of the Paris model of La Creole. I also want to make this beautiful detail for my model. For this I use the etching technique. I have already drawn the necessary template.

-
Hi Ed, this is a beautiful sight. In addition, your report is for me a textbook for modeling, where I always find great suggestions.
- 3,618 replies
-
- 7
-
-
- young america
- clipper
- (and 1 more)
-
ancre Chebece 1750 by Jeronimo - FINISHED
archjofo replied to Jeronimo's topic in - Build logs for subjects built 1501 - 1750
Hi Karl, Beautiful progress! It is a fine precise work. -
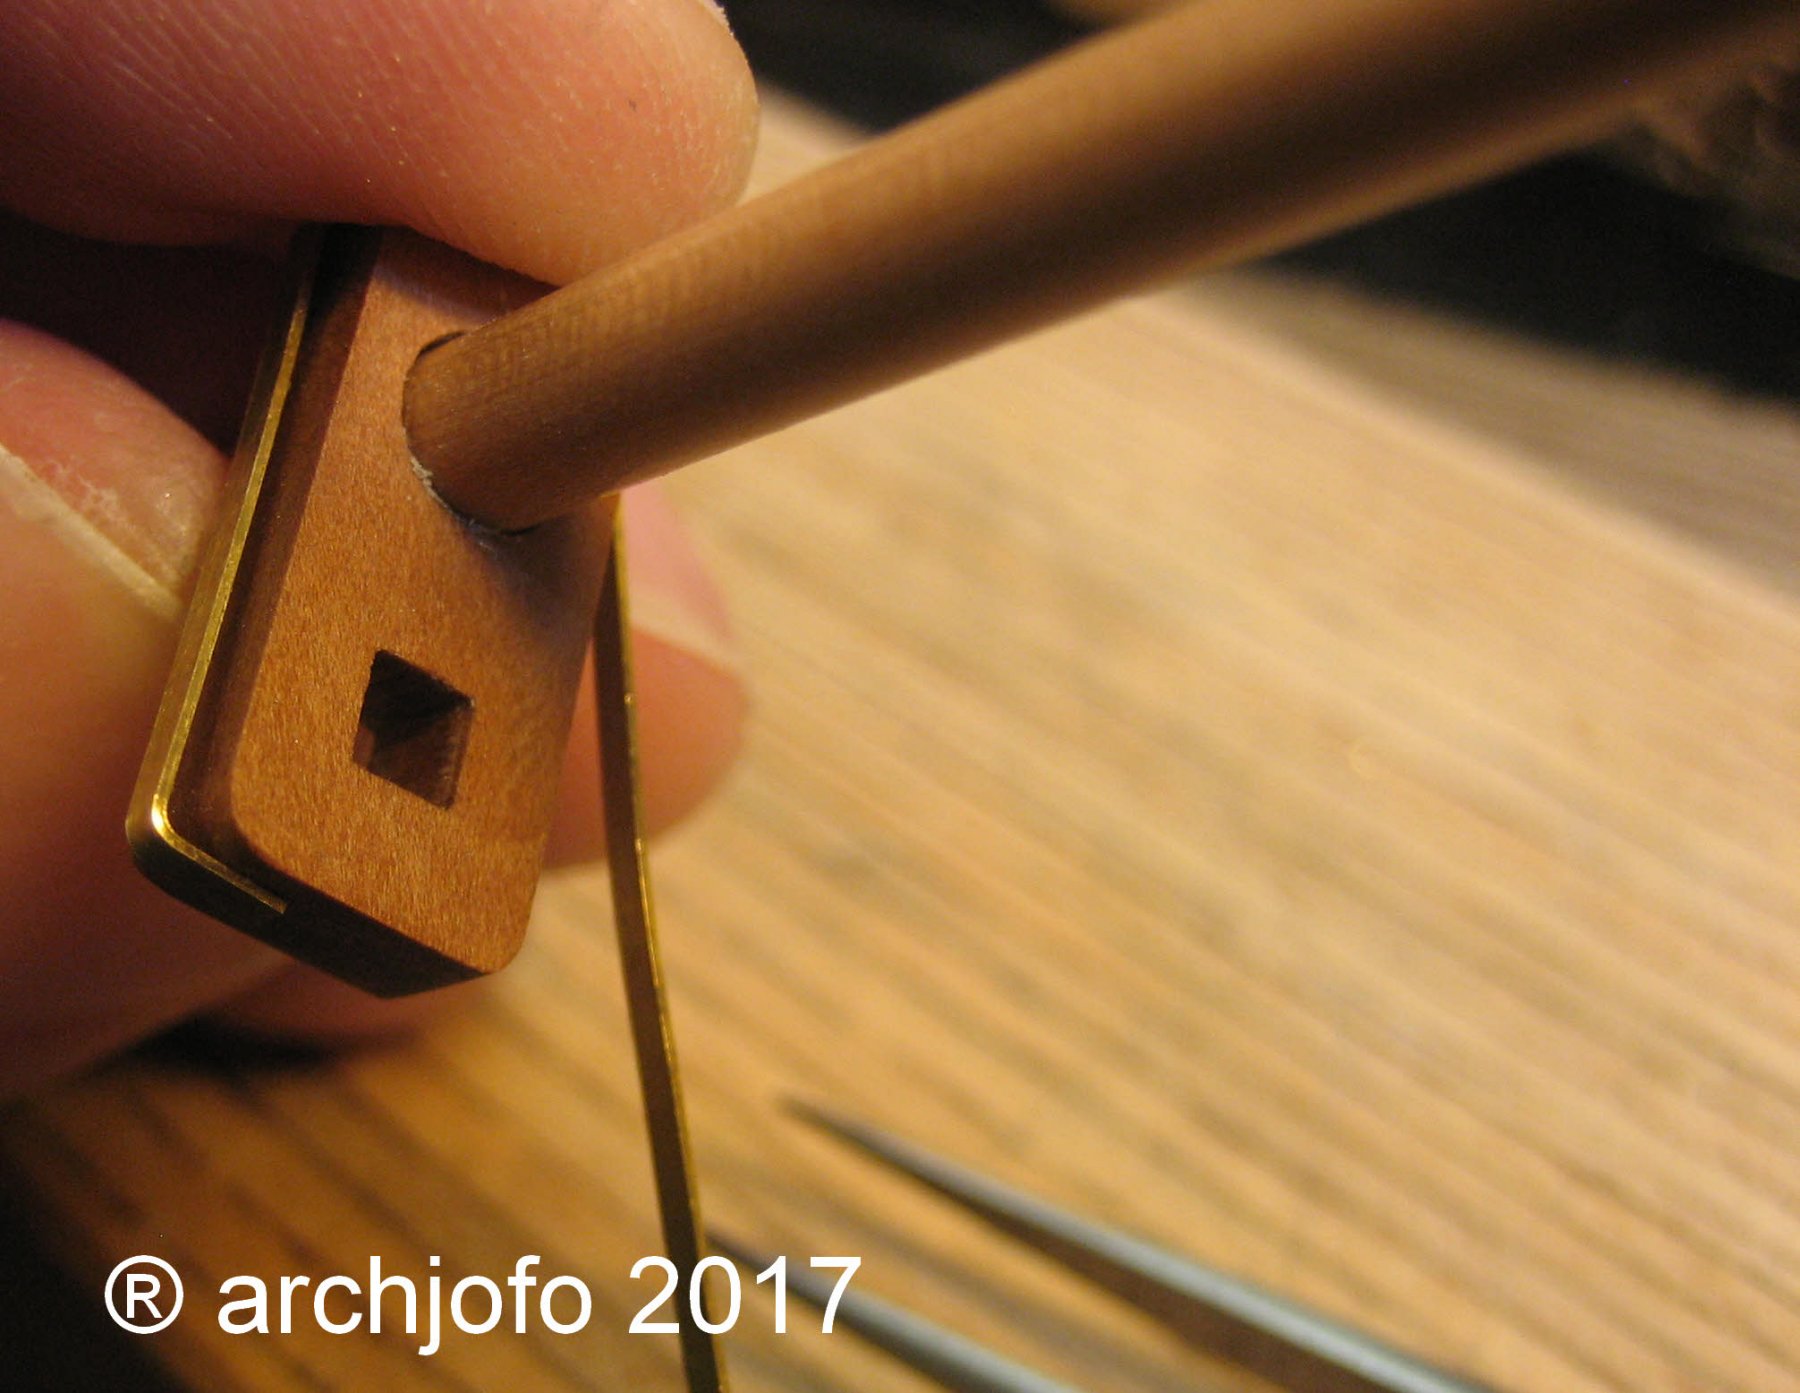
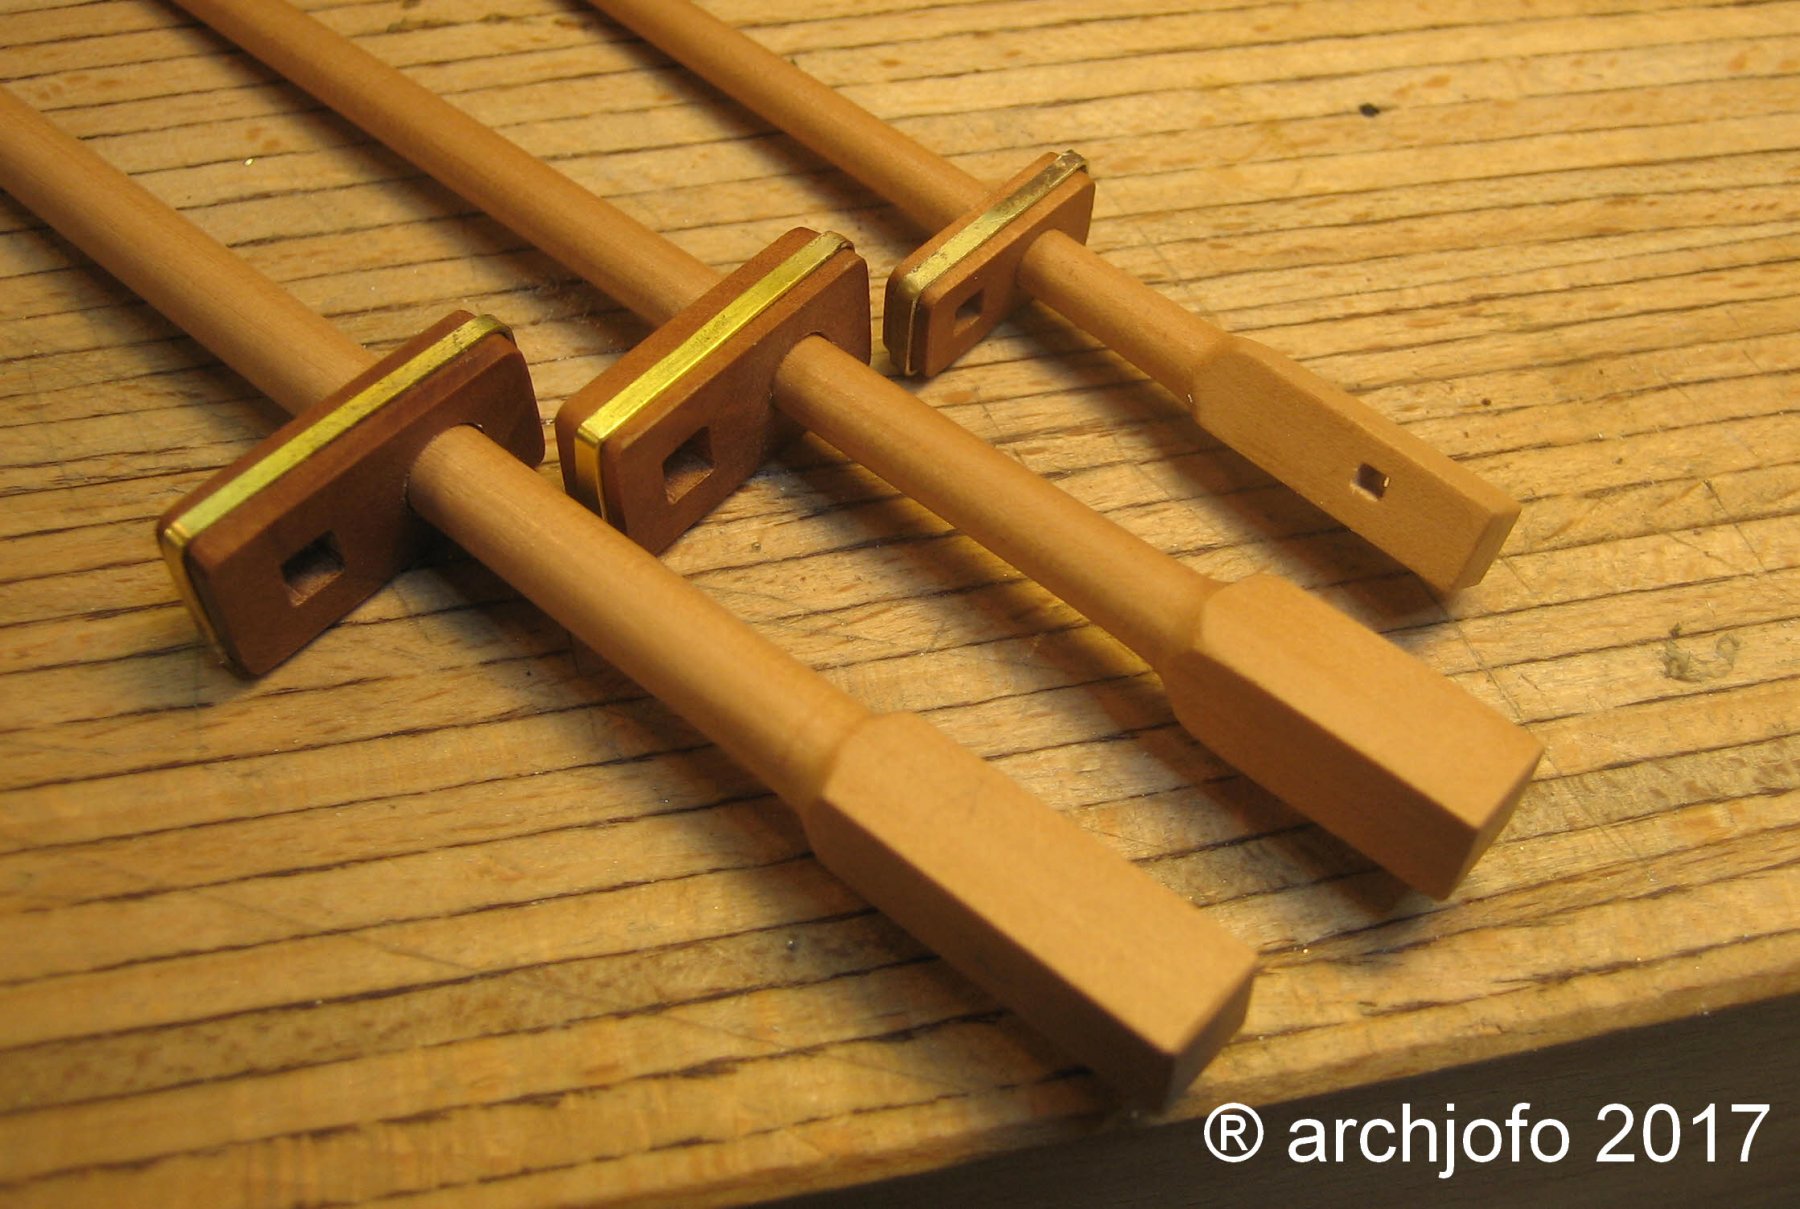
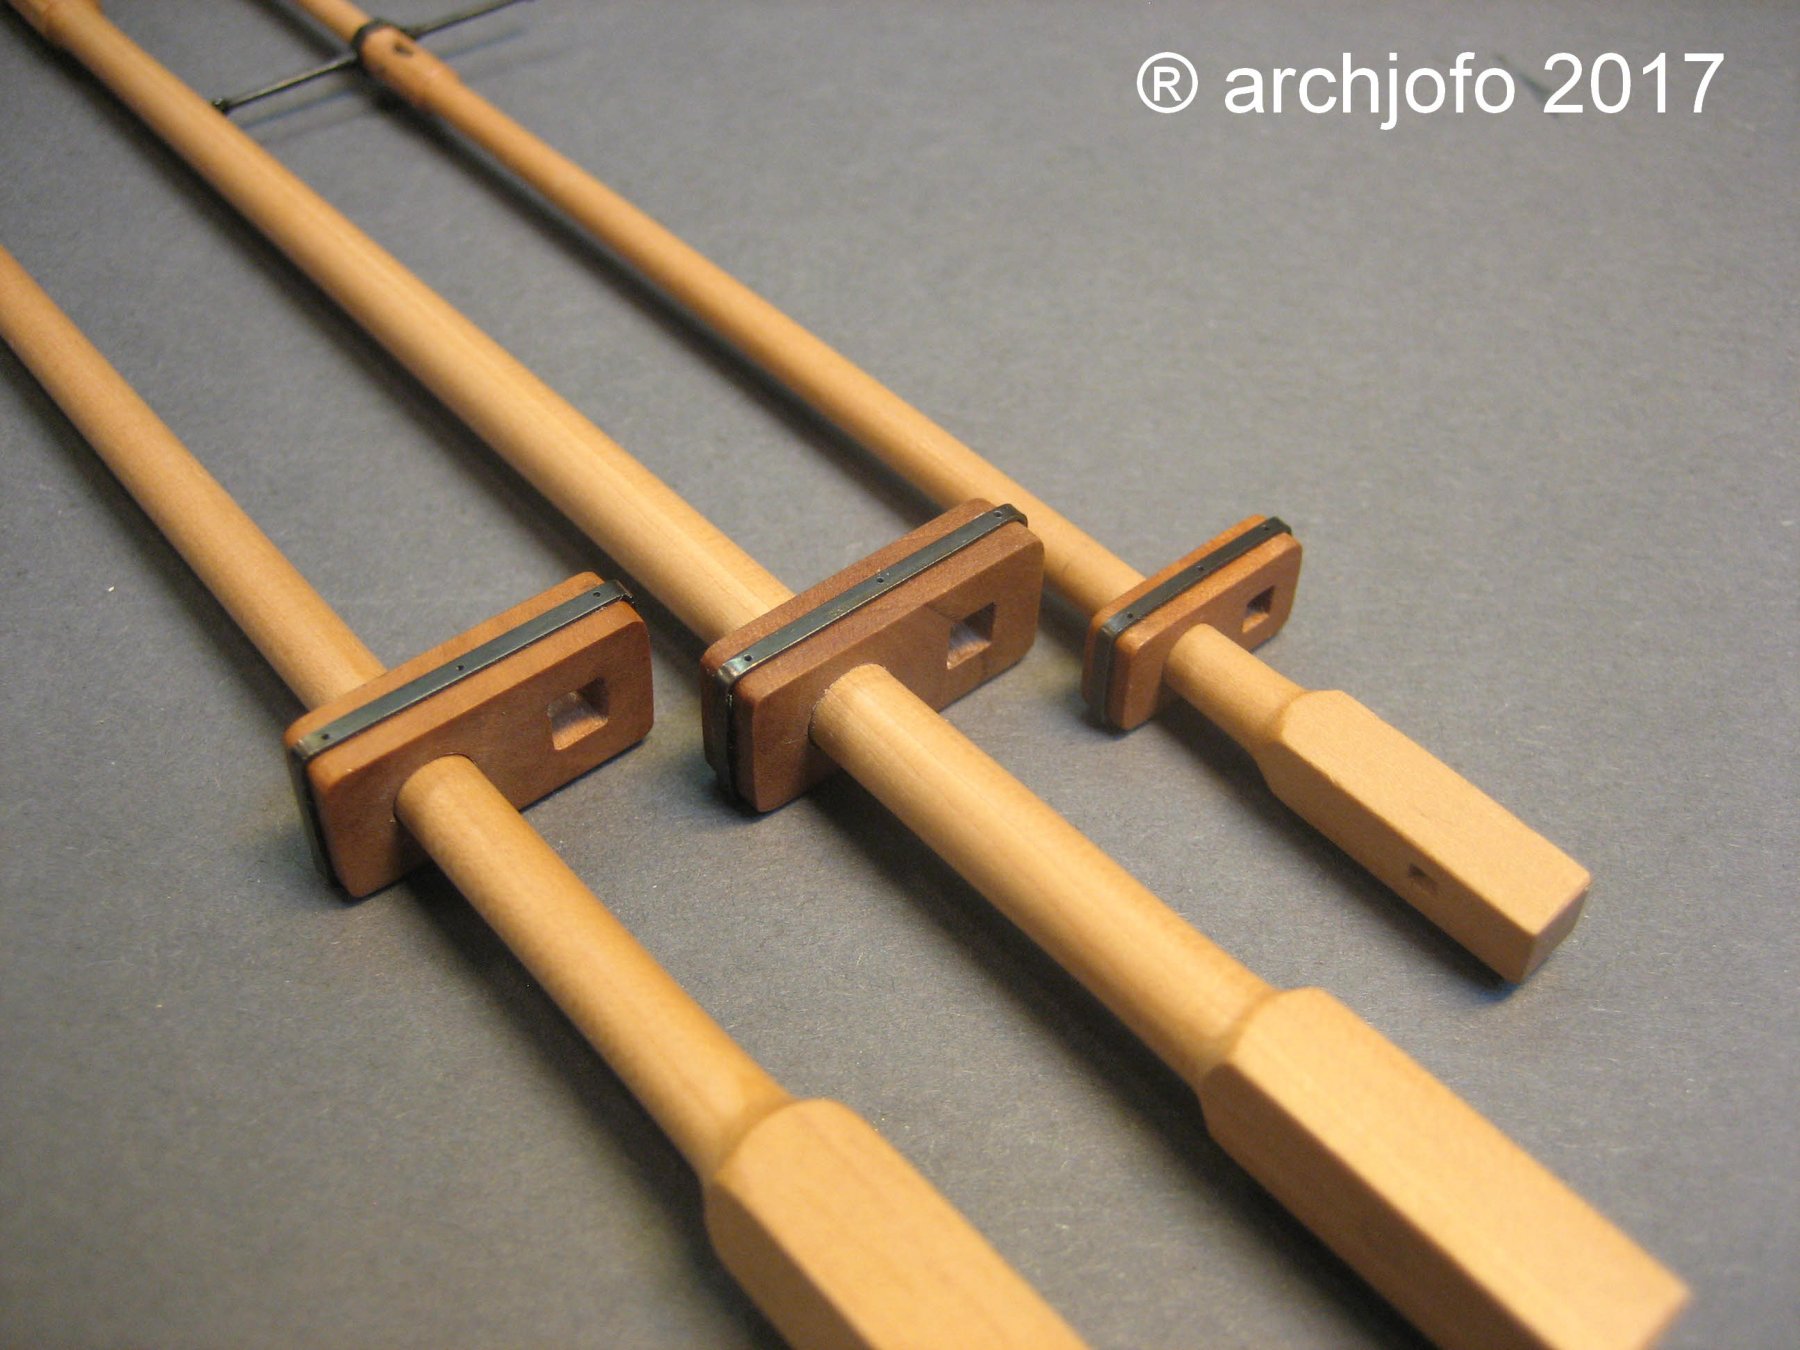
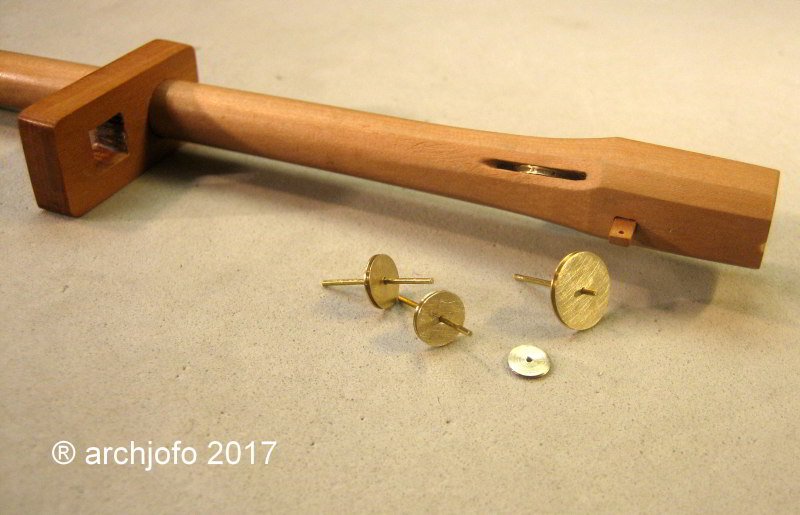
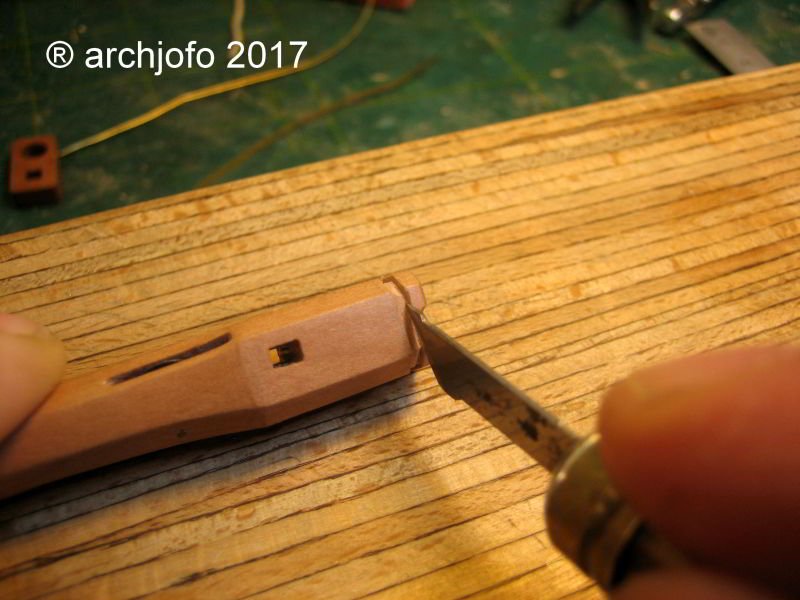
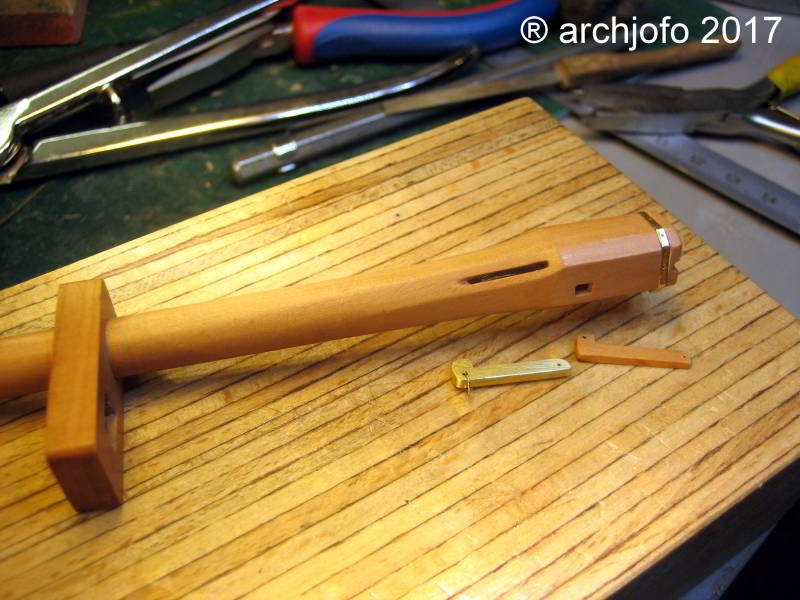
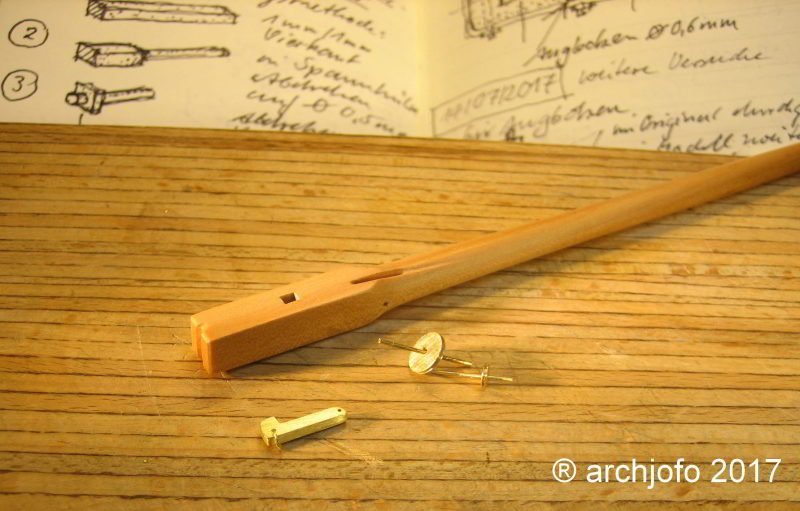
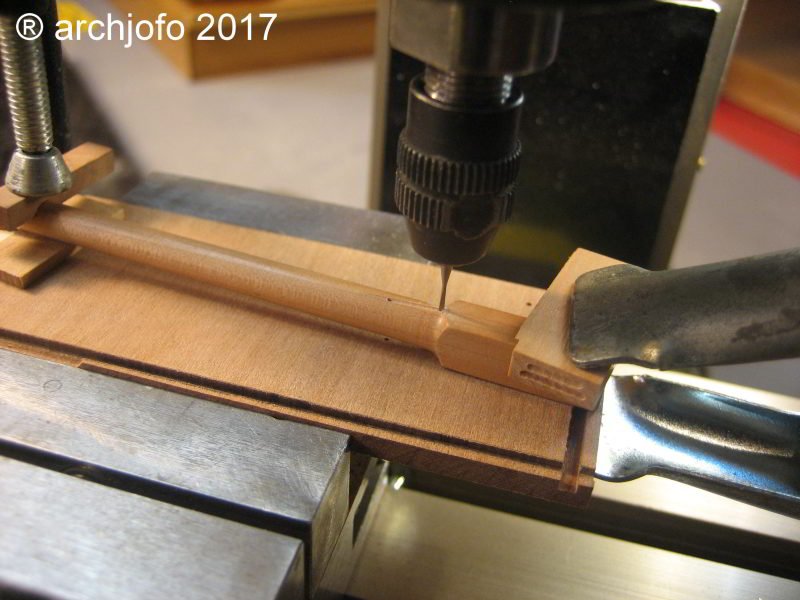
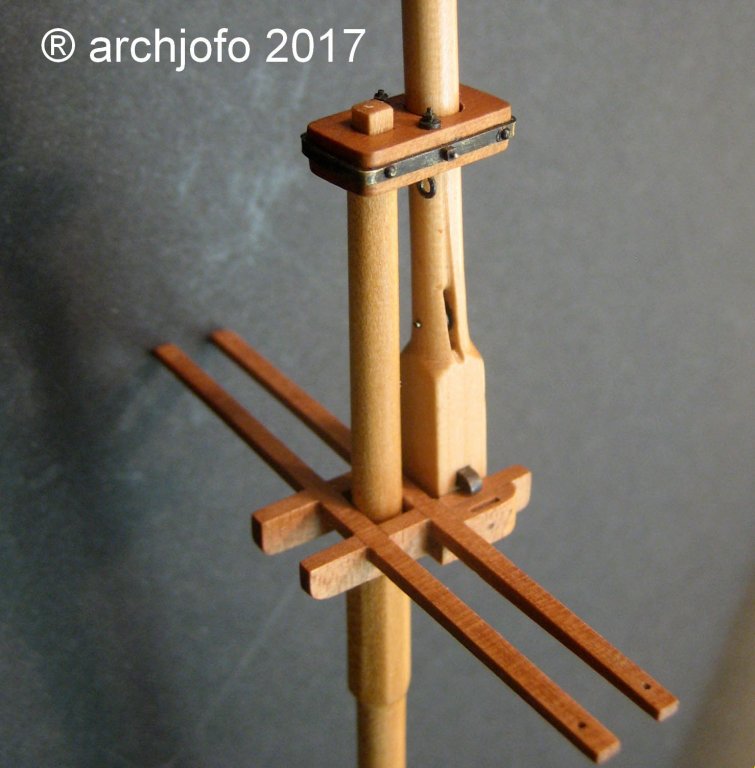
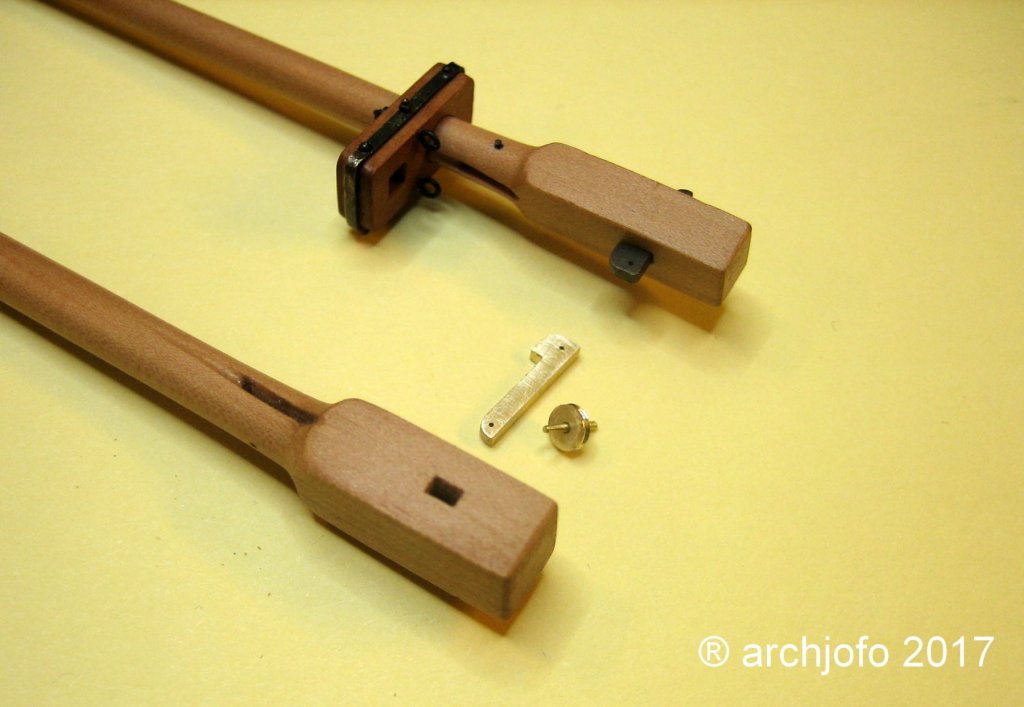
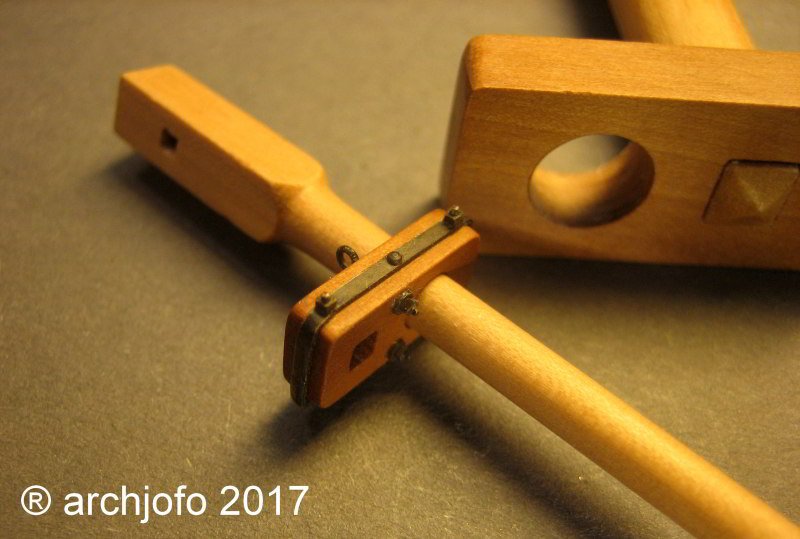
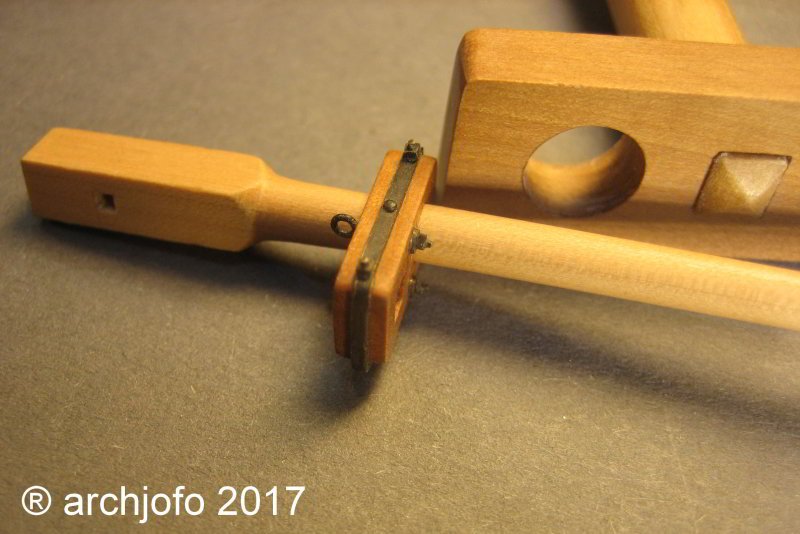
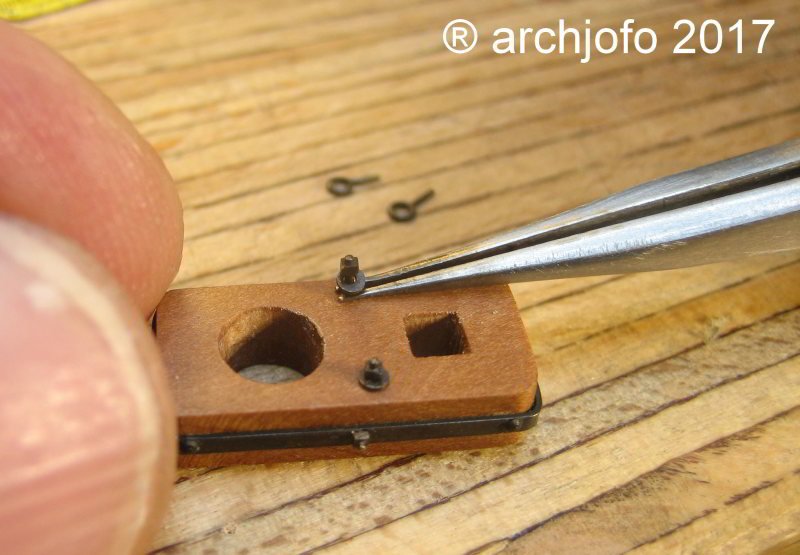
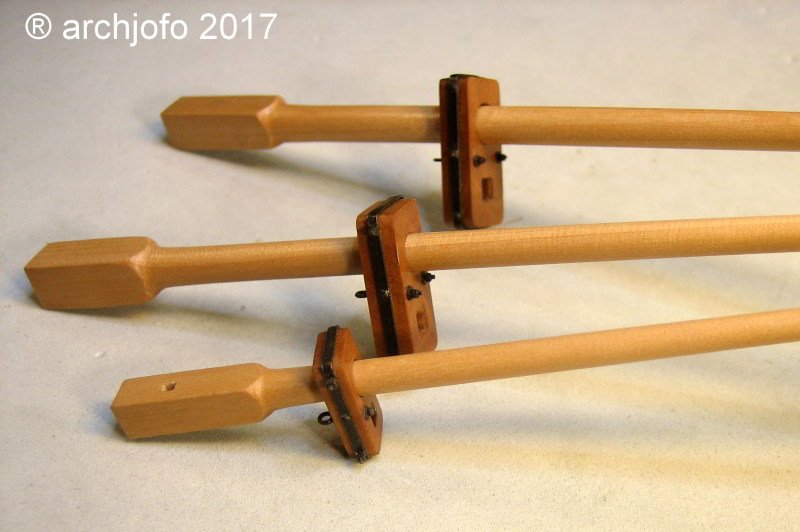
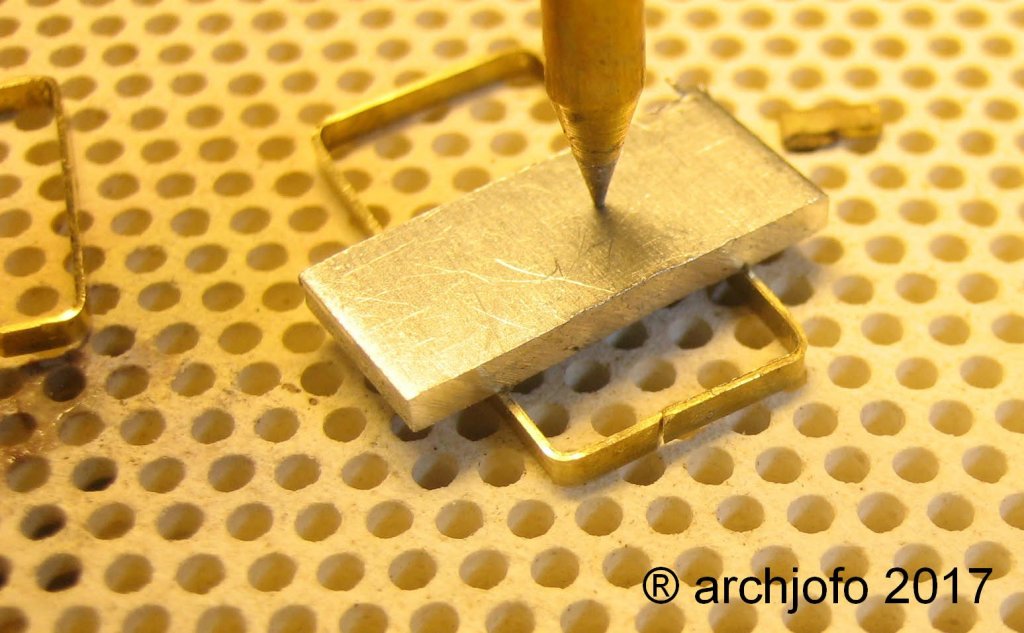
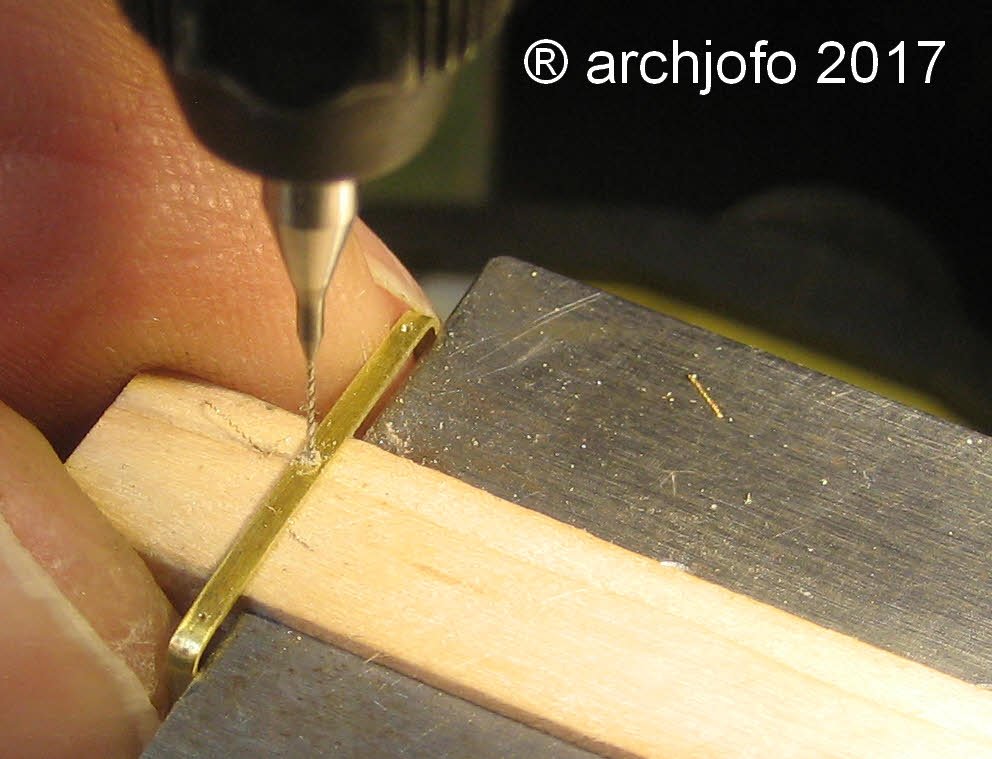
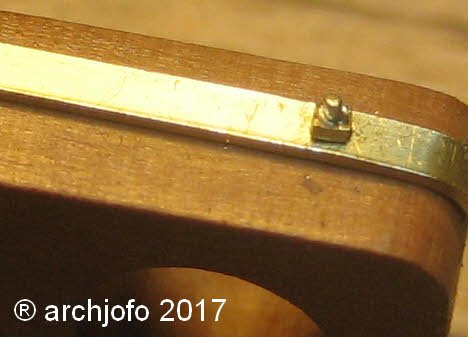
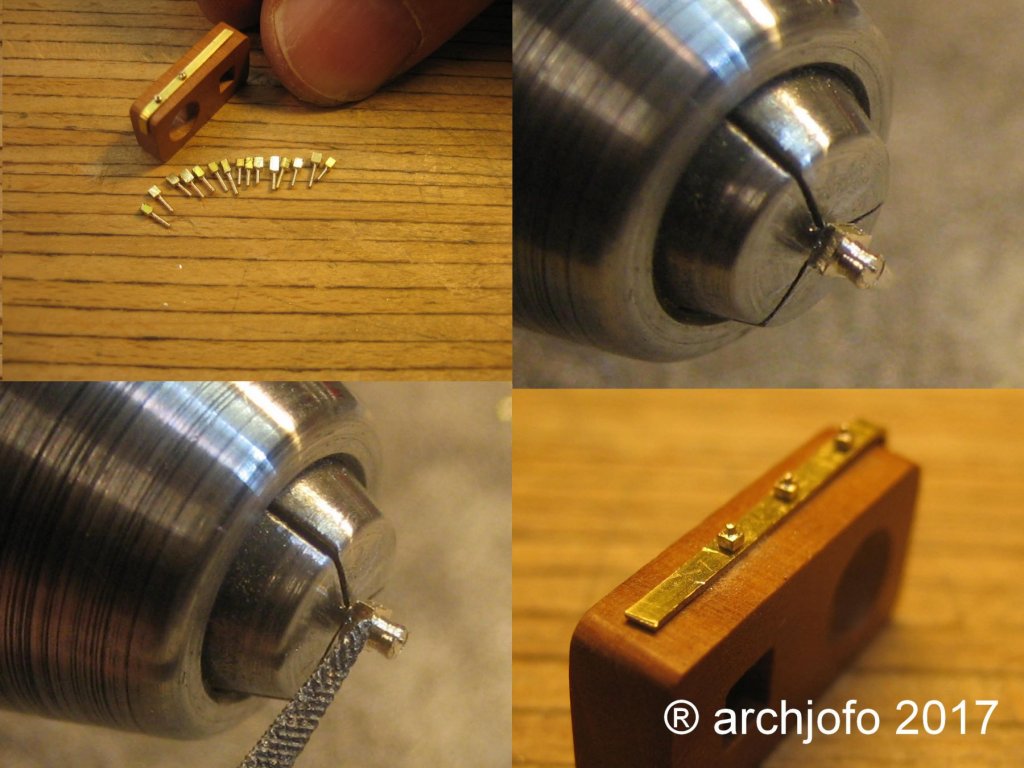
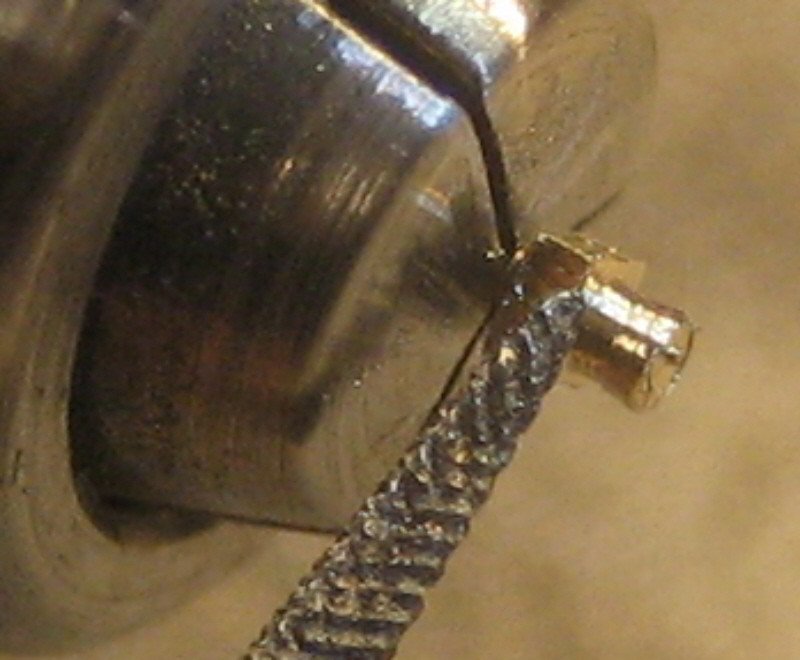
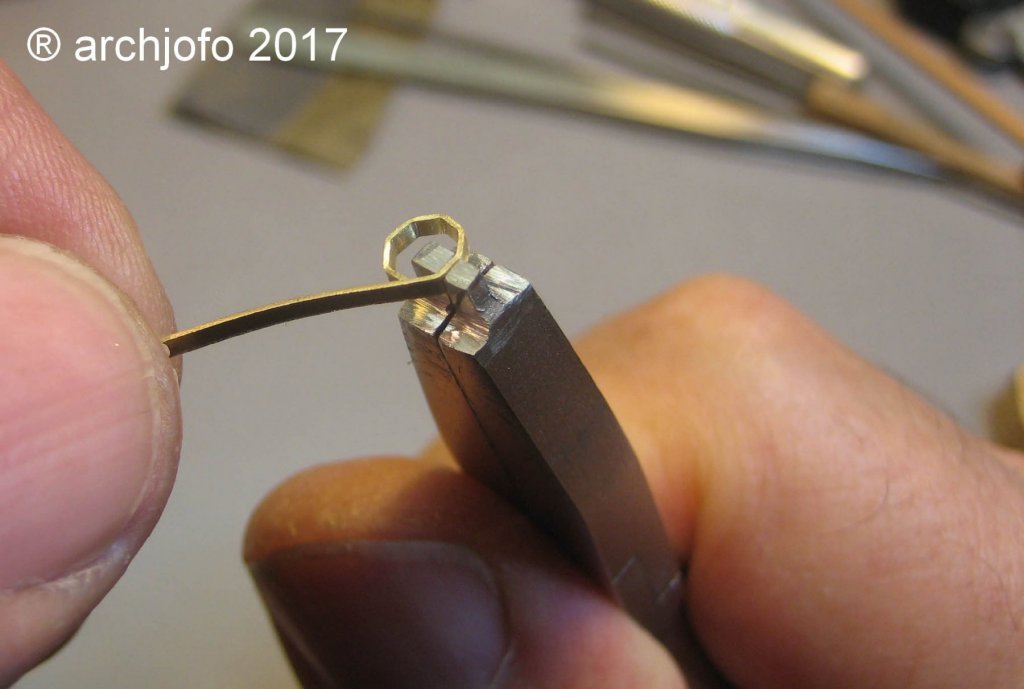
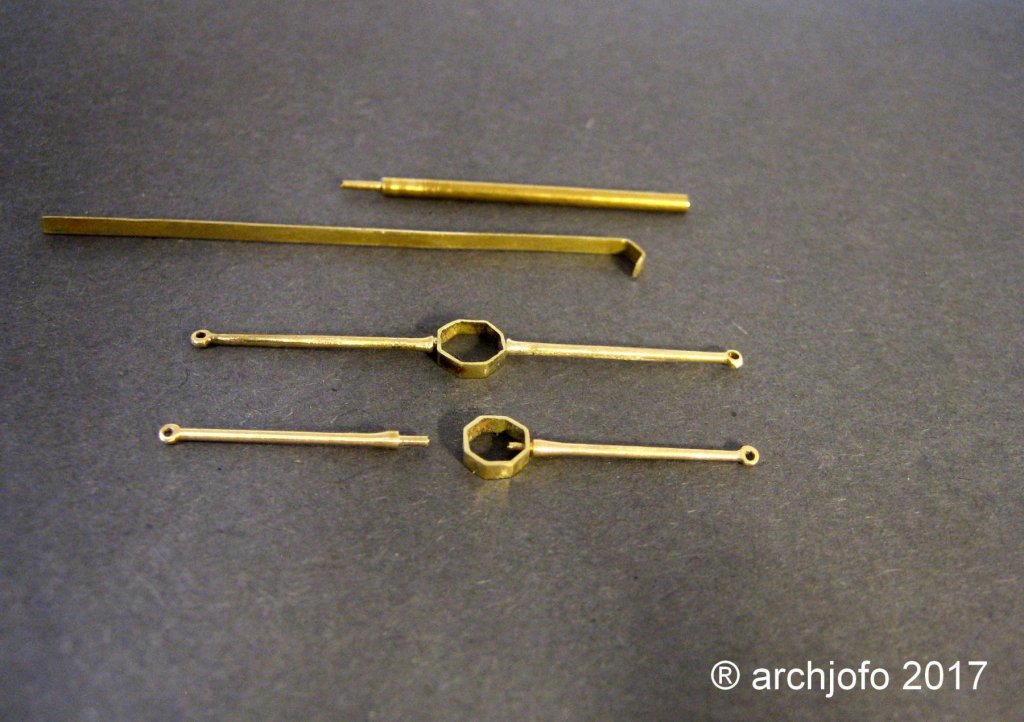
Hello, the continuation of the report is about the fittings for the topmast caps. The iron bands must be fitted with bolts and square nuts. To make this detail with 0.75mm / 0.75mm square nut and a 0.4mm diameter bolt, I chose the following method as shown in the pictures.


-
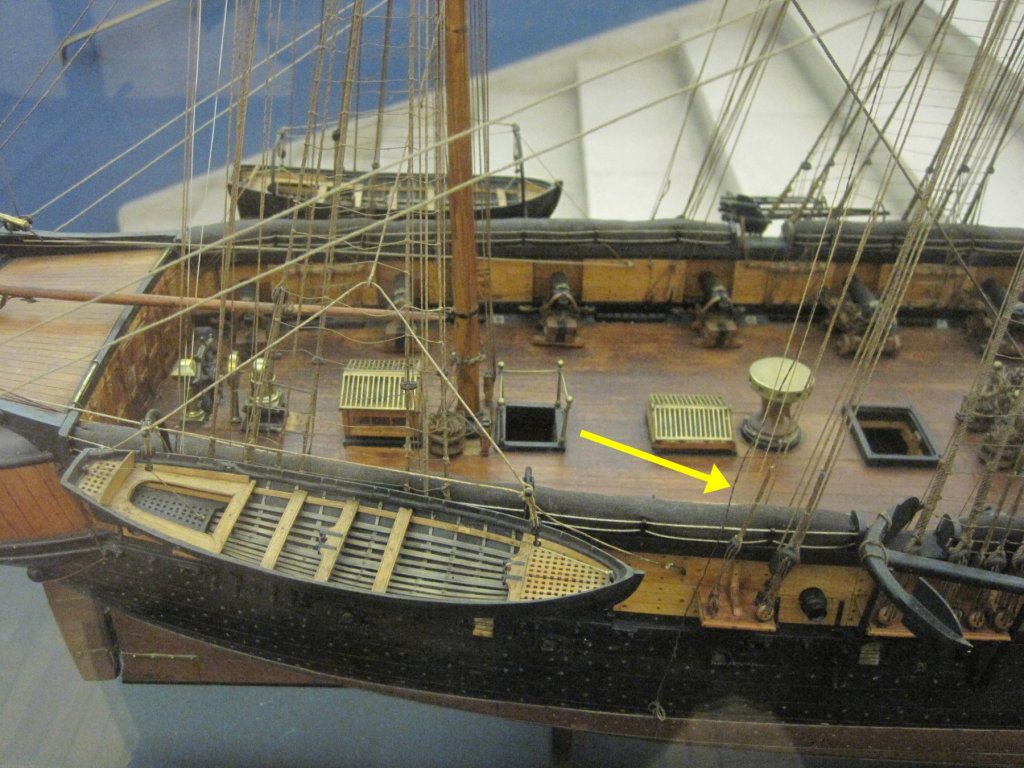
Hello, It always makes me happy when I notice your interest in my report. Thanks everyone In this context, the lightning conductor on the main mast should not go unnoticed. On the original model (yellow arrow) the lightning conductor can be seen. I assume at least that this is so.
-
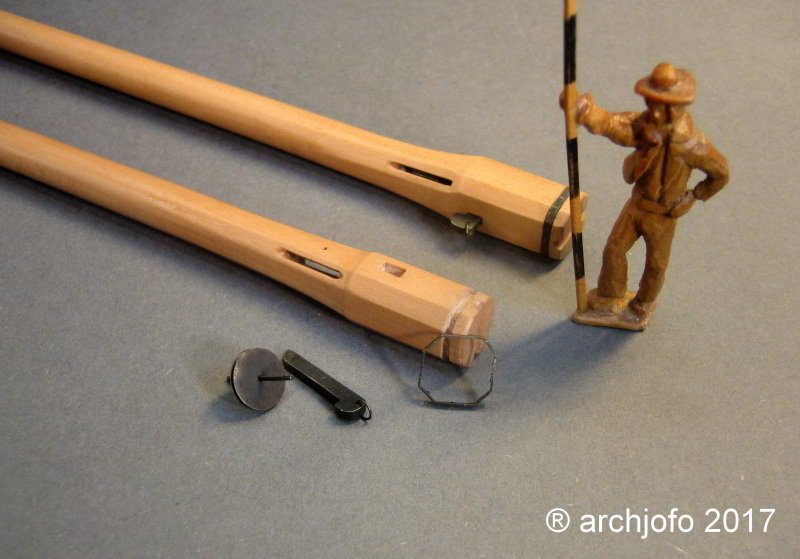
Hello, thanks to all, for your attention. After finishing the tops, I continue with the royal masts. The French Corvette had a weathervane on every royal mast. Here are some pictures: Whether this corvette also had lightning conductors is in this context quite a legitimate question.

-
Hi Jim, Thank you for your interest in my work. Yes, I have to squeeze the metal strop a little.
-
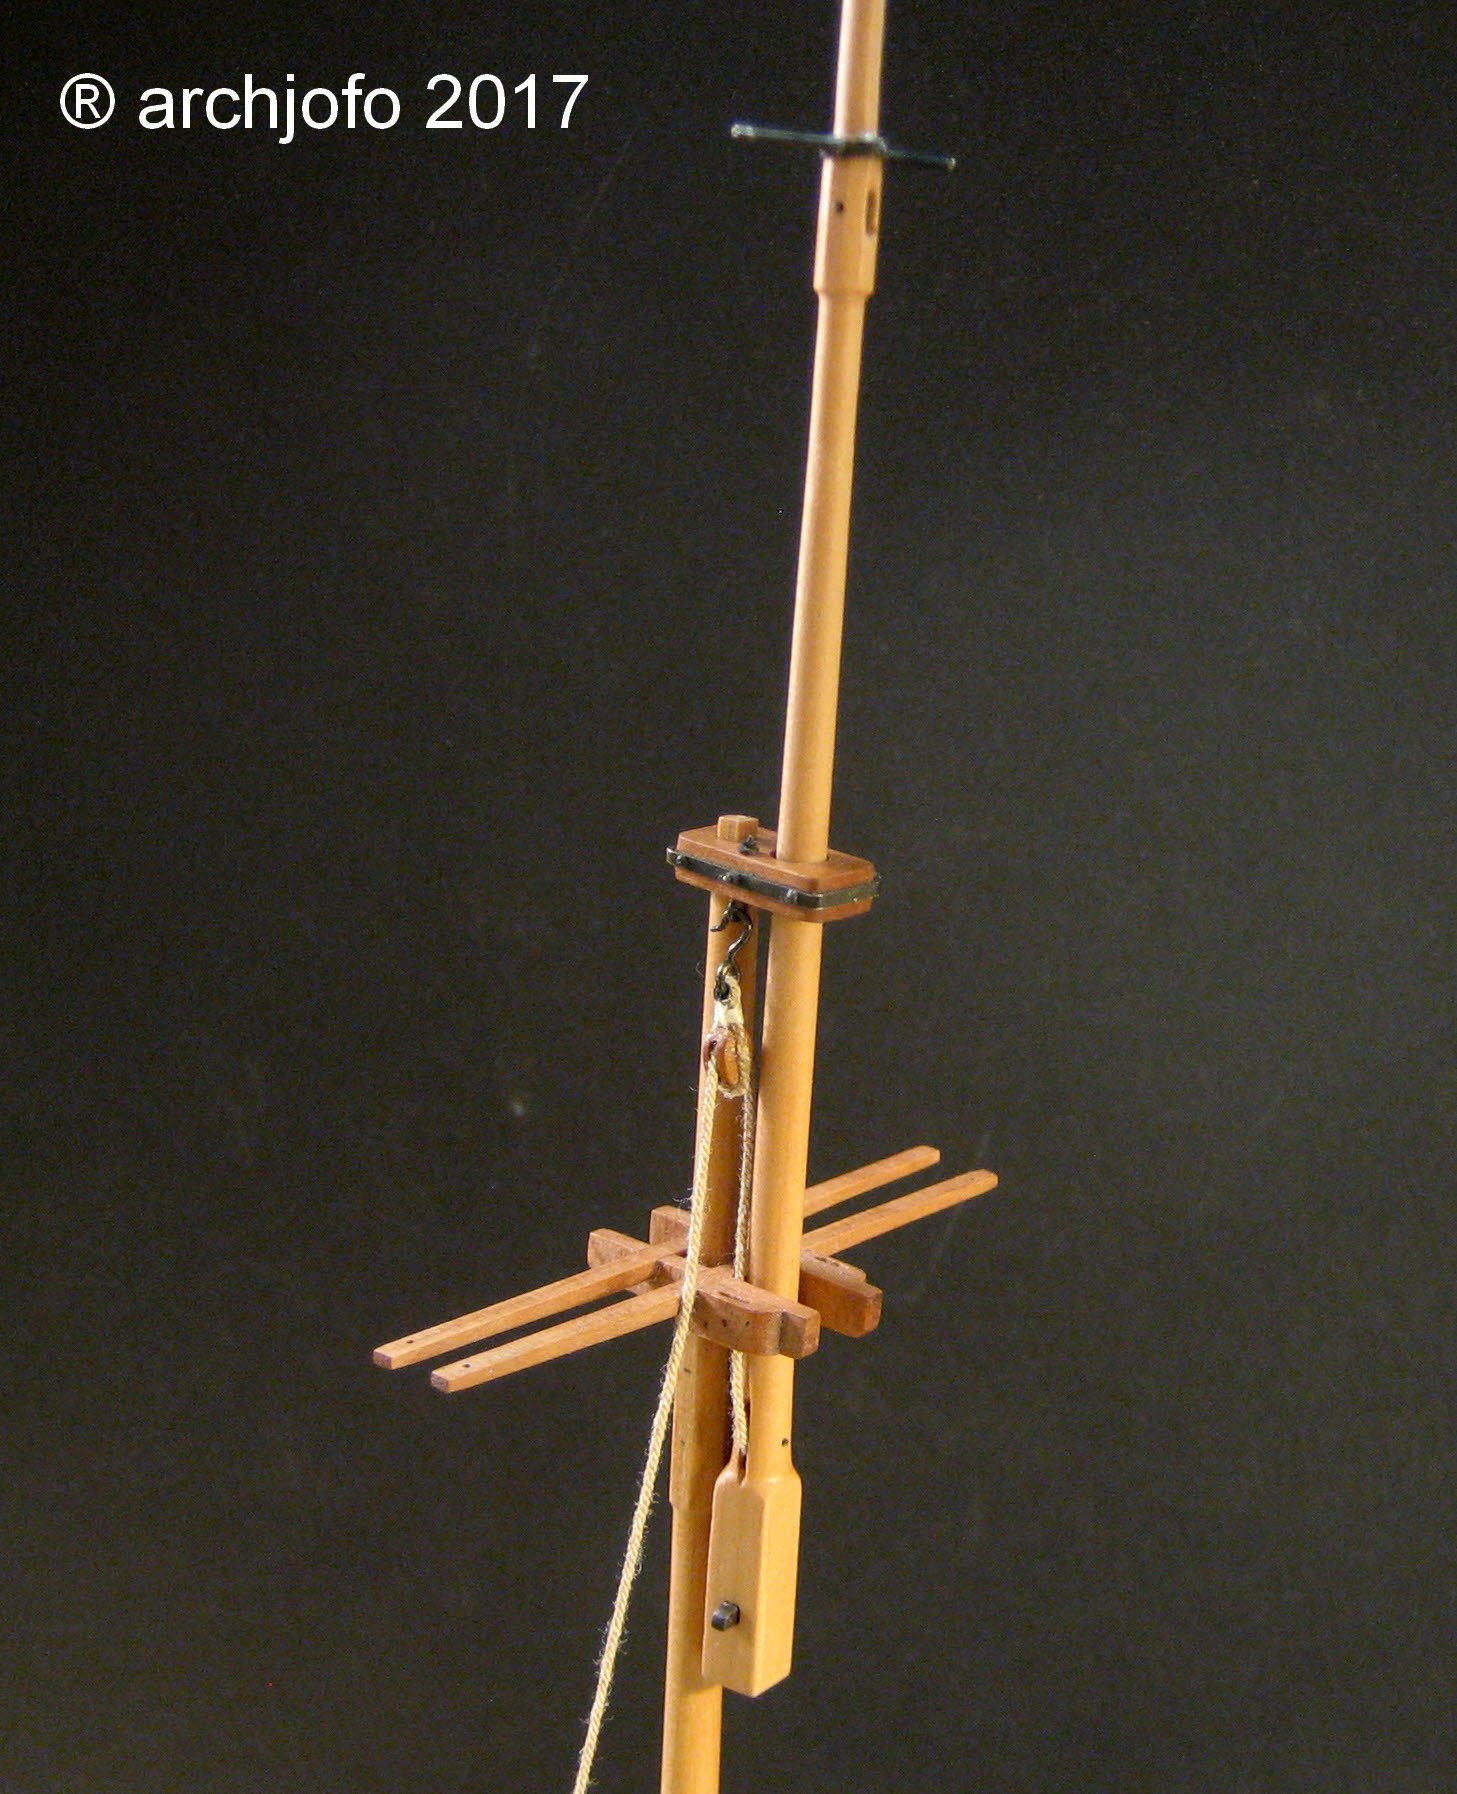
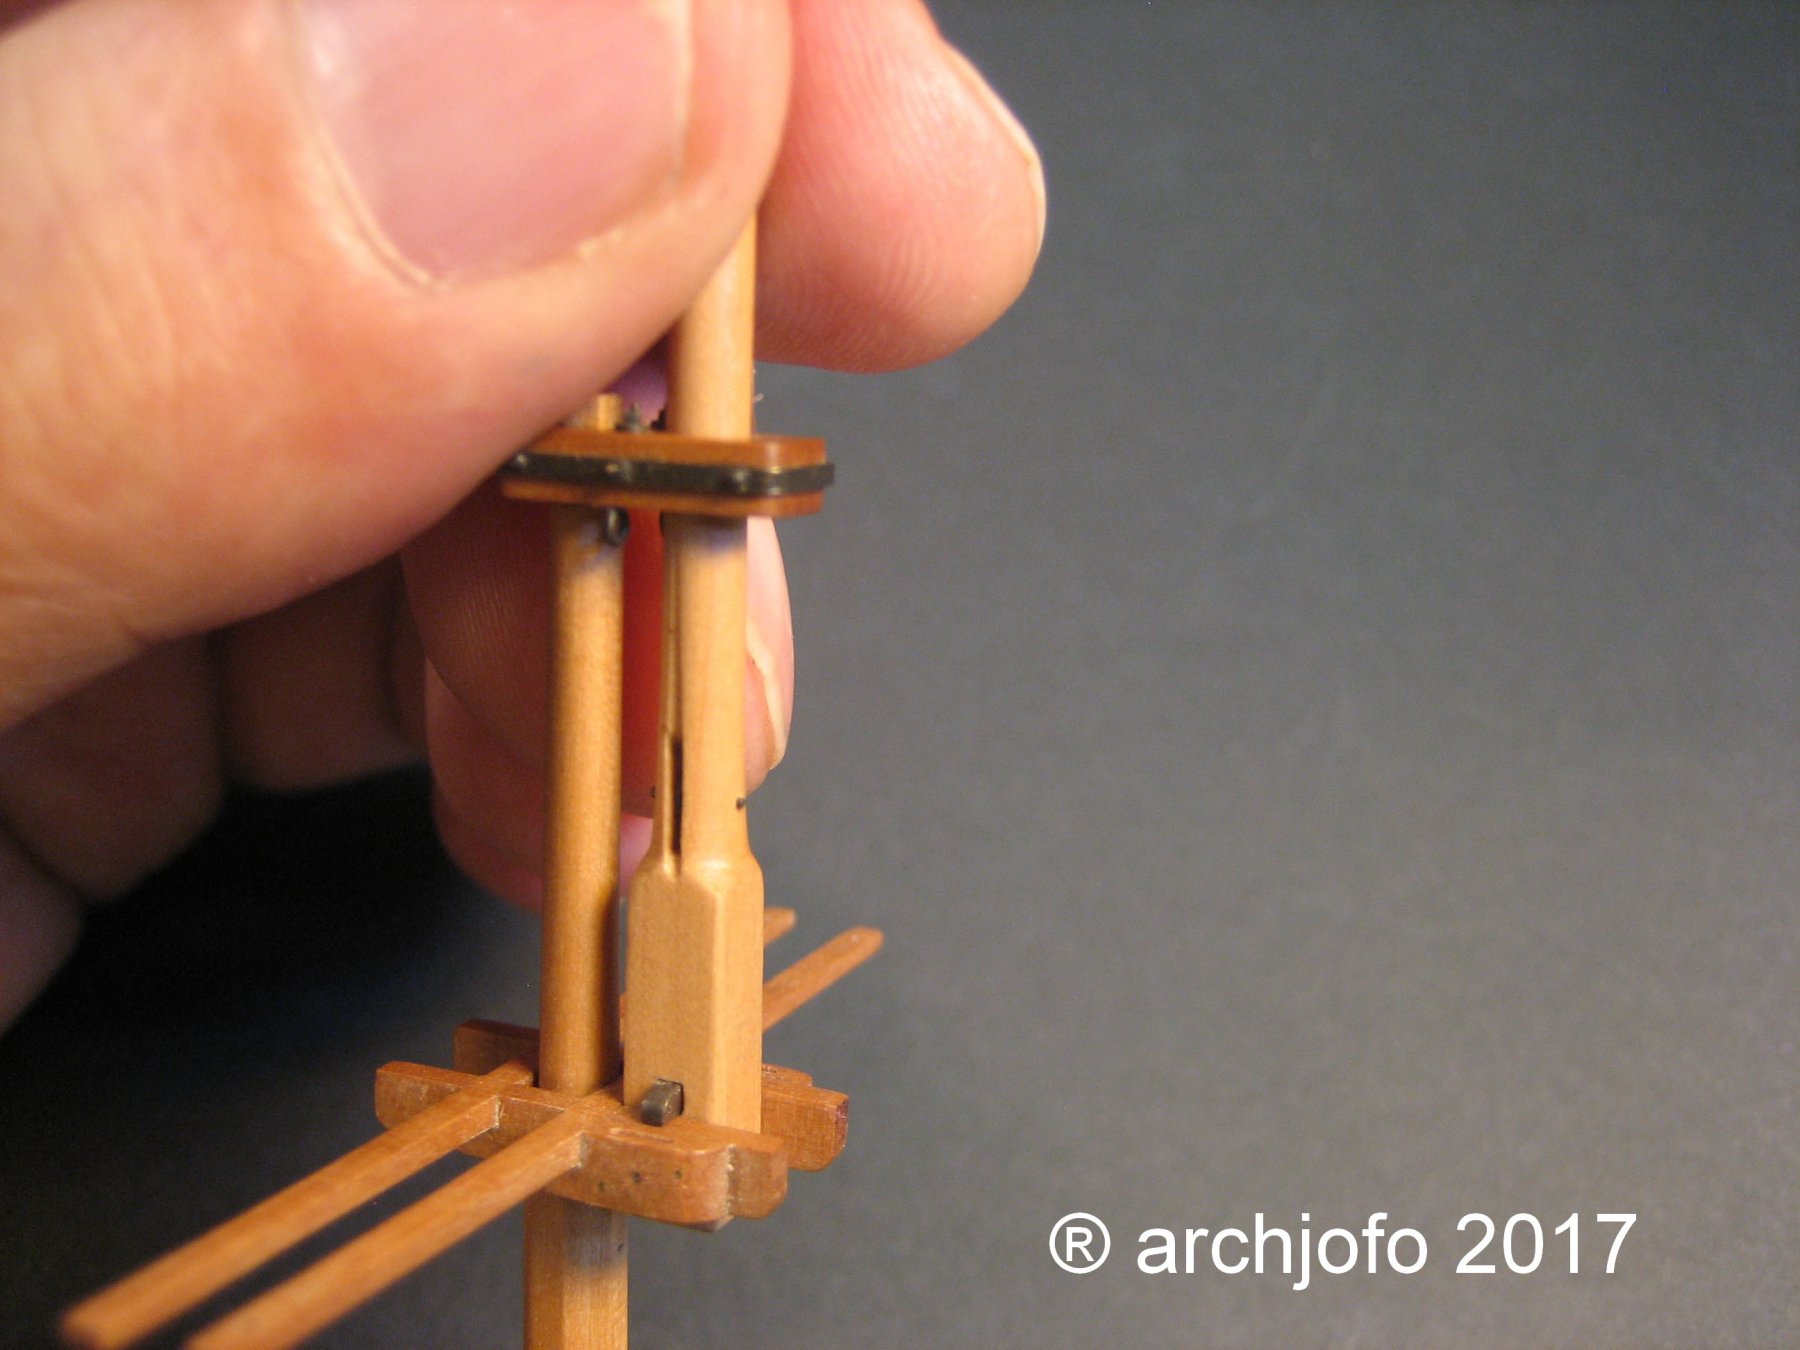
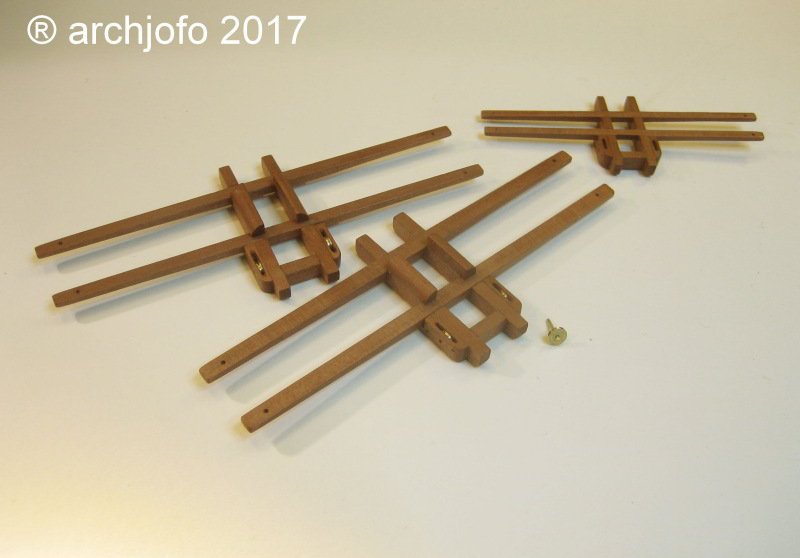
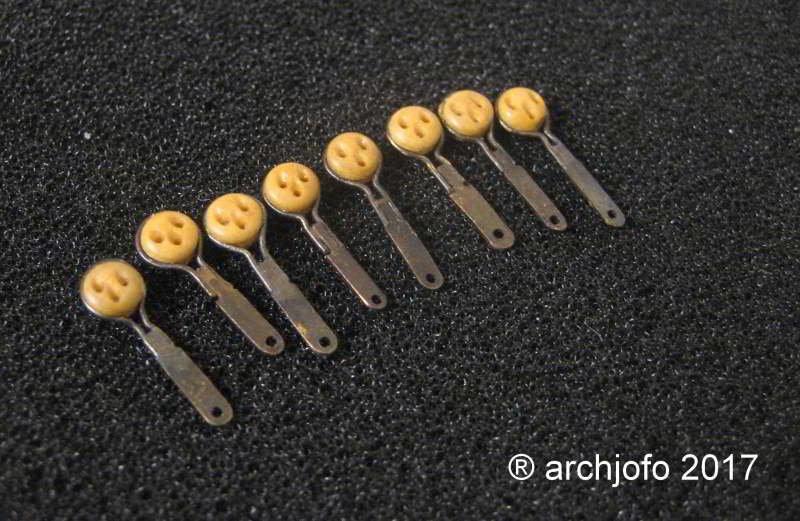
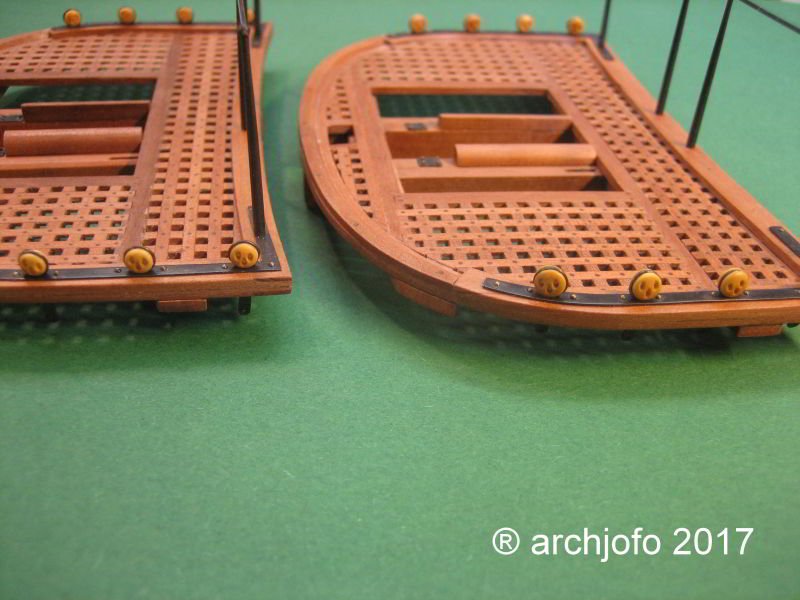
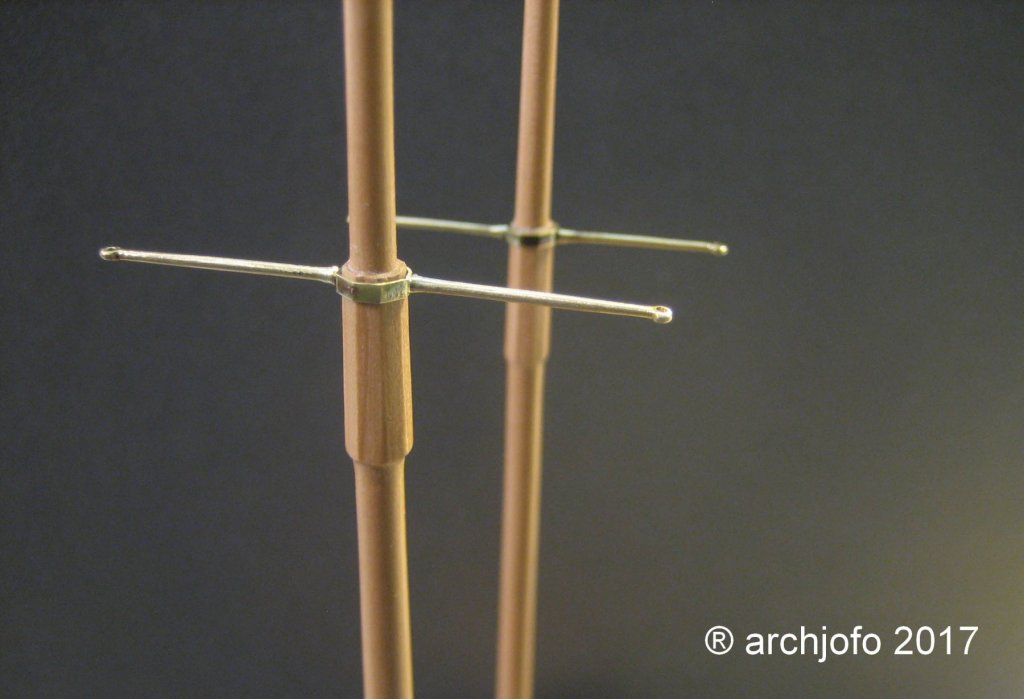
Hello Albert, Thanks, and everyone else for the LIKES. Meanwhile, I made the futtock shroud plates for the tops of the foremast and the mizzen mast. The difference between the deadeyes of the top of the foremast and that of the mainmast is barely recognizable (0.2 mm), yet it is important to me. The difference between the deadeyes of the top of the foremast and that of the mainmast is barely recognizable (0.2 mm), yet it is important to me. Furthermore, I produced the royal cross trees for the formast and the mainmast. I hope the pictures explain everything so far.


-
Hello Doris, it is amazing how exactly you work. You have developed your technique to the highest level. It is unique, I know nothing comparable. Please do not let us wait too long until the report continues.
- 1,035 replies
-
- 6
-
-
- royal katherine
- ship of the line
- (and 1 more)
-
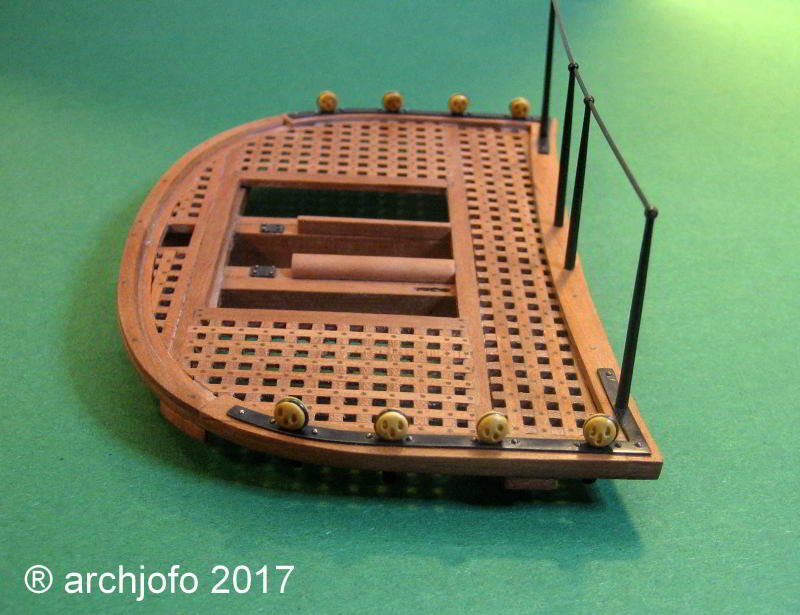
I am very happy about your interest in my building report. To all thank you for it. Today only a picture of the finished top of the main mast.
-
Hi Mick, these useful tools you can buy. Here, for example, LINK.
-
Hi Nils, as always an eyecatcher. Wonderful model building.
- 2,625 replies
-
- 5
-
-
- kaiser wilhelm der grosse
- passenger steamer
- (and 1 more)
-
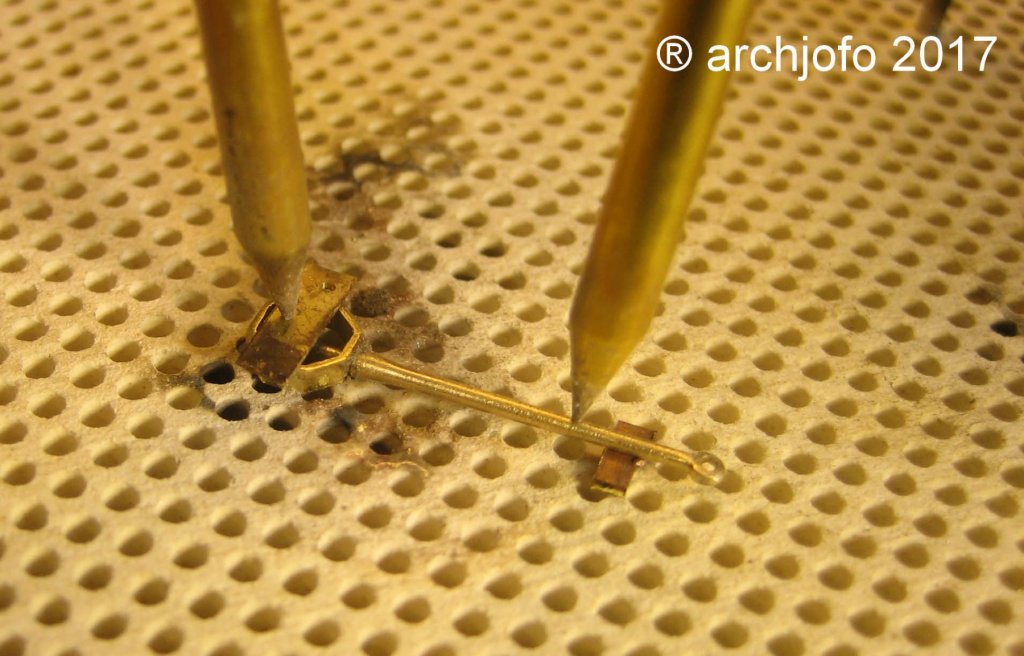
Hello Carl, thank you for your very nice comment. But my works are still not perfect. I only take pictures of the perfect details ... In the meantime, I made the topmast deadeyes and futtock shroud plates for the top of the main mast. Here are some pictures of how I did it. The parts are brazed.
-
Hello, the construction of the tops is completed. I will soon continue with the completion of the masts.