MrBlueJacket
-
Posts
1,314 -
Joined
-
Last visited
Content Type
Profiles
Forums
Gallery
Events
Everything posted by MrBlueJacket
-
 Well done. Your customer file now has a 10% off your next kit note. Nic
 -
And yes, start a build thread by all means. If you finish it, I will give you 10% off the next kit you get from us! Nic
-
Hi Tony, Per our conversation, I think Bondo will be able to fill out the bow nicely. Nic
-
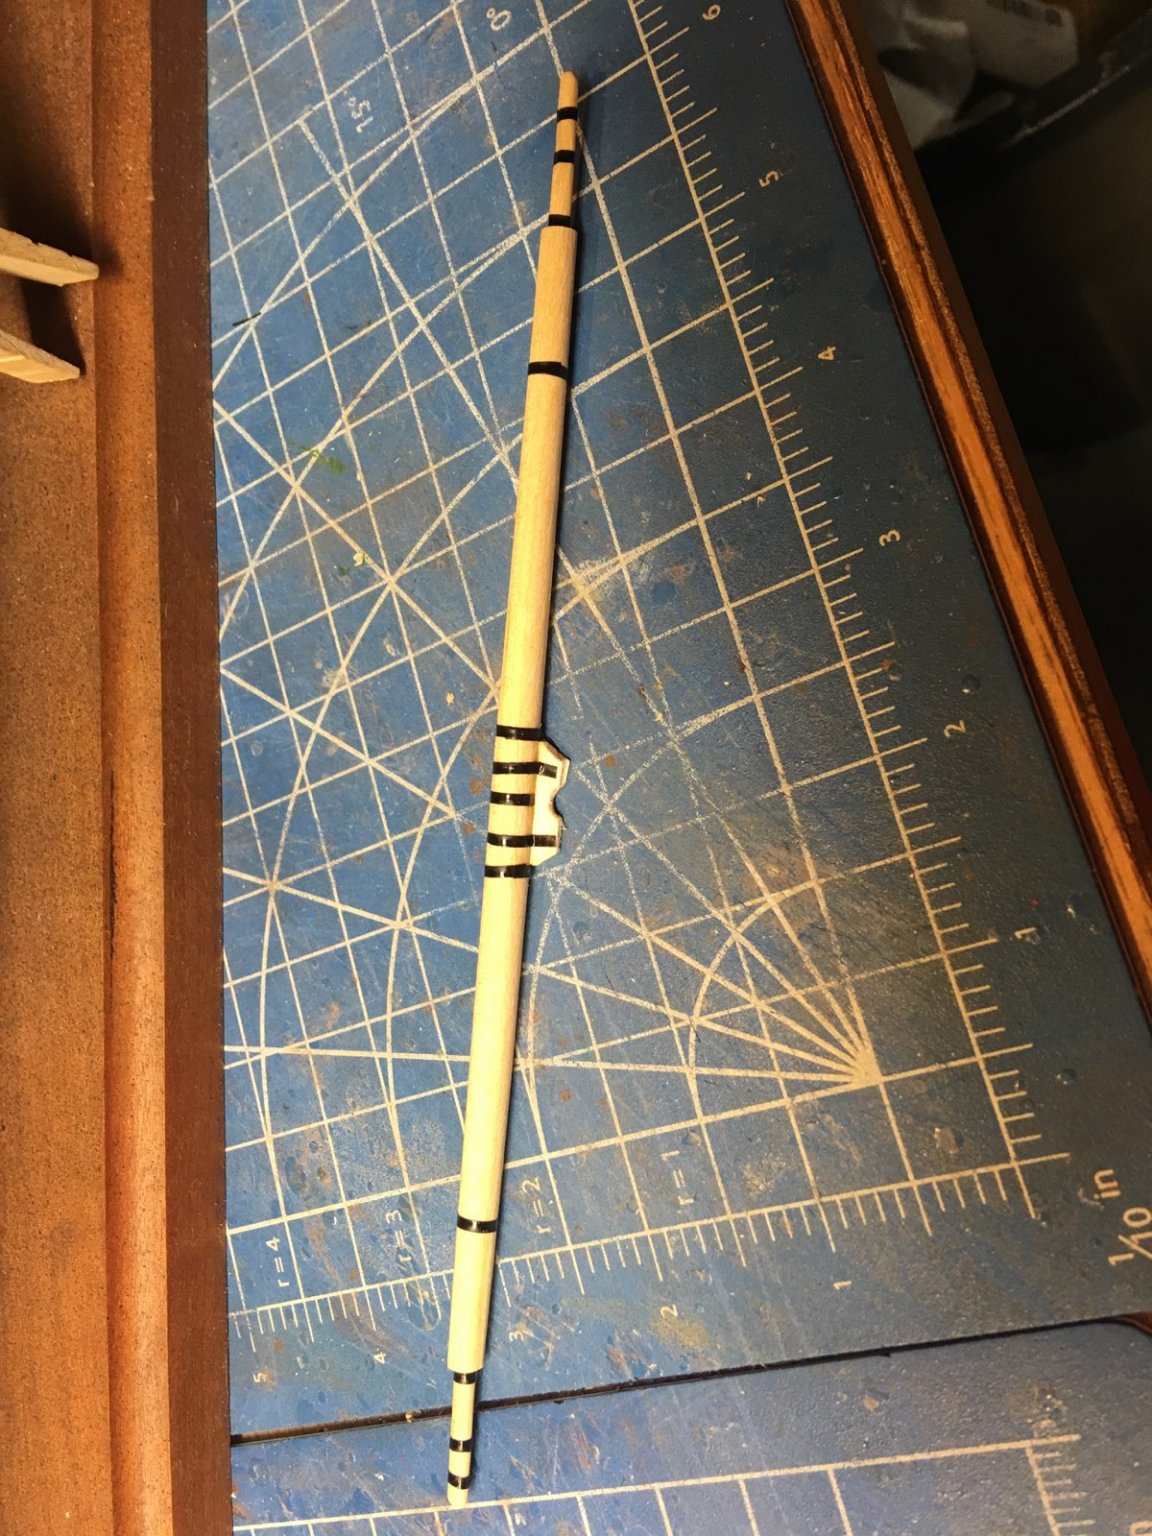
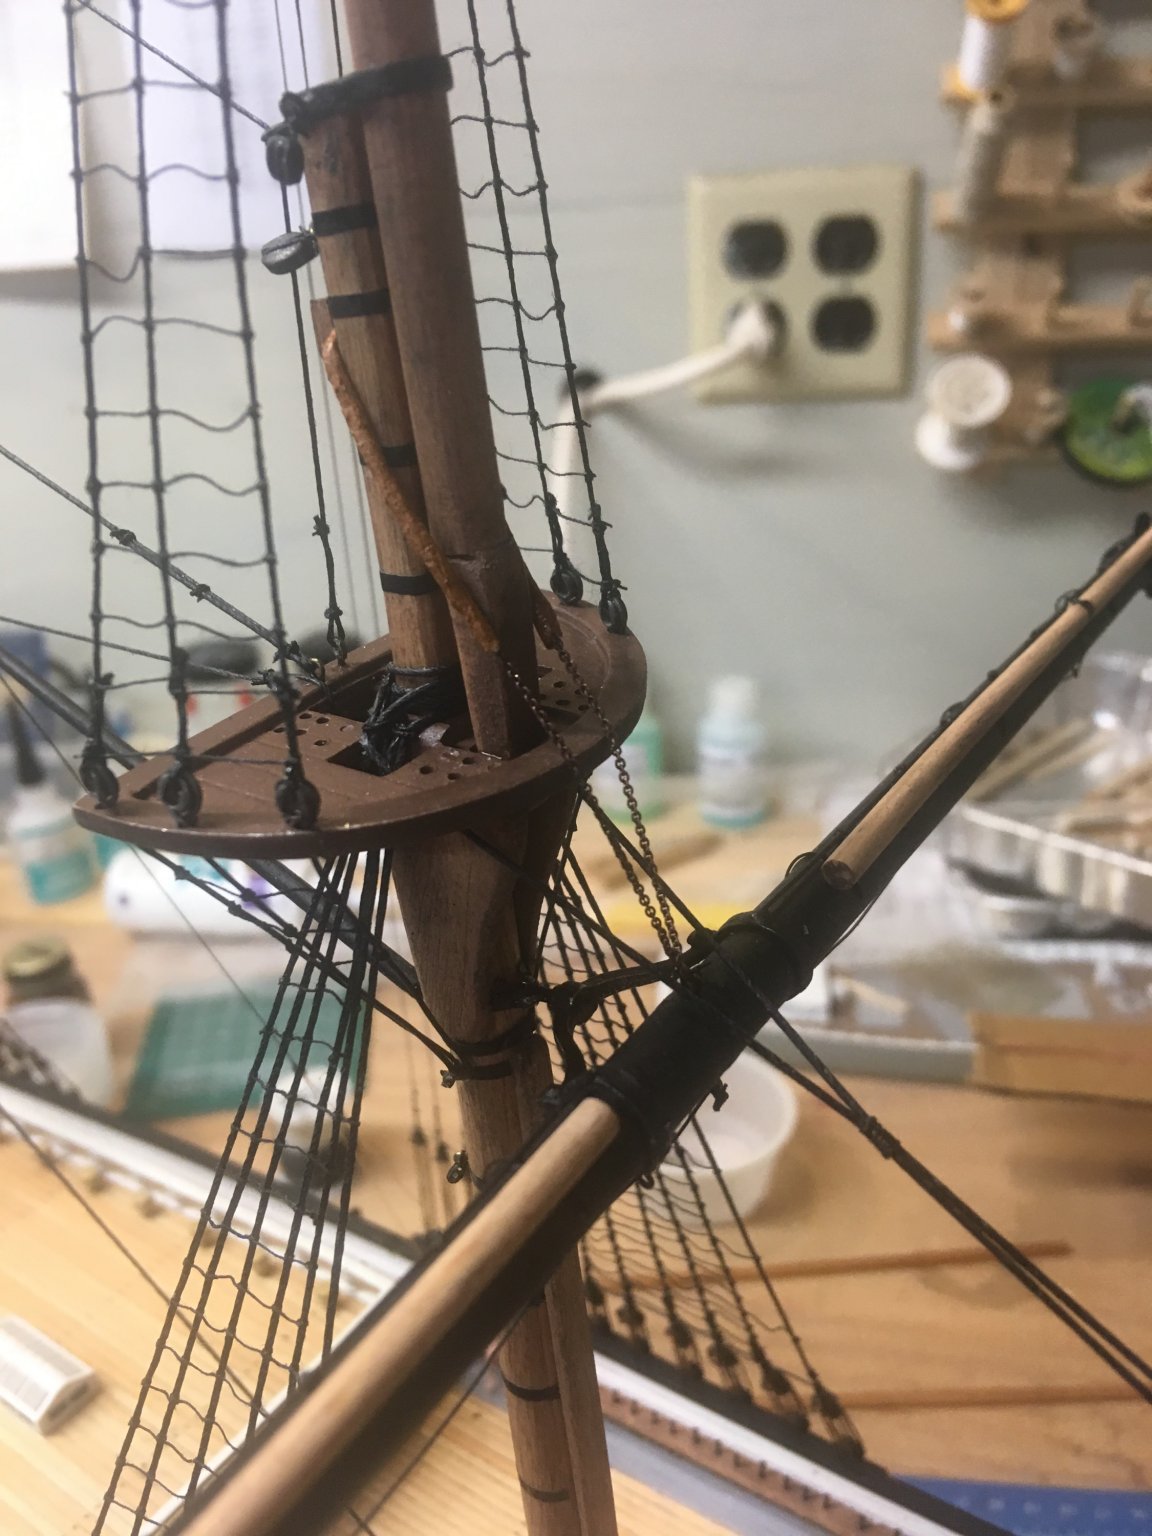
Here's one end of the standing lift. All but the lower yards are like this.
- 356 replies
-
- 8
-

-
- red jacket
- finished
- (and 1 more)
-
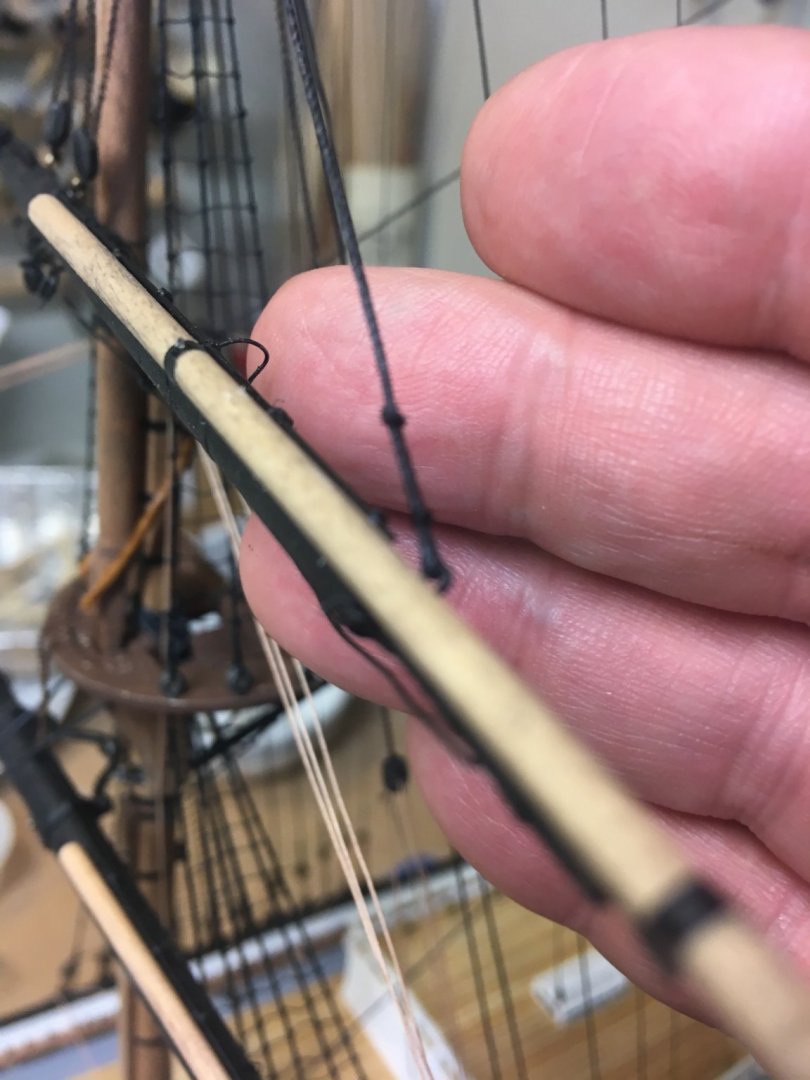
To try to line up the upper deadeyes, of course you can increase or decrease the tension on the lanyards. Another method not so well known is to twist up or unravel the shrouds themselves. That only goes so far, however before it makes other troubles.
-
"Putty and paint, Makes it look like what it ain't"
- 85 replies
-
- 2
-
-
- perry
- BlueJacket Shipcrafters
- (and 1 more)
-
Notice how the deck furniture placement is rastered into the deck - saves a lot of measuring!
- 85 replies
-
- 1
-
-
- perry
- BlueJacket Shipcrafters
- (and 1 more)
-
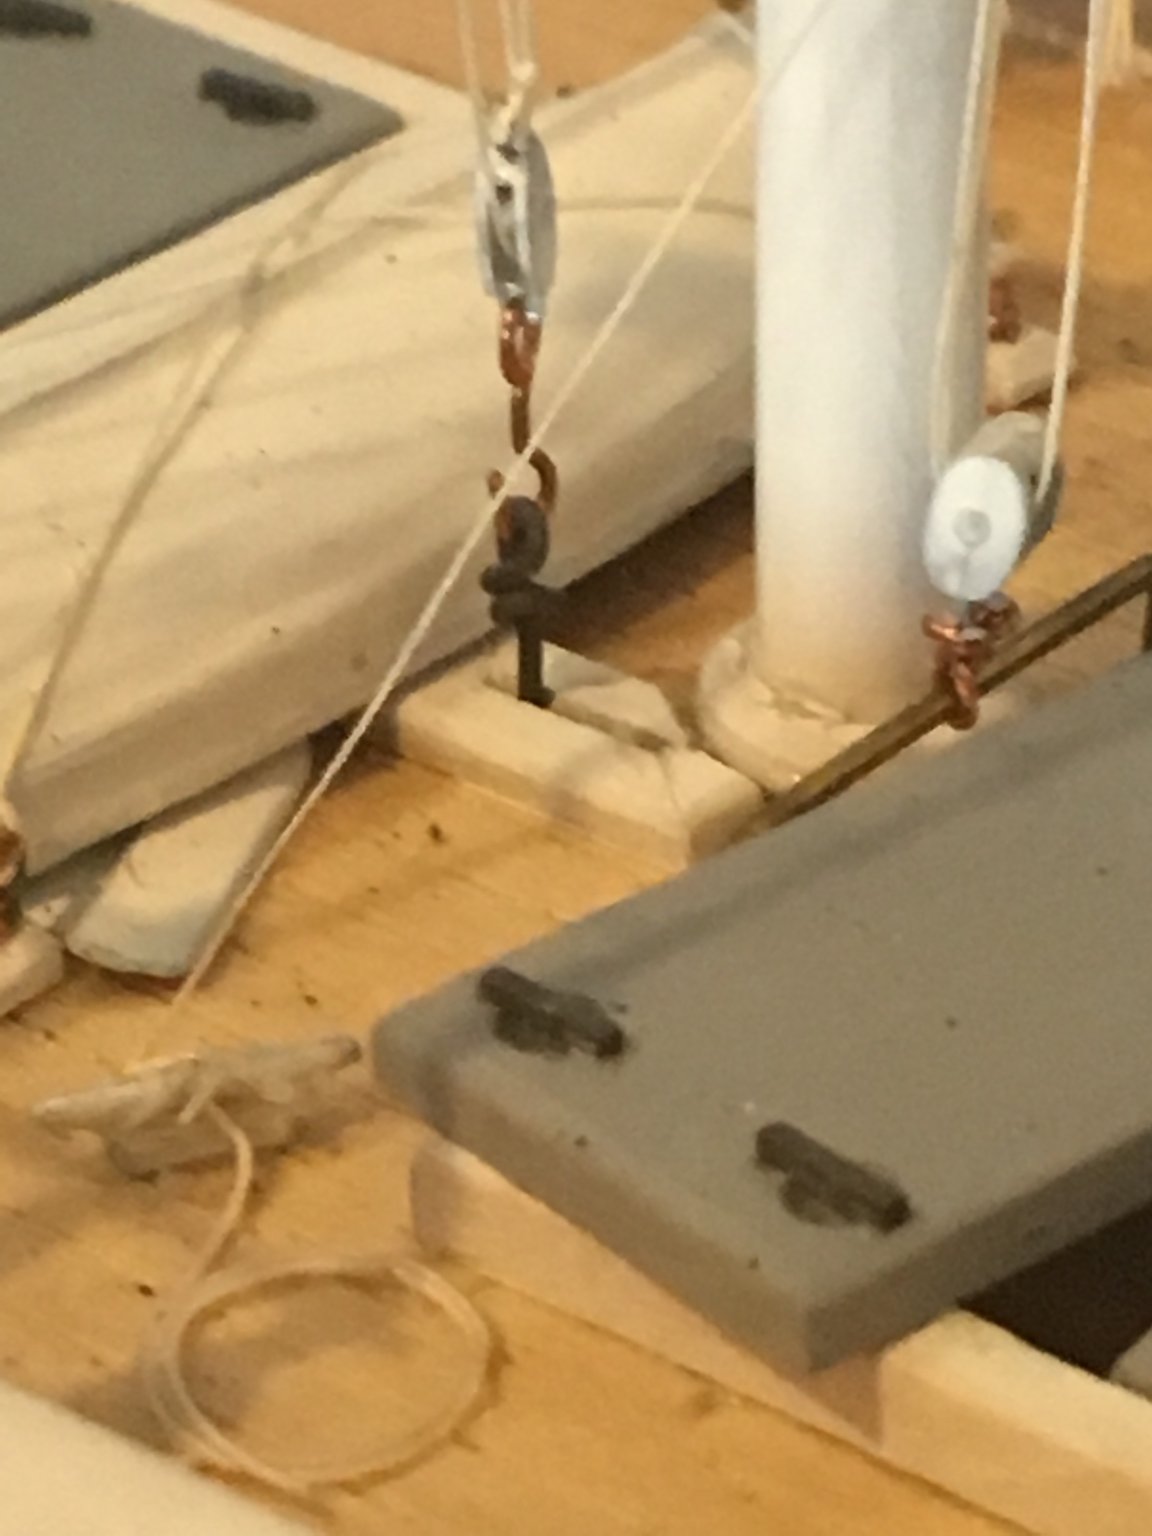
When the centerboard is down, the eye is close to the deck. When the centerboard is up, the eye is of course much further up as well. Nic
-
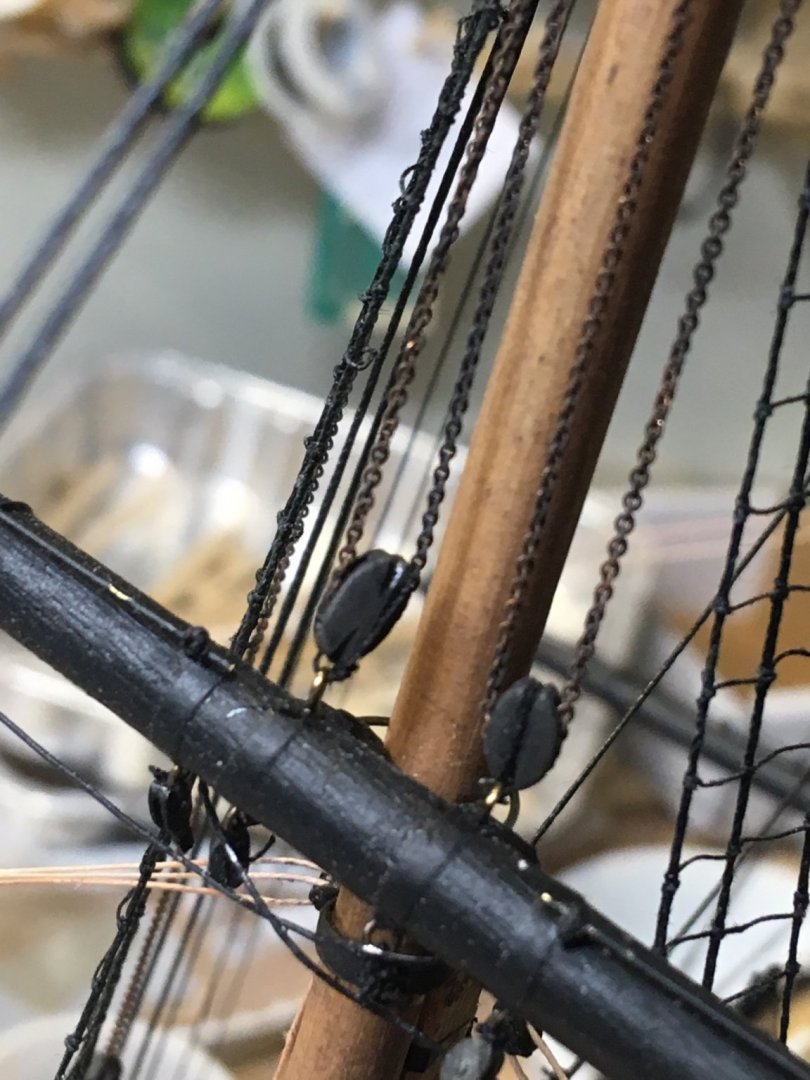
So here's the main top yard installed And a close-up of the twin chain halyards that hold it up.
- 356 replies
-
- 11
-
-
- red jacket
- finished
- (and 1 more)
-
Very nice looking, John. Nic
-
Nice to put a face to the name...................Hello Rob - you don't look like your signature photo at all
-
Very artistic. I love natural wood like that, and the cantilever is visually interesting. Nice walk-around video, too. Nic
- 1,208 replies
-
- 3
-
-
- great republic
- clipper
- (and 1 more)
-
Excellent job! Is that a piece of driftwood I see at the base? Nice touch.
- 1,208 replies
-
- 2
-
-
- great republic
- clipper
- (and 1 more)
-
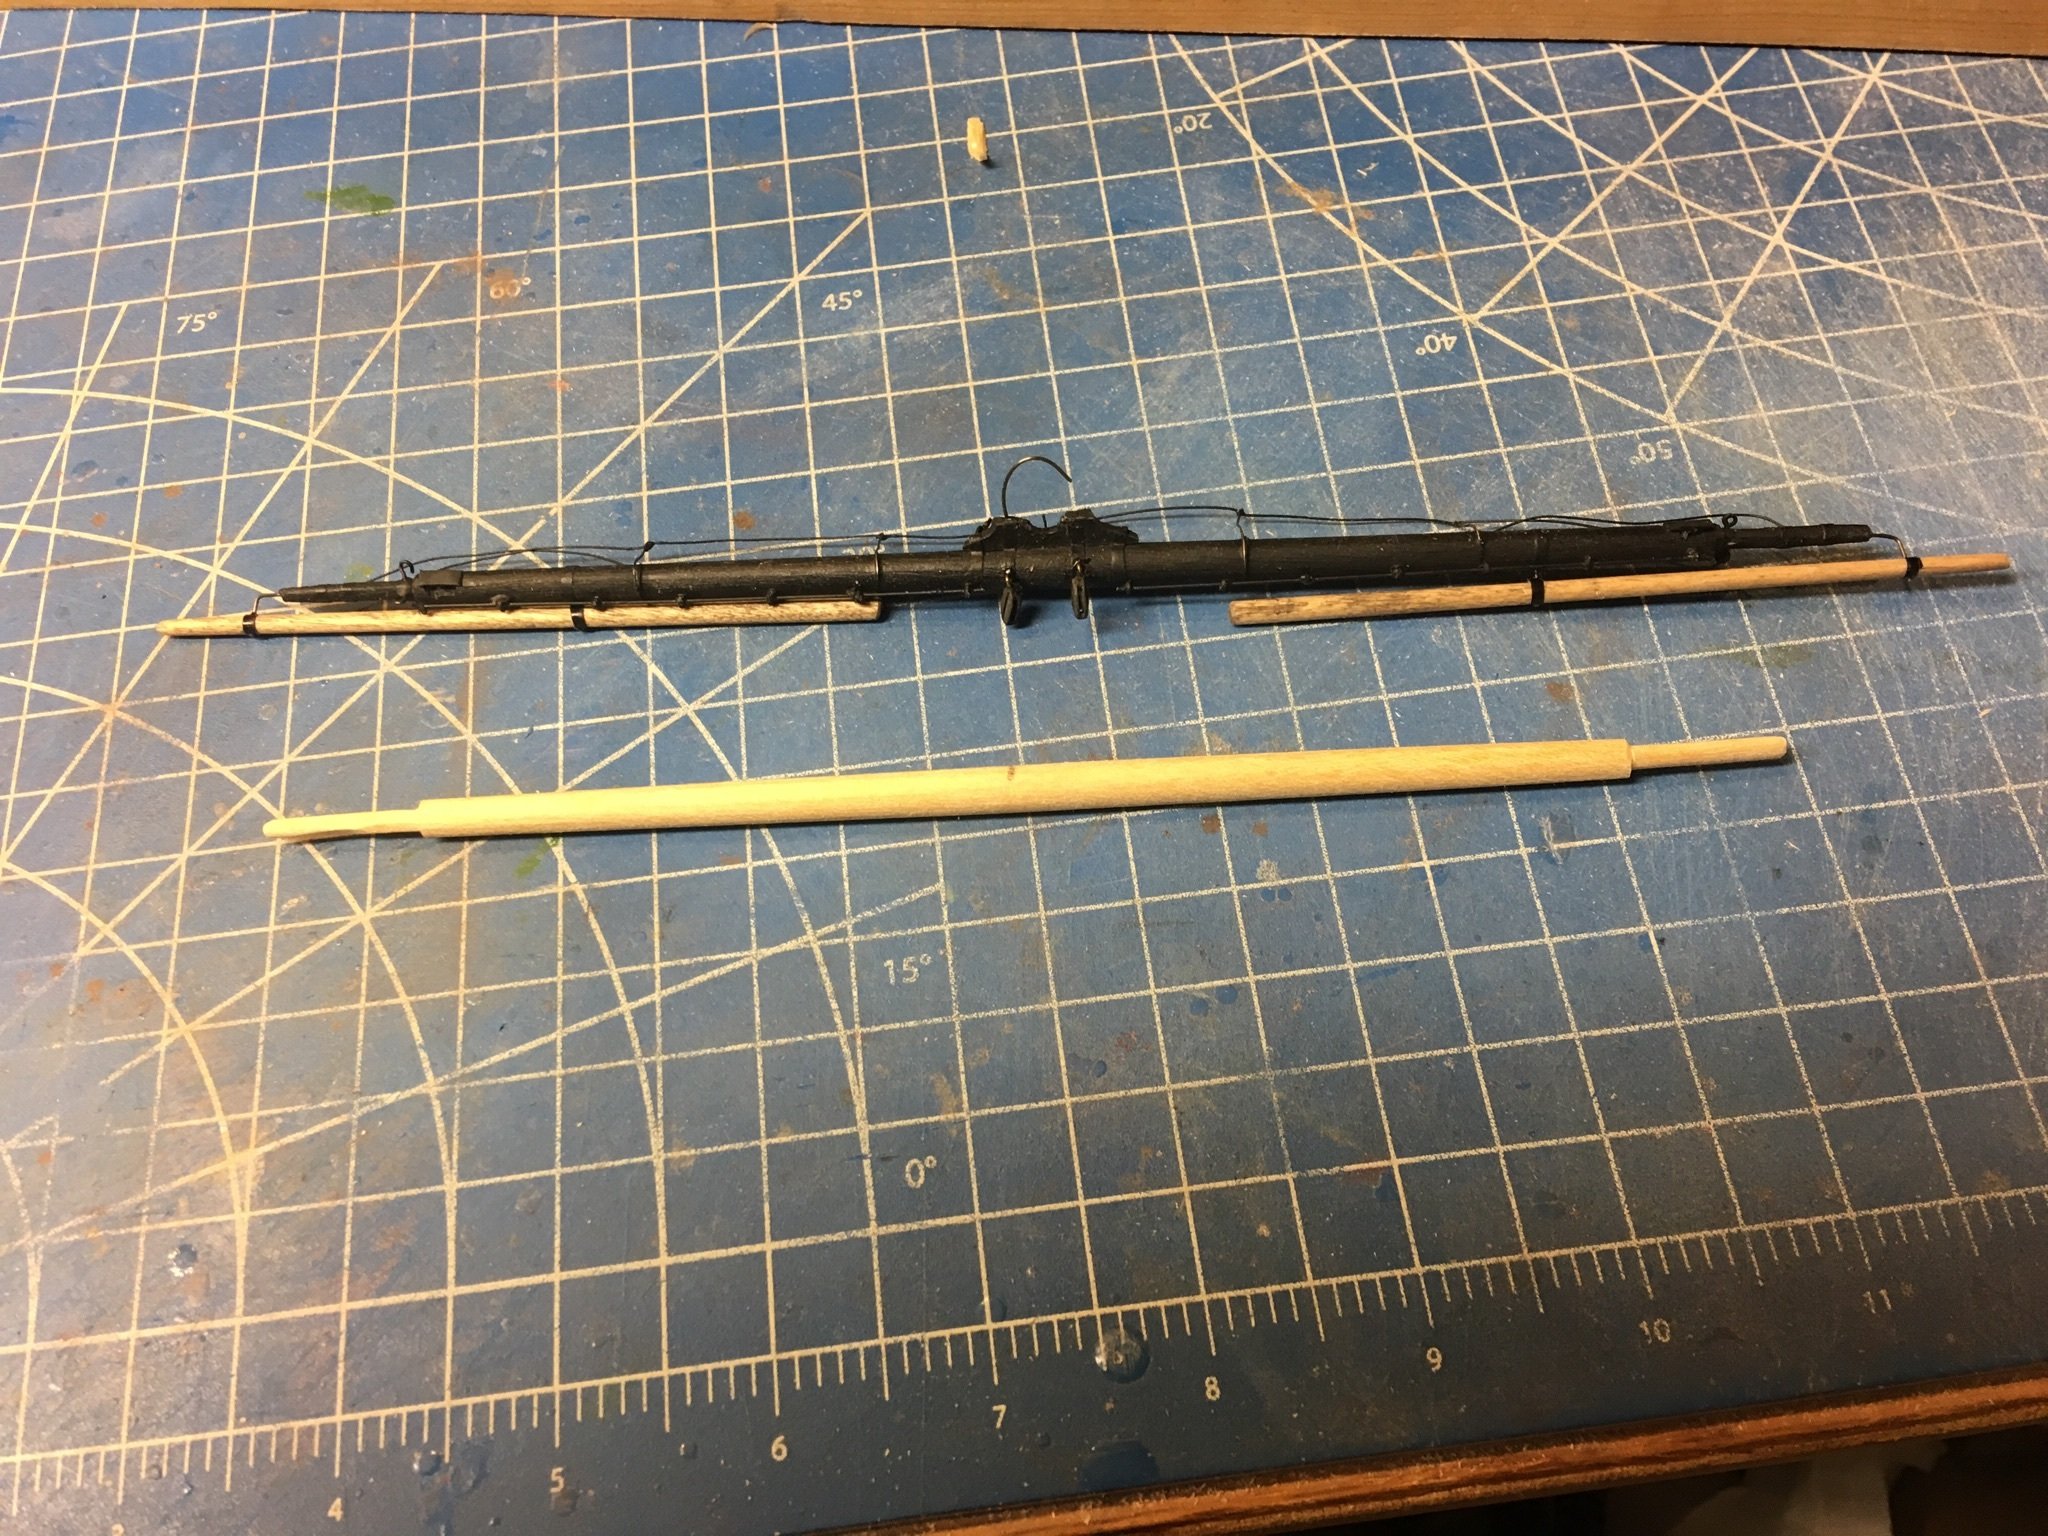
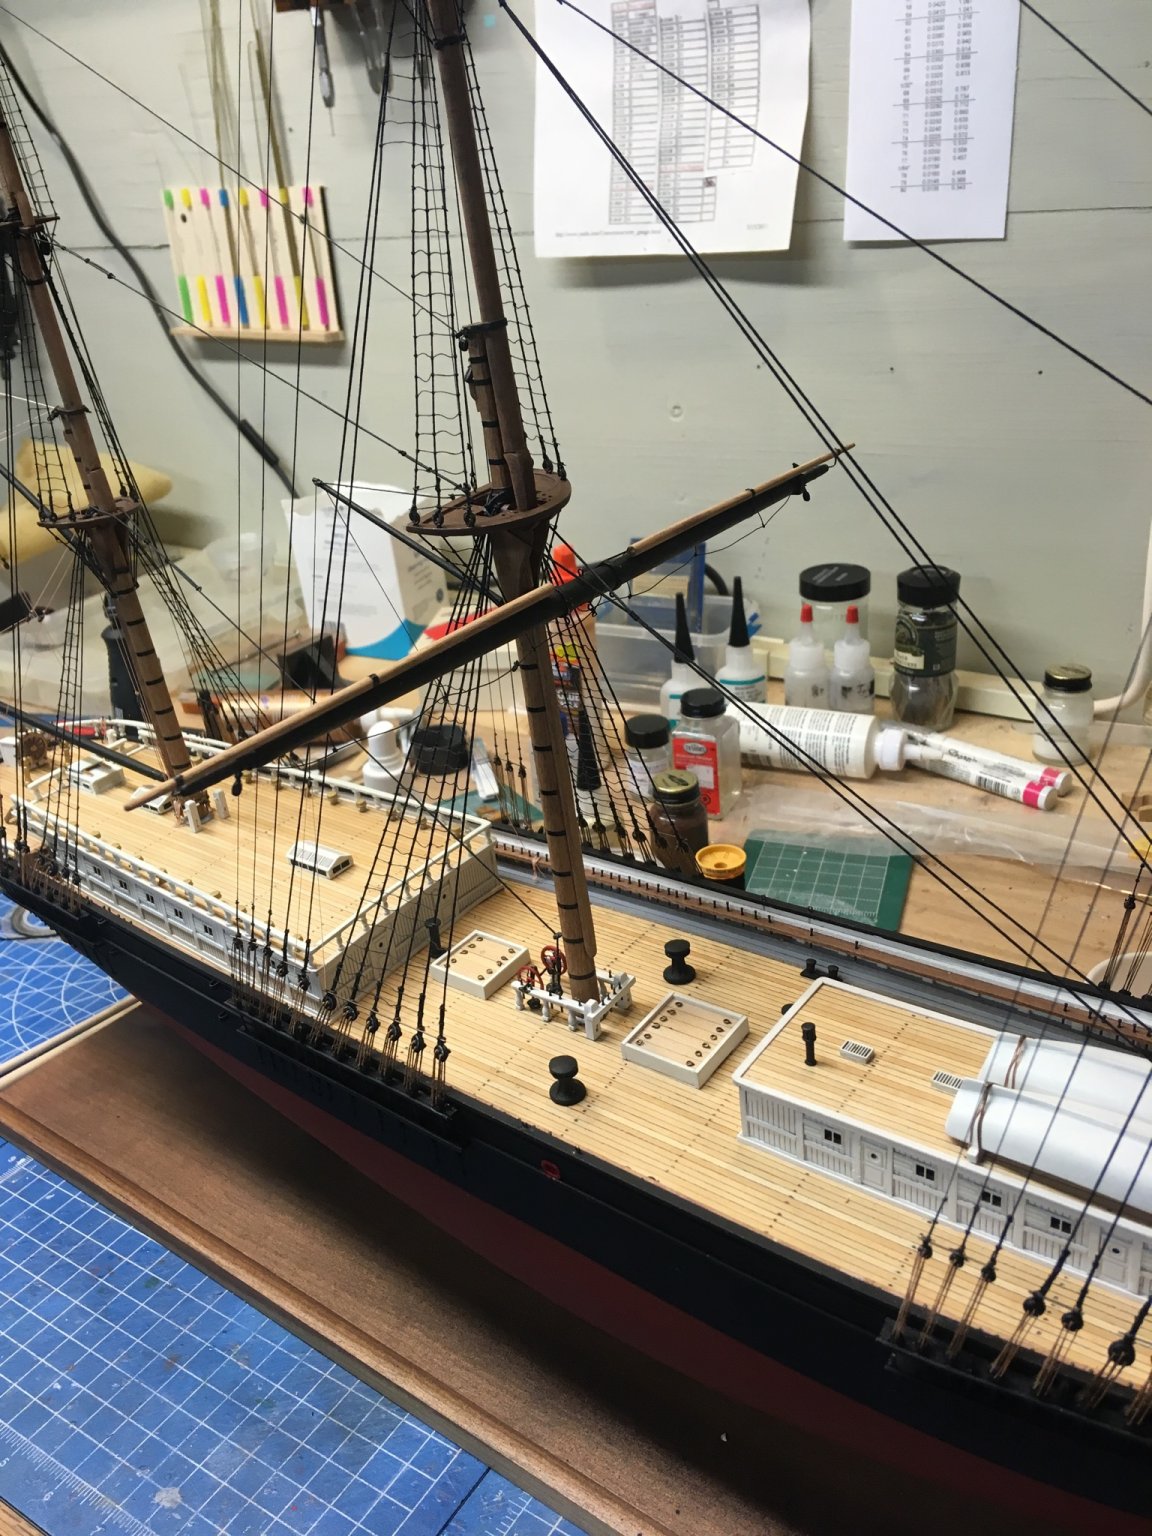
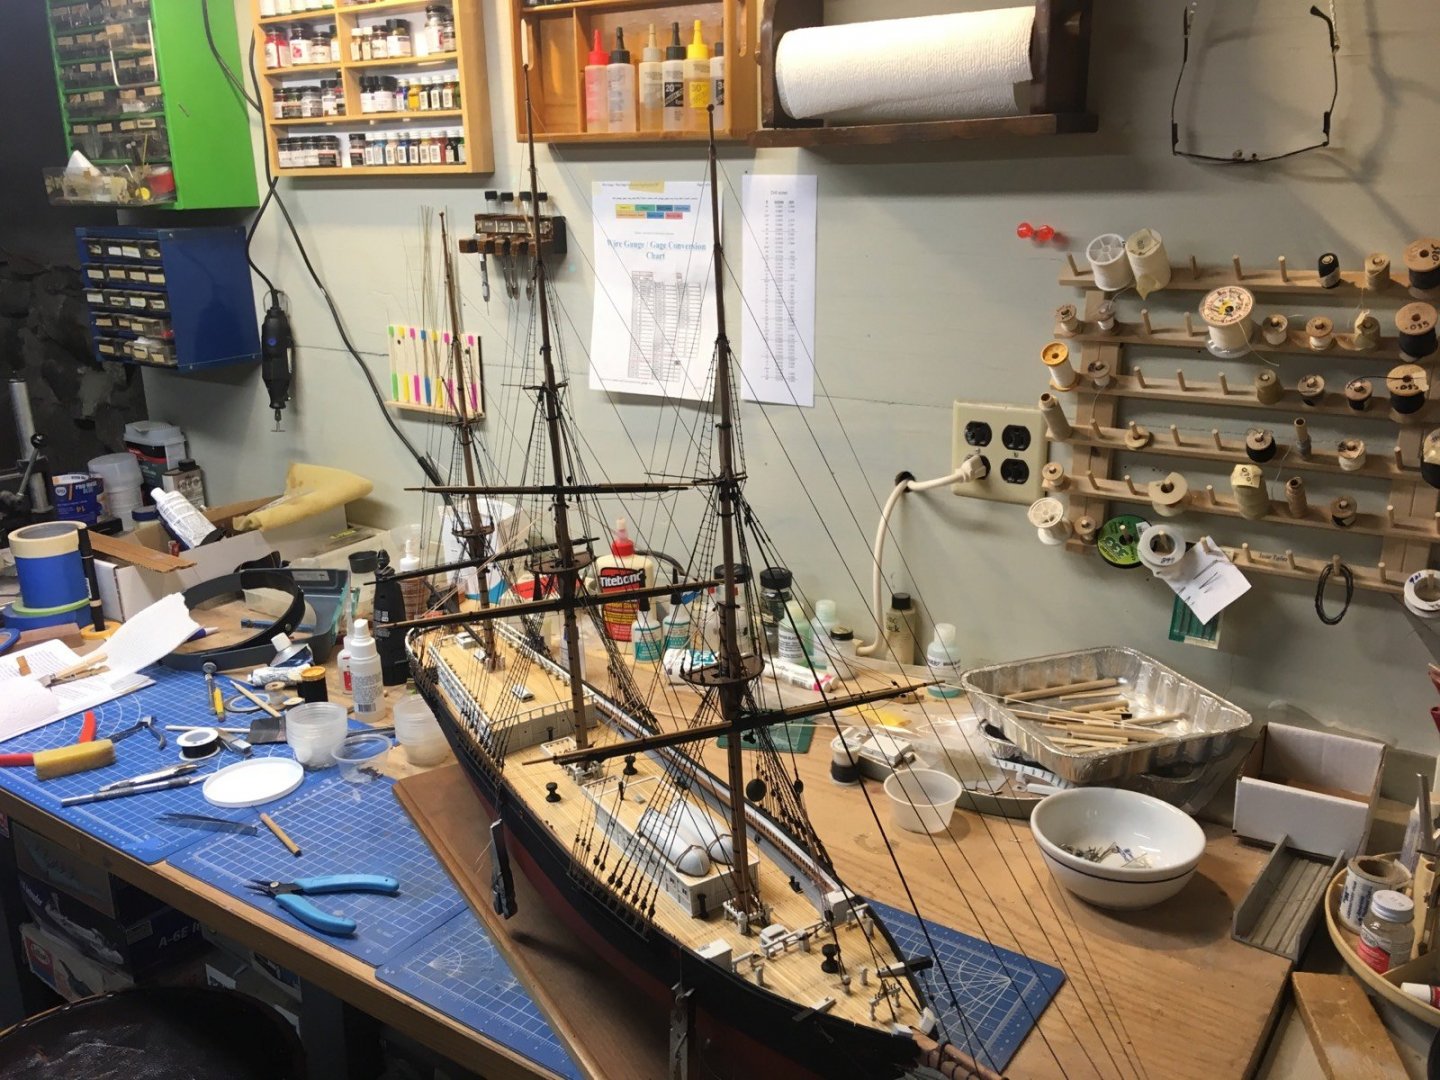
All the lower lifts are complete. Now working on the top yards. Here is the main finished, and a roughed out fore top yard.

- 356 replies
-
- 10
-
-
- red jacket
- finished
- (and 1 more)
-
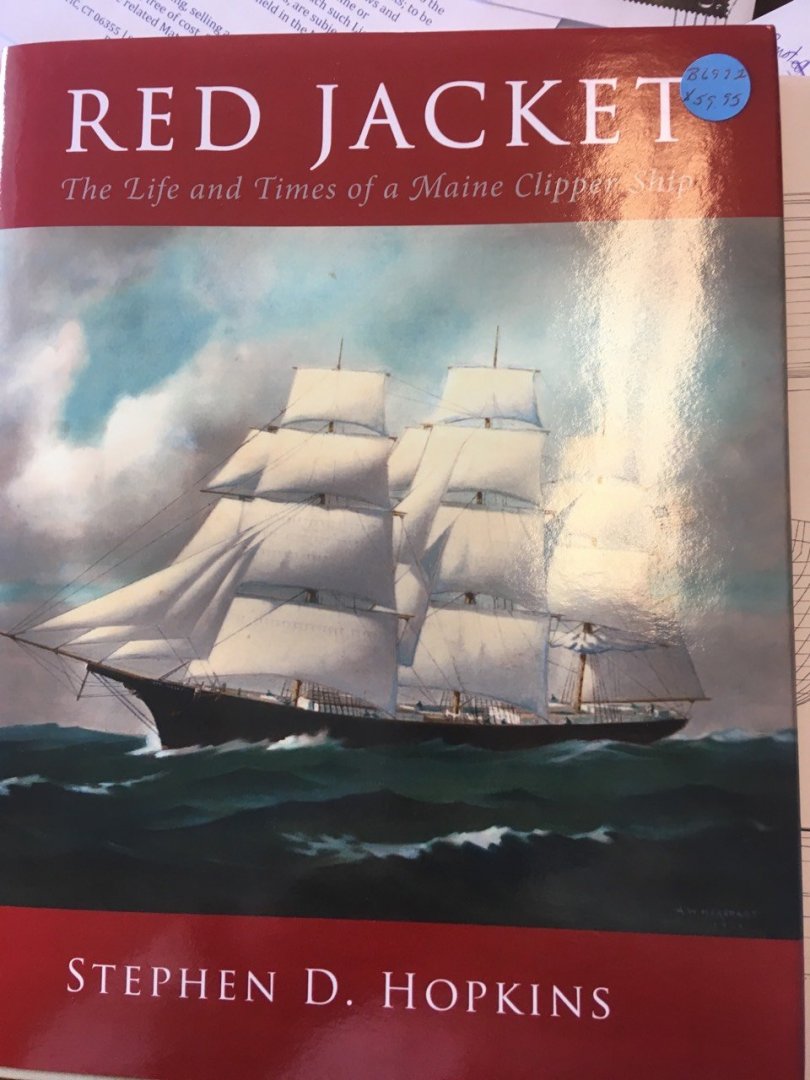
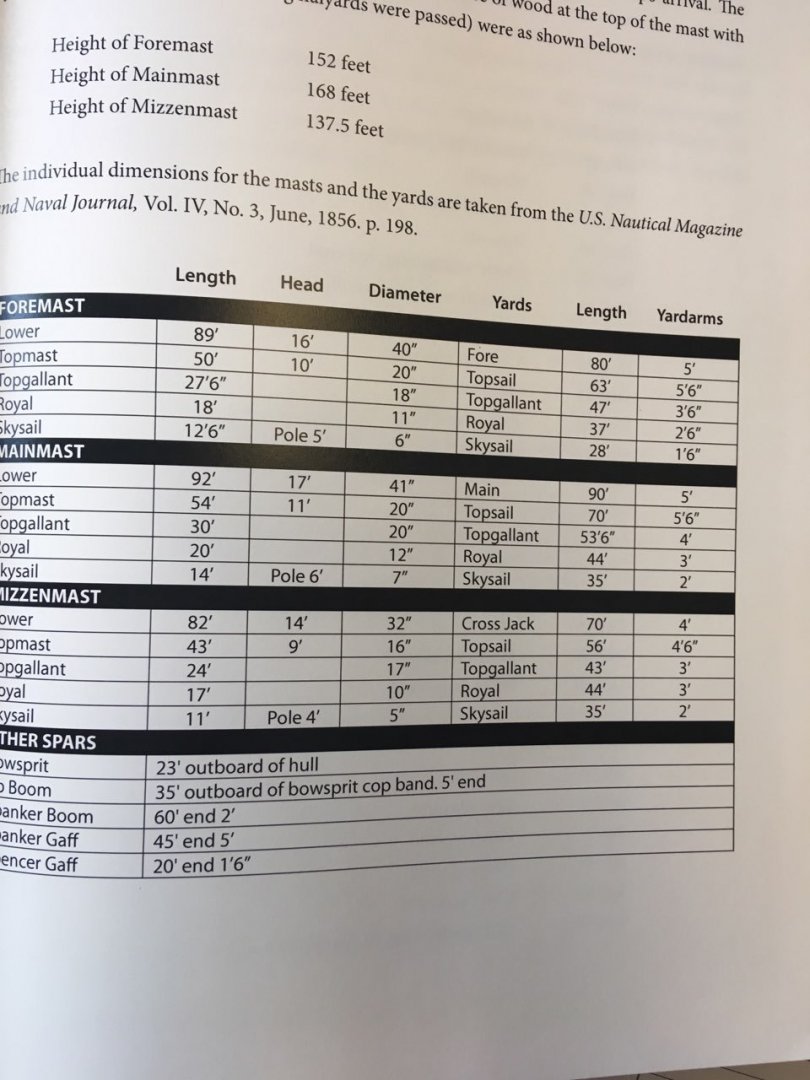
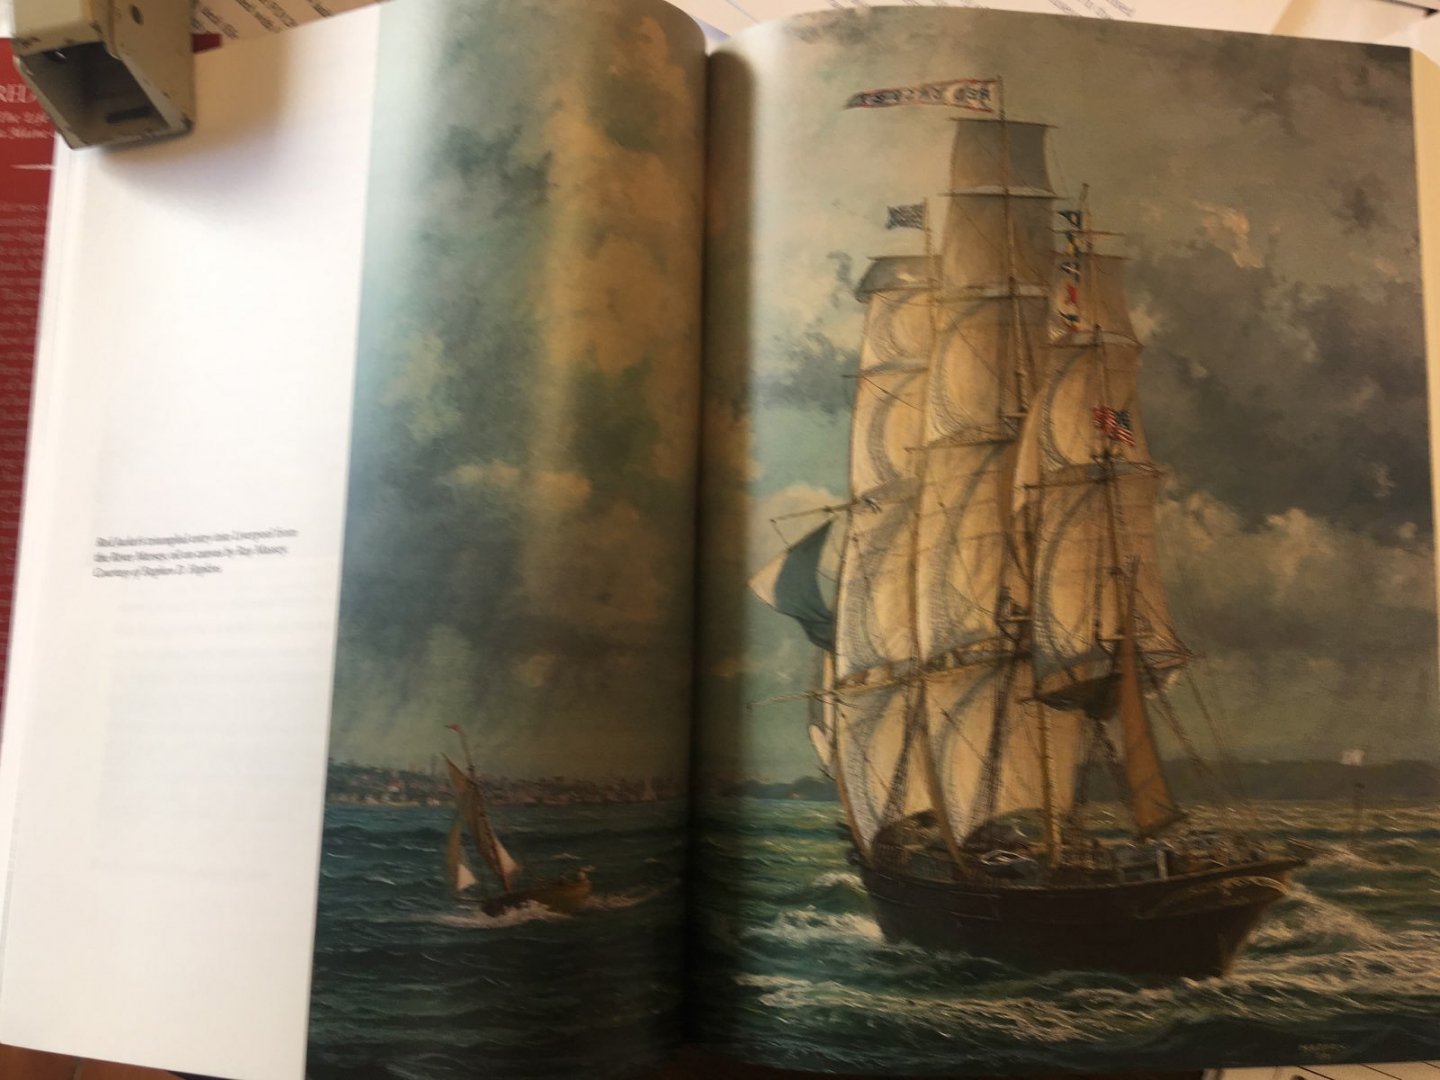
We carry a book of the Red Jacket that is pretty comprehensive. Paintings of her maiden voyage show both 4 sails and 5 sails on the masts. Here are some shots from the book: Book cover Sail plan: Dimensions of masts and yards: Oil painting sailing into Liverpool maiden voyage:

- 356 replies
-
- 6
-
-
- red jacket
- finished
- (and 1 more)
-
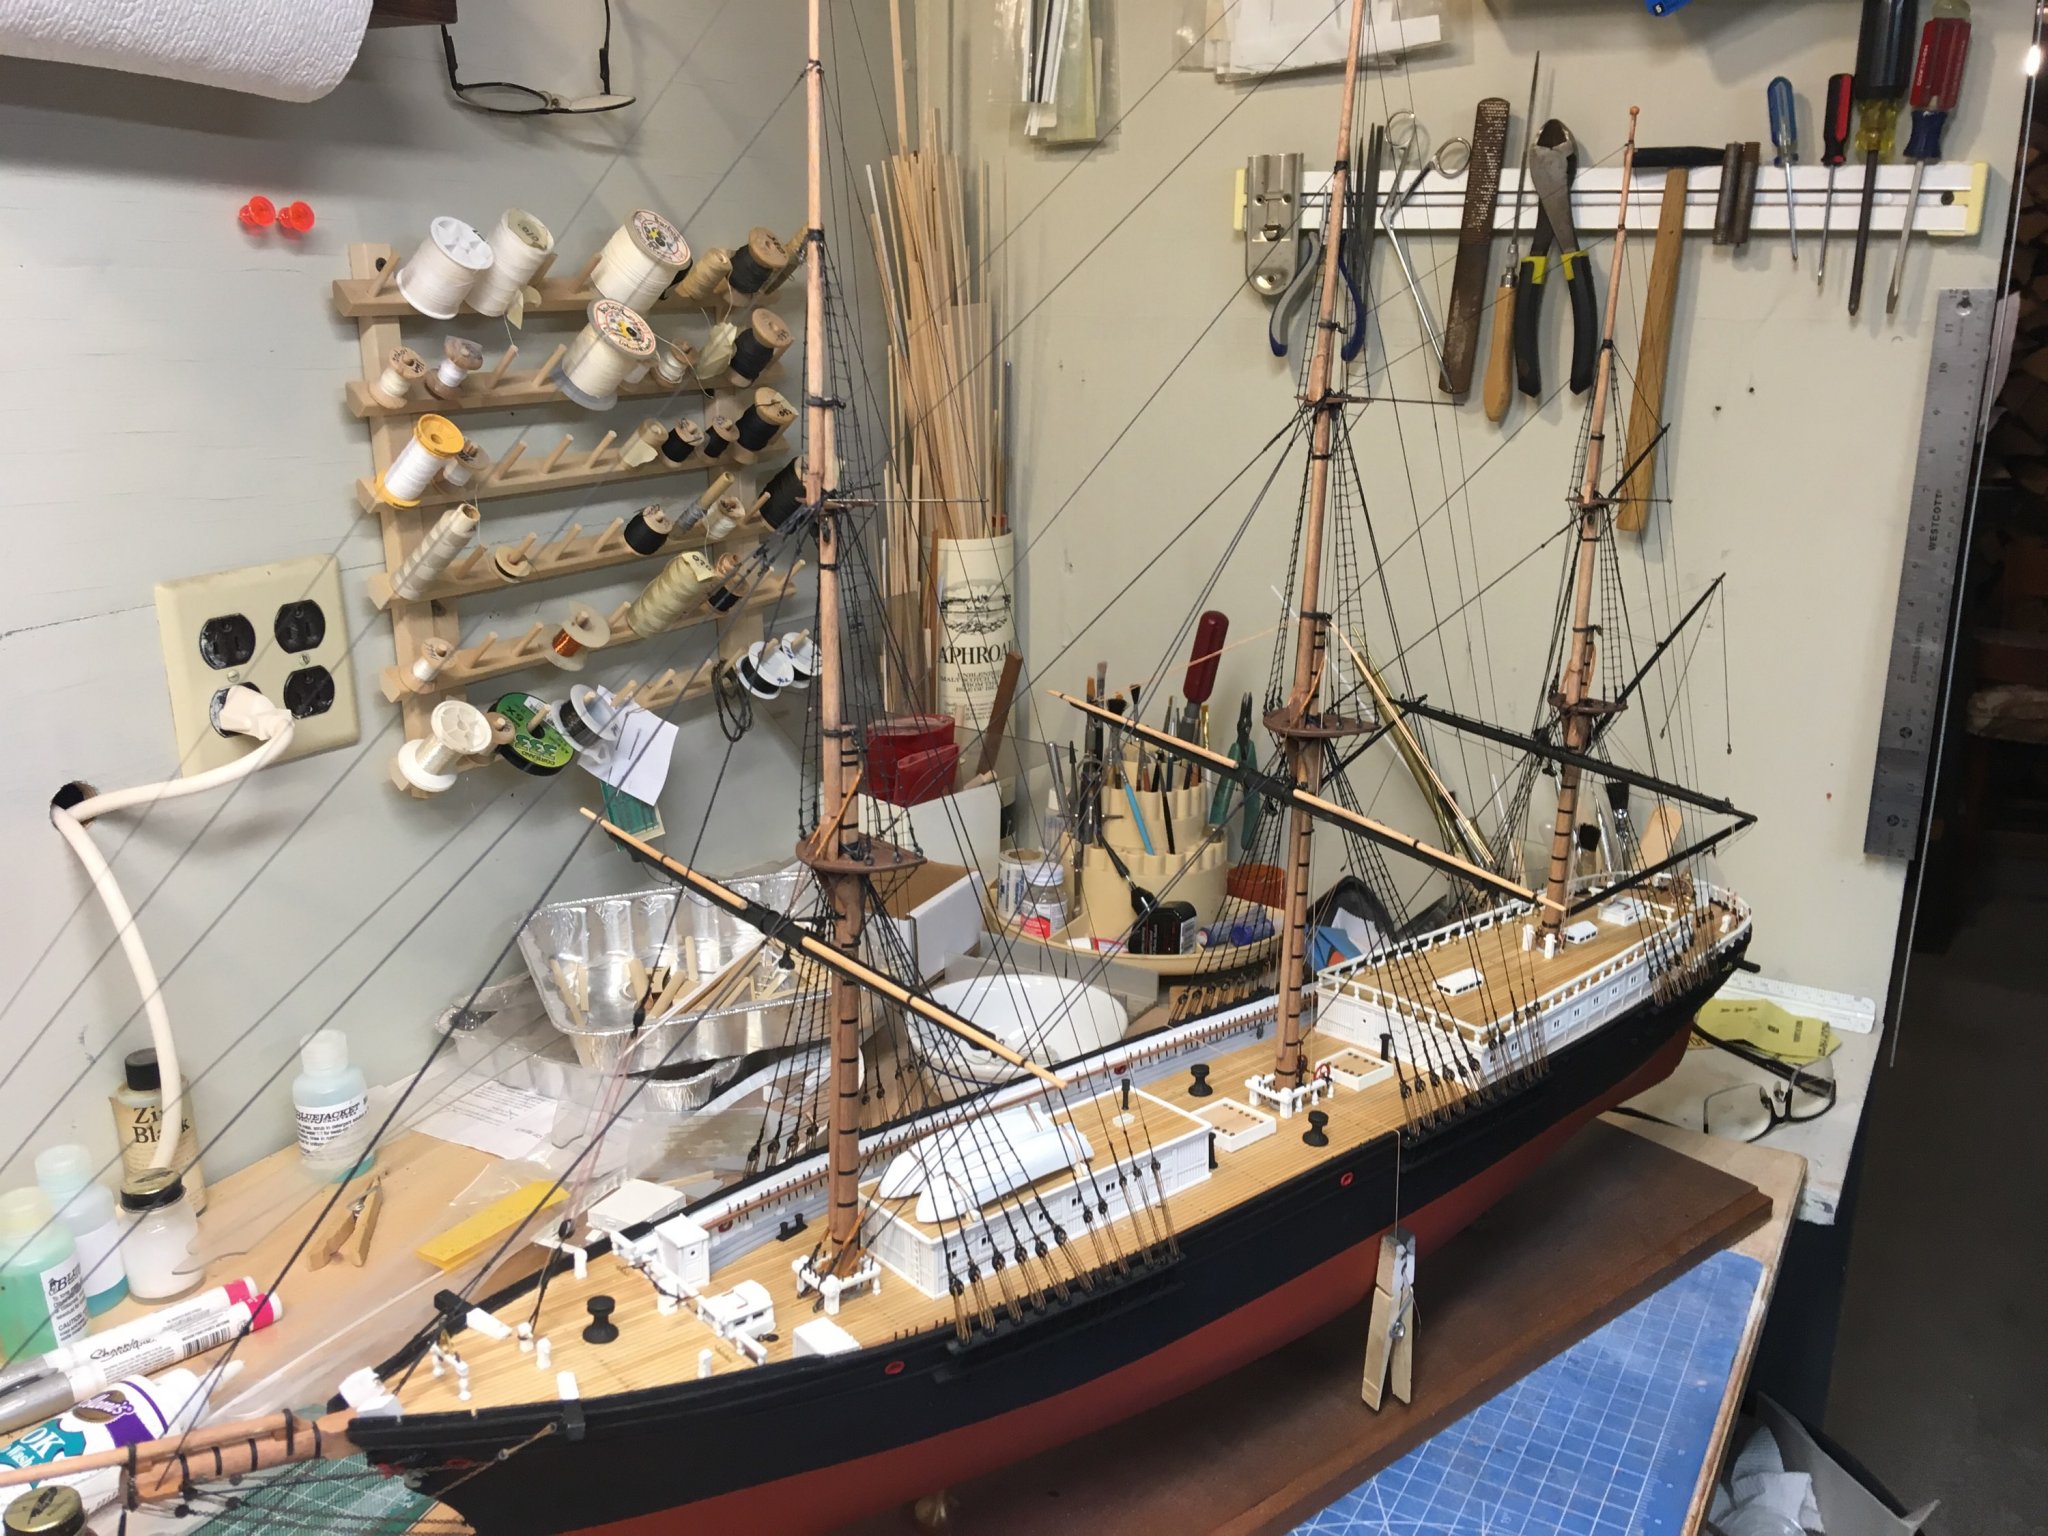
Thanks Rob, I've had a sinus infection that had me down for several days. 3 other people at BlueJacket are sick (none Corona-V). All the lower lifts are done, and I'm working on the top yards.
-
Very nice build. I will put a note in your customer file that you will get a 10% discount on the next kit you buy from us! And if some readers don't know, that is BlueJacket's standing offer when you do and finish a build thread on one of our kits. Nic
- 21 replies
-
- 1
-
-
- America
- BlueJacket Shipcrafters
- (and 1 more)
-
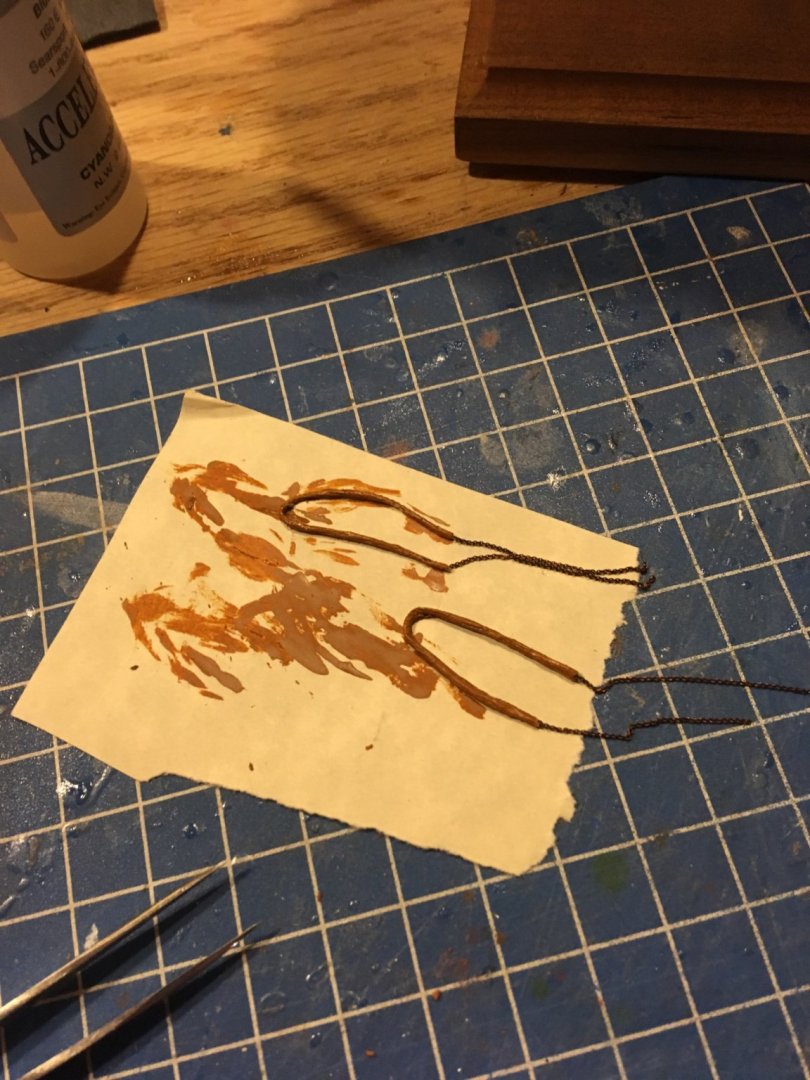
The chain slings for the yards are protected from chafing around the mast by being wrapped in leather, like the main stay etc. I wrapped the chain in paper towel soaked with Elmer's and painted it after it dried with wood-color paint.
- 356 replies
-
- 6
-
-
- red jacket
- finished
- (and 1 more)
-
Funny you should mention it - Here's the first yard mounted. I took a week off to do a repair job. Nic

- 356 replies
-
- 7
-
-
- red jacket
- finished
- (and 1 more)
-
Old modeling phrase: "Putty and paint..... Makes it look like what it ain't"
- 85 replies
-
- 1
-
-
- perry
- BlueJacket Shipcrafters
- (and 1 more)
-
I see you already have!