HOLIDAY DONATION DRIVE - SUPPORT MSW - DO YOUR PART TO KEEP THIS GREAT FORUM GOING! (Only 72 donations so far out of 49,000 members - Can we at least get 100? C'mon guys!)
×


MrBlueJacket
-
Posts
1,309 -
Joined
-
Last visited
Content Type
Profiles
Forums
Gallery
Events
Everything posted by MrBlueJacket
-
 Excellent job! Your customer file now shows a 10% discount on your next kit from us. Nic
- 87 replies
-
- 3
-

-
- bluejacket shipcrafters
- red baron
- (and 3 more)
-
CA glue has a shelf life of 6-10 months at room temperature. Not "kicking" is a sure sign of old glue. You can use accelerator for awhile, but at your point, I would scrap the glue and buy fresh. Here at BlueJacket, we keep our CA in the freezer until sold. That way everyone gets really fresh glue. Once opened, you cannot go back to cold storage. Nic
- 23 replies
-
- 3
-
-
- Spray
- BlueJacket Shipcrafters
- (and 1 more)
-
That's a really good job of kit bashing.
- 34 replies
-
- 1
-
-
- grand banks dory
- bluejacket shipcrafters
- (and 1 more)
-
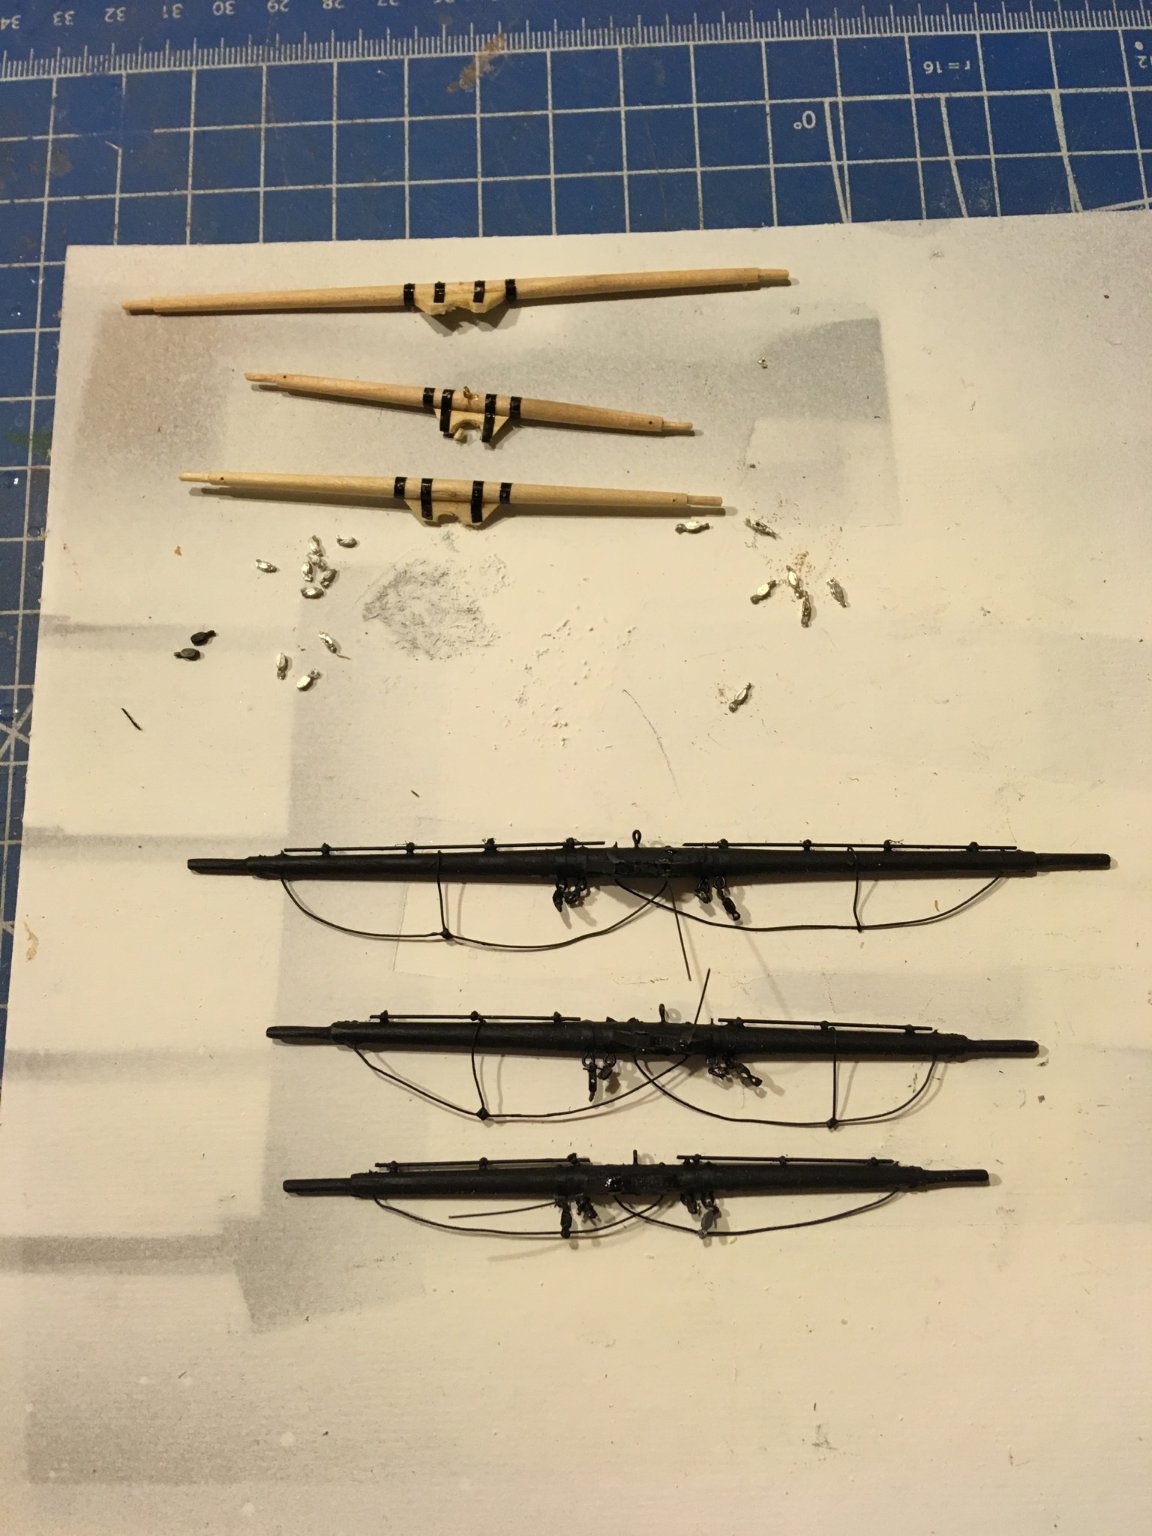
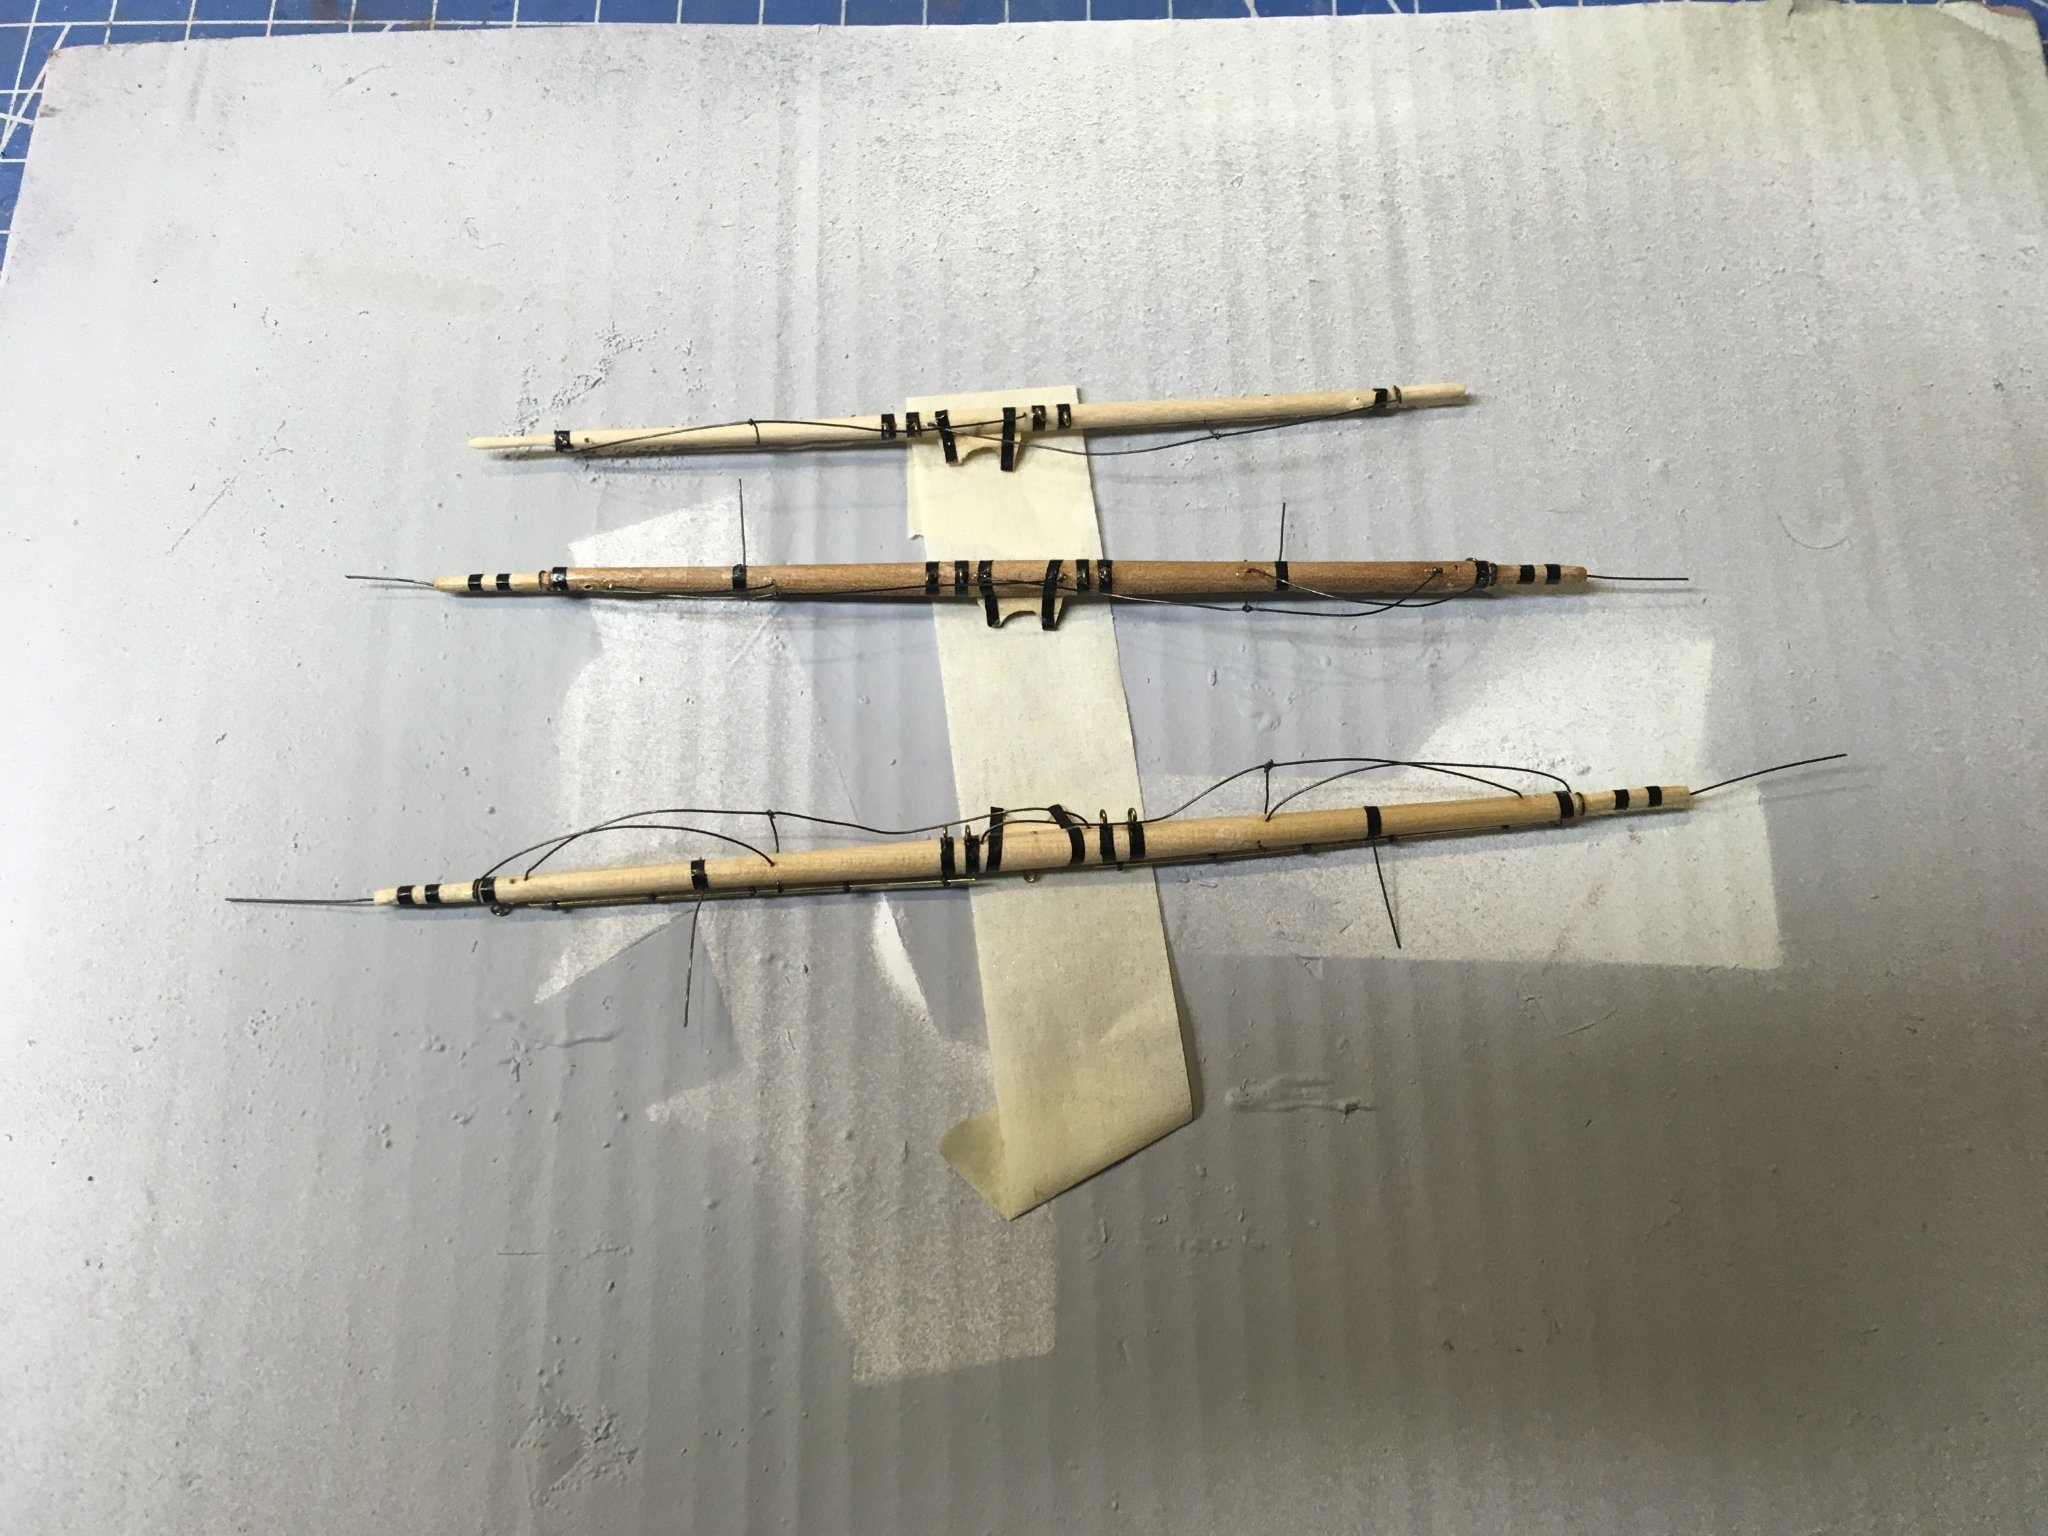
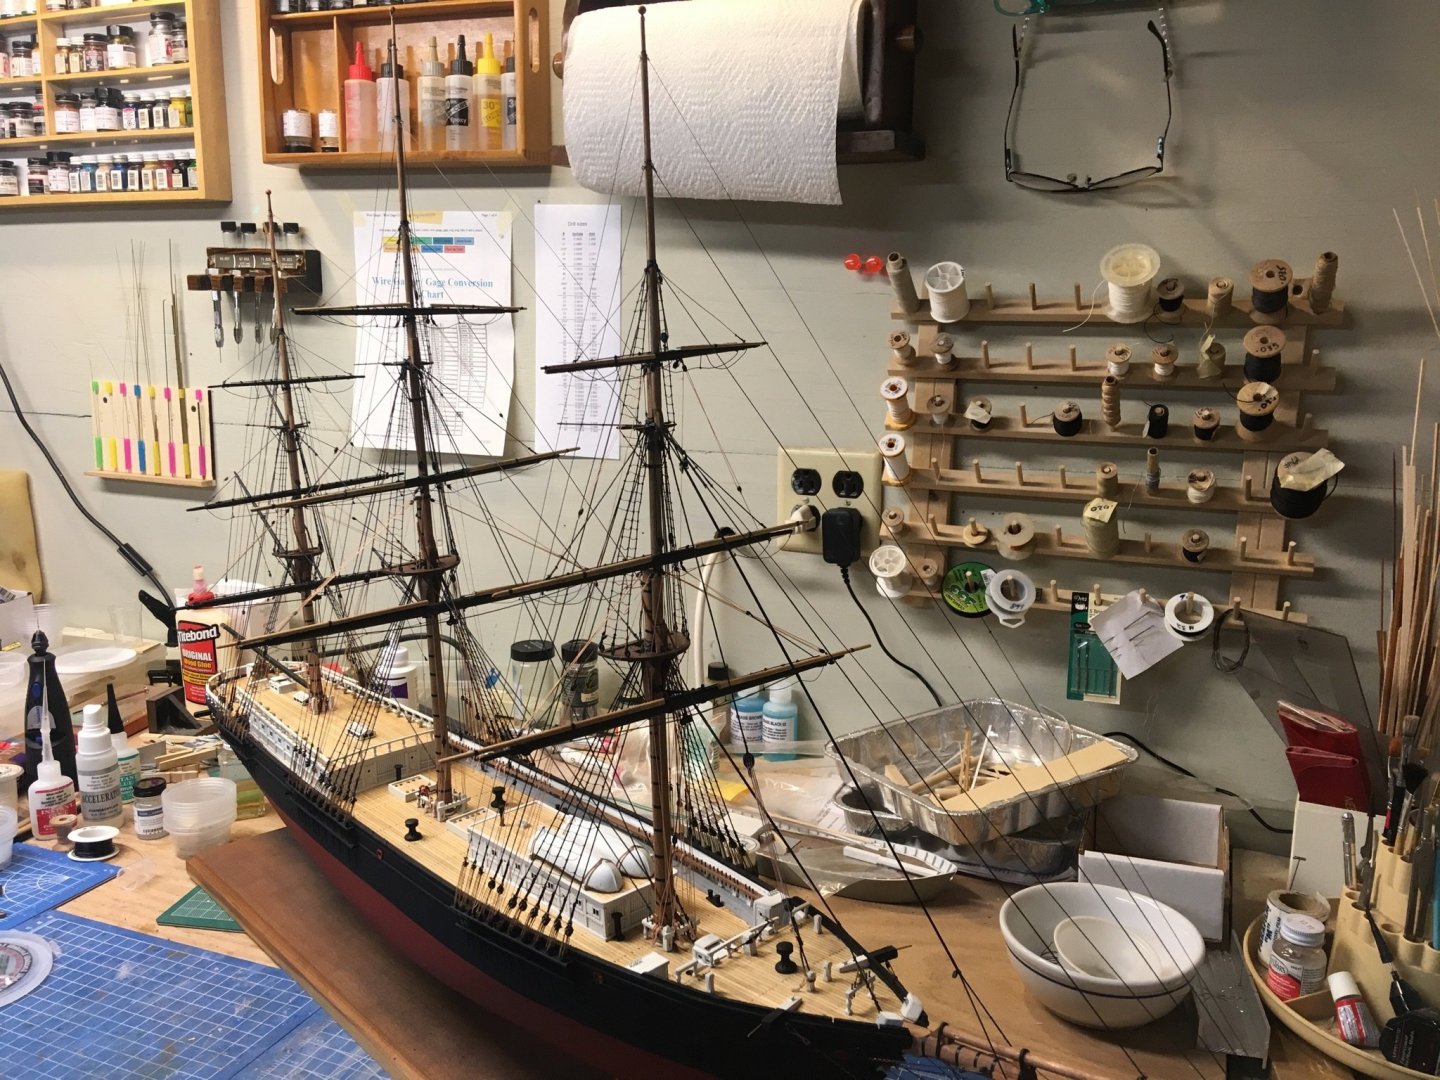
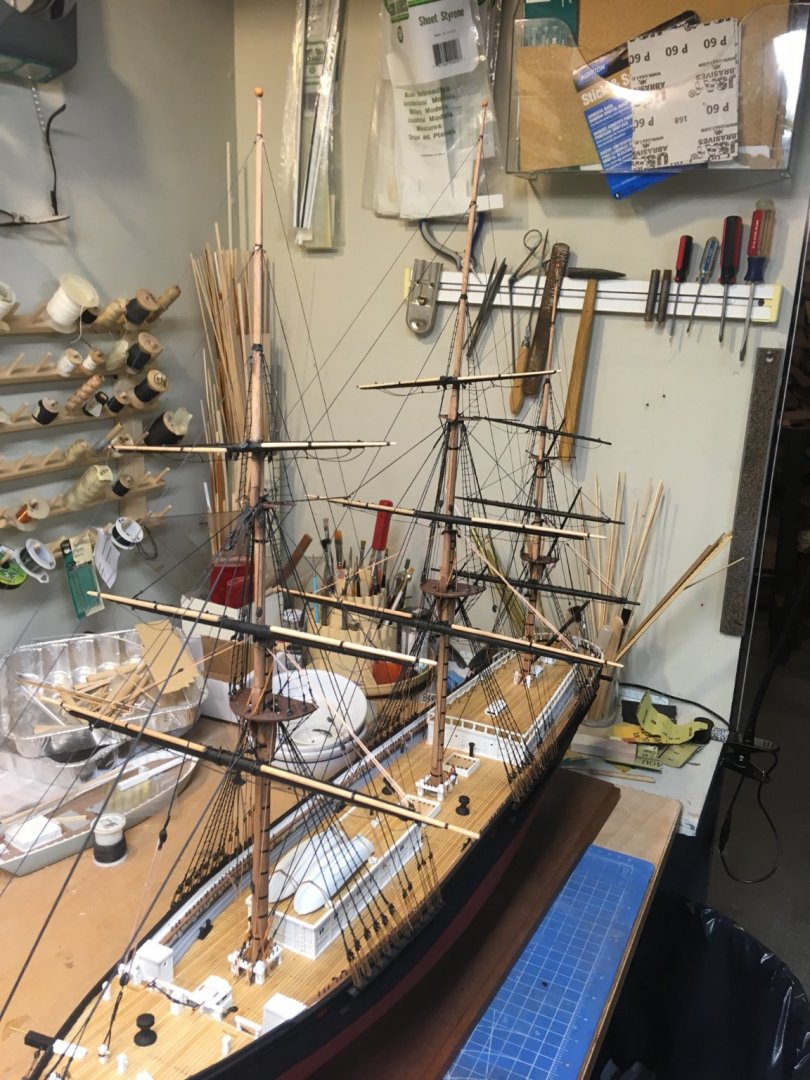
Over the weekend I was able to finish the royal yards, they are ready to mount. Also worked on the sky yards as well.

- 356 replies
-
- 3
-
-
- red jacket
- finished
- (and 1 more)
-
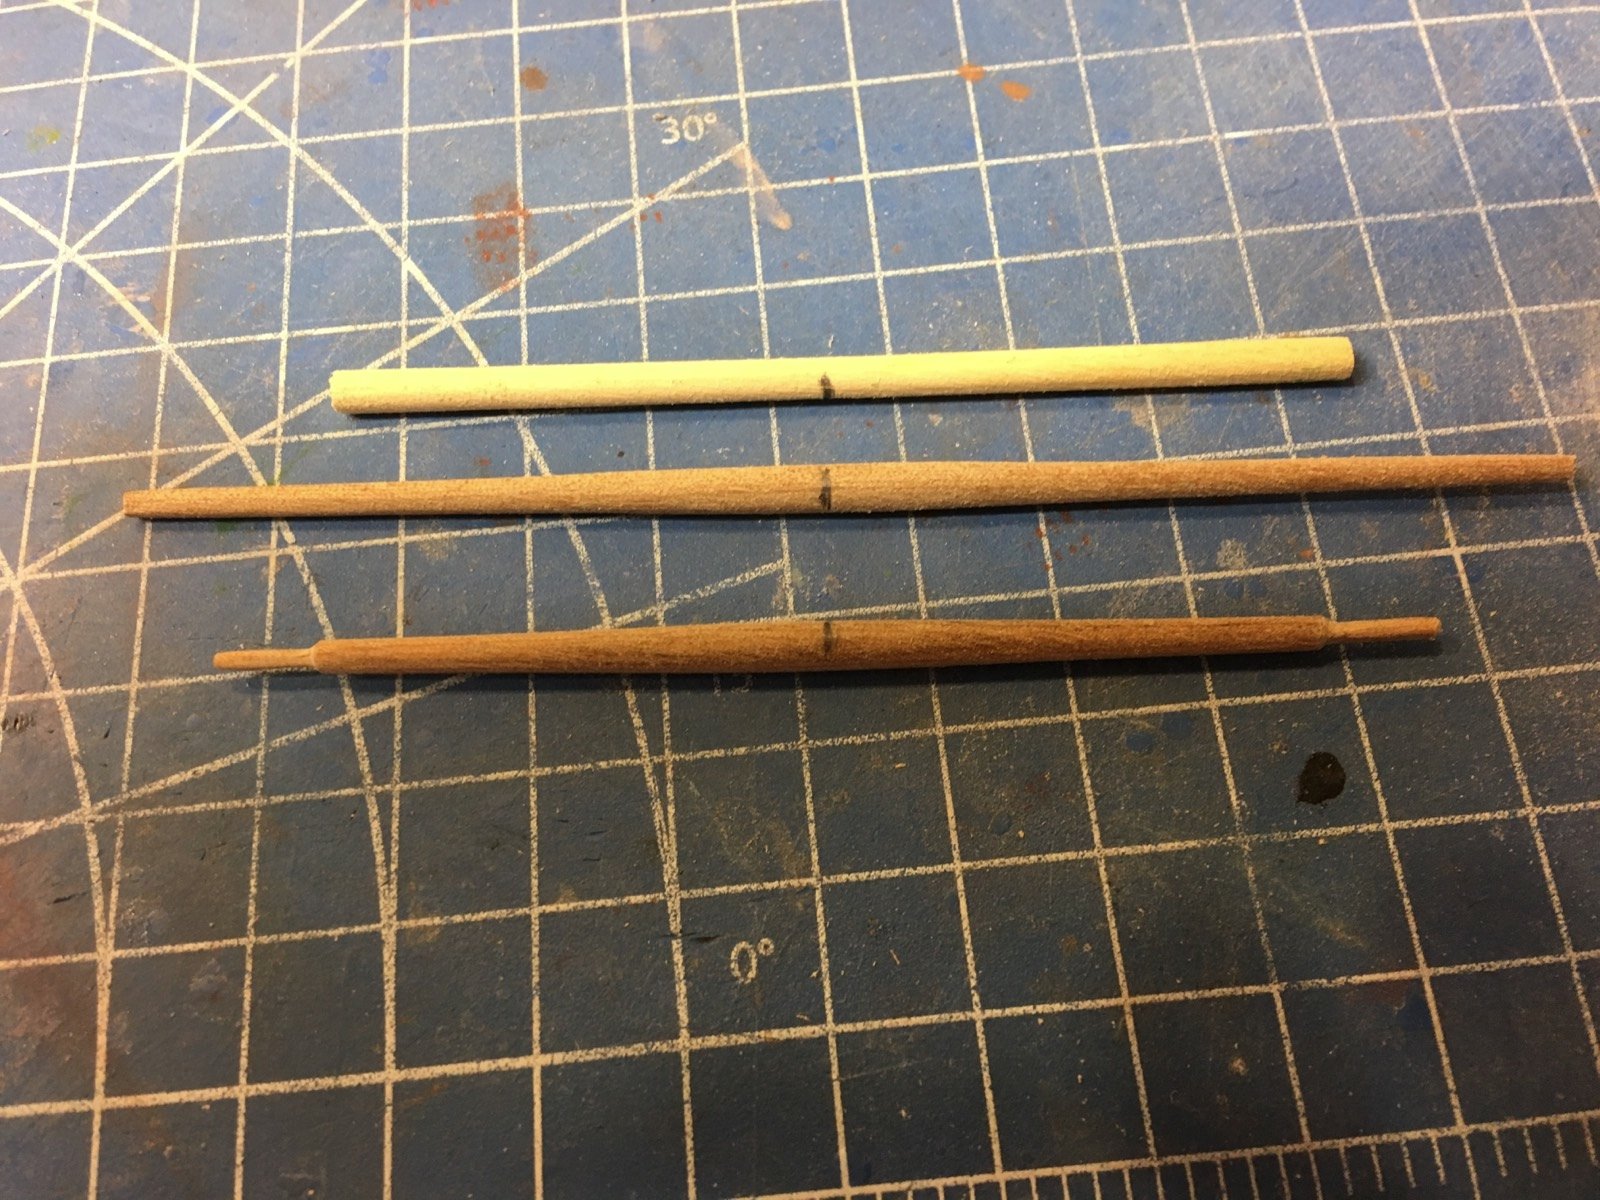
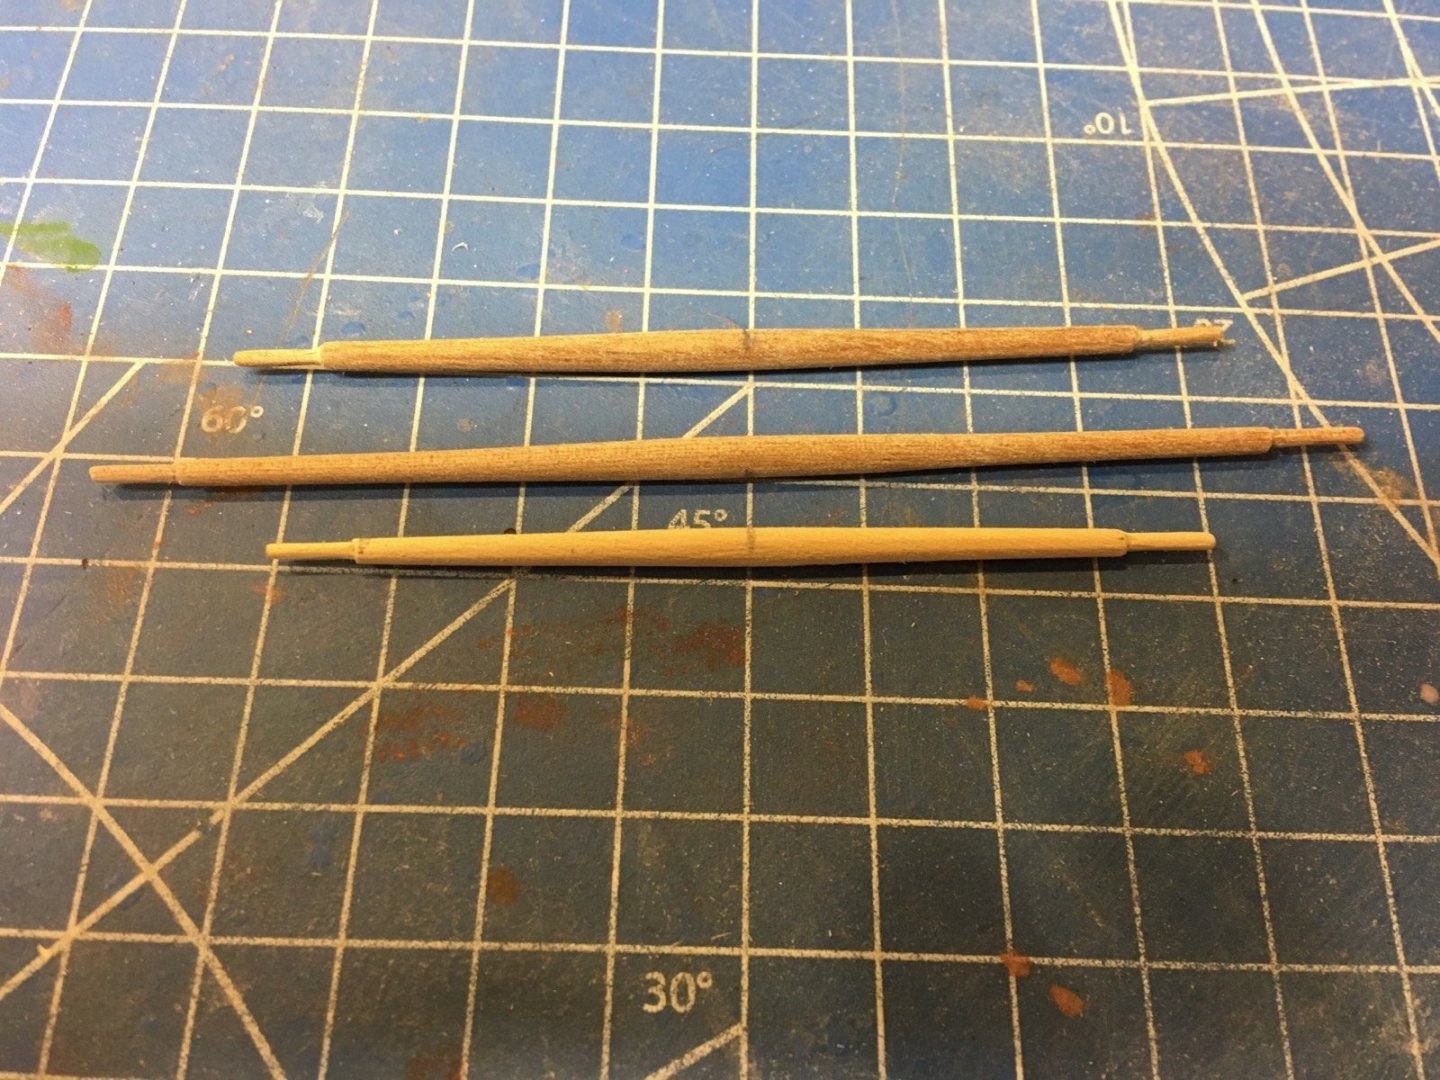
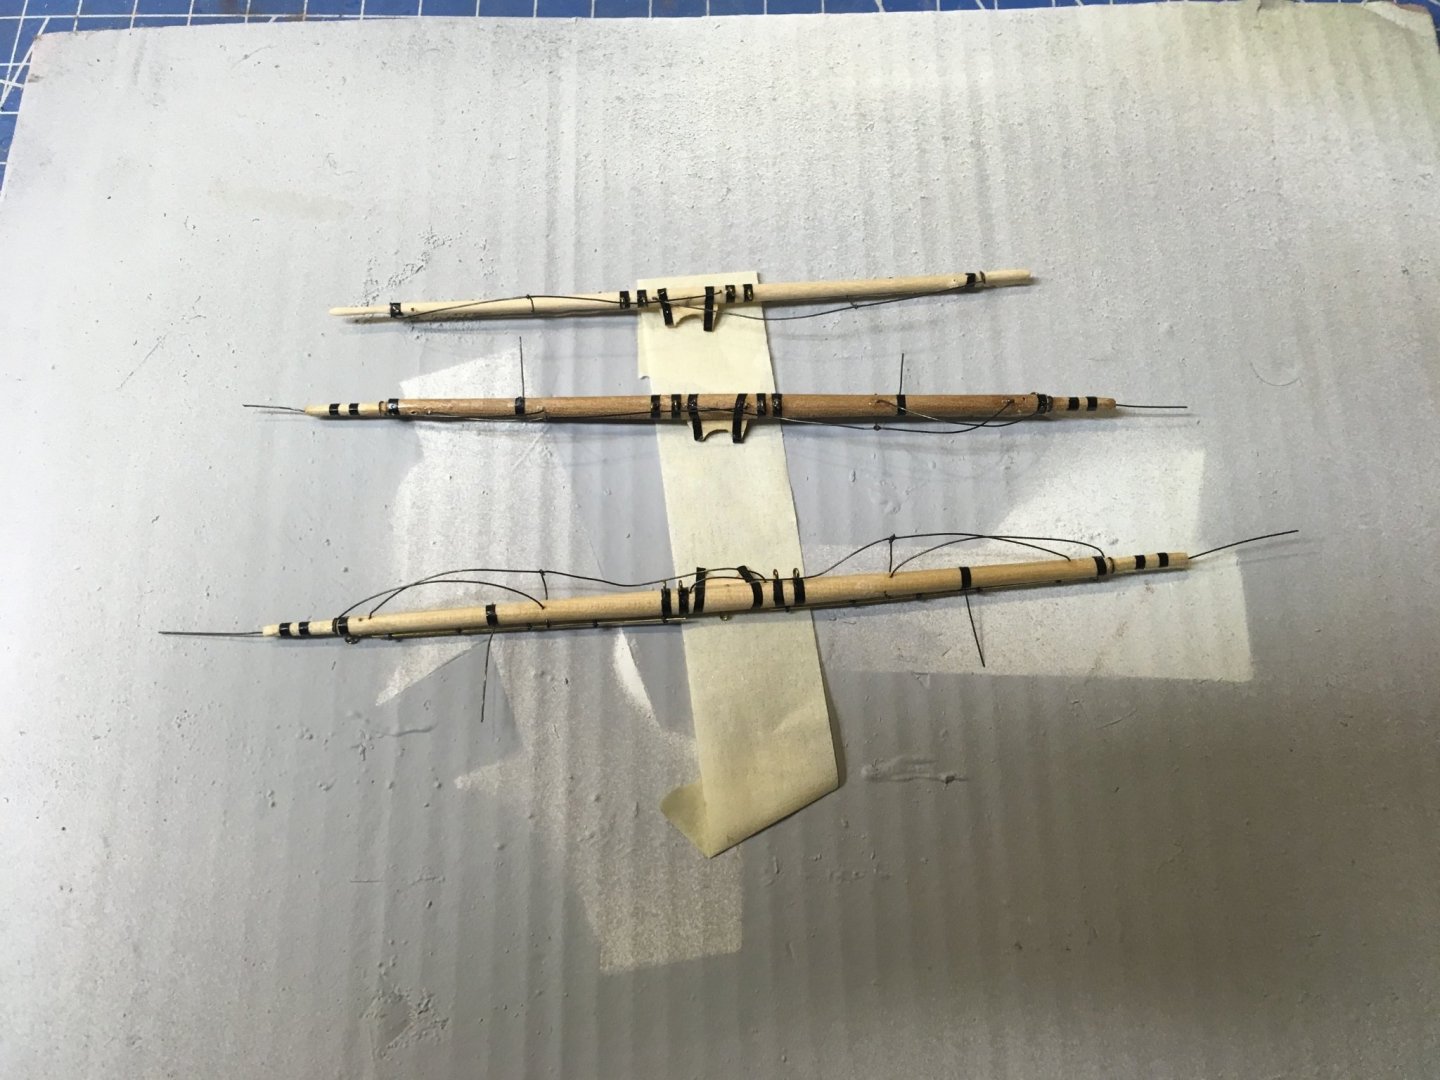
So here's the start of the royal yards. from dowel to tapered to yardarm. And now all 3 roughed out, ready for saddles, jackstays, footropes, etc.

- 356 replies
-
- 6
-
-
- red jacket
- finished
- (and 1 more)
-
Status update: Rigging the sheet and clew lines takes a lot of time, but there's not much to look at. Next up are the Royal yards.
- 356 replies
-
- 8
-
-
- red jacket
- finished
- (and 1 more)
-
The late modeler Steve Wheeler has often said "the trash can is your best tool" Having said that, I hate re-doing things. But if you're not happy, I think it's necessary. Go for it and make yourself proud! Nic
- 87 replies
-
- 6
-
-
- bluejacket shipcrafters
- red baron
- (and 3 more)
-
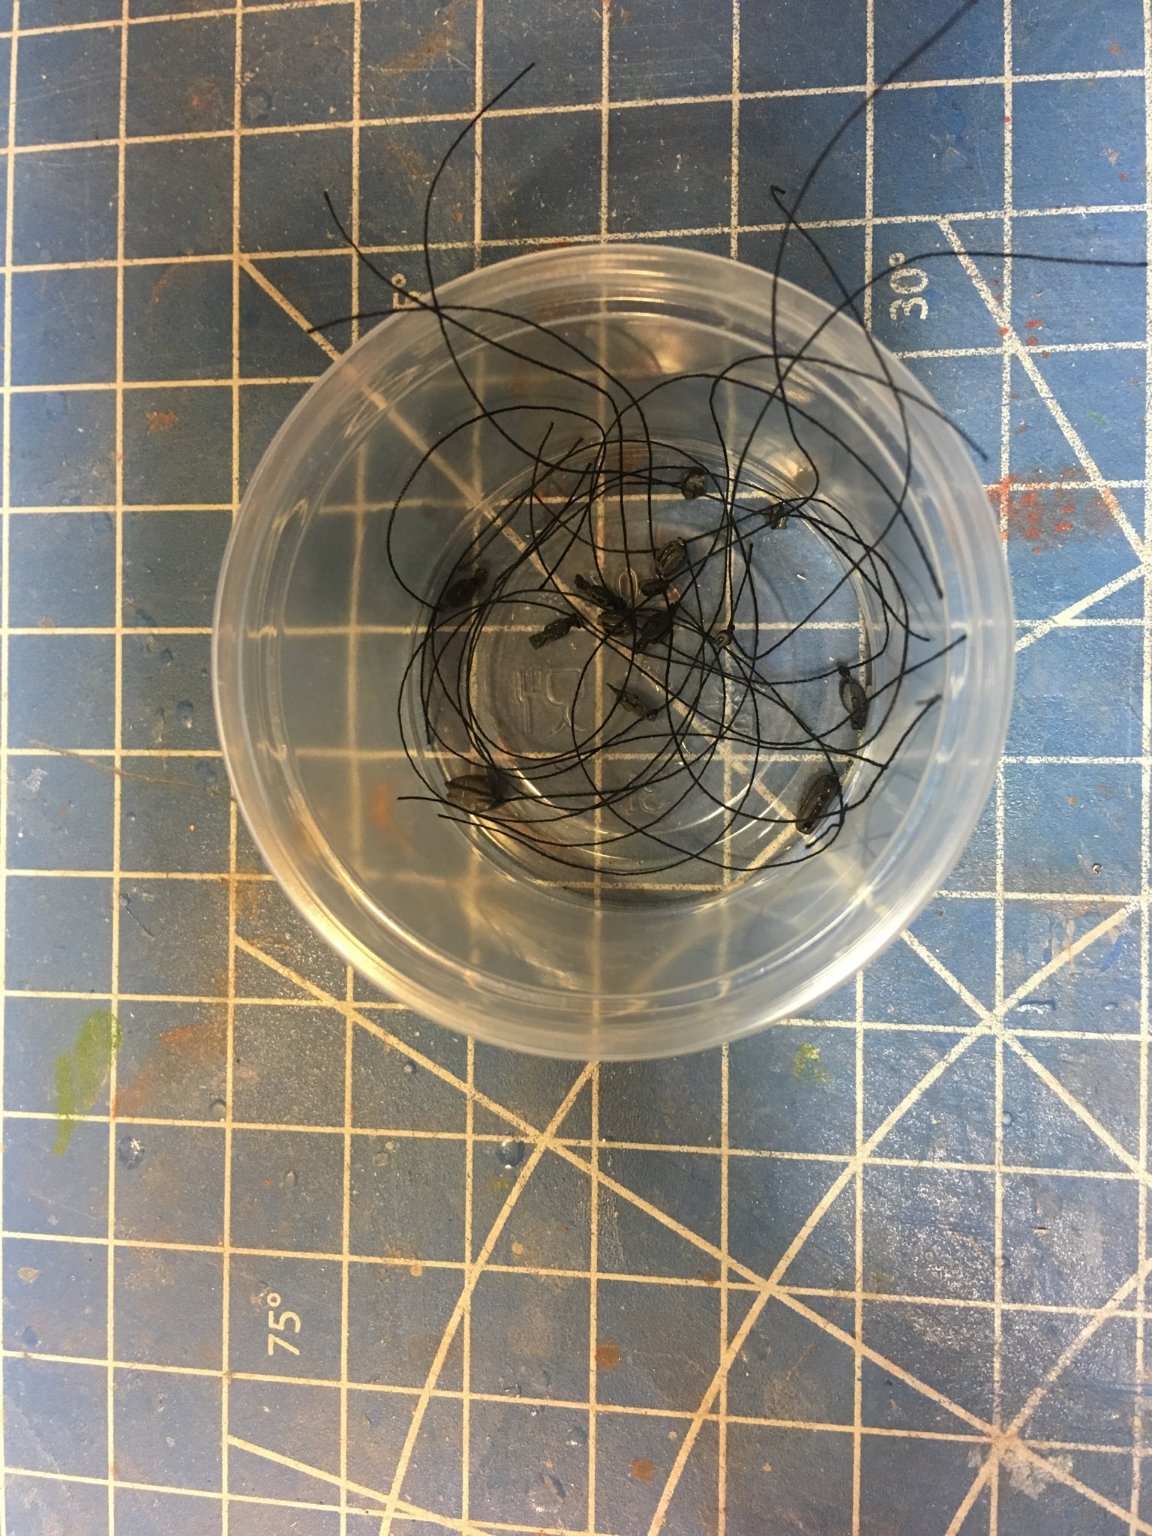
Trim the ends, apply a spot of fabric cement to the back of the upper loop, and install. Very convincing look.
- 356 replies
-
- 10
-
-
- red jacket
- finished
- (and 1 more)
-
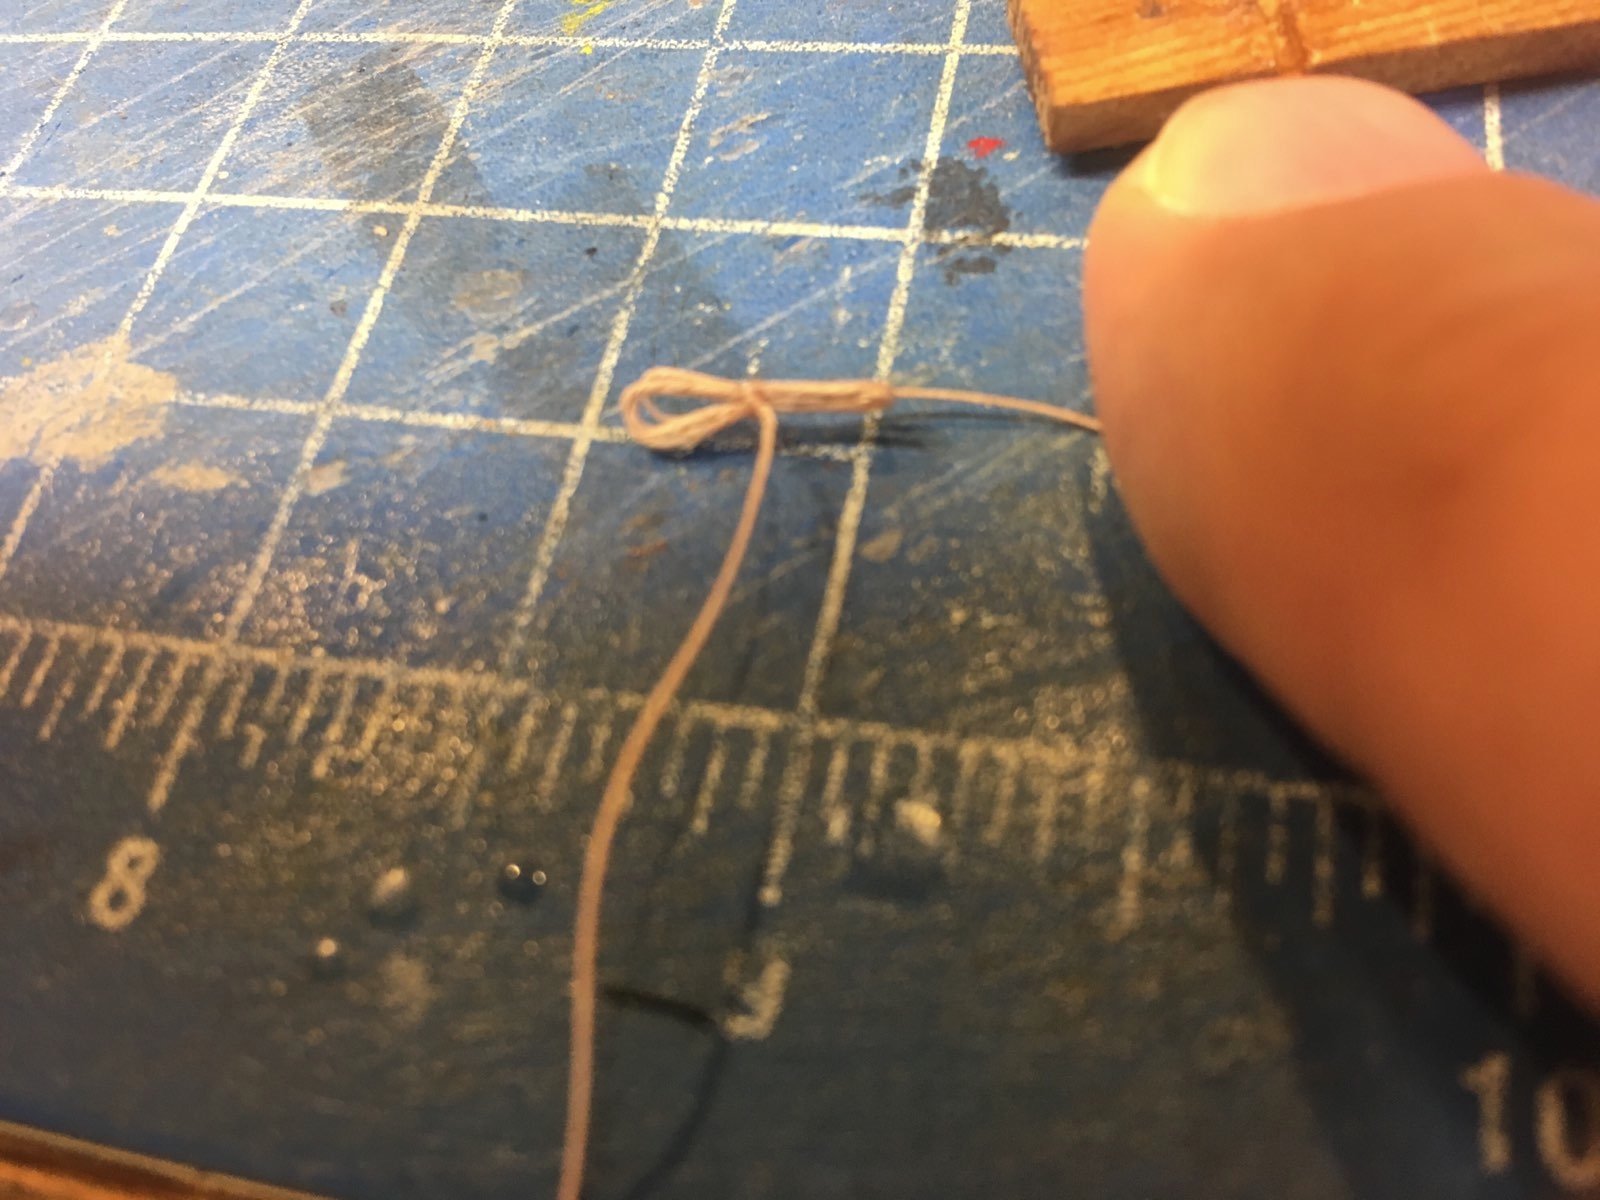
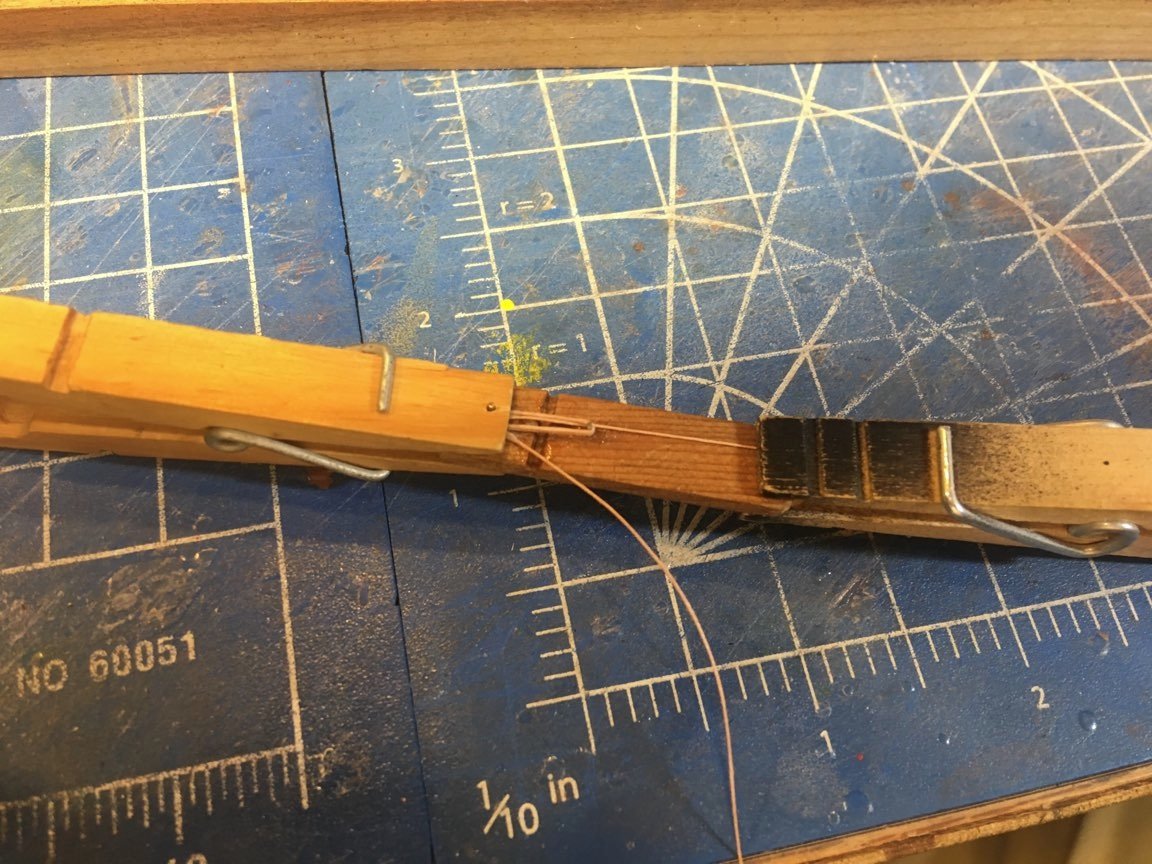
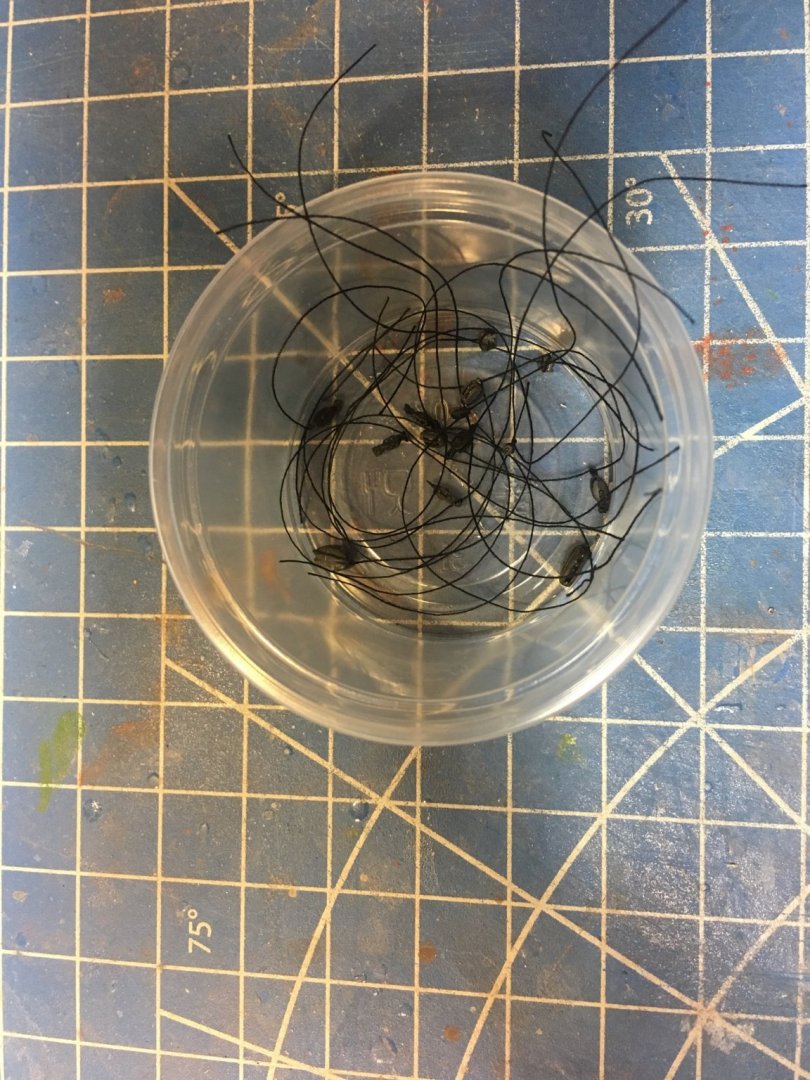
Then slide the loose thread end through the groove and knot it in the middle of the coil. Use a tiny drop of CA to secure the knot. Then slip the coil off the jig, spread out the upper end a little.

- 356 replies
-
- 5
-
-
- red jacket
- finished
- (and 1 more)
-
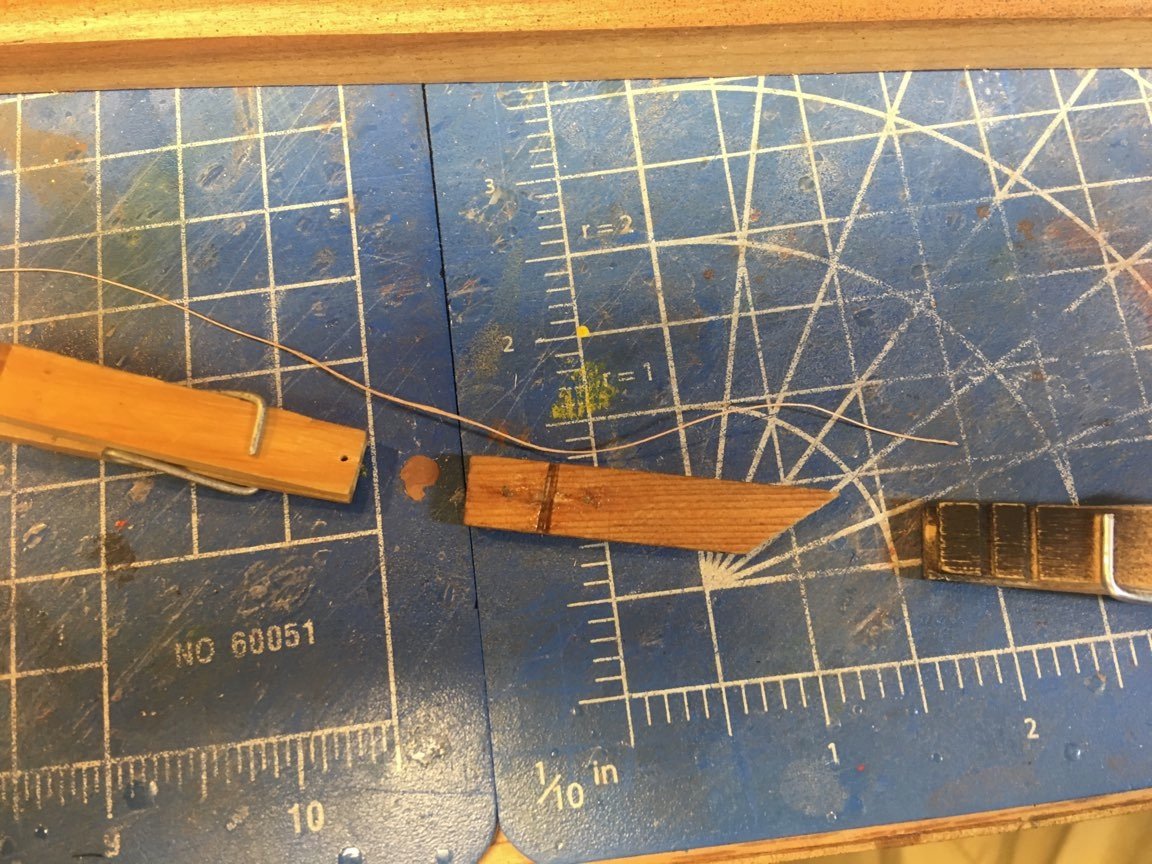
Clasmp the end of the thread with the clothespin on the right side of the picture. Then put three wraps of thread aroiund the pins, and clamps the left pin with the clohespin with the hole in it.
- 356 replies
-
- 5
-
-
- red jacket
- finished
- (and 1 more)
-
Last night I made a few rope coils. Here's how to do it. First, the equipment - a strip of wood with a groove and two pins, two reversed clothspins, one of which has a hole in it, and of course the thread.
- 356 replies
-
- 4
-
-
- red jacket
- finished
- (and 1 more)
-
I agree with Roger. It could be any two non-compatible finishes. For example, enamel first, then acrylics. Or, acrylics, then enamel. The ides is that when you wipe off the caulk color, that solvent won't eat at the underlying finish. Nic
-
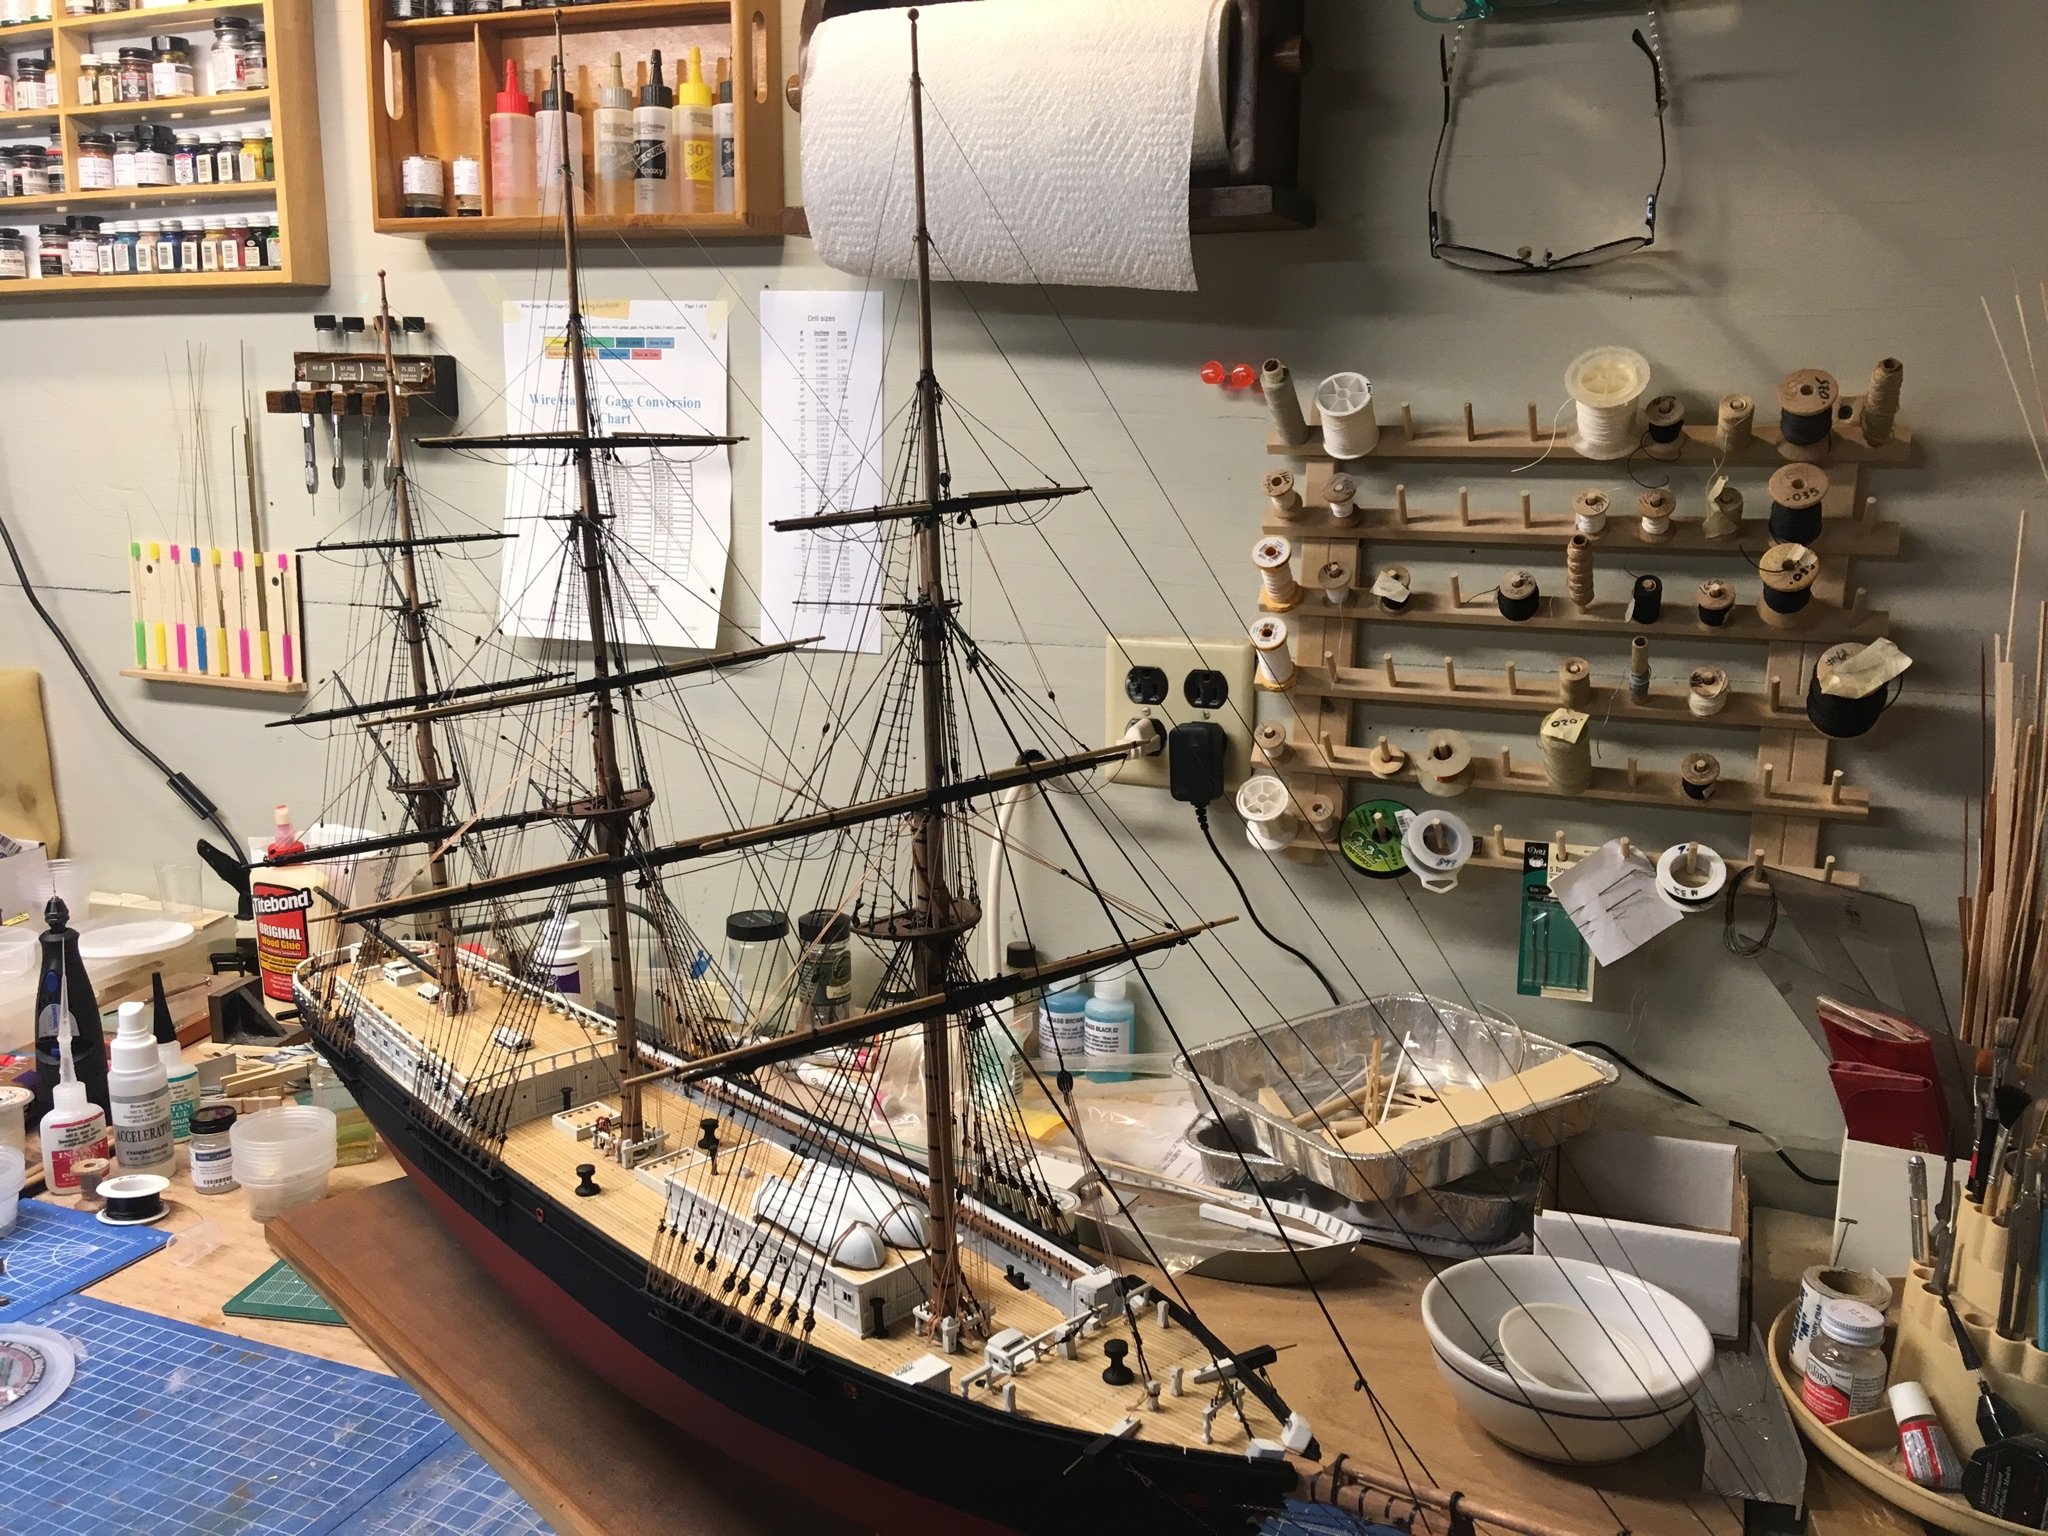
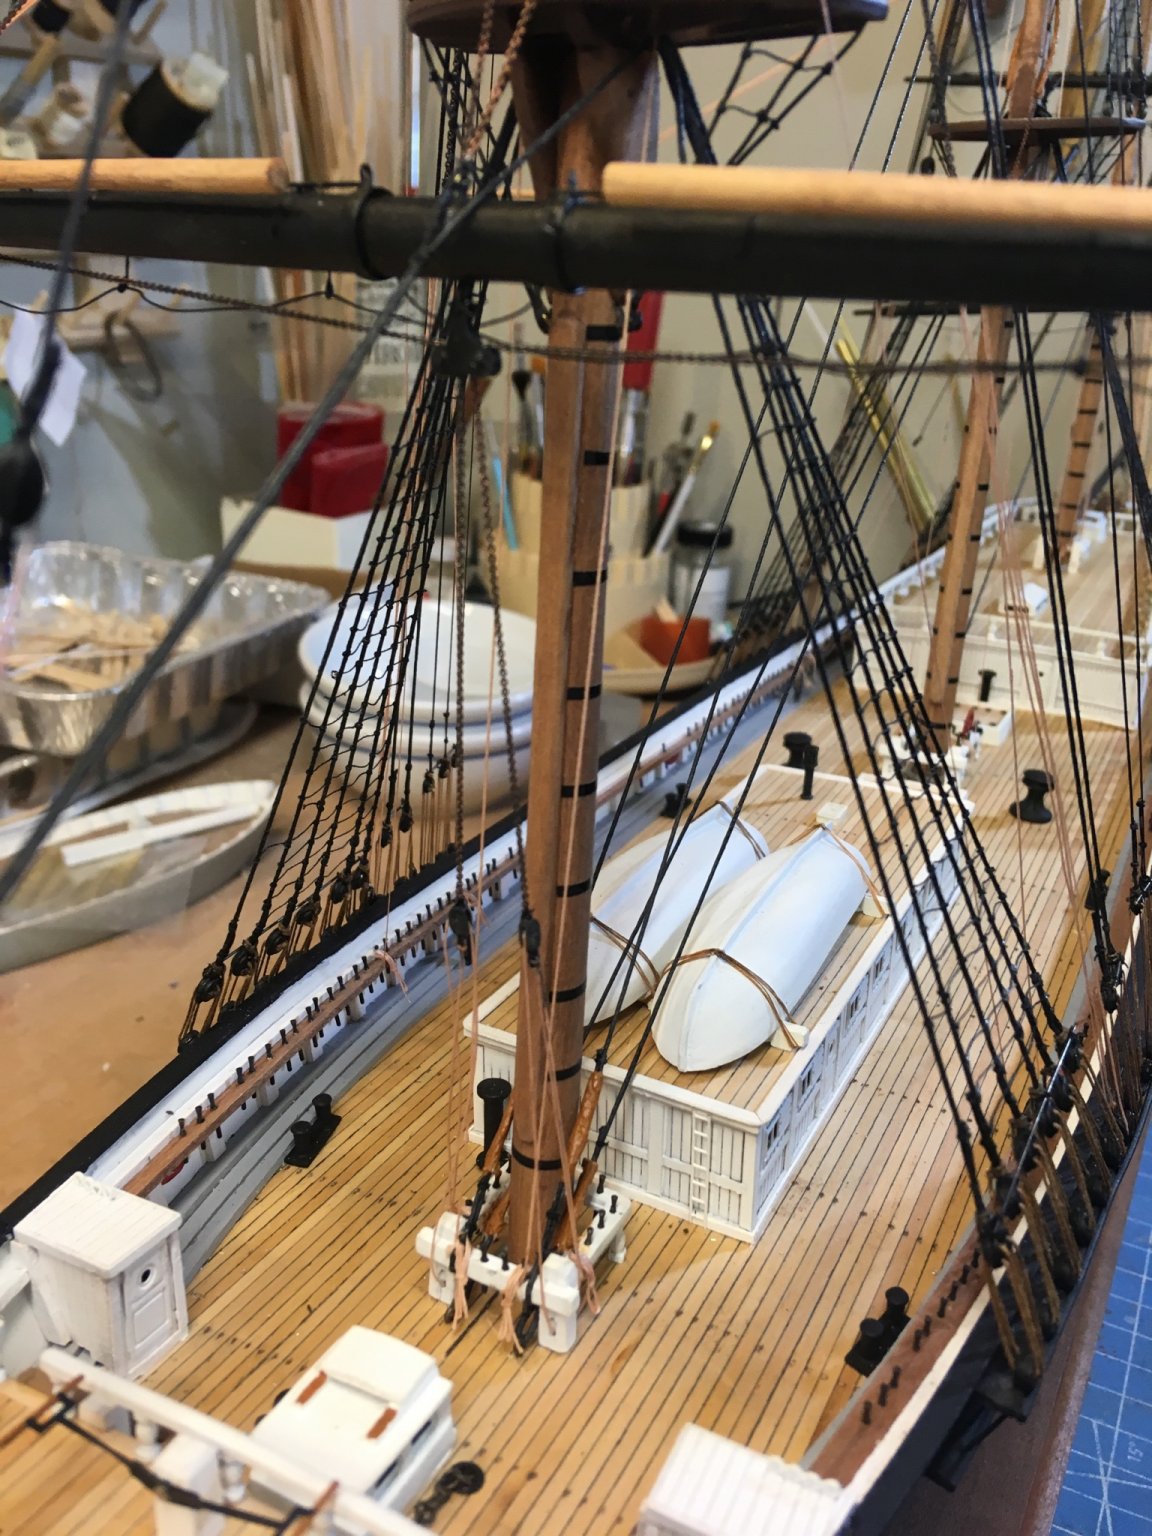
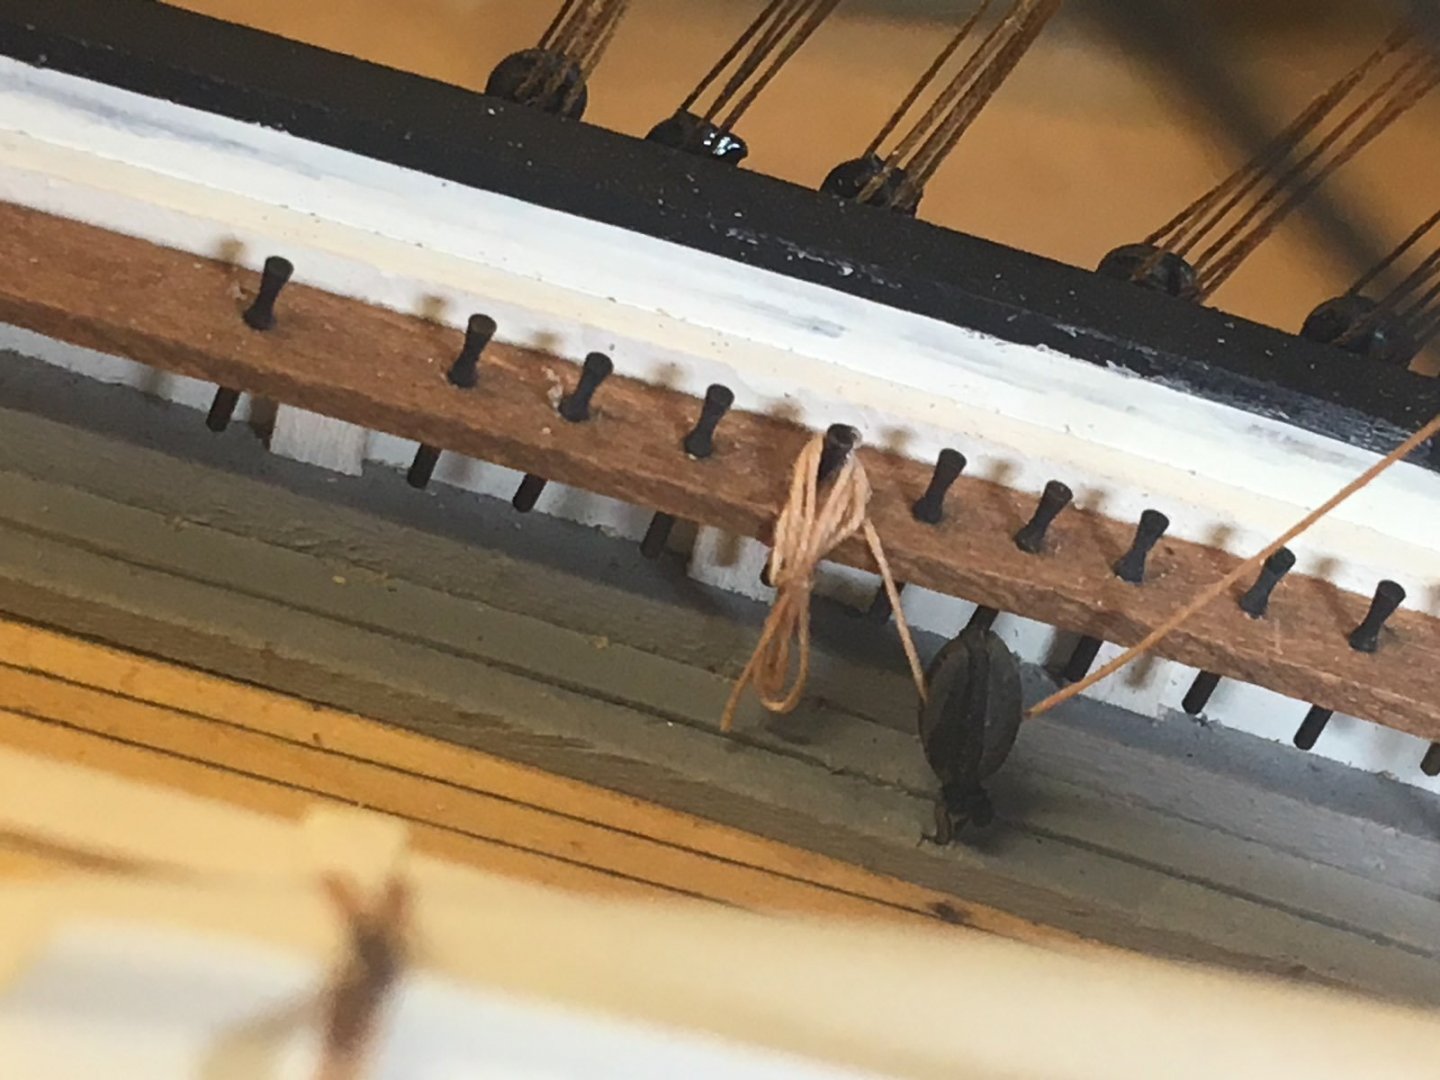
All those blocks now added to the yards, and they are now hung on the masts. All askew until I add the lifts this weekend. And the halyards, and the sheet sand clews.
- 356 replies
-
- 11
-
-
- red jacket
- finished
- (and 1 more)
-
When I do the rigging on these yards, I will document my technique. Of course, it is only one of many ways to do it. Nic
- 356 replies
-
- 1
-
-
- red jacket
- finished
- (and 1 more)
-
Here's all the blocks prepped to get tied to the yards.
- 356 replies
-
- 2
-
-
- red jacket
- finished
- (and 1 more)
-
And here they are ready for painting. I use .010" wire for the footropes, they always get bent around when I do the rigging, so I won't straighten them out until the end. The fore and main have 15 holes drilled, and 7 eyebolts each.
- 356 replies
-
- 4
-
-
- red jacket
- finished
- (and 1 more)
-
All the topsail sheets and clew lines are done. Here's a shot of the mizzen Next will be making the t'gallant yards.
- 356 replies
-
- 5
-
-
- red jacket
- finished
- (and 1 more)
-
If you plan on leaving bare wood , then it should have a clear coat before masking off.
- 87 replies
-
- 4
-
-
- bluejacket shipcrafters
- red baron
- (and 3 more)
-
Once you mask off, it is a good idea to paint either clear of the color under the tape. That seals the edge of the tape and makes for nice crisp lines.
- 87 replies
-
- 4
-
-
- bluejacket shipcrafters
- red baron
- (and 3 more)
-
A good choice for starting. Remember: "Putty and paint - makes it look like what it ain't" One of my favorite expressions, and so true.
- 34 replies
-
- 1
-
-
- grand banks dory
- bluejacket shipcrafters
- (and 1 more)
-
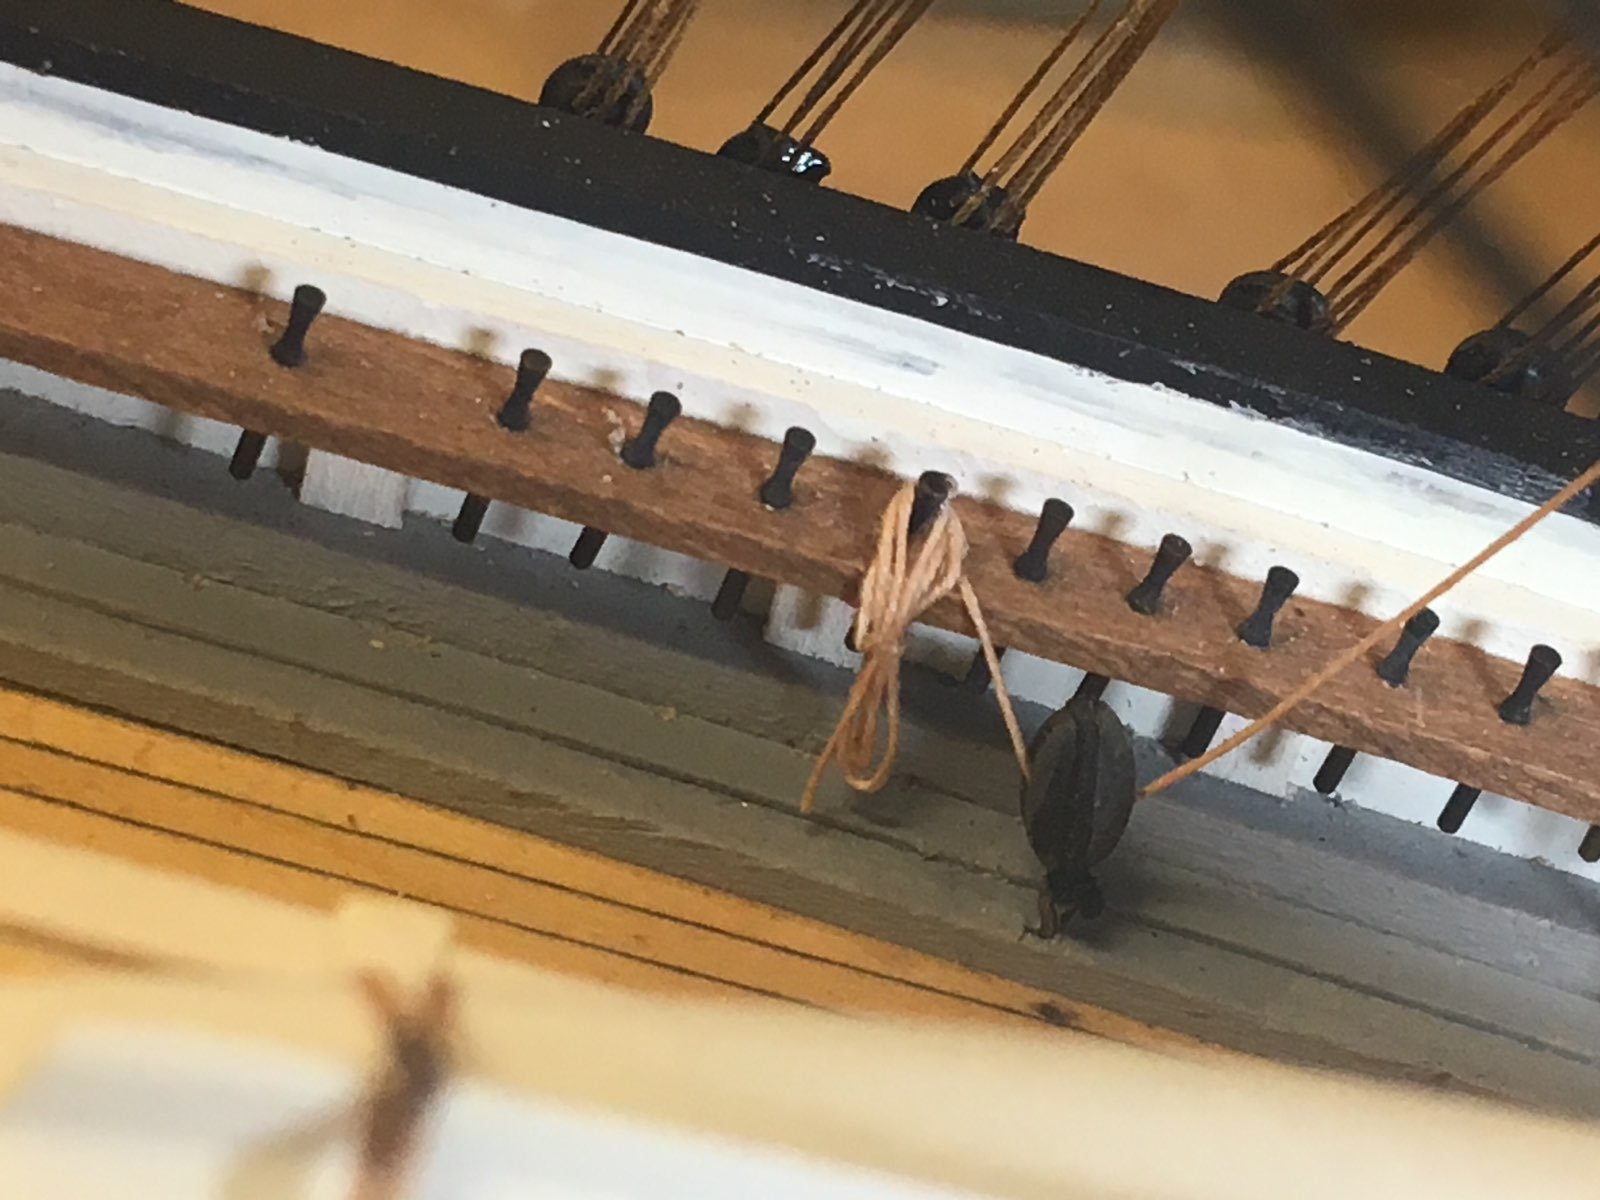
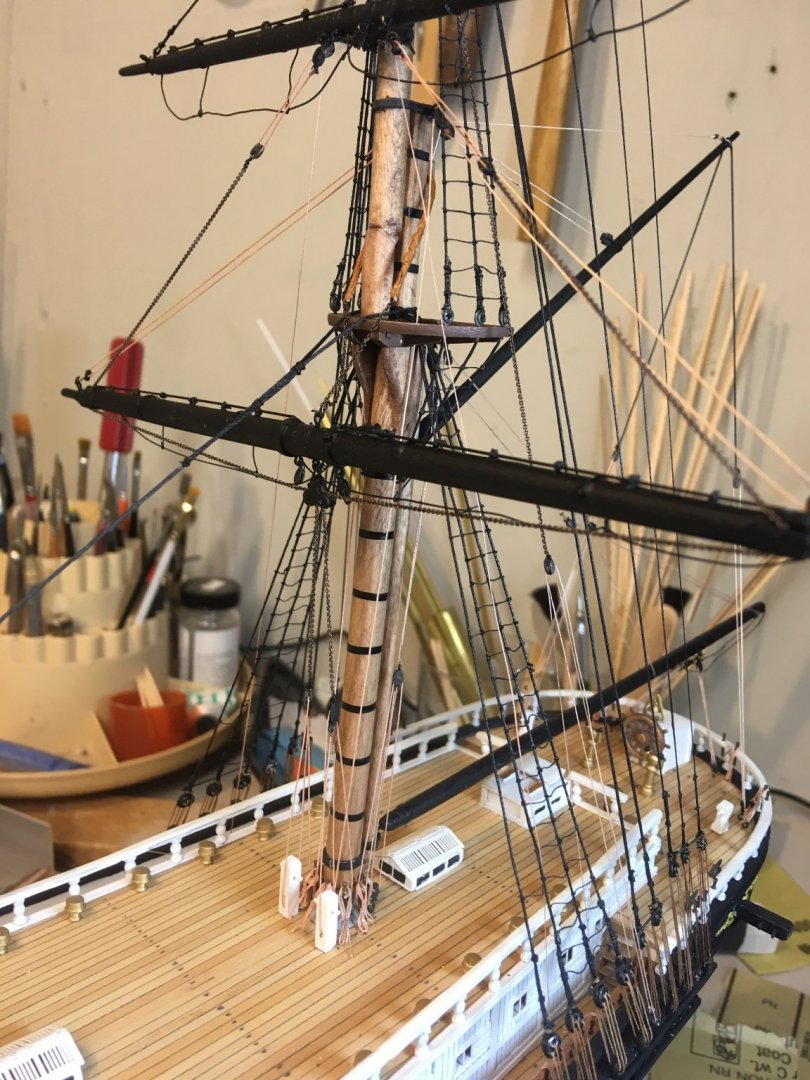
Got the foremast topsail sheet and clew done this afternoon. Hard to see the "cloverleaf block" under the foreyard, but the chain is belayed to the pinrail, then through the cloverleaf block, the out to the sheave at the end of the yard (remember when I put those in?) and then to a single block, which receives a line from the topmast near the center, then down to the pinrail. The sheet tackle is .015, while the clew is .010. This is because the sheet carries a lot of force when he sail is deployed, but the clew only pulls up the sail itself.

- 356 replies
-
- 3
-
-
- red jacket
- finished
- (and 1 more)