HOLIDAY DONATION DRIVE - SUPPORT MSW - DO YOUR PART TO KEEP THIS GREAT FORUM GOING! (Only 24 donations so far out of 49,000 members - C'mon guys!)
×


Bill Hime
-
Posts
311 -
Joined
-
Last visited
Content Type
Profiles
Forums
Gallery
Events
Everything posted by Bill Hime
-
Hi Mort, The Flying Fish and the Cutty Shark are of later design. The Baltimore shipyards started producing the earlier smaller clipper ships as slave runners, privateers and blockade runners in the early 1800's. There are several kits out there. Check Model Expo Warm Regards, Bill
-
 Hey Lou, Thank you! Another thing I learned working with the Wenge is that with sanding, the open pores quickly fill with saw dust. Add a little linseed oil to the sanding and that should help cover any of those defects. Heck, on the saw, I'm not sure off the top of my head. It was a cheap off-brand. I picked it up at the local home store at cost on black Friday, lol. I'm hoping my skills will make up for the quality of the tool . I just needed something to start using now. I will definitely upgrade in the future. Harvey, Thank you! I actually saw that in a sample practicum by Robert Hunt. He said it was a defect in the kit design. After hearing it from two sources, I'll definately make a card stock template with the two bow points together. Then if necessary, I'll cut both ends off and use the new piece to complete it Thanks Guys! Bill
 -
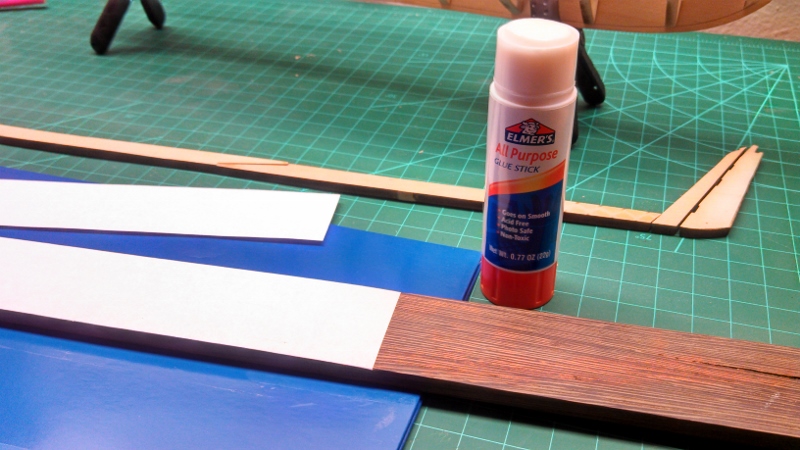
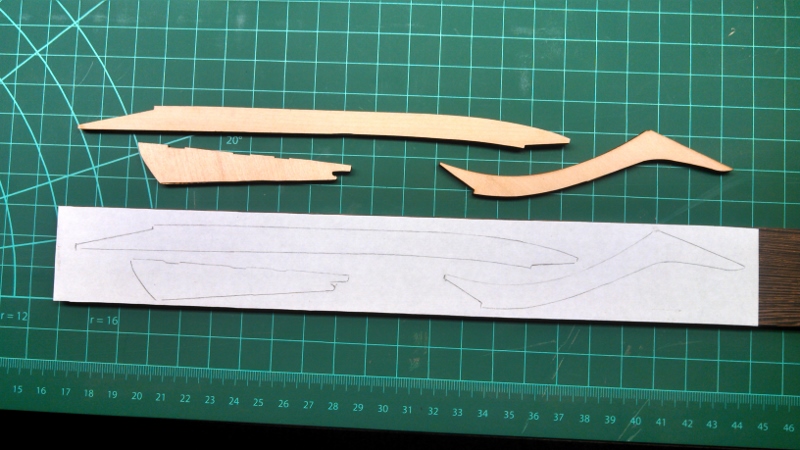
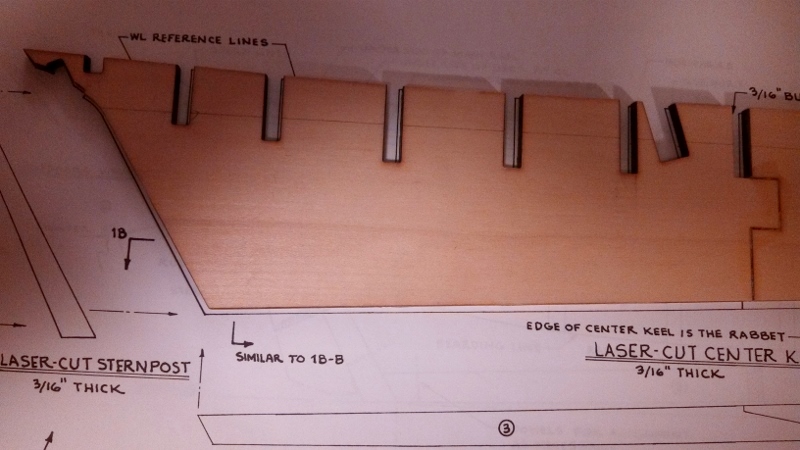
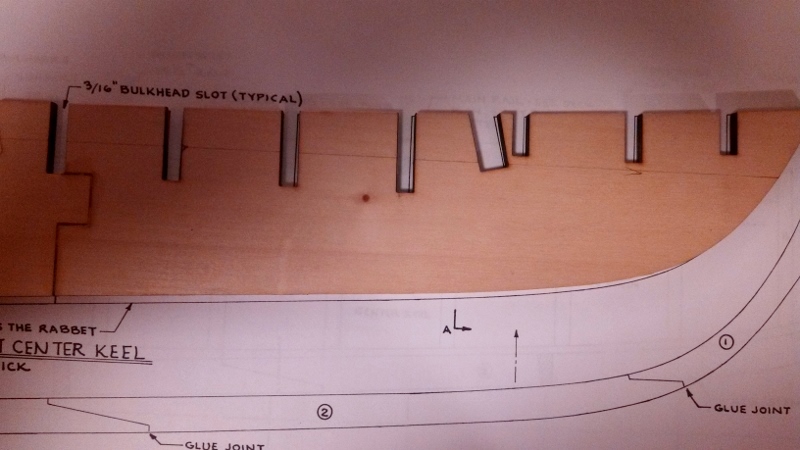
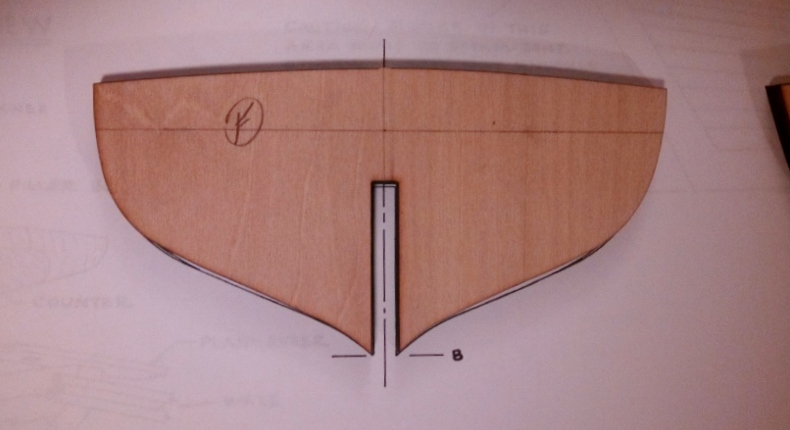
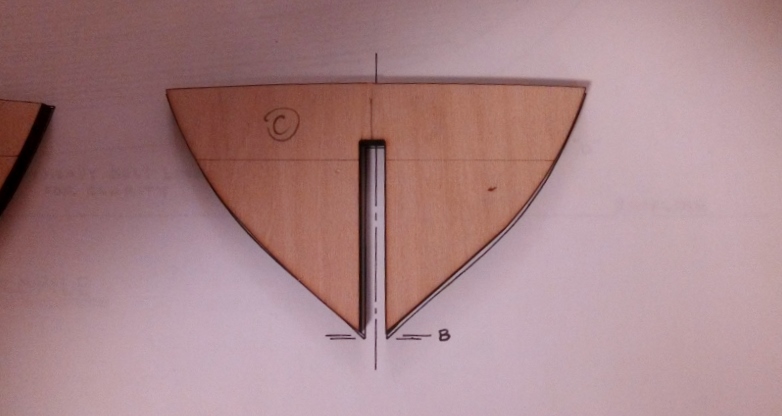
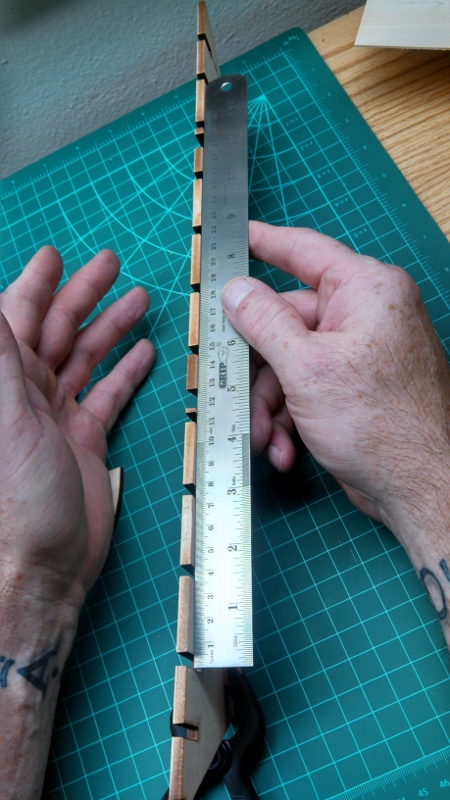
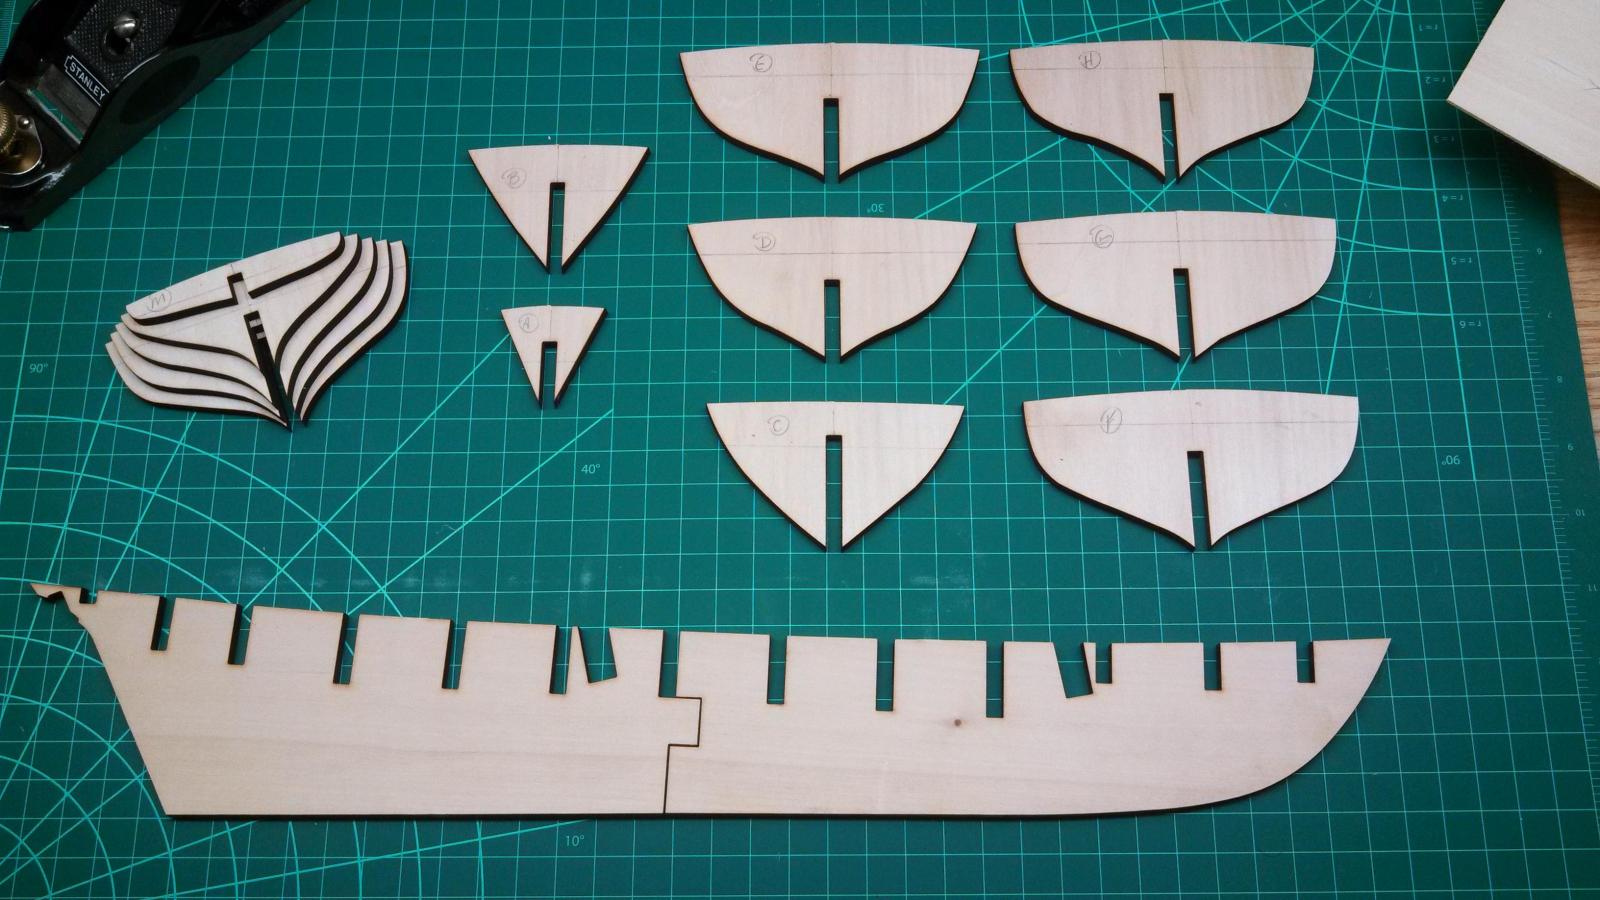
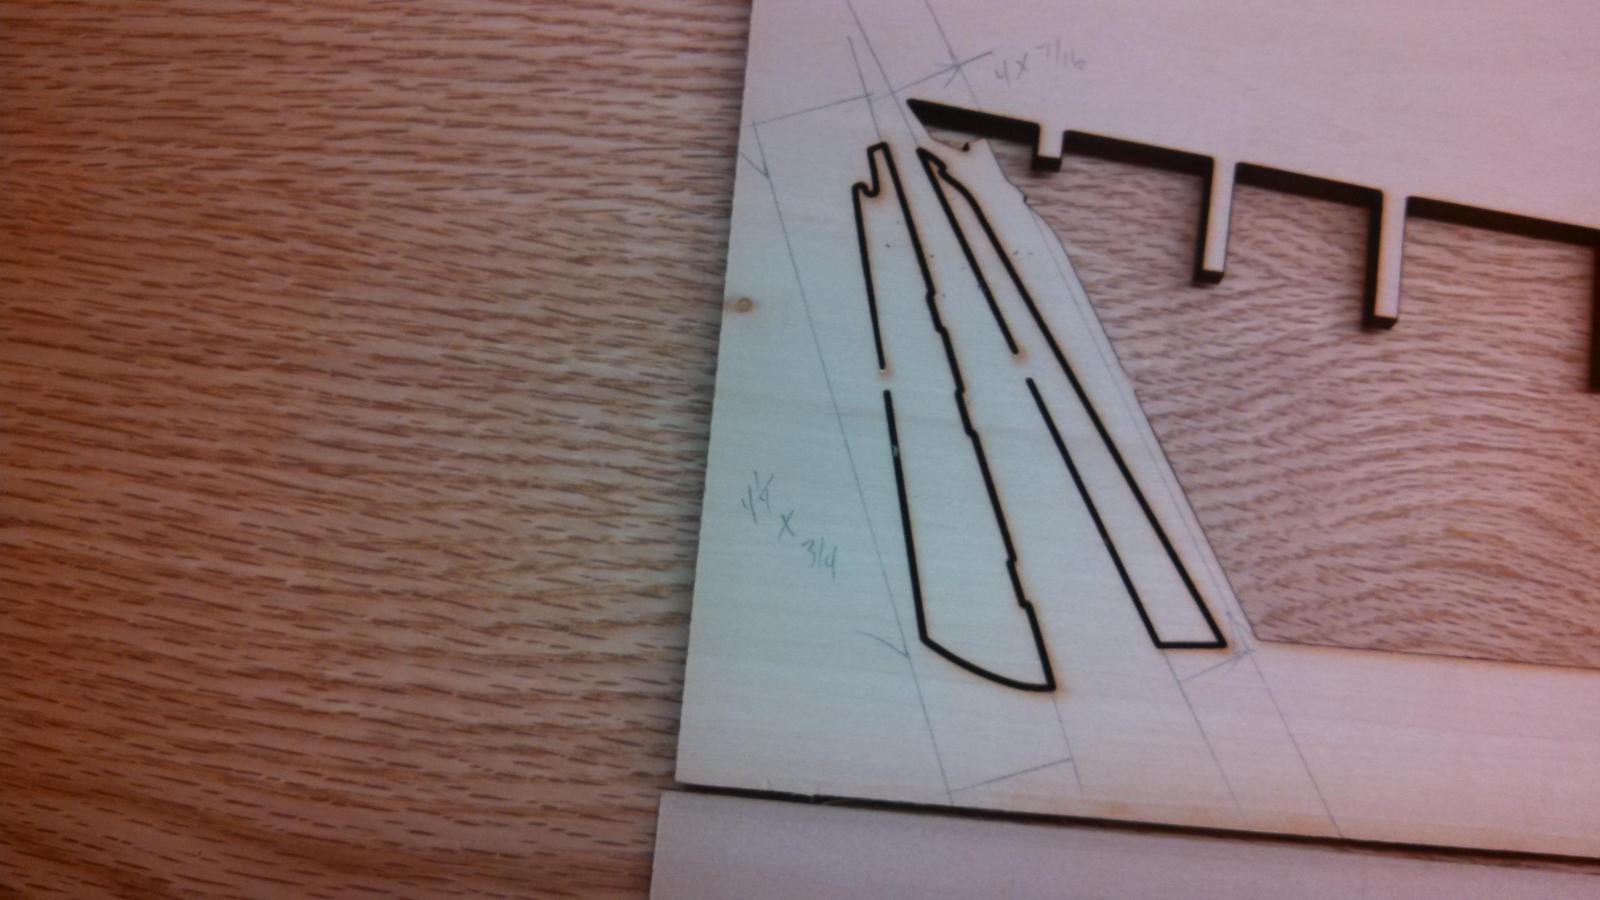
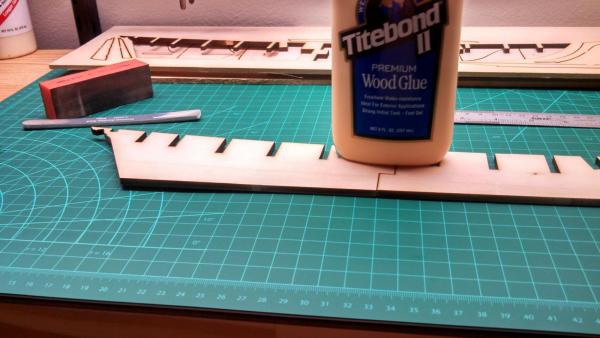
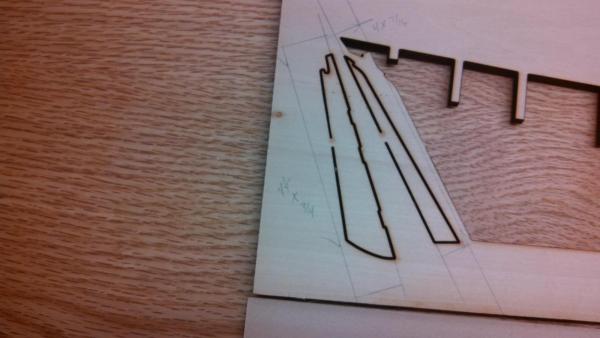
Bulkheads all fit as they should now. Today I started laying out the keel pieces on the Wenge wood replacement. After trying to mark out the patterns with assorted white pencils, I decided to cut typing paper to board size, coated the paper using a Elmer's glue stick. I then surface sanded the board barely wiping it clean. Finally, I applied the paper to the wood and ready to trace kit supplied pieces on to it. Below are pictures of the steps. I work the next couple of days so I'll probably cut these out on my new scroll saw, (Thank to my Admiral!) Friday night Warm Regards, Bill

-
I discovered pretty quick last night after drawing the bearding line on the center keel that I just need to re-size the 3 offenders. So today I will do just that. My next step will be to lay out the keel, stem and rudder on the Wenge wood replacement. I think I will fasten the Wenge wood keel and stem before cutting in the bearding line with a sharp chisel. It will actually give me more control cutting up to the Wenge, especially with it being a substantially harder wood. I will use a plank to check the depth as I progress. Alistair, Thanks for the quick feedback last night. You are definitely spot on ! Augie, Yes it does call for some blocking. I plan to start with the middle two bulkheads, square them with blocking then work out from center. I'm sure I'll have a few more " not so good ideas" in this journey, lol. I just go back to what I was told by a wise Admiral, "Take your time", jcoby, Thanks for the feedback, and peak into the future ! I think I just had an answer to the mast receiving blocks. join two blocks together, drill a hole for the mast. Then cut the block in half, removing enough material from each to account for the thickness of the center keel. Align on each side and glue. Lol, but that's a way's away. Thank you again, your insight is invaluable to me :)
-
Alistair, Thanks for the input. the tops are all reasonably flush. Issue is that several bulkheads hang low into the bearding line. After drawing the bearding line on my center keel, I now realize that I only have 3 offending bulkheads. So my initial thought was not particularly a good one, oops! I'll shape the tails enough to bring them in line with the bearding line. Thanks! Bill
-
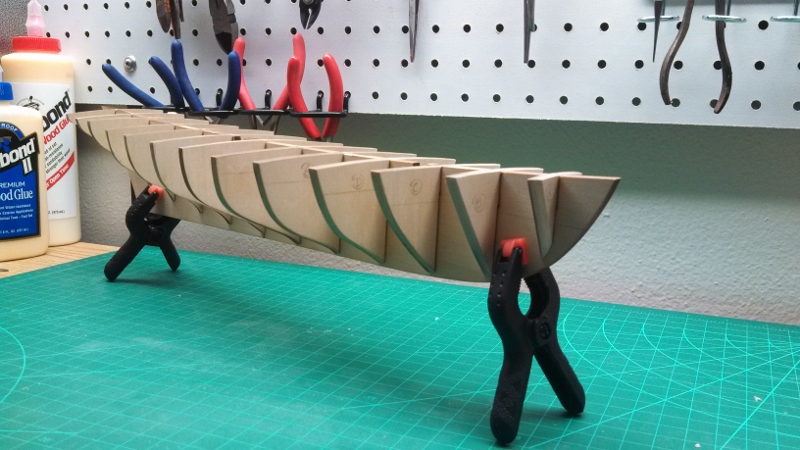
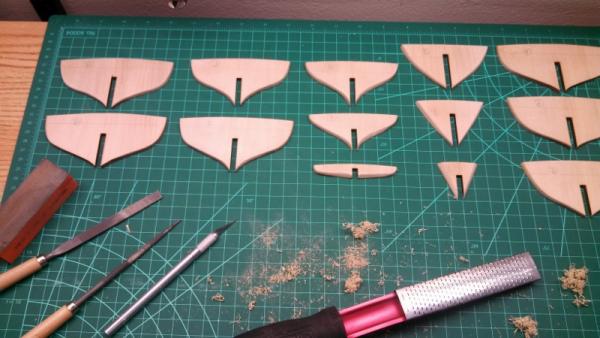
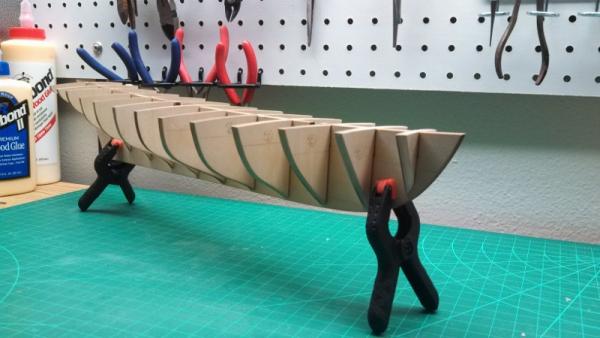
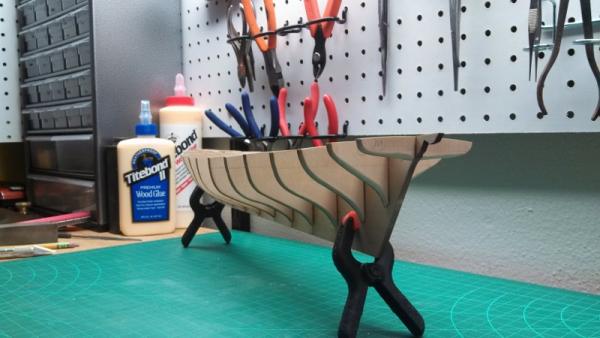
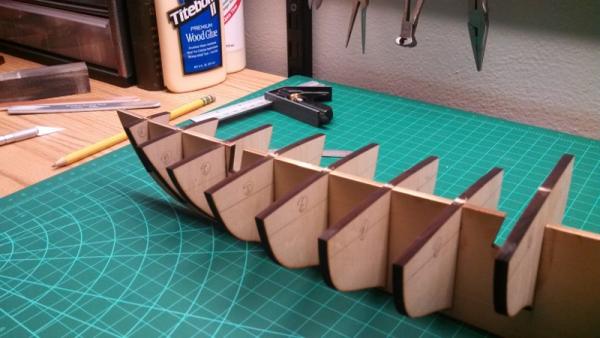
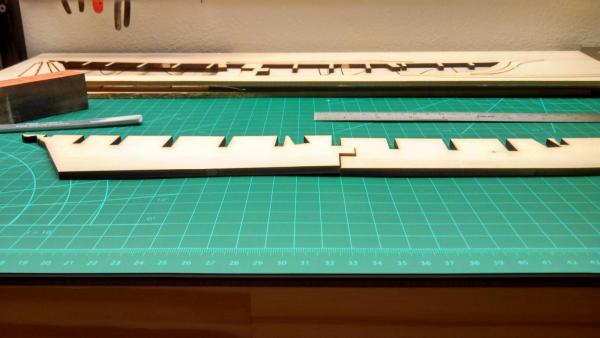
Faired the bulkheads today. Took quite a bit of tweaking to get them to settle into the center keel slots. Below is my first initial dry fit. I took some close ups, you can see there is little space for the bearding line across the mid keel length. My first thought is to buildup the top of the center keel and raise the bulkheads up to meet it flush. I'm thinking 3/32". This seems easier than altering the shape of the bulkheads and thus the shape of the hull is preserved.. Your thoughts are welcomed as always ! Again, thanks to all of you! Bill

-
Ron, What a pleasure to have you stop in. I've nothing but admiration for your skills. The detail on your Oneida build is first rate to say the least. This scale and cabinetry/furniture making is worlds apart!Not to mention, the learning curve of knowing nothing about the subject matter except my love for tall ships. This is truly where I belong and I'm loving every step of the journey You know, a good carpenter is confident and comfortable with his tools and his trade...A great carpenter never lets himself get comfortable but continues to challenge himself. I have a great deal to learn...Forever the apprentice Bill
-
Thanks everyone for the input ! Alistair, Thank you keeping track of me and keep the input coming Augie, It gives me a sense of confidence knowing you're watching over my shoulder, thank you :) jcoby, I can't tell you how much I appreciate having another Pride build going on here, (and a little further along ). Your input is invaluable, Thank you! And now to all of you, I'm The Apprentice Here, LOL! If anything amazing happens here is because of your guidance. Today, I'm fairing bulkheads, establishing a good dry fit and hopefully fairing the bearding line as well. Going to spend the rest of the day in the shipyard, thanks to the graciousness of my Admiral Bill
-
Hey jcoby! I love the build! Nice log too. It's great to have someone else here that's building the Pride. Thanks for forging a path. I saw where you were having problems with Basswood fuzzing out on small details. That's why I'm using woods like Rosewood, Cherry, or Pear for detail parts. They hold sharp edges and are easy to work with chisels and files I've learned a lot just looking through your log. I'll definitely follow along! Please feel welcome to comment/suggest on my log anytime! Bill
-
Lou, Thought I'd stop in and see what you're building over here. Wow, this is a beautiful build! I'll definitely be following along . Thank you for following me through my first build. I greatly appreciate your input. Bill
-
Lou, Thank you for the response ! Bill
-
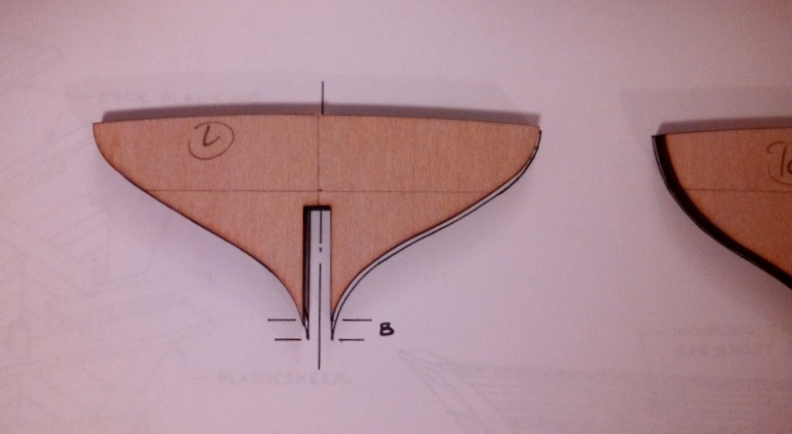
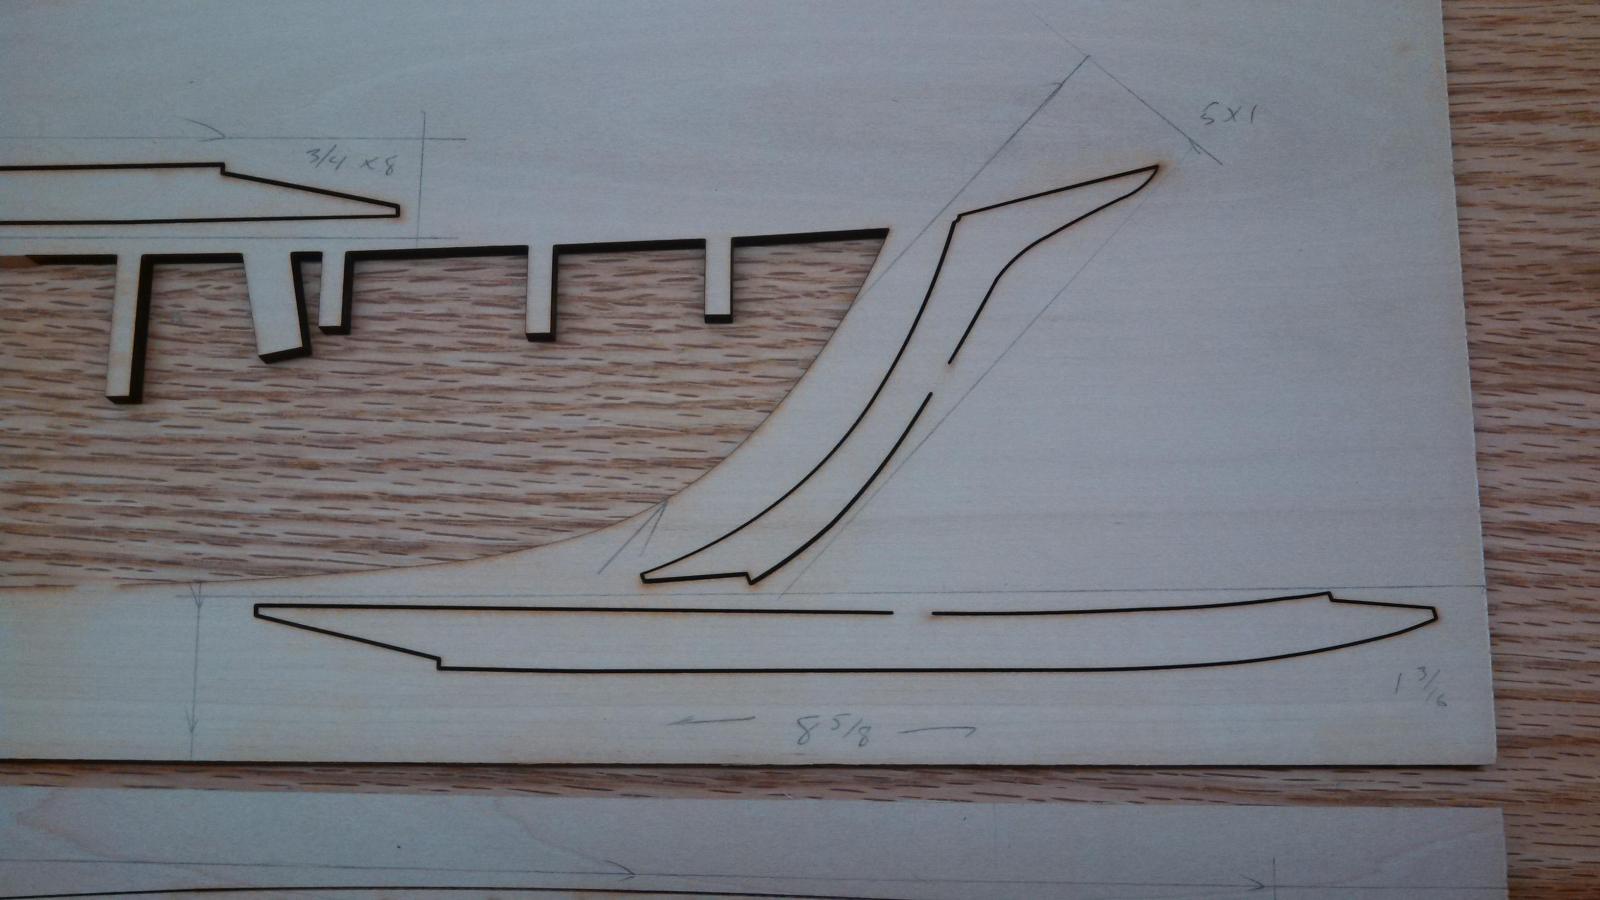
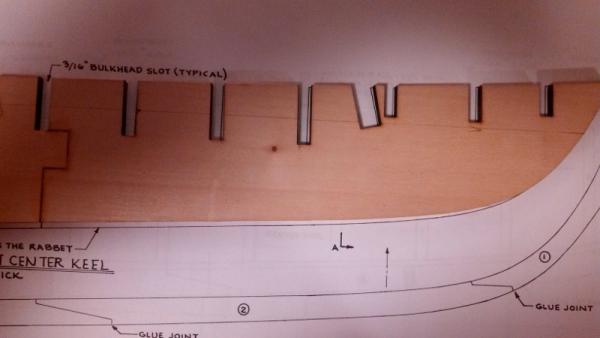
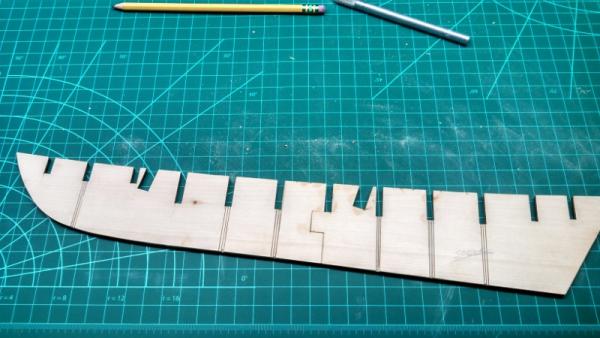
Keel is successfully flattened! So moving on to establishing bearding line and beveling bulkheads. I laid them all out on the 1:1 plans and see what appears to me, as a significant variance, pieces not quite lining up with drawings..consistently undersized. In the below pictures, the Center Keel concerns me most. What would be the best way to establish the bearding line since the Center Keel is short on the plan across the bottom and length by as much as 3/32"? I would like some good input on this since fairing the keel line is a one time chance to get it right ! Bill As far as the bulkheads go, is this variance expected and/or expected? Warm Regards, Bill


-
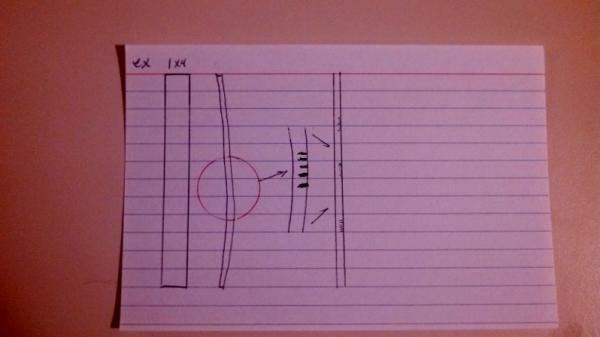
Eamonn, Definitely! Scoring is basically etching a line in wood. Often used in mortise and tenon work to create a stopping point when trimming out with a chisel so the cut does not peel out past the intended area. Scoring can also be repeated cuts across grain to relieve stress in the wood and relax a bow in a board. My center keel had a significant bow in it's length. After scoring the keel in several spots along it's length, I then applied glue brushed deep into the scoring lines followed by clamping/pressing. The glue was to protect the joints from chipping out. I cut approx. 1/2 the thickness of the center keel lumber. I'm delighted to say my center keel came out flat See example below: Thanks for asking, Bill
-
Hey Lou, Thanks for stopping by! I might be incline to replace the bulkheads, we'll see. As far as Wenge, I've picked my pieces carefully, we'ii see how they turn out Warm Regards, Bill
-
Casey, I've posted more pics than text thus far, lol. I'm only using Wenge for the keel, plankshears and rails. Perhaps some other small details. Wenge is a great wood, and as long as you select pieces with a tighter grain and cut your pieces to run with the grain it should look quite nice Sudomekh, You should start a build log and reference it when wanting to give an example.. Bill.
-
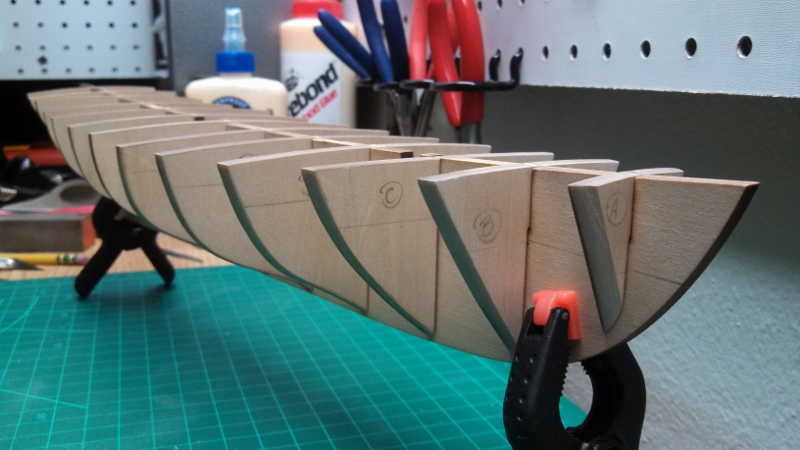
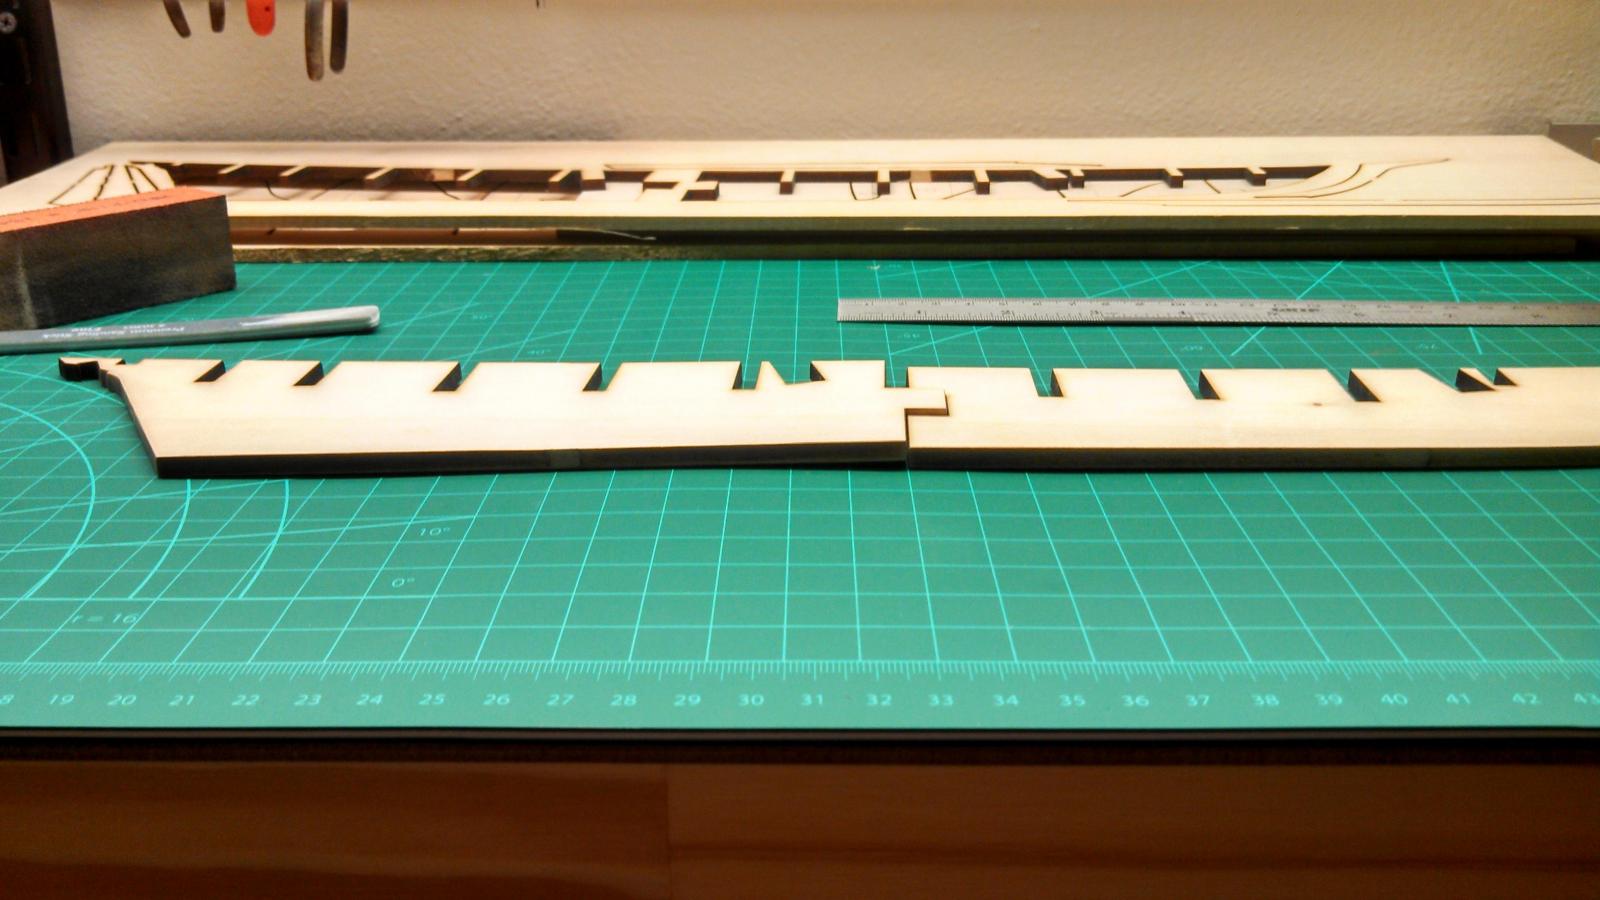
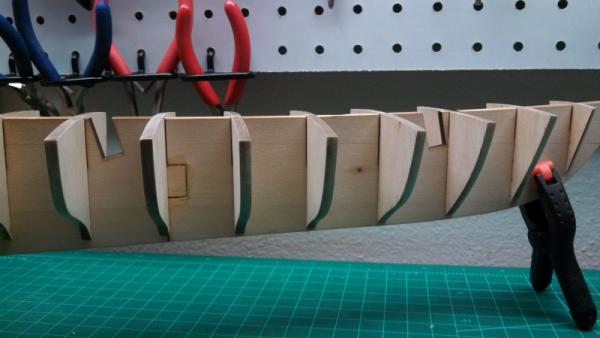
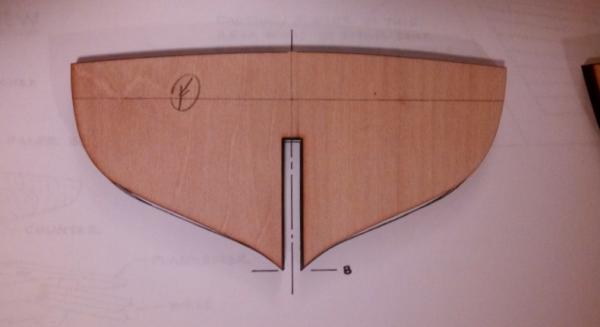
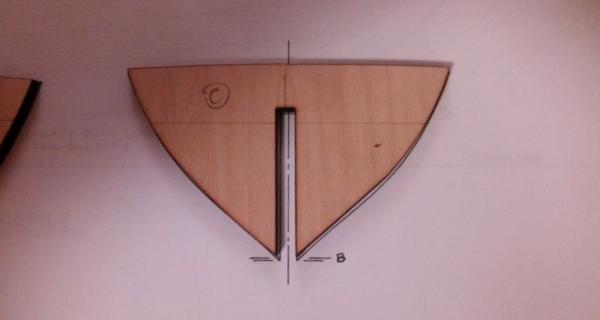
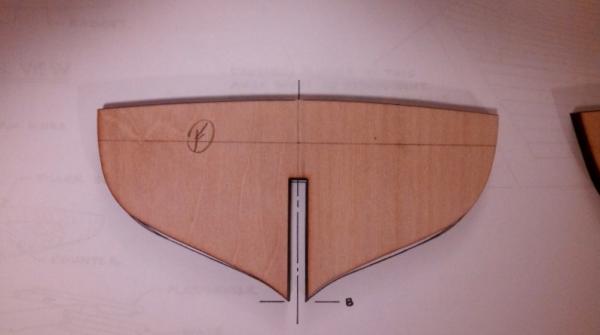
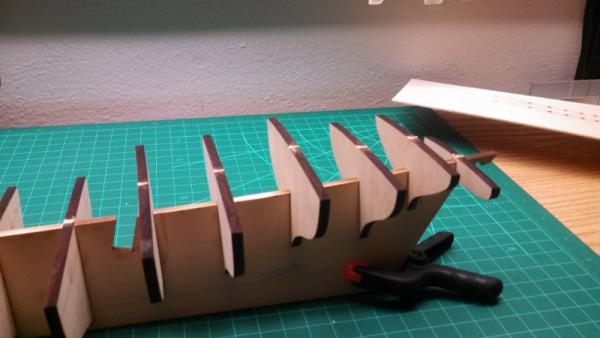
So here is last night's dry fitting of the bulkheads, as you can see, bulkheads G-K do not sit down in their slots. The next series of pictures are of the center keel after pressing. She still is a good 1/32" off of being straight, so I am going to score, glue and clamp her for about 24-48 hours and see how that comes out. In doing all this, the biggest problem I have come across tonight is that bulkheads G-K are significantly cupped. Pressing them is not out of the question but the bigger issue I am running into, is that unlike newer kits, my bulkhead and false keel are all made out of true lumber and are not plywood. Fixing plywood is much simpler than fixing such thin pieces of wood that have sat in a box since 1999. So with that said, we will see how the keel turns out when I pull it out of the clamps, scoring is not an option as with the bulkheads I would have to run with the grain, whereas with the keel I was running across the grain. In the meantime I will be cutting out my keel, stem and stern post and making templates to transfer them onto the Wenge wood that I have selected as their replacement. Any thoughts are more than welcome. Looking forward to hearing what you have to say, in the meantime, I'll keep working away because there is always something that needs to be done in the shipyard. Warm regards, Bill


-
Very nice Augie. I always learn something from your post ! Bill
- 2,191 replies
-
- 1
-

-
- confederacy
- Model Shipways
- (and 1 more)
-
Very nice work. The quality is in the details. Bill
-
Alistair, Thanks for popping in! Yes, you are right about needing to get the center keel (false keel) straight. If I need to address it after gluing and pressing, I will most likely score the offending areas, fill with glue and press until dry Warm Regards, Bill
-
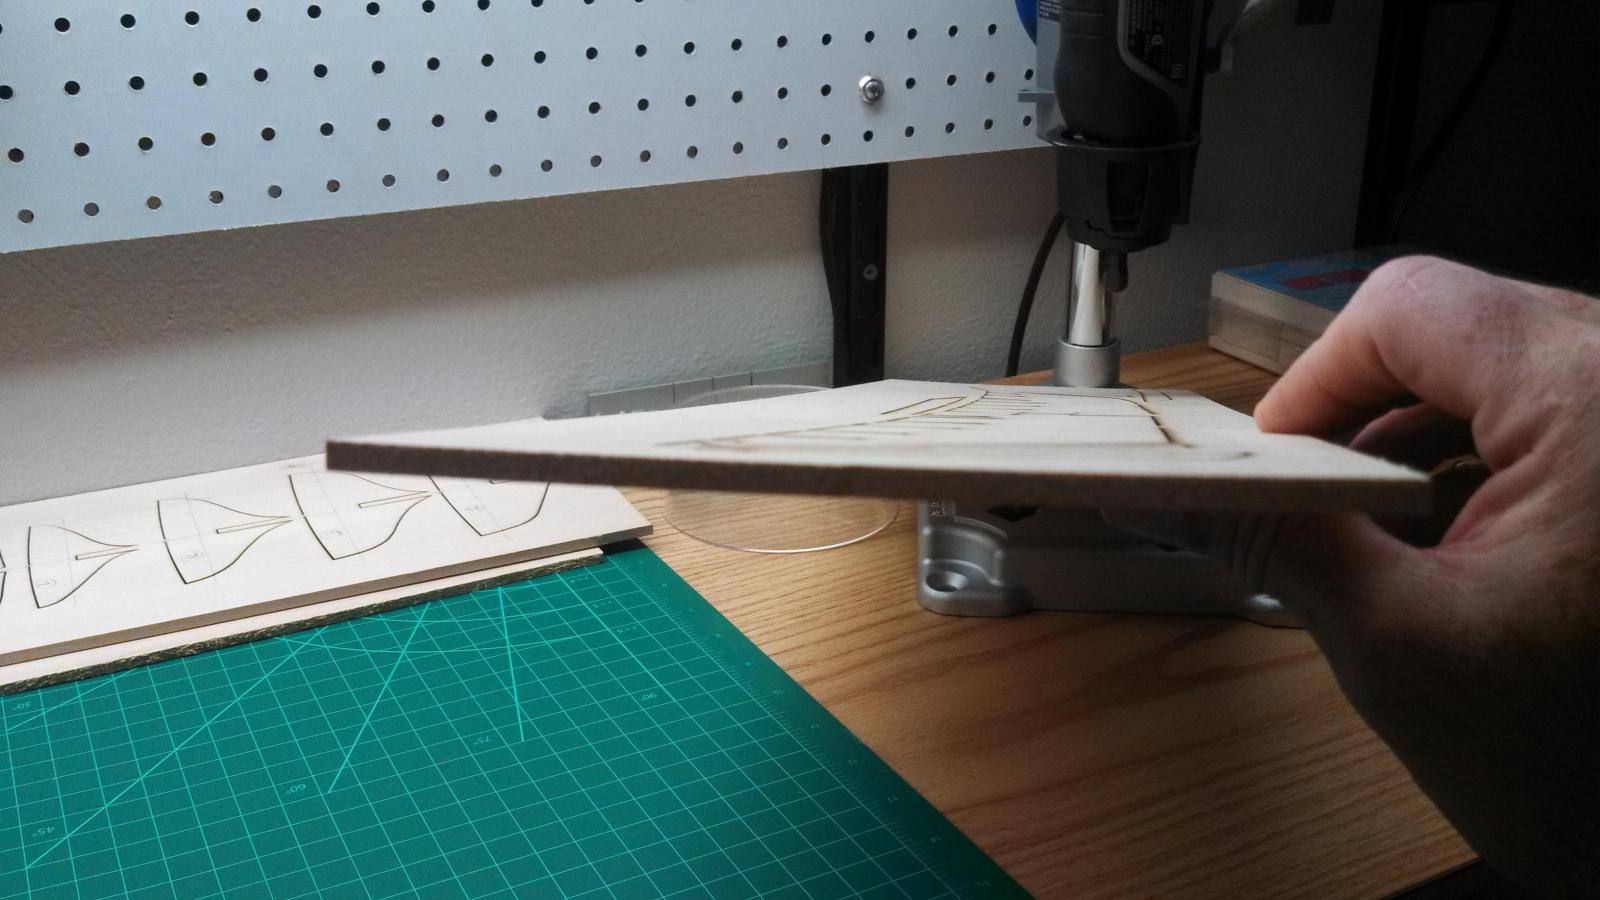
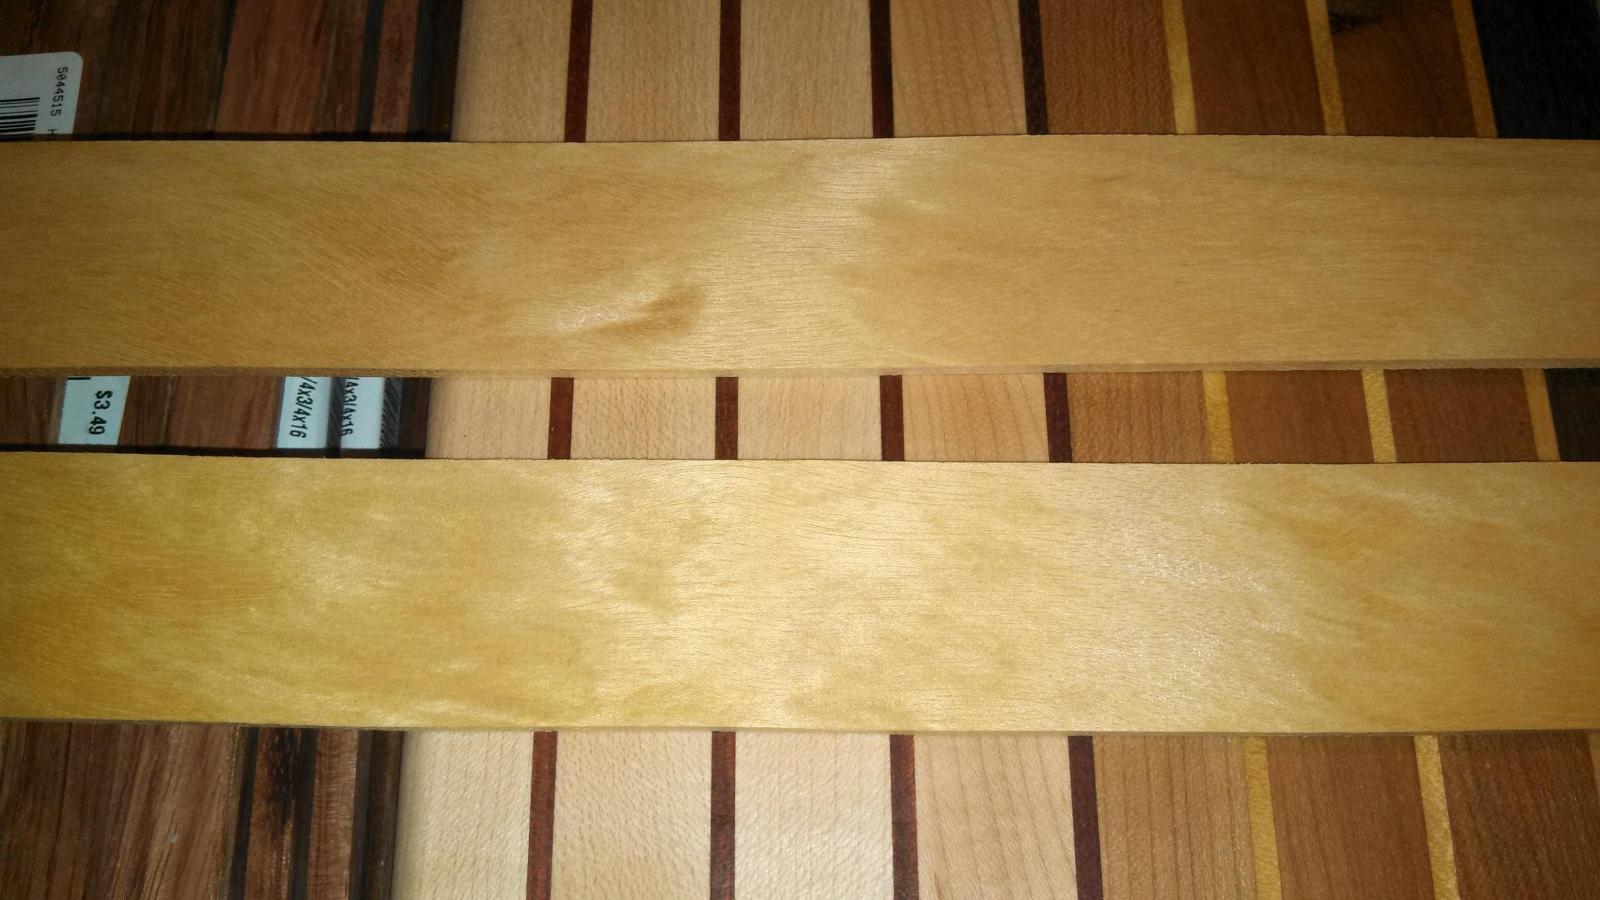
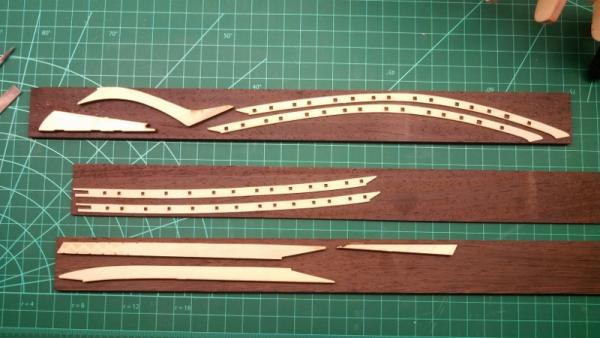
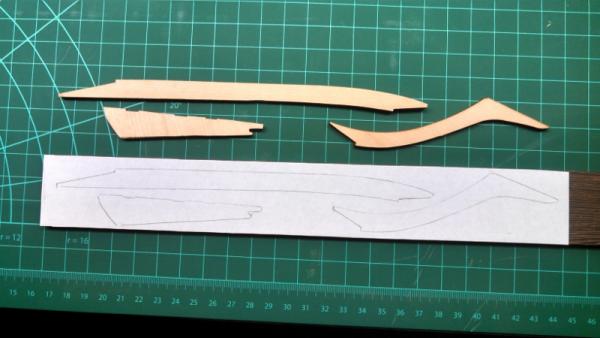
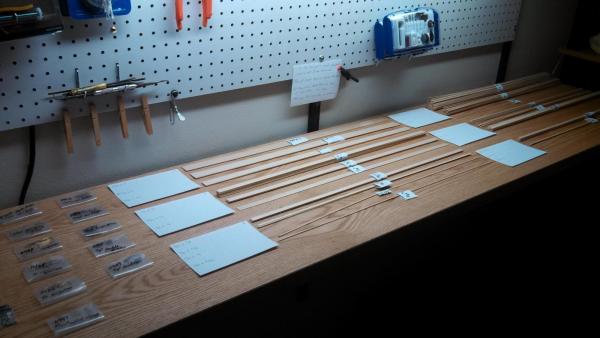
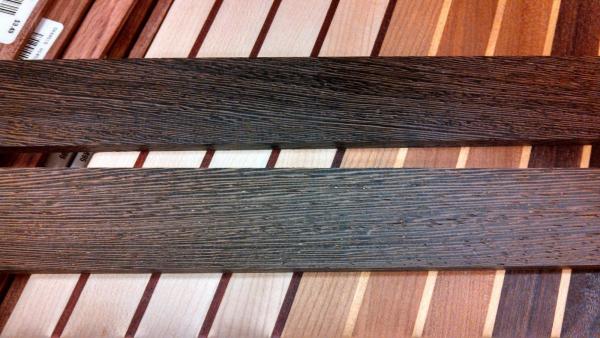
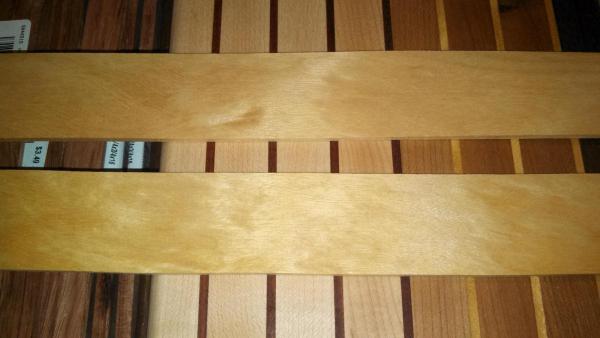
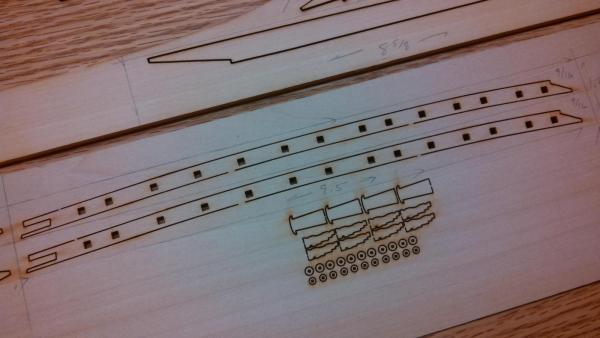
As you can see, the shipyard has finally come to life! Here you can see that everything has been inventoried, separated and tagged. Upon examining the laser cut sheet stock, I found the center keel sheet and the bulkhead sheet to a lesser extent, were cupped. Something I will keep in mind when gluing and squaring the hull frame. Next, then, all the bulkheads and the center keel have been removed, with the center keel given a light sanding. Bulkheads have been lettered and each marked with a reference line. At this point, I have put a lot of thought into changes I want to make to this kit. I plan on incorporating Wenge Wood into the keel and rudder, as well as the deck railings and plank sheers. I will also be using boxwood instead of basswood for the hull planking and I will be using Yellowheart for the decking. Here below are an example of two of the woods. I am going to cut out the keel pieces and plank sheers and use them as a finishing template for these pieces. I will use the laser cut outline, then, to lay the pieces out directly on the hardwood for cutting so they will be larger than needed. From here they will be rough cut and finished. Below, you can see that I have laid out dimensional stock on each of the pieces to determine how much wood would be needed and what size pieces of wood I would fit them into. So tonight, I will be gluing up the center keel and pressing it under some weight as it dries. Tomorrow is Thanksgiving so it'll be back to the shipyard on Friday for some bulkhead gluing. Until then, happy Thanksgiving to all you guys and have a great holiday! Warm regards, Bill


-
Ray, Absolutely beautiful work my friend . I've read through your log, didn't see a detail on how you fixed your cannons under deck so they swivel and stay in place. Turning her decks down is the real test for how well the cannon placements are set for sure! Warm Regards, Bill
-
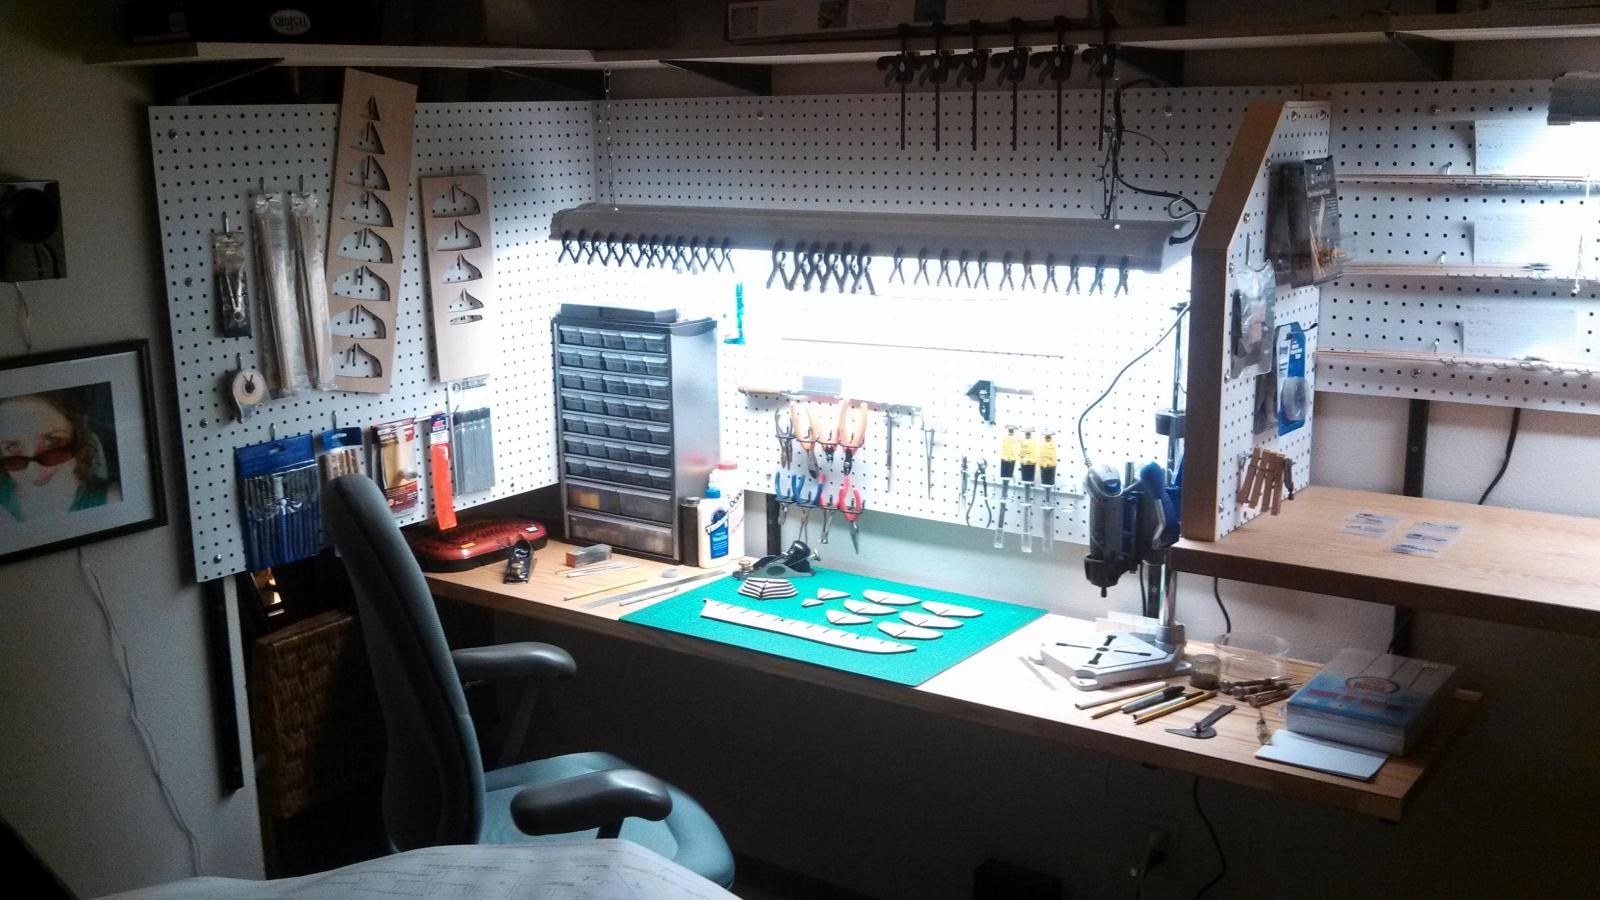
Why not make your own?! Something to hand down as an heirloom. I'm building a roll around cabinet. The top as a surface to run my power bench tools. Several draws for parts, blades, bits, etc... I'd like to put a 2 plug outlet on it as well Bill
-
I agree on Walnut being brittle. Especially if cutting for planks, etc..I guess the question is, "what other dark woods are there?". Any wood can be stained dark. If you're thinking of celebrating a woods characteristics rather than covering it up, then look to African woods. Wenge, is a dark dense wood with interesting contrast in it's grain. Bublinga, has variuos tones of reds to almost black. Works well. it's used for instruments and fine woodworking from the smallest details to the largest projects. (this is one of my favorites) There are others, but these are the two that stick out to me. In fact, i'm going to incorporate Bublinga into my current build Of course there's Ebony, but for many reasons, you're better off ebonizing Boxwood in my opinion. Warm Regards, Bill
-
Hello Ollie, This is a great build log! Nice detailed explanation. Your work speaks for itself, quite beautiful. I'll be following along for sure Warm Regards, Bill
- 803 replies
-
- 2
-
-
- colonial cutter
- modellers shipyard
- (and 1 more)
-
Narrowing down the field for first ship model
Bill Hime replied to Bill Hime's topic in Wood ship model kits
Eamonn, That is a nice compliment, thank you! I sure will put it here. I have started a build log, "Pride of Baltimore 1:64 scale by Bill Hime". I will here shortly, put a link in my signature as well Warm Regards, Bill