Old Collingwood
-
Posts
11,637 -
Joined
-
Last visited
Content Type
Profiles
Forums
Gallery
Events
Everything posted by Old Collingwood
-
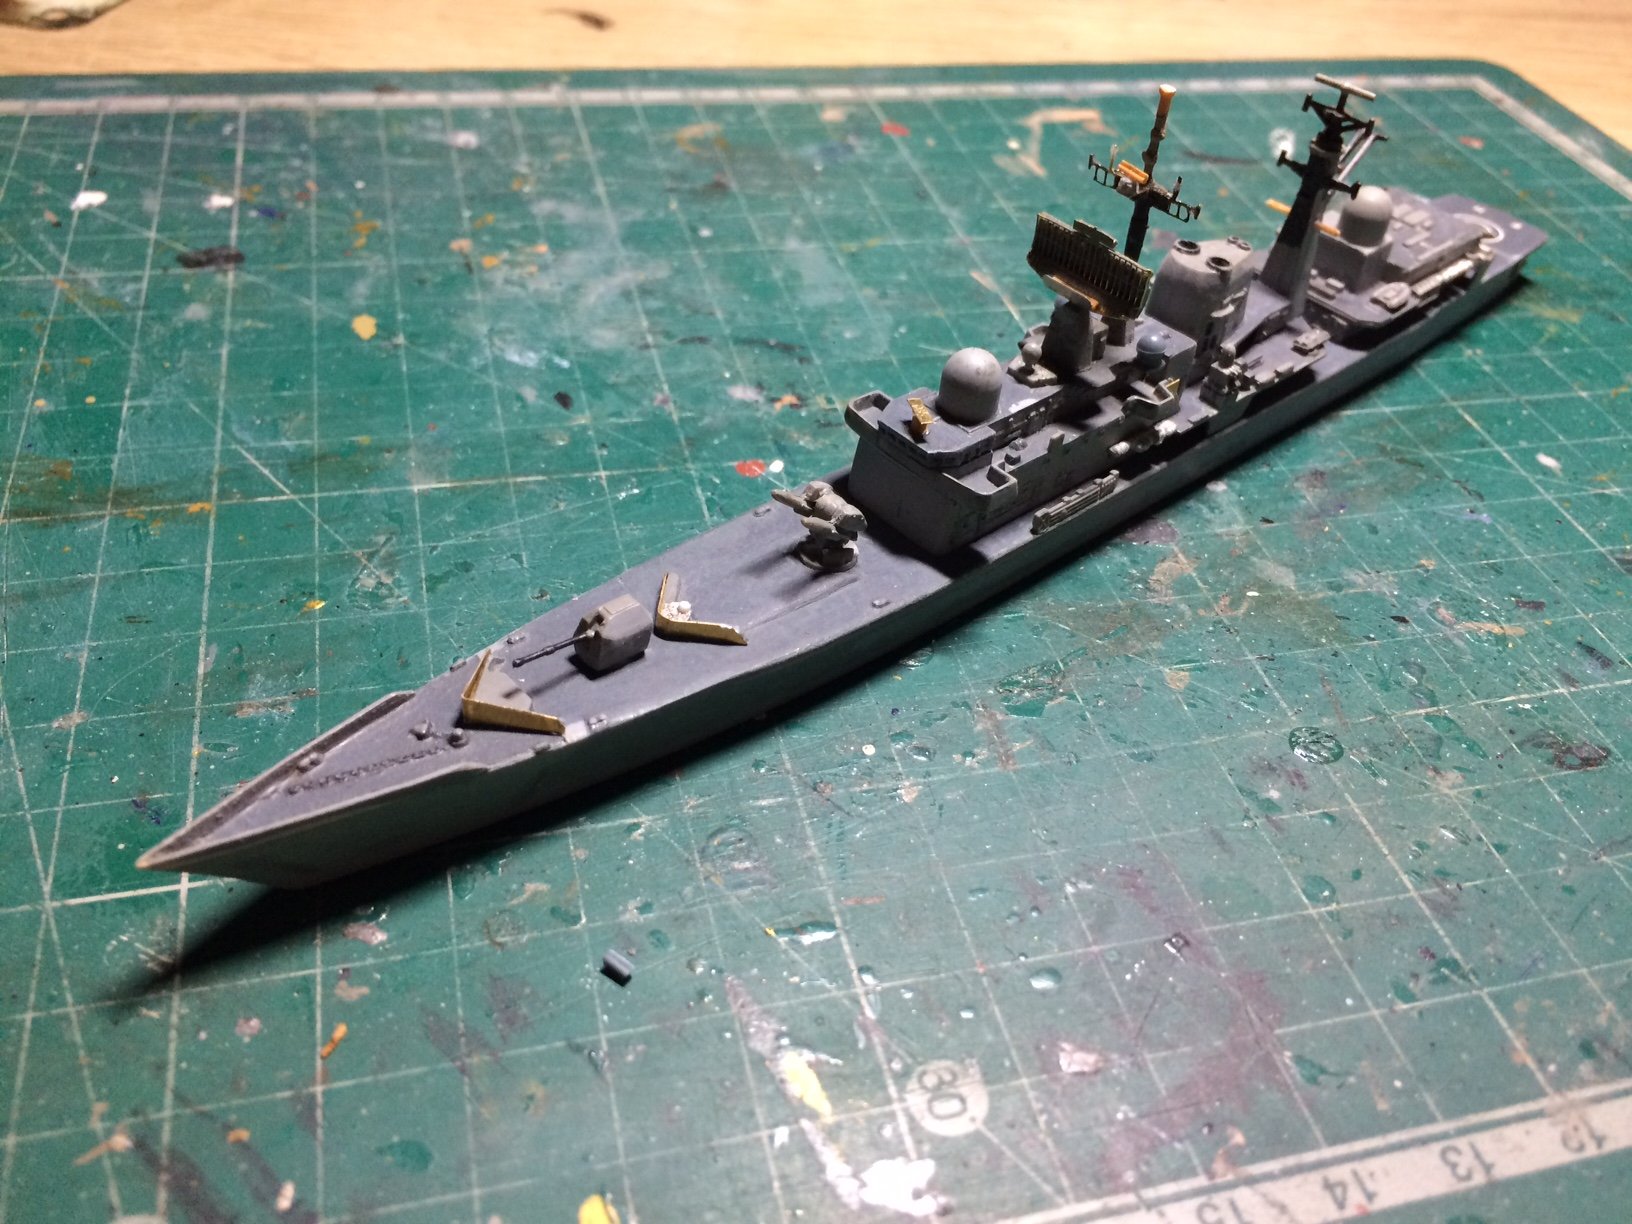
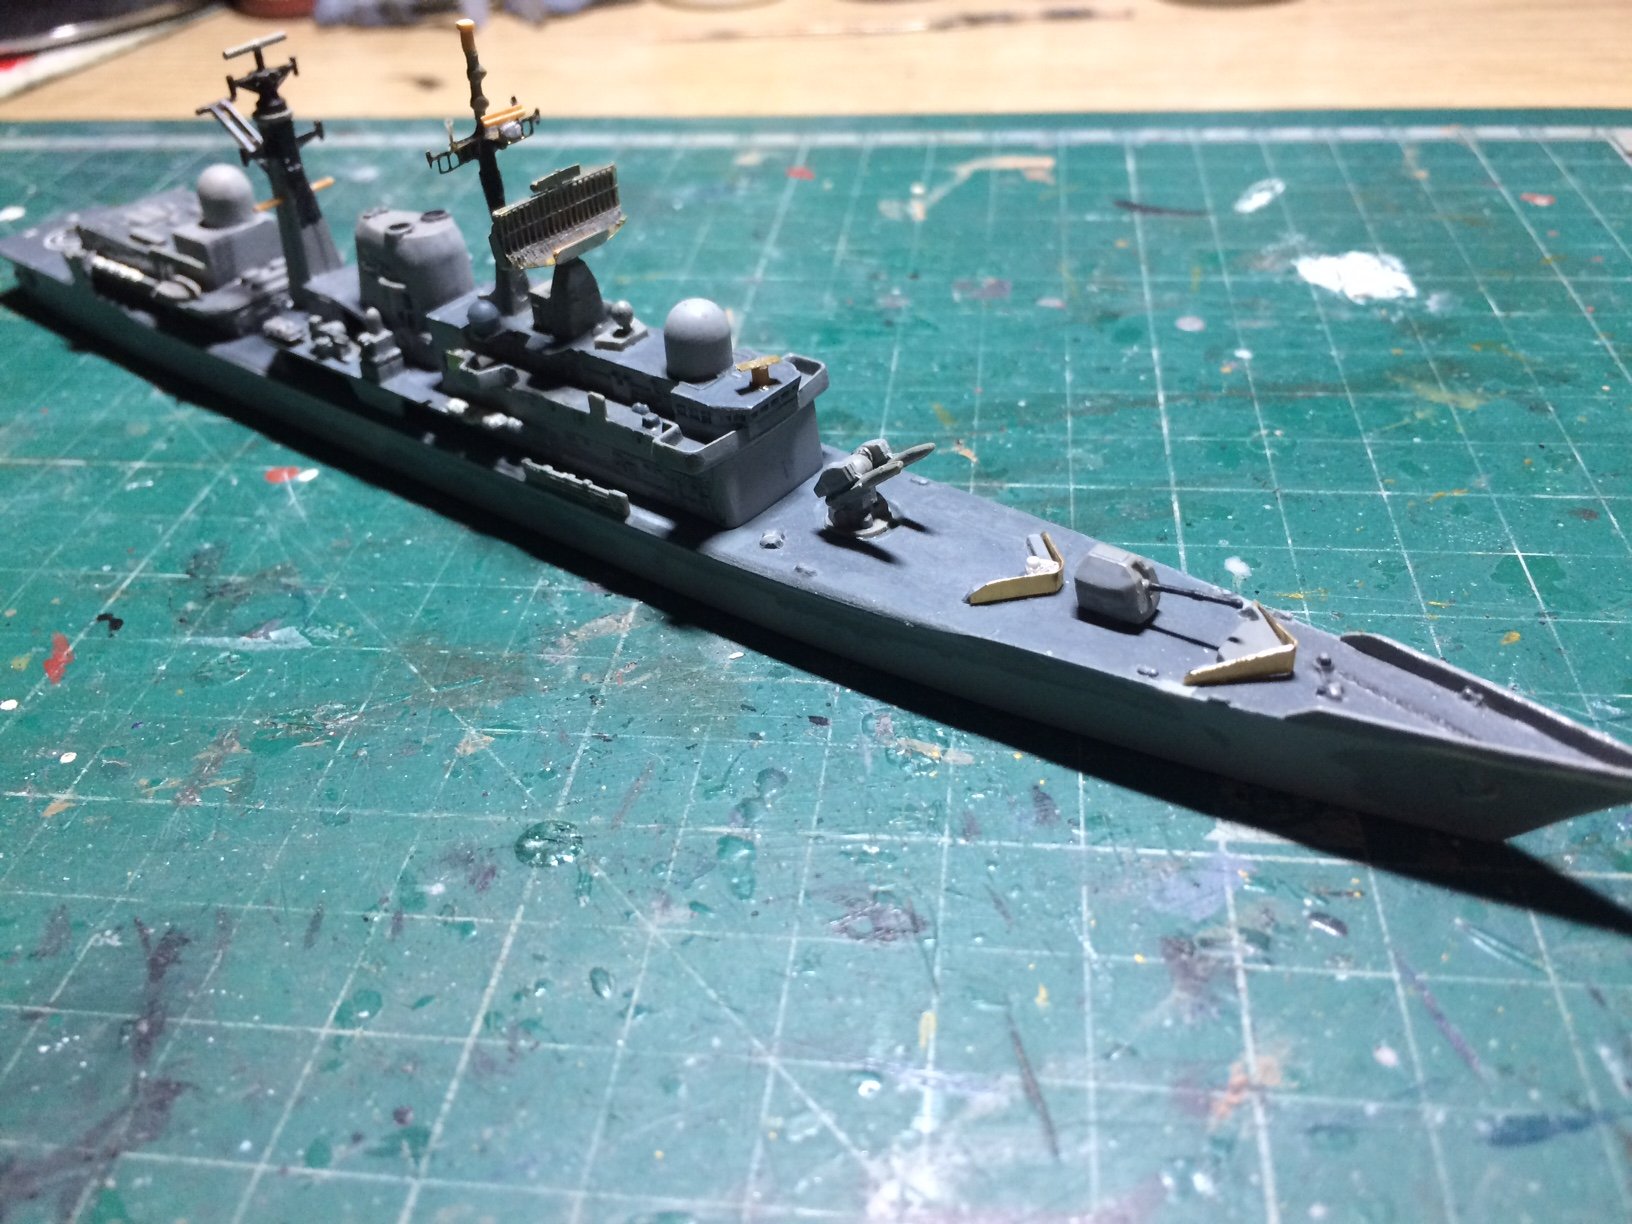
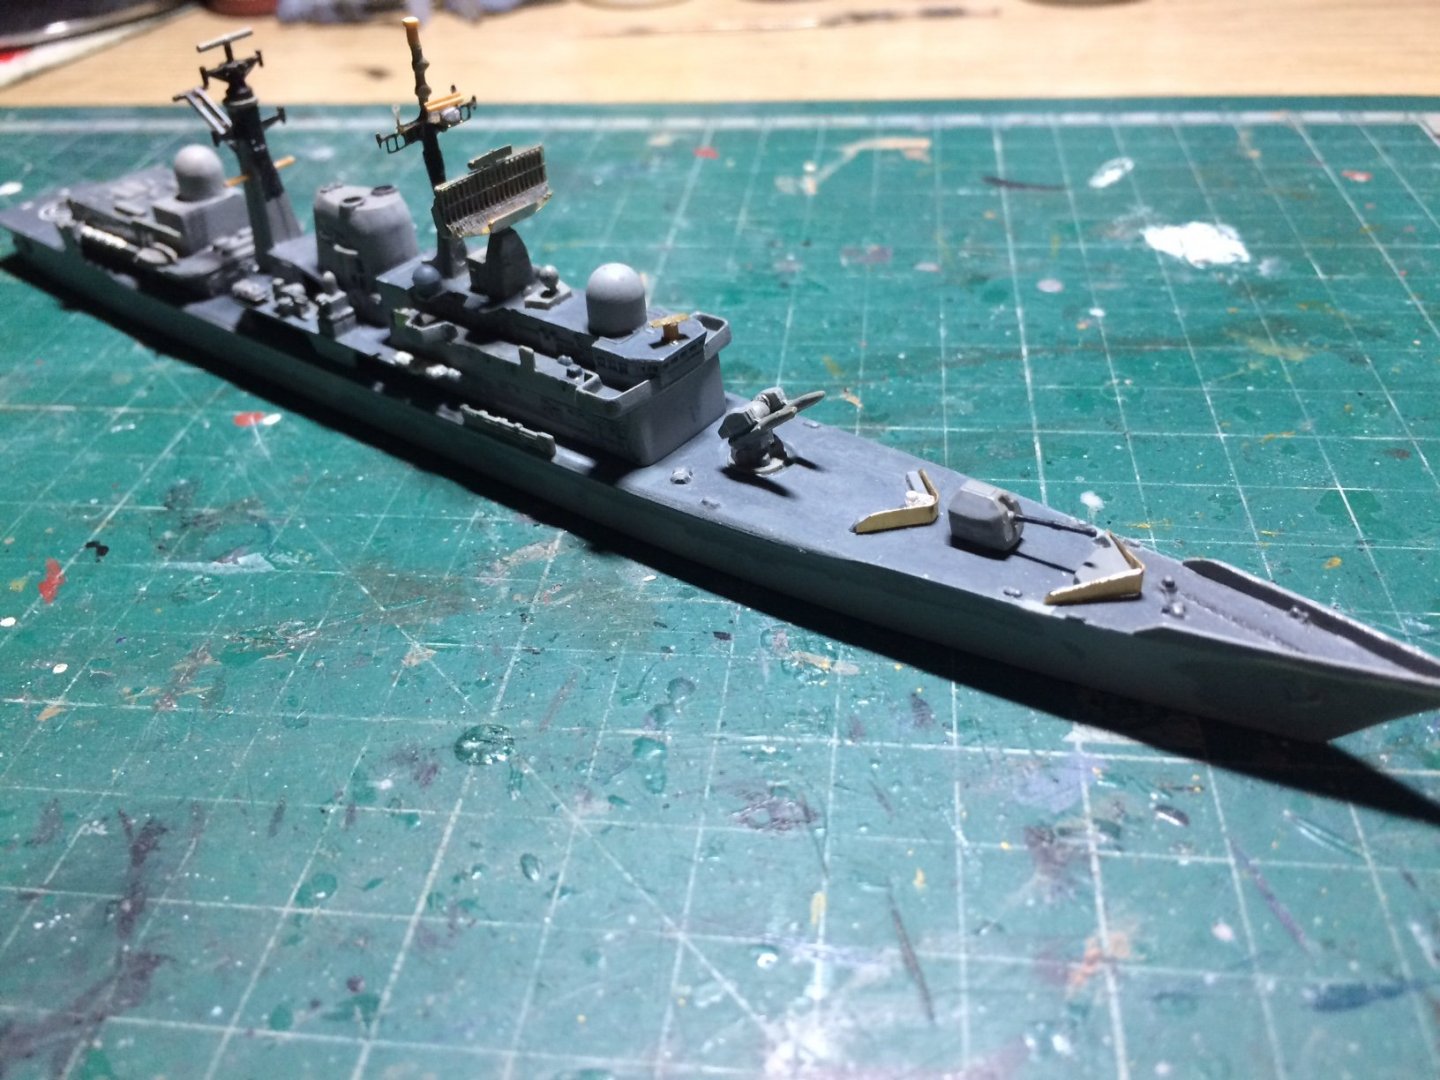
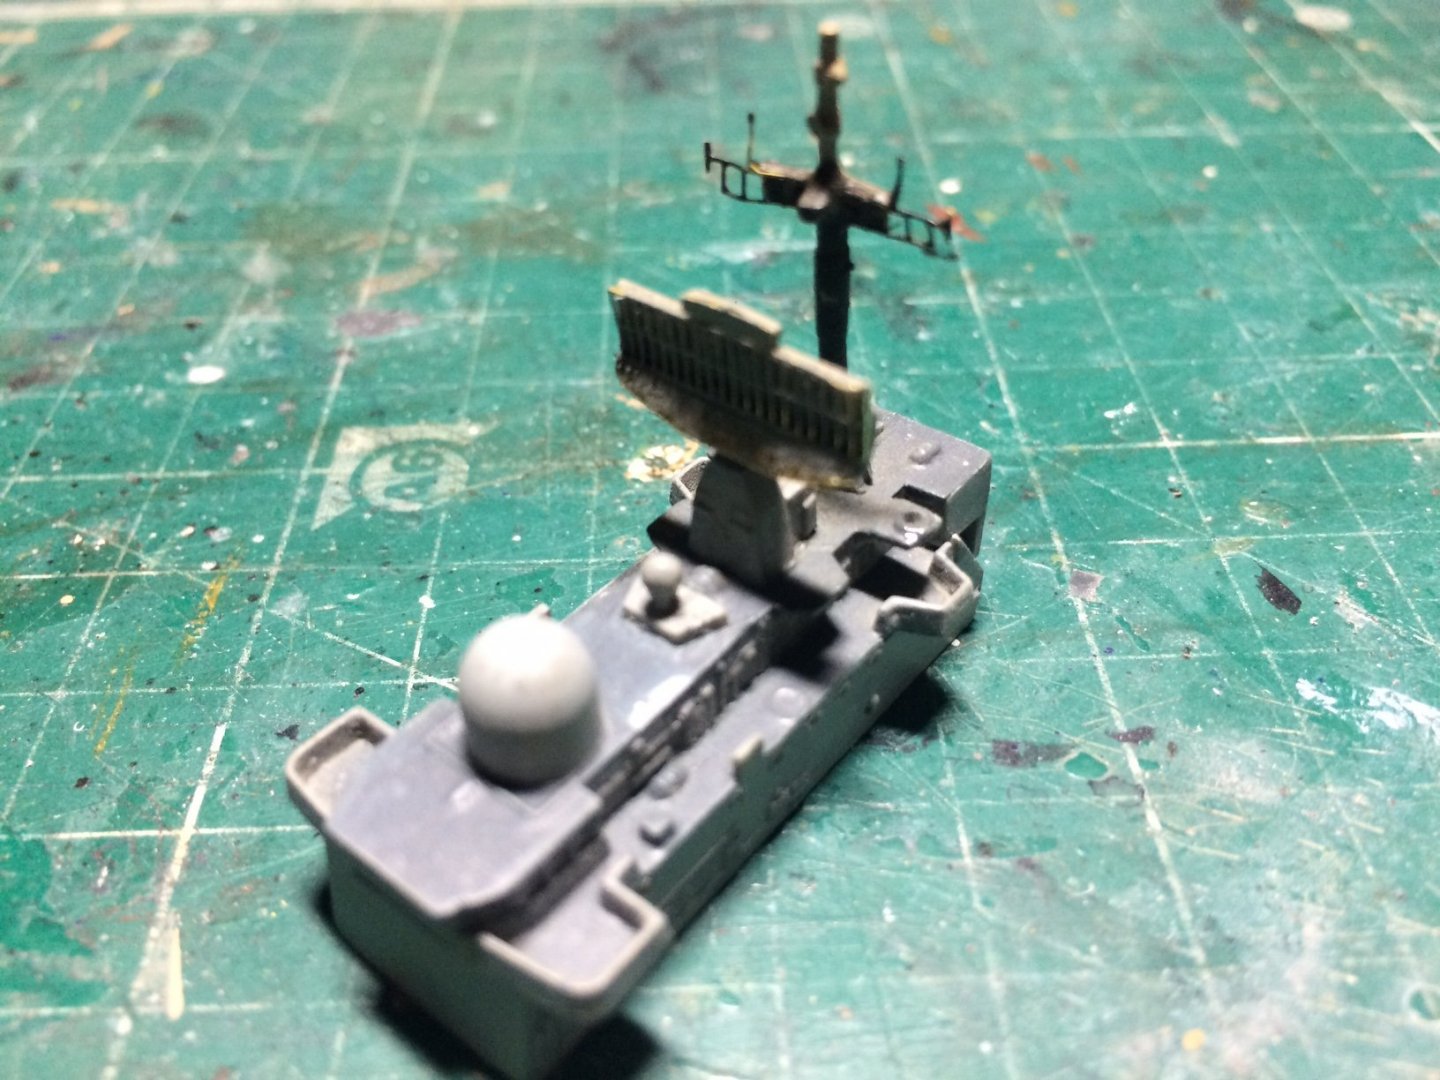
 Evening all, a little more work this evening - I added another aerial ontop of the bridge and a few other bits and pieces, then I dry fitted everything back in place to see how its looking - OC.
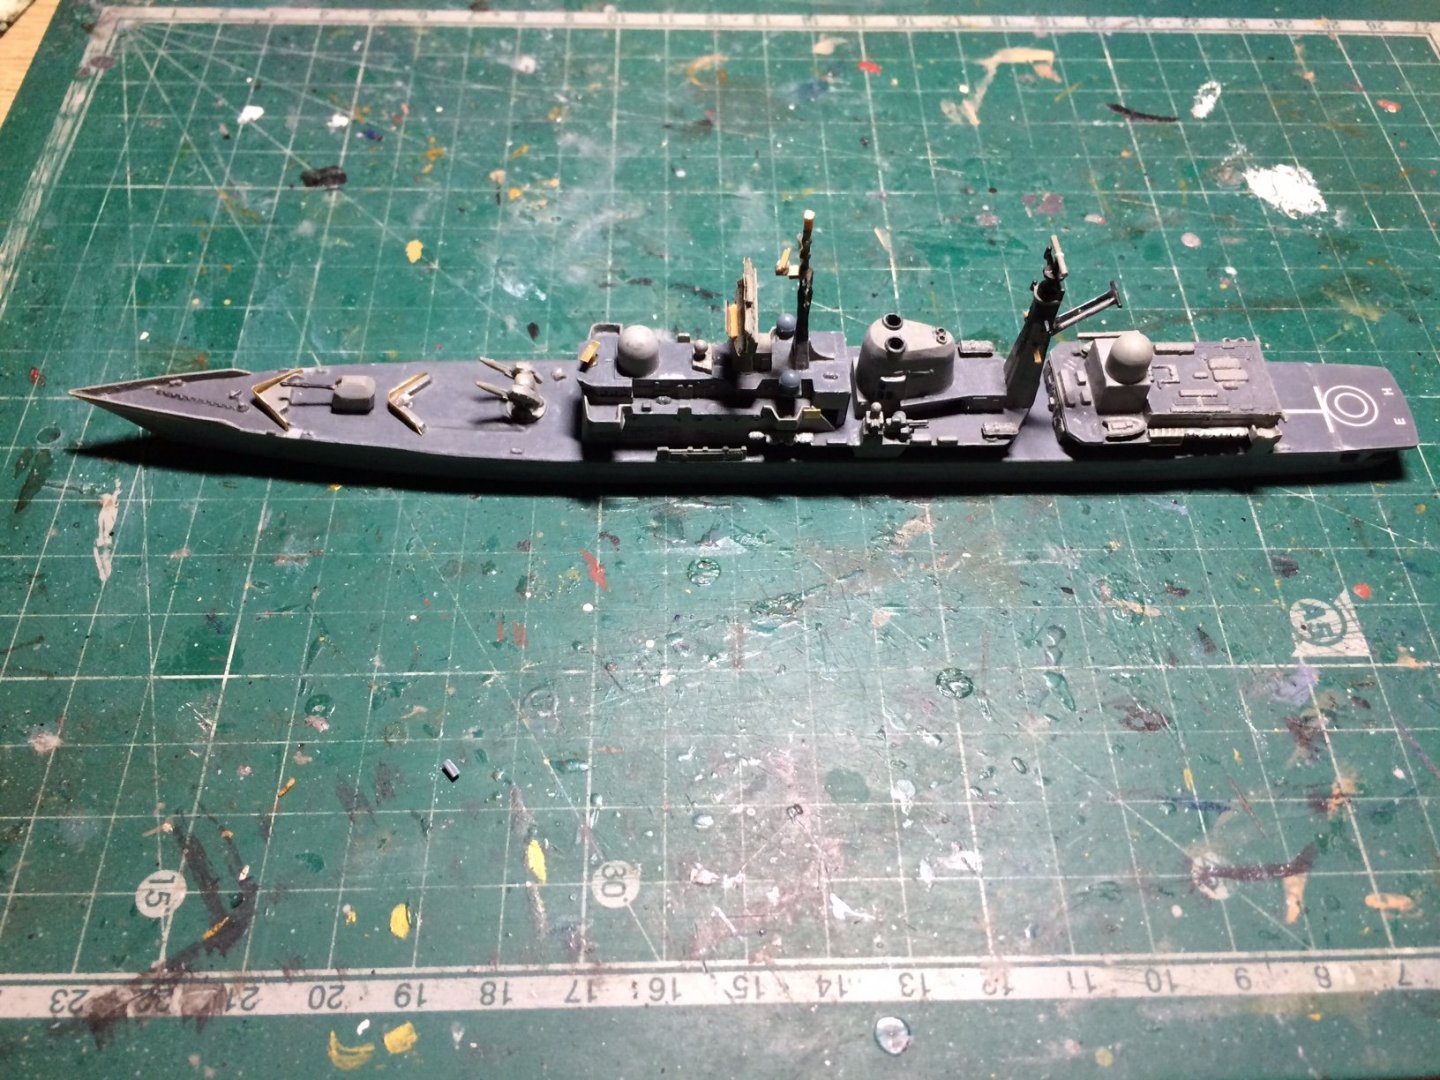

-
Thanks Scott - very true over the time frame, with the metal barrels I understand they are included in the kit as its the Delux edition. OC.
-
I chased this up today the seller (from china) told me there is a delay as they have not actually been made ready for distribution yet from Flyhawk, and there will be a wait (of unkown time frame) before it will be firstly sent to me then for it to arrive here, OC.
-
The little dance we all do on the floor "looking - looking again then re looking" I thought of the idea of using a magnet but wouldn't work with me - would stick to my leg due to the metalwork in it. You are doing a lovely job she is really standing out - lets all remember these are 1/700 kits very very small that makes a 6ft tall sailor just 2.5mm tall. OC.
-
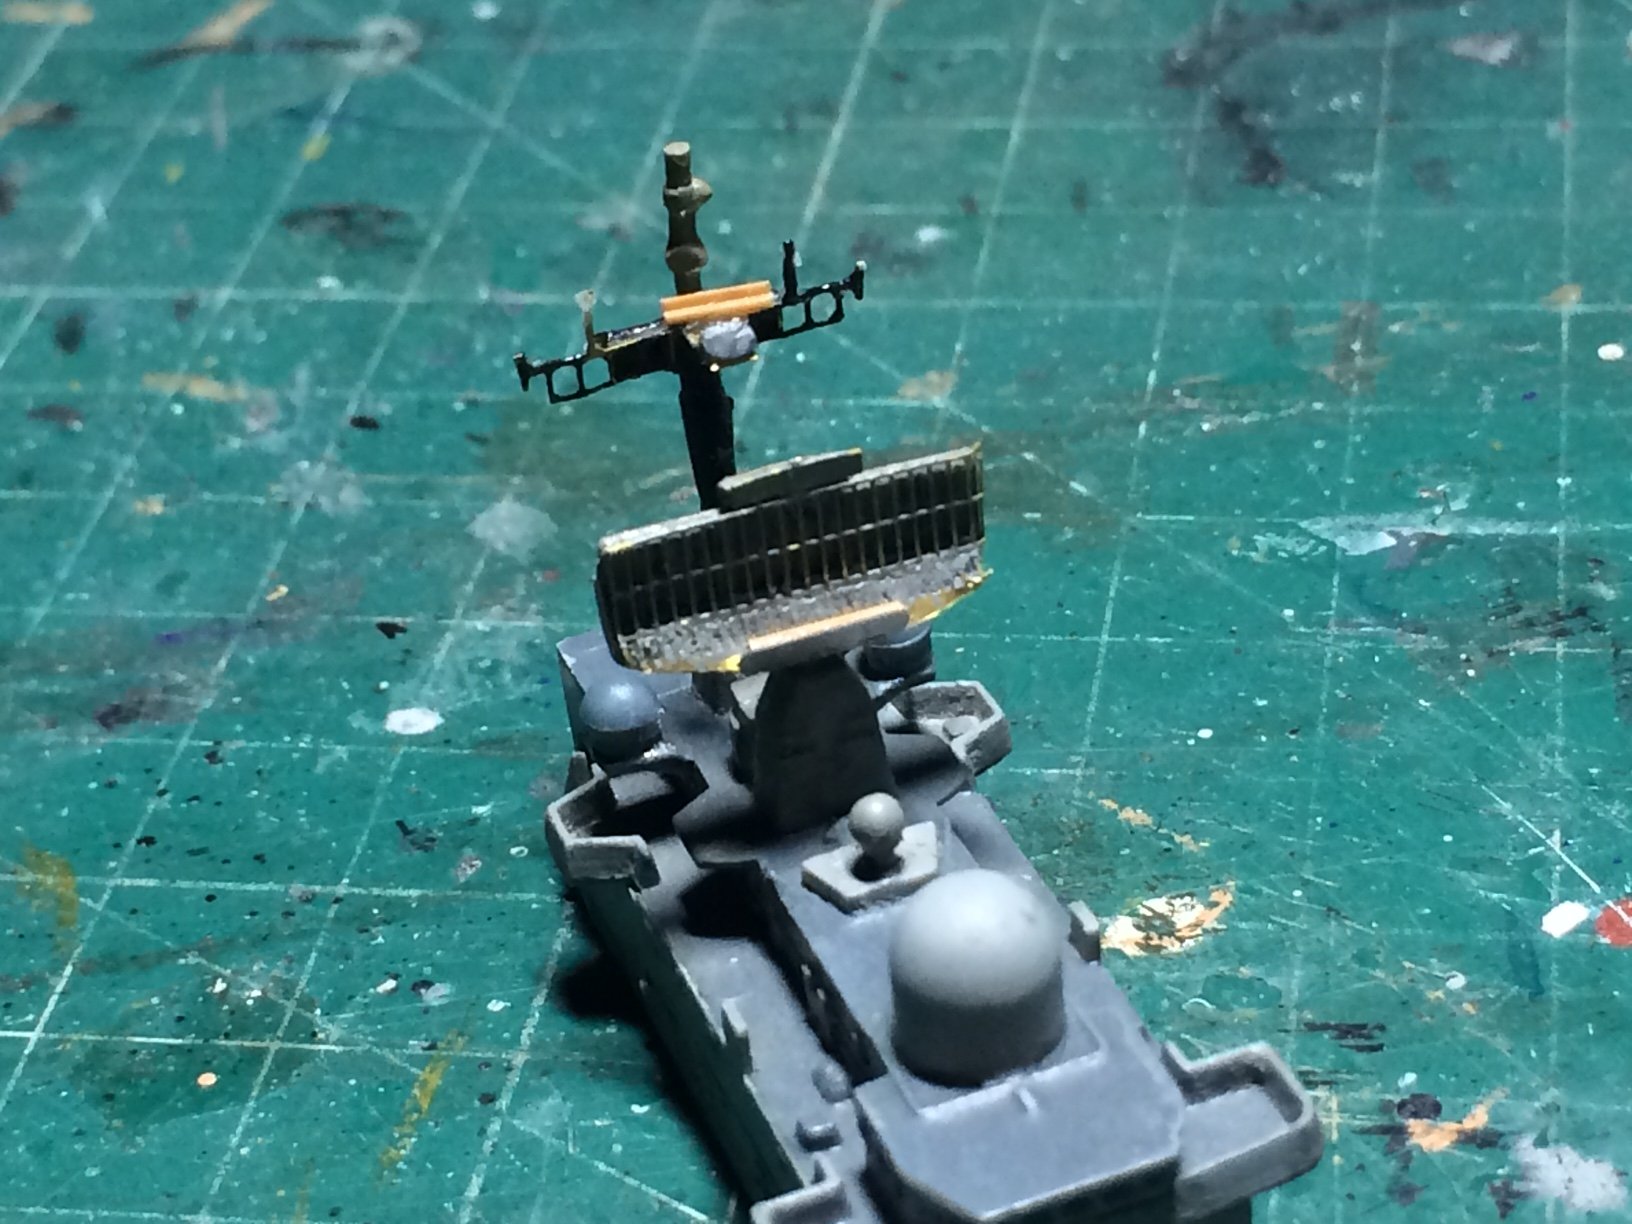
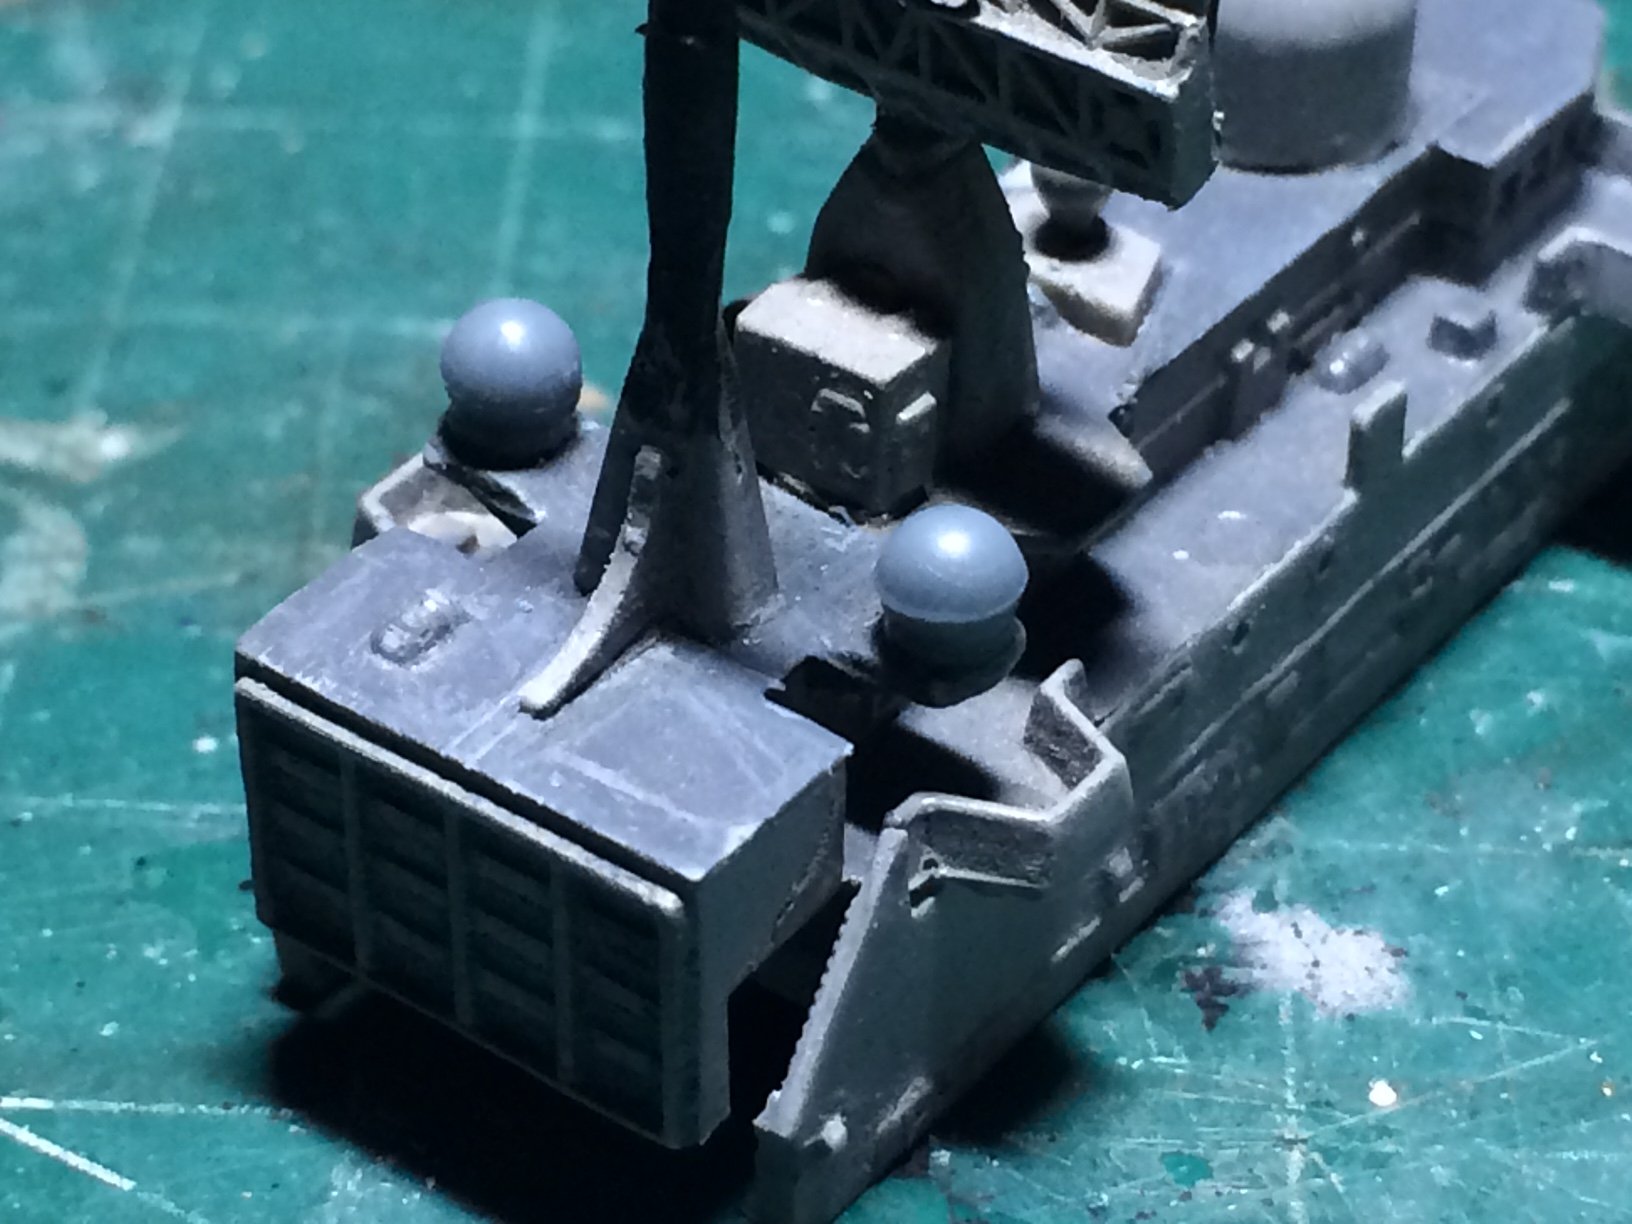
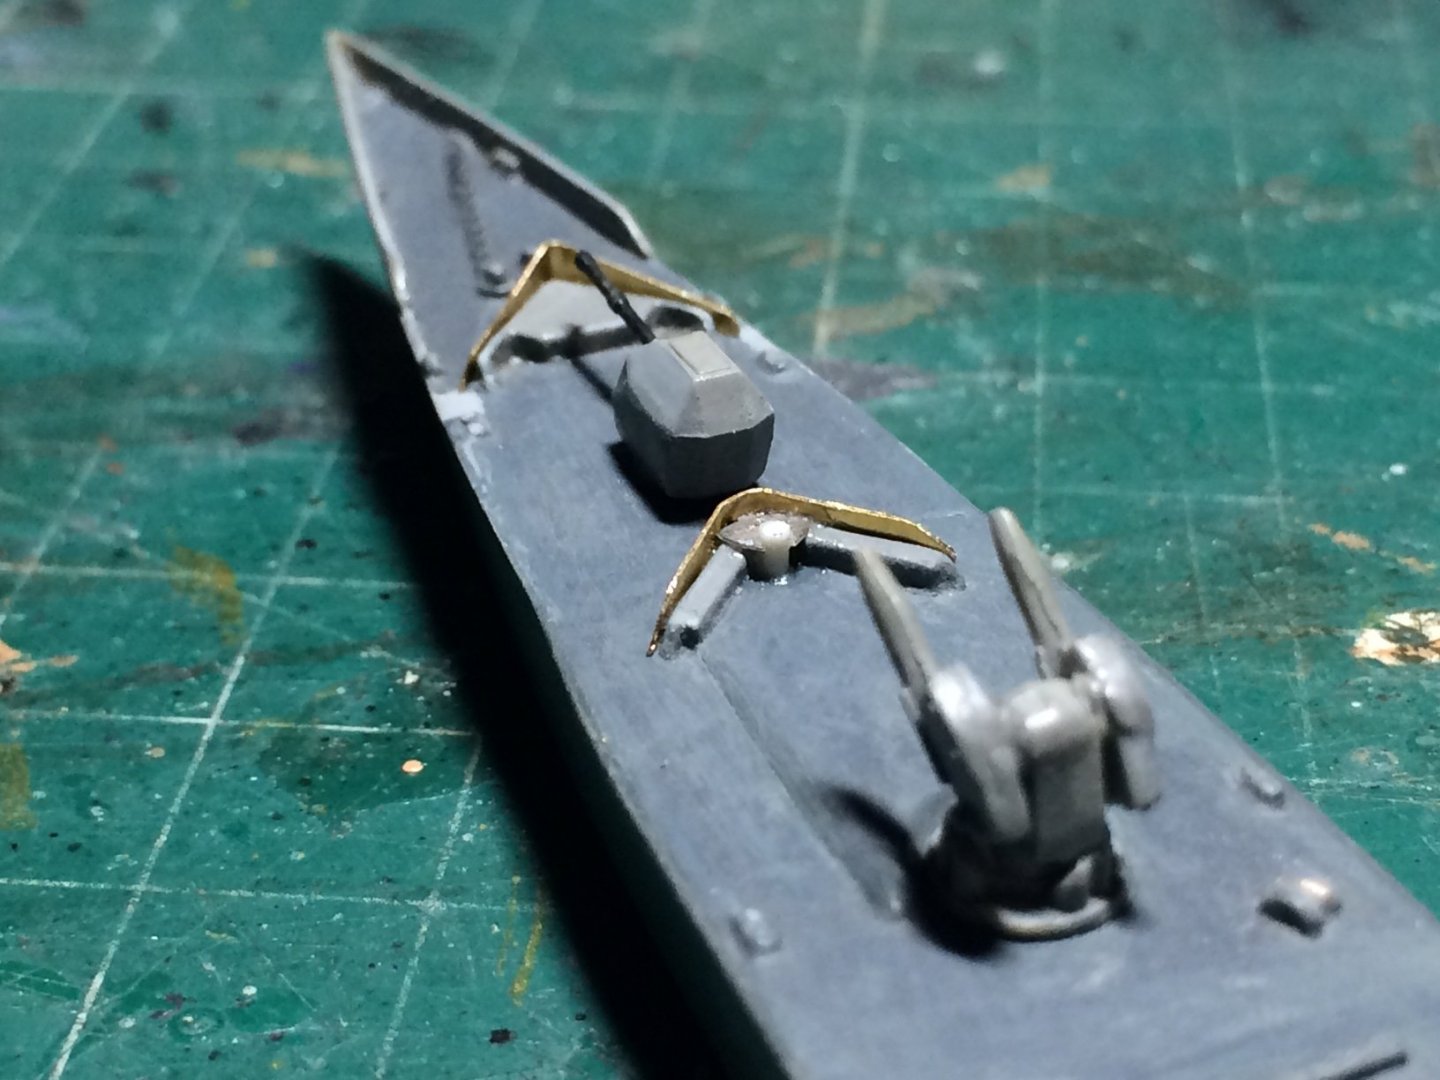
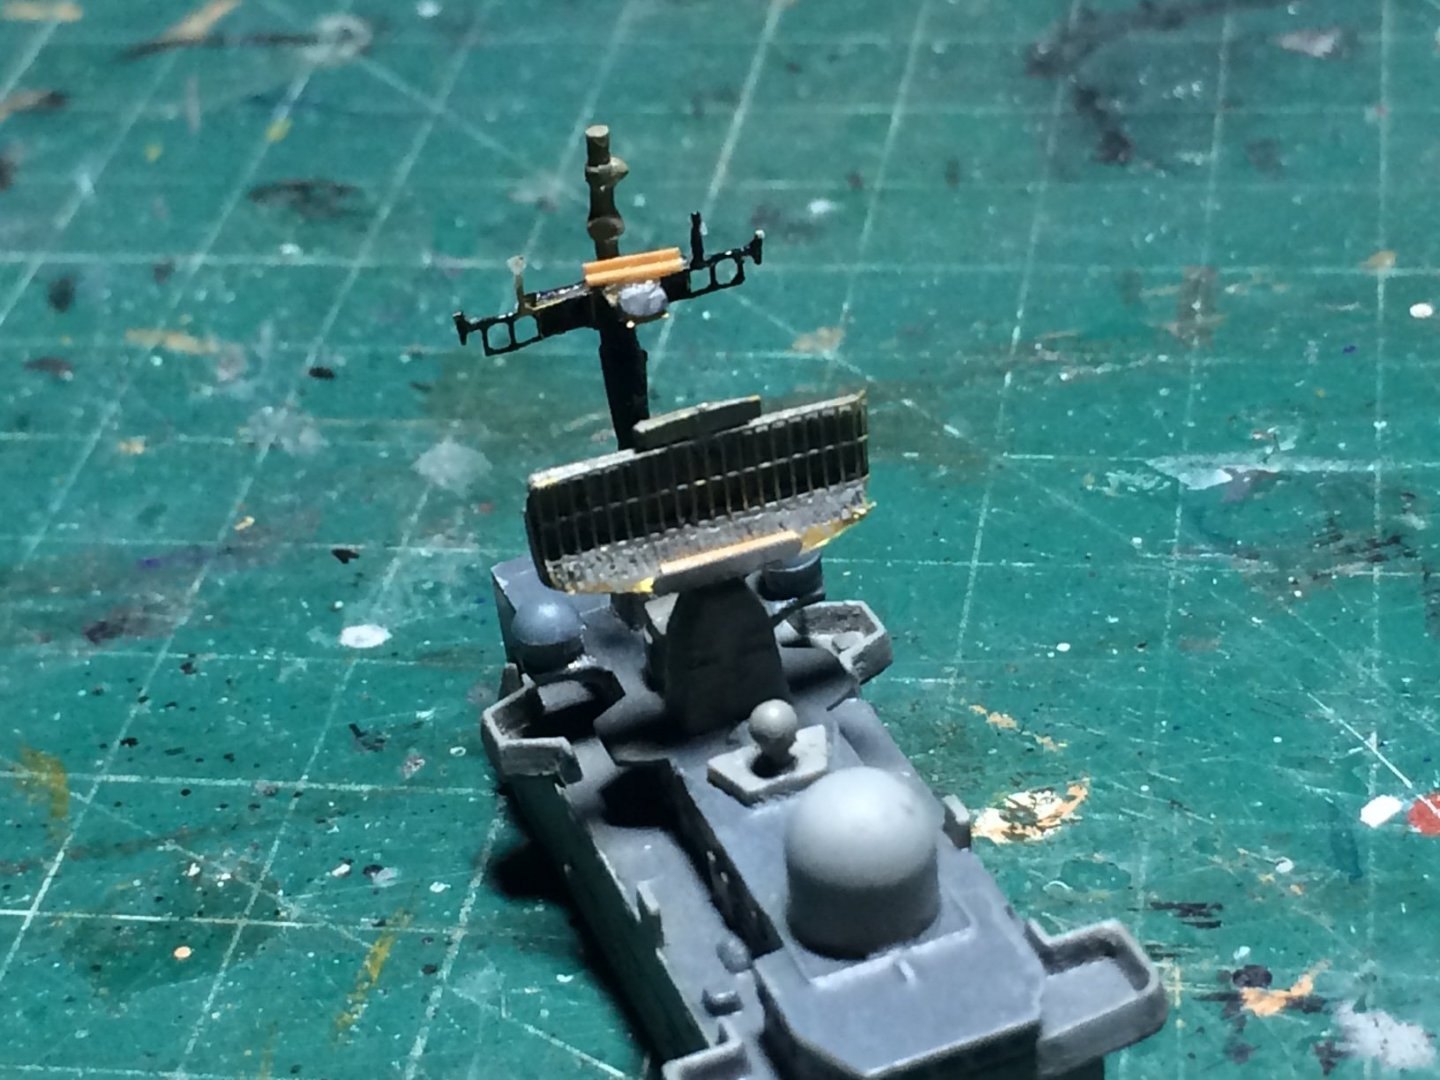
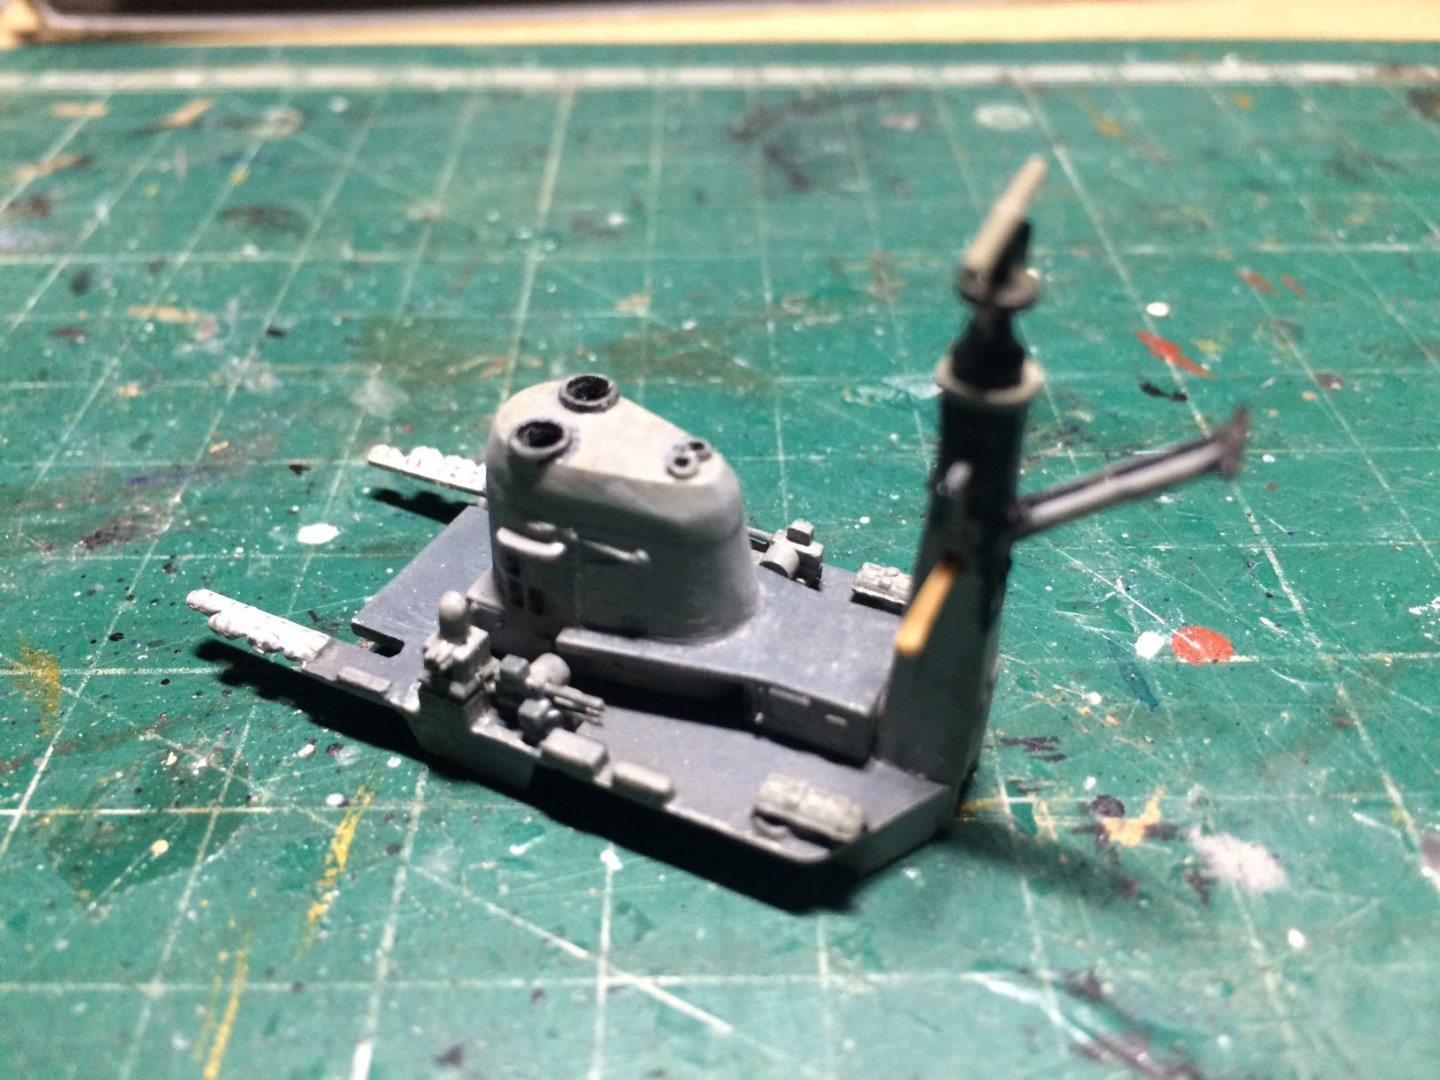
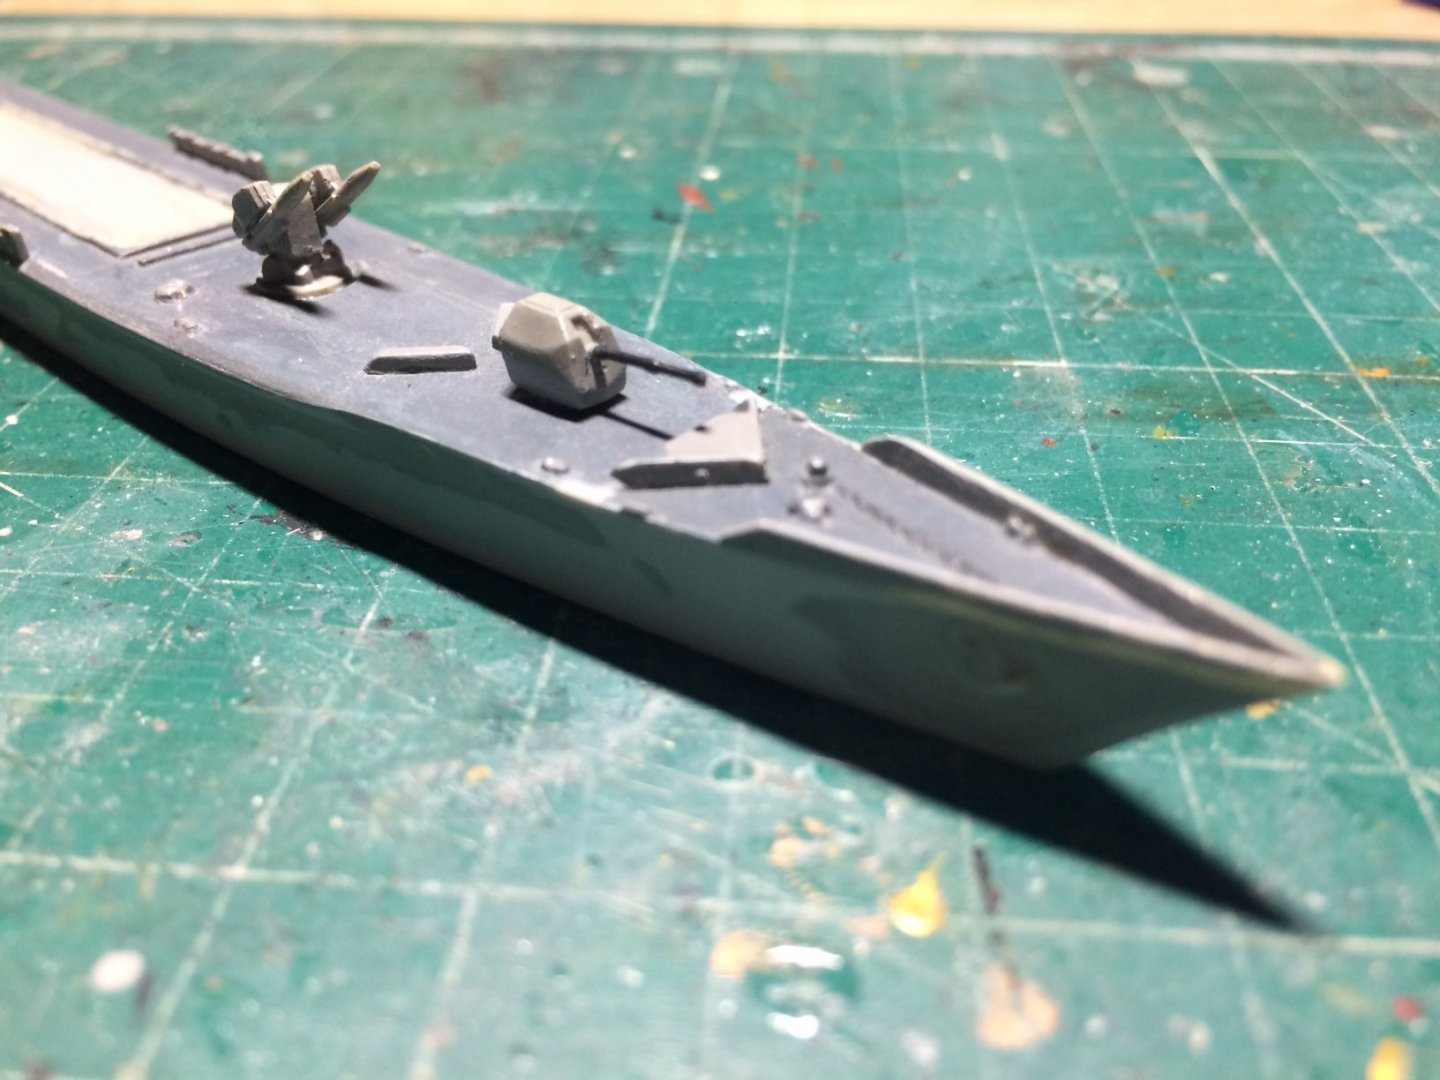
Evening all, more progress on the Fortress - first I decided to see if I could build up the break waters, I had some PE frets left over and I discovered that some of the edging was roughly the right size - so I cut a length using my sharp blade this was then shaped against the plastic break waters then with tiny amount of CA applied with a fine bit of wire, I then pushed it in place, I then found some slightly narrower edging and the same idea then glued in place. After they had set I shaped them using my edge cutters, after I added a small amount of detailing behind the rear most break water. I then worked on the main mast with the PE I added a small platform and created a small aerial, then I had a go at the Two round radar domes very very luckily I found Two perfect round bits of left over something or other - perfect they were the right size and were duly glued in place. Starting to look a wee bit busier now. OC.


-
Thank you for explaining about those Ammo products - love the ones you use, they look so handy. OC.
- 127 replies
-
- 2
-

-
- Akitsushima
- Pit Road
- (and 2 more)
-
These are what I used that were very smally - https://www.ebay.co.uk/itm/192875243072 And - OC.

- 127 replies
-
- 4
-
-
- Akitsushima
- Pit Road
- (and 2 more)
-
Wonder if mine was different that I got to use on my challenger tank as soon as I opened the jar the smell was very obvious even the admiral could smell it from Twenty feet away - brushing it over the tanks surface was very smelly I almost had to stop due to the odour, the only thing I could do was to try to de gas it really quickly using the hairdryer. Certainly a shock compared to zero odour acrylics. OC.
- 127 replies
-
- 4
-
-
- Akitsushima
- Pit Road
- (and 2 more)
-
I love that stuff but its too smelly to use in a lounge. OC.
- 127 replies
-
- 5
-
-
- Akitsushima
- Pit Road
- (and 2 more)
-
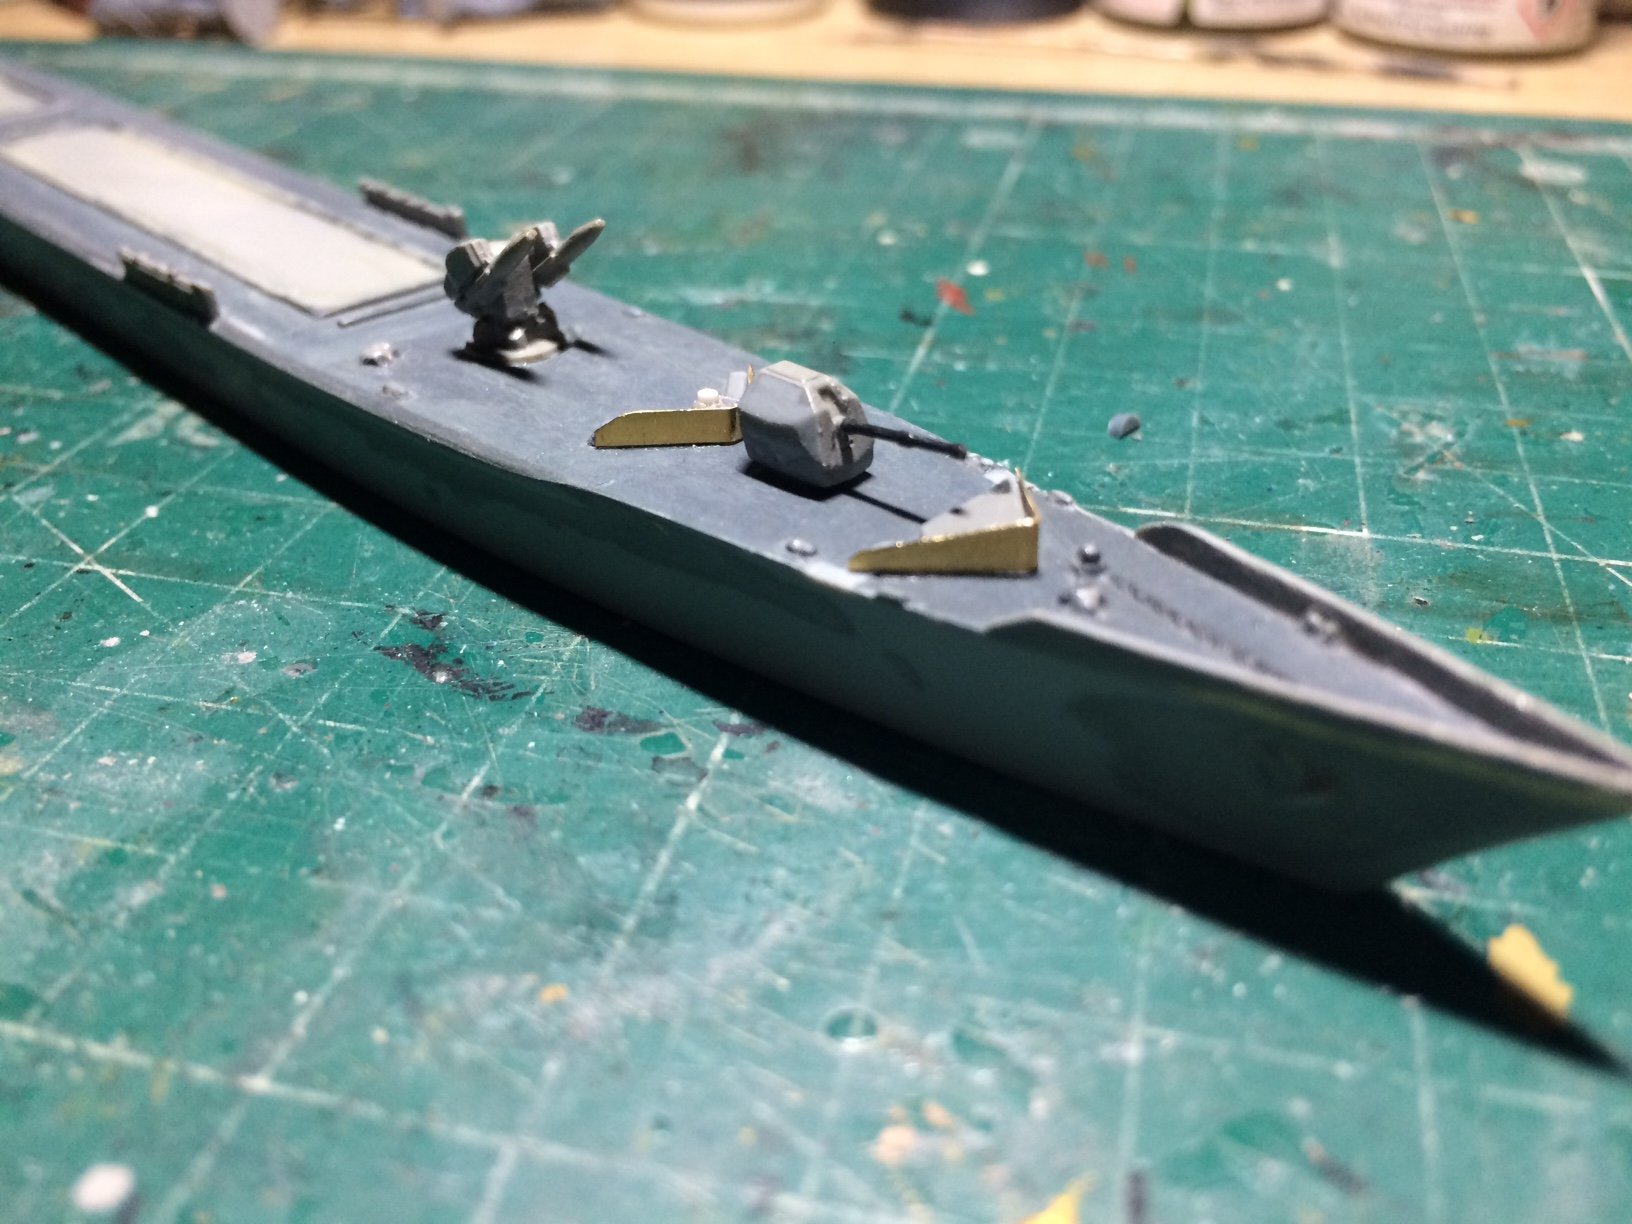
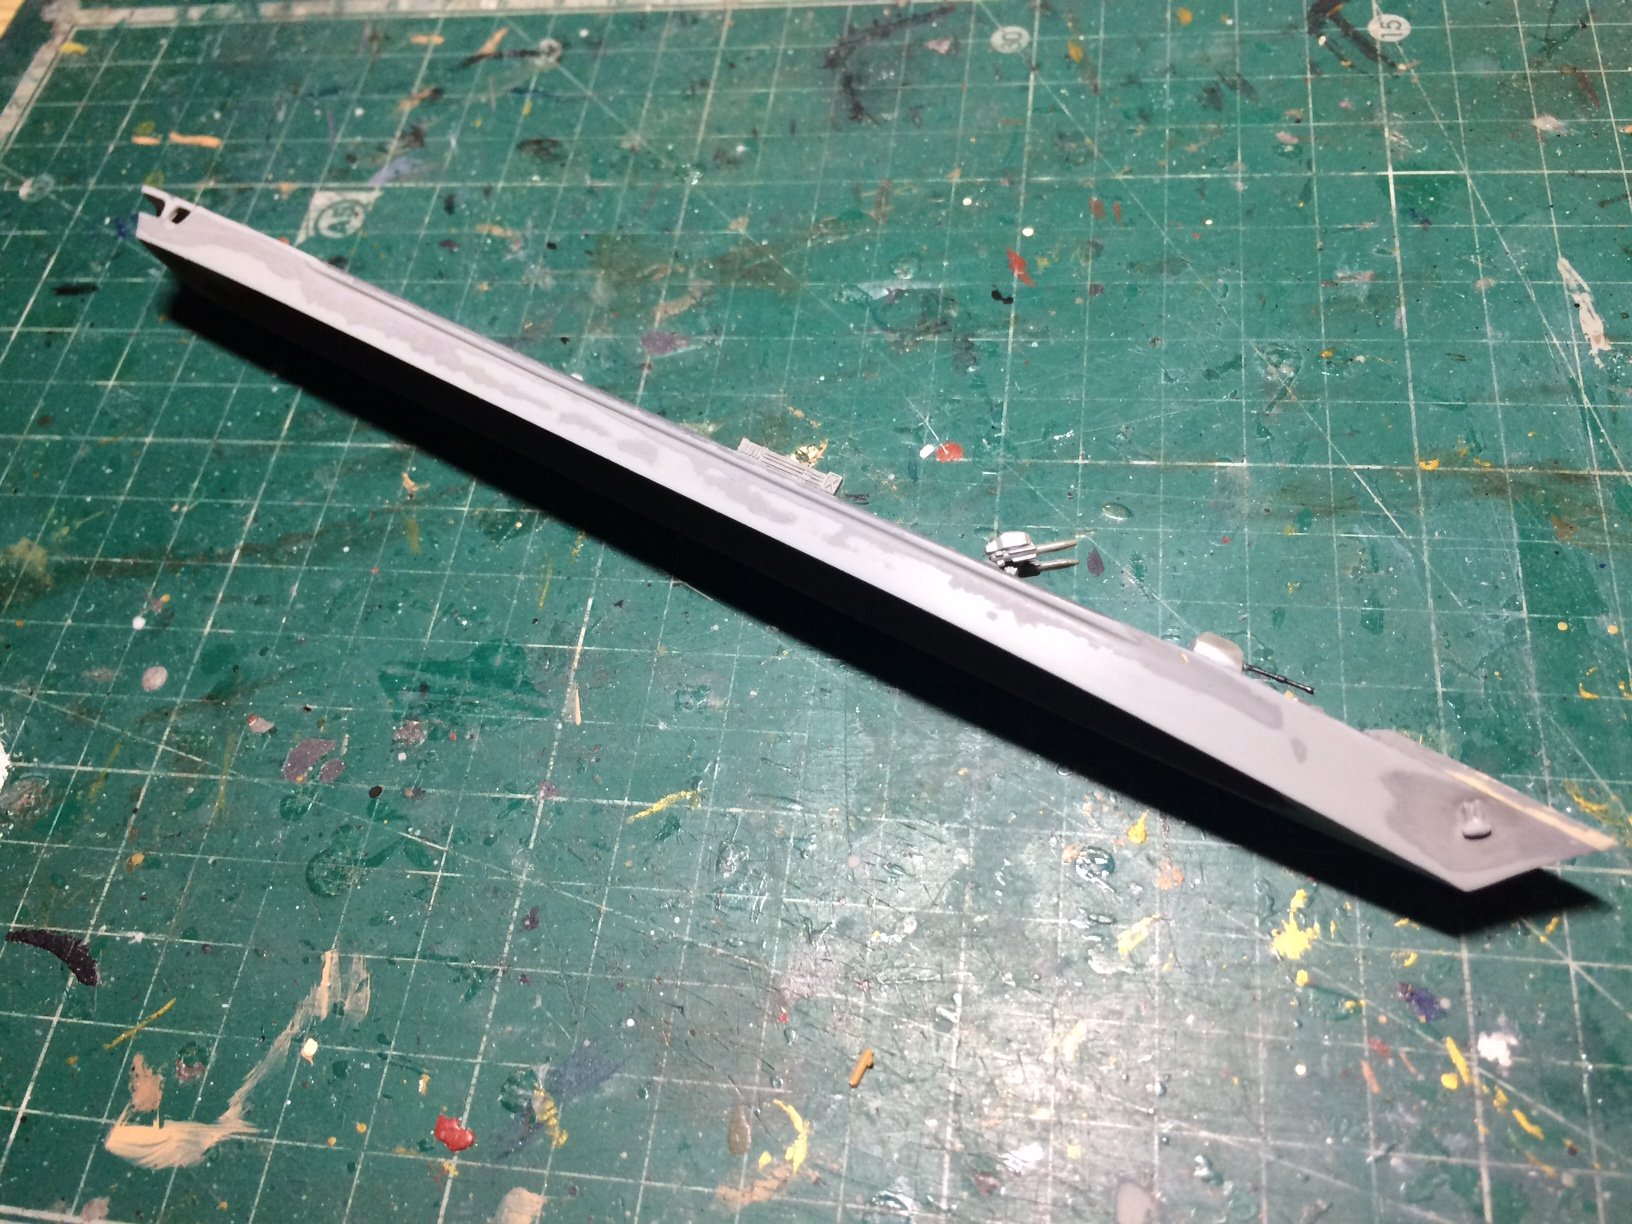
Just found our a few things about the boat - she was the only one of her class to have the extended bow bulwarks, the reason for this was she was going to be trialed for the Phalanx system and it was going to be placed on her forecastle between her sea dart and 4.5in Kryton turret, but to make it less affected by the sea spray they built up the bulwarks and enlarged her break waters. So thats another job for me to do - extend her breakwaters. When we saw her it turned out we were very lucky to catch her as only a few months later she was sent off to be scrapped. OC.
-
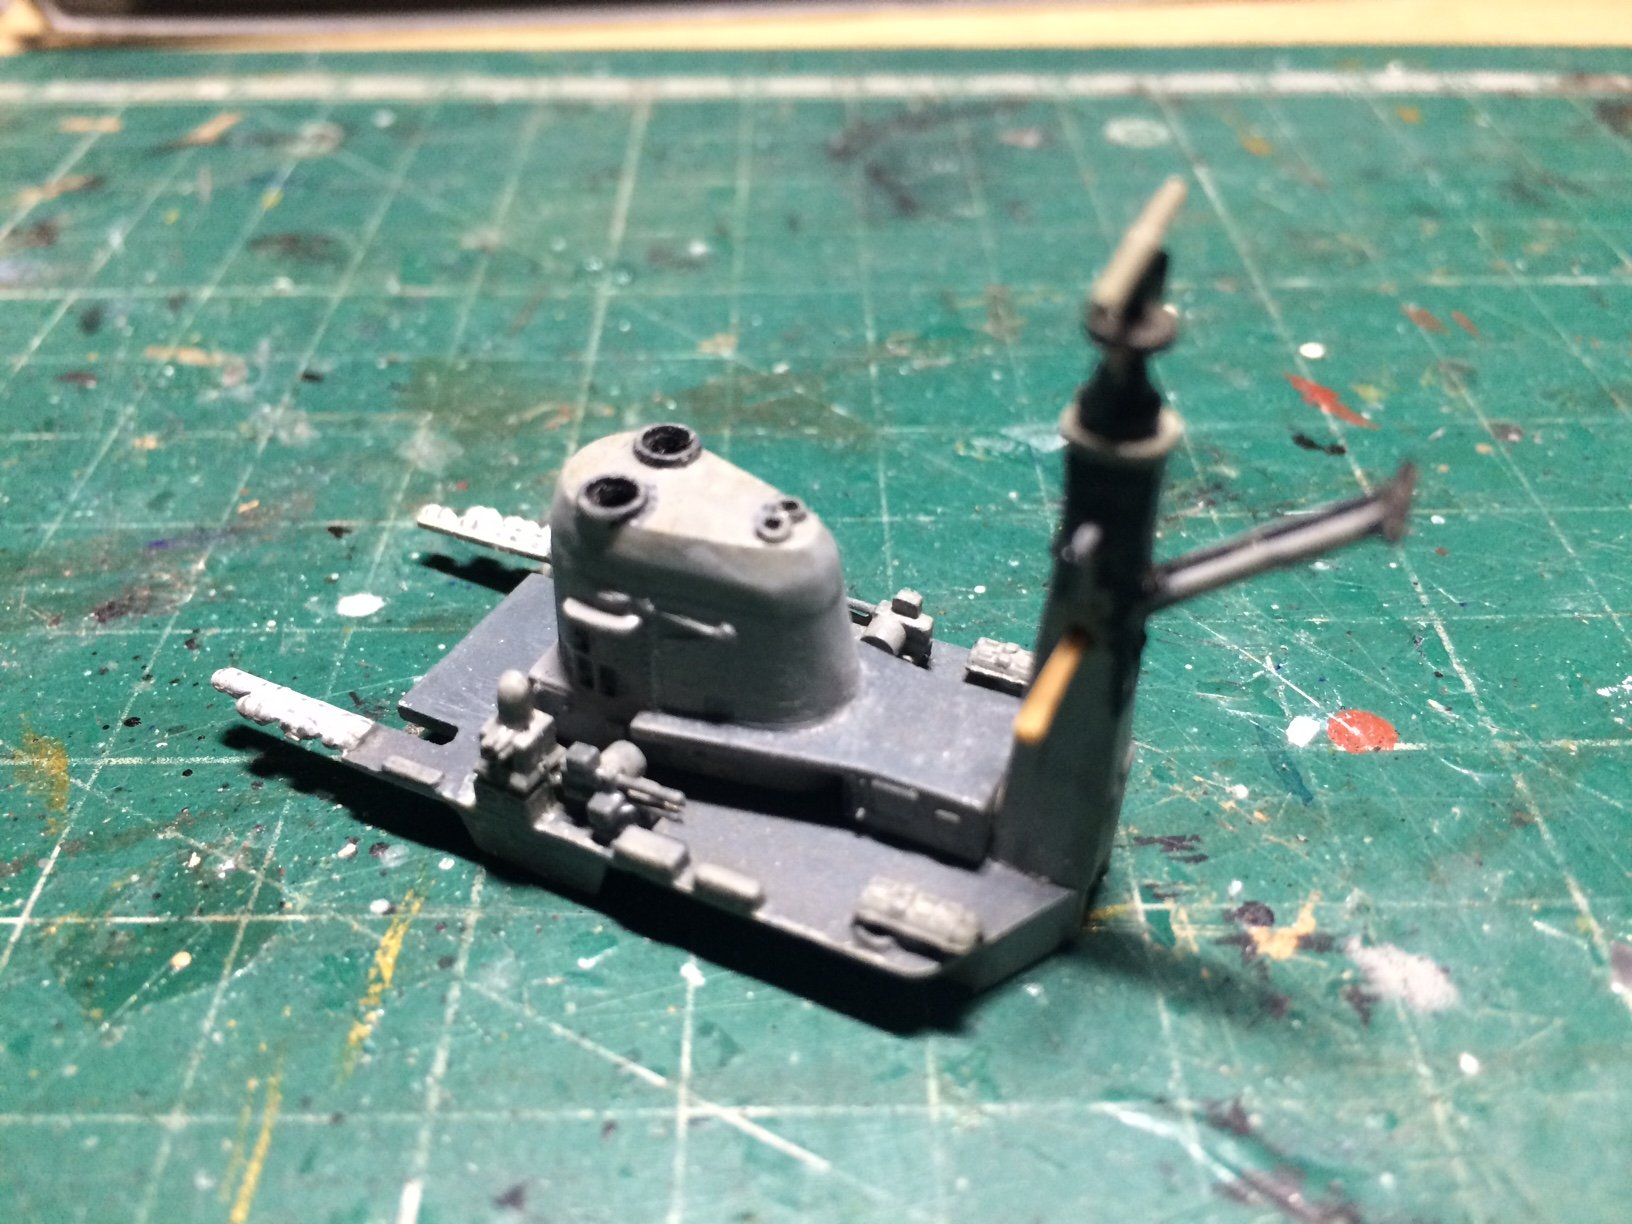
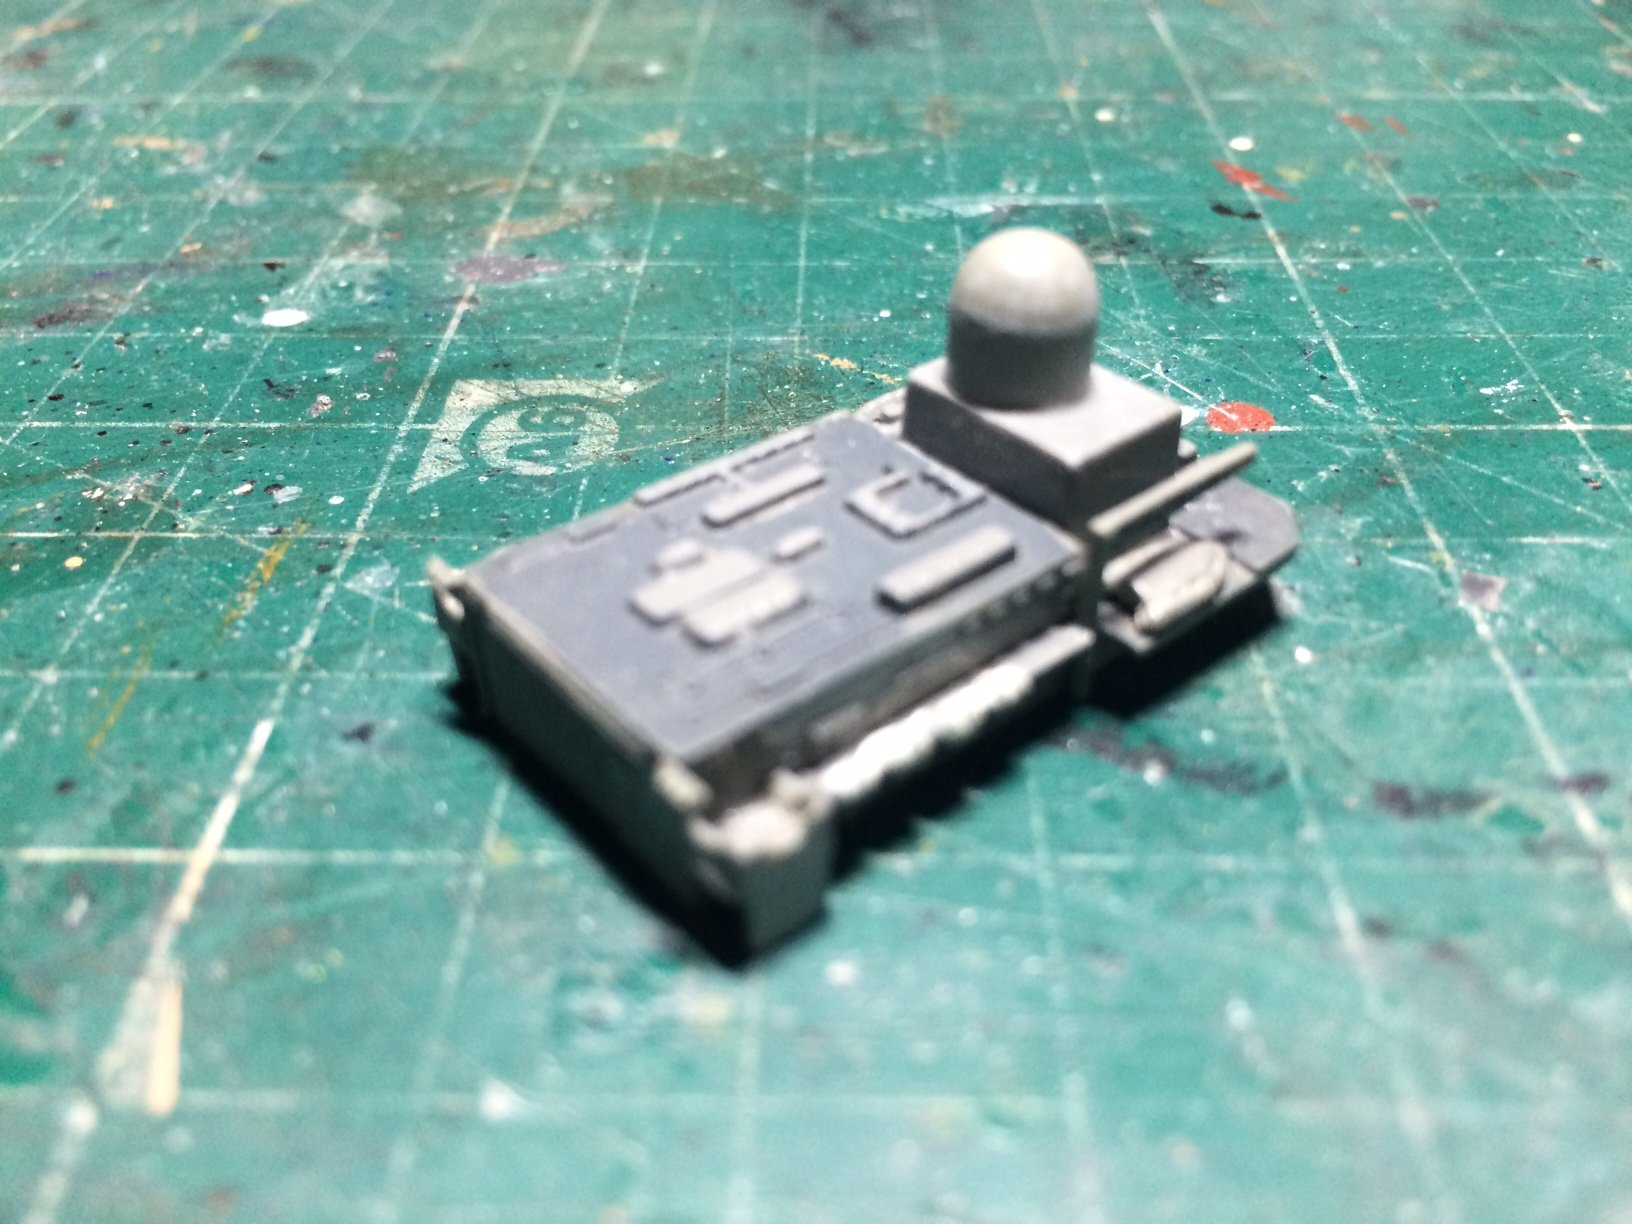
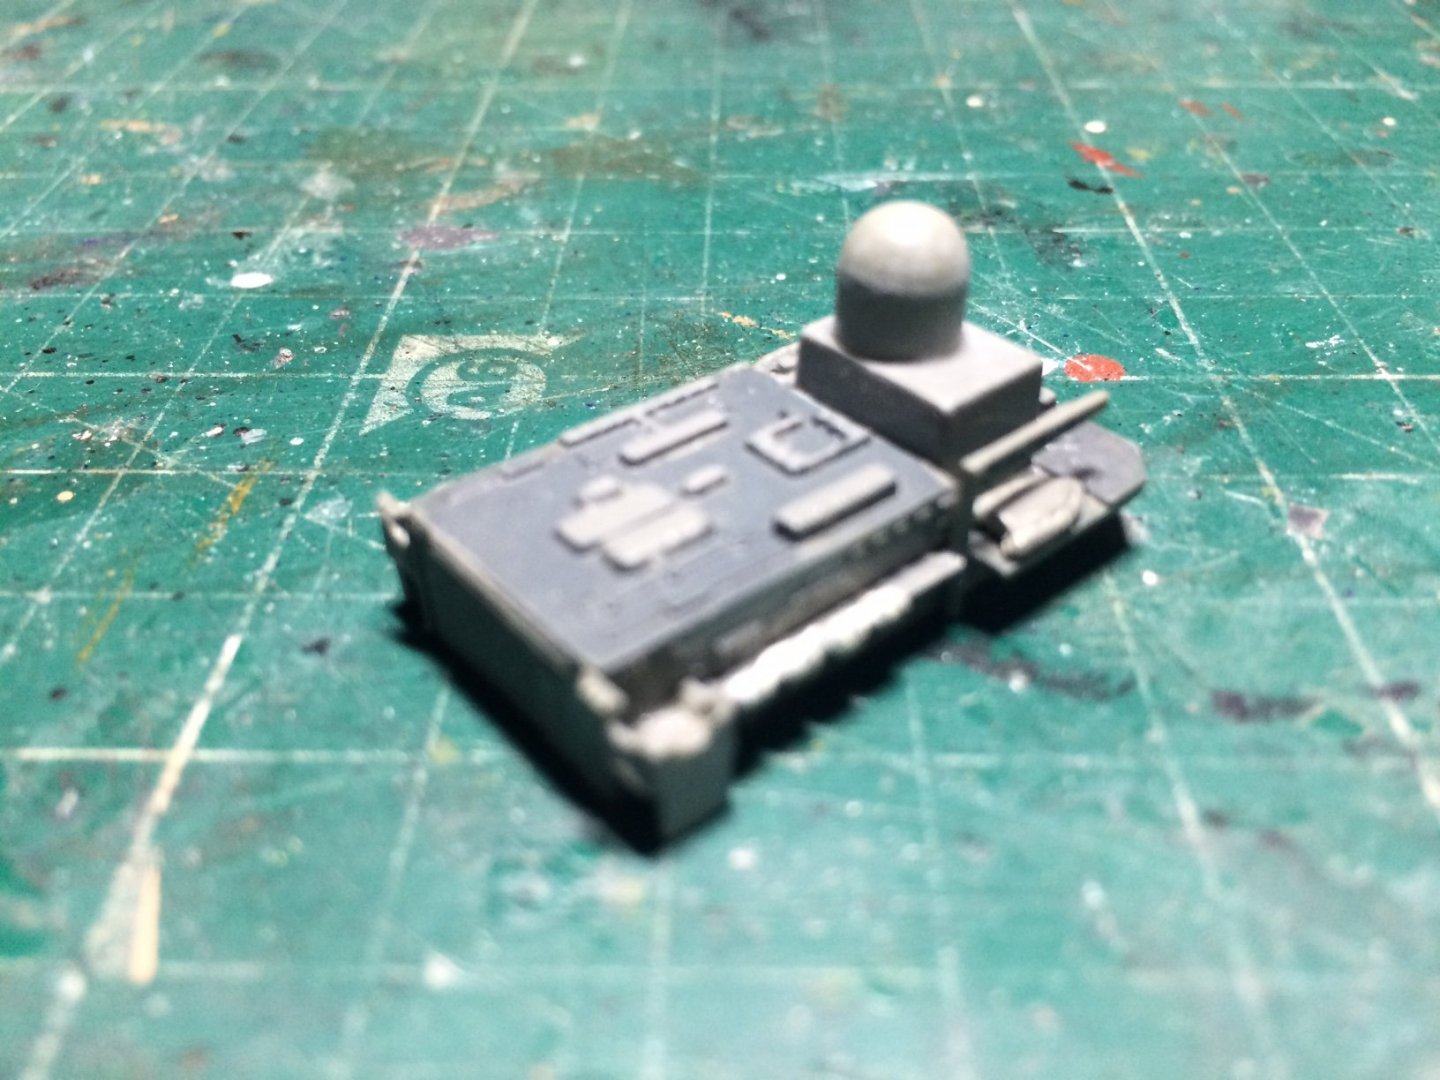
Thank you Alan, she will never be perfect as there are too many issues with it - some of the PE aerials leave a lot to be desired, I had to imitate one with the thinnest plastic stock I could find and sand a bit, to get it level I drilled a small hole right through the base of the main mast, then pushed it through and glued it in place, then the secondary radar globes were missing so I had to scratch build something similar (will need shaping as long as they do not come un glued) There will be no PE handrails as I do not have any and when finished she will most likely be without many decals including her pennant number and name plaque on her hull. But I think she will be an improvement over how I built her - it was my first plastic ship kit since a teenager and first one I ever built in 1/700 scale and under not the best circumstances - light and lack of viewing aids apart from my glasses. OC.
-
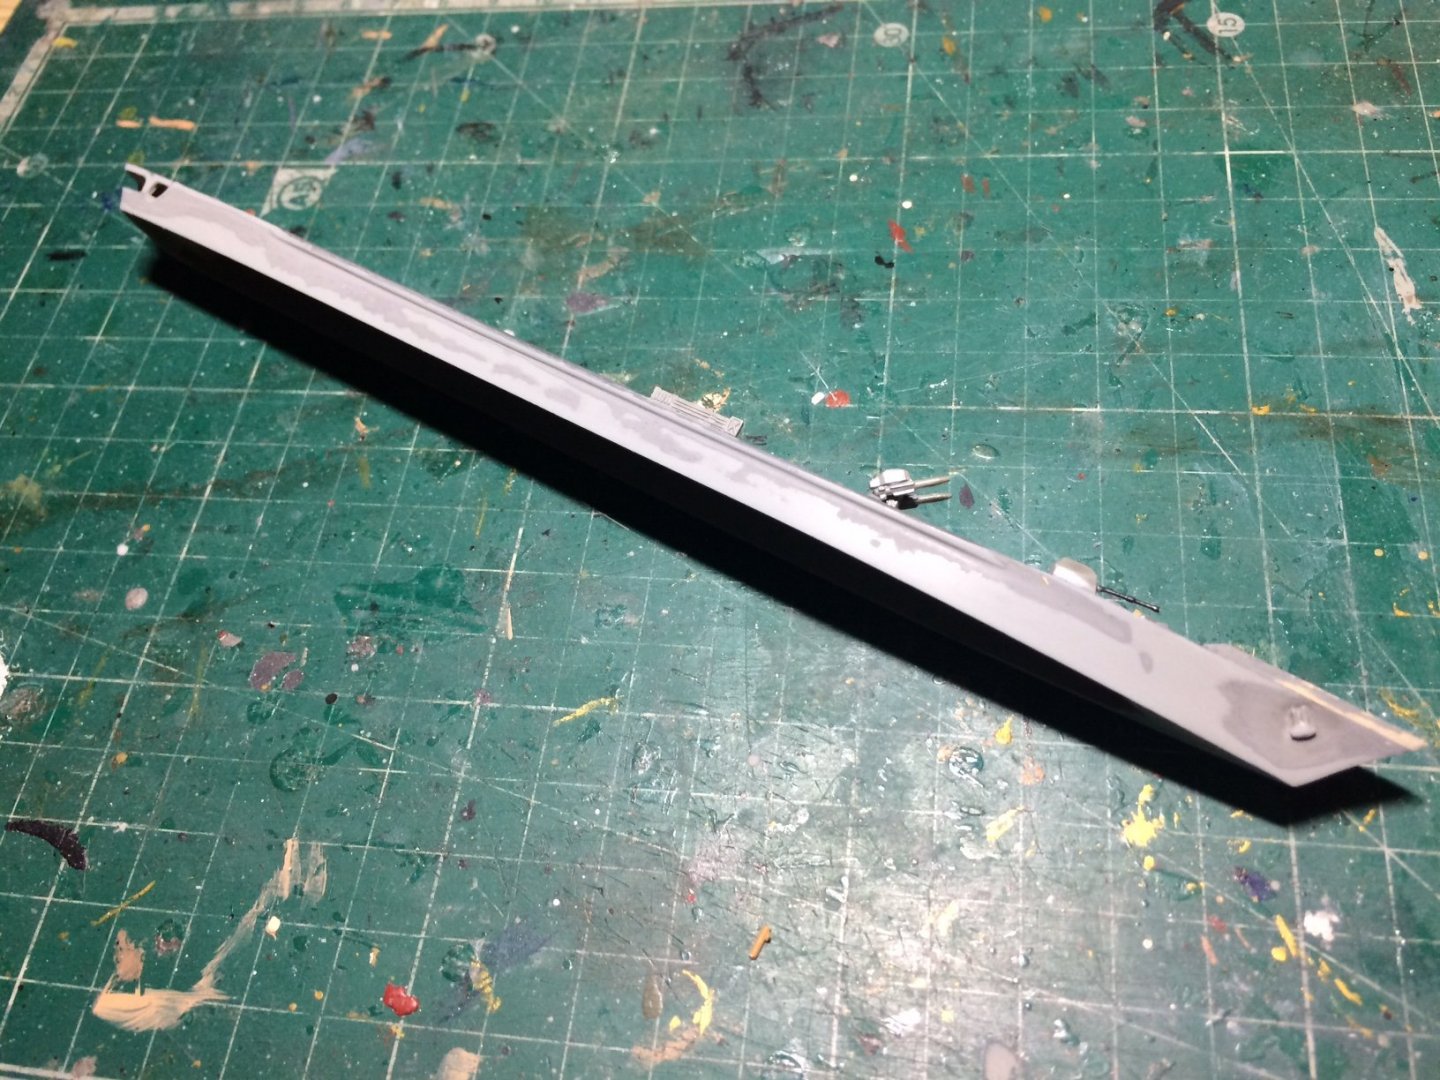
Evening all - here are some progress photos, most of the de-paint process has been done - its a nice flat area now ready for my surface primer, then the top coat, I will mask the rear flight deck so I will be able to rescue the heli landing circle and work on improving some of the lines by masking and painting, the deck/tops of the blocks will also be done by hand. Not the greatest pic I have taken as the lens favoured the details in the background. OC.
-
Thank you so much Gary for those very kind remarks and for following my build. OC.
-
More progress with this tonight but before I knew it - was time to pack up and I forgot to take pics, so basically I have most of the parts scraped and cleaned showing some good detail, I have sanded down the hull sides and cleaned up the bow, the plan is - I will give all the parts a spray with Tamiya surface primer (rattle can) then a top coat again rattle can, then I will paint the decks by hand as they would not have been dead smooth due to the anti slip paint on them. This will leave a ship with no decals though (unsure where I can get a set - I have been looking) OC.
-
Thanks Ken, so far I have been using a sharp blade to good effect, I have a tiny amount of isopropal in a spray bottle but it wont be enough I dont think. OC.
-
Its ok Alan we love our food around here and often get talking about it - you have joined a real "Click" of people the banter is often as good as the topic. OC.
-
I took it where we used to live close to a naval port, I was thrilled when we saw her during her farewel tour. OC.
-
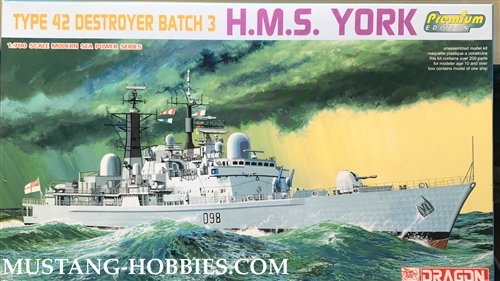
This was the kits box artwork its a mk 3 version of the lengthend type 42 - HMS Edinburgh had the extended frontage (that I had to scratch) OC.
-
Evening all, I decided to make a start on this today - I started removing the superstructure from the deck so I could get a better look at the details - "Boy was it in a state" but no surprise really as when it was built I was using just the basic tools no optovisor and just a over head light on our old haunted cottage where we used to live. I have been gently scarping away to remove the rough paintwork that looks like it was applied with a trowel - not to mention the trapped dust under the paintwork. Its going well even exposing some of the sharp details that was lost under the paintwork, the idea is to clean it up as much as possible then re paint again using brushes but this time it should be a better job as I have magnification and a good light. I will put some pics on tomorrow. OC.
-
Thank you Mark, I understand its because it is the Main unit standard hence why it is so large. OC.