Old Collingwood
-
Posts
12,104 -
Joined
-
Last visited
Content Type
Profiles
Forums
Gallery
Events
Everything posted by Old Collingwood
-
 That does look nice and smooth Craig, I have the Vallejo Primer (that I have been using on my figures by brush so far) I intend to try it on my figures but using my new airbrush - wonder also how it would work on my Hood - taking into account how good the finish you have go off you Mr Surfacer. OC.
- 174 replies
-
- 5
-

-
- prinz eugen
- trumpeter
- (and 2 more)
-
Thank you so much Ken. OC.
-
Indeed, I am speaking to the chinese seller about this very thing - they have offered a partial refund and are very sorry - just waiting to discuss how much this will be? OC.
-
Thank you for the link Craig, thats quite a hike in price over what I paid, only extra cost to me was buying the wood deck my price also included Free delivery. Interesting to see what UK shops will stock Hood and what thier price ranges will be. OC.
-
Really looking forward to your next instalments on this build Alan - great news with the completion of the sections. OC.
- 460 replies
-
- 4
-
-
- Finished
- Flower-class
- (and 1 more)
-
Thank you kindly Roger, yes supply of these kits does seem a bit slow here in UK no where has yet started selling thh Hood kits by Flyhawk, also sometimes you have to buy something when you have the money - that was my case - I knew it would be a long delivery I was/am in no hurry and I chatted with the chinese dealer who said the baox would be securely and strongly put together - the only thing missing with it in fairness was Fagile tape all over it. OC.
-
Hope we see more of your projects. OC.
-
I think Its all the more special when we attack an older kit with the skills that we have now - keep up the great work mate. OC.
-
What lovely special pictures Kevin - family pics are priceless, that one of you in your gear reminds me of one I had when I was in the Sea Cadets. OC.
-
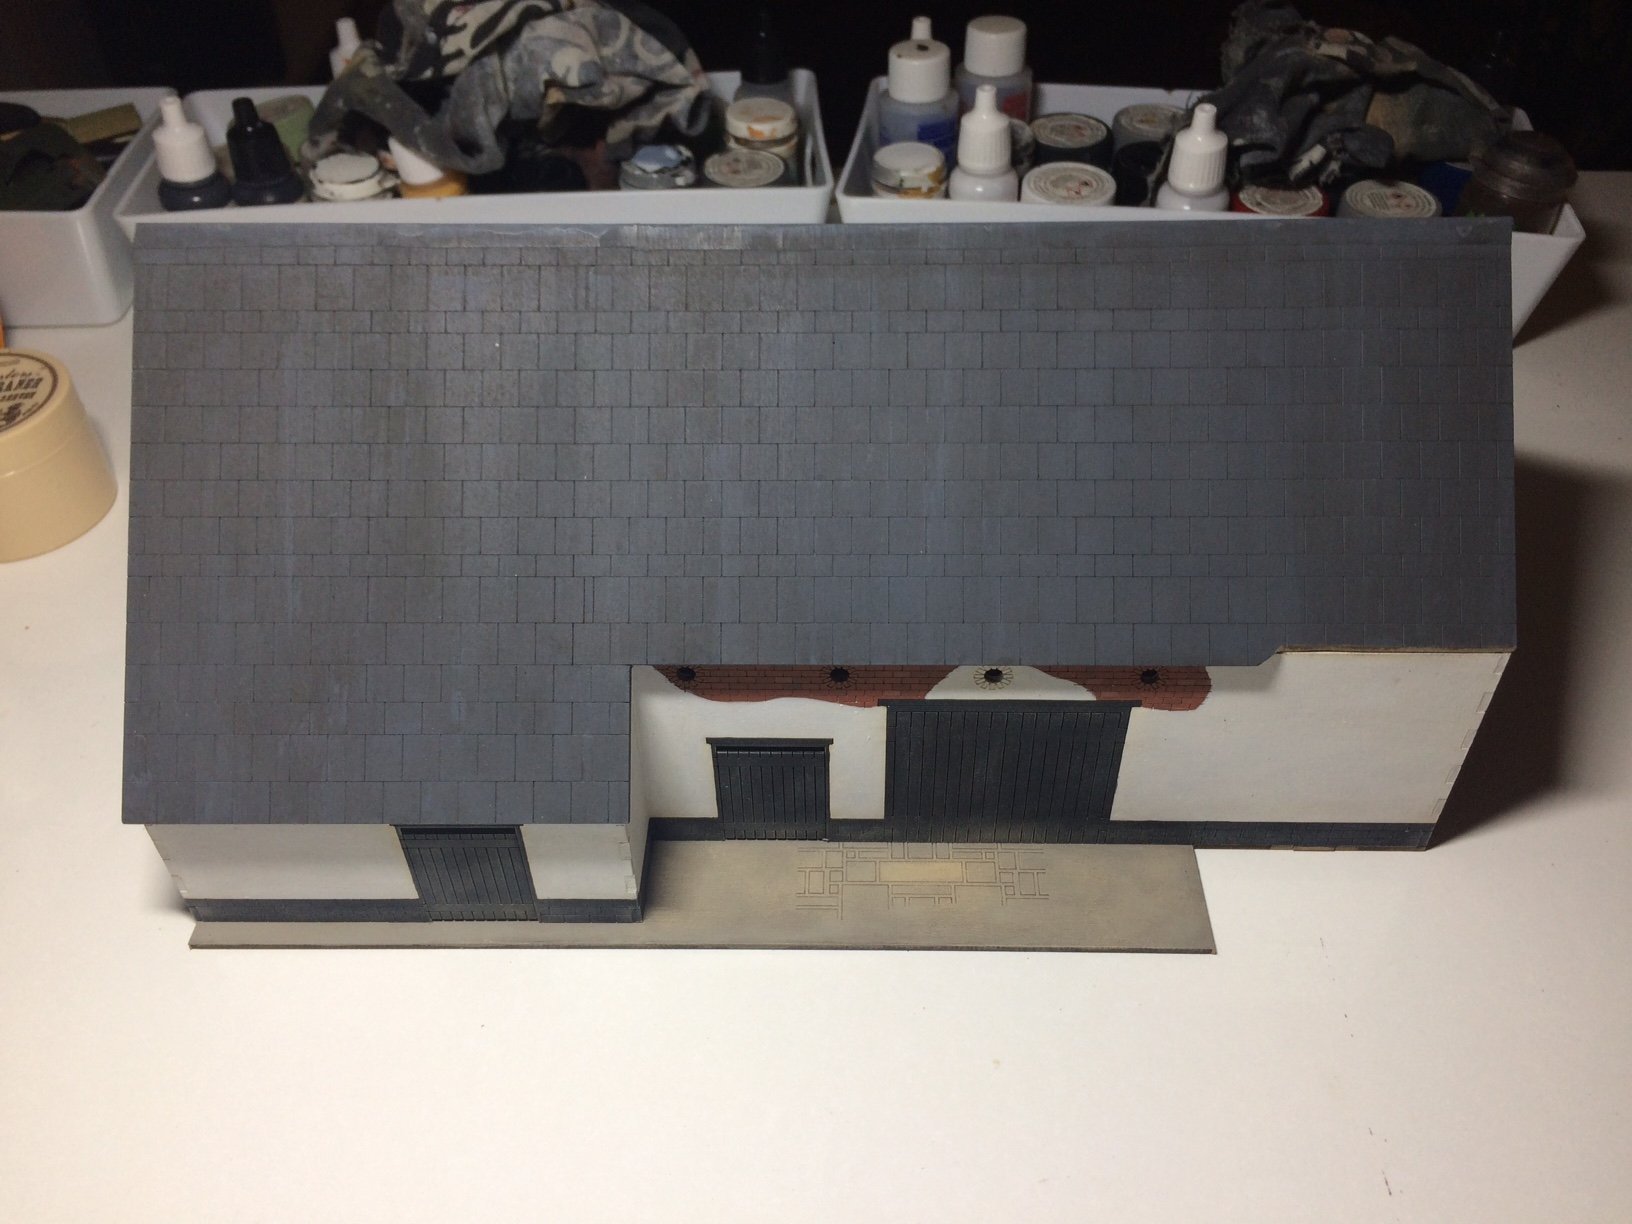
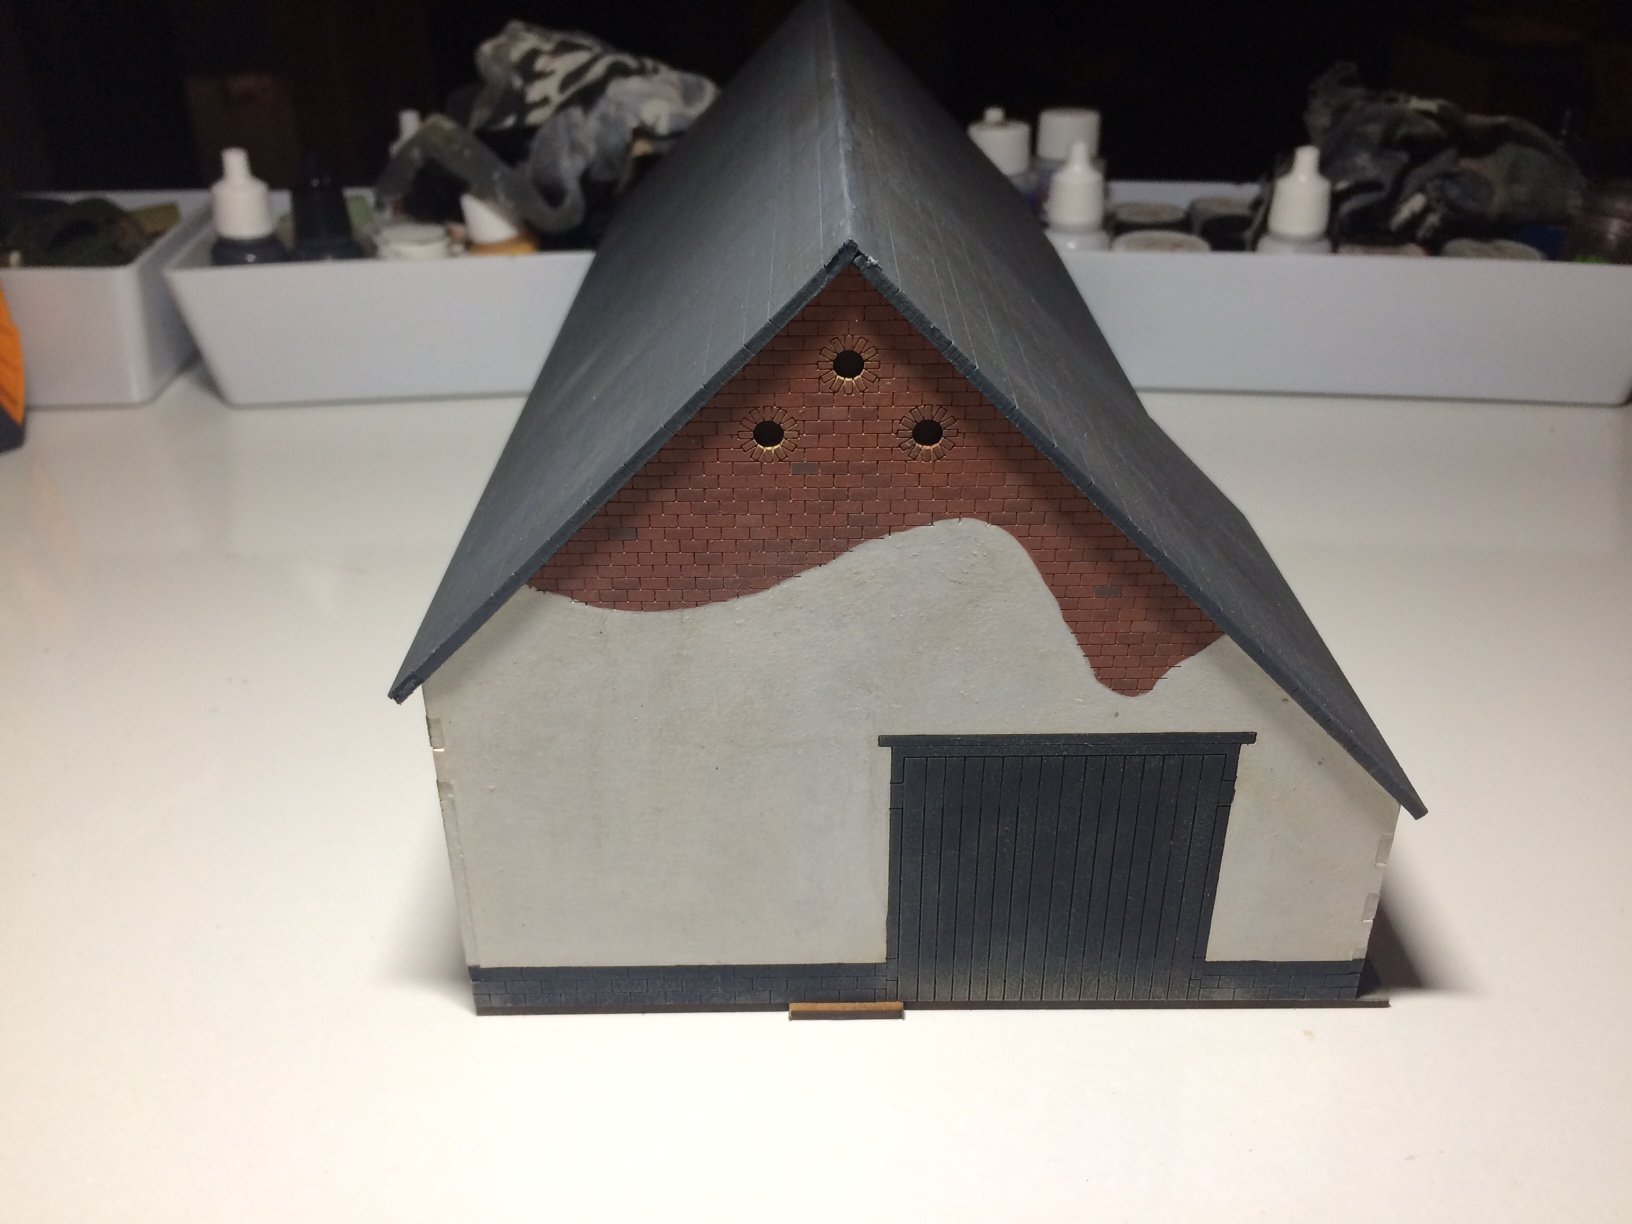
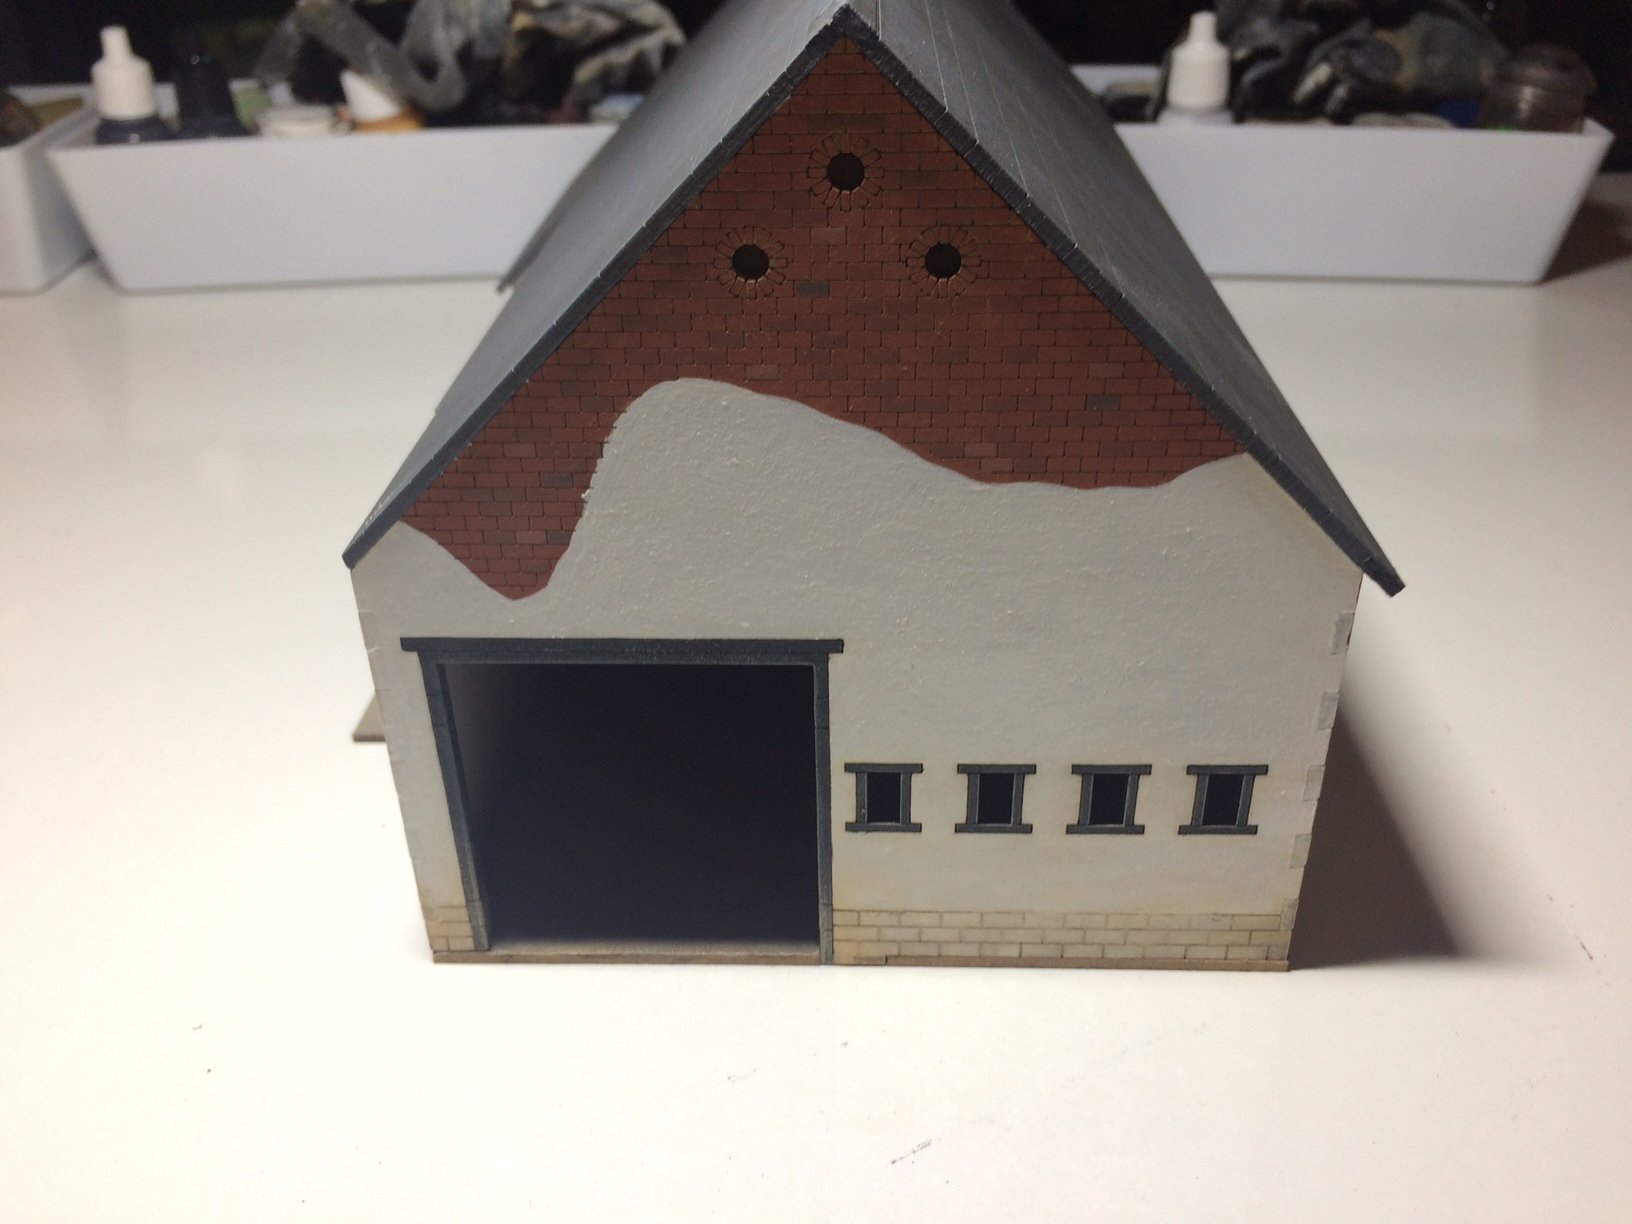
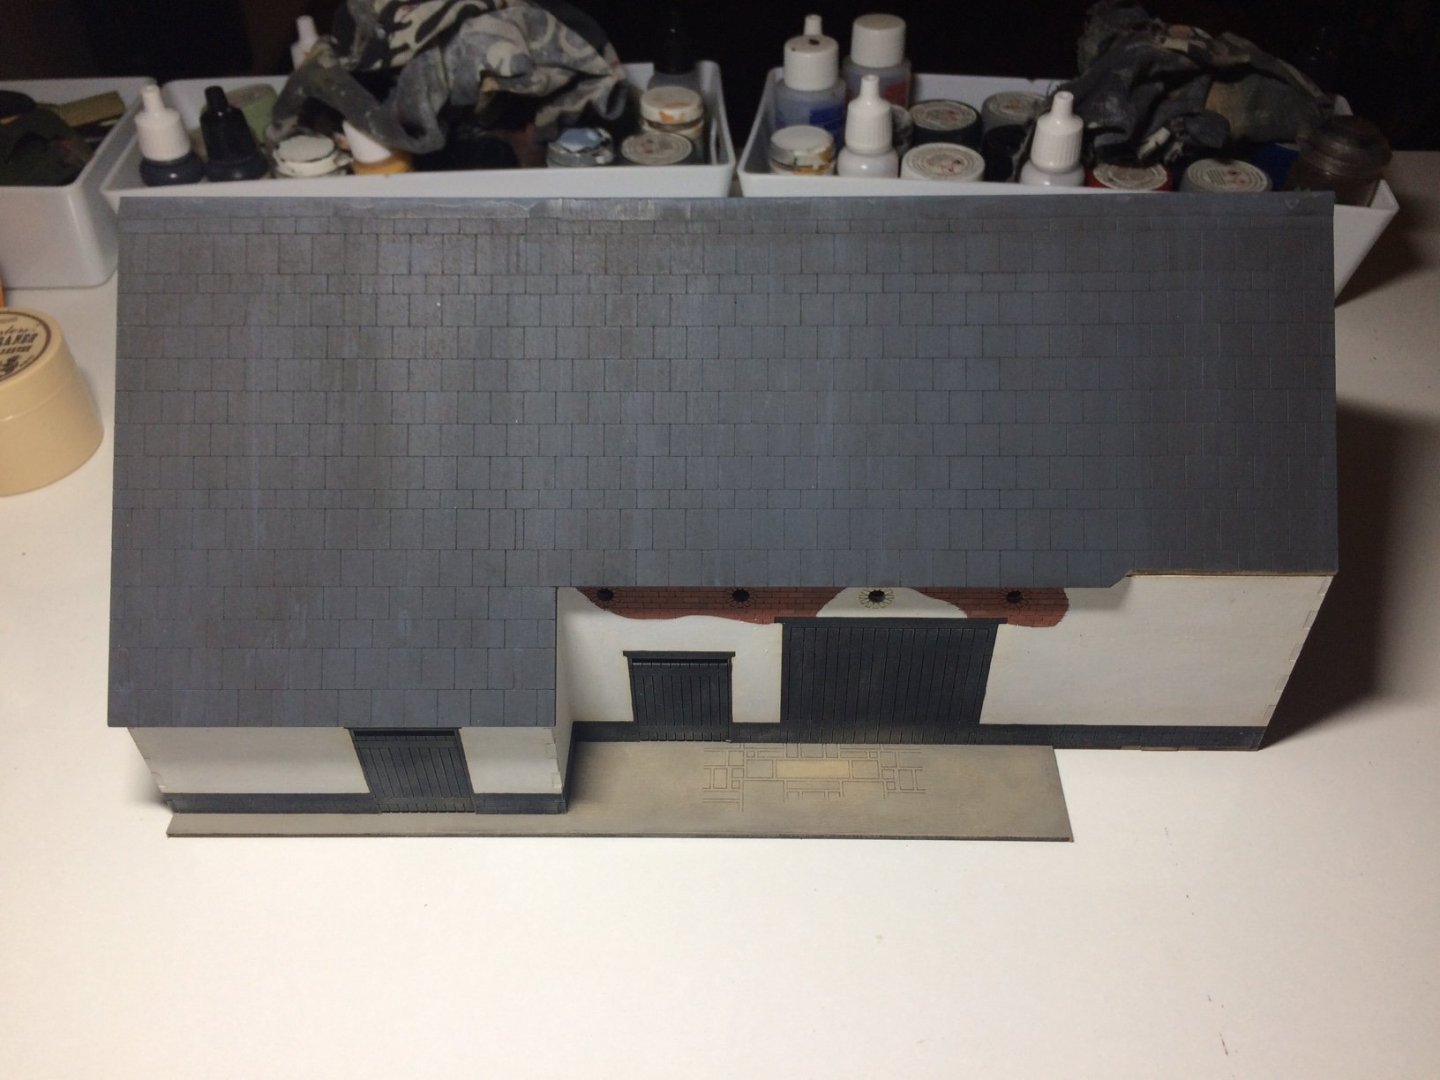
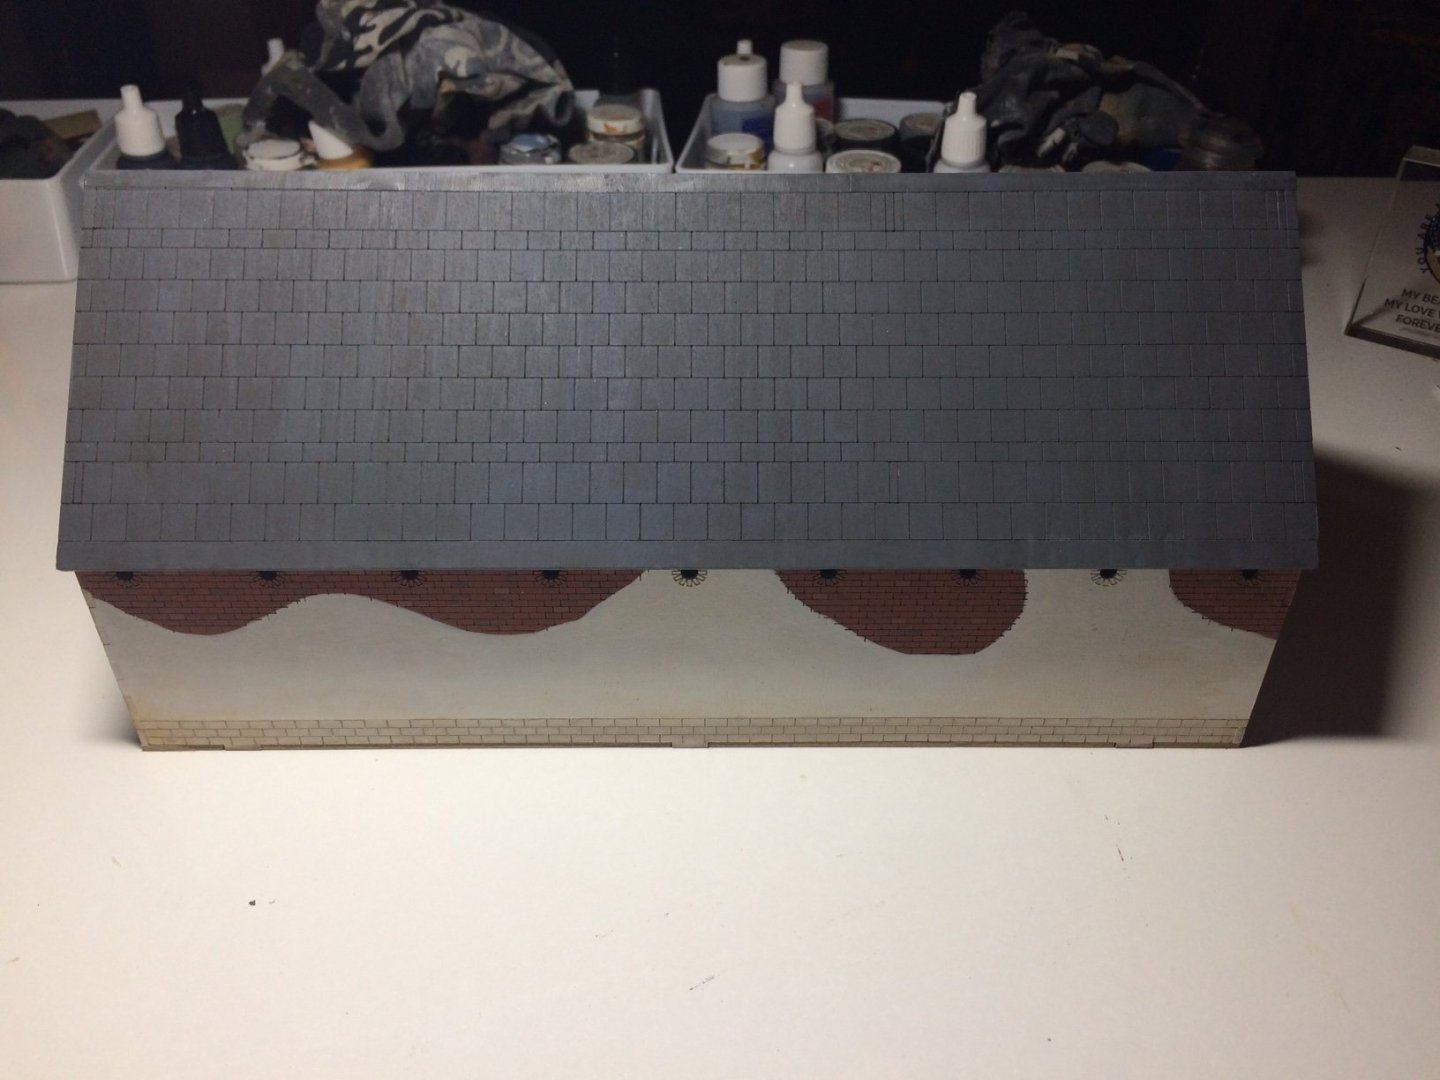
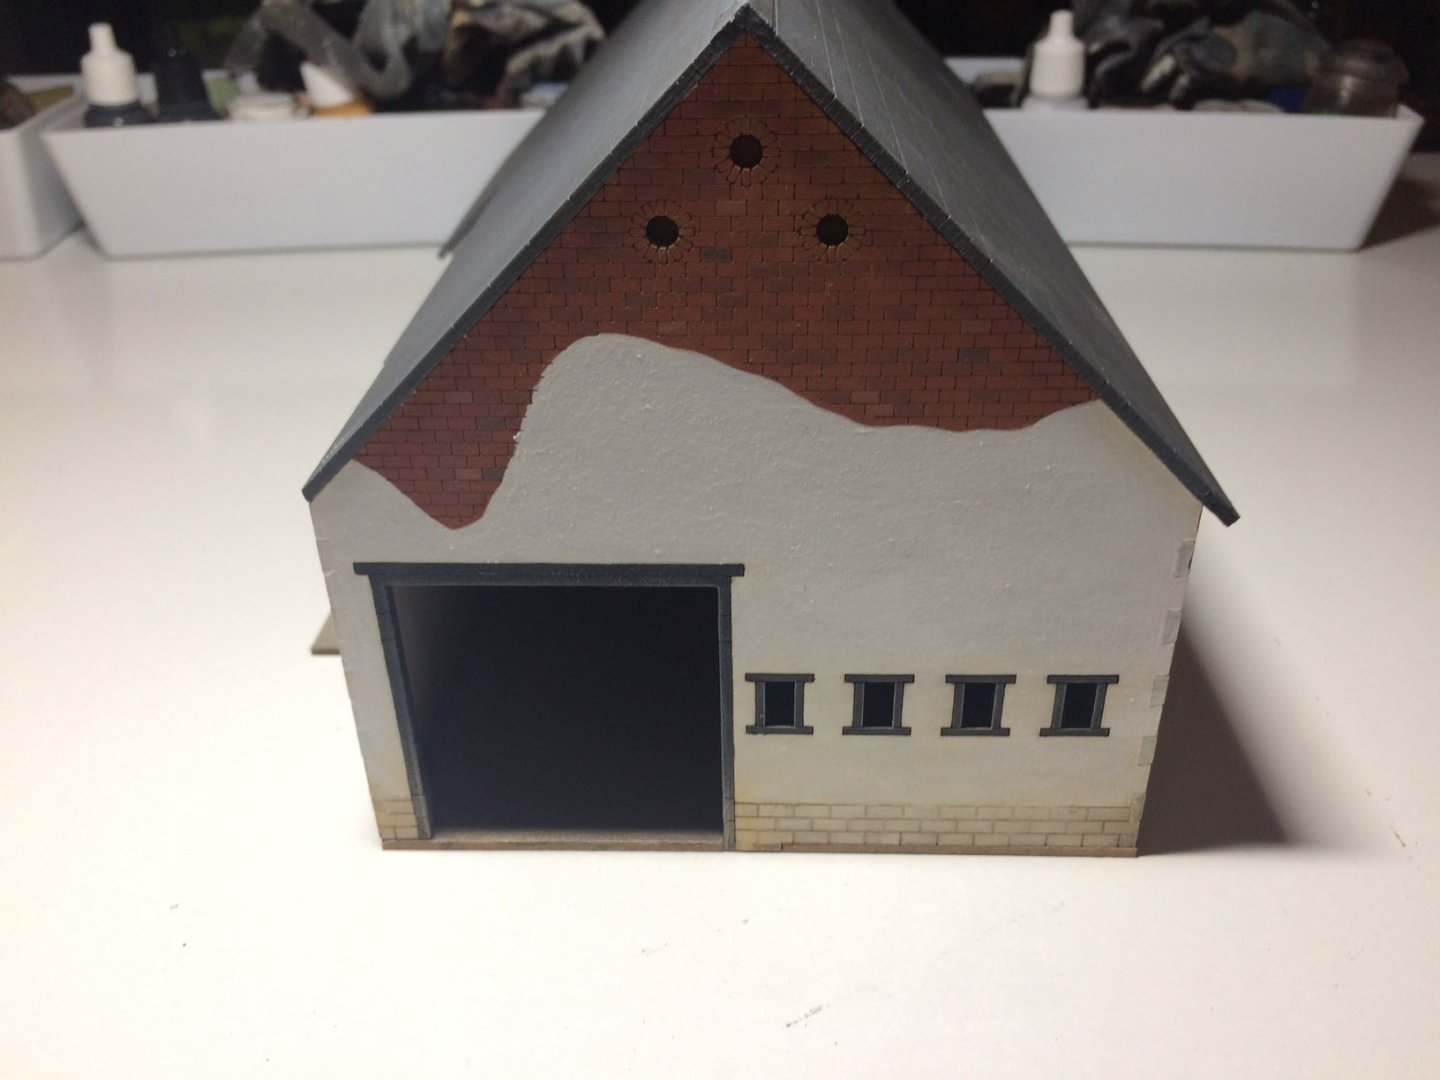
Evening all, the Barn is now finished - roof attached / painted and weathered. OC.

-
Delicate job - you need the strength that comes from enough CA but can't apply too much as it will mar the excellent paint work. OC.
-
Thank you Gary for taking the time to read through my minefield - it truly means alot. OC.
-
Trouble is when I went looking for it - there was no UK suppliers of the kit only China, and I went with the seller with the best Feedback, will be interesting to hear there reply to my message I sent them. OC.
-
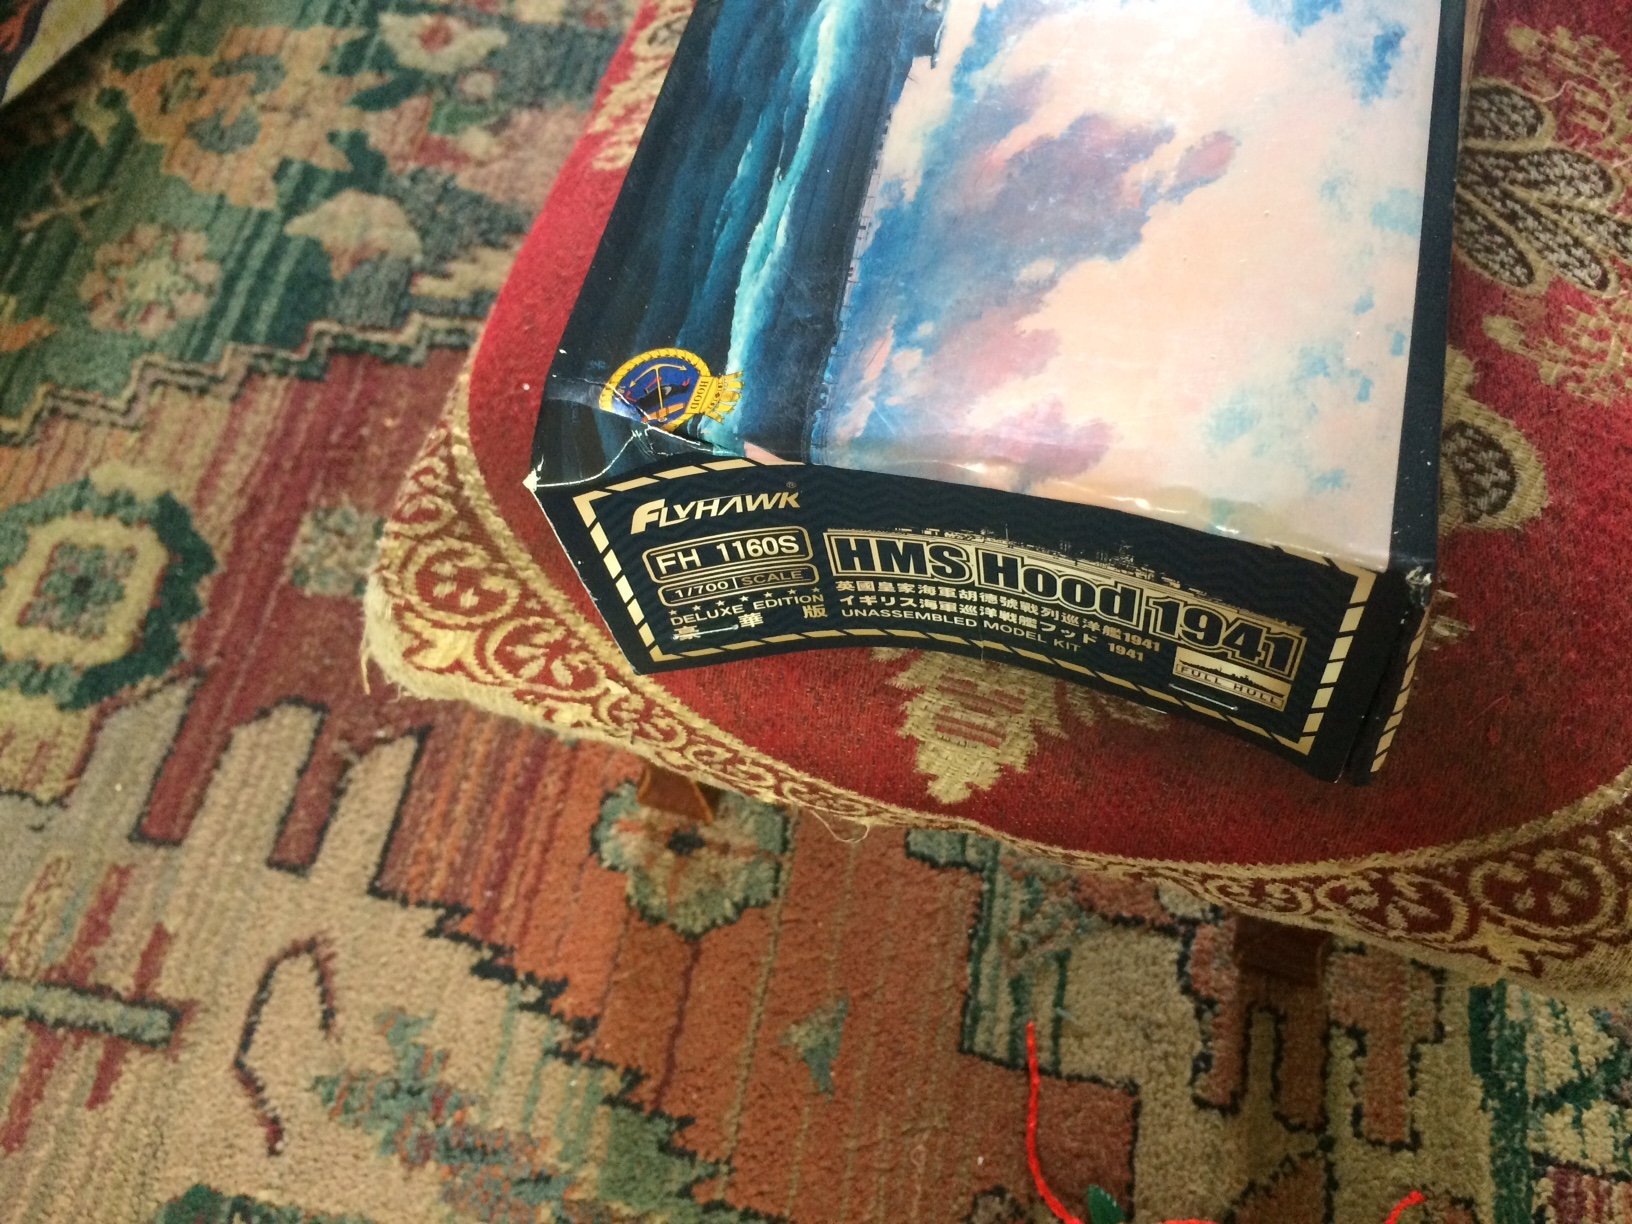
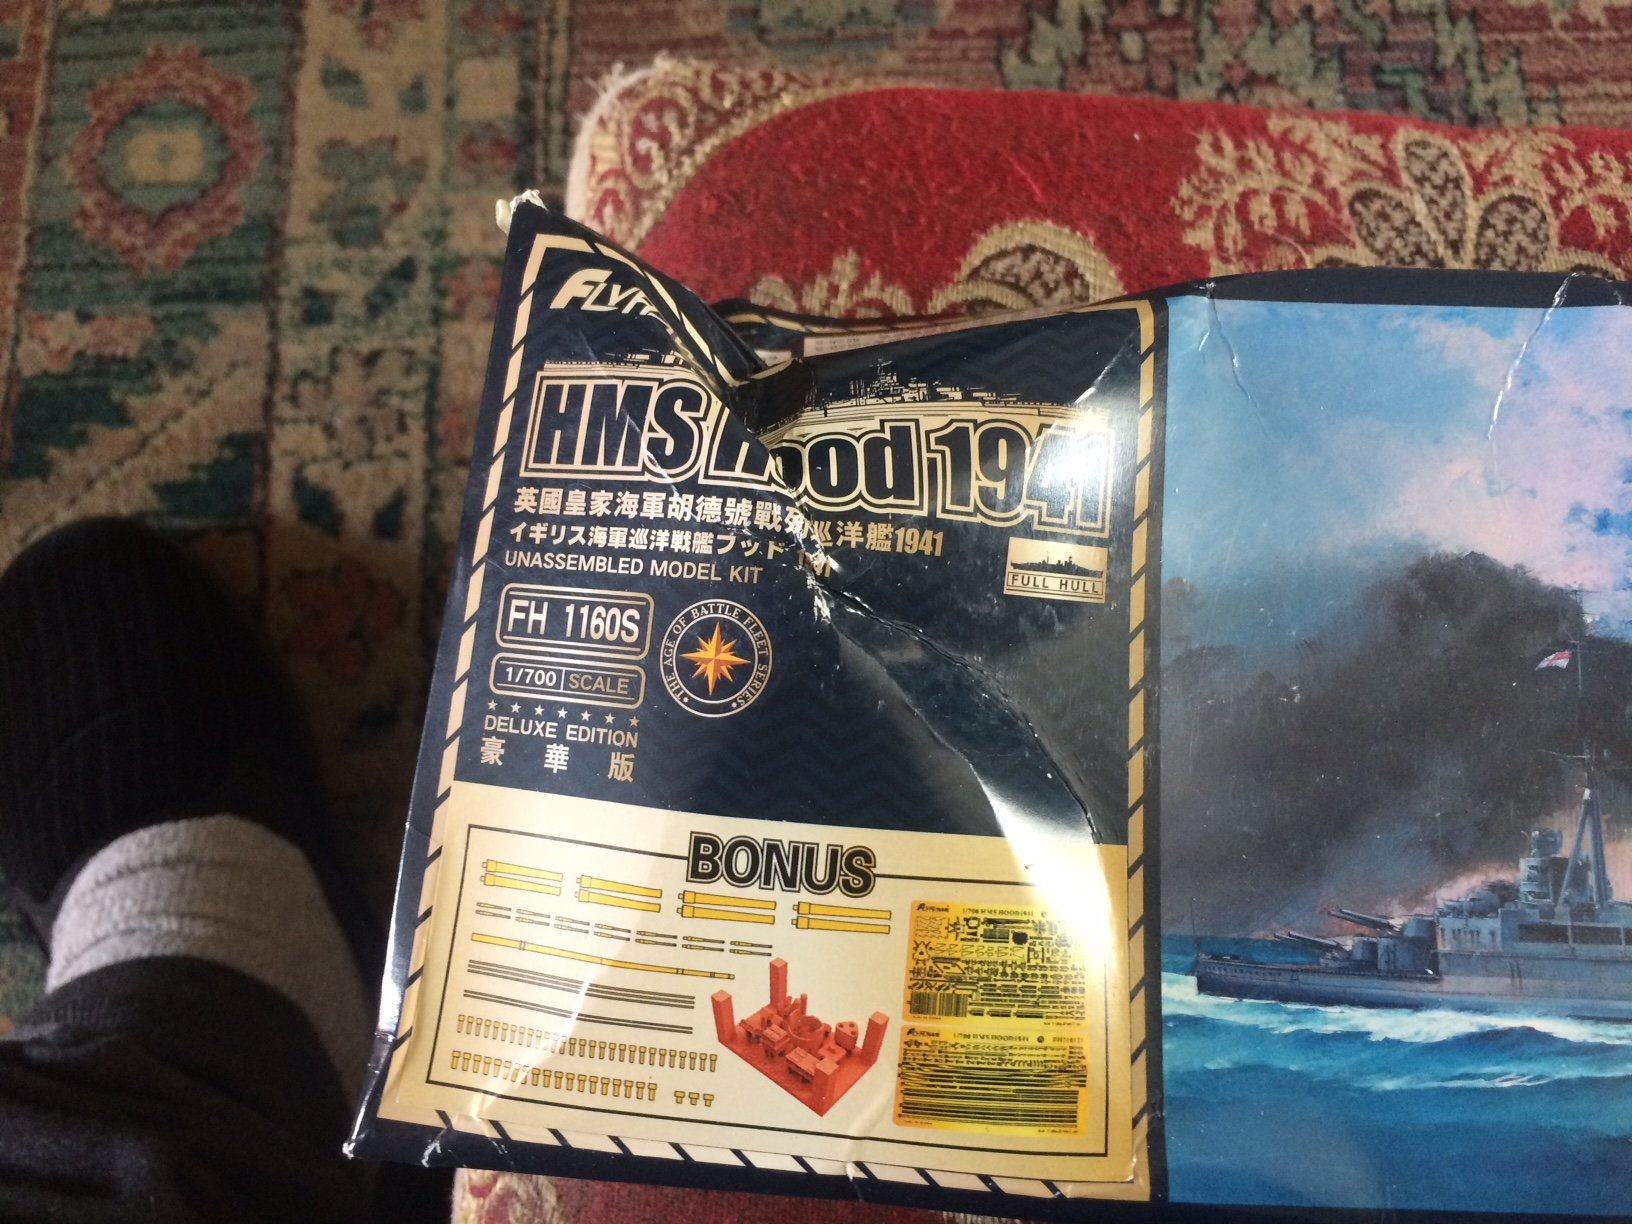
Just checked on the contents - they look OK from what I can see through all the sealed bags, and the hull parts are still sealed in the styrene sheets with rubber bands around both ends - The wood decks (that I brought seperatly) are intact. So it looks like just the box that got bashed - just not good from the different handlers through its long journey. OC.
-
It had styrene taped around the box making a thin box itself, but even that was punctured, the package hd no "Fragile" tape or any form of warning that the parts were delicate, I have sent the seller in China a Fle Bay message including the above photos. I havn't fully checked the contents as I was frankly so dissapointed to see the damage after asking them to package it well (as they had had several negative feedbacks for damaged items. OC.
-
That is looking so good Greg, I know I keep saying it - but with each build you do they just keep looking beter and better. OC.
-
That looks nice - very like the bottom of Vic. OC.