


Old Collingwood
-
Posts
12,007 -
Joined
-
Last visited
Content Type
Profiles
Forums
Gallery
Events
Posts posted by Old Collingwood
-
-
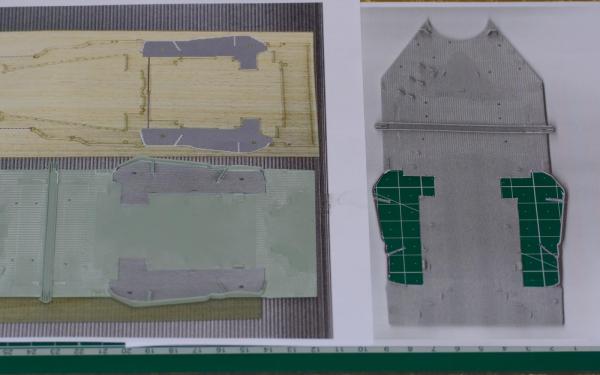
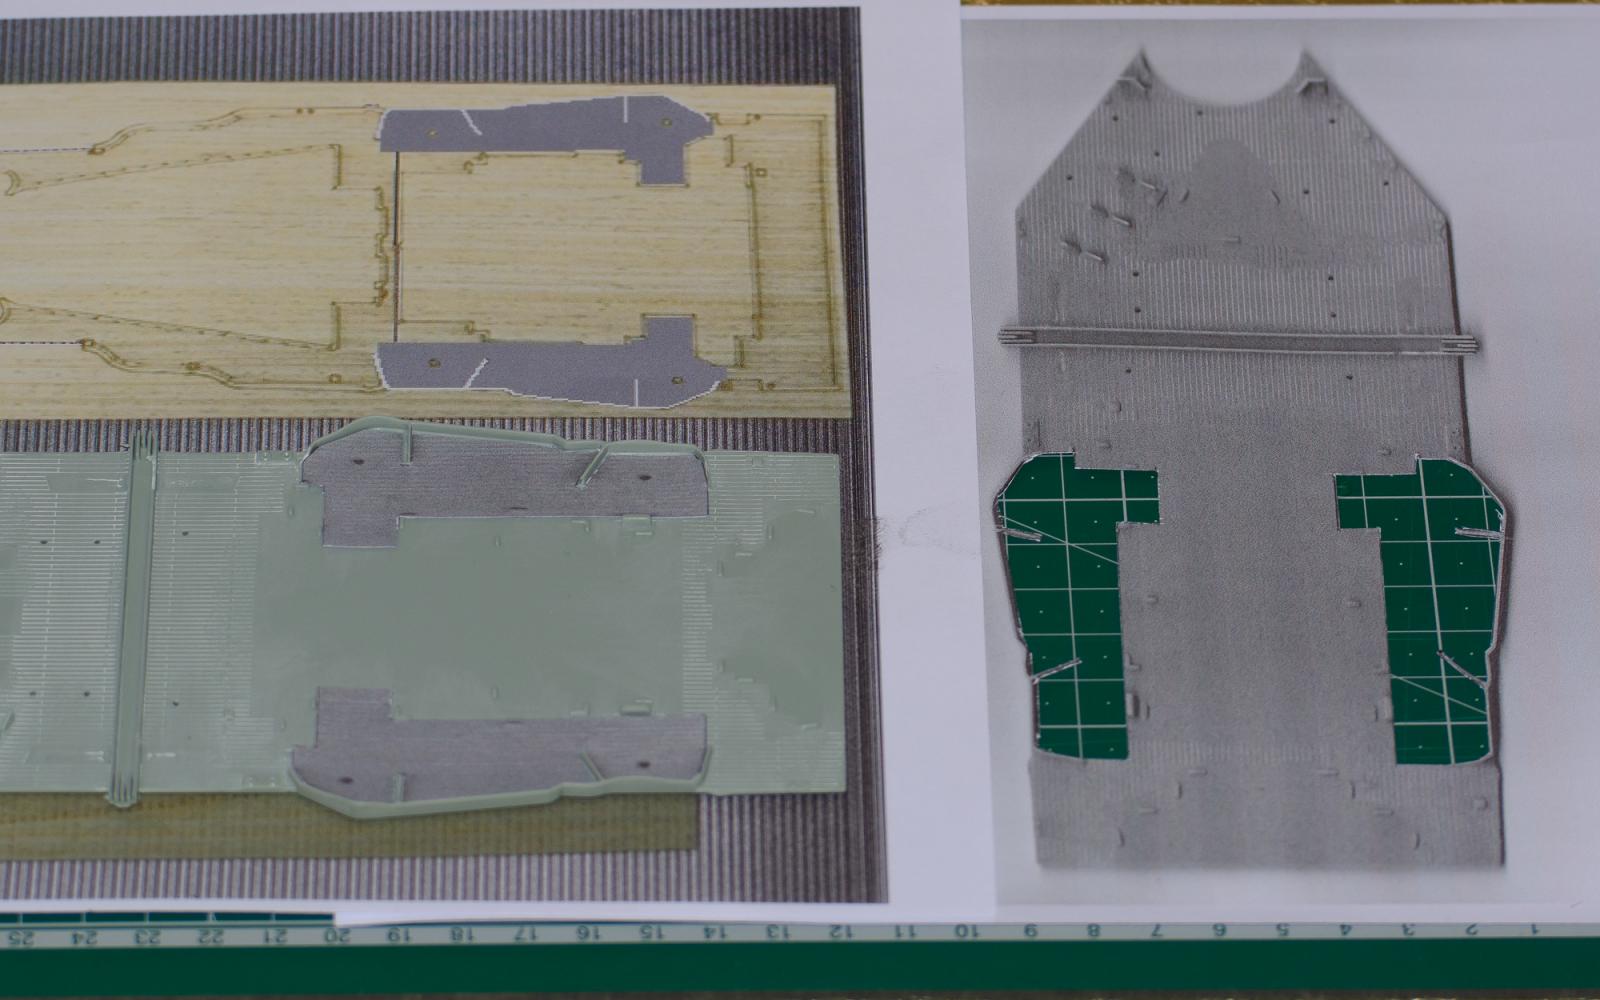
While i m waiting for my new paints to arrive i decised to have a look at the seperate deck sections, i have not decided yet when i can get some wood decking but i have decided to carry on as if i am getting it, so after a lot of researching different sites i have come to the conclusion that the raised plastic simulated planking would be better sanded off, also i have discovered that the areas around the 4inch guns - mid section had reinforced metal floors and painted dark sea grey, so i found a picture of the wood planking and also i did a scan of the plastic area from my model, and ended up with a few ideas.
I marked out the metal area on my scanned part that was a 1:1 scale with the real plastic part, then i set about cutting this out with a sharp blade, i have done this for both sides and both are now awaiting a coat of dark sea grey, then the next stage will be to tidy up the bulwark area/shields that sit in front of the 4inch guns, and give them a couple of coats of paint before gluing the steel decking in place.
Here is a pic showing what i mean.
OC,
- EricWilliamMarshall, hexnut, BenF89 and 2 others
-
 5
5
-
Hi david, coming on really nice a love your decking very tidy

OC
-
Progress has stalled abit folks
 that first layer of my Admiralty Paints Red Ochre that i applied to the hull, started to come away it wasn't very hard even though i had left it over a whole day to dry
 I think i will have to try a different paint as it ju
t doesn't seem solid enough, i have seen an Acrylic Vallejo surface primer in red, so possibly with a few drops of black it will do a better job? i need to search out a seller of it and purchase it before i continue with the water retention floaty type device we call a hull 
OC
-
Sutch sharp painting and very accurate detailing, she is looking swell.
OC
- SteveLarsen and Canute
-
2
-
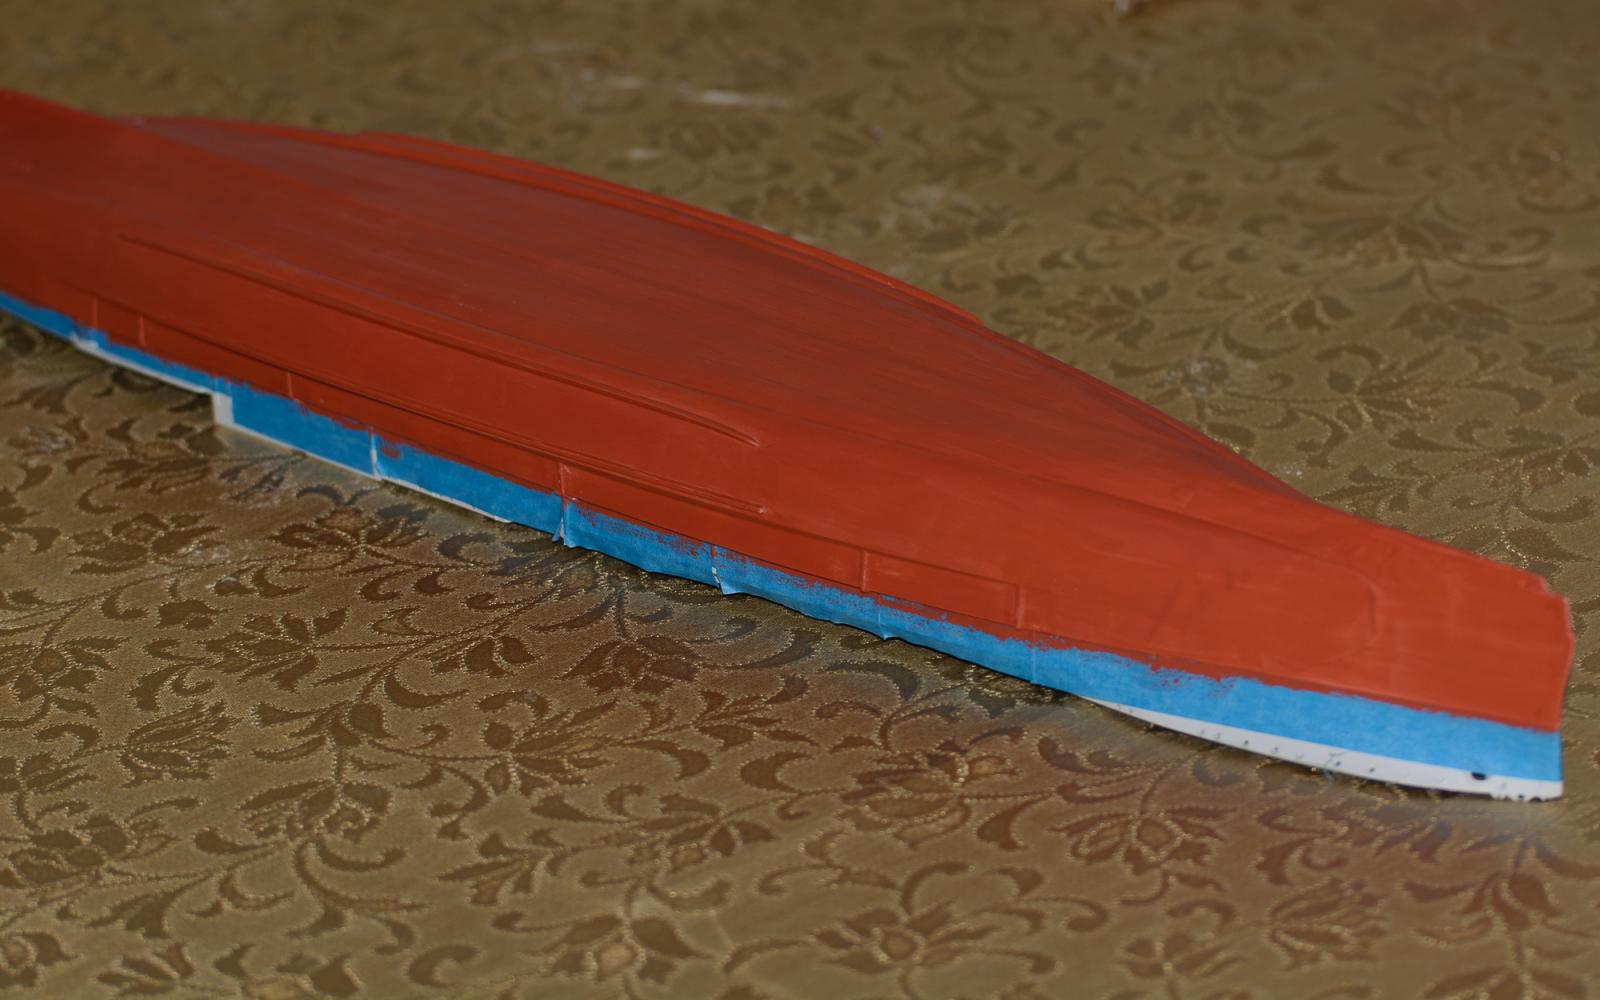
I started to mask off the boot line today with low tack blue tape, i had to cut this tape into small sections to fit in between the hull details, after completing this - that seem to take all day
 i let it sit then smoothed it down to get a good seal with a small sponge.
I have now started hand painting the first layers of the hull red color, i have chosen to use my Red Ochre that i already had, this is close to Red Oxide and i believe quite close to RN Anti fouling paint, it looks a bit patchy at first folks
but this shouls smooth and even out with more thin cooats and gentle sanding between coats - fingers crossed 
OC


- Canute, popeye the sailor, clearway and 3 others
-
6
-
Great work their tim she is looking so authentic and true to scale, i am dreading doing all my small bits and pieces at 1/350 scale on my build, esp the 20mm orli's they are so tiny....
OC.
-
-
Hey - a great subject and in my fave old medium plastic
 A man walks into a Bar and goes "Ouch" it was a metal bar.......
I too am trying to make plastic look like metal its a bit different from making wood look like "ermmmm"
...wood 
Anyway can i join in the watching please, i am rubbish in a group to shy, but if its ok i will sit i
n the wings and watch.Oh yes nearly foregot - i used to build Accurate Armour resin 35scale tanks from Tiger to Warrior IFV.
OC.
-
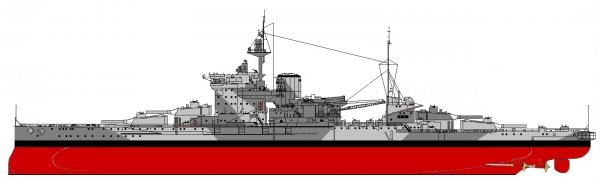
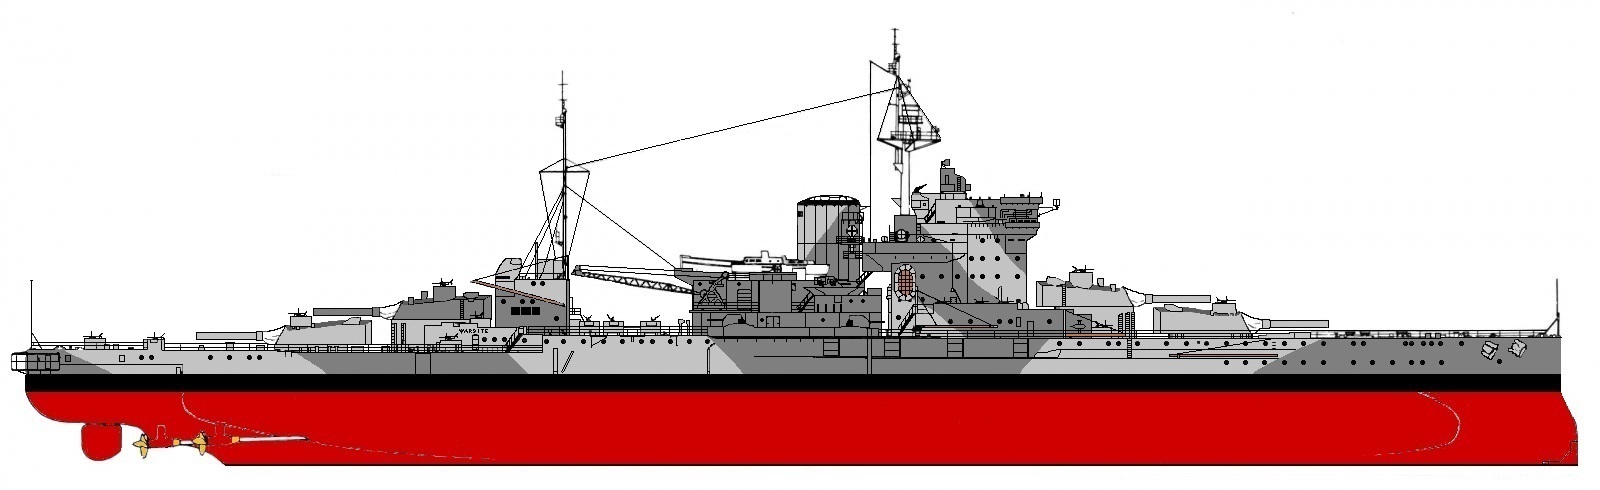
My plan is finnished here is both sides as i am building here
OC.

-
Hi david good progress there, i can understand where you are coming from regarding the planks, i had a similar situation with a part works build, i have a build sitting in the cuboard HMS President i think? that has a surplus of planks.
OC.
-
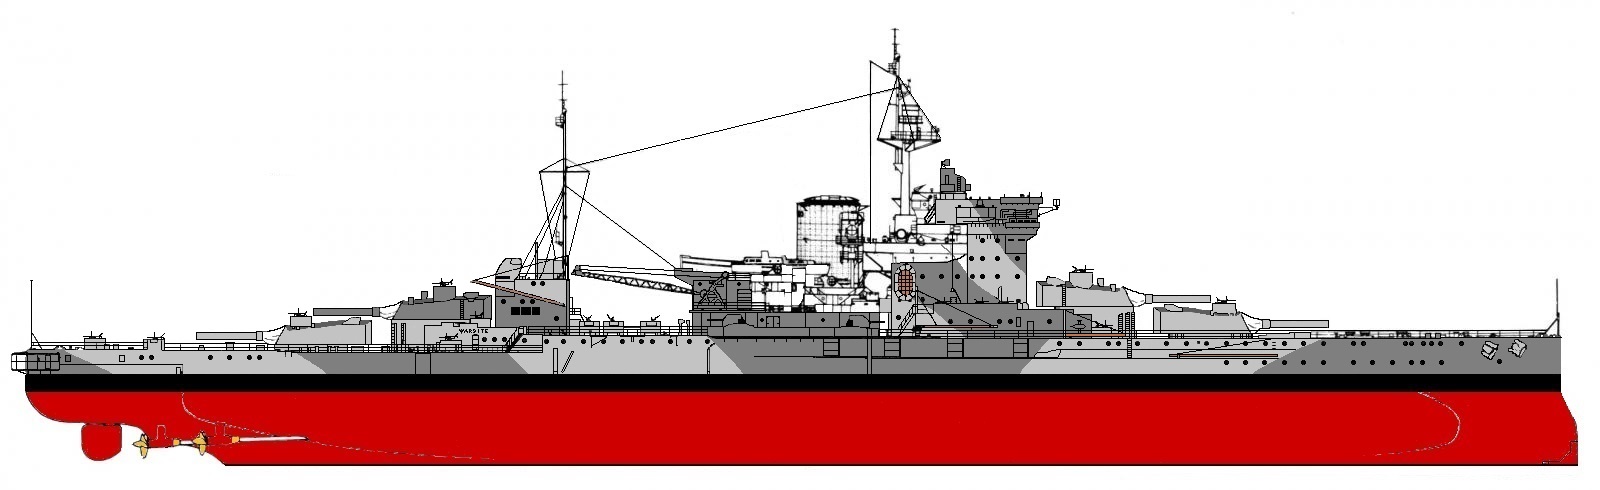
Here is another picture from the diagram i have been worrking on
 it takes time because i am having to zoom into 600x and work in squares to fill in the details, i am cross referencing from different sorces at the same time, to try to get the most accurate 1944 representation of her.
OC
- Canute, mtaylor and popeye the sailor
-
3
-
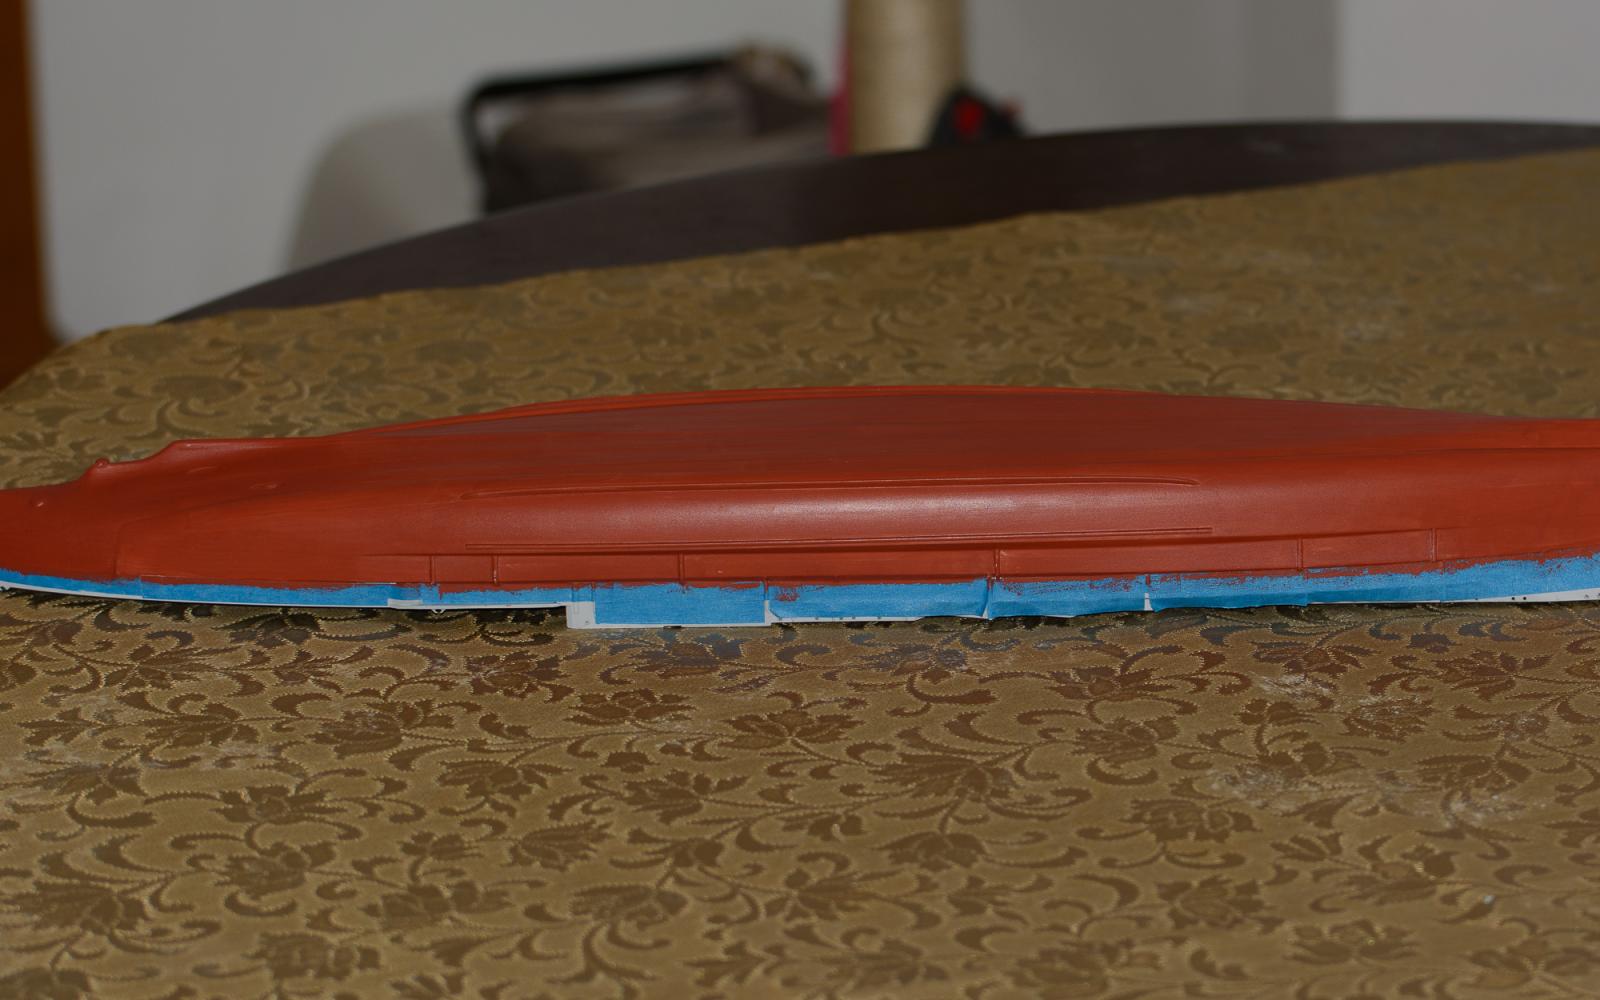
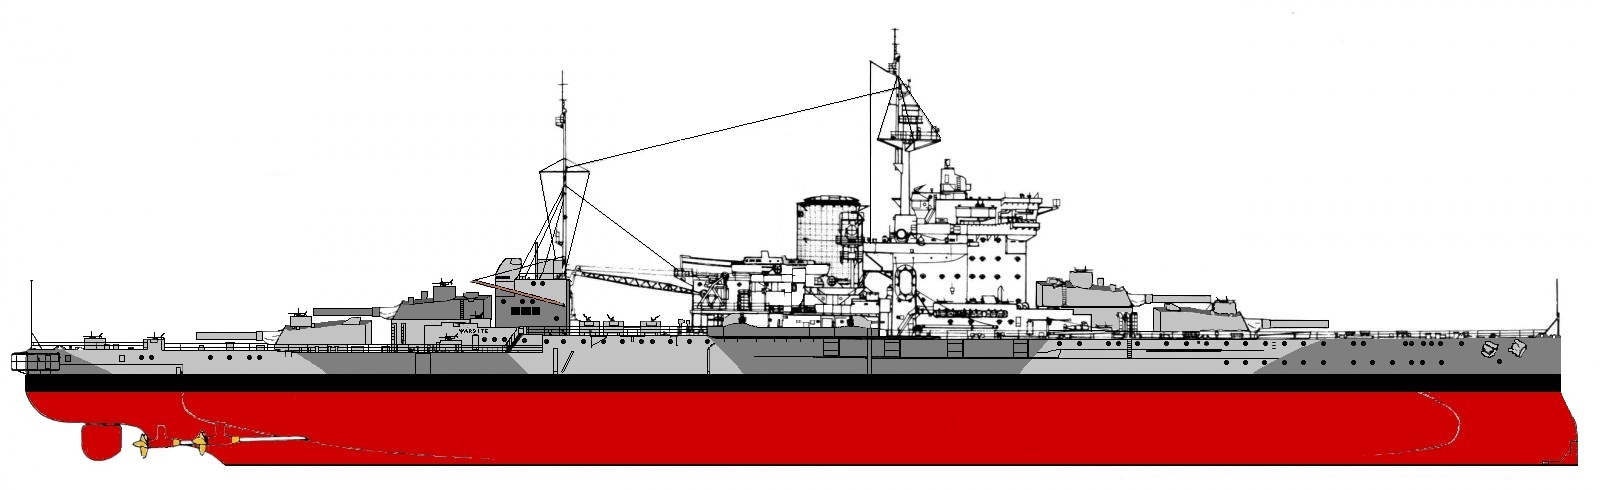
I achieved a bit more progress yesterday with the bow area, i am getting to the stage where i am quite pleased with the way it is turning out
she is getting closer folks to being completed in the hull area anyway promis This morning i have also been continuing to work on my plan in Micro Paint, its coming on what do you think?
OC.

- hexnut, popeye the sailor, Canute and 1 other
-
4
-
More primer arrived so i was able to continues with hull both forward and aft, after mixing the paint to a 50/50 mix with distilled water i came across a technique that has helped to level out the paint in a smoother manner, before applying the primer i heated up the section to be painted with a hairdryer first, and i found with a quick thin layer and the hairdryer, applied again after application, the paint was smoothing out nicely and drying quickly.
I put on about 5 layers and have left it over night to harden before i give it a light sanding/wire wool keying, ready for more parimer.
The idea is to get a smooth even layer that will be hard enough for me to gently improve some of the buried details with my knife, the hull will be ready then for the propper painting
OC.
-
That could very well be the case OC, and that would also end up giving you some trouble.
Thanks Joe, lucklely none went on the sides just under the hull.
OC
-
Use isopropyl to clean the hull. Various liquid soaps can leave surfactant residue behind the actually prevents adhesion.
Thanks Joe, i wondered if it was down to the layer of PVA i had painted over the hull?
OC
-
I foregot to mention - i have been working on a plan in Windows Paint, of how i want my build to look, here is the plan part finnished -
OC
- BenF89, hexnut, SteveLarsen and 3 others
-
6
-
Just a smal update folks - I decided to do a bit more sanding to blend those areas i had painted, well i have it back down now to near clear palstic minus the hull side bow plates
they just didn't look right, yeterday i took delivery of some more Vallejo primer so i can do the - Prime/Sand/Prime/Sand dance .But what arrived that realy had my eyes popping out of my head where the turned metal barrals
but - WOW are they tiny tiny little things, they are like the tinniest of baby pecsision metal work i have ever seen :o i will need a magnifying telescope to work with these as i was hoping to hold them with a pin or something down the barrals, while painting .They look superb though, oh and the 20mm Orli's i received aswell including the pe framework/shields
I think my work will be cut out working on these folks - my appoligies for swearing in advance
OC.
-
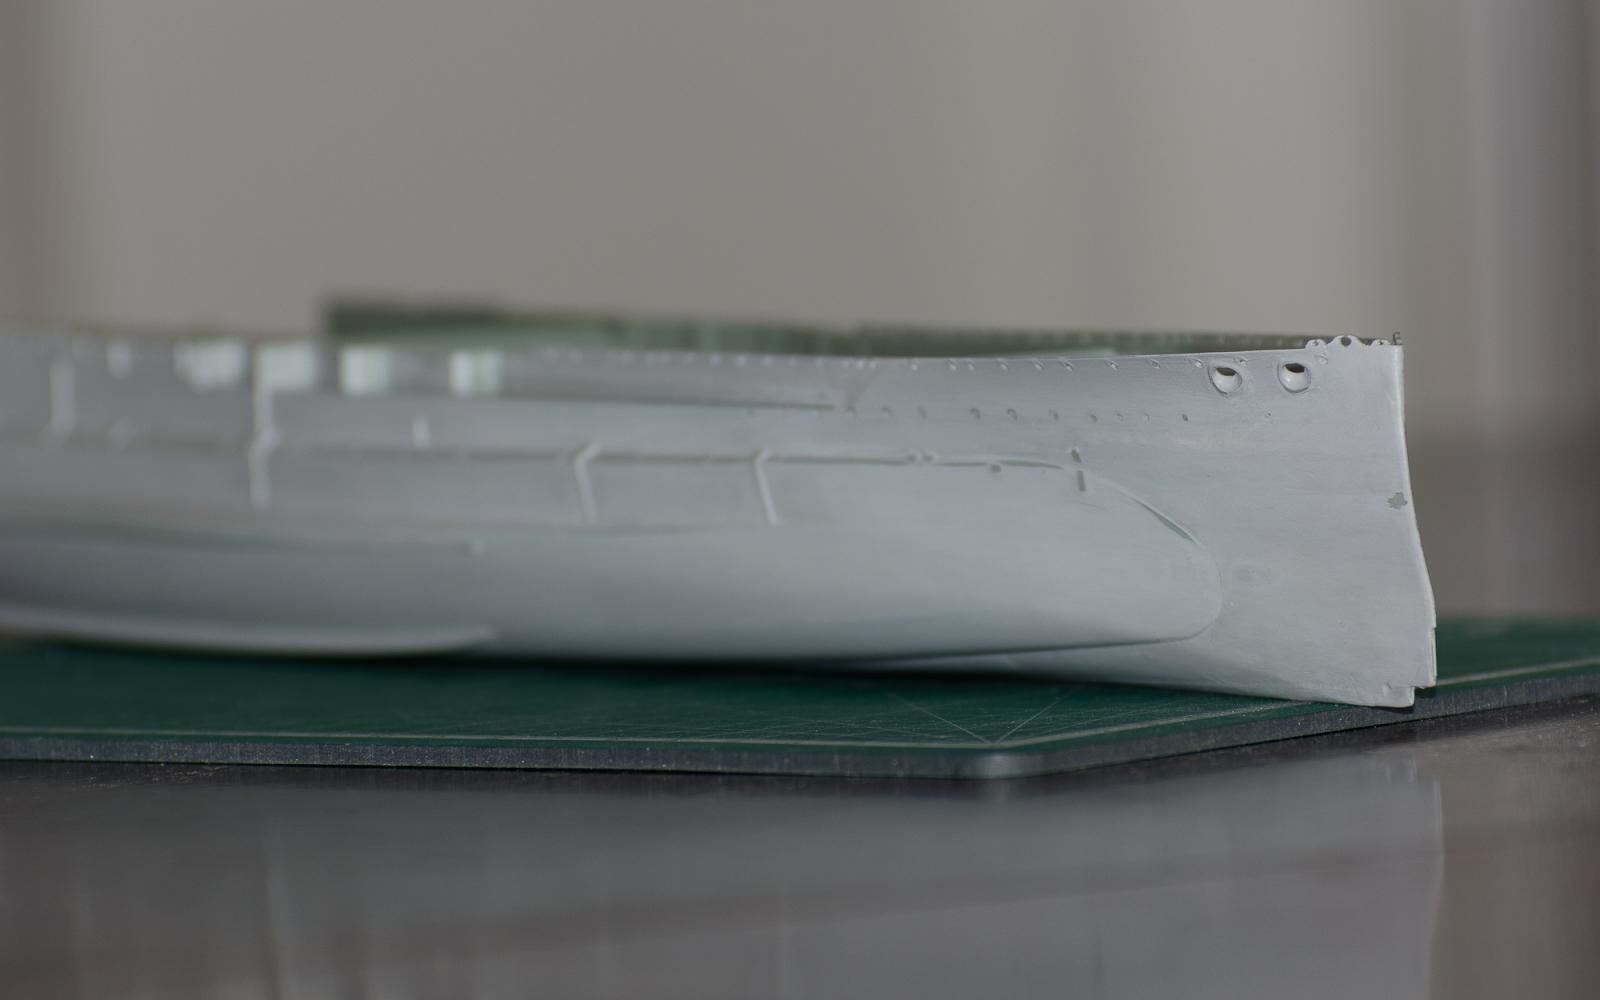
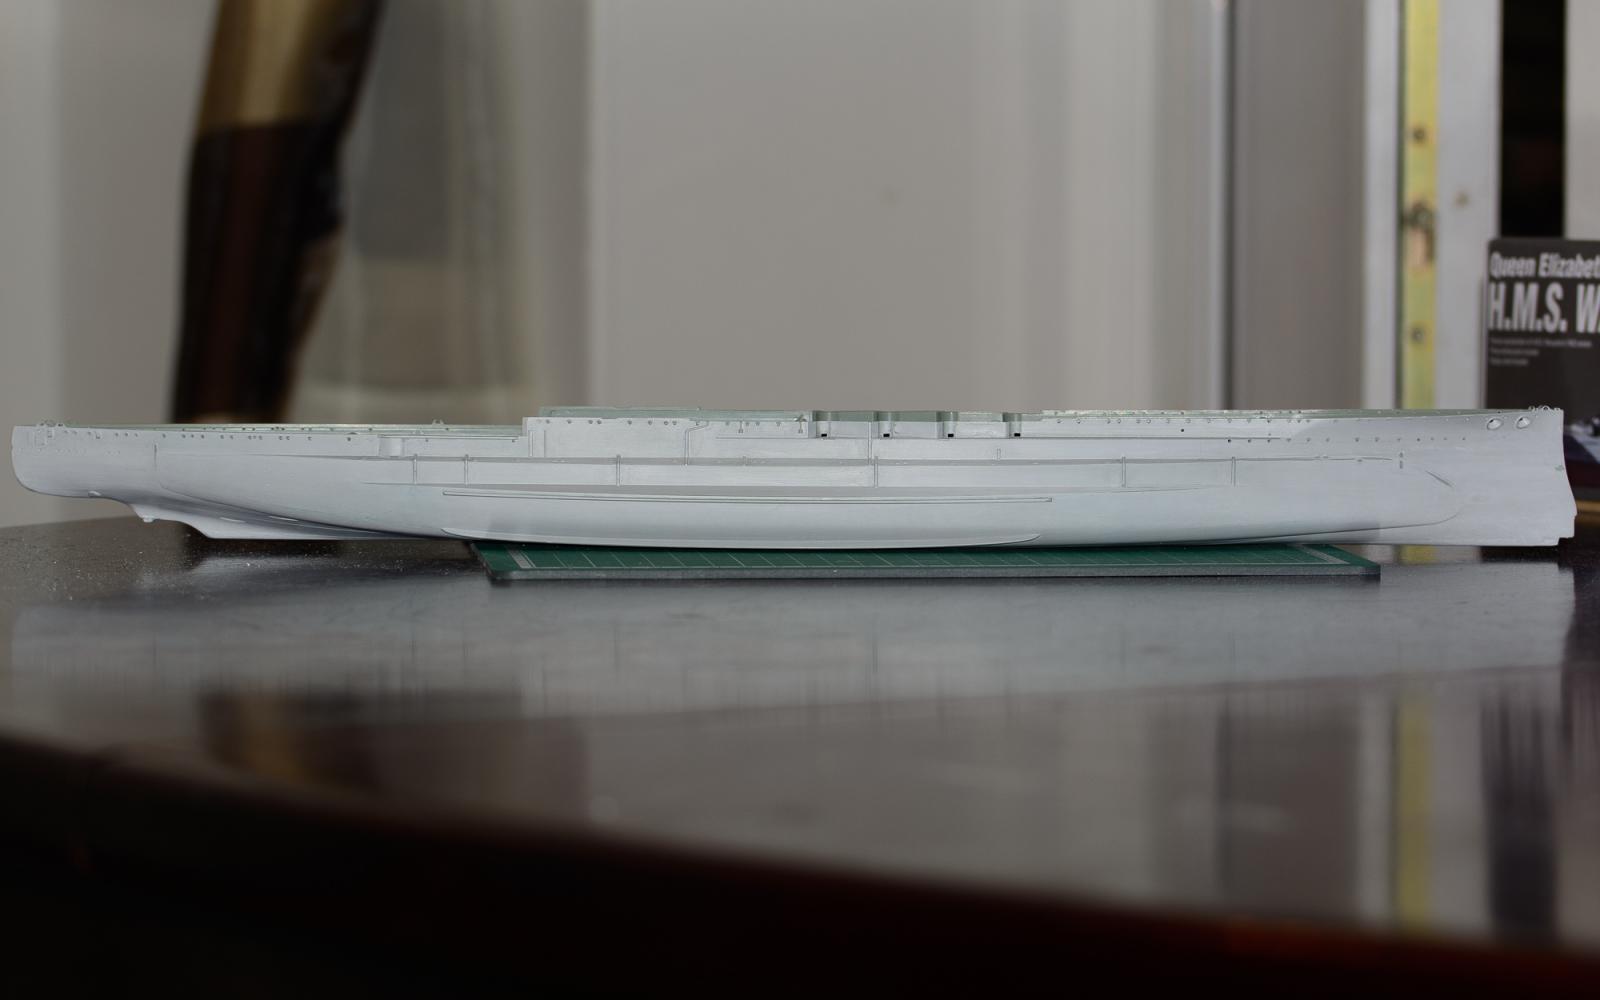
More work today with a bit more sanding then smoothing with wire wool, i also decided to remove a few of the fairleads as firstly some got damaged by my heavy handed holding while sanding, and also because they are larger and set further inwards on the deck area on the real ship.
Here are a few current shots that show the current status - one side is 95% primed and ready for its first camo layer minus a small amount of filling near the bow fairleads, and a small amount of primming where sanding has revealed the plastic.
OC.


- mtaylor, docidle, SteveLarsen and 6 others
-
9
-
Port side aft bulwark planked... I'm cleaning up the shop a bit and I'll start on the hull planking.
Critiques, laughing out loud, pretty much anything you want to say about it is allowed, as always.
I do notice that there's a couple of place that need a touch more sanding, but those places are on hold until after the rest of the hull is planked. Might as well get everything at once....
Superb work mark
It so reminds me of some of the architect drawings i was fortunate to be shown when i spent a week with the RN down at Pompy, this plus a very extensive tour over Victory including some of her normaly closed off areas like the Keel lockers, and ballast keeps
It is a credit to yourself and some of the other dedicated history tellers - through their building of sutch beautiful peices of art, and the long standing commitment to achieve realism, i feel honored to share my work here on the site

OC
-
I guess i learned a lesson with simulating armour plates at this scale - if using paper make sure it is thinner than printer paper, dont use PVA/White glue to fix them down or wash over them, and only use Poly cement to fix paper down or lightly rub over to seal the paper for light sanding, above all else keep the scale thickness to a minimum as it will stick out like a saw thumb
:(OC
- EricWilliamMarshall, Canute, mtaylor and 1 other
-
4
-
So after a few fun and games with my primer, i think i have cracked it, and one side of the hull is semi primed and sanded minus a small section of sanding on the bow, to blend in all those paper hull plates that were Far to over scale even with just printer paper.
OC
-
Did you sand the hull first? From my plastic car days, I recall we had to take some 400 grit paper to the body to give some 'tooth'. Otherwise the paint, even primer, flaked off.
Hi Mark,
Sorry i didn't reply earlier, i thought i gave them enough of a key for the primer, but in hindsight i had put a layer of PVA Glue down that was supposed to seal in my paper strips, could that have affected it by stopping the primer from attaching well?
I have sanded key areas well back now and used the last of my Vallejo surface primer, till i order some more, it has settled down a bit better now and sanded ok before my final bit of primer, i will give it a good day to harden then sand it a bit more with 1200 grade.
OC
-
OC, was the hull surface clean? If casting oils, release agents or dust are on the plastic, the paint won't stick. Get some dishwashing liquid and warm water and wash your hull. Let it dry and then paint.
A good brand I like here in the US is "Dawn". No scents, cuts grease.
Hi Ken,
Yep i washed both hull sections with washing up liquid then rinsed off with warm running water and left to dry before working on them, i then glued my paper hull plates on firstly with wttle glue PVA but then had to settle them down with Revell contacta poly cement, i then sanded these down.
I am not sure if it may have been areas of white glue that may have stopped the primer sticking well, or just me not giving the primer enough time to fully harden before sanding?
OC
-
I am also painting in a sensitive area - the living room with my wife a few feet away so paint fumes or over spray is a deffinate no no, thats why i am applying the acrylic by hand and going a few feet into the kitchen to use the dryer, its abit inconvenient but its the way i have to do it.
It will be easier when the hull is finished its prep work, as everything else will be in smaller areas even the camo on the hull, and the superstructer should be easy to paint due to smaller size.
OC


HMS Warspite by Old Collingwood - FINISHED - Academy - 1/350 scale - PLASTIC
in - Kit build logs for subjects built from 1901 - Present Day
Posted · Edited by Old Collingwood
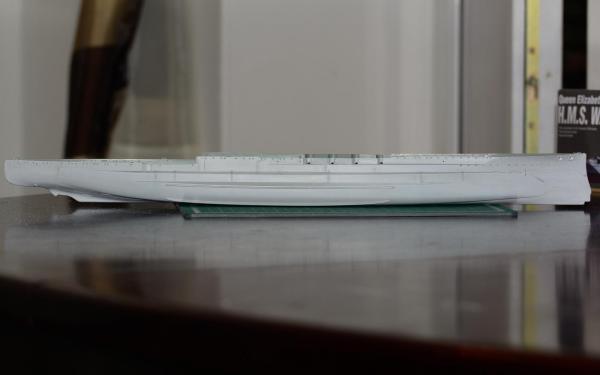
Just a quick update folks, i put a coat of Admiralty Dark Grey RN01, on the paper sections i had cut out to represent the metal deck areas that are to go under where the 4inch guns sit, this color is the standard RN color for metal deck areas, so i will contiue with it on the other sub deck sections.
Oh, still waiting on my red surface primer and flat black for the boot line, i will be able to continue with the hull then
OC.