

Karleop
-
Posts
500 -
Joined
-
Last visited
Content Type
Profiles
Forums
Gallery
Events
Posts posted by Karleop
-
-
Hola Mar3kl:
Just a tip: for bending the plastic figures you can use a steam iron, (see my post #12). It is useful not only to bend figures but also to shrink them if you need it (for example the emperors of the bowsprit).
Saludos, Karl
-
-
Que tal Frank and Michael:
Nice to hear that the information could be useful to you.
Saludos, Karl
-
-
Hi Karl!
Great looking sails!
Do you know of where I could by the sail plans that comes with the BB kit? I am making my ship from Corel and they do not include sail drawings. Is the BB kit the same scale as Corel 1:75?
Frank
Hola Frank:
I don´t think you can get the sails from BB, but if you want I can send you pictures of the different sails and they measures. And yes, the BB kit is also 1:75 scale.
Saludos, Karl
-
Hola Mark:
Your nailing looks really nice, probably I could do the same to mine Vasa.
Saludos, Karl
-
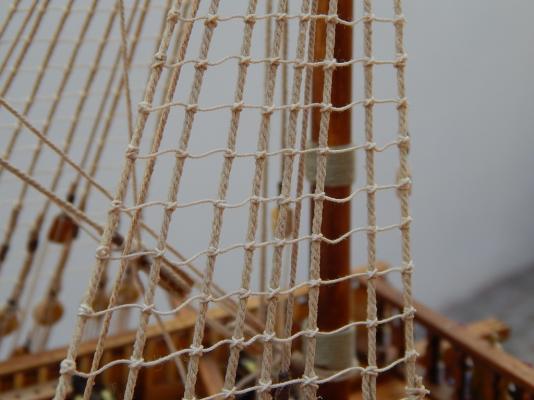
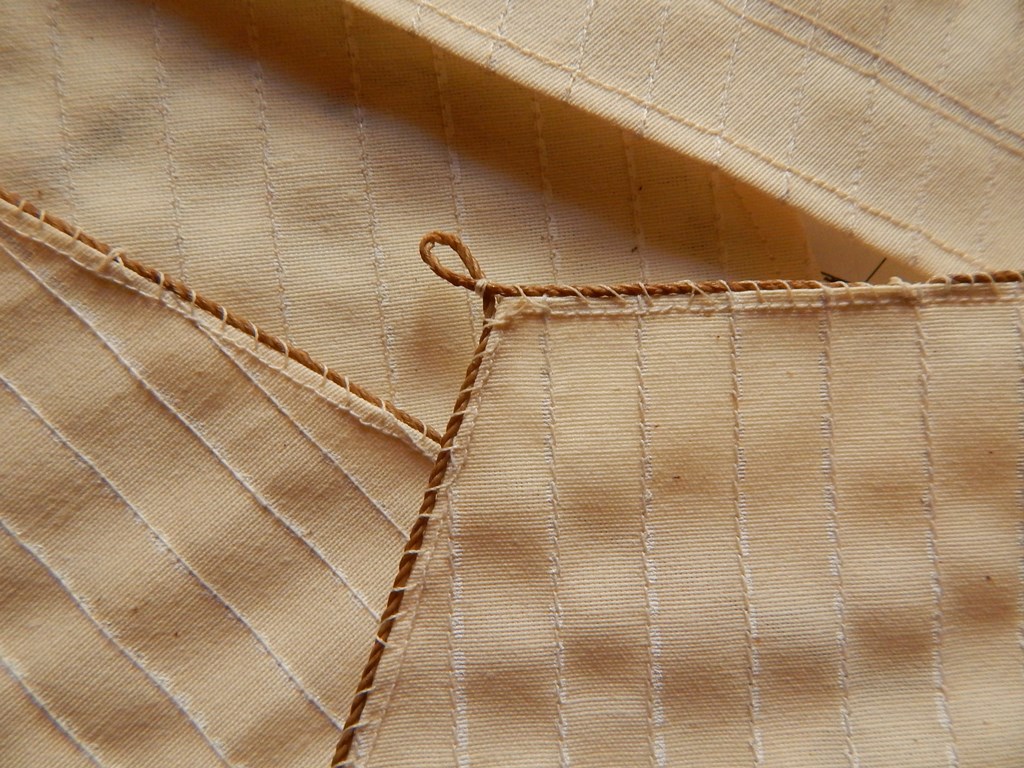
Hola amigos:
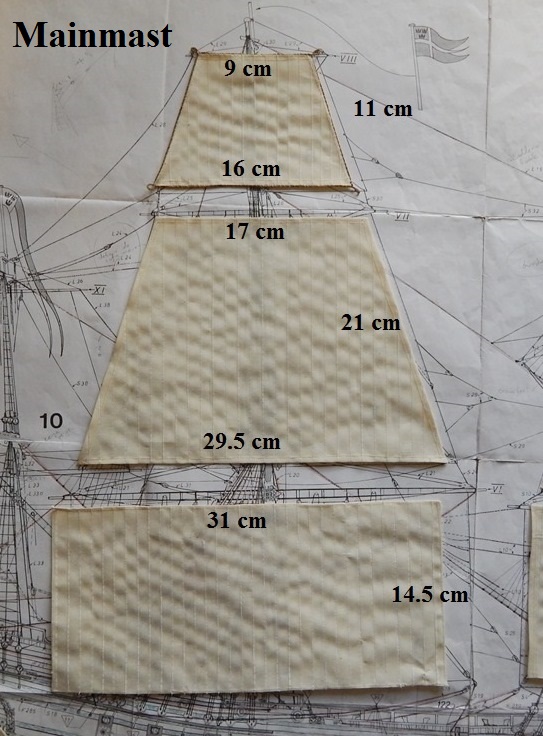
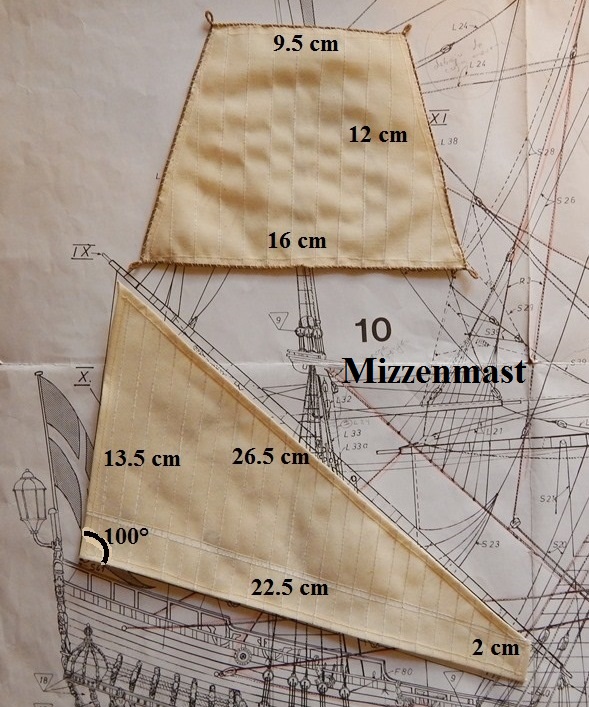
Well, now I'm in the process of making the sails. First I had to learn how to use sewing machine from my wife, as well as learning to sew by hand to place the bolt rope that go around the sails.
The BB kit has all the sails printed in one sheet of fabric, so the first step was to cut the different pieces, then to sew the hem around the borders and sew several lines along the sails to simulate the the different pieces that form it. At last I sew the bolt ropes that go around the sails.
I must to point out that to make the bolt lines it was necessary to search for a suitable thread in fabric stores: size (1.2 - 1.5 mm diameter), material (cotton or polyester) and color (beige or light brown), not an easy task. Finally I only find a white nylon thread with the correct size. After doing several tries I accomplished an acceptable finish using a mix of white glue, water and the same acrylic paint I used to paint the plastic figures in the ship. In the pictures you can see some sails with the bolt ropes already sewn and some without them.
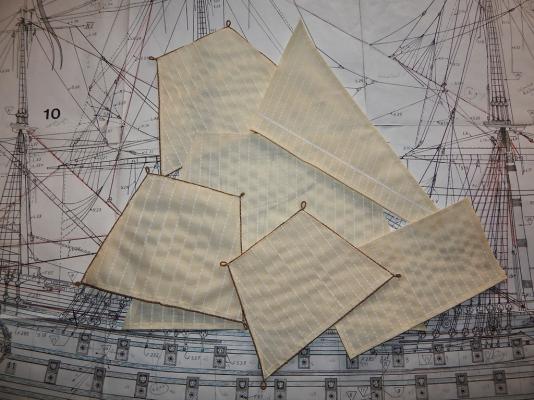
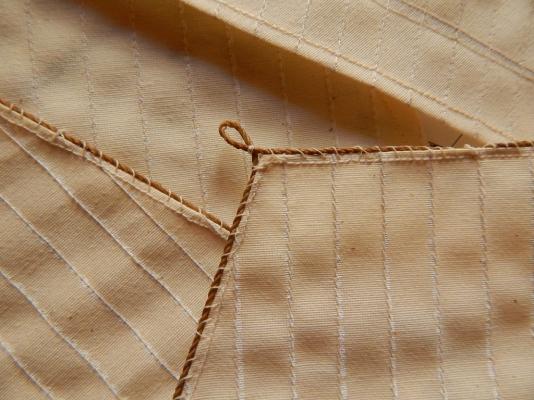
Saludos, Karl
PD: Thanks for all the likes
- RichardG, marktiedens, schnu and 6 others
-
 9
9
-
Hola mar3kl:
You are doing a fine work with the painting, its getting very nice.
Saludos

-
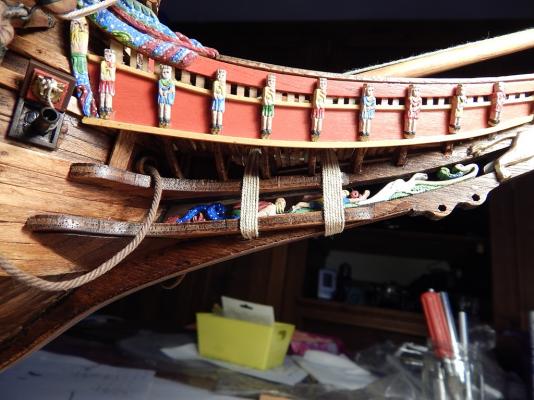
Hola Mar3kl:
You are achieving a good job, only a little comment: in your last picture you mention that for the mounting of the back corner sculptures you need a solid piece to adhere them. I am not sure if I understand correctly your annotation but, in my case I had no problem to adhere them due that they are made with 2 parts making a 3D figures.
Saludos, Karl
-
-
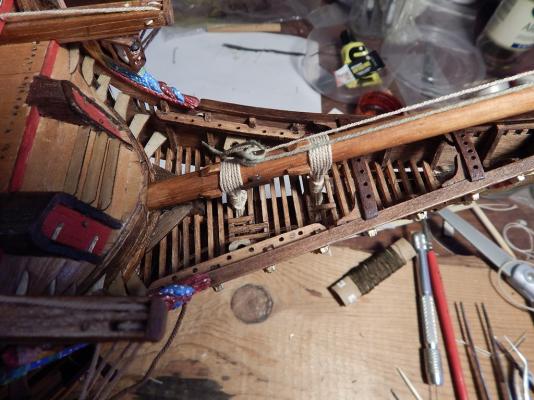
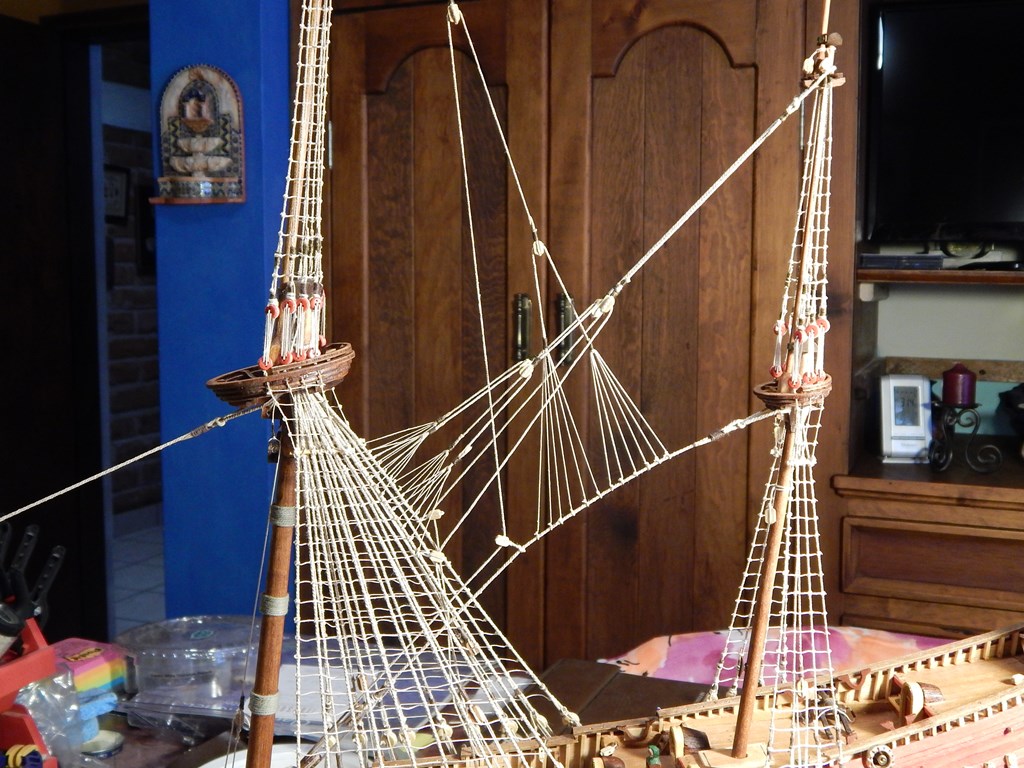
Hi guys:
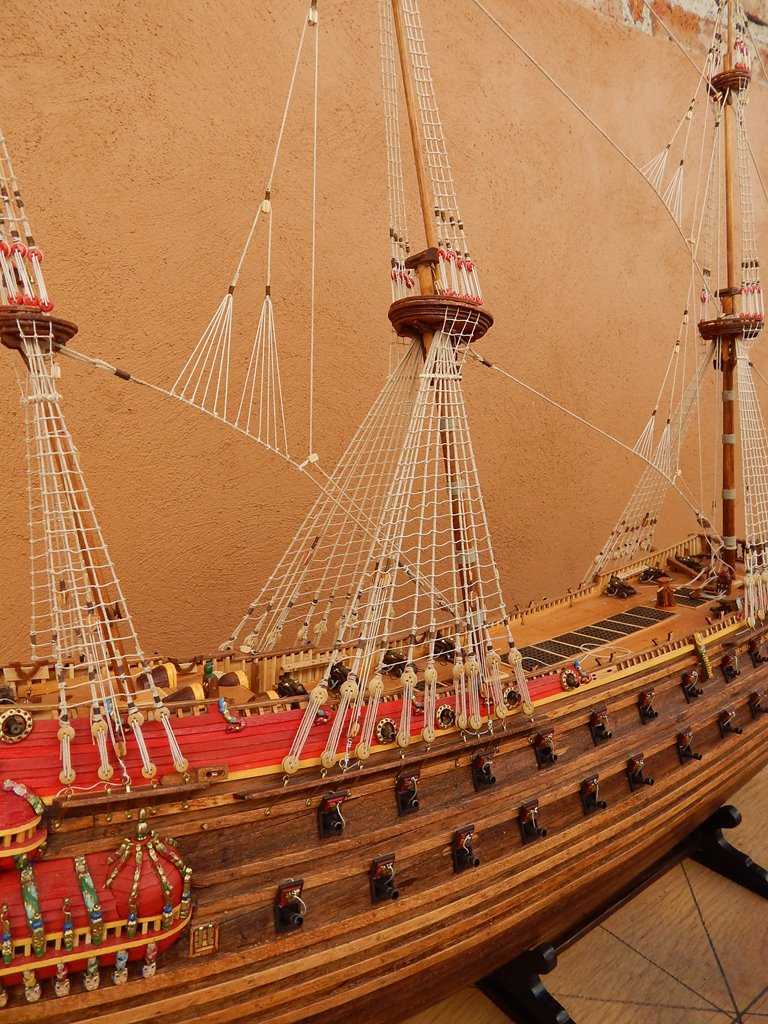
Finally I finished the standing rigging placing the upper stay of the mizen mast.
At first I was going to do it according to the BB plans (only one rope) but I change my mind and prefer making it as shown in the 1:10 Vasa model and Clayton´s, with double rope and fixing them to the main mast shroud.
It is important to mention that if using this form it is necessary to make additional holes to the pinracks located near the mainmast. Do it before making the shrouds!!


Saludos, Karl
-
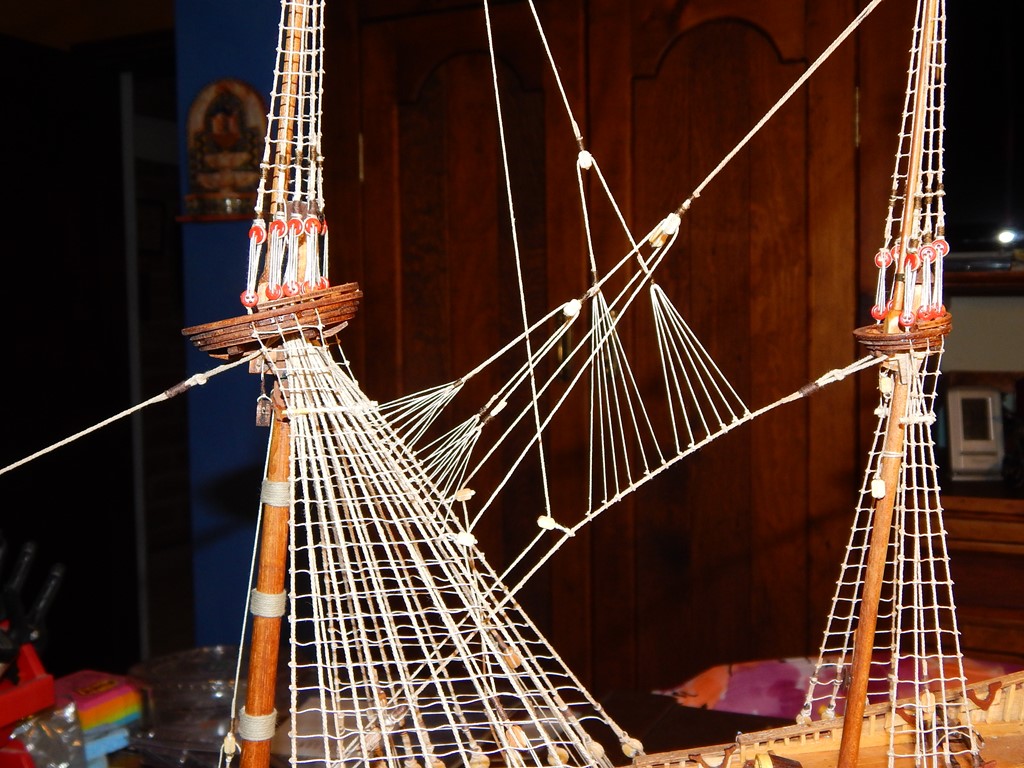
Hola Matti:
In order to make the ropes vertical it was necessary first to locate the correct location of the lugs corresponding to the holes of the bowsprit deck using a thread as a guide.
In the pictures of Clayton´s and in the 1:10 model there are a couple of slots or grooves to pass the rope in the lower part but due that in the BB model there are not enough space to have both slots I made only one.
Hope this help, saludos, Karl
-
Hola Mar3kl:
Your towers look fantastic, only a little comment: as I know they must be parallel and it seems your upper one is slightly out of line (or is the angle of the picture?)
Saludos, Karl
-
Hola Werner:
Thanks for your comments. So we are 4 instead of 3 BB Vasa builders in the forum, that is good!!. By the way, your ship looks very nice.
Saludos, Karl
-
Hi Friends:
Thank you very much for your likes and nice comments, they are very encouraging.
Saludos, Karl
-
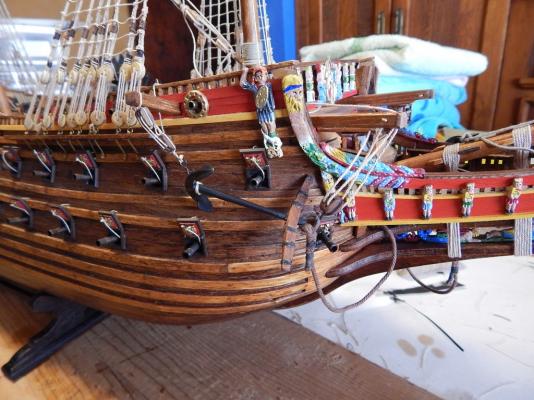
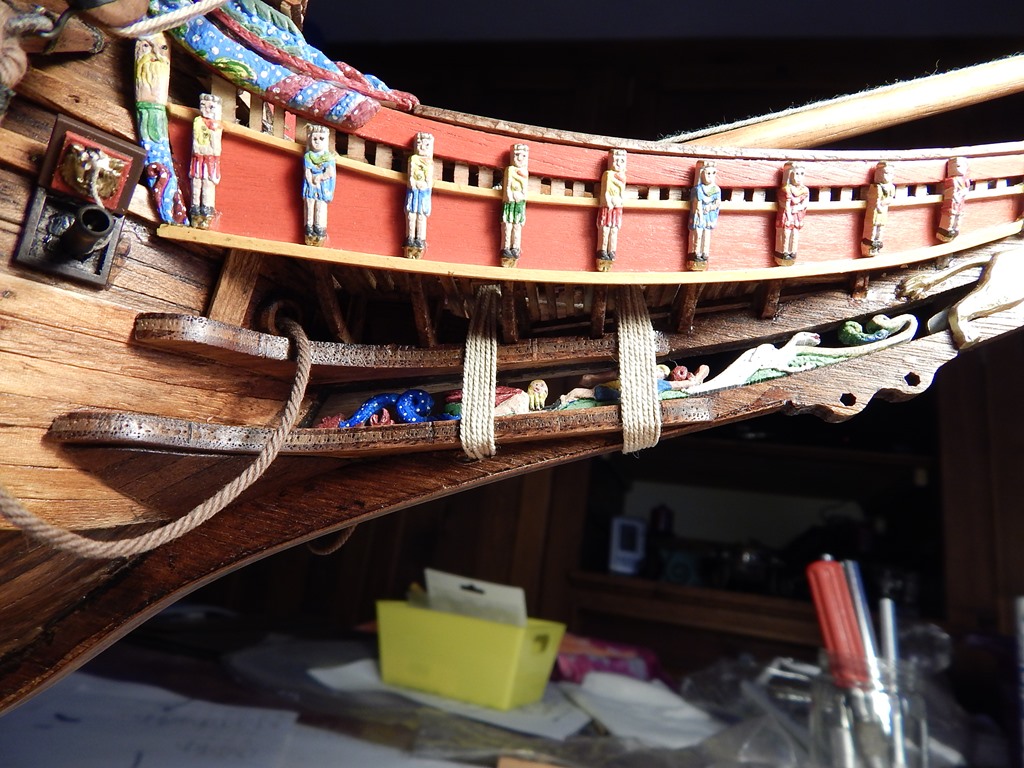
Hola:
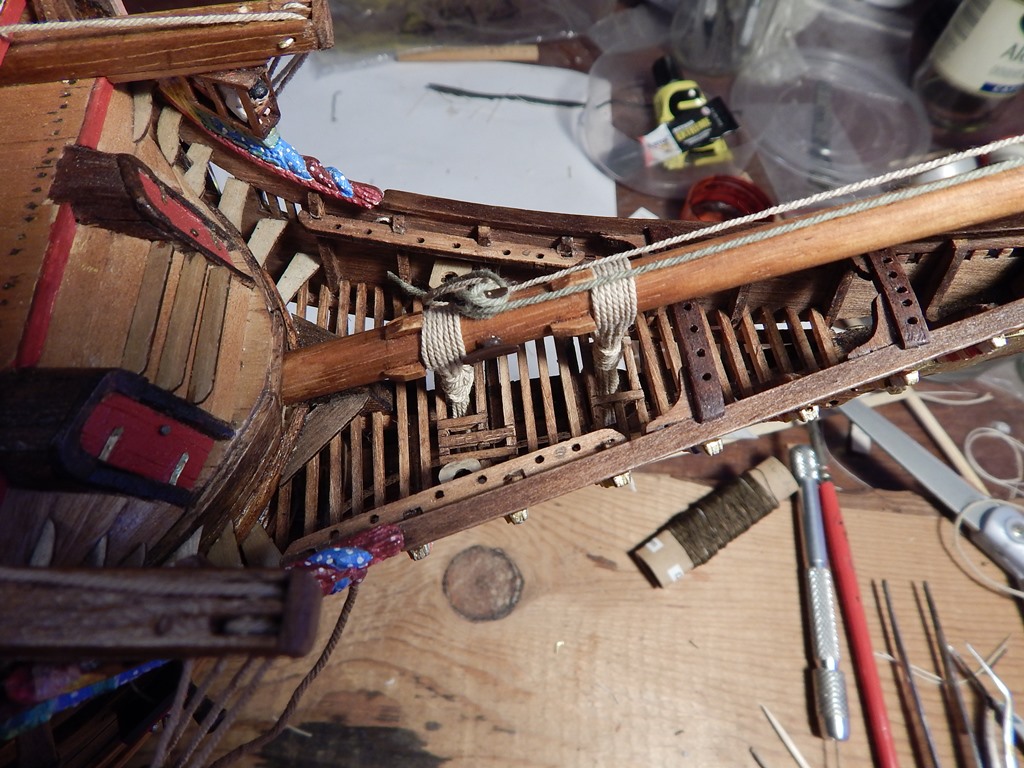
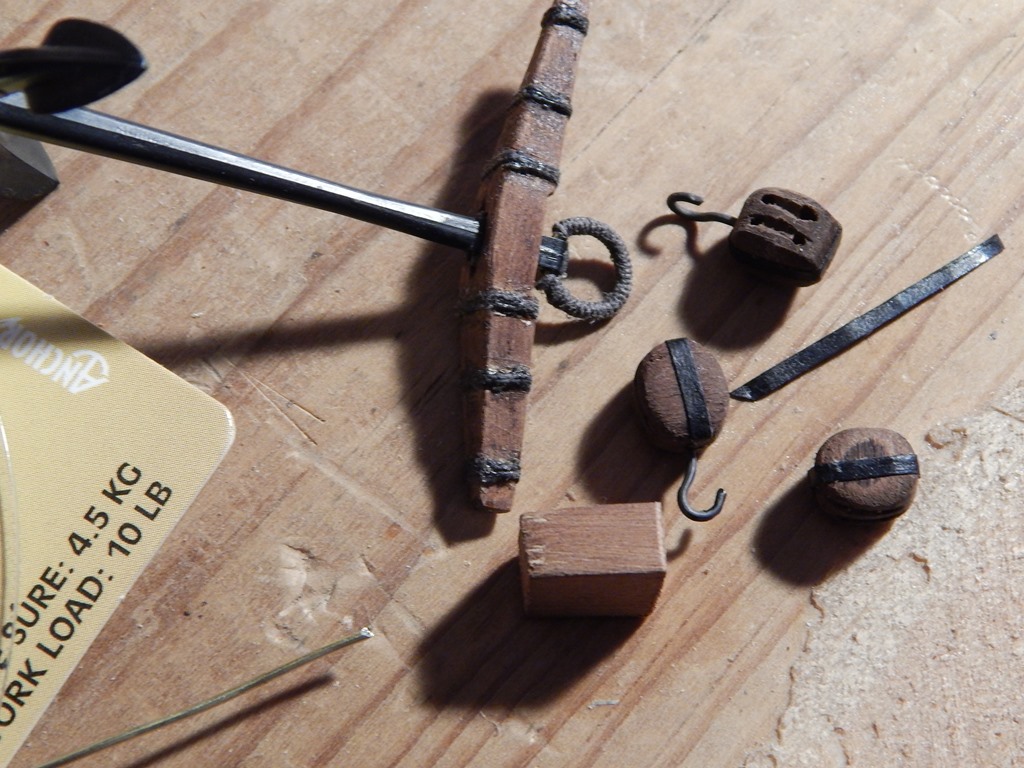
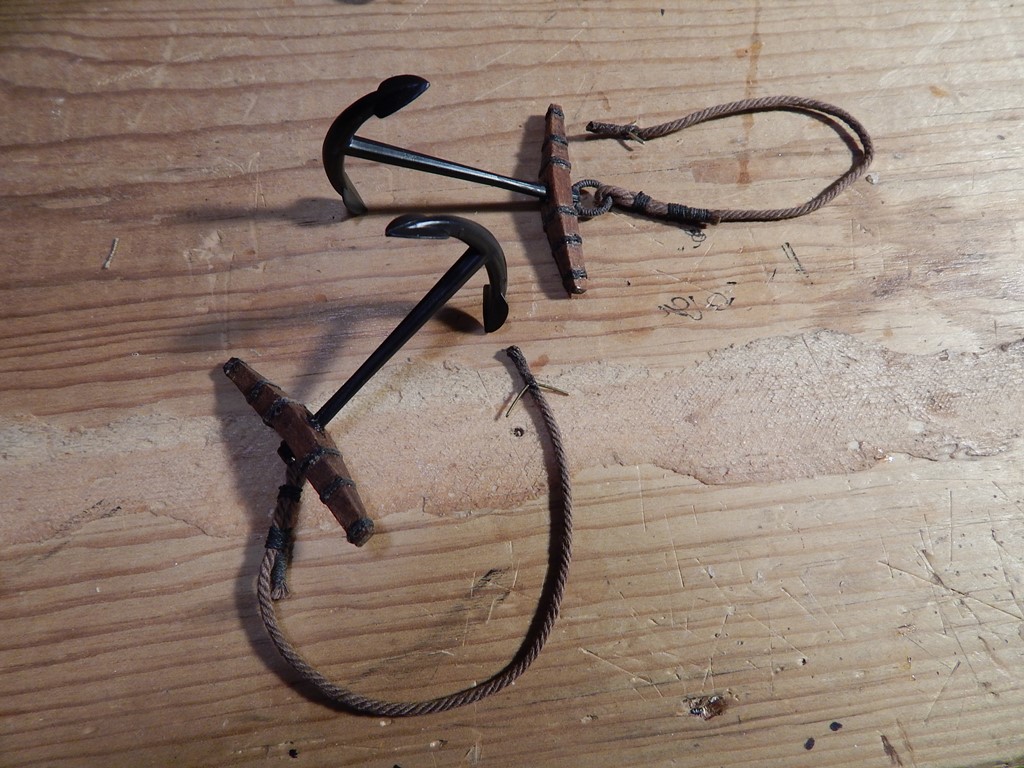
Before going into the sailing process I decided to finish the anchor fittings. Here some pictures:
For the first step it was necessary to do the blocks due that the ones included in the kit seems not the appropriate. To accomplish this I used a little piece of redwood, brass wire obscured with Black Patina (the one used to the lead in staining glass) and the metal strap for the pulley was made with a paper strip painted black.

The second step was to fix the anchor ropes. Here you can see the little pieces of wire in the opposite side of the anchor that were used to fix them inside the anchor ports
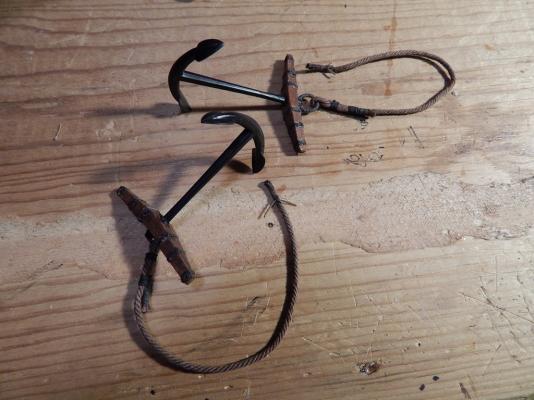
And finally, installing the anchors in its place. This was done according to the BB instruction manual, except I added little wood caps in the extremes of the anchor davits. I made this because the ropes tended to slip off the pulleys due to the low weight of the kit anchors (in the original this did not happen due the great weight of the anchors)
Thanks for your comments and likes.
Saludos, Karl
- dgbot, marktiedens, NAZGÛL and 5 others
-
8
-
Mar3kl:
Really nice planking and the butt pattern on the strips is very convincing.
Saludos, Karl
-
-
-
Hola Mark:
That is true love for a ship!! But for the other hand its interesting to see the differences in both kits.
Saludos, Karl
-
Hola Mar3kl:
Just noticed your posts. Welcome to the BB Vasa builders. As far as I know there are only 3 of us in this forum: Matti, you and me.
Your work with the hull sees nice.
Saludos, Karl
-
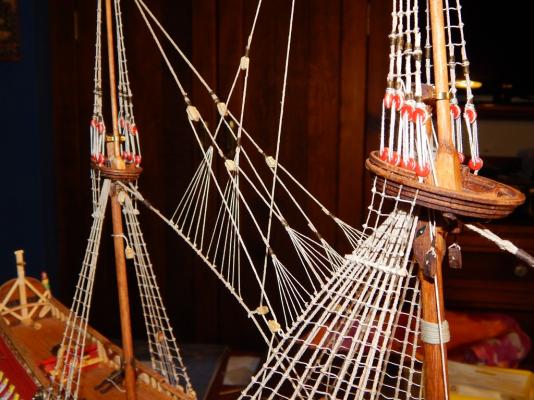
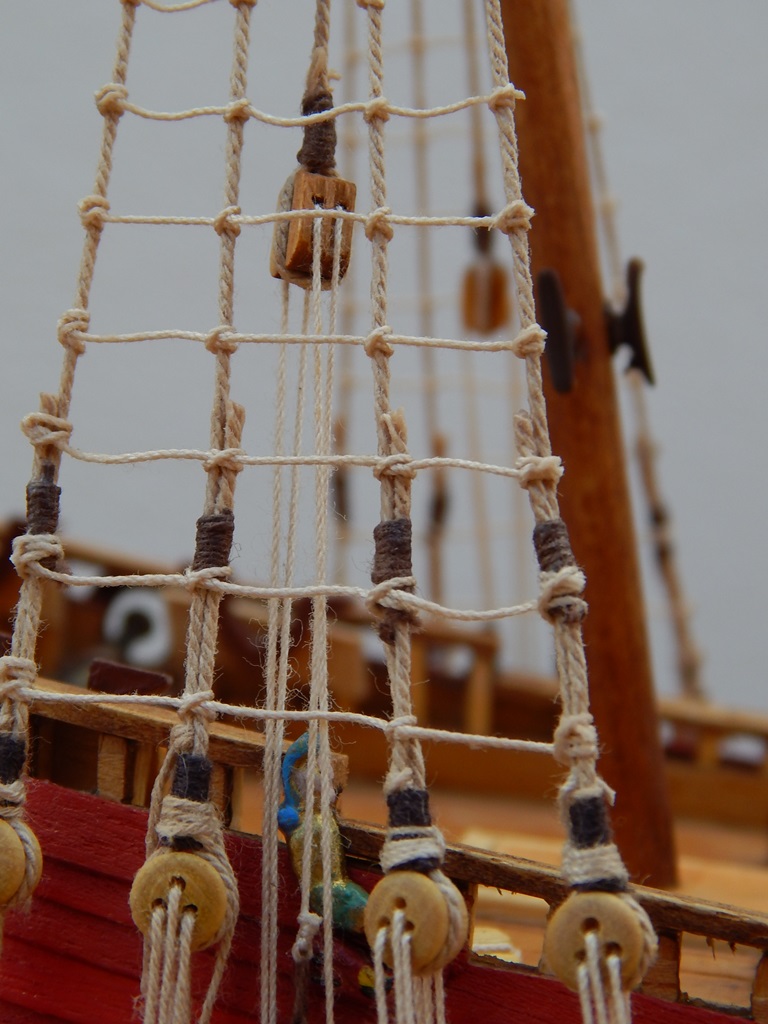
Hey friends:
I had several days without showing progress in my Vasa, which does not mean I was not very busy working on the rigging.
So, at last I finished the more than 1,000 knots that were needed to fixed the ratlines to the shrouds !!
Probably this ratlines could be a little thinner and darker but I used the material that came with the kit.
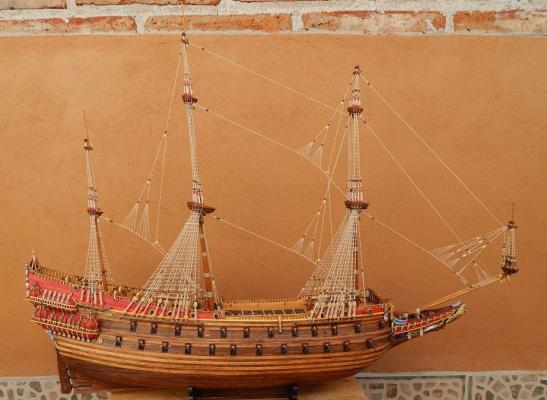


Now I will begin with another challenge: doing and sewing the sails in order to fix them to the corresponding yards.
Saludos, Karl
-
-


Vasa by Karleop - FINISHED – Billing Boats – reviving a poorly built model
in - Kit build logs for subjects built from 1501 - 1750
Posted
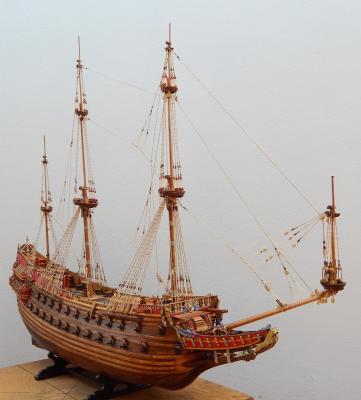
Hi friends:
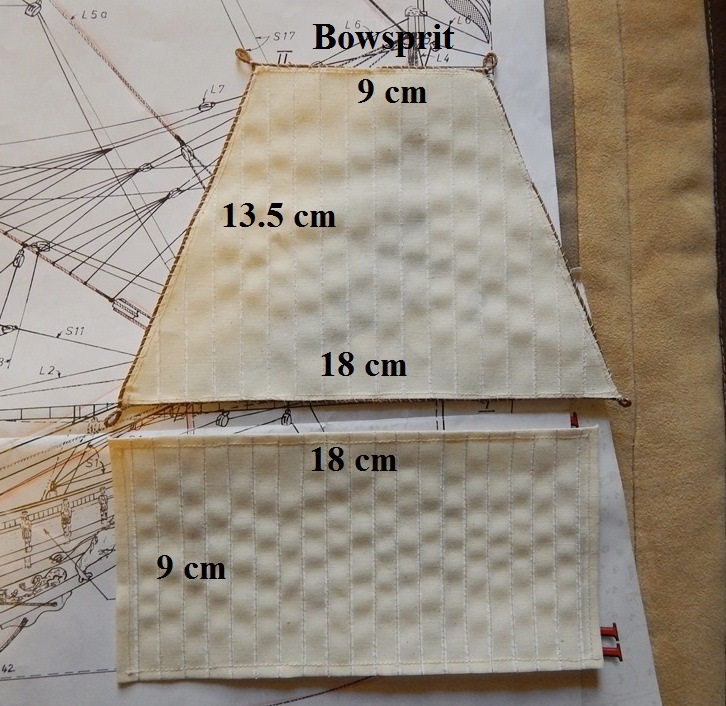
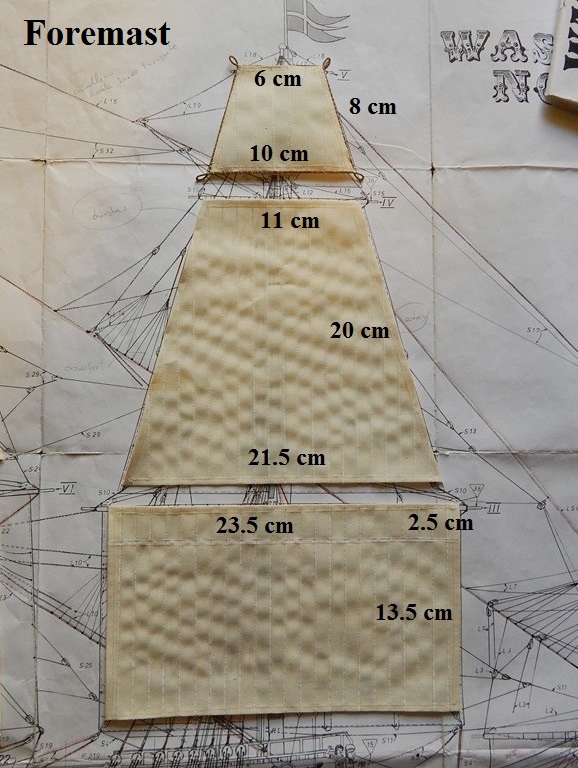
These two last weeks I was a little lazy with my sails, in part of doing other things as: dealing with termites in my house!! , and in part because fixing the sails to their spars is not as fun as with other parts of the construction. Anyway this are some of my advances with the bowsprit and foremast sails:
Saludos, Karl