

Karleop
-
Posts
500 -
Joined
-
Last visited
Content Type
Profiles
Forums
Gallery
Events
Posts posted by Karleop
-
-
Thank you Werner and Michael for your kind words. Its nice to know that my pictures can be on some help to you.
Saludos, Karl
-
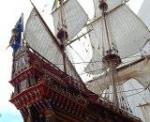
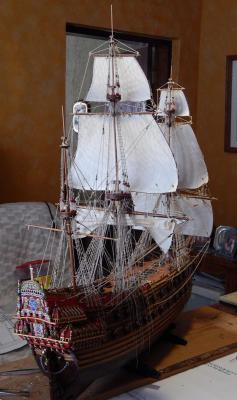
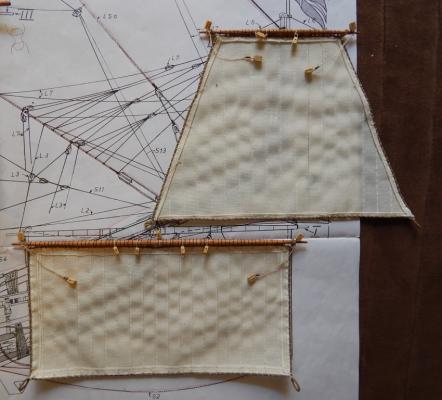
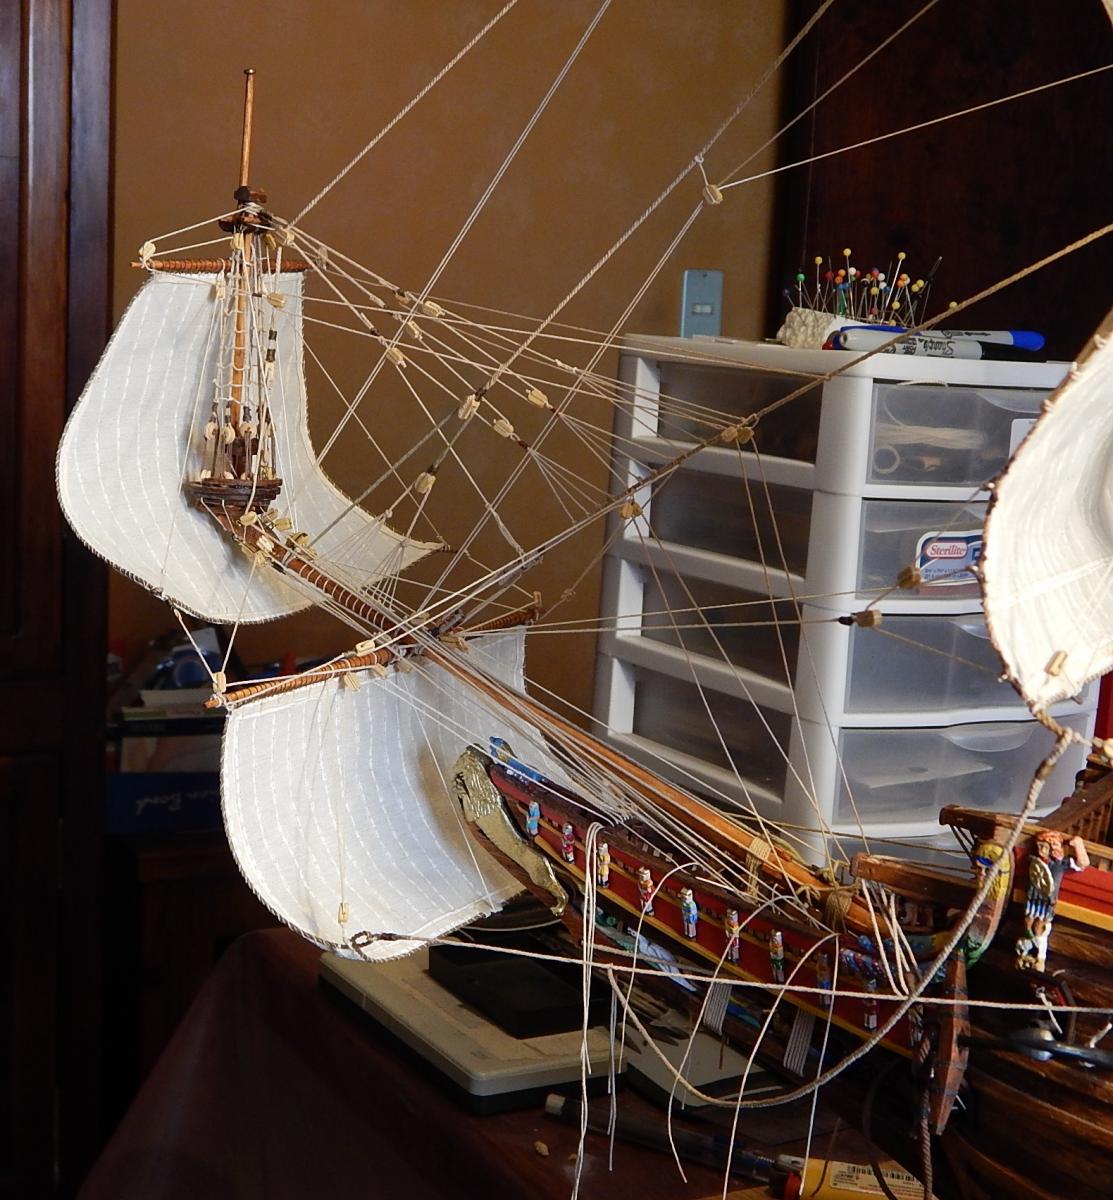
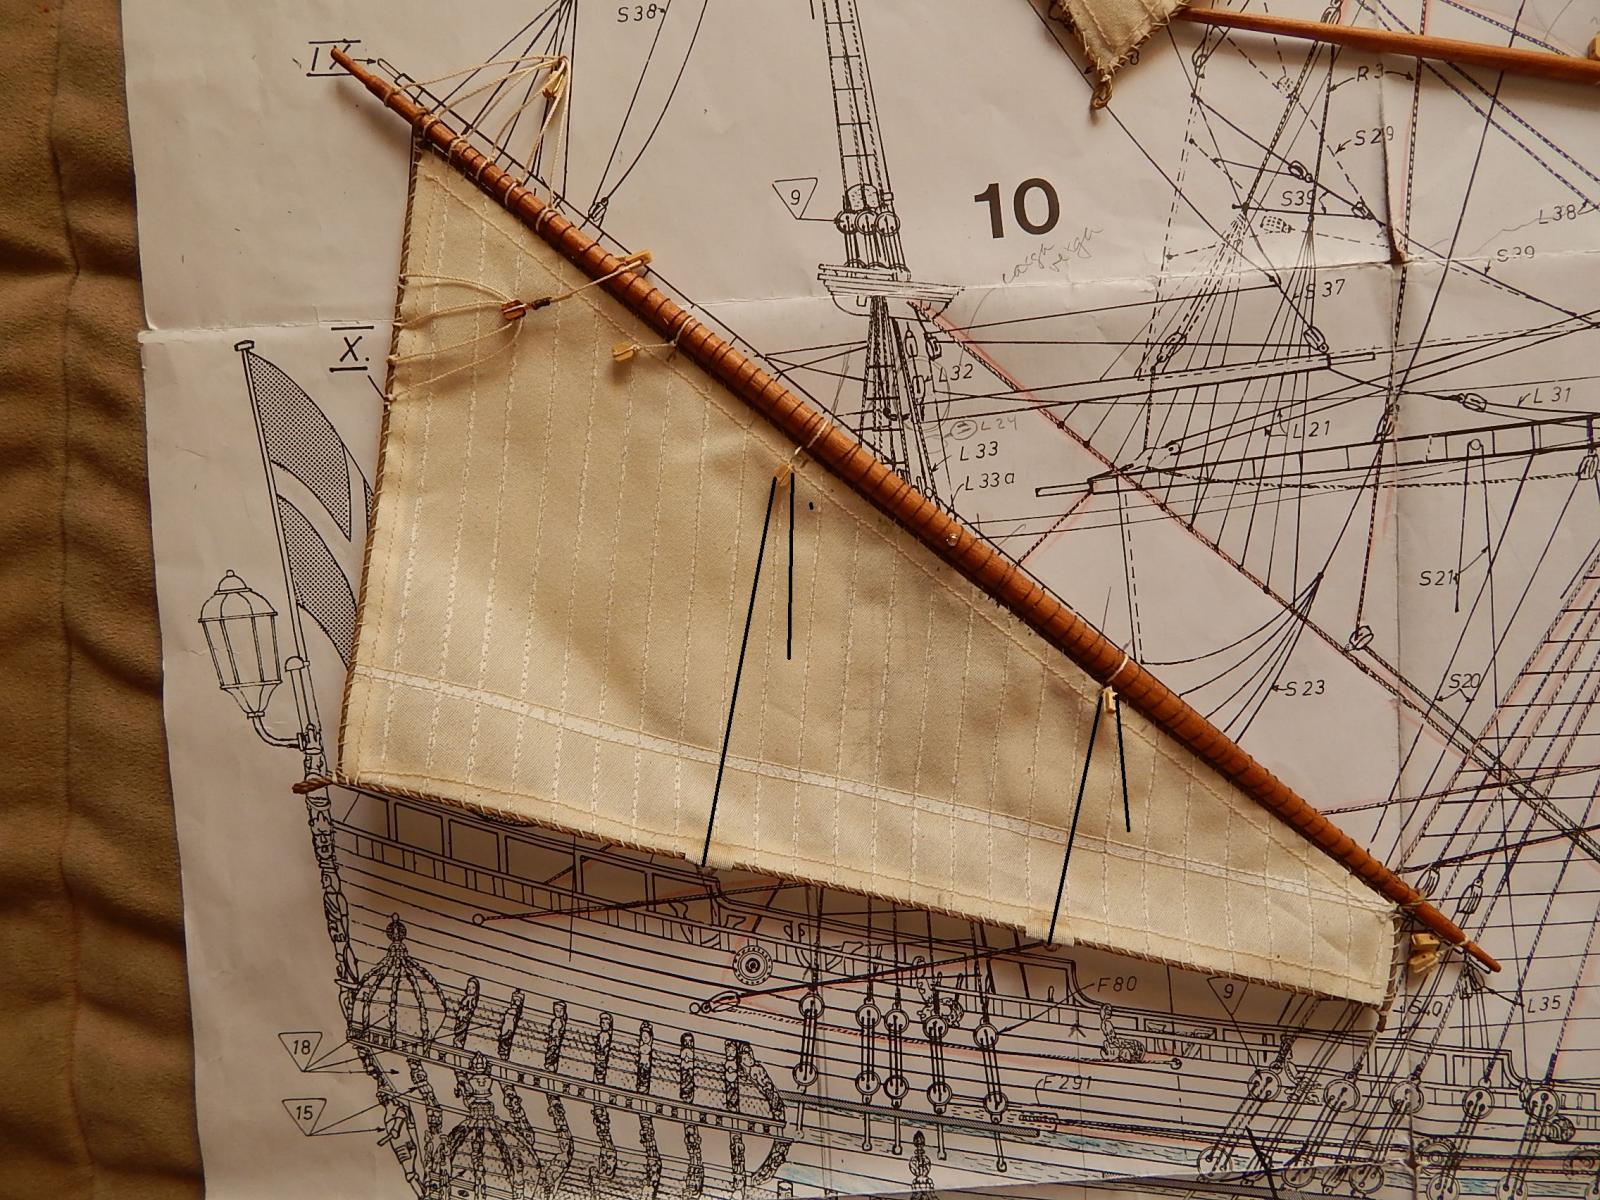
Hi Mates:
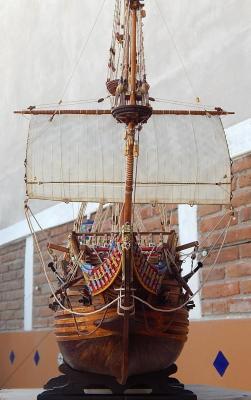
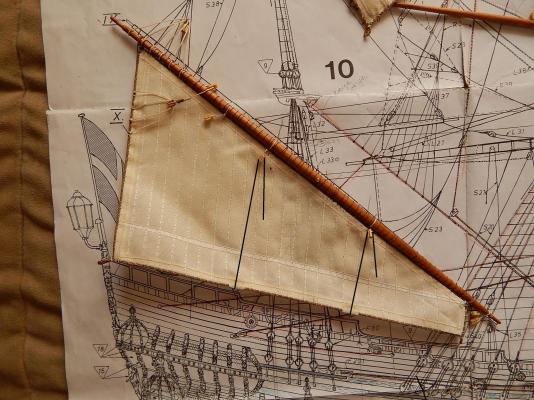
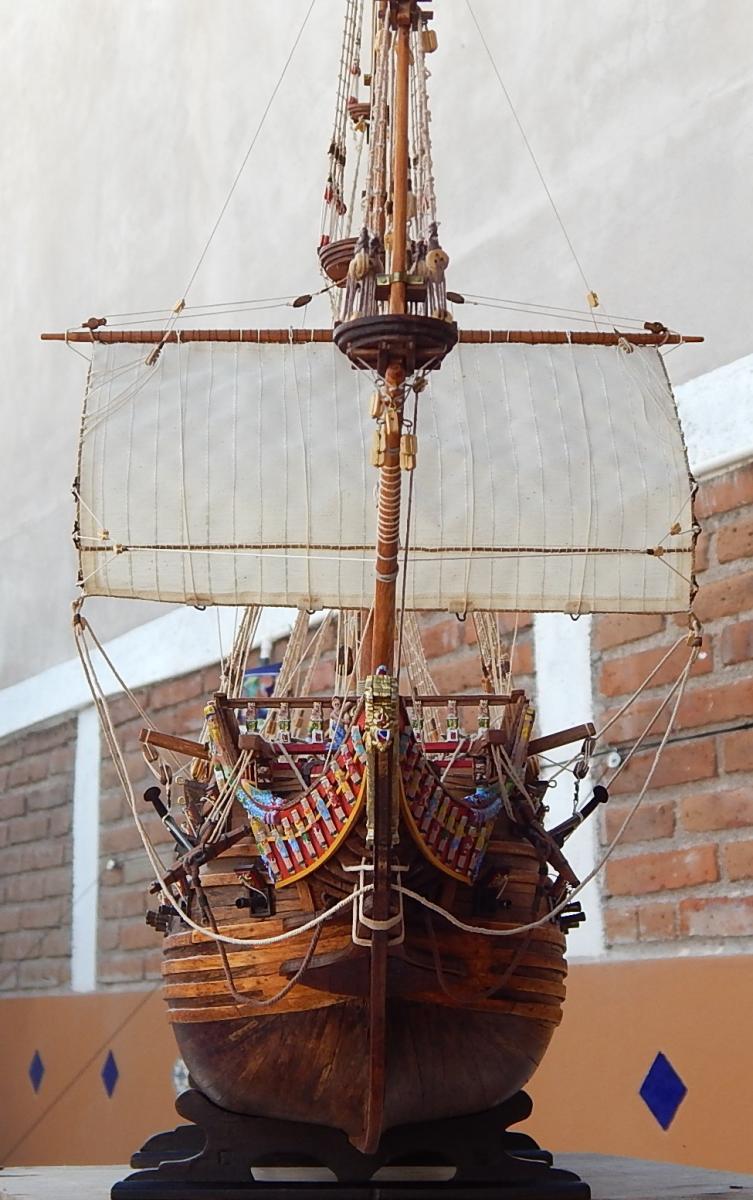
After almost two weeks of having all my family reunited for the Holidays and not having enough time to work on my ship I finally finished to place the sails on the bowsprit. As with the other sails I have not fixed them permanently until I double check the correct tensions and locations of the rigging yarns. Here some pictures:


Saludos and best wishes for this new year, Karl
-
-
-
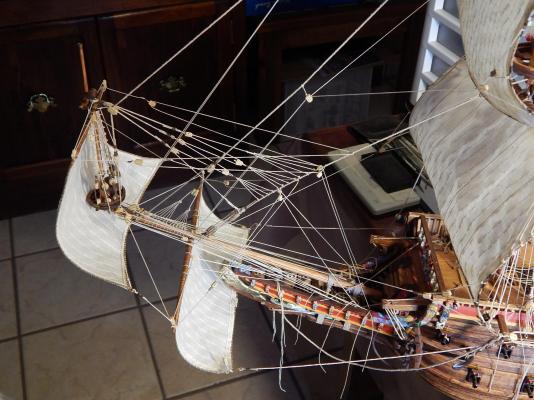
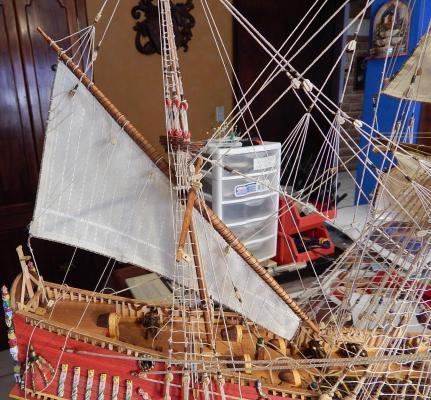
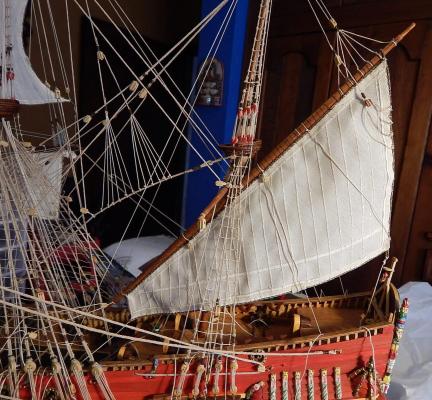
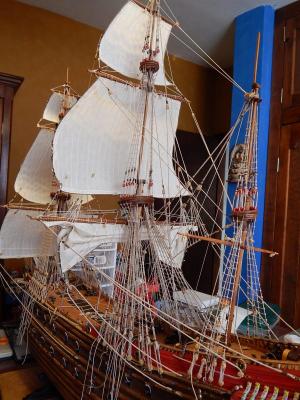
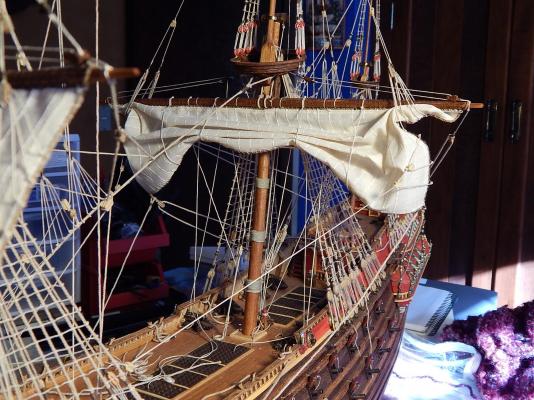
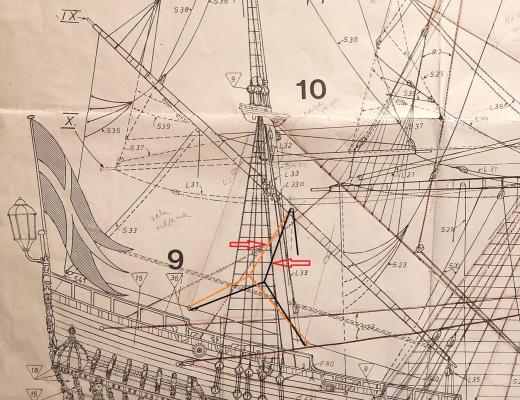
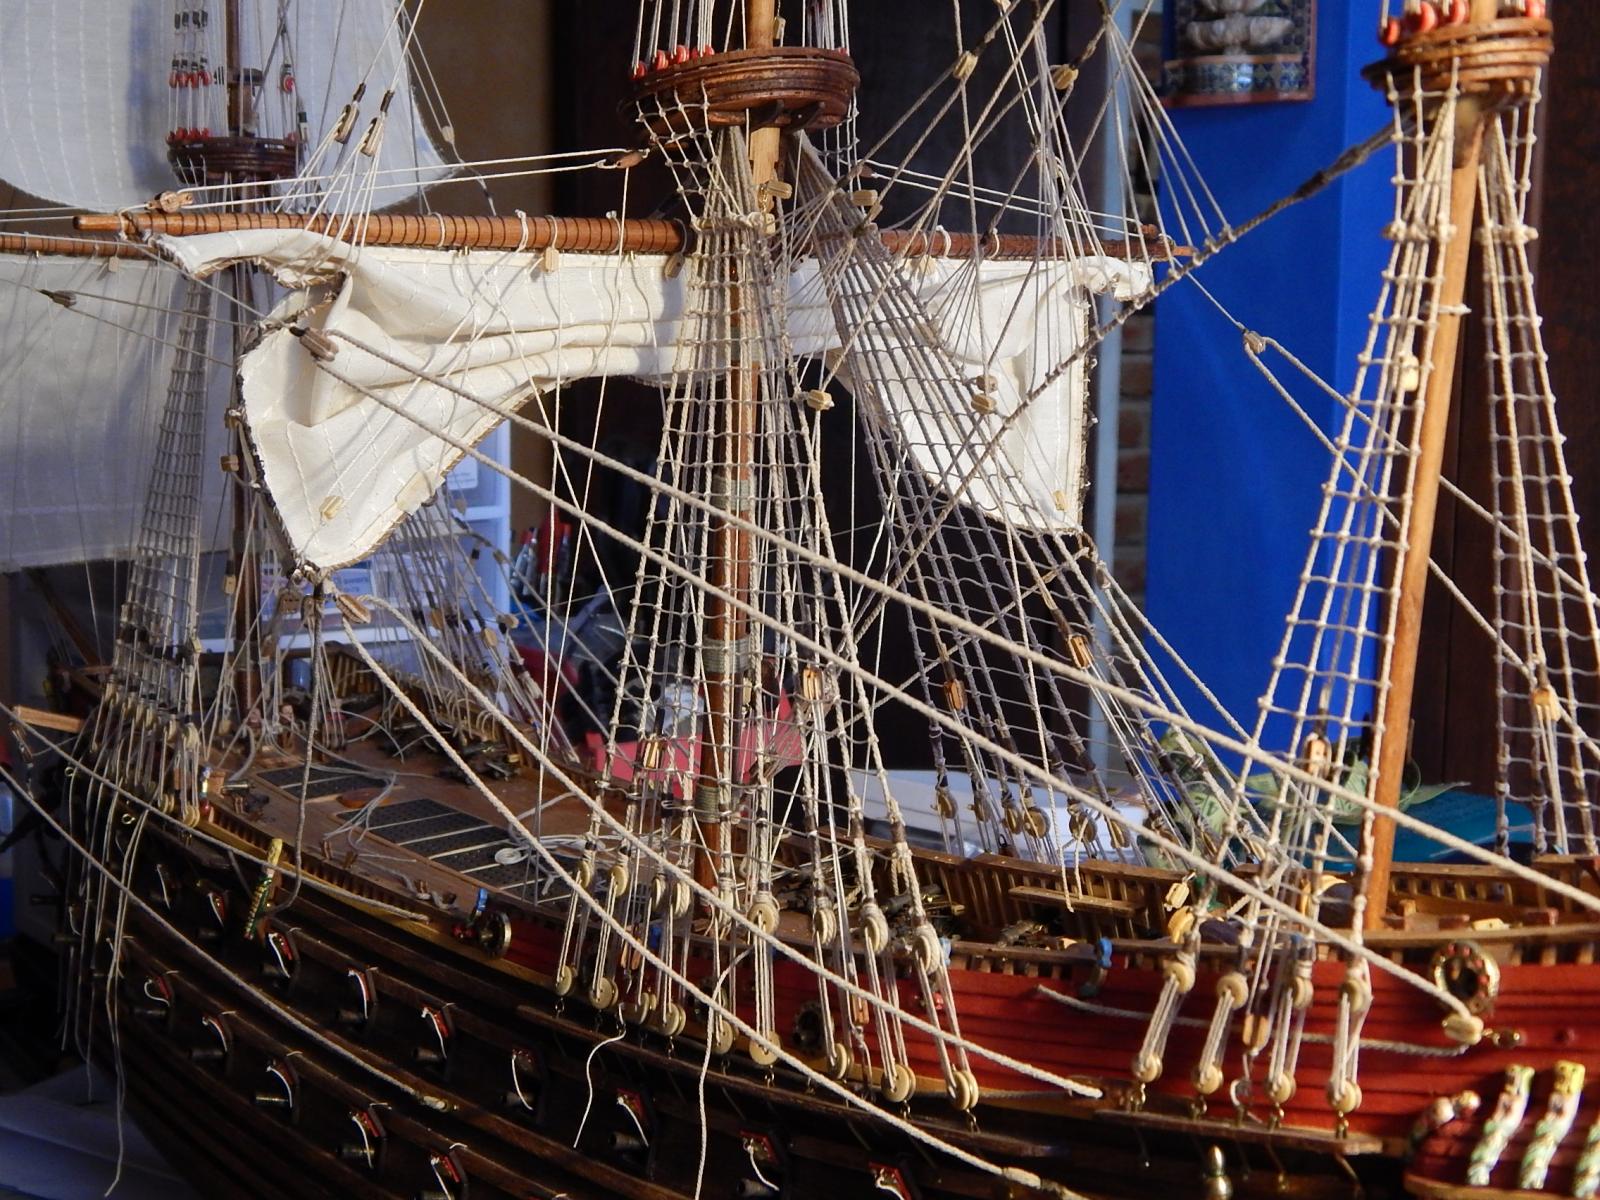
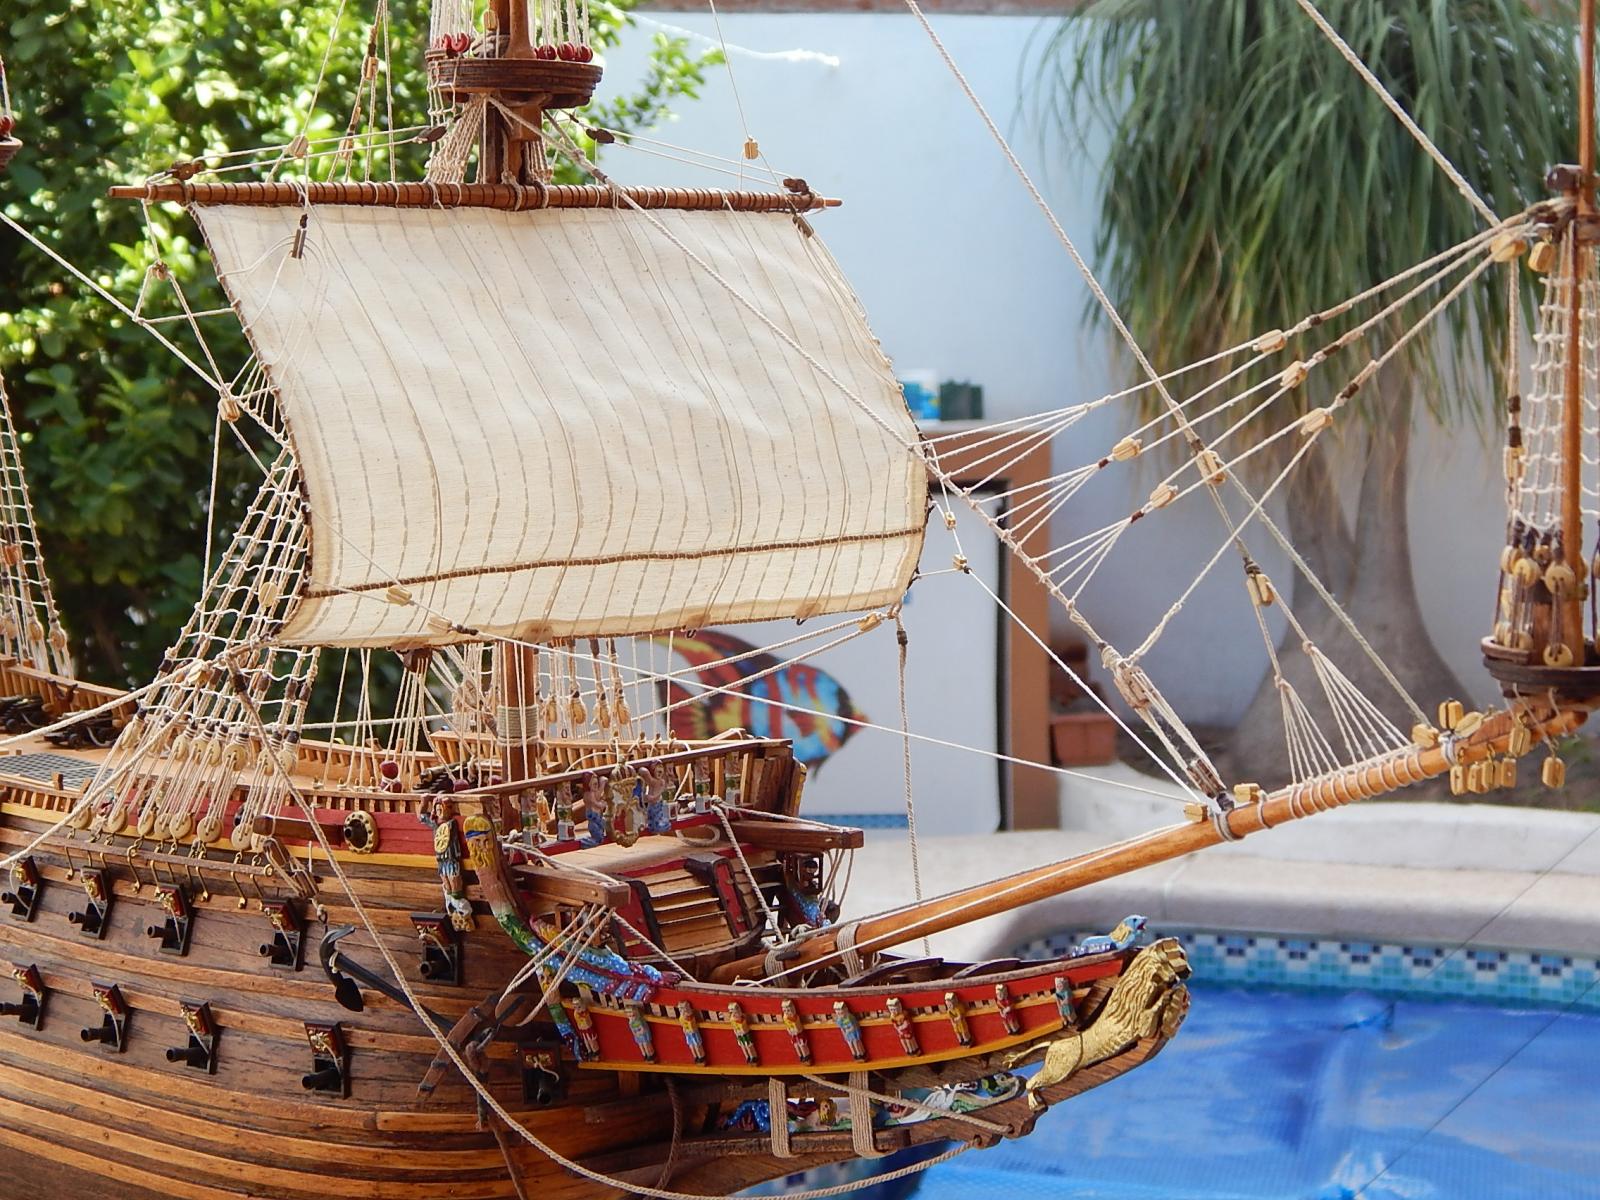
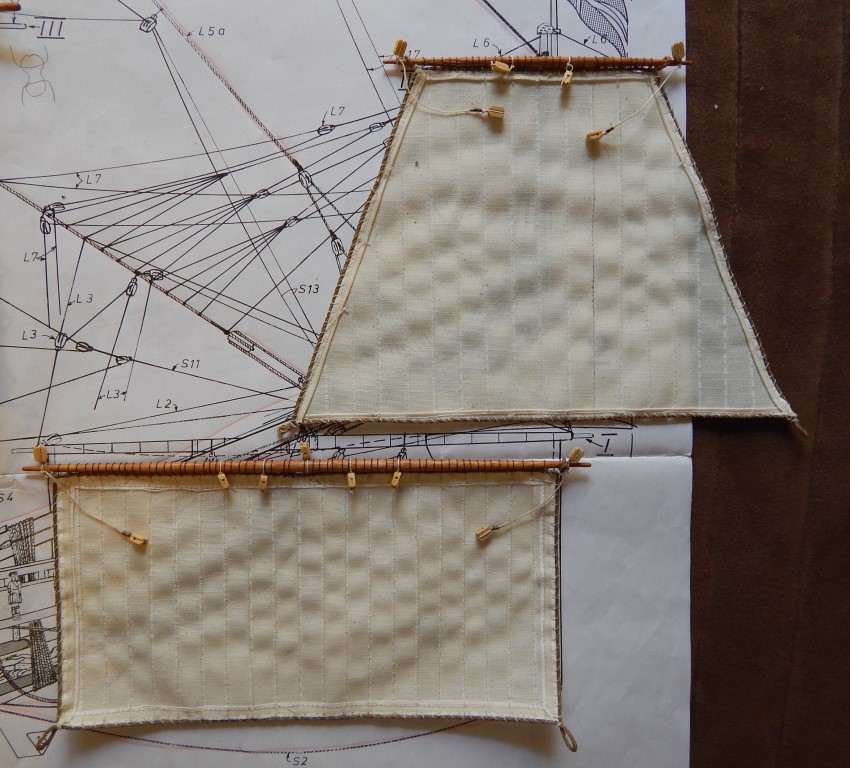
Hi friends:
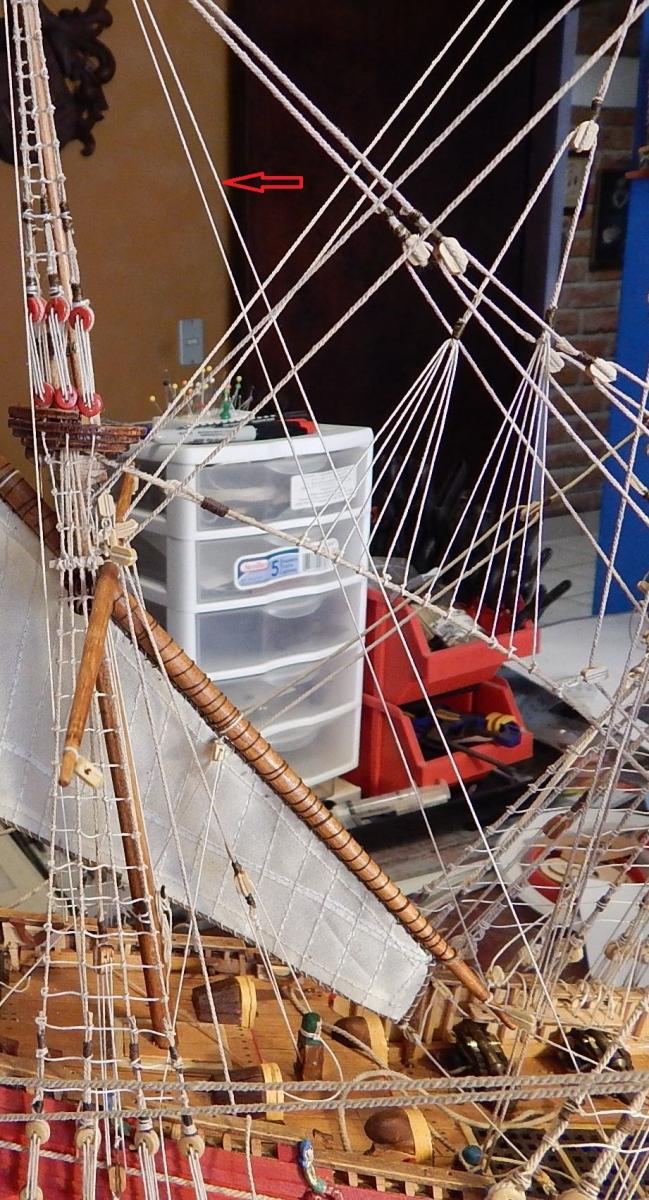
Unlike the lateen sail where I used the rigging show in the Vasa model pictures, for the topsail of the mizzen I followed the BB plan, especially for the braces, because it seems to me a more logical arrangement. According to the pictures in Vasa´s museum, the topsail braces are fixed on the lateen yard and in BB plan there are fixed on the main mast shrouds.
Also I have changed the main mast topgallant yard braces a little, due that they were interfering with the mizzen topsail (compare the next pictures, noting the mentioned braces with an arrow):
Before After

It’s important to remark that is a good idea not to fix the lines of the sails and yards (braces, topping lifts, halyards, downhauls, buntlines, etc.) on the pin racks or belaying pins, because the order they are placed can be modified (as in my case) and it is important to avoid crossing lines.

Saludos and Happy Holydays, Karl
- cristikc, fmodajr, marktiedens and 5 others
-
 8
8
-
Que tal Ulises:
You are doing a terrific work with the first planking and metal frames.
Felices Fiestas!! Karl
-
-
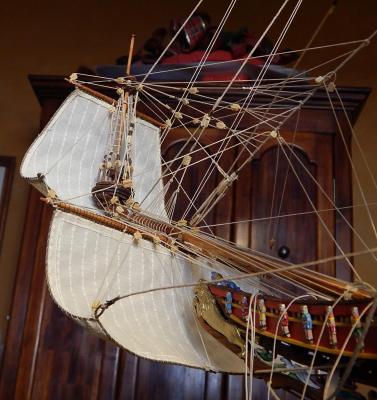
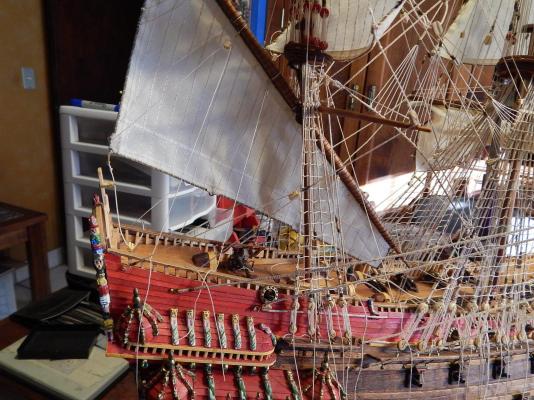
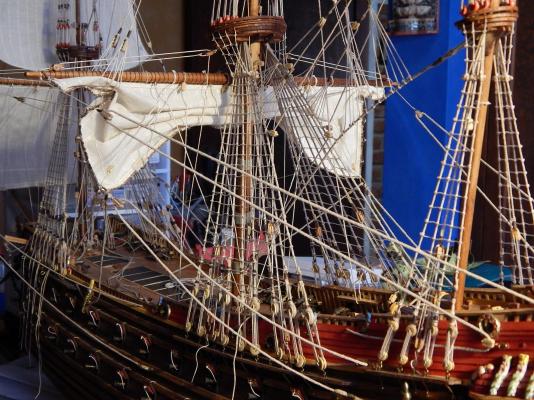
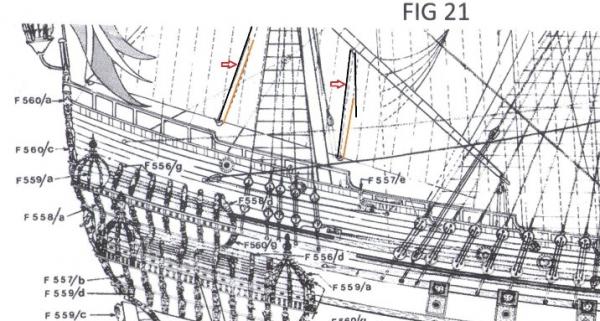
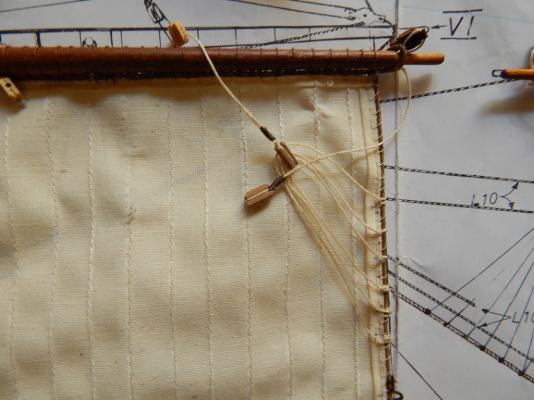
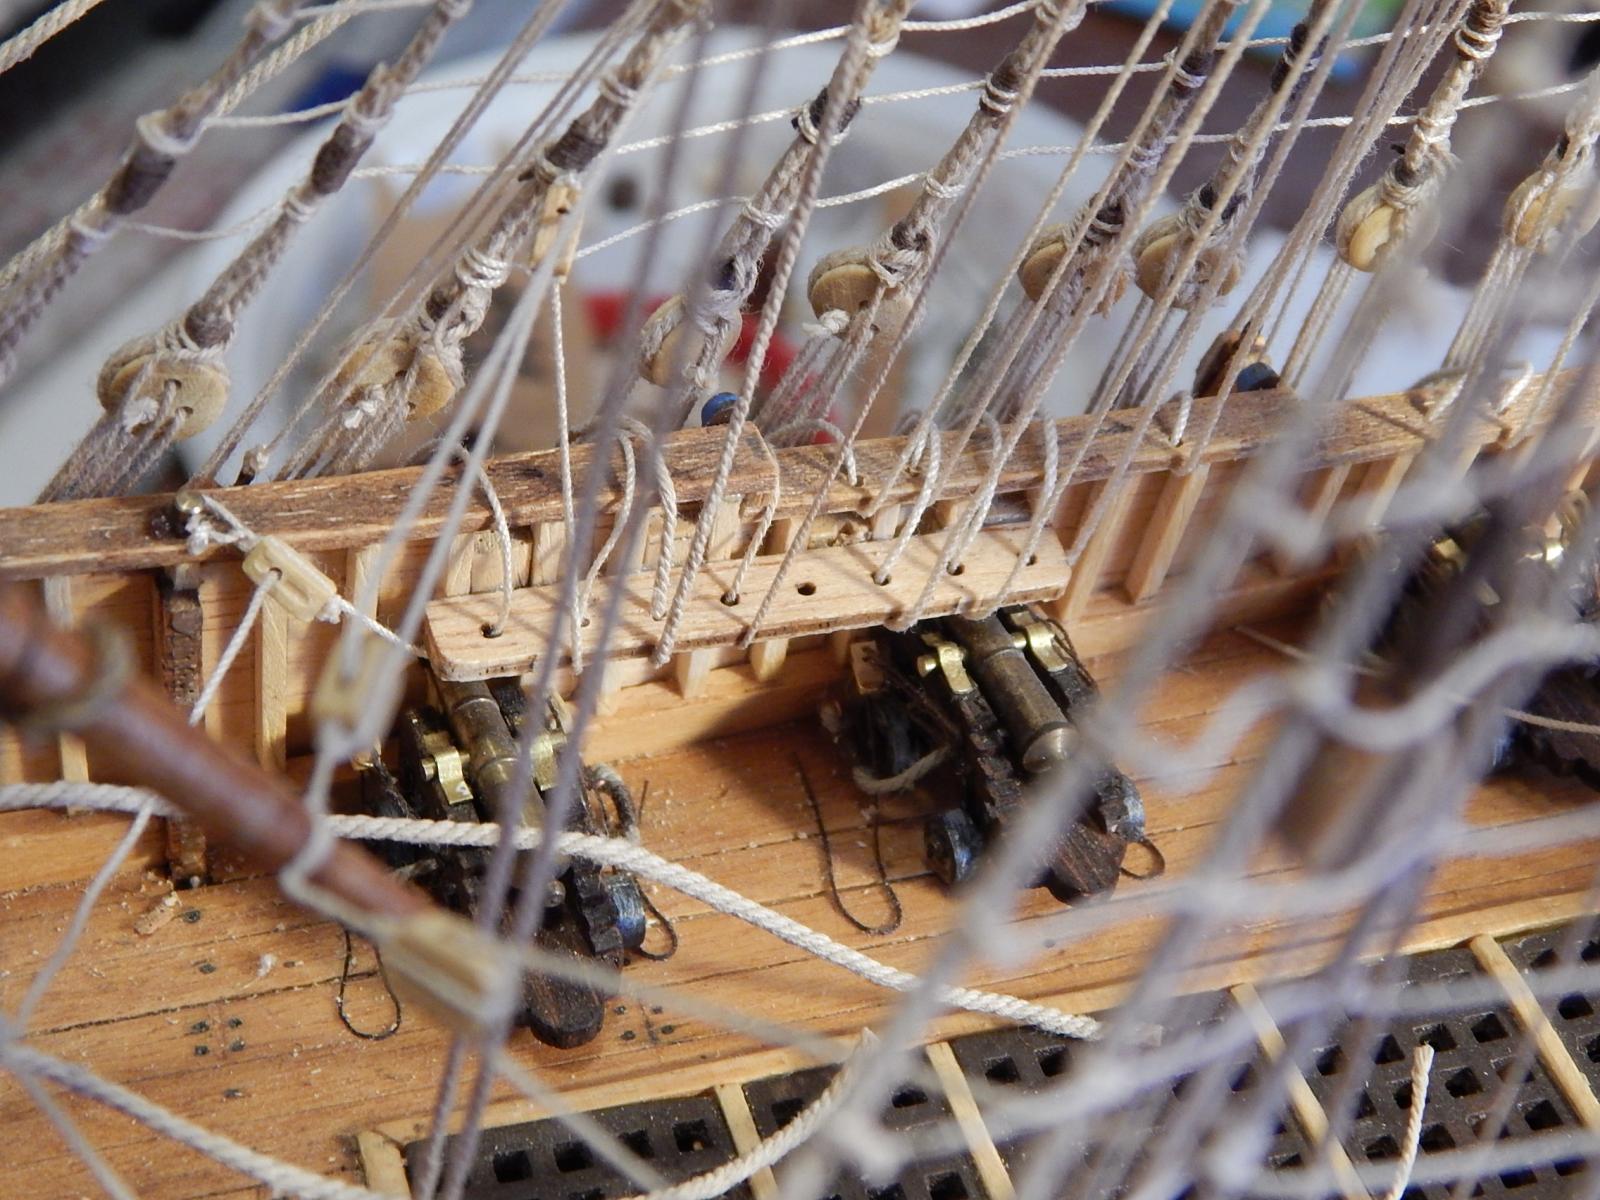
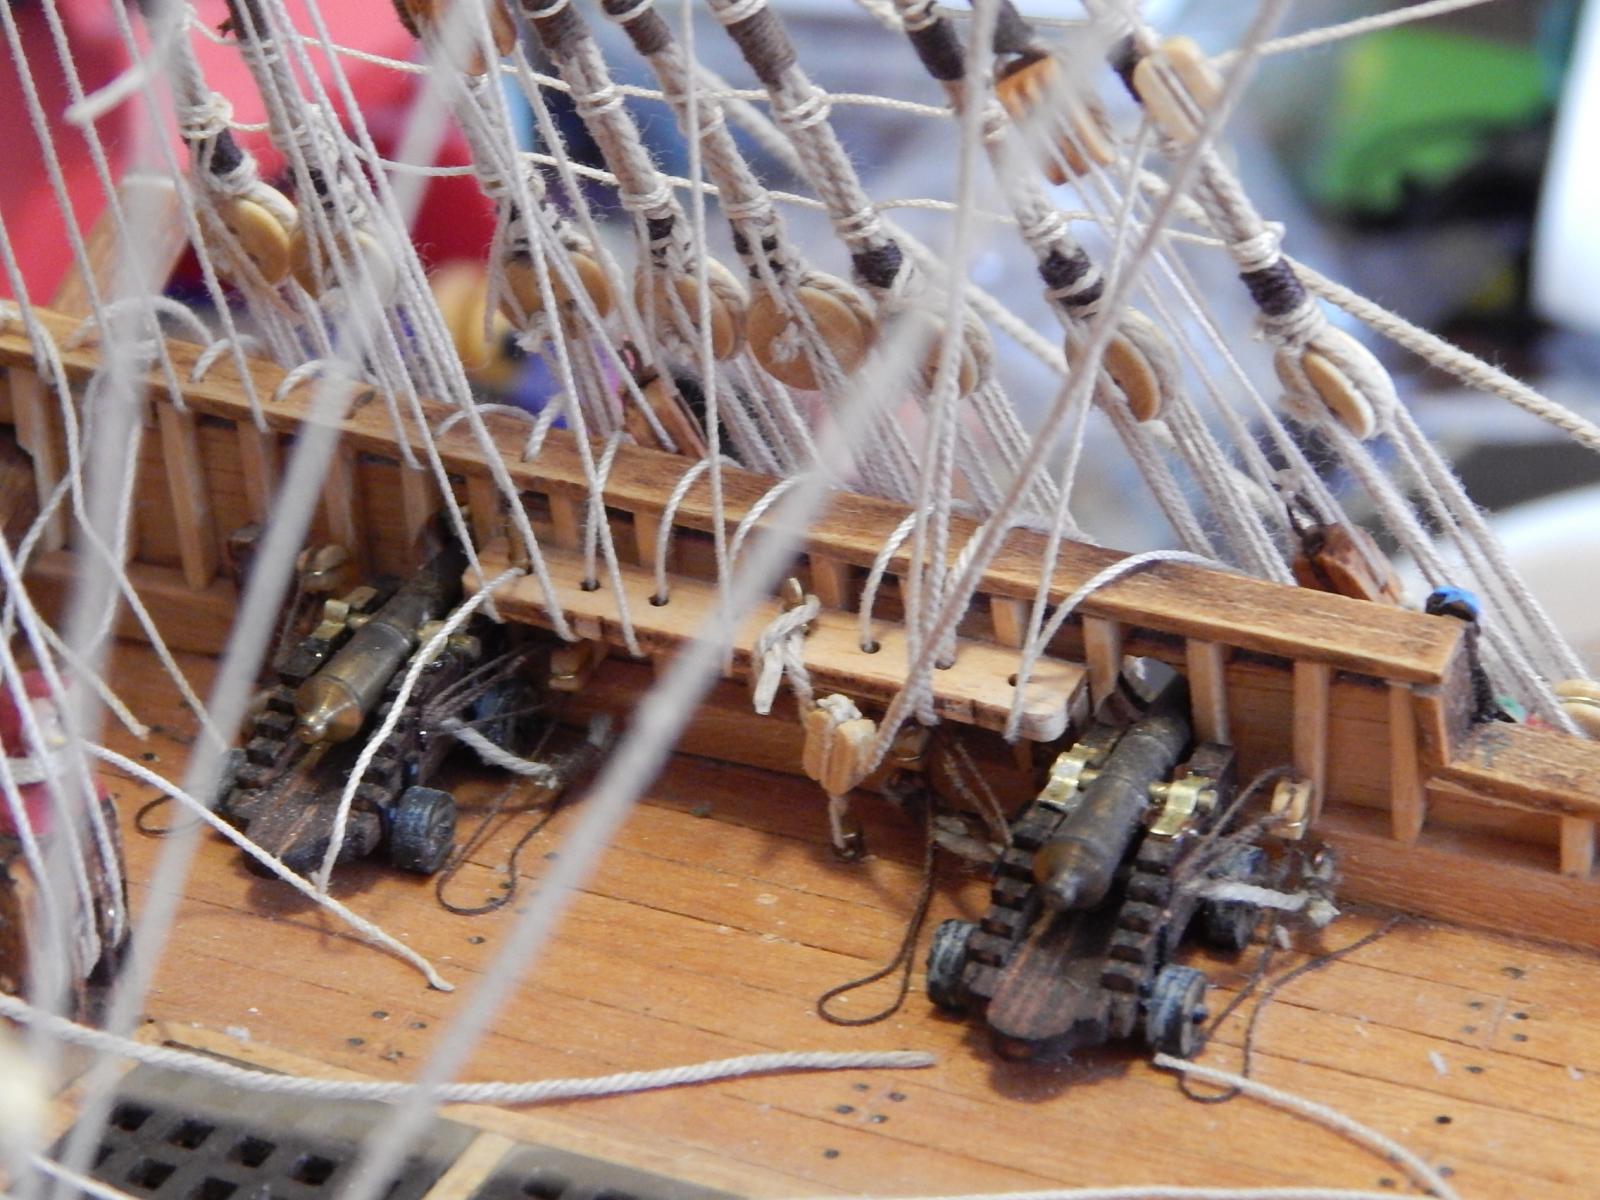
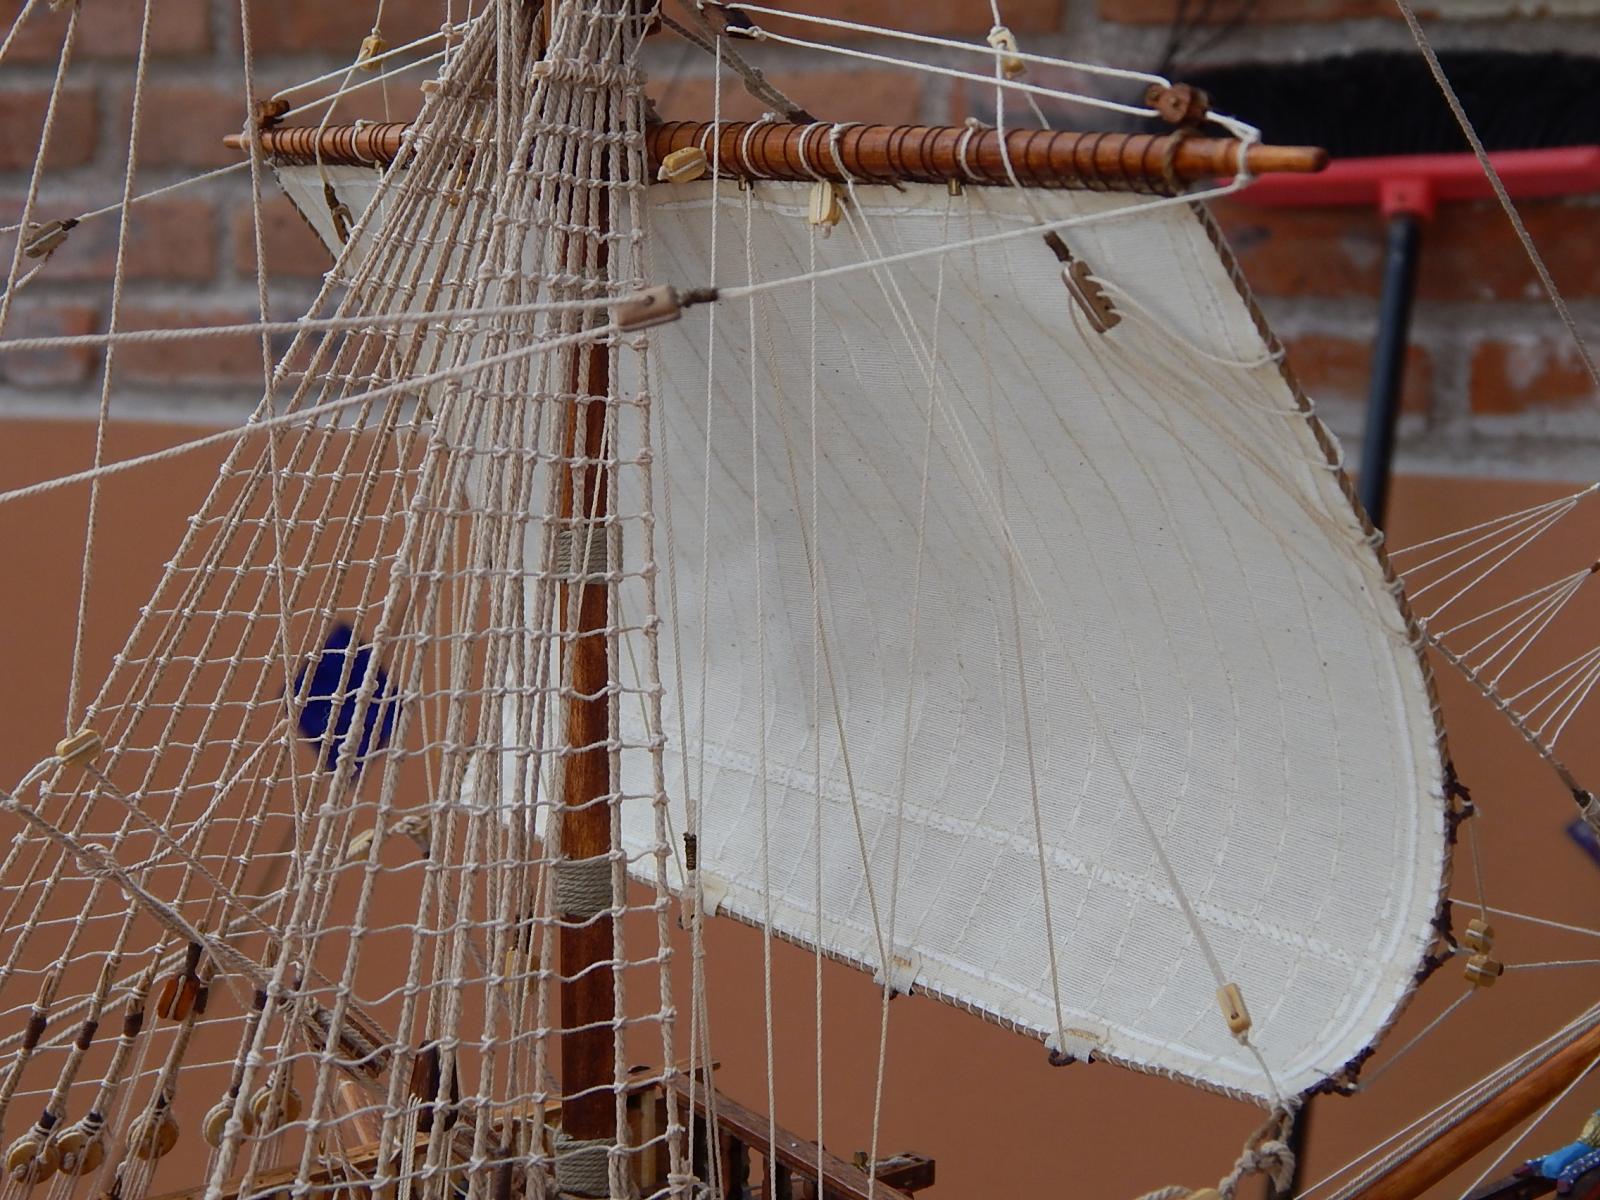
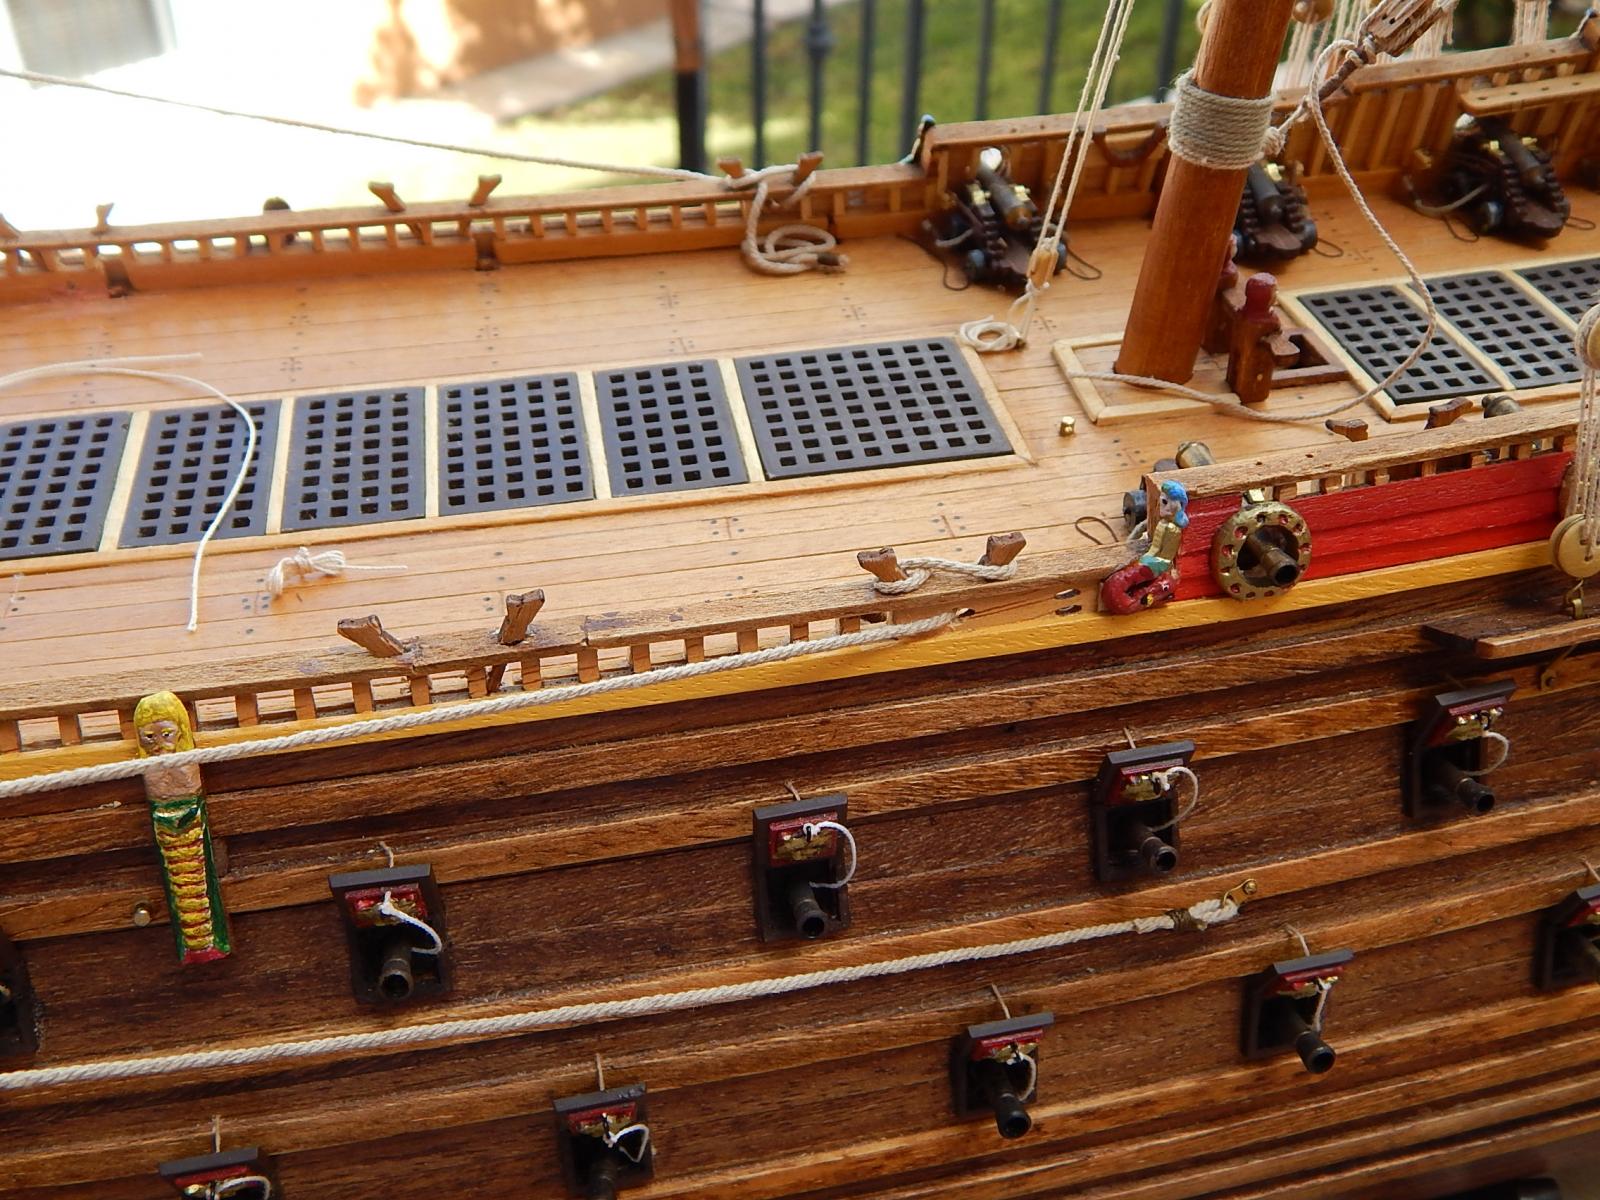
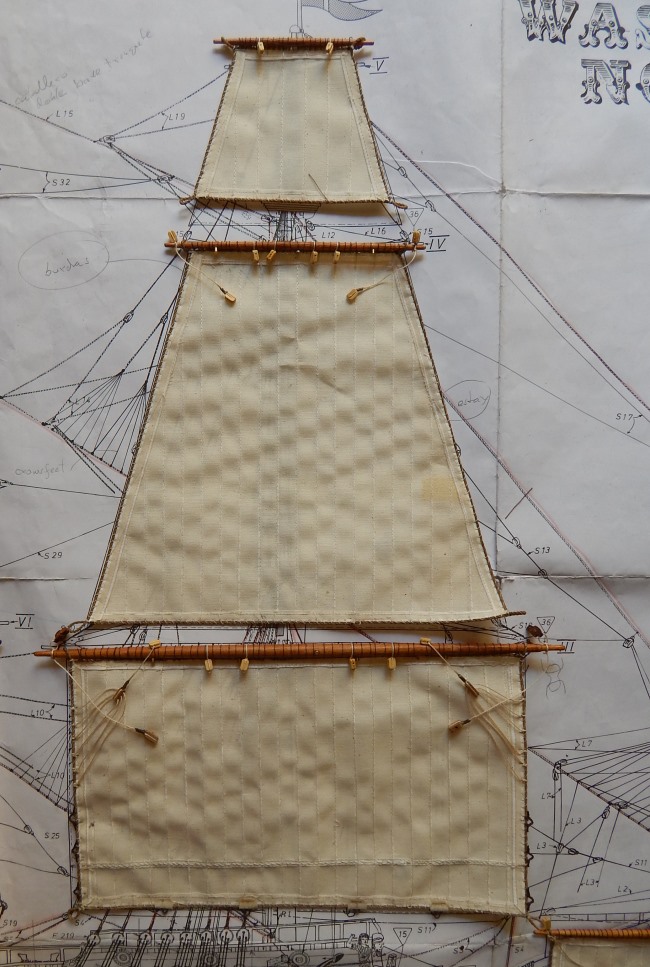
Hi friends:
Now I finished the Lateen sail of the mizzen mast, as usual I must to combine the information on the BB plans with the Vasa model pictures.
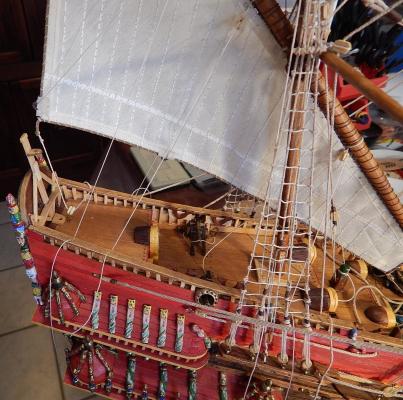
There were several differences but the most relevant was the way to fix the front of the yard. According to the BB plan the threads lay exactly on the sides of the upper part of the main stairs (the first behind the main mast), blocking them. In the Vasa model pictures it can be seen that this lines are fixed to the main mast shroud, as I did.
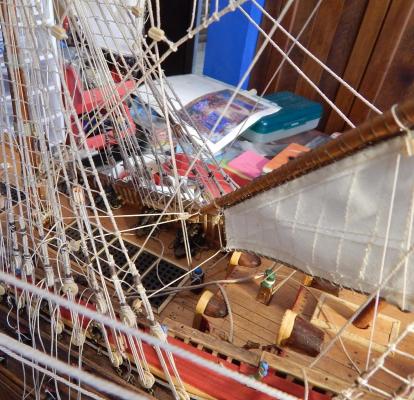
Additionally I also had to add new belaying pins to fix the lines of this sail.
Thanks for all your likes,
Saludos, Karl
- Dimitris71, md1400cs, GuntherMT and 8 others
-
11
-
Hola Werner:
Thanks for your comments! About your question, I fixed the cannon ports only with glue (the "universal" type, that's serves to glue metal, wood, plastic, and so on) As an addition you can see my post #87
Saludos, Karl
-
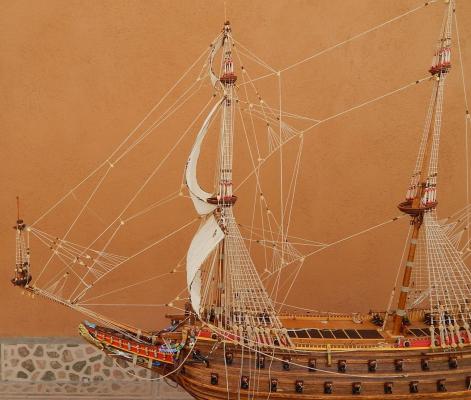
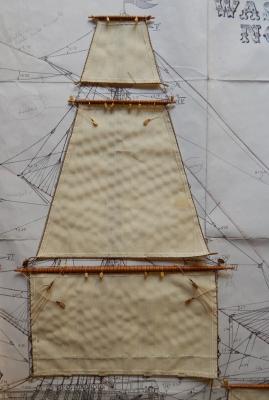
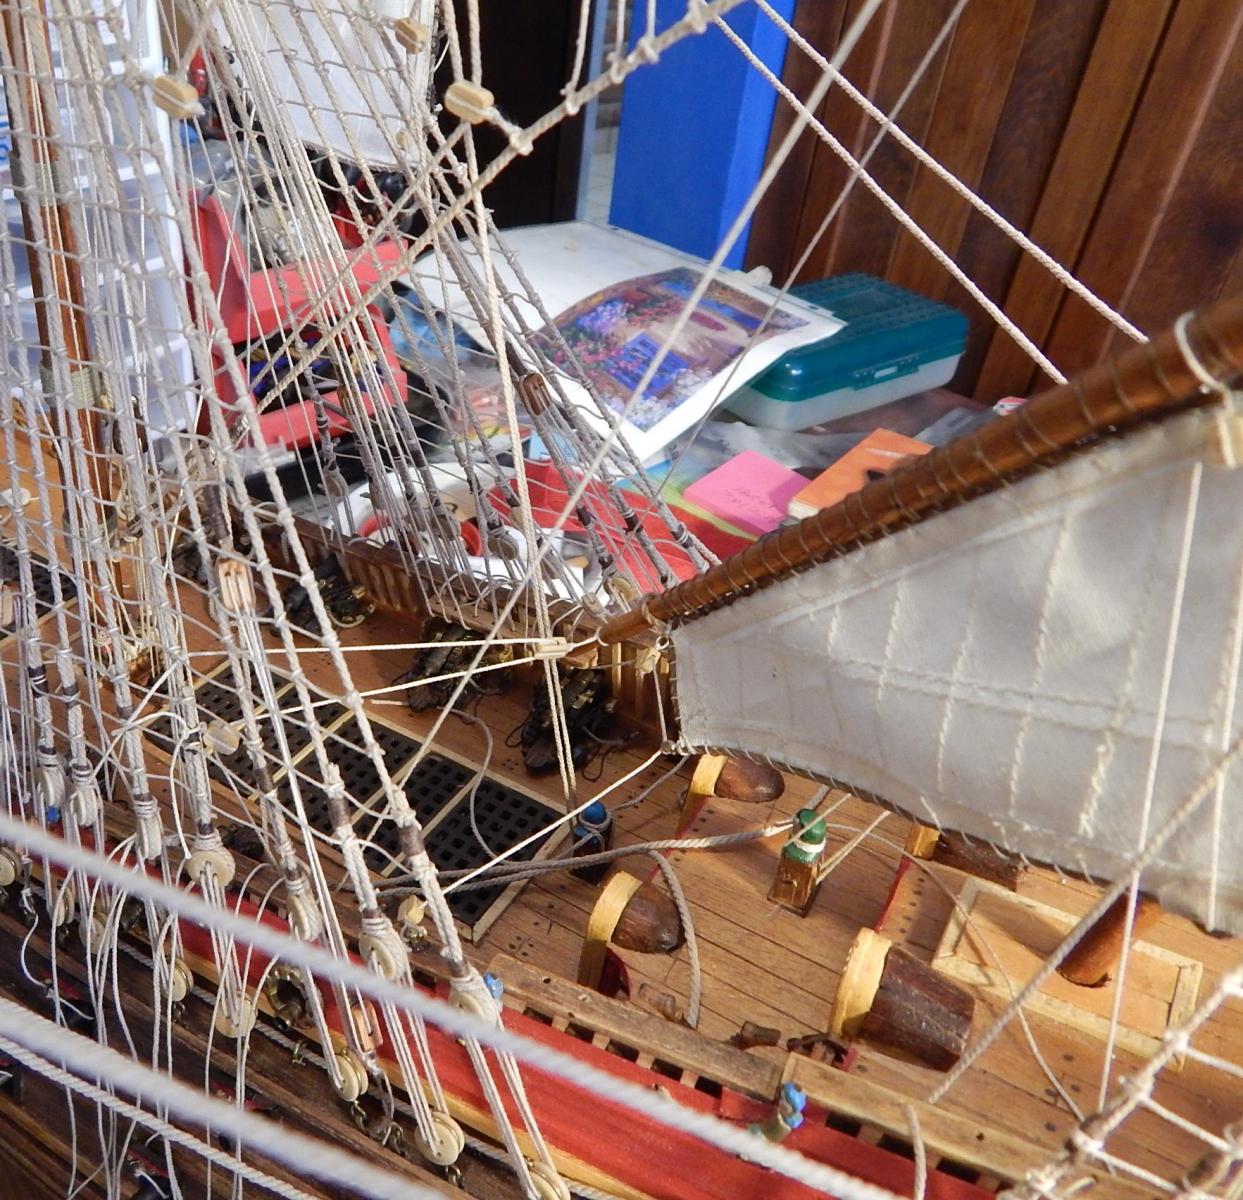
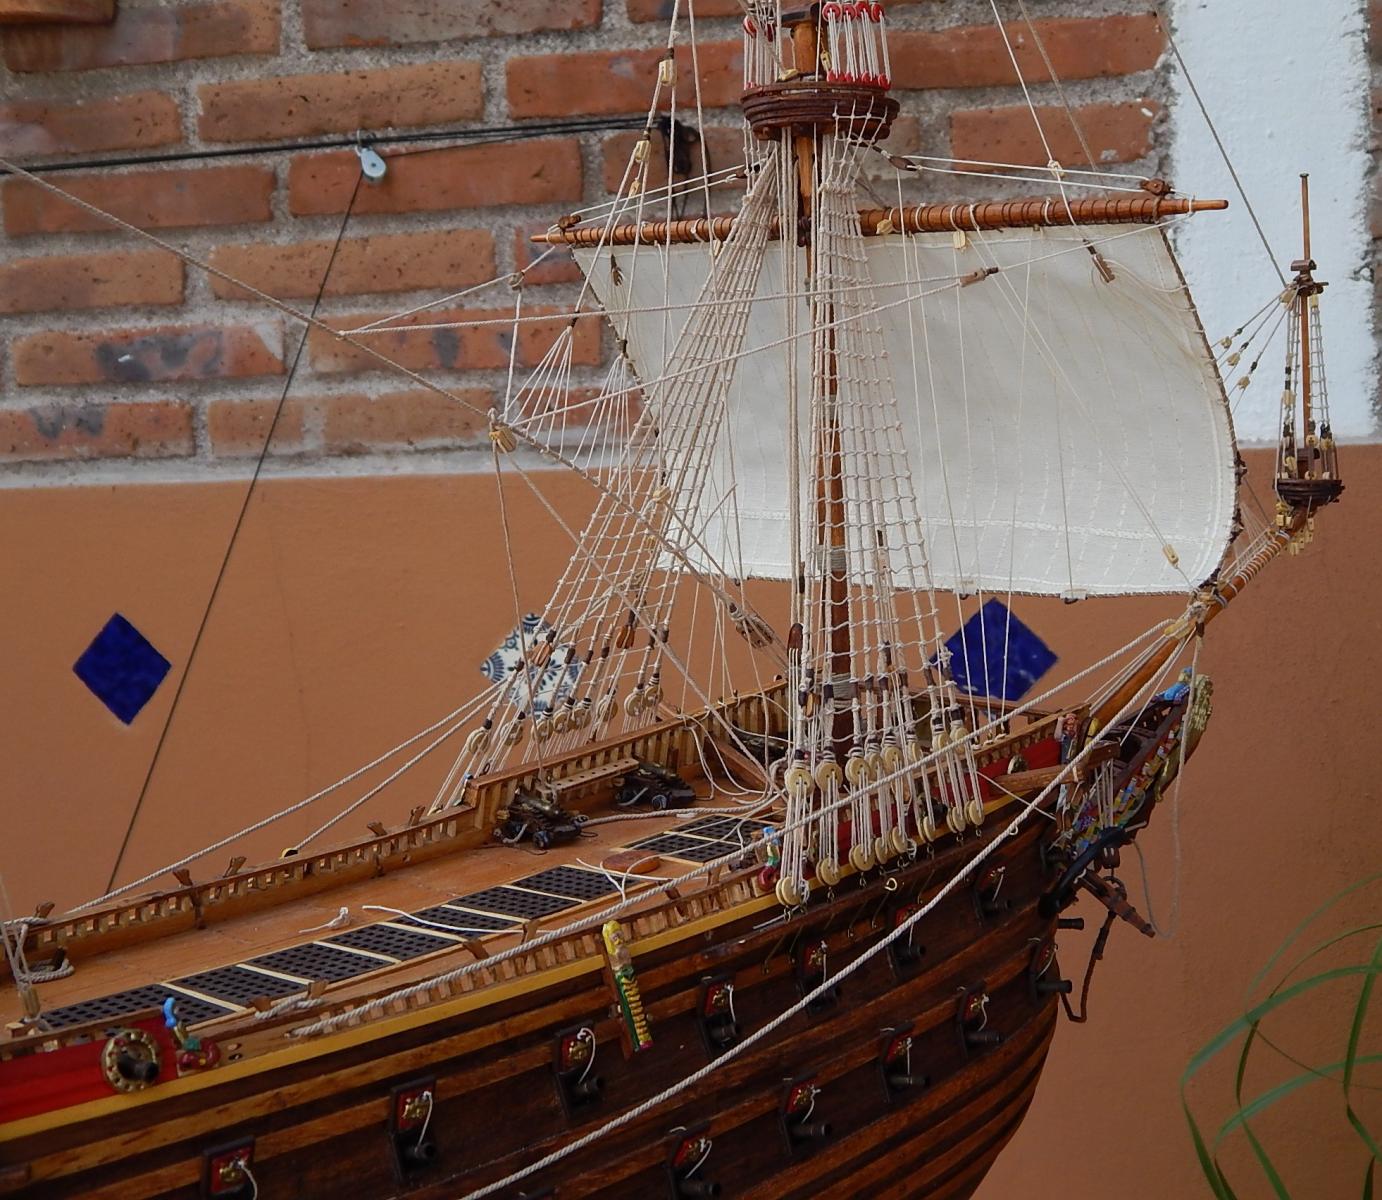
Hola:
I just finished installing the sails of the main mast. As I mention before I made some changes in the rigging, adjusting more to the Vasa pictures than to the BB plans.
I haven´t fix the rigging threads yet, and I am waiting to finish all the sails to do that, because:
1) to facilitate the maneuver in putting the new lines,
2) due to the changes in the rigging some of the lines intersect each other, so it is necessary to change the place on the pinracks and this is more easy if you haven't fix the lines already and finally,
3) to make final adjustments to the tension of the yarns

Next challenge: the mizzen sails. I will probably make a combination between the rigging shown in BB plans and Vasa pictures to have a more "logic" rigging.
Saludos, Karl
- marktiedens, dgbot, WackoWolf and 5 others
-
8
-
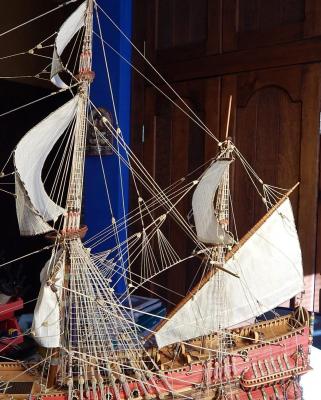
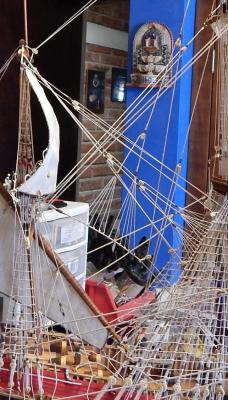
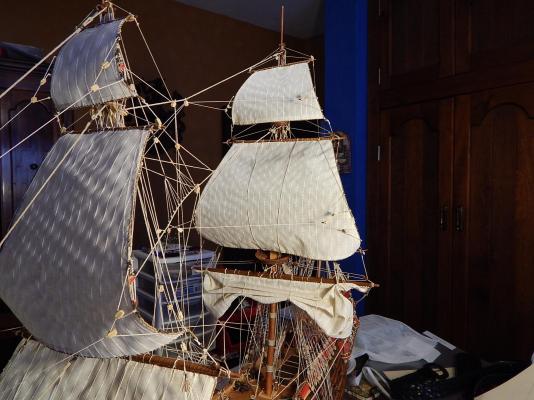
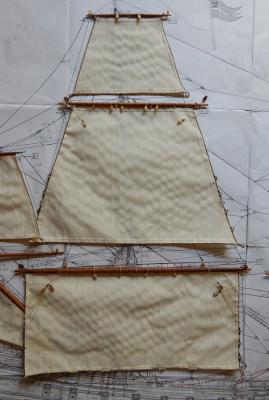
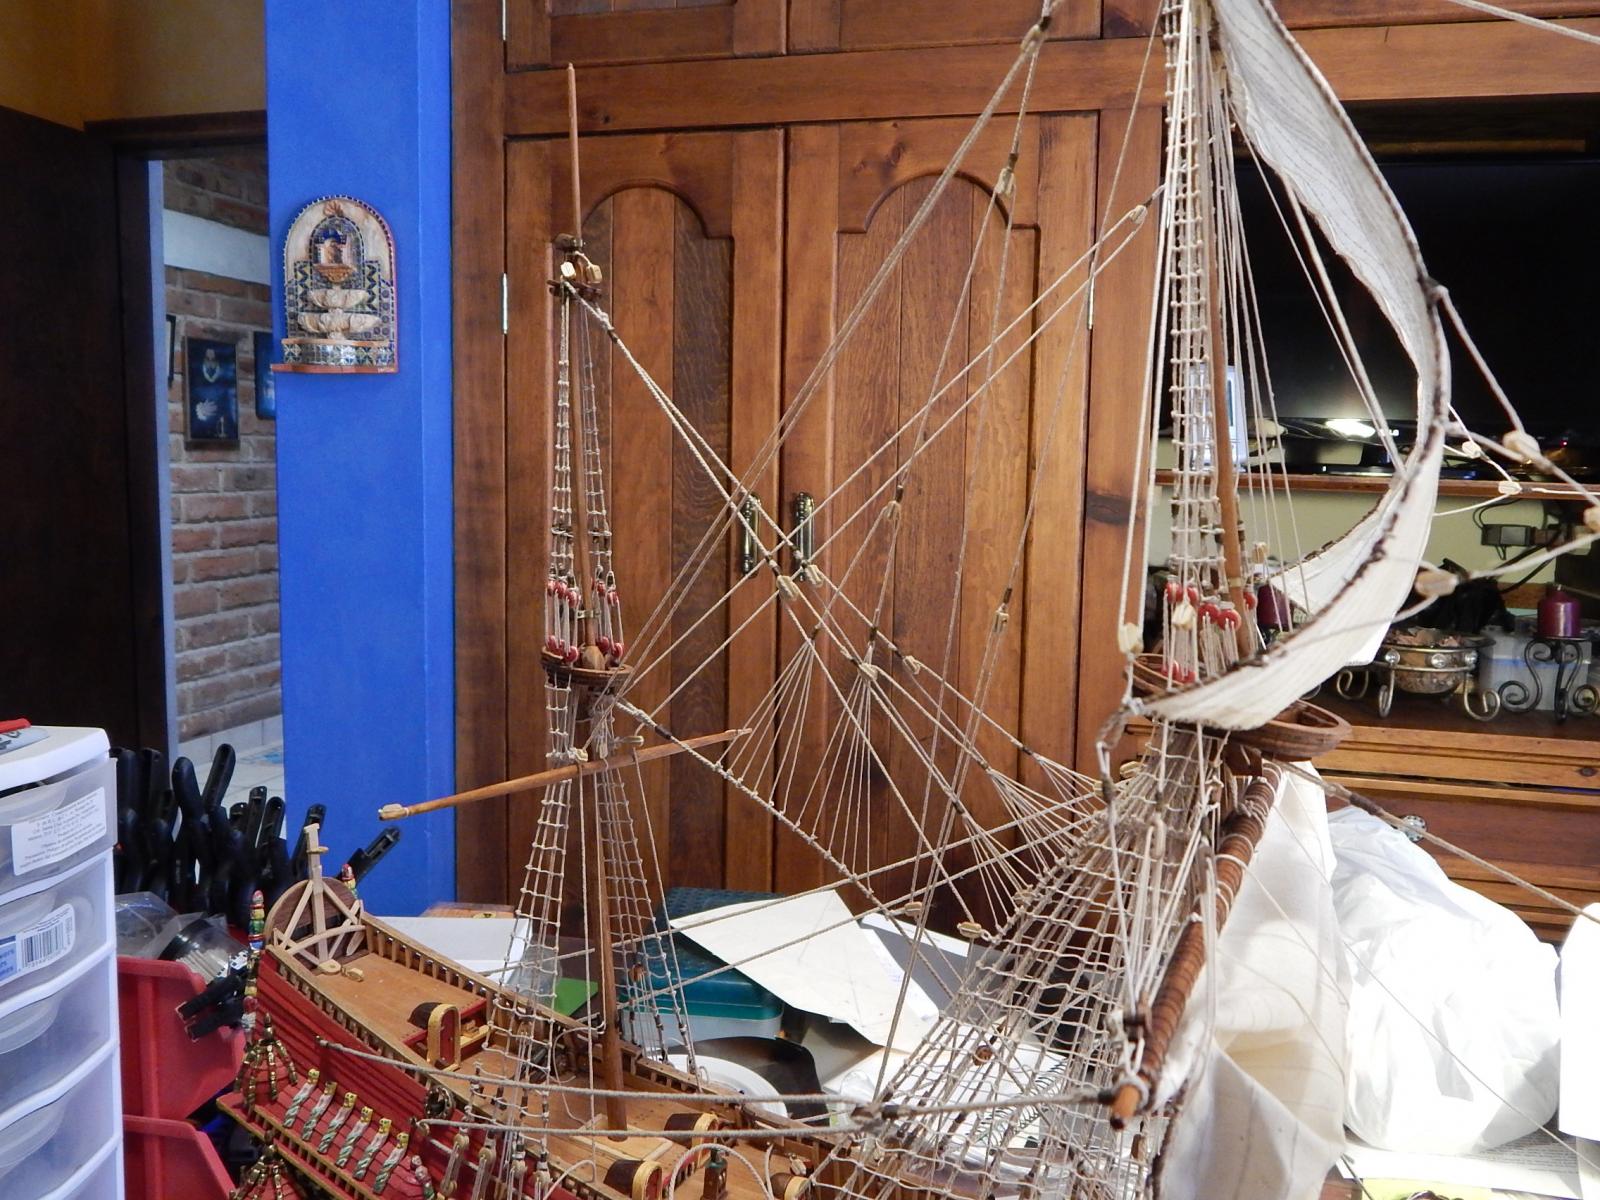
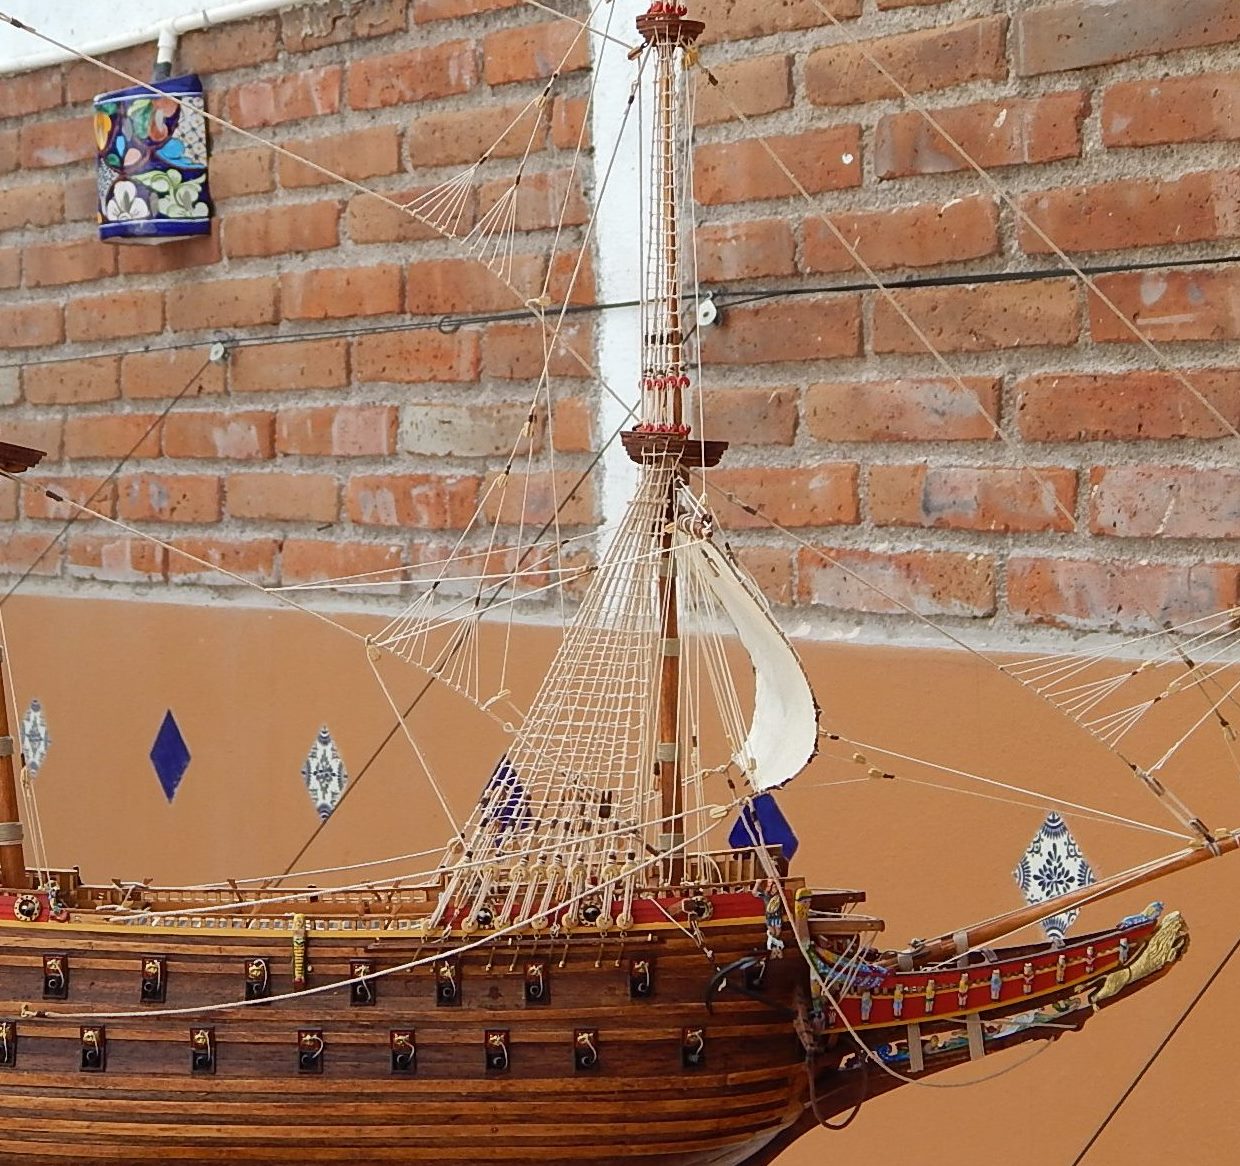
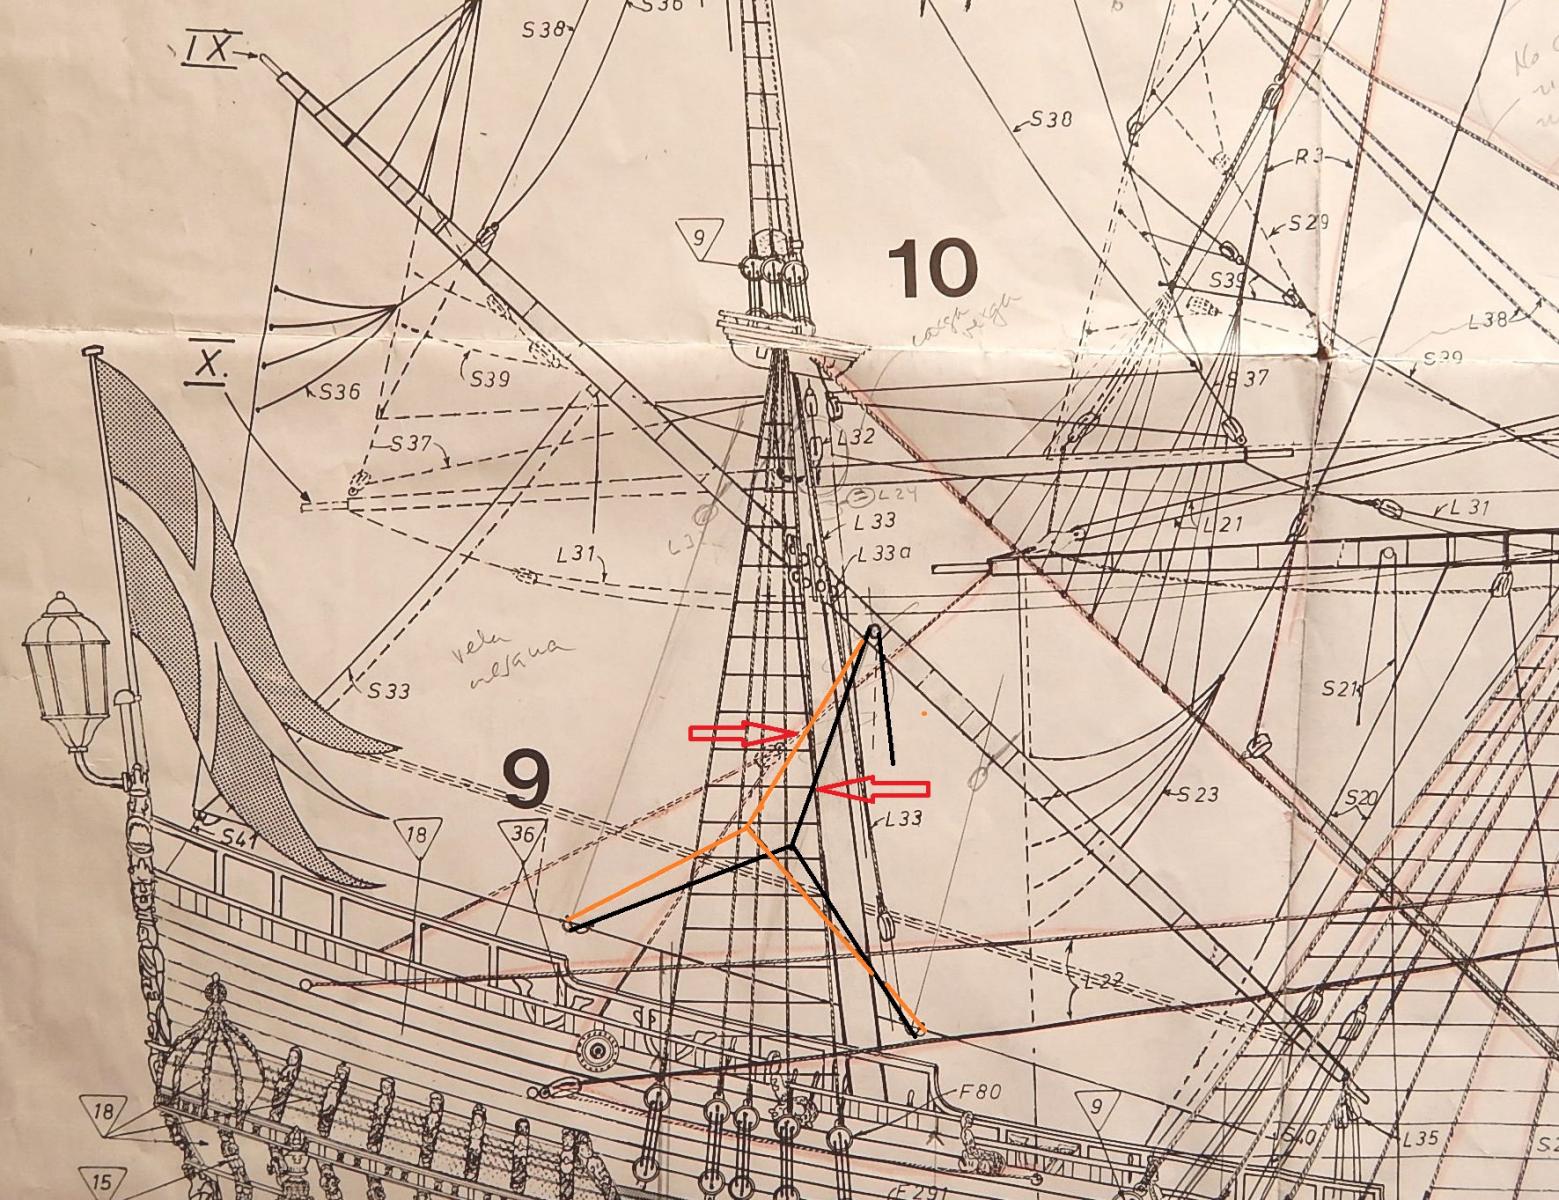
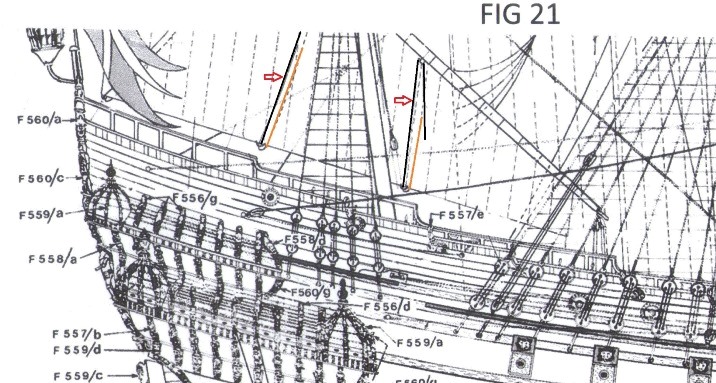
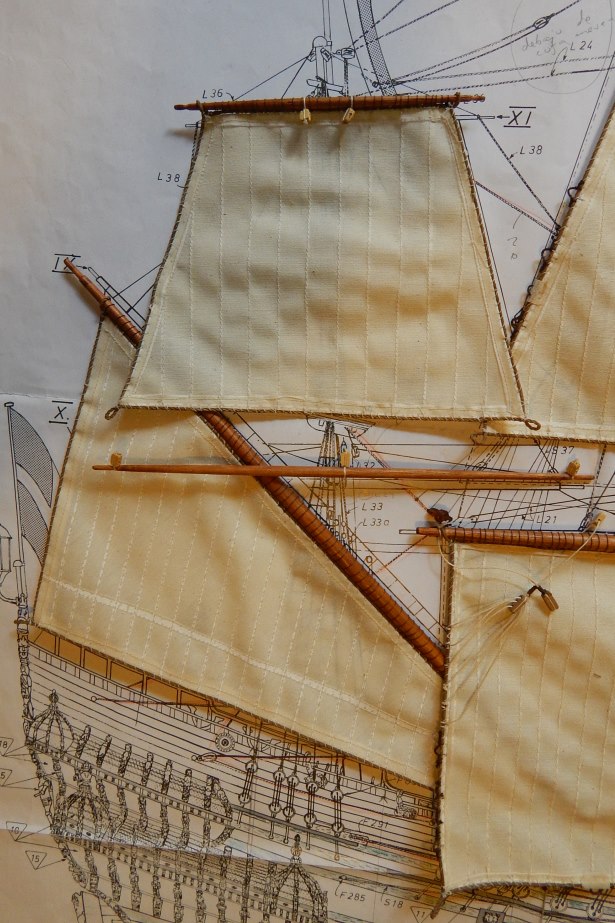
A sunday update:
One of the main differences I saw between the BB plans and the Clayton´s and museum Vasa pictures are the top mizzen stay and the lines that hold the spars of the main mast topsail to the mizzen mast (braces). Unfortunately in the pictures is impossible to distinguish how are they fixed some of them. So, I figured out how to install them thinking in a logical form. Here you can see my solutions:

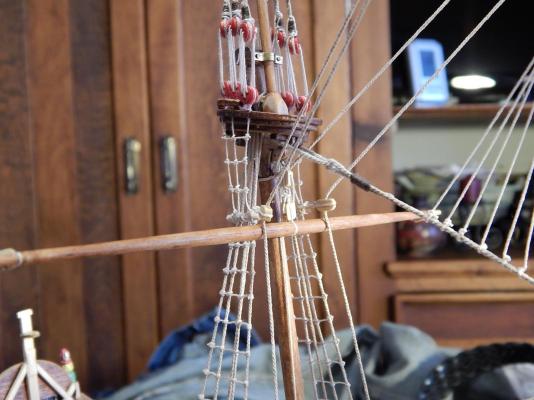
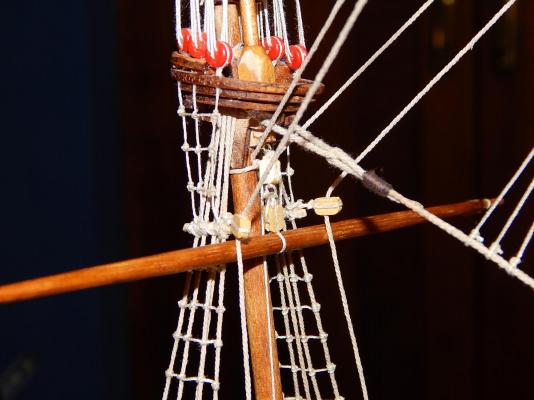
Saludos, Karl
- WackoWolf, marktiedens, Lin Feng and 3 others
-
6
-
Hola Rich:
An interesting form to do the shrouds, but as GuntherMT says how will you secure them to the mast? I find more practical to do the complete line (with the 2 sides) and then fixed to the deadeyes than are already fixed to the board. The trick is to have sliding knots to adjust the final dimension of the shroud line. You can see my post #108 for more clarity. Anyway, as we say in Mexico: there are thousand forms to kill fleas.
Saludos, Karl
-
Matti, Ulises, Frank and Michael:
Thanks to all for your kind words!!
Saludos, Karl
-
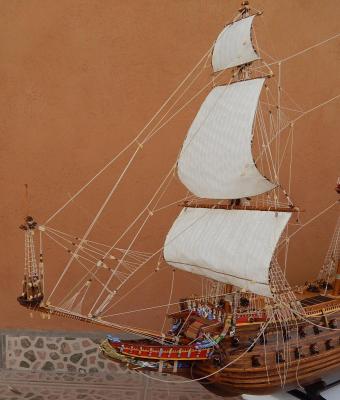
Hola!
Now I finished the main course sail. In this case I select to have it partially folded for a more interesting view. At first, I didn t know how to do it because the material in BB for sails is a little stiff and even with water it is not very maneuverable but finally it seems OK. I also change some of the rigging of BB plans to the more logical 1:10 model in Vasa museum.
In behalf of the interested people I send some detailed pictures:

Thanks everyone for the likes.
Saludos, Karl
-
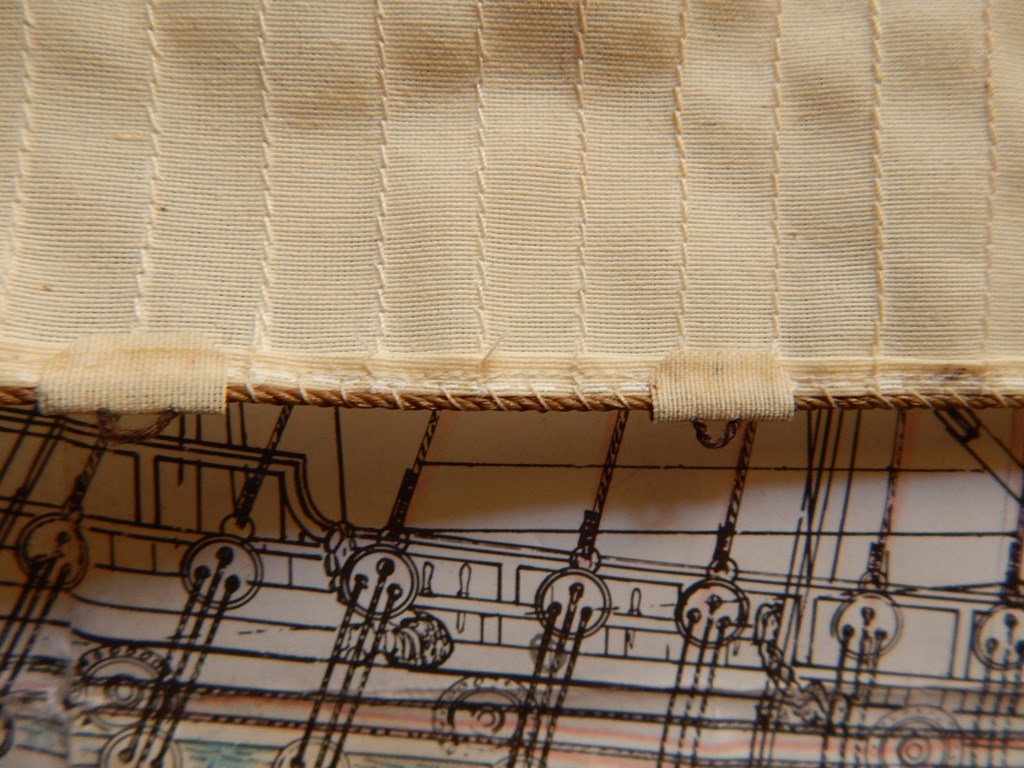
Hi everyone:
After countless rigging I finished to place the sails on the foremast.
As you can see the lines are still not fixed because I expect to give them one last adjustment, and mainly because I changed some of the rigging following the pictures of the 1:10 model in Vasa´s museum. Doing this, it was necessary to change the order of the position of the lines to avoid crossing lines to the belaying pins, and this operation was easier made on progress.


Thanks for watching,
Saludos, Karl
- Dimitris71, GuntherMT, md1400cs and 9 others
-
12
-
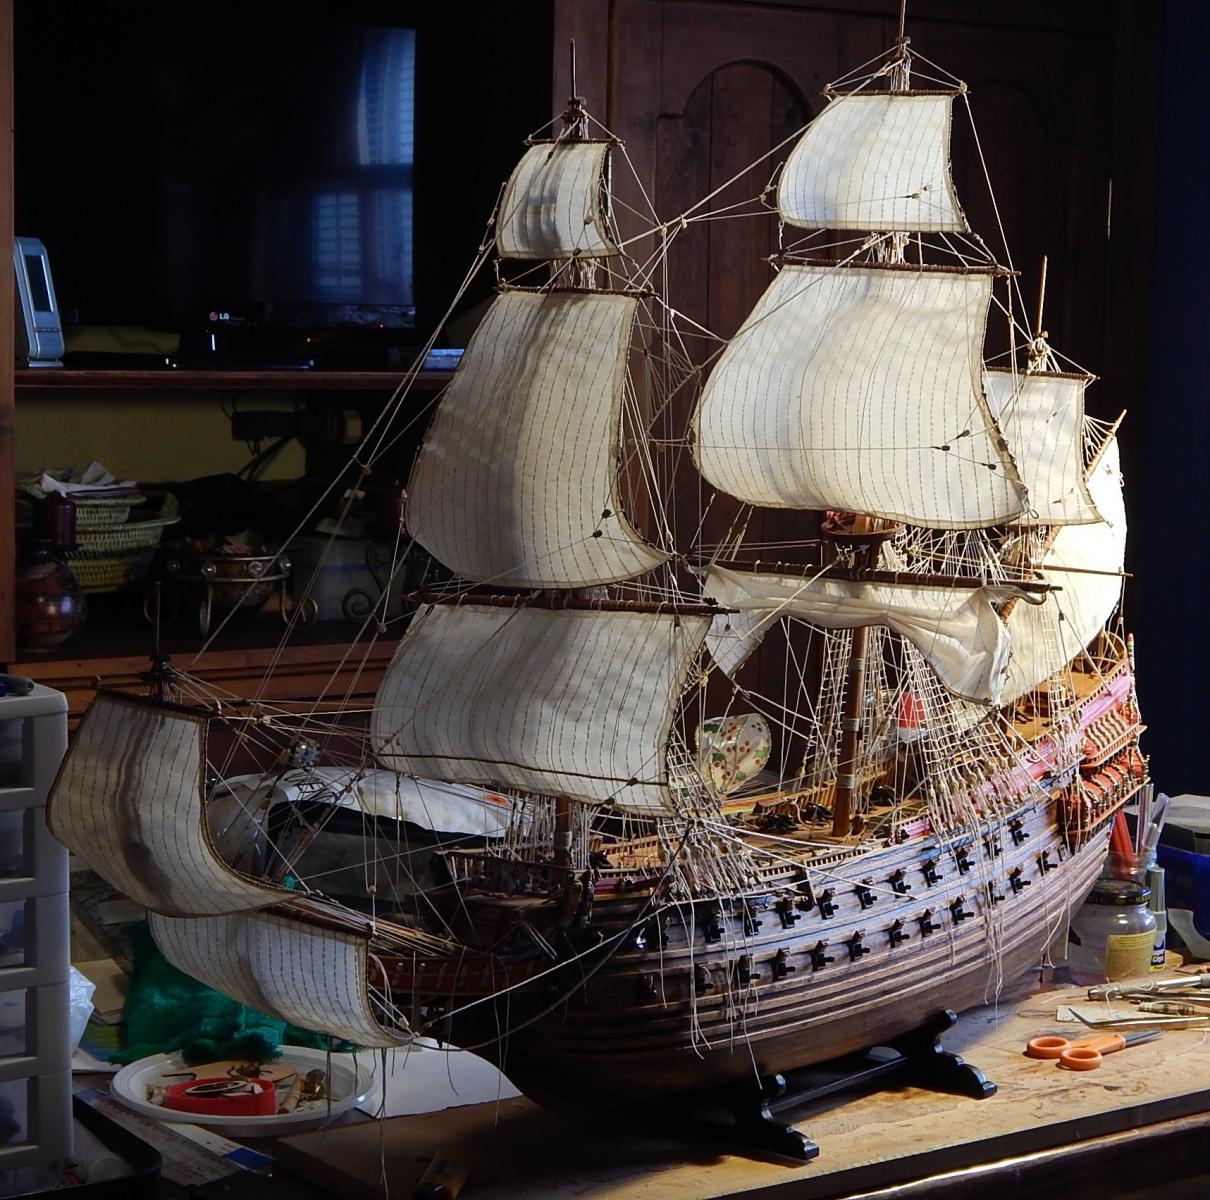
Hola Matti:
Indeed Matti, I am in the final steps and have an ambivalent feeling: it gives happiness but at the same time sadness for finishing it.
About weather, now it is really nice, sunny and temperatures between 20 and 30 °C and our coldest temperatures during winter are usually no less than 10°. (But in summer is really hot: 30 to 45°)
Saludos, Karl
-
Hi friends:
Special mention to all the likes I received, there are very encouraging, Thanks to all of you.
Saludos, Karl
-
Hi Frank:
At first I was not sure how the sail would like without trying to "bend" the sail previously using diluted varnish or a bath with water and white glue as some modelist recommend, but as you already noticed the sail billow out thanks to the the number of lines used to fix it. Now I am in the process to install the upper one or topsail.
Saludos, Karl
-
Hola Michael:
Thanks for your words. I decided to double the pictures jpg size, due that sometimes is frustrating trying to see some detail with no success.
Saludos, Karl
-
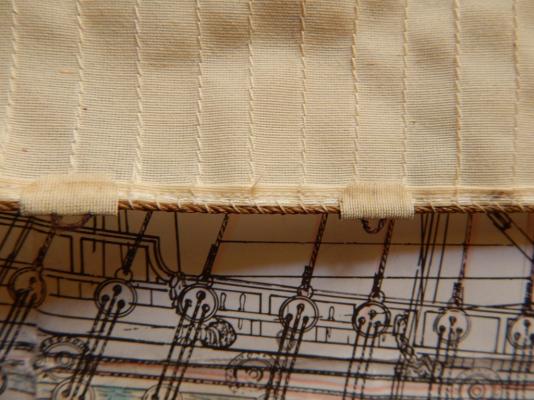
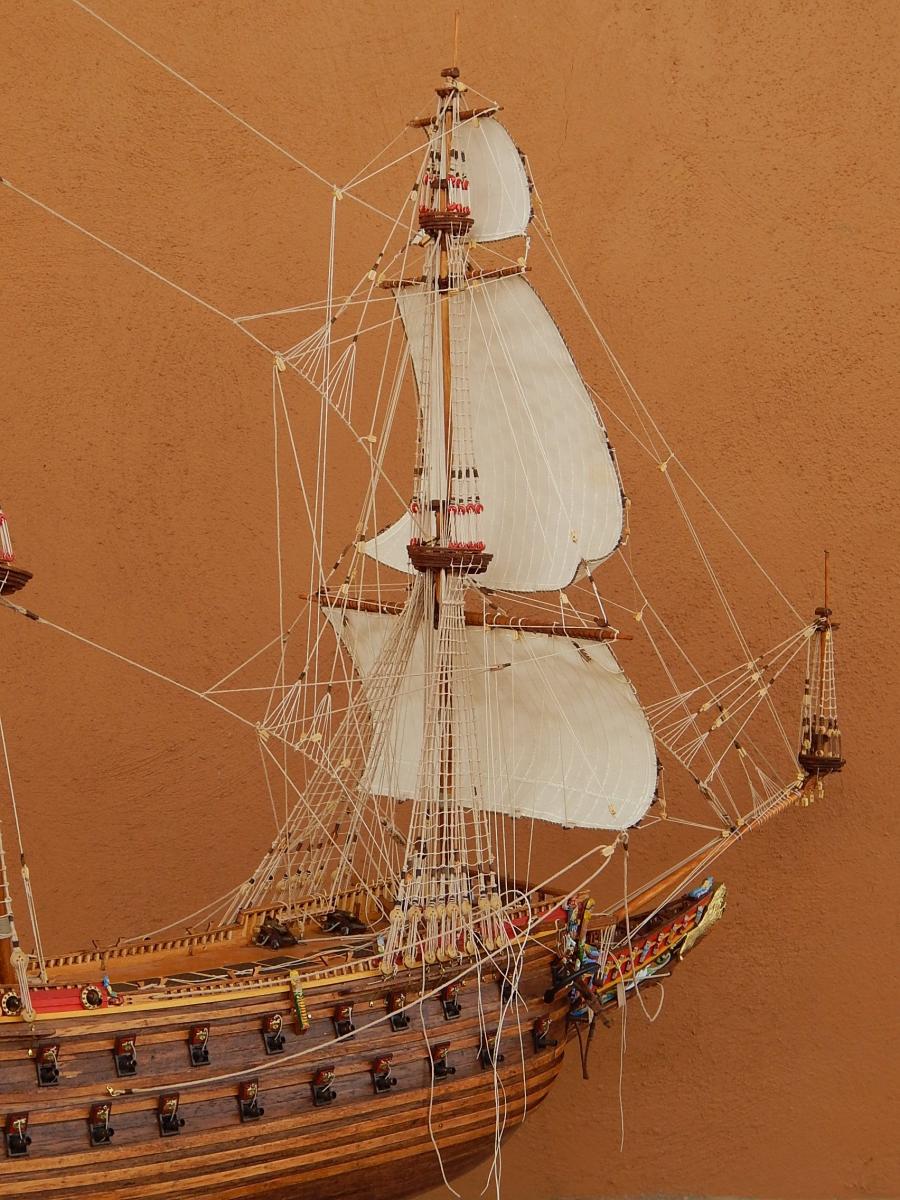
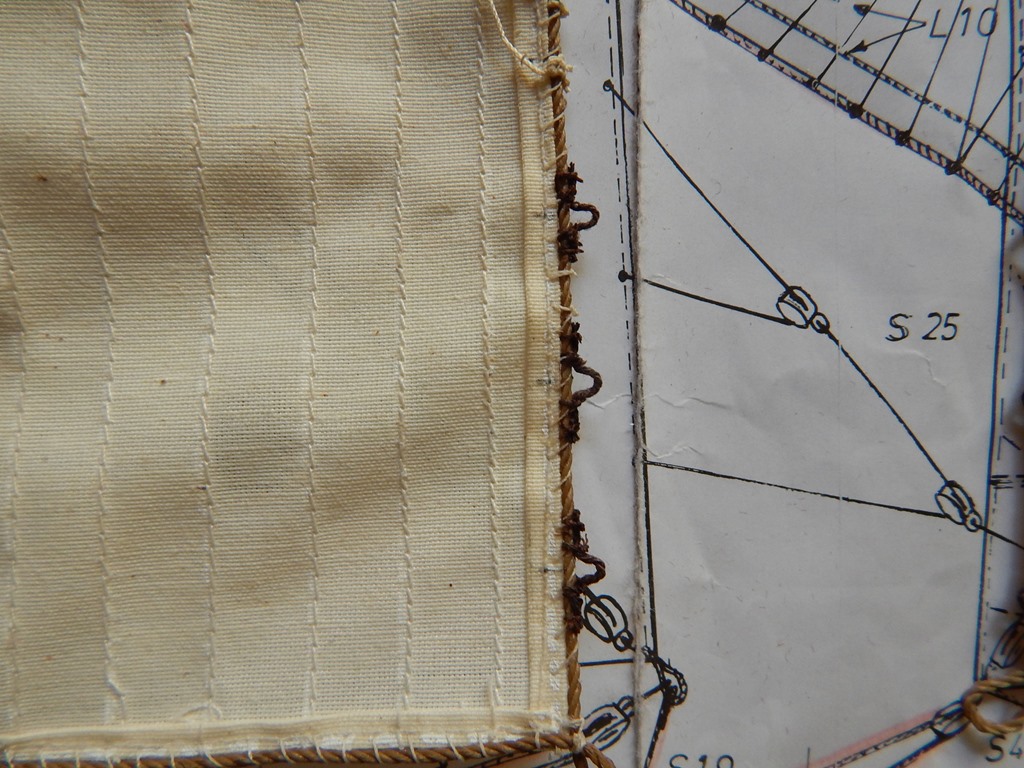
Hi friends:
It seems that I am approaching the final steps, now in the process of placing the sails on the masts. As the first one I selected the fore sail or fore course. One thing to mention is the great number of rigging it has: 18 lines for this sail only!!
Here some pictures:


Thanks for your likes and comments.
Saludos, Karl
- VonHoldinghausen, schnu, Lin Feng and 9 others
-
12
-
Hi guys:
Continuing with the sail details I arrive to the Lateen sail. At first it appeared to me that the form to arrange the folding rigging lines, according to the Plan, was not logical. So I tried to see them in the pictures of the 1:10 model at the Vasa museum and Clayton´s and although it is difficult to see the details one thing is clear: there were different.
Revising again the drawings in the Manual instructions I noticed another inconsistency between the drawing that comes in the Plan and the one in the Instruction manual and although is not complete it seems to be the correct one. Finally I decided to use the latter with some part of my own.
PLAN:
MANUAL:
MY OPTION:
Saludos, Karl
-
-
Hola Frank, Schnu and Matti:
Thanks for your nice and encouraging comments.
Also, its nice to have several likes, thanks to everybody!!

Saludos, Karl
-
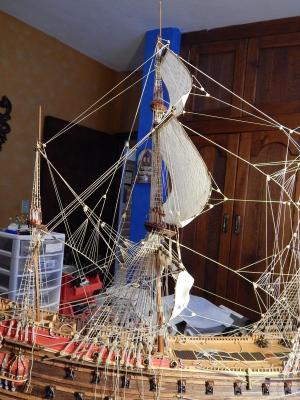
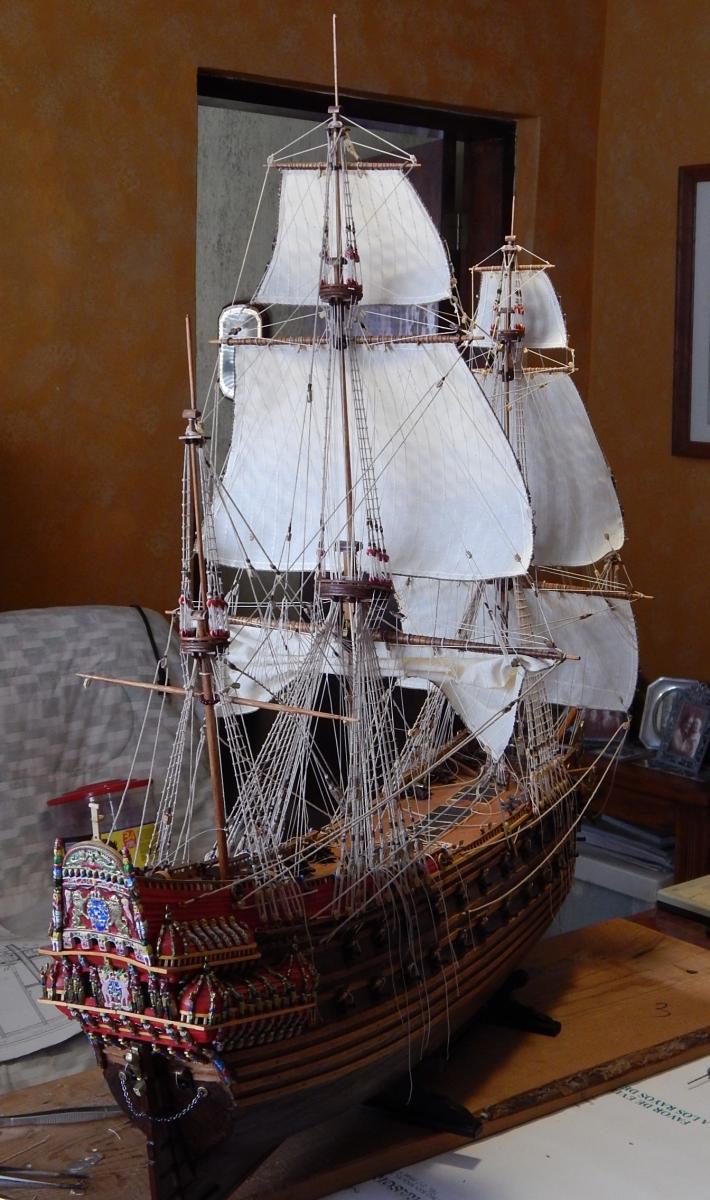
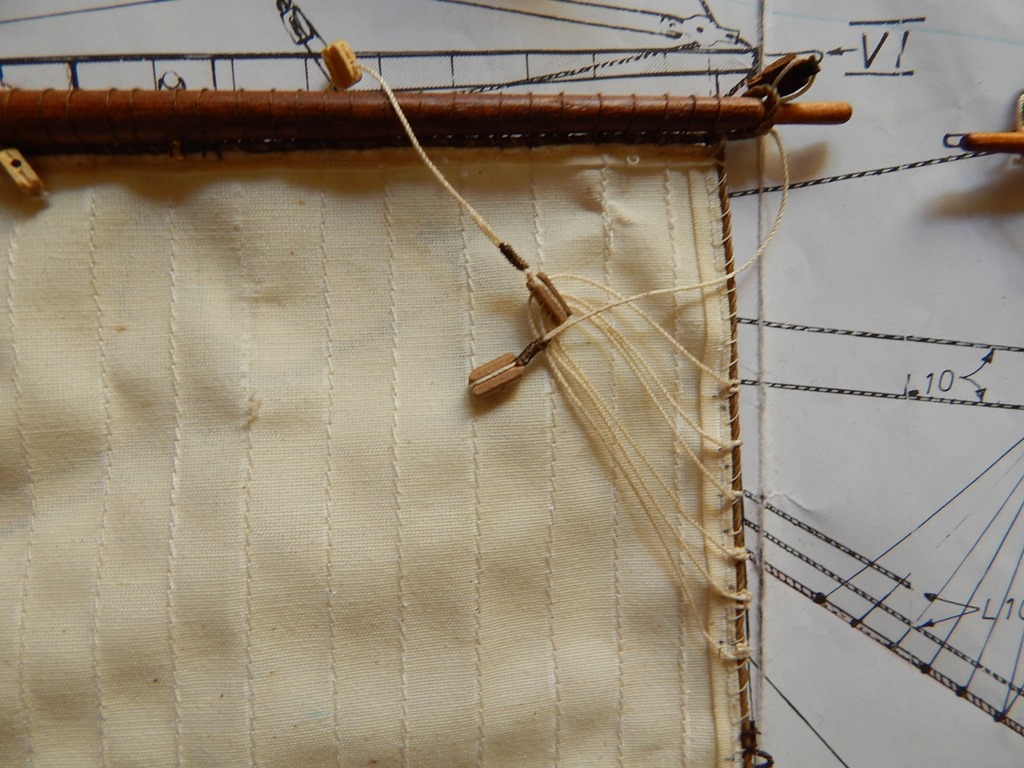
Hi guys:
These past two weeks I finished fixing the sails to the spars corresponding to the main and mizzen masts. Also adding more details to the sails and spars:

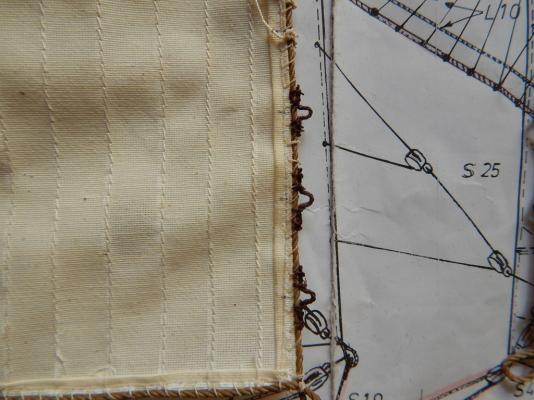
Thanks for your likes.
Saludos, Karl


Vasa by Karleop - FINISHED – Billing Boats – reviving a poorly built model
in - Kit build logs for subjects built from 1501 - 1750
Posted
Que tal Ulises,
yo make me laugh with your comments. It is really hard to compete with your wonderful work.
Saludos, Karl