


RMC
-
Posts
933 -
Joined
-
Last visited
Content Type
Profiles
Forums
Gallery
Events
Posts posted by RMC
-
-
Hi Jason
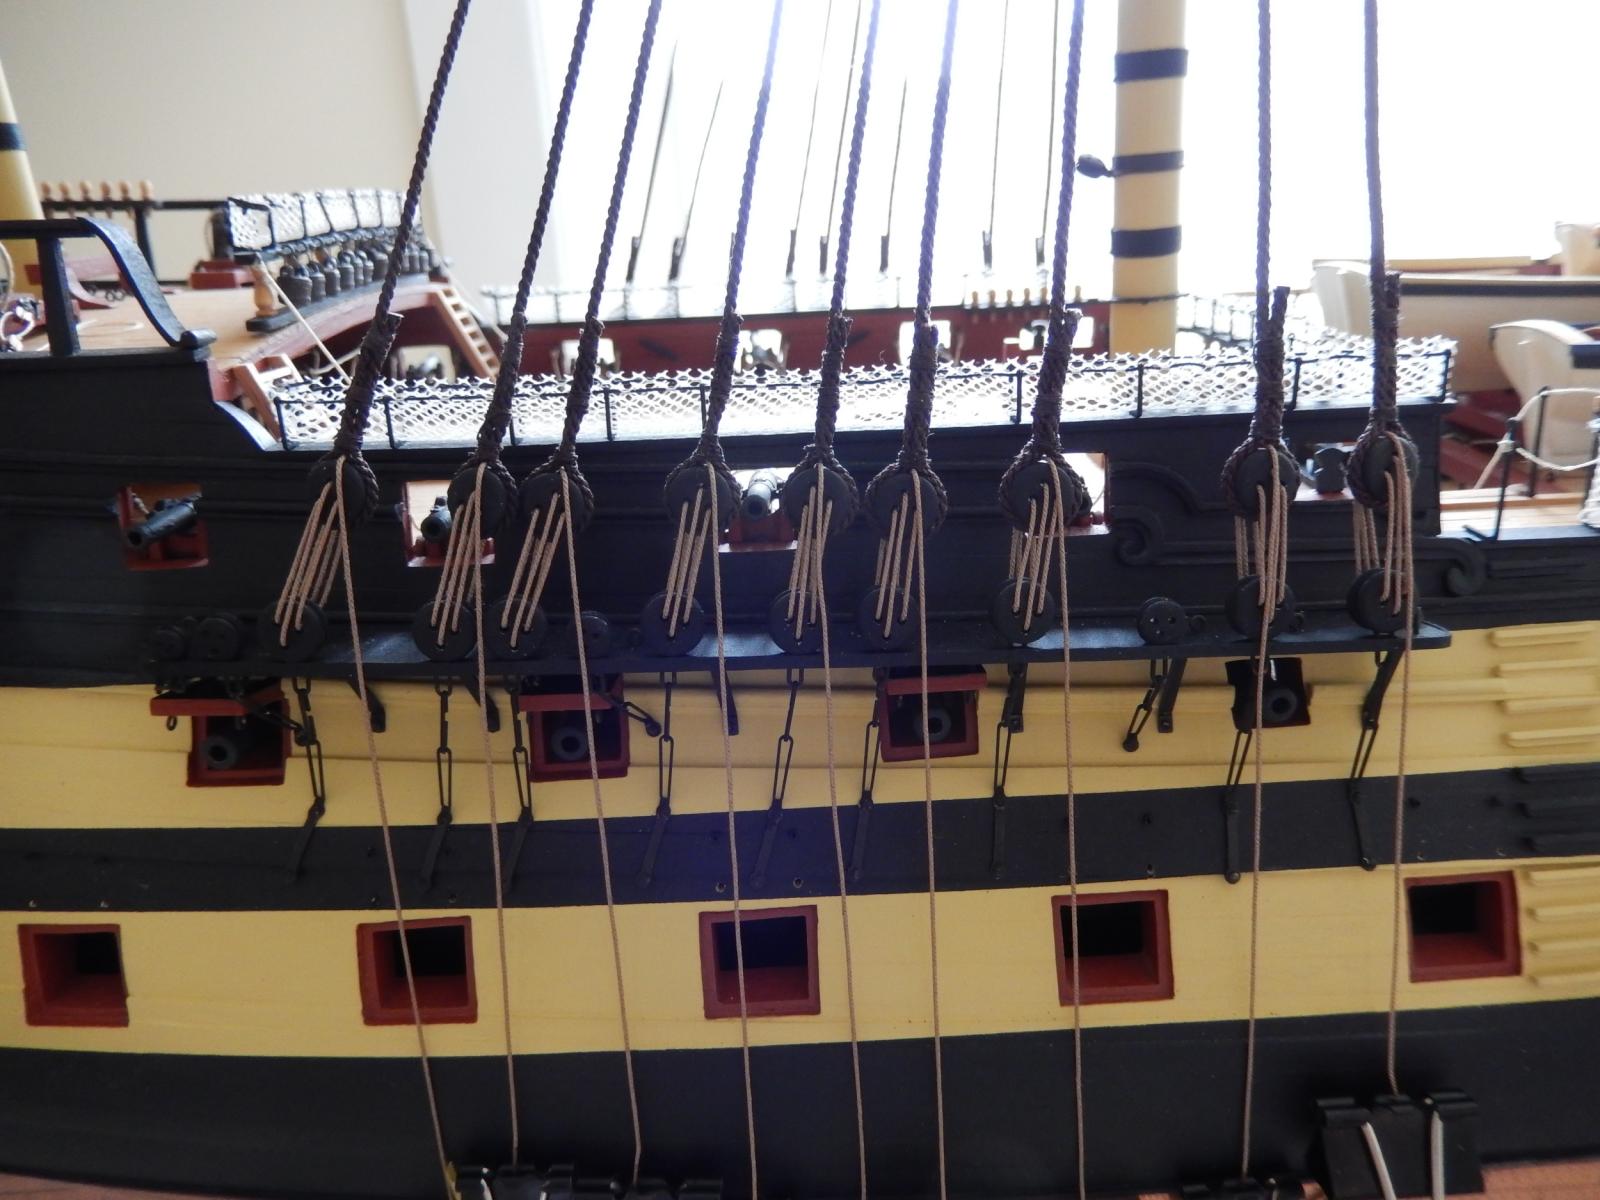
Having just had a small heart attack, I checked the plans. They show the cleats(?) on the battens as I have them. Whether the plans are wrong .... It would be no big thing to re-do them, but I would prefer to keep them as is. Do you have a picture of the arrangement you have suggested?
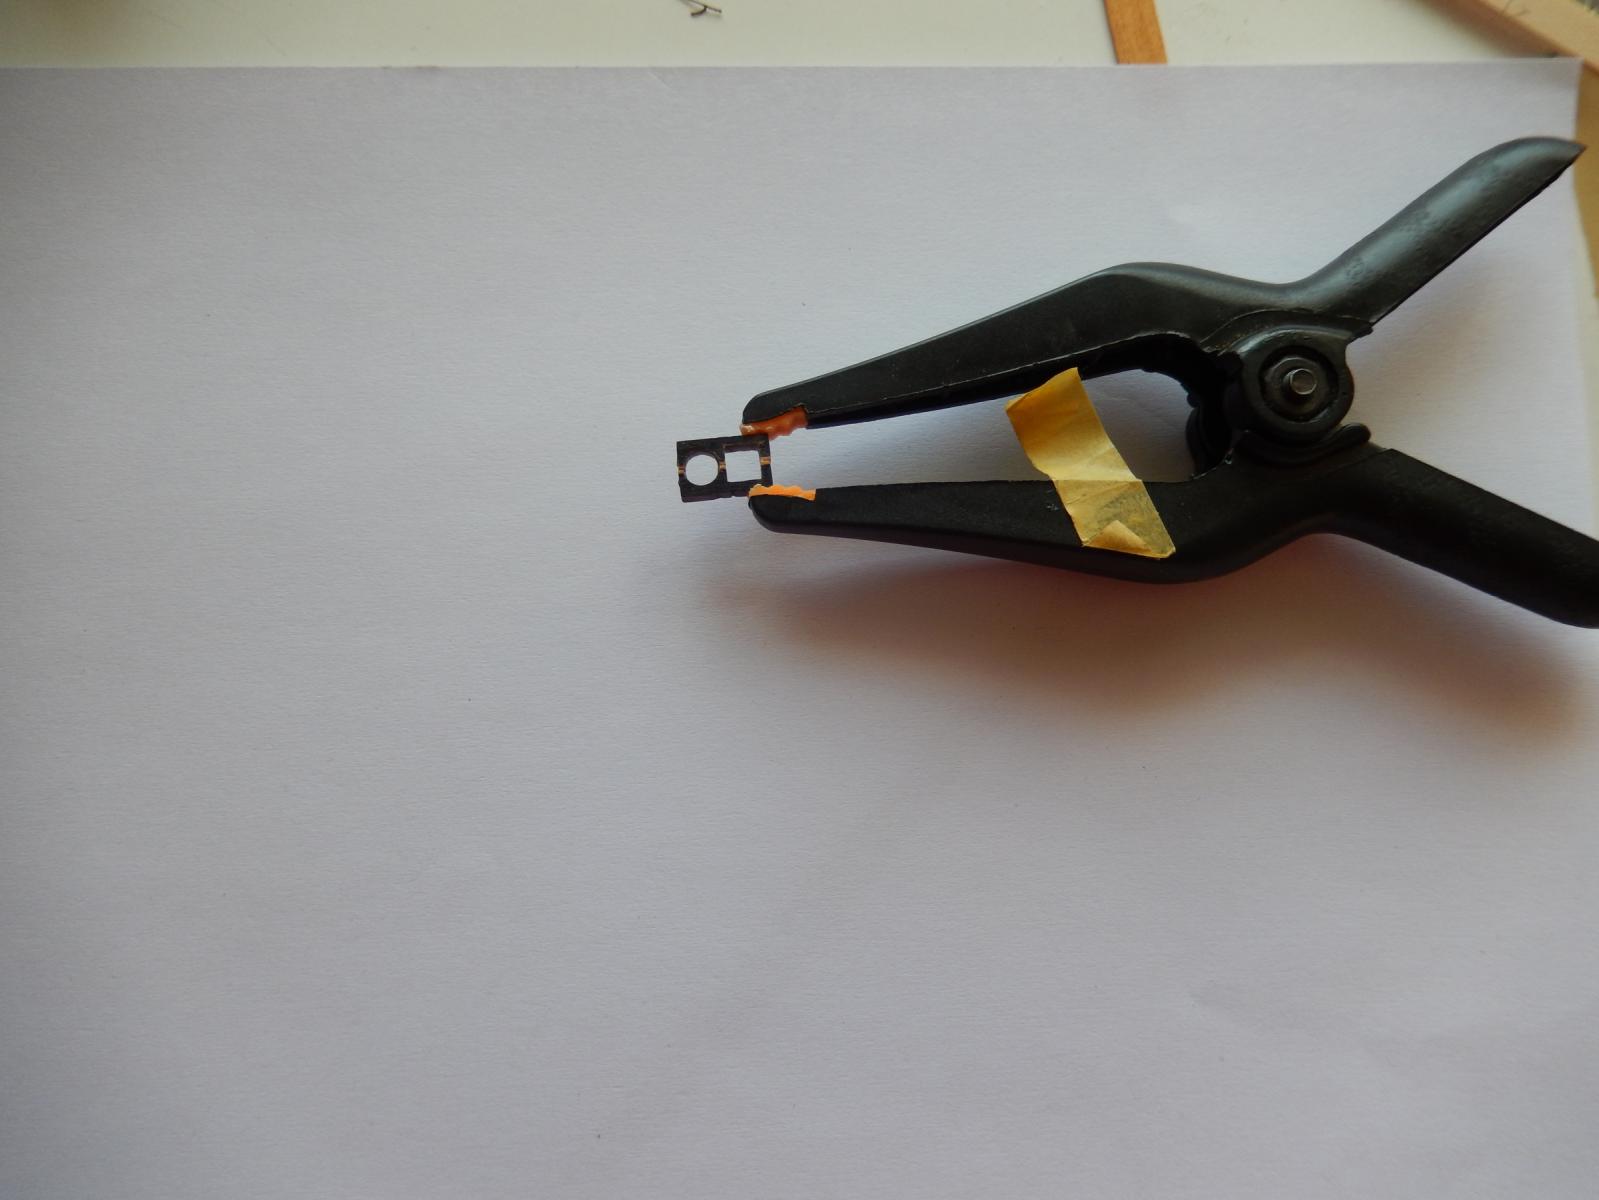
J: I bought the clamps at my local hardware store. I use them often - they were cheap and are very effective. Unfortunately my hardware store is in Sydney, Australia which is probably a bit out of your way. (I'm sure you will find Home Depot would have something similar.)
-
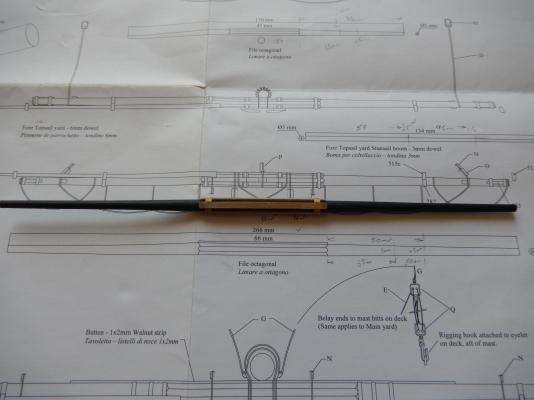
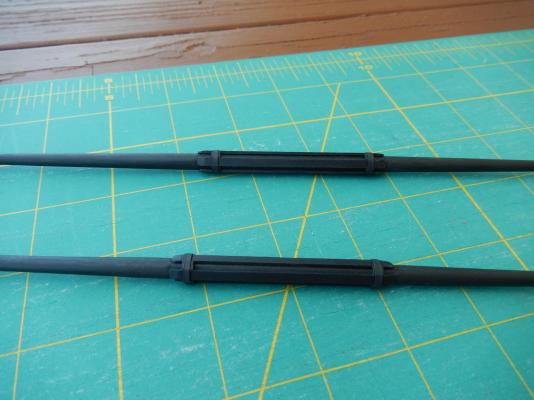
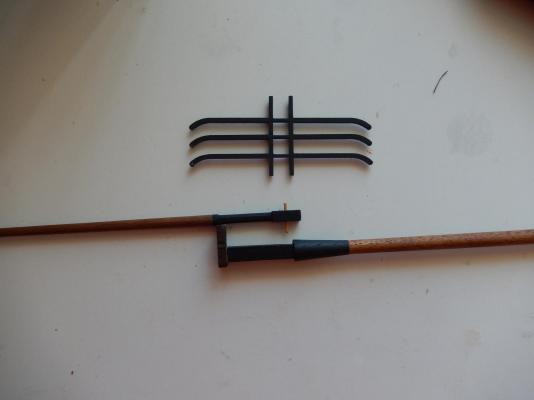
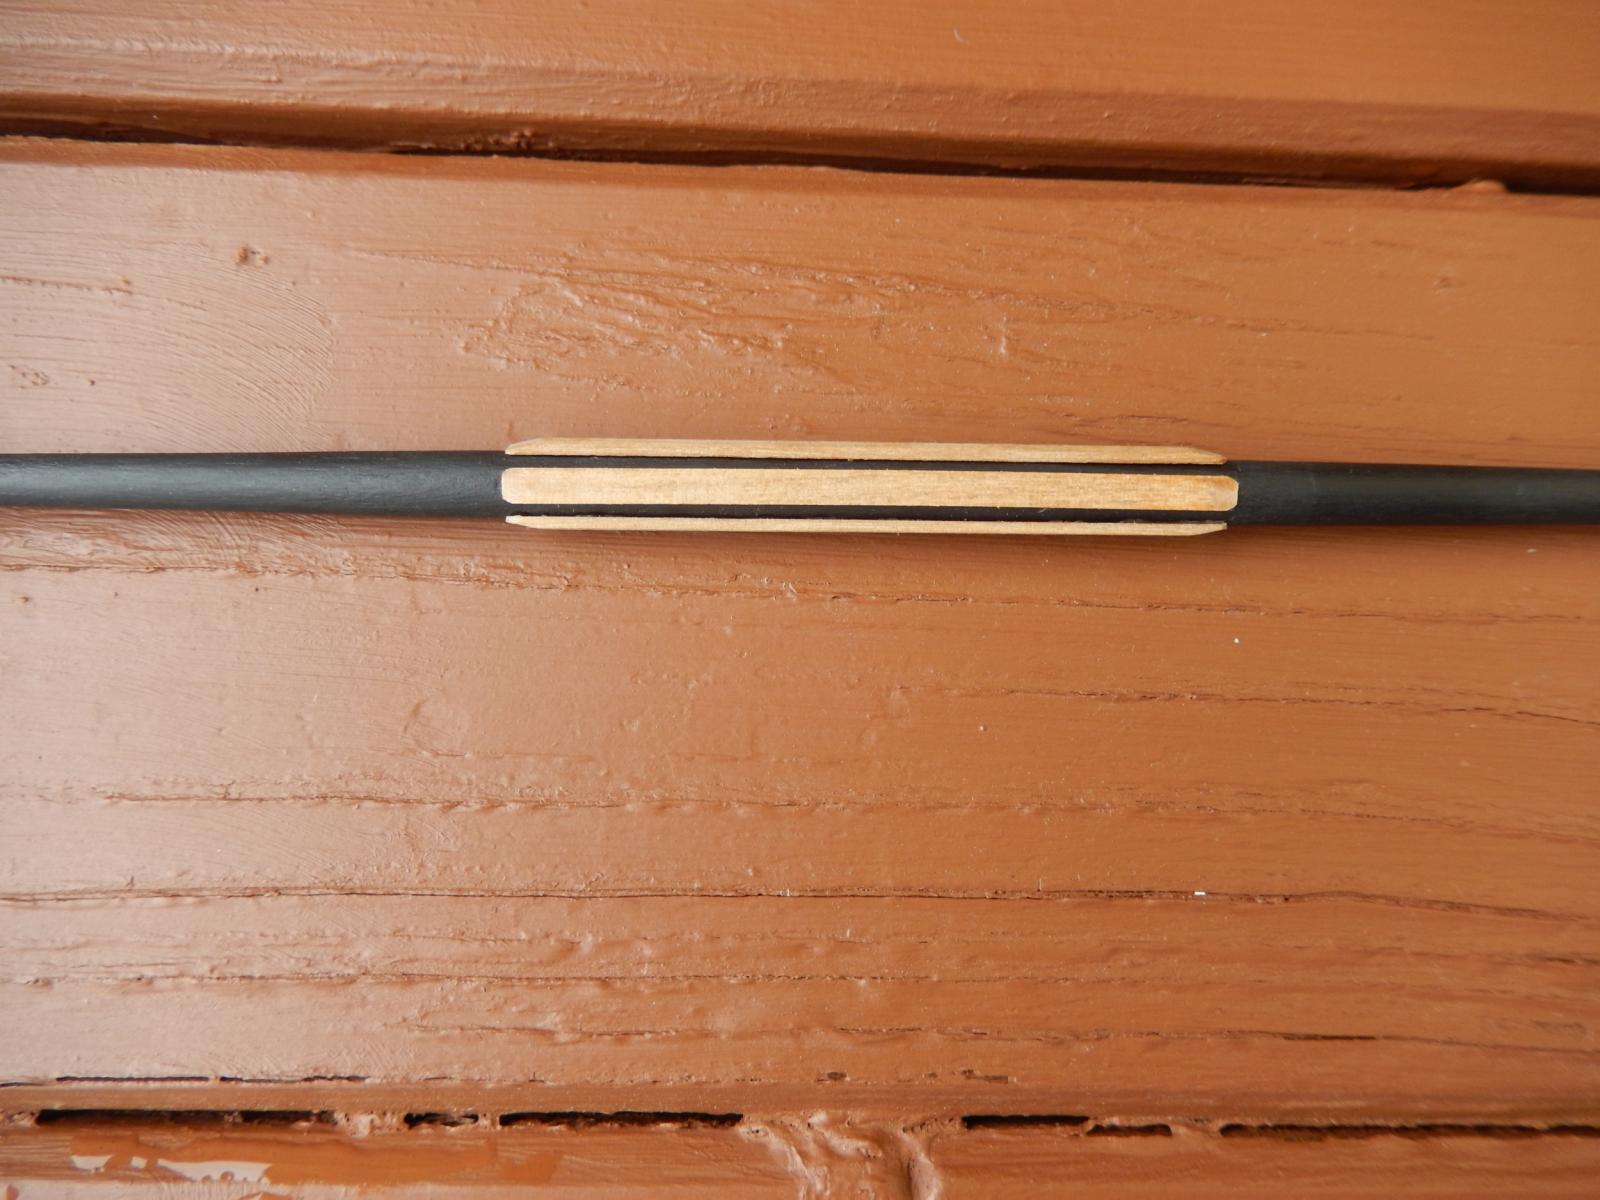
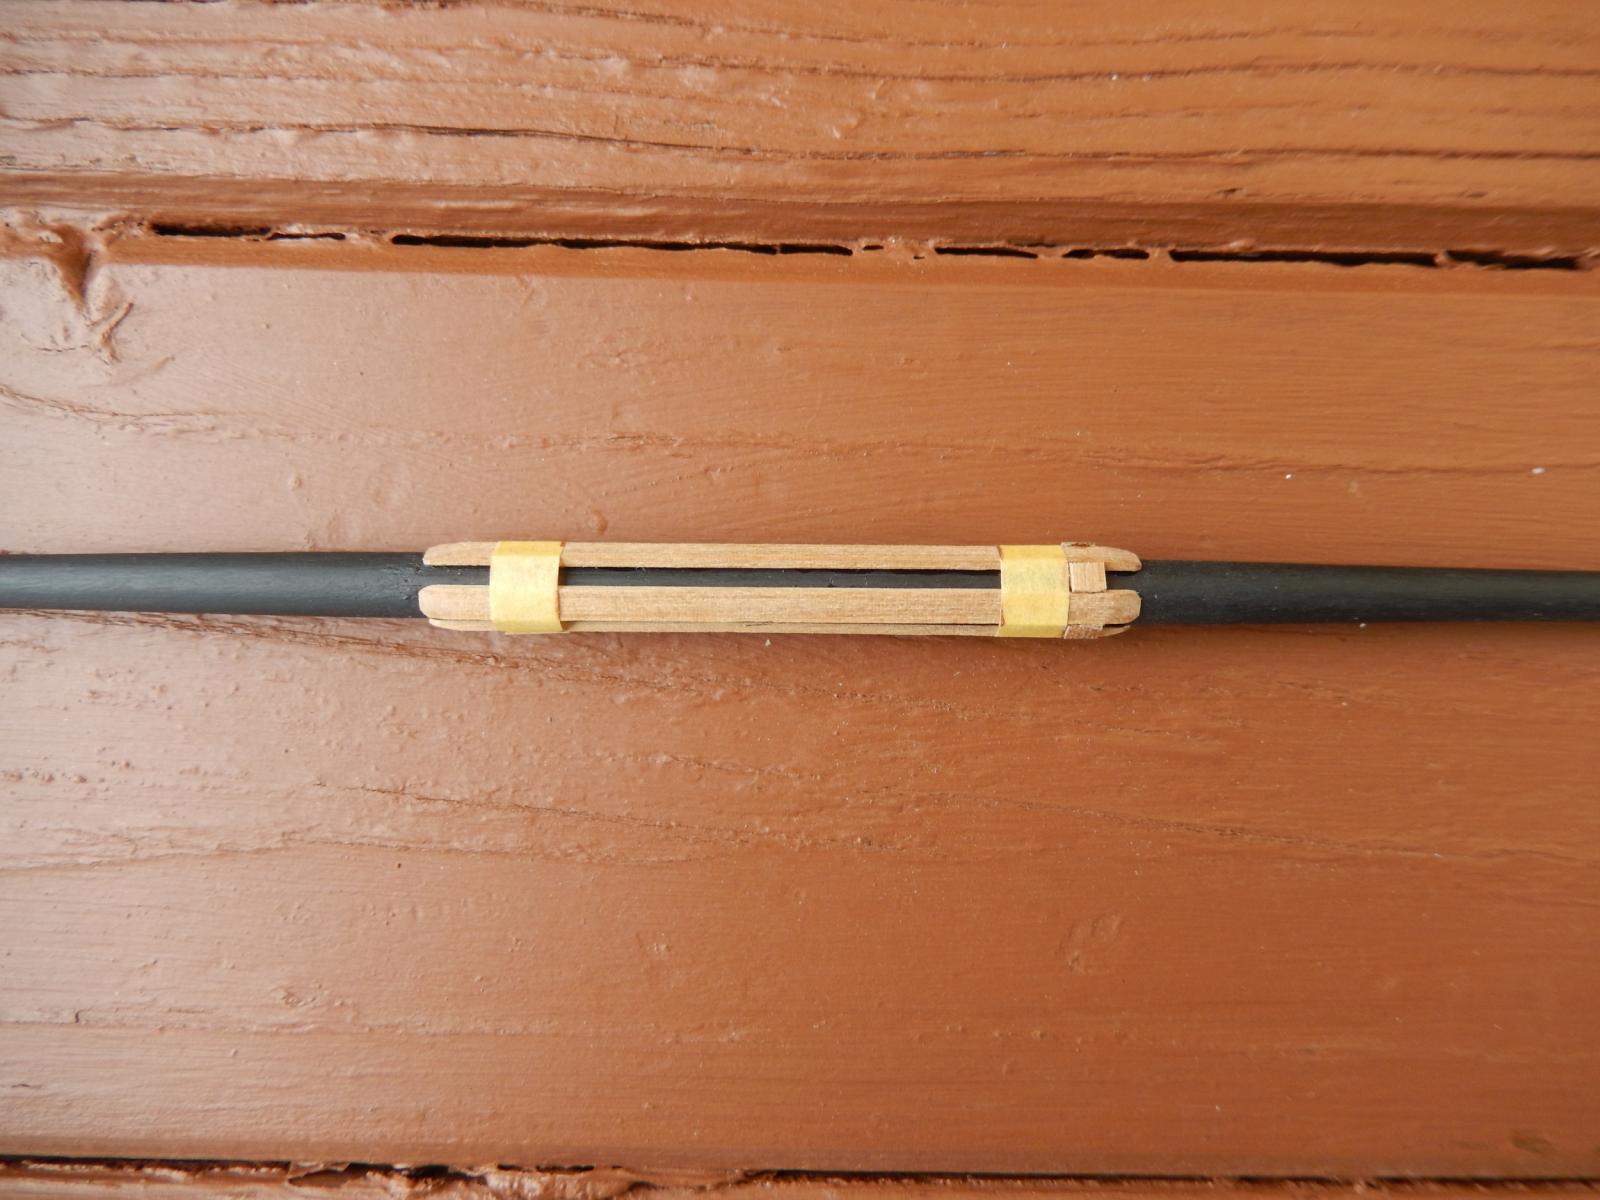
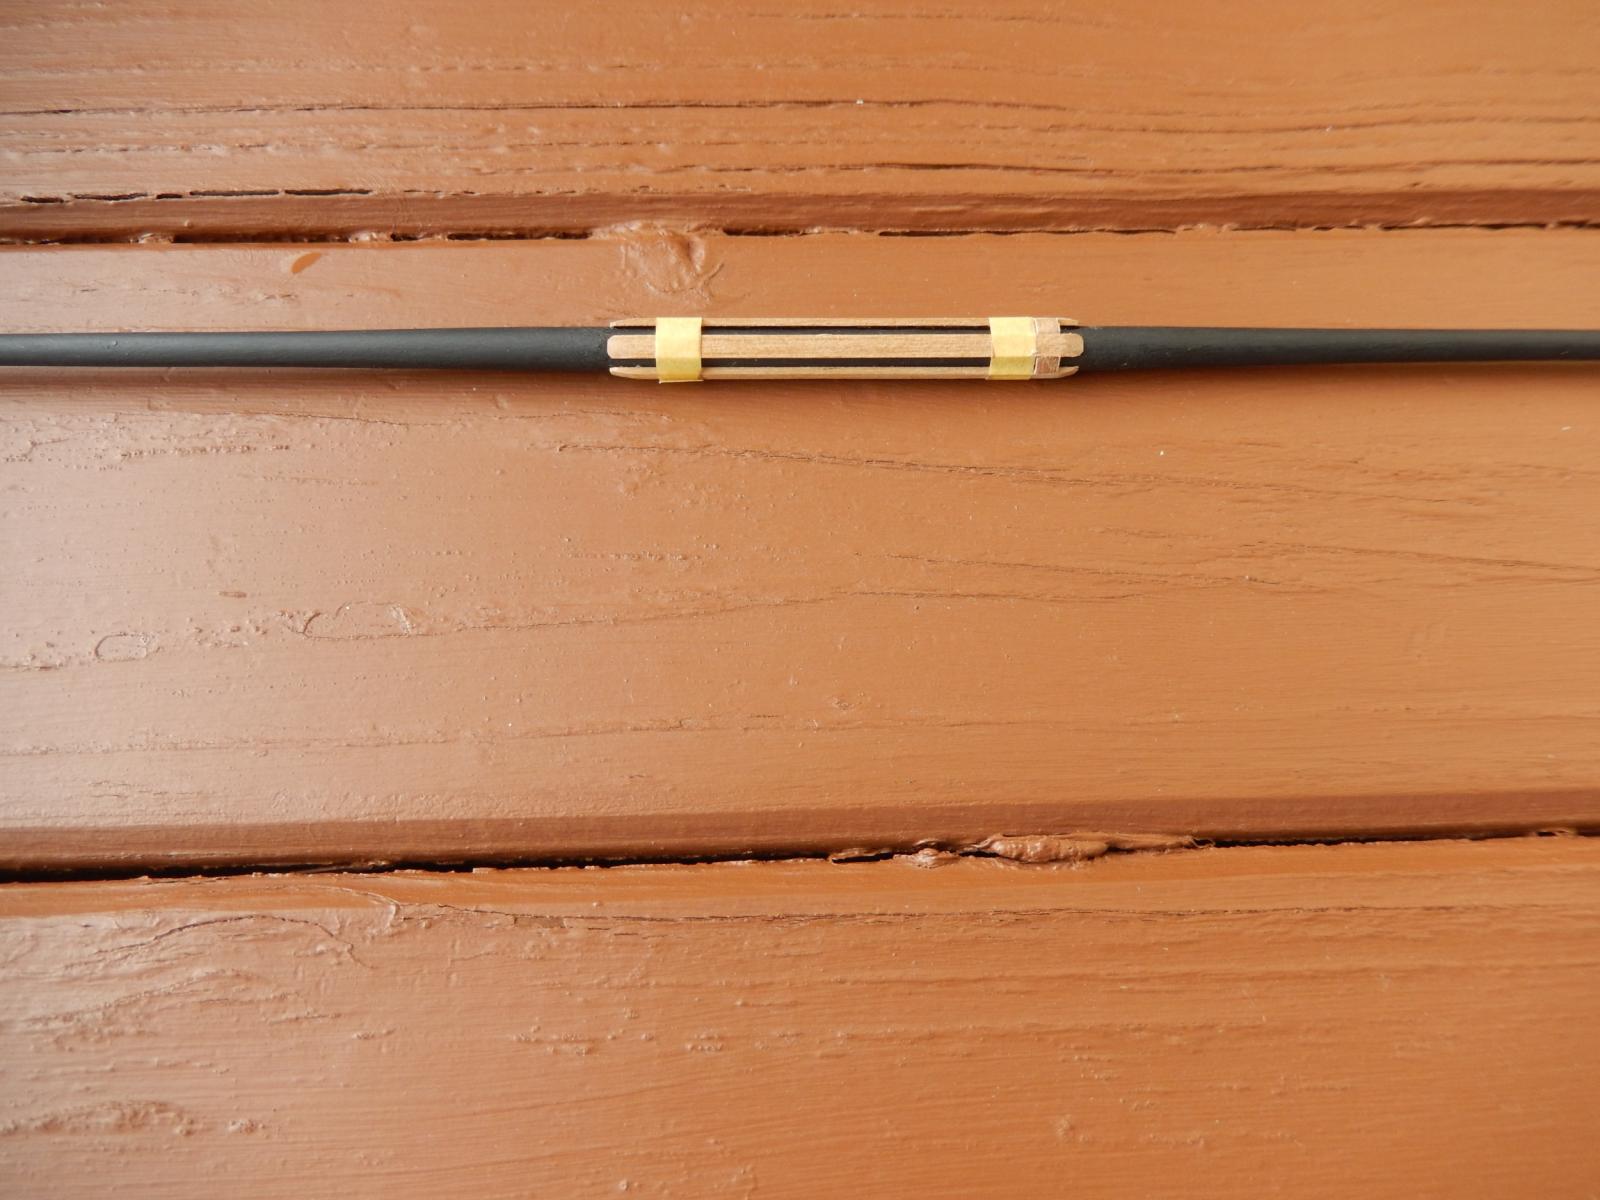
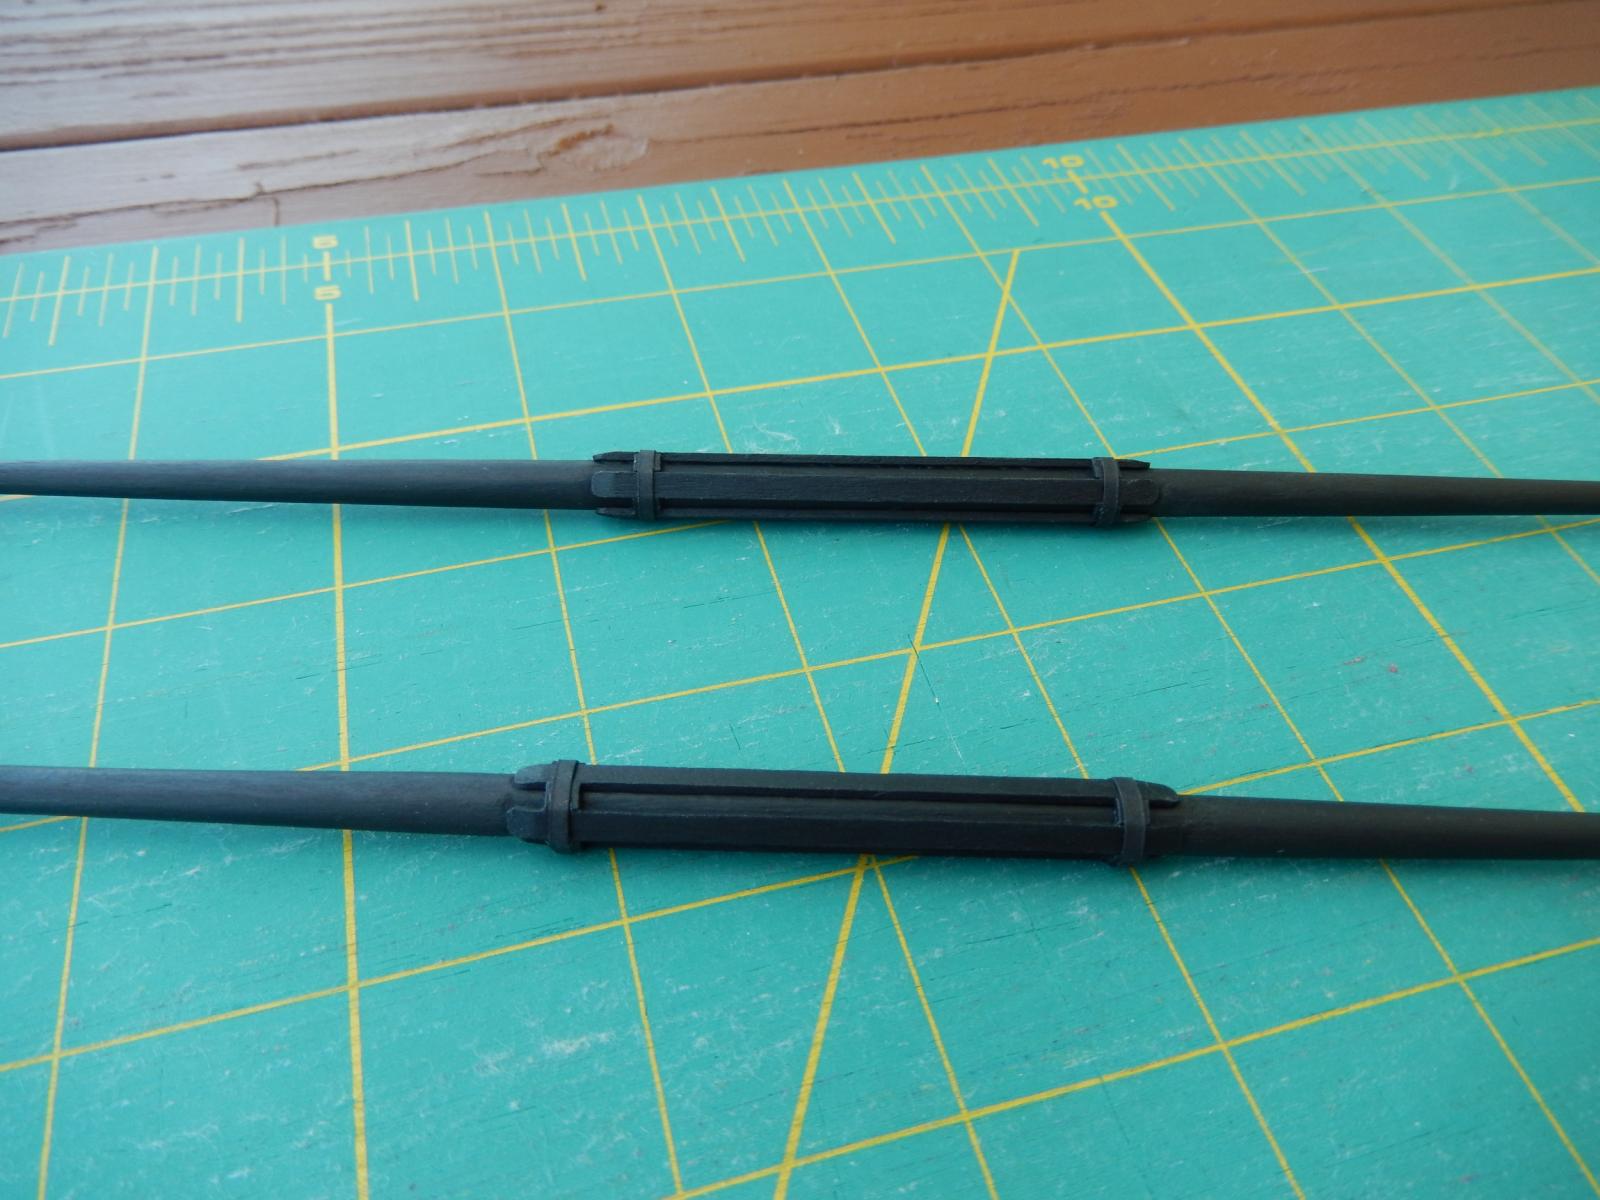
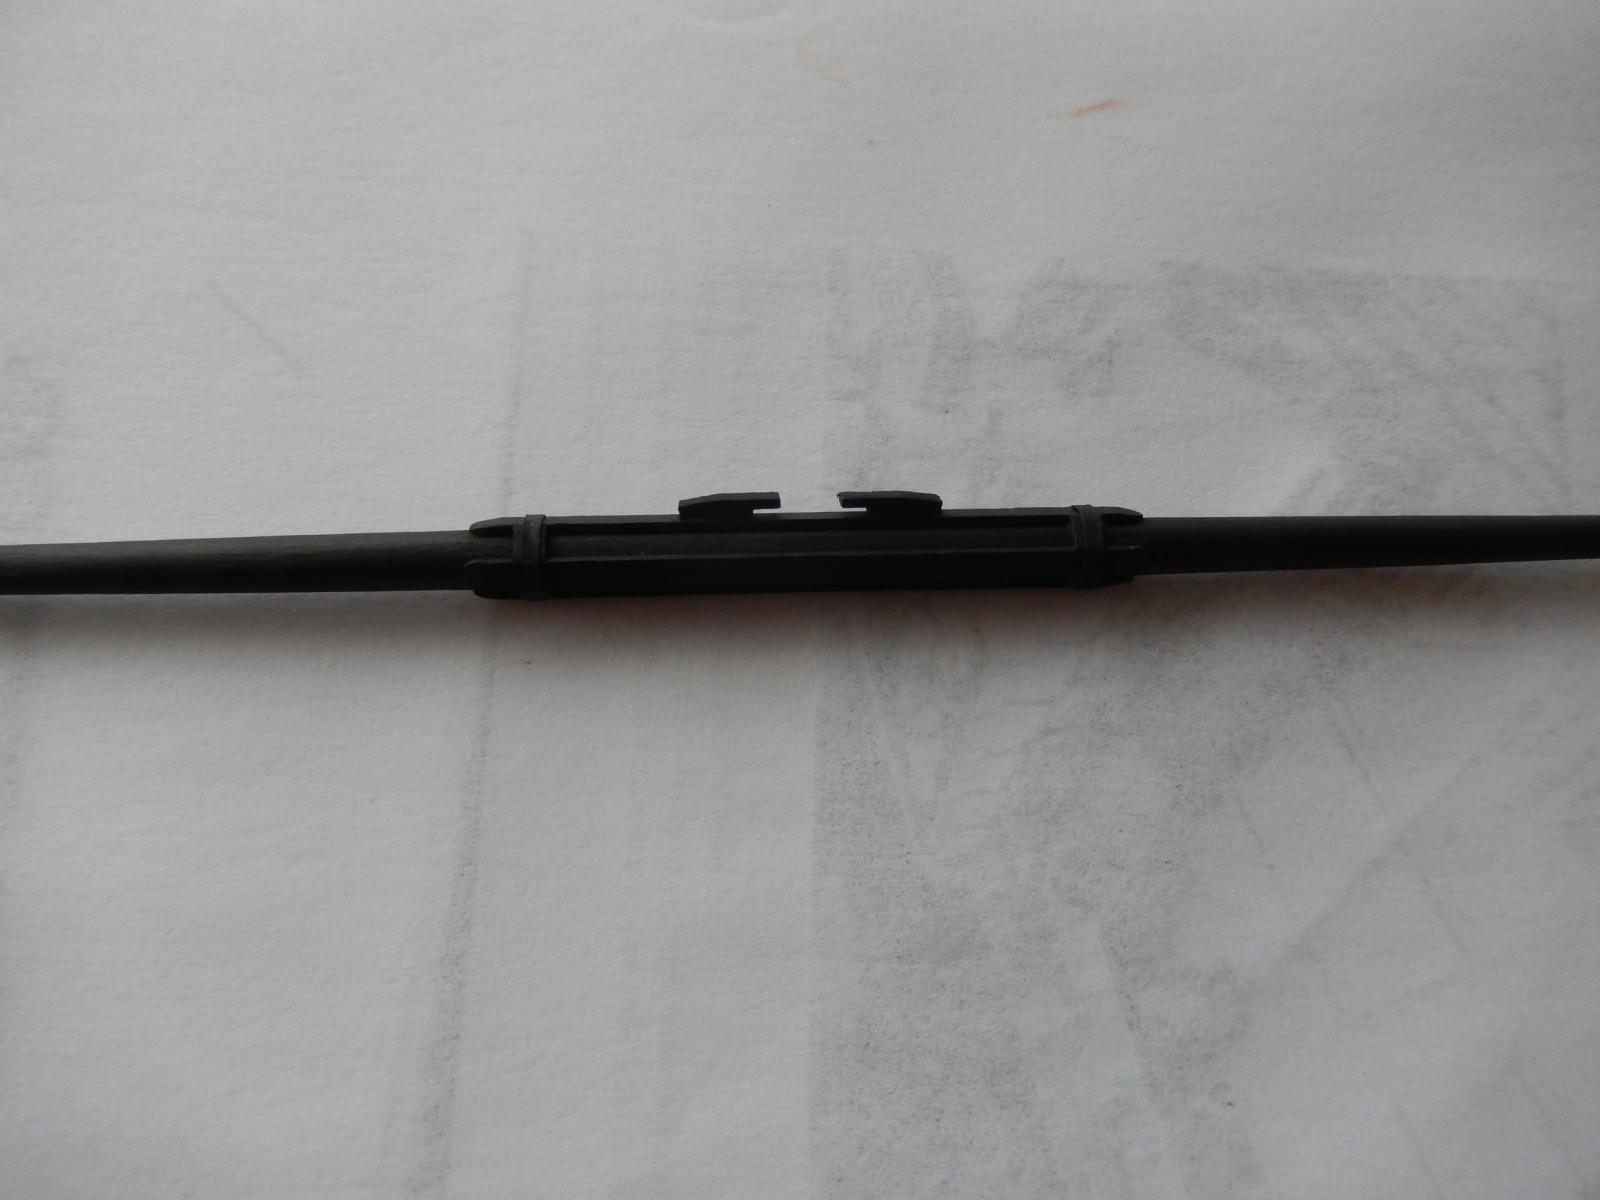
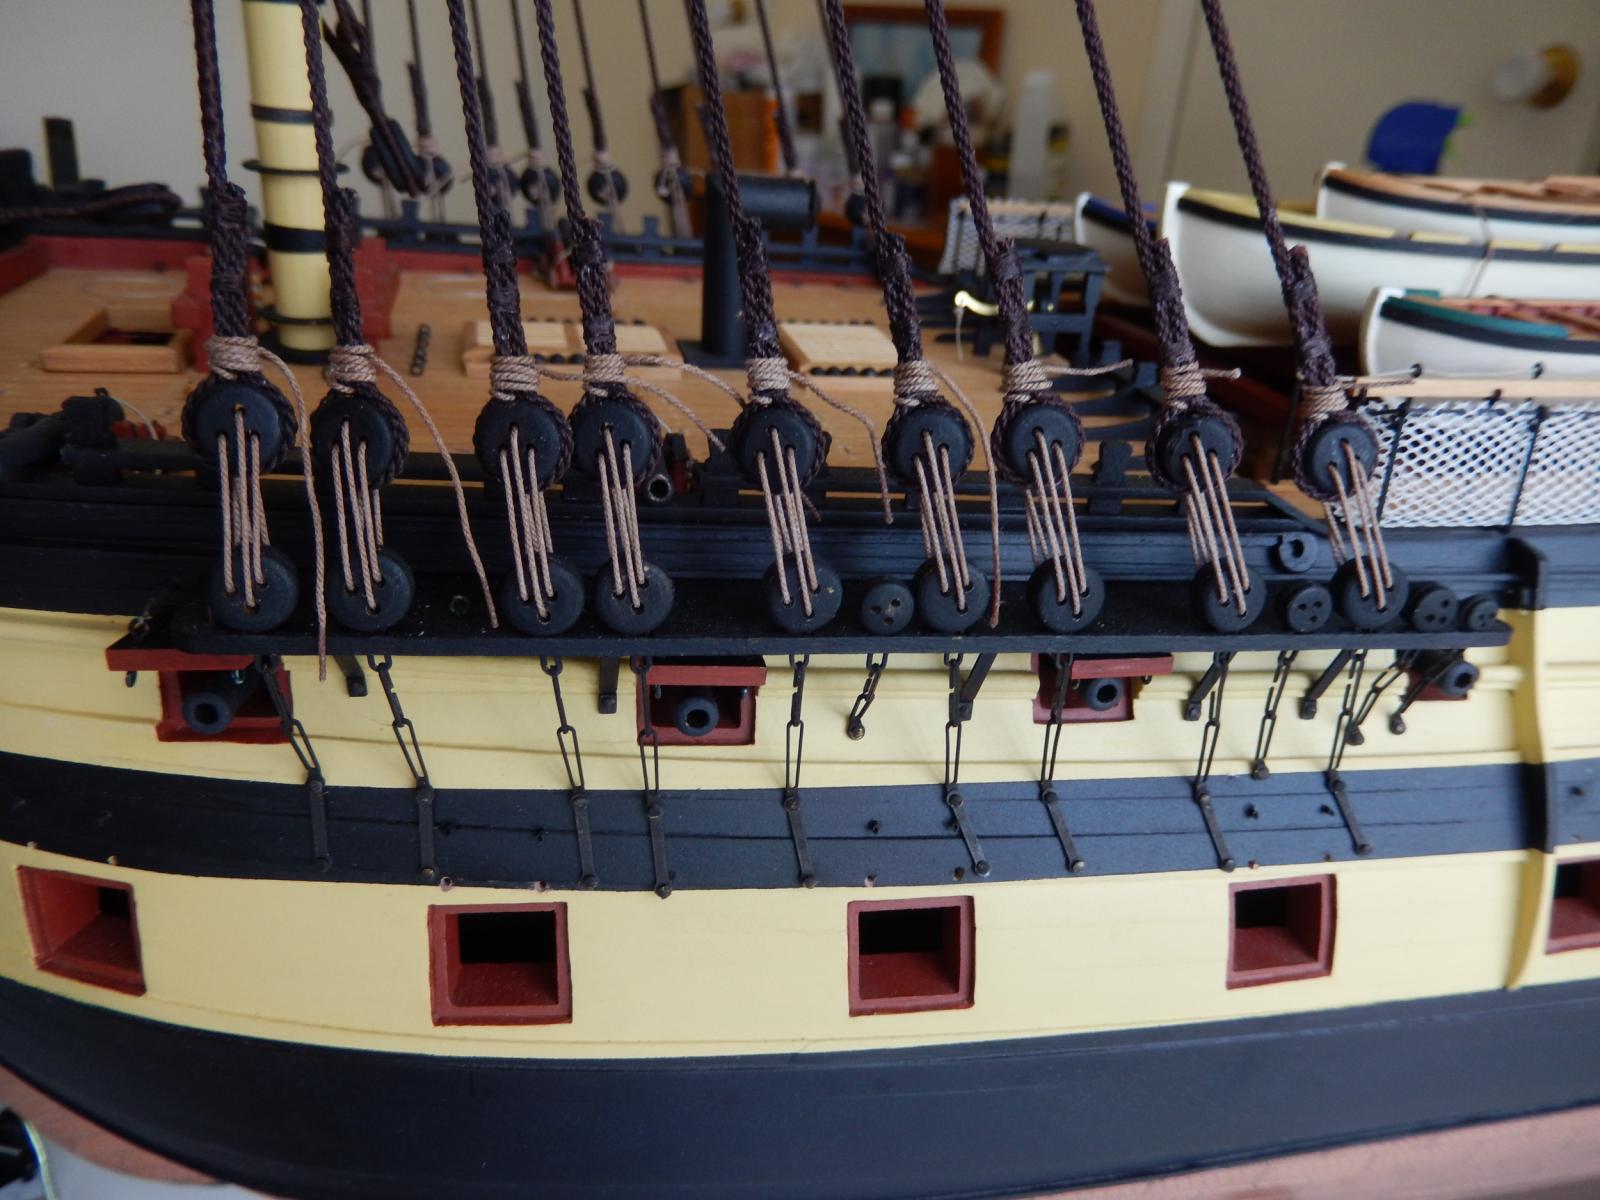
I have made a little progress over the holidays. The basics of the yards are now complete. The fore and main topsail yards were not all that straightforward, but all seemed to come out acceptably in the end. I hope the following photos will help those who come after. The tamiya tape is invaluable in assisting to get the correct spacing of all the bits and pieces. I'm afraid the photos are a little out of order but .. there you are.

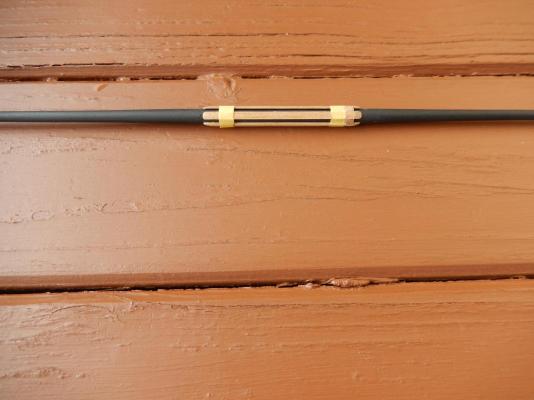

Here are the 'metal' bands have been added.
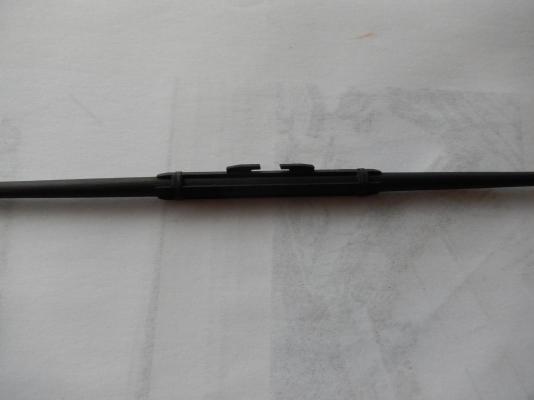
What looks to be damage in this photo is paint from the underside of whatever the two 'things' are called.
- Bettina, Dubz, mort stoll and 4 others
-
 7
7
-
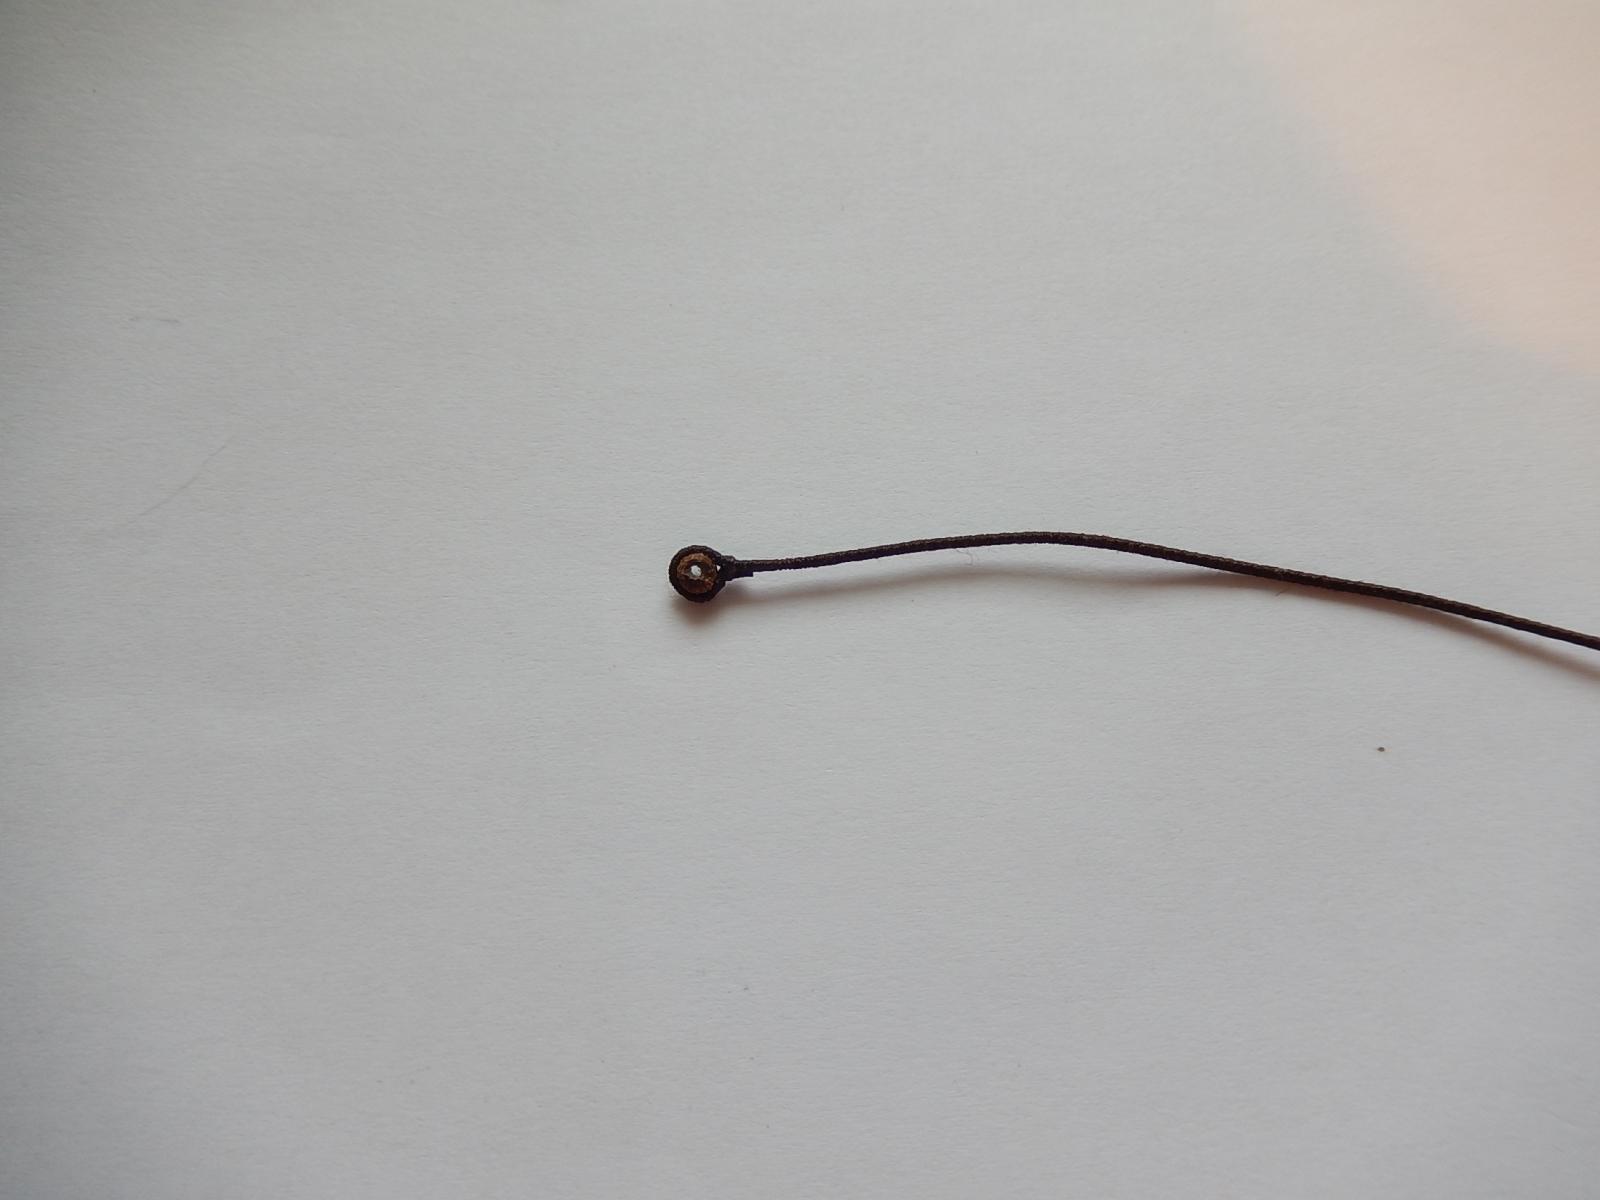
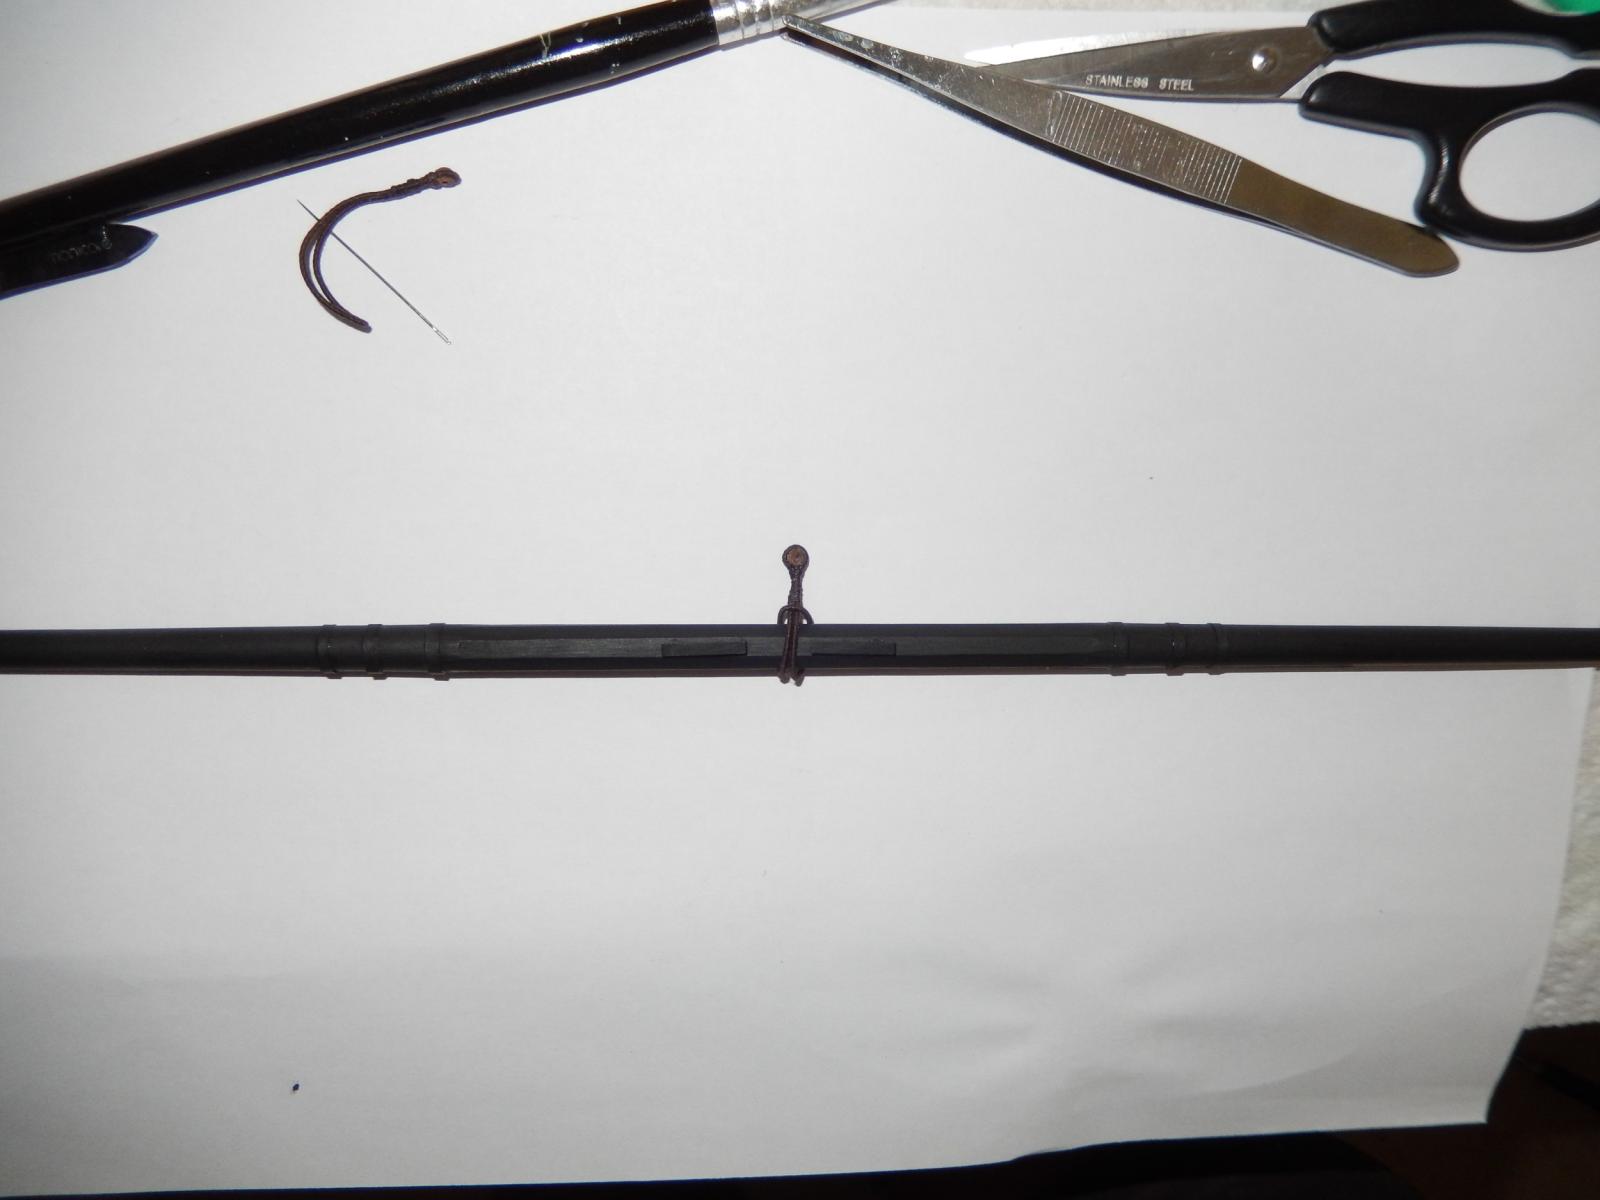
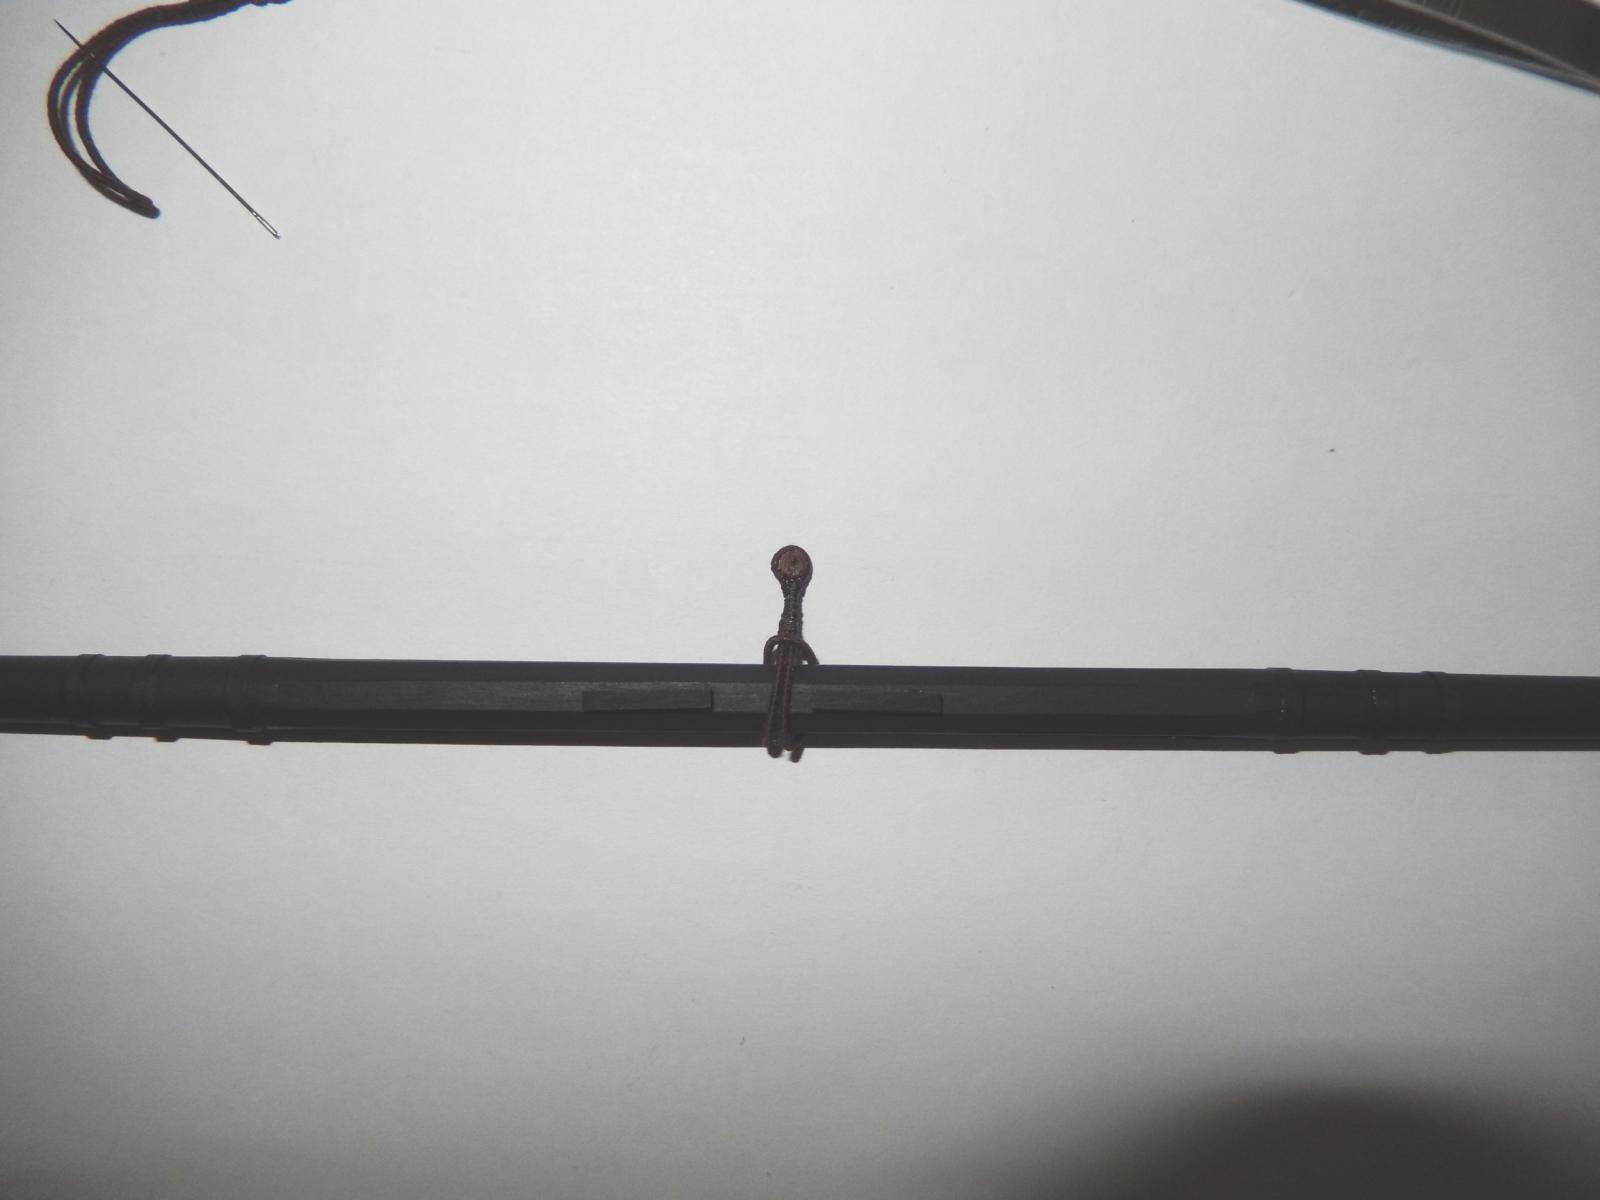
I decided to try my luck with the slings. The thimbles were made using Arthur's method (AEW p.23). As a result of an earlier mishap I had a comparatively short length of thread already served for which there was no obvious application. Well, waste not ....
Both ends of the thread were sealed with a drop of medium CA. The thimble was then tied off to the thread using a couple of overhand knots, The were secured with dilute PVA and left to dry (actually I used my wife's hair dryer to speed things up).
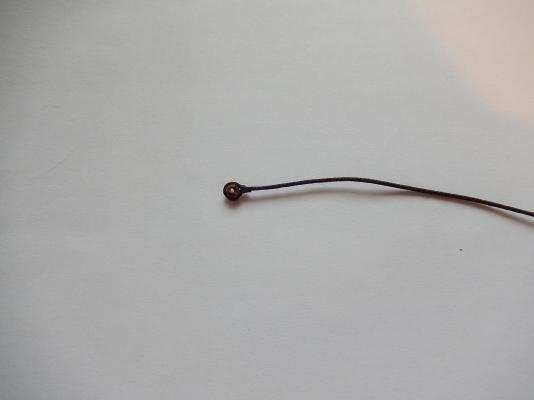
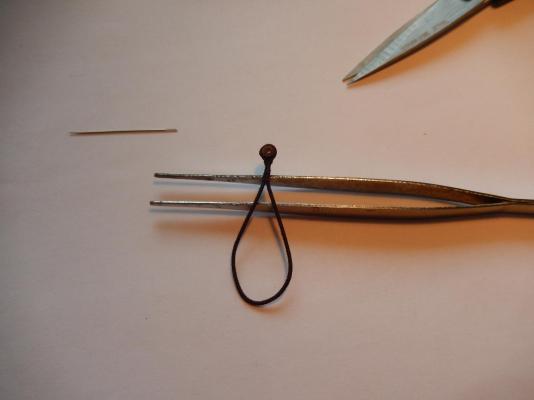
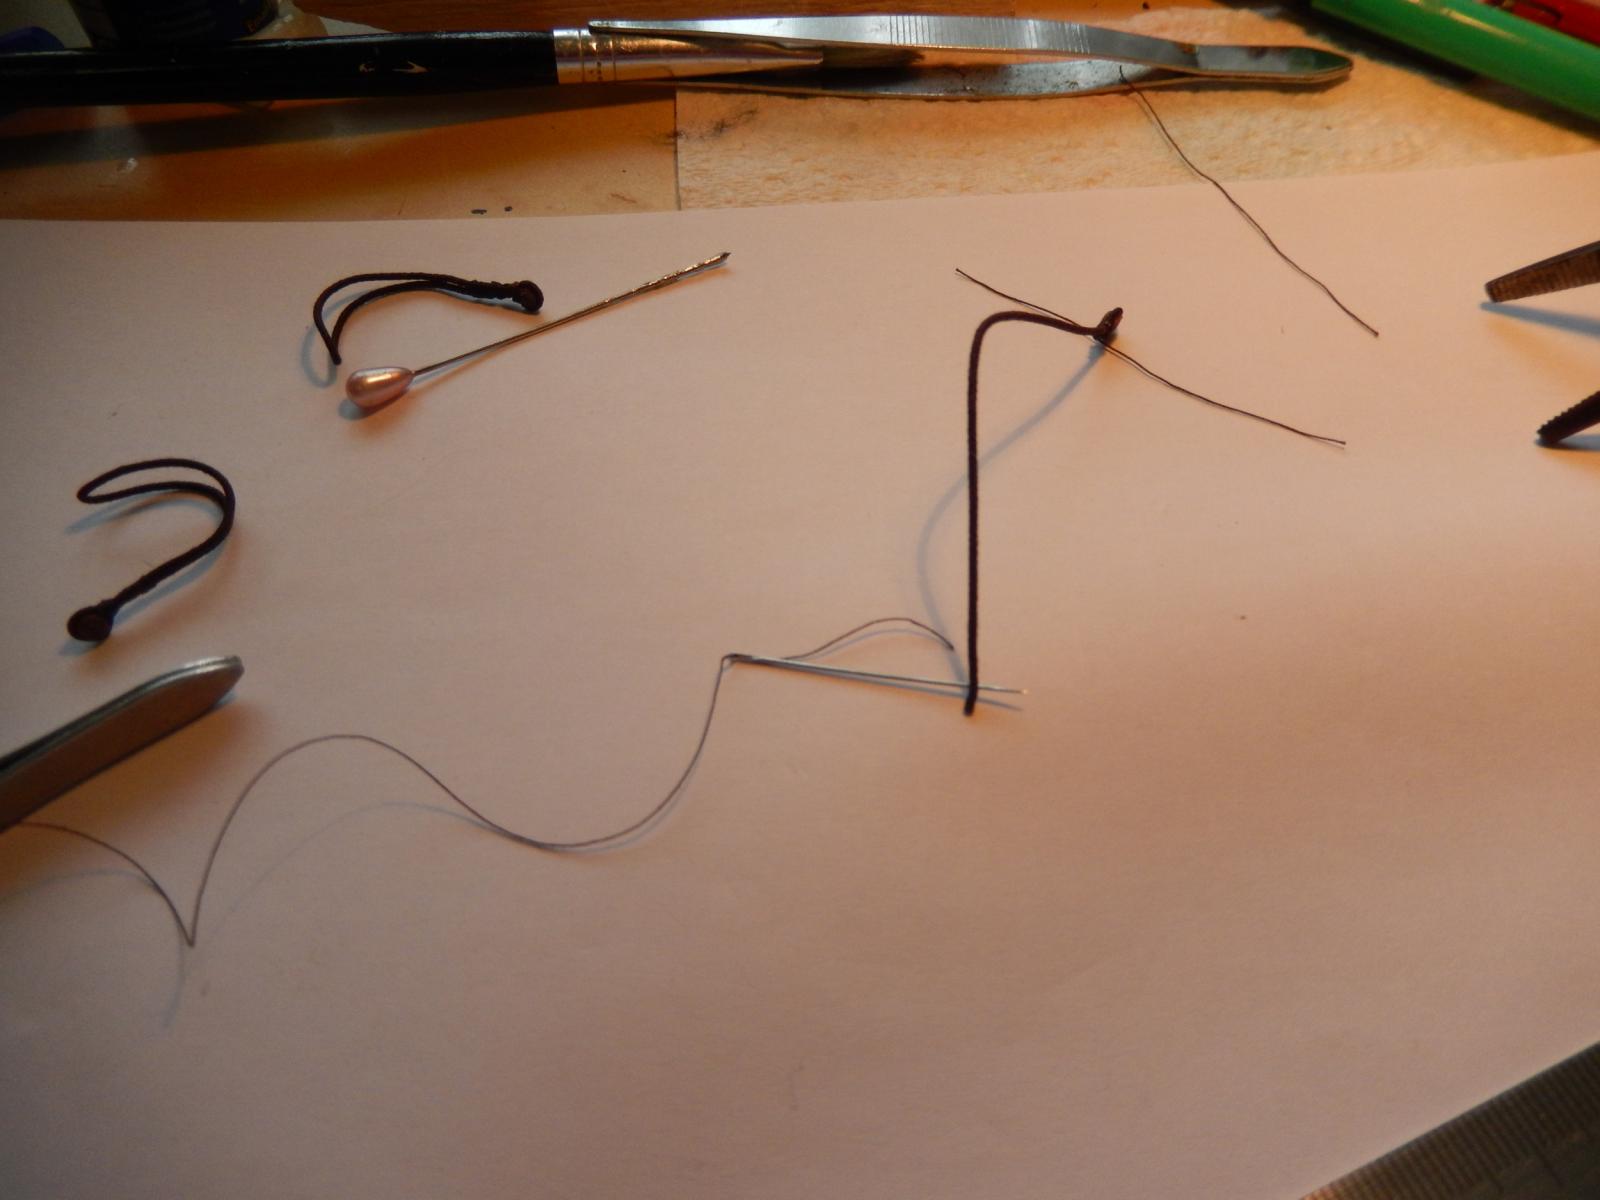
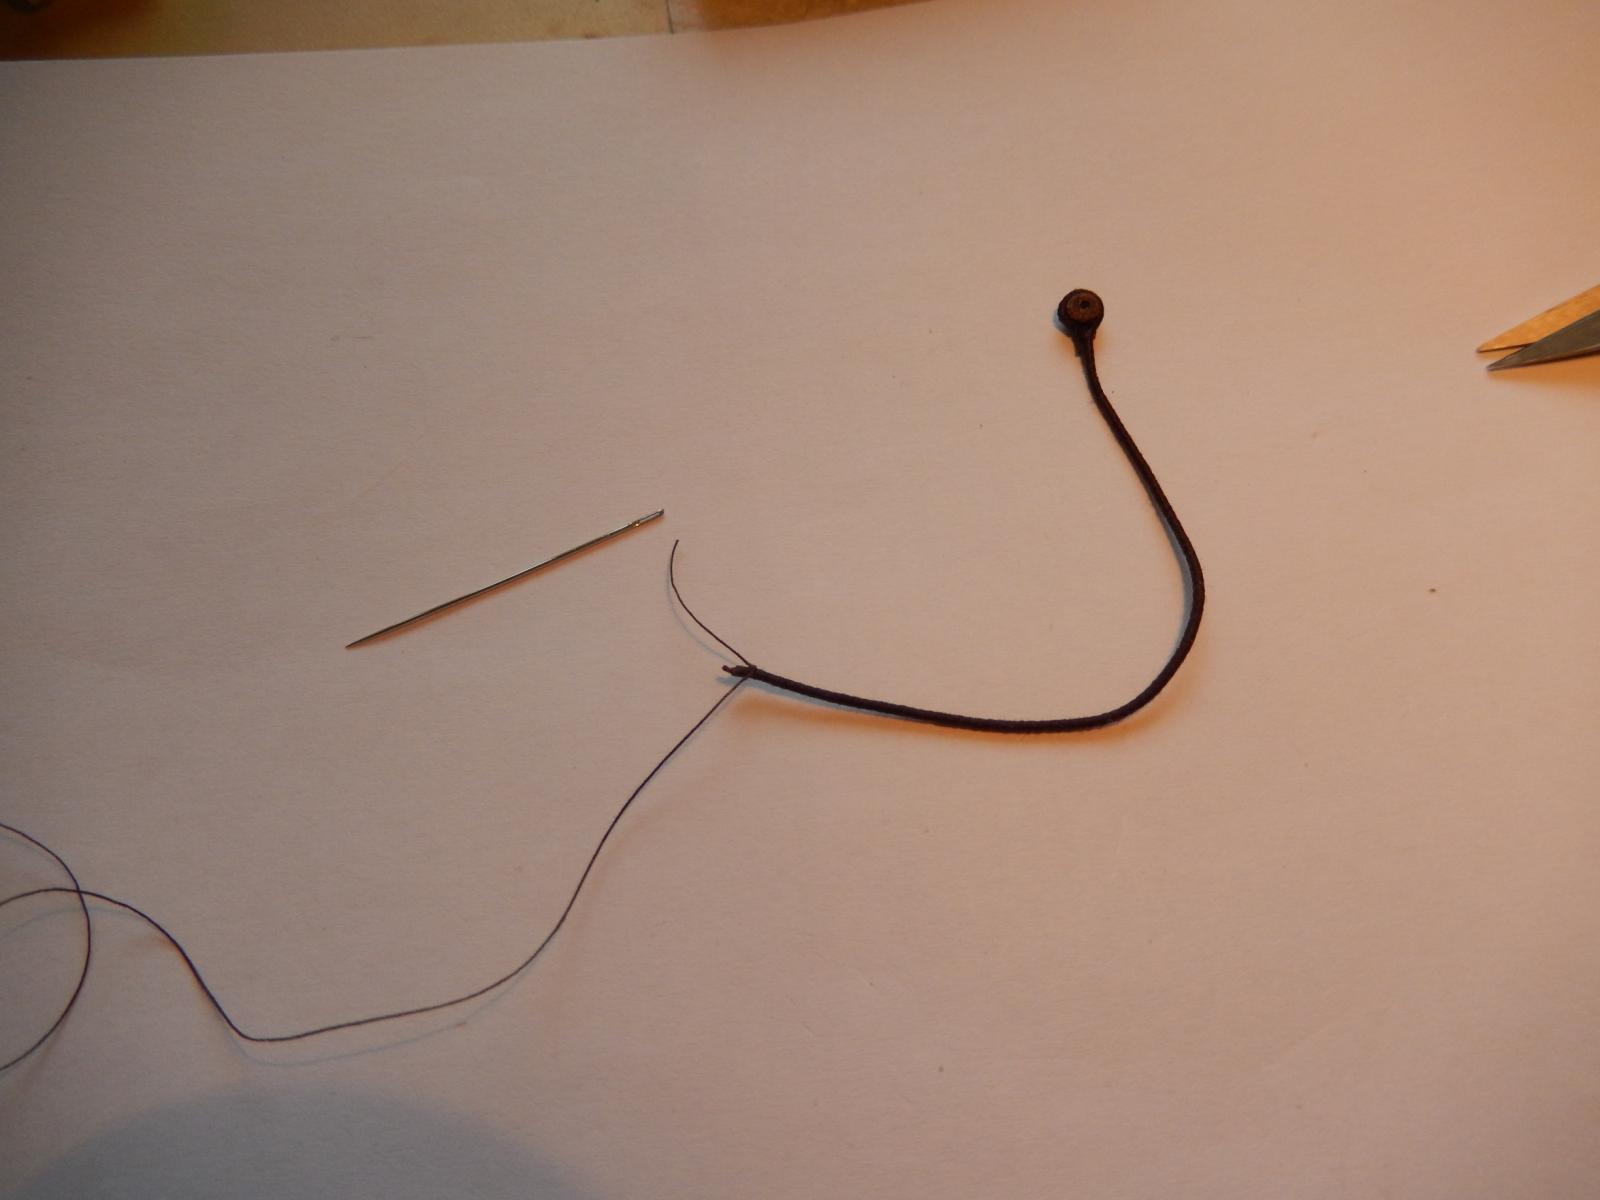
Two or three mm from the end of the served thread, the serving was threaded though with a needle.


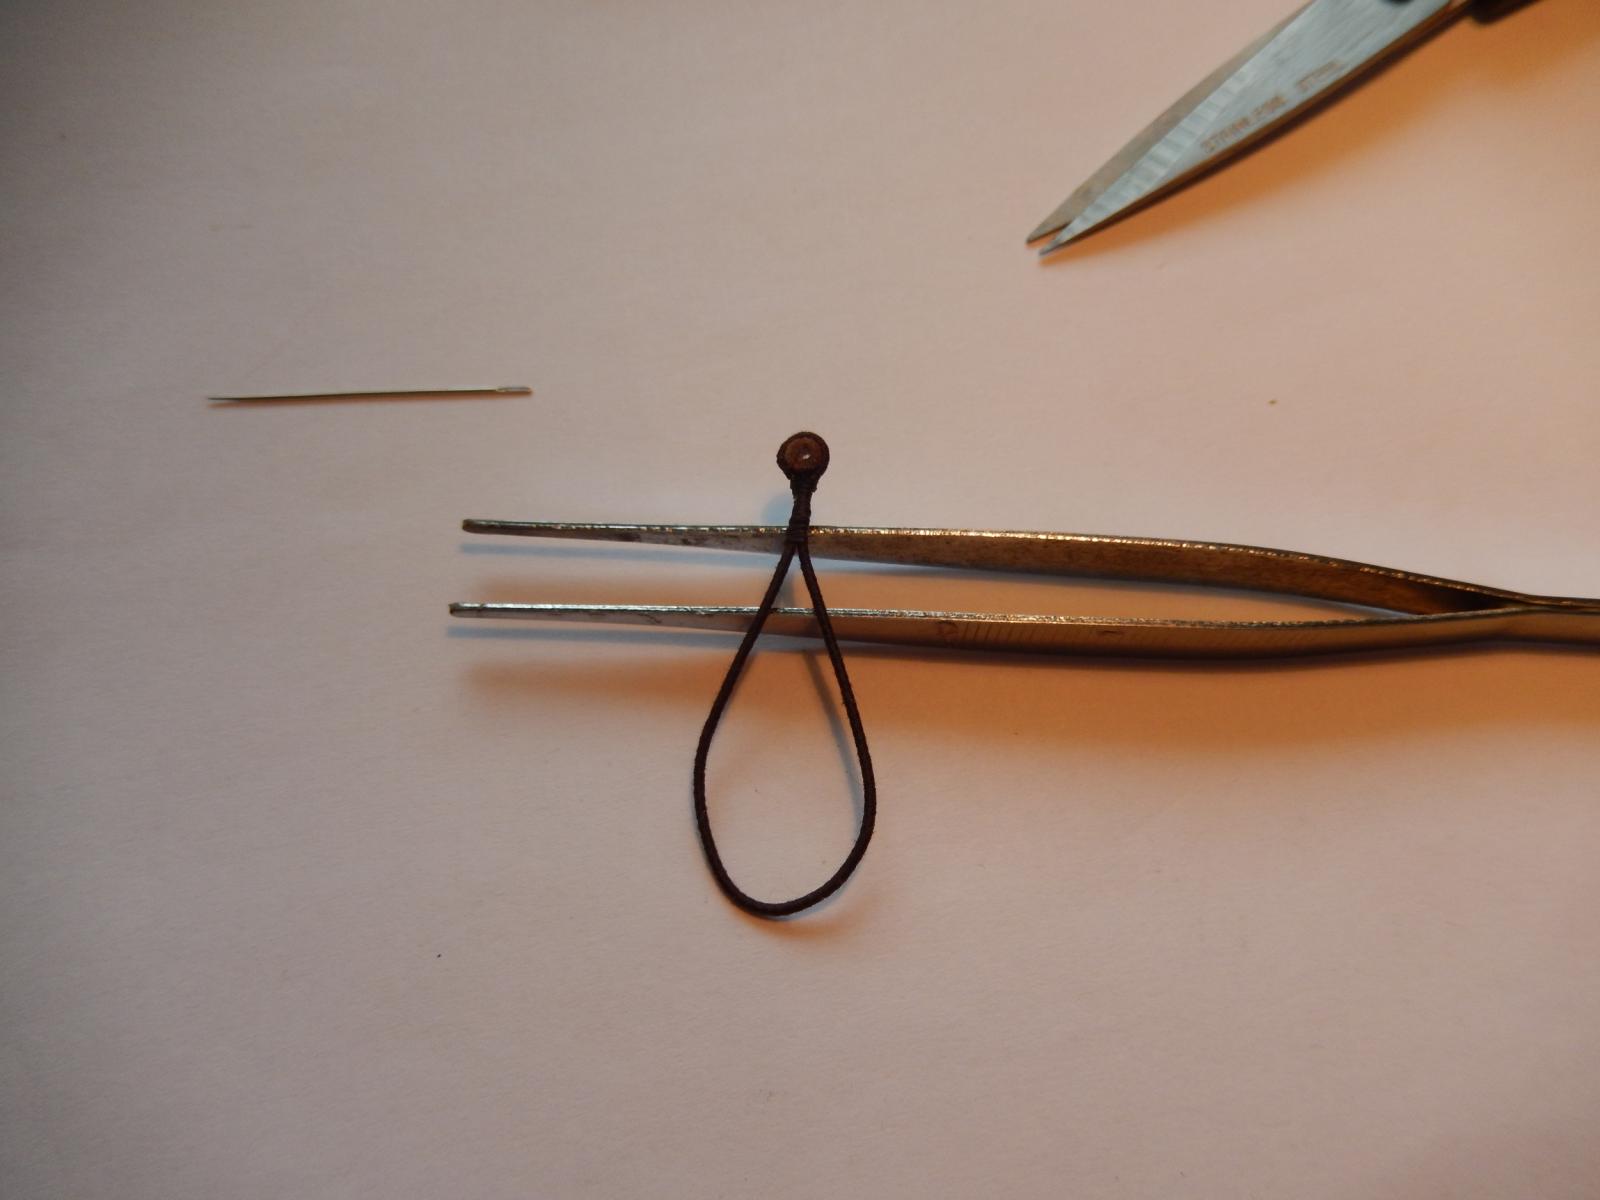
The loop is closed so the the two ends of the served thread butt against each other, then the whole lot is seized up to the thimble. The method is fairly easy and the result is quite acceptable, though not nearly a elegant as Arthur's - which is really beyond me.
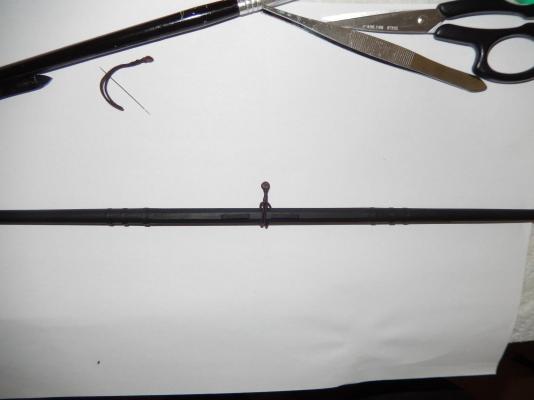
This gives an idea of how it will look on a yard.

-
Thanks Arthur. I'm glad I asked for advice -and thanks for the help you have given me (and others) during the year - it's much appreciated.
I will be spending Christmas and most of January down the coast south of Sydney. (I hope the weather is better than yesterday which was really quite amazing. We were fortunate to see the blackest cloud I have ever seen pass over, before hitting a nearby suburb as a cyclone.)
Among other things I will try to finish off the yards between visits from invaders. Now, having looked at the plans there are a few things which are not clear to me at least.
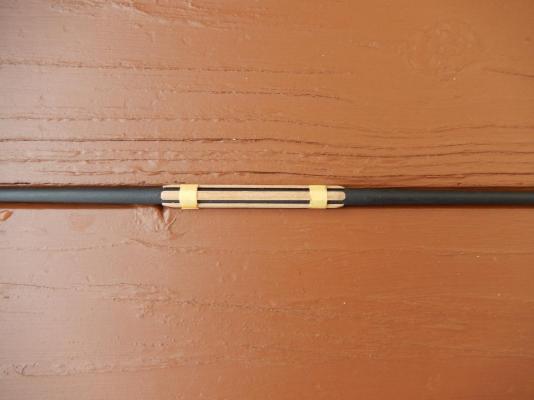
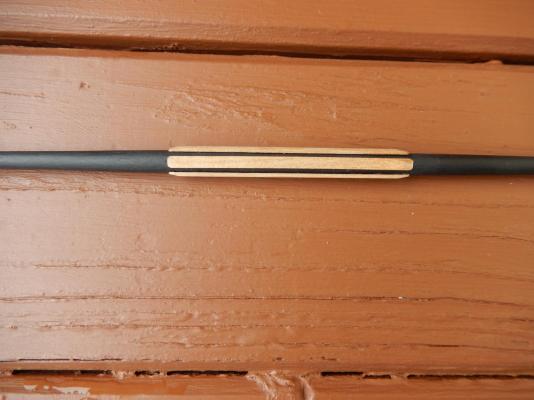
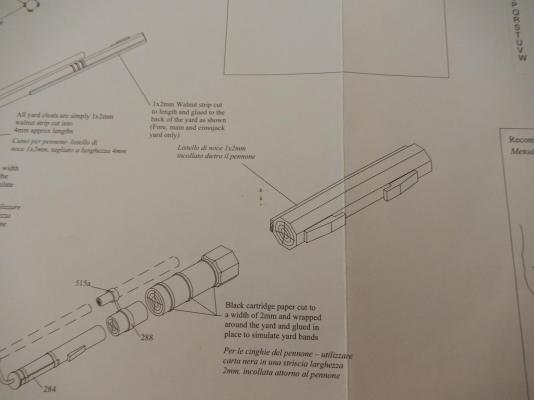
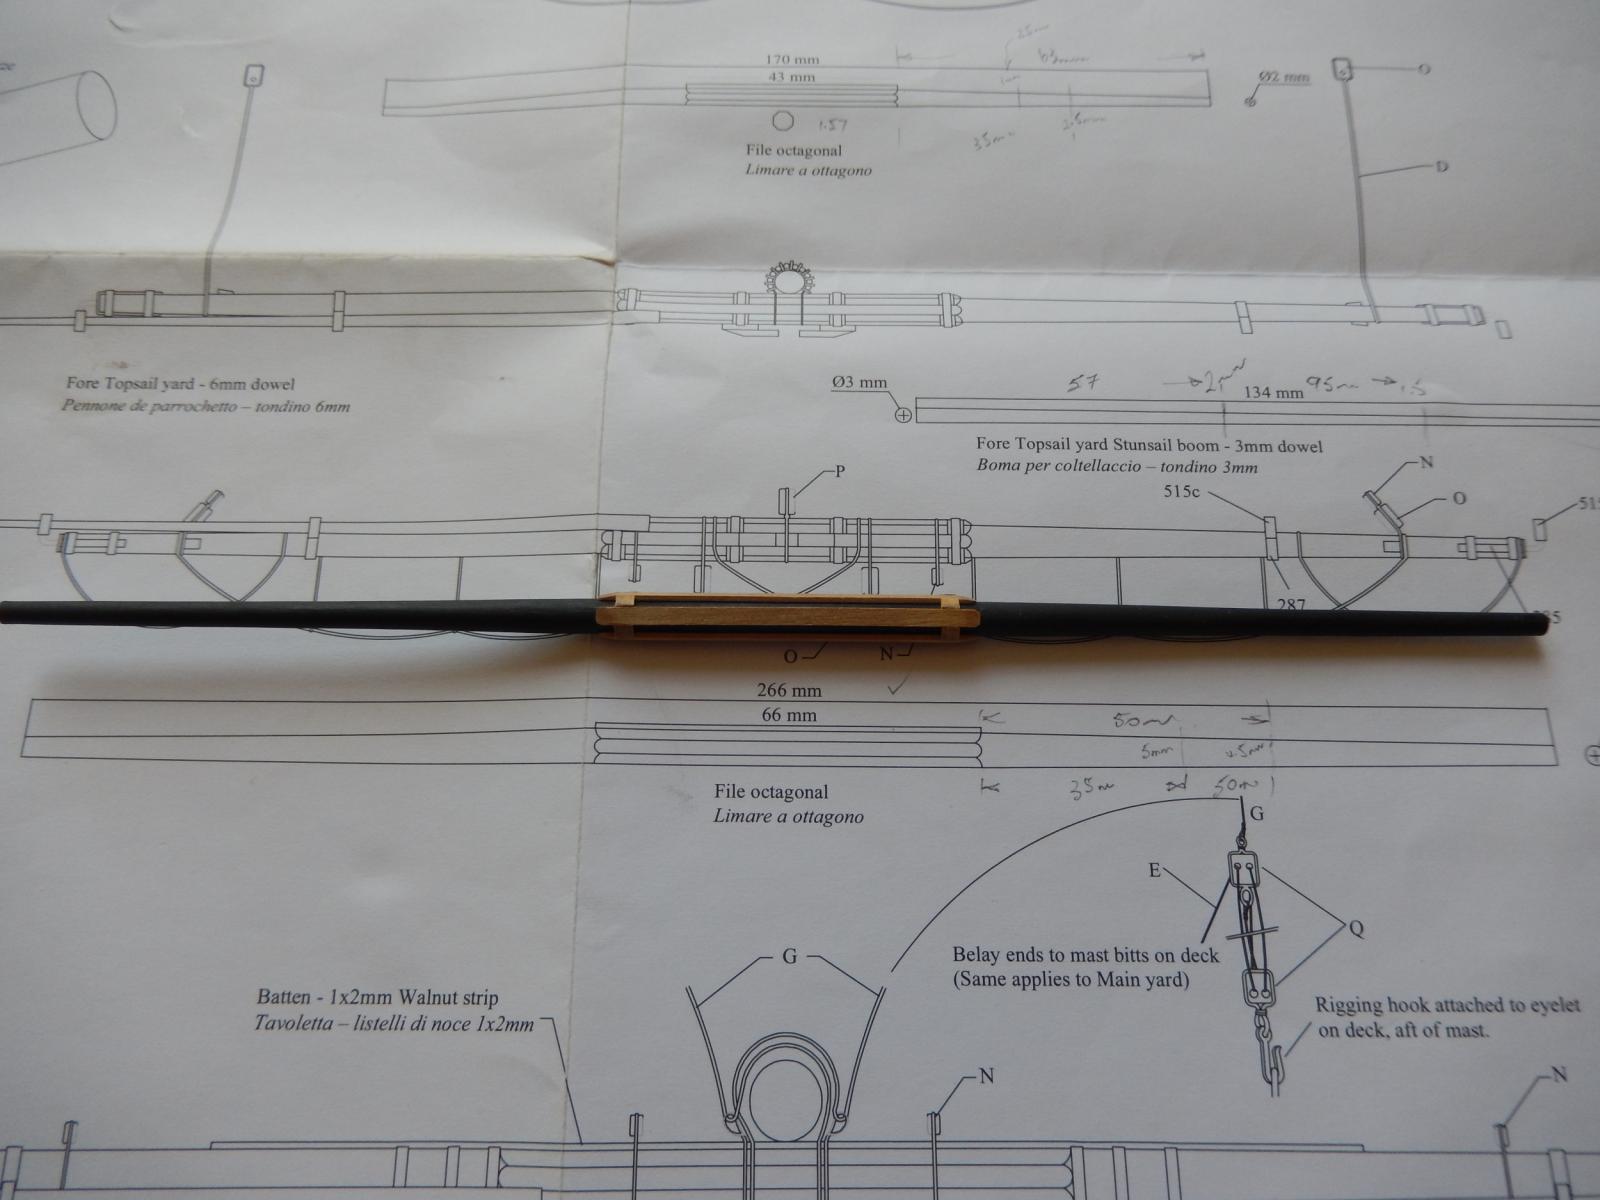
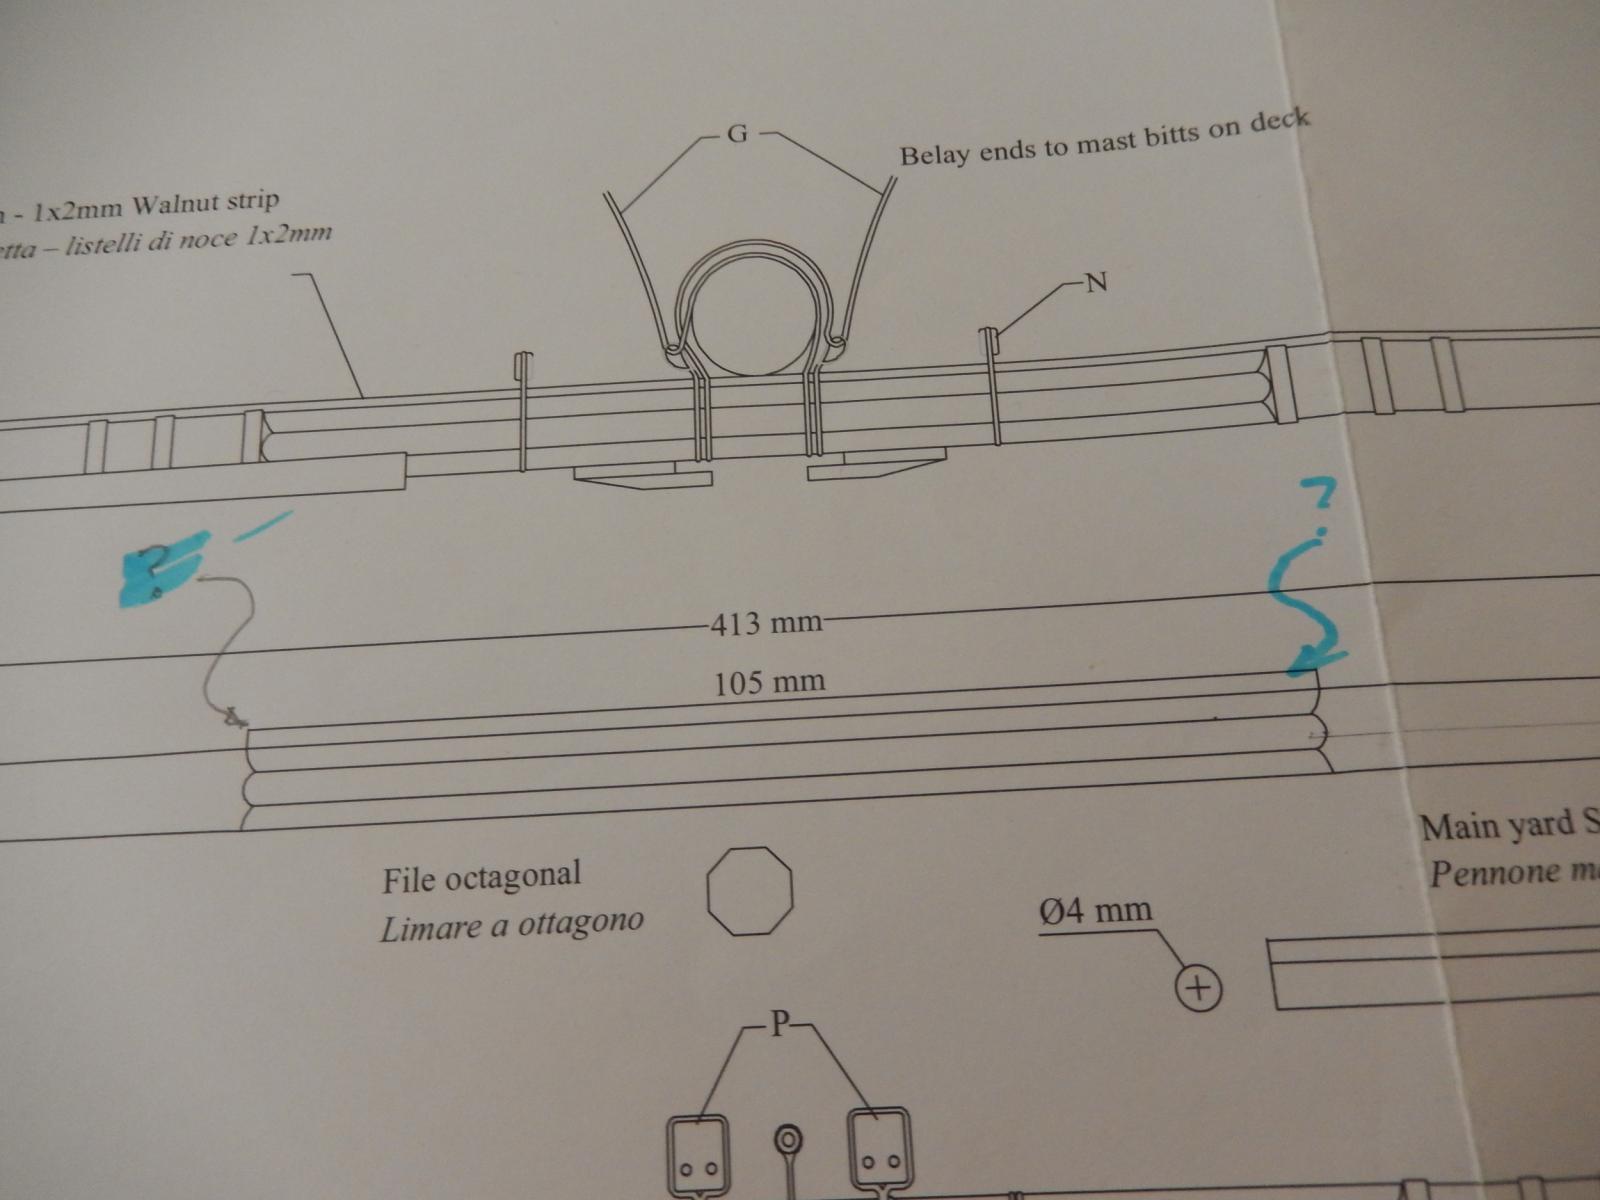
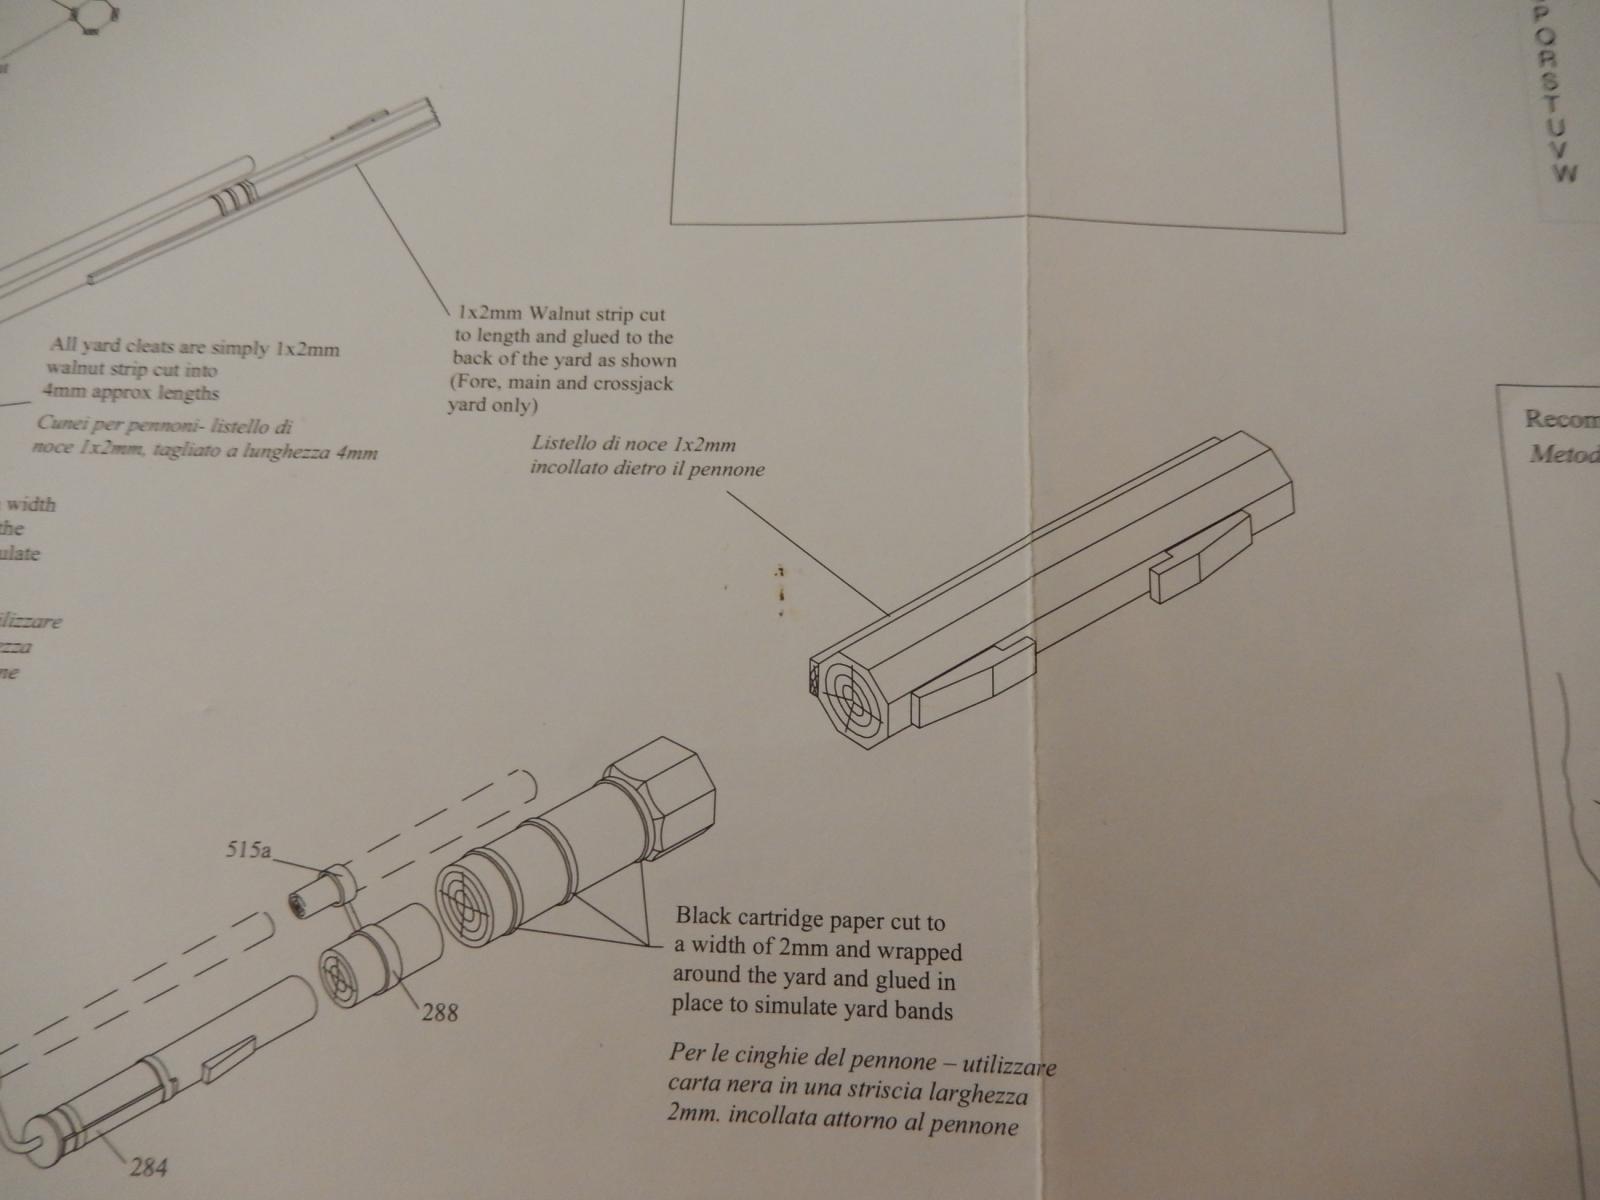
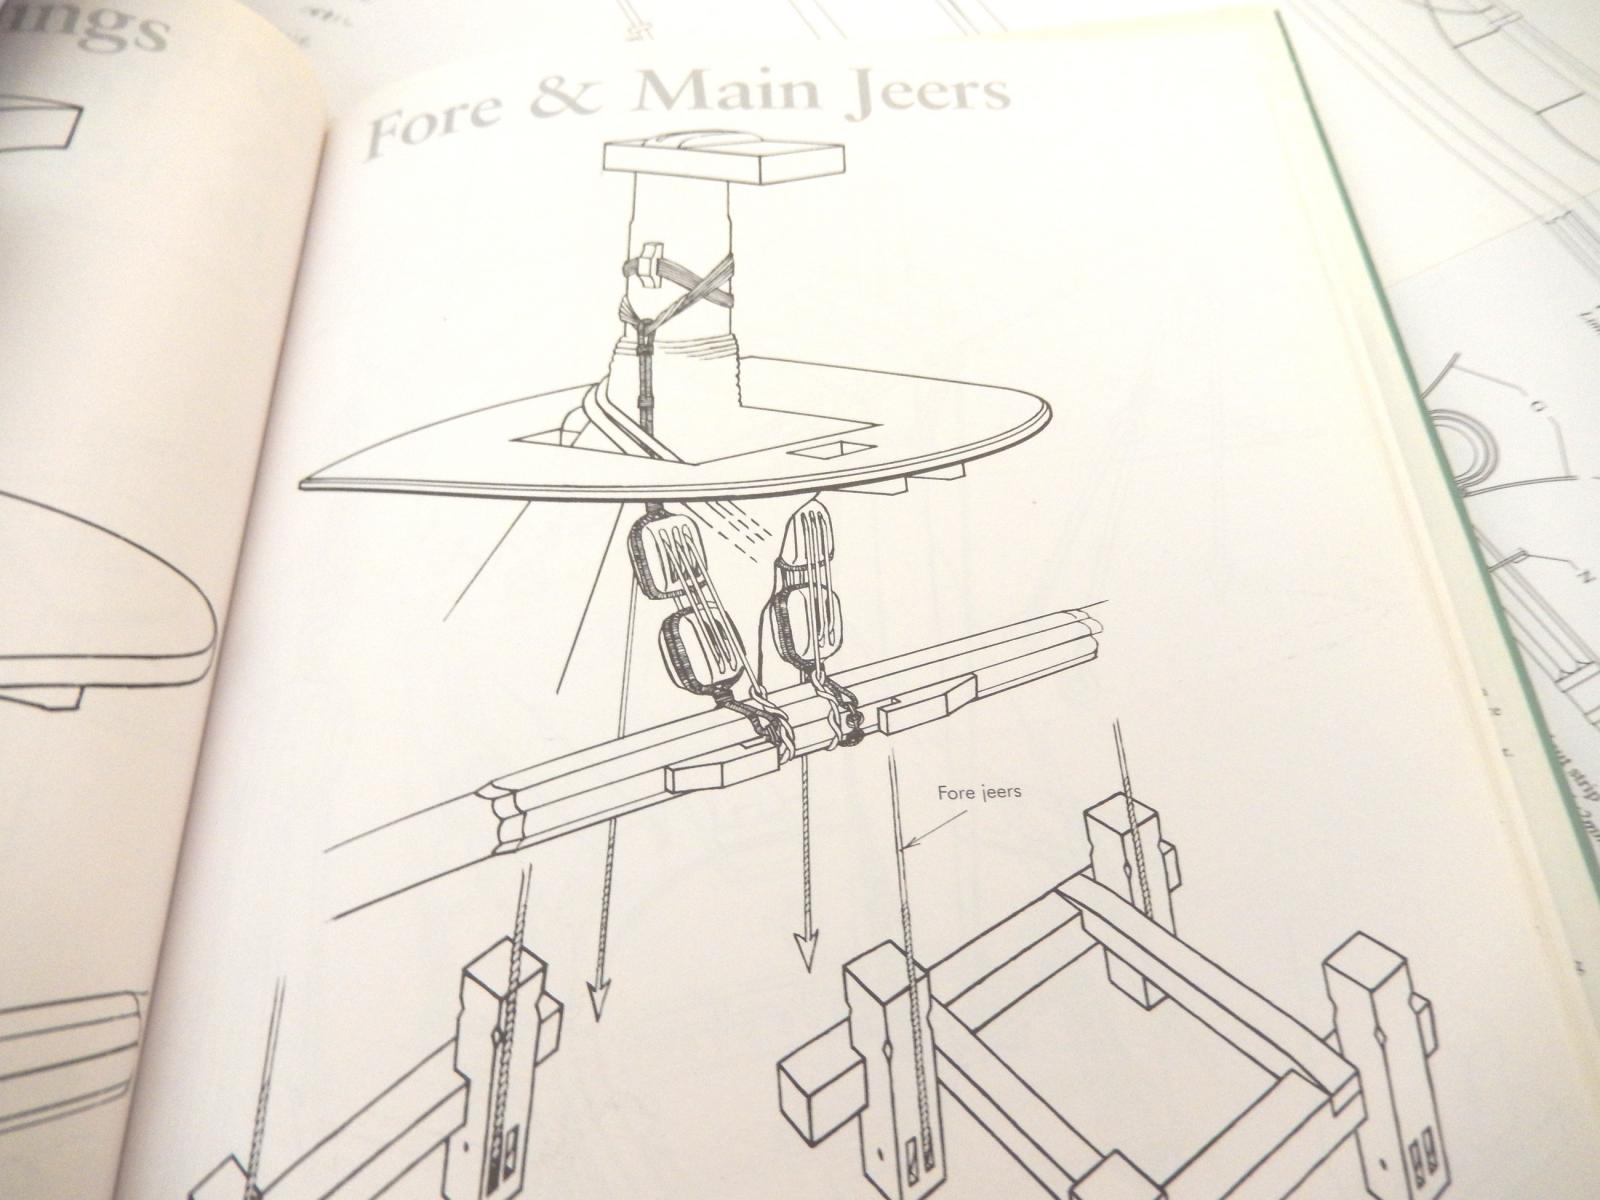
Above the octagonal centre section of the main yard (and a number of others too) there appears to be a piece of woodstrip above the preliminary drawing. It then disappears in the drawings of the finished yard. Does anyone know the reason for its appearance/disappearance?
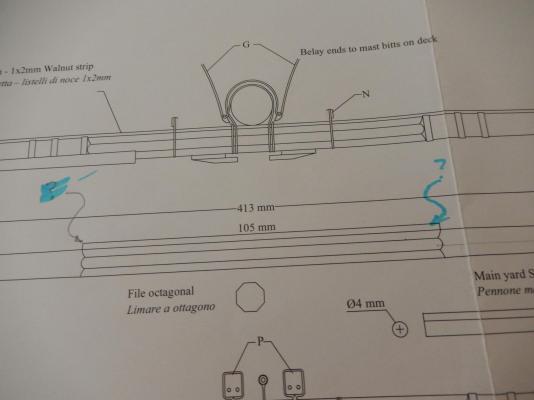
The cross section shown below suggests the octagonal section has been built up
as does the illustration from Petersson
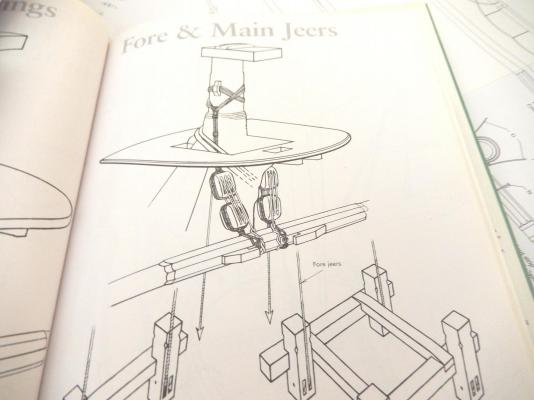
Is this the case? I had just assumed that once the centre section was filed to be octagonal, that was it - at least I hope so.
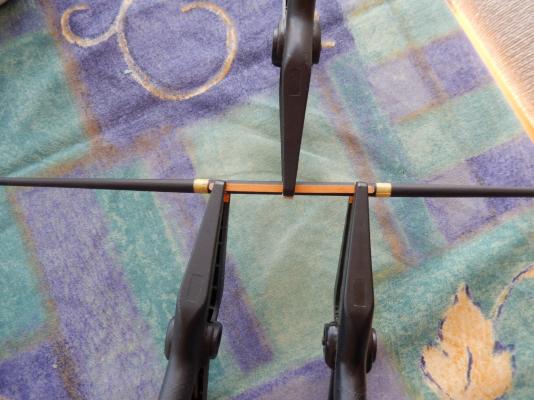
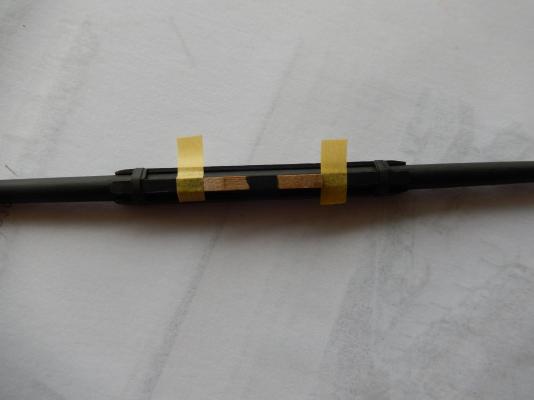
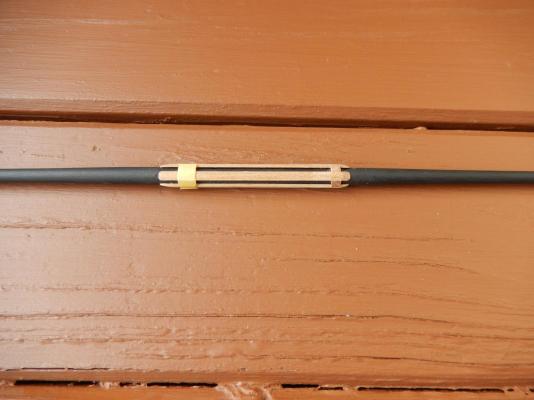
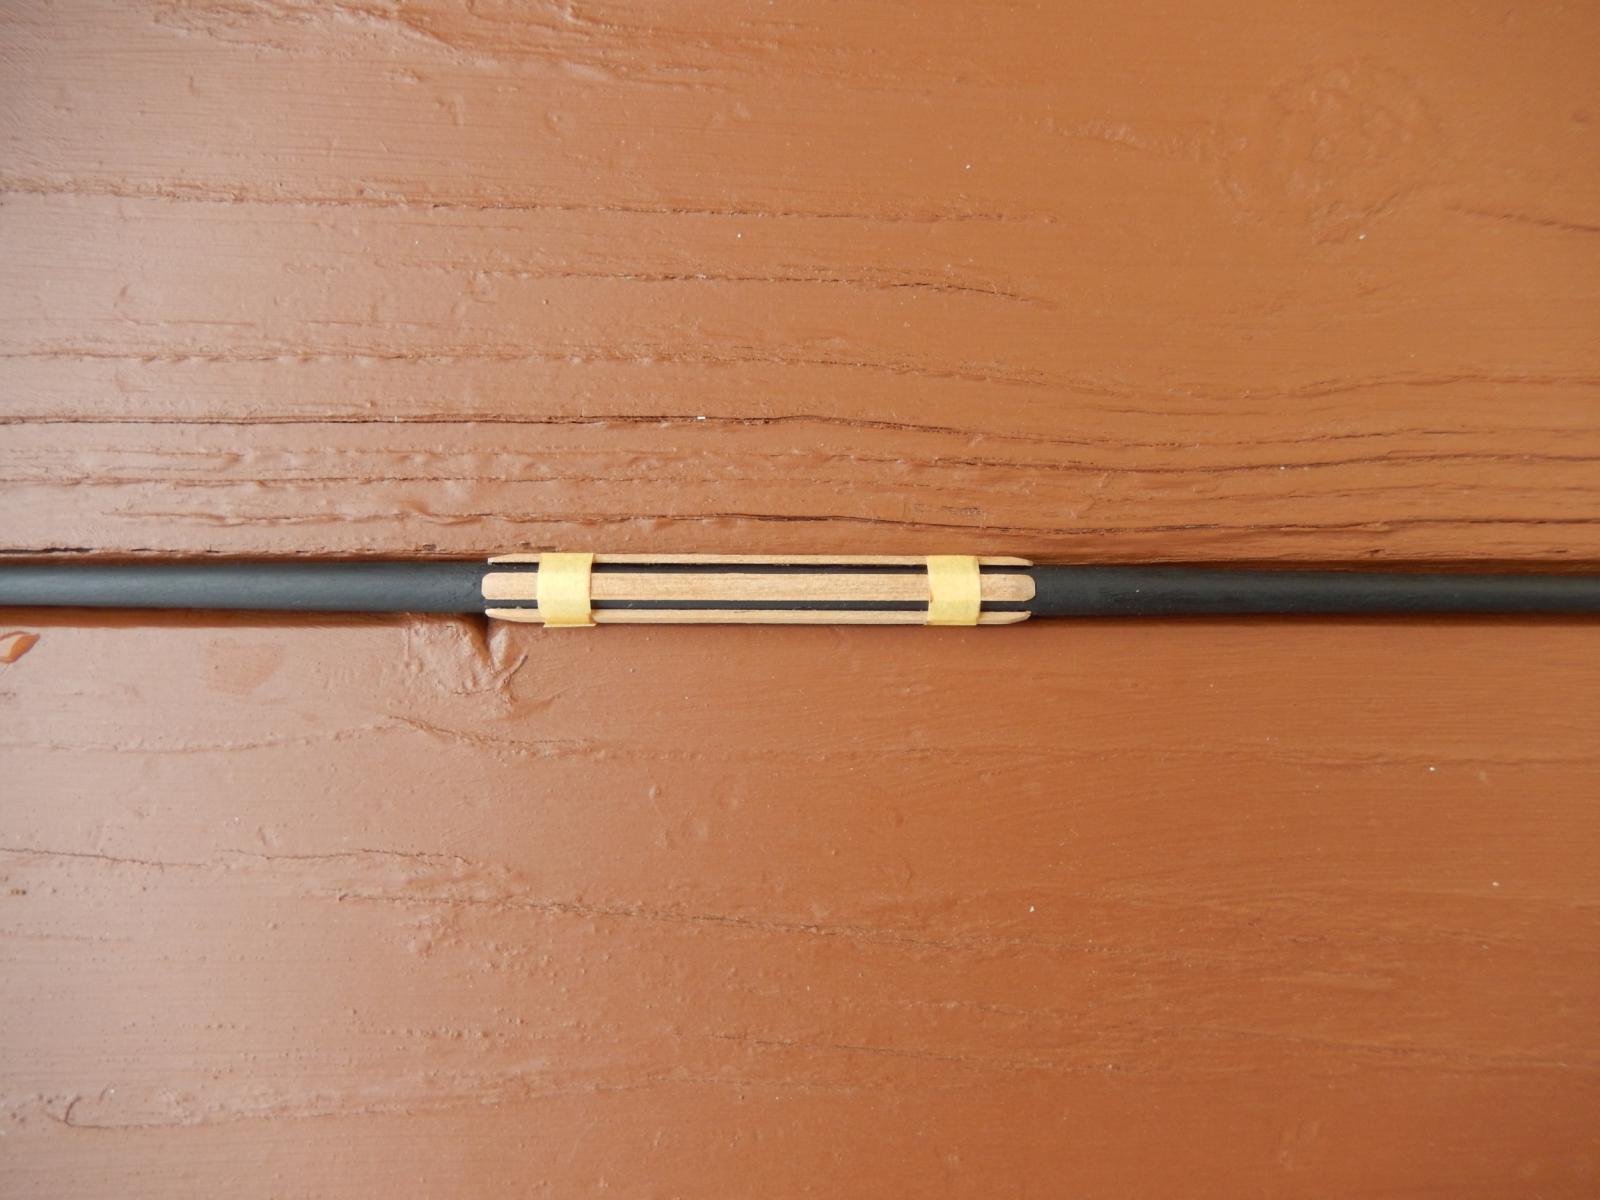
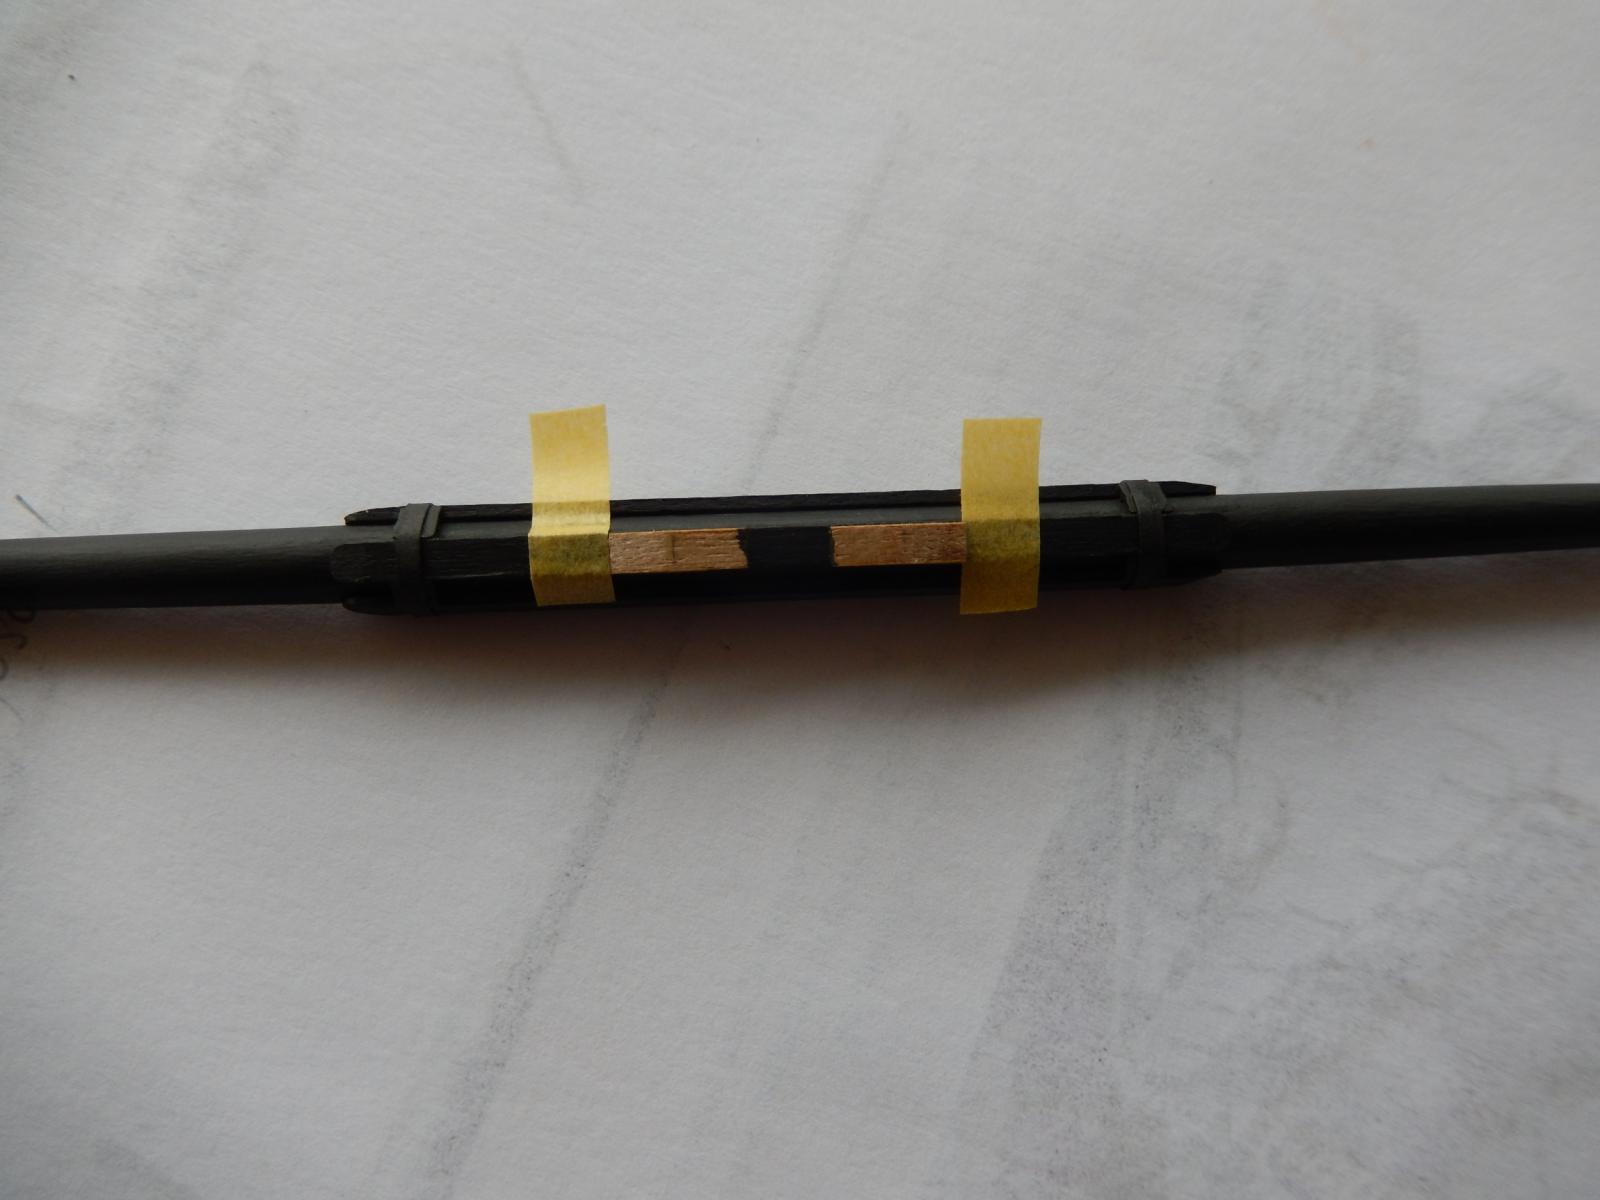
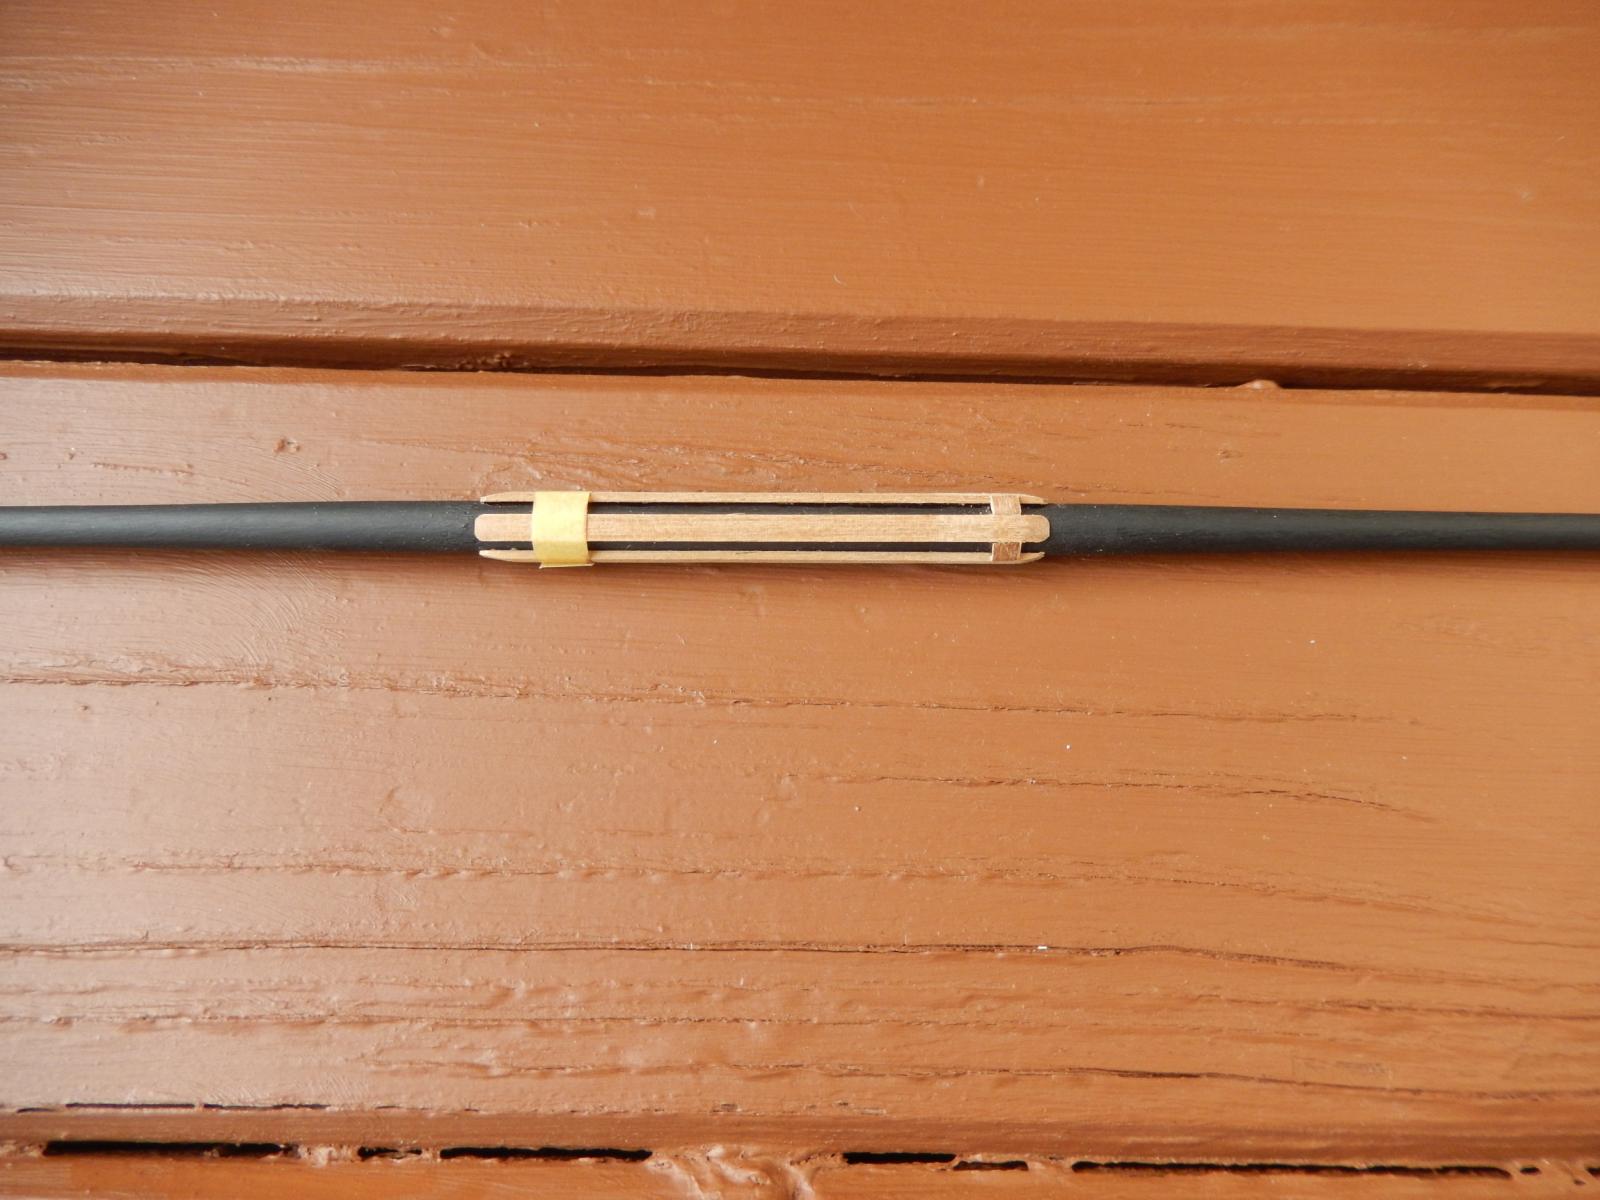
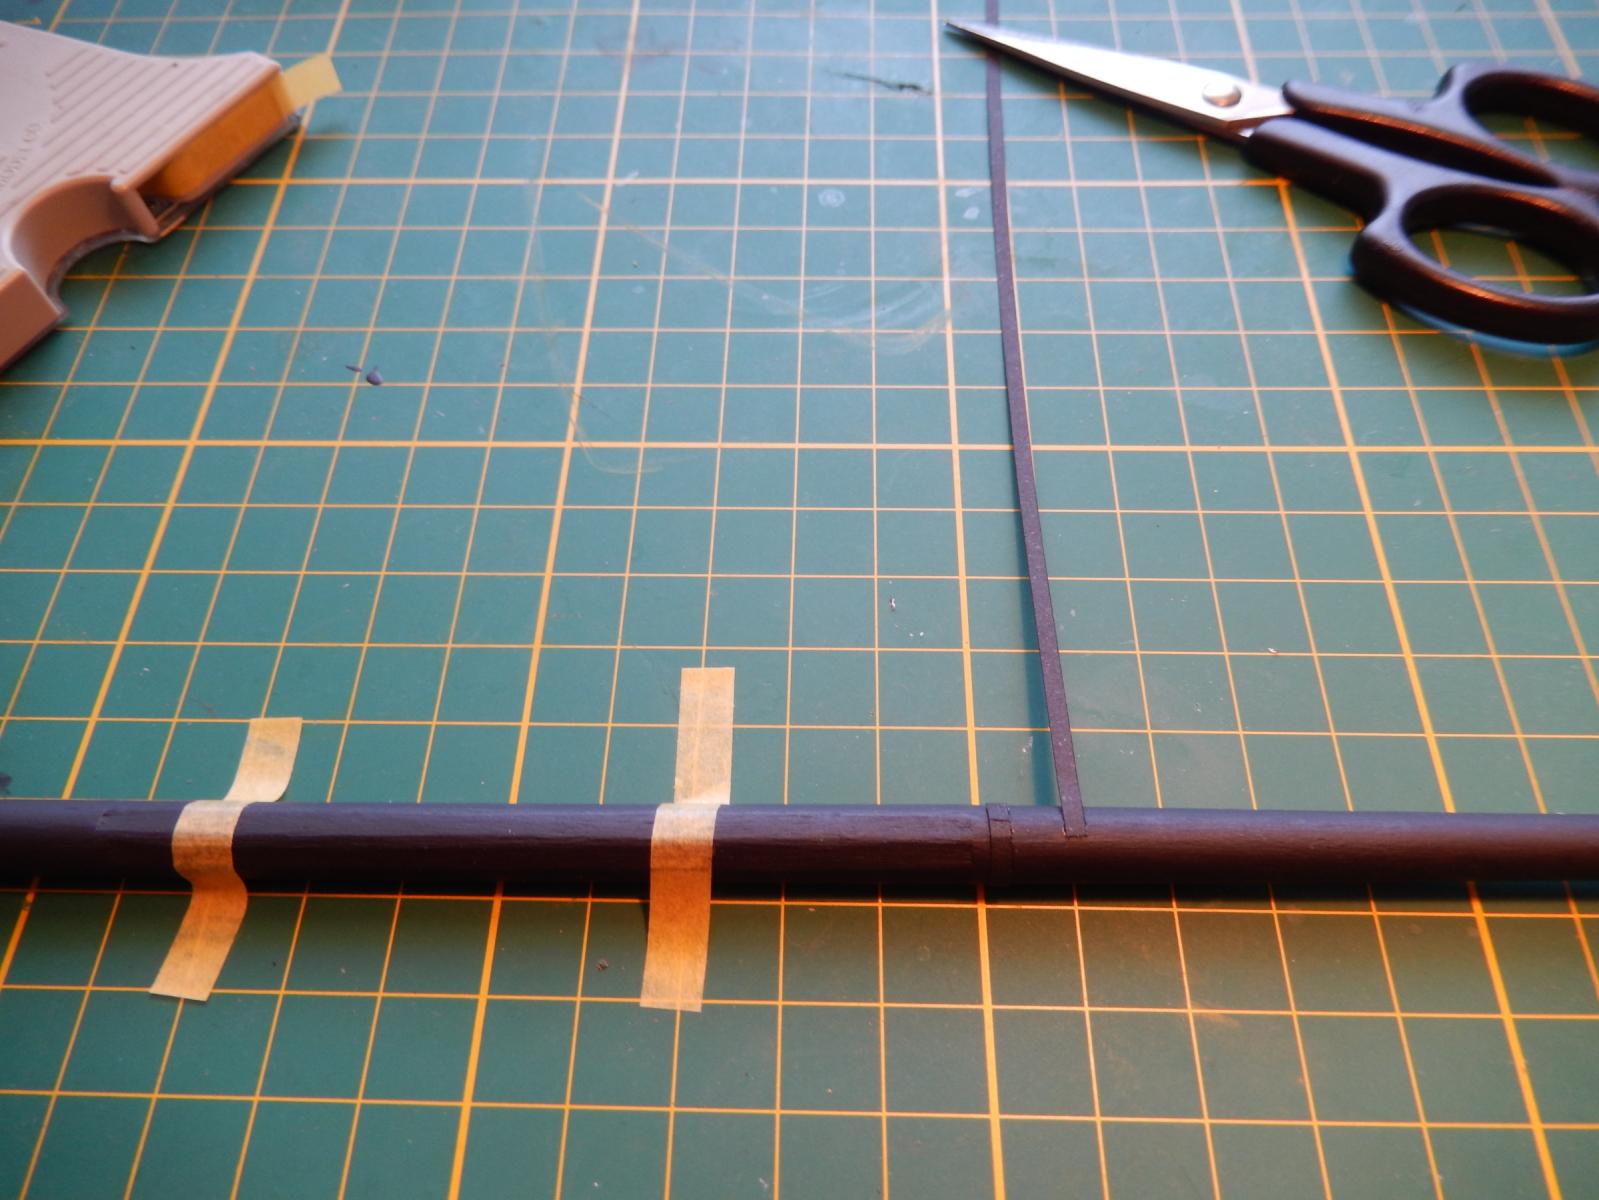
On the positive side, I found quite a good way of positioning the iron bands around the yards, though I'm sure someone will have got there before me.
Tape the yard to a cutting mat. Put a dab of medium CA on the end of the cartridge paper band. Glue it at right angles to the yard (the cutting mat makes it easy). Wait for the glue to set, then coat with CA the remaining length necessary to circle the yard. Then firmly pull the paper around the yard to meet at the beginning. The result is a very good finish.

Finally it seems a good time to wish anyone looking at this the best for Christmas and the new year. To those who 'liked' some of my stuff, thank you for the encouragement. To those who were kind enough to make comments/give help, thank you indeed. Among others Allan, Brian, Jason and Mort - - for anyone I've missed, please put it down to age.

Bob
-
-
Having had enough of futtock shrouds for the time being, decided to start finishing off the masts. The futtocks etc can wait for the new year. I am not at all happy with my tying off the futtock shrouds and will try to make them a bit more civilised. The problem has been the 01mm thread I have used (at least that's my excuse). It's very difficult to control even when wet and that combined with the significant contours of the Syren thread, make things even more difficult. It is almost impossible to move a knot once tied, up or down the Syren rope.
I have now decided to buy some 0.2mm Syren thread and attempt to overlay the bindings I have already made. The Syren stuff is more managable. If it works I will use the Syren stuff on the remaining shrouds from the start. If it doesn't nothing is lost, but redoing the whole lot doesn't bear thinking about.
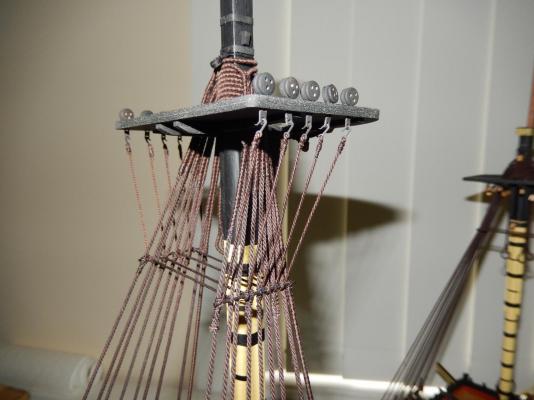
Finishing off the masts has had its own problems (my, this is a really good whinge). Here I blame the plan (of course).
The cap into which the main topgallant mast fits would would 'grab' the topgallent mast around the octagonal section, rather than the circular section above it.I have measured and remeasured the masts and their dimensions are correct. Consequently I have repositioned the fid to be about 3mm higher than specified. I found the same problem with the mizzen. The foremast was OK.
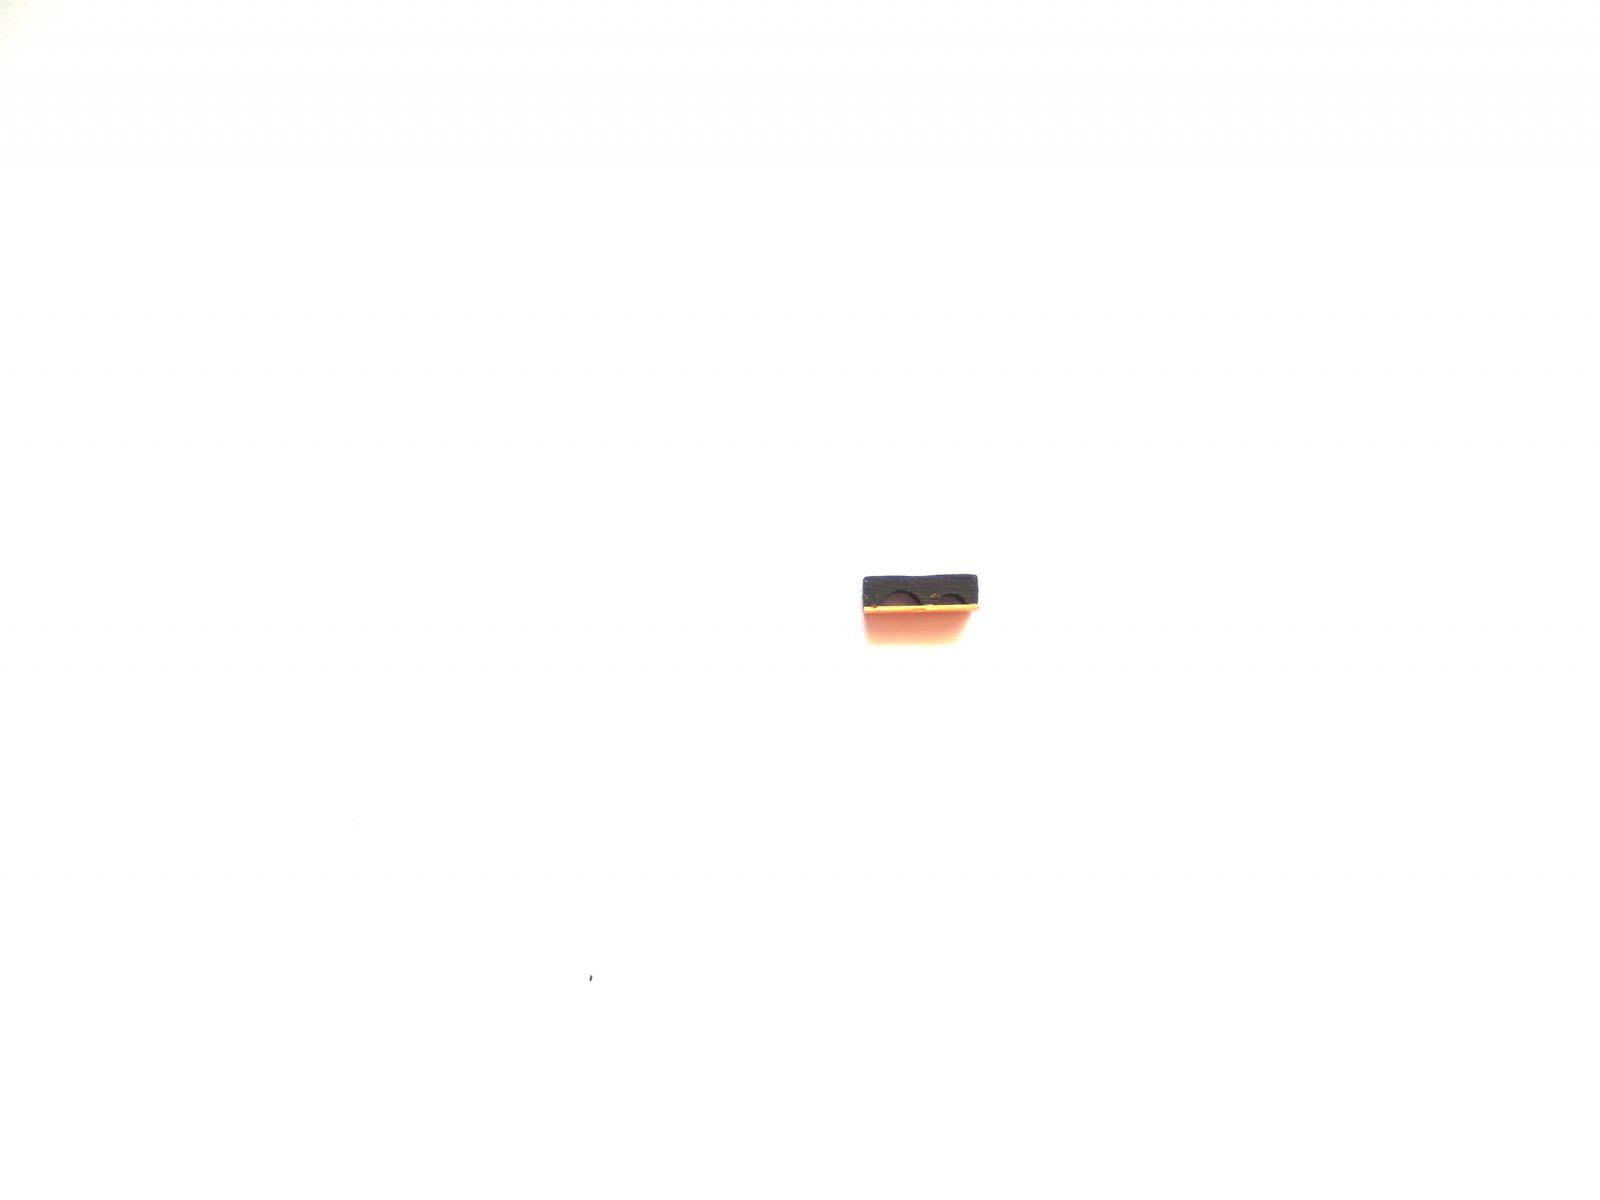
Just as an aside, all of the mast caps are laser cut lengthways. This results in the 'round' holes in the caps being not round at all. To solve this problem I CAed some very thin wood strip to both halves of the caps, which resulted(with some filing) in a nice round hole to receive the upper mast. The square hole in the completed cap shown in the lower picture is for the top of the lower mast. (I have squared the larger hole for all the caps - which seemed like a good idea at the time.)

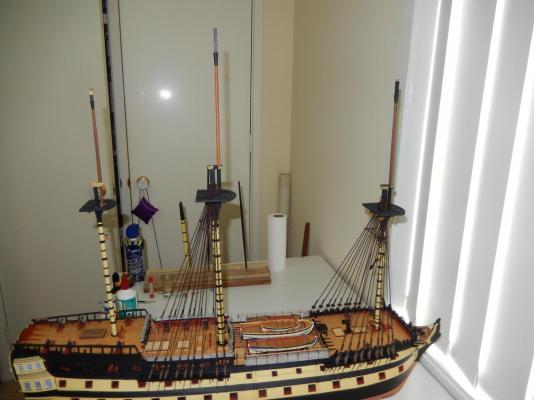
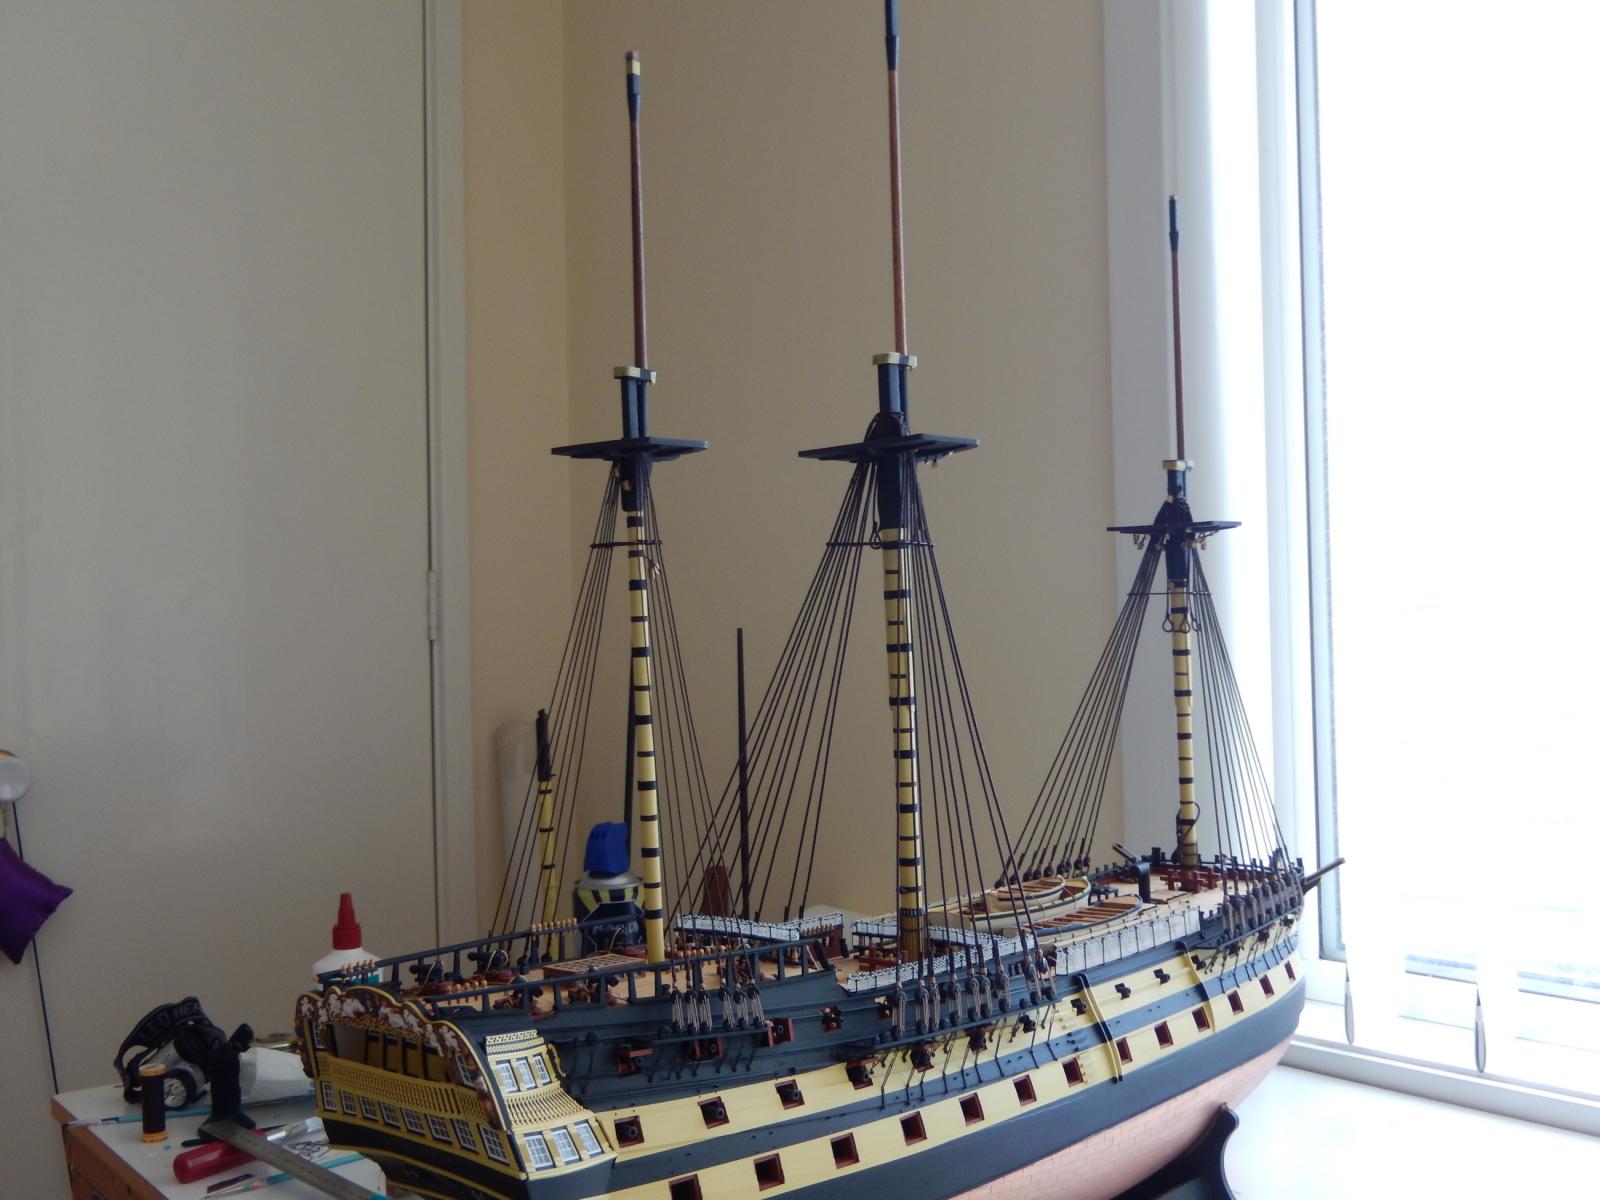
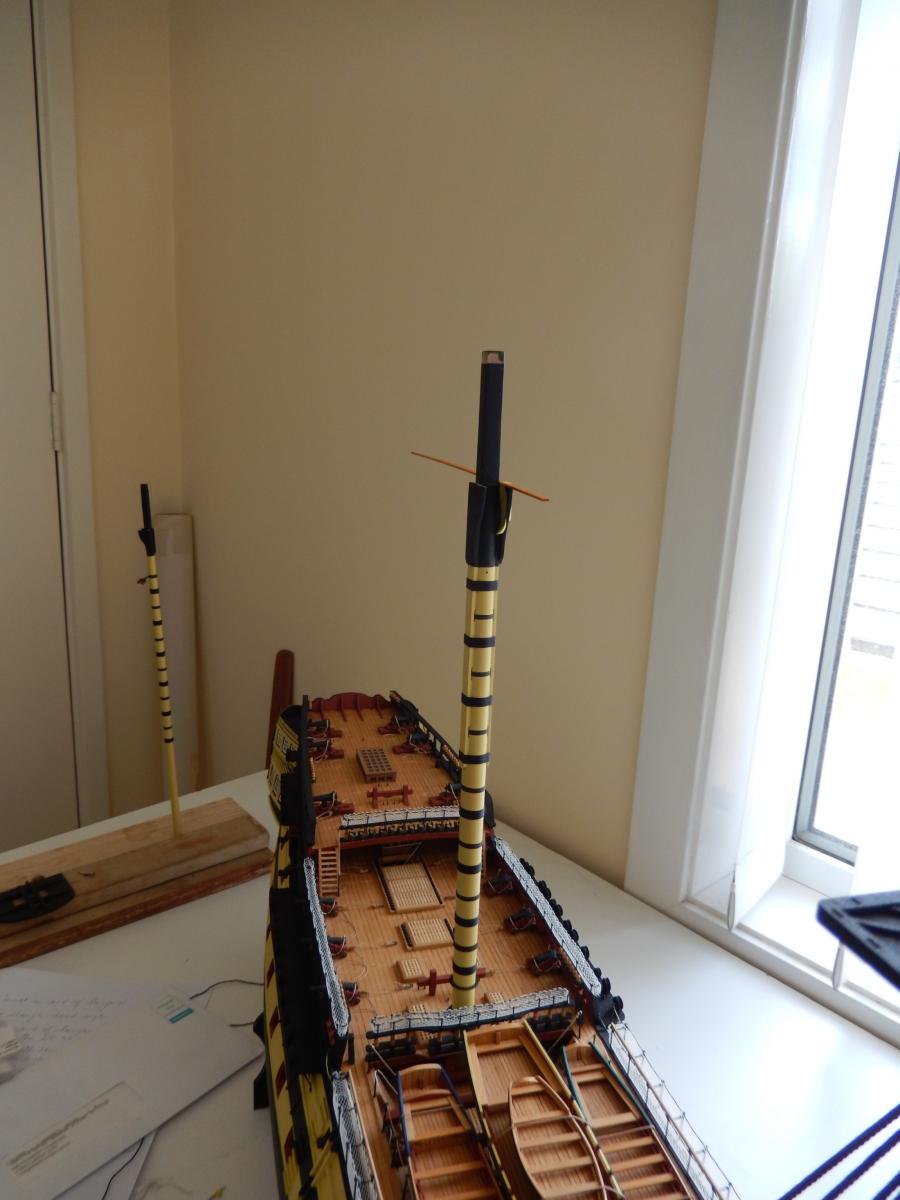
Here, finally, are the three topgallant masts all dry-fitted.

I am not sure if it is a good idea to complete the masts now. Advice is welcome.
- AON, mort stoll and Kevin
-
3
-
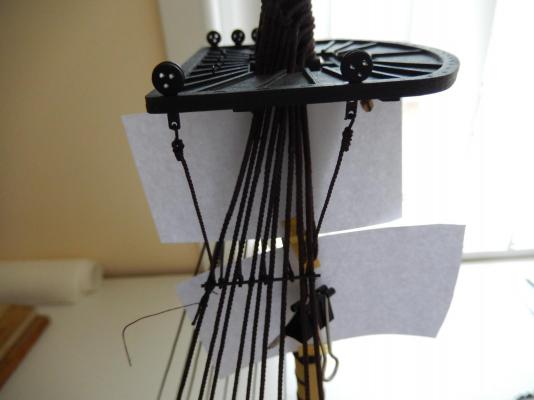
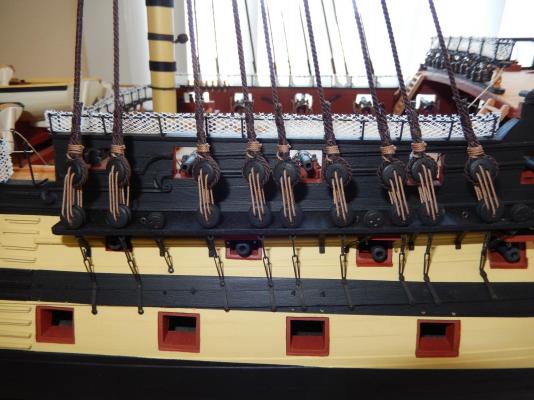
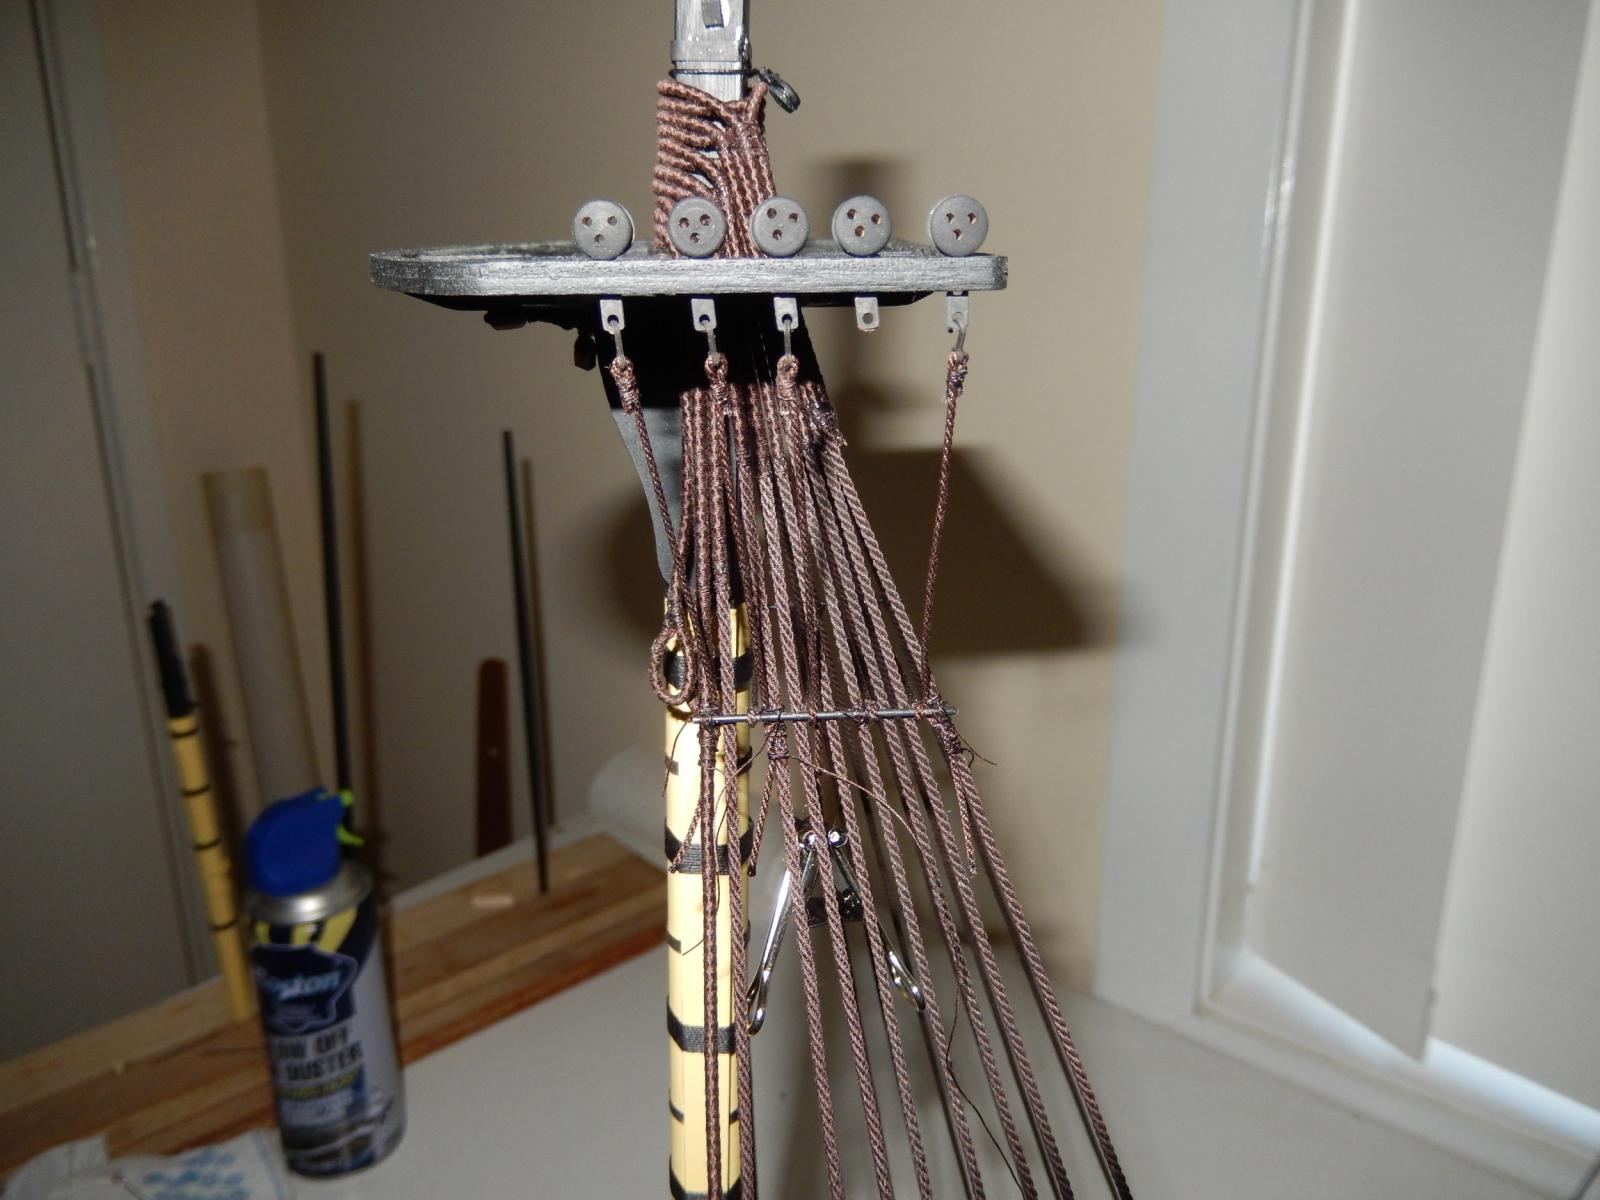
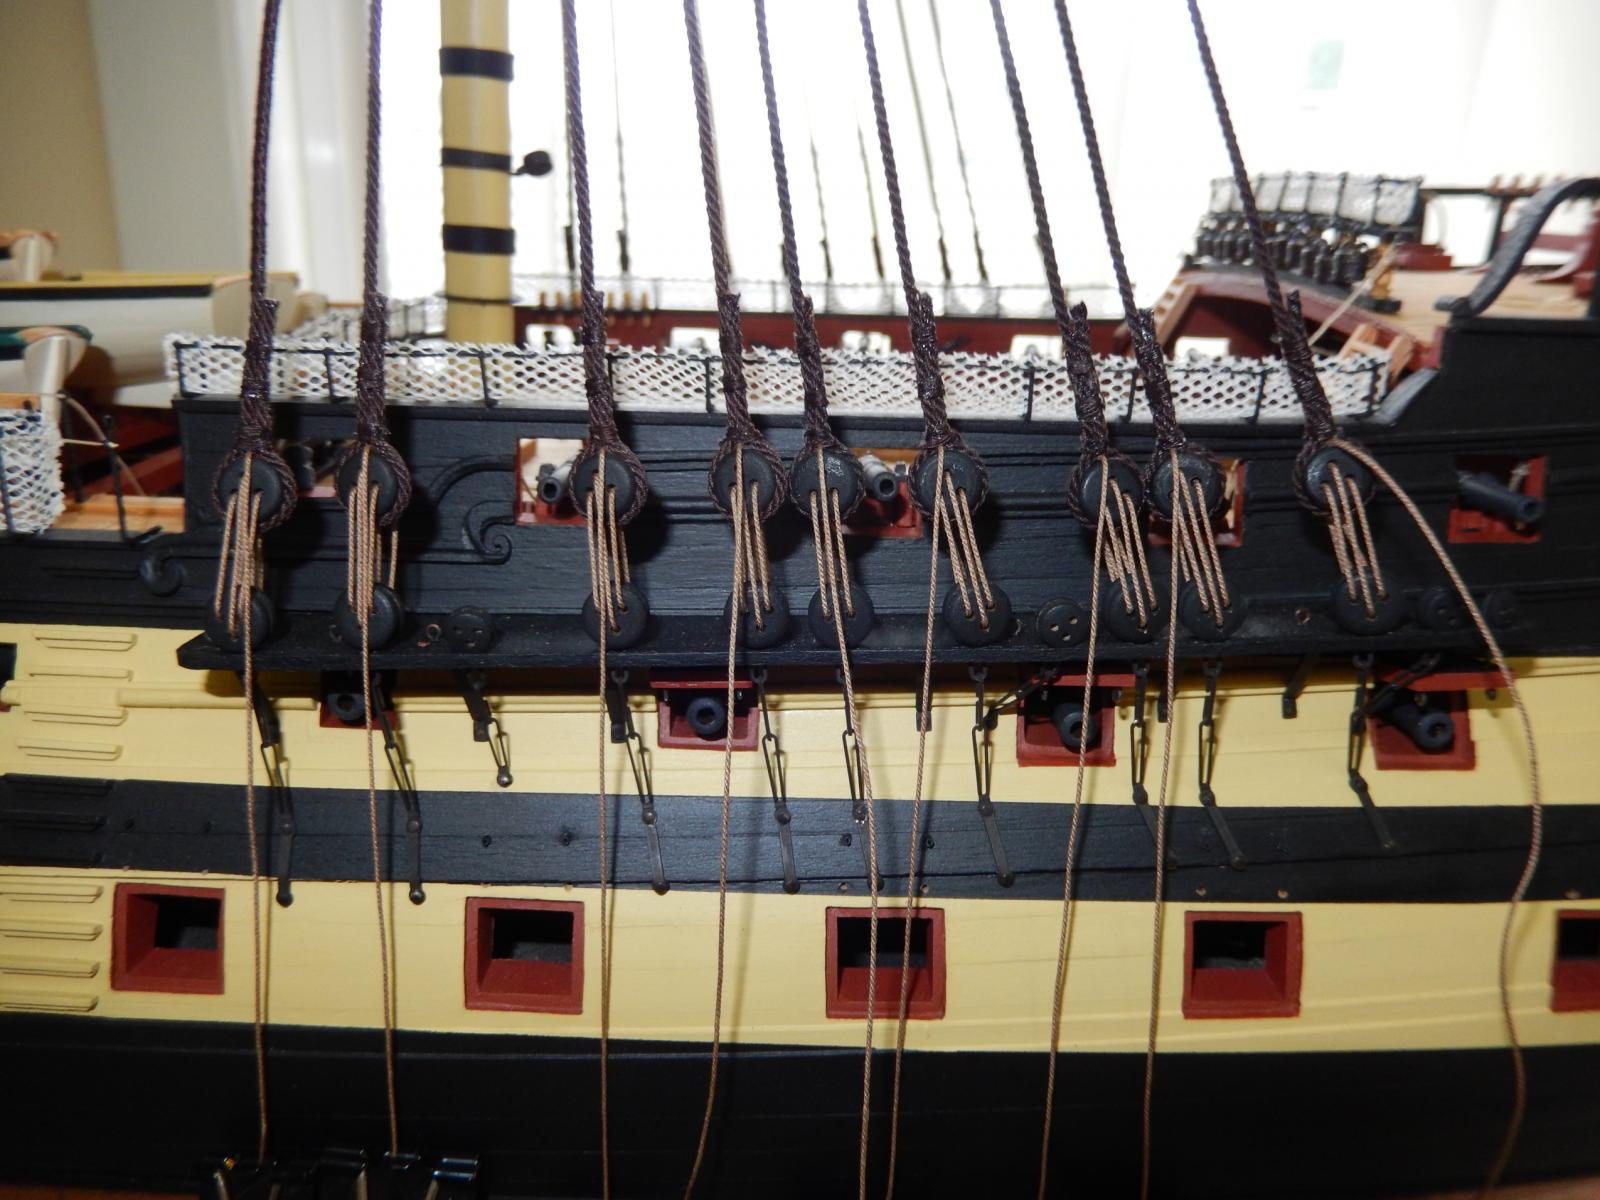
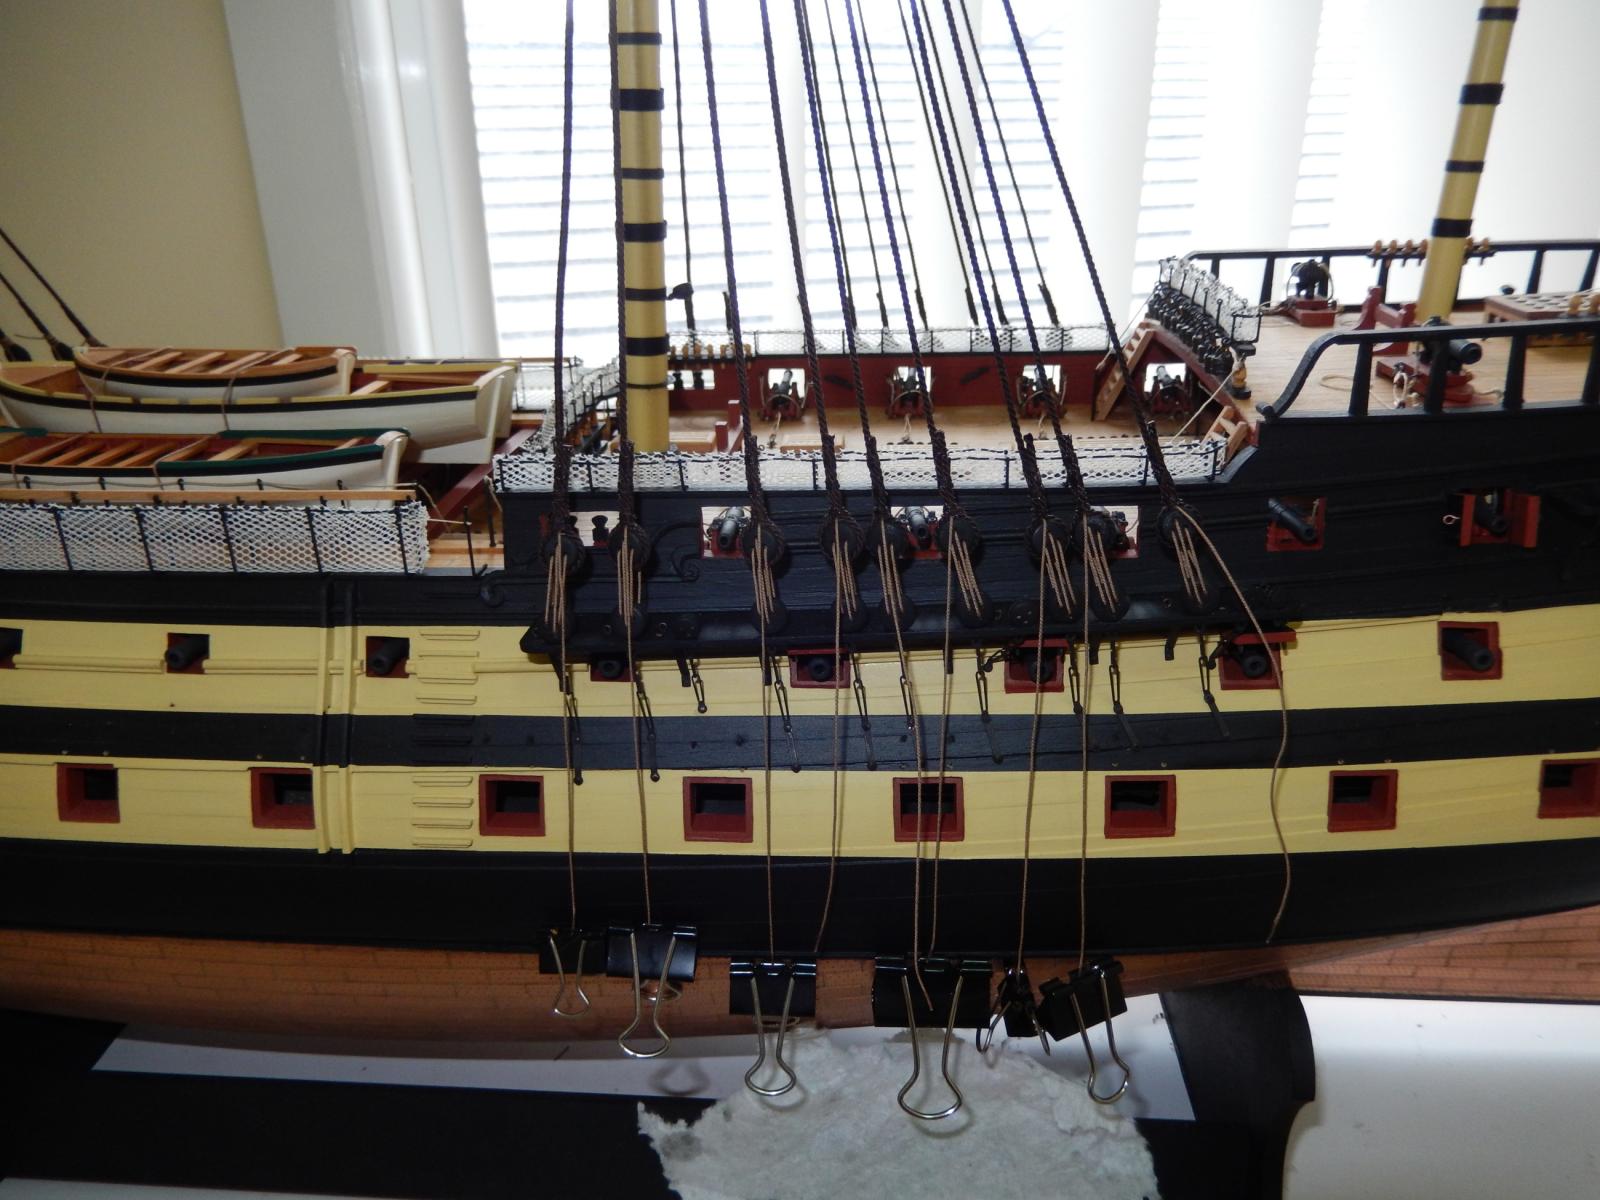
The futtock shrouds for the mainmast are complete. It was another quite fiddly job where competent knot-tying is required. Unfortunately this is not my long suit. There is very little room between the shouds and the thin thread went everywhere but where I wanted it to go. Finally the only way I could make it behave was to apply 50:50 PVA:water to it as I bound the futtock shrouds to the main shrouds. The result is just acceptable.
I used a small bulldog clip as a weight on the futtock shrouds to maintain tension while attaching them. The Syren thread I have been using also provided some thrills. The sizes of the thread are specified in imperial measures
 . For the futtock shrouds, the plan specifies 0.75mm thread. The nearest Syren thread converts to 0.88mm - not much difference. When I went to thread it through the holes in the hooks which are attached to the deadeyes, it wouldn't go through. I then put a drop of CA on the end of the thread to keep it from unravelling (something it does tend to do if you are not careful). This then made the thread fractionally thicker! I tried trimming the CAed end to a point. No joy - again it unravelled.. By this time I was certainly not rejoicing. The answer was of course, an inspiration
  . Apply medium CA to about the last 5 or 6mm of the thread. While still wet, twist the end of thread so that it becomes tighter and thus. smaller diameter. A bit of CA on your fingers is neither here nor there; the CAed end went through the holes, and once through, the thread followed, though it was a close thing.
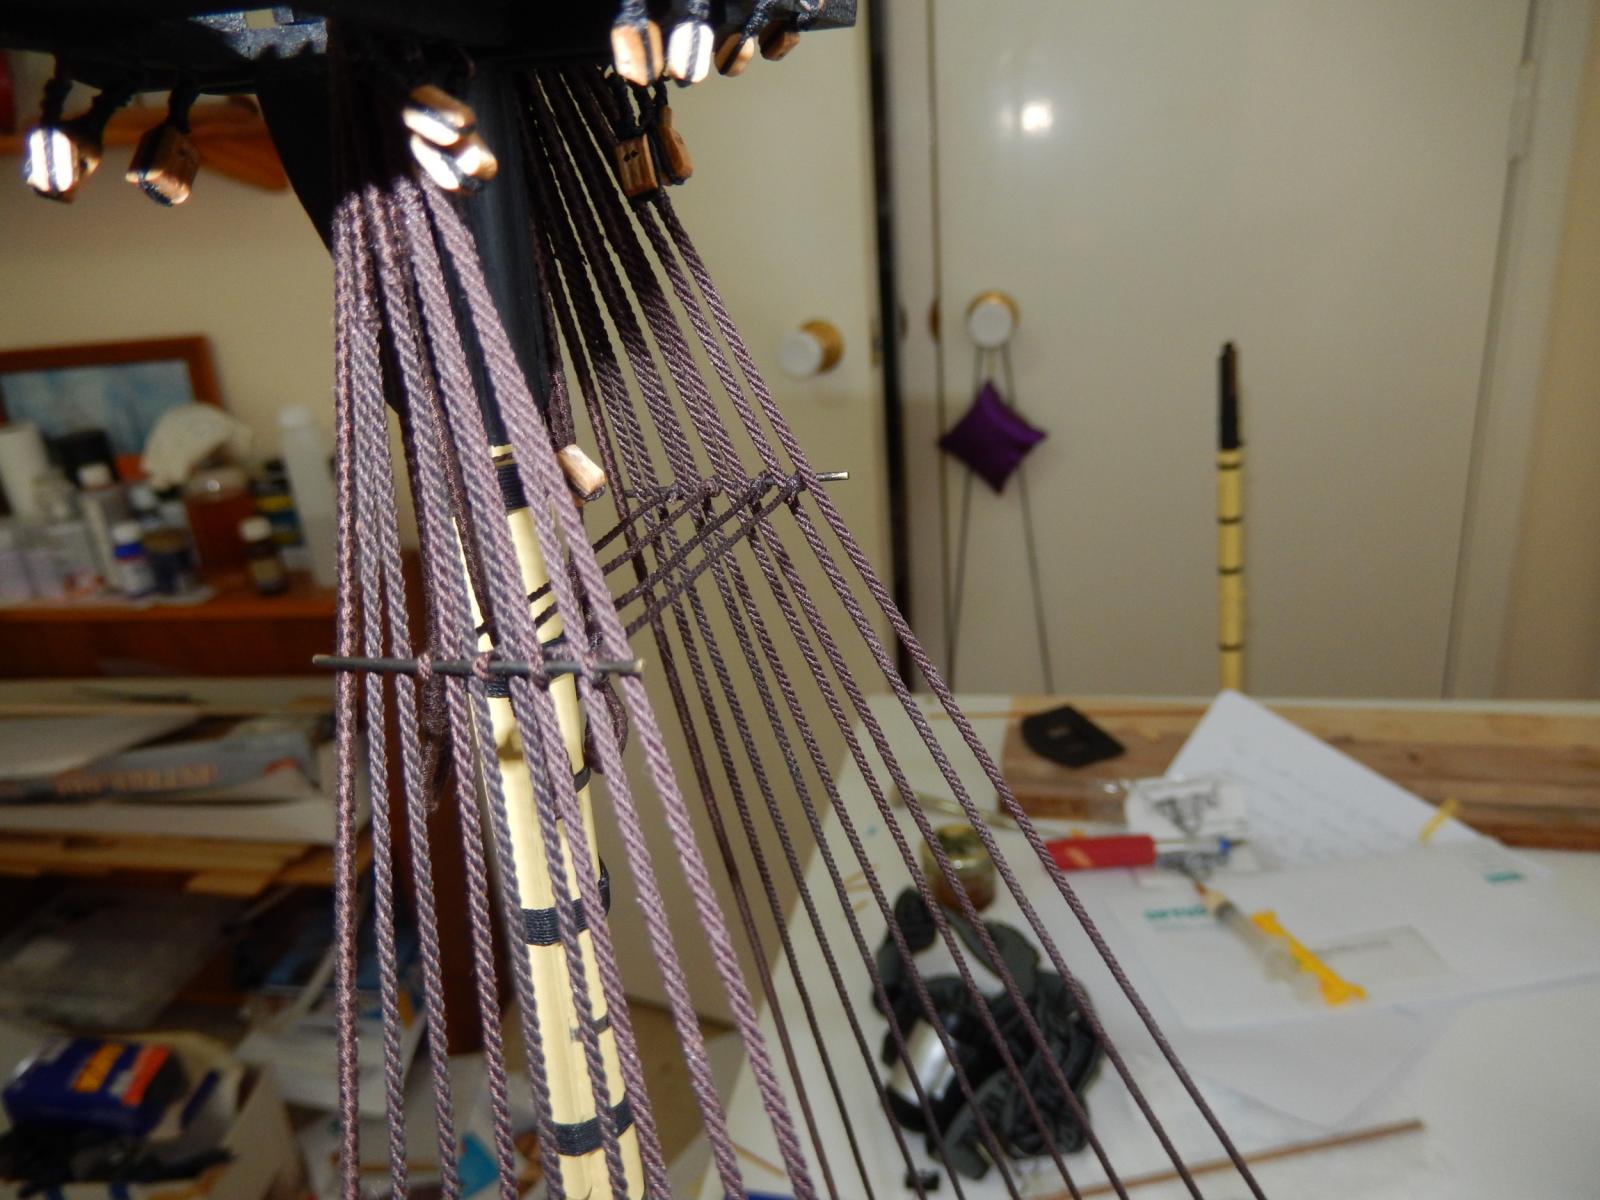
The following two photos show the bulldog clip weighing down one of the futtock shrouds.
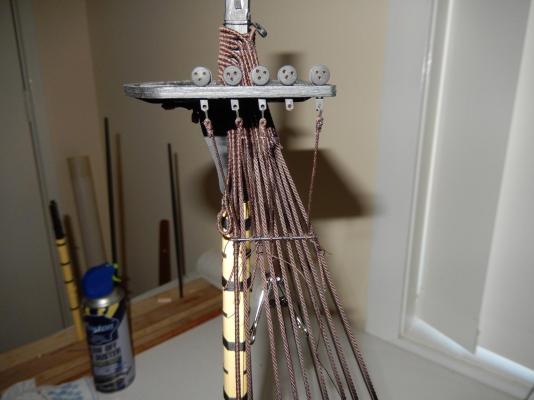
With threads going all over the place, I found it difficult to see what was going on. Some white paper placed behind the shrouds made things a little easier to see.
Finished.

PS: Len -thanks for the like. I hope things are going well for you.
-
The catharpins for the mizzen are now finished. I could only fit three, rather than the four that seem to be specified. I have no idea how four could be fitted without drilling a hole through the mast. As it is, the three barely scrape in.
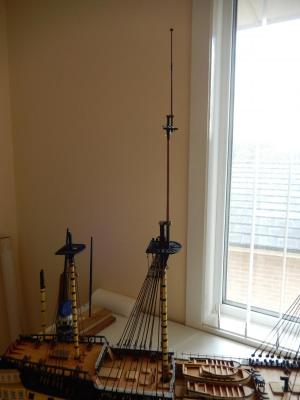
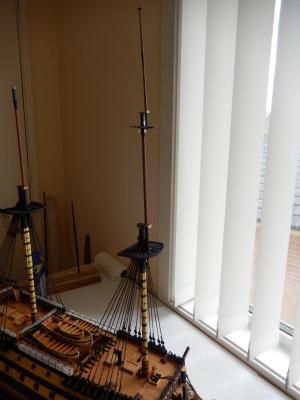
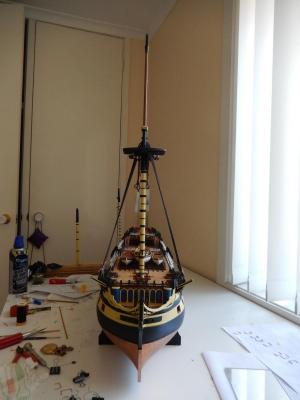
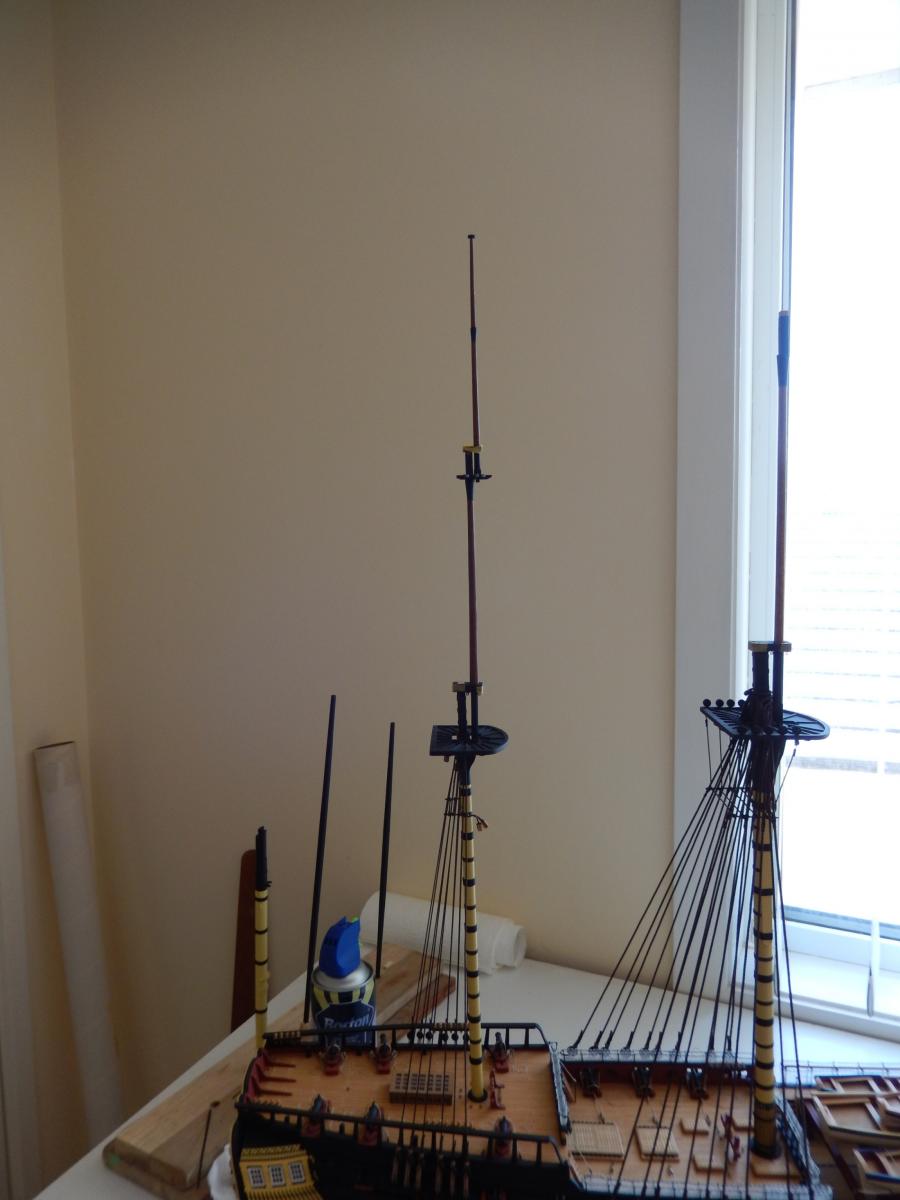
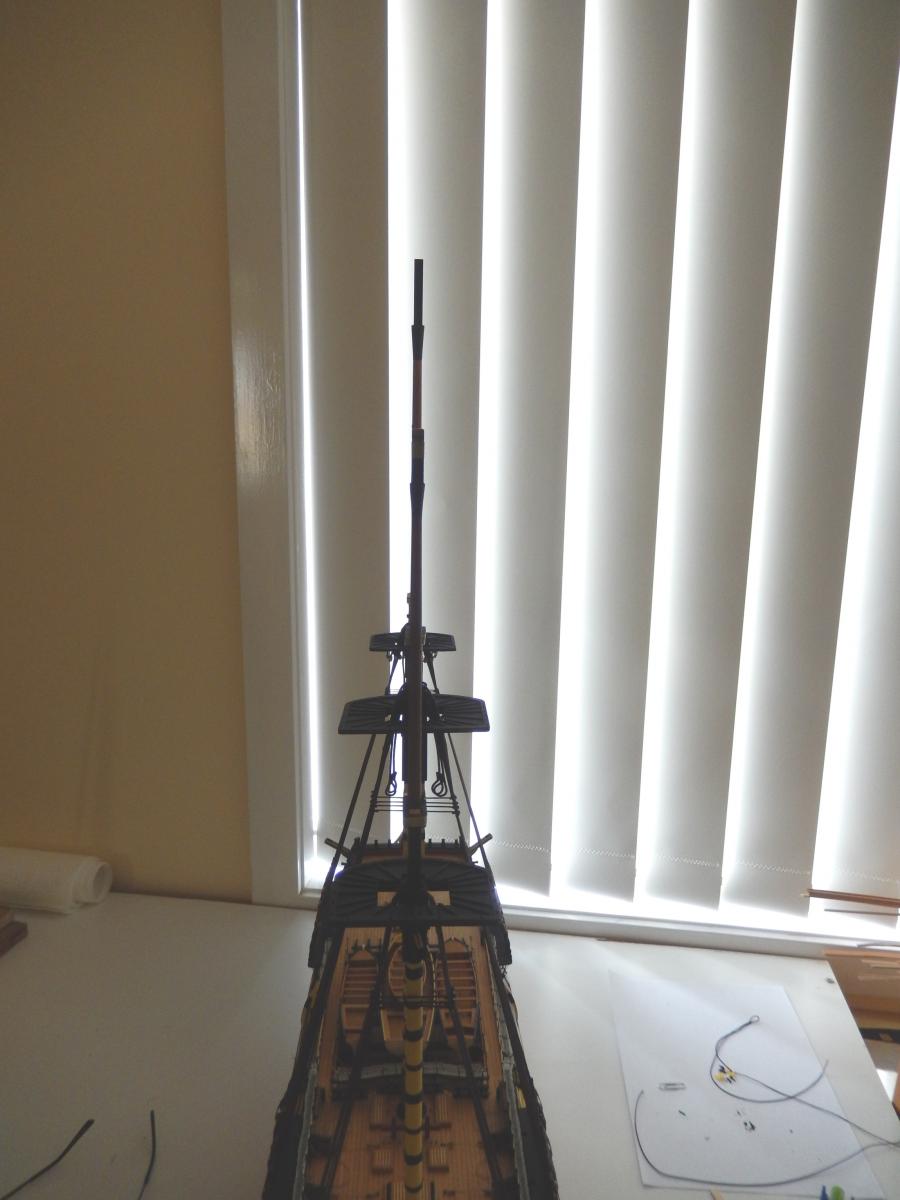
The mizzen topmast has been dry-fitted. All the topmasts line up quite well

and this is how things look at the moment.
- AON, freewheelinguy, Bettina and 1 other
-
4
-
Don: Just water applied with a small brush. After everything had dried, I then applied 50:50 water: white glue.
-
The mizzen shrouds are finally finished - though towards the end of the rather painful process I had it more or less under control. Progress has been rather slow with a couple of smallish household disasters taking up quite a bit of time over the last couple of weeks. Belatedly I found saturating the Syren thread for the lanyards made it behave reasonably well. The thread for the shrouds is fairly stiff, and with serving, the thread becomes very stiff indeed. A fair amount of tension (not too much) is needed to straighten it out. The results are acceptable, though again one of the deadeyes is a mill or so lower than it should be.
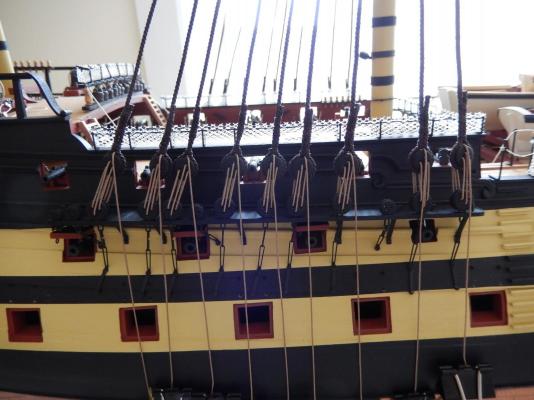
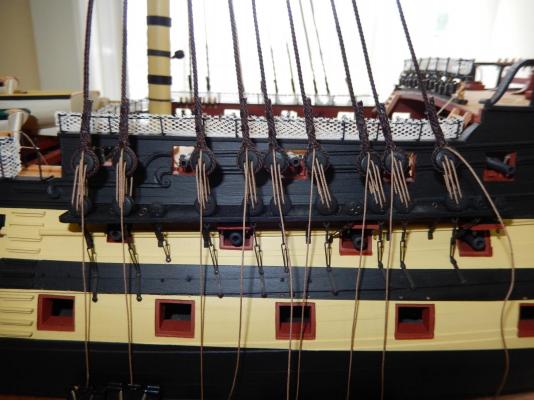
The port side came out quite well.
The starboard, not quite so well.

The catharpins are yet to be done and that's something to look forward to.

-
Bettina - 14 likes? You've made my day.

-
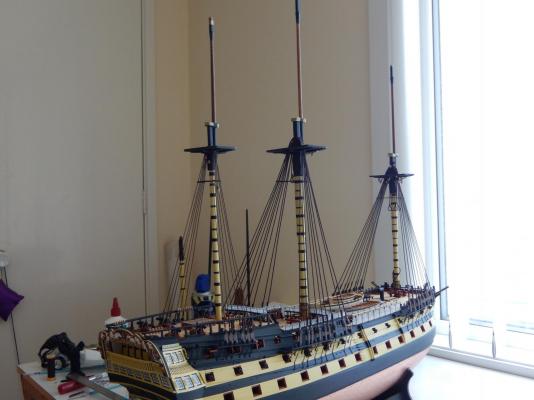
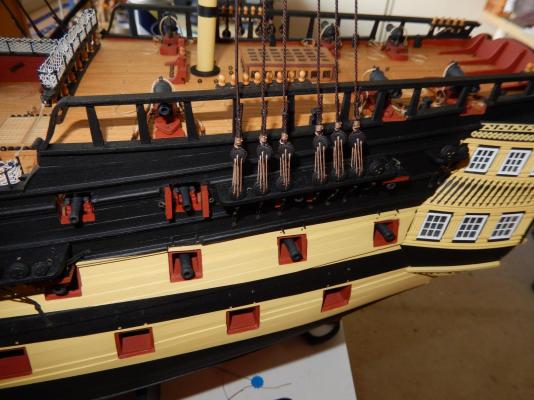
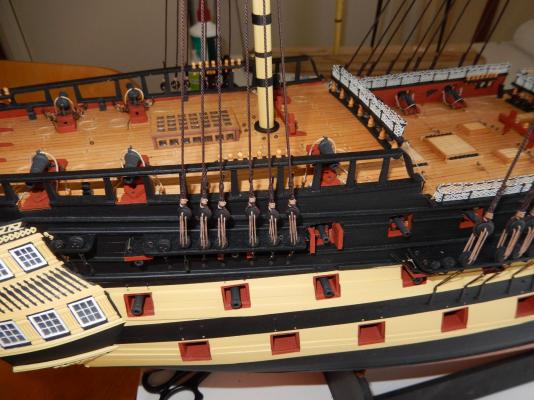
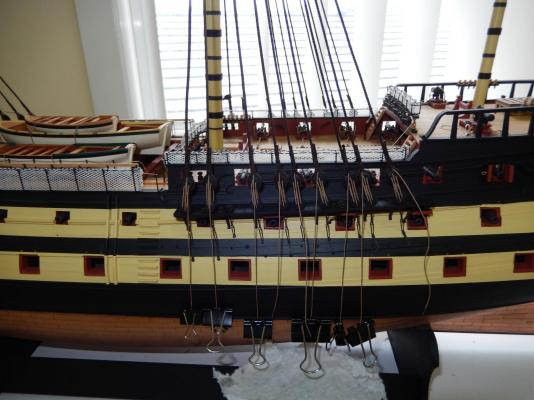
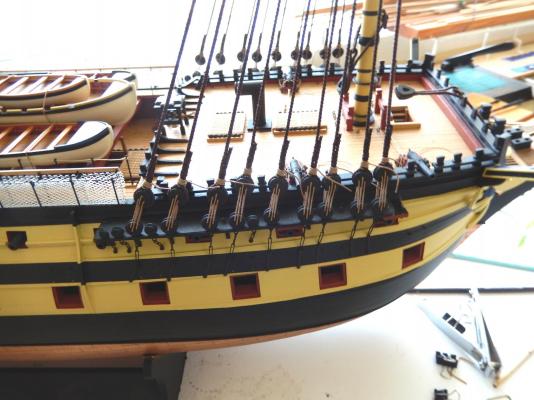
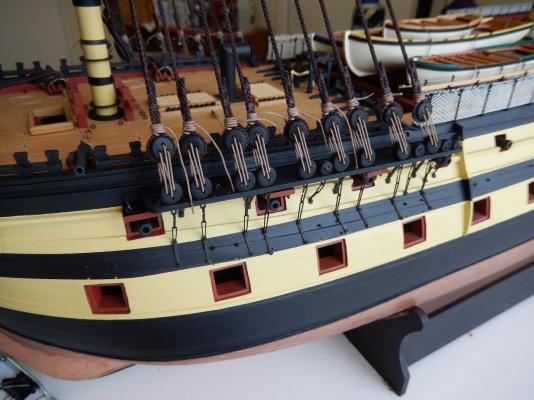
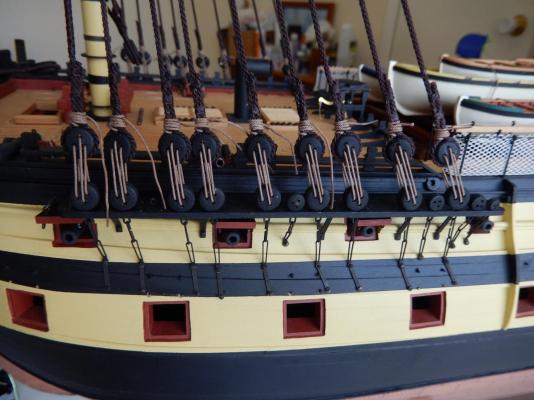
The boarding pikes are in and my fingers are crossed. Despite the risk of damage later, think it probably is the right time to do it. Access is not easy even at this stage, and with more rigging, it's likely to be far more difficult.


I have also stepped the mizzen mast - now for even more deadeyes.
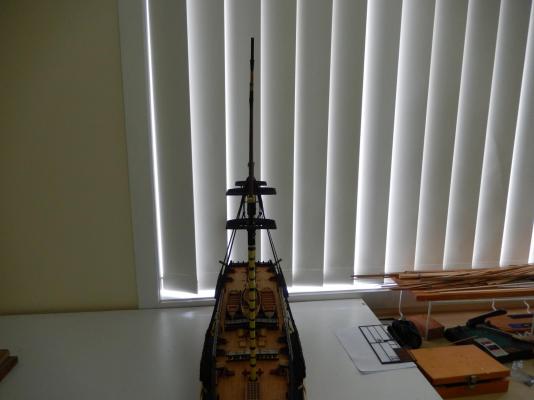
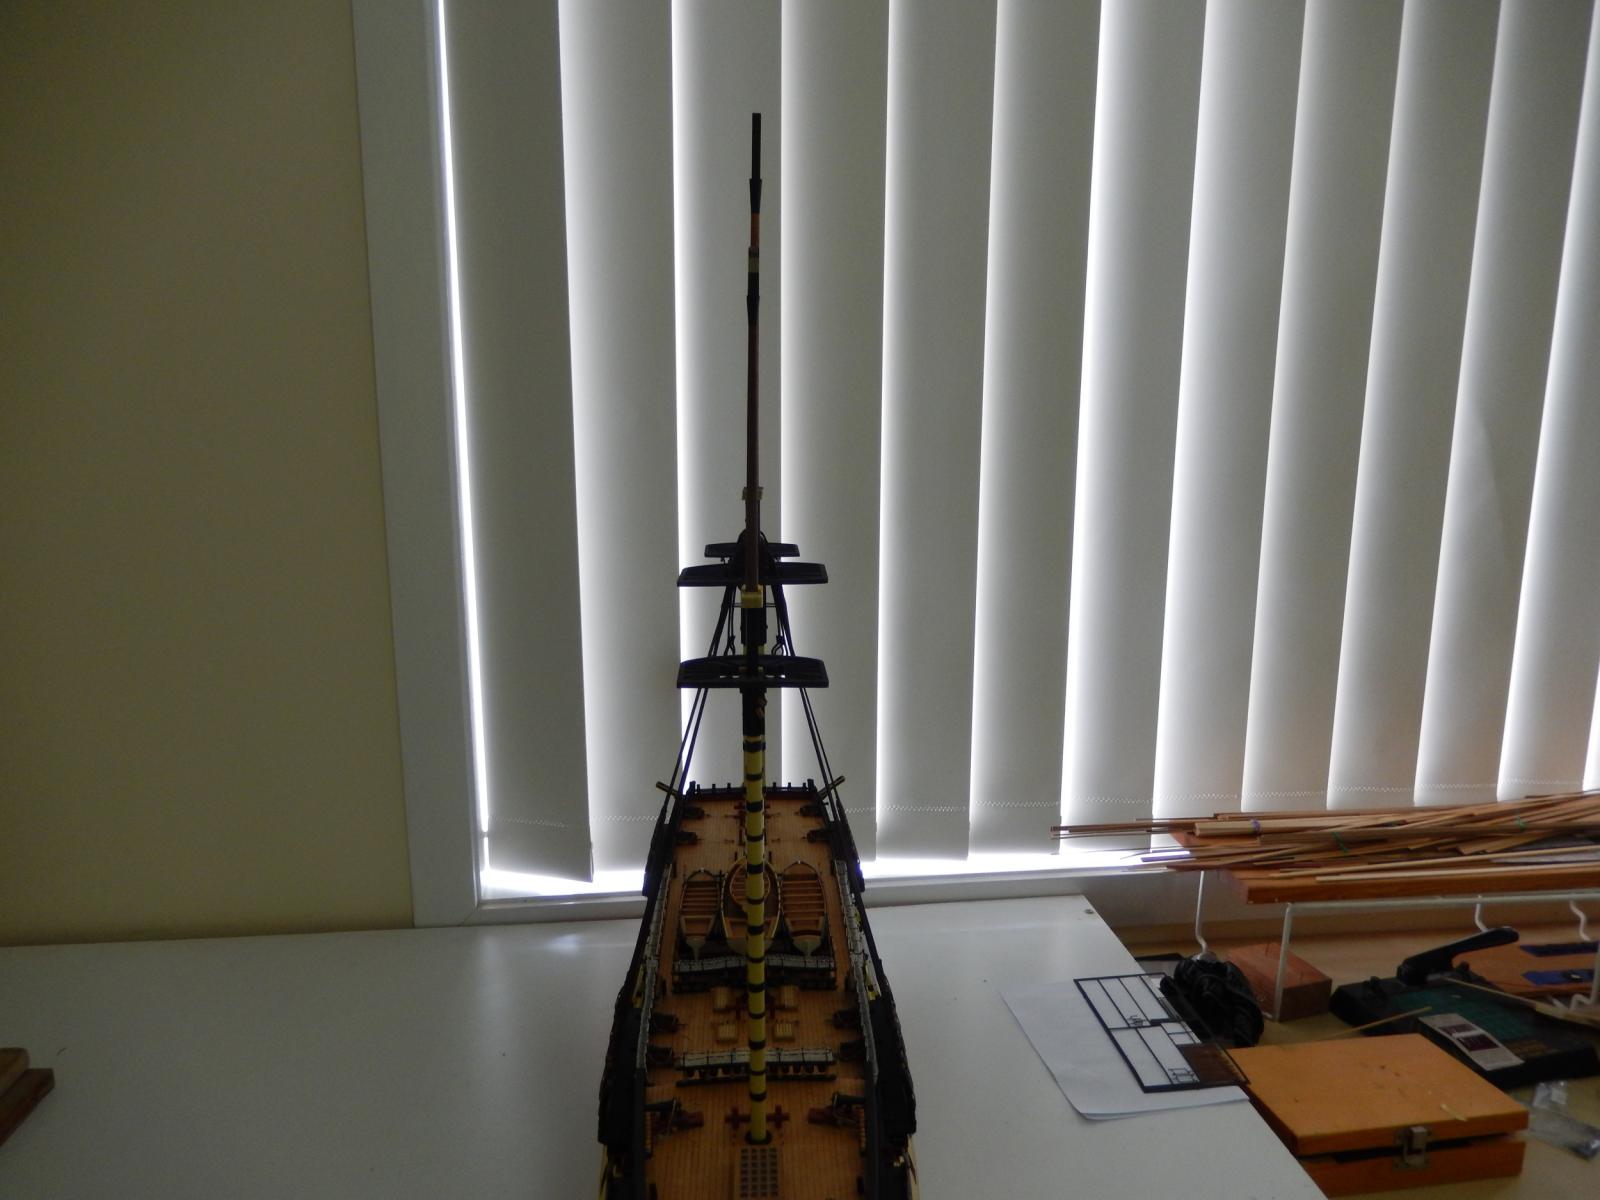
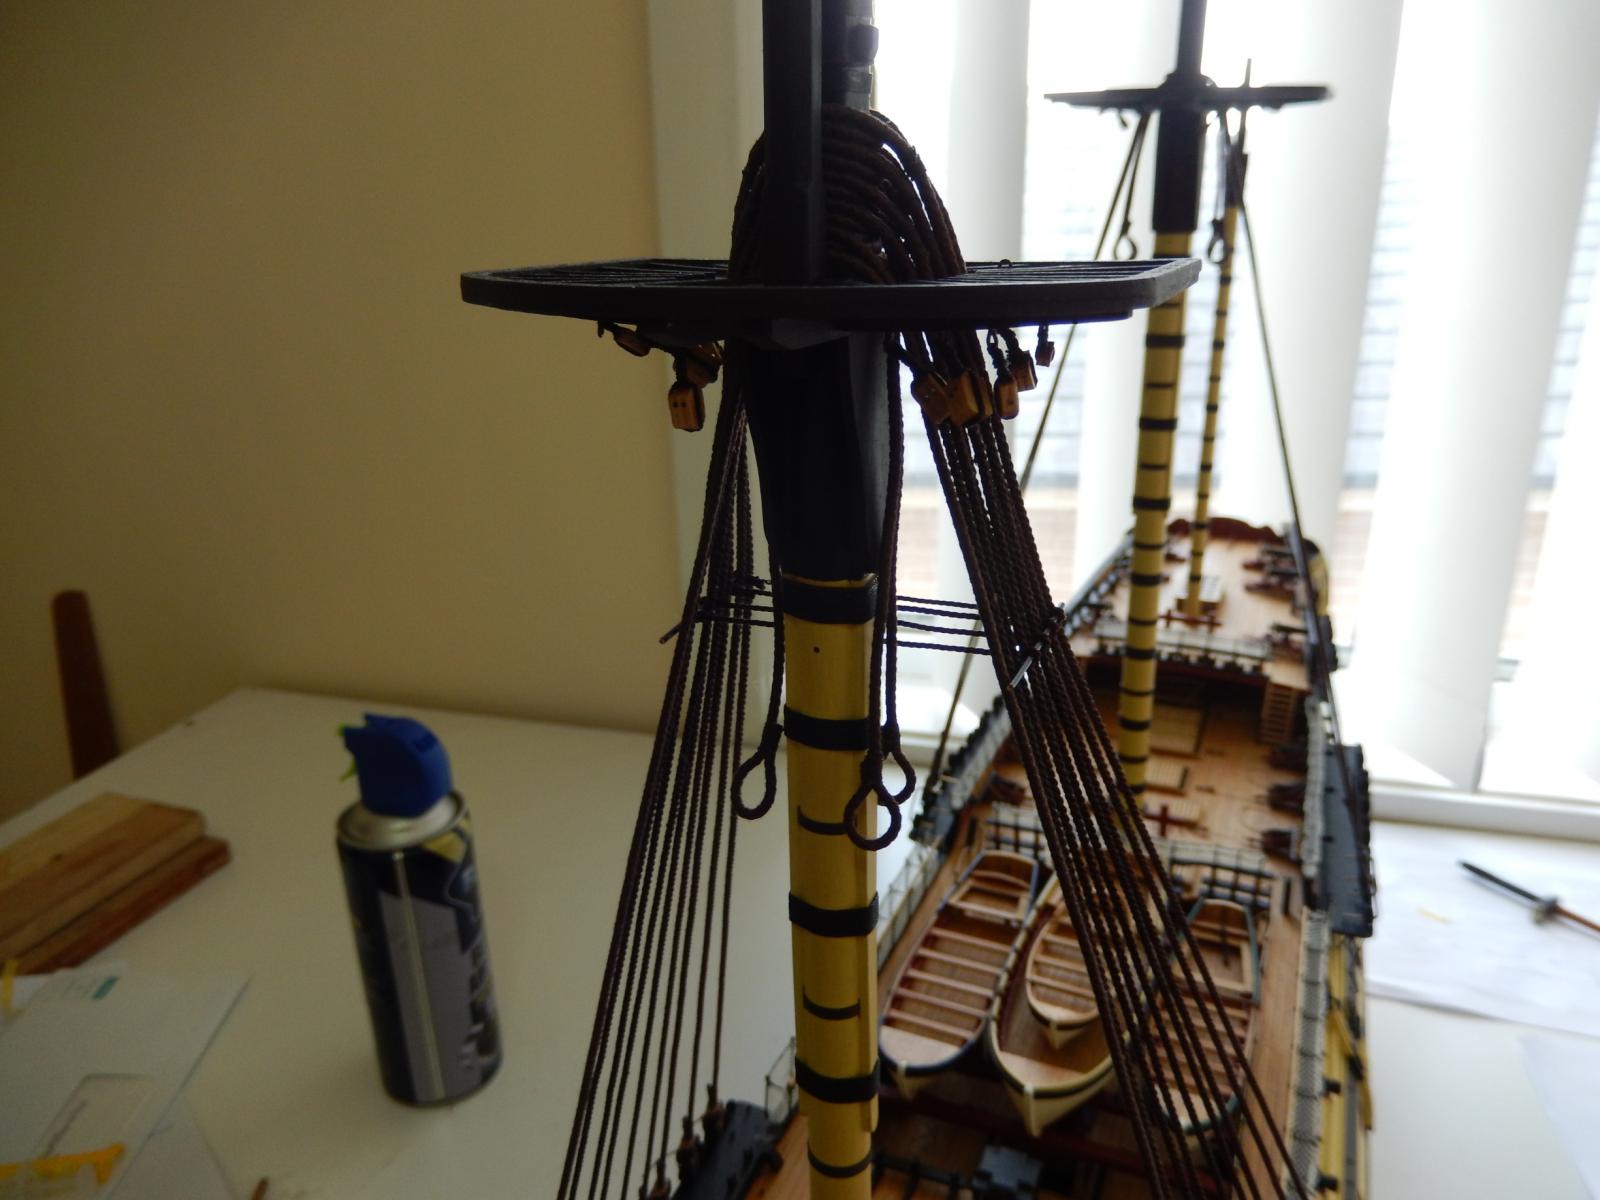
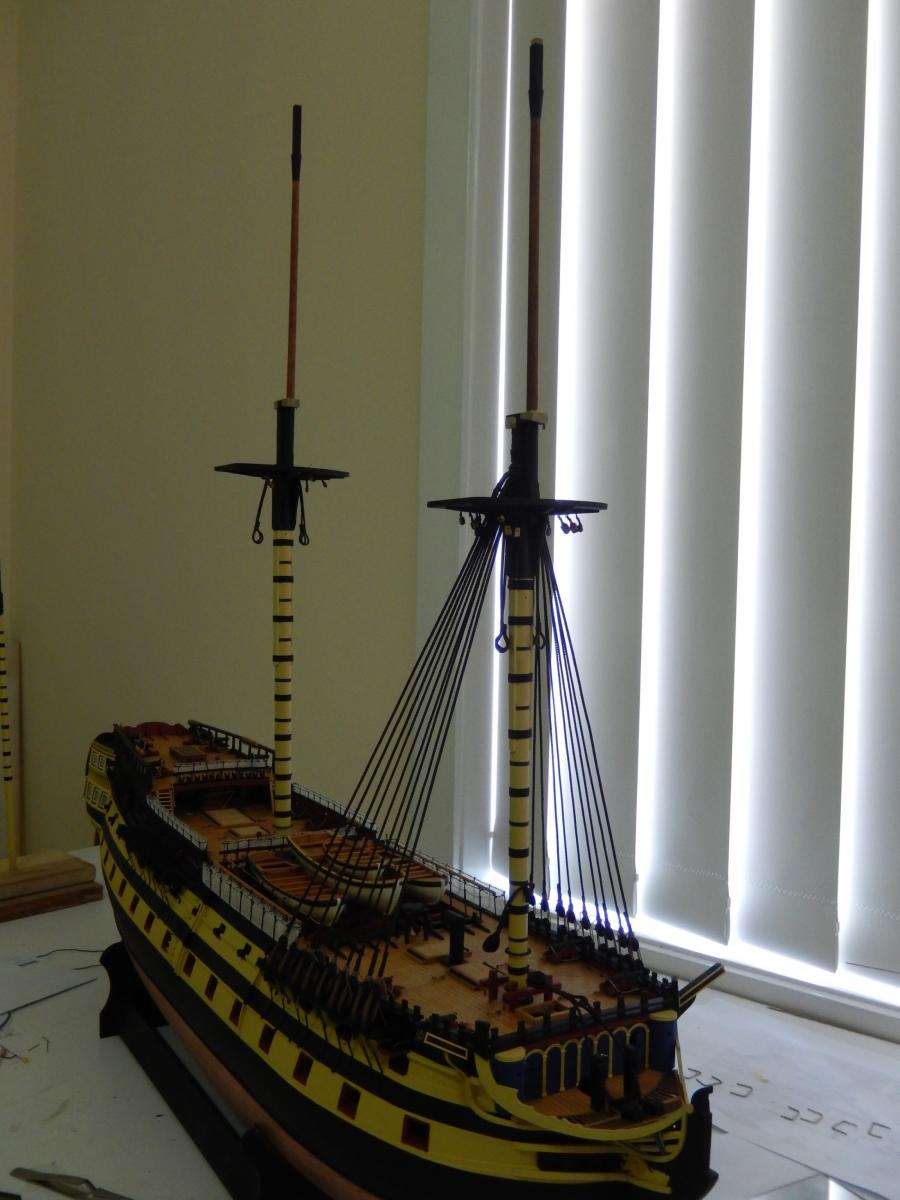
At this stage, all of the topmasts are dry-fitted. The photo below gives the appearance that the masts are not parallel. In fact they are. I presume it's an artifact of the camera lense.
- dgbot, AON, mort stoll and 5 others
-
8
-
Arthur and Jason - I'm really in two minds about the boarding pikes. Extra rigging will make it more difficult to put them in; putting them in, then rigging is likely to cause damage. I will probably put them in soon and cross my fingers.
-
Progress on the shrouds has been glacial. Having two tiny anarchists (1 1/2 and 2 1/2) for the last two weeks has tended to slow things down - especially their grandfather.
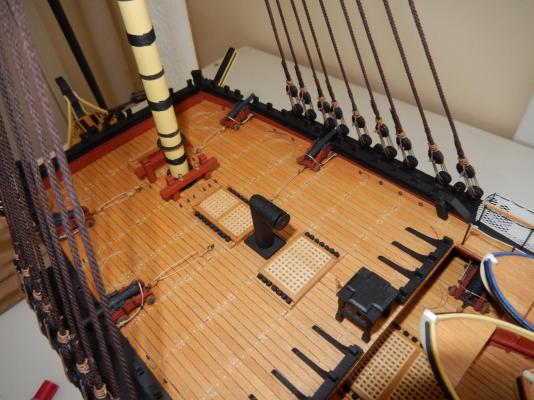
At least the shrouds for the mainmast are now done, as are the catharpins. A couple of belaying pins have been put onto the bitts at the fore and main masts. As one of our (late) sports boadcasters would have said, "forward progress".
The deadeyes came out acceptably, though they are not as even as I would like. For no good reason I had quite a bit of trouble with them (more than with the formast shrouds). I ended up re-doing some of them, which did improve matters a little.

The catharpins were also rather fiddly. Leaving the brass rods longer than specified and adjusting their length after they were attched to the shrould certainly made it easier (see my earlier post). My knot tying is not up to boy scout standards I'm afraid and it's something I need to improve.


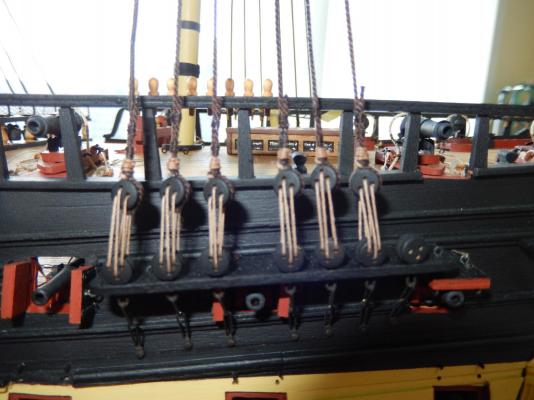
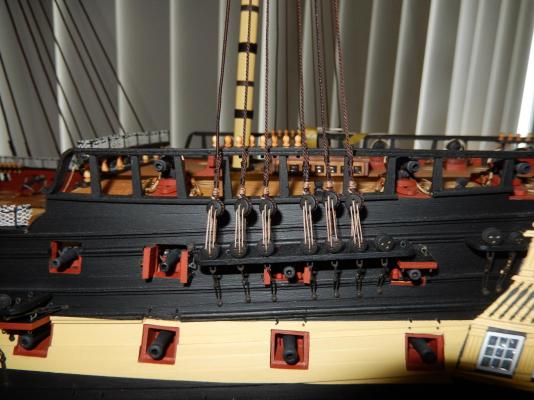
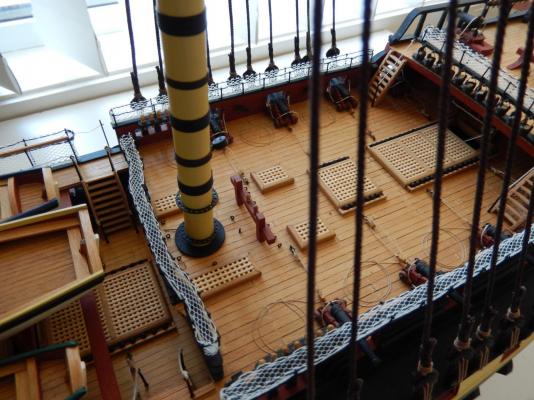
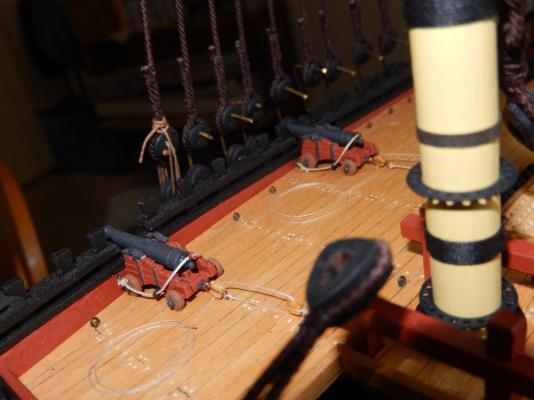
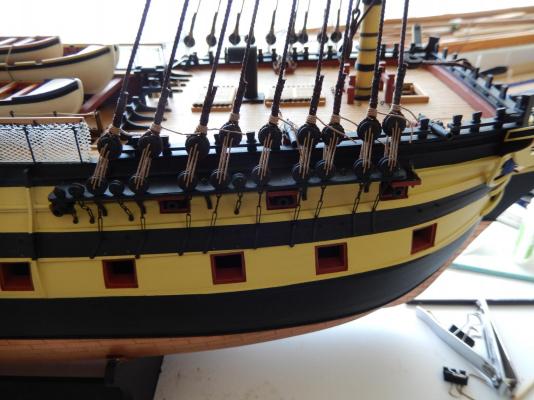
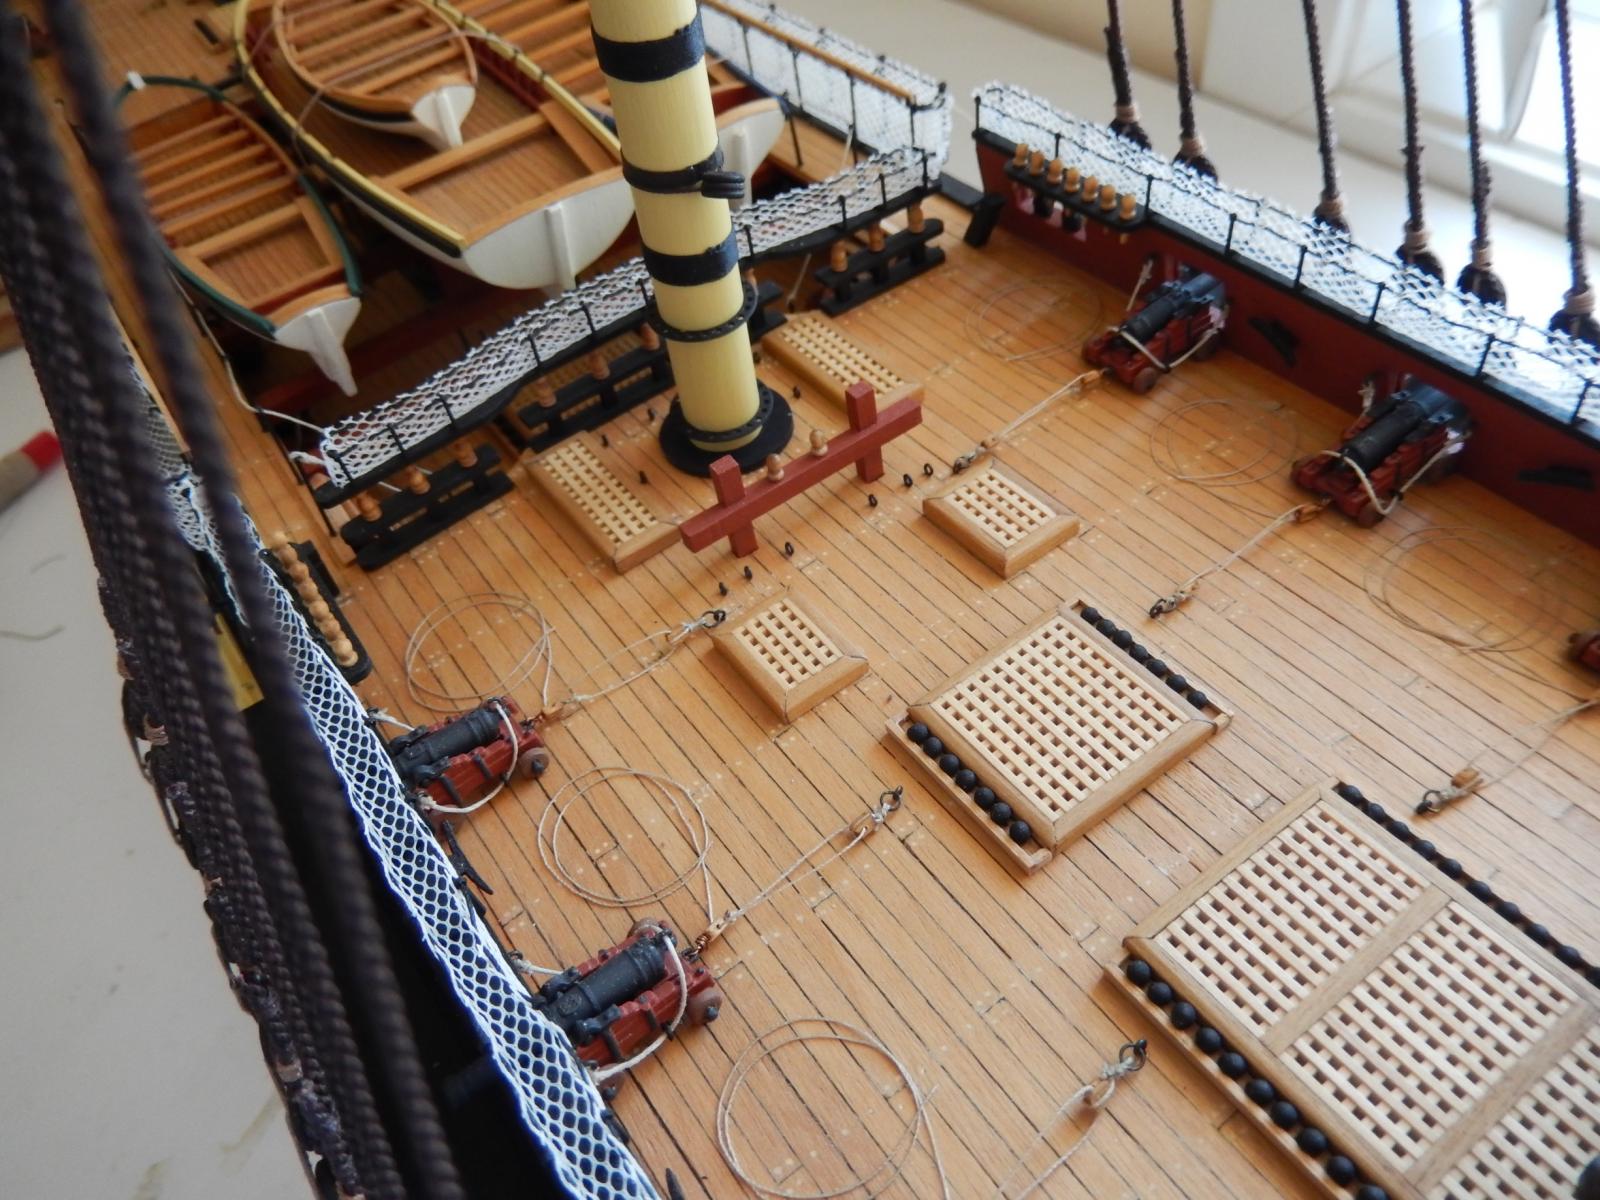
Here are the belaying pins installed on the bitts. It's hard to see how more than two would fit comfortably. In looking at the photos, it just occurred to me that it may be time to put the boarding pikes in the rings provided. Doing it later may be quite difficult. Comments/advice welcome.

-
Thanks again Arthur. Your photo really helps. It does seem odd that there is no provision for belaying pins in the bitts. If I can get access to the bitts to drill a few holes for pins, I guess now is the time to do it.
-
Thanks Arthur. I'm afraid I didn't enjoy the process very much at all.
As usual I have a question. You may remember I incorrectly put the row of six eyelets behind the mainmast bitts, rather than in front of them. I would prefer to leave them as is. Now that you are quite advanced with the rigging, with this experience, do you think this is likely to be a problem? If it does cause problems later, I will need to replace or duplicate the row of eyelets in the correct place very soon while I still have reasonable access.
-
The catharpins for the foremast shrouds are done, though there is a little touching-up to do. I found it a very fiddly job indeed. One mistake to avoid is to cut off the brass rod to the correct size. This makes it difficult to tie the rod to the formost and rear shrouds. Cut the rod larger than necessary, then when the rod is installed, cut it off to size.
In the process of all of this I bumped and damaged one of the catheads (I'm surprised I hadn't done it before this). While it wasn't knocked off completely, it ended up at a rather unsatisfactory angle. I was unable to completely restore it without causing further damage.
 The repair however is not too bad and I really don't think anyone (except me) would notice it.

The shrouds for the main mast are more or less complete. They have come out quite well, but I will give them a couple of days to settle down before tying off the lanyards. At the moment I think I'm shrouded out.
- AON, mort stoll, Kevin and 4 others
-
7
-
Thanks for your reply Jason. It's certainly a disappointing that the Mary Rose is unlikely to be open for business. I was quite looking forward to it, and fortunately my wife tolerates most of my ideosyncracies. Your description I think gives us the go ahead anyway.
Perhaps my wife can exercise her further toleration in the The Still and West. In one way or another, this may turn out to be quite an expensive exercise, and I know who will be paying.
-
Mary Rose Museum.
My wife and I will be going to a wedding in Dorset in mid-May next year. We had hoped to go to theMary Rose Museum on the way home towards the end of May. I have now learned that most of the museum will be closed until (likely) sometime in July.
Question to those who may have been to Portsmouth: is it still worth a visit for a couple of days?
-
-
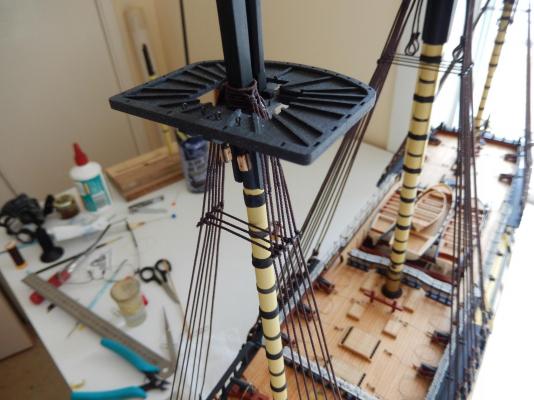
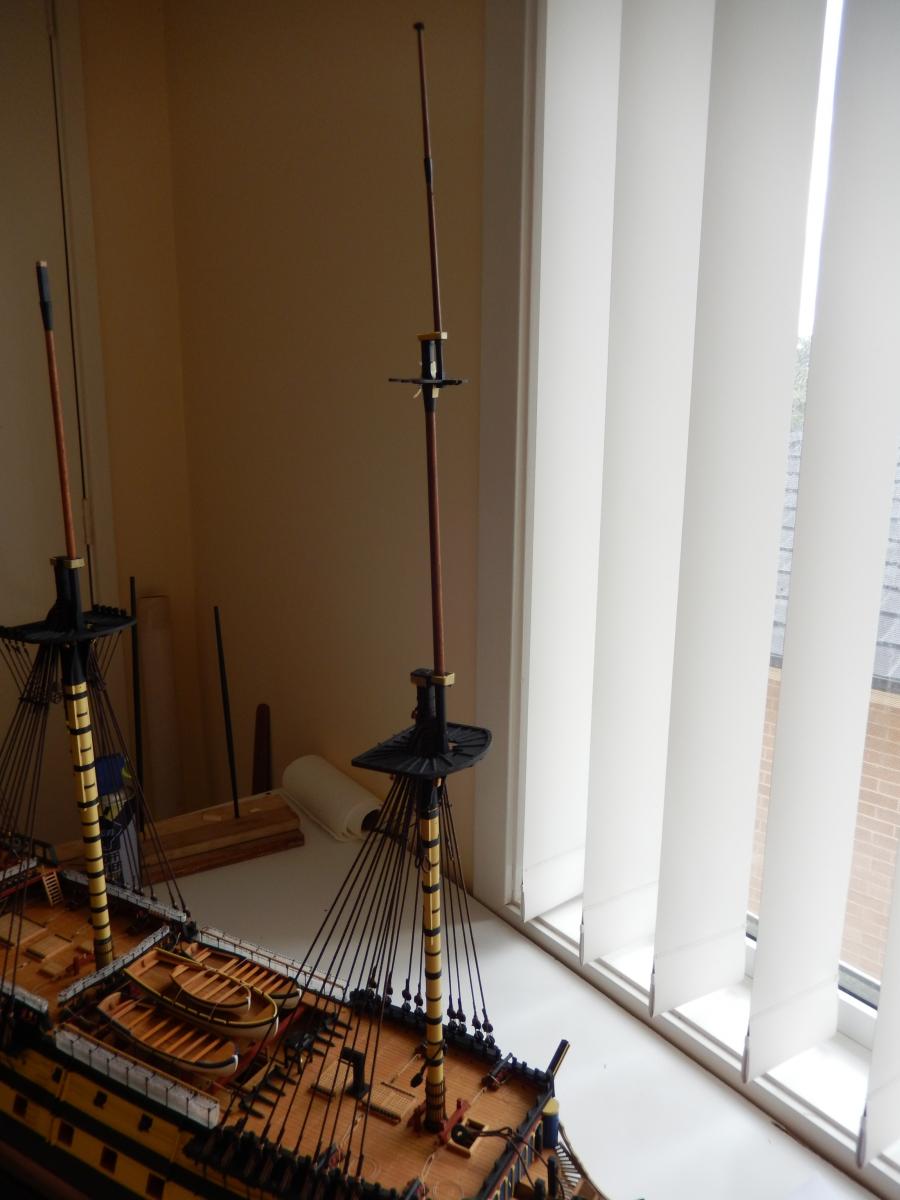
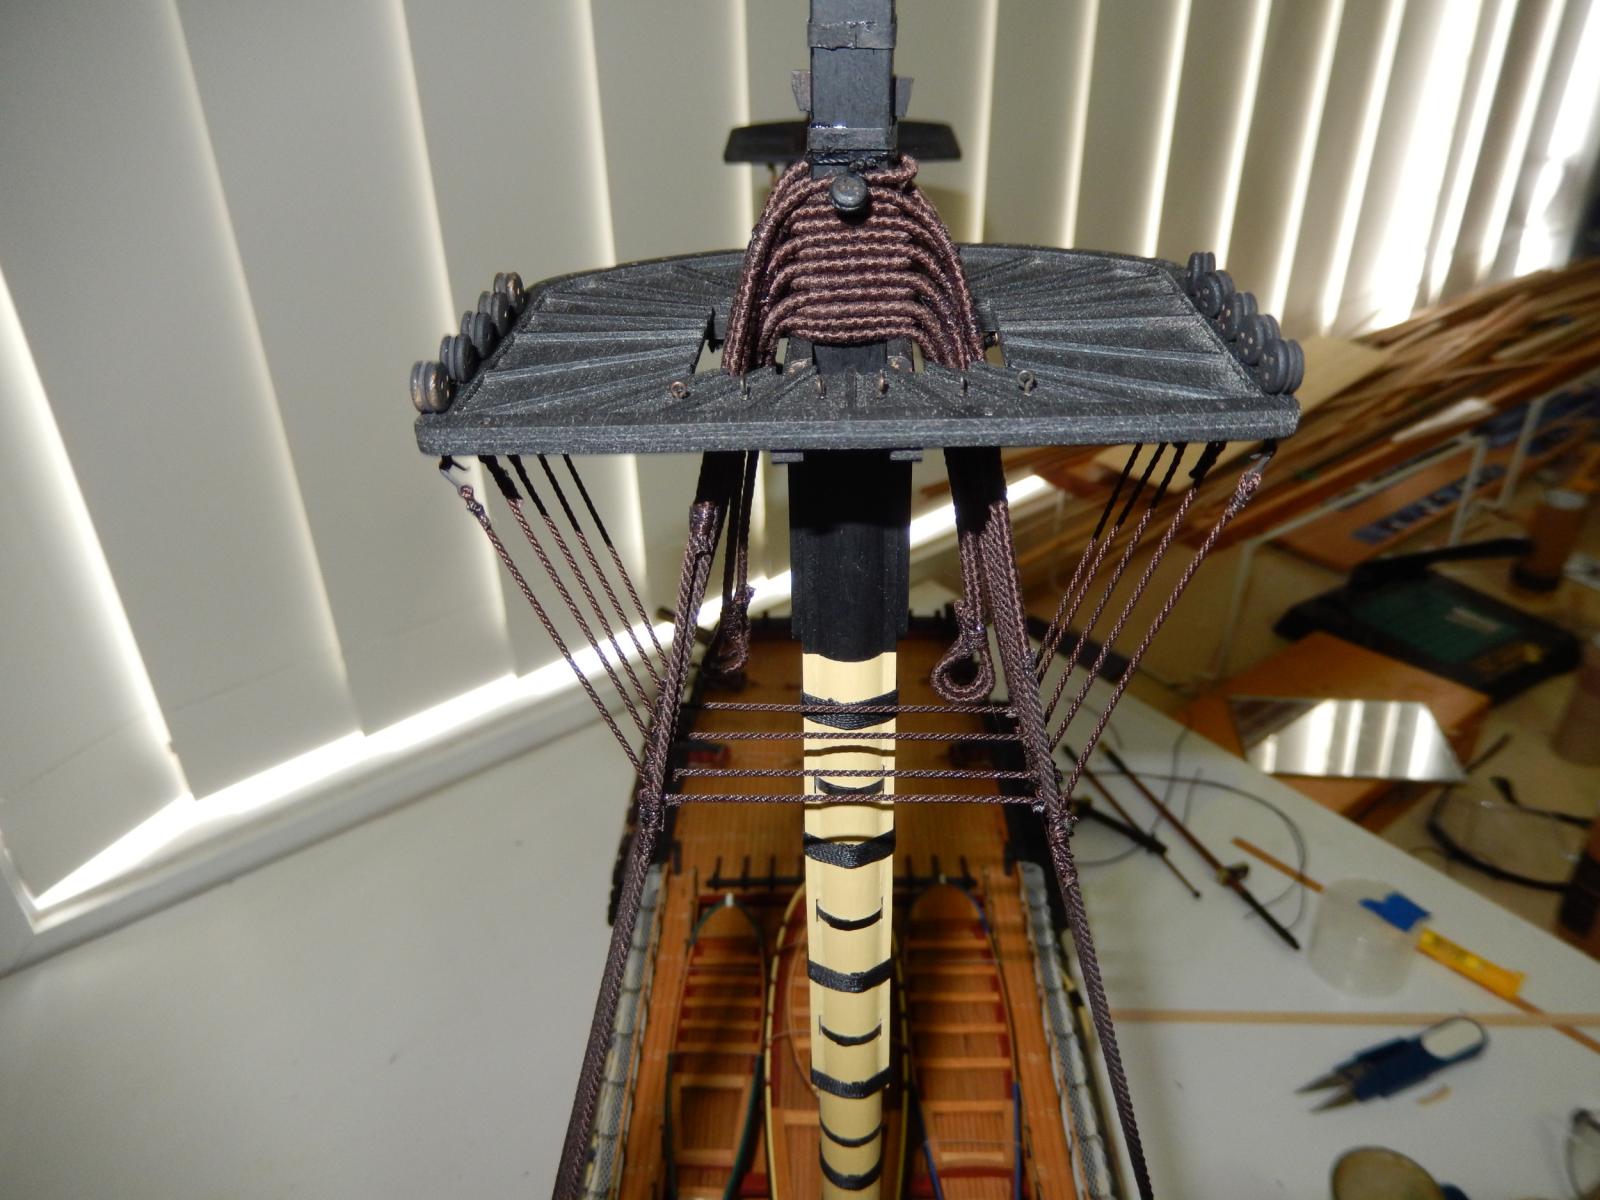
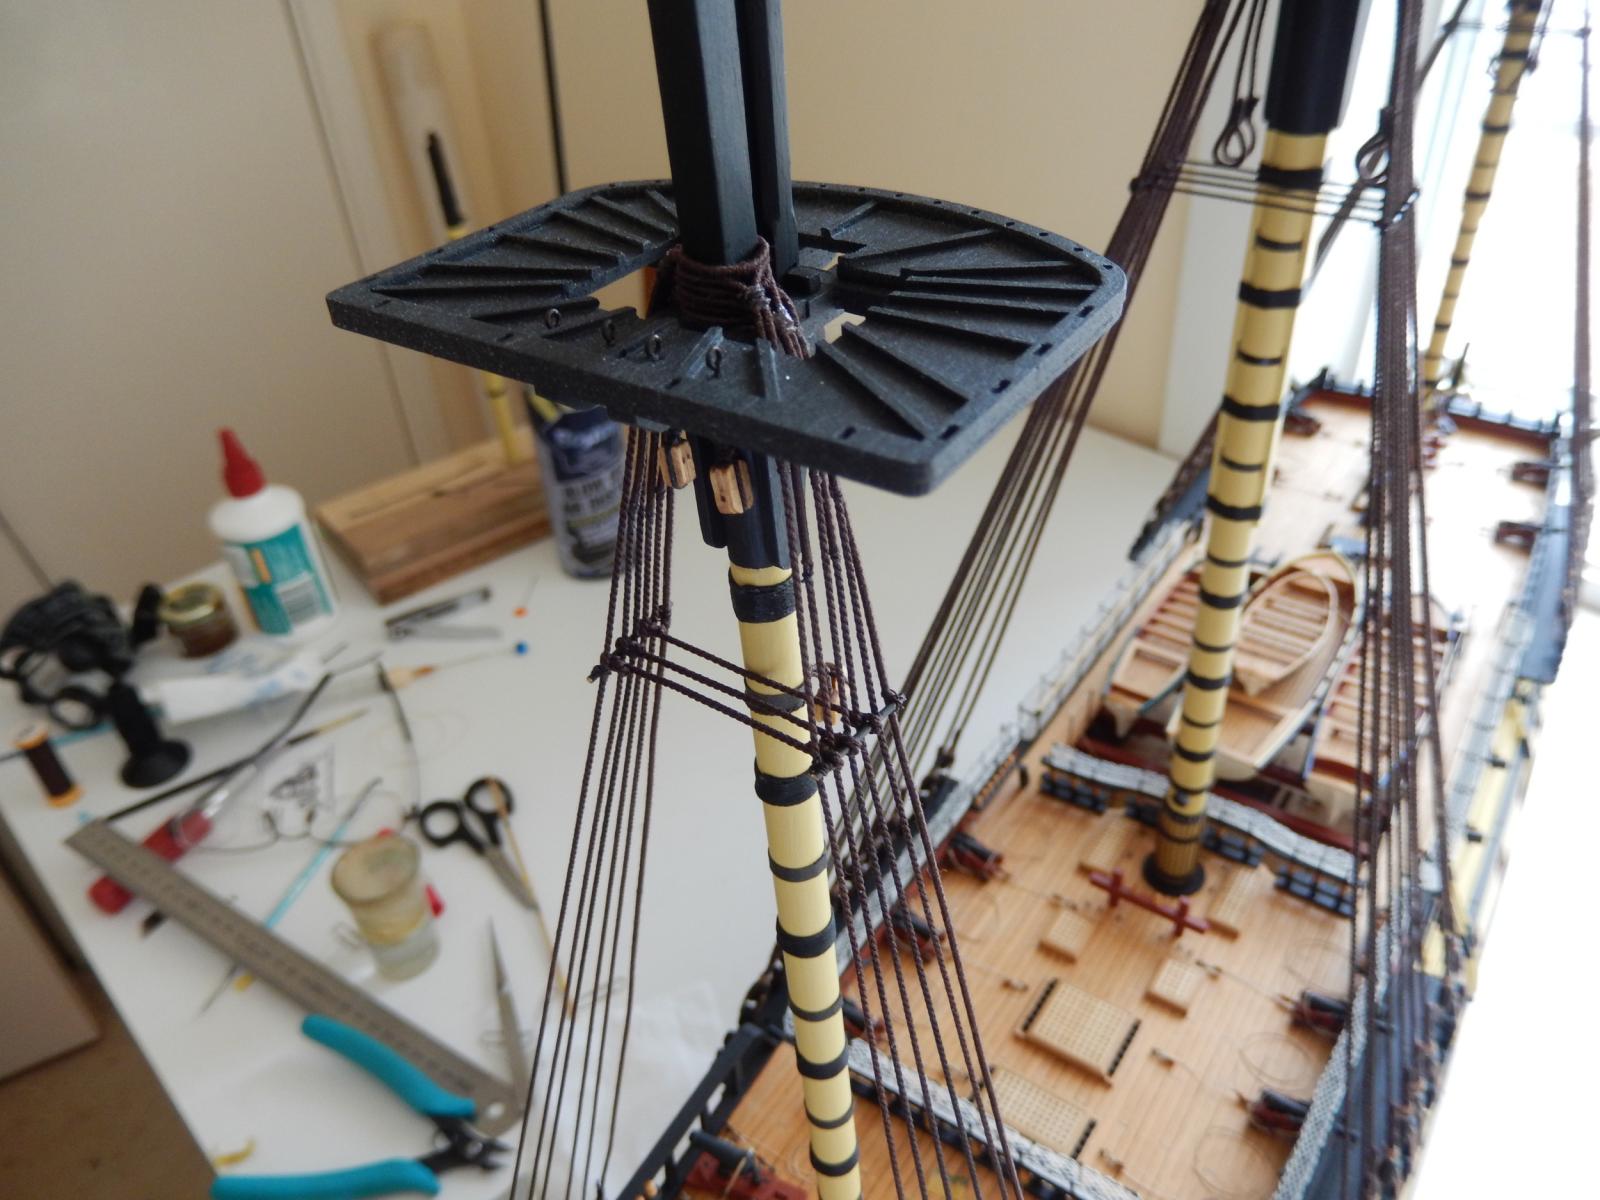
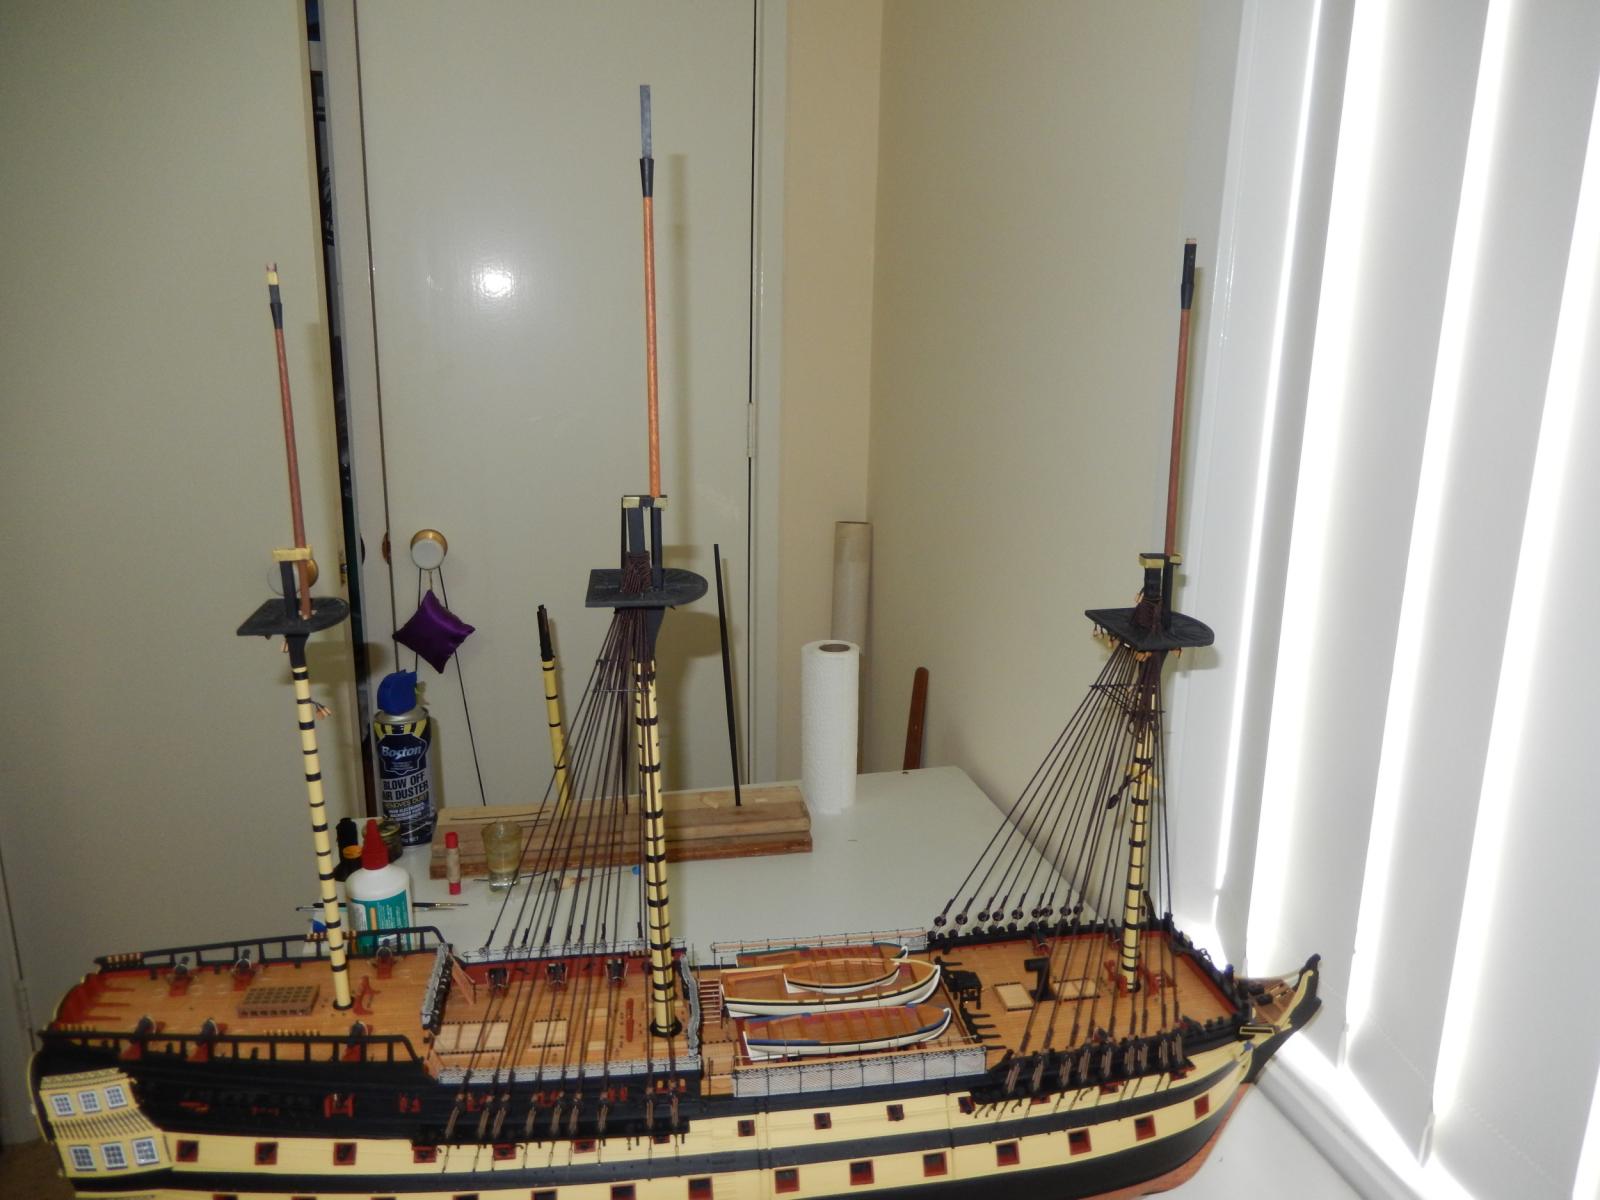
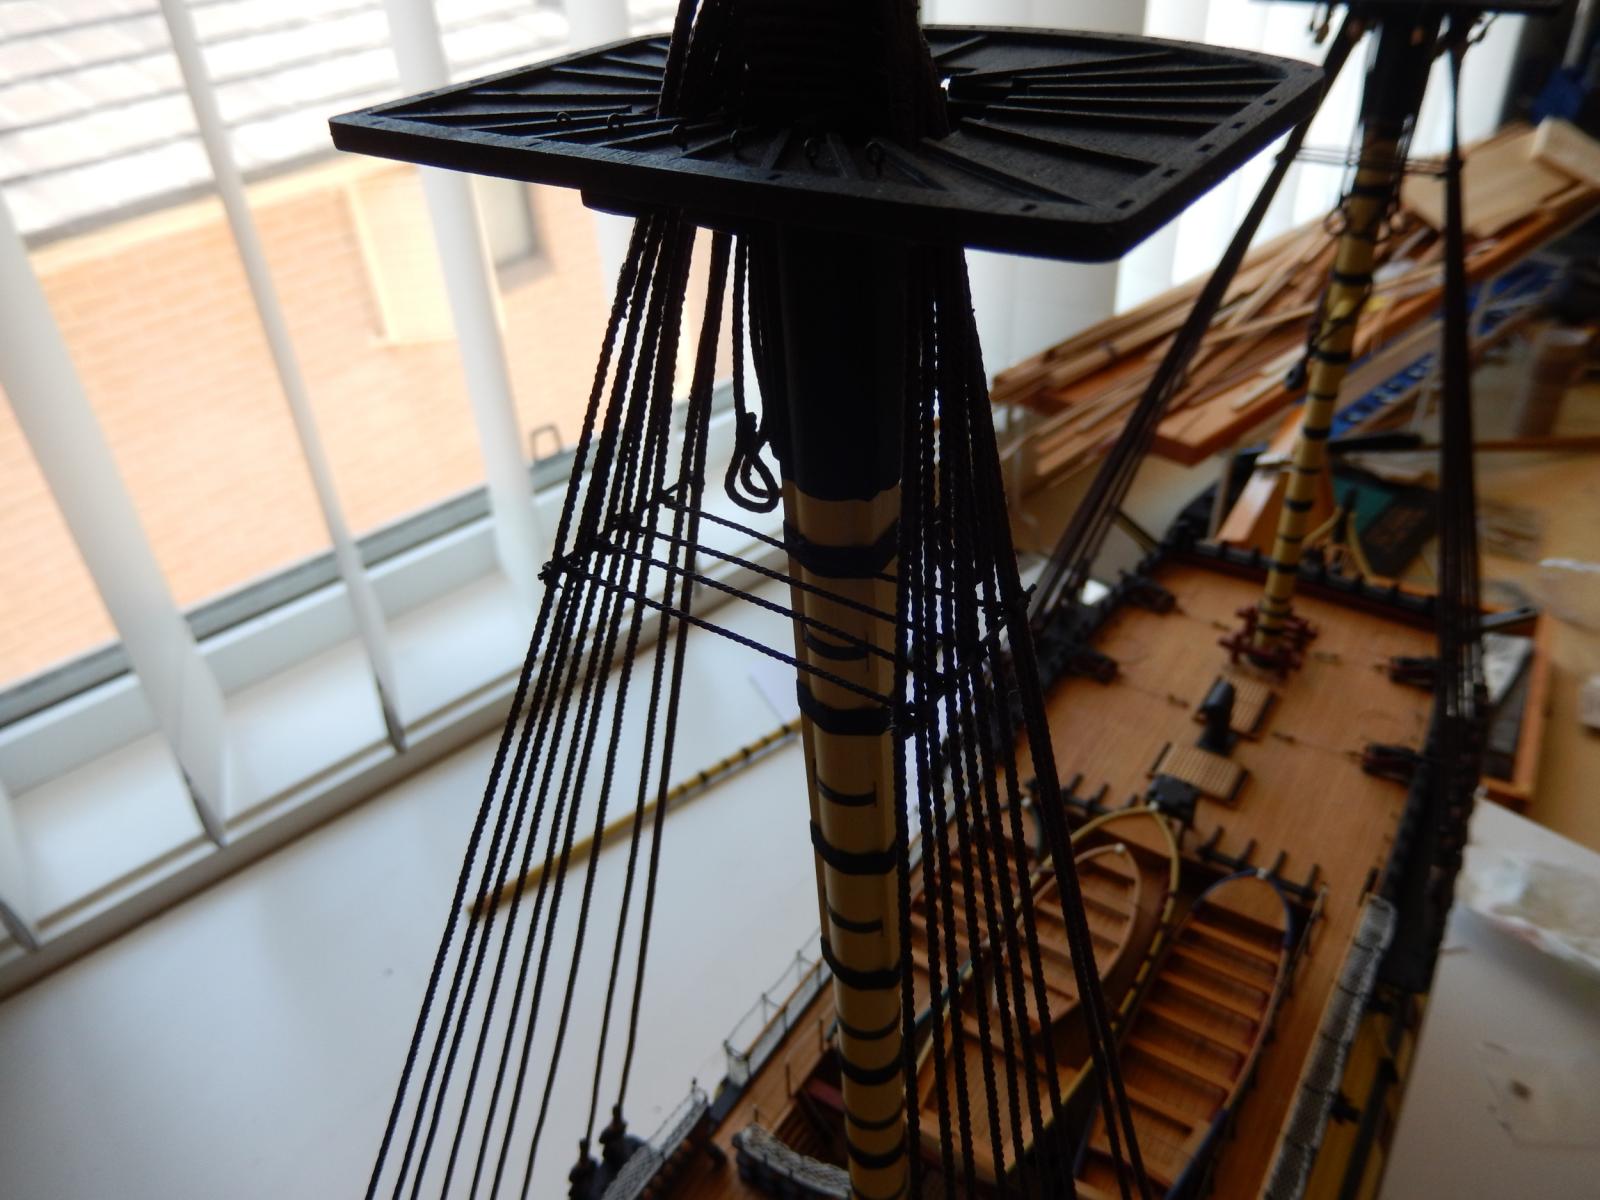
The main mast is now stepped and the the top has been mounted.
To make the sides of the top properly aligned fore and aft, a straight piece of wood strip was placed on one of the hounds (?) and the strip was sighted along the deck planking.


The fore top and main topmasts have been dry-fitted.


And I couldn't resist - the lanyard on the forward deadeye has been replaced.

-
Thanks Brian. I think I will replace that lanyard (not that I'm obsessive), but at the moment I'm working on the main mast and trying to forget about deadeyes for a while. Incidentally we visited the national parks in Arizona and Utah recently - you live in a beautiful part of the world.
-
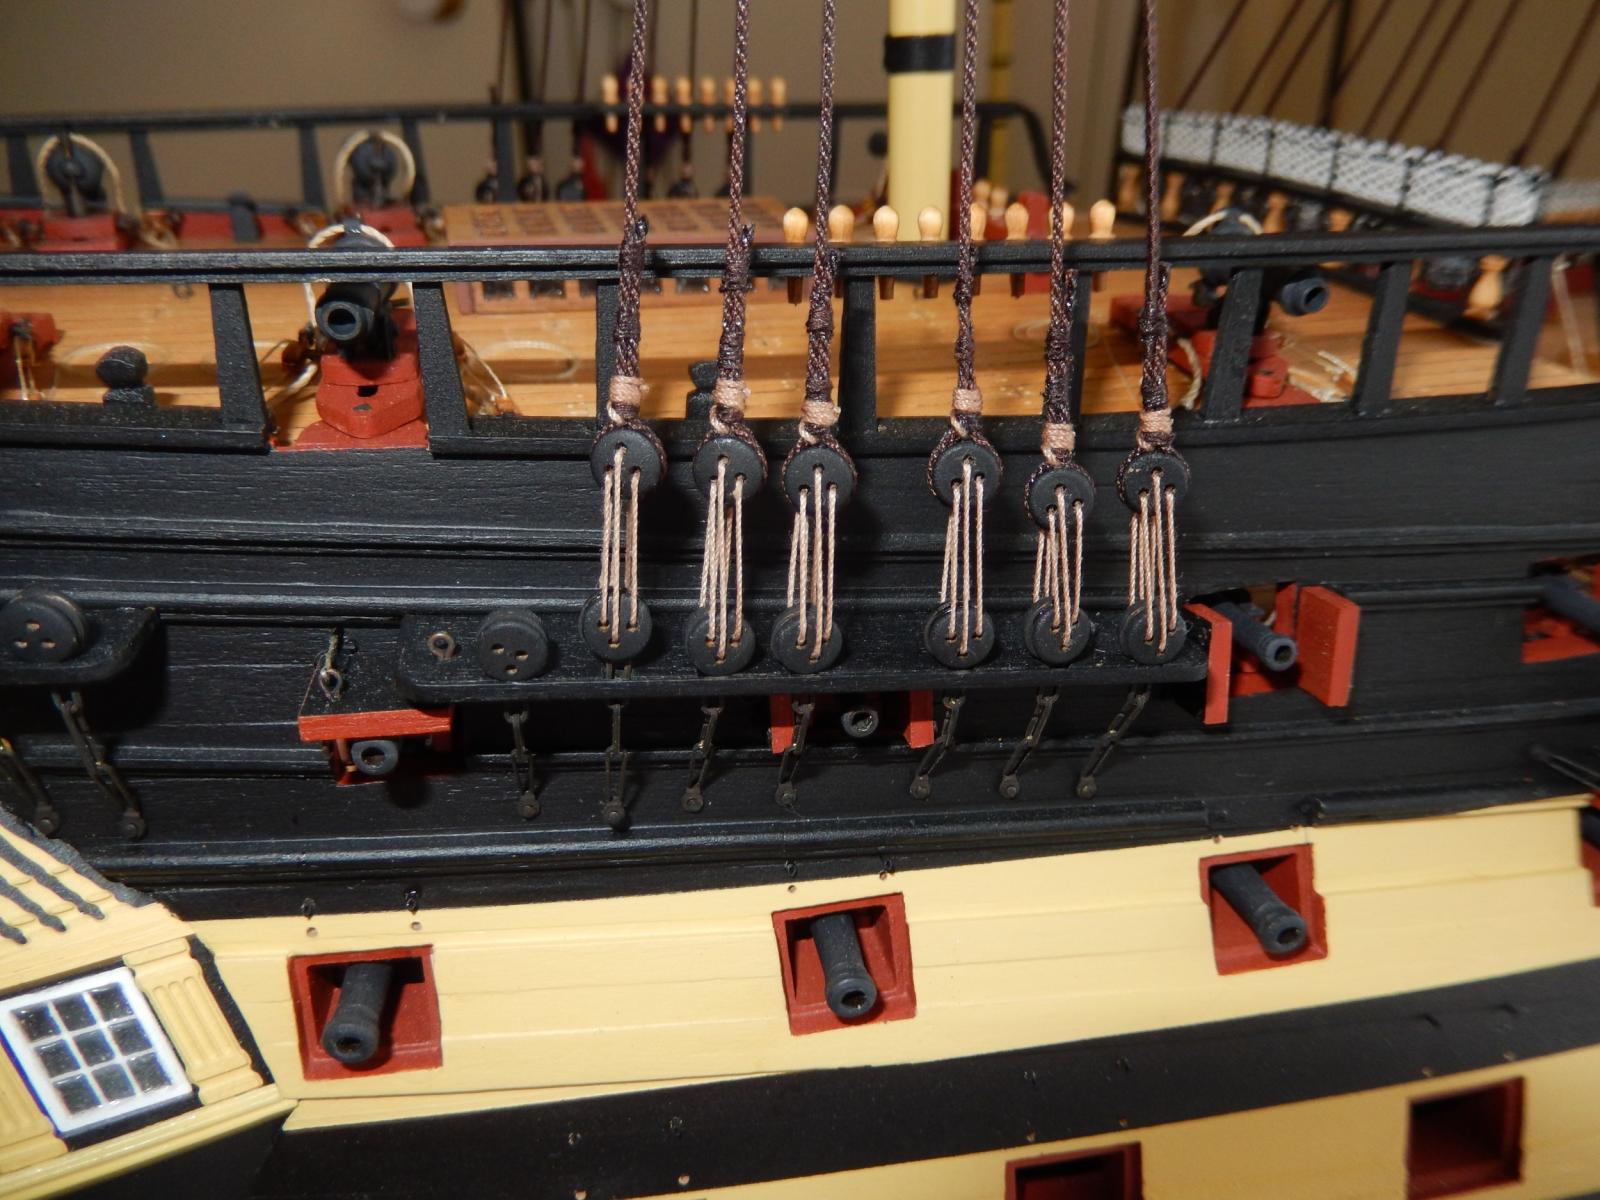
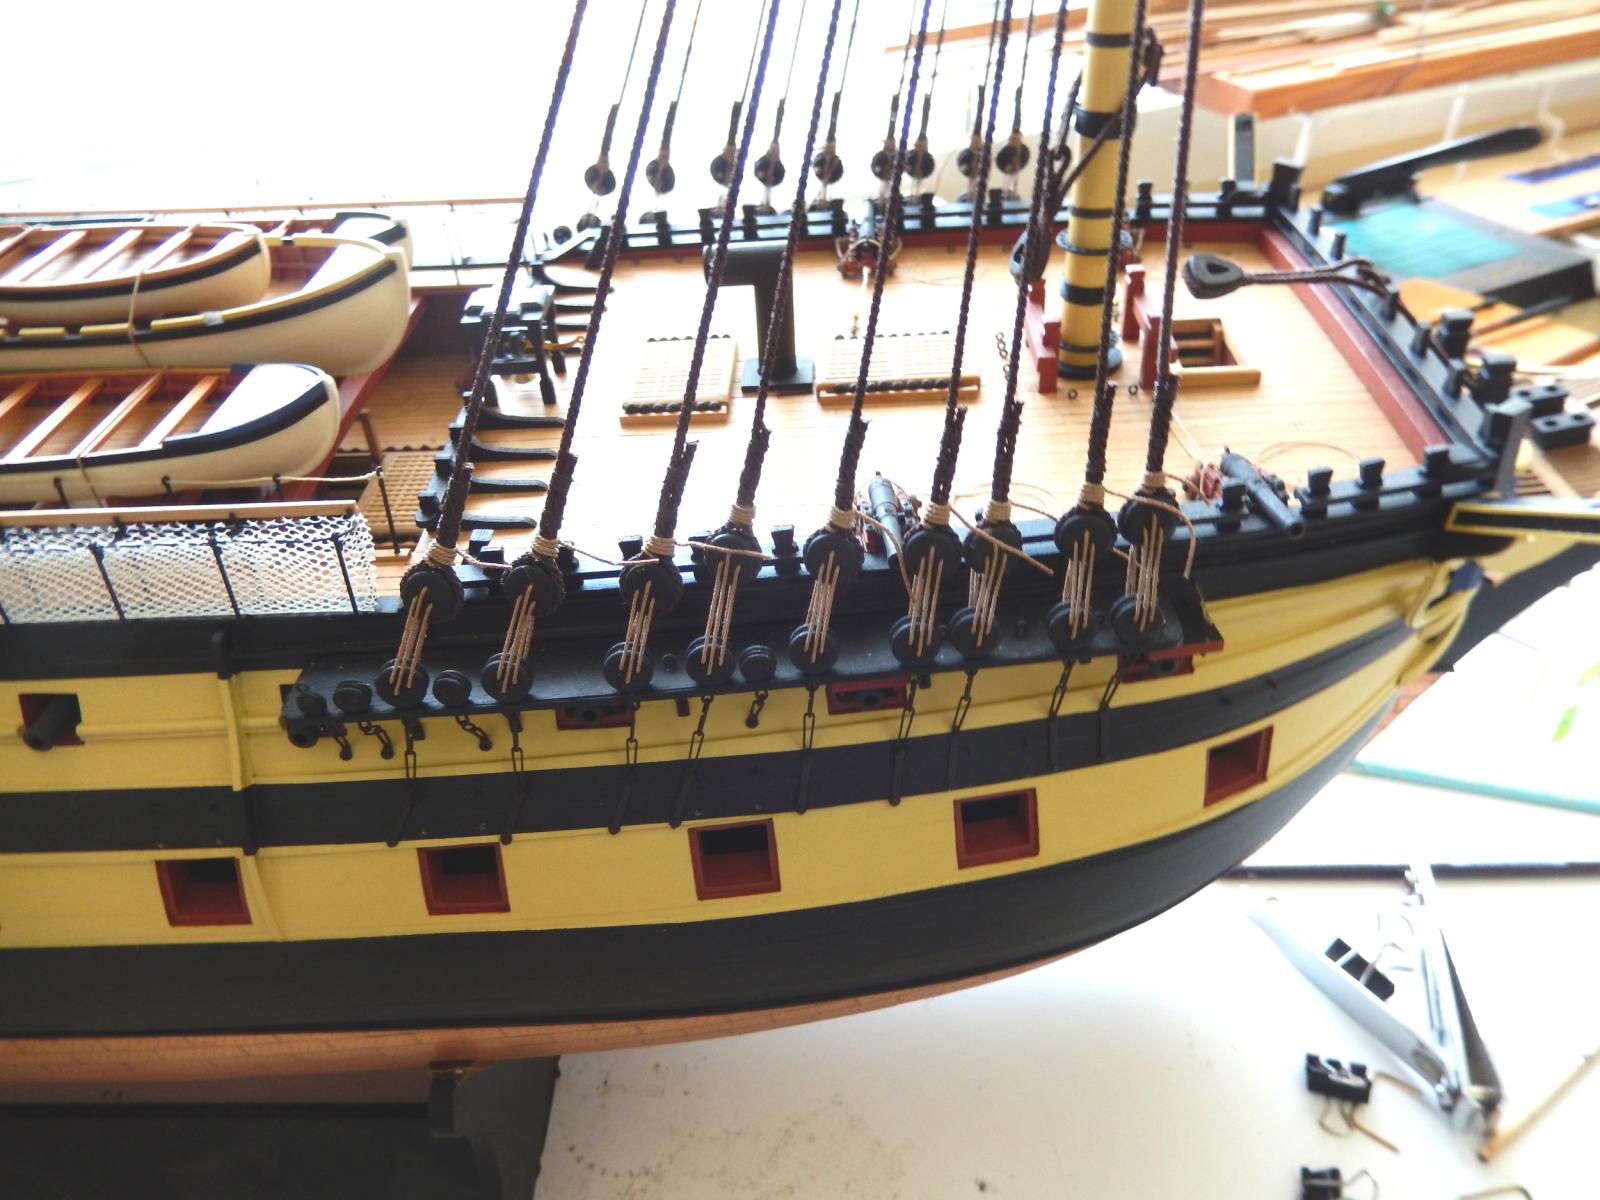
The lanyards for the foremast shrouds are done - though I will not finally finish them off at this stage. The whole thing has been a (mainly self-inflicted) drama. I am quite pleased with the port side, not so pleased with the starboard. One of the deadeyes there is a too high; one a too low, despite attempts to adjust them. Redoing them is really not on.
I was not careful enough with the lengths of the wire spacers. I shall be more careful in future, though at this stage I feel as if I ever see another deadeye, it will be far too soon.
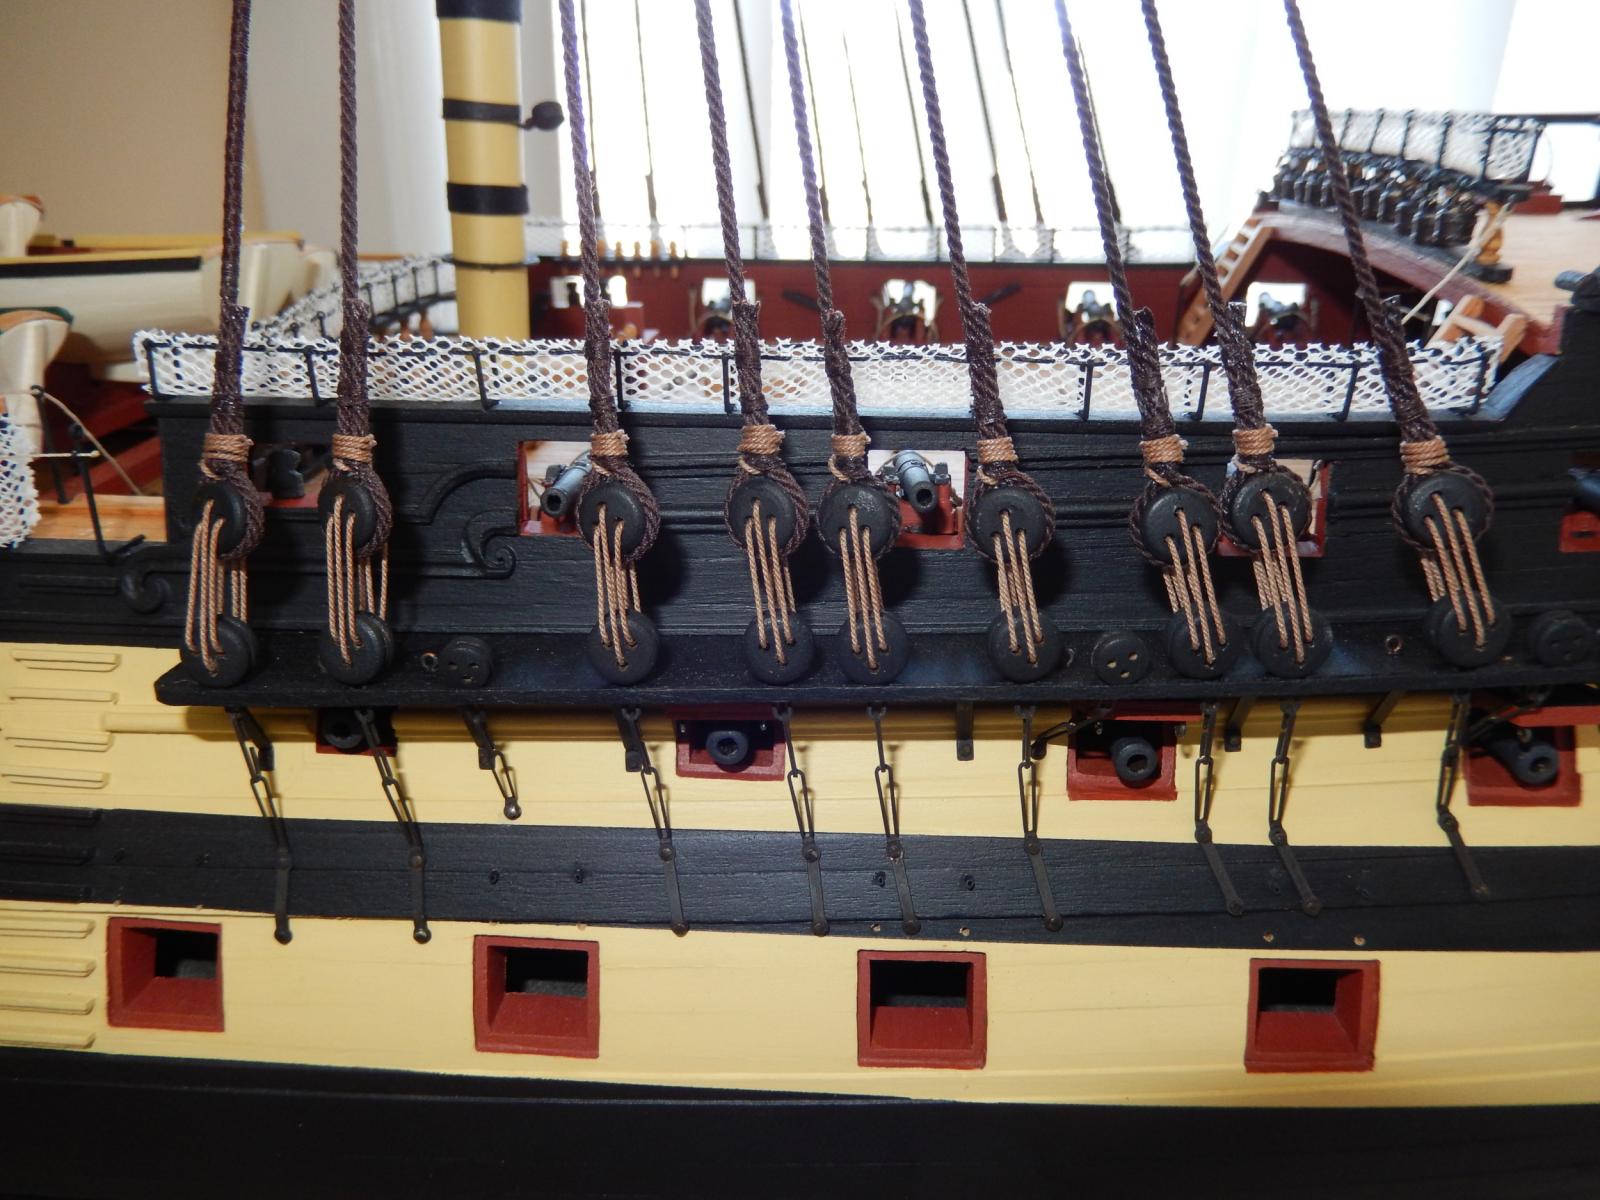
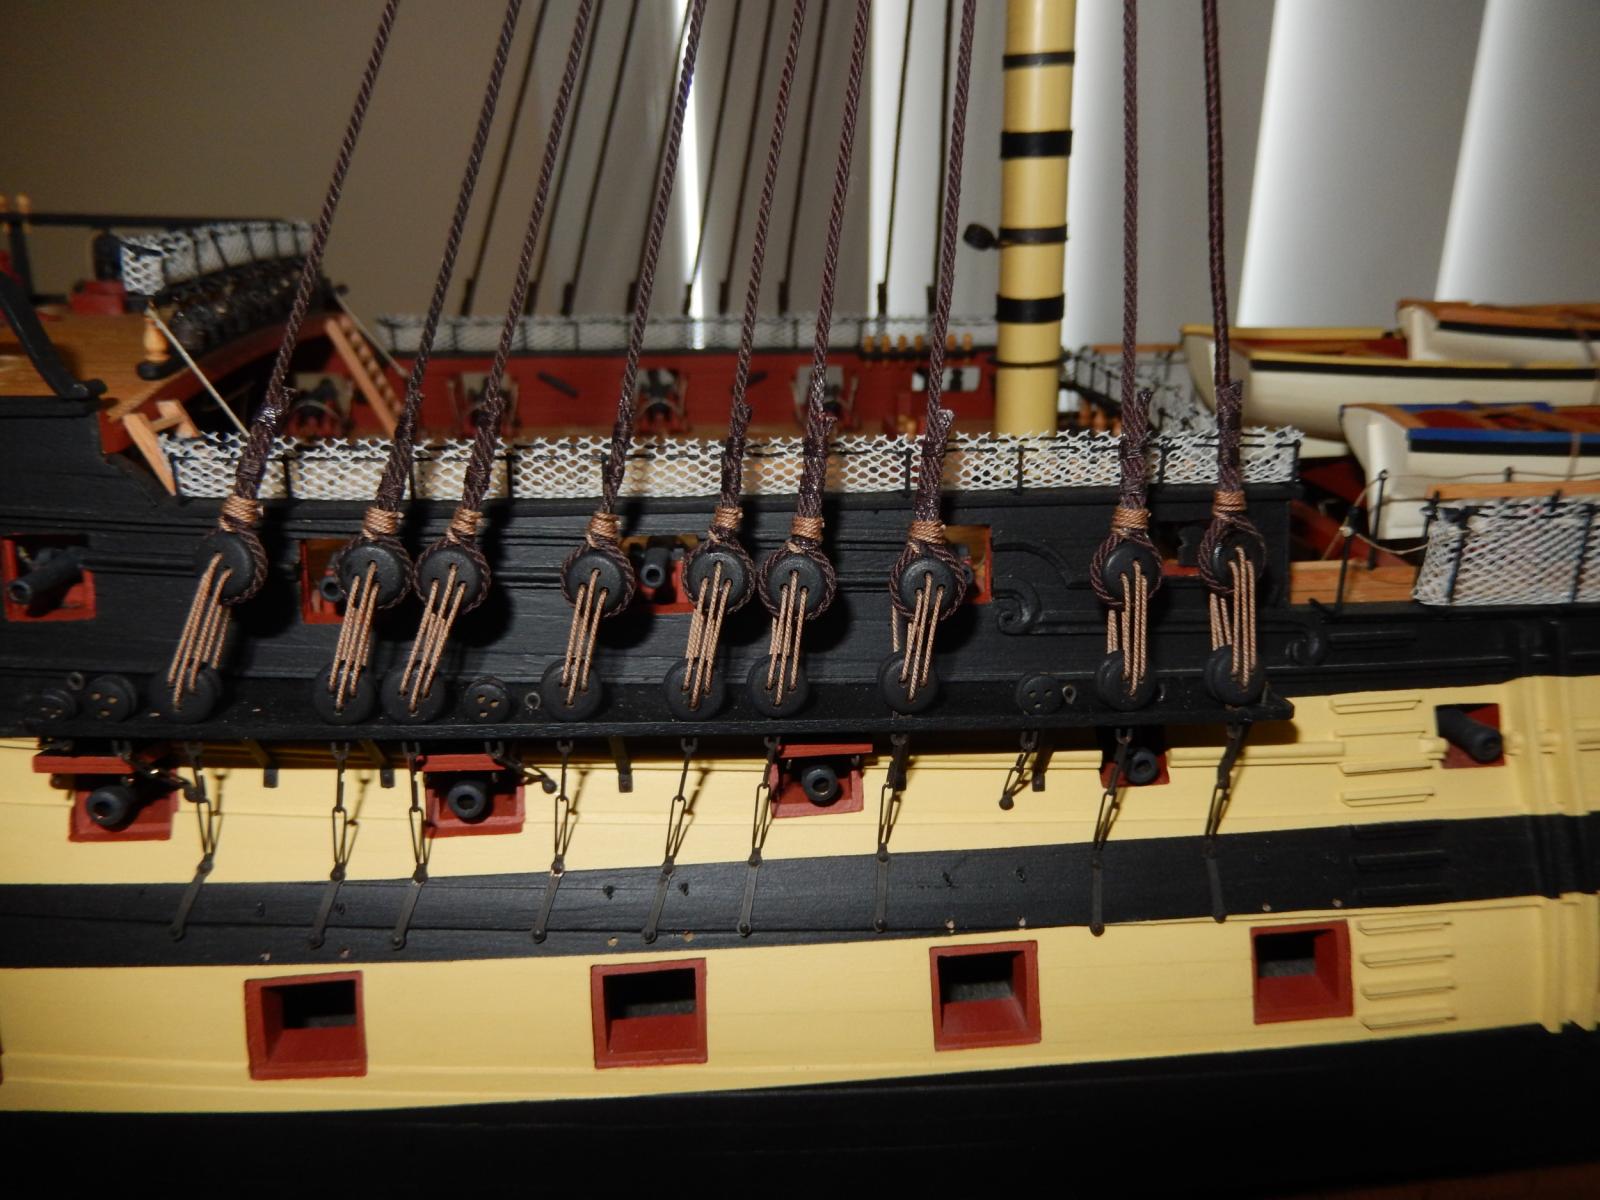
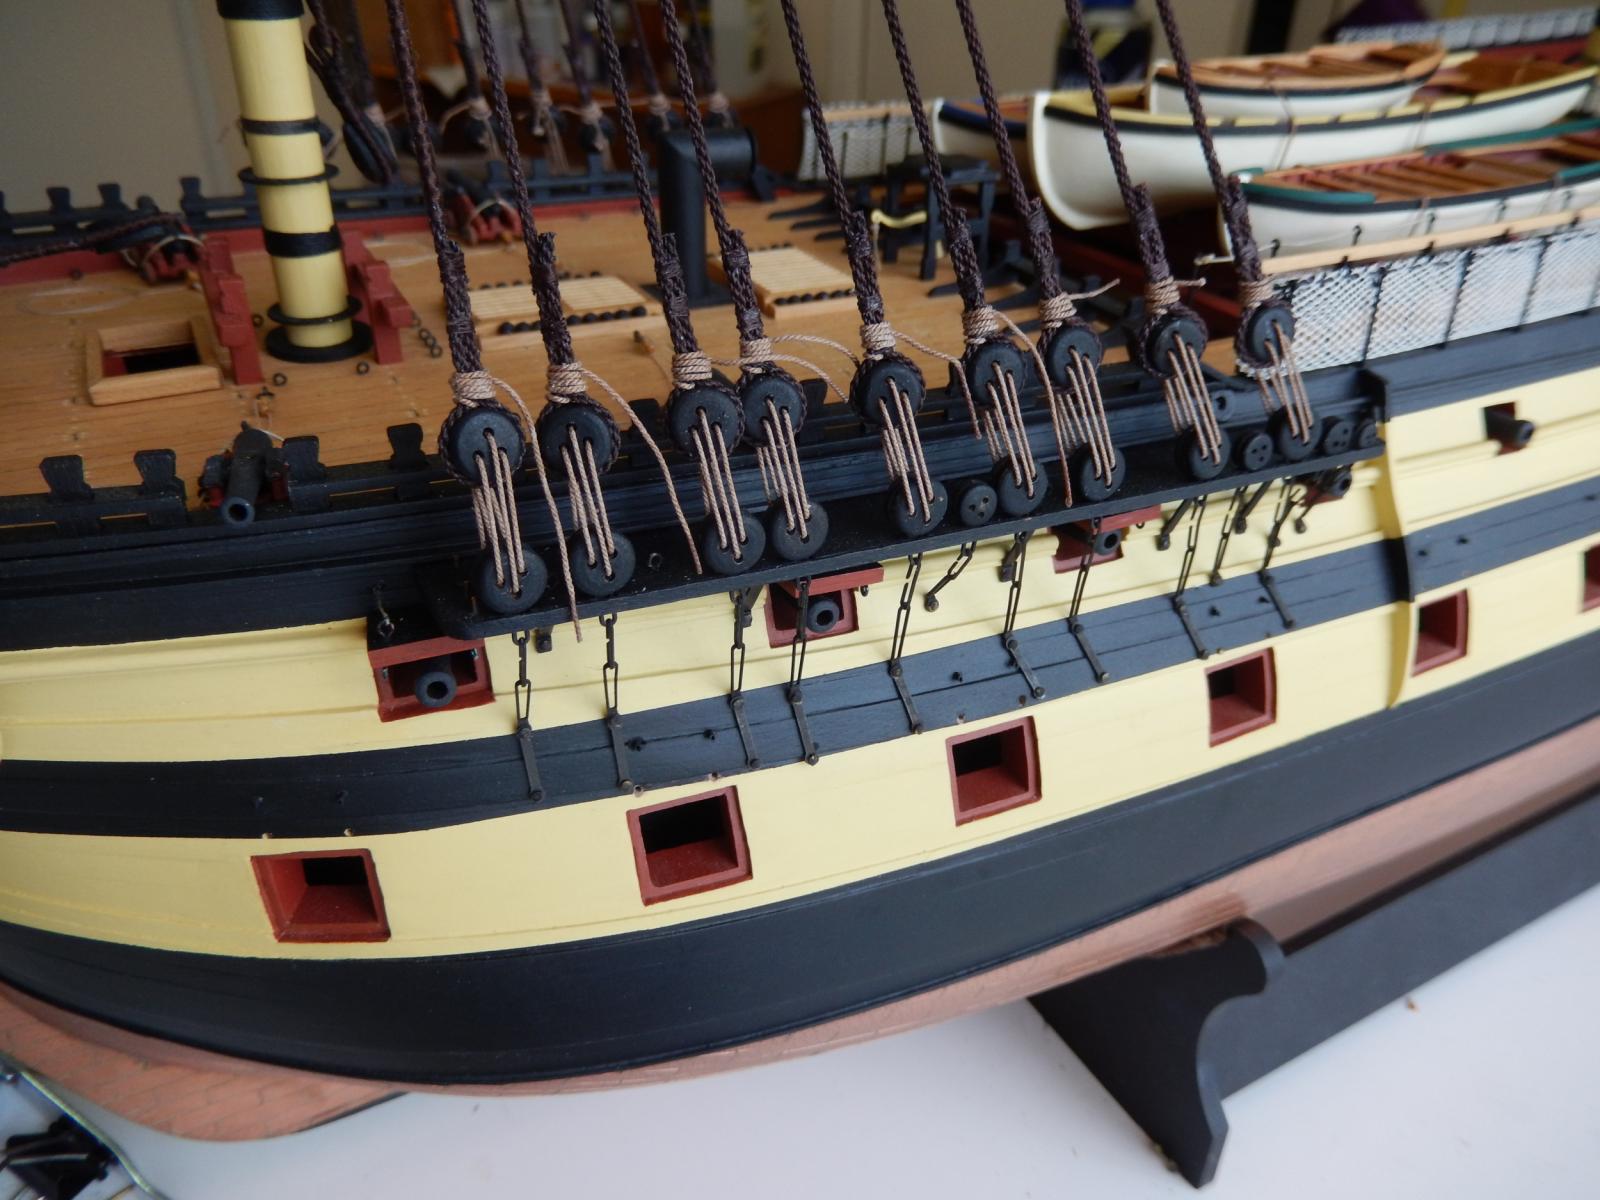
The following two photos show what I certainly hope is the correct way to do the lanyards. If it is not, please keep me in blissful ignorance.

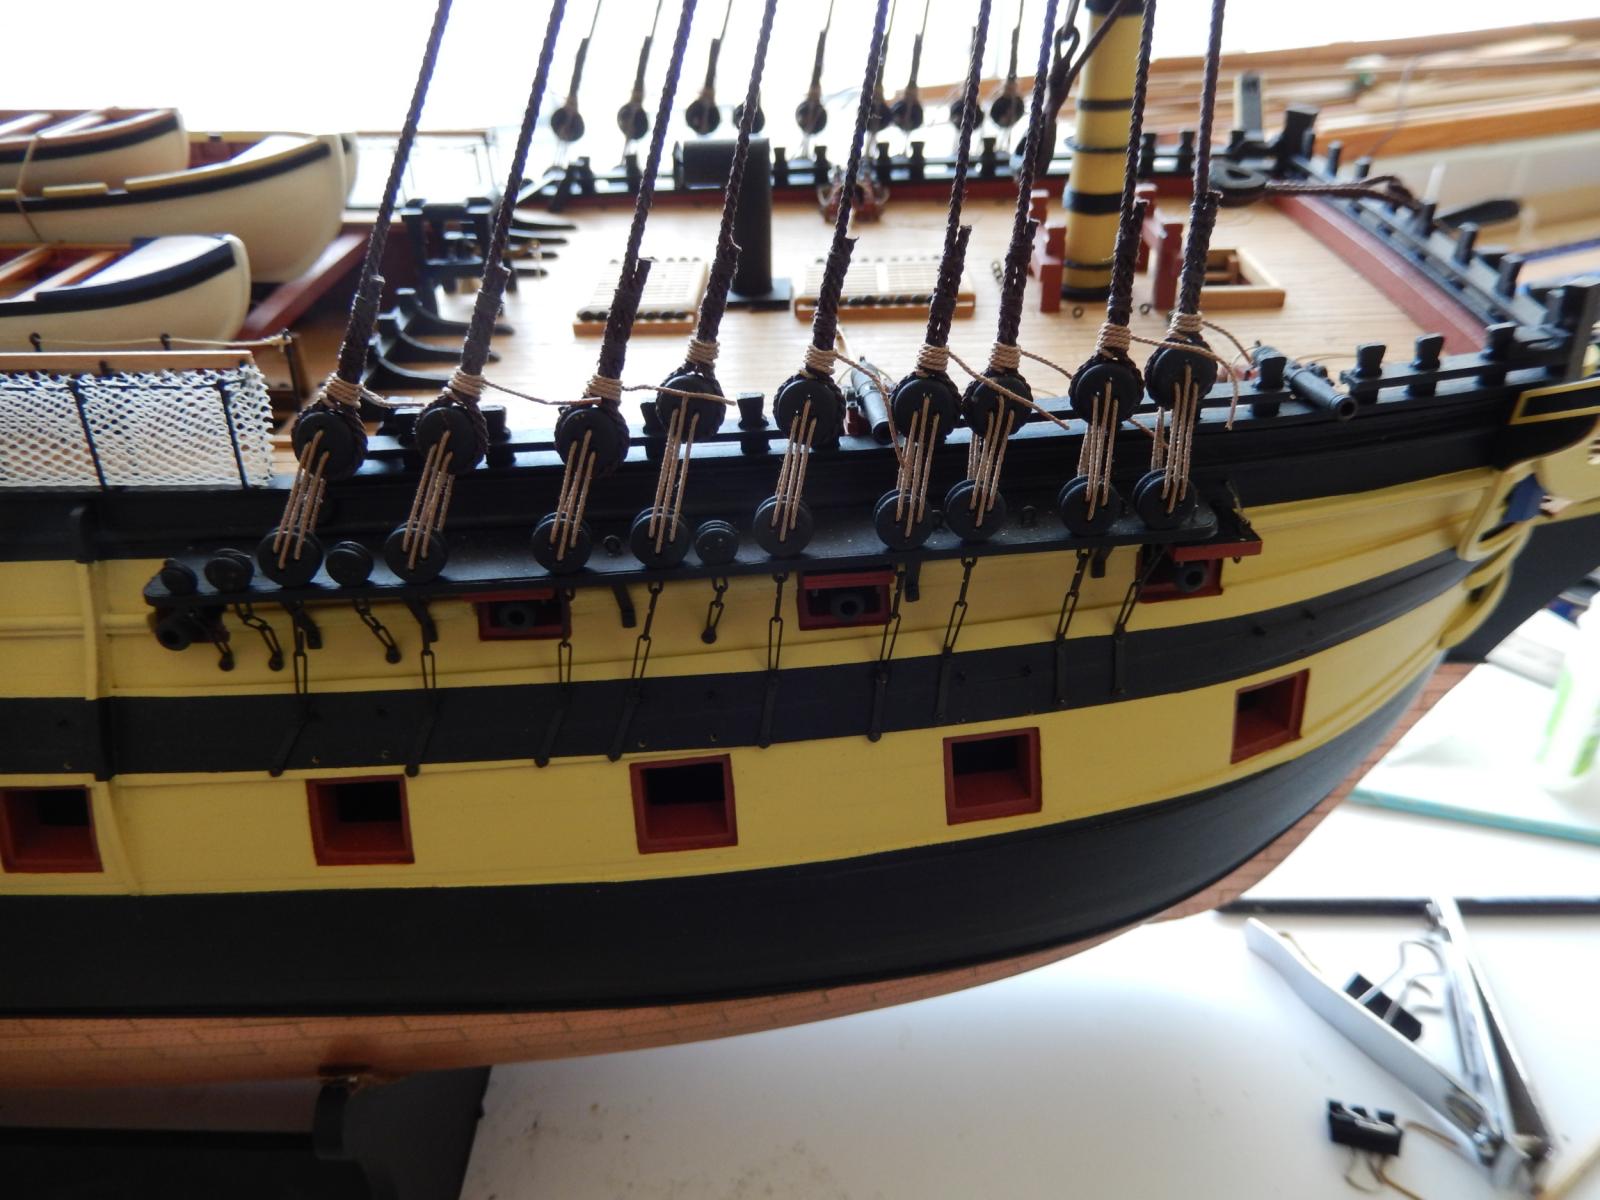
Here is the starboard - I will probably redo the lanyard on the first set of deadeyes (on the right side of the photo) as it is wound around the shroud three times - all the others are wound four.
and the port side.
-
Arthur: it's really obvious now. I don't know how I missed it. (But then again, I can never find my glasses or car keys either. ) If you are ever happen to be in Sydney, the drinks are on me - though I know it's a long way to come for drinks.
Jason thanks for the comment. (There may even be a drink for you too.
)


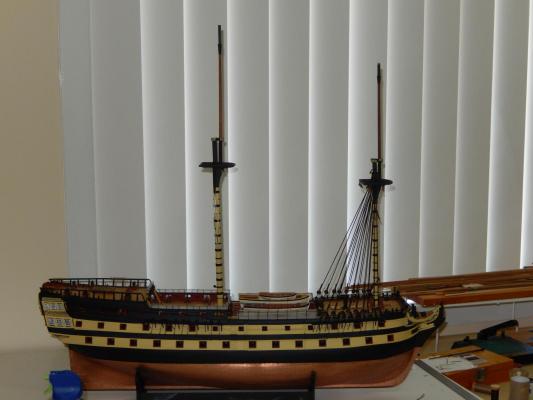
HMS Vanguard by RMC - FINISHED - Amati/Victory Models - scale 1:72
in - Kit build logs for subjects built from 1751 - 1800
Posted · Edited by RMC
Jason: all is forgiven.
I have now painted the oars (there seem to be a lot of them). Unfortunately I didn't have the suggested colour scheme with me while away, so mine look a little different - wooden (brown) bodies and dark grey handles - to the specification. I'm quite pleased with them so I will leave them as is.
It also occurred to me that putting a crew member or two on the model may give a better idea of the actual size of the the ship. I bought a few figures from Cornwall Model Boats and have painted them to see how they look. I then realised that I didn't know the details of the appearance of the captain's/admiral's uniform, so in the photos Nelson (?) has silver trousers - which is perhaps a little gaudy. Since taking the photo he has been properly dressed (off white pants) and is no longer the subject of snide remarks. (I haven't really yet decided if I will any of the figures on the model.)
Just for the record this is the 2015 photo of sunset on the summer solstice (not as good as 2014 - but not bad). As I wrote earlier in my log, the mountain on the right is Pigeon House Mountain, named by Captain Cook in his voyage up the east coast of Australia. How he saw a pigeon house is a mystery to me, but then he had been at sea a long time.
And just for the hell of it here is a sunset 4 weeks later. Reminds me of Lord of the Rings.