HOLIDAY DONATION DRIVE - SUPPORT MSW - DO YOUR PART TO KEEP THIS GREAT FORUM GOING! (89 donations so far out of 49,000 members - C'mon guys!)
×


scrubbyj427
-
Posts
1,690 -
Joined
-
Last visited
Content Type
Profiles
Forums
Gallery
Events
Everything posted by scrubbyj427
-
 Looks very nice Ben, glad to see you back at it. The boxwood looks great on there!
 -
Hi Wilma, thank you. They are coated in WOP first so nothing else can penetrate the wood, then I apply a wash of sorts. I’m just starting to use this so I’m experimenting with it still but I definitely like the results. I just brush it on then after it dries I go at it with a cloth soaked in some alcohol. Works quite well.

-
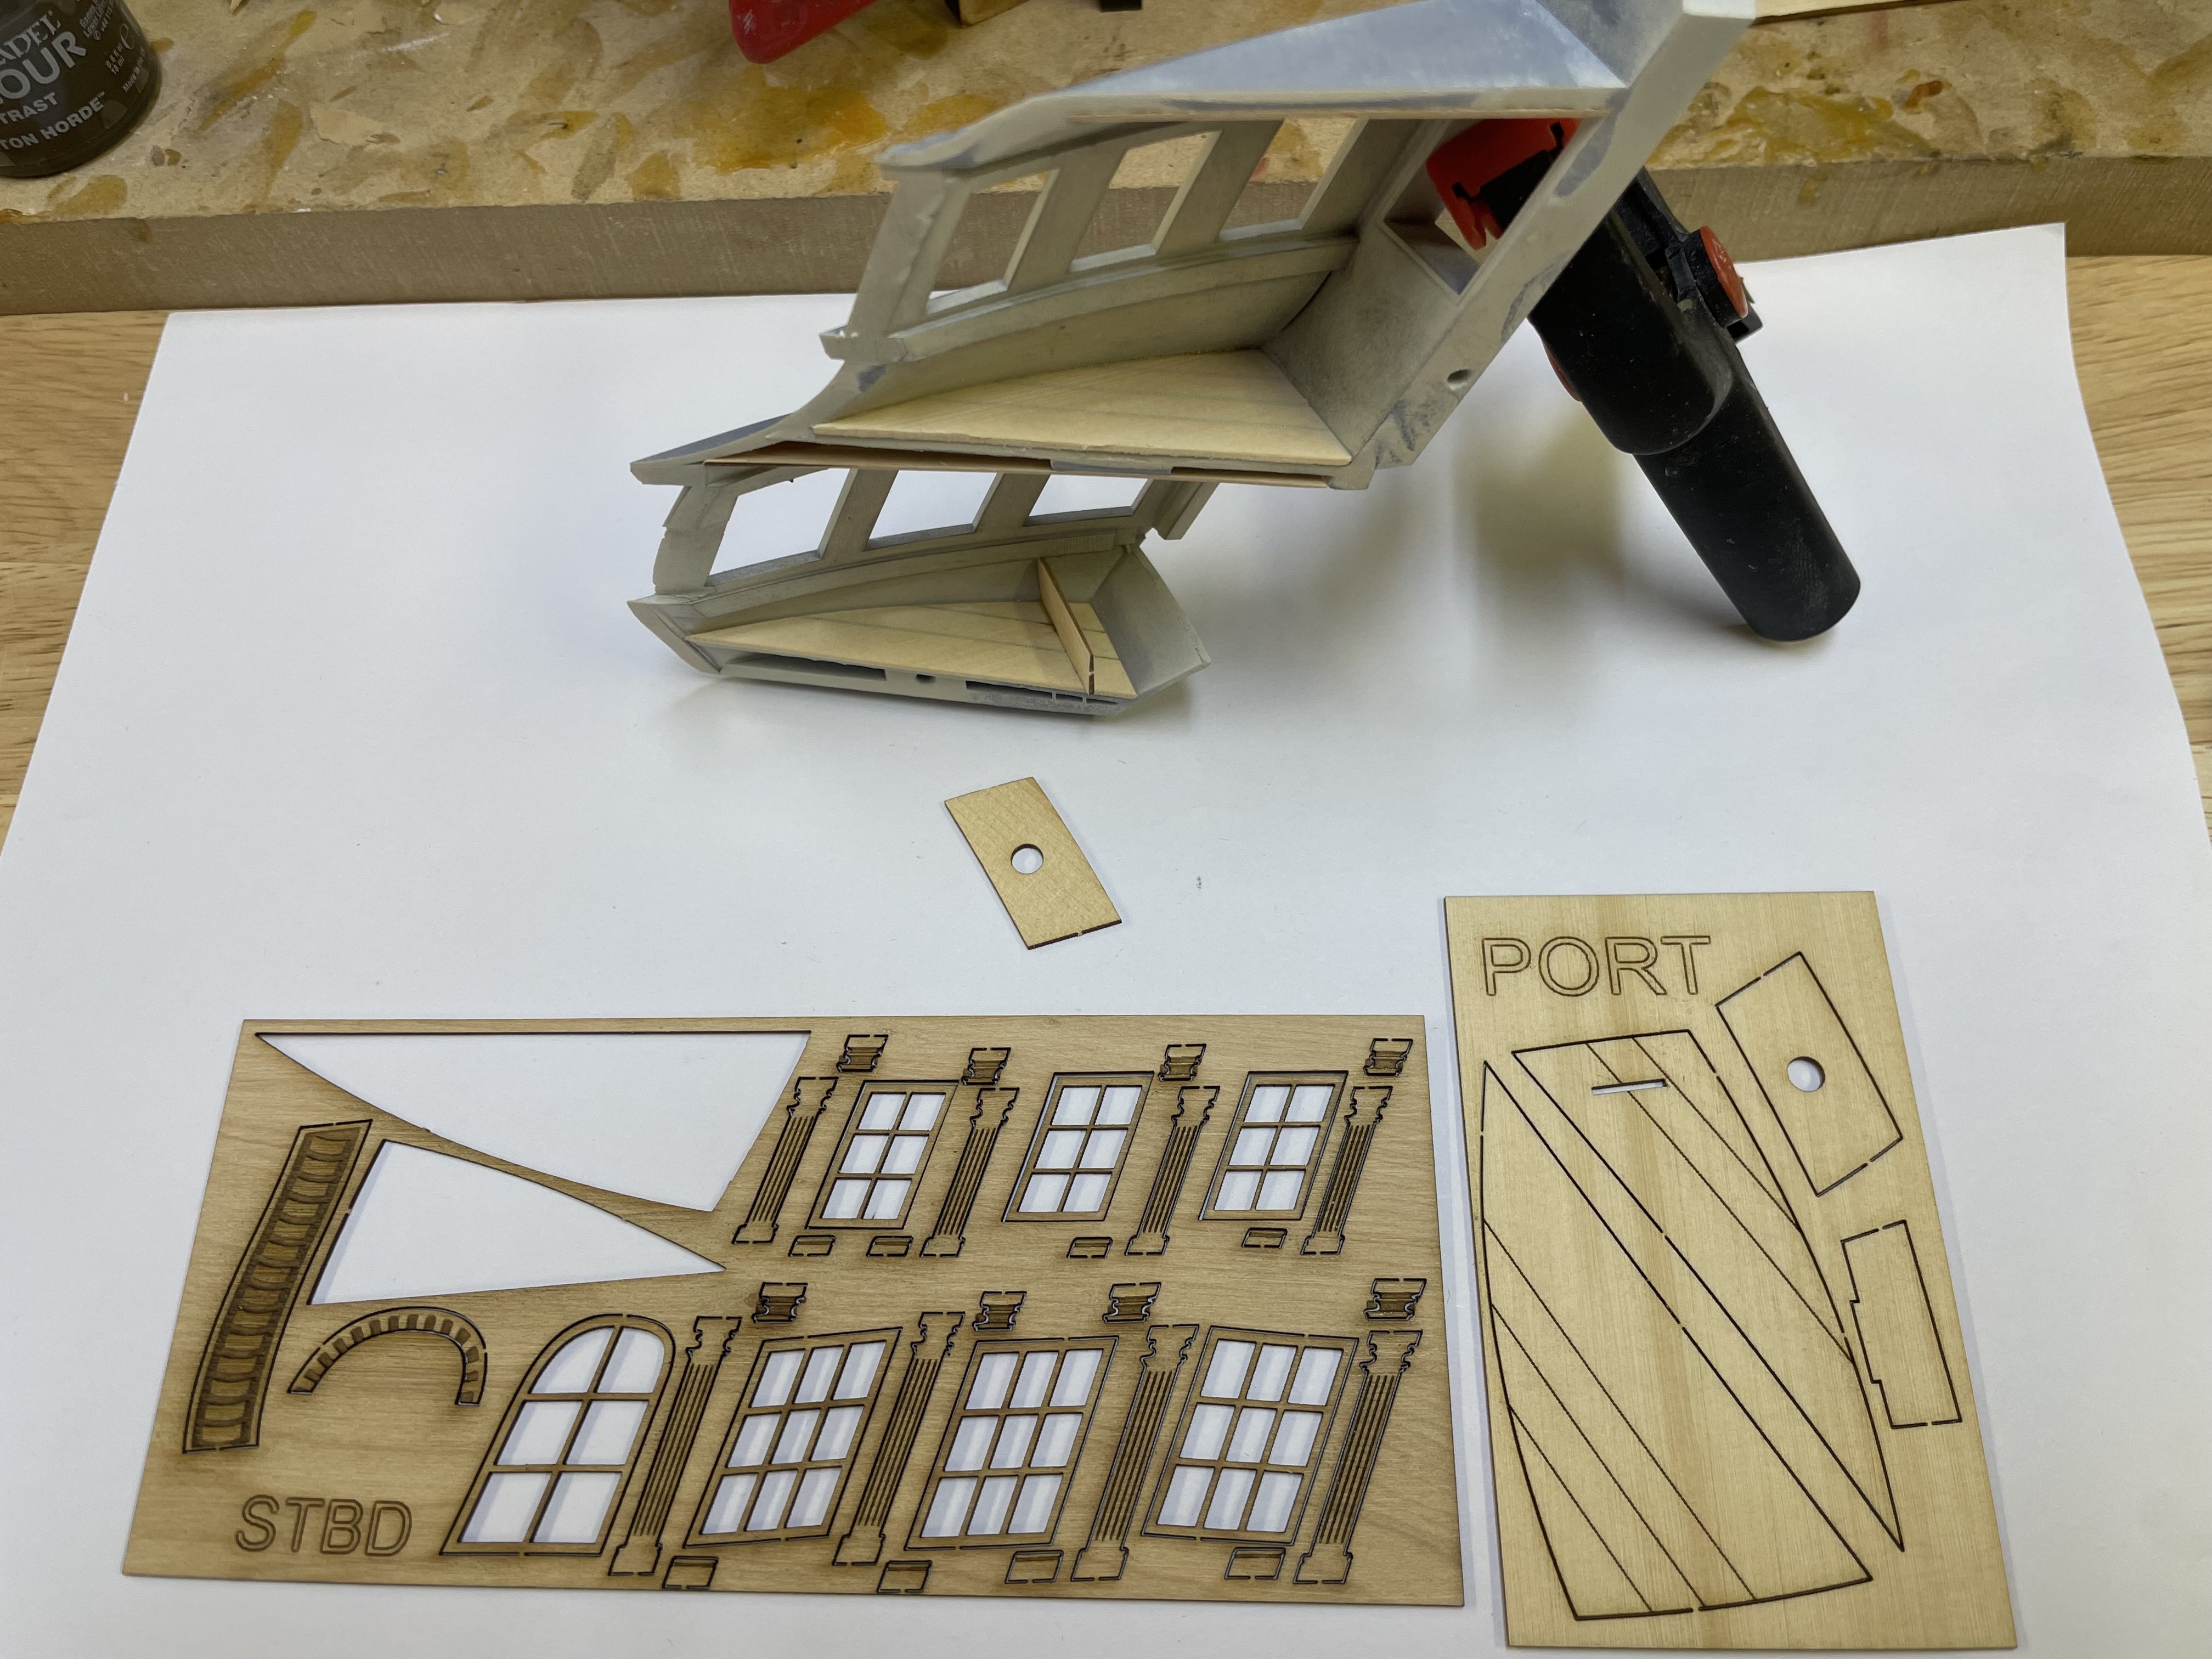
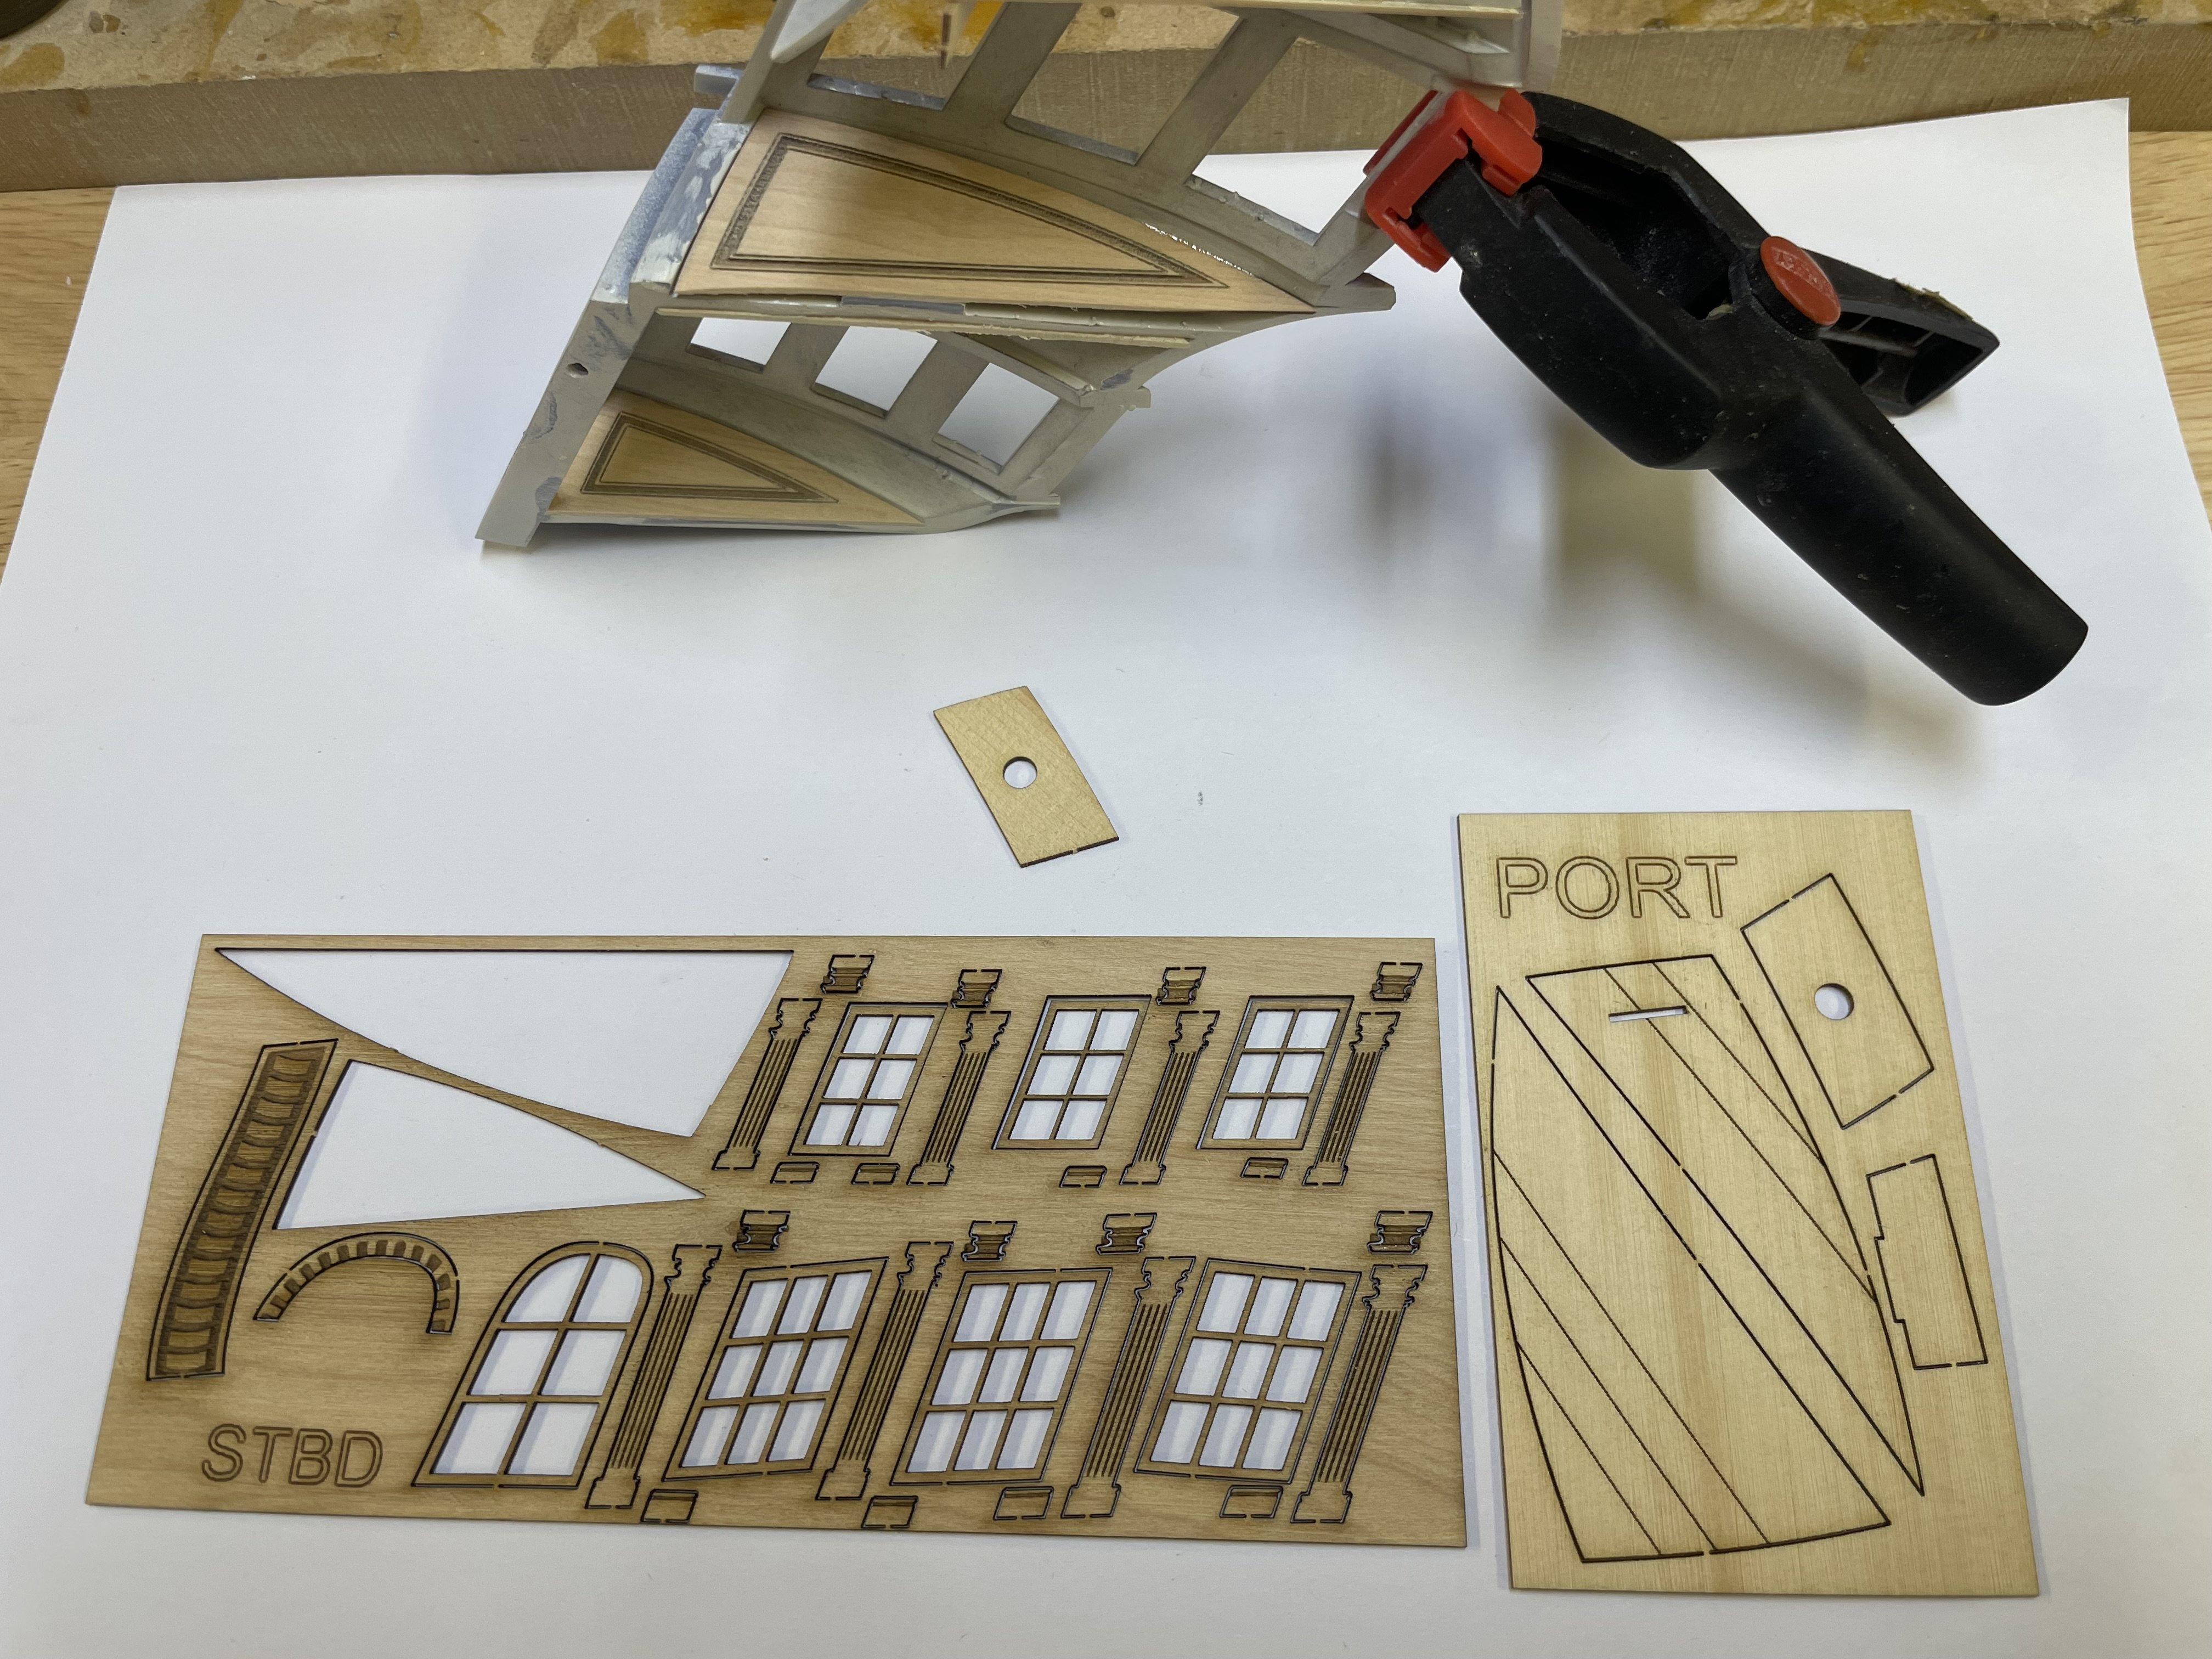
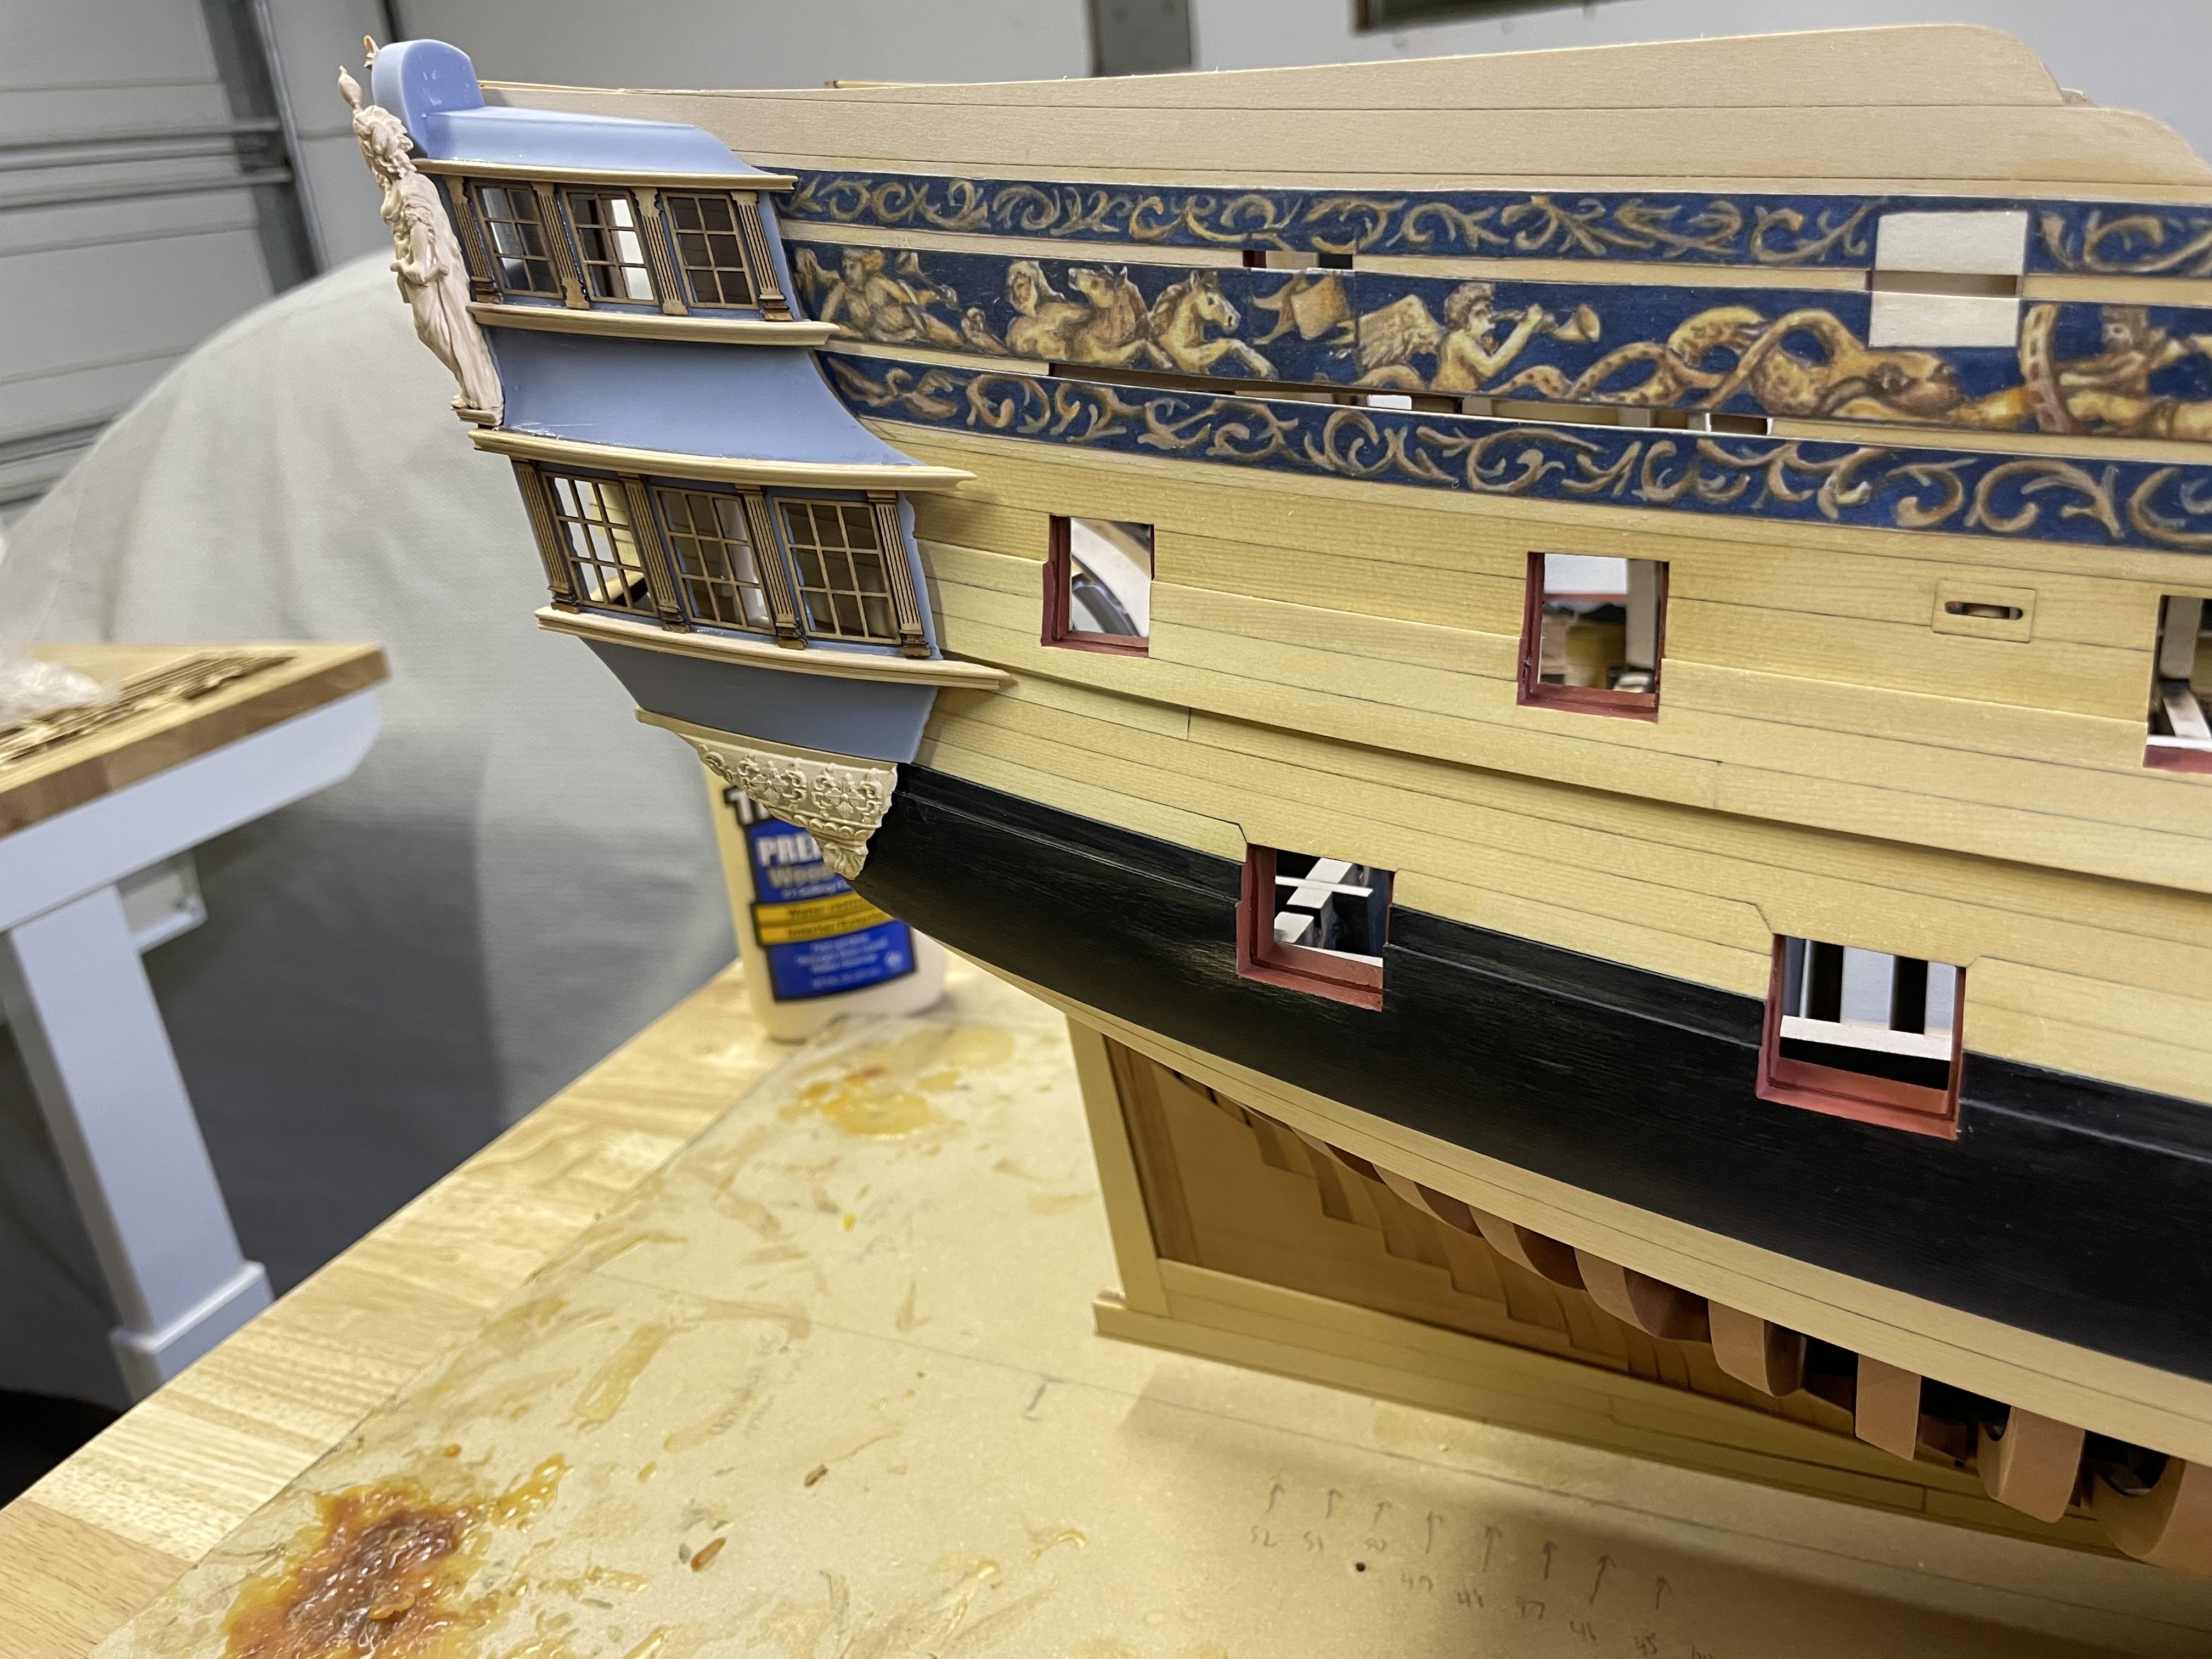
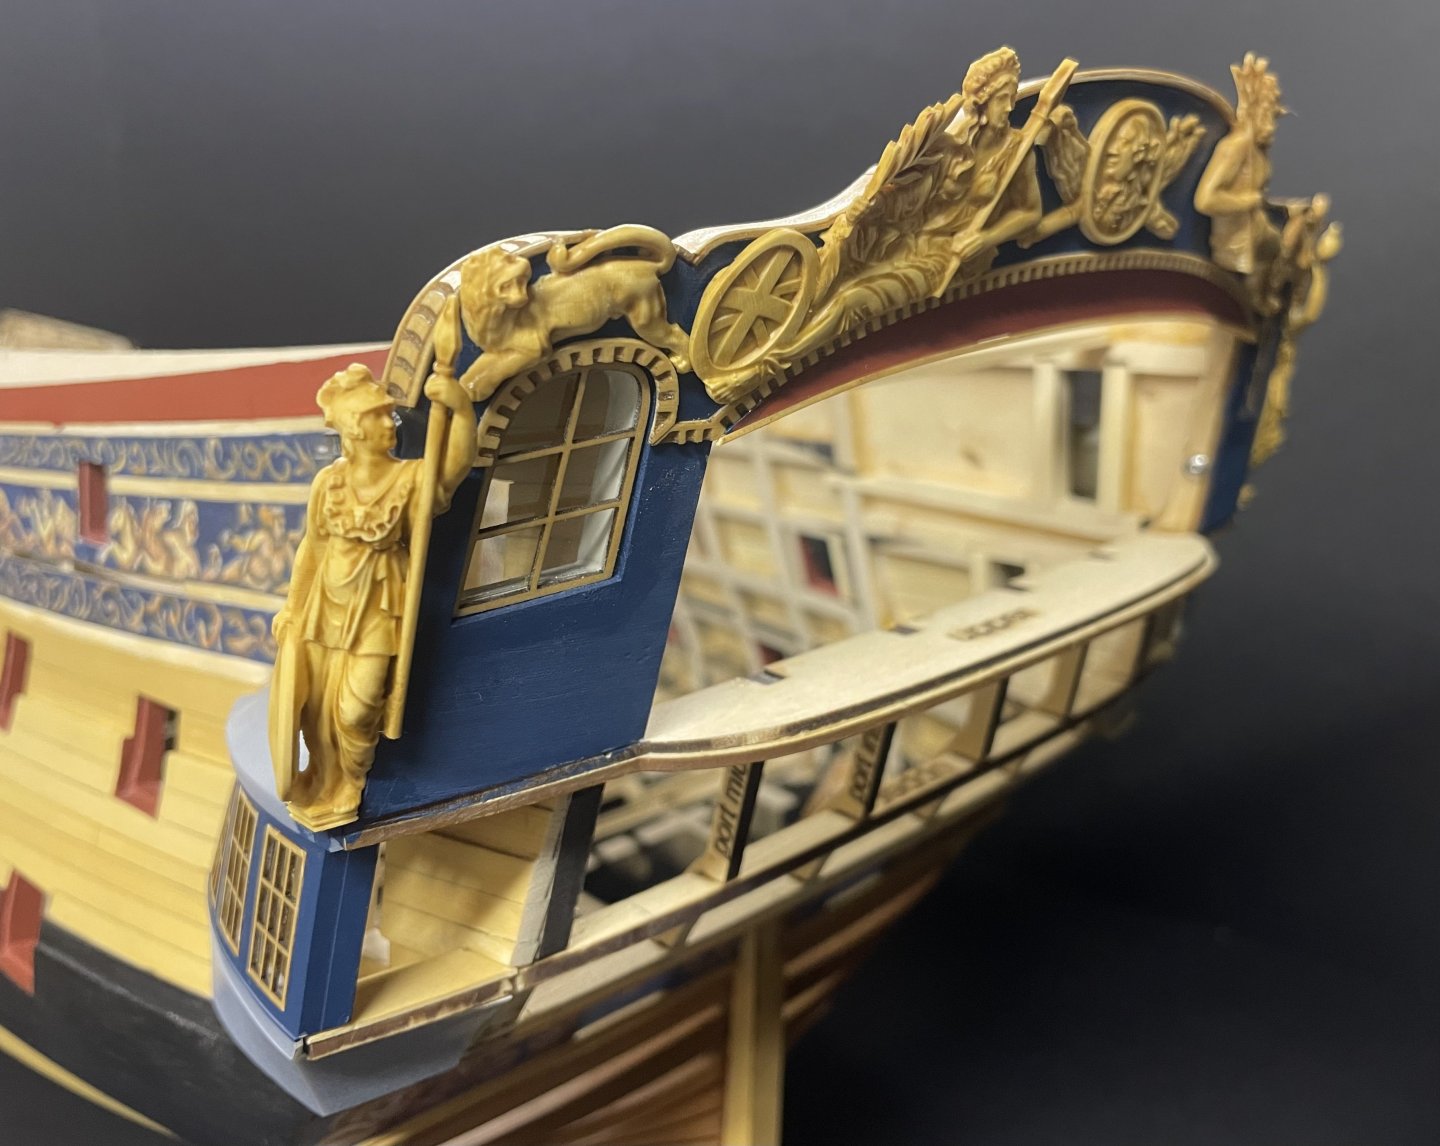
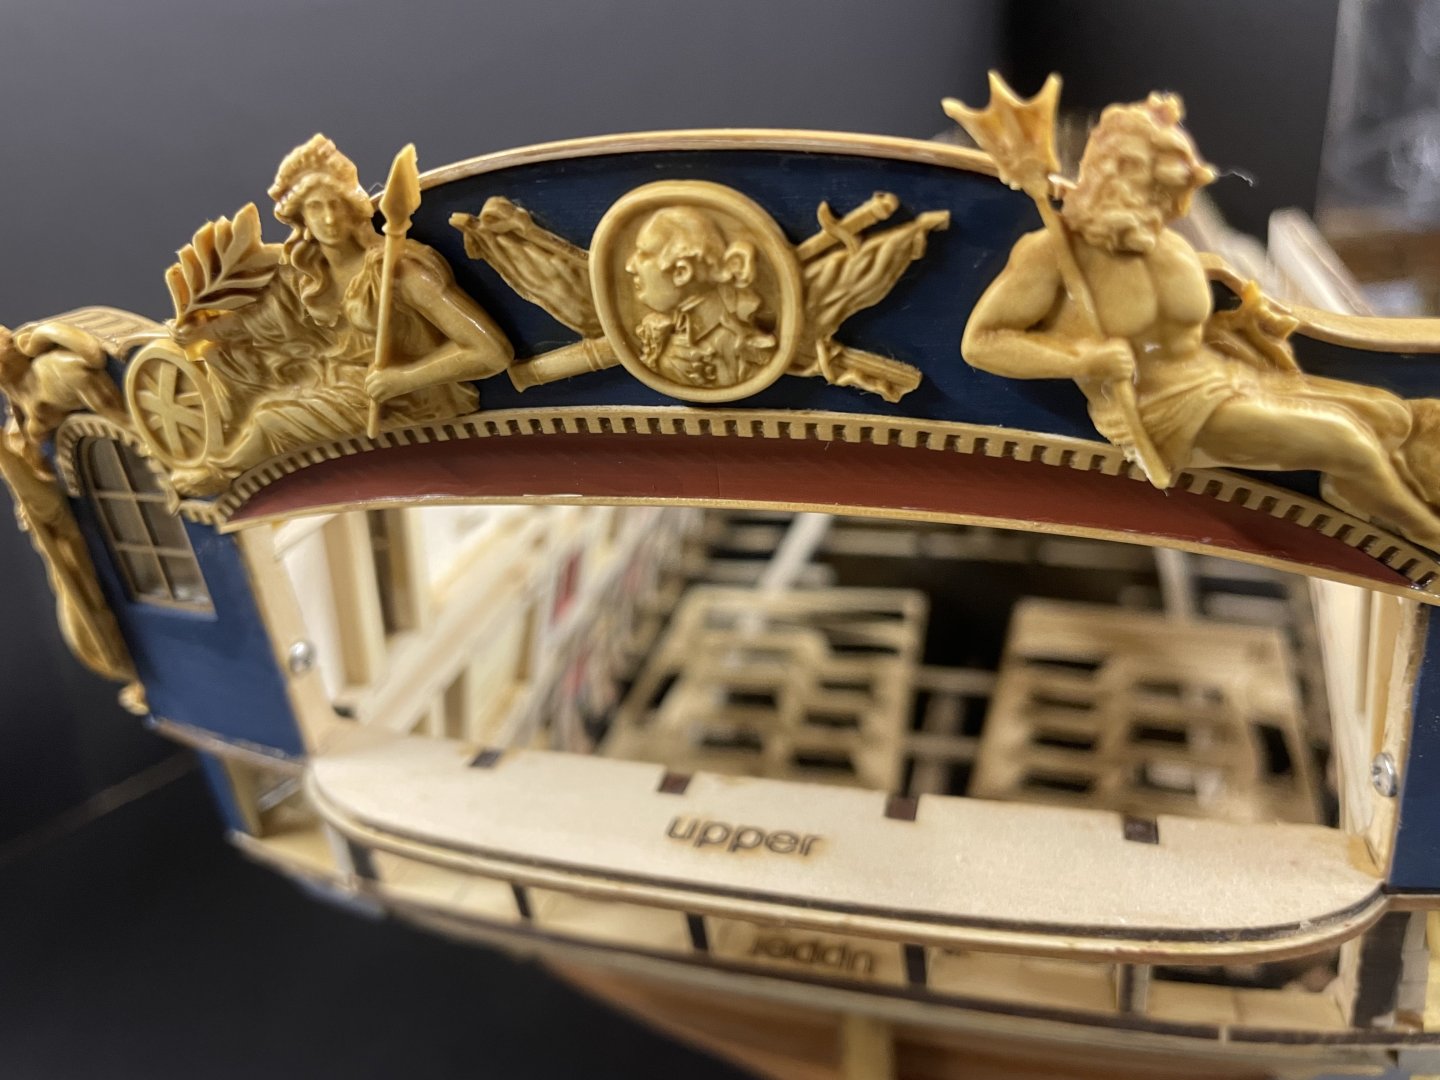
I was able to attach a lot of the upper carvings yesterday as well as some trim. All the laser files are dialed in and ready to go. The Taffrail was a bit tricky, made up of two layers of very thin boxwood, it requires a lot of patience. The carvings required some clearance work against the trim as expected, otherwise they fit absolutely perfect. I have to return to work on Friday so this will probably be the last update on the model for 6 weeks. Will be finishing the stern and lower windows when I return and the rest of chapter 3. Then on to the gun deck!


- 396 replies
-
- 32
-

-

-
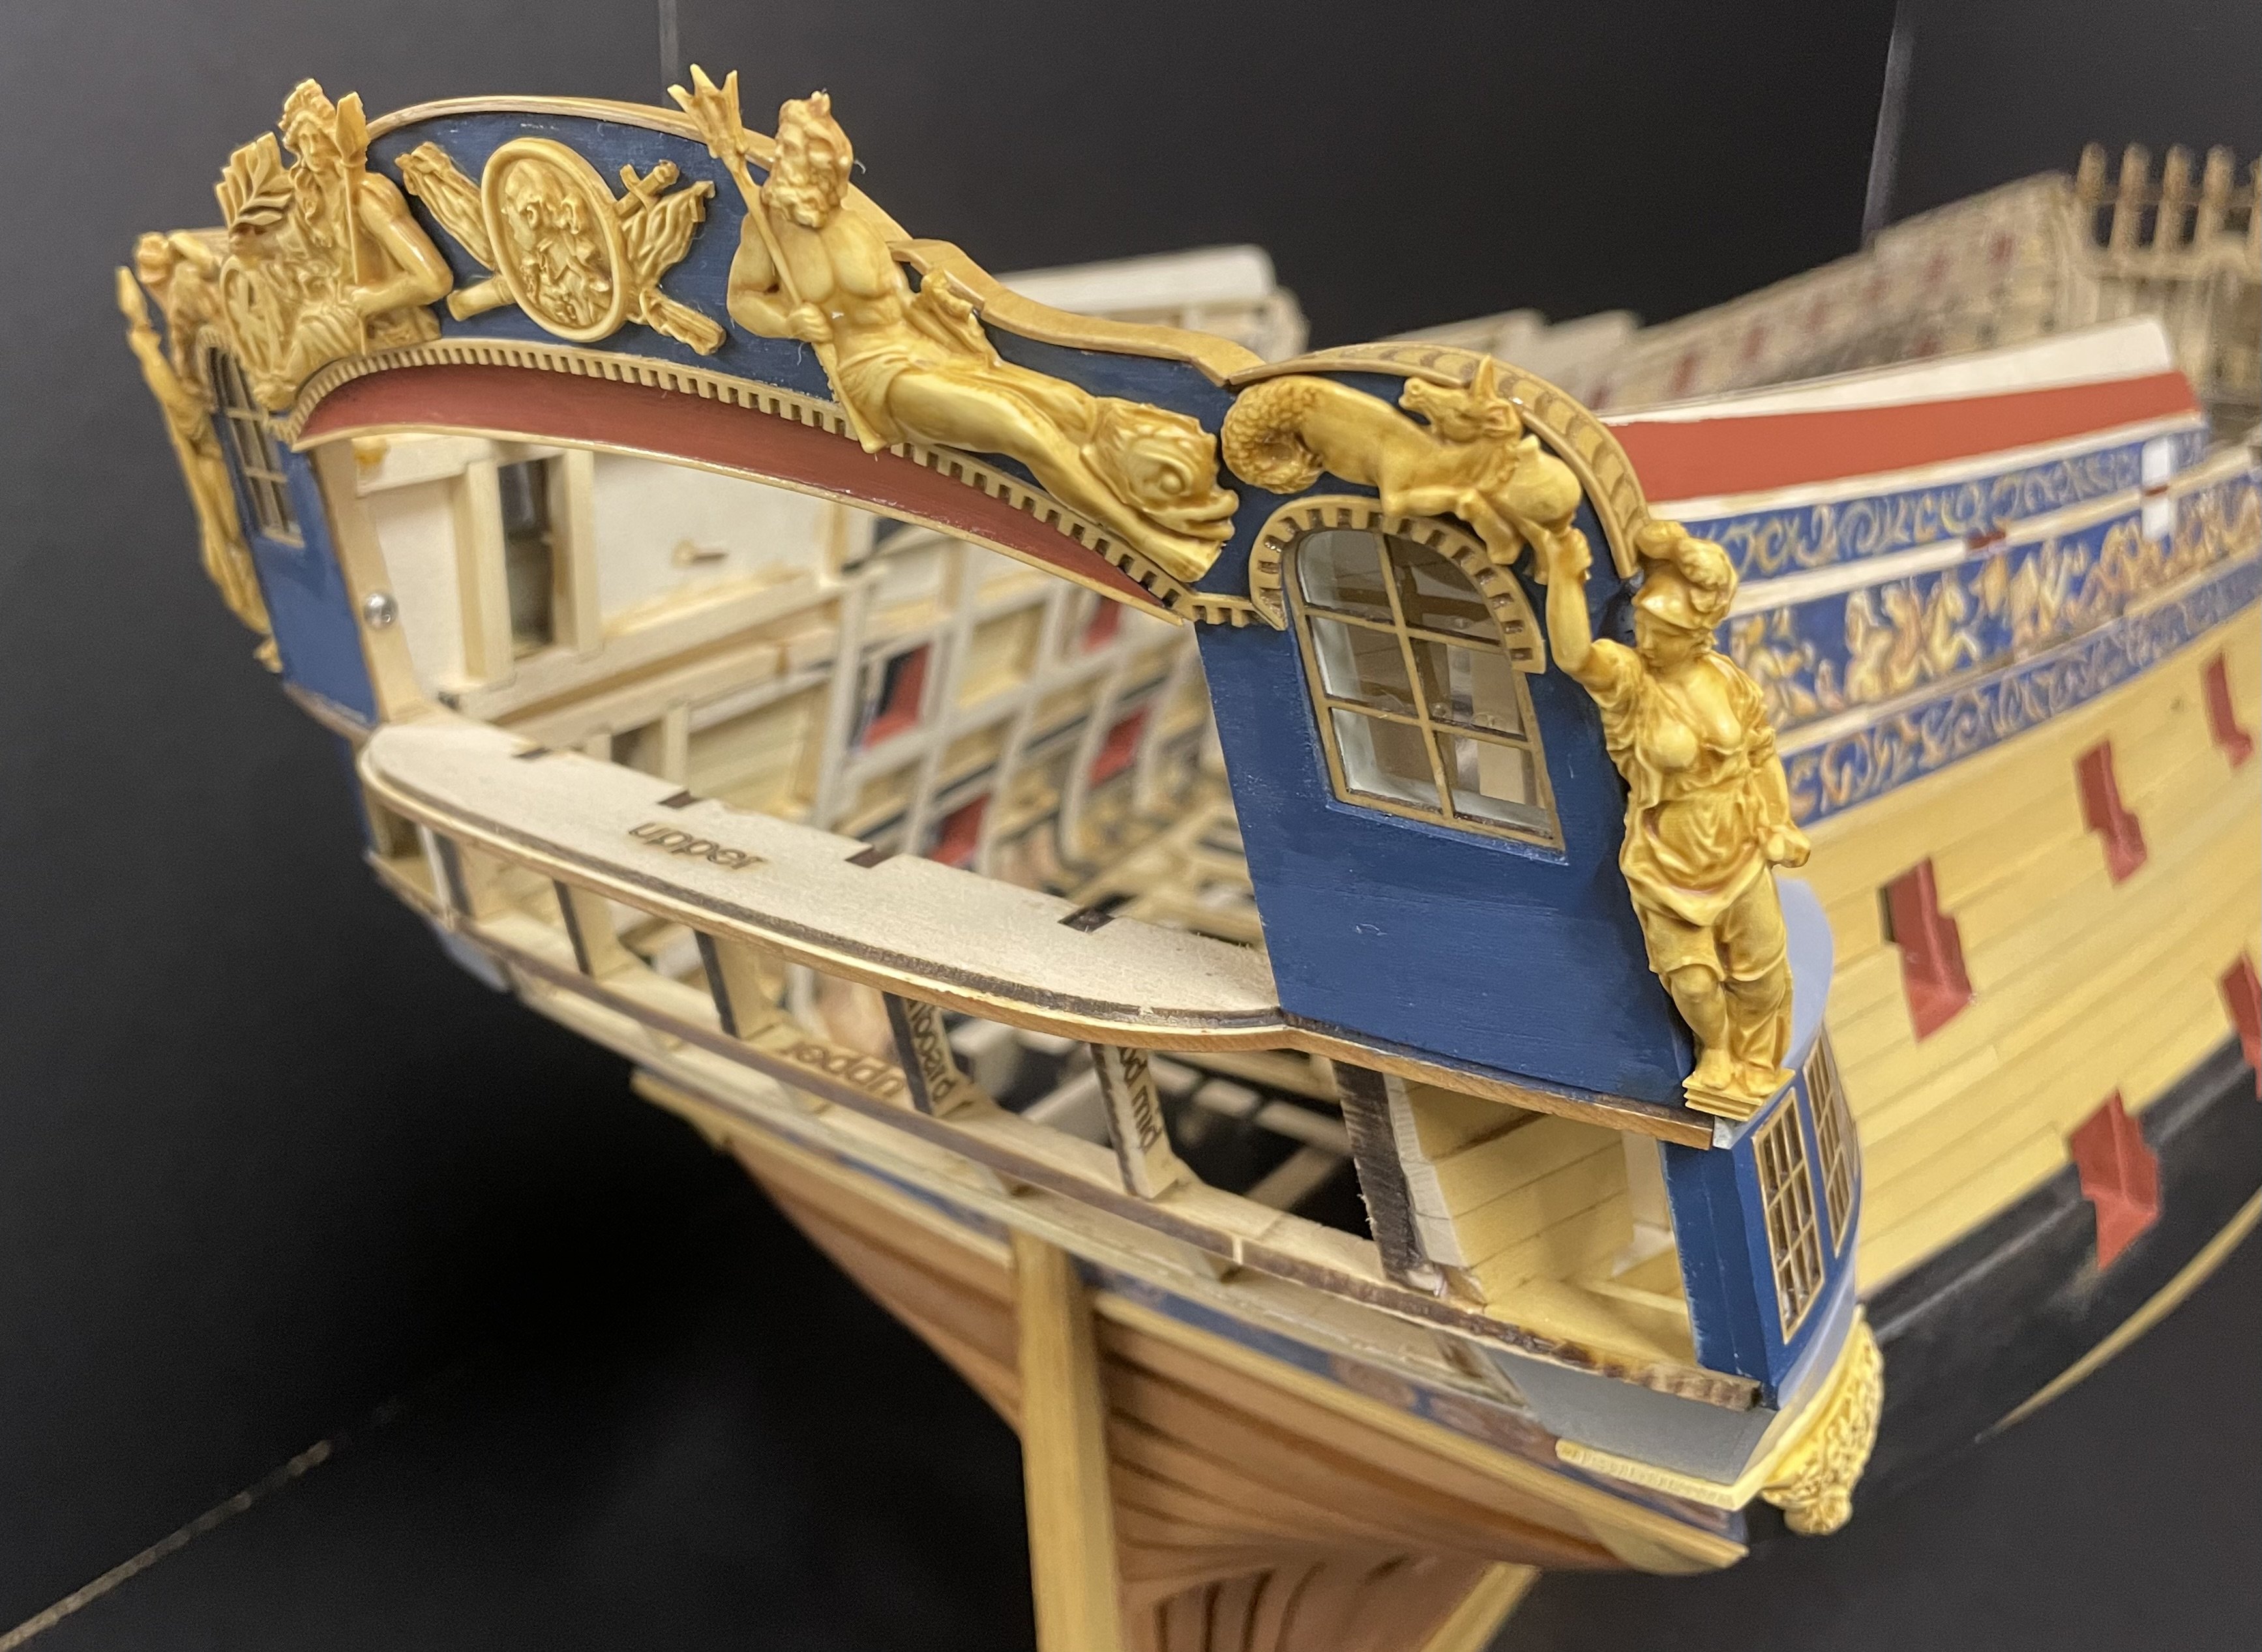
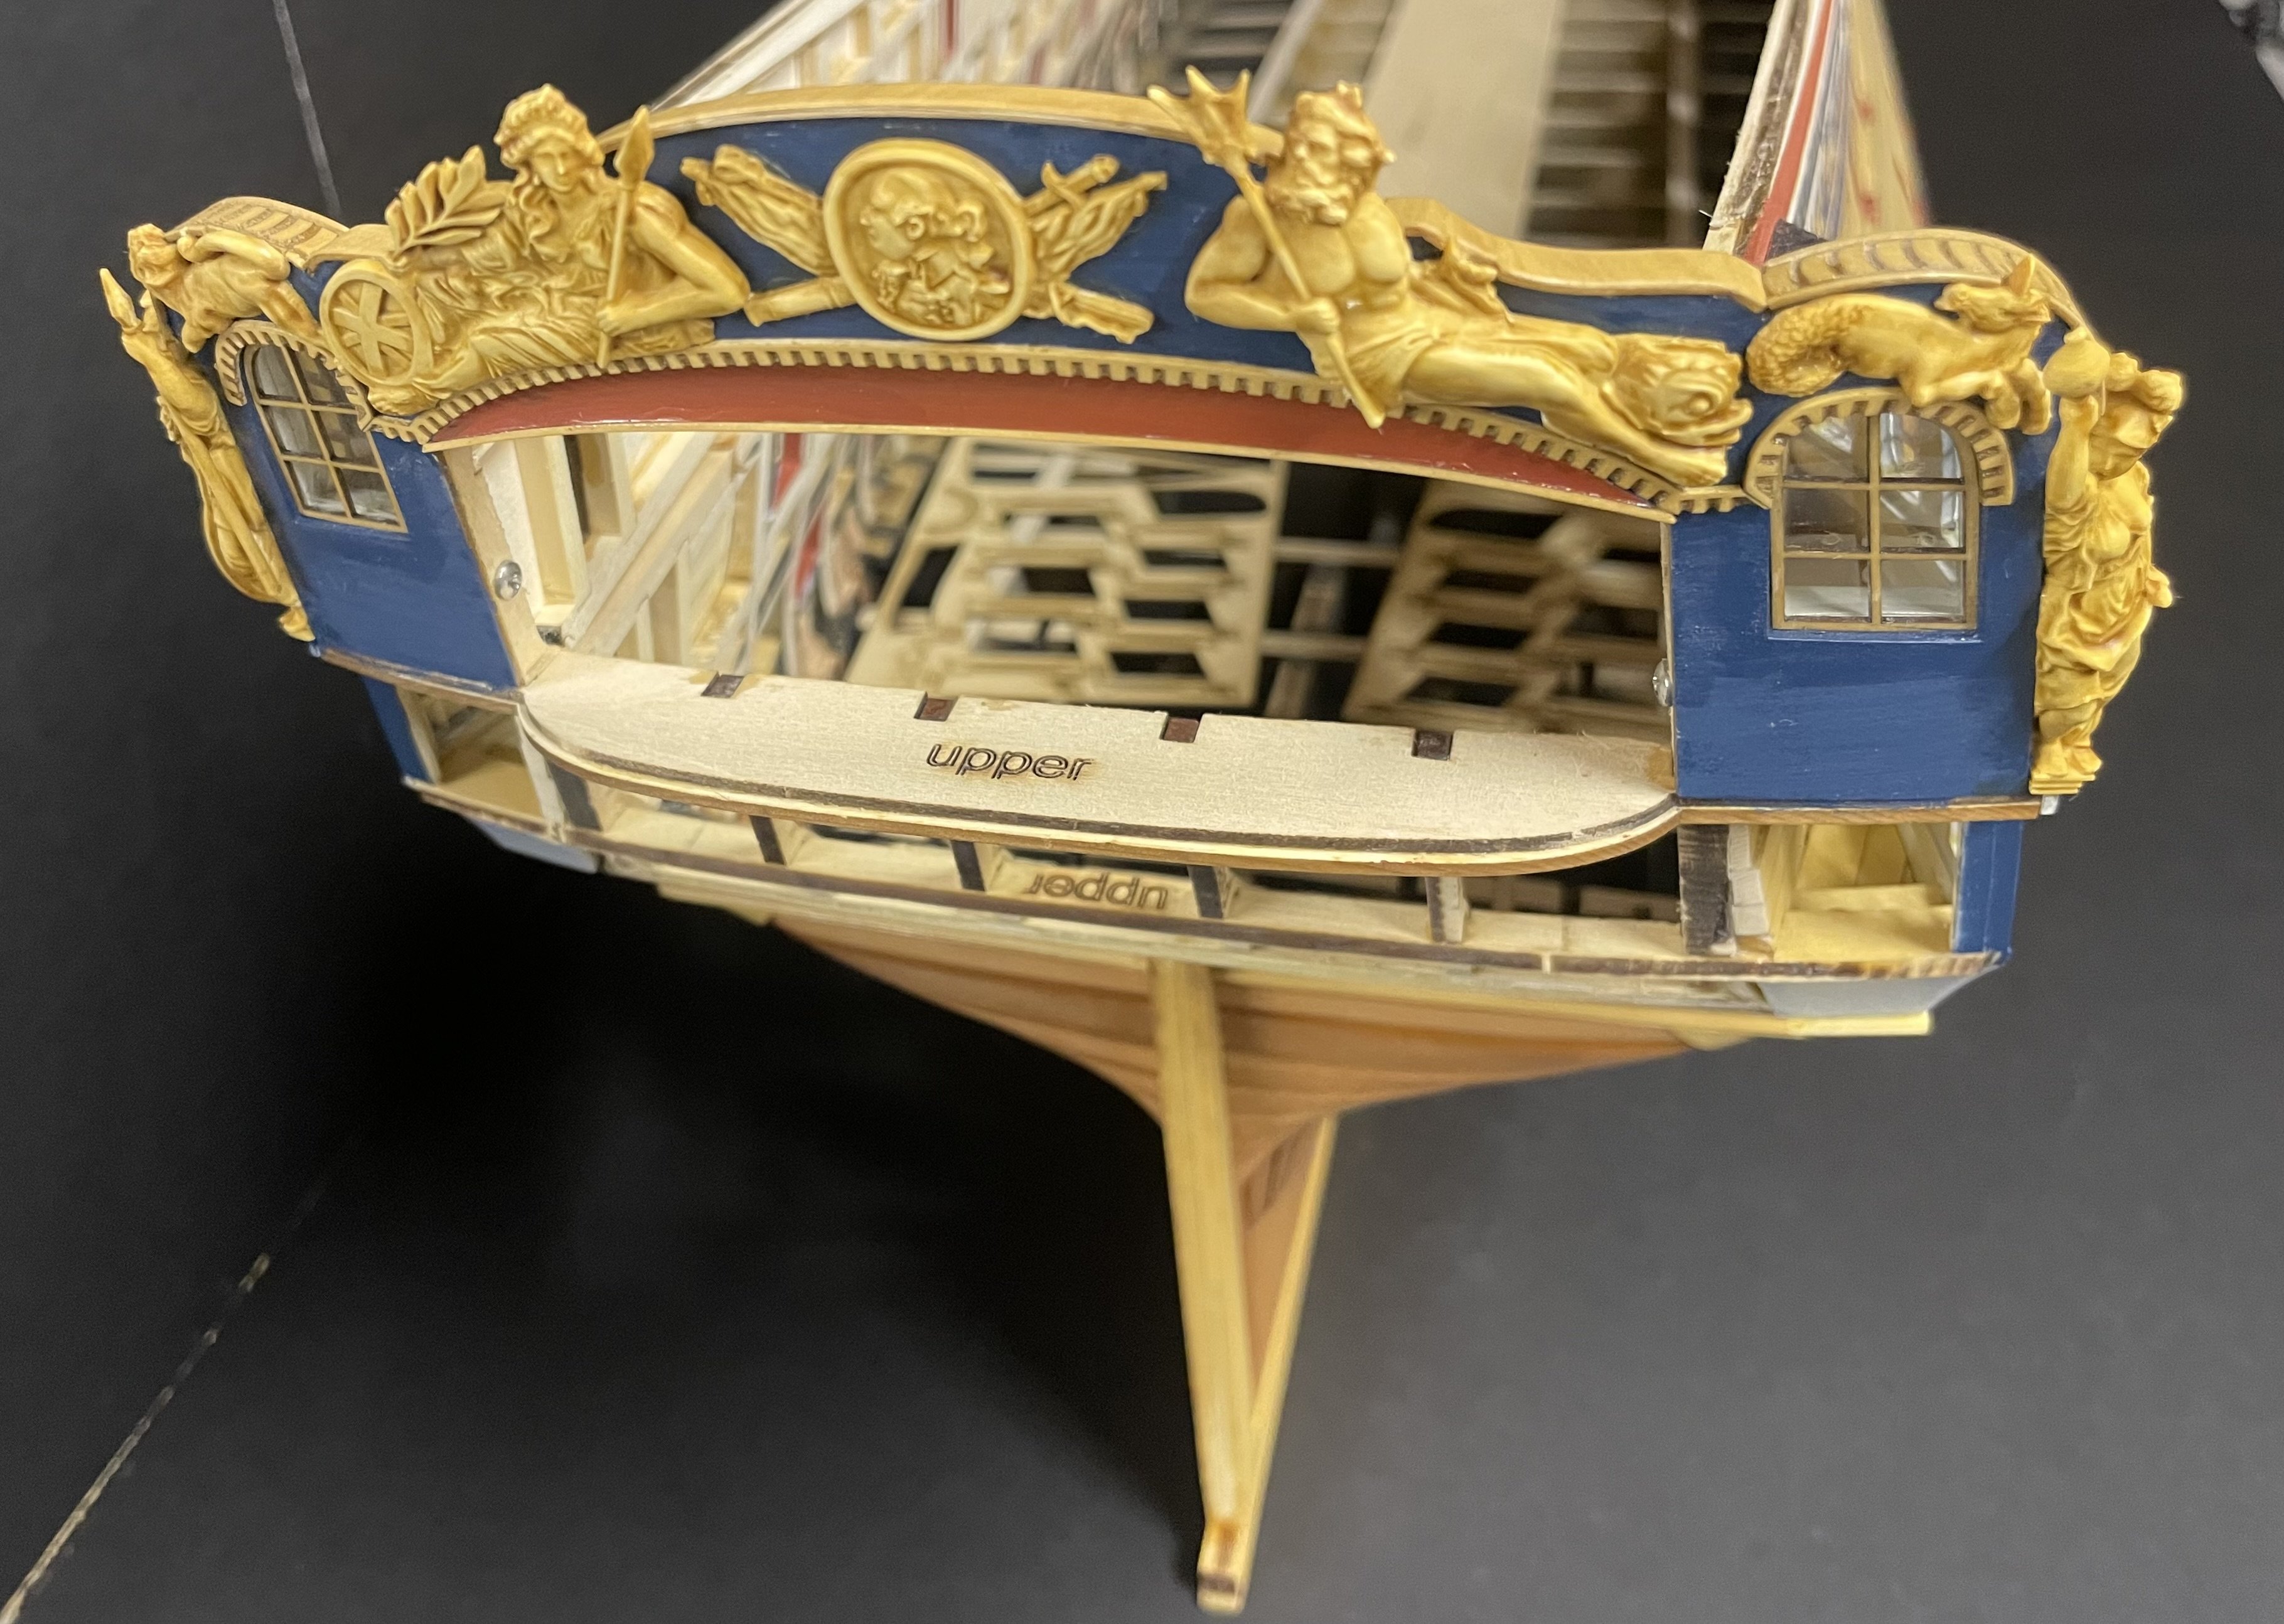
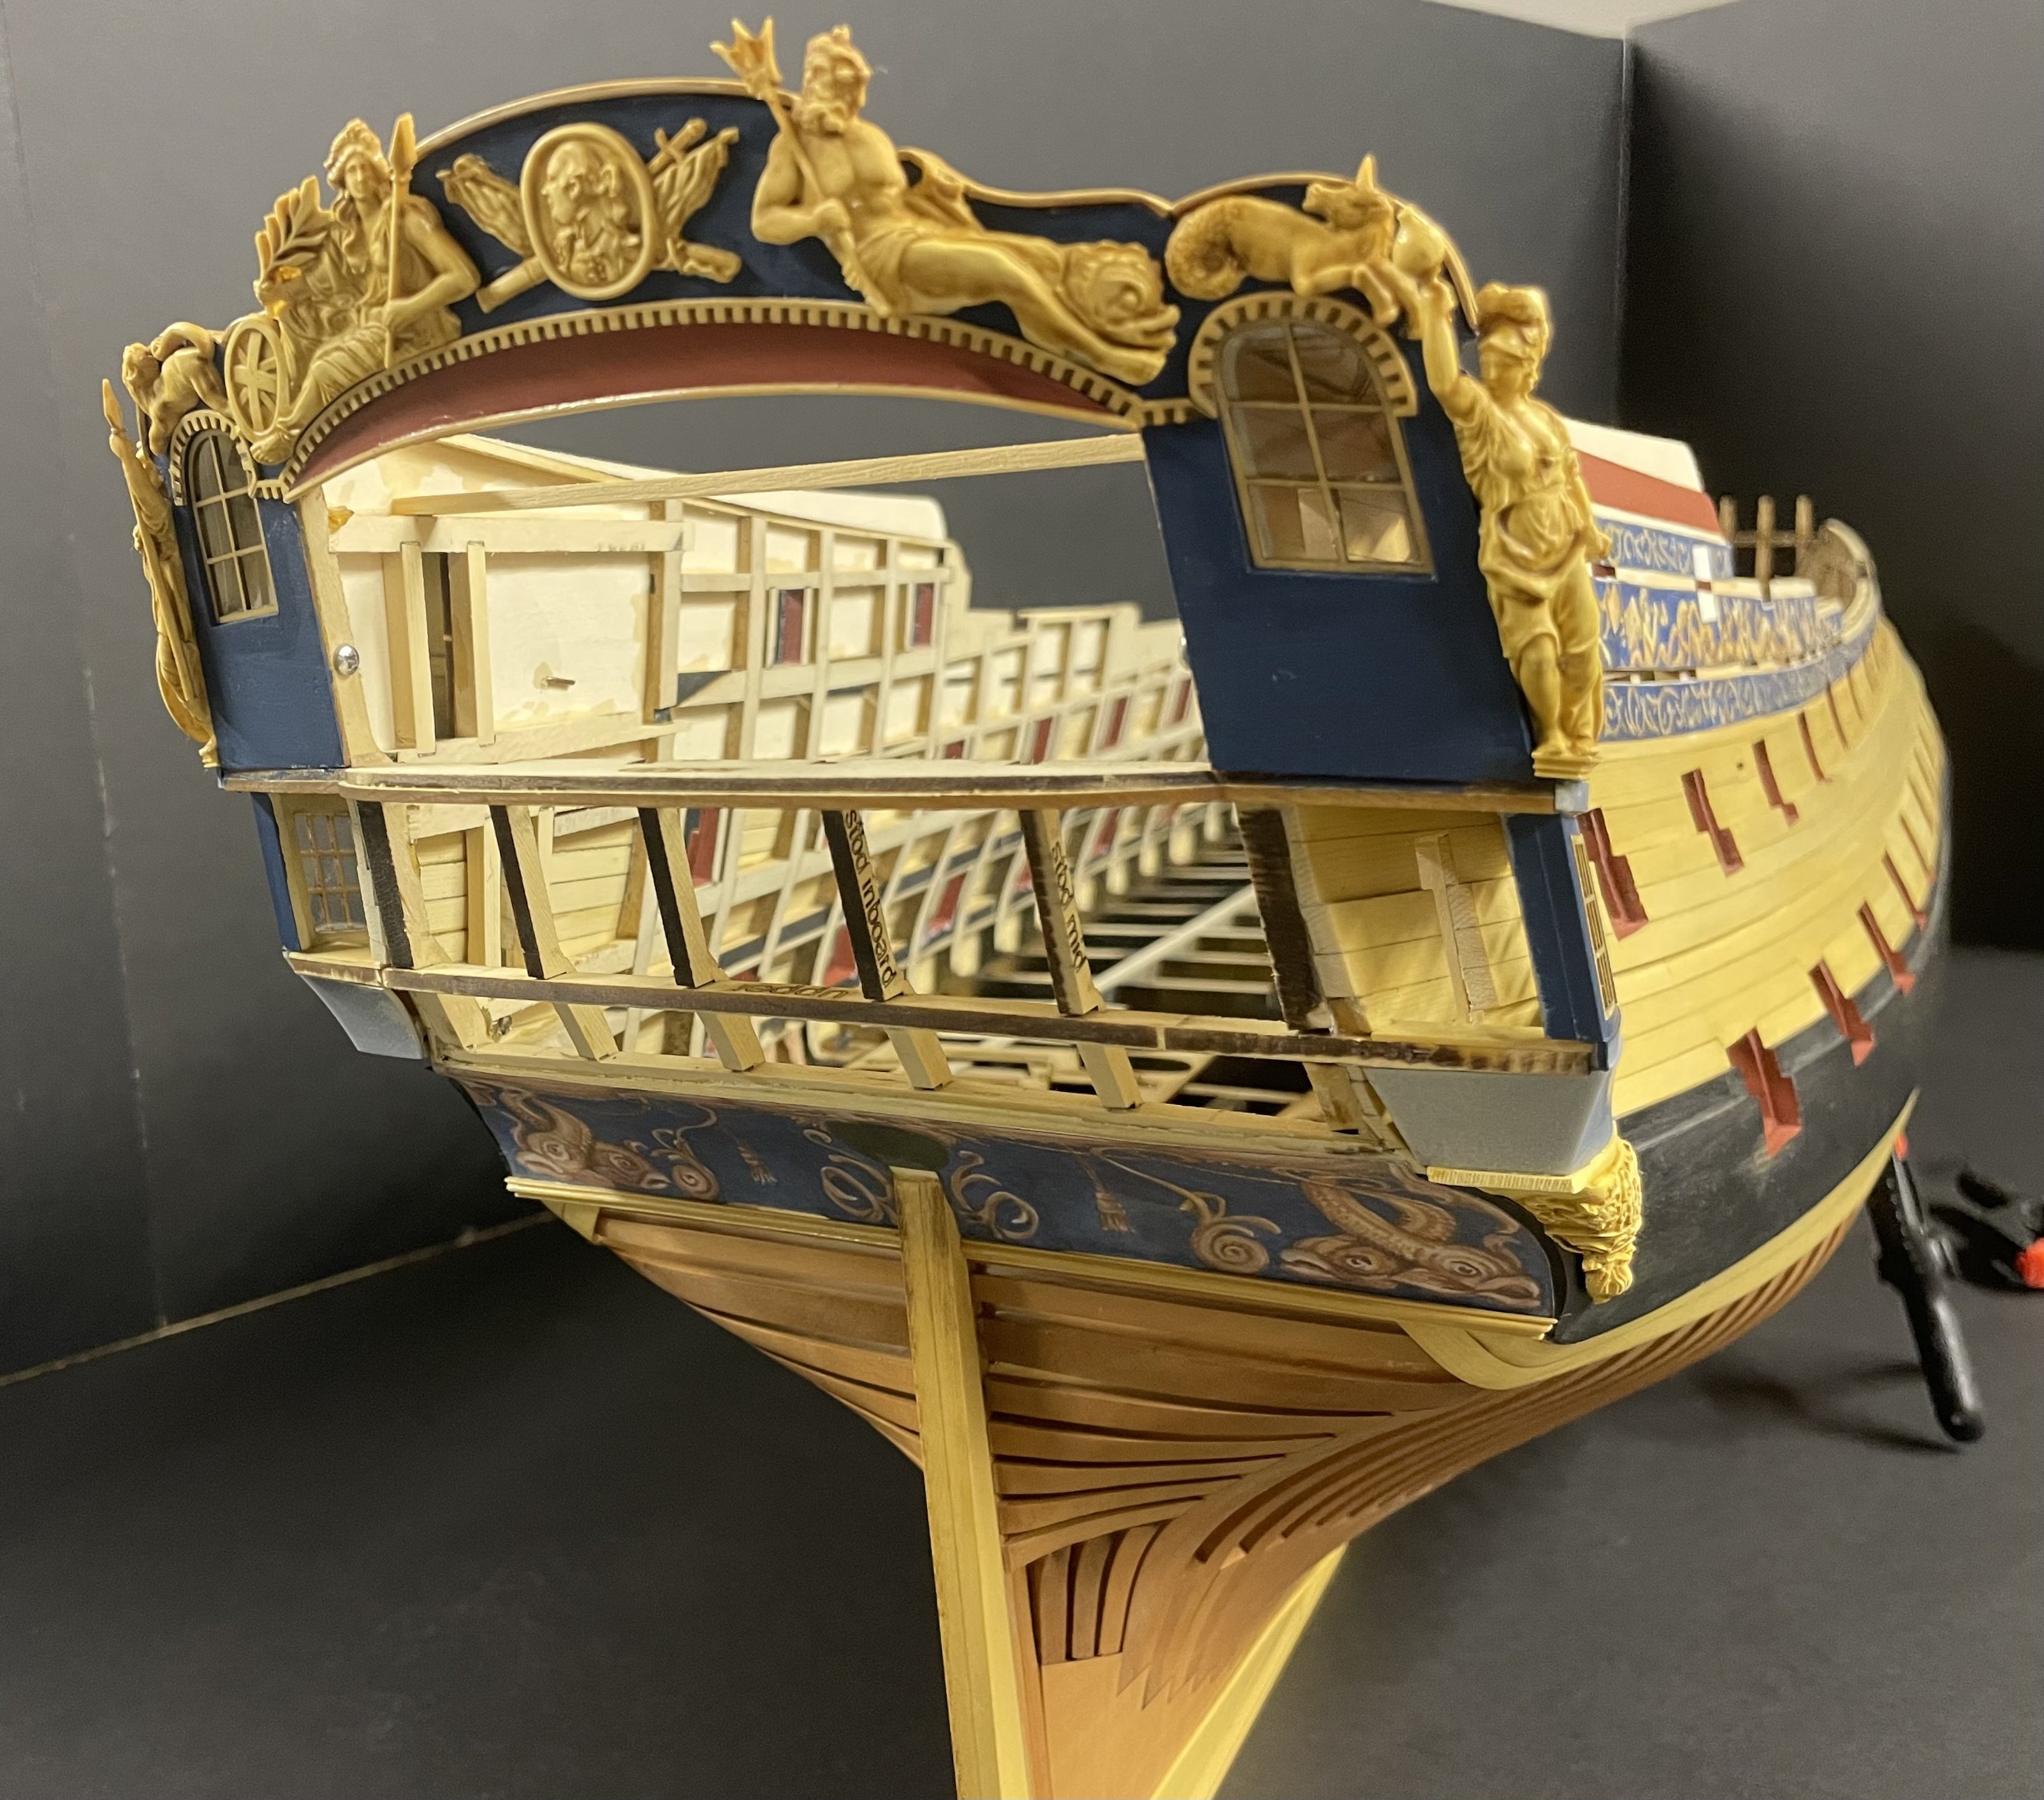
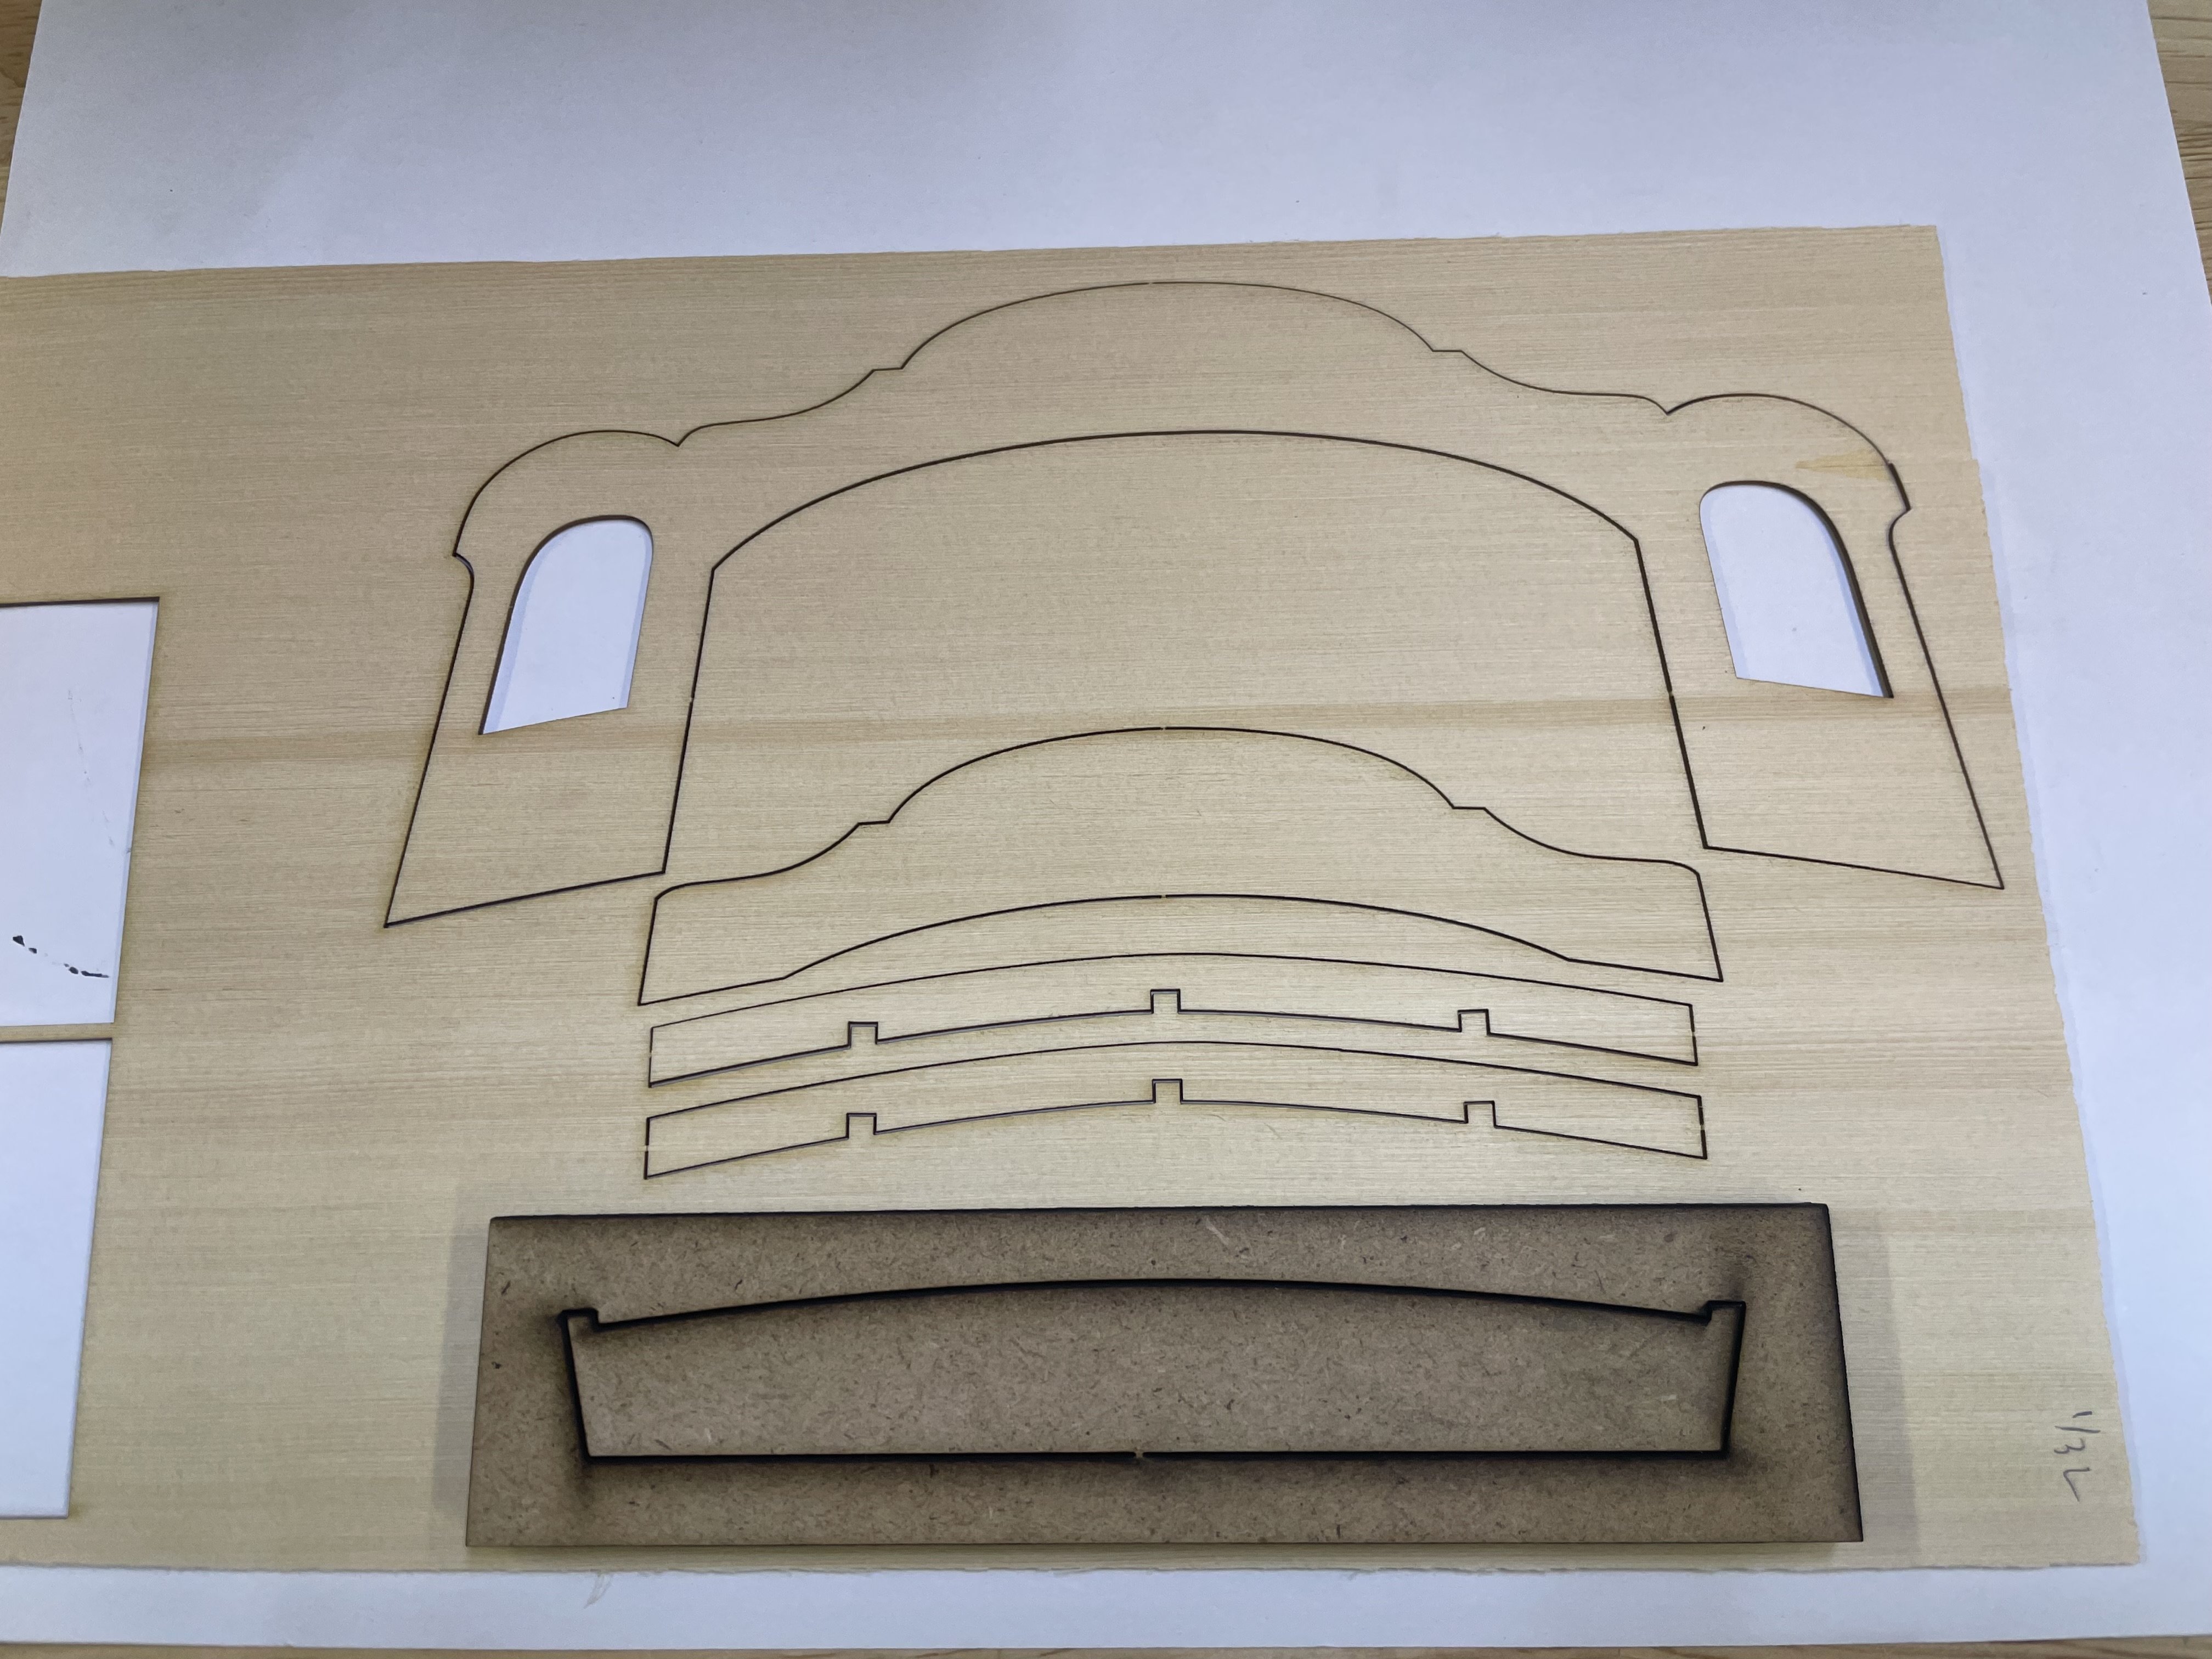
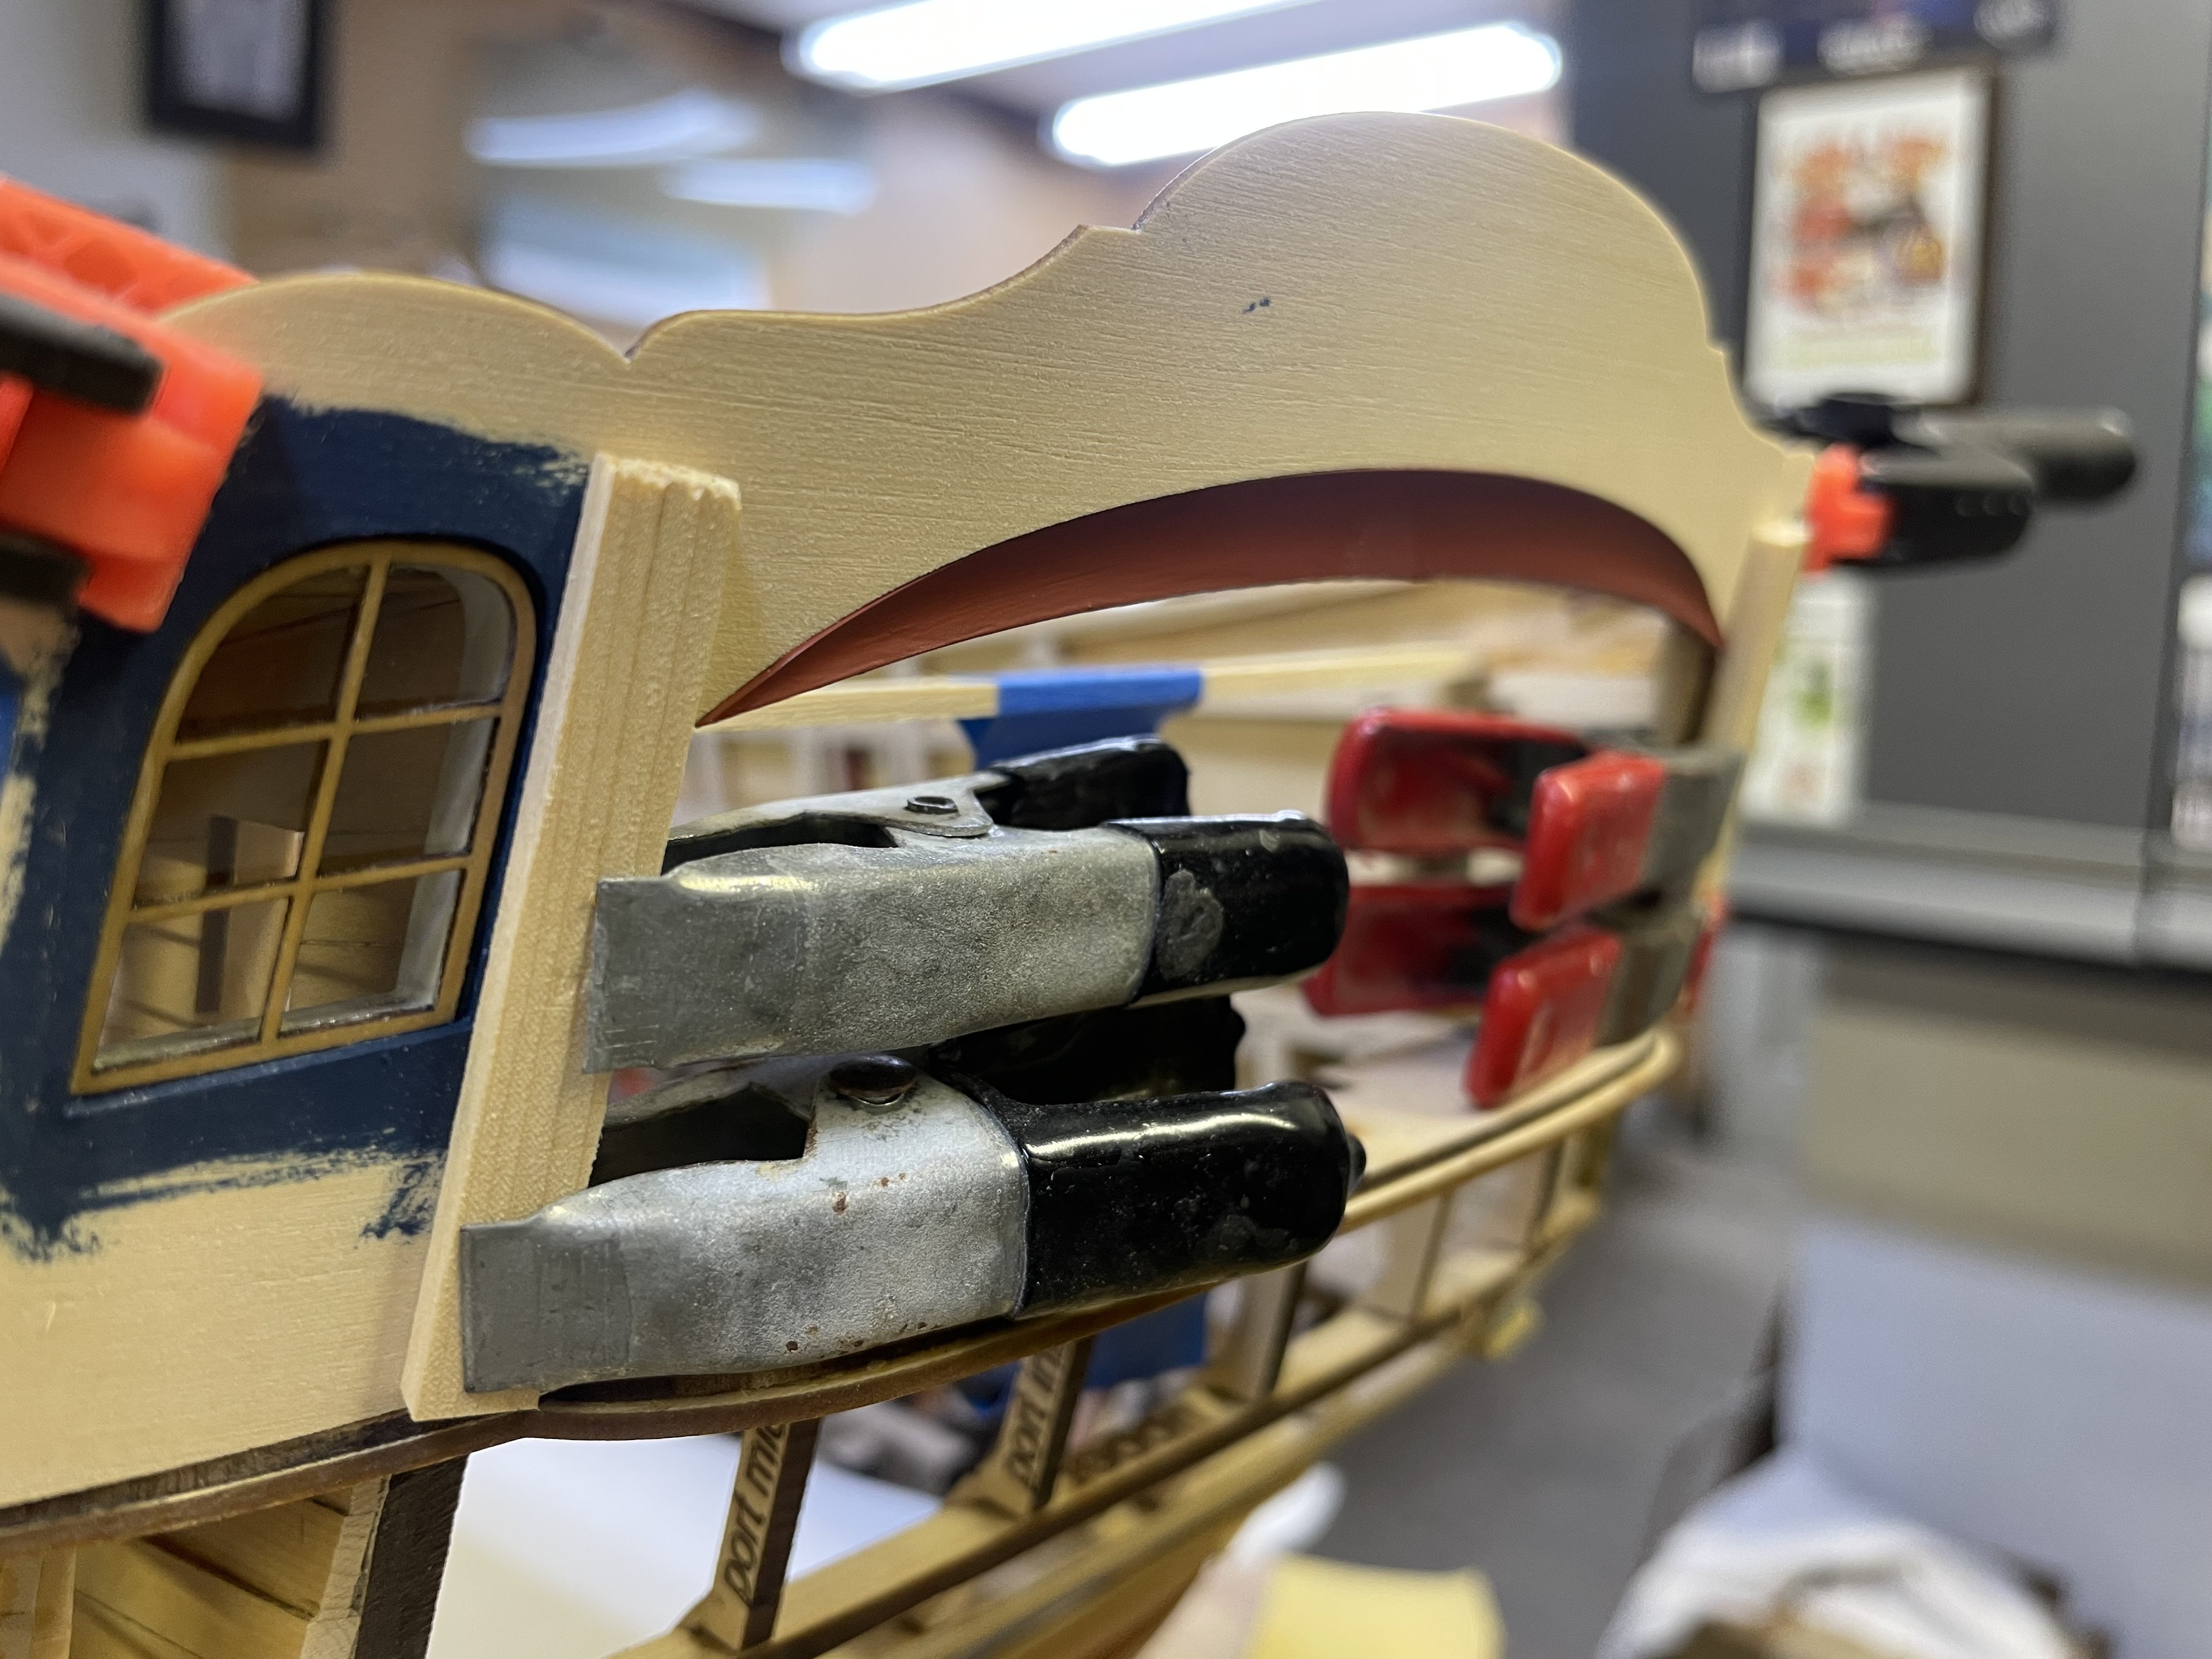
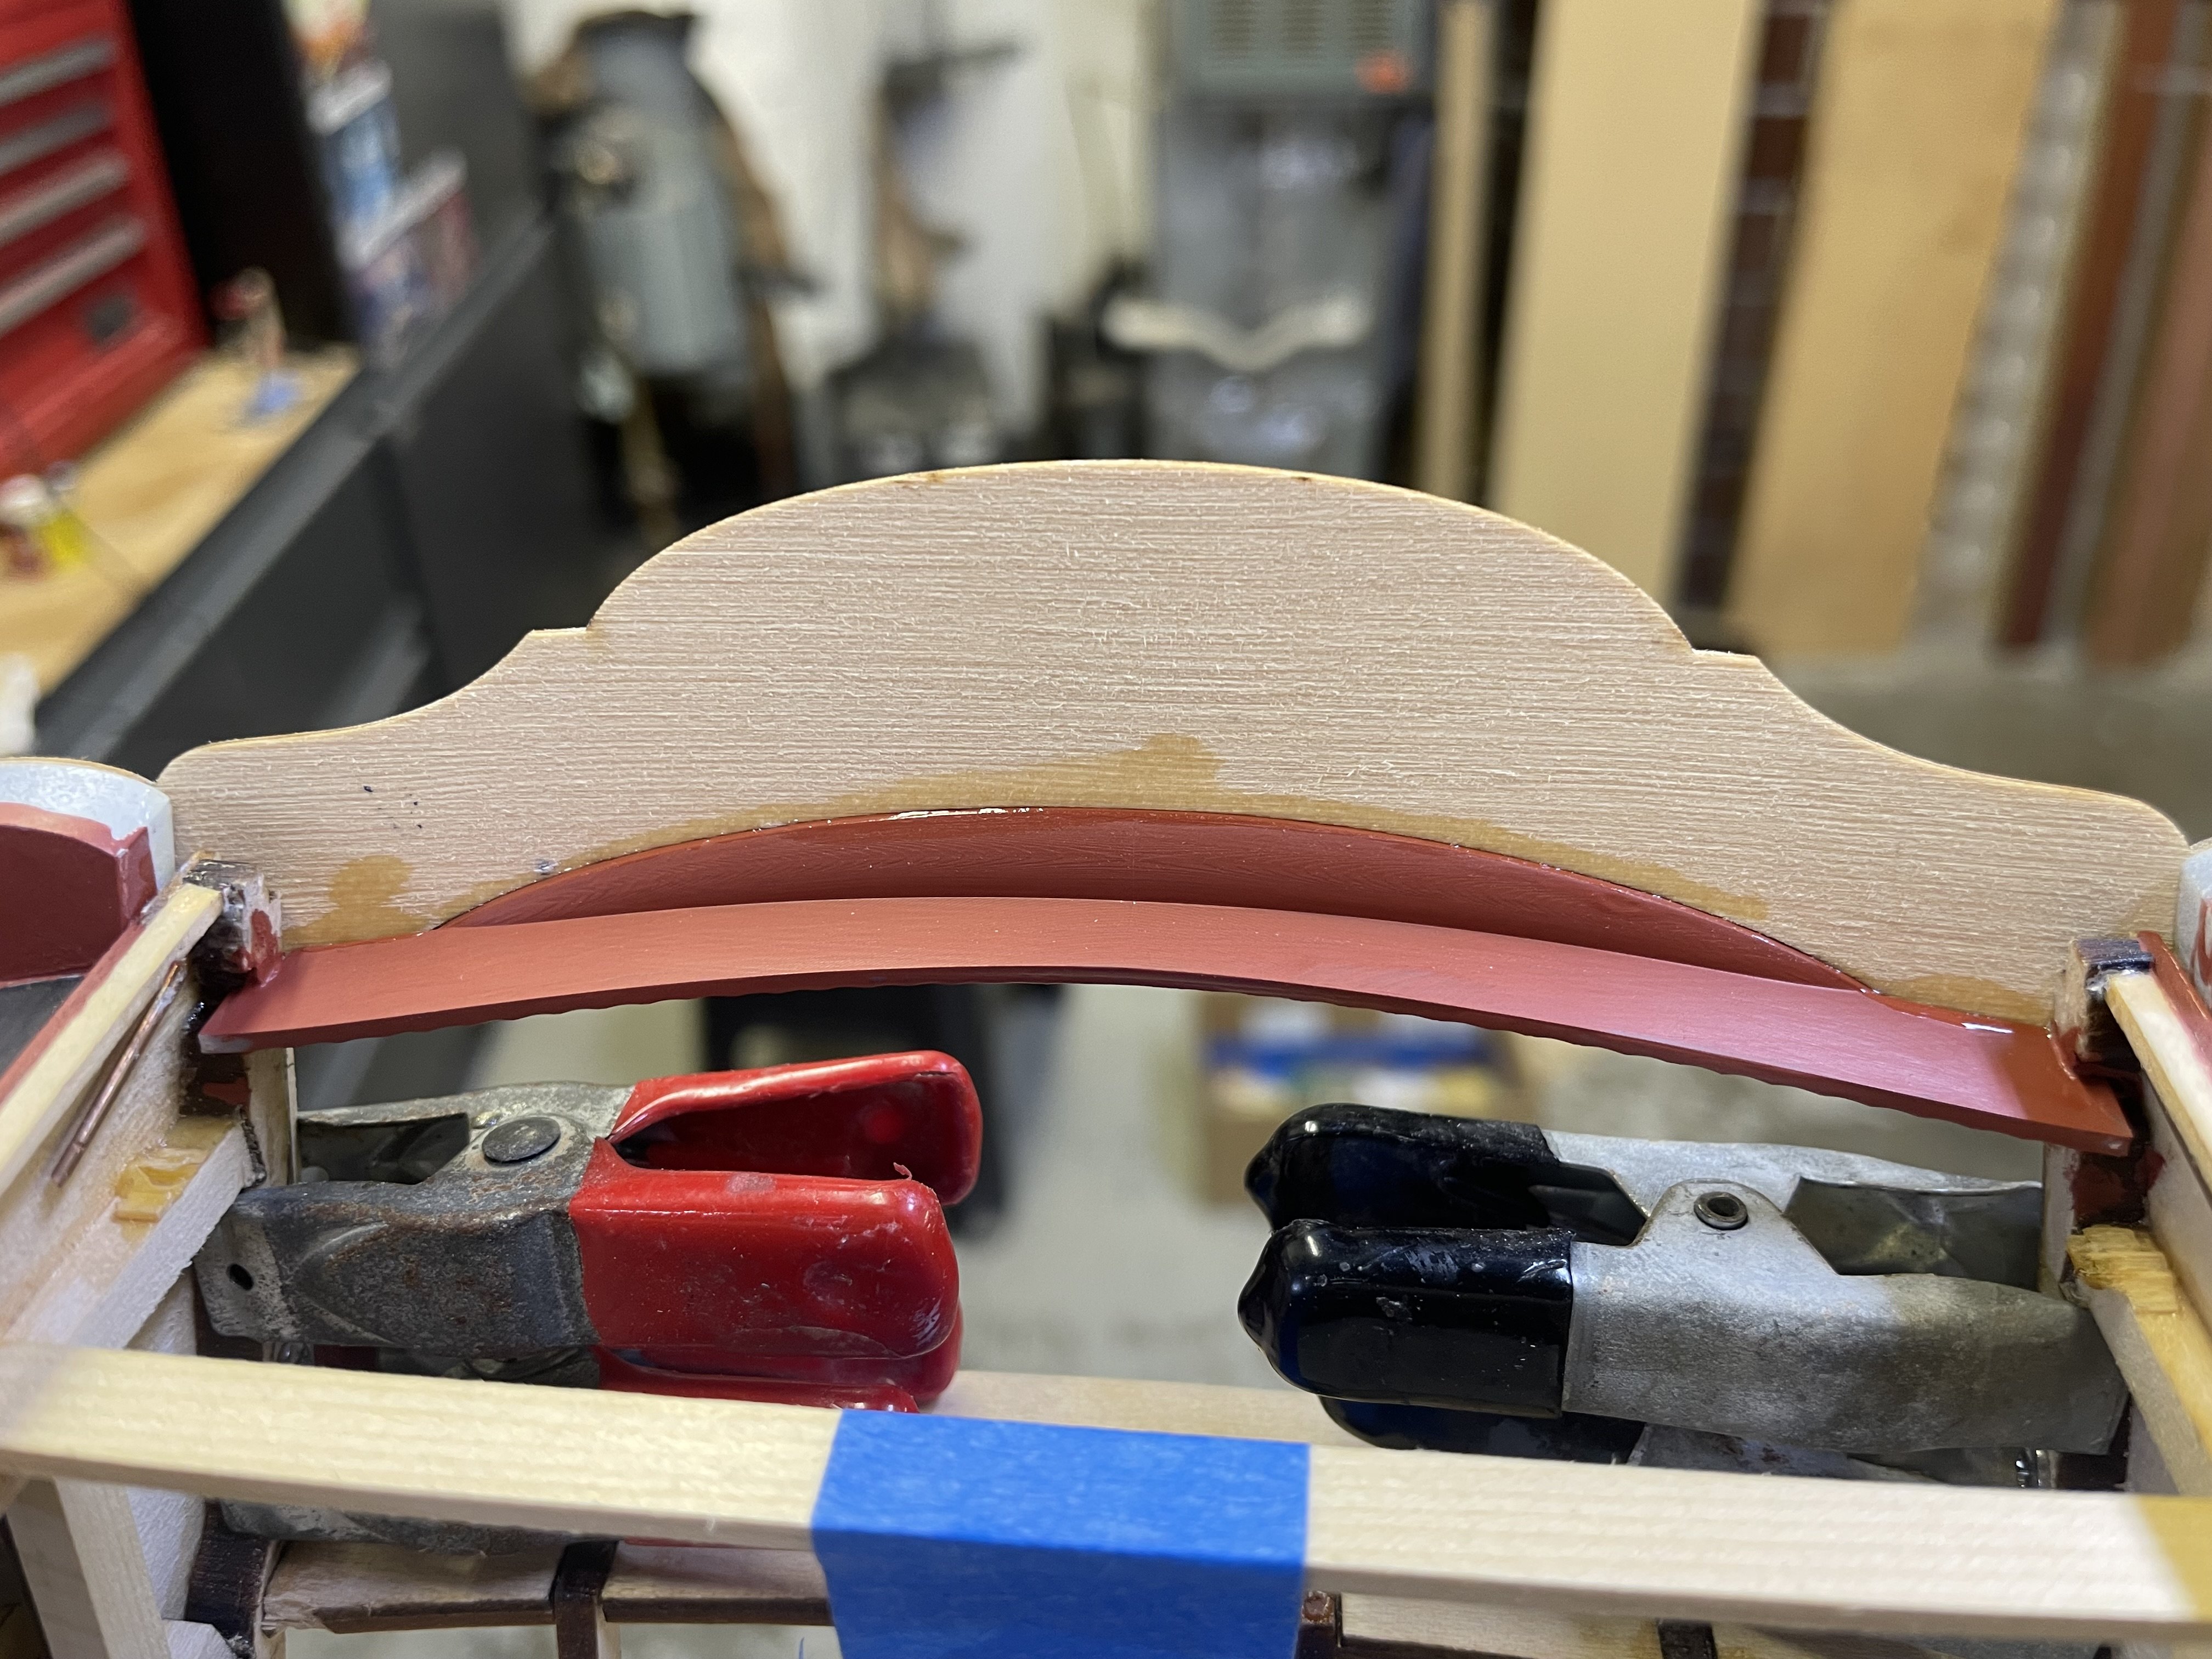
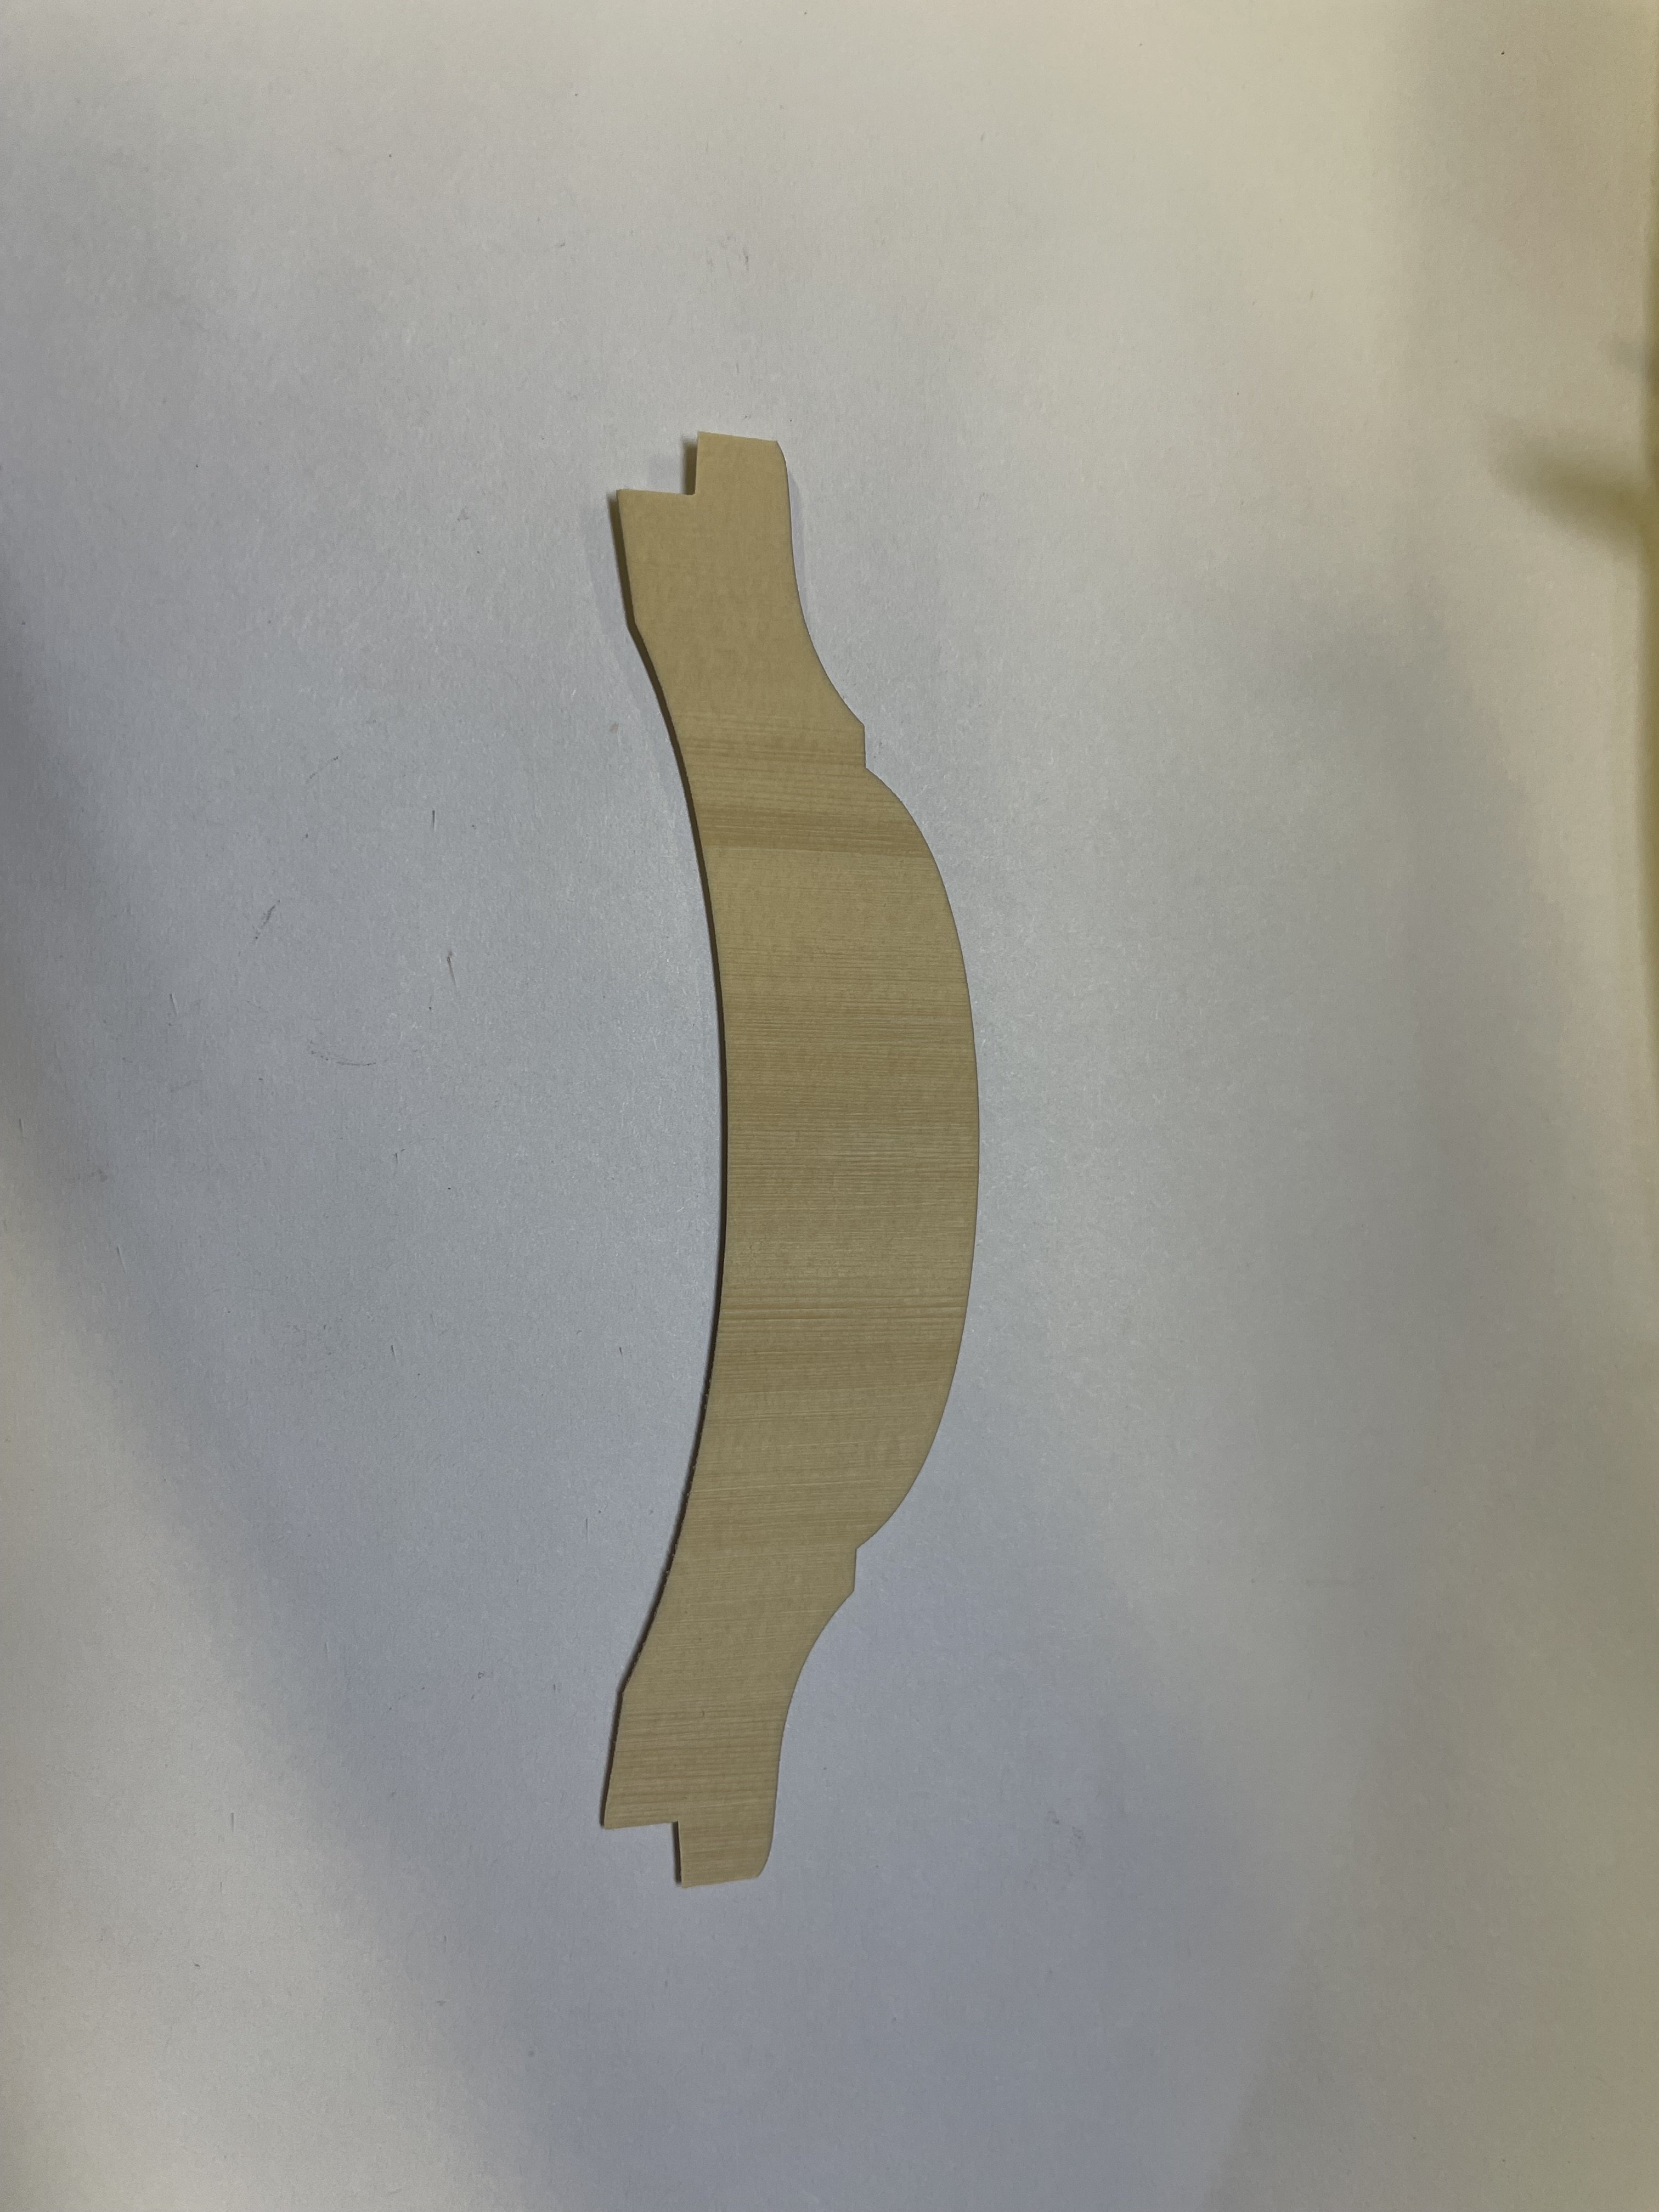
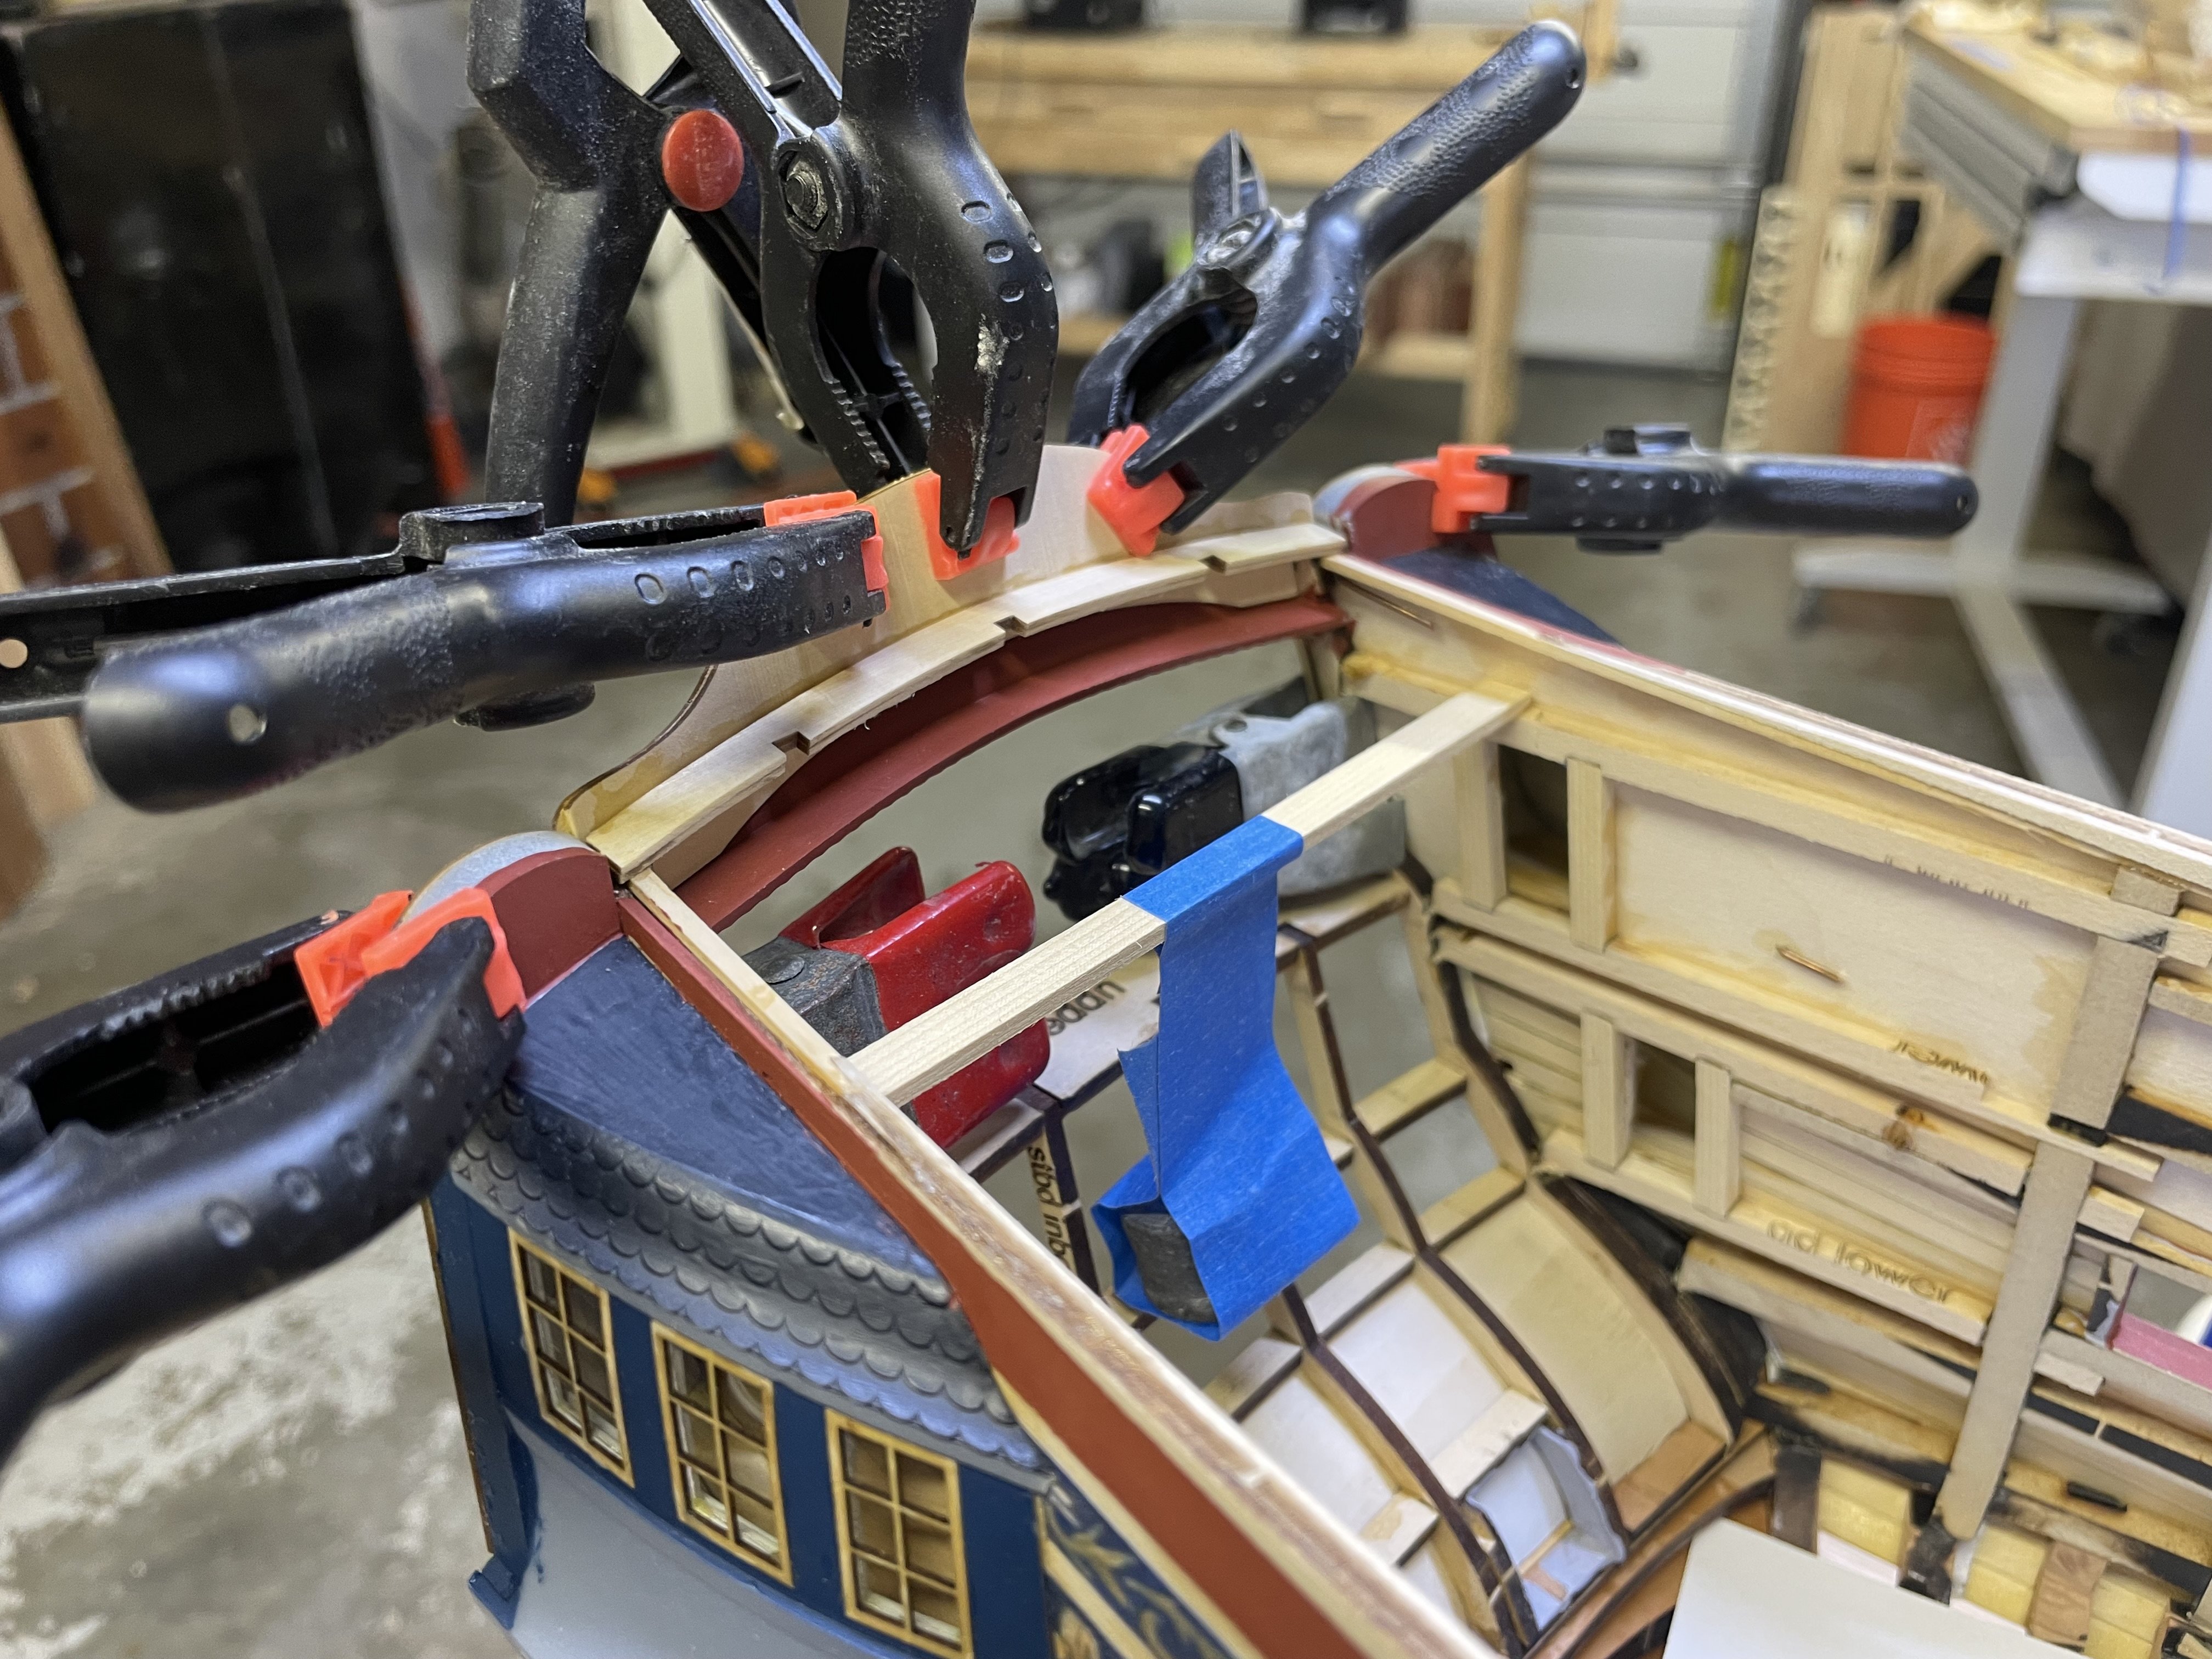
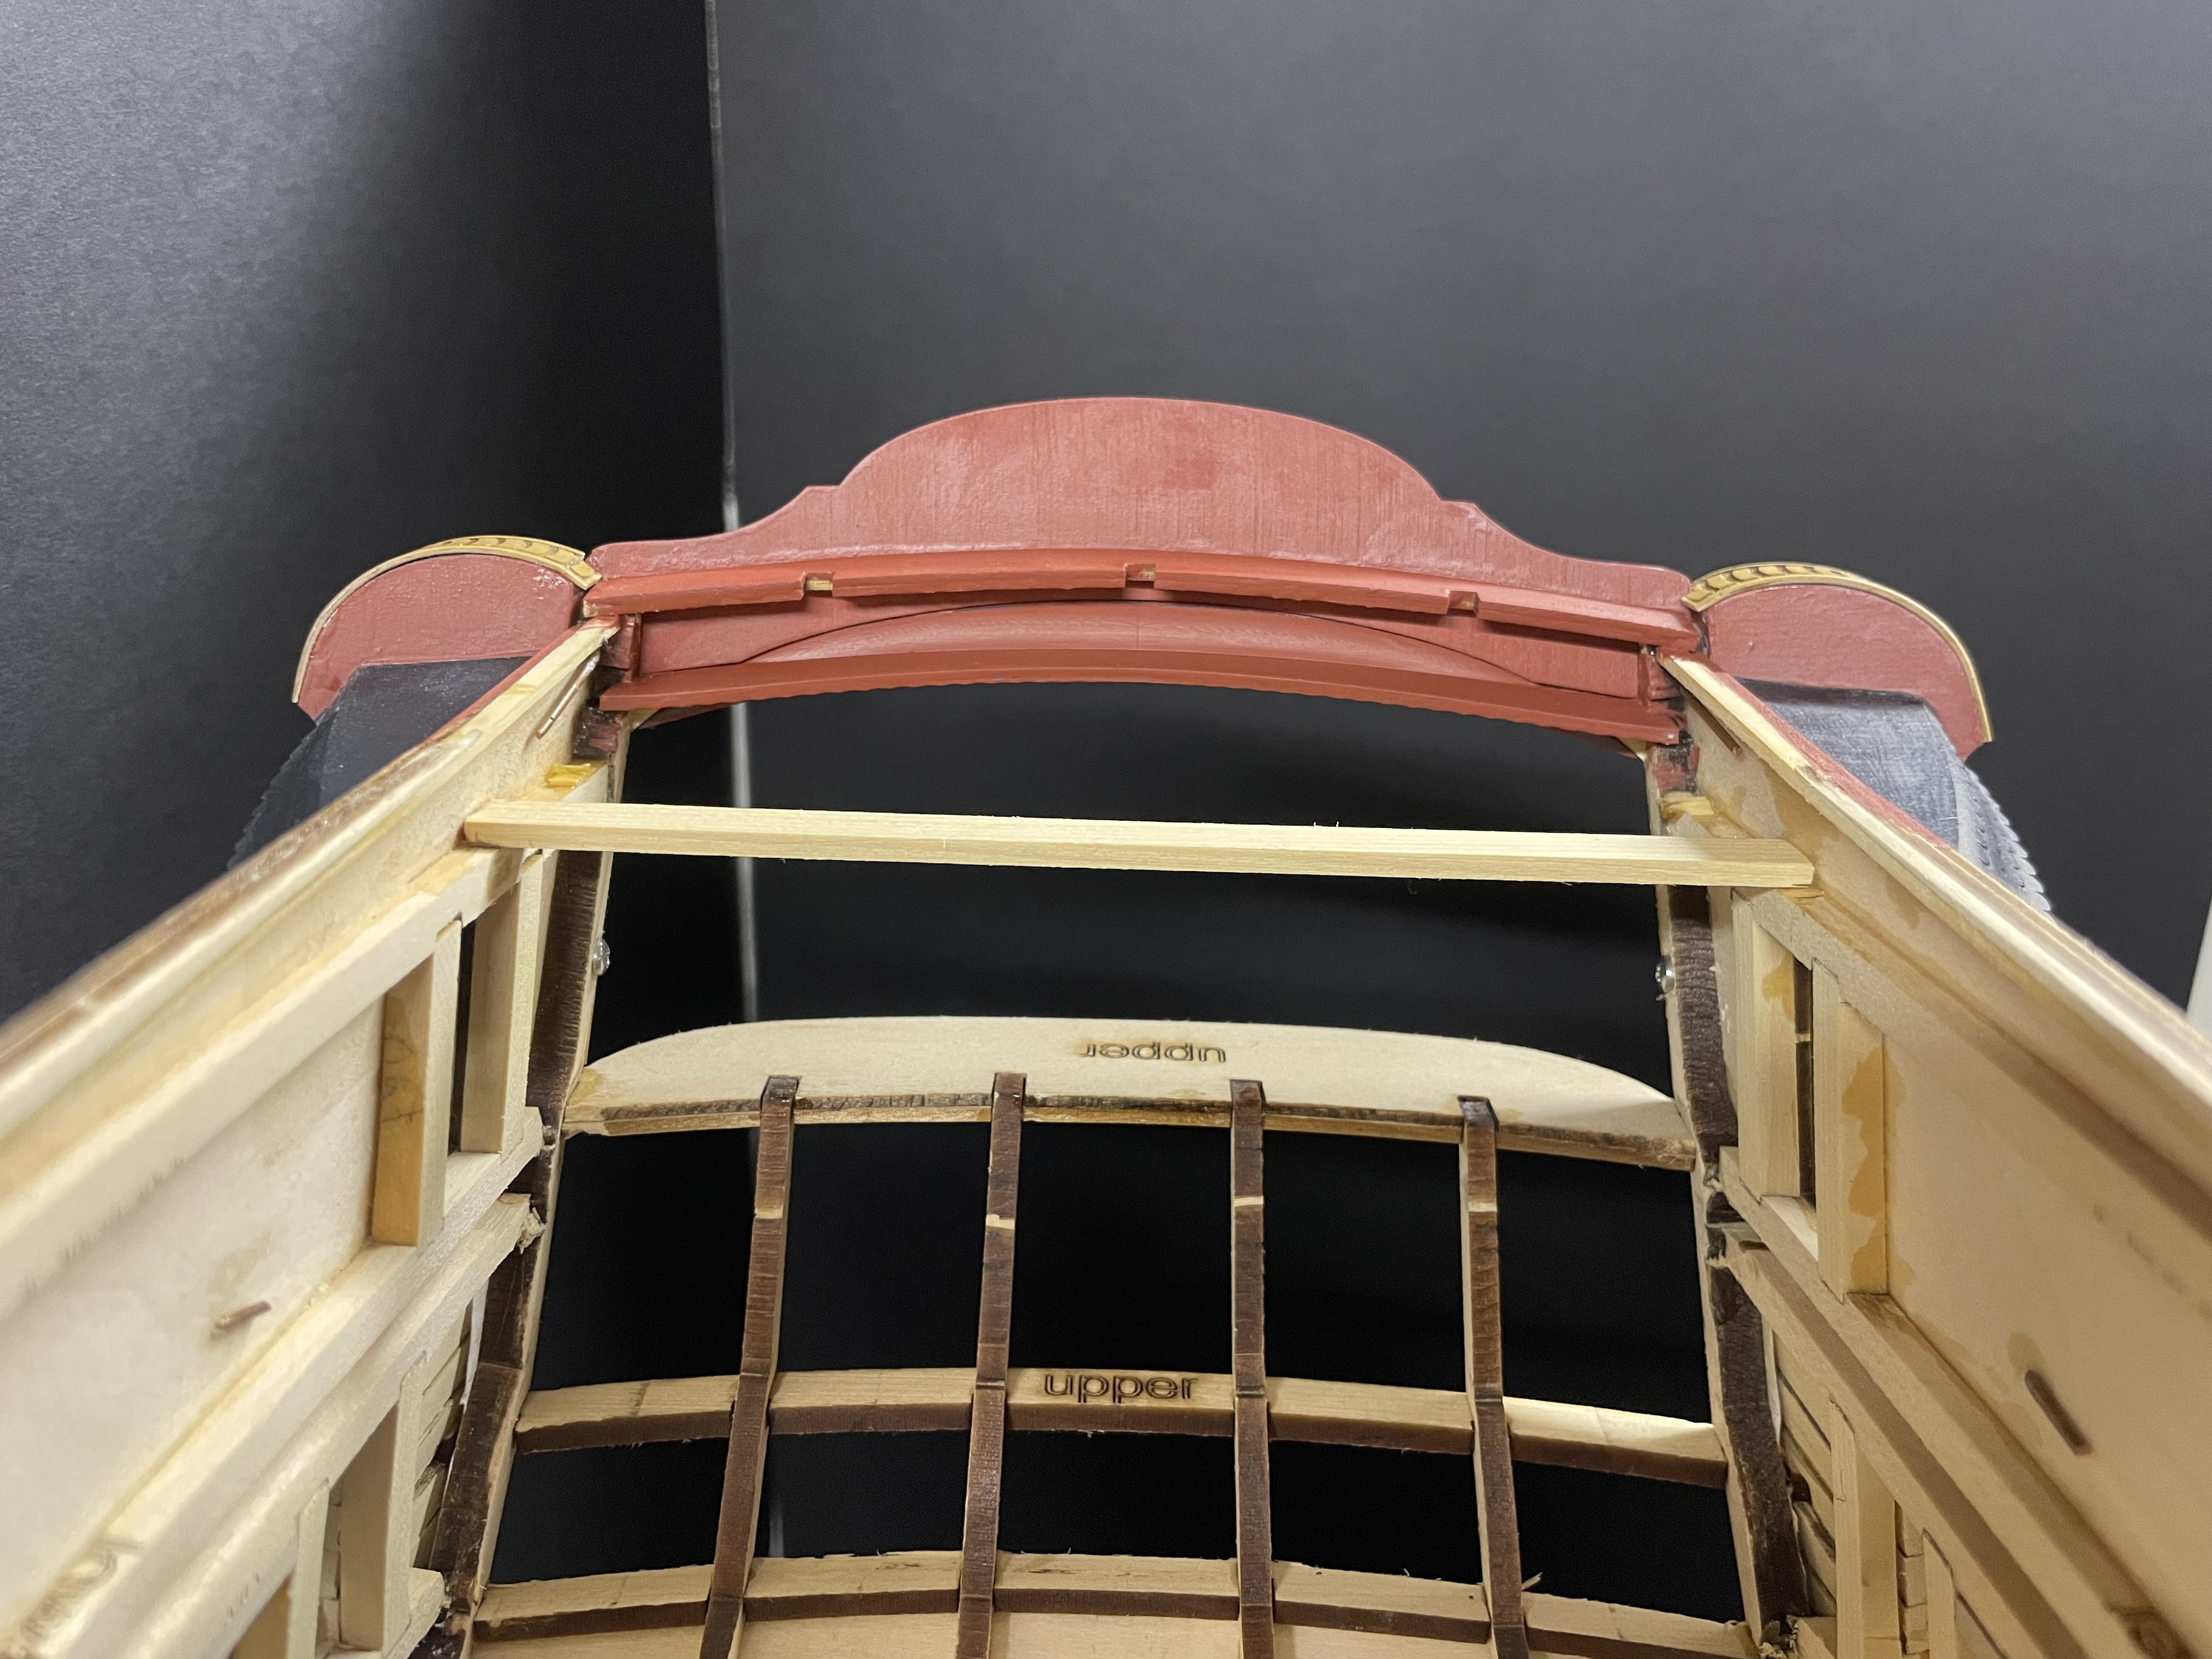
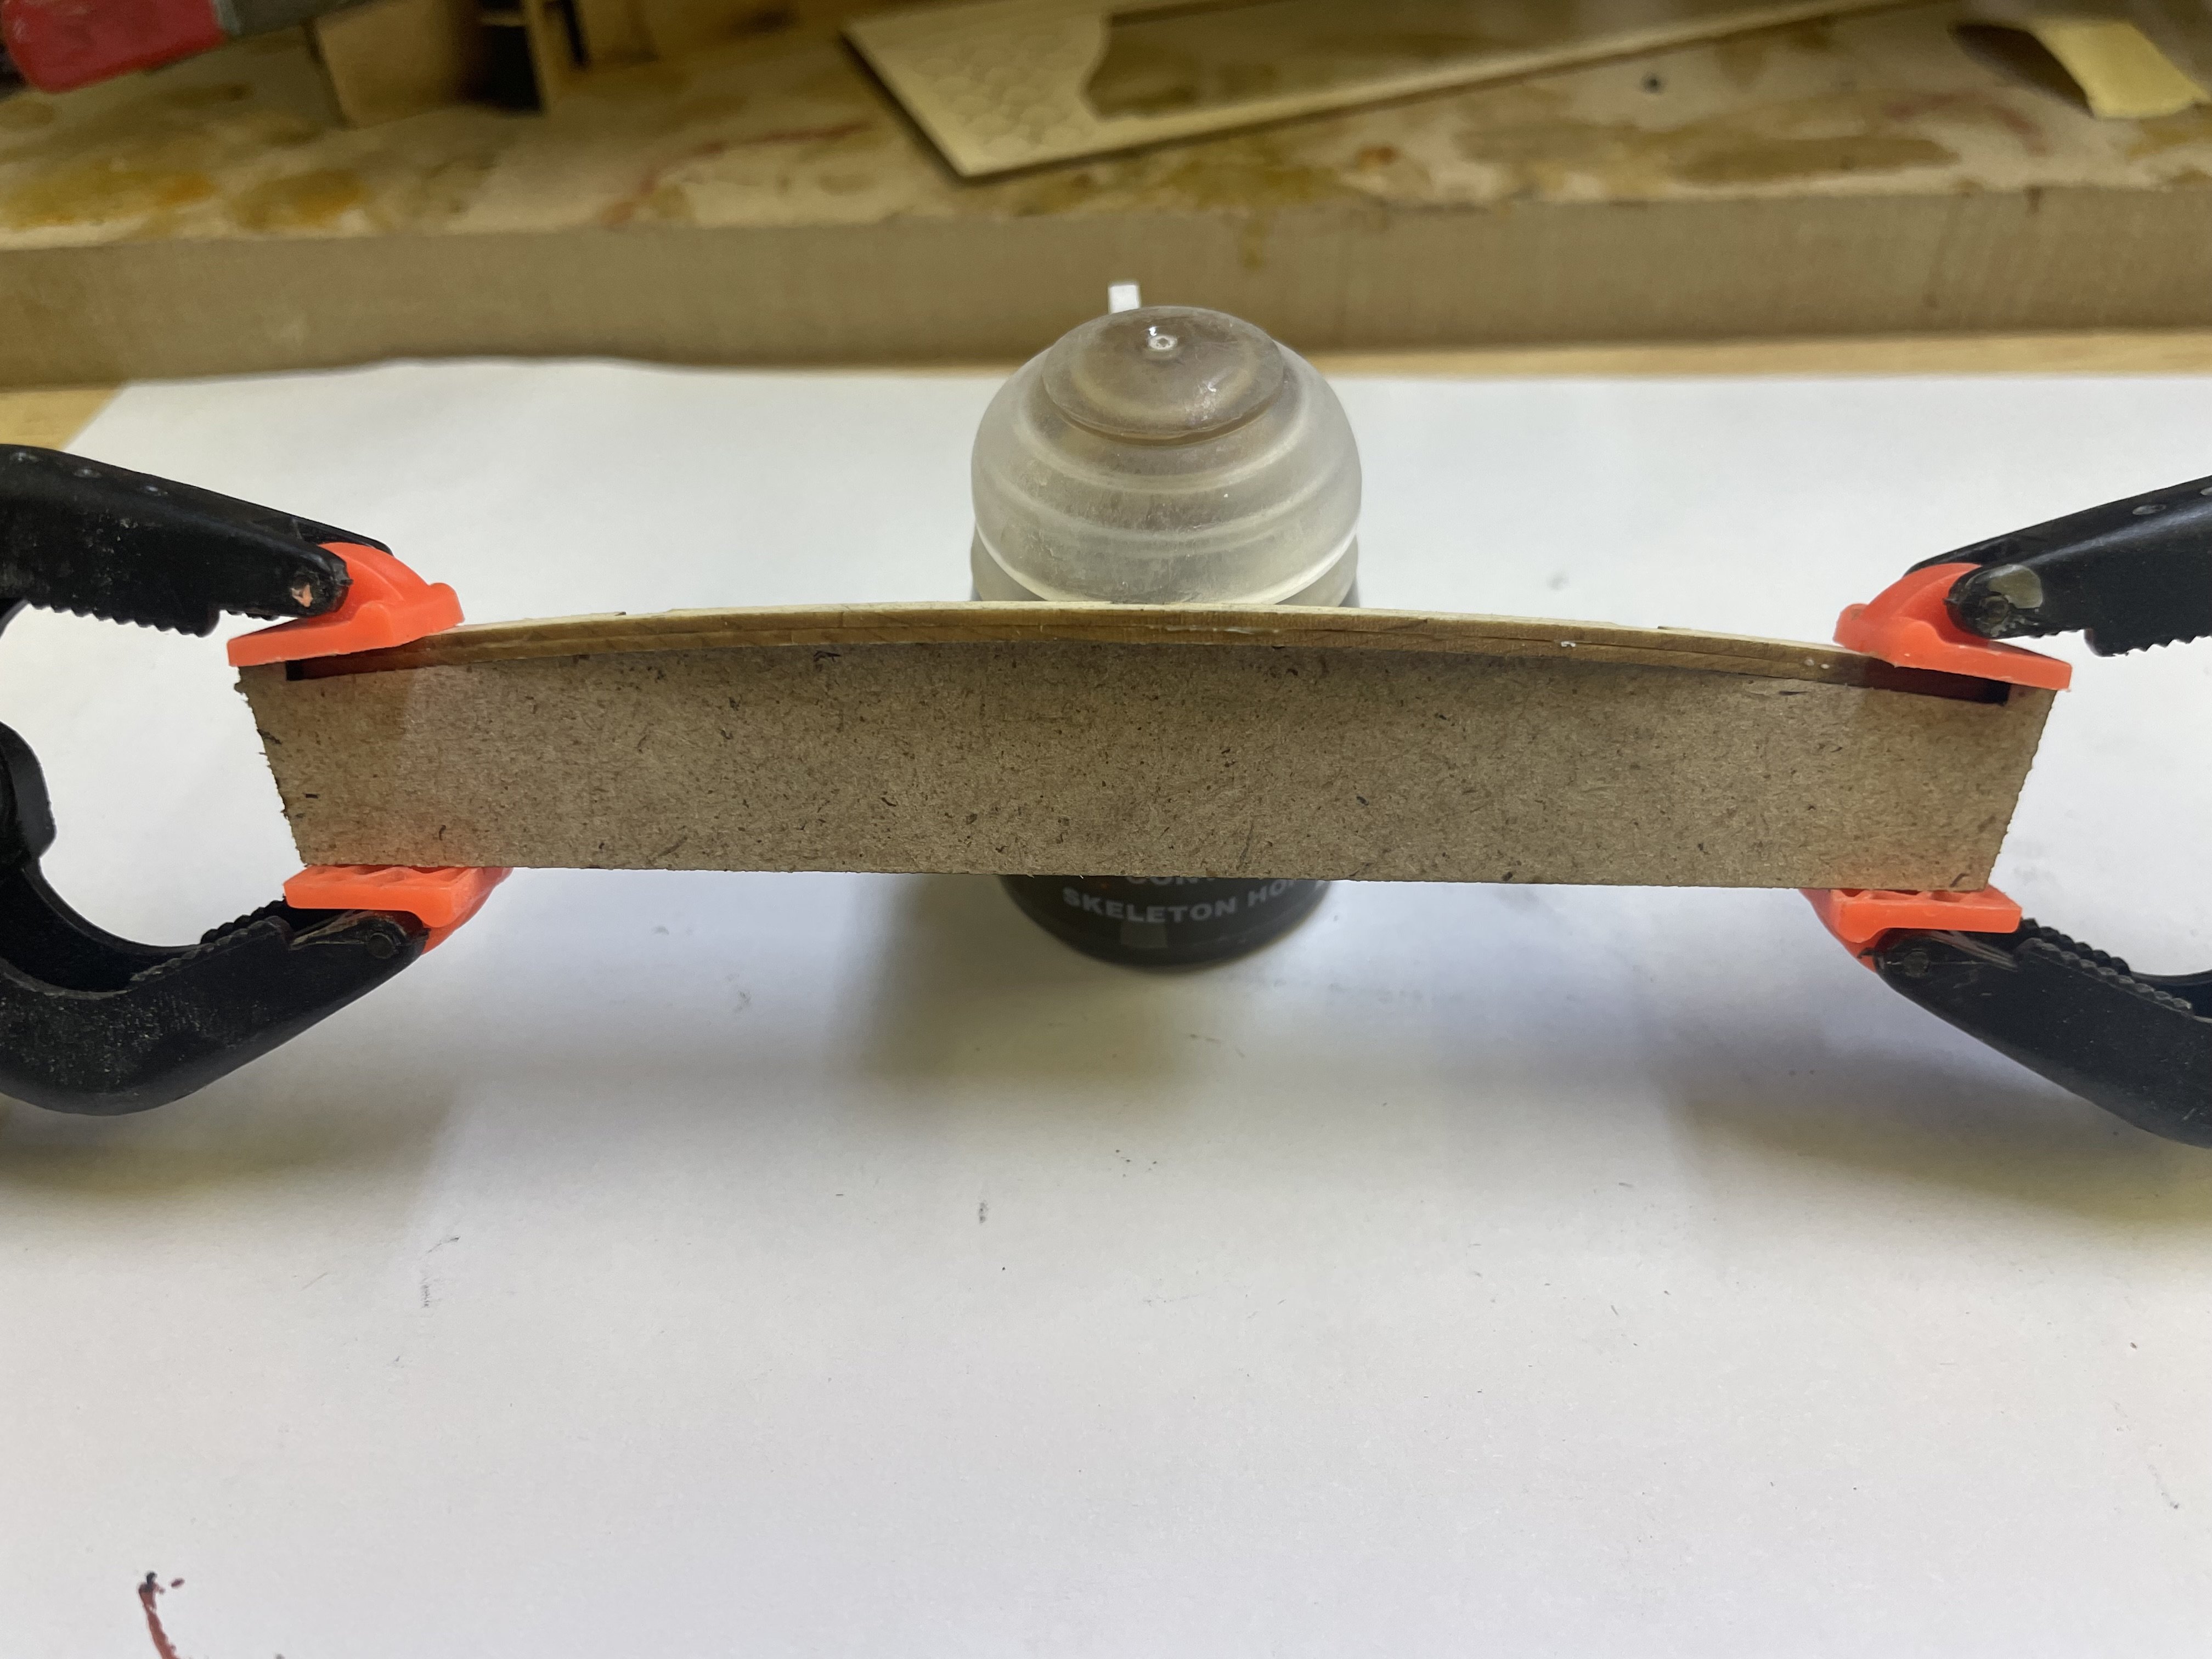
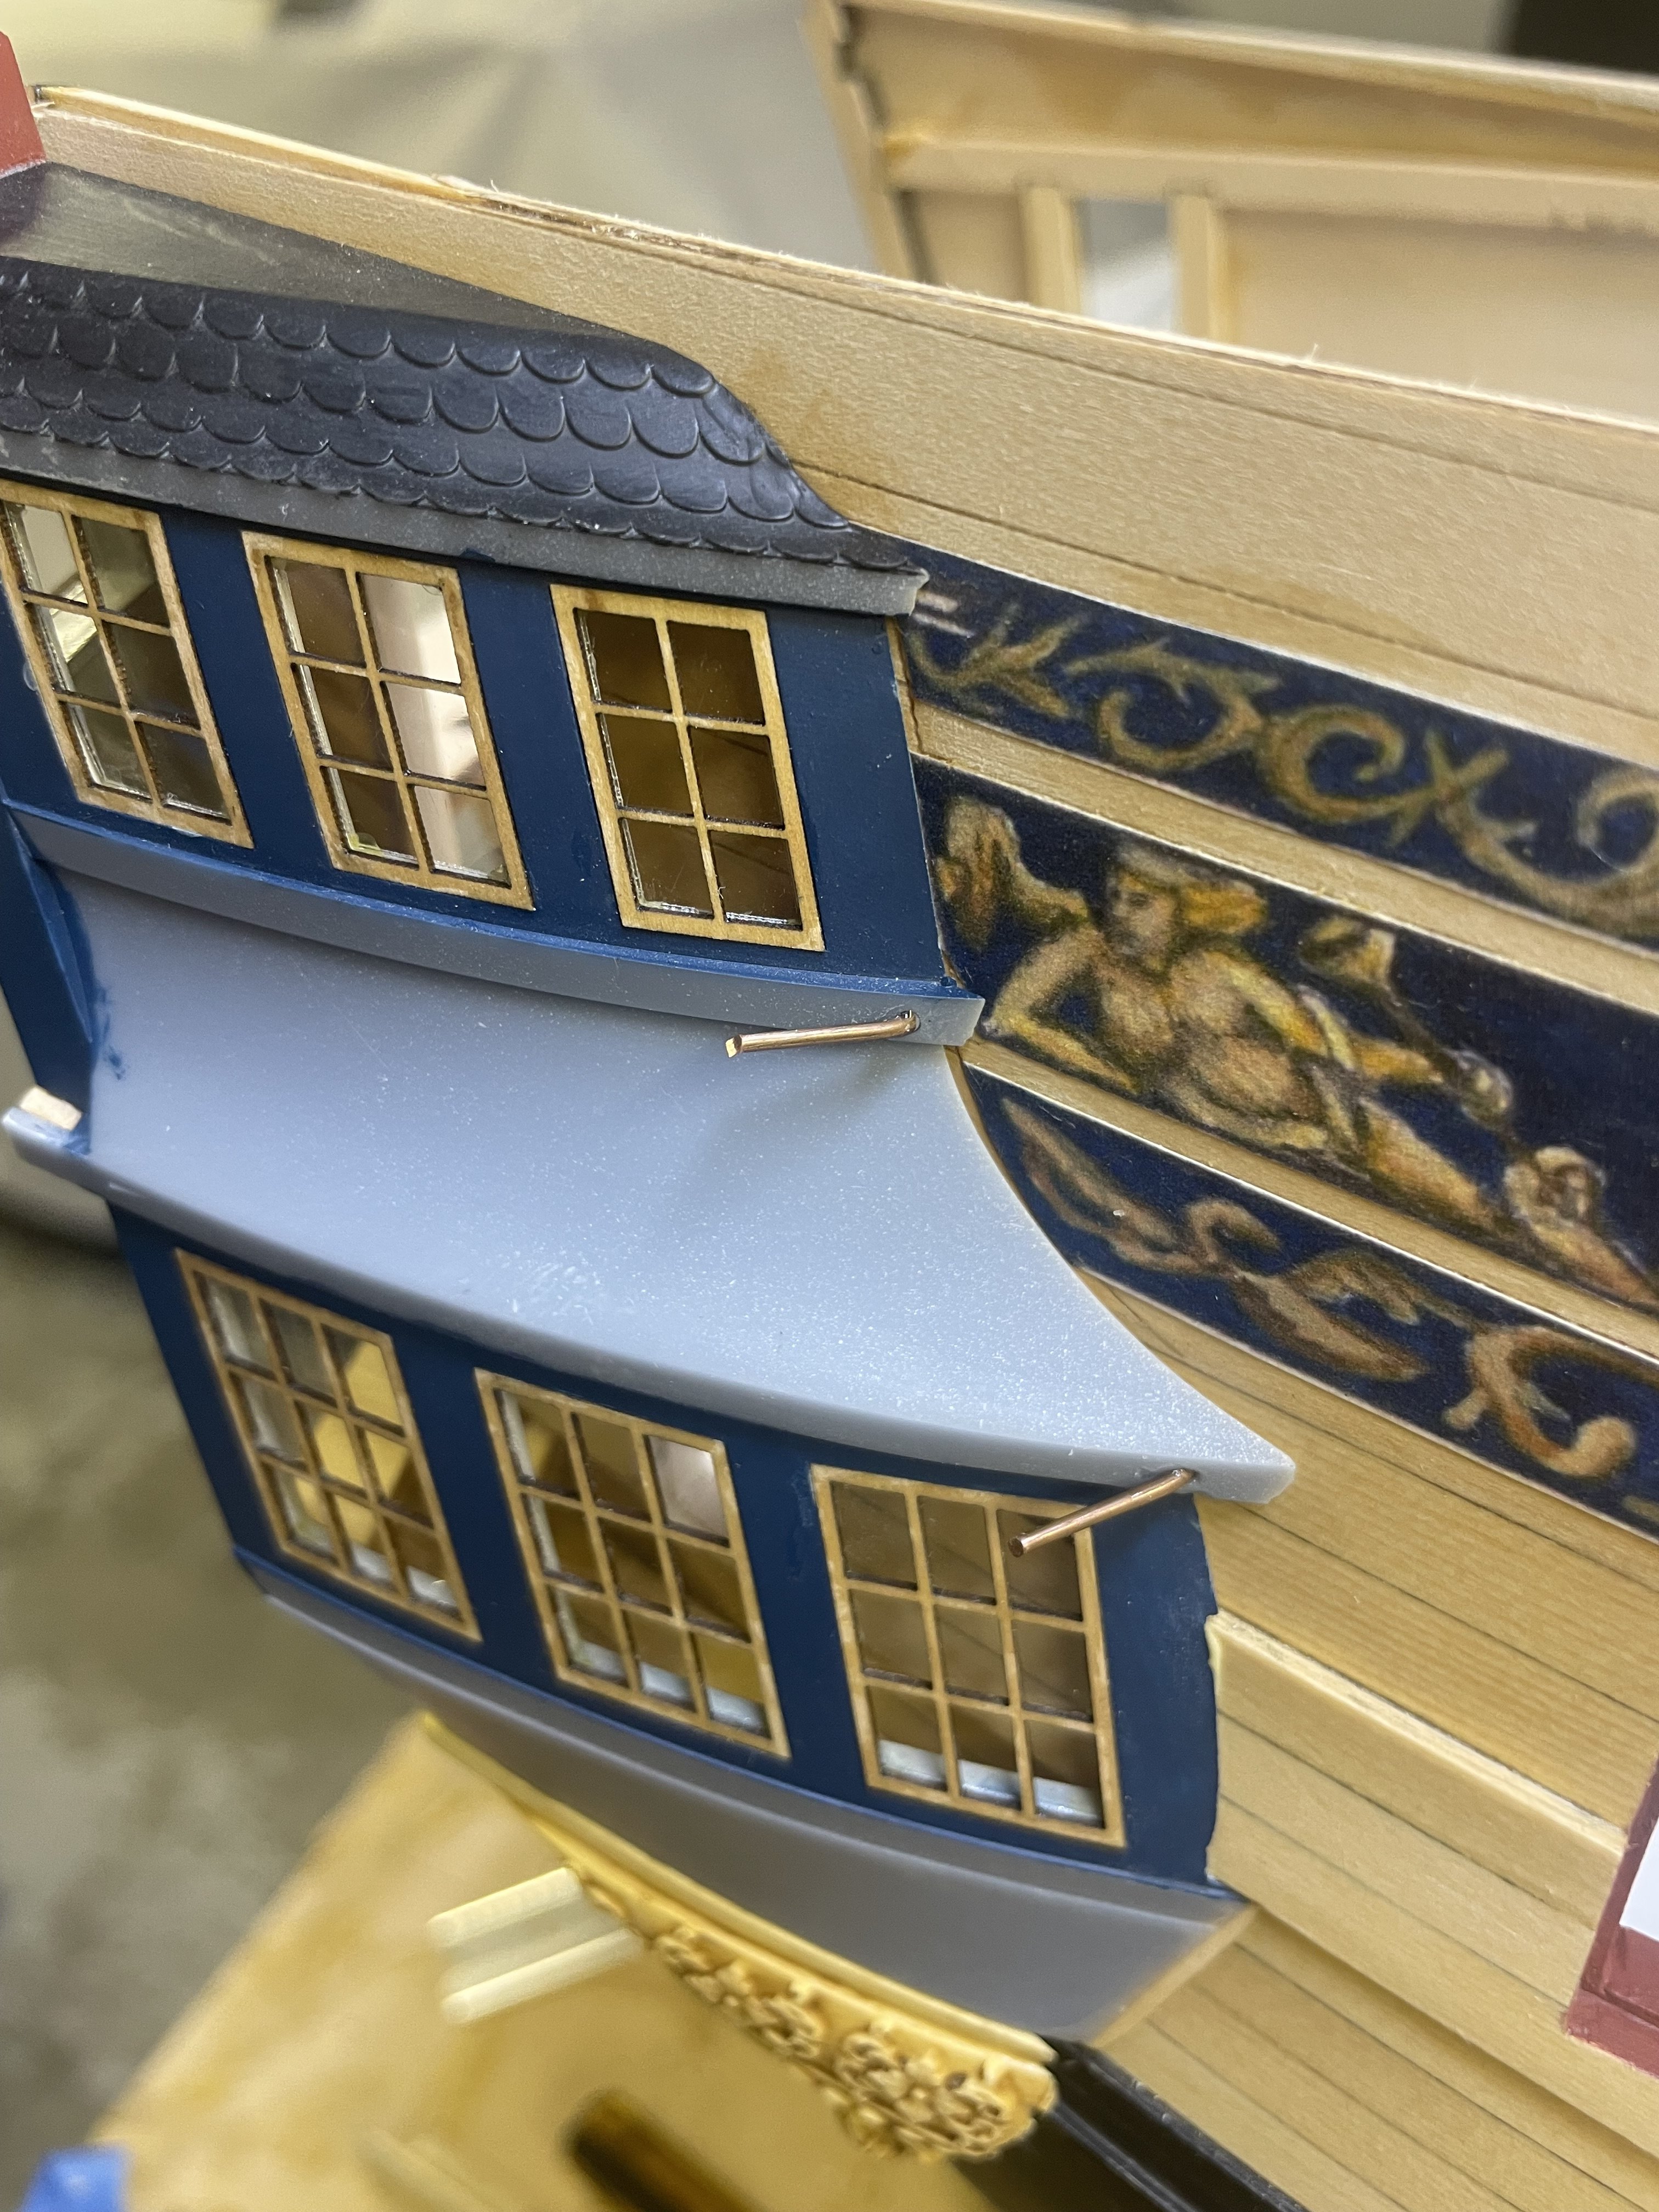
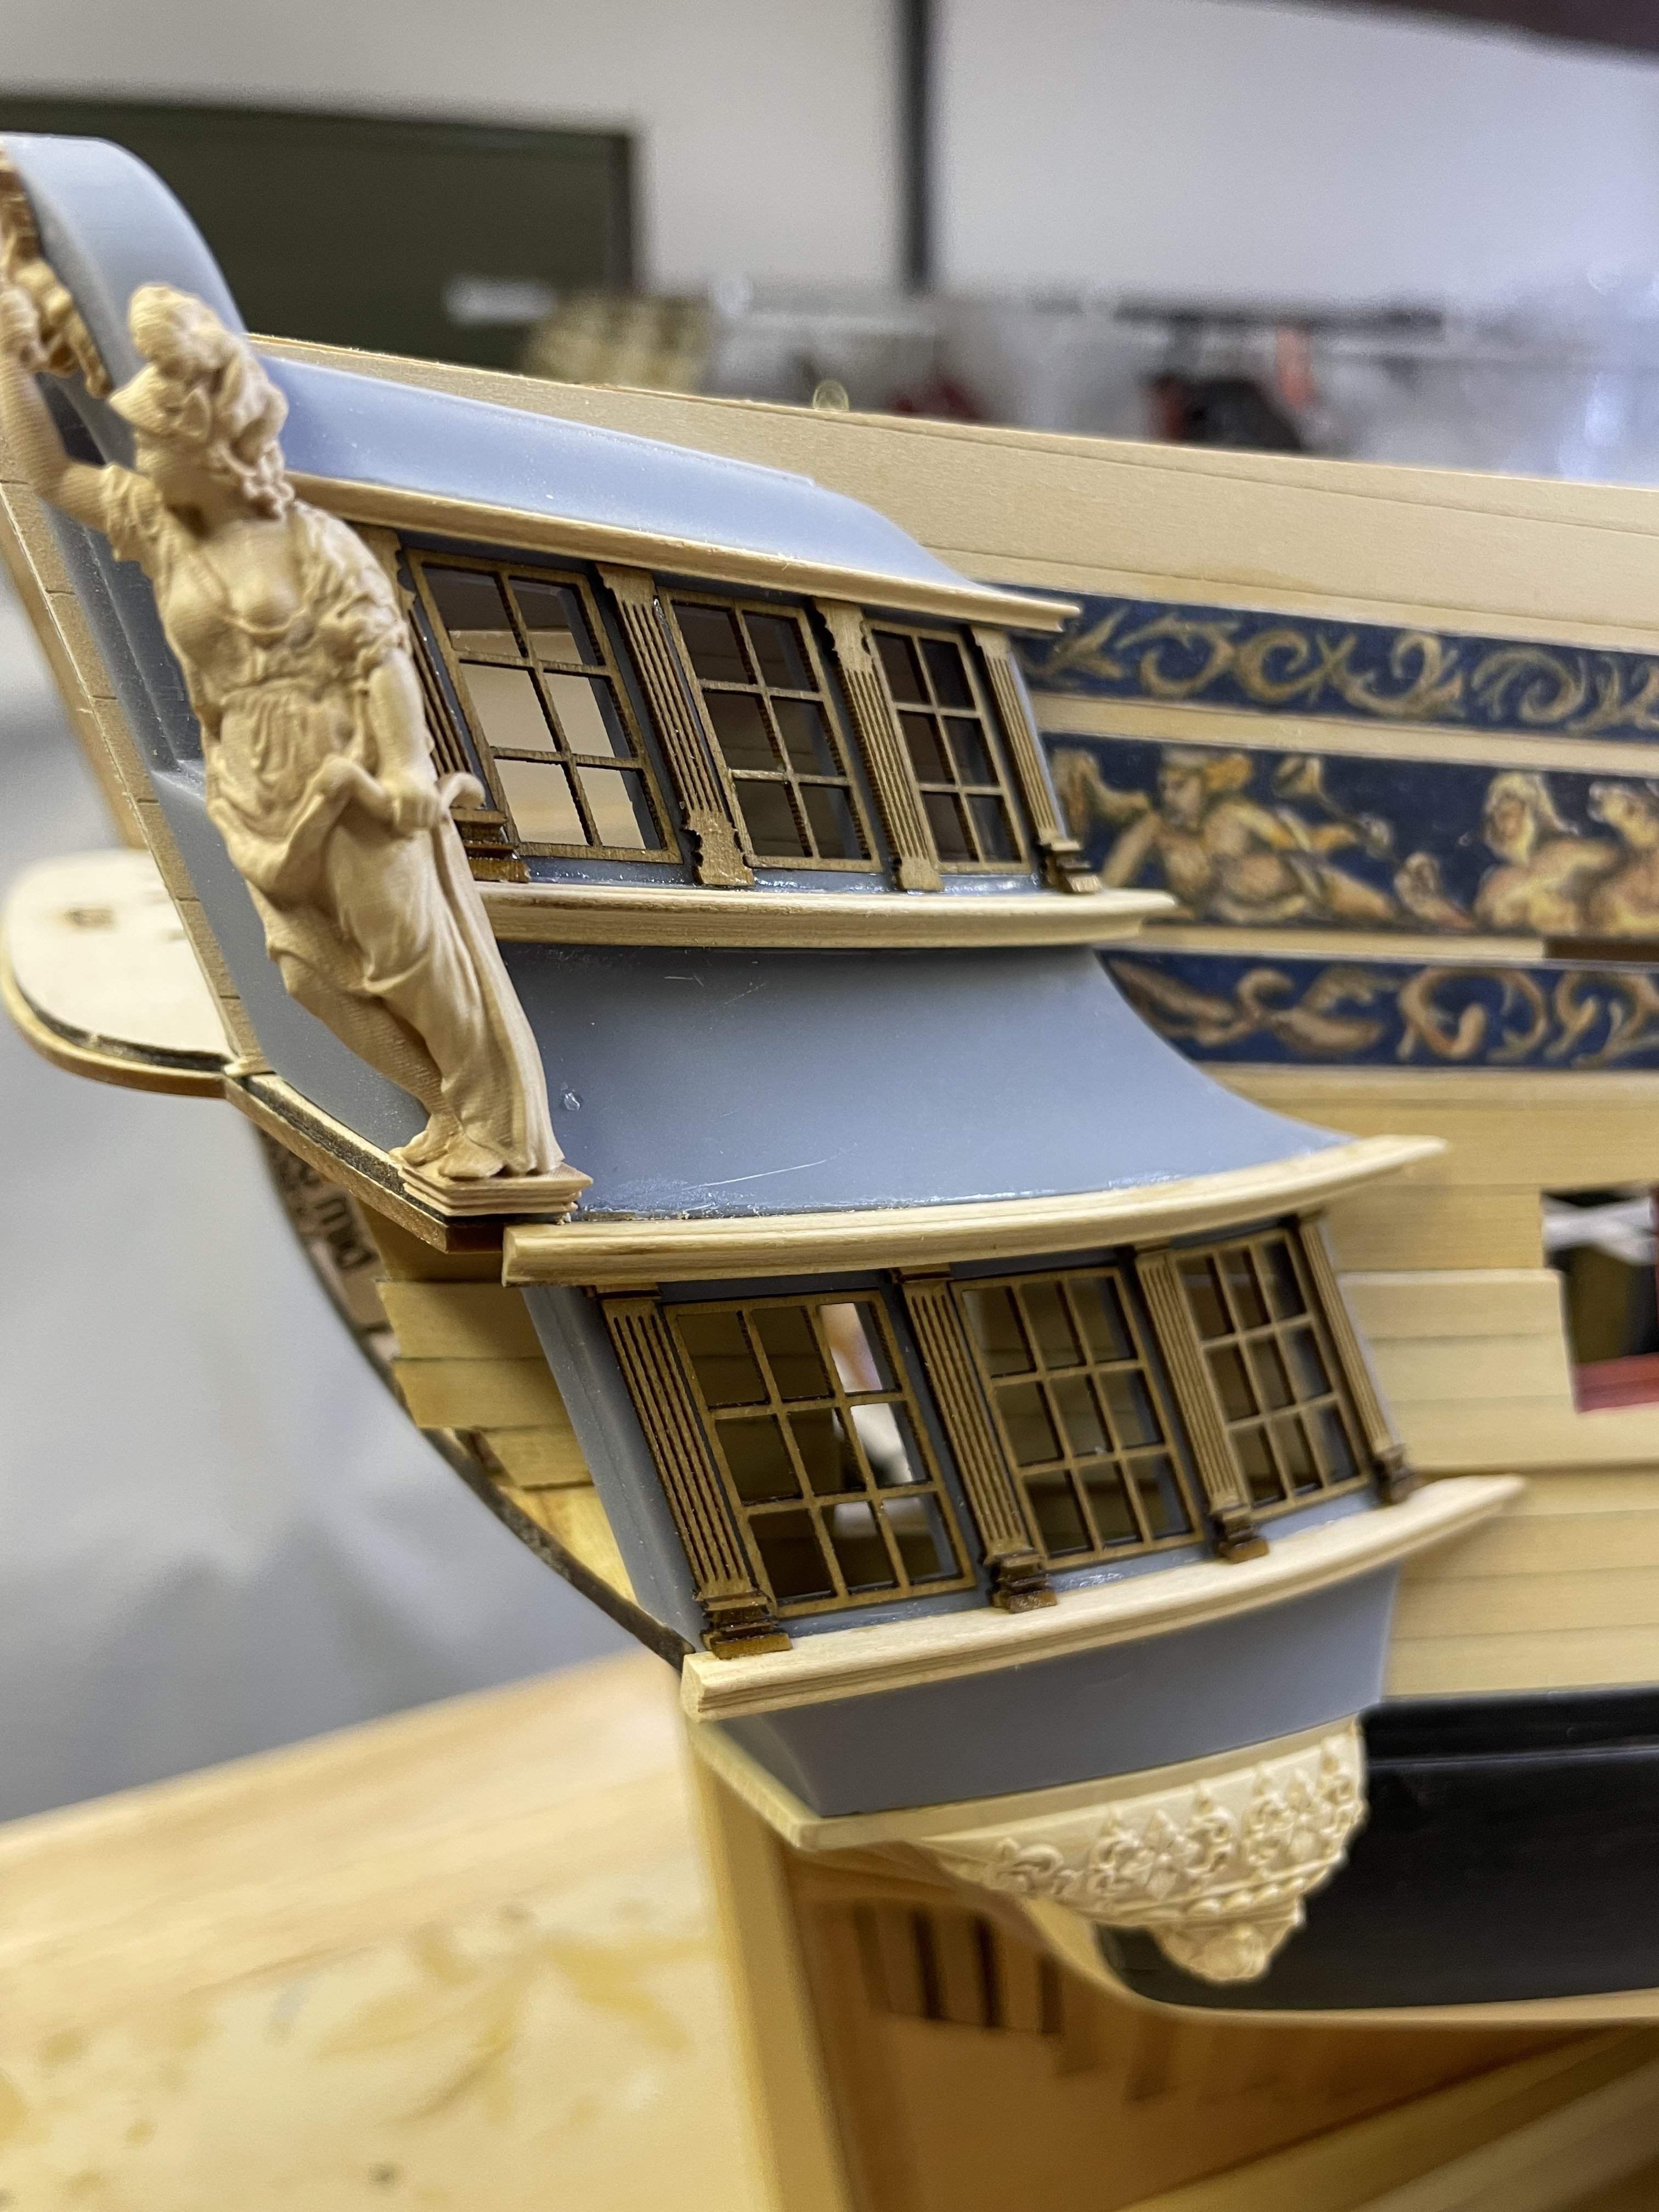
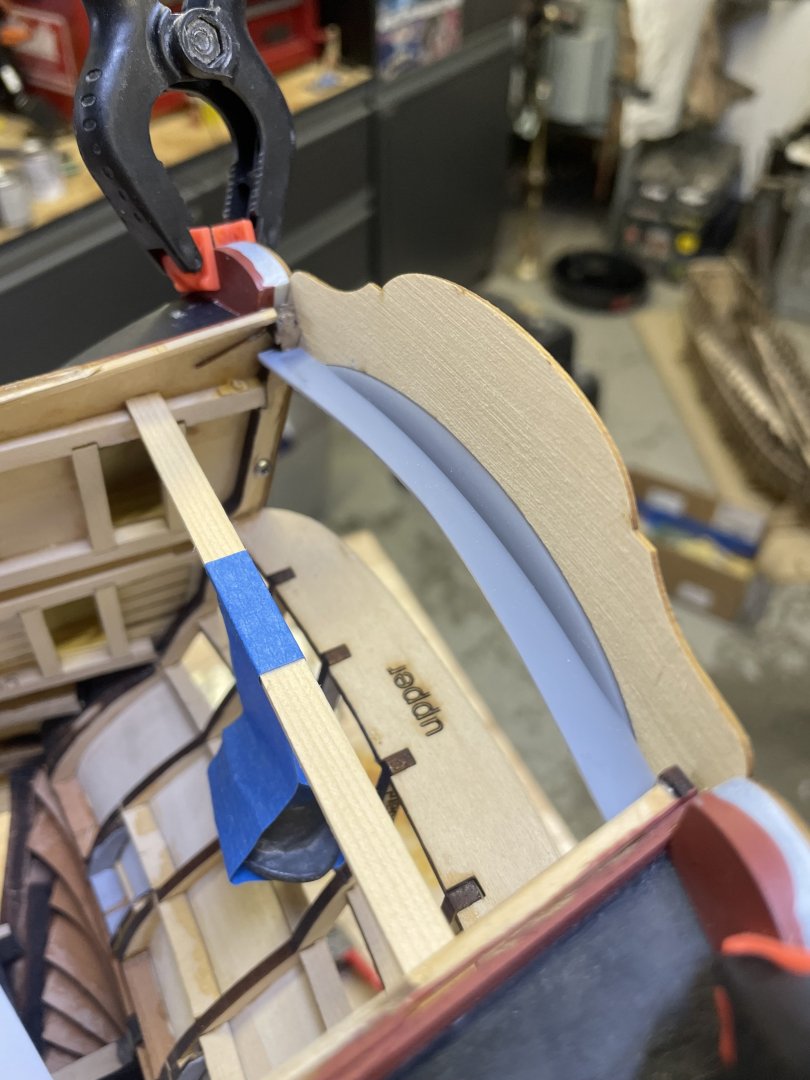
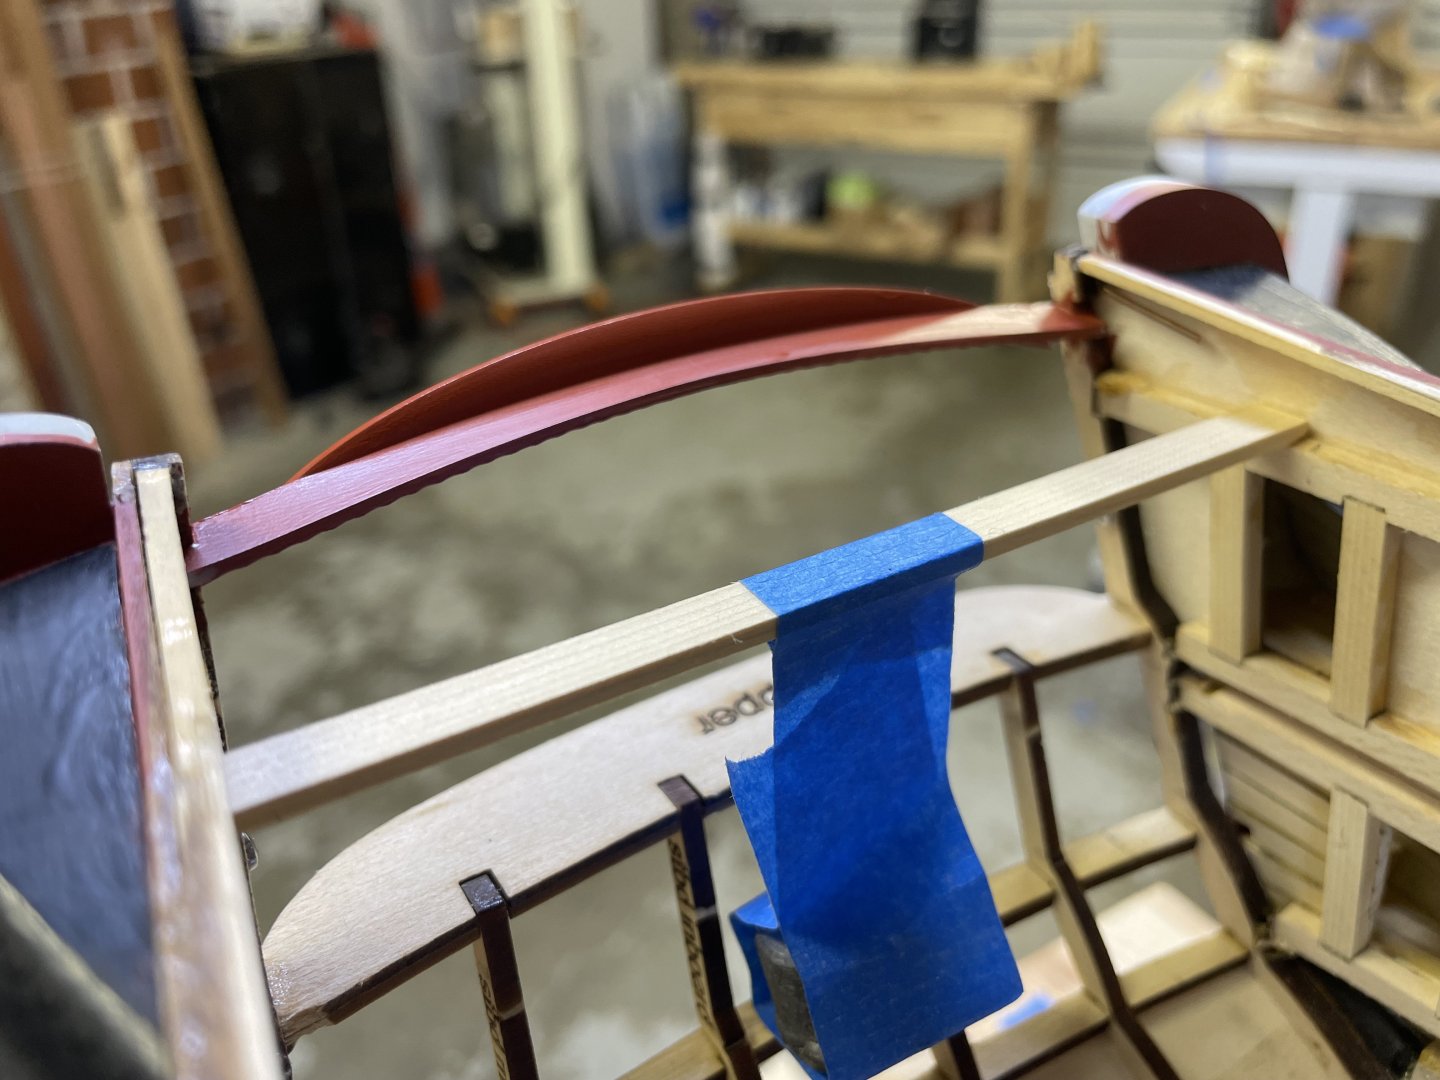
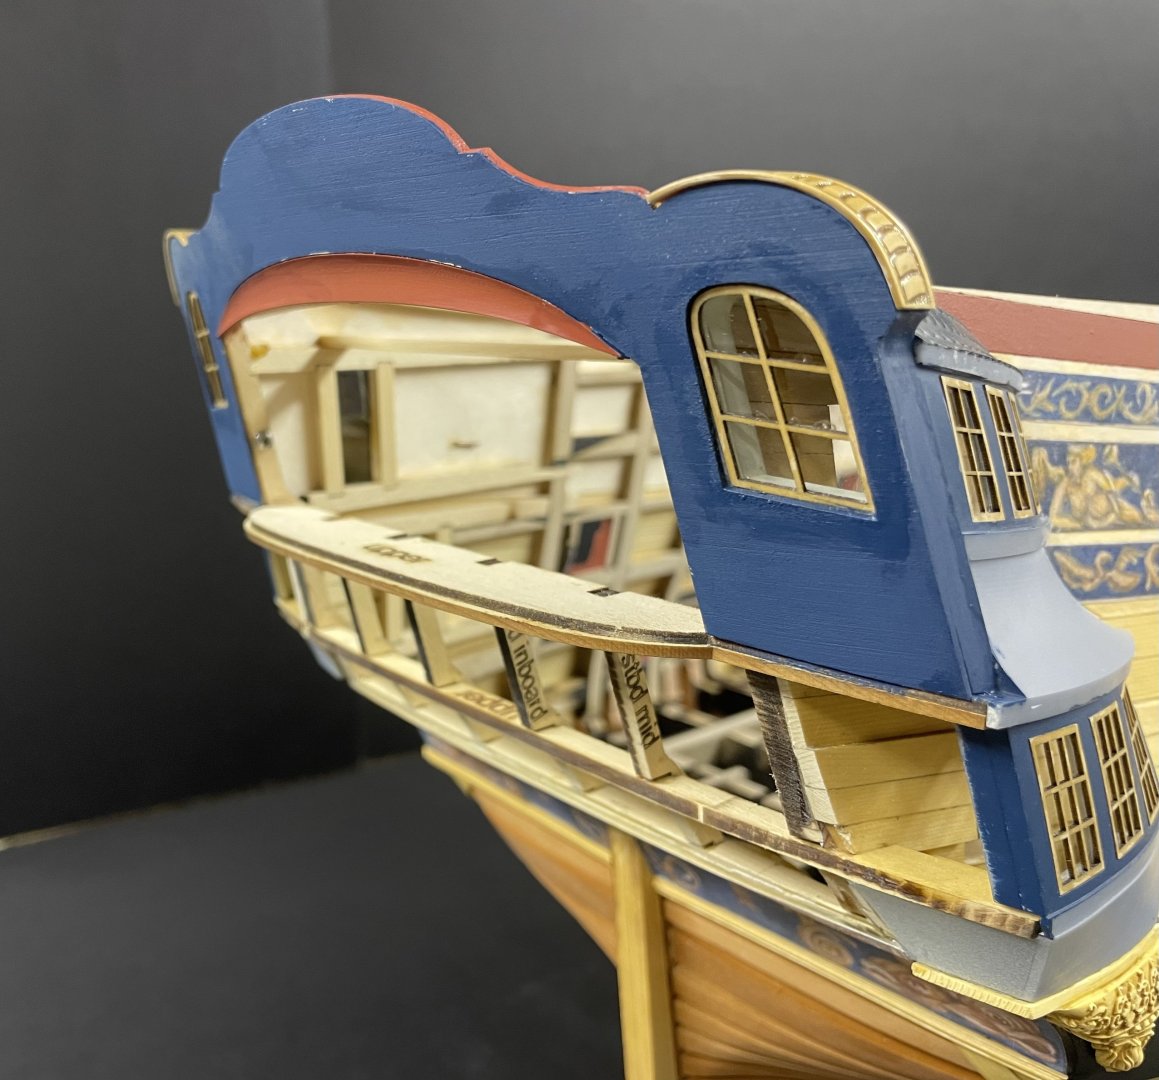
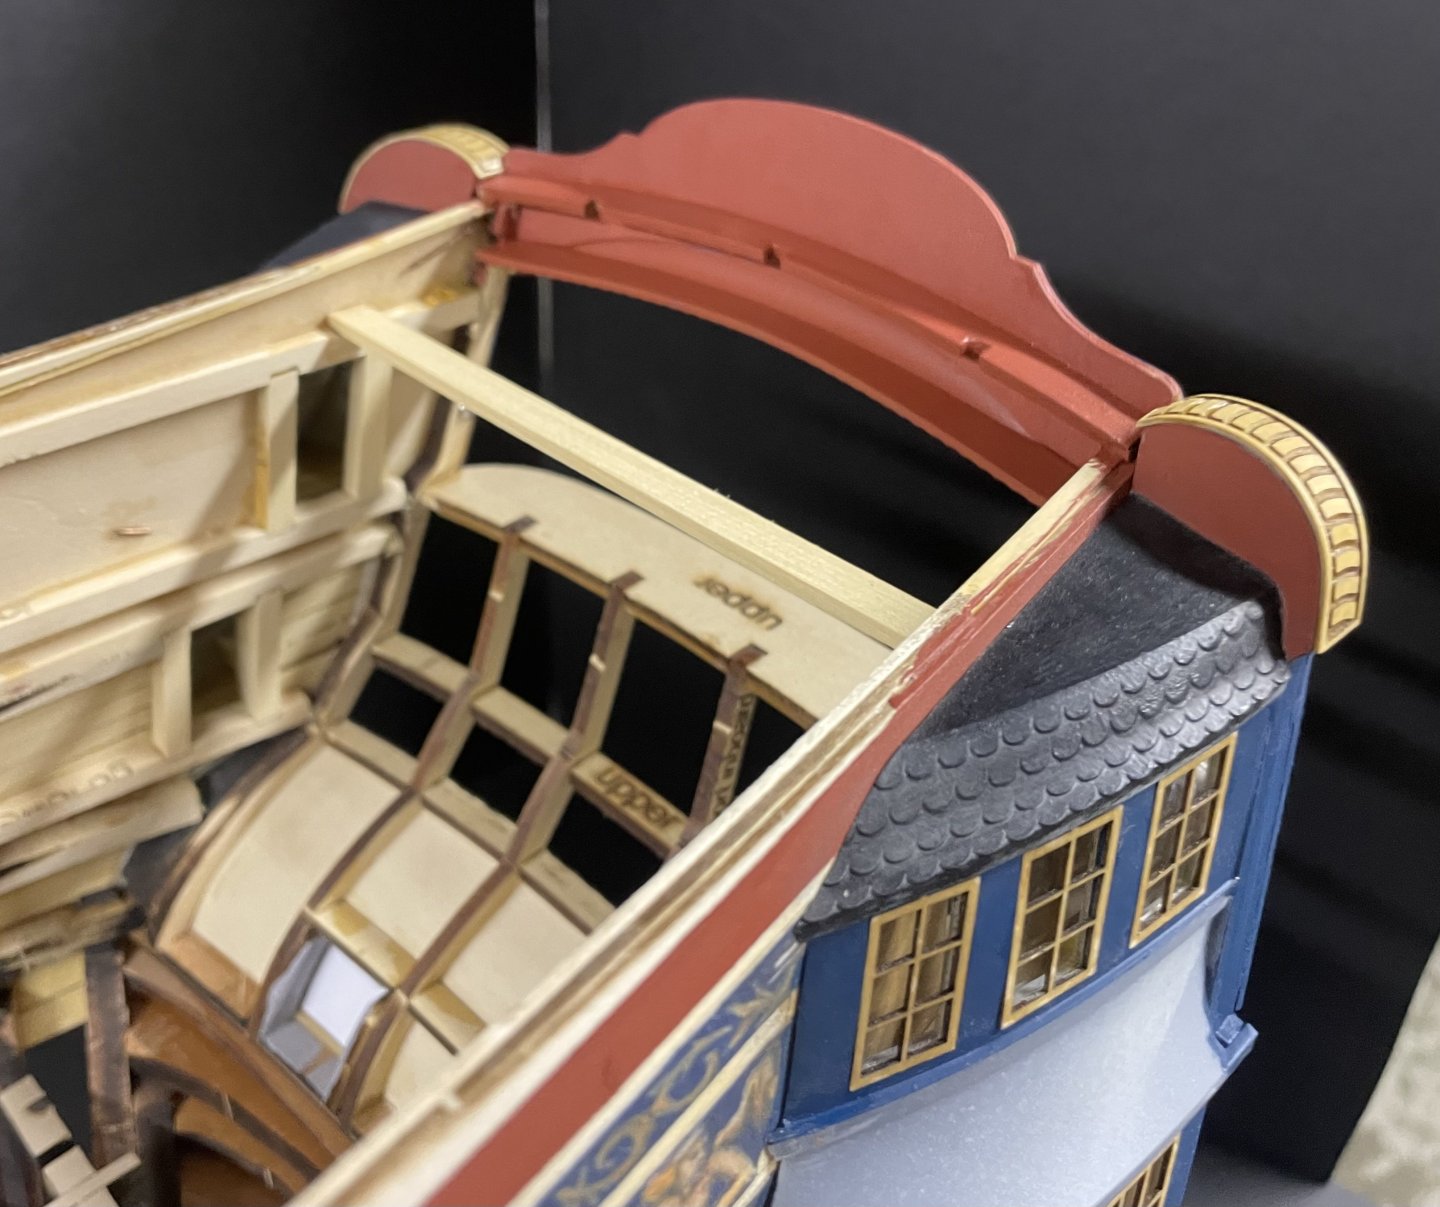
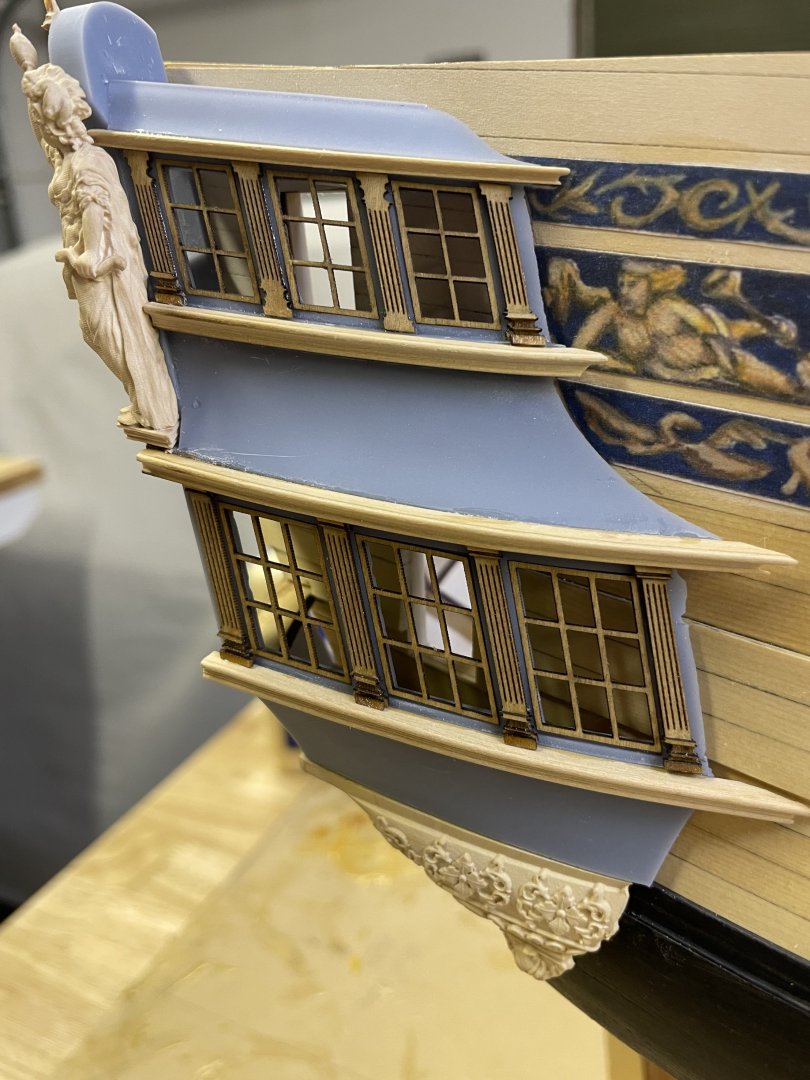
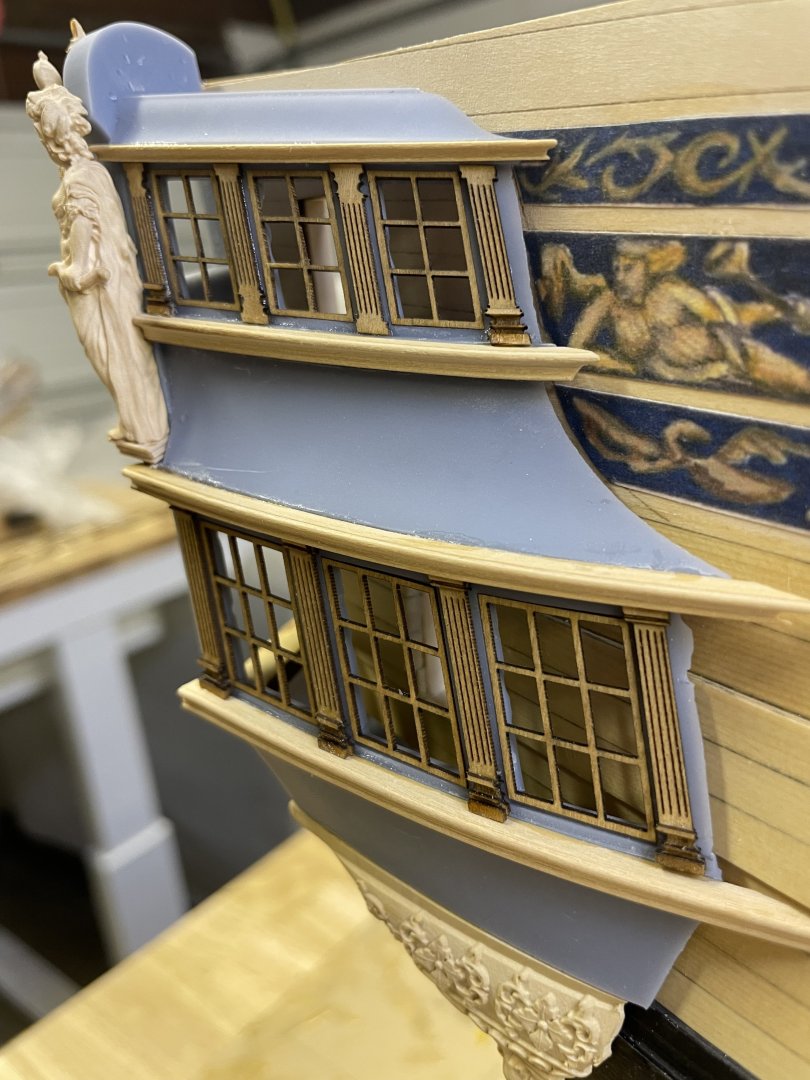
And finally it all comes together by Adding the upper balcony panel. This is a bit tricky and requires everything before it to go well. The panel is 1/32 AYC and designed to fit over the QG’s and stern framing, it’s pretty delicate so be careful. start by clamping the panel on one side at a time, making sure it fits around the windows. It should have a snug fit right over them as they protrude out of the QG slightly. You may also need to do some minor trimming at the bottom so they fit on top of the balcony beam. That 1/32 ledge behind the QG is exactly for this purpose. above you’ll also notice that I have the cove installed, I finally decided to print this along with the aft deck beam for the poop deck. This fits into some notches in the stern frames. I installed a temporary beam to maintain the measurement between the two stern frames where the printed cove/beam install, I should have done this before I installed the QG’s it would have made things much easier, thankfully it was only about 1mm out so I pushed the ends in and quickly glued down the piece of scrap. above you can see where the printer beam fits into the notches. It should sit at its proper angle. CA works best when attaching printed parts. once satisfied with the fit, I pulled the balcony panel off and painted the beam red, we will Be adding an AYC margin plank to the top of the beam shortly. I also painted the margins of the window with the blue I’m using to match the friezes, I chose to go on the dark blue side, similar to the contemporary Bristol model. With all that completed I set the panel back on and strategized how to attach it. With the arrangement above it wants to lift off on the outboard ends. So I glued all the clamped spots with PVA so I had working time and then once everything was set and clamped I worked the outer edges with CA, I used similar thick pieces of scrap to carefully hold the edges down while the CA set. Once the panel was secured and drying I attached the upper part of the cove to the panel, if everything went well then it should already be a tight joint, I just let CA flow into it and it set. now is the inner laminate part of the panel, this just gets us closer to the tidiness we want and stiffens it up. I cut the piece so the grain runs the other way to help it conform. I had to do some very minor trimming to get this to fit. It should drop in nicely. I secured it with PVA and some CA on the edges. Finally we add the upper beam, this spans the stern frames and will be responsible for holding some knees later on in the build. This is a laminated piece. Way above you can see it in the parts sheet along with the 1/4” MDF jig that will help with providing the correct camber Once the beam it ready go ahead and bevel the end that Fits against the panel until it fits nice. It can be secured with CA. And finally paint it all red. as you can see once it all was finished I continued with painting the back side of the upper balcony panel blue, in fact the paint is still wet… it’s getting cold in the garage this time of year. Today I will move onto finishing the upper stern with all the fun carved goodies, the reward for all the hard work. JJ


- 396 replies
-
- 26
-
-
-
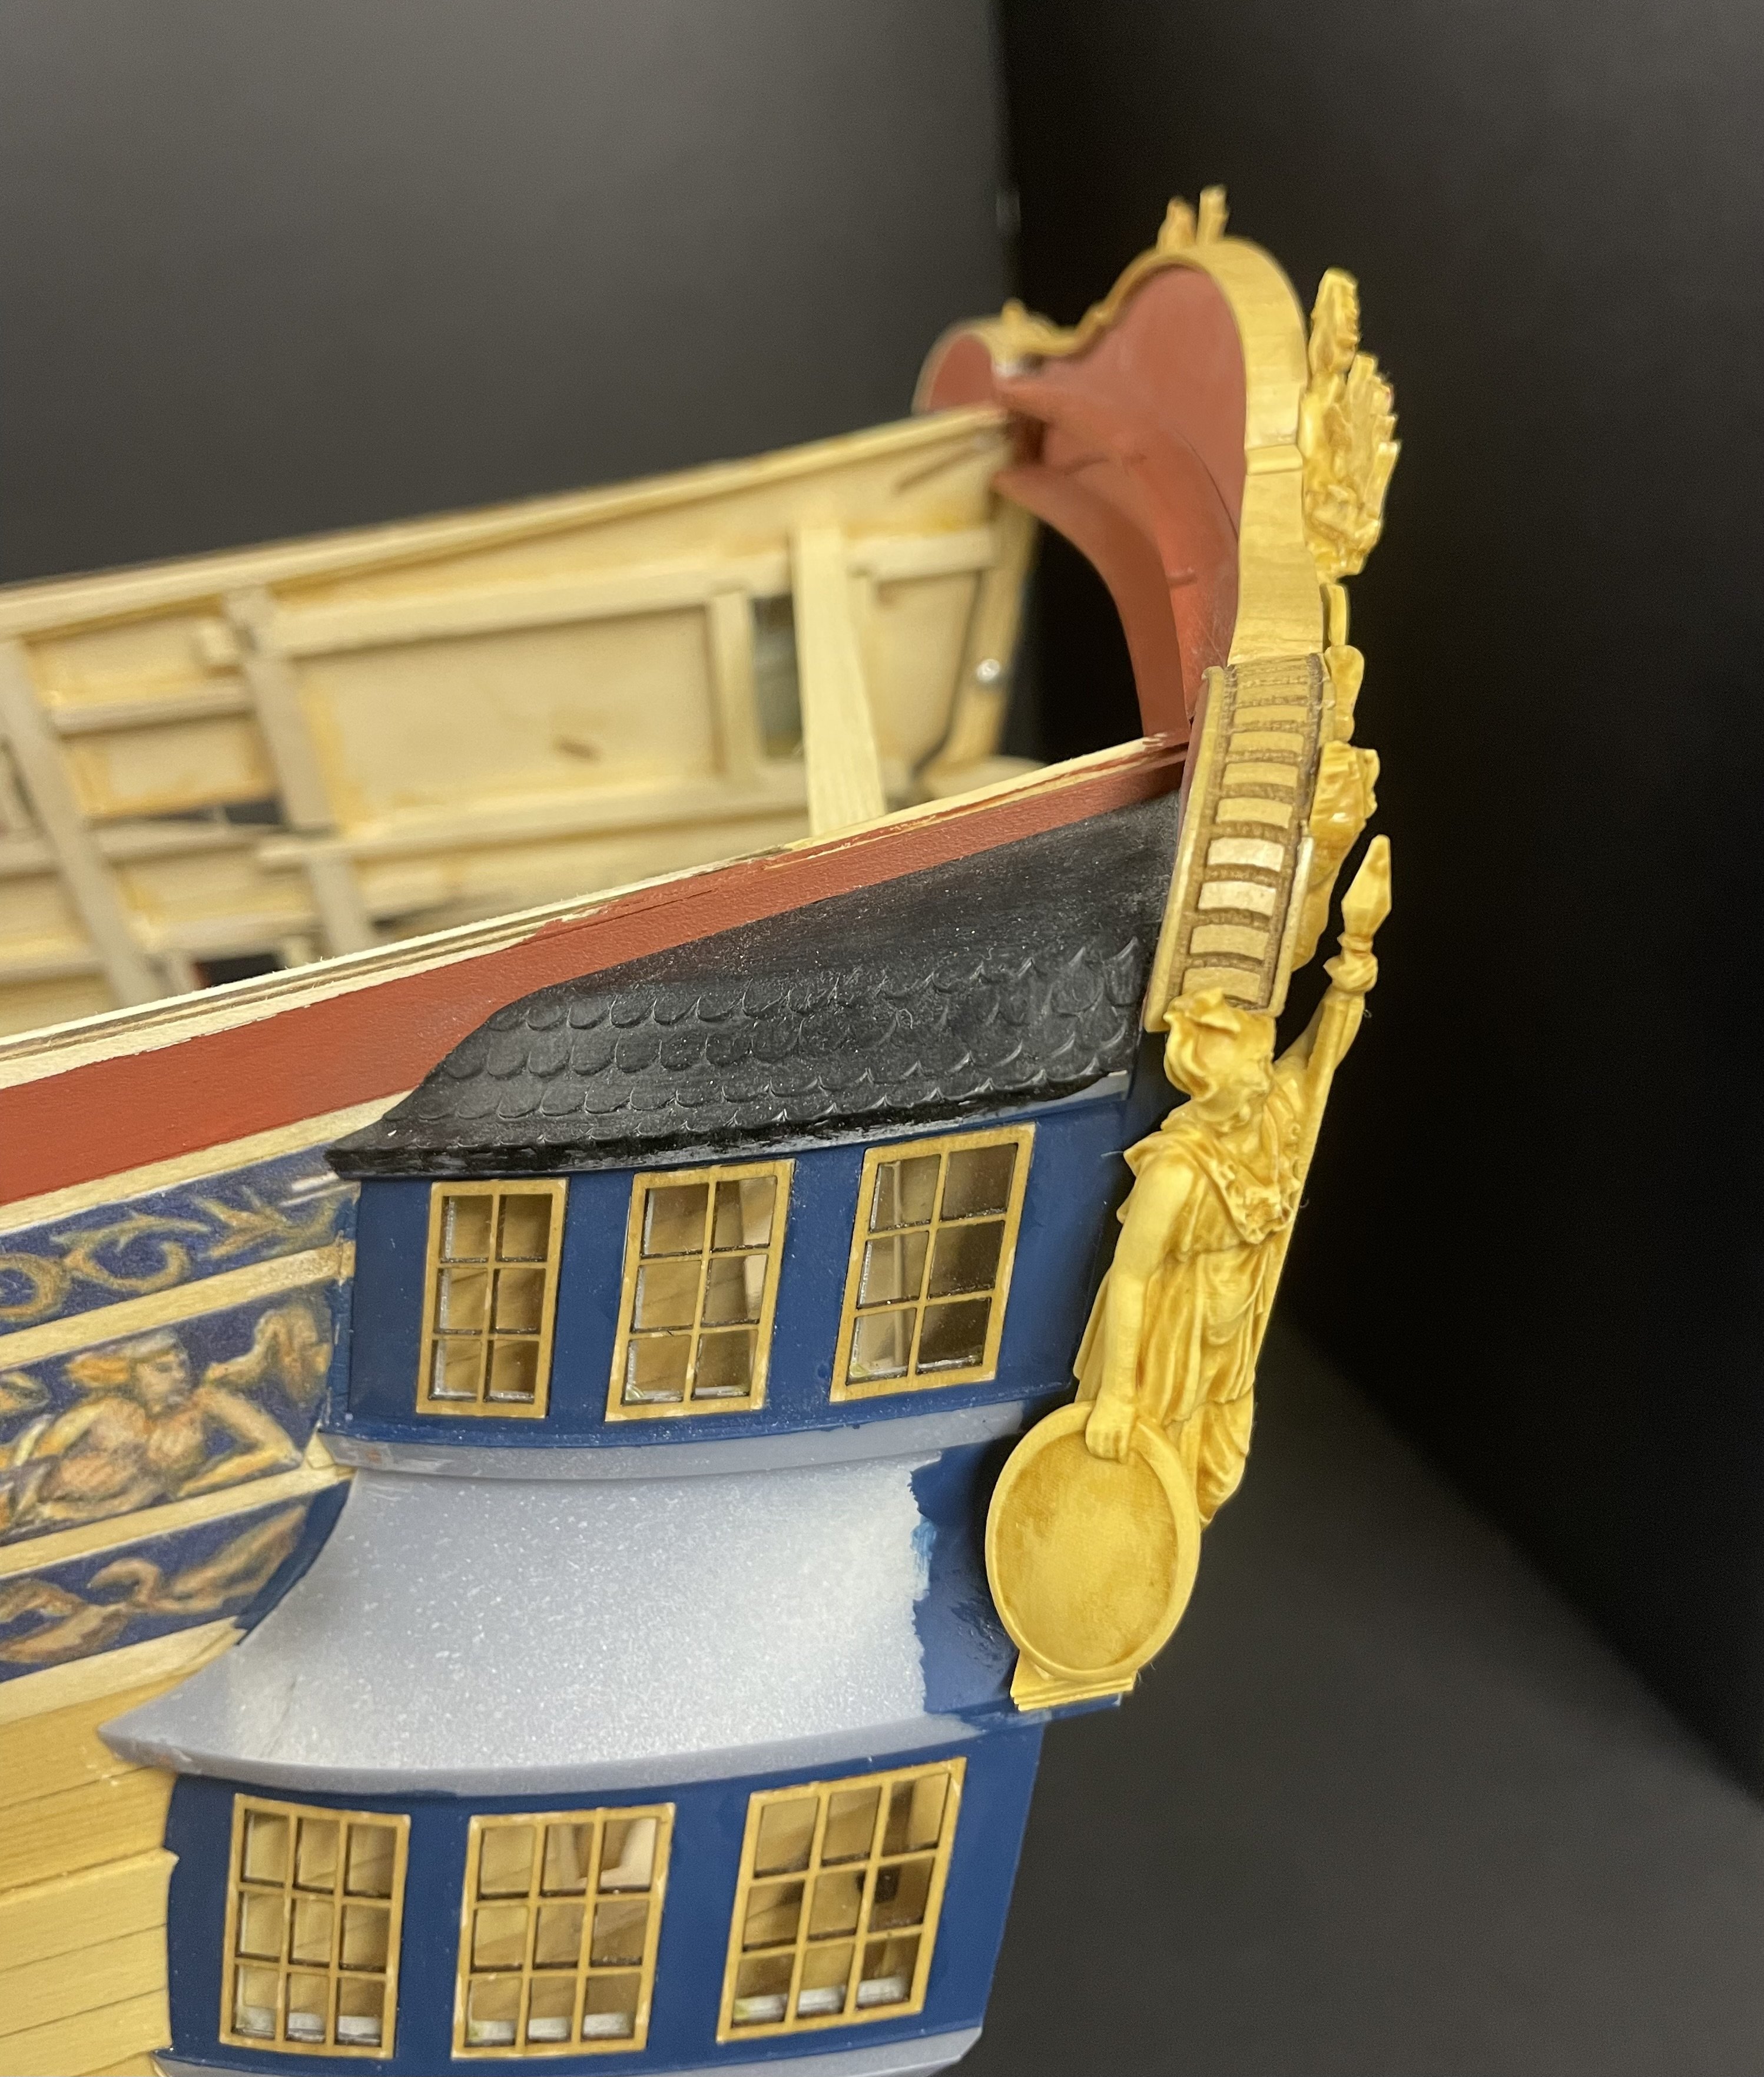
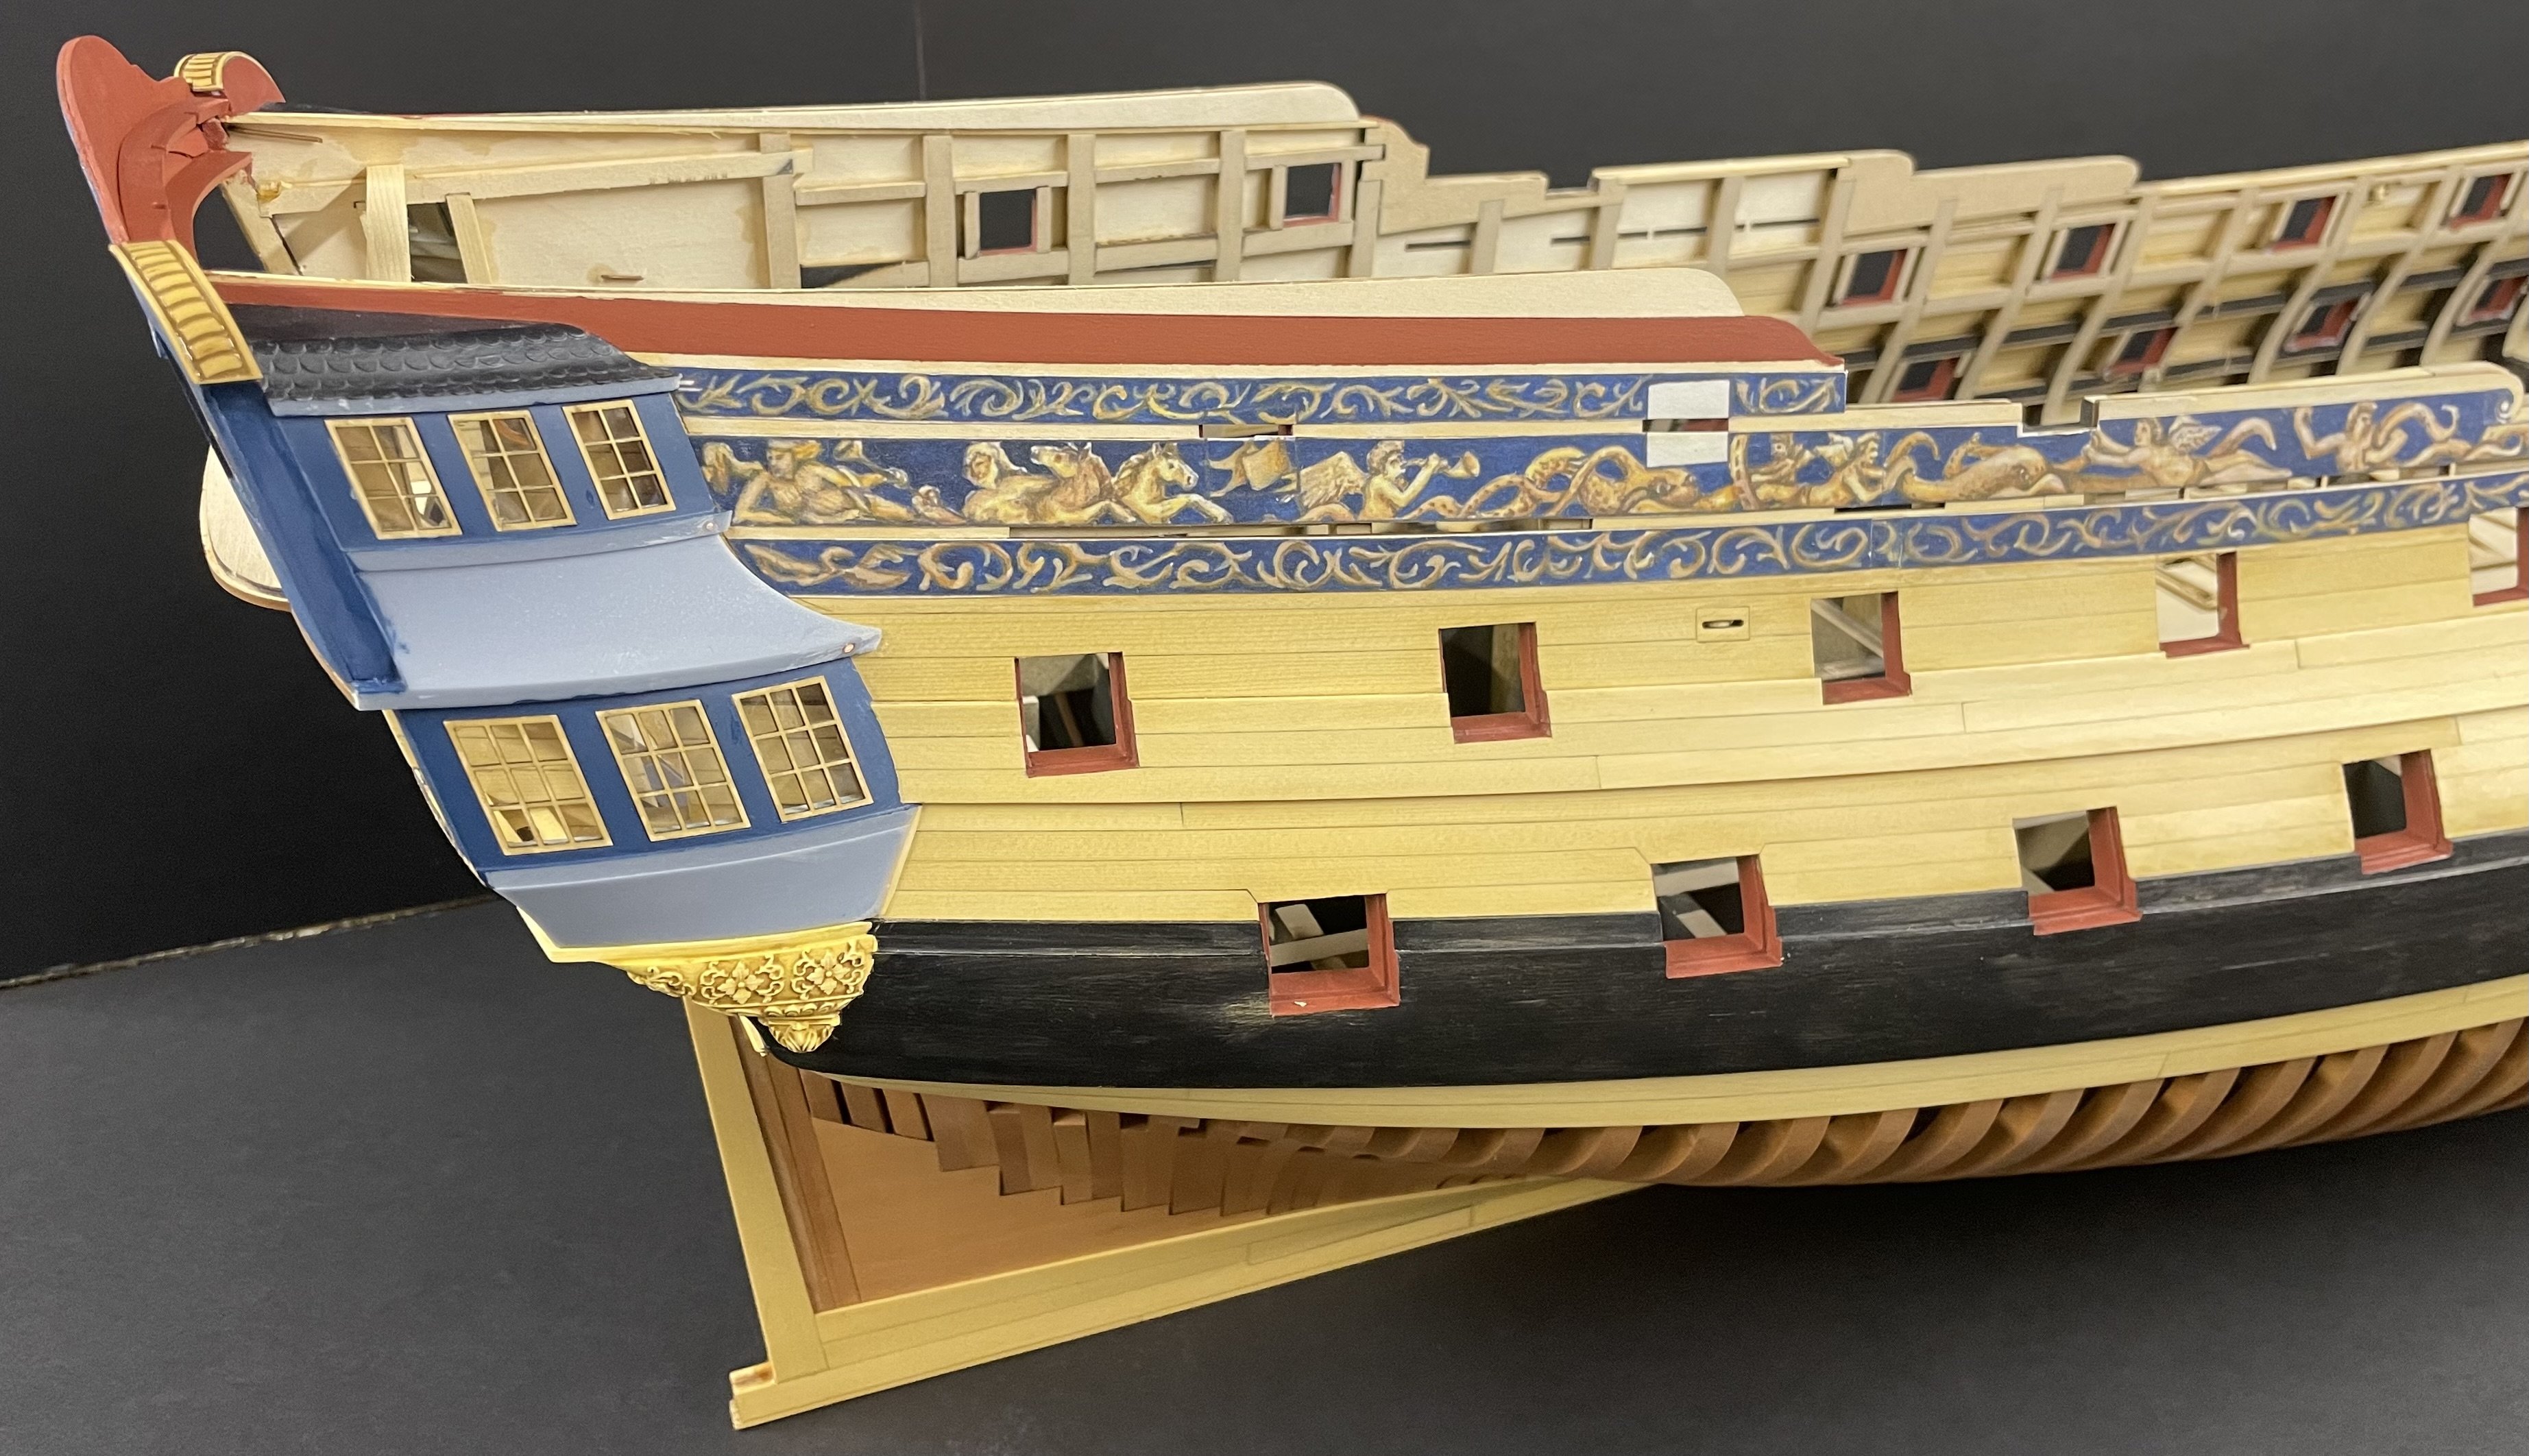
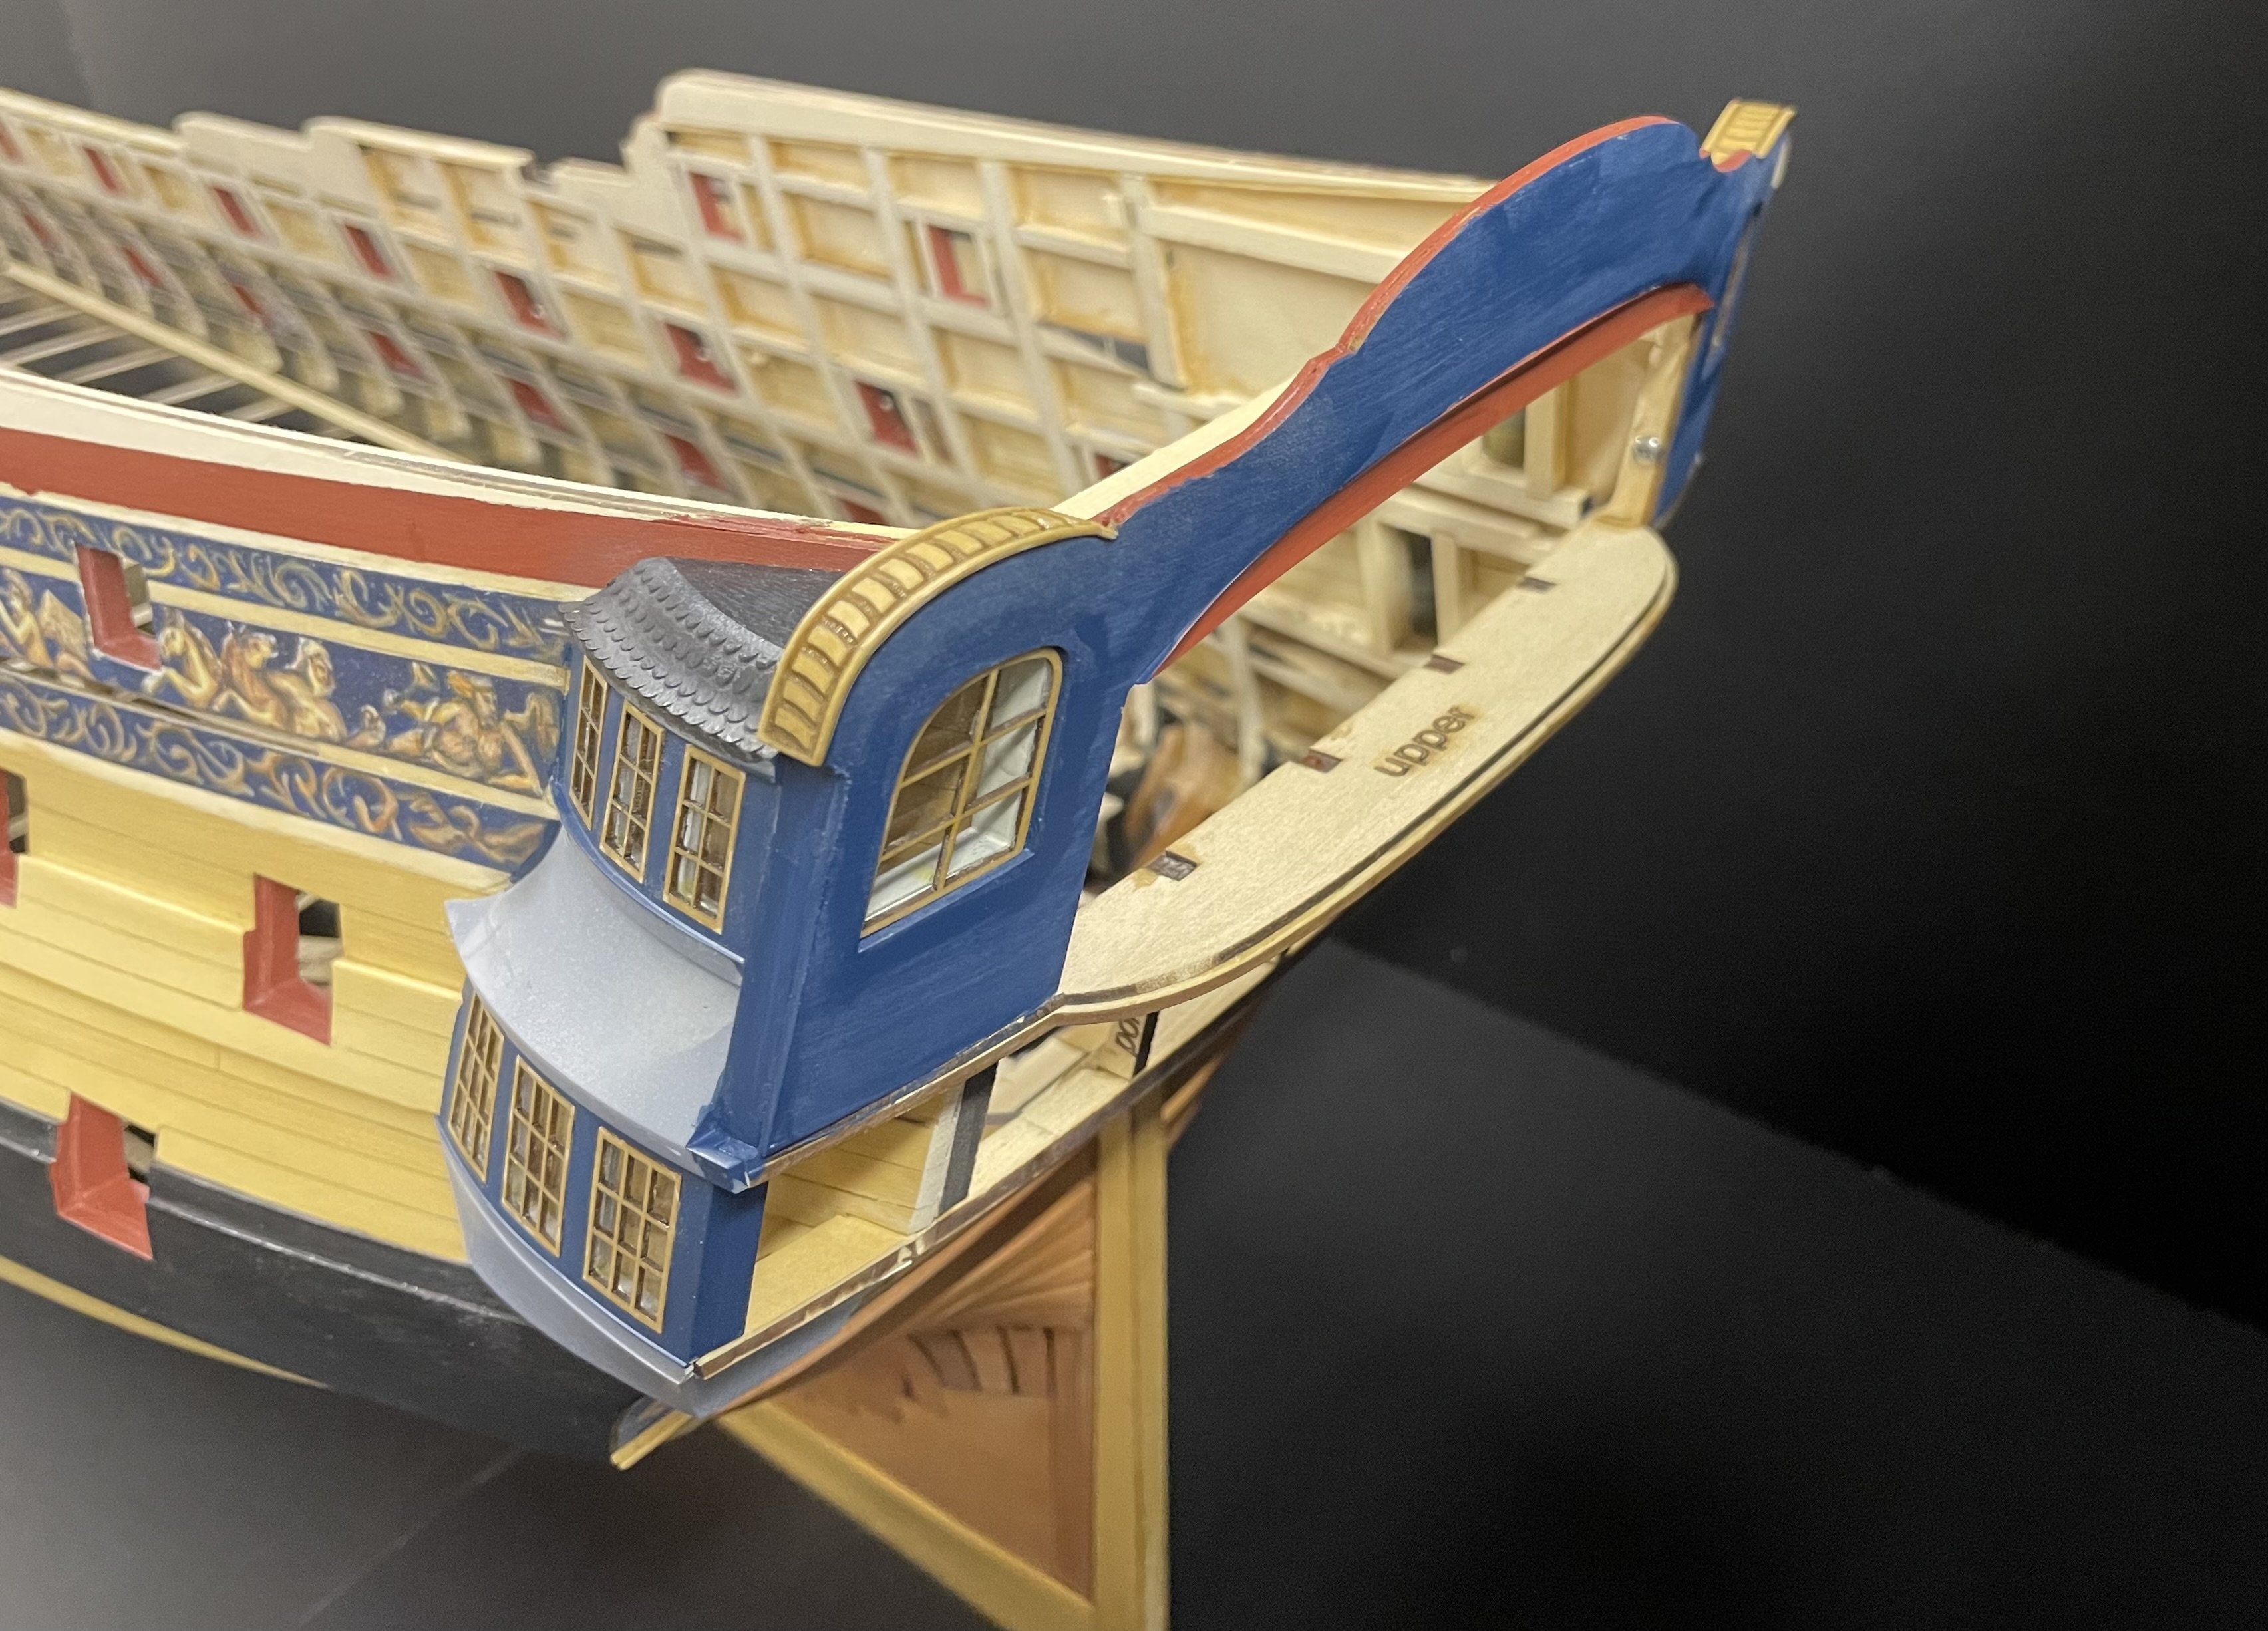
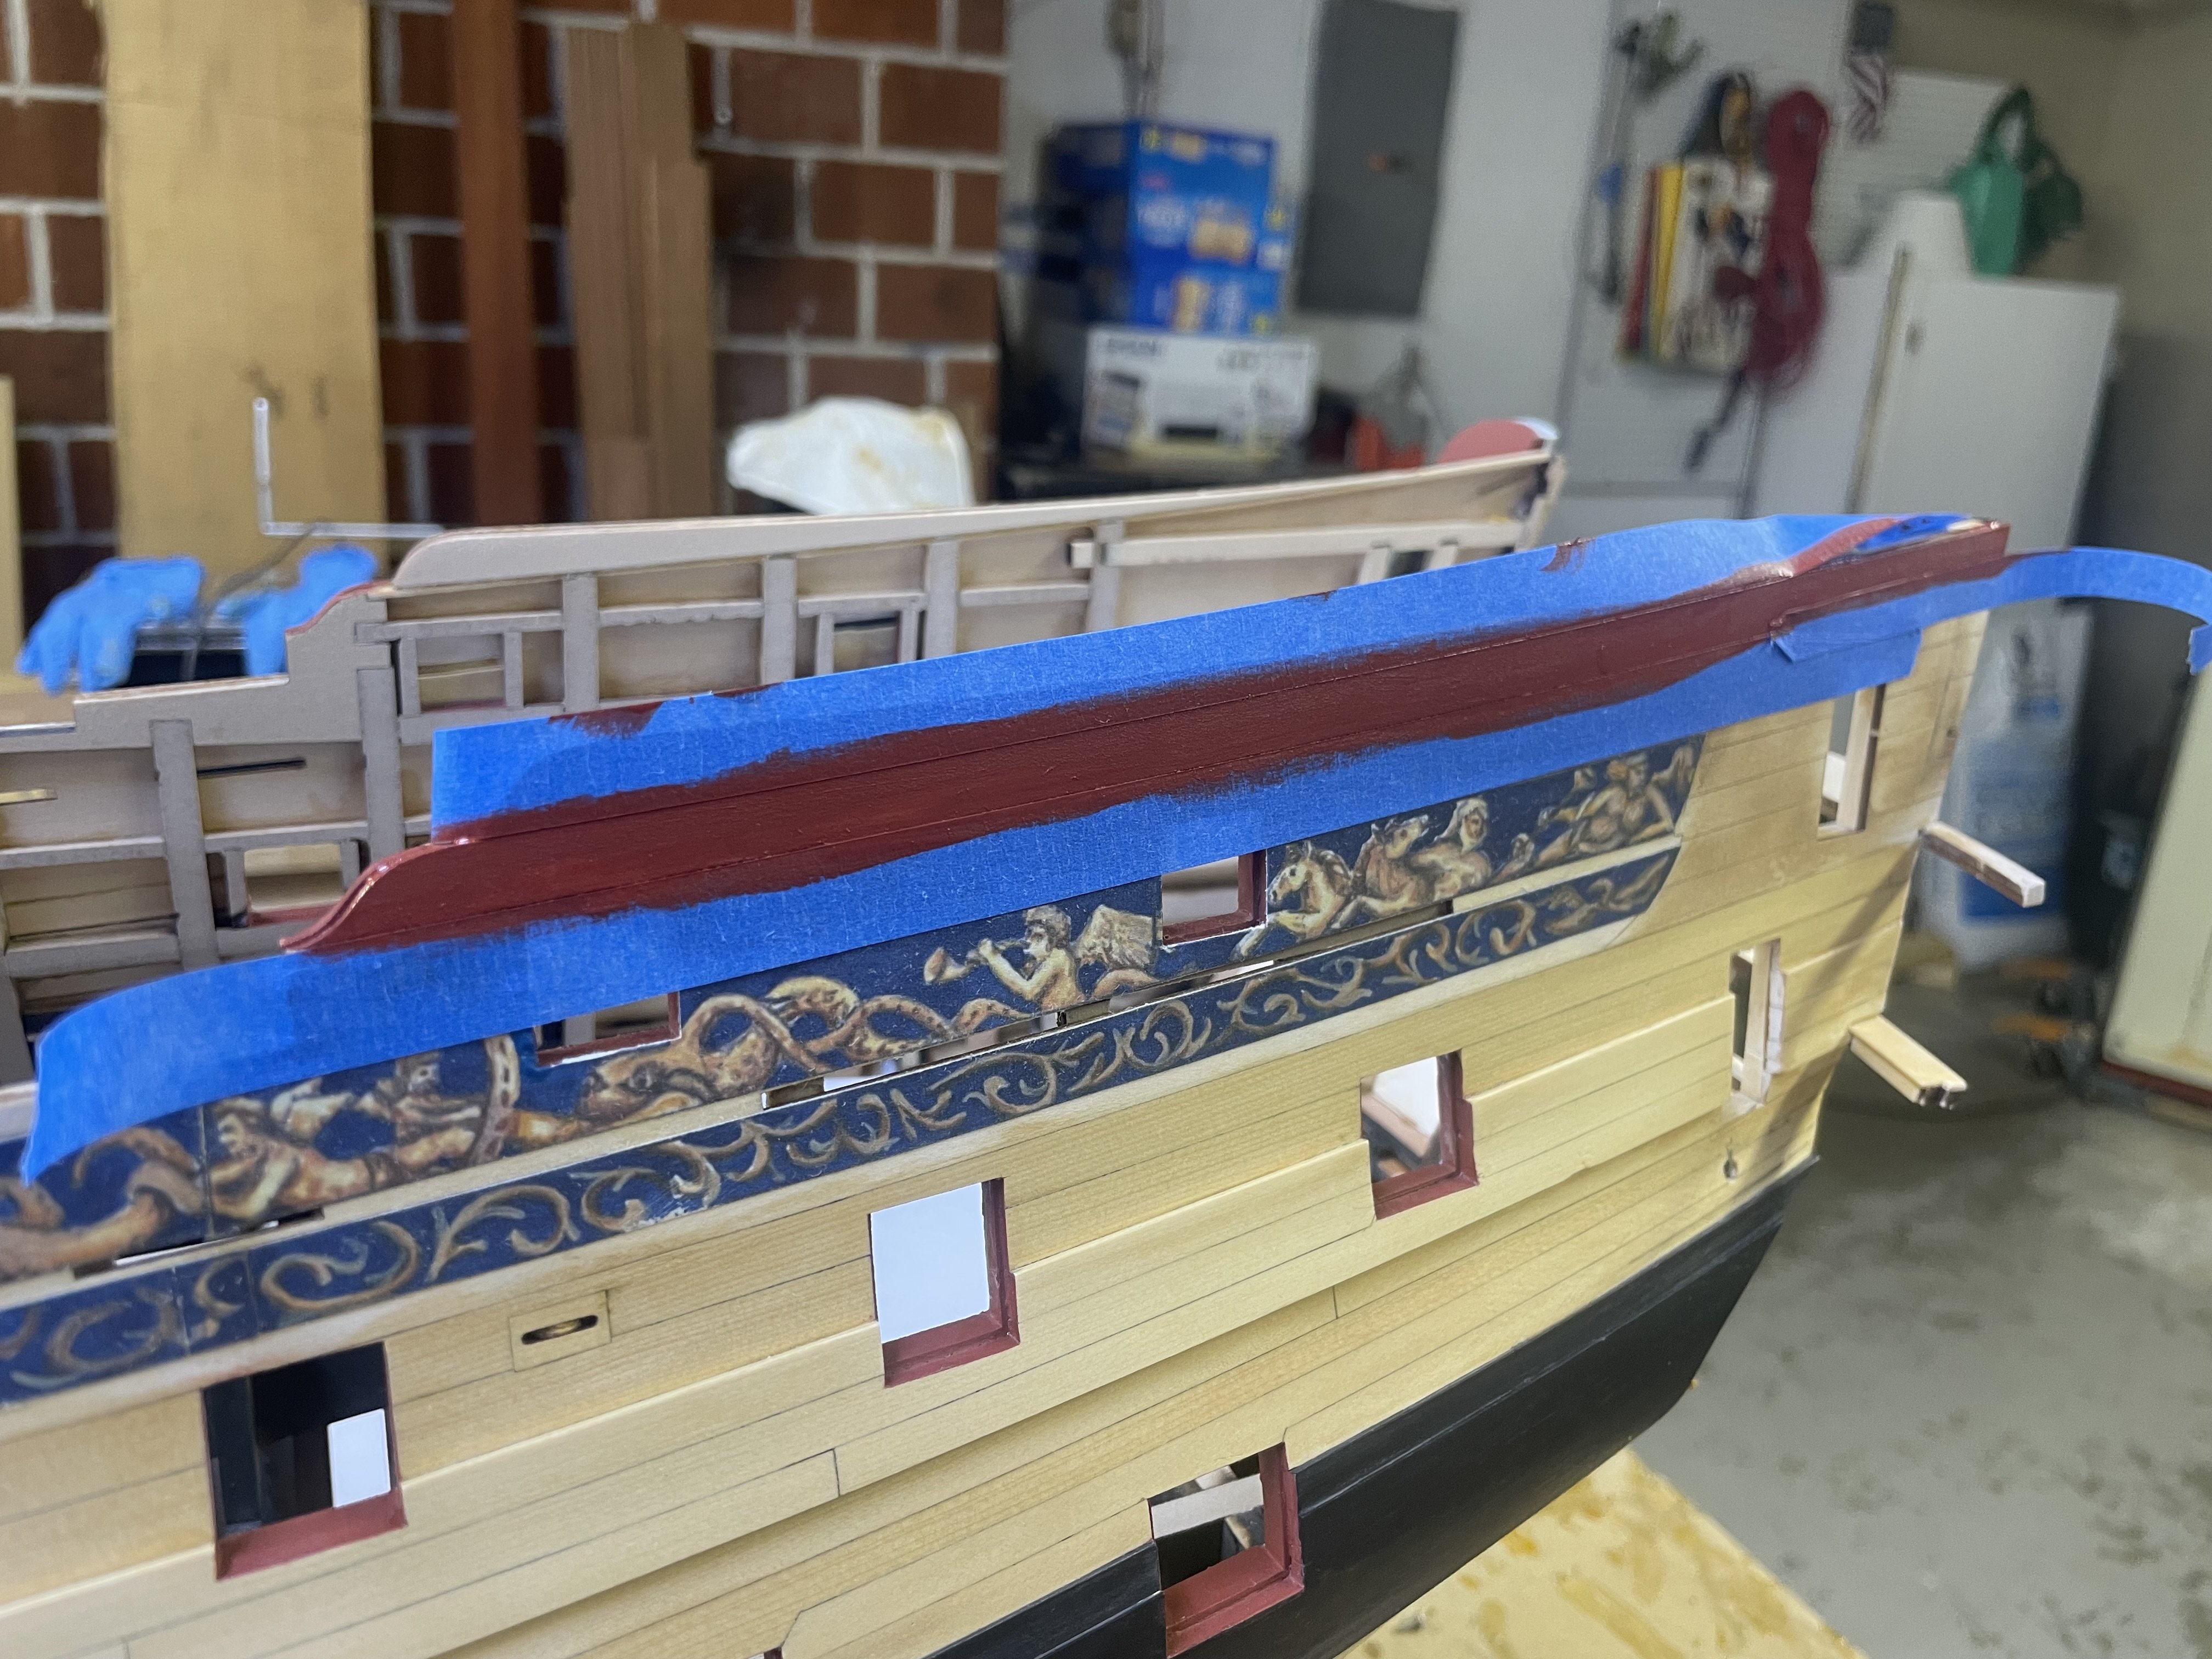
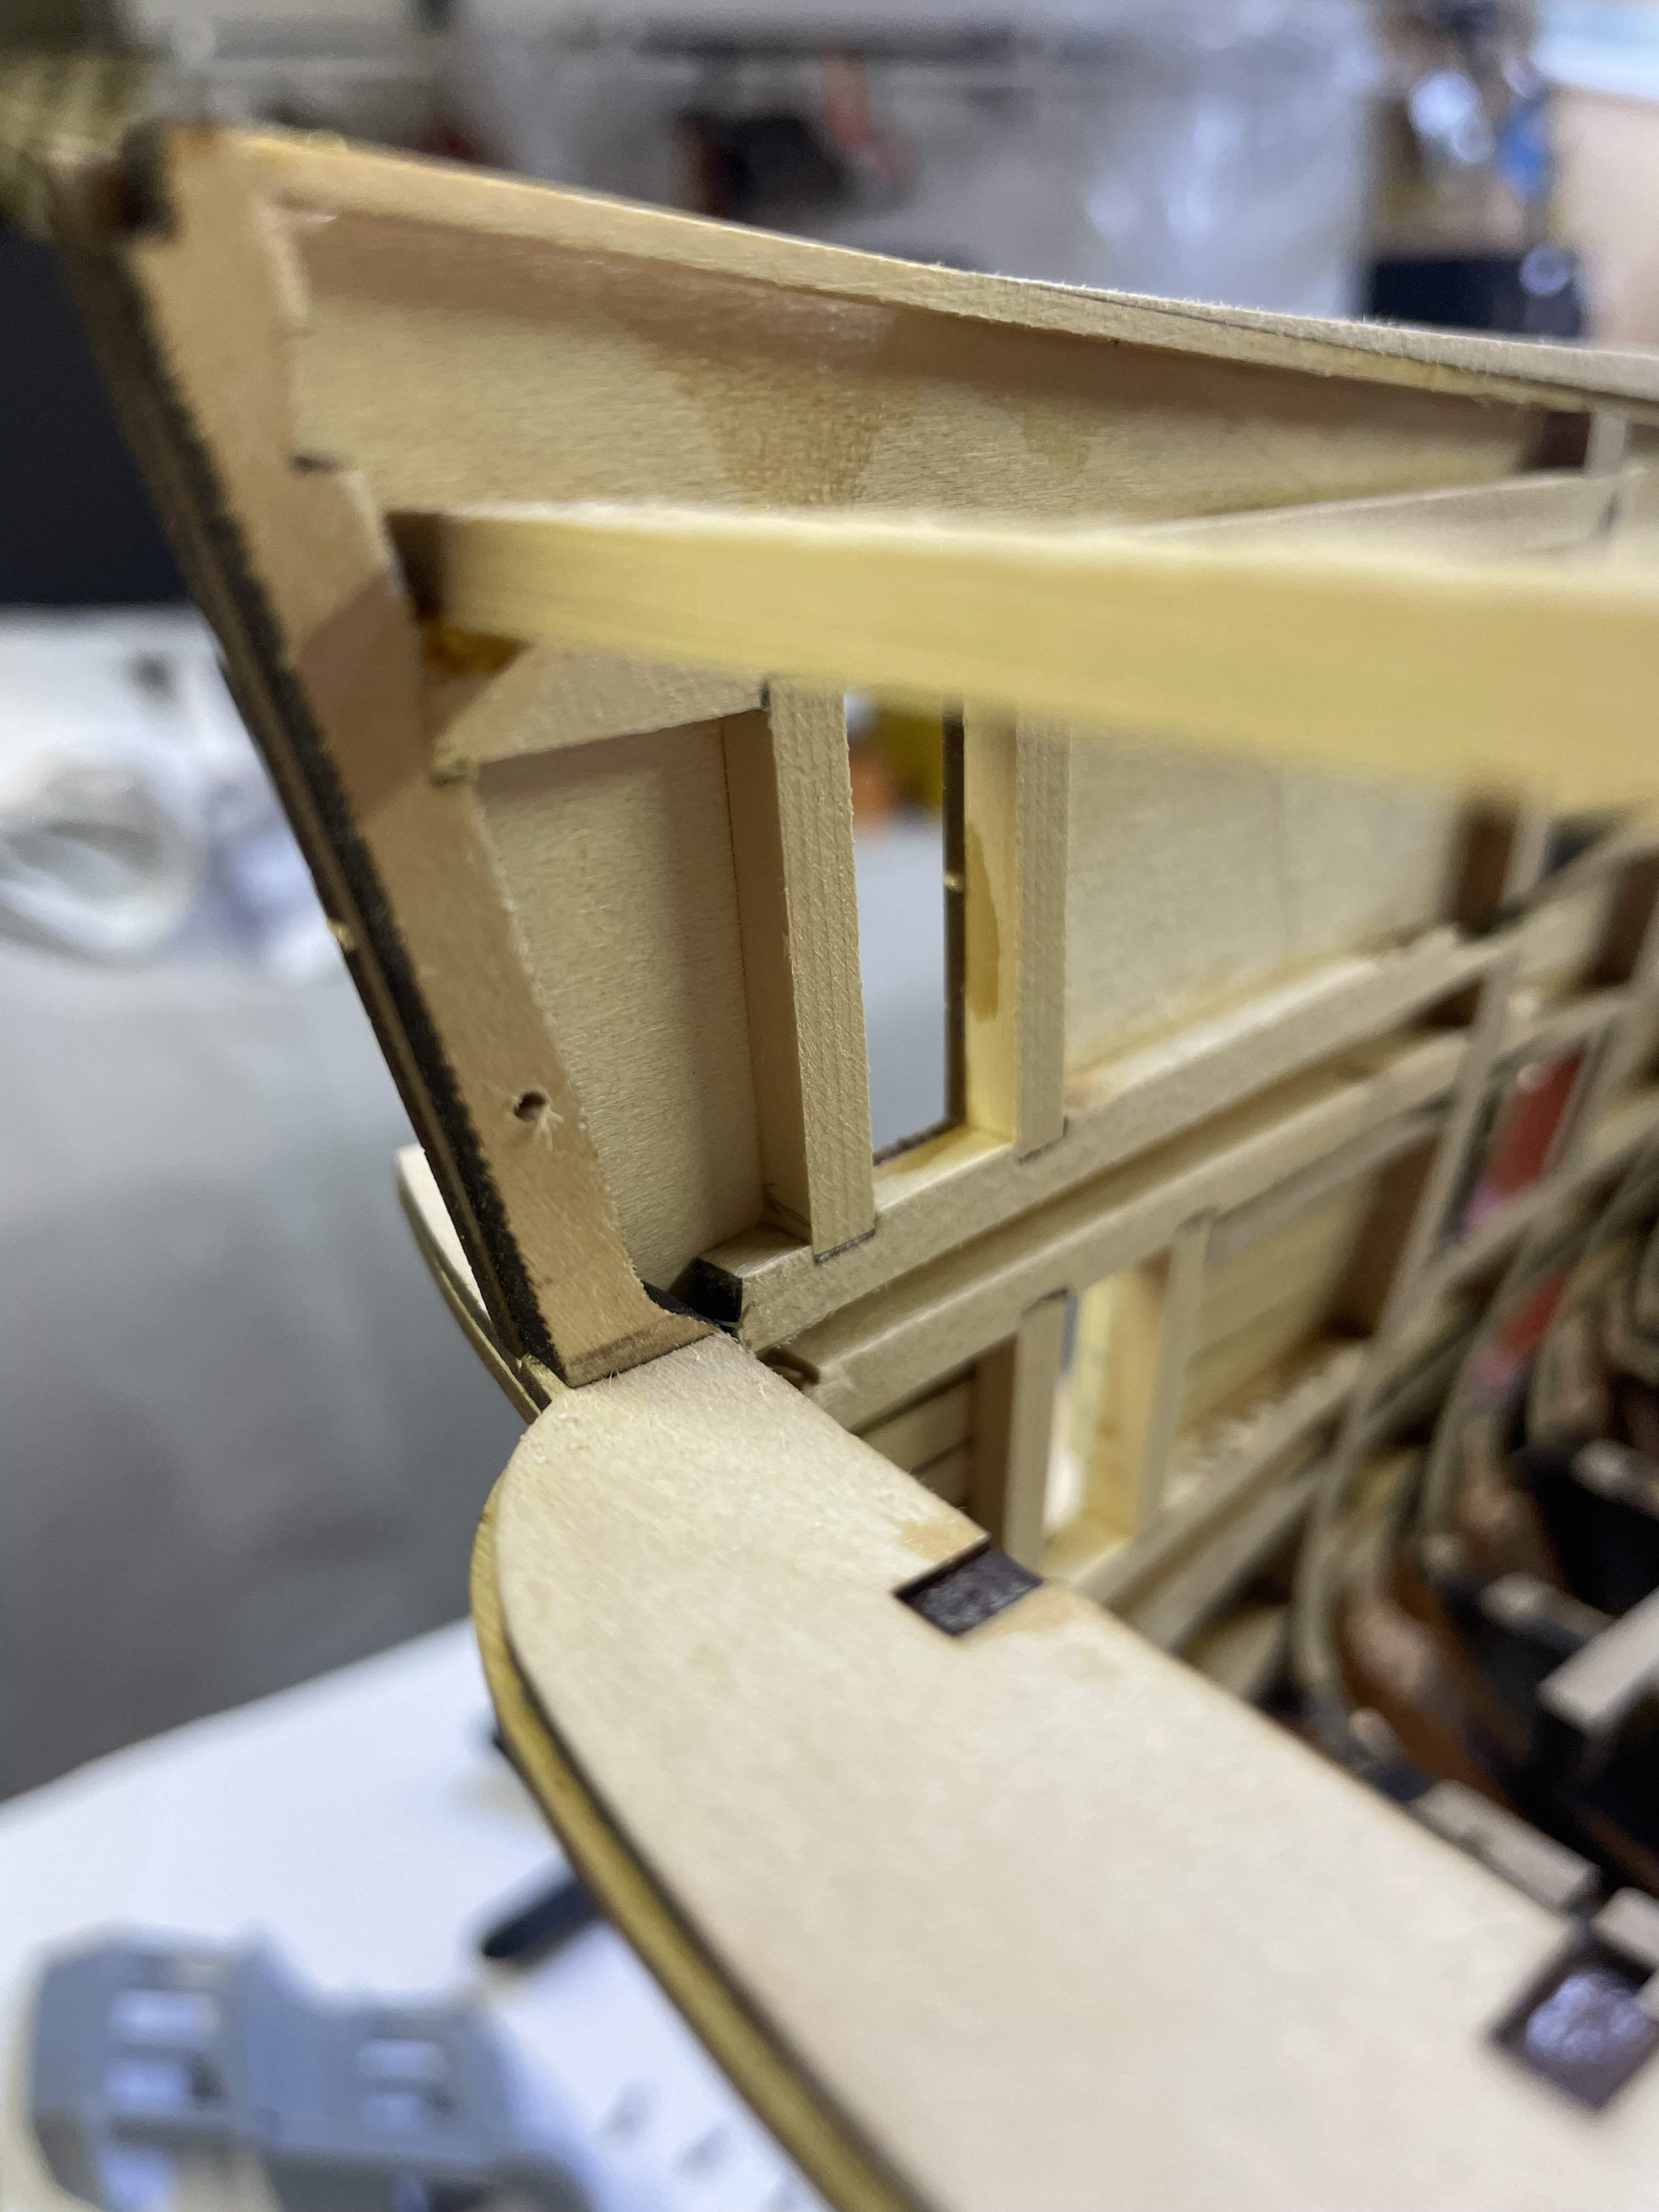
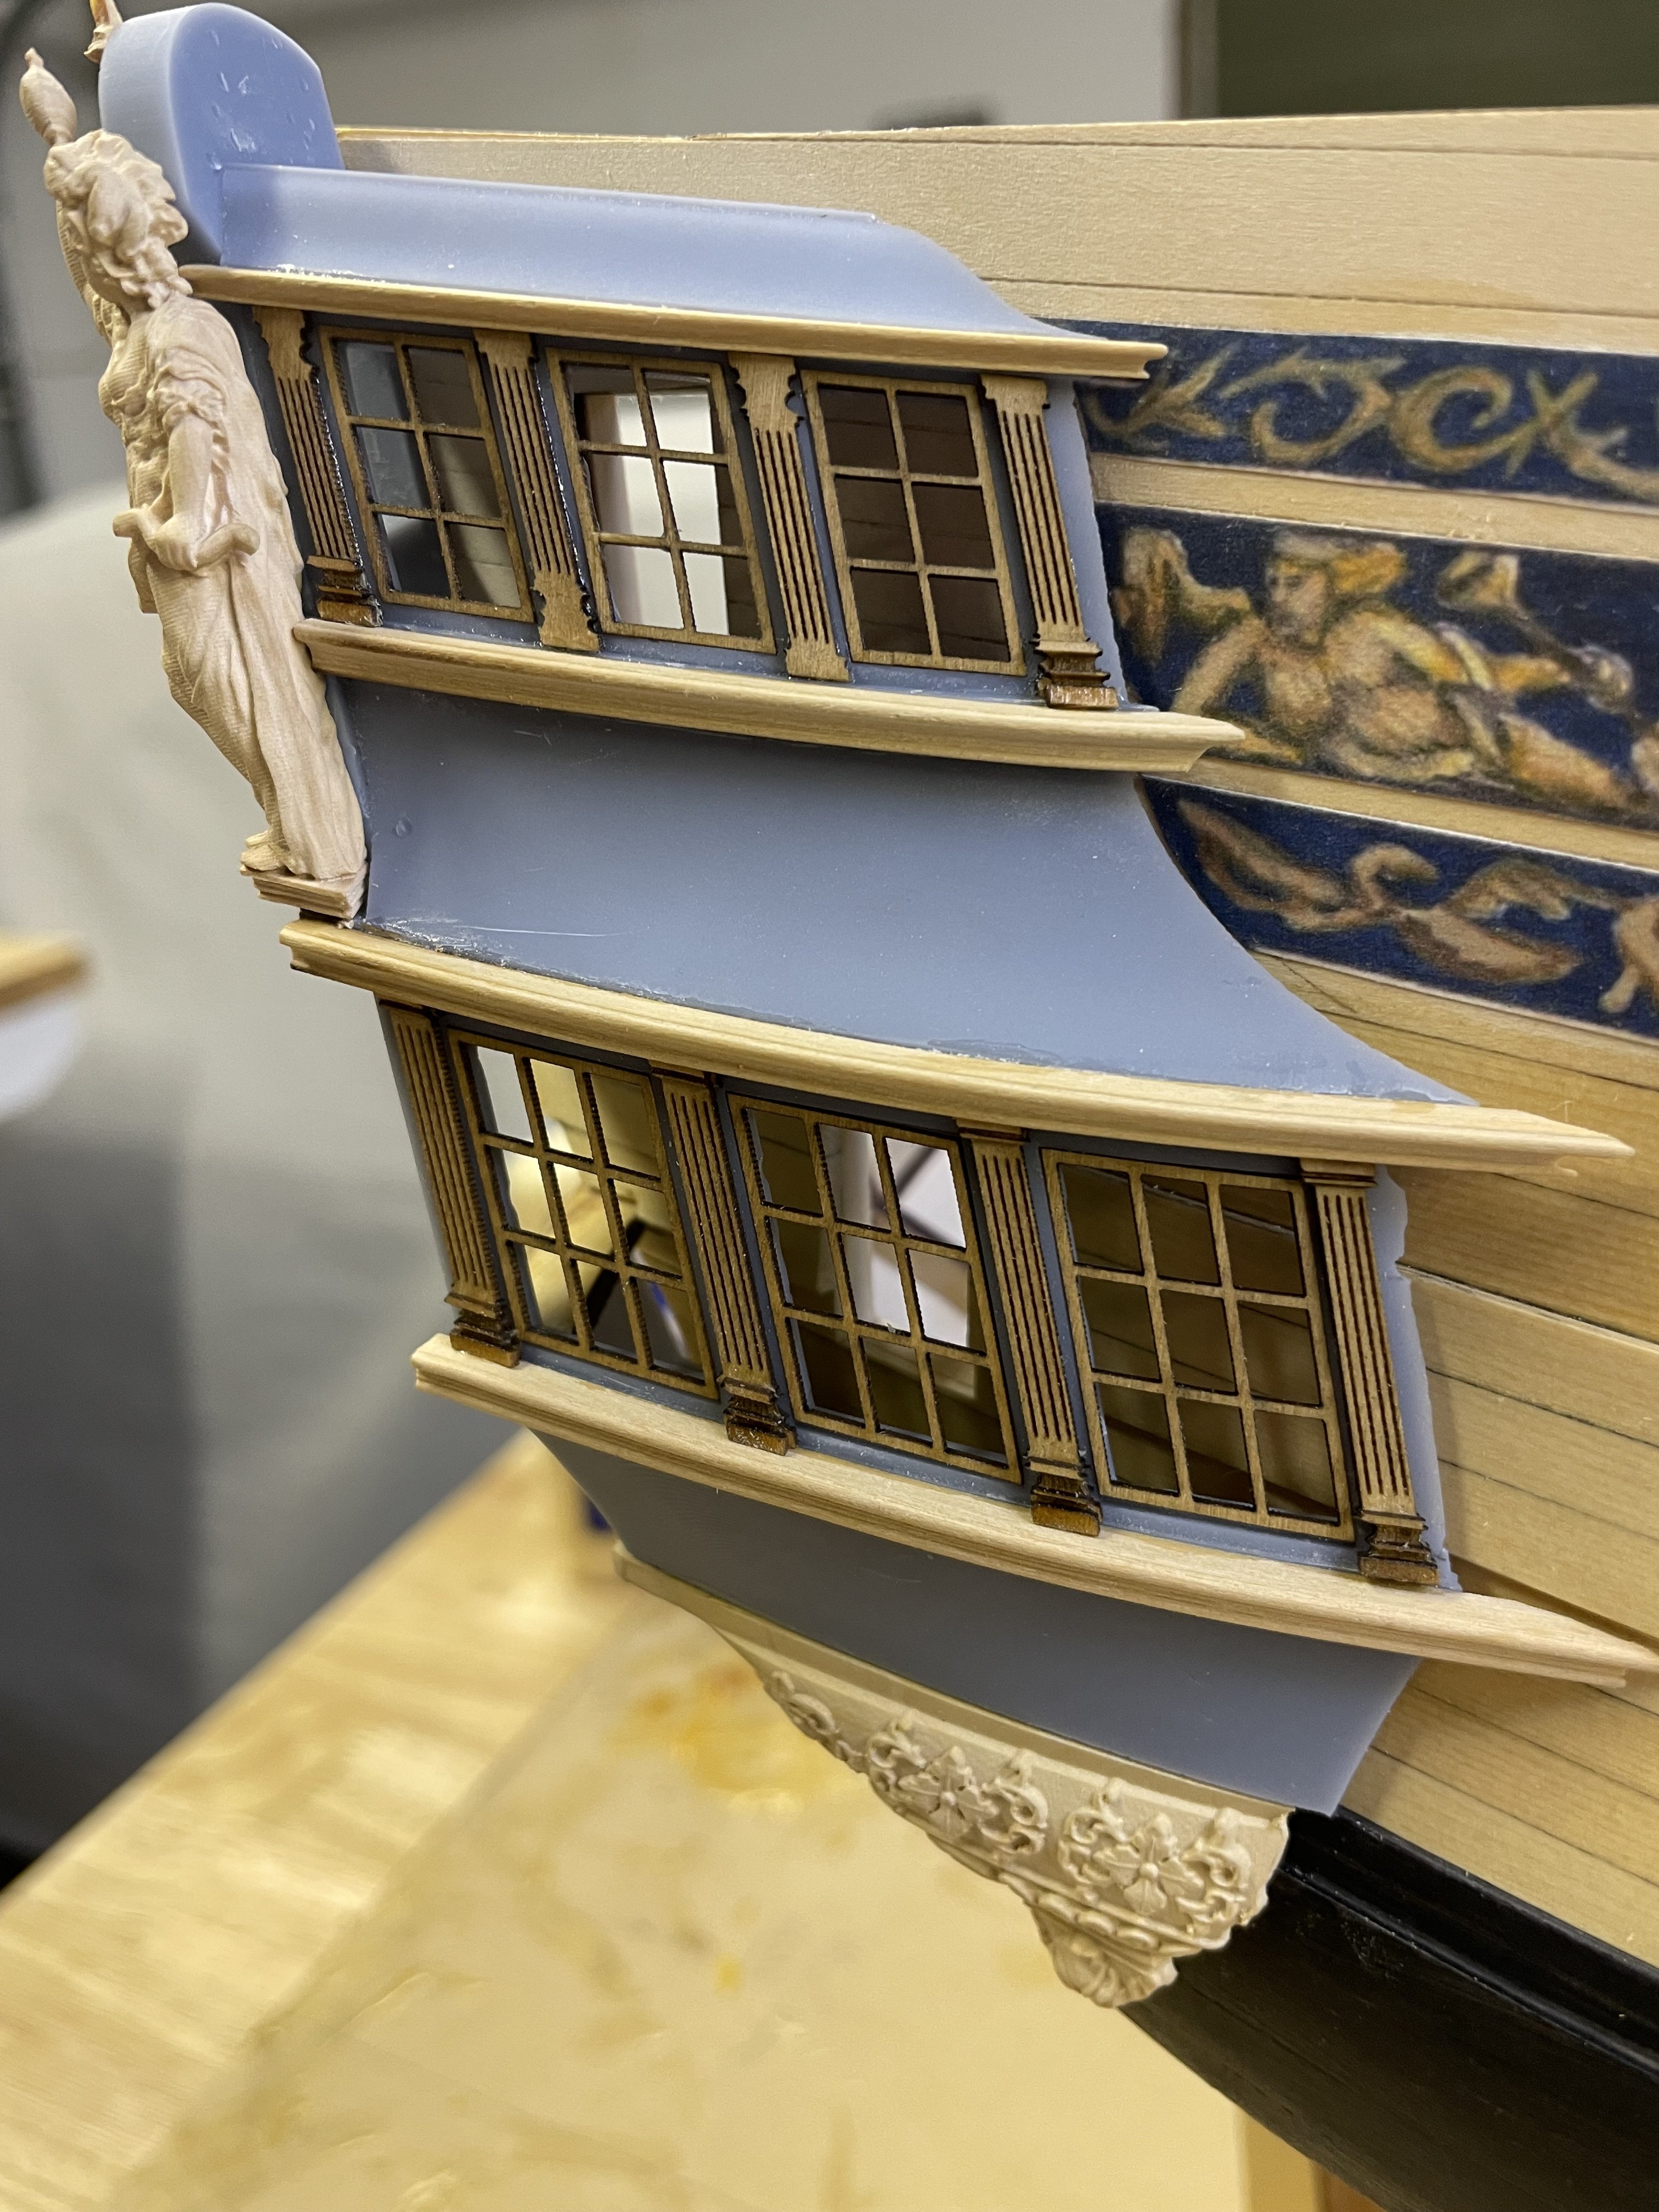
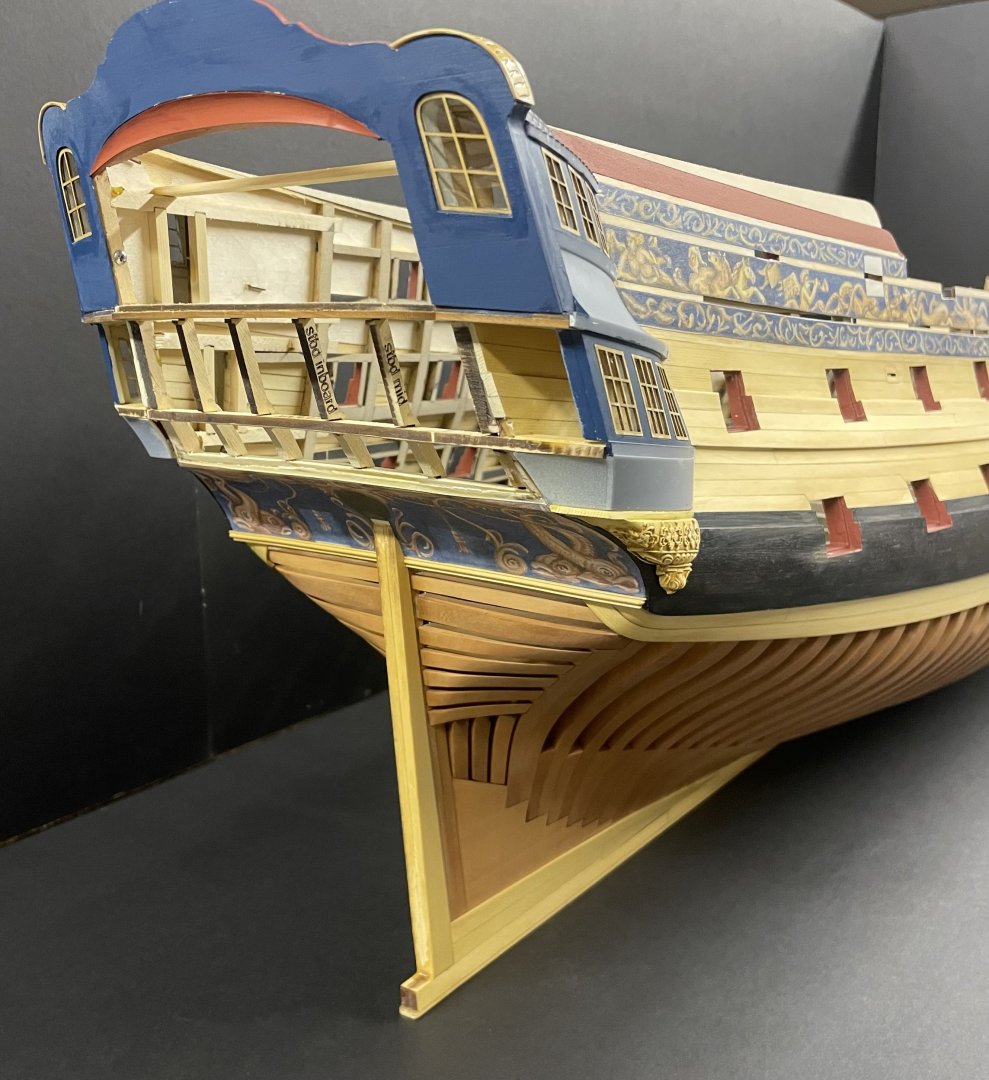
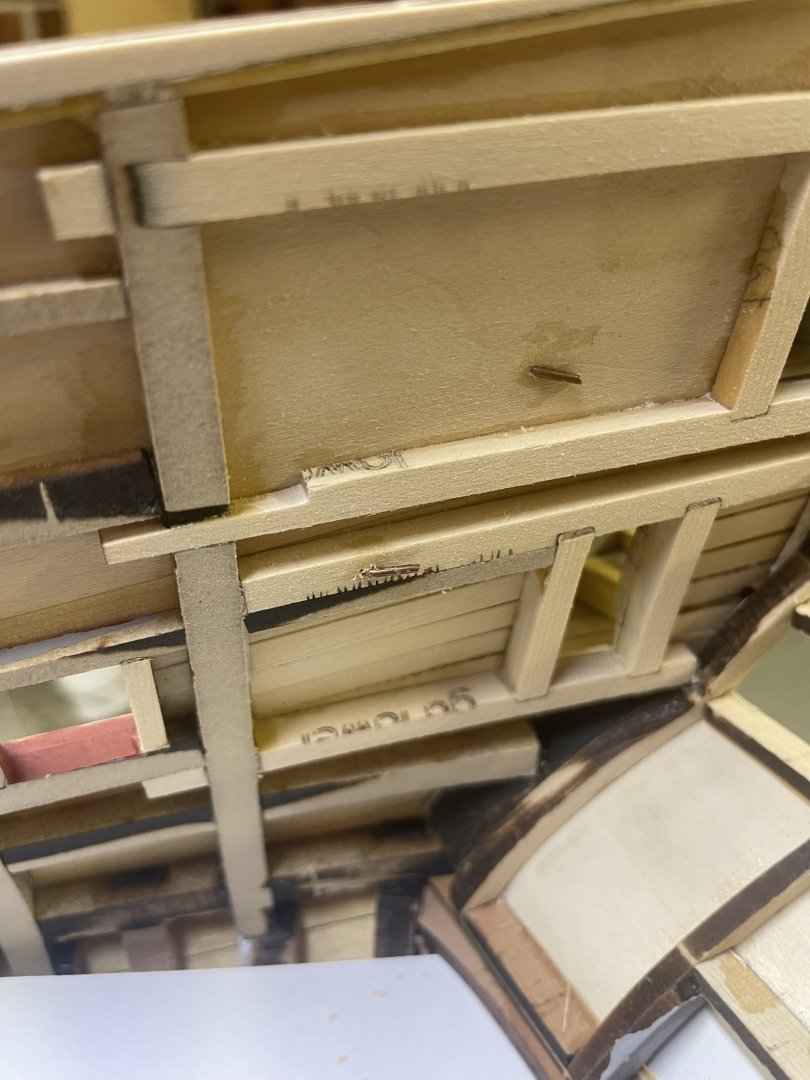
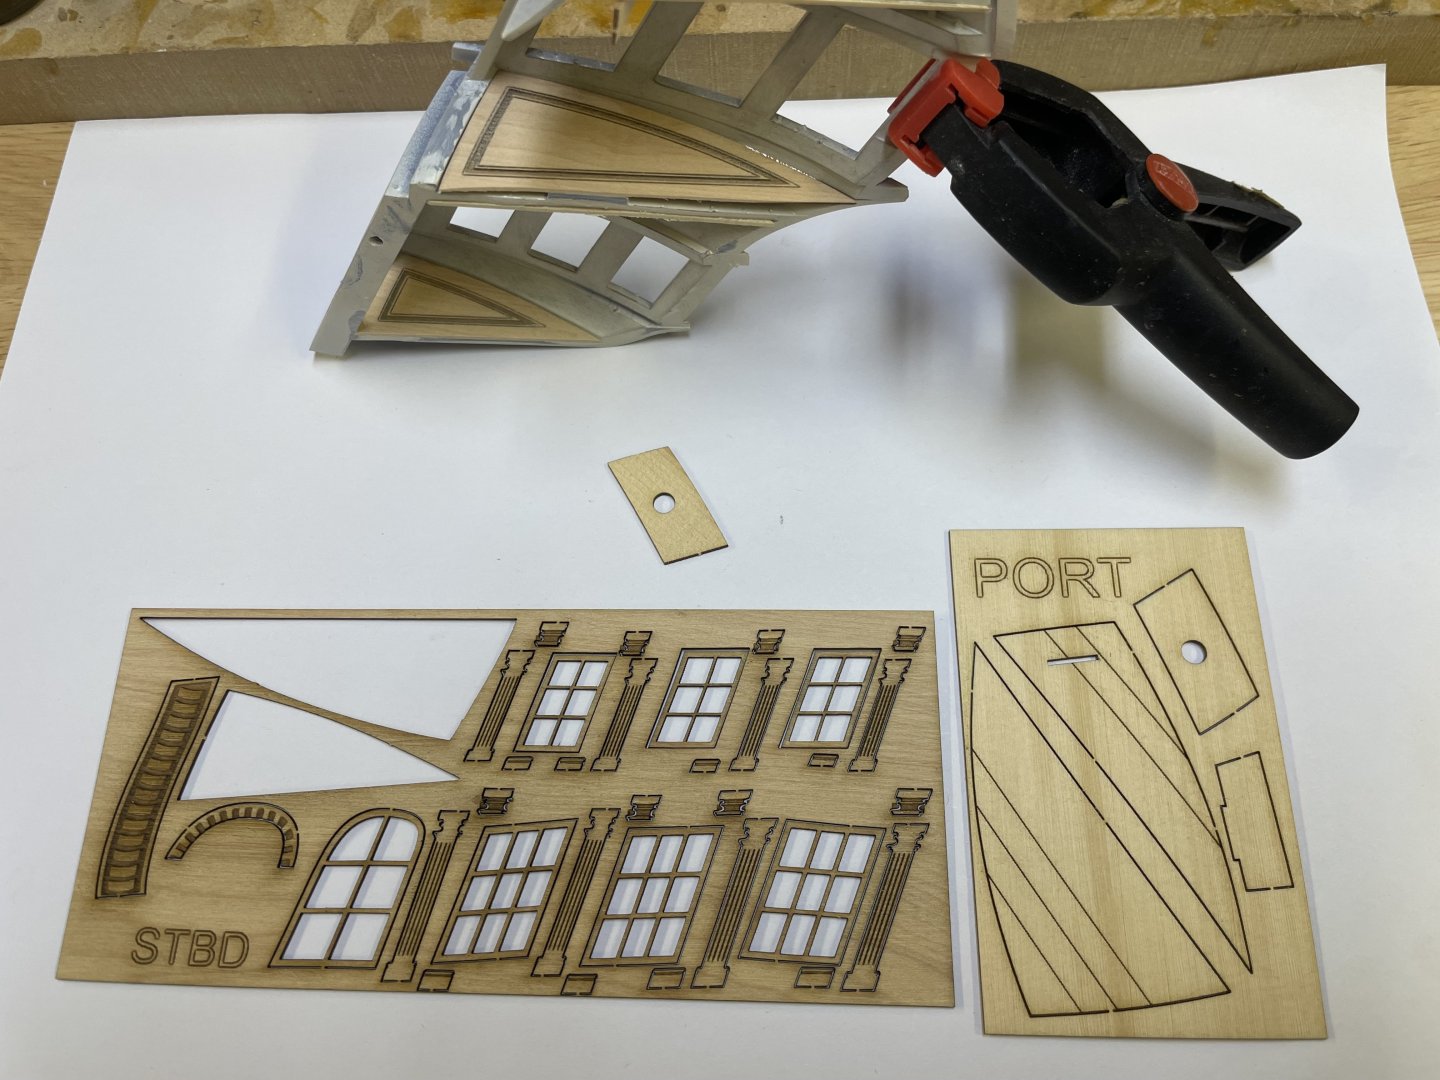
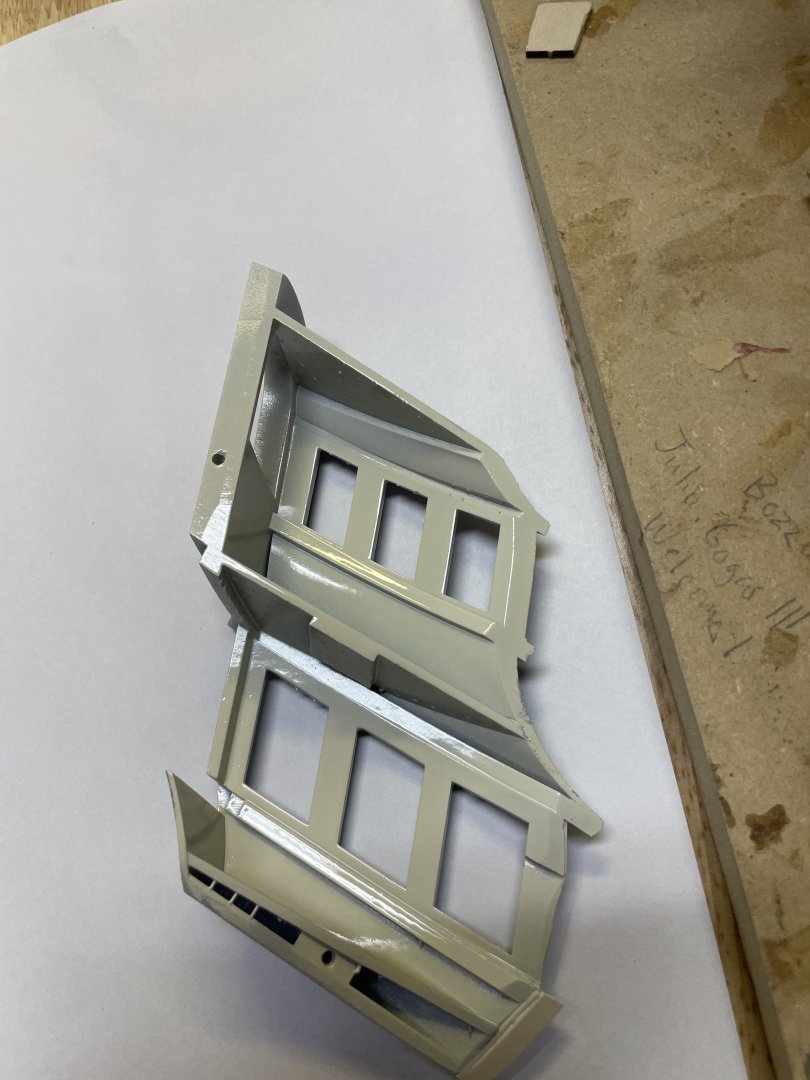
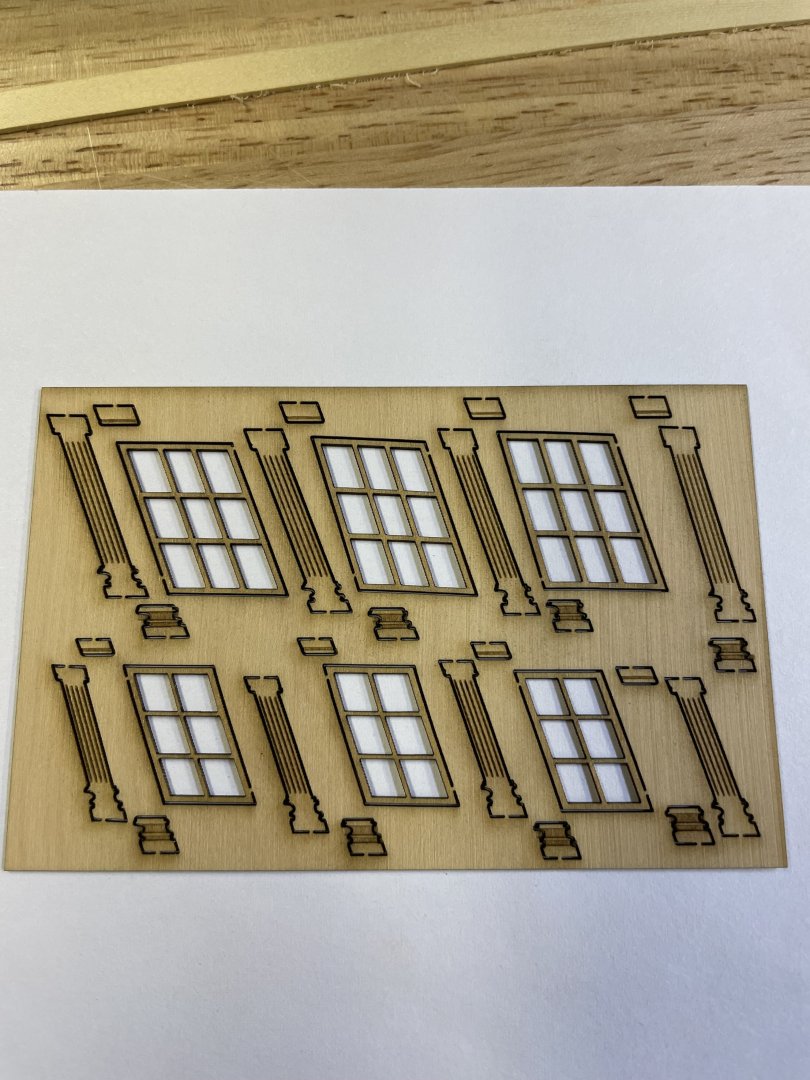
Outfitting the QG’s. before I permanently attached the QG’s I painted them and fitted the interiors. You won’t see much but I added some panels and the head, I wanted to hide as much 3D print as possible. below are the parts to outfit the QG, we have the window frames, the columns and the head. Also I have some etched flooring as well as ceiling panels in the photos you can see the flooring and overheads going in, along with the toilet. I will cover this more in detail in the instructions. below we have the lower beam, since it will be visible through the windows I doctored it up with some thin AYC leftover from planking, I added a little shelf that will go over the head. Before fully attaching the QG, I went ahead and taped off the frieze panel and painted in the red area, this way I don’t have to mask the QG. after that was completed I went ahead and double checked The fit, made sure to sand down the added panels so they fit against the hull. Once that was completed I attached the QG, I screwed it down and then I pinned it with some copper rod (.040”) and CA. once firmly attached I used flush cutters on the soft copper and carefully filed down the rest. on the back side I just folded the pins over, except where there will be interior paneling, once the ca cured I flush cut that end as well and filed it down flush. The rest of the QG outfitting will be completed once the transom is assembled, the molding has to go on and then the columns can follow. You can also see the drop installed which is pretty straight forward, just a lot of sanding and adjusting until it fits tight.


- 396 replies
-
- 23
-
-
-
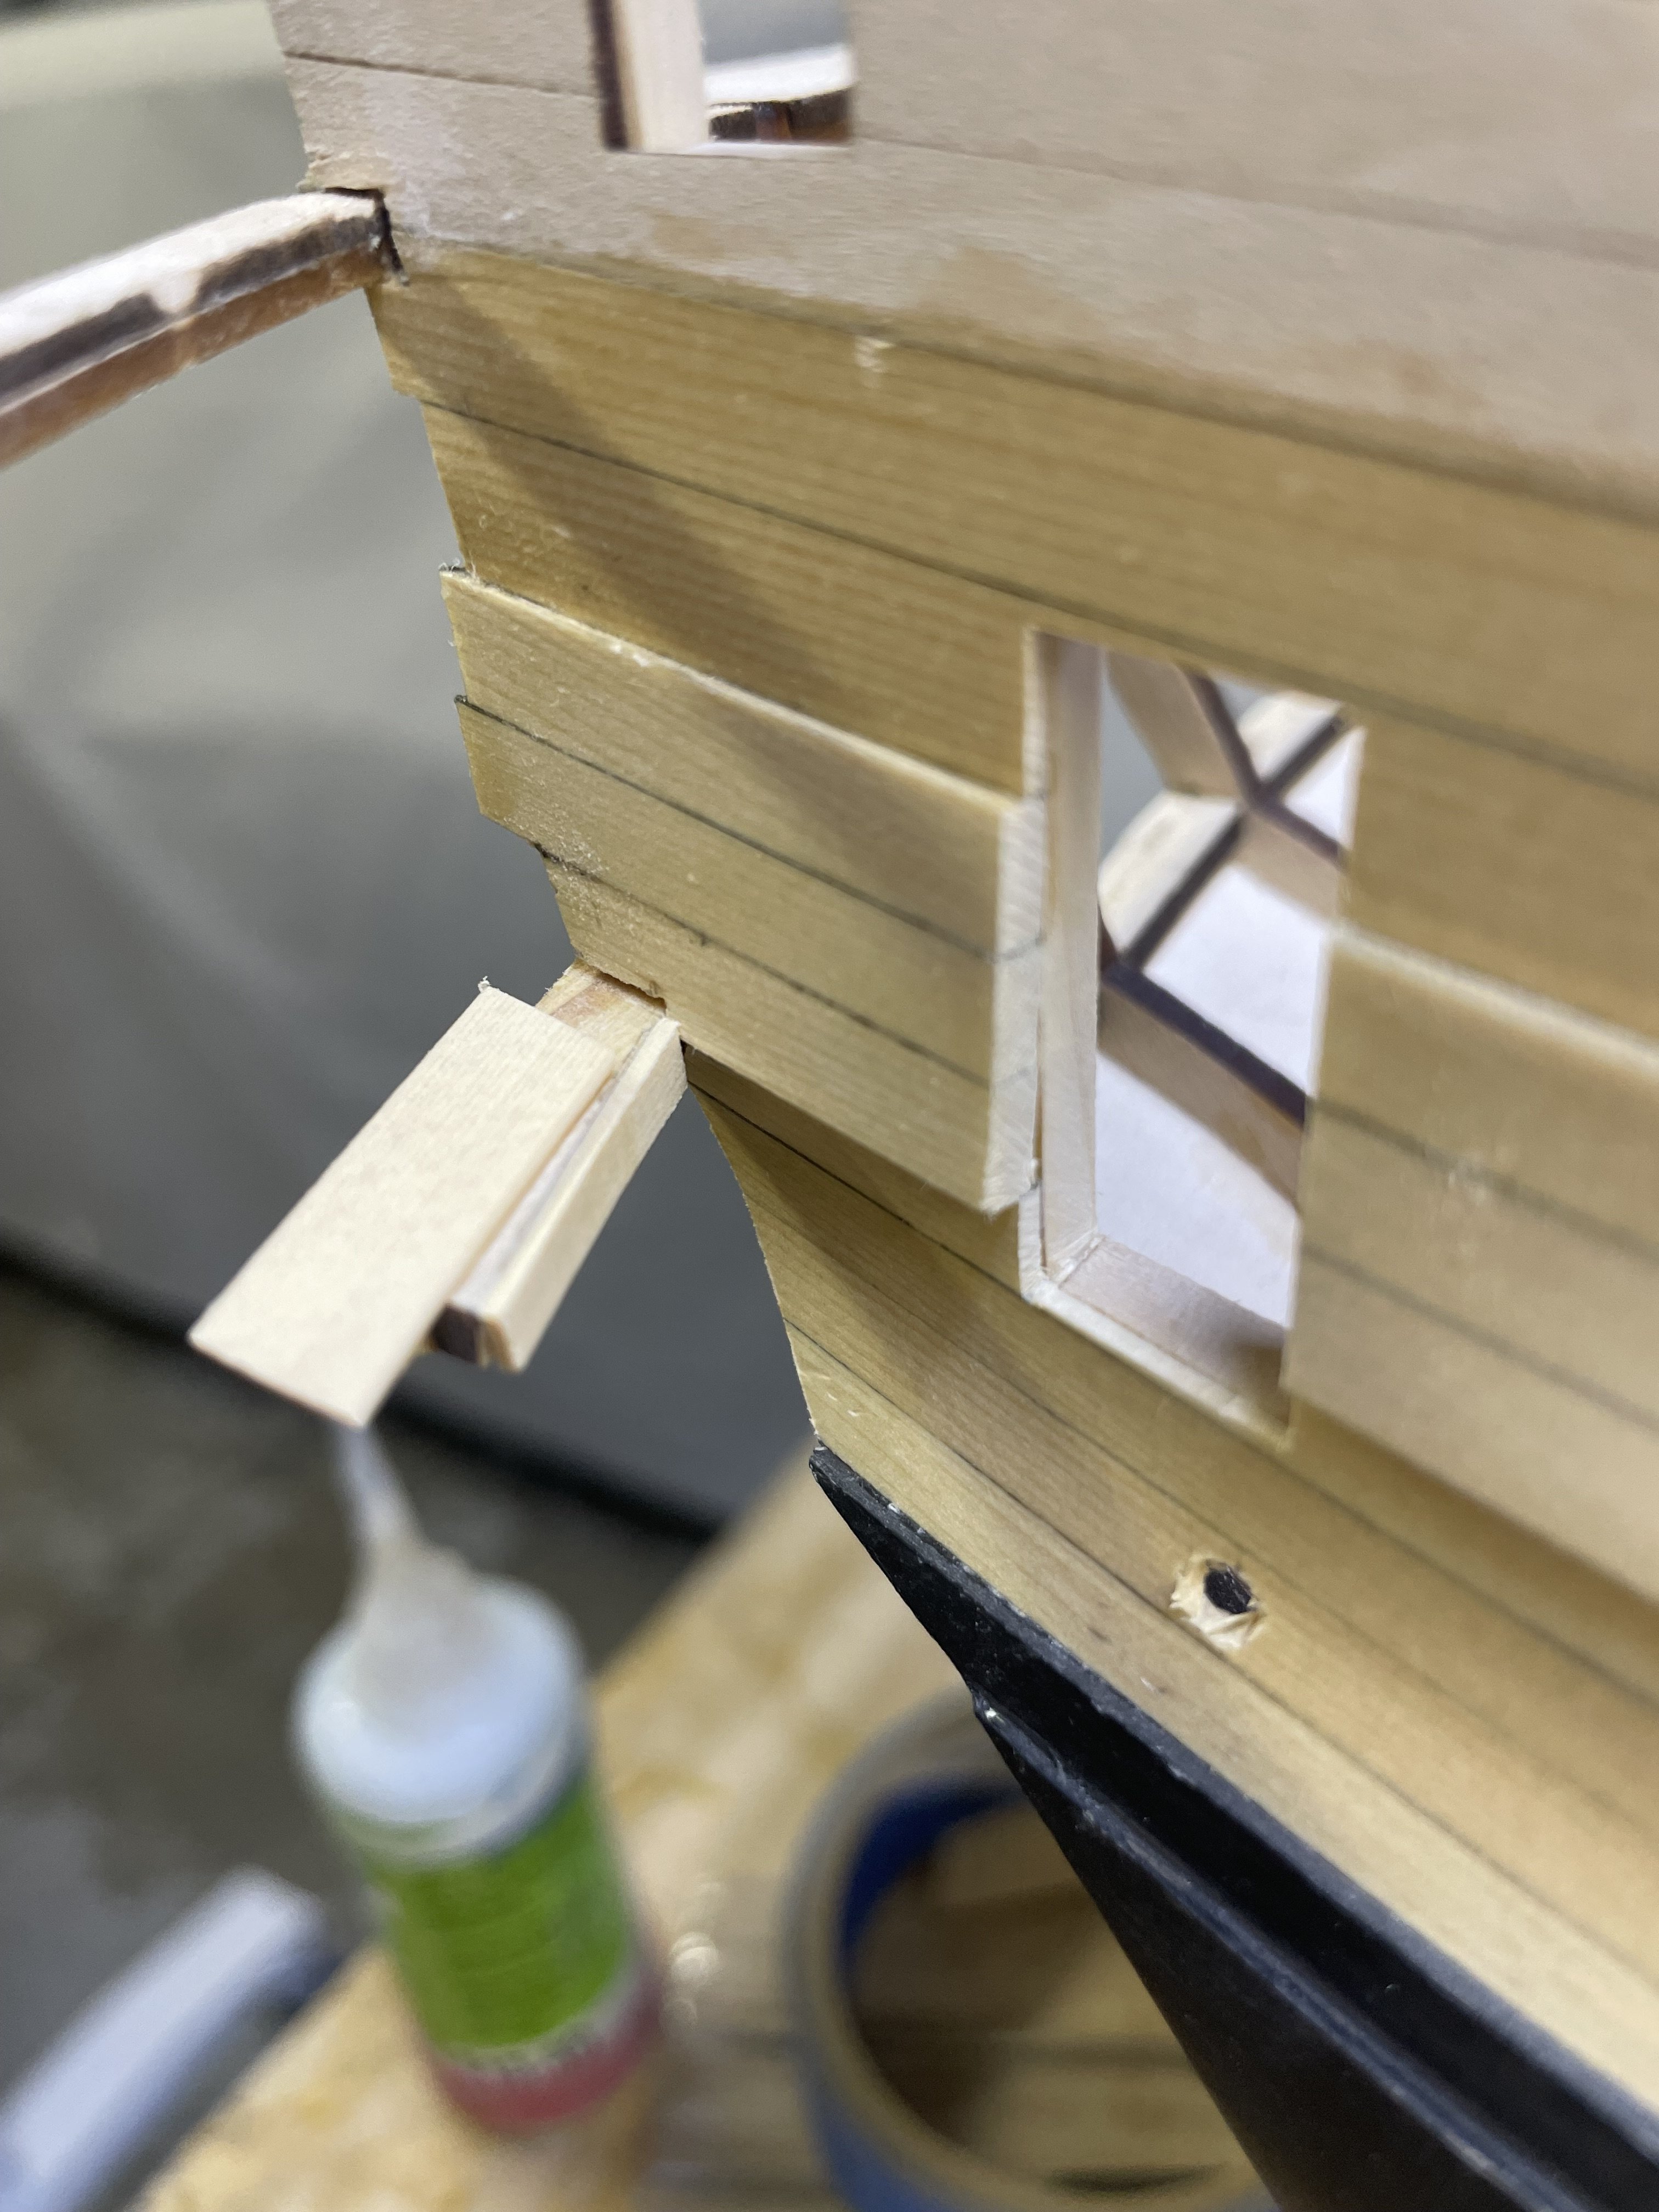
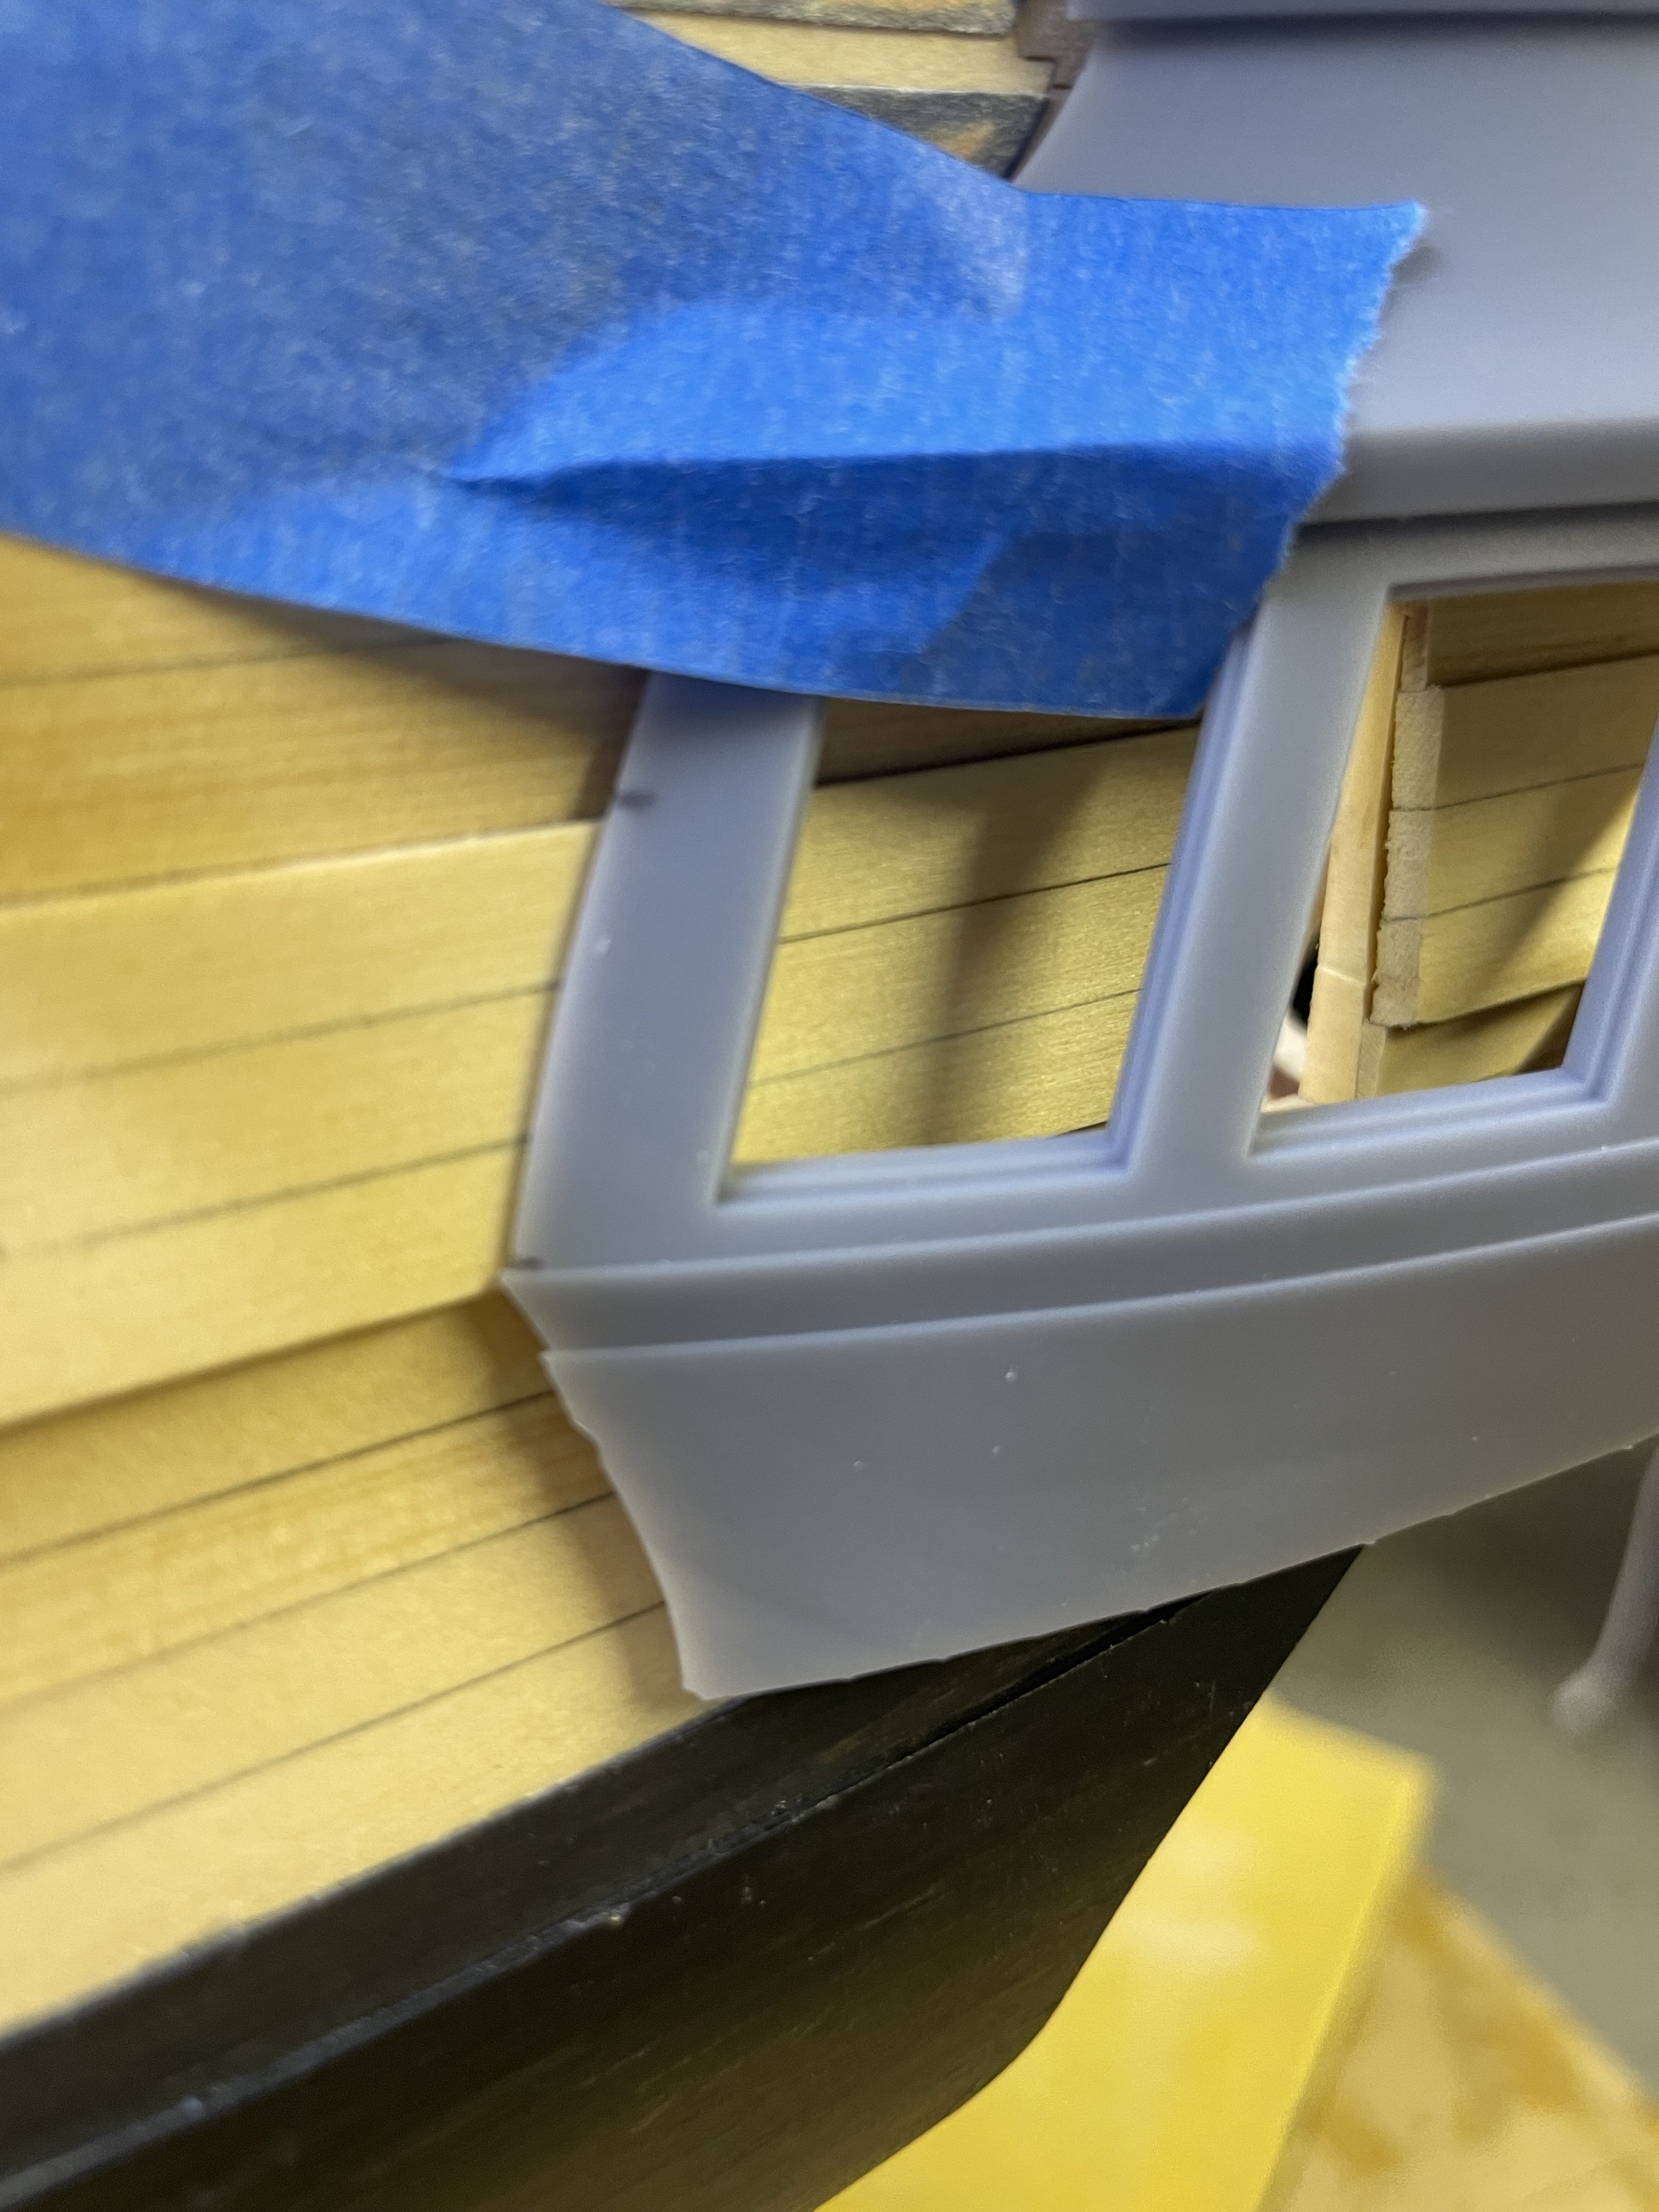
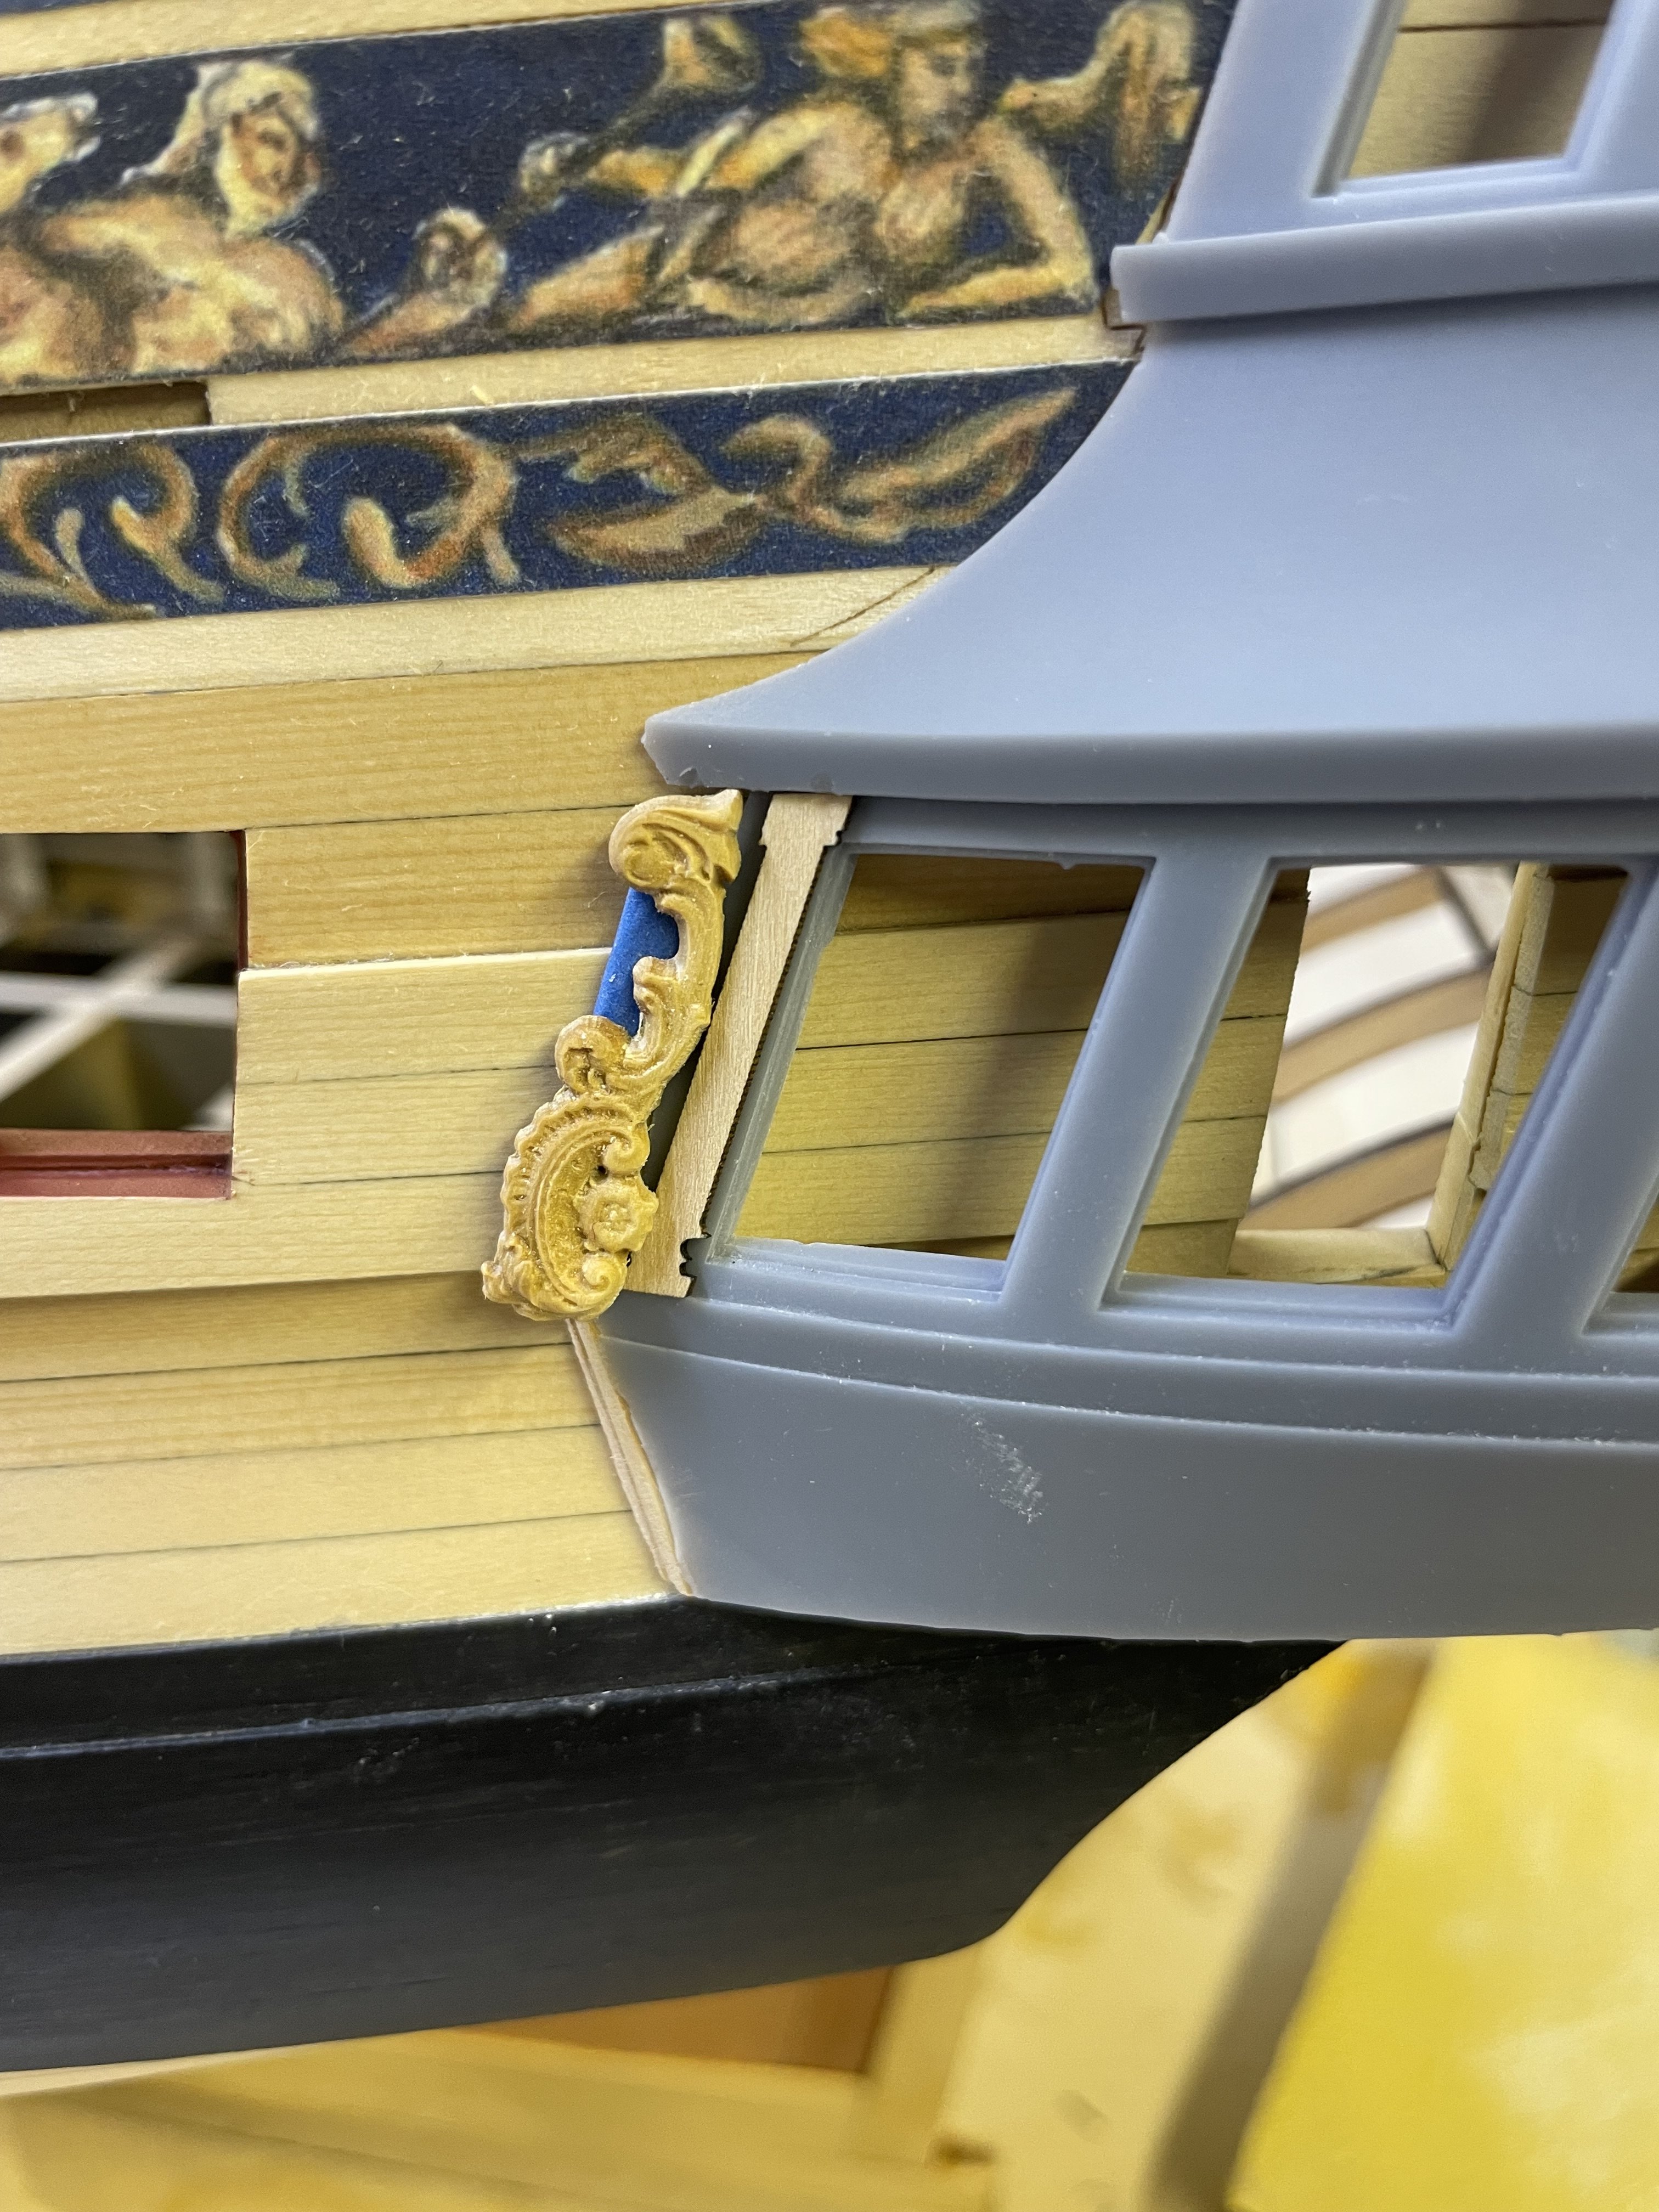
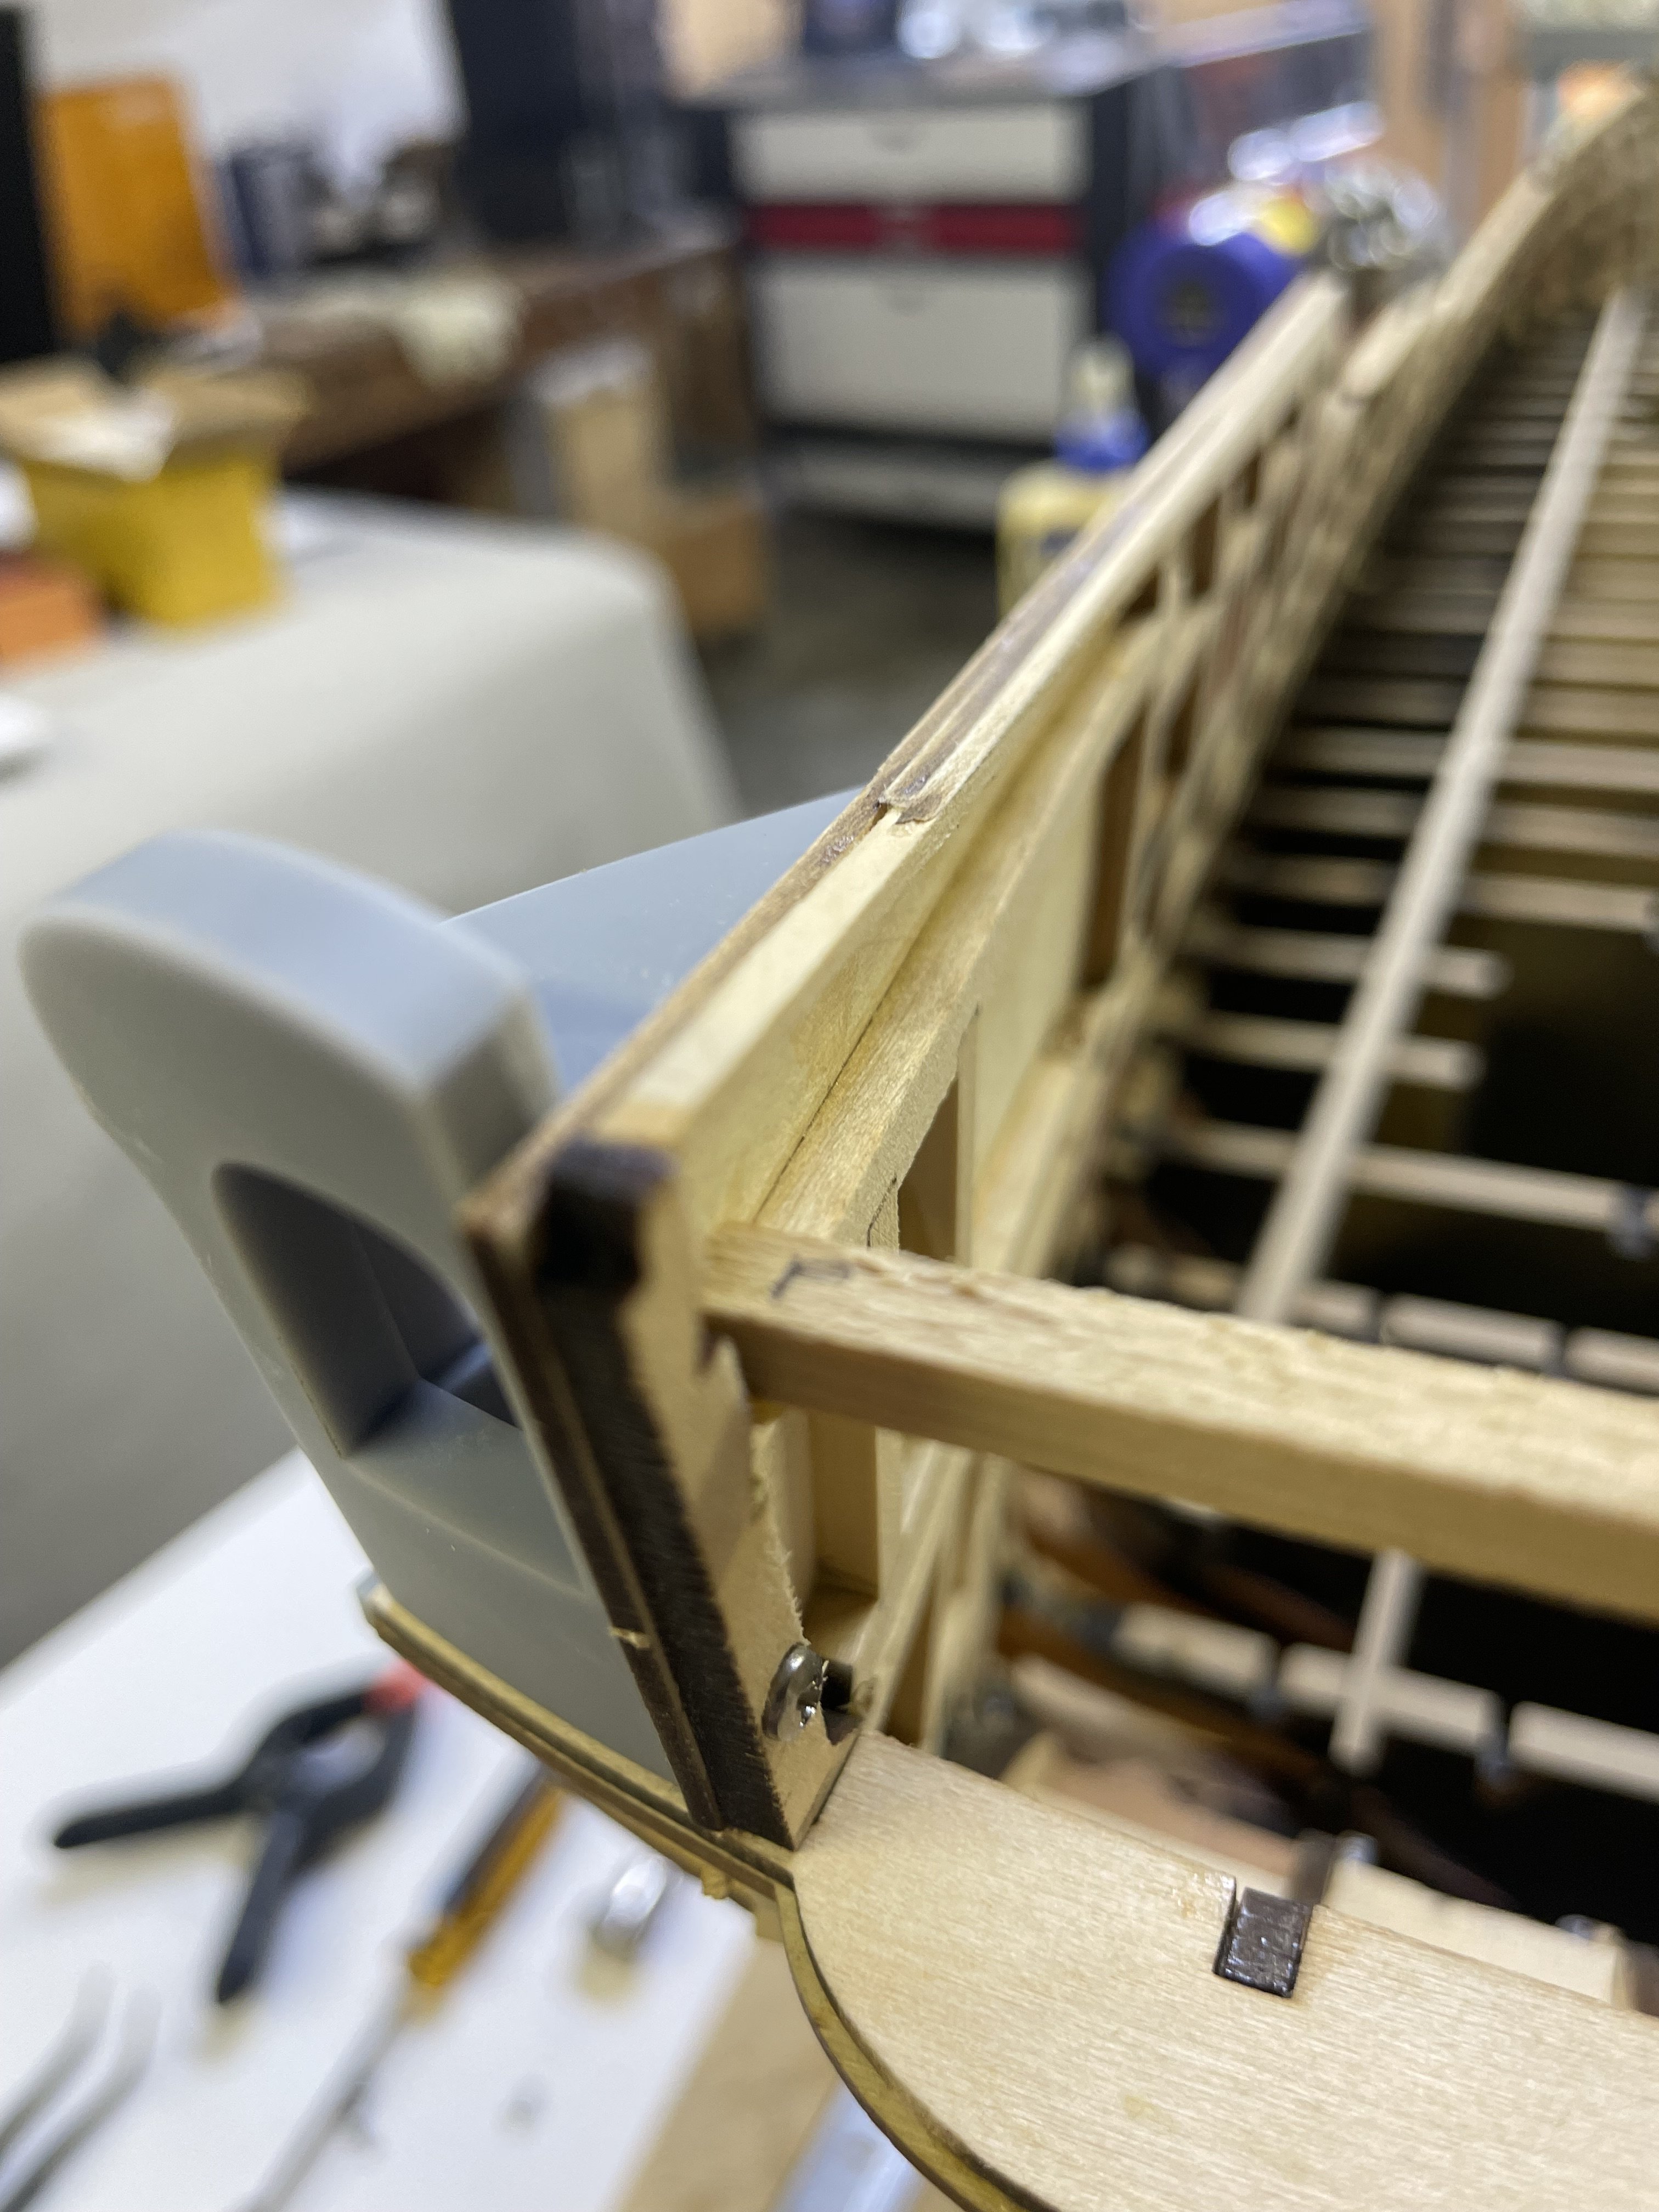
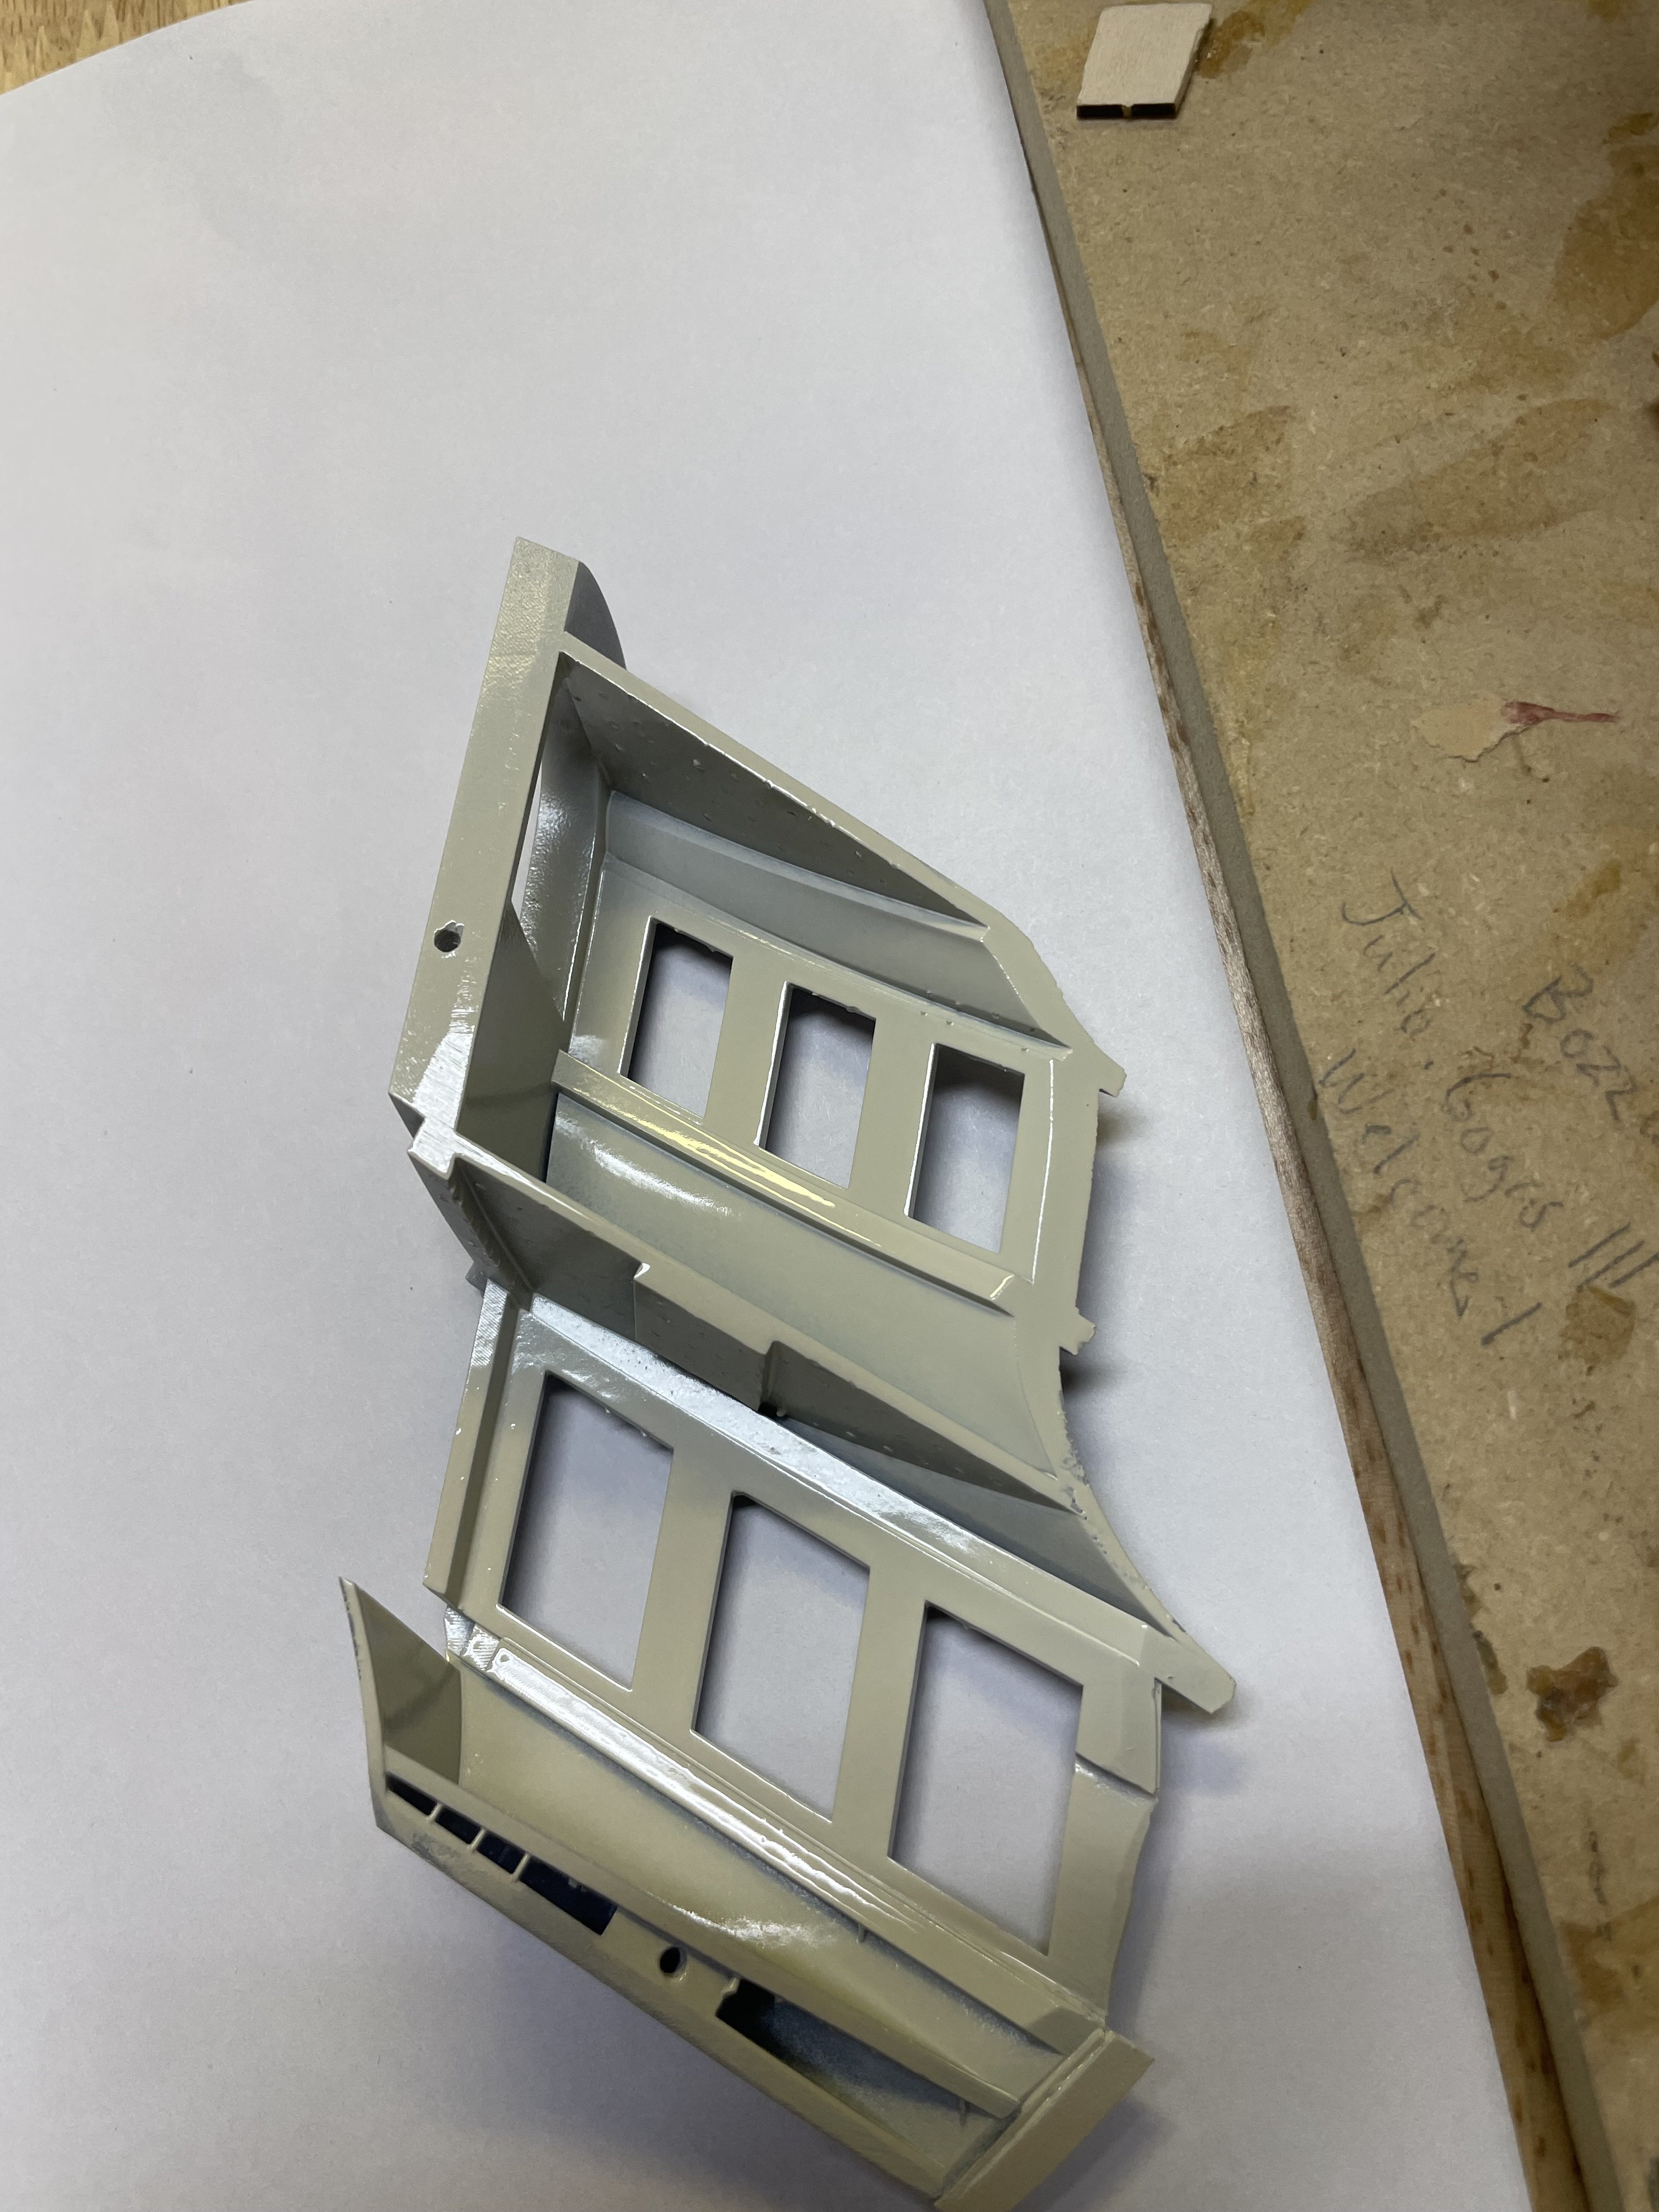
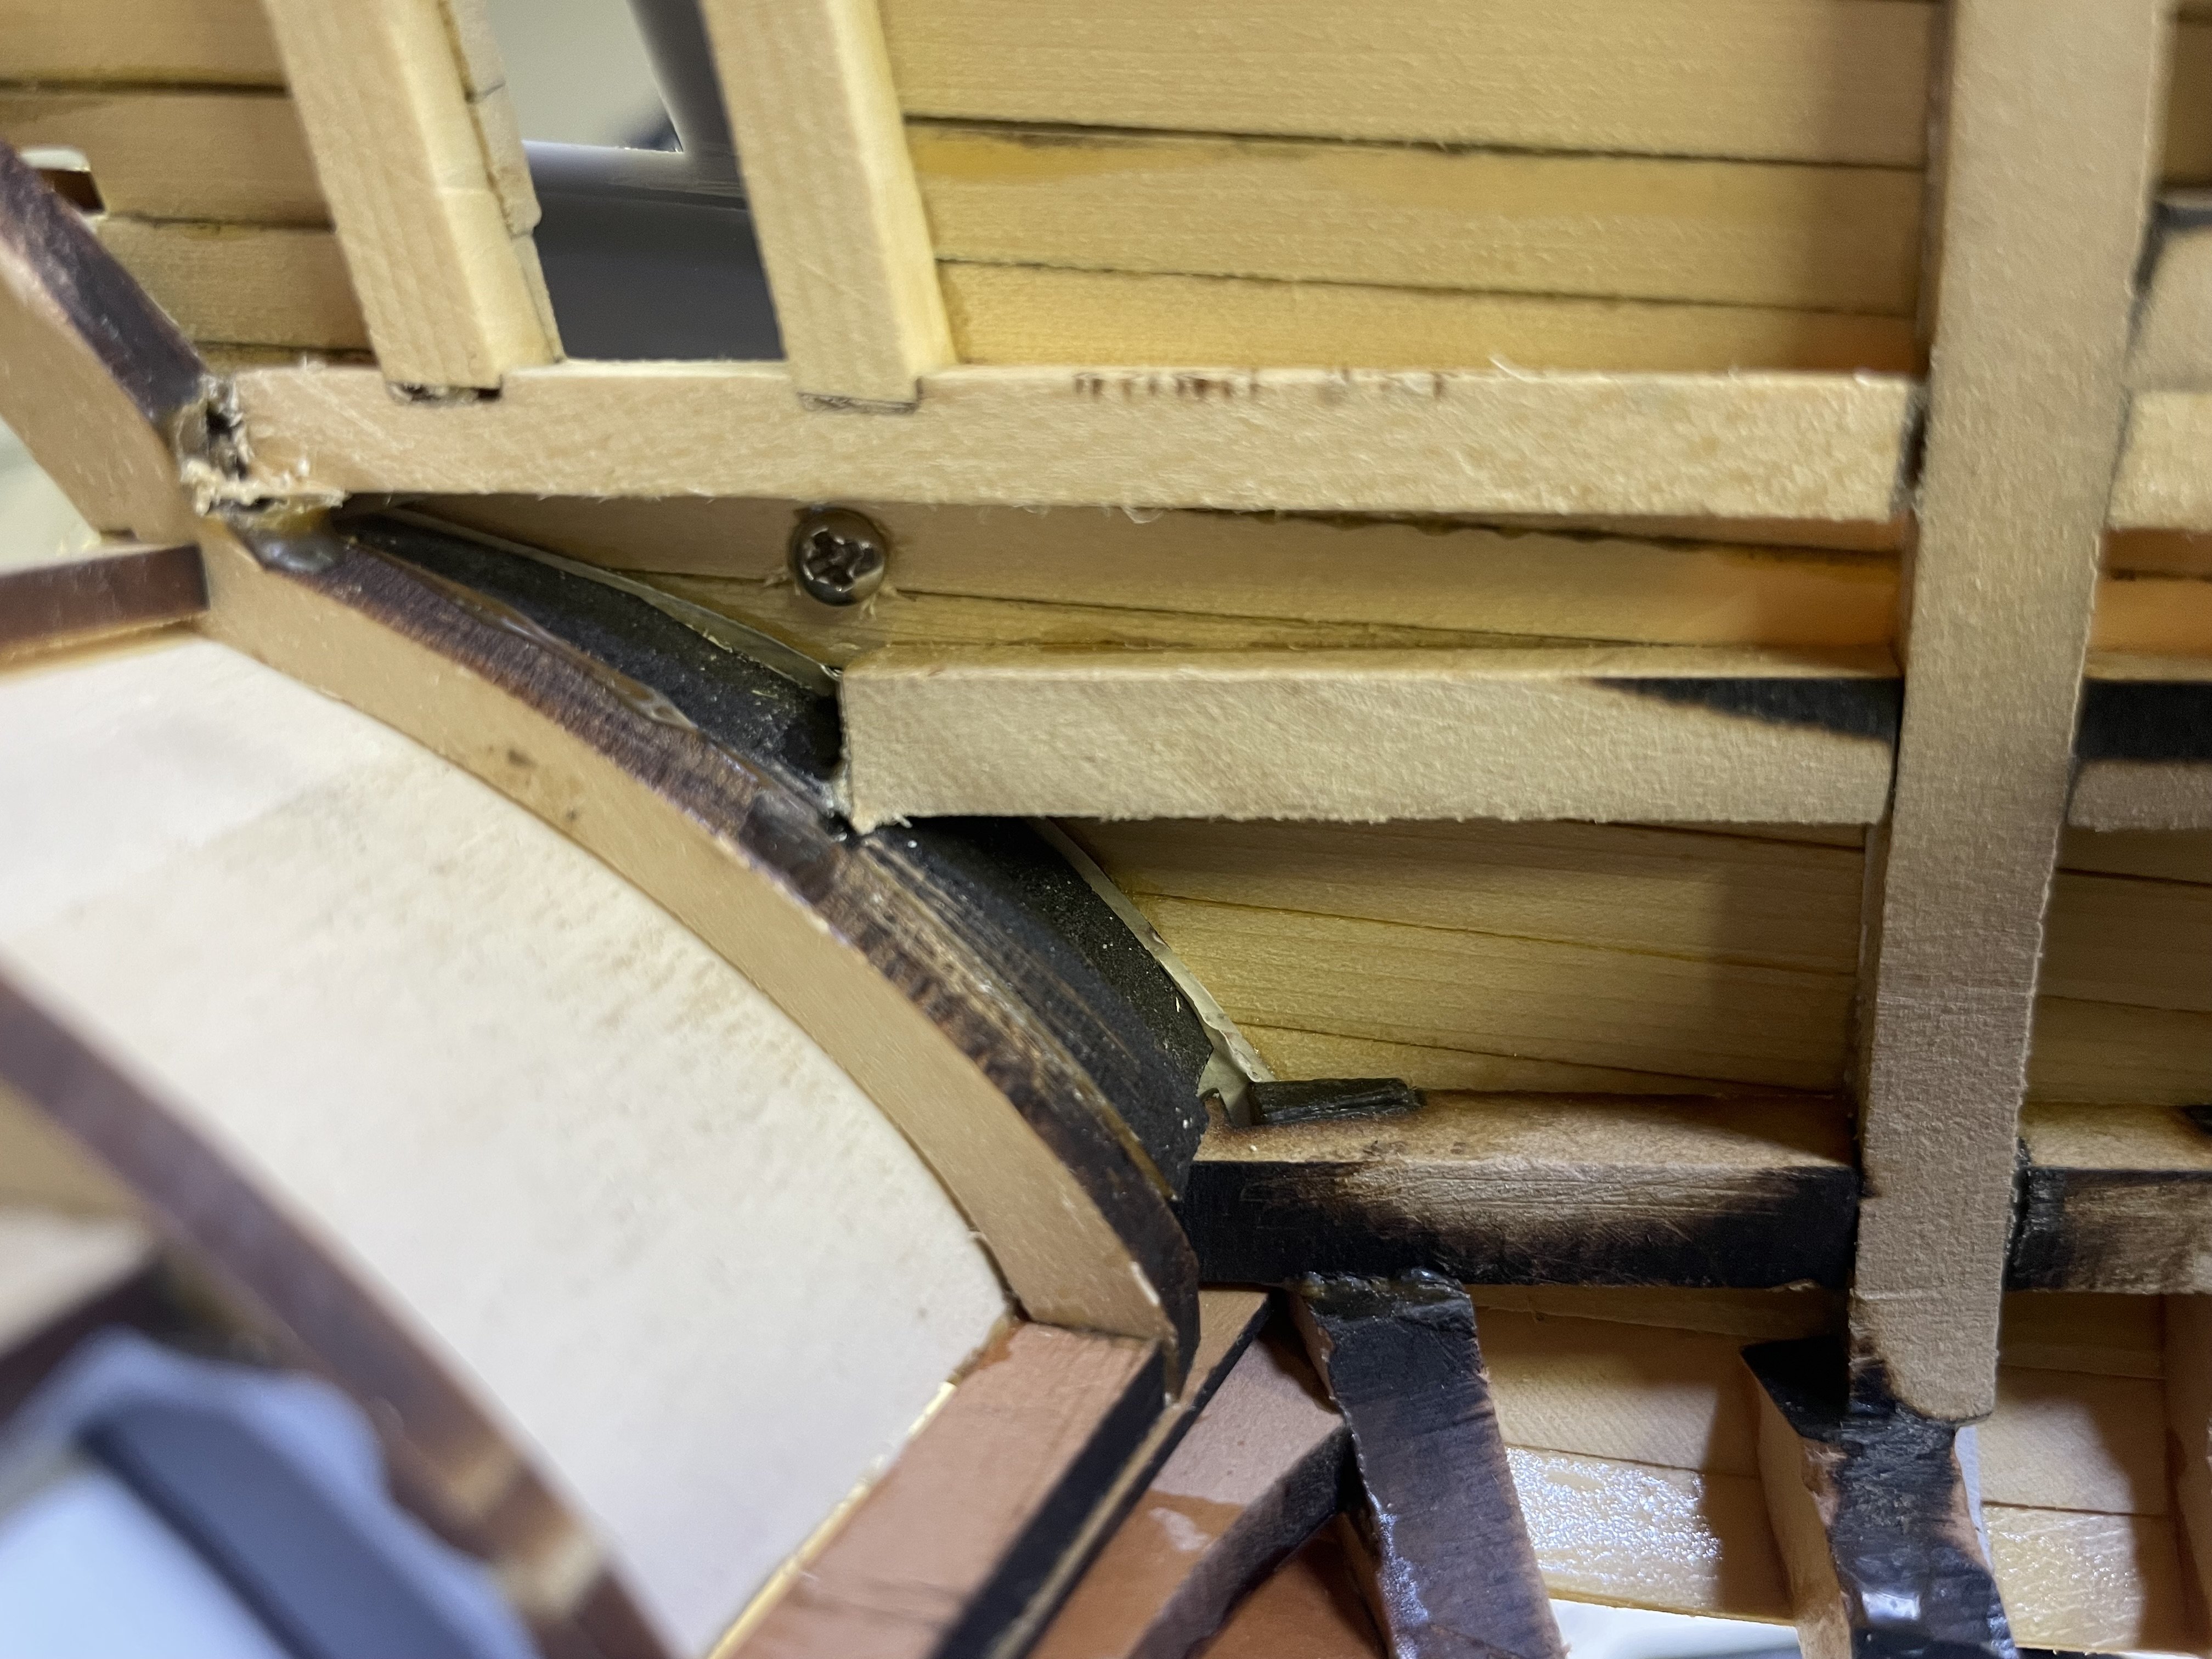
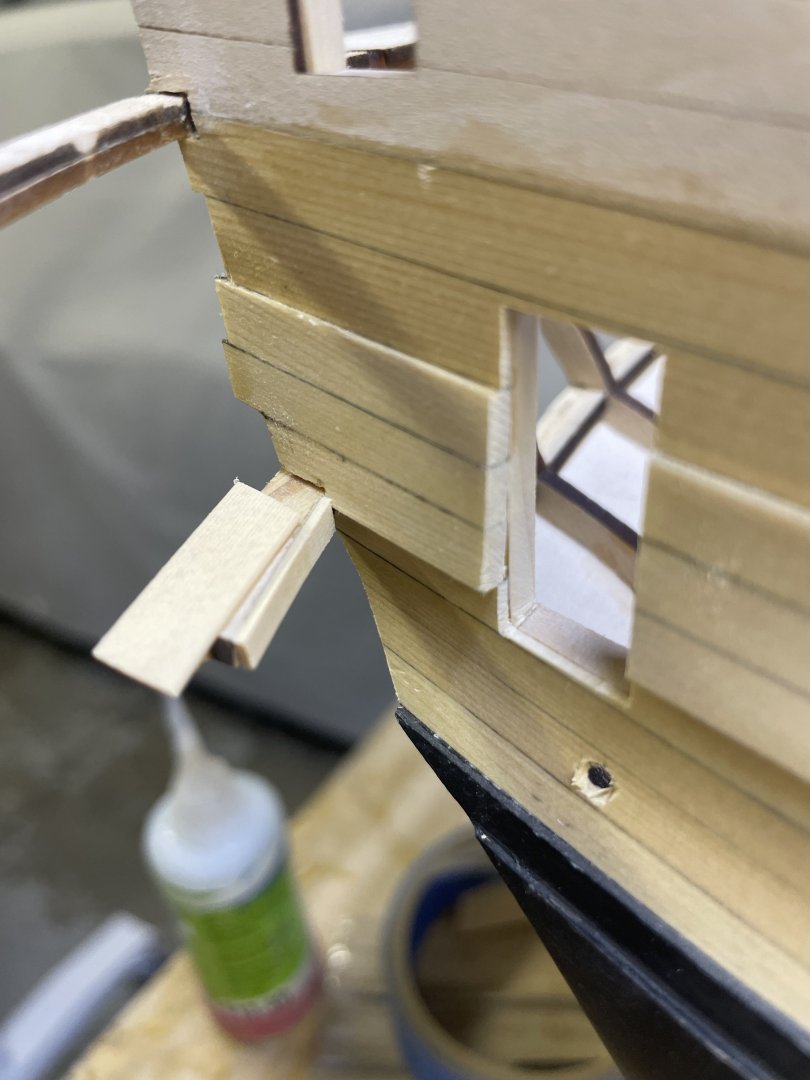
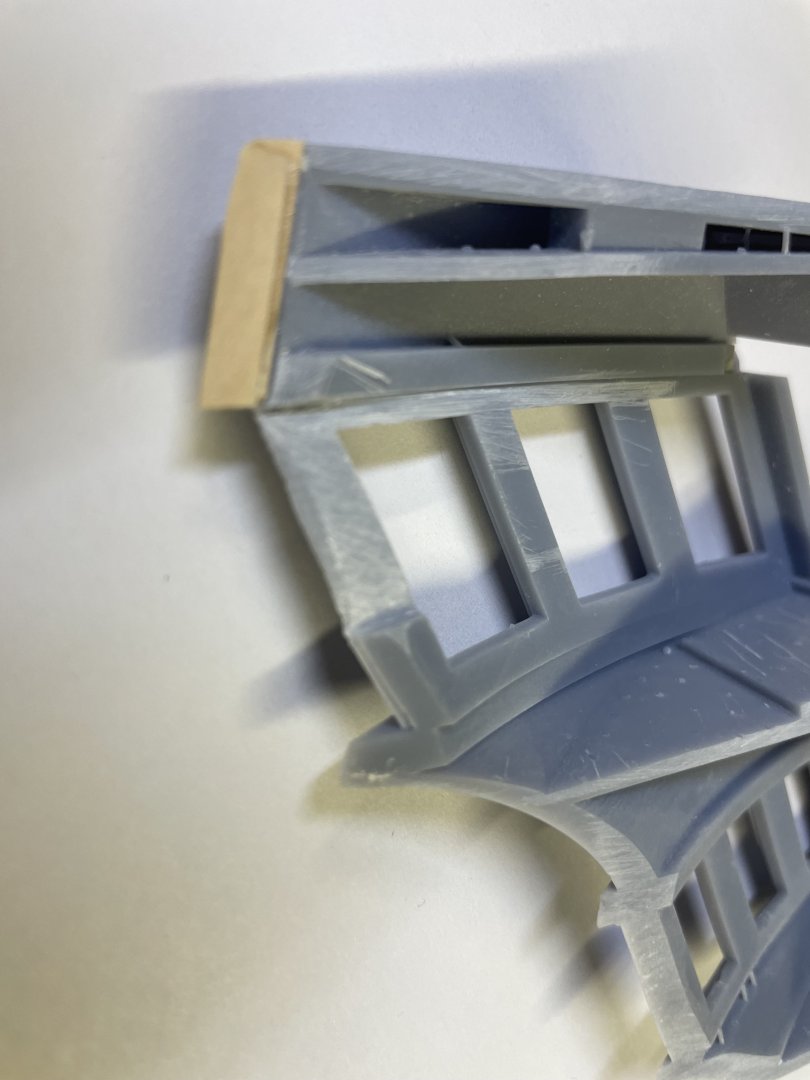
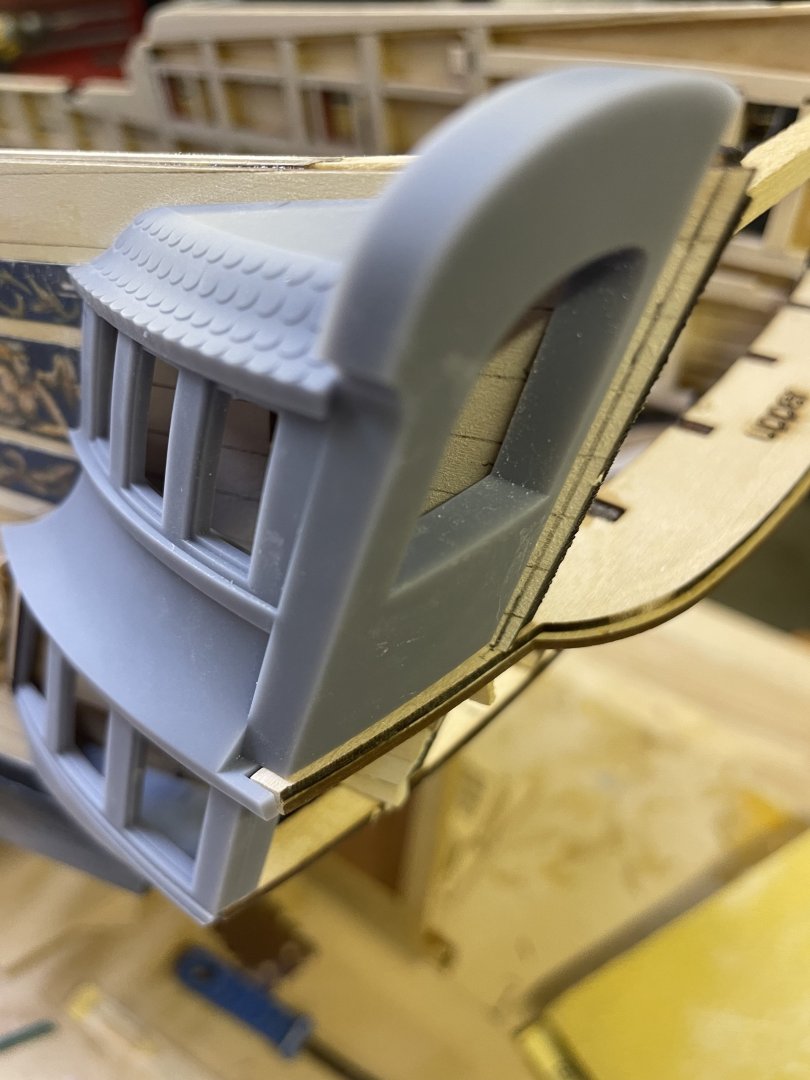
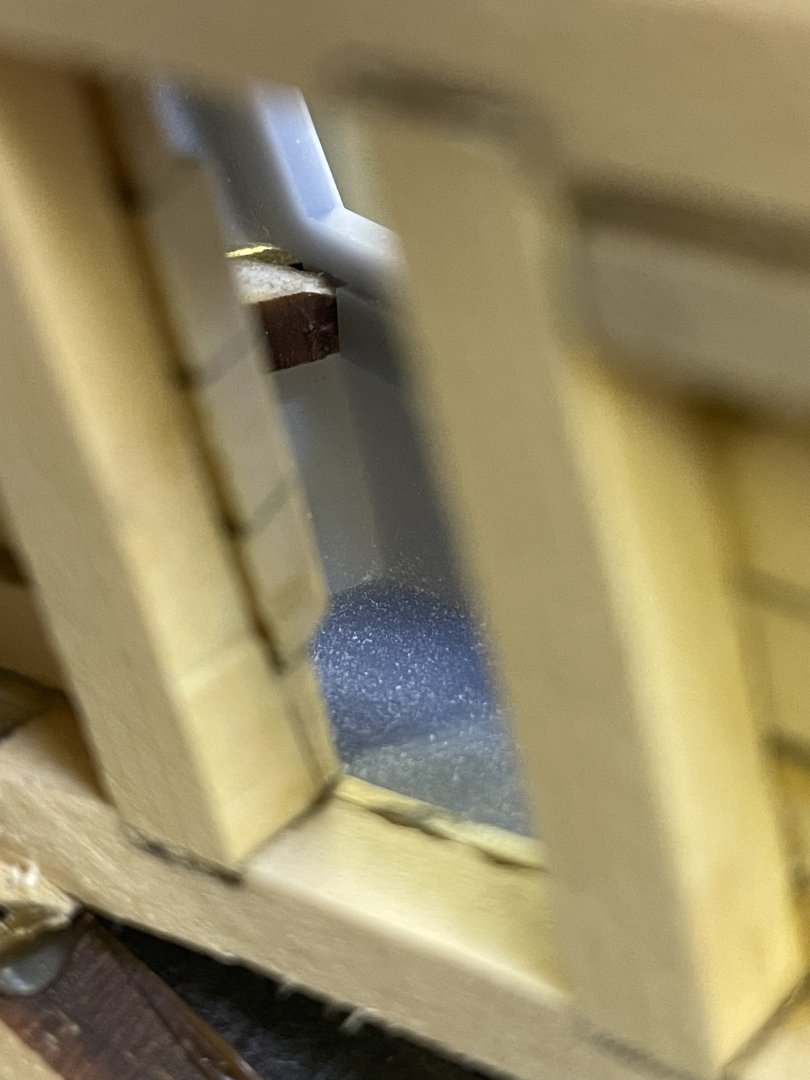
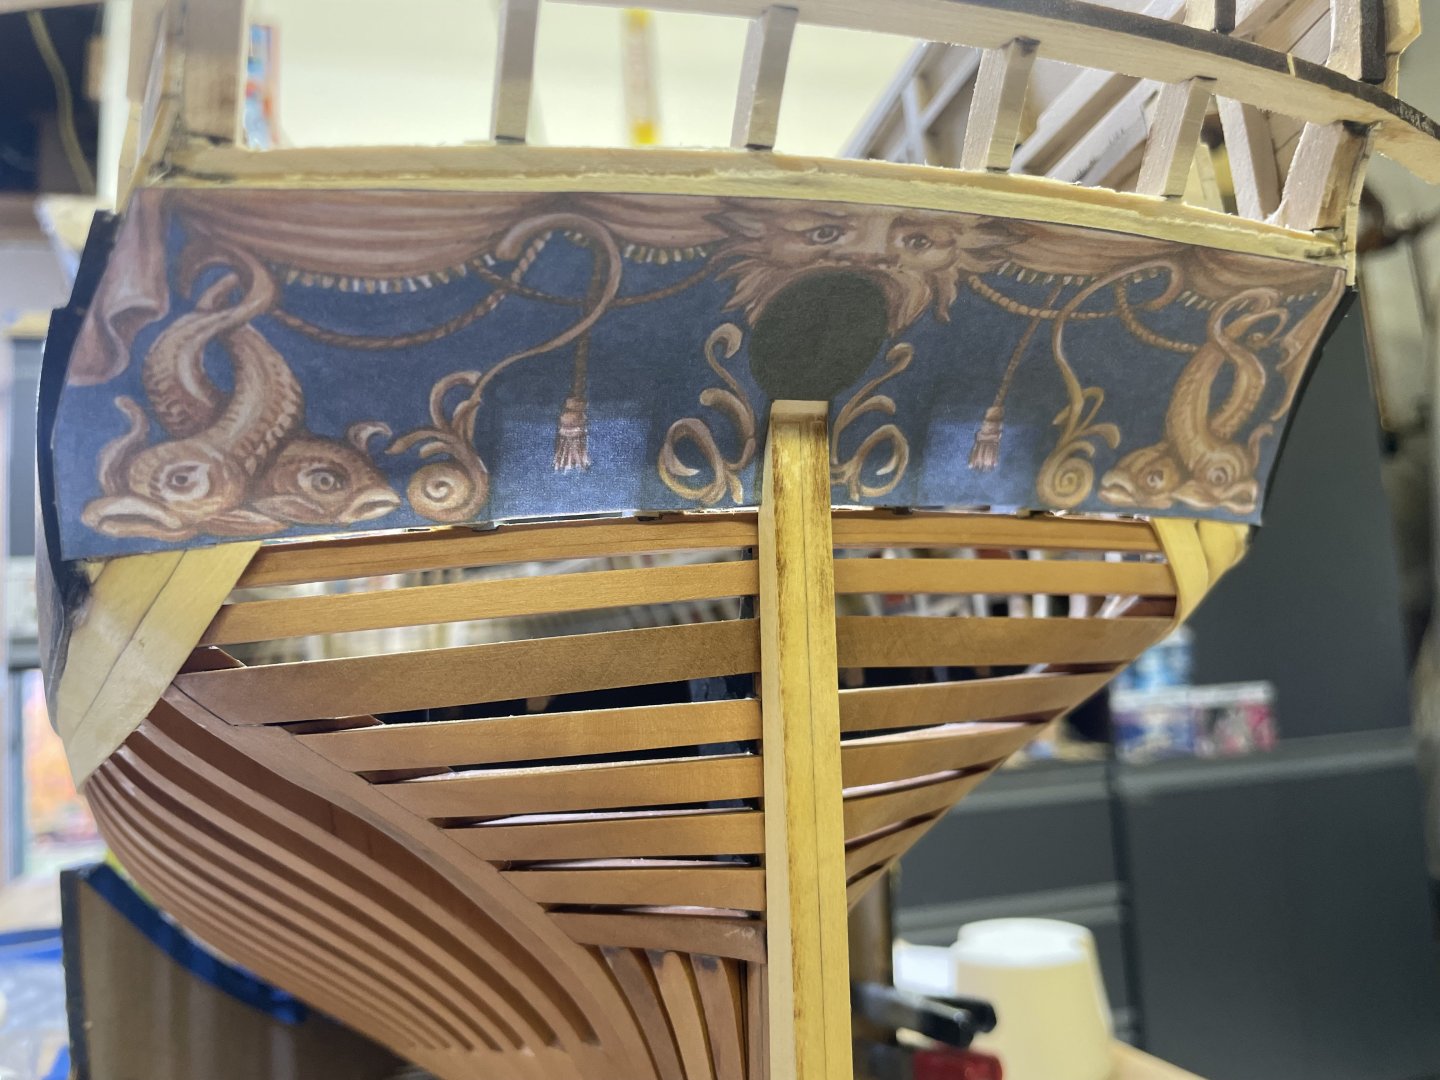
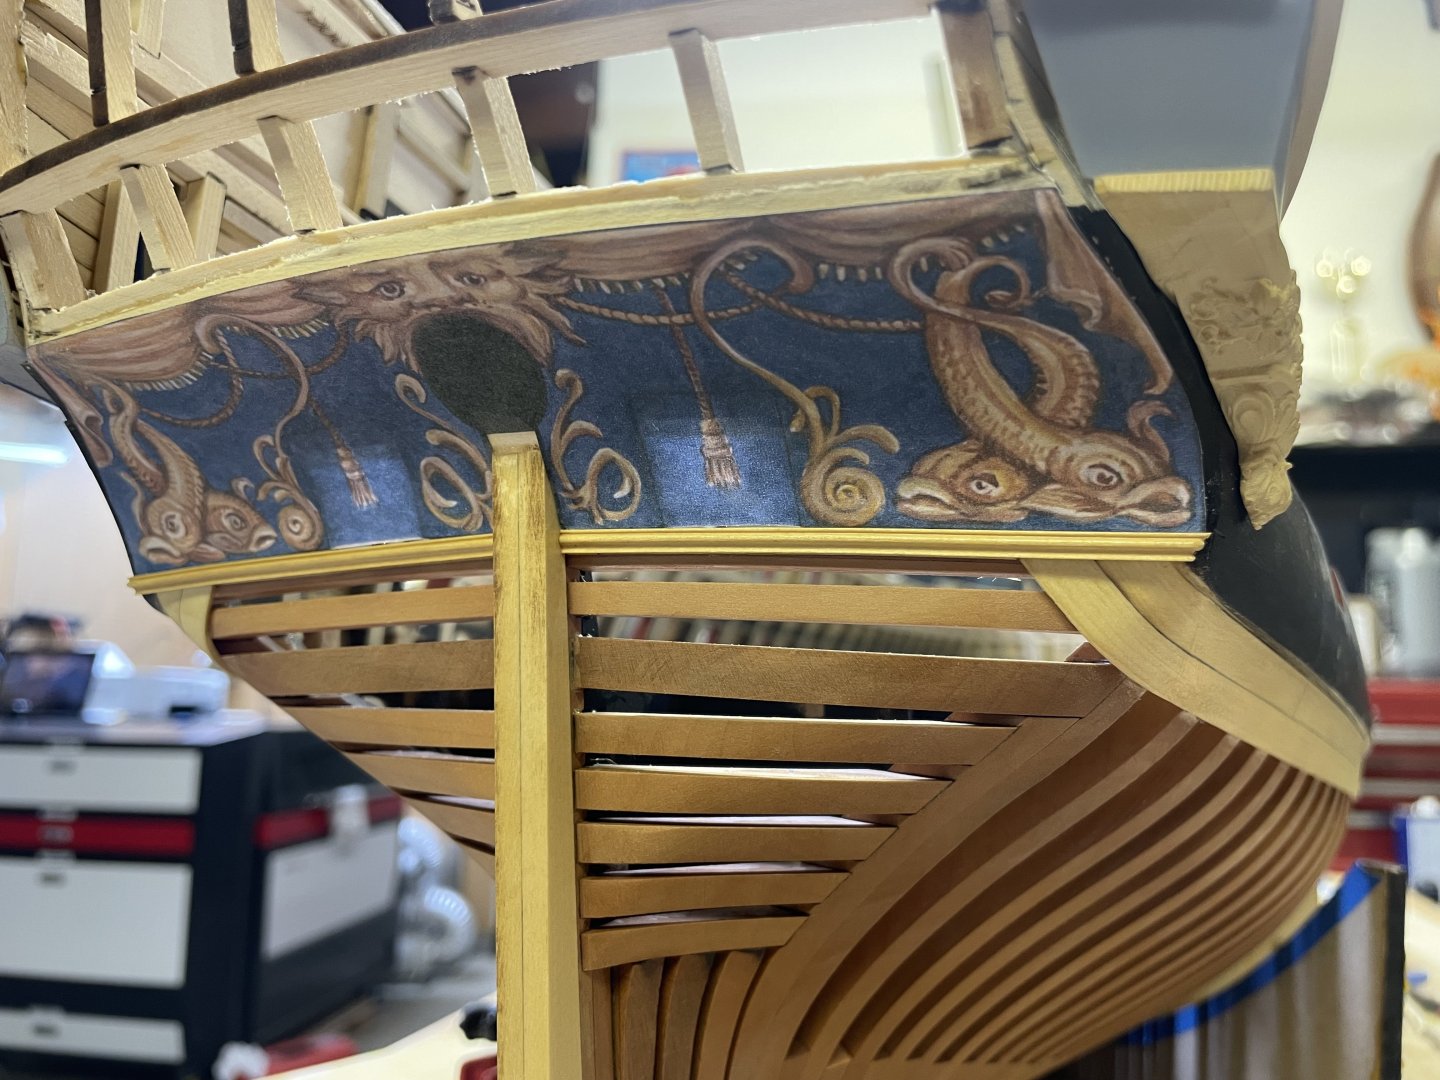
Some updates: So I started assembling the Q galleries and attaching them to the model. This is a very tricky part of the model and requires a lot of patience and attention. It will be emphasized in the instructions! Begin with fitting the q galley on the model and marking where it needs to be filed to clear the channel wales, go ahead and file and sand until the part fits pretty tight against the side of the hull i had to add a little bit of boxwood strips to the lower edge, my channel wales are probably running a little thick. Test fit several times and make sure the q galley is sitting down correct on the beams as shown below as well as in the notch on the lower beam. above You can see how the gallery fits up against the balcony beam. Make sure it’s just like this. A lot of clearance is required for the channel wale so take Time to file it down right. once everything looks good you can make sure that a column fits on the forward lower window as well as the carving, the carving covers up a lot of sins so if you chip and edge of the q gallery don’t stress too much. below you can see the balcony beam hangs out about 1/32”, this is required for the transom panel to sit on, later after we get the galleries attached. above, looking in the lower gallery you can see where the lower beam notch fits into the Q gallery, make sure you have that fit. It needs a little convincing to pop into place sometimes so take your time. Below is where I drilled a hole to screw the upper part of the gallery down, I used tiny machine screws I found in the hardware store, anything will work as long as it’s small enough. I screwed them down in two places and this is helpful when taking them on and off frequently to test fit. below is where I screwed the lower part, the q gallery has a solid block built into it for accepting a screw. Carefully mark out on the model where it’s located and drill the hole through, carefully mark on the part where to drill and then drill the hole when you take it off. once the gallery fits well I went and painted the inside, I used an ivory white with some weathering compound to age it a little. Once it’s dry we can begin adding the interior parts.


- 396 replies
-
- 16
-
-
Lovely work Dusan. That looks very good. Happy sanding!
-
Made some progress today on the QG install but still working through some bugs, lots of parts in the trash! And I don’t like the color so I’m going to redo the paint work. More on these next week. But I did have a success with the lower counter frieze and the boxwood molding. After some manipulation and multiple prints I think I have it where I want it and it fits pretty good. Some minor trimming required but nothing serious.
- 396 replies
-
- 25
-
-
-
Thank you Greg. I’m currently putting one together and have it installed, however I don’t like the blue so I’m going to take it off and start over. so far the only cedar on the QG’s is the laser etched flooring that fits into the printed floors of the QG’s. Everything you are seeing so far is boxwood.
-
Thanks guys. I’m very pleased with how the carvings have turned out. The painting was quite useful and easy to interpret into a 3D model. More to come soon!
-
Some small progress on the QG today. Spent most time designing parts and printing trial and error. Oh and whatever this resin is, it’s absolutely best friends with CA and believe it or not… Tightbond. There will be zero issues attaching things to these and then to the hull.


- 396 replies
-
- 28
-
-
-
Lookin good, you’re moving right along. getting to the fun stuff now.
-
I’m not quite sure I understand what you are asking. Are you referring to where the planks meet the lower counter?
-
Thanks guys. Still a ways to go. Will be making some more revisions to the 3D model today and hopefully print another one this evening. I’m hoping to have the QG design and laser cut parts sorted by early next week.
-
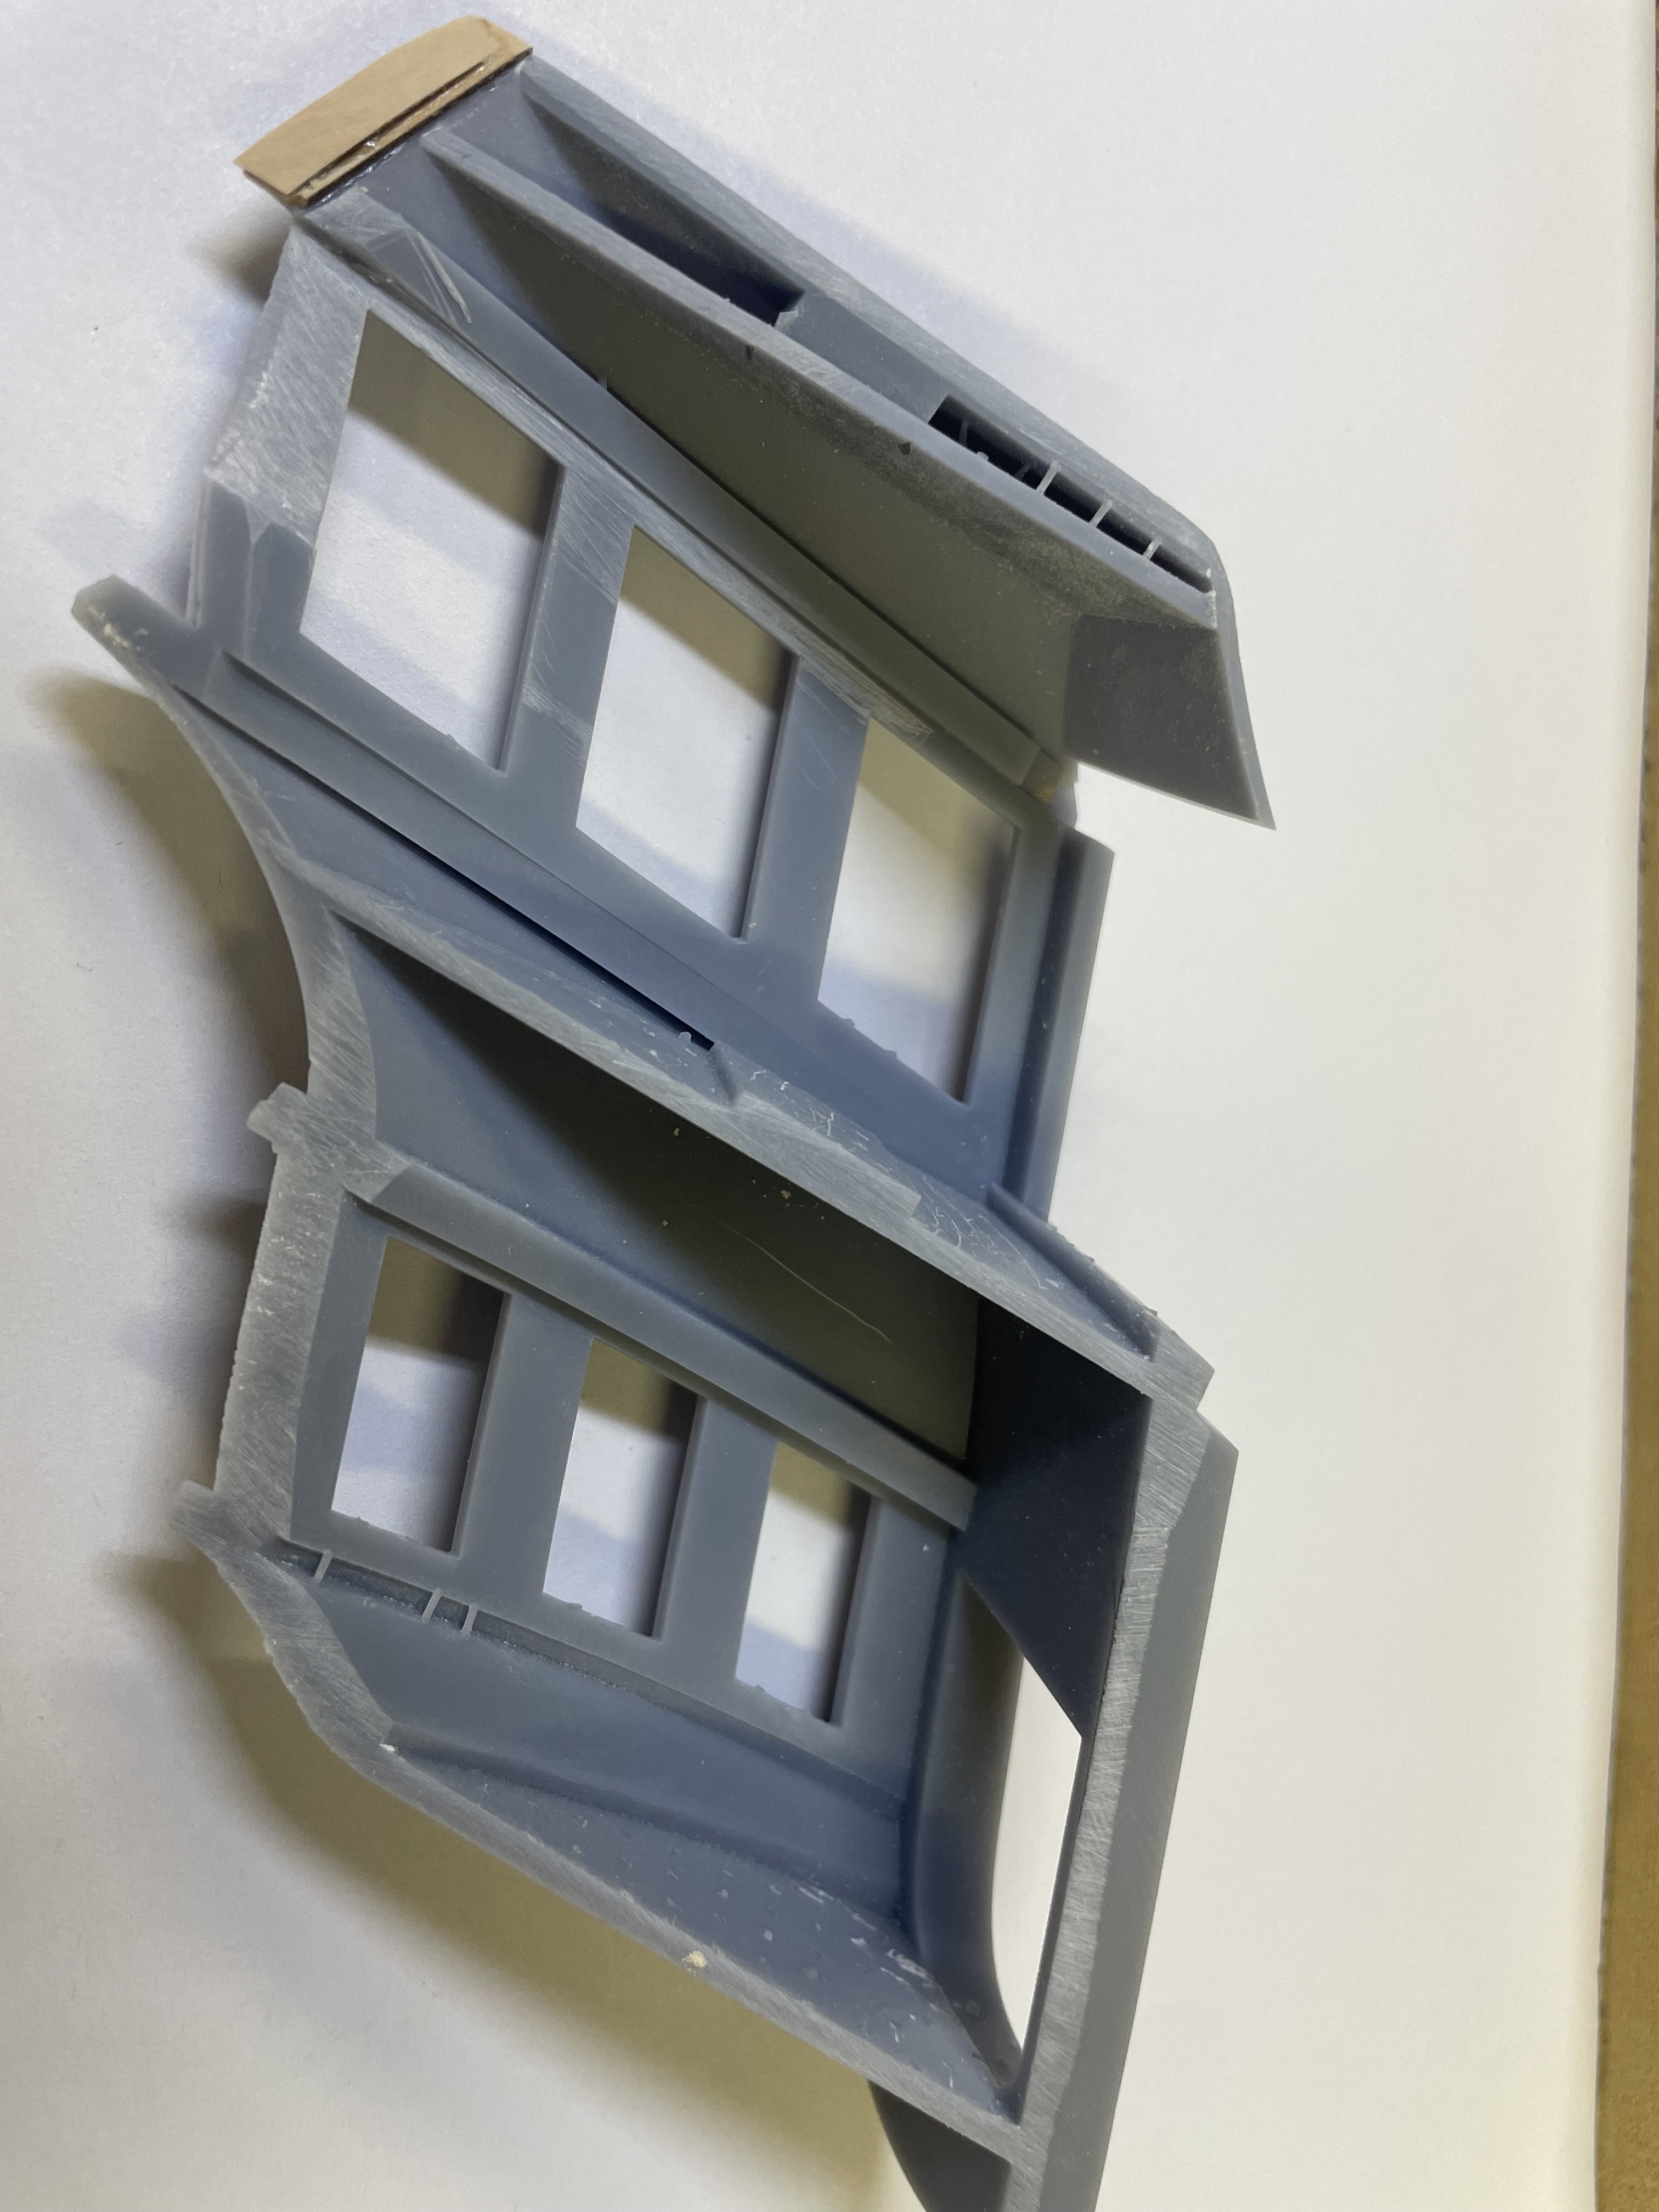
Some very preliminary QG work done tonight. Lots of boxwood had to die for this to happen. New revised windows on an old prototype QG, some messed up columns and oversized moldings. But you get the idea. There’s still much more to these things but this is the basic idea.

- 396 replies
-
- 25
-
-
-
Timing is everything. Im still working on it one chapter at a time. You build reasonably quick. May be better to wait so I have some chapters in stock anyway!!
-
Nice work!
-
Thank you Glenn! Would love to see you build one!
-
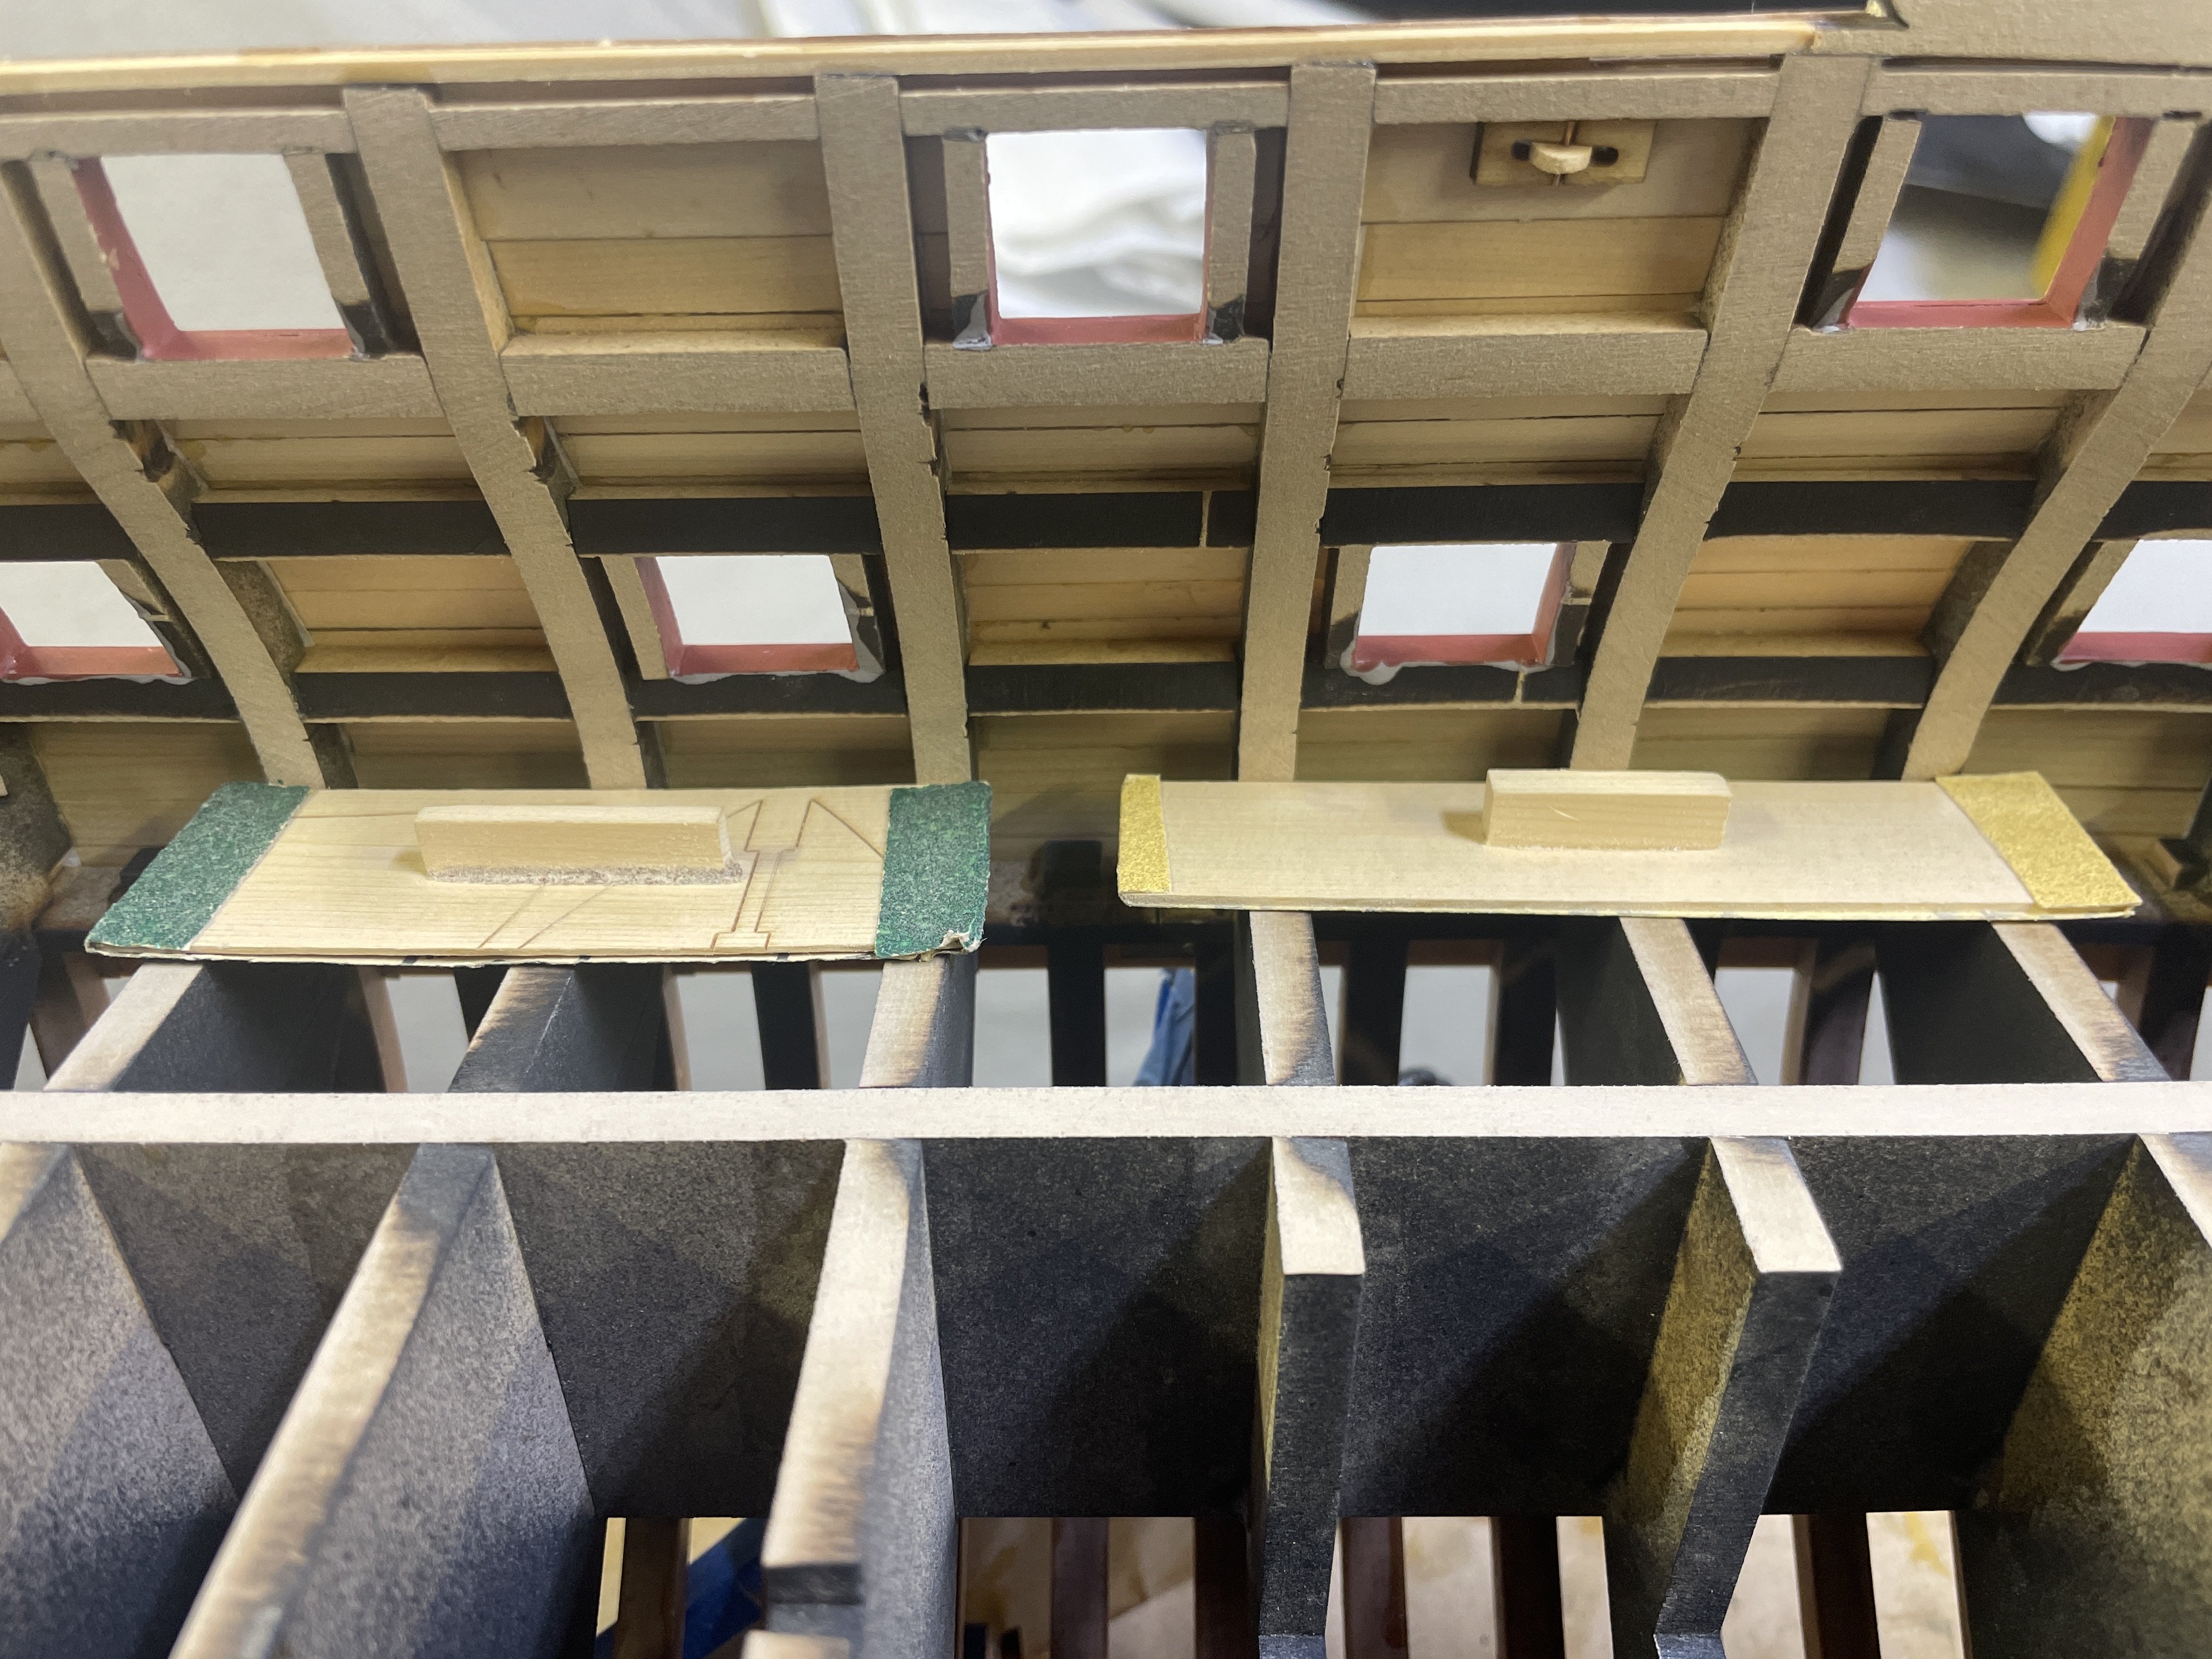
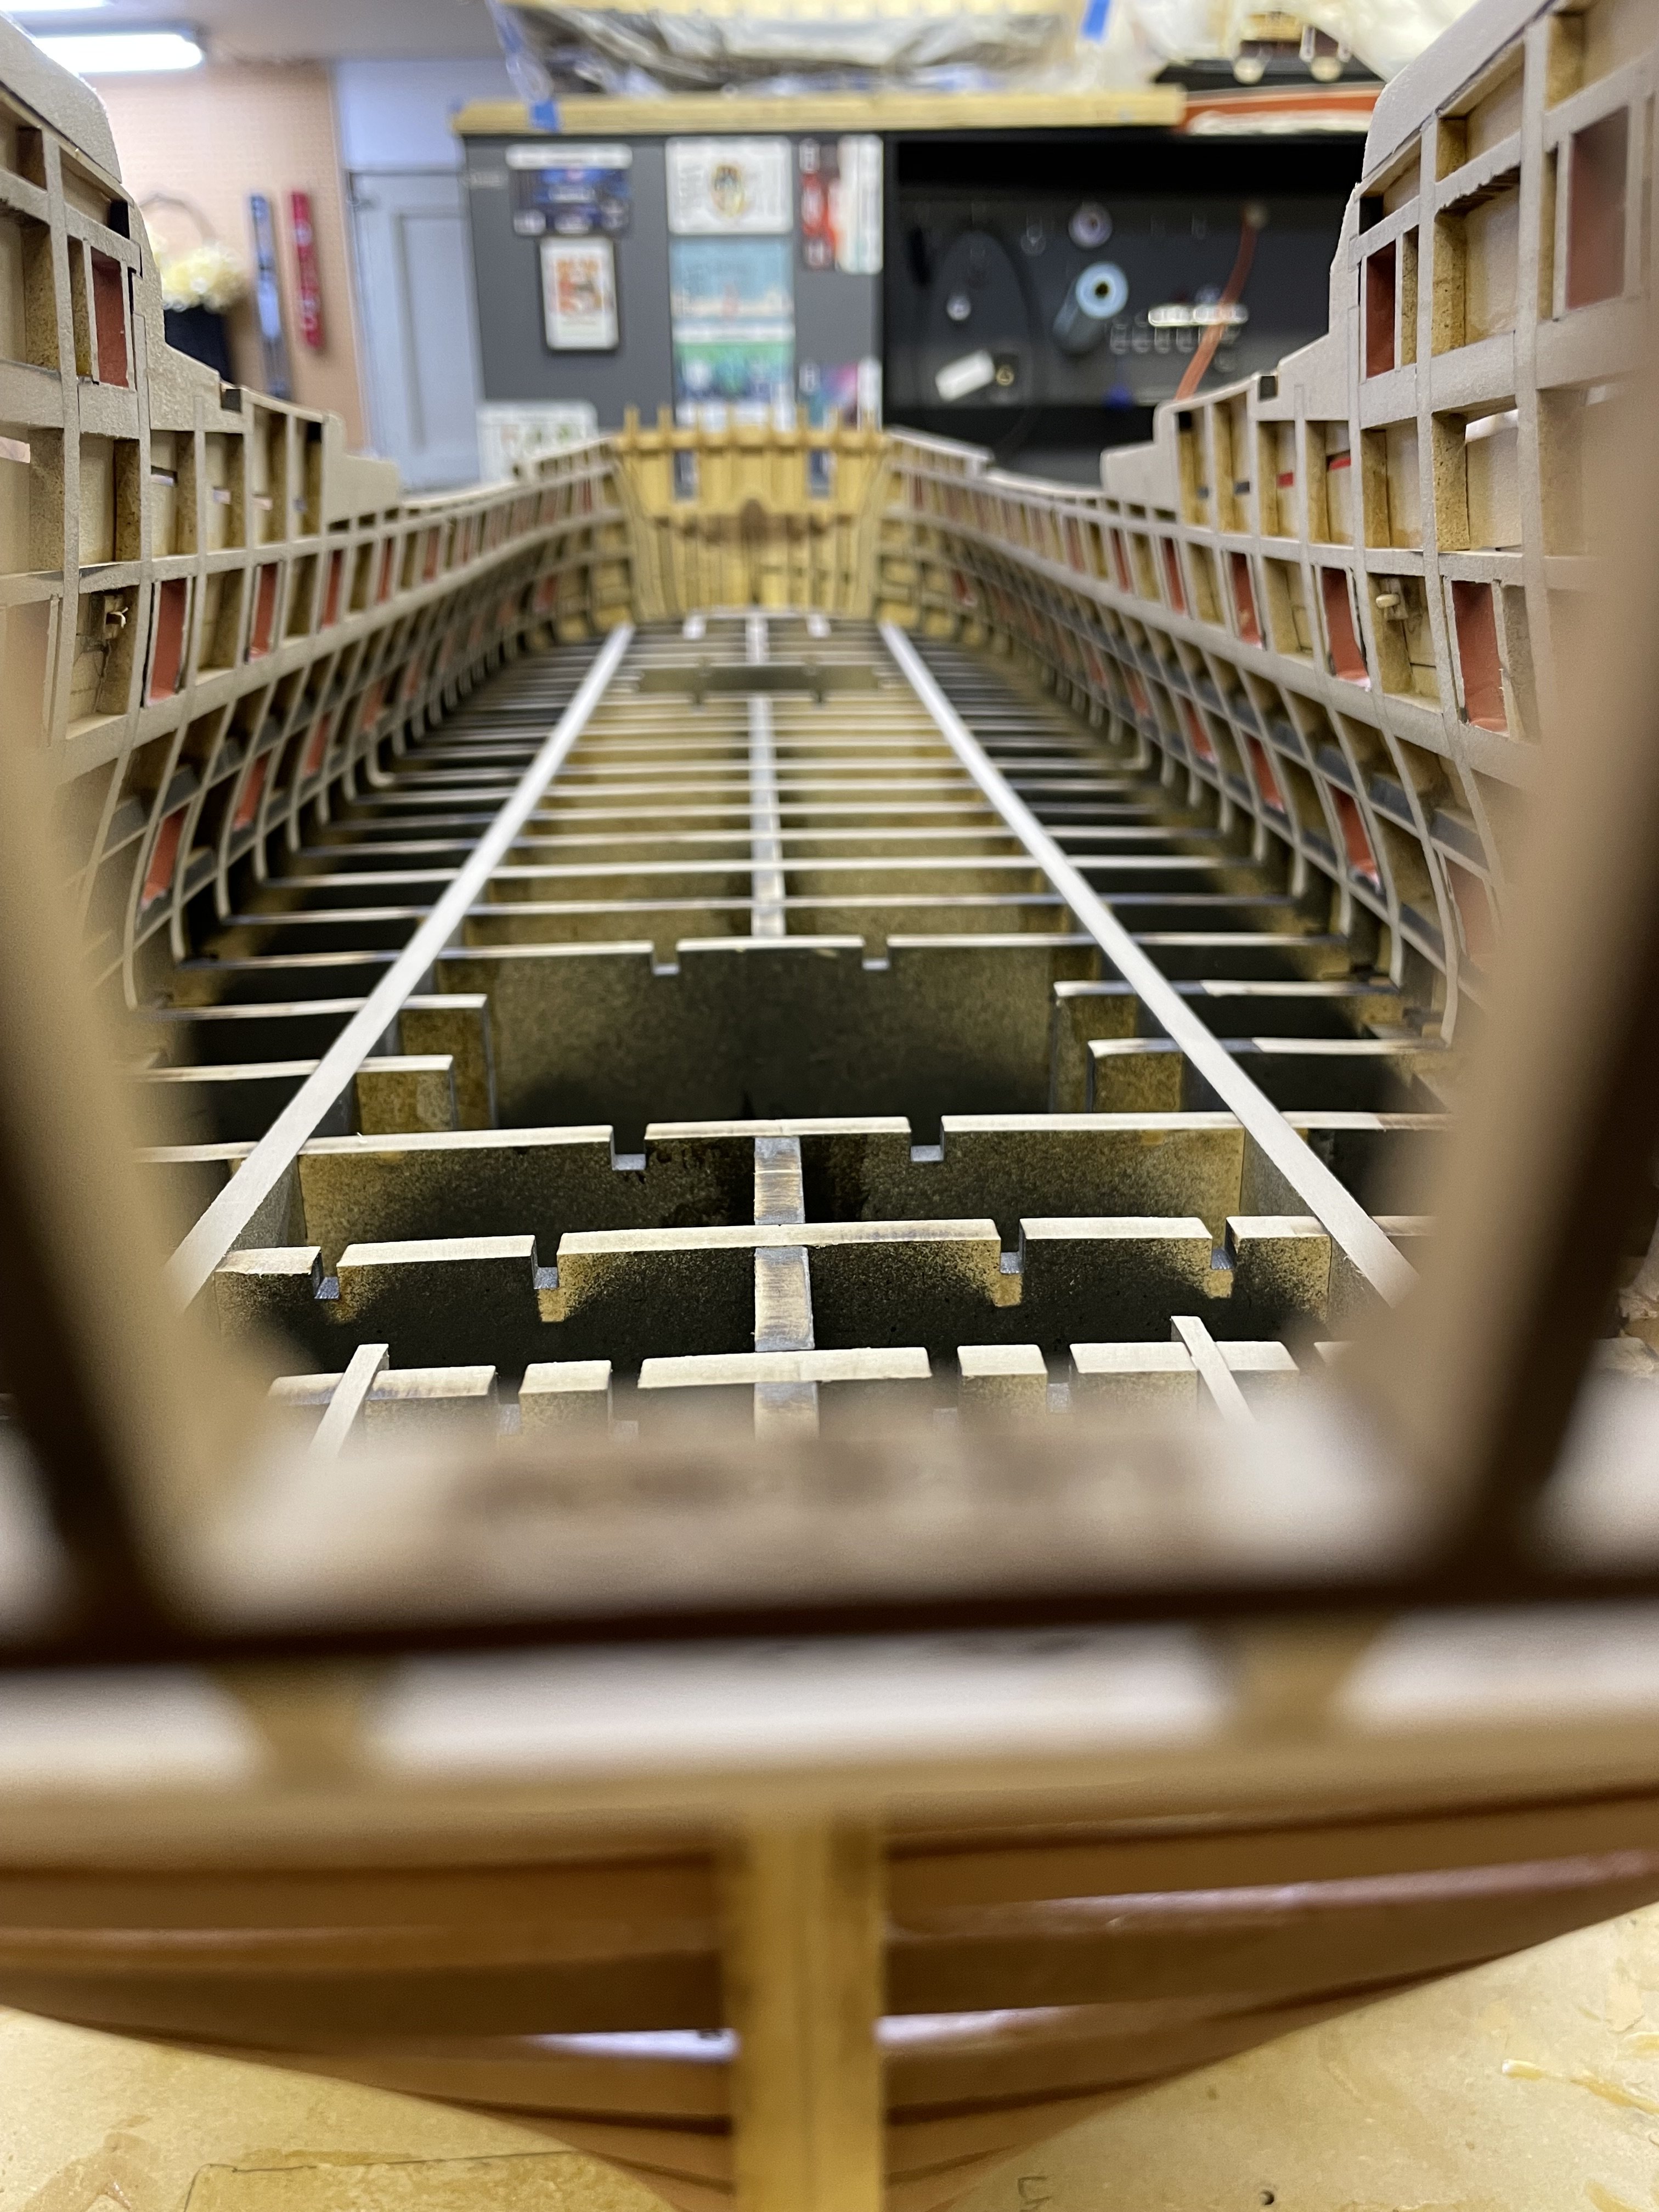
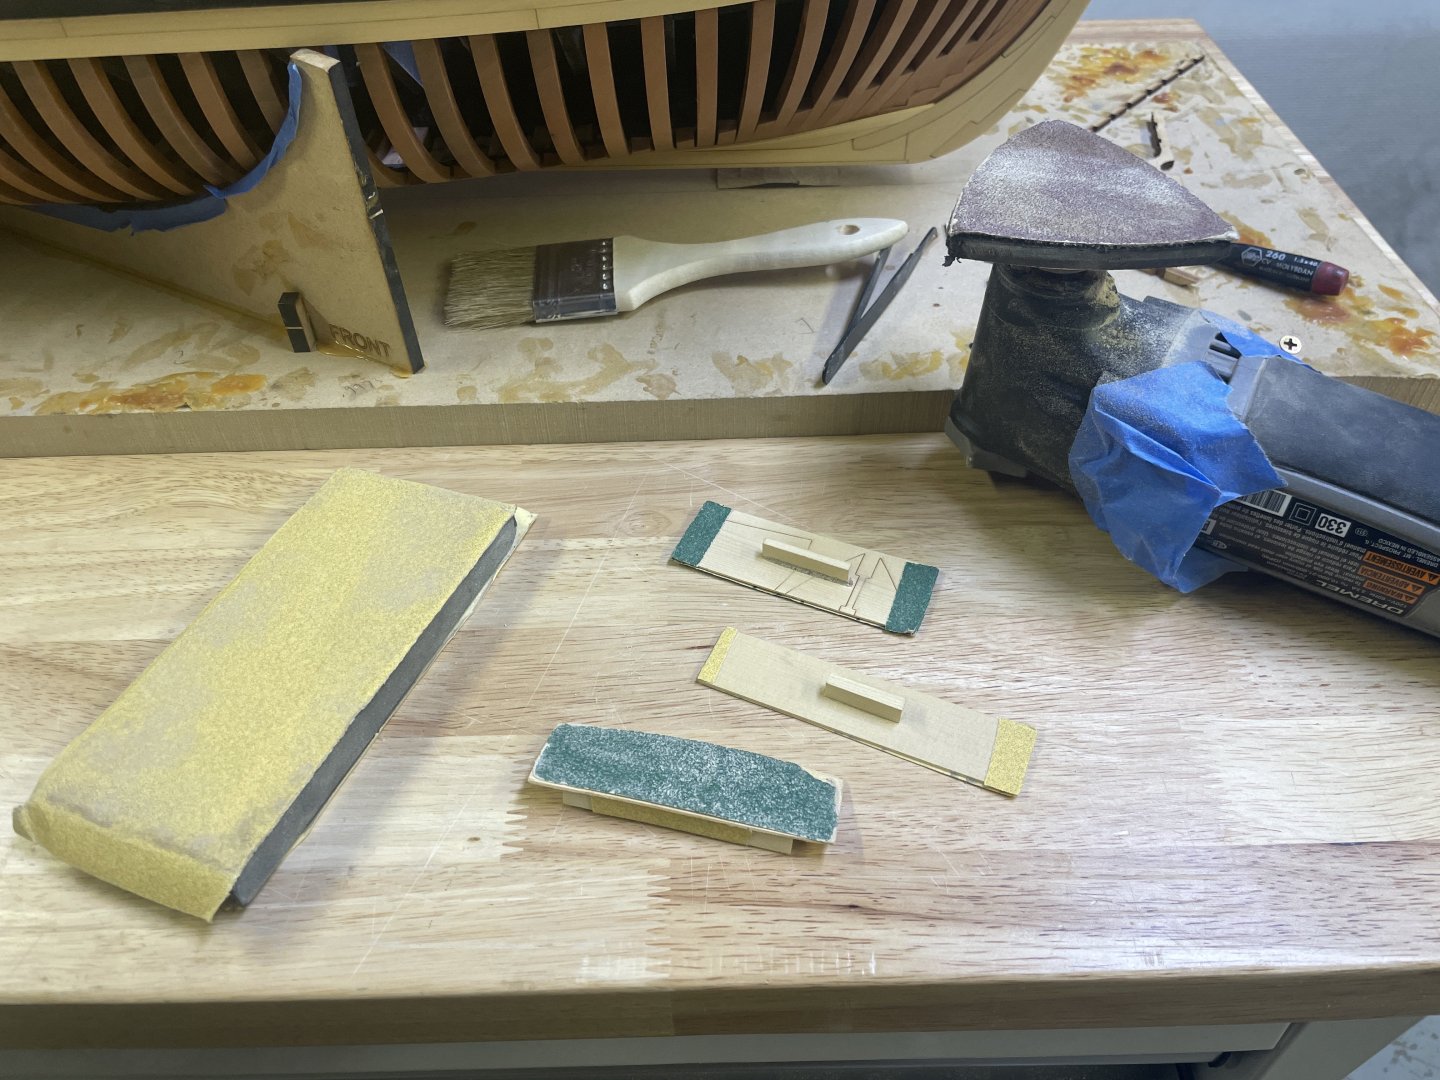
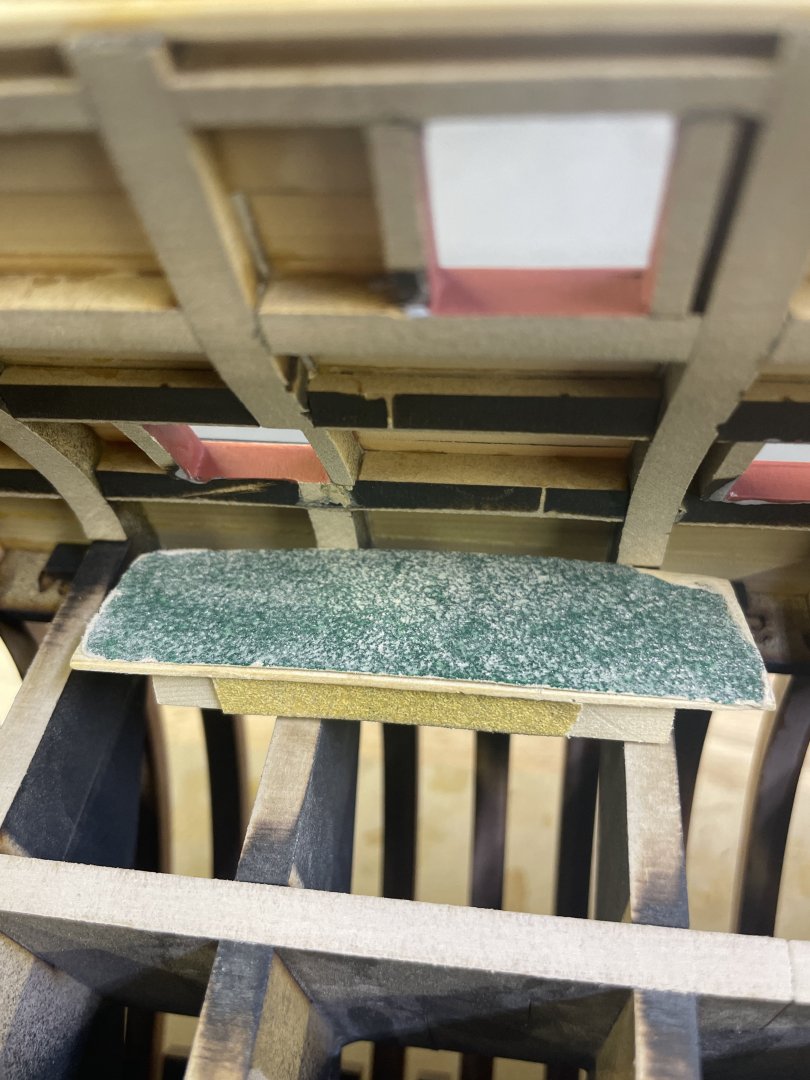
I start with one of these wonderful dremel tools (everyone should have one) and then move on to a series of thin little block s that I make. And I finish out the gun deck level with this wide foam block that I used on the hull. The little thin sheet blocks are wide enough to span three bulkheads so they keep things even but they are flexible enough to not dig holes. The curved one helps with getting down to the bottom of the extensions, the little pad with lighter sandpaper helps you keep a grip on it.

- 396 replies
-
- 13
-
-

-
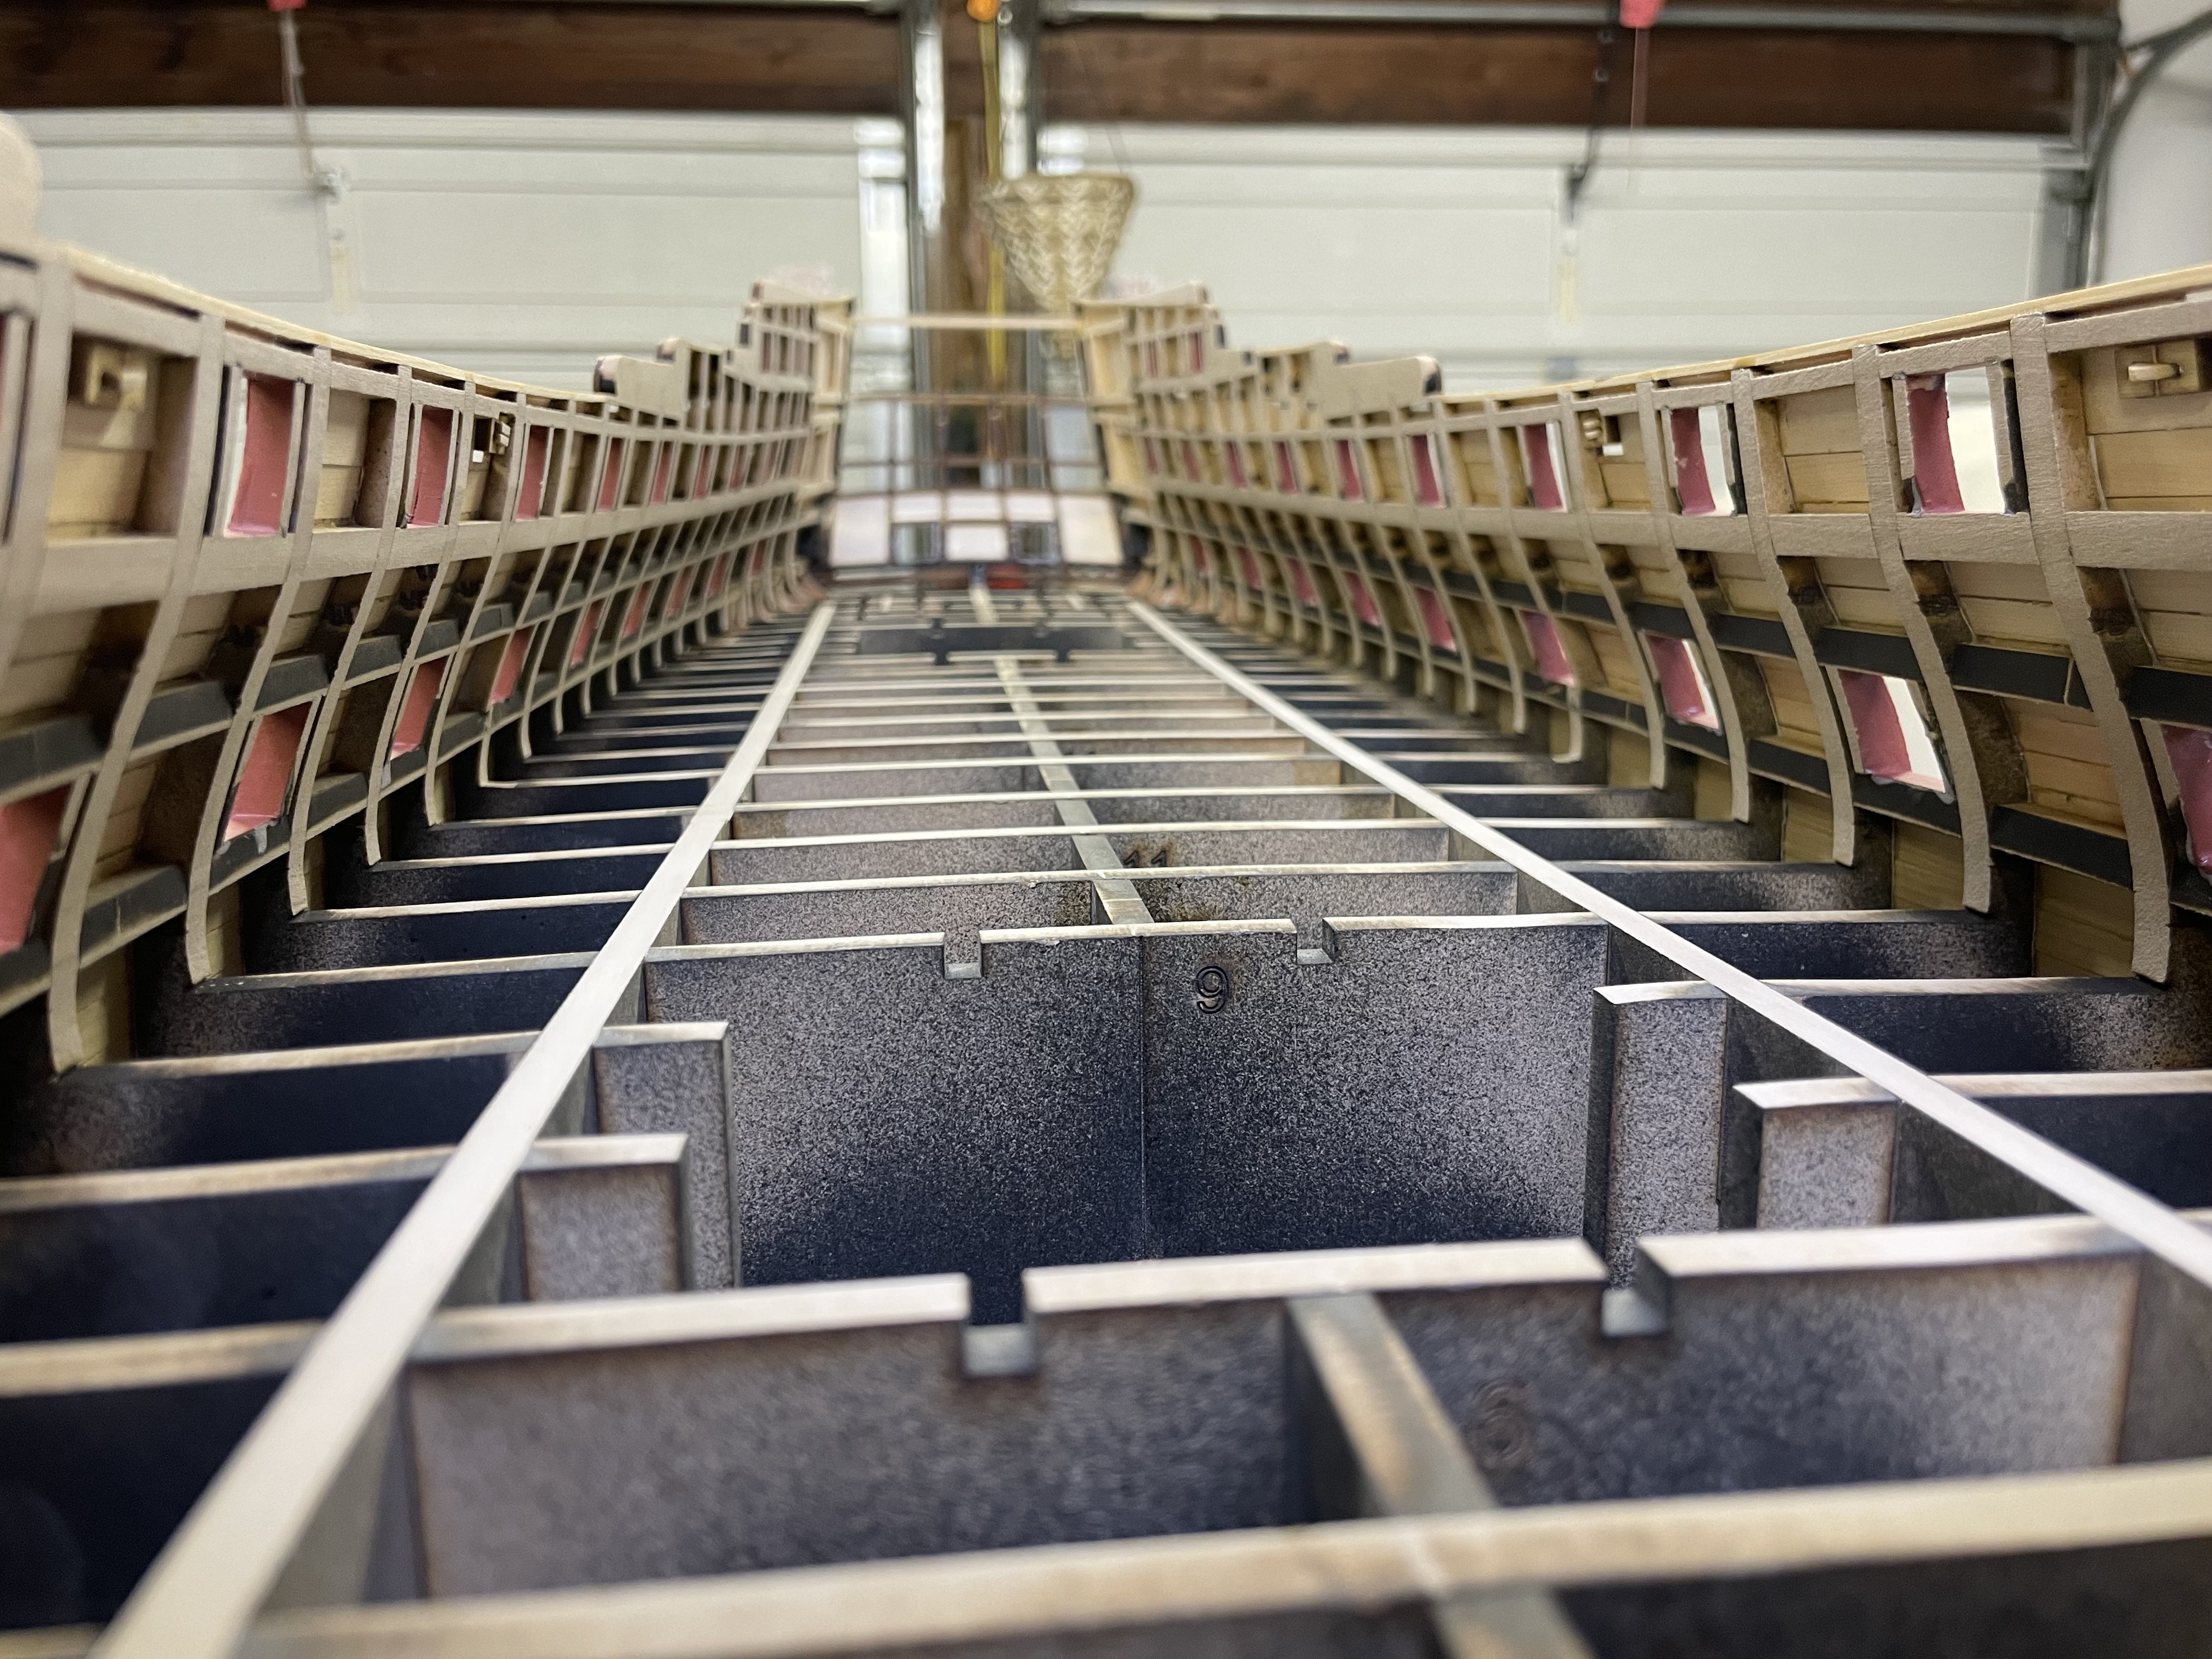
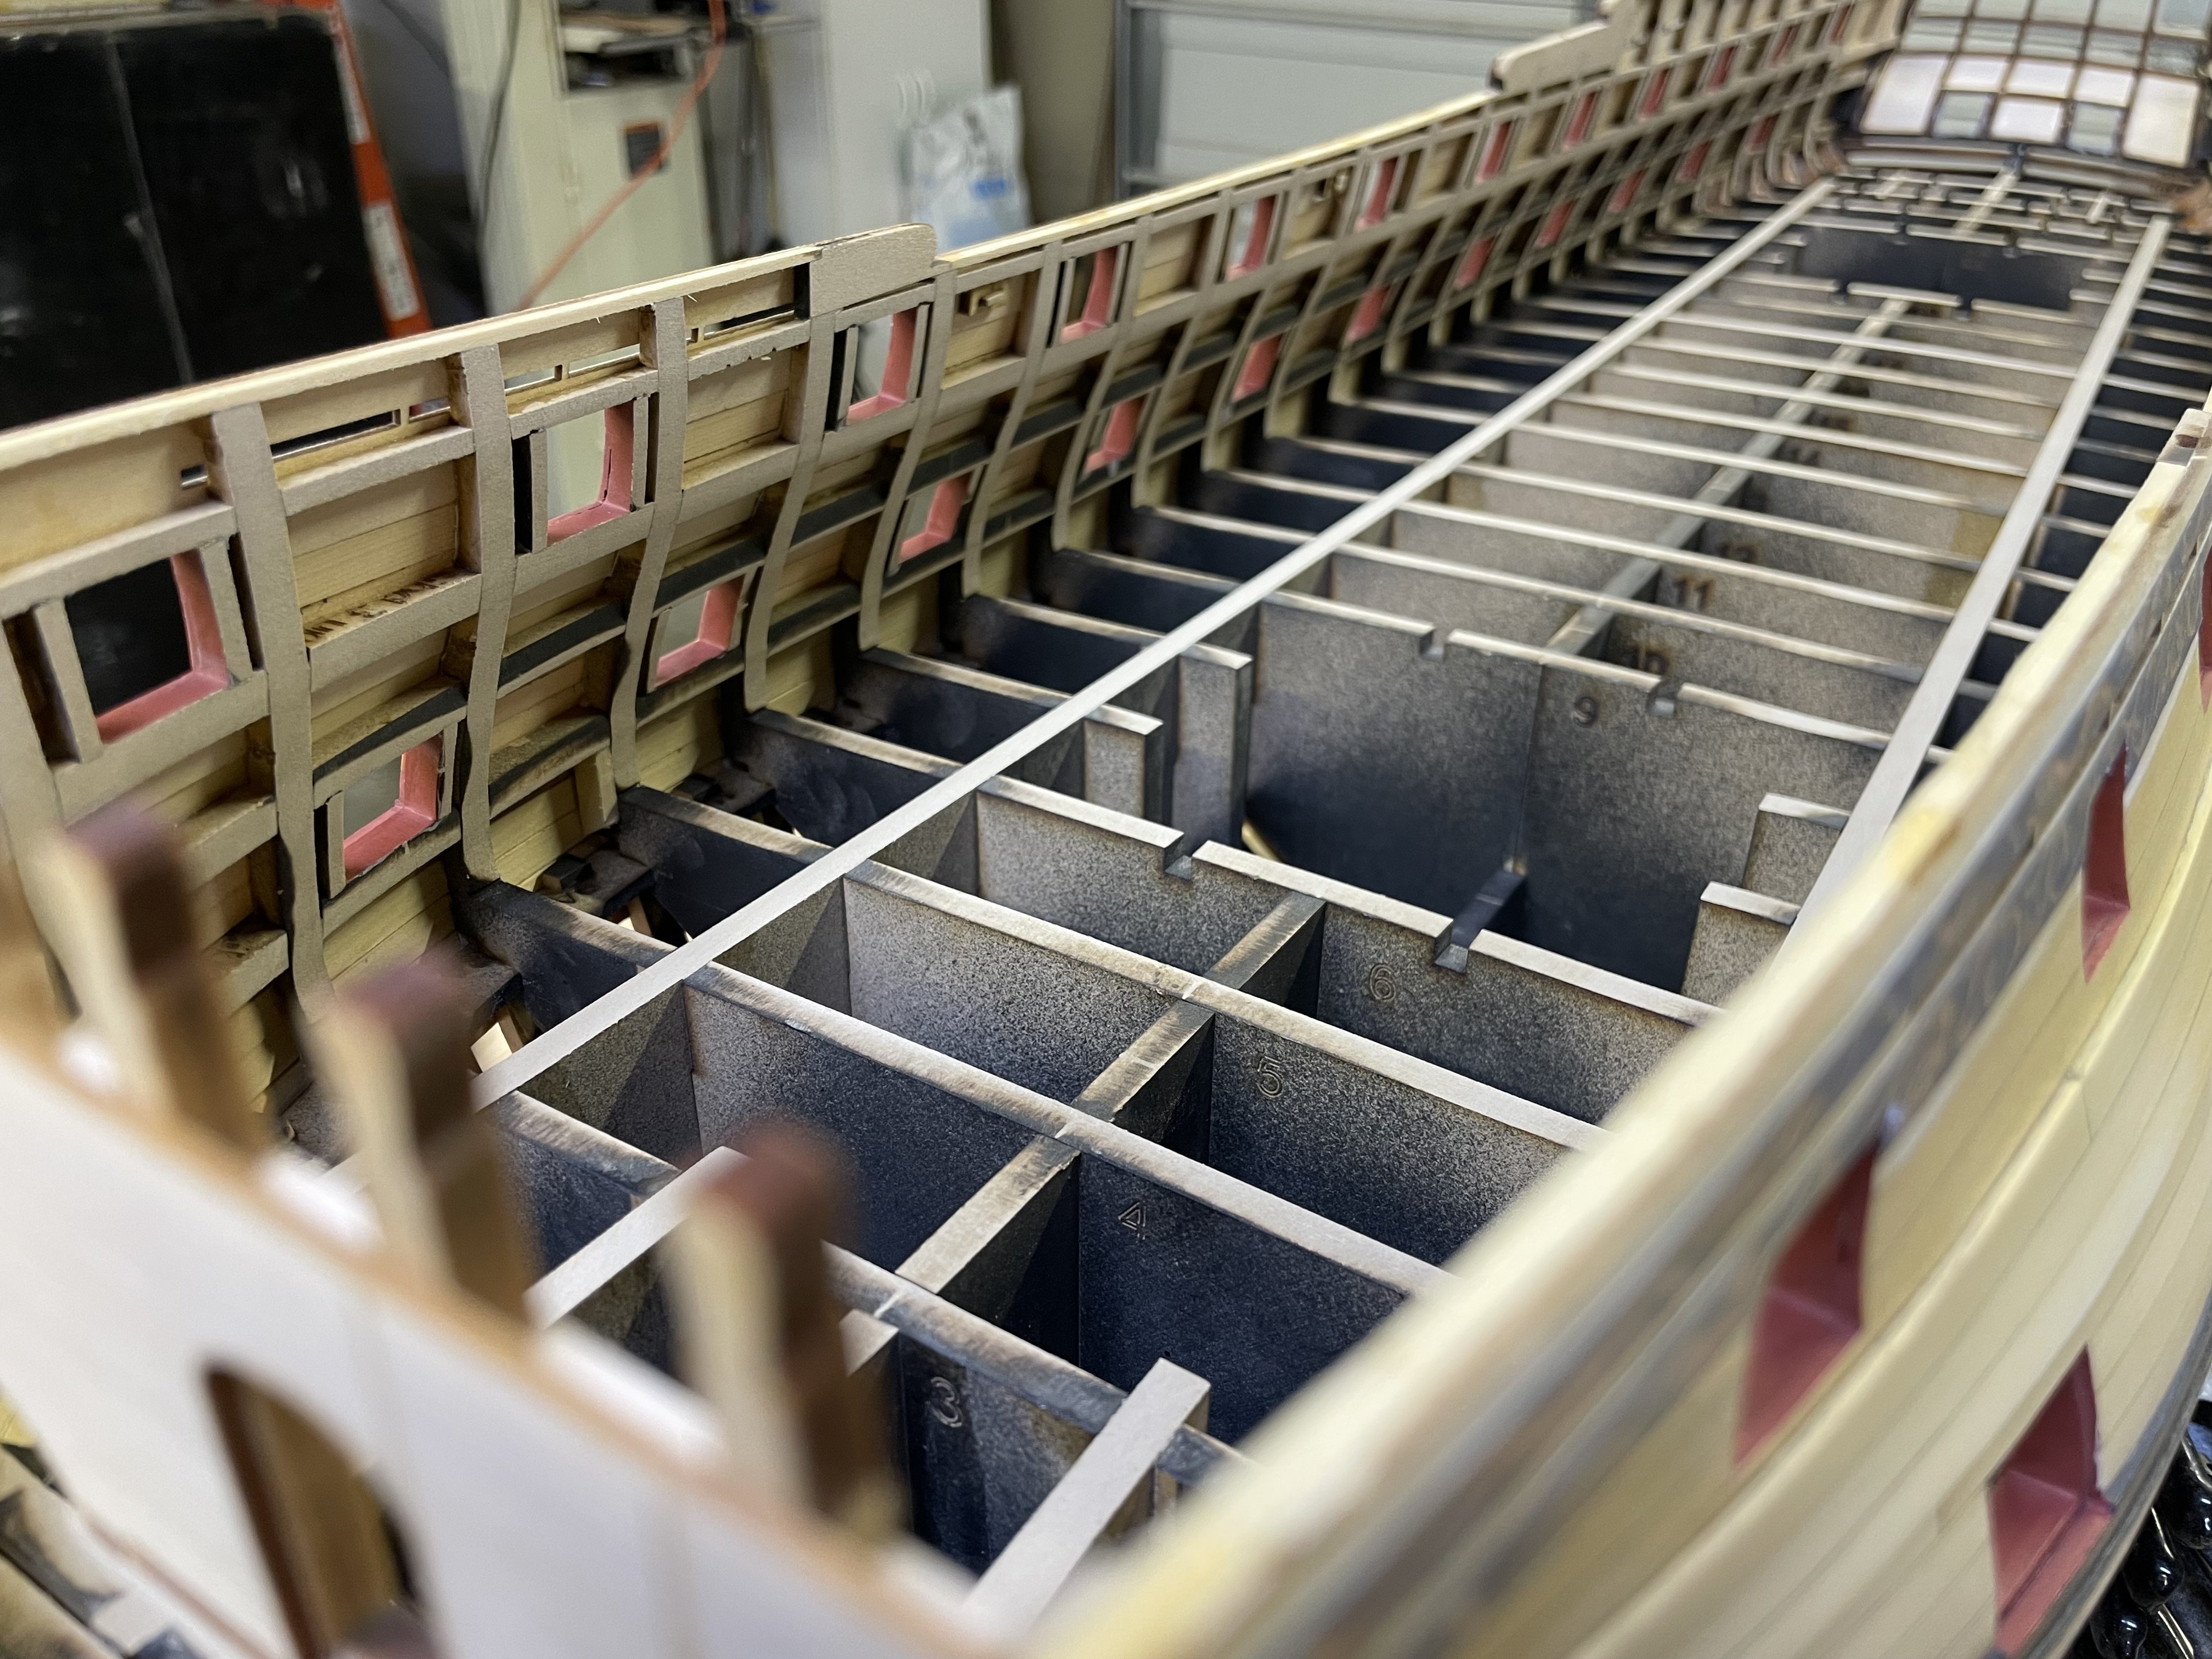
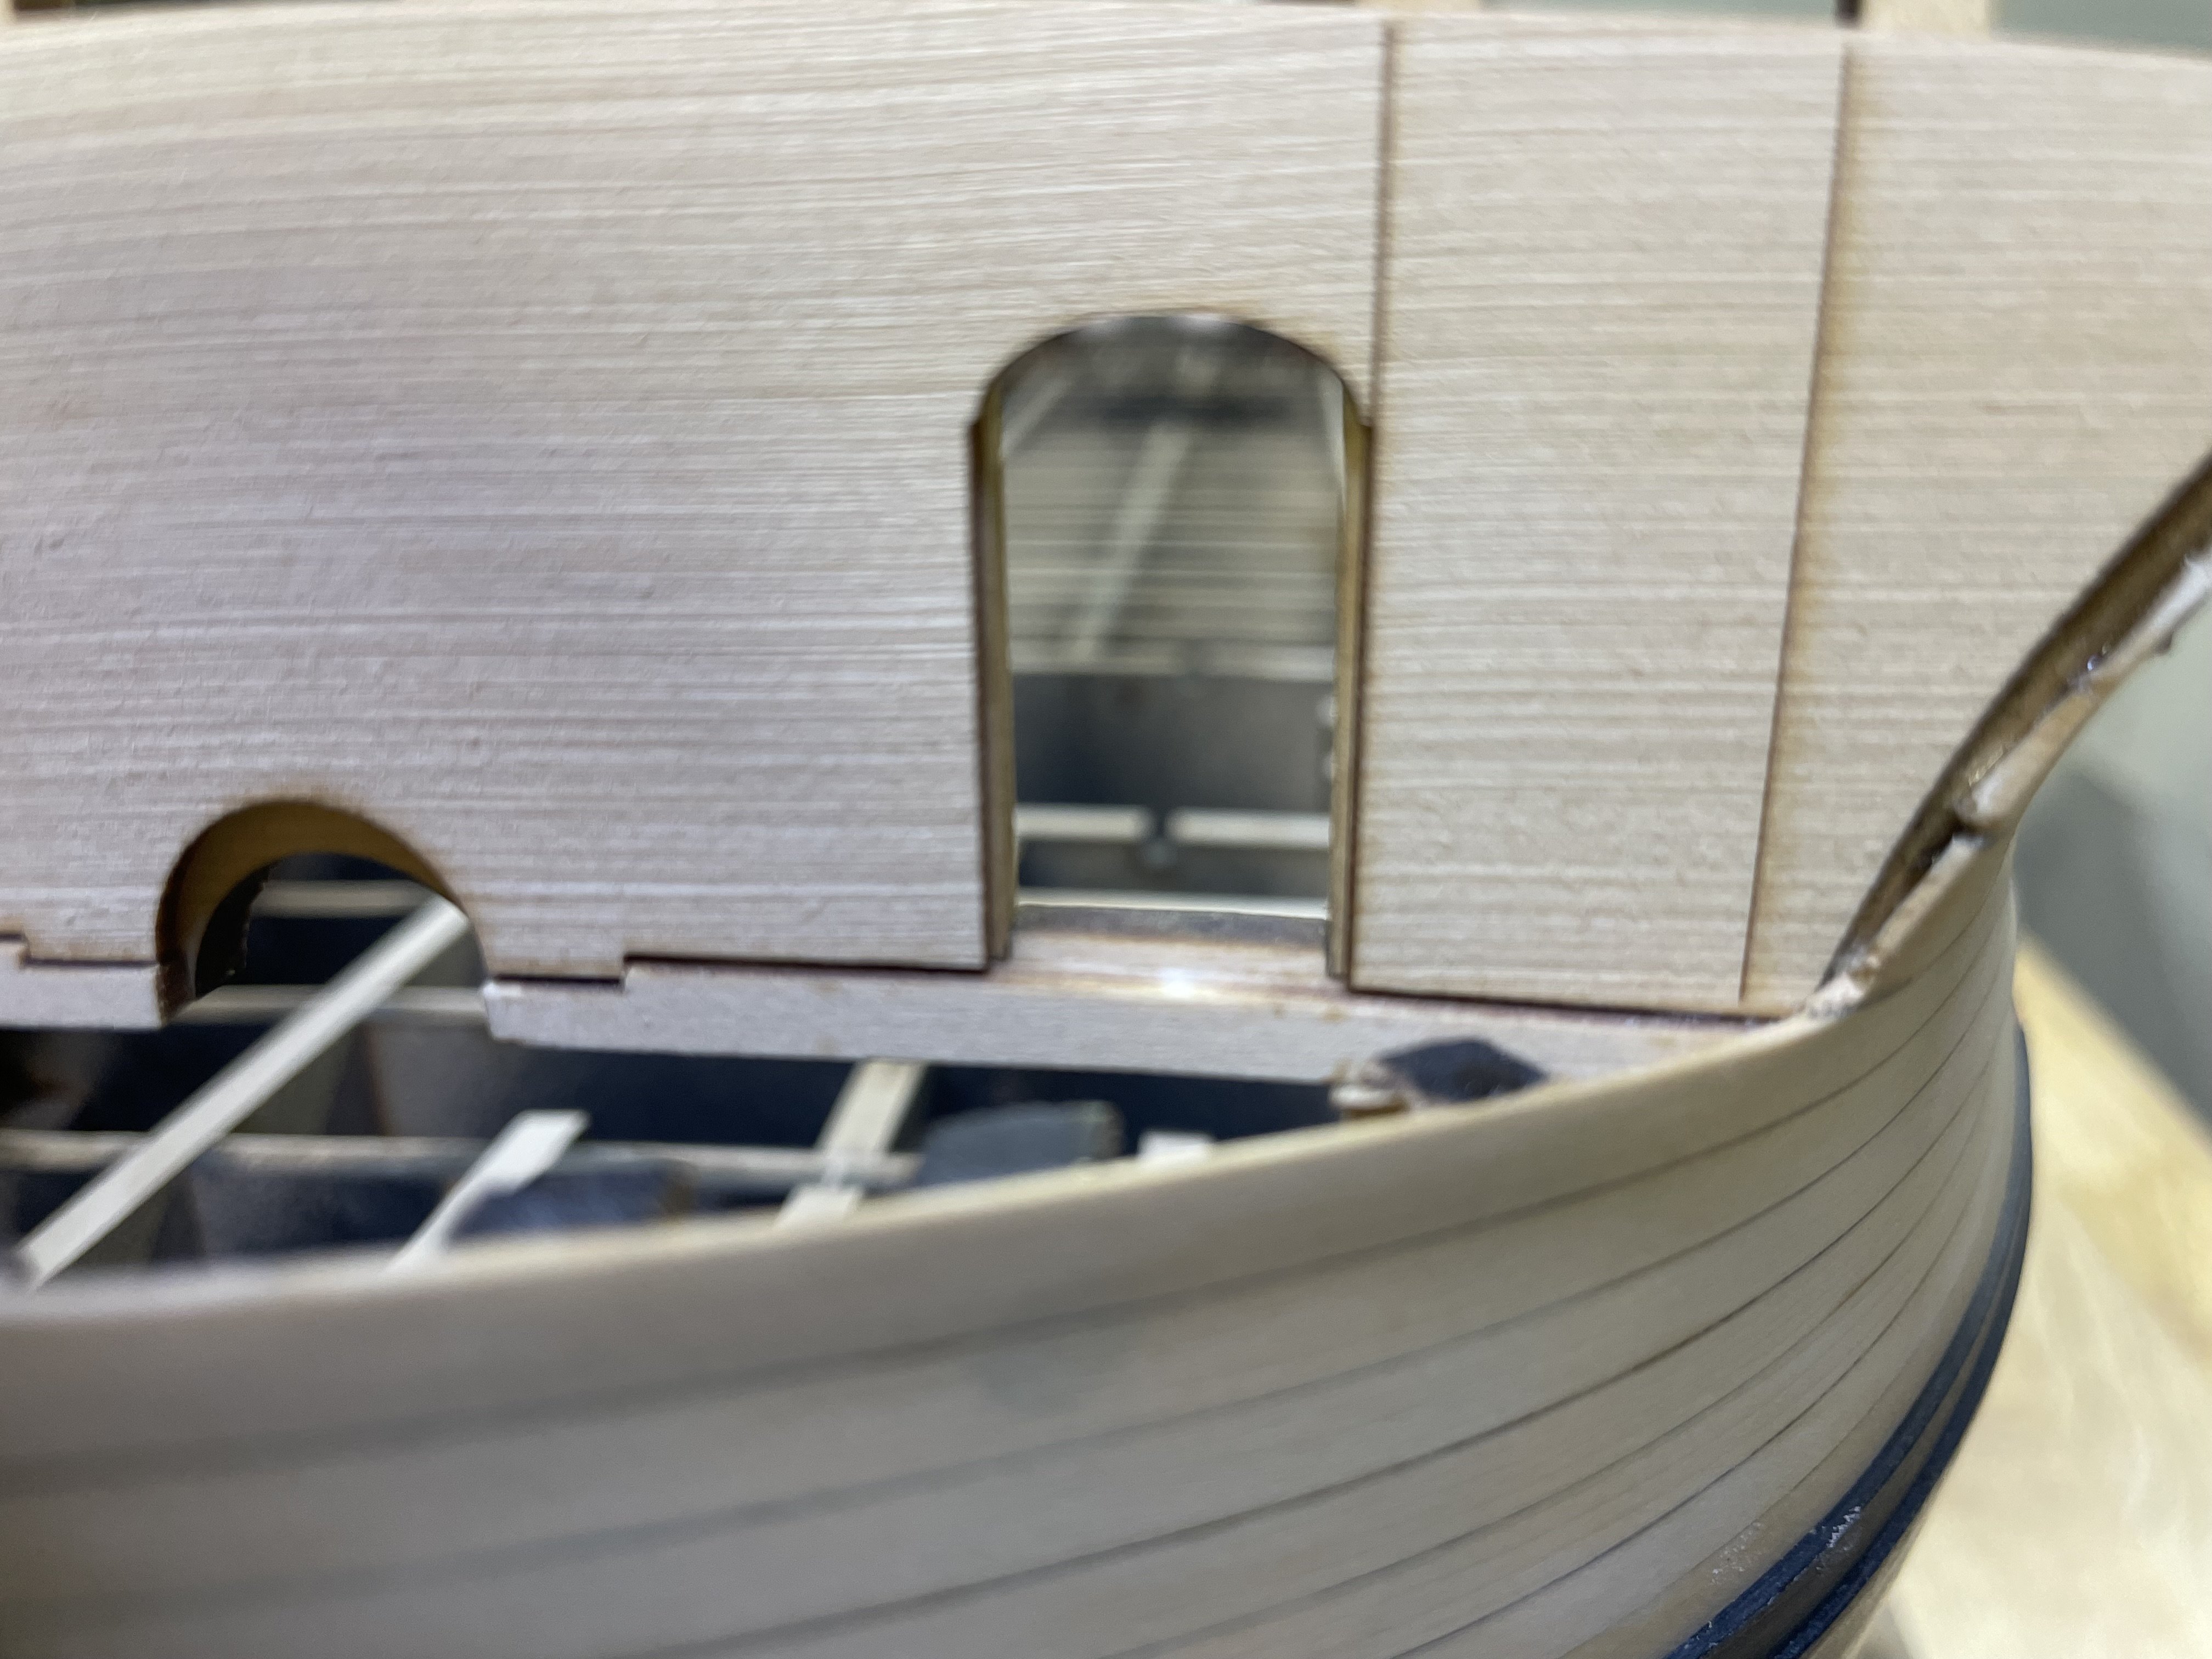
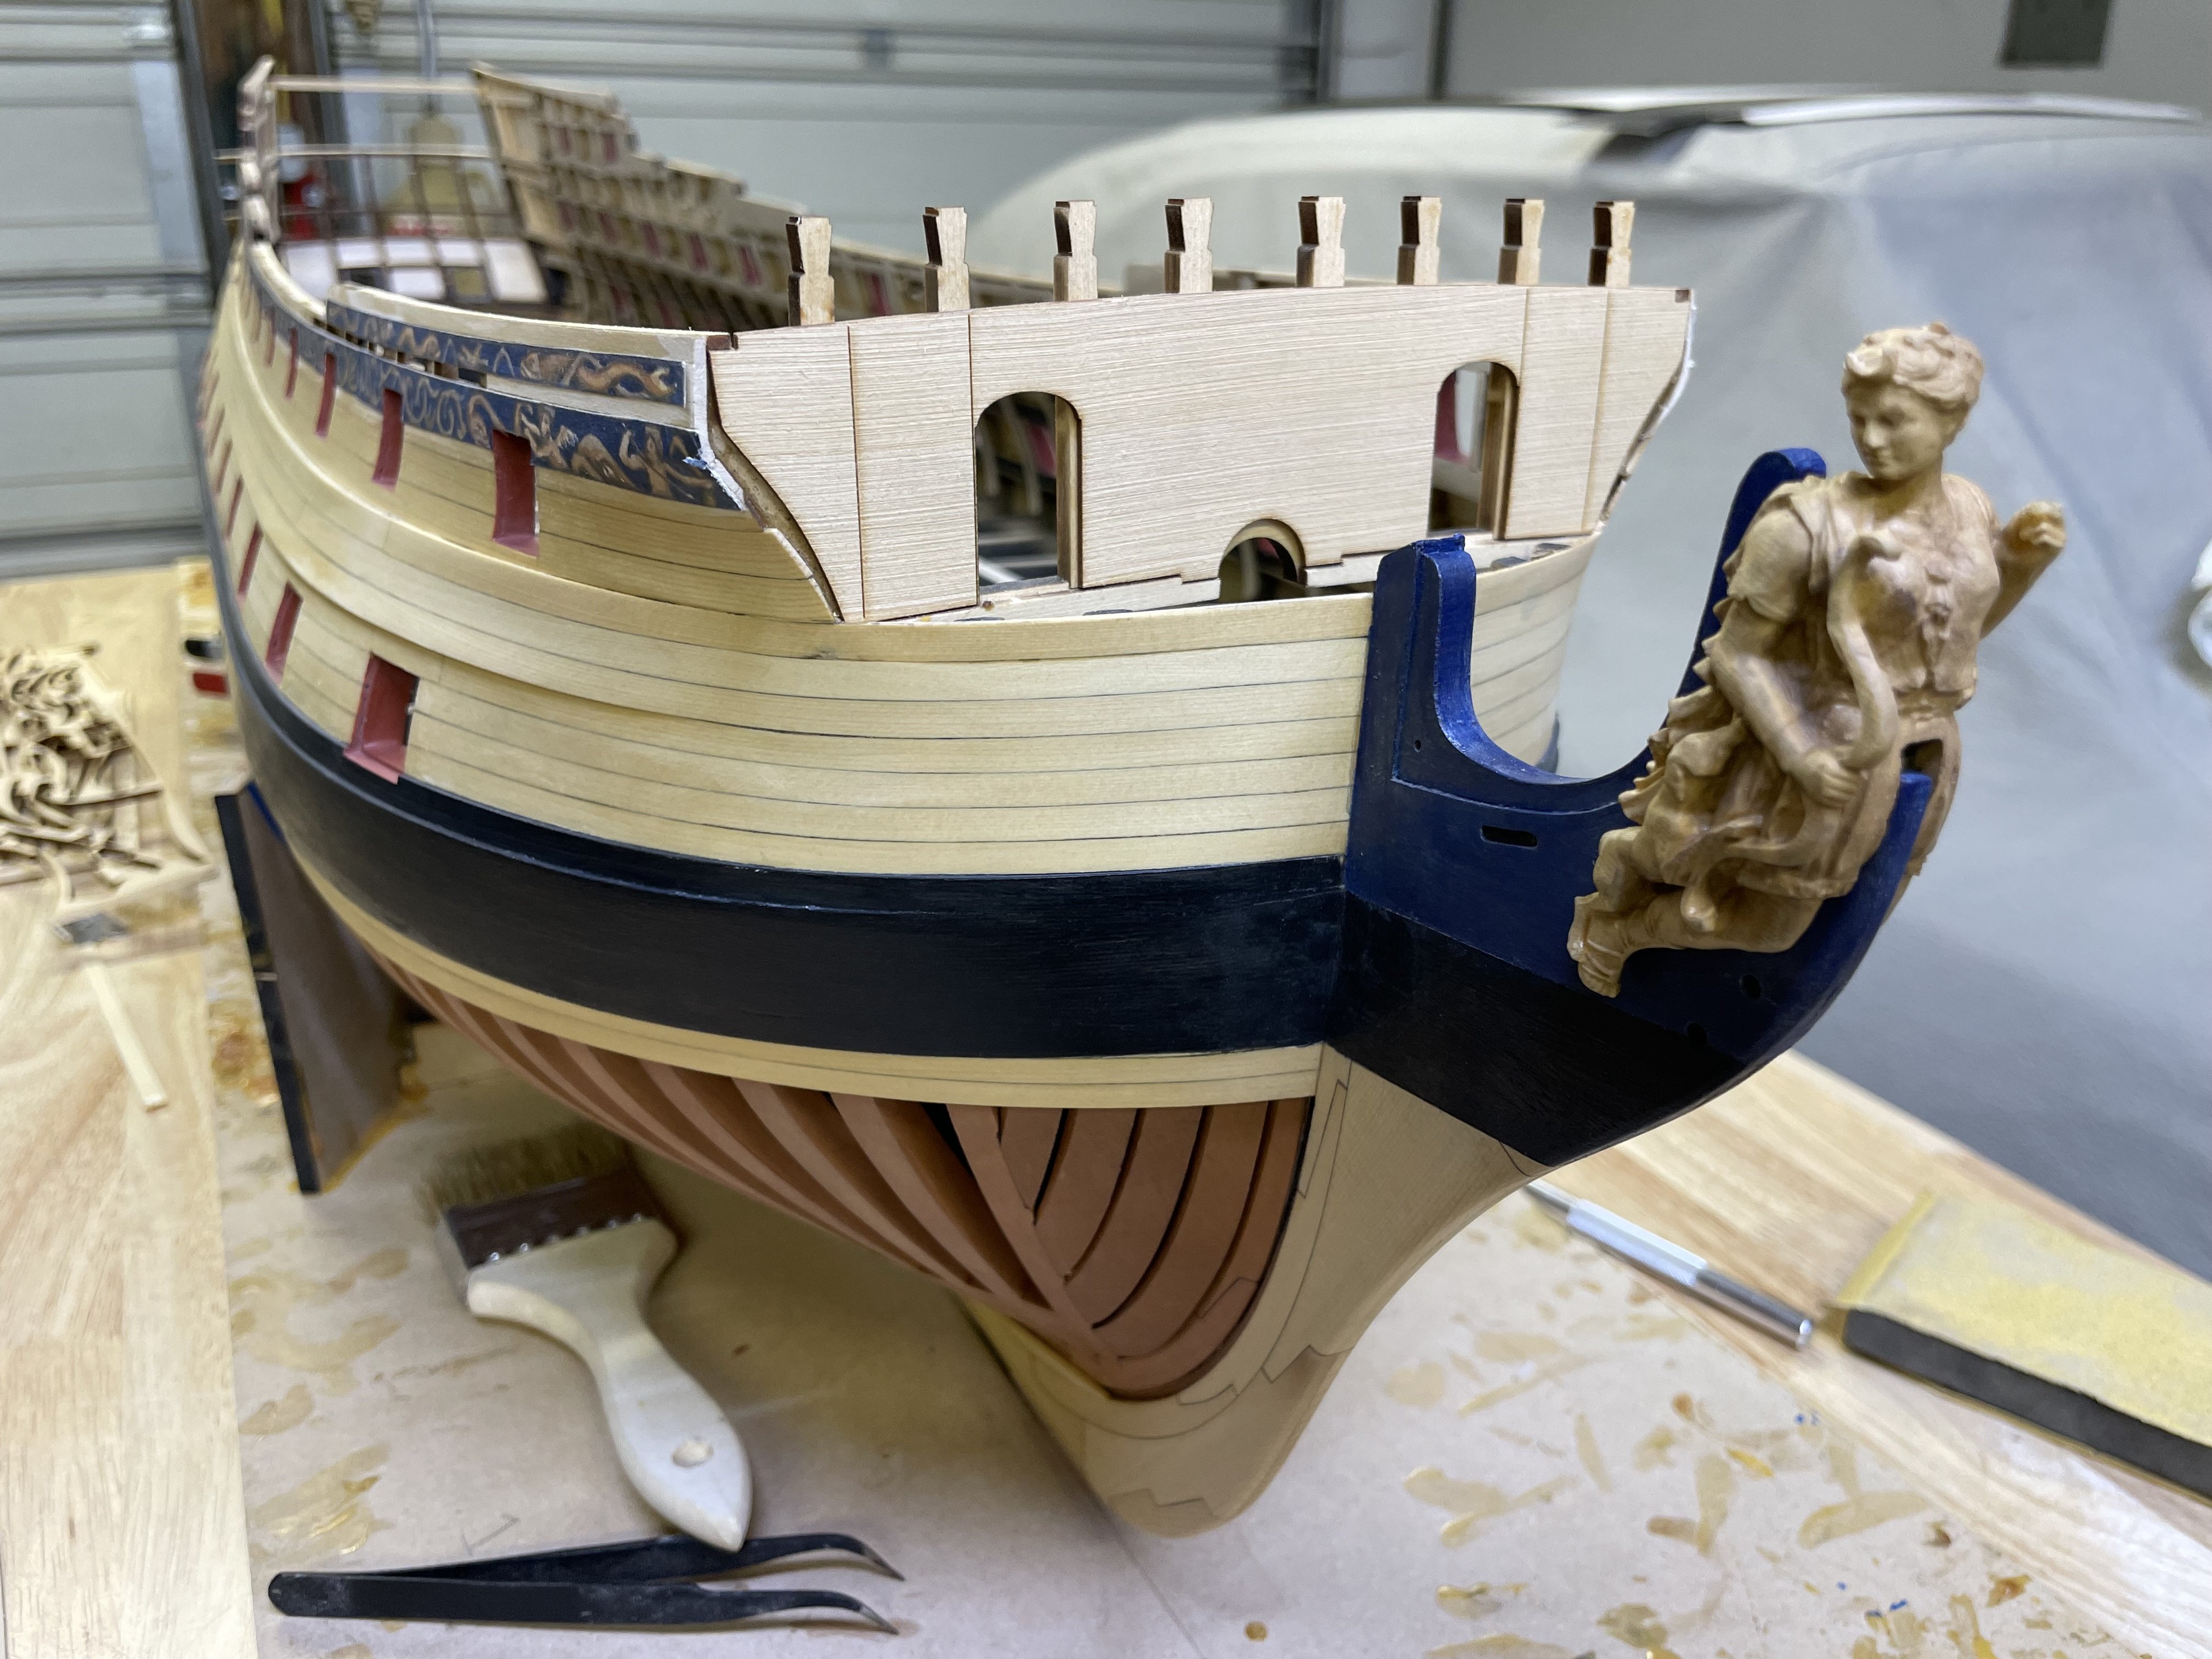
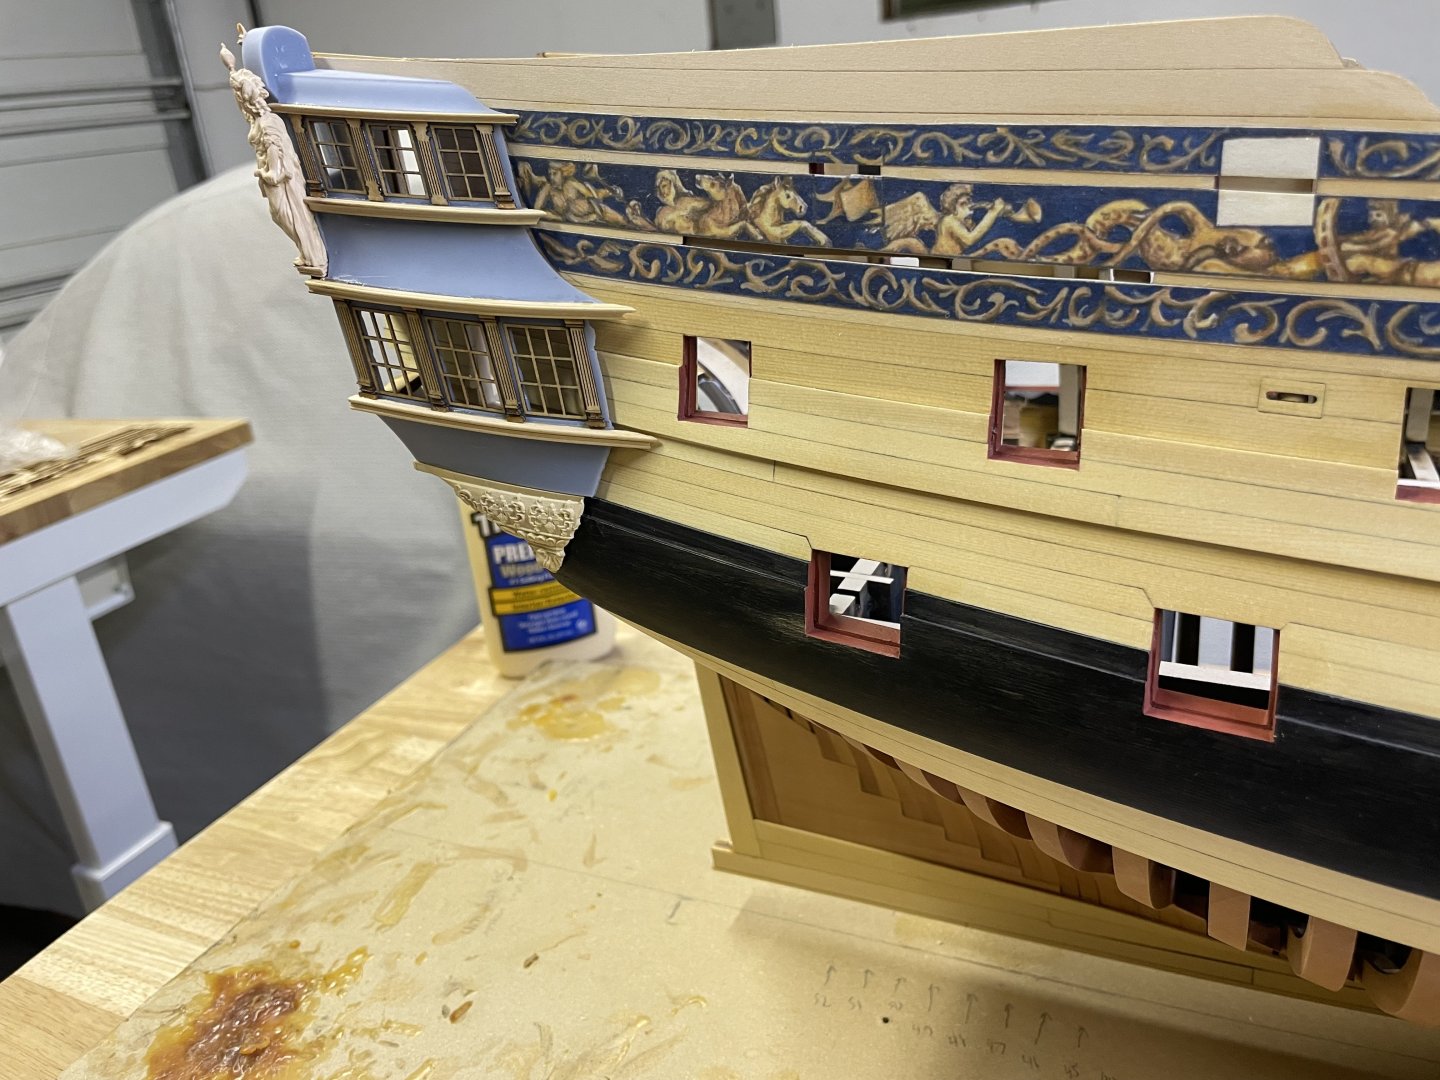
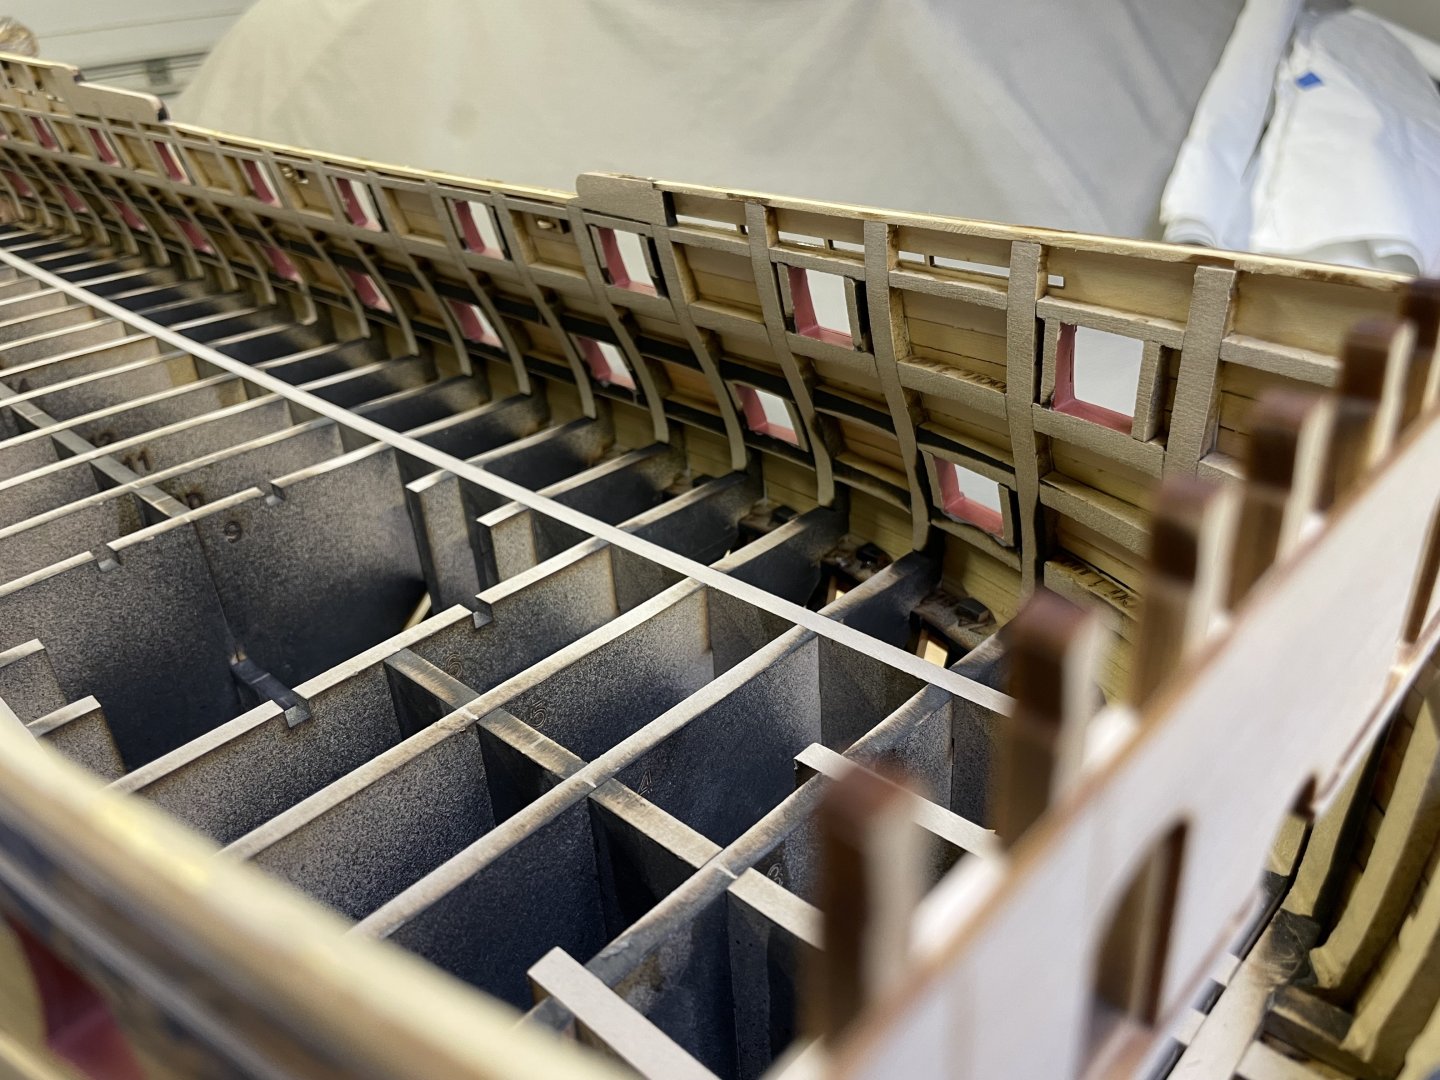
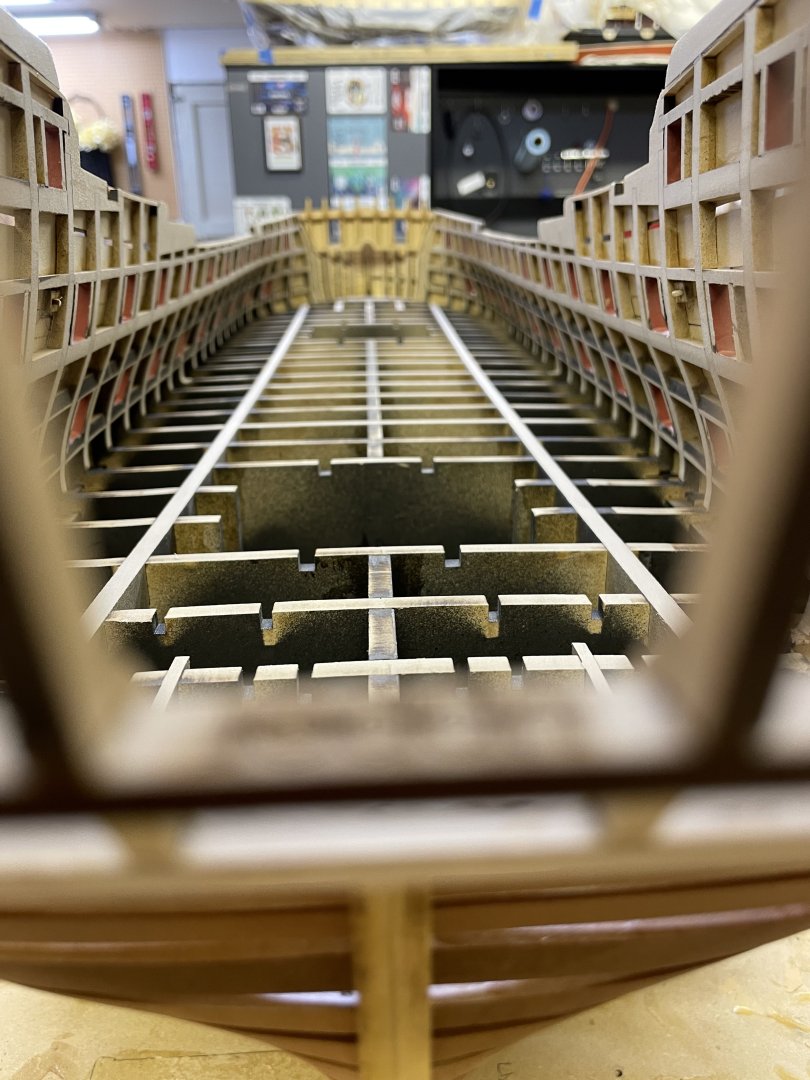
The end of chapter 2 or the beginning of chapter 3, however you want to look at it…is just a bunch of sanding. So that’s what I’ve been doing the last couple days. A little paintwork at the bow and some playing around with the beak head parts. In the meantime I’m printing a revised QG prototype and hope to have a set of them bolted on later this week, installing and outfitting the QG’s will be the bulk of chapter 3, along with some other exterior details. More to come soon.


- 396 replies
-
- 29
-
-
Nicely done Steve! Those look good.