HOLIDAY DONATION DRIVE - SUPPORT MSW - DO YOUR PART TO KEEP THIS GREAT FORUM GOING! (89 donations so far out of 49,000 members - C'mon guys!)
×


scrubbyj427
-
Posts
1,690 -
Joined
-
Last visited
Content Type
Profiles
Forums
Gallery
Events
Everything posted by scrubbyj427
-
 I think that would look really good. I personally like the duller not so bright colors, that will definitely compliment the rich color of the pear. I’m toying with adding a little weather to mine. Will see.
 -
Excellent work Dusan! She’s looking great!
-
I’m a red ochre fan but I’d say second from bottom, X7 is closest to the painting if that’s the route you want to go.
-
Thank you Frank. Would love to see you build one! Stay tuned for a website soon. I will begin to produce chapter 1 kits in the near future.
-
Great to see you back at this project Jack! Looking forward to more updates.
-
Outstanding job so far Ben! Looks great! I took mine outside and hit it with the leaf blower when I was done, did the job….washed my car afterward.
-
Very nice Chuck!
-
Excellent work Frank!
-
Just glue it on carefully with some slightly damp pva, it will conform/bend. you just need to bend up upwards less than 1/16”. Or you can stretch it in a photoshop program.
-
Starting in Rhino 8
scrubbyj427 replied to GioMun's topic in CAD and 3D Modelling/Drafting Plans with Software
Draping surfaces, constructing basic shapes and learning the tool functions will lead you right into modeling ships. Theres likely some marine focused ones. I’m also sure there’s plenty here on MSW. Lots of people are 3D modeling ships on here. -
Starting in Rhino 8
scrubbyj427 replied to GioMun's topic in CAD and 3D Modelling/Drafting Plans with Software
You should follow all the Rhino tutorials until you are proficient with basic surface modeling and 3D construction, From there you can start constructing basic 2D plans into a wire frame 3D object. -
Very nicely done on those uprights and windows! Going to make for a good looking QG!
-
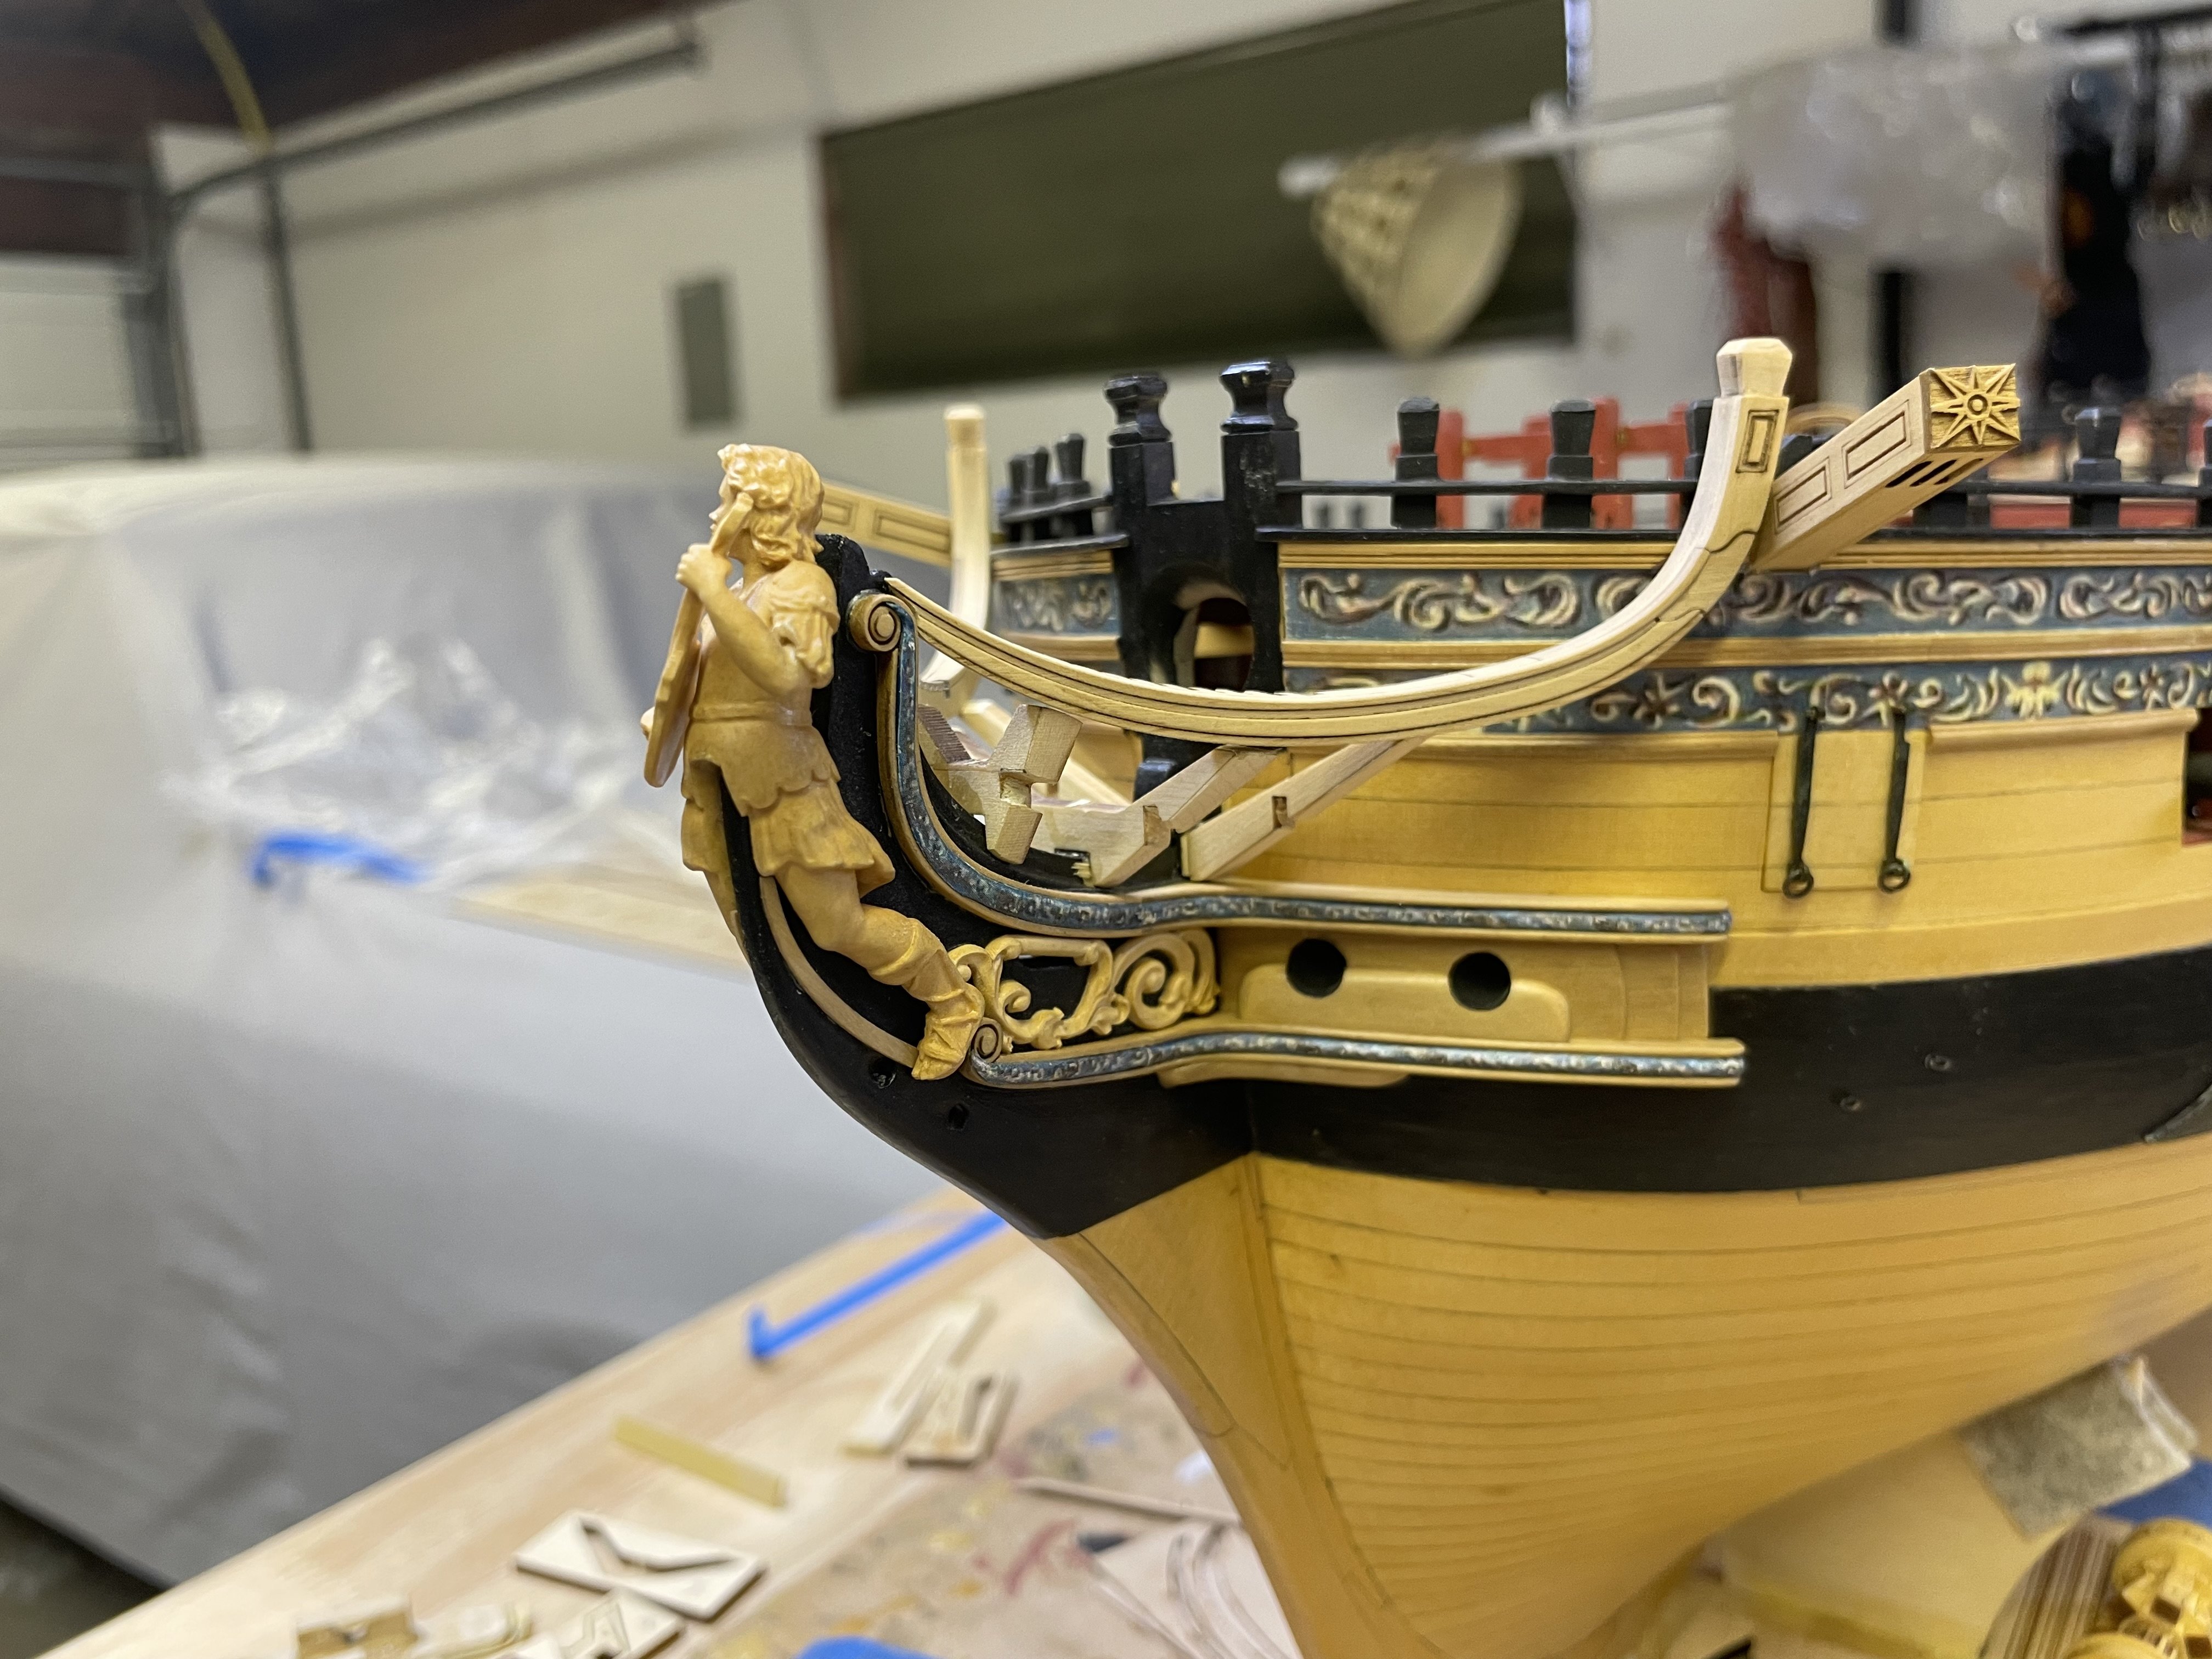
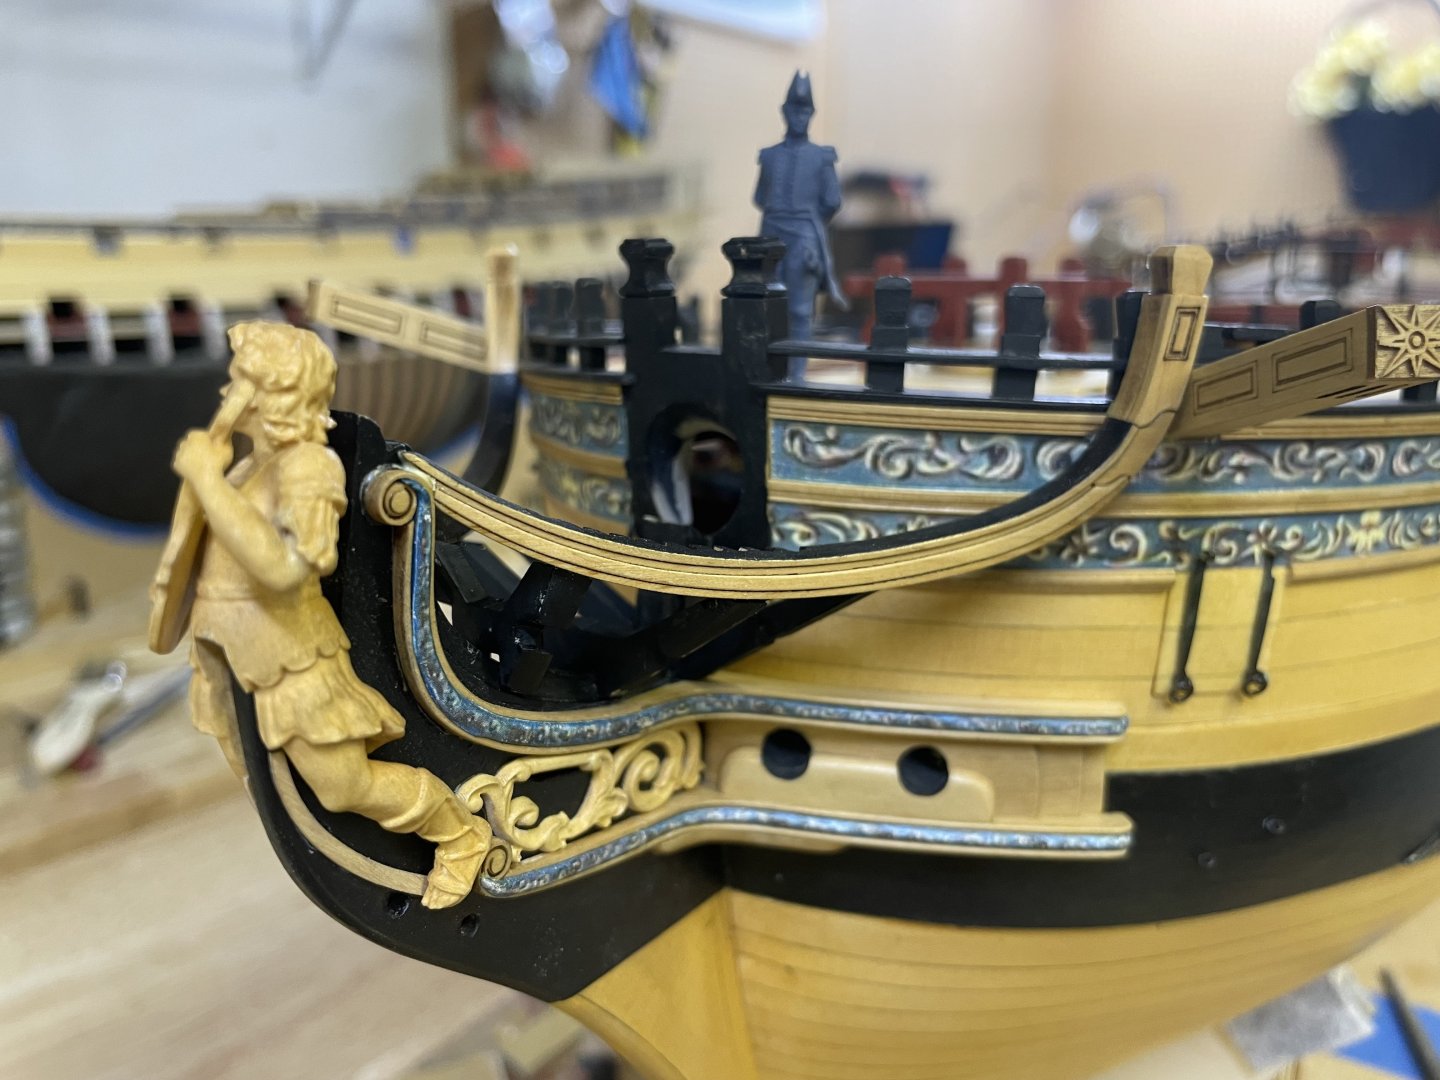
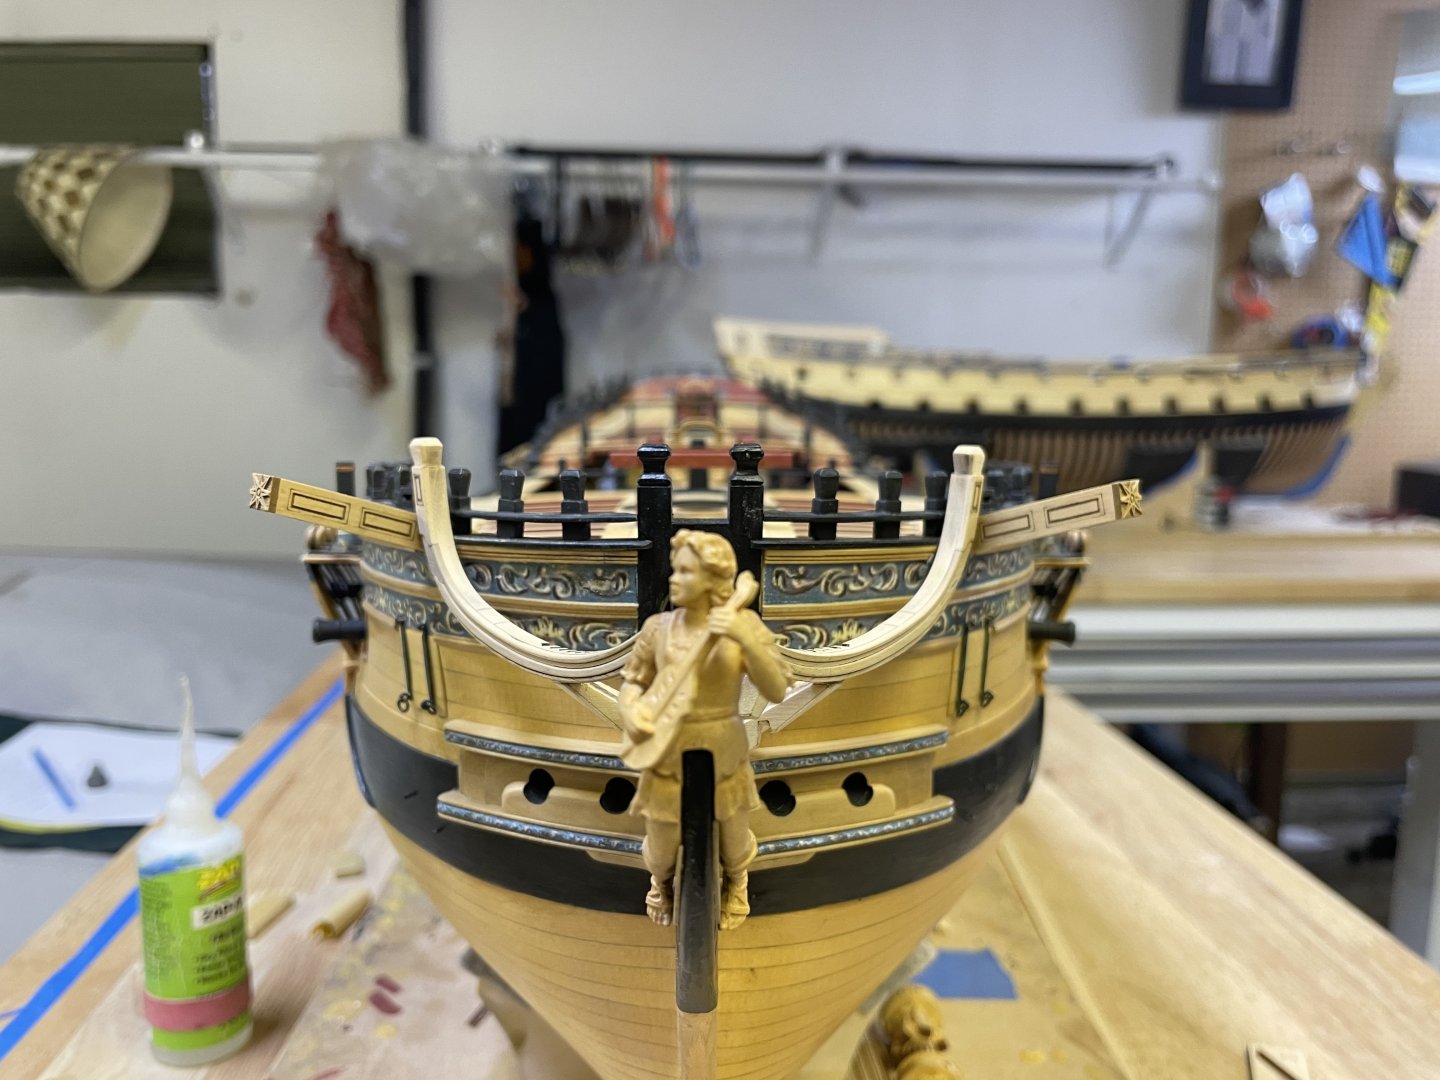
Headrails on and they look pretty darn good! Onward!


-
If I can complete 4 full strakes in one day I feel like I was moving fast! This is amazing you did this all in one day!
-
Thank you Christian. Still a few small bugs that are being worked out of chapter 1 but it’s almost there.
-
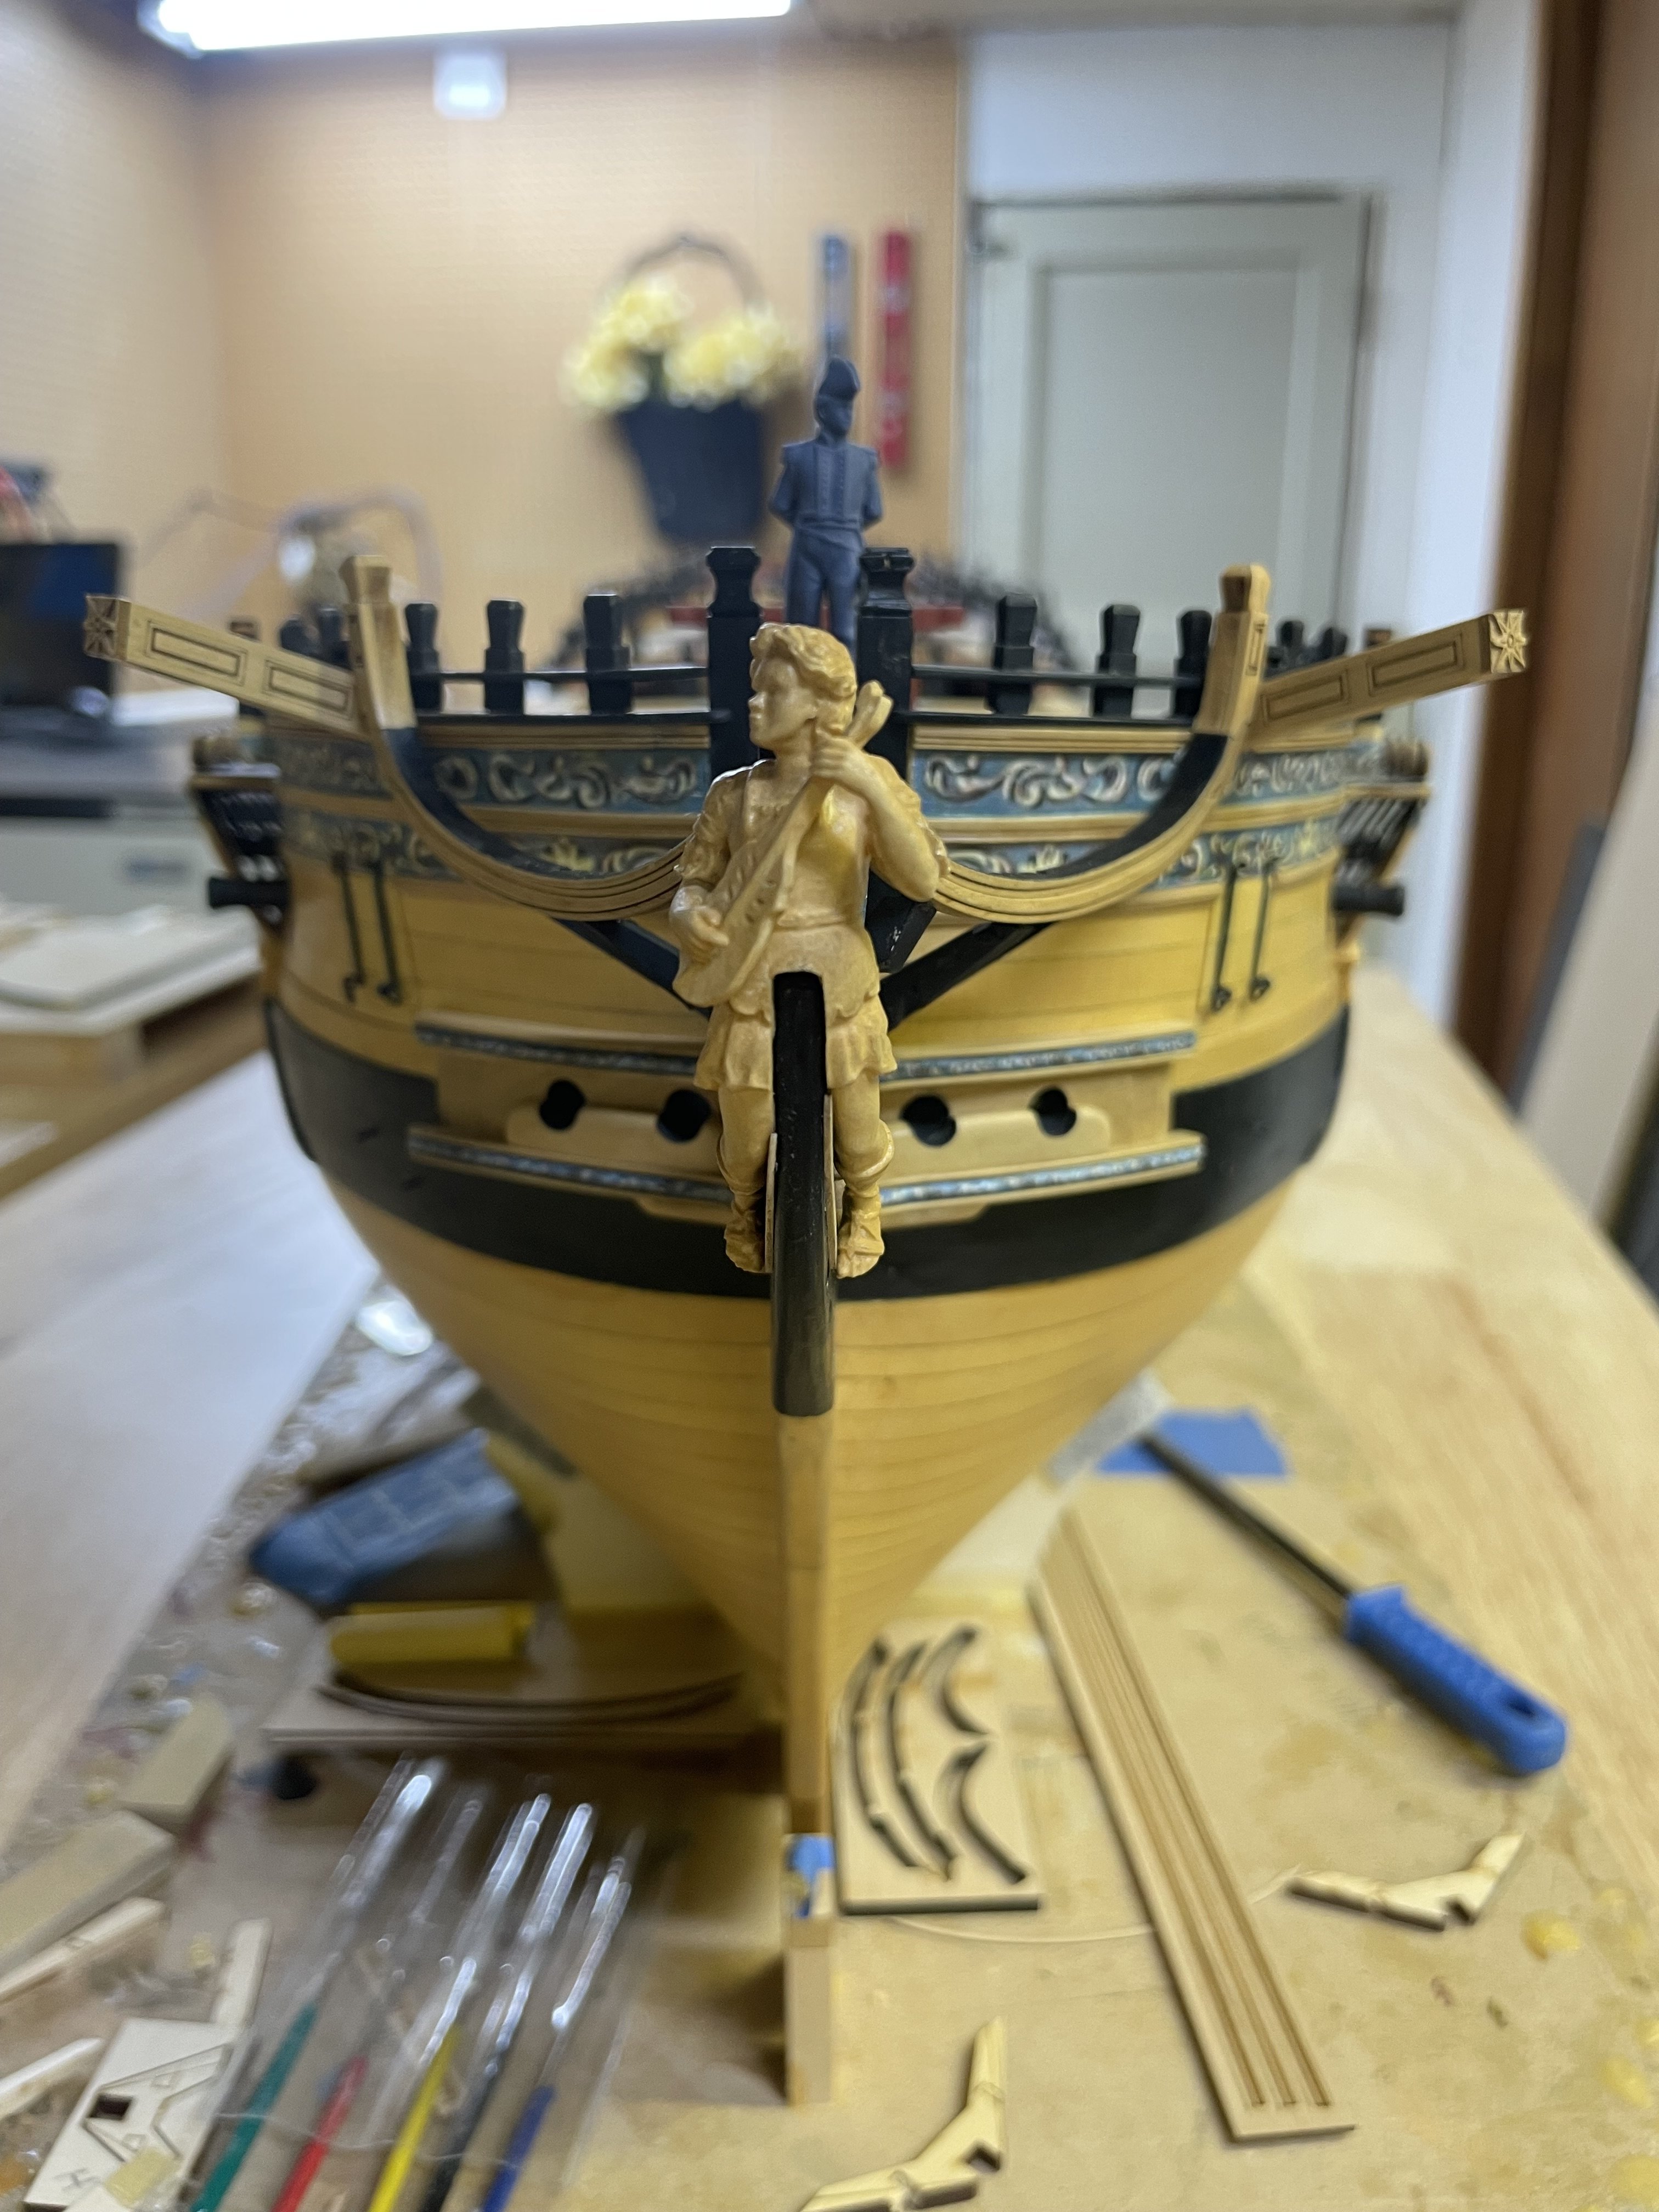
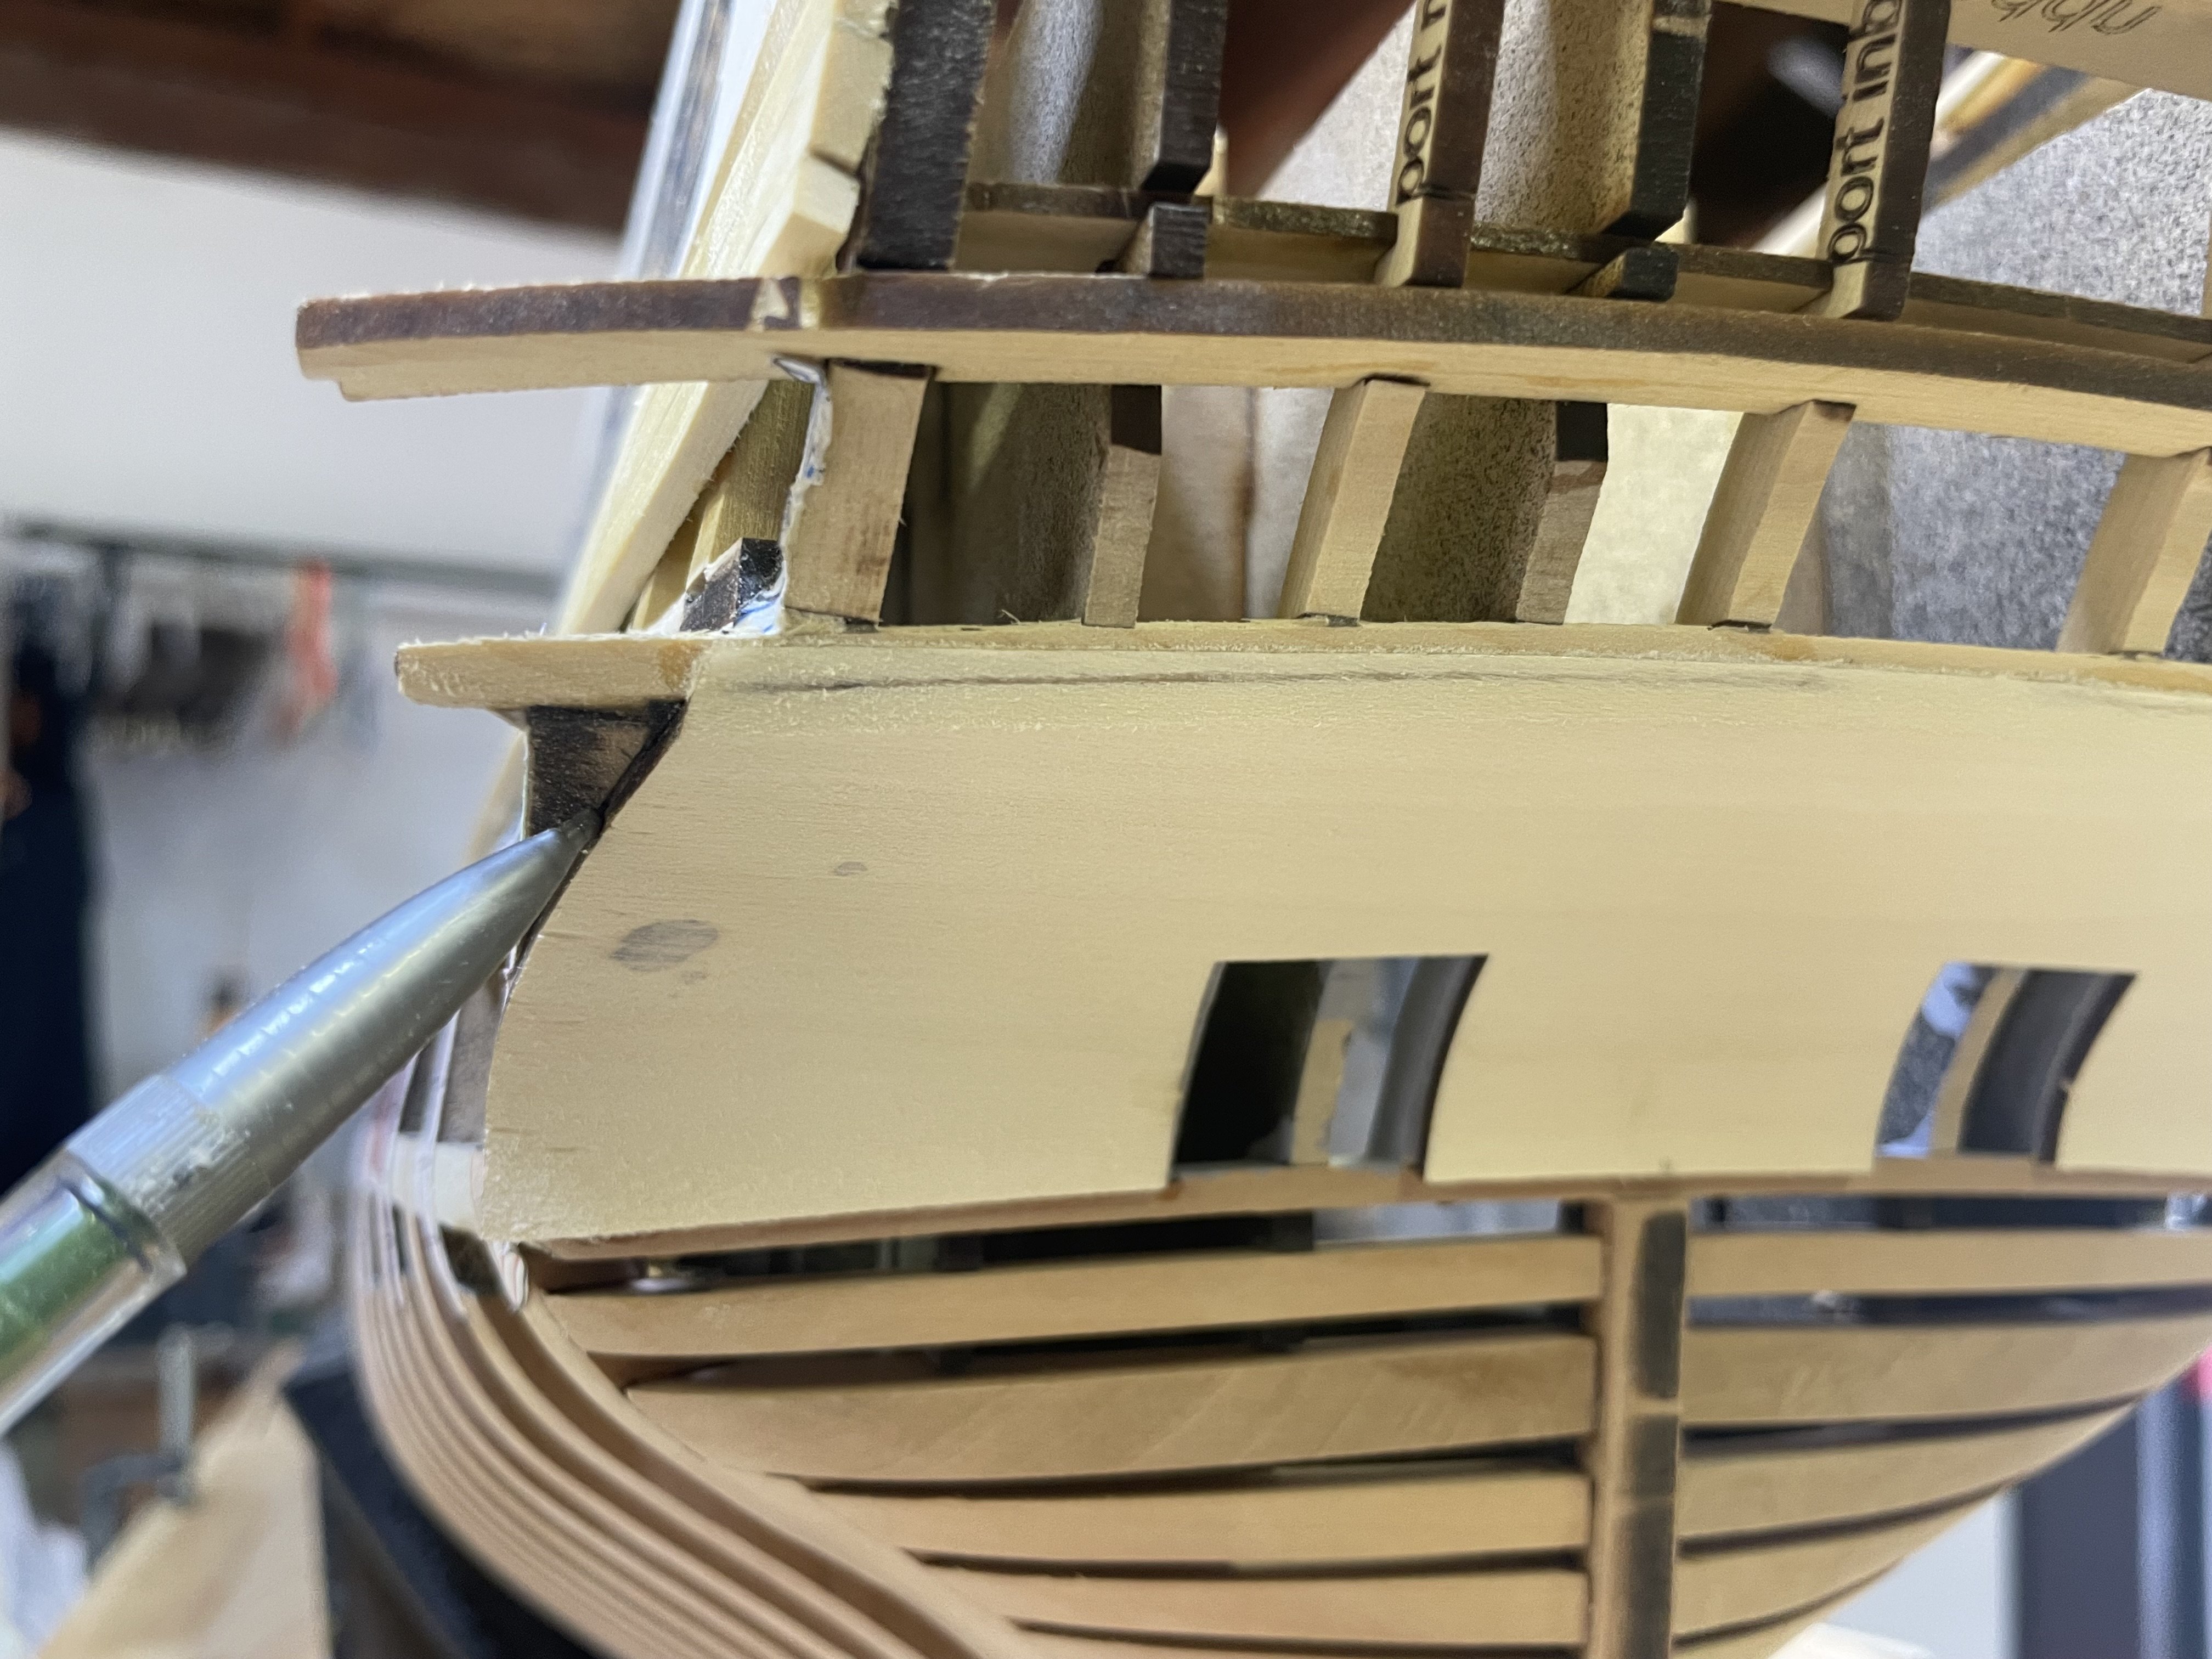
I couldn’t bring myself to glue another plank to anything today. So I decided to work on something fun. I think I have these headrails in a good spot so im going to coat them in WOP and then paint them black on the insides and tops. The head Timbers are in place and I’ll paint those too. A smidge of fine tuning on the headrails when I glue them down should do the trick.


-
it was a very rewarding part of the build for sure and something I had no experience with. It sure made the model and the friezes pop! And Thank you. It will look really nice sitting next to your Winnie!
-
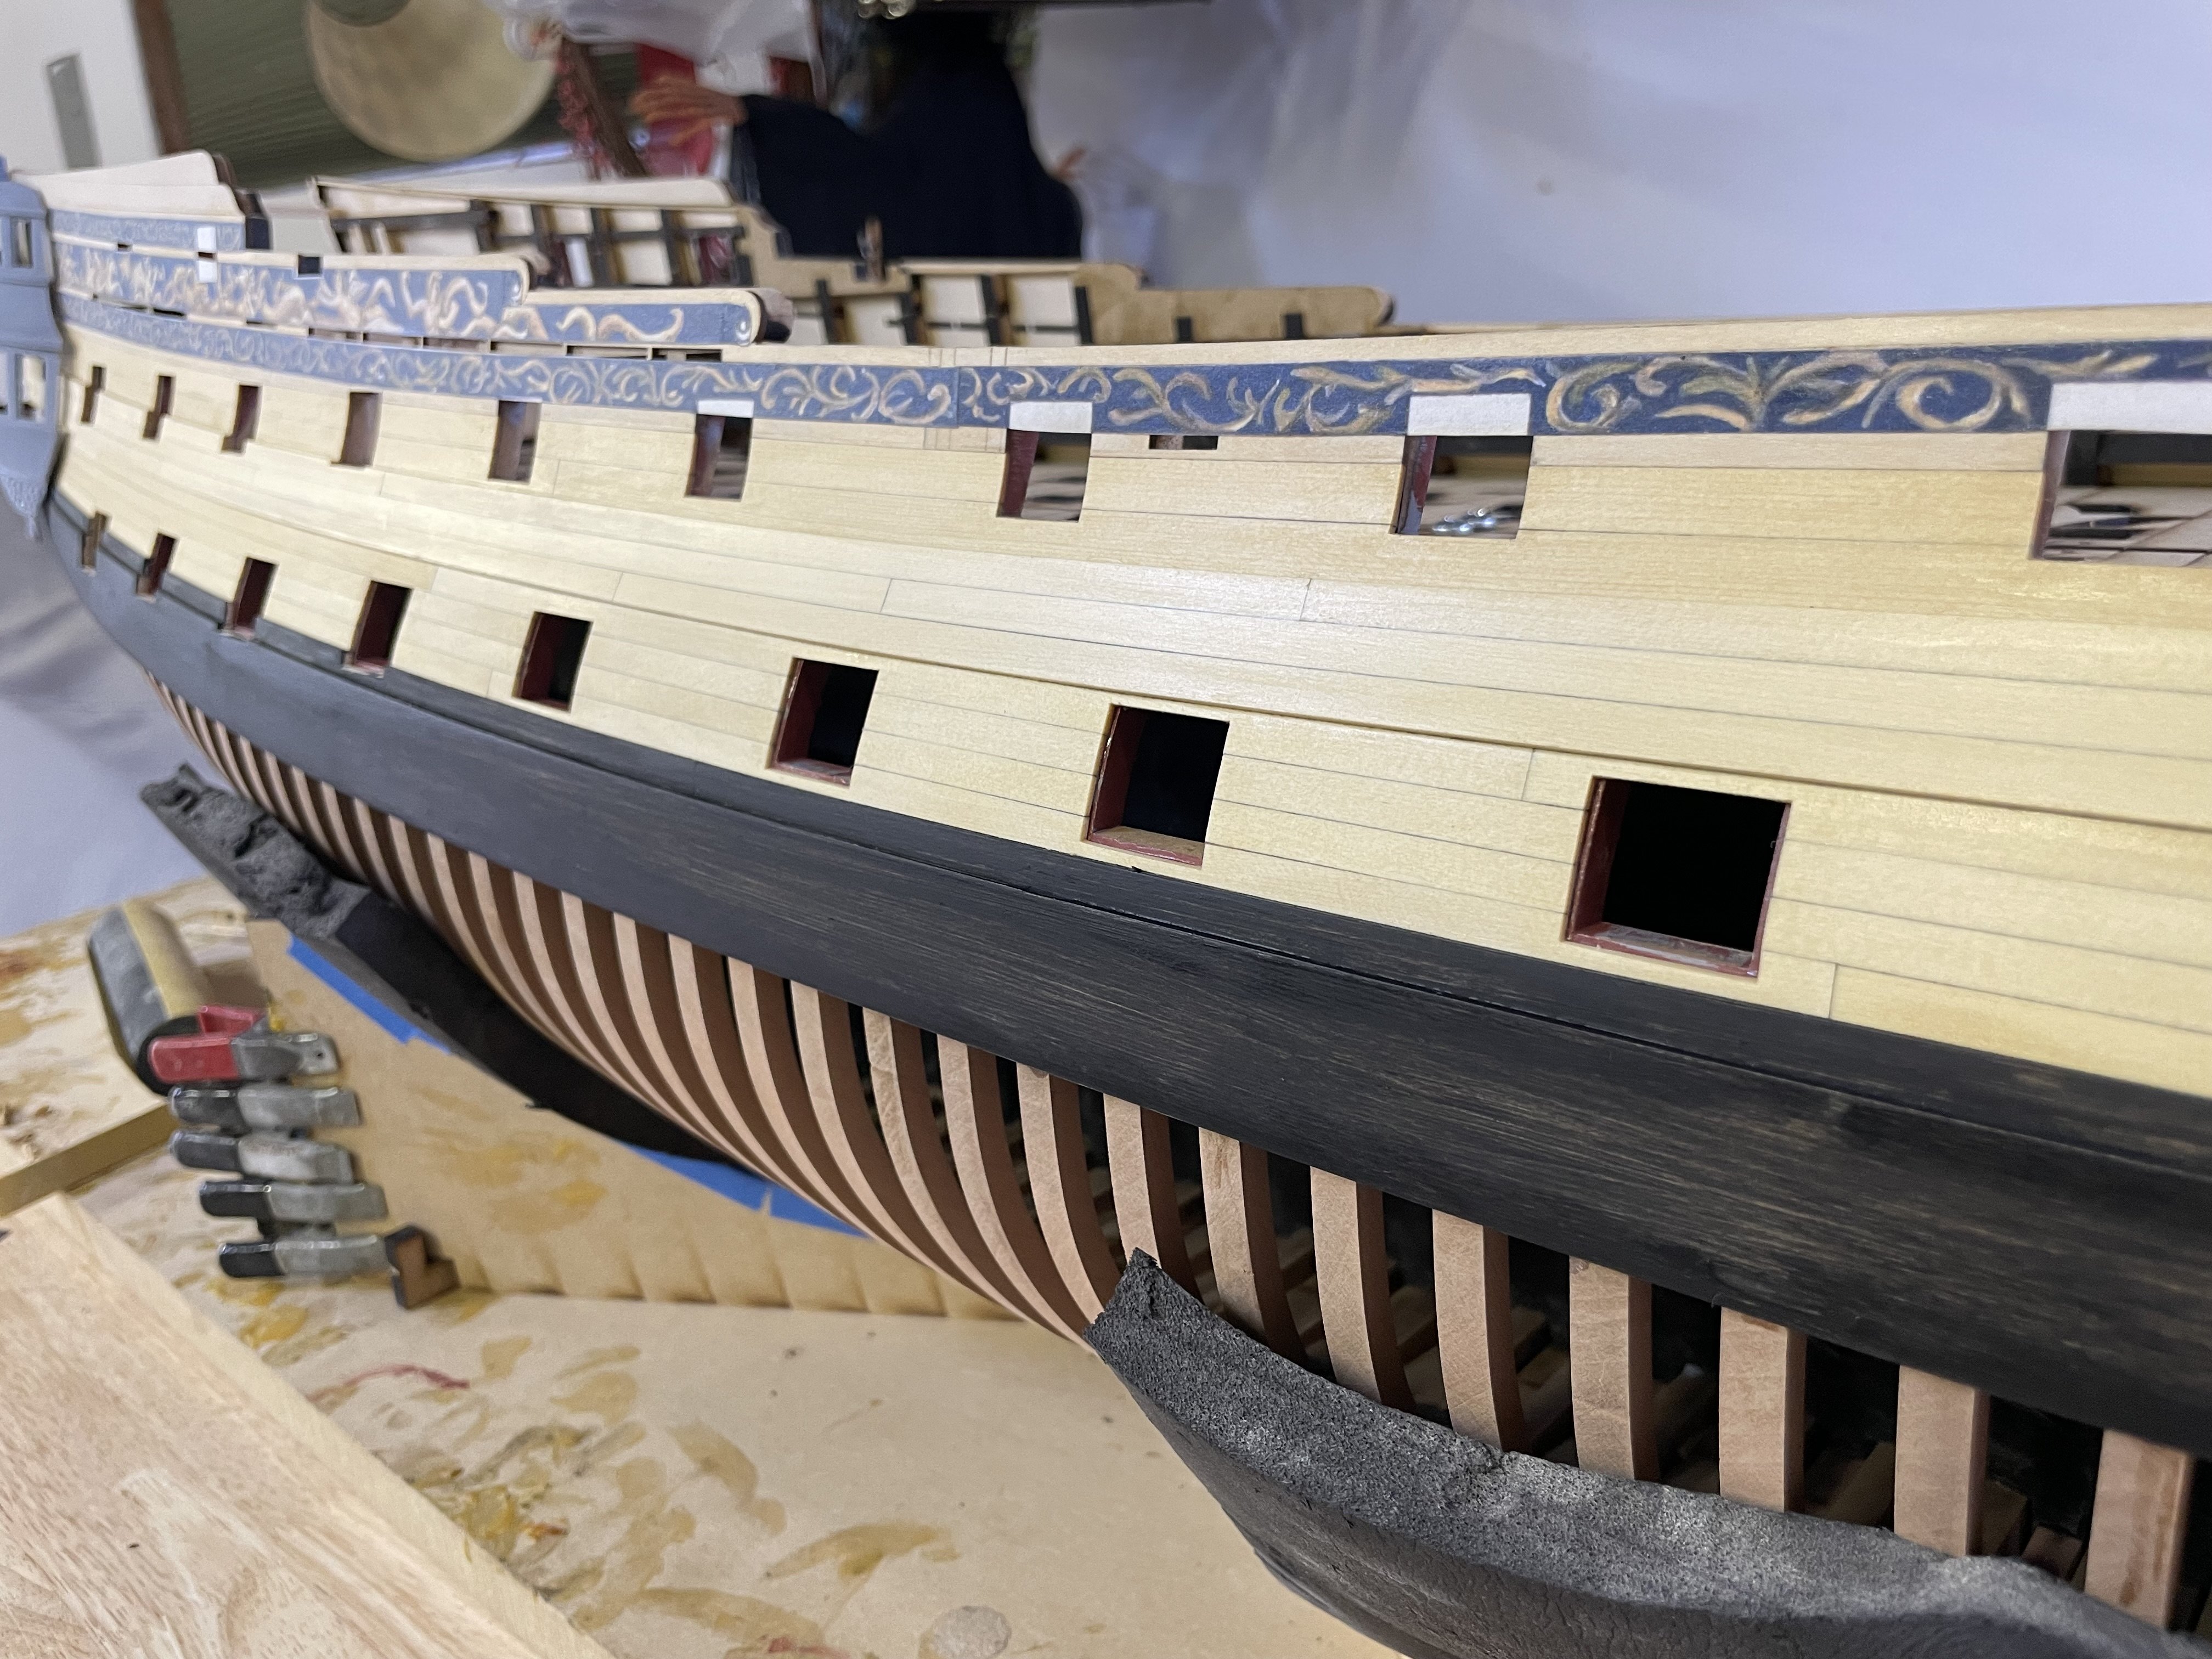
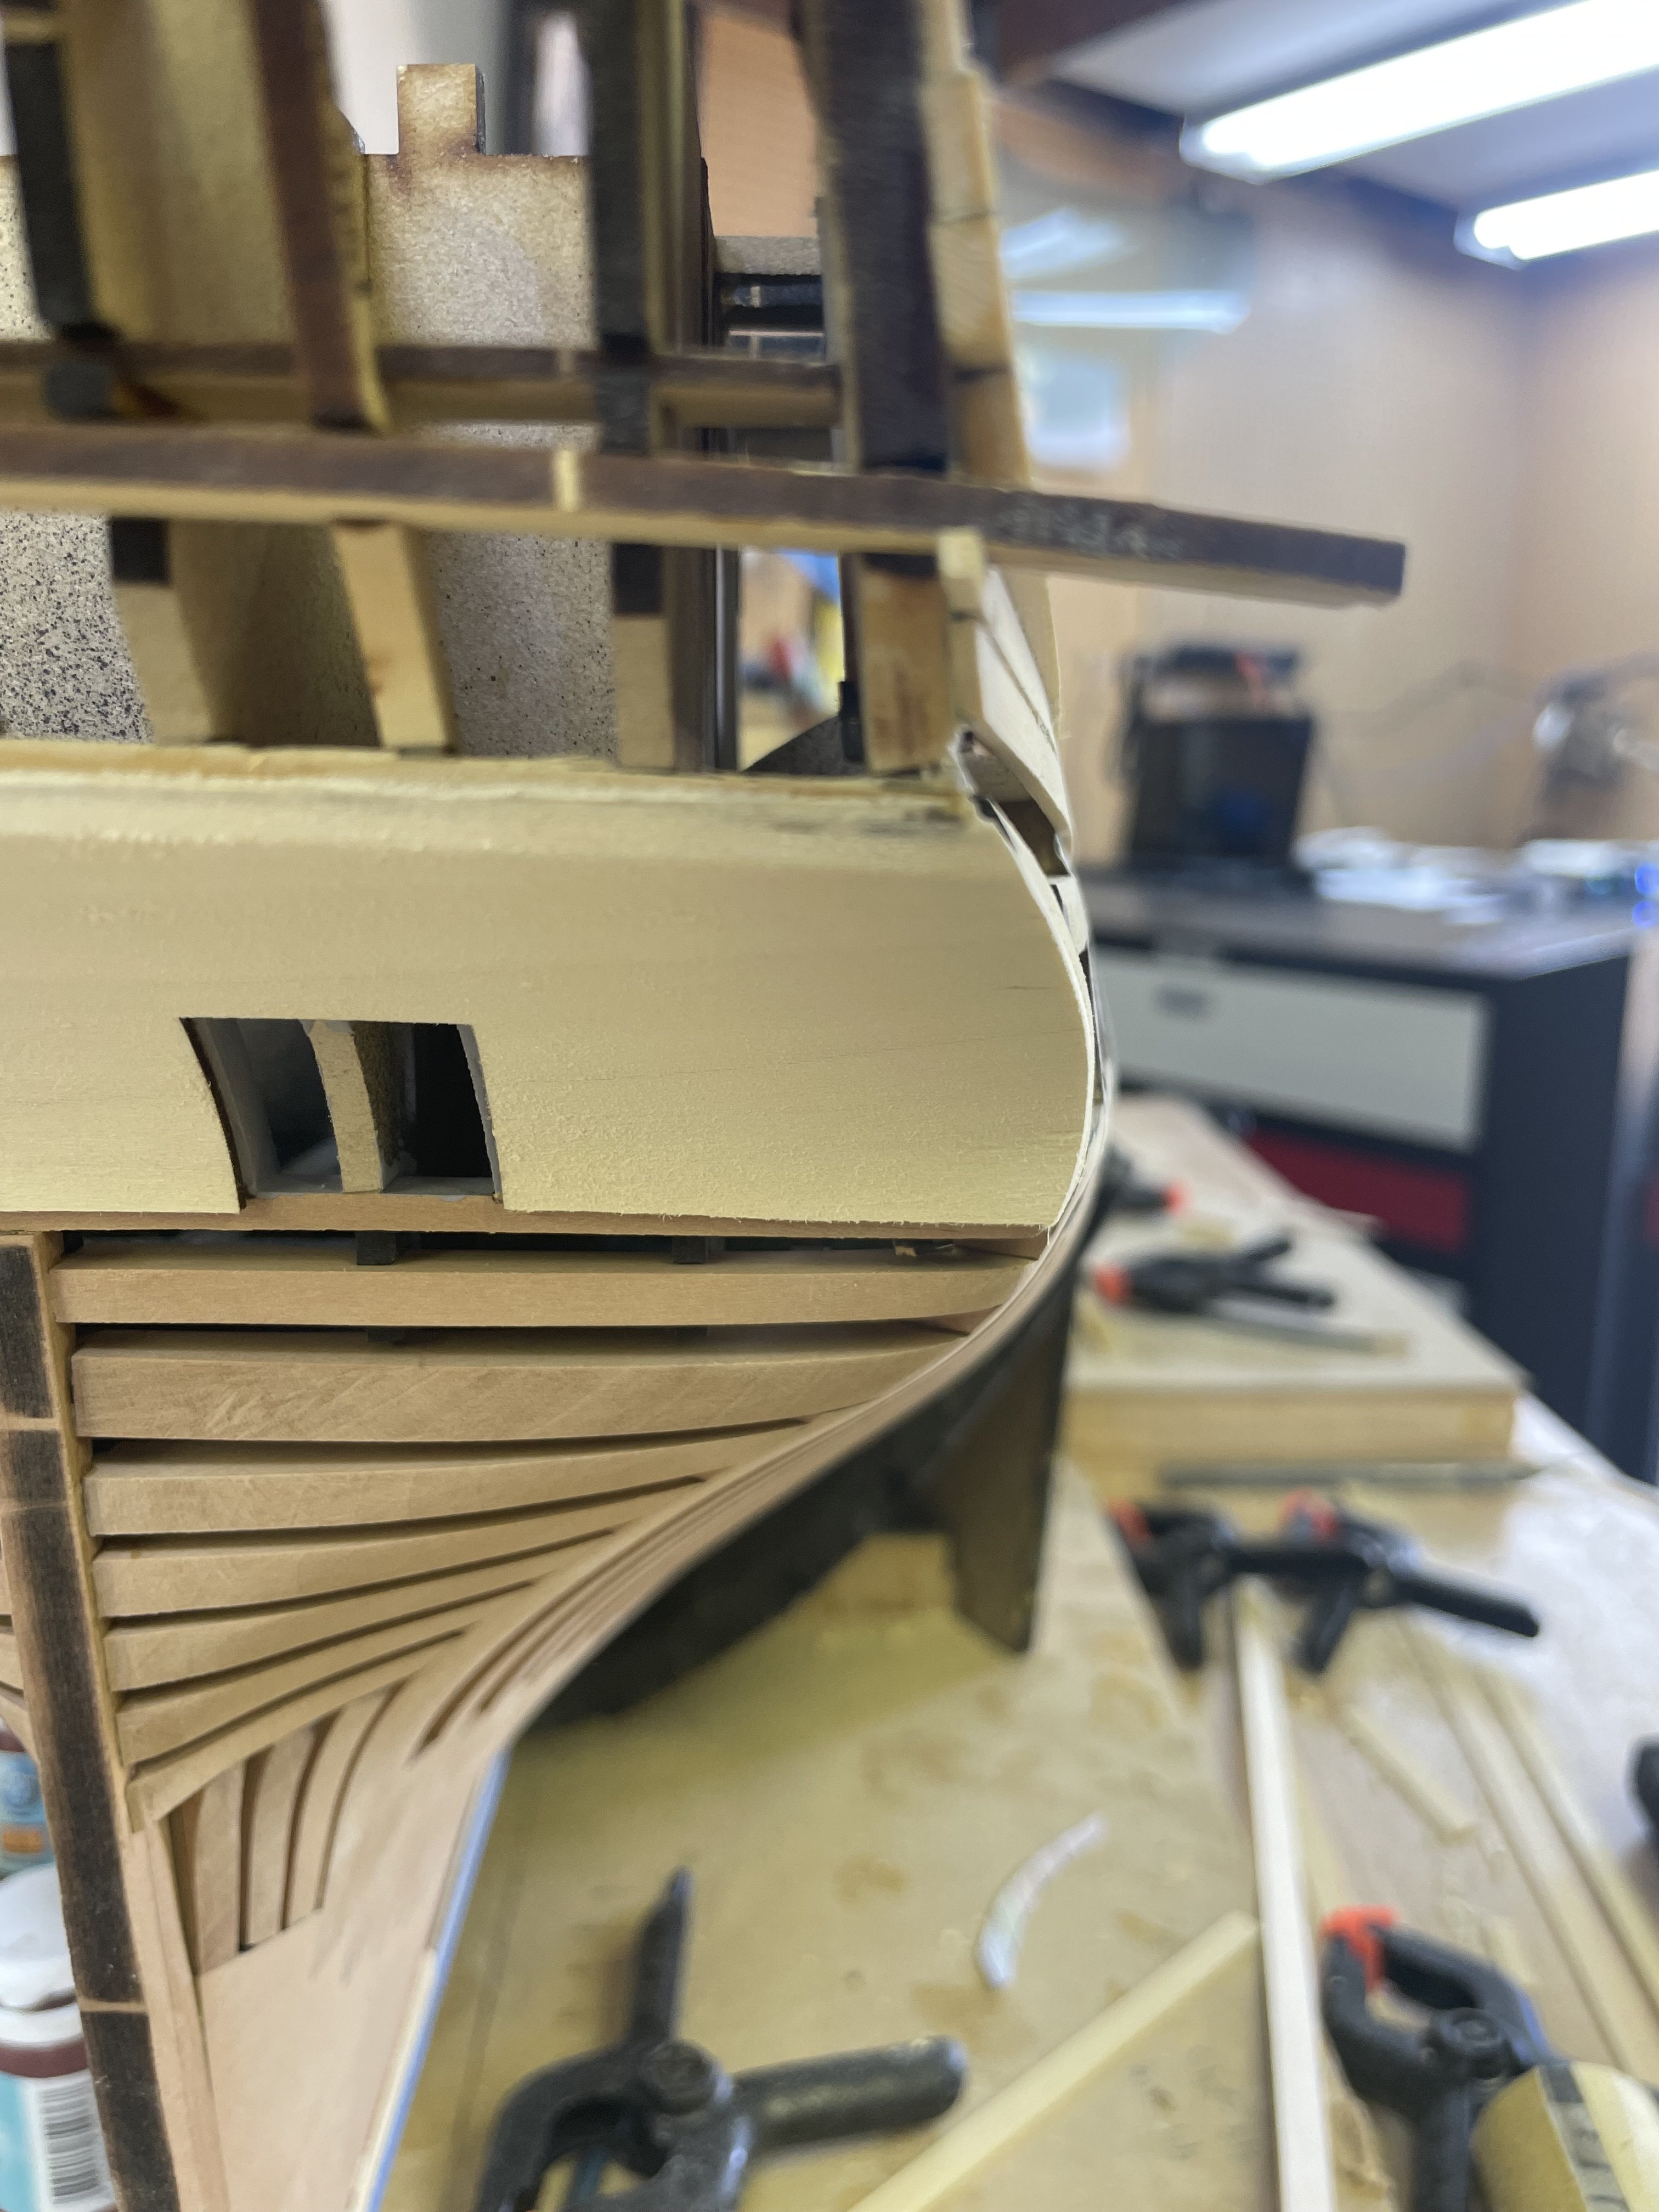
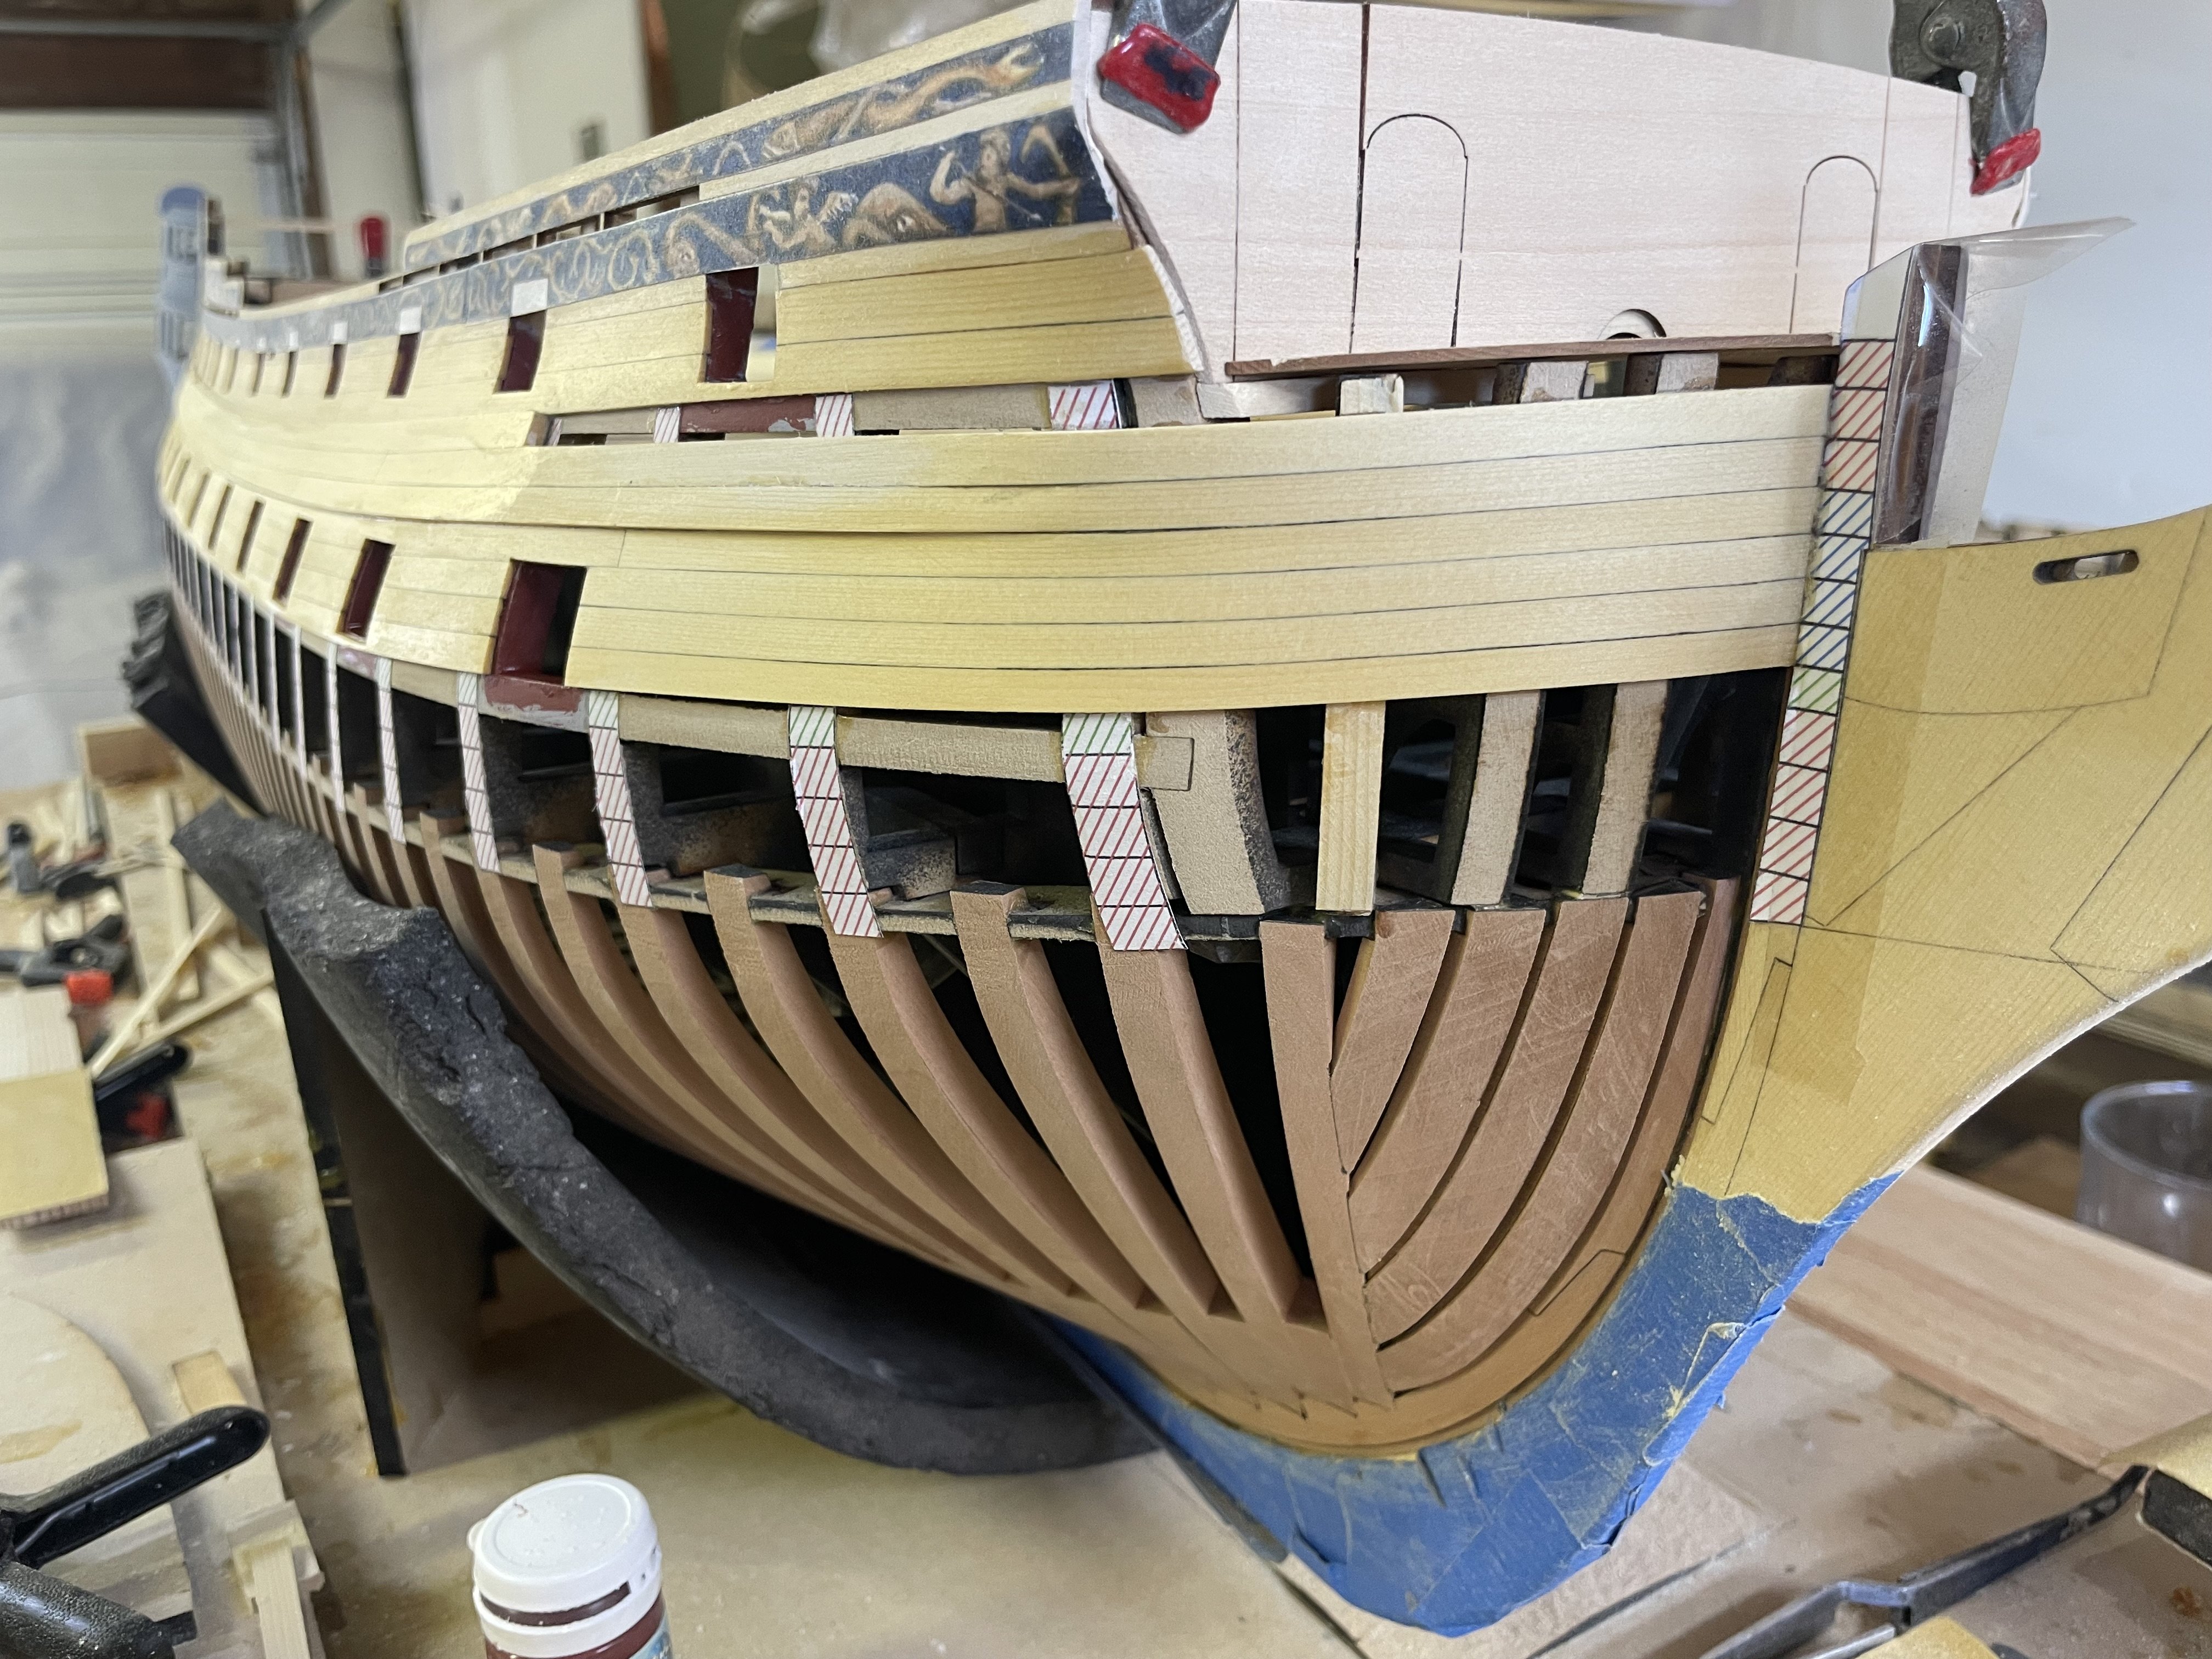
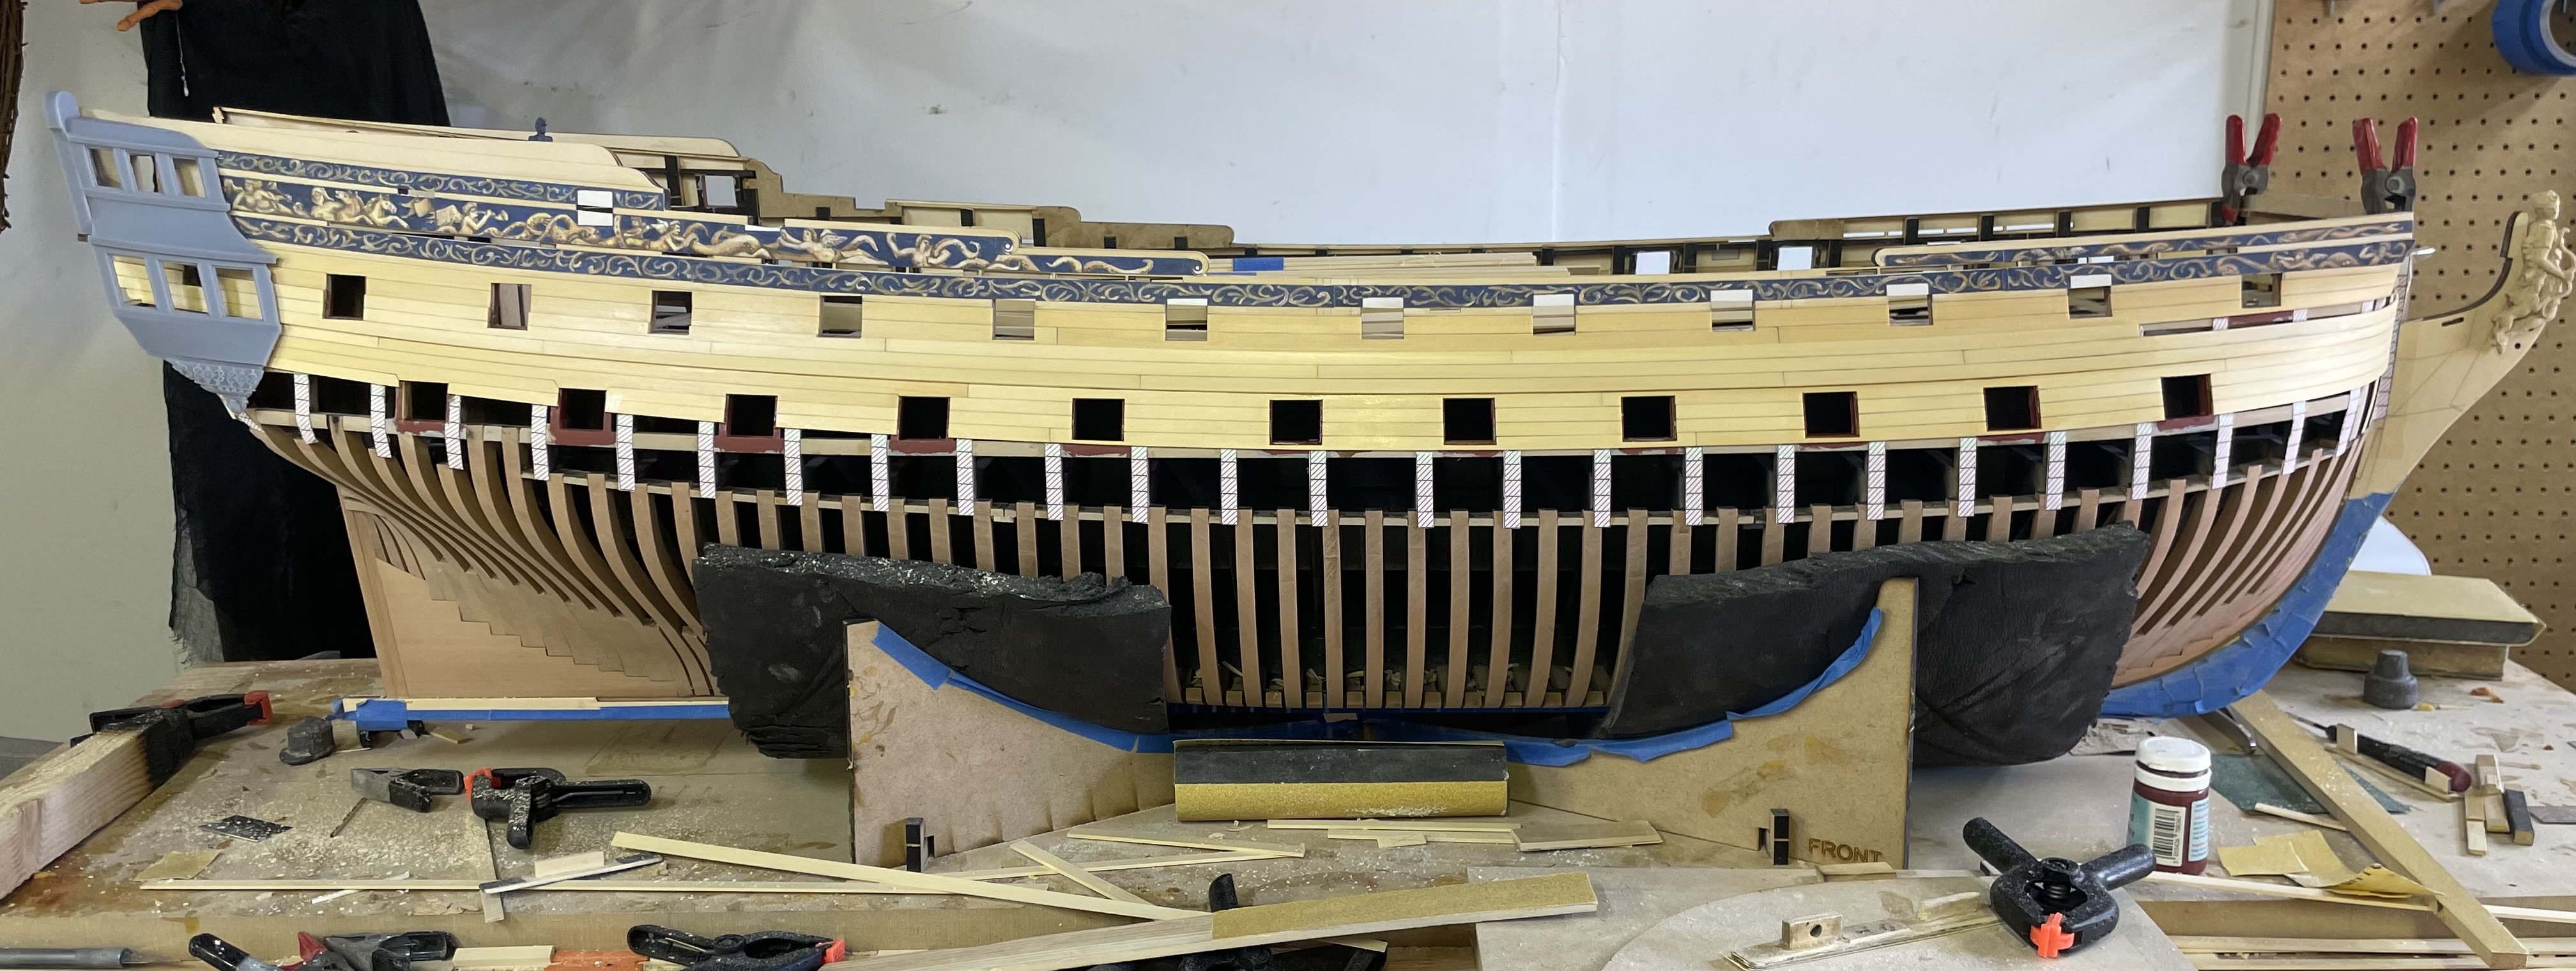
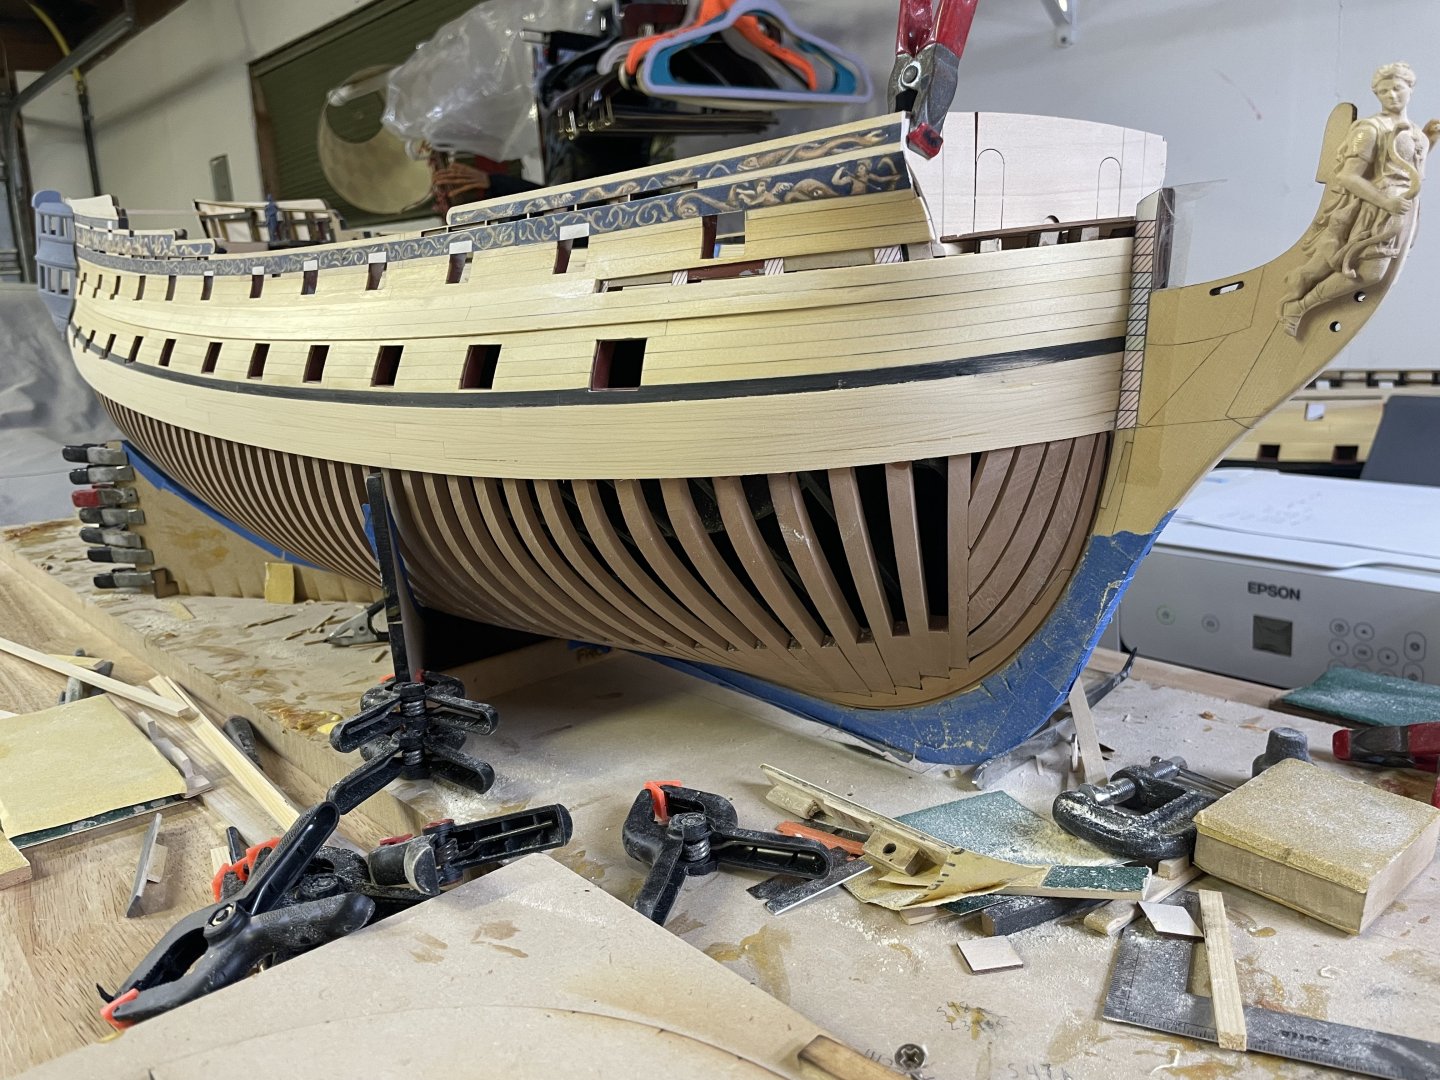
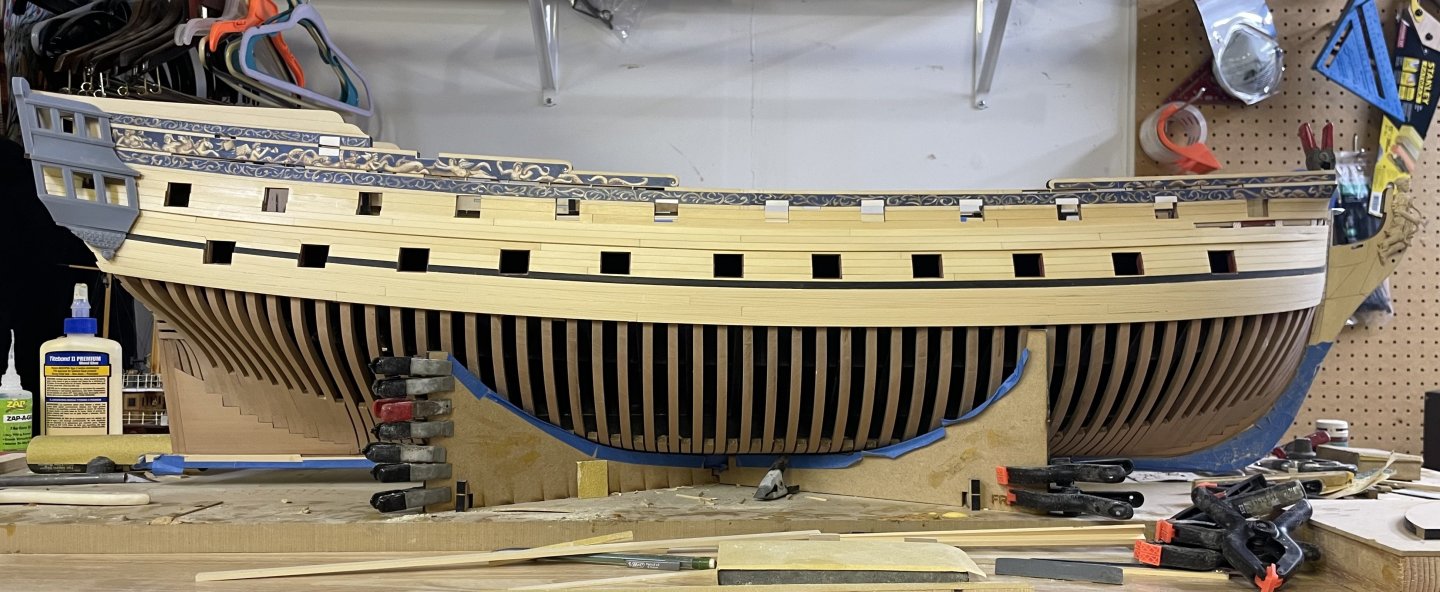
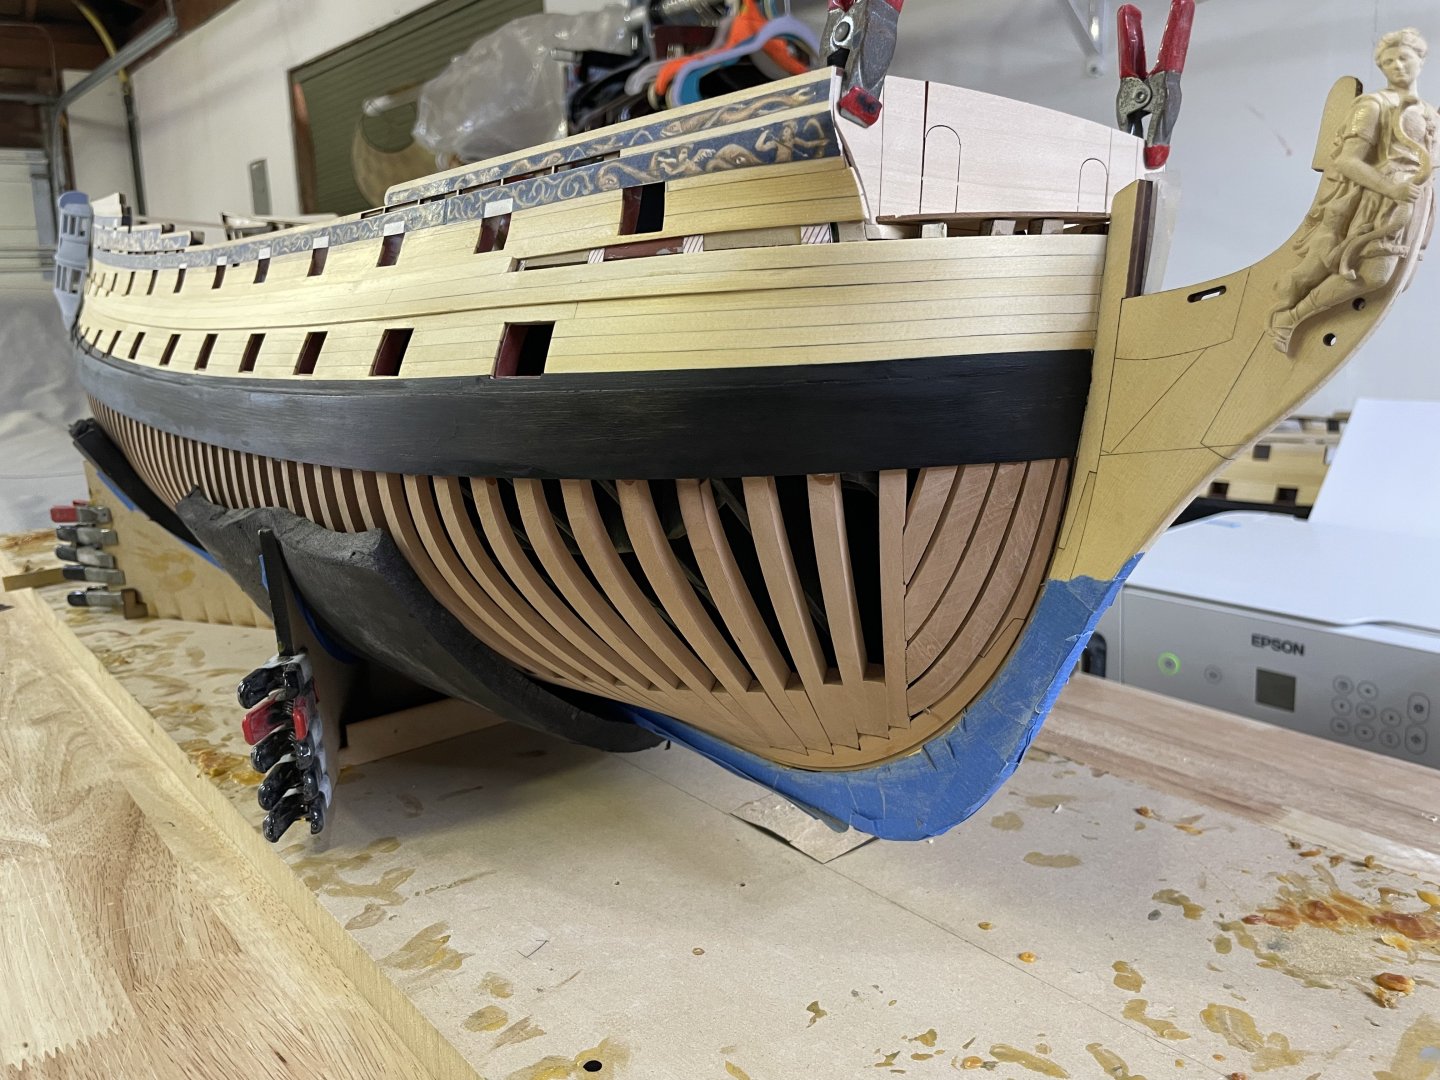
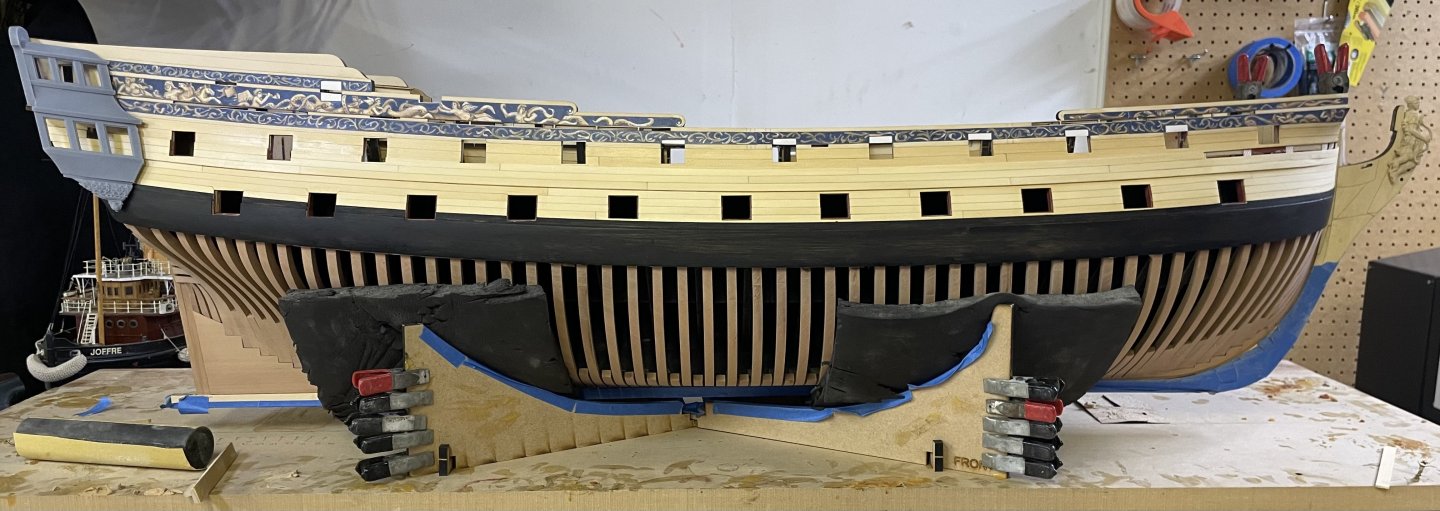
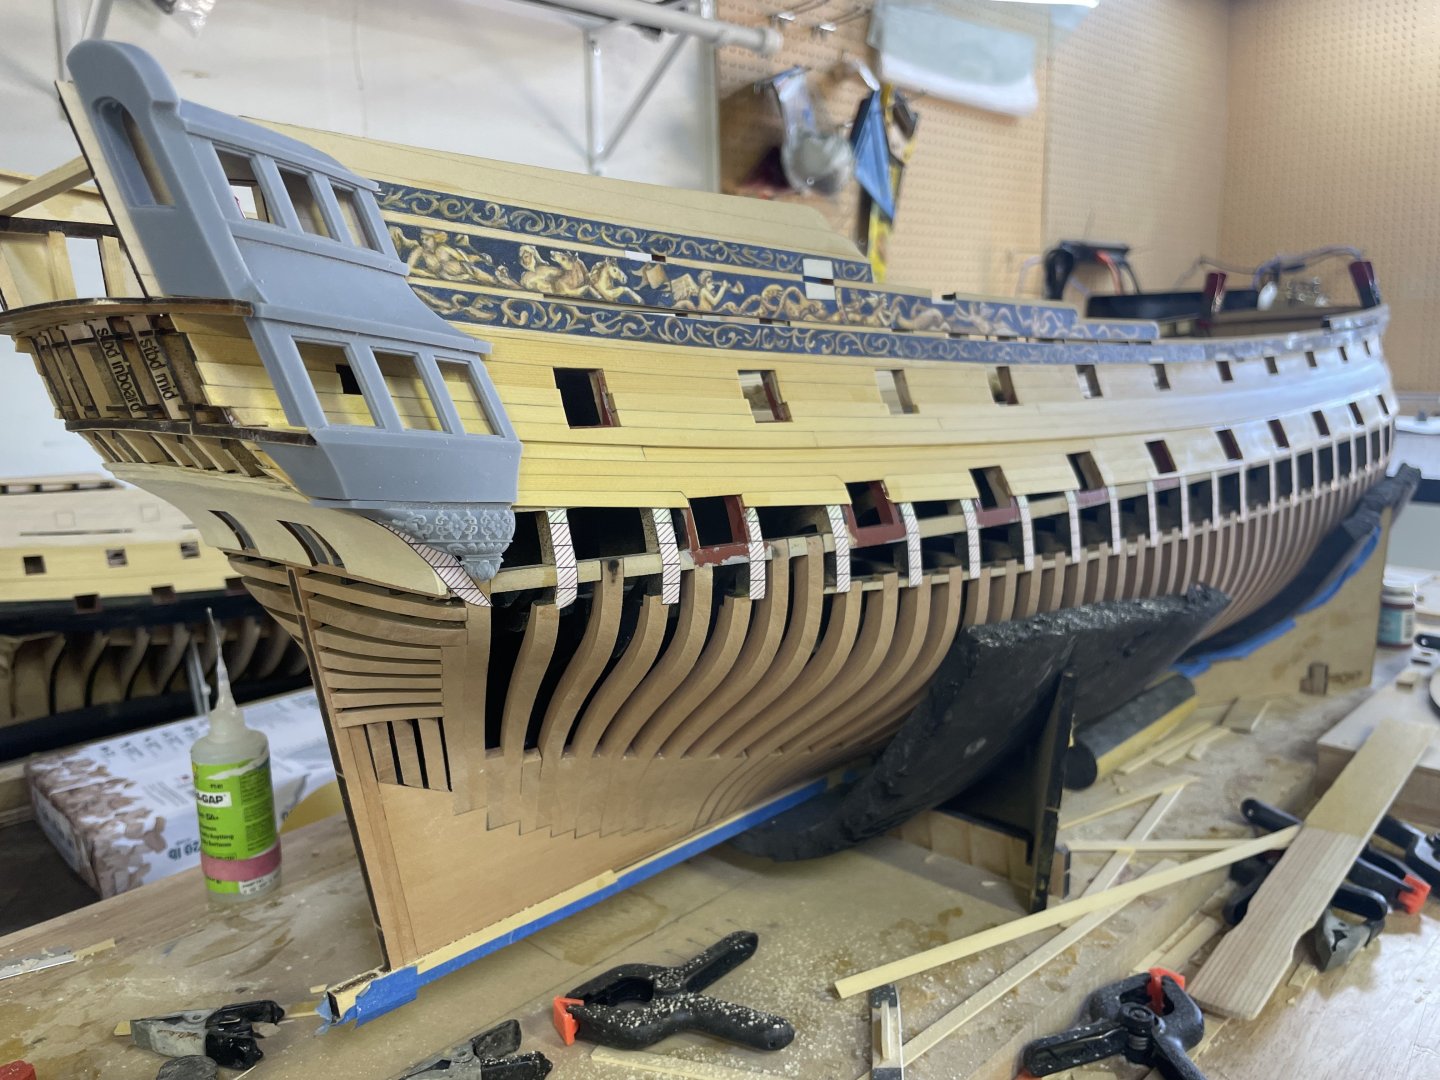
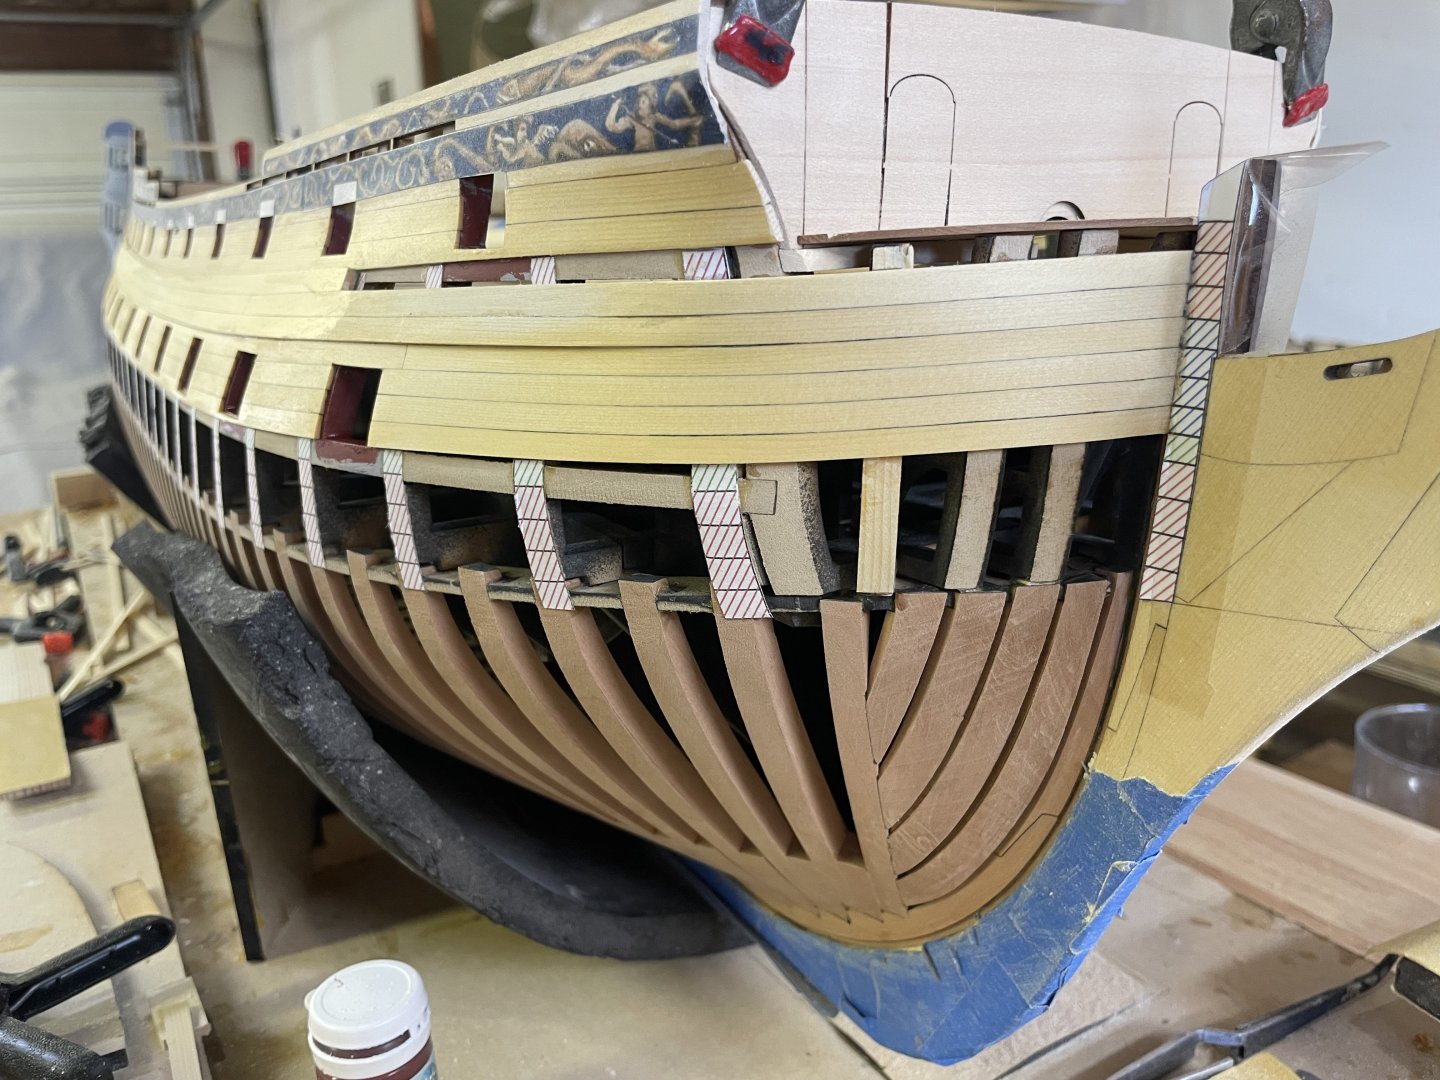
Today I finished the main wale, a huge milestone after 10 days of a nonstop planking party. Just half of the other side to go now. Once both wales are complete I can move onto finishing out the gunports with some fine tuning and another nice coat of red. I need to figure out the width of 1-2 planks below the main wale and probably 1-3 planks up from the keel, then I can finally protect all those pear frames and move onto the QG’s.


- 396 replies
-
- 30
-

-

-
Great job on those wings. They look perfect!
-
Nicely done! The molding sure makes it look good!
-
That looks really good Dusan! You shouldn’t have much problems with the wing transoms, there’s a lot of material there for a margin of error. You can sand off everything later that you don’t need.
-
Very nice work Ben. Time for those wing transoms. They actually go on quite nice but lots to sand off!
-
Thanks Ronald. So the QG itself will actually be 3D printed but you won’t be able to tell once it’s dressed up with all the exterior and interior goodies. The drop however is going to be boxwood. I should have all the stern carvings soon.
-
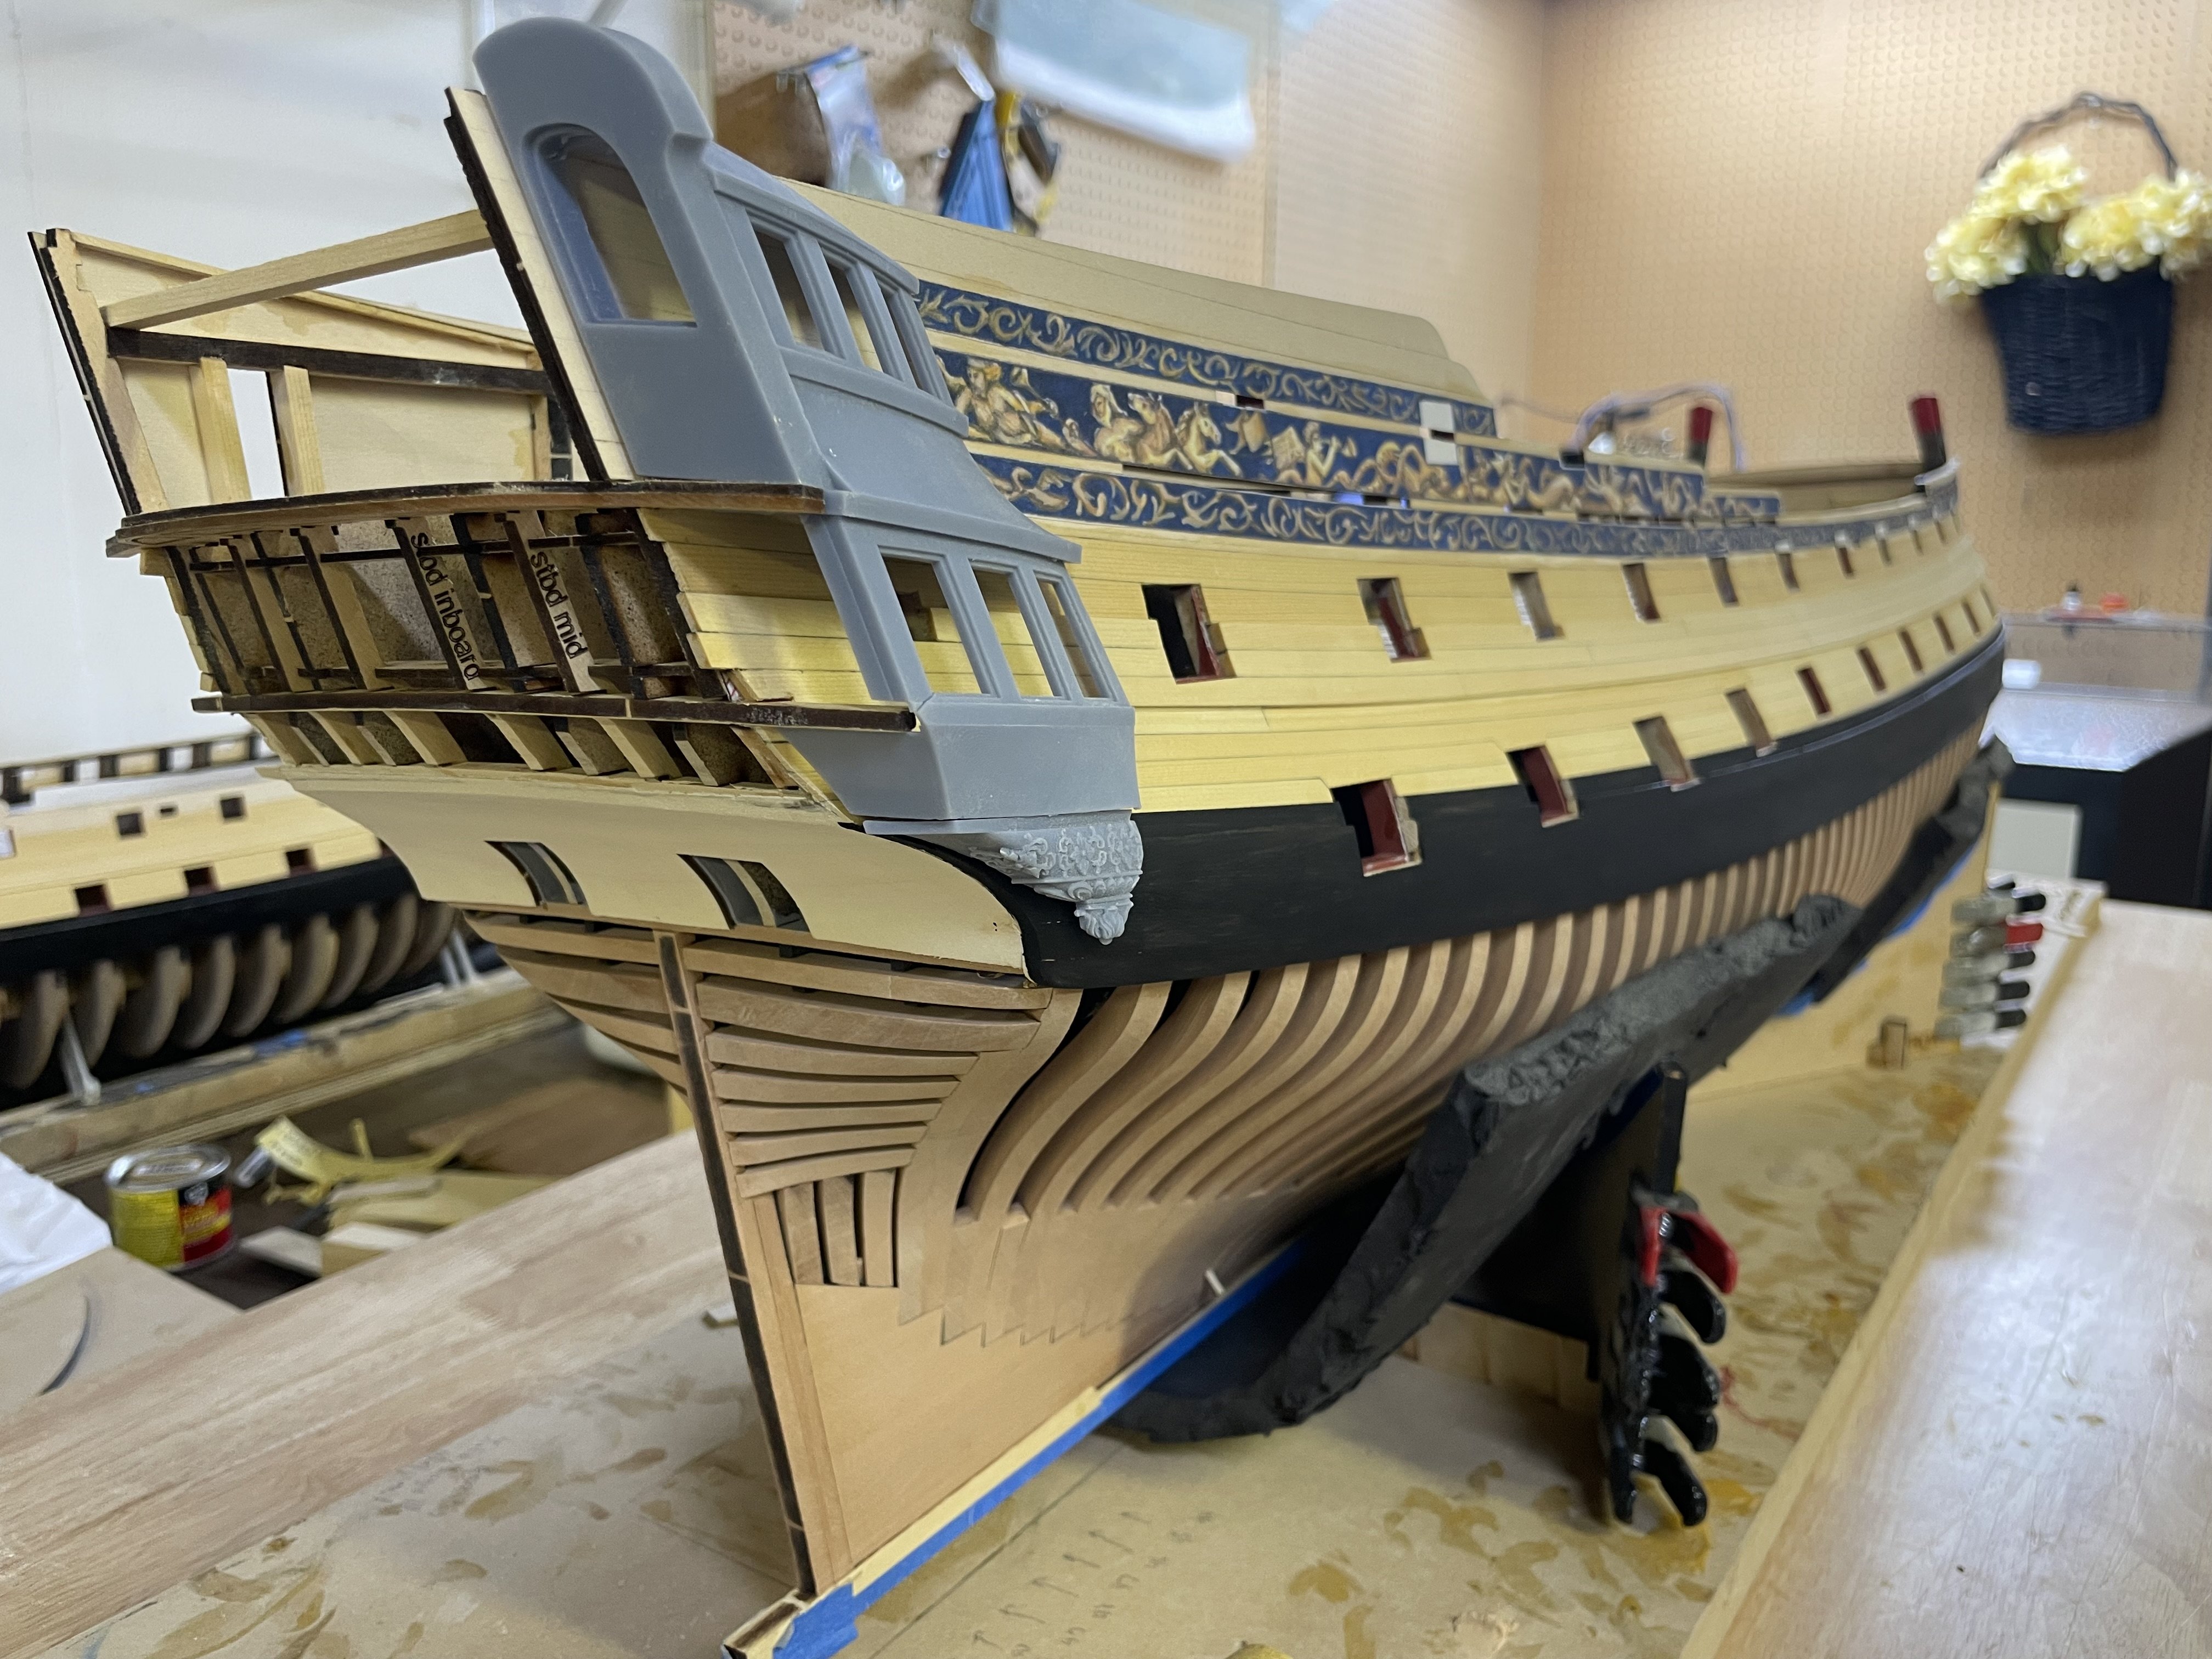
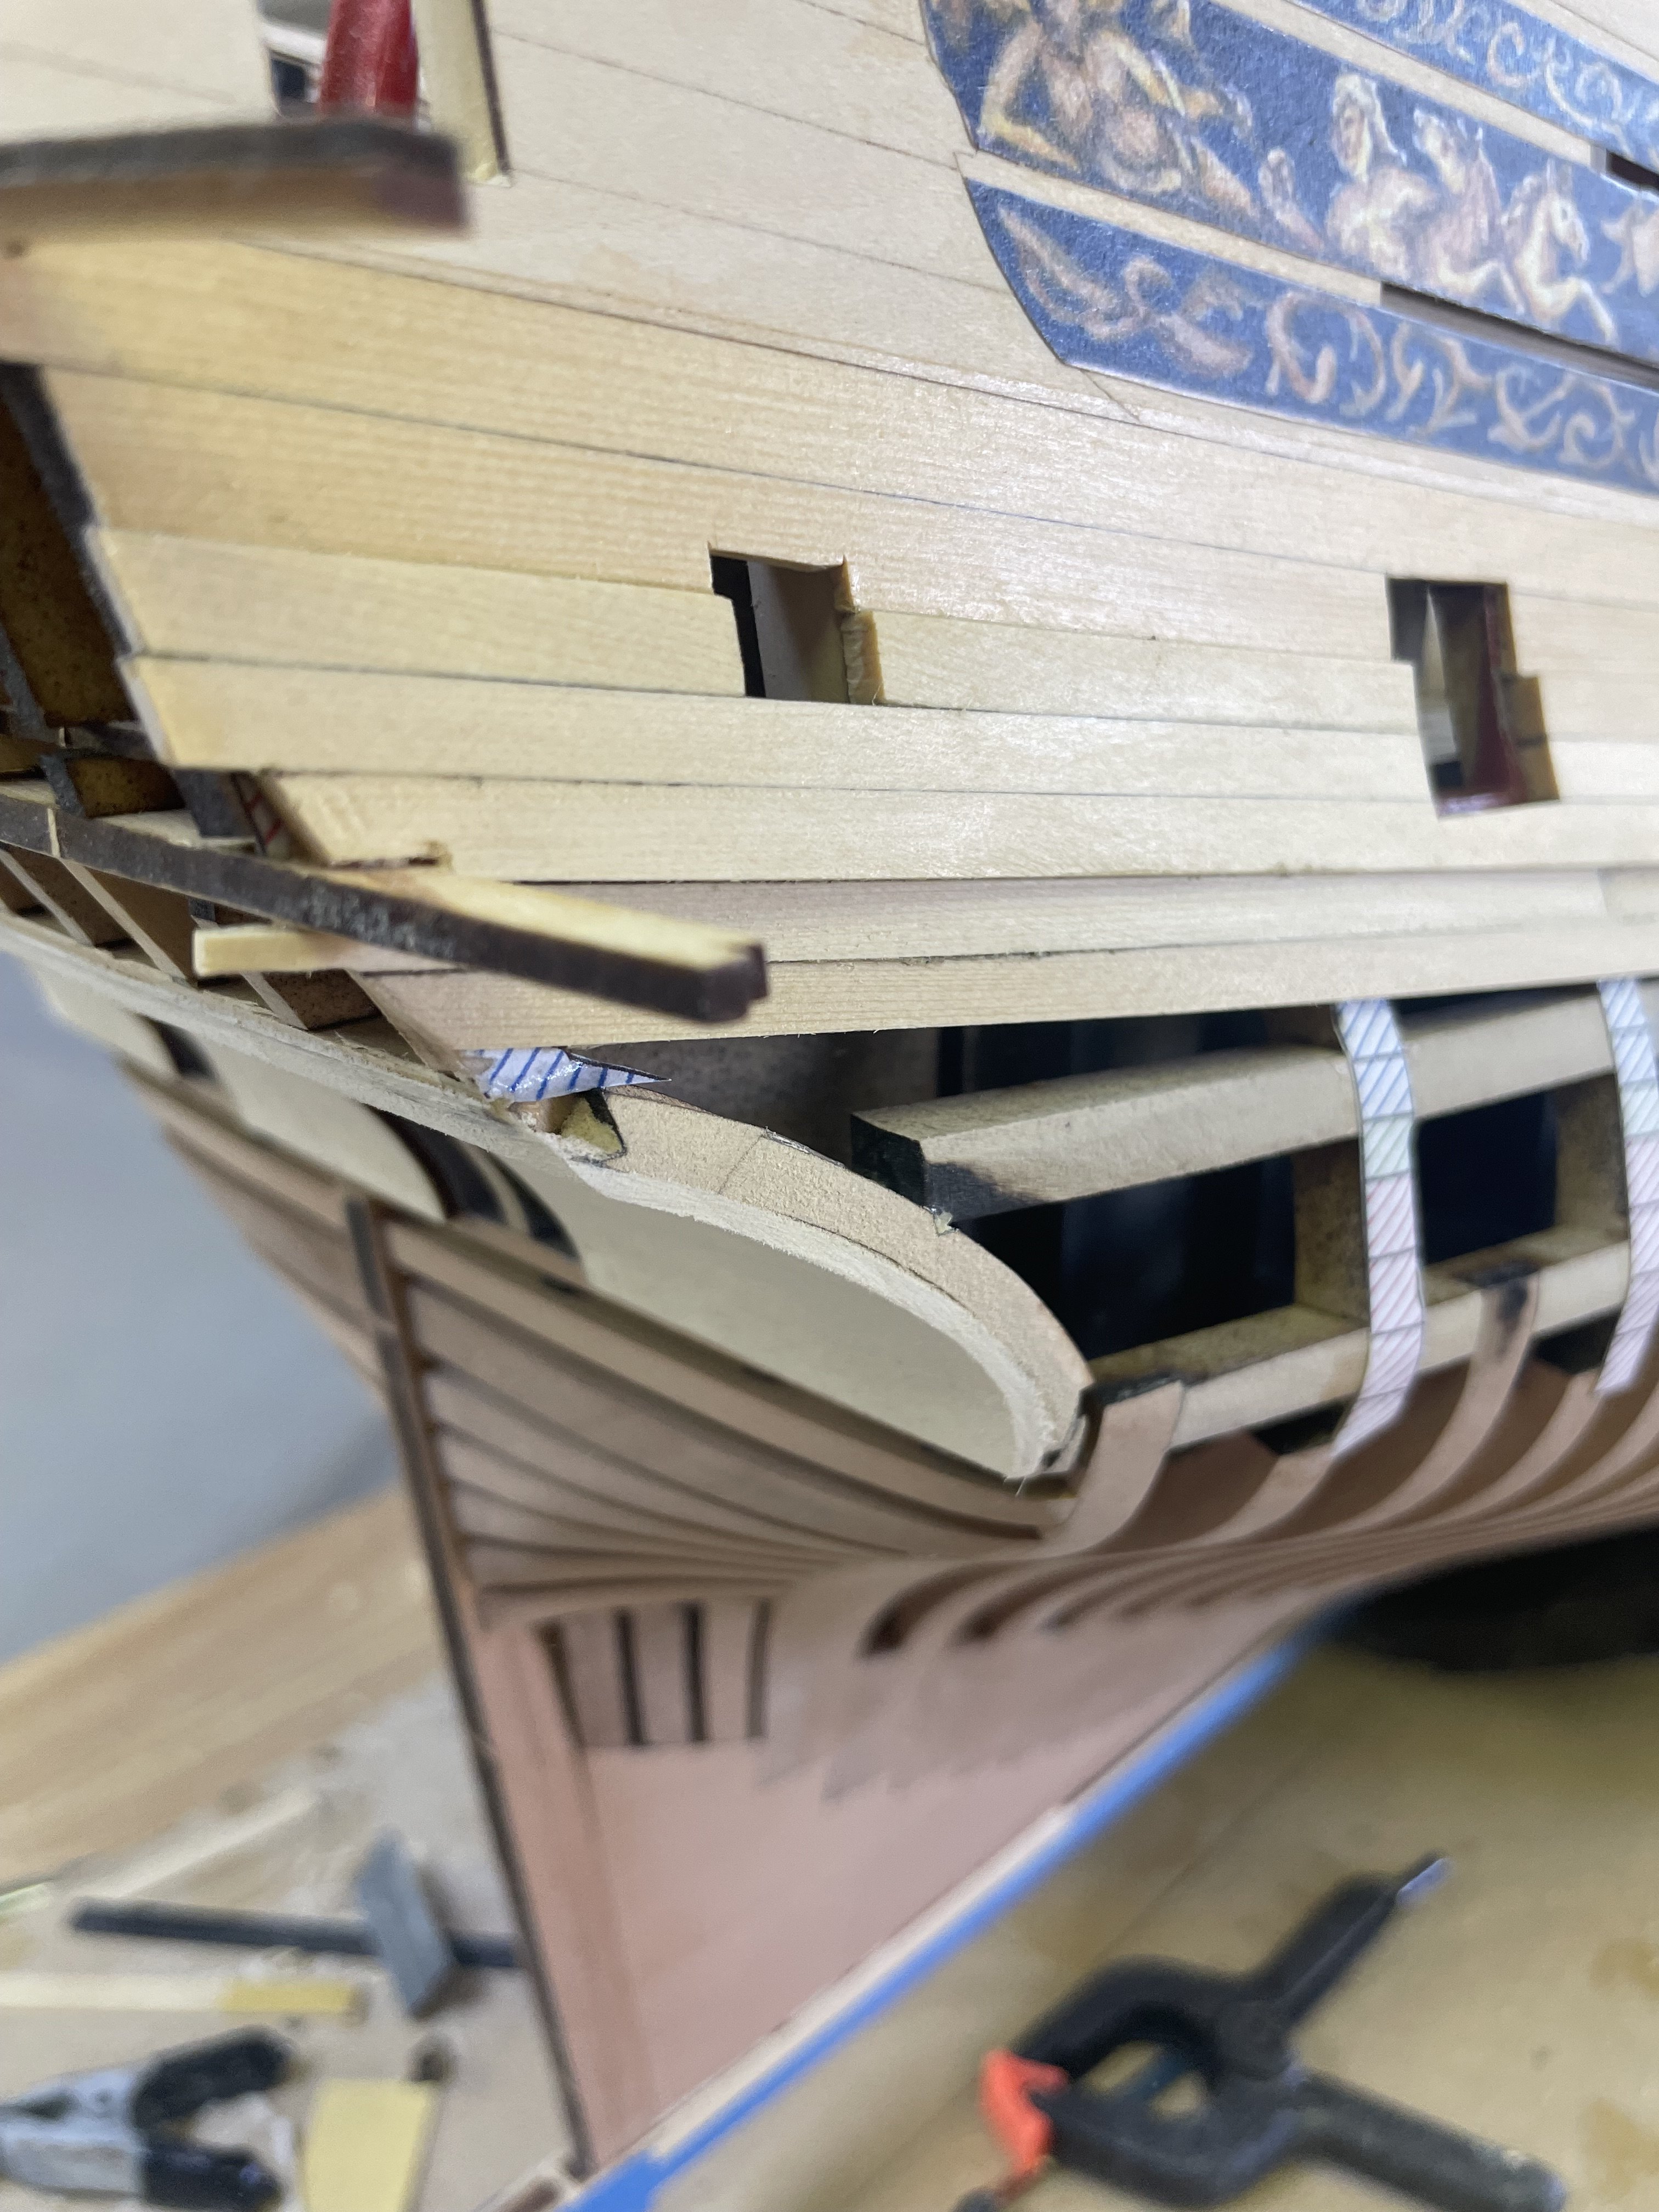
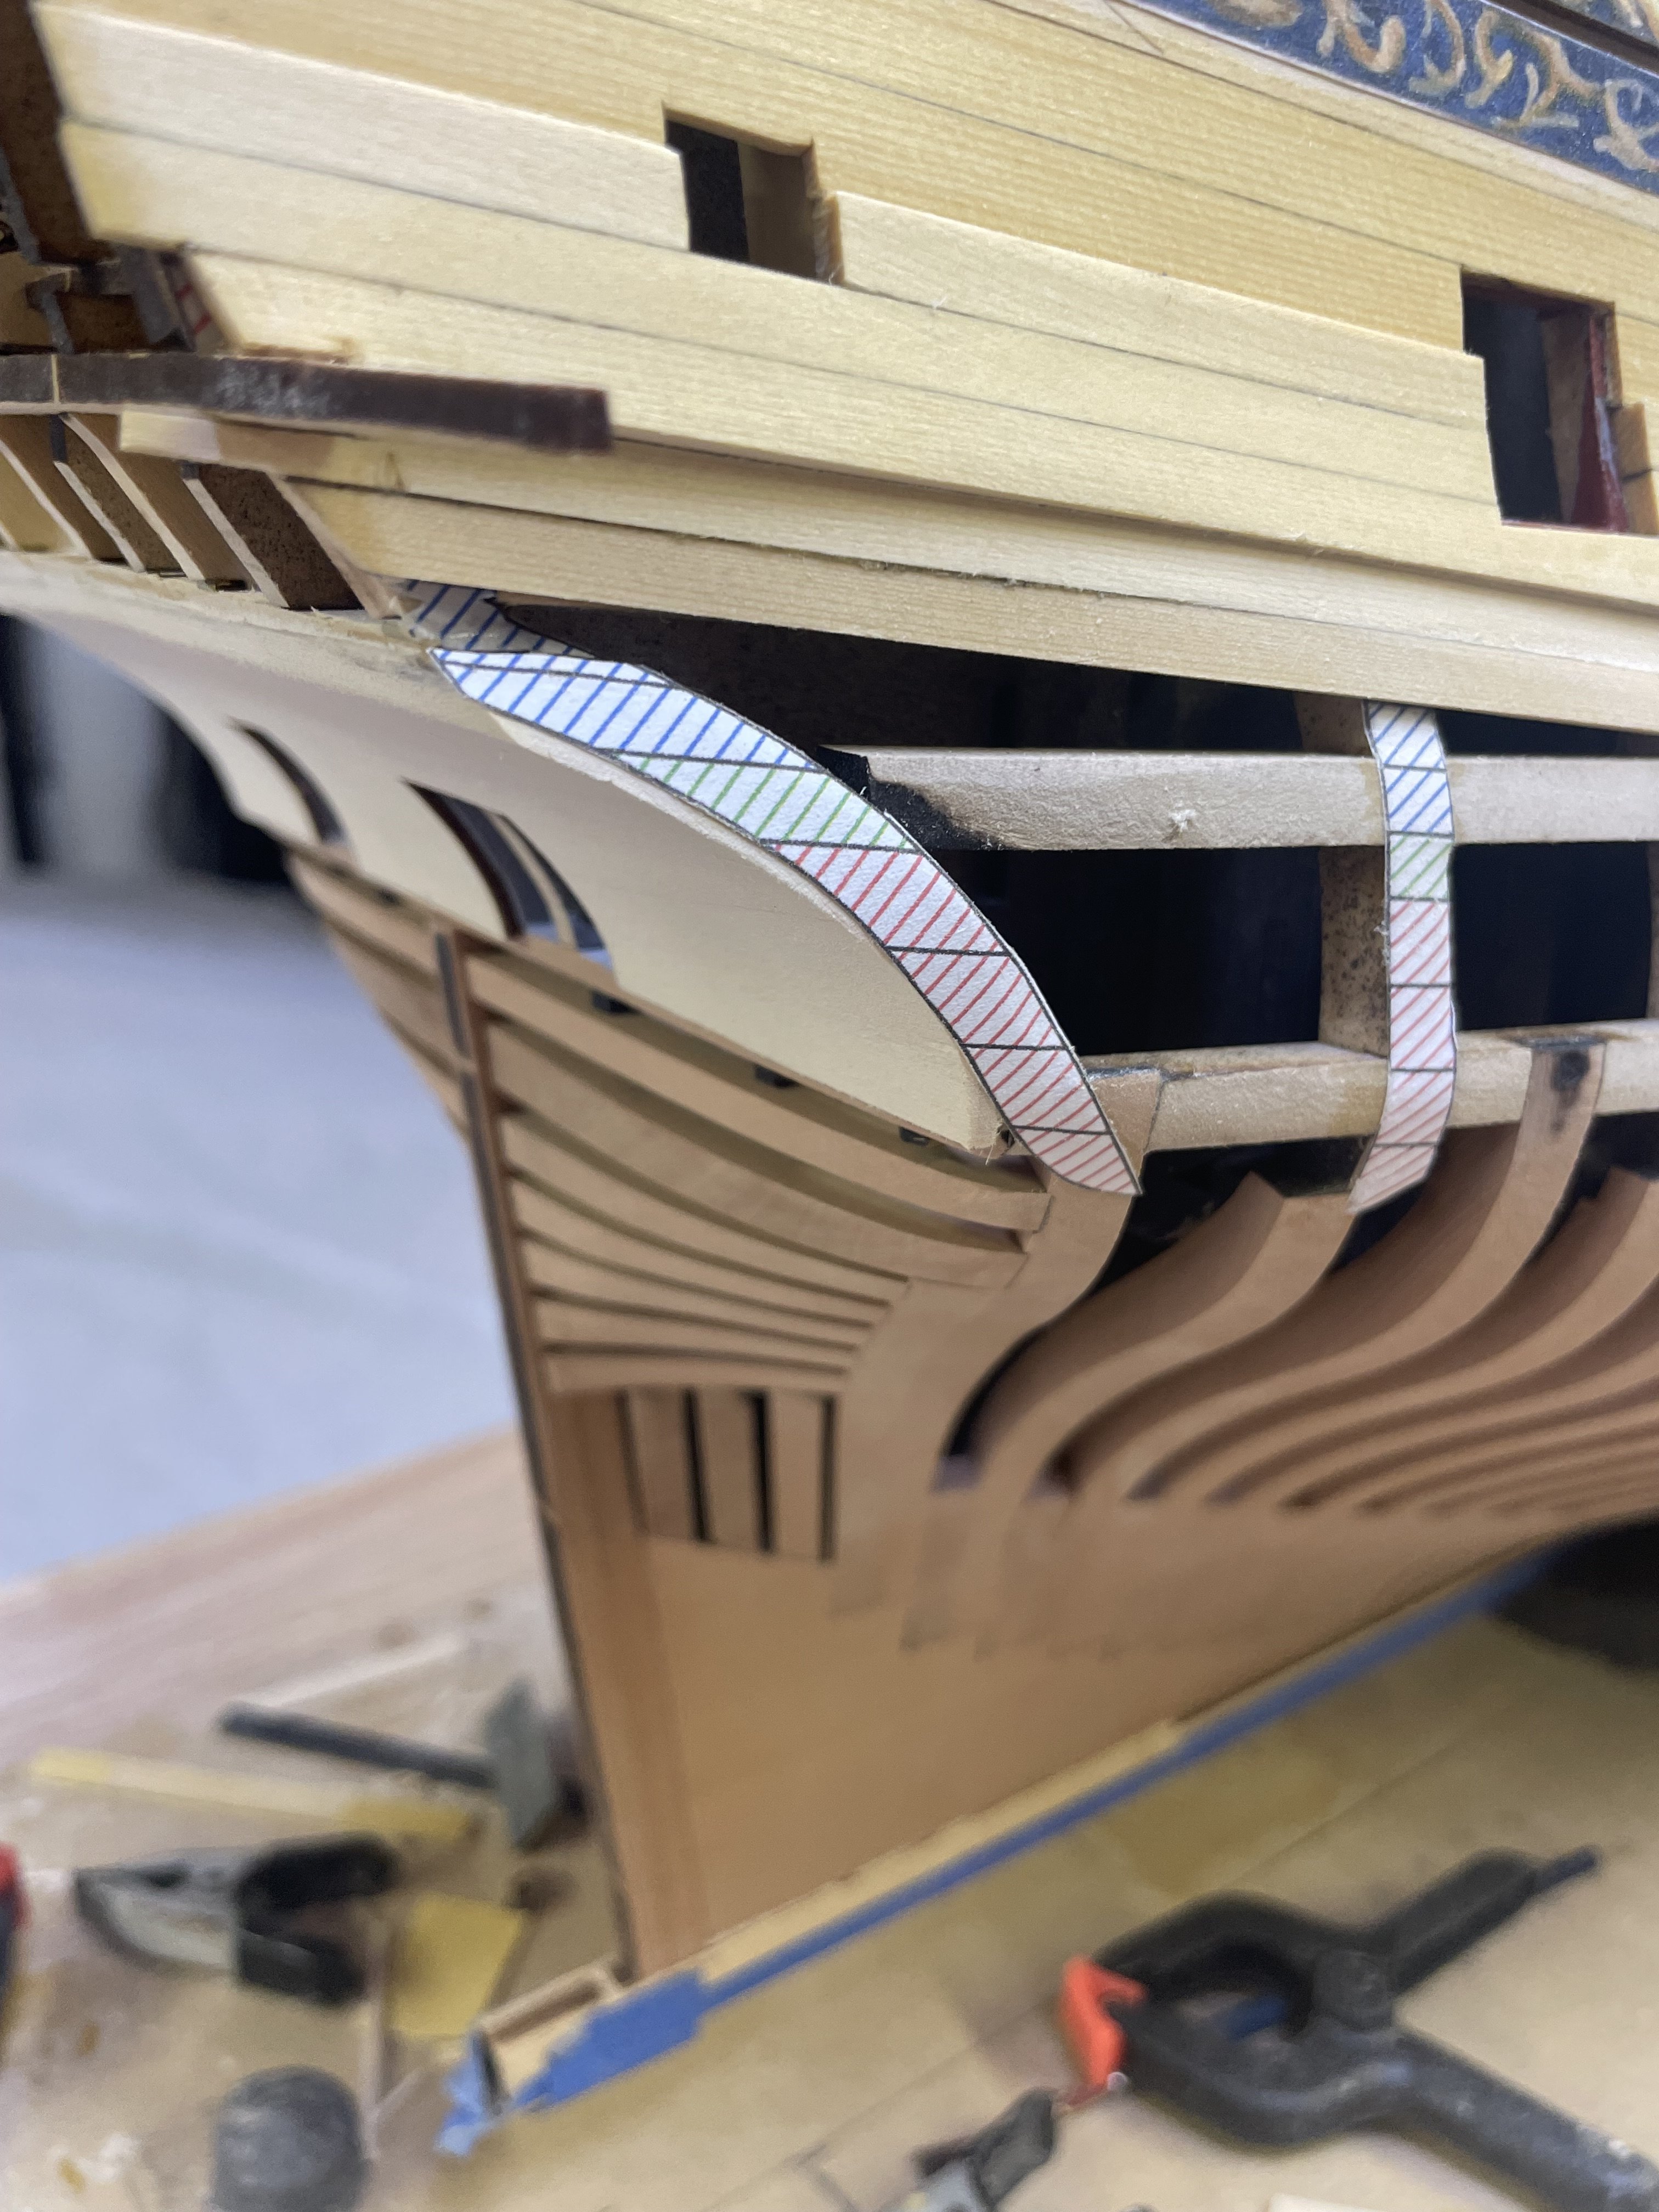
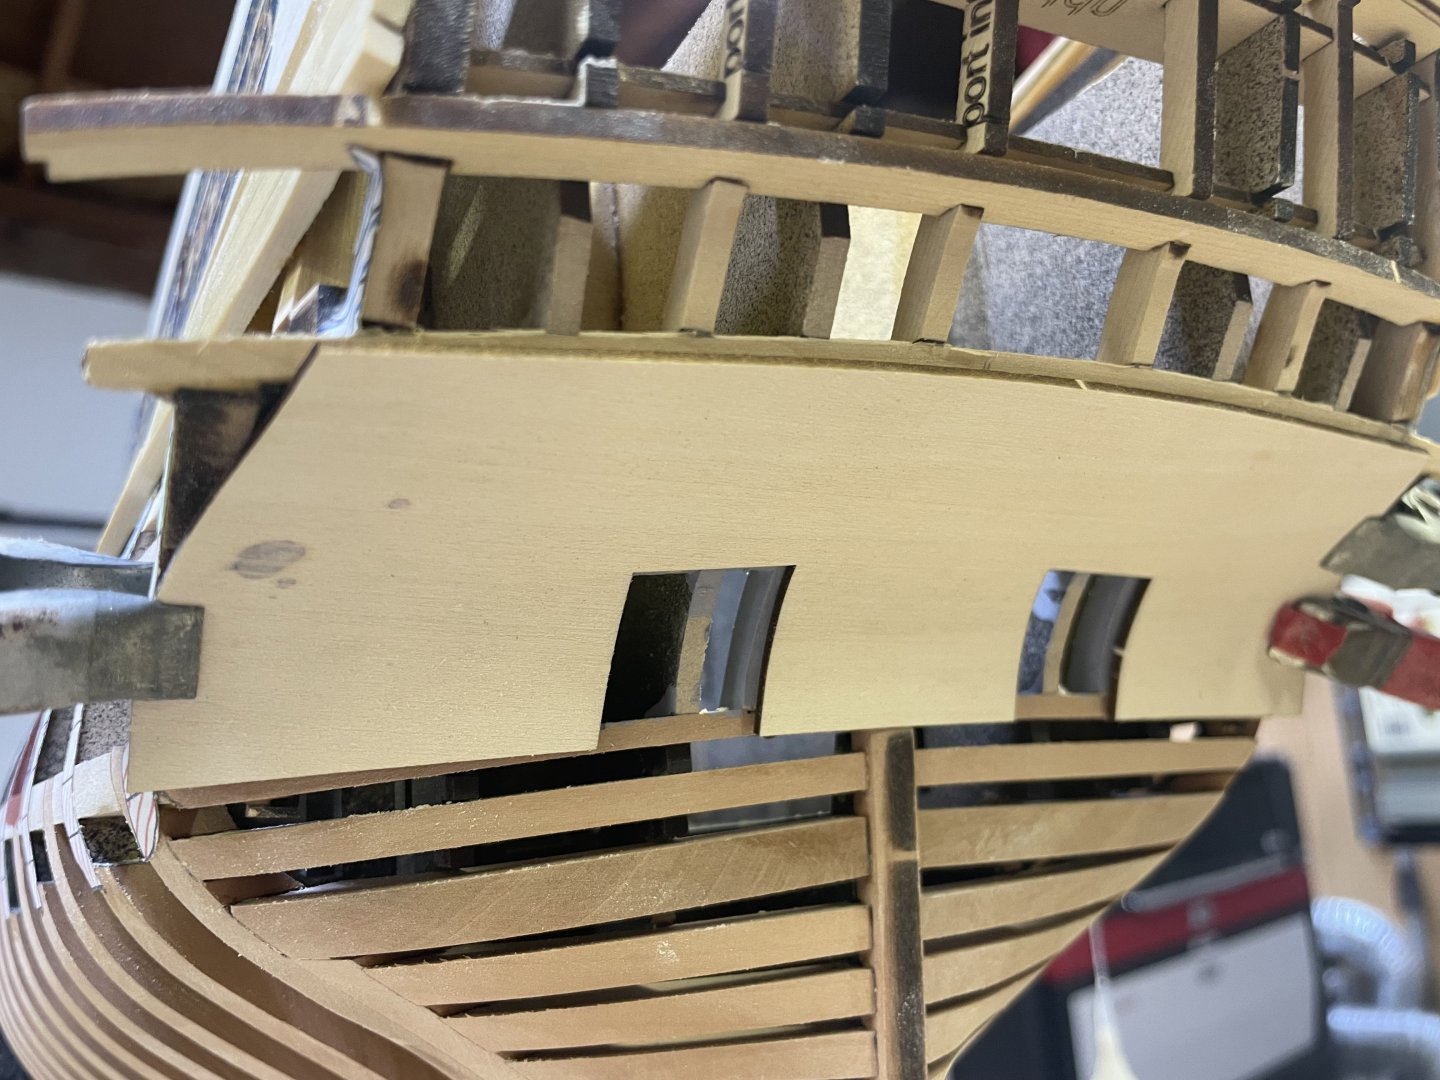
Progress continues and today I got the lower counter glued on and faired in so I could finish the planking belt on the stbd side. The lower counter is laser cut with some extra material on it. I centered it over the gunports and positioned it so that it was sitting level on each side then clamped it down once it’s in place it can be glued from The Backside with CA, just don’t glue to the jig pieces! I also wetted the inside face of it so that it wanted to curl in the right direction. Once it’s in place you can see where things need to be sanded. I also trimmed the lower part of the counter about halfway up The wing transom, I’m going to take an additional 1/32-3/64th off so the mounding can rest there. Once completed the counter should have a nice curve into the outboard stern framing and the aft cant frames once this is done the last planking strip can be added and work can resume on the last few belts. I finished up the last remaining lower planking belt before the main wale. I will start on the black strake tomorrow and finish with the main wale and 1-2 planks below that. Also testing one of the QG’s and the printed drop, which is actually going to be boxwood.


- 396 replies
-
- 21
-
-