HOLIDAY DONATION DRIVE - SUPPORT MSW - DO YOUR PART TO KEEP THIS GREAT FORUM GOING! (83 donations so far out of 49,000 members - C'mon guys!)
×


scrubbyj427
-
Posts
1,690 -
Joined
-
Last visited
Content Type
Profiles
Forums
Gallery
Events
Everything posted by scrubbyj427
-
 Hi Clare, thanks for the info, surprised they don’t sell them individually. Unfortunately I need a lot of it and not much of the others.
 -
That looks really good!
-
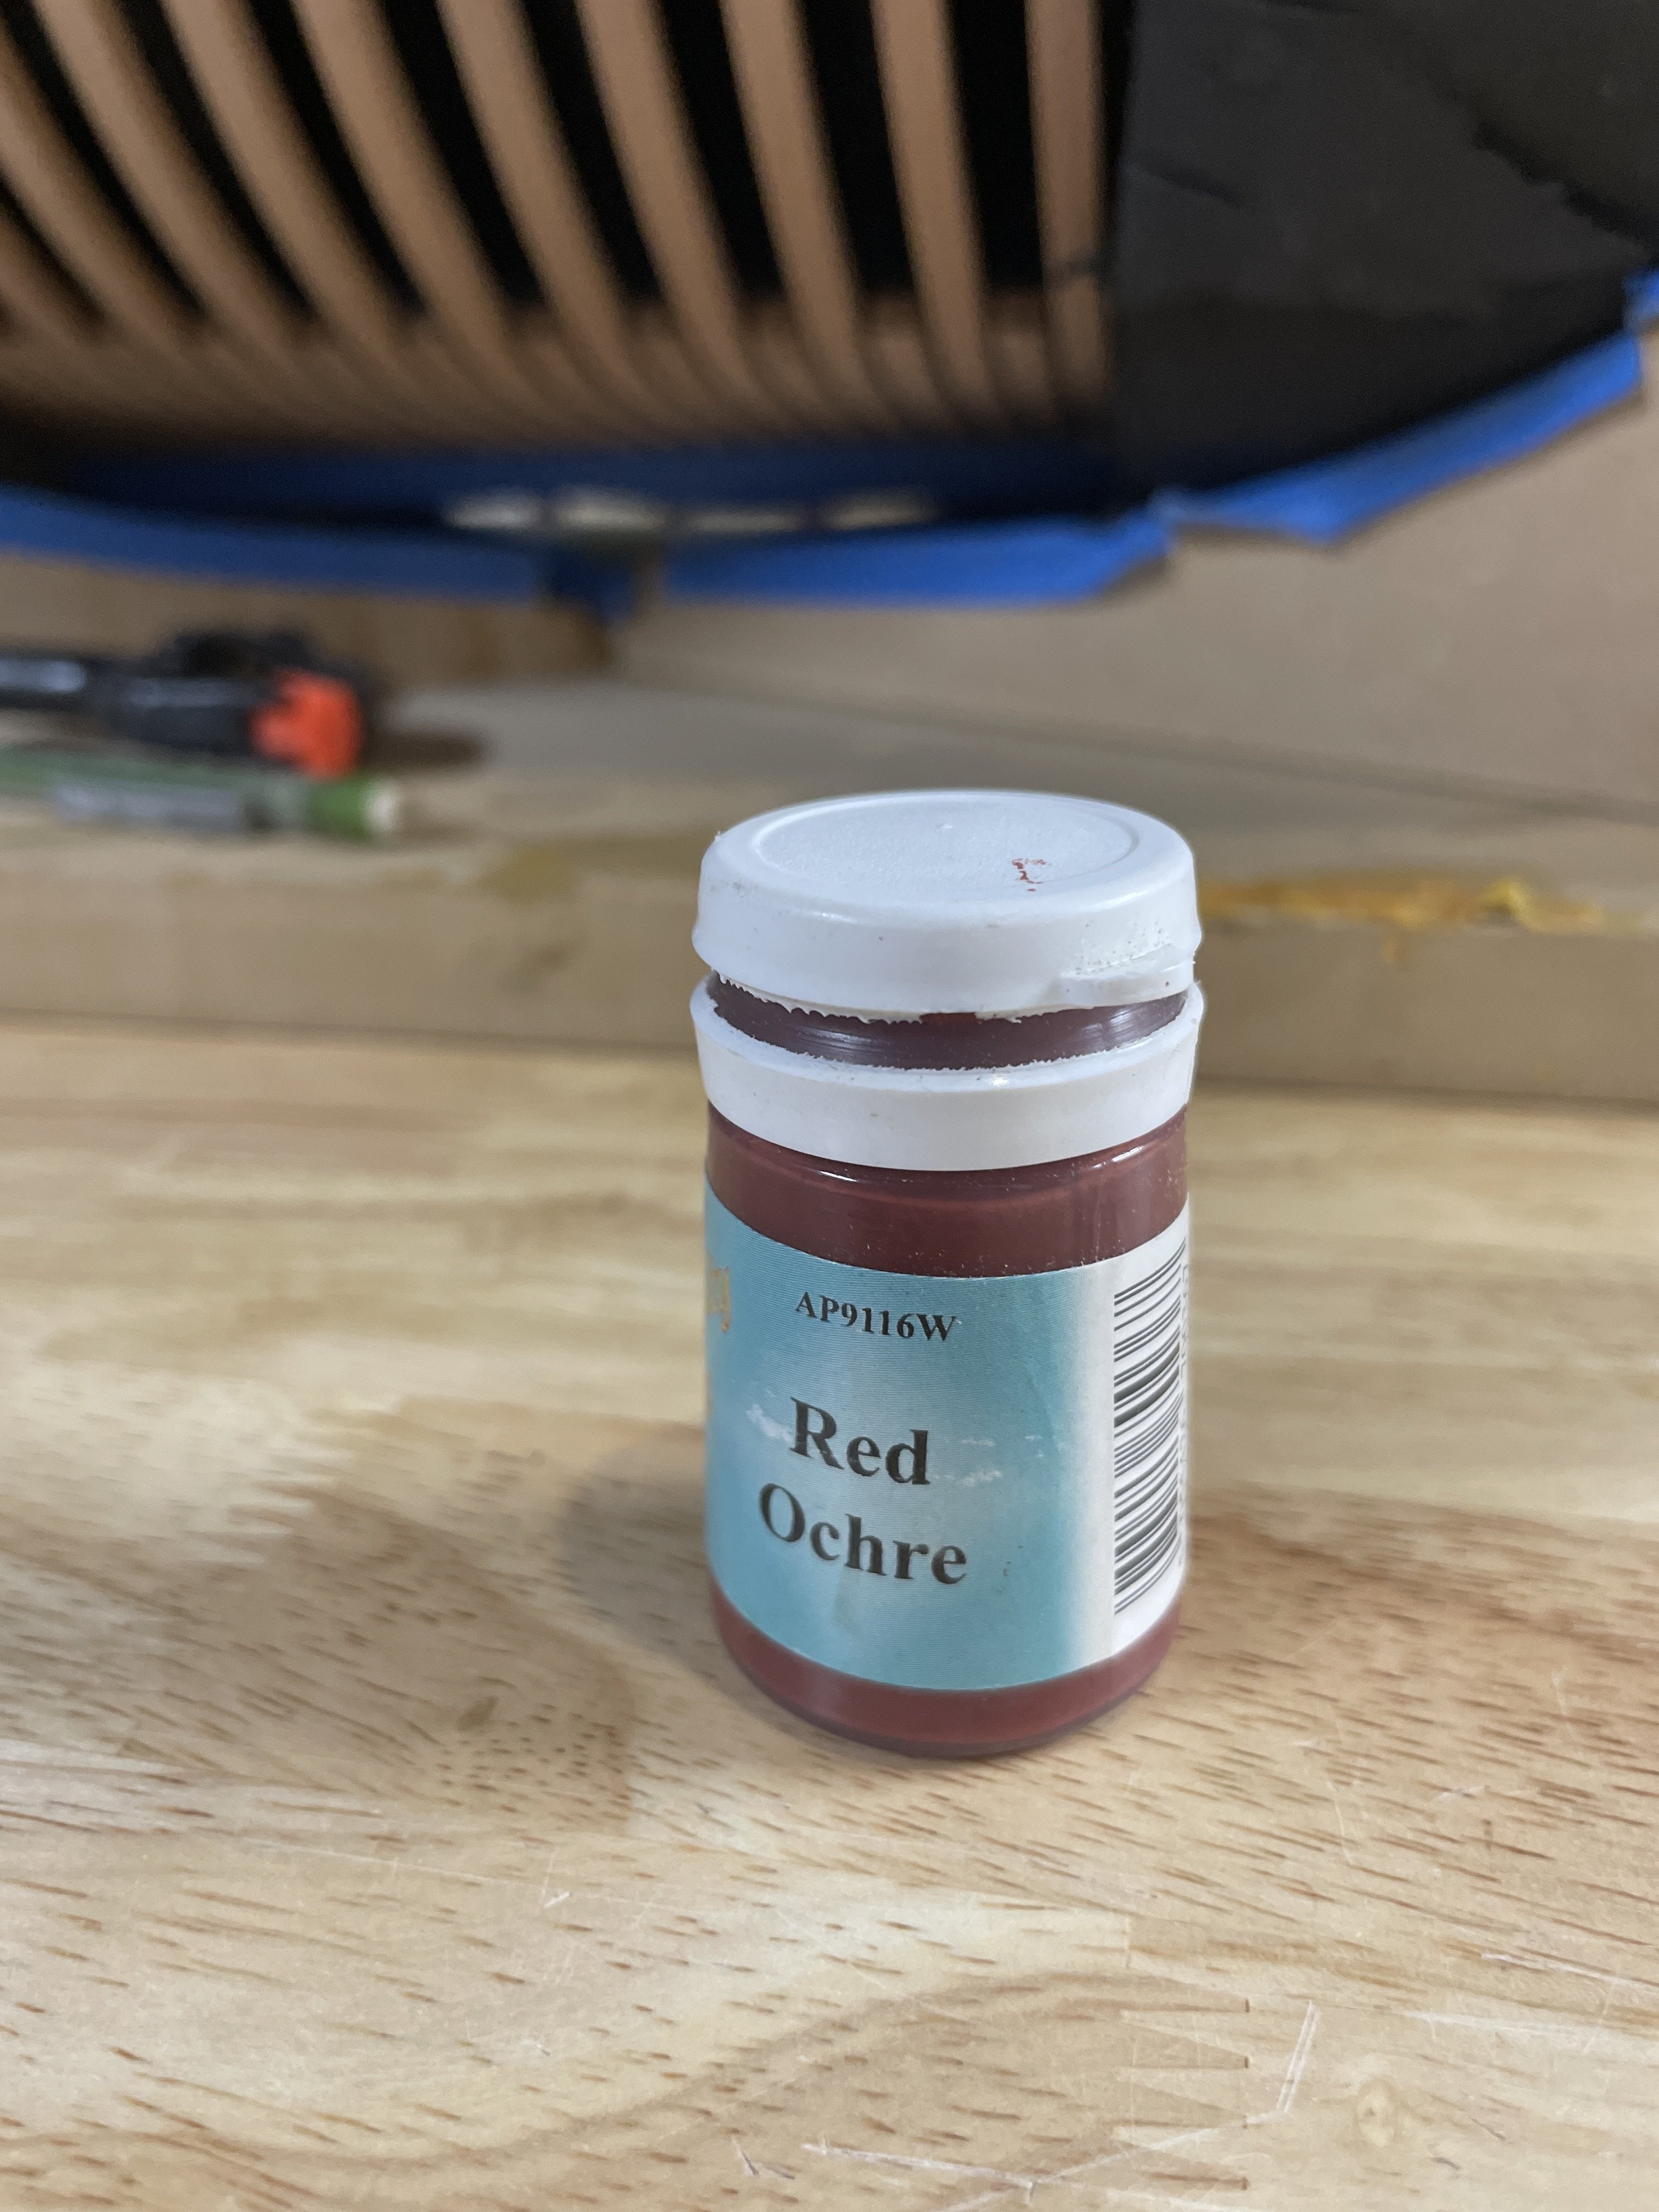
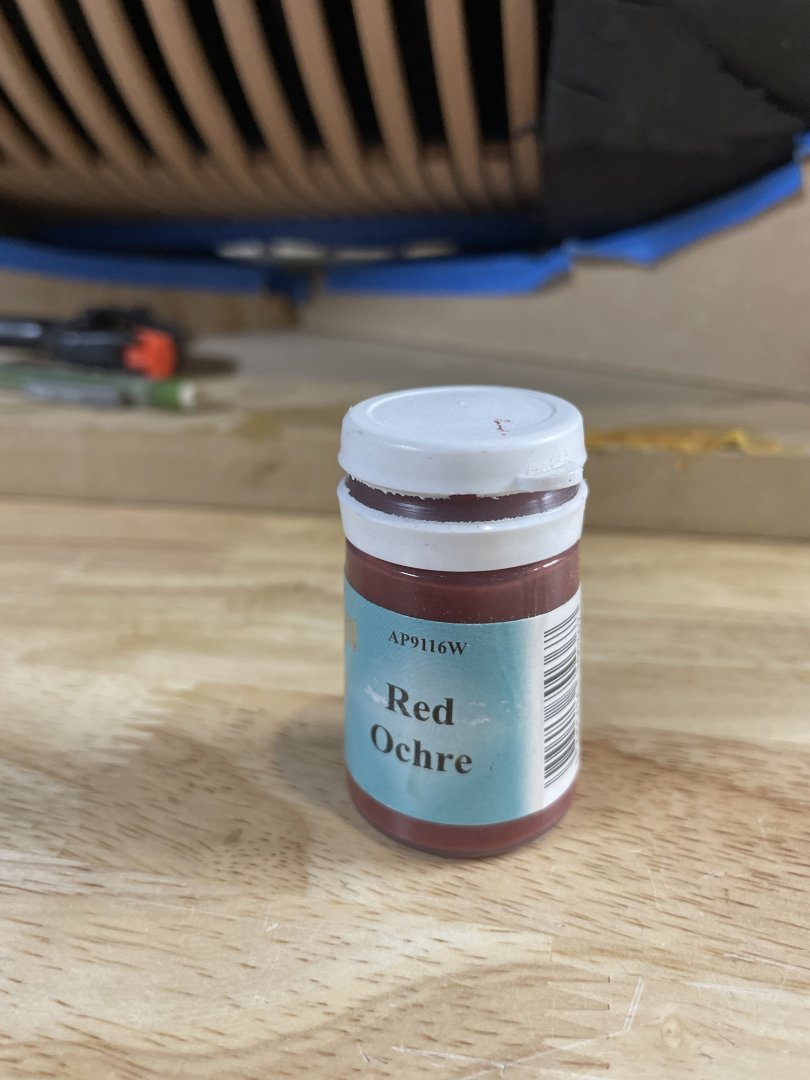
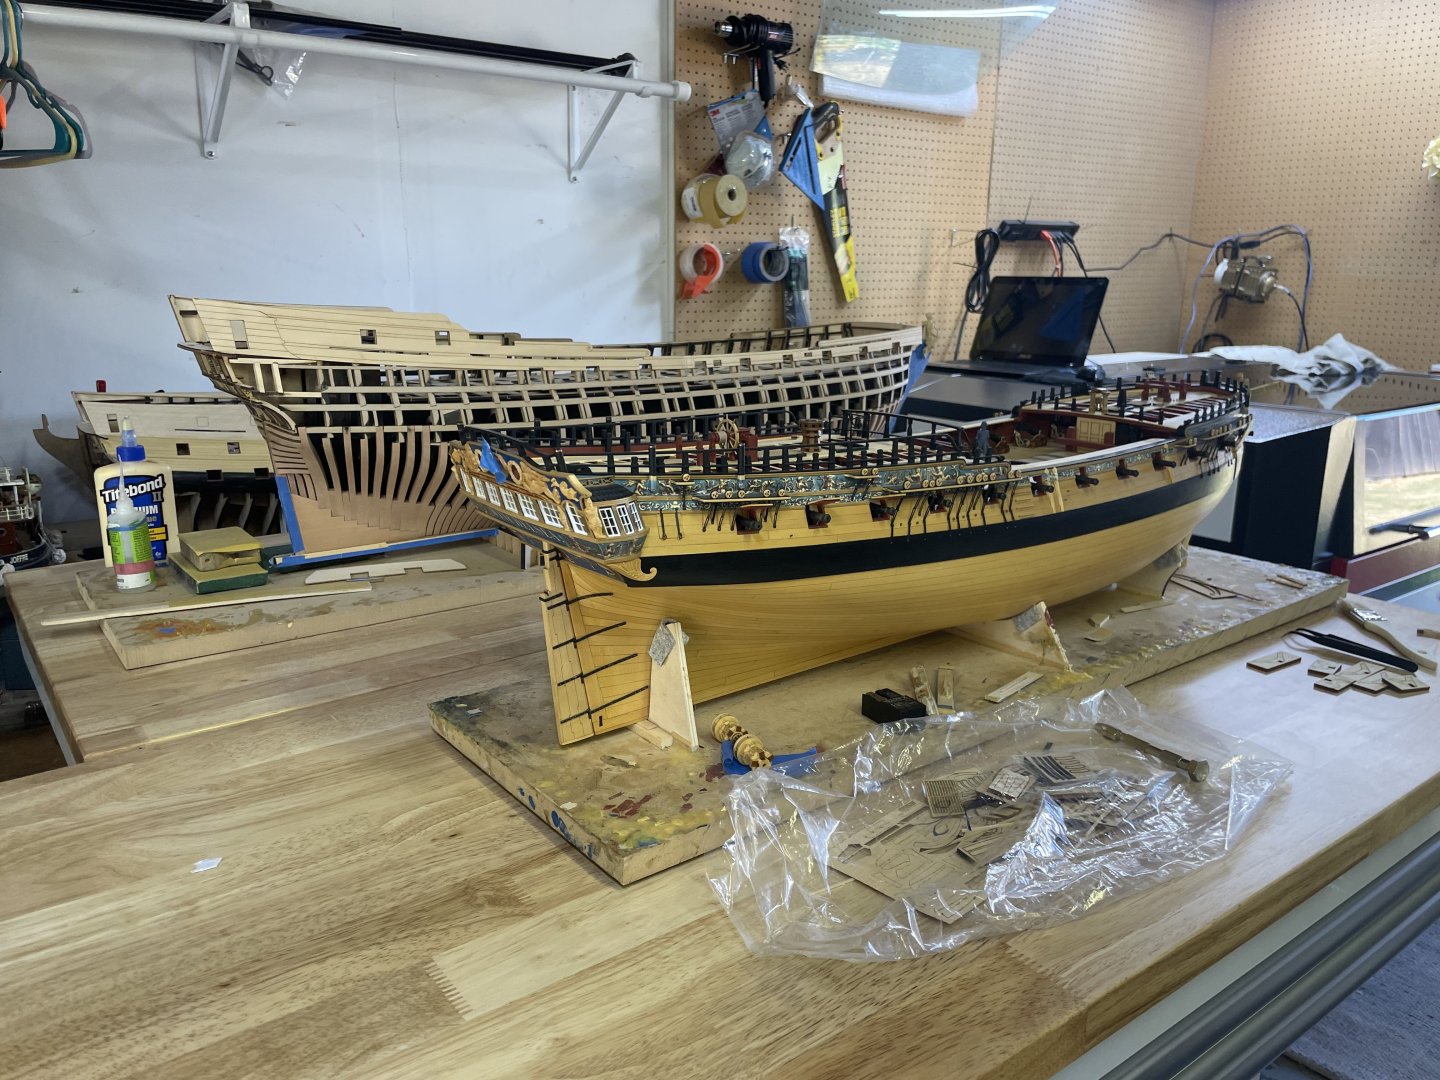
Thank you Dusan, im looking forward to it as well, I should have an update on those today. Hi Ben, I used the Caldercraft red ochre just like I used on Winnie, I’m not a fan of bright reds and prefer an older look. In fact I’m even considering adding a little age To Portland as seen on some of the contemporary models. Will see. As for the wales, i will be doing them straight just like the Bristol model and the POB Portland. Ive been thinking about templates for the port surrounds since I started designing the model and I still am. Like the Winnie I just eyeballed them on the POB Portland and they turned out nice. But I’m still thinking about how I could make a template to do this. Stay tuned.
-
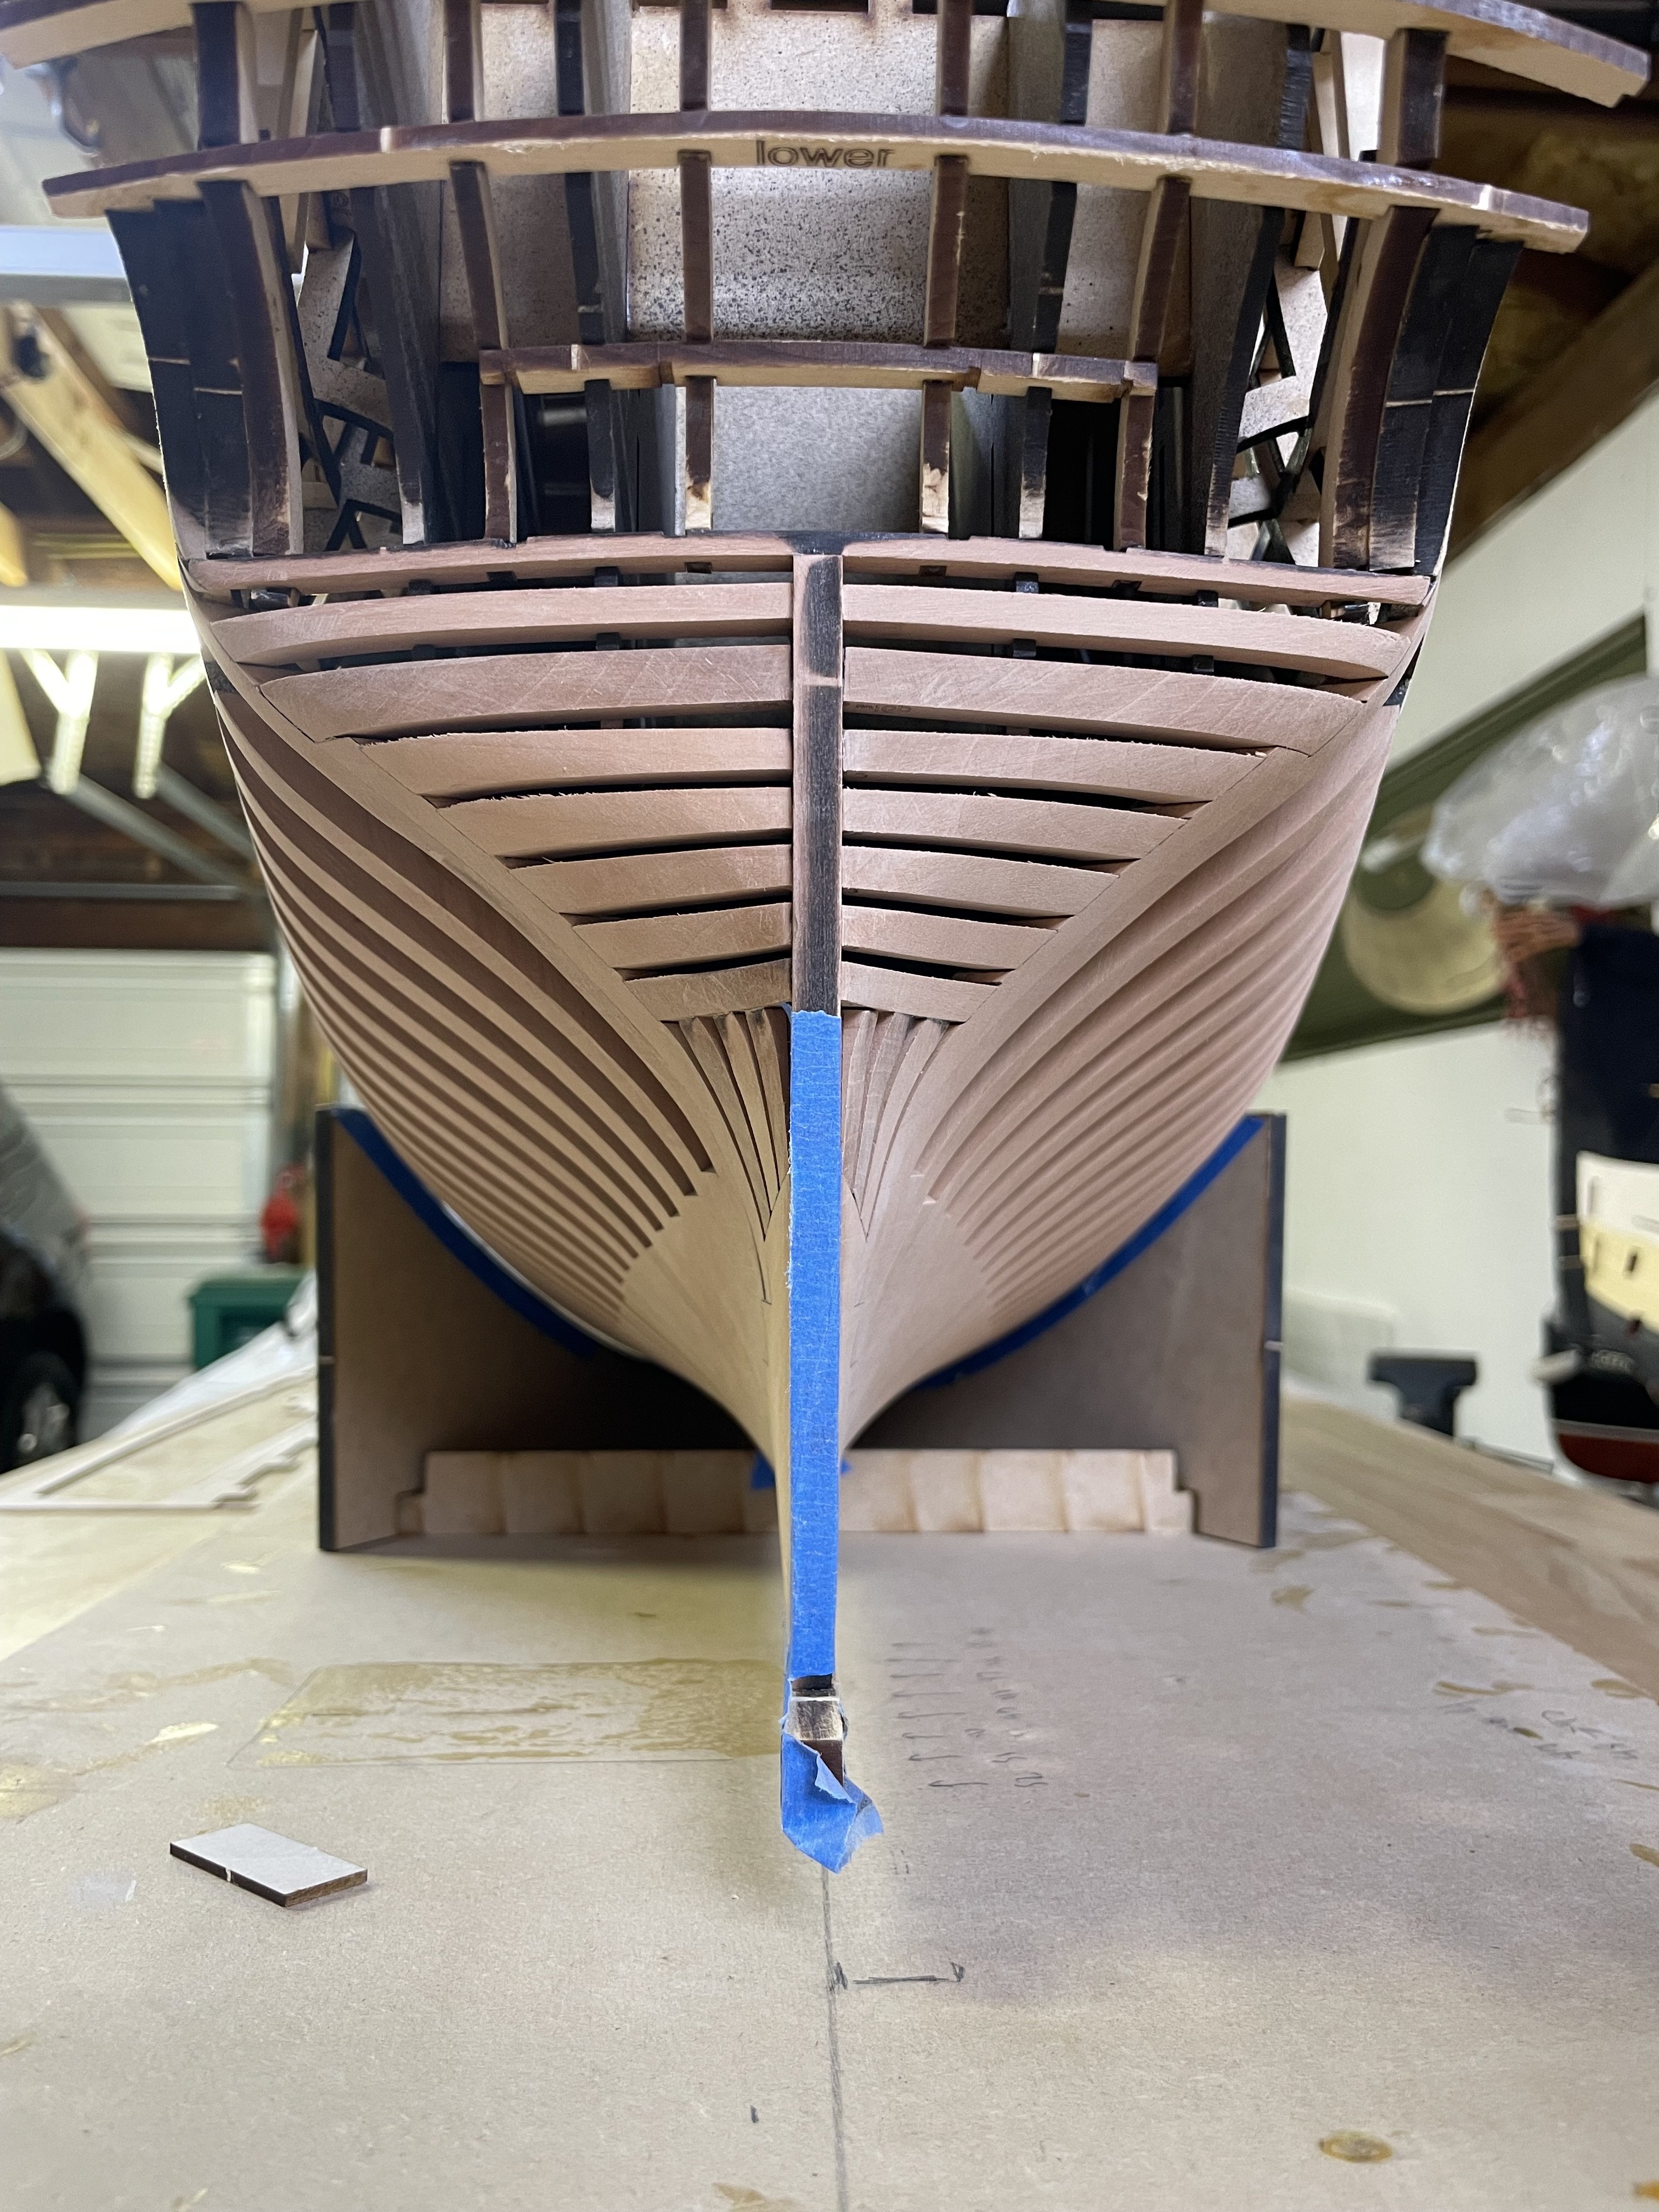
Officially underway on chapter 2 now, I have all the Gunports primed, block sanded and painted. Tomorrow I will start milling wood and begin planking from the main wale up.


- 396 replies
-
- 28
-

-

-
Shaping up to be a really nice kit. Well done. Are you not planning to leave some of those beams exposed though?
-
Thanks guys. I saw the shipwright shop but I was hoping to avoid shipping and find something on this side of the pond. Looks like I have no options! Thank you!
-
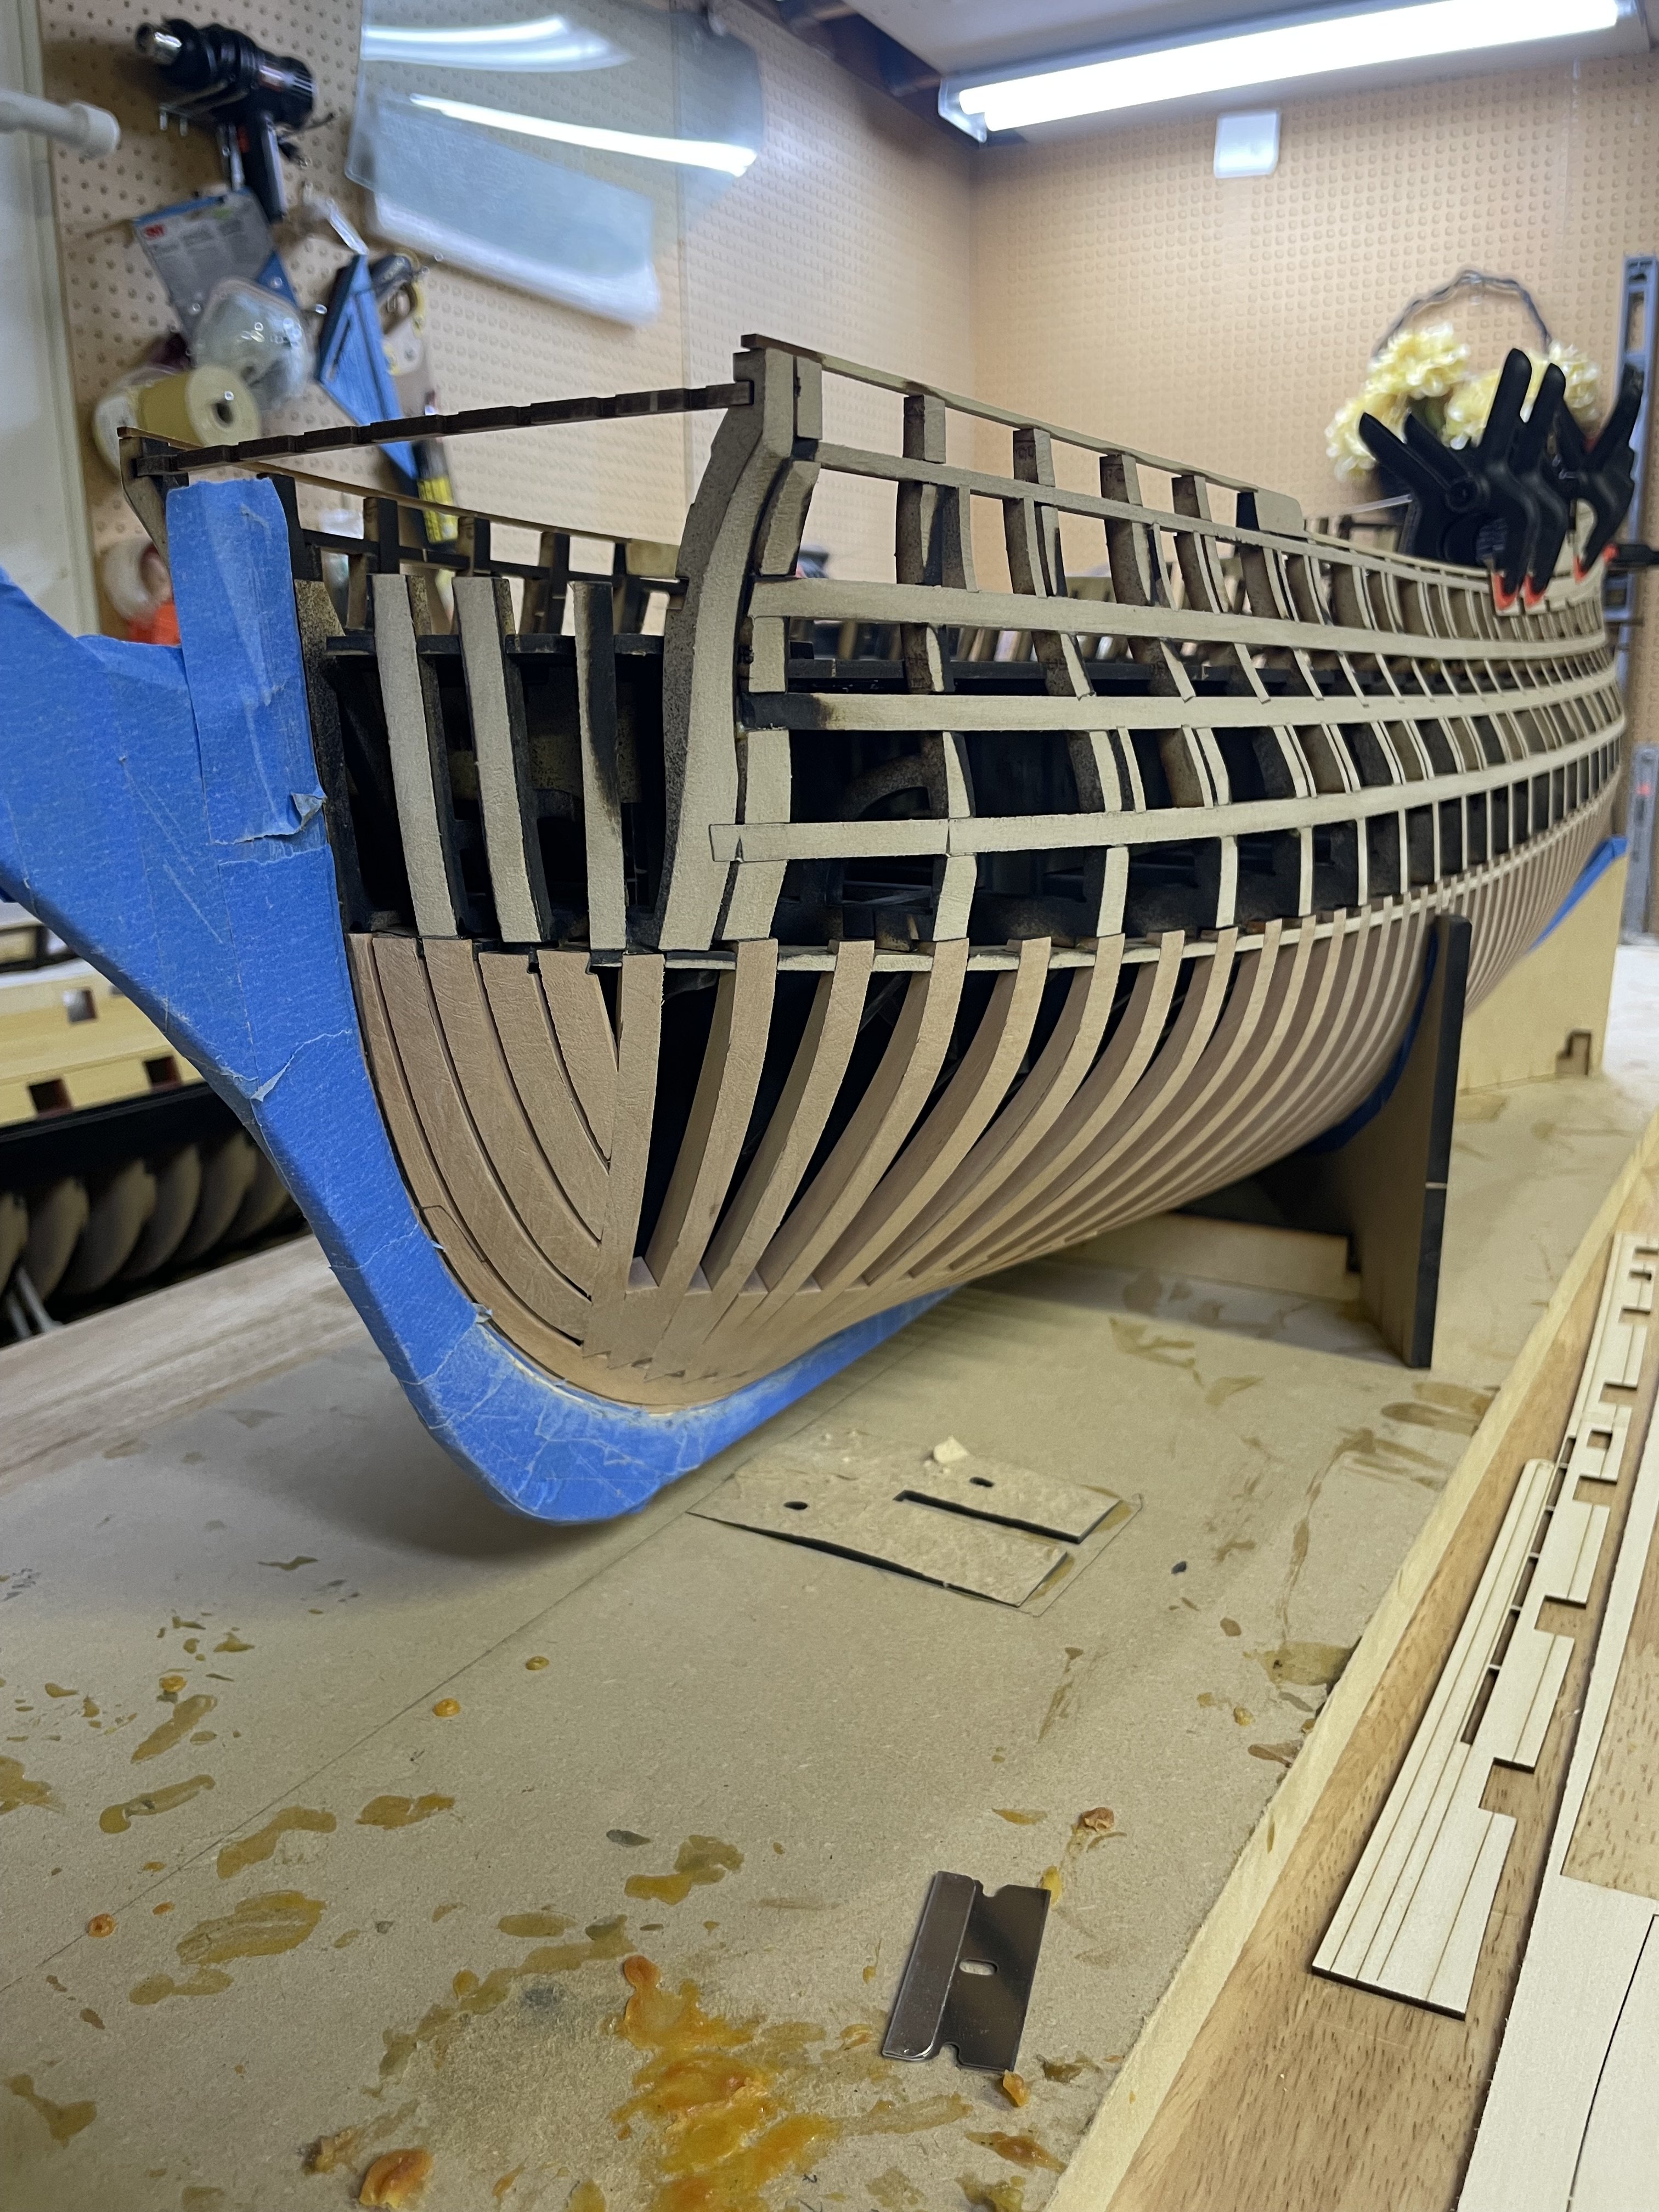
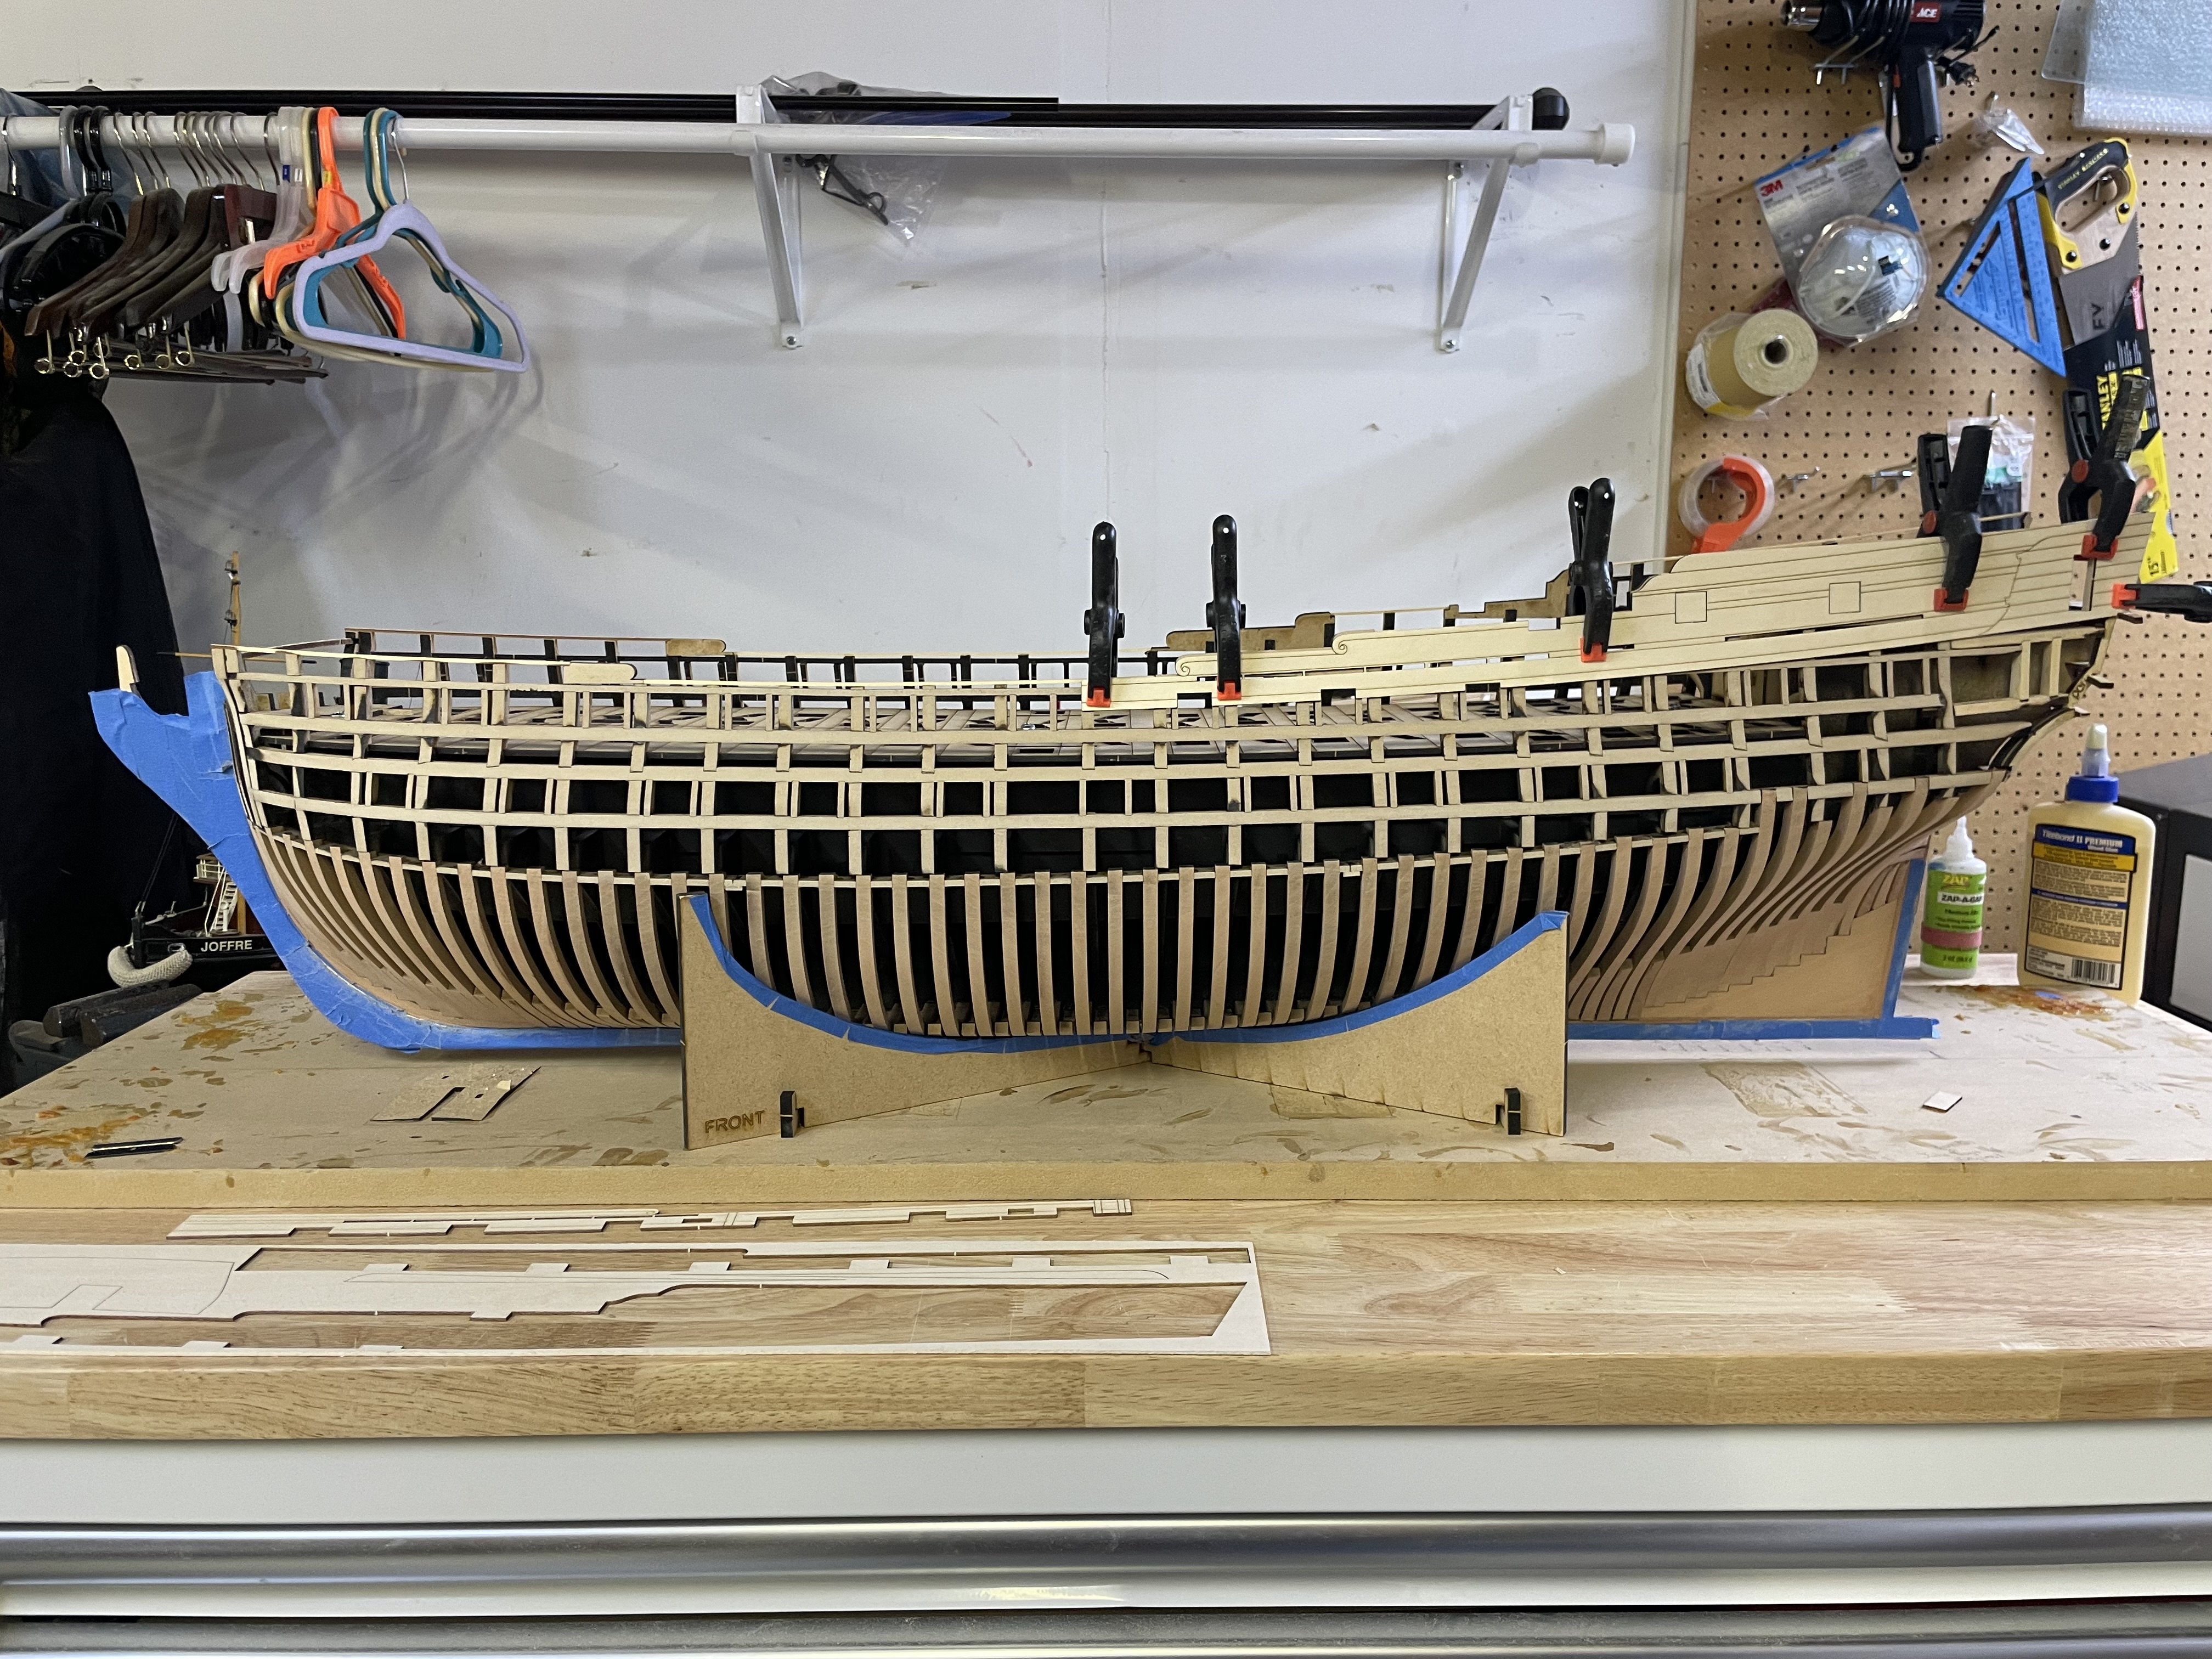
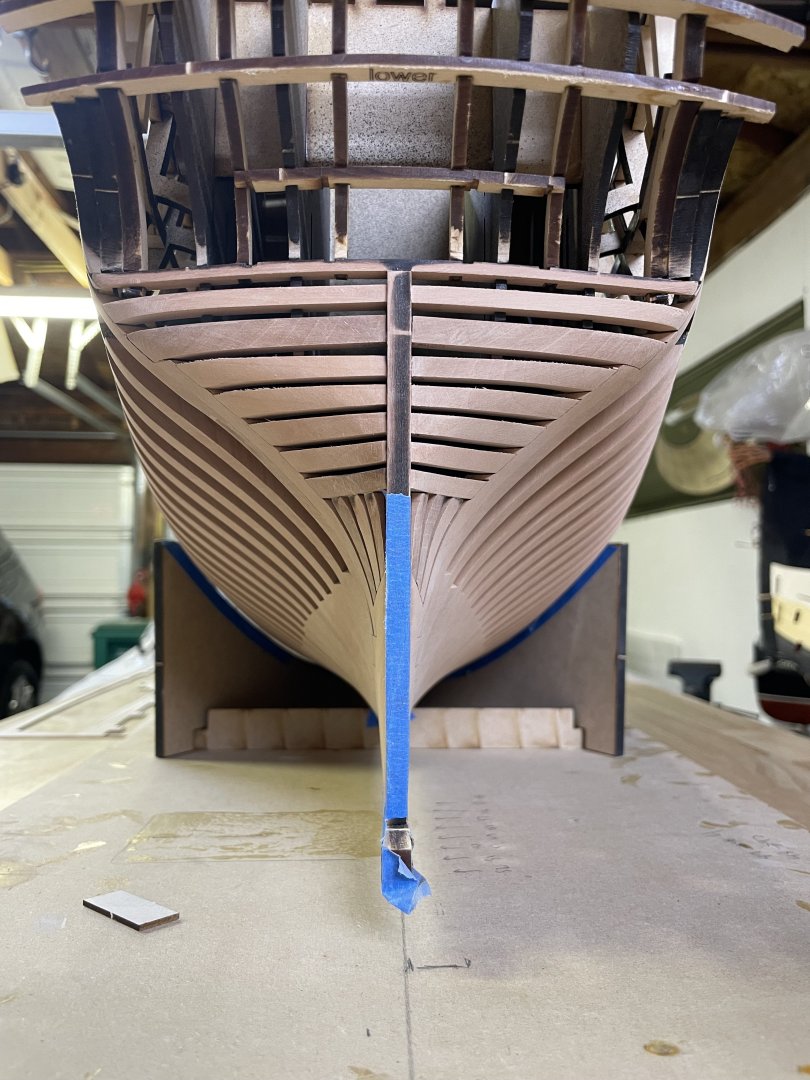
Today I got back to work on Portland, I faired up the lower counter and added some high build primer on all the gunport frames. I used a solvent based high build primer to seal up the MDF, it soaked it up like a sponge. I’ve always been a little concerned about swelling when adding water based products to MDF, the primer also makes sanding and finishing the ports nice, it fills small gaps or joints in the port framing. Ive also been working on planking guides that will attach to each bulkhead and assist with spilling, more on that soon.


- 396 replies
-
- 19
-
-
-
Has anyone found something comparable/identical to caldercrafts red ochre? I can’t find any of it in the states and Cornwall is out of stock. Would be nice to find a perfect substitute. Thank you in advance for any leads. JJ
-
Planking looks great Frank! Almost there.
-
Interesting. I’ll definitely be following. May build unrigged and laser cut the whole project. Im going to read up on her more
-
What size is she at 1/48? May be a fun side project.
-
MONTAÑES by Amalio
scrubbyj427 replied to Amalio's topic in - Build logs for subjects built 1751 - 1800
What amazing work! Stunning model! -
Great work Ben, those Hawes pieces look good and well gapped. They sand down pretty quick with the oscillating tool.
-
Great start to the framing Dusan! The perpendicular frames move very quickly, especially when you take all the char off beforehand. Looking forward to seeing the cant frames!
-
Very inspiring. Can’t wait. Perhaps background checks should be done on customers lol.
-
Wow. For real? Who does this? It’s not like your rope is going to break the bank.🤦♂️
-
Incredible work of art!
-
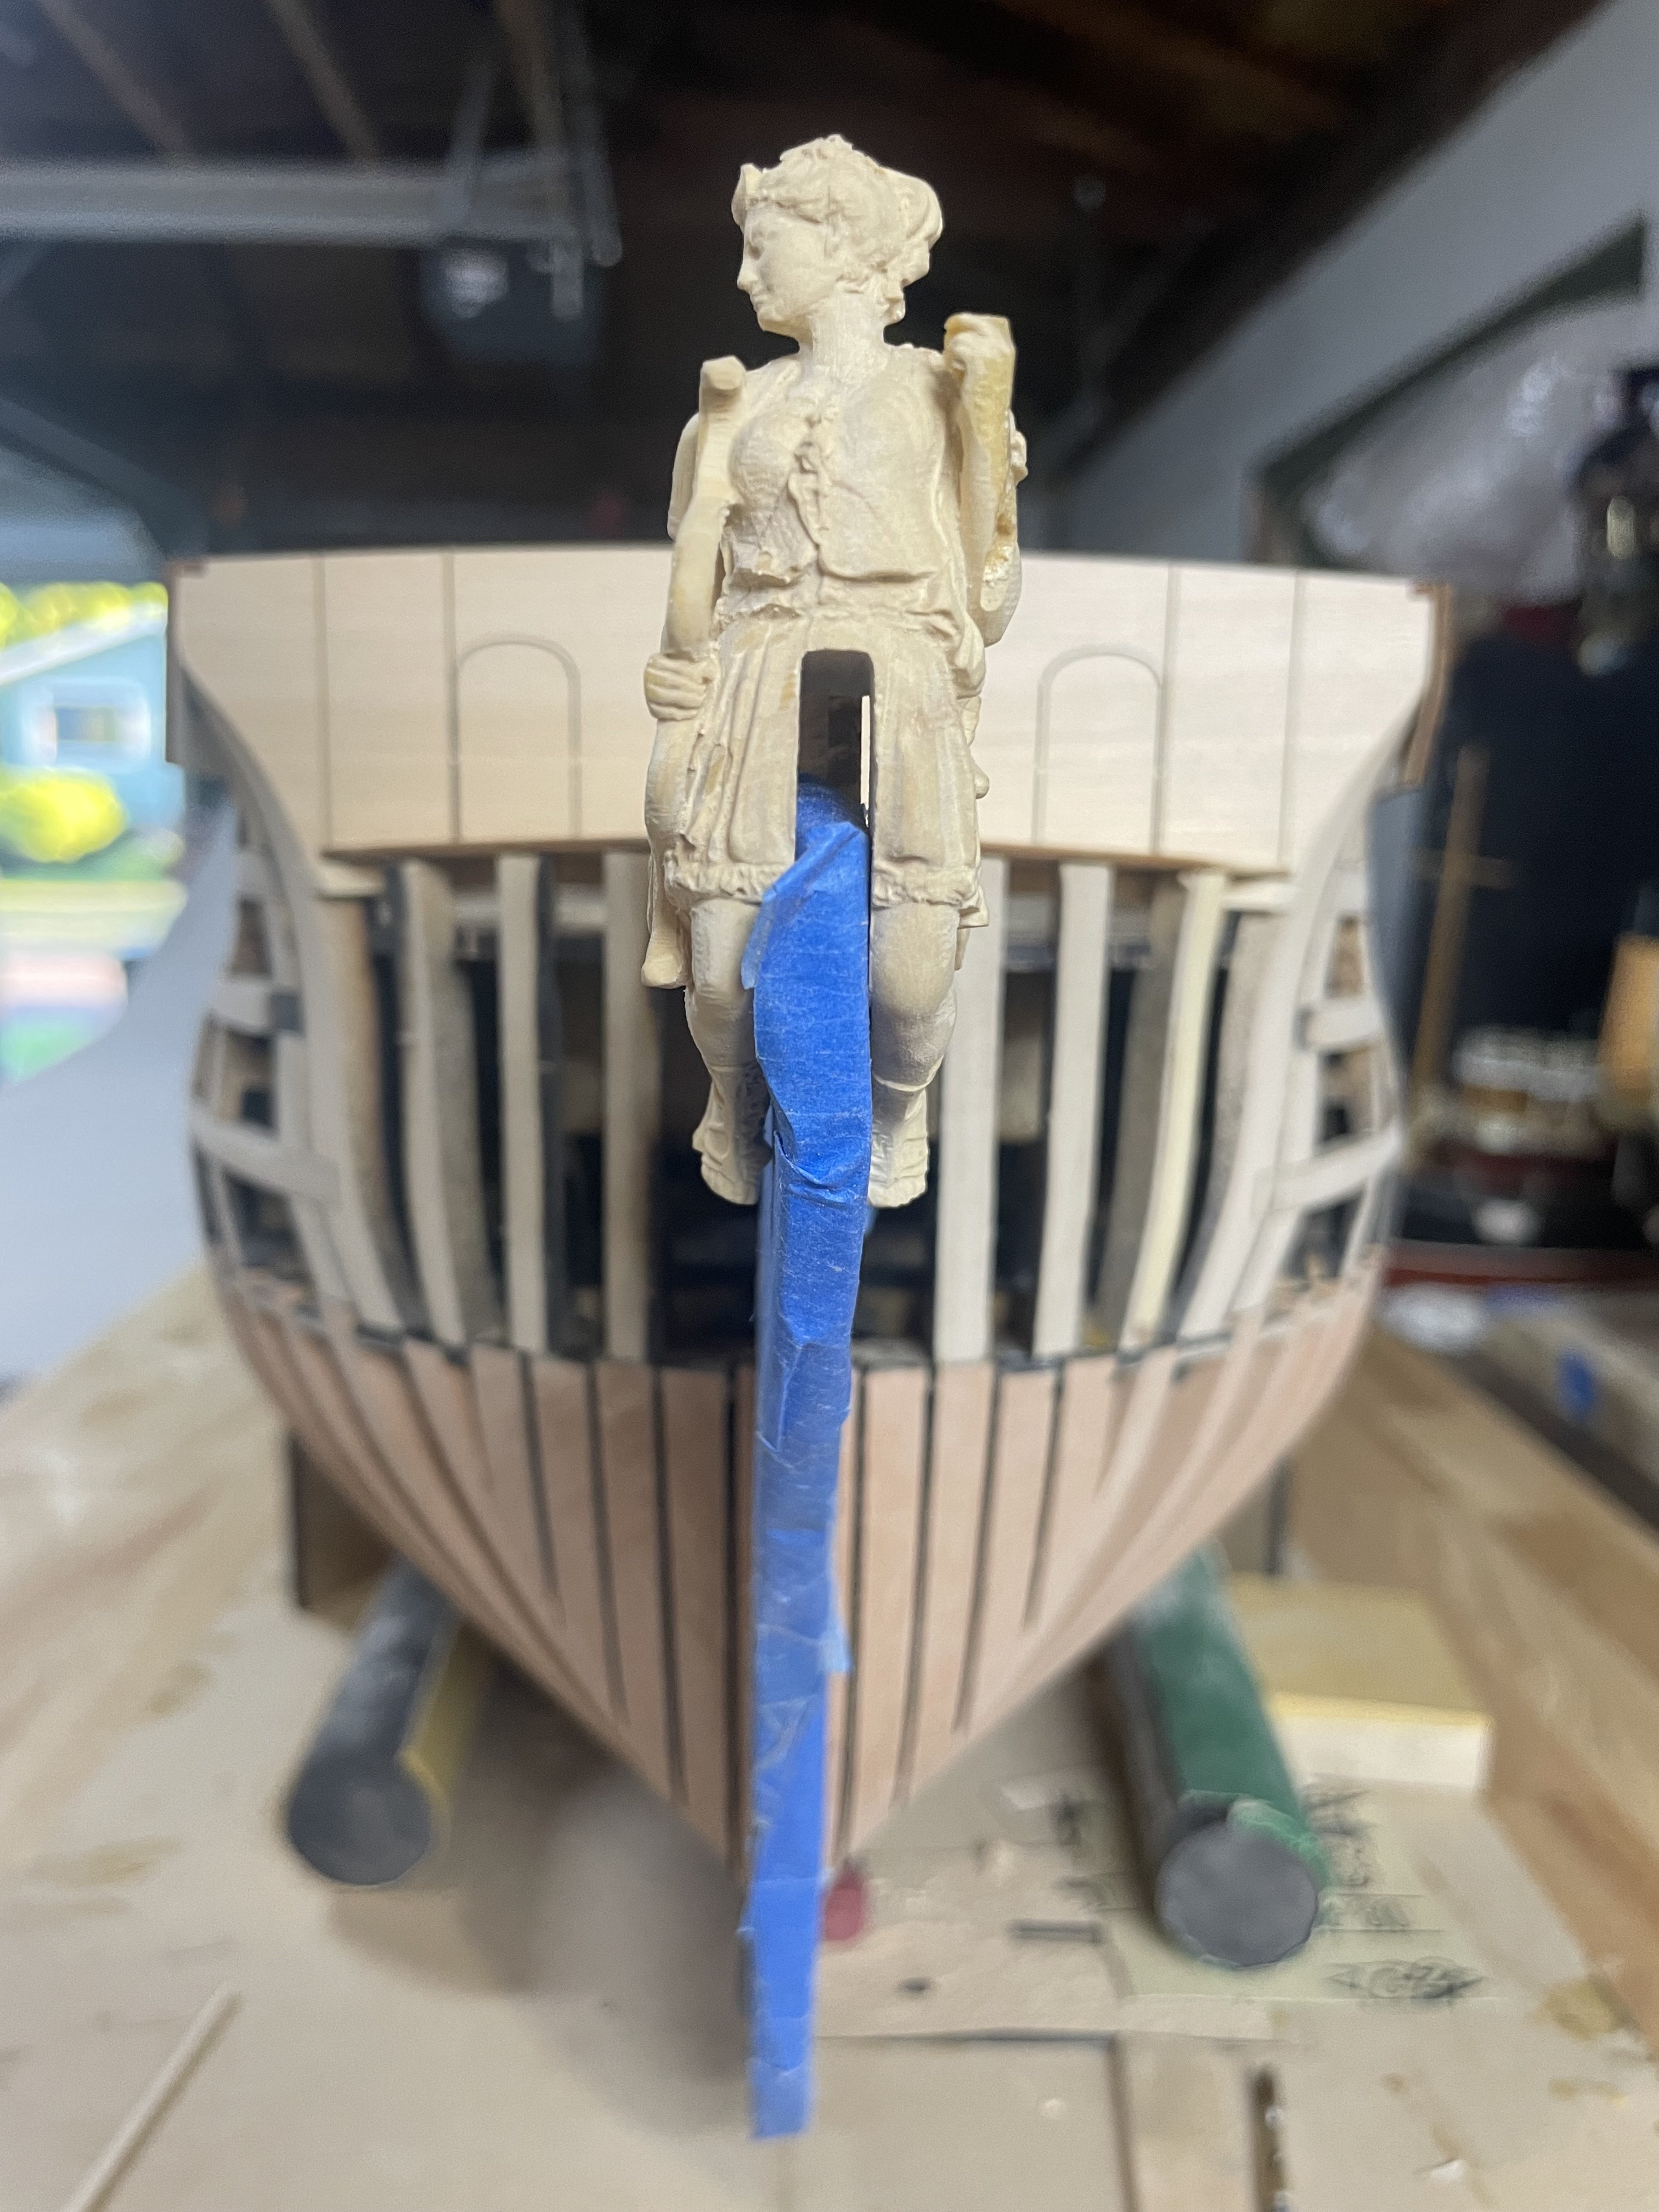
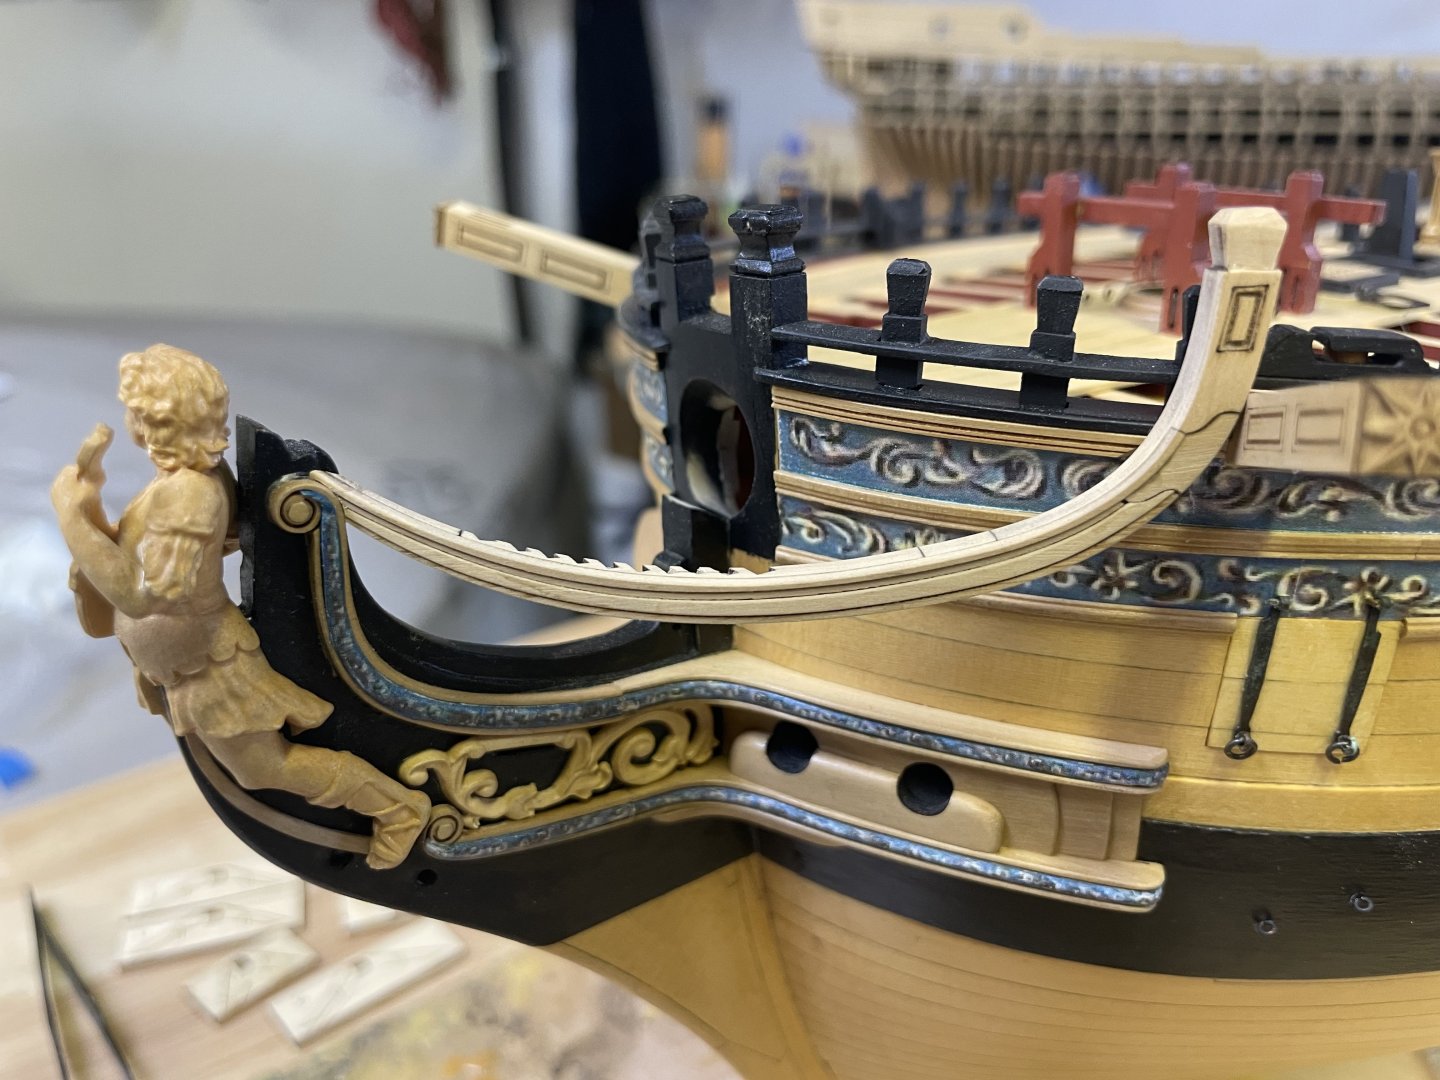
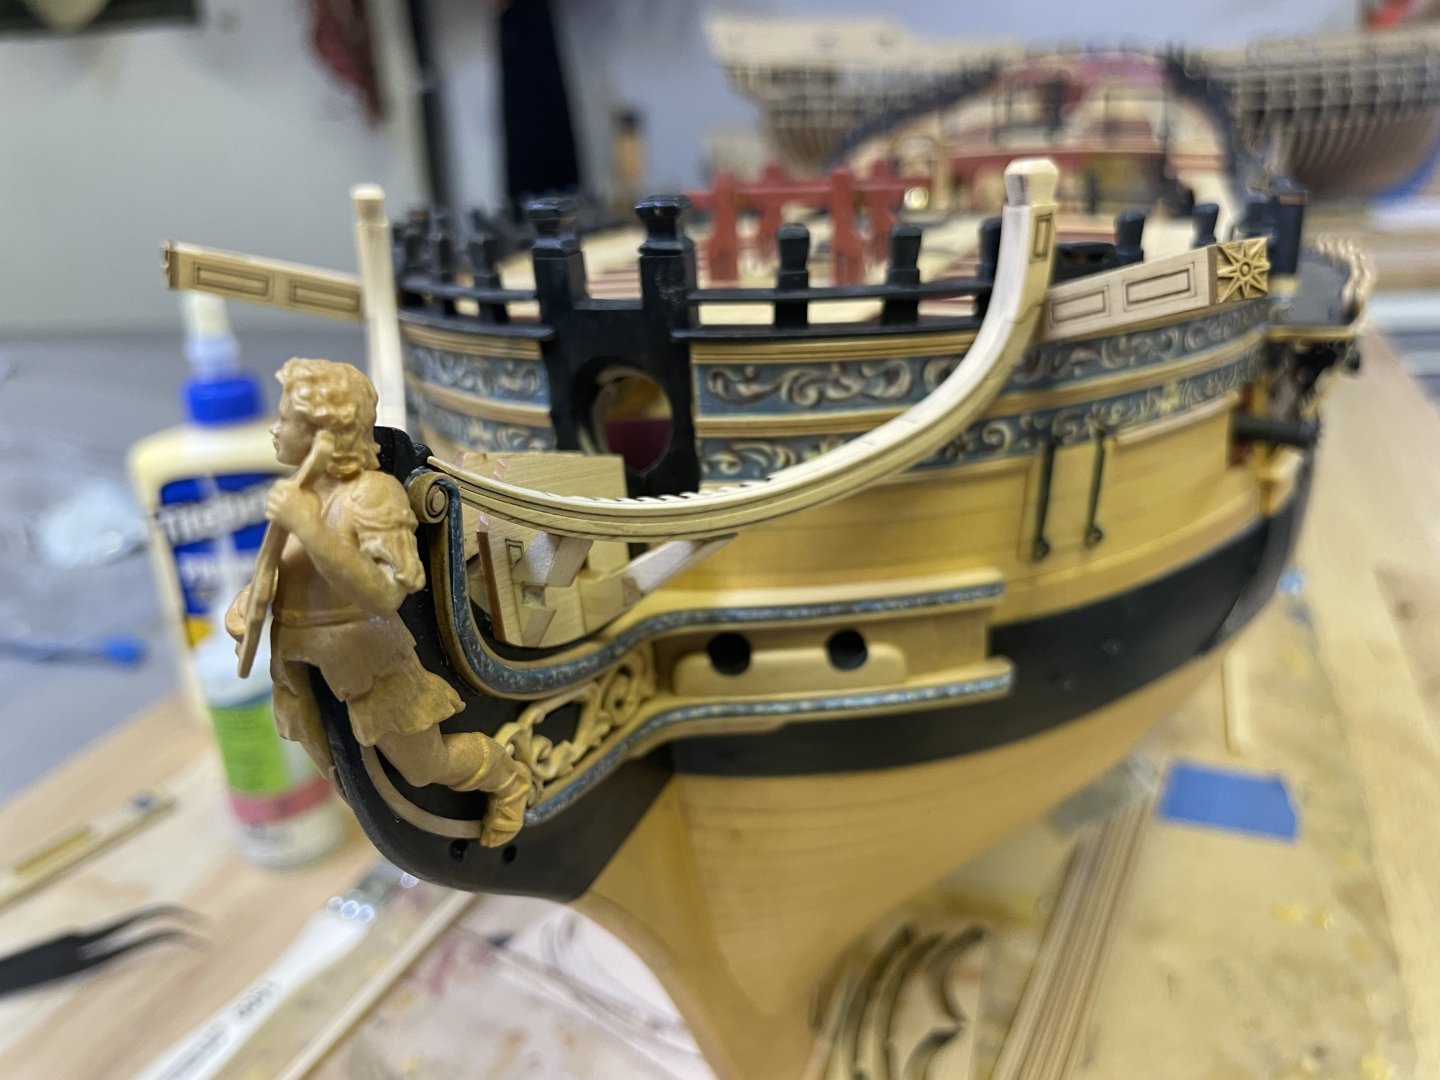
Some forward progress on chapter 12 tonight, I began fitting the headrails and head timbers. Precision work but I think it’s starting to fit pretty well. Had to add some material to one side of the aft head timber but it will get painted so it should work out.
-
Yes I’ll be using AYC for the planking. Probably do the wales the same as the POB model.
-
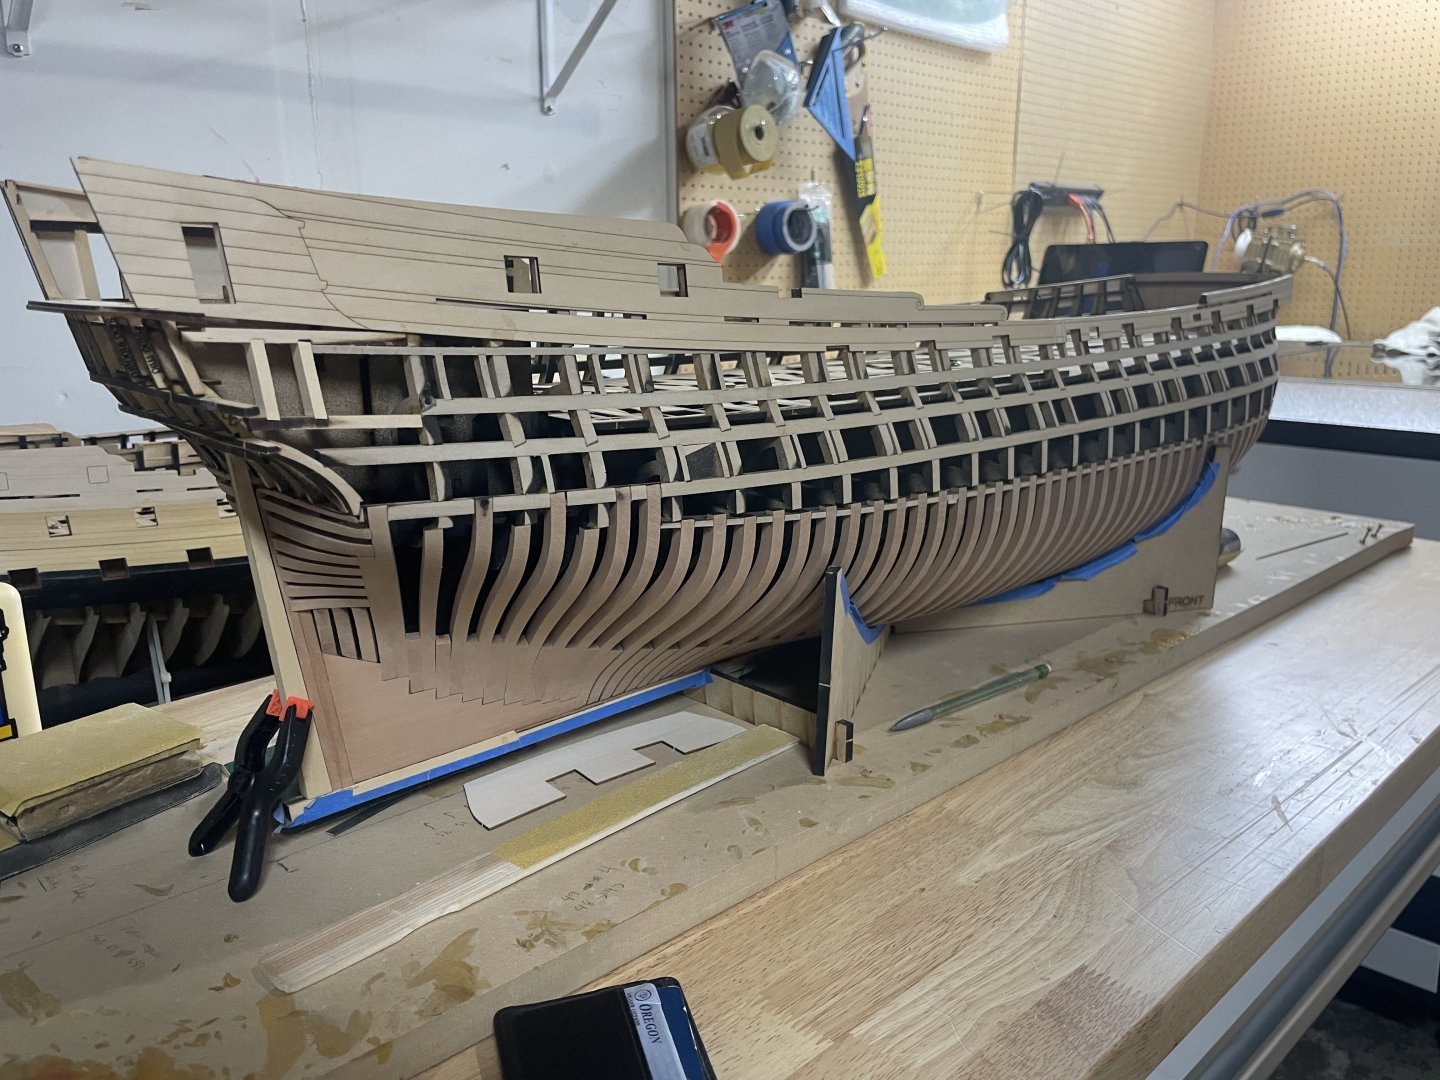
Moving into chapter 2 I’ve attached the frieze panels and added the forward false sub deck for fairing reference. Now it’s time to primer and prepare the gunports for paint and line off the upper hull for planking. Finally it will begin to look like Portland!


- 396 replies
-
- 23
-
-
-

-
Someone’s got their own dedicated workbench again. Will be back at Winnie again…slowly, in between working on and designing Portland. Looking forward to finishing this awesome project!
-
Excellent precision work Dusan! Looking forward to your framing work! JJ
-
Thanks guys. It’s slowly starting to look like something resembling a Portland class ship.
-
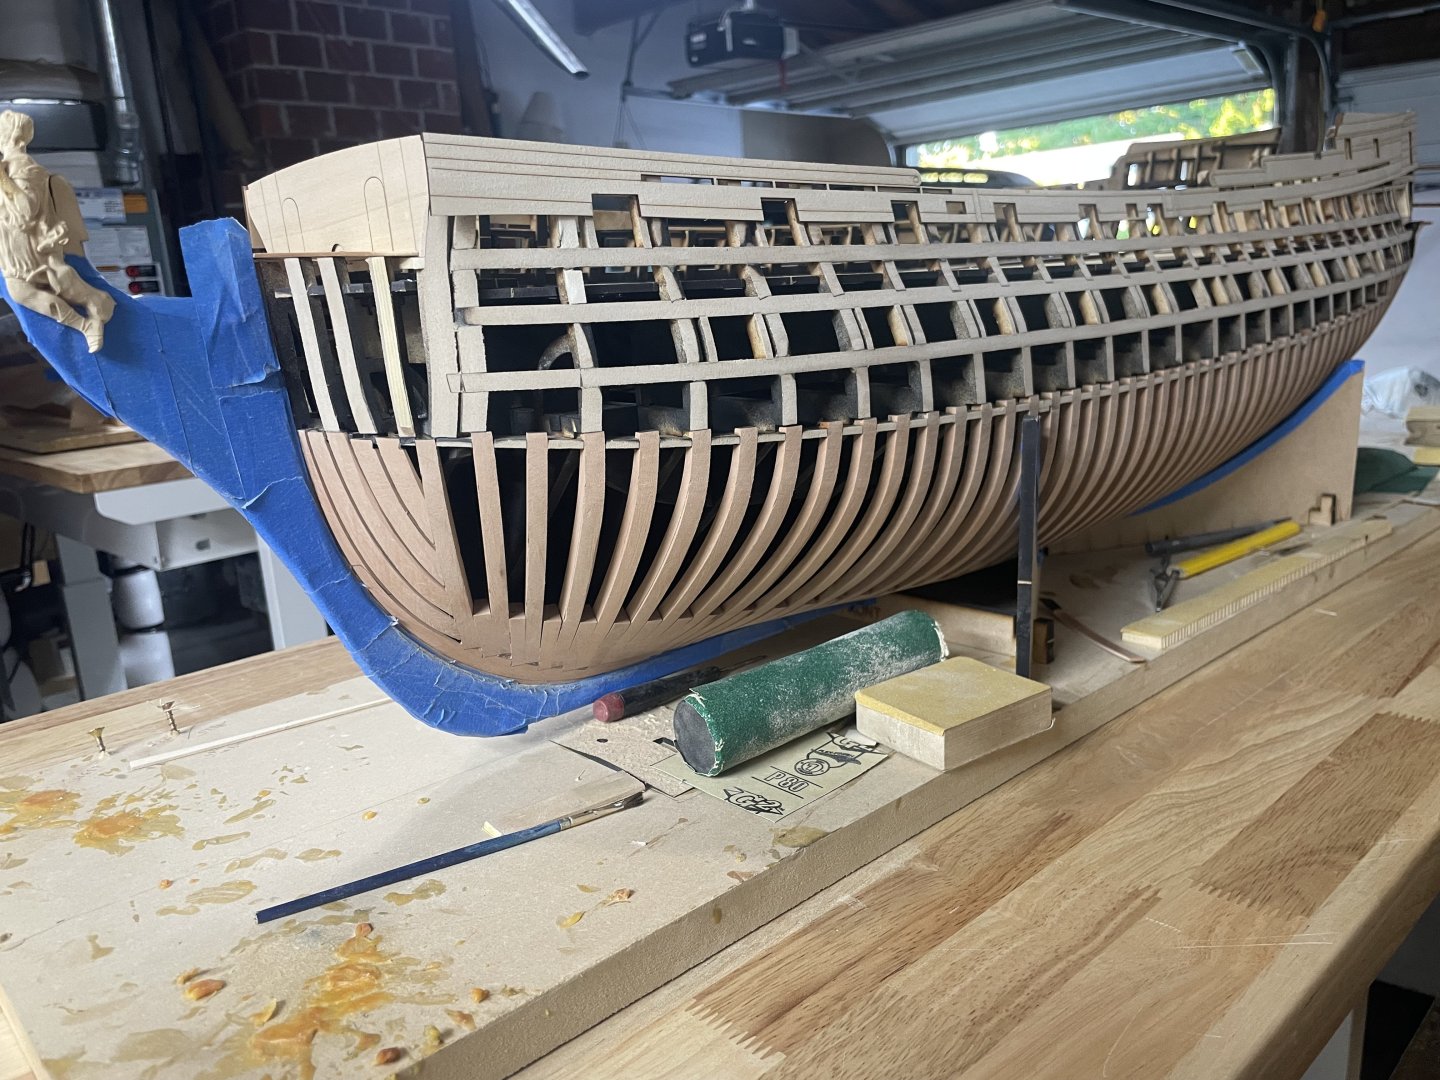
Port side mostly complete now. Some minor block sanding to do now and then permanently attach the frieze panels and prep for planking.

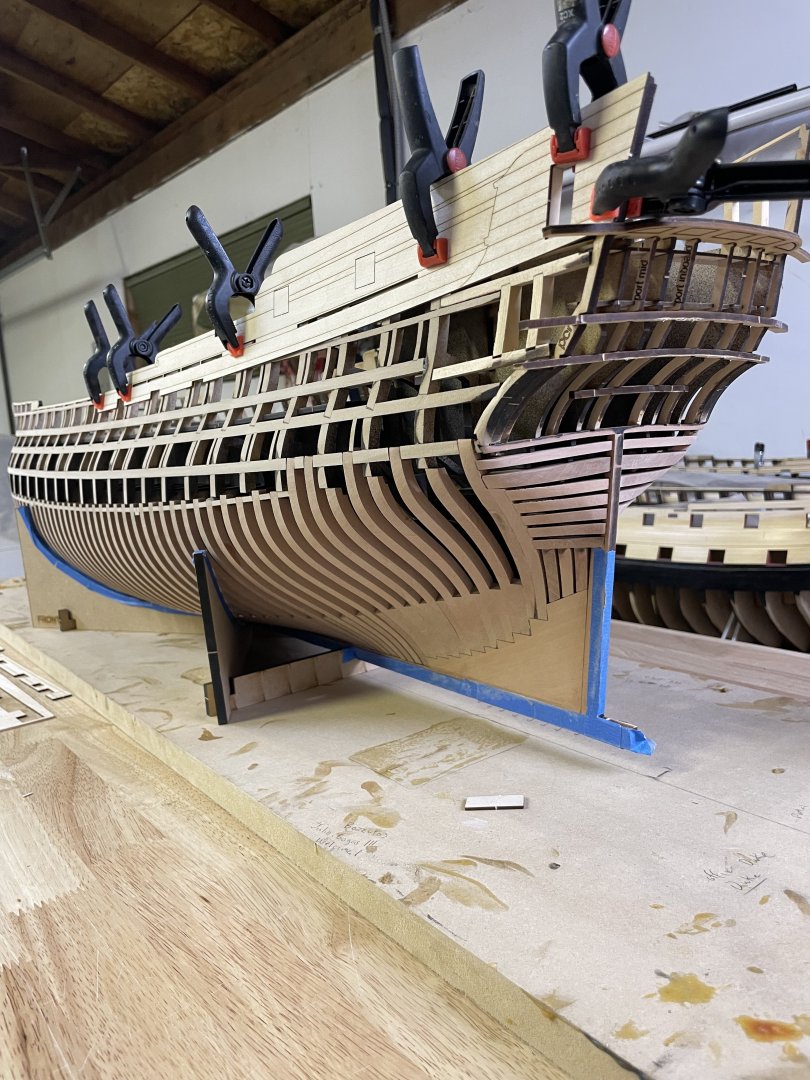

- 396 replies
-
- 25
-
-