Stuntflyer
-
Posts
1,198 -
Joined
-
Last visited
Content Type
Profiles
Forums
Gallery
Events
Everything posted by Stuntflyer
-
 Well, I really don't know, Brian. Perhaps Chuck or someone else will be able to give you the answer. Thanks for stopping by! Mike
- 607 replies
-
- 1
-

-
- winchelsea
- Syren Ship Model Company
- (and 1 more)
-
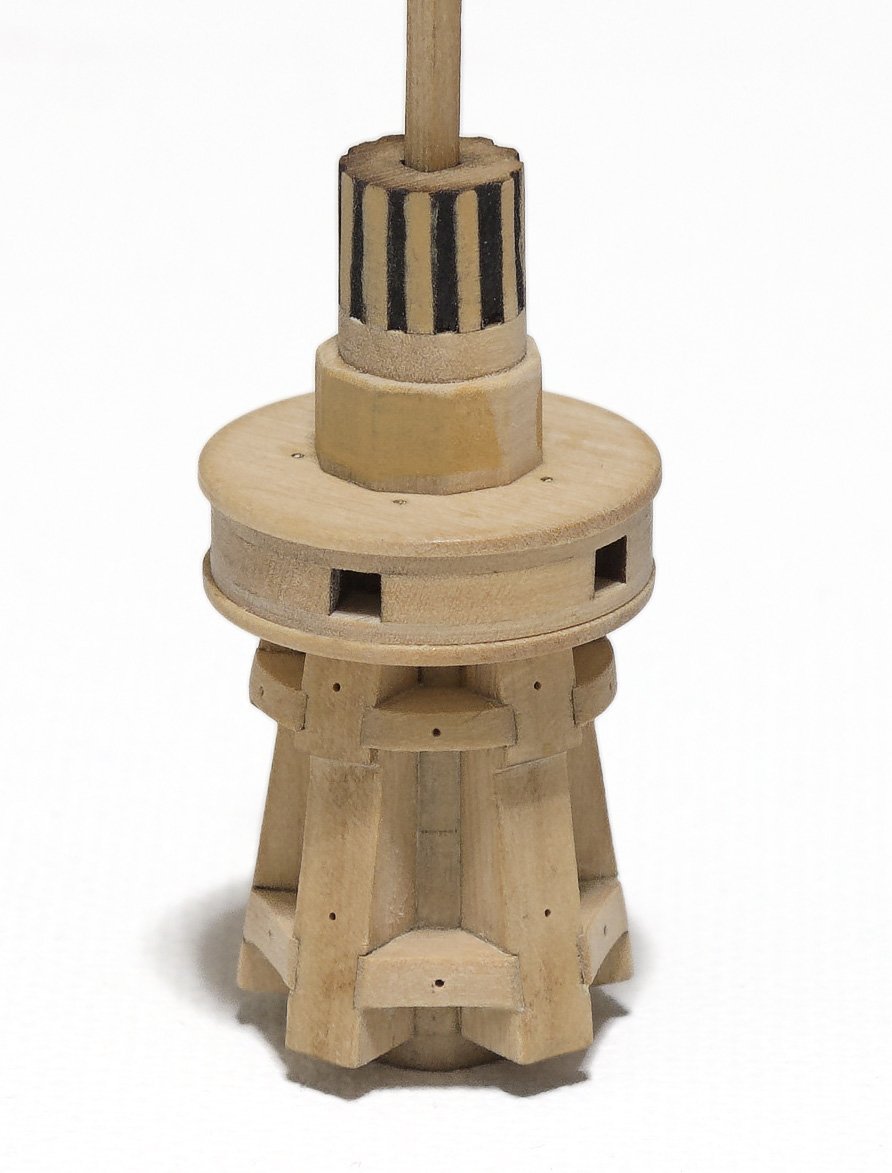
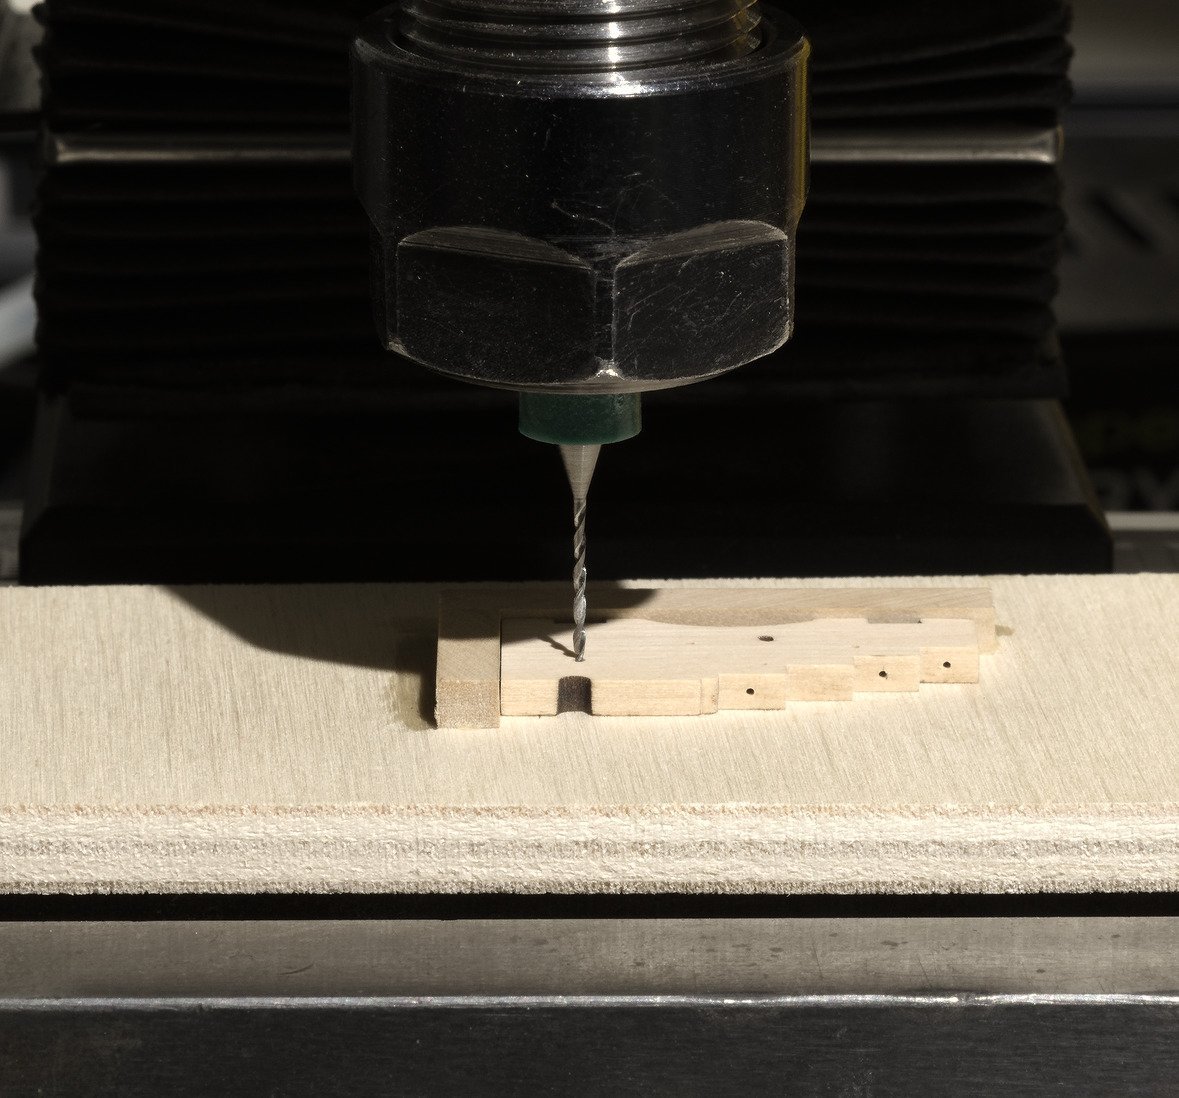
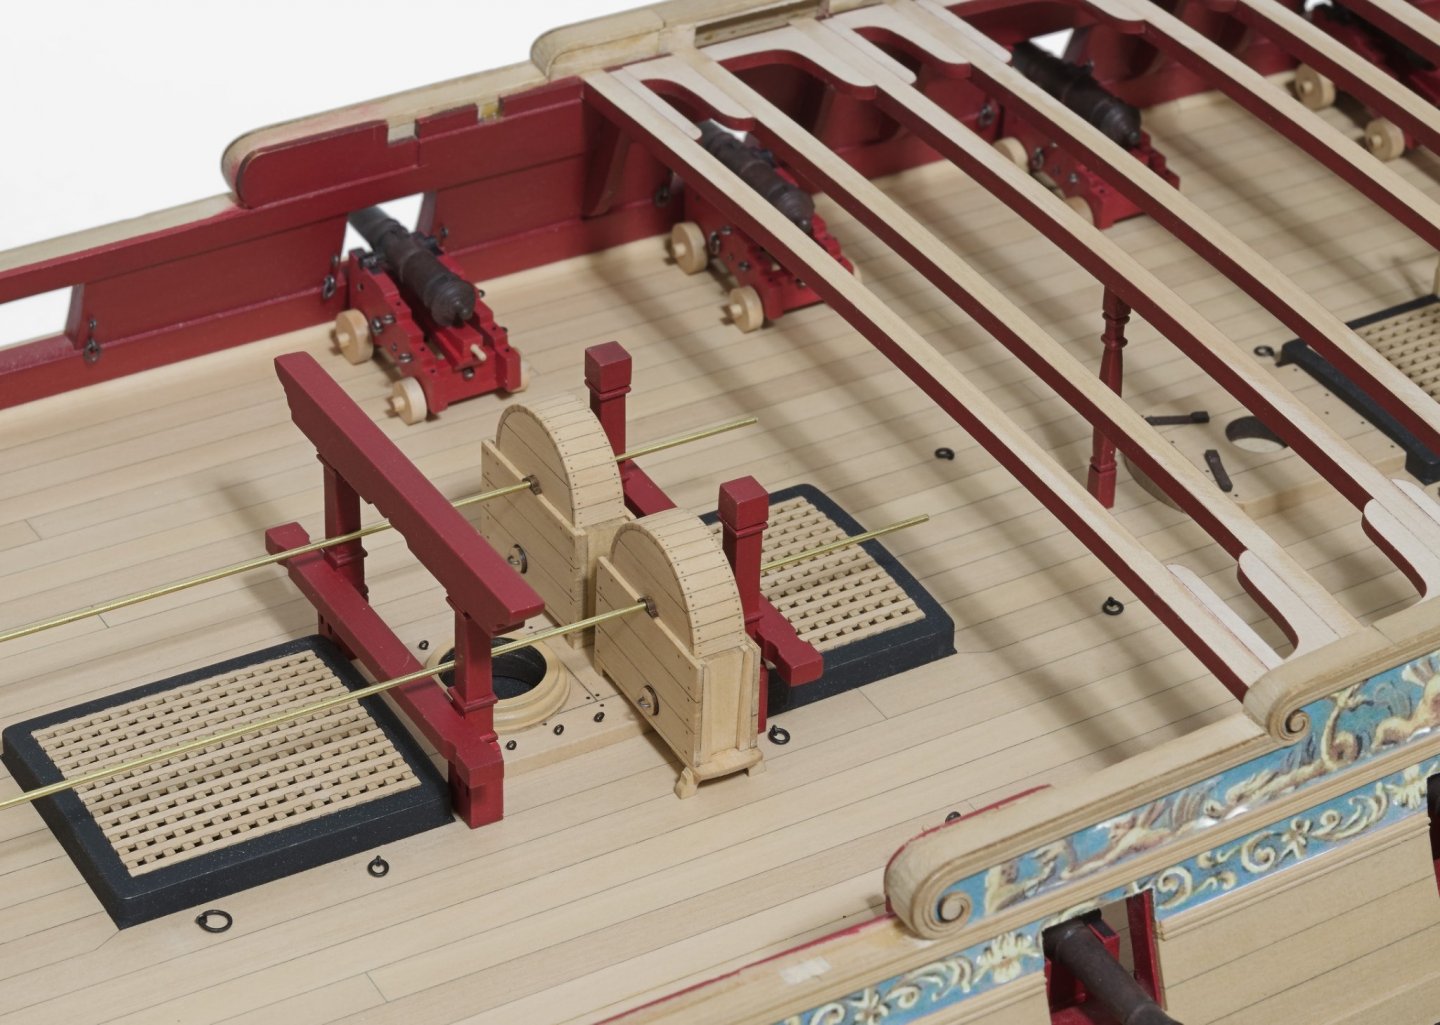
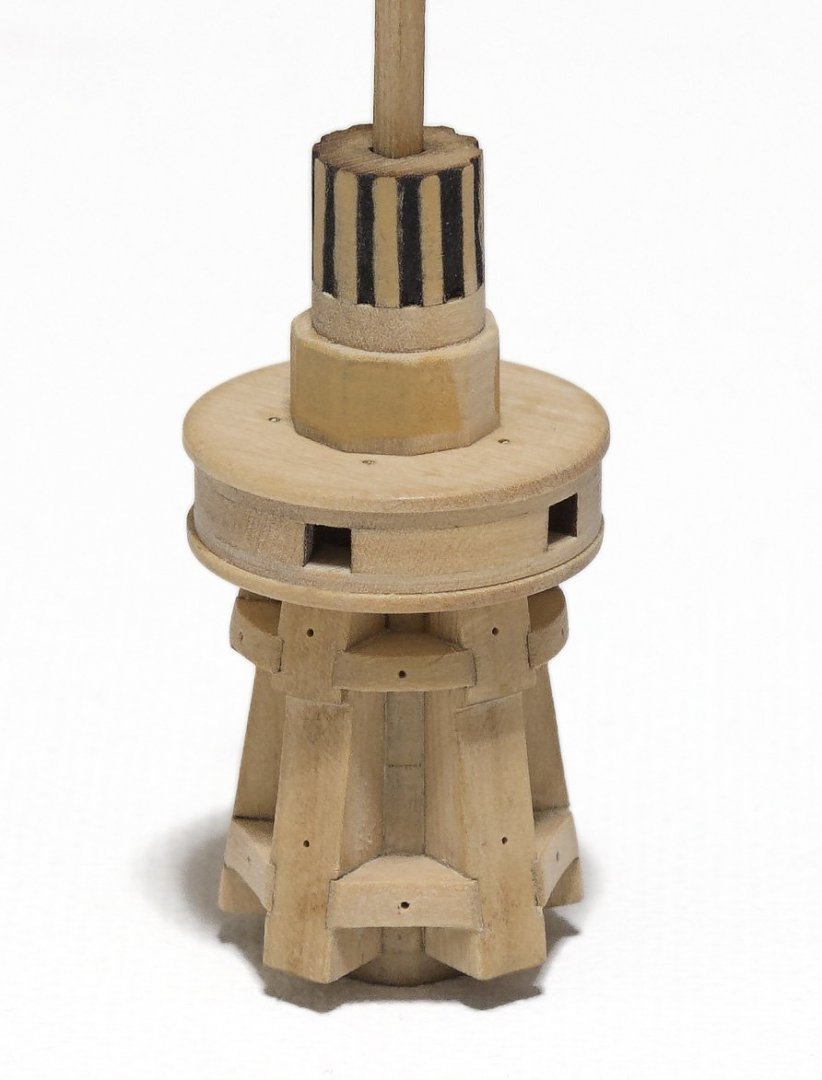
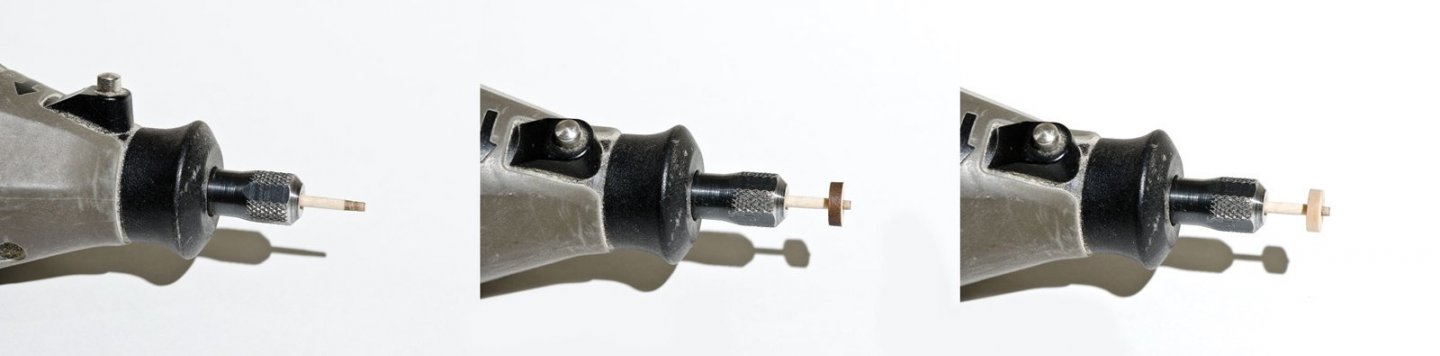
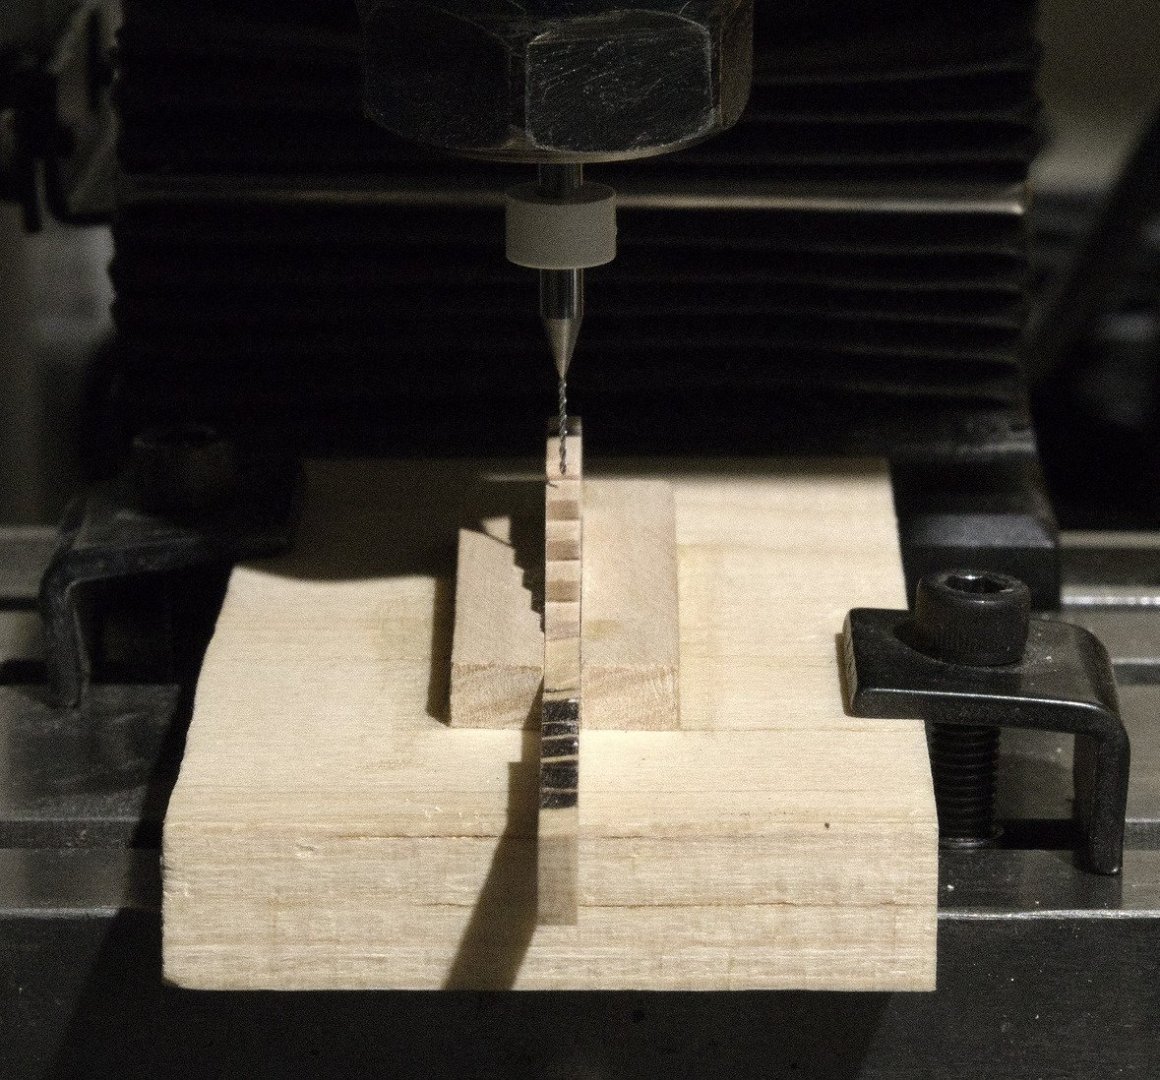
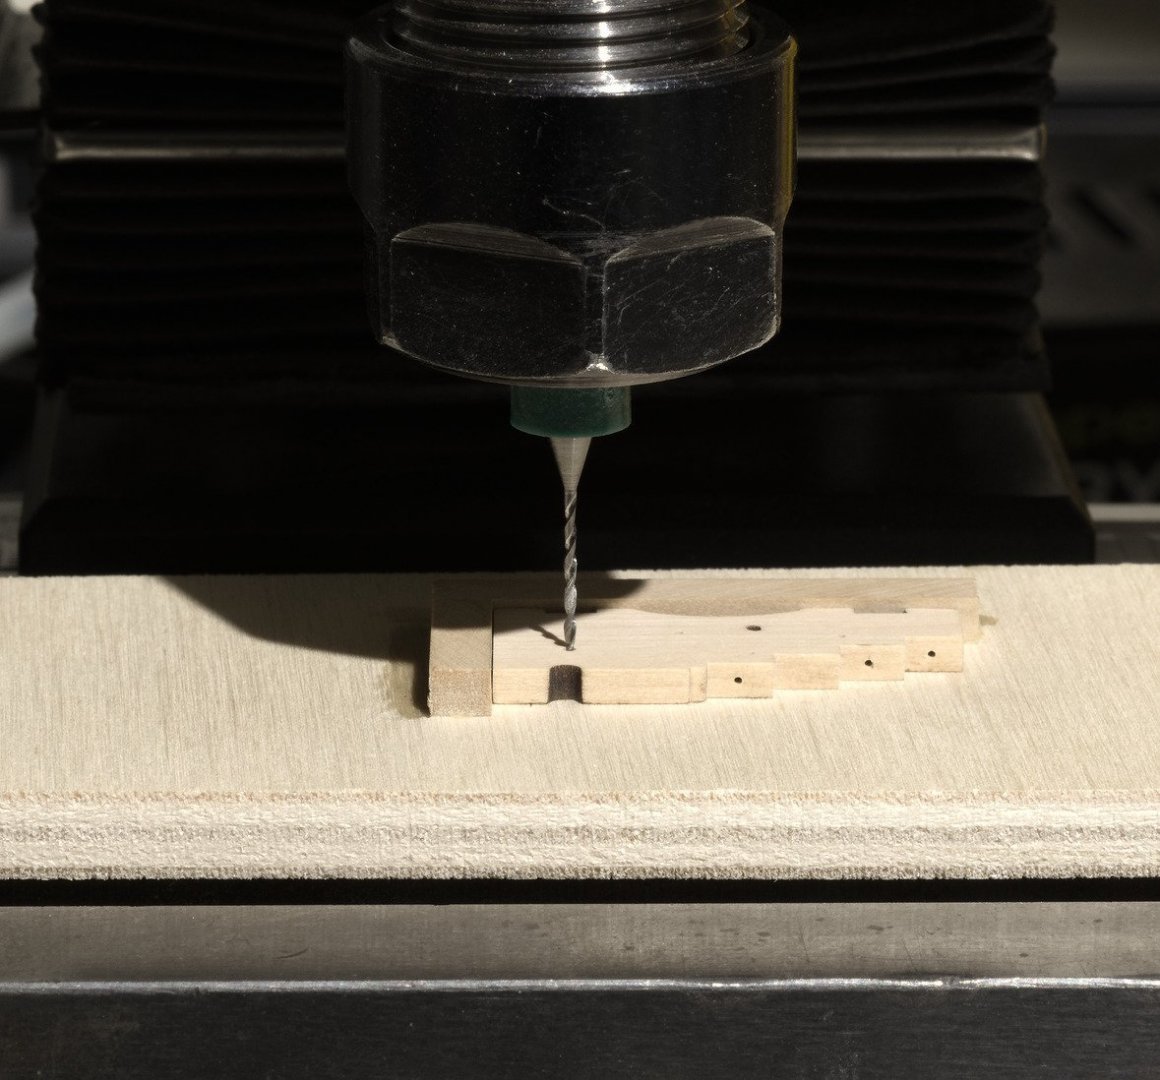
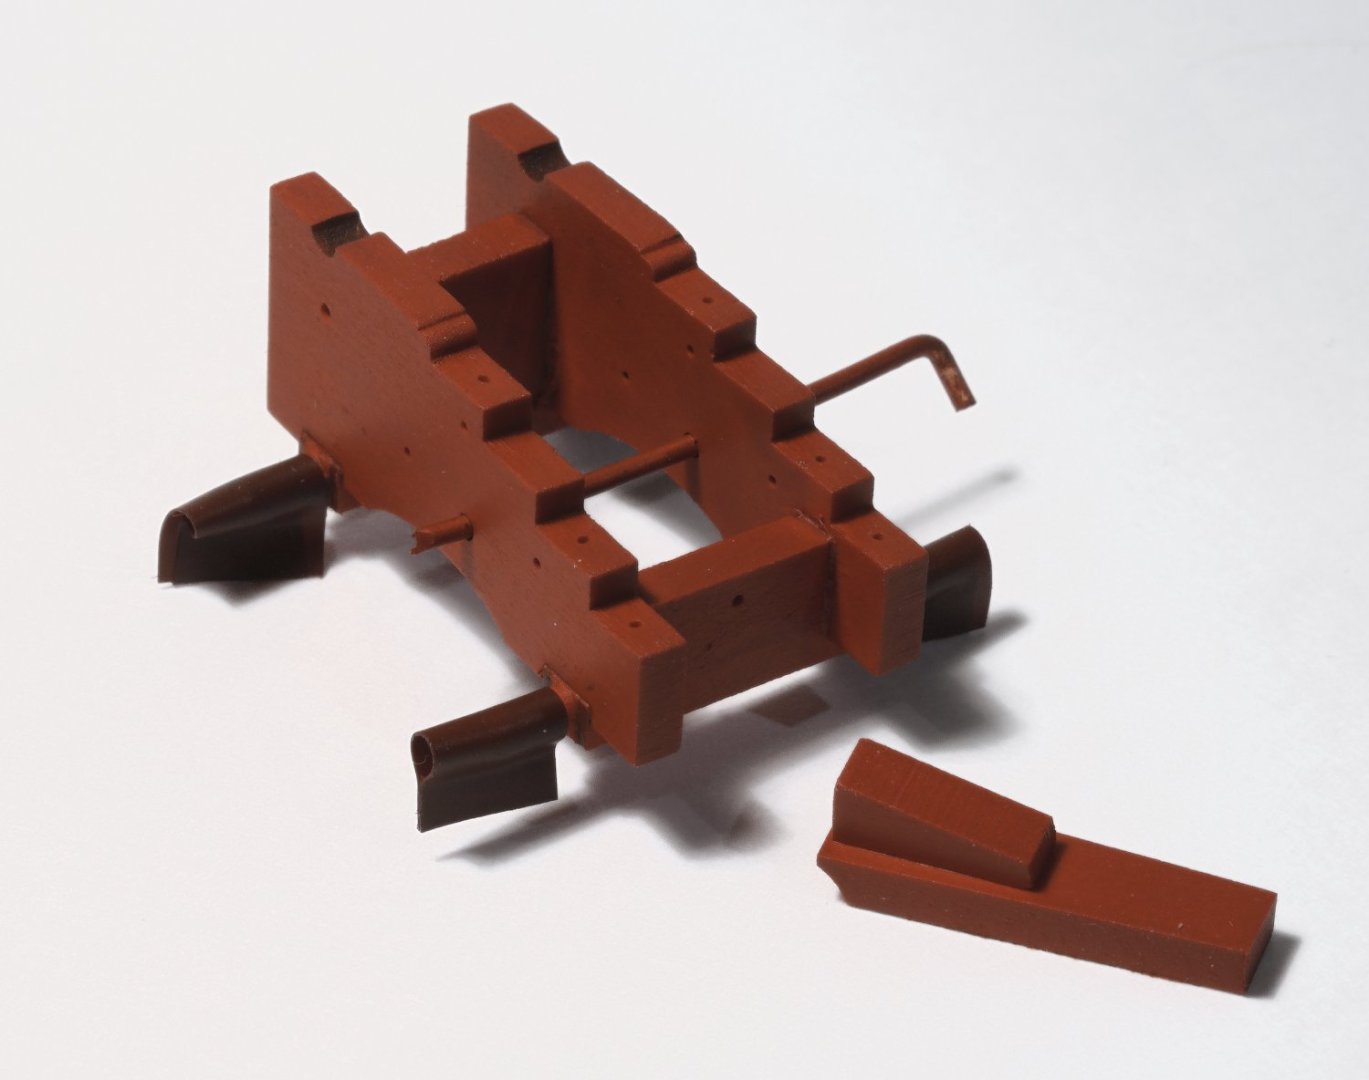
I'm still working in the area of the chain pumps. Getting the pumps to sit properly is a bit fiddly. Your basically there when the chocks are sitting flush on the mast partner and the deck and there is no rocking of the pump. In order to achieve this I had to shorten the tubes on the bottom of each pump. In making the jeer butts and gallows I deepened the sheave slots on the mill. I used 1/32" and .045" end mills as needed. Then I inserted tiny discs to simulate the sheave. With a press fit, no gluing was necessary. I just applied some W-O-P over the sheave to better hold the disc in place. Okay, it's not PVA, but it does have holding properties and keeps things a whole lot neater. I used some layered masking tape to help in aligning the pump while gluing it in place. Mike

- 607 replies
-
- 21
-
-
- winchelsea
- Syren Ship Model Company
- (and 1 more)
-
Those black caps really enhance the look of the ship. Nice! Mike
- 1,784 replies
-
- 4
-
-
- winchelsea
- Syren Ship Model Company
- (and 1 more)
-
I just edited post #395 as I felt it needed a clearer explanation. My apologies, Mike
- 607 replies
-
- 3
-
-
- winchelsea
- Syren Ship Model Company
- (and 1 more)
-
Glenn, If I push the guns against the waterway then they will all be at different angles. I prefer the look where they are in line with each other. There are enough fixtures (coamings, mast partners, stove platform, etc.) to use my method. Brian, I won't be rigging the guns. Mike
- 607 replies
-
- 8
-
-
- winchelsea
- Syren Ship Model Company
- (and 1 more)
-
1. The barrels should be aligned in the carriages. 2. The sides of the deck fittings like the coamings should be parallel to the centerline of the deck. My method relies on those things being correct. In the example above I am using the sides of the coaming as the template for the whole process. The rear trucks against the adjustable parallel insures that the carriage is always perpendicular to the centerline of the deck. Doing this insures that the barrels will be in alignment. Hope that makes sense.
- 607 replies
-
- 7
-
-
- winchelsea
- Syren Ship Model Company
- (and 1 more)
-
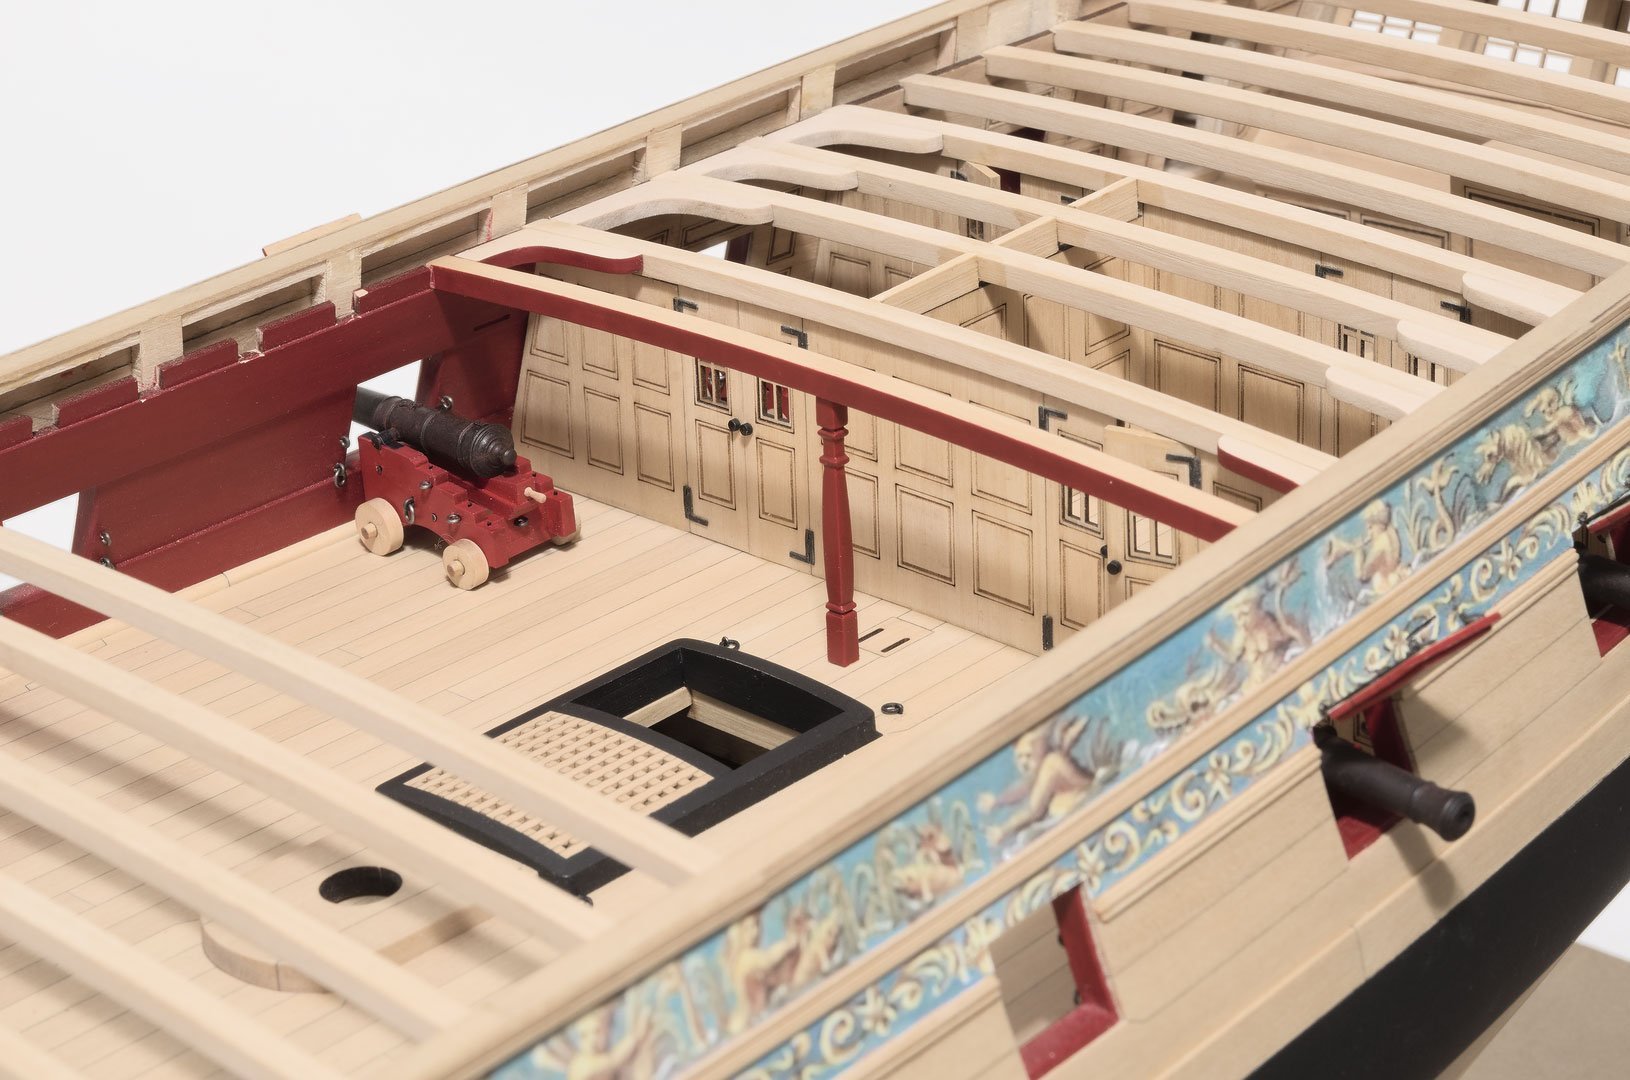
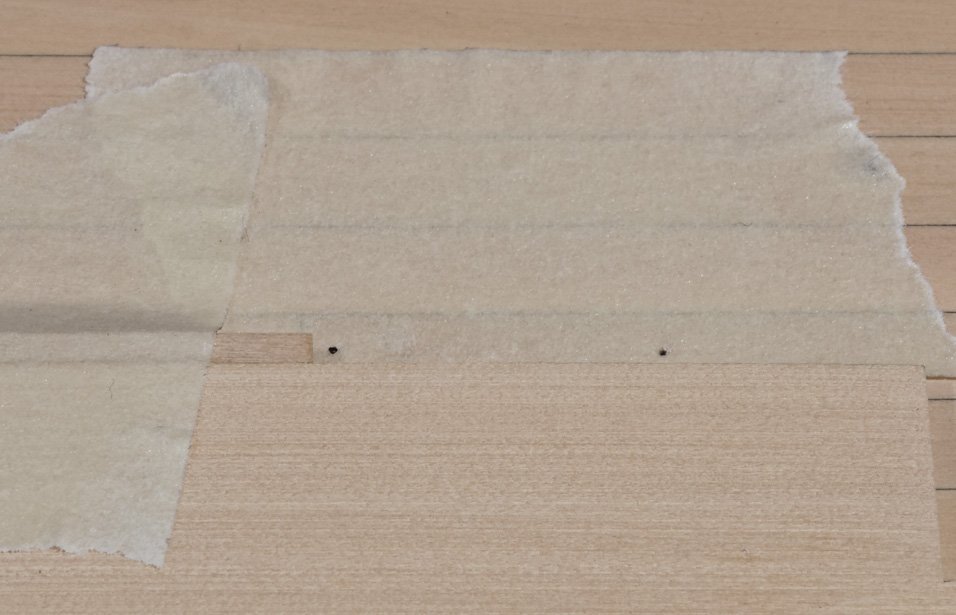
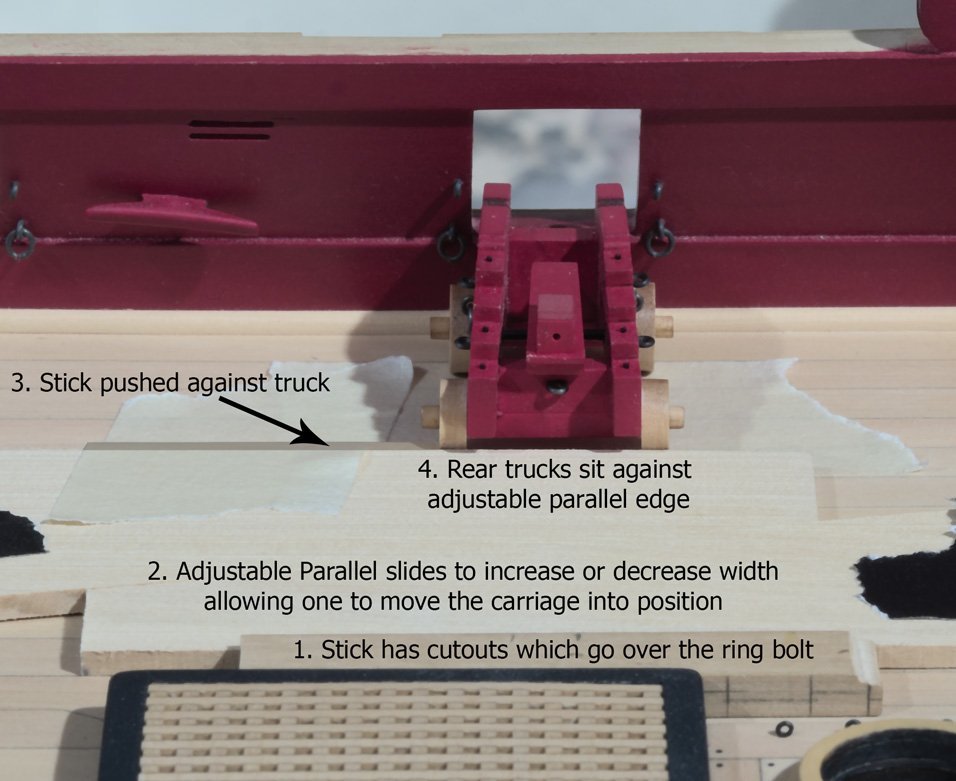
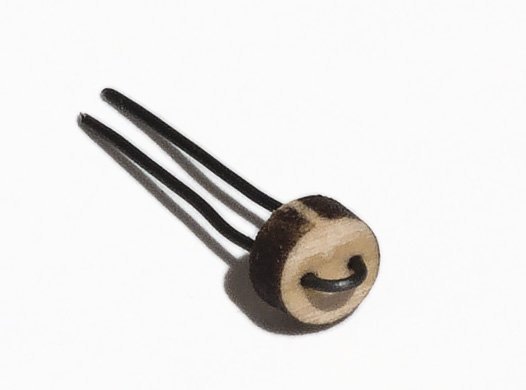
As promised here is how I go about pinning the guns to the deck. In doing so I try to set most of the guns parallel to one another. In order to do that I use the edge of the deck fixtures as a starting point. First, let's see what the pinned carriage looks like. I used a #77 drill to make a hole in the bottom of the rear trucks. Mine are done on the mill, but doing it by hand also works. After adhering a length of 28 gauge wire into each truck the wire is shortened to about 1/32". The two rear trucks were then glued to the axle while visually aligning the wires to each other. The photo below is explained with steps 1-4. 1. This stick has cutouts that cover the ring bolts on the deck. This allows the stick to be pushed up against the edge of the coaming. The coaming is centered on the deck so I know that the stick is parallel to the centerline of the deck. 2. I made an adjustable parallel gauge on the Byrnes saw. The gauge sits between the rear trucks and the stick I mentioned in the previous step. By sliding the two halves of the adjustable parallel I can move the carriage as close to or as far away from the gun port as I want. The carriage remains perpendicular to the centerline of the deck as long as I keep the rear trucks against the edge of the adjustable parallel. Once the carriage is positioned I placed a few pieces of tape over the gauge to hold it in place. 3. I placed a stick against the truck as a stop in order to register the gun carriage fore and aft. 4. I put some masking tape on the deck where the pins would be located to protect the planking. I used a toothpick to add a dab of black paint to the bottom of each pin. The carriage was placed on the deck as shown in the photo below. Simply push down to transfer the paint to the tape. The markings for the holes ready to be drilled. Use a #75 or #76 drill if you need some wiggle room. Mike
- 607 replies
-
- 17
-
-

-
- winchelsea
- Syren Ship Model Company
- (and 1 more)
-
Brian, I will be doing a few guns this week. Give me a few days and I will describe my method for you. I can't tell you if pinning is standard practice or not. However, I wouldn't want one of these guns getting dislodged in the area where the beams are located. I'm sure you can see why. Mike
- 607 replies
-
- 5
-
-
- winchelsea
- Syren Ship Model Company
- (and 1 more)
-
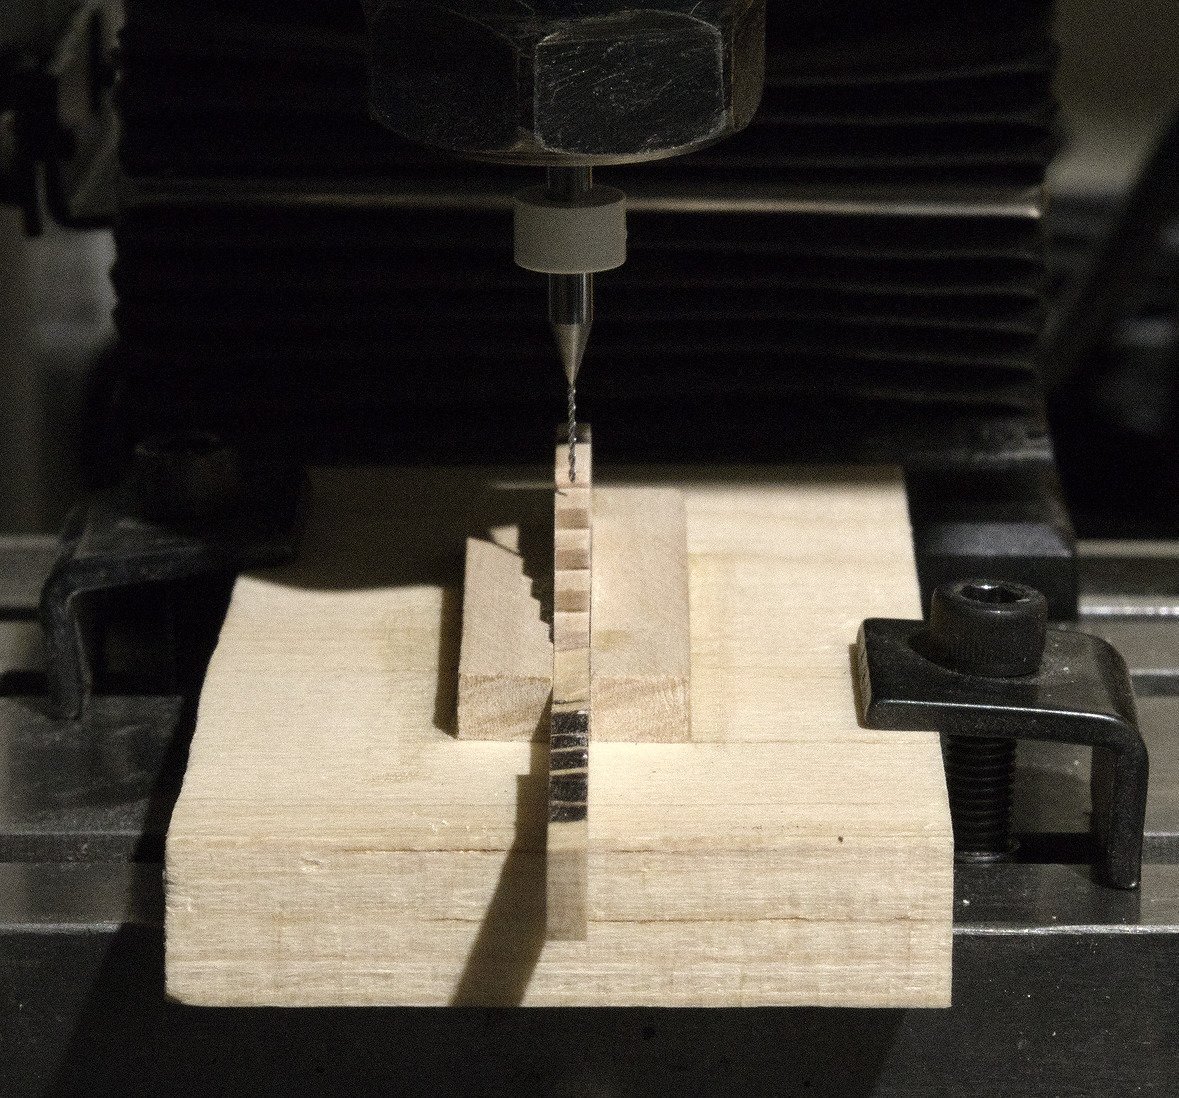
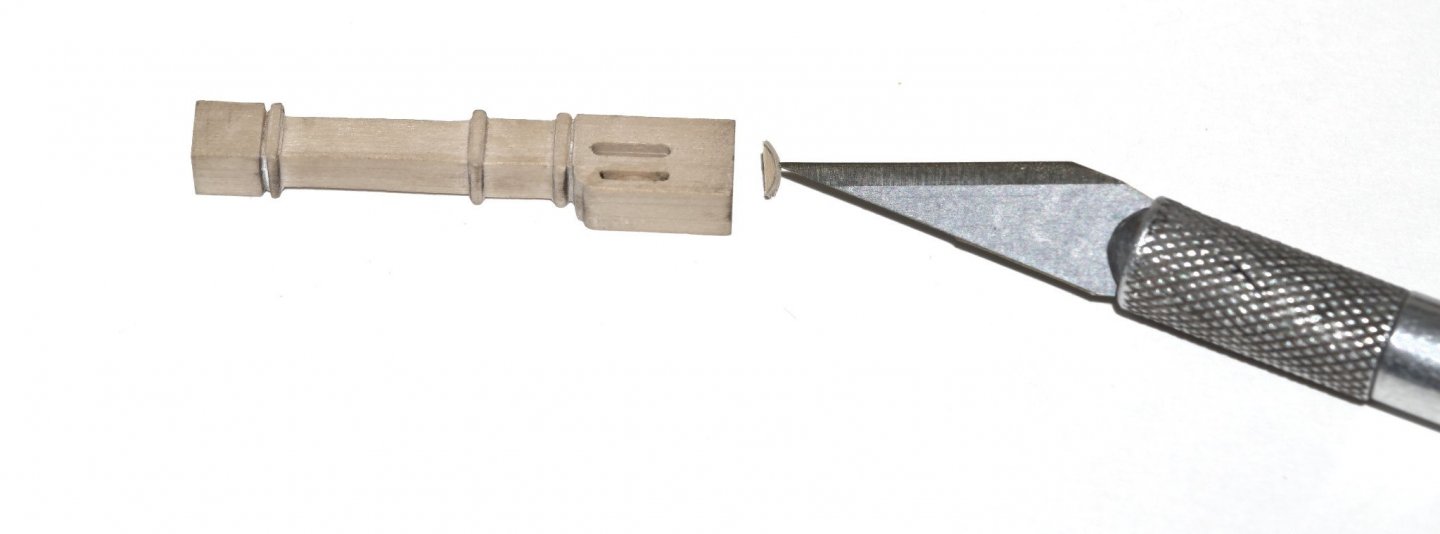
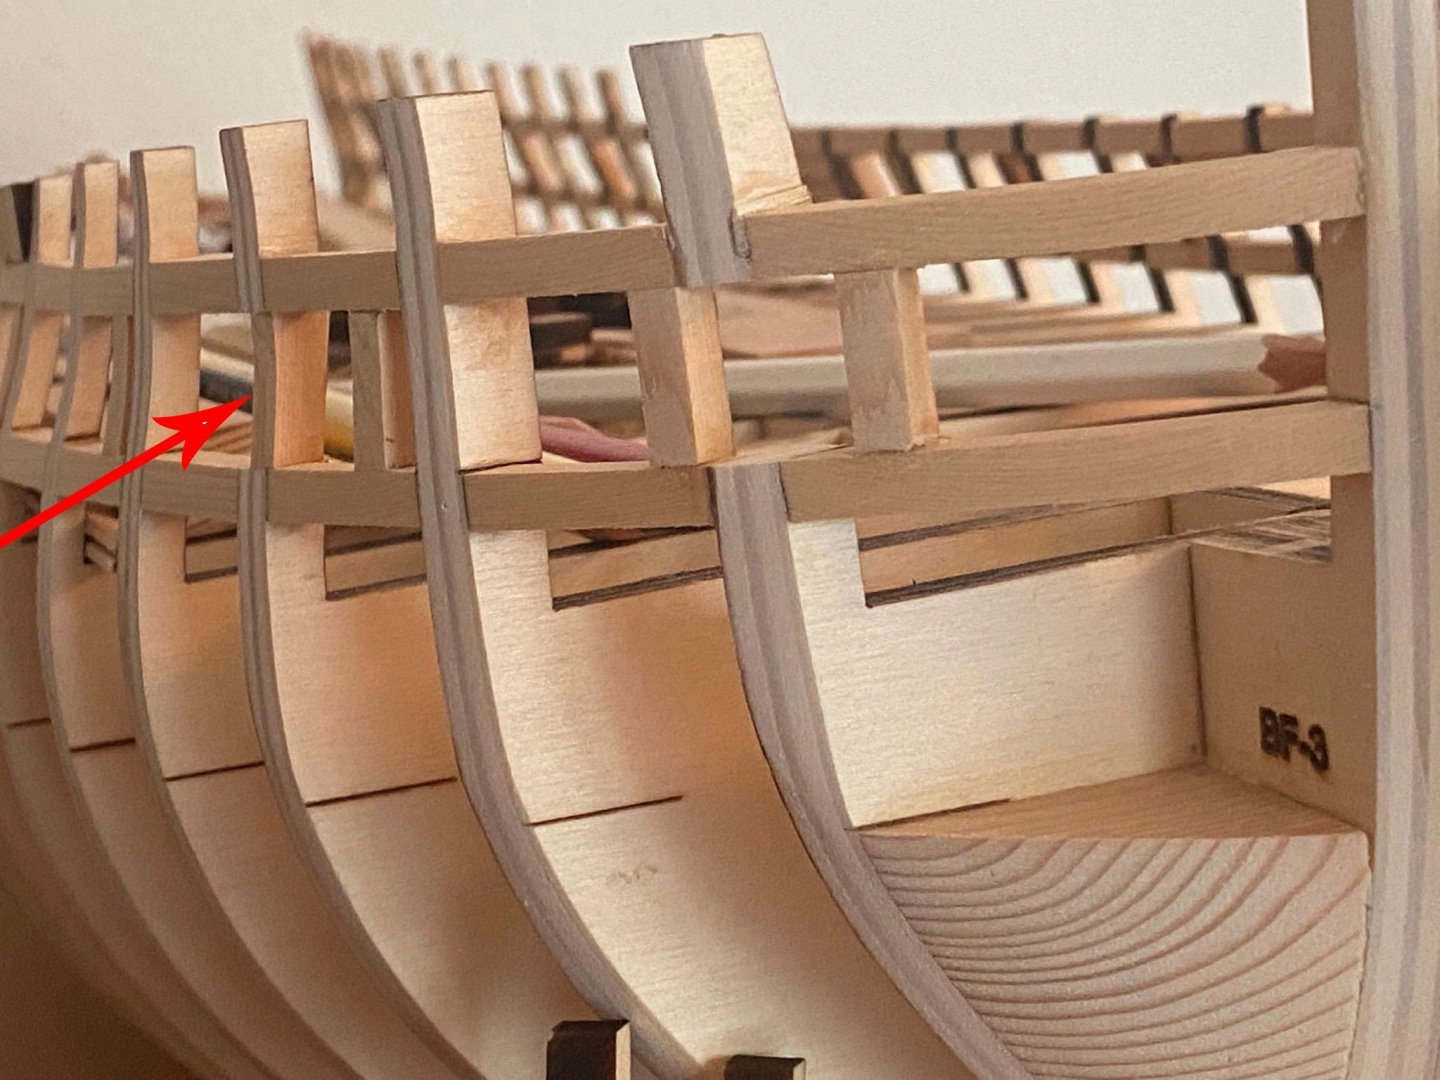
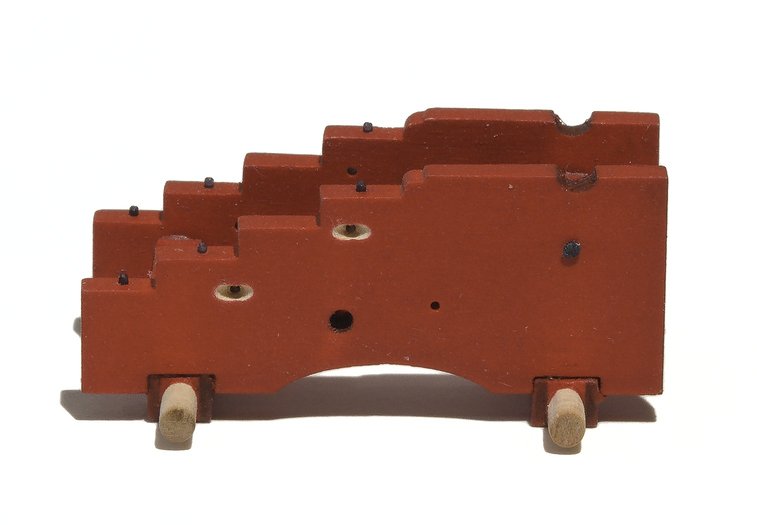
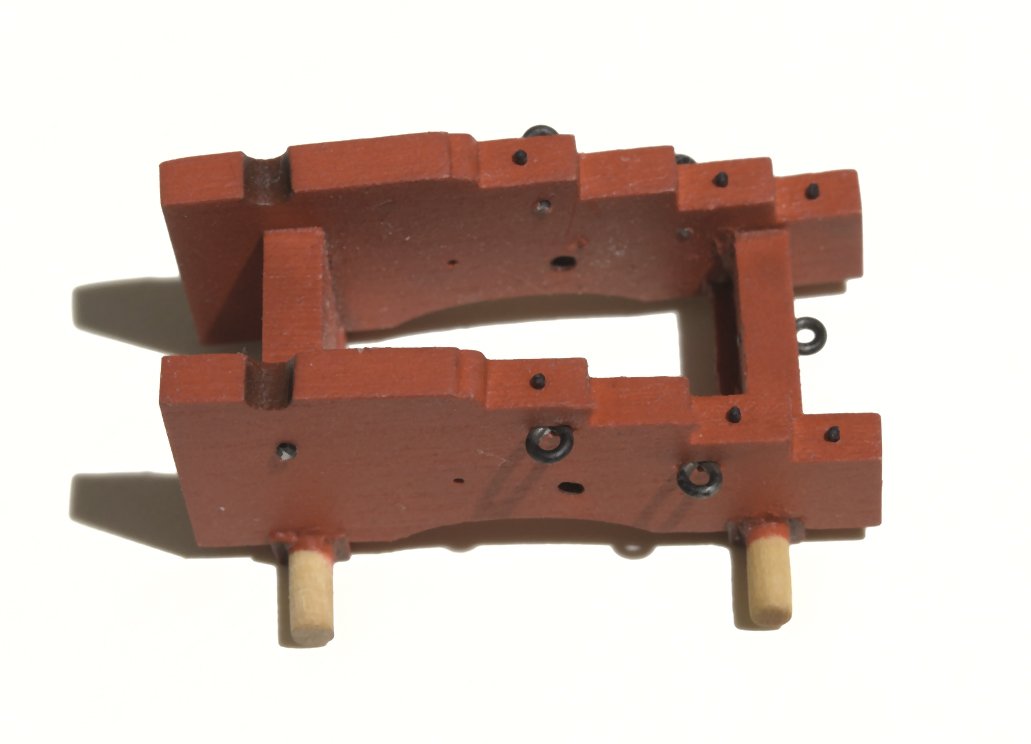
I Just finished up the chain pump construction. Definitely a fun kit to build. I'm going to add the fragile tongue later. I found it easier to install the drain plug handle first, before adding it to the pump. There are numerous "boards" that have to be beveled on one side only in order to conform to the rounded hood of the pump. In doing so, I removed all of the char on that one side while being careful not to overdo it. Just enough to clear the char. This gives the appearance of a tight joint when placed against the previously installed board. Mike
- 607 replies
-
- 18
-
-
- winchelsea
- Syren Ship Model Company
- (and 1 more)
-
Joe, Jean-Paul, I dilute with water until I get a smooth flow out of the airbrush without having it come out too watery. I usually set the compressor between 35-40 psi. Hope that makes sense. Fred, thank you! Sometimes I feel the same way you do. . . "If only I were half as good...". Mike
- 607 replies
-
- 3
-
-
- winchelsea
- Syren Ship Model Company
- (and 1 more)
-
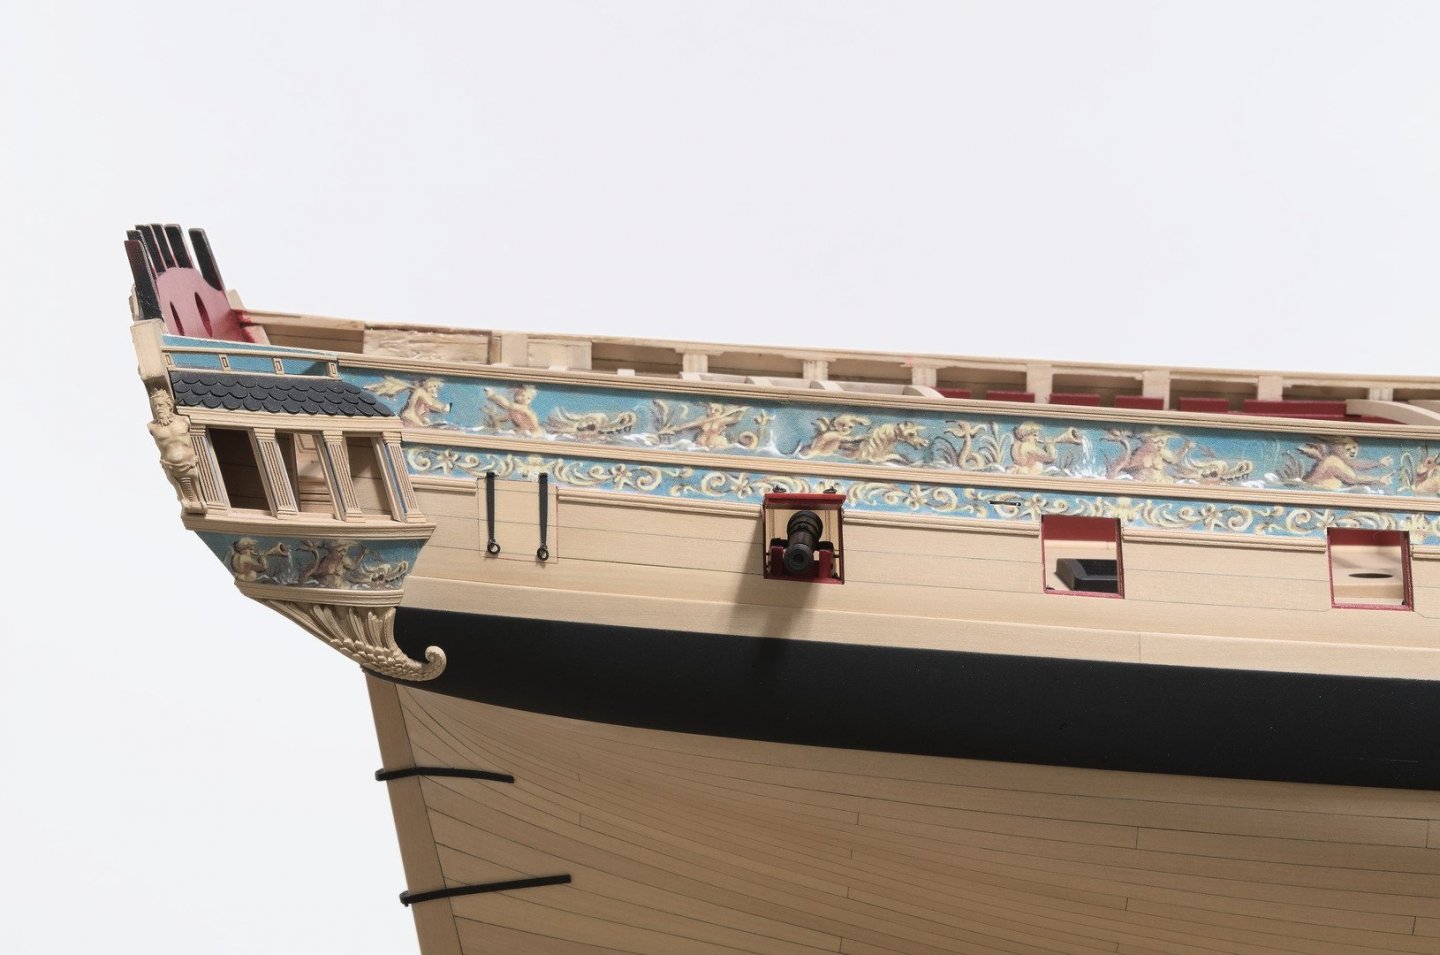
Nice work, Frank. I assume that you faired the outer stern frames to the proper width. Mike
-
I use Winsor & Newton or Grumbacher water based Acrylic paints in a tube.
- 607 replies
-
- 2
-
-
- winchelsea
- Syren Ship Model Company
- (and 1 more)
-
I thought that it would look better in red so I went with that. Brushing would have been iffy, at least for me. I used the airbrush with a coat of Dullcote on top.
- 607 replies
-
- 3
-
-
- winchelsea
- Syren Ship Model Company
- (and 1 more)
-
I forgot to add this in yesterdays post. Ready for paint. . . Mike
- 607 replies
-
- 13
-
-
- winchelsea
- Syren Ship Model Company
- (and 1 more)
-
Aren't the filler pieces already made for you whereby you would just need to bevel the sides for fit. Don't over think it, Frank. Mike
-
Hi Frank, It's probably just the photo but I'm wondering how the batten looks against the framing in this area. Mike
-
Looking wonderful! Mike
-
Just a small update on the progress made over the last few days. Mike

- 607 replies
-
- 18
-
-
- winchelsea
- Syren Ship Model Company
- (and 1 more)
-
The only way to recess those eye bolts in boxwood is to remove some material. I understand that the Yellow Cedar is soft enough, where just a push on the eye bolt will recess it. Mike
- 607 replies
-
- 2
-
-
- winchelsea
- Syren Ship Model Company
- (and 1 more)
-
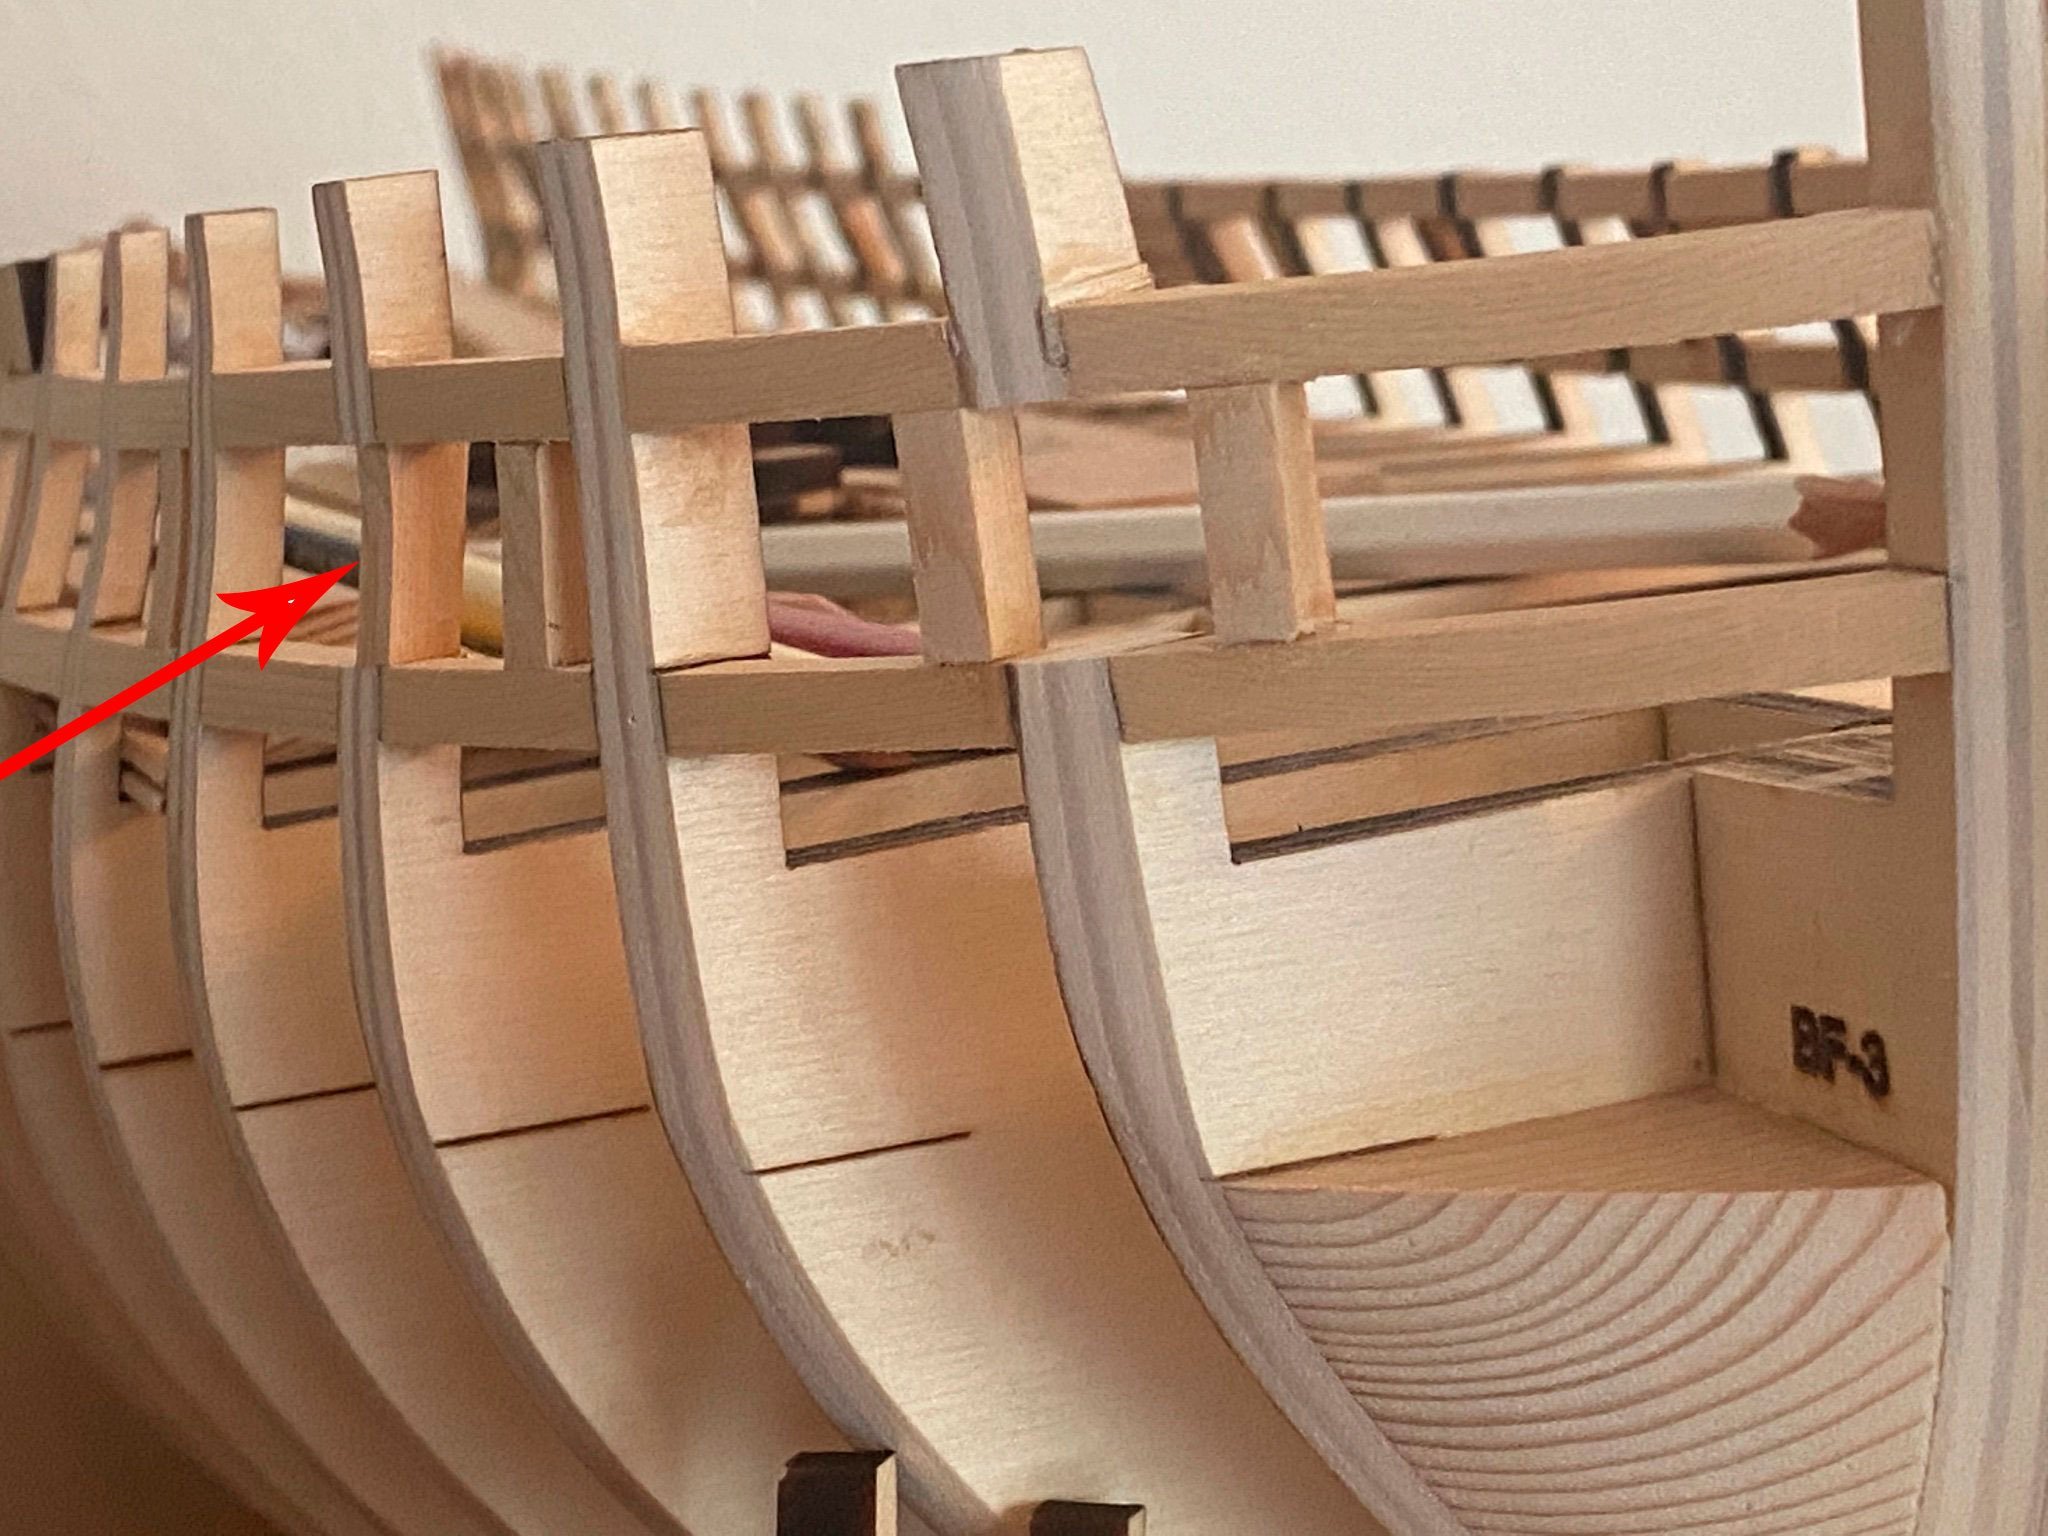
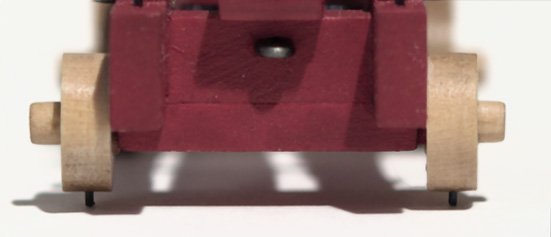
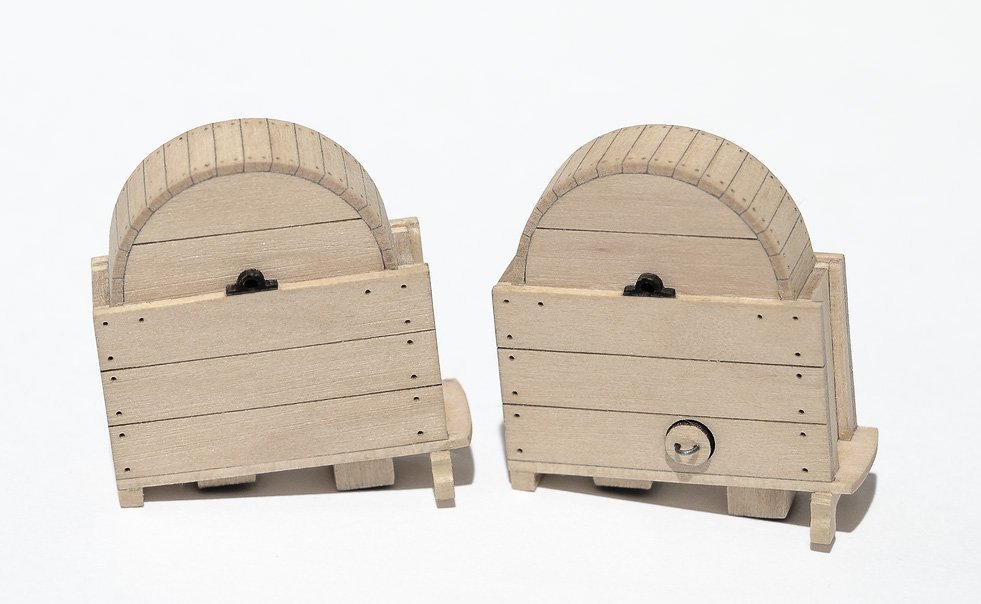
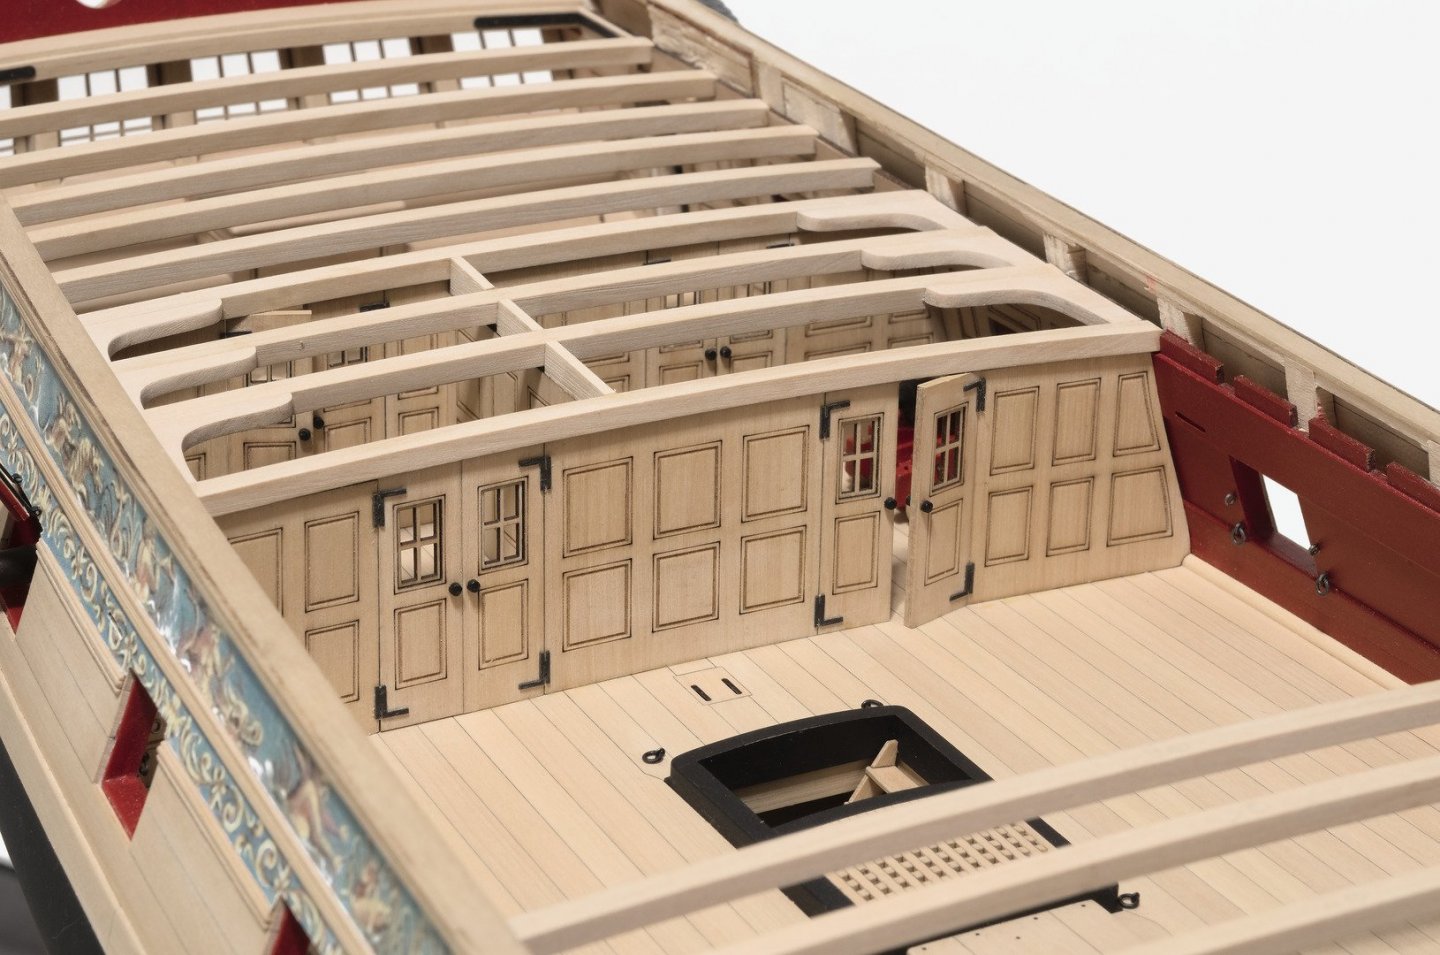
Before adding the forward bulkhead I needed to get the two guns which sit between the bulkheads installed. Here are some of the things I did when I made the carriages. The laser char was removed with a sanding stick. Afterwards the diameter of each truck was measured and grouped according to size. The axles were partially shaped with a pillar file and some sandpaper. Then I used a drilled hacksaw scraper to make the axle round. I did this with a push and turn motion while moving along the axle. The mill was used to make the holes for the bolts Sections of the carriages were assembled and spray painted with an airbrush. By turning a round needle file, I was able to remove material from the carriage so that the eye bolts would sit deeper into the carriage side. The filed area was painted red before inserting the eye bolts. After adding the two more gun port lids, I installed the two guns. All of the guns will be pinned to the deck with 28 gauge wire inserted into the rear trucks. Then the forward bulkhead was completed along with some lodging knees. Mike

- 607 replies
-
- 26
-
-

-
- winchelsea
- Syren Ship Model Company
- (and 1 more)