HOLIDAY DONATION DRIVE - SUPPORT MSW - DO YOUR PART TO KEEP THIS GREAT FORUM GOING! (Only 64 donations so far out of 49,000 members - C'mon guys!)
×


Stuntflyer
-
Posts
1,197 -
Joined
-
Last visited
Content Type
Profiles
Forums
Gallery
Events
Everything posted by Stuntflyer
-
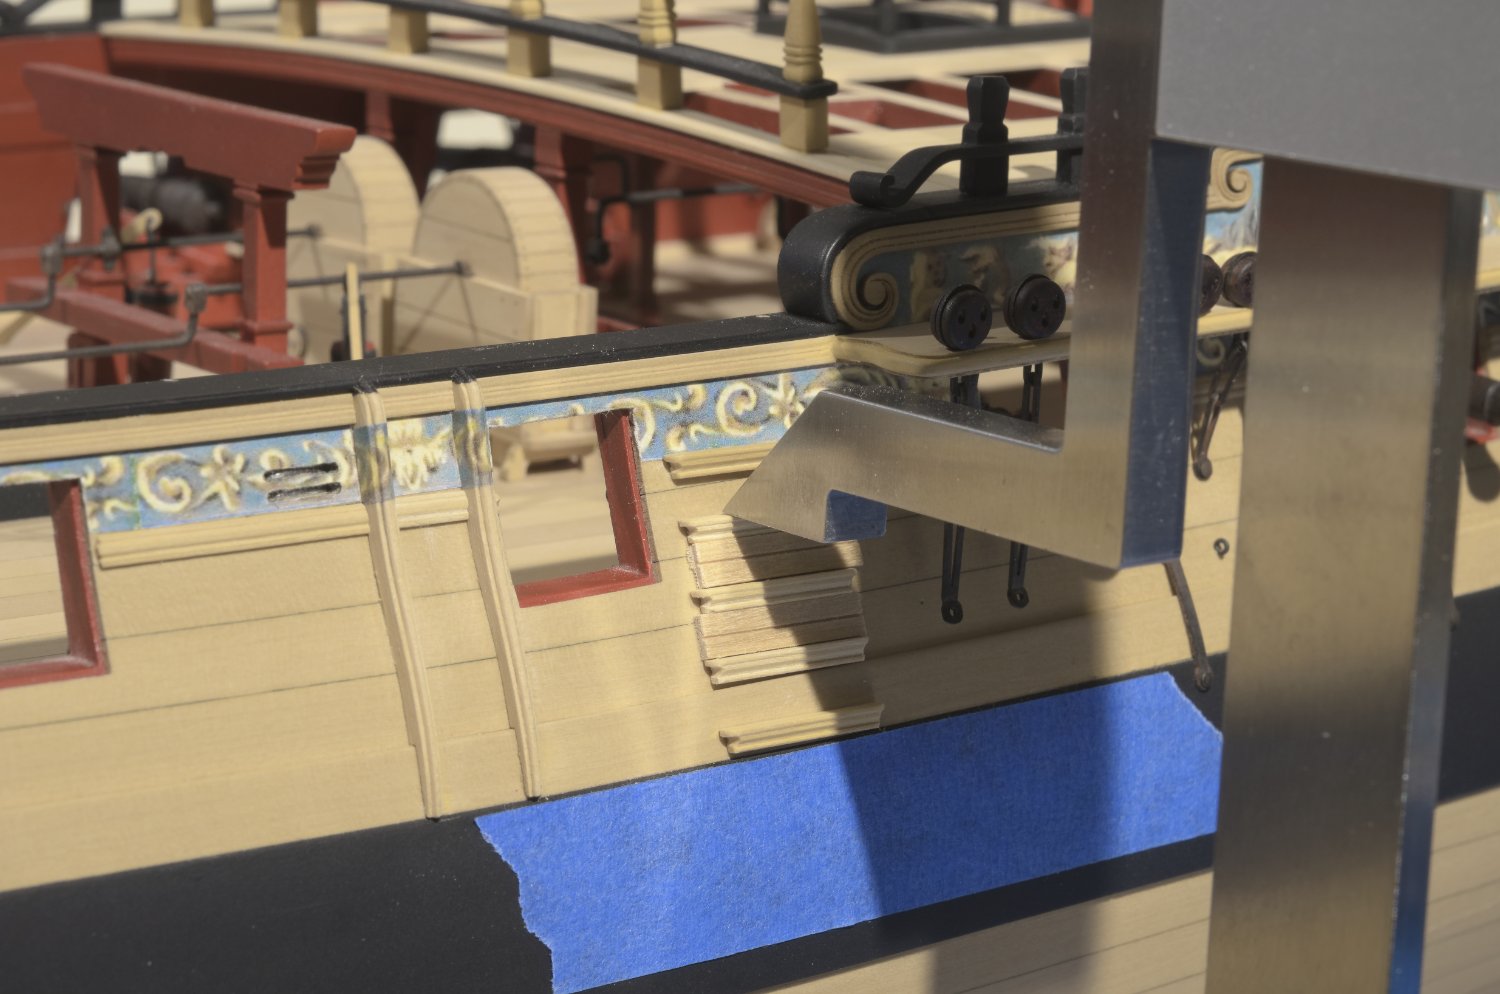
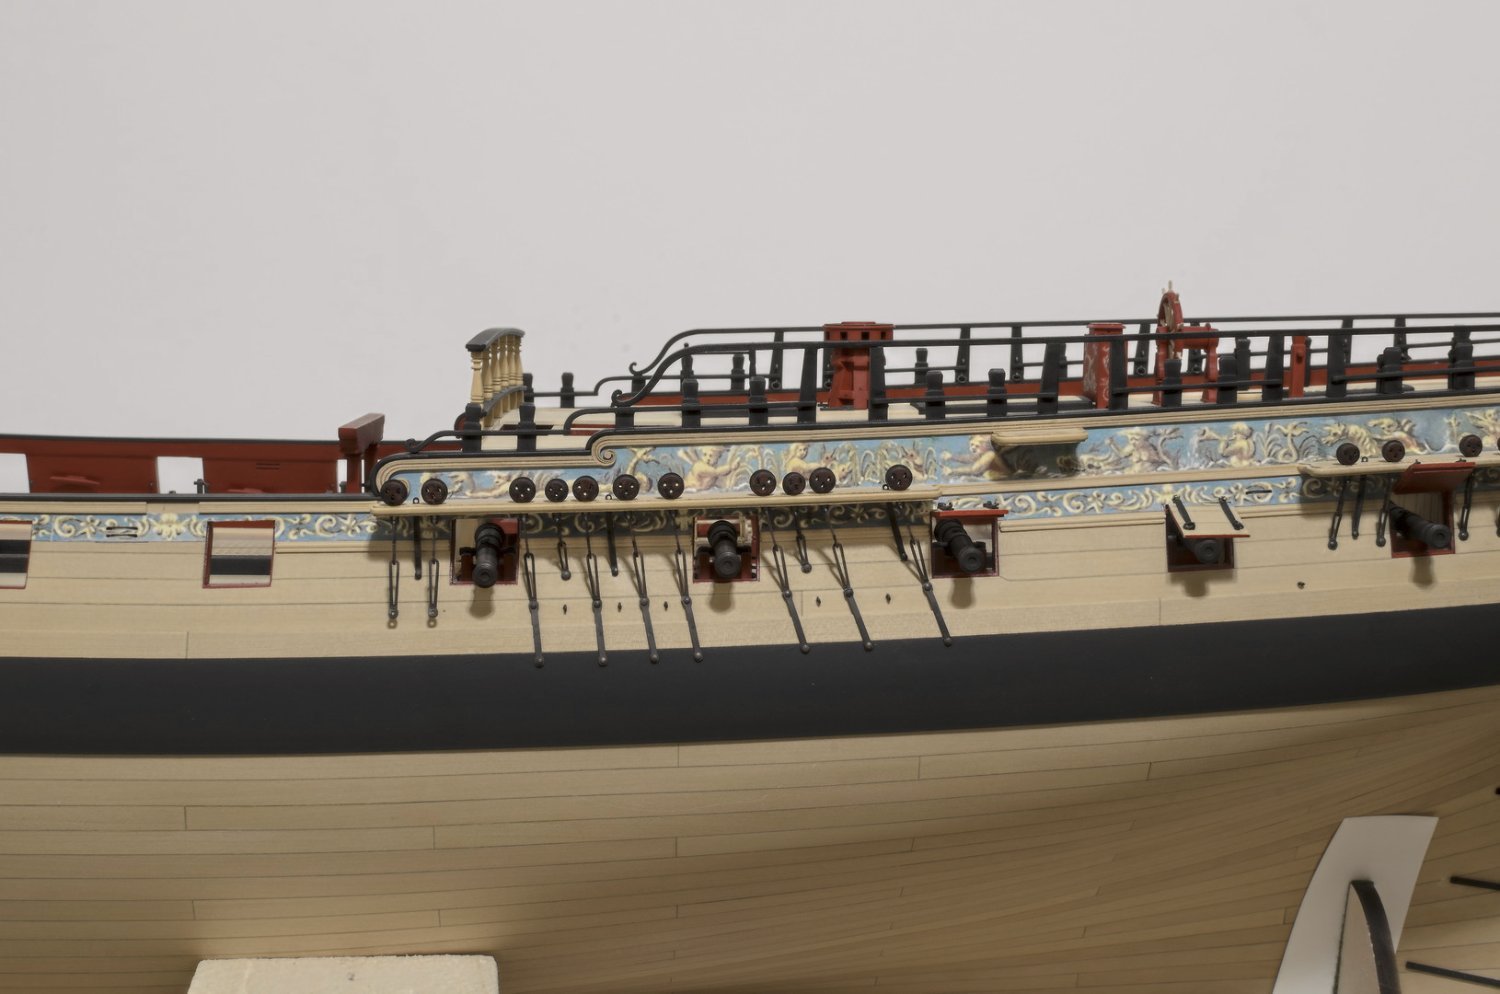
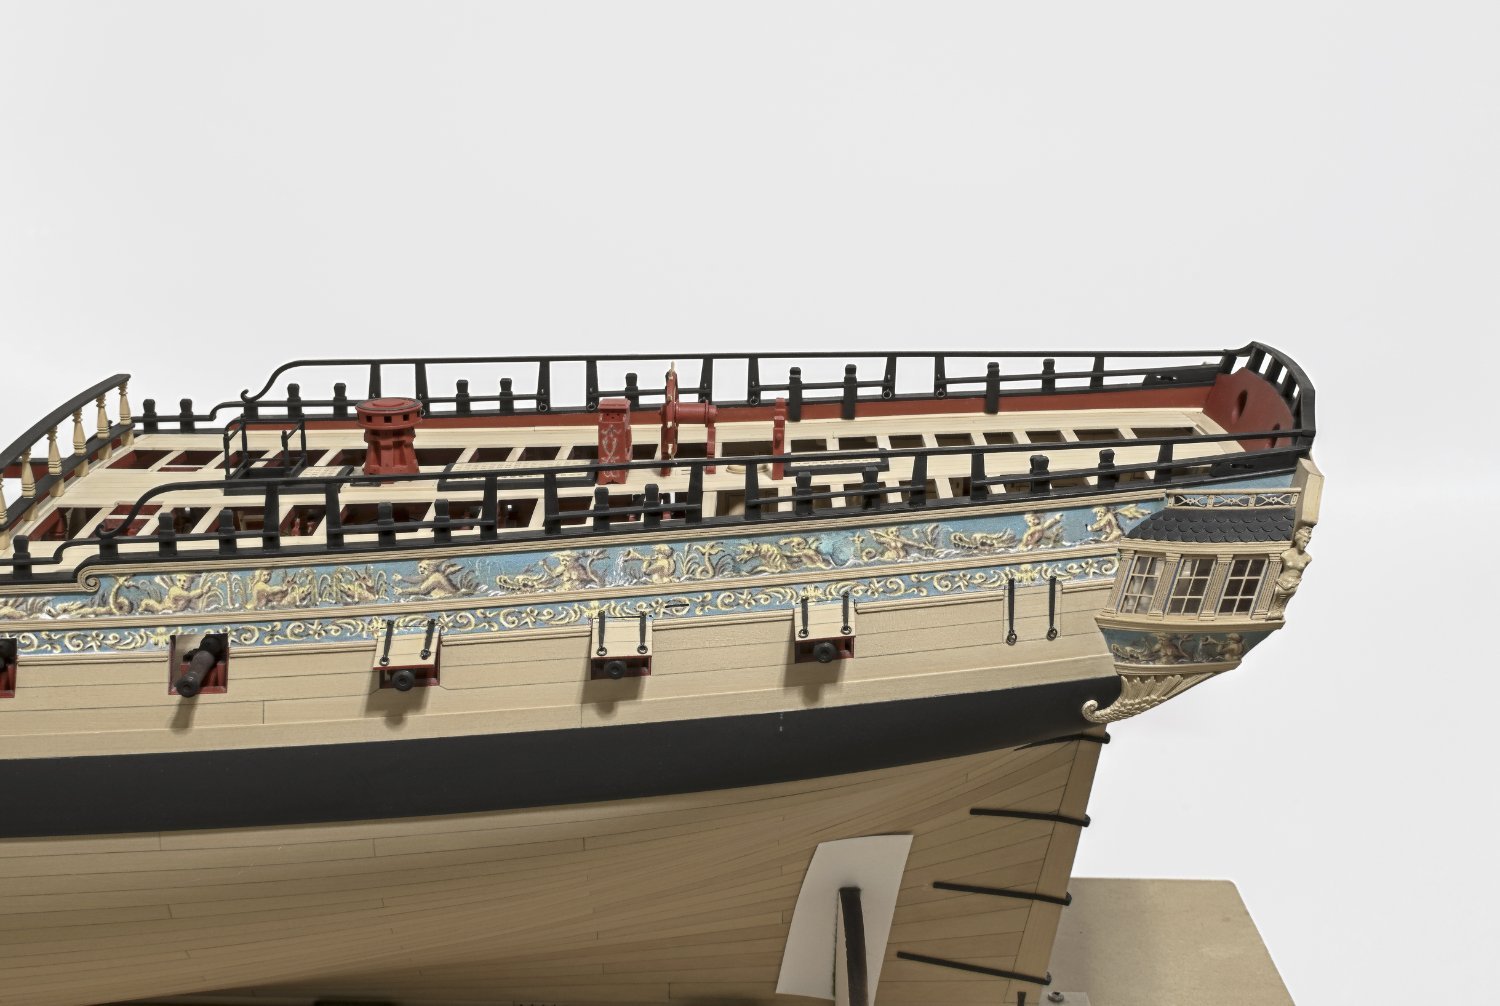
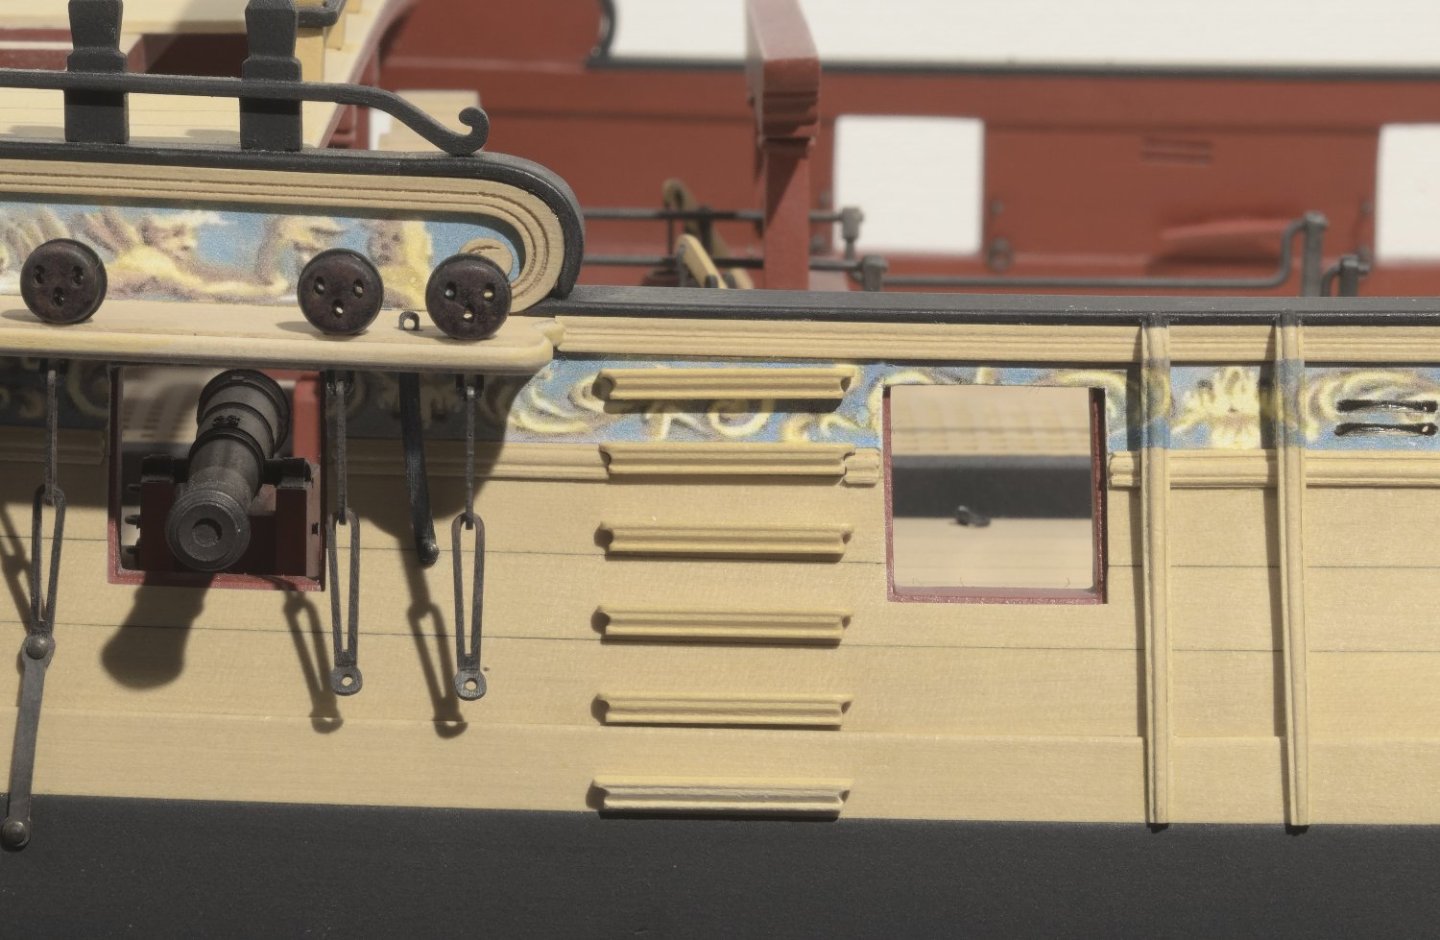
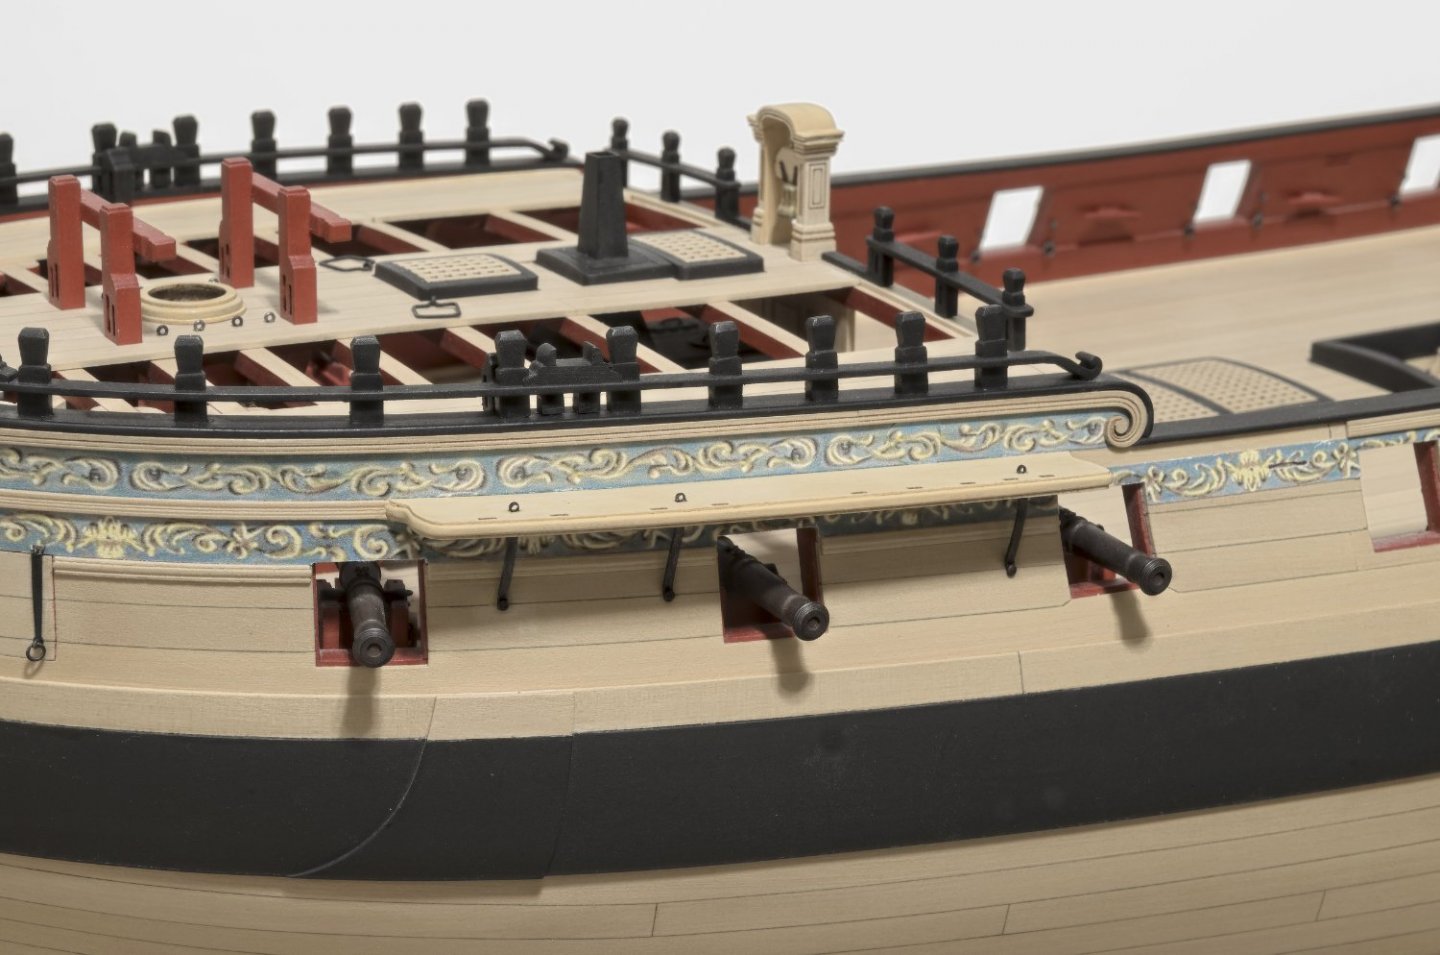
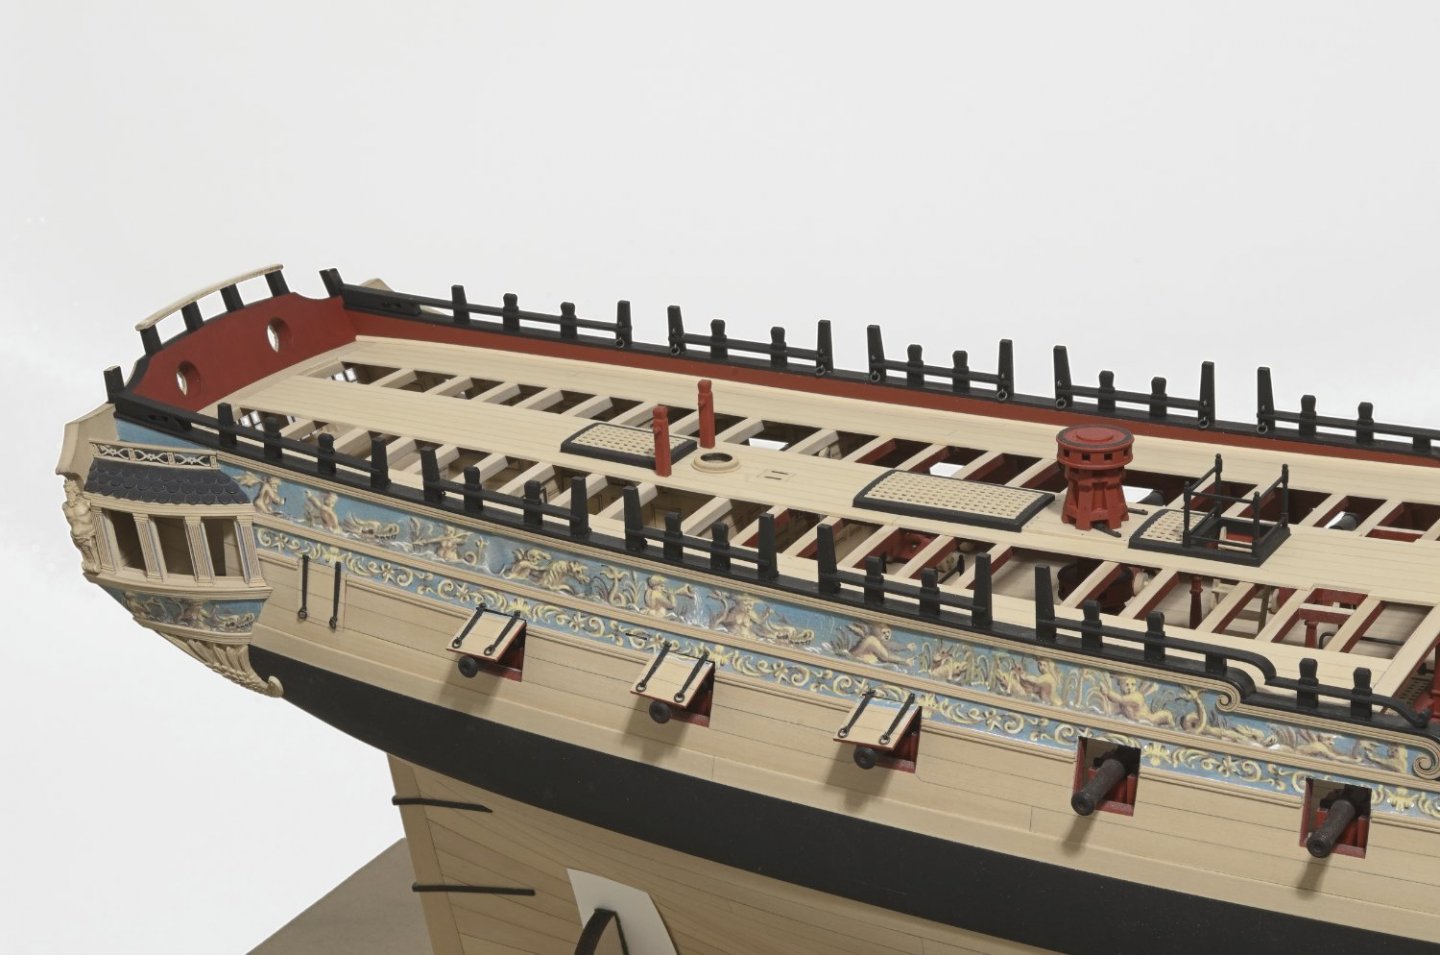
 I now have the boarding ladders completed. Chuck says that they are "pretty straight forward". I guess that in a way they are, but I needed to figure out how deep to make the profile for it to work. The back edge needs to be tapered in order for the tops to sit parallel to the building board. If the profile is too deep they would be too thin on the bottom after tapering. My first scraping was just that, too thin. I made another profile that was only half as deep and that worked out okay, I think. The I-Gauging tool help me to see when the top was parallel. The middle three ladders where later given a coat of Poly after being glued onto the hull. That strip of blue tape was just to protect the wales from getting scratched by my fingers while working. I decided not to cover the top ladder with a frieze. Now that the ladders are in I will finish up the two dangling chain plates. Mike
- 607 replies
-
- 26
-

-

-
- winchelsea
- Syren Ship Model Company
- (and 1 more)
-
Very nice, Dusan! Keep up the good work. Mike
-
I remember feeling hesitant when I needed to cut out for the catheads. Using an ultra fine saw really made things a lot easier. No doubt yours will look great. Mike
-
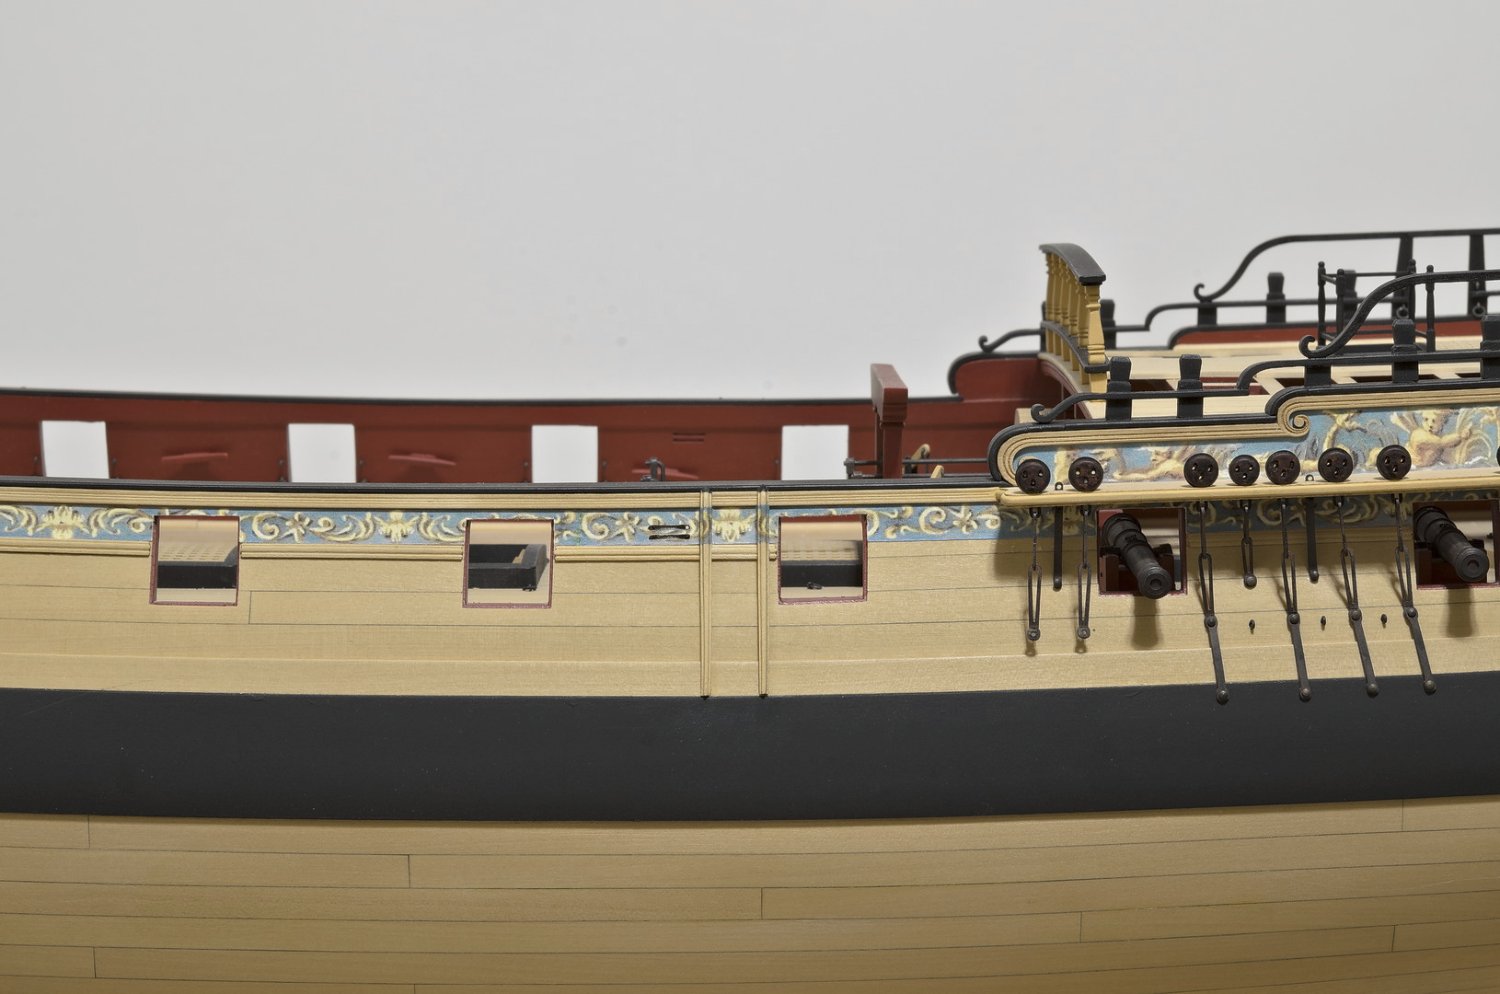
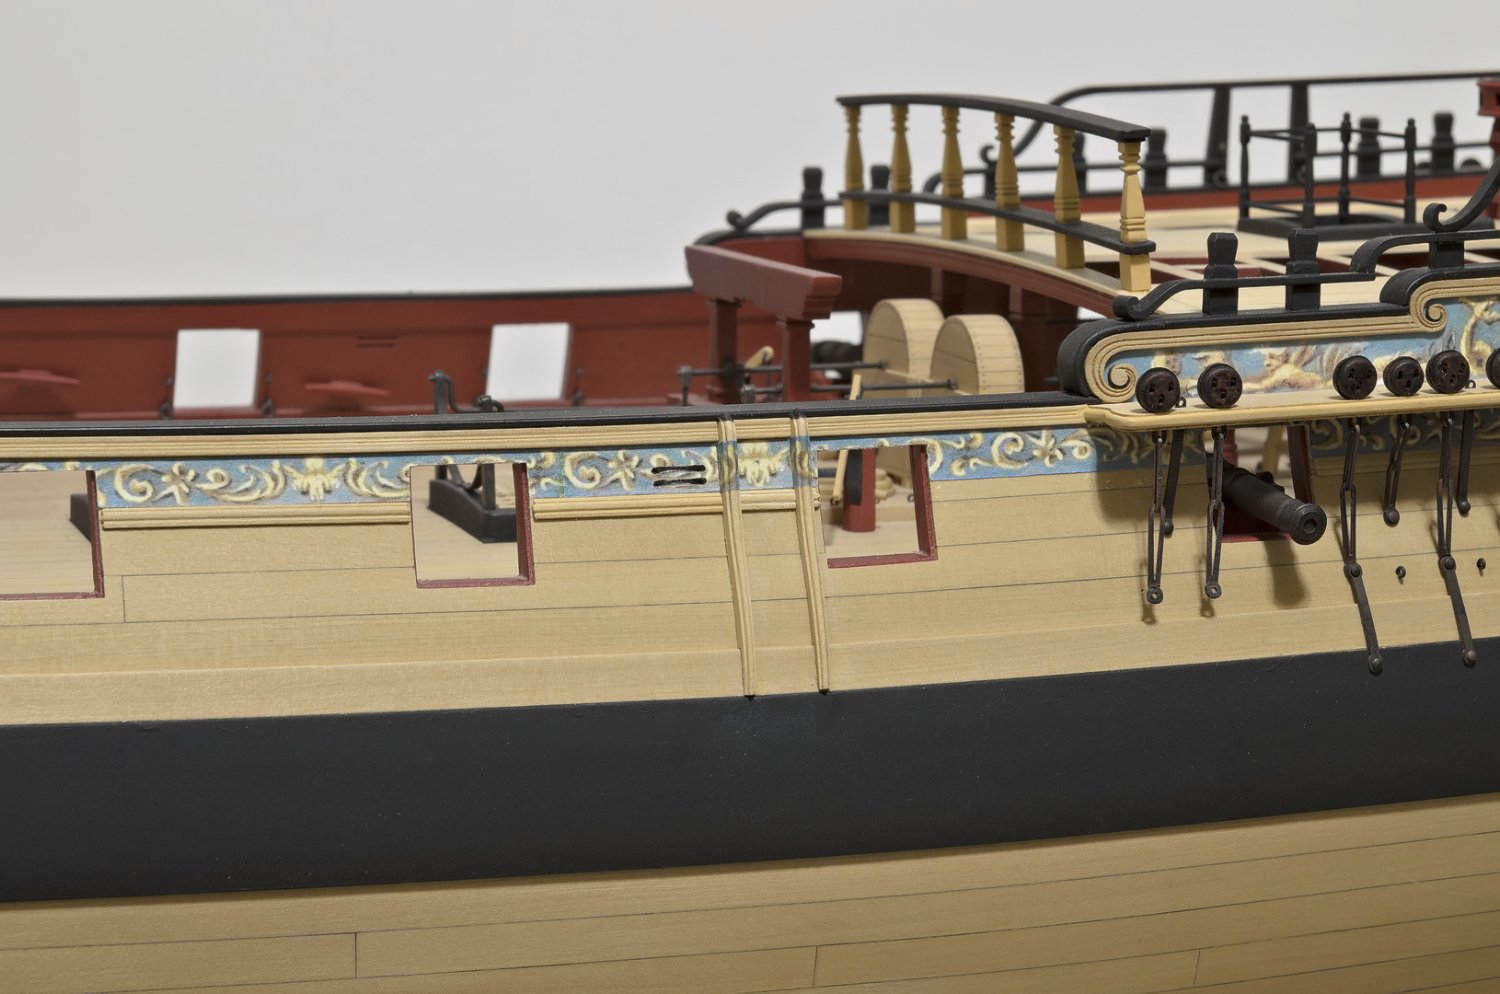
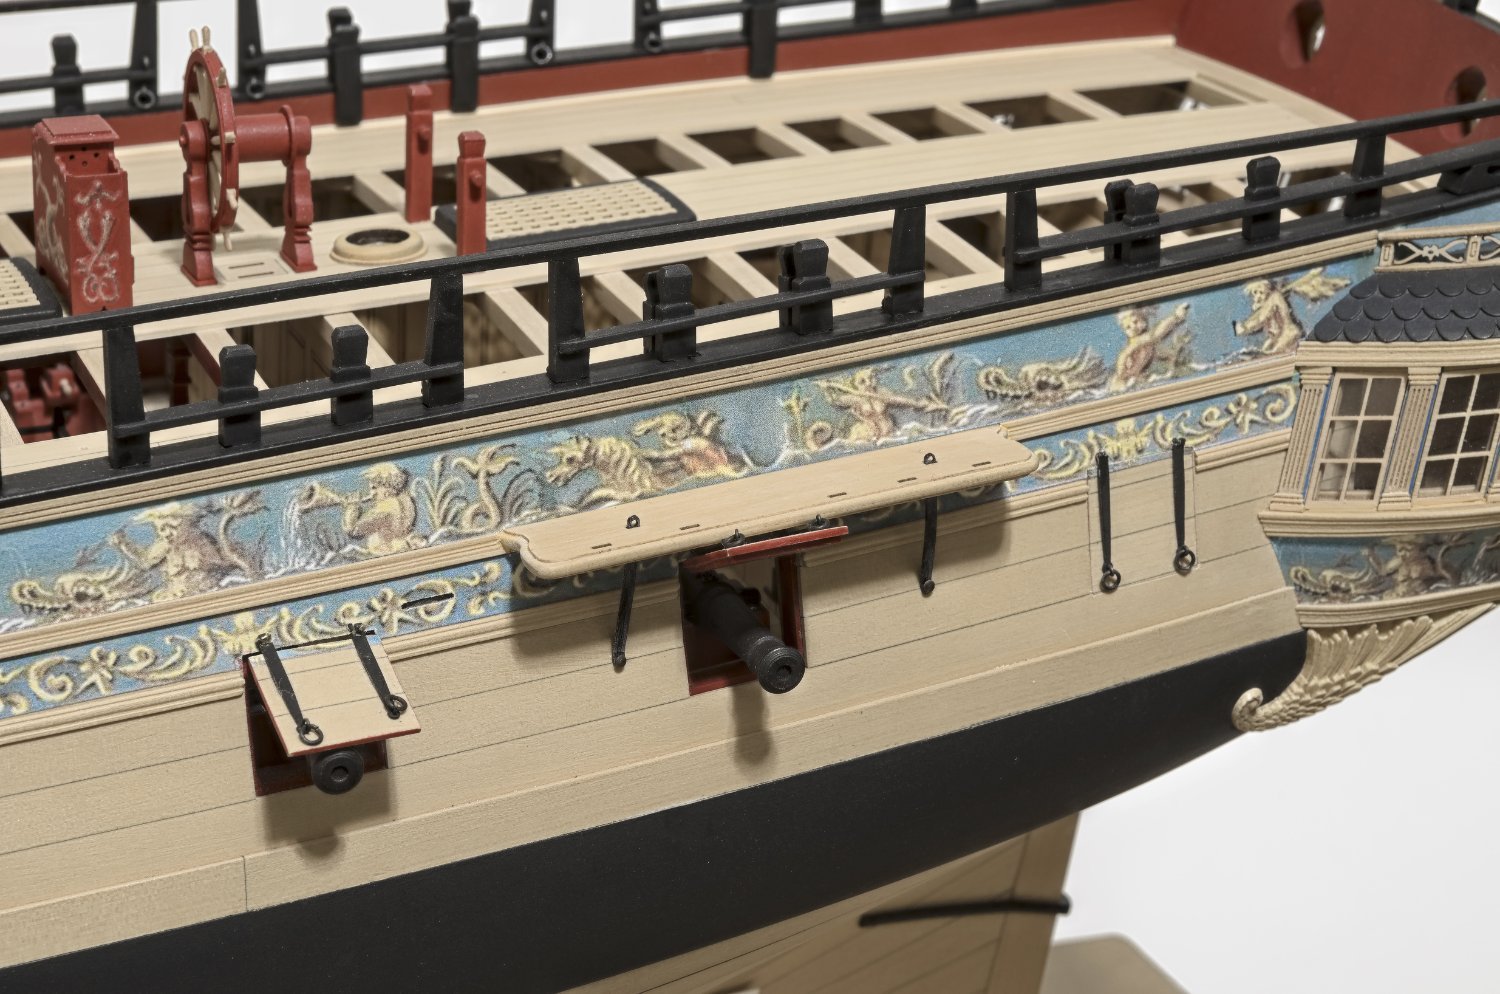
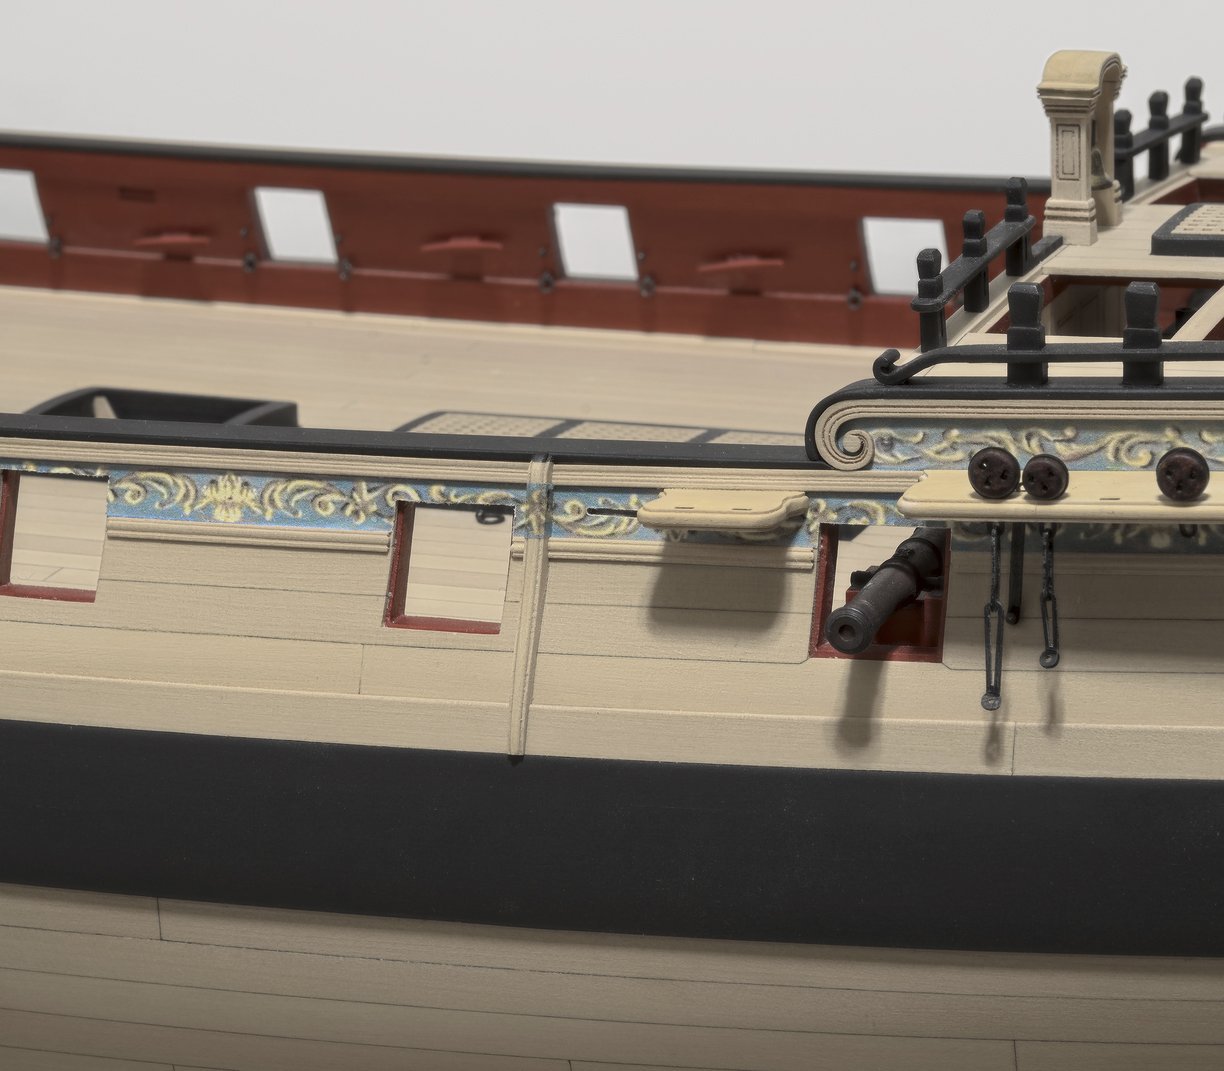
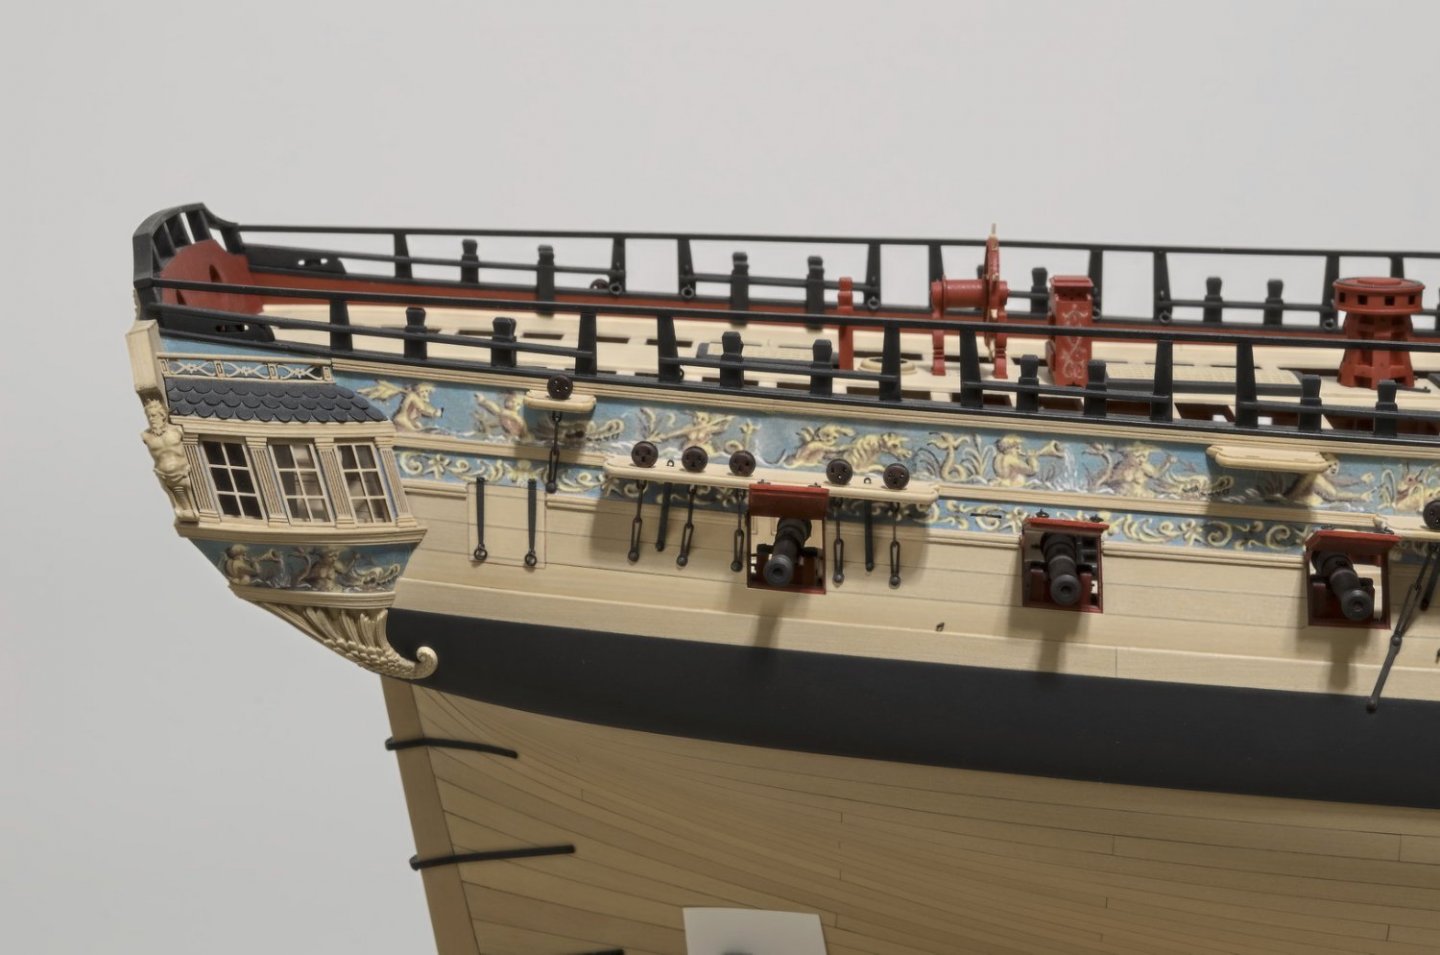
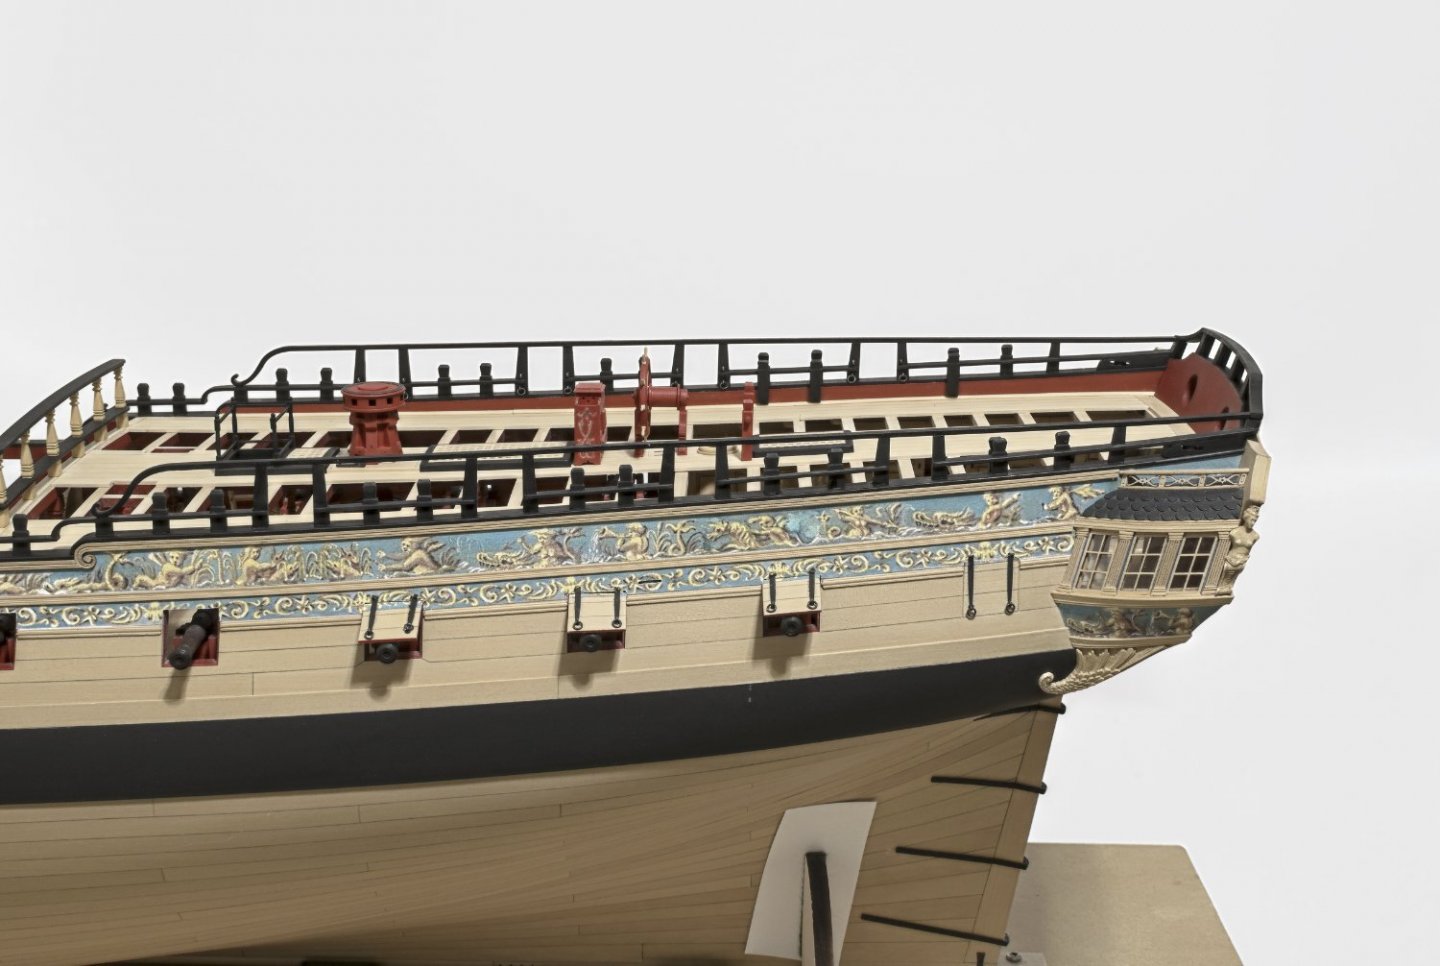
As usual I'm working on a number of tasks at the same time. The Lantern is near completion and I should have some photos to share fairly soon. Meanwhile I've managed to complete the nailing of the chain plates except for two on each side which I left dangling. Also, I removed the moulding under them. When I start on the boarding ladders it will be easier to work in that area without the moulding. Besides, I prefer to shape the moulding to the profile of the ladders while off the ship rather than on. The billboard and fenders are done. The fiddly fenders required a lot of profile tweaking and I was very happy to be done with them.😏 Mike


- 607 replies
-
- 20
-
-
-
- winchelsea
- Syren Ship Model Company
- (and 1 more)
-
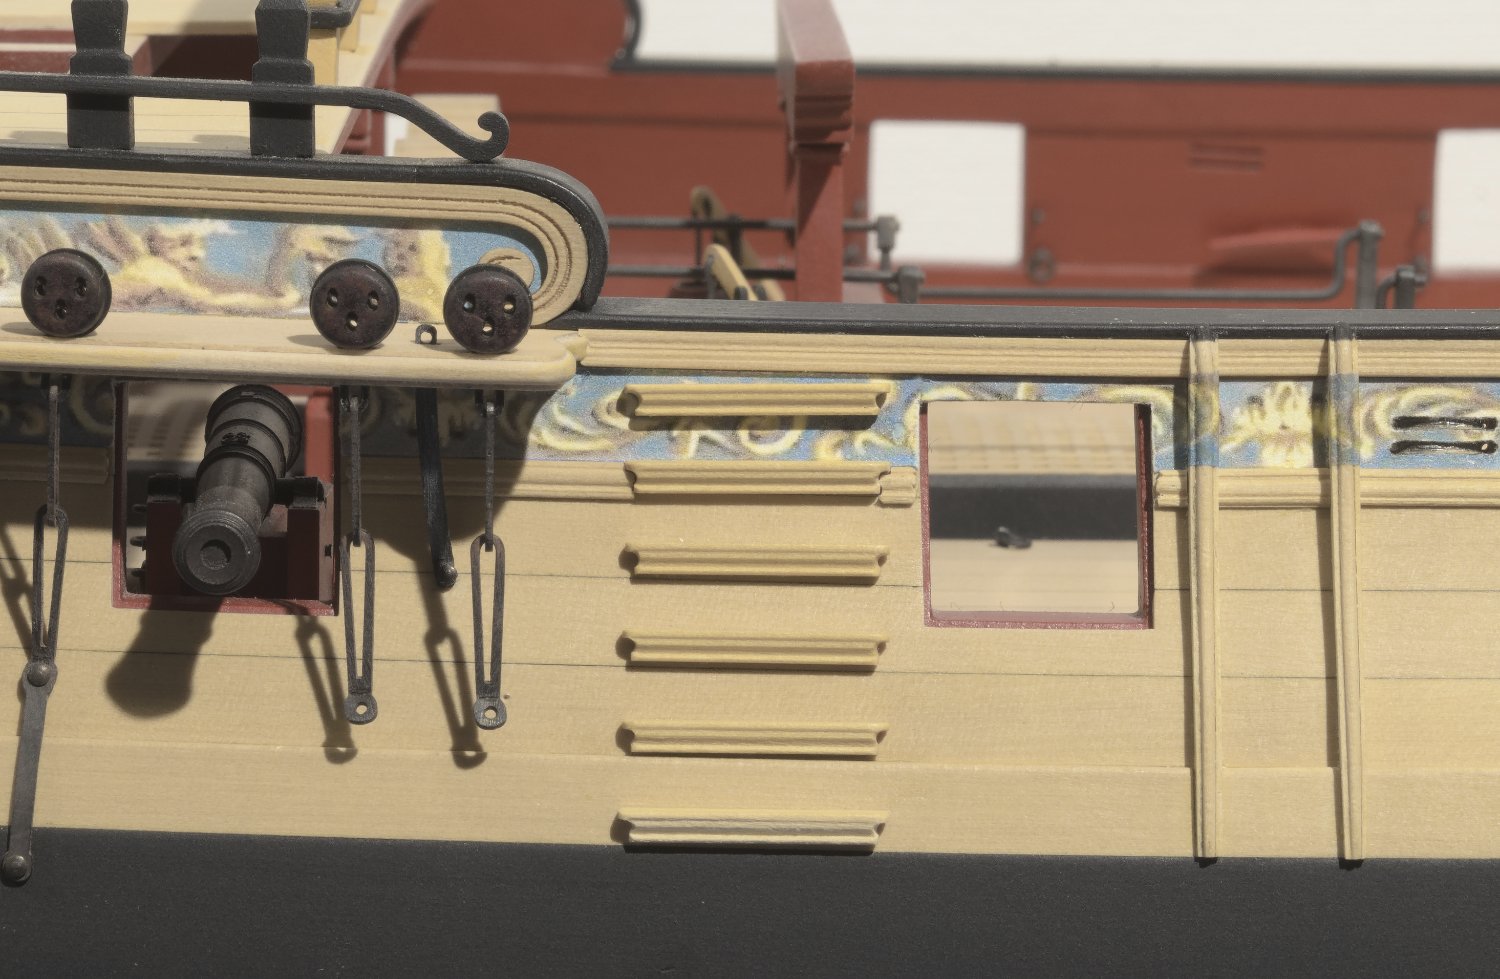
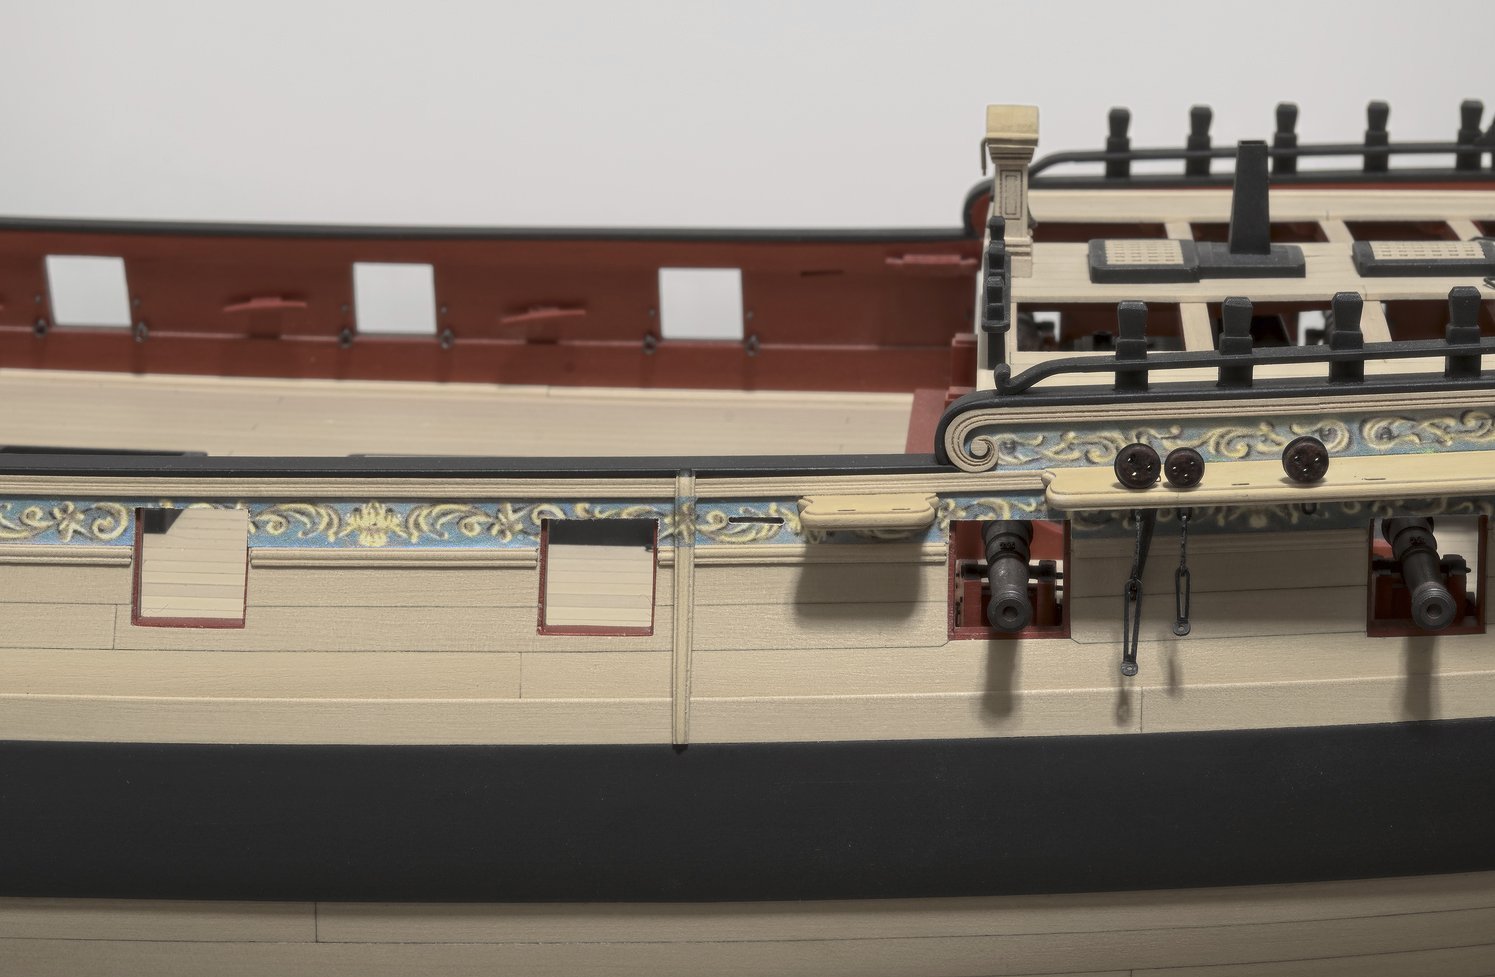
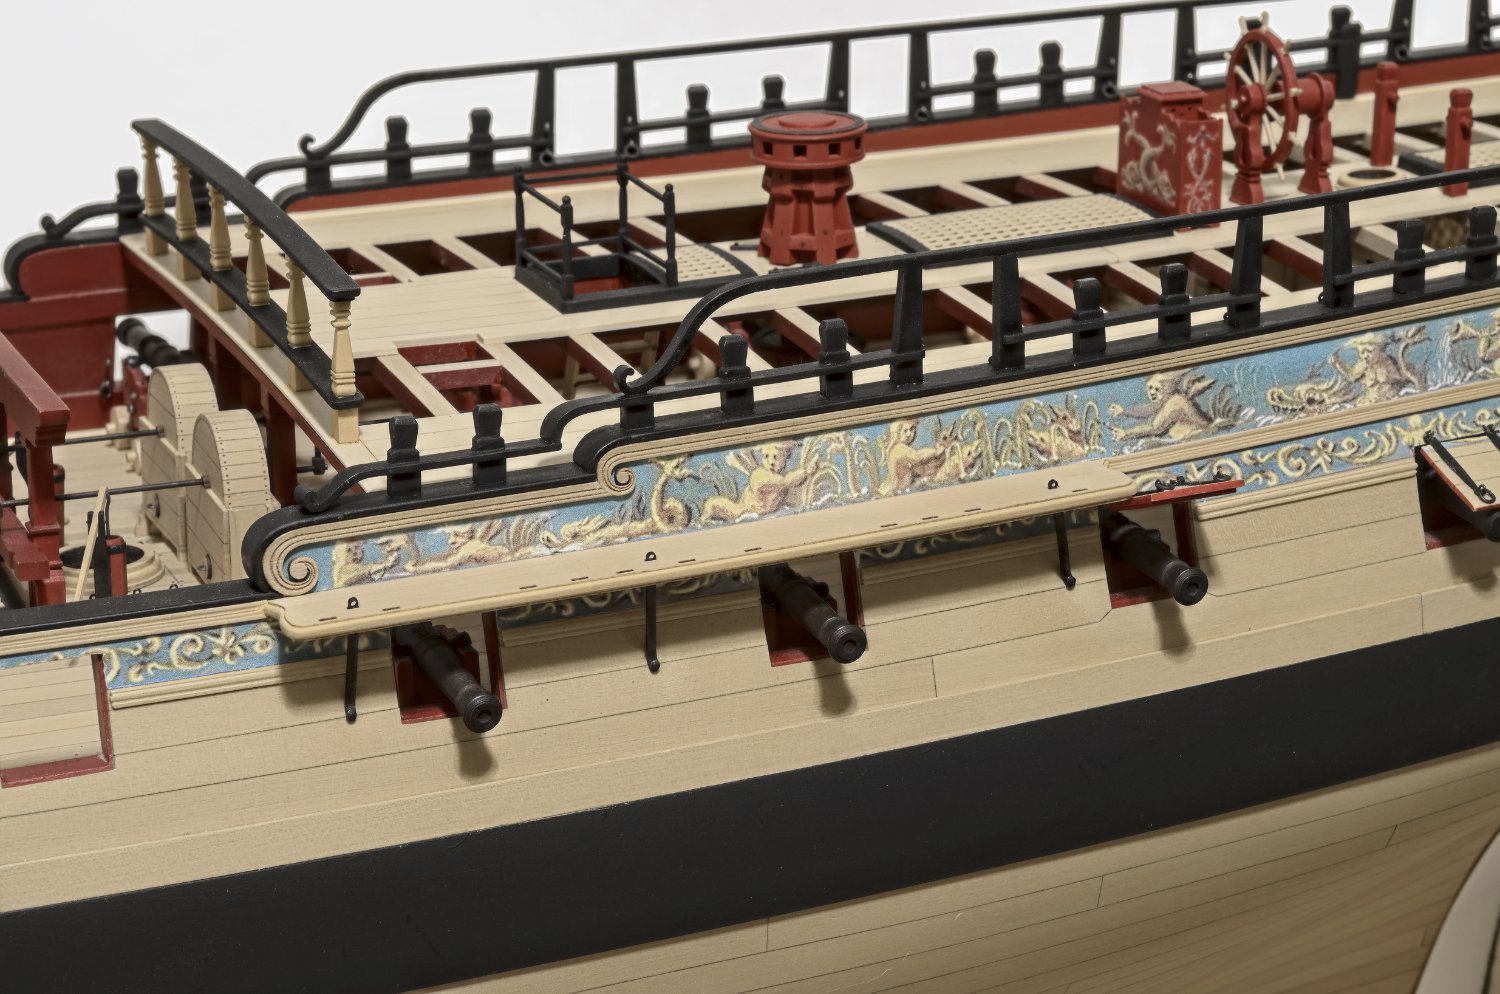
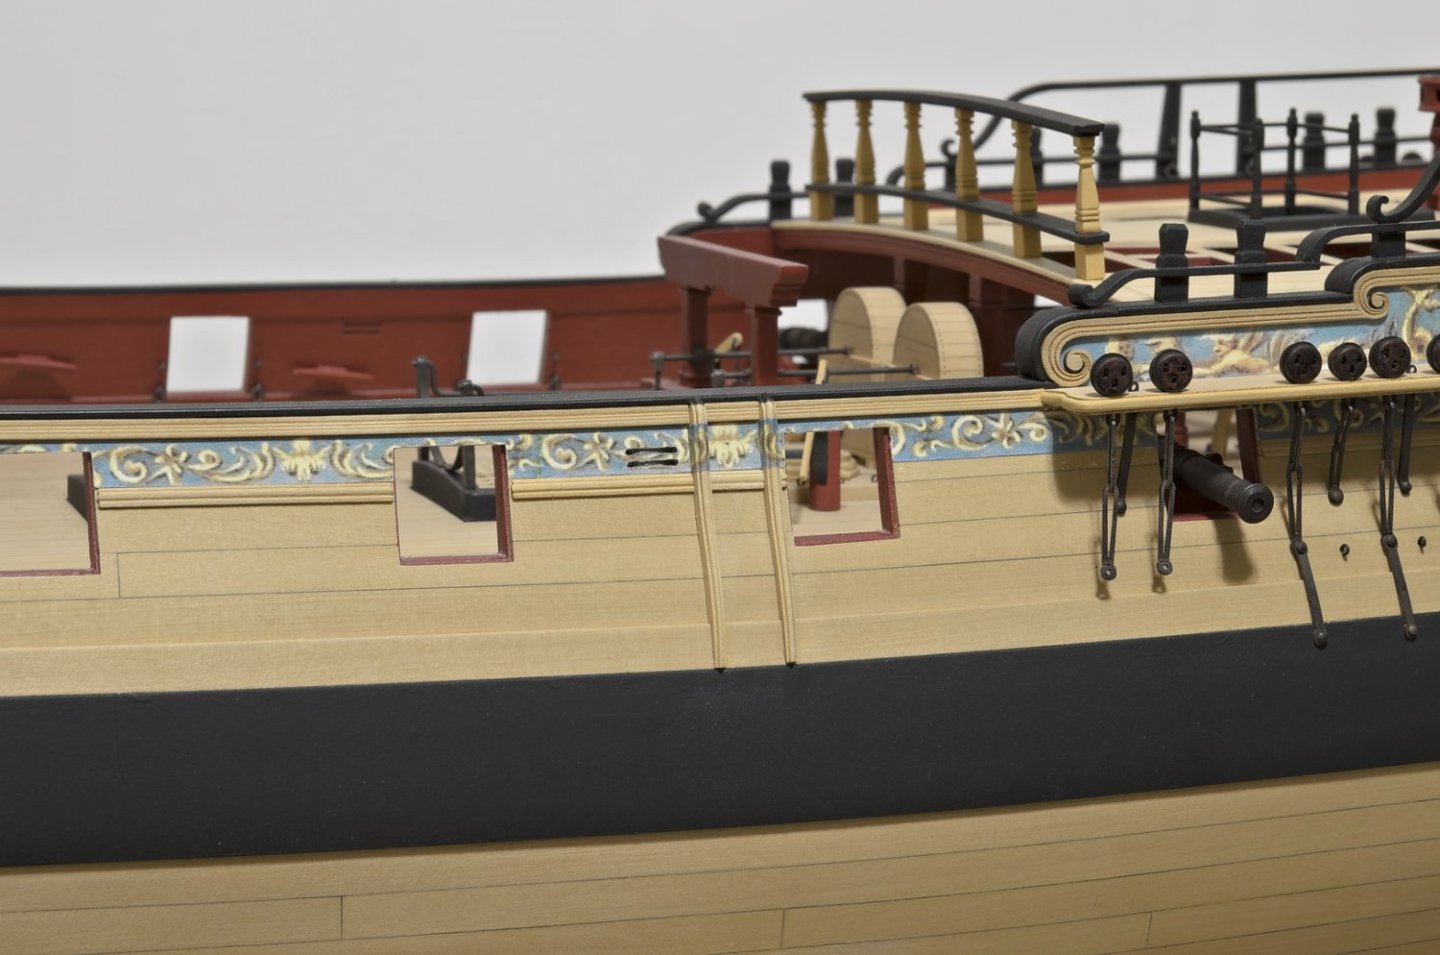
I still have a lot more work to do on chapter 11. Here is generally where I am at as of today. Both main and mizzen channels are done (almost). Notice that the forward two chainplates are not attached to the hull. I'm going to remove that moulding where the second ladder goes. This will make it easier to both install it as well as shape the moulding that goes around it. All of the stools are in. Keeping things Parallel First attempt at chesstrees Mike


- 607 replies
-
- 27
-
-
-
- winchelsea
- Syren Ship Model Company
- (and 1 more)
-
Looks great, Thomas!
-
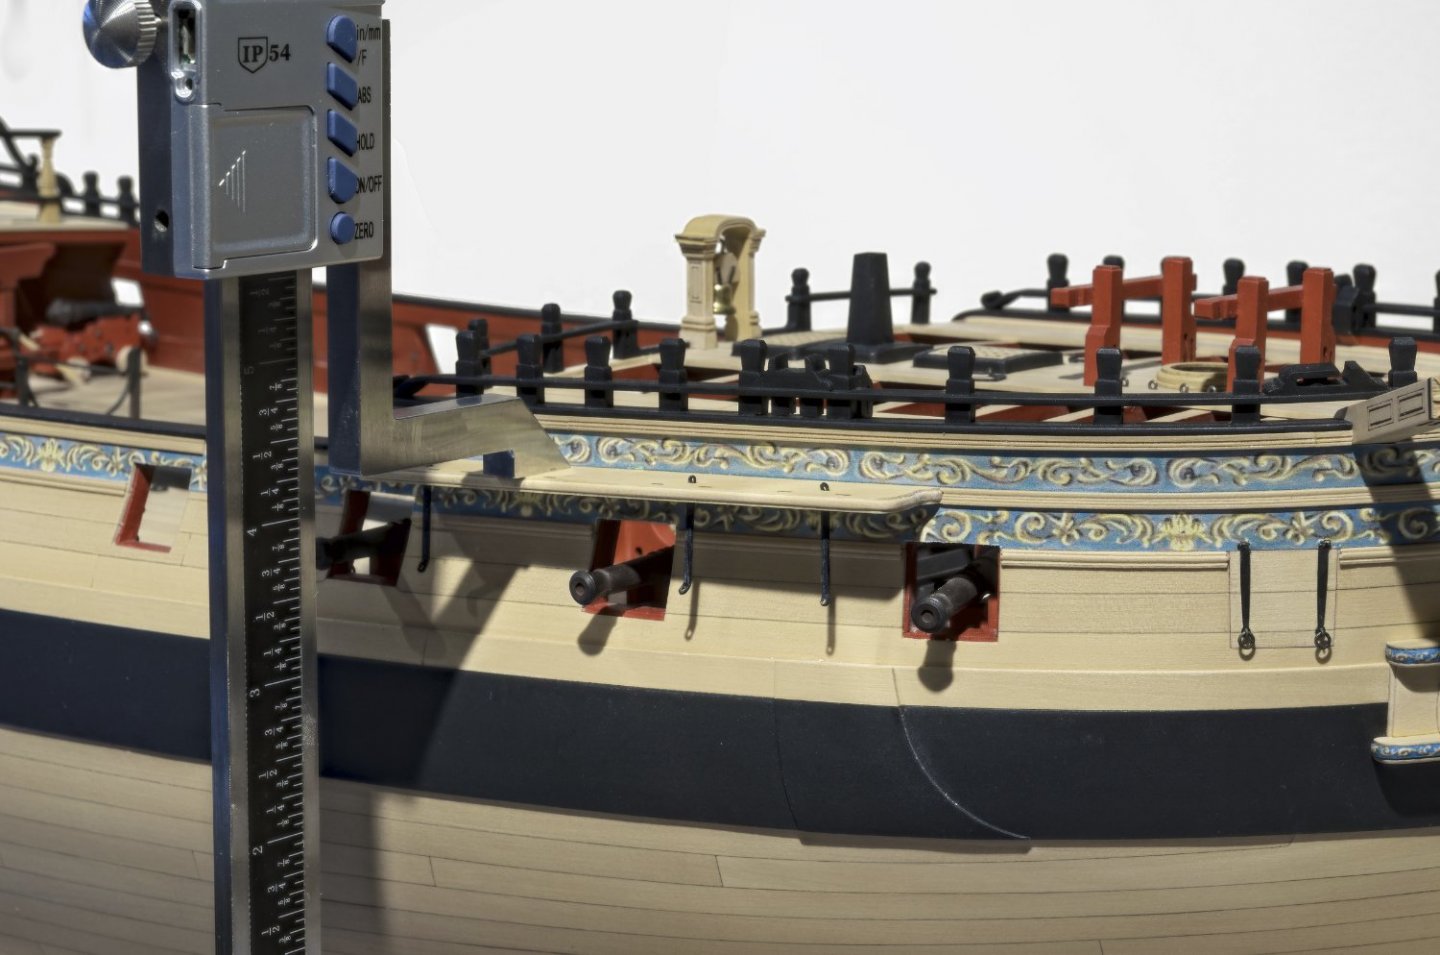
Thanks, Thomas! http://www.igaging.com/ Look under measuring tools / height gauges
- 607 replies
-
- 2
-
-
- winchelsea
- Syren Ship Model Company
- (and 1 more)
-
Thanks!!! Chapter eleven starts with my completing the six channels. . Before gluing each channel to the hull I set the straps. Each strap was angled according to the plan sheet. A tiny drop of medium CA underneath is all that was needed. I did find that there where a few slots which needed some angling on the bottom of the channel in order to get the desired strap angle. I was careful not to file away the shape of the slot as seen from above. During the gluing process, the IGAGING Digital Height Gauge was used to set the channels parallel to the build board. Once the channels where set, I used blackened brass nails, leftover from my Mayflower kit, to attach the bottom of each strap to the hull. A tiny smear of CA on the nail was more than enough to hold it securely in place. Mike

- 607 replies
-
- 24
-
-
-
- winchelsea
- Syren Ship Model Company
- (and 1 more)
-
A great start! Obviously a complex part of the build where I know you’ve made numerous prototypes. Can’t wait to see it all done.
- 1,784 replies
-
- 2
-
-
- winchelsea
- Syren Ship Model Company
- (and 1 more)
-
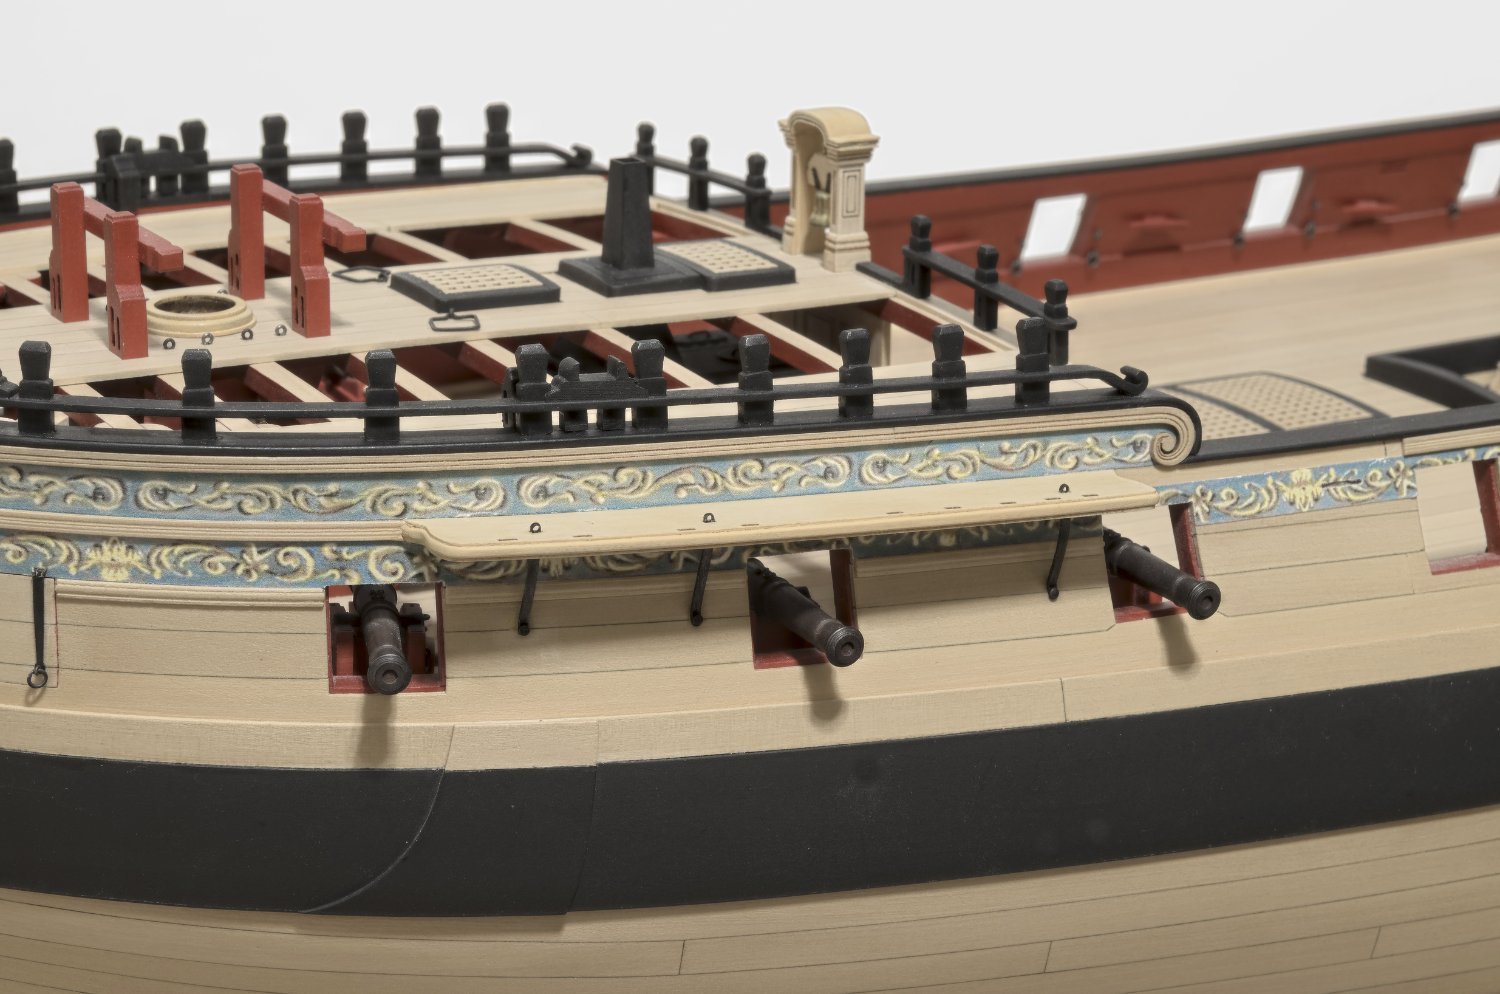
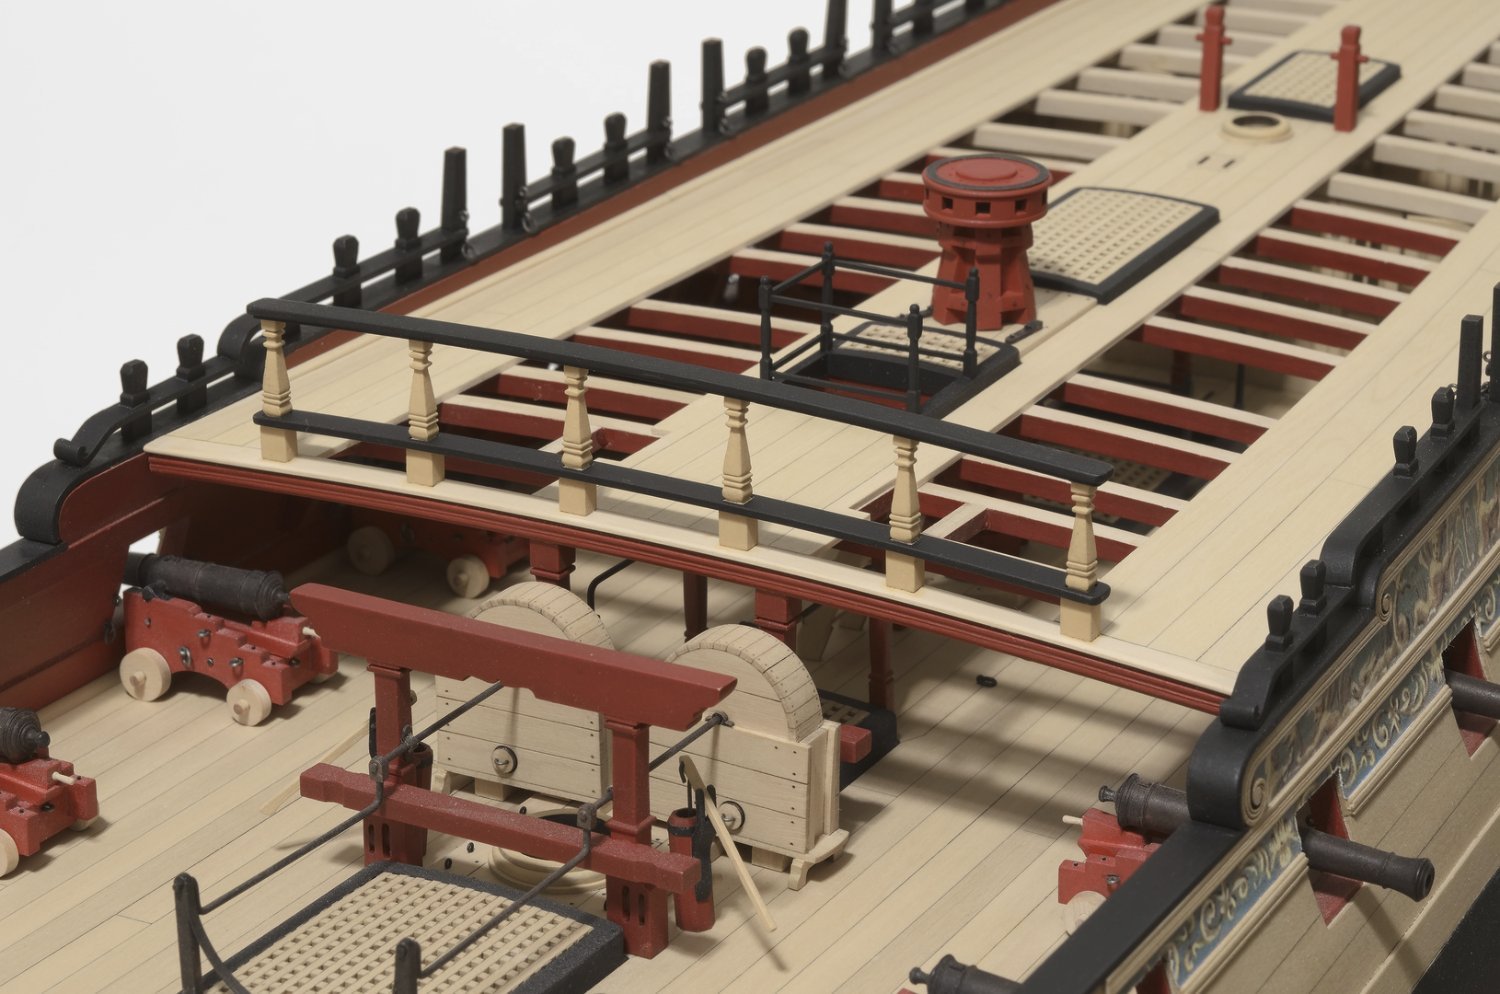
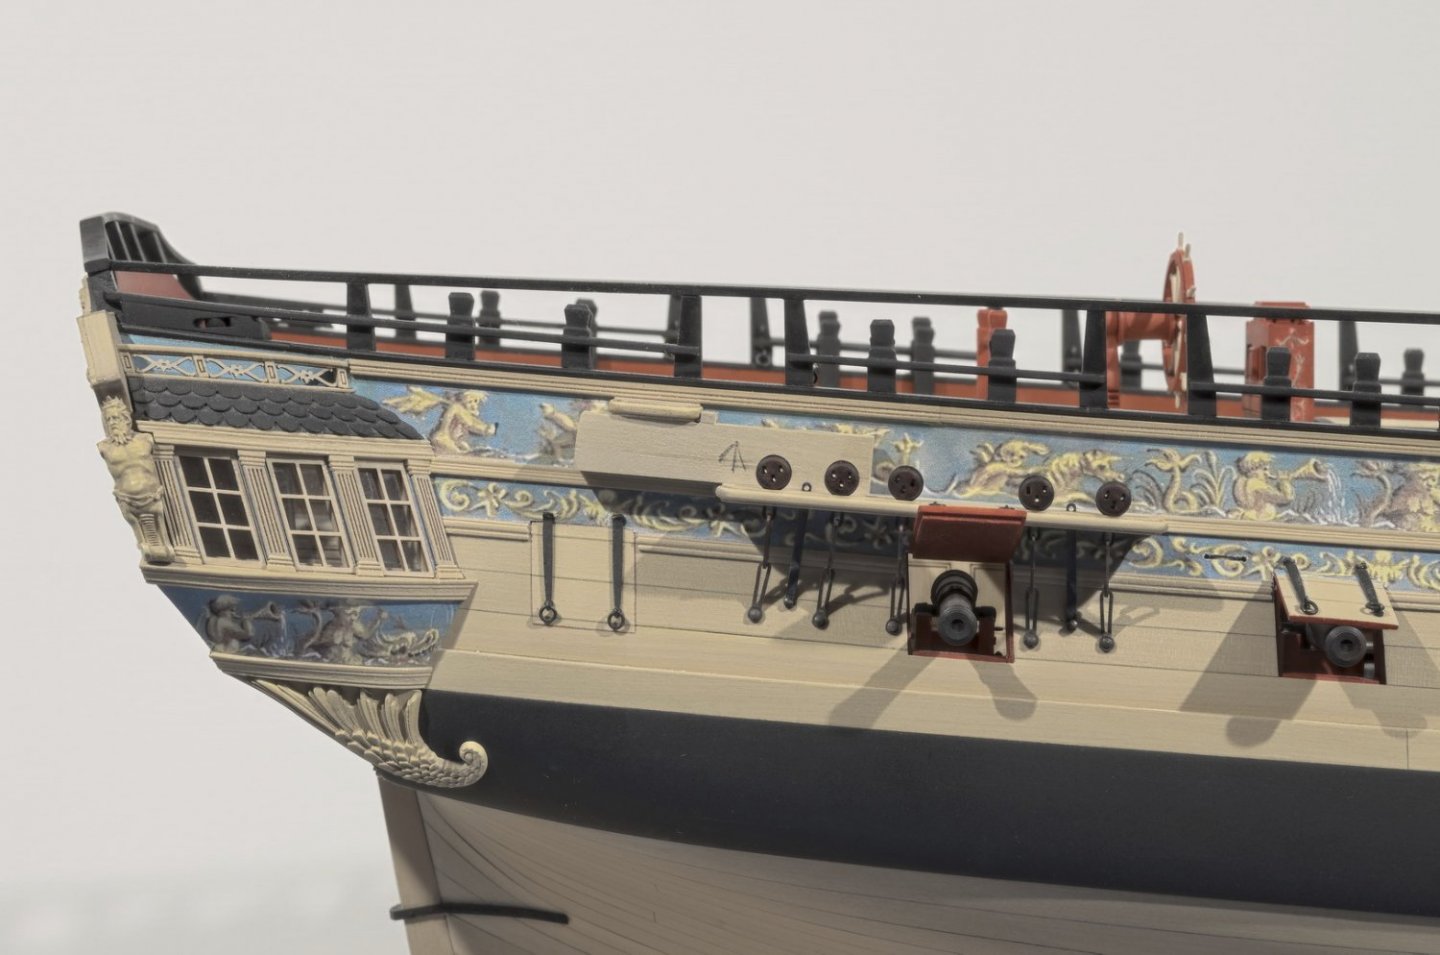
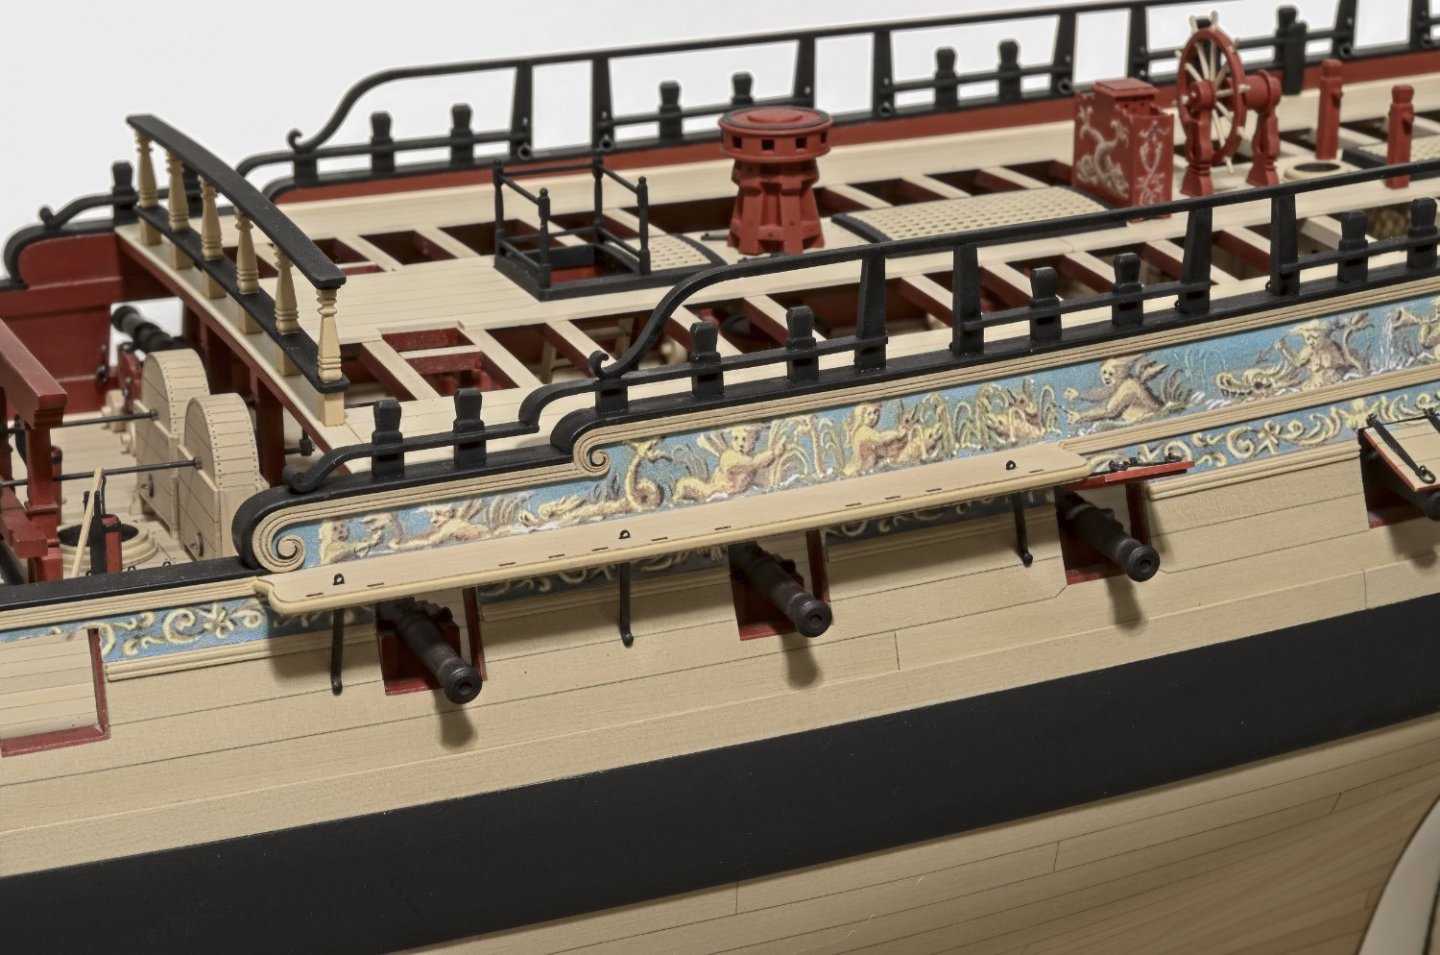
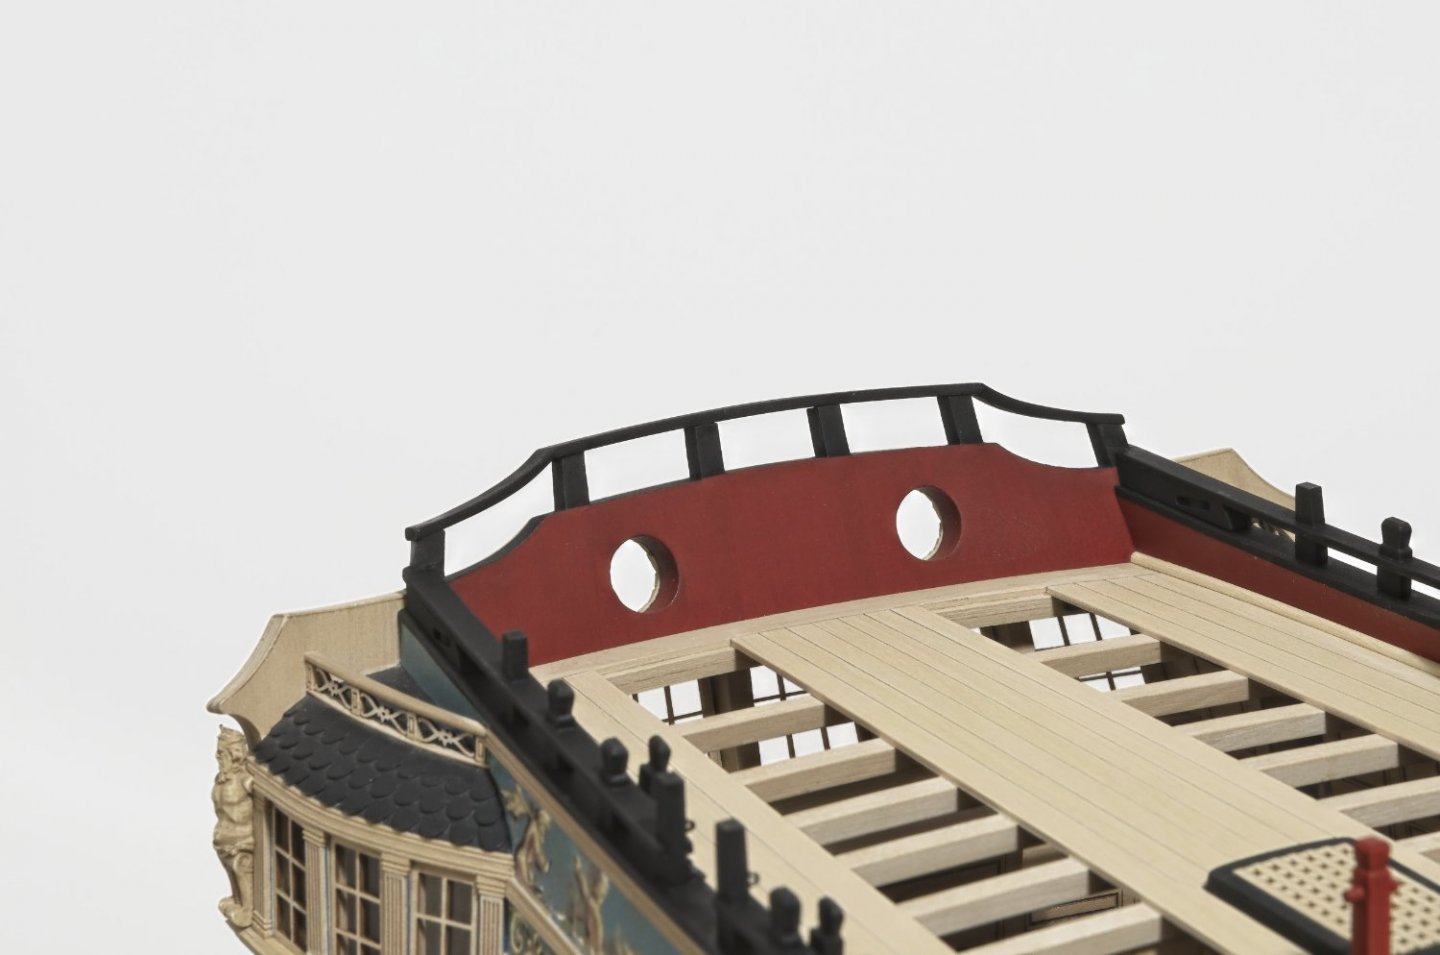
Just a quick update. . I managed to complete the upper rail today which finishes up chapter ten. One thing I would mention is the importance of being able to tweak the pillars on either side of the gun barrels. In my earlier post #483, Ofelia shows the way to get them into alignment. If I had glued them in with epoxy or CA it would have been very difficult to tweak them later while installing the upper rail. The rail is thin, so it wouldn't take much for things to not line up perfectly. Before adding the rail, I checked it for the run along the pillar tops. It was check in both directions, sideways and from the top. I ended up changing the curvature of the rail as well as re-tweaking one or two pillars. Since the pillars where glued in with PVA, I simply nudged the pillar one way or another without the need to moisten the glue joint. Mike
- 607 replies
-
- 17
-
-
- winchelsea
- Syren Ship Model Company
- (and 1 more)
-
Hi Joe, My camera is an old Nikon D5100 DSLR. It has a very good 16 megapixel sensor for its time. But in order to get sharp shots I use prime lenses. Mostly the 60mm macro lens, but sometimes the 35mm f/1.8. Of course I always use the tripod and I shoot at bass ISO. Surprisingly , new cameras with more megapixels are not going to yield better shots for the kind of photographs that we are taking and where they are being posted on the web.
- 607 replies
-
- 2
-
-
- winchelsea
- Syren Ship Model Company
- (and 1 more)
-
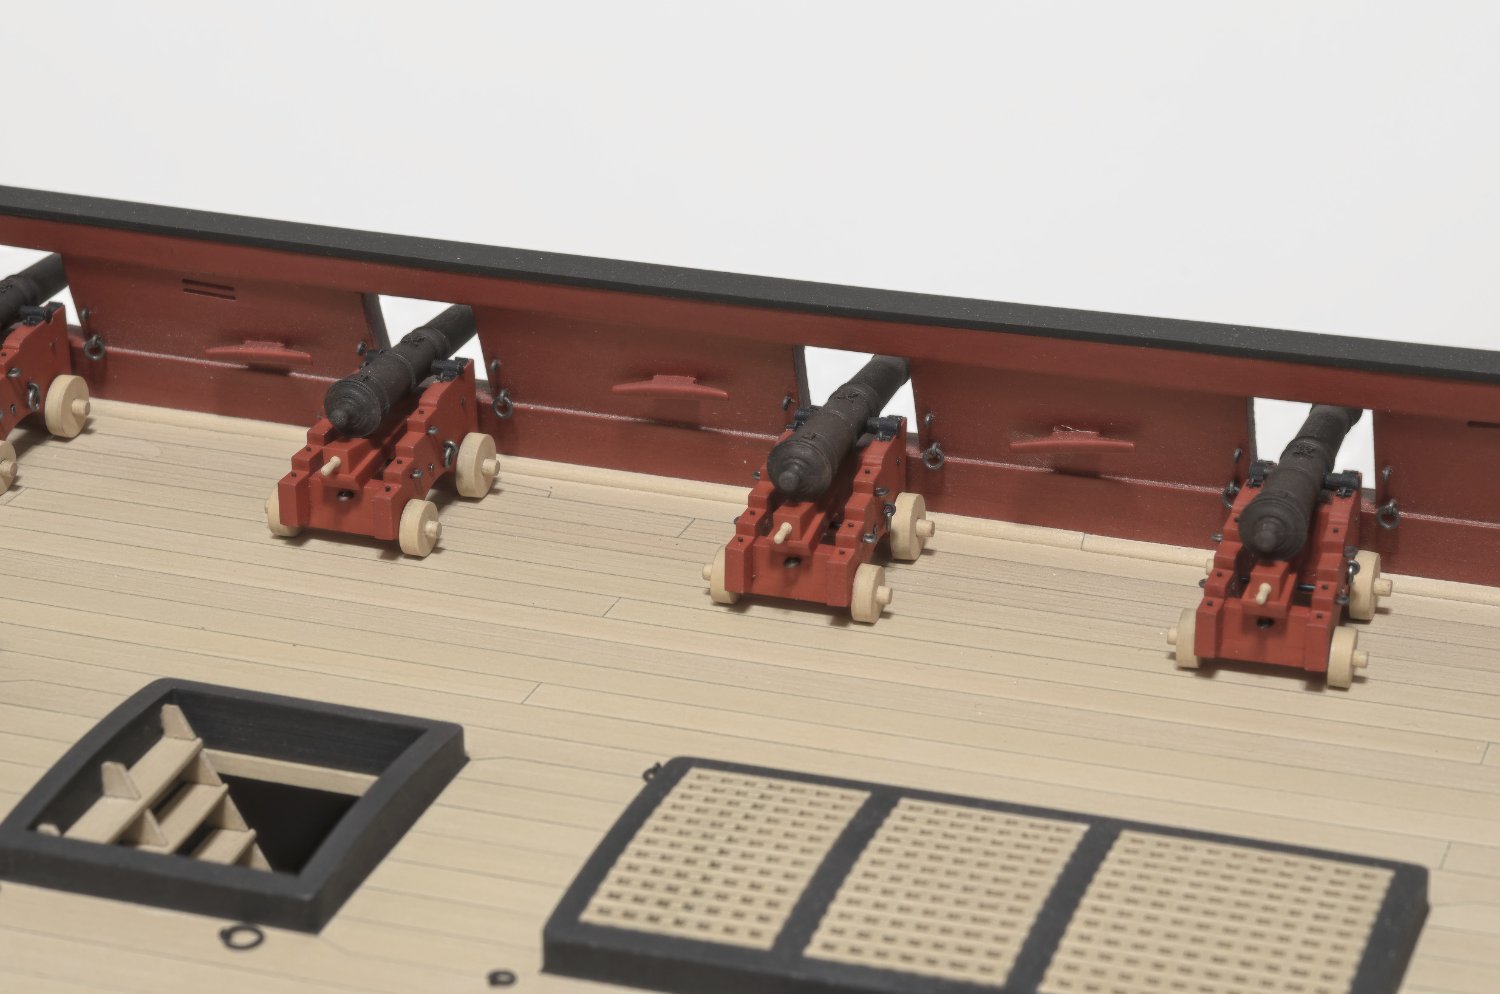
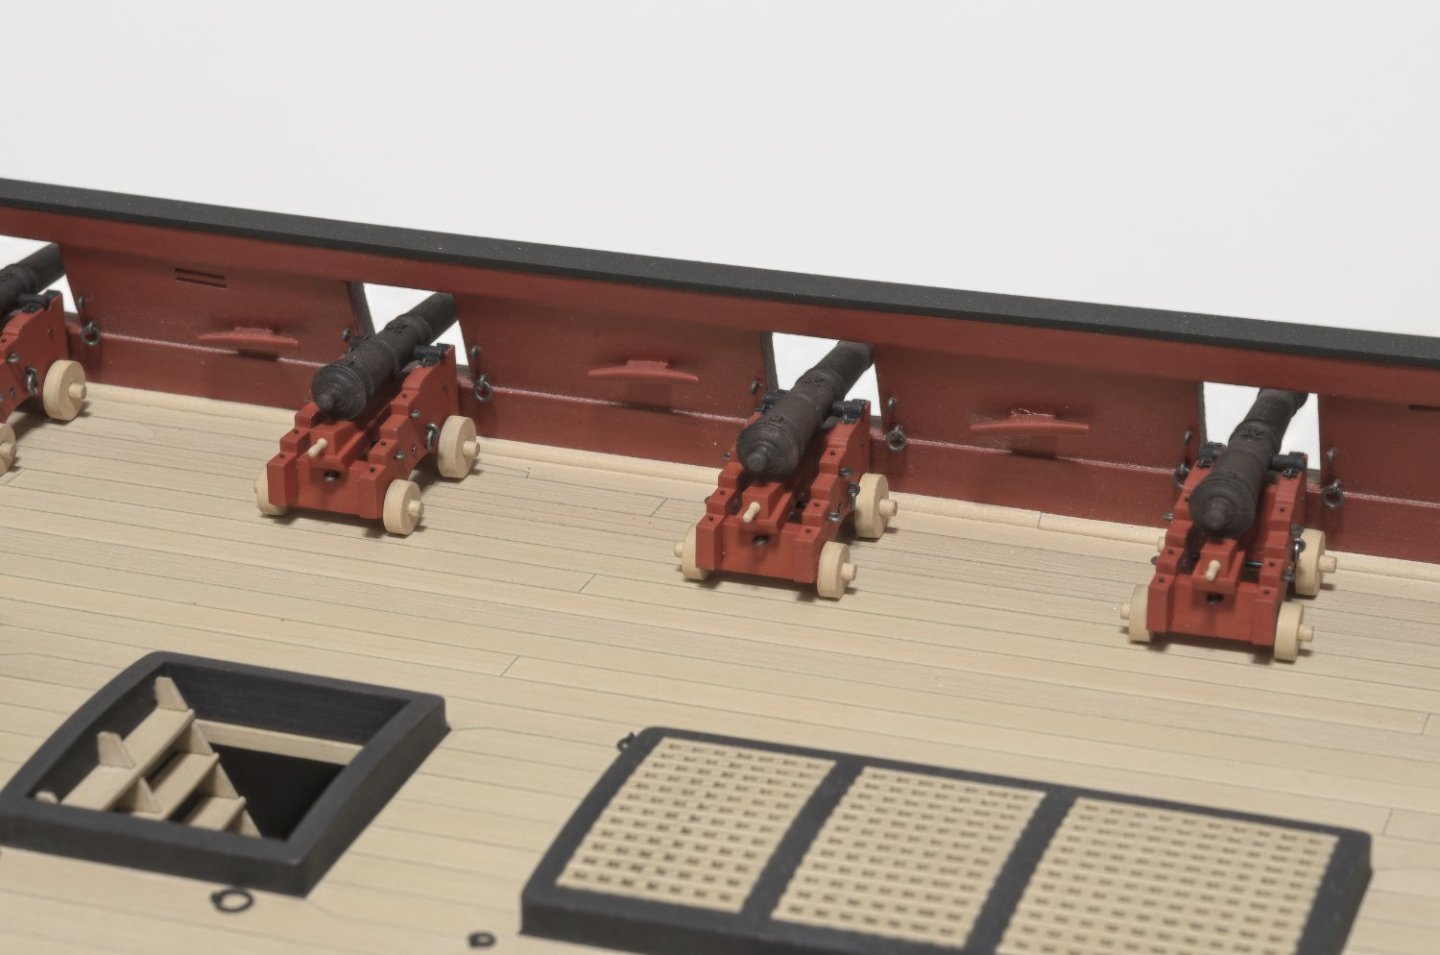
I guess that we each have our own idea of what constitutes a milestone. For me it's getting all that repetitive work completed in making guns. Mike
- 607 replies
-
- 19
-
-
- winchelsea
- Syren Ship Model Company
- (and 1 more)
-
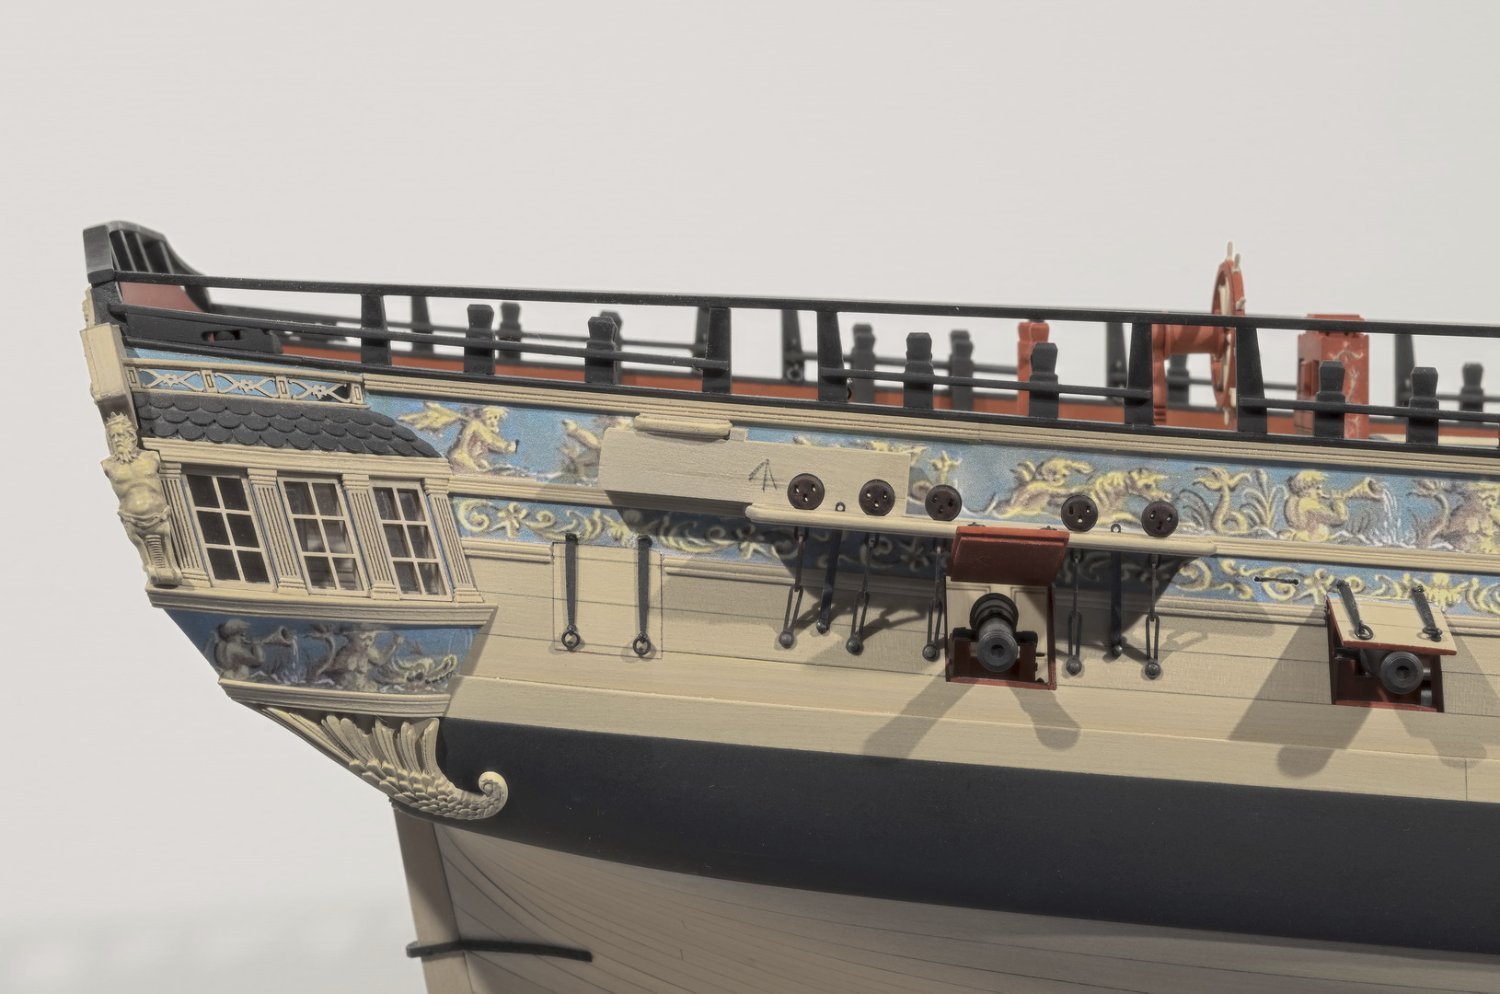
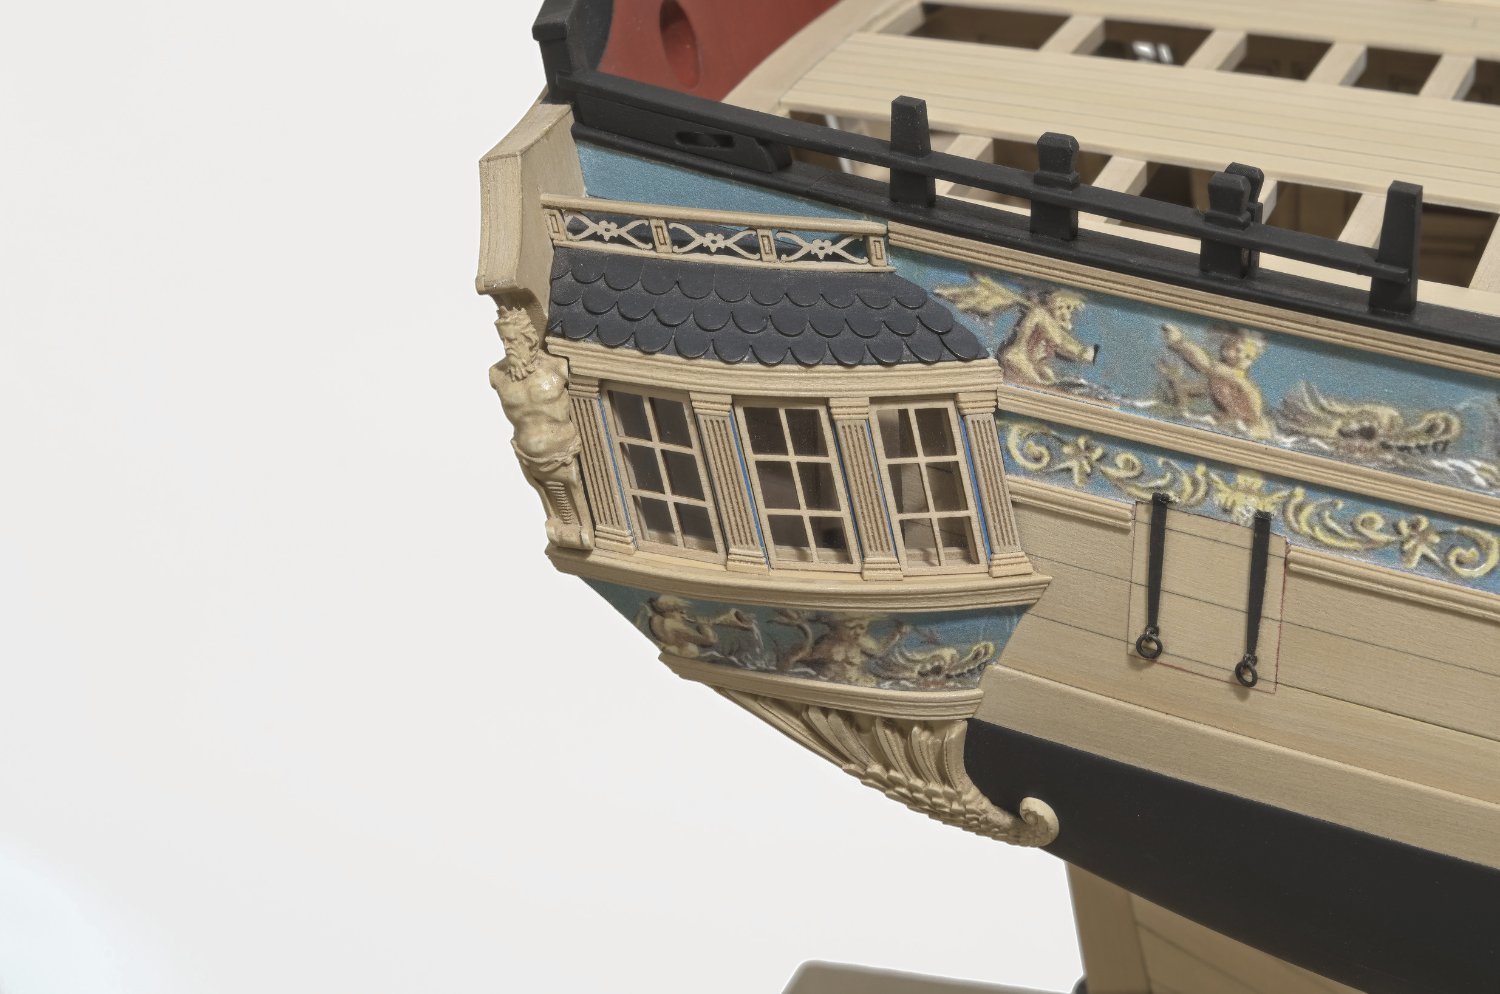
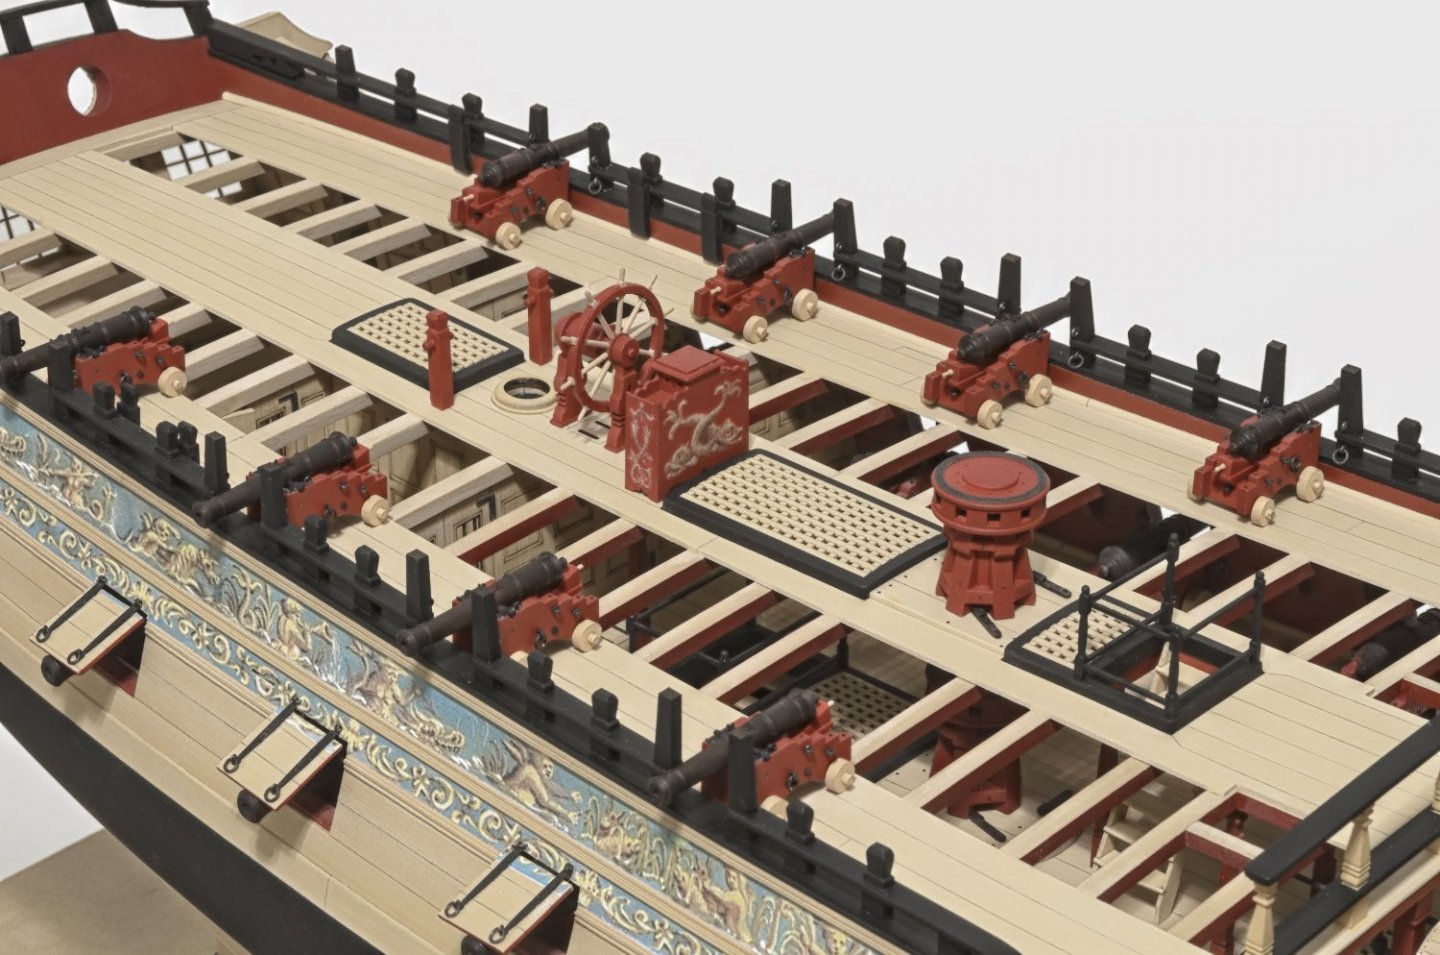
Thanks you all! I've been catching up on areas of the ship that were not completed earlier. The Q-gallery windows where on hold to avoid damage or dust collection. The remaining large guns due to my just being lazy. Anyway, here are some photos along with a few updates to chapter ten. After I drill the holes for the pinned QD guns I will finish up the upper rail on the QD. Mike


- 607 replies
-
- 22
-
-
- winchelsea
- Syren Ship Model Company
- (and 1 more)
-
Nicely done, Chuck. Can’t wait to see your Winnie tomorrow.
- 1,784 replies
-
- 1
-
-
- winchelsea
- Syren Ship Model Company
- (and 1 more)
-
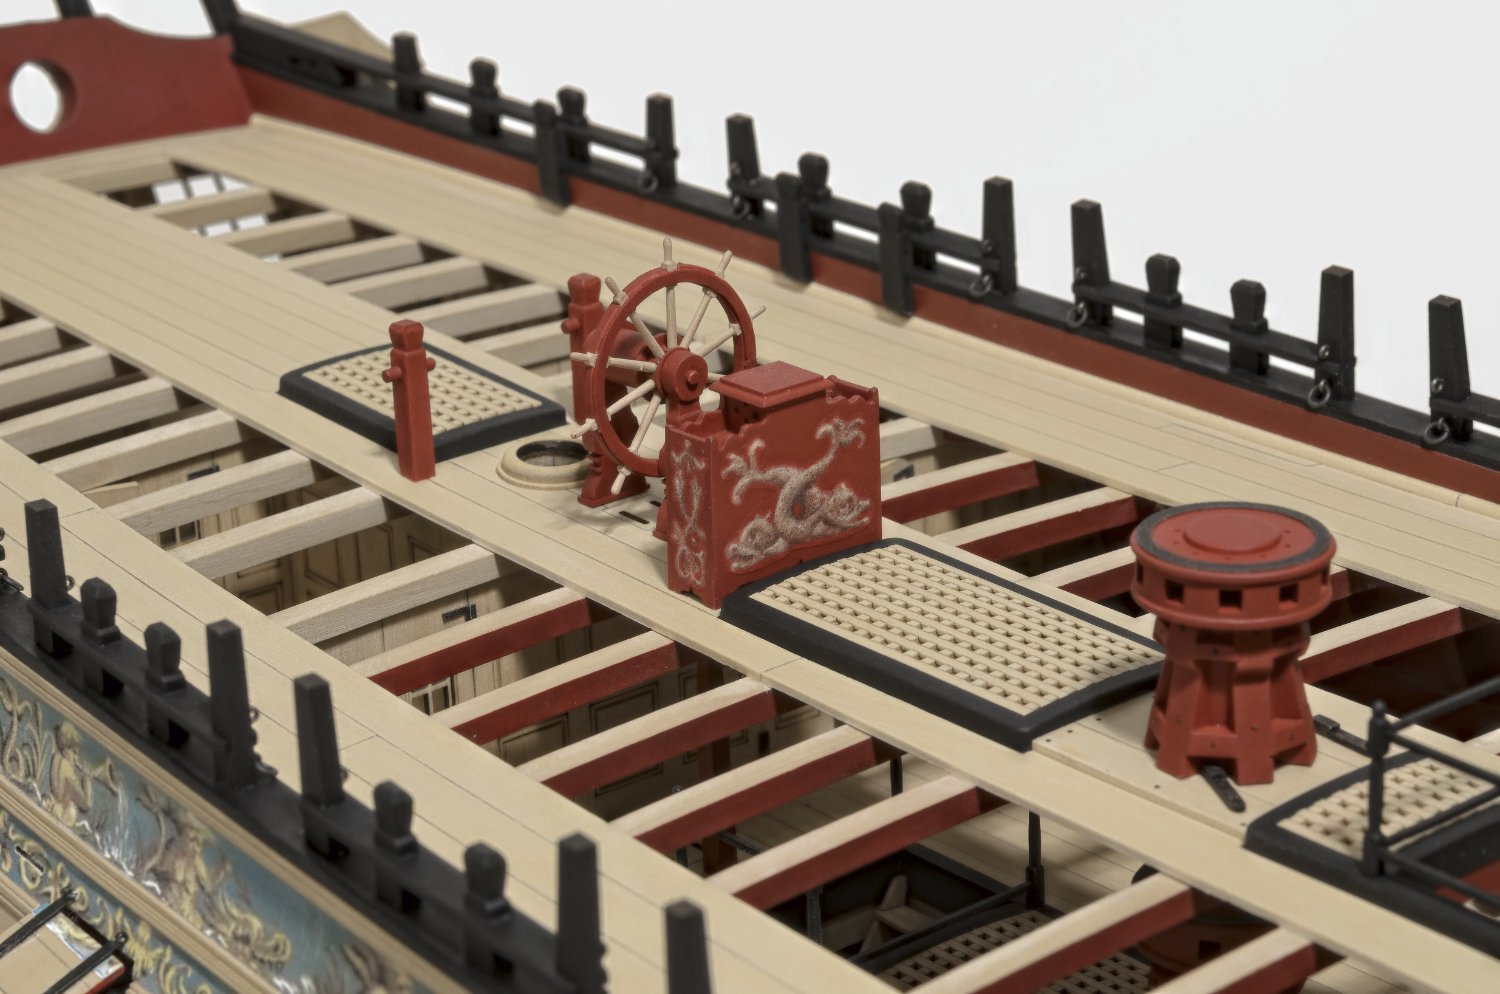
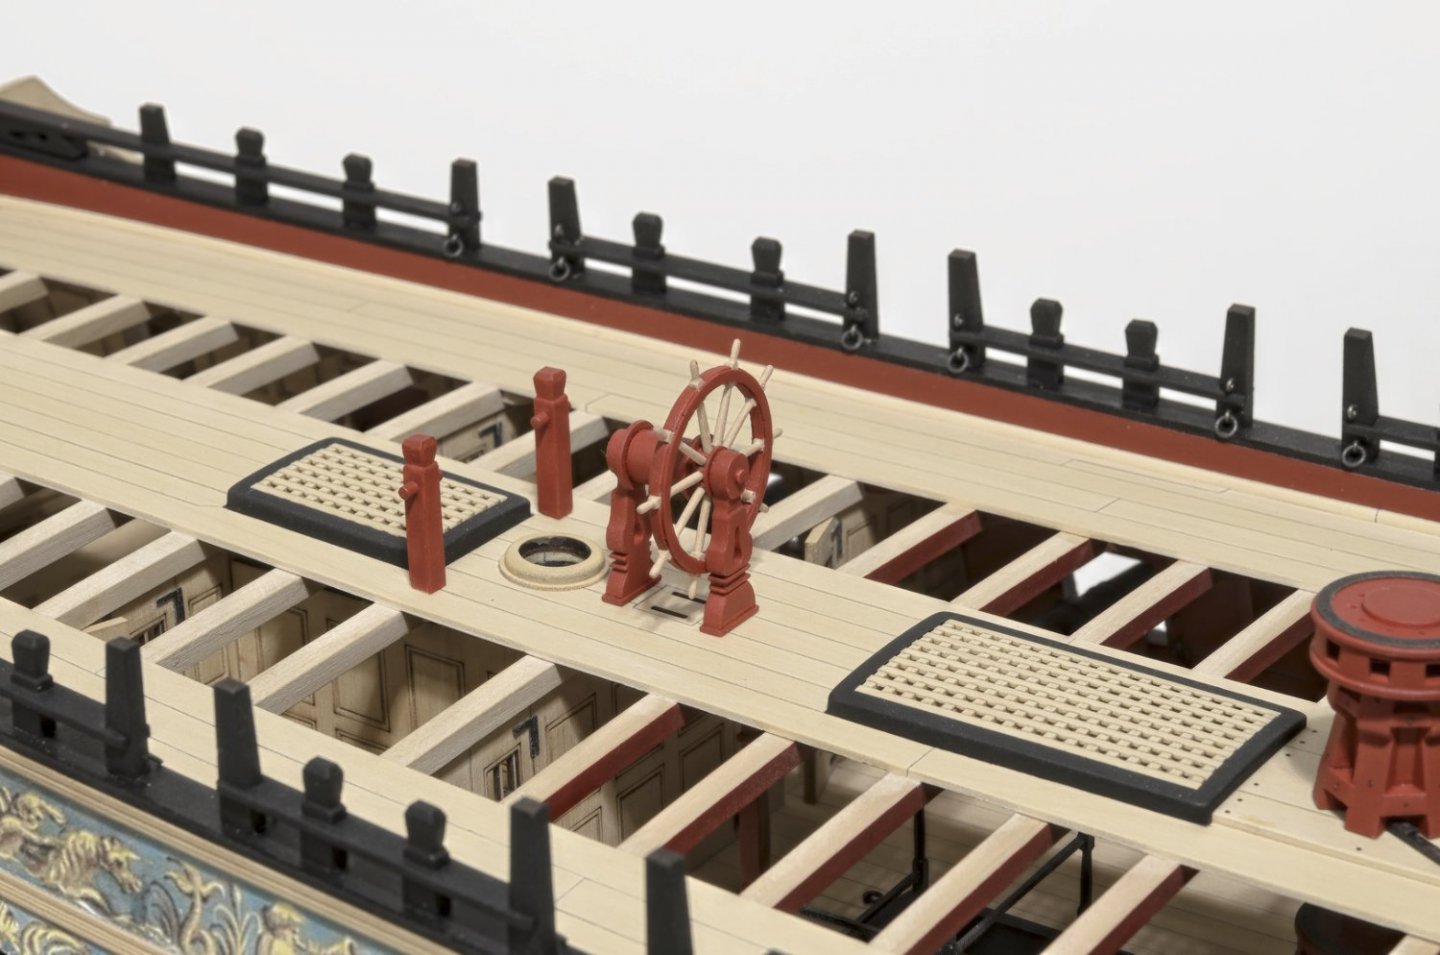
I placed a square stick in the Dremel. Using a dial caliper to measure, I reduced the diameter of the stick at three locations with needle files. The base of the handle and right below the squared area was reduced using a round file to .035. The bottom of the spoke at the hub was reduced using a flat file to .045. Once that was done I was able to do the final shaping while using the reduced areas as a guide. Mike
- 607 replies
-
- 5
-
-
- winchelsea
- Syren Ship Model Company
- (and 1 more)
-
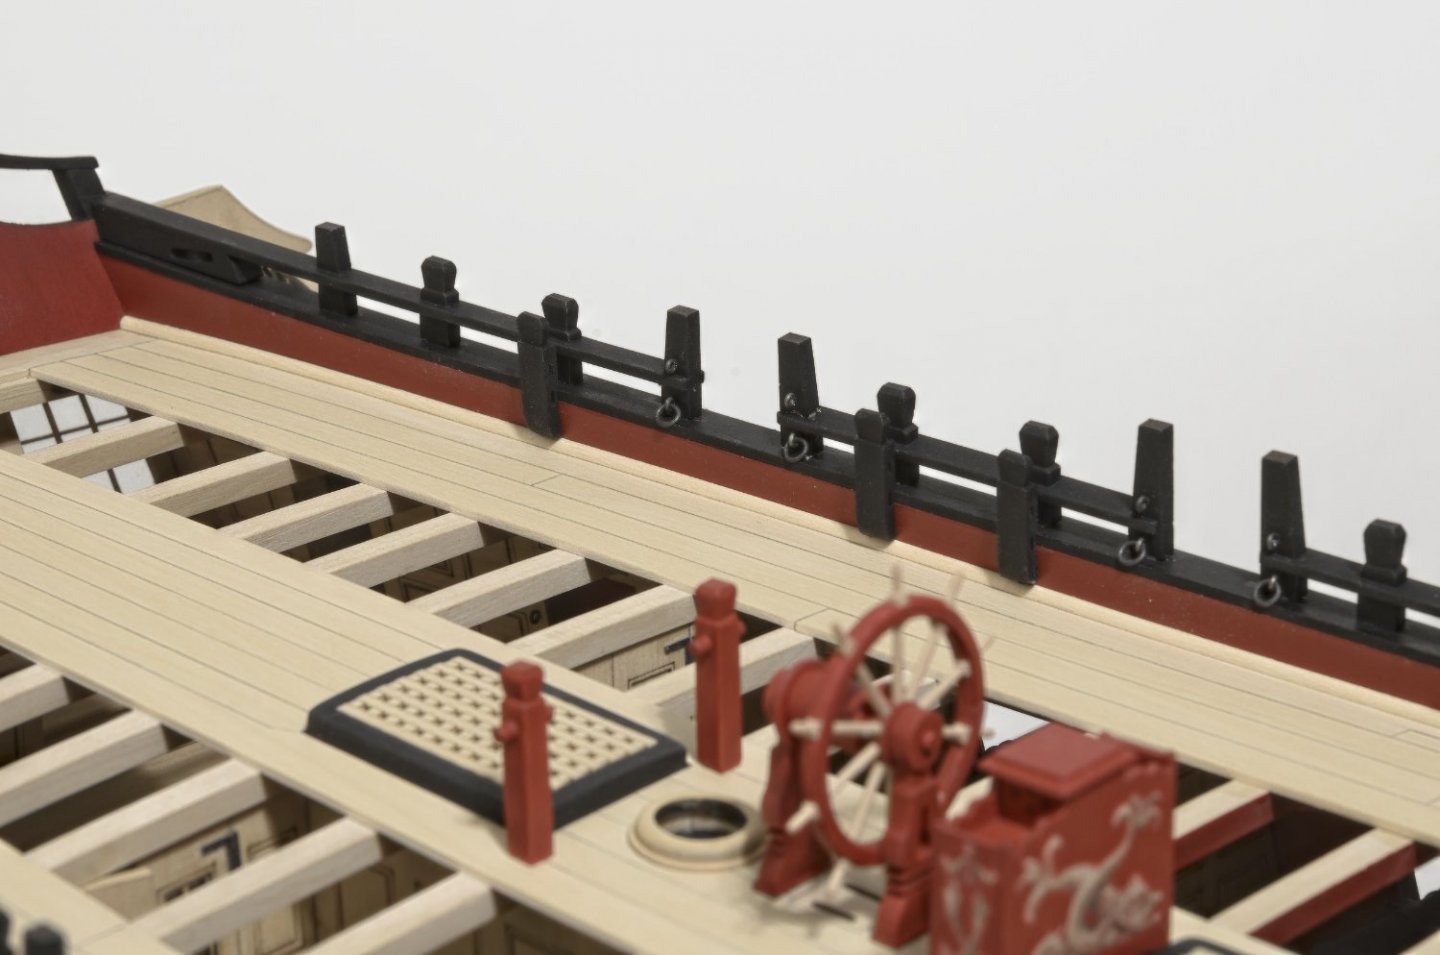
More progress today. I managed to get the wheel finished and on the ship. I could have used the laser cut spokes, but I decided to scratch them instead. Either way would have worked just fine. Mike
- 607 replies
-
- 21
-
-
-
- winchelsea
- Syren Ship Model Company
- (and 1 more)
-
Yes, it’s true. I spent a lot of time on those columns. That said, Chuck’s attention to detail when laser cutting parts really makes all the difference. He lays out the foundation, but the work has to be done beyond that in order to get a satisfying result. Mike
- 607 replies
-
- 4
-
-
- winchelsea
- Syren Ship Model Company
- (and 1 more)
-
Thanks, druxey
-
Chuck, Is there another fender located near the forward end of the waste? Mike
-
Thanks, Chuck With regard to adhering the friezes to the binnacle. Do you prefer Scotch Spray Mount or Elmer's Glue Stick? Mike
- 607 replies
-
- 1
-
-
- winchelsea
- Syren Ship Model Company
- (and 1 more)
-
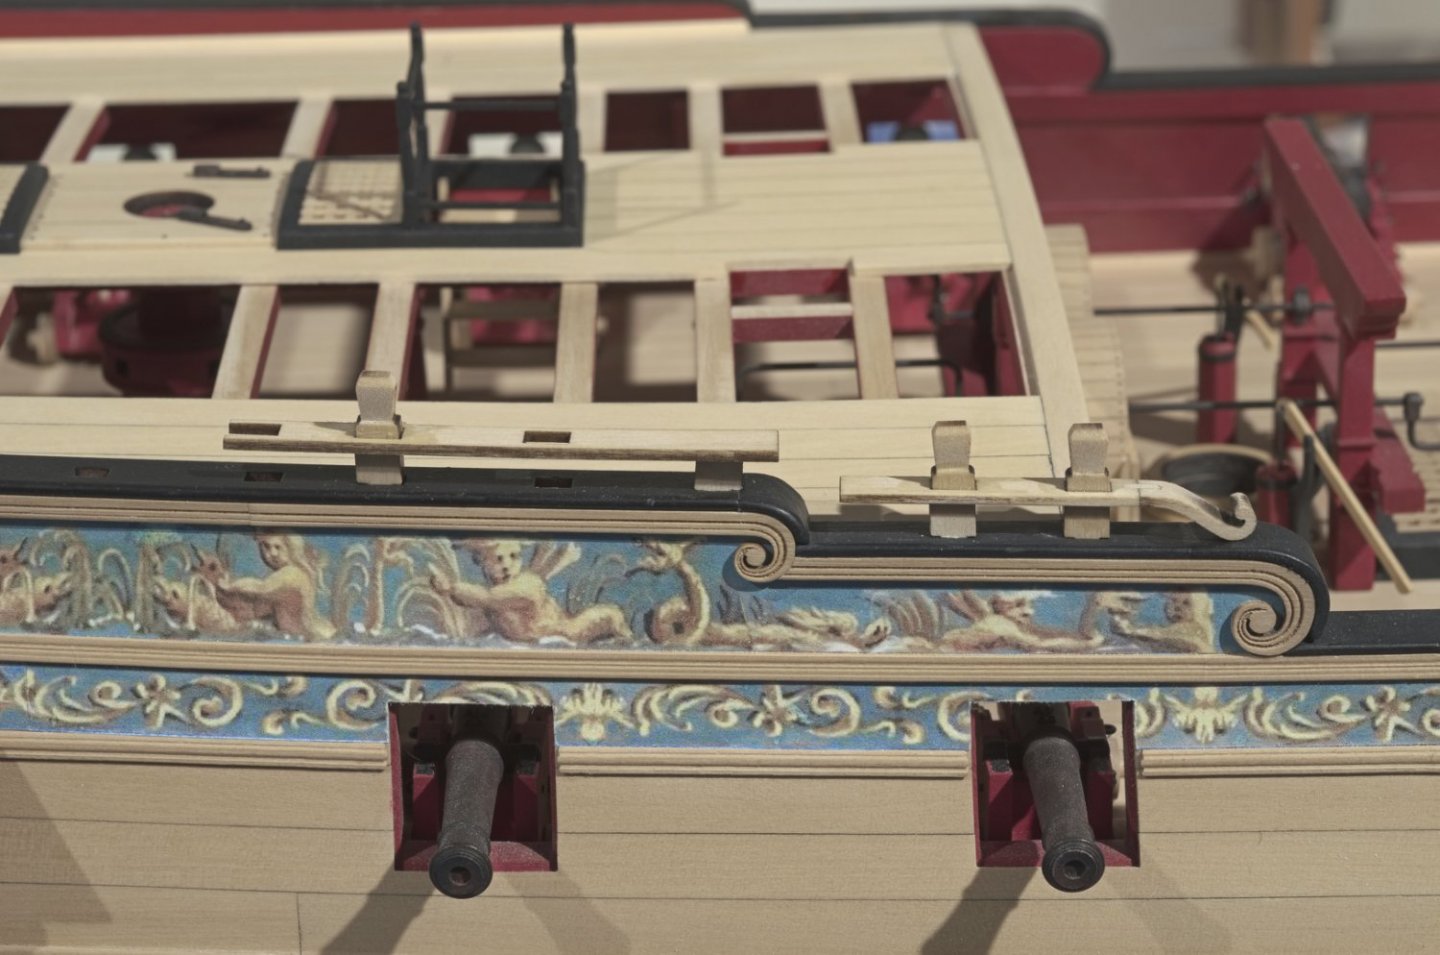
The breastrail which was one of those in between projects I've been working on is finished. It looks pretty straight forward, but the six columns required some time to shape. Luckily the laser cut side gave me the shape that needed to be duplicated on the adjacent side. Mike

- 607 replies
-
- 22
-
-
-
- winchelsea
- Syren Ship Model Company
- (and 1 more)
-
That looks so nice!
-
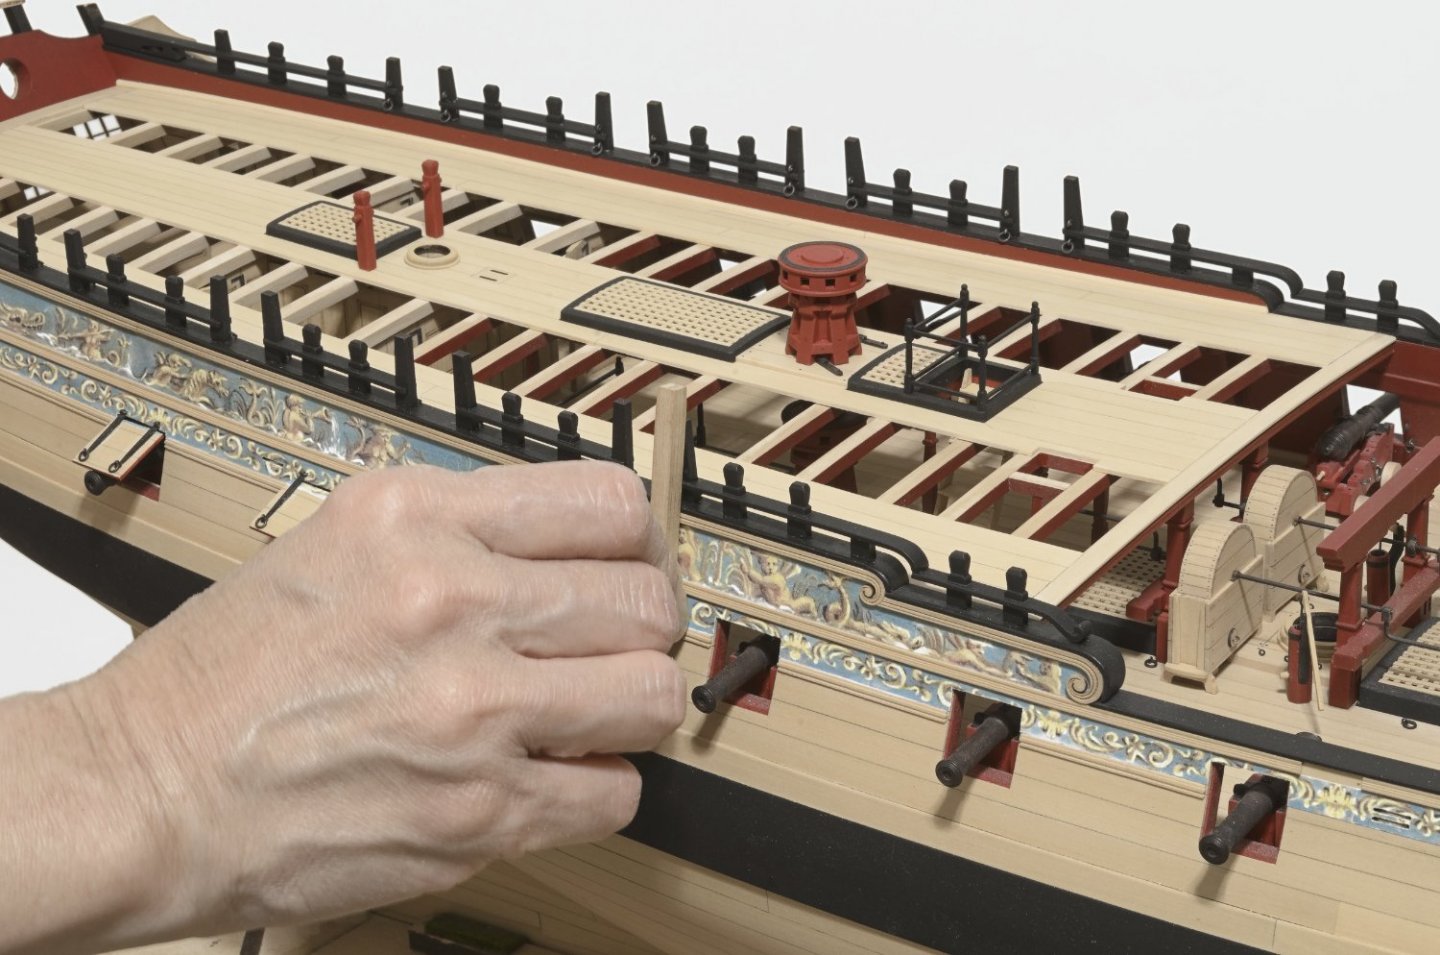
I didn't realize that it's been almost a month since my last update. Actually I've been working on the ships wheel, binnacle, QD rail, etc., as the mood strikes. Kinda gives me time to think about my next move on making a specific part. Getting started on the QD rail proved to be finicky when I tried to add too many parts at once. My only suggestion is that however you go about it, don't do that. I ended up only adding and securing the pieces that I felt would would form the foundation for the remaining pieces. Every timberhead and post that goes on the rail should be set vertical. Everything was pre-painted beforehand. The two sections are ready to accept the remaining parts. I can move either one forward or aft while setting up the post, etc. Ofelia, my fiancee, shows how to use a short stick to establish the proper angle for the posts. The stick is placed along the two upper moldings and the top outside edge of the post. Before the glue sets it's easy enough to tweak the post. As of today. . Mike
- 607 replies
-
- 23
-
-
-
- winchelsea
- Syren Ship Model Company
- (and 1 more)
-
Sorry, I’m trying to figure out who Chris is. Mike