Stuntflyer
-
Posts
1,197 -
Joined
-
Last visited
Content Type
Profiles
Forums
Gallery
Events
Everything posted by Stuntflyer
-
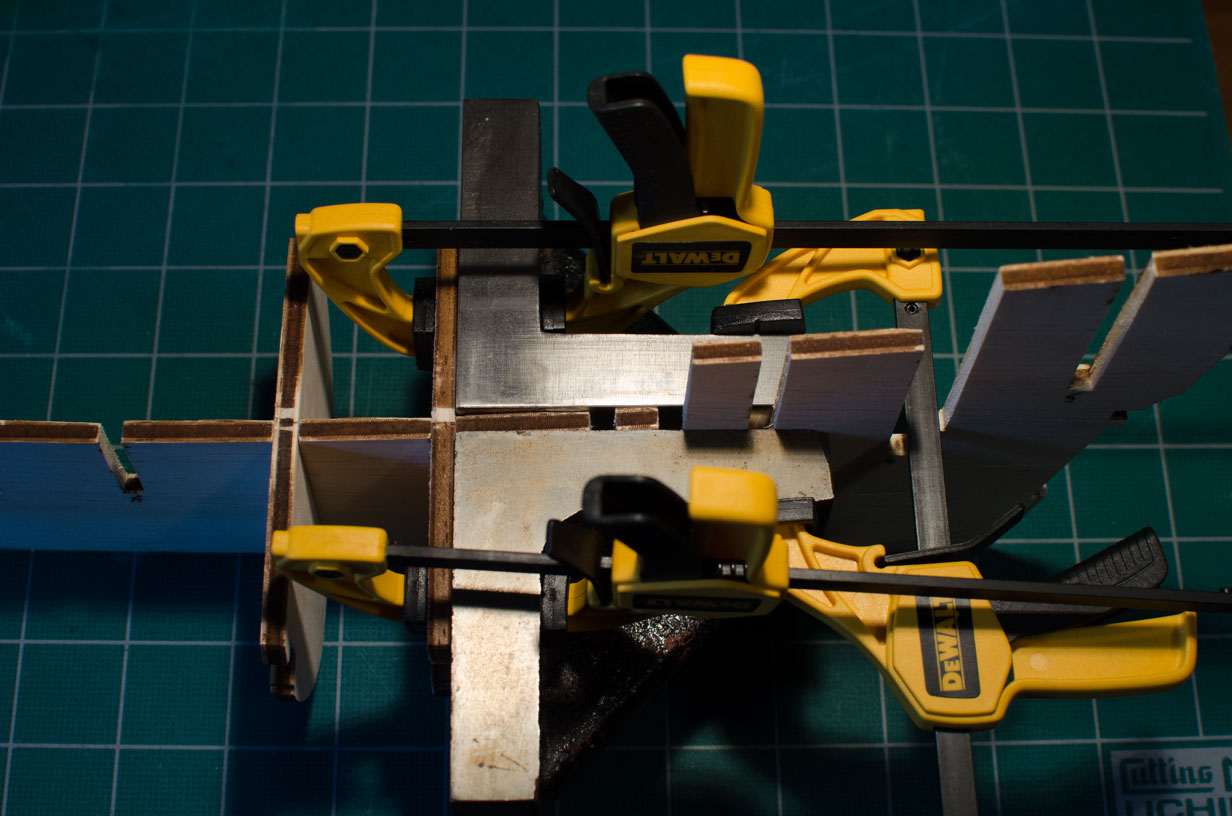
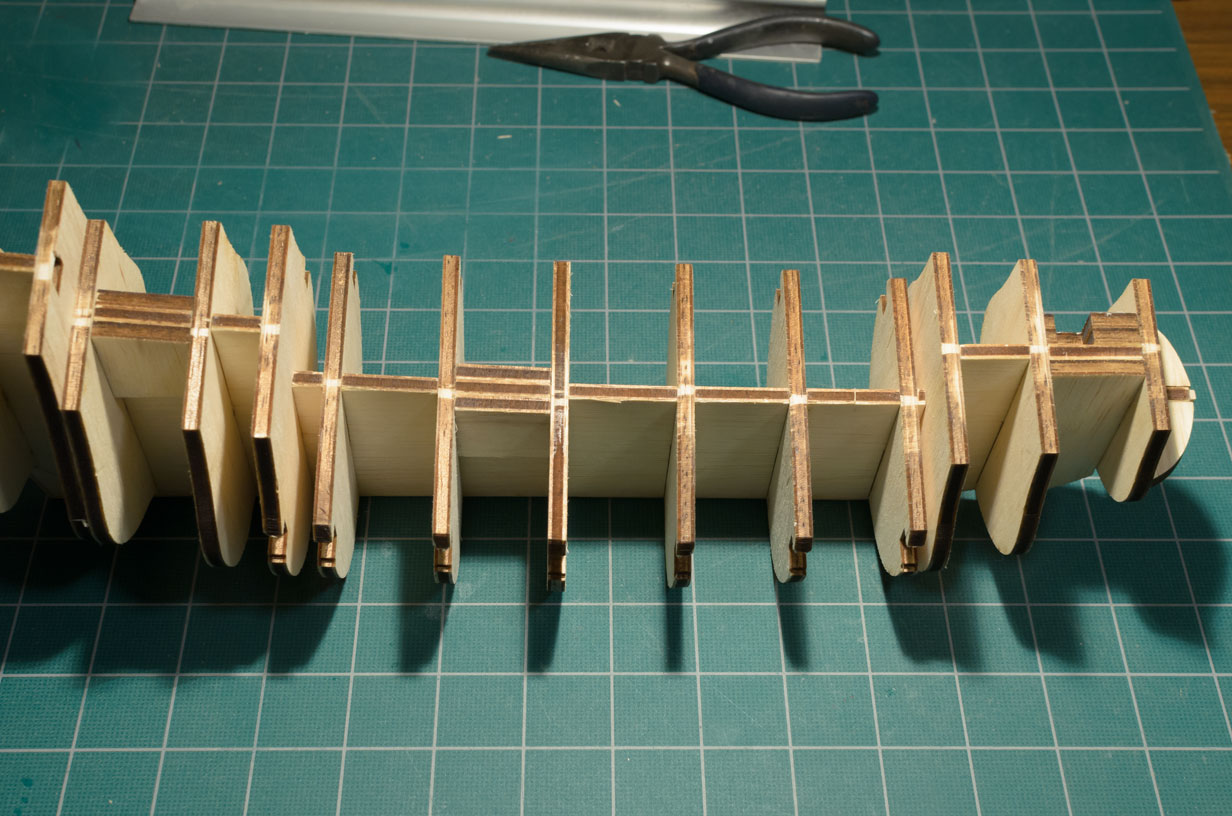
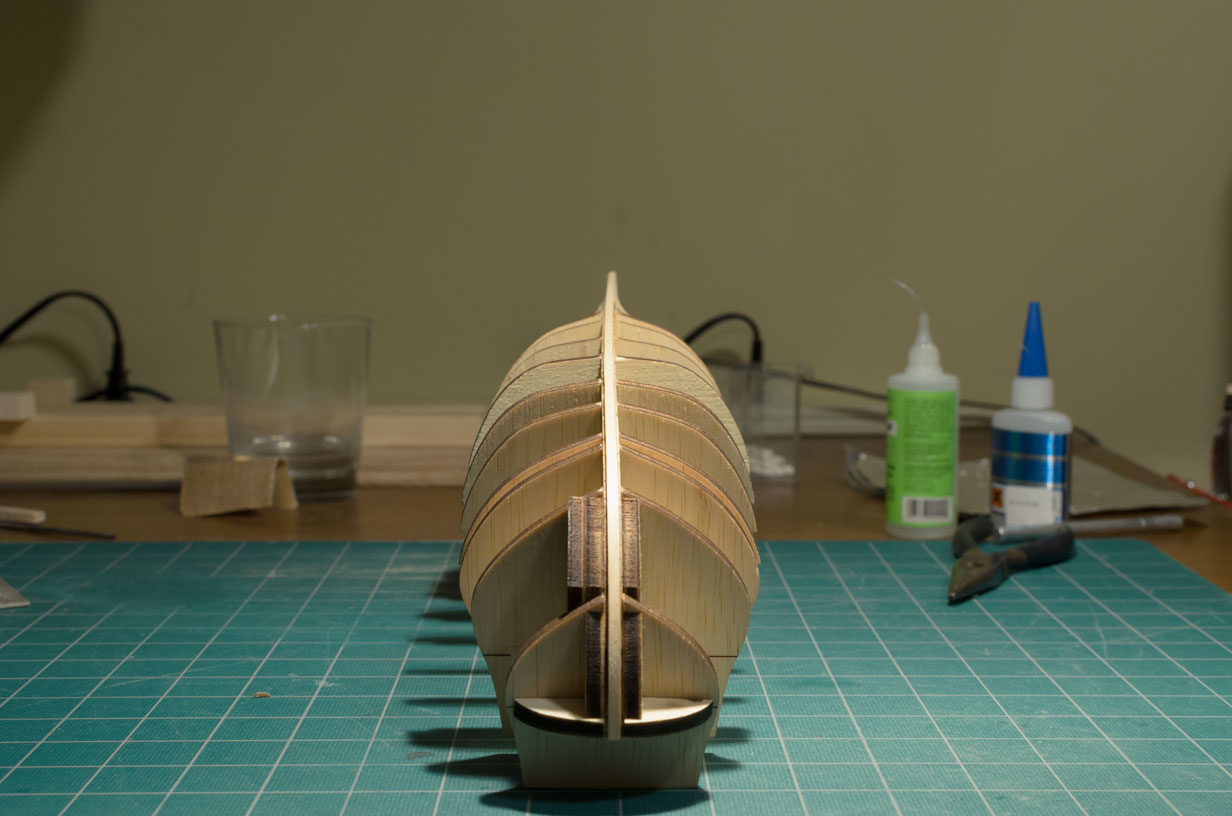
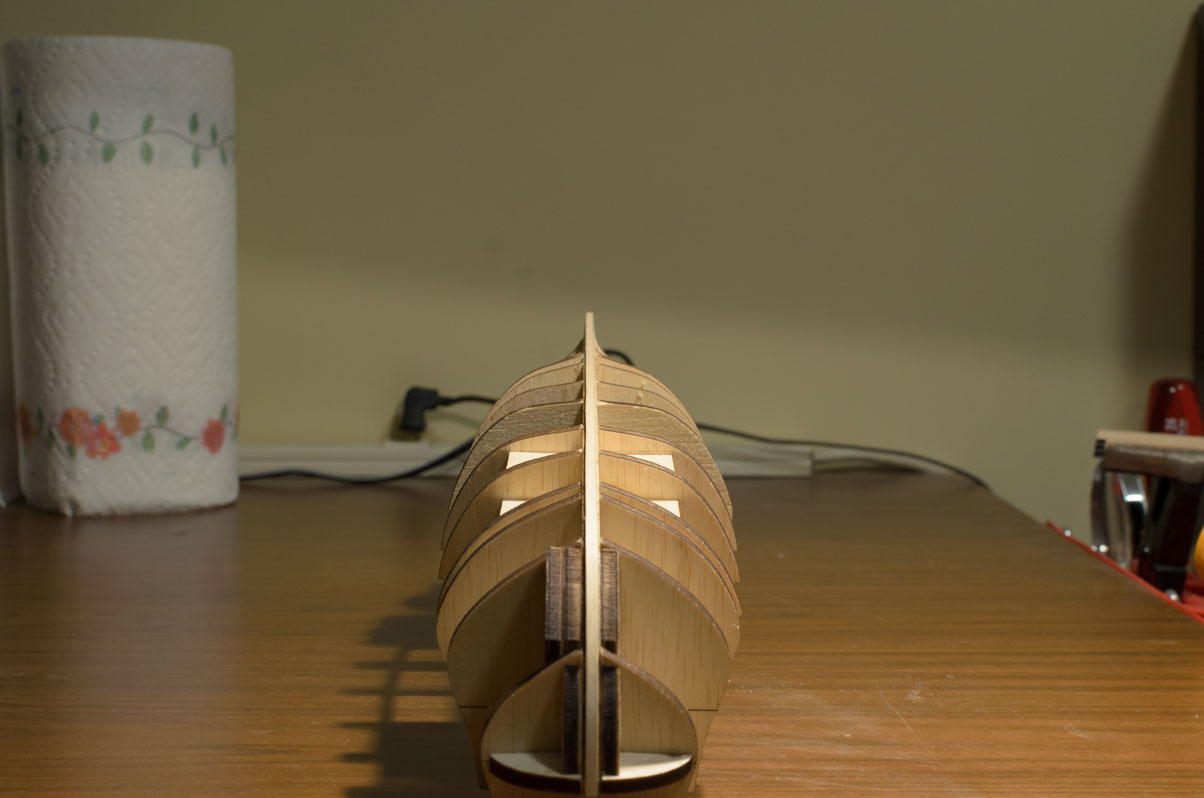
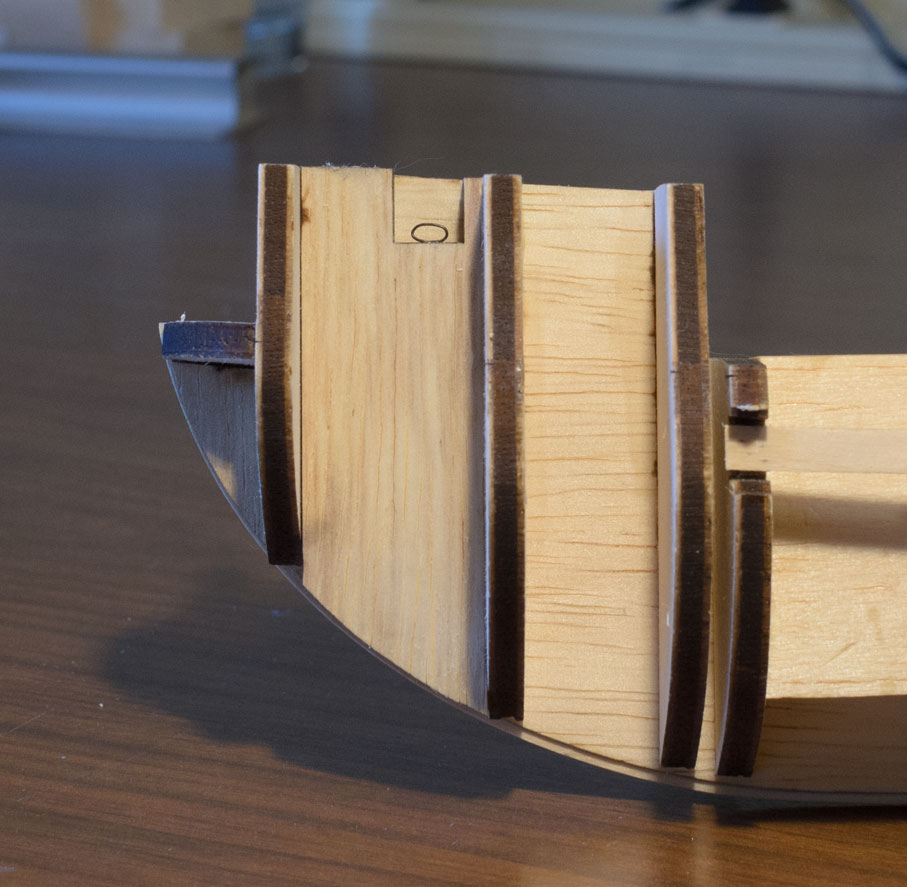
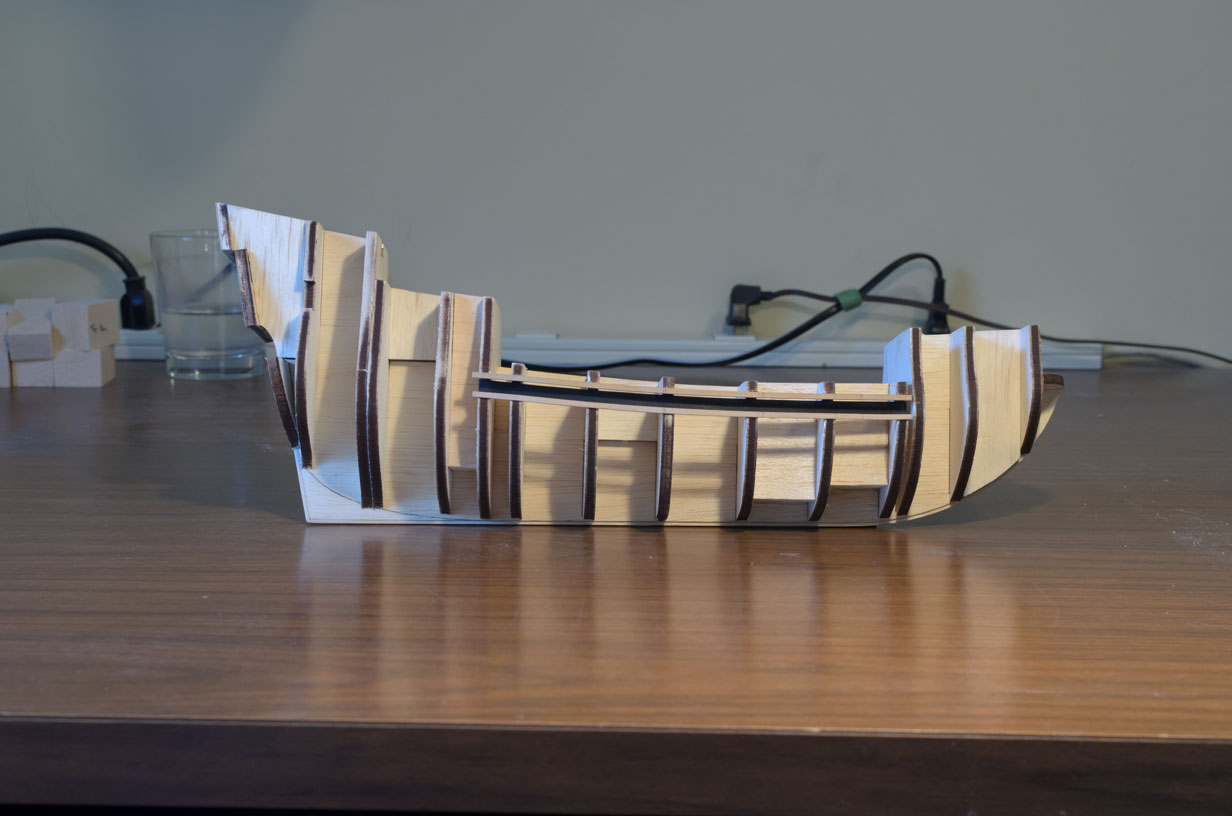
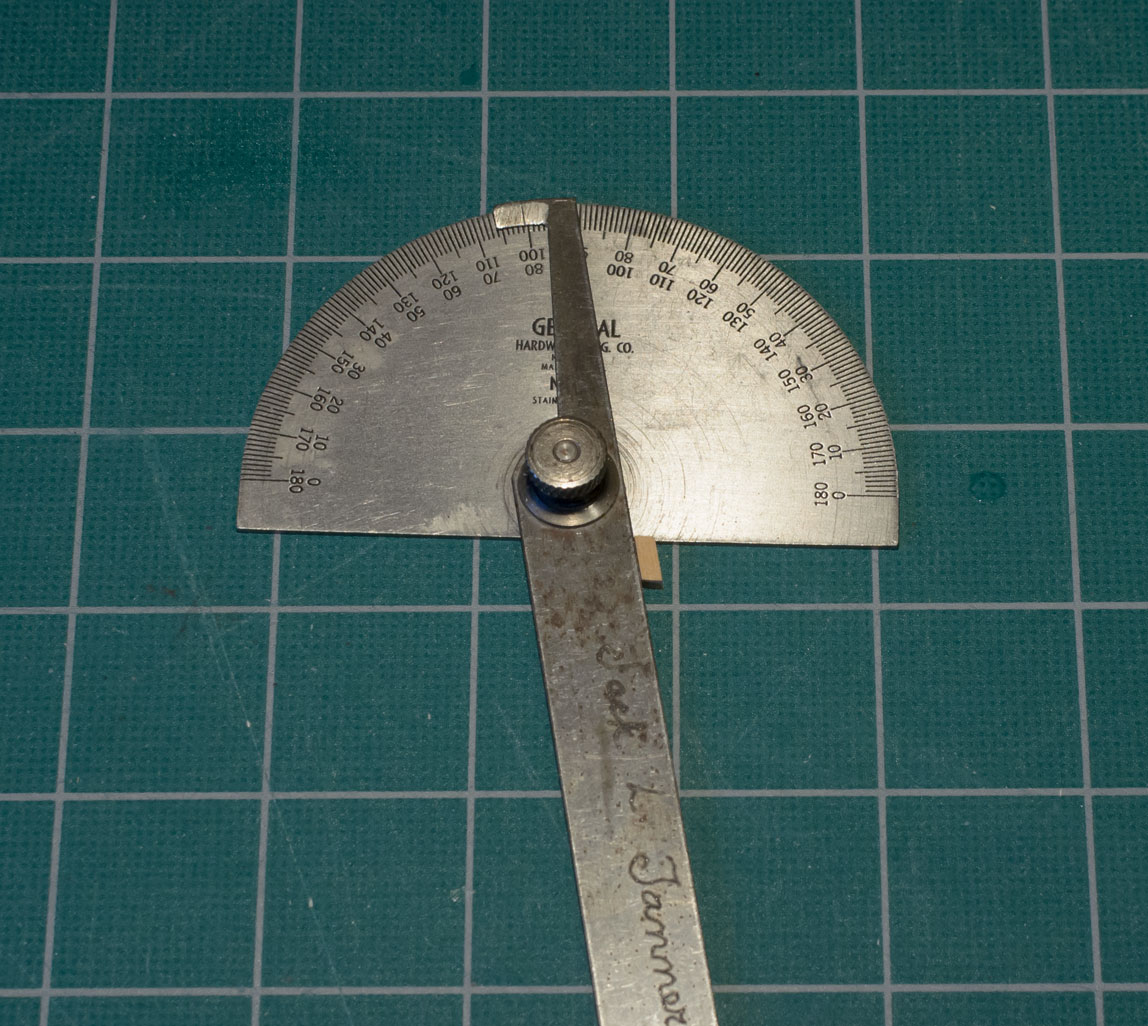
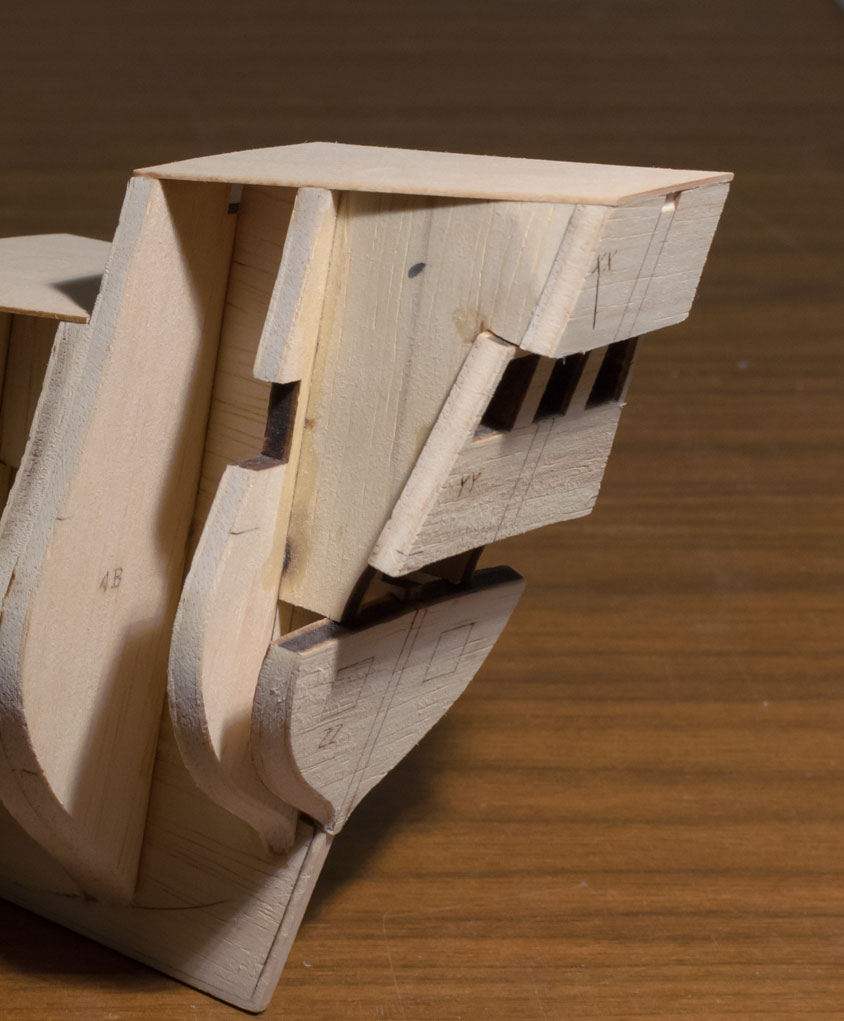
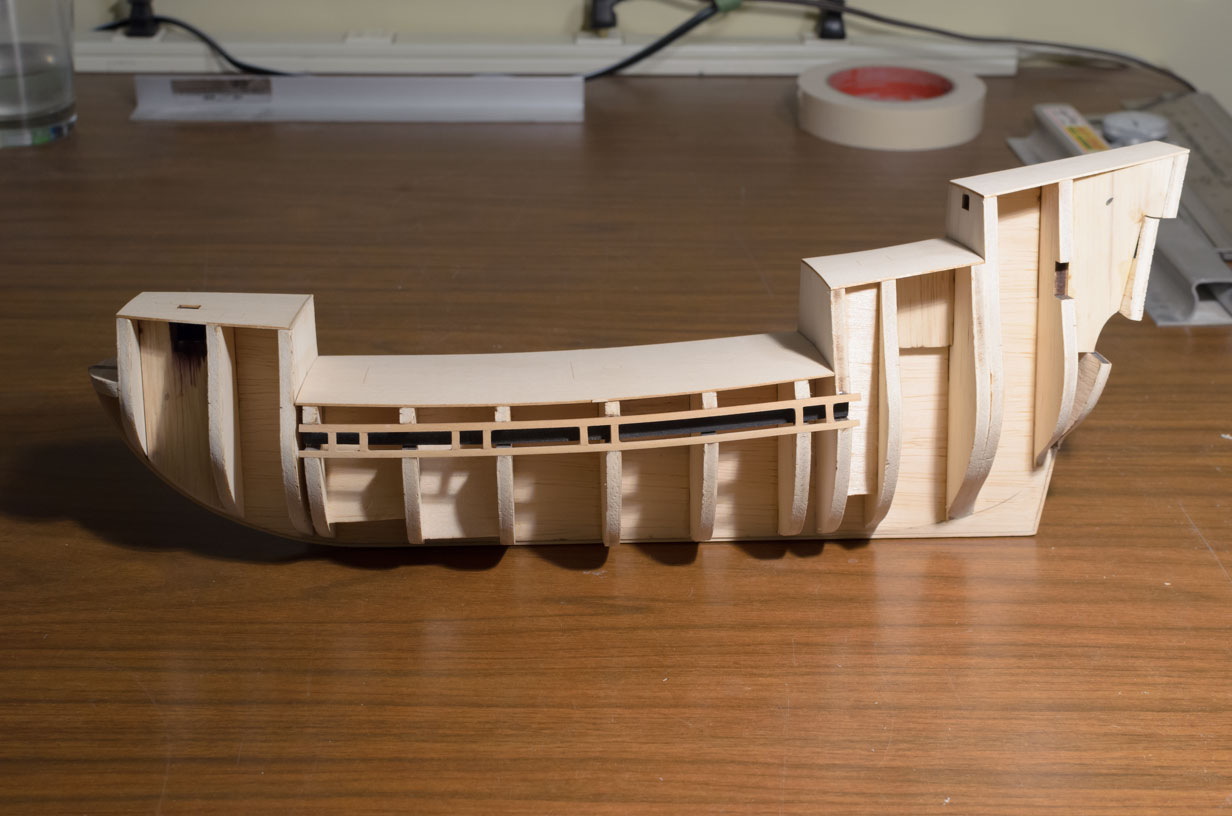
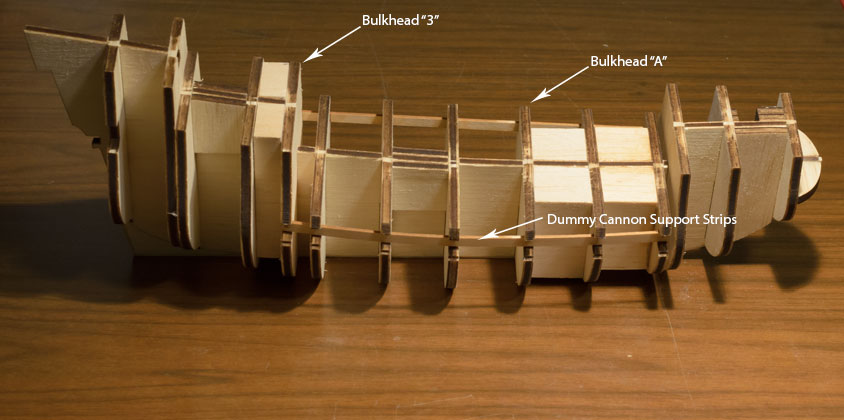
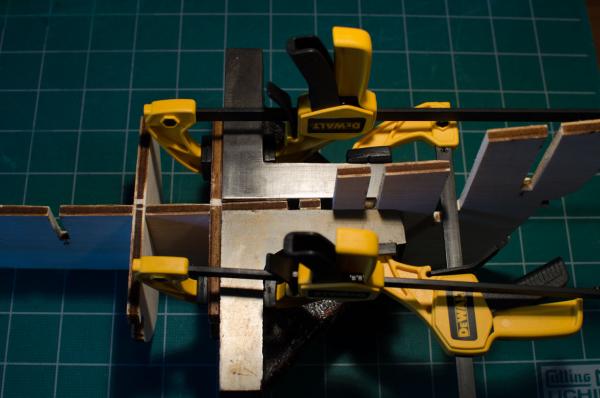
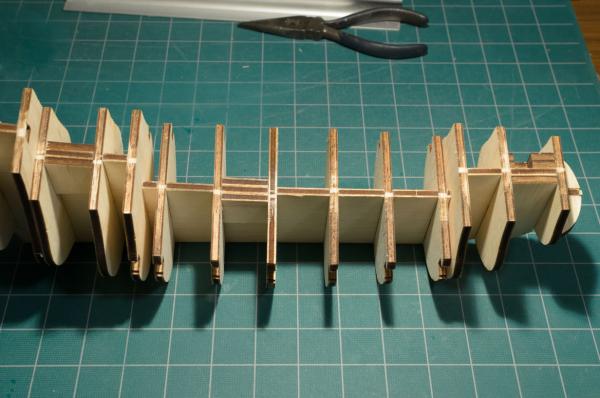
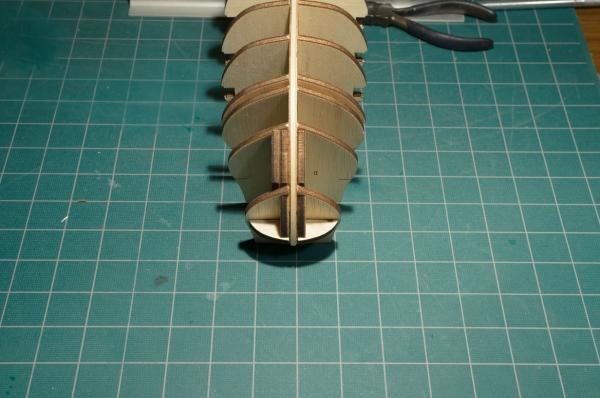
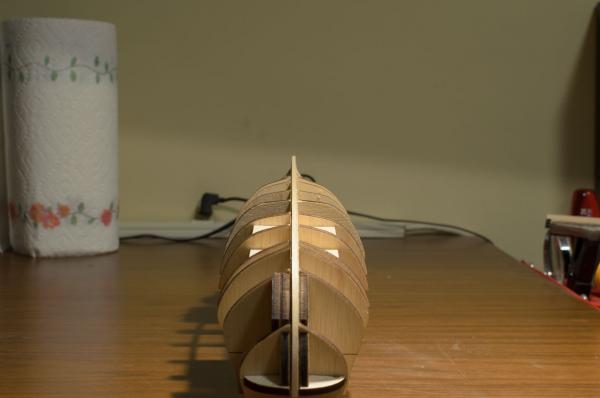
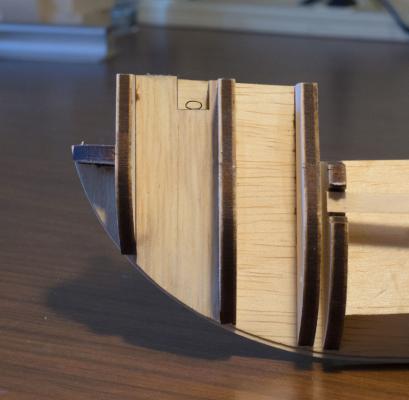
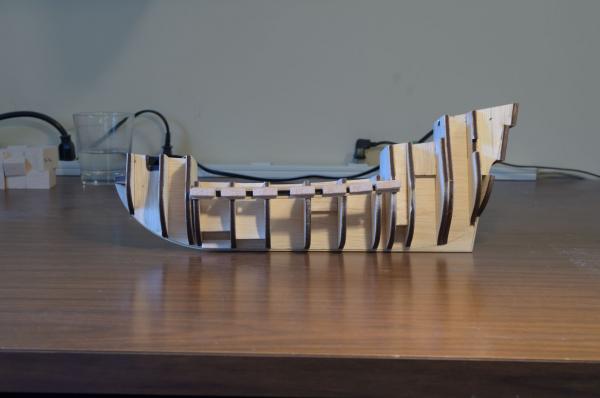
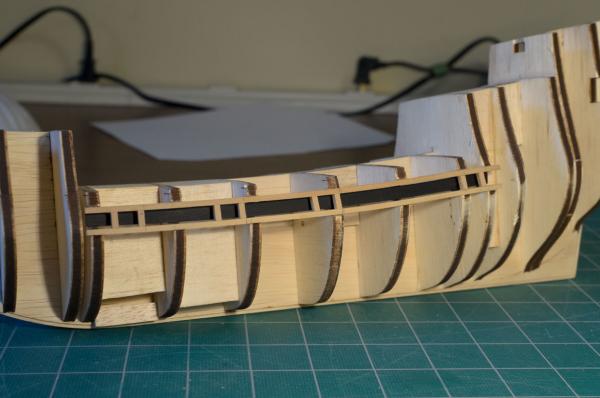
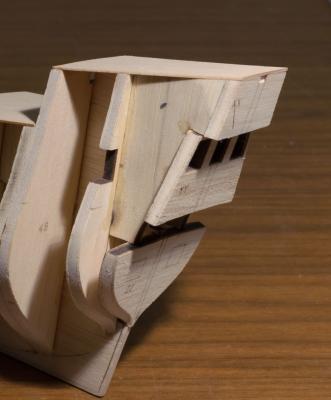
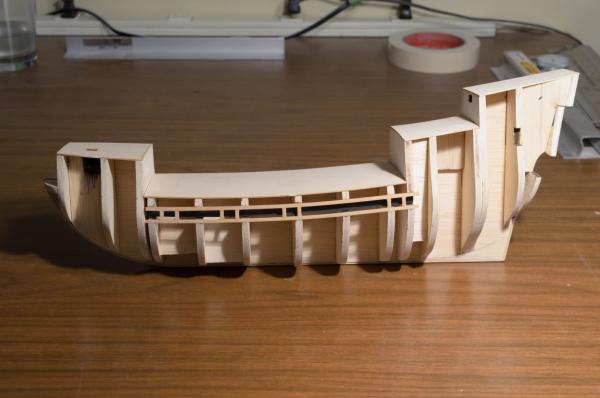
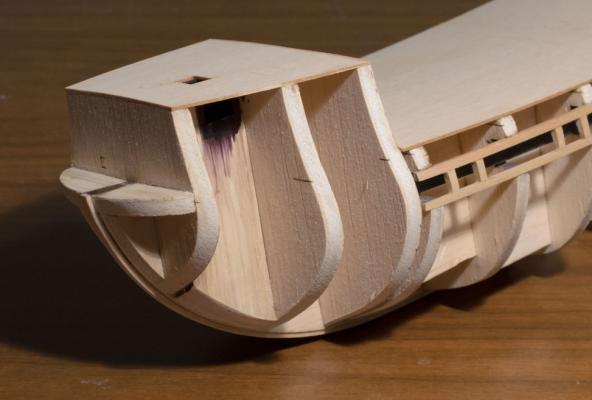
 Hello everyone, Welcome to my build log of the Model Shipways "Mayflower". For those who have been following my build of the US Brig Syren, I have decided not to build it at this time. These two models require a similar level of experience yet have their own set of challenges. I have decided to build the Mayflower for those challenges that I feel are more to my level of experience. Chuck has done a superb job with the Mayflower instructions and there are some excellent build logs here on MSW. I would appreciate any help or suggestions that you might have as I move along. ● Clamp setup for first bulkhead: Hours after removing the bulkhead former from the sheet I noticed that it was curved but not warped. After all the bulkheads are glued in place I will attempt to straighten the former. ● Clamp setup for remaining bulkheads: ● Bulkheads and filler pieces glued into the bulkhead former: The initial fit was generally tight. When fitting the bullheads I allowed for the PVA glue swelling the wood by sanding in a very small amount of bulkhead movement past 90° fore and aft. ● Curved bulkhead former before straightening: Straightening was achieved aft of bulkhead "A" in three steps. 1. Blocks were inserted between the formers A&B and C&D to prevent this area of the hull from moving while attaching the "dummy cannon support strips". 2. These support strips were used to straighten 90% of the curve by pulling the hull straight and pinning the strips in place before gluing. 3. Blocks were inserted between bulkheads 3 and 3b in order to correct the remaining curve in this area. Straightened hull ● Eye bolt: This was formed using a 1/8" dowel and then compressing its shape into an oval. Photo shows eye bolt temporarily in place before priming and painting the inside of the two "fore mast Fillers" and eye bolt black with Badger 16-01 Engine Black. Testors Dull coat was used to flatten the finish. ● Gun Port Framing: I will be using boxwood as the primary wood for the model. Although the gun port framing will not be seen I wanted to see what it was like to work with. No complaints at all and I really like getting clean crisp edges easily. After the bottom gun port frame was glued into place a 1/4" balsa sheet, of a consistent thickness, was cut into small filler pieces to maintain an equal distance between the two gun port frames while the top frames were being glued. Later, this greatly eased the process of making the small vertical pieces for the ports. I have no idea why the small block between C&D was there so I removed it after the photo was taken. I made a test piece for the vertical frames to see if the angles were similar for both the top and bottom. It turns out that they were at approximately 10.5°. All I had to do was cut one angle with the help of the disk sander and then measure 1/4" and cut the other in parallel. Very little sanding was needed to achieve a nice fit. Were the gun ports angle upwards at the bow and stern a slight angle was sanded in the opposing direction to account for the tilt of the vertical strip. After the stern pieces XX, YY and ZZ were glued in, the hull was faired and the four false decks were glued into position. Once dry they were later faired into the hull shape.
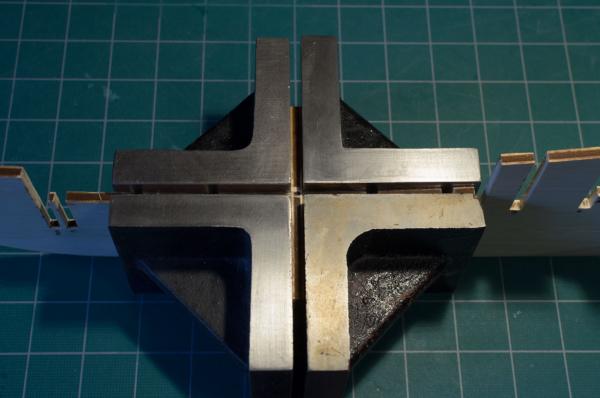


-
Michael, Thank you for your very kind comments. It's very gratifying to see experienced modeler's like yourself taking time to view my build log. Mike
-
Cutting Lap joints for Deck Furniture, etc.
Stuntflyer replied to Stuntflyer's topic in Modeling tools and Workshop Equipment
Jack, I believe you have found a way to do it. You're right that it might be more time consuming unless doing many of them. Still, I will pick up the bit to see how well it cuts. Funny how CS at Dremel told me they didn't have a bit that would do it. This is the #654 bit Michael, I will try the file way as well. Thanks, Mike -
Cutting Lap joints for Deck Furniture, etc.
Stuntflyer replied to Stuntflyer's topic in Modeling tools and Workshop Equipment
My original question was about cutting half lap joints. Do you think that the Dremel Shaper Table could be setup to do something similar to this video using a saw blade or cutoff wheel? http://www.woodsmith.com/magazine/extras/167/mitered-half-lap-joints/ -
Cutting Lap joints for Deck Furniture, etc.
Stuntflyer replied to Stuntflyer's topic in Modeling tools and Workshop Equipment
Jack, I called Dremel and they do not sell Rabbet bits. I'm wondering if I would be better off getting a hobby saw, though I'm not sure which one. The Byrnes is perhaps too expensive. I would prefer not doing it by hand. Mike -
Bob, Thanks! I am still following your Longboat log. I love what you have done with it so far. No doubt, it will be a beauty when finished. Mike
-
Hi Thomas, For the second time I'm seeing your absolutely gorgeous build of the Syren. No doubt there will be a third. I just wanted to point out that there might be some photos that are not linked on page 10. Mike
-
What Chuck suggests about the mix ratio is what I did on the Longboat. I used 1pt golden oak to 3pts natural and it reduced the blotchy appearance a lot. 20/80 would be better still. Mike
-
Adam, Thanks again. Please let me know when you start your Longboat so I can follow along. Mike
- 109 replies
-
- 1
-

-
- 18th century longboat
- model shipways
- (and 1 more)
-
Hello Wes, Great to have you back. I might not be ready to take on a build like the Connie but I have been patiently awaiting your return to this excellent build log. Welcome back, Mike
-
Sure Mike, here it is. . . http://modelshipworld.com/index.php/topic/7971-us-brig-syren-by-stuntflyer-mike-model-shipways/
-
My next build, the US Brig Syren, should arrive sometime this week. There will be some interesting challenges ahead for sure. Again, thank you all for your support and taking the time to visit and comment on my first build. Mike
-
Cutting Lap joints for Deck Furniture, etc.
Stuntflyer replied to Stuntflyer's topic in Modeling tools and Workshop Equipment
Great, I will contact Lee Valley next week. Mike -
Cutting Lap joints for Deck Furniture, etc.
Stuntflyer replied to Stuntflyer's topic in Modeling tools and Workshop Equipment
SpyGlass>>> Well, that's an interesting approach with a nice result -
Cutting Lap joints for Deck Furniture, etc.
Stuntflyer replied to Stuntflyer's topic in Modeling tools and Workshop Equipment
Druxey>>> I'm certainly willing to try. What would be a good brand of chisel? As of now I don't have any. Jud>>> I will give that a try -
Cutting Lap joints for Deck Furniture, etc.
Stuntflyer replied to Stuntflyer's topic in Modeling tools and Workshop Equipment
Jim, I don't think that I could get really clean joints doing it by hand. I would think there must be a way to jig this for manual work. A half-lap looks simple but getting it right is another thing. Mike -
Cutting Lap joints for Deck Furniture, etc.
Stuntflyer replied to Stuntflyer's topic in Modeling tools and Workshop Equipment
Now that I'm looking at it I don't think it will work. The strip wood would have to be held 90 degrees for an end cut. Mike -
Cutting Lap joints for Deck Furniture, etc.
Stuntflyer replied to Stuntflyer's topic in Modeling tools and Workshop Equipment
I hadn't thought about a router. I do have this. I don't know what kind of bit I would use though. Mike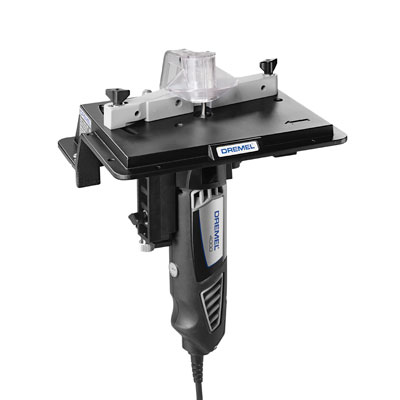
-
Is there an accurate way to cut half-lap joints for things like deck furniture without having to use a table saw? I would like to use a manual jig setup if possible. Thanks, Mike
-
Thanks Kurt Mike
-
Hello, Does anyone know what these Model Shipways' Syren colors, hull/spar black and bright red would be in either Model Masters, Floquil or any other good quality acrylic paint that is still available? I realize that floquil is no longer in business but some colors are still available online. Thanks, Mike
-
Hi Gary, I'm about to start the Fair American by MS myself very soon. Your doing a really nice job on her. Your log is very informative and I have enjoyed reading it as well. Regards, Mike
-
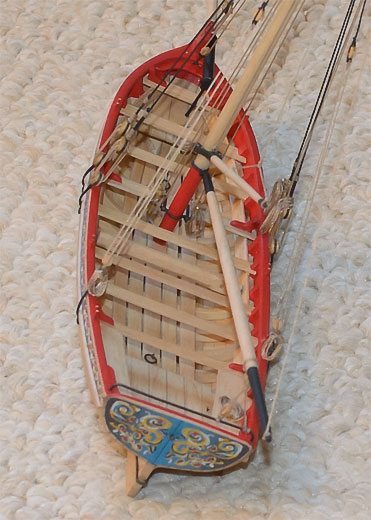
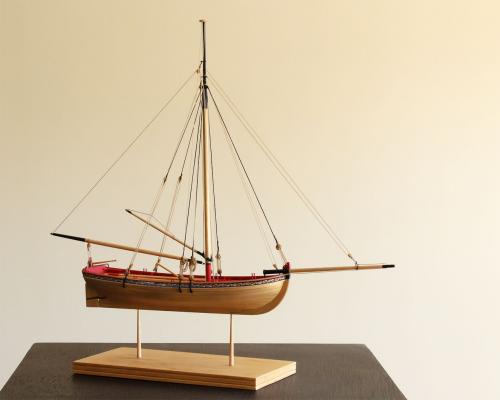
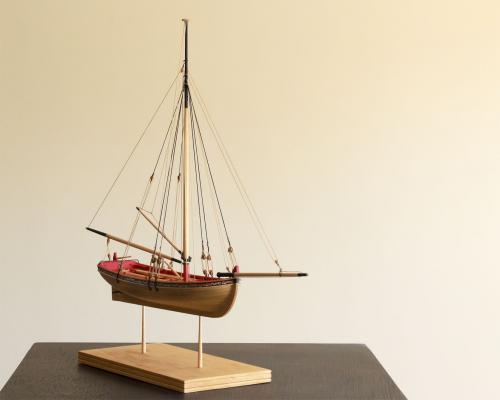
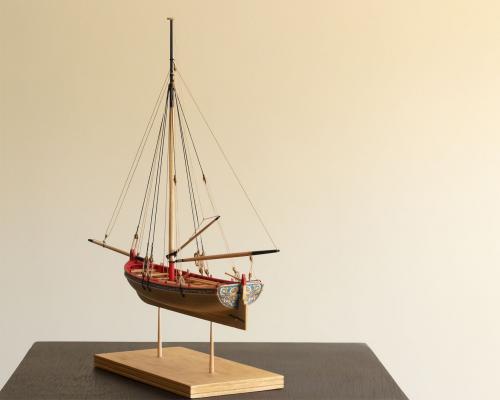
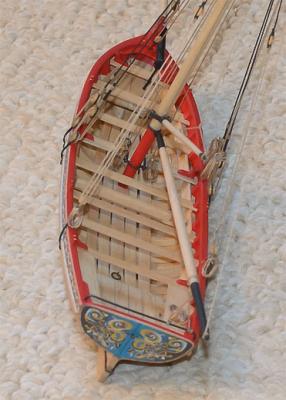
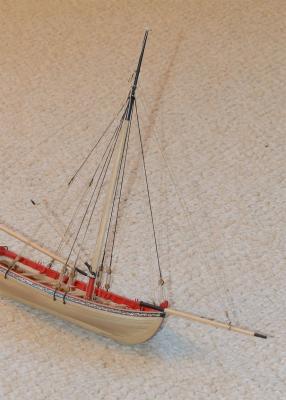
My finished Longboat, a very rewarding and humbling experience. A big thank you to everyone for all your support over the past eight months. You have kept me going when I was seriously in doubt. I know that this wonderful group of people here on MSW will help me to move forward and I look forward to sharing thoughts and ideas with other members in the future. Now, if I could only decide on what to build next?
- 109 replies
-
- 13
-
-
- 18th century longboat
- model shipways
- (and 1 more)
-
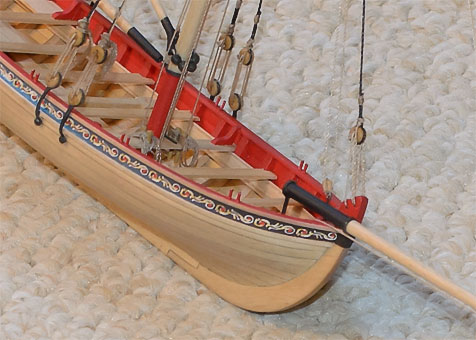
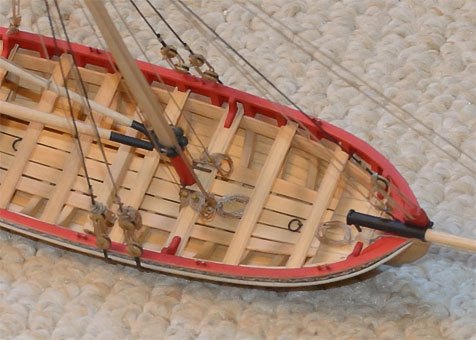
Thank you very much guys! It's been an amazing journey so far. David B., All the paints used were thinned with water. I did the red with Badger water based acrylic and a brush. Trying to spray this paint did nothing more than clog the airbrush. Brushing it on wasn't so great either. If you try and sand between coats, it tends to ball up and subsequent coats tend to bead on the surface of the previous coat. The black as well as the tan (for the belaying pins) were done with Winsor & Newton acrylic and a brush. The quality of the W&N paint is worth every penny and has none of the negative traits of the Badger paint. I will try to spray the W&N paint on the next build. All of the paint colors are over coated with Testors spray Dullcoat. The red looked very uneven until I used the Dullcoat which does an amazing job of evening out the color tone. The Dullcoat is useful in other ways as well. For example, I used CA to adhere the chainplates to the hull which leaves a tiny amount of shiny CA around the pin where the chainplates are attached. I lightly sanded the CA with the corner piece of #320 sandpaper to dull and partially remove the excess CA. A light spray of Dullcoat completely masked the area so that it blends perfectly with the rest of the hull. The "jib sail outhaul" kept moving along the cap rail and I was sure that any type of glue on the line or cap rail would show. After positioning the line, a light spray of Dullcoat adhered the line to the cap rail with no trace of it and no discoloration of the line.
-
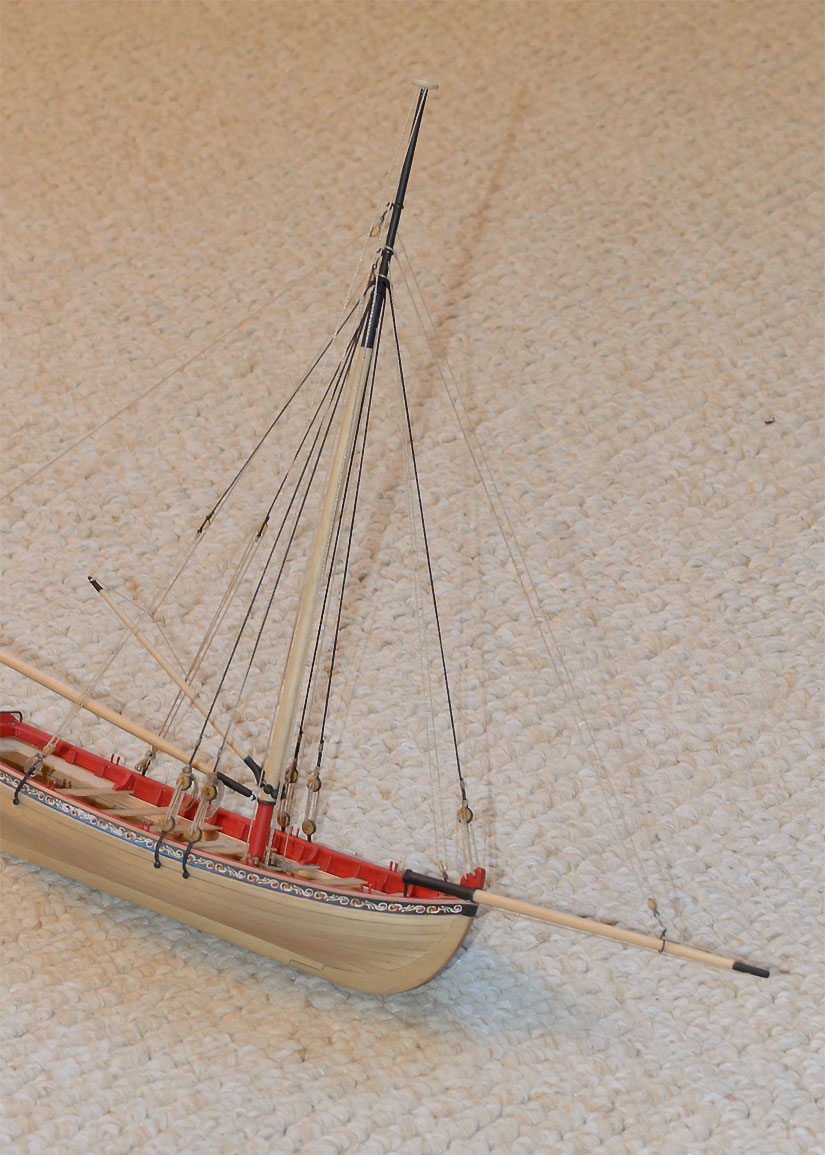
Having completed the rigging it's on to the oars, anchor and stand to complete the model.
- 109 replies
-
- 10
-
-
- 18th century longboat
- model shipways
- (and 1 more)