-
Posts
1,197 -
Joined
-
Last visited
Content Type
Profiles
Forums
Gallery
Events
Everything posted by Stuntflyer
-
Erik, Be careful when you make the sheaves. On mine, also basswood, the area around them was very thin and weakened the mast considerably. Mike
- 222 replies
-
- 18th century longboat
- model shipways
-
(and 2 more)
Tagged with:
-
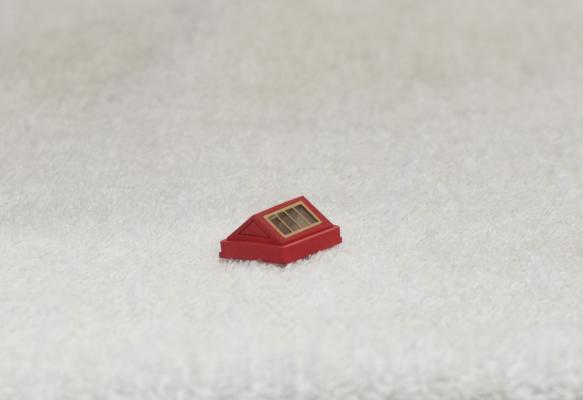
I was able to finish the Skylight today. I applied some semi-gloss varnish to the windows which helped them look a bit more authentic and shows up nicely fairly close up.
- 452 replies
-
- cheerful
- Syren Ship Model Company
-
(and 1 more)
Tagged with:
-
Hi Maury, I would say that around 4-5 coats, not too dry, gives the right coverage. Mike
- 452 replies
-
- cheerful
- Syren Ship Model Company
-
(and 1 more)
Tagged with:
-
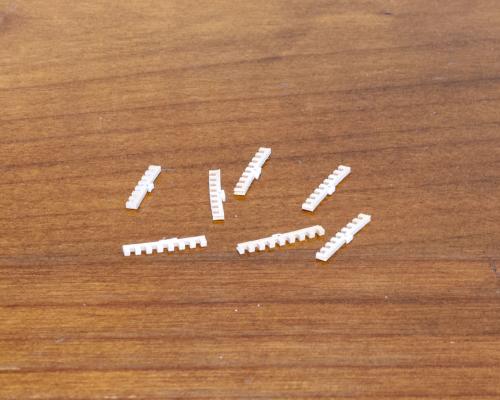
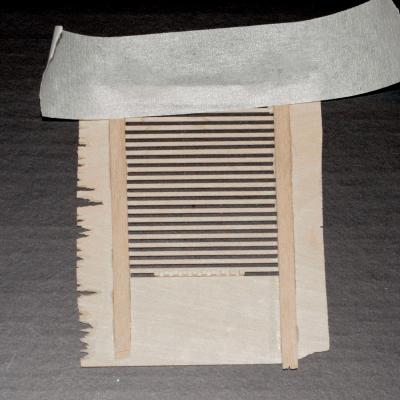
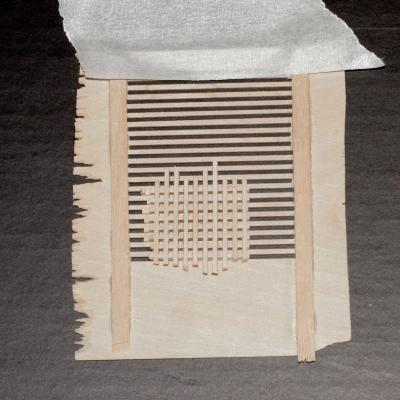
While working on the hull planking, I managed to get a few of the deck fittings completed. The gratings were made completely from scratch. Inspired by Chuck's kit tutorial, I was able to come up with a method to complete them.The Windlass was made from the kit. After the gratings were cut on the table saw, I edge bent them to the approximate camber. After bending back each grating slightly to the exact camber, 1/32" tabs were glued to the bottom of each grating for support. Similar to the one from the kit, the gratings were then placed in a jig I made on the table saw. The grating strips were inserted into the jig. Two temporary grating strips were inserted, one at each end, to keep the gratings parallel to one another. After making sure that everything was square, I glued .045 x .045 flat strips to the grating strips to complete the grating. I made this jig for establishing the roundup once the grating and coaming were combined. I had a lot of fun making the Windlass. Again, I decided to spray paint the colors. This photo shows the setup for spray painting. The completed Windlass
- 452 replies
-
- cheerful
- Syren Ship Model Company
-
(and 1 more)
Tagged with:
-
Hi Brian, You've done a great job on the ship. I especially like the rigging work you have done. Must be nice working with quality rigging line. Mike
- 831 replies
-
- Armed Virginia Sloop
- Model Shipways
-
(and 1 more)
Tagged with:
-

Cutter Cheerful 1806 by rafine - FINISHED
Stuntflyer replied to rafine's topic in - Build logs for subjects built 1801 - 1850
Looking really nice Bob! Do you ever sleep? Mike- 525 replies
-
- cheerful
- Syren Ship Model Company
-
(and 1 more)
Tagged with:
-
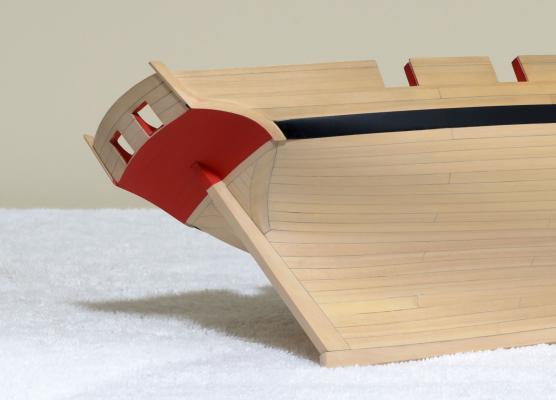
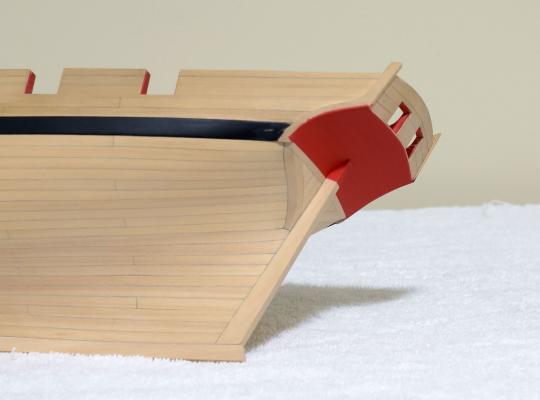
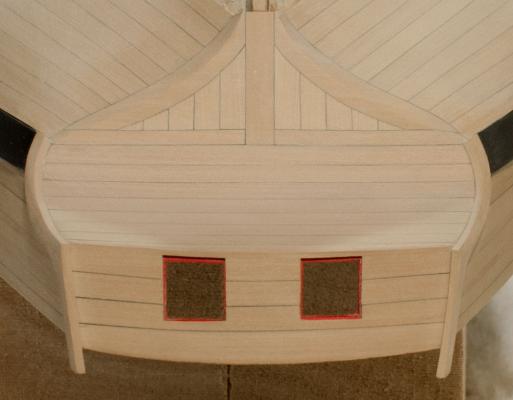
Before final sanding the hull, I decided that it would be a good time to paint the counter. My experience with brush painting the color "red" has not been great. I decided to try my Paasche air brush. The paint used is W&N Crimson with some Burnt Umber mixed in. I have read somewhere here on MSW that acrylic paints can clog an airbrush. With that in mind, I thinned the paint to a slow drip and gave it a try. As a result, the airbrush never clogged and the paint flowed very smoothly. Since the fashion pieces are going to be black it wasn't necessary to tape off that area exactly. I'm thinking that it would be a good idea to wait until the cap rail and other pieces are in place around the fashion pieces before I paint with black. While the paint was left to dry thoroughly, I started work on the stern post. It turned out that the area that the stern post is glued to was slightly off 90°, maybe by a 1/2°. This made getting a close fit on both sides a little tricky and I had to work for a few hours before I was satisfied with the fit. Once glued, I finished sanding the hull planking. The only other thing I wanted to do was to paint the red on the stern post. That was sprayed as well.
- 452 replies
-
- cheerful
- Syren Ship Model Company
-
(and 1 more)
Tagged with:
-
Thanks guys for the kind words and all the "likes". Chuck has designed a superb first time scratch build along with a monograph on how to build it. Even though there could be multiple ways of doing things, I admit that sometimes my methods have been wrong. One of my goals is to find better ways for getting the work done correctly on the first try, if possible, and avoid the re-do's. I think the learning process is one of the things that makes the hobby so interesting and at times challenging. Mike
- 452 replies
-
- cheerful
- Syren Ship Model Company
-
(and 1 more)
Tagged with:
-
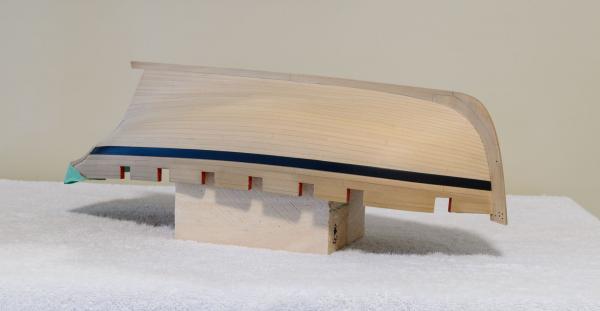
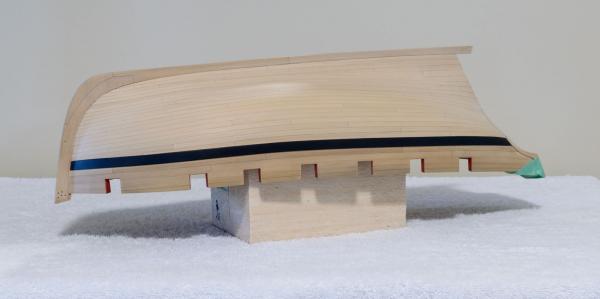
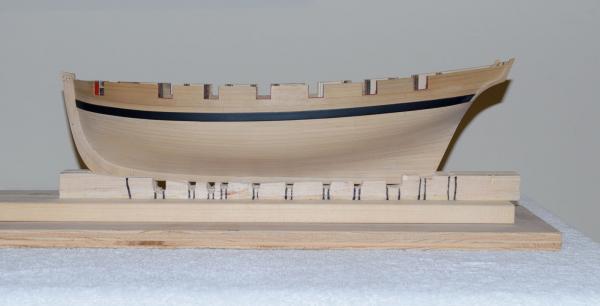
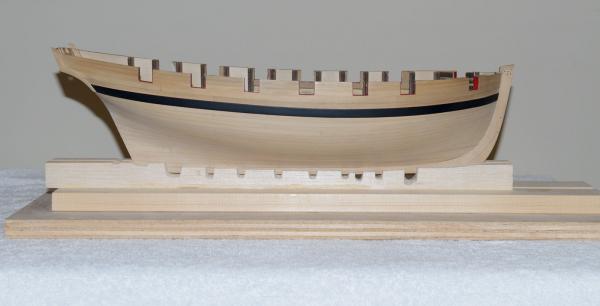
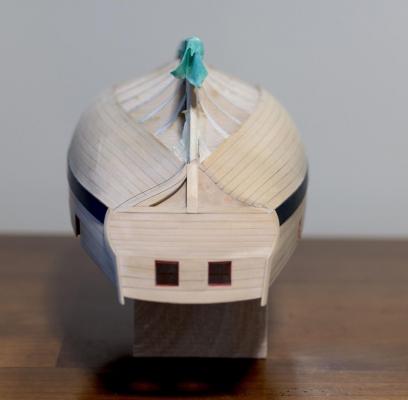
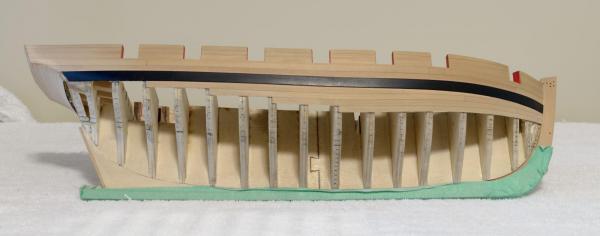
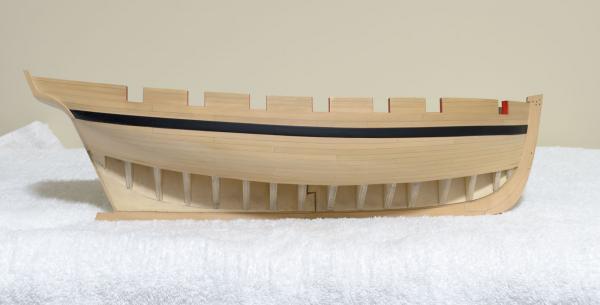
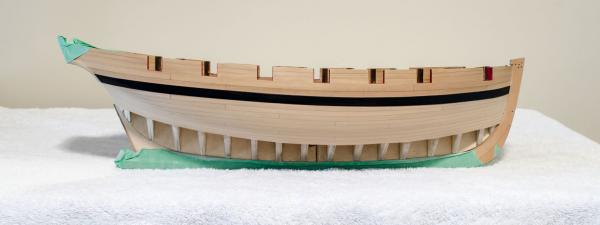
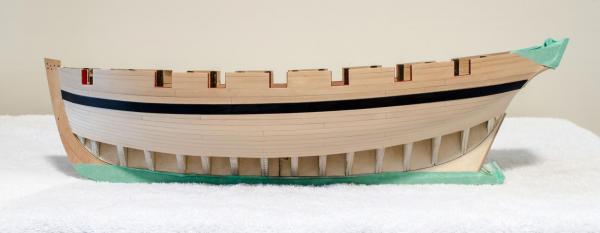
I'm finally finished planking the outer hull. I don't know if all Cutters are difficult to plank, especially aft, but this one surely was. Even though the bulkheads are spaced close together, the planks seemed to flatten slightly between some of them. I suppose that this is normal but it did require some additional sanding in order to get the right shape. I'm wondering if inserting spacers between the bulkheads before fairing the hull might have prevented this. Anyway, so much for my nitpicking! I'm still doing a bit of sanding here and there but I'm getting close to the end. I will apply some Wipe-on Poly to the hull after the Stern Post is attached.
- 452 replies
-
- cheerful
- Syren Ship Model Company
-
(and 1 more)
Tagged with:
-
Nice work Erik! Looks like you're taking your time and working sloowly. It shows. Mike
- 222 replies
-
- 18th century longboat
- model shipways
-
(and 2 more)
Tagged with:
-
Alex, Thomas, thank you for the nice comments!
- 452 replies
-
- cheerful
- Syren Ship Model Company
-
(and 1 more)
Tagged with:
-

Cutter Cheerful 1806 by rafine - FINISHED
Stuntflyer replied to rafine's topic in - Build logs for subjects built 1801 - 1850
Very nice Bob! Chuck better write another chapter soon just for you. Mike- 525 replies
-
- cheerful
- Syren Ship Model Company
-
(and 1 more)
Tagged with:
-
Though I'm somewhat hesitant to re-do mistakes, your comments and all the likes are indeed encouraging. It's a big relief to be finally moving on to the next stage of the build. Thank you all! druxey - Absolutely no regrets. Mike
- 452 replies
-
- cheerful
- Syren Ship Model Company
-
(and 1 more)
Tagged with:
-
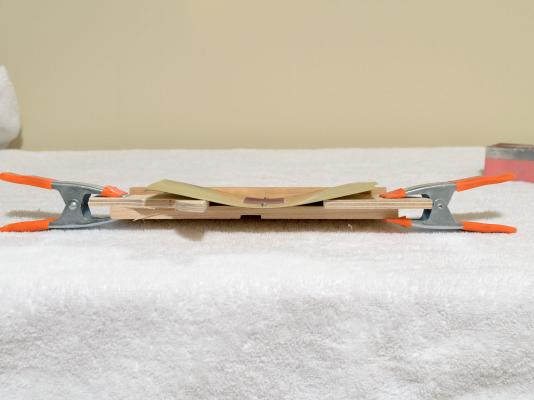
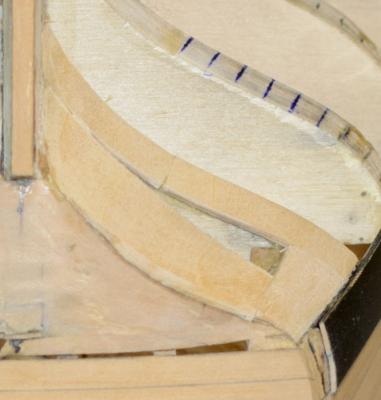
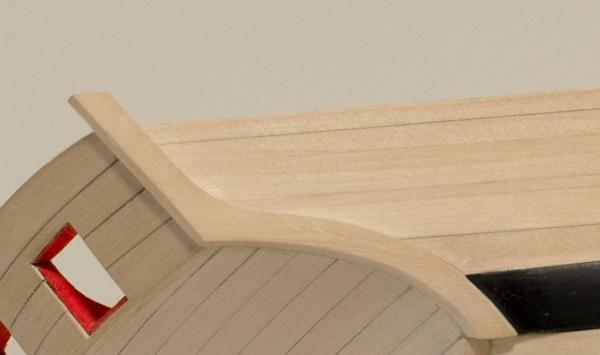
At the August SMSNJ meeting I had the opportunity to compare my Cheerful with Chuck's. It was obvious that I had made a few mistakes making it difficult to achieve the overall look at the stern that I was striving for. This is what the square tuck was going to look like if I continued on. There is only enough room for four 3/16" filler pieces when there should be room for five. This was caused by my over fairing the last two bulkheads by a considerable amount. The black lines indicate what the correct shape should have been as pointed out by Chuck. I thought about leaving things the way they were and I might have, if it were not for the fact that the fashion pieces were misshapen as well. I made three attempts at these but never got the consistent width that I was hoping for. Bothered by all of this I decided to try and fix these mistakes if possible. This photo shows most of the planks and the two fashion pieces removed. I could have left a few more planks in place but I wanted to correct for some gaps left during the first attempt. 1/16" shims were added to the last two bulkheads and faired. The planking has been completed for the second time. After gluing and clamping, I used a flashlight shining from inside the hull in order to show the tiniest gap that might have existed between the planks. Any gaps were corrected by tightening the clamps a bit more. In order to get the proper shape for the fashion pieces, I had to cut back the upper half of the wales about a 1/16". This allowed the fashion pieces to rise up slightly thus giving more width to the middle section. The process was tedious as I didn't want to damage any of the surrounding planking. After all the fixes were completed I was able to complete the square tuck. The five filler pieces are actually .196" wide instead of 3/16".
- 452 replies
-
- cheerful
- Syren Ship Model Company
-
(and 1 more)
Tagged with:
-
The ship is coming together beautifully Augie. It just keeps getting better with each update. I really like the contrast between the colors too. Mike
- 2,191 replies
-
- confederacy
- Model Shipways
-
(and 1 more)
Tagged with:
-
Hello everyone! It has been a while since my last update so hopefully others will come more frequently in the future. Below is a photo showing all the planking completed on one side. Unfortunately I'm having to cope with wood strips that don't have square edges as delivered from the source. This makes things very tedious and slows down the process tremendously. The gun ports were originally done with no pencil edge and were very hard to see. After carefully removing them I made new ones using pencil edging. The last strake has been gradually tapered down to 1/64" and the wale will sit directly below it. The lighter planks at the top will eventually be painted and should give some uniformity to the hull overall.
-
Bob, Really nice! I'm always looking forward to your next post. It's great how you go about adding extra detail to the model. Mike
- 277 replies
-
- model shipways
- 18th century longboat
-
(and 1 more)
Tagged with:
-
Chuck, Thank you for the very kind words. Anytime you want to trade I will be the first in line. You give all of us something to aspire to. Mike
- 452 replies
-
- cheerful
- Syren Ship Model Company
-
(and 1 more)
Tagged with:
-
Over the past three weeks I've been able to complete the planking of first belt below the wales. All of the edge bending was done as described in chapter four. The learning process was a lot of fun and I highly recommend giving the technique a try.
- 452 replies
-
- cheerful
- Syren Ship Model Company
-
(and 1 more)
Tagged with:
-
Erik - Your planking looks really nice! Watch out for the top of the stempost. It's not as strong as it might look. Some others, including myself, have broken it off accidentally. Once the cap rail is in it should be stronger. Mike
- 222 replies
-
- 18th century longboat
- model shipways
-
(and 2 more)
Tagged with:
-
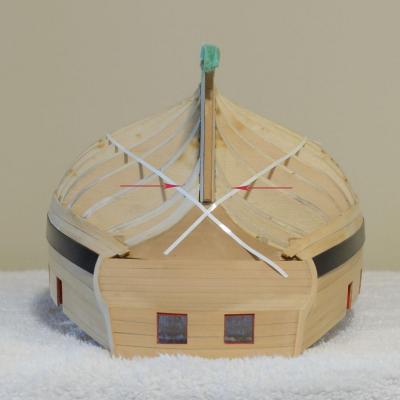
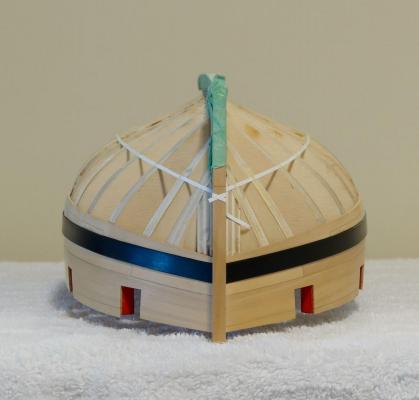
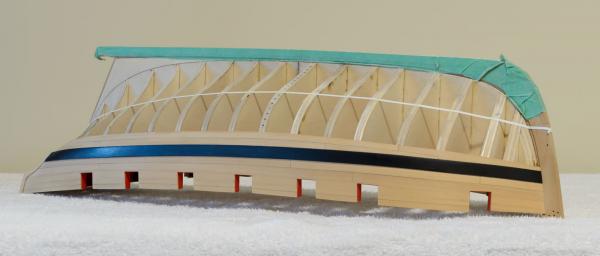
I spent several hours lining out the hull. I marked all the bulkheads aft of the first four with a tick mark for 3/16" strakes. The result was that most of the bulkheads have strakes that will be 3/16" for the next eight. The first four bulkheads at the bow will require tapering of each plank. I was hoping that all of the bulkheads aft of those four would not need any tapering. It turns out that the two last bulkheads will require some plank tapering. The arrows show that the lining out misses the tick mark by a 1/16". The bulkhead before it by less than 1/32" I'm really hoping that I didn't do something wrong. It seems odd that these two tick marks didn't line up with the tape where all the others aft of the first four bulkheads did. The result was almost identical for both sides.
- 452 replies
-
- cheerful
- Syren Ship Model Company
-
(and 1 more)
Tagged with:
-
Wow, That looks fantastic! Mike
- 1,051 replies
-
- cheerful
- Syren Ship Model Company
-
(and 1 more)
Tagged with:
About us
Modelshipworld - Advancing Ship Modeling through Research
SSL Secured
Your security is important for us so this Website is SSL-Secured
NRG Mailing Address
Nautical Research Guild
237 South Lincoln Street
Westmont IL, 60559-1917
Model Ship World ® and the MSW logo are Registered Trademarks, and belong to the Nautical Research Guild (United States Patent and Trademark Office: No. 6,929,264 & No. 6,929,274, registered Dec. 20, 2022)
Helpful Links
About the NRG
If you enjoy building ship models that are historically accurate as well as beautiful, then The Nautical Research Guild (NRG) is just right for you.
The Guild is a non-profit educational organization whose mission is to “Advance Ship Modeling Through Research”. We provide support to our members in their efforts to raise the quality of their model ships.
The Nautical Research Guild has published our world-renowned quarterly magazine, The Nautical Research Journal, since 1955. The pages of the Journal are full of articles by accomplished ship modelers who show you how they create those exquisite details on their models, and by maritime historians who show you the correct details to build. The Journal is available in both print and digital editions. Go to the NRG web site (www.thenrg.org) to download a complimentary digital copy of the Journal. The NRG also publishes plan sets, books and compilations of back issues of the Journal and the former Ships in Scale and Model Ship Builder magazines.


