Stuntflyer
-
Posts
1,197 -
Joined
-
Last visited
Content Type
Profiles
Forums
Gallery
Events
Everything posted by Stuntflyer
-
 Chuck, I call the company that makes G-S HYPO cement and they say that it won't melt anything and is safe to use on nylon thread. Mike
 -
Thanks Andy!
-
Thanks for reminding me. To be safe, I won't use the G-S glue on the MS line. After the Longboat is completed, unless there is some good reason to use nylon line, I'll use something else. Among other things, making coils out of this stuff is not fun. Mike
-
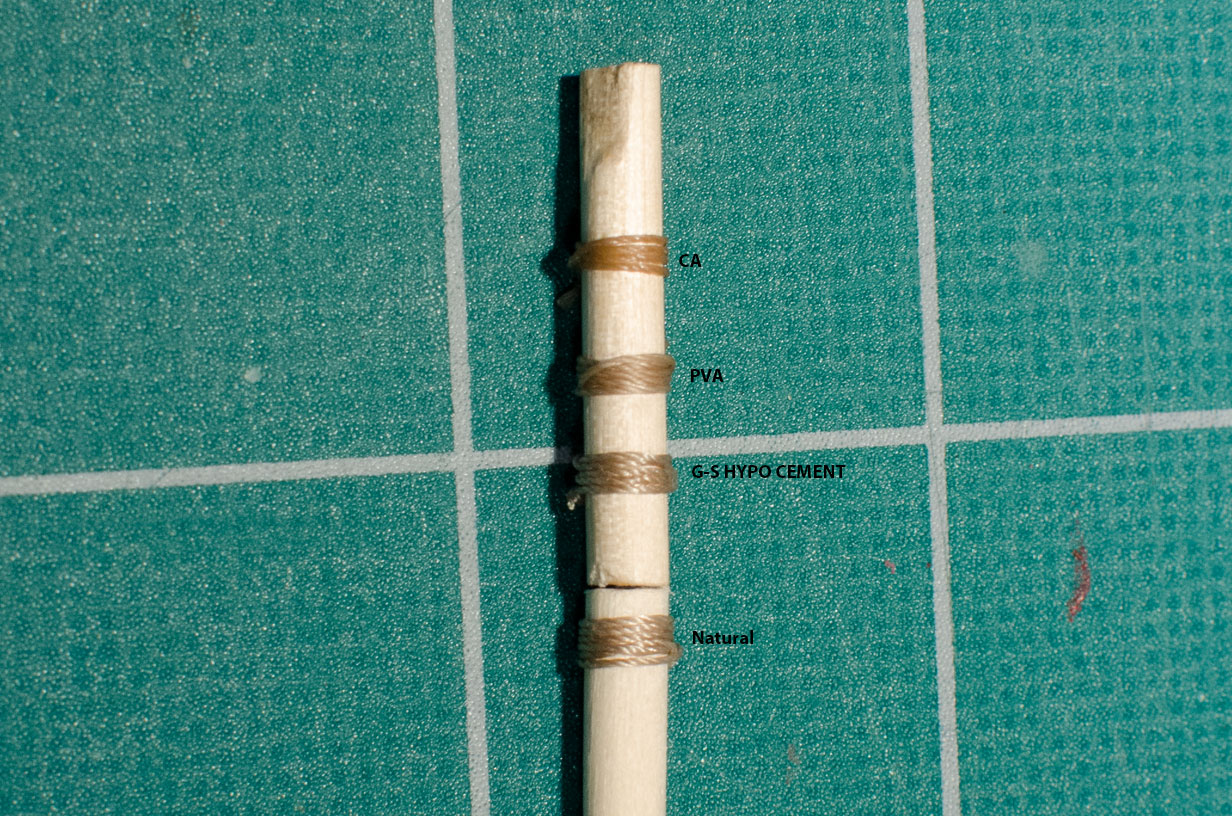
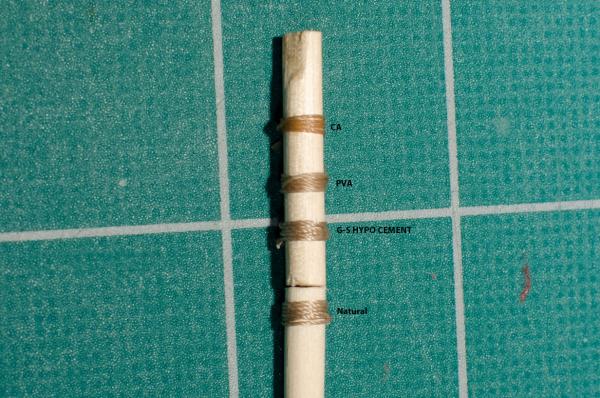
I haven't had a chance to try other PVA glues other than what I have been using which is Elmers Carpenter Wood Glue (thinned substantially). It definitely changes the color of the tan line to a darker tone and I think it takes away from the natural look of the line by giving it a smeared look. You can see this in the photo comparison below as well as other photos that I have posted on this page. Though not shown here, I have noticed that it leaves a whitish residue on black line. The photo below is test sample showing 3 different glues against a natural sample for comparison. I think that the best result comes from the G-S HYPO Cement. Yes, it's a little gooey and sticky, yet it appears to preserve the natural color and look of the line.
-
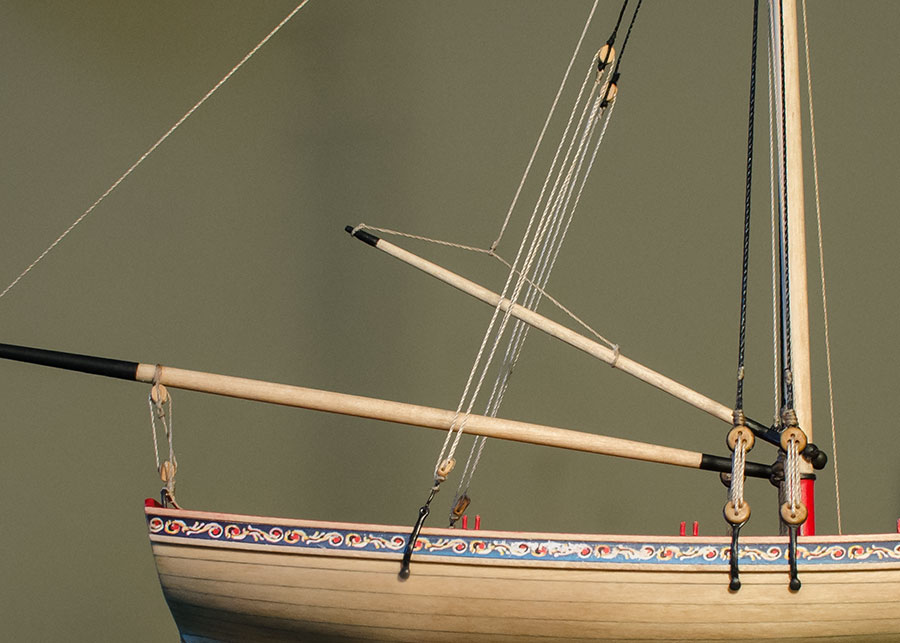
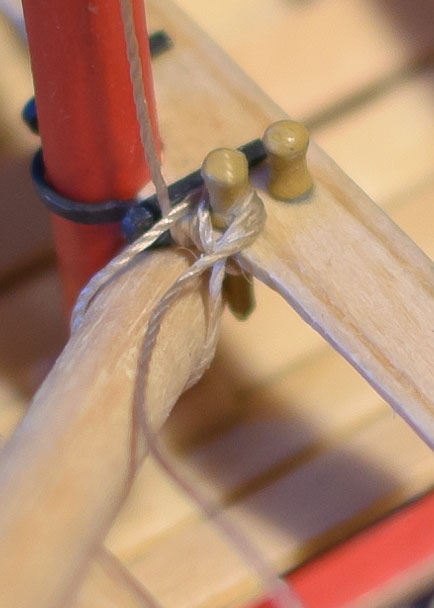
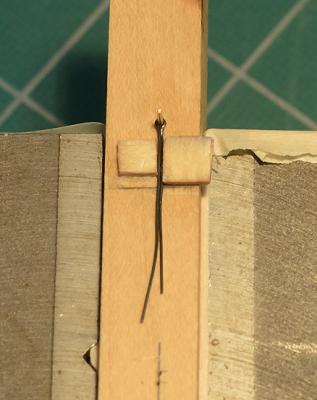
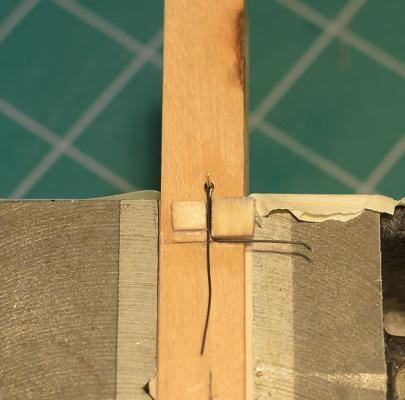
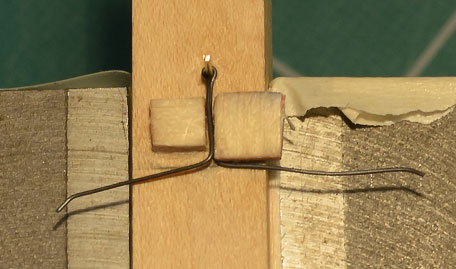
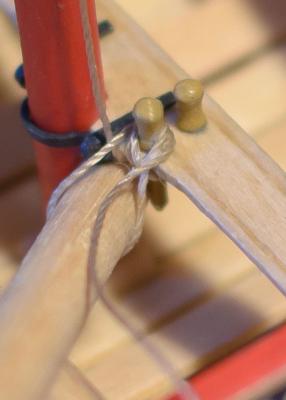
"Running Backstay" assembly completed. Almost! As per the instructions, the chainplates were made from 28 gauge wire, pendents from .018 black rigging line and running backstays from .018 tan. Additionally, the hooks were made from 28 gauge wire and the blocks are 1/8". I just need to add some rope coils.

- 109 replies
-
- 6
-

-
- 18th century longboat
- model shipways
- (and 1 more)
-
Pops, Thanks for the kind words from one newbie to another. The "running backstays" are next and I will have to be careful not to break anything while making and fitting all the parts. Could be challenging as I am still training myself to move more slowly. I already broke the mast once. We'll see!
-
For the shrouds I used the kit supplied .021 black line and seized it with .012 tan line. White glue though better than CA still darkens the tan color more than I would like.
- 109 replies
-
- 6
-
-
- 18th century longboat
- model shipways
- (and 1 more)
-
Thanks!
-
I understand what you are saying about the seizing. The kit supplied .021 rope is black not tan. Should I use this for the shrouds? The tan is .012.
-
So I should use .021 black rope to Seize the shrouds around the masthead? Also, it seems like the kit supplied tan rope is too thin for shrouds.
-
Rigging the Shrouds. . . The instructions say, "Seize the shroud around the masthead with .021 black wire". I guess that's 24 gauge black wire which seems rather heavy for this? If used, how many wraps would you suggest? Thanks, Mike
-
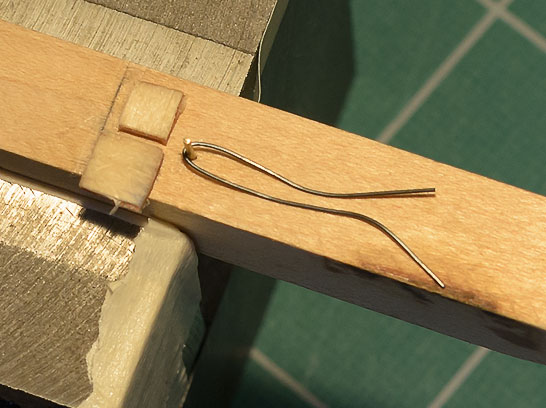
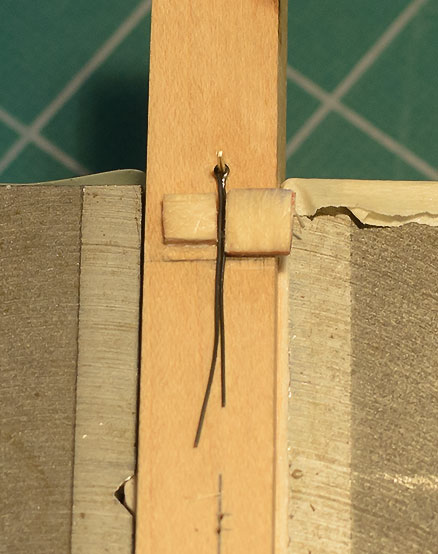
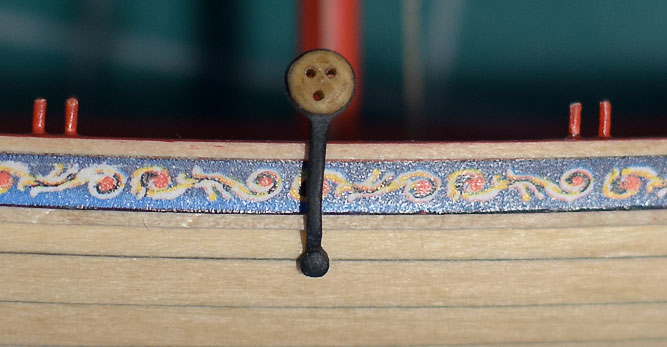
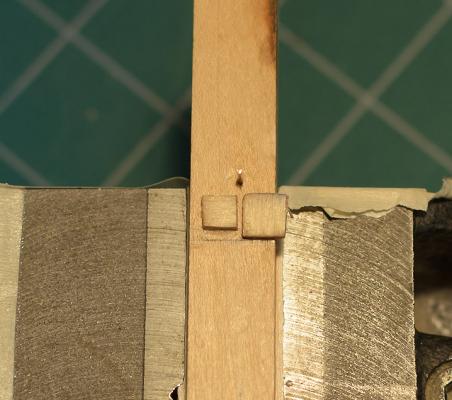
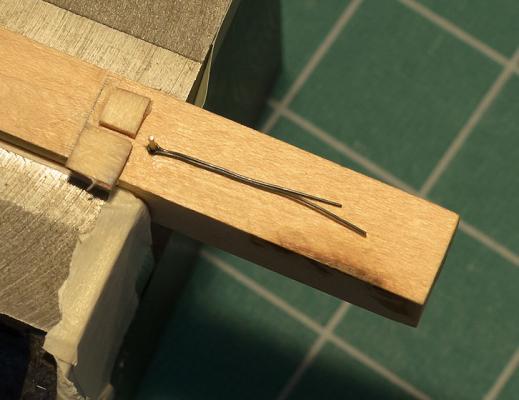
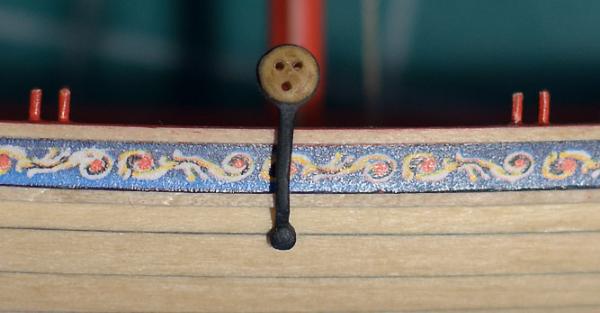
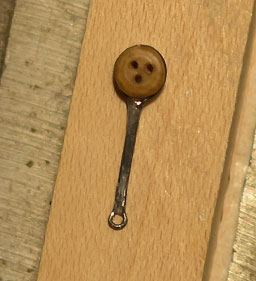
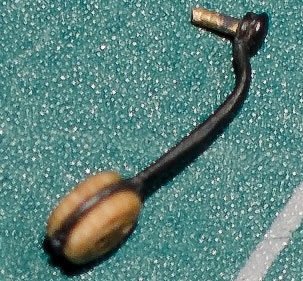
I made this simple jig for the chainplates. The plywood square worked alright but a metal square would be better for large batches as it will hold up longer and not crush when pulling the wire around it. Here is one glued using CA and then bent to hull shape and painted The kit supplied deadeyes leave a lot to be desired.

- 109 replies
-
- 7
-
-
- 18th century longboat
- model shipways
- (and 1 more)
-
That looks so much better!
-
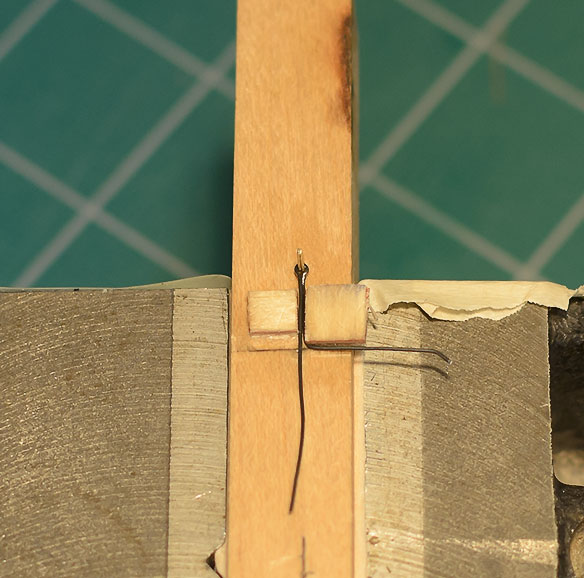
Hello Chuck, Does the 1/32" sq molding on the side of the hull have a tiny notch filed into it where the chain plate crosses the molding? Thanks, Mike
-
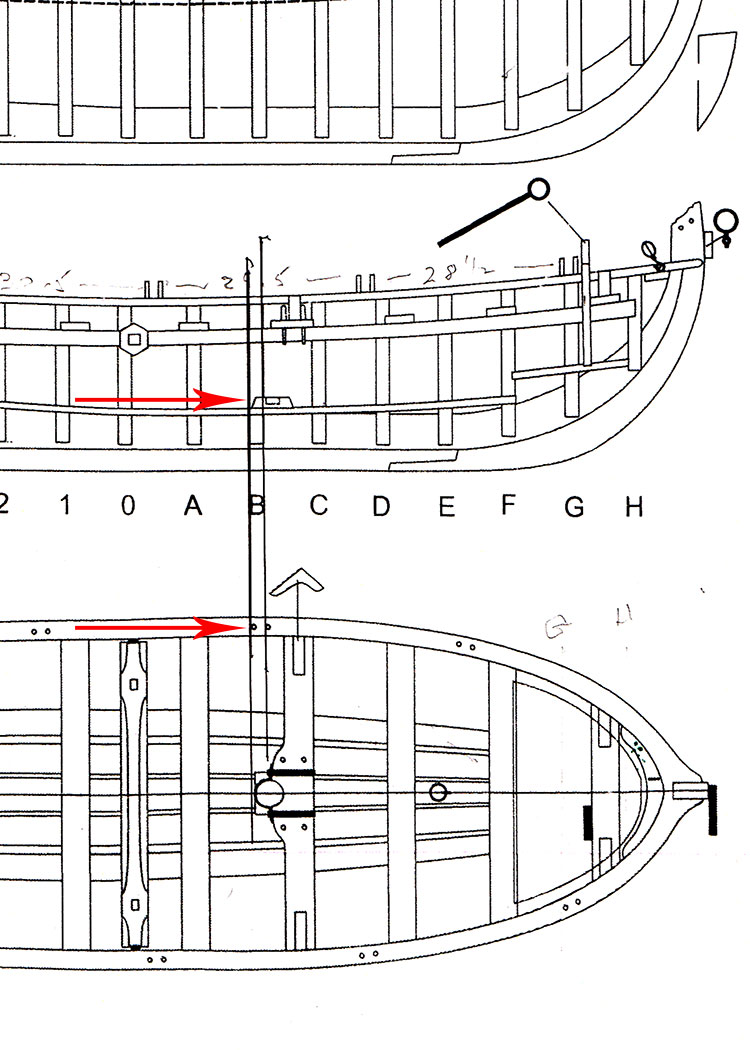
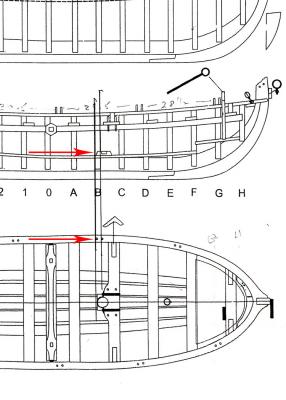
Looking at the location of the oarlocks on the kit plan, it appears that there is a mistake on the port side near bulkhead "B". Drawing a straight line down from both sides of bulkhead "B" shows that this oarlock is located where a chainplate will be. The photo above shows that I placed this oarlock according to plan. Looks like I will have to relocate this oarlock aft to make room for the chainplate. Looking at Chucks build you can see that's exactly what he did. http://modelshipworld.com/index.php?/topic/629-18th-century-english-longboat-by-chuck-c1760/page-2
- 109 replies
-
- 3
-
-
- 18th century longboat
- model shipways
- (and 1 more)
-
Thanks Chuck, Wow, that's great! The Longboat seems to be a very popular build. A more detailed version would make it even better. You can count me in for sure. When do we get started? Mike
-
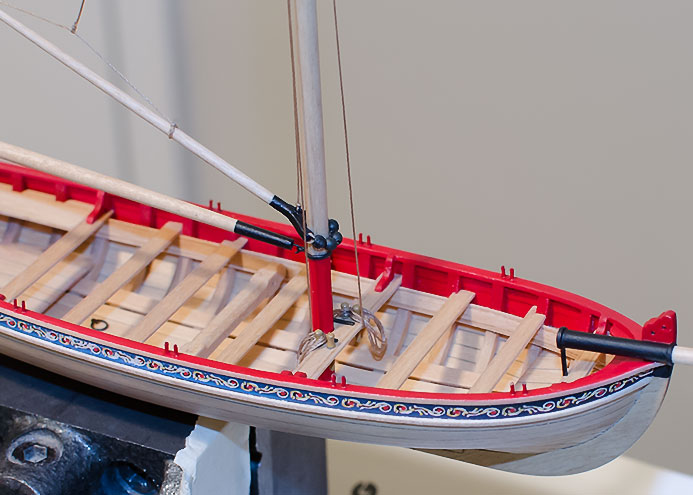
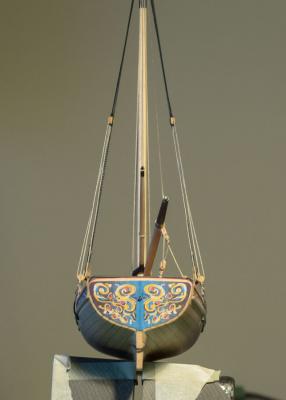
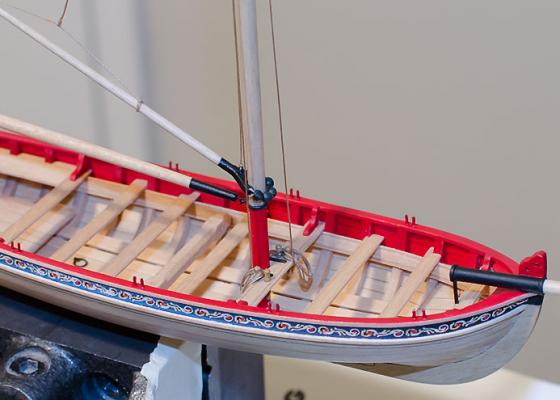
Completed gaff assembly and its rigging. My girlfriend thinks the boat is too small and should be at least twice as large. She is afraid to touch it for fear of breaking something. So am I!
- 109 replies
-
- 7
-
-
- 18th century longboat
- model shipways
- (and 1 more)
-
Really looking nice. . . I also glued the planks in segments, 2 to 3 bulkheads at a time. Mike
-
Ryland - That's a great observation that I missed when I first looked at the photos. On my build I was quite surprised at just how much bulkheads E thru H had to be tapered.
- 335 replies
-
- 2
-
-
- 18th century longboat
- Finished
- (and 1 more)
-
The top of the shear plank rests along the dashed line shown on the plan which is about 1/16" below the top of the bulkheads. The shear should have a natural flow into the stem. Notice the position of the dashed line relative to the stem. This will leave room for the cap rail, something I didn't do initially but corrected later. You only need to "dip" the center of the sheer lower if you want more curve.
-
Pops, been there done that myself too. I almost gave up on mine a few times. Sometimes I needed to step back for a few days, gather my thoughts and then continue on. You said. . ."I mean, some are high on the port side while some are high on the starboard side." That seems very odd. Is it possible that some thwarts are not touching the riser where they are glued? You might want to check that out. As frustrating as it might be for you right now, I think that completing the build would still give you great satisfaction. I have enjoyed following your build log very much.
- 132 replies
-
- 3
-
-
- 18th century longboat
- model shipways
- (and 1 more)
-
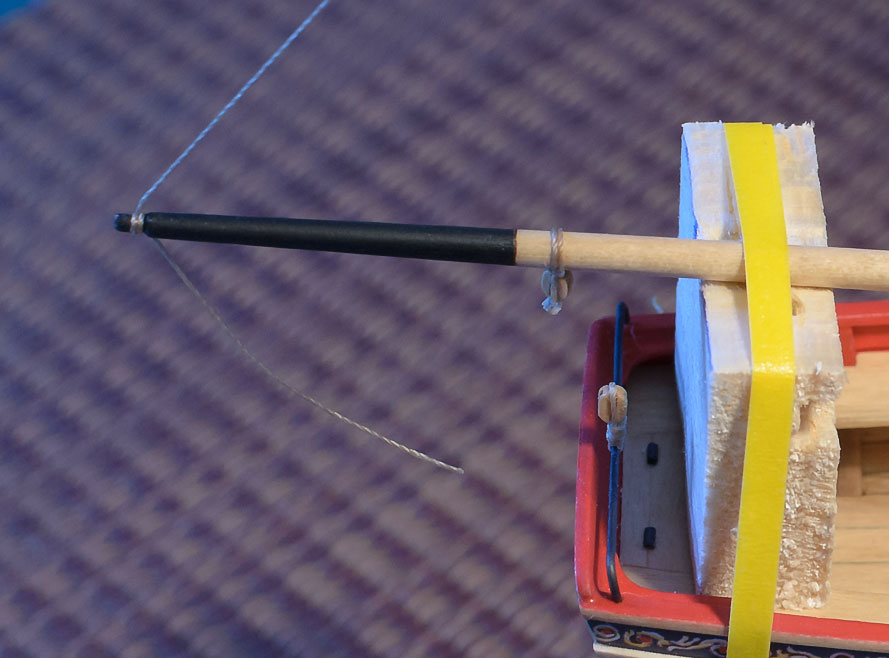
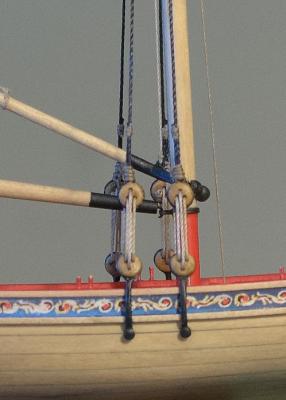
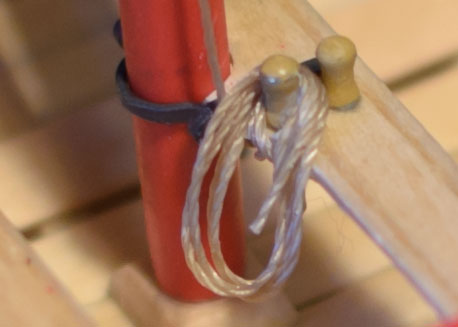
The boom sheet is now finished. After coiling a separate length of rope I compressed the coil with tweezers to make it more elongated and then used hair spray to fix the shape.

- 109 replies
-
- 7
-
-
- 18th century longboat
- model shipways
- (and 1 more)
-
Bob, I always enjoy reading your build logs. They are very informative and the quality of your work is outstanding.
-
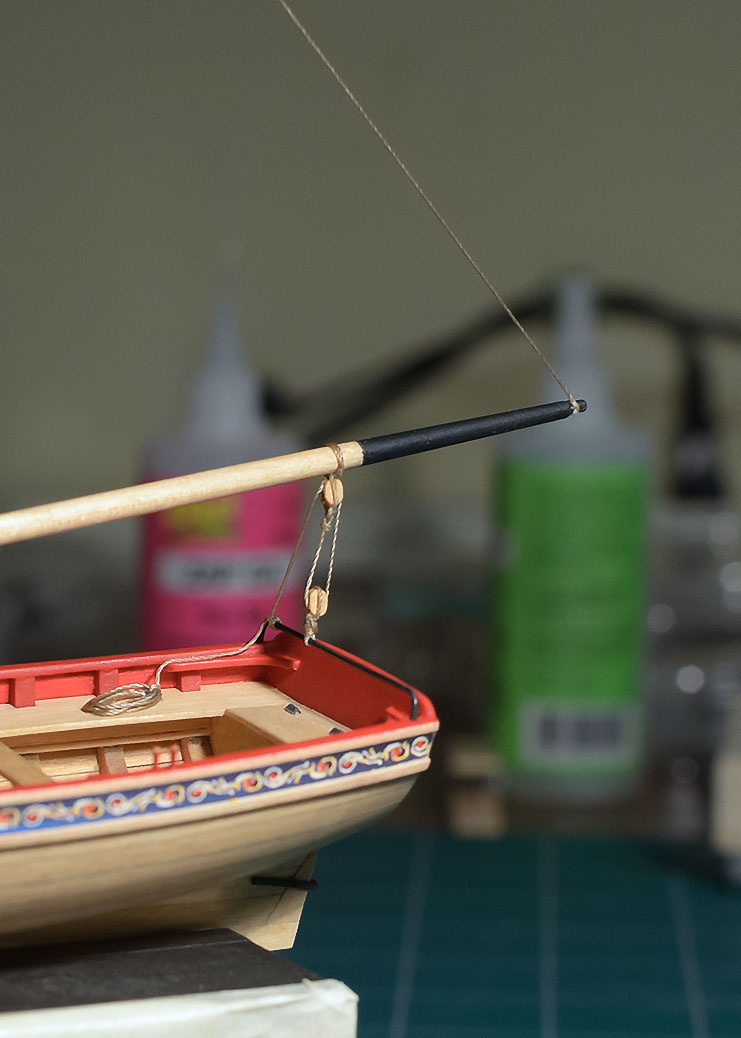
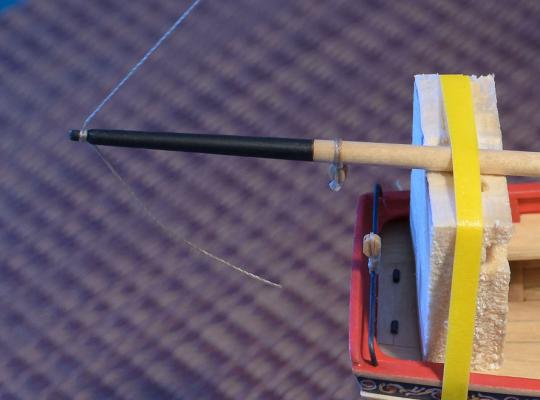
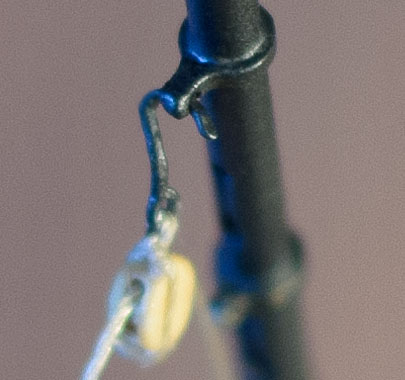
Started rigging today. . . I used a scrape balsa block to hold the boom in position while making the "topping lift". The angle of the boom matches the plan. I wanted to make the "topping lift" and rope coil from one piece of rope, if possible. After trying various ways, unsuccessfully, I finally came up with a jig using a 5/32" dowel. I used a tiny amount of thinned white glue to hold the first coil in place. Once dry, I made the other coils by wrapping 3 more turns around the dowel and gluing again. After removing the dowel, I shaped the coil as best I could and applied more glue to hold everything in place. As you can see I decided to use a hook instead of seizing the block directly to the mast ring.
- 109 replies
-
- 3
-
-
- 18th century longboat
- model shipways
- (and 1 more)
-
Looking at Model Shipways POB kits I see that the Niagara is an intermediate level build and the Syren is advanced level. Is the Syren a more difficult build than the Niagara? Mike