GaryKap
-
Posts
276 -
Joined
-
Last visited
Content Type
Profiles
Forums
Gallery
Events
Everything posted by GaryKap
-
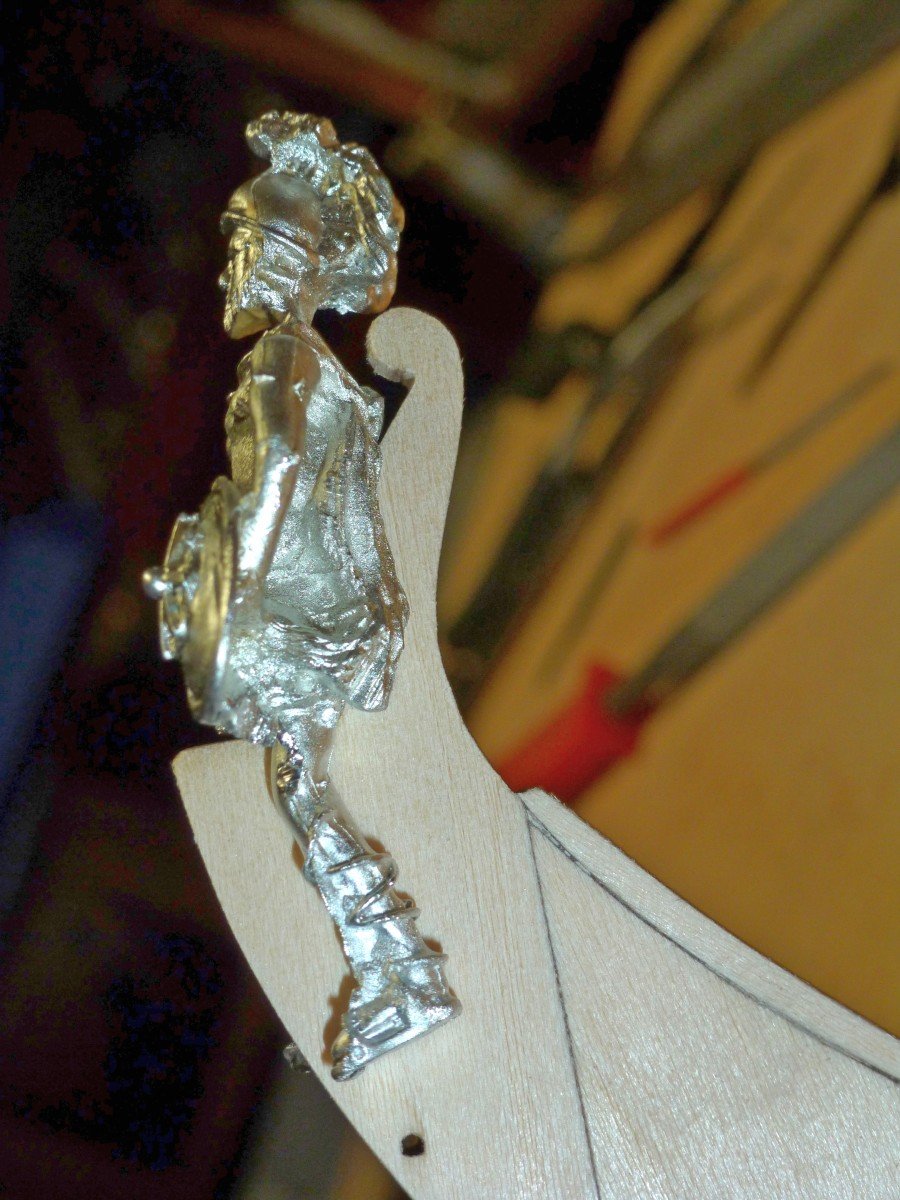
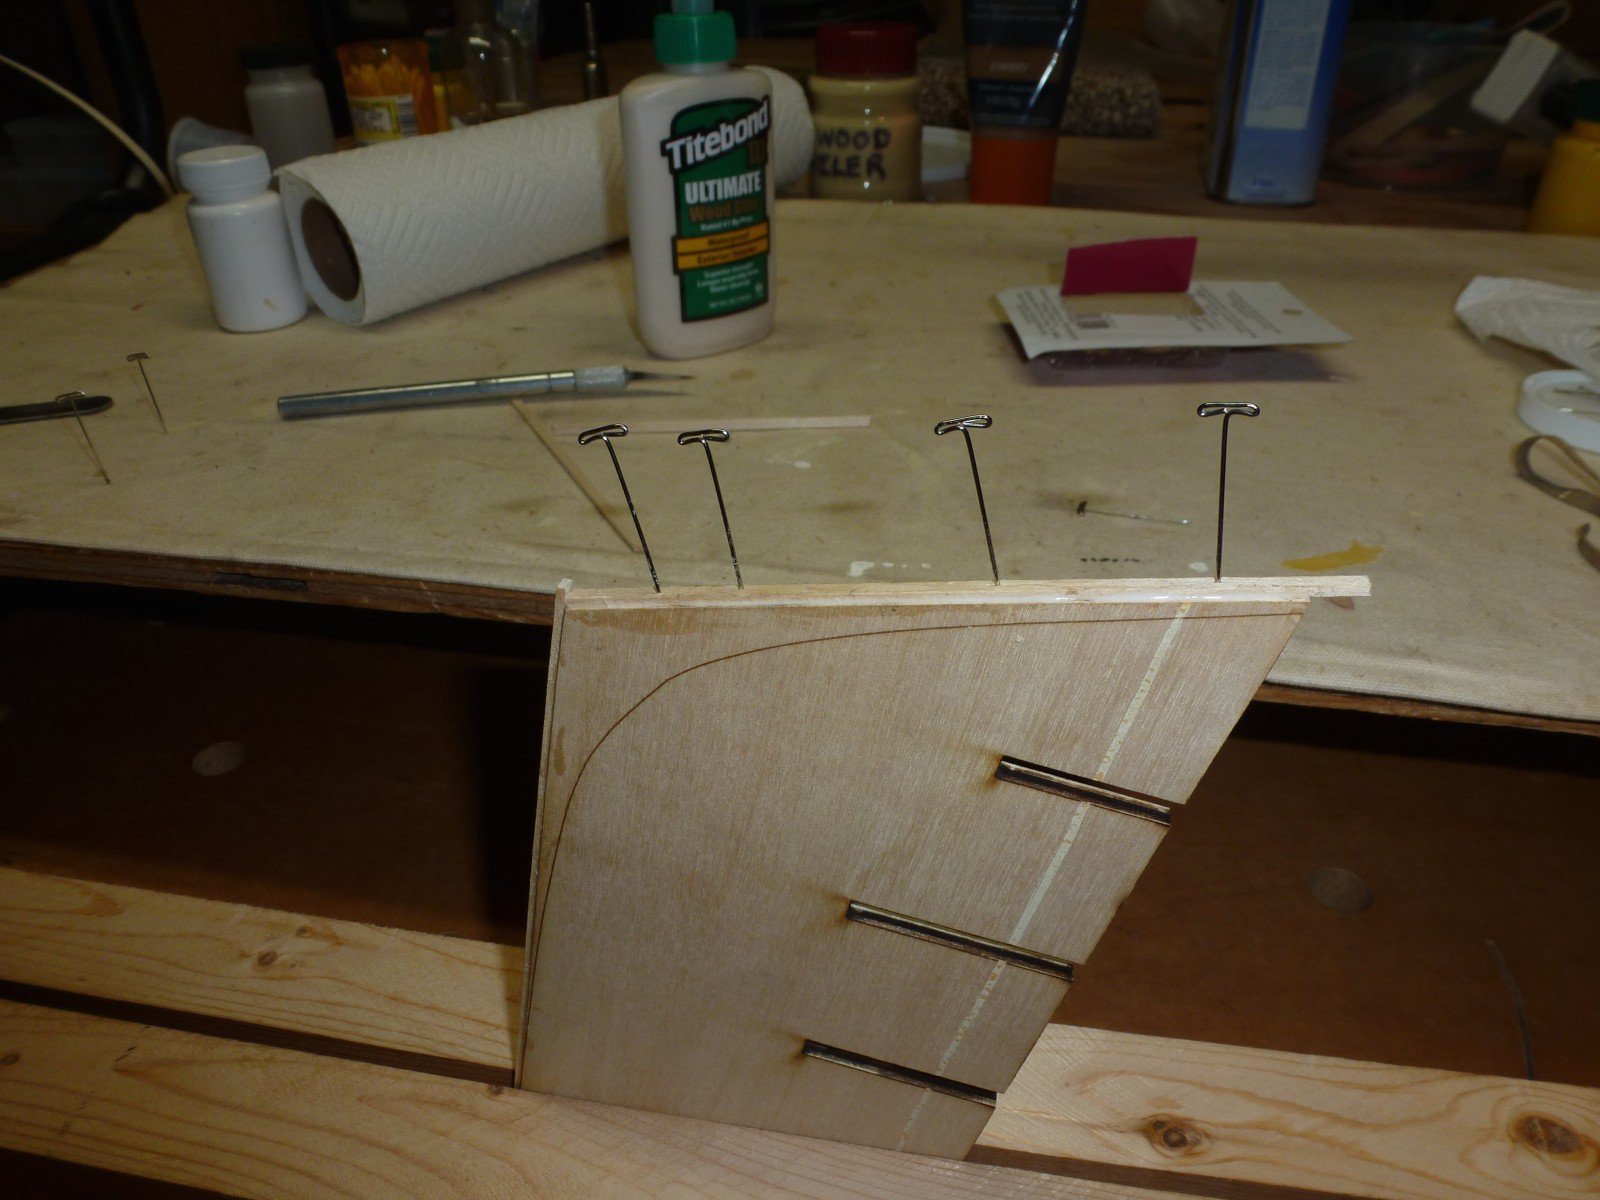
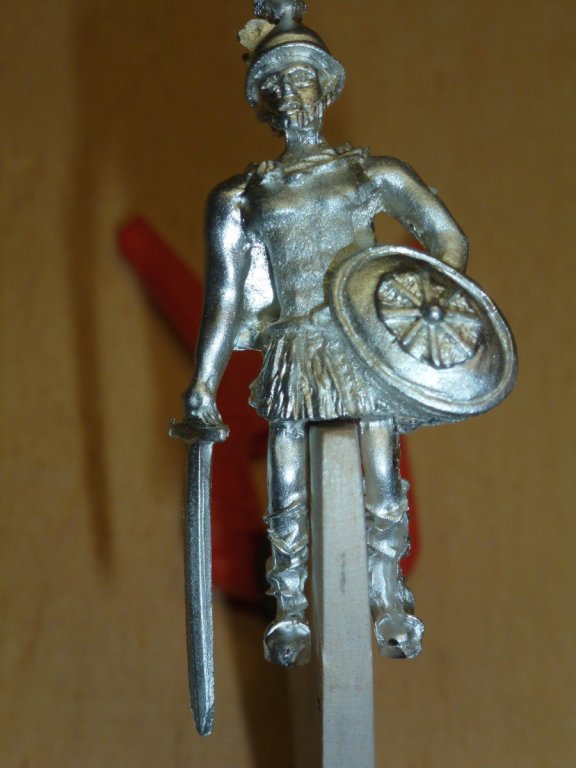
 Hi JohnB40 – Welcome. I hope you start a build log as well so we can swap ideas. And thanks for the “likes”. Chuck, I hope you will provide guidance whenever you think it is needed. Rafine, good to have you aboard as always. Today I tapered the stem assembly. The key thing here is to make the assembly narrow enough to fit between the figurehead guy's legs. I also did some filing on the figurehead to do the final fitting. Then I sanded the assembly with 320 grit sandpaper and re-stained with Minwax Golden Oak.

-
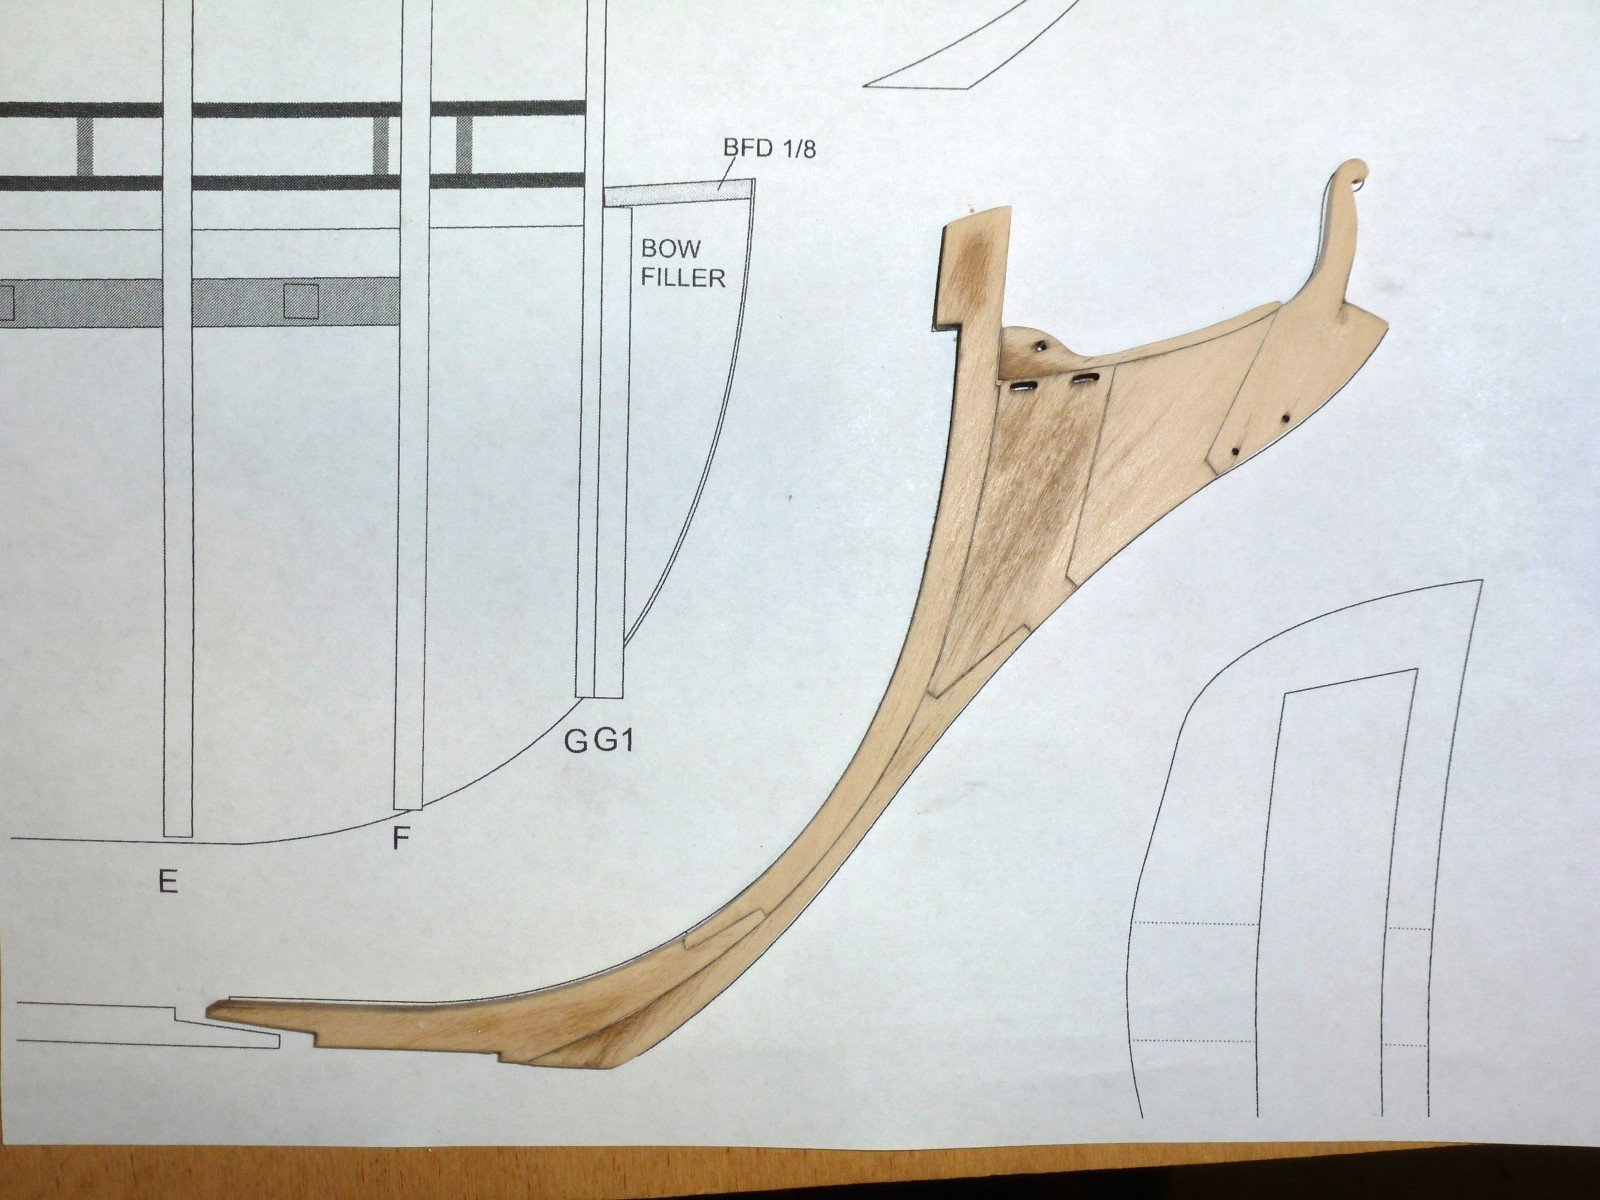
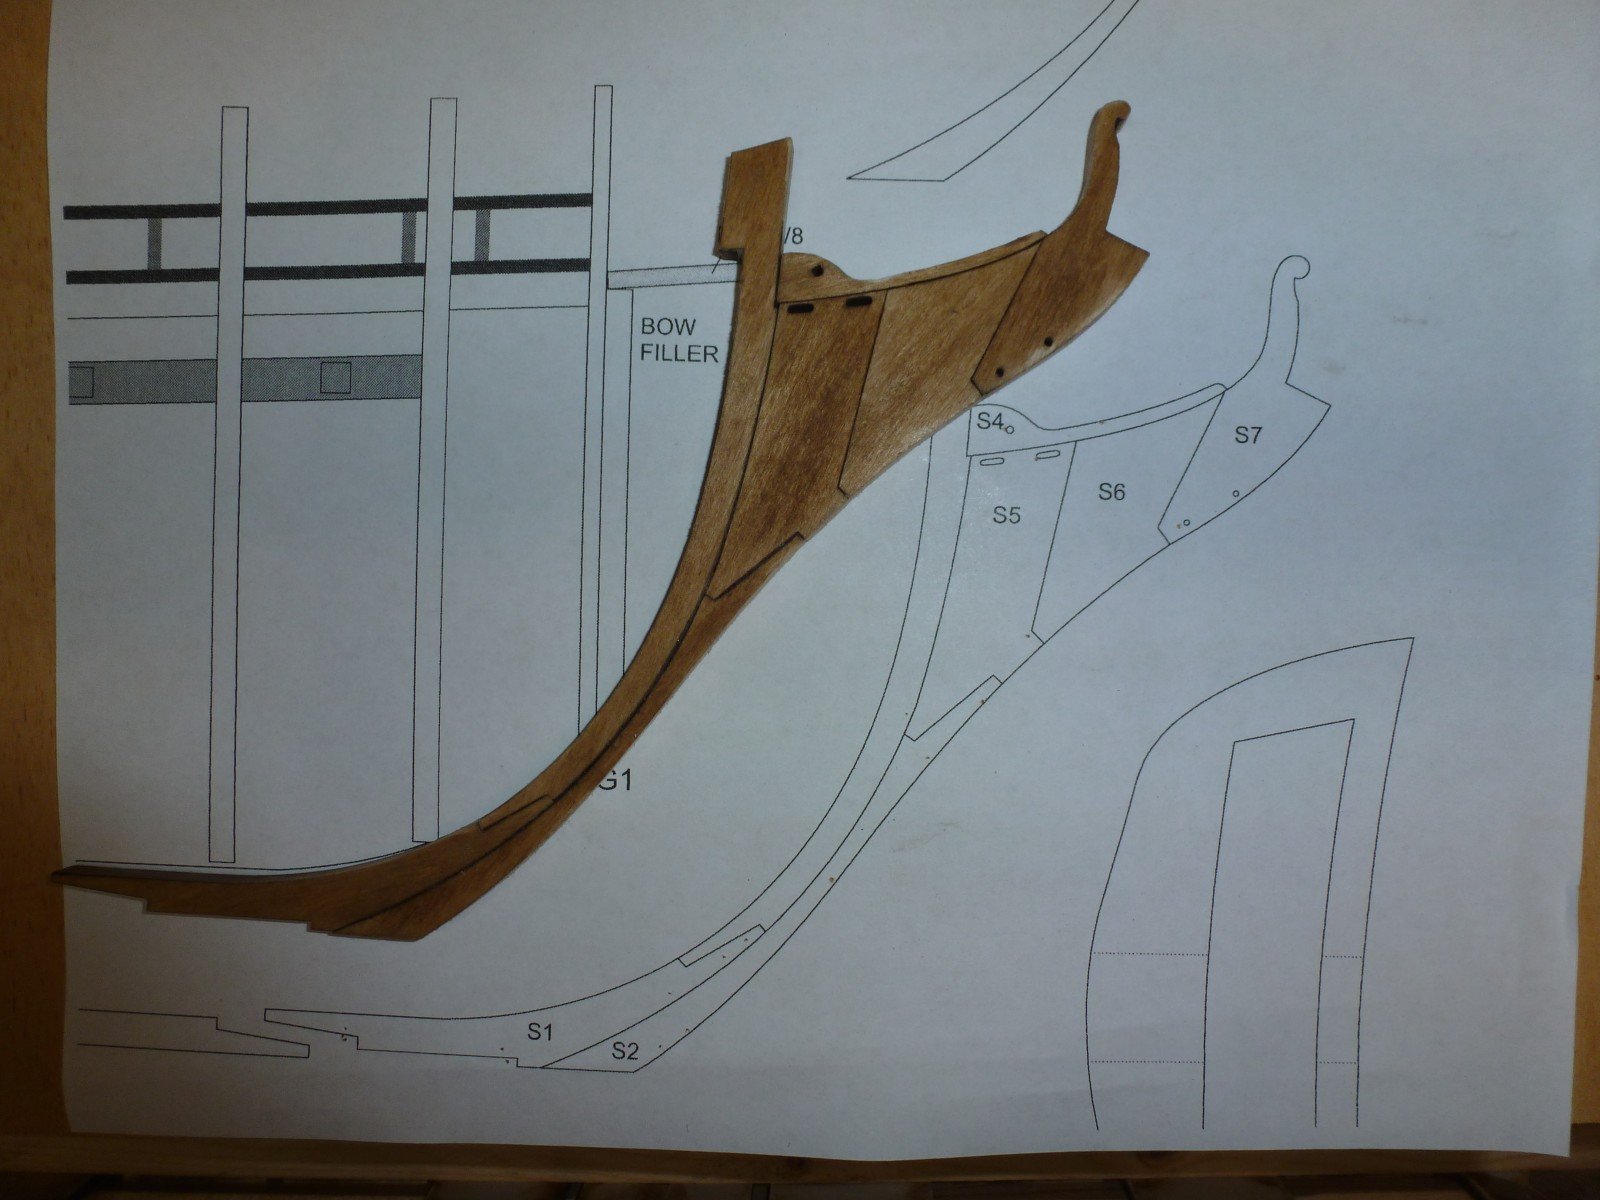
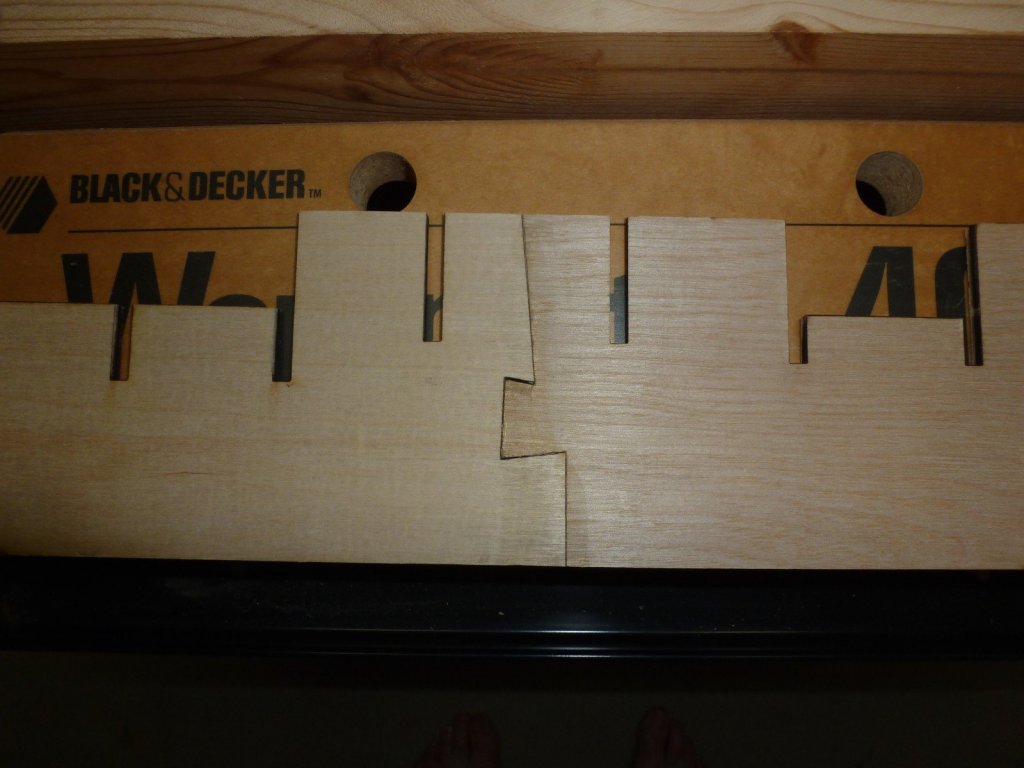
Thanks to Dubz build log, I was made aware of the problem with the stem assembly. Yup, mine has the same problem. Oversimplified, the S1 – S3 part is approximately 1/8 inch too long. My solution was to shorten both parts equally where they meet at the scarf joint. (this has to be done carefully and in small increments). I then glued the S1-S3 parts making sure they matched the curve of the bow. When the glue set, I added the other parts. After the glue sets, I will taper the assembly. (Instruction Manual Ch. 1 p. 3). Here is a link to the color version of Chapter One in case anyone wants to follow along: http://modelshipworldforum.com/resources/Confed/chapter1.pdf

-
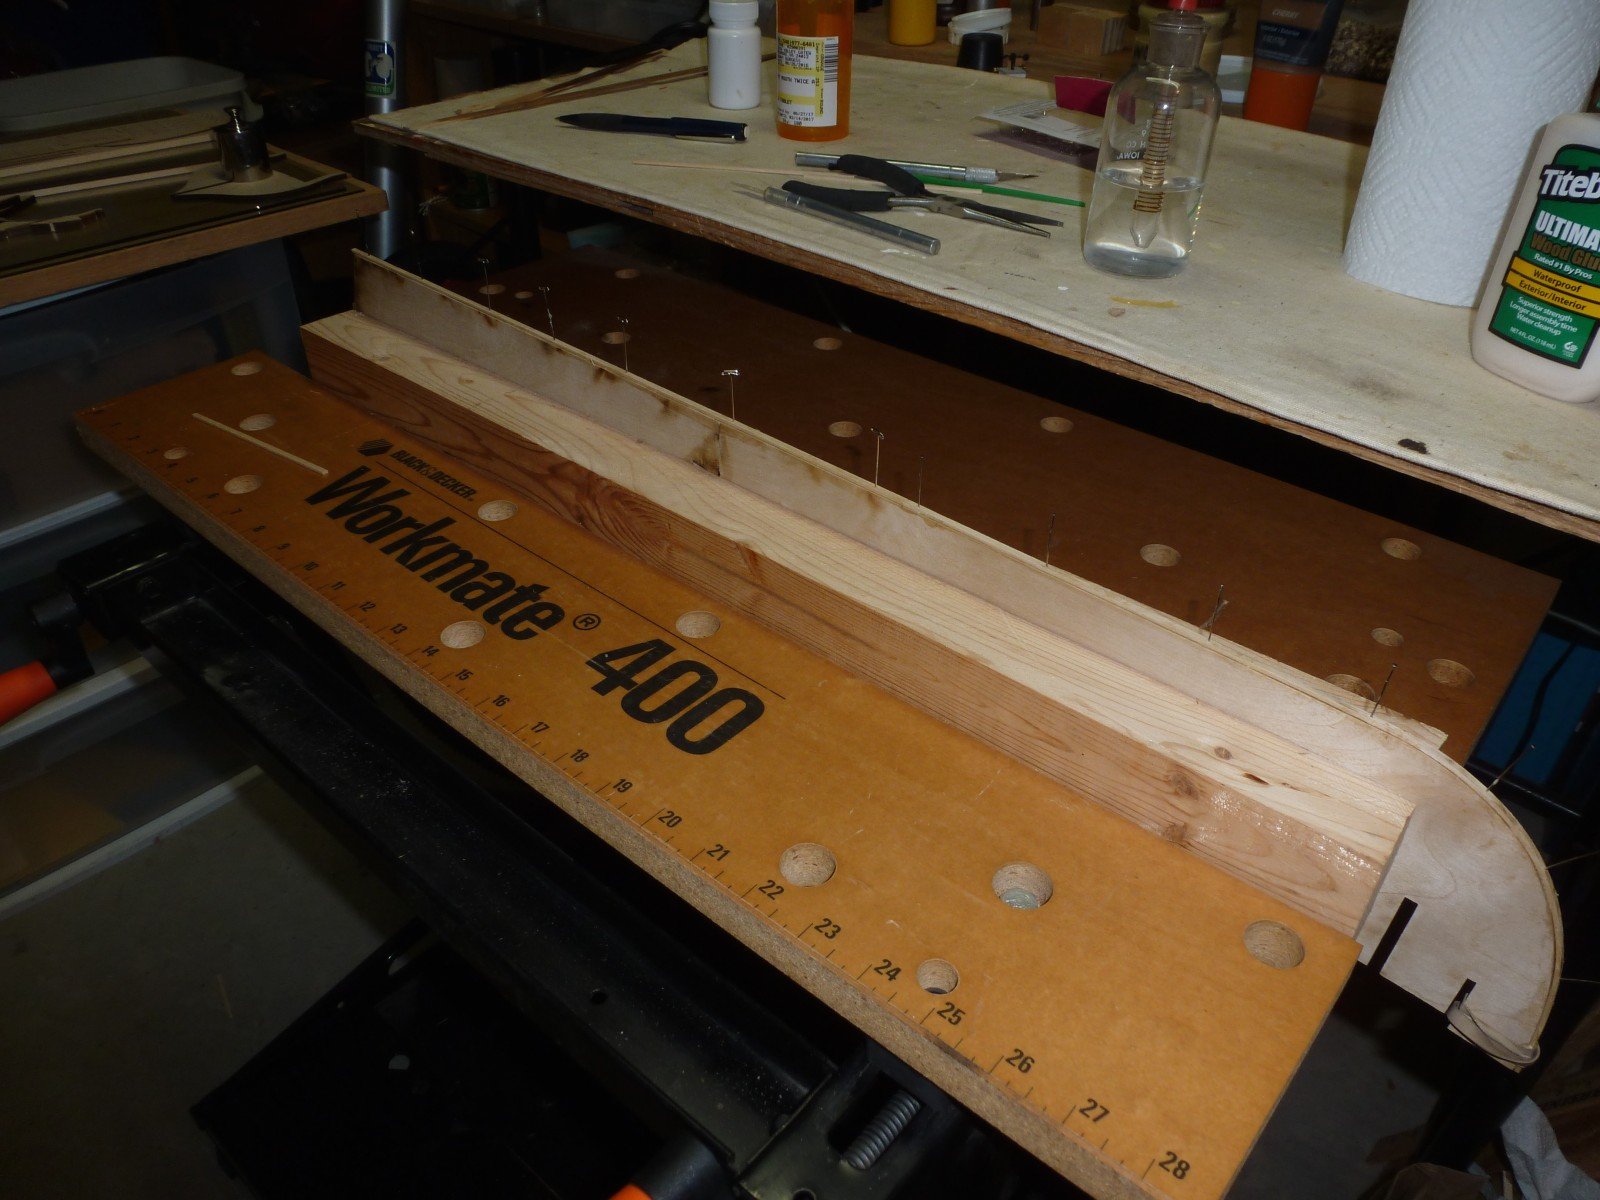
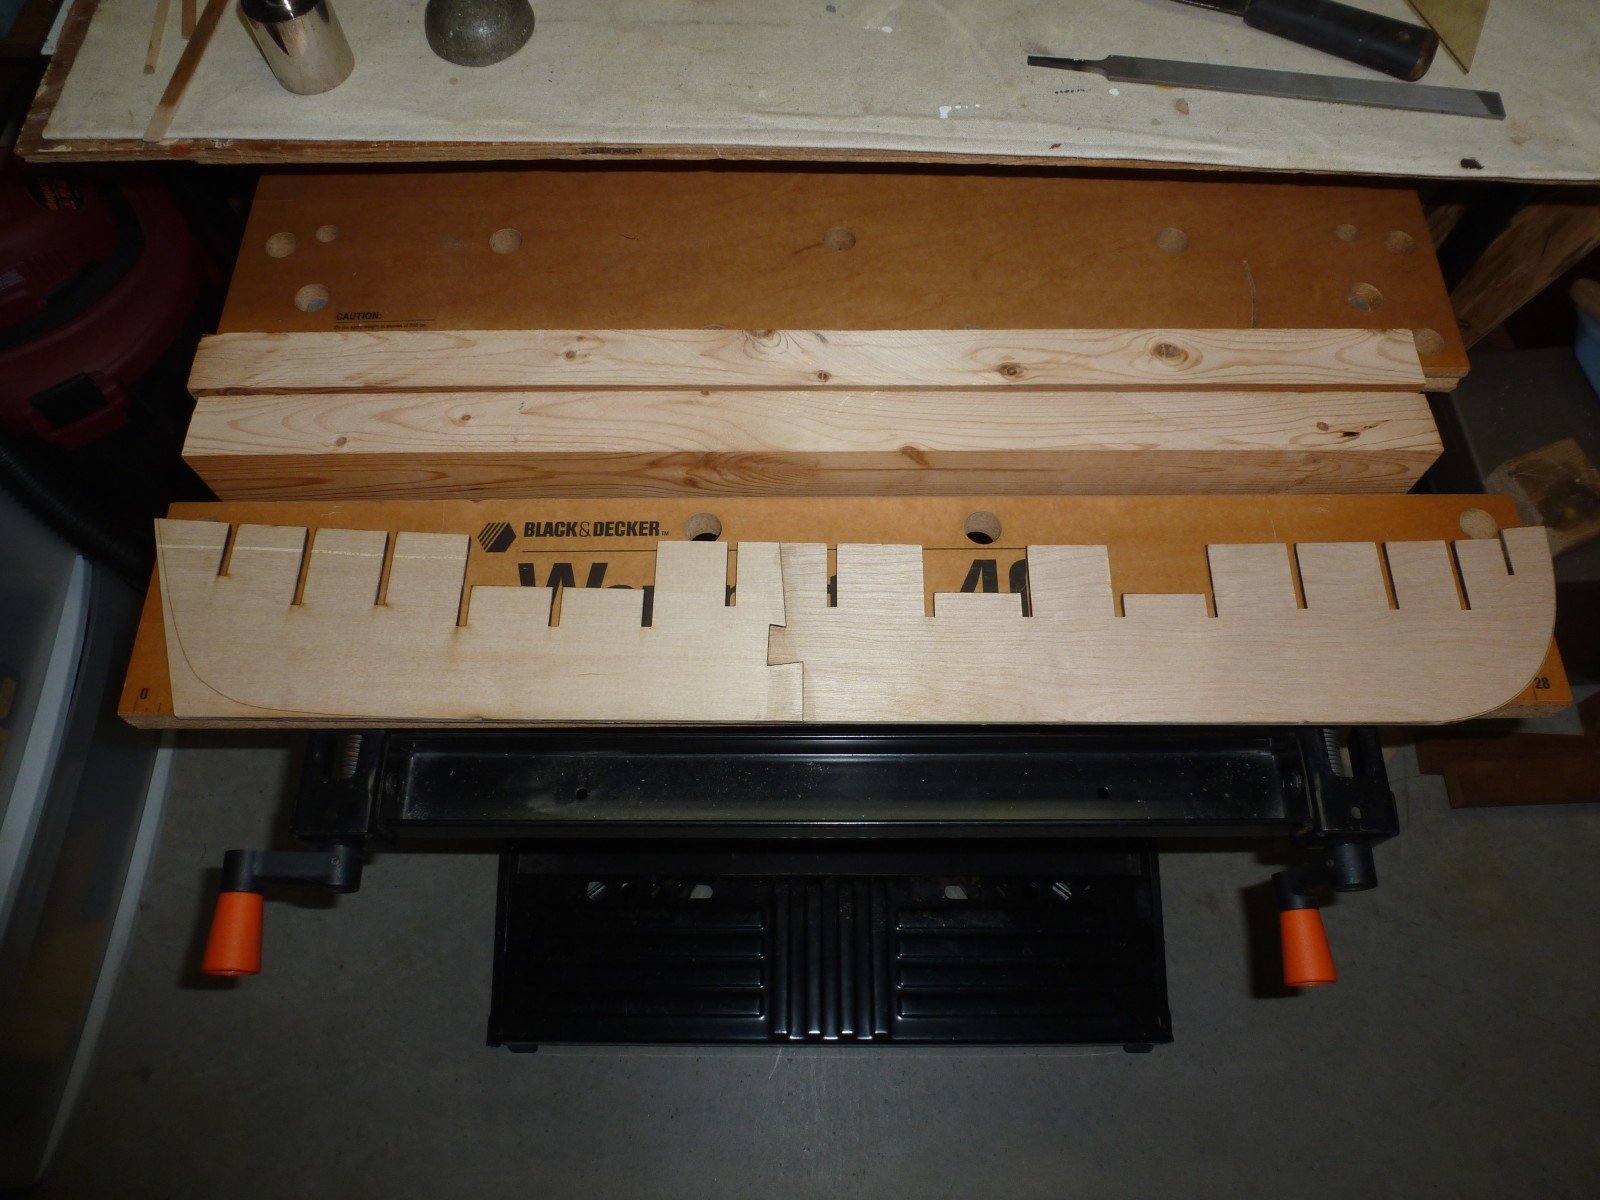
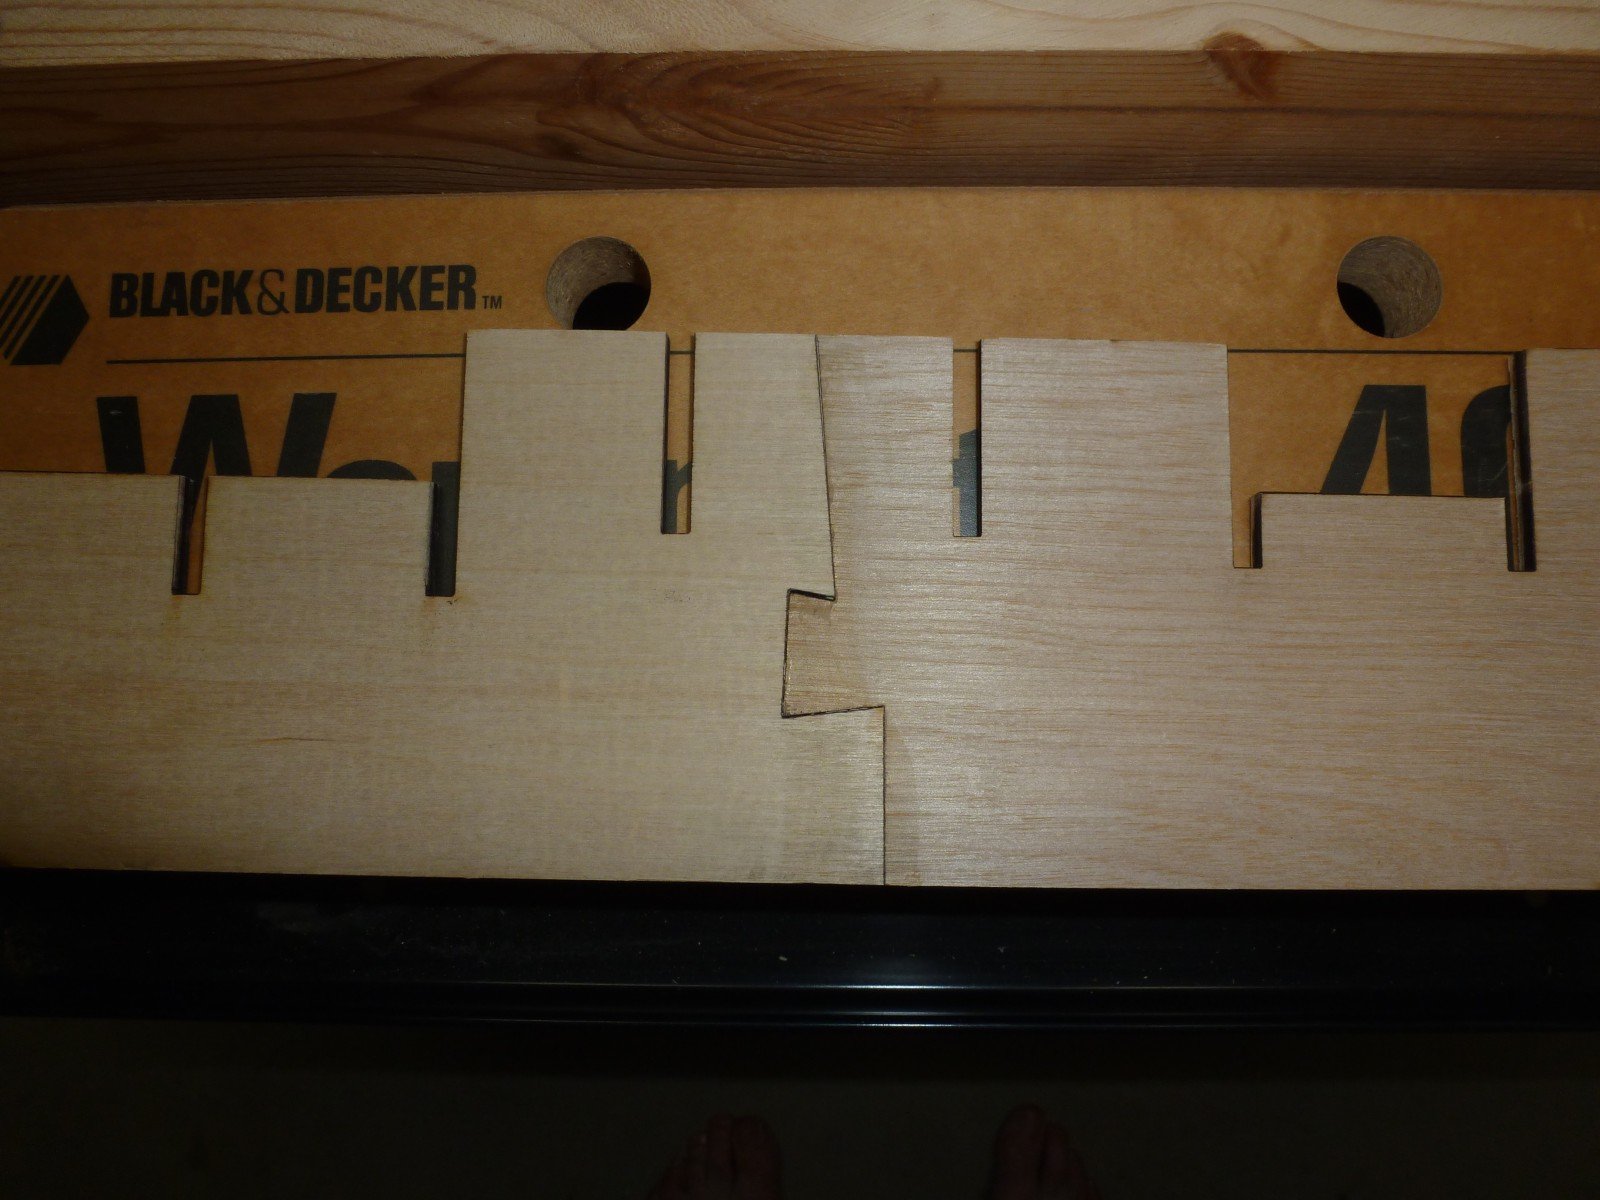
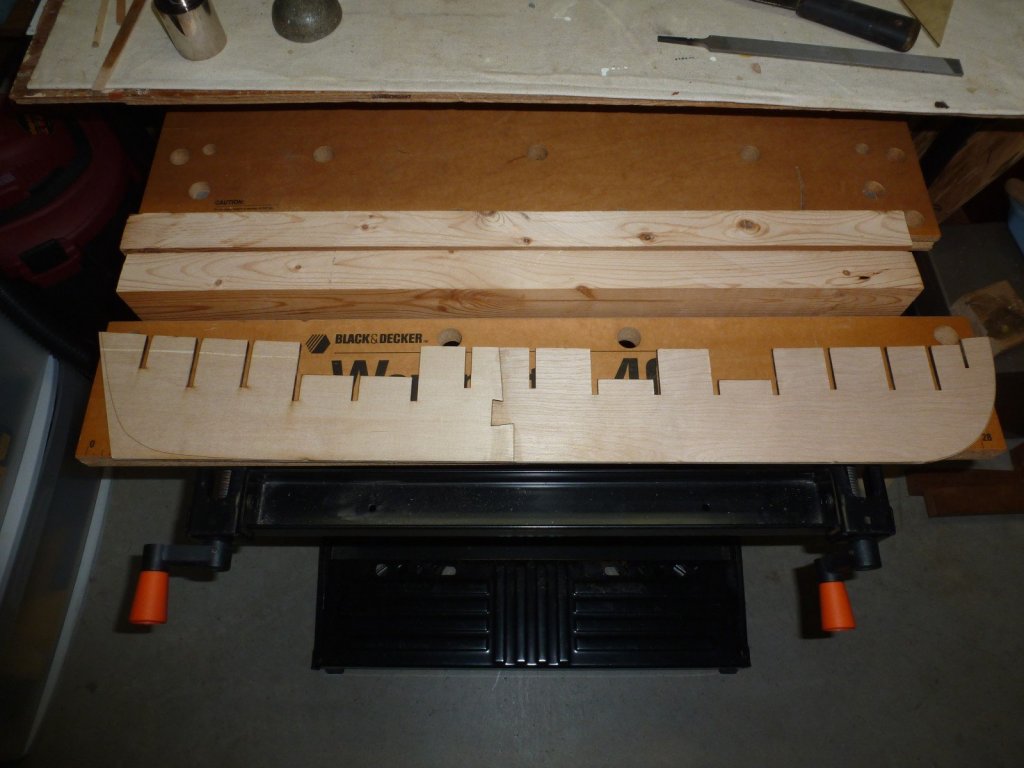
Welcome aboard Steve and Nirvana. Rafine, Jay and Duncbe, thanks for the “likes”. Today I pre-bent the rabbet strip using the piece of plywood that the forward bulkhed former came from. I then installed the rabbet strip (see photos). I am using Titebond III glue and am happy with it so far. I experimented first and made sure that it was soluble using denatured alcohol. I then cleaned most of the laser char from the seven pieces that make up the stem assembly, and put a coat of Minwax Golden Oak stain on them. I did this to prevent glue marks when I put the pieces together. The bulkhead former is tightly clamped into the vice to keep it straight as an arrow. After the stain is allowed to dry I will do the assembly and of course sand and taper the stem.

-
I selected “Confederacy” as my next build. I was extremely impressed by the design quality of “SYREN” and building her was so enjoyable that I wanted something similar, and hope I have found it. I was aware of other build log reports of poor quality plywood supplied in the kit for the bulkheads and bulkhead former and was very pleased by the excellent quality that was provided – perfectly flat and very sound and strong. All other components appear to be good as well. The cannon castings are a bit rough but workable. Plan “B” is to order the good stuff from Chuck. I have glued the two halves of the bulkhead former (under two sheets of glass) and the glue is now “curing”. I invite you to pull up a chair and join in. I would especially appreciate comments from other “Confederacy” builders. I have visited all other build logs that I could find and have learned from each of them.
-
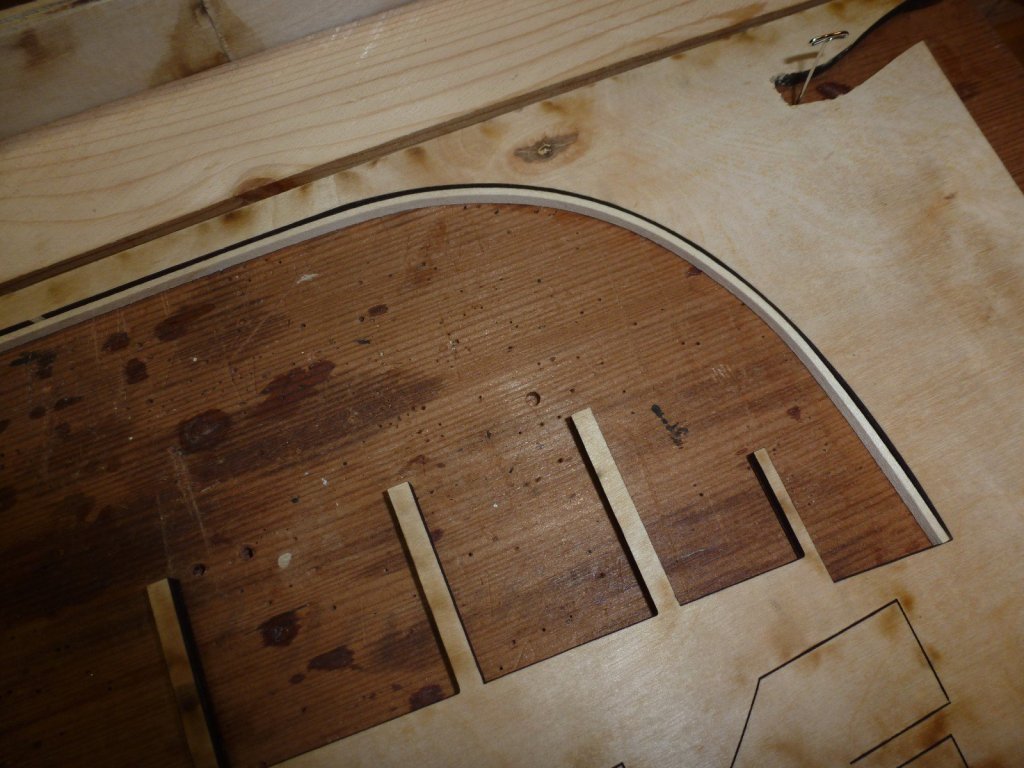
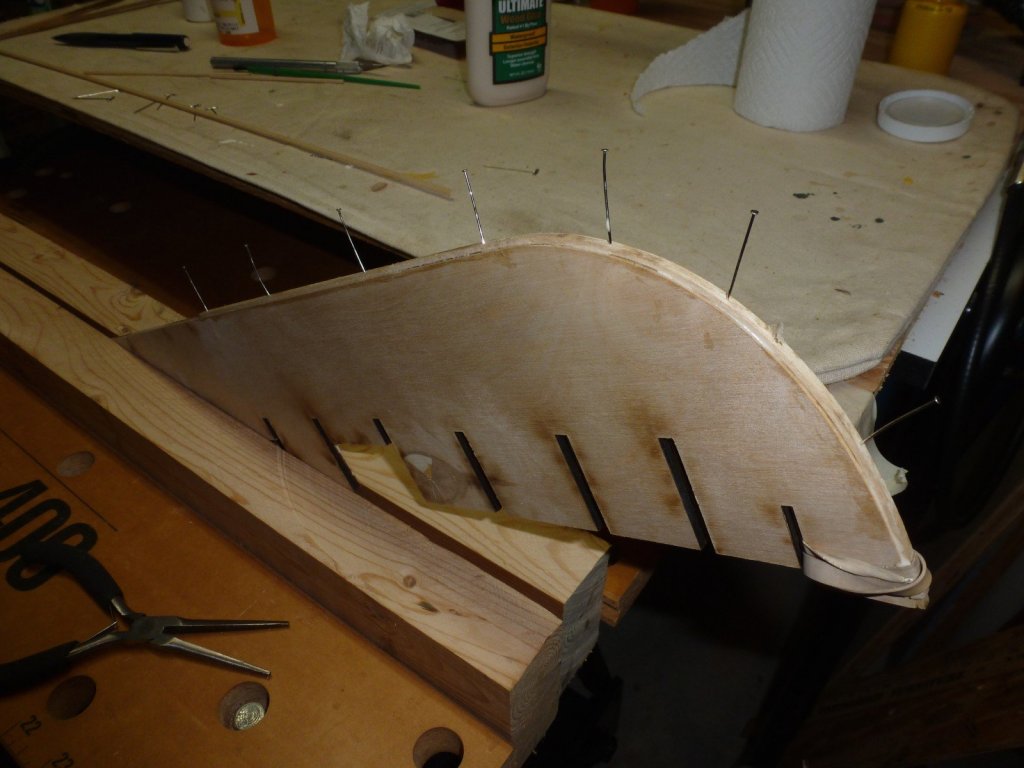
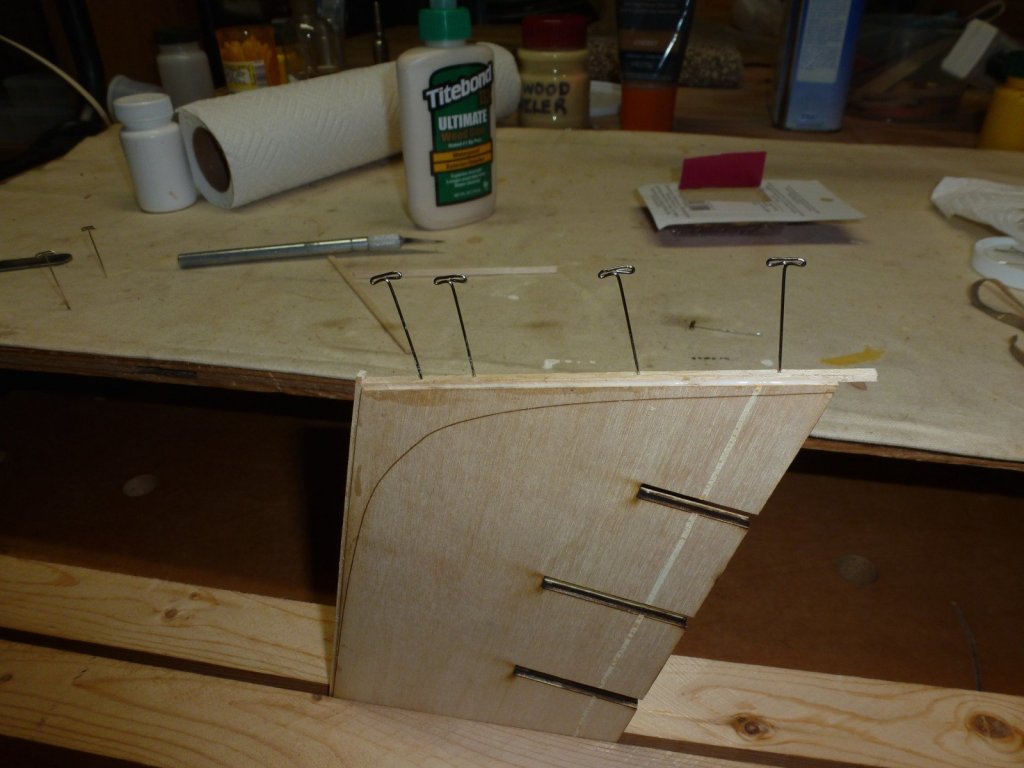
Great work, Jesse. Thanks for sharing your idea on making those tiny knees. I think a person has to have actually BUILT one of these small boats to appreciate the quality of your work. I know it was quite a challenge for me. Looks like you are mastering it. Can't wait to see your completed boat. Keep the pictures coming. By the way, I have ordered Model Shipways "Confederacy" (back ordered) and when studying Chuck Passaro's instructions, I was amazed at how much his design of a ships boat has evolved from "Syren" to "Confederacy". Take a look: http://modelshipworldforum.com/resources/Confed/chapter19.pdf He starts out with a plank of bulkhead hull that morphs into a plank on frame. Very clever. I will likely be starting a build log so you will see whether it is easier or harder... <<Gary>>
- 1,306 replies
-
- 12
-

-
- syren
- model shipways
- (and 1 more)
-
Hi Jesse - Nicely done, so far. The frames, floor boards, thwarts, and oarlocks etc, will really make the ship's boat stunning. I do have a recommendation for you. The instructions on page 74 tell you "With these details completed the boat can be glued on top of the gallows bits". I waited until after I had completed the running rigging to do this, and was glad that I did. I believe the boat on the gallows bits would really get in the way and make it more difficult to belay many of the lines during rigging. But as always, there is more than one "right way" to build a model ship. I'm glad to see you back in the shipyard. <<Gary>>
- 1,306 replies
-
- 9
-
-
- syren
- model shipways
- (and 1 more)
-
Hi Jesse - For my SYREN build, I installed the chain plate assemblies and lower deadeyes, then the hammock cranes and netting, and after that the shrouds themselves. I found that there was sufficient space to work with the hammock cranes and install them as well as the netting when the lower deadeyes were in place. I also found that the thin strip of wood that runs along the hammock cranes gives the whole assembly more strength than I previously thought. I don't recall any problems tying off the running rigging to the pin rails. The sequence I described worked well for me, but there is certainly more than one "right way" to do this. Also, the hammock netting was easier to install than I feared, and it came out better than I thought it would. The cranes and netting add a lot to this model. Good luck with whichever sequence you select. Its great to have you back at work again. Your quality of work is supurb! <<Gary>>
- 1,306 replies
-
- 11
-
-
- syren
- model shipways
- (and 1 more)
-
I agree with Greg. The good thing is that all of the planking below the water line will be covered with coppering. And the coppering is easier to do than you might imagine. <<Gary>>
- 1,135 replies
-
- 2
-
-
- model shipways
- syren
- (and 2 more)
-
David - I'm glad you got a good response from Marc Mosco and Model Shipways. I have had to request replacement parts from them in the past and have always been pleased with their prompt response. Their guarantee to send replacement parts at no cost regardless of who is at fault is truly unique and refreshing in today's business climate. Apparently problems with poor quality plywood and laser burns on wood parts are now not uncommon in Model Shipways kits, as other build logs have complaints as well. It would be good to hear and know the "other side" of the story. It would be nice to hear Marc Mosco explain the difficulties he might have with obtaining good quality plywood and also difficulties in production of laser generated wood parts. I hope you will enjoy your SYREN build as much as I did. It is really a nice kit and makes up into a beautiful model. <<Gary>>
-
Hi Steve - Thanks for starting this build log...although you are already pretty far along. I am also building Emma C. Berry, but did not start a build log. I have the frames, transom, and clamps completed. I also have the cabin and forecastle soles completed, but have not done the ceiling or the wet well. I do have the assemblages of deck beams around the cabin and hatches assembled but not attached to the clamps. I can't decide whether to build the wet well or not; and whether to leave a portion of the framing exposed so one can look into the hull. It appears from your photo that you elected not to install the wet well, and also that you simplified the knees between the deck beams. I will likely do the same. You have done a very nice clean job so far. Any photos of earlier stages of your build will be appreciated, as well as any tips you may have. Yes, I will definitely be following along. <<Gary>>
-
Hi Doris - Yes, the SYREN model is at a scale of 1:64. The hull is approximately 19 inches long and 5 inches wide. Here is a link: http://www.modelexpo-online.com/product.asp?ITEMNO=MS2260 I have also built Model Shipways Sultana, Rattlesnake, Fair American, Newsboy, and Benjamin W. Latham. I had more enjoyment building SYREN than any of these, and the finished model looks better too. I also learned many useful techniques from the instructions that I can use on future models. <<Gary>>
-
Hi Doris - You might check out the USS SYREN by Model Shipways. She has a great history, and was launched in 1803 to fight against terrorists in the Mediterranean. The kit is very well designed with excellent instructions printed in color and bound as a book. I just completed her and feel that the kit is suited to builders with a range of skills. There are several very good build logs on this site, as well as a number of hobbyists to assist you. You can download the instruction manual from Model Expo as a series of Adobe pdf documents. Those plus the build logs should give you a good indication of what is involved. And at the end, if you do even a half way decent job building her, you will have a beautiful model. Good luck in your search for a model. <<Gary>>
-
Thomas - As so many others have said, your work is stunning! A couple of suggestions. You might want to consider installing the channels and chain plate assemblies before you install the hammock cranes and the hammock netting. The cranes & netting are stronger than I thought they would be, but they are still quite fragile and liable to be damaged when you are working on the chain plate assemblies etc. Also, build the 25 foot longboat but defer securing it to the top of the gallows bits until after some of the lower rigging components are installed. If you don't, I think you will find that the longboat gets in your way when you are trying to do the rigging. Just my two cents. You are doing an outstanding job and I am looking forward to your future posts on this build log. <<Gary>>
-
Hervie - Just a reminder - it is VERY important that you sand the planks as smooth as possible before coppering. What I mean is that there should be no change in the surface elevation from plank to plank, or this will show in the final result. Chuck Passaro's coppering instructions worked very well for me, and I hope they will for you too. By the way, the kit provides much more copper than you will need to cover the bottom of the hull, so you might want to do some experimenting with the copper tape before you start on the hull so you understand how it will perform. Good luck. <<Gary>> p.s. The copper tape seemed to adhere to the wood filler well enough. pps The other SYREN build logs on this site provide valuable tips on coppering that may help you too.
-
Hi Jesse - I drilled mast holes too and I am glad that I did. I just finished the shrouds and I think the job would have been much more difficult if the masts were wobbling all over the place becuse of lack of support. Your jig should help insure that the mast holes are drilled at the correct angle. Your ship is looking good. <<Gary>>
- 1,306 replies
-
- 7
-
-
- syren
- model shipways
- (and 1 more)
-
Hervie - I "second" the advice from EJ_L to add filler material at the bow and stern. I did that on my build following advice from another build log, and am happy that I did. I think it helped more with planking the inside of the bulwarks, especially at the stern. You are doing a great job with your build - and with your build log. As you say, the build log takes as much time and effort as working on the ship model; even more so when the build starts to go wrong. Your efforts are appreciated. There is usually more than one "right" way to construct the model and you are offering some good ideas and nice alternatives. Keep up the good work. <<Gary>>
-
Hervie - I found that a flat wood file held vertically was a useful tool to thin down the interior parts of the lintels and sills, and not nearly as risky as the sanding drum on the Dremel; especially as you get closer to your desired thickness. <<Gary>>
-
Hi Hervie - I also am building the SYREN but do not have a build log for her. I drilled my mast holes early on and am glad I did. You should try to get the holes as close to the correct angle fore and aft, (see instruction manual p. 92) and of course vertical side to side as you can. But slightly oversize holes will permit you to make fine adjustments later as you say. Of course, reducing the diameter of the mast dowels will accomplish the same. The kit does include mast coats (instruction manual p. 93). They are actually 1/8 inch thick and can be found on the sheet of wood that includes the ship's boat. They will cover up any of your "corrections" and neatly finish the job. You are doing a very good job so far. Keep up the good work...and keep us posted. <<Gary>>
-
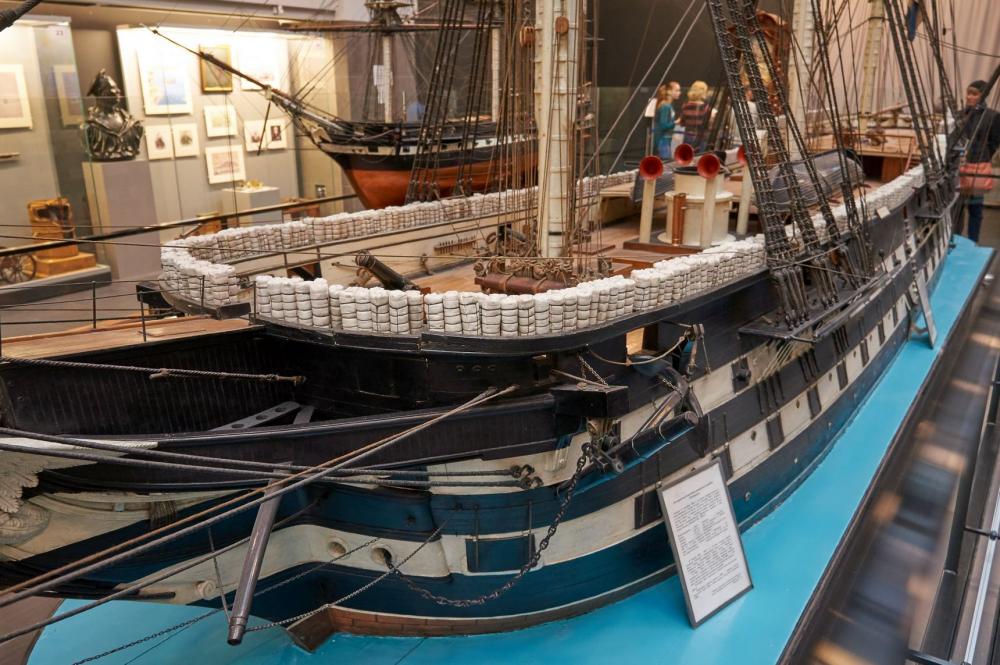
Here is the way hammocks are depicted on a (large) ship model in the Central Naval Museum in Saint Petersburg Russia: <<Gary>>
-
Sal - Thank you for your prompt reply, and for confirming my fears and suspicions. I am planning to simply insert the step where I install the chain plate assemblies and deadeyes before I install the hammock cranes. I have holes drilled for the masts and can temporarily step them to insure the correct alignment of the chain plate assemblies. I think I will be a lot more comfortable doing it this way. <<Gary>>
- 659 replies
-
- 4
-
-
- syren
- model shipways
- (and 1 more)
-
Hi Sal - I would like your opinion / advice on something. I am at a point in my SYREN build where I am almost ready to install the hammock cranes and boarding panels, and I am wondering if it would be better to install the chain plate assemblies and deadeyes first. I know that most SYREN builders follow the Gospel of Chuck and do things as outlined chapter by chapter, and I recognize that there is a lot of experience and experise behind this. Following the instructions, the chain plate assemblies are installed much later than the hammock netting. On the other hand, my gut is telling me that those hammock cranes and netting etc will be very fragile and vulnerable to damage from my fumbling fingers as I try to secure the chain plate assemblies to the hull. So, Sal, with twenty - twenty hindsight, what is your opinion? After completing your SYREN, would you advise installing the chain plate assemblies first, or following the build sequence in the Instruction Manual, or does it really make a difference...? Thanks in advance for any light you might shed on this. And hopefully some of the followers of your build log might chime in as well. <<Gary>>
- 659 replies
-
- 2
-
-
- syren
- model shipways
- (and 1 more)
-
Hi Jesse - While waiting for the Dremel attachment, you might consider working on the deck fittings (Chapters Twelve and Thirteen). And as Chuck recommends, "Each fitting should be treated as a mini modeling project of its own". For me, these have been very satisfying and given me a sense of accomplishment. The binnacle and companionway turned out much better than I expected. And of course the build logs by Sal, Dubz, Rafine, and Gahm help to visualize the finished product. With the main fife rail, note the warning to be careful when drilling holes in the laminated fife rail - it is still rather fragile as I learned the hard way. So...grab some of these small fun projects that help move your build along. And I hope you are feeling better. <<Gary>>
- 1,306 replies
-
- 14
-
-
- syren
- model shipways
- (and 1 more)
-
Jesse - I admire your ingenuity! Your improvised cutting tool will certainly guarantee that all carronade barrels are uniform. Nicely done. I hope your health improves. I am retired from the U.S. Forest Service and over the years picked a number of ticks from my body. So there but for the grace of God... And some of my good friends and former colleagues are dealing with tick related illness. Hang in there! <<Gary>>
- 1,306 replies
-
- 10
-
-
- syren
- model shipways
- (and 1 more)
-
Hi Sal - When I was rigging FAIR AMERICAN I found that when bringing lines down the lubber hole, it helped a lot to have the line attached to a longer heavier "yarn darner" needle. I could lower the needle and line vertically down through the lubber hole (or aimed at a belay point) and get it to where I wanted without the lines tangling and snarling. Ask the Admiral - she might have a yarn darner needle or will certainly know where you can buy one. Your SYREN is looking very good. You are doing a nice job on her. <<Gary>> p.s. The yarn darner needle doubles as a marlinspike.
- 659 replies
-
- 6
-
-
- syren
- model shipways
- (and 1 more)
-
Coats and Clark Thread for rigging
GaryKap replied to bigcreekdad's topic in Masting, rigging and sails
HI bigcreekdad - I also use Coats and Clark upholstery thread for "fine" rigging. I find it very easy to work with and prefer it to the stuff that comes in kits. I buy black (color 2) and tan (color 543) in 150 yard spools from good ol' Walmart. <<Gary>>