HOLIDAY DONATION DRIVE - SUPPORT MSW - DO YOUR PART TO KEEP THIS GREAT FORUM GOING! (Only 13 donations so far - C'mon guys!)
×


GaryKap
-
Posts
276 -
Joined
-
Last visited
Content Type
Profiles
Forums
Gallery
Events
Everything posted by GaryKap
-
 JesseLee - Yes, that is my concern as well - the copper plating is apparently fragile, and I thought the MinWax Wipe On Poly would help to keep it stuck down and prevent damage while the model was being completed. I am not so concerned about copper weathering and patina. I have enormous respect for Dubz and the very high quality of his work on his Syren build. He recommends not using MinWax but instead recommends using Zapon Varnish to coat and protect the copper plating. Now that must be a European product because even Google does not have much luck finding it for me. Perhaps one of your "followers" might have some knowledge of a product available to us in the U.S. that would be comparable. <<Gary>>
- 1,306 replies
-
- 5
-

-
- syren
- model shipways
- (and 1 more)
-
JesseLee and followers - What do you guys think about the idea of putting a coating of Minwax Wipe On Poly over the copper plates to protect them from damage? I am only at Chapter Four of my SYREN build, and will need to deal with this at some point in the future. I'm glad to be aware that those copper plates are so delicate. On a somewhat related topic, I visited the USS Constitution a couple of weeks ago. She is in drydock for re-fitting, including a new copper bottom. At the nearby visitors museum they offer the opportunity for you to etch your signature into one of the new copper plates that will go on her bottom. Of course I had to do that...I think it is kinda neat. <<Gary>>
- 1,306 replies
-
- 9
-
-
- syren
- model shipways
- (and 1 more)
-
Hey Andrew - Isn't Lightning # 1 on display at the Skaneateles Historical Society housed in the Creamery on Fennell Street? If so, you should go take a look for yourself. I used to sail a Lightning on Skaneateles Lake fifty years ago. As I remember, there was some texture to the canvas covered deck. It made a sort-of non slip surface when someone was putting up or taking down the jib. I am enjoying your build log. You are doing a great job with the kit...makes me want to build one myself. <<Gary>>
-
I am in the process of building Model Shipways SYREN and am finding it to be MUCH more enjoyable than recent builds of Benjamin W. Latham, Fair American, or Rattlesnake ( old solid hull kit). I am taking my time and everything is going very smoothly. I have just completed framing the gun ports and sweep ports (Chapter 3 of the practicum) with no problems thus far - no busted stanchions. I think it is because the kit is so well designed and the instruction manual and plans are so clear. The 132 page color instruction manual is GREAT! Plus I have all of those excellent build logs to glean information from. The kit has some laser markings for key part alignments that are a real help. Chuck Passaro deserves a lot of credit for his excellent work putting this kit together. It is simply a pleasure to build. <<Gary>>
-
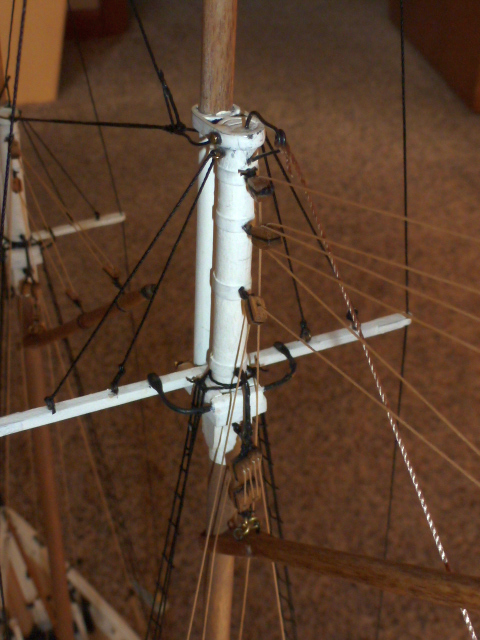
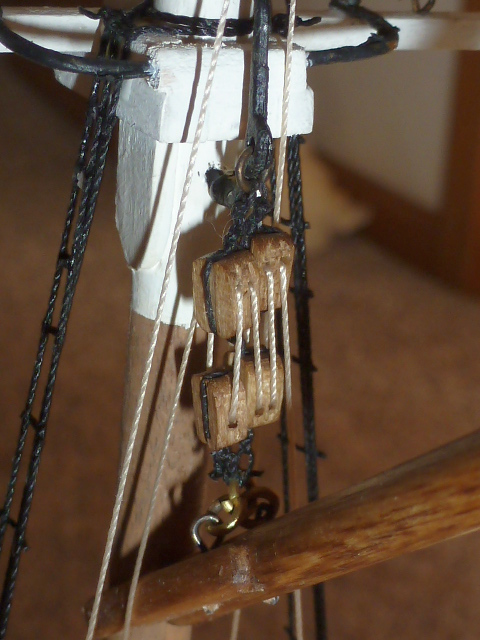
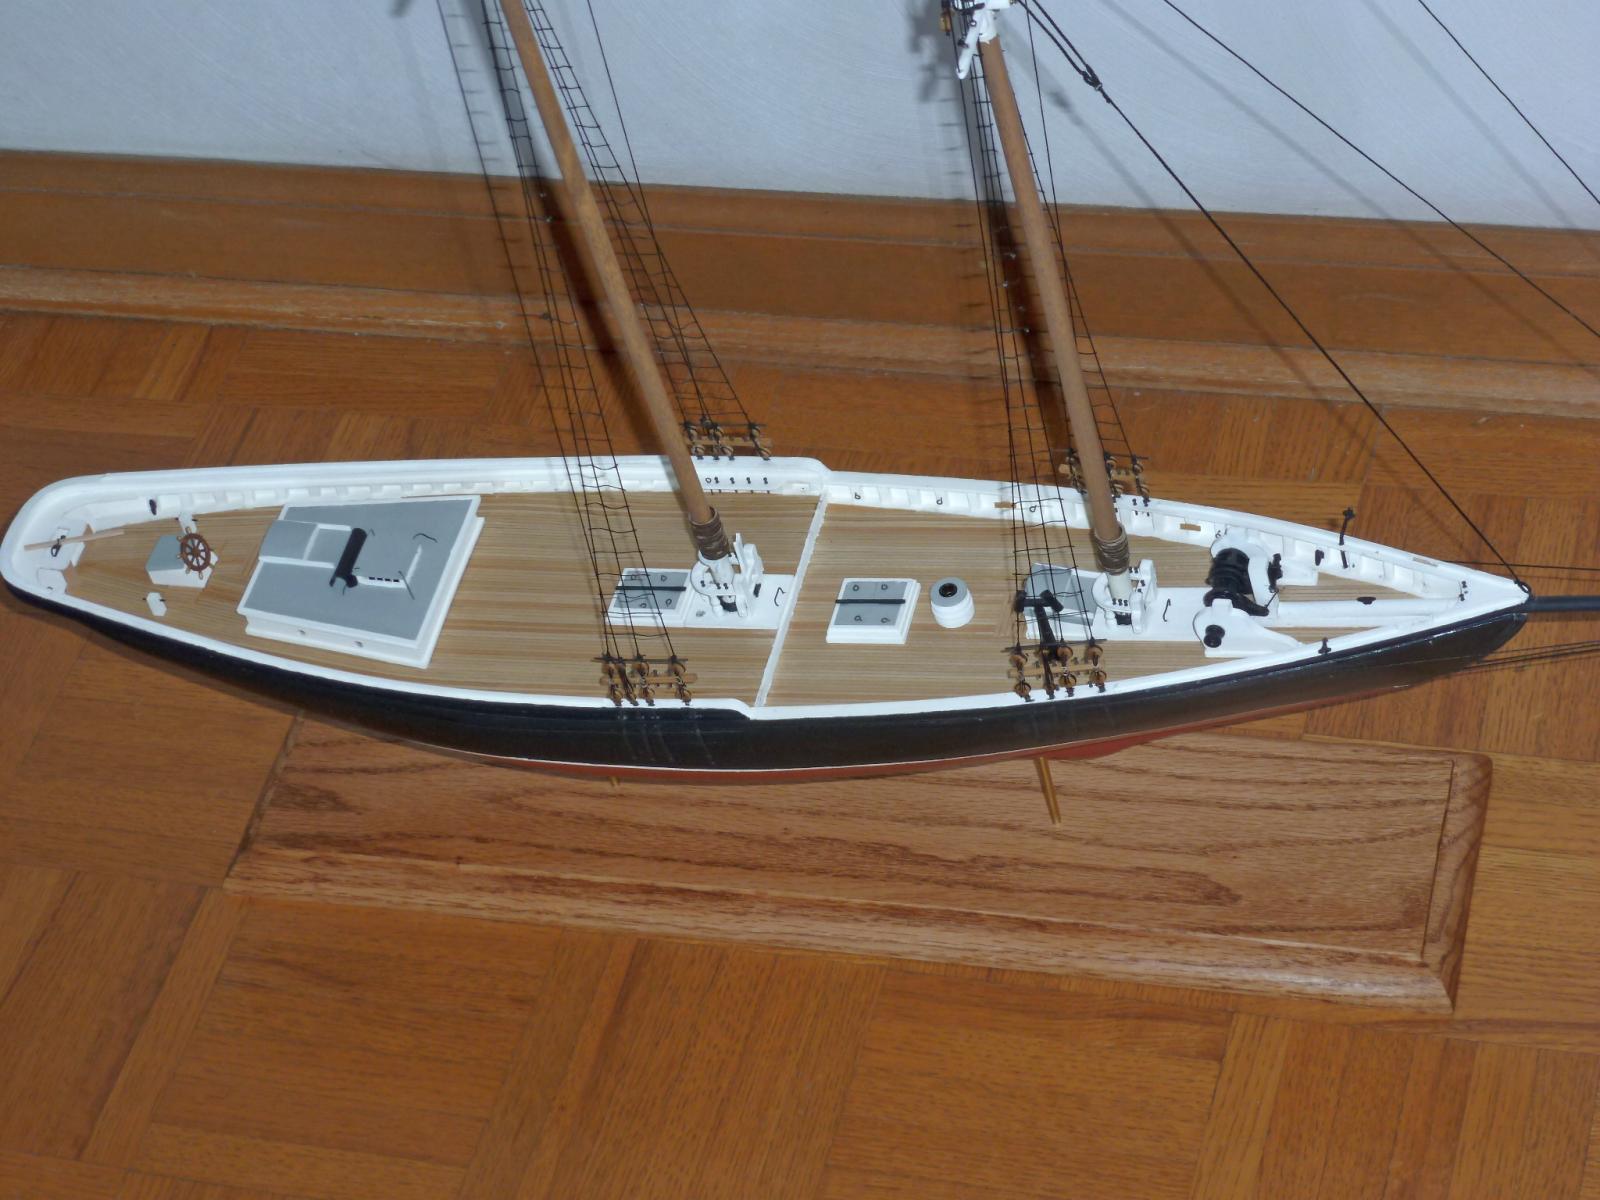
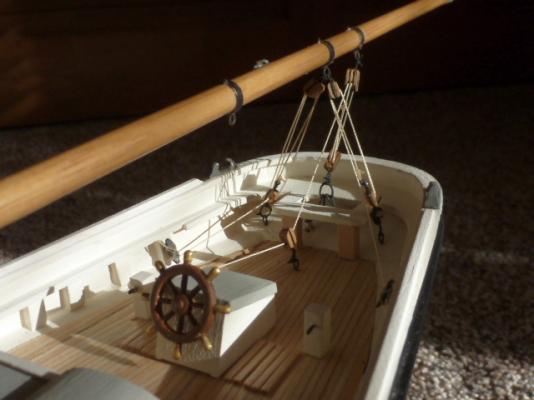
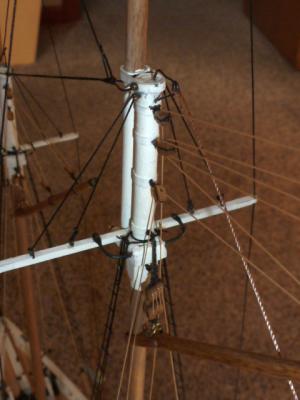
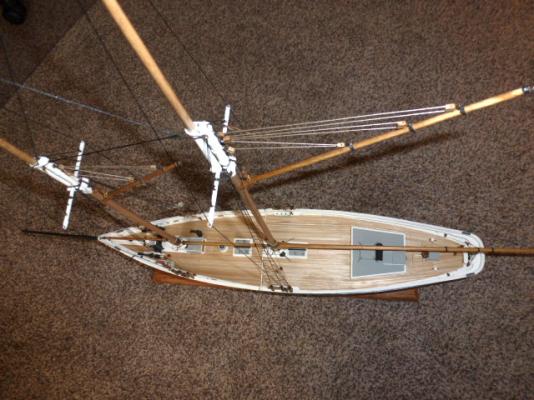
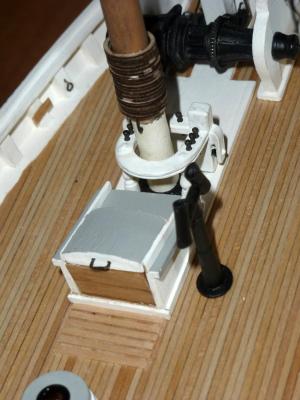
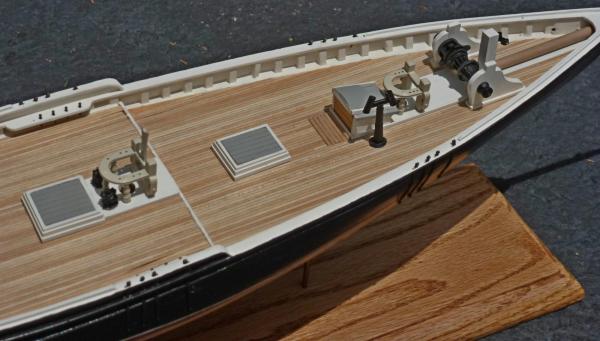
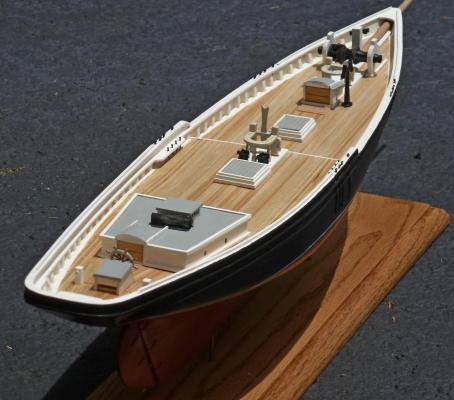
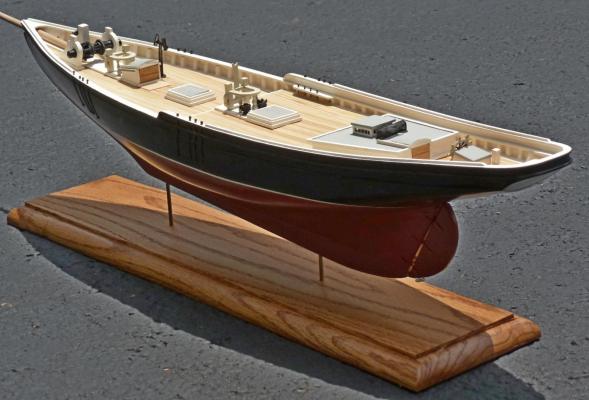
Hello Lawrence, Ken, and Bob - Thank you for your kind words. The standing and most of the running rigging are done. I still need to add some finishing touches like rope coils. I need to decide how I want to stow the anchors. Those that were supplied with the kit are the large "bank" anchors. According to Chapelle, these were taken apart and stowed on deck forward of the windlass. The stock was lashed alongside the anchor, which was secured with flukes aft. Anchors were sometimes lashed to the windlass bits, outboard of bitts, on the warping head. The smaller iron anchors used in harbors (not supplied) were usually stowed on the rail abaft of the anchor davits. Here are some pictures:


- 50 replies
-
- 14
-
-
- benjamin w latham
- model shipways
- (and 1 more)
-
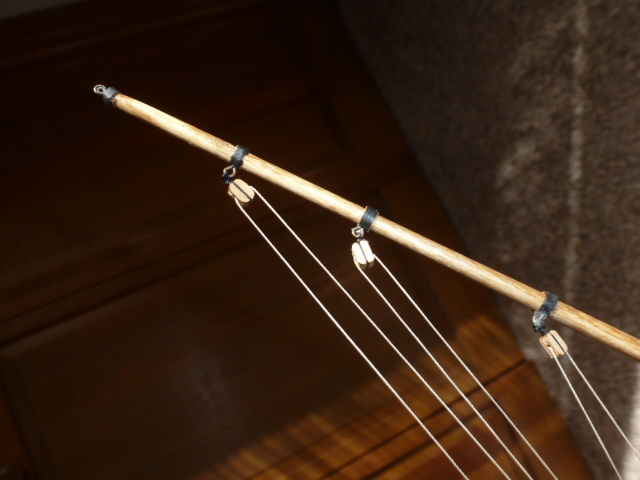
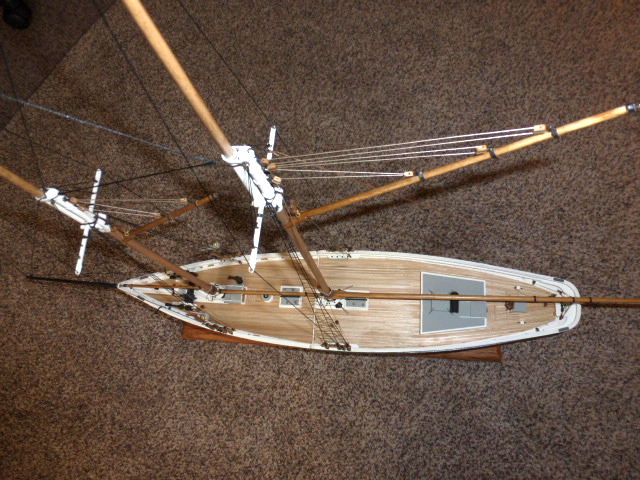
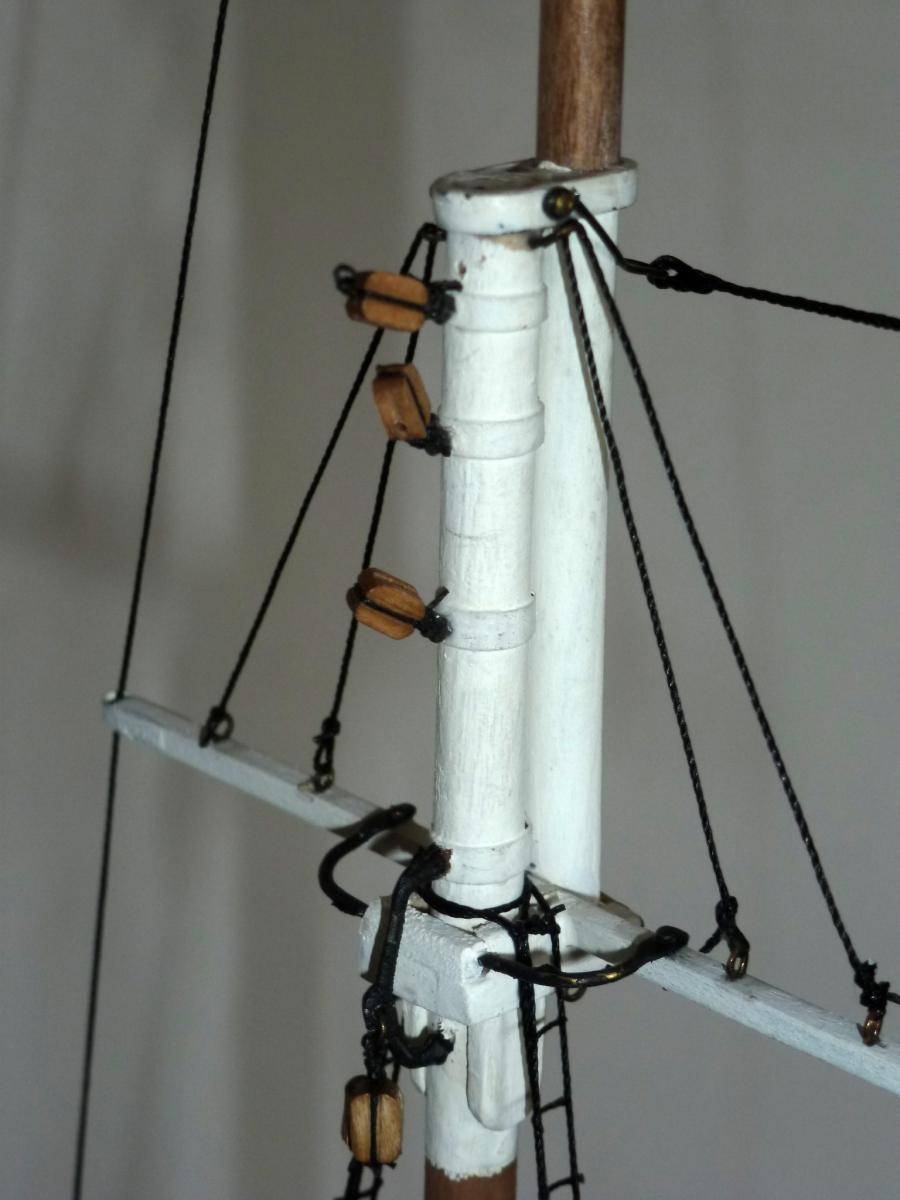
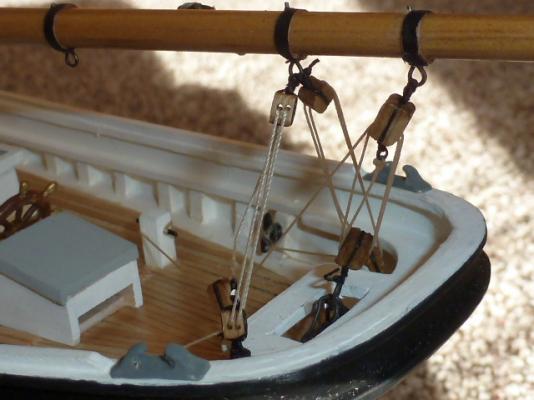
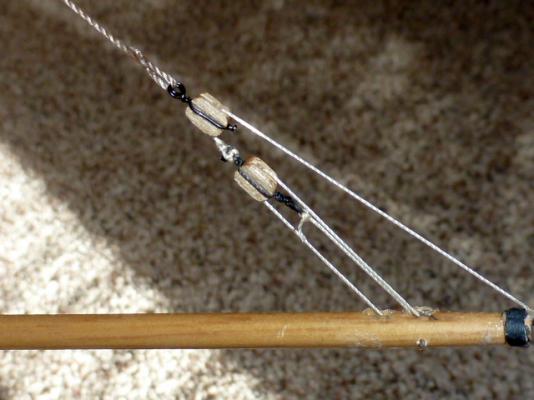
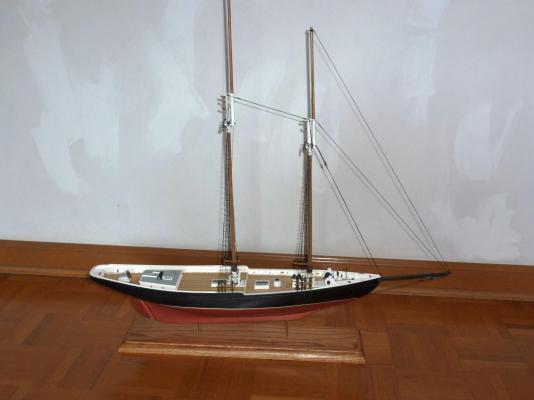
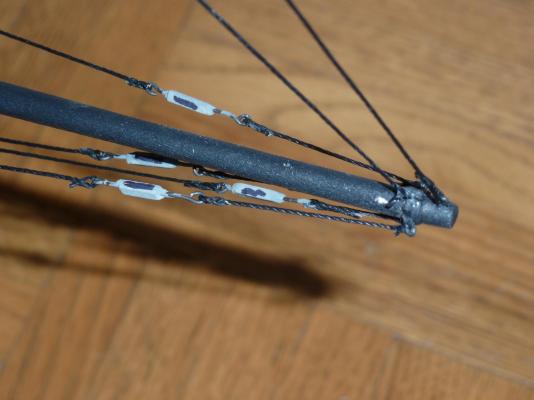
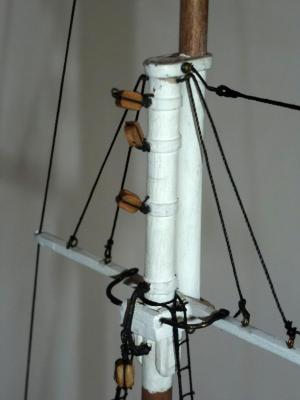
Thanks to everyone for your kind words, support, and encouragement. And for the "likes". I have completed most, but not all of the standing rigging. Here are some pictures to show progress. Again, the instructions accompanying this model are very good, but the information provided by Chapelle (The American Fishing Schooners 1825 - 1935) REALLY is helpful. Chapelle gives dimensions for SO many things - the turnbuckles, the crosstrees, etc that a modeler needs to know to make things in correct proportion (not that I always did...). These build logs are intended in part to give help to future modelers. Two pieces of advice. First, for splicing line, get large needles called "yarn darners" (ask the Admiral). These come in a packet with a variety of sizes with eyes that will accept most rigging diameters. Second, to make turnbuckles at 1/48 scale, use the 1/16" square wooden strips. Drill a hole longitudinally through a piece 3/8" long. Make an eye is steel wire, run the wire through the wood, and make an second eye. Smooth the ends of the wood to the shape of a turnbuckle, paint it grey to look like galvanized steel, and put a black stripe down opposite sides to create the appearance of the open center.

- 50 replies
-
- 15
-
-

-
- benjamin w latham
- model shipways
- (and 1 more)
-
Great idea for a pencil holder to mark the waterline. I will have to remember and use your method in the future. I had just relied on stacks of books; testing until I had the correct elevation. Your invention is much more elegant! <<Gary>>
- 1,306 replies
-
- 5
-
-
- syren
- model shipways
- (and 1 more)
-
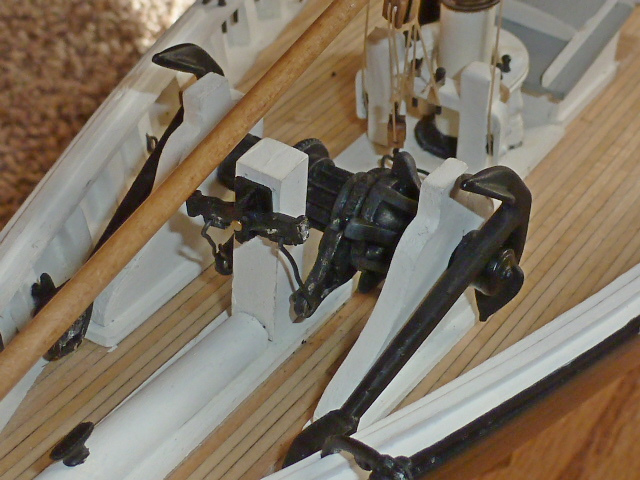
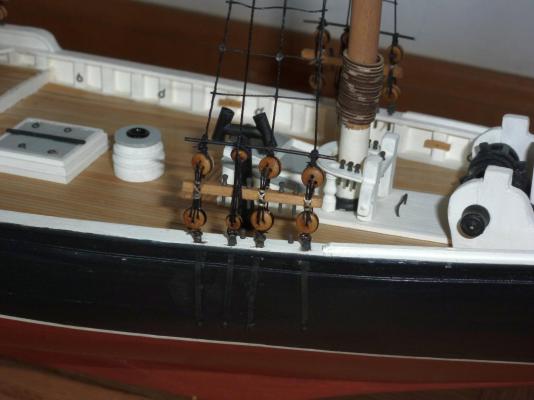
Jeff - your carriages don't look bad to me. One advantage to doing the gun carriage rigging is that it hides most of the "adjustment" that might be needed to the front trucks. I think I used 1/8 inch blocks for this. And I will remind you, the kit includes tiny brass handles for the quoins. To make mine, I cut wedges from a strip of mahogany 1/8" x 1/16" and finished them with wipe on poly. If you do need to deepen the trunion notches as wq3296 and I did, the cap squares will mask this nicely. I used the brass rod that came with the kit for my trunions, and finished the guns with brass darkening solution that I purchased at a local antique store. But they also look handsome left in natural brass. <<Gary>>
-
Jeff - You might want to contact Chuck Passaro at Syren Ship Model Company and ask him if he has a gun carriage kit that would work for you. Give him as many dimensions as you can and tell him what you want to do. Decide whether you want to use the brass cannon barrels supplied with the kit or purchase new ones to go with the carriages. While you are at it, you might consider the additional blocks you will need to rig the cannons. (four per gun) and order these at the same time. Other items you might consider ordering are the shroud cleats (I found these difficult to make on my own), and also his wooden cleats. So here I am - spending your money for you. Well, good luck and please keep us informed of your progress. <<Gary>>
-
Hi Jeff - I went with the low budget alternative - I removed the "axles" and glued the wheels directly to the carriages. It was good enough for me. You might try that approach and if you are not happy with the result, then pursue the option of buying better carriages. Good luck. <<Gary>> p.s. Something to be very cautious about - small changes in carriage / wheel dimensions can greatly affect the position of the cannon barrel relative to the gun port. I found myself sanding off the bottoms of front wheels to get the cannon barrels properly positioned. You need to do a LOT of test fitting as you proceed to build your cannons.
-
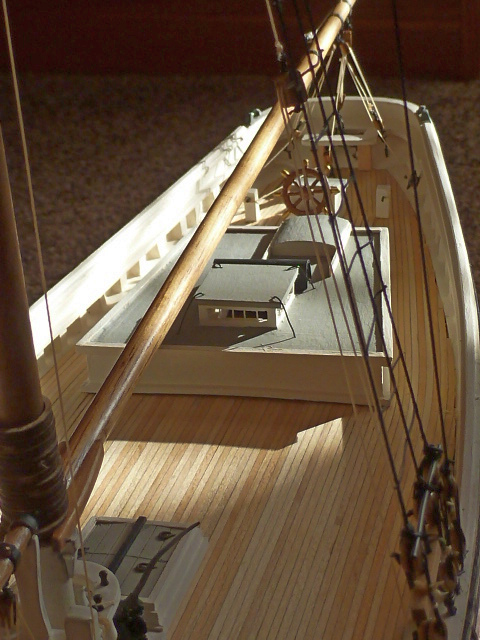
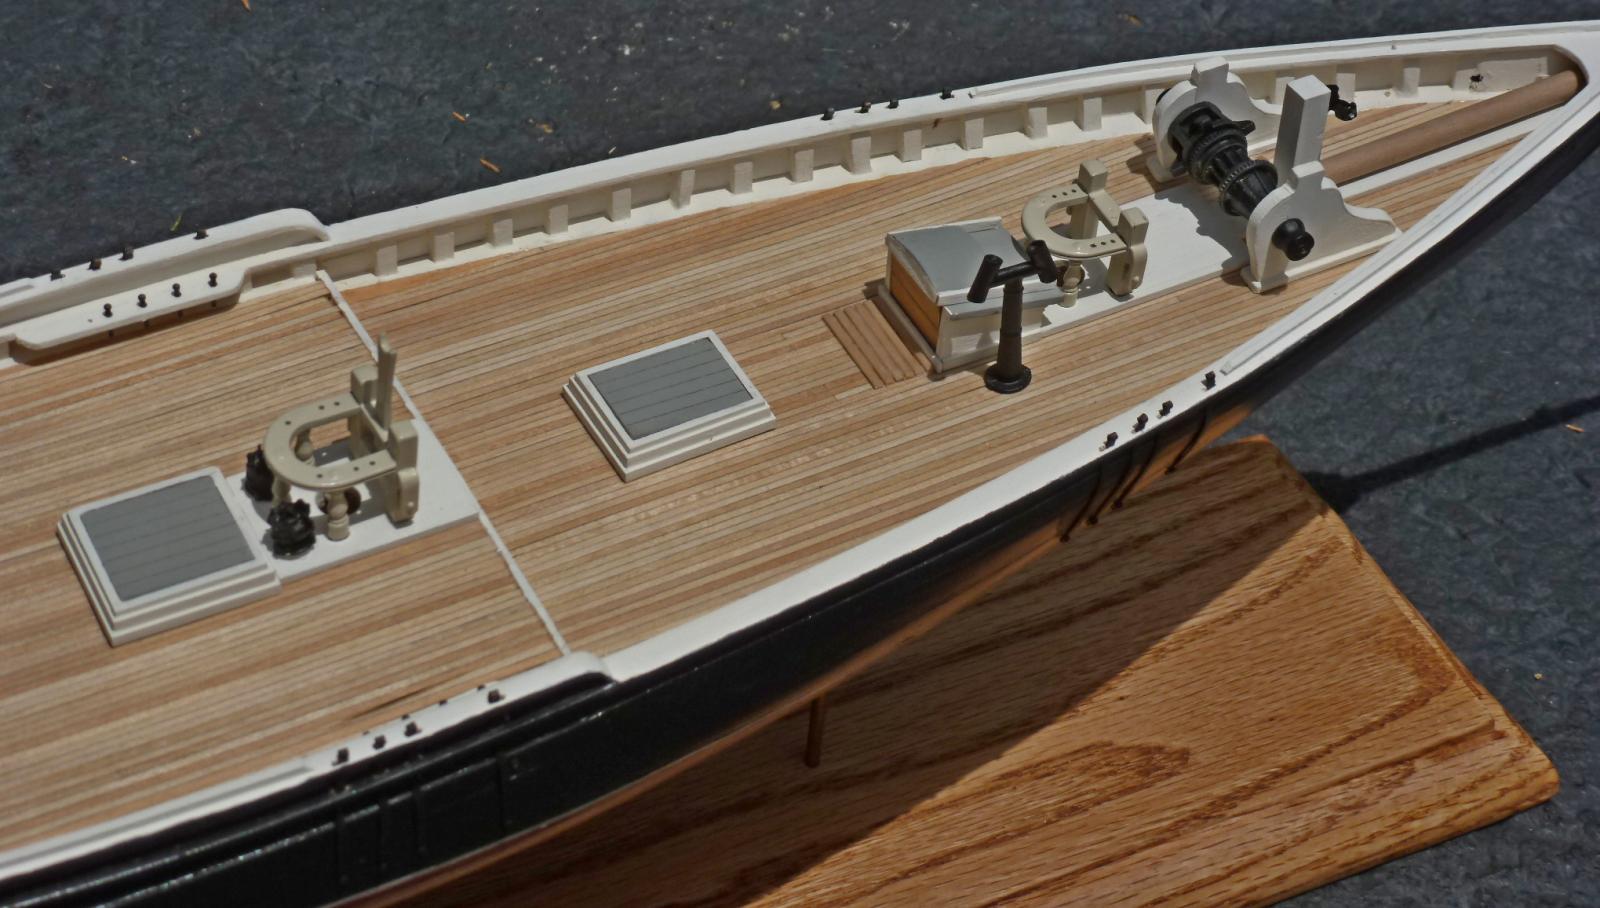
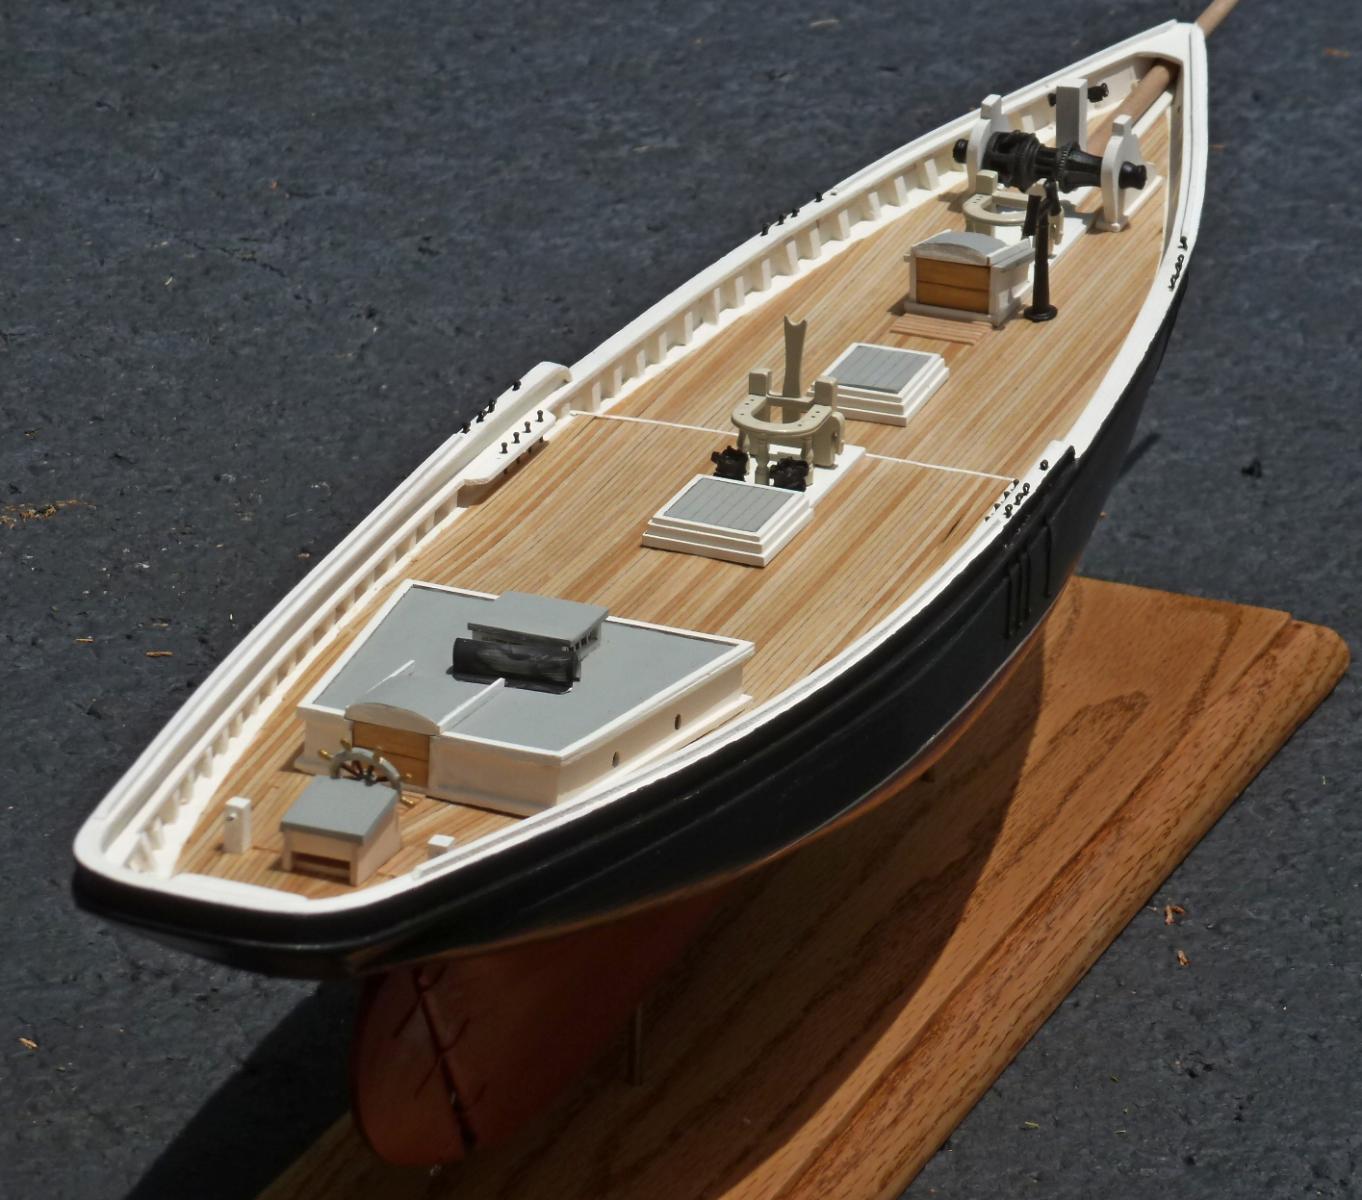
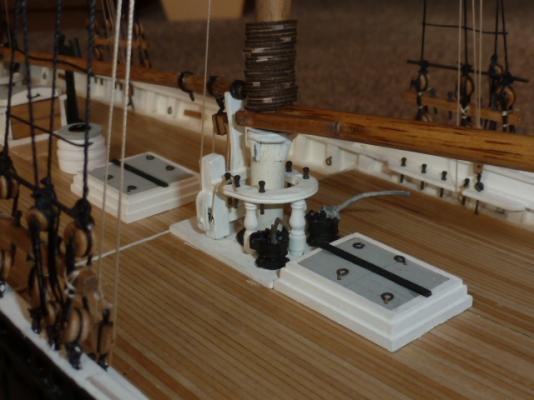
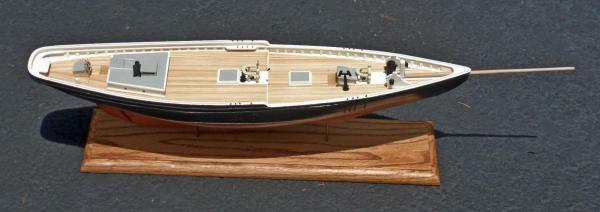
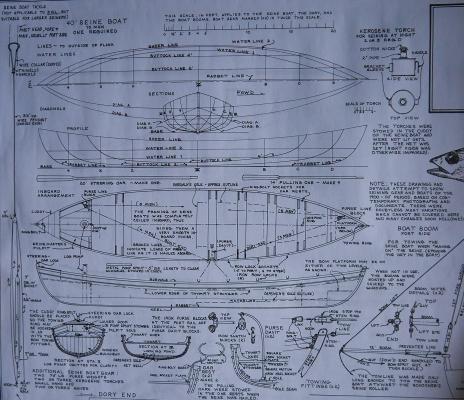
Progress Report: It's been a while since I posted, so here is an update. I have finished planking the deck, added the main rail, monkey rail, and monkey log. I did not attempt to do the scuppers or rail mouldings. Because I have decided to model a generic Grand Banks fishing schooner, I did not add the seine roller nor did I include the propeller assembly or exhaust pipe. I have assembled the hatches, forward companionway, trunk cabin, and wheel box but have not glued them down. They are just sitting on the deck. I have mostly assembled the windlass bit support mechanism and the samson post. The bitts and fife rails are primed and sitting in mounting holes but are not finished yet. The chain plates have been installed. As you can see from the photos, the ship is mounted on an oak board with 1/8” brass rods. Thanks to Rafine for his helpful suggestion on this. Here are some thoughts on the quality of the kit for anyone looking at this log and considering whether to select Benjamin W. Latham as their next ship model project. At this stage of my construction, I would recommend it; especially for someone looking to gain experience before going on to something more difficult and complex. For the most part, the kit is well designed. Providing the center keel as a four part “sandwich” helps insure a strong straight hull. The two thickness of construction gives you a center line that helps when cuting the rabbet – a much easier job than with “Fair American”. The transom was the one tricky part, but it worked out OK. The plans are straightforward, and the planking layout included in the plans is a great help. There are no difficult bends, so the planking is relatively easy. I used a sharp plane to taper the width of the planks, and could run a single plank from stem to stern in most instances. The kit is very generous in the quantity of material supplied. Same for the 1/16” x 1/16” strips for the deck. The cast metal parts supplied with the model are excellent; better than most “kit bashers” could create. The only down side so far is the forty foot seine boat that I was unable to complete (see earlier entries in this log). The kit makes an impressively large ship model and will appear even more so with masts and rigging. Here are some pictures:
- 50 replies
-
- 13
-
-
- benjamin w latham
- model shipways
- (and 1 more)
-
Hi Jeff - Nicely done! And thank goodness for wood filler. A suggestion for your shopping list. You might want to buy some 400 grit sandpaper. I found that it makes a real difference in the finished wood surface; even compared with the 220. <<Gary>>
-
Your decking looks very good. The main deck planking is a bit trickier. Study the plans carefully. I am away from home so I can't be more specific, but you want the planks to parallel the trunk cabin. Check the drawings to see how the planks lay forward and aft of that. Also, I did not attempt the "nibs" but in hindsight wish I had. Good luck with it. <<Gary>>
-
Bob - Simply BEAUTIFUL - A fantastic job!!! Thank you for letting us look over your shoulder as you built her. I know I learned a lot from you on this one. Well done. <<Gary>>
-
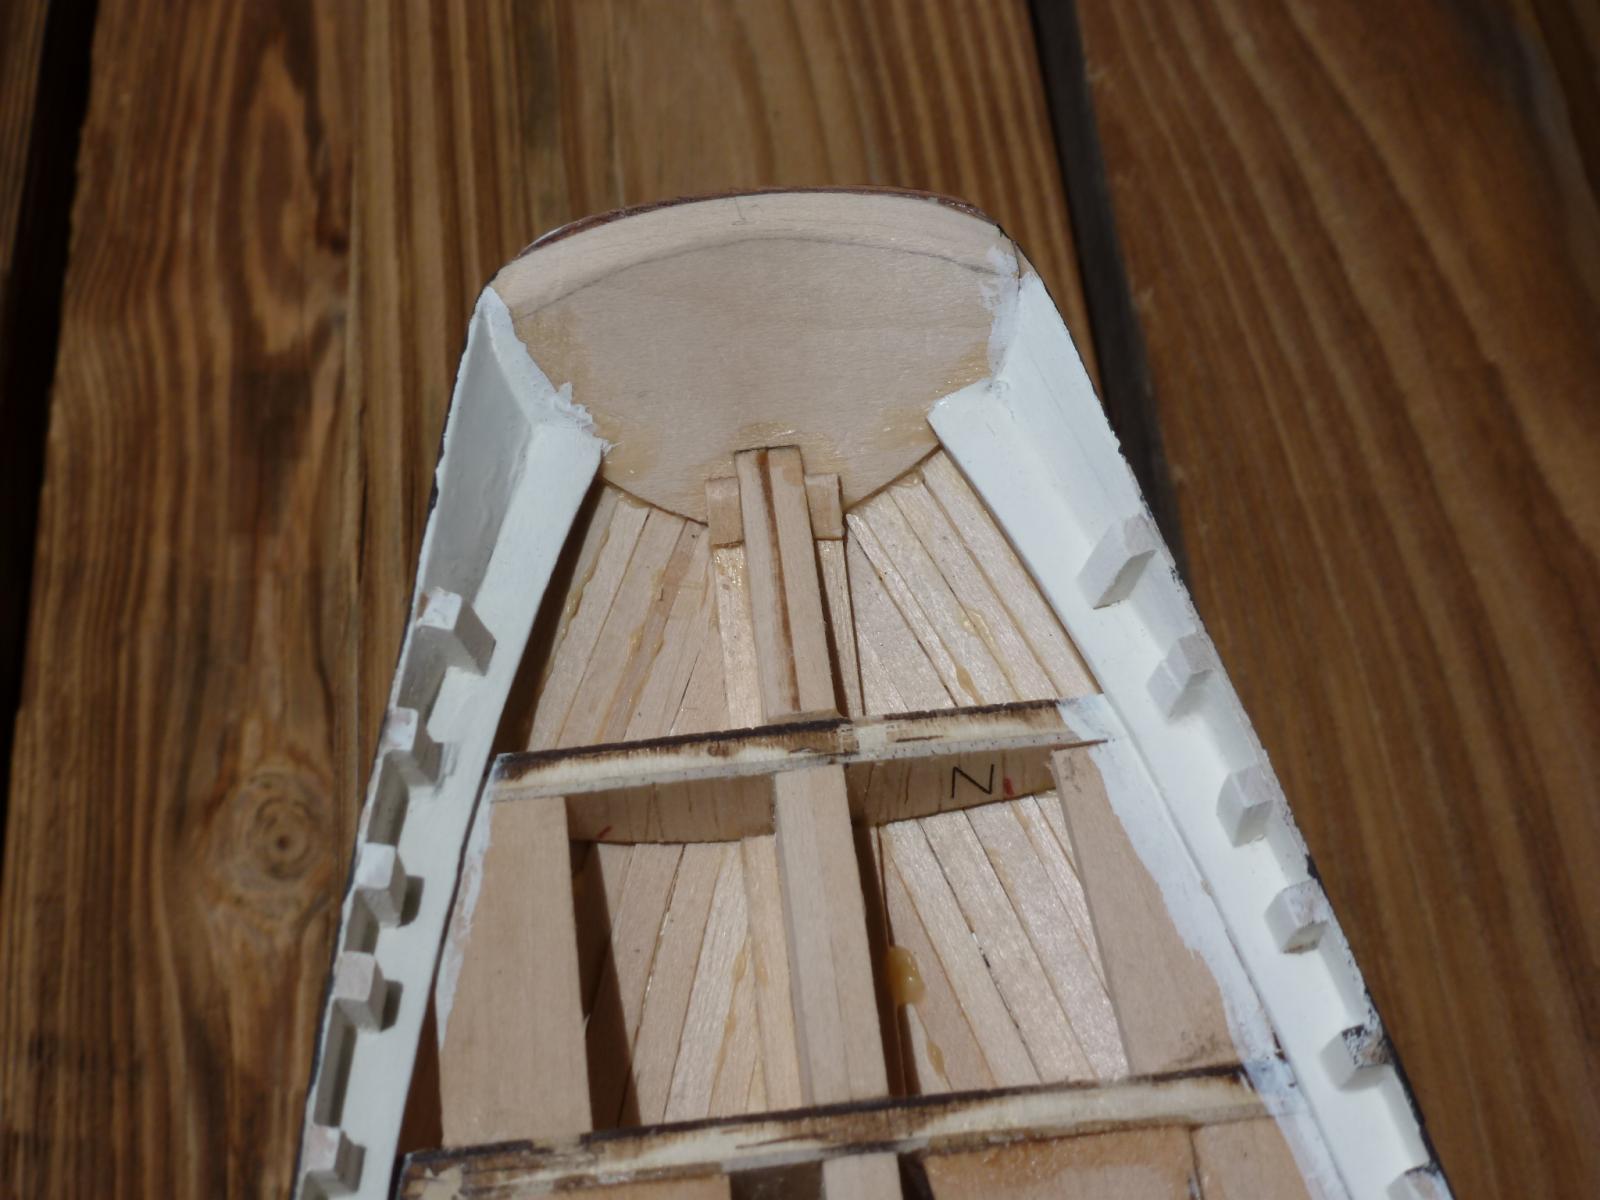
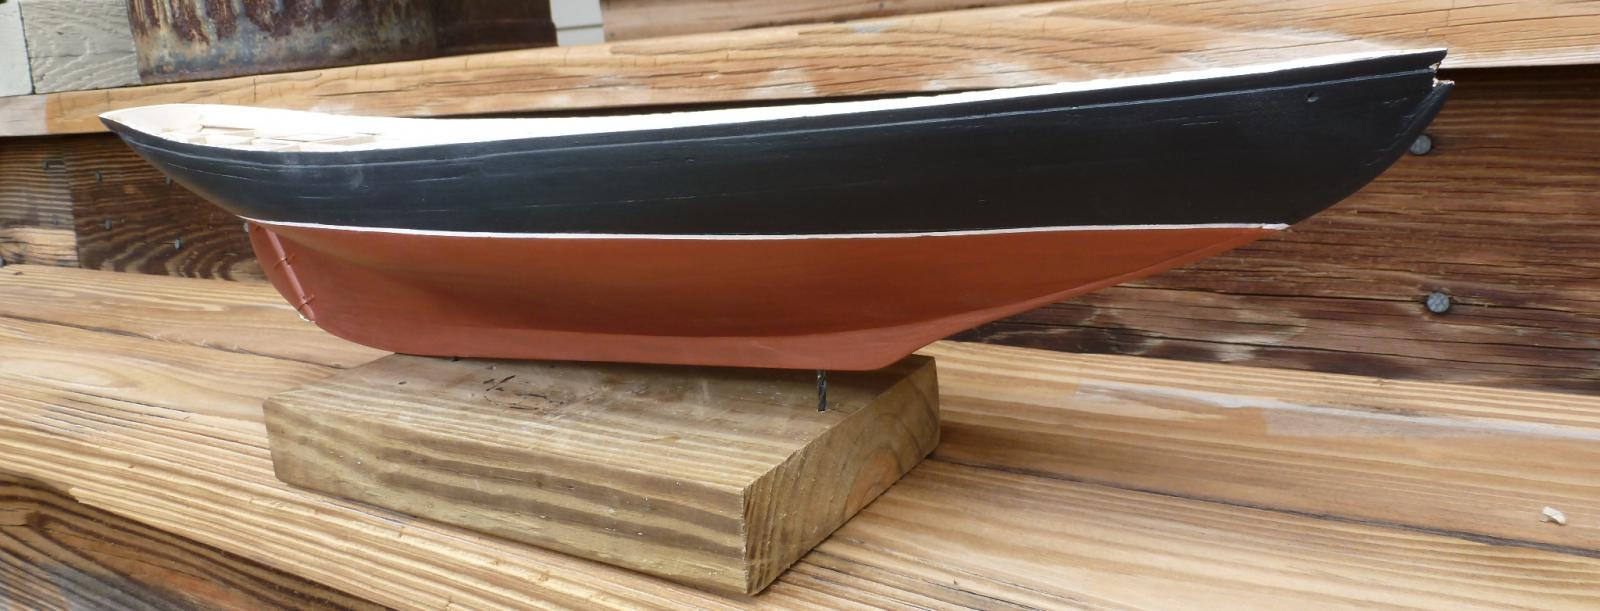
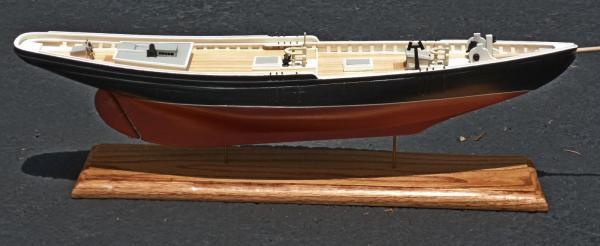
Progress Update and Discussion: I have not posted for a while, mainly because of problems and frustration with the transom assembly on this vessel. I thought I had the transom installed EXACTLY as per the instructions. The position was correct and the angle of the transom relative to the bulkhead former was precisely the same as the template provided (Fig. 11, p.13). It all seemed to be good. Planking the hull went smoothly - no severe bends needed for the strakes like with FAIR AMERICAN. However, when I started planking the bulwarks, I realized that the bulwarks met the transom at a much steeper angle than shown in the plans...and nothing like the Ben Latham would be. I also discovered that Bulkhead K was off center; something I failed to spot earlier. I was too far along to rip everything out and start over, so I decided to move forward and see if I could fix it. Well, as we say here in Virginia, it was kinda like watching sausage being made - not pretty - but I did it to my satisfaction. I have progressed to the point where I know there will be a finished ship model at the end. I can no longer claim to be modeling the BENJAMIN W. LATHAM though, and because I have given up on the seine boat, I am no longer modeling a mackeral seiner. So I guess this will simply be a representative Grand Banks Fishing Schooner. And that's OK. I can now borrow ideas from Elia's Arethusa build log as needed. Also, I can add that white stripe at the water line that I really like. Here are some photos to show you my progress to date- <<Gary>>

- 50 replies
-
- 14
-
-
- benjamin w latham
- model shipways
- (and 1 more)
-
AK0309 - A very good build log that might be of help to you is Arethusa by Elia - 1907 Knockabout Banks Fishing Schooner http://modelshipworld.com/index.php/topic/409-arethusa-by-elia-1907-knockabout-banks-fishing-schooner/ especially the photos at the bottom of page one and on page three. She's a scatch build but very similar to Ben Latham. Perhaps it would be better to post your question in the "Building, Framing, Planking and plating a ships hull and deck" forum and include a photo of your build to clarify what you are asking. More people would see it and you would have a better chance of getting the answer you are looking for. David, your offer to help is always appreciated. I might be asking some questions when I get further along. <<Gary>>
- 50 replies
-
- 2
-
-
- benjamin w latham
- model shipways
- (and 1 more)
-
Hello ak0309 - Sorry but I am unable to provide any help at this time. I am not as far along in my build as you apparently are. But the transom certainly is tricky. <<Gary>>
-
Hi John - Yup, that's a fly tying vise. I used to be a fly tier when I lived in north Idaho and could fly fish for west slope cutthroat trout. When I moved here to Virginia over 20 years ago, I discovered that the brook trout here are much smaller and more difficult to catch, so I lost interest. But rigging a ship model requires many of the same skills and tools as fly tying. I use the vise quite a bit, as well as the scissors and hemostats. I still haven't figured out a way to incorporate those hackles into my rigging though . <<Gary>>
-
Hi Jerry - Thanks for dropping by and for your kind words. As I said to John (post #197), you should also consult the build logs of Rafine, Pete Jaquith, and KenW. I pretty much constructed my model from the kit, but these guys went well beyond that. When I stopped working on her a few weeks ago, I could see all of the imperfections and flaws. But now when I look and see her sitting there, I see a beautiful little ship that I created and I'm happy . (Ah, yes, I still need to do those rope coils...) <<Gary>>
-
Yes, a great tool...and in many part of the U.S. you can buy a pack of them for a buck at a Dollar Store. <<Gary>>
-
Hey Bob - GREAT photographs...and your rigging looks pretty good too . You are setting a high bar for future ESSEX builders, but you are also assisting them immeasurably by providing such wonderful clear pictures of what the rigging and the details of the ship are supposed to look like. That's something novice builders like me struggle with - visualizing how something is supposed to look. Your build log is better than a practicum. Thank you for taking the time to share your work with the rest of us. <<Gary>>
- 1,477 replies
-
- 4
-
-
- essex
- model shipways
- (and 1 more)
-
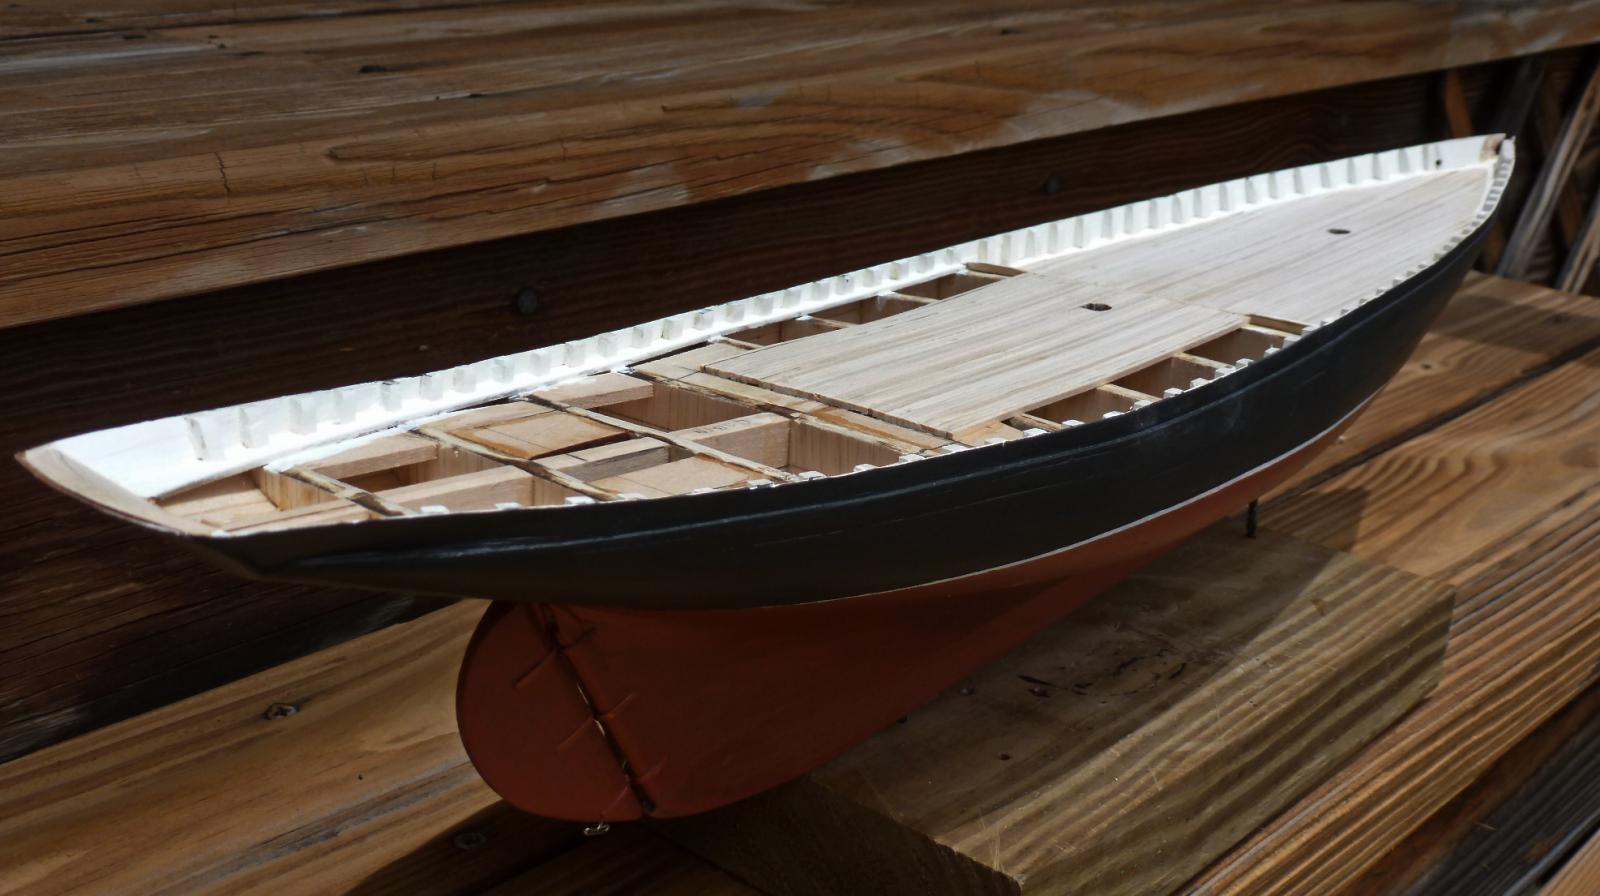
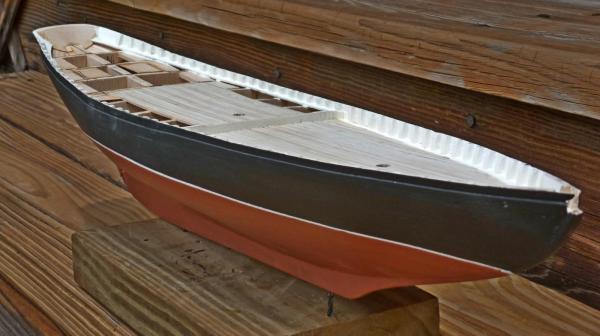
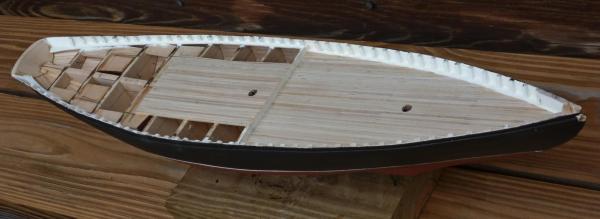
Hello Elia - Thanks for your comments and the link to Jim LeFever's seine boat build pictures. In essence, he used just the plans to scratch build the seine boat...and that is a REAL possibility. He certainly shows that it CAN be done...and beautifully!. I do have the option of raising the keel up (hull upside down) and running the 1/16 X 1/32 ribs under it. The 1/16" wide ribs are sitting on 1/8" thick bulkheads, though, and it would only take one instance of gluing the planks to the ribs where the glue slopped over and glued the rib to the bulkhead. And that would be the end of that model. High probability and difficult to avoid. But I'm glad you agree that the seine boat kit and directions are not well thought out. <<Gary>>
- 50 replies
-
- 1
-
-
- benjamin w latham
- model shipways
- (and 1 more)
-
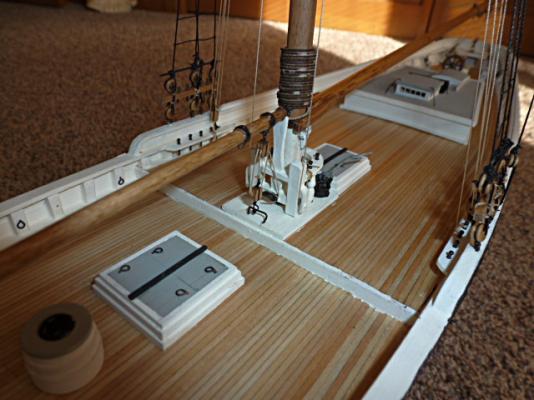
Progress report: I spent the day working on the Planksheer / waterway. The foredeck planksheer is nearly completed as I write. This task was more time consuming and delicate than fairing the hull. And the other build logs that complain about those delicate stanchions that break off easily are exactly correct. The stanchions need to be slimmed down and carved to shape to sit the slots in the planksheer. The emery boards from the dollar store were the most useful tool for doing this. I still have the quarter deck planksheers to fit. Nothing worth a photo at this stage... <<Gary>>
-
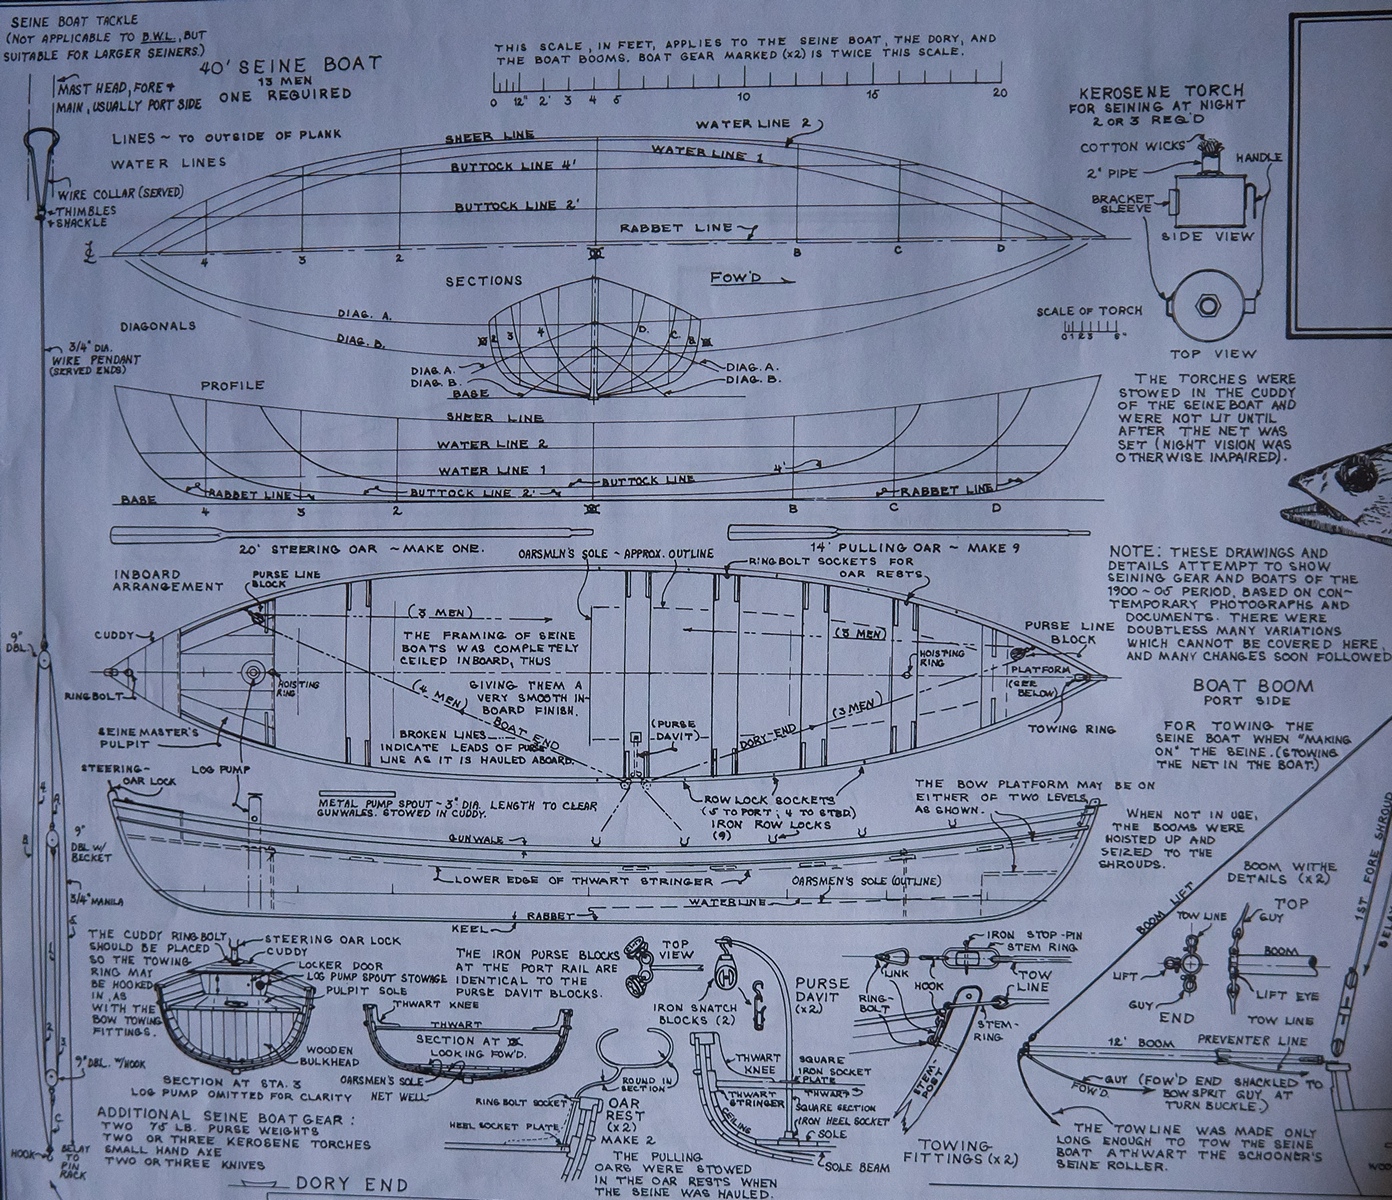
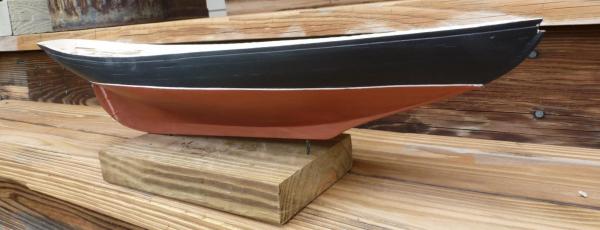
Ken, John and David - Thank you for your suggestions. I need to mull this over. Whether or not I build and include the seine boat will determine the size and type of mounting board. So I can wait a bit after the LATHAM hull is planked and painted. I am considering modifying the seine boat instructions and construction to have the ribs inboard of the keel, and to have the bulkheads at the bow and stern be attached to the keel and not function as "formers". That would be consistent with the plan for the seine boat (see picture below). <<Gary>>
- 50 replies
-
- 3
-
-
- benjamin w latham
- model shipways
- (and 1 more)
-
Ken - Thank you for your suggestion and your kind offer. The seine boat was 40 feet long, or ten inches for the 1:48 model, and Model Expo does not offer a Ship's Boat of that size. In addition, the seine boat was double ended. I did give some thought to trying to modify my seine boat kit, but I'm not sure how well it would turn out. The seine boat is intended to be displayed right side up and as if it was floating behind BW Latham as shown in this picture: http://www.modelexpo-online.com/images/prod/p2633b.jpg so I would want the boat's interior to look pretty good. I need to give this some more thought. Thanks again for your help. I appreciate it. <<Gary>>
- 50 replies
-
- 2
-
-
- benjamin w latham
- model shipways
- (and 1 more)