Kevin
-
Posts
7,006 -
Joined
-
Last visited
Content Type
Profiles
Forums
Gallery
Events
Everything posted by Kevin
-

Red Ochre Paint
Kevin replied to starlight's topic in Painting, finishing and weathering products and techniques
Admiralty Paints is very good, if in the UK the Halfords rattle can red primer is very similar in colour Caldercraft Admiralty Waterbased Paints from Cornwall Model Boats -
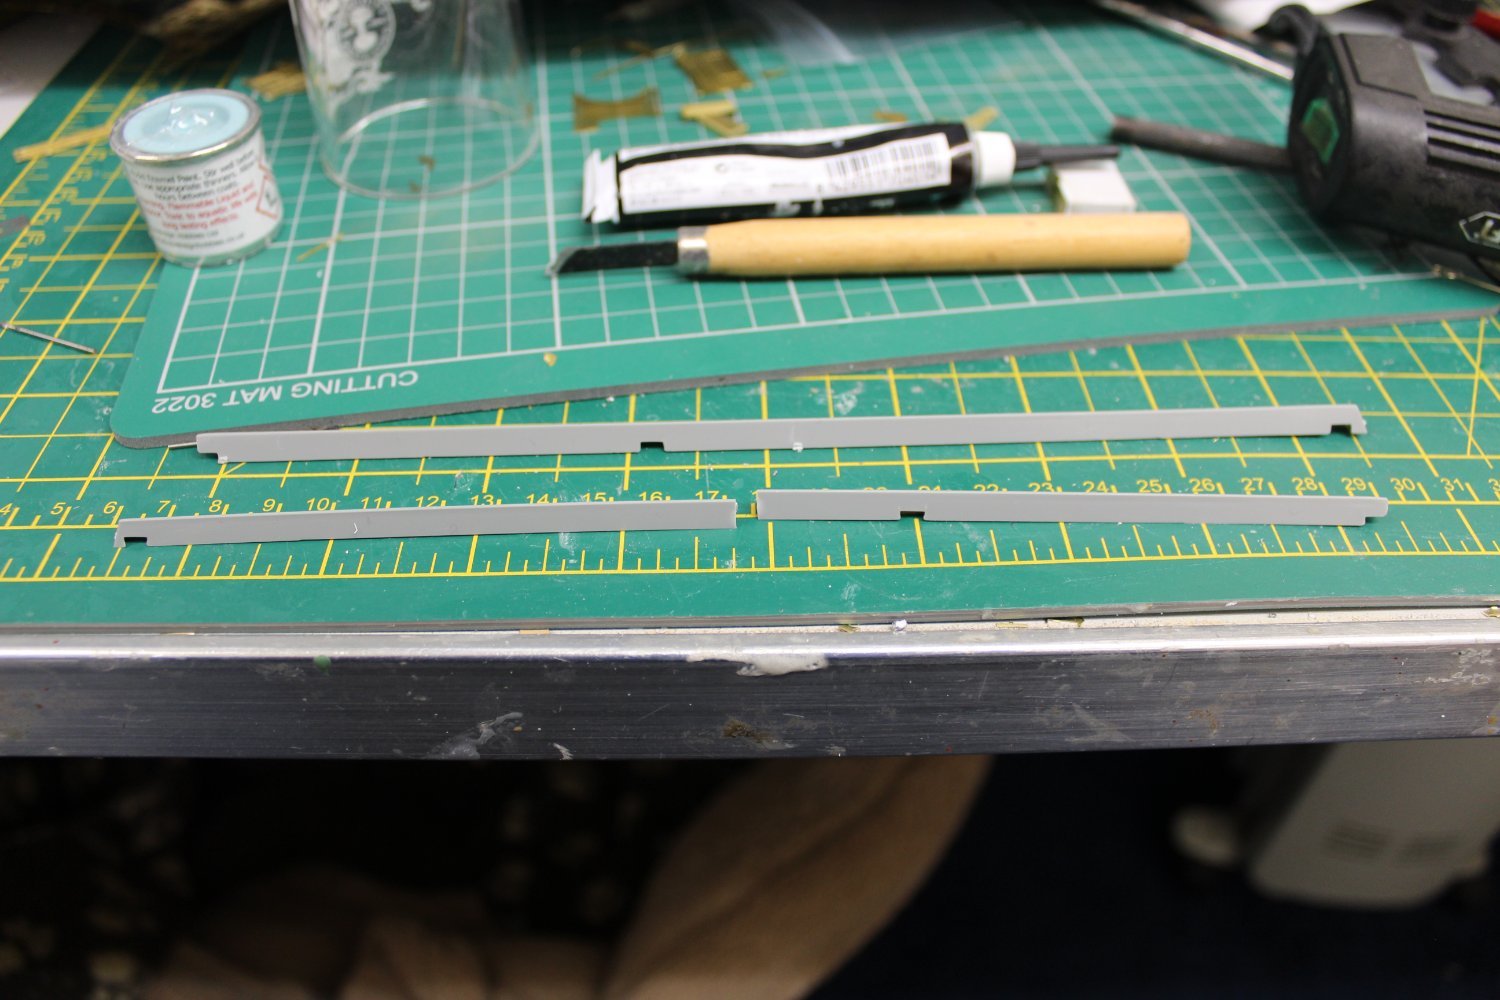
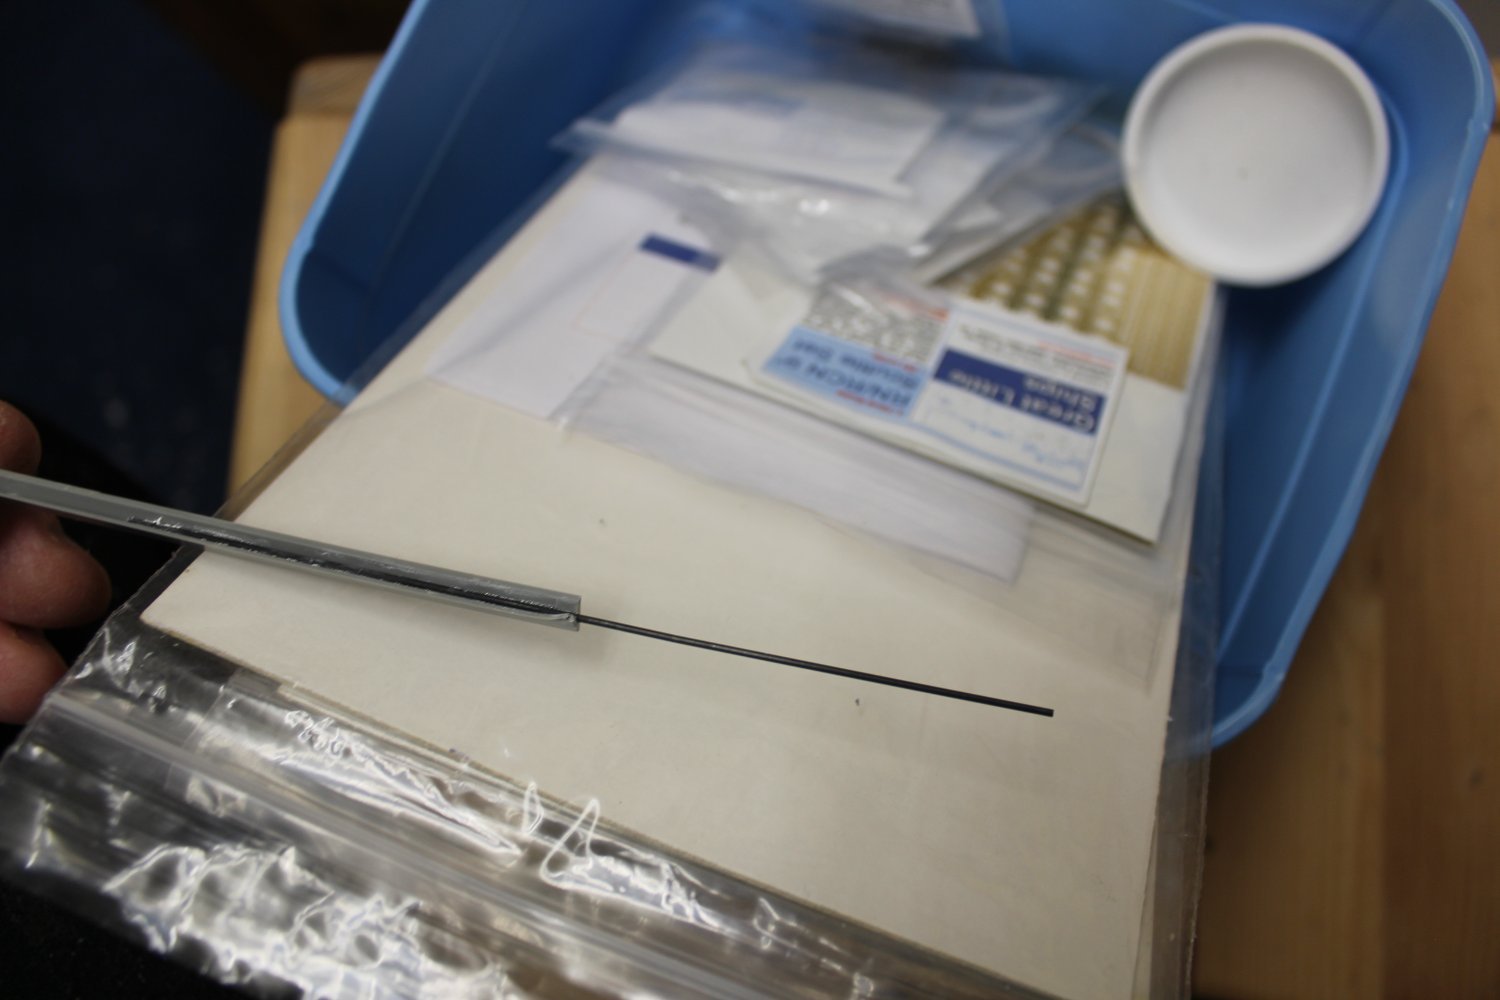
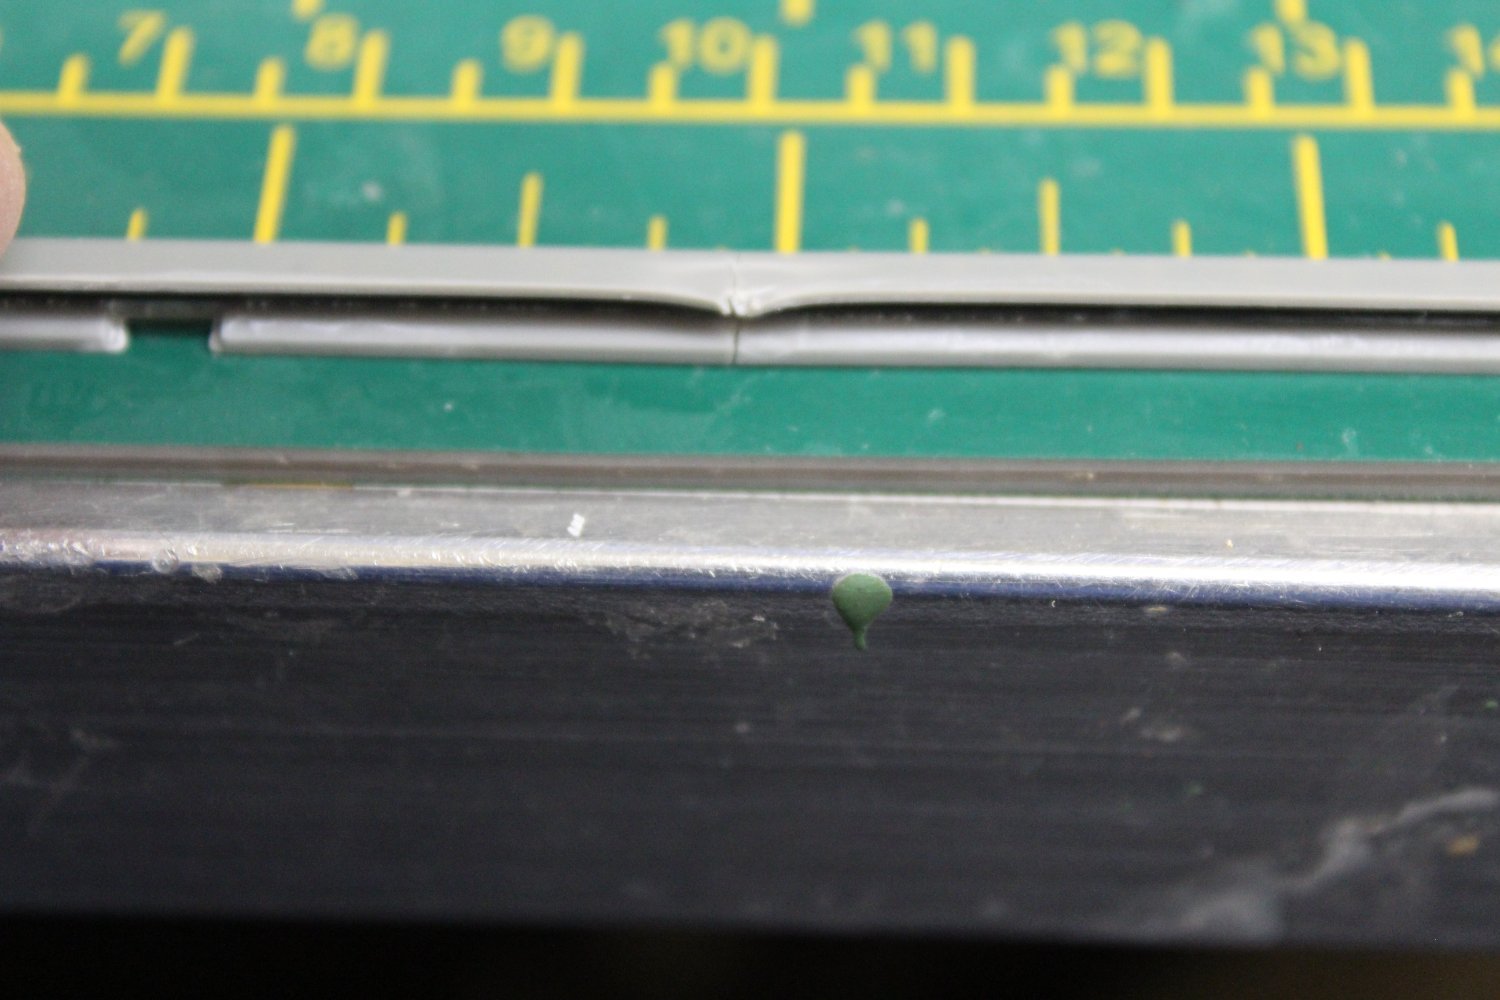
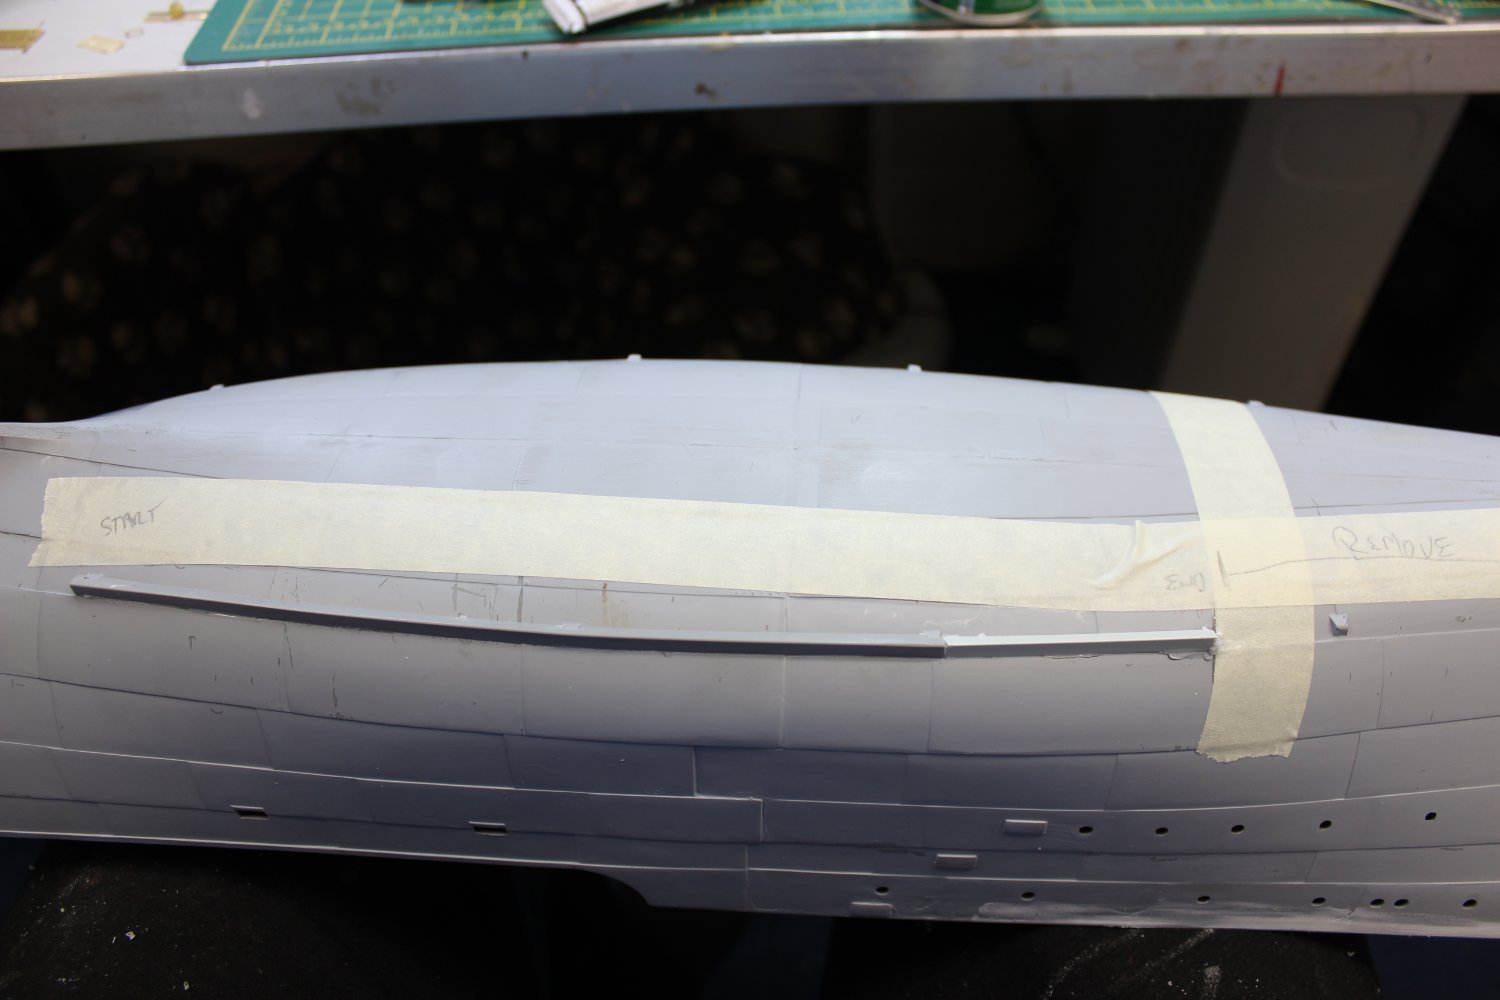
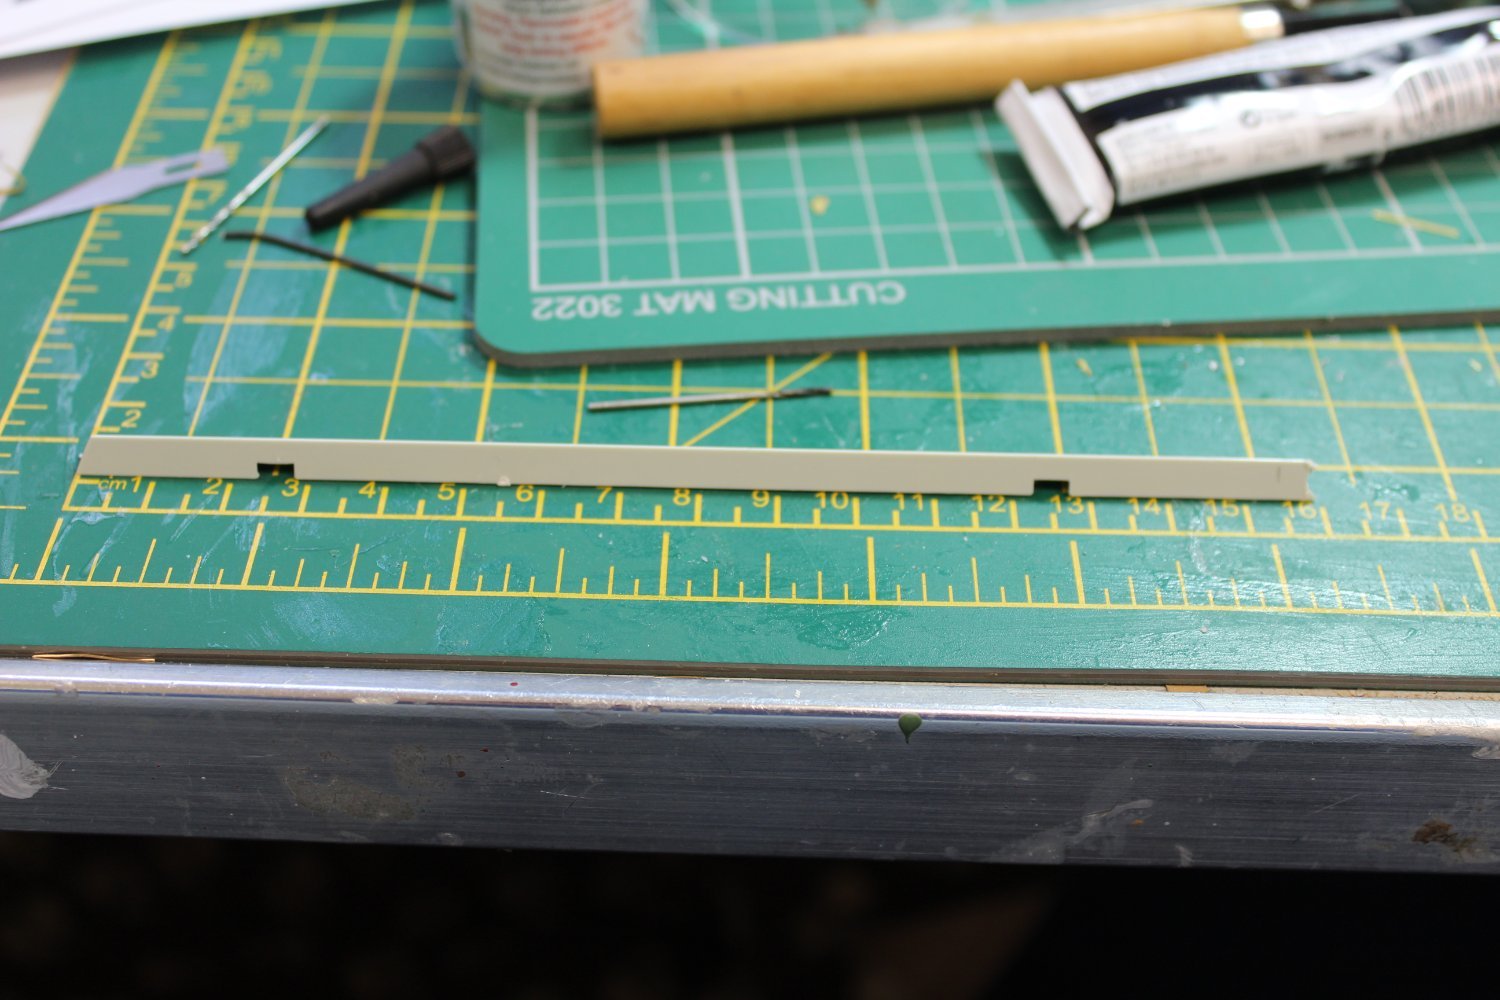
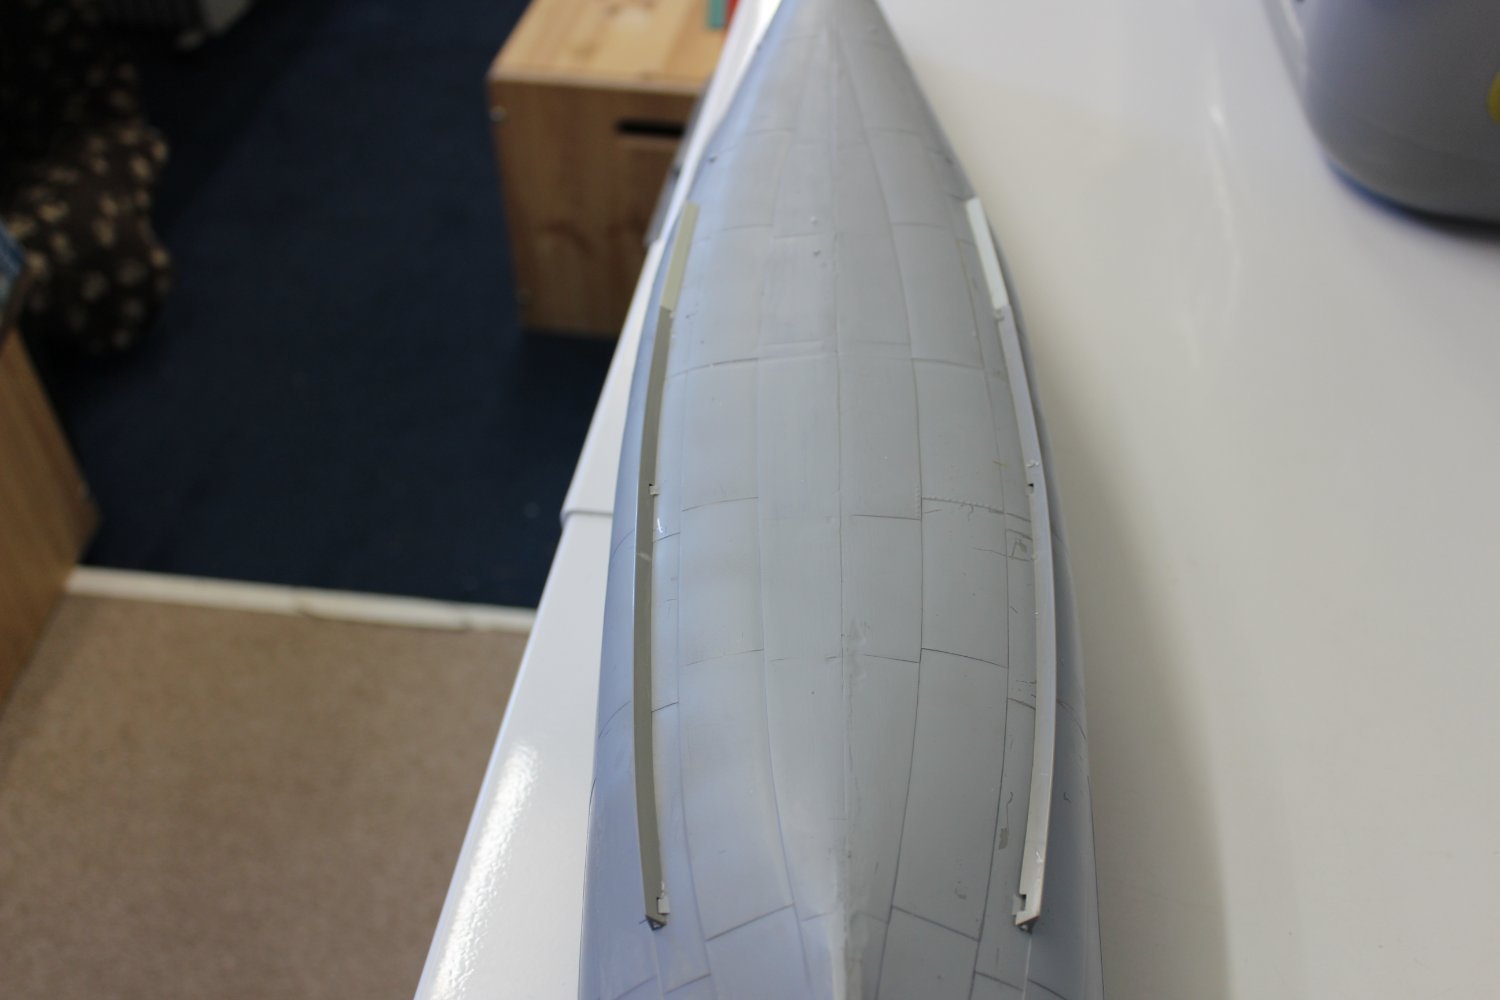
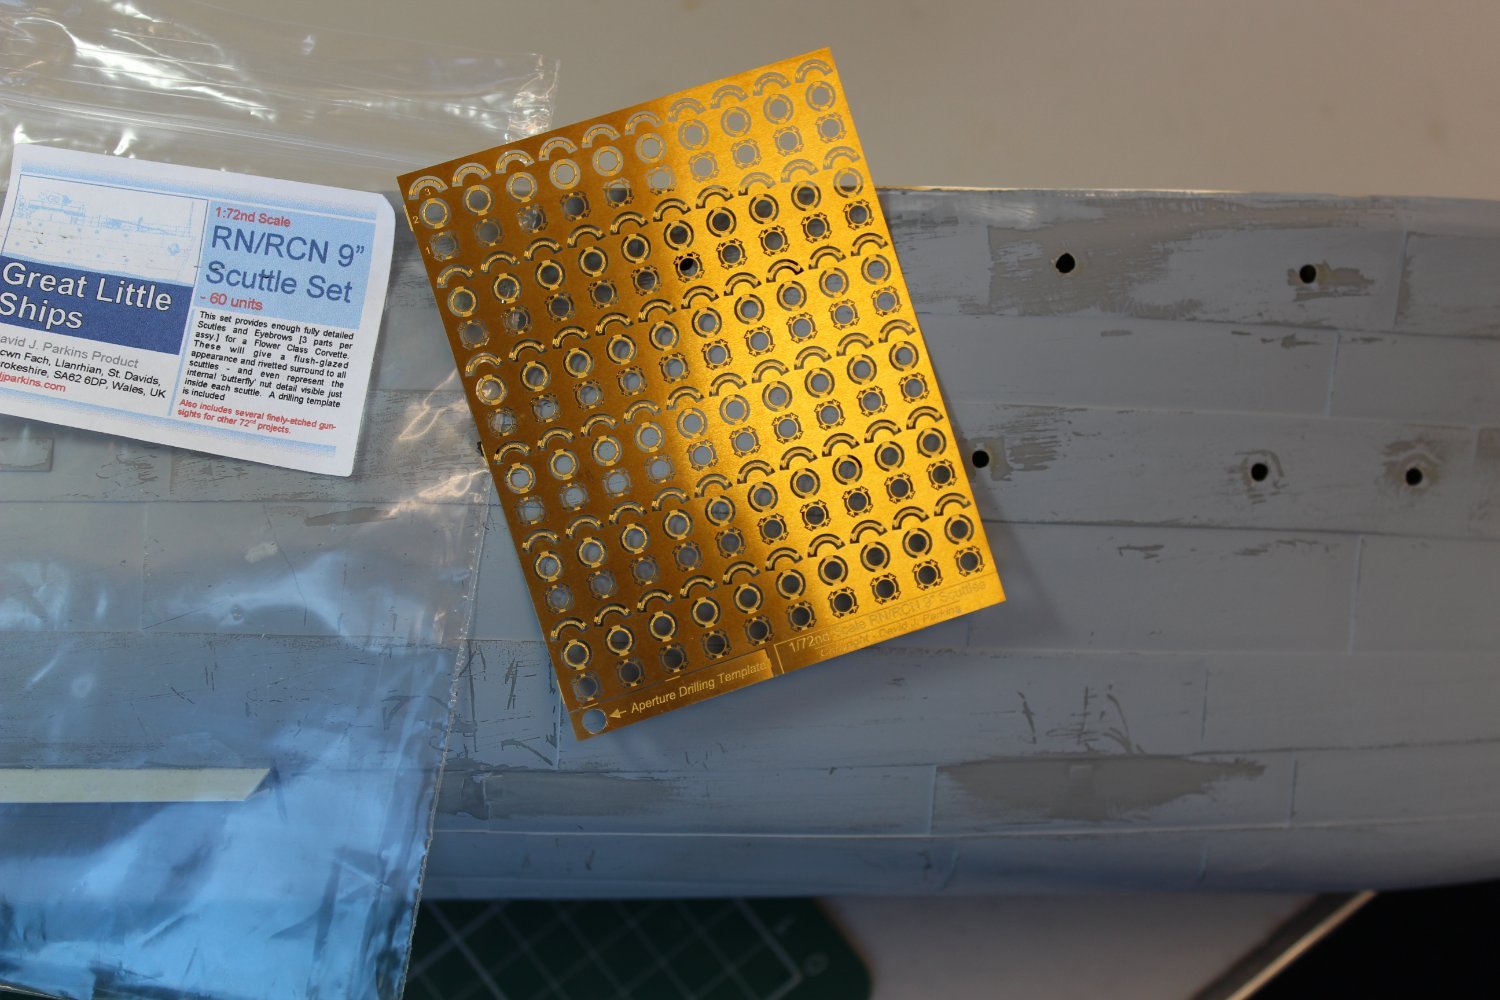
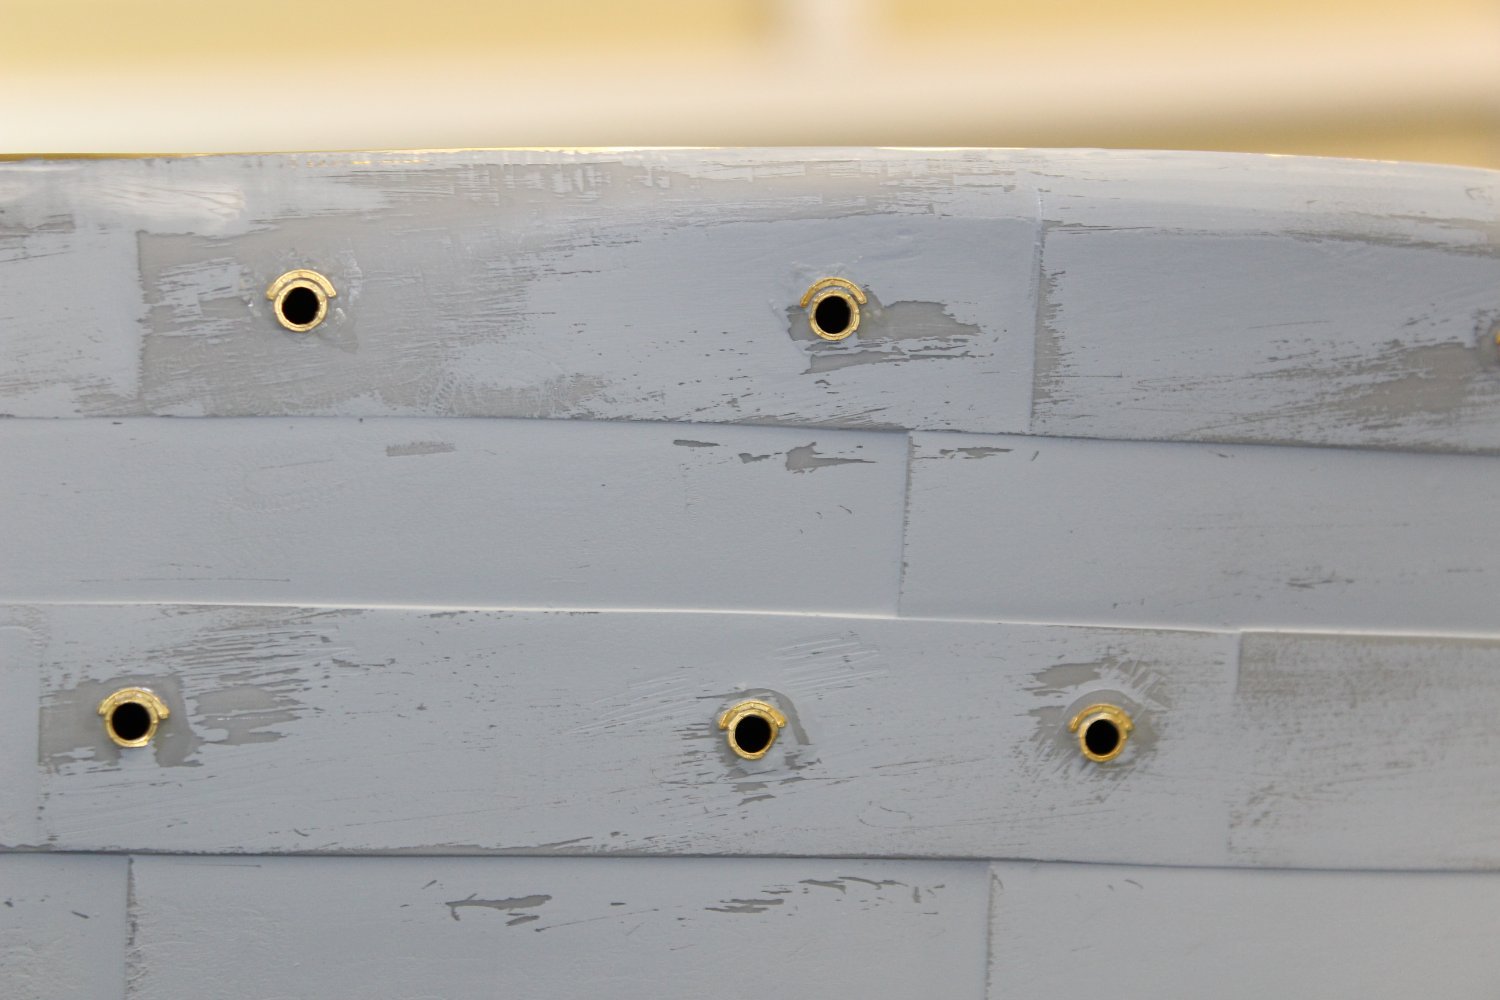
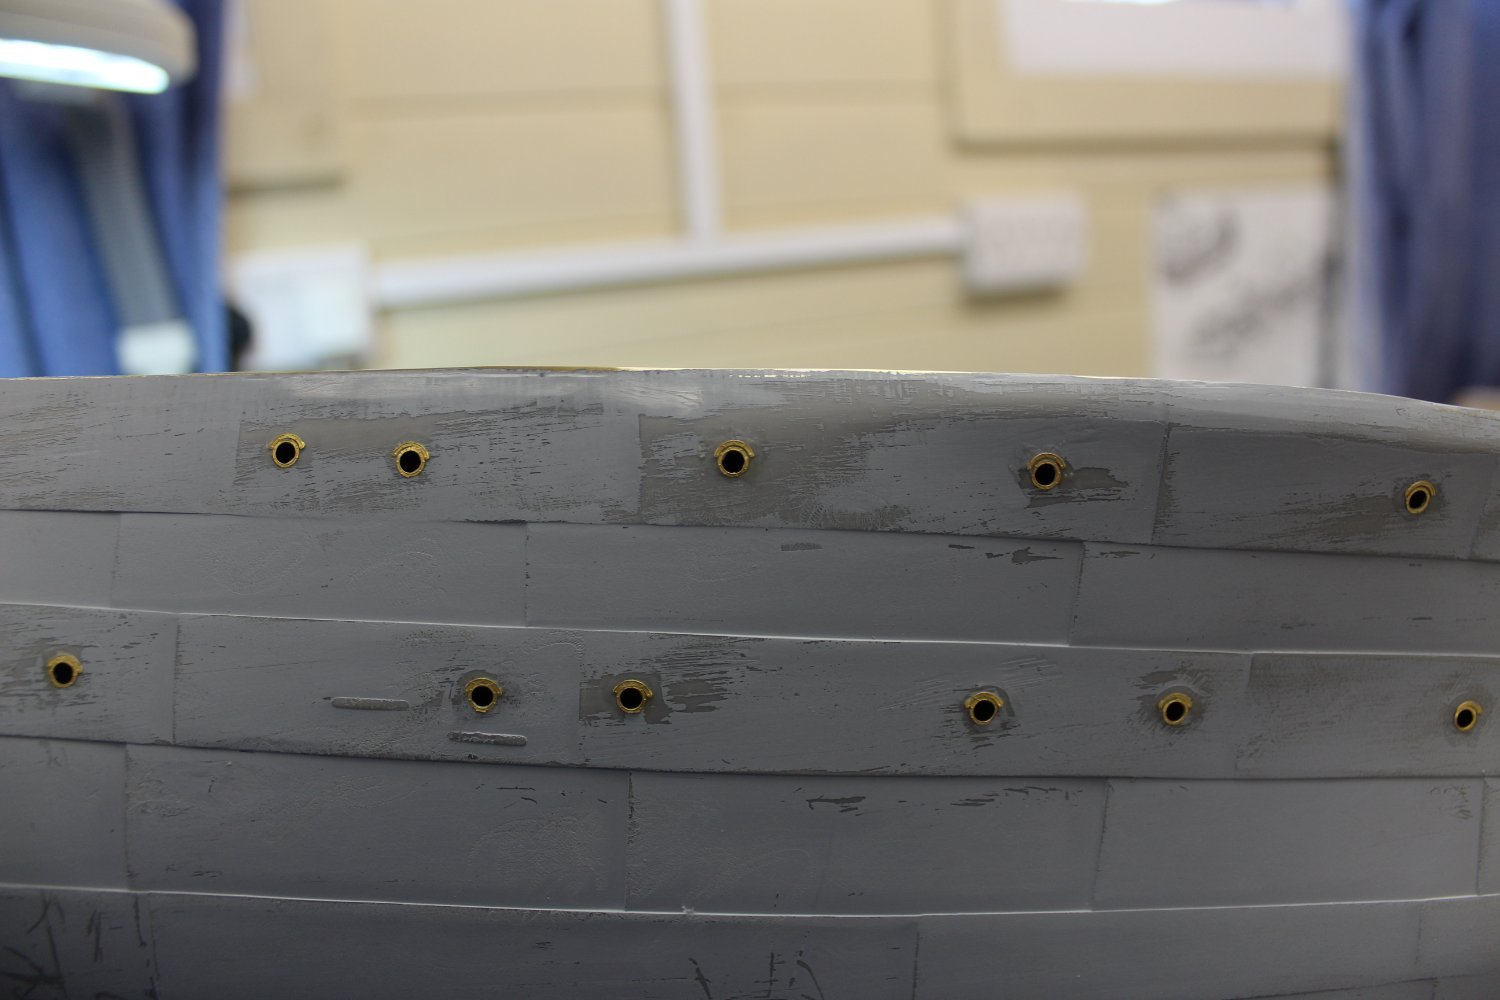
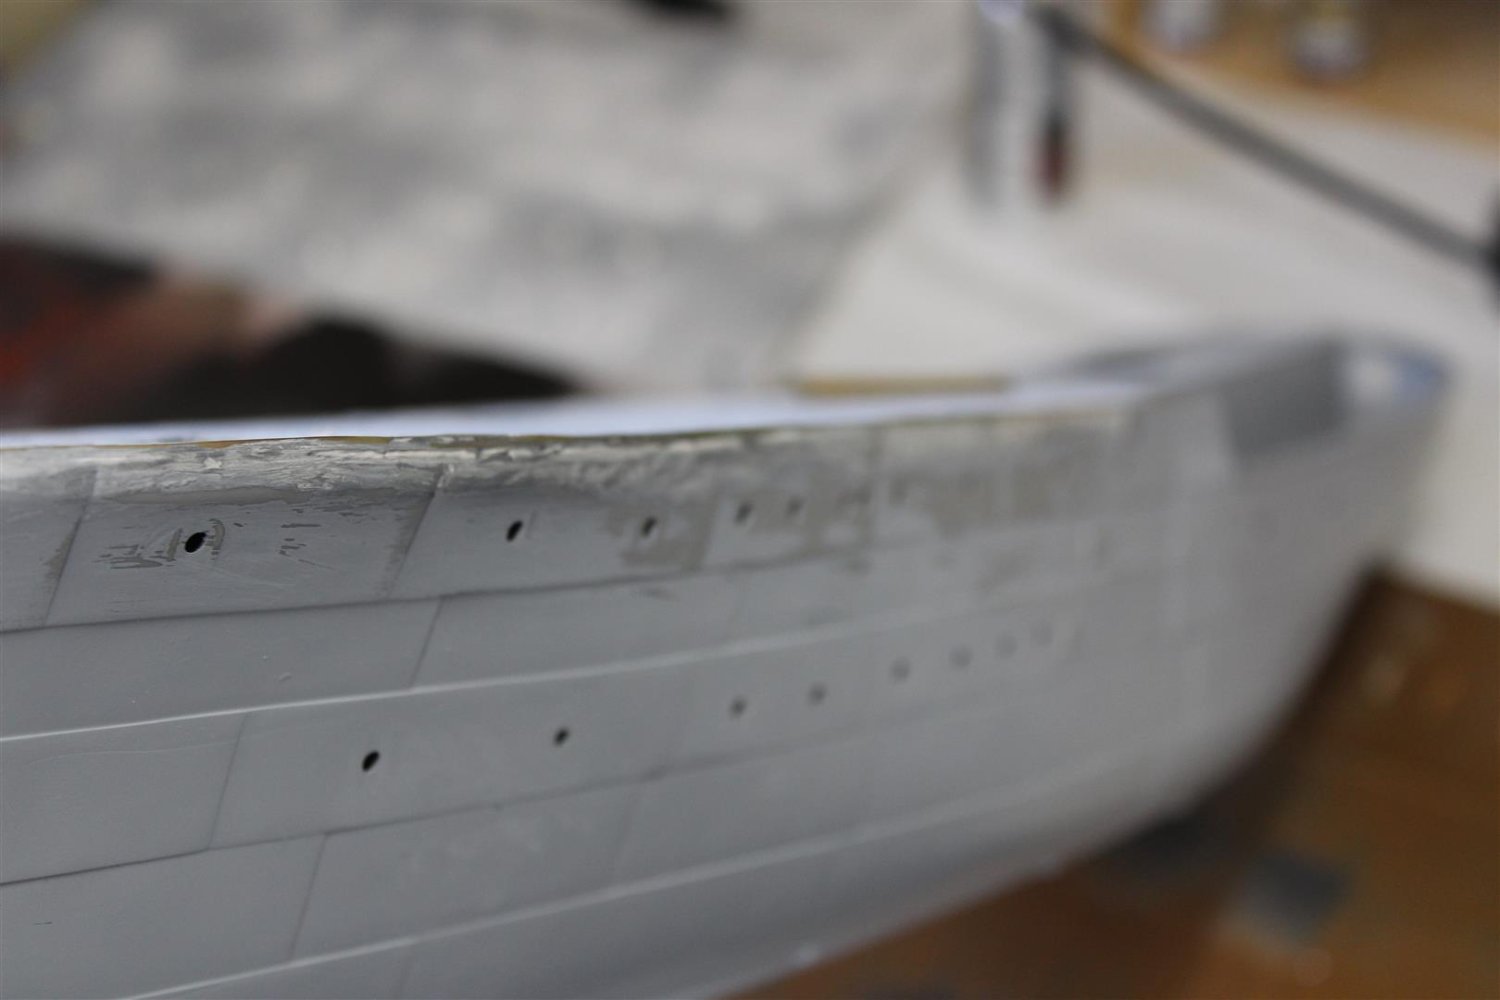
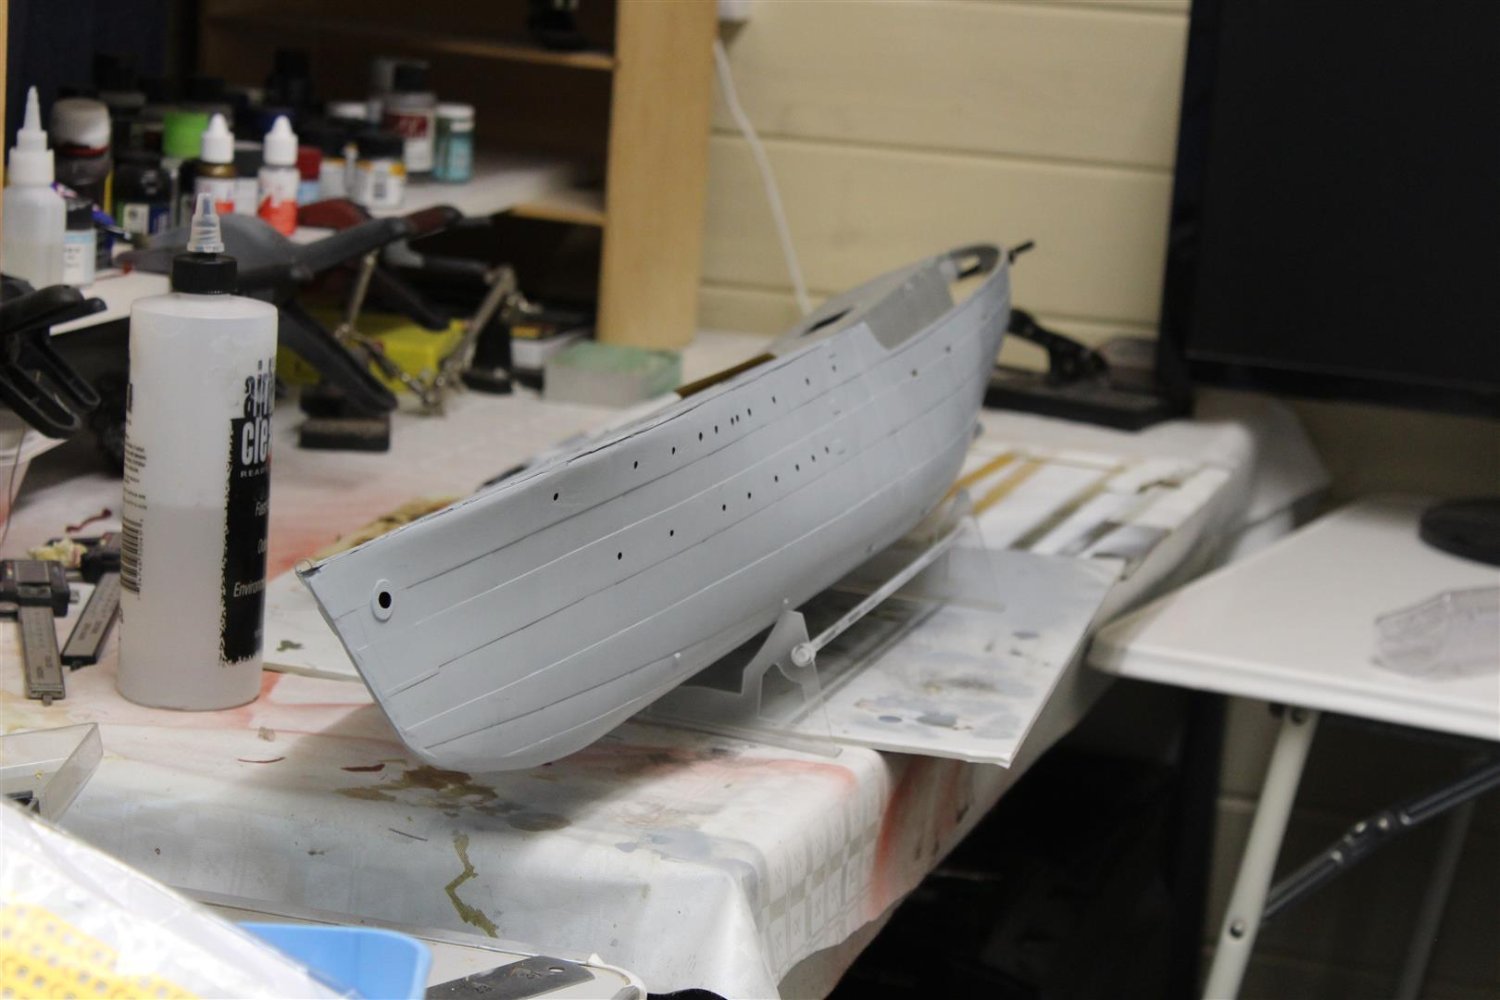
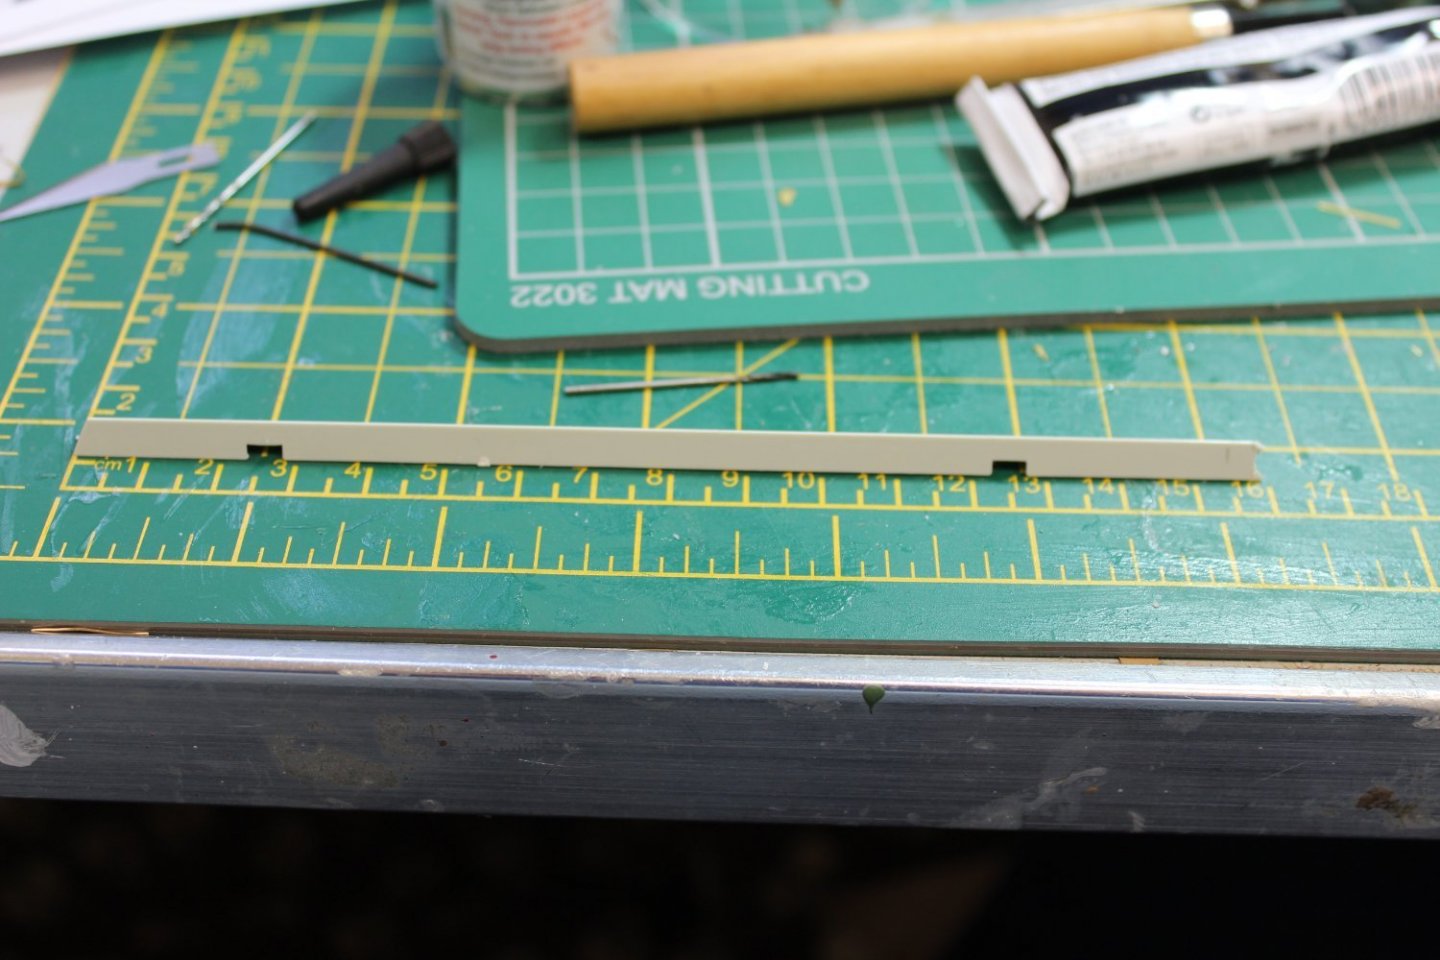
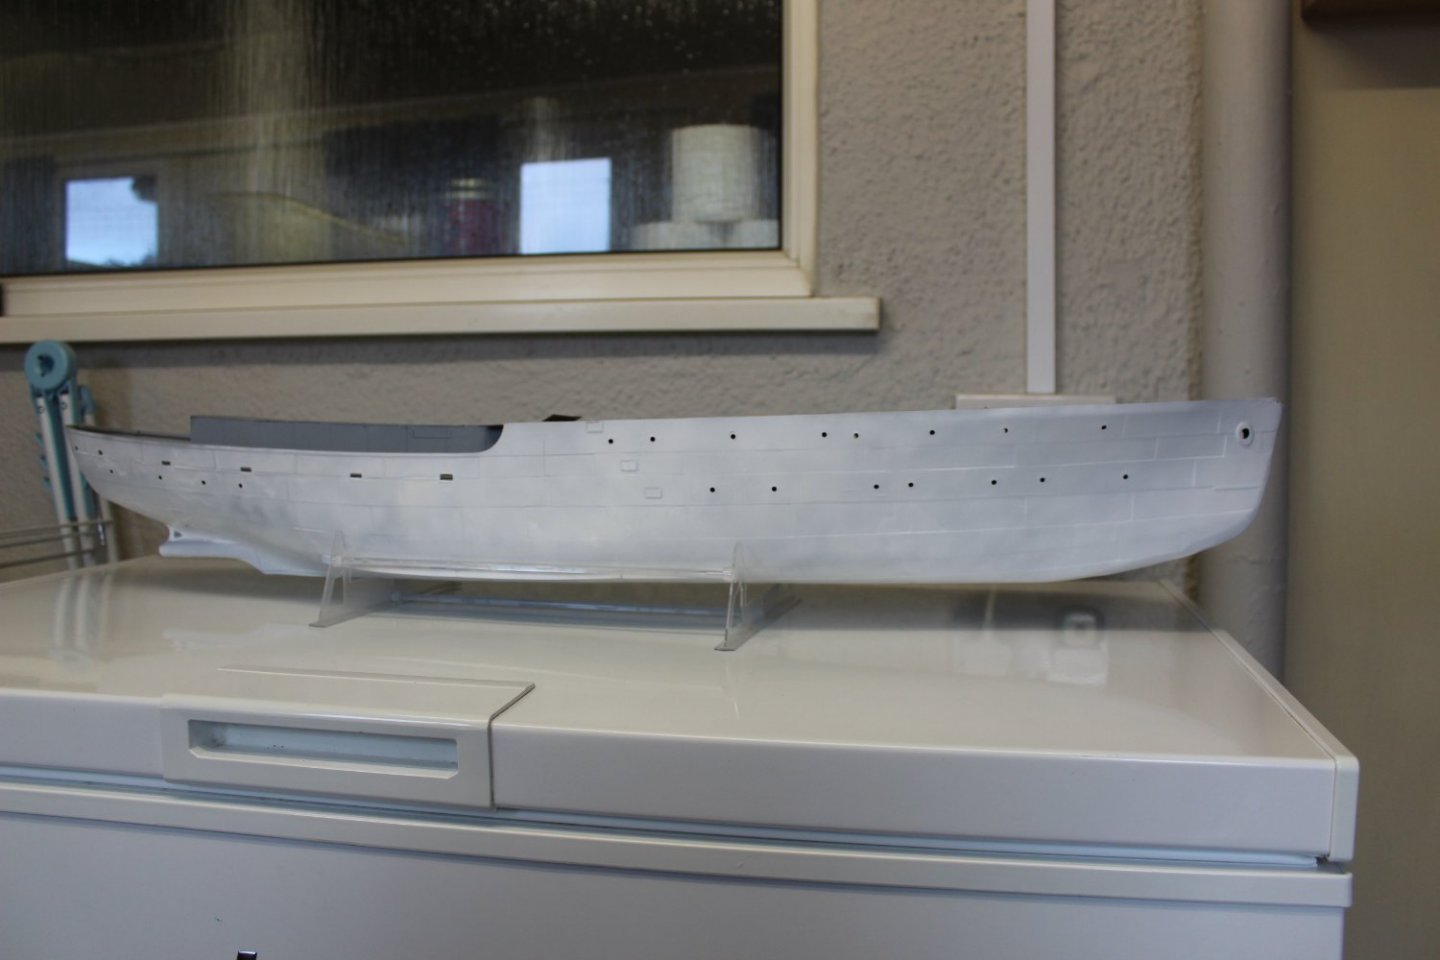
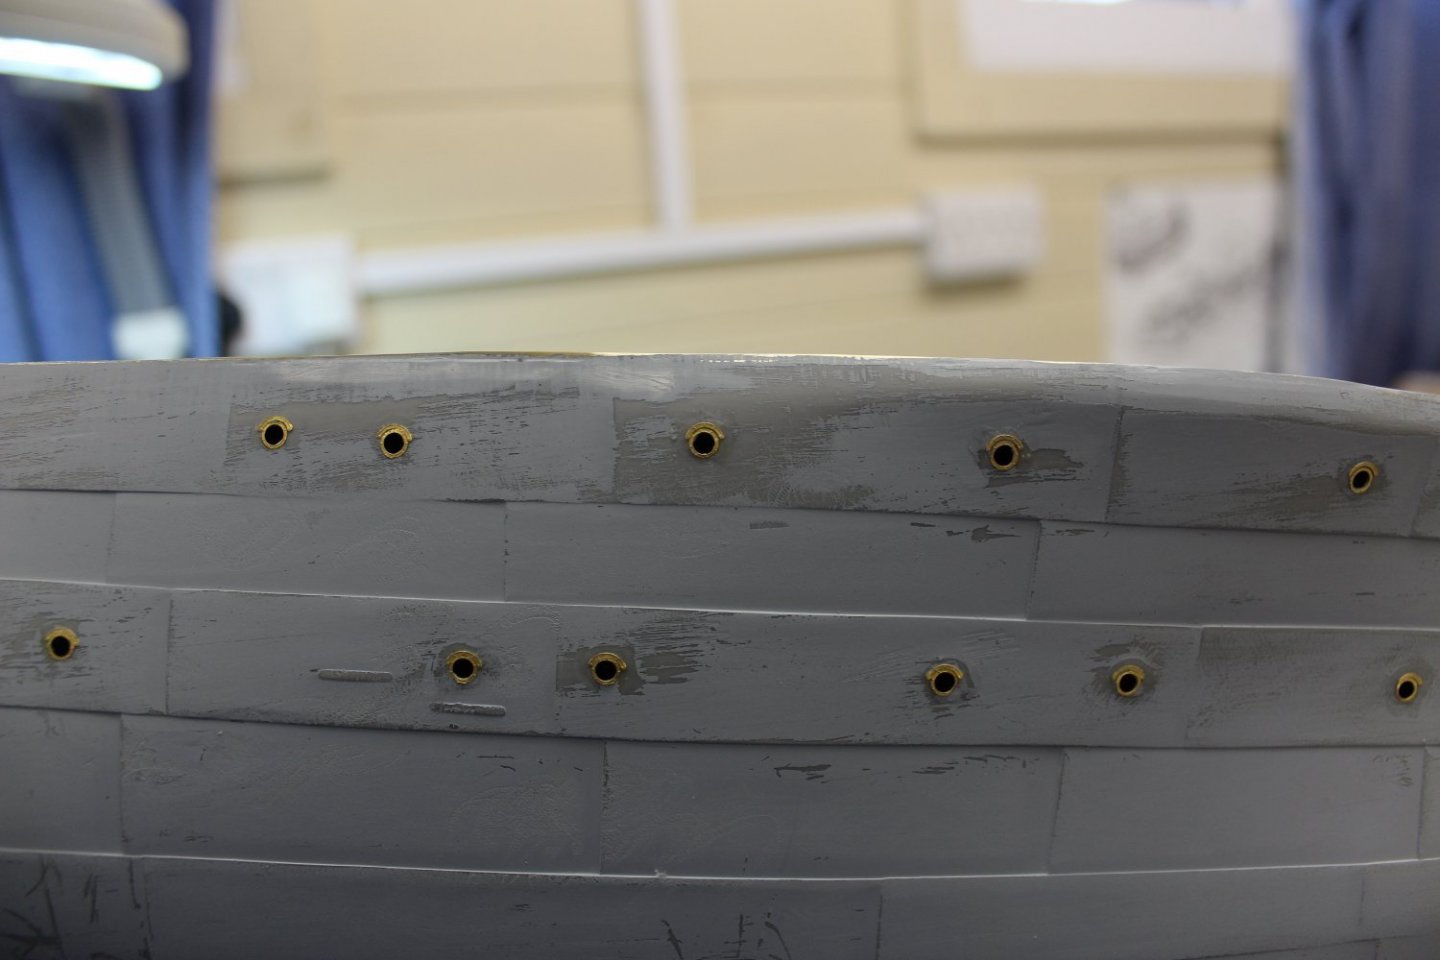
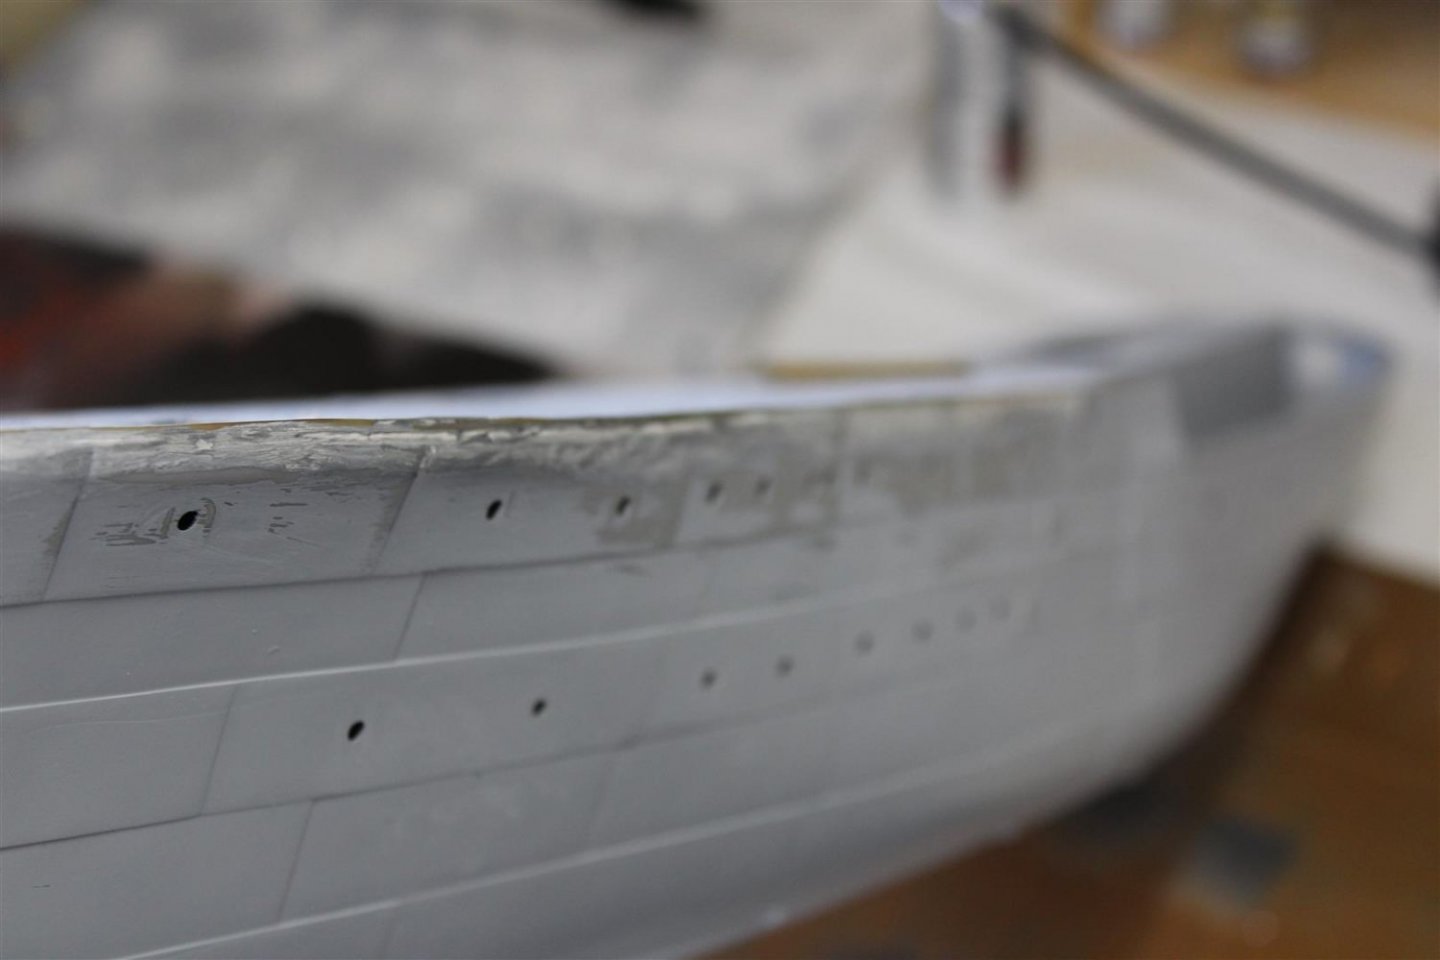
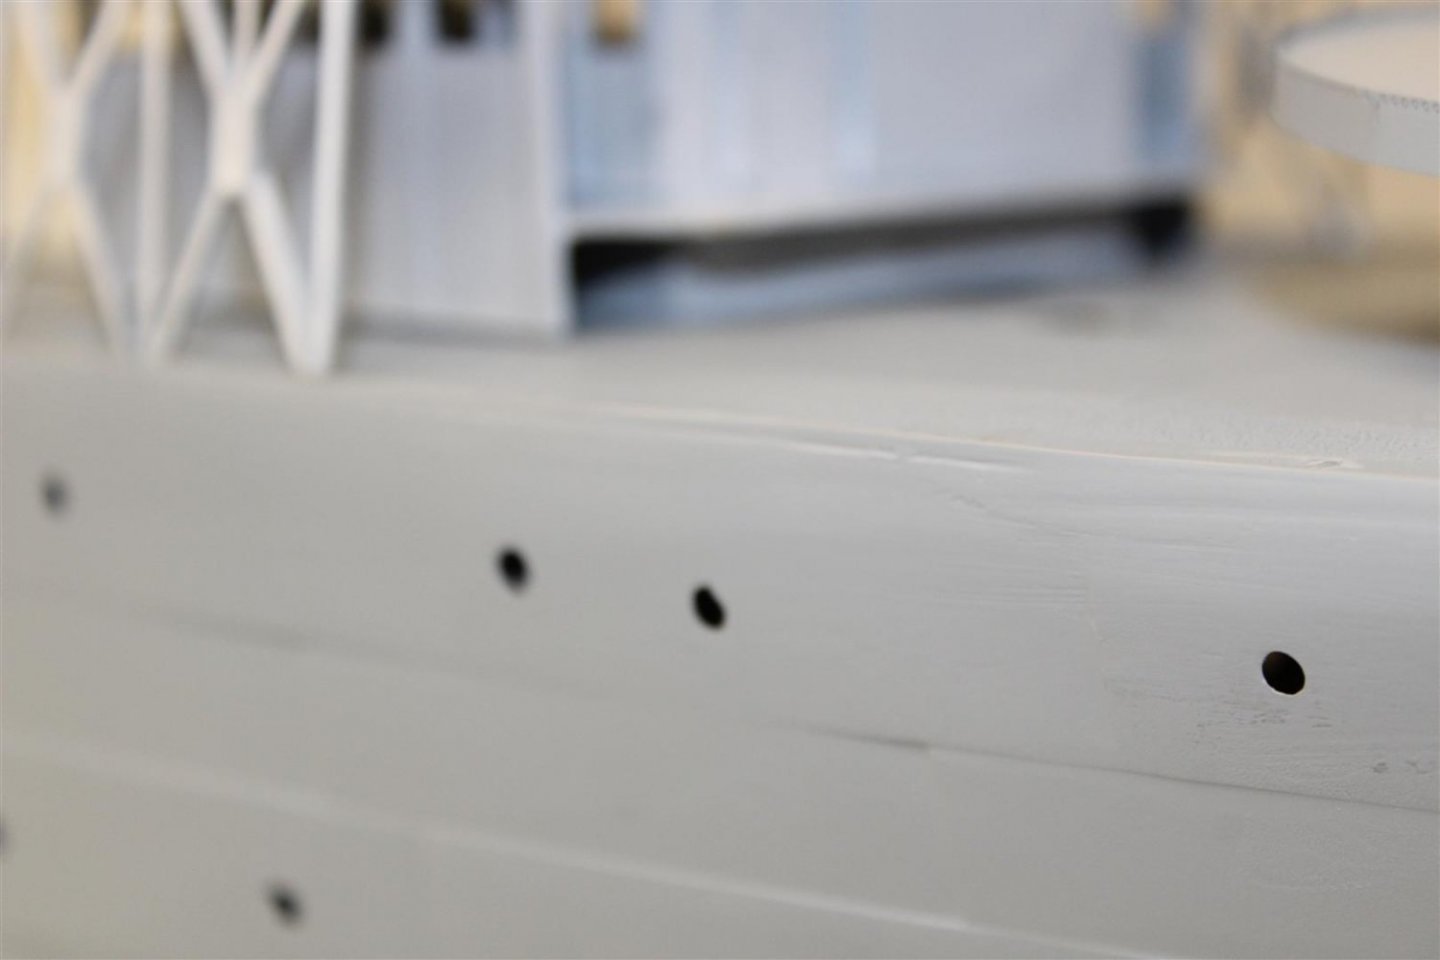
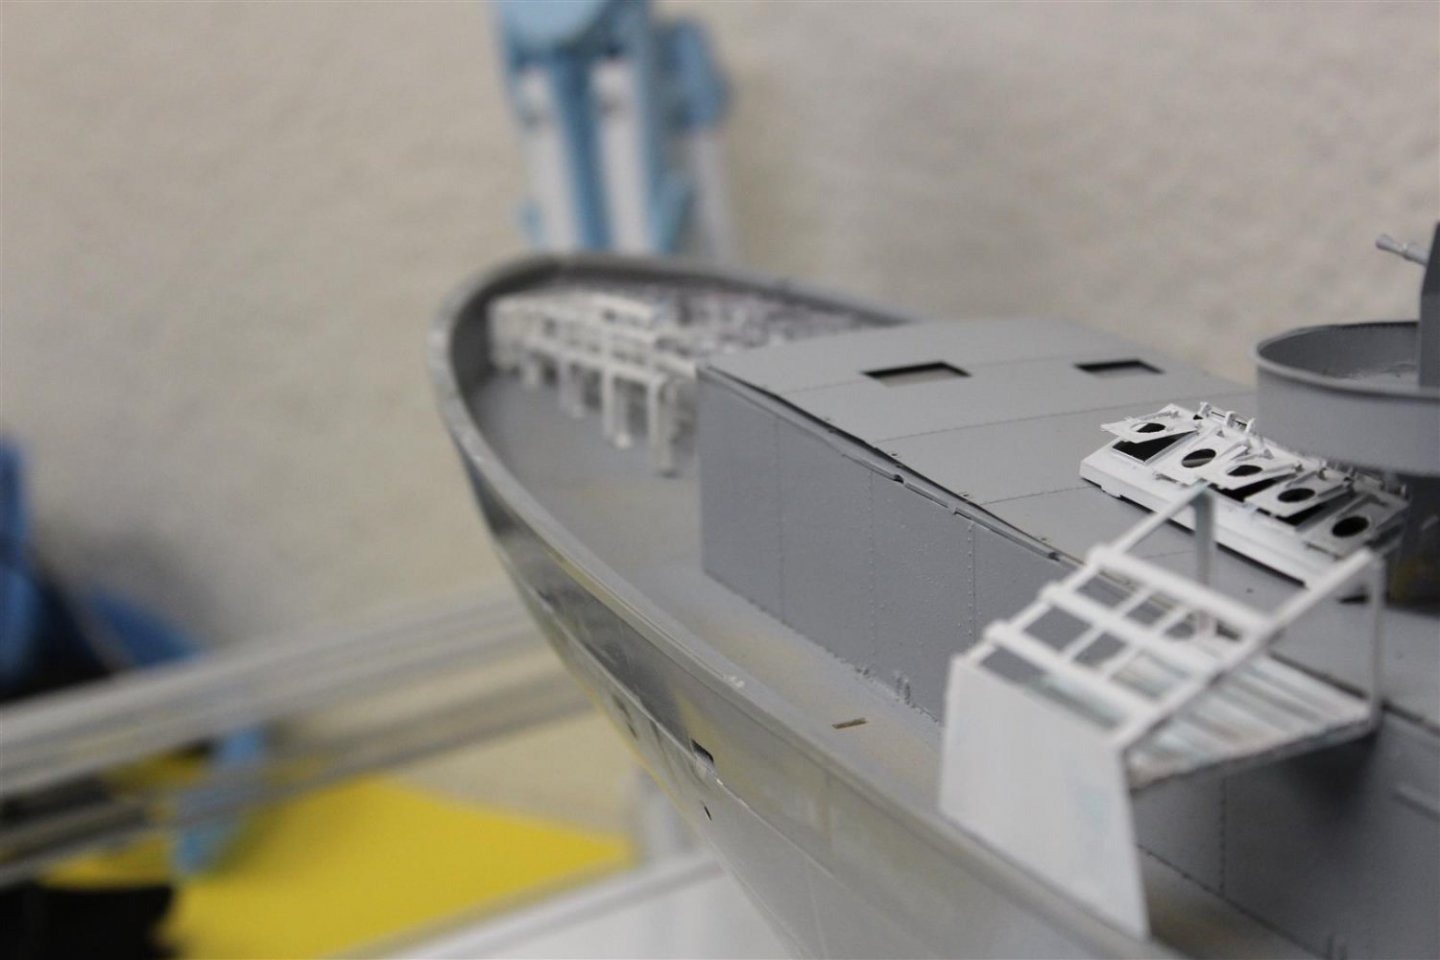
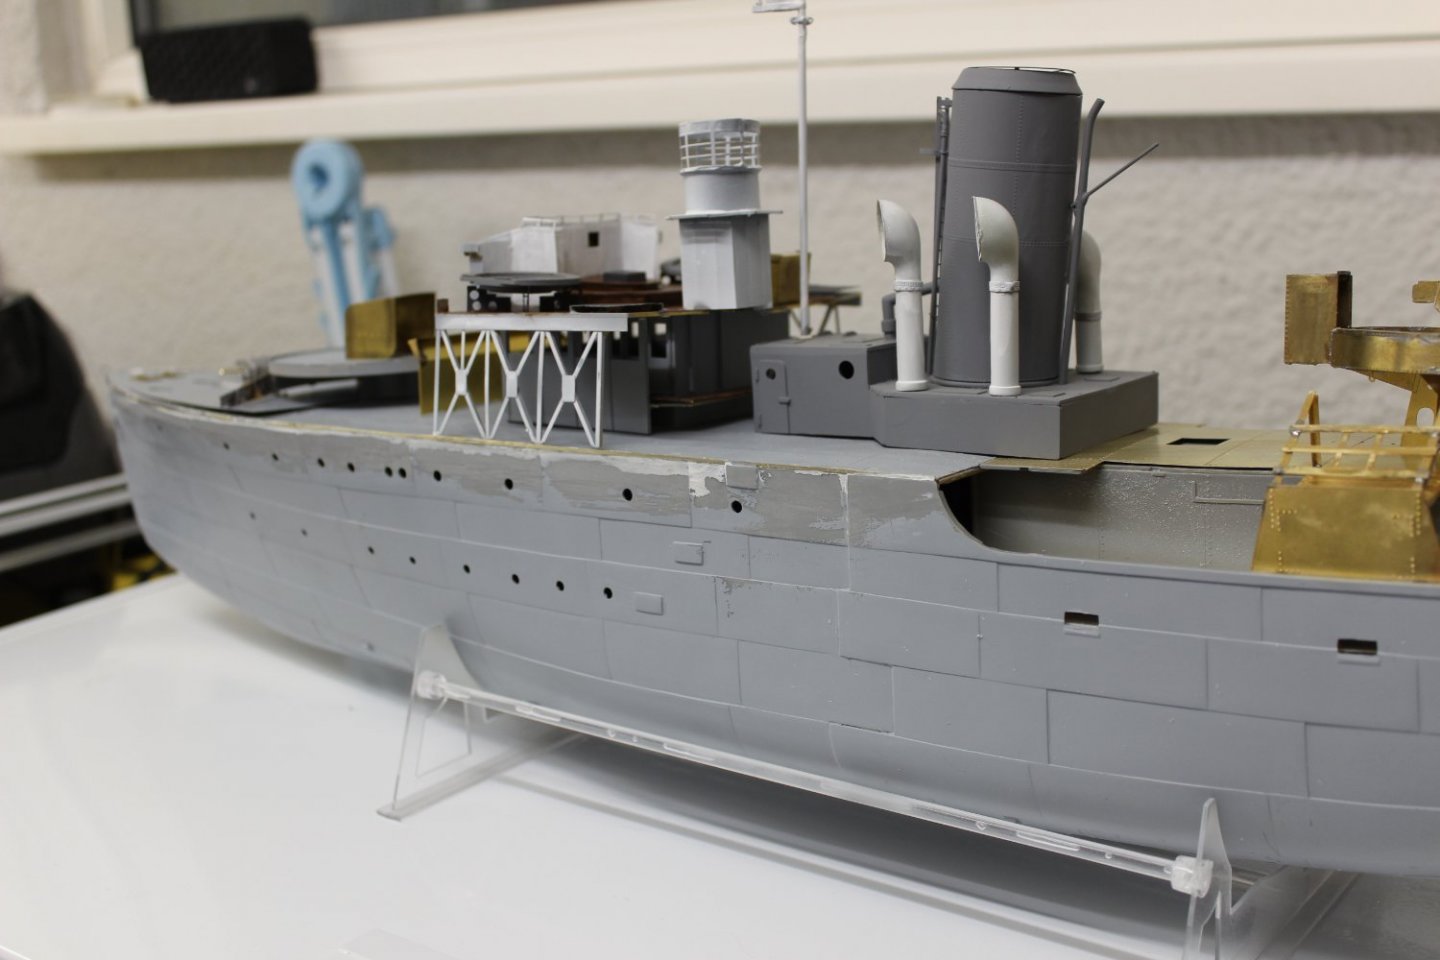
Good morning everyone thank you for comments and likes Bilge keel one side was broken in the kit box, strengthened with a bit of wire they are far to long, so 16 cn was taken from the forward section, and now looks right far to long 16cm removed Portholes part of the GLS (Great Little Ships) set, put on with PVA glue the eyelids are also included vajello white primer


-
lovely to see an update from you, shame i just cannot get back into mine
- 60 replies
-
- 1
-

-
- enterprize
- caf
- (and 1 more)
-
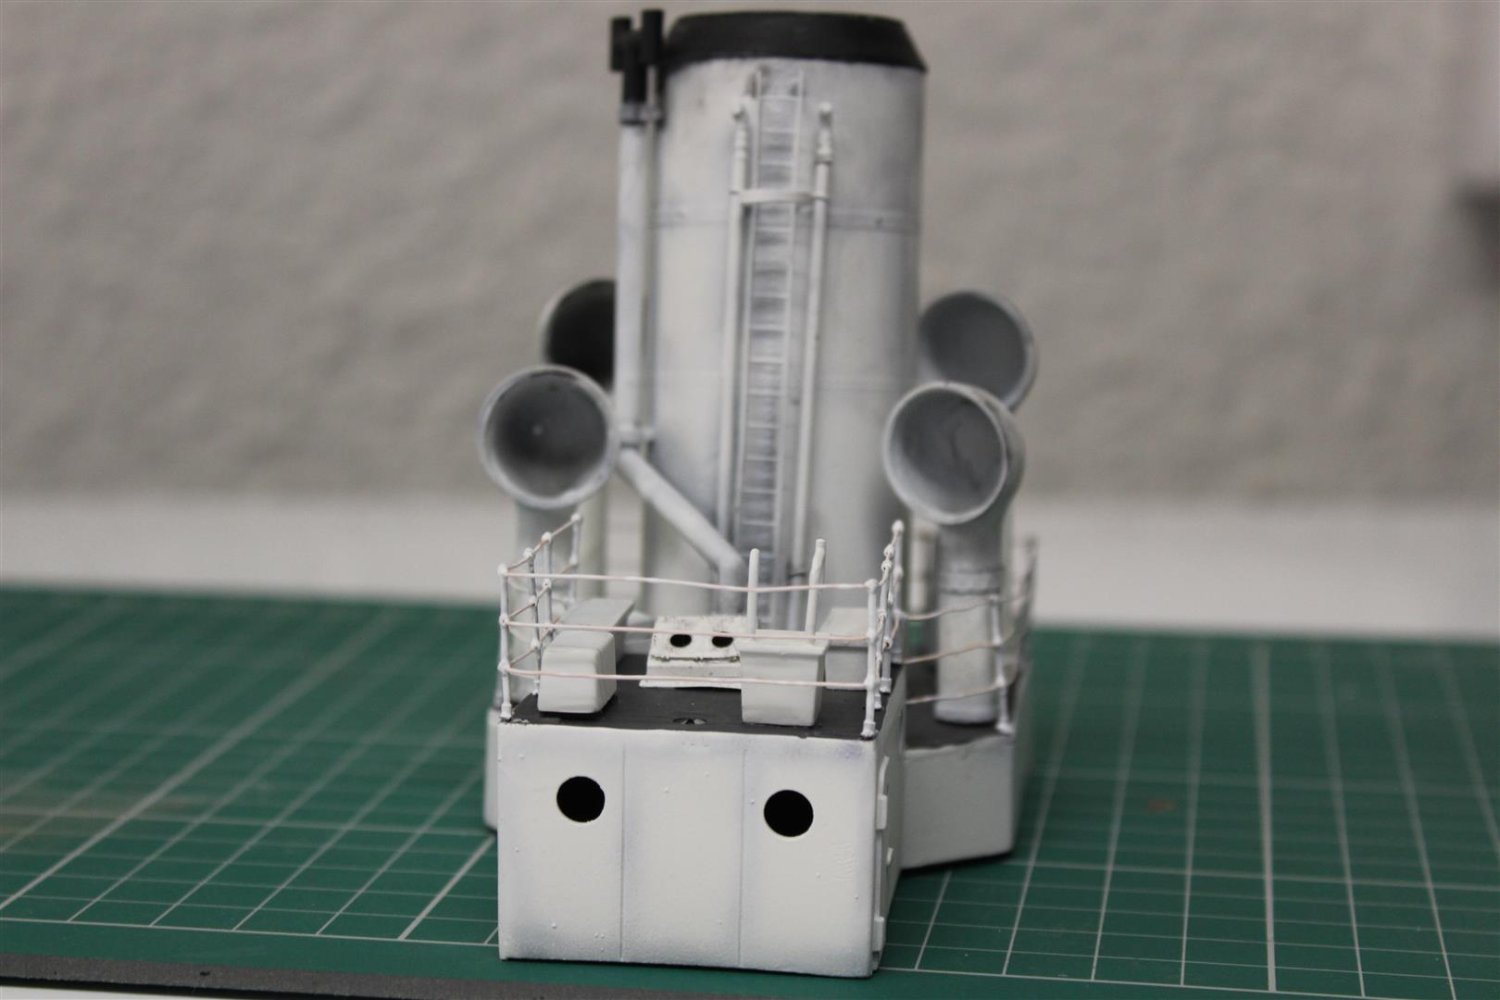
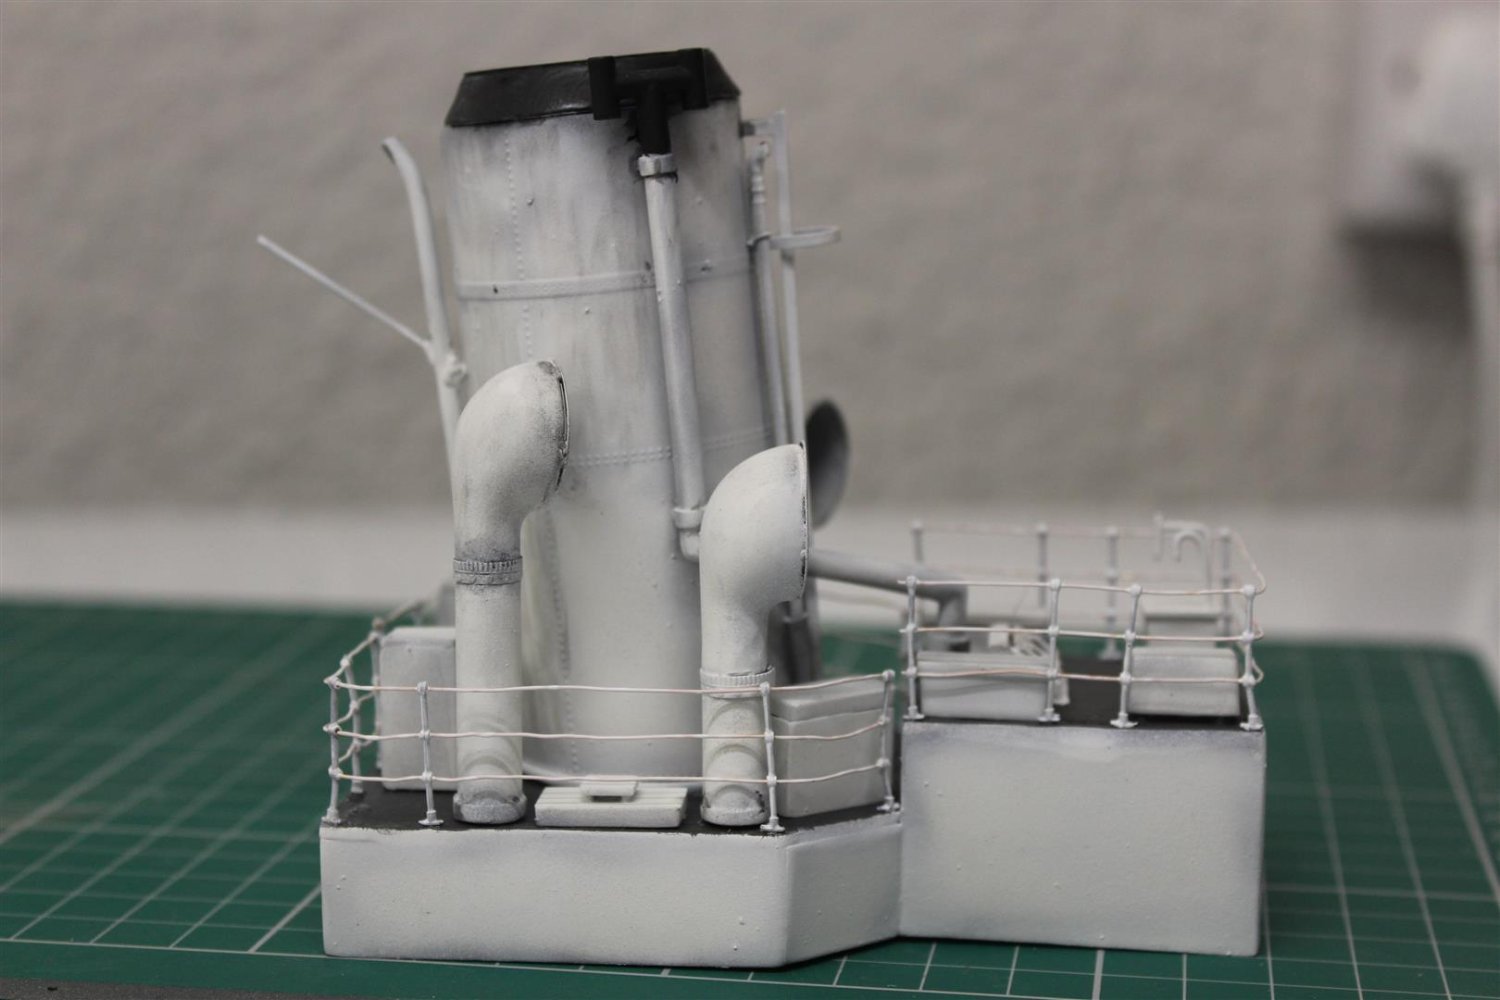
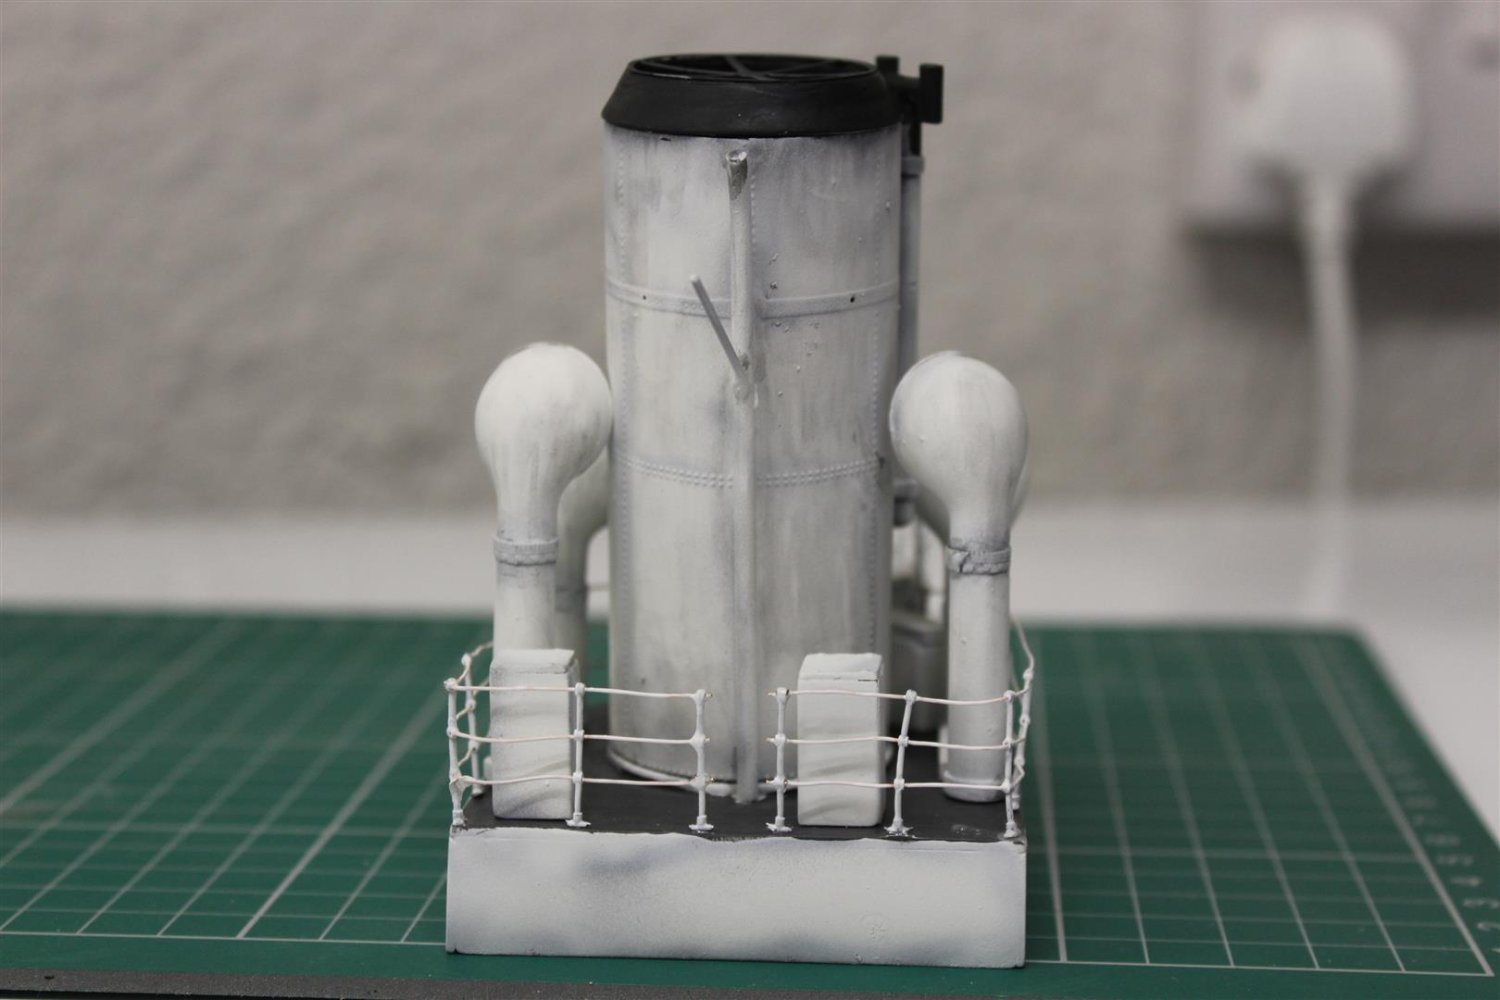
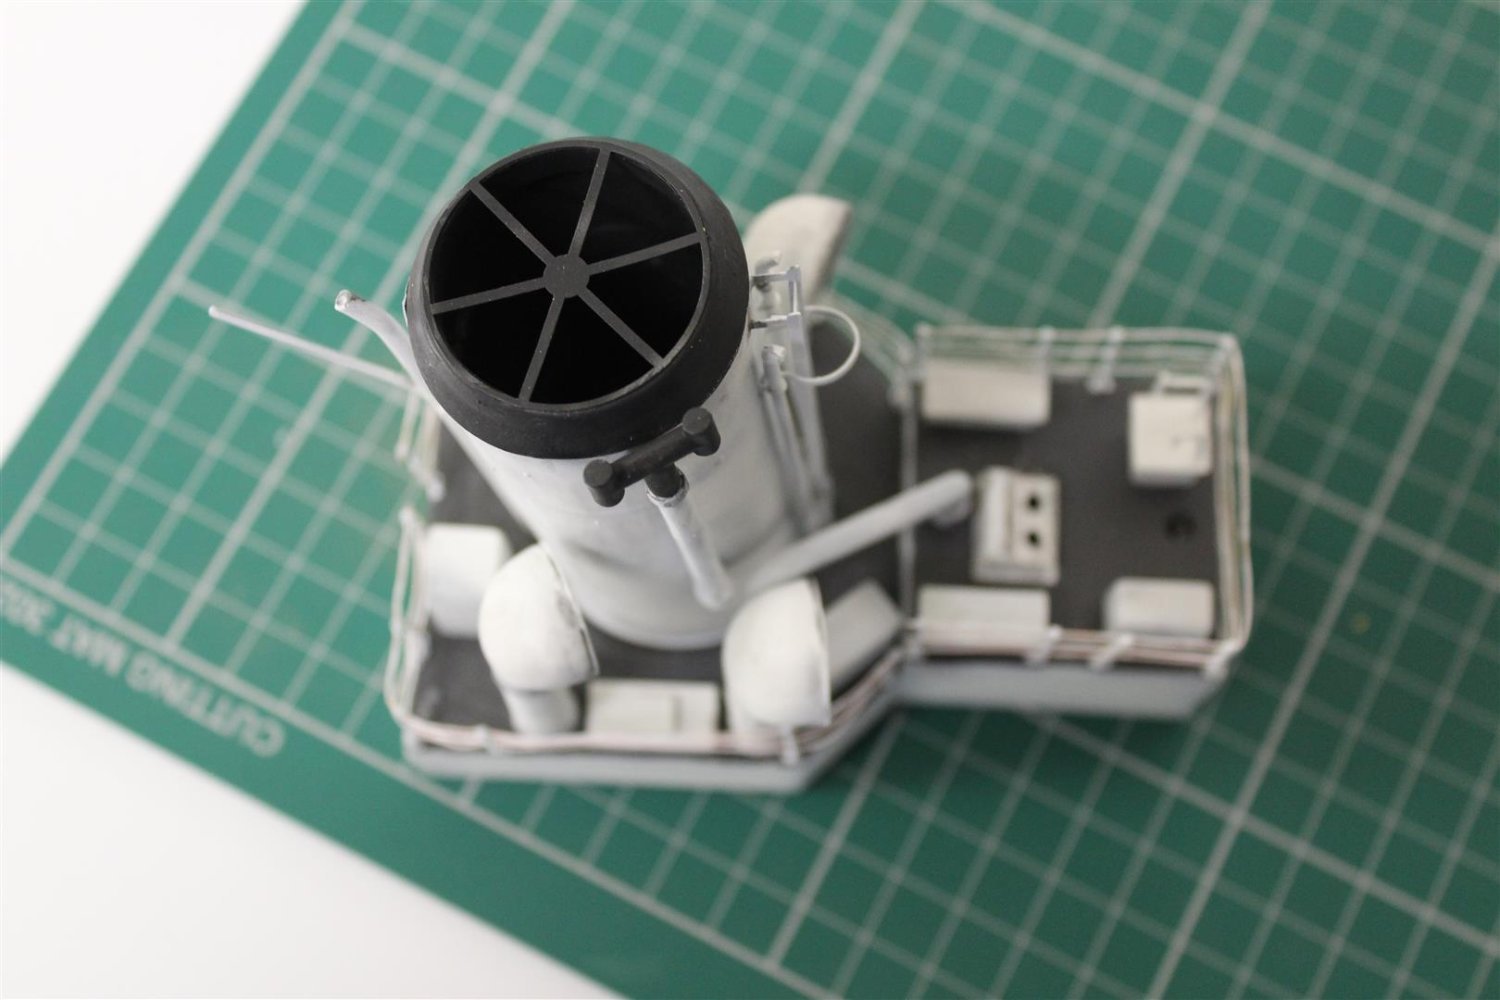
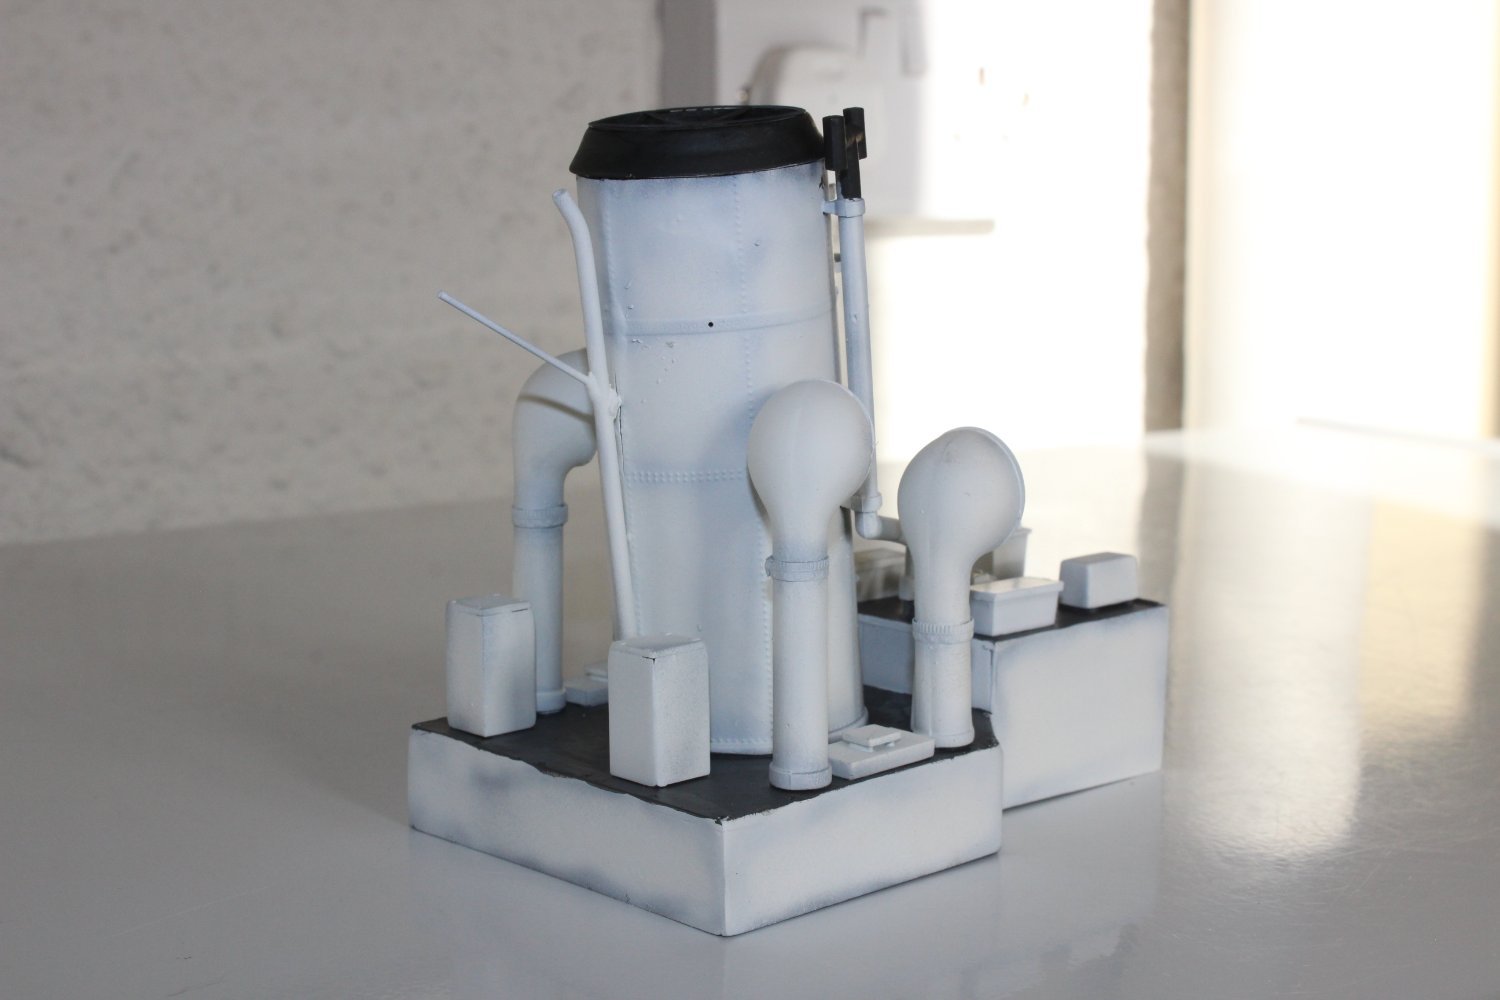
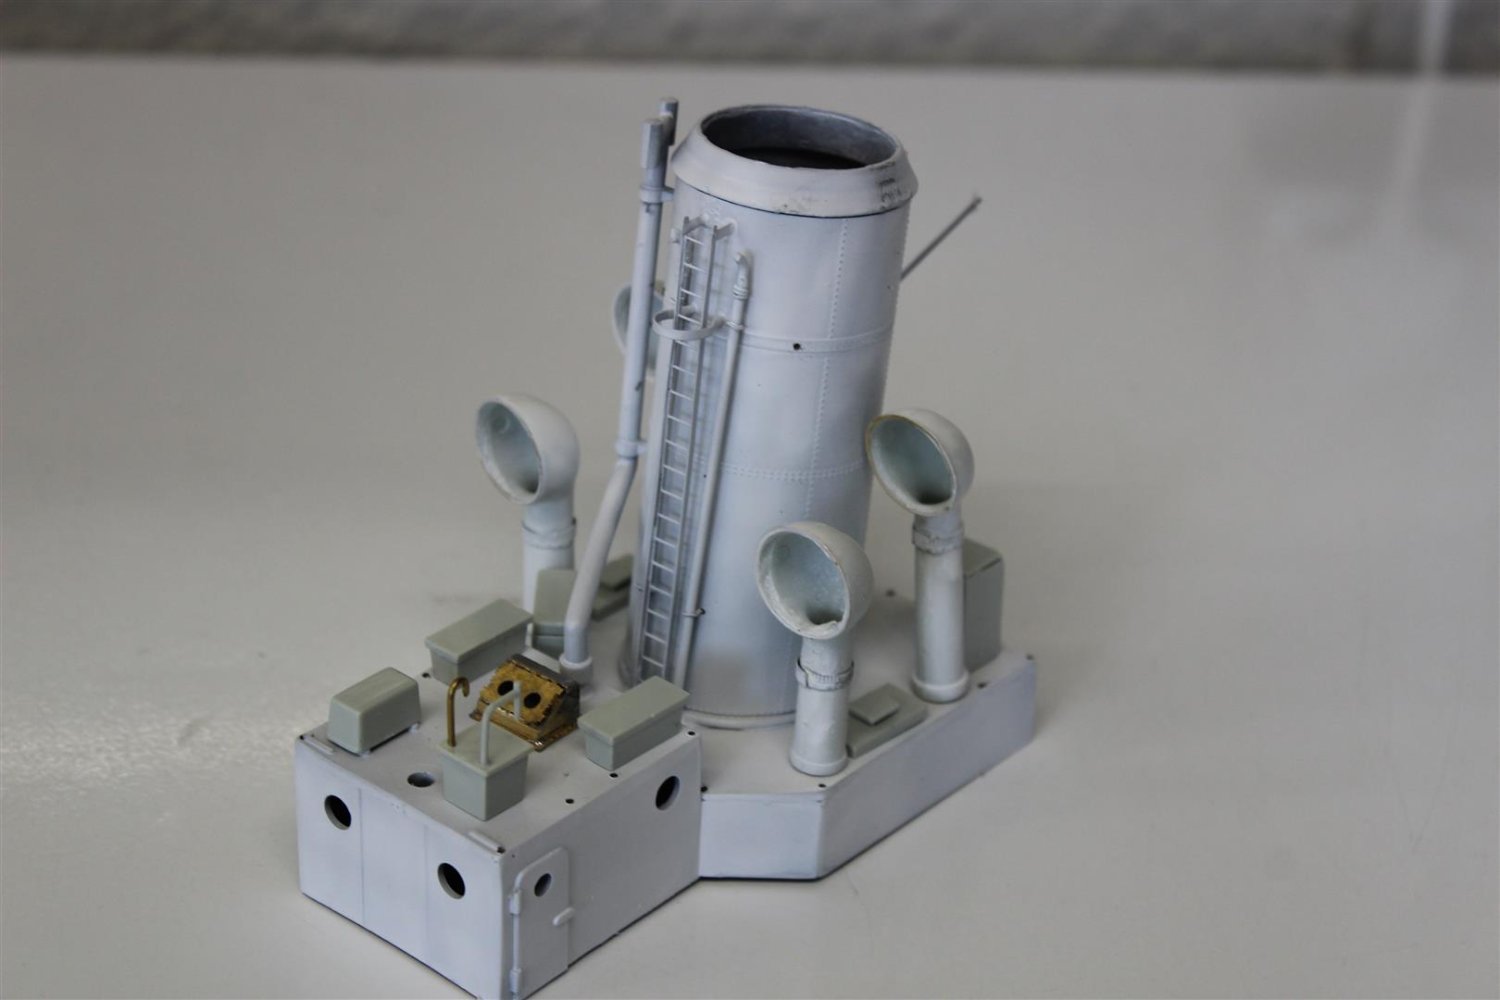
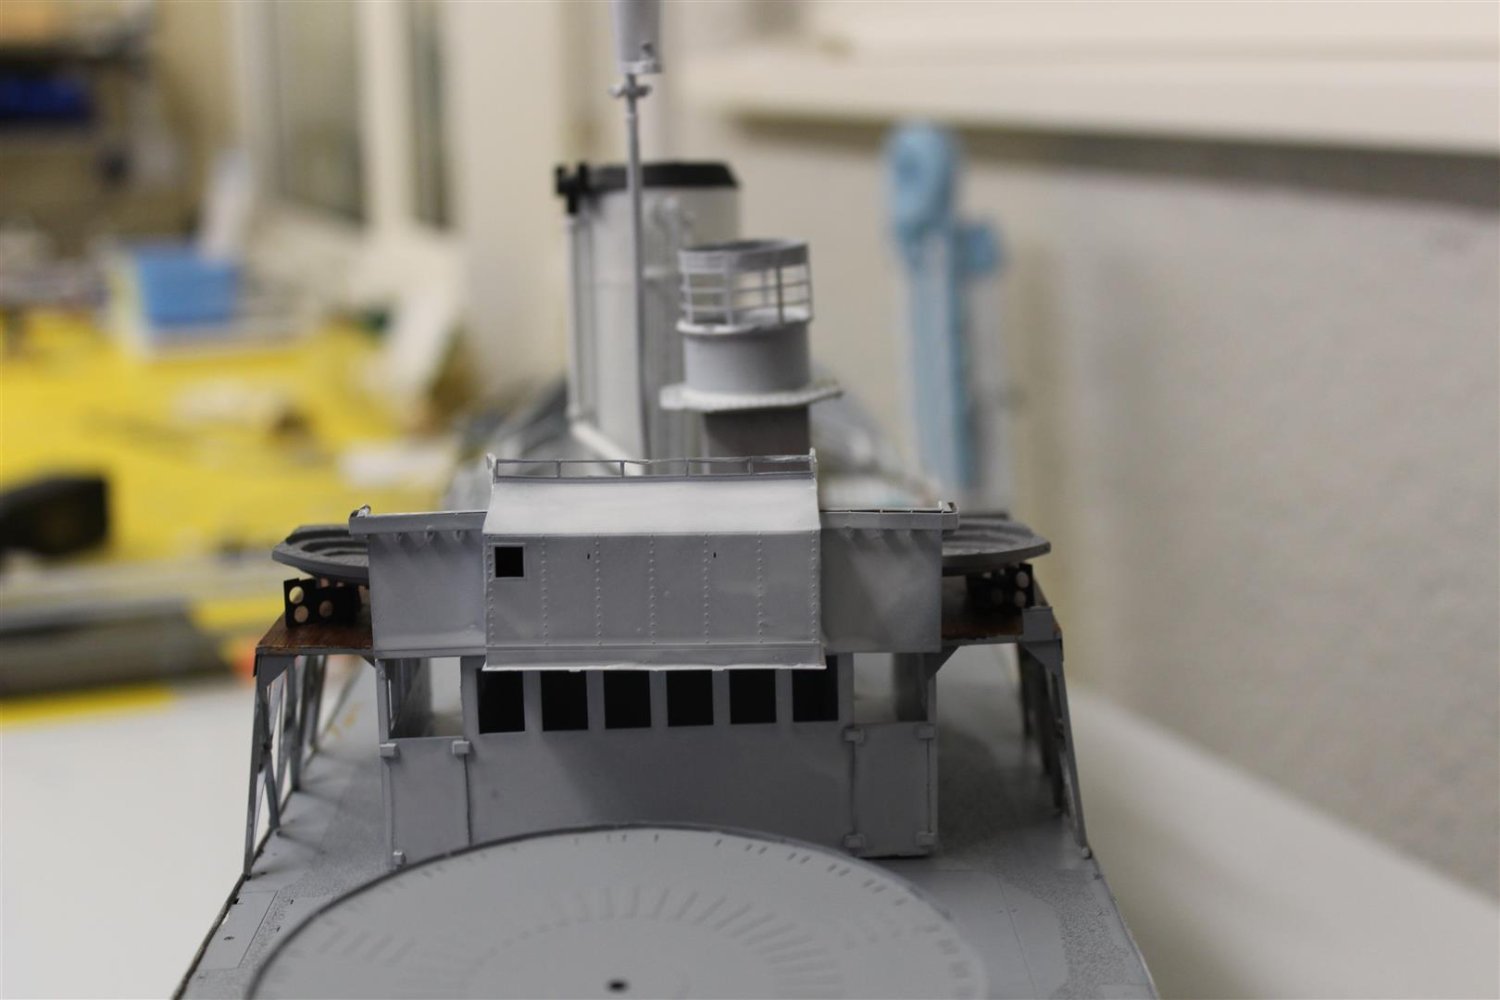
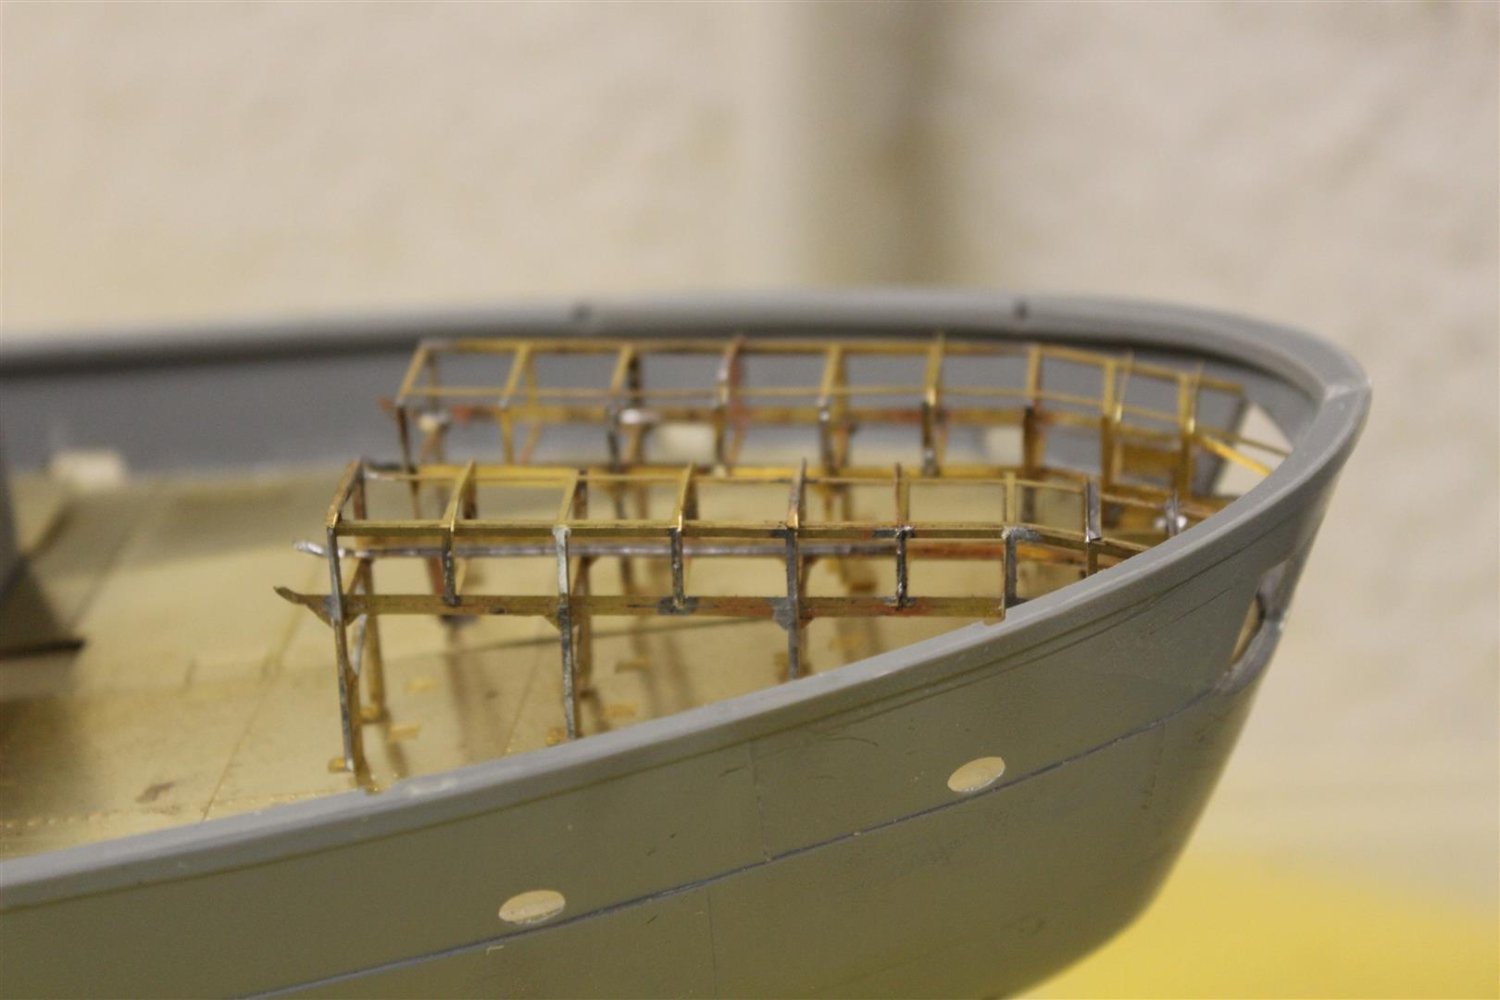
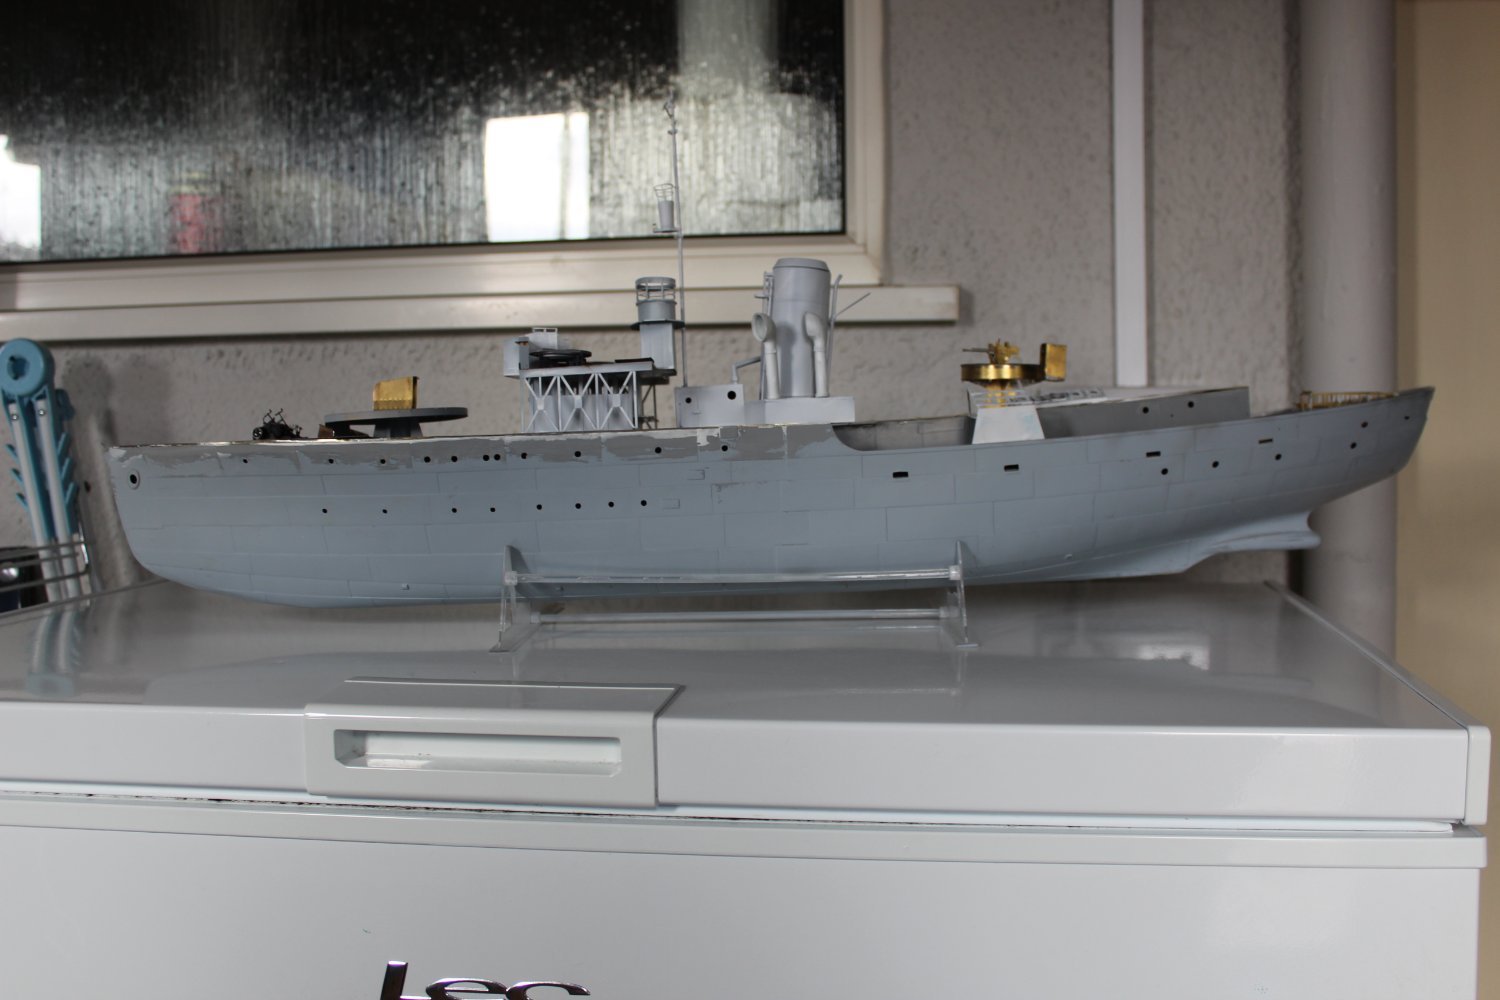
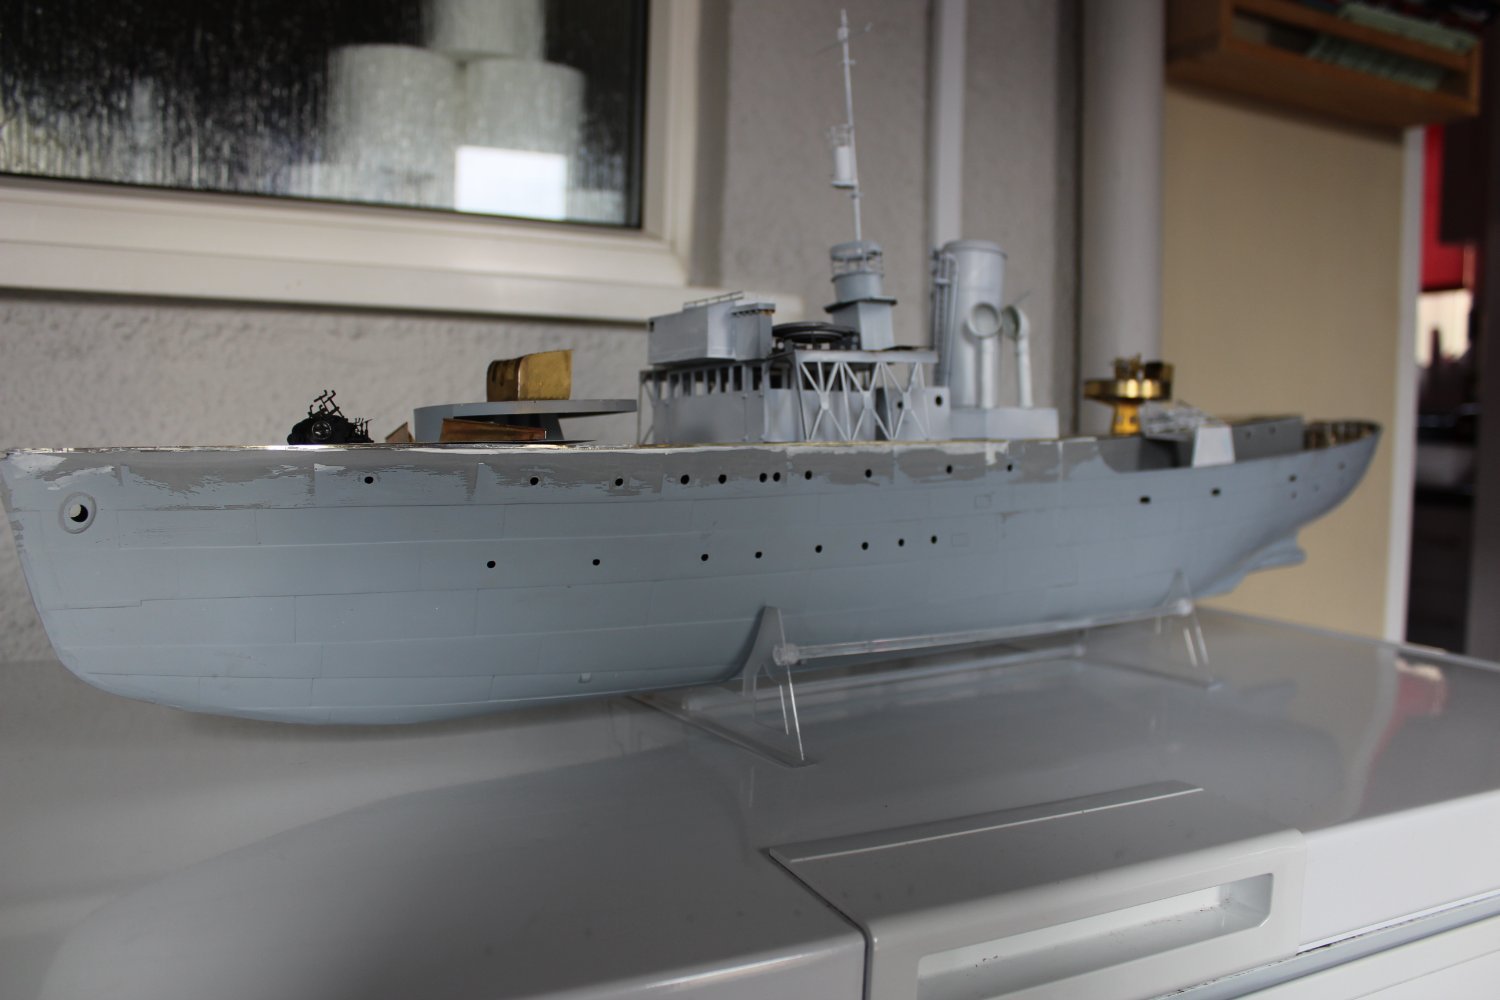
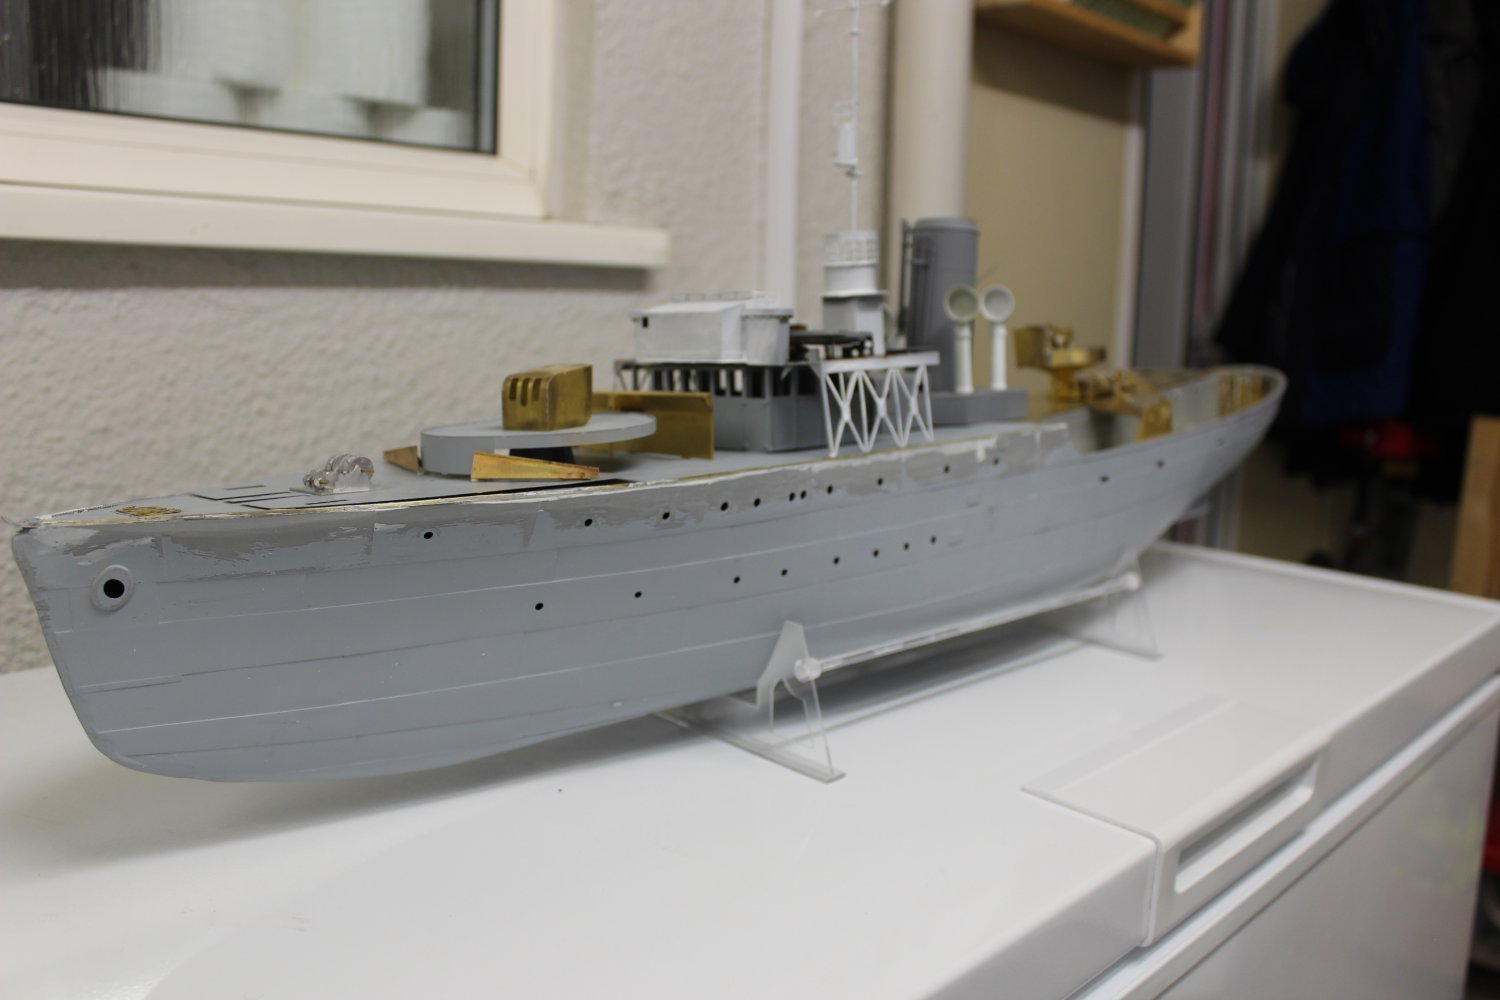
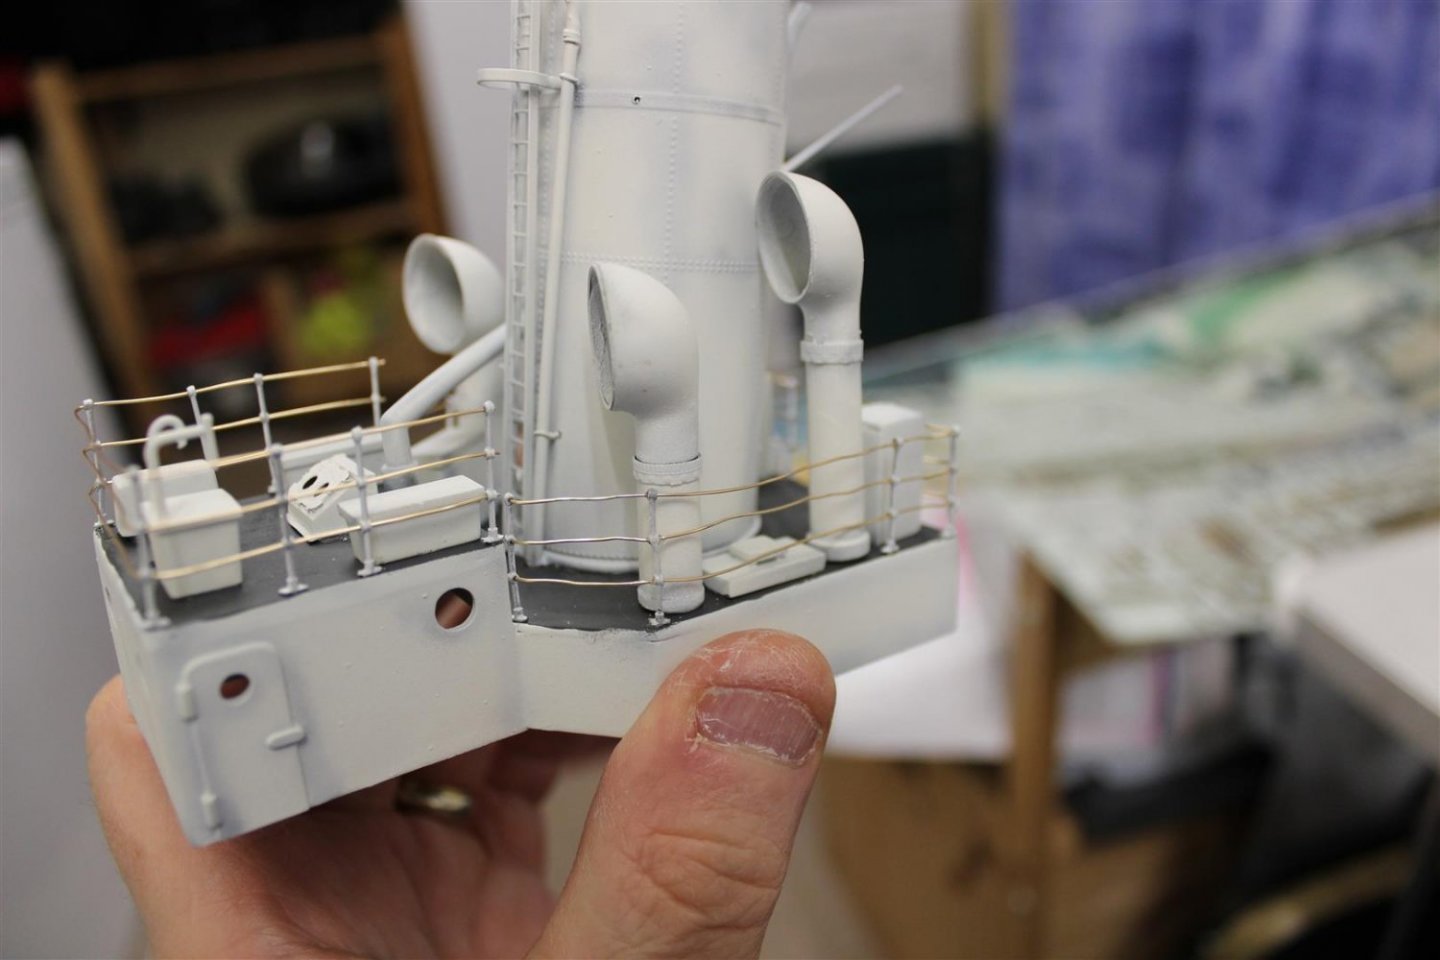
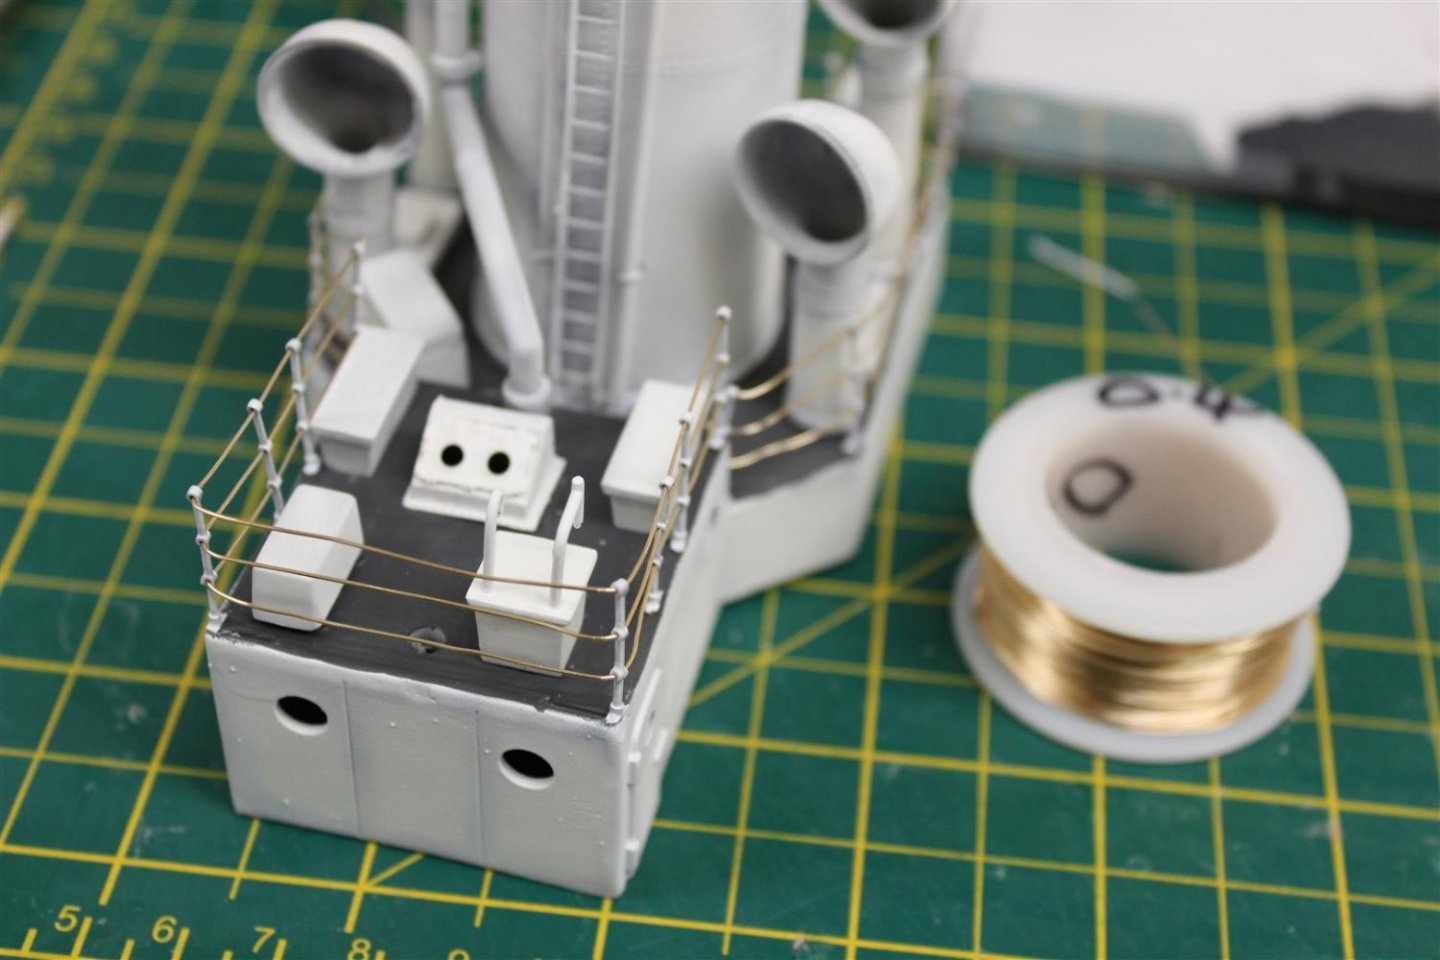
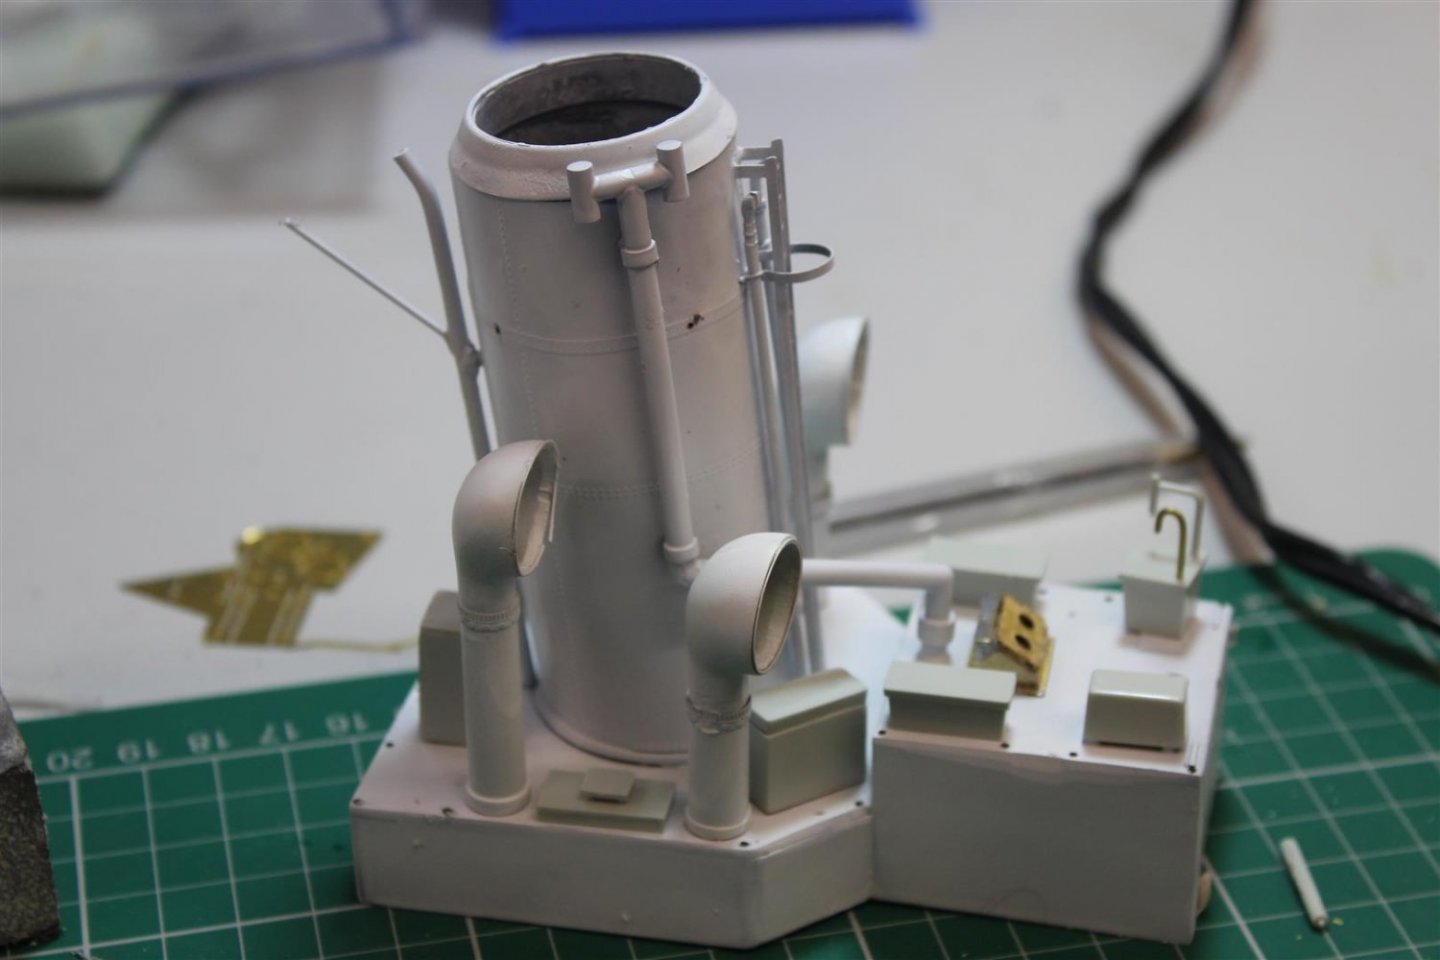
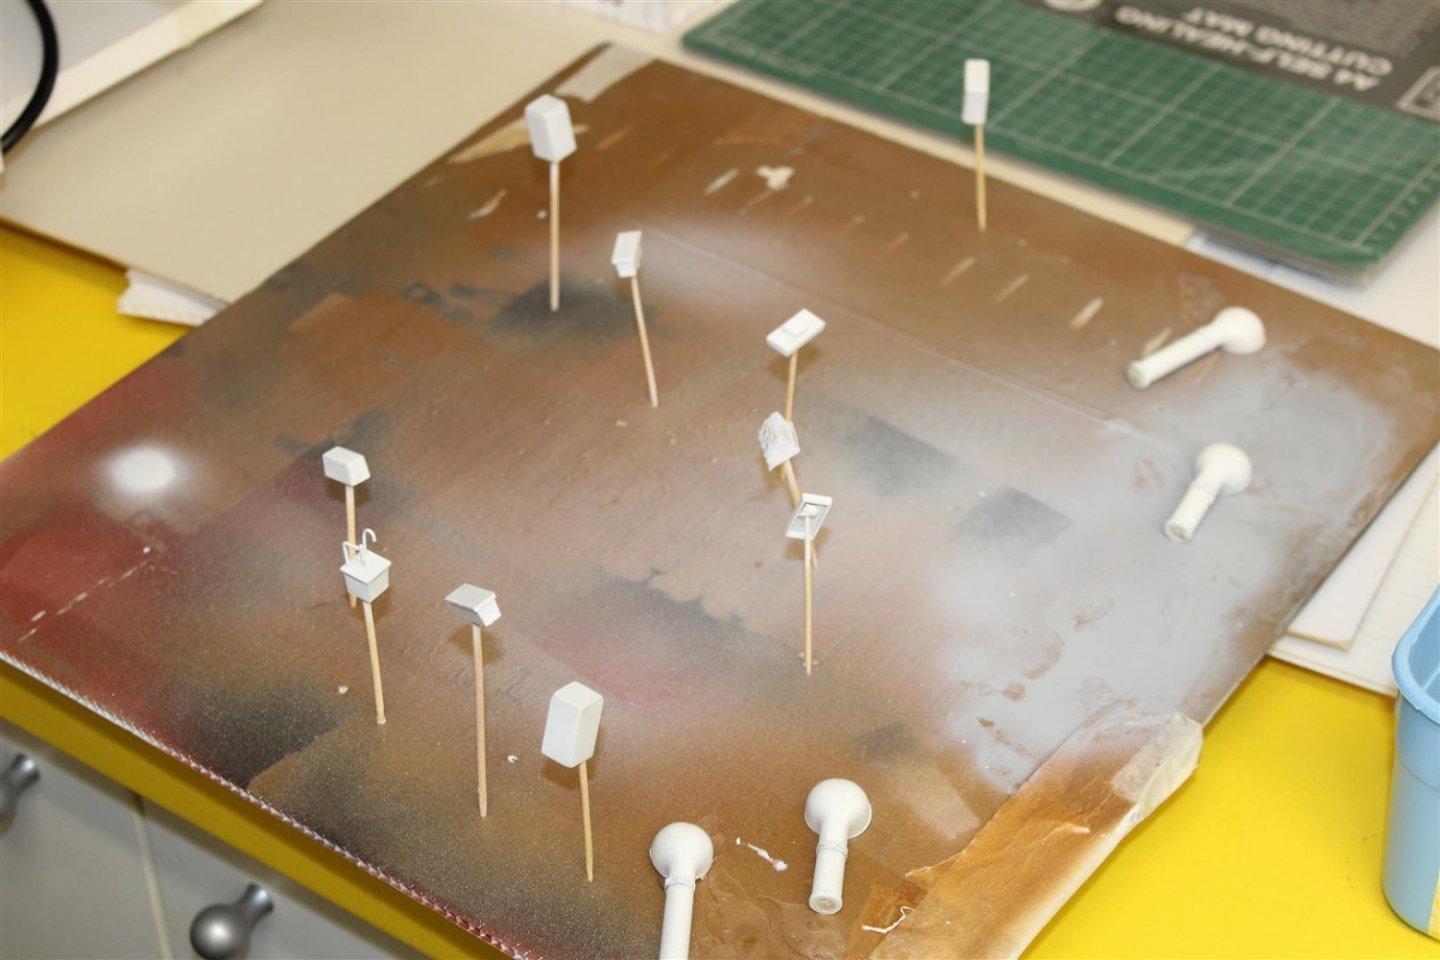
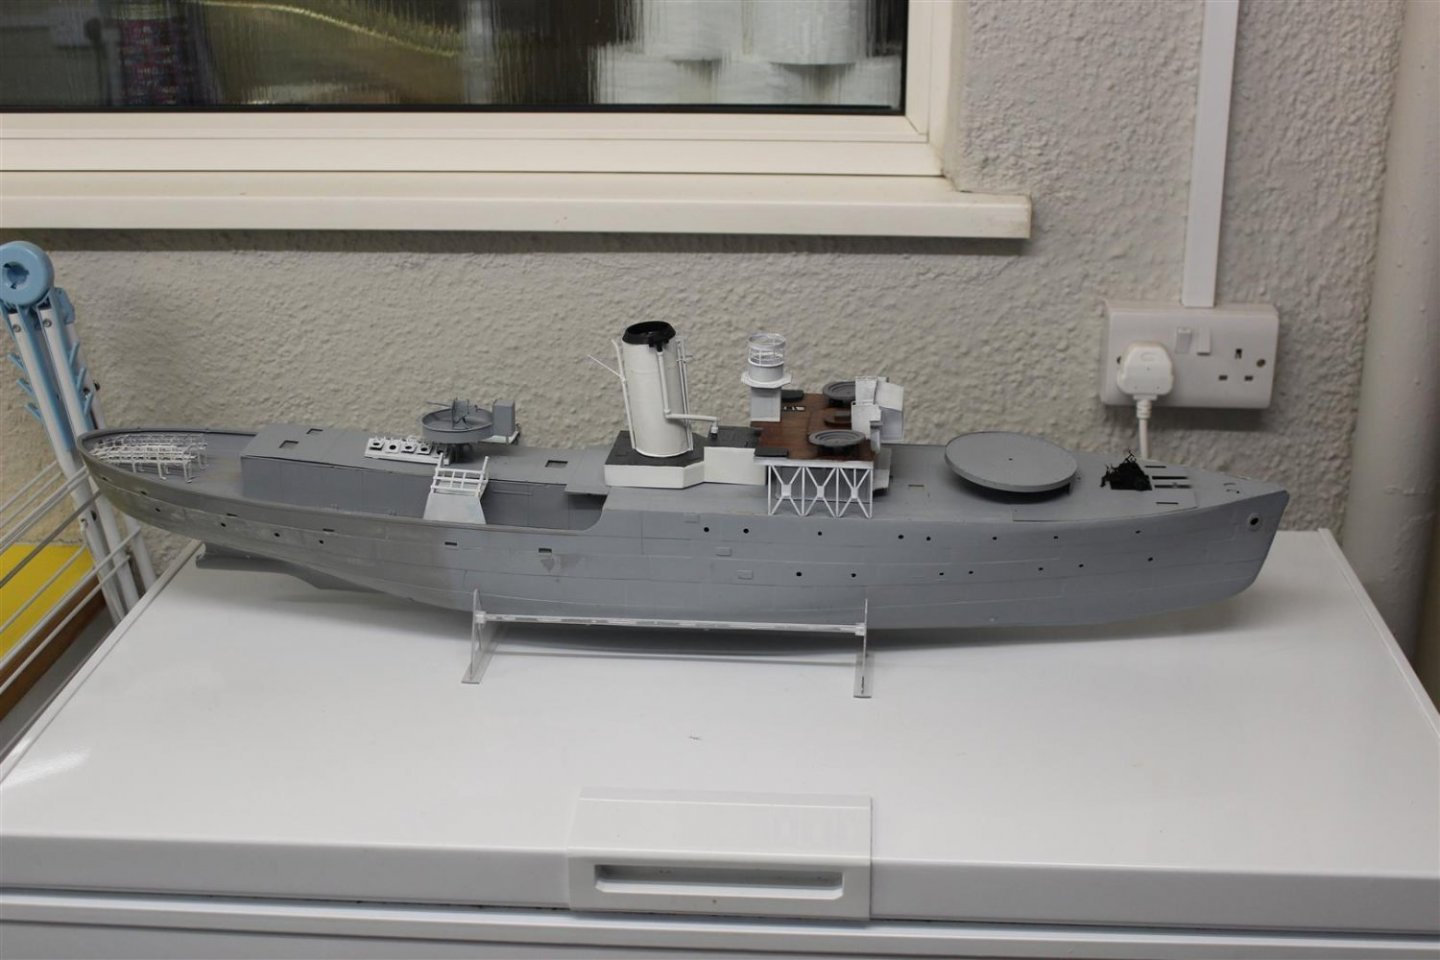
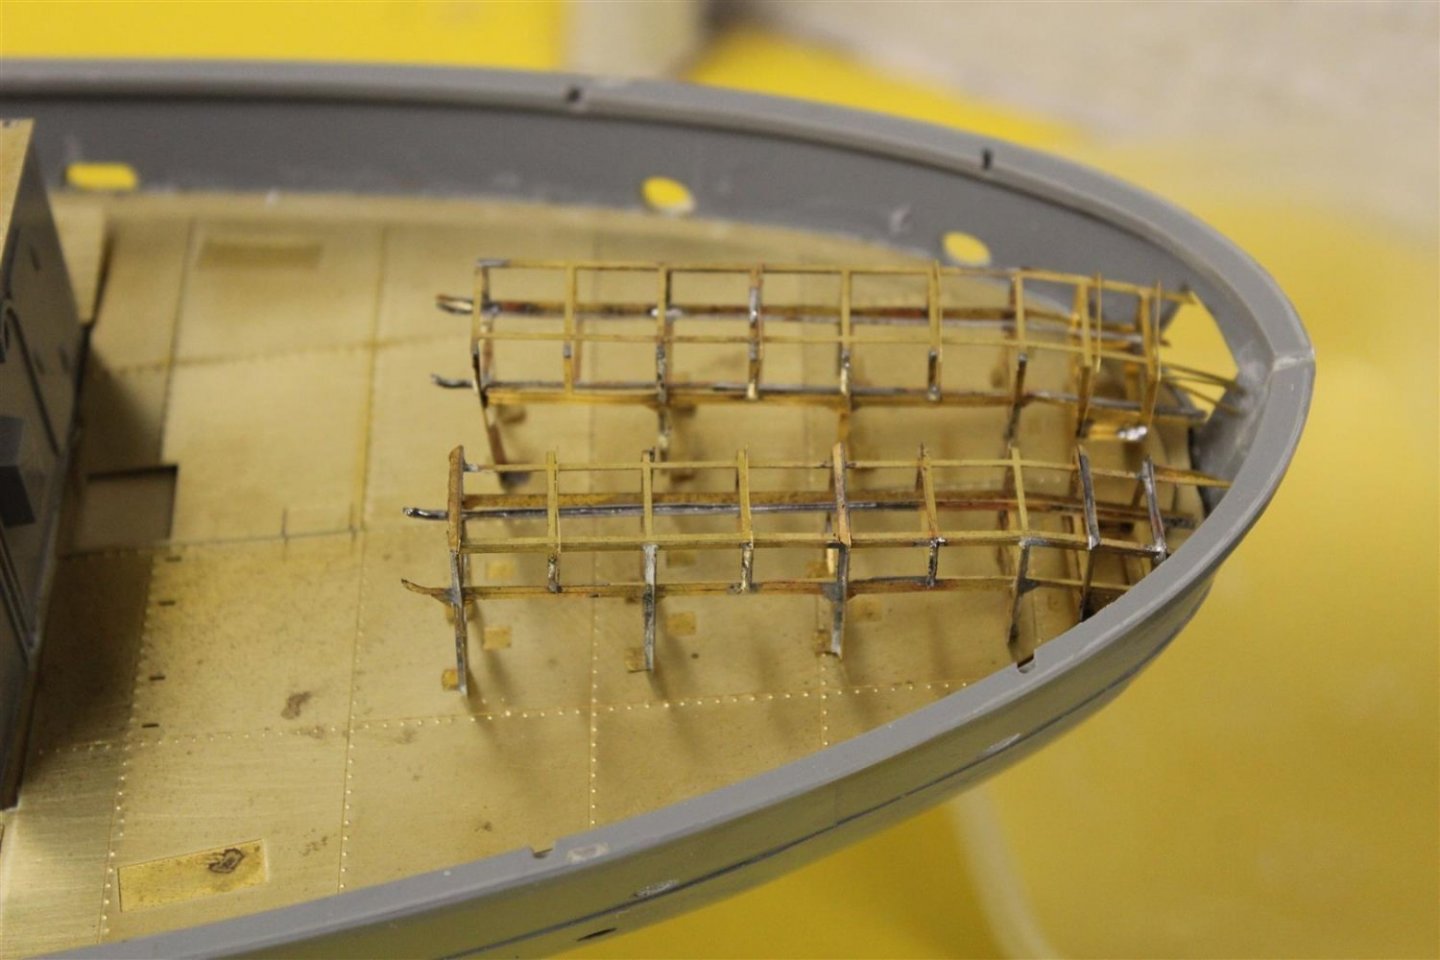
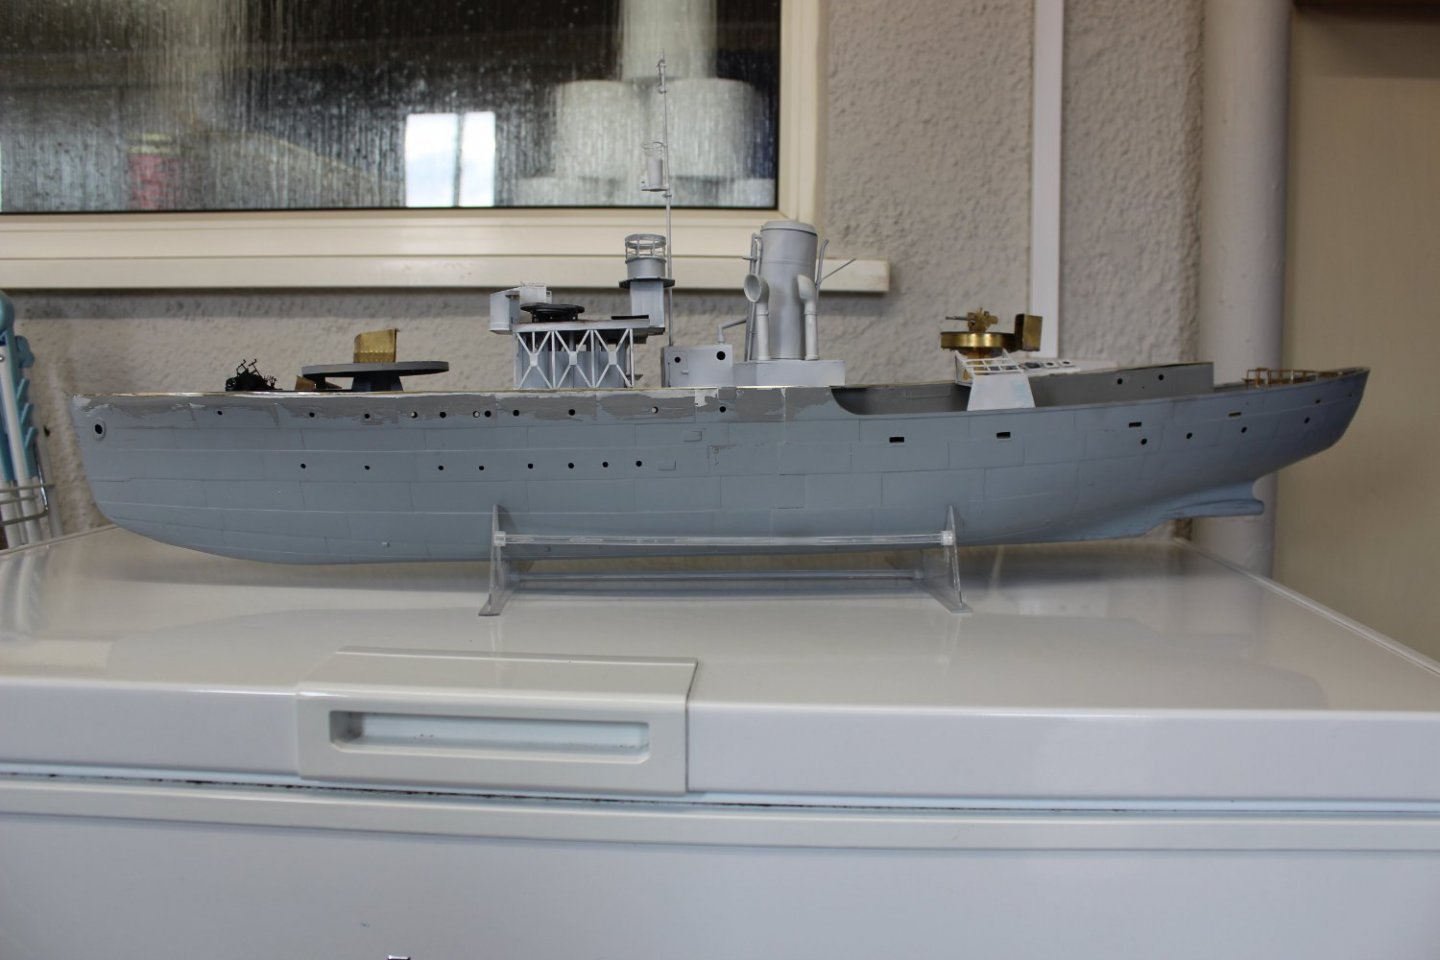
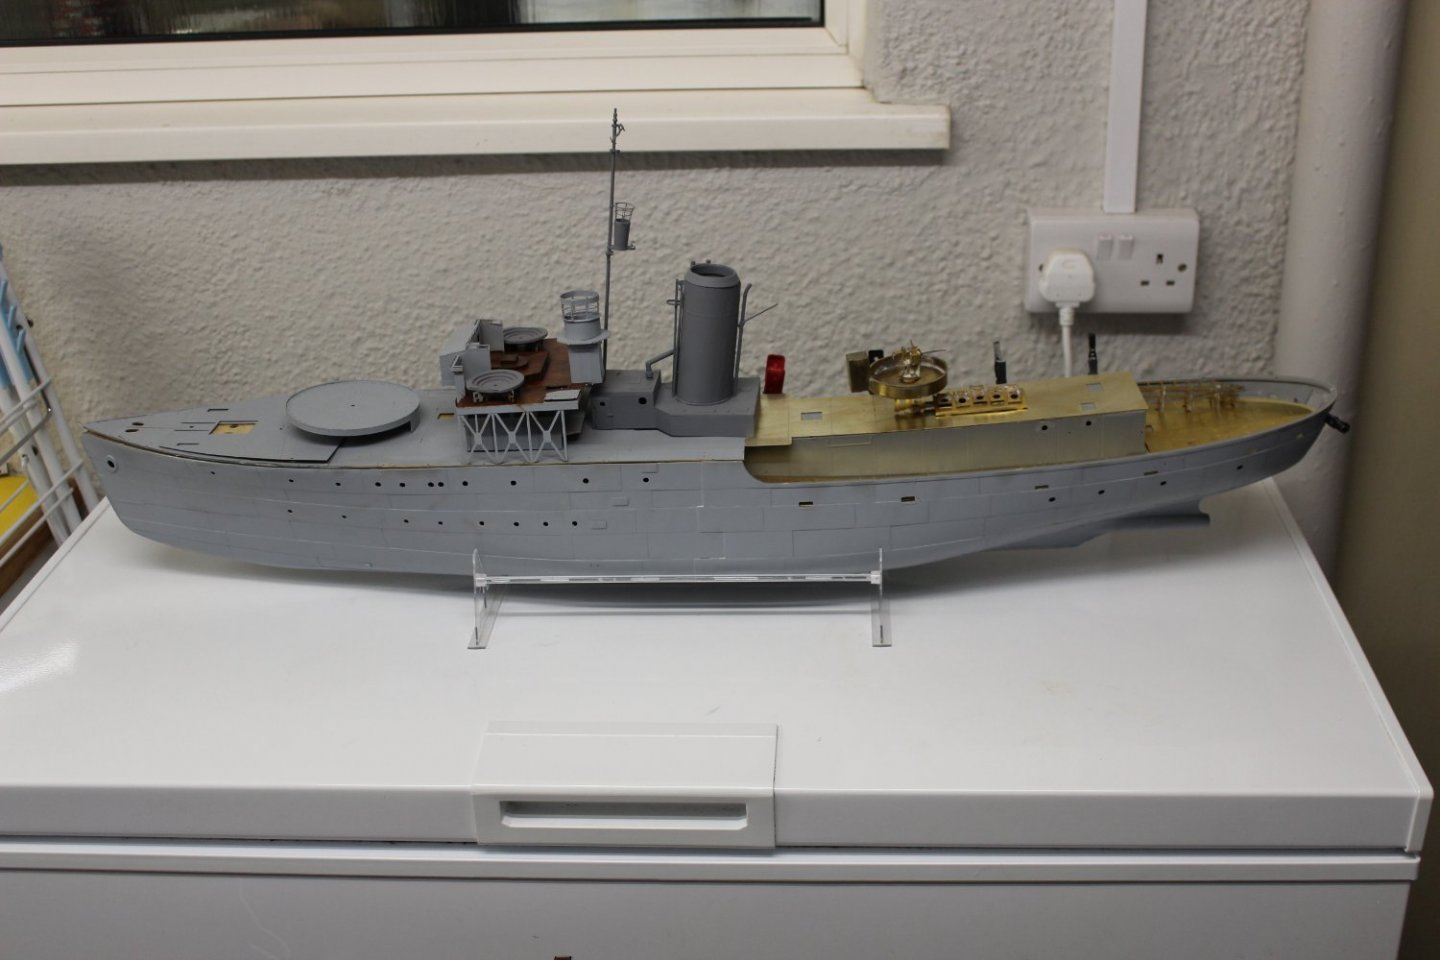
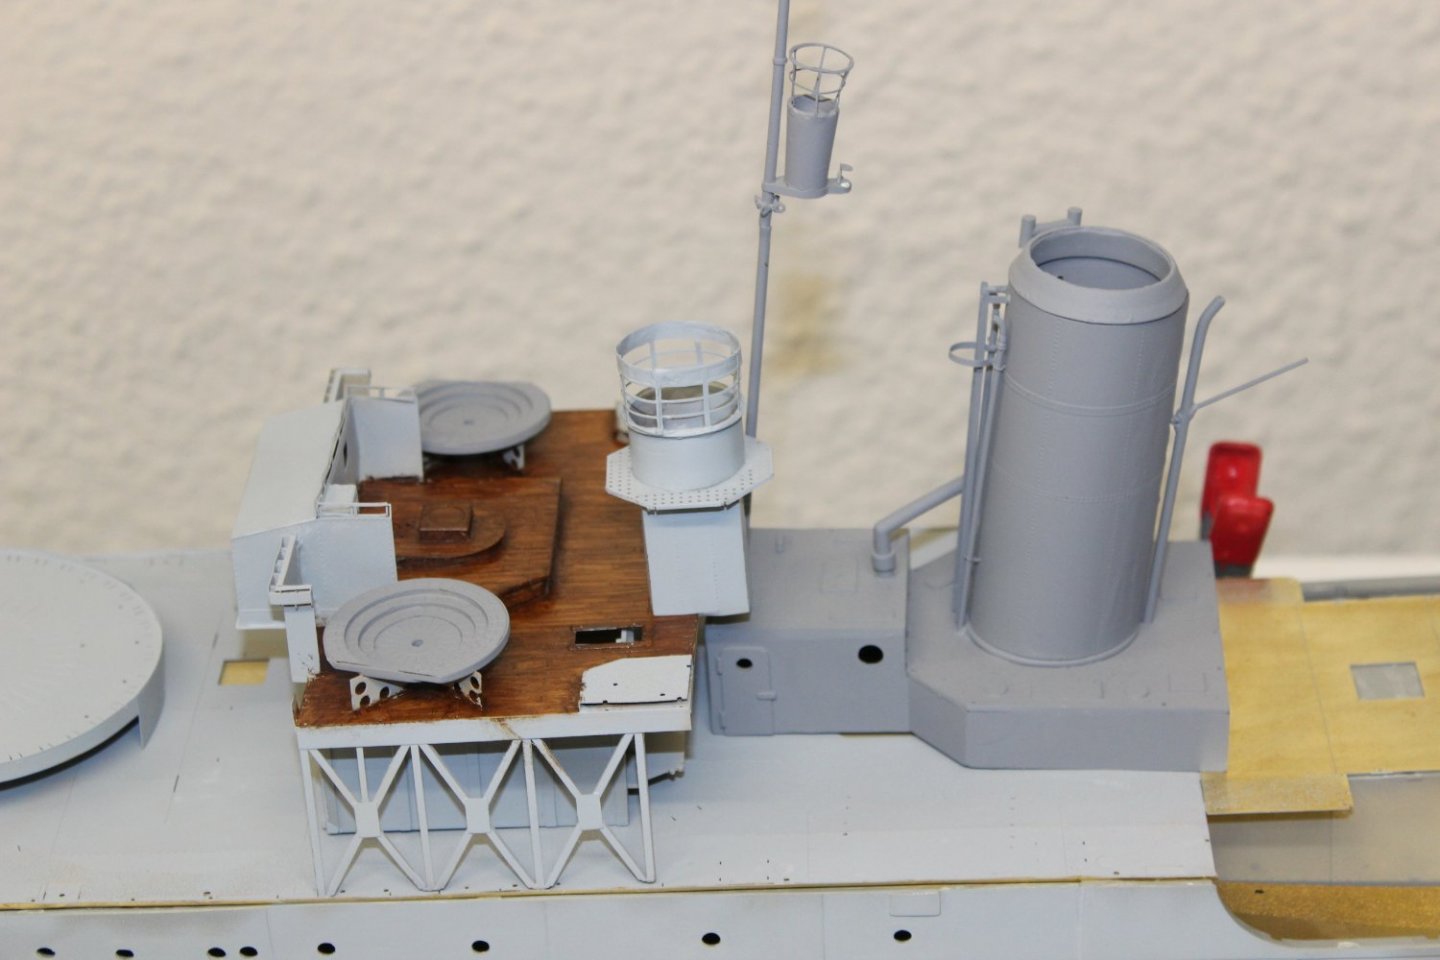
good evening everyone, thank you for comments and likes i have had a couple of days off, to do some DIY, lots planned for this year this evening i completed the railings and did a bit of weathering on the funnel assy, tomorrow i will hopefully do the the funnel guy ropes and more patching up of the hull


-
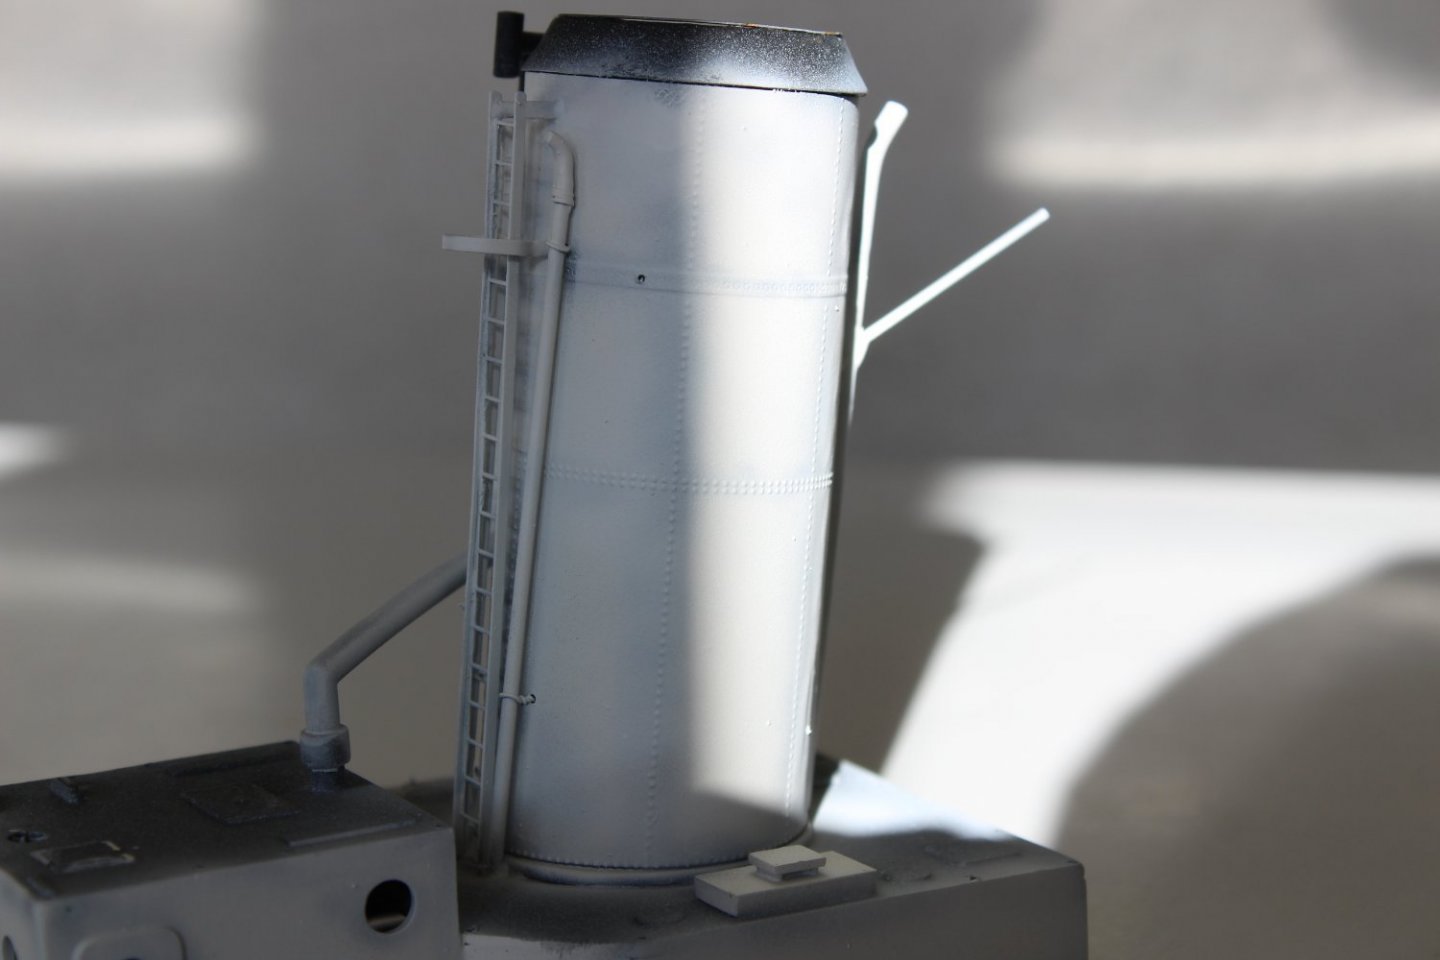
good evening everyone thank you for comments and likes back to basics and tried some pre-shading (could do better)


-
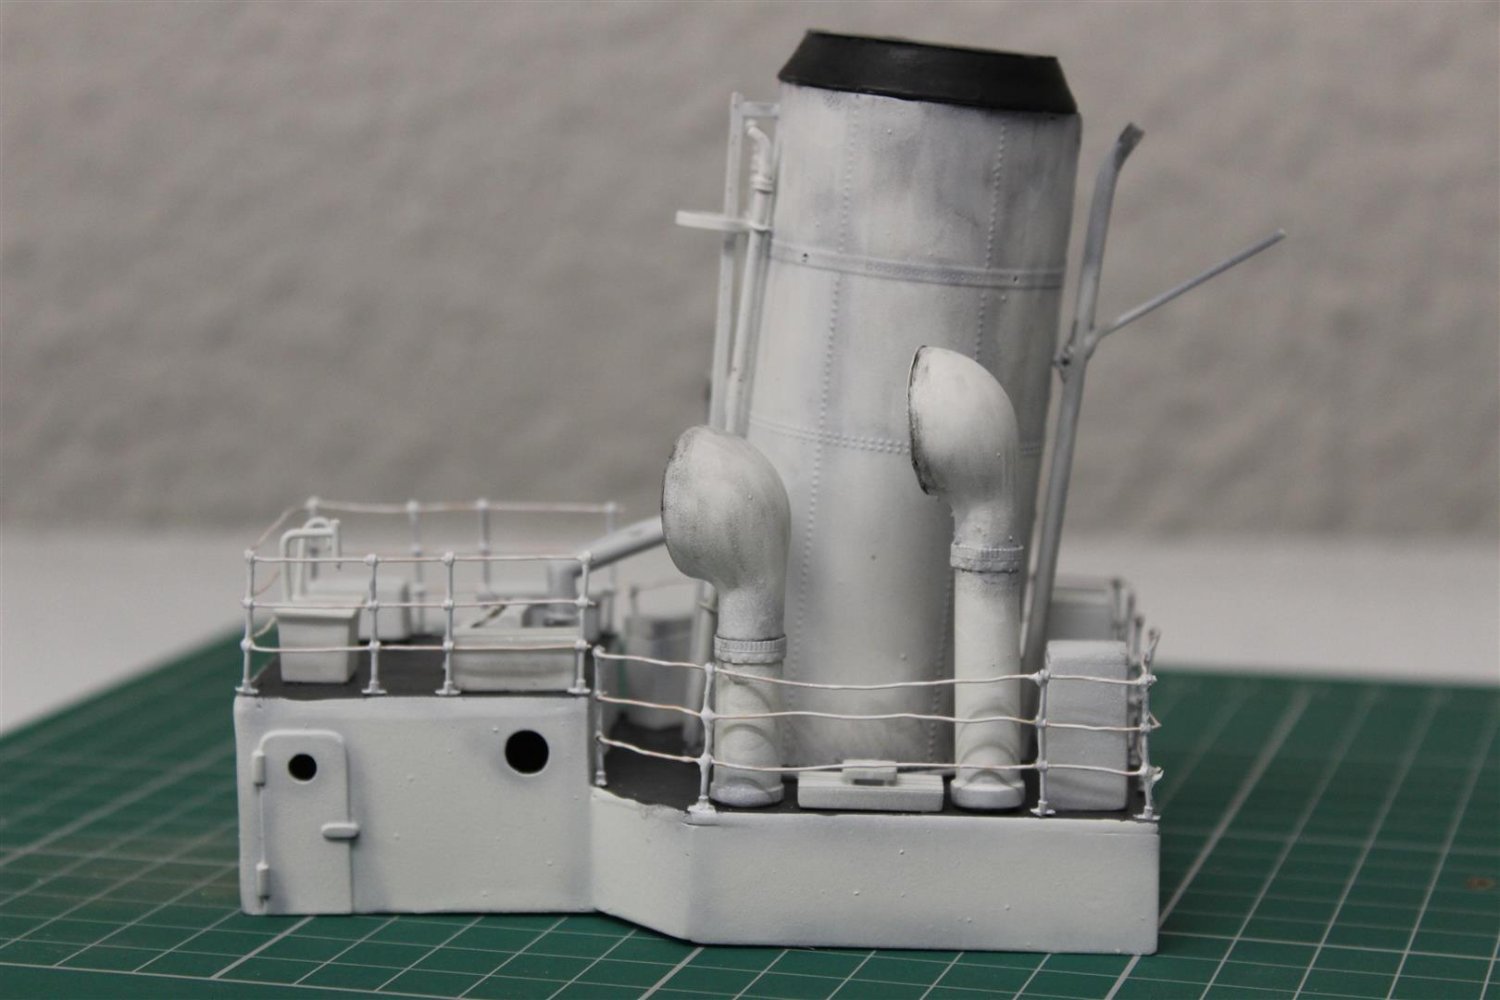
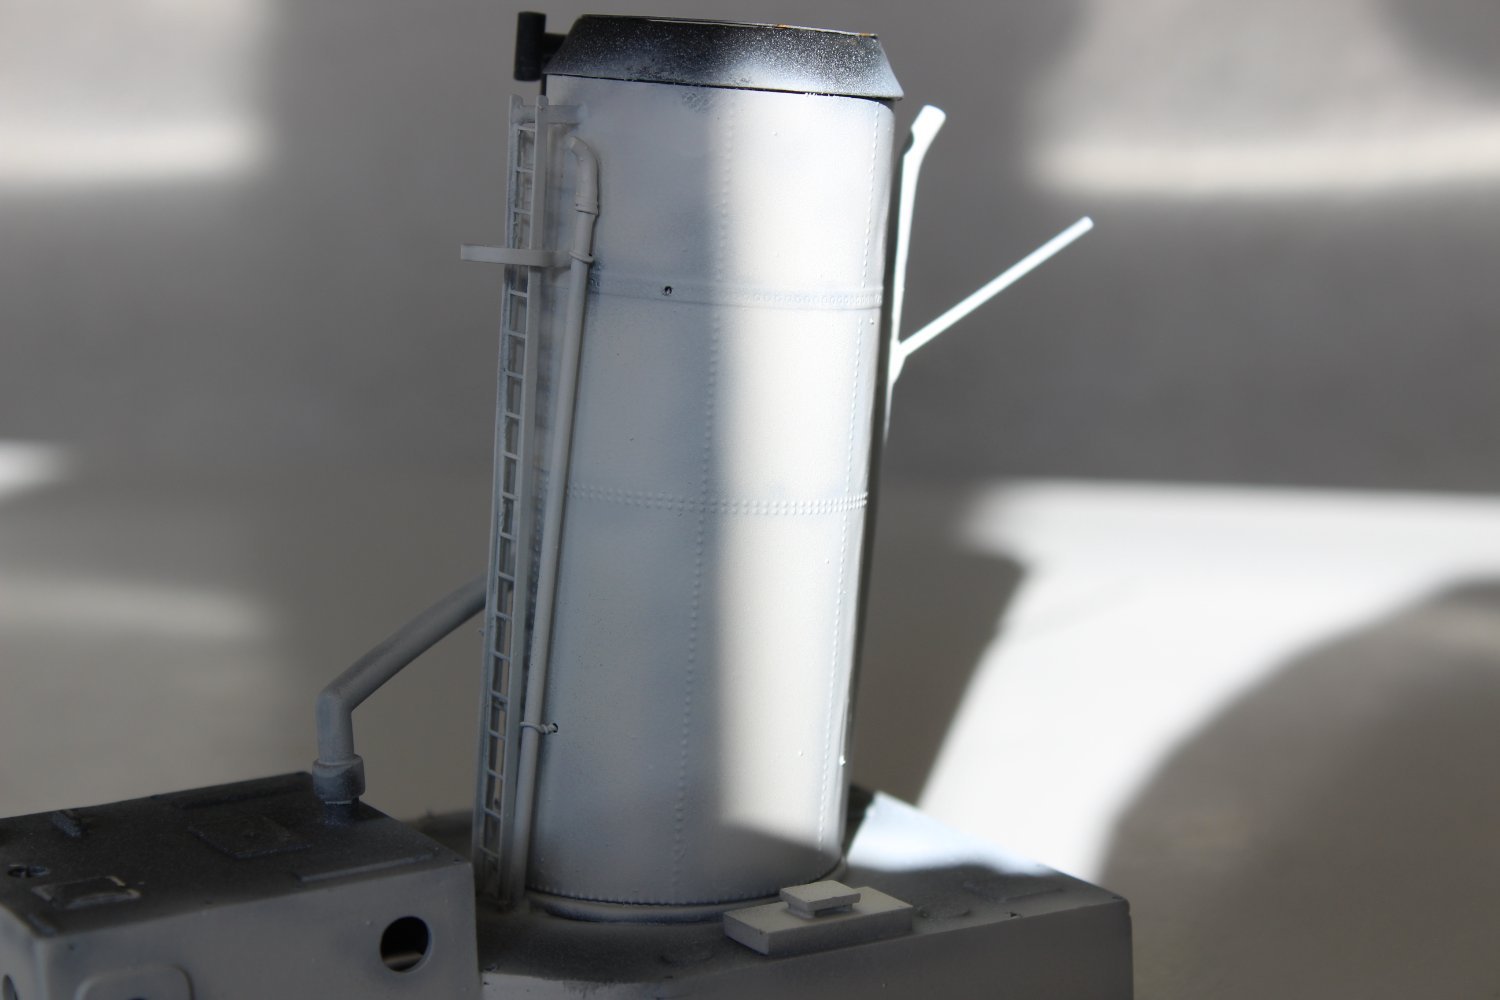
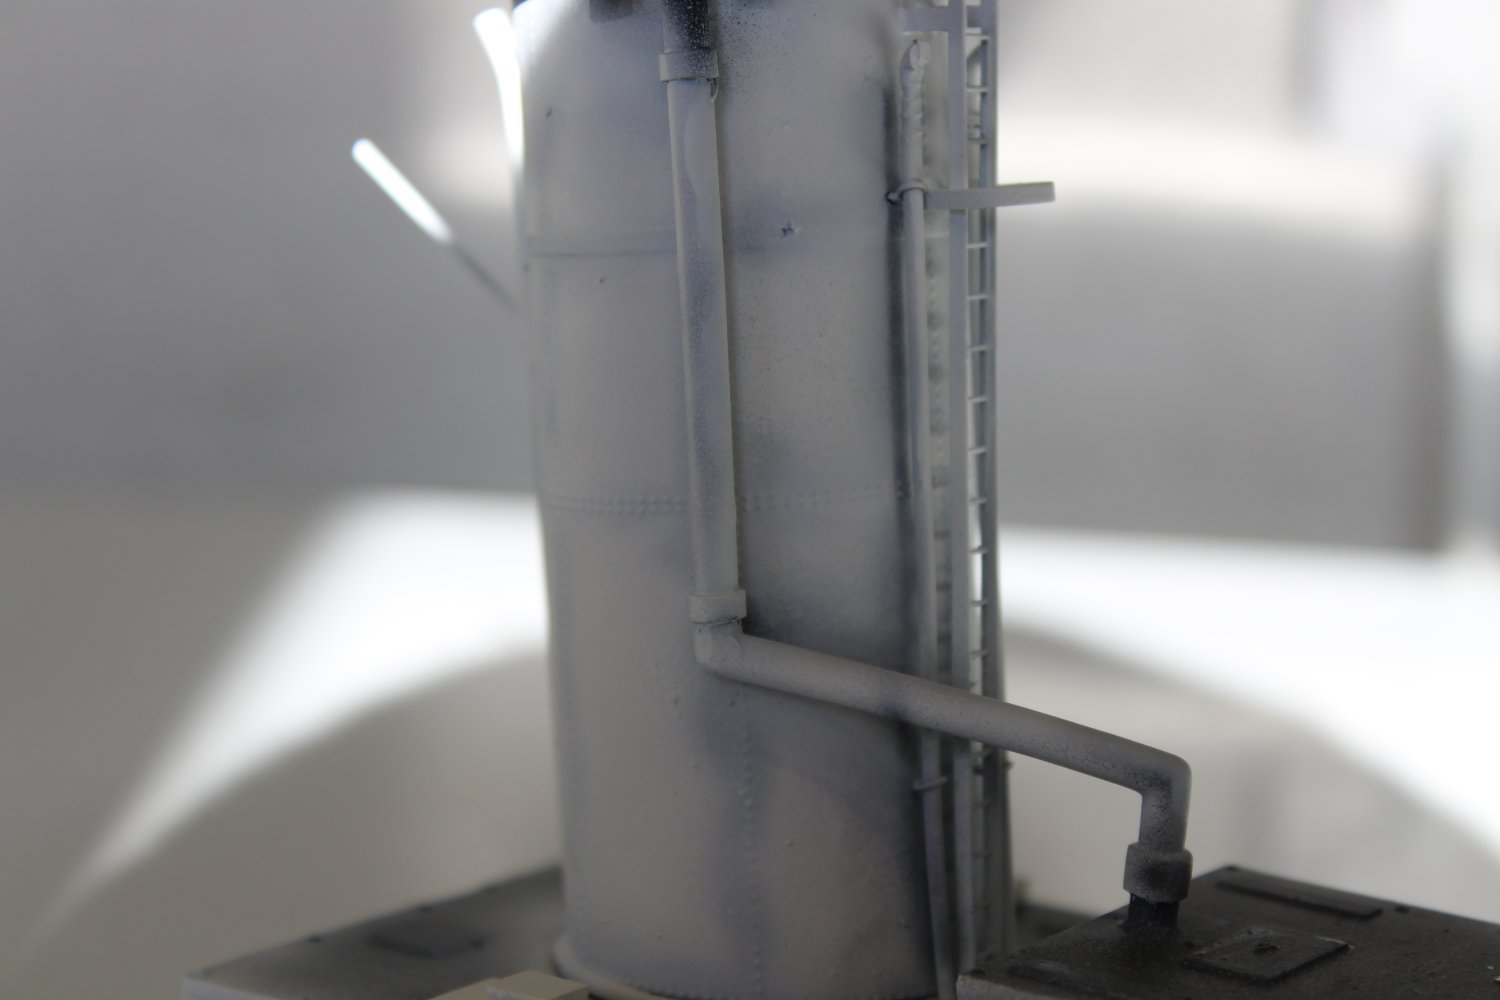
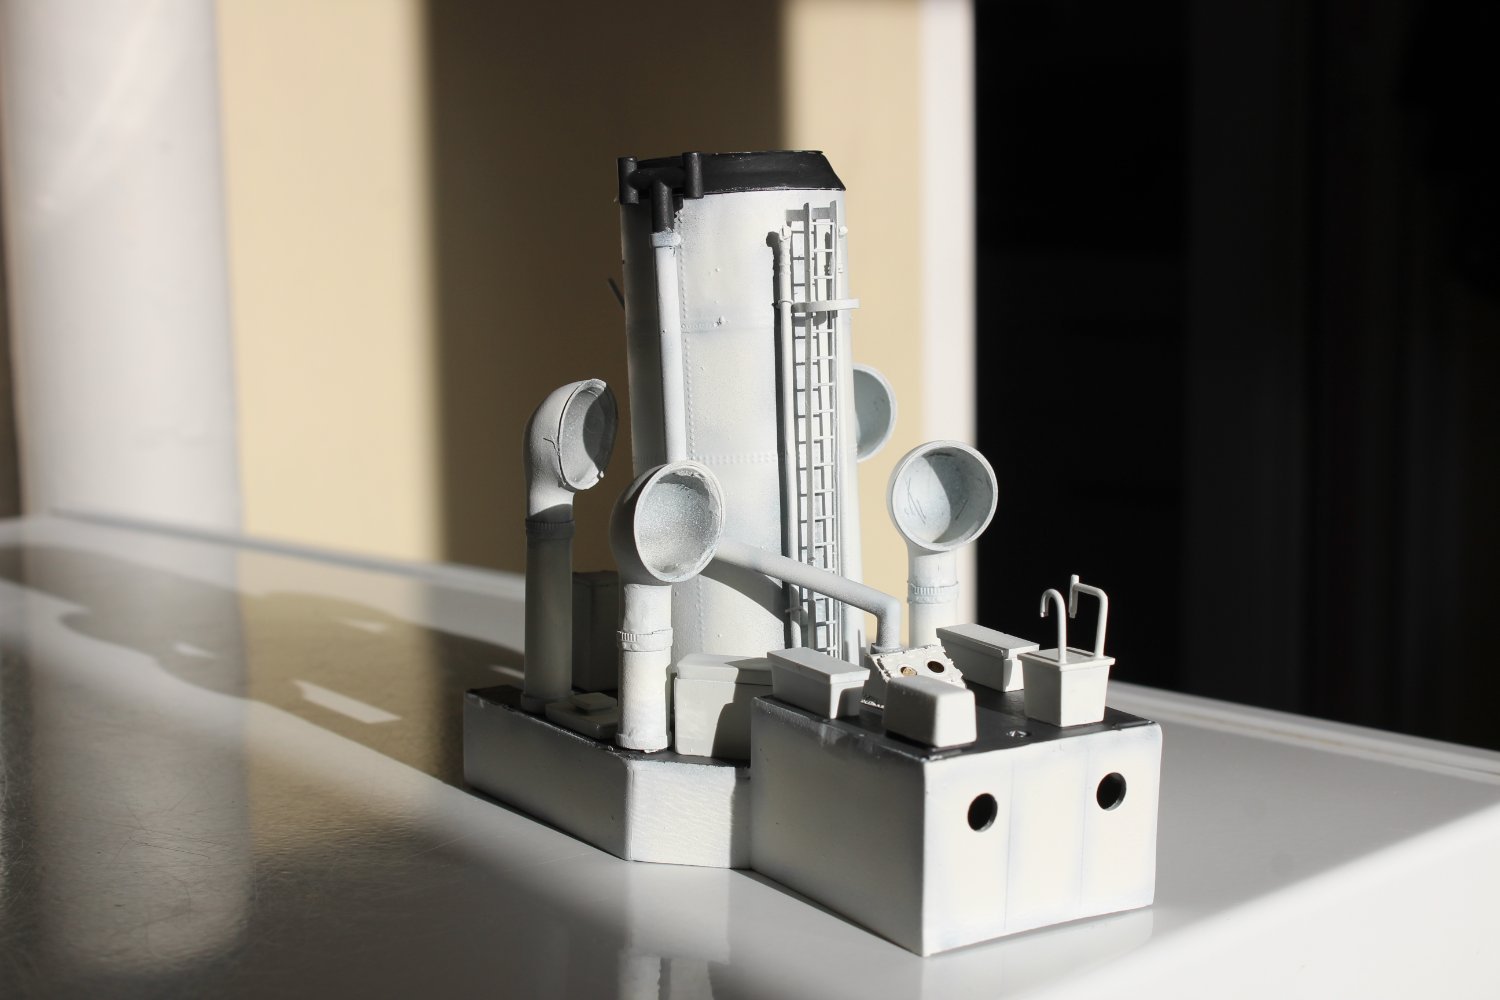
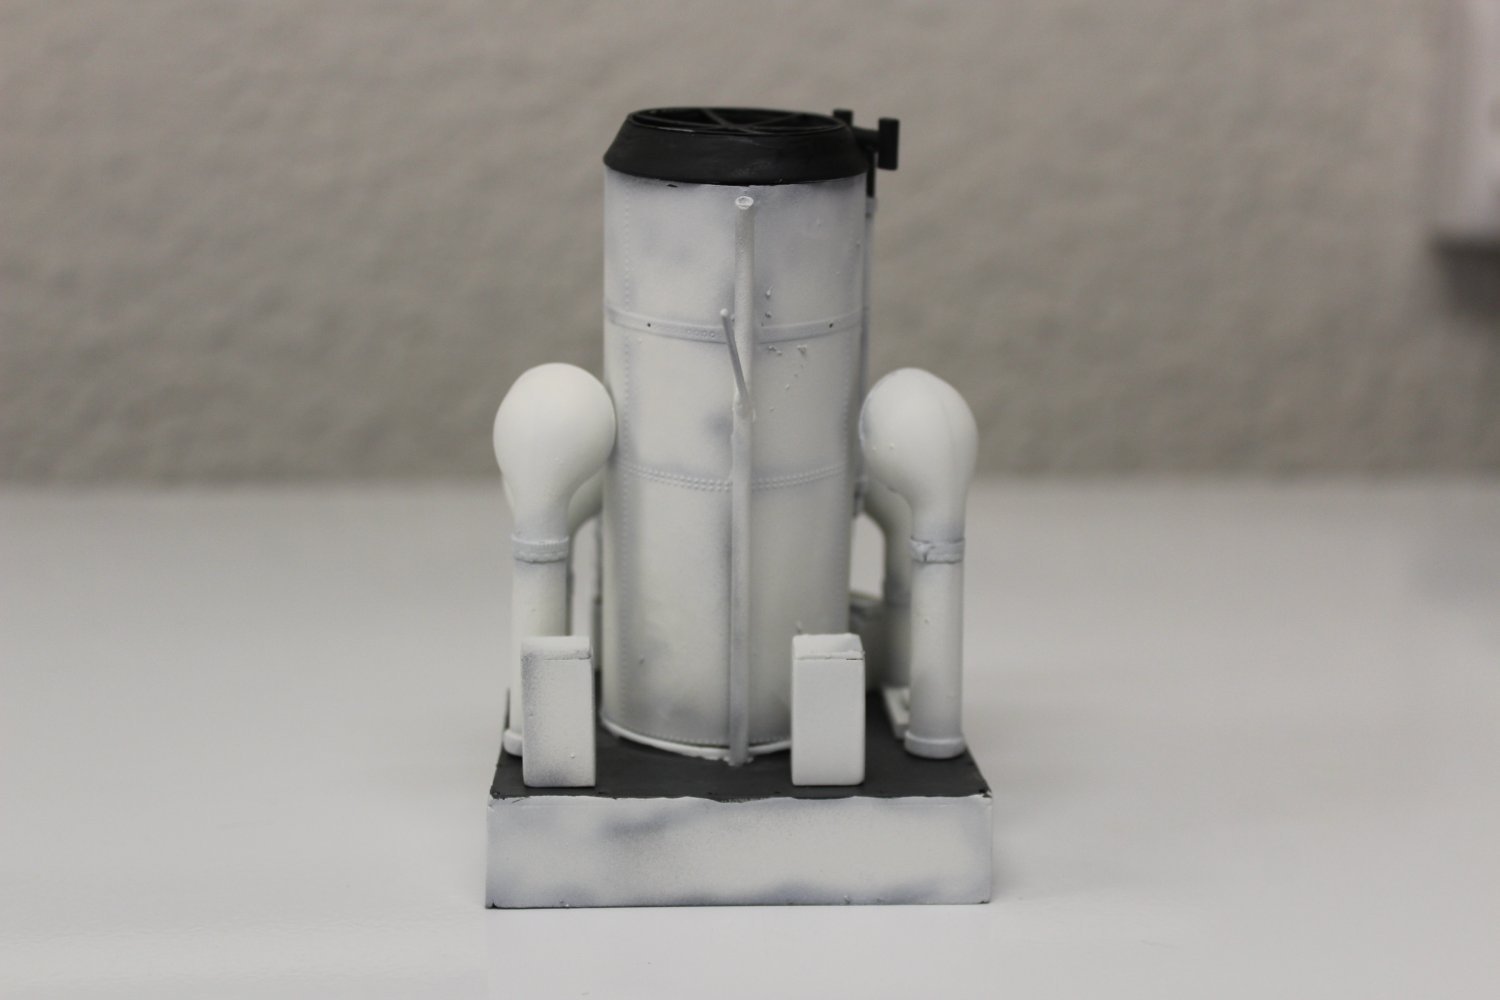
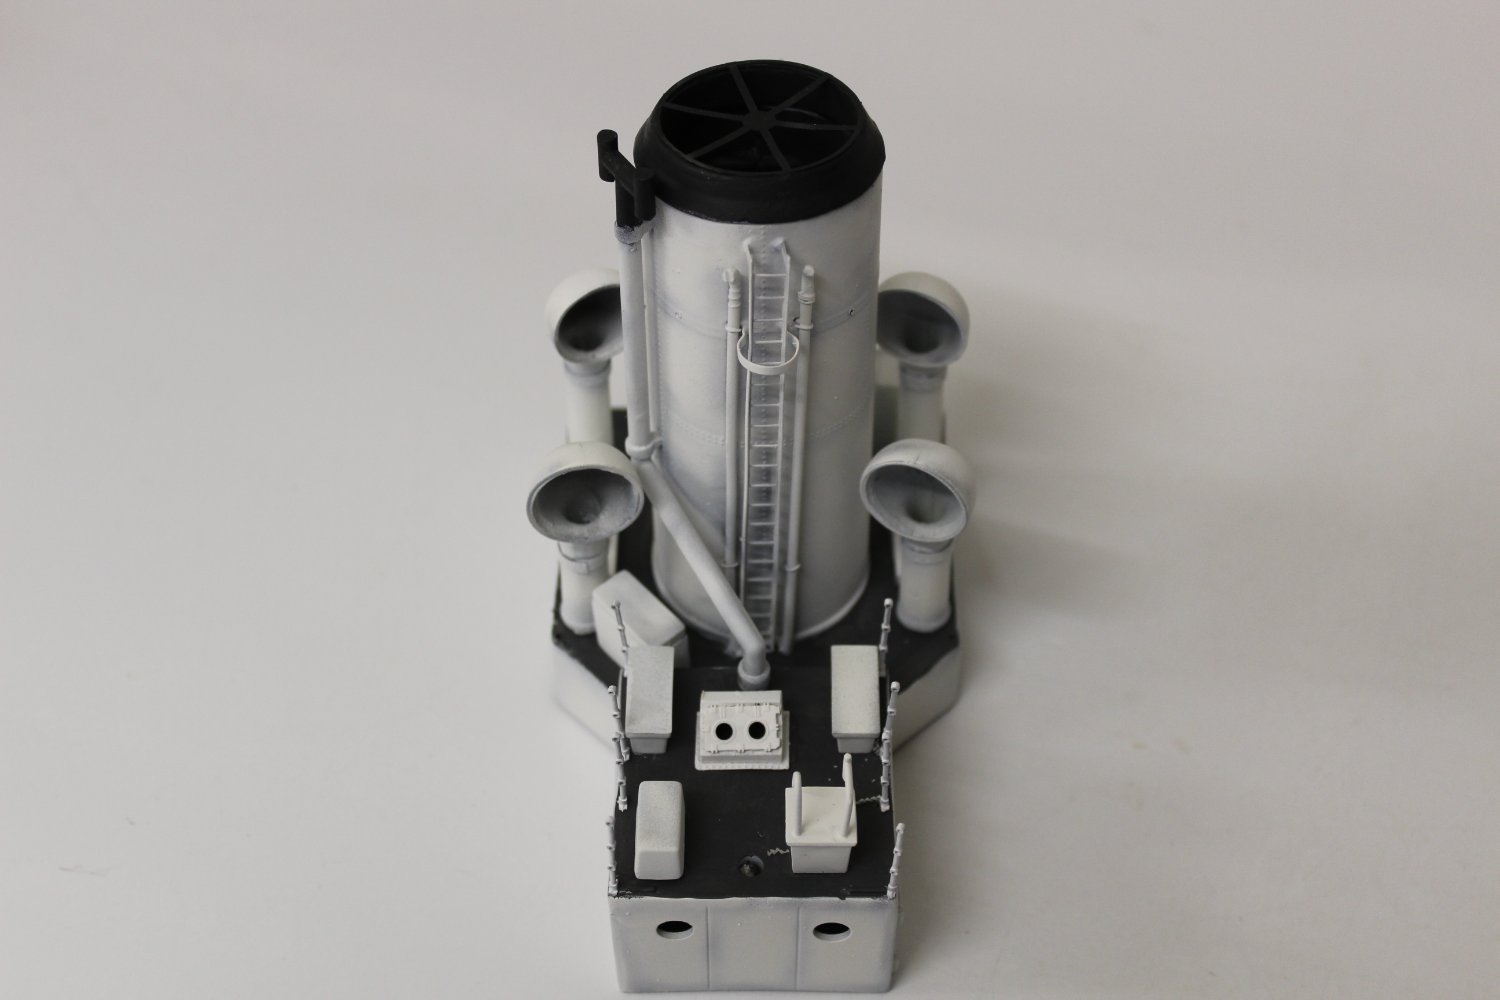
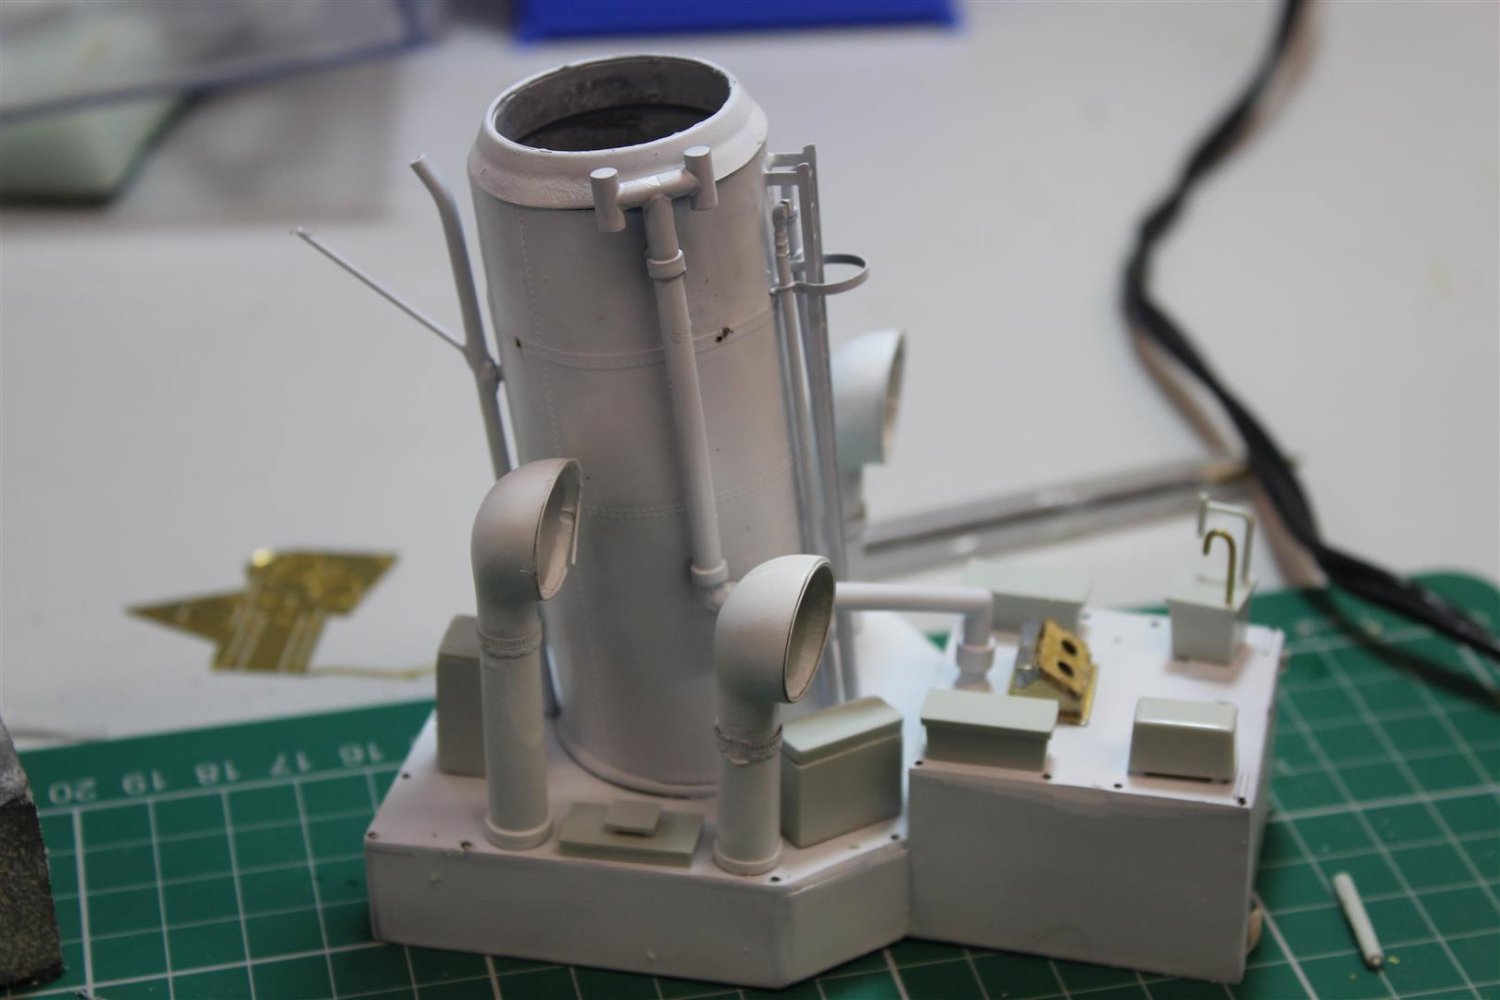
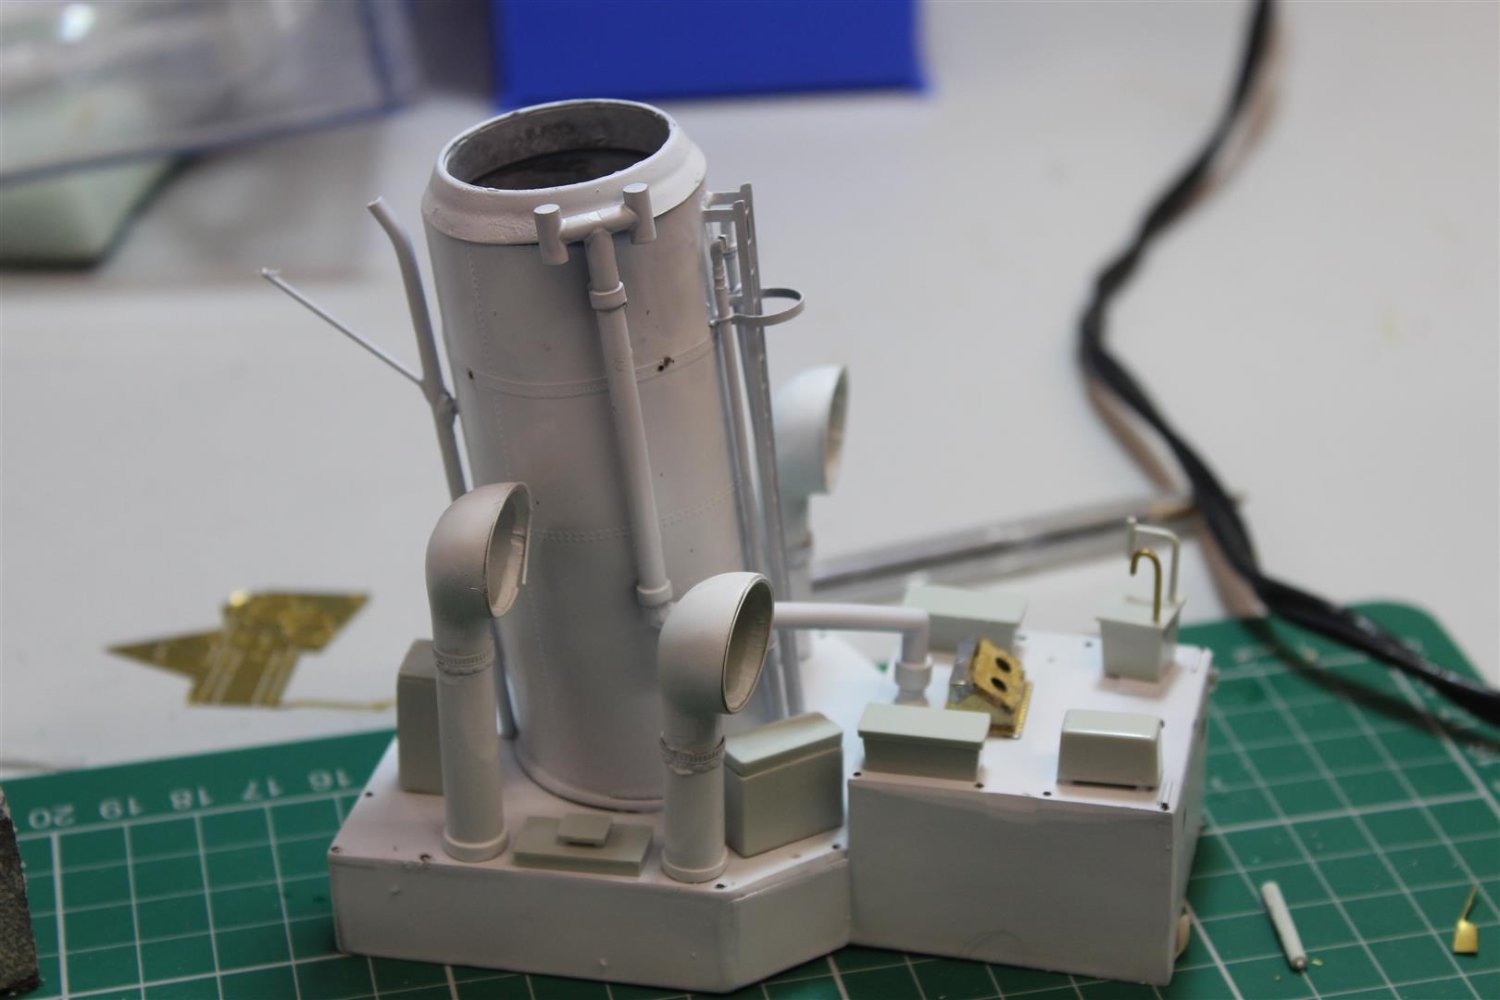
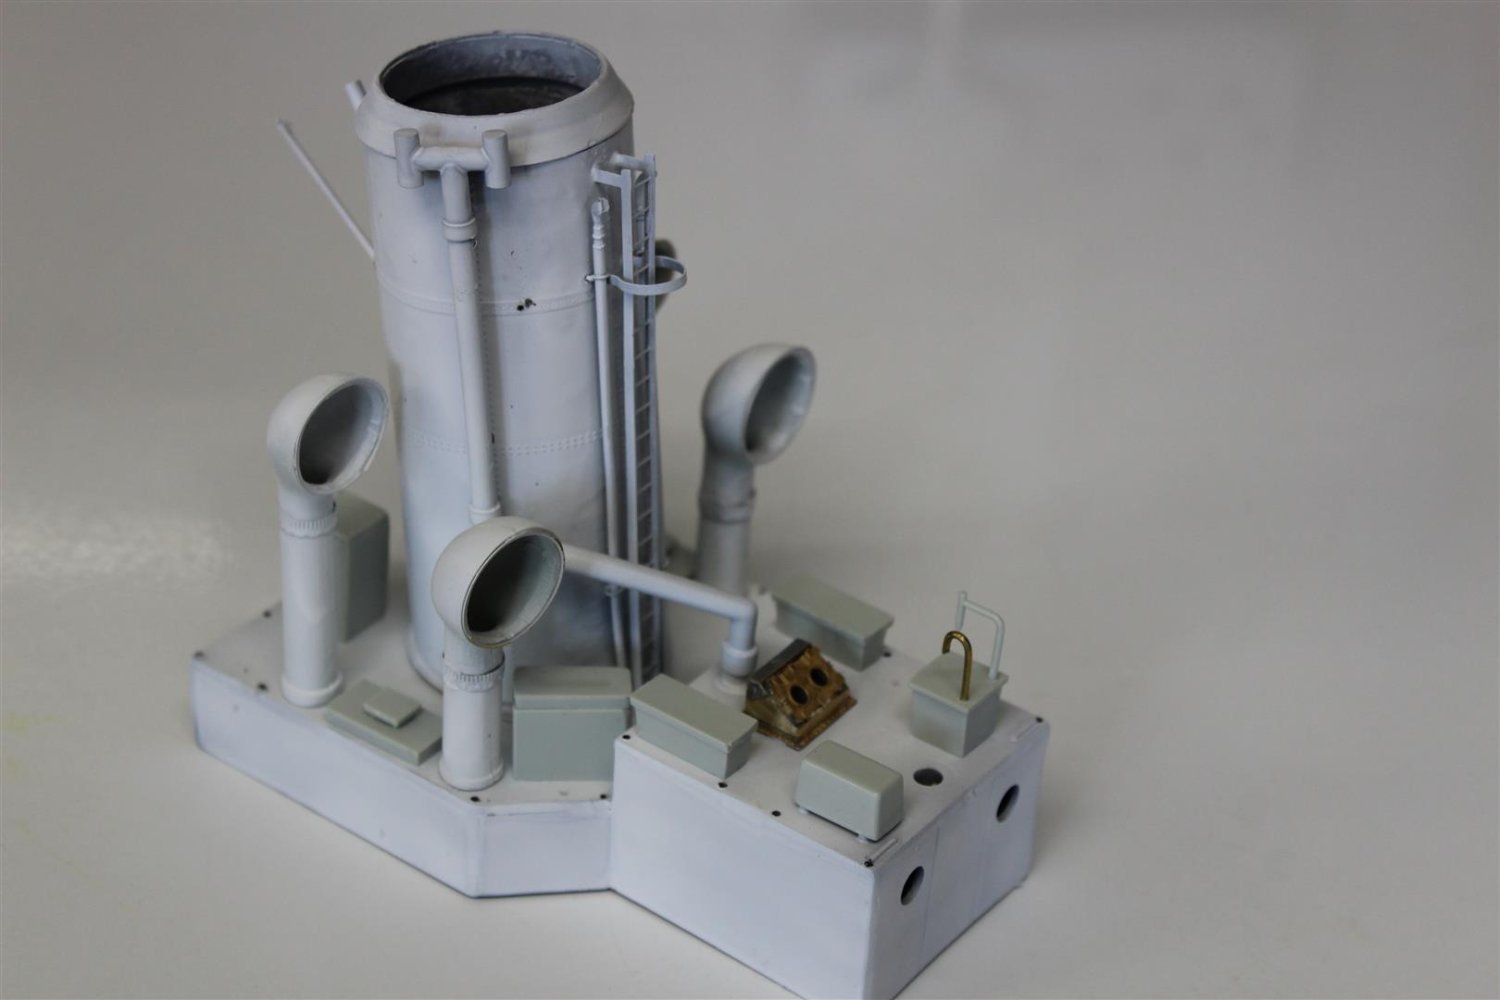
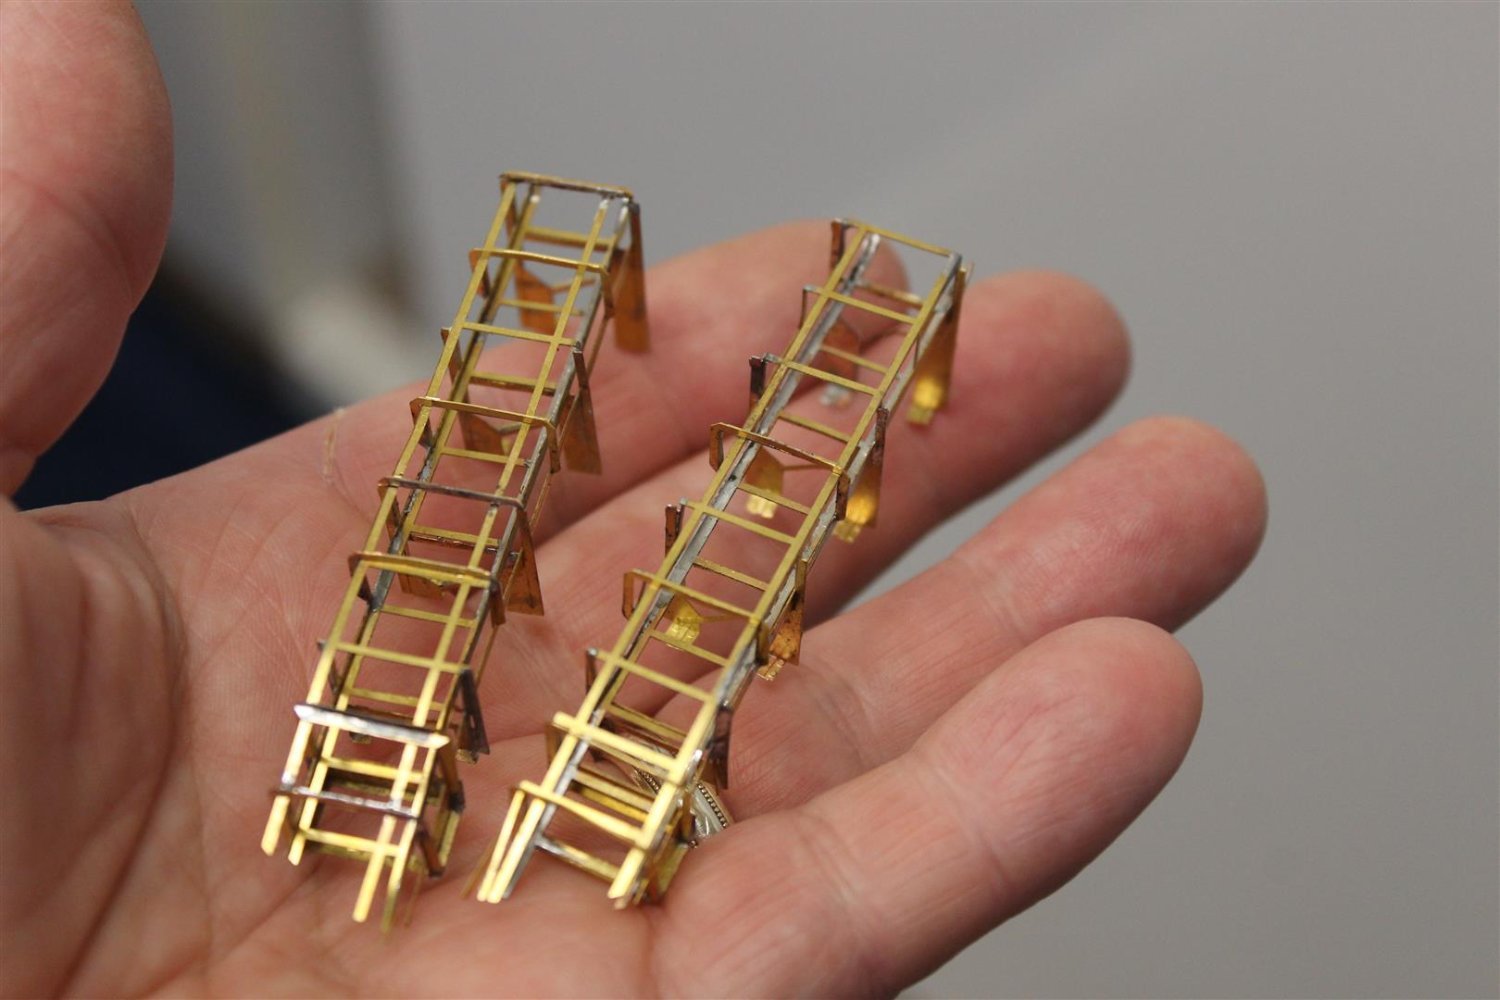
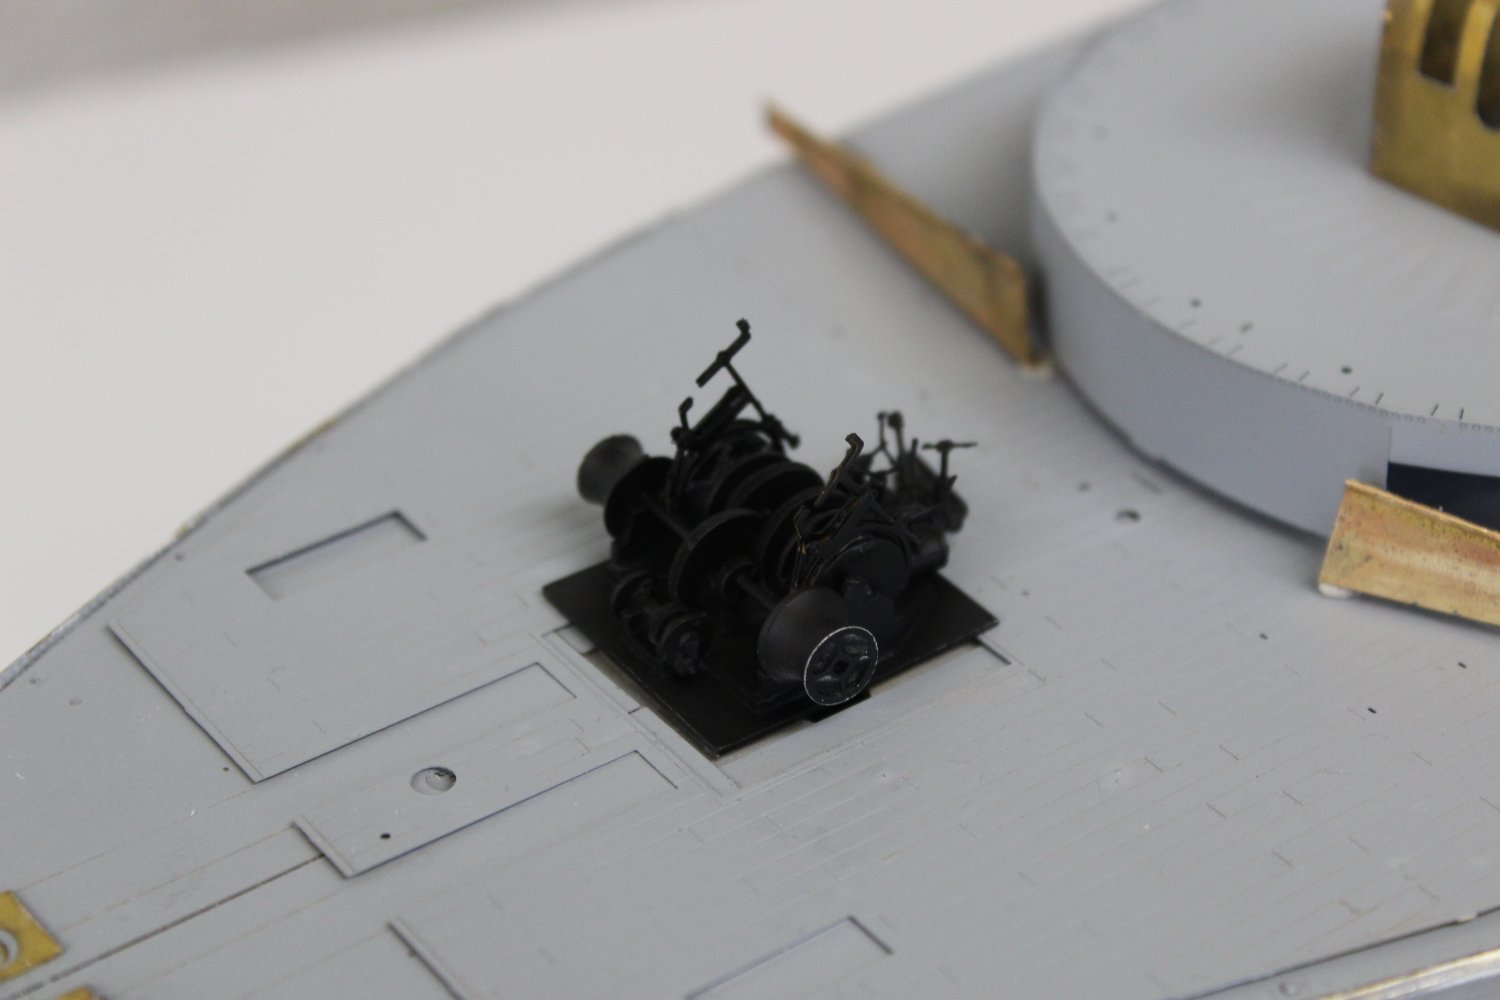
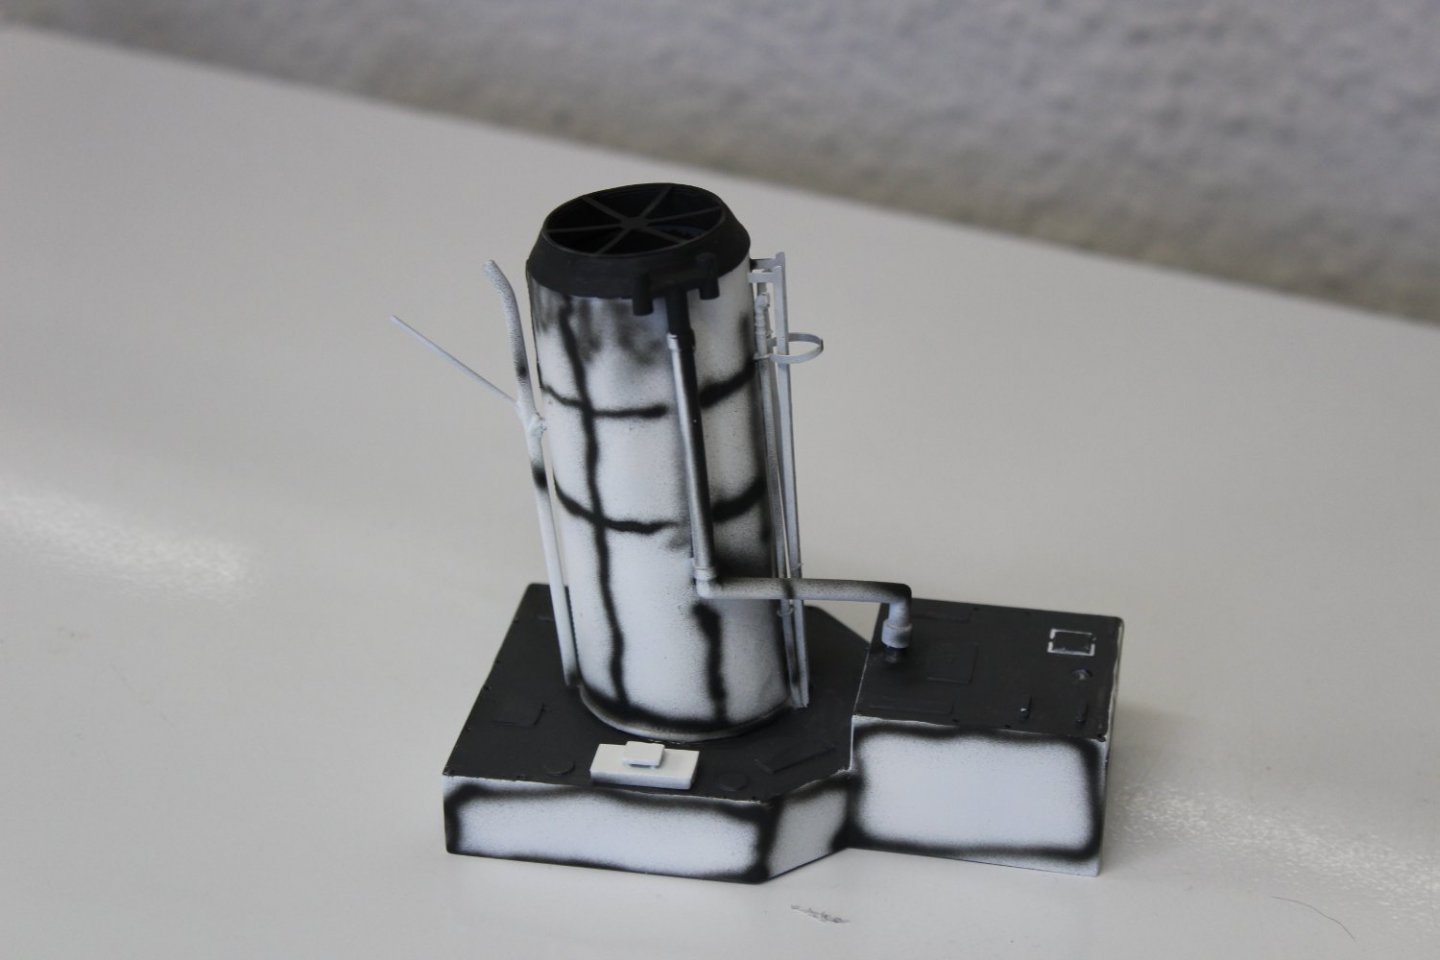
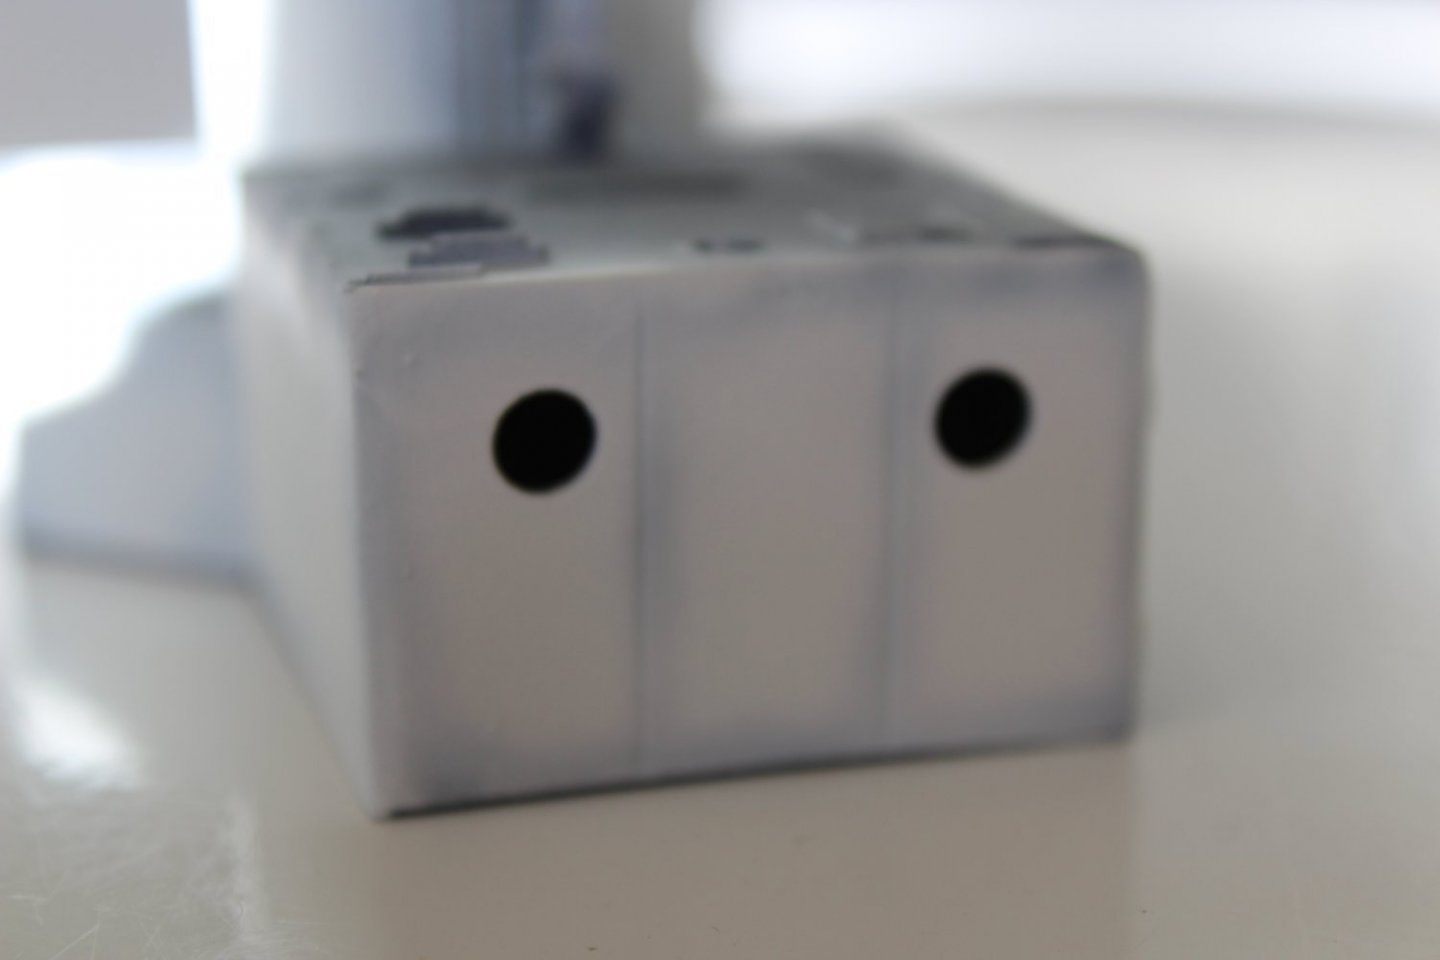
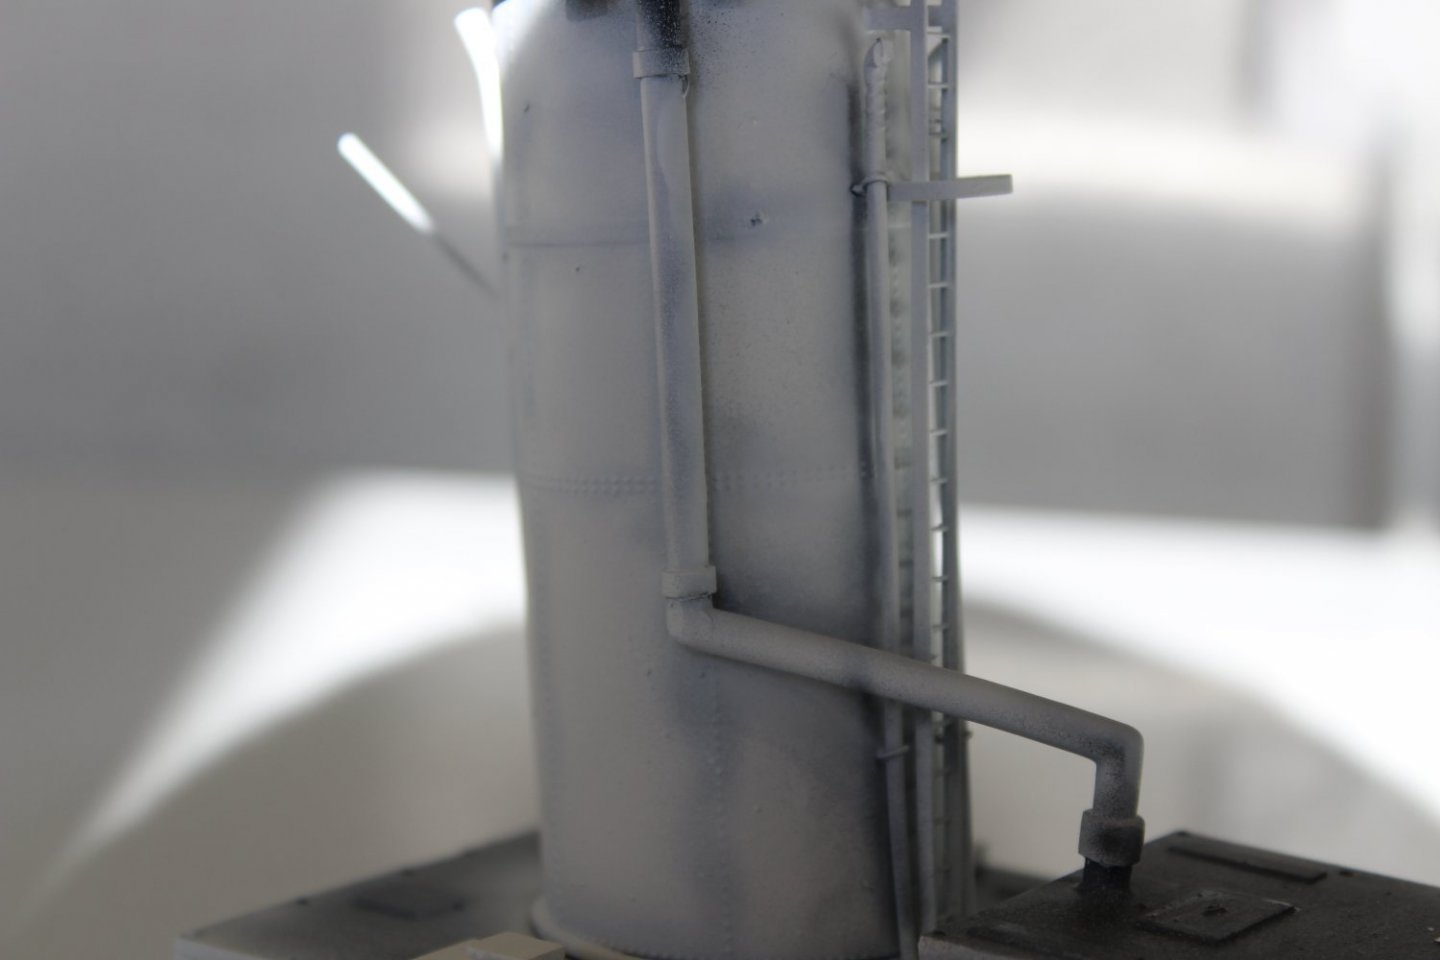
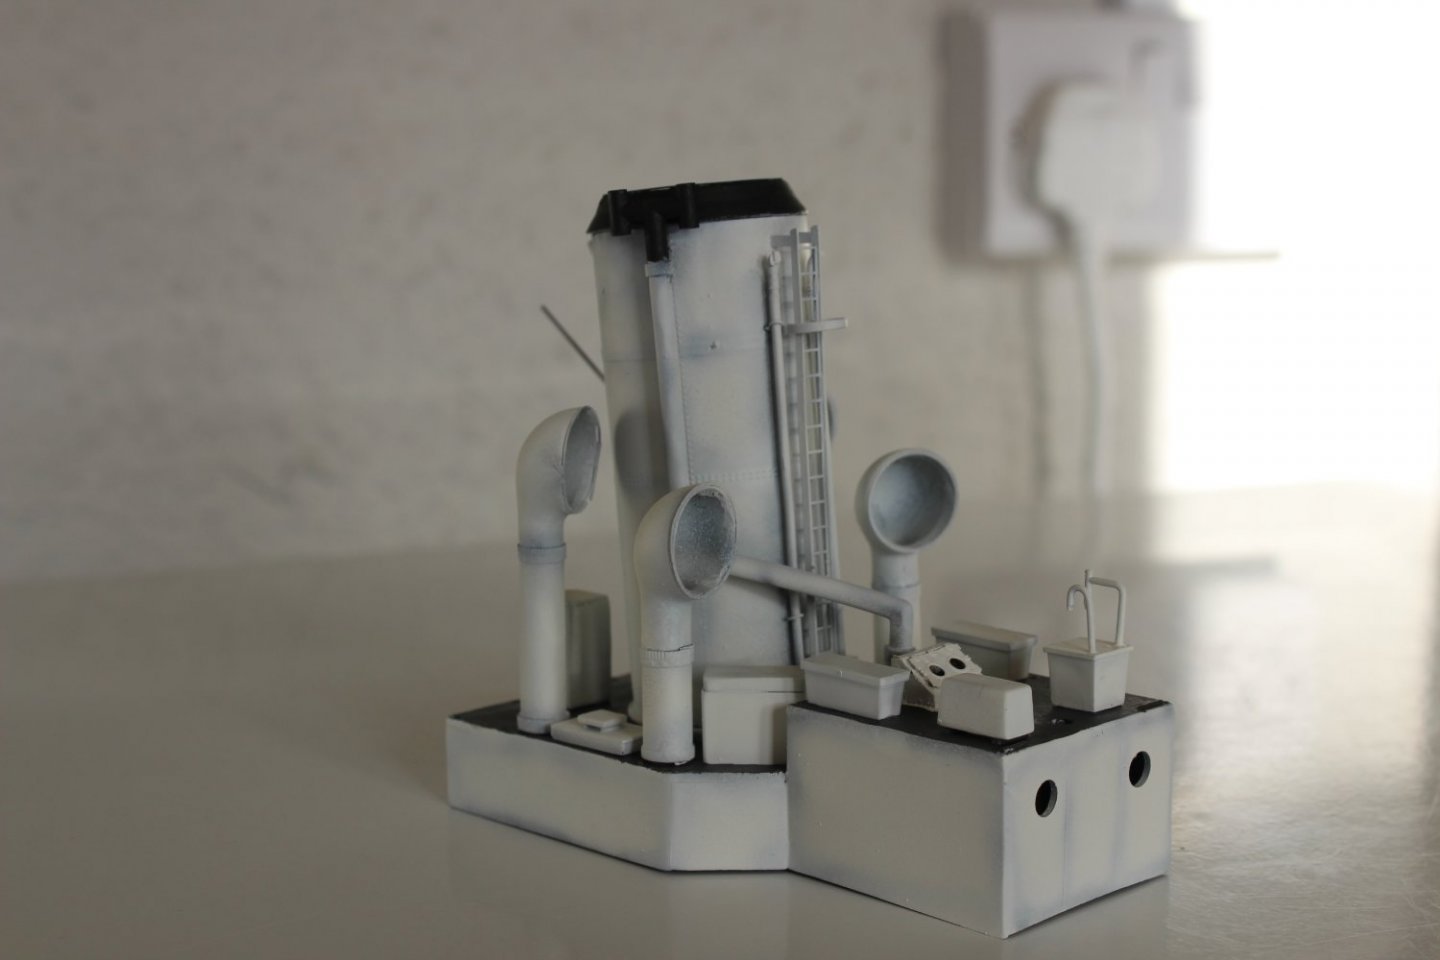
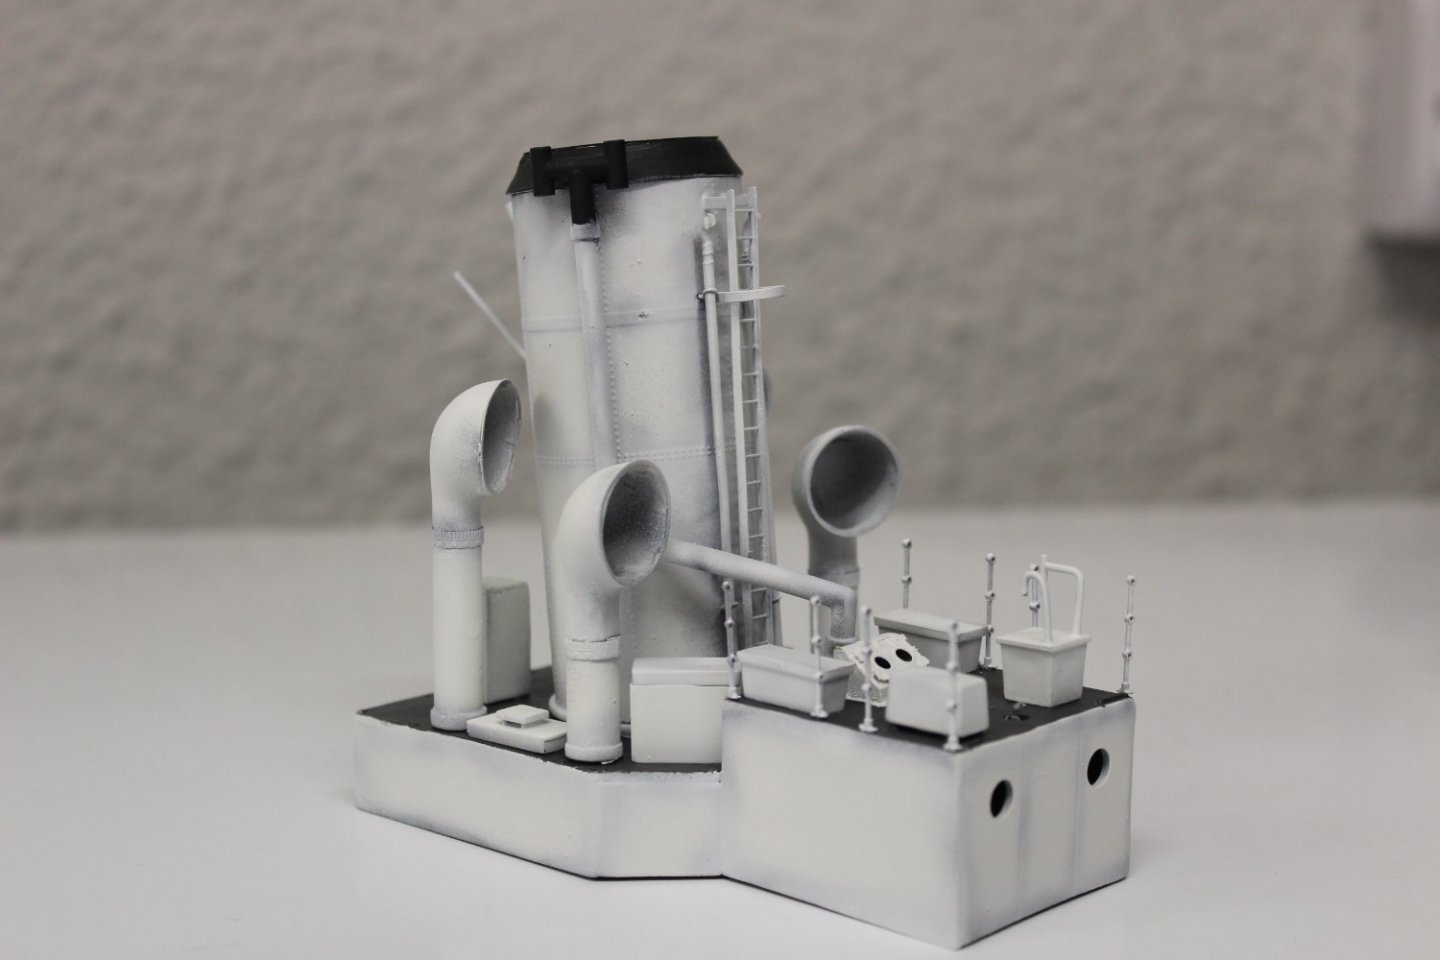
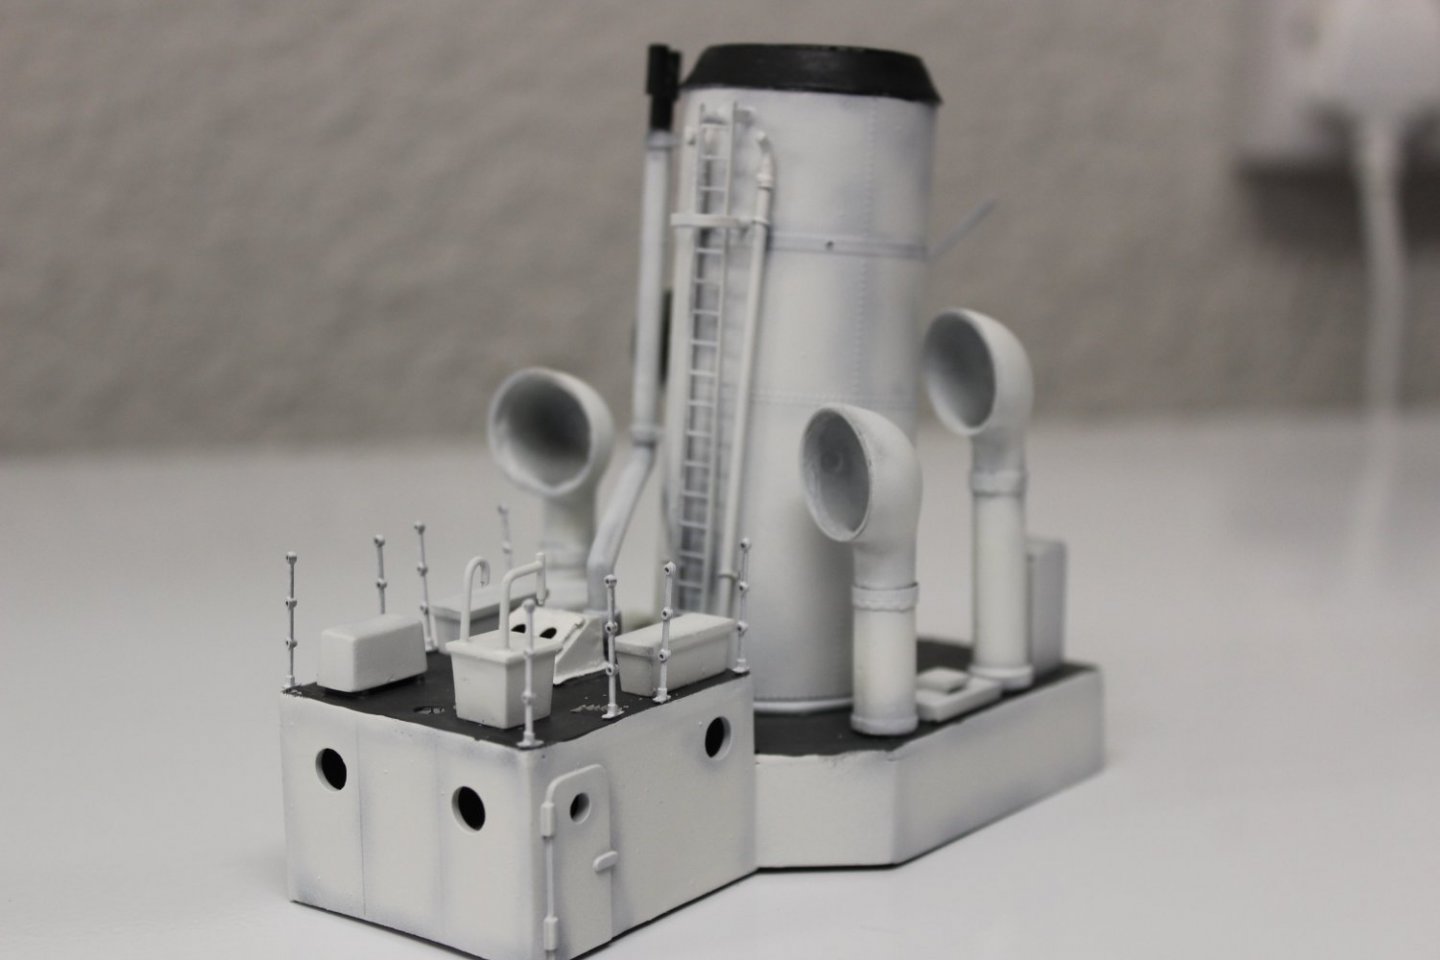
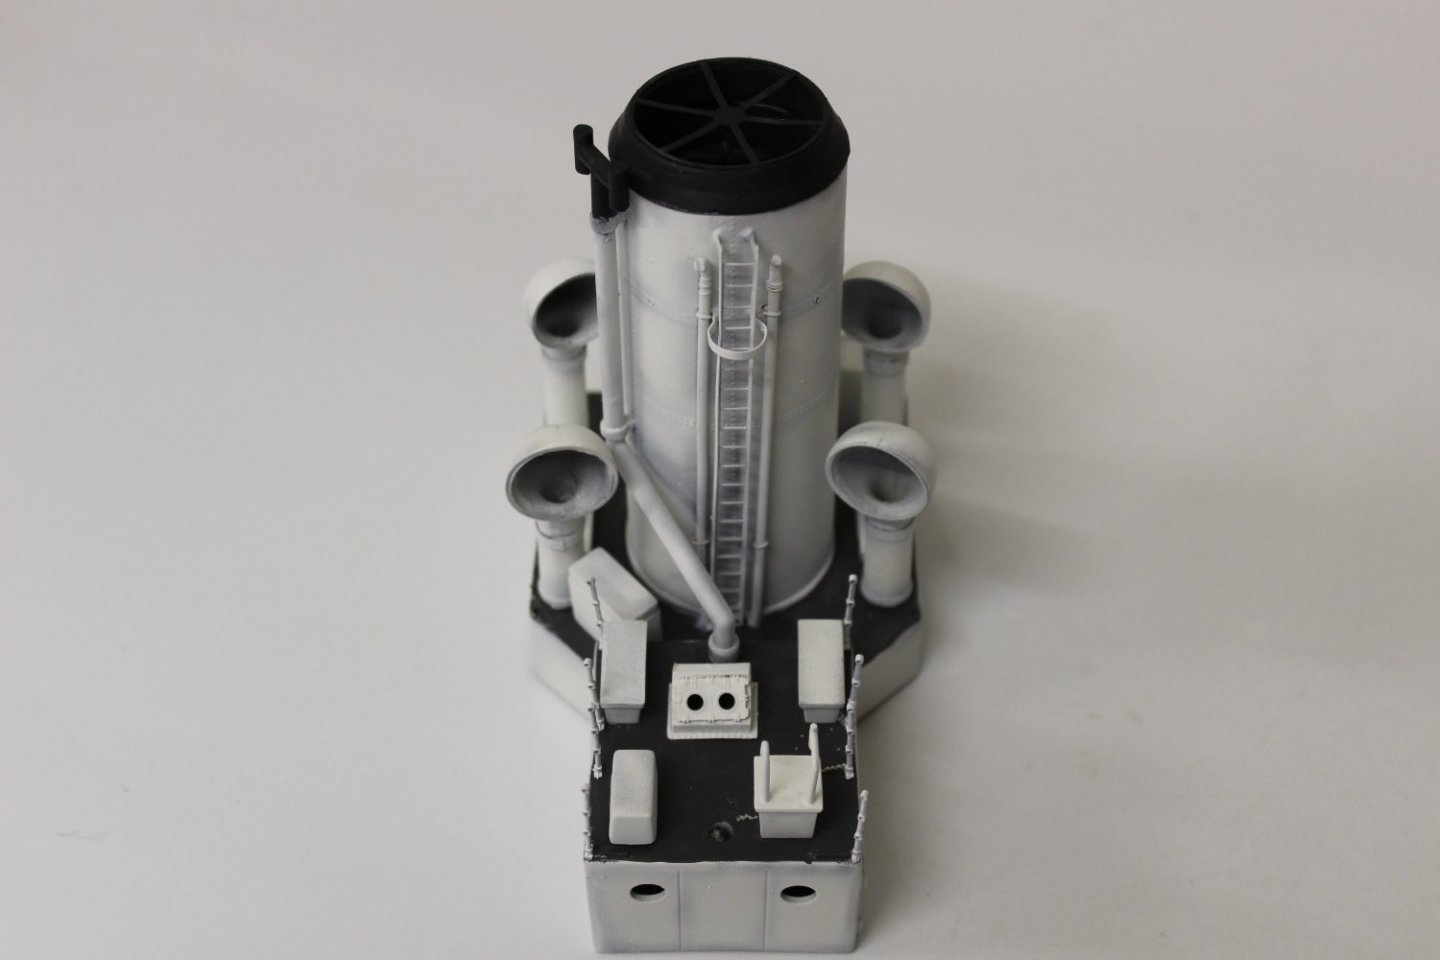
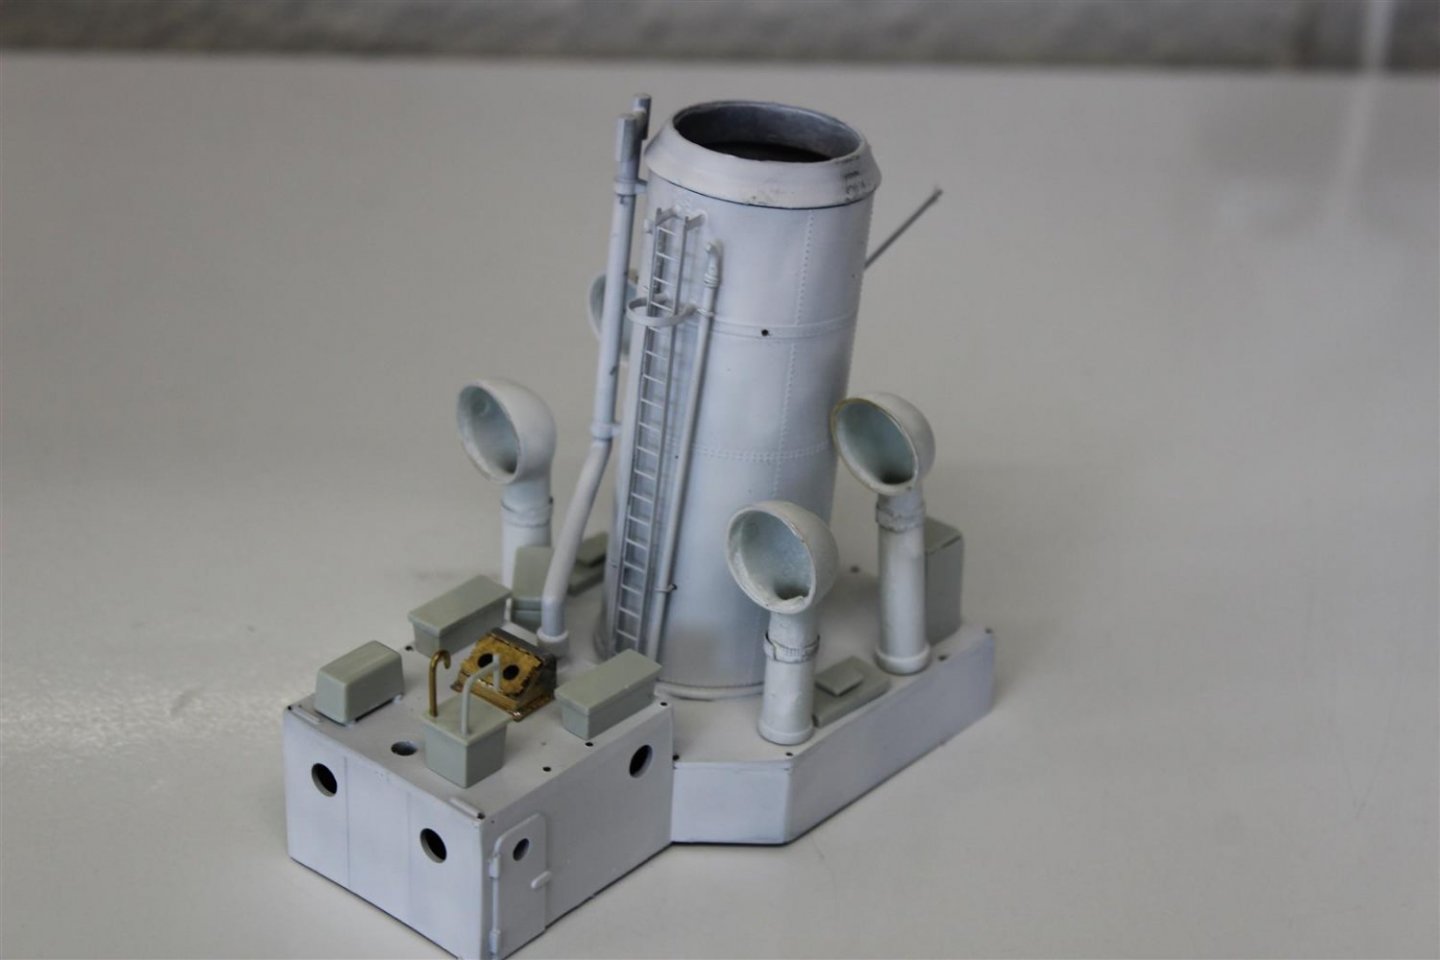
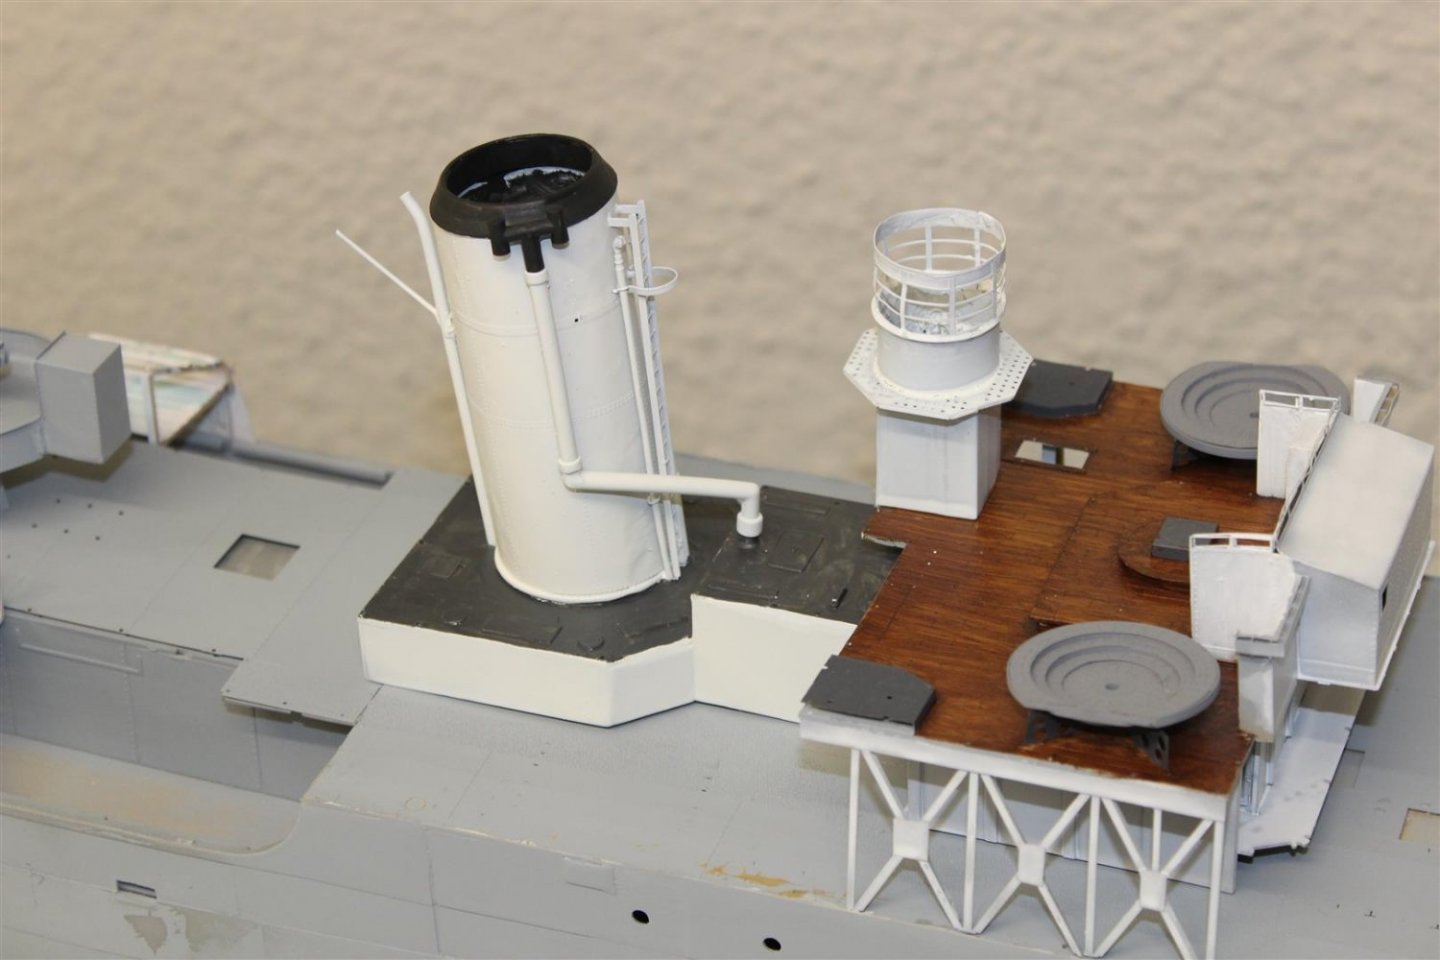
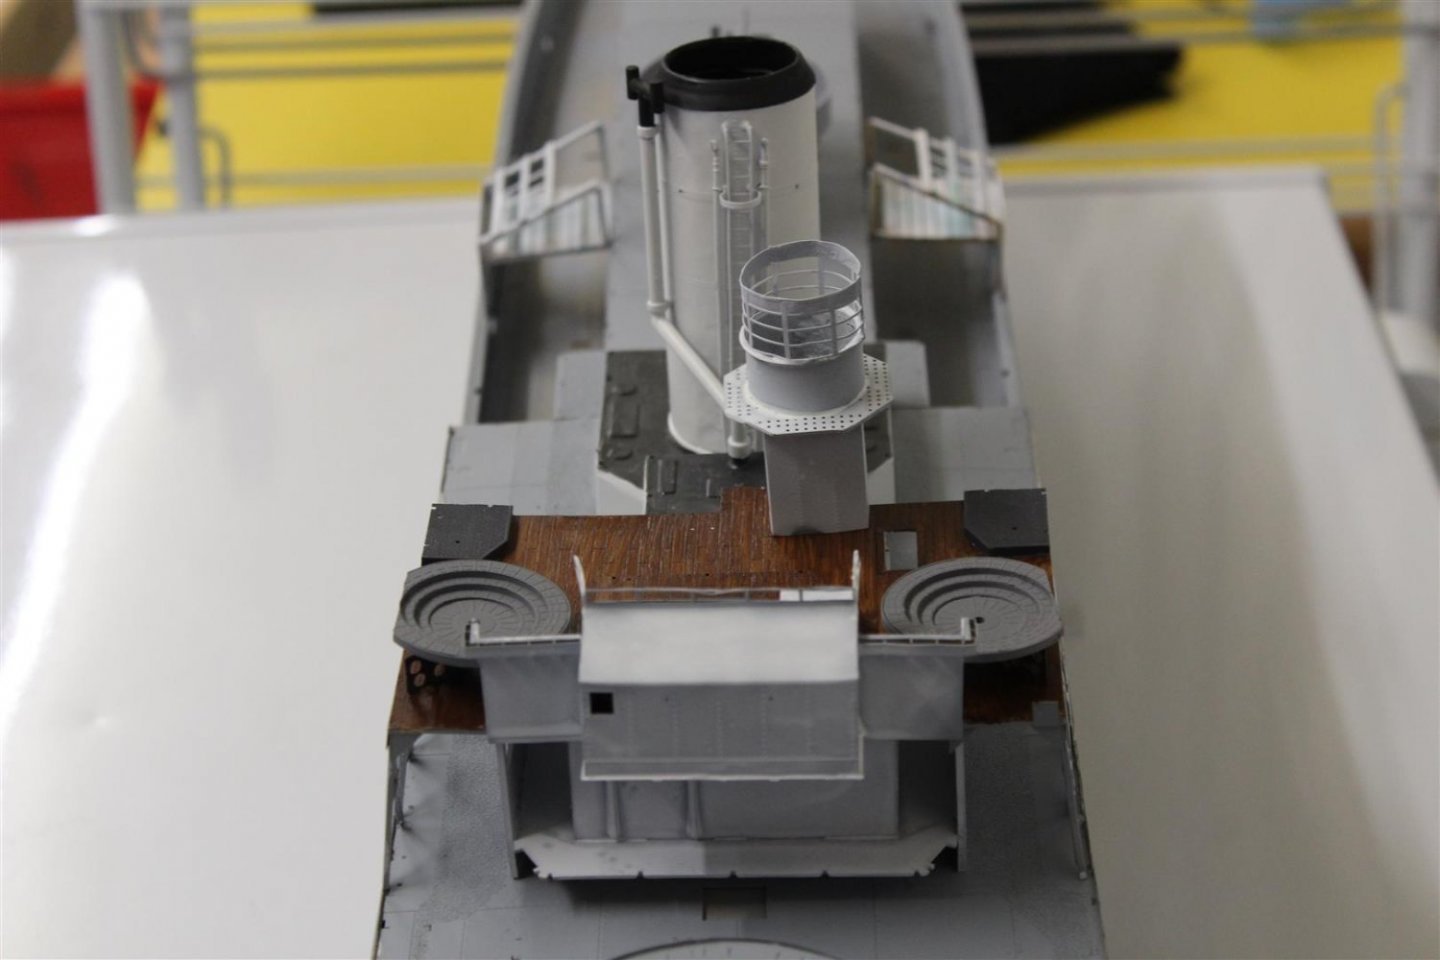
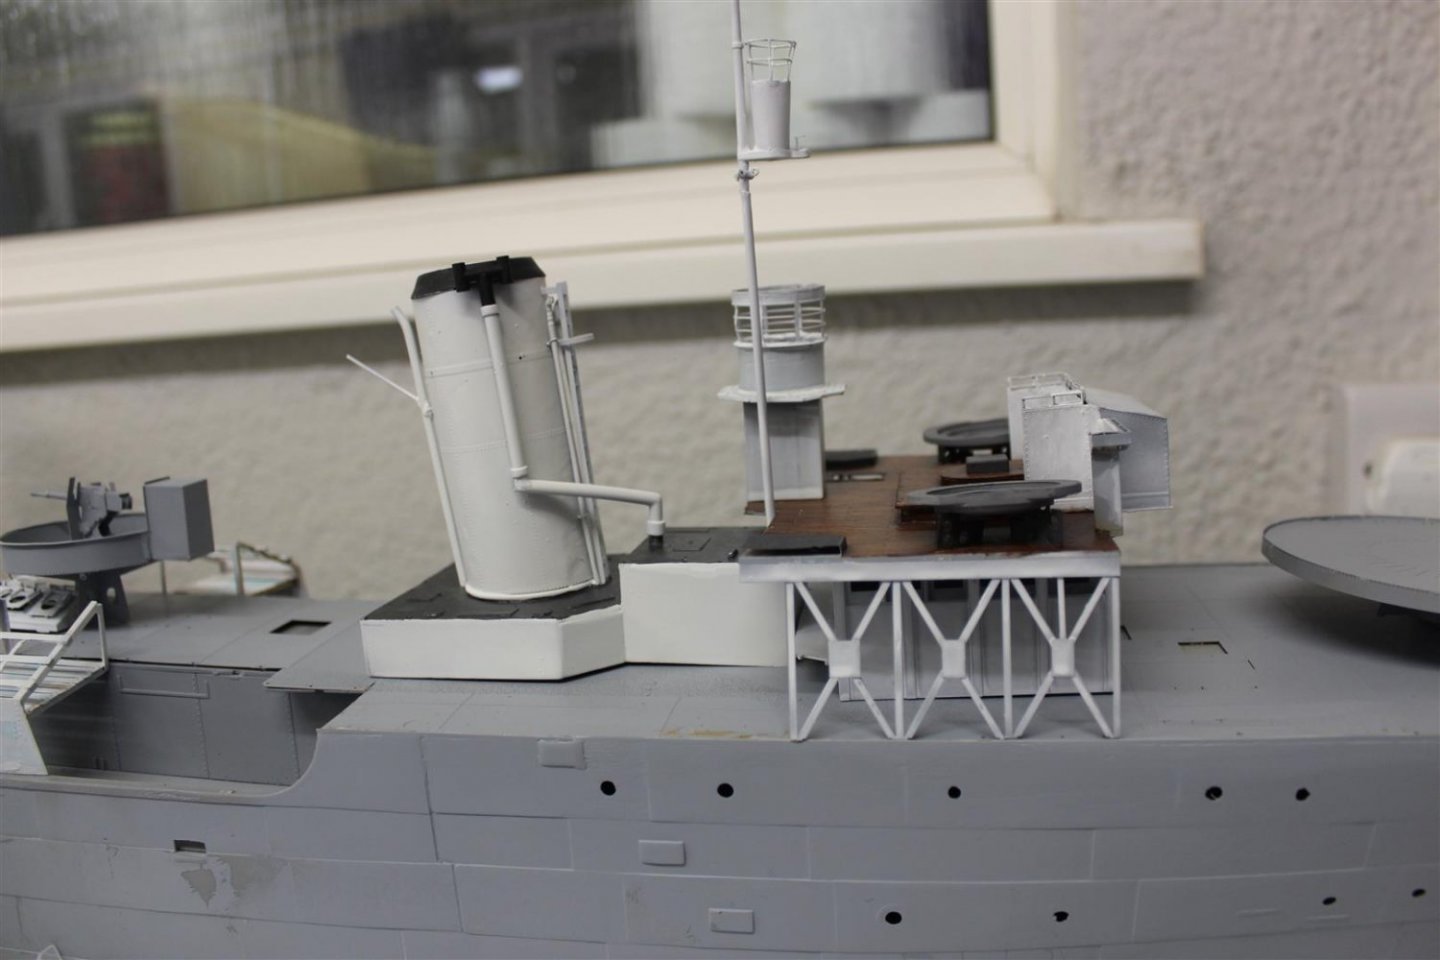
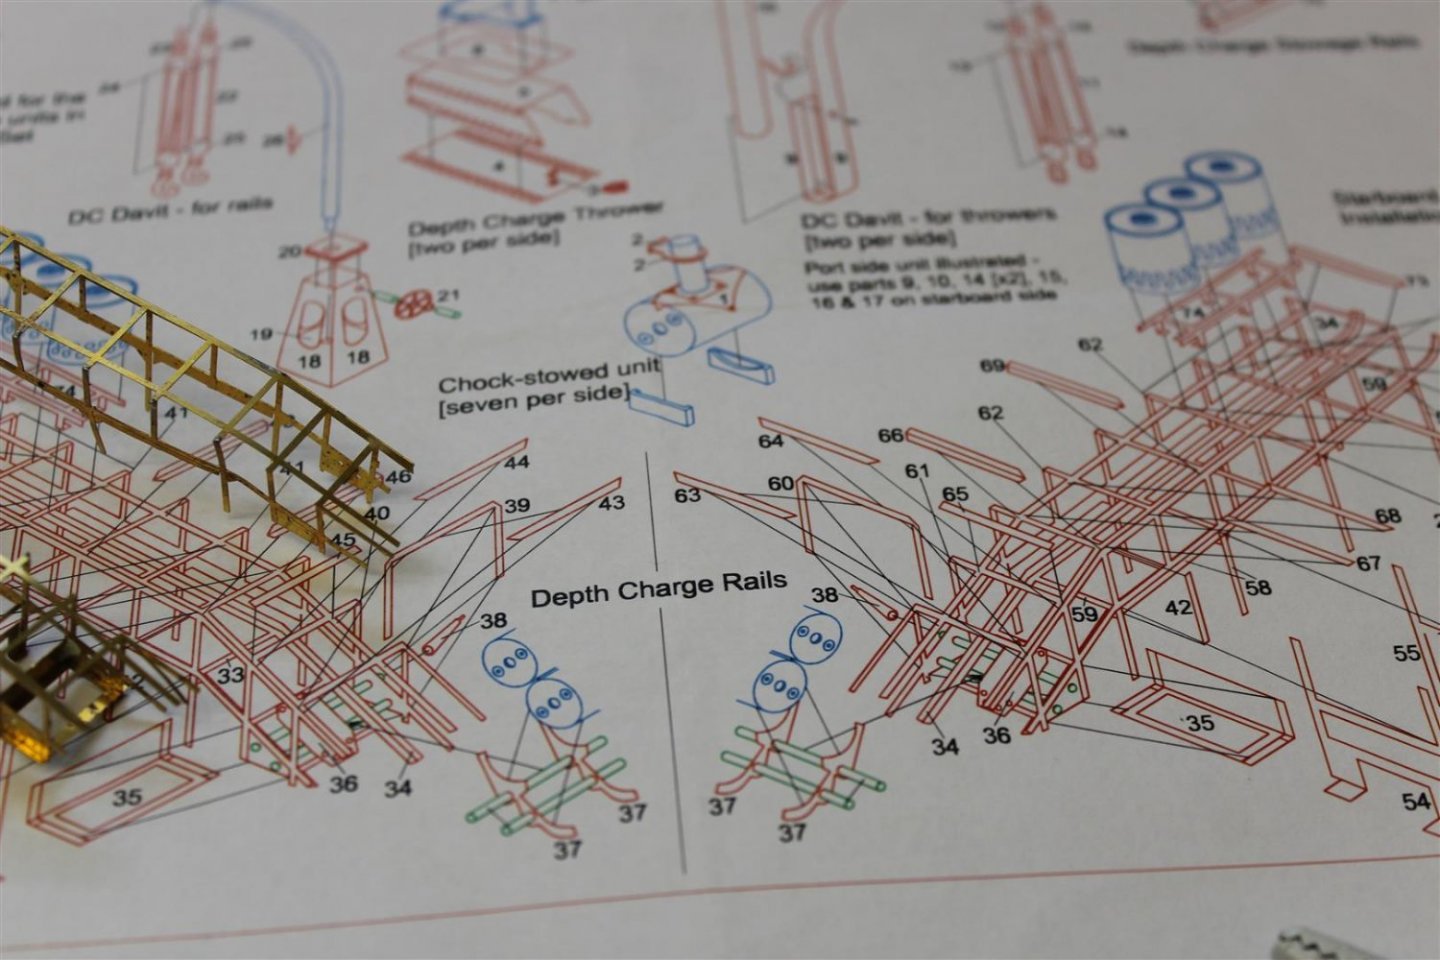
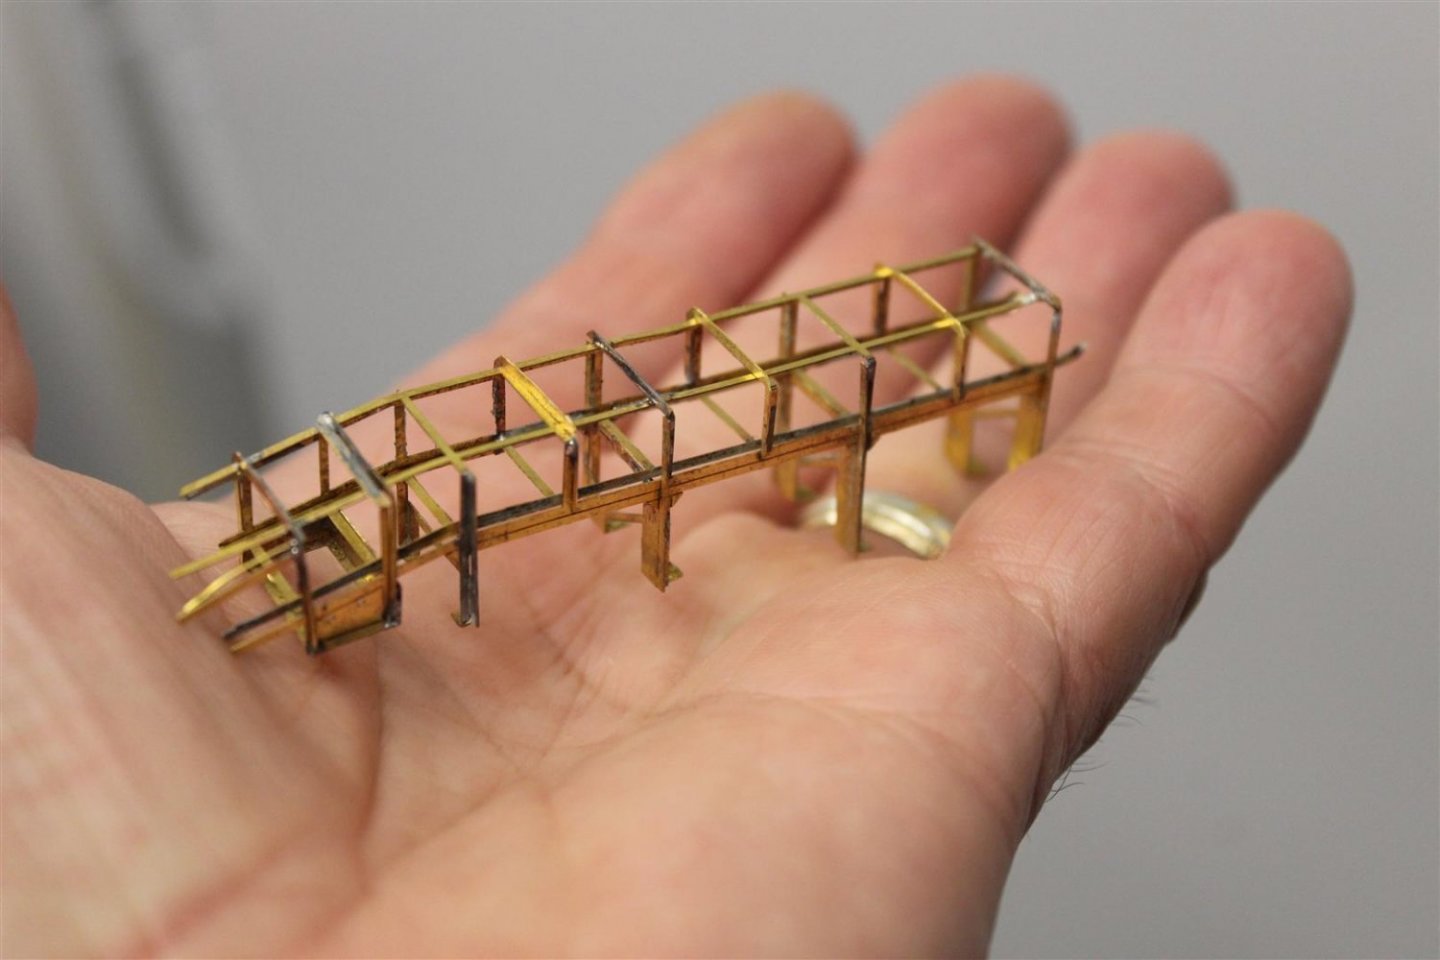
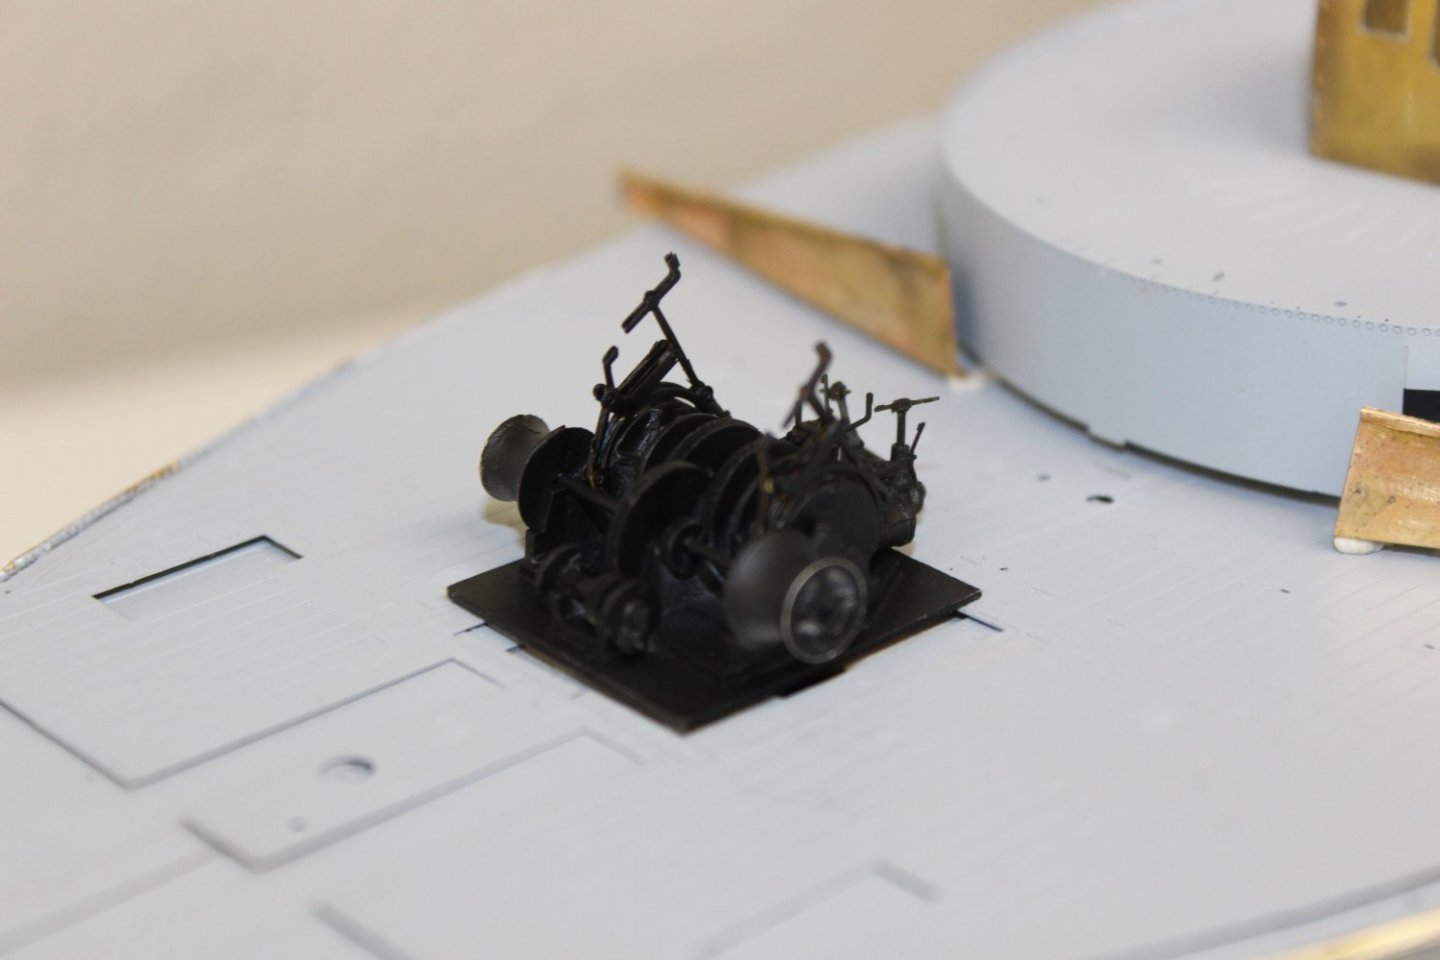
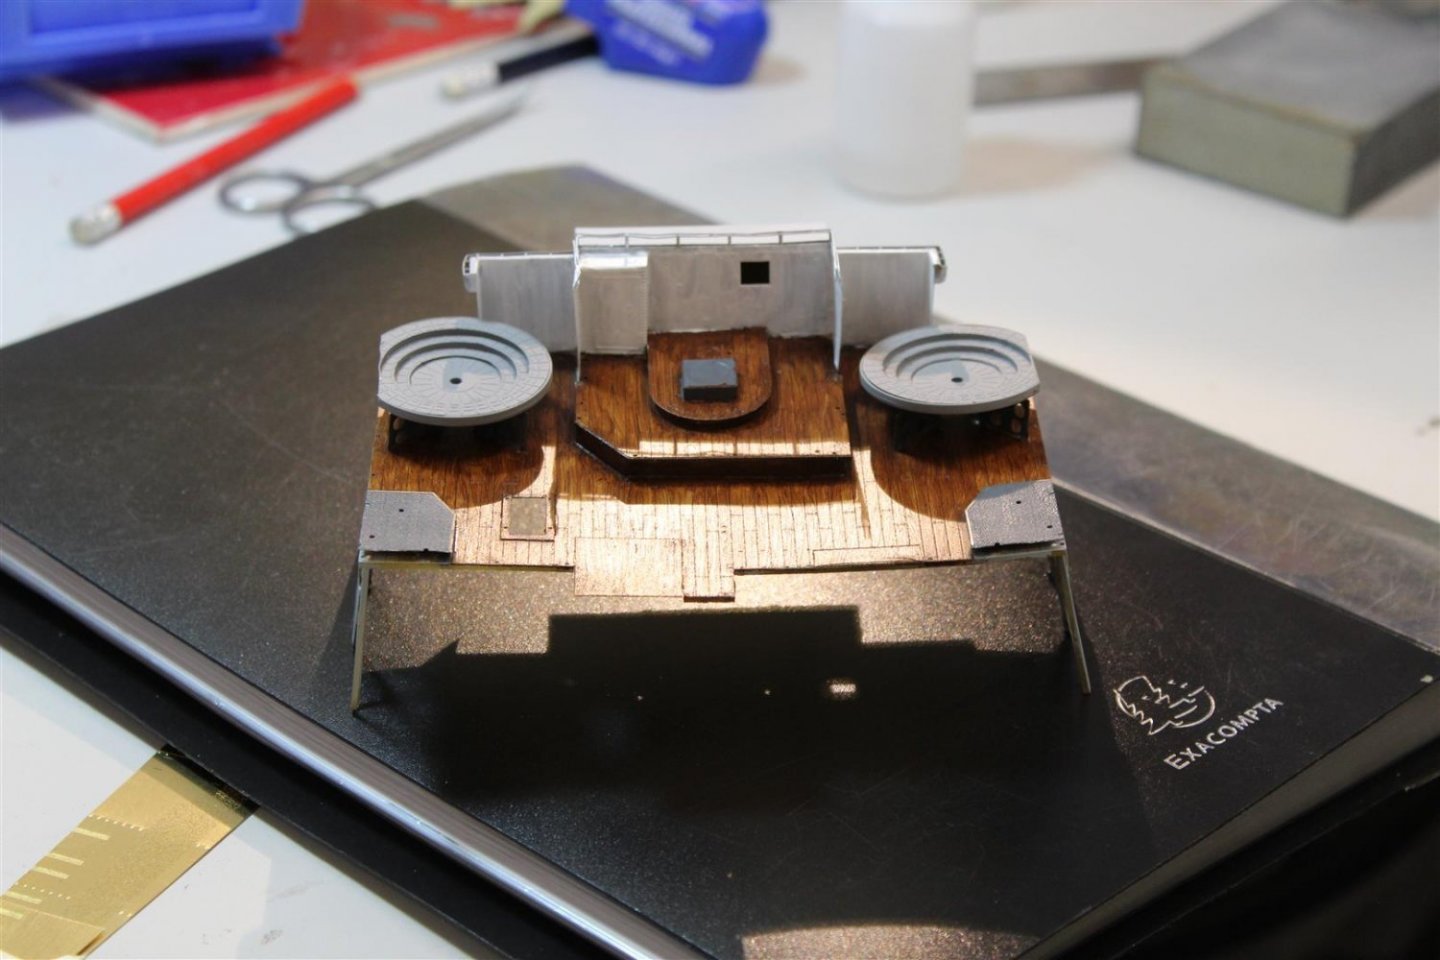
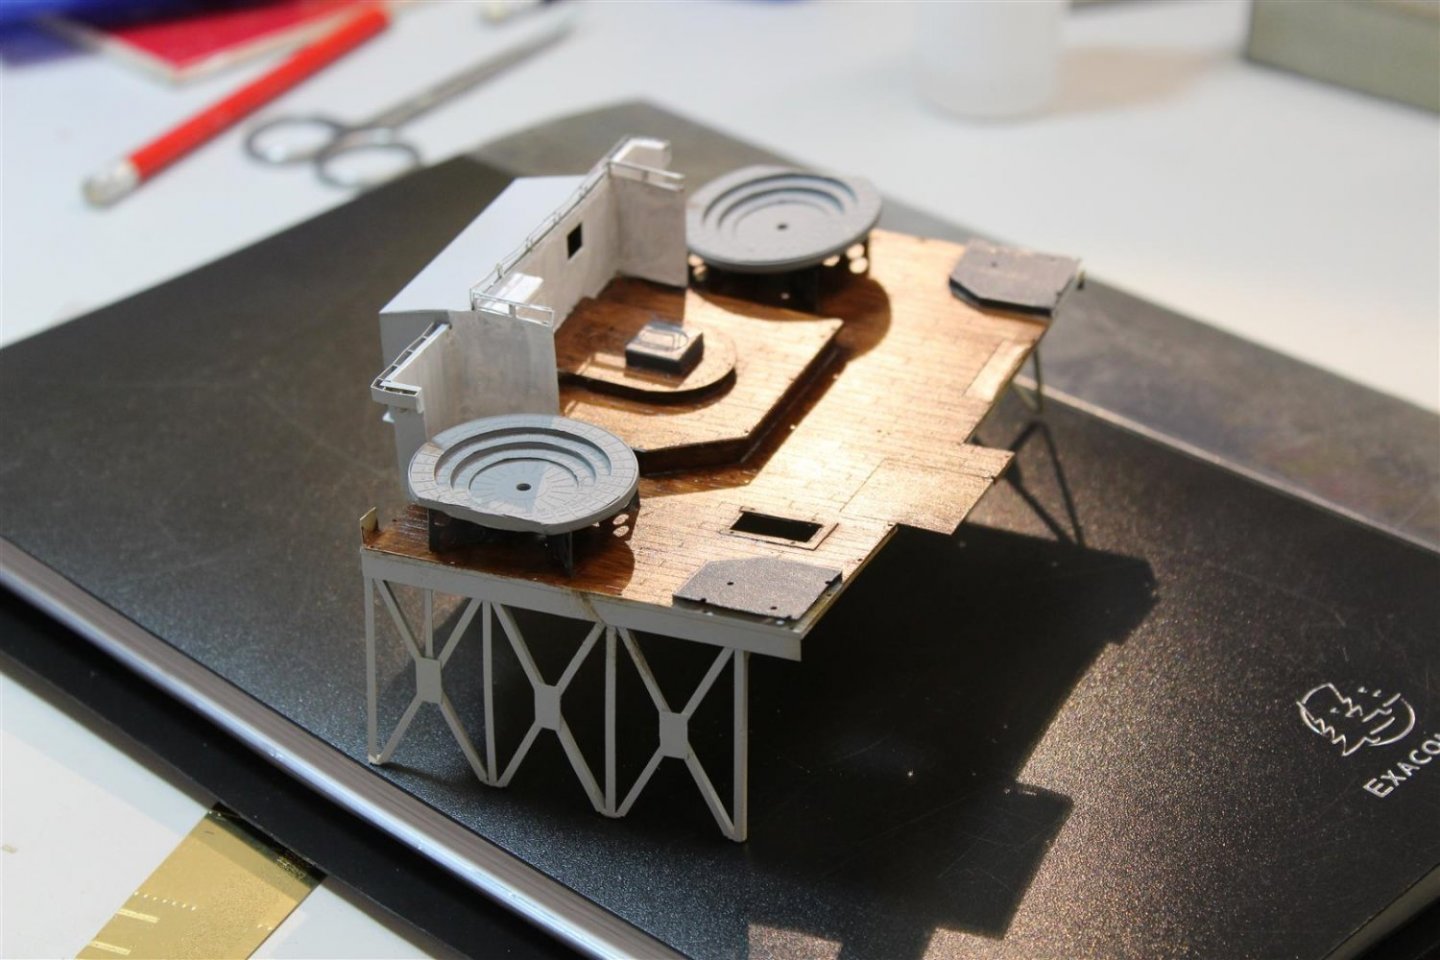
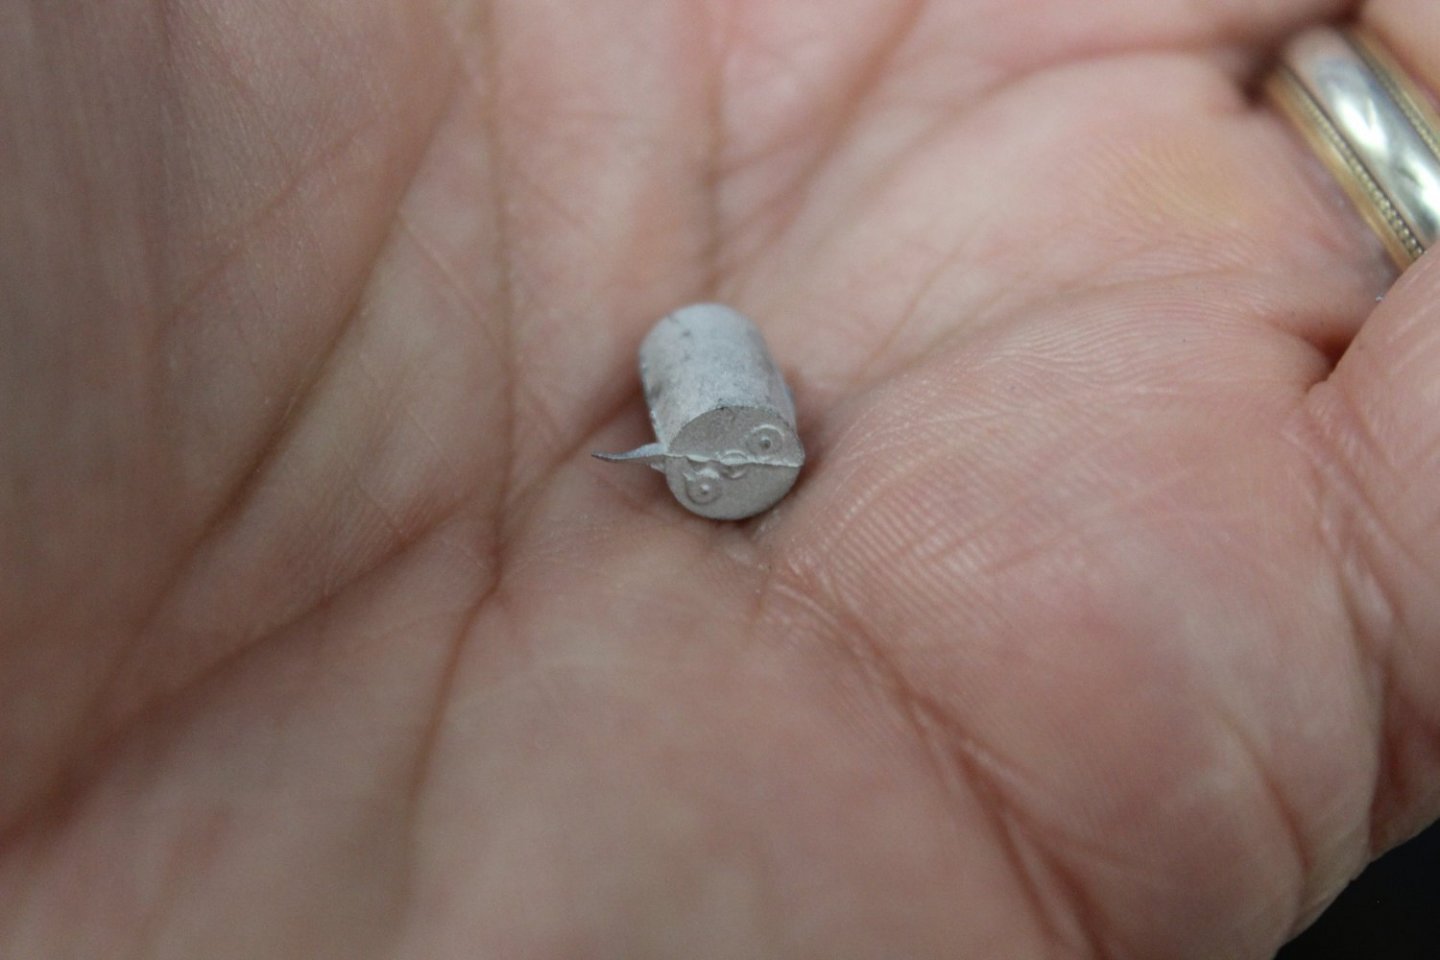
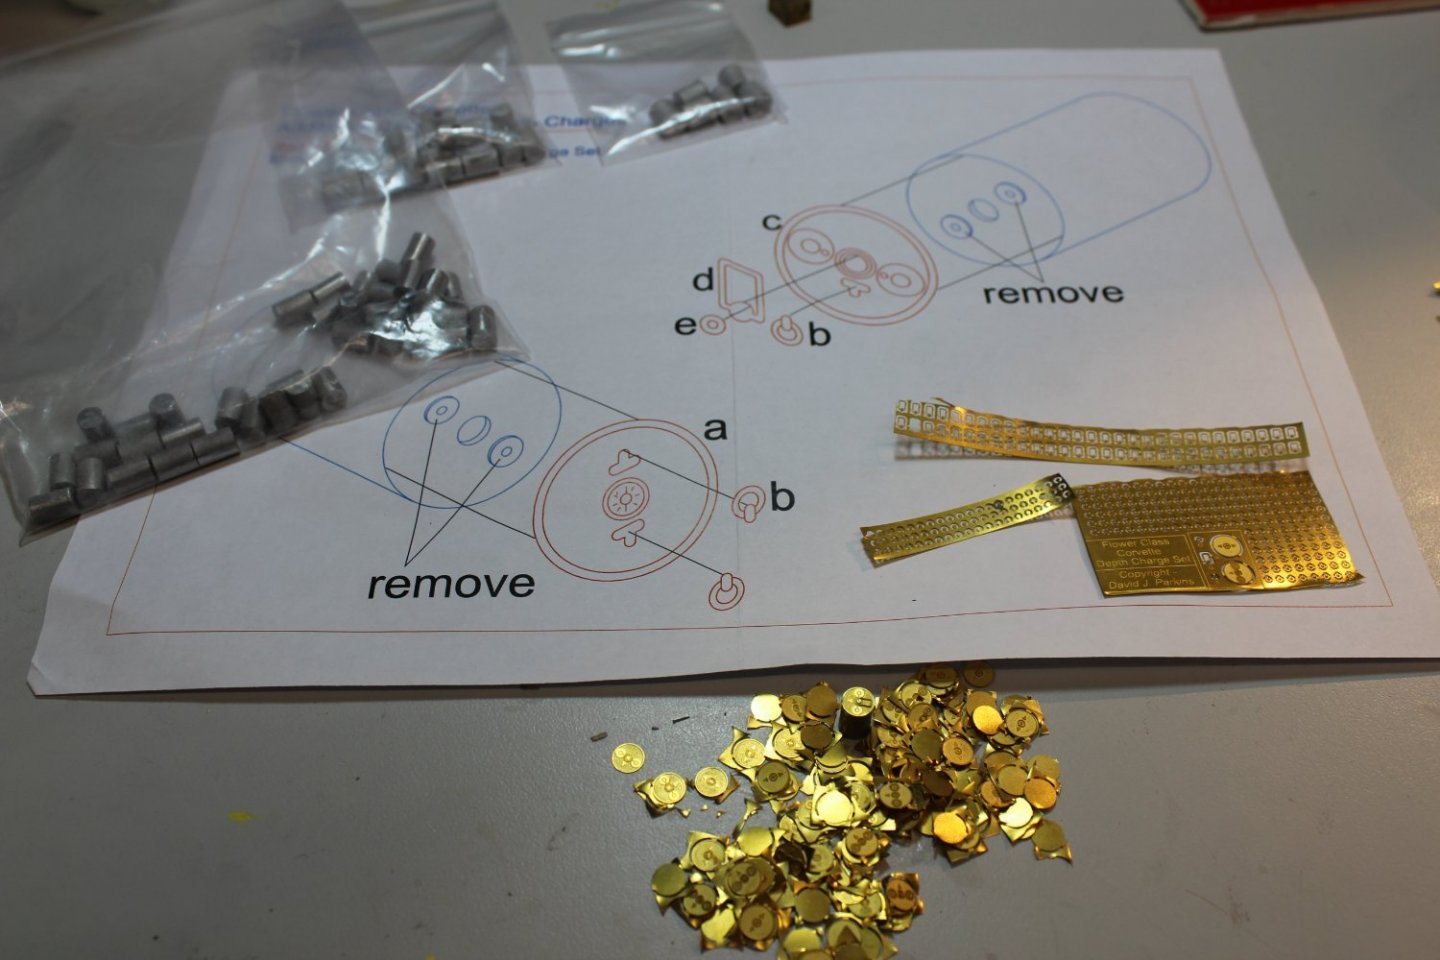
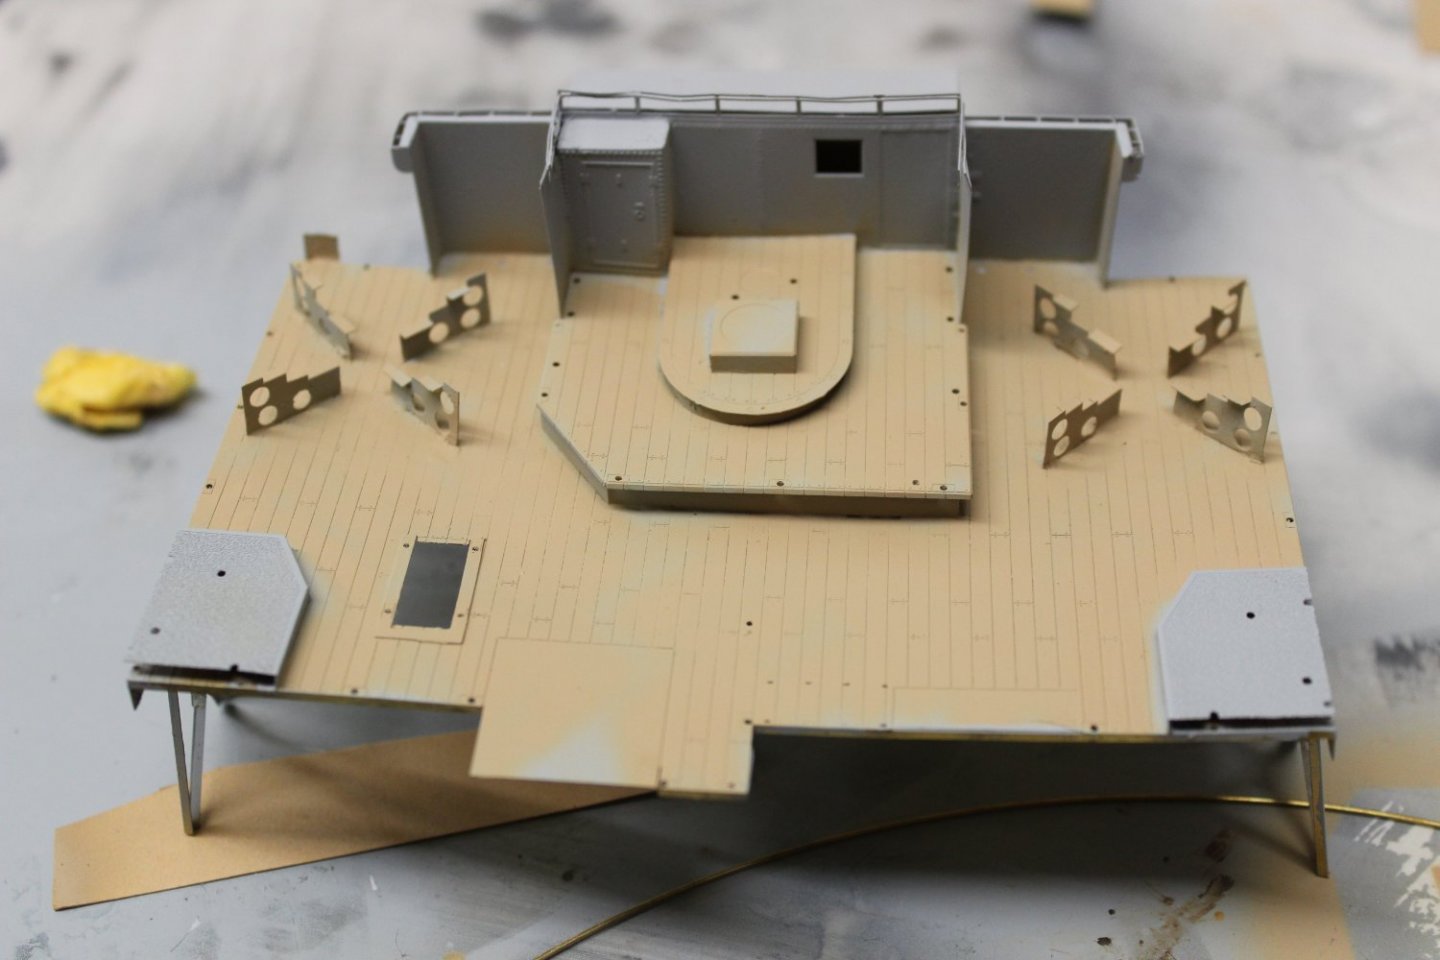
good evening everyone thank you for comments and likes the depth caharge racks, i primed in red, thinking (incorrectly) that they are finished in a dark colour, they were redone in white primer i want to finish ate least one unit this week, so the funnel assy got it, white primer, with colour coats top coat and colour coats grey for the deck, which needs another coat, Tamiya Nato black for the funnel the lockers are from the kit with the exception of the skylight i continue to remove the hull to top deck seam line, but it is going


- 141 replies
-
- 10
-
-
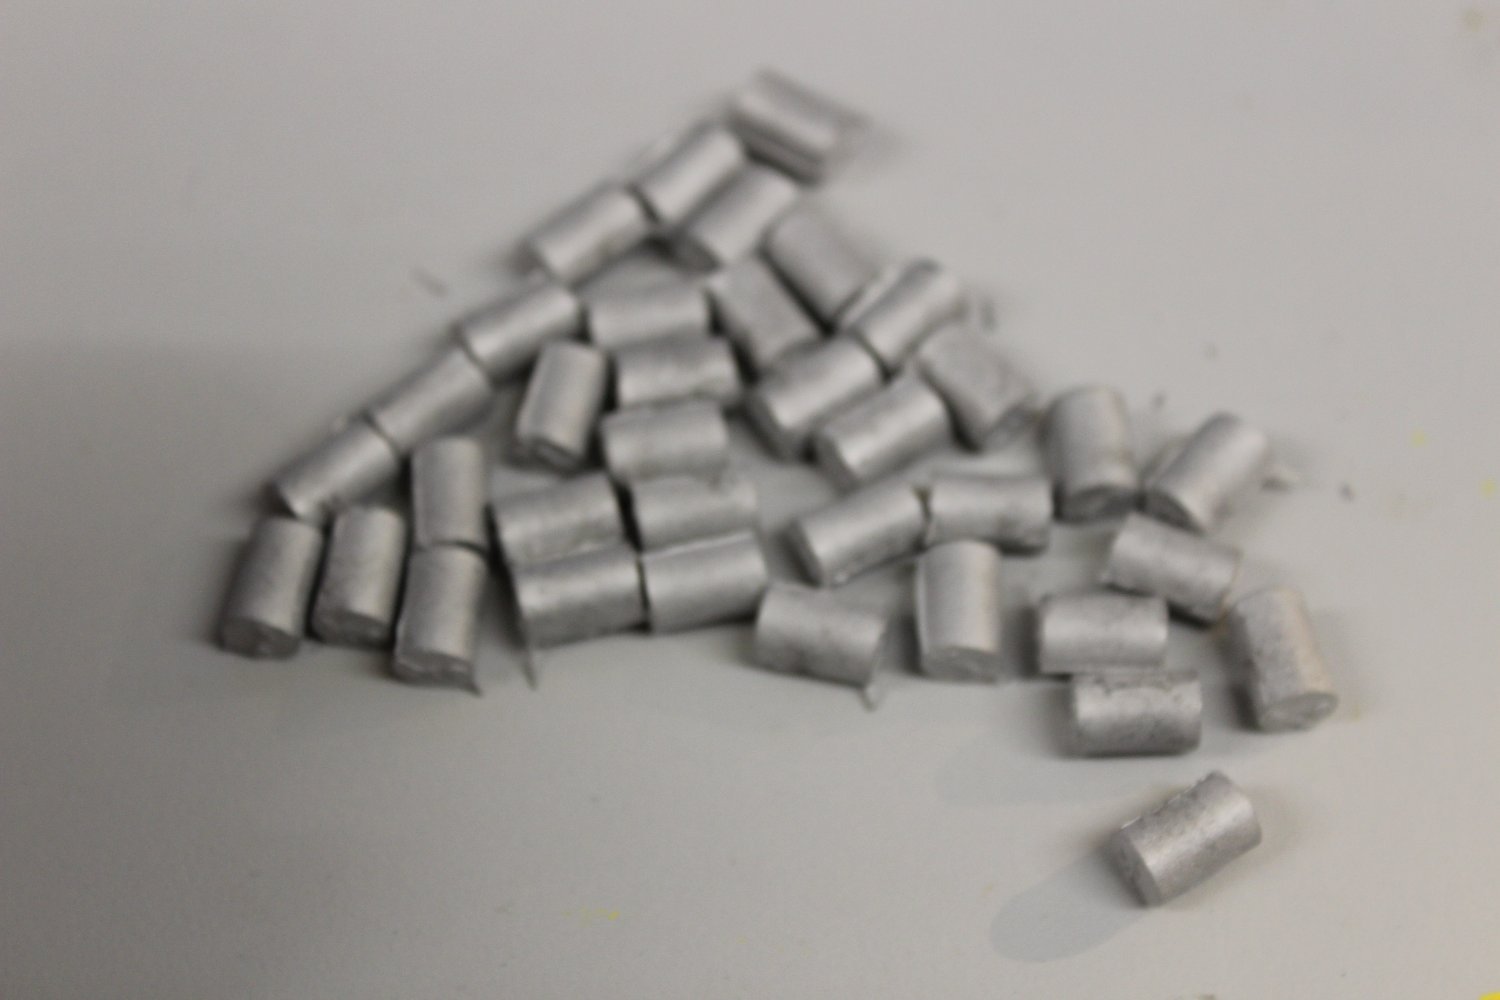
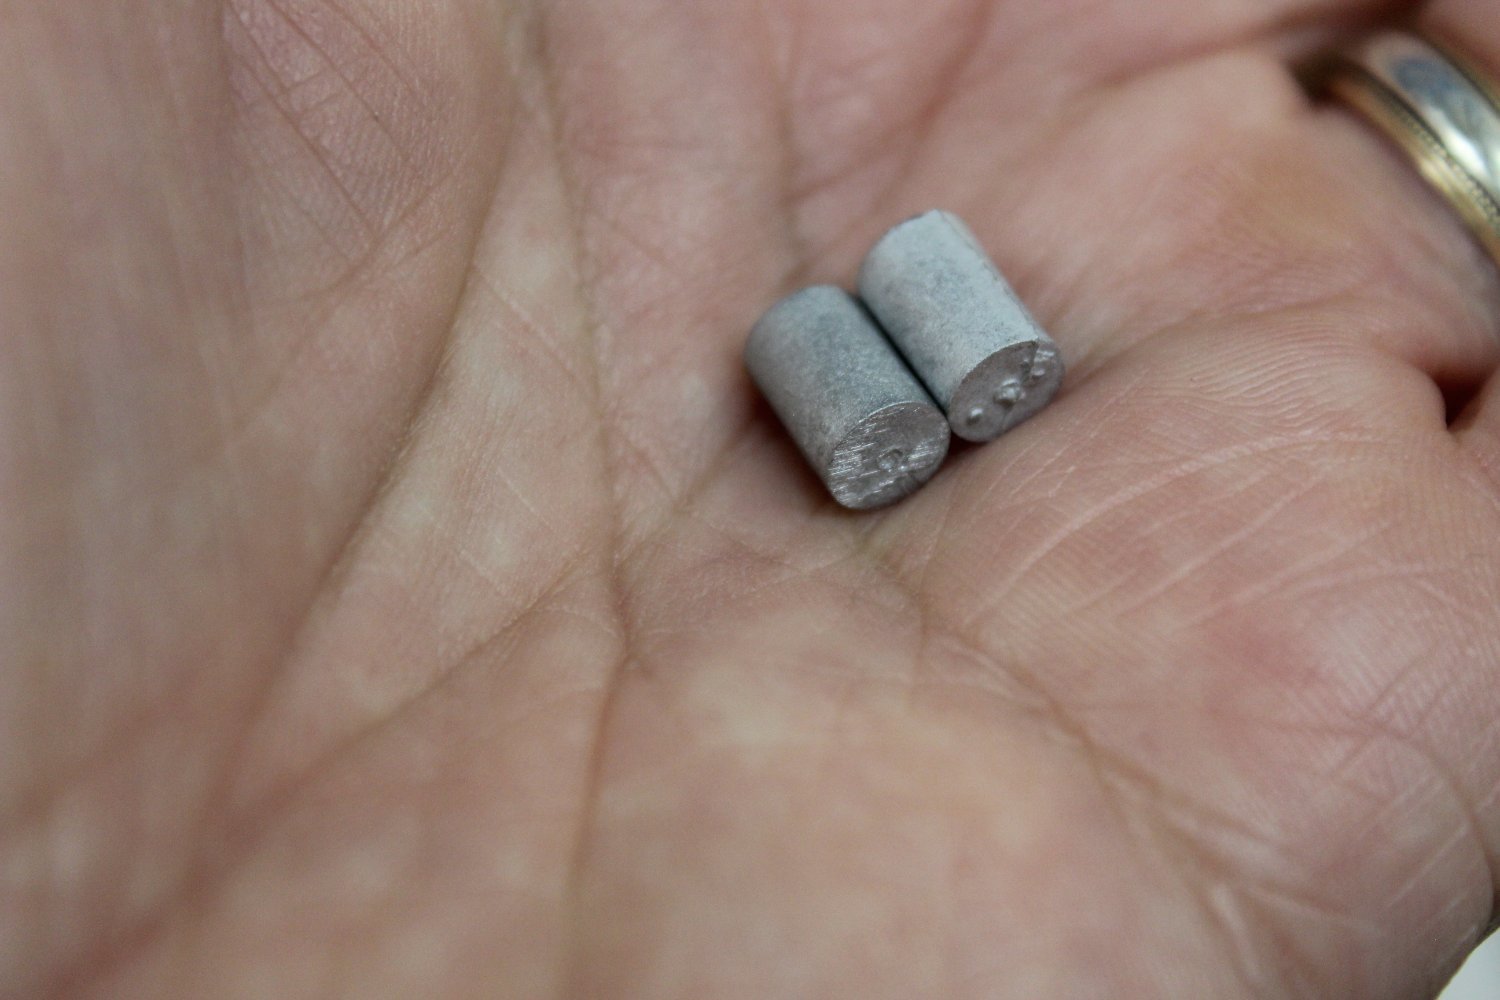
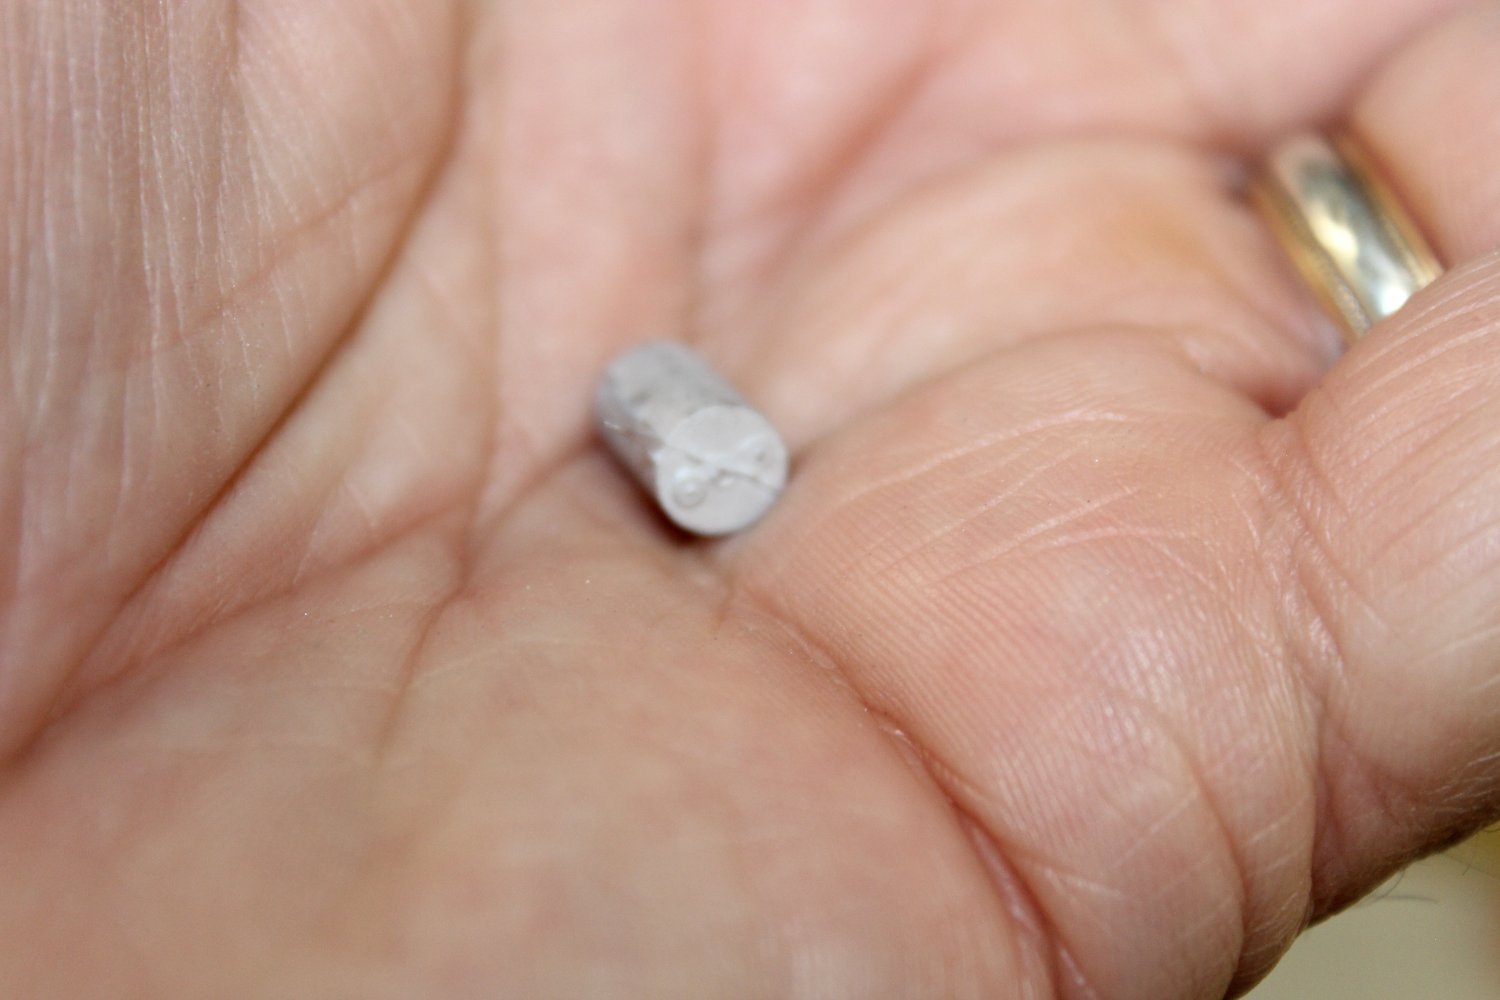
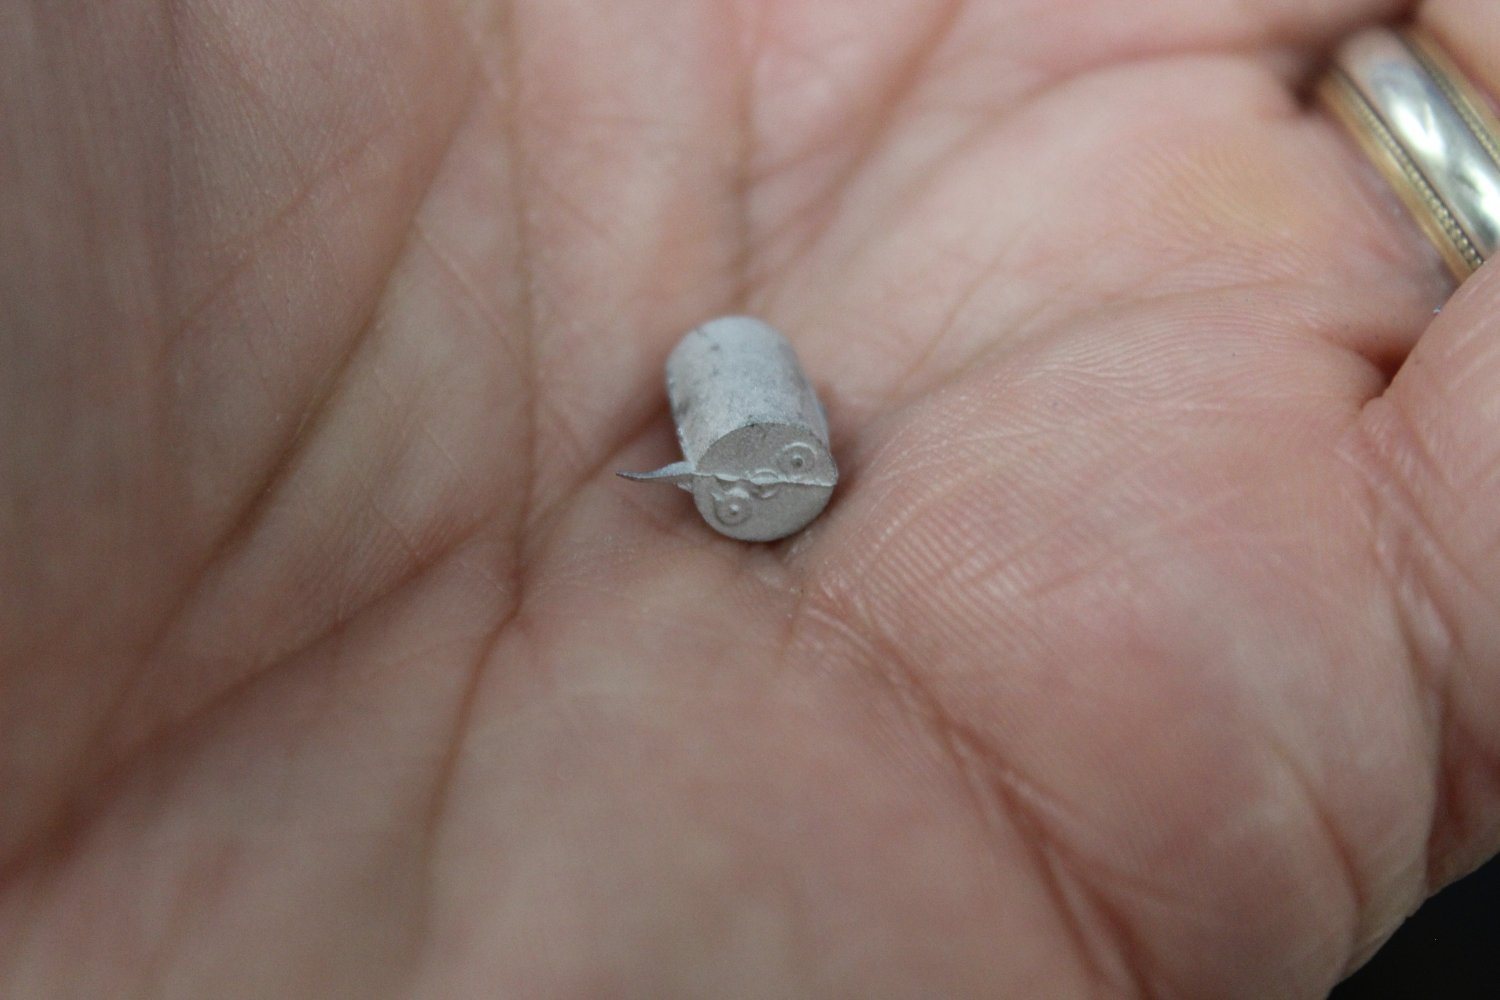
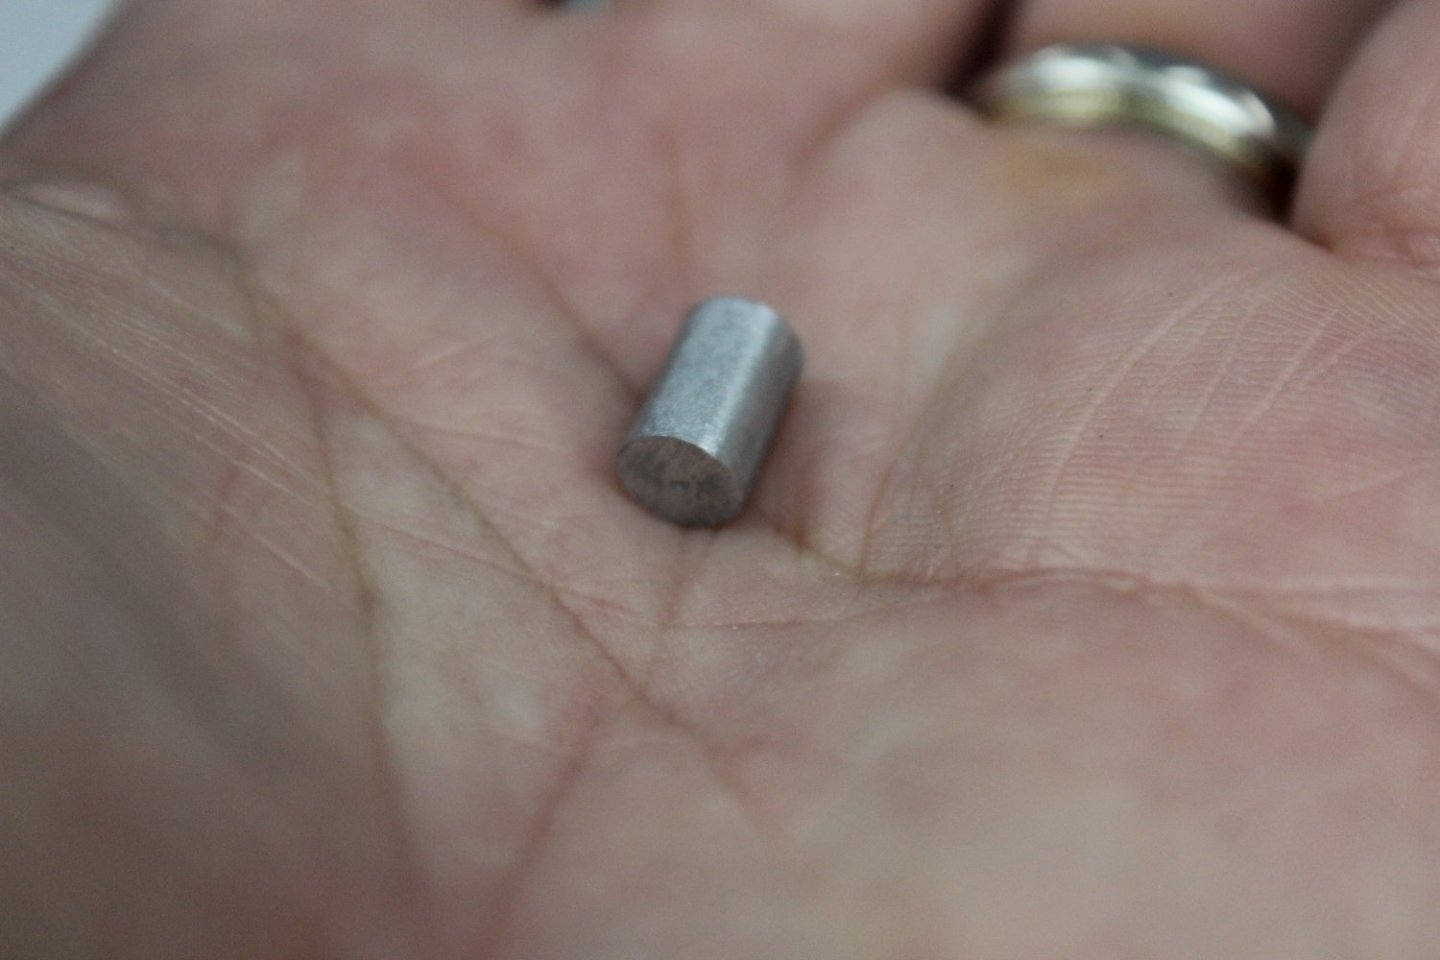
70 Mark VII were carried, and 40 of them were in the racks, with the crappy Atlantic weather they would have to be quite sturdy Depth Charges, Mark 6, Mark 6 Mod. 1, Mark 7, Mark 7, Mod. 1 (maritime.org)
-
yes i am, its a bit messy still in places, but i am now even managing to clean previous bits up
-
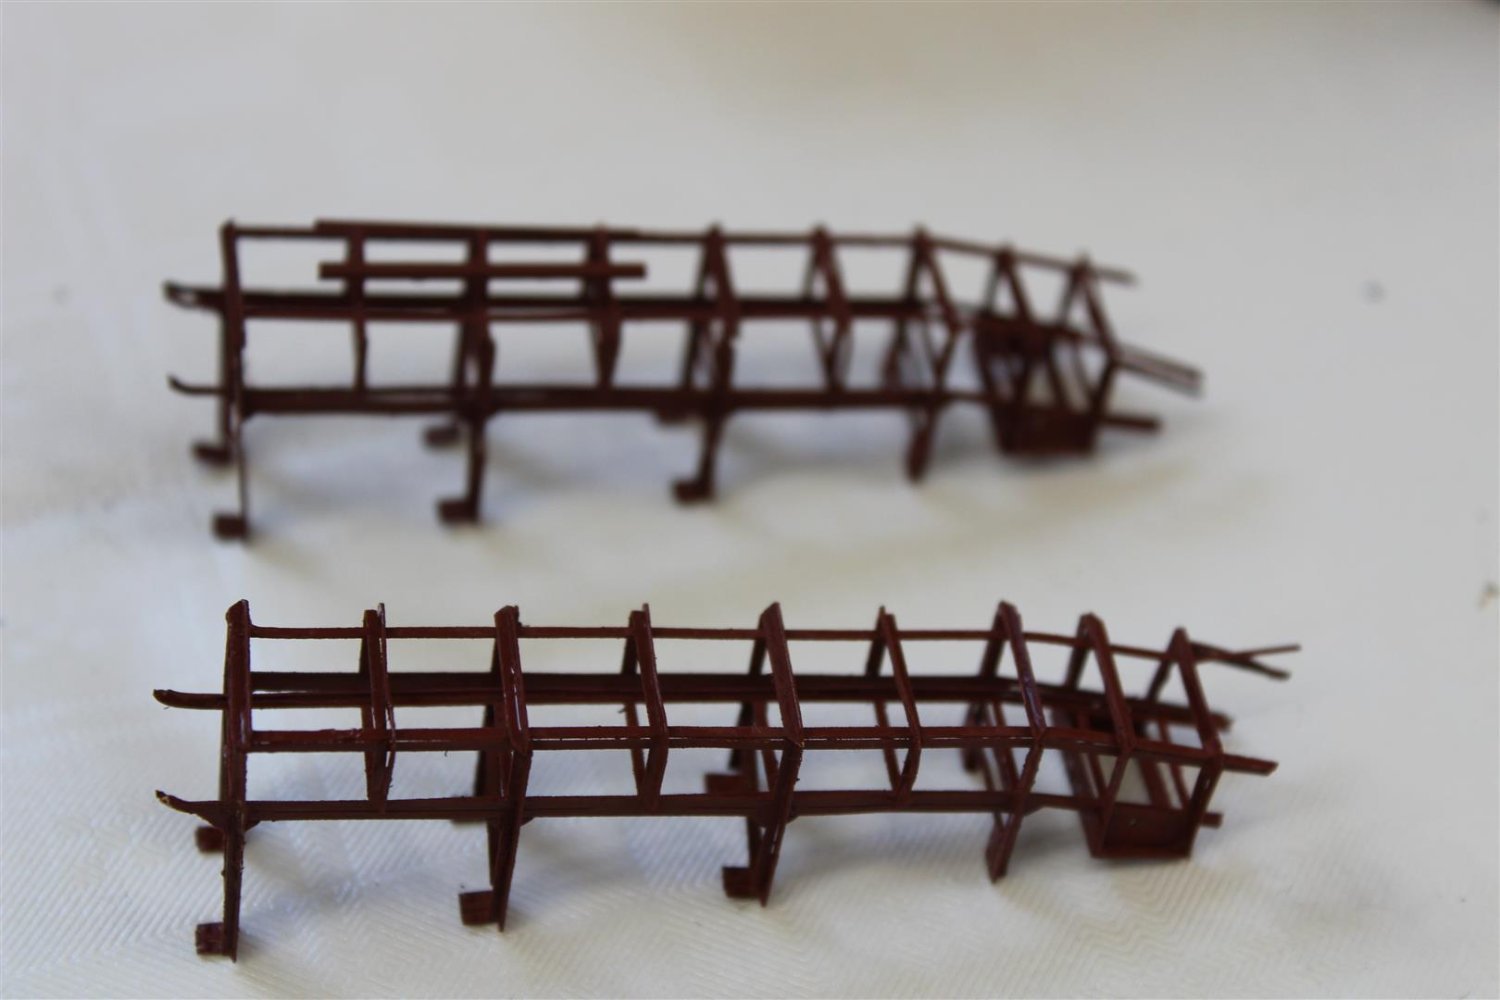
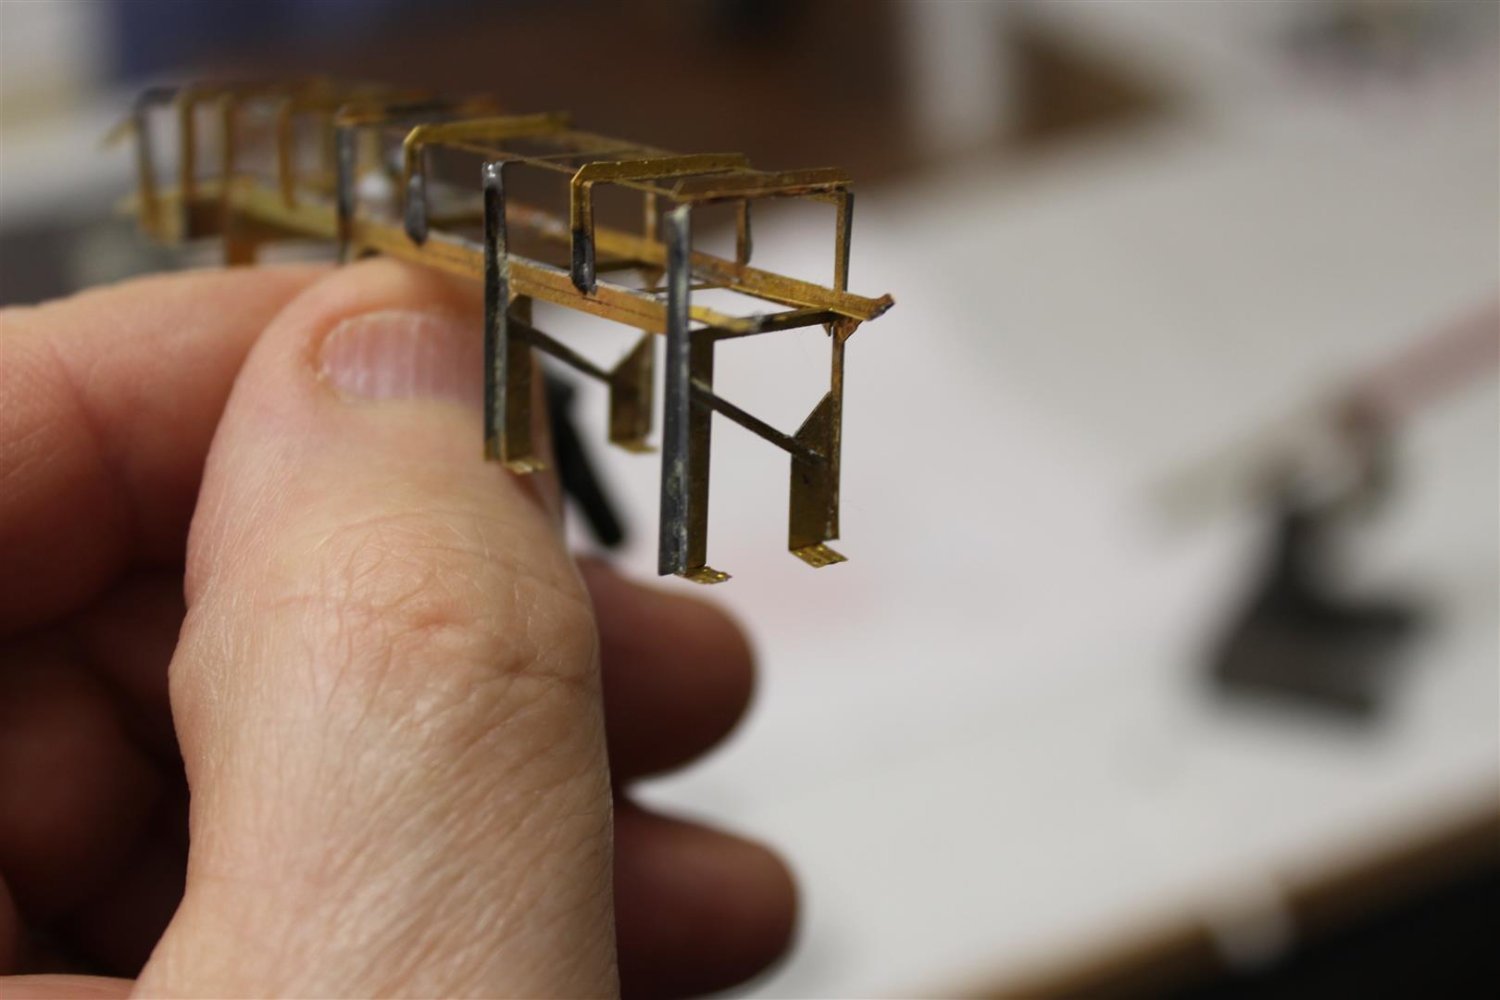
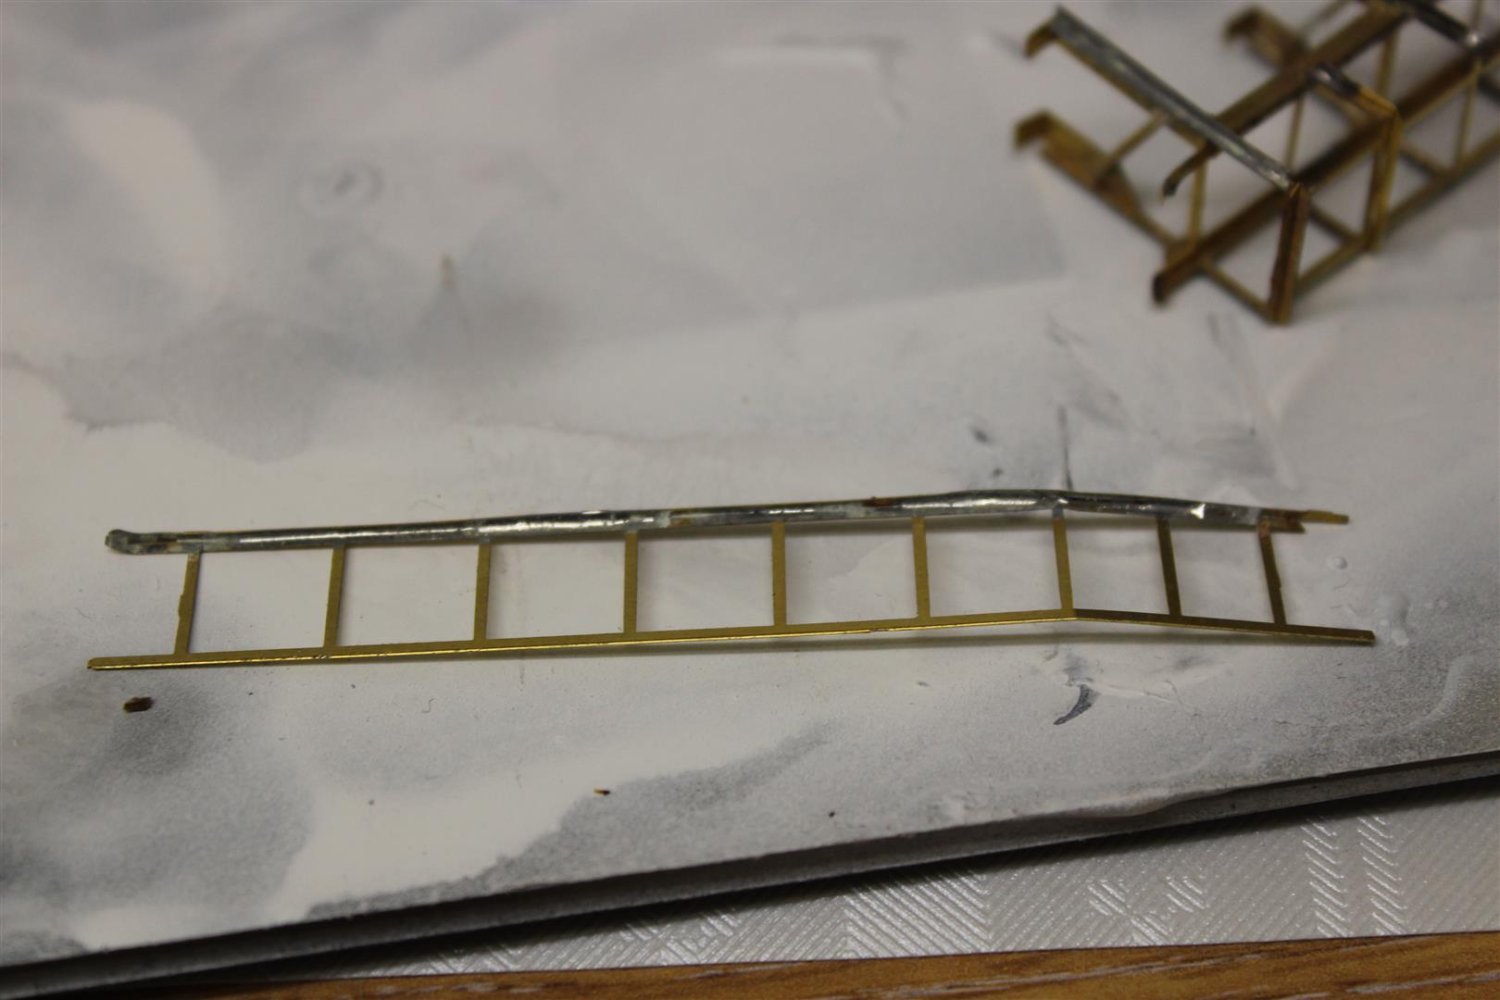
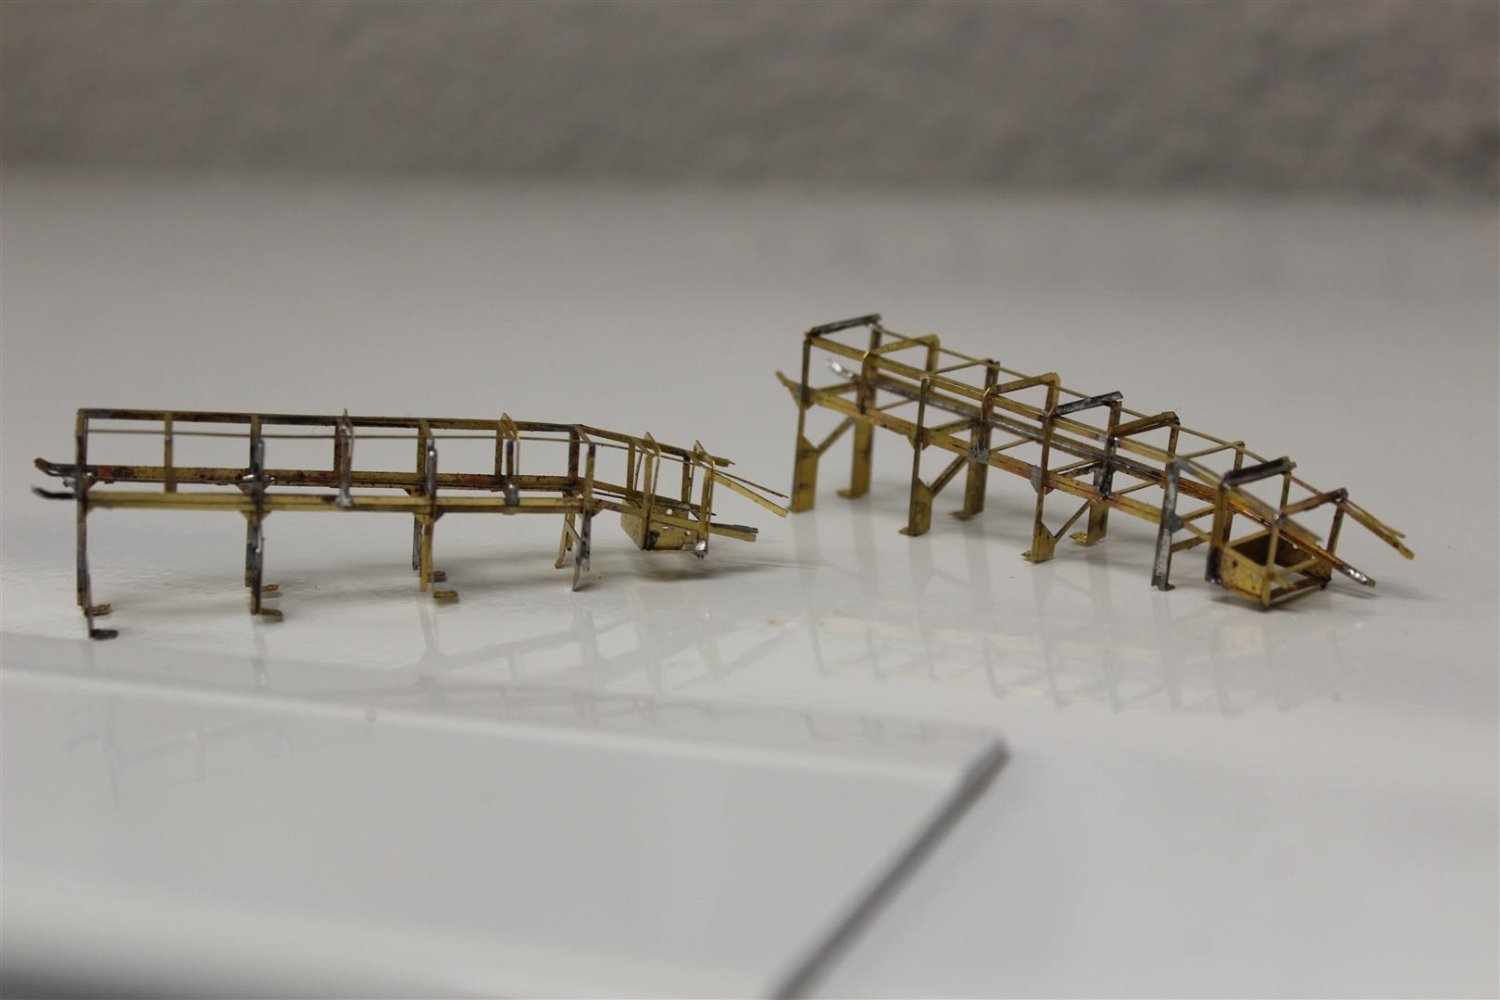
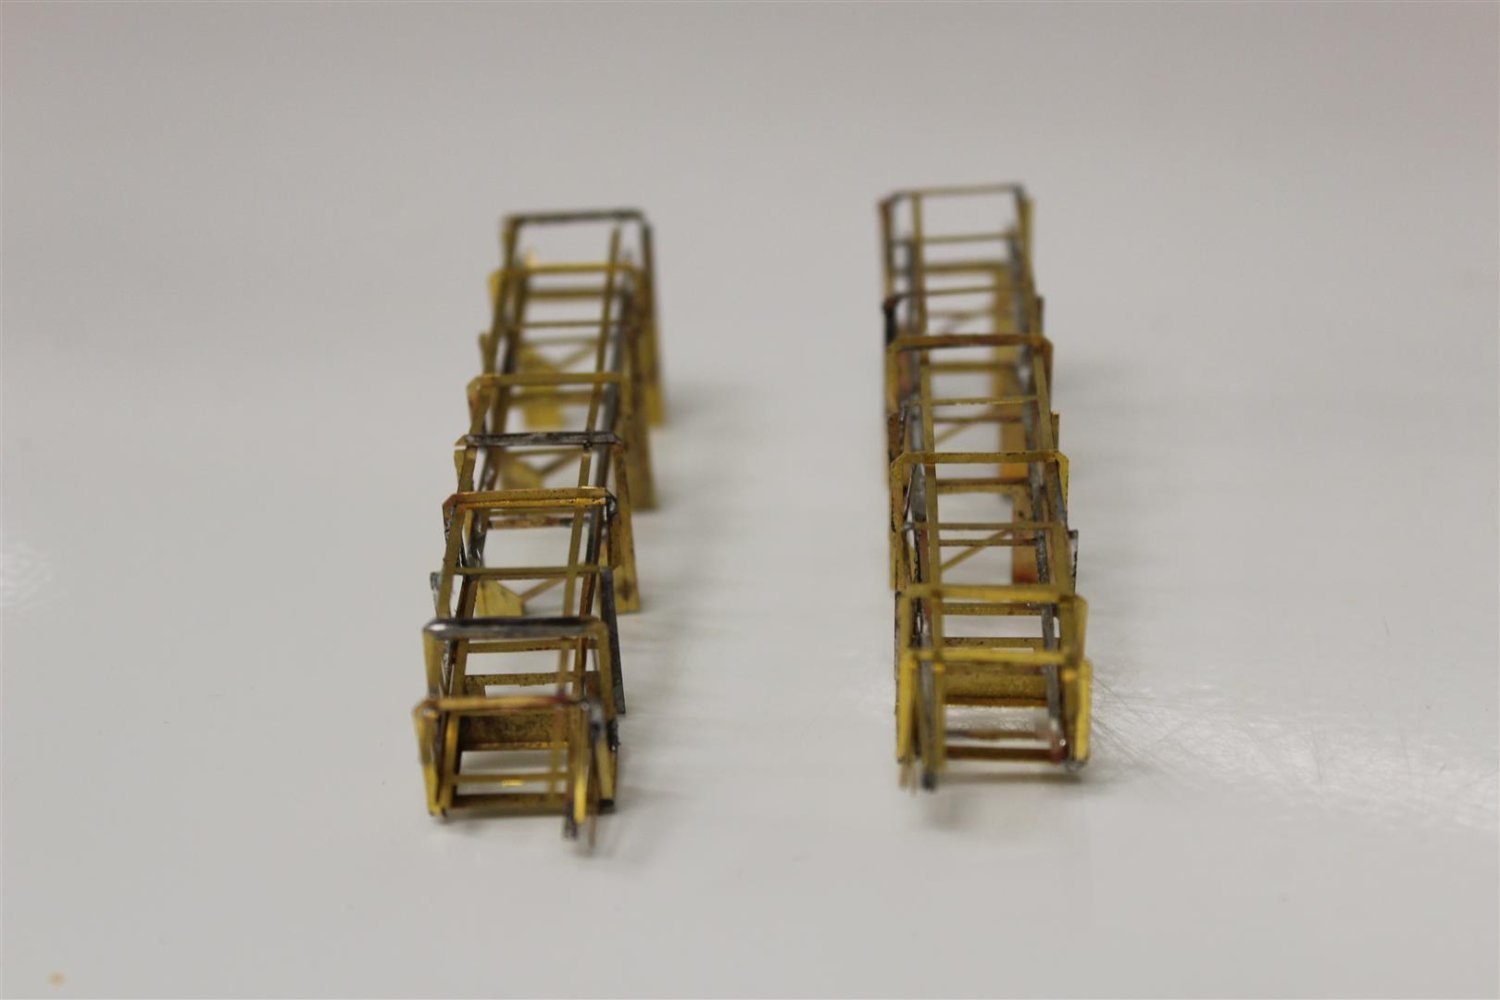
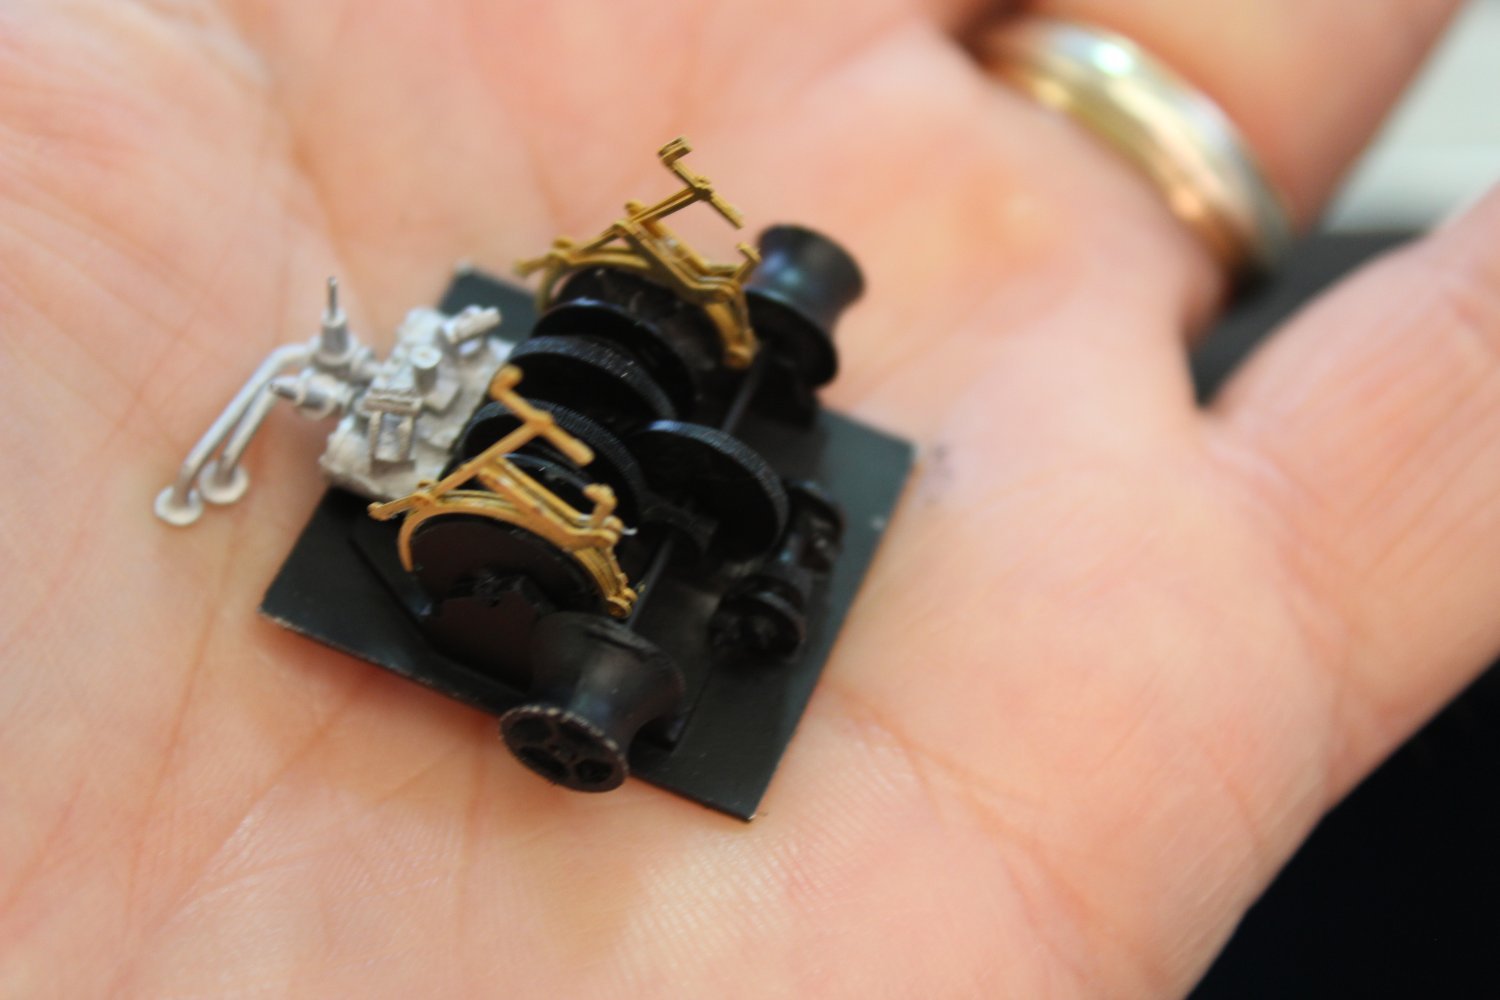
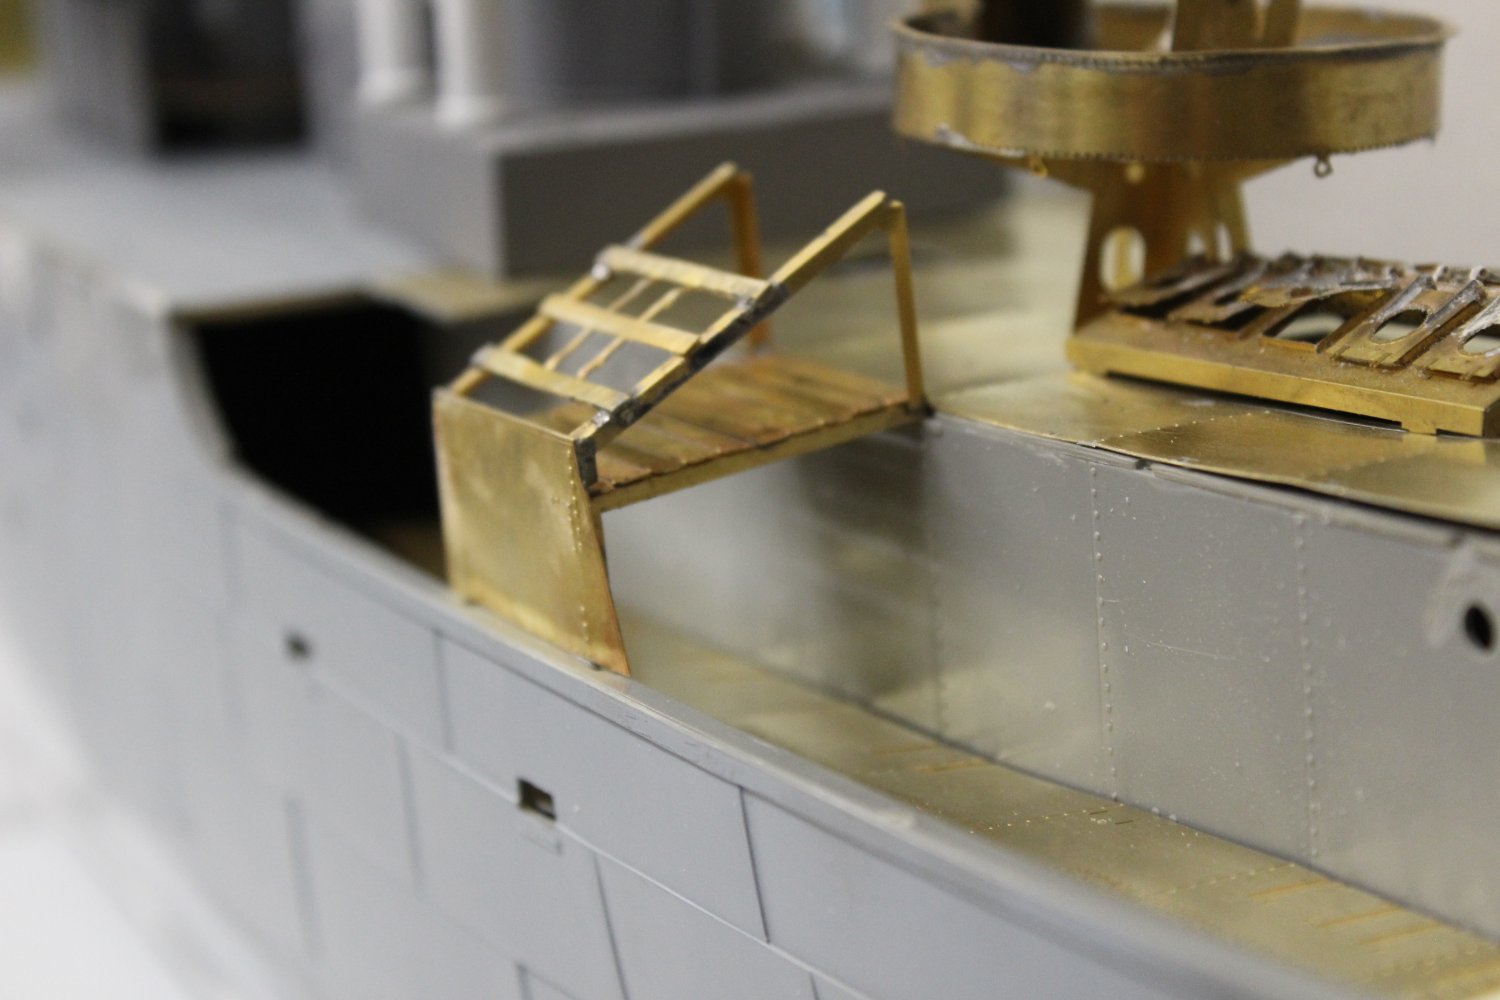
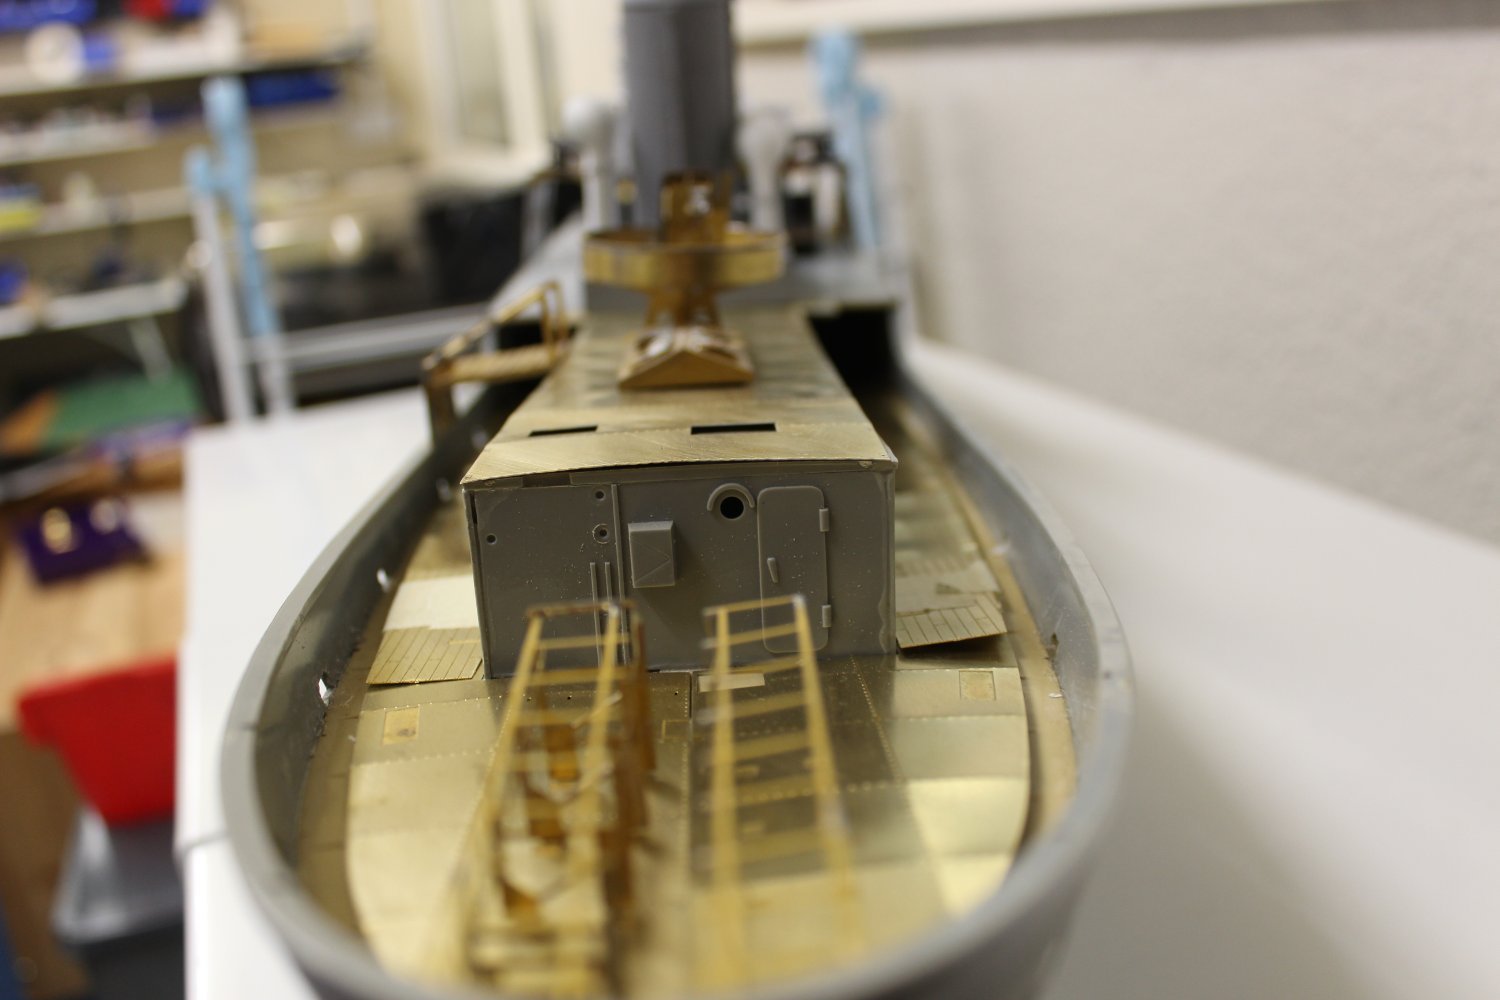
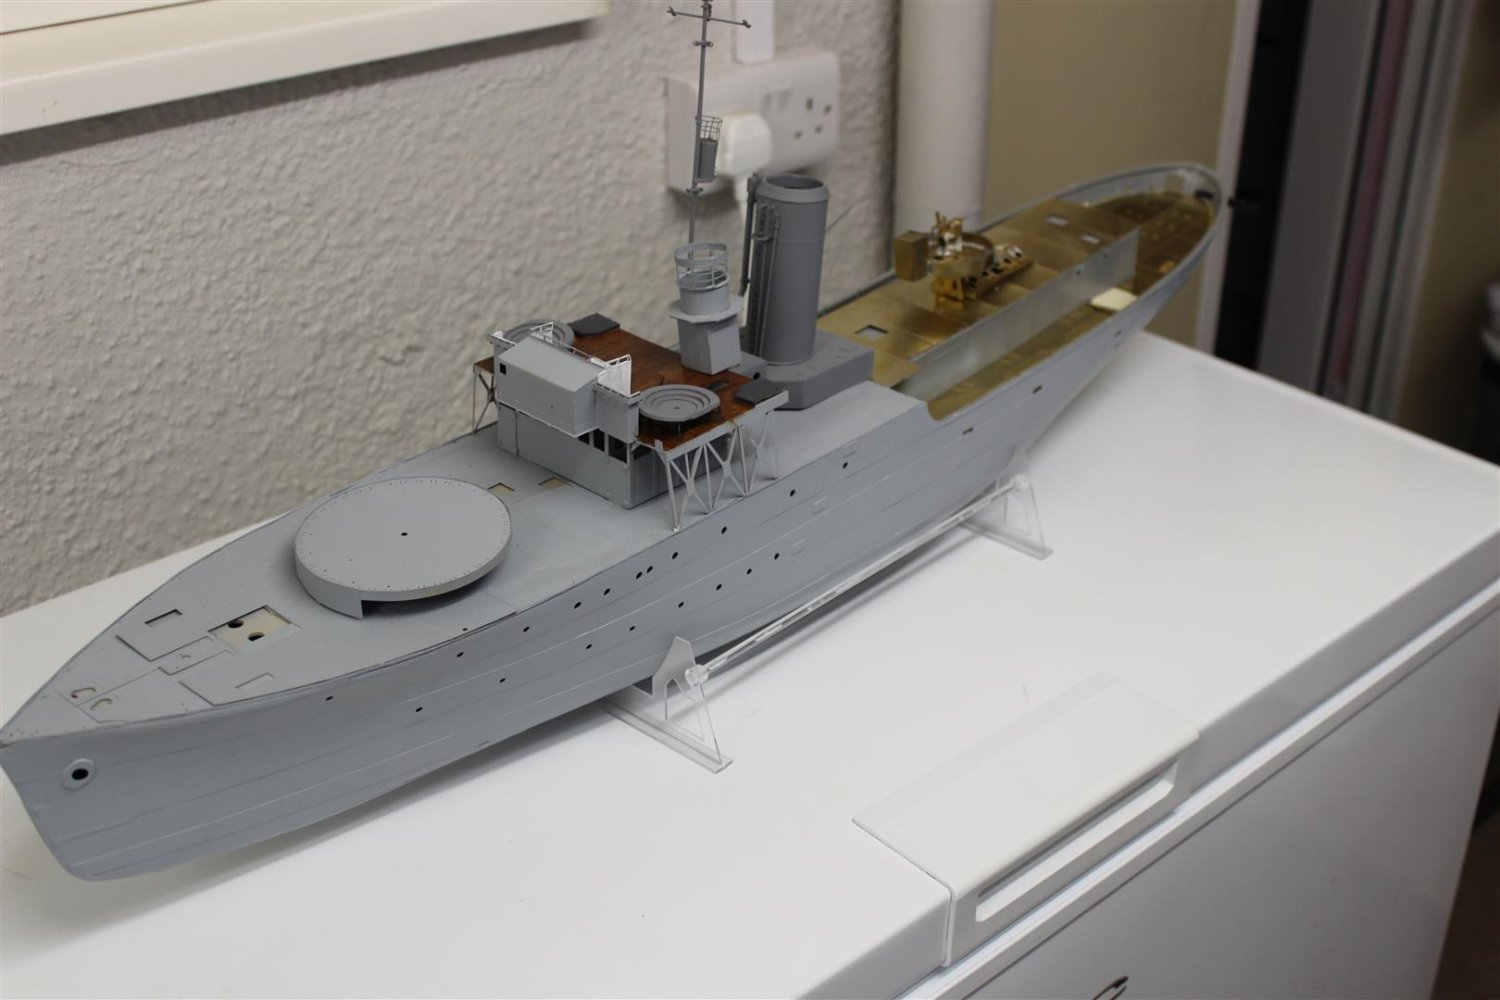
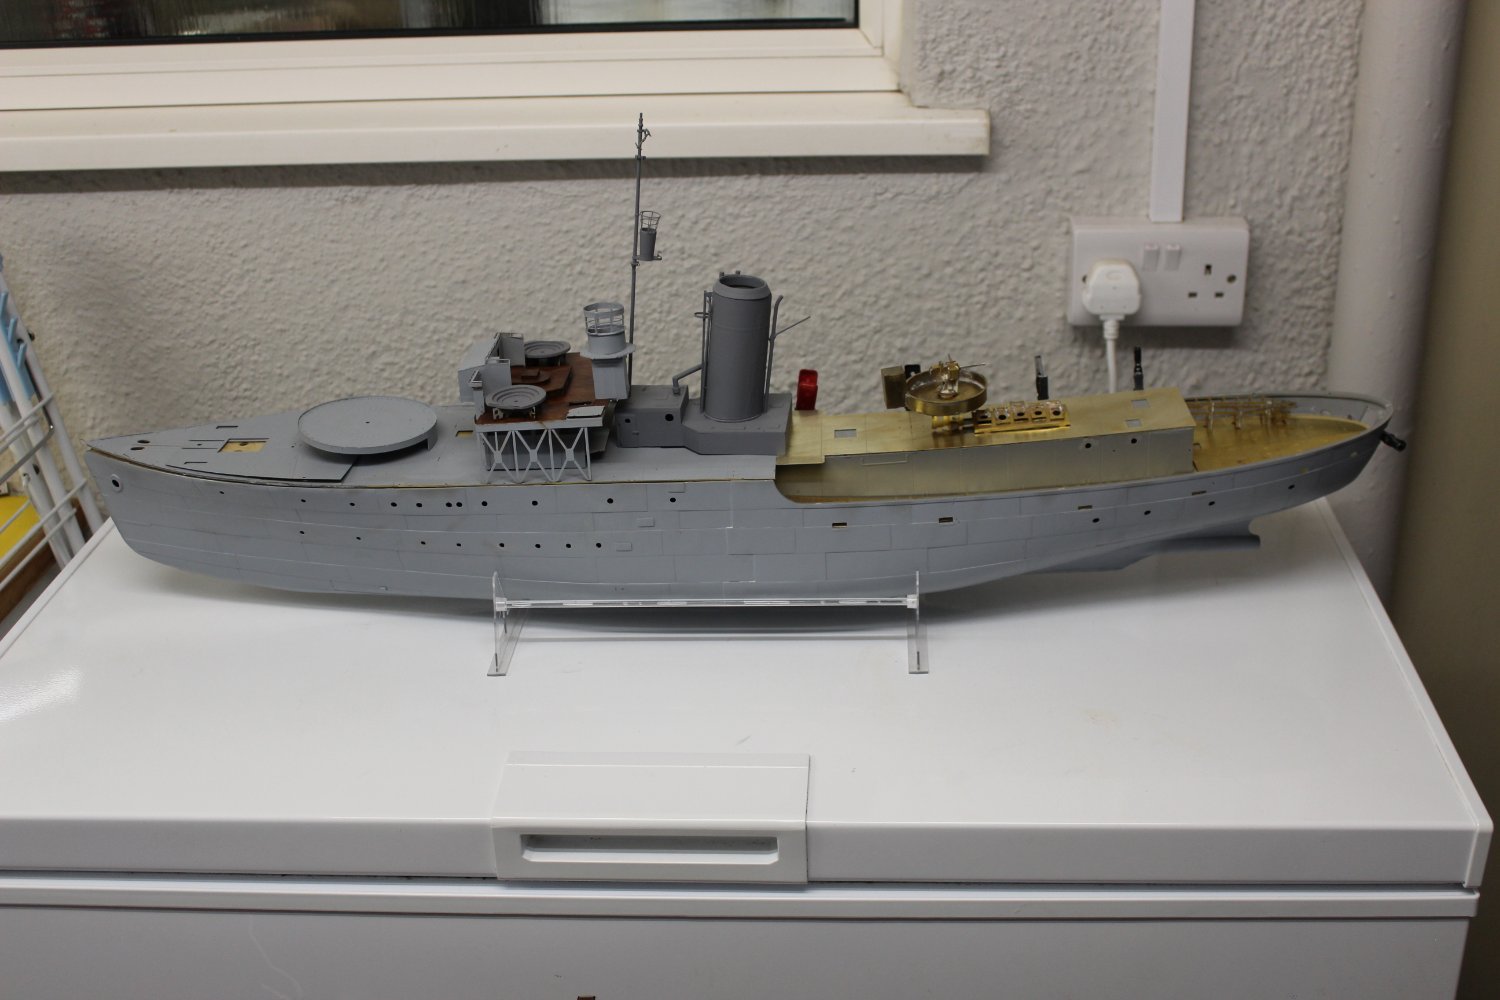
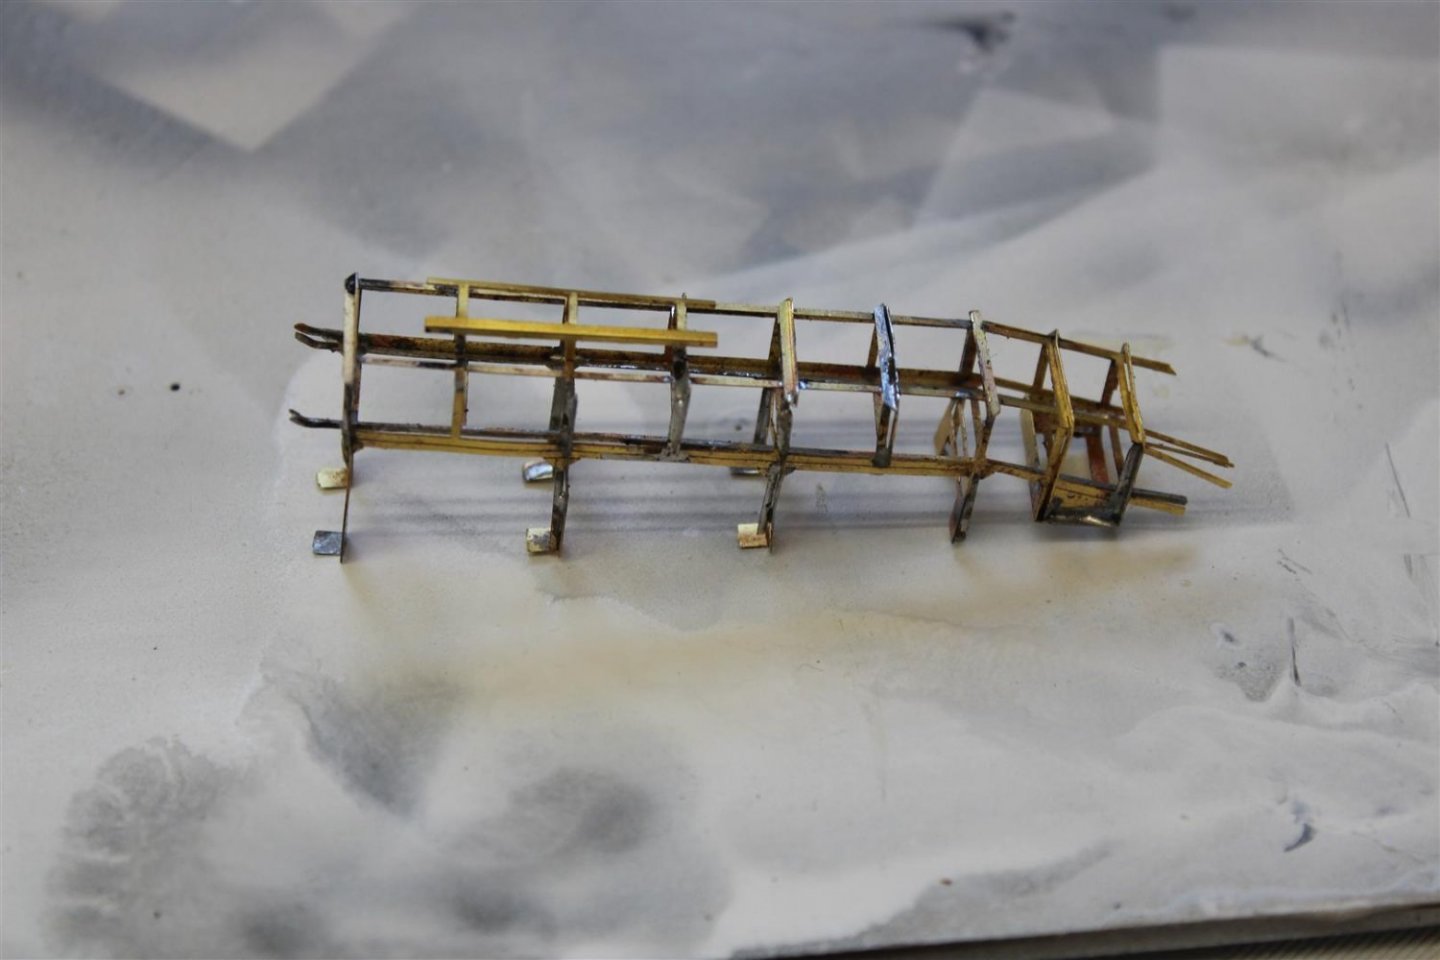
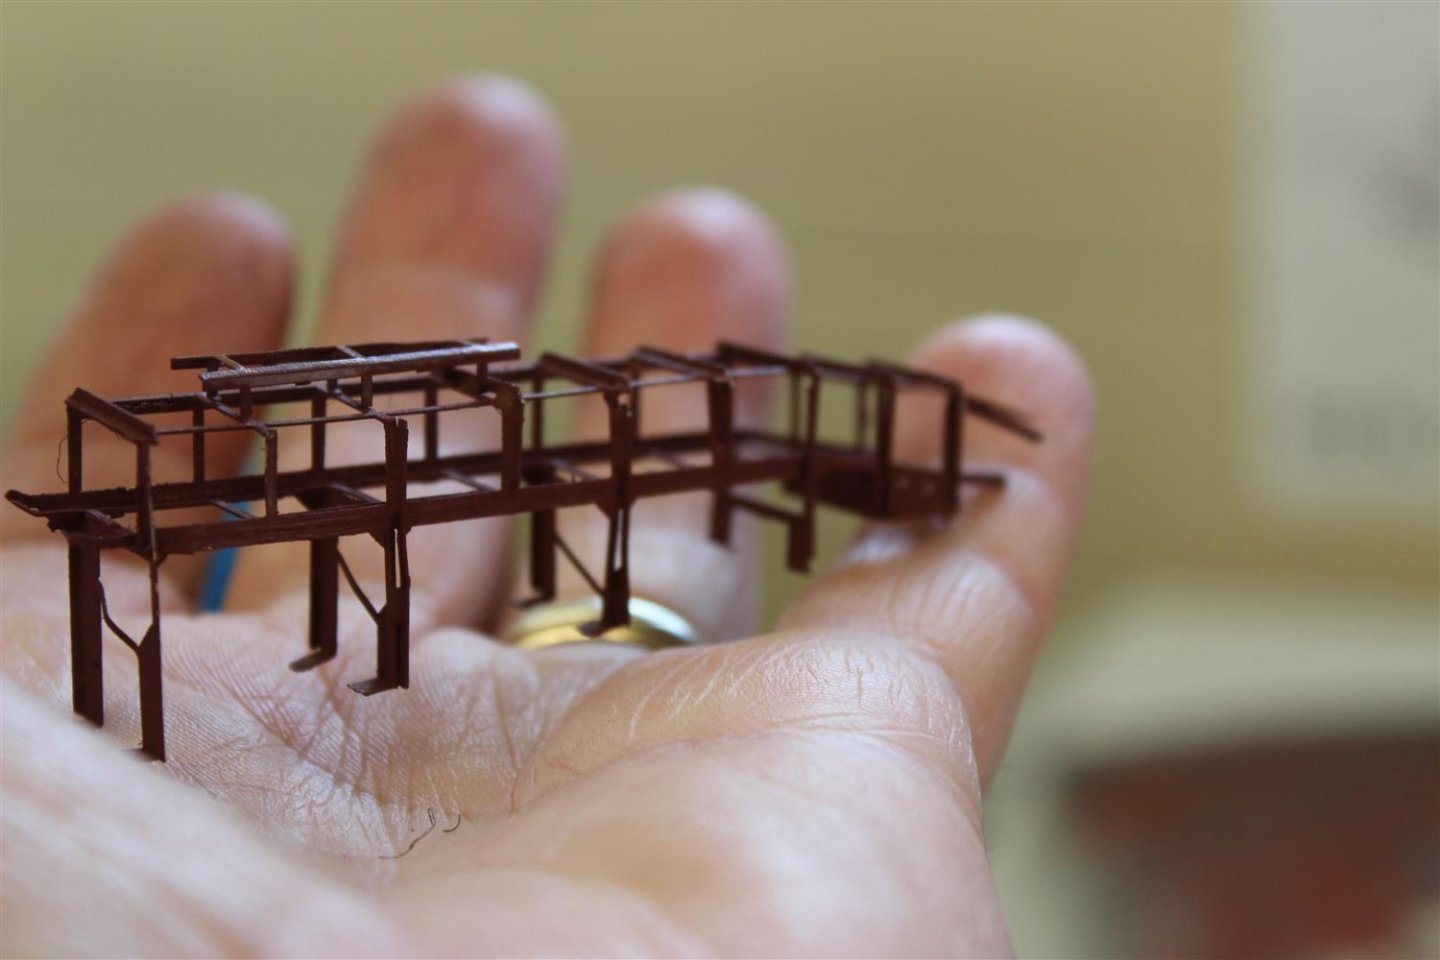
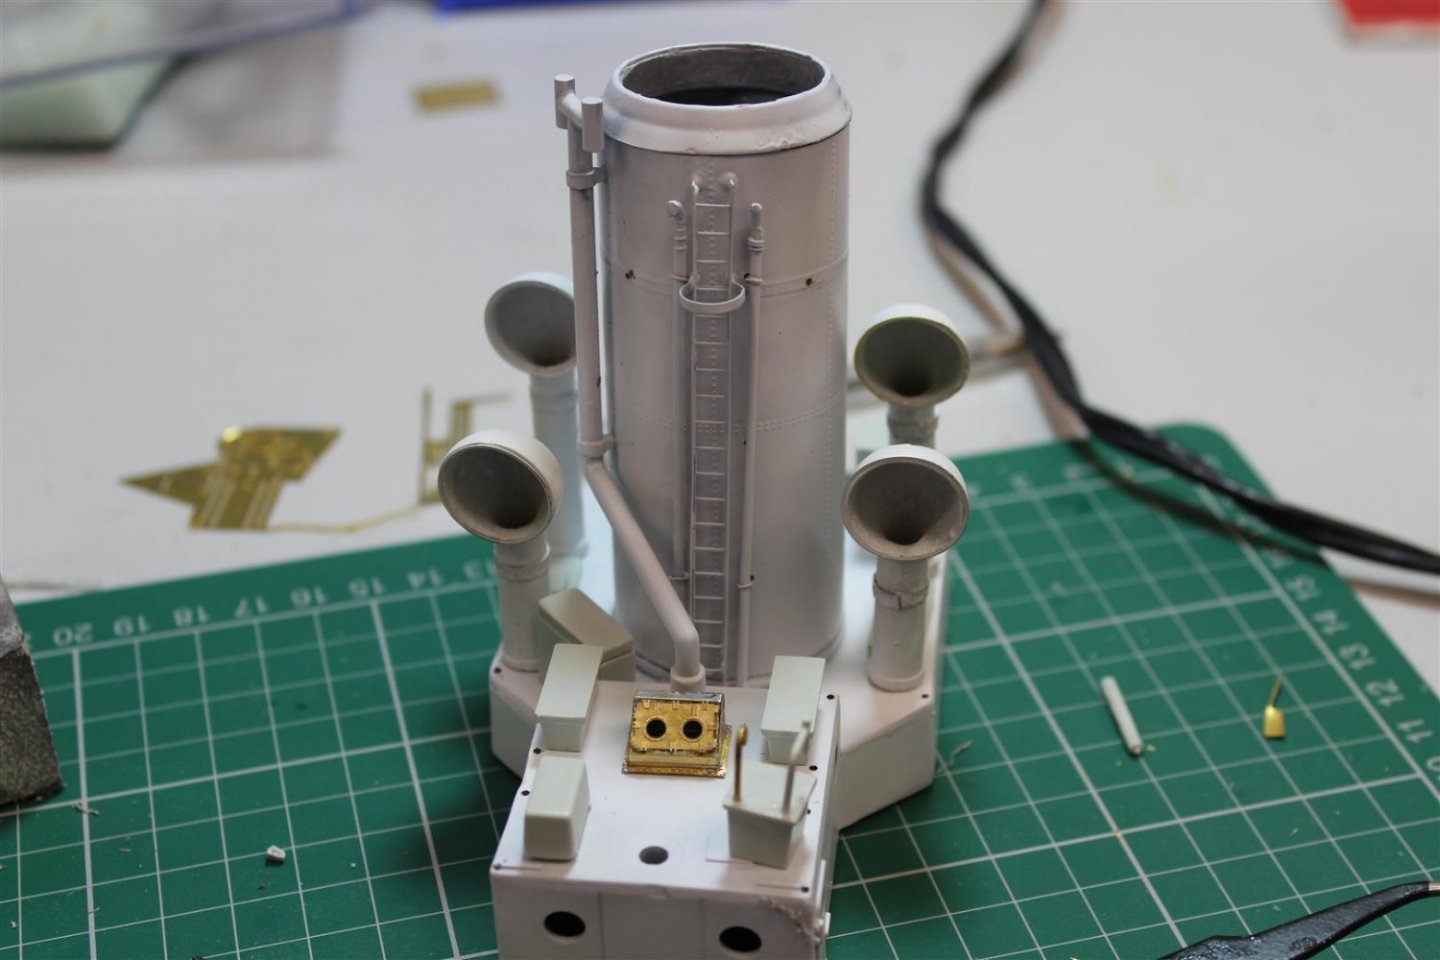
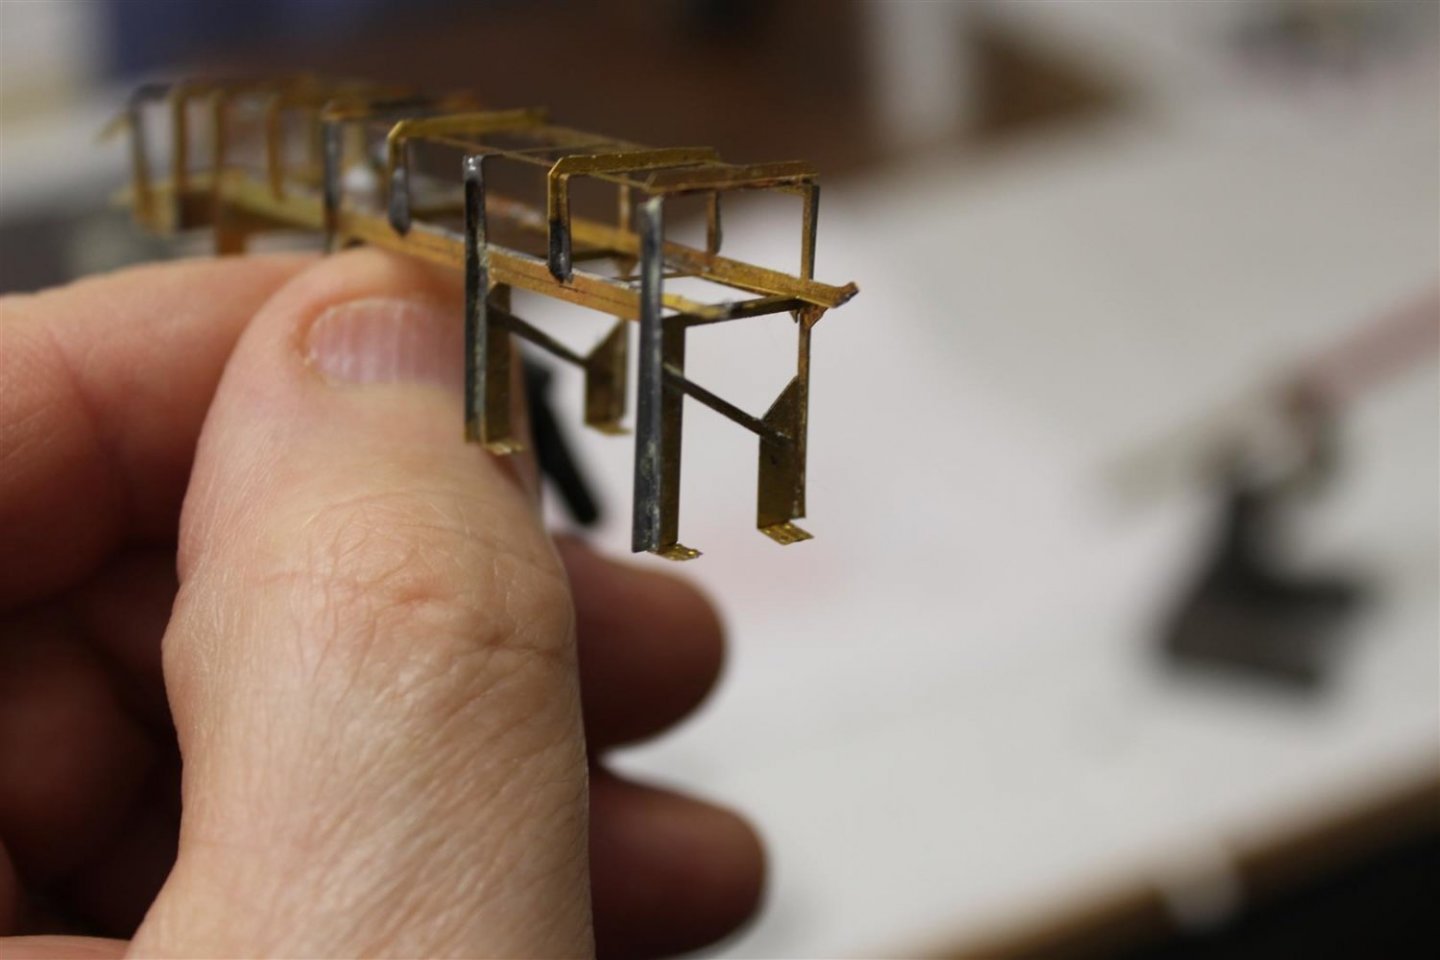
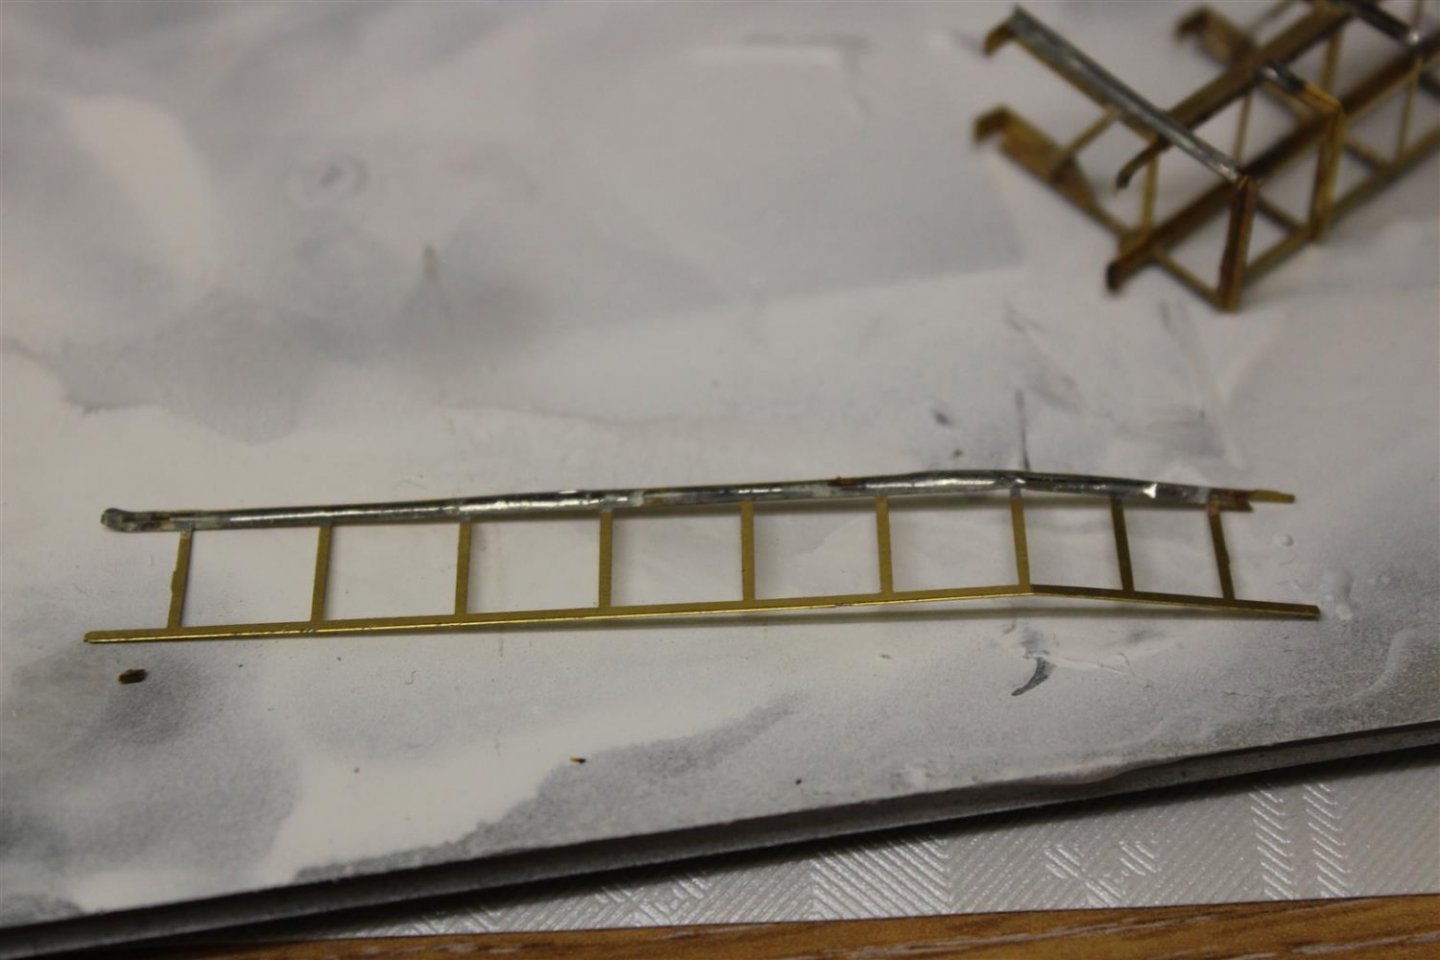
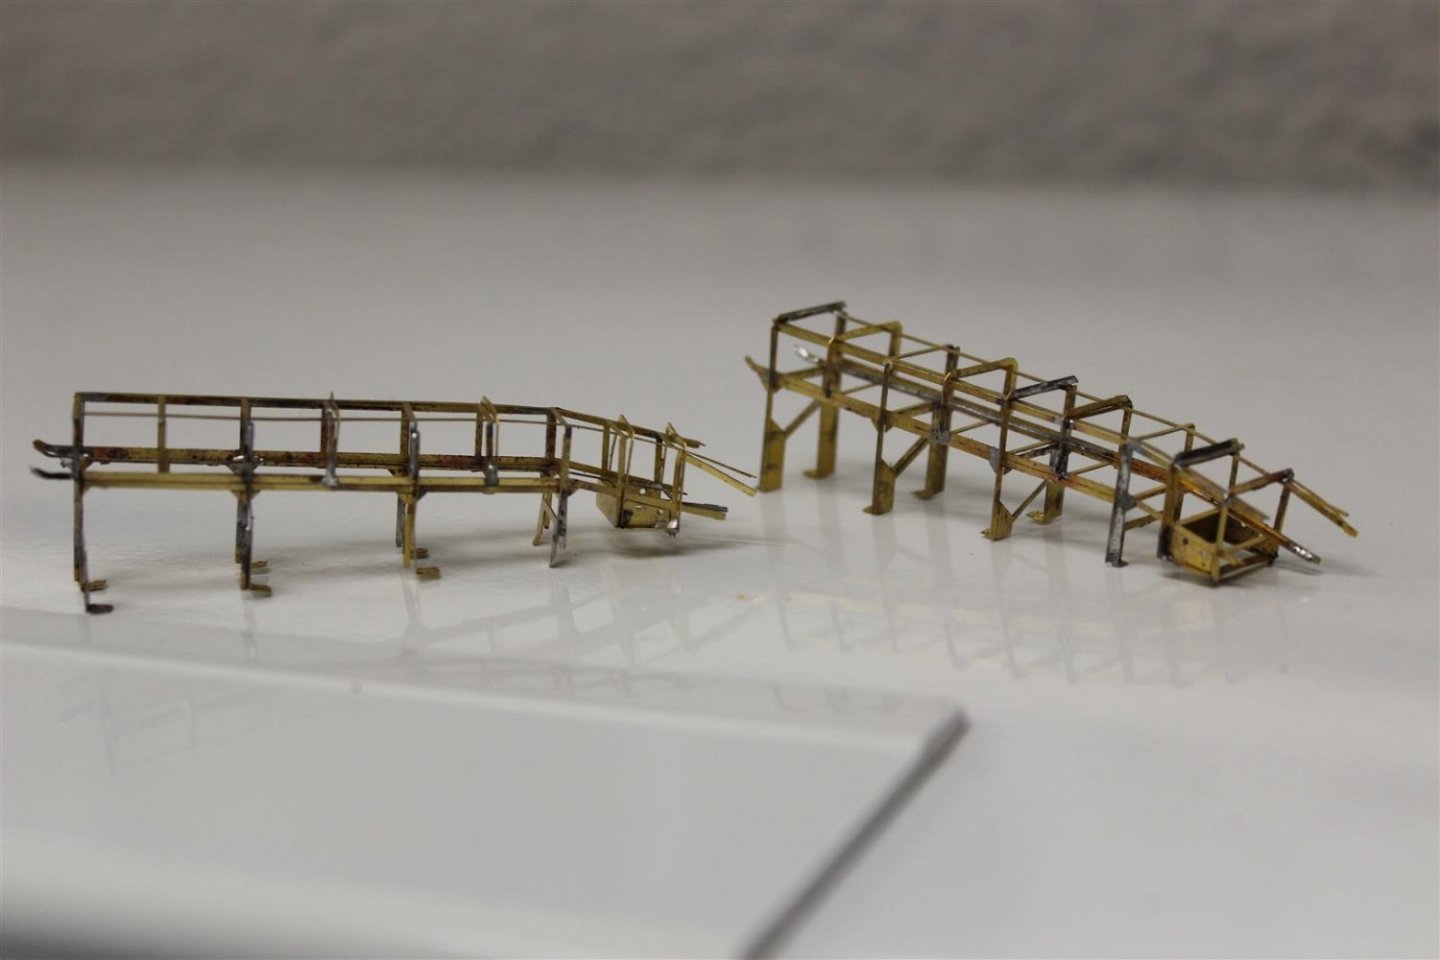
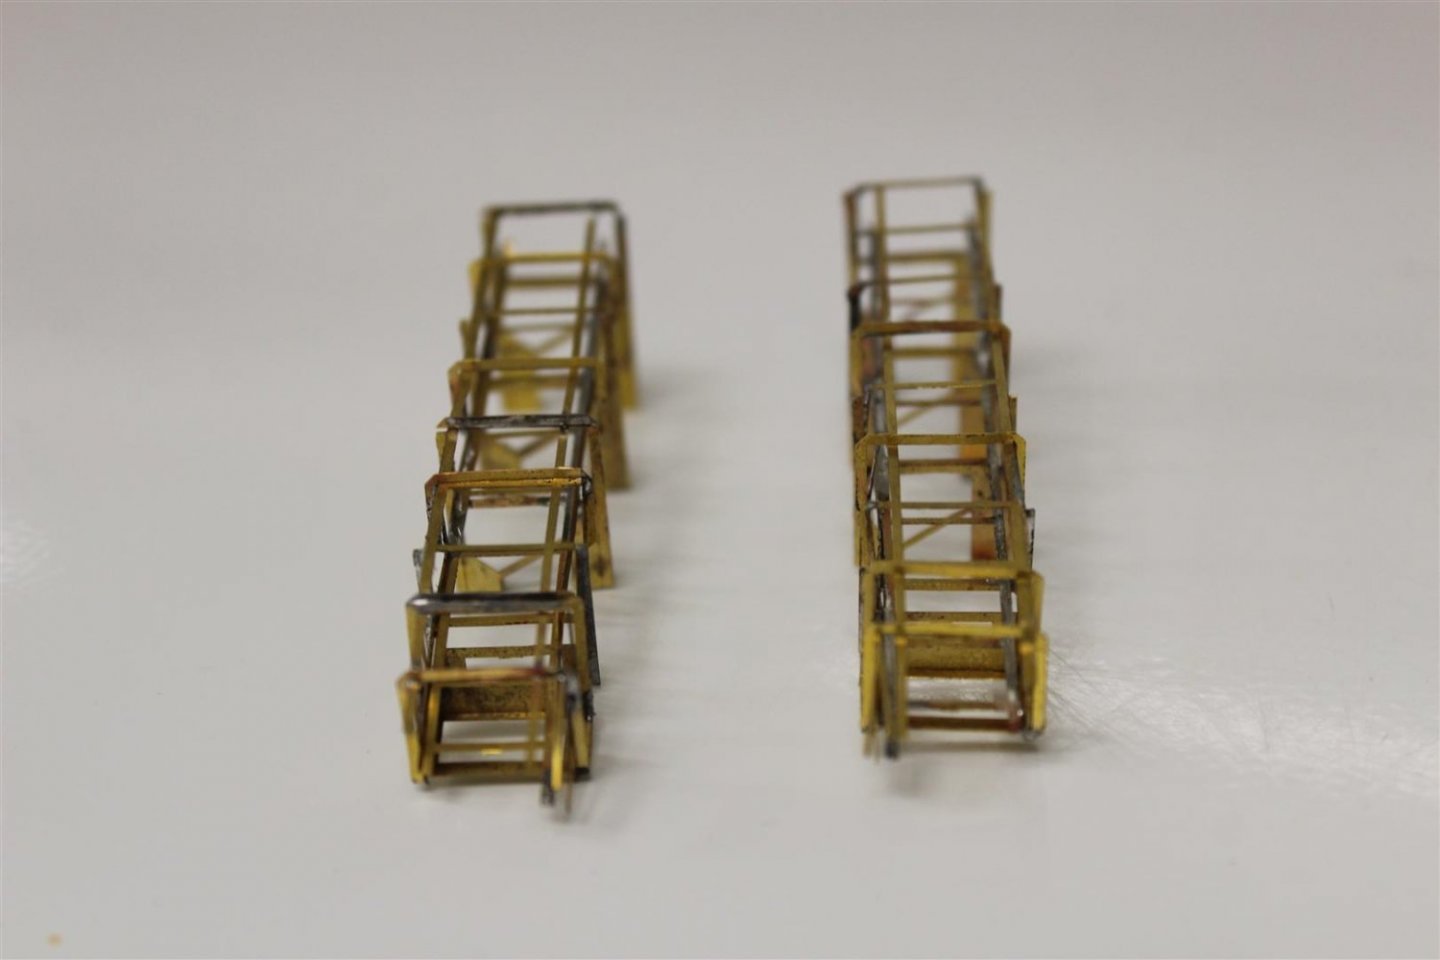
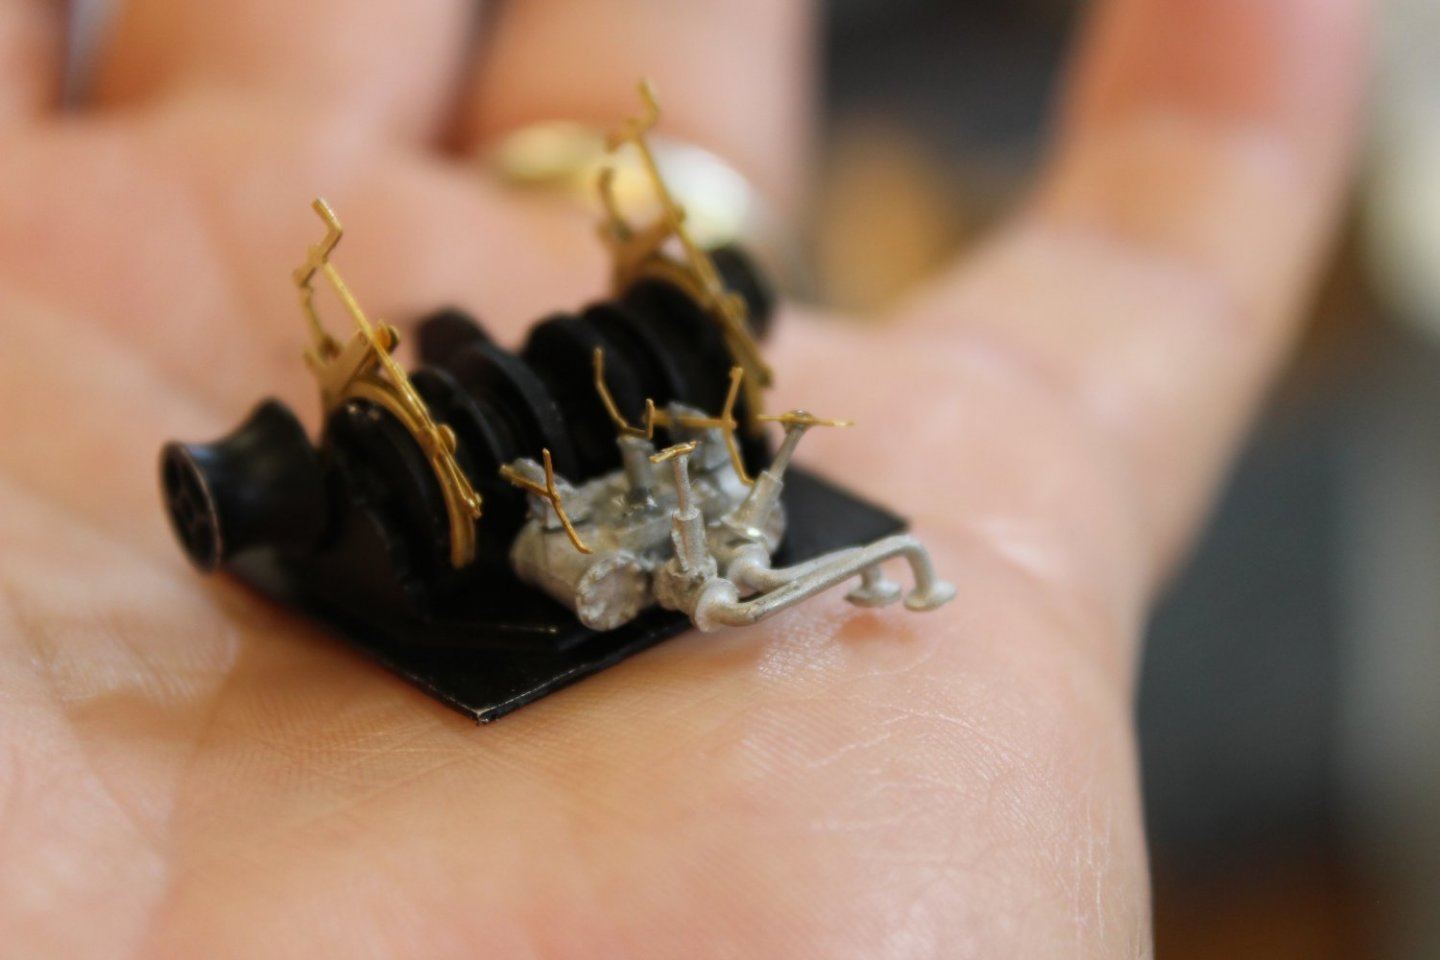
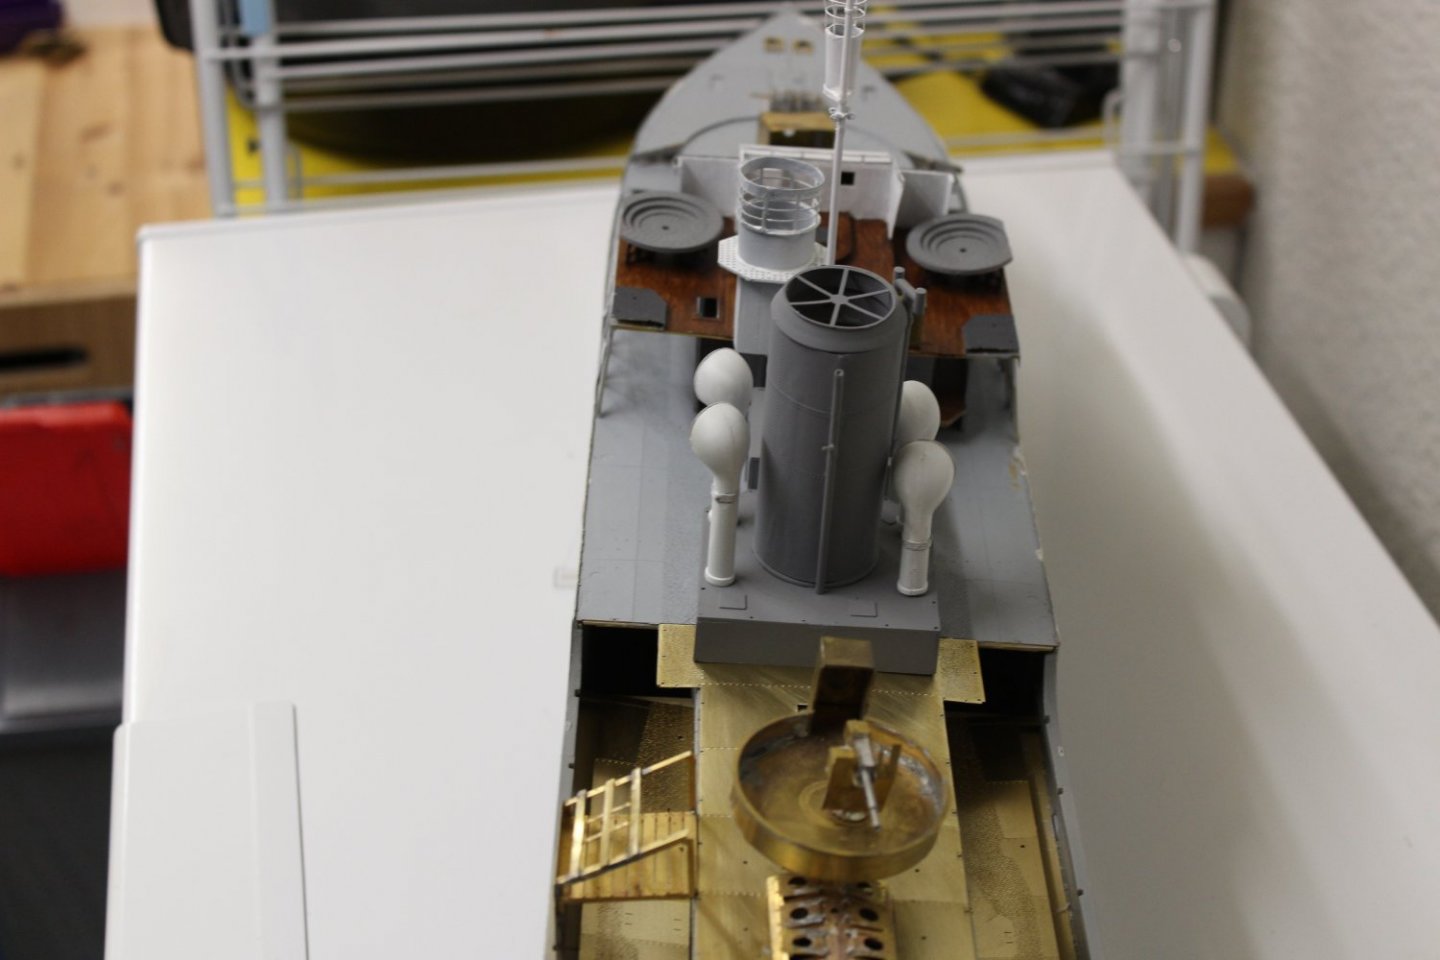
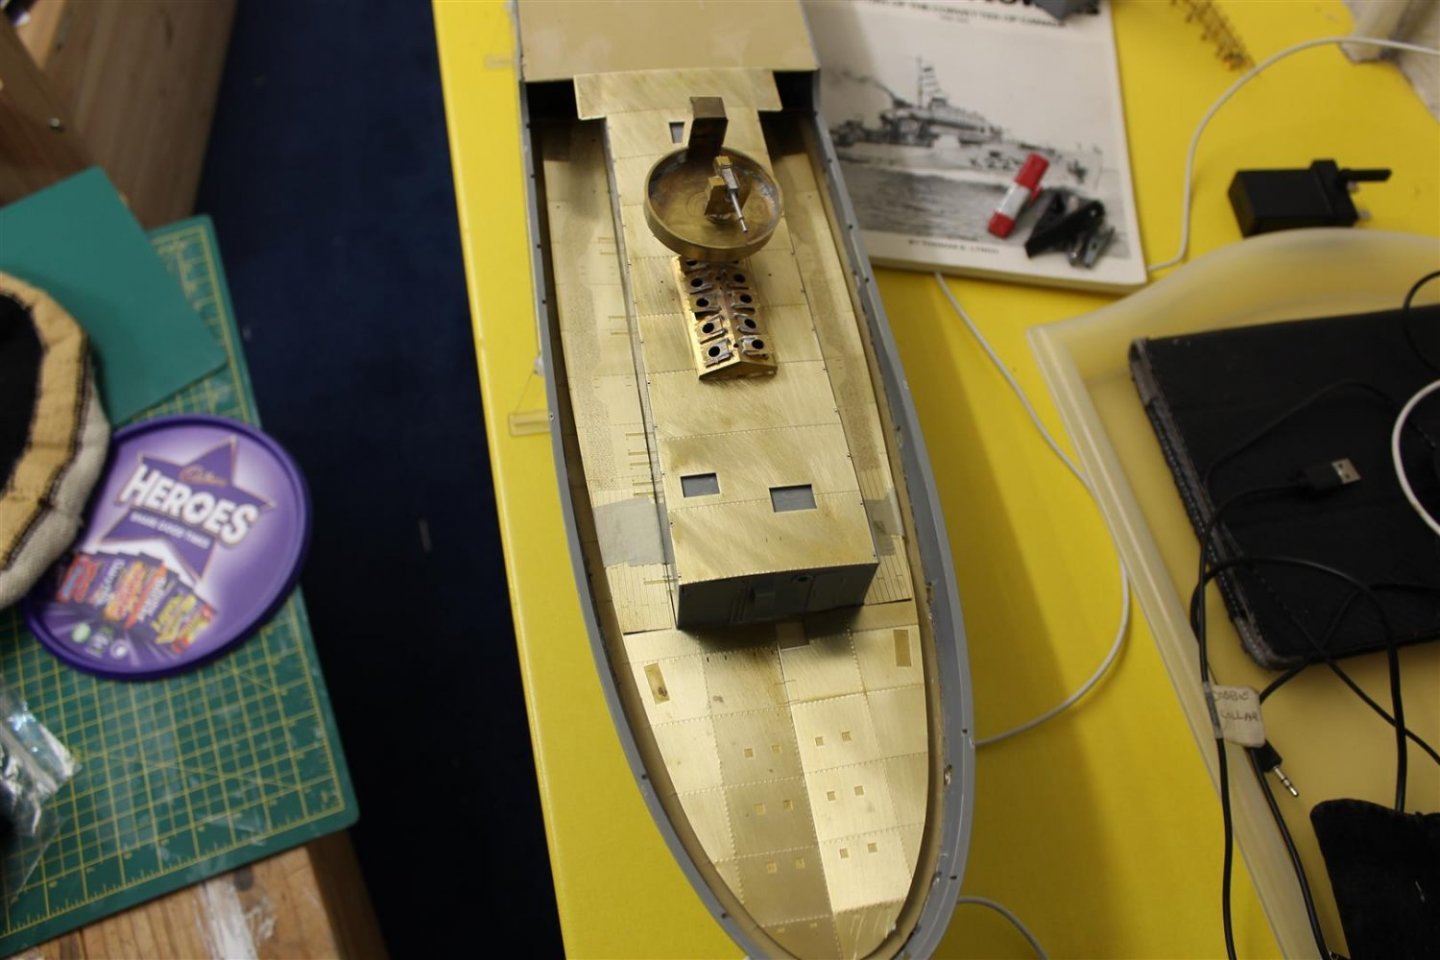
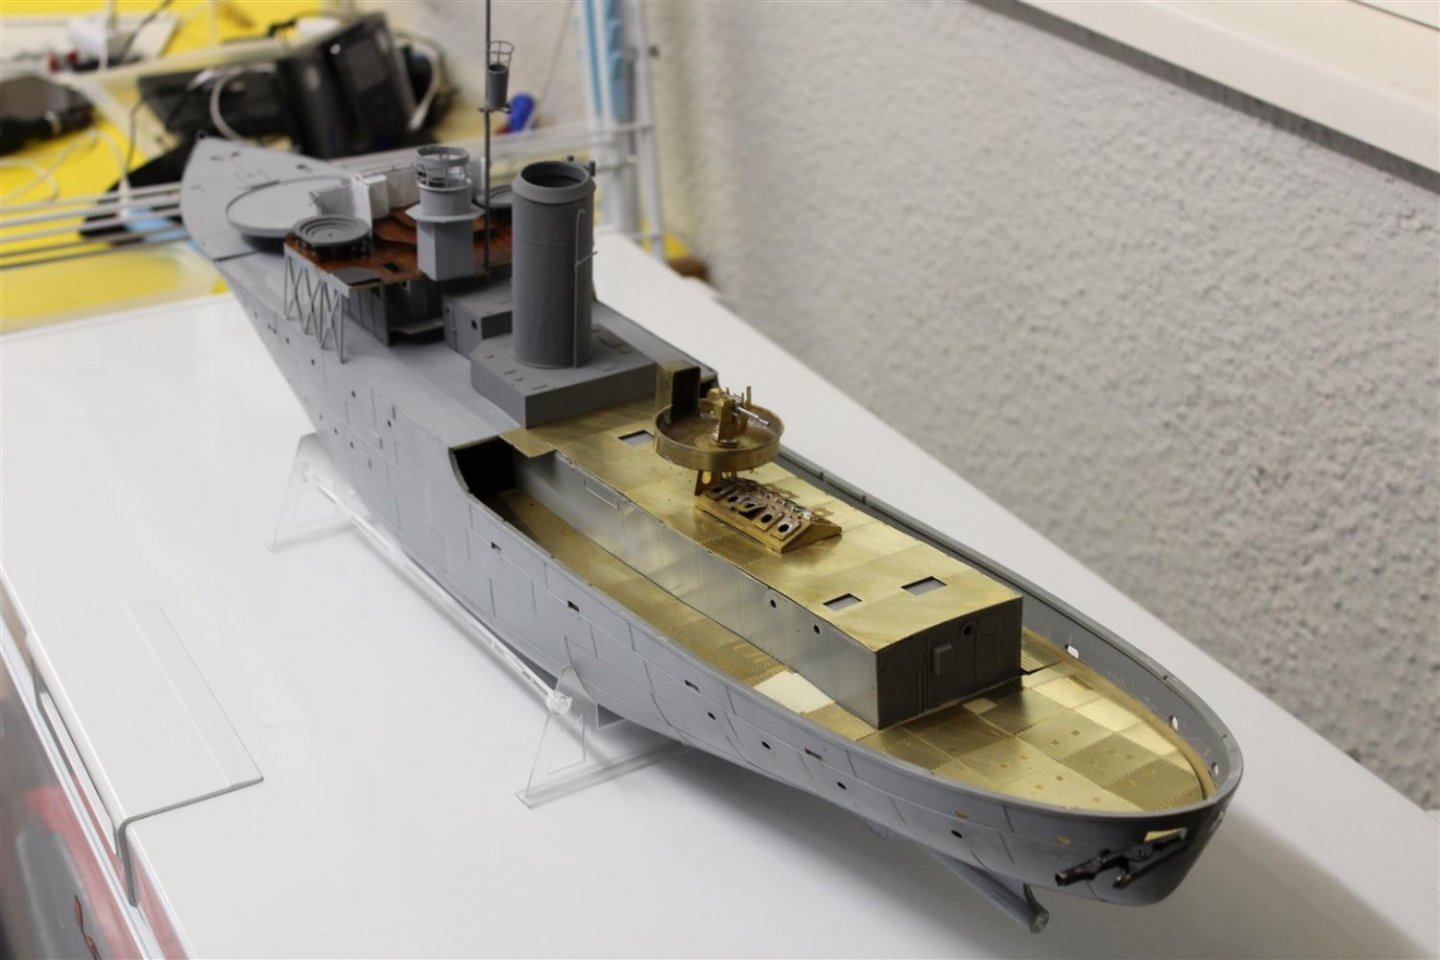
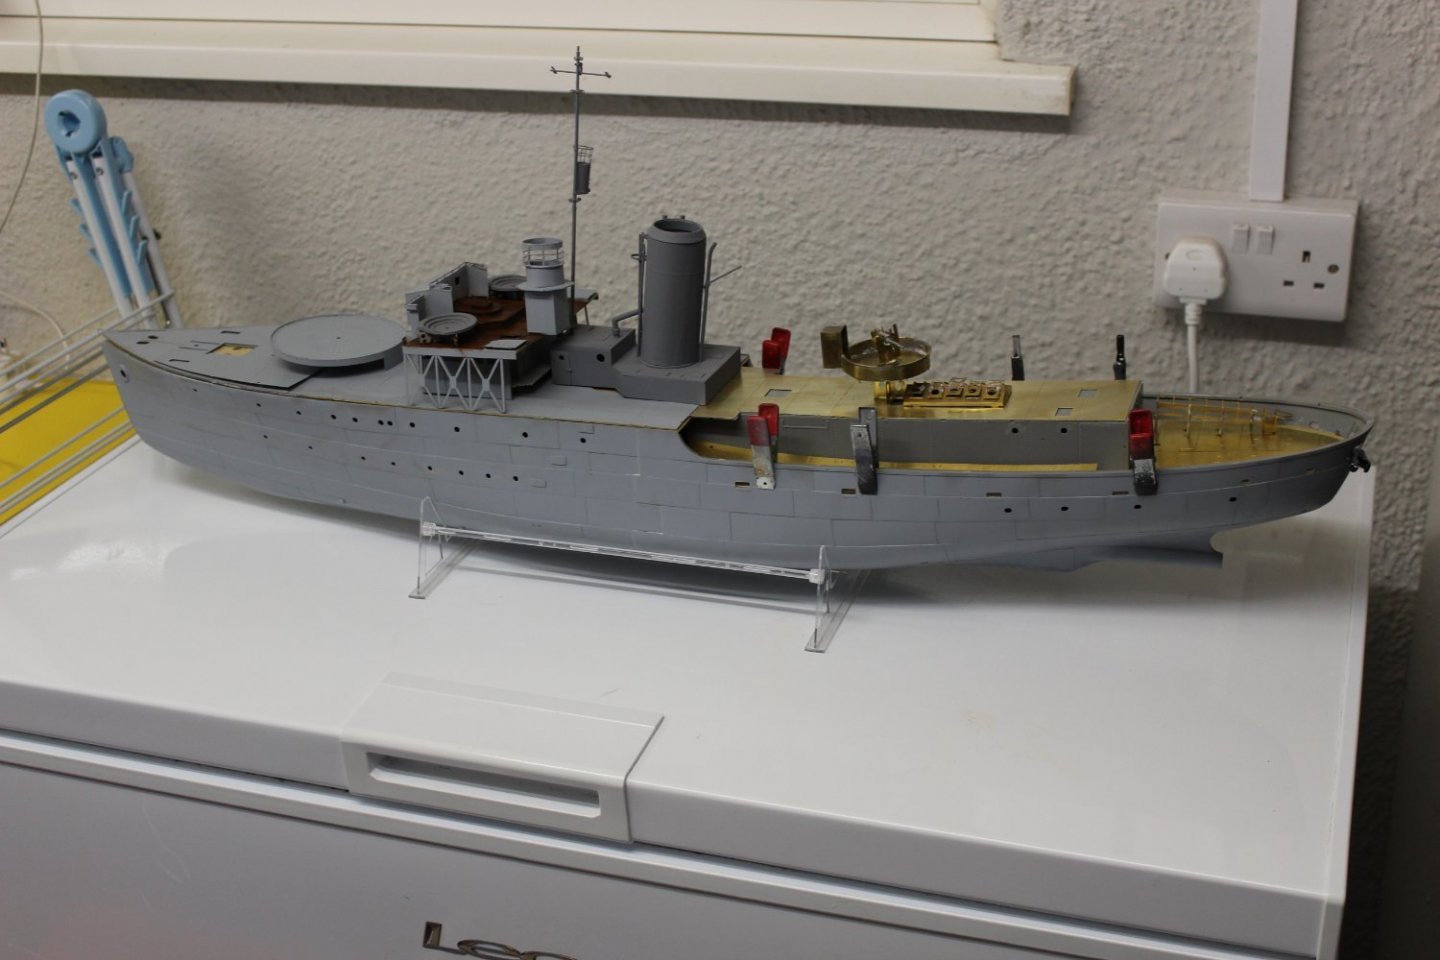
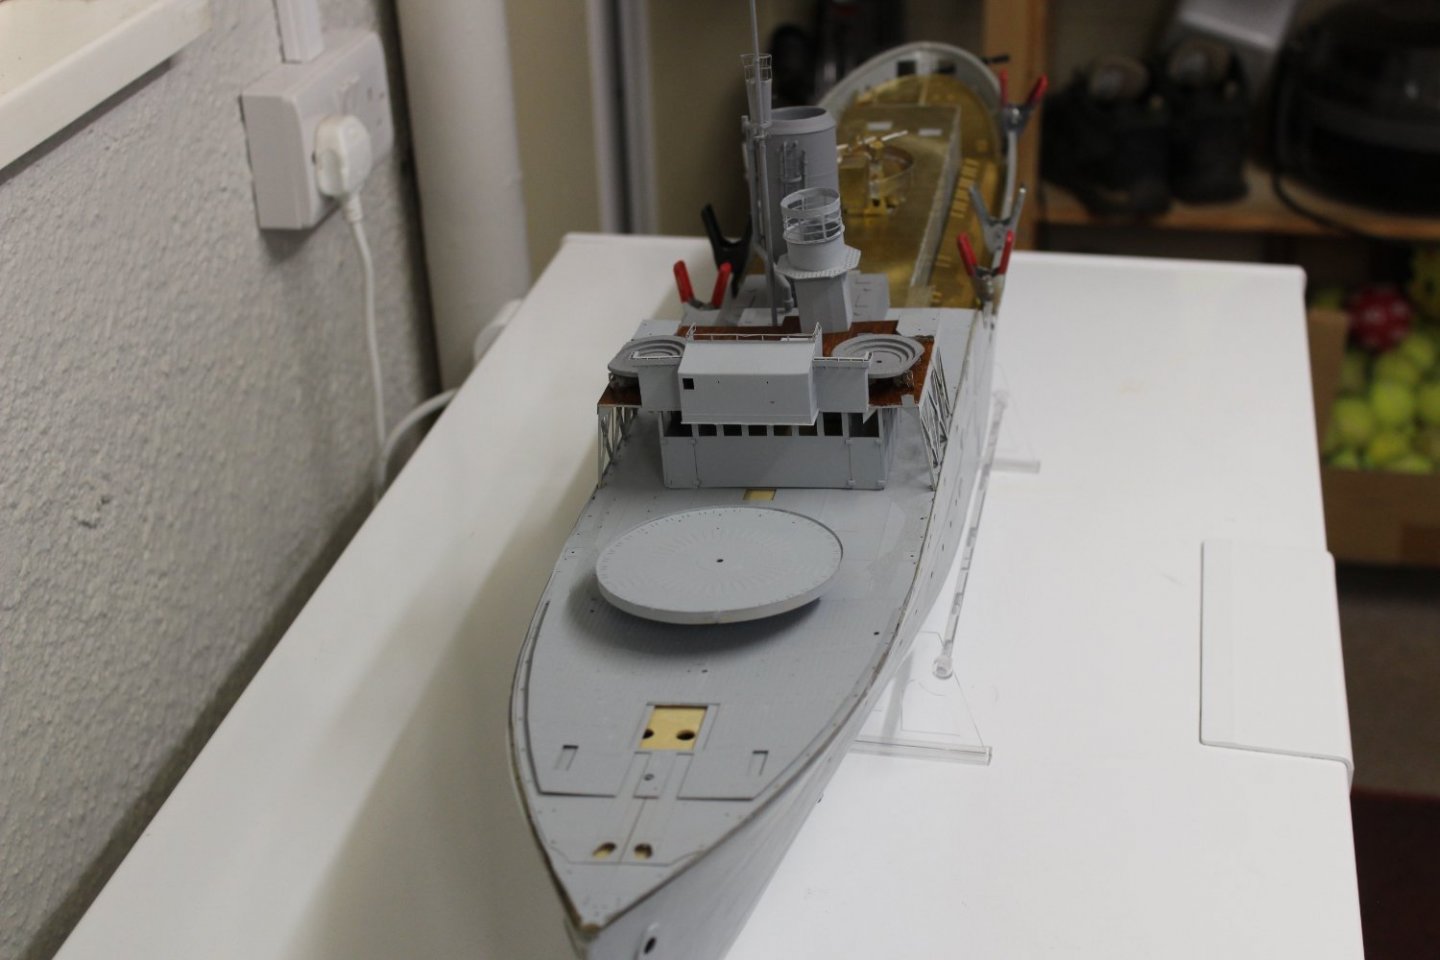
good evening everyone Thank you for comments and likes apologies for being grumpy for the last few weeks onto the Bluebell, and the depth charge racks, there is more PE on these two units than on lots of extra detail sets, but it is starting to look ok i have about 40 pieces left to add


- 141 replies
-
- 13
-
-
lovely to catch up on your log again, you have made such a fantastic job on her so far
-
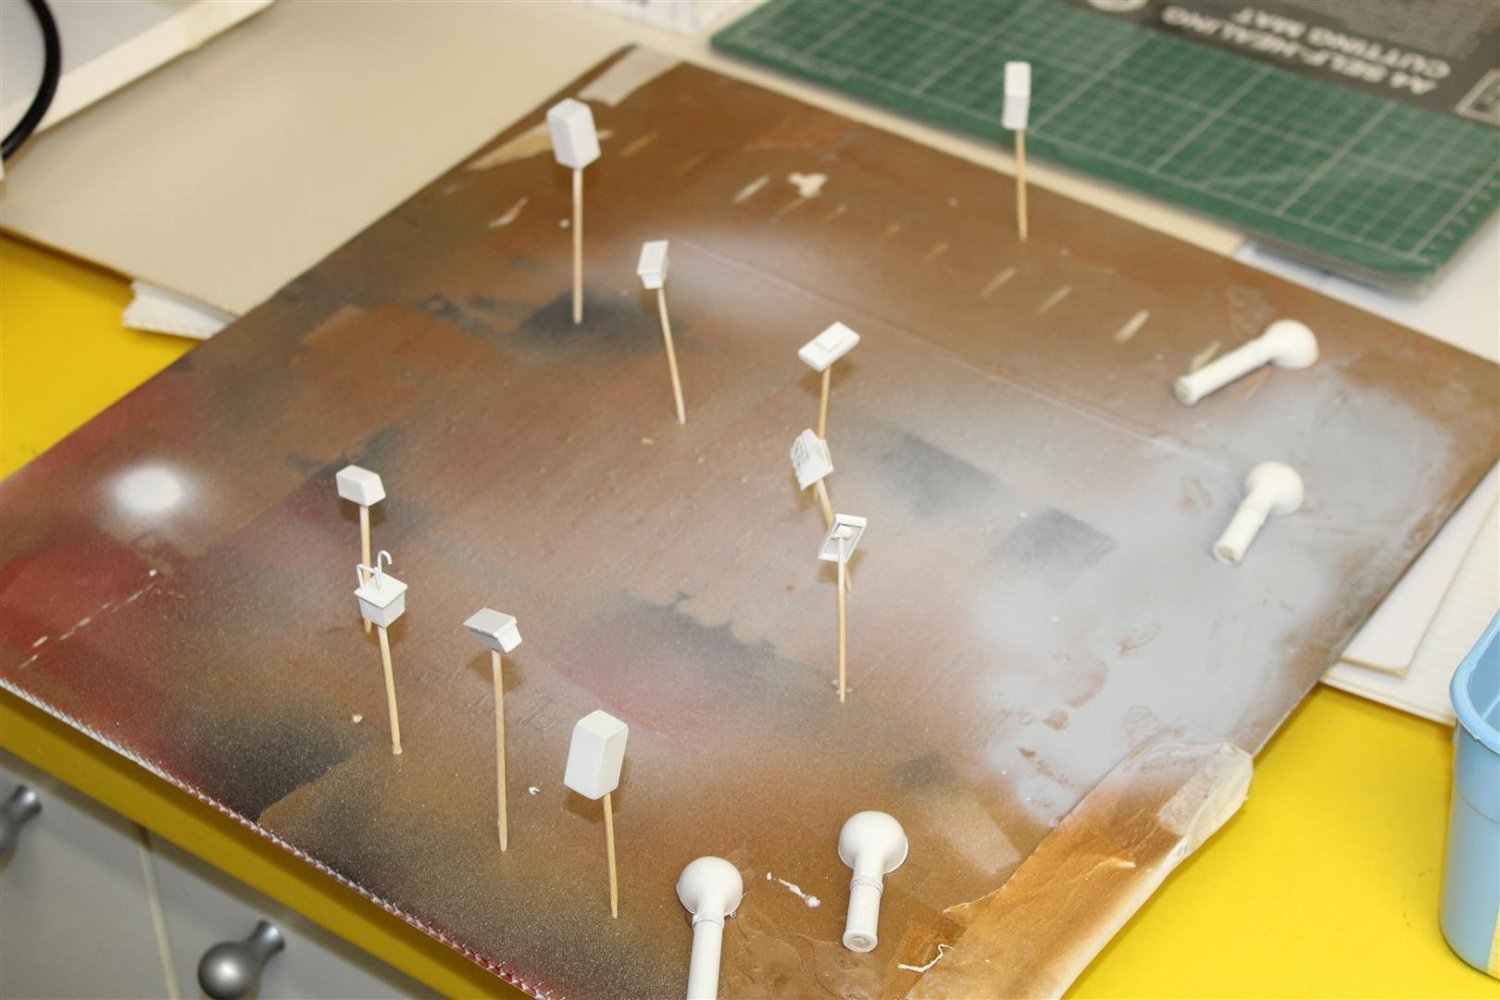
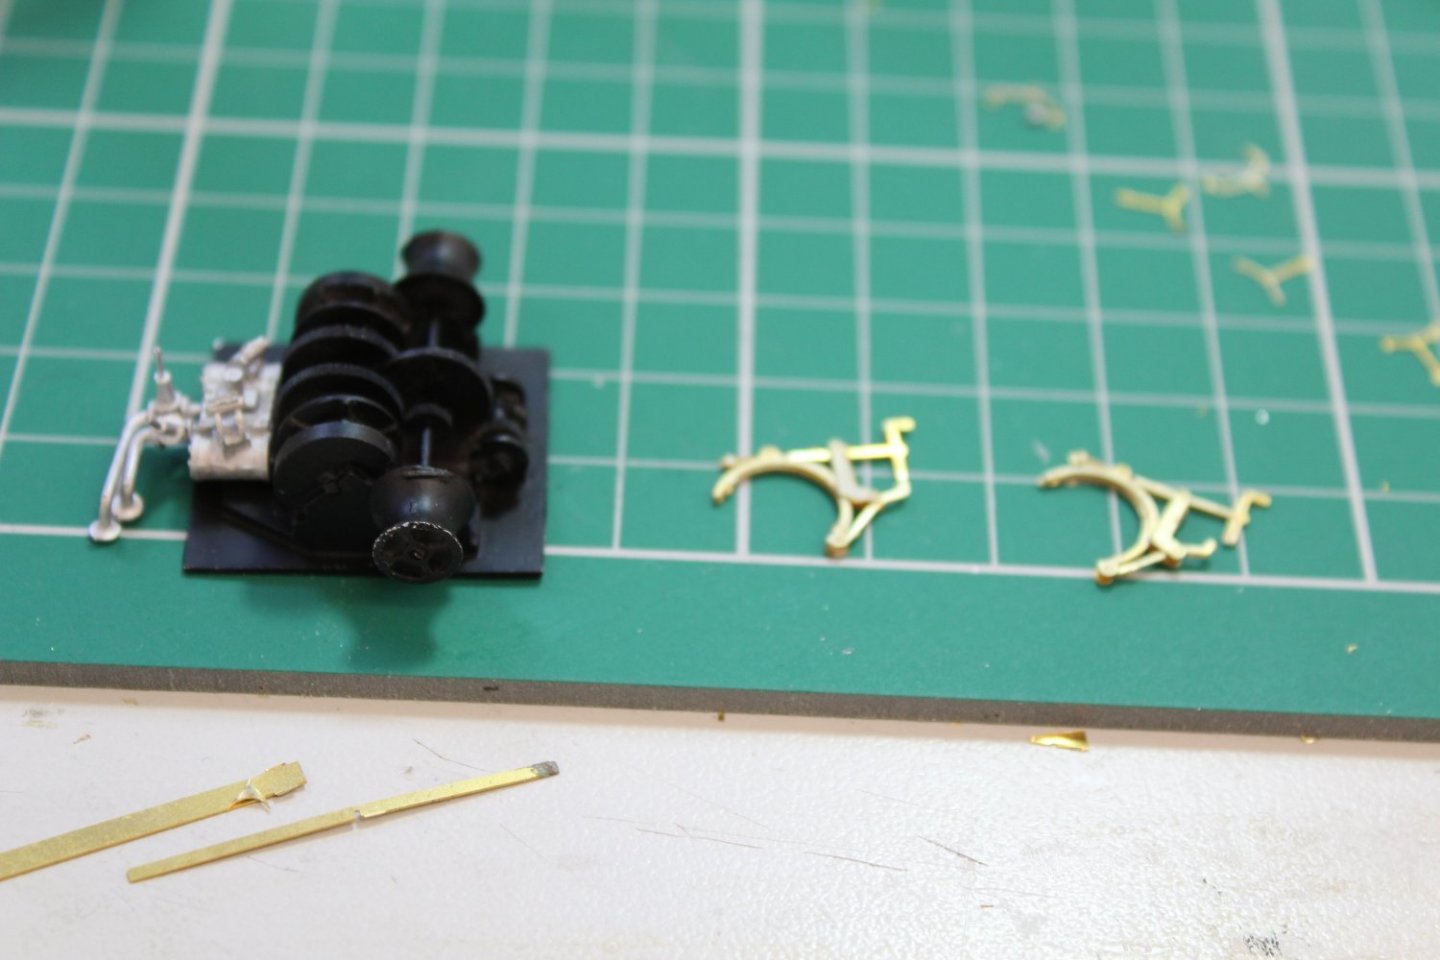
Good afternoon everyone well the anchor windlass is done now and has a coat of black primer on it, i love this GLS PE primer has gone on to more of the completed bits, like the engine room skylight new paints arrived, colourcoats, by Soveriegn hobbies, these will be her going out clothes some of the PE bits i had done in the past had a powdery finish, cleaned up with my tooth brush


- 141 replies
-
- 12
-
-

-
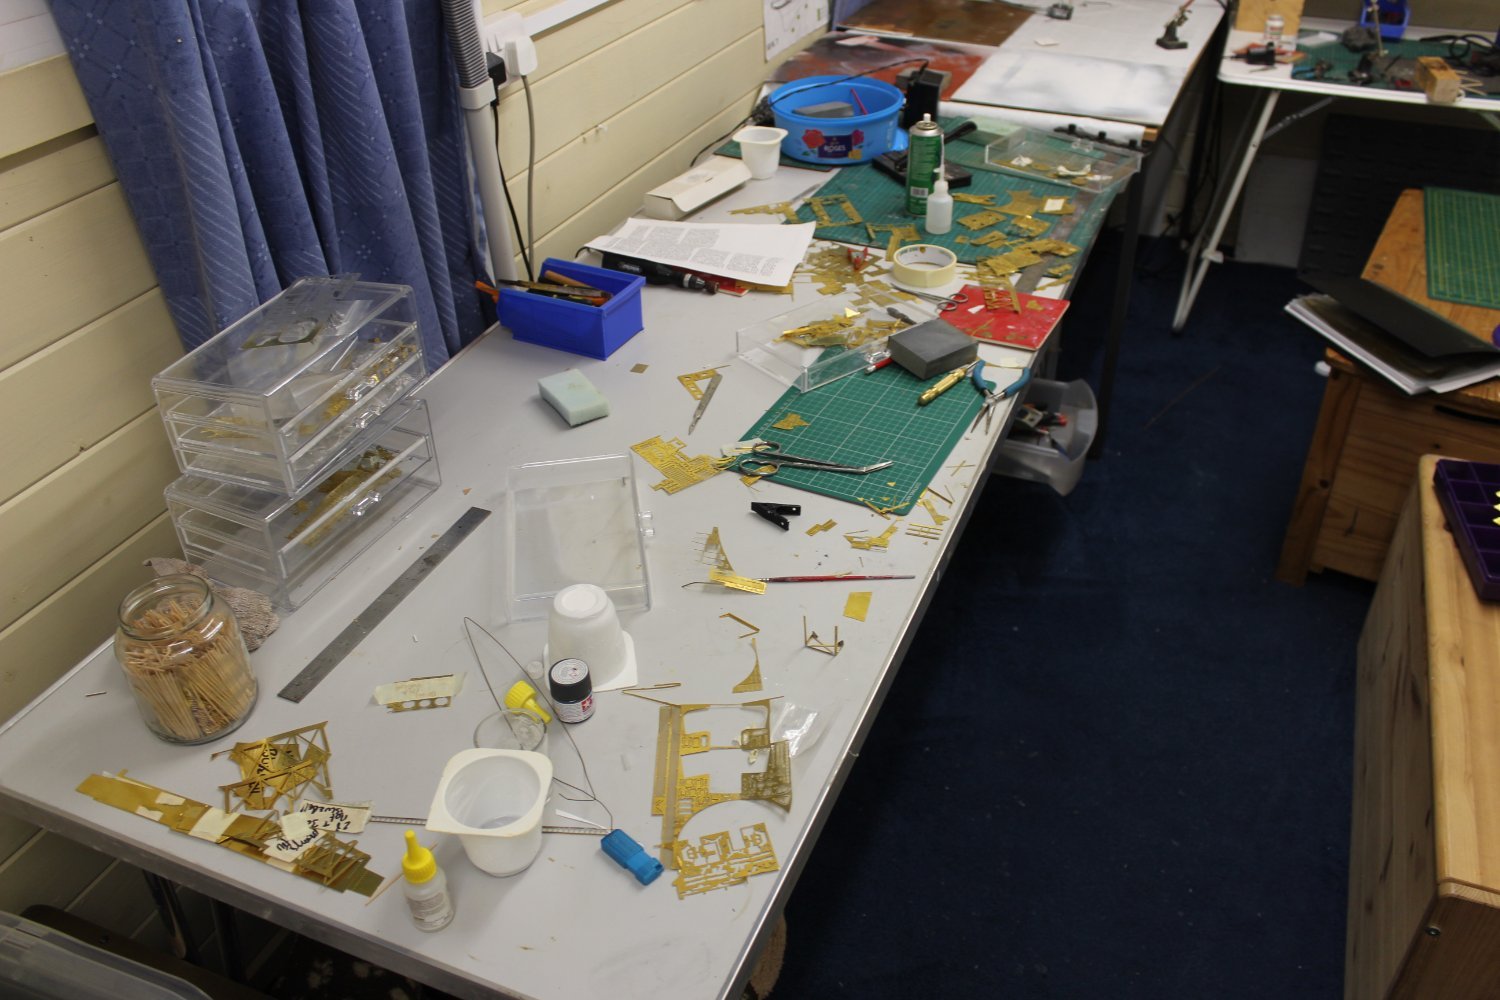
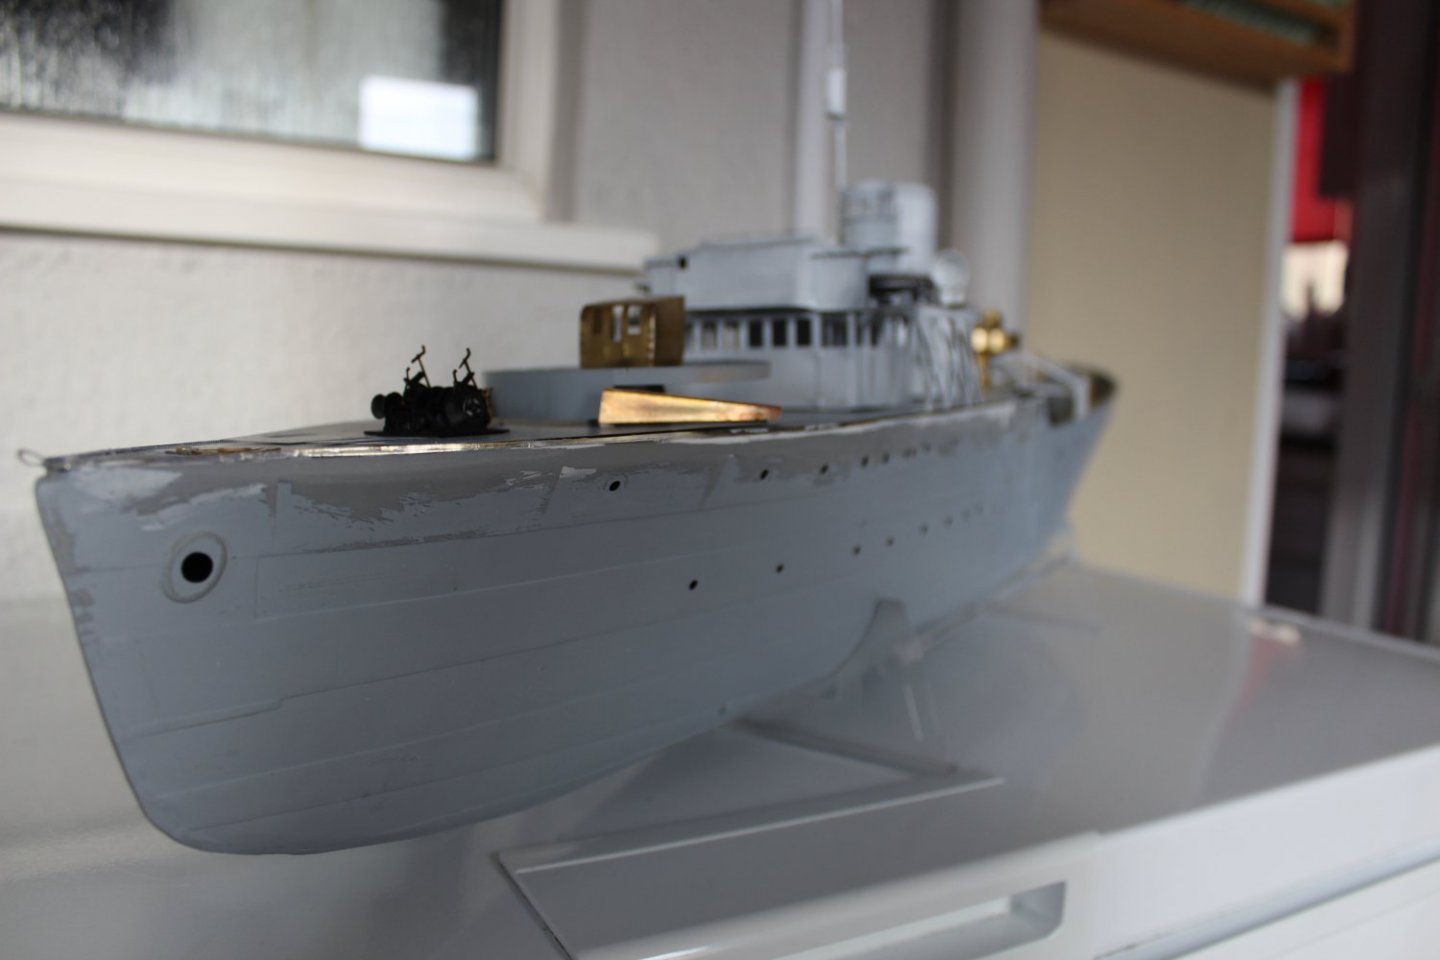
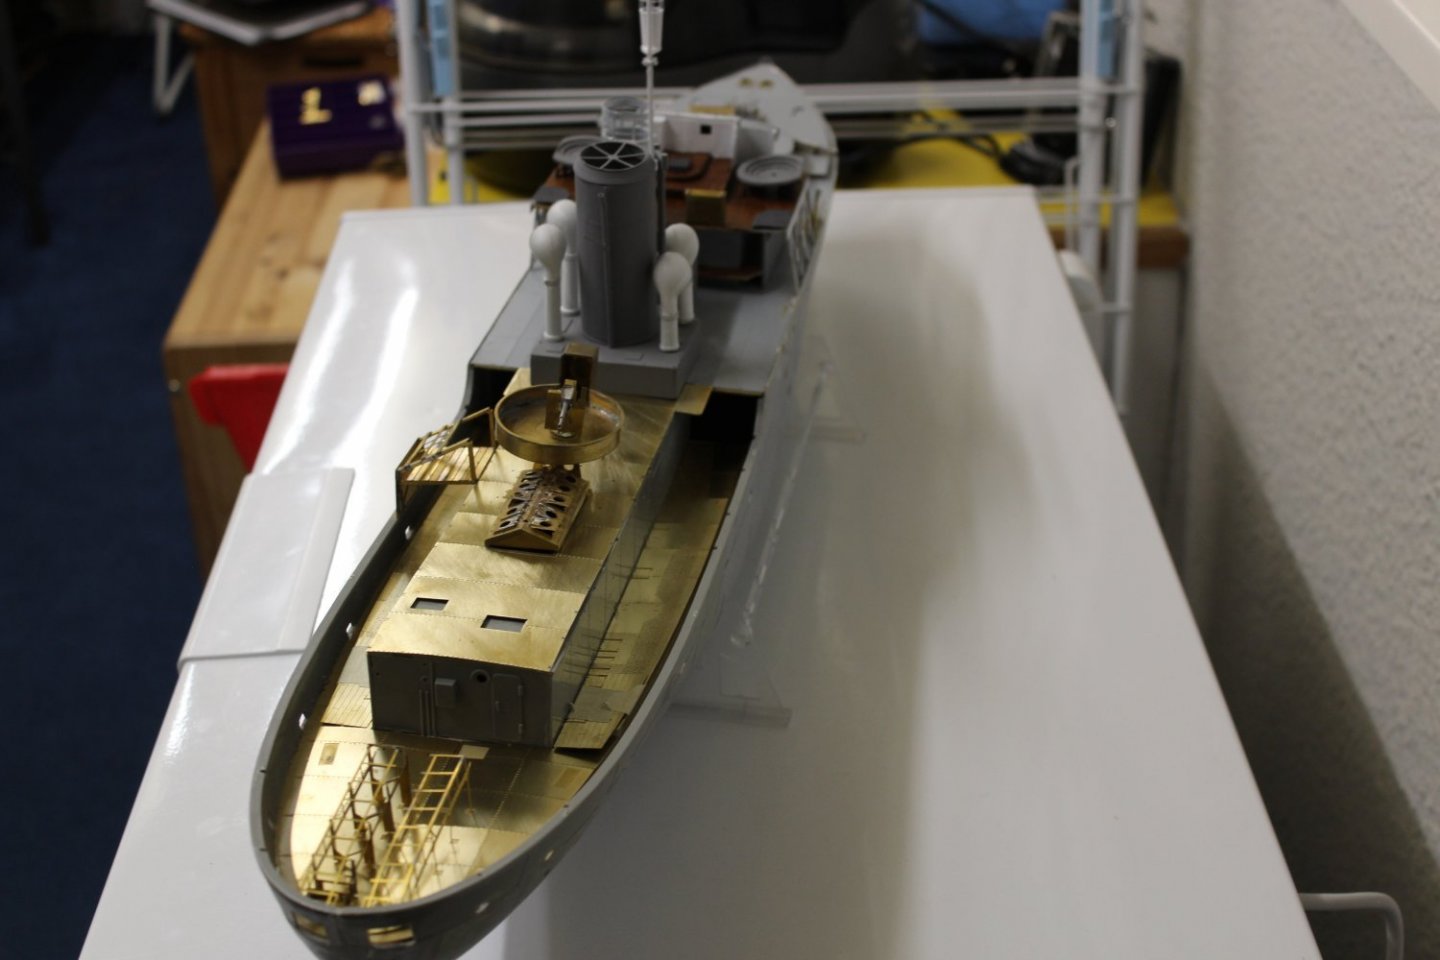
good evening everyone HMS Bluebell work continues, but slowly soldering takes me forever, but today I managed to make up one of the Carley float unit, and the breakwaters, work continues to blend the top deck with the hull, but it looks so much better than a few days ago i have a paint order coming in from Sovereign hobbies, then most of the vessel will go to white loads of photo etch still to make up nothing is fixed into position yet


- 141 replies
-
- 10
-
-
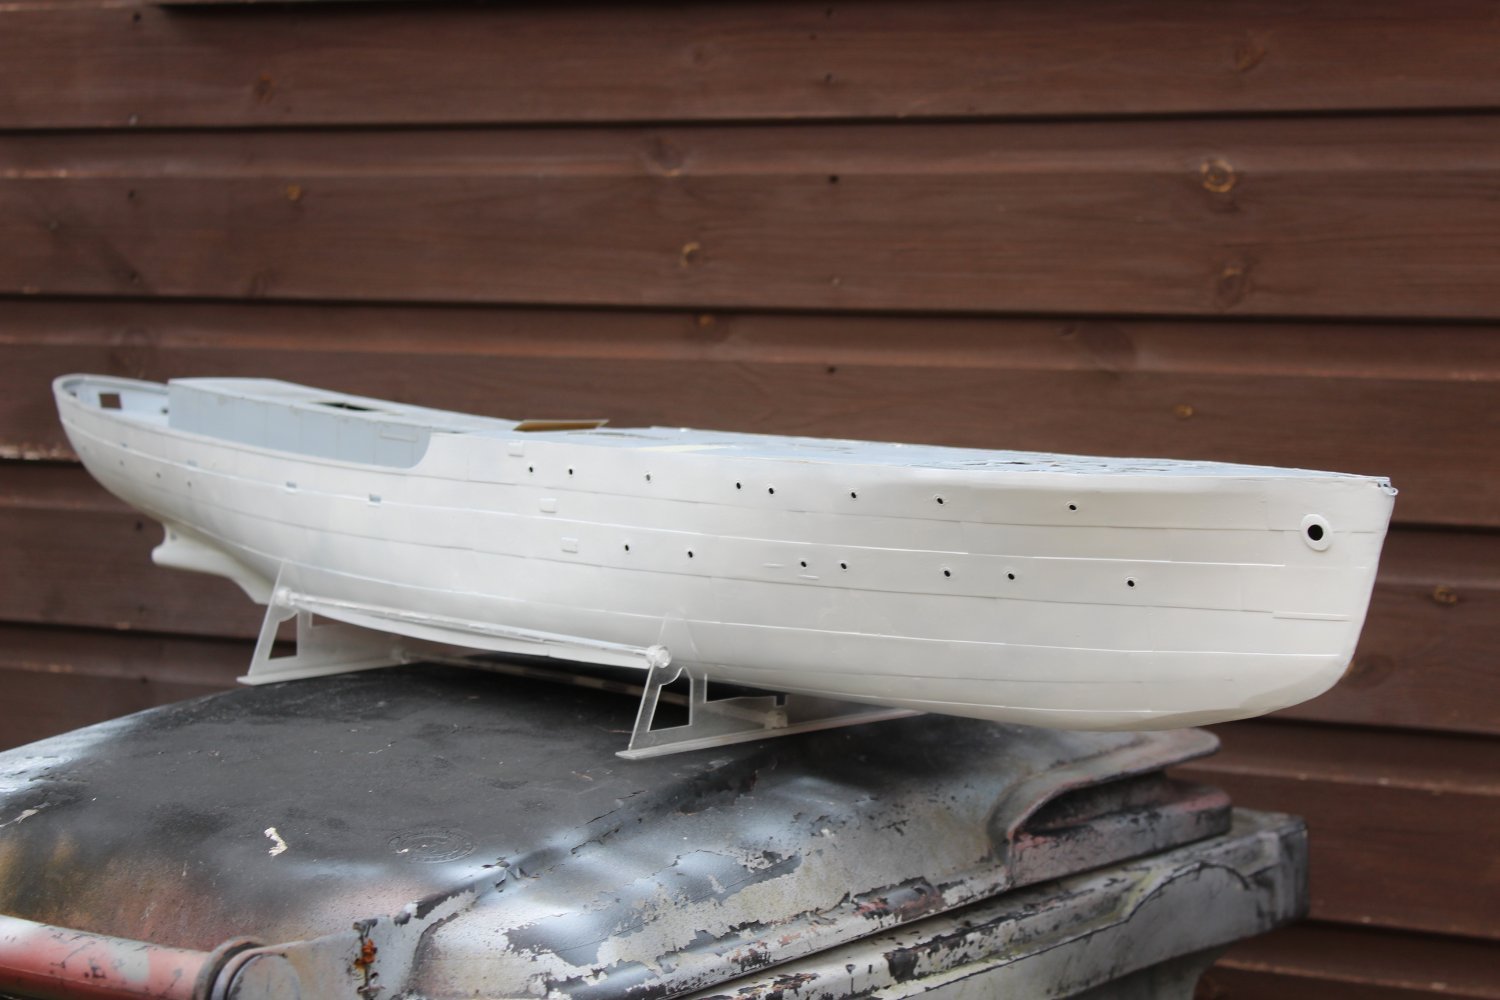
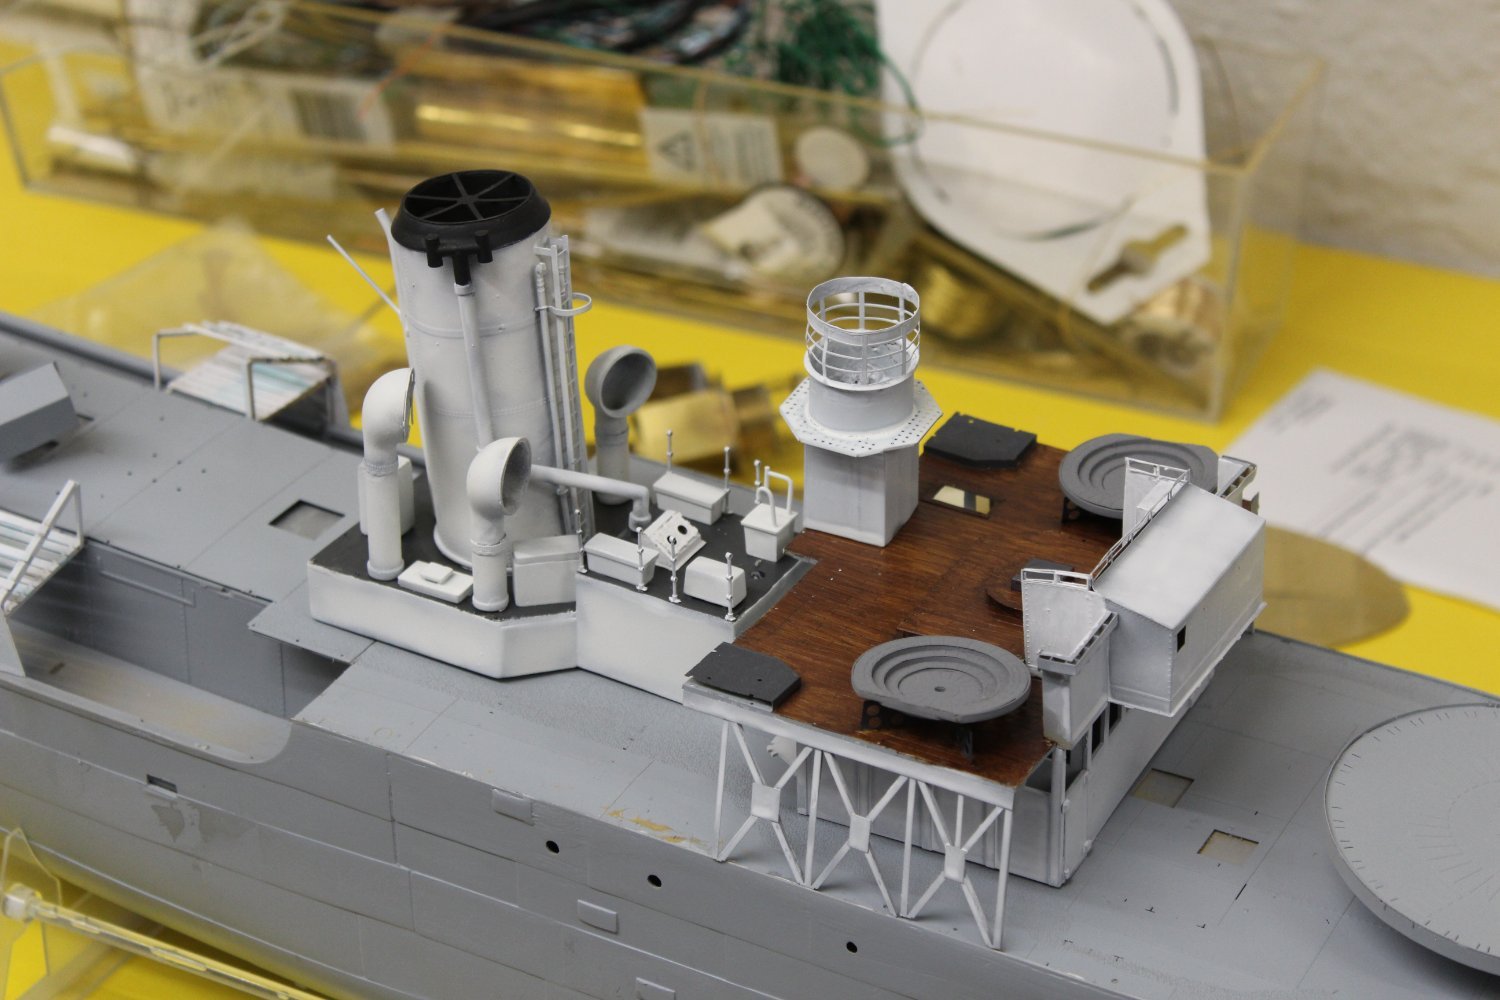
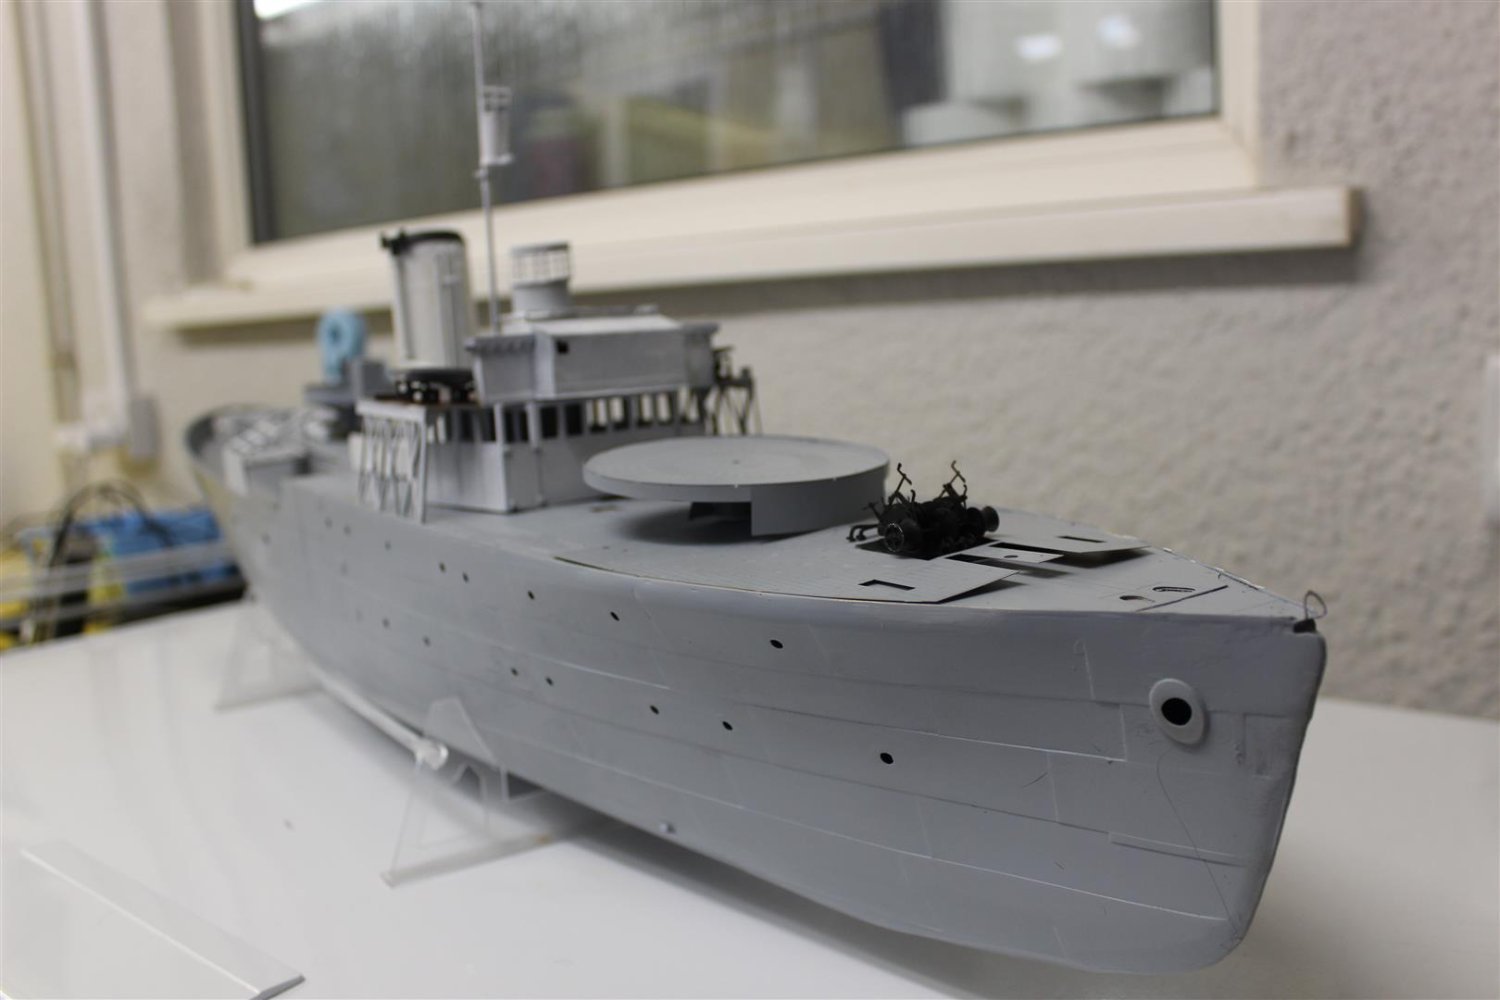
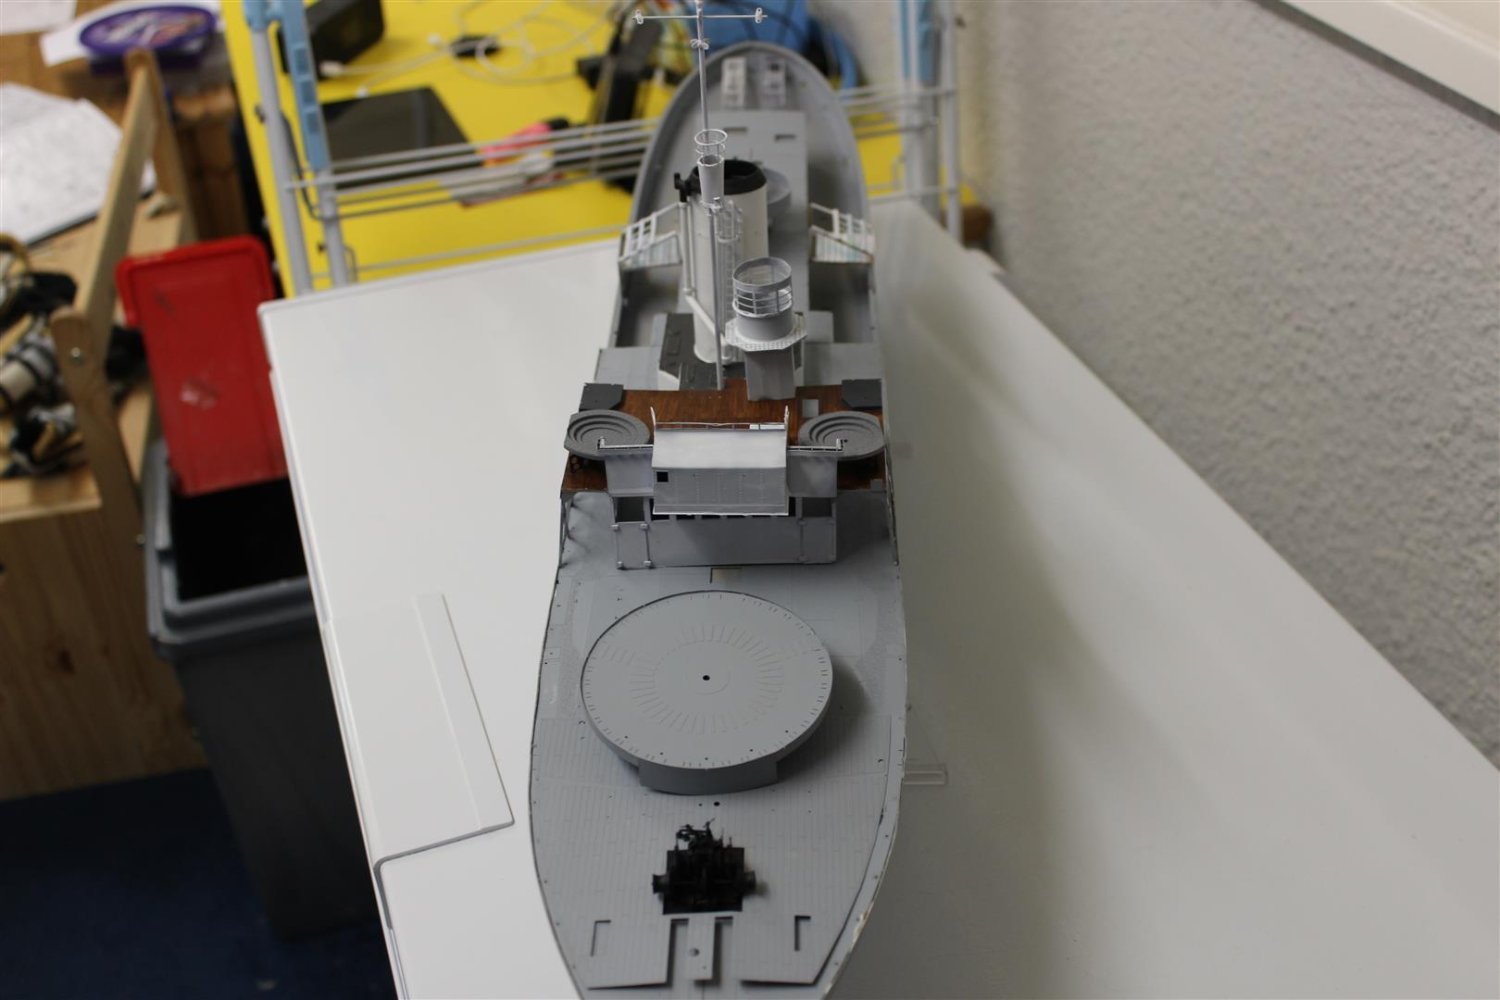
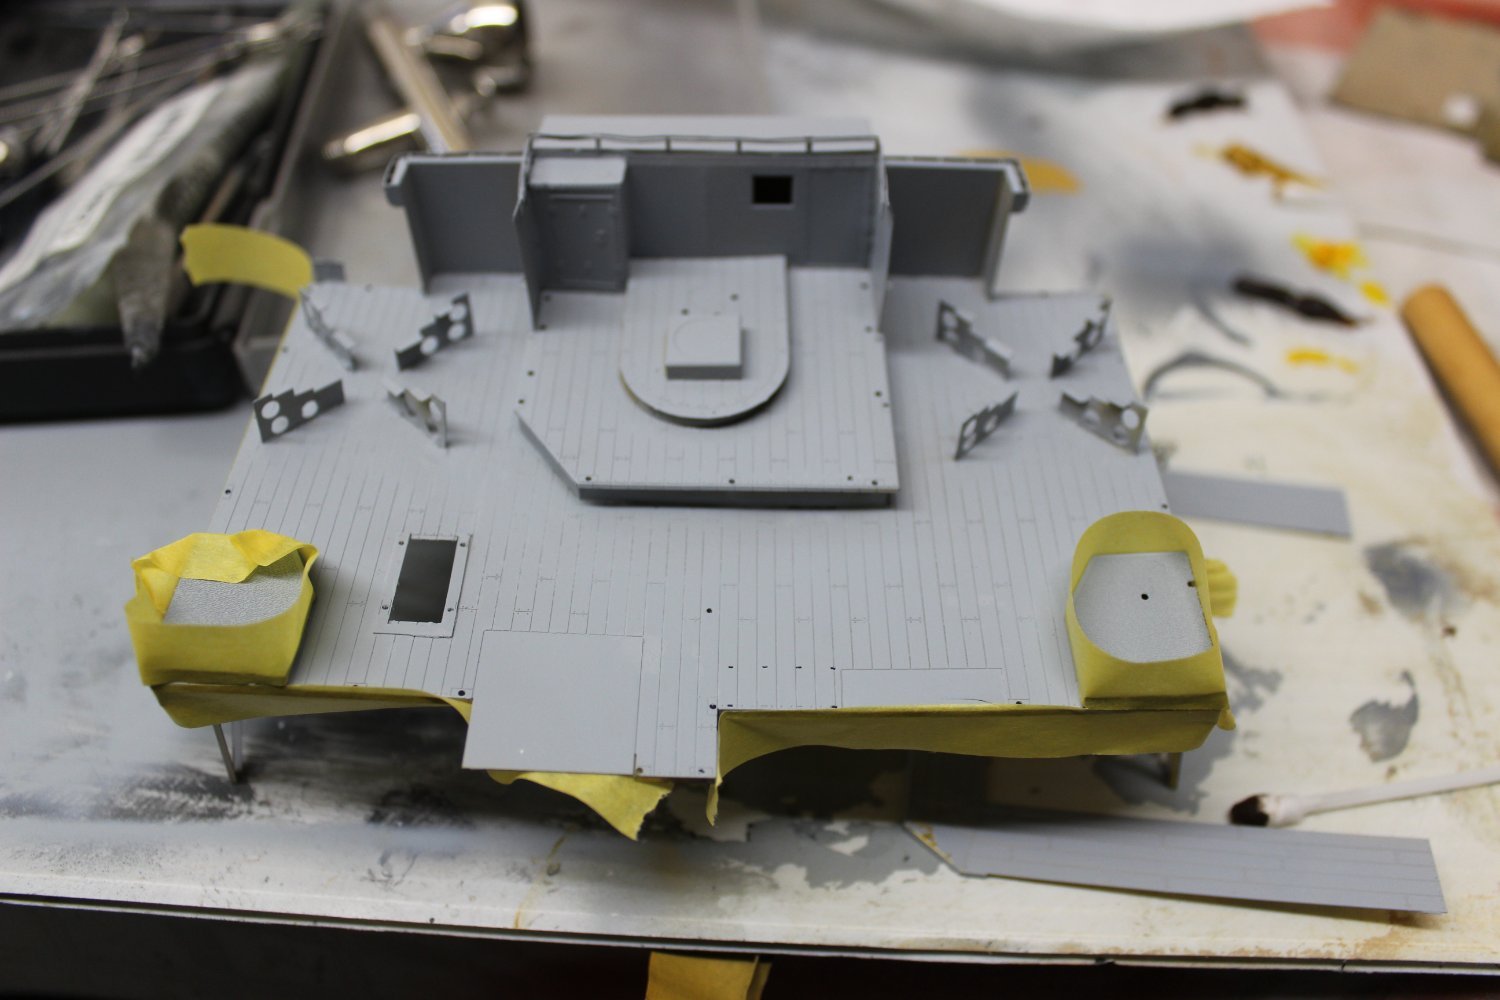
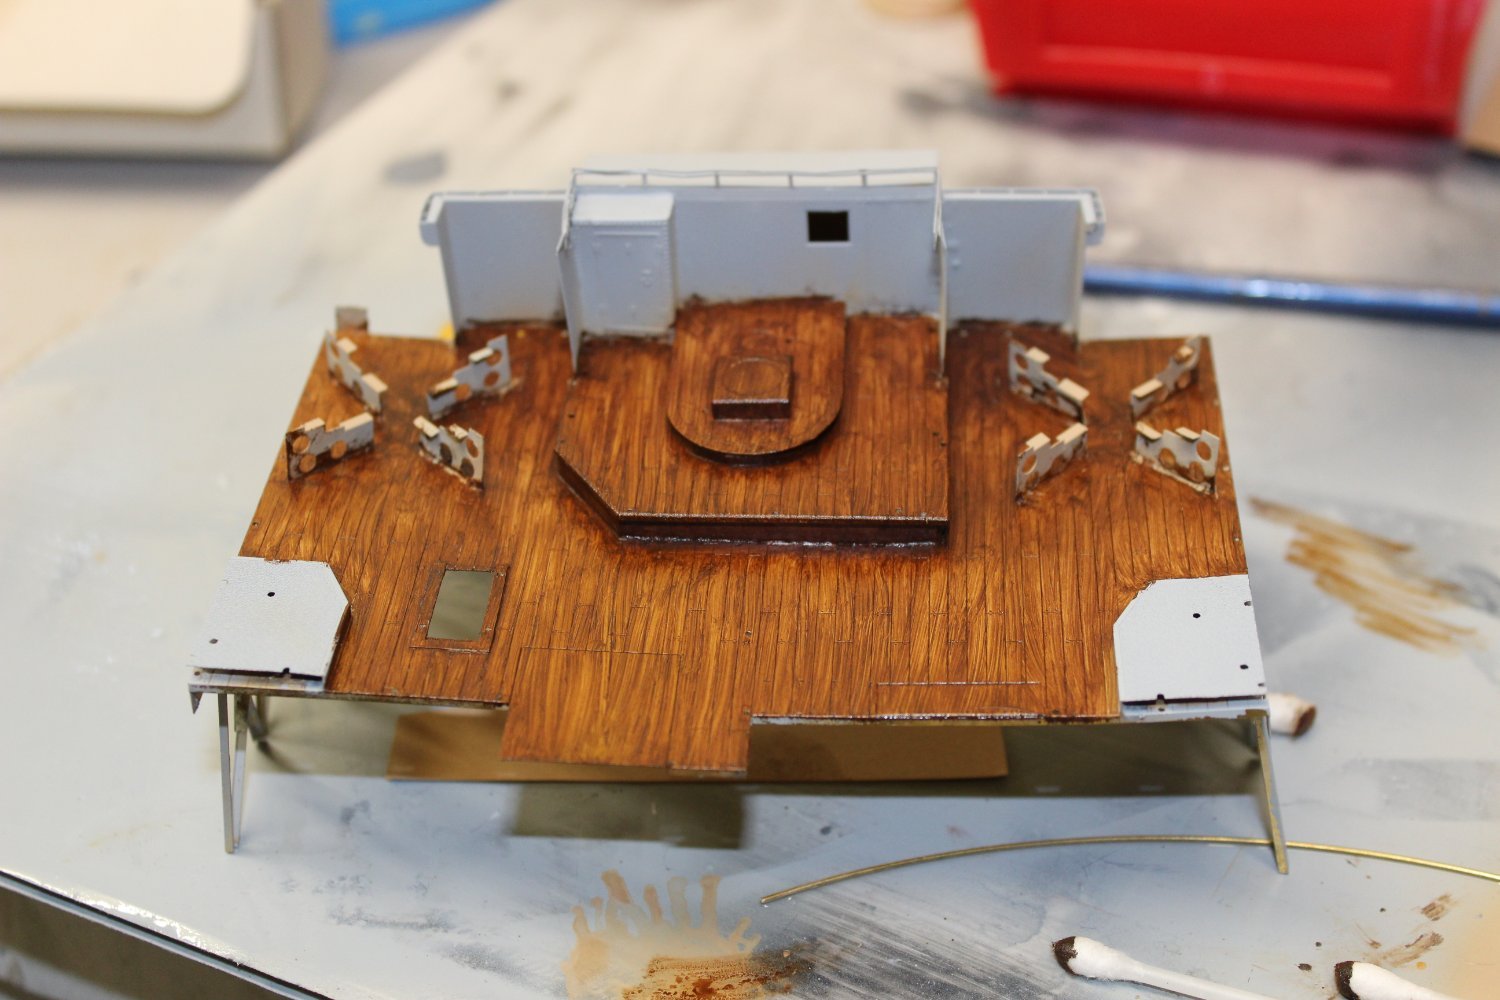
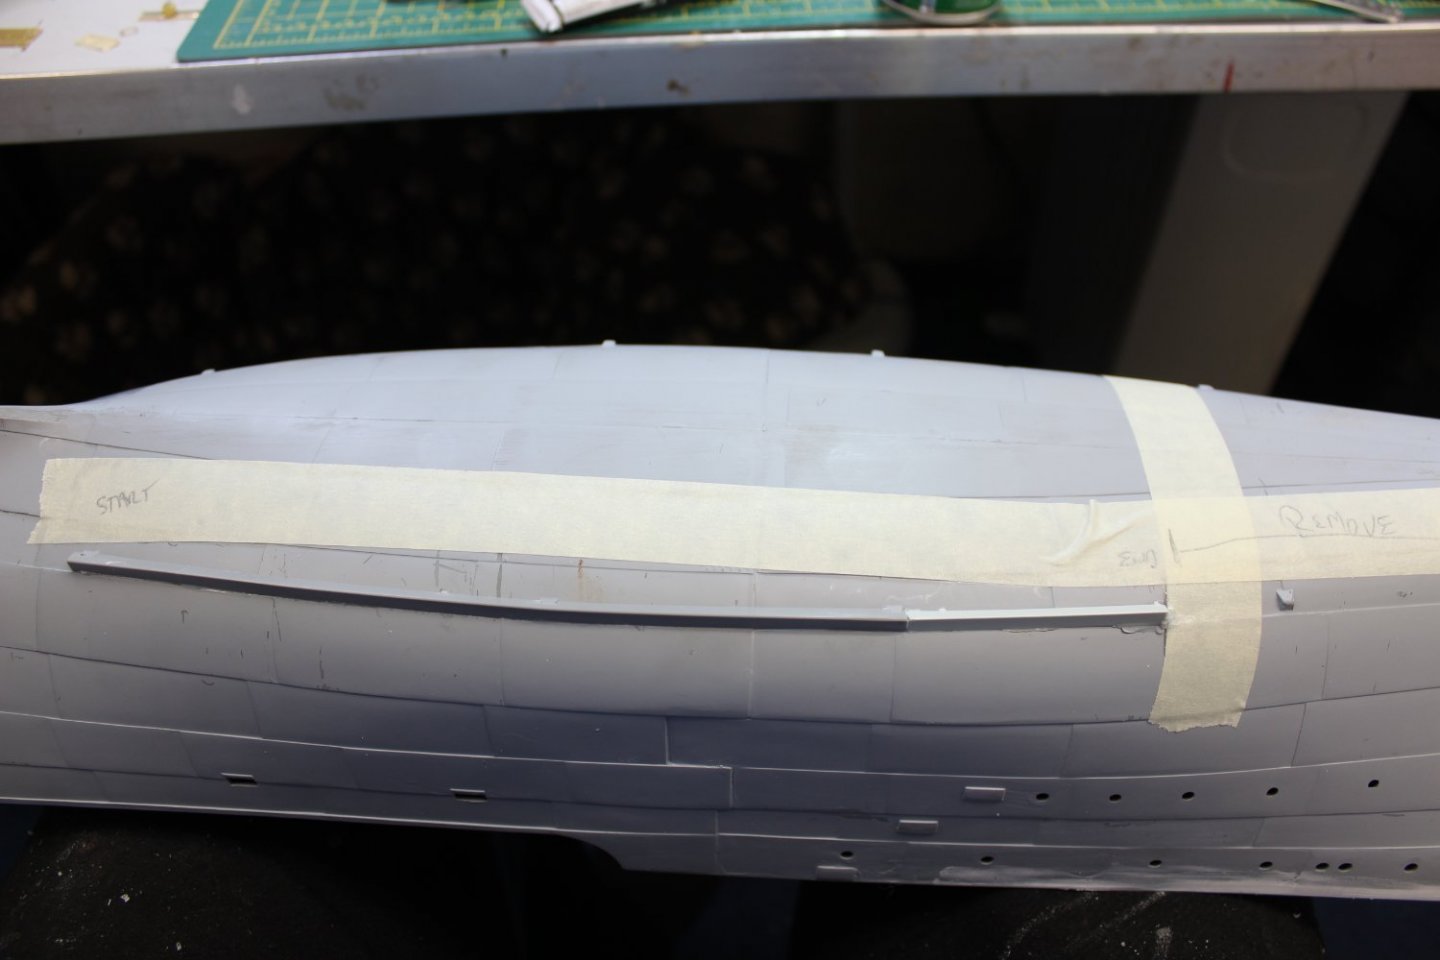
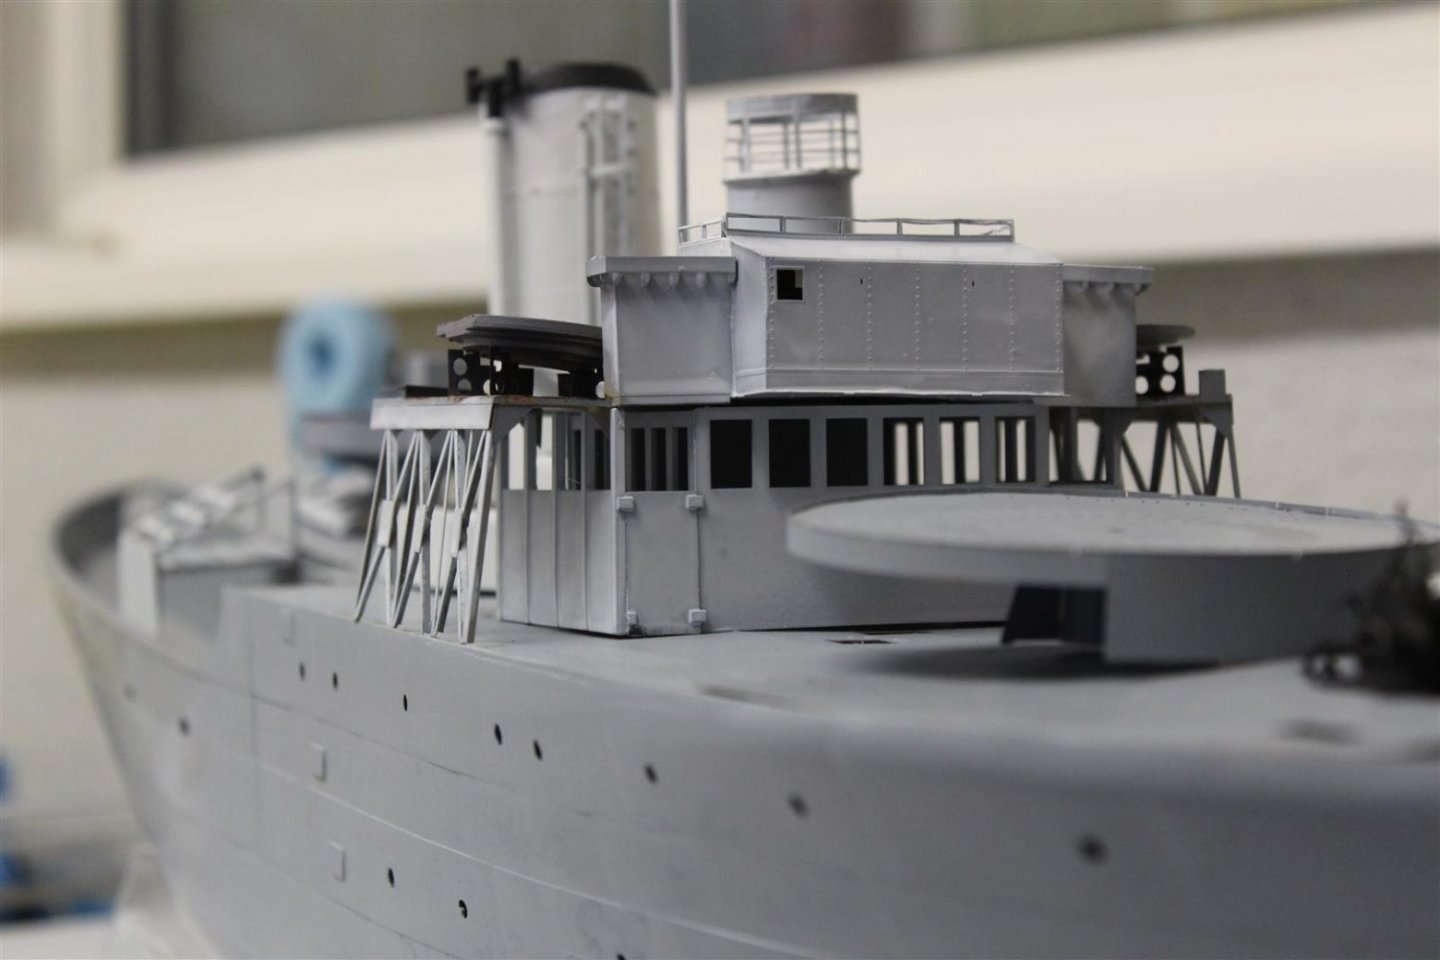
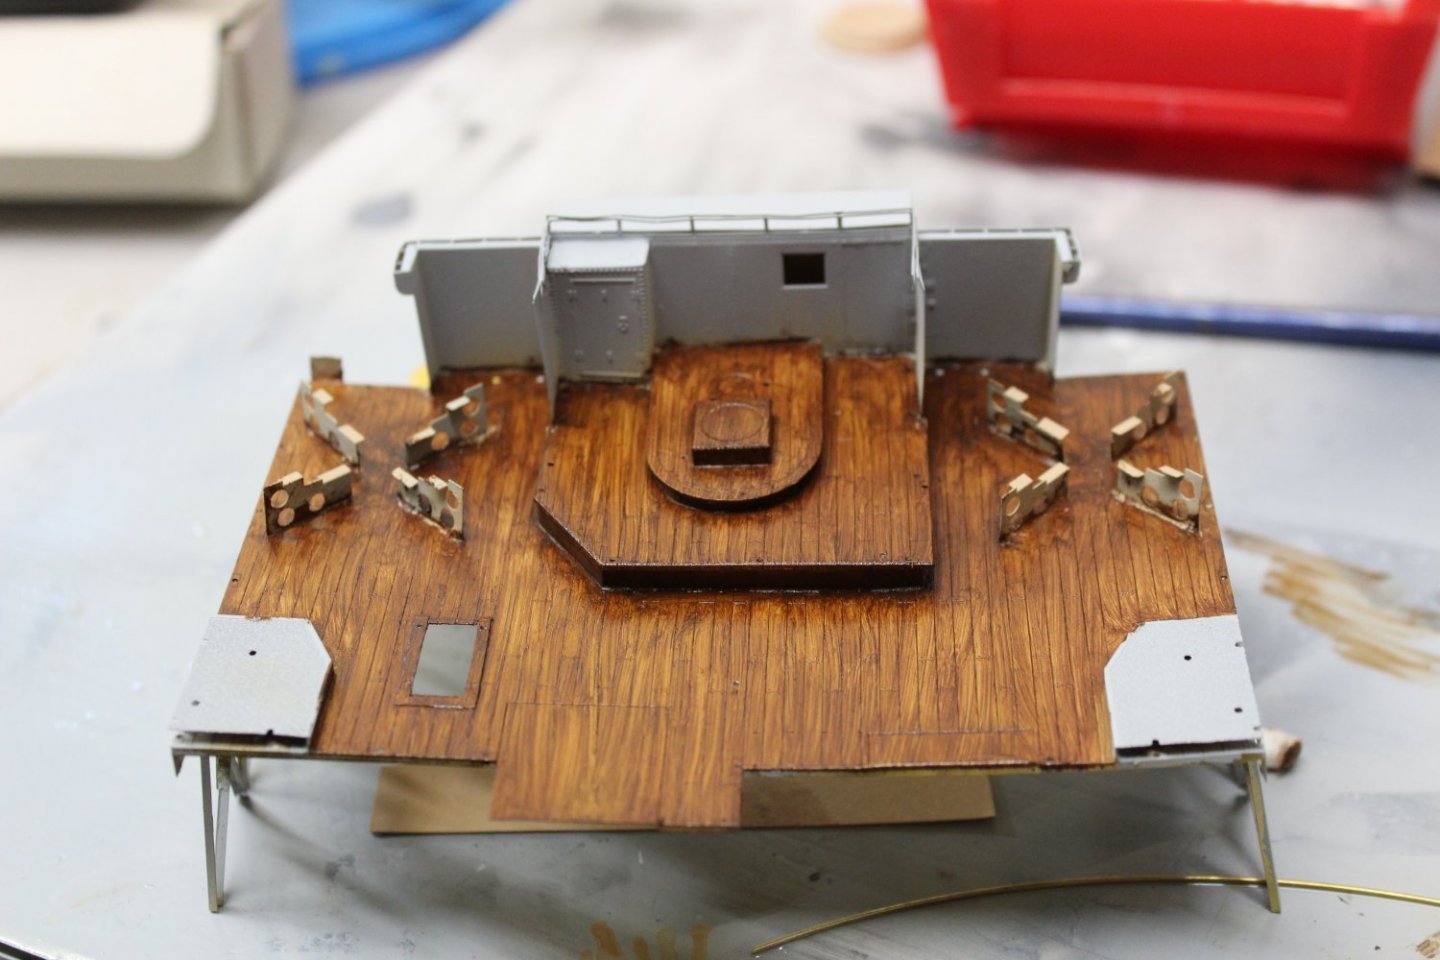
good evening everyone thank you for comments and likes more progress made on the build the forecastle is now fixed into position, i need a bit of filler to match it to the ships side more work done on the bridge, yes the wood is to dark, i like it, i will get the rest to look a bit more like teak all the rivet markings have now been done, thats about 300 i did today i am now awaiting a callout for the Western approaches colours

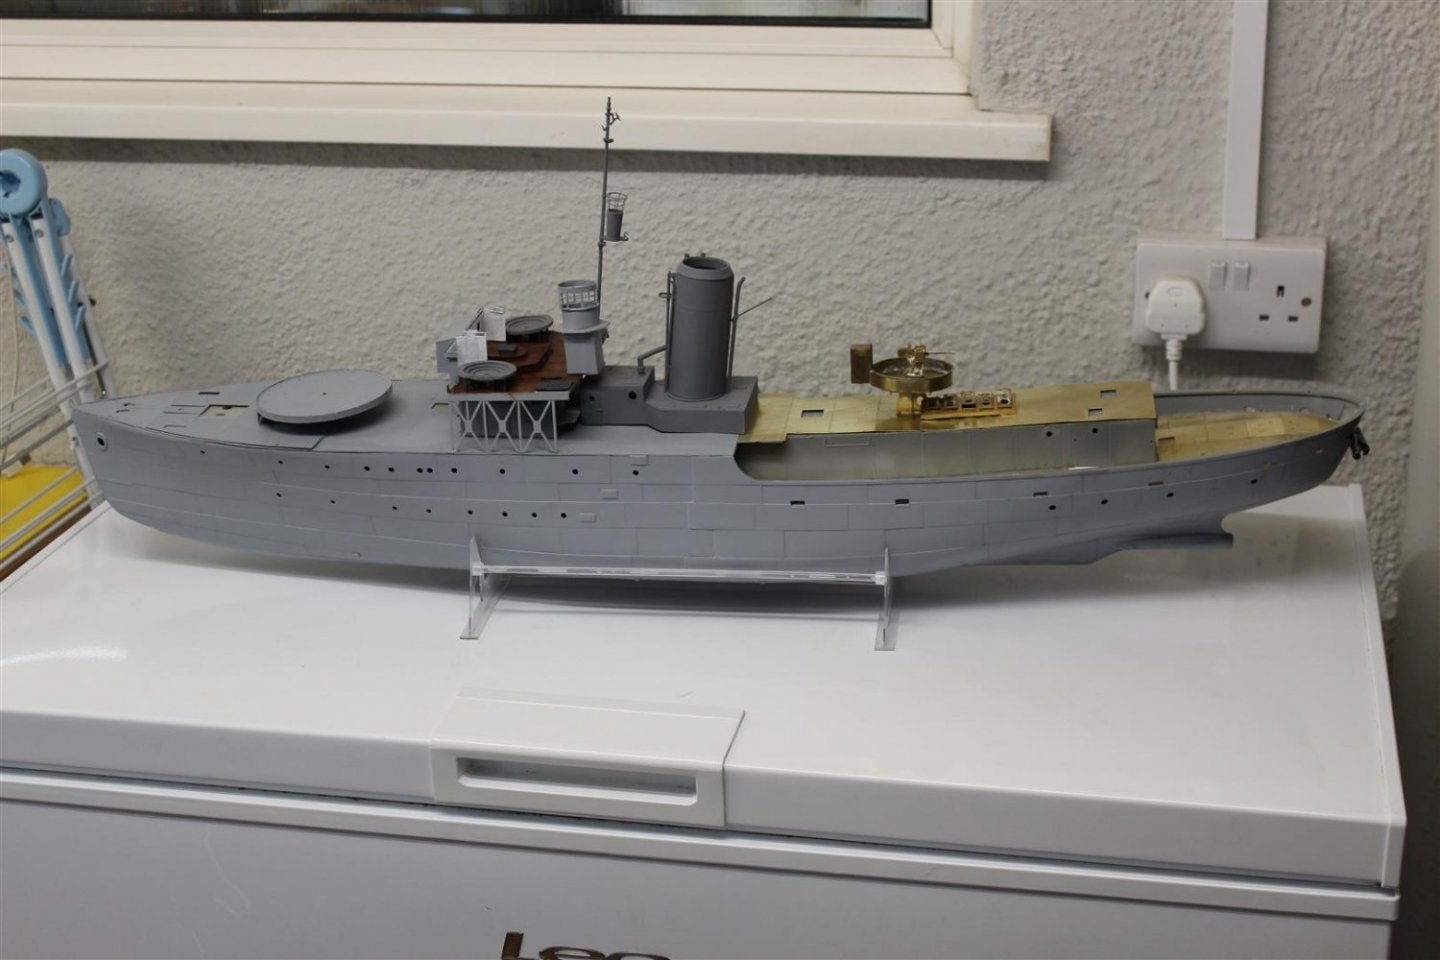

- 141 replies
-
- 11
-
-
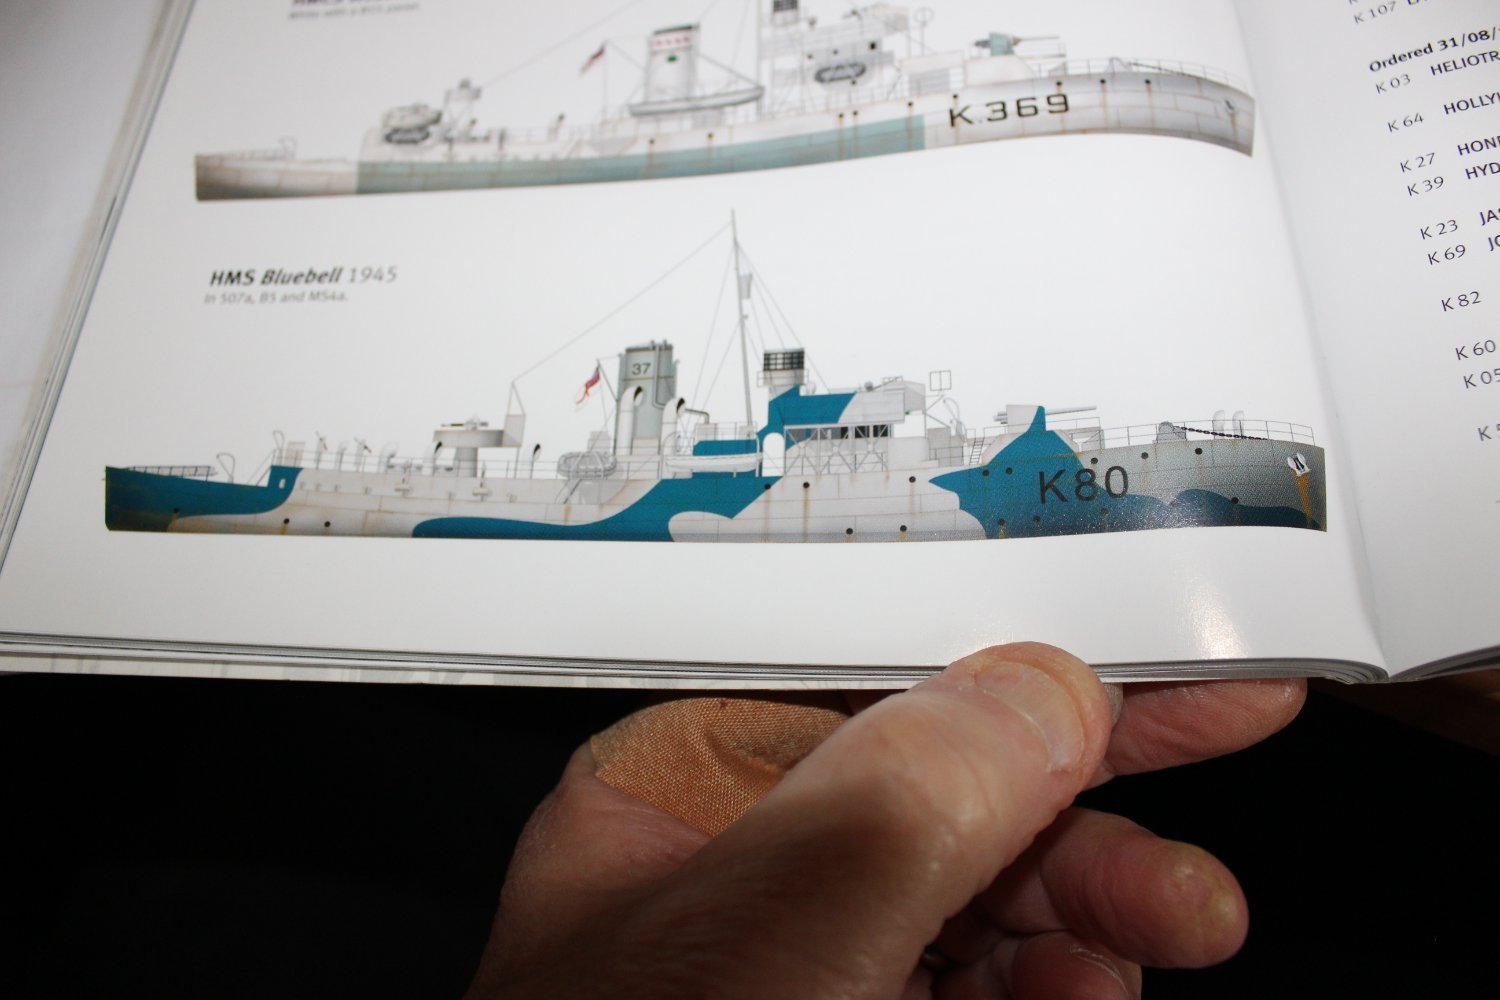
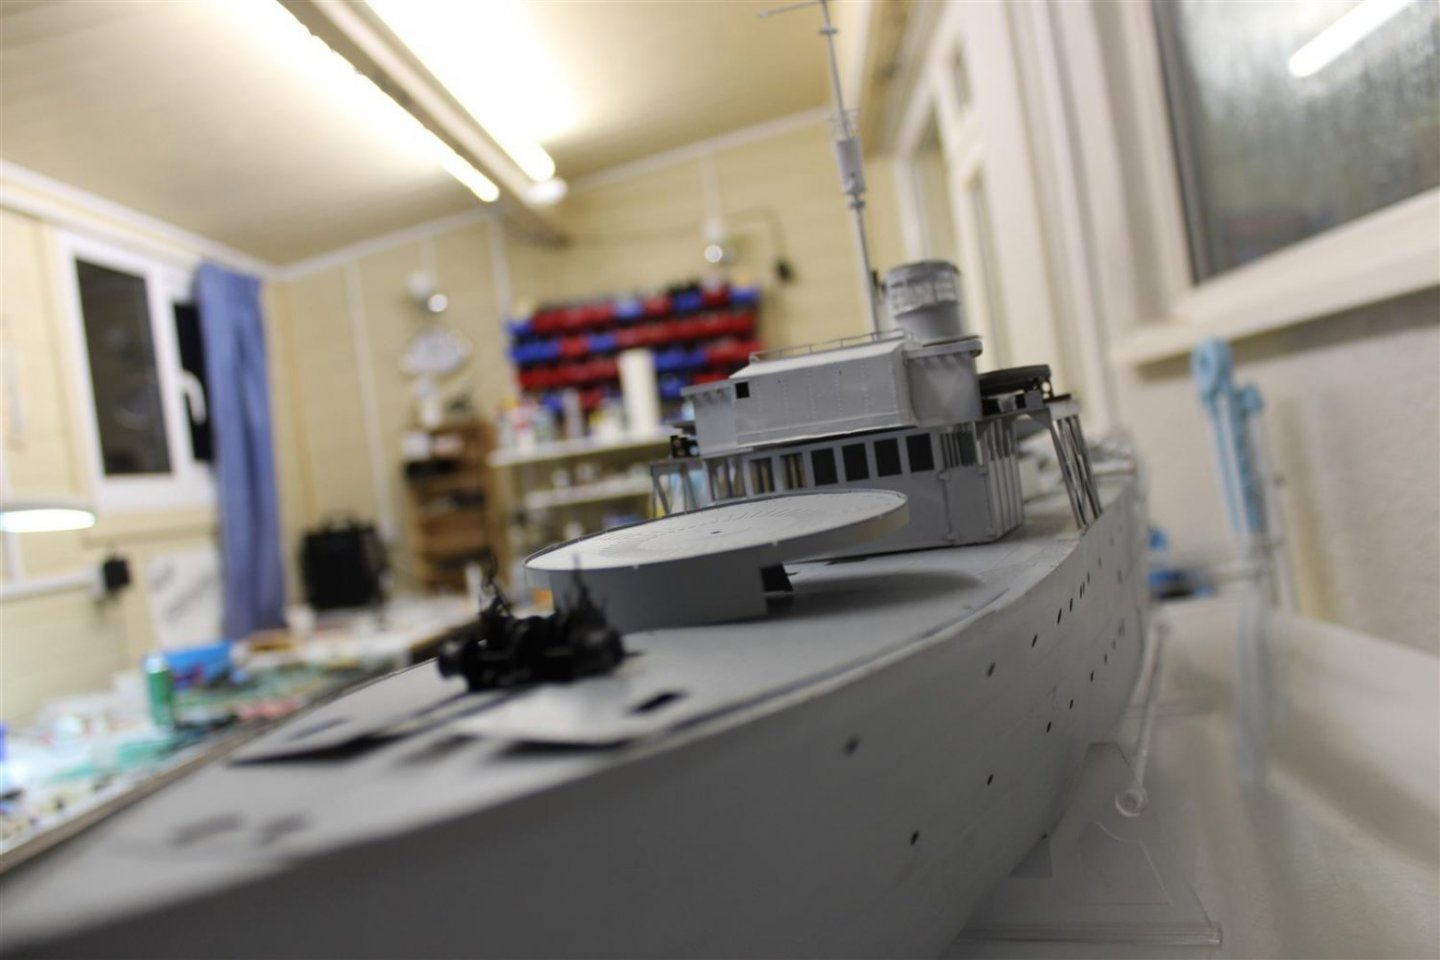
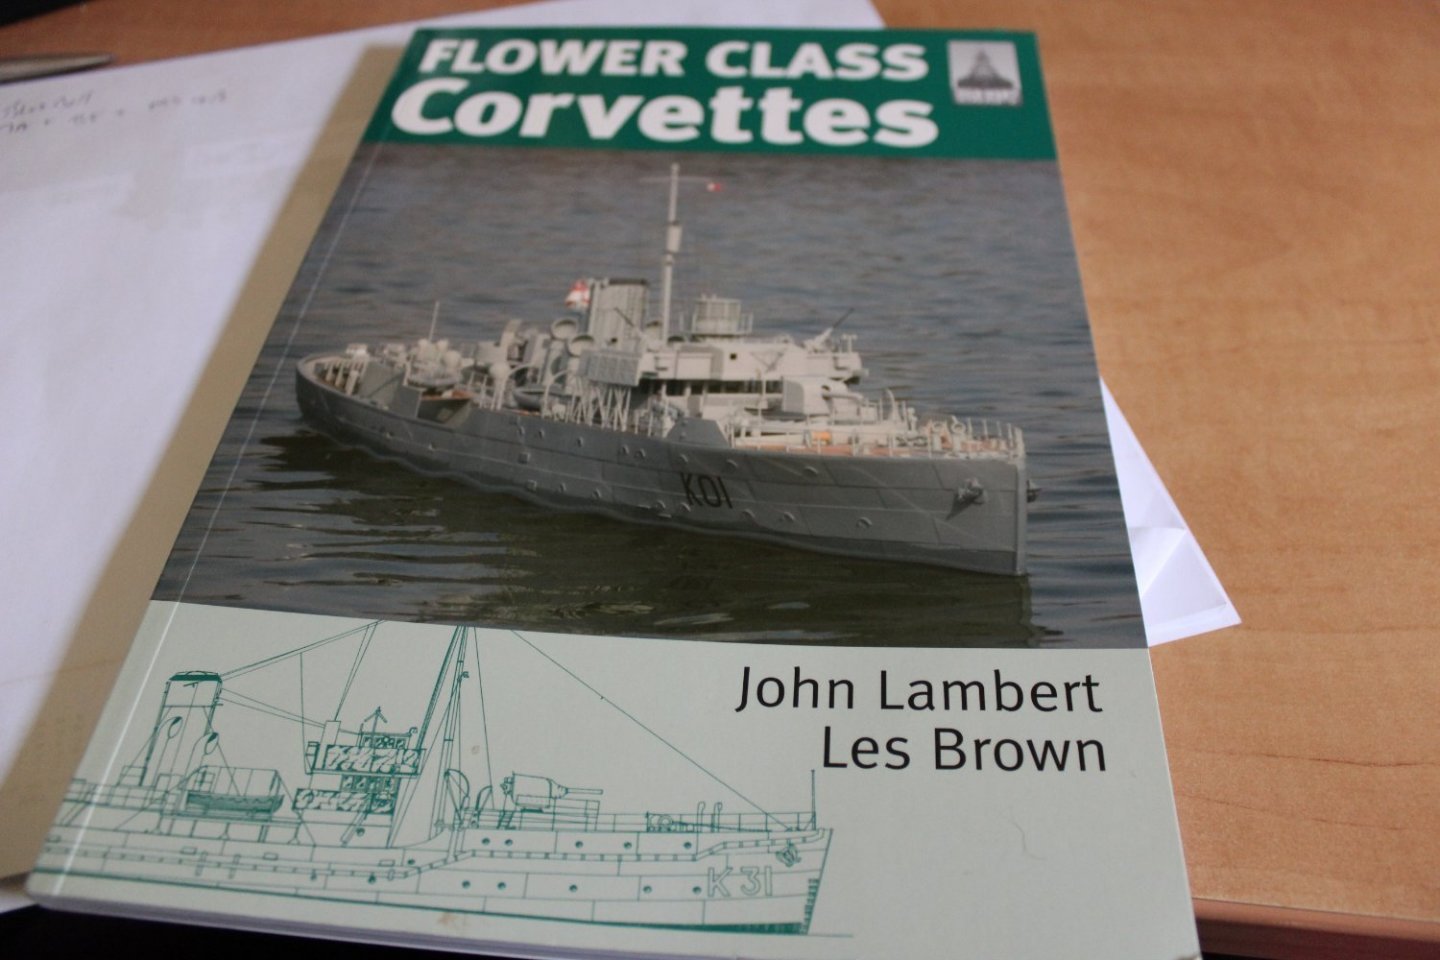
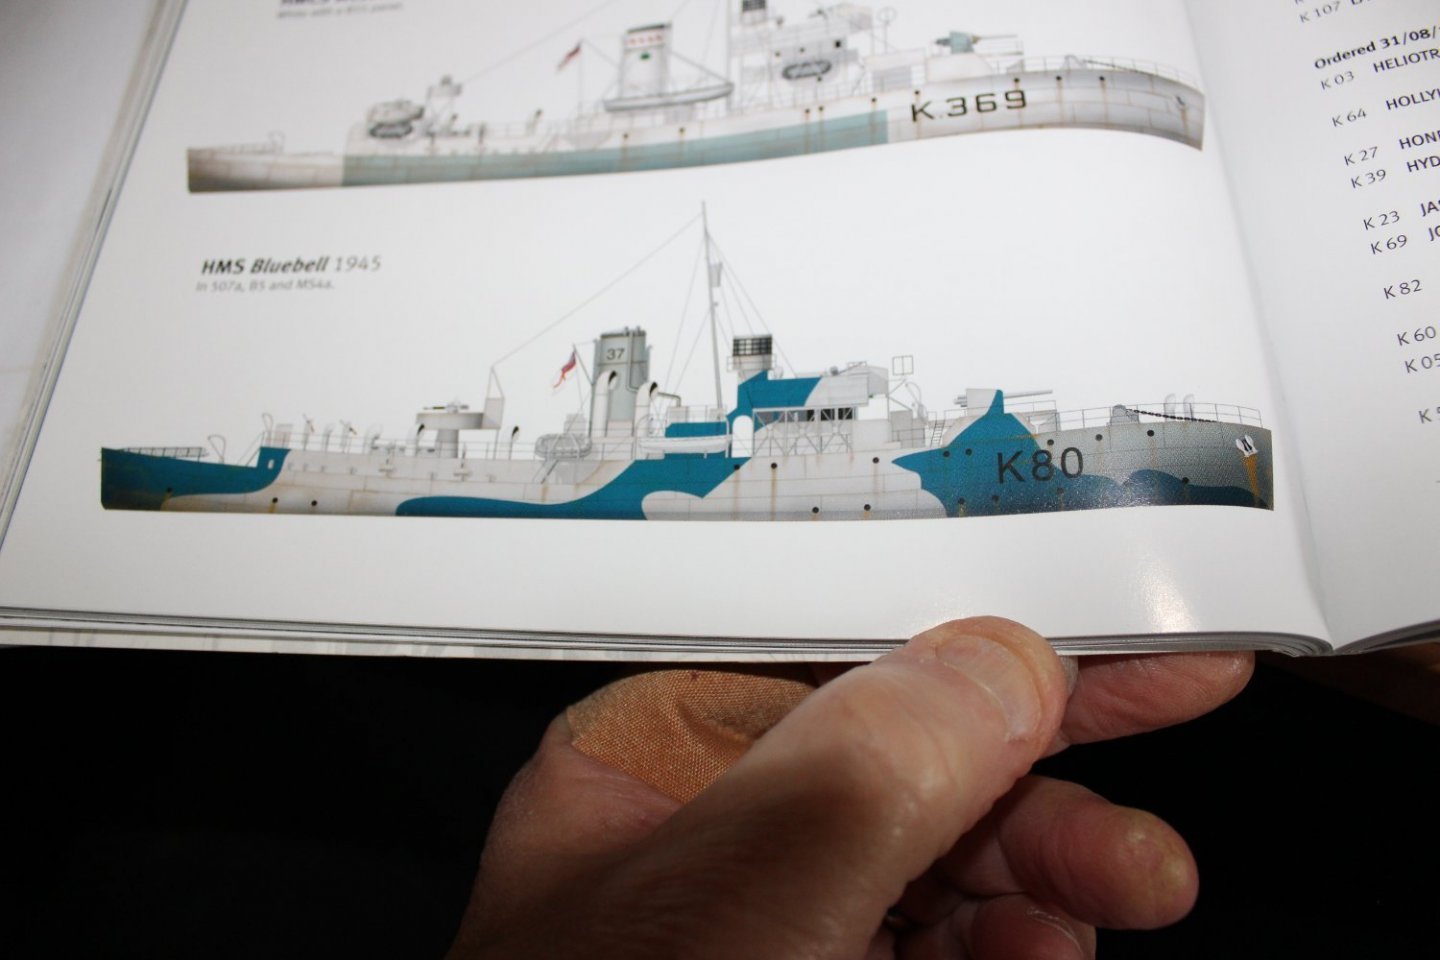
good evening everyone thank you for comments messages and likes well the dust has settled from the builds fiasco, hopefully how i can get on and complete something i have been talking to Sovereign Hobbies about the paint scheme, it seams the book i am, going by is wrong in the colour call out, i was after a western approaches 1945 scheme with a dark blue, the colours listed 507a B5 MS4a were never used together, as an official scheme
- 141 replies
-
- 11
-
-
good afternoon everyone been a crap week model making wise, loosing the SD14 and then abandoning the POW, but that's just modelling, for others there are far more important things in life to worry about i have brought the Bluebell back to the bench, took me a few hours to get back into it, the biggest difference between when it was put away and now is the airbrush made up a few depth charges, and played with some wood effect,


-
off grid maybe it certainly is not going to landfill, it's not terrible, just not a standard i wish to share ,
-
good evening everyone i feel like Adel i am going to have to pull out of this build, i am unable to produce this kit into a standard that I am happy to share with you Sorry
-
thank you, i will read that when i get a chance
-
thank you, rereading the reply it wasnt two rudders then with independent movement, it was two welded together offset so how was this solved, was it better propeller design, two props, twin rudders?