HOLIDAY DONATION DRIVE - SUPPORT MSW - DO YOUR PART TO KEEP THIS GREAT FORUM GOING! (Only 20 donations so far - C'mon guys!)
×


harvey1847
-
Posts
528 -
Joined
-
Last visited
Content Type
Profiles
Forums
Gallery
Events
Everything posted by harvey1847
-
HMS Alert 1777 by Jaekon Lee - 1/64
harvey1847 replied to Jaekon Lee's topic in - Build logs for subjects built 1751 - 1800
Welcome aboard Lee! Nice, clean and neat keel so far! Good job. Best wishes with the Cutter... Daniel. -
Hello Piet! Have you changed your avatar? And what have you done with v.1 Dingy boat? Good luck with version two. Best wishes. daniel.
-
Hello again Richard! Yeah, it makes sense to me. The best thing about the wale is that you actually have a nice curve line that it is exact and true to the hull. This will help you (has helping me) to measure all the diffrent heights up and donw. Specially becacause with the wale in place I cannot put a square between the frames and I have no gantry-bridge to measure things from above. Next project I´ll do this for sure. best wishes! Daniel.
-
Sorry Richard, I was just trying to be funy Did you actually have made the wale or is a tape to find out the shape of the wale? I do like the picture, it´s like she is floating in the space, like the NASA SaturnV, like a dot on space. Yesterday I couldn´t see the point about the shot. If it works for you oh kill. When I made the wale I spent like two days meausiring the sheer plan and translating those meausures to the model with a square set. I could not see the final result till all those dots and lines were on the Triton. Your shot it is a clever idea but be careful with the measures of the top of the wale to the gunports lintels/ceillings. Hope you understand me. (sorry about my english aswell) Take care! daniel.
-
Do not see the point Saturn...
-
Still alive and drawing... now with the fore cant frames... The draft takes a lot of effort,,, actually I think is much more or less the same effort than actually building the ship on a log. Lots of tedious work and repeating lines and more lines. We´ll see. Daniel.
-
Sorry Piet, but when I have seen Dingy painted on grey I said Aouchh... Then I´ve realised that you are not making a XVIII century POF gun ship but the O.19 submarine...Quiet easy to get lost cause the little tiny dingy dingy dingy.... looks like a whole project by itself! Your skills and eyes are amazing. You must be related to some jewelery ancestor or something. Willing to see her (v.2.0) on the deck of the O.19! And really nice pics on her case! Daniel.
-
Thanks Mark, Jürgen, Aldo...! and all! I suspected that Mark so I´ll reinforce the bulkhead and who knows if I´ll add some boxes of dried fish like mackerel or pink salmon... Back to draw! Daniel.
-
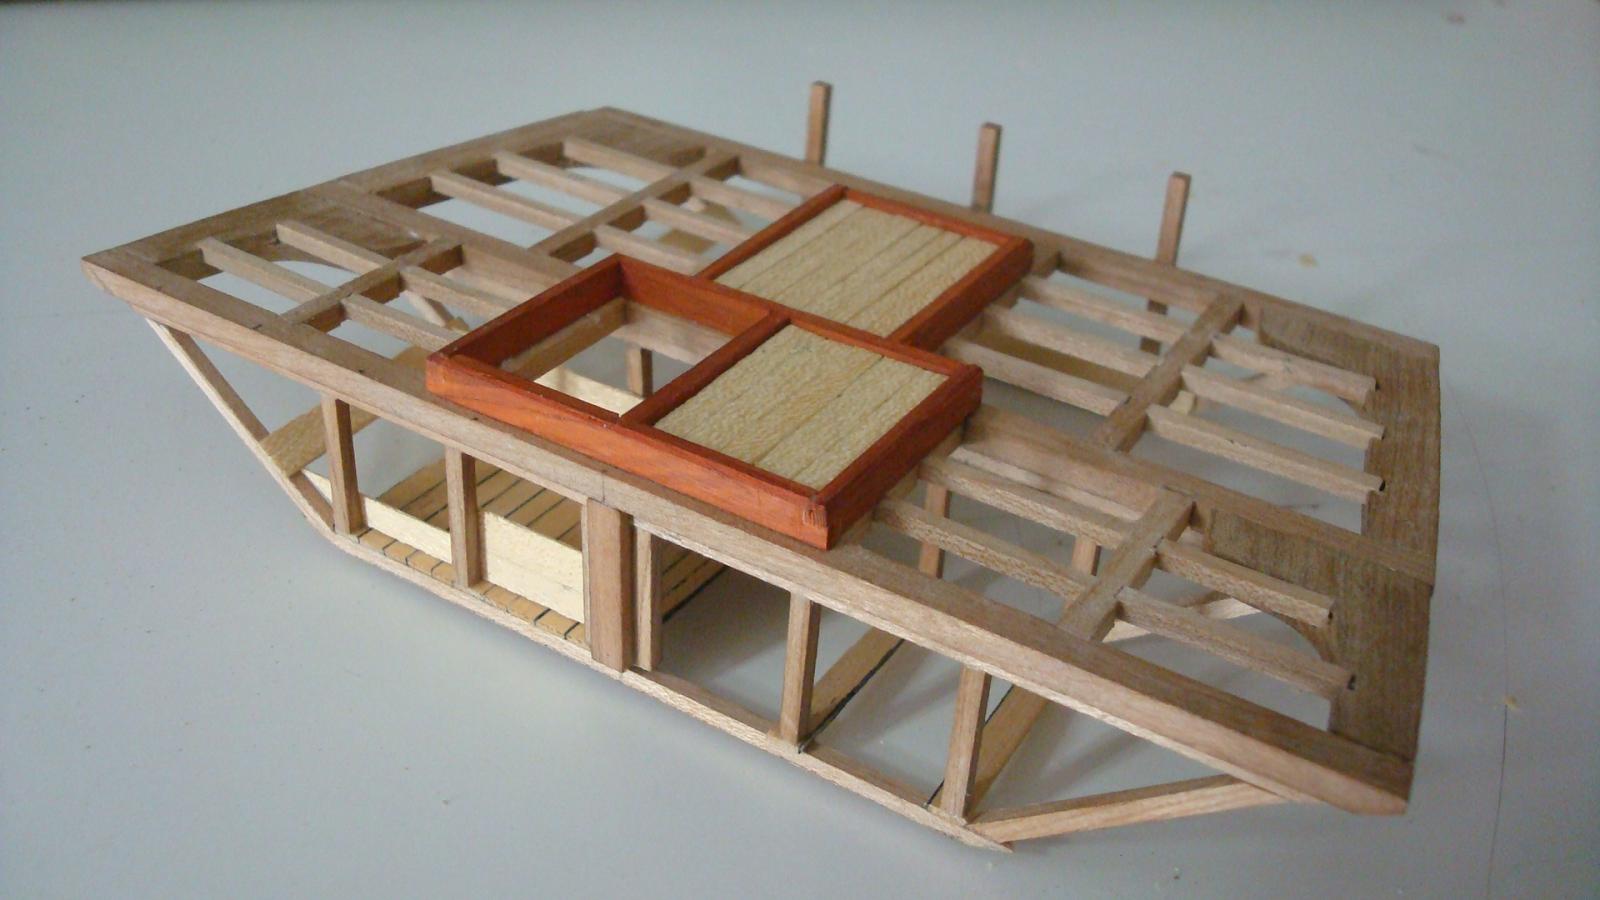
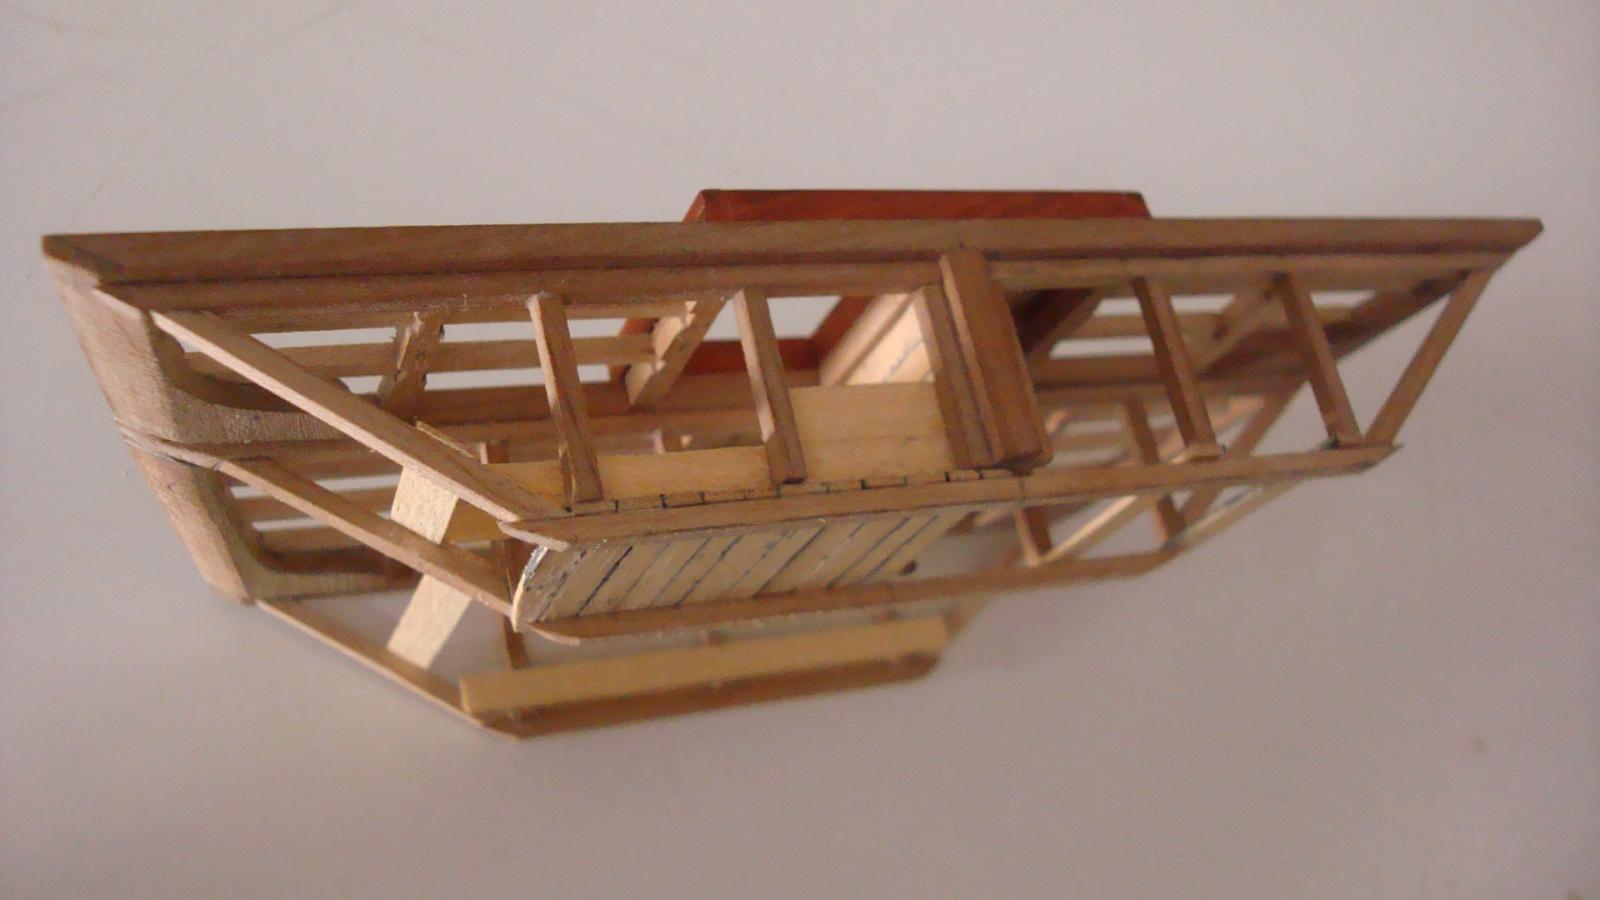
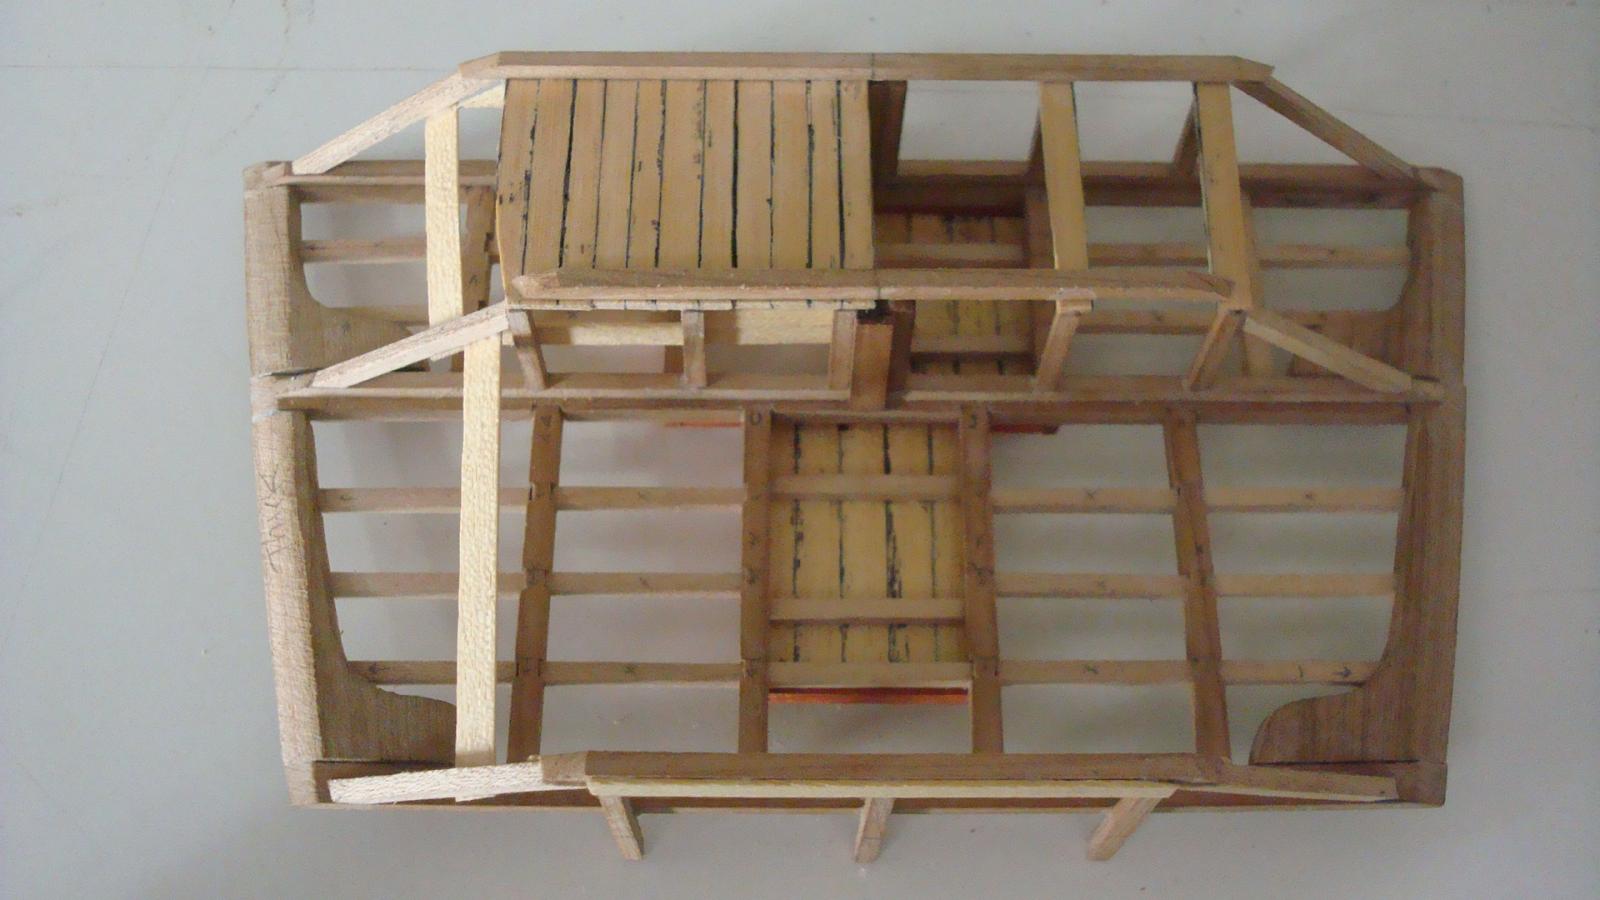
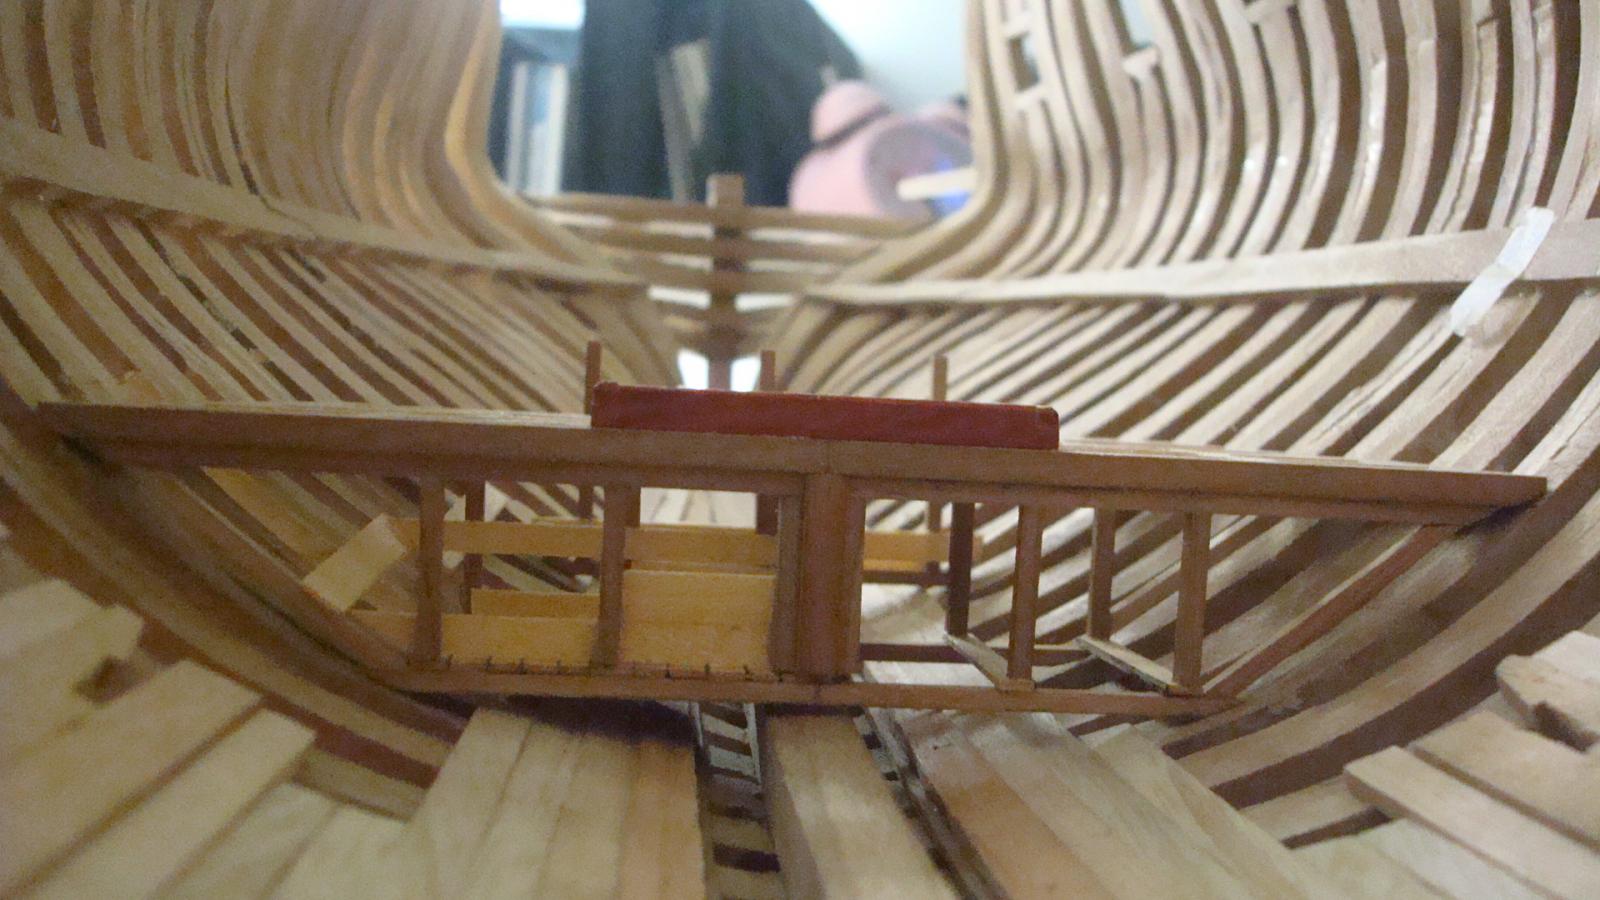
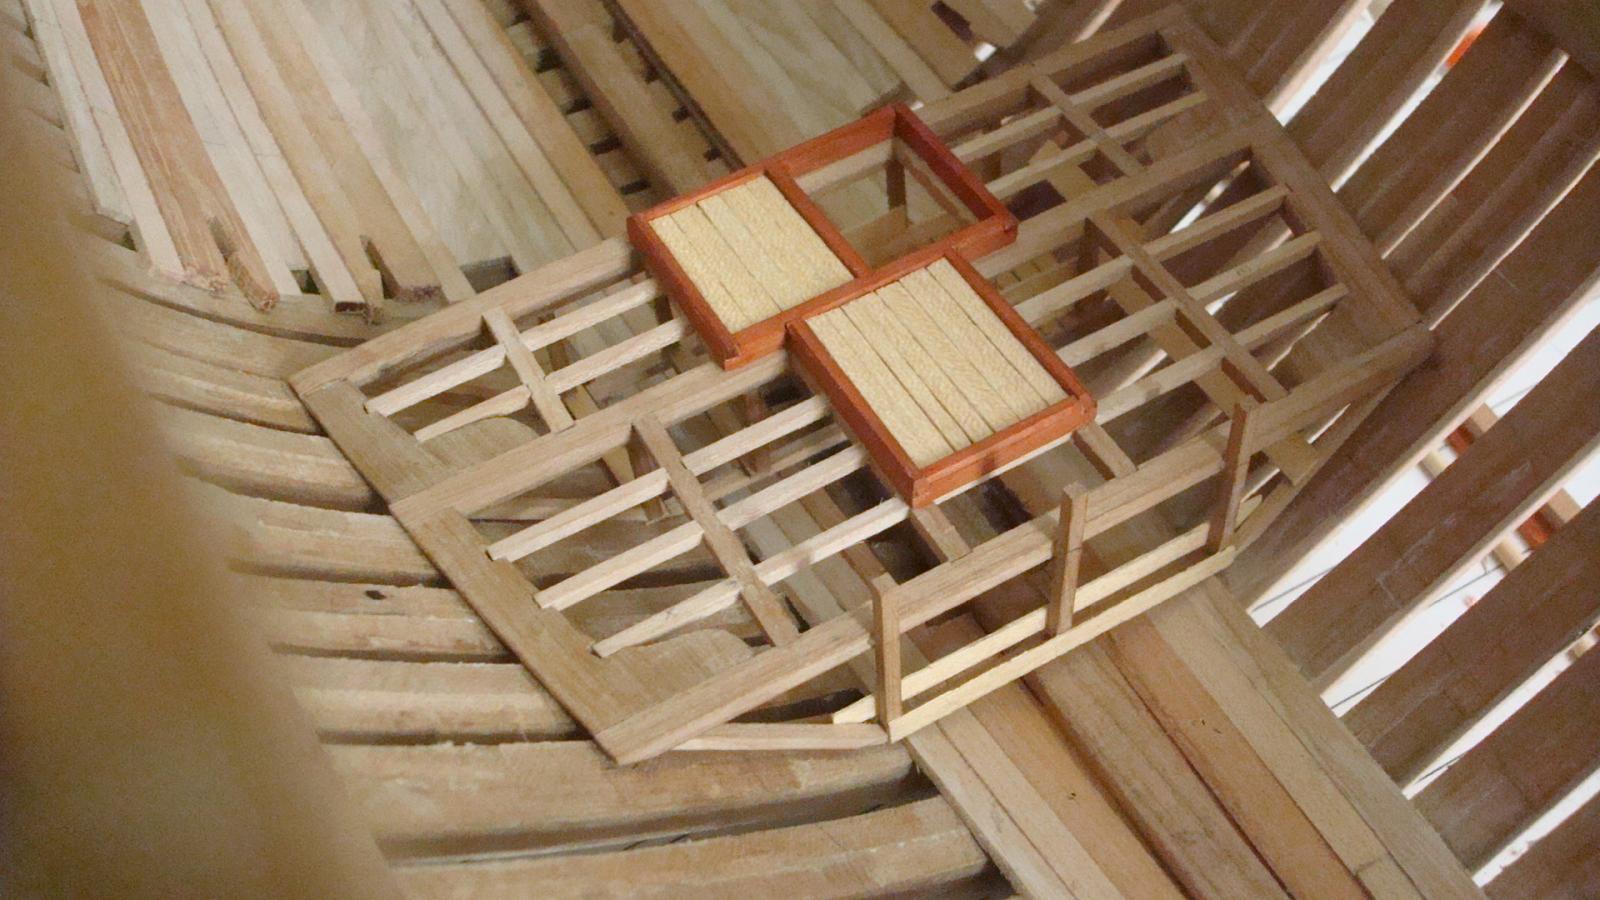
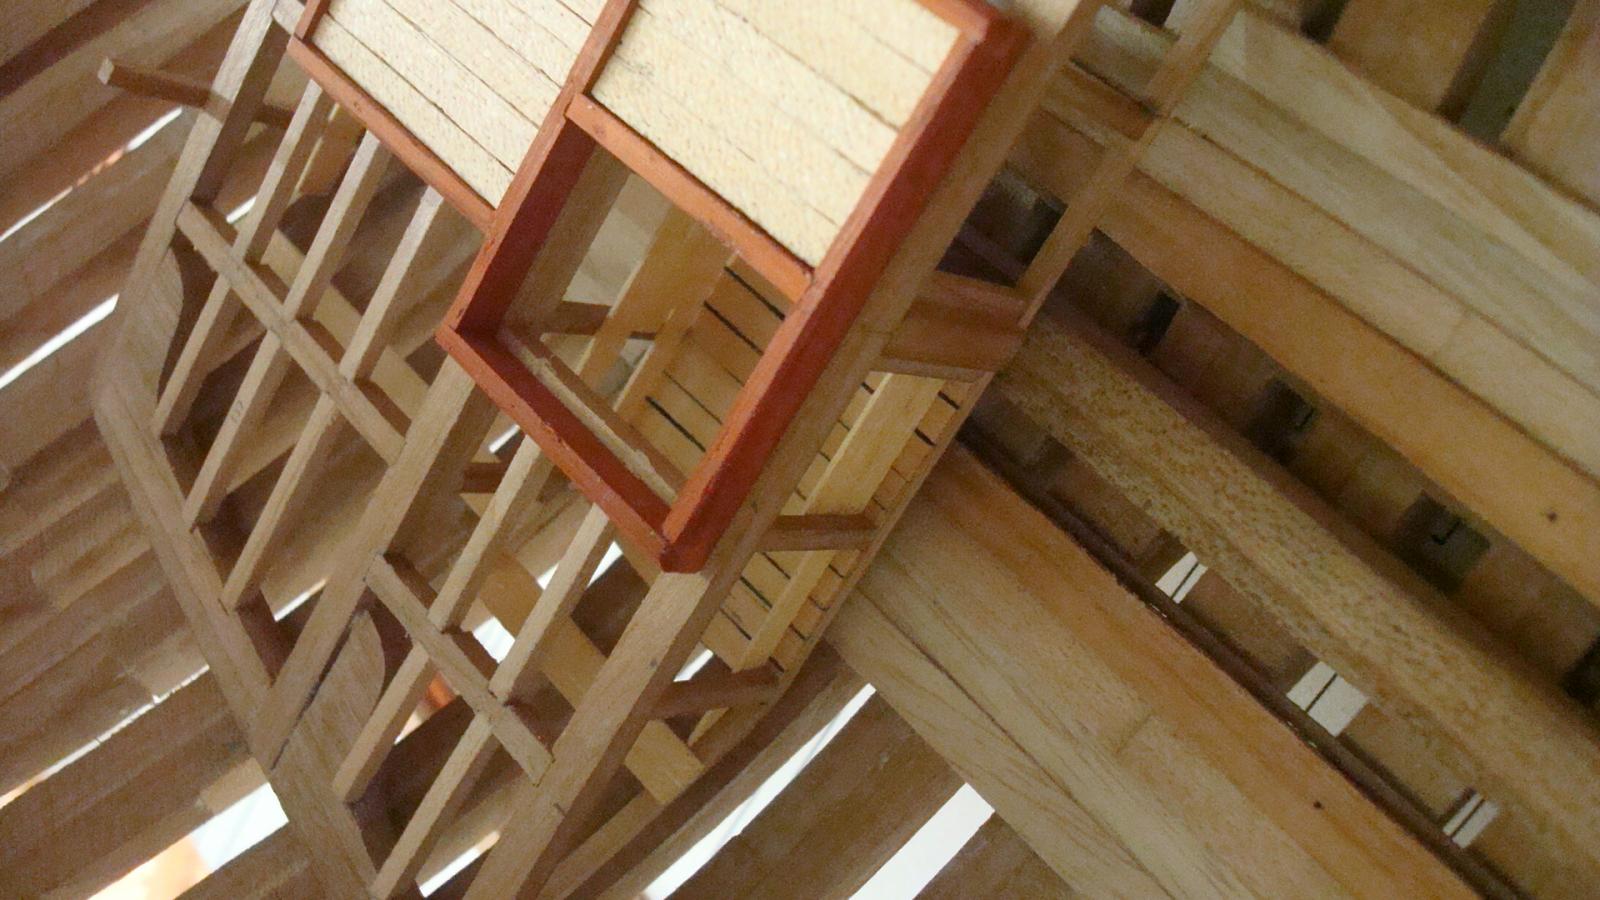
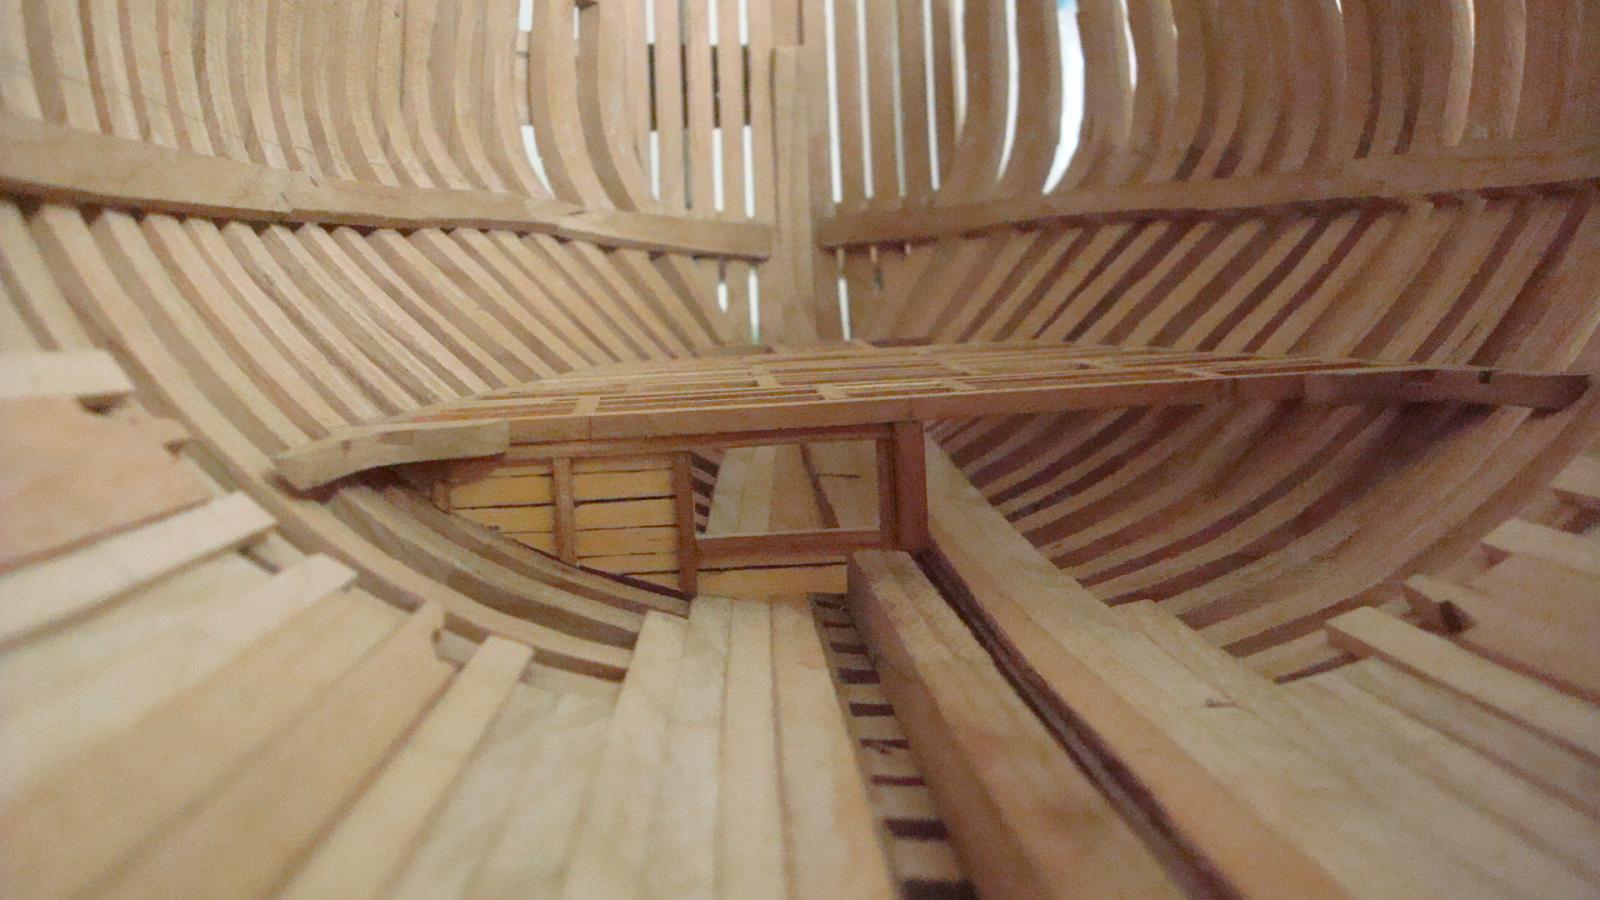
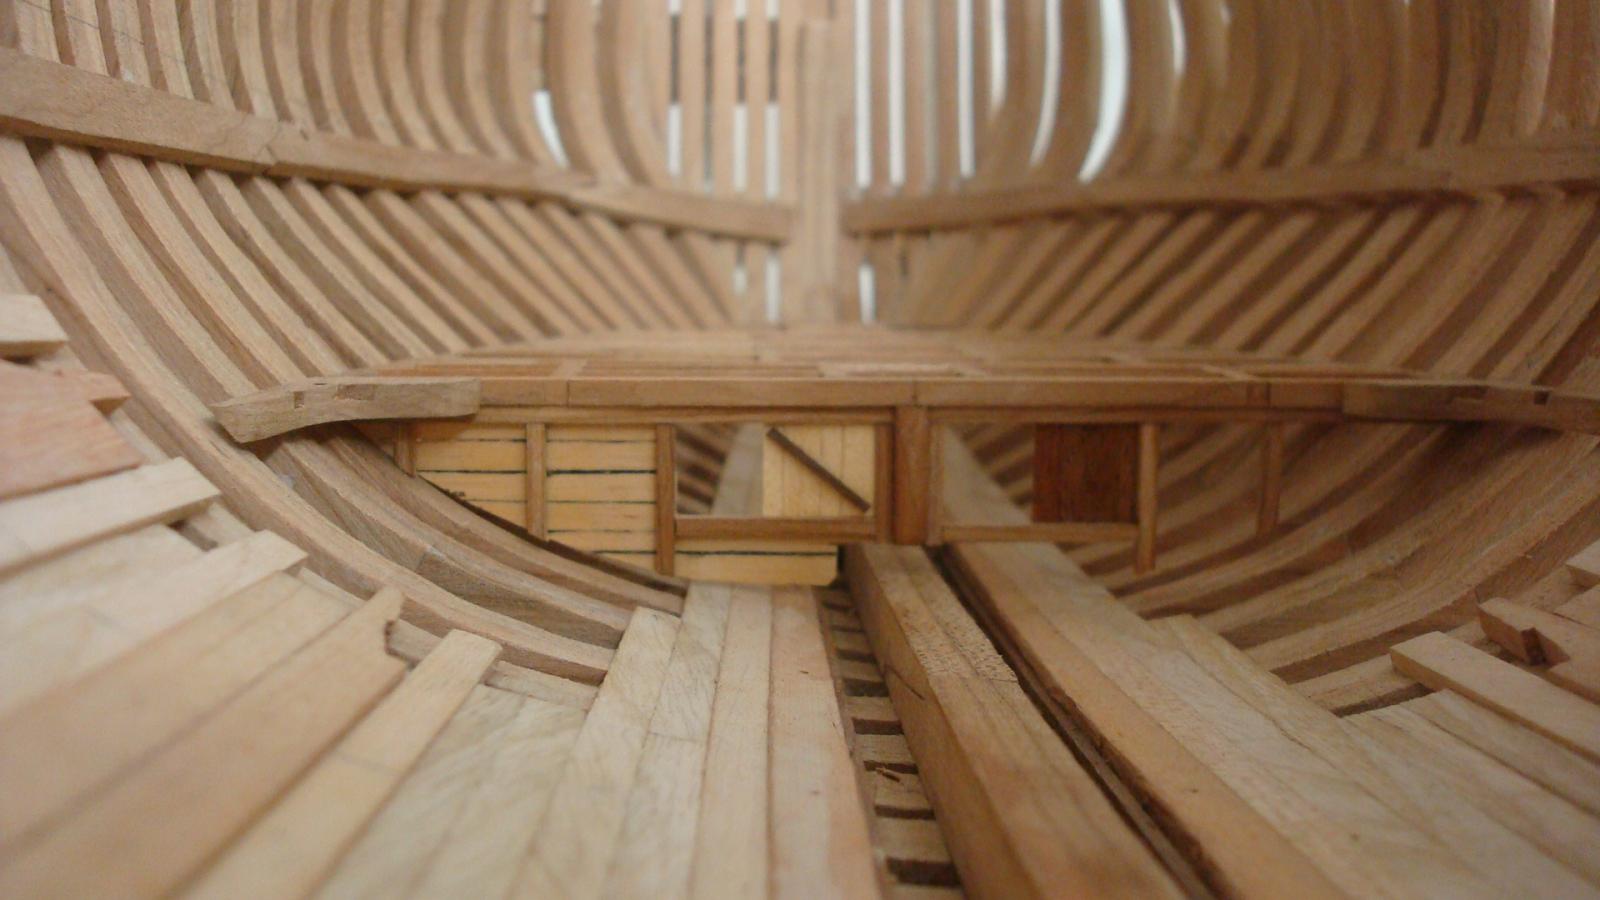
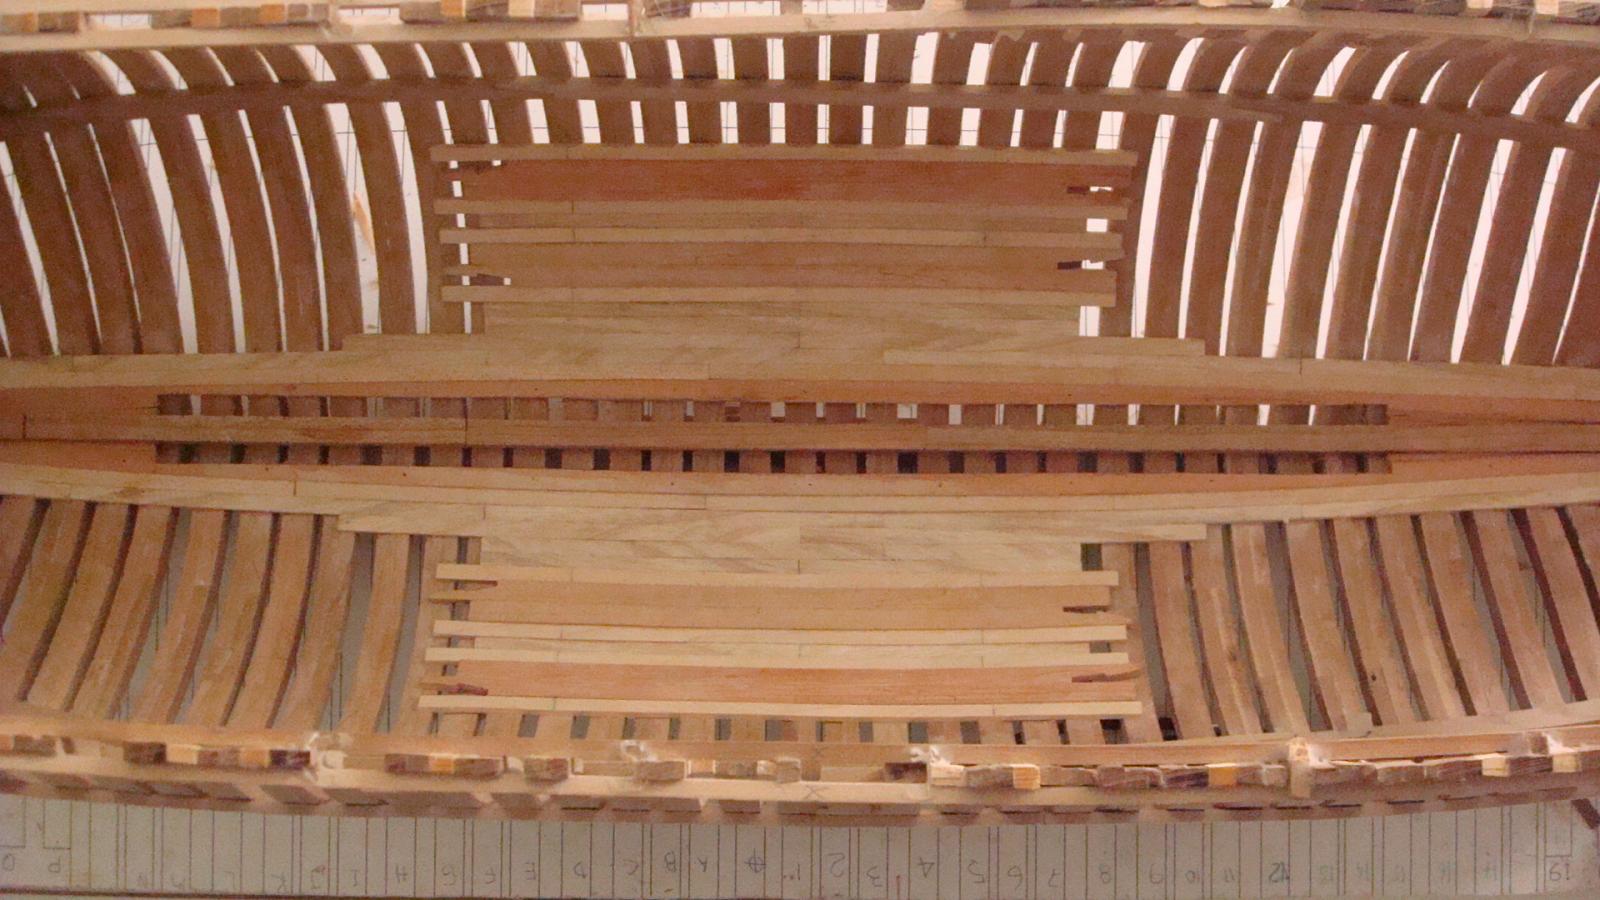
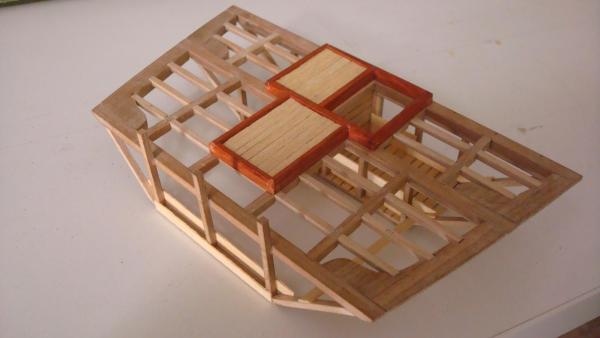
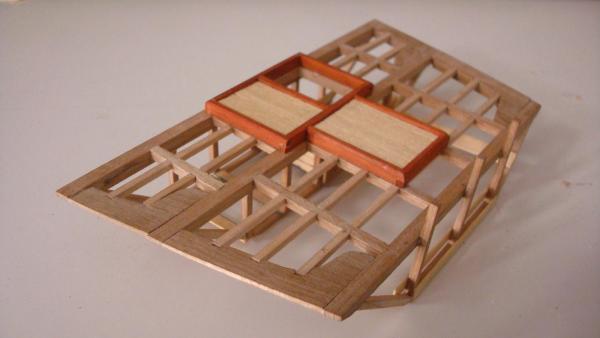
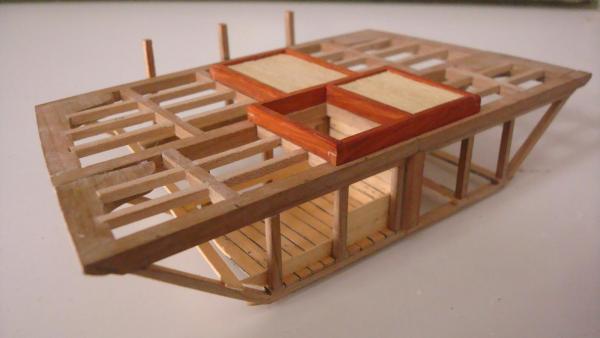
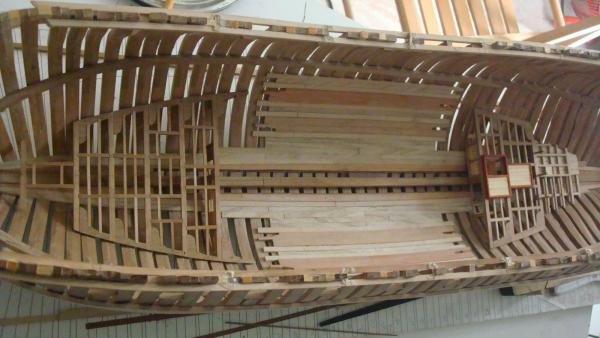
Hello All and thanks for all the “likes” (12 in a month, hahaha) Oh boy! I never thought that 60 pieces of wood would tell so much about the structure of a platform. I do know that much more of this work will be invisible with the other decks but do not not how, I keep keeping the things not simple. It is quiet easy to get lost if you are trying to actually build the whole inner structure of the ship, so where do you stop detailing the different rooms…? For the spirituous drinks and the fish* I thought that was odd to have such a reliable source in touch with the limber water… rats, fungus, dark water… So I have decided to make 3 separate rooms for all of this. Like that we were talking about the powder room on the magazine. Here are the pics; there are lots of them from the beginning. I ended using pieces of paper to find out the shape of the bulkhead, easier and cheapier and I ran out of balsa wood. Here´s a lot of work between the pics above and the rest of the post but no pics of it... we are talking about 60 pieces that took me almost a week... Here´s the magazine where I´ll move now. Just to check. The rooms and departments kind of scare me,,, how many pieces will be involved?... Need to buy a better camera... (*) FISH: Got a question to you, Do you think it was a room for fresh fish or salad fish? If it is salad I´ll leave the bulkhead like that but if it´s fresh I´ll have to double the bulkhead with 40mm plank (for real) on both sides (2 or 3 planks). On another side, I have decided to dedicate 1 week to the Triton an one to the CAD on the Principe De La Paz because otherwise I´m not going to be able to end none of them…No rush in this hobby… Best wishes and happy winter! Viva J.C. Fogerty and his CCR!!! Daniel.


- 226 replies
-
- 11
-

-
Hello Aldo! What a surprise to see you back! I had no idea at all about the illness. Anja on her post of july 25th said something about health issue. I am really happy that you are stable now and glad that you can spend some of your time with the Triton... My mom has the same illness. She is 67 and believe me, she makes a perfect "normal life". On the first days she was in the hospital with the dialysis every single day but right now and since four months she is at home with her treatment and meanwhile she paints and in the afternoons makes some pottery. She is ceramist and an artist. Well, don´t want to bother you, just to let you now that is an illness (chronic, I now) but you can deal with it and damn I know you will! Best of my wishes Aldo and hope to see those planks really soon!! Daniel.
-
Welcome back Rusty! Do not konw why but we are always cleaning and tidying up our shops, much more than cleaning the living room i.e... it´s something that the Admiral always says to me ..." You are always cleaning your shop!! is it so messy what you do upstairs?!" Best wishes, Daniel.
-
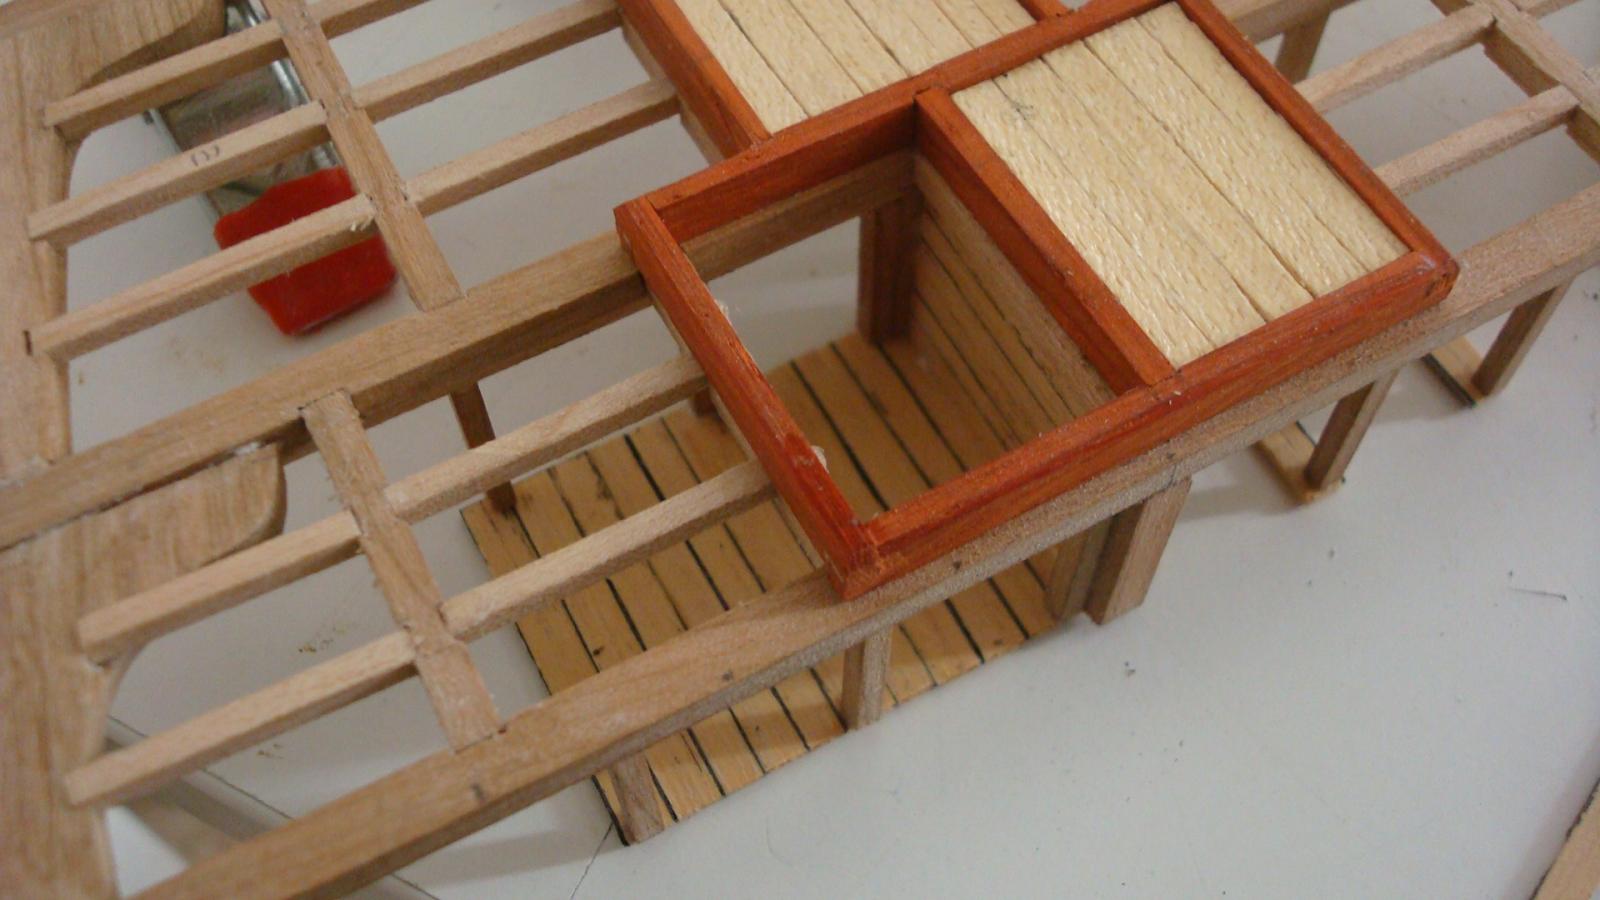
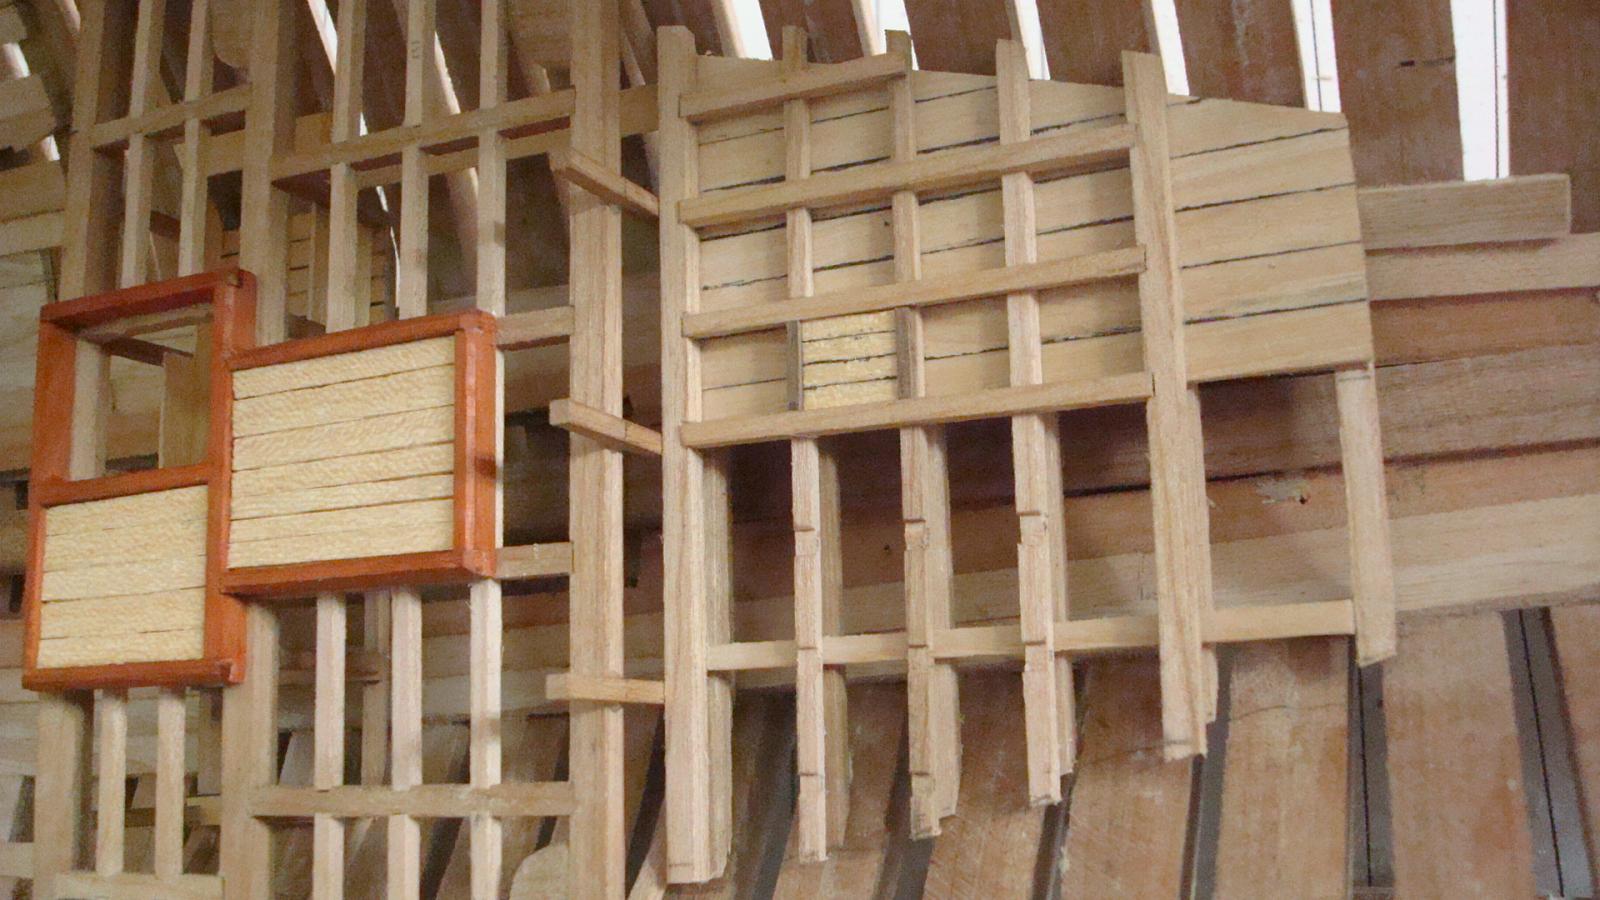
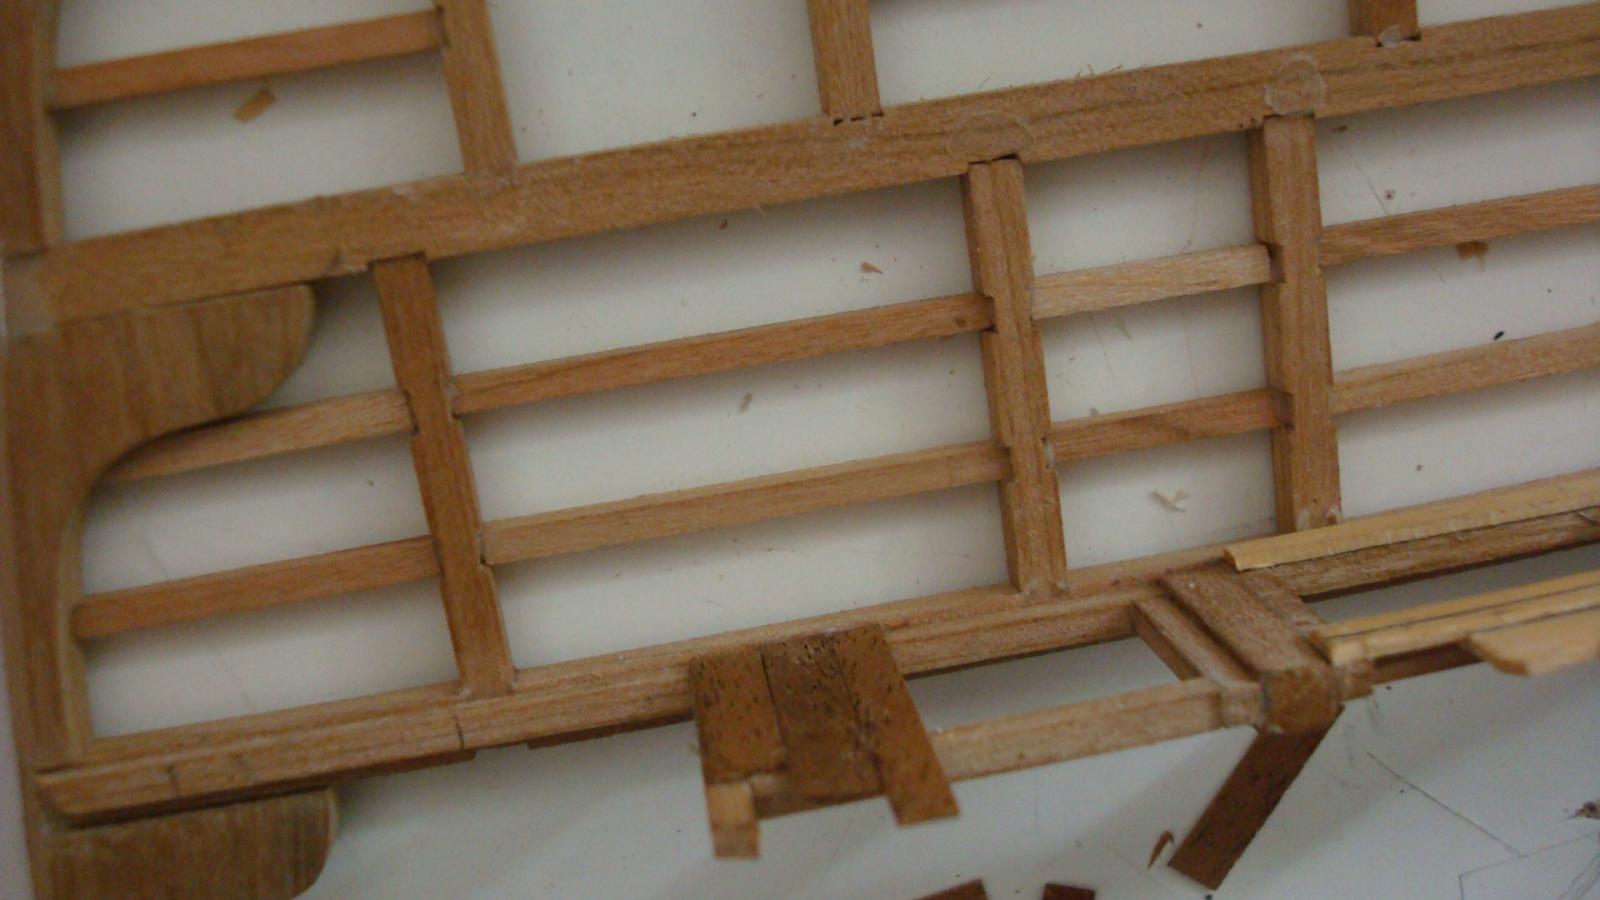
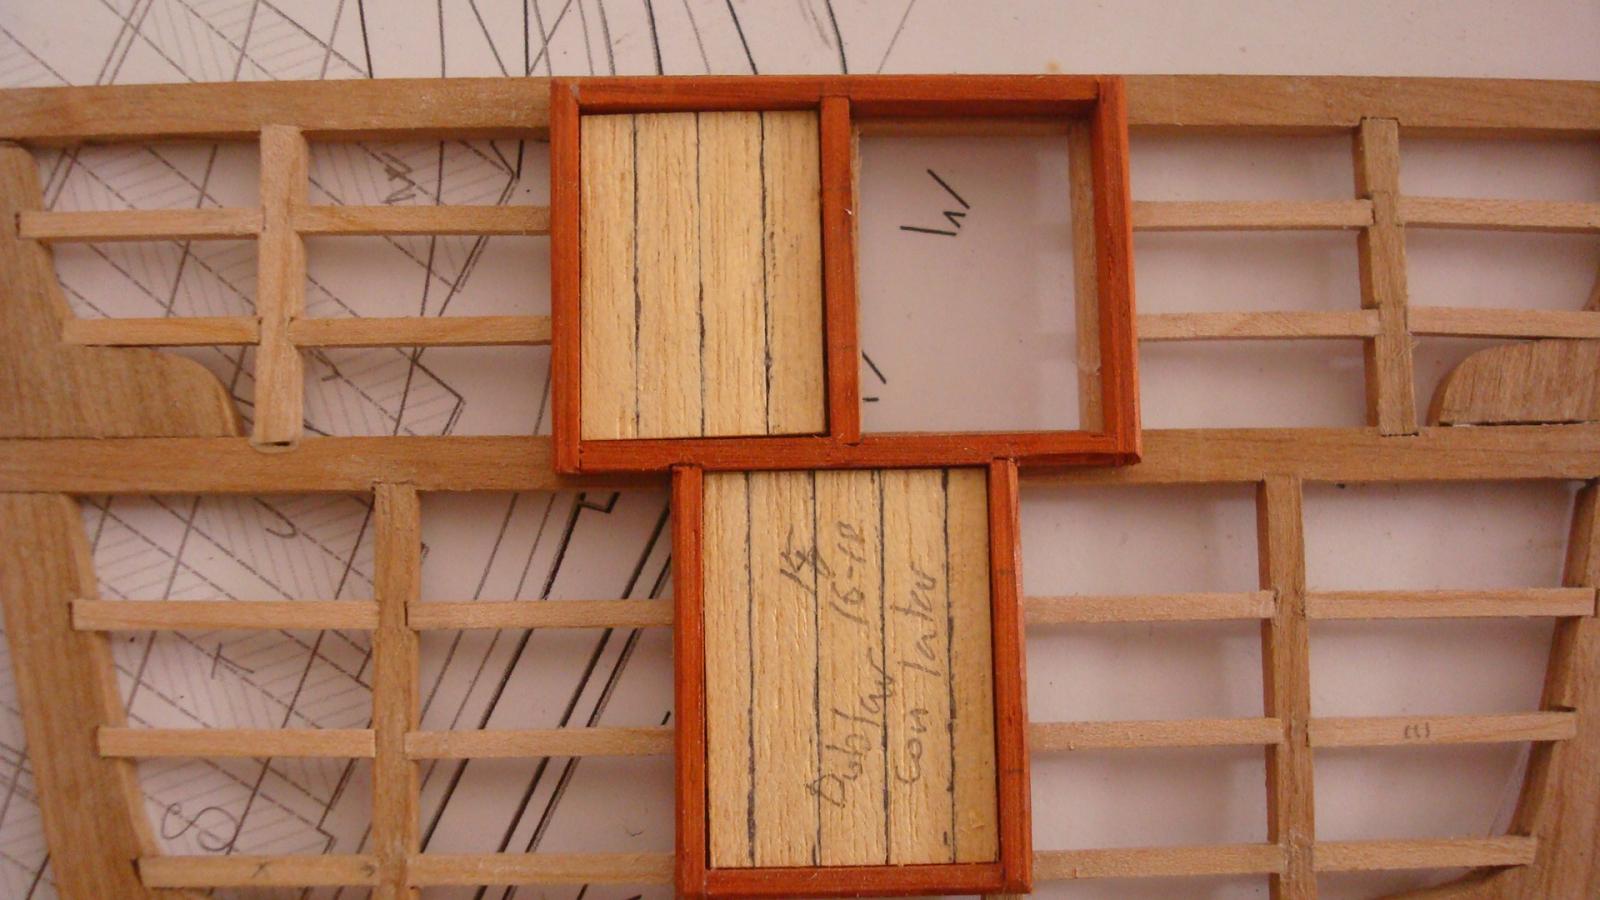
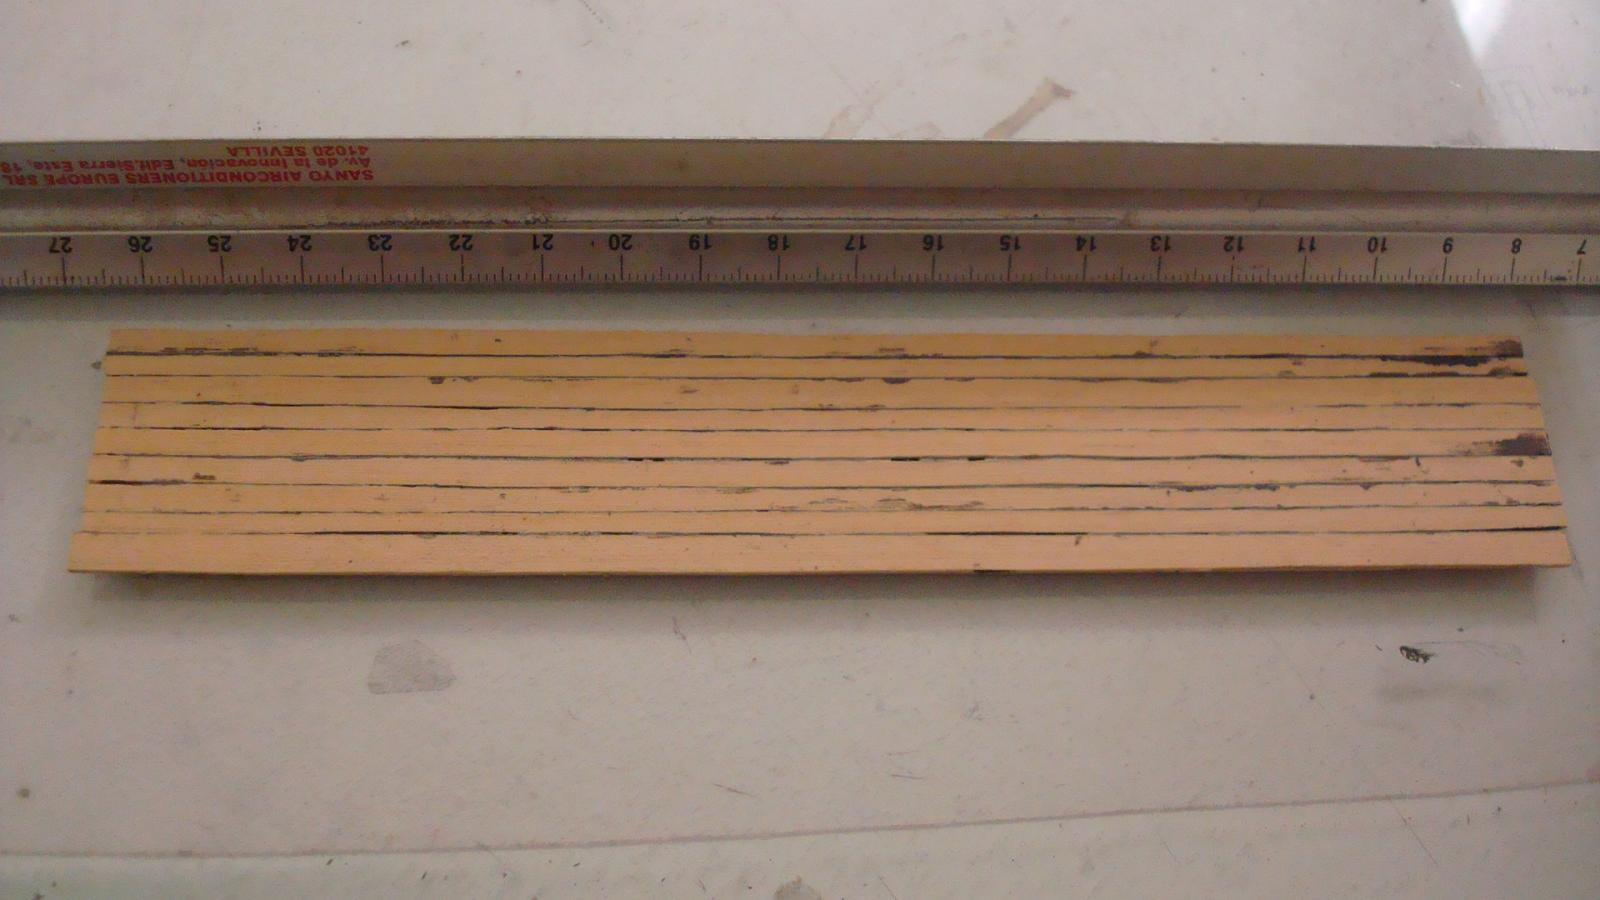
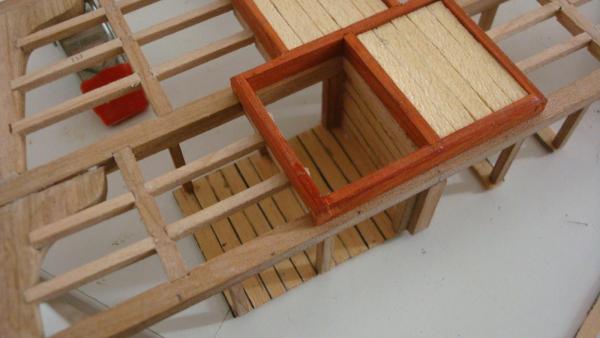
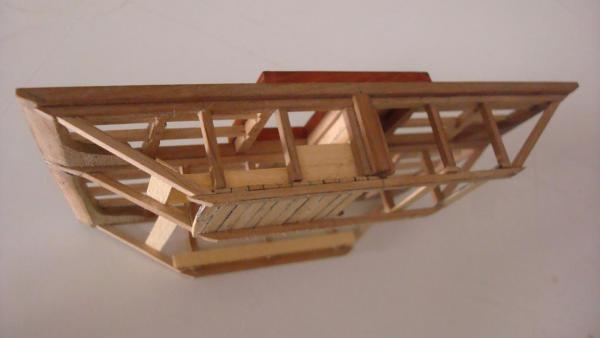
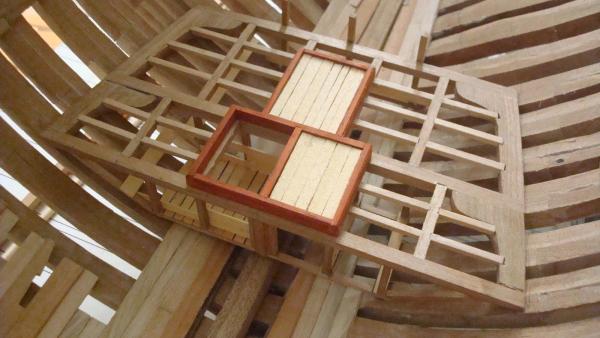
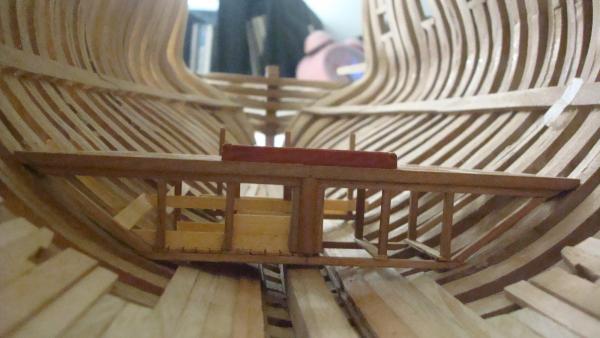
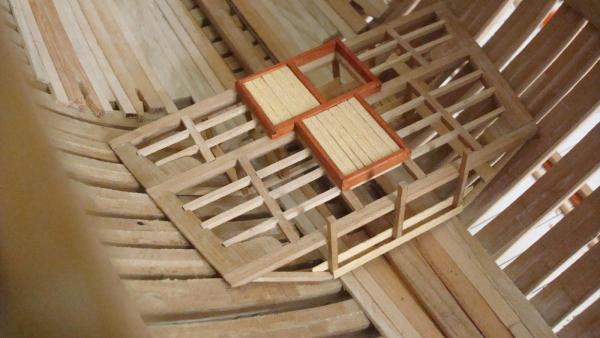
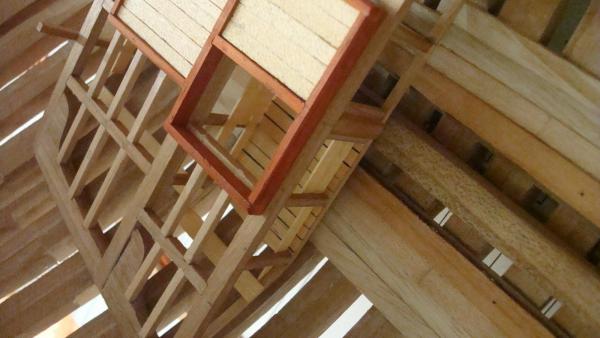
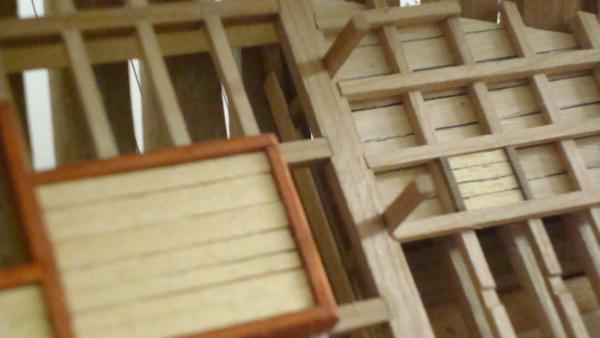
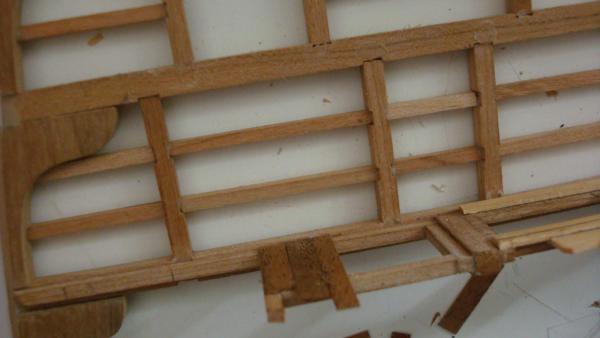
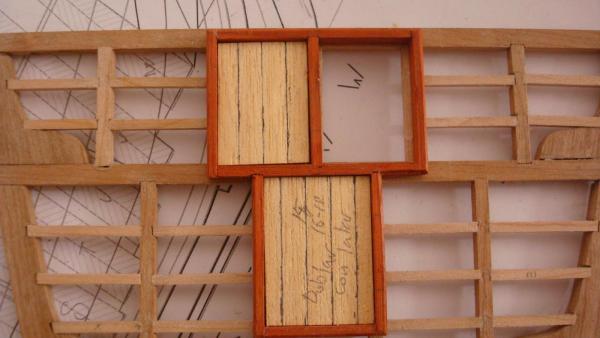
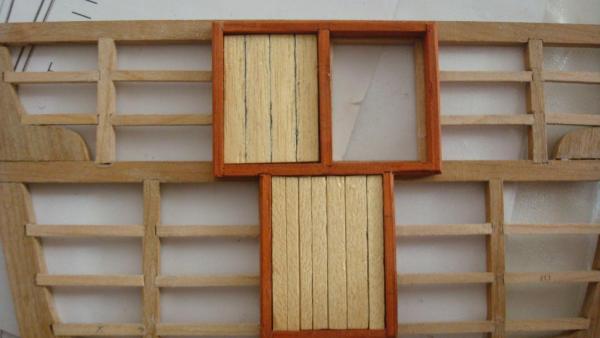
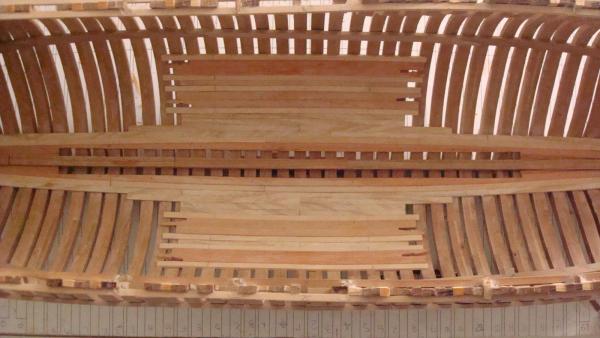
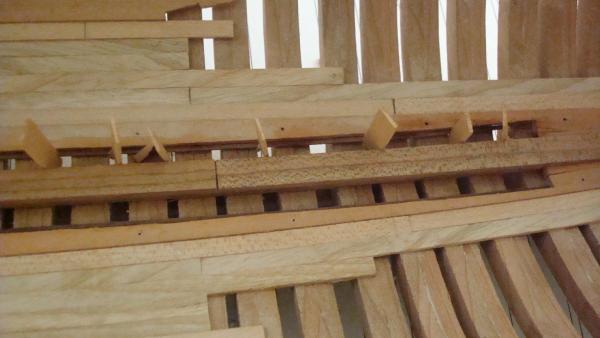
I used the balsa pattern to draw the shape on the bulkhead already done. I also used it to get the different hights of the main pillar and the other small ones. The main pole -post is 3x3 and the others 2x2. All this measures are what has been taking me a lot of time of thinking. 2 mm means 9.6 sq cm on real, 3 --- 14.4 sq cm much more or less 15x15. I always try to translate the measures to the real to see if the model looks true to the real world or is a "fake". For example on the aft platform, the one for the fish and the spiritous drinks I did long ago, the strips measure 4.5mm (21.6cm real). To find out strips of that size for a hatch seems to me odd. So I re-do it with stips of 10 - 15 on real. Any way here are the pics of where I am right now... What I have wanted to explain is how the windows -doors can be open and how they work. I have not the tools to make the groove on the frame to hold the door but looks real to me. Daniel.

-
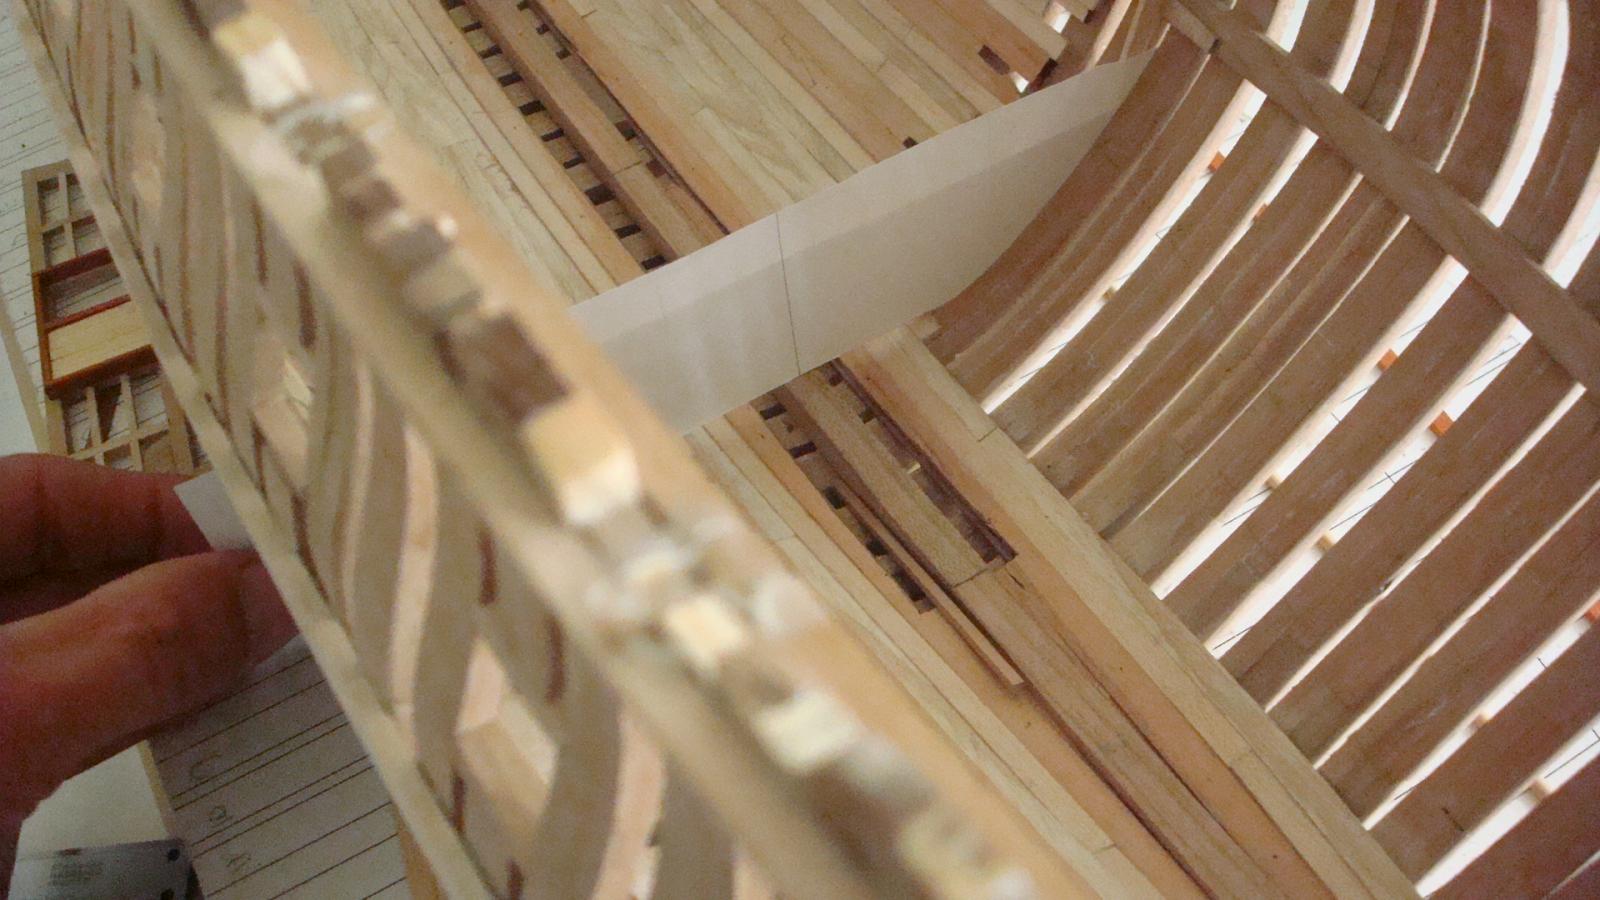
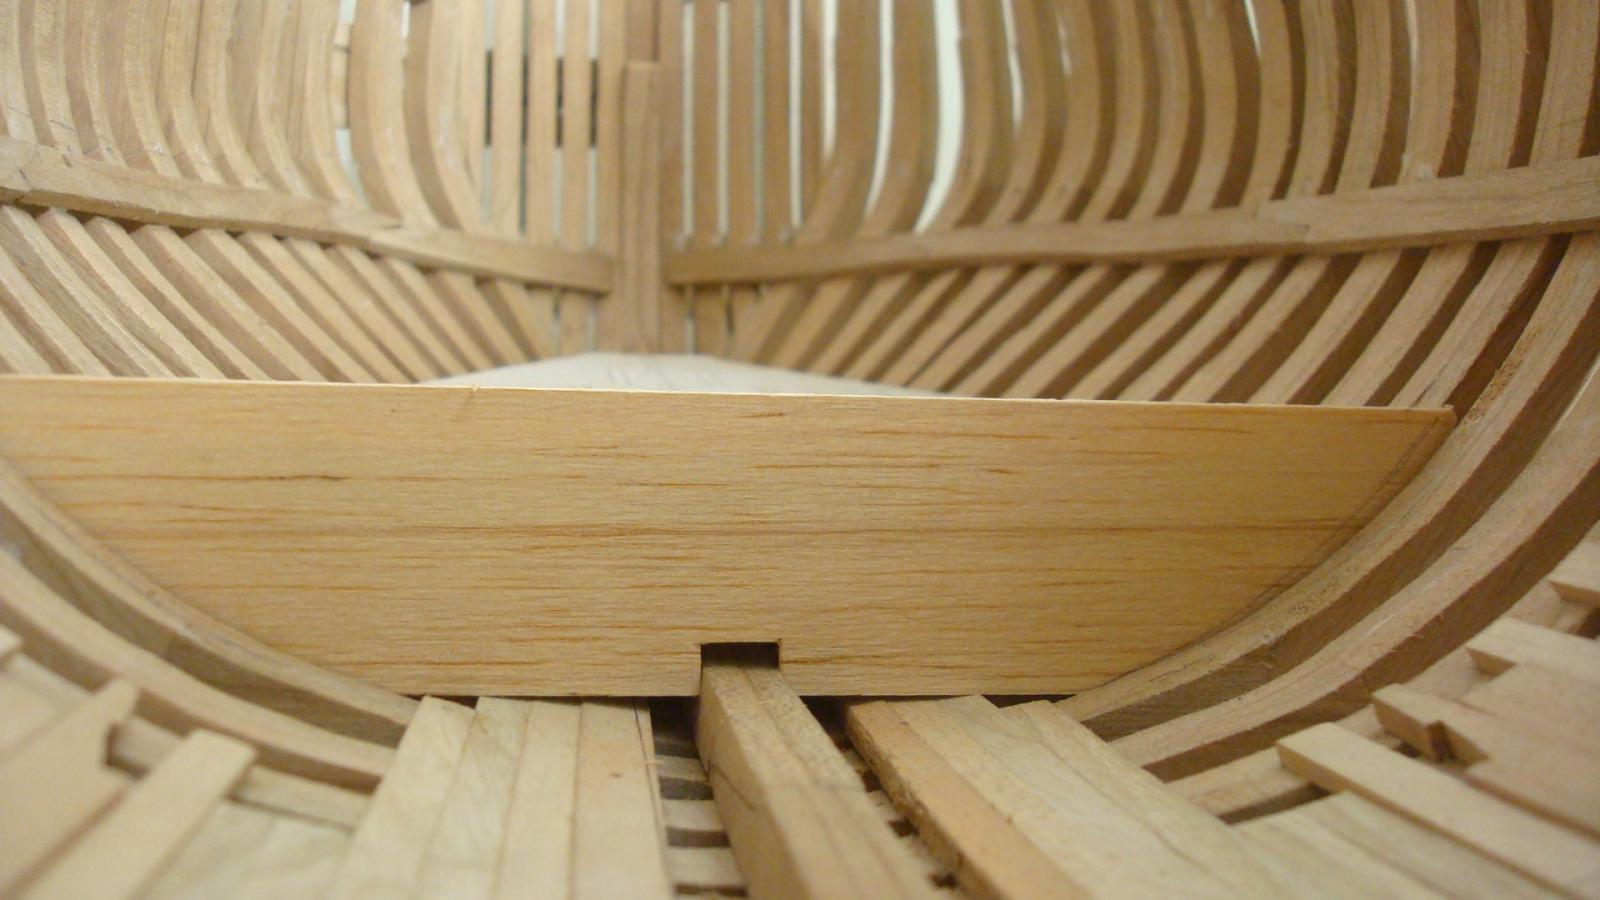
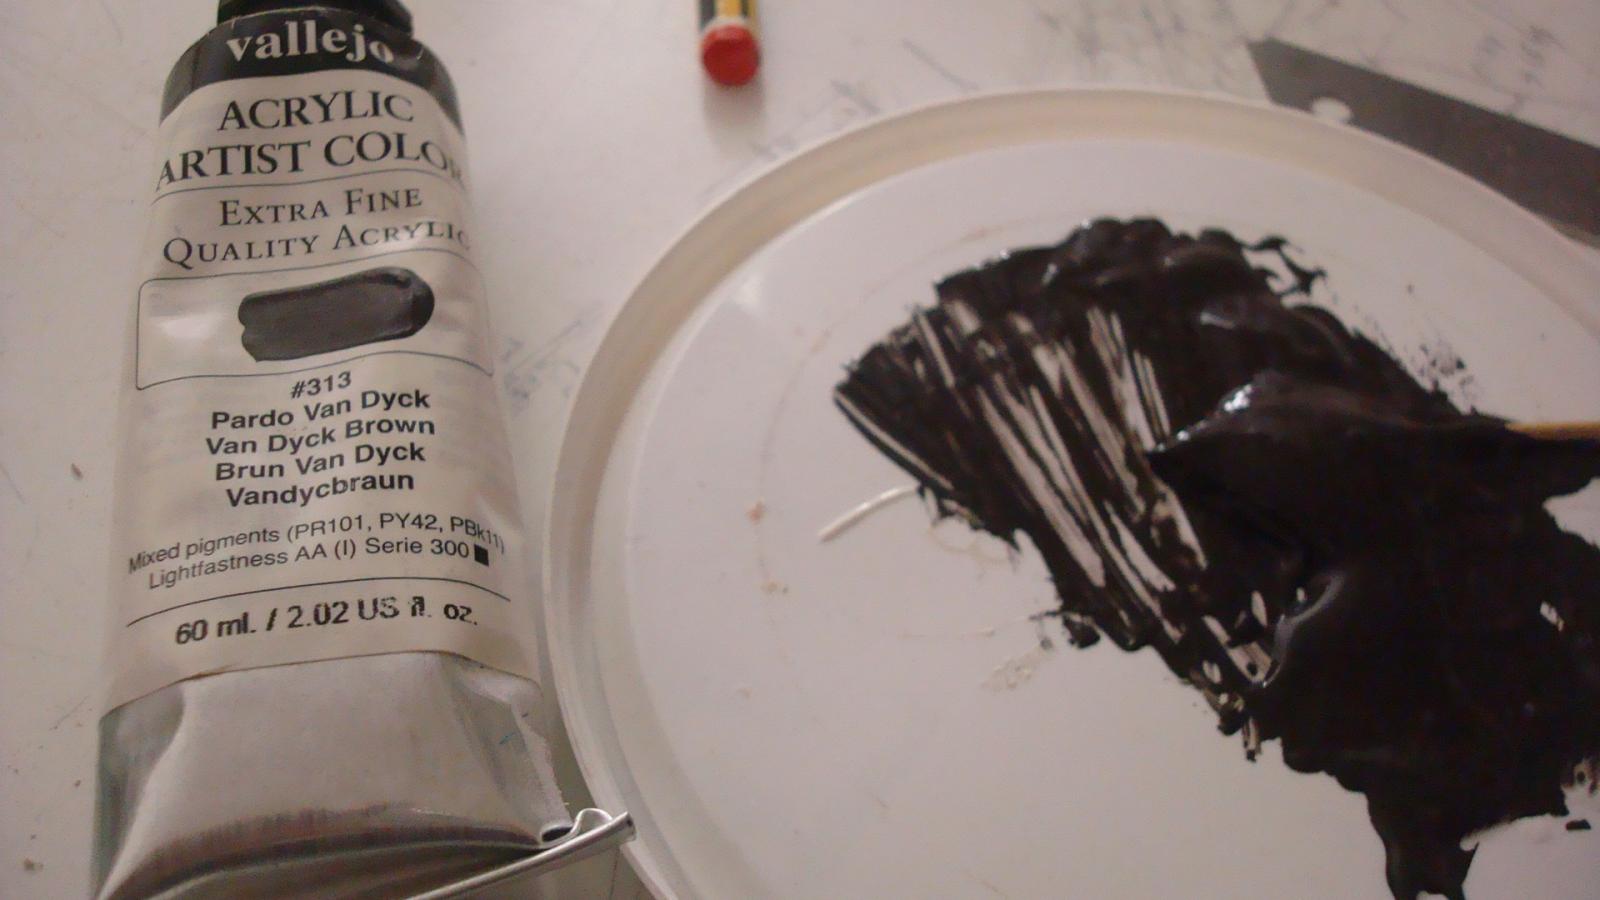
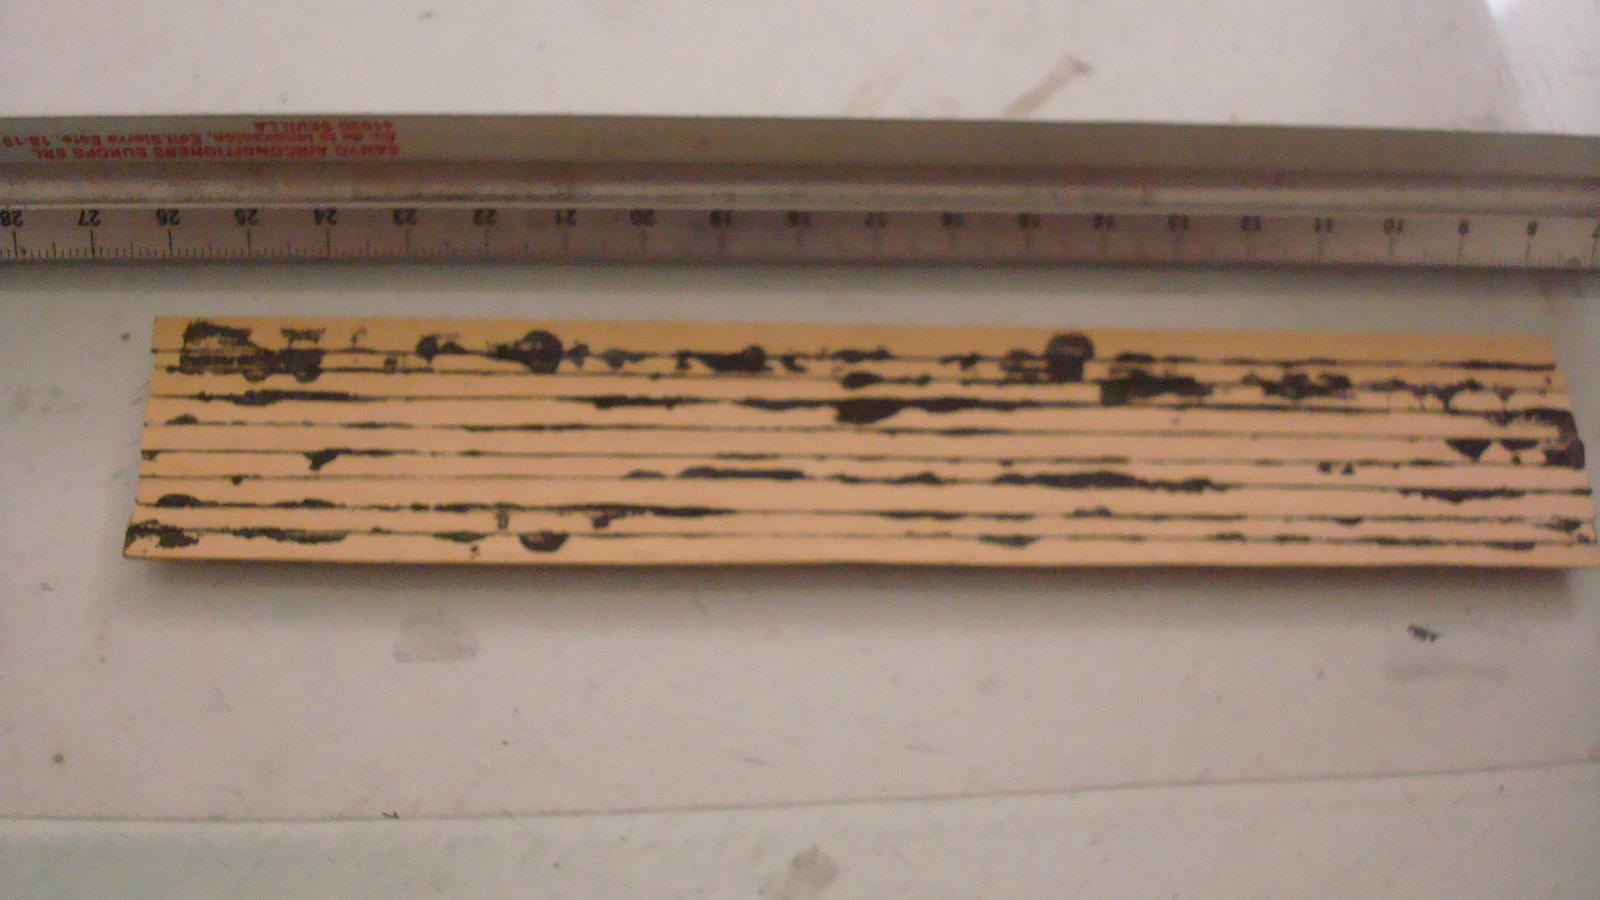
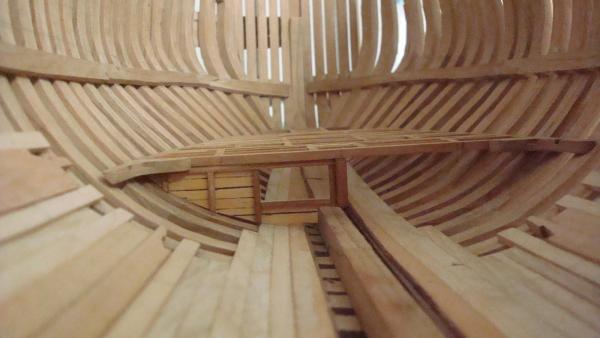
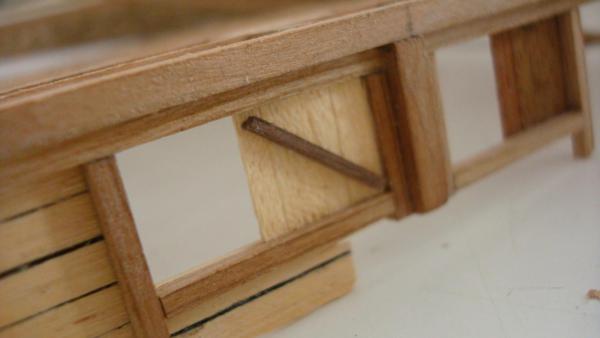
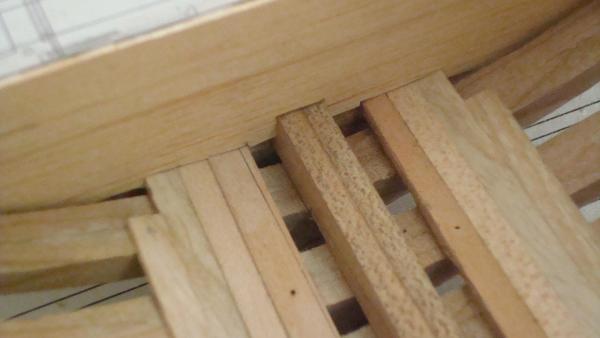
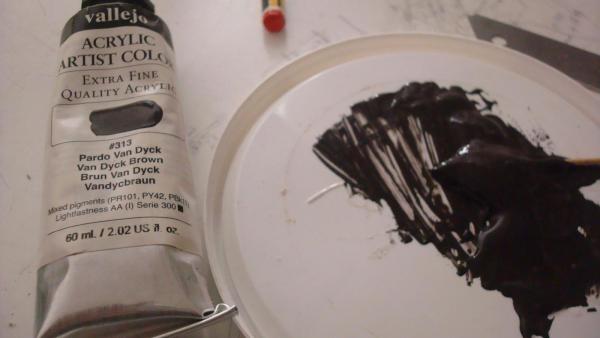
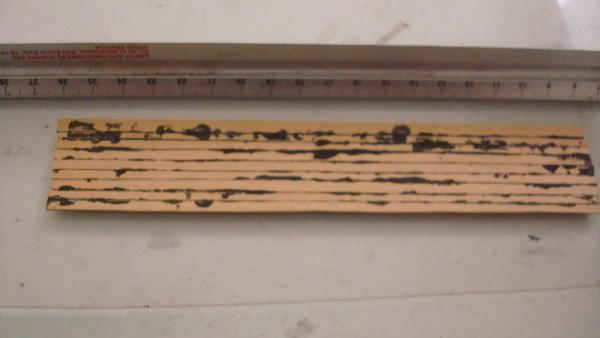
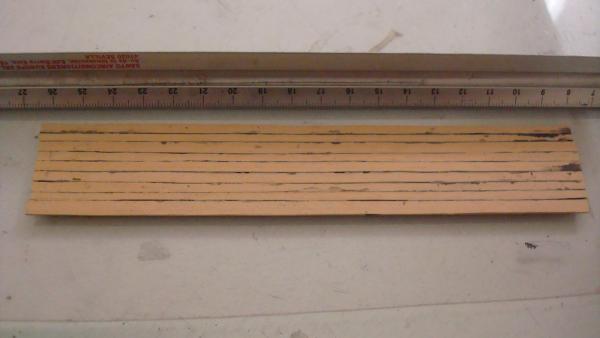
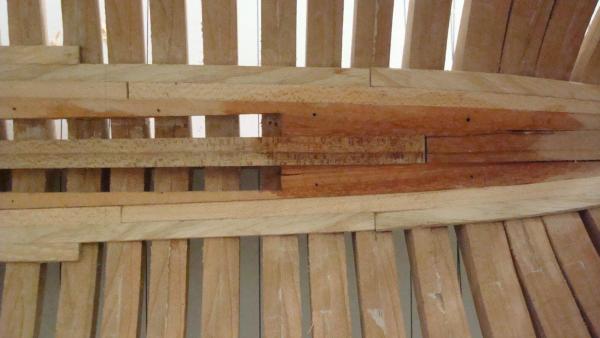
So, after all this work, I started with the bulkheads of the lower platforms. The fore one has taken me like 4 days, thinking and rethinking how the hek it was made. (I´m going to speak on present cause it´s easier for me) I start with a piece of 1mm balsa wood to try to find out the form of the bulkhead. Trial and error...for me it´s the best method. After removing the piece several times I end with this... the pic shows the stage without the 1x1 step of the limber. After that I glue several strips of "ramin" wood with a mix of glue and dark brown achrylic to comform the bulkhead and simulate the caulking* I use a file to scrap the excess of glue and sand it with a square block. caulking* I have a question, Are all the bulkheads caulked or only the ones close to the water on the hold area? On the powder room and that zones I guess there´s no doubt. Maybe I am wrong and none of the bulkheads were caulked. Please tell me something.

-
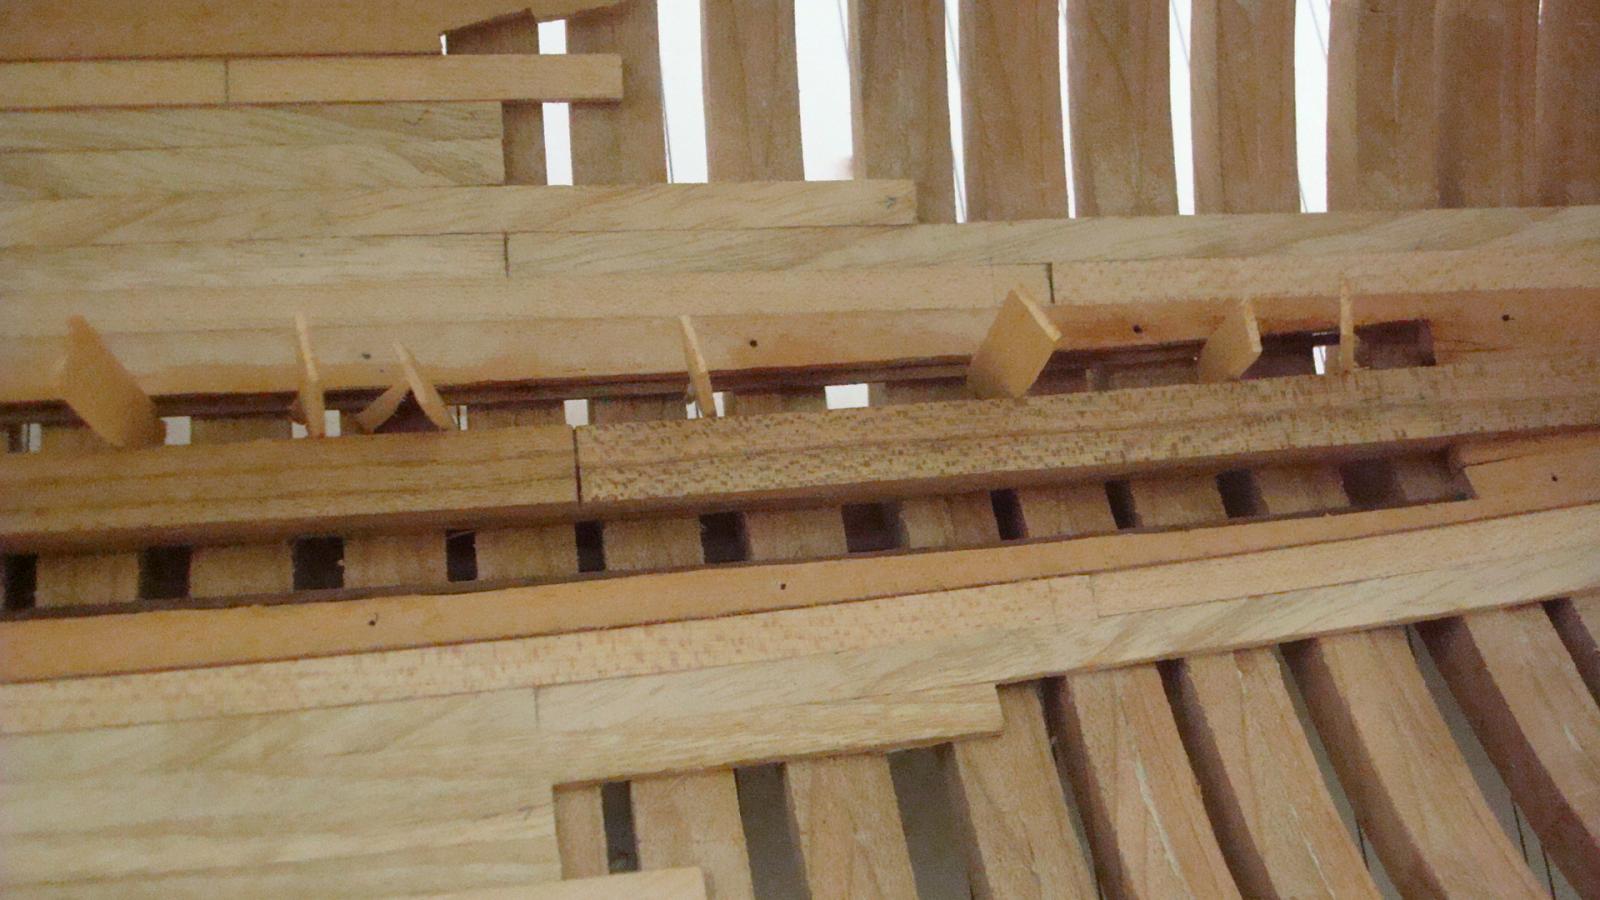
So... I re-do the limber strake. I cut it to kind of square the timber using a sharp blade and some chisels. I also glued a 1x1 mm strip to simulate the step where the covers of the limber go. It has been a surgery work and really a pain on the neck. I need a proxxon mill or something to reach that kind of detail, who knows... next project maybe. All this work had to be done to start with the interior working. Right now I am dealing with the hooks and the "mast bases"
-
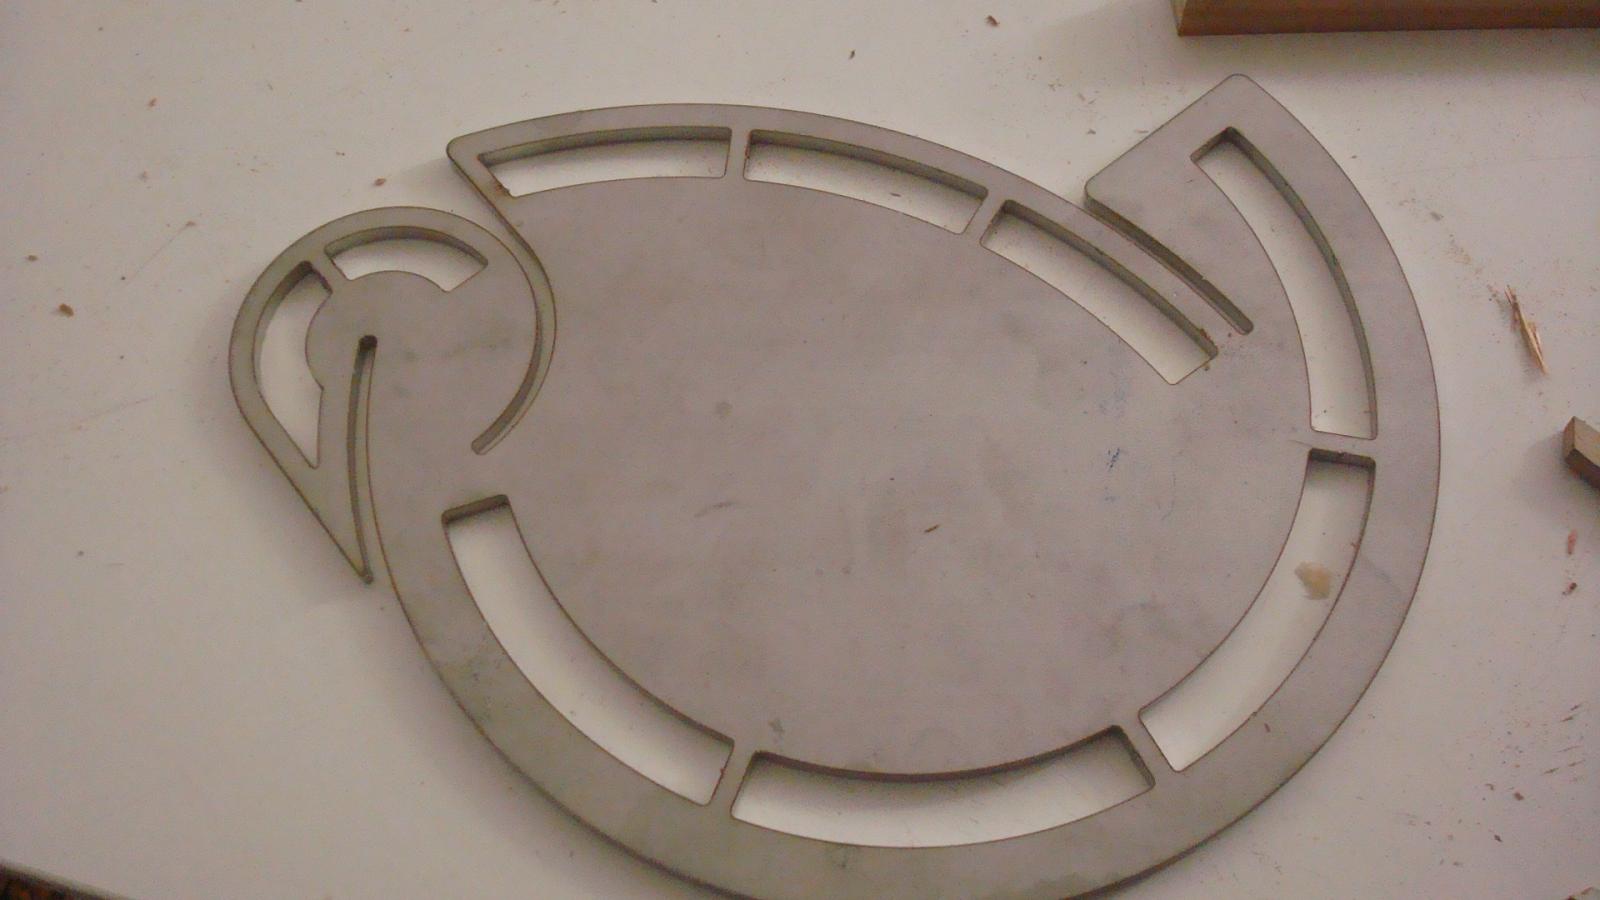
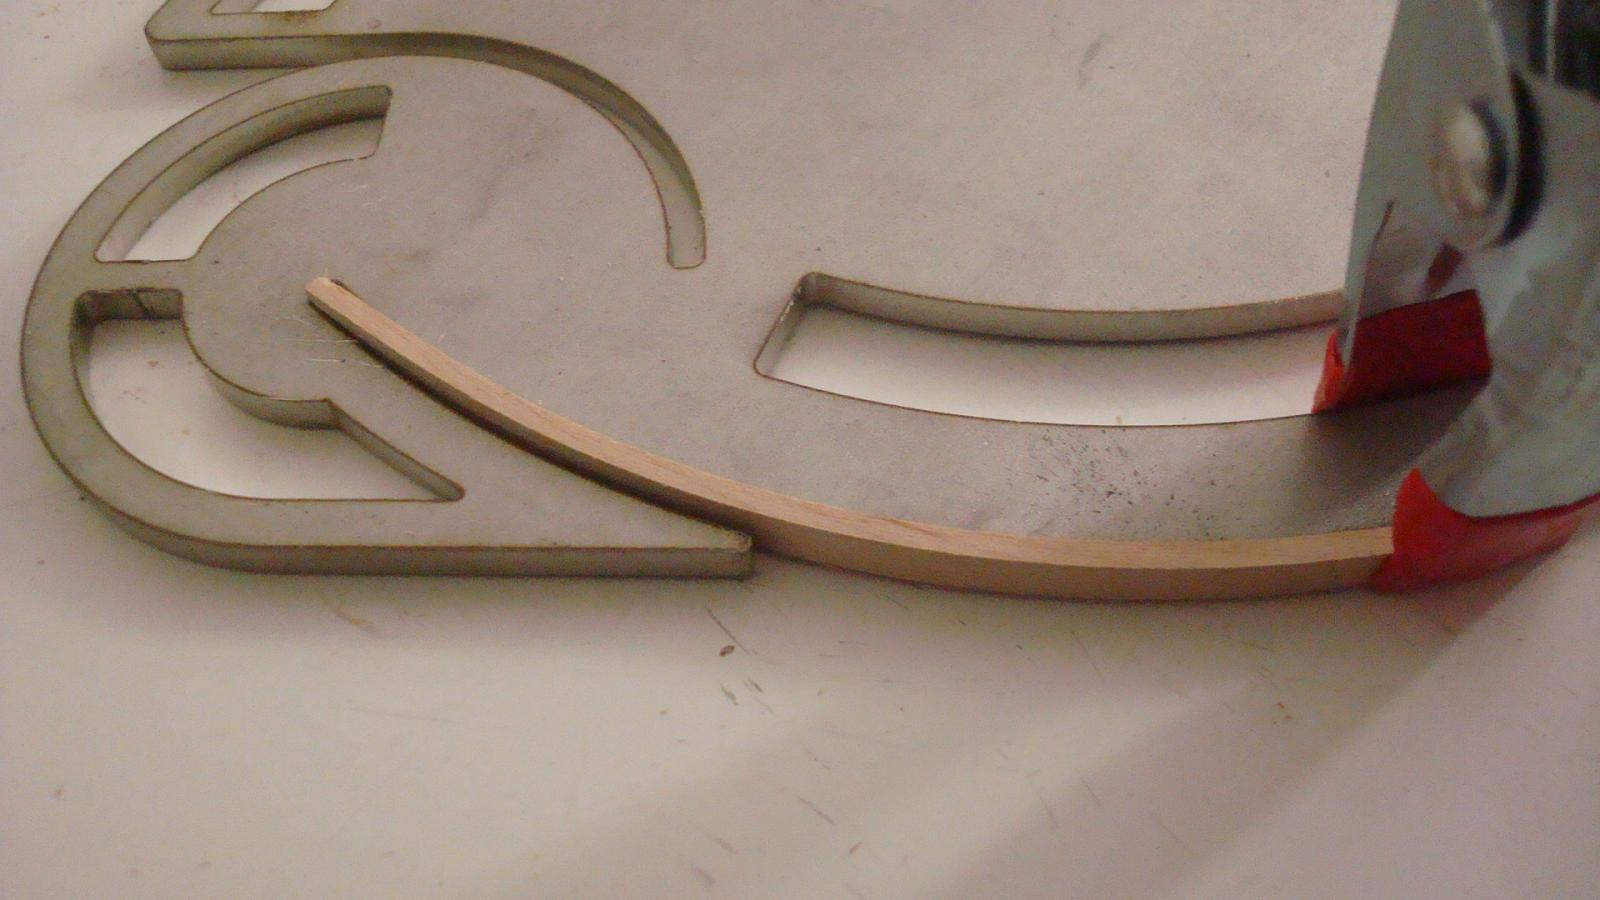
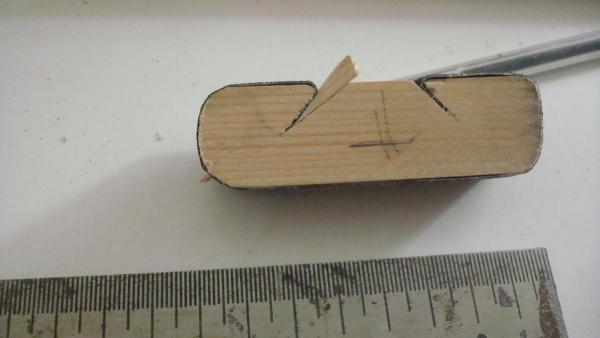
HELLO Hello! It´s been a while since my last post but promise, promise that I´ve been working on (the Triton). It´s just that there was nothing reliable to post here. new tools: I made a block to sand the wale out of a 25x25mm piece of pine. I also discovered a metal plate to curve the timbers. I bought it years ago by mail (not inet, nor amazon) and do not remember the address of the guy. (maybe cabrapente knows it) It is pretty useful and you avoid to have lots of jigs to get the proper curvature to the timbers, specially on the stem and stern. Here are the pics: I´ll go to next post...

-
Welcome aboard! Daniel.
-
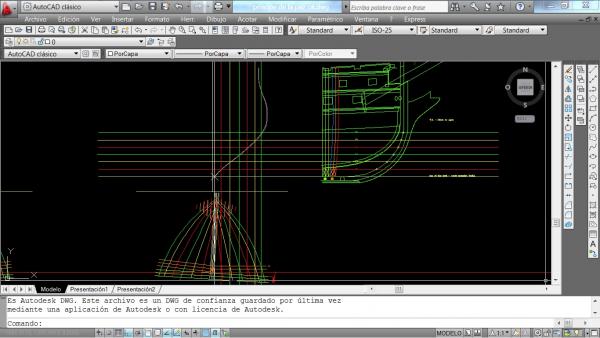
The pdf´s attached are only the progress till now. I have drawn 16 water lines separate 3 feet parallel to the top of the keel so I have 16 points to check on every frame. One frame takes me about two hours and when I get bored I draw other parts of the sheer plan. The widths and moulded widths are from the 1784 Joseph Romero Fernandez De Landa vademecum. It also includes all the different pieces necessary to build ships of 100, 74, 64 and frigates of 34, minor frigates and boats and more. This vademecum is quite cheap (12€) and “rough”. It has no half breadth plan or sheer plan nor a general body plan for the different types of ships. So… you have to kind of “invent” how the hek all the pieces were fixed together. You have also to decide the scarfs on the pieces. The book was intended to show the pieces to be cut on the forest with extra wood to drag them to the shipyard, especially huge pieces like the stem. I am also using the book “The ship of 68 guns from 1752” (Isidro Rivera 2012 ISBN 13: 978-84-615-3821-8 (Spanish, no English edition). Pretty useful in order to follow a hypothesis of construction, for example the keel. This book shows how a ship is built following the rules of the English shipwrights. Retamosa follows the rules of the French but I can “extrapolate” some concepts. I have contacted with the author to see if he can clarify me lots of doubts about. Hope to meet him in a month or so… For example the scarfs on the keel were horizontal not vertical like on the HMS Triton or the HMS Victory. It has also 2 shoe keels. Slightly differences that have to be checked to end with a true model from that period. If any of you have some info about the keel or the things I have wrote do not hesitate and post it here. Would be very apreciate it. Enjoy the week! Daniel. pdf_30_10_14_cant fr.pdf pdf_30_10_14_cant fr HB.pdf
-
CONGRATULATIONS Jürgen!! She actually looks like the first proper built HMS Triton on this forum. The rest of us have to comform with the double frame method that is less pleasent to look at... (smile) Beatiful framing again! daniel.
-
We are talking about 3 millimeters Remco, three millimeters high... They look great to me too. Daniel.
-
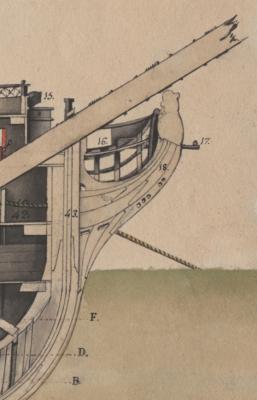
Hello Christian! Thank you very very much for the explanation about how actually the plans were done but I think I´ll continue with the splines method. Too complex for me but chapeau for you...You could draw with a compass, a pencil and a piece of paper and I, by now, just could not. Aahh the splines and computers! Interesting discussion about the Keel and the stem - apron... Look what I have to deal with to try to draw mine...I am doing a lot of research to find out a proper keel print to my project but looks kinda impossible task. Notice that even on the print there is like scarfs that has been trying to be erase by the shipwright or the artist. (because it looks more an artisctic print than a proper plan to me) Best wishes. Daniel.
-
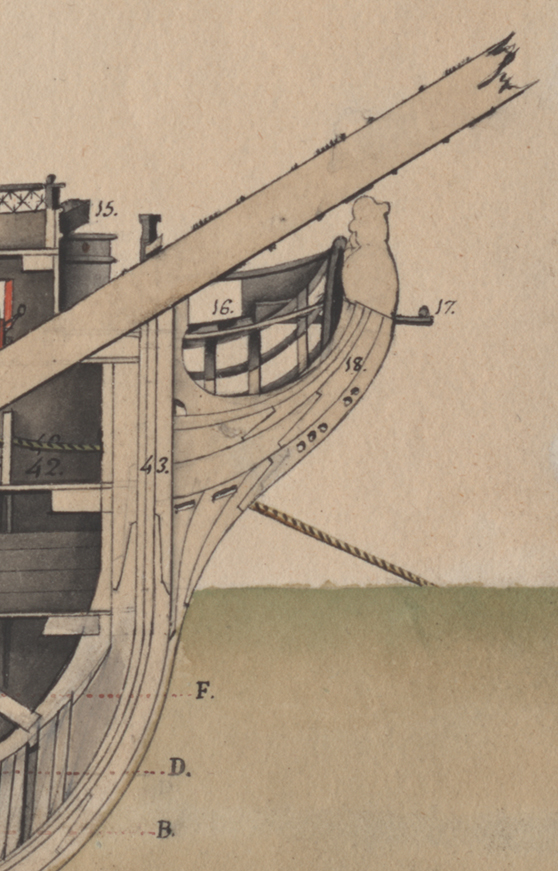
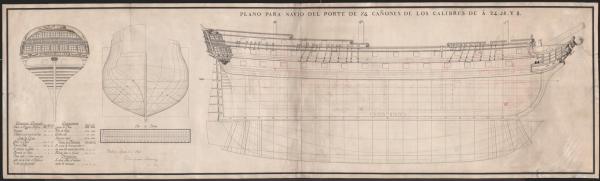
A brife introduction and some thoughts… While trying to put together all the info and starting the new log here I searched for the CD of the MNM yesterday and the date wrote on it was January 2012. Therefore I started this project more or less around those days. MNM is the acronym for Naval Museum of Madrid. They used to be able to sell you plans and prints for one euro plus two euros for the CD but they do not do it anymore. Something that I don´t understand at all. It is totally a shame because we have an enormous Public Record Office with thousands of files and prints already scanned that should be able to be consulted by all and specially the enthusiast modelers around the World and here in Spain. It should be like the National Naval Museum in UK for example. It was once but not anymore. The shipwright was Julian Martin De Retamosa (1747 -1827) one of the latest shipwrights or the Real Armada and known for building the best ships of the Real Navy in this last period. Spain had lost years ago the supremacy of the seas and was no able to build ships of the line at the rate of other navies do like French or specially the Royal Navy which has become the first world power. Never the less from 1790 to 1800 only three 74´s and seven frigates were built. The print I have is dated at Madrid on 1803 and as you can see the name is not on the list above so I assume it is a draft that never went to a good end. That´s what encourage me more, to actually build a ship that is unique and do it totally from scratch. The plans and the model. Since English it´s not my mother tongue I am writing on word, then copy and pasting. A single post takes me a while. I´ll be updating the log from time to time trying to put all the info the best I can but trying to explain the way I draw the draft and no boring you guys with lots of literature. Wish me luck! Daniel.

-
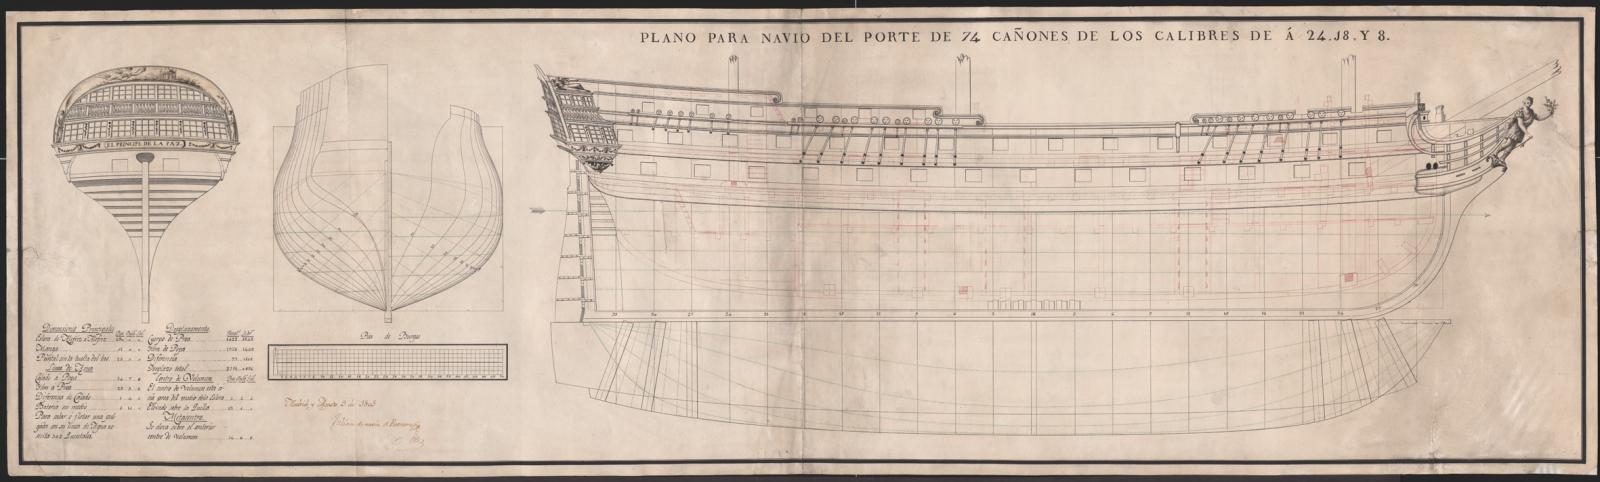
Hello All! It has been a while since my last post and I am in the need to explain why It is taking me so long to post something reliable… I have lots of “war fronts” open with the Triton, the wales, the gunports, the stern, the inside planking, the limber strake… I´m kind of lost with so many started out things so I have make kinda schedule to be followed (hope so) and erase every single point. The other reason is that I have started seriously the draft of a 74 called “Principe de la Paz” (Prince of the Peace). Is a Spanish ship dated on 1803 from a shipwright called Julian Martin de Retamosa. I supposed that the ship was never built because I have been searching and searching and there´s absolutely nothing about her on the books about taking action in any combat on that period. I have the plan already scanned and it´s real. I mean the draft was real. Another thing is if she was actually built or not. I supposed not. Here´s a tiny pic of the whole plan. The original size is big (5906x1778 - 50x16 cm and weights 18Mb) therefore I´m able to draw on it pretty accuracy. I think I´ll open a new log as I said to Christian (Anobium) because It´s a whole new project by itself. No pics of the Triton by the moment but right now it´s like a volcano because if I follow the schedule she is going to grow up pretty quickly… fingers cross. Best wishes and happy days! oooOH Happy Days! Daniel.
-
Hello Piet! Congratulations!! I am with Remco I hadn´t realize the high of the antenna and with those cables and specially the last photo She looks like she needs some sort of sails or something... One question, all those cables were sumerged or there was some kind of mechanism to tight them when was underwater? just courious. Congrats again, Daniel.
-
Good morning Piet and all! To be sincerous the tought work was done (mainly to have lots of layers already named 01,02,03,05,...) the rest was quite easy. When I printed it amazed me the sized of it. It´s tiny tiny, so tiny that one could think about modelling it out of scholar plaster rather than chiseled and sanded out of a piece of wood... Just kidding! Anyway, have you think about making a wood (cooper, brass,tin) framed case and stick inside the frame plane plastic sheets? instead of bending the plexiglas. You can choose from a lot of existing already moulded frames or make your own ones. Good luck and happy weekend ahead, Daniel.