HOLIDAY DONATION DRIVE - SUPPORT MSW - DO YOUR PART TO KEEP THIS GREAT FORUM GOING! (Only 13 donations so far - C'mon guys!)
×


dashi
-
Posts
248 -
Joined
-
Last visited
Content Type
Profiles
Forums
Gallery
Events
Everything posted by dashi
-
 Jeers: Please help me if I've got this wrong. Taking a Bark to be classified as a small ship and cross referencing Steel's discription of rigging the lower yard jeers with his tables of running rigging for a 400 to 450 ton ship appears to indicate the use of 3 x 20 inch single jeer blocks. 1 on the yard and 2 lashed to the head according to the following excerpt: https://maritime.org/doc/steel/tables/pages/112-ShipOf22-20Guns.htm https://archive.hnsa.org/doc/steel/part7.htm#pg201 This appears to be at odds with KM's AOTS and the kit which seem to rig the jeers for a large ship from 677 tons upwards according to the size and number of jeer blocks stated in the aforementioned tables along with Steel's discription of rigging the lower yards on large ships. https://maritime.org/doc/steel/tables/pages/082-ShipOf32Guns.htm Am I reading this wrong and if so then please correct me? Cheers dashi
 -
Mast Lengths and their above deck heights for HMB Endeavour
dashi replied to dashi's topic in Masting, rigging and sails
Quote from "The Ship Builders Assistant 1766 written by William Sutherland" http://The Ship-builder's Assistant; Or, null. https://play.google.com/store/books/details?id=hwhBd0jiVqAC- 63 replies
-
- 2
-

-
- HMB Endeavour mast lengths
- above deck mast heights
- (and 3 more)
-
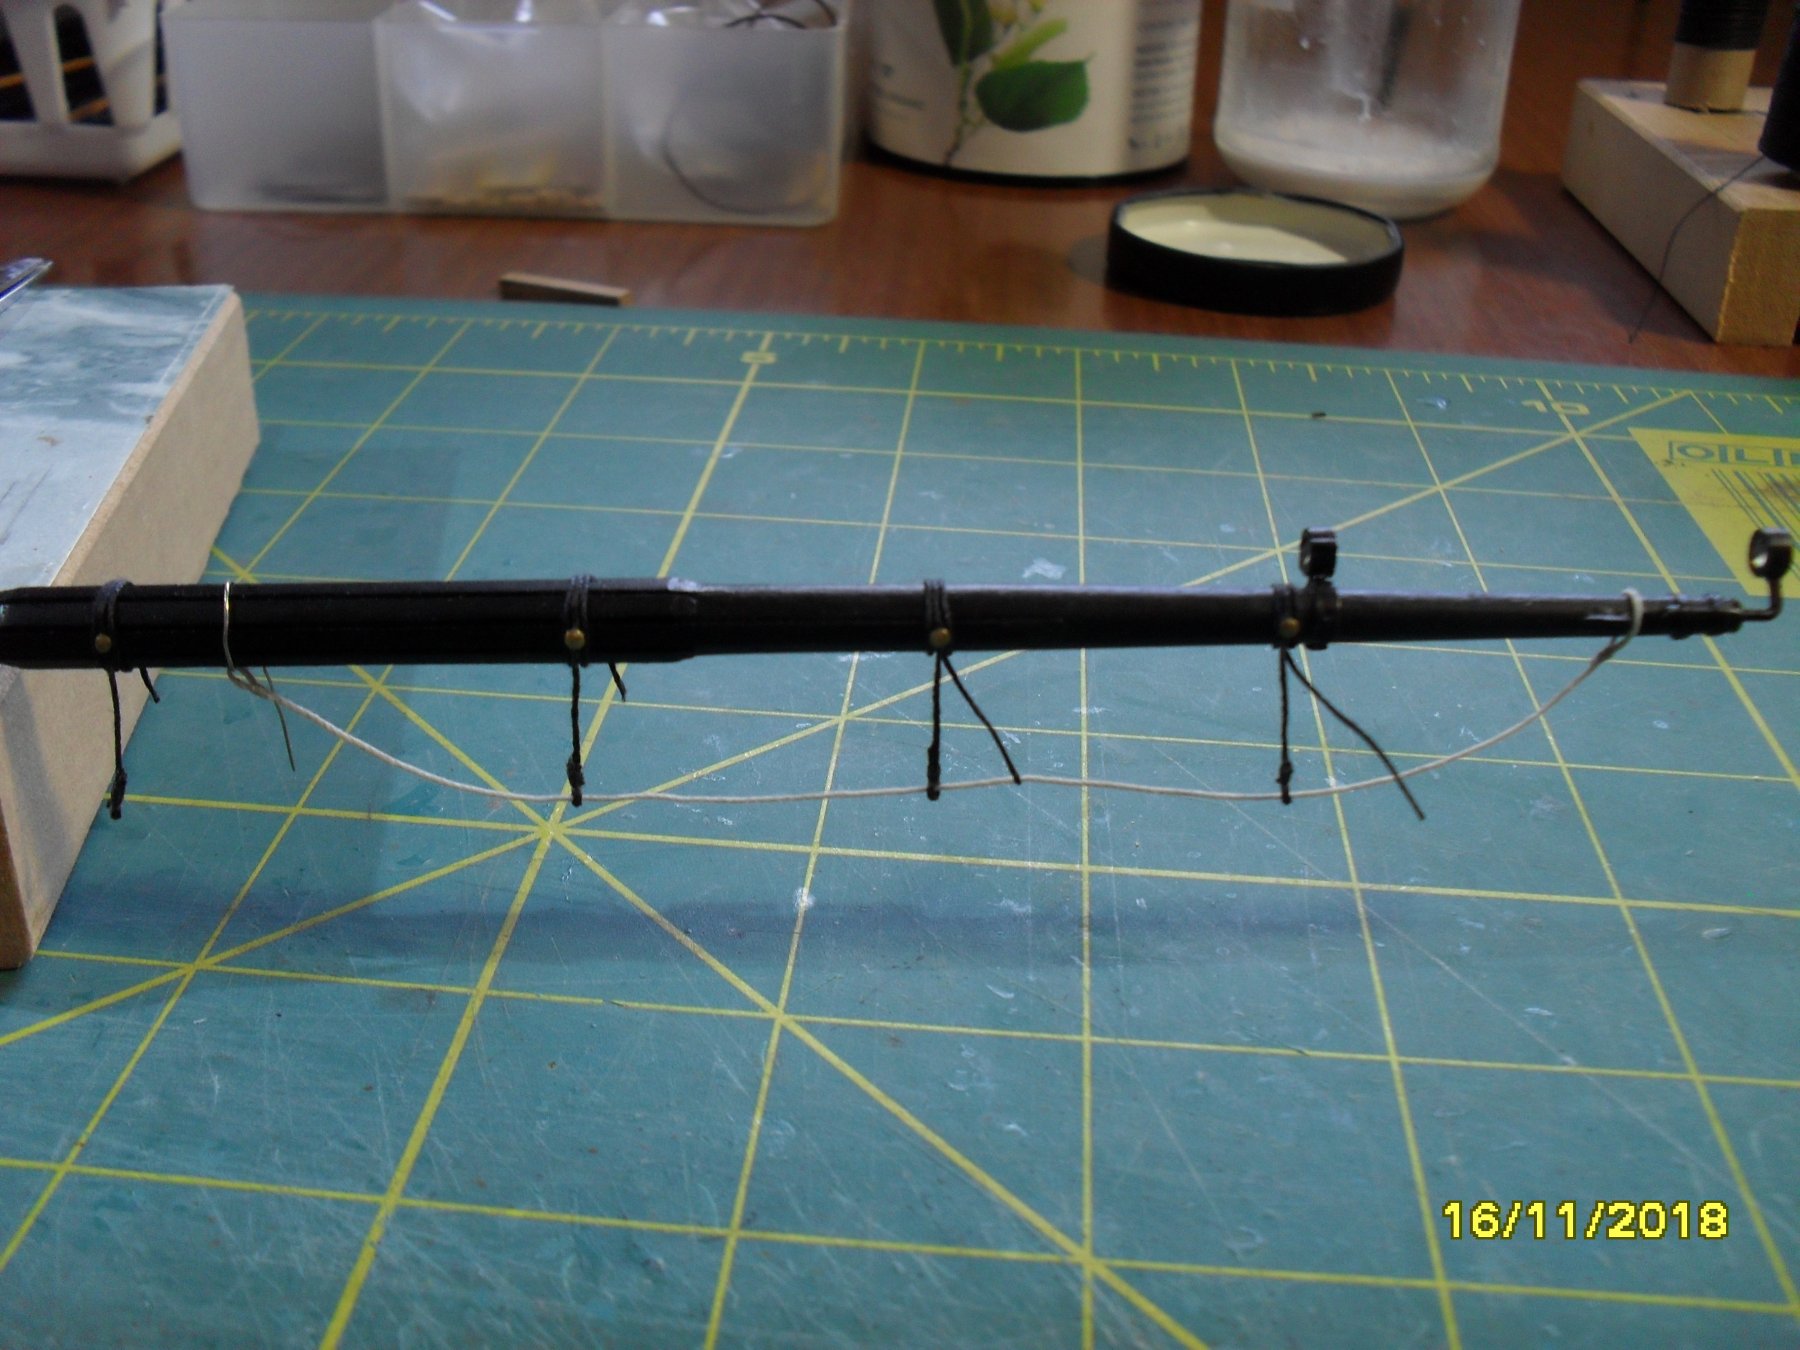
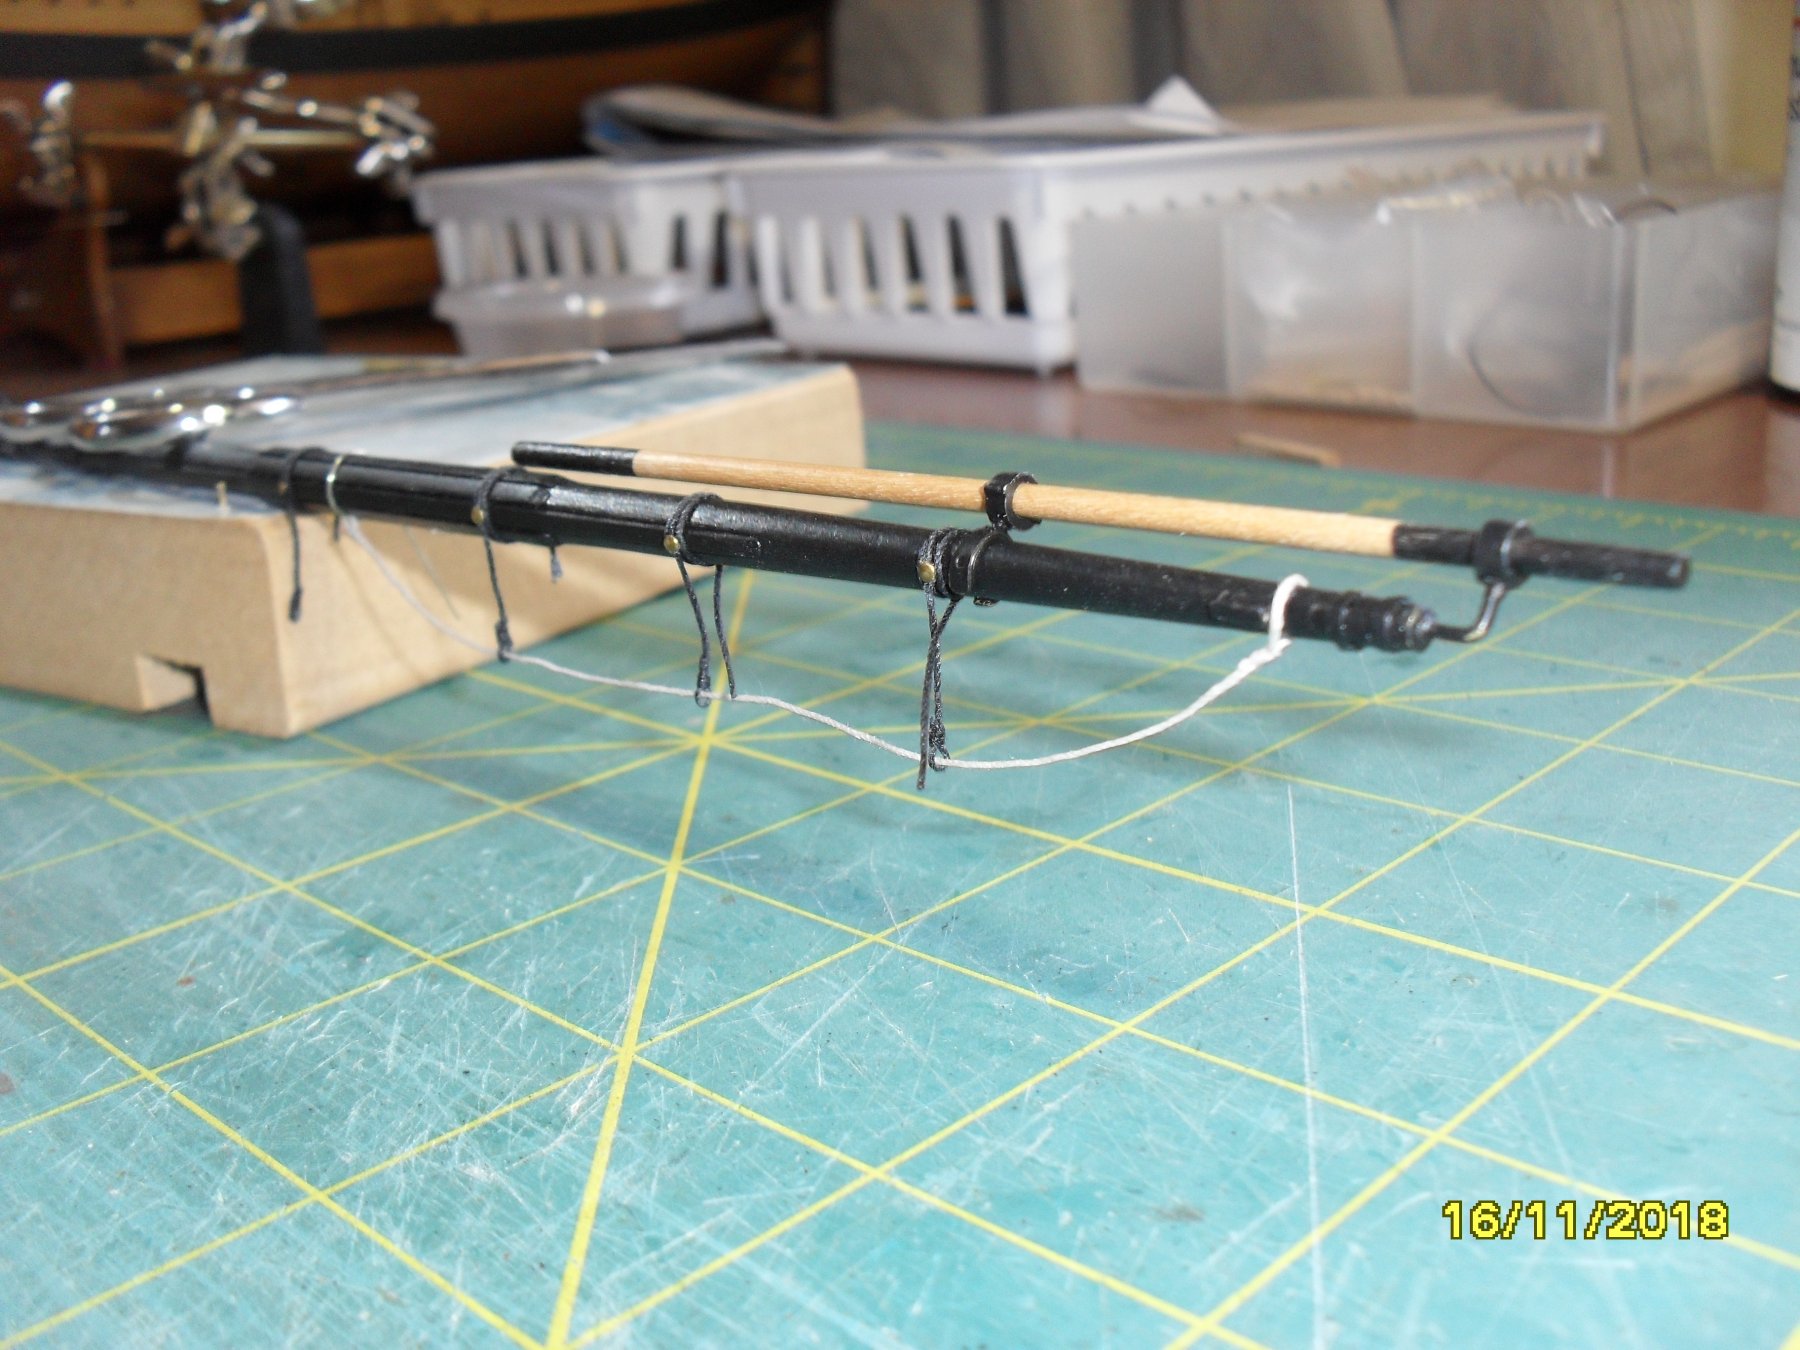
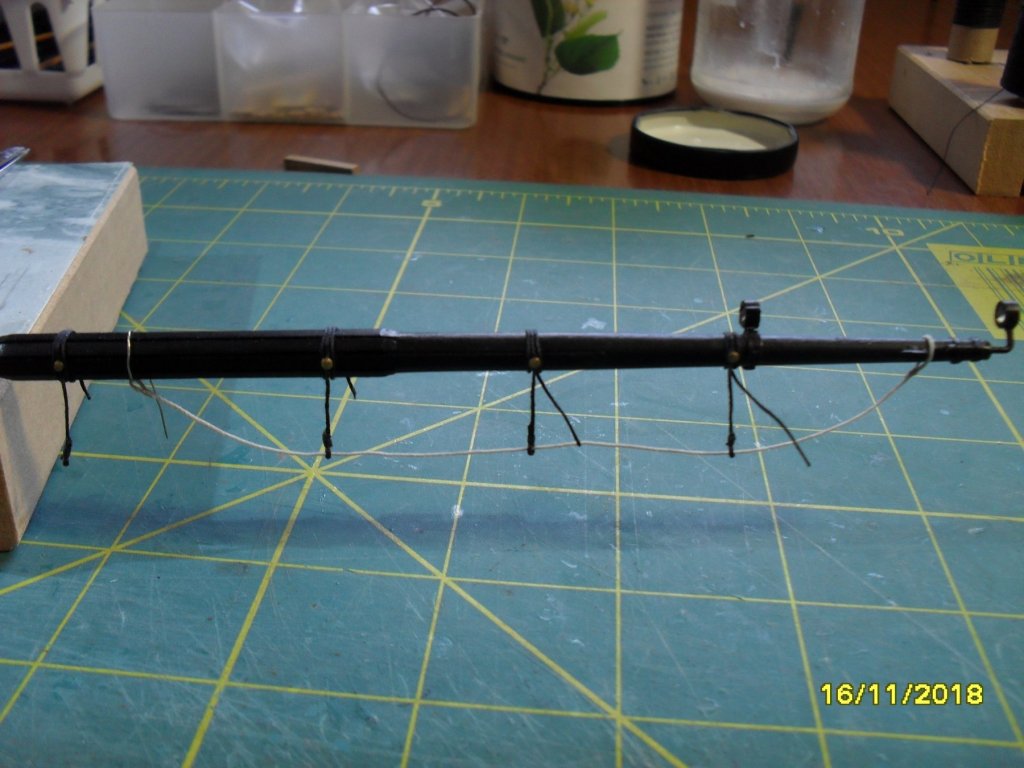
Stirrups and horses first attempt: First set dry fitted on the main yard. The wire will be replaced by lashing at final fitting and the horse can be pulled through the thimbles on the stirrups then removed from the yard so I can make it's partner to the same length and the yard is clear when fitting its various blocks. The thimble on the end of the horse has been set with diluted white glue so it can be eased through the stirrup thimbles. At final fitting the stirrups and horses will be wetted and set using diluted white glue, the nails will be painted black and the stirrup lashings set and loose ends trimmed. The horse thimble is made by forming a loop and whipping around a small brass rod then fixed with ca glue but not allowed to stick to the rod. The stirrups are made using a small jig so I can insert the nail through the weave exactly 3ft to scale from the thimble while the thimble is held held so its eye will be in line parallel to the yard and then the nail is carefully set in place with a little ca glue. I found by dampening the small spot where the nail penetrates the weave with a drop of diluted white glue helps it separate the weave in the middle of the stirrup cord. I might add a photo of the jig a bit later but for now wanted to get this uploaded to check if it all looks ok?

-
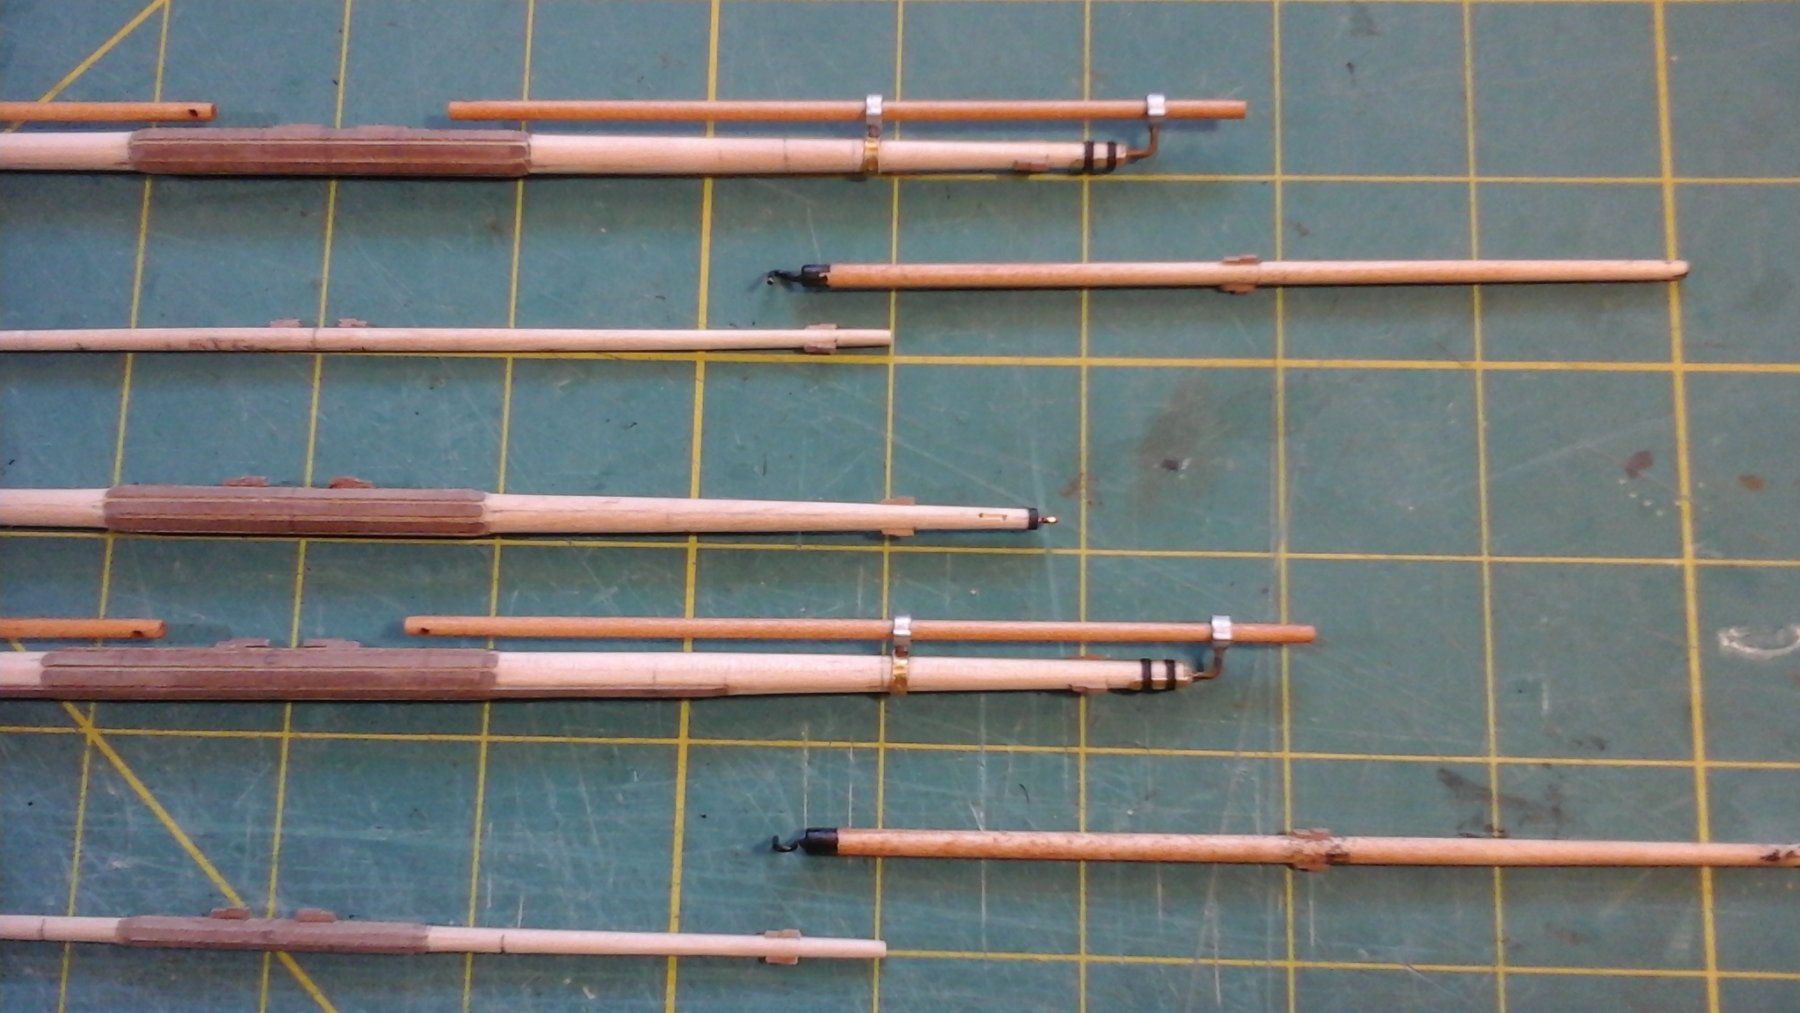
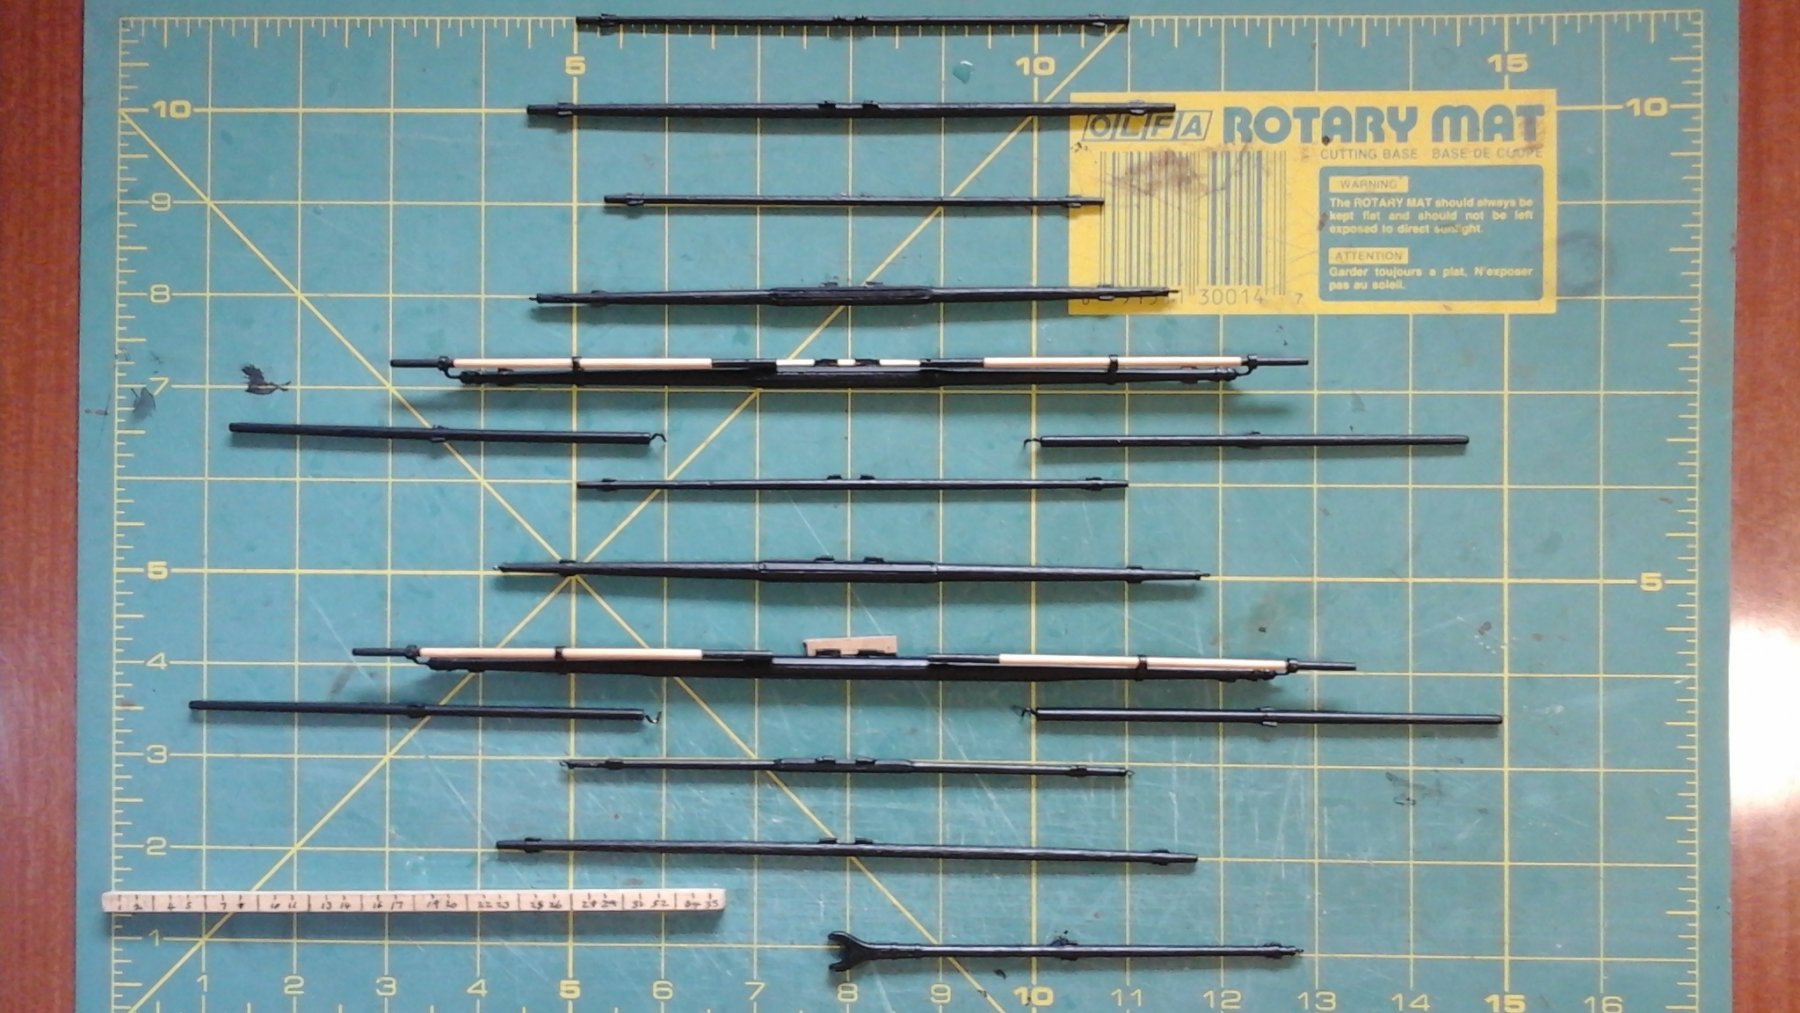
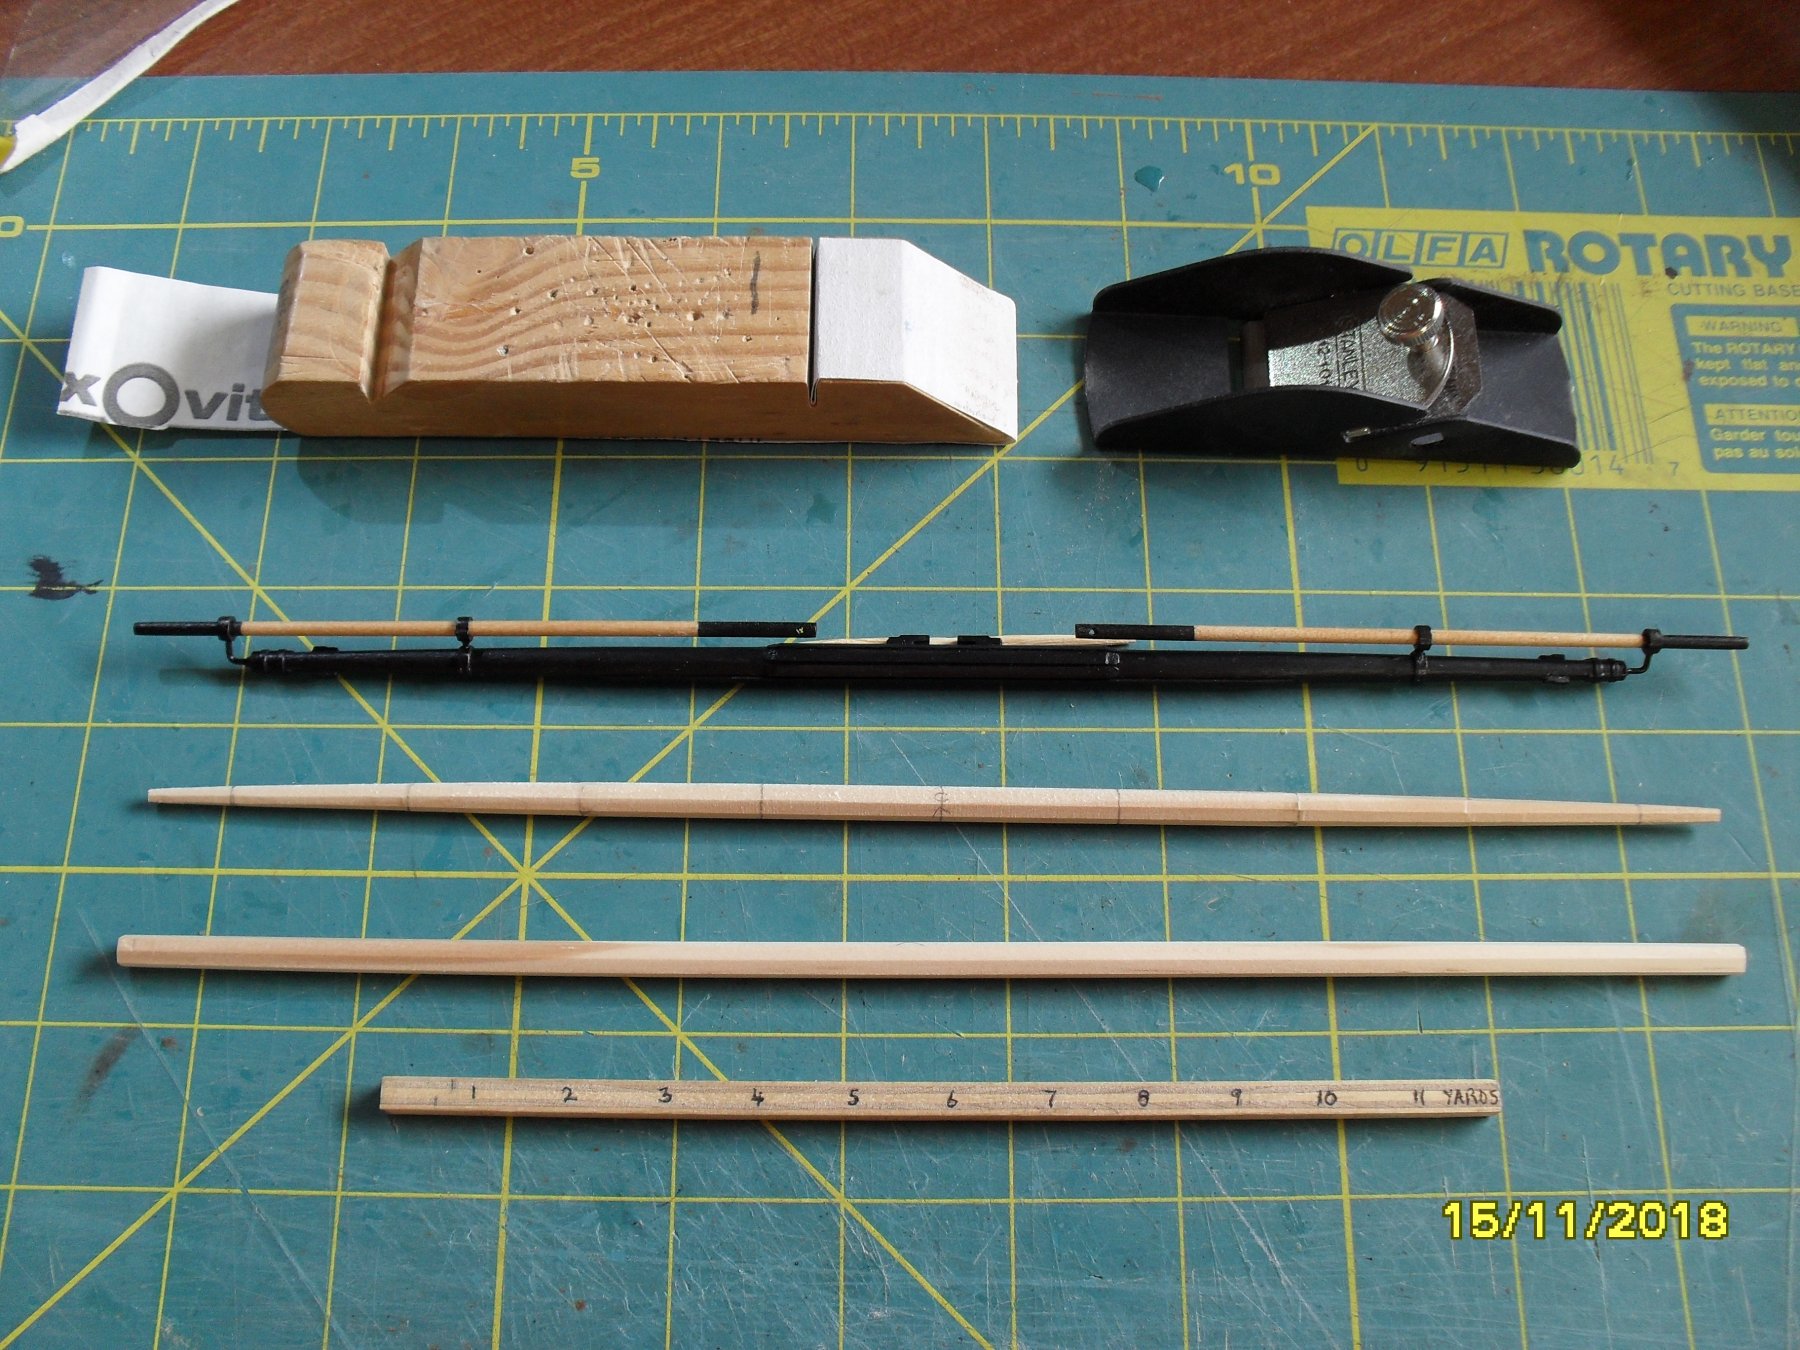
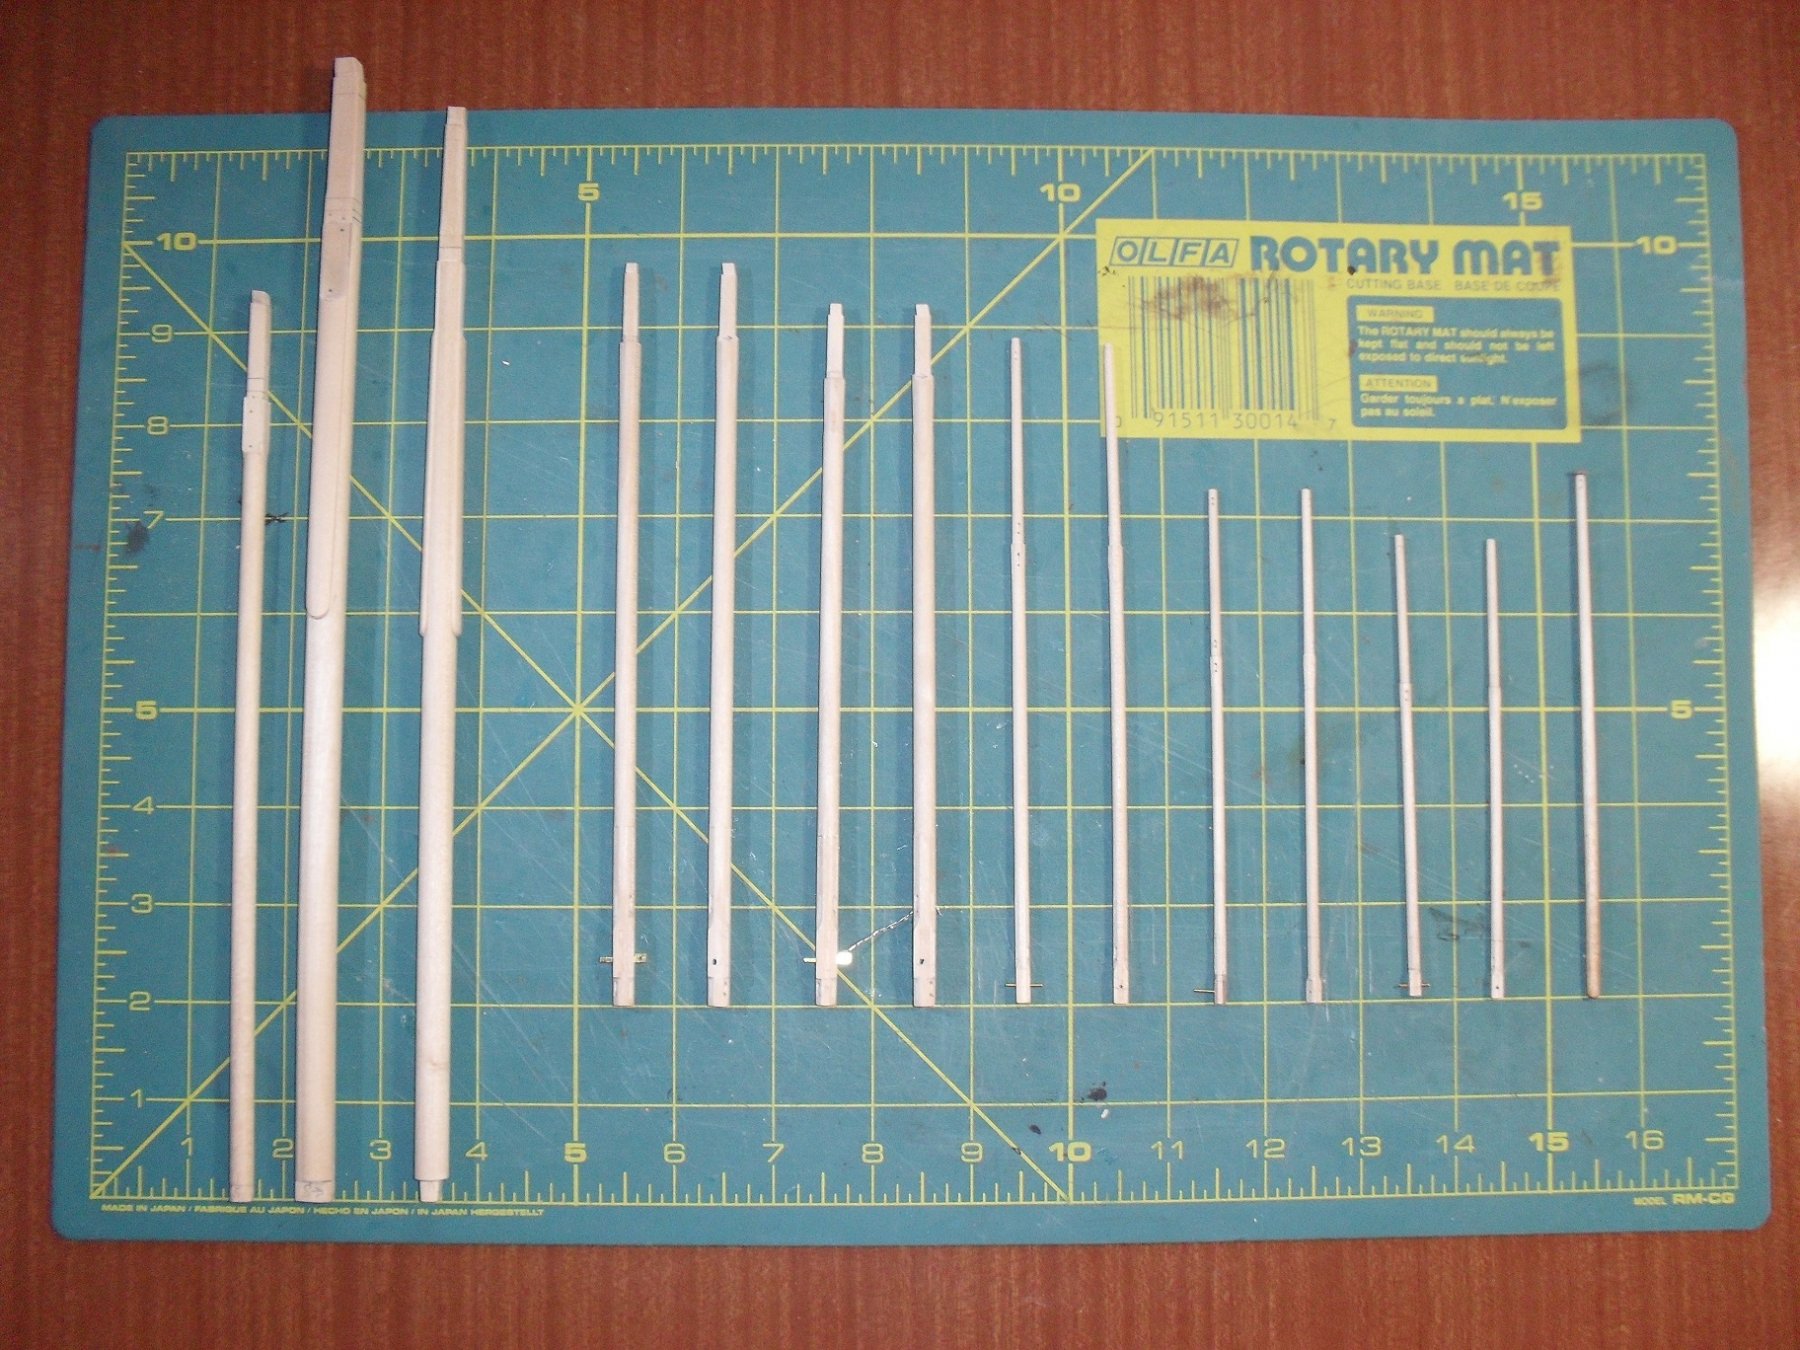
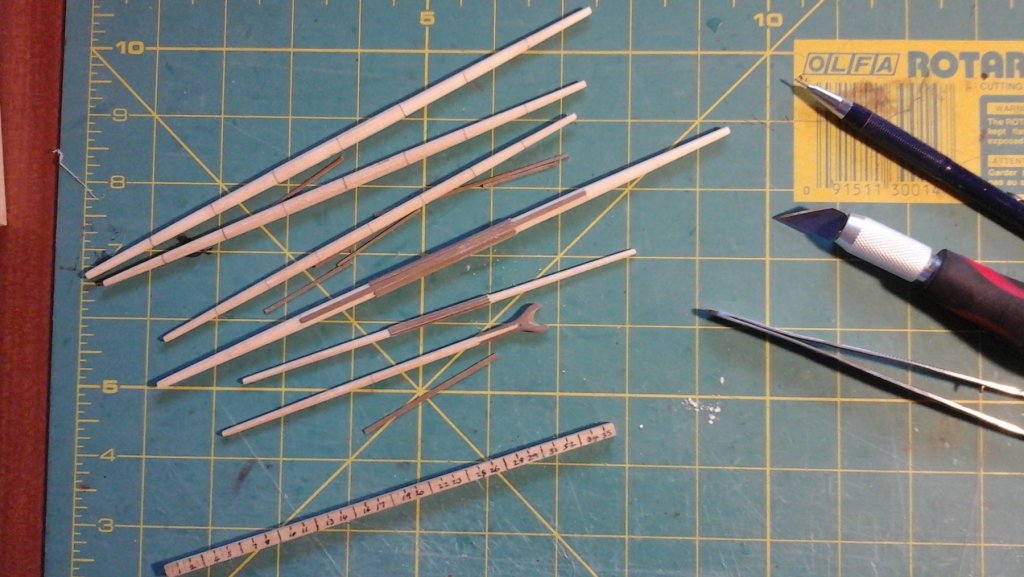
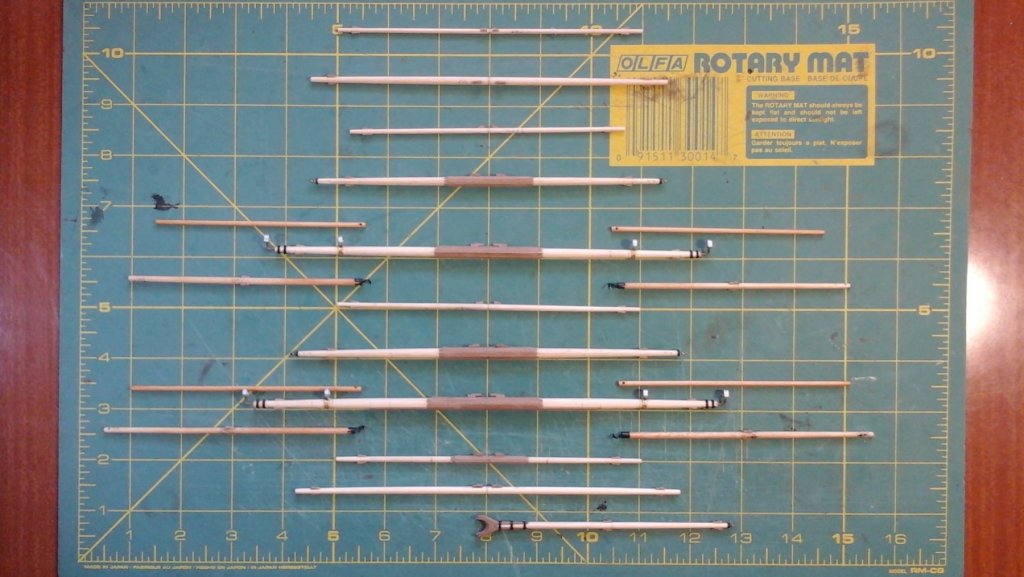
Thanks Dave. Update: Yards Here's some pics of the stages of making the yards up to painting. I've basically followed the method laid out by Steel https://www.hnsa.org/resources/manuals-documents/age-of-sail/the-elements-and-practice-of-rigging-and-seamanship/page-1/ while using the measurements given by Woolwich Dockyard 1771 http://collections.rmg.co.uk/collections/objects/86385.html. As I don't have a lath I've just used the plane and sandpaper. It took a while to set the plane blade to the right depth so my first practice attempts were on cheap dowel until I got it right. First I planed the dowel square to the required width, then down to octagonal and finally divided each half into quarters and progressively shaved one layer off per each of the outer 3/4s , tapering to the ends leaving the middle quarters octagonal (see pic). Then sanded the outer 3/4s to 16 sides and sanded to round. There maybe other methods which work better but I'm happy with the results. After shaping I cut the battens from spare 3x.05 mm in the kit, trimmed to width and rounded the ends, then applied to the octagonals using white glue. When dry I carefully duck billed the ends using a craft knife with curved blade. (not mentioned in the kit) For the the cleats, farrell's, rings and boom irons I used the kit supplied parts and referred to Steel for respective positioning and shaping. Then painted the first coat and gave a light 400 grit sanding before applying the second coat to give a relatively smooth finish. Next will be fitting the horses and blocks etc to the yards. Edit: I wasn't happy with the kit gaff jaws so carved out a replacement.


-
Thanks Pat. As for a chart table I'm not sure, but I'd imagine it would be in the cabin safe from wind and weather. Possibly the survey was plotted on the plane table and then transferred onto the chart in the cabin? Here's a link to National Museum Australia which has some info and a couple of Cook's navigational instruments http://www.nma.gov.au/explore/collection/highlights/captain-cooks-navigational-instruments . Cheers
-
Thanks for the interest and comments. Thanks Judy that's really interesting. I got the idea for the plane table as it was a listed item for the endeavour and read that Bligh one of Cook's understudies mentioned Cook surveyed by drawing lots of triangles. So putting that all together and with my military navigational experience of triangulation wanted to show Cook as the expert cartographer he was and represent Endeavour as a science vessel. Interesting point about using sight and sound to guage distance. Makes me wonder if the boat mounted swivel guns were used for that purpose also? To make it work the platform Cook built over the tiller needed to be fit for purpose. Considering that Cook also refers to the mast tops as platforms in his log I took that as my guide for its construction. Cheers
-
Re parrels: From my understanding, according to Steel the top yards including gallants etc have parrels. The lower yards including the crossjack have truss pendants and slings. Rigging Period Ship Models by Kenneth Peterson has good diagrams of how it's done and appears to compliment Steel's descriptions. The Elements and Practice of Rigging And Seamanship, 1794, by David Steel, https://maritime.org/doc/steel/part7.htm#pg204
- 108 replies
-
- 1
-
-
- endeavour
- caldercraft
- (and 1 more)
-
Great work as usual Steve. I've started my yards and if we are both using the same resources, notice on Steel's plan for the gaff there is a sheave in the end, but it's not in the AOTS. What's your thoughts on this?
-
HMCSS Victoria 1855 by BANYAN - 1:72
dashi replied to BANYAN's topic in - Build logs for subjects built 1851 - 1900
Wow Pat very nice work 👍- 1,000 replies
-
- 2
-
-
- gun dispatch vessel
- victoria
- (and 2 more)
-
She's coming along great Dave👍. I've just figured out how to use the new like button... 2 taps. Thought I'd been giving out likes until today when I realised I hadn't been doing it right lol 😁
-
Quote from The Elements and Practice of Rigging And Seamanship, 1794, by David Steel, Rigging https://maritime.org/doc/steel/part6.htm
-
Mast Lengths and their above deck heights for HMB Endeavour
dashi replied to dashi's topic in Masting, rigging and sails
Royal Museums Greenwich, Object ID ZAZ1355, Essex 1741 shows the mizzen ('edit': without the support timbers shown) stepped in the lower deck http://collections.rmg.co.uk/collections/objects/81146.html- 63 replies
-
- 1
-
-
- HMB Endeavour mast lengths
- above deck mast heights
- (and 3 more)
-
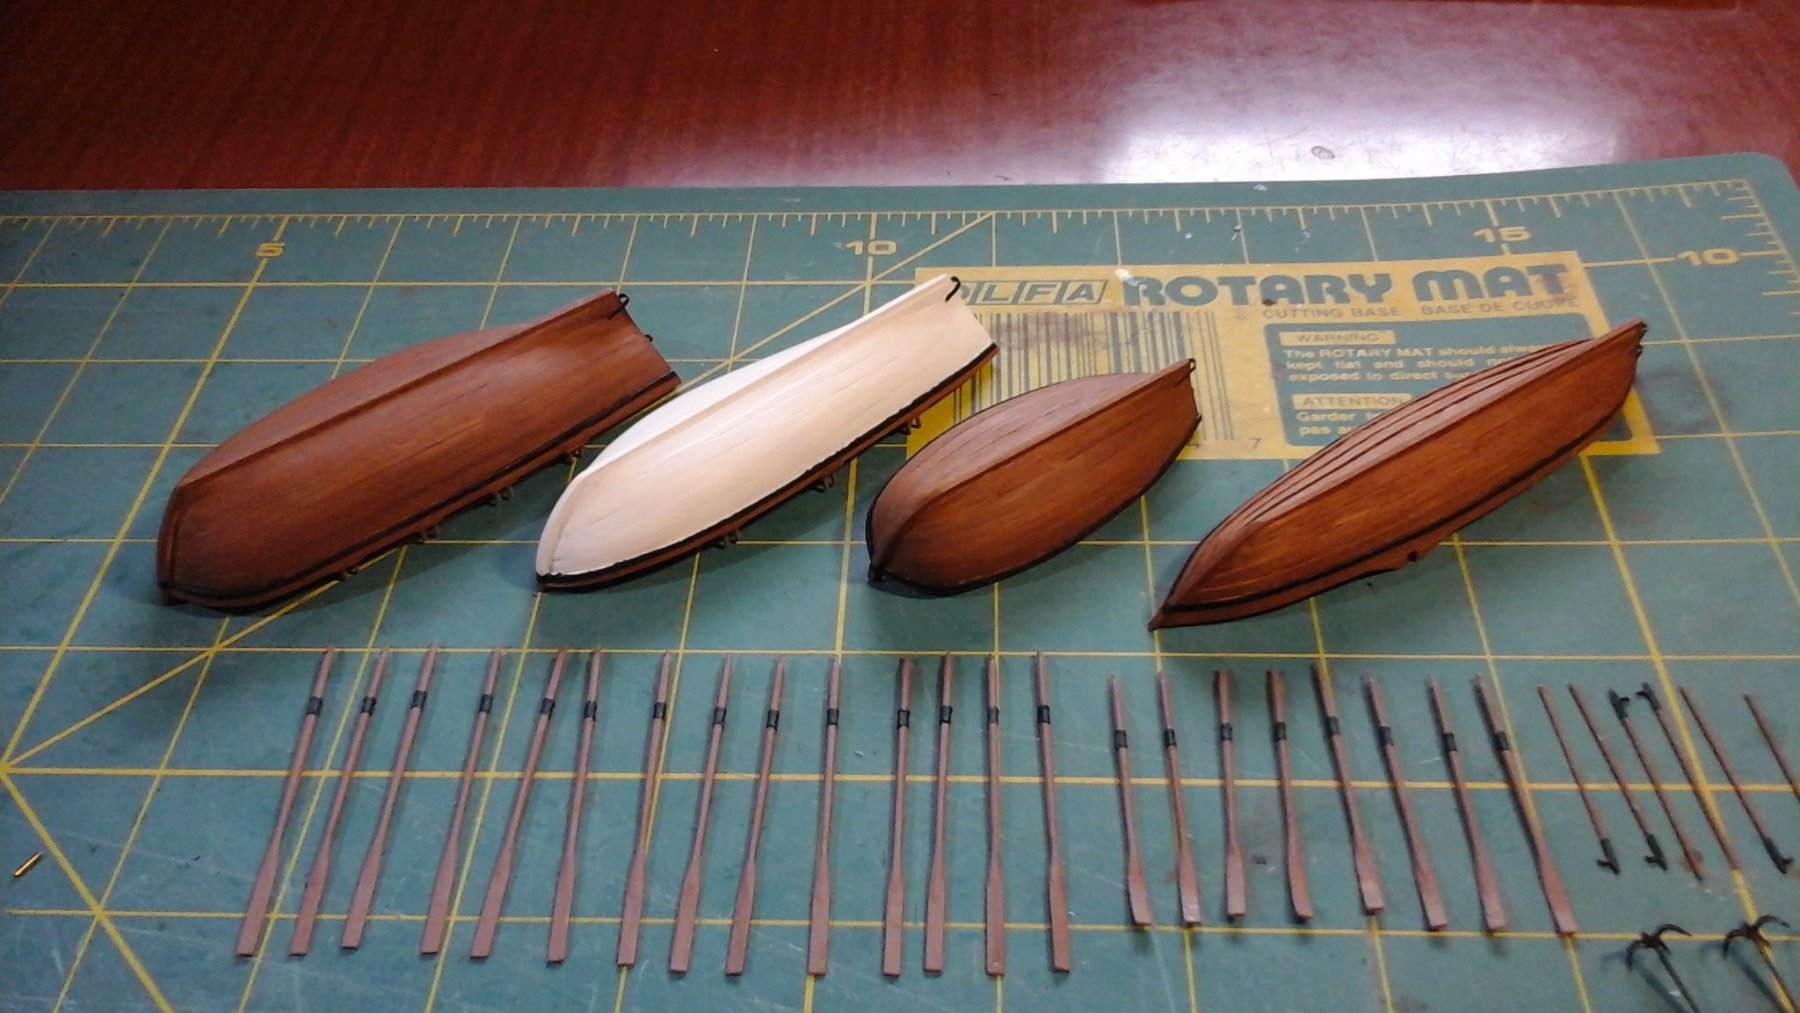
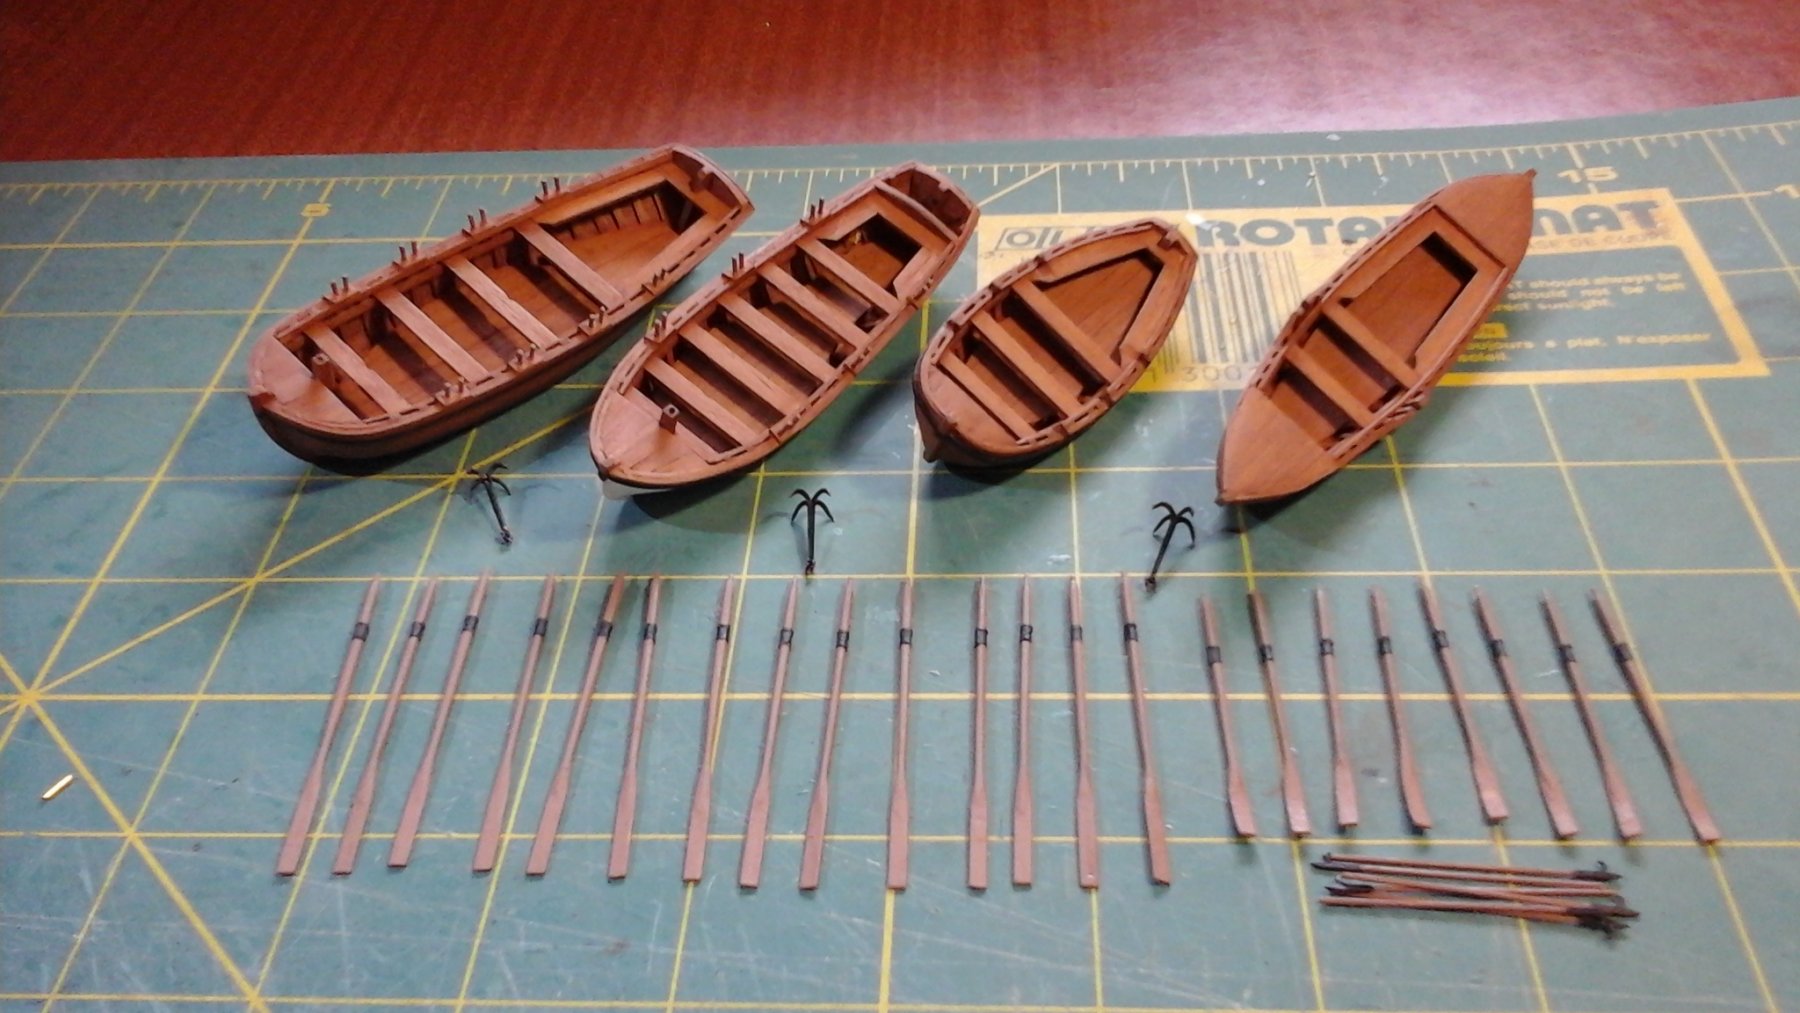
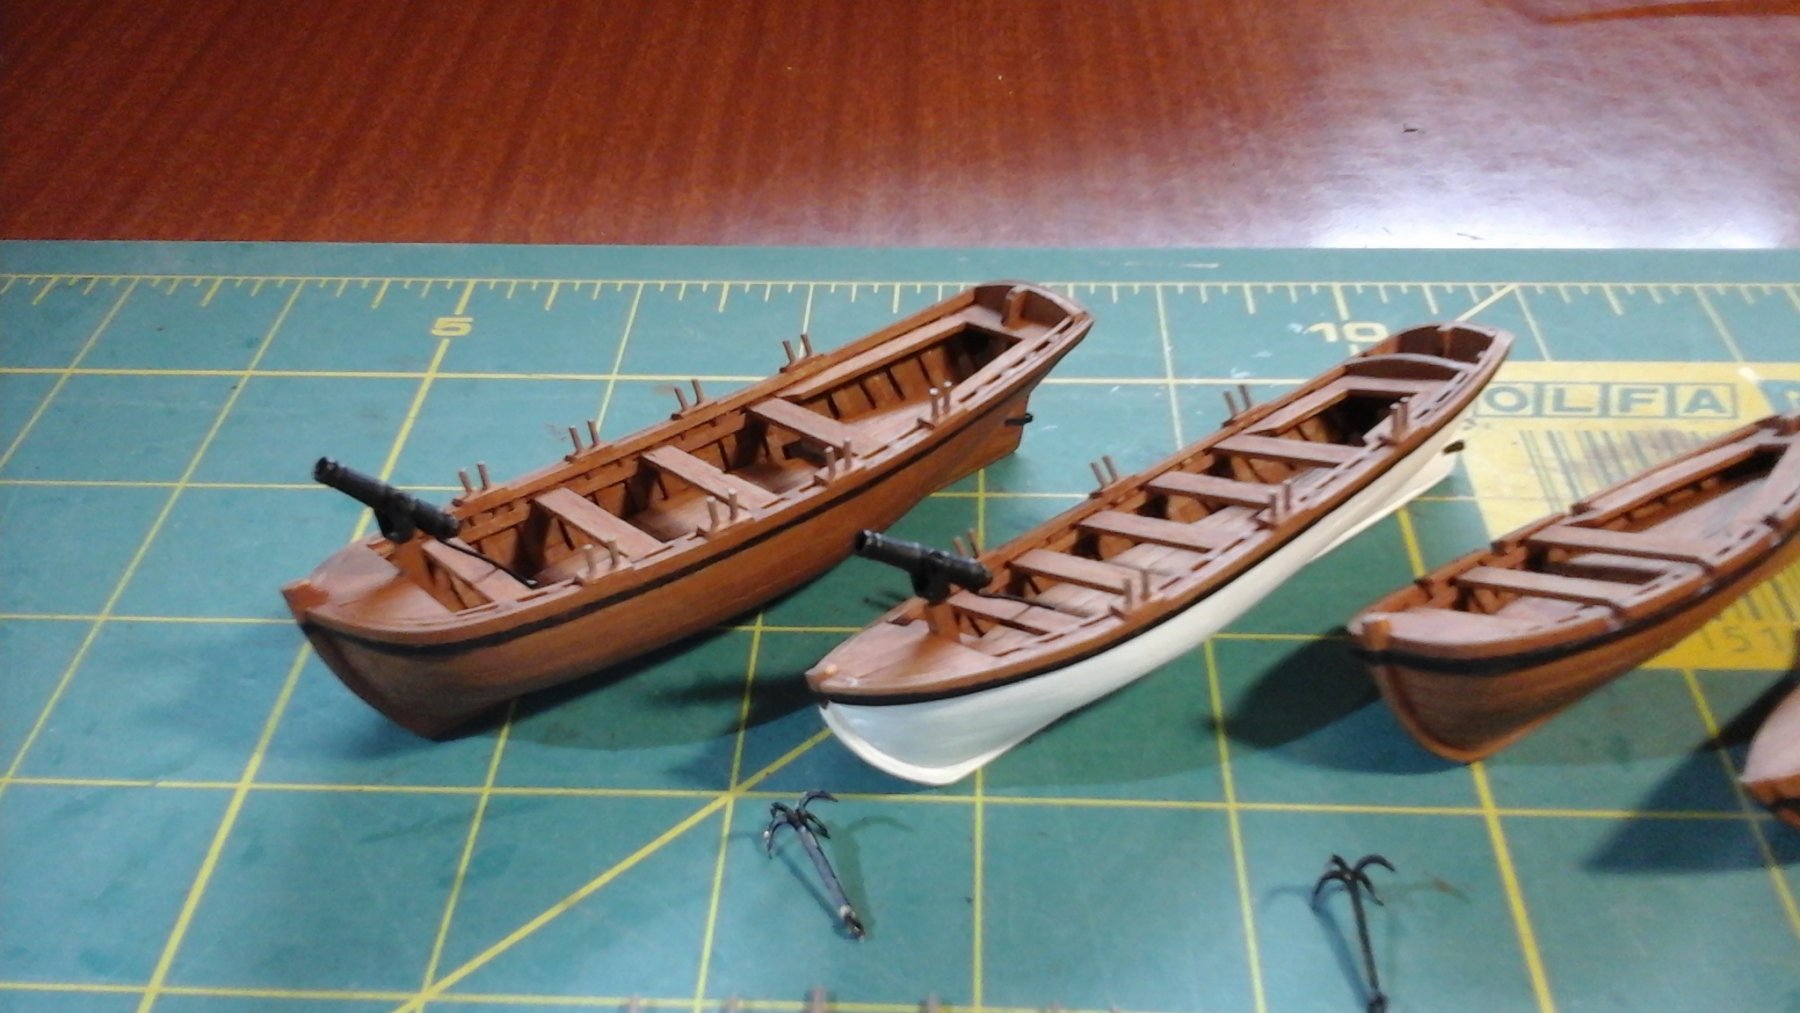
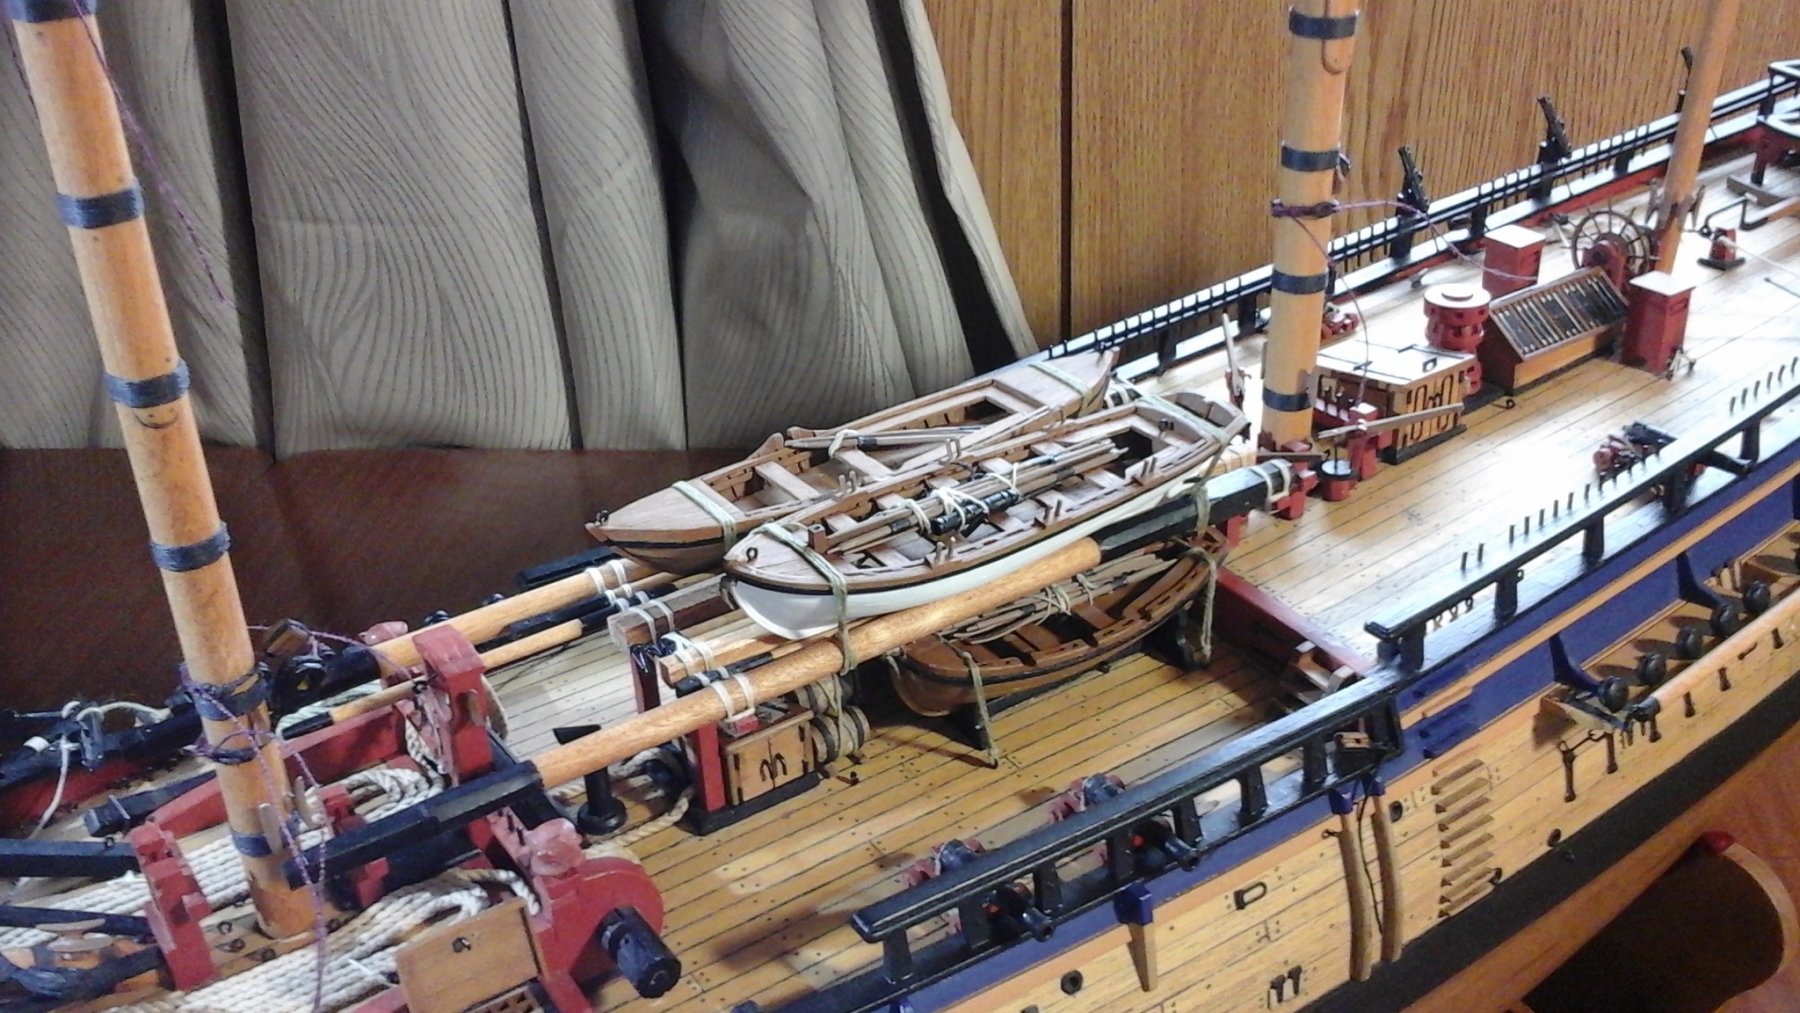
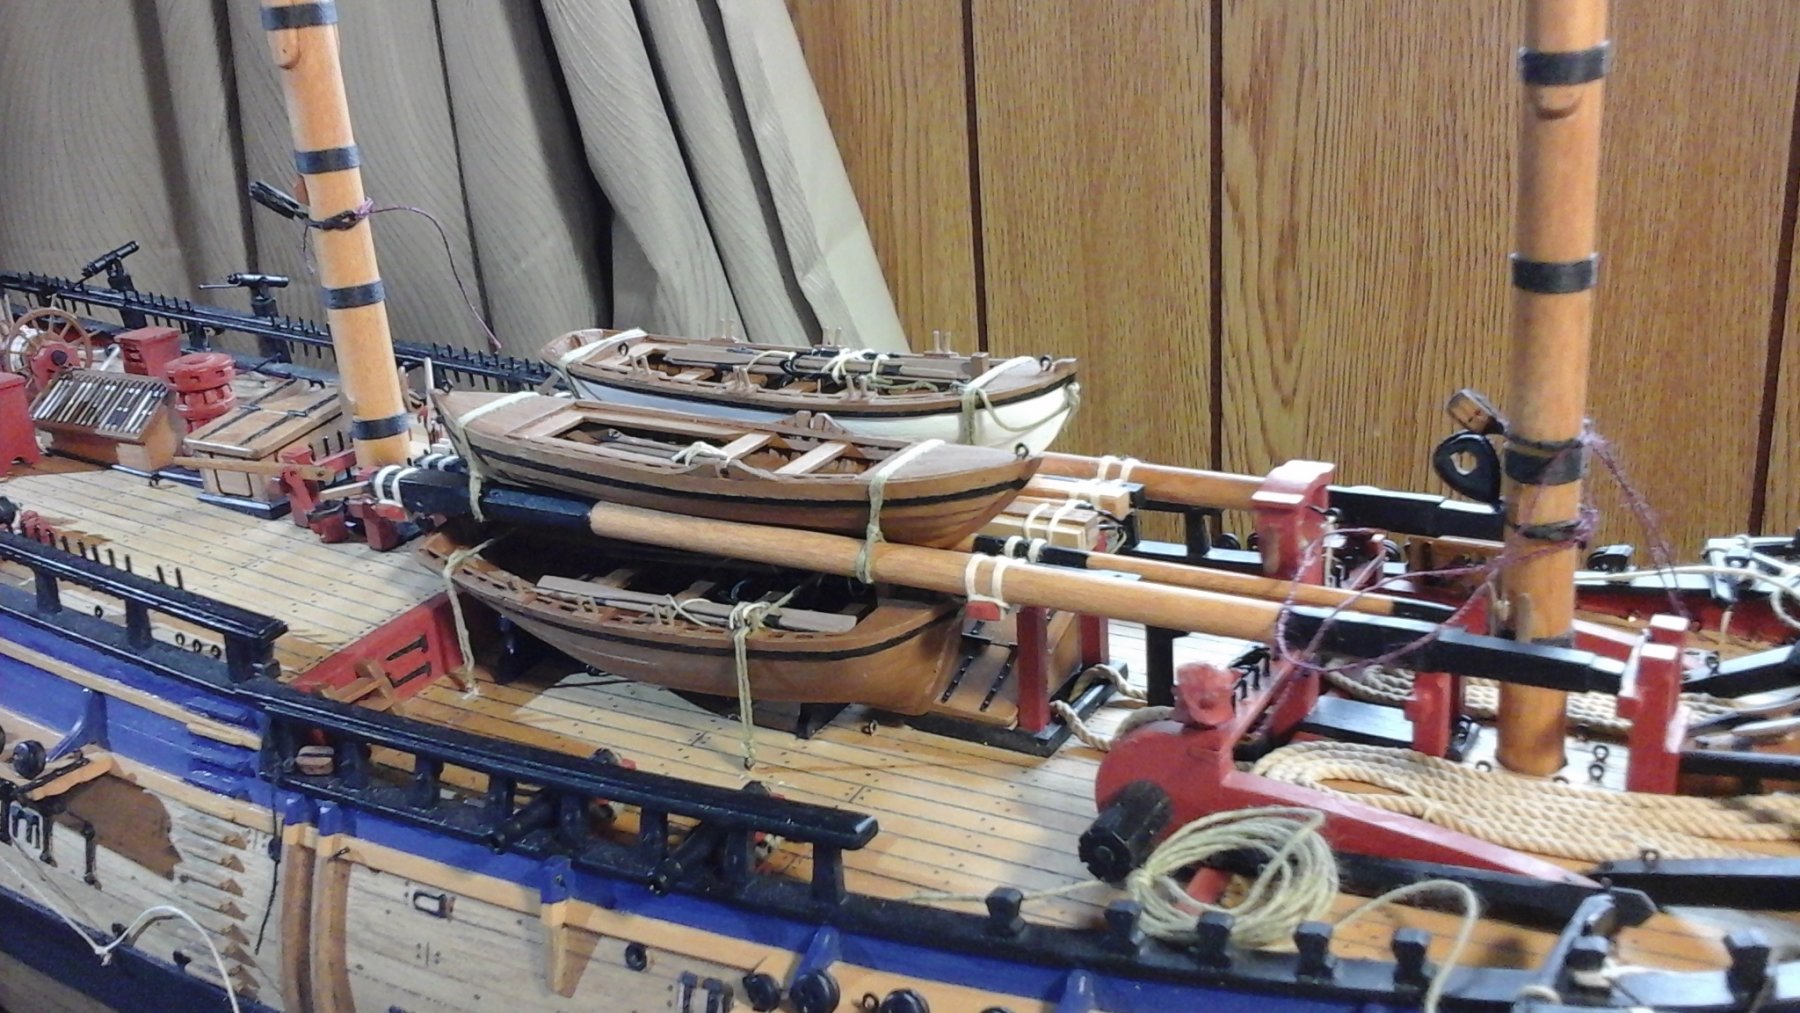
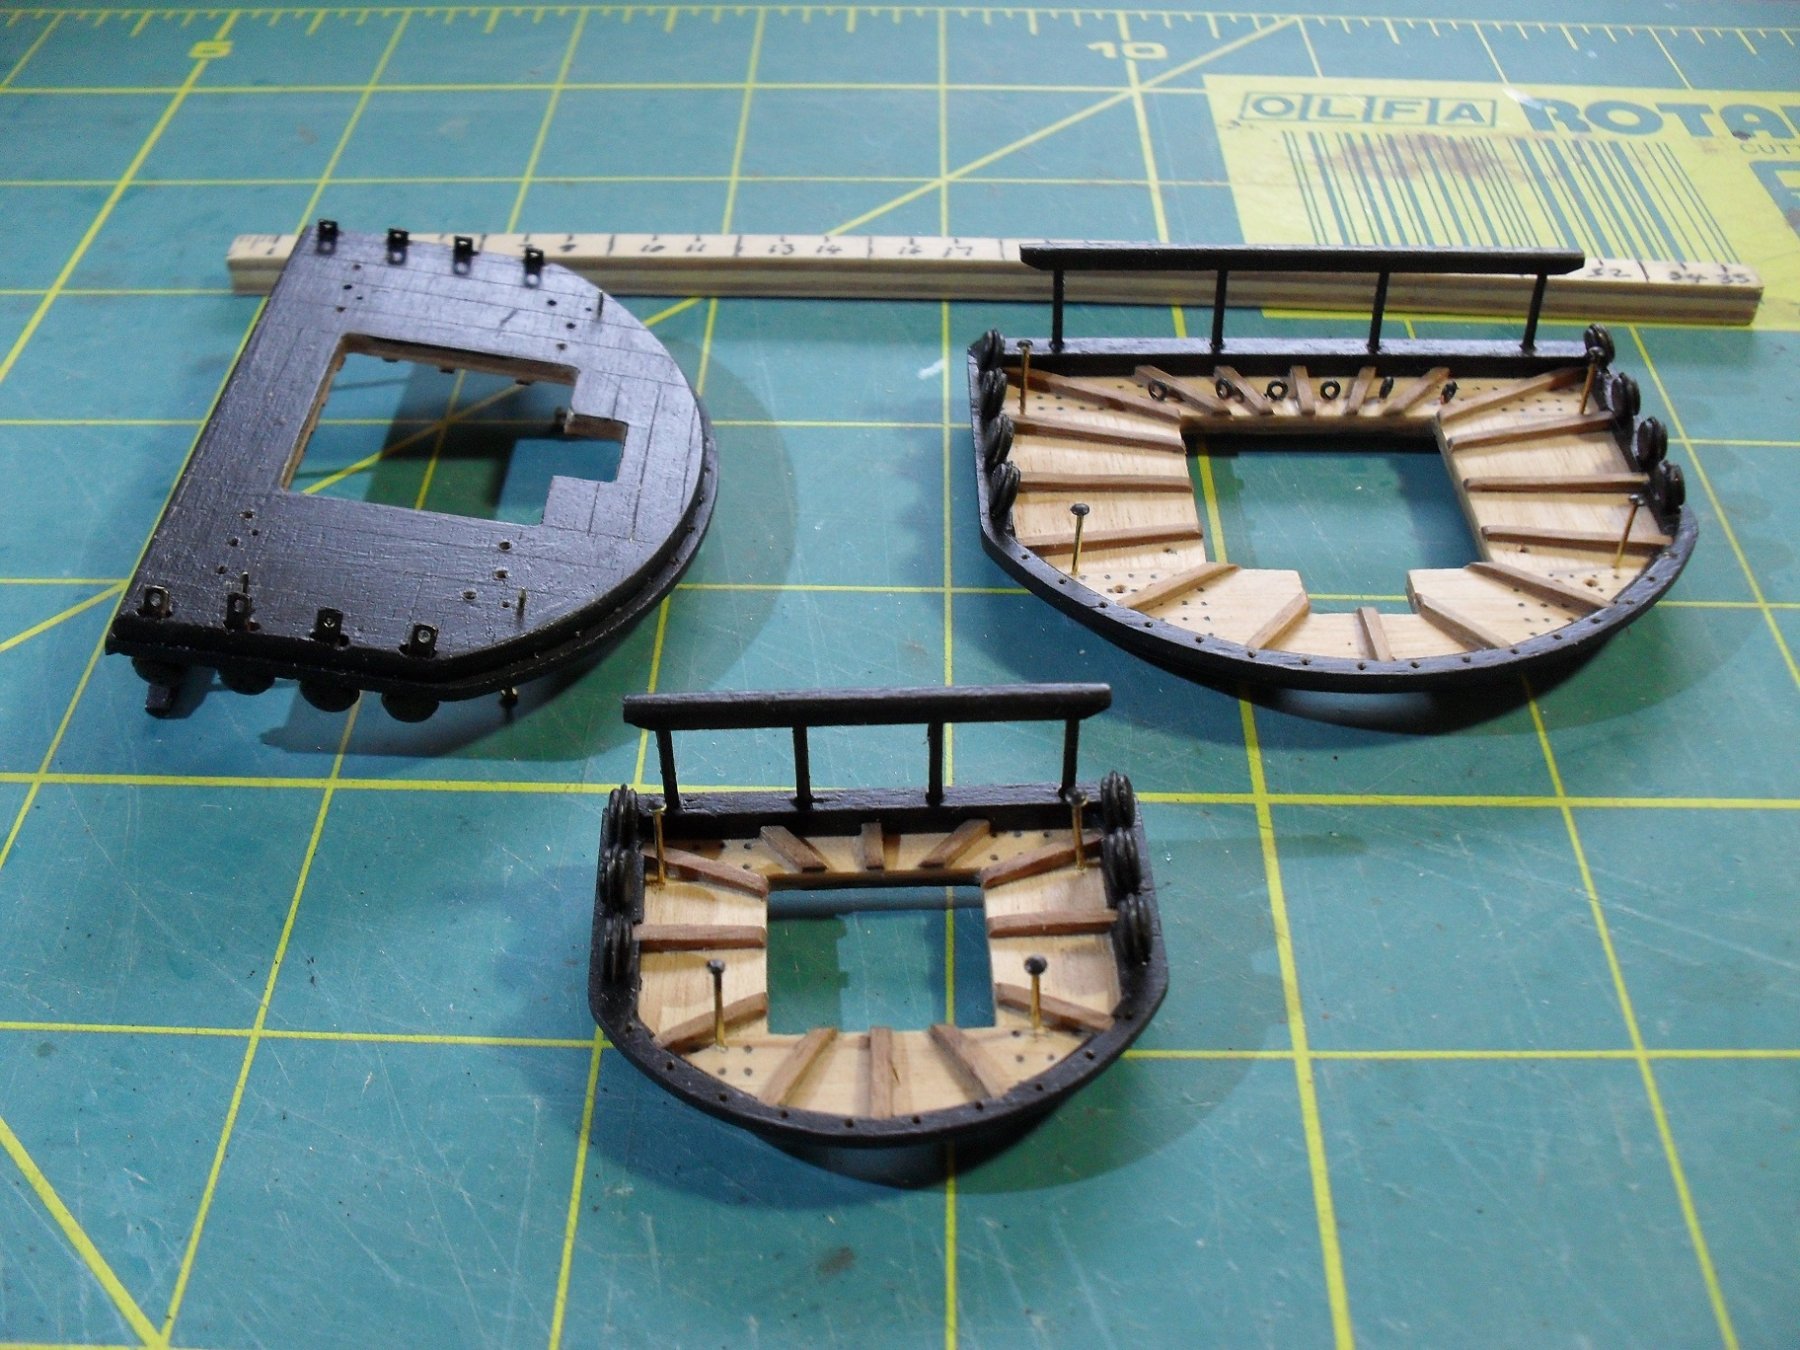
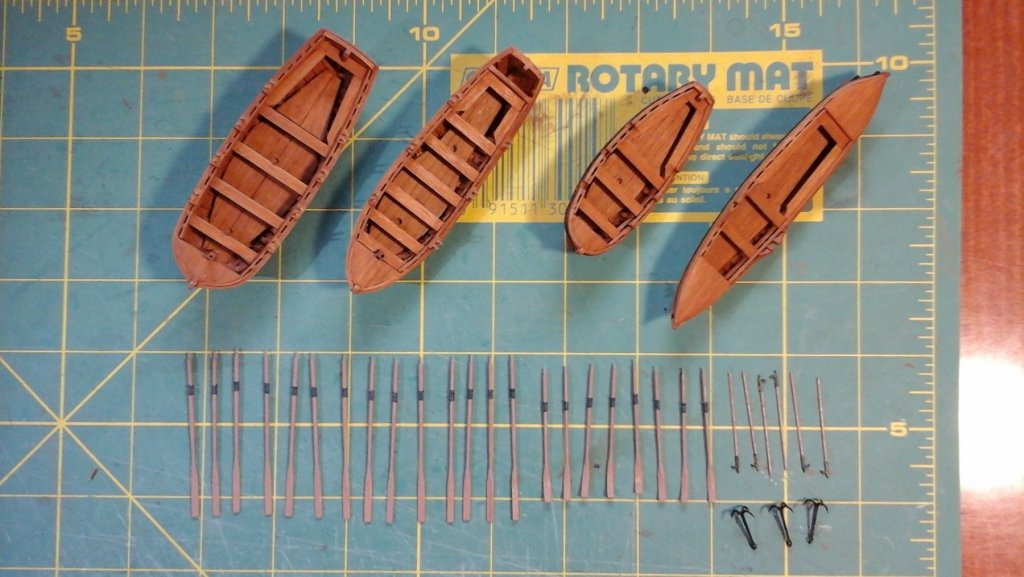
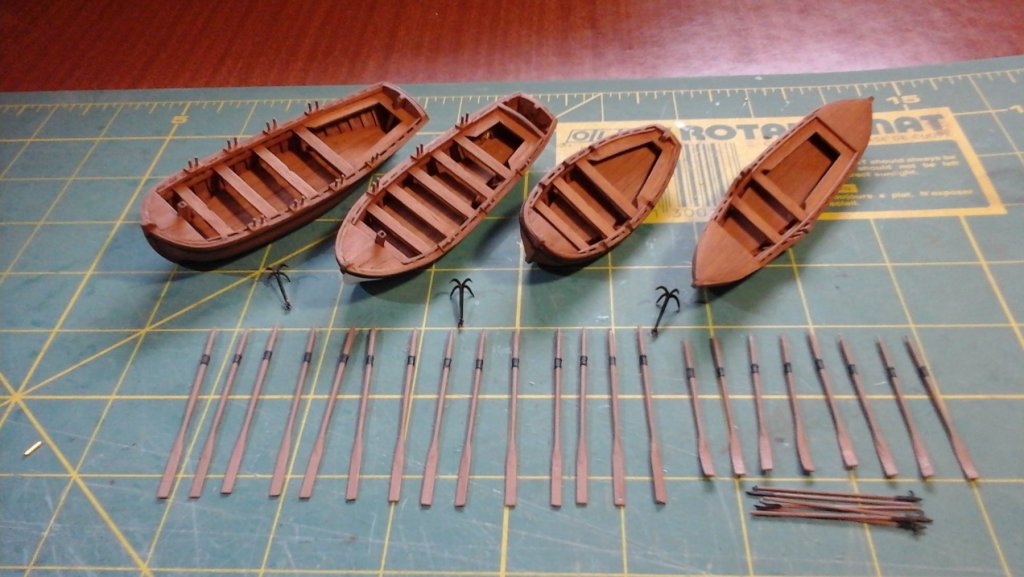
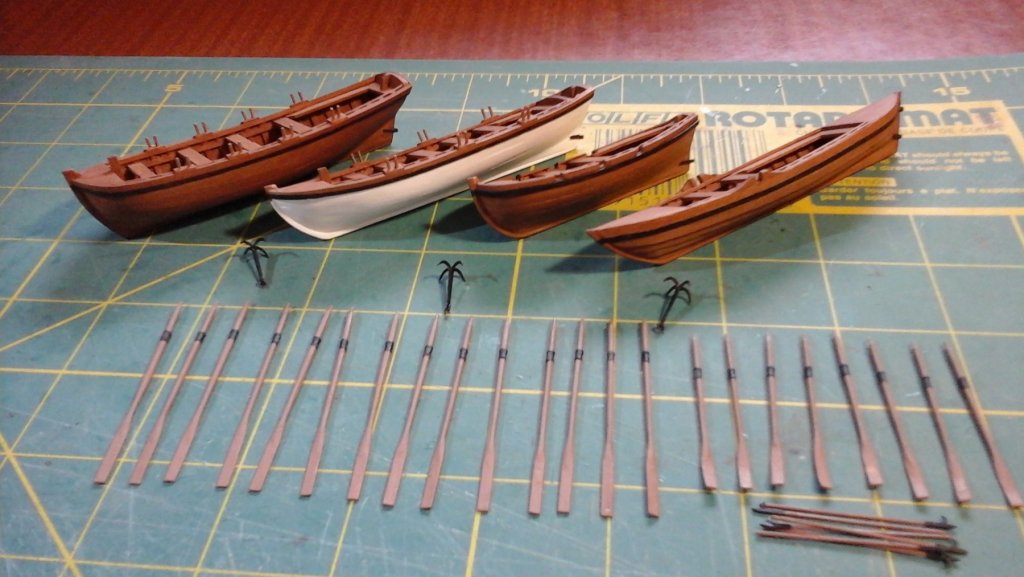
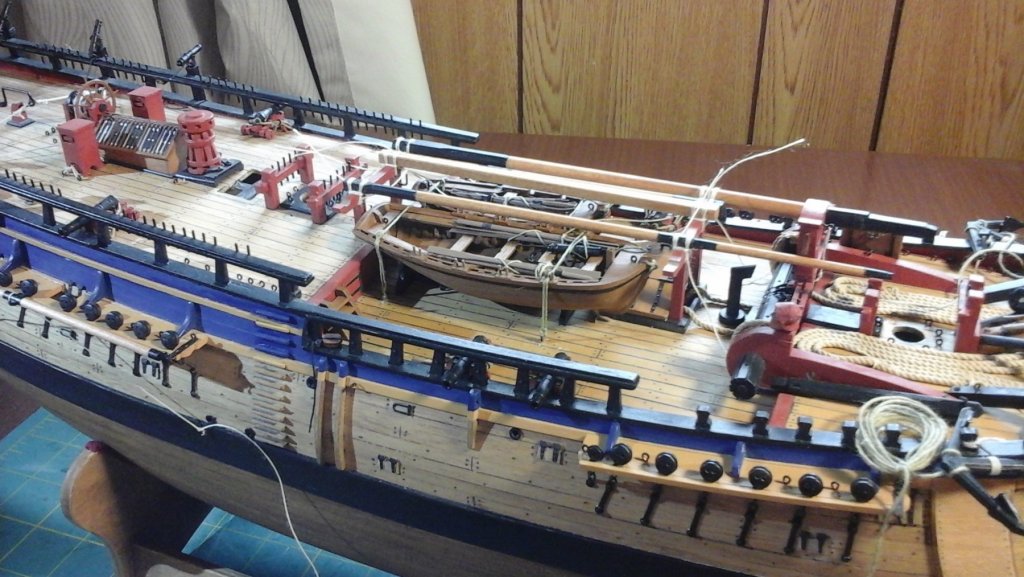
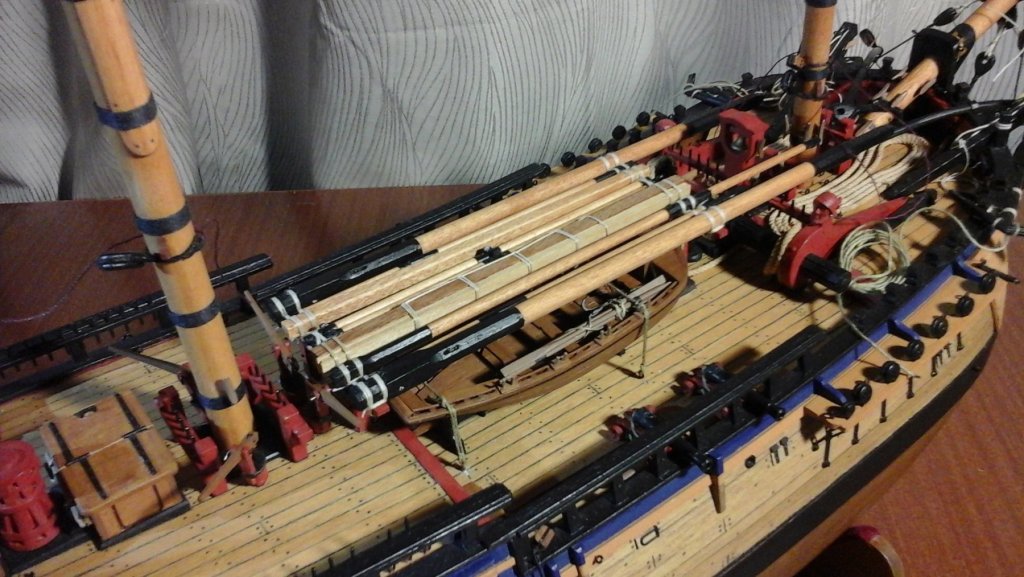
Thanks everyone for looking in on my build even though it's on a go slow. Update: Ships boats [finally!!!] Well after a break and some health stuff I've managed to complete the ships boats. Probably not as good as I'd like, but I can't sit at it for as long as I used to and having trouble holding things in my left hand, so pushing this body to make some progress as I'd like to eventually complete it. Boats: Basically I've followed the kit and added tholes and swivel guns to the longboat and pinnace and painted the pinnace hull lead white as per Endeavours log. In hindsight I should have lowered the floors as per Rods build log and I wasn't happy with the shape of the pinnace hull but after some filler and several coats of lead white it looks ok if you stand back and squint. The yawl is stowed under the gallows instead of overhead, to allow clear access to the waist hatch. I was constantly conscious of how tight it all is around the 4lber deck guns and know that gun drills were carried out according to the ships log, so hope there is just enough room. Also I think the longboat and pinnace may have been towed seas permitting. Edit: How to make the boat keels are not in the kit instructions, so I laminated 2 layers of 3x0.5 split lengthwise and shaped and glued one layer at a time. Then sanded and stained each boat with a pigmented stain and finished with Matt polyurethane. Oars: After building the boats there was plenty of 4x.5 mm veneer left over so I laminated this to both sides of each brass oar using ca glue, then cut out, shaped and and painted. For the oar stops [not sure what they are called] I wrapped a couple of layers of masking tape cut to the width and then trimmed to simulate two wrapped layers. Stowing: I've added some spare lengths of timber on the gallows just in case of hitting a reef etc... I couldn't see how the gallows could secure all that without it slipping off until yesterday I discovered and old photo of model gallows with a hollow carved in the outer ends to seat the spare top masts. So following this practice as can be seen in one of the photos I've managed to tie and secure everything down while keeping it clear of the pumps. Cheers Dashi


-
HI Rod thanks. My build is on slow and have had a break, but have finally got some more done so will post an update today.
- 108 replies
-
- 1
-
-
- endeavour
- caldercraft
- (and 1 more)
-
I haven't been on here for ages and just found your log. She's looking good Rod.
- 108 replies
-
- 1
-
-
- endeavour
- caldercraft
- (and 1 more)
-
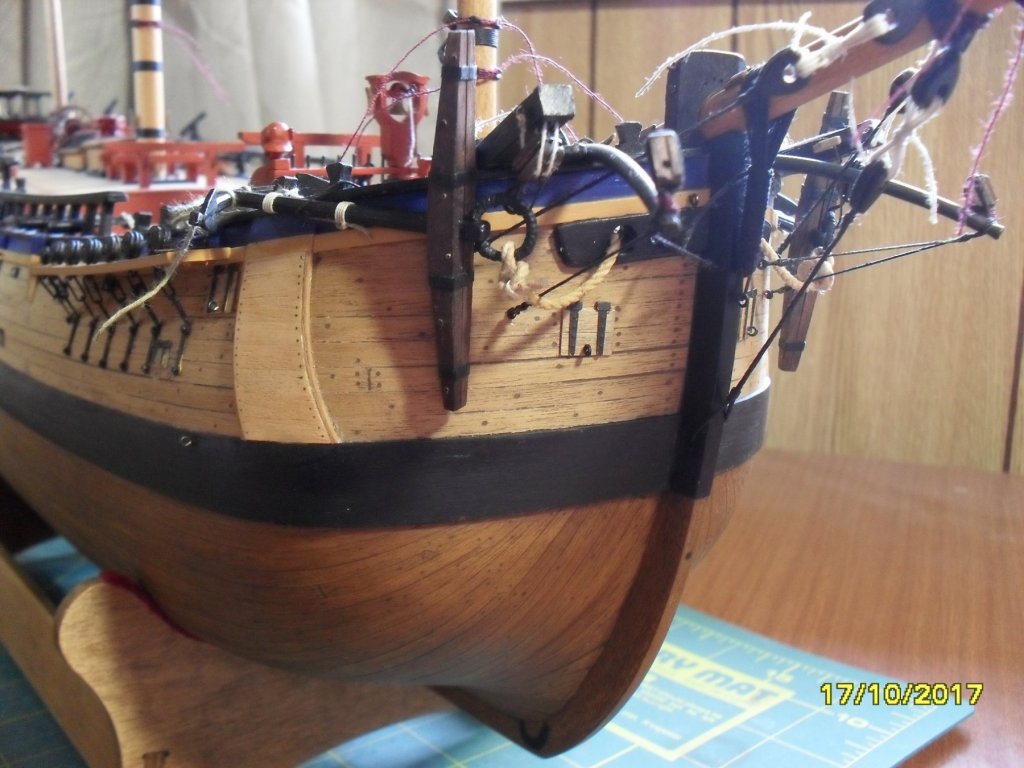
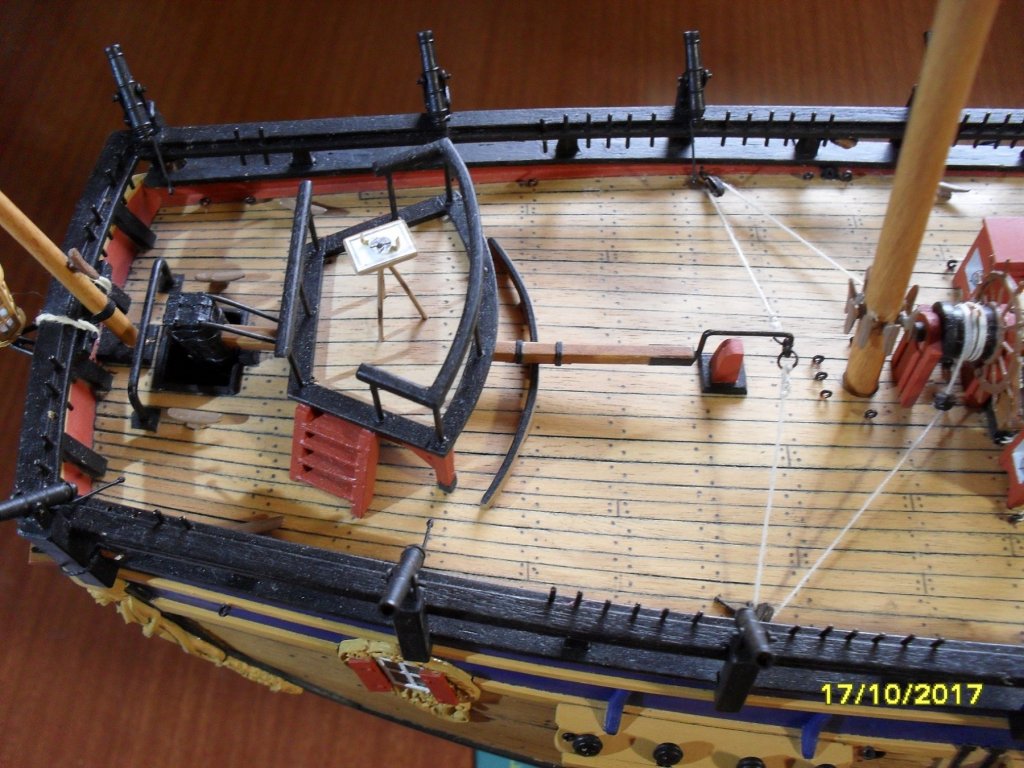
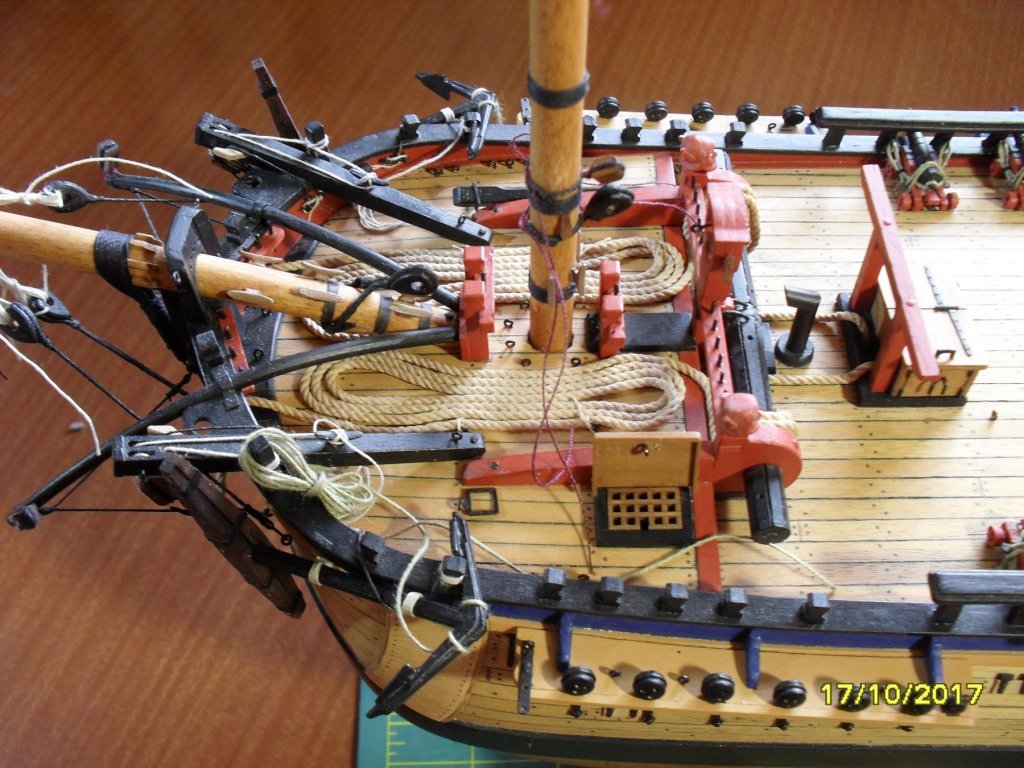
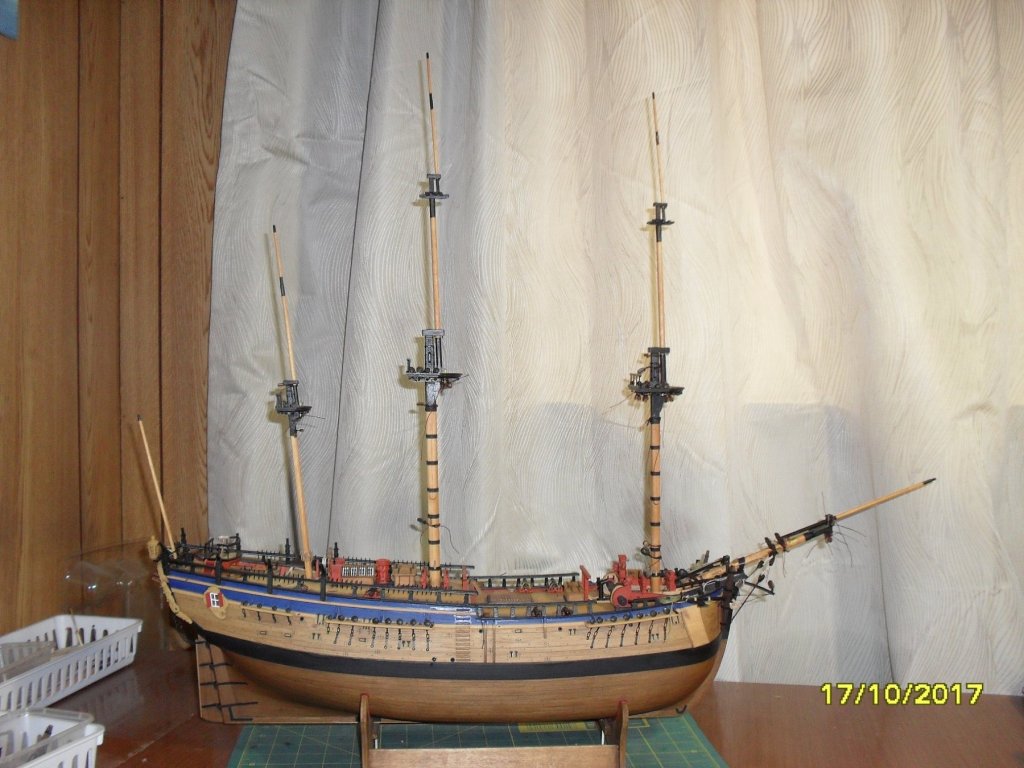
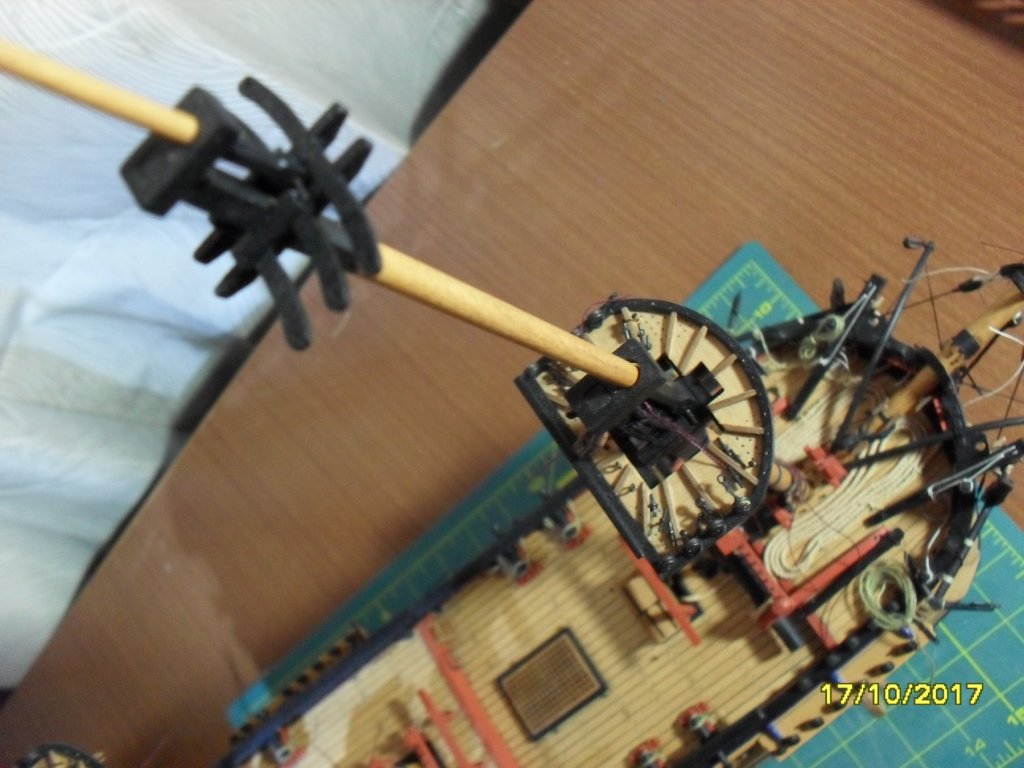
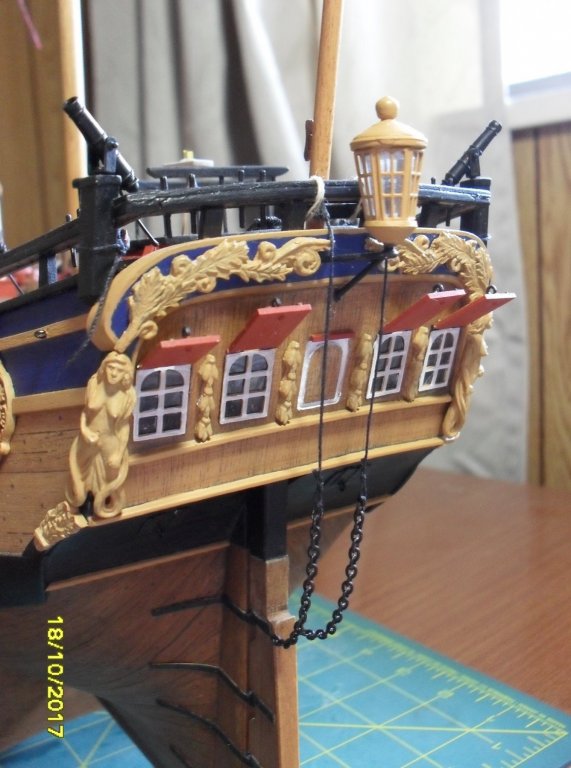
Cheers Russ Update: I've managed to progress a little with the build since my last update which was a while ago sorry. It's slow going due to constant headaches and migraines from a pinched nerve in my neck due an old injury aggravated a couple of years ago. Masts completed according to Steel and original draft as best I could. Bashed top trestle trees as the kit were both the same size. Main head platforms completed from kit supplied parts with a little bashing. Thinking about adding netting to the railings. Anchors, ground tackle, cable completed and clear the boom-kin stays. Replaced the kit anchor cable for smaller as it was way too large. Tiller platform bashed with plain table and surveyors compass which is just my idea of how Cook might have surveyed from the ship. Compass housings bashed from kit with compass needles agreeing with Cooks surveyors compass. Sailing down the east coast off the South Island of New Zealand after leaving Queen Charlotte Sound where Cook modified the tiller. Guns fitted with breach ropes and 2 mounted on quarter deck which was done before reaching New Zealand. Added stocks to swivels with two swivels set aside for the boats as indicated by Cook in his log. Deck fittings finished. Bashed a fore hatch coning and re-rigged the tiller to match contemporary drafts. Set the wheel forward of the drum so it doesn't fowl the new tiller rig and which is in accordance with the Woolwich plan draft. Re made the gallows with smaller stock to scale as the kit supplied were too heavy. Emergency steering tackle rigged and belayed to aft rail ready for deploying in the event of tiller failure which had happened several times according to Cooks log. I added the chain as there was none in the kit. Ok that's it for a while. Next will be the boats and yards I expect. Cheers Dashi


-
Hi Dave, Thanks for looking in. As you have noticed I've been away from this for a while and it looks like I could be absent for sometime to come yet as I have some urgent life matters to attend to. Nothing serious but I've had to mothball the build for a while. cheers Dashi
-
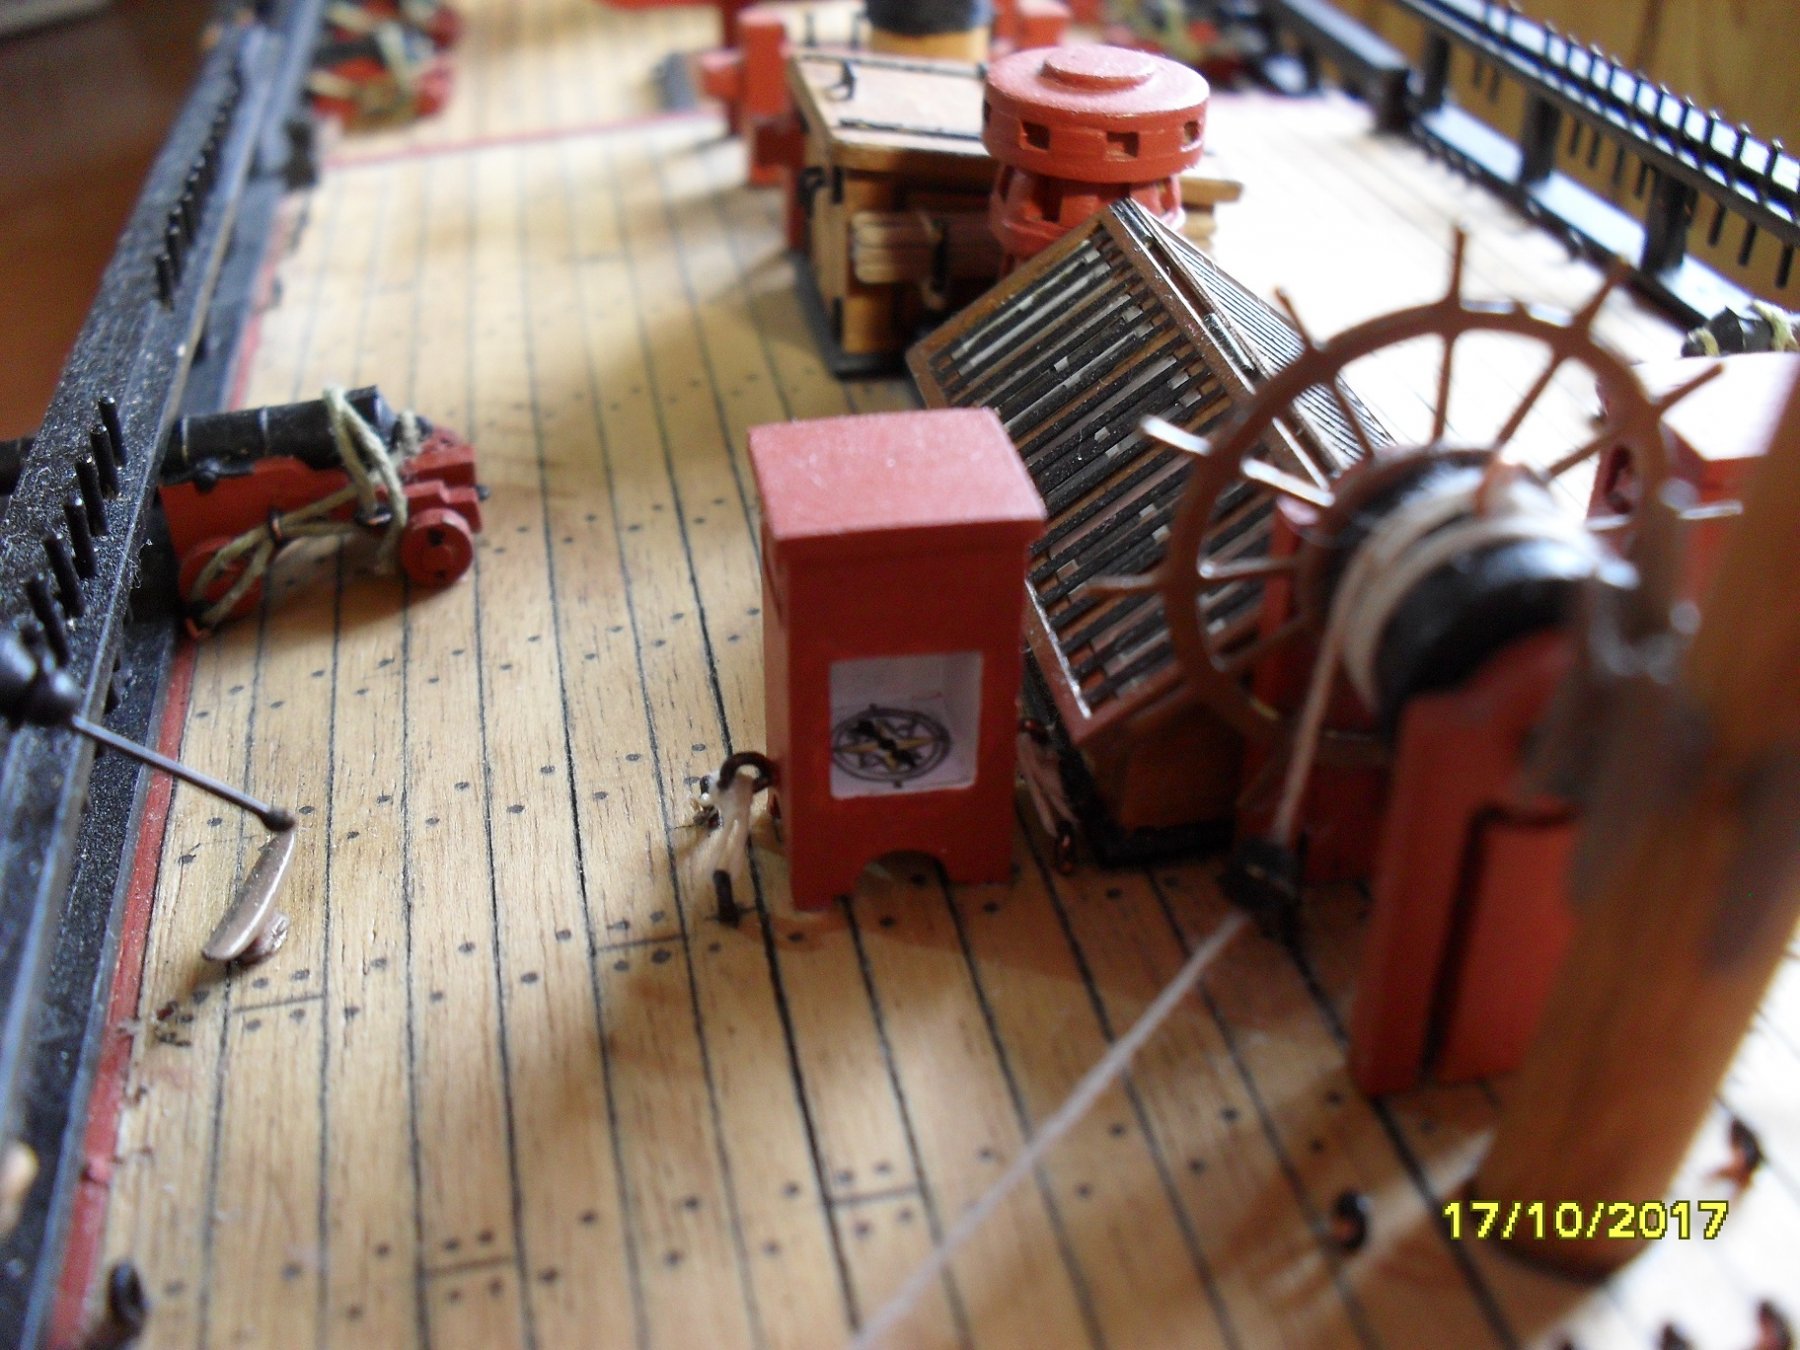
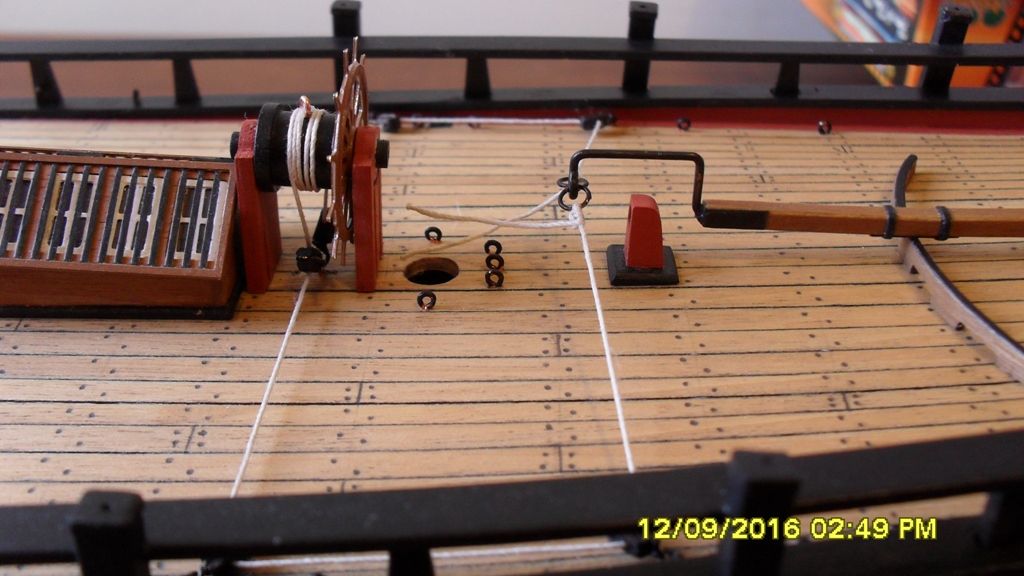
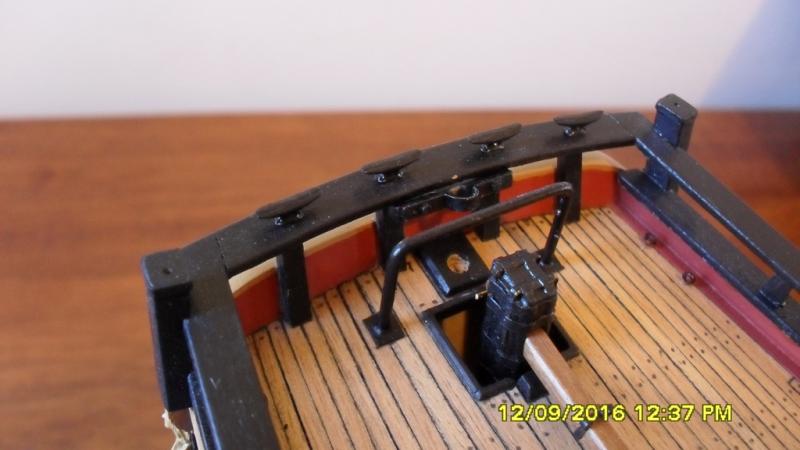
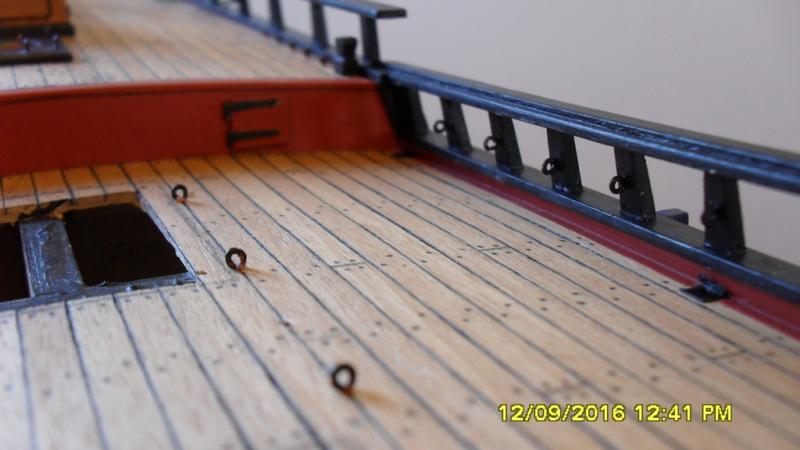
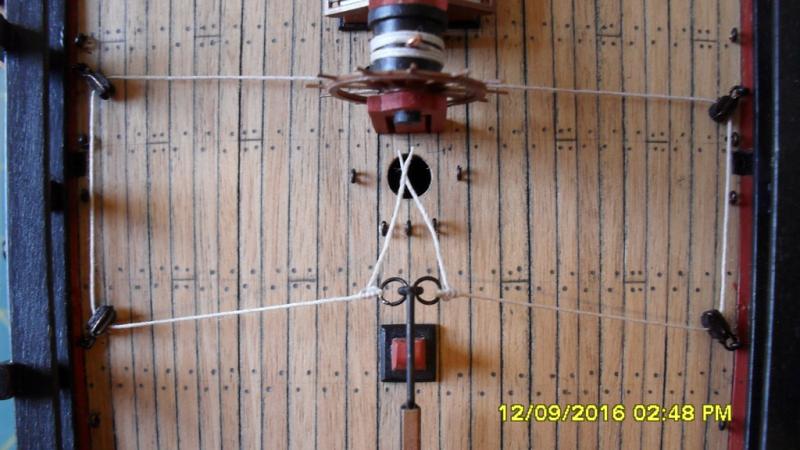
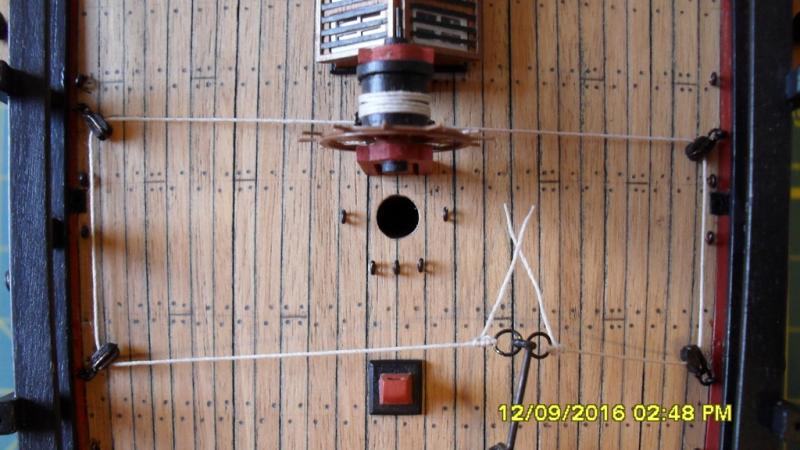
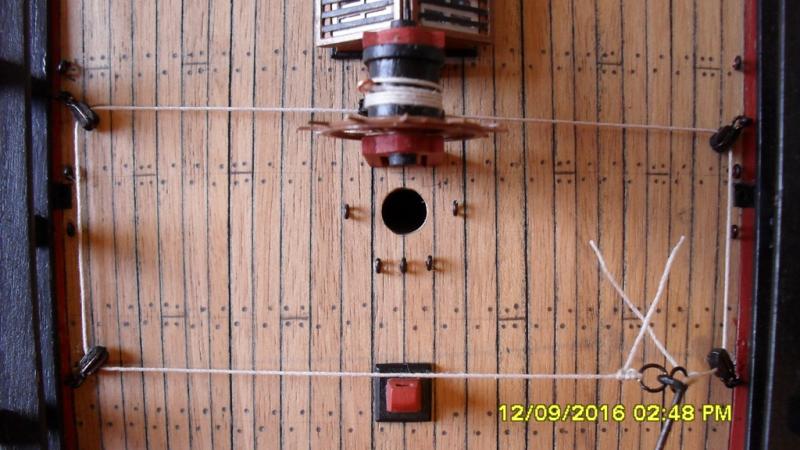
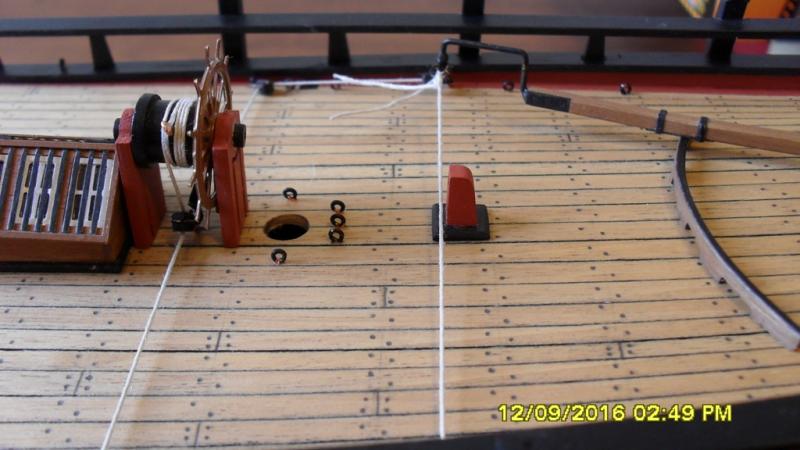
The shipyard is open again for a short while so here's what I've been upto. Flagstaff step, eye bolts and helm. While gluing eye bolts all over the deck and in some stanchions for the 4 lbr carriage guns I got a little carried away and fitted the mizzen horse before realizing I still needed to fit the flagstaff step and bracket... oops. I couldn't find the instructions in the kit for the flagstaff bracket except on the plans which doesn't include a step. So with some mutterings I managed to assemble and paint the bracket and bash a step and carefully glue them in place (bracket under the rail) checking the flagstaff for plumb with a 3mm dowel and without needing to remove the horse. For the horse I used card for flanges where it meets the deck. I used the AOTs and kit plans for the eyebolt locations, can never have too many eyebolts as it's harder to add them later. Plus I've added one pair of eyebolts for each of the carriage guns with an extra set on the quarterdeck. The Endeavour was originally fitted with x6 4 lbrs on the main deck and was supplied and extra 4 after she had left dock. In Tahiti Captain Cook mounted 2 of the 4 lbrs on the quarterdeck leaving 4 on the main deck while four were taken to guard the shore fort. Thinking about it this makes sense because the guns on the main deck won't be able to fire on the side you are lowering a boat from, which would leave you exposed to attack. Finished the helm. Thanks to Jud's help in working out the math for the helm tackle in my tiller question regarding the tiller transom, I can confirm that not only does the tackle clear the flu, but it remains at a constant tension throughout its sweep as you can see in the photos (I believe someone asked for a proof of concept). I used brass wire around the helm blocks soldered with one end shaped into a hook and then strung them on a wire and soaked them in dark mahogany stain. Will trim the helm ropes later. I've pinned an axle through the wheel and drum so it can turn and be removed should the need arise. Cheers Dashi


-
Hi Mindi I've posted this answer in your discussion question and pasted it here also, and cheers Pat. Here's a link to a discussion we had a few months back http://modelshipworld.com/index.php/topic/13503-mast-lengths-and-their-above-deck-heights-for-hmb-endeavour/?hl=%2Bendeavour+%2Bmizzen. If you are going for the taller mizzen then based on the length given for the mizzen standing mast in 1771 from Woolwich yard @ 50'6" and assuming it to be stepped in the lower deck (see discussion), I've worked out the following for the 1:64 scale Caldercraft Endeavour kit: Above the quarterdeck 181mm, below deck 57mm = Total 238mm. Using the Woolwich yard measurements I've also had to adjust the kit lengths of the main and fore standing masts to 296mm and 286mm respectively. If you choose to use these measurements then please double check my math. Hope this helps? Cheers Dashi
-
Hi Mindi here's a link to a discussion we had a few months back http://modelshipworld.com/index.php/topic/13503-mast-lengths-and-their-above-deck-heights-for-hmb-endeavour/?hl=%2Bendeavour+%2Bmizzen. If you are going for the taller mizzen then based on the length given for the mizzen standing mast in 1771 from Woolwich yard @ 50'6" and assuming it to be stepped in the lower deck (see discussion), I've worked out the following for the 1:64 scale Caldercraft Endeavour kit: Above the quarterdeck 181mm, below deck 57mm = Total 238mm. Using the Woolwich yard measurements I've also had to adjust the main and fore standing masts kit lengths to 296mm and 286mm respectively. If you choose to use these measurements then please double check my math. Hope this helps? Cheers Dashi
-
Nicely made pinnace and love what you have done bashing the mast and sail. Cheers Dashi
-
Thanks Pat and for the heads up re those swivel guns. When marking the chainplates for the mizen I noticed a pair of shrouds would come too close to the swivel gun post, so I moved the channel aft by about 1.5 to 2mm. On a couple of recent photos with out the mizen channel in place you can see the extra pin holes I drilled in the sheer strake. Another note re the mizen channels. The ones I bashed are a 1/3rd wider than the kit's and even then the shrouds will just clear the rough tree rail. cheers Dashi