MORE HANDBOOKS ARE ON THEIR WAY! We will let you know when they get here.
×


KenW
-
Posts
1,230 -
Joined
-
Last visited
Content Type
Profiles
Forums
Gallery
Events
Everything posted by KenW
-
 Congrats. and thanks for the information. Your build is excellent. No rest for the weary, however. Waiting to follow the Independence again. Great job.
- 306 replies
-
- 2
-

-
- armed virginia sloop
- Patrick Henry
- (and 2 more)
-
Thanks Dave. My red heart has also faded. So I'm looking for another type of wood. I may have to use paint on my next time. What is your source for blood wood, purpleheart and rosewood? I do like the look of your hull. Thanks.
- 306 replies
-
- 3
-
-
- armed virginia sloop
- Patrick Henry
- (and 2 more)
-
I really like that you didn't use paint, but use different woods to achieve that 'authentic' look. What wood is the dark brown wood on the hull? And is that redheart on the inner bulwarks? Thanks.
- 306 replies
-
- 2
-
-
- armed virginia sloop
- Patrick Henry
- (and 2 more)
-
I really like that display stand. You should market it.
- 306 replies
-
- 3
-
-
- armed virginia sloop
- Patrick Henry
- (and 2 more)
-
Check out the Cheerful from Syren. Chuck Passaro offers the plans and a keel and bulkheads package cut by his laser printer; and he has worked with Crown Timber who offer a wood package. Not sure of the cost. But I hope that this style of 'kit' catches on. I'm too old to buy and learn how to use all the power tools needed to do a real scratch build. Chuck offers some solutions and I hope others follow suit. Cheers.
- 481 replies
-
- 3
-
-
- rattlesnake
- model shipways
- (and 1 more)
-
This is my third model. My previous two were MS kits. At the time, there was a problem getting the Mamoli kit (a fire or something). However, I should point out that I get all my blocks and line from Syren and used boxwood, holly, walnut and redheart from Crown Timber. And I don't use the dye cast metal deck furniture. So, the only parts of the kit I used were the frame (keel, former and stern and stem posts) and a couple of stern window frames. So I guess, from my point of view, you could use either one. Check out 'jsgerson's build log on this site. He's using the Mamoli kit with the help of Bob Hunt's practicum. His build looks great, and he may have some advice as well. Cheers.
- 481 replies
-
- 2
-
-
- rattlesnake
- model shipways
- (and 1 more)
-
Thanks Dave. Thanks to all the 'likes' as well. Cheers.
- 481 replies
-
- 1
-
-
- rattlesnake
- model shipways
- (and 1 more)
-
Thanks E.J., Sam and Jon. I don't think I'm going to take those shrouds off and redo them at this point. May change my mind. Jon - One of the reasons I follow your build and others here on this site is because I find the kit plans to be very sparse when it comes to details. You can't rely on them. So, even when I'm on vacation, I'm always thinking about possible problems that lie ahead. Modeling can be a full time experience. Cheers.
- 481 replies
-
- 2
-
-
- rattlesnake
- model shipways
- (and 1 more)
-
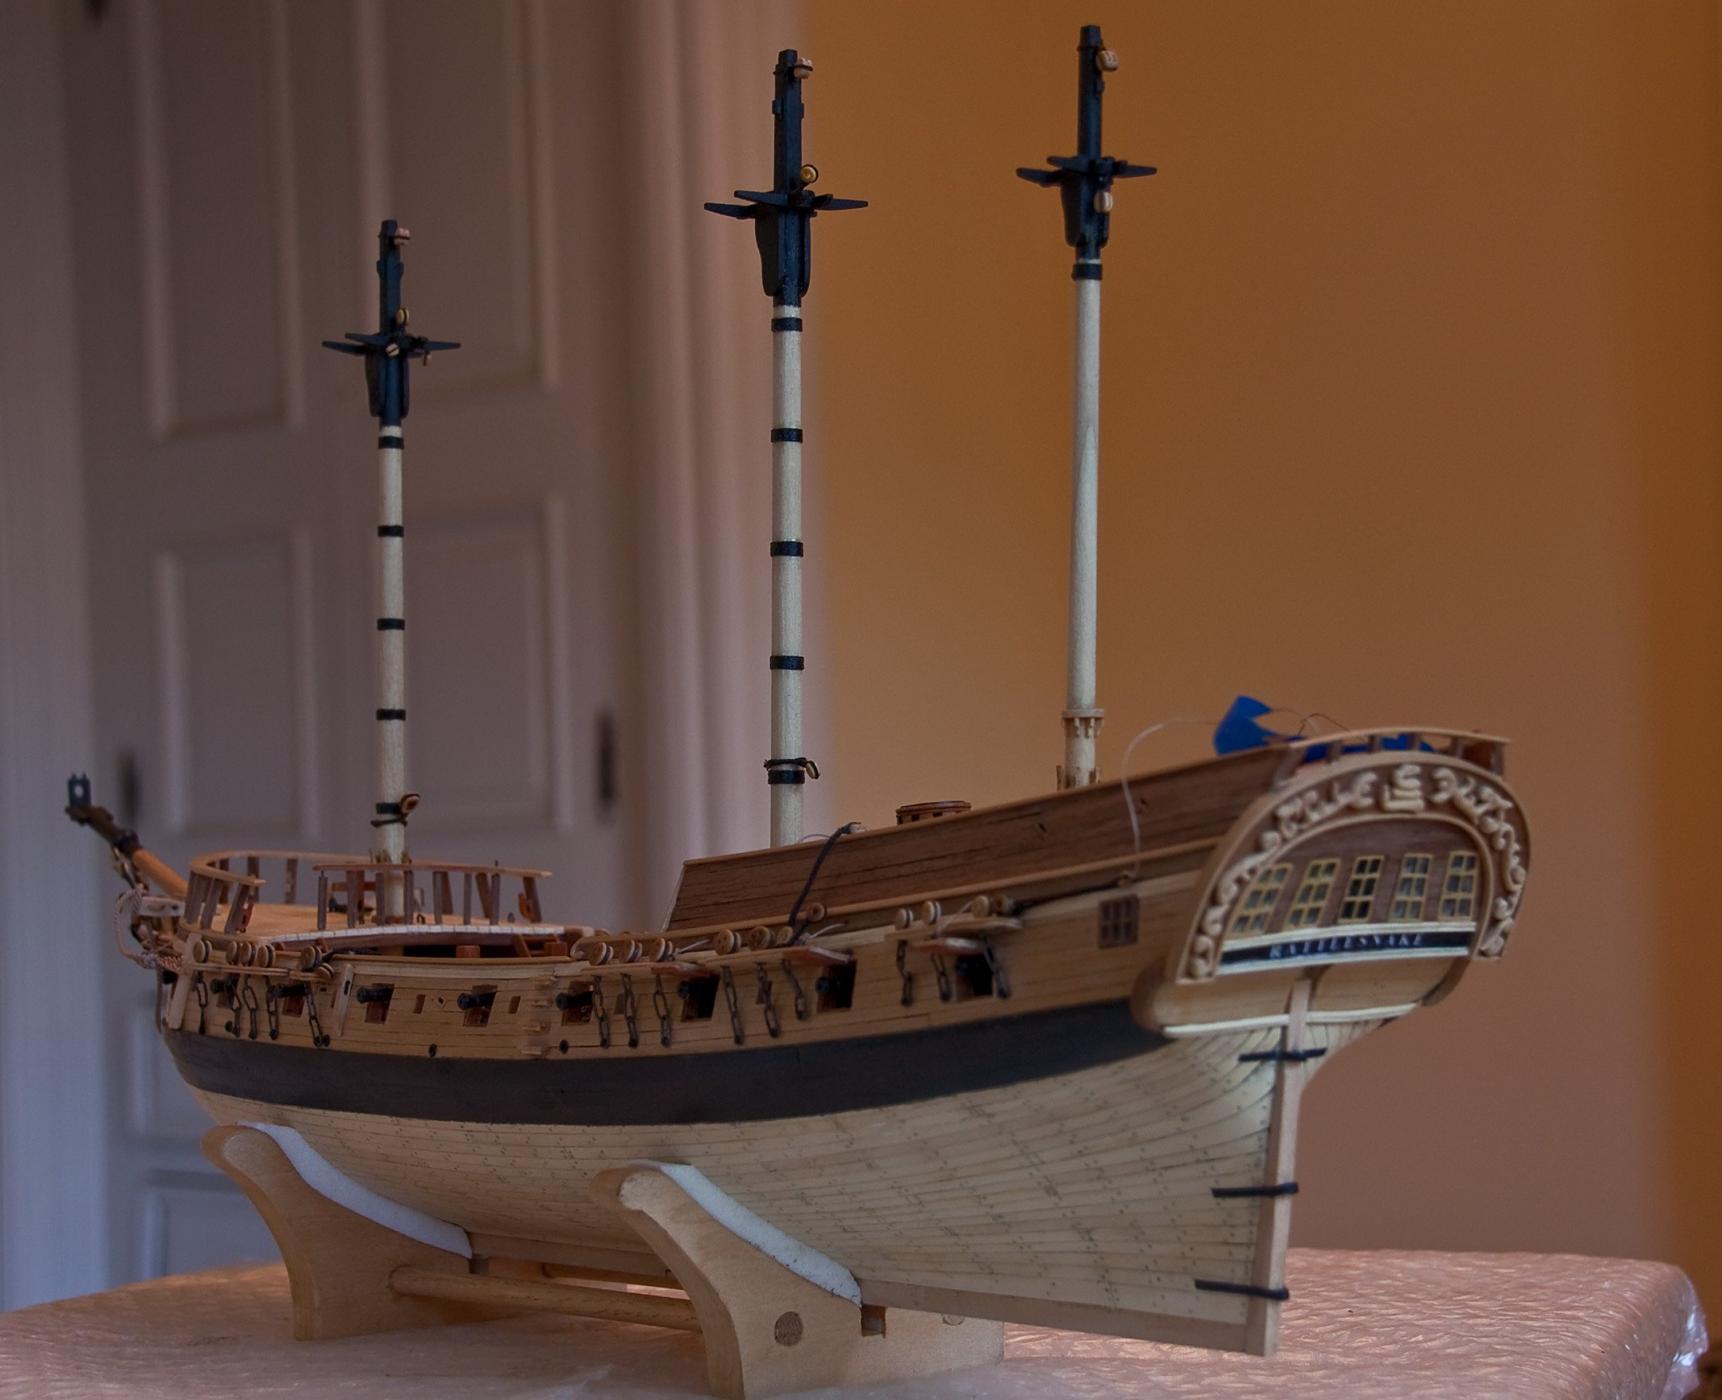
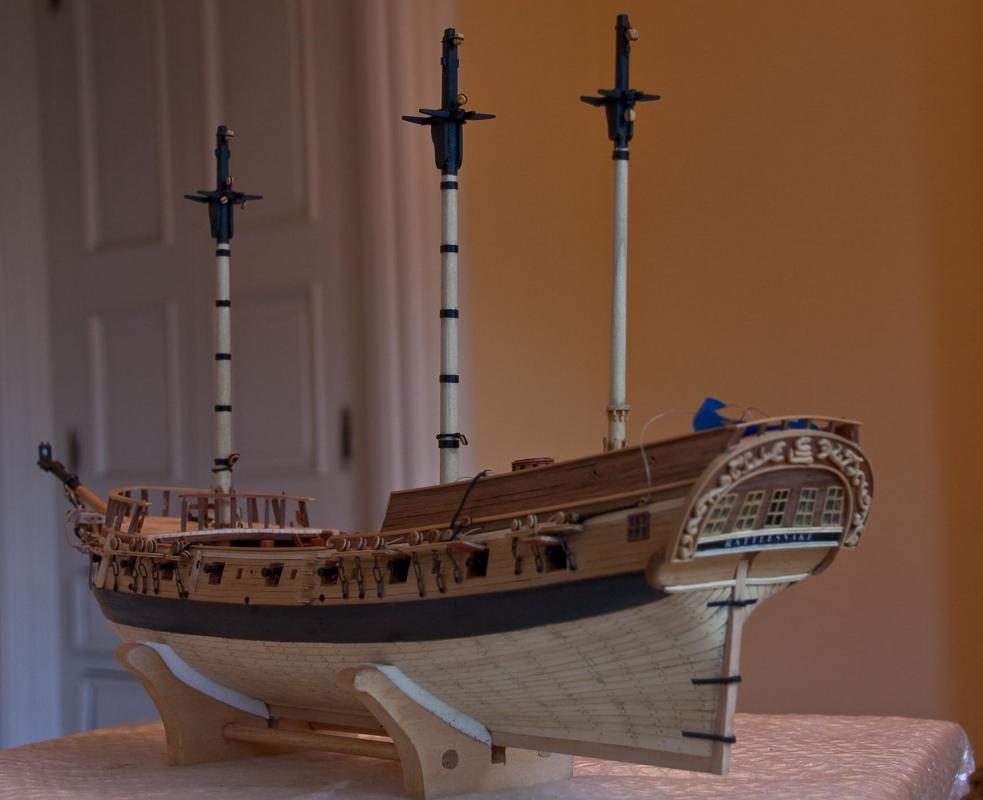
WOW; I just realized how long it has been since my last post. So, this is an update. The bow sprint shrouds and the boomkin shrouds were done a while ago. I added the fore and main stay collars. They are supposed to be doubled, according to Artscherl, but when I do them, the two served lines don’t ‘stand’ together the way they do in his book. So I wrapped a thin line around to two served lines as a kind of worming or snaking to hold them together. Hopefully, no one will notice. The mizzen shrouds were added to the model. I also attached the shroud cleats since I always try to do whatever I can off the model. I’m not planning to use sheer poles since Antscherl (and Lees) state that they weren’t used until the 19th century. And, now that I look at the photo, I’m not happy with that middle shroud (its deadeye is too high).

- 481 replies
-
- 12
-
-
- rattlesnake
- model shipways
- (and 1 more)
-
All that is truly out of my league. I'll have to think of something else.
- 306 replies
-
- 3
-
-
- armed virginia sloop
- Patrick Henry
- (and 2 more)
-
A Bernzomatic hand torch ... a propane tank, with a regulator ... ???
- 306 replies
-
- 4
-
-
- armed virginia sloop
- Patrick Henry
- (and 2 more)
-
Really nice job. Working with medal is another skill completely. Congrats.
- 306 replies
-
- 2
-
-
- armed virginia sloop
- Patrick Henry
- (and 2 more)
-
You're doing a great job. I'd advise that you not tie off lines permantly until all lines in a certain area are installed. You don't want lines to touch each other, or rub together. Even if it means, for example, switching lines amoung shroud cleats, etc. Keep up the good work.
- 974 replies
-
- 2
-
-
- rattlesnake
- mamoli
- (and 1 more)
-
Thanks Russ. I think I'll make up one of those jigs. Thanks for the 'likes' as well. Cheers.
- 481 replies
-
- 1
-
-
- rattlesnake
- model shipways
- (and 1 more)
-
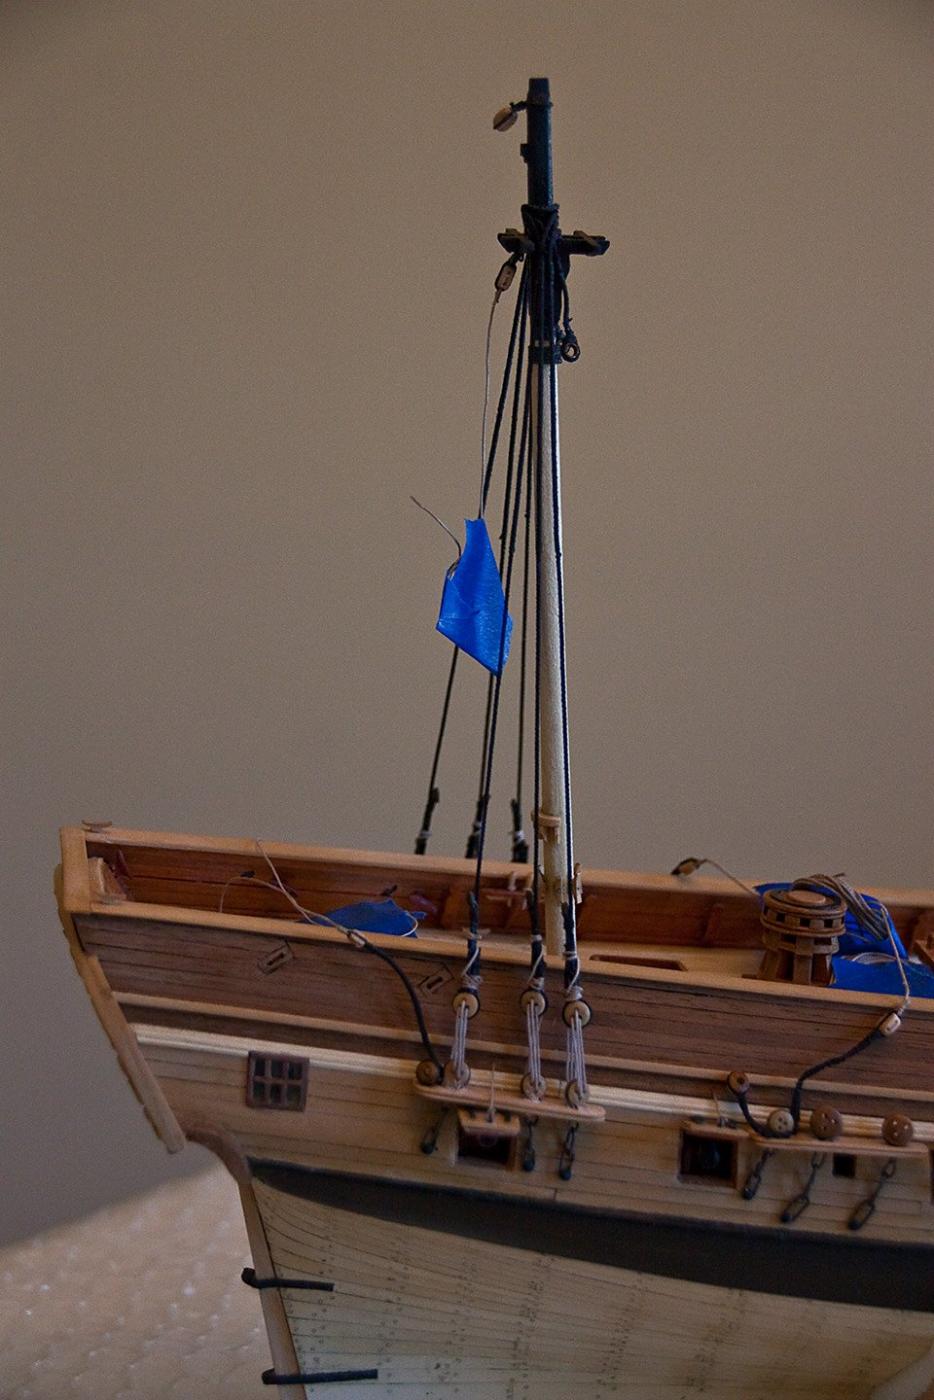
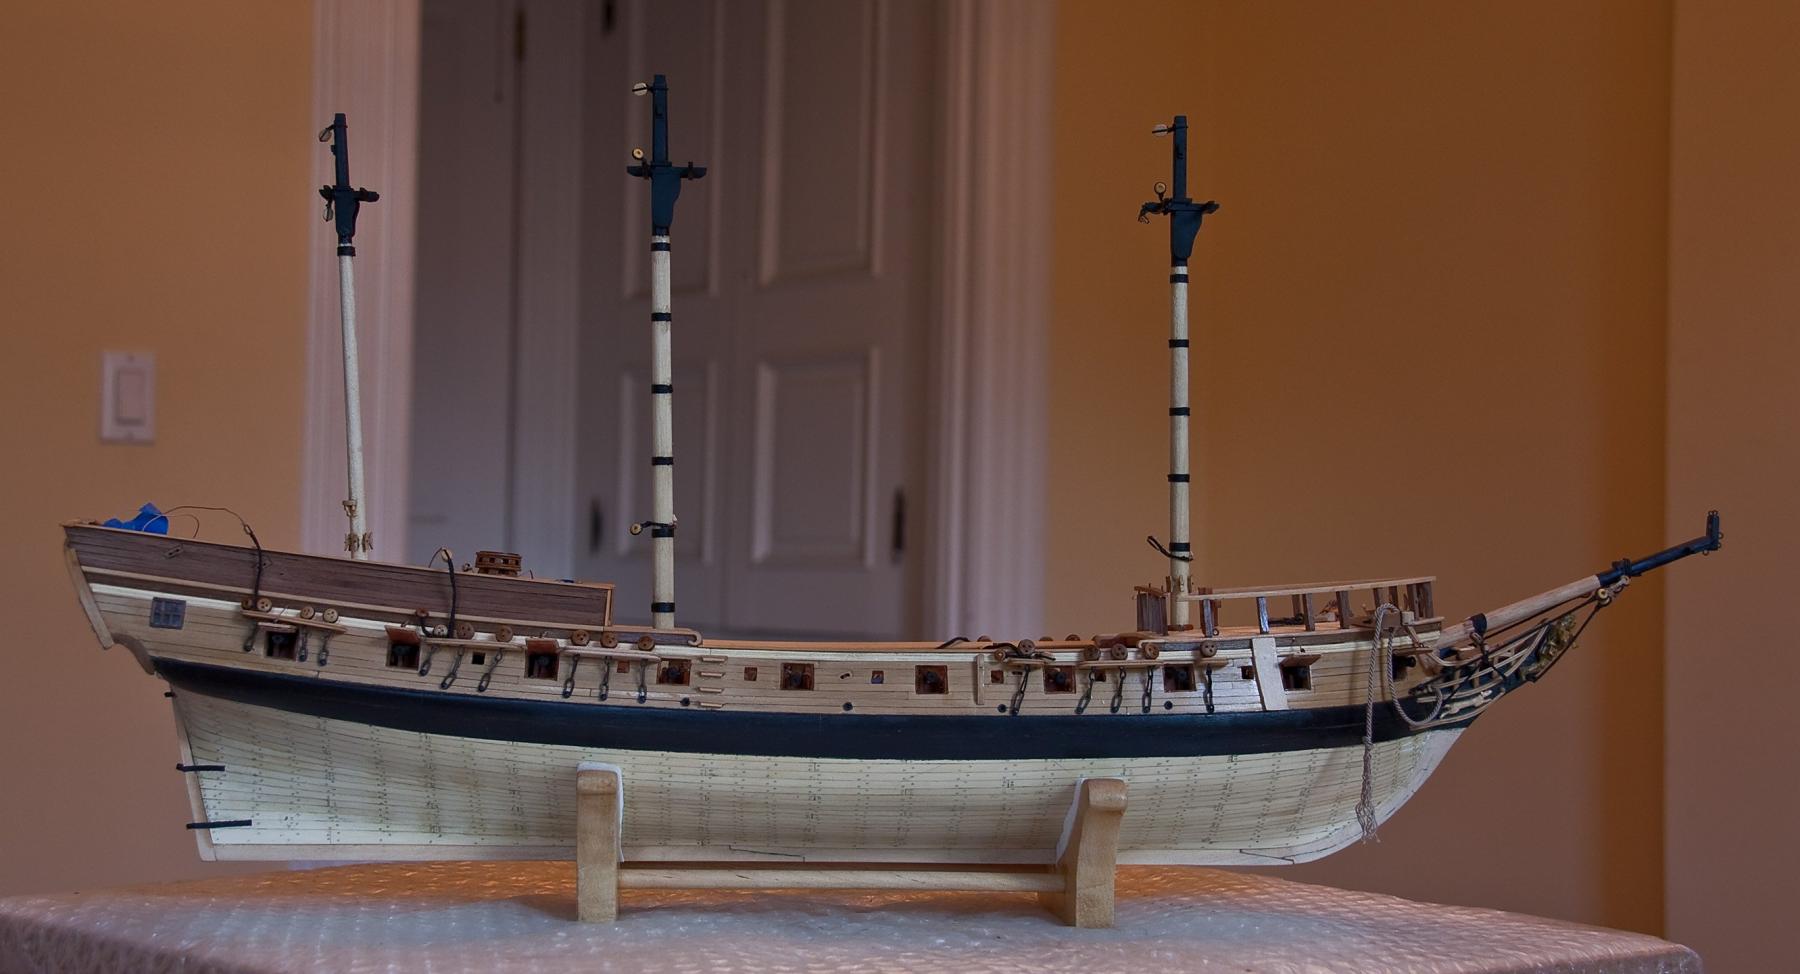
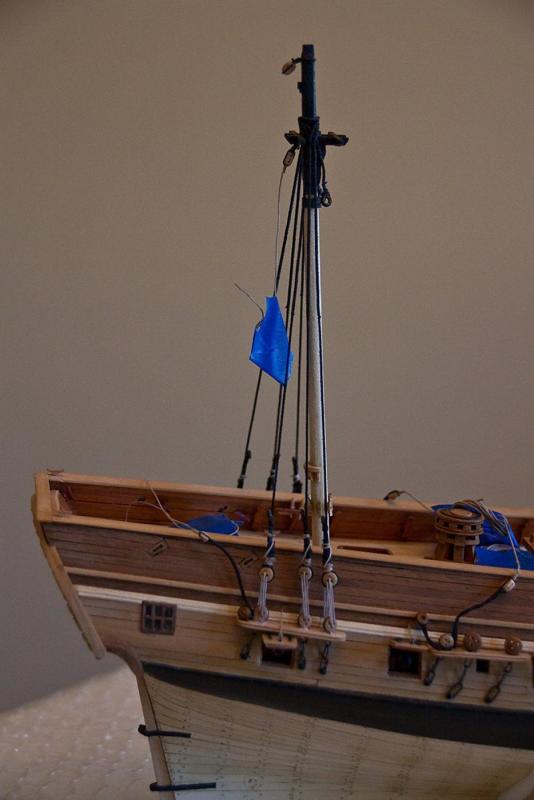
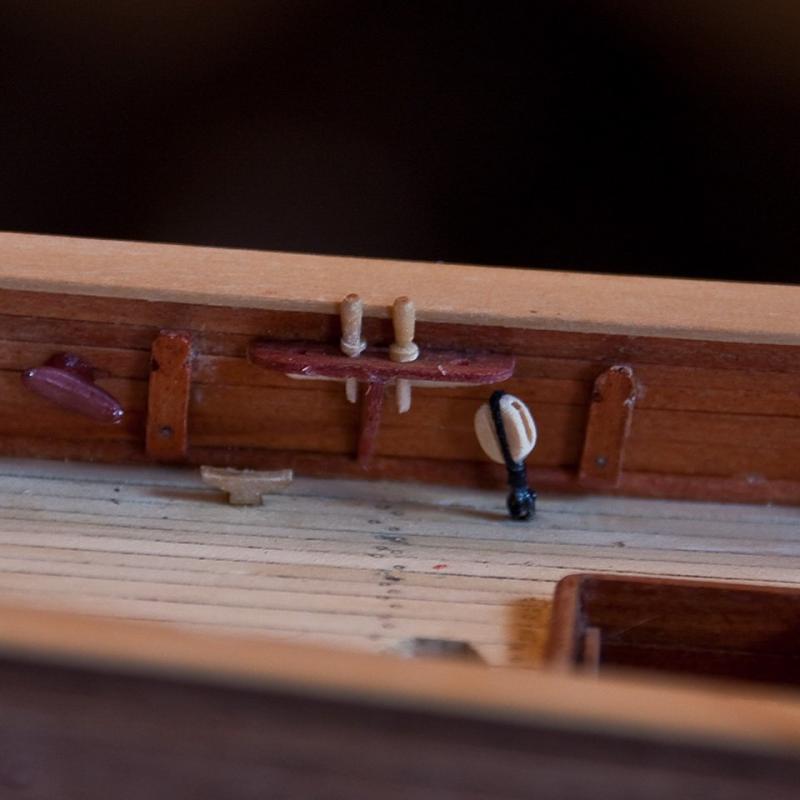
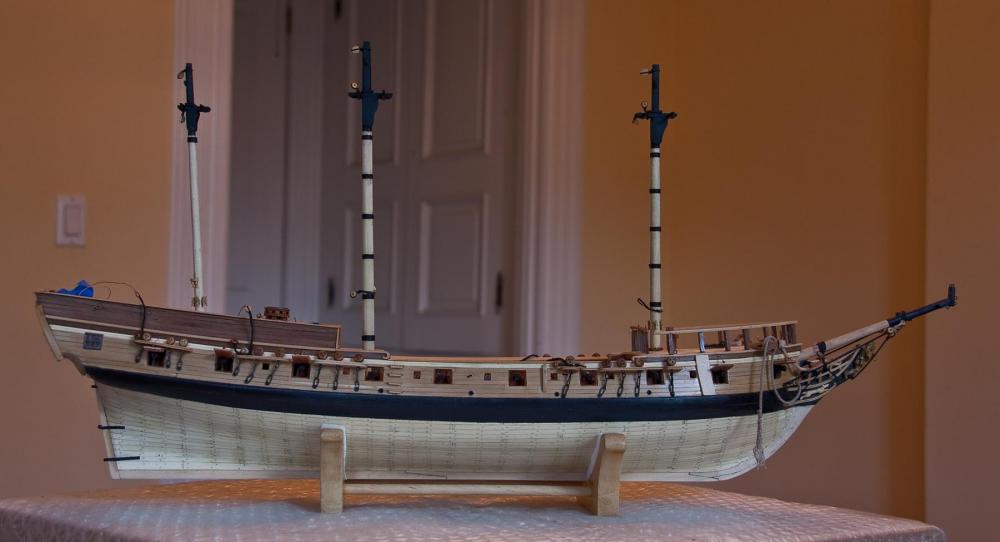
I’ve finaly reached another milestone: The lower masts have been constructed and glued into place. There are a few things that should be pointed out. Lees states that wooldings were made of line before 1805; so even though the Hahn plans seem to show metal wooldings, I chose to go with line. I also added a belaying pin rack that will hold 4 pins for Mizzen lines that will need tying off. My belying pins obviously need to be a bit smaller. My next milestone will be to add the shrouds and stays. And, Lees also states that the sheer pole was not used until around 1800. I like using the sheer pole to help align the dead eyes, but I guess I will have to try to get them all lined up without it. If that is too much of a problem, then I’ll add the sheer poles anyway.
- 481 replies
-
- 12
-
-
- rattlesnake
- model shipways
- (and 1 more)
-
On the plan you posted: Is it possible that the bottom on the plan is the correct horizontal; which means that it can be used to draw the water line? But Brian is right; there should be at least a mark on the stem and stern to use a reference points. And I also agree that it's not easy to make a water line from two different types of wood. Keep us posted.
-
I agree that that metal transom belongs in the garbage. I can't wait to see what you use as its replacement. Are you going to carve a new transom? Hope you include a lot of photos of your process. Cheers.
-
Your model is looking really good! Excellent work; and of course fortitude. A quick practical question - Would you recommend holding off on the crows feet until after the lower yards are attached? I was wondering if that would make the rigging of all those blocks under the tops easier. Thanks.
- 974 replies
-
- 1
-
-
- rattlesnake
- mamoli
- (and 1 more)
-
Right Jon. I cut the diagonal just beyond the serving. My biggest problem now is getting the exact length of the line or strop. I'm always a little too long or too short.
- 481 replies
-
- 1
-
-
- rattlesnake
- model shipways
- (and 1 more)
-
Thanks Jon and Martin. To make the splice, I used the method described by D. Antscherl on page 42 of his FFM, volume 4. It took a few tries to get a good one, but it came out alright. For eye splicing, I use his method which is also described in his book. I will check out Blue Ensign's log to see his technique. Cheers.
- 481 replies
-
- 2
-
-
- rattlesnake
- model shipways
- (and 1 more)
-
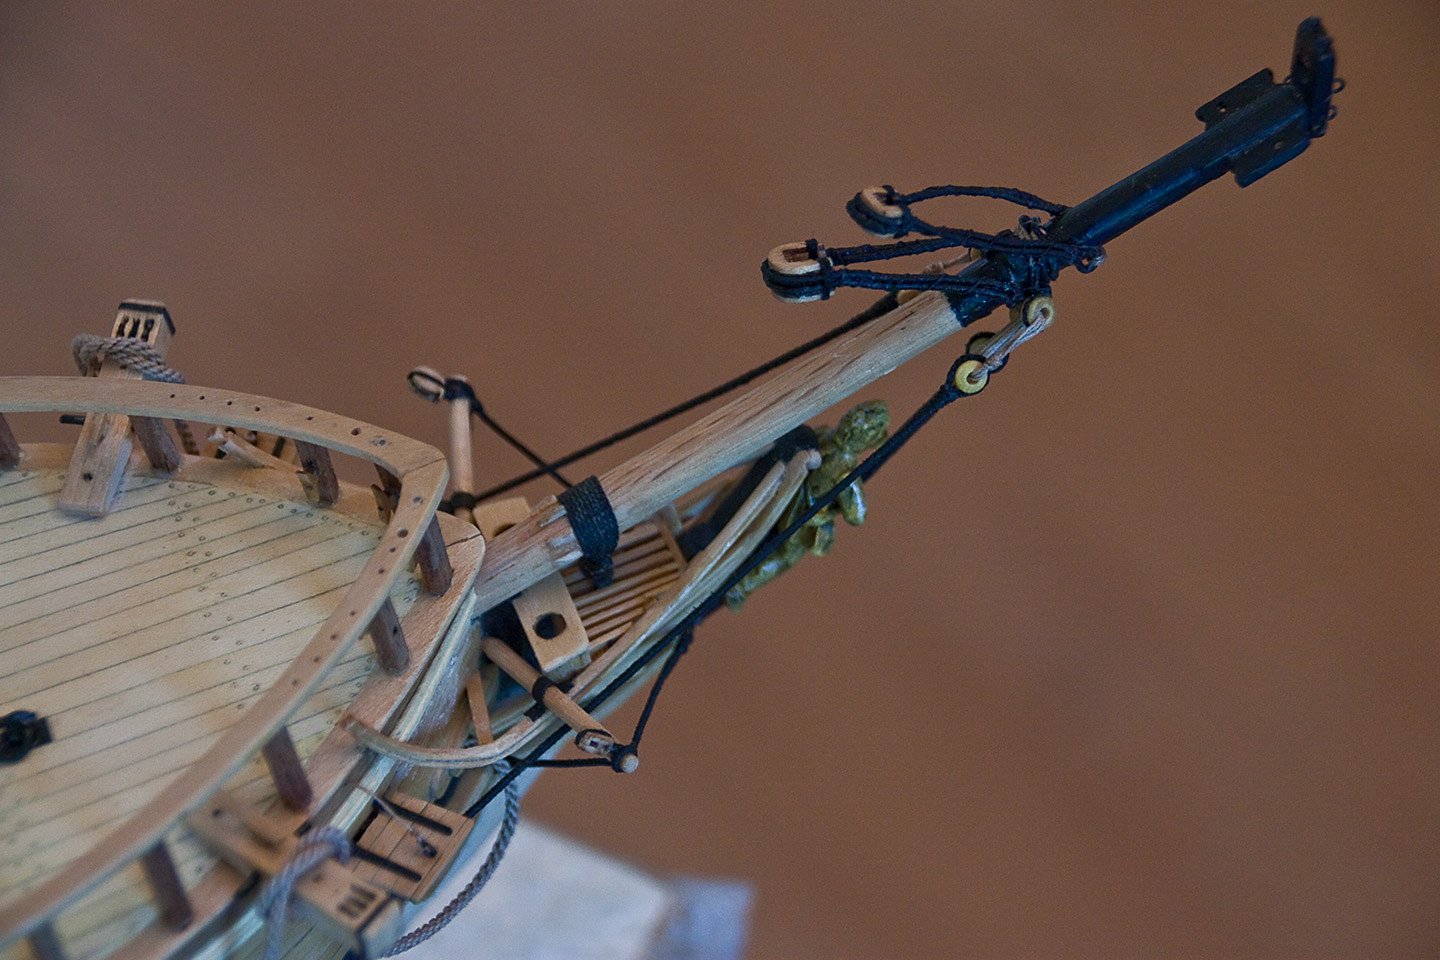
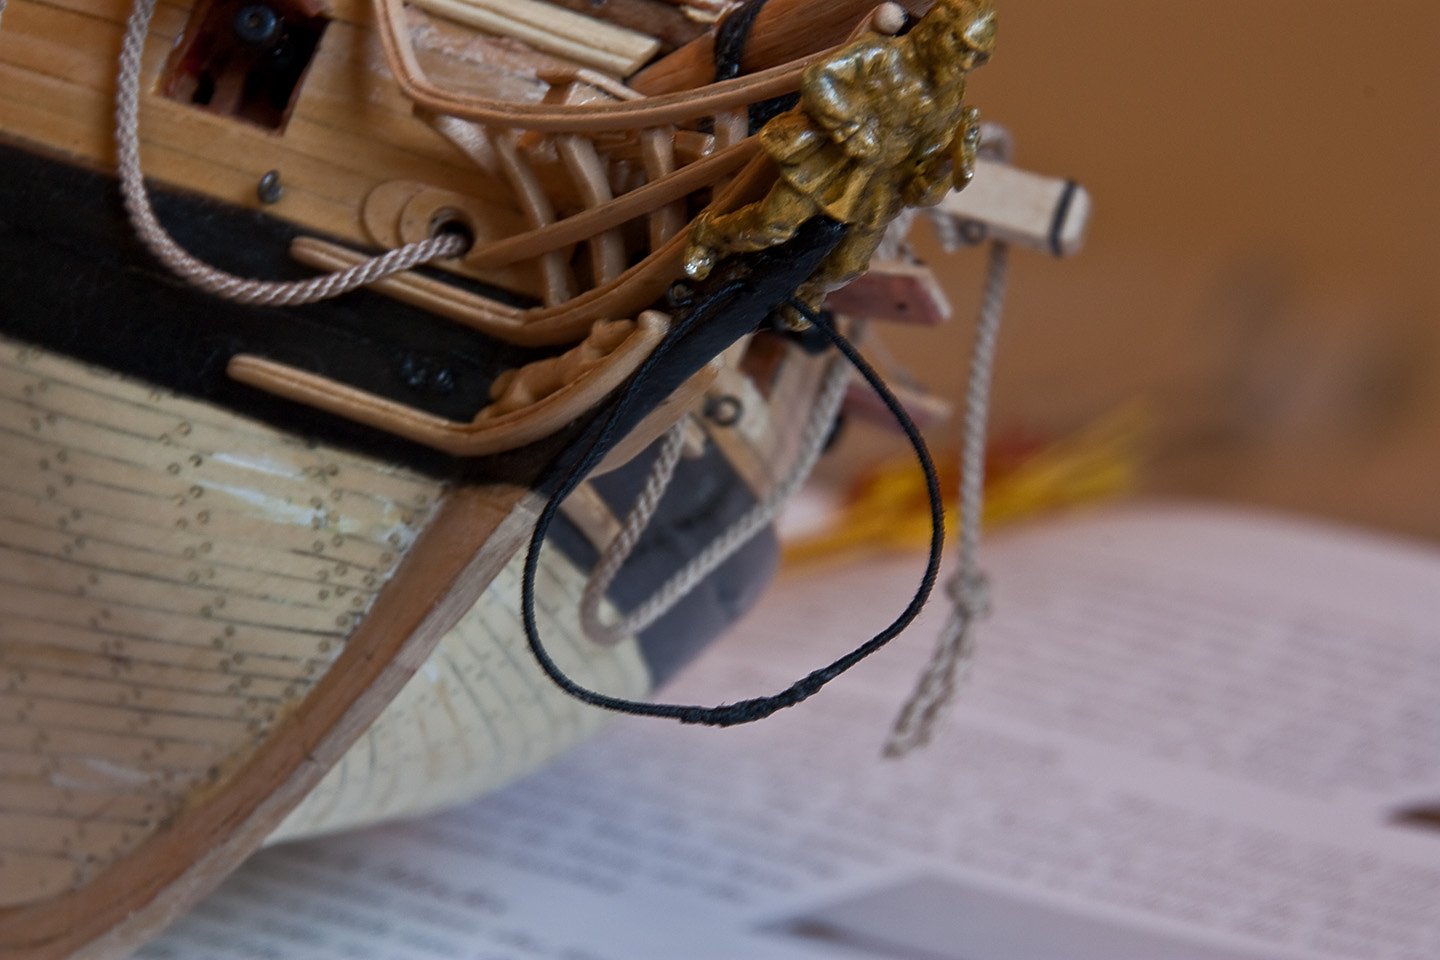
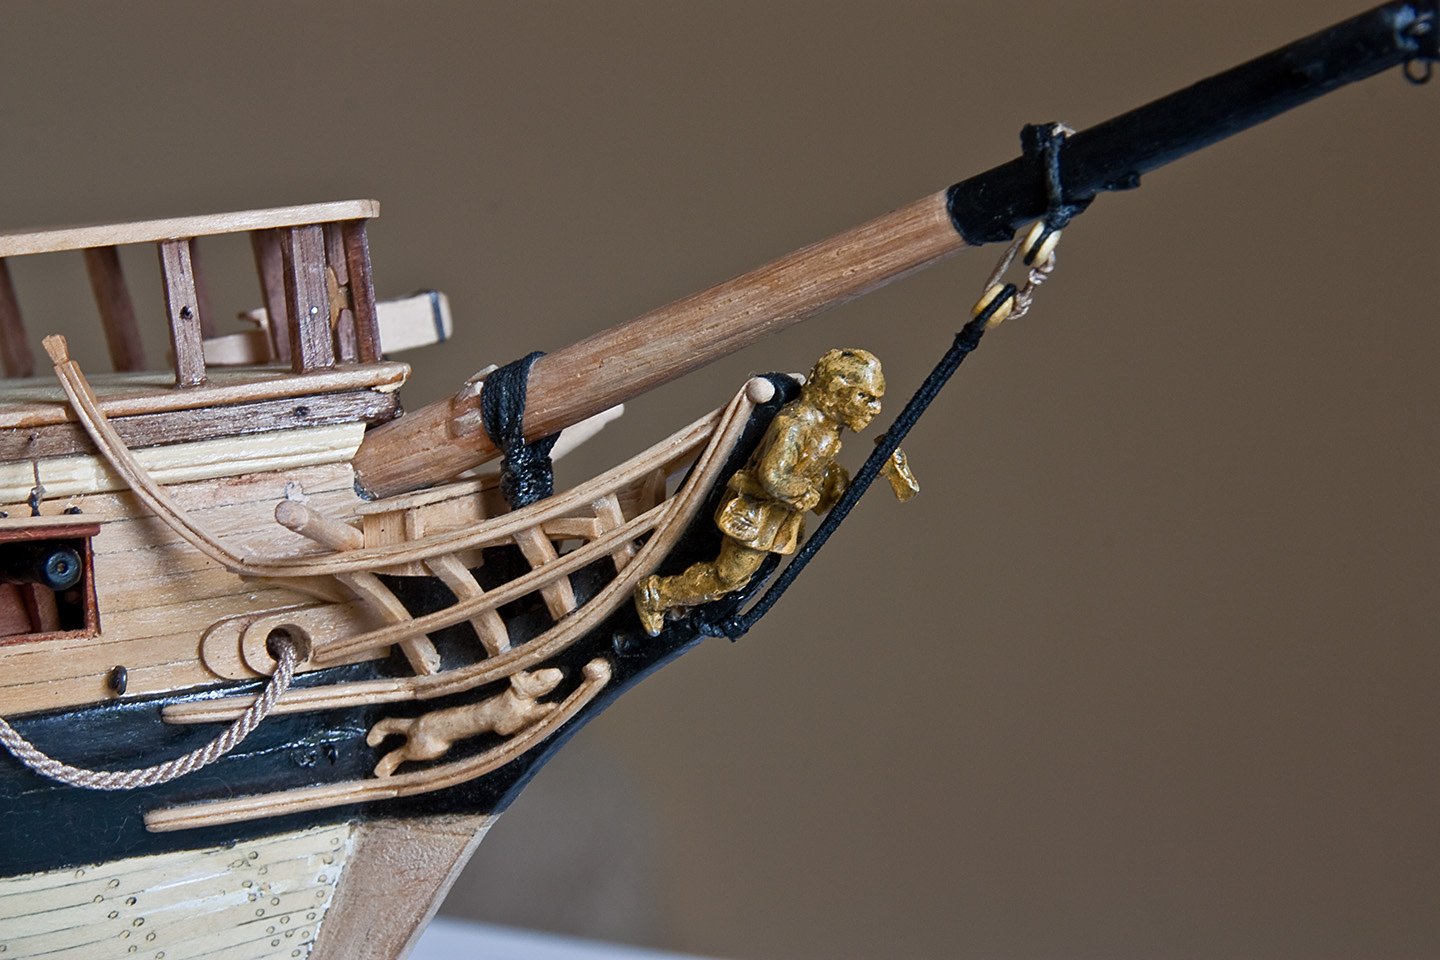
I started rigging with the bobstay. According to Antscherl’s Fully Framed Model, the bobstay is both served and doubled. I’ve never done either before. I purchased the Serve-o-Matic from Syren and while I made some errors putting it together, it works fine. In order to double the stay, I had to figure out how to splice the two ends of the served line in order to make a loop. After several tries I got something I can live with. Part of the challenge is that the splice has to be made while the served line is fed through the hole in the stem. Since I felt that the splice was still noticeably thicker than the rest of the line, I placed the splice inside the hole in the stem. After some shaping, I seized the thimble in the opposite end and then lashed it to the bobstay collar. So now it’s on to the bob sprint shrouds which are served but not doubled.


- 481 replies
-
- 14
-
-
- rattlesnake
- model shipways
- (and 1 more)
-
Thanks for the comments B.E., Nils, EJ, Bob and Don. And the 'likes' as well. I'm looking forward to the rigging as well. Cheers.
- 481 replies
-
- 2
-
-
- rattlesnake
- model shipways
- (and 1 more)
-
Thanks Tom, Martin and Jon and the 'likes'. Good reminder Jon, I always put all my bottles in re-cycling. Did they smash bottles at launches back in those days? It's not like the boat will sail off any time soon. Cheers.
- 481 replies
-
- 2
-
-
- rattlesnake
- model shipways
- (and 1 more)