MORE HANDBOOKS ARE ON THEIR WAY! We will let you know when they get here.
×


KenW
-
Posts
1,231 -
Joined
-
Last visited
Content Type
Profiles
Forums
Gallery
Events
Everything posted by KenW
-
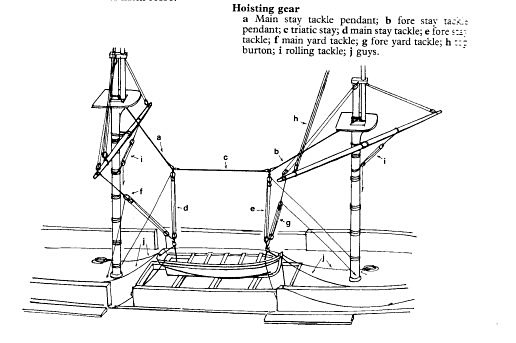
 The Burton pendants were for hauling sails, masts and any other item required. I don't think they were used for the ship's boats. They are relatively short and just hang there. I suspect that the main stay pendants used for hauling out the boats were somehow 'traced' up in a kind of coil or something. Don't know. We need more input.
 -
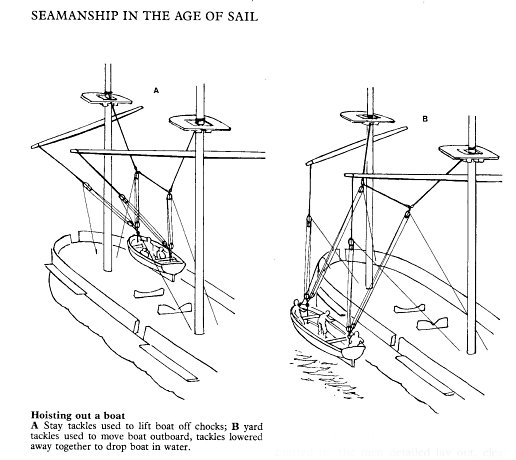
Hey Christian: I have that book on order. I just got, "Seamanship in the Age of Sail", by John Harland. He has these drawings in Chapter 20. On reading the text, I can't figure what was done with the mast stay tackle and the fore stay tackle pendants. He says that the two yard tackles have "trace lines" that were used to haul them up and then "stopped neatly along the yard out of the way". He says the (mast) pendants "were permanent fixtures", but doesn't say what was done with them when not being used. They look much longer than the burton pendants so I don't know if they can just hang there. Anyway, sorry to clog up your log with these issues. Probably should be on a separate entry. Your build is looking great and I'm enjoying following it along. Cheers.

-
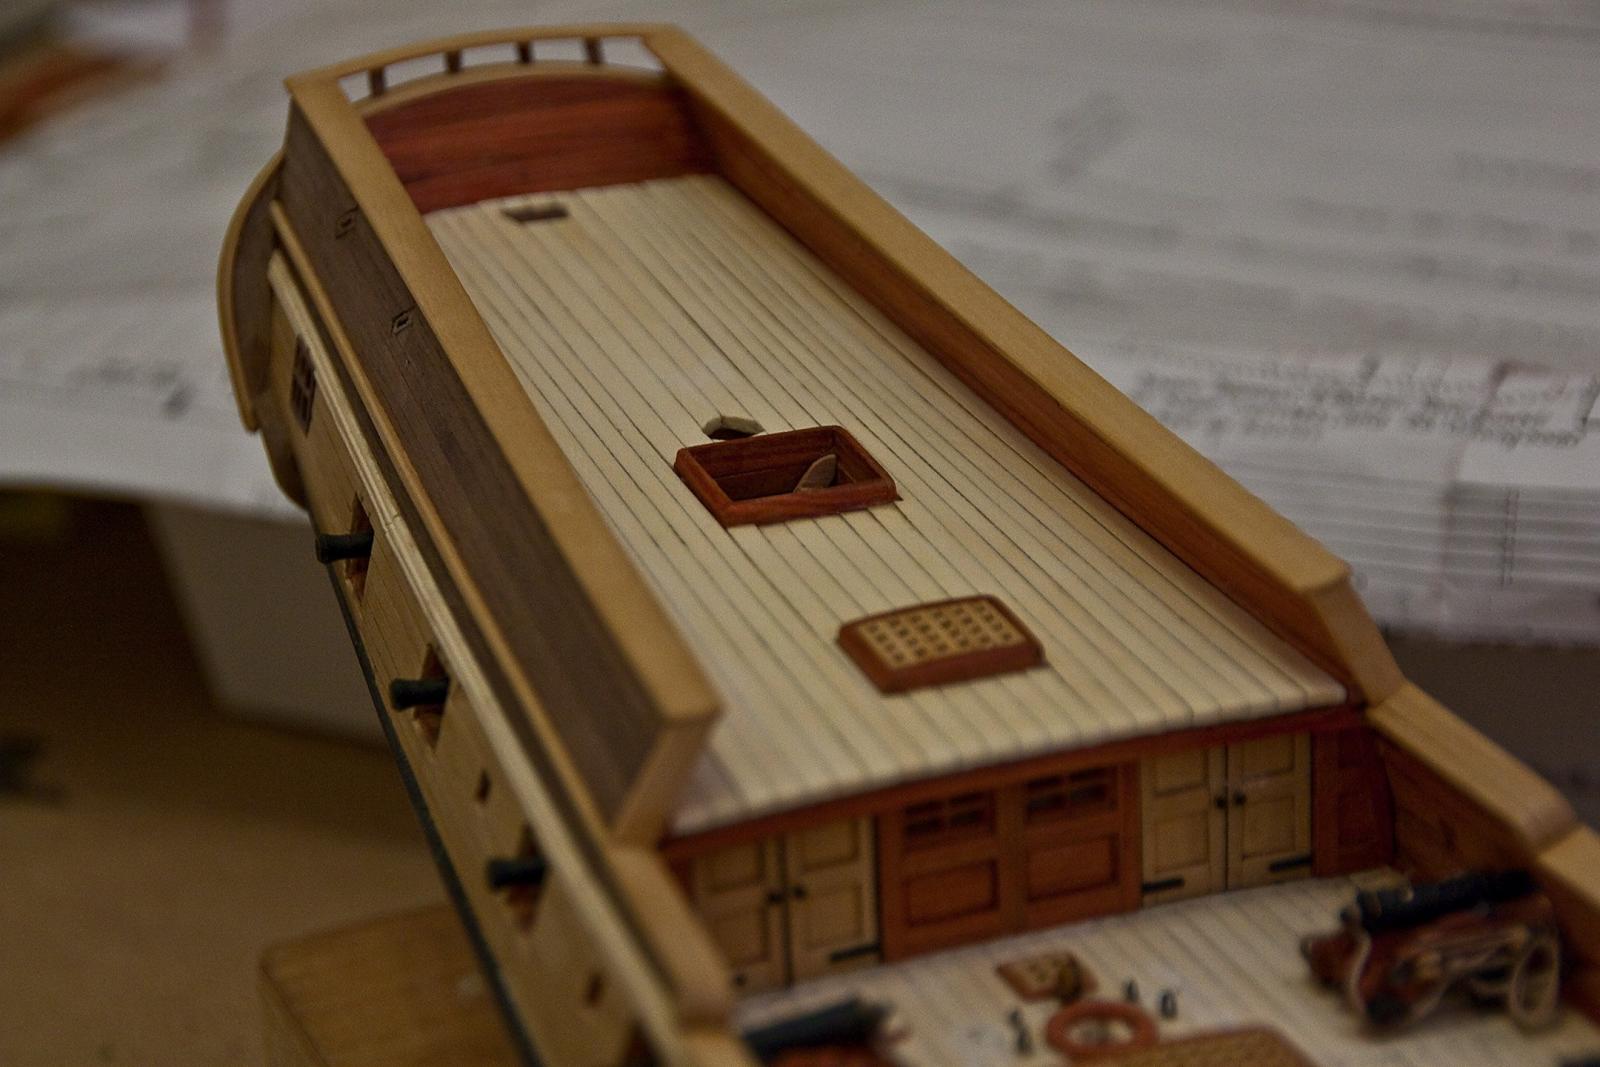
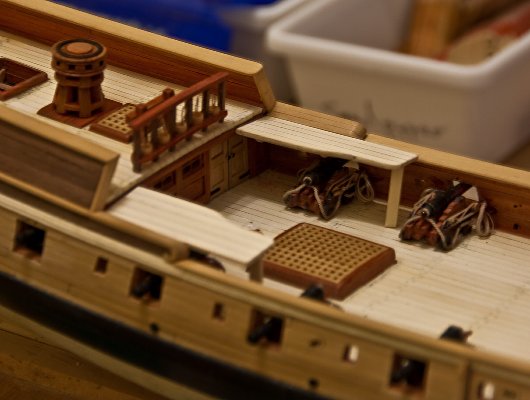
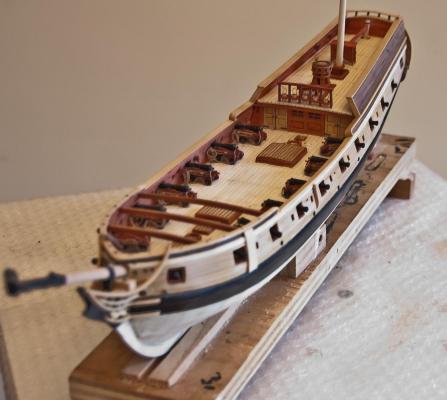
Just a small update – I installed the horse for the boom sheet, the kevels on the quarter deck bulwark and the bulkhead ‘ladder’ or steps. I made 4 kevels per side to give me a place to tie off the lower main yard lifts. Still need to come up with a place to tie off the crossjack lift, but there is plenty of time to make that decision.

- 481 replies
-
- 7
-

-
- rattlesnake
- model shipways
- (and 1 more)
-
Thanks Christian - The method of launching the ship's boats agrees with a model I just saw and the US Naval museum in Annapolis. What I don't understand is what they did with the blocks, etc. hanging from the main stay and the pendants attached to the two lower yards. They can't just be flapping there in the breeze. Anyway, I have lots of time before I get to that point.
-
Great rat lines. I use clove hitches; once I get going, I can tie them pretty quickly. Are you planning any rigging for the ships boats? Not much information out there on this. The model is looking outstanding.
-
Thanks Jon. I agree totally. Enjoy your build.
-
Jon: I just reread your posts, as well as mine, and still feel that I like the Chapelle look better. The problem seems to be that there is no absolute source where a definite plan or drawing can be found. Howard Hahn even questions the Admiralty drafts. Added to that, compromised model kit plans and defects in the modeler's ability means that getting a truly and totally accurate model is probably impossible. I don't mind the look of the fixed platform being higher than the waist cap rail. And, I kind of like the look of the extended platform. I will experiment with a bracket, as well as a post. I completely agree with H.M. Hahn when he says that the model builder must, "do a little research and decision making of his own." Cheers.
- 481 replies
-
- 3
-
-
- rattlesnake
- model shipways
- (and 1 more)
-
Nice work. Did you do the tree nailing by hand? I always have a hard time drilling the holes.
-
Hey Jon: Well, I also did some more research with my limited library. It turns out that I do have a Hahn book, but not the one with the photo of the Rattlesnake model. I do have a book by Howard Chapelle entitled,"The History of American Sailing Ships", published in 1935. My copy is pretty old but there are a couple drawings of the Rattlesnake. They show no temporary gangway and an extended fixed gangway. And, there is a post right behind the ladder. As of now this is the way I'm going to do my model. With the extended fixed gangway, I could place a post between the guns anywhere behind the stairs to allow more room for firing. Or, I can try a metal bracket (made of wood). I attach a photo of my fixed platform which is held up by pins and piece of scrape wood to represent the post. It is a solution - maybe it's not the best but I'm open to more suggestions.

- 481 replies
-
- 6
-
-
- rattlesnake
- model shipways
- (and 1 more)
-
Hey Jon: I do have the Hahn book, but neglected to look at it. I see that he has a vertical post (but he doesn't have buckets). My fixed platform will be below the quarter deck - about like yours, I think. But you see the issue with the steps on the outside of the hull. Those coming up would have to jump down to the gun deck or make a somewhat awkward step to the ladder in order to get to the quarter deck. Also, how 'fixed' is the fixed gangplank? It seems to me that the vertical post would get in the way of those manning the gun(s). I suspect that there are no absolute answers to these questions. But the discussion is interesting.
- 481 replies
-
- 2
-
-
- rattlesnake
- model shipways
- (and 1 more)
-
Jon - Thanks for sharing your research. I'm encountering problems with the fixed platform that are probably due to errors in my construction of the hull. The fixed gangway must extend from the quarter deck beam and not block the cabin door. This puts the platform level with the short rail and above the cap rail. Also, it ends just before the 'steps' on the outer hull for coming aboard the ship. I'm considering doing away with the temporary gangway and extending the fixed gangway to cover those outer steps. A ladder will be added for access to the quarter deck and gun deck. Also, the Hahn plans don't have a turn post under the fixed platform, just metal brackets to provide support. (I may also have a problem since my quarter deck doesn't have a very big curve.) I hope my description is clear as I don't have any photos yet of my proposal. Ladders will also be added for access to the forecastle. I welcome the thoughts of all.
- 481 replies
-
- 1
-
-
- rattlesnake
- model shipways
- (and 1 more)
-
Great work EJ. I like your color scheme and the planking is outstanding. Looks like there is an advantage to 'double' planking. An impressive looking model. Cheers.
- 608 replies
-
- 3
-
-
- la couronne
- corel
- (and 1 more)
-
Thanks EJ. I coming to the same conclusions.
-
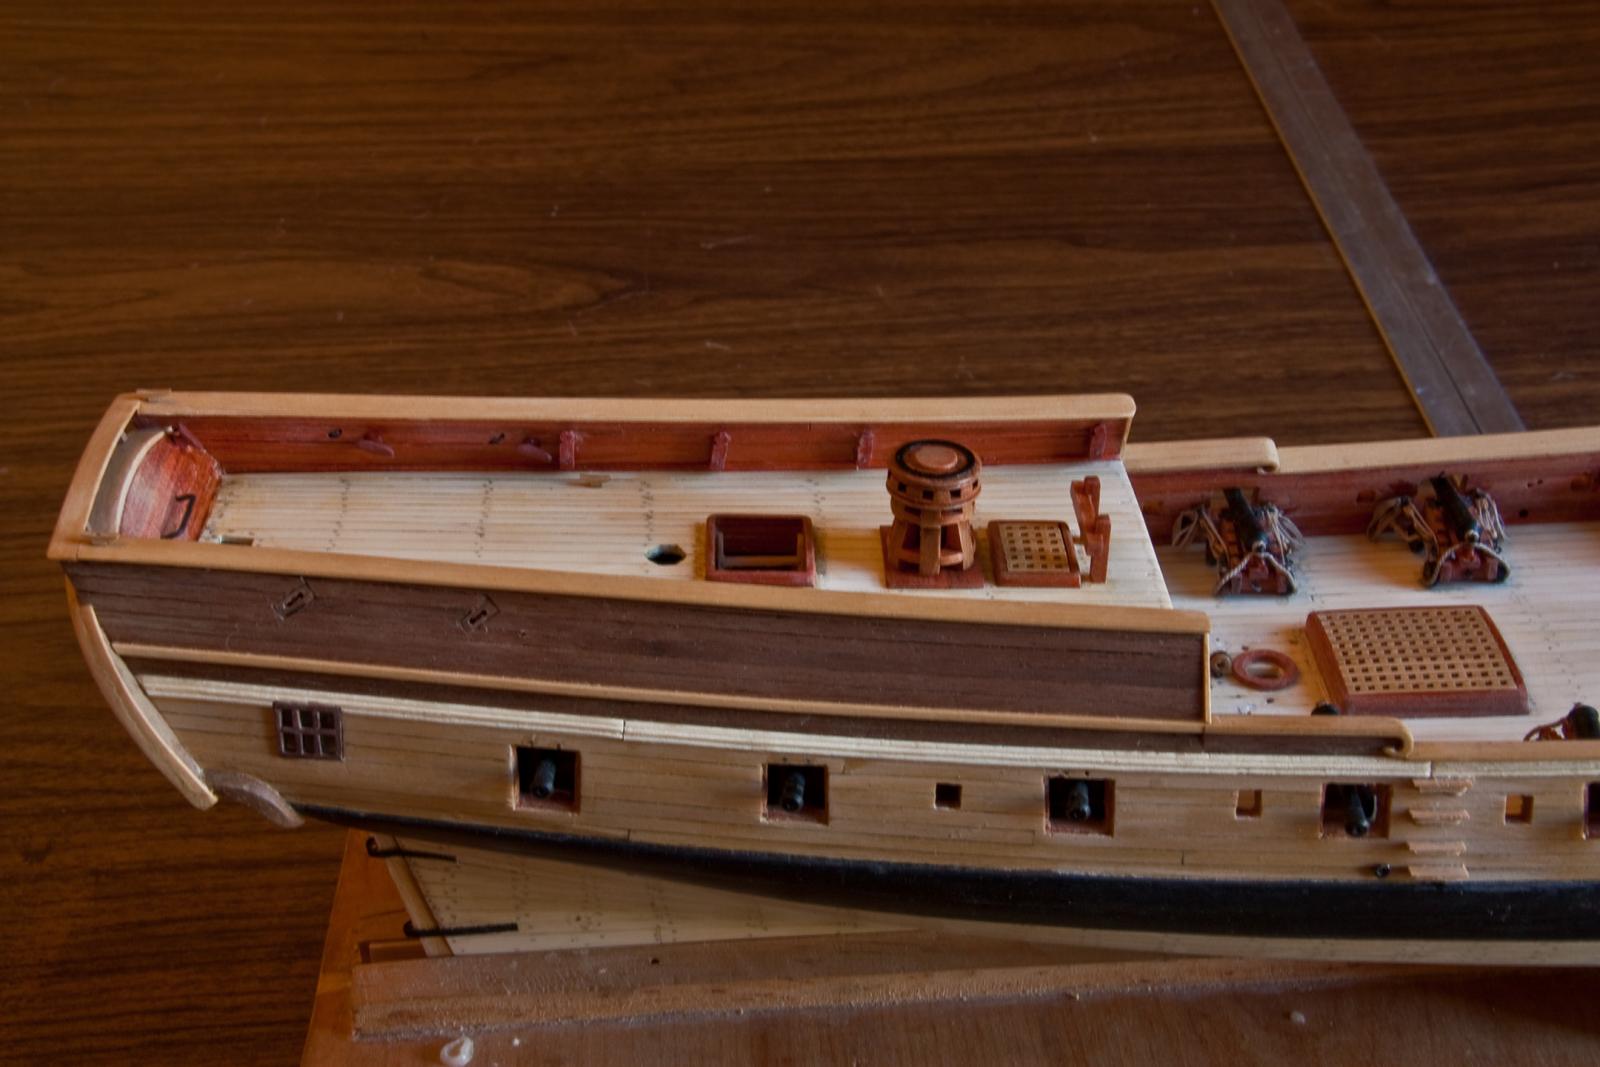
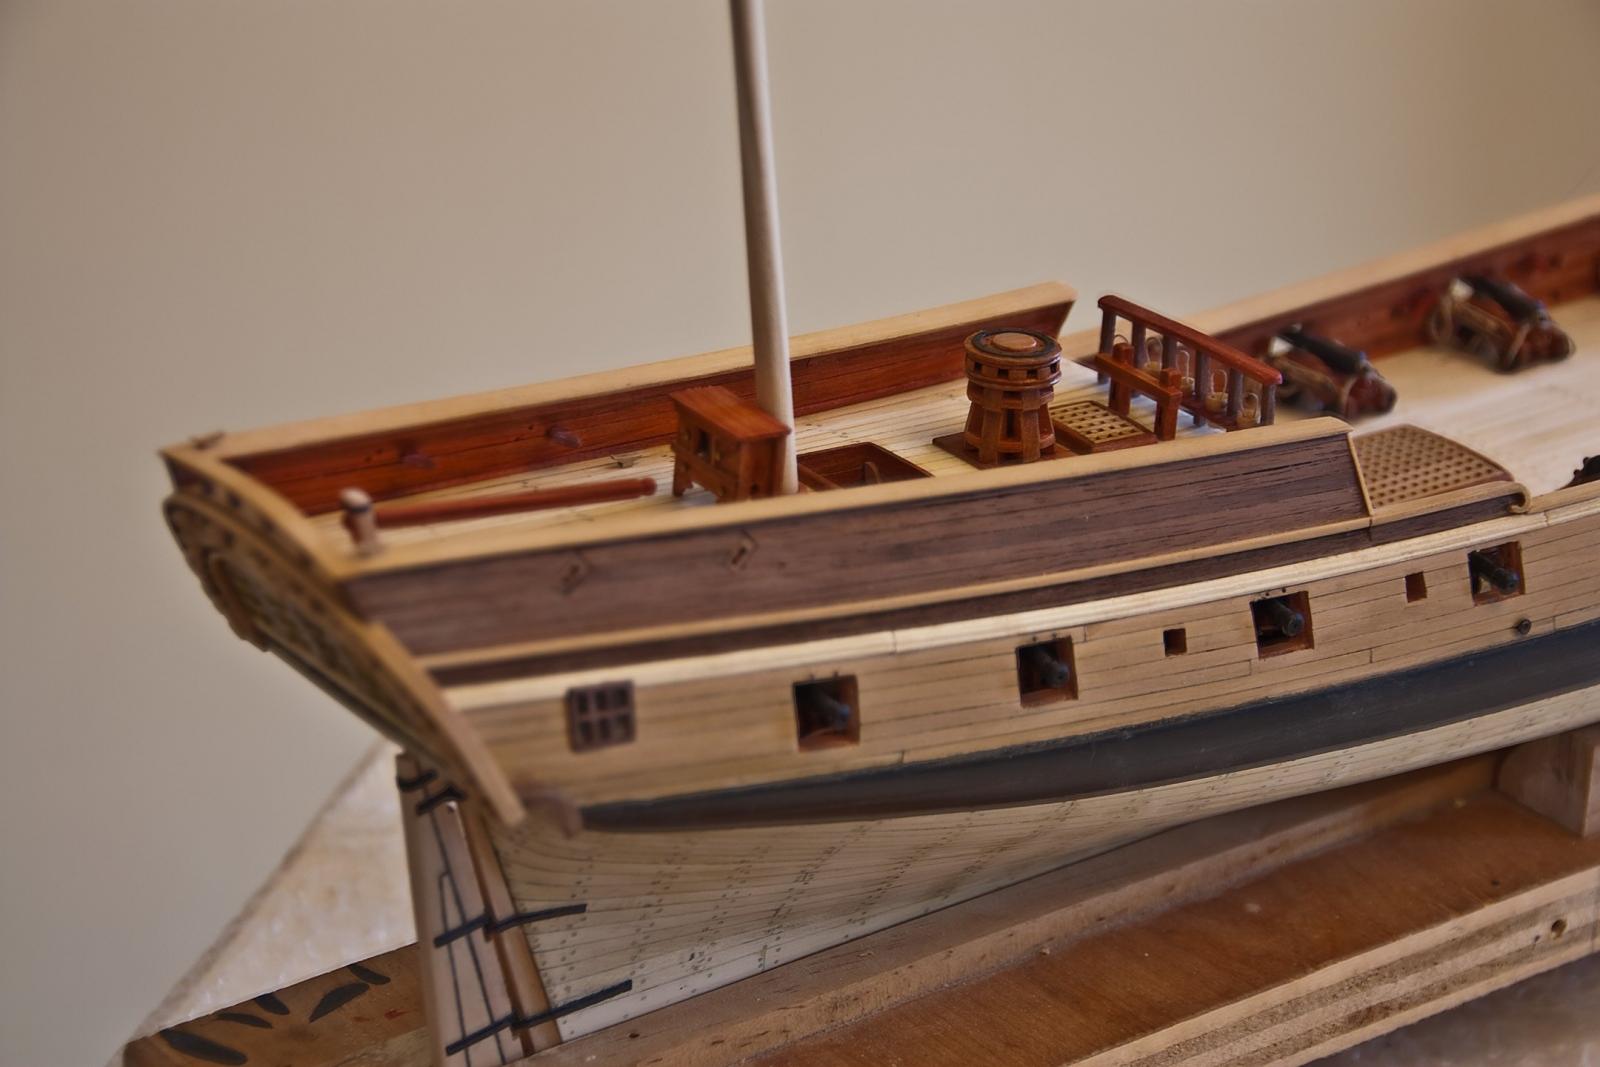
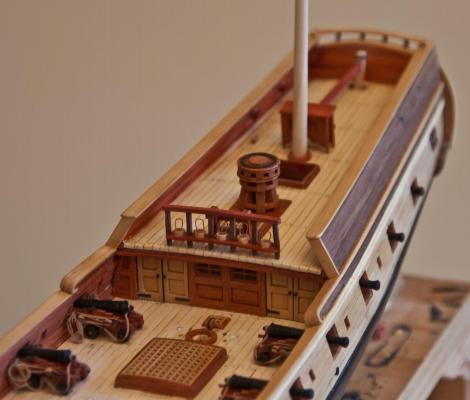
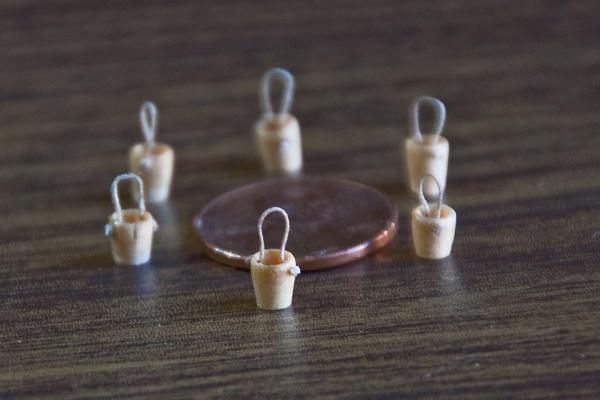
I made a bucket rack and the buckets are in place on it. However, I found that in order to have room for anyone to get around the rack, I had to reduce the rack to only hold 5 buckets. So I have one bucket left over. Maybe I’ll put on the deck somewhere. (I'm certainly not going to kick it.) Also, I glued the bit and capstan onto the quarter deck. The bucket rack and other furniture (the binnacle, rudder/tiller and mizzen mast) are not glued. I don’t want too much furniture getting in the way when I get to the rigging stage. The tiller will be at its proper angle when it’s glued. Next I will move toward the forecastle, adding the permanent gangway and assorted eye and ring bolts onto the gun deck. I’m unsure about whether to include the temporary gangway.

- 481 replies
-
- 11
-
-
- rattlesnake
- model shipways
- (and 1 more)
-
Cutter Cheerful 1806 by rafine - FINISHED
KenW replied to rafine's topic in - Build logs for subjects built 1801 - 1850
Congrats on another superb build. An excellent example of your skill. I look forward to following your new build. Cheers.- 525 replies
-
- 5
-
-
- cheerful
- Syren Ship Model Company
- (and 1 more)
-
Good to see you building and blogging again. Your boat looks great.
-
Cutter Cheerful 1806 by rafine - FINISHED
KenW replied to rafine's topic in - Build logs for subjects built 1801 - 1850
Great work as usual. One questions: Did you do the puddening by hand, or use Chuck's tool? Thanks.- 525 replies
-
- 5
-
-
- cheerful
- Syren Ship Model Company
- (and 1 more)
-
I agree about placing the buckets with the guns. In looking through all my books, I don't see any rails filled with buckets. Petersen's has a similar rail configuration but instead of buckets, there were blocks at the base of the posts for the lines that belayed to the rail. During action, I'm sure the buckets would be next to the guns. I don't know where the buckets would be when the boat was in port.
-
Thanks Dave, Martin, Jon and 'CDM67', and all the 'likes'. Jon - I used a 5/32 basswood dowel. I cut a 1 inch long piece and put it in my electric drill (it wouldn't fit in my Dremel) and turned slowly. The tricky part was getting the pin hole in the exact center. I started with a 1/16 drill bit, then a 3/32 bit, and finally a 1/8 bit. The drill bits were held in my hand. Then I used a sanding stick to file down the bucket and create a narrower base. At that point I applied the Wood Hardener, and once dry used a #74 drill for the rope handle holes. The last thing was to cut off the extra dowel; it's much easier to do everything with that extra length. Hope this helps.
-
Doc - This model is looking great! Are there pieces of ply attached to the stern to help shape the balsa? Cheers.
-
Well, I made the buckets. There were a few mistakes along the way and I’m thankful for Min-Wax Wood Hardener. I managed to get 6 buckets in the end. However, my first effort at making the ‘rail’ to hold the buckets shattered. I‘ll have to keep trying. The tree nailing on the quarter deck still needs to be done. But, all in good time.
- 481 replies
-
- 13
-
-
- rattlesnake
- model shipways
- (and 1 more)
-
Great work Jon. My understanding is that the staff at the stern was only used when the boat was in port. Not sure about when the boat was at sea - watching here to follow your research. Cheers.
-
The quarter deck is planked. I still can’t understand why I have so much trouble getting the shape of the planks to be as precise as some of my small furniture. Next is to make kevels and add cleats and stuff. Also, I’m going to have to have a go at making buckets. There doesn’t seem to be anyway to avoid it.

- 481 replies
-
- 13
-
-
- rattlesnake
- model shipways
- (and 1 more)
-
HM Cutter Cheerful 1806 by Erik W - 1:48 scale
KenW replied to Erik W's topic in - Build logs for subjects built 1801 - 1850
Great looking model. And don't worry about having to rip things out and doing them over. Everyone in my club says they have to do that all the time. Keep up the excellent work.