HOLIDAY DONATION DRIVE - SUPPORT MSW - DO YOUR PART TO KEEP THIS GREAT FORUM GOING!
×


KenW
-
Posts
1,231 -
Joined
-
Last visited
Content Type
Profiles
Forums
Gallery
Events
Everything posted by KenW
-
 I glued the bulkheads on to the keel former. I was surprised that after I was so careful when I cut out these parts, they still were not ‘square’ and centered properly. So I had to do a lot of scraping, filing and adding shims; and I still have fairing to go. Oh well, there is a reason I, among others, prefer to start with a kit and laser cut pieces. Well, I plan to install the false decks and then fair the bulkheads. I think I will need more sand paper.
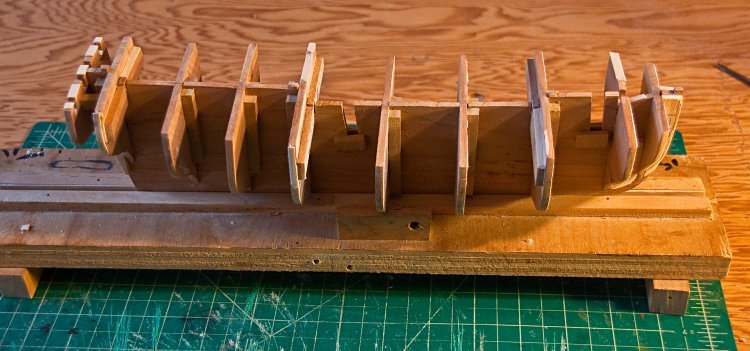
- 122 replies
-
- 9
-

-
- independence
- privateer
- (and 1 more)
-
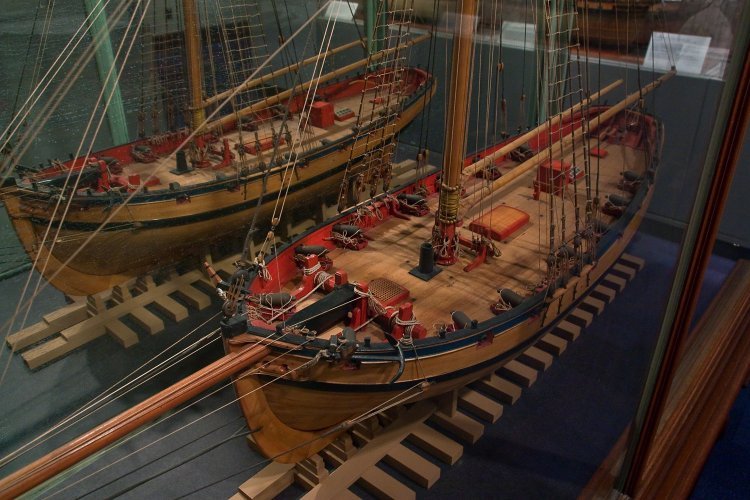
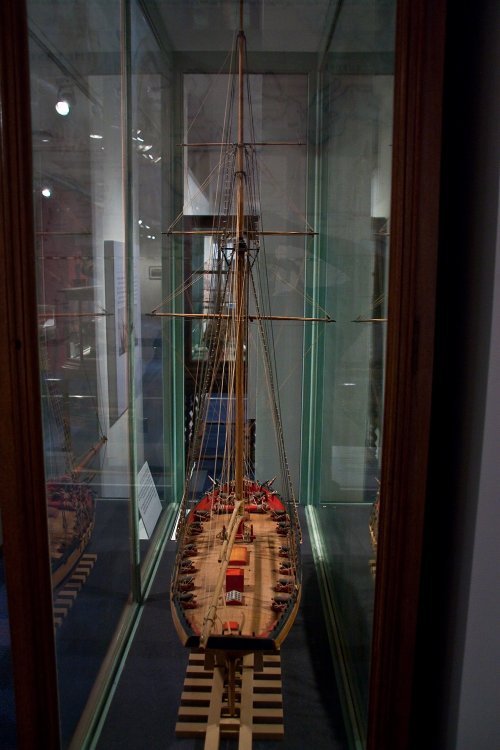
Hey B.E. I'm enjoying your Cheerful build log and have already learned a few things. The Admiralty model of the Cheerful/Surly is here in the US at the museum of the US Naval Academy at Annapolis, Maryland. I took these photos on a recent visit there. Thought you would enjoy them. The back of the case is a mirror - there aren't two models in the photo. Cheers.
- 574 replies
-
- 8
-
-
- cheerful
- Syren Ship Model Company
- (and 1 more)
-
Thanks for your reply. And, yes, I've seen them now that I see them. I'll check them out. Cheers.
-
I just discovered this build and enjoyed reading it. I’m also very impressed with the excellent result. A great looking model. I do have one question - what does your wife’s soft metal hairpin look like? Nne of my wife’s hair pins are made of soft metal. Maybe it is a British/American thing. Great work - now I have to look up your Cheerful log. Cheers
- 156 replies
-
- 2
-
-
- pinnace
- model shipways
- (and 1 more)
-
Hey Bob. Looks like an interesting ship. I'm sure you'll do an excellent job. Can't wait to follow along. Cheers.
- 359 replies
-
- 6
-
-
- prince de neufchatel
- model shipways
- (and 1 more)
-
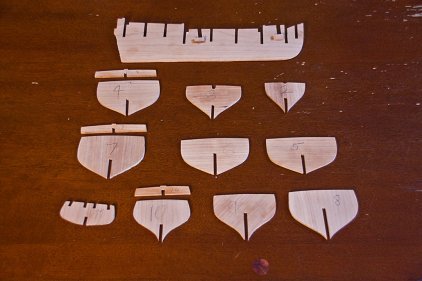
All of my builds so far have been American Revolutionary War Privateers. I’m continuing that trend with this build of the Independence, an American Privateer that was possibly built in 1775. There were several privateers named the Independence during the war, but I found a reference to a privateer in the book, ”A History of American Privateers”, by Edgar Stanton Maclay published in 1899. In the book, Maclay states, “The 6 gun schooner Independence, Captain Nichols, in September, 1776, captured six vessels”. I’m using the Artesania Latina kit, Independence 1775, as the basis of my build. It is a 6 gun schooner which matches the quote by Edgar Maclay. However, there are issues with the scale of this model. It is listed as a 1/35, which I assume is a metric scale. That scale would translate to a 1/32 or 1 foot equals 3/8”. That scale would make a boat that was extremely small compared to other kits of similar models. When I assembled the bulkheads and false keel that came with the kit, with the sub decking the resulting boat looked much too large. The kit model looks very much like Harold Hahn’s plans of the Halifax and, to a lesser extent, the Hannah. So I decided to make the kit smaller. Specifically I want to construct a model that was about 2 inches smaller than the Halifax based on H. Hahn’s plans. My modified model will assume the boat is 1:48 scale. That decision means I will have to make all of the basic parts from scratch without any power tools except for a Dremel. The first step is to make a copy all of the Artesania Latina plans reduced by 80%. Reducing the plans is probably the easiest task I will attempt. Next is to order some sheets of wood. I went to the Wood Project Source and ordered several sheets of Cherry at various thicknesses. I chose cherry because it was the cheapest they had and I liked the color and strength of the wood. When the wood finally arrived, I cut out each bulkhead and the false keel from my reduced copy and pasted it onto the 5/32 inch cherry sheets. After cutting the parts out, I sanded and filed each part until I was satisfied with the way each fit together. I hope they look as good when the parts are fit together.
- 122 replies
-
- 7
-
-
- independence
- privateer
- (and 1 more)
-
Well done! A great model; almost complete. Enjoy your accomplishment - and... what's next? Cheers
- 682 replies
-
- 3
-
-
- halifax
- lumberyard
- (and 1 more)
-
I haven't tried it yet, but someone somewhere suggested hollowing out the lead from a pencil. Sand off the paint and you have a long eight-sided tube. I don't know how hard it would be to get the lead out, but ... Just an idea. Cheers.
-
Mitbok: Just discovered your tremendous model. The only thing better than your woodworking skills is your metal working skills. (Or it could be the other way round.) Sometimes I get confused about whether your photos are of a real boat or of your model. Great, great model. Cheers.
-
I vote for the Chebacco. That is the kit I would purchase the minute it became available. Cheers.
-
Looking good! What kind of wood are you carving? Looks like you don't have problems with splitting. Cheers
-
I can't see a thing. Great work.
-
I don't really understand all of your explanations, but I do recognize outstanding workmanship. And that you certainly have! An amazing build - can't wait to see it. Happy New Year.
-
Looking good Mike. I'm interested, maybe, in this kit as well. I'll enjoy watching this build progressing. Good luck.
- 607 replies
-
- 6
-
-
- winchelsea
- Syren Ship Model Company
- (and 1 more)
-
Congratulations on completing an outstanding model. The workmanship is excellent and I will continue to use your blog while building my next model. Great job.
- 653 replies
-
- 4
-
-
- trabakul
- marisstella
- (and 1 more)
-
You sails look absolutely fantastic!! It also reminds me why I use furled sails. Great work with the sowing and all your other techniques. Cheers.
- 653 replies
-
- 6
-
-
- trabakul
- marisstella
- (and 1 more)
-
Thanks E.J. and Dave. I'm completely convinced that the Rattlesnake is built at a smaller scale(1:64) than the Fair American (1:48). And, thanks for the kind words Jim; as well as for the 'likes'. Cheers.
- 481 replies
-
- 1
-
-
- rattlesnake
- model shipways
- (and 1 more)
-
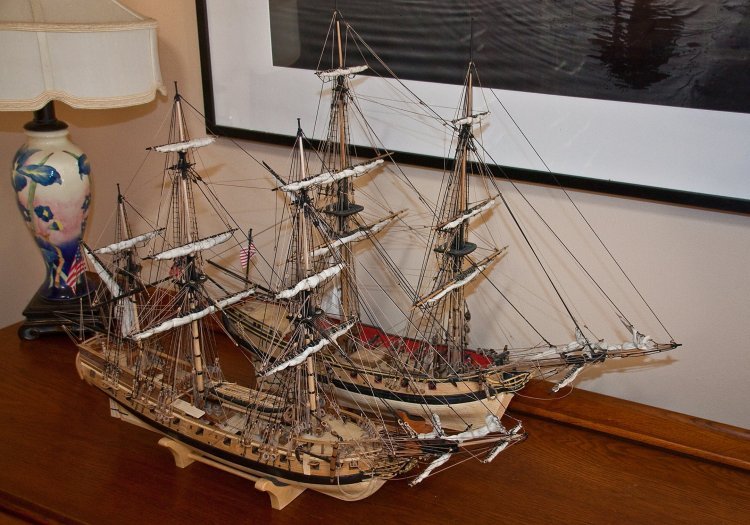
One last observation. At some time during the build, a question was raised as to the scale of the Rattlesnake vs the Fair American. While I agree that there are scale issues with the MSW Fair American, I don't think it's the same scale as the Rattlesnake. The photo shows the 2 masted, 14 gun Fair American next to the 3 masted, 20 gun Rattlesnake. And while the length of the two models from tip of the boom to the tip of the jib boom is the same, I think the Rattlesnake model is clearly done in a smaller scale. Thanks to all who followed this build and I hope to have another build log started soon.
- 481 replies
-
- 7
-
-
- rattlesnake
- model shipways
- (and 1 more)
-
Thanks Jean, Steve, John and Martin. It was a fun journey. Good luck to you in your journeys as well. Cheers.
- 481 replies
-
- 2
-
-
- rattlesnake
- model shipways
- (and 1 more)
-
Thanks Ben, E.J., Ryland, Russ, Jon and Tom; as well as for all the 'likes'. Cheers to all.
- 481 replies
-
- 2
-
-
- rattlesnake
- model shipways
- (and 1 more)
-
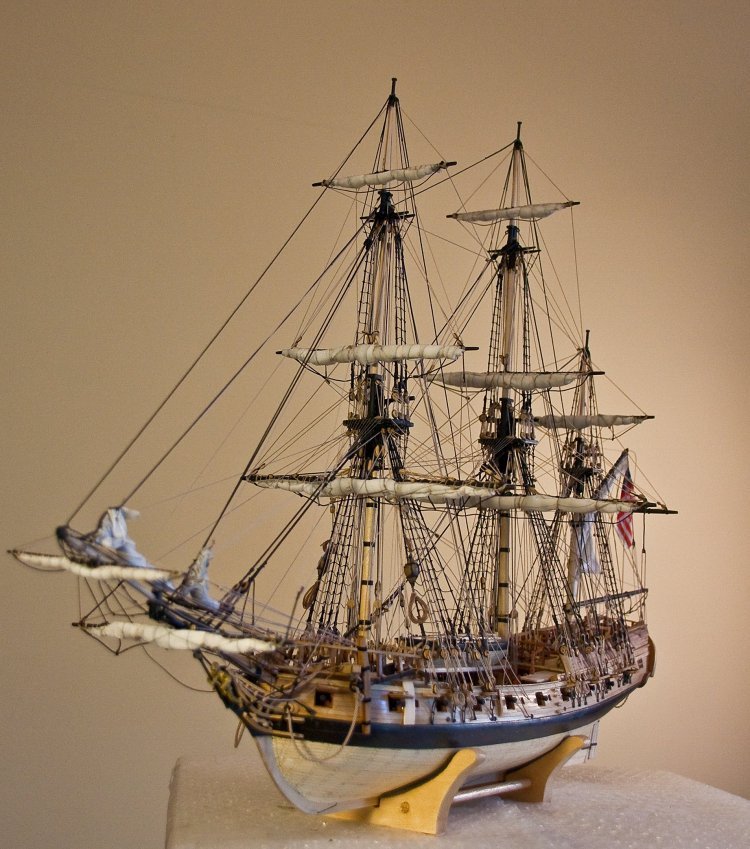
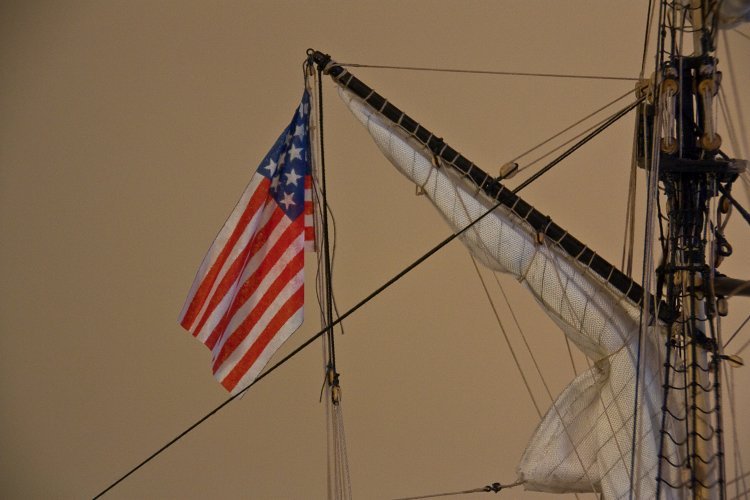
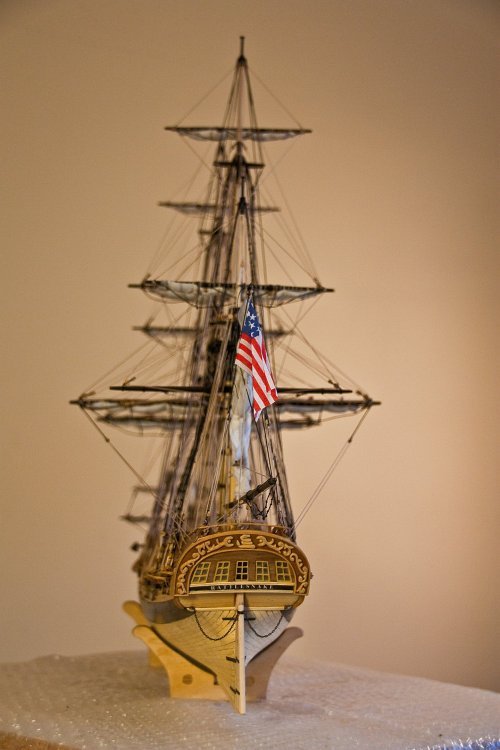
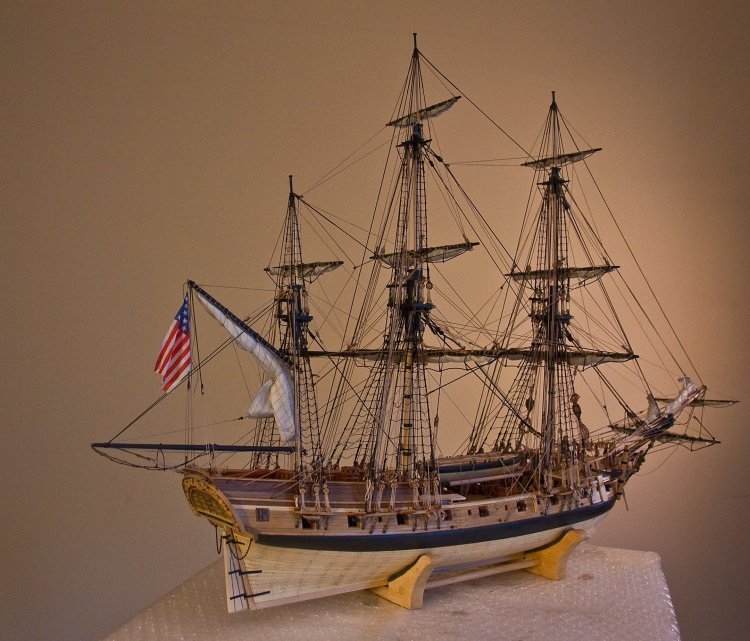
The model is finished! I made an ensign which I’m flying from the gaff. I followed Chuck Passaro’s method from his log about his new kit of the Queen Anne Barge which can be found at ‘https://modelshipworld.com/index.php?/topic/12476-syren-ship-model-company-news-and-forthcoming-new-projects-products/&page=9’. His method worked and I’m really pleased with the flag. A few words about American ensigns during the Revolutionary War: According to the US Navy ‘American Navel Flags of the Revolution’ web site, the Continental Congress in 1777 ”passed an act establishing a national flag for the United States of America. The law specified the flag have thirteen stripes and a blue ‘cannon’ of thirteen stars. No further details were specified.” This lead to several variants of navel ensigns, the most famous being John Paul Jones’ ensign with red, blue and white stripes and eight pointed stars. For my last model I decided to use the ensign flown by John Barry on the US Alliance which had 7 white stripes, 6 red stripes and eight pointed stars. For the Rattlesnake I’m using a “common variant” of 7 white stripes, 6 red stripes and five pointed stars arranged in a unique pattern. I guess I like being different. But I am the captain. (Notice that I neglected to trim some lose threads attaching the ensign block to the gaff.) More Photos:


- 481 replies
-
- 23
-
-
- rattlesnake
- model shipways
- (and 1 more)