HOLIDAY DONATION DRIVE - SUPPORT MSW - DO YOUR PART TO KEEP THIS GREAT FORUM GOING! (Only 24 donations so far out of 49,000 members - C'mon guys!)
×

Diver
-
Posts
402 -
Joined
-
Last visited
Content Type
Profiles
Forums
Gallery
Events
Everything posted by Diver
-
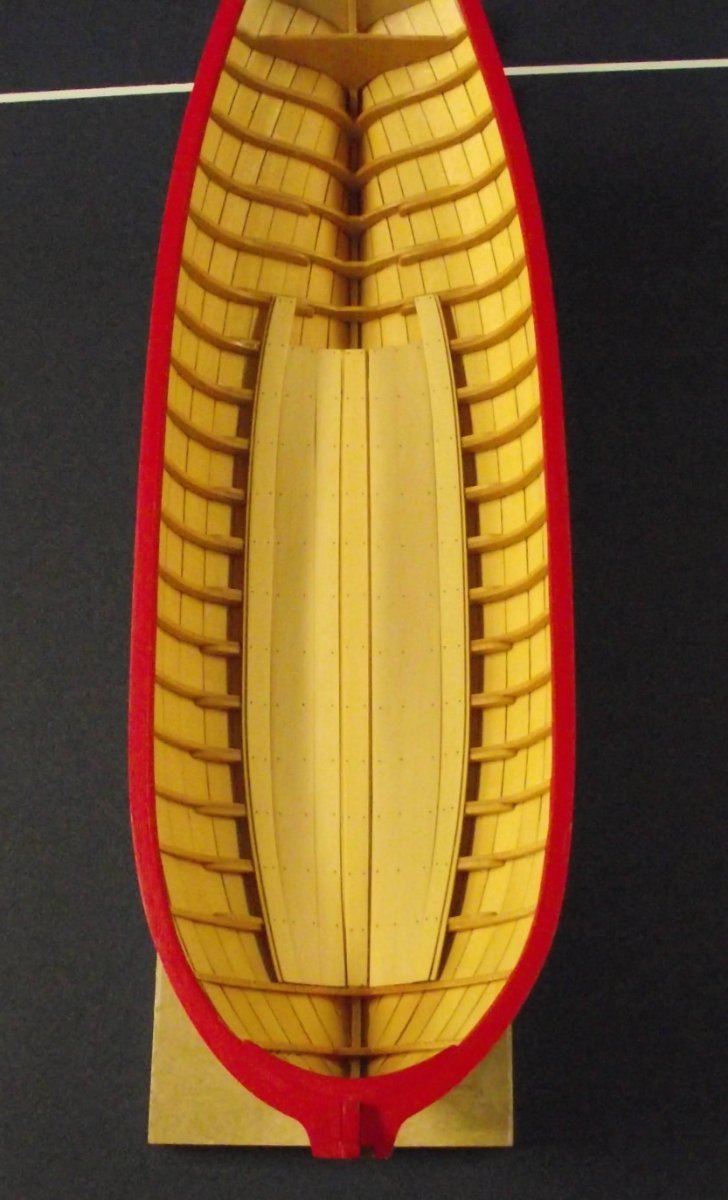
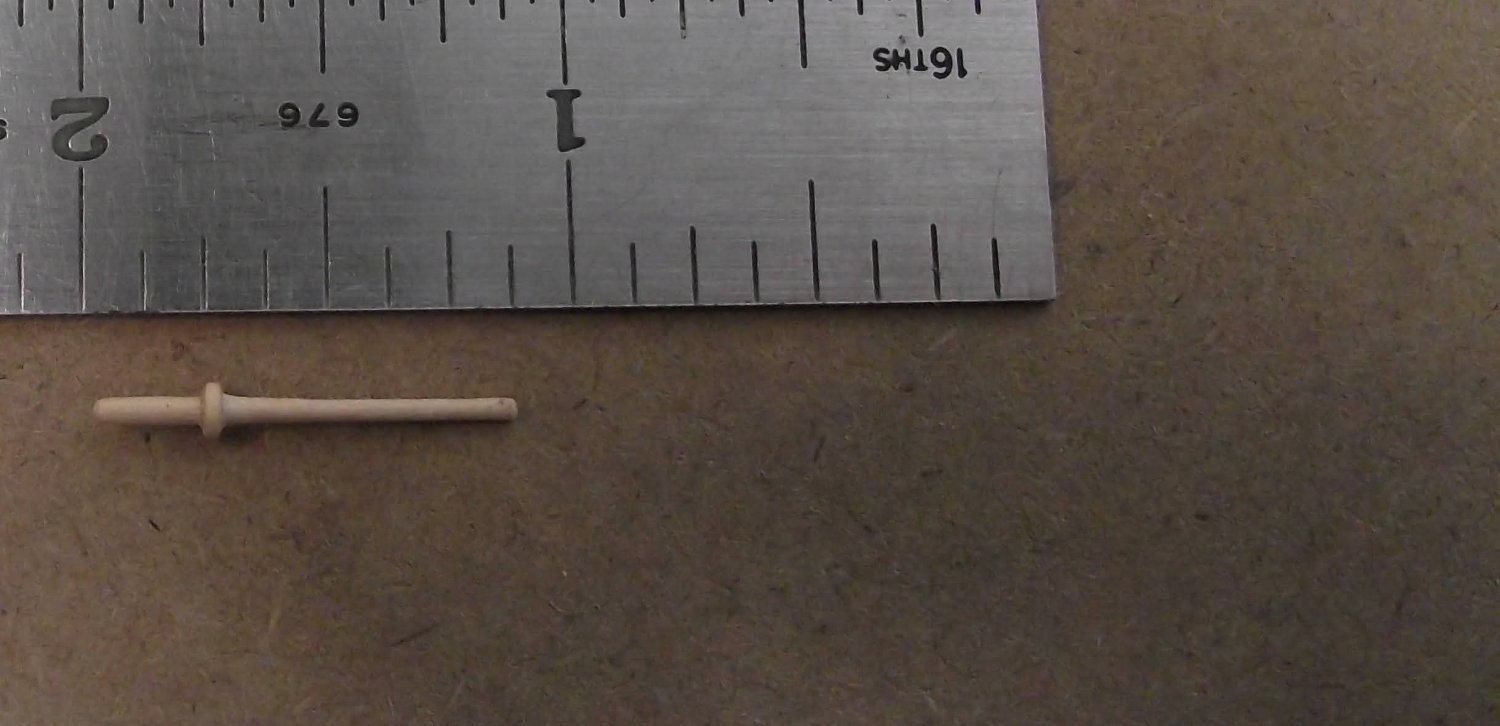
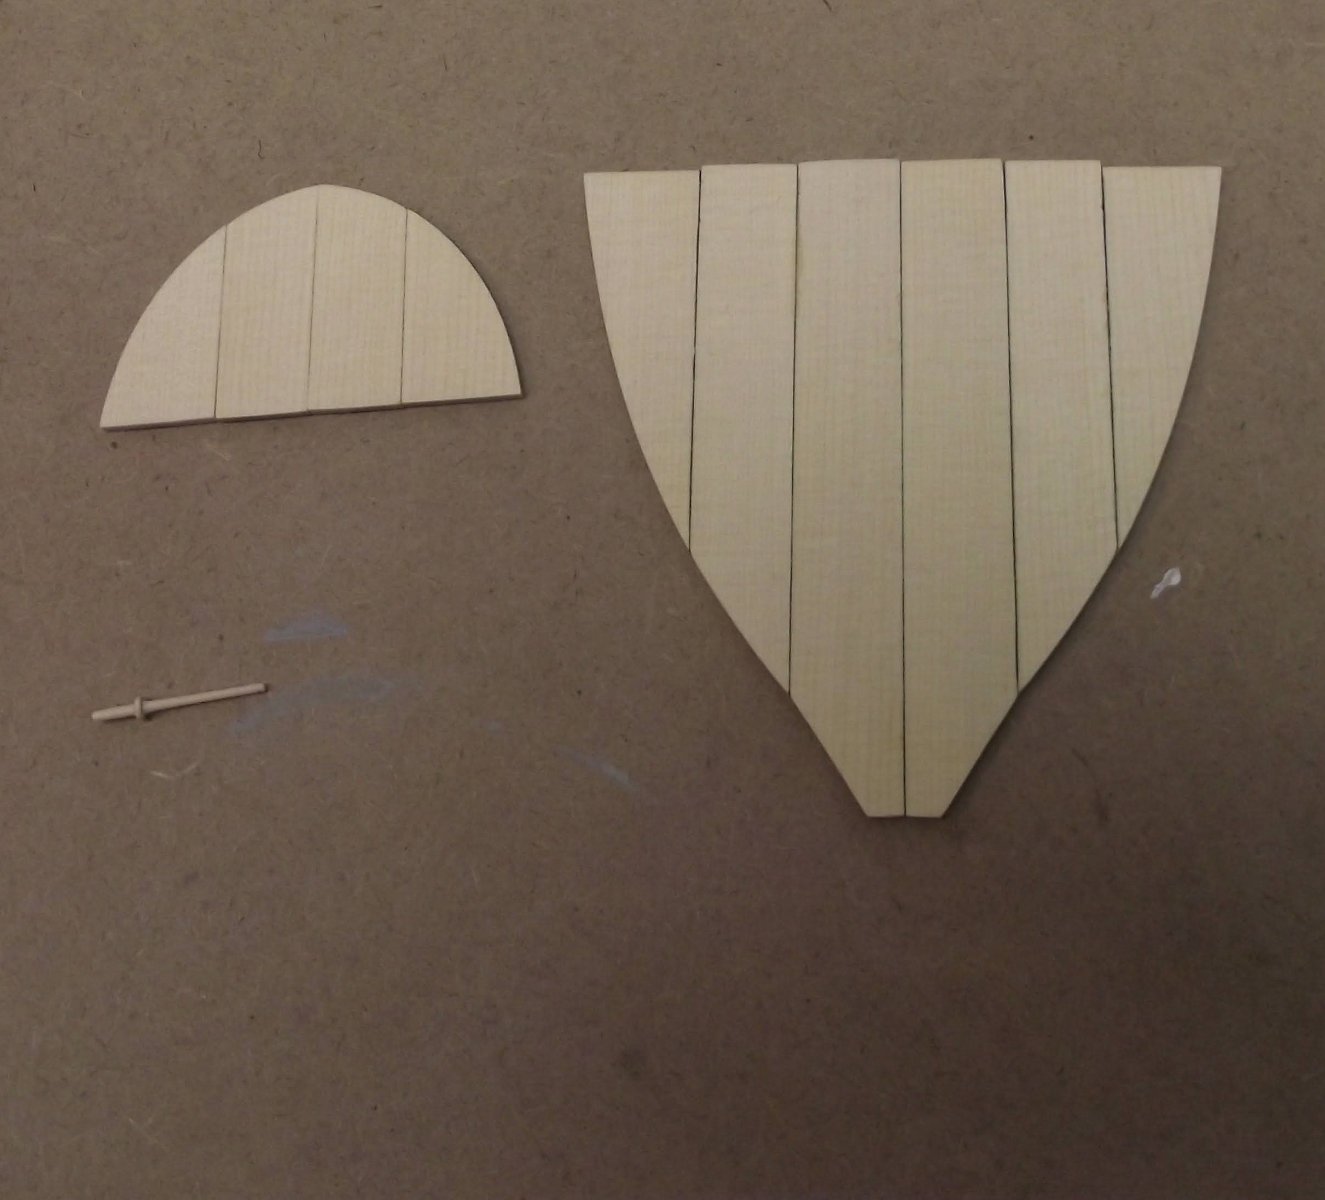
Finally got back in the shop and installed the floor boards. With out a doubt I found this the most challenging step in the build so far. I had a difficult time getting the glue to take in some areas. I purchased new glue today and assembled the platforms. I will install the reinforcing pieces later this evening and make the templates. The Admiral bought me the Dremel drill press last year, so today I chucked a piece of dowel and turned a belaying pin. I made a small chiesell out of a drill rod and it worked very well. Hope to have more shop time now that the Honey Due list is complete


- 217 replies
-
- 8
-

-
- medway longboat
- Syren Ship Model Company
- (and 1 more)
-
Great work. I finished installing my floor boards last night. I must admit that for some reason this has been the most challenging part of the build. I will be doing the platforms tonight. I will post some pics later on today. For some reason I had a very difficult time getting the glue to take on the floor boards, I wonder if it had something to do with the coat of WOP. Off to town today for new glue and eye glasses. Really enjoying you build. Bob
-
Beautiful work. I am doing the same project and will follow along on yours.
-
Looking for a good "starter" pin vise set
Diver replied to Capella's topic in Modeling tools and Workshop Equipment
By the way, It is US made -
Looking for a good "starter" pin vise set
Diver replied to Capella's topic in Modeling tools and Workshop Equipment
I purchased my Pin Vise from Lee Valley tools. It cost $25.00 Canadian and comes with an assortment of Swiss made drill bits. I have used it regularly with no issues. Check out there web site. -
Your build is looking great. I had to cut at least 6 new planks for my Medway. It is my first ever build so a pretty steep learning curve. I have made many mistakes but still look forward to the build.
-
I will follow along on your build. Like you, born in England, Yorkshire to be exact, and have been an Grand Prix fan as long as I can remember. Looks good so far.
-
Not much to report on my build. Have been installing some new doors in the house over the Xmas break and just have not had the energy to go to the shop in the evenings. I have got the floor boards in now and will be proceeding as per the instructions very soon. When I have a little more done I will post some pictures.
-
One more novice question. Do any of you builders use Tite Bond and CA on the same joint?
-
Hello Bob. No need to post pics. This evening I went into the shop, and soaked the 2 thick floor boards in hot water for 15 minutes. I then wiped them dry and with a bit off hair-dryer heat twisted and bent until they went in almost perfectly. I have now drilled all the holes for the nails and will install them tomorrow.I will wait until I have installed all the floor boards before I do the WOP. Your thoughts on that appreciated. Bob
- 217 replies
-
- 2
-
-
- medway longboat
- Syren Ship Model Company
- (and 1 more)
-
A question for my fellow builders. I am having a heck of a time getting the thick floor boards to lay flat on all the frames. I have been heating and bending numerous times and no luck yet. Any and all suggestions greatly appreciated. Thanks in advance, Bob the Diver
-
Good evening Bob. Sorry for taking so long to reply. In the last few days I have got the urge to get back in the shop. I just came up from working on the thick and troublesome floor boards. During the nice weather, most of my off time is spent helping the Happy Gardener and doing house renos, repairs and general up-keep. I have a birthday coming up and my wife is in the process of ordering the Mast and Rigging kit for me as well as some of the Lee Valley miniature tools. Thanks for asking and I hope to up date my build log soon. How did you go about shaping the thick floor boards to fit the frames? Bob
-
Cheers from Port Hope, Ontario, Canada
Diver replied to Peter Rumgay's topic in New member Introductions
Hello Peter. Welcome from the east side of the province. (Gananoque) -
Stihl power tools make an excellent shop vac. When it is running you can carry on a conversation right next to it. They are pricey but are a great machine.
-
Beautiful work. I hope mine is half as good. Been a very buy summer with no shop time but the Medway sits proudly on my work bench. I started on the floor boards today. Shorter days mean more shop time.
- 263 replies
-
- 1
-

-
- Medway Longboat
- Syren Ship Model Company
- (and 1 more)
-
Thanks Kurt and everyone else. I am looking forward to purchasing and using an air brush. I will probably try painting some one use water bottles just to get use to process. I am very interested in trying the different types of paints and will listen to all suggestions on what is best for a very detailed plastic model. Bob
-
Good day Kurt. I am planning on building the Italeri 1/12 scale Fiat 806 Grand Prix car. I do not think it will be more that 12" long. I will want tp use water based paints if possible. I do have a Porter Cable pancake compressor, and an 8 gallon shop compressor. Your advise appreciated. Bob
-
I am pondering the purchase of an air brush. Going online is daunting. They seem to range in price from $90.00 to many hundreds of dollars. I want it to be reliable with available replacement parts. Any suggestions greatly appreciated.
-
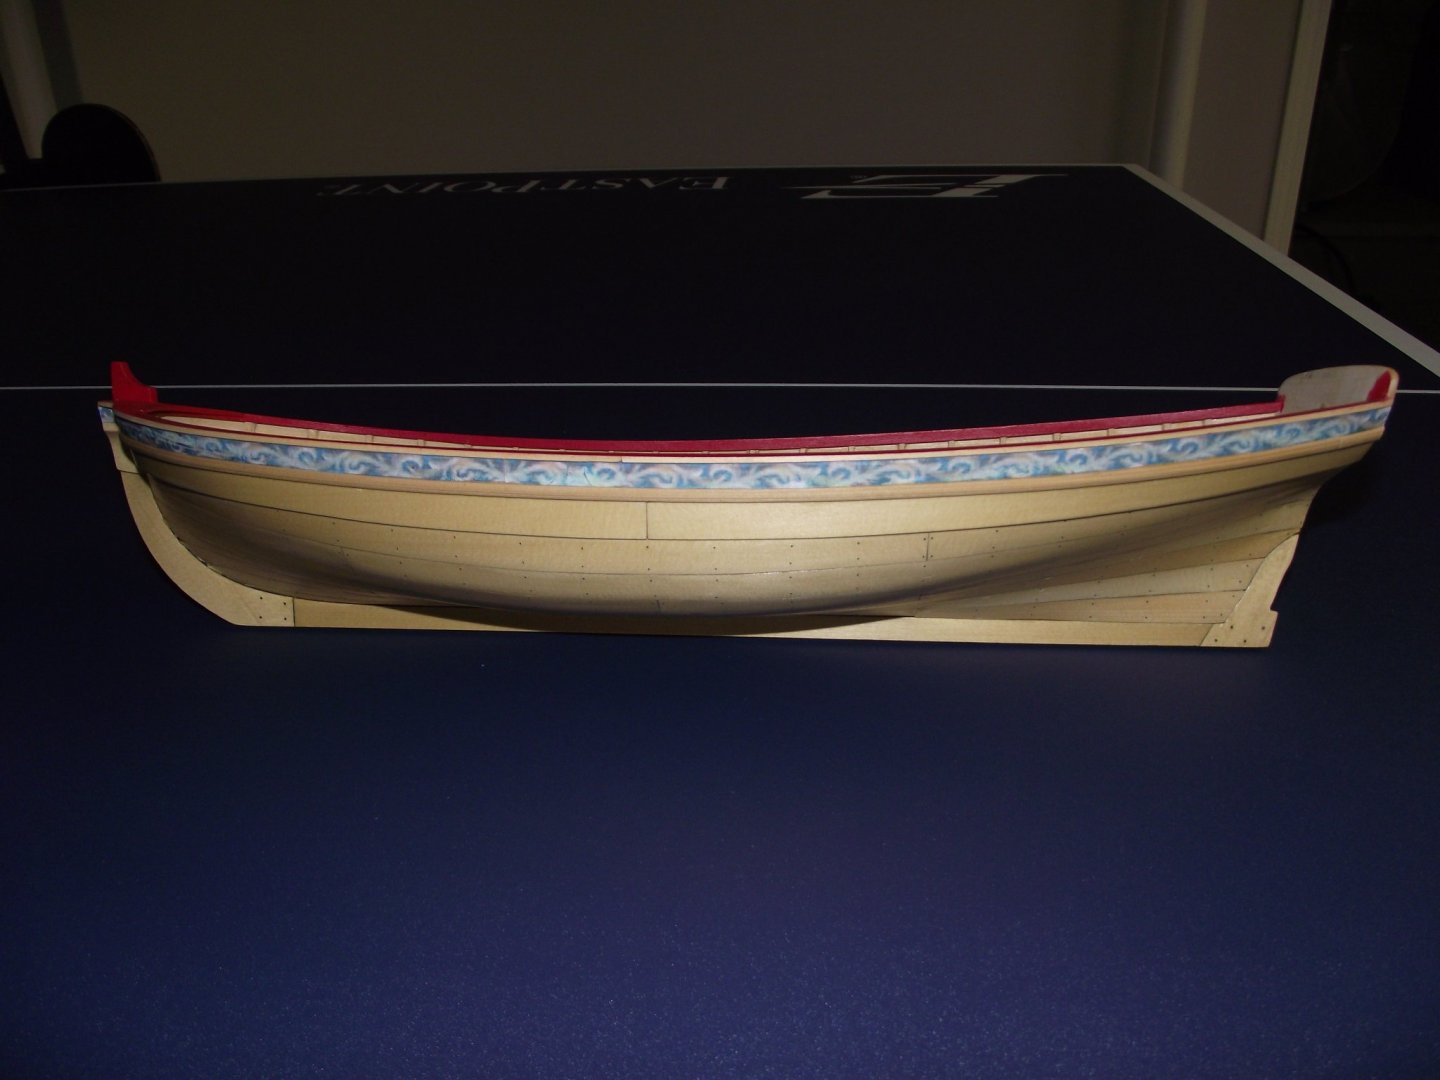
It has taken about a year, but chapter 3 is complete. Time in the shop will be less for a while as the Admiral and I get going on the gardens etc.
- 217 replies
-
- 10
-
-
- medway longboat
- Syren Ship Model Company
- (and 1 more)
-
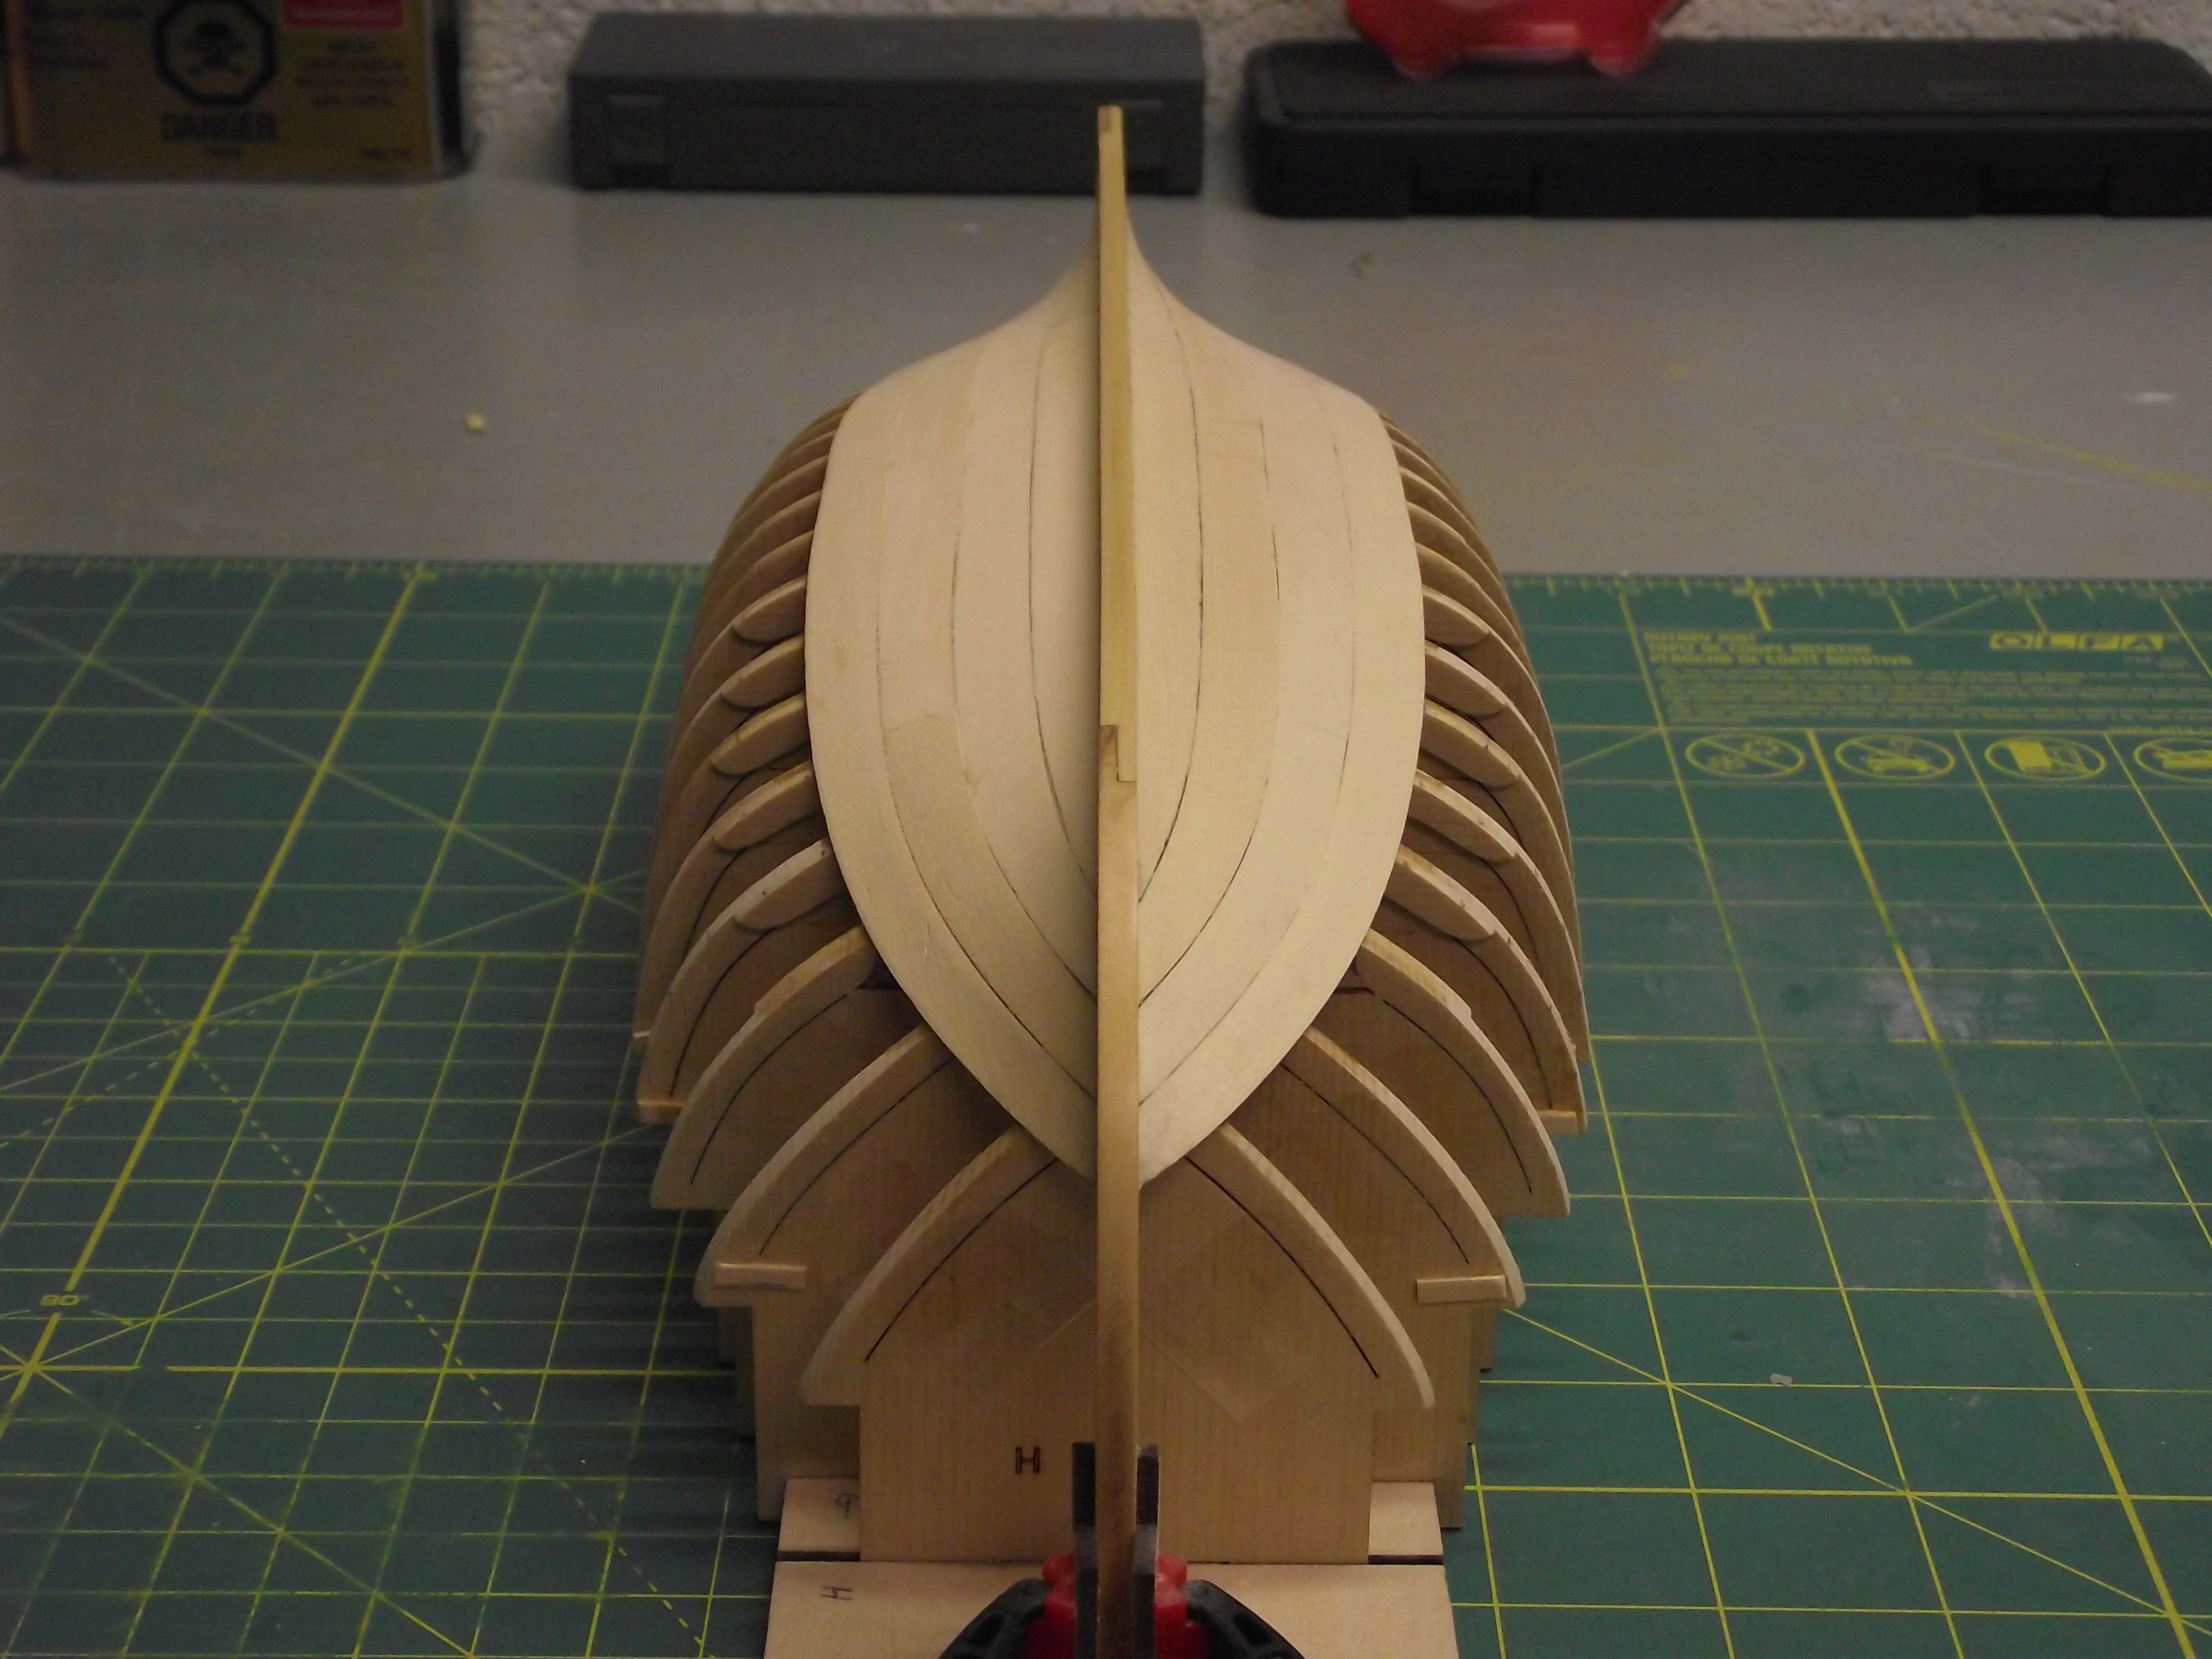
My biggest concern was that I might break my 0ne and only #77 drill. Being patience and stopping when my fingers got tired paid off. Very glad I did it, brings life to the hull. I did manage to put some dings in the planks when trimming the nails but have been able to sand most of them out.
- 217 replies
-
- 3
-
-
- medway longboat
- Syren Ship Model Company
- (and 1 more)
-
Excellent build. Some day I hope to have your level of skill. Being nosey, are you building in an engine room of sorts?
-
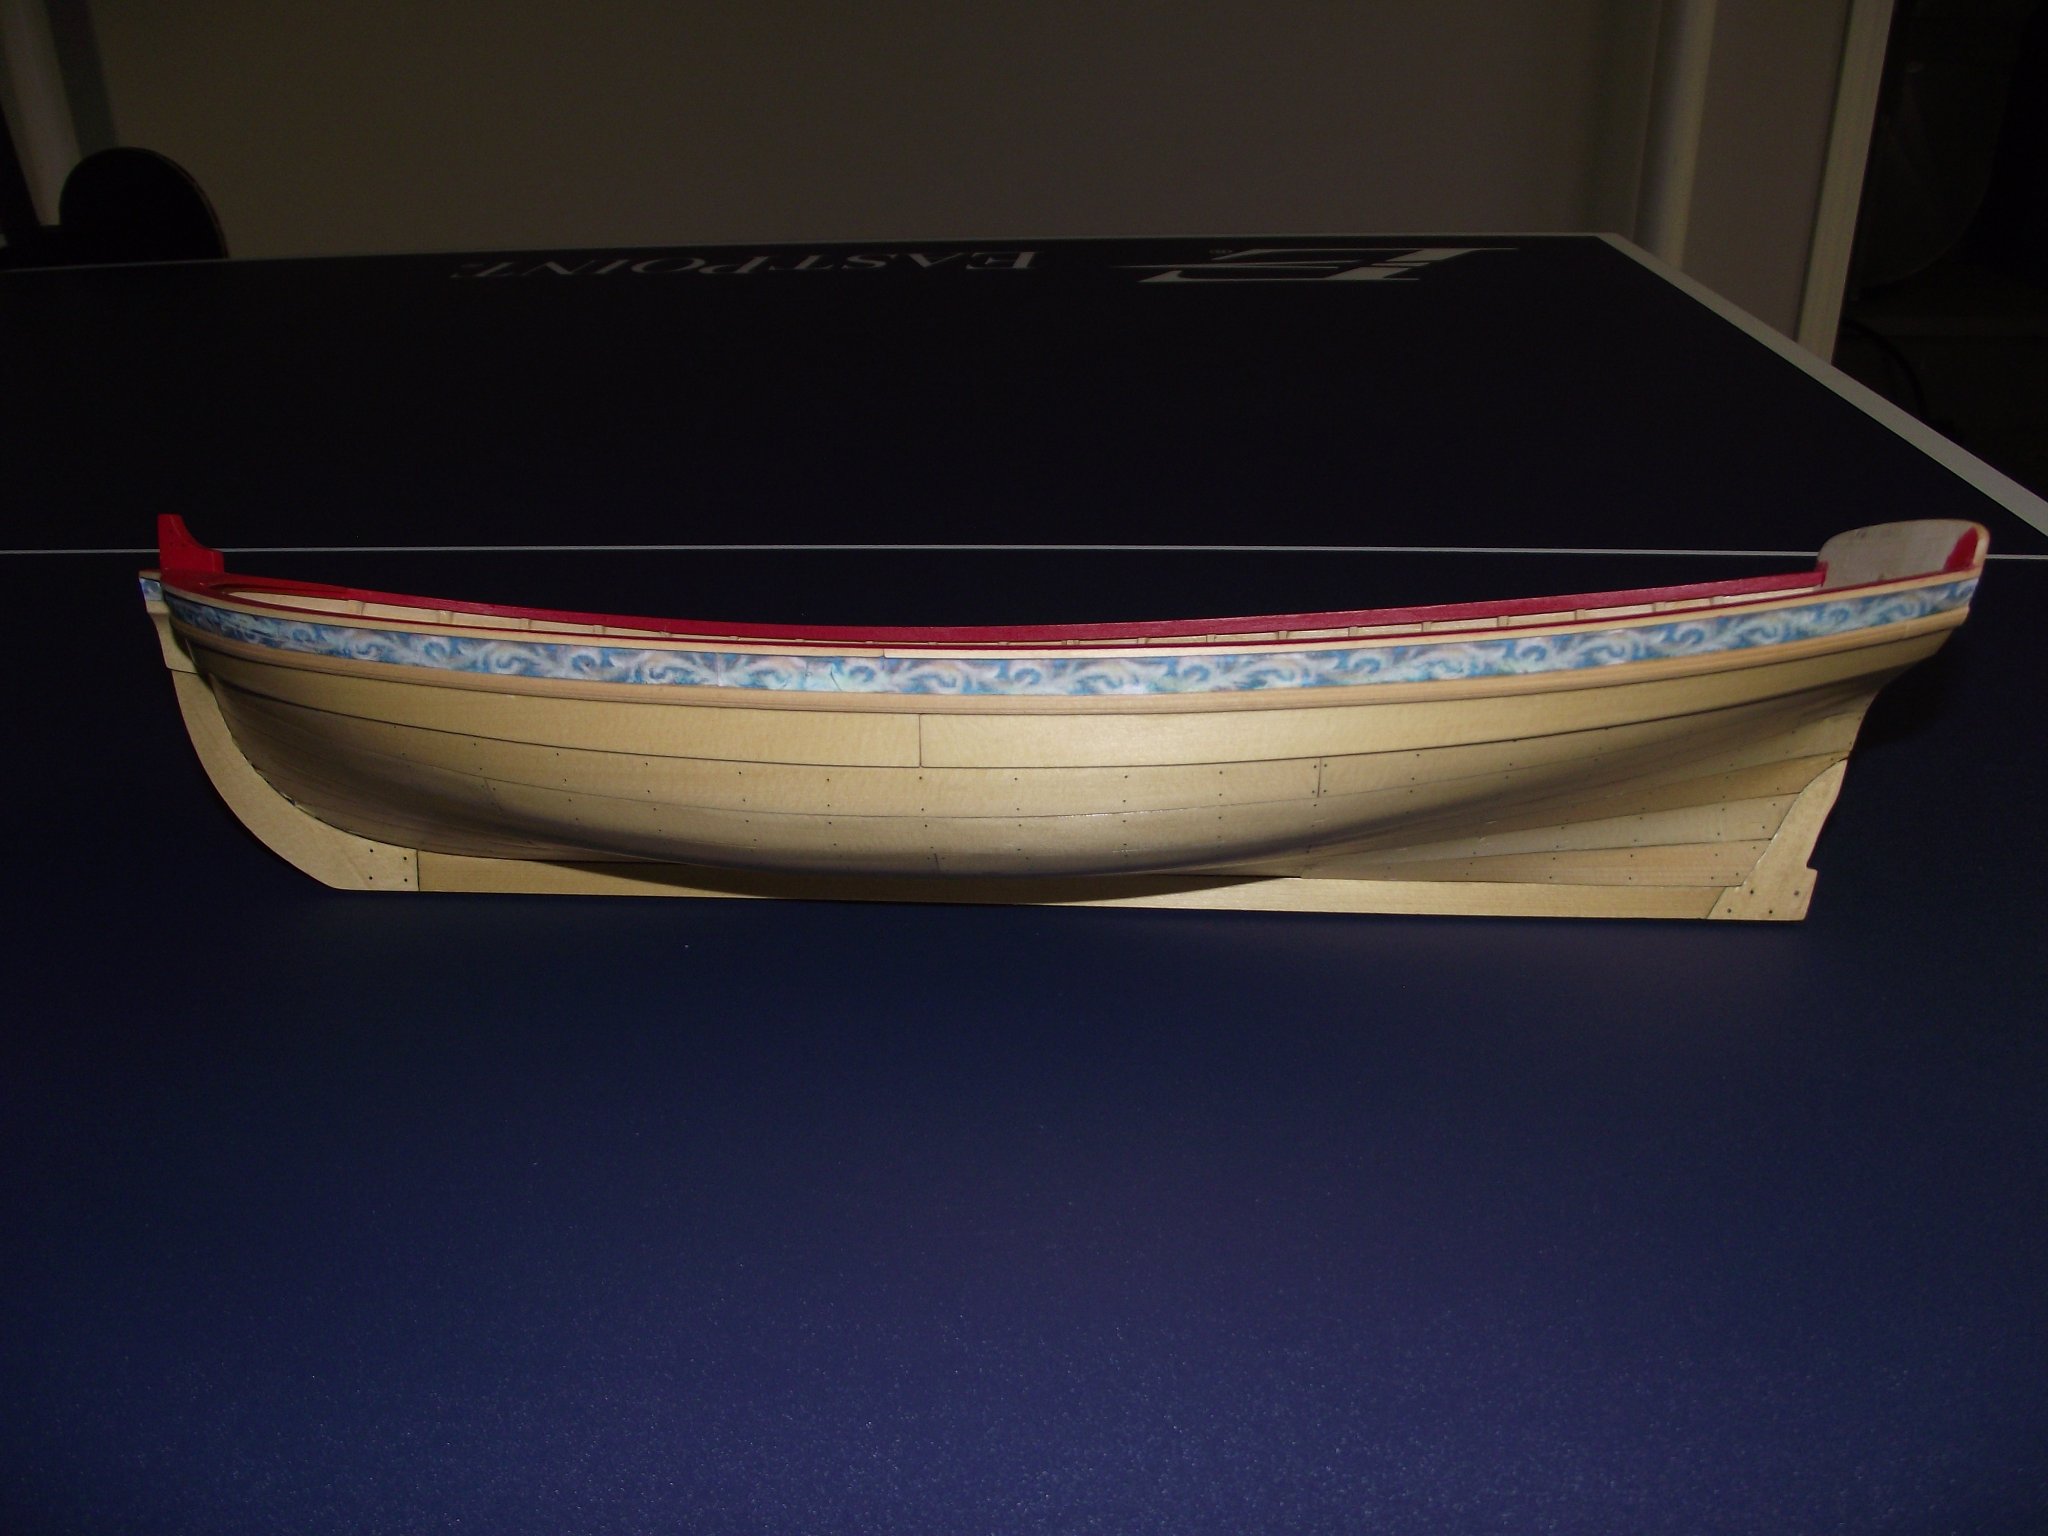
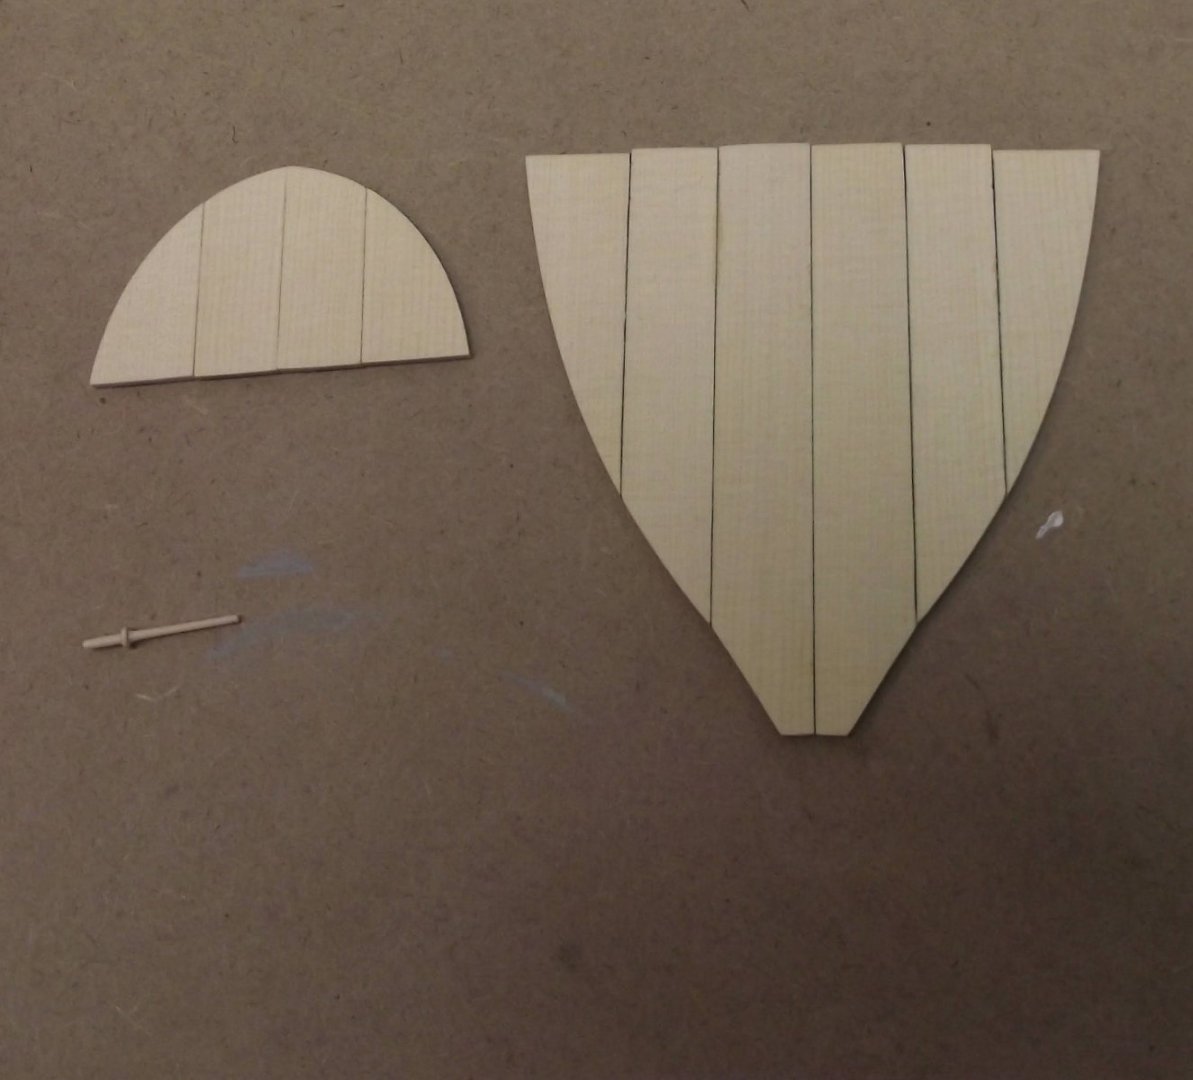
Chapter 3 almost done. Today I will install the friezes and trim rails, (all ready cut out and shaped). I need to work on my photography or buy a new camera.


- 217 replies
-
- 13
-
-
- medway longboat
- Syren Ship Model Company
- (and 1 more)
-
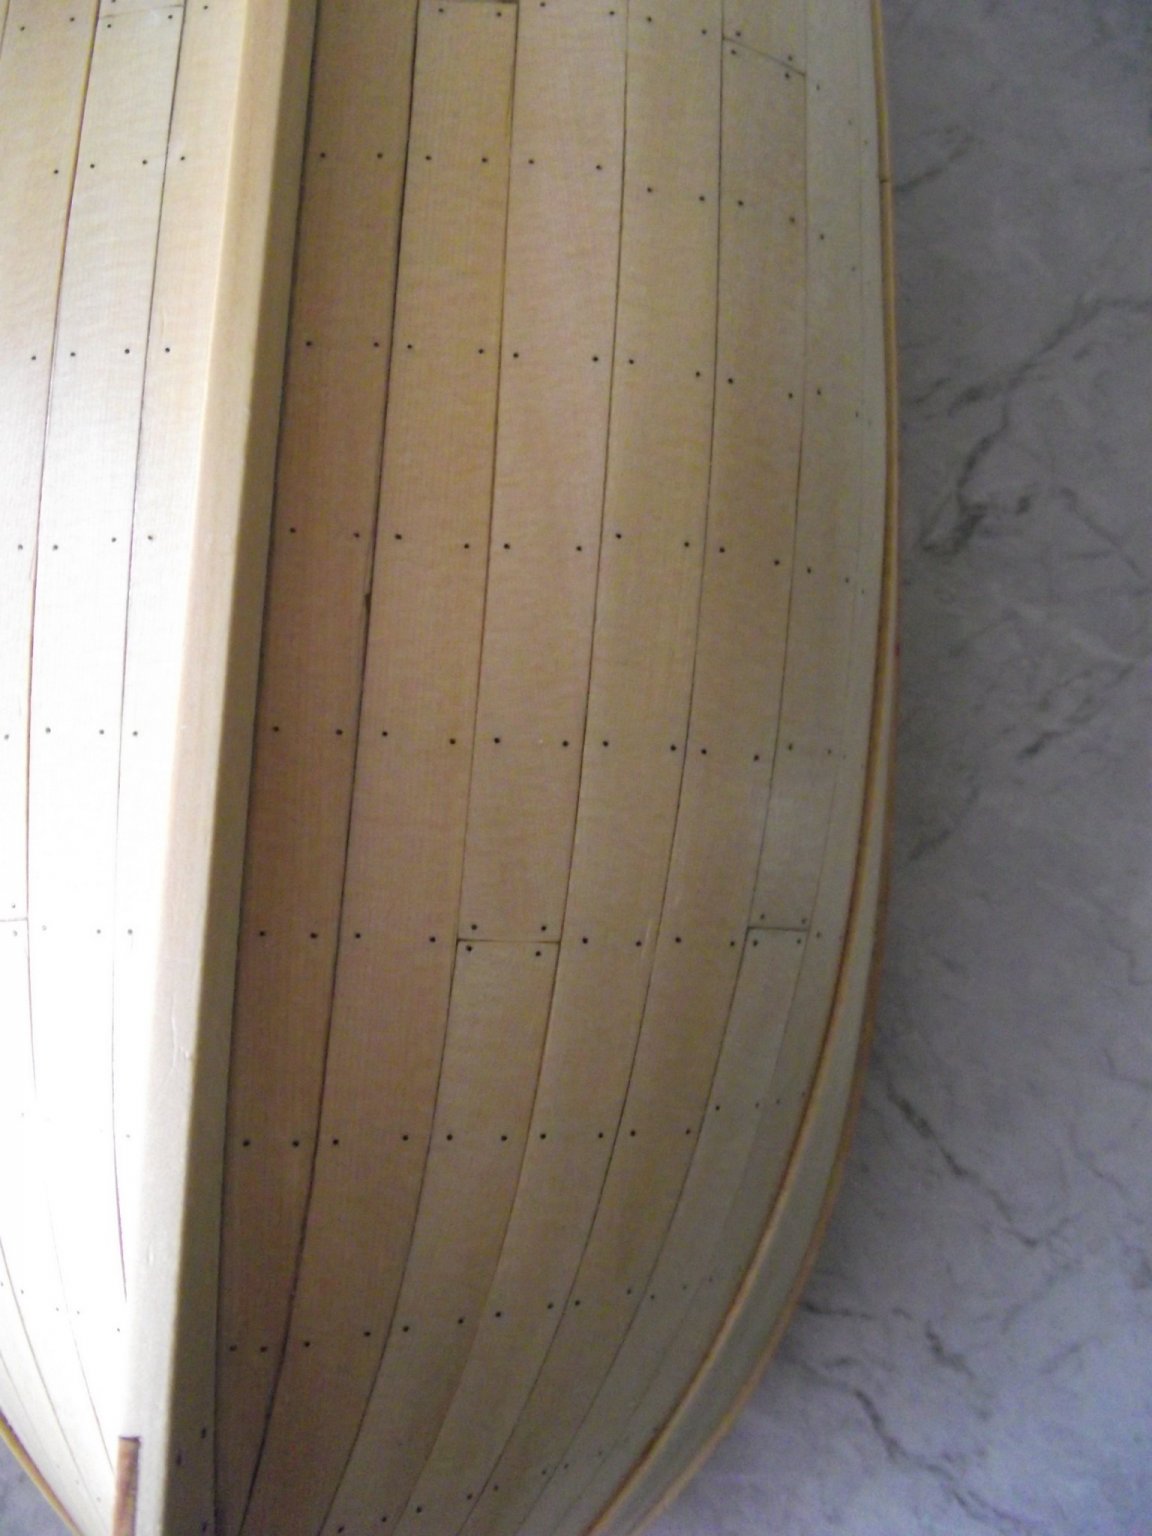
I can not help myself. I did count all the holes I drilled. In one evening i drilled all the port side, the next night, the starboard side. The next evening all the mono nails were cut. Last night they were all glued in and tonight they were all trimmed, hull sanded and one coat off WOP.
- 217 replies
-
- 3
-
-
- medway longboat
- Syren Ship Model Company
- (and 1 more)
-
Welcome to the site from a fellow Ontarion. I am east of you in Gananoque, heart of the 1000 Islands. Thats a very fine looking areoplane