
HOLIDAY DONATION DRIVE - SUPPORT MSW - DO YOUR PART TO KEEP THIS GREAT FORUM GOING! (Only 20 donations so far - C'mon guys!)
×


Maury S
-
Posts
1,490 -
Joined
-
Last visited
Content Type
Profiles
Forums
Gallery
Events
Everything posted by Maury S
-
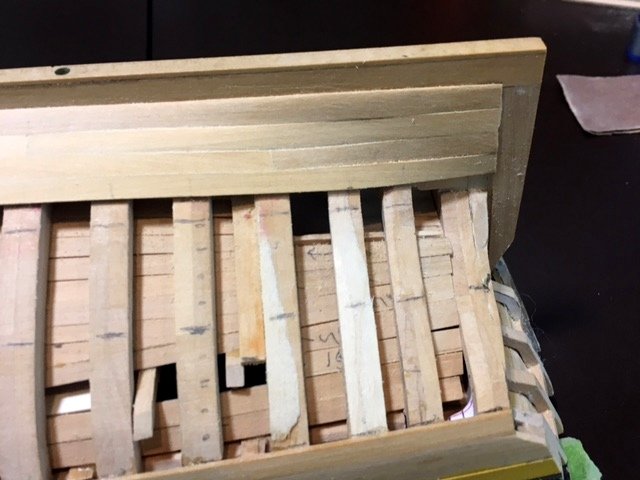
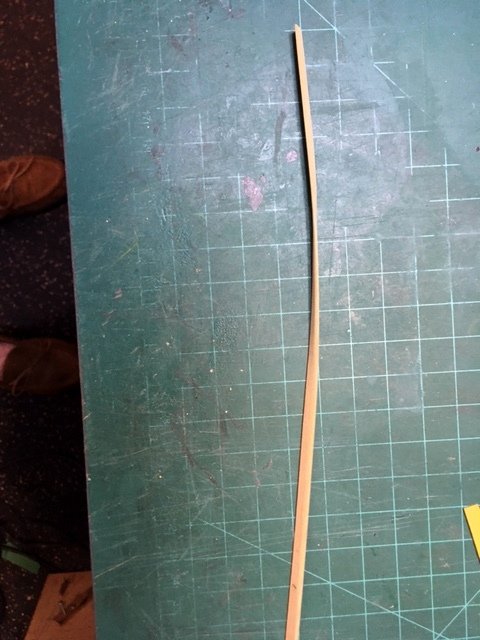
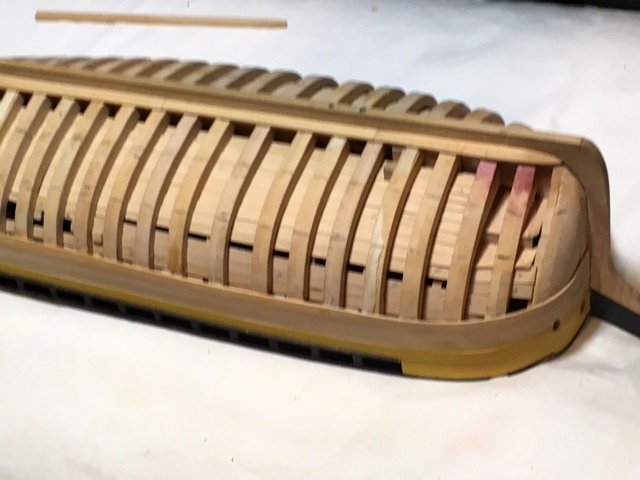
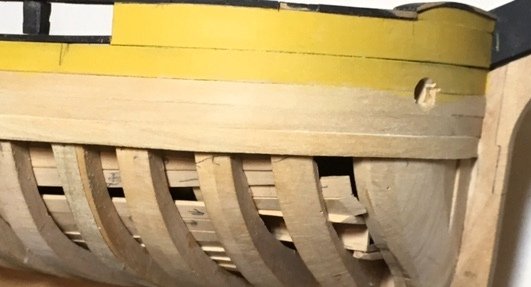
 Now that I have confidence in the layout for the steelers, I've continued planking the lower band. The plank snapped in the heat-only bending process three times (wood became too brittle), so I went back to steaming the piece (wrapped in a wet paper towel and cooking for 2 minutes on high in the microwave). It bent and twisted easily and has to be set aside to properly dry (at least over night, even after using the air blower). There is a stain from the water (barely visible in the upper right corner) that I hope disappears with drying. Maury
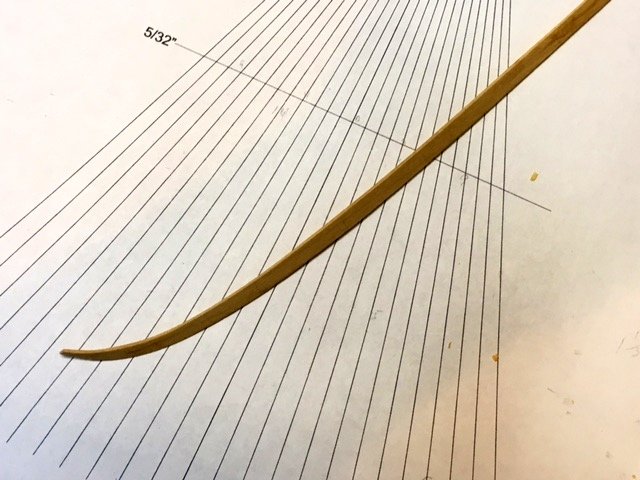
- 525 replies
-
- 6
-

-
- anchor hoy
- hoy
- (and 1 more)
-
Thanks, that was why I put the drop strake end at the regular joint mark following the 3 strake rule. The light line represents a frame center. Maury
- 525 replies
-
- 3
-
-
- anchor hoy
- hoy
- (and 1 more)
-
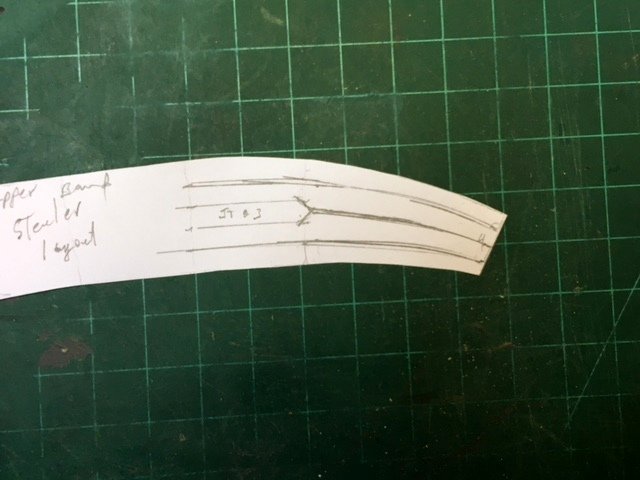
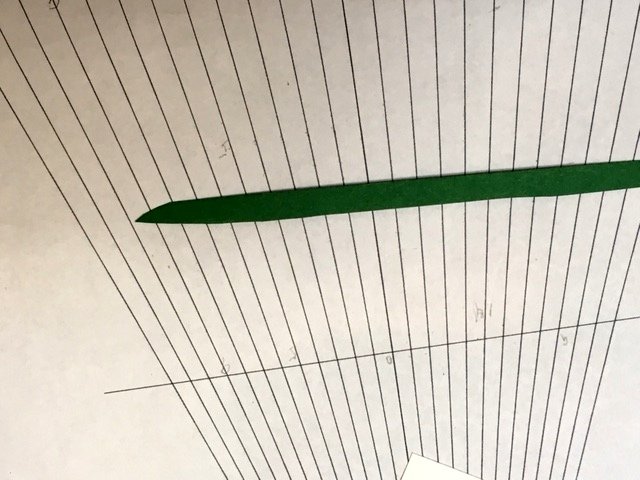
Planking / Steelers... Druxey reminded me the the planking at the bow was going to be a challenge, so I've been thinking about that quite a bit lately. I thought I'd lay it out on paper first and see how things developed. I cut a paper pattern to match the bottom of the wales and then started playing with the space between the wale and highest plank in the lower band. The way it was laid out there are ten more strakes. The tapering just about cuts the plank width in half but the narrower plank at the stem does not look pleasing. Because of the severely rounded bows, almost all of the taper comes between the stem and the third frame back. Even though the hull will be painted, I want to do it right and since this is my first experiment with steelers, here goes. The placement of joints has already been determined. The joint closest to the bow is at the fourth frame and three (and eight) strakes down from the wale. That seems a reasonable place to start. I tried with one steeler and it still squeezed the planks a bit in the middle band. If I put in two steelers, one at strake 3 and another a strake 8, I cut the number of remaining planks at the bow from 10 to 8 and the size seems more pleasing. Upper band pattern shown below: " The pattern of "three to two planks" seemed best so that's what I've laid out so far. I marked out four strakes from the bow to frame 4 and five from 4 aft. I then marked the center of the third strake at frame 4 where the joint falls and drew in the ">" pattern. Any comments / corrrections are appreciated. Maury
- 525 replies
-
- 4
-
-
- anchor hoy
- hoy
- (and 1 more)
-
More inspiration for us! Maury
-
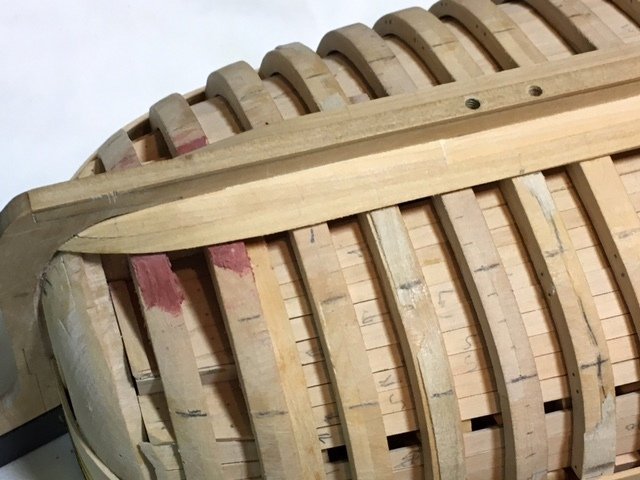
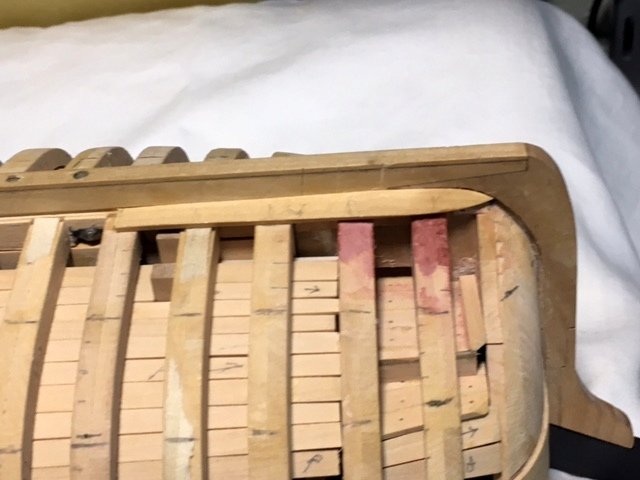
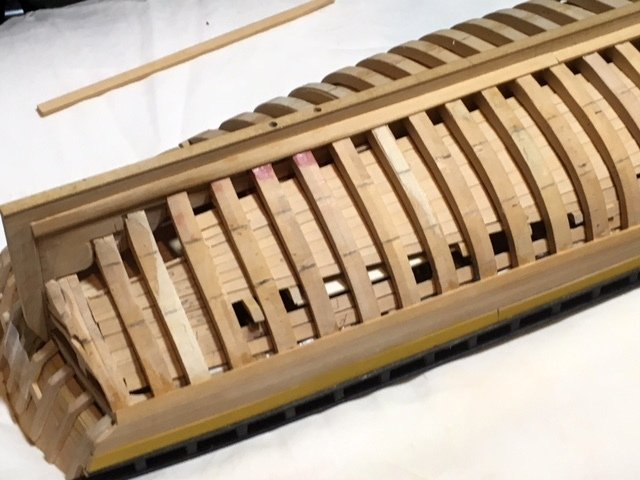
The long voyage of planking is underway. Four strakes including the garboard are done. One more to complete the low band, then I'll move to the upper of three bands. All planks are spiled and dry heat twisted to shape (except one of the bow pieces that was too brittle to bend). Lots of minor edge sanding to get a good fit, but as has been said often, treat each piece as a project itself. I use tick strips from the edge of each plank to the band line so there is little cumulative error. The planks at the stern will be thinned to blend smoothly into the stern post. No gaps. Lots of surface sanding to be done once all the planks are in. Maury
- 525 replies
-
- 10
-
-
- anchor hoy
- hoy
- (and 1 more)
-
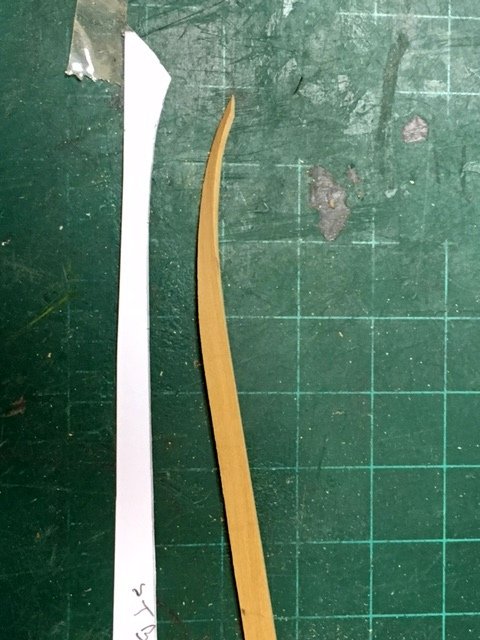
Thanks for the input! I guess I mis-read my other source. I can shift things around but I'd prefer not to remove the first strake above the garboard. Changing to 3 strakes between makes fewer joints and gives me only one little wrinkle to the pattern at frame 19. I'll re-do to accommodate the appropriate guideline. It all gets painted over so I'm not highlighting the seams. The spiling pattern for the first starboard strake above garboard (see Primer on Planking by David Antscherl ) and the resulting plank with the required twist is shown. It can be seen installed below. No ugly gaps between planks. There is some minor surface sanding yet to be done near the bow, but it's one of the better joints I've made. Every time is a learning experience. Maury
- 525 replies
-
- 15
-
-
- anchor hoy
- hoy
- (and 1 more)
-
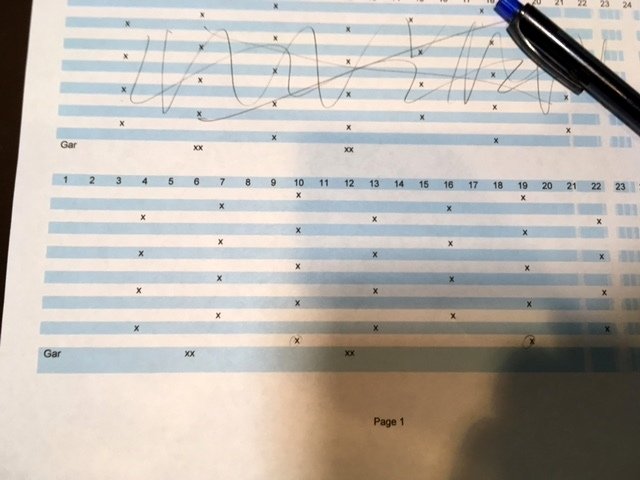
Back from vacation and into the shipyard... Laying out the planking using a spreadsheet. There are 25 frames and 14 strakes from wales to garboard. The rule for joints I ended up with was two strakes between joints on a frame and two frames between joints on an adjacent strake. It seems simple now that it's laid out but it took an hour of playing around to get there. I ended up shifting the entire pattern one frame to the right so the nearest joint to both the stem and stern is 4 frames away. The "X" marks on the sheet show the pattern. It would not have worked if I had included the garboard so I made sure the pattern did not line up with joints on the garboard. On to spiling. Maury
- 525 replies
-
- 5
-
-
- anchor hoy
- hoy
- (and 1 more)
-
Painting Wales
Maury S replied to JohnB40's topic in Painting, finishing and weathering products and techniques
Thinning and multiple coats is the secret to a beautiful finish. Read over Chuck Passaro's Cutter build. I use Model Shipways hull and Spar Black, thinned 50%. Works well for me with no streaks or brush marks. Maury -
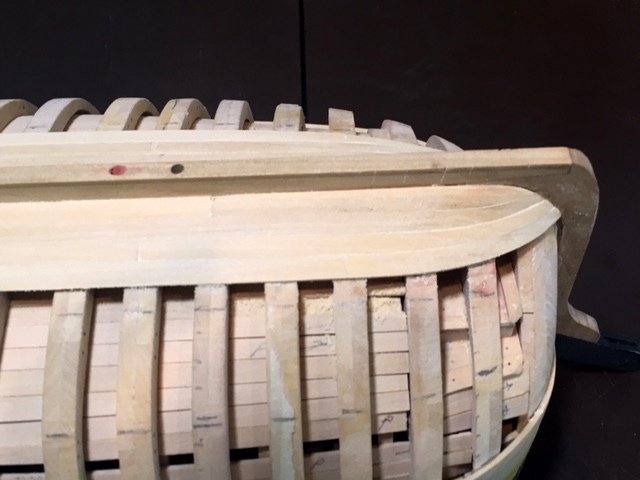
Druxey, Yes, it's going to be a challenge. Once the garboard plank is in, re planning the layout of planks at the bow can begin. The garboard plank has severe twists both at the bow and the stern. The bow portion was laid out in card first, transferred to wood, then adjusted to run fair. Then the stern portion was shaped and twisted (hot air machine and gentle twisting). Edge sanded where it enters the rabbet and glude in place. THe center portion was then fit. It needs some final sanding, then on to the other side. Maury
- 525 replies
-
- 11
-
-
- anchor hoy
- hoy
- (and 1 more)
-
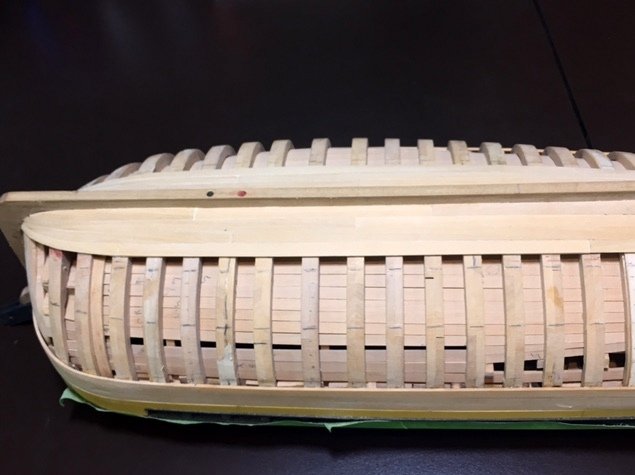
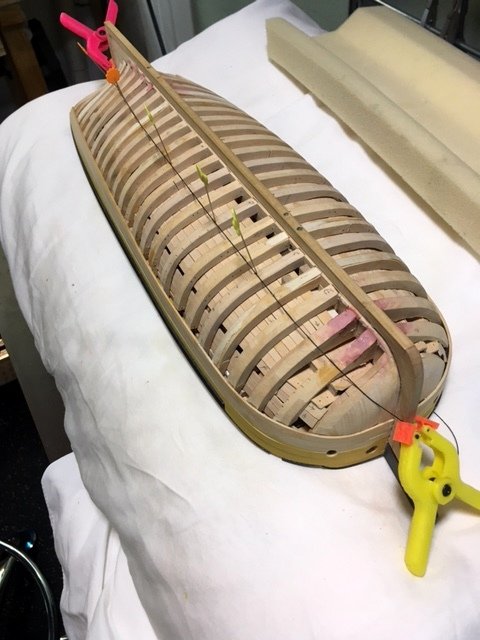
Lining out the planking: The first thing is to determine the number of planks at the dead-flat. 140 inches, divided by 10" = 14 strakes. There is not a great deal of difference fore and aft, so 10" planks will be the starting point. Next is to measure from the keel rabbet to the point on the stern post where it intersects the counter. That's where planks would go from landing vertically at the stern to almost horizontally along the wing transom. Just about 48" so five strakes at about 10". Dividing the planking into three bands of 5, 4 and 5 strakes works well. Every third frame was marked using tick strips. At the fifth tick from the keel I stretched a thread from stem to stern (David Antscherl method) initially held by some pins. Then I put a small dab of white glue where the thread crosses each frame. Getting that (thread) line fair is key. I wet a finger and roll the thread up or down along each frame until it looks fair from all directions. Picture taken before this last step. The same procedure was followed 5 ticks down from the wale and repeated on the other side. The band does NOT follow the thread at the bow. It just needed to be held at the stem. A little "Bondo" was needed to smooth out the transition at the keel for a few frames. It will all be planked over. Maury
- 525 replies
-
- 8
-
-
- anchor hoy
- hoy
- (and 1 more)
-
Bending with steam easily
Maury S replied to a topic in Building, Framing, Planking and plating a ships hull and deck
I have a similar hot air unit. I've used it on box and temperatures above 225 F tend to char the wood and I've never had the wood go malleable....maybe user error. A combination of wet and dry bending is still where I am. Maury -
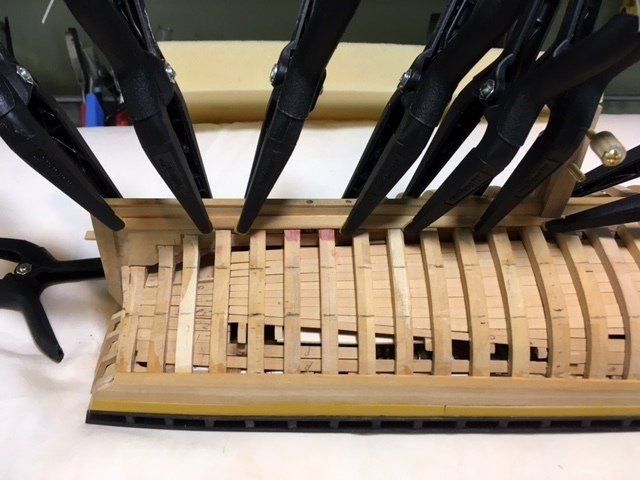
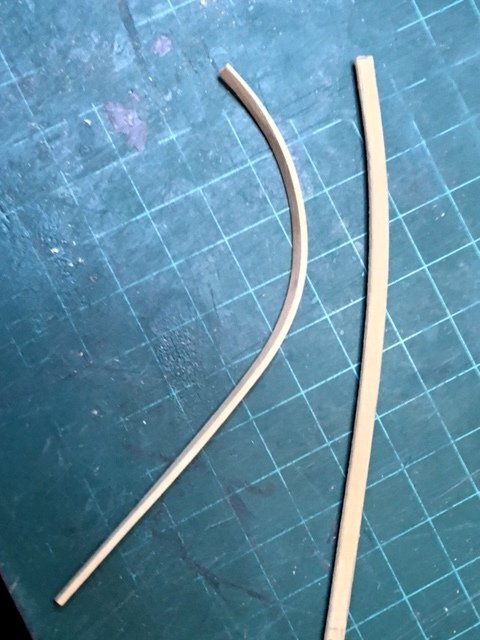
The model has been taken off the building board to prep for planking. First thing is the wales need to be widened to three planks. These are under-planks and will have another piece placed on top later on. Perfect fits are not required, but this is no time to sluff-off. Spiling is called for. It's started with card stock to get the correct shape, transfer to wood and cut to shape. The following picture shows two planks for the bow area. One is spiled, and the other is spiled, "steamed" (wrapped in a paper towel, soaked and microwaved for two minutes) and bent to shape by clamping in place over night. A little sanding was necessary to make a good fit and it was glued in place. The joint is as good as it gets. Patience is required and worth the effort. A little sanding to match the two higher planks and it will be set for the second layer. Now to the port side. Maury
- 525 replies
-
- 12
-
-
- anchor hoy
- hoy
- (and 1 more)
-
PM sent with details.
-
Checking cost of shipping to Perth. Under the circumstances, it would come in the original box. The building board is something you can cut from MDF. Maury
-
Jean-Philippe, Sorry I missed your question. Yes it's still for sale. $179 and I pay for shipping. Maury
-
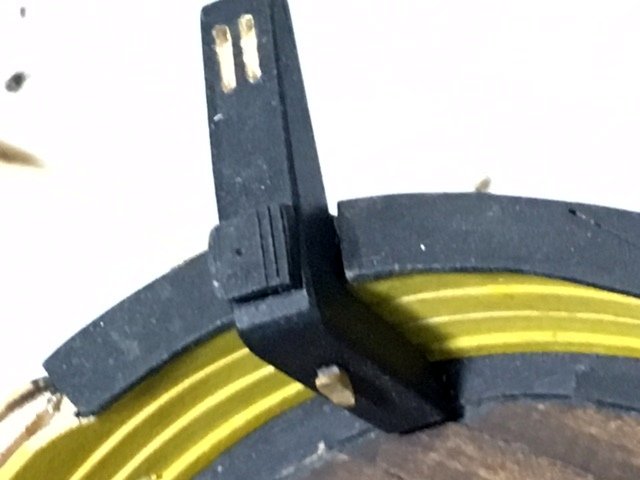
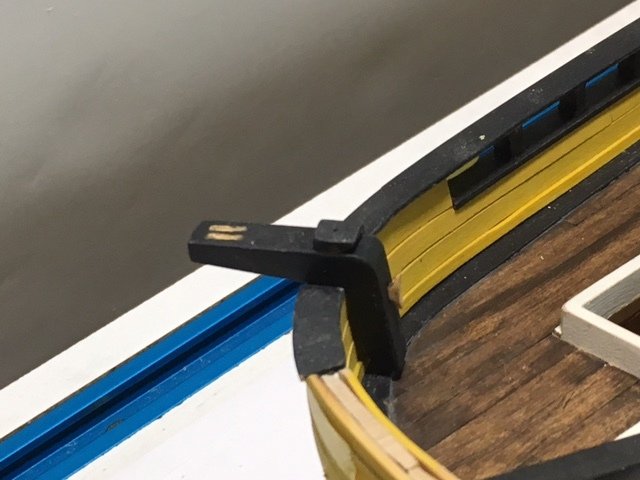
Druxey, Thanks for the term. Yes, the open part faces forward. I painted the sheave Gold color to make it more visible, but you have to look closely to see it (not visible on the photo). Maury
- 525 replies
-
- 3
-
-
- anchor hoy
- hoy
- (and 1 more)
-
The cat heads have been re-done with some modifications. A sheave has been added at the back end of the top of the cat to redirect the tackle aft, and a cleat has been added to the vertical part. I spent most of the weekend finishing blocks and cleats. Maury
- 525 replies
-
- 7
-
-
- anchor hoy
- hoy
- (and 1 more)
-
End mills (micro) Vendor source
Maury S replied to Maury S's topic in Modeling tools and Workshop Equipment
Thanks. Maury -
I need a 1/16" end mill. I see Drill Bit City sells carbide ones. For cutting grooves in Box or pear, do I opt for HSS or carbide ?? Any other sources? Thanks, Maury
-
Pandora by marsalv - FINISHED - 1:52
Maury S replied to marsalv's topic in - Build logs for subjects built 1751 - 1800
Are the iron stanchions get removable? No way they can use the lower capstan as setup. Maury