HOLIDAY DONATION DRIVE - SUPPORT MSW - DO YOUR PART TO KEEP THIS GREAT FORUM GOING! (89 donations so far out of 49,000 members - C'mon guys!)
×


fmodajr
-
Posts
868 -
Joined
-
Last visited
Content Type
Profiles
Forums
Gallery
Events
Everything posted by fmodajr
-
 Thanks Clark, Is this a book on the "Reale de France"? If so, i'll try to find the book. Thanks, Frank
- 510 replies
-
- 1
-

-
- reale de france
- corel
- (and 1 more)
-
Thanks for visiting and for your kind comments Rick! I'm working on a time consuming area of the model right now and I'll should be posting an update in a couple of weeks. Frank
-
Nice job on the planking Mark! Happy New Year!! Frank
-
She (Vasa) keep drawing you back!! Lamp looking excellent so far. I have to pick up some of that "Black wash" Bottle!! Frank
-
Michael, Thank you and thanks for visiting. Best wishes to you and yours this holiday season!! talk soon, Frank
- 510 replies
-
- 1
-
-
- reale de france
- corel
- (and 1 more)
-
Thanks Hubac, Even though they are not the same ship, it is very reasonable to believe that a lot more research was done by the author of the "Fleur de Lis" Monograph than was done on the Corel kit. So my build looks like it will have some elements of both plans. I'm also having some fun trying to work with both plans and it is making me use my brain a little bit more in the thought process!! Happy Holidays, Frank
-
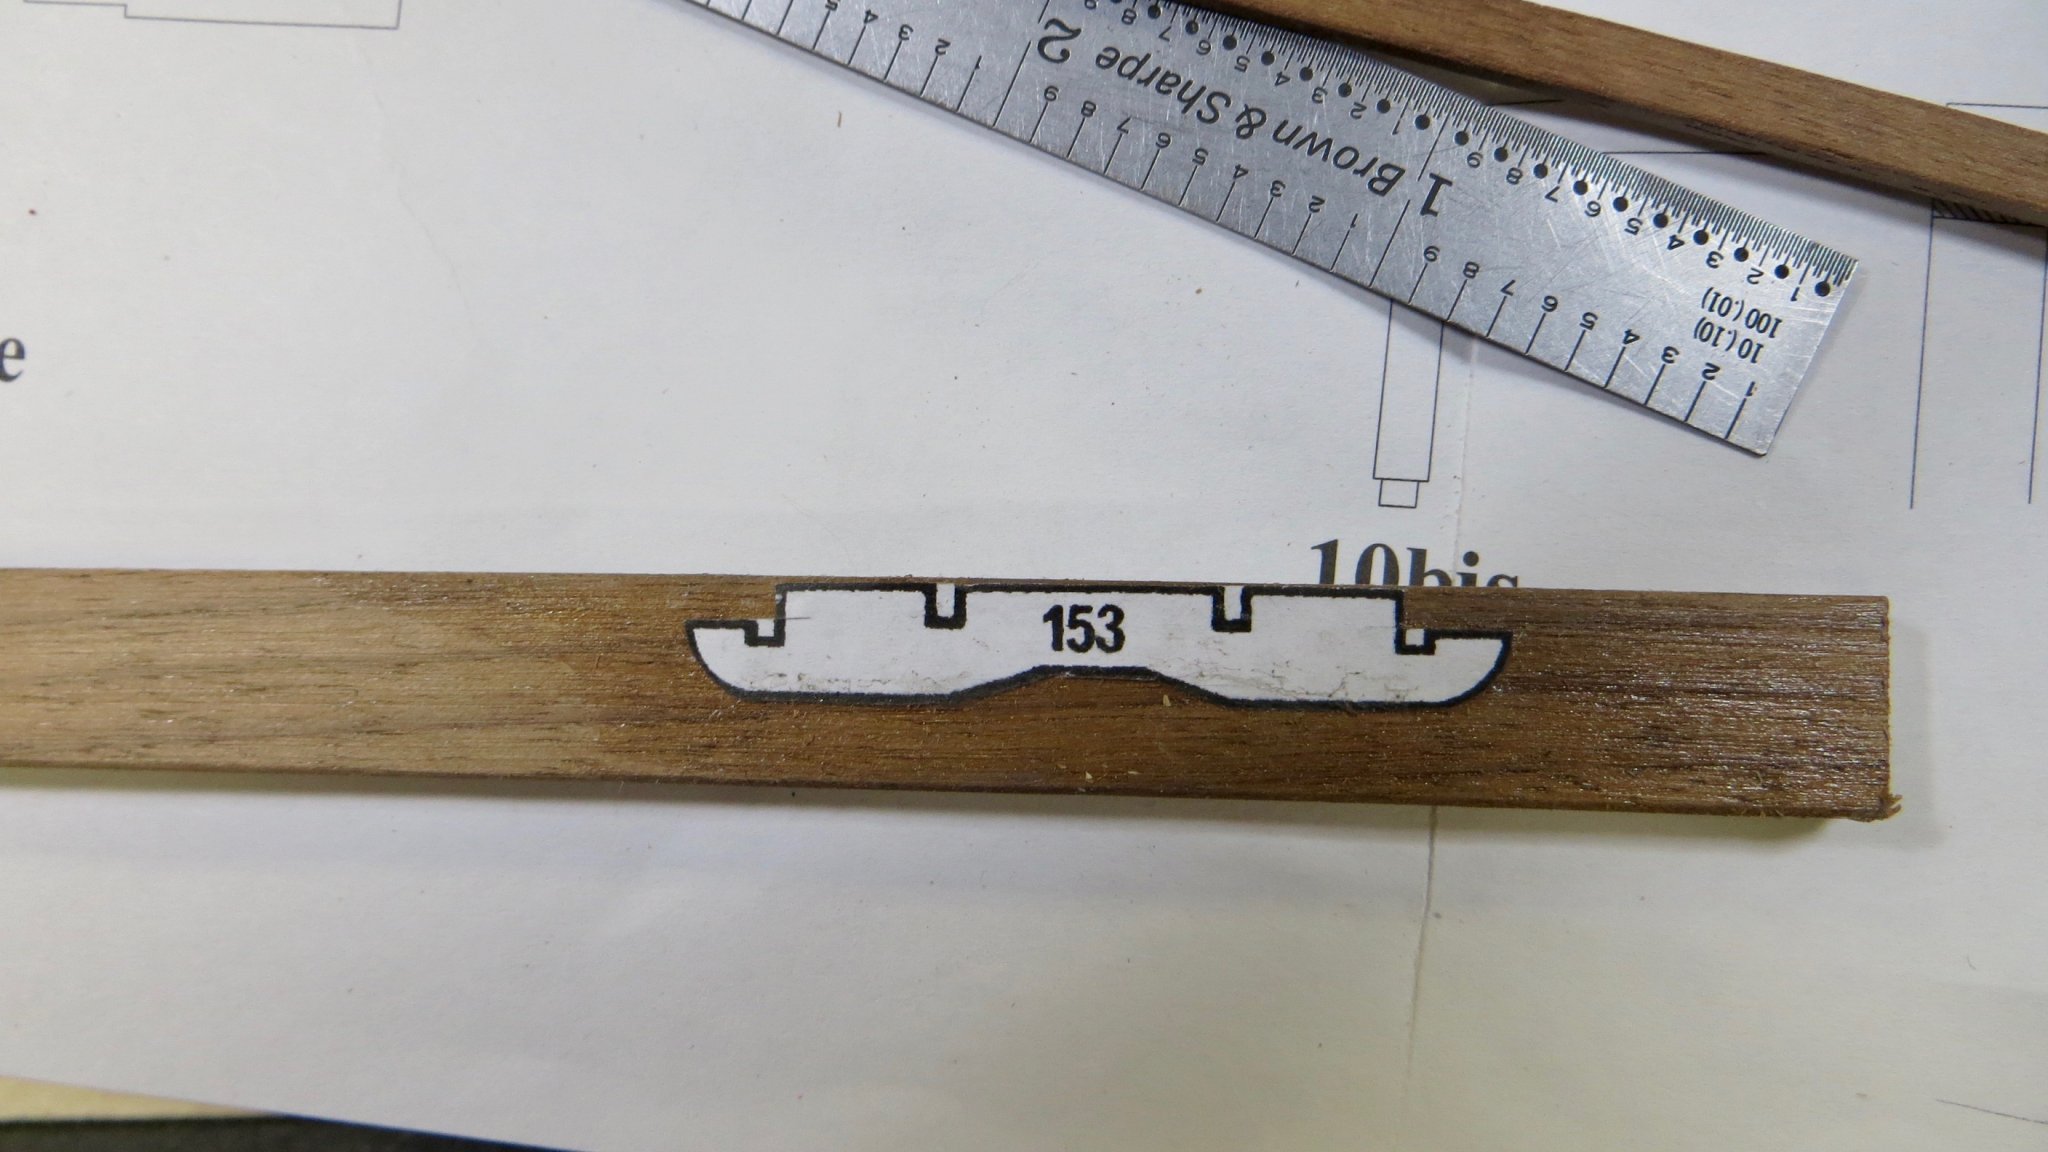
Hi Clark, I do have a scroll saw on my work bench, but I find my "Byrnes Table Saw" works much more accurately for the slots and cutouts and it is my main "go to" tool. Frank
- 510 replies
-
- 2
-
-
- reale de france
- corel
- (and 1 more)
-
Hi Clark, I like the "slipway" stand you made! Happy Holidays to you! Frank
- 112 replies
-
- 1
-
-
- corel
- reale de france
- (and 1 more)
-
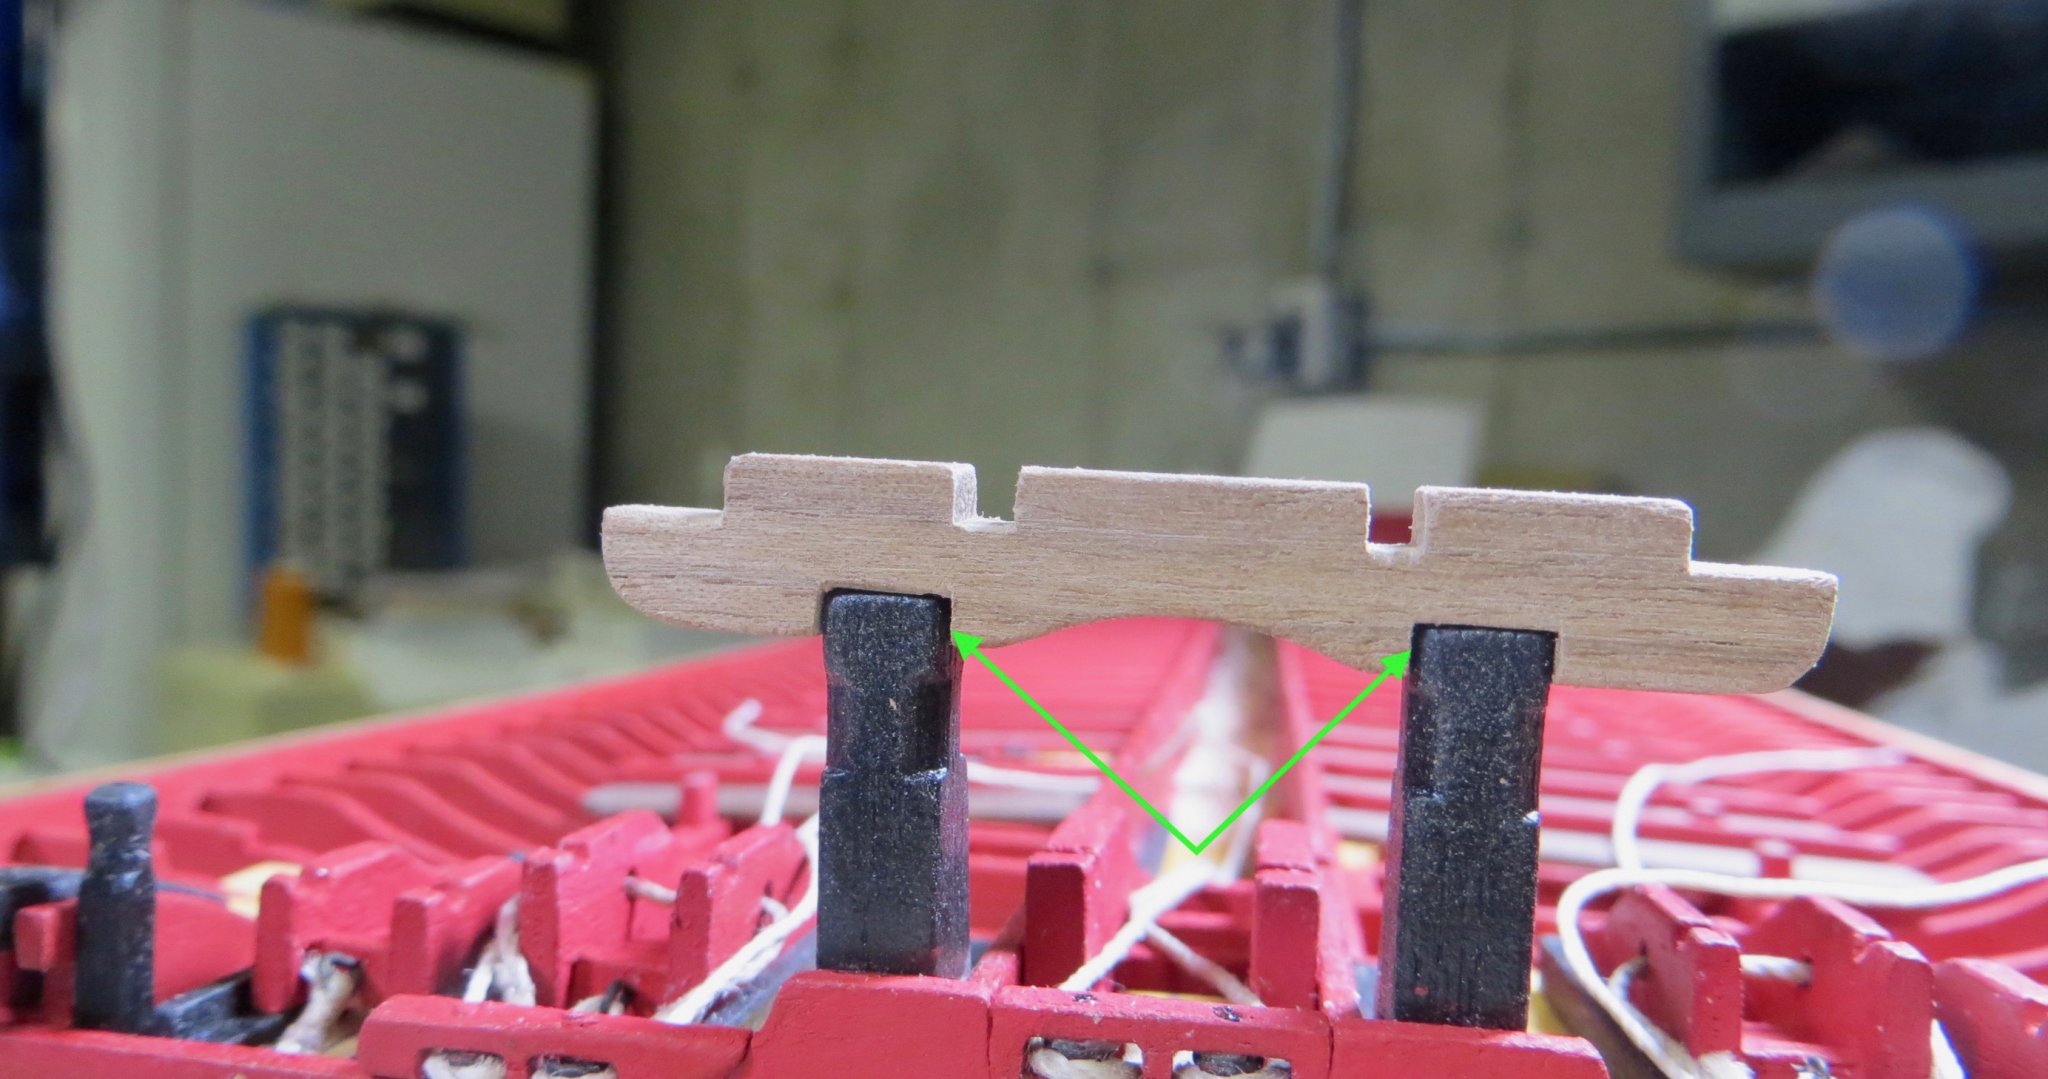
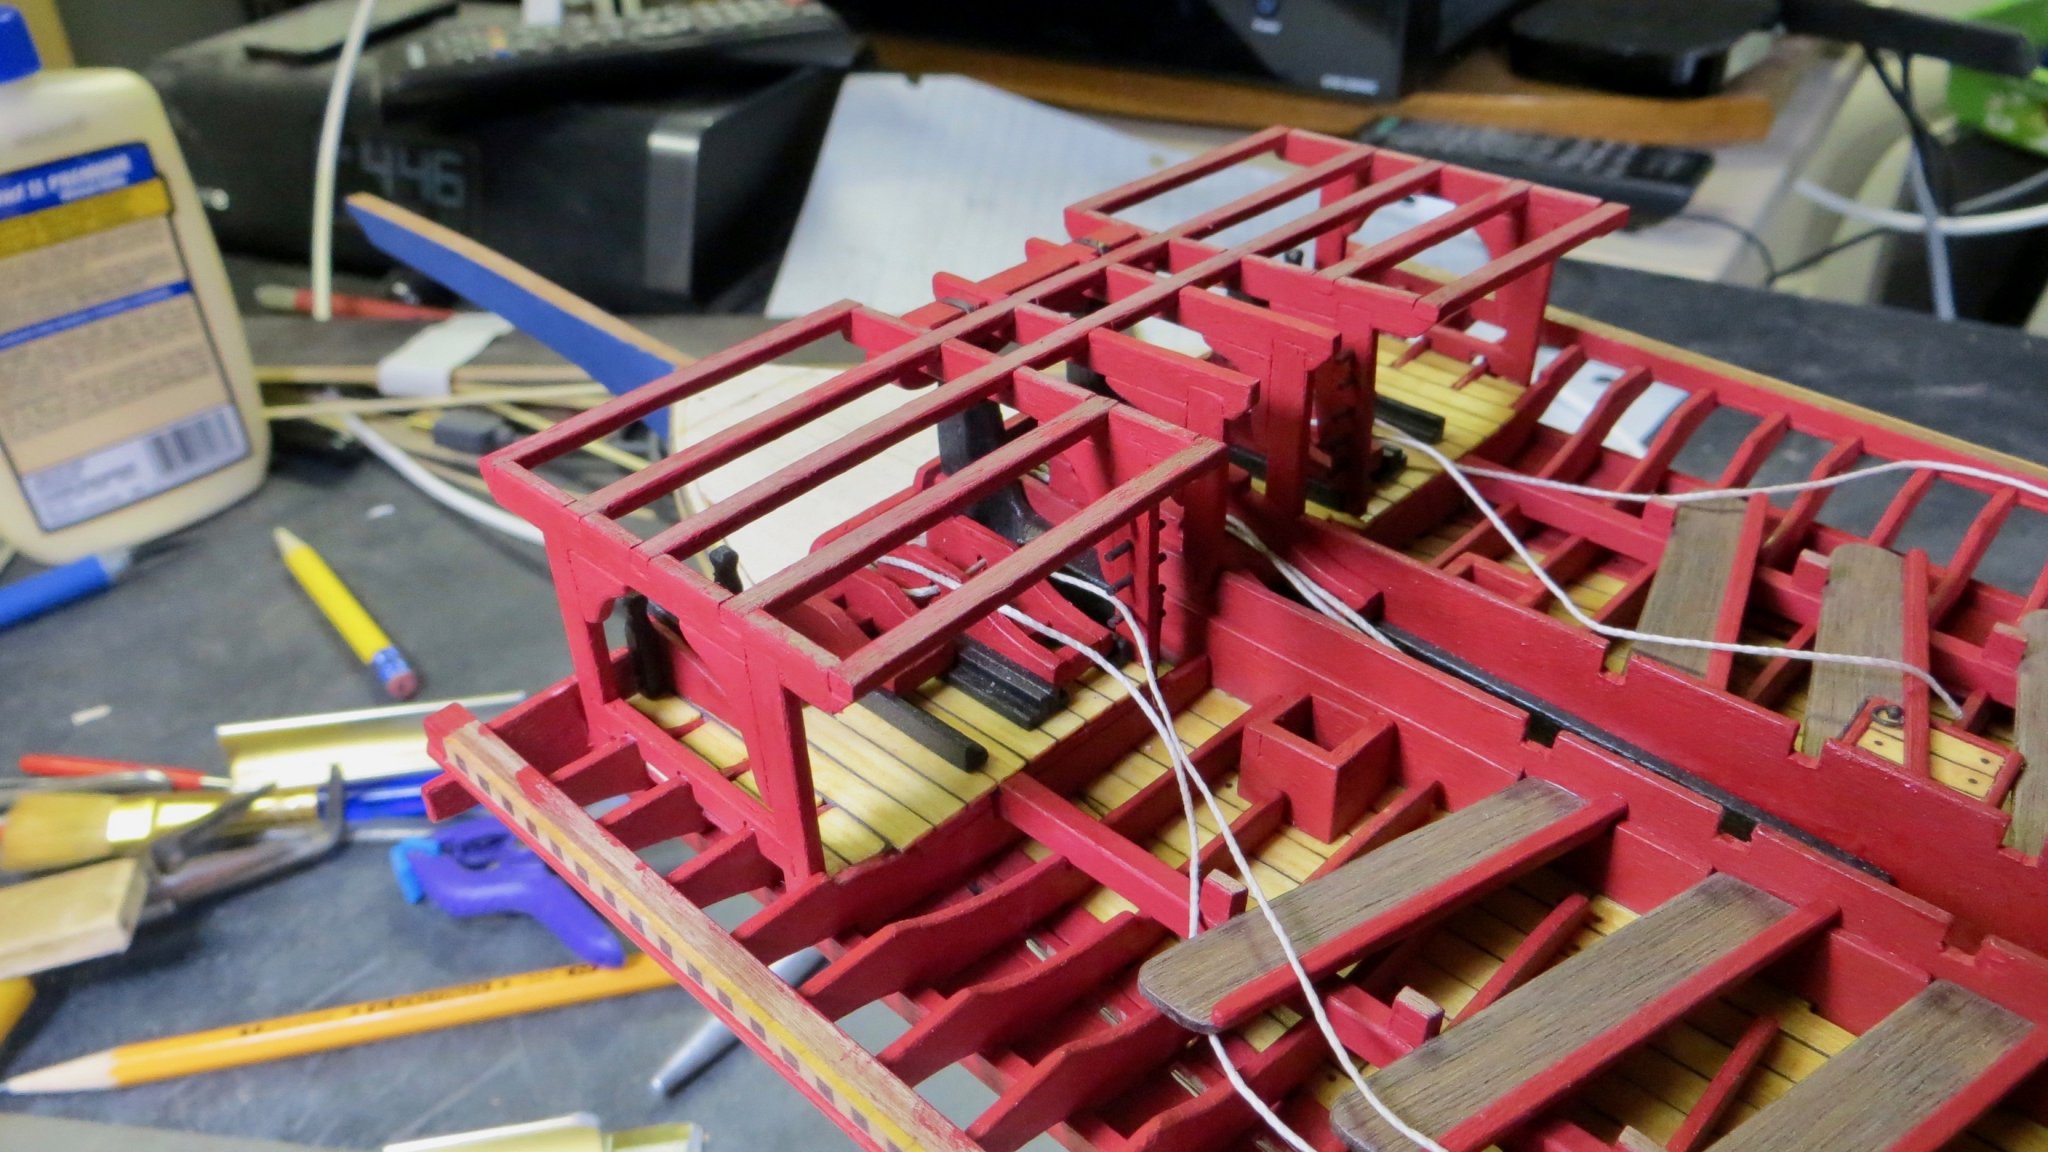
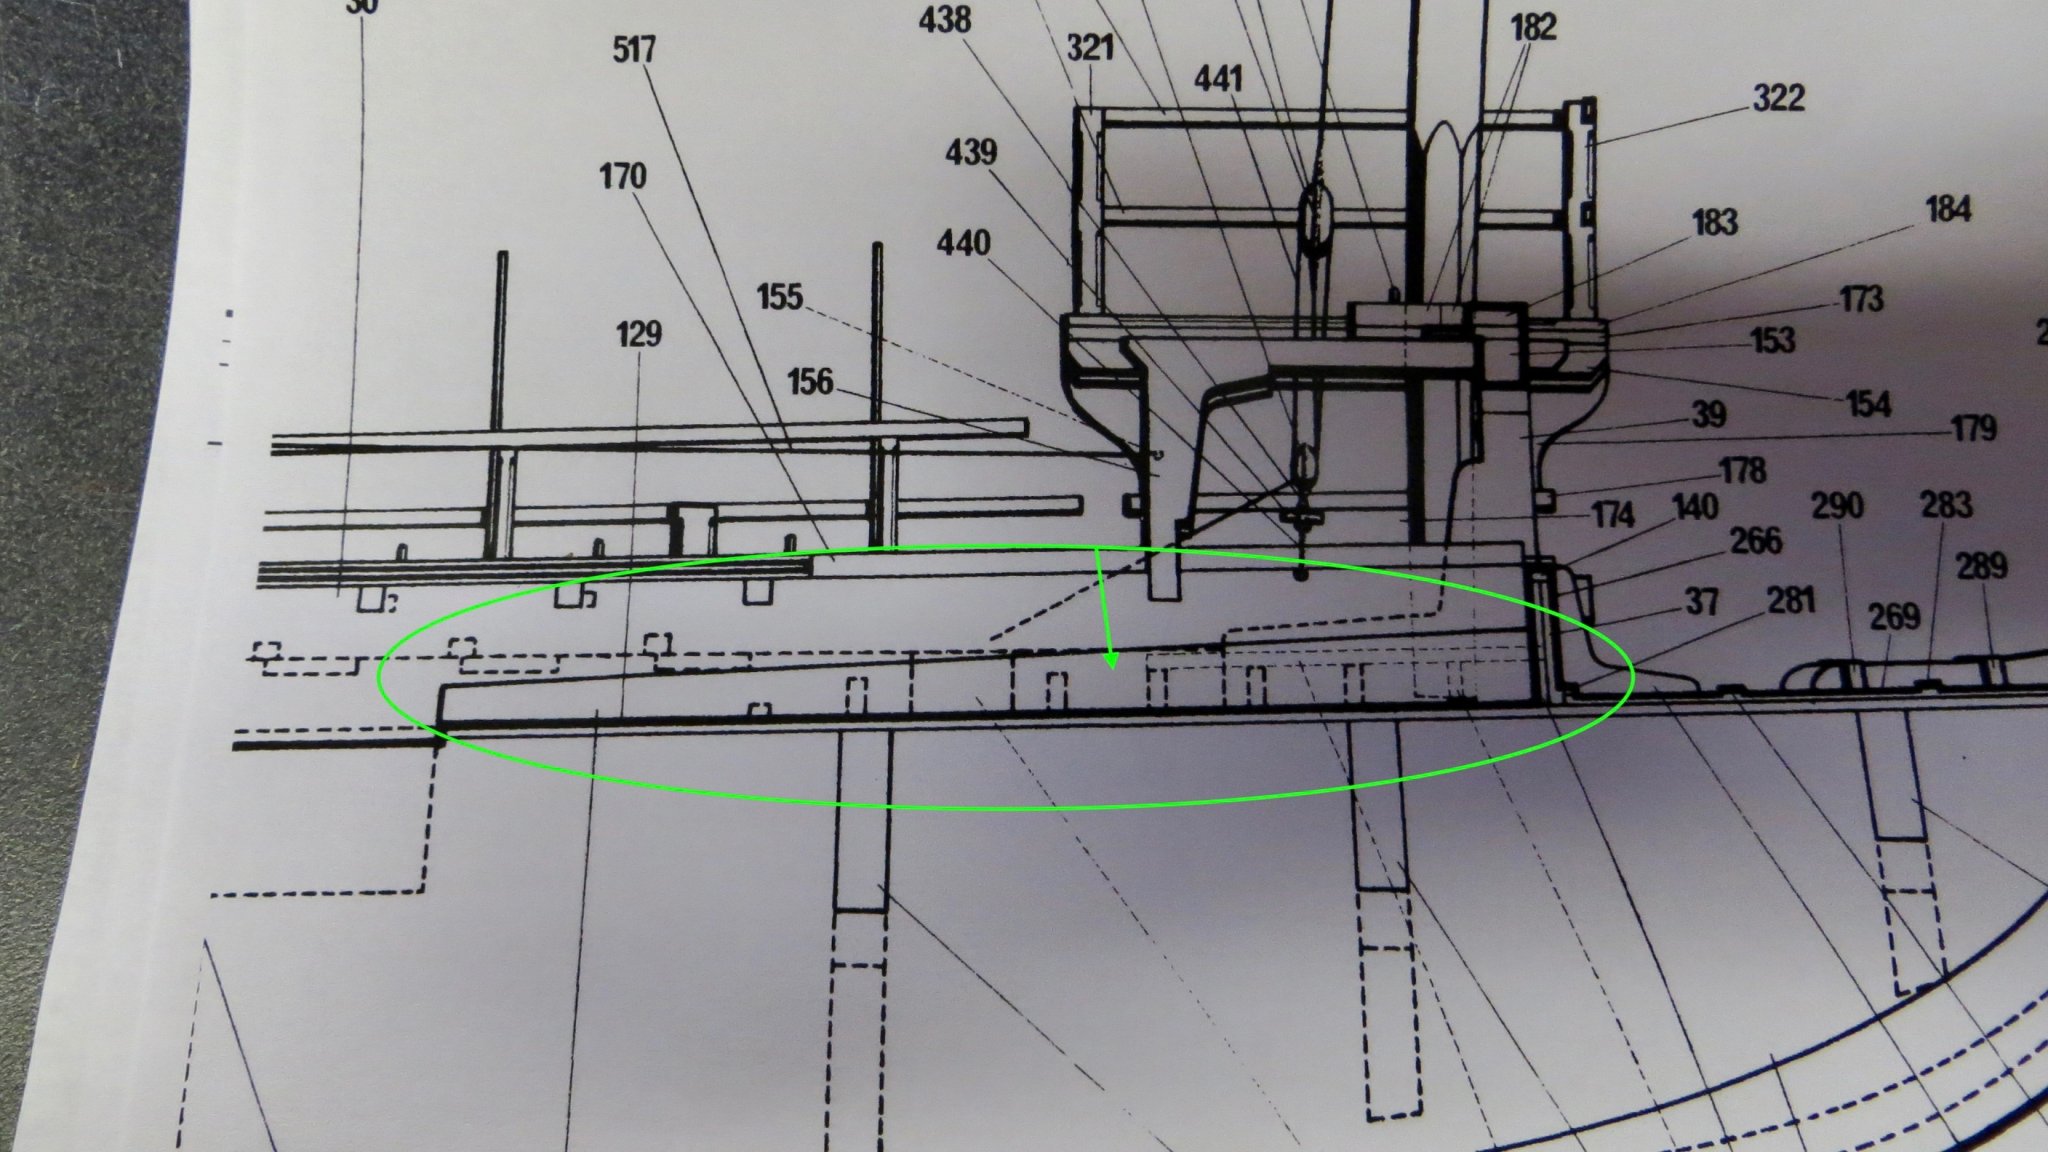
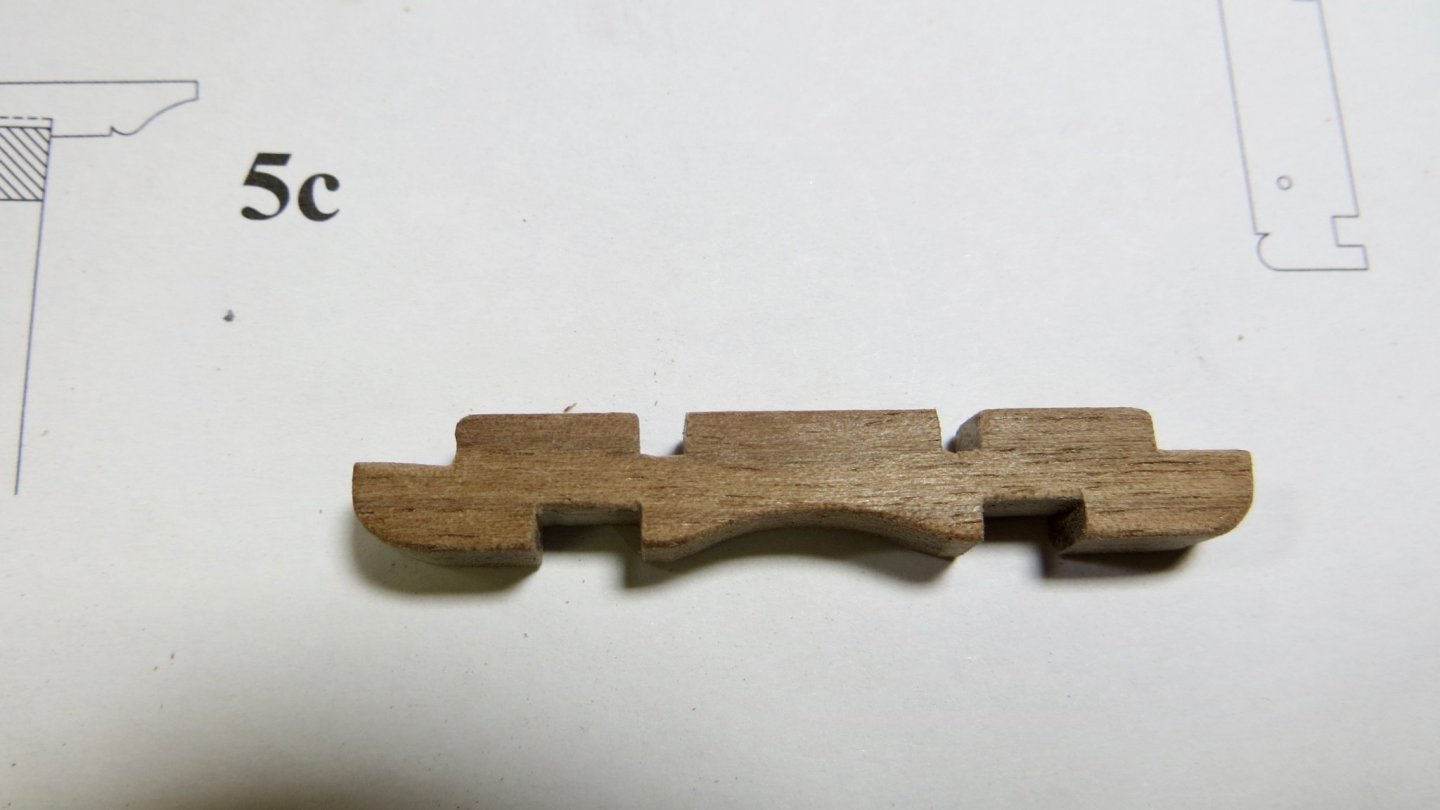
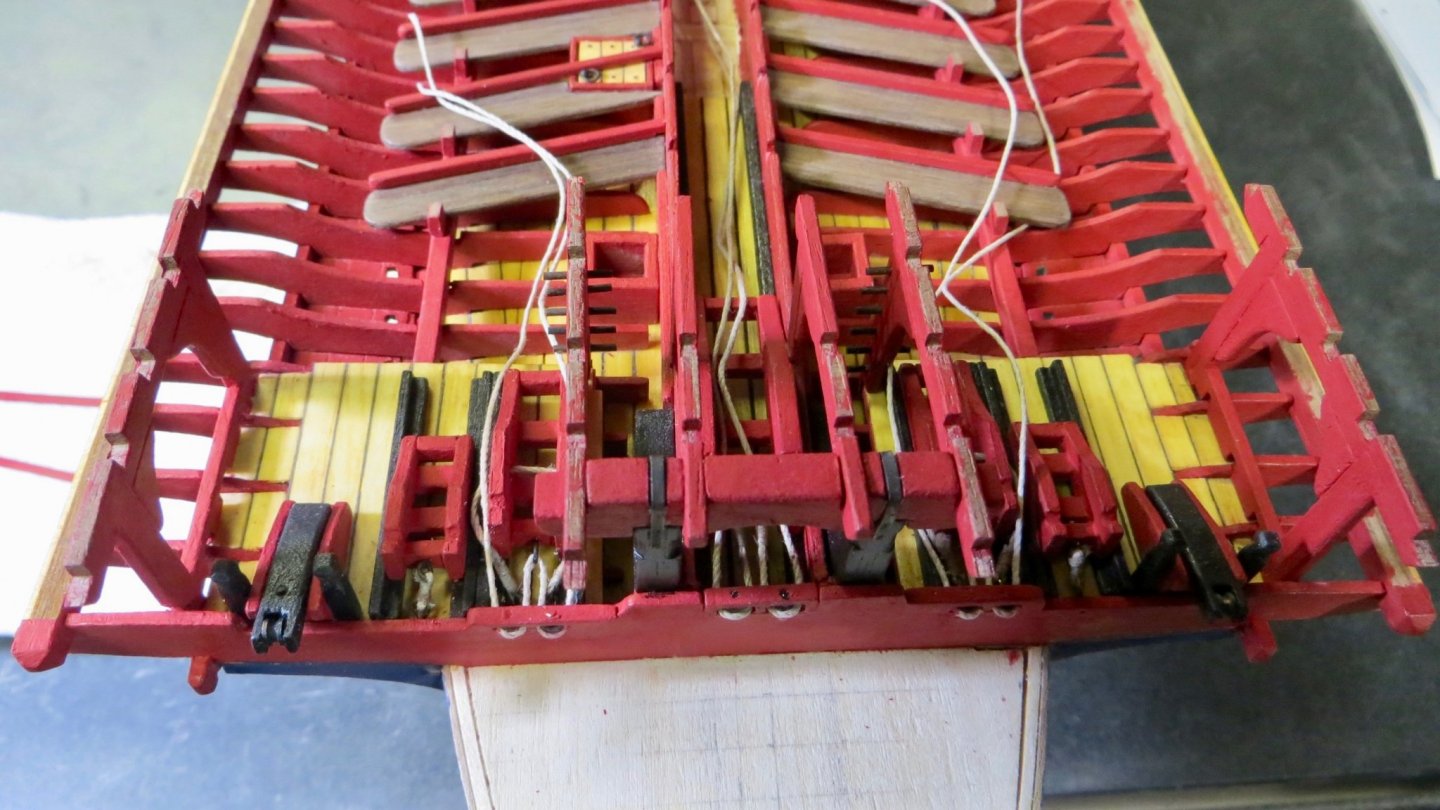
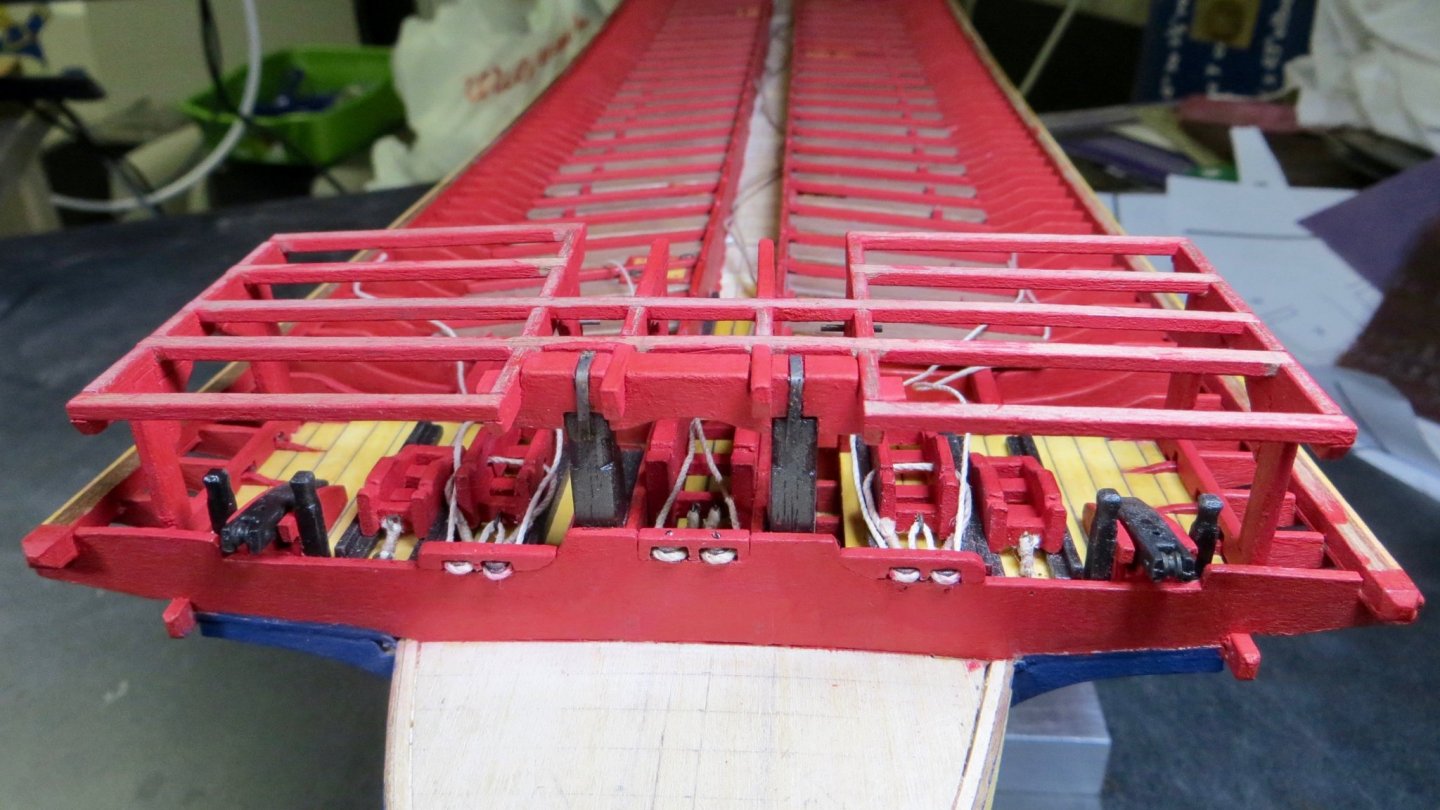
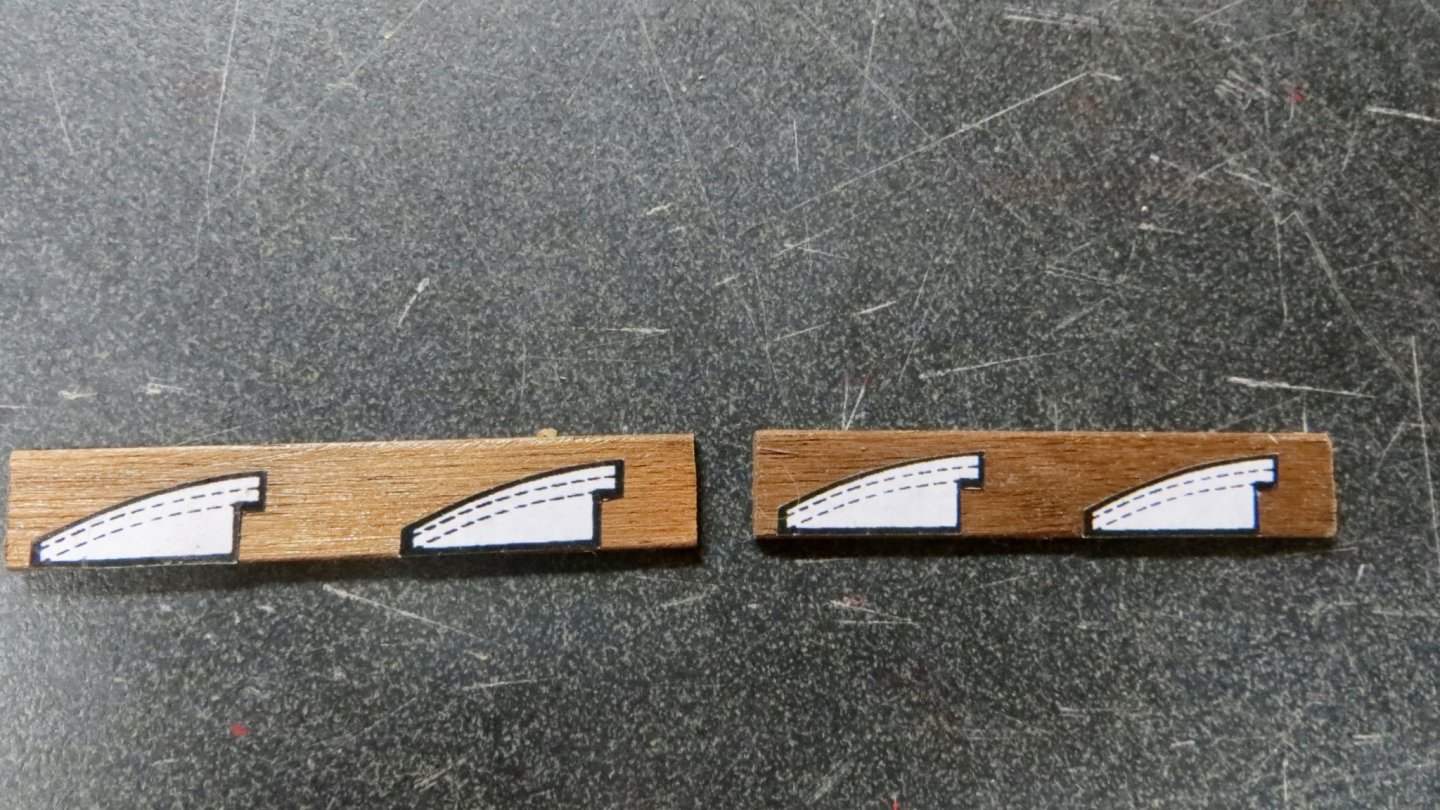
Hello, I started work on the upper platform right above the cannon deck. The Corel kit provided preformed pieces as shown on this photo. I thought I would try making the platform more realistic and I took a lot of ideas from the "La Fleur de Lis" plans that I have. Kit provided pieces: I created a new pattern and cutout the shape of the main beam that will be the primary support for the platform. This front beam is shown on the Corel plan to sit on top of the two black posts that I made early in this build. I didn't think this was correct, so using the "Fleur de Lis" plan as a guide, I had made the two vertical posts 2 mm taller than the Corel plan showed and notched the cross beam for a better fit. I made new posts and ribs, keeping the same size as the Corel pieces. This photo shows the added notches on the tops for the decking support beams. On 2 of the vertical posts are 1 mm round pegs for what I assume are vertical ladders to reach the upper platform The front main beam painted and installed The vertical post assemblies installed And finally, the deck support beams installed In my haste to build this upper platform I didn't notice, until after the fact, that there are a couple of rigging blocks for the foremast, near the gun deck, that I should have probably installed first. I'm pretty sure I can squeeze in there and add them now, or soon, before finishing the upper deck planks. Thanks again for visiting and I hope everyone has a Happy Holiday season!! Frank


- 510 replies
-
- 8
-
-
- reale de france
- corel
- (and 1 more)
-
Michael, Thanks for stopping by! We wouldn't want to upset the French, so i'll stick to the kit guns!! Lol!! best, Frank
- 510 replies
-
- 1
-
-
- reale de france
- corel
- (and 1 more)
-
Clark, Just found your log. I too look forward to following your build. You're off to a great start! good luck and more importantly, have fun! Frank
- 112 replies
-
- 1
-
-
- corel
- reale de france
- (and 1 more)
-
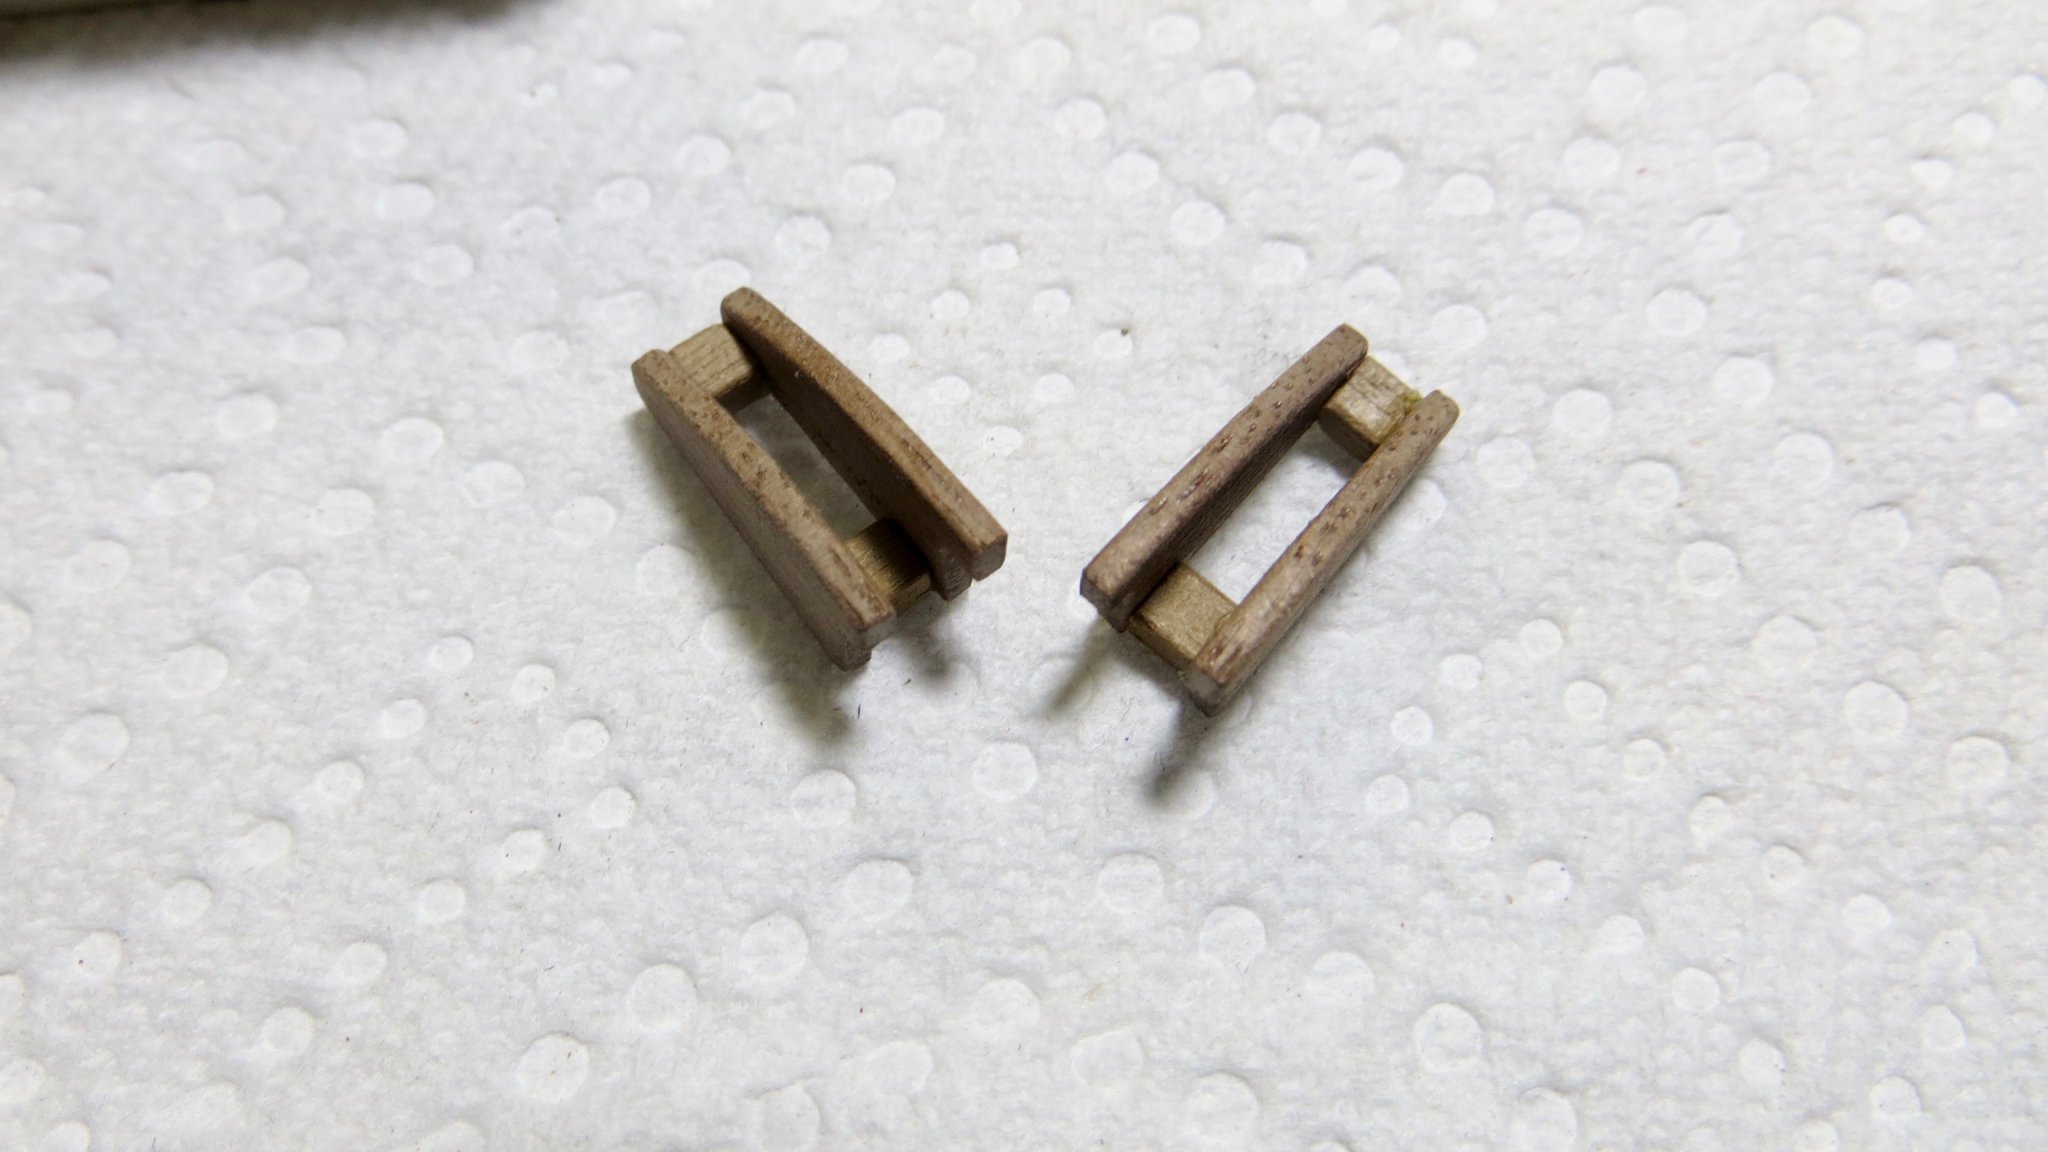
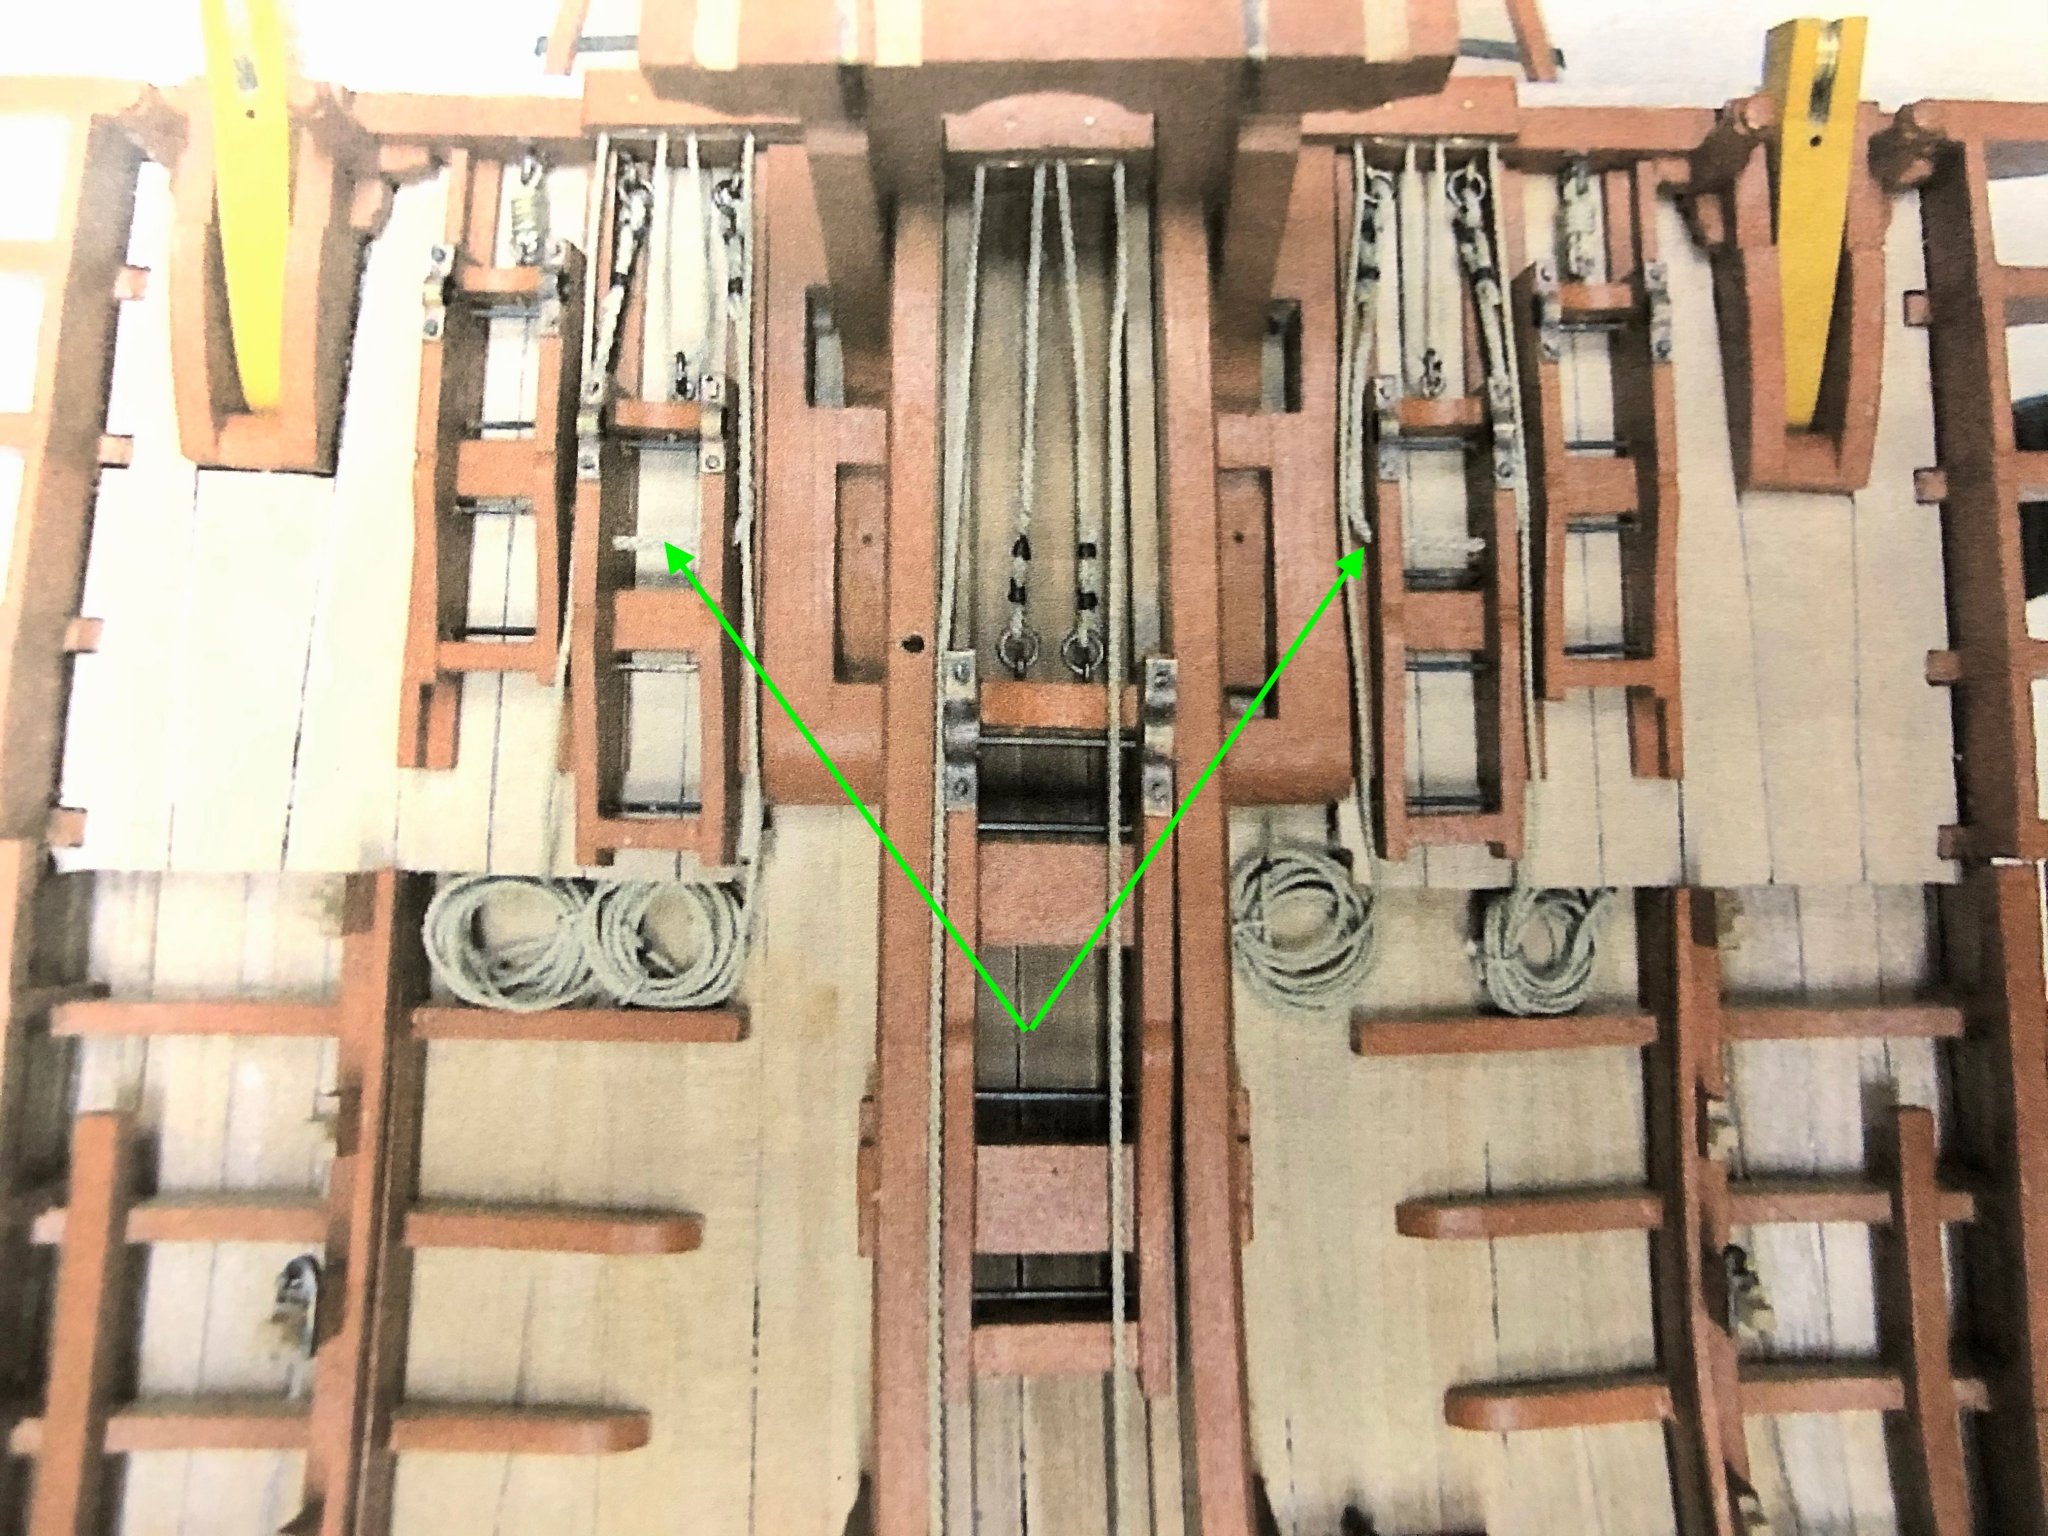
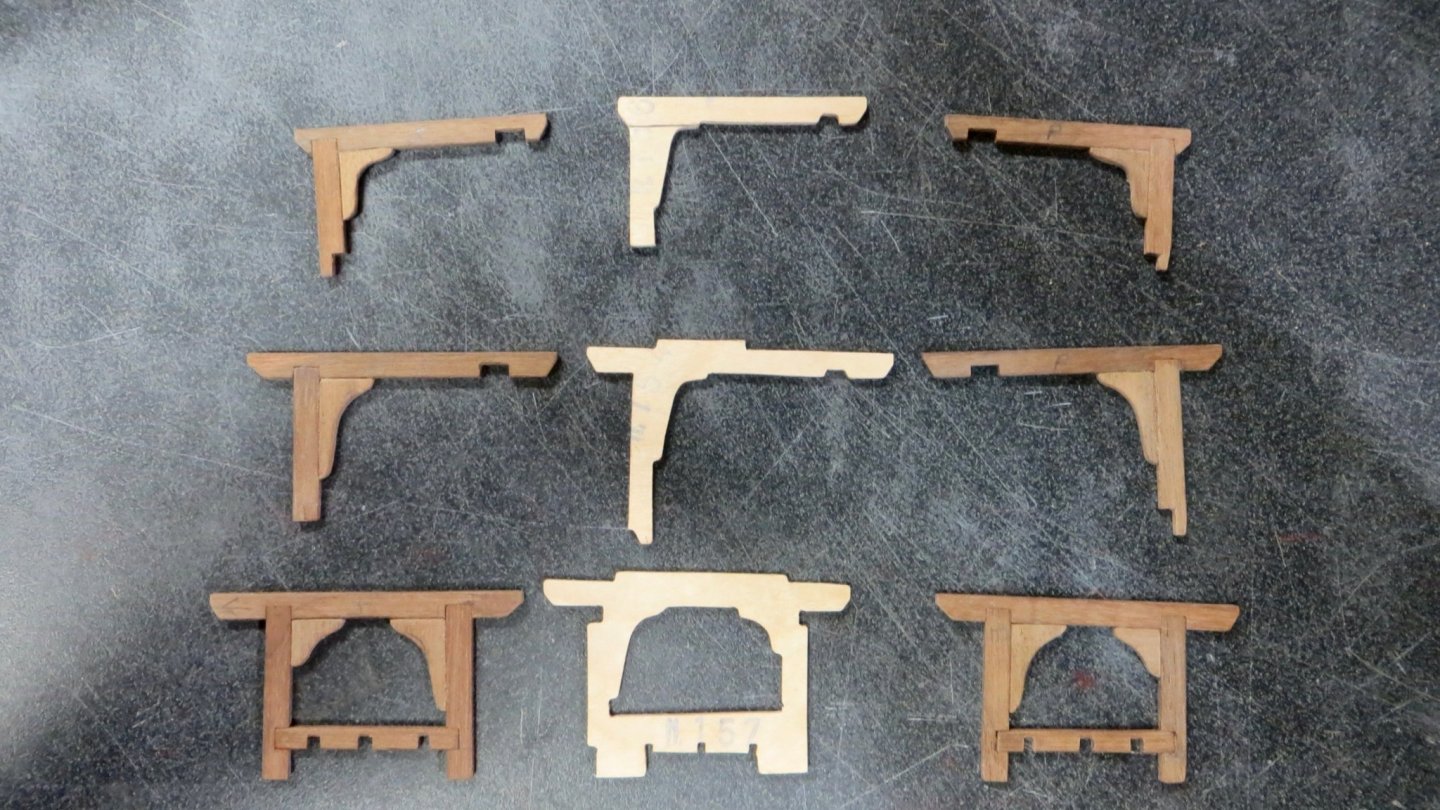
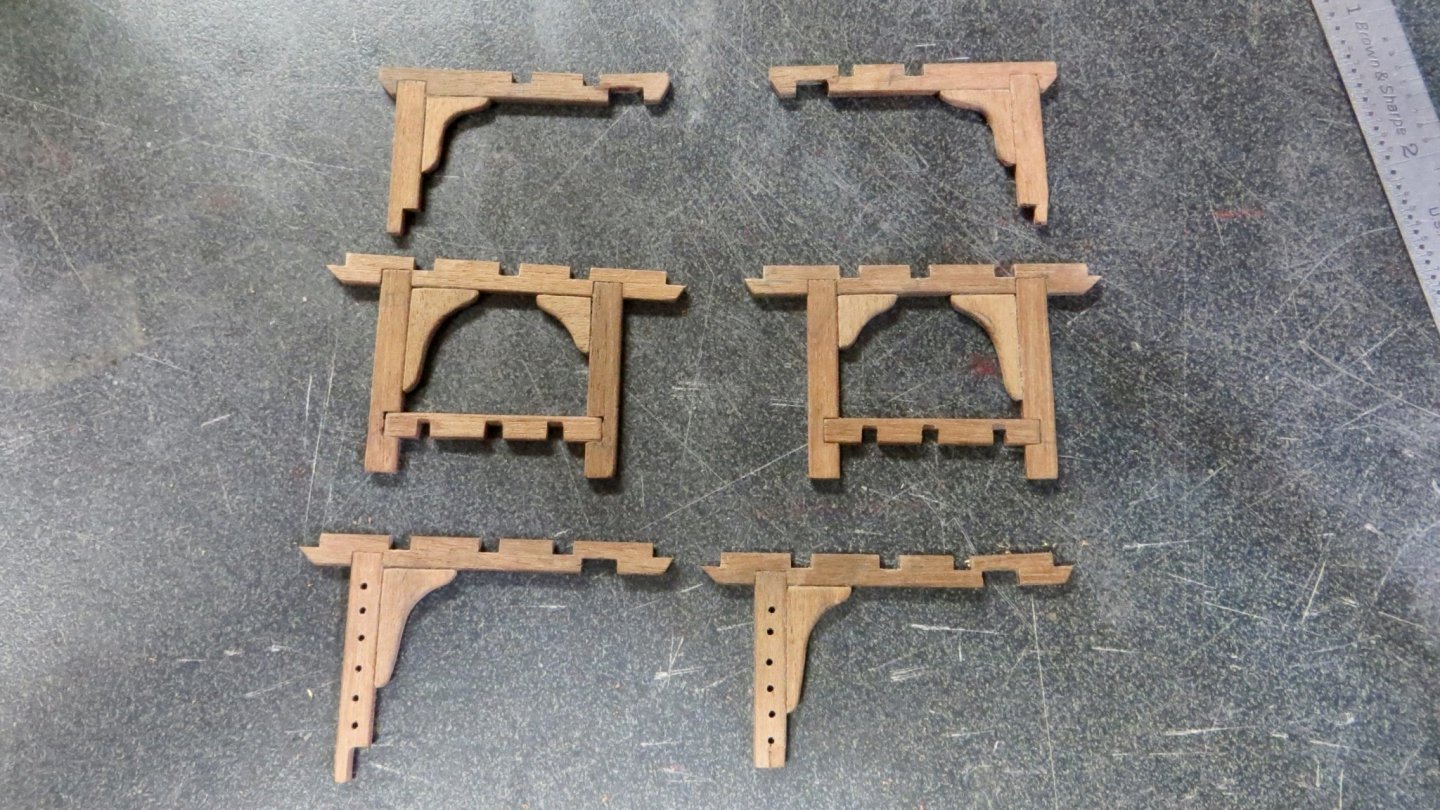
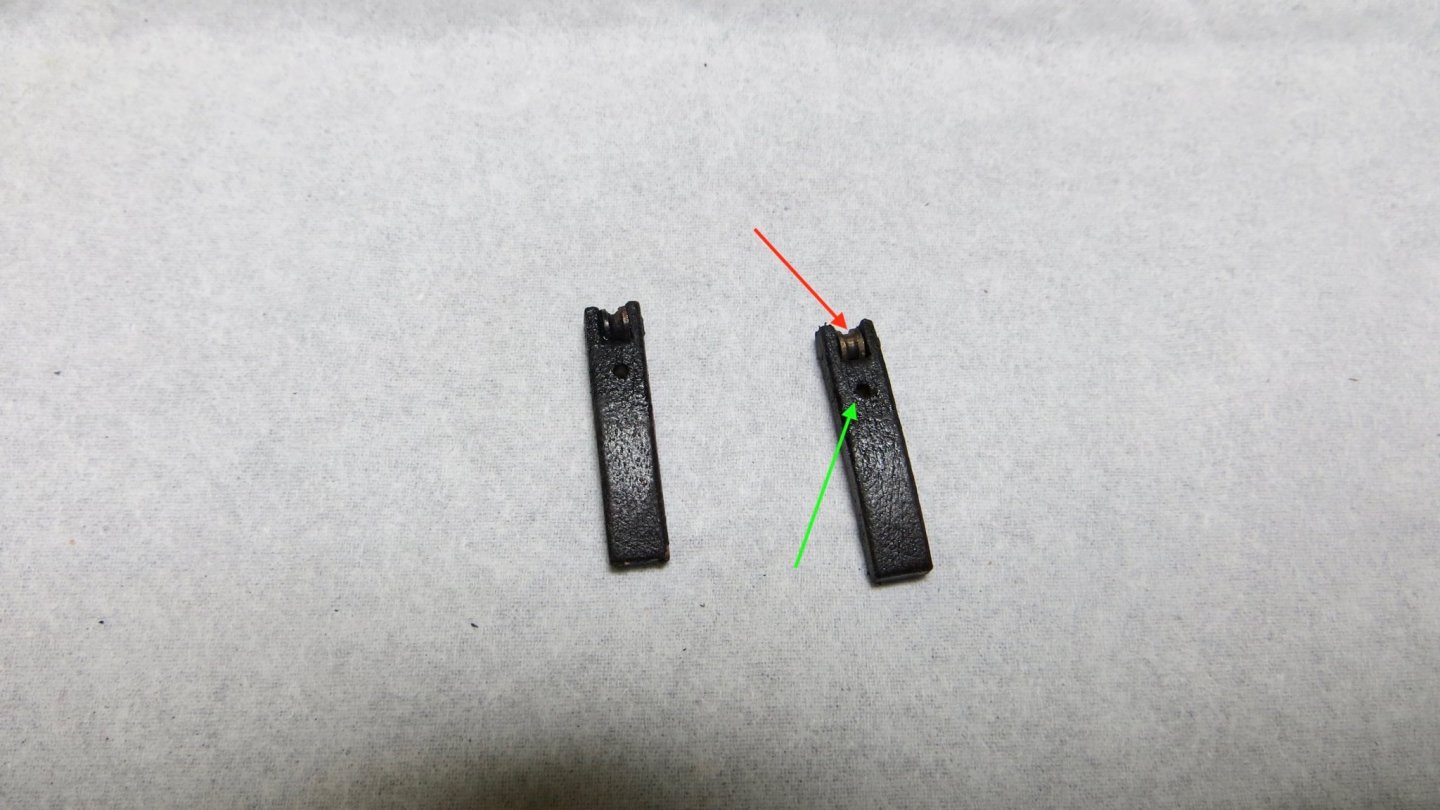
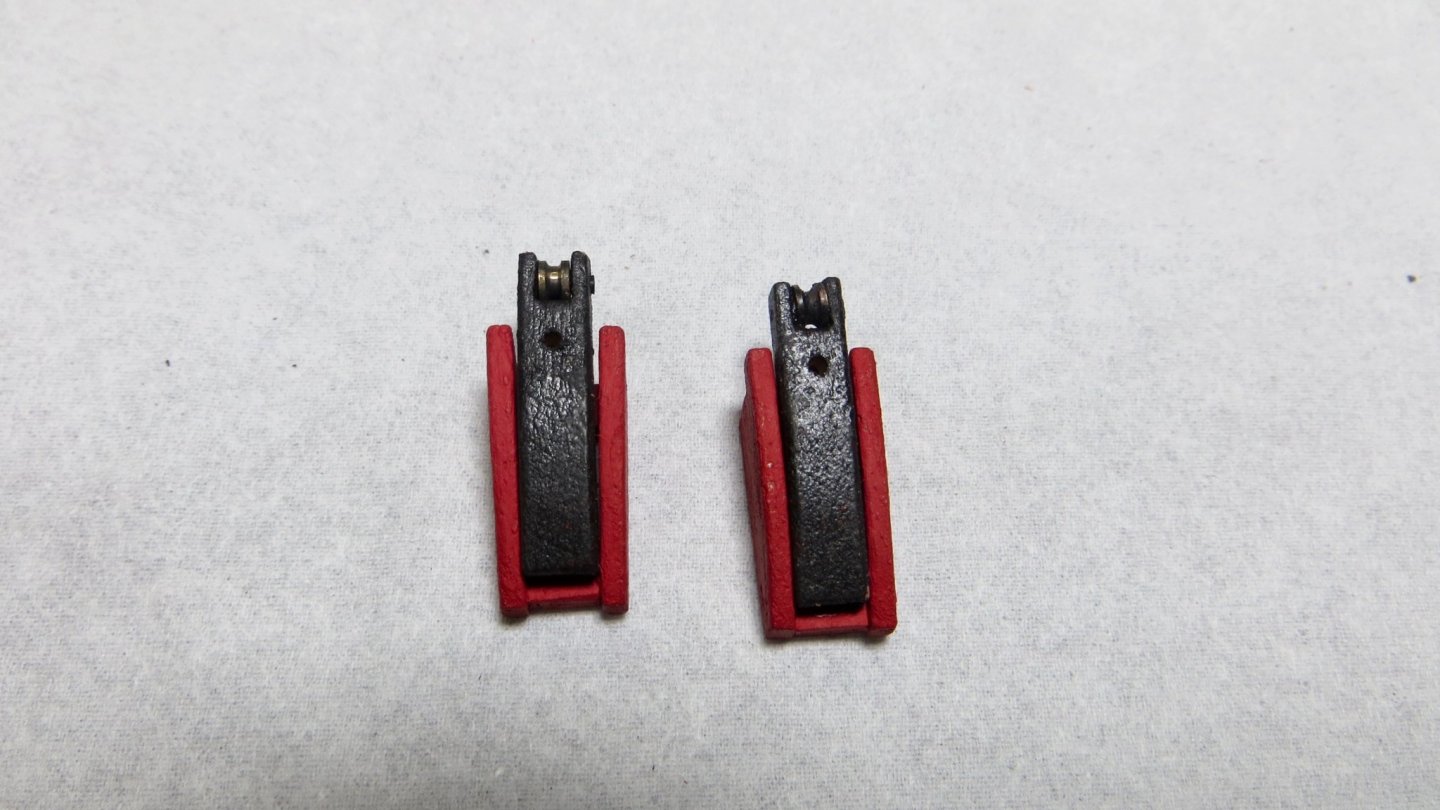
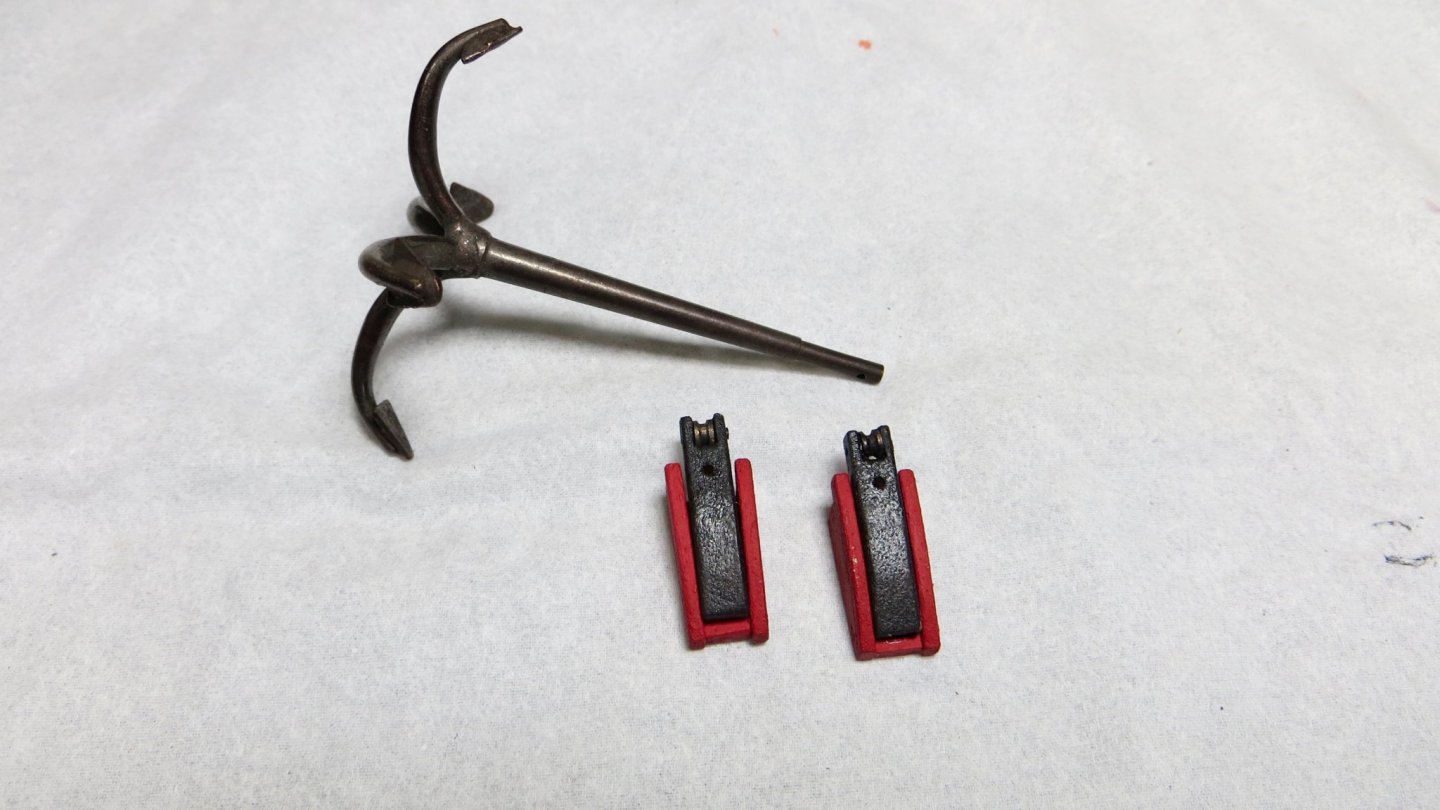
Hi, I am continuing to finish up the lower platform. Next to the two smallest carriages are the windlass for the anchors. As with the carriages, I glued the pattern onto the wood and cut and shaped them. The windlass or pulleys are not rectangular. The width is narrower in the back than in the front. Located in-between is the pulley block. Looking at a YouTube video illustration, it showed the anchor line being raised up with the sheaves (see red arrow). When the anchor itself reached the sheave, a line was run thru the hole behind the sheave (see green arrow) and tied to the anchor end and anchor line. At this point the anchor line was pulled and the whole block lifted up and flipped back, allowing the anchor stem to sit on the windlass. Type of anchor used and supplied with the kit. I will rig up the anchor later in the build. Photo showing the windlass installed on both ends, along with bitts on each side of the windlass used to tie down anchor lines (green arrows). As was mentioned in earlier posts, we can see that everything on this lower platform is very tight to each other. The next step in the build is to frame the upper deck (above the cannon deck in the last photo). These are the parts (see next photo) supplied by the Corel kit to do the framing. Lucky for me, I will also follow the methods of other very nice Reale builds on this website, and NOT use these. As mentioned many times, I have the "Fleur de Lis" plans, which have drawings of the real framing method. I will try to follow these plans and hopefully build more authentic beams, posts, and knees Thanks again for everyones likes and comments! Appreciated! Frank


- 510 replies
-
- 5
-
-
- reale de france
- corel
- (and 1 more)
-
Thanks Clark, Easy enough to do! I'll try reversing them, before I add the cannon, to see how they look! Frank
- 510 replies
-
- 1
-
-
- reale de france
- corel
- (and 1 more)
-
Hi Mark. Thanks for visiting and for your comments. Your opinions are definitely worth more than you think In reading Hubac's post, along with your thoughts, i'm feeling better about using the kit's cannon. Thanks again, Frank
- 510 replies
-
- 1
-
-
- reale de france
- corel
- (and 1 more)
-
Hubac, Thank you very much for you your input and knowledge. Your thoughts definitely put my mind at ease! I am swinging back around to using the kit supplied cannon, as you suggest. Thanks again, Frank
- 510 replies
-
- 1
-
-
- reale de france
- corel
- (and 1 more)
-
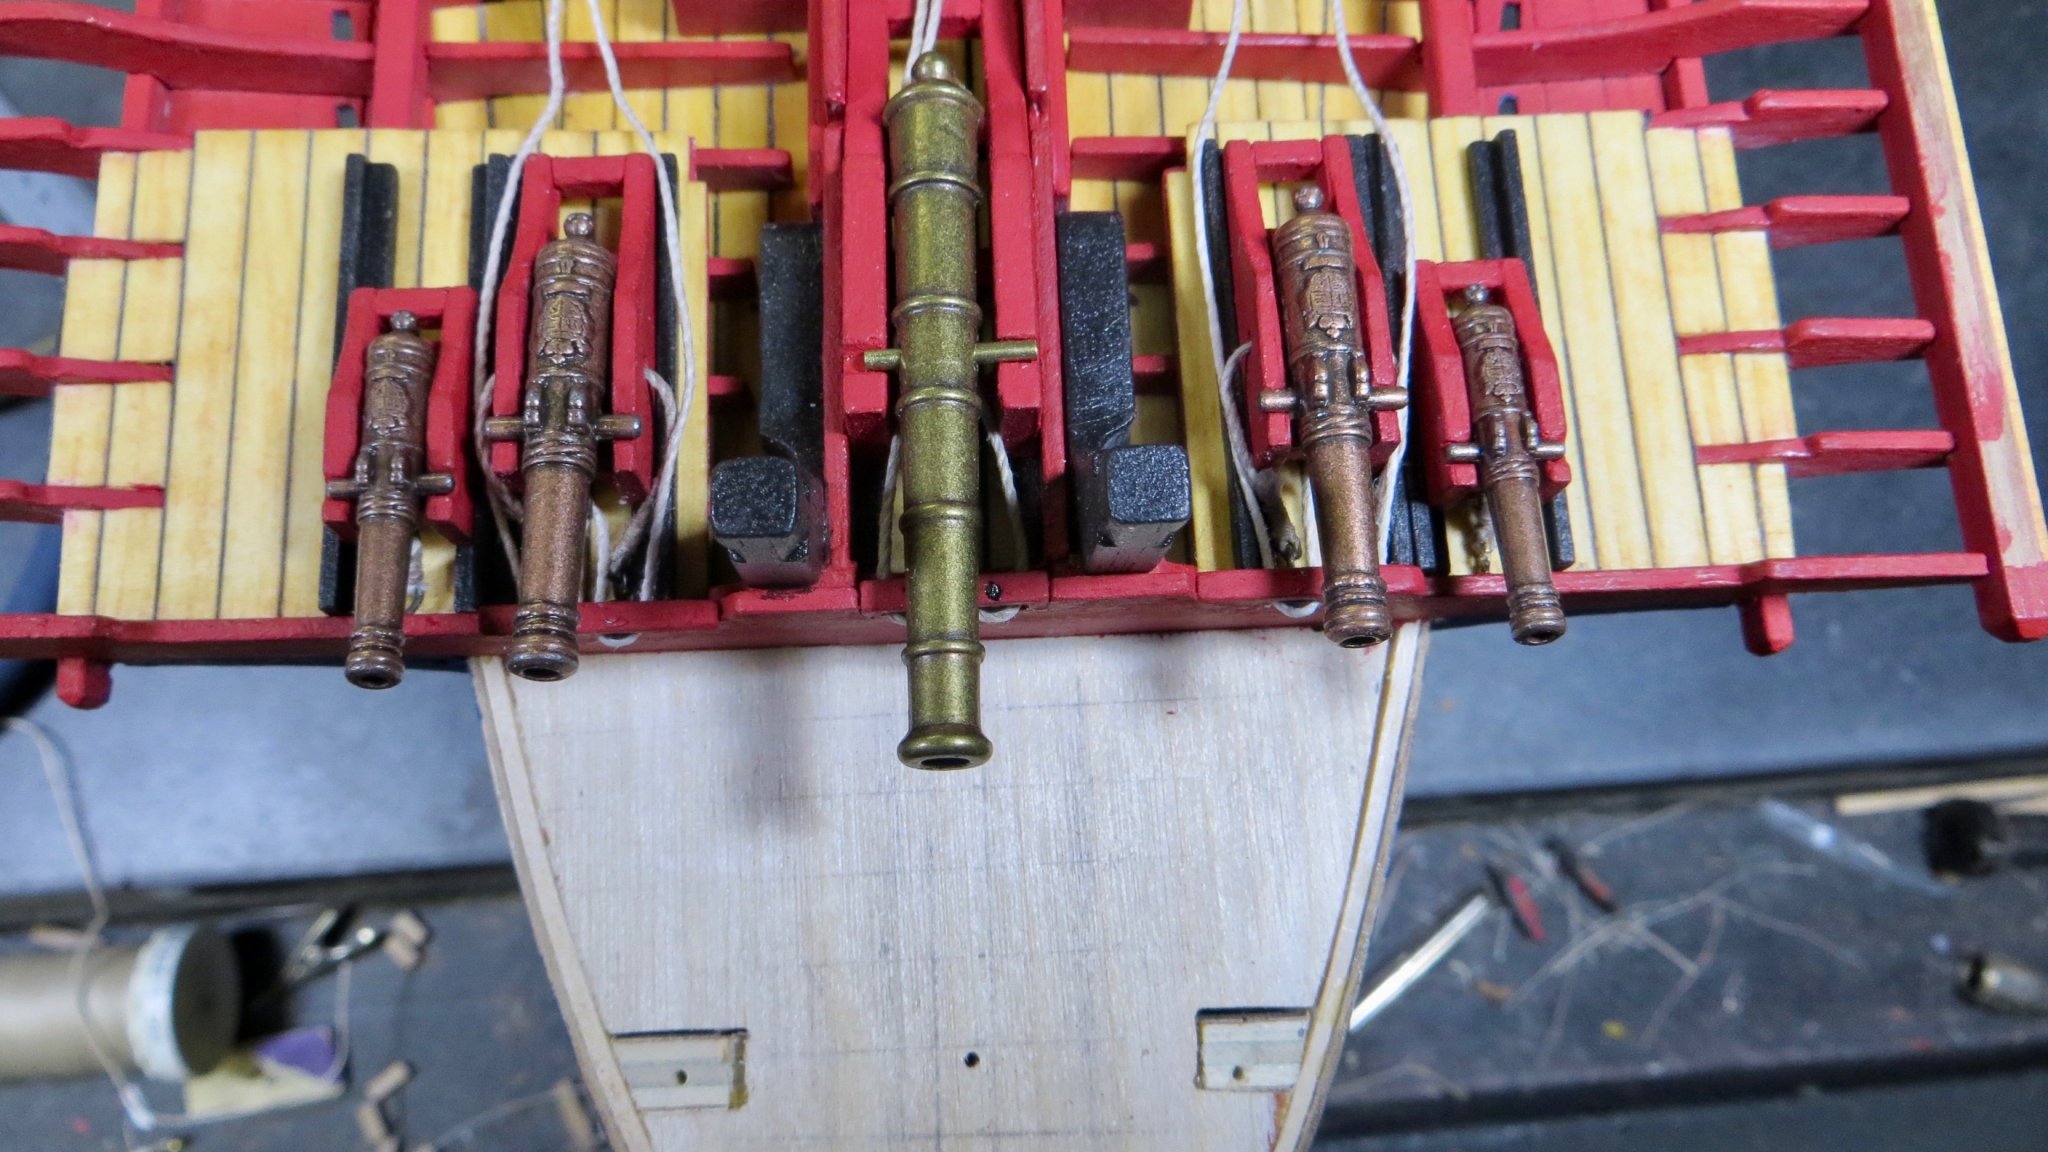
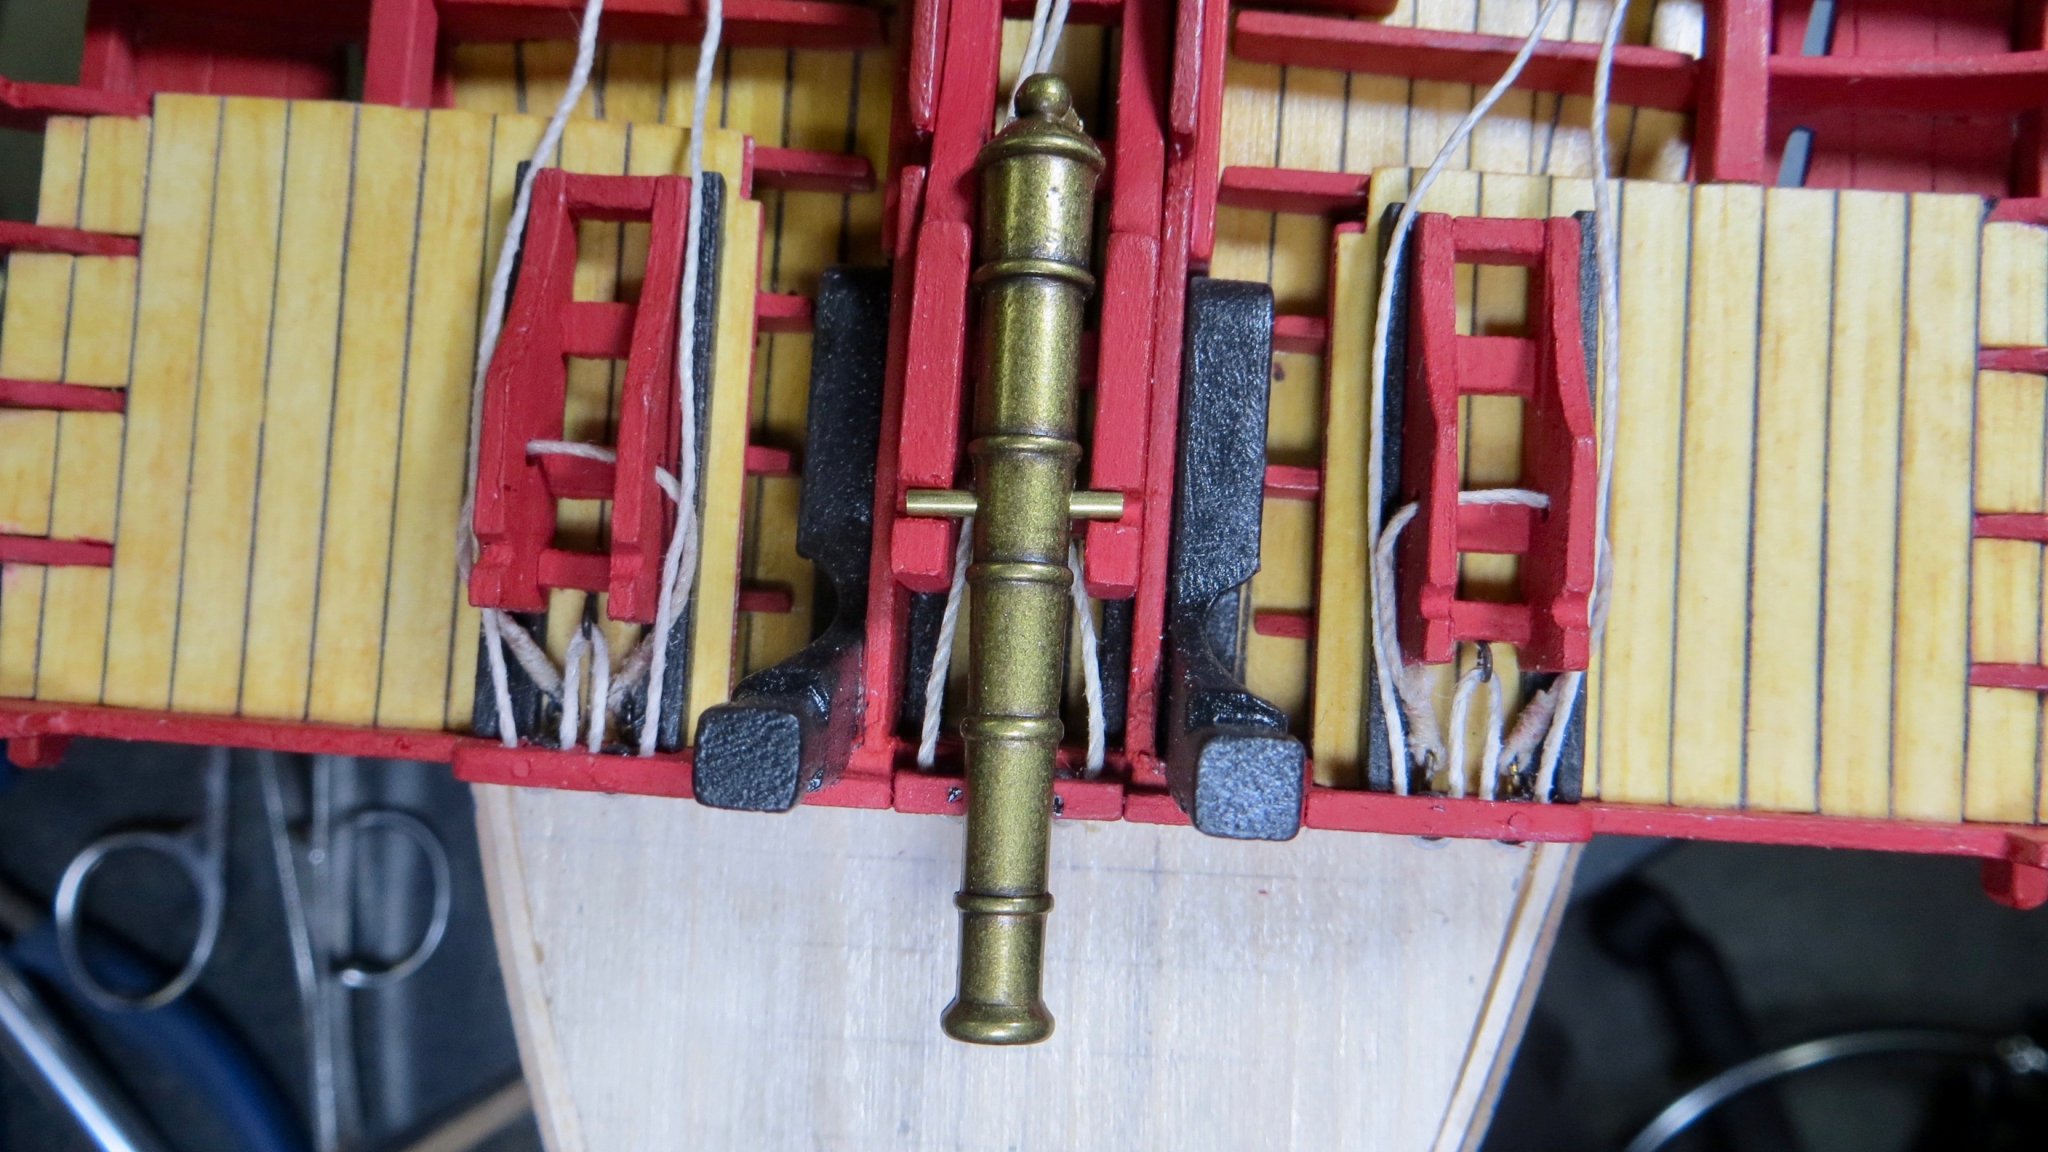
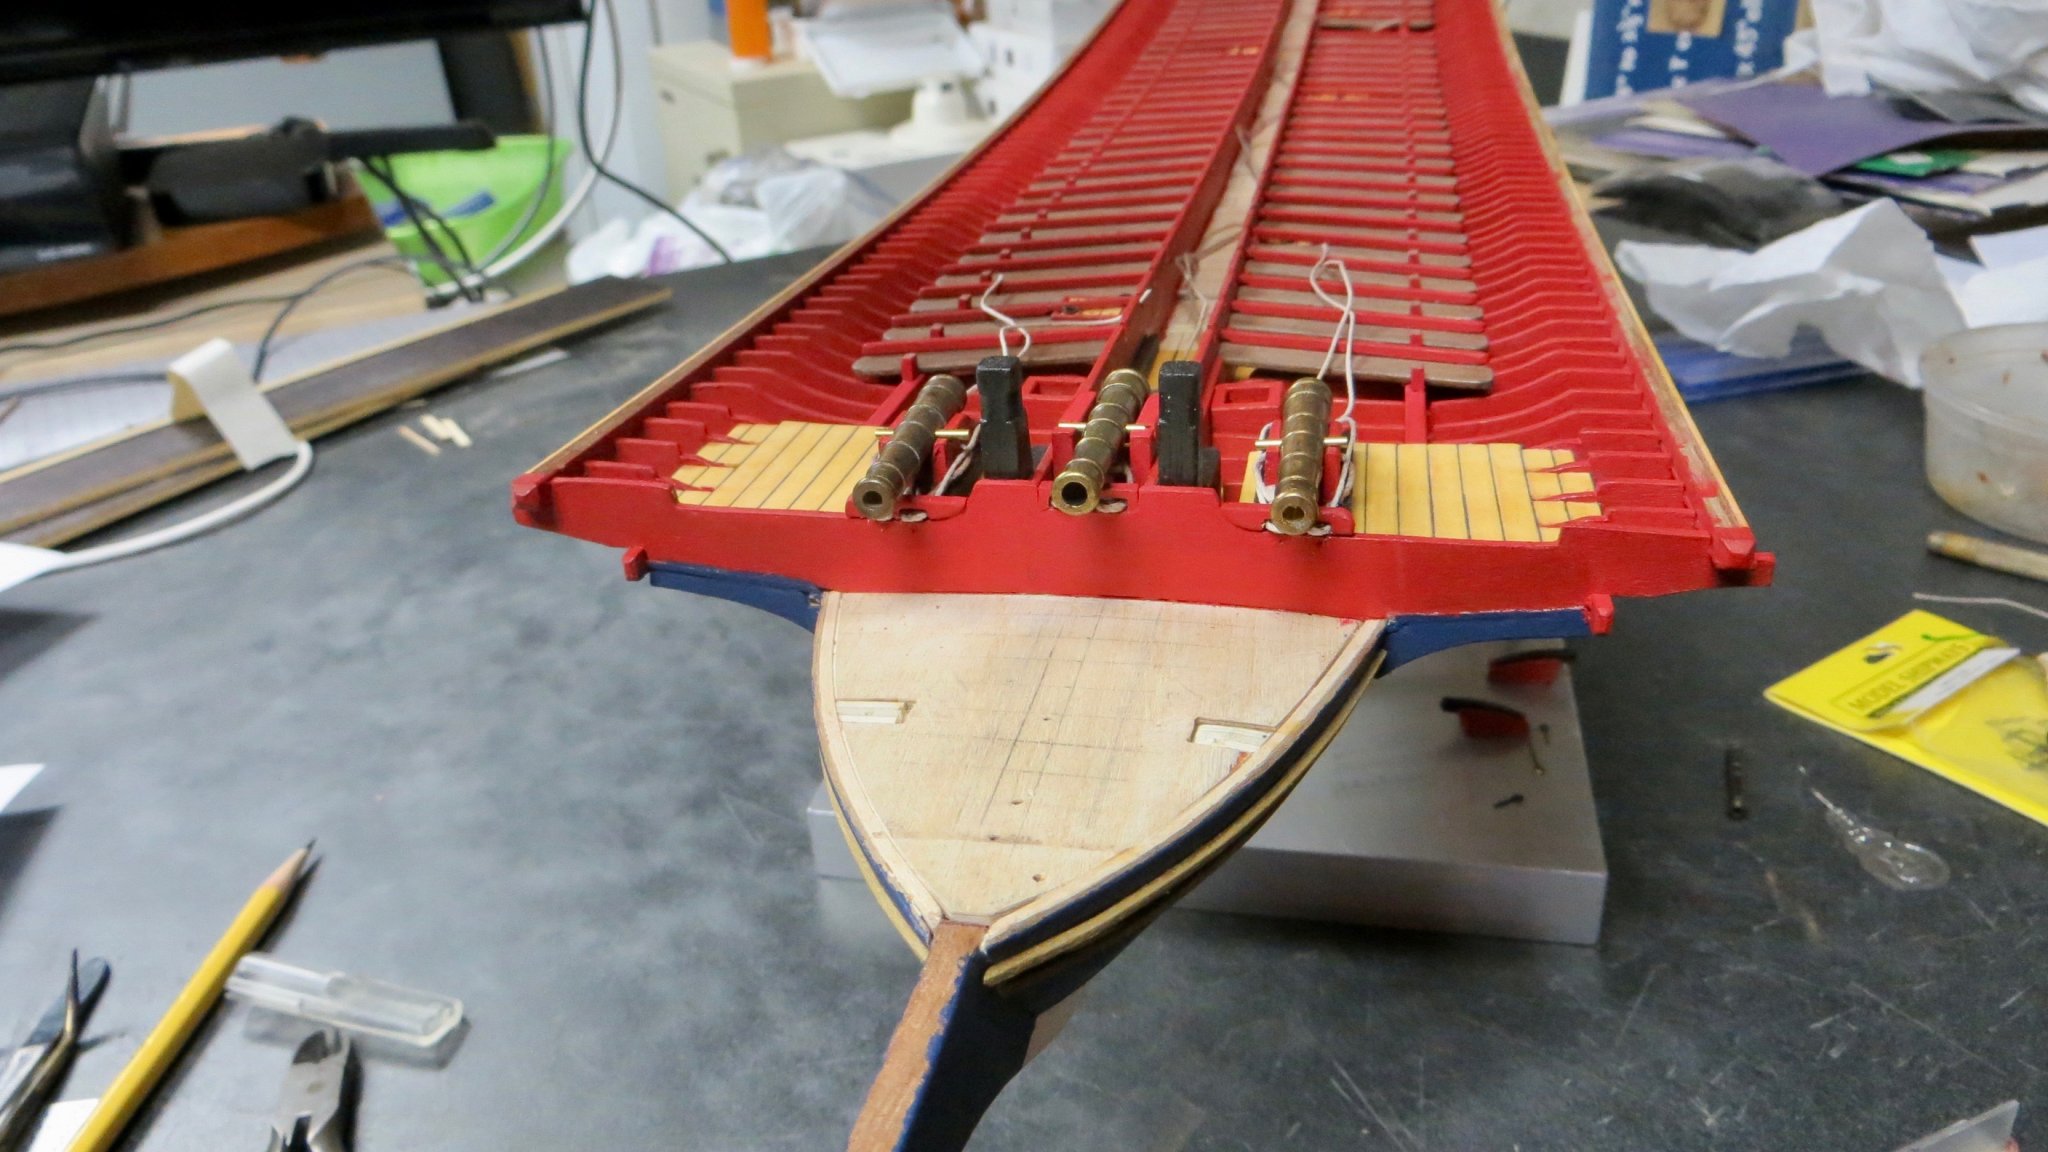
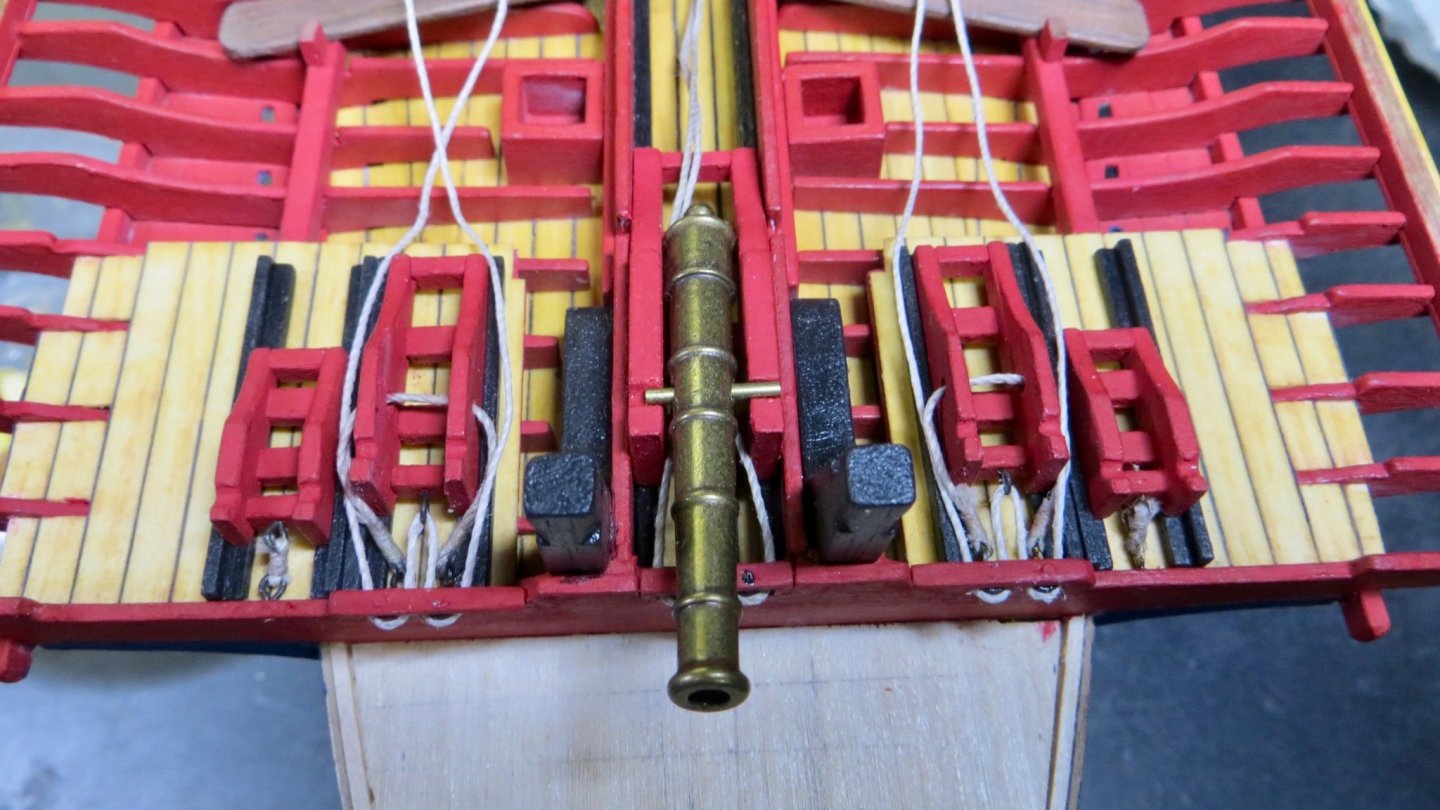
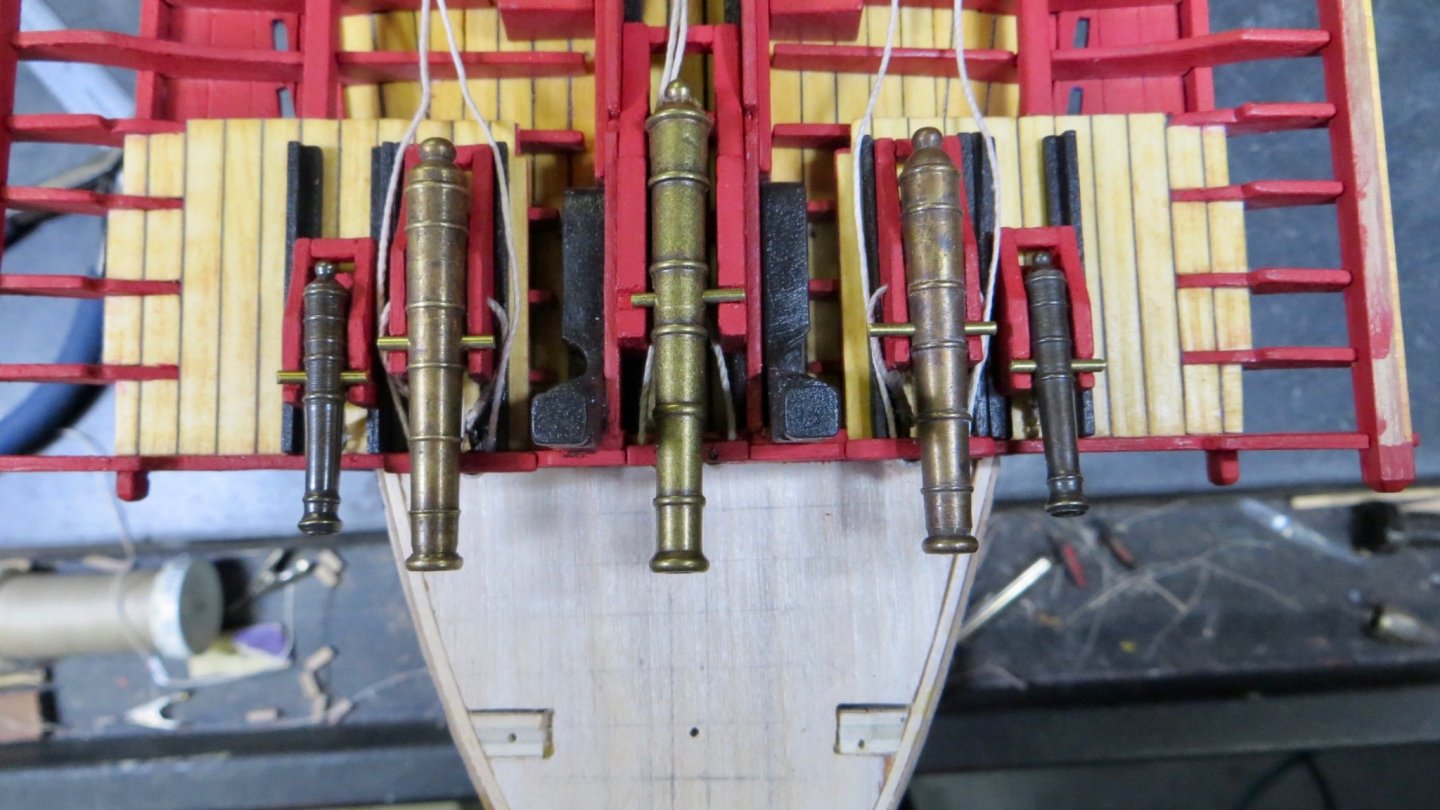
Hello, Making some more progress on the gun carriages. I added the final 2 gun carriage supports on each side of the center cannon. The Fleur de Lis plans show the support on the left butting up with the one in place for the cannon shown. The smallest carriage is rigged with a line shown here. All carriages installed in place. So, while fabricating and installing the carriages, one thing has been bothering me and I was hoping to get some opinions from you who have been following this log. I temporarily placed the guns that came with the kit onto the carriages (see the next two photos) and I am worried that the two cannon (see green arrows) on each side of the center cannon are a little too big and out of scale. I found some smaller cannon and placed them in the next 2 photos. They feel more to scale, but I would have to find a replacement for the center one, since the style is different from the ones I had in my stash. (I am planning to blacken or paint black the cannons later) Any thoughts or opinions would be appreciated. Am I over thinking this? On the "La Fleur de Lis" plans, the cannon look to be smaller than the ones the Corel kit provides. Thanks again for visiting, Frank


- 510 replies
-
- 4
-
-
- reale de france
- corel
- (and 1 more)
-
Thank you for your assistance. I'm not quite sure what Clark, in the post above, is looking for. Hopefully this will help him. Thanks, Frank
-
You move fast Mark Nice job. How did the blending with the sheet with the gun port openings go? It looks like it blended well from the photos. Frank
-
Sorry, I can't help you Clark. I don't speak German and I tried to find the Belin Goussier painting online and was unsuccessful. Frank
-
Hi Clark, I have been searching all over the internet, but I can't find the painting you are looking for. I did find references to the French warship "La Reale" which is not the same ship ad the Reale de France. thanks, Frank
-
Clark, Thank you for your comments. It is appreciated. I agree. I just have to decide how I want the ship (model) to be presented! Michael, As always, thank you for your input and research. Everything you stated makes sense to me I will continue to use the monograph of "La Fleur de Lis" as a guide and the beautiful model by R. Courgeon, as I have been trying to do where applicable. Thanks to all for visiting. Frank
- 510 replies
-
- 1
-
-
- reale de france
- corel
- (and 1 more)
-
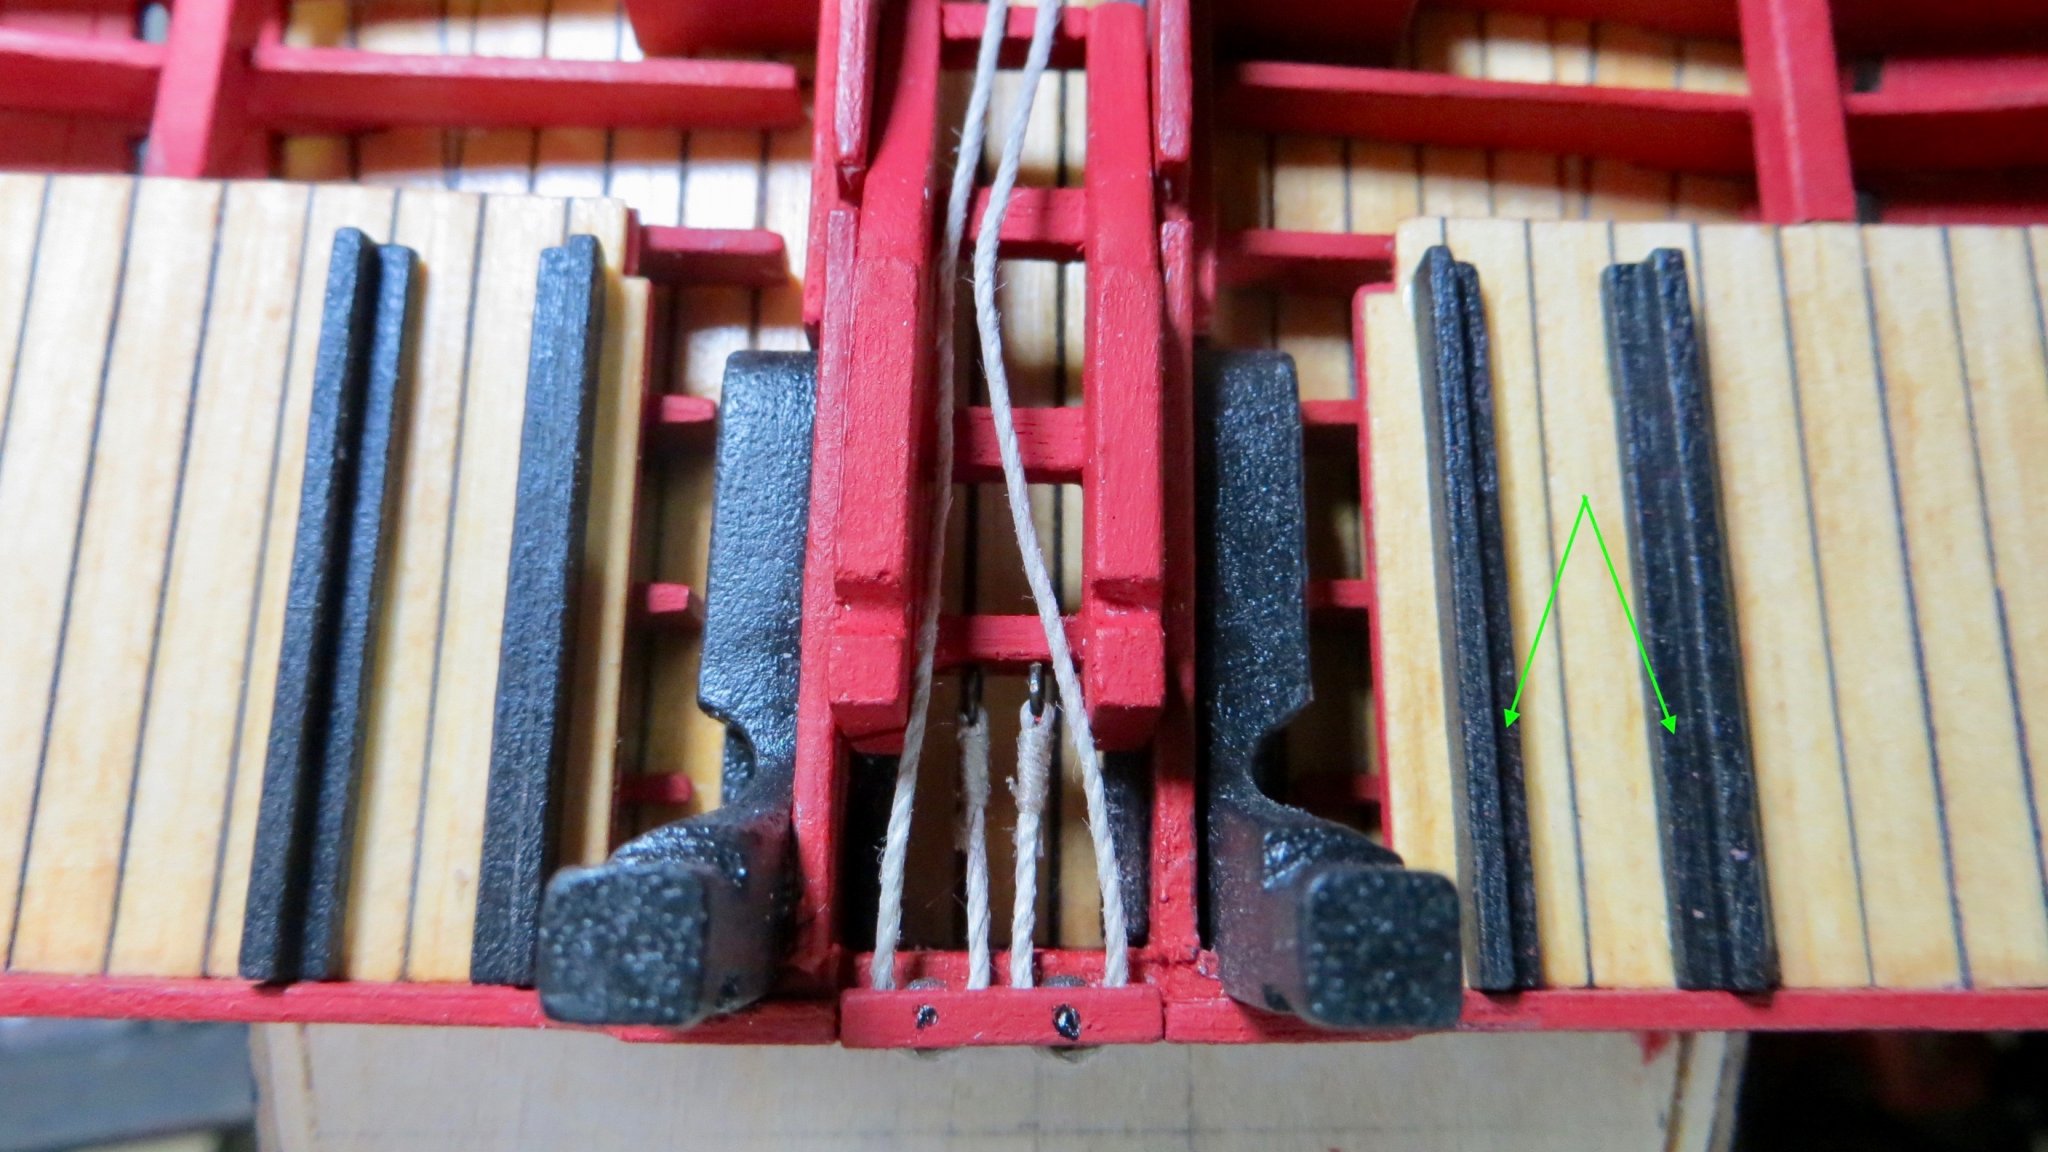
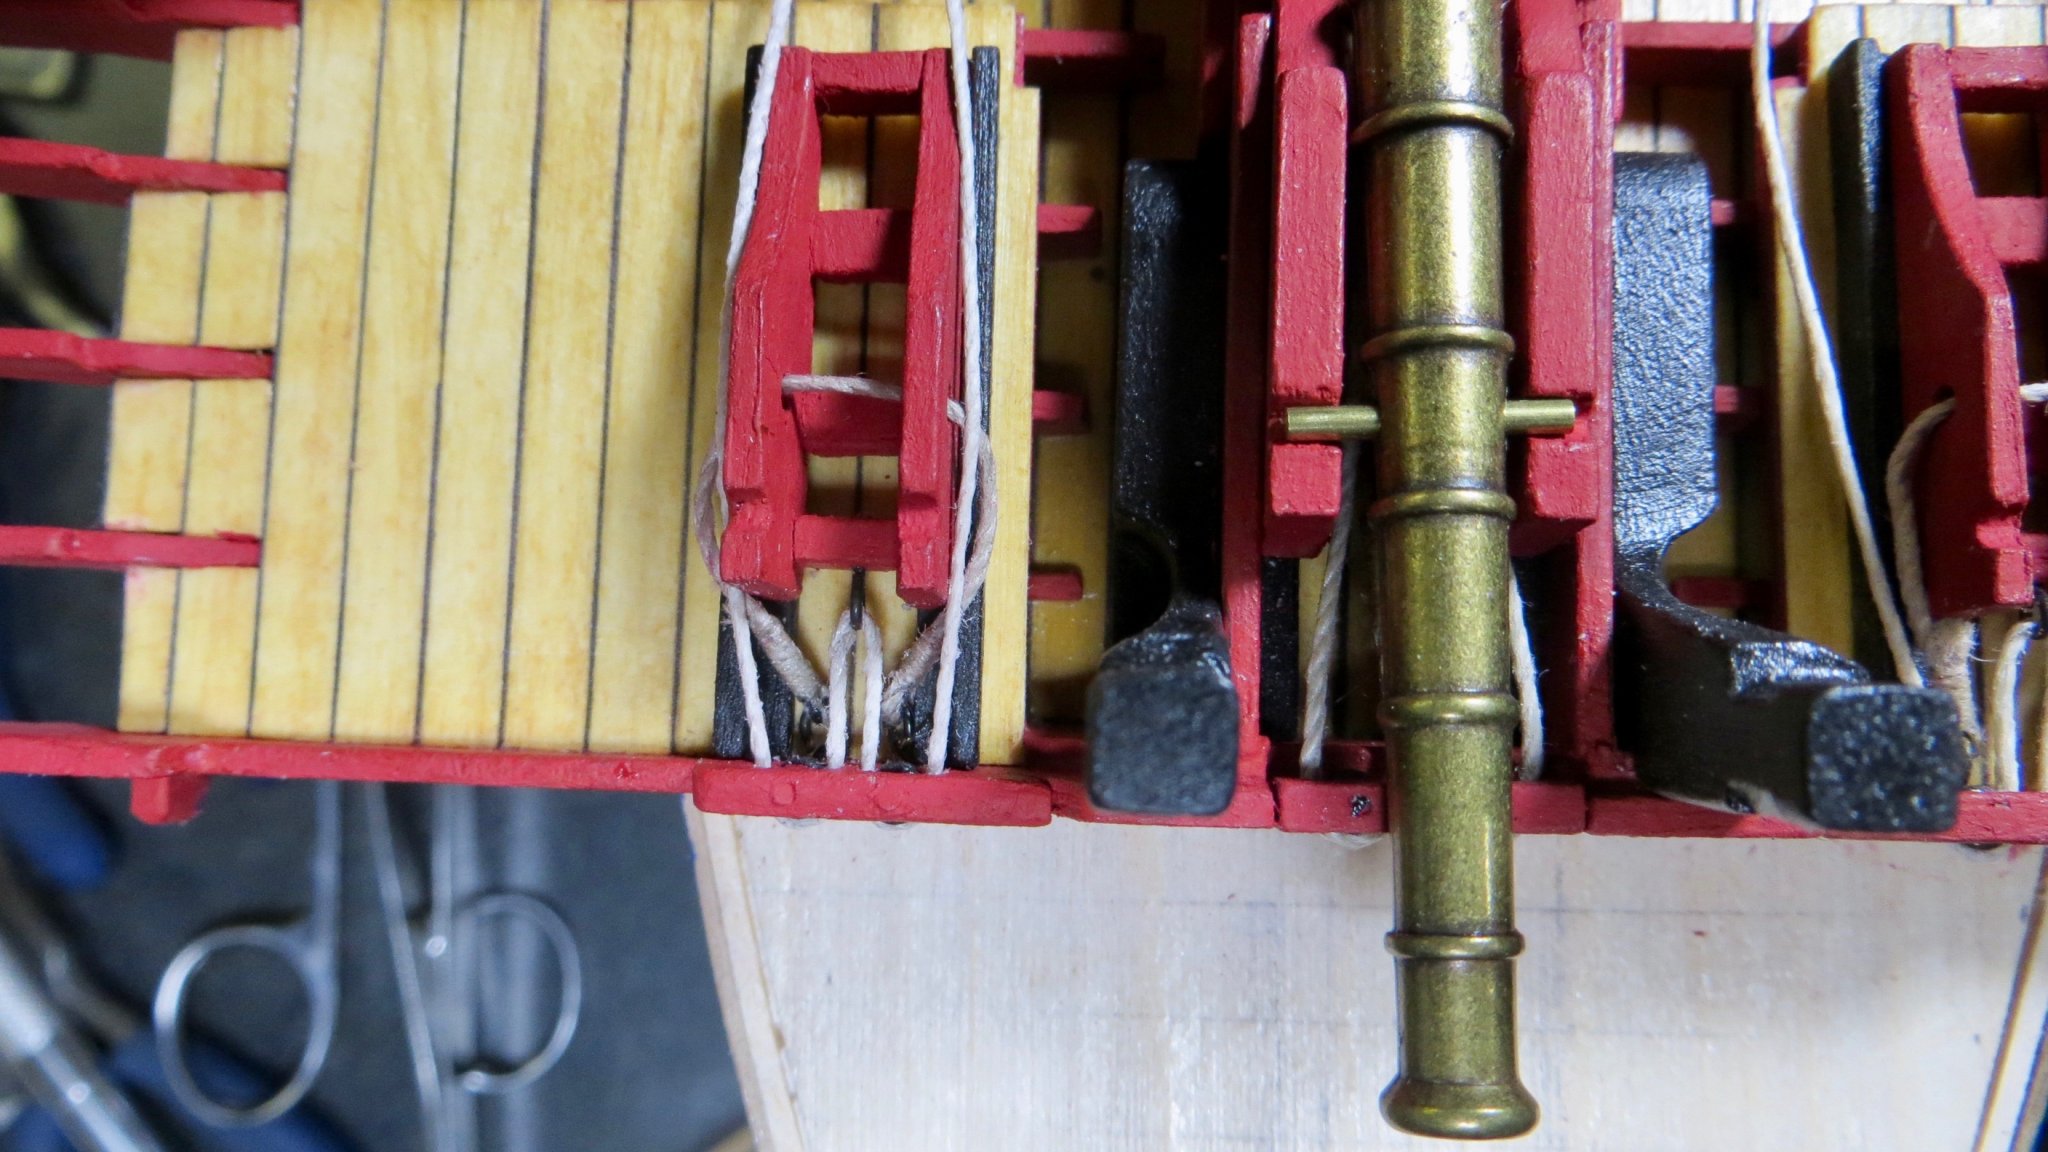
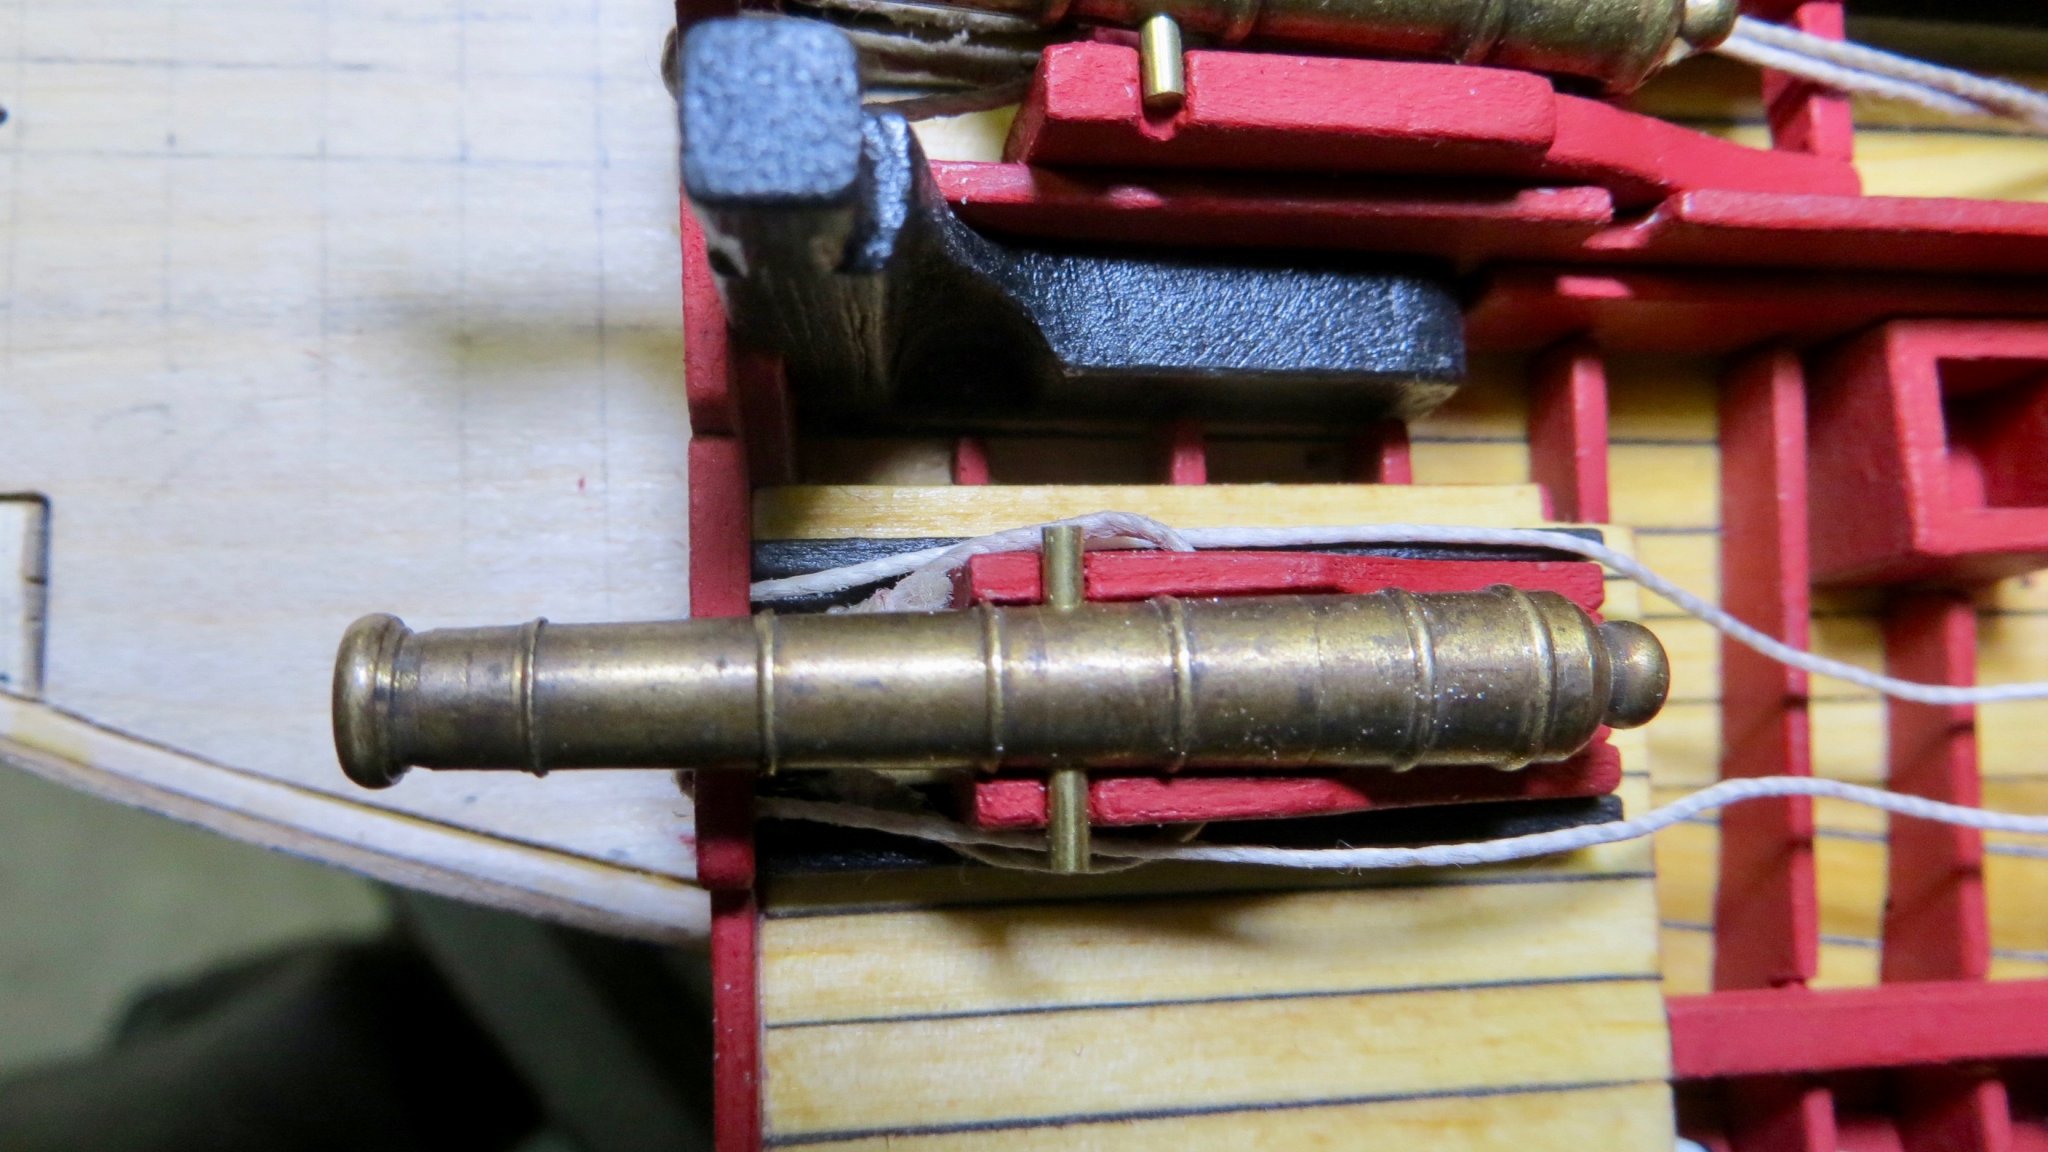
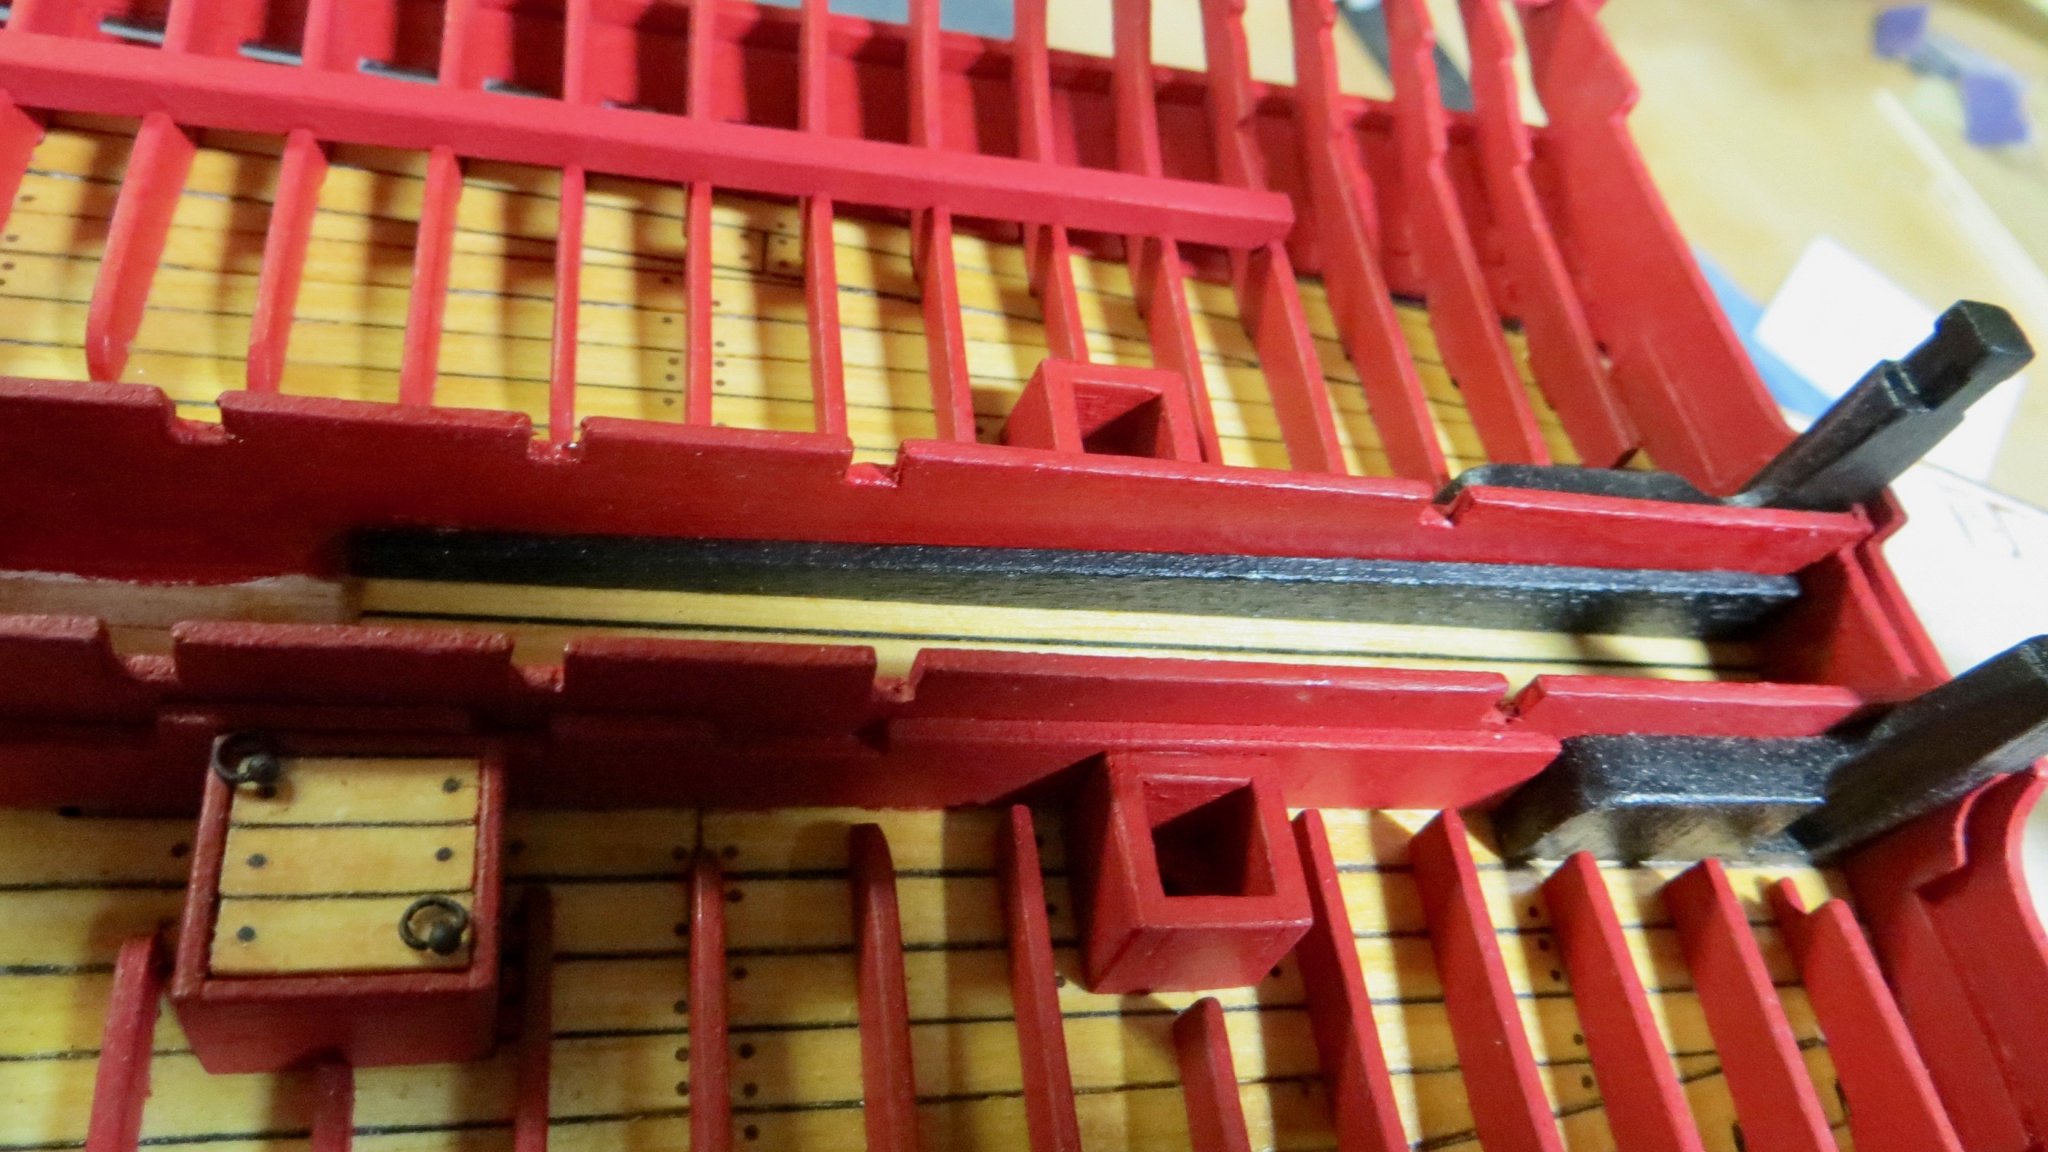
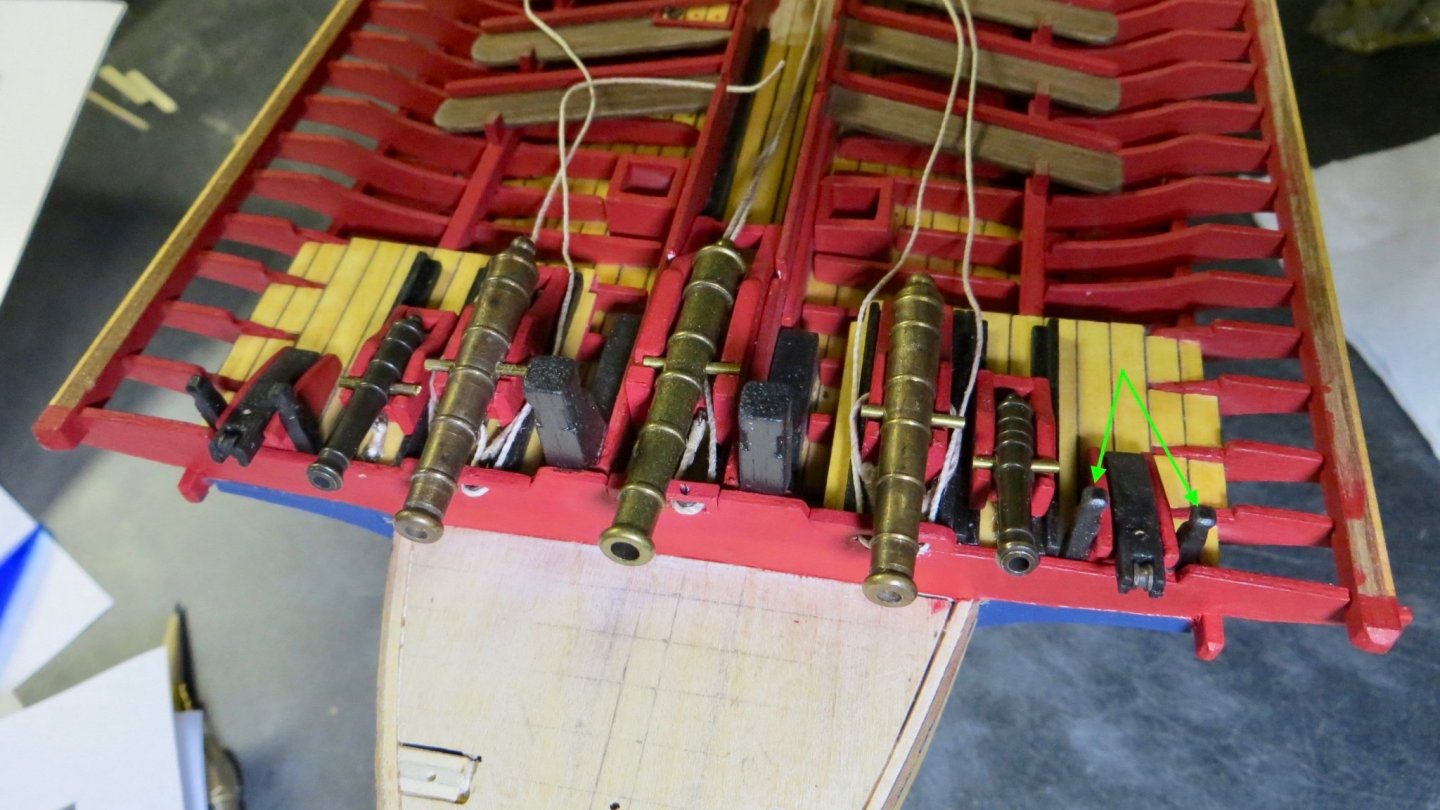
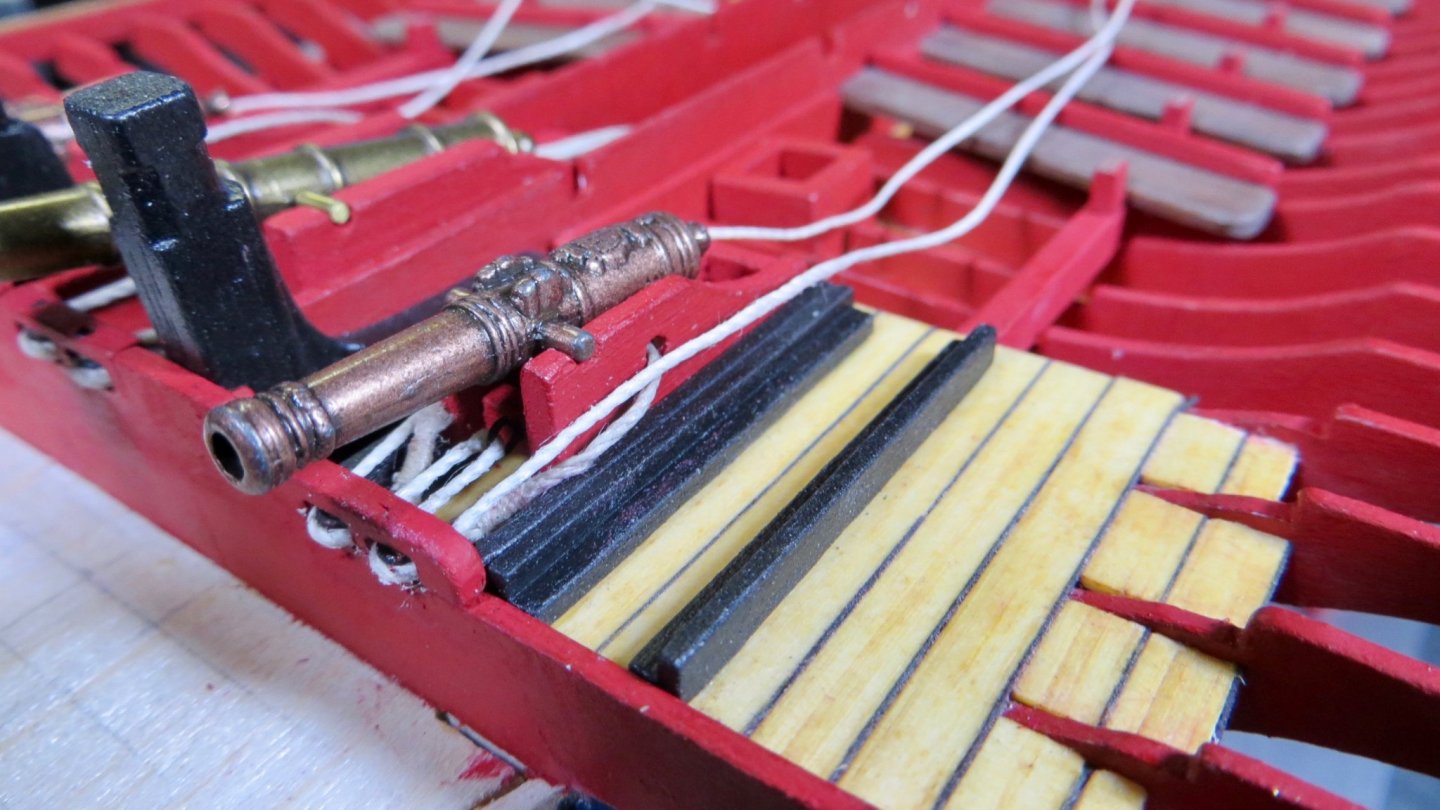
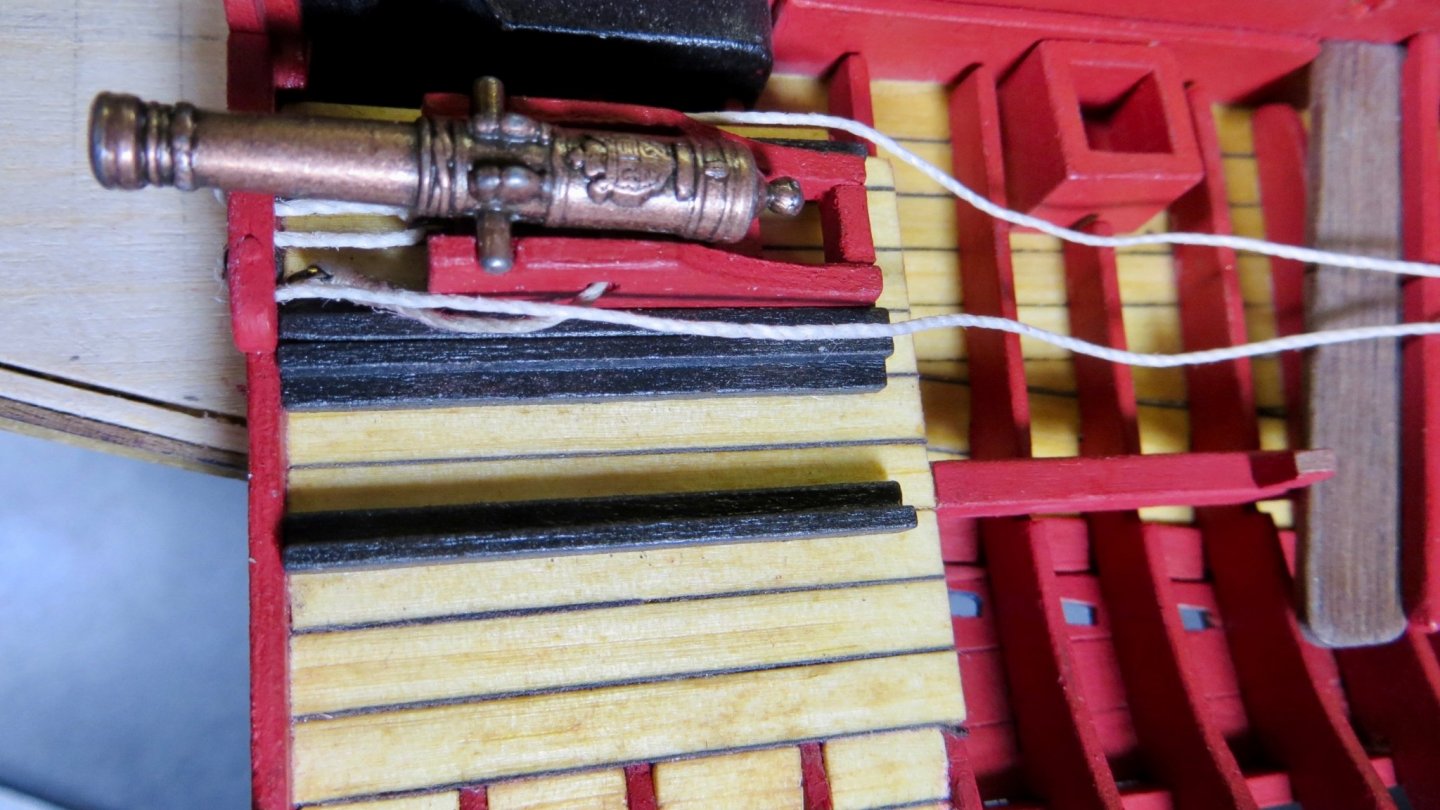
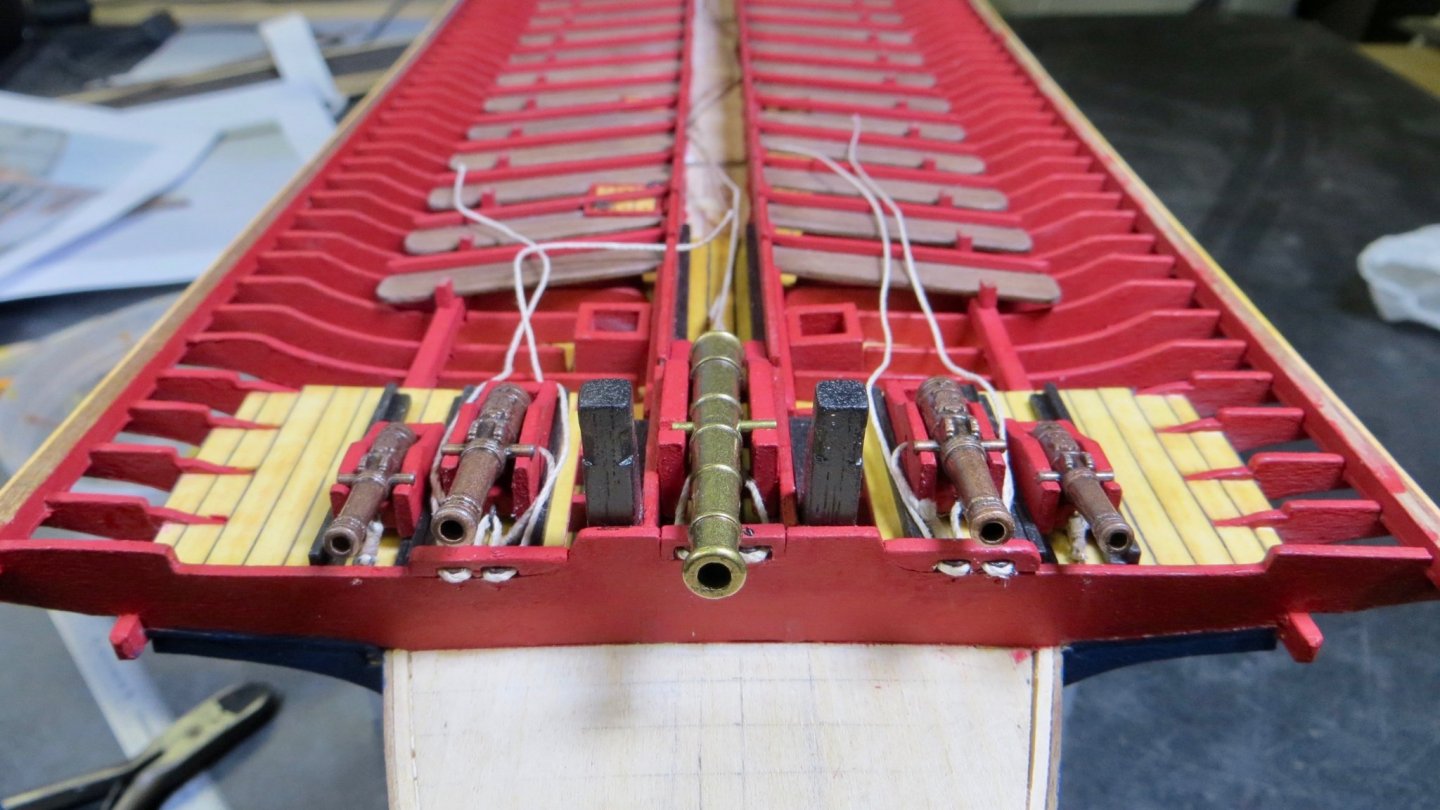
Hello, Thank you all for your thoughts and likes! Clark has a great point (in the post above this one) about how tight the carriages and canons are to each other! I started work on the two carriages on each side of the large center one. First I installed the L-shaped platforms that the carriages sat on (See green arrows) Then I rigged up the breaching ropes (lines) and attached the carriages to the platforms. Very tight fit trying to work on these lines. I added the sheaves to the front support and rigged the haul lines. Again, very tight fit. I will coil the lines later in the build when I decide where to put the coils. I will be adding the canon later in the build, after work is finished in the bow area, but I just placed them on to see how far they would extend into the bow area. Now i will turn my attention to the last two smaller canon that will sit to the sides of the carriages I just made. Thanks again for visiting, Frank


- 510 replies
-
- 5
-
-
- reale de france
- corel
- (and 1 more)
-
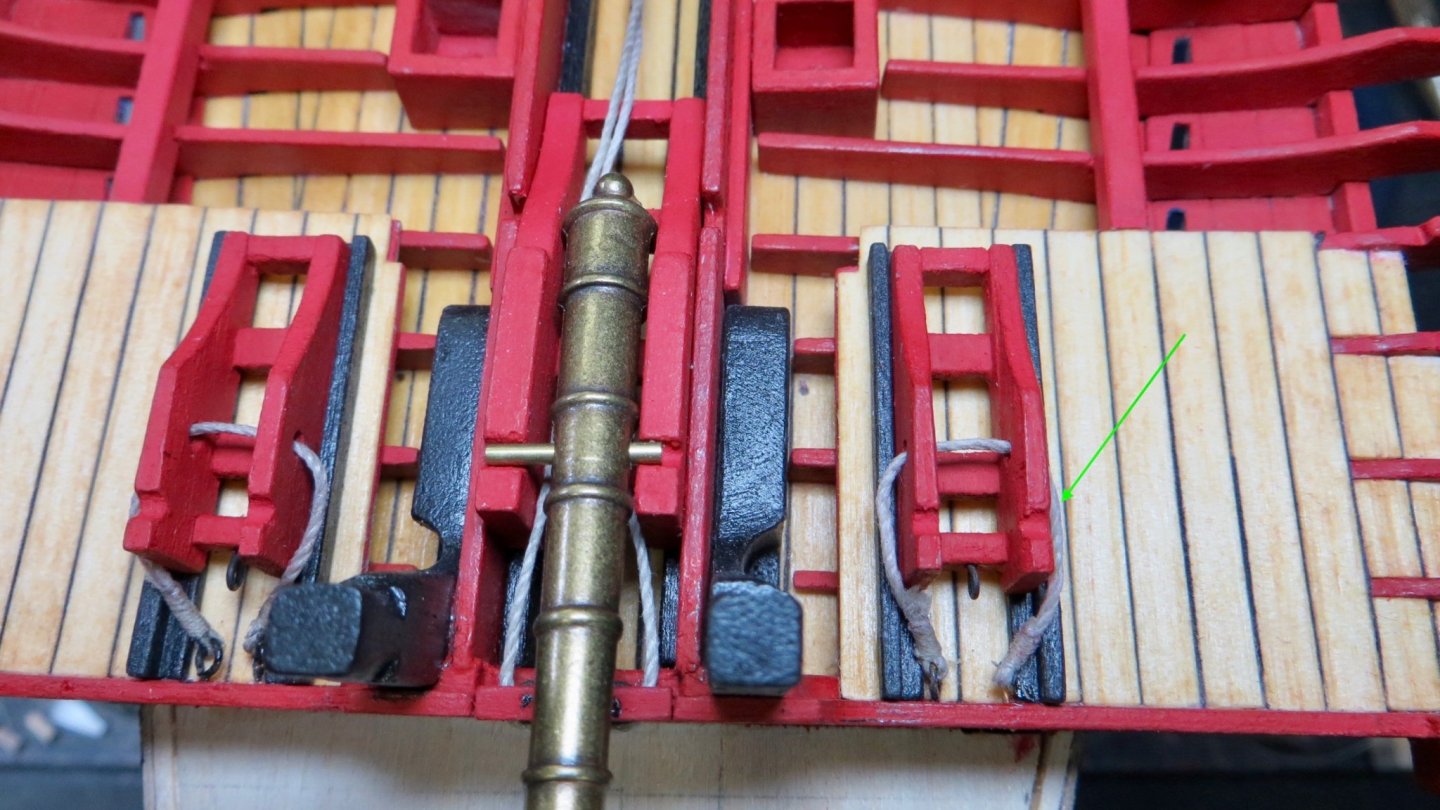
Hello Phil, Thank you for all the assistance. I don't believe the carriages were mounted in place, (but not sure) I found this photo of a "Fleur de Lis" beautiful model by R. Courgeon which shows the abutting carriages with breach ropes. (See green arrows) It also shows that the 2 smallest carriages at each end were just fastened to the front horizontal wood beam. Anyway, with the carriages so tight next to each other, i'm wondering if the cannon balls were loaded from the front deck!! Thanks again, Frank
- 510 replies
-
- 3
-
-
- reale de france
- corel
- (and 1 more)
-
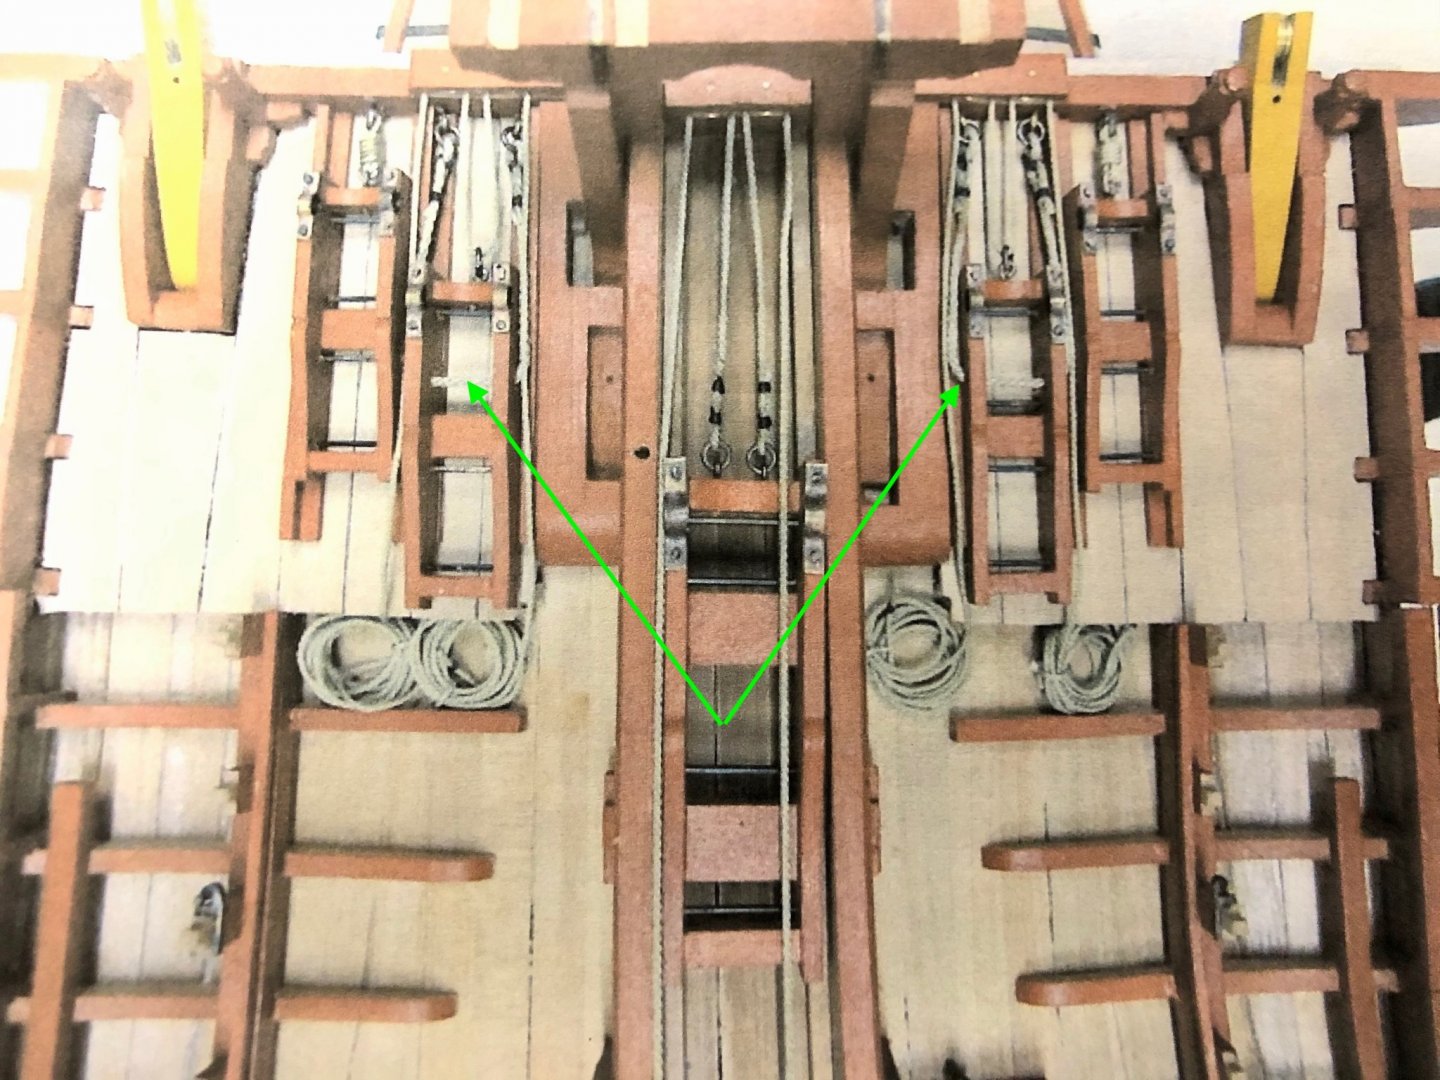
Hello Clark, Thanks for stopping by! You bring up an excellent point. I couldn't find anything that shows a rig in the back. Was it because the carriage is mounted on a relatively steeply angled platform? Did the carriage slide back on its own gravity? Anyway I will keep looking. The carriages on either side of this one have holes drilled thru them and breeching rope running thru them preventing them from going back. Working on them now. Will have photos soon. Thanks, Frank

- 510 replies
-
- 4
-
-
- reale de france
- corel
- (and 1 more)
-
Michael, Nice sewing instructions! Not too late to stitch the top around the edges by hand I did this on my Vasa build, but yes, very time consuming Lol! Is that your sewing machine? or is it from the sewing school you mentioned above? It looks very complicated and expensive!! Happy Thanksgiving! Frank