HOLIDAY DONATION DRIVE - SUPPORT MSW - DO YOUR PART TO KEEP THIS GREAT FORUM GOING! (Only 13 donations so far - C'mon guys!)
×


fmodajr
-
Posts
868 -
Joined
-
Last visited
Content Type
Profiles
Forums
Gallery
Events
Everything posted by fmodajr
-
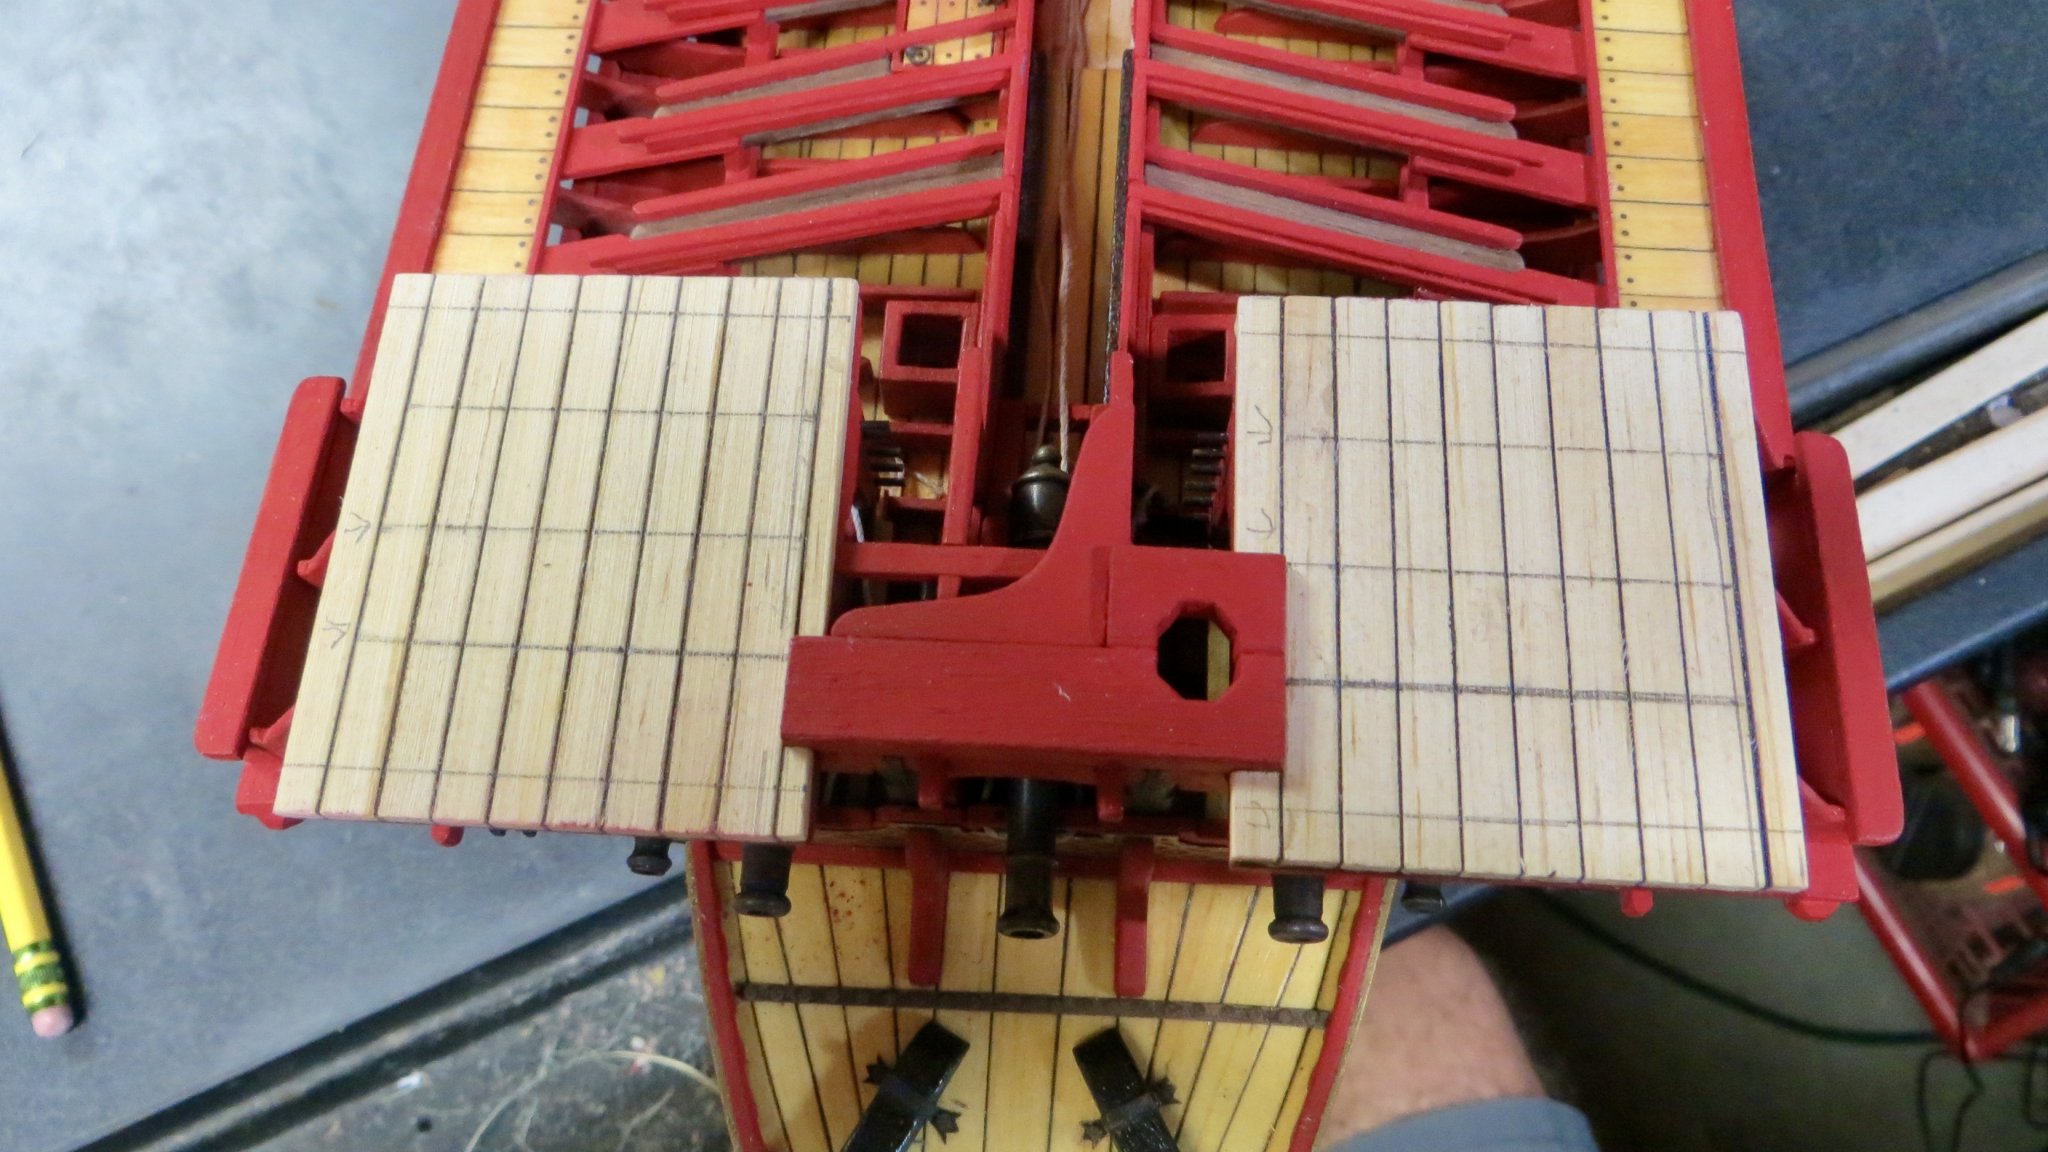
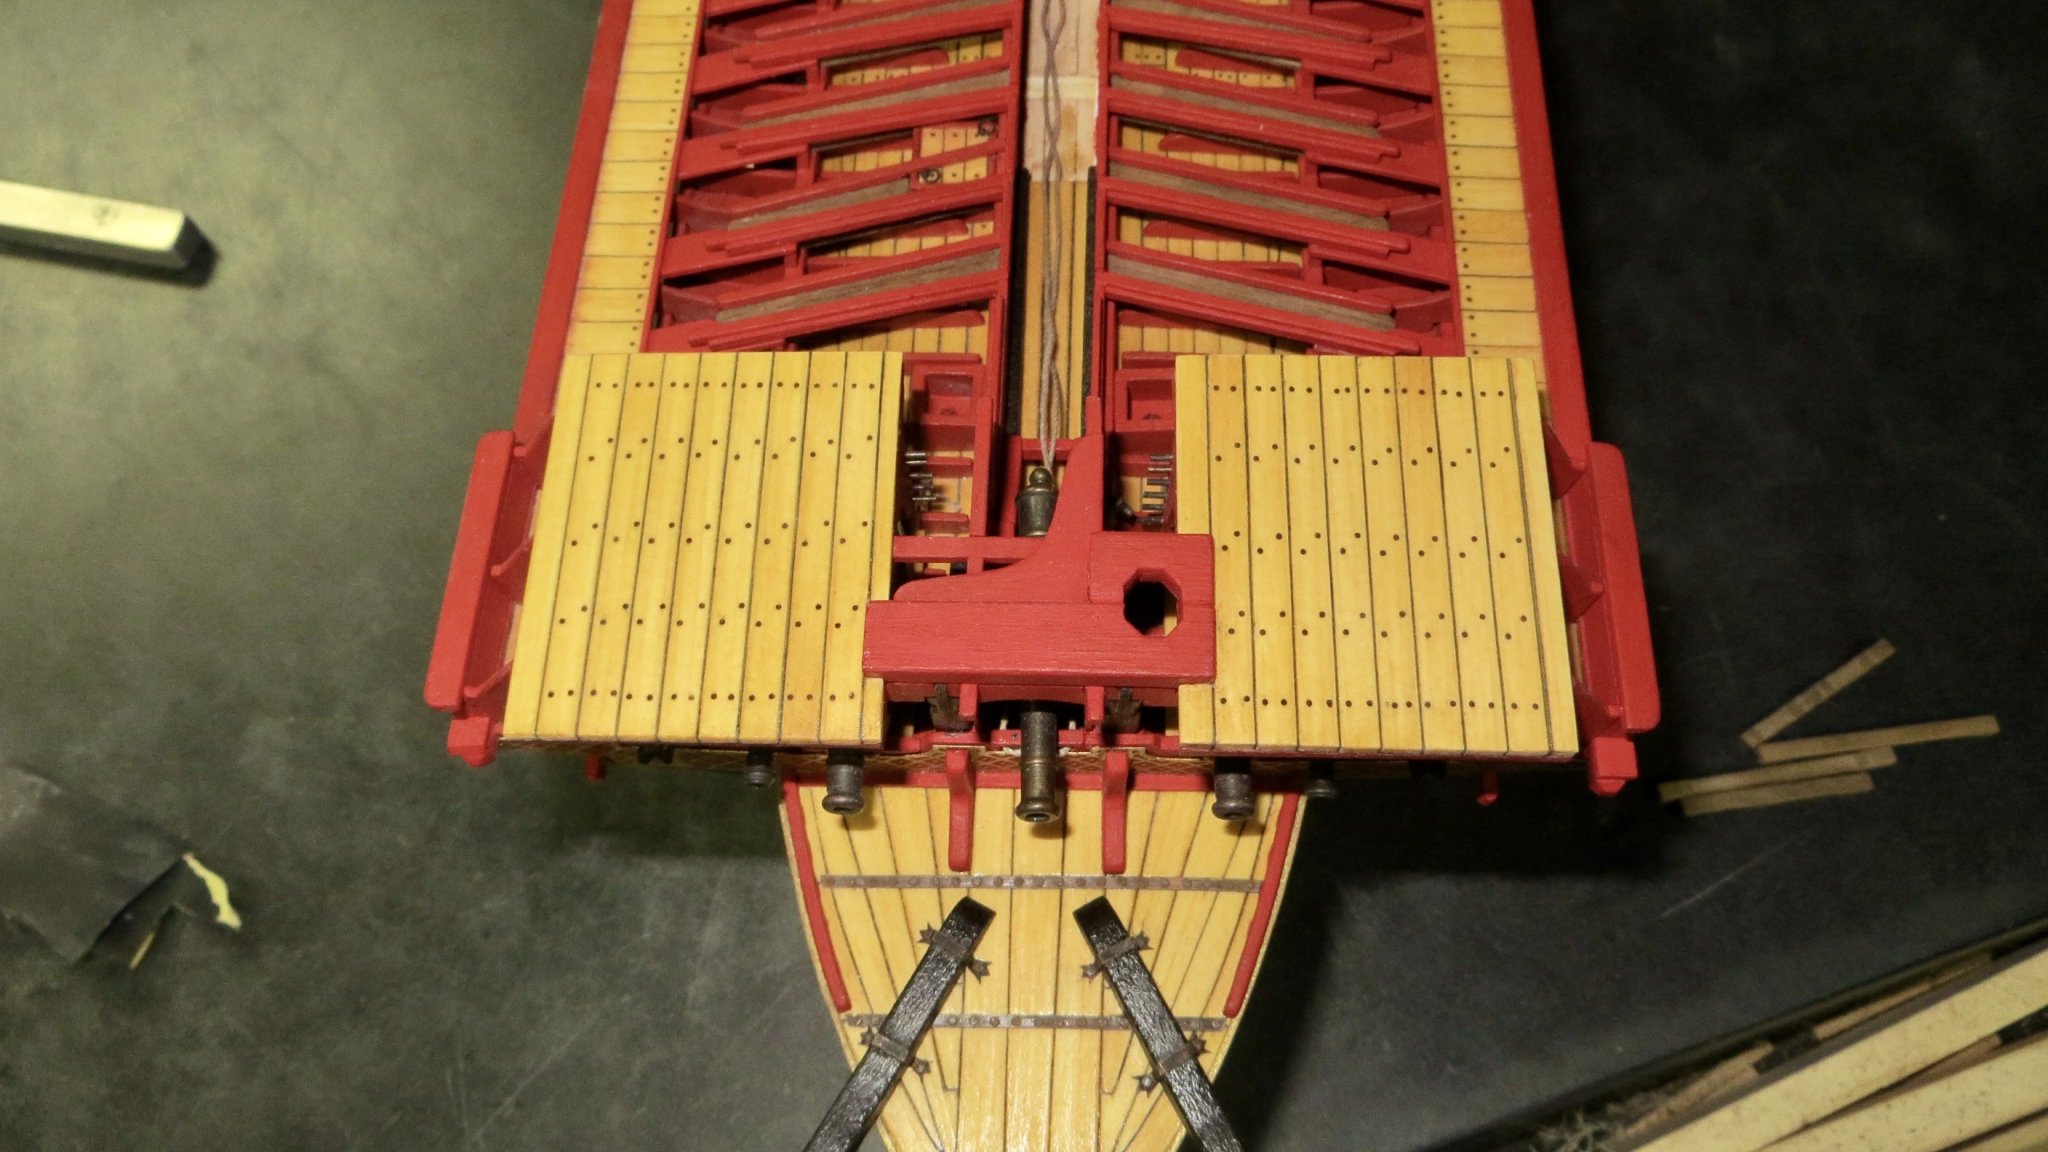
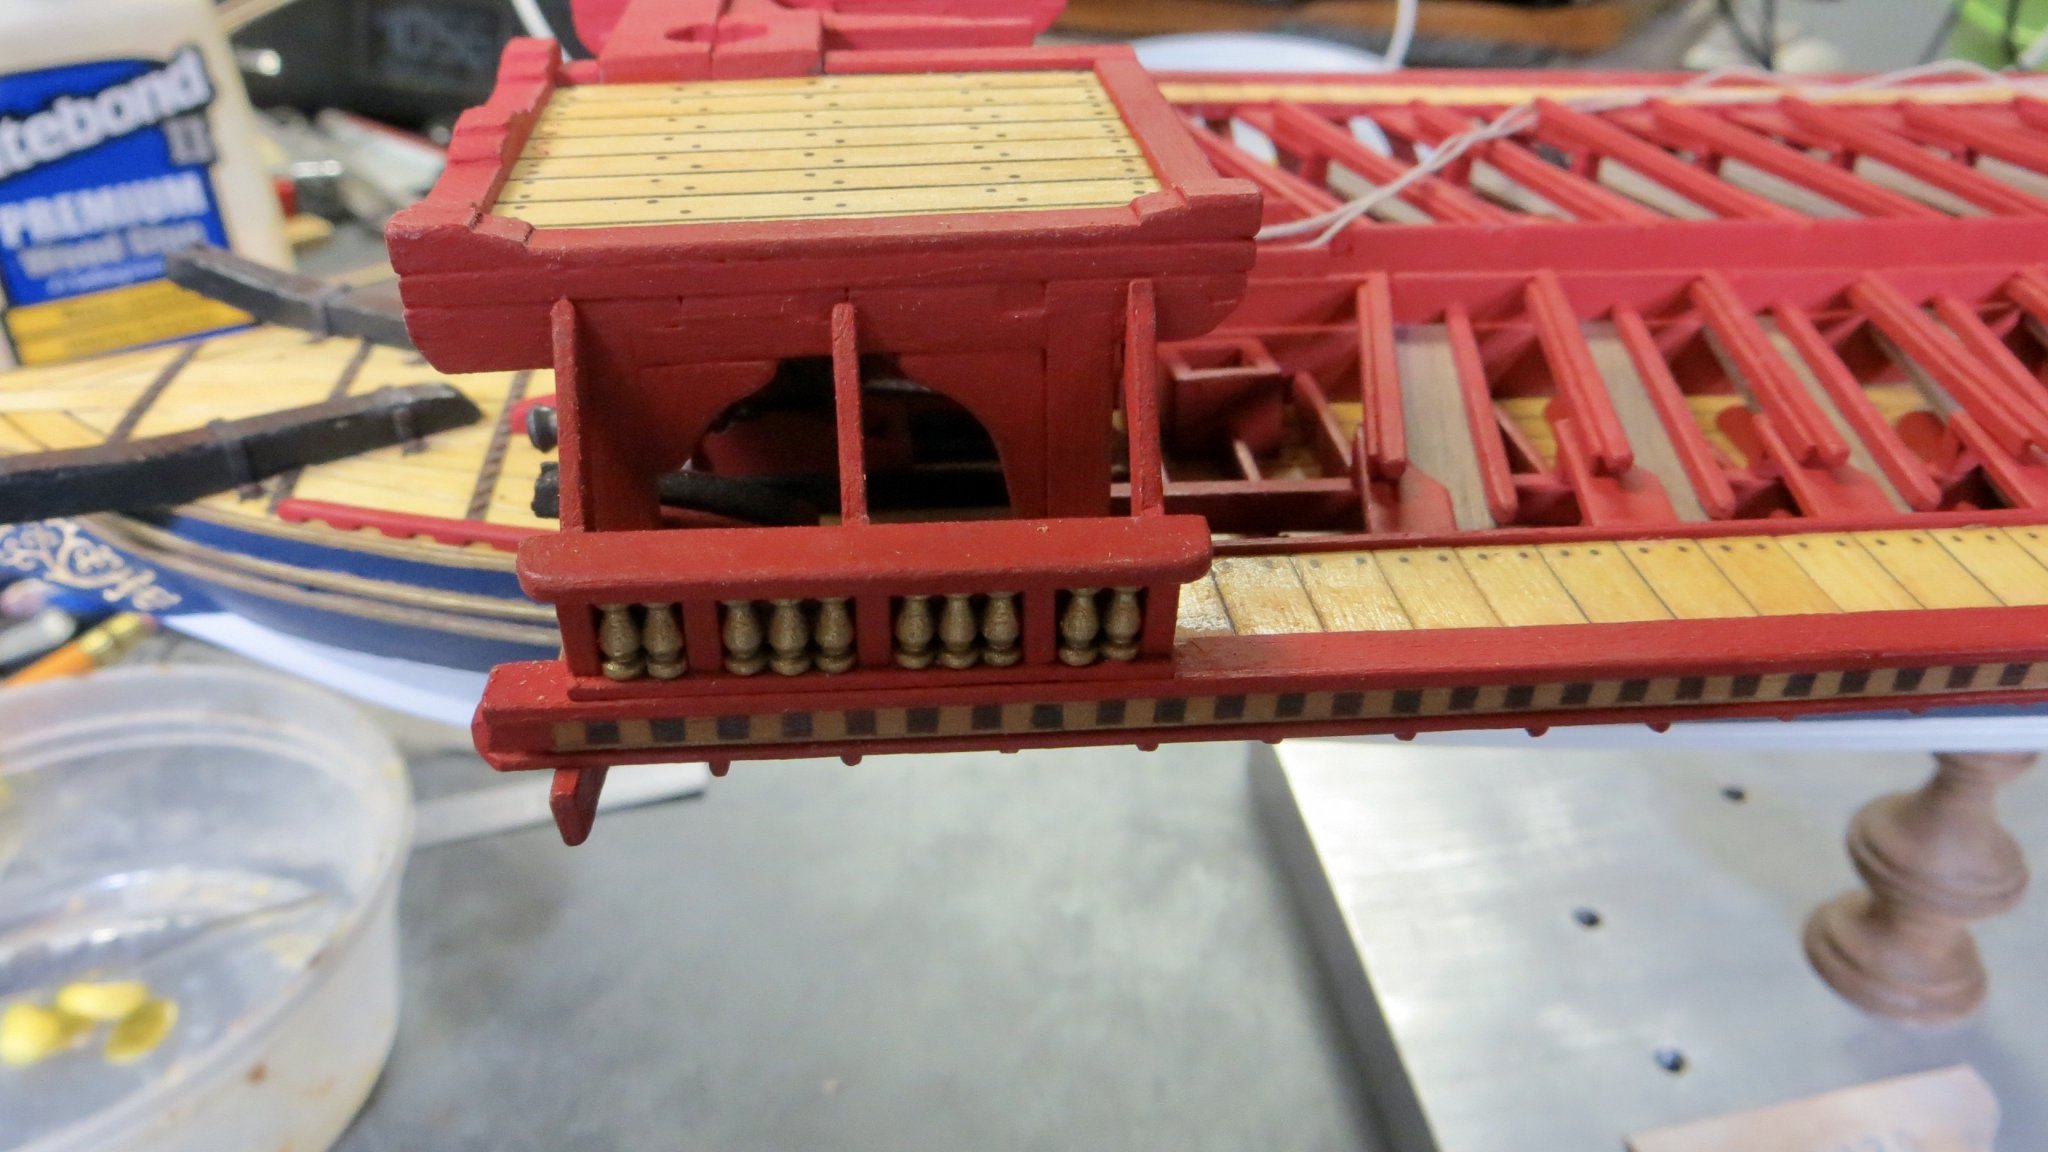
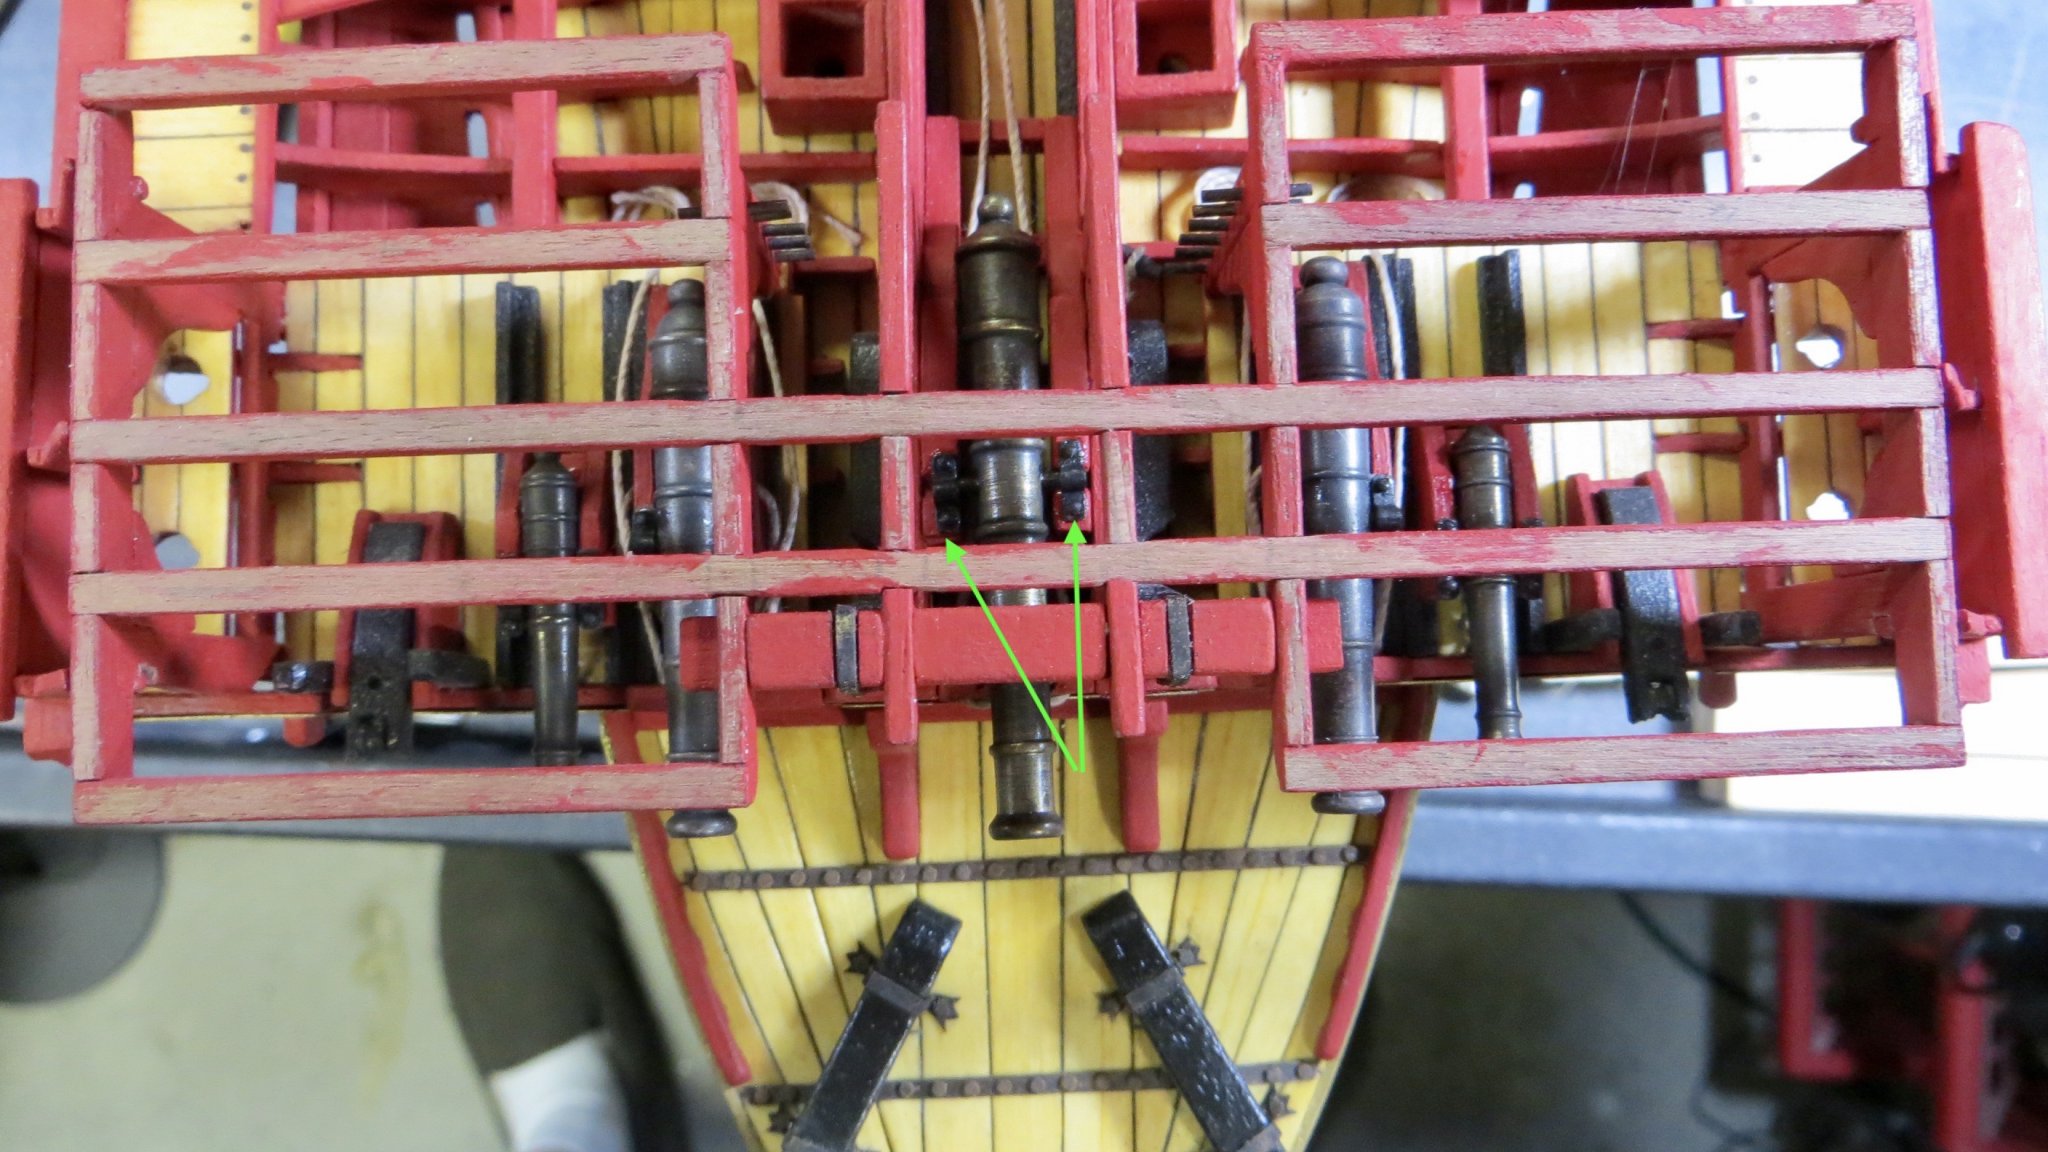
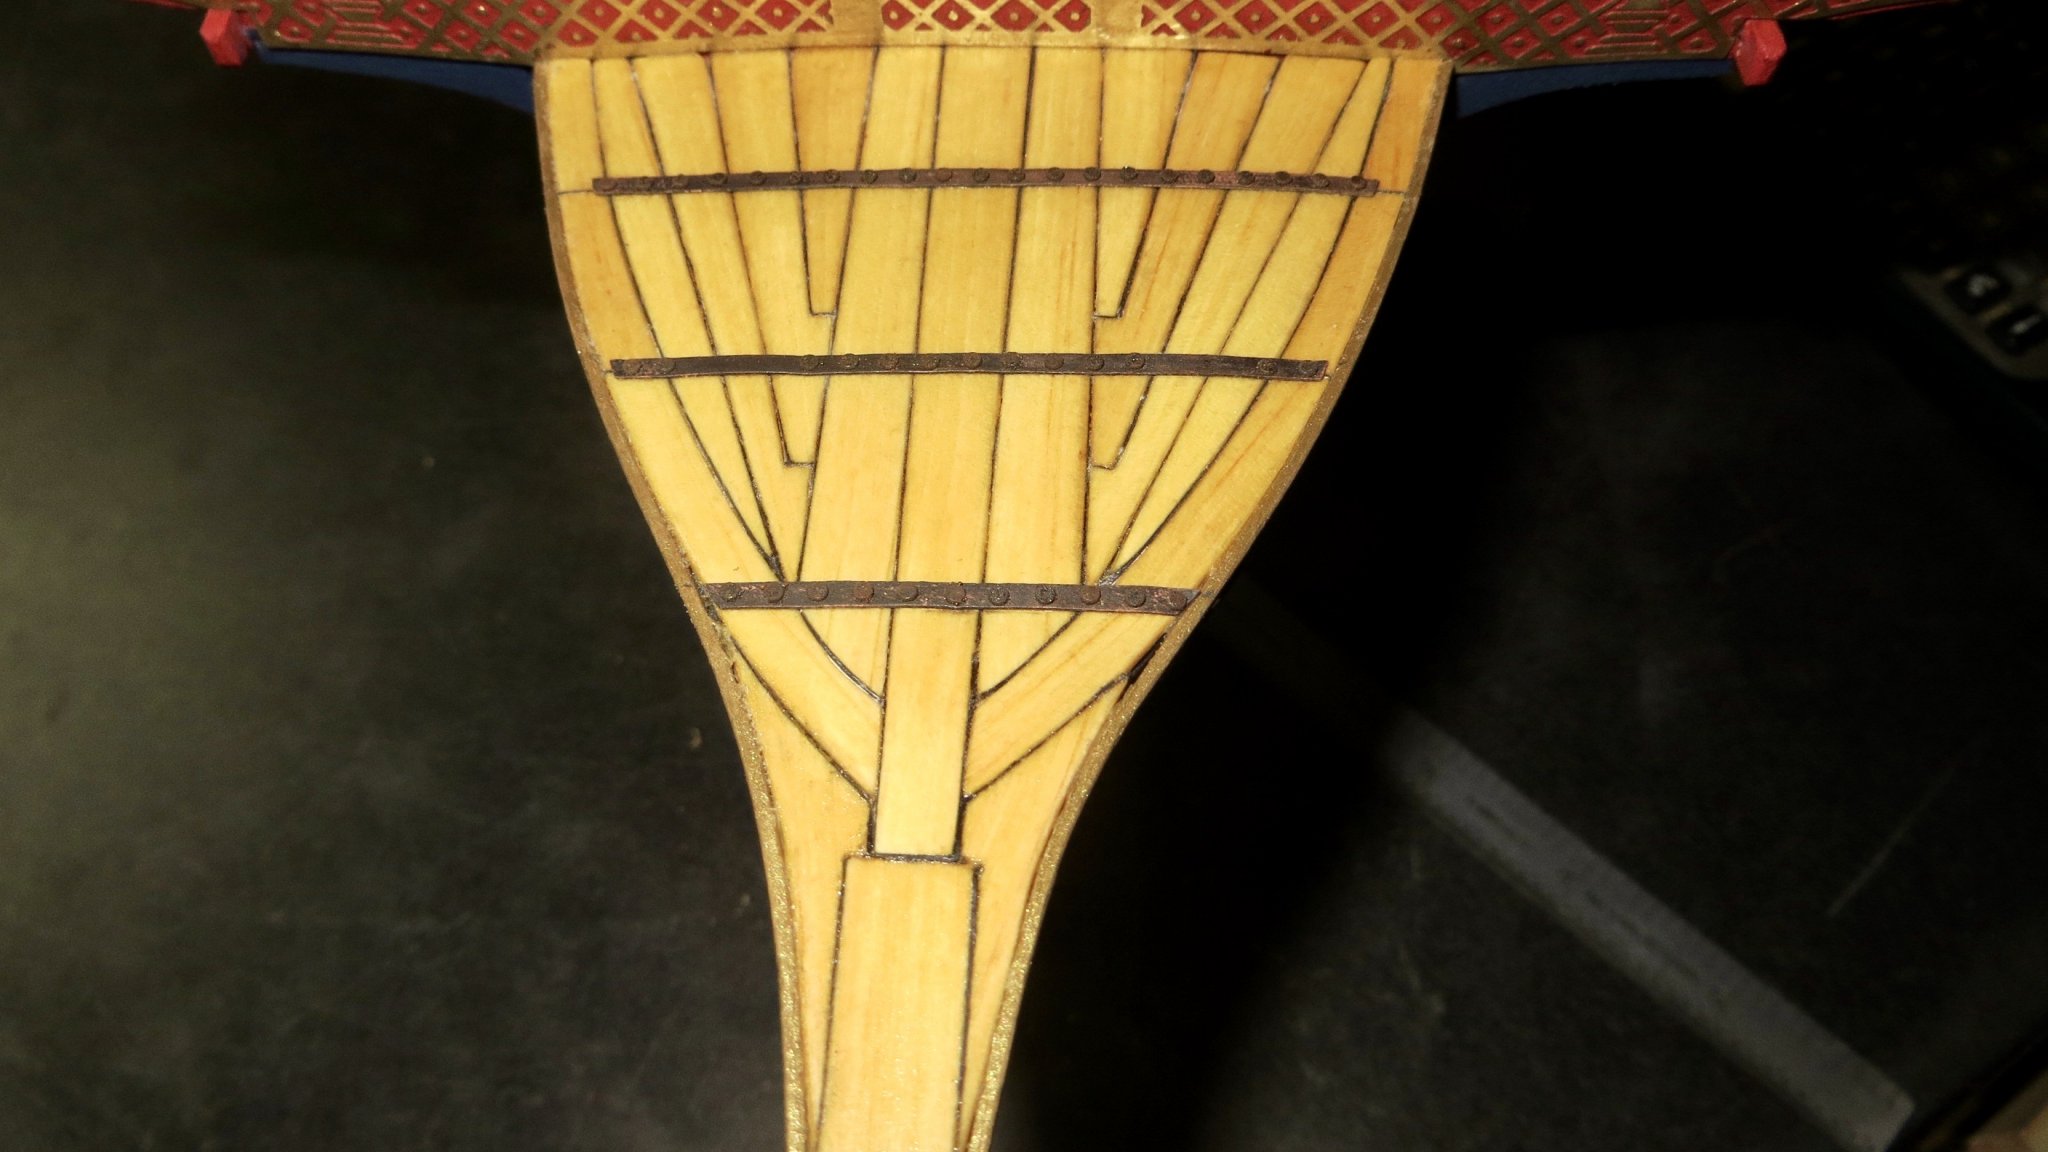
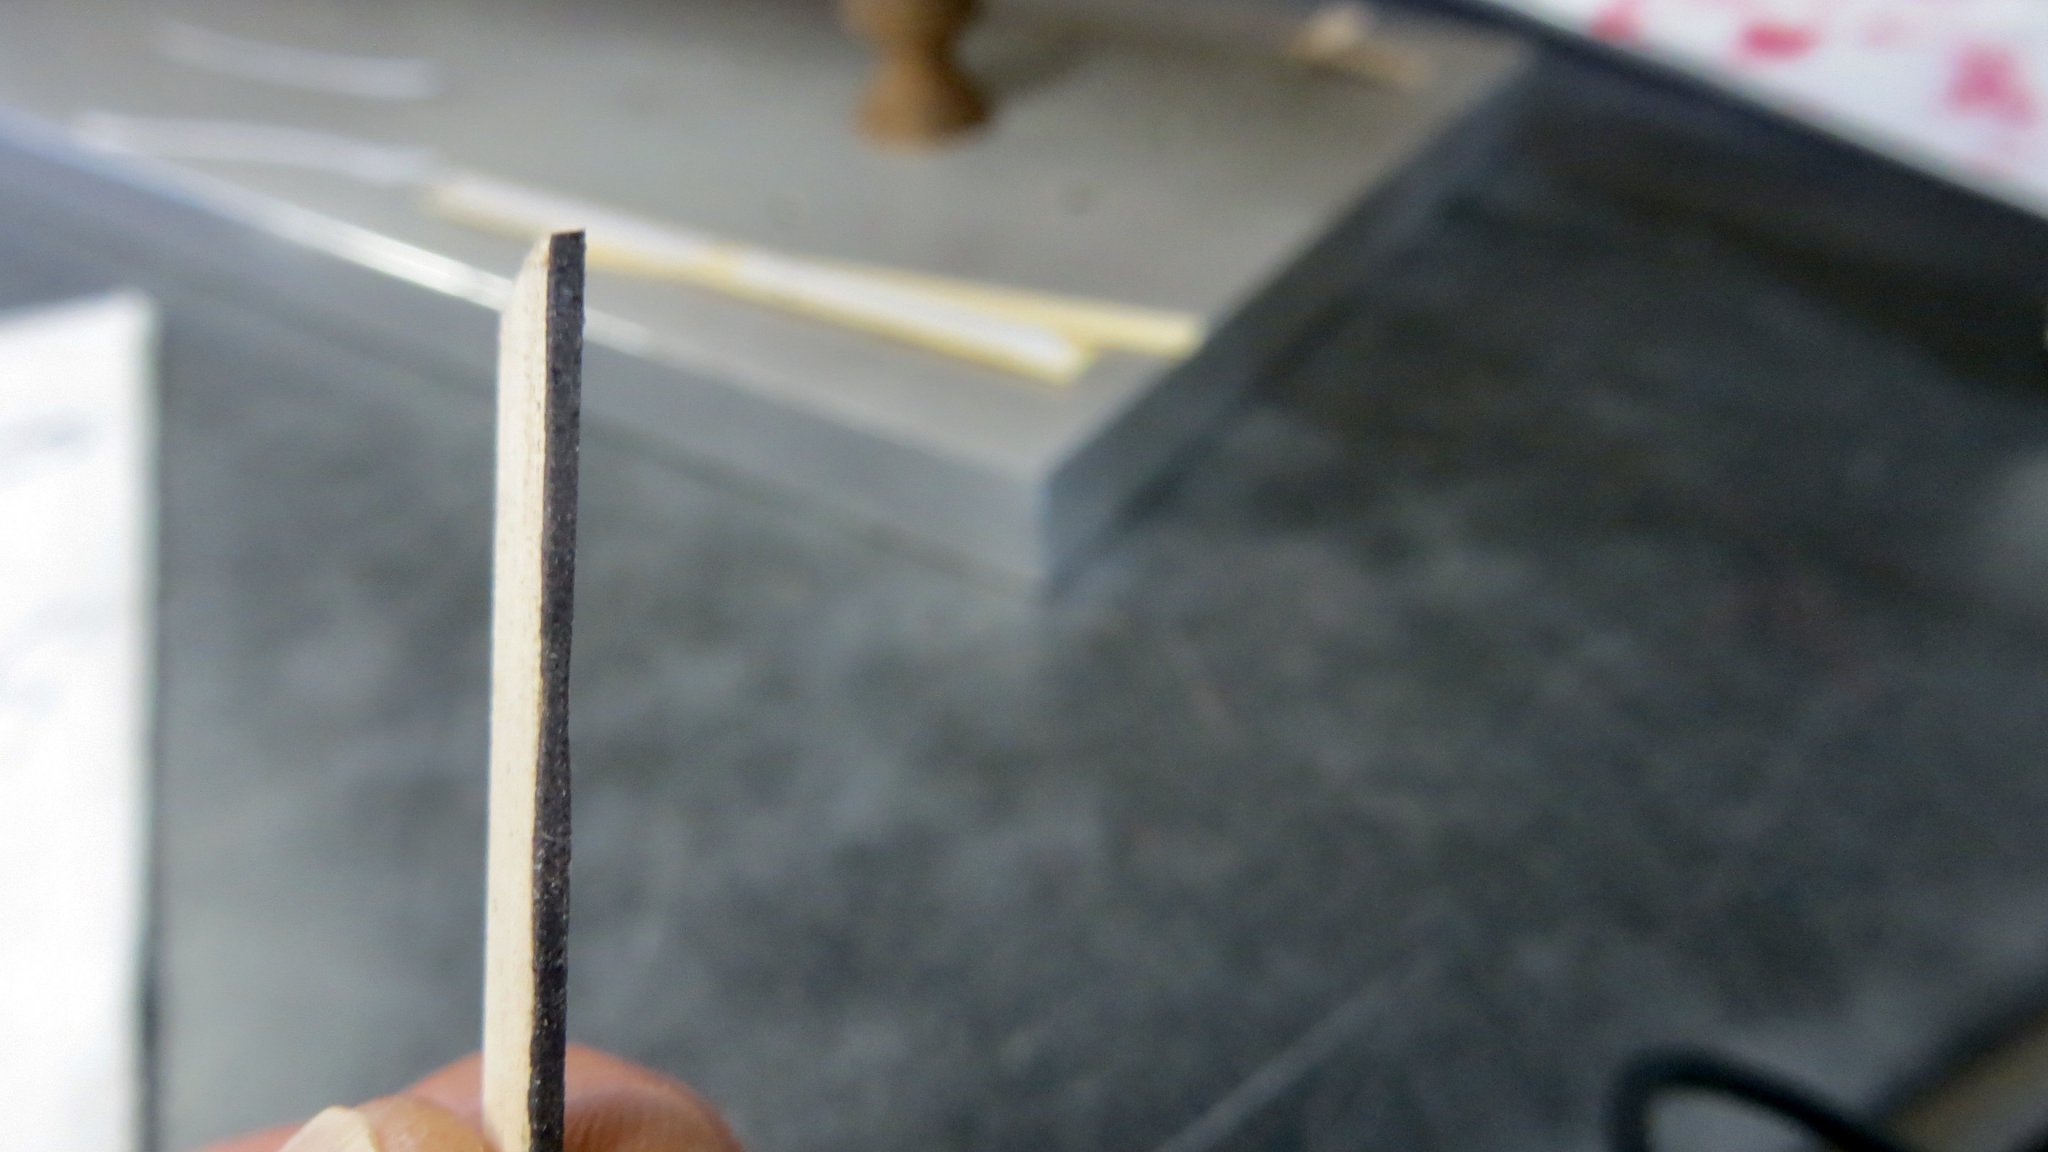
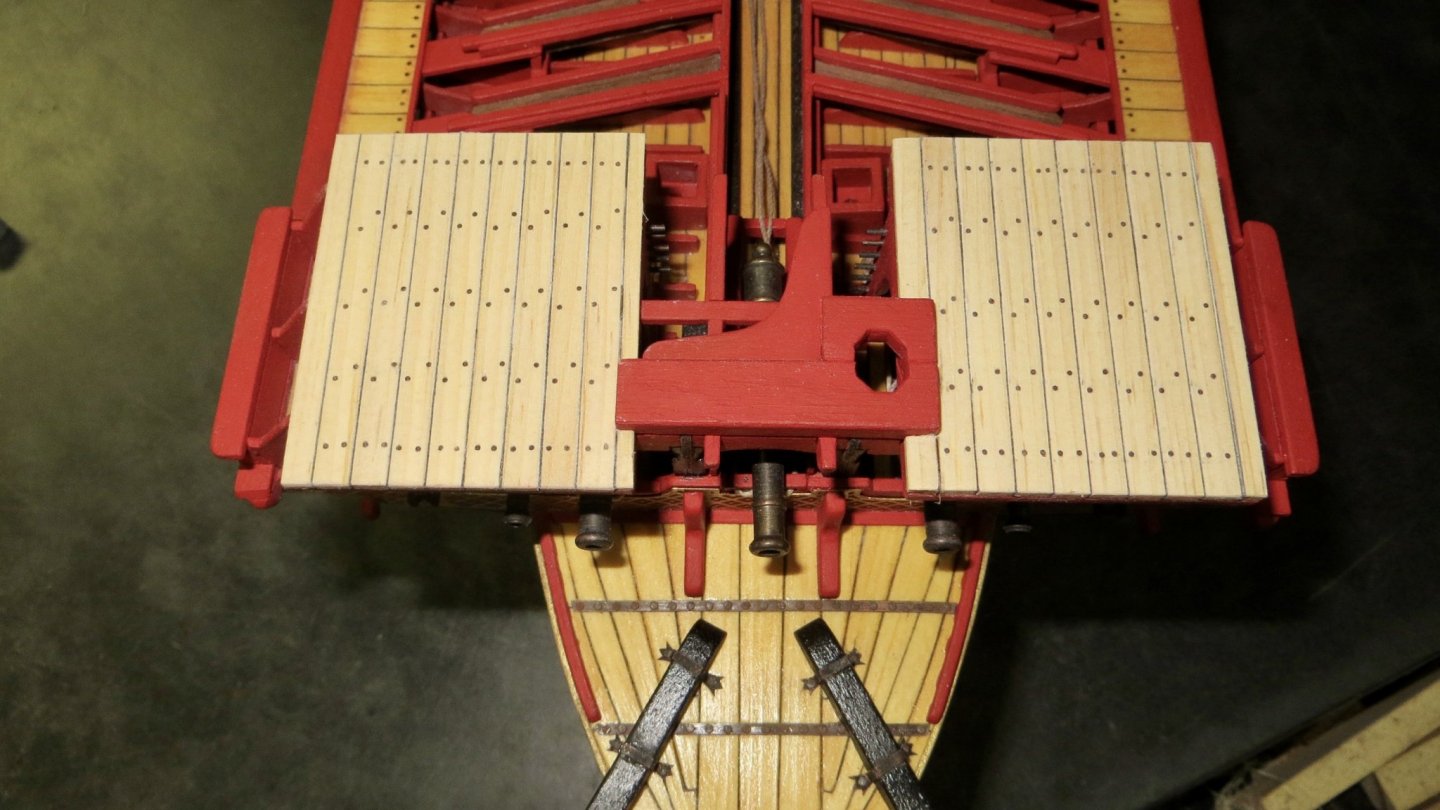
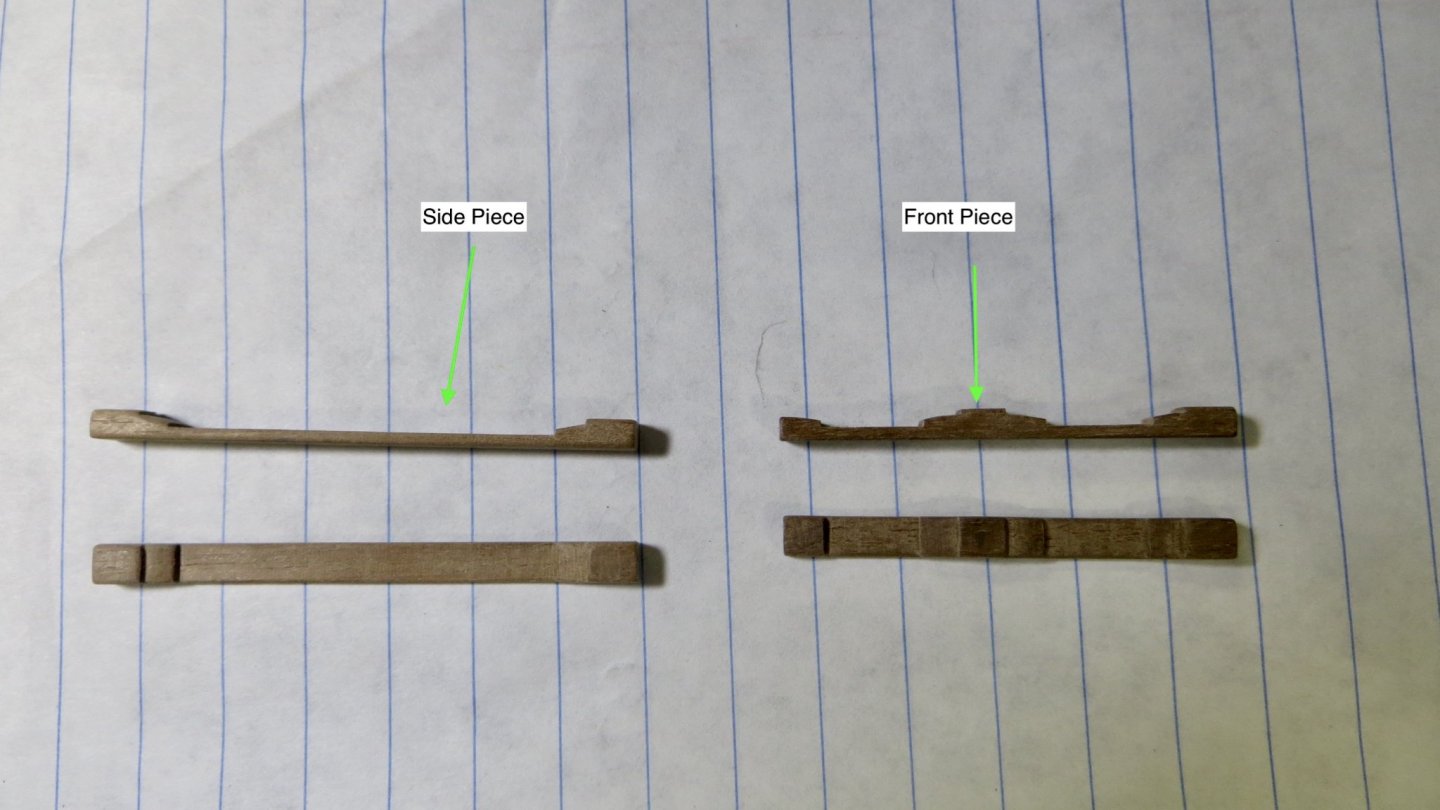
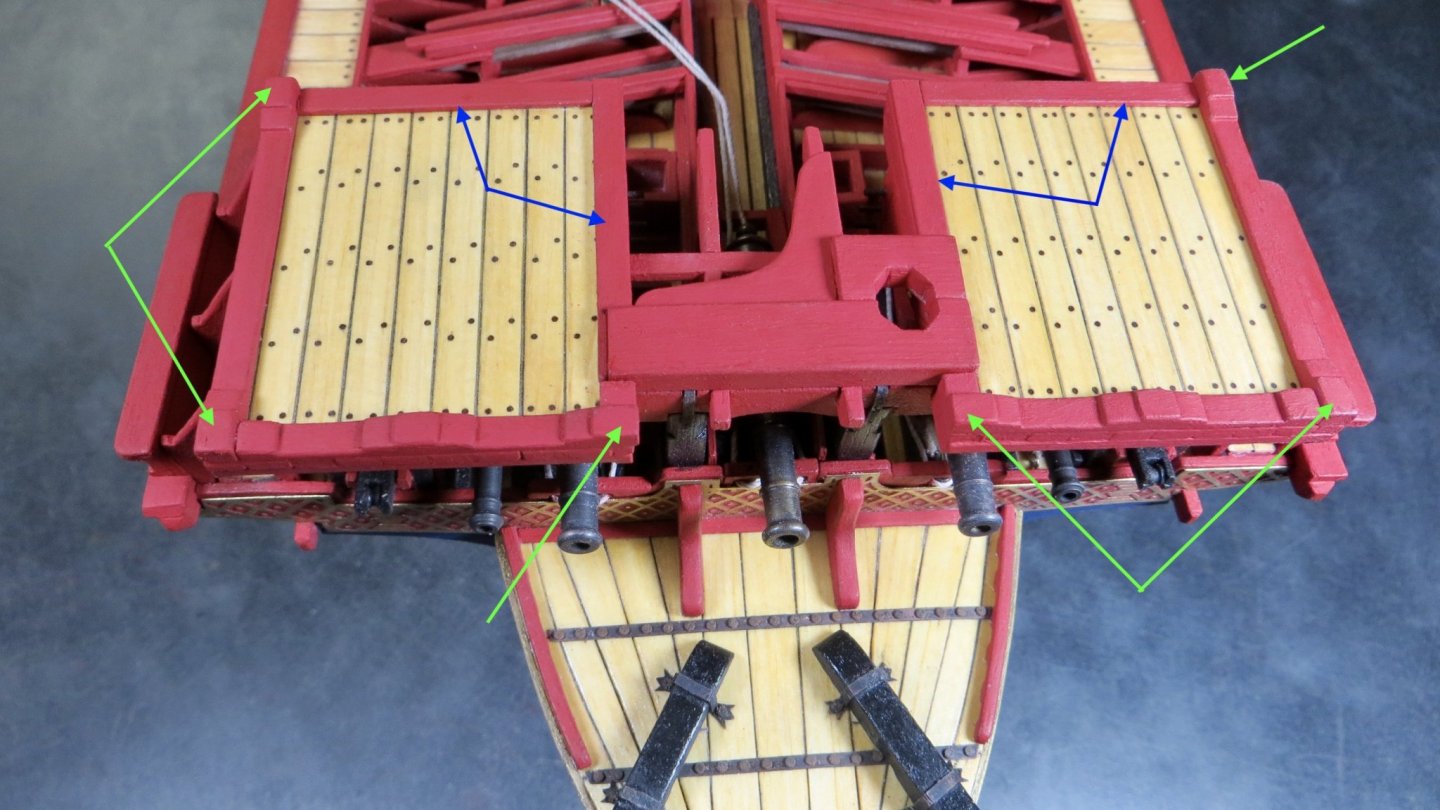
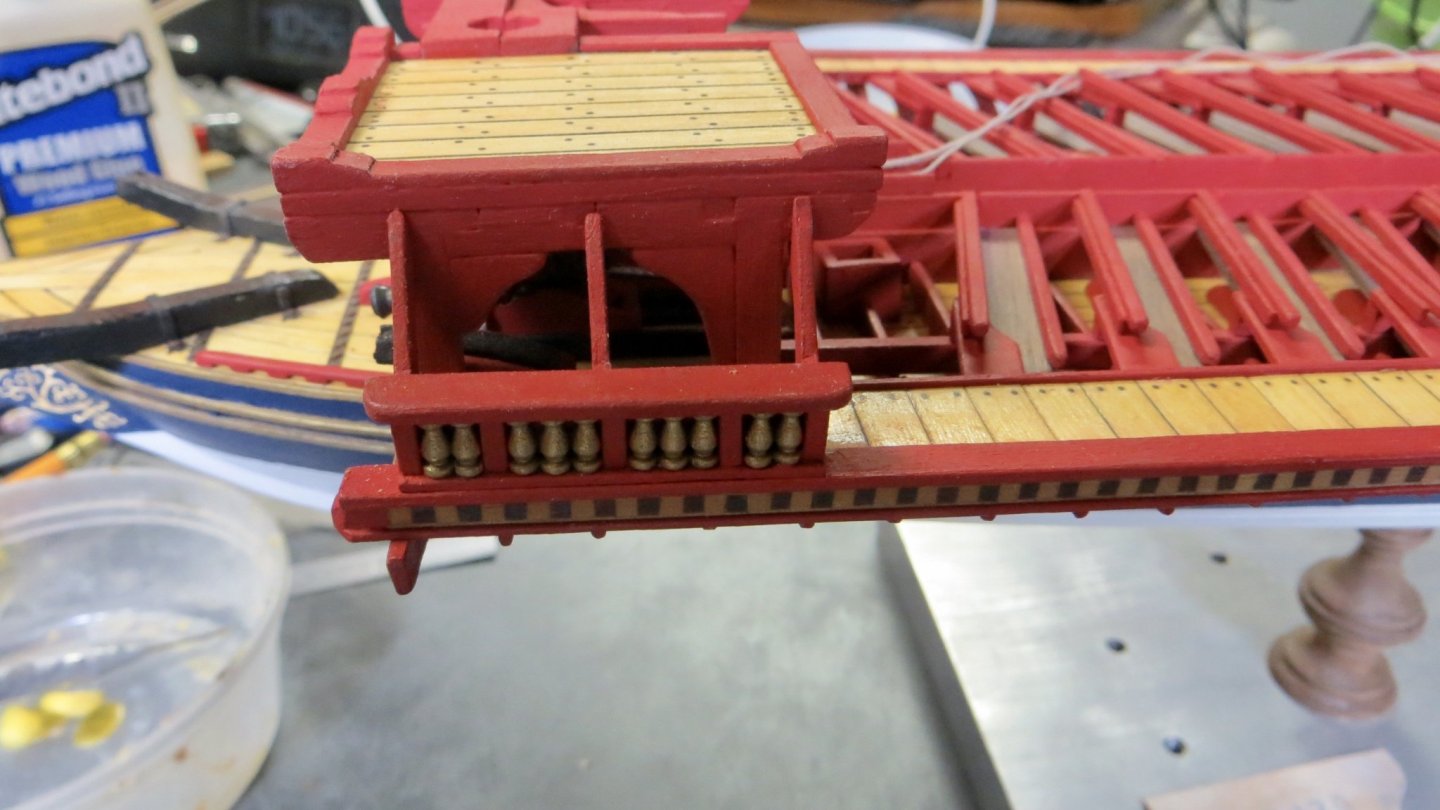
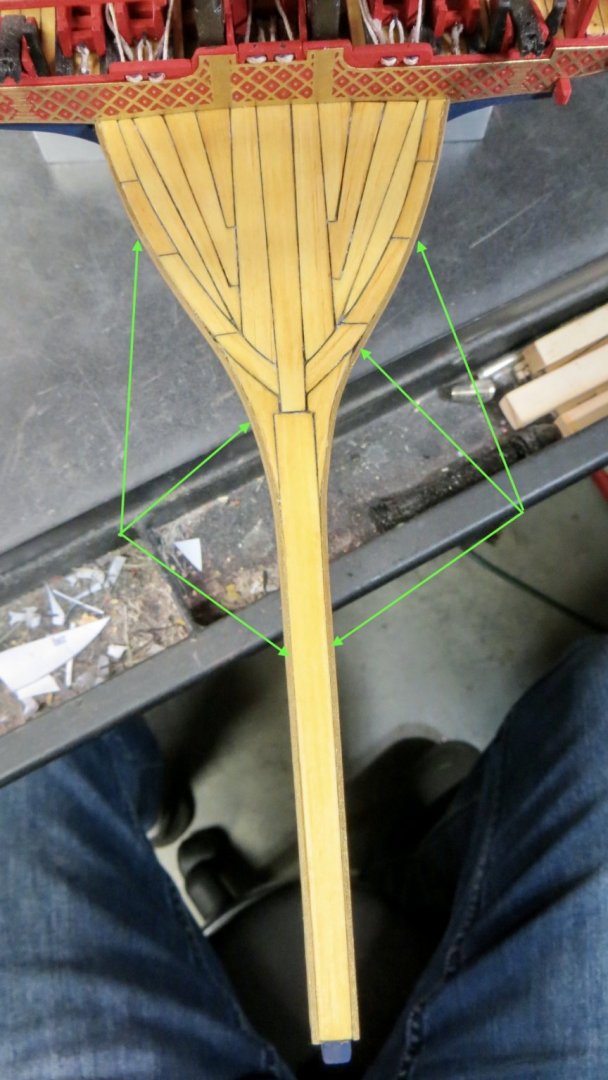
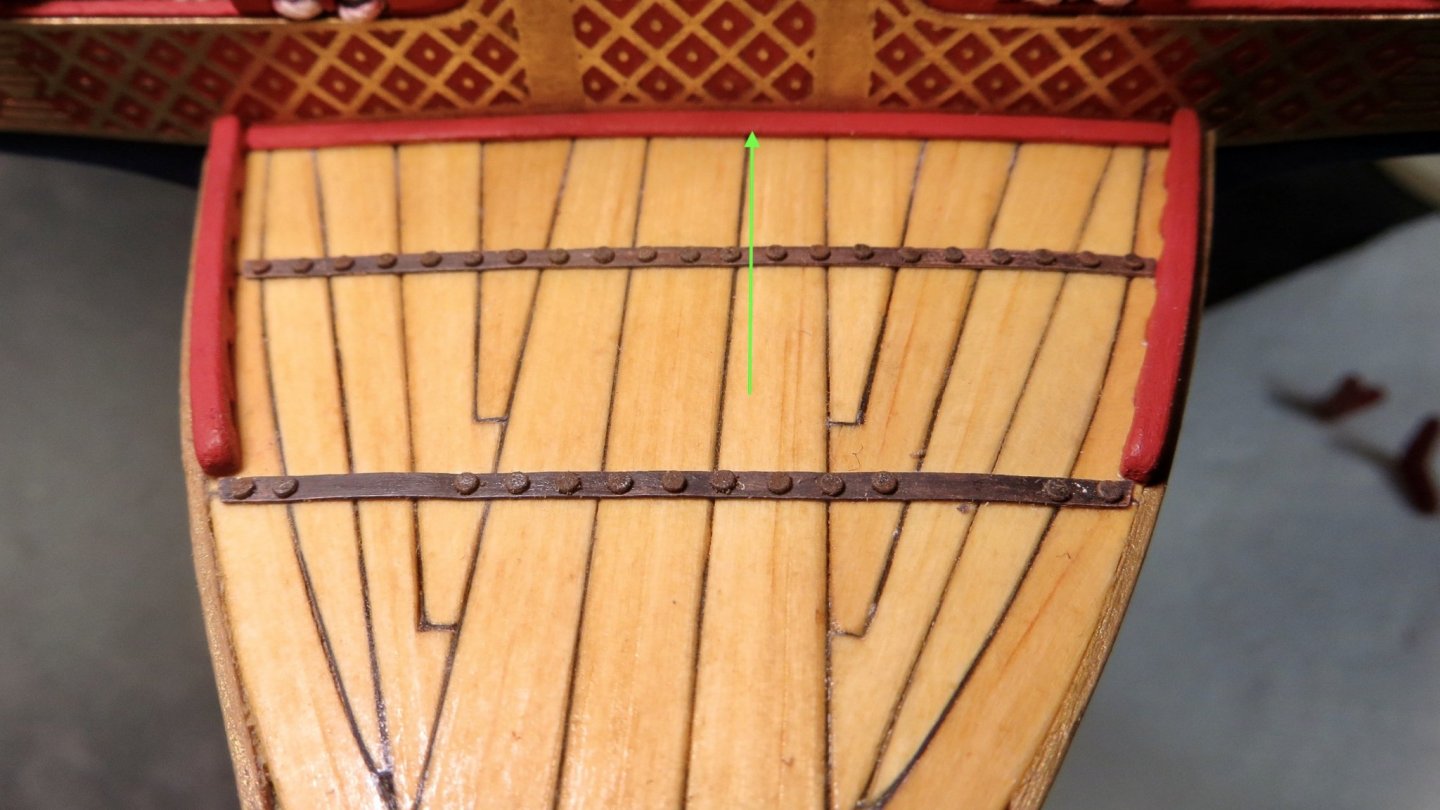
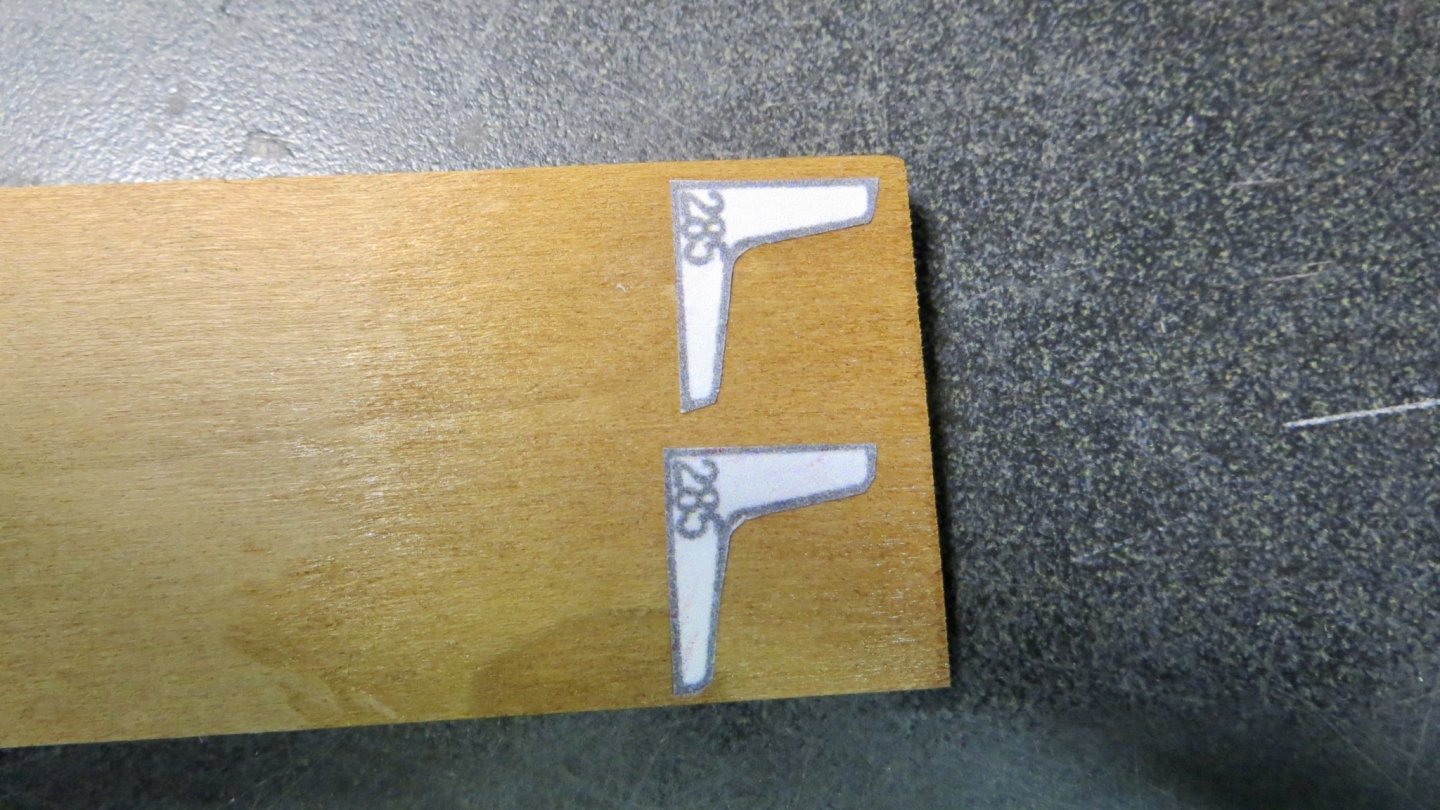
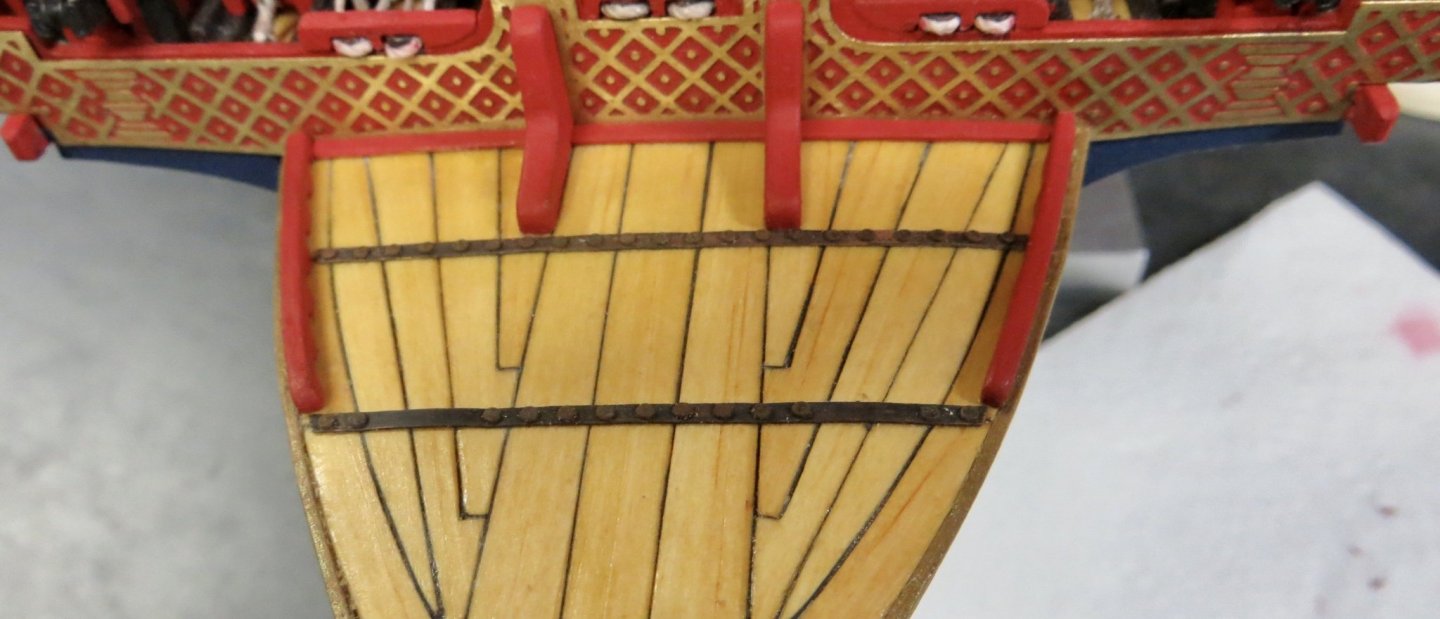
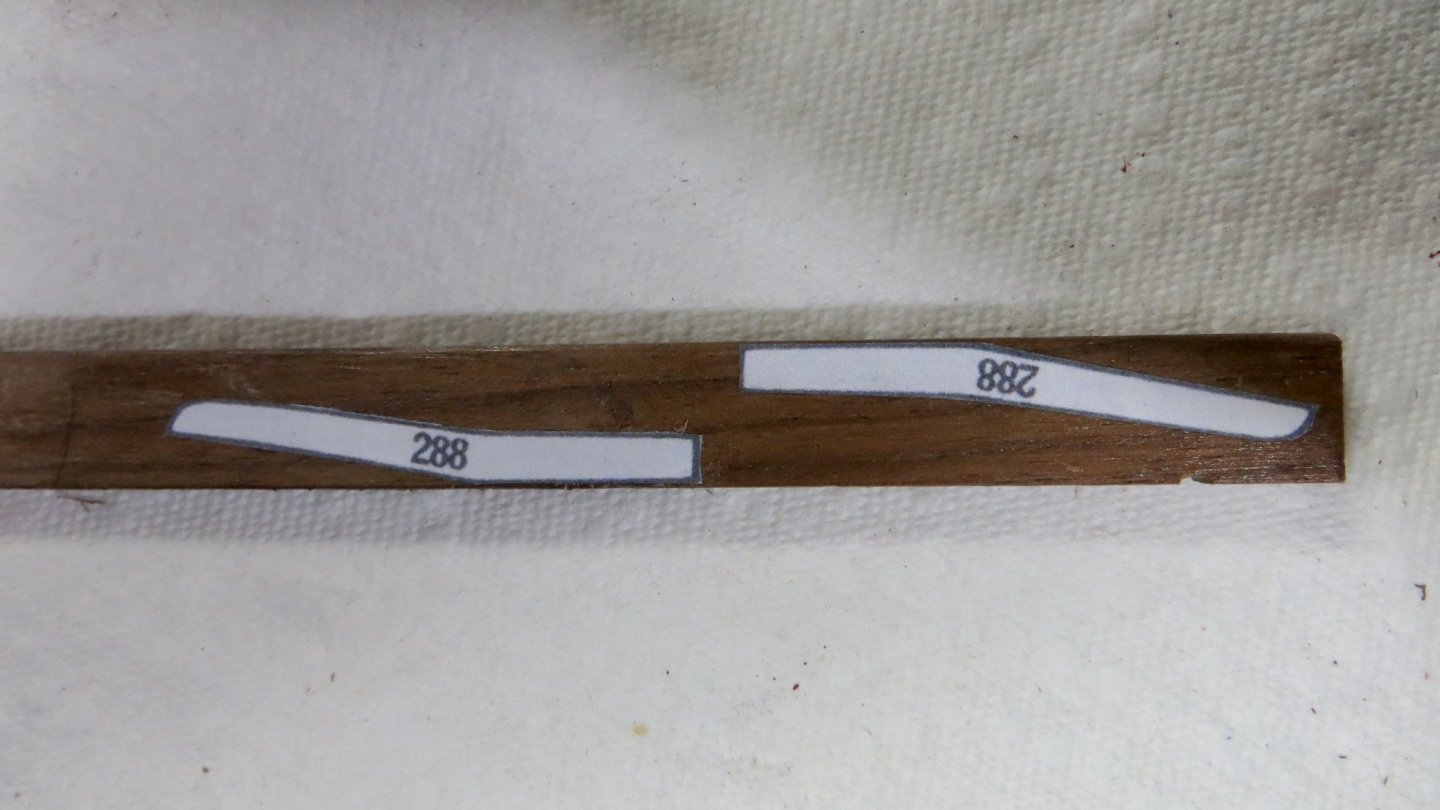
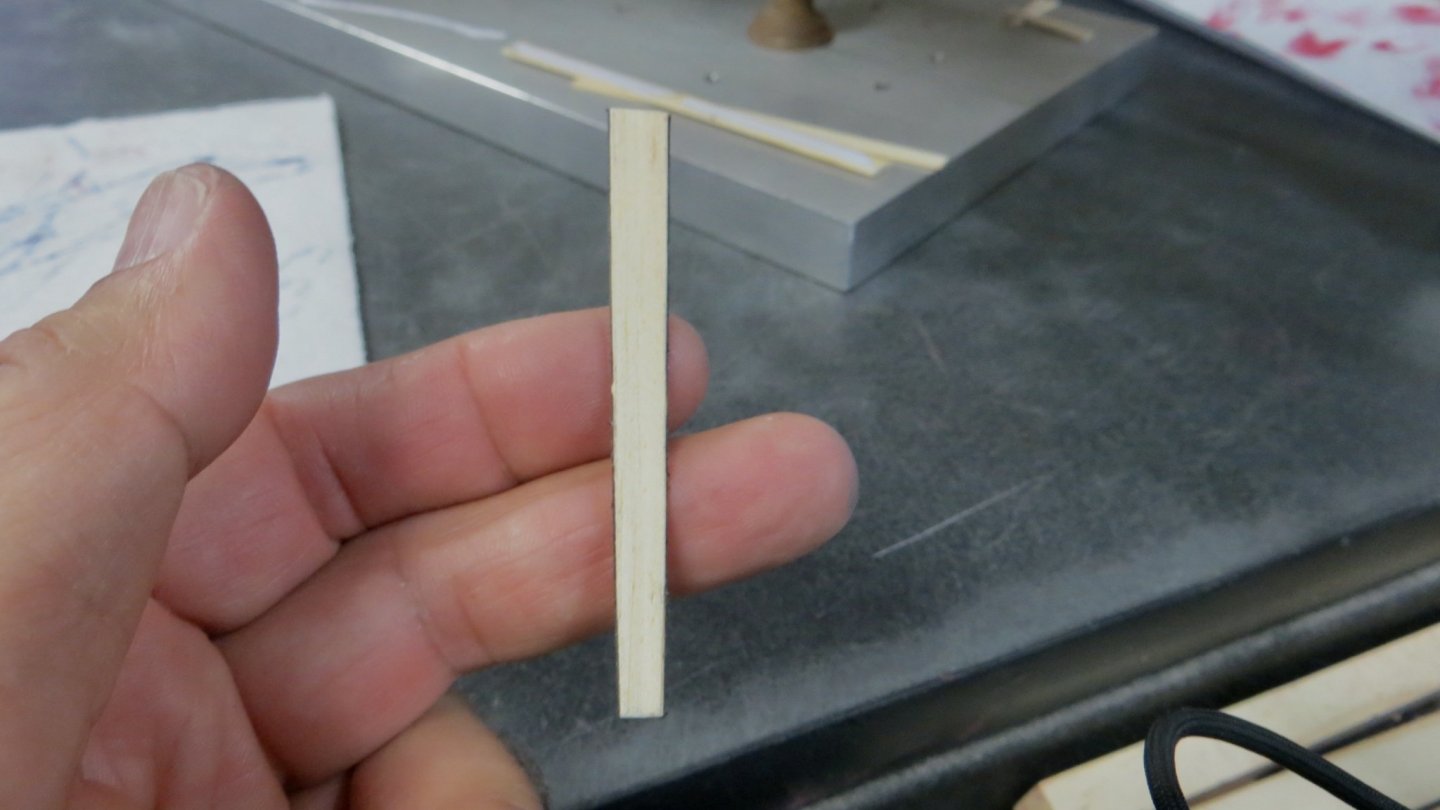
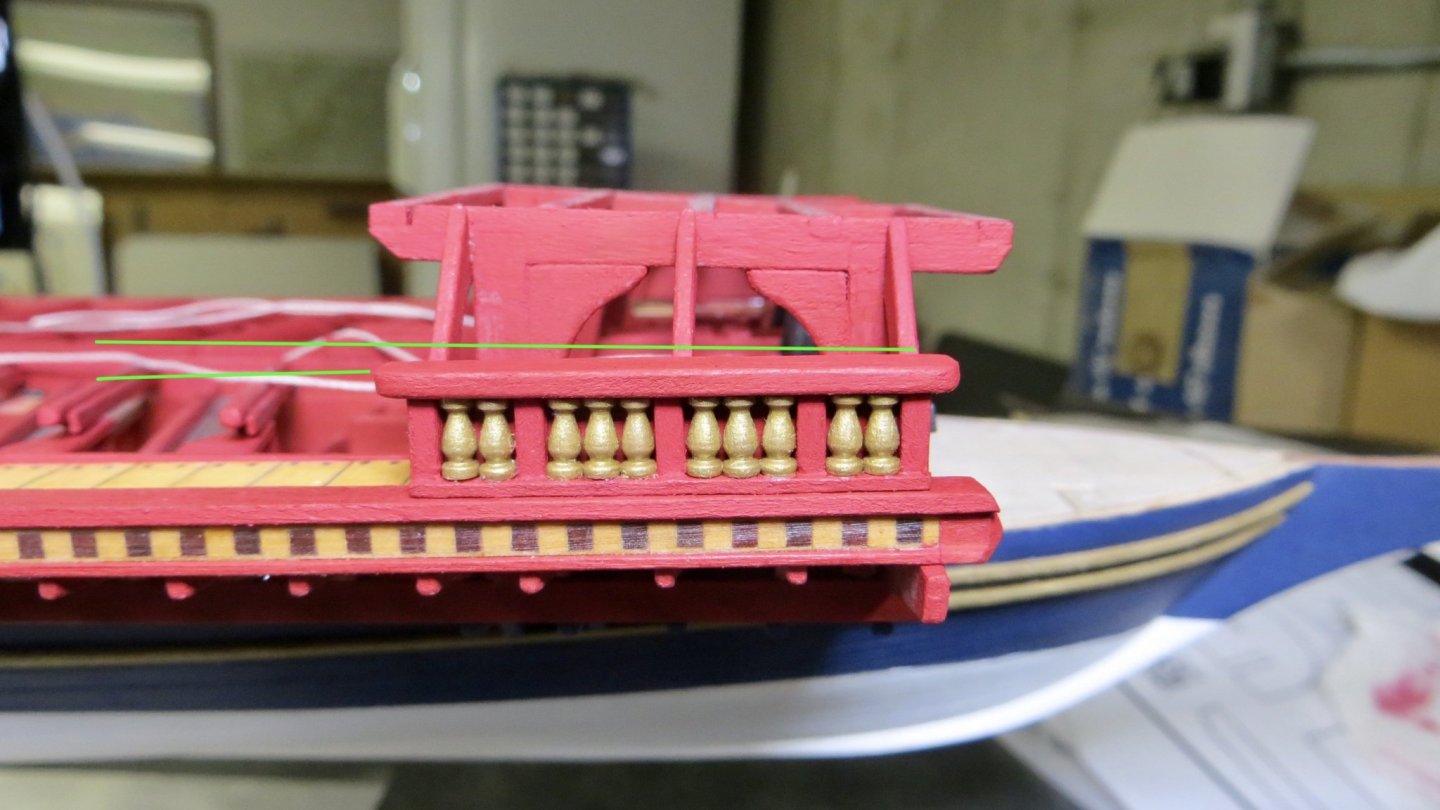
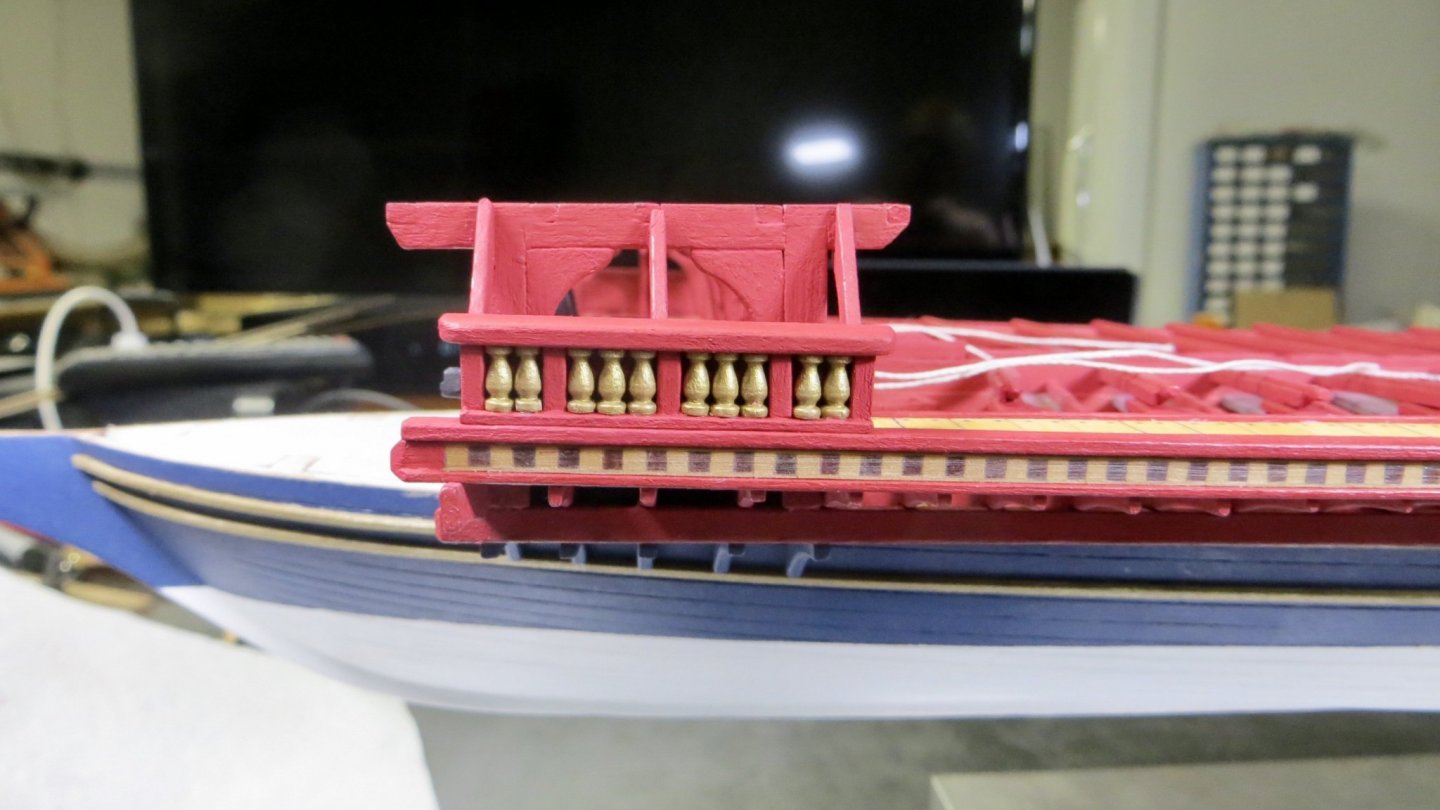
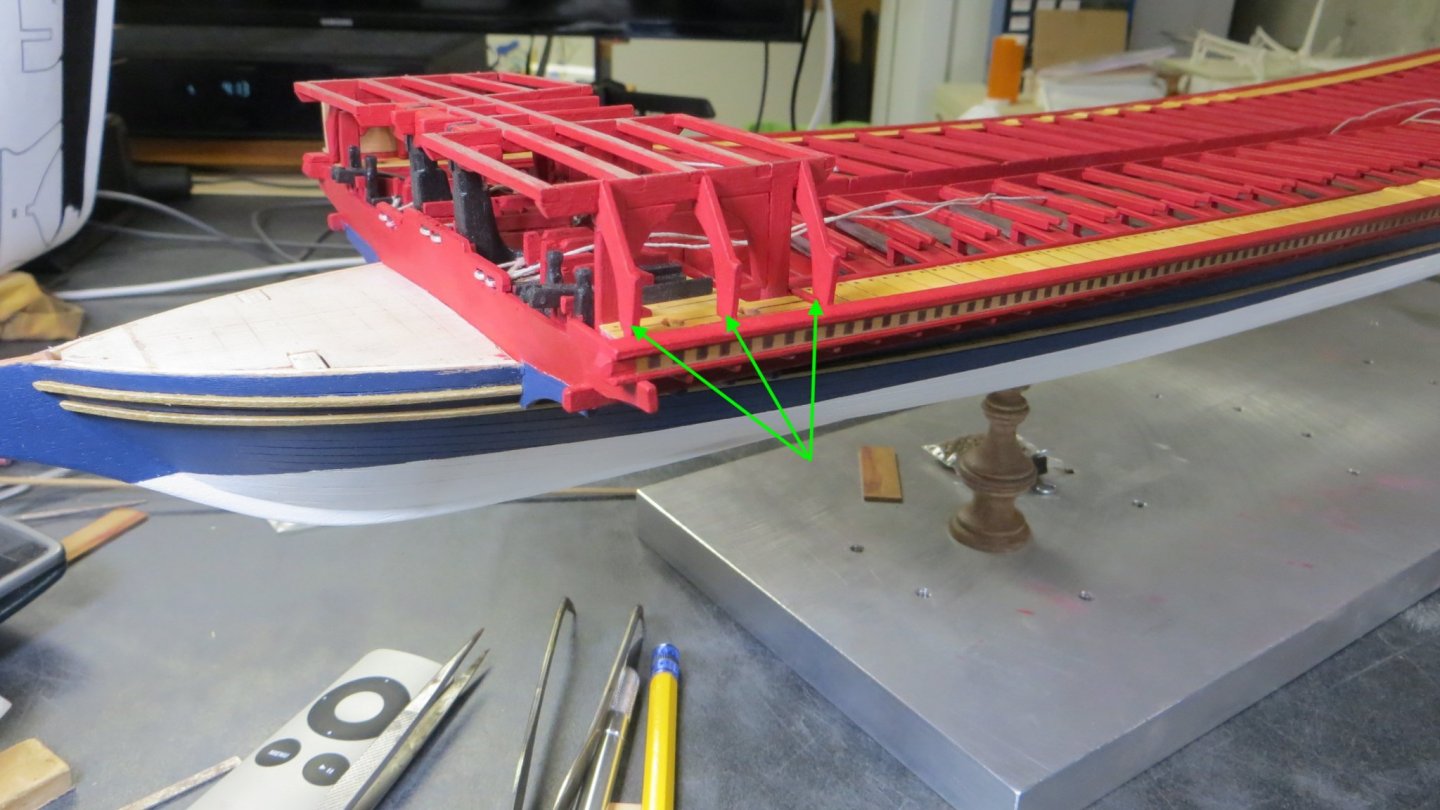
 I made some more progress with the upper deck over the cannon. The planks for the decking are from the same material as the other areas of the model and I used the same methods with the black paper as described previously. The Corel plans call for the decking planks to go all the way "end to end" on the beams underneath. I thought this odd. I was thinking that the molding around the edges should go on first, but in checking with the "Fleur de Lis" plan, the layout was the same as the Corel plan. (Molding or trim to be added on top of the planks) The Fleur de Lis plan show the decking planks slightly wider than the Corel plans and I followed this also. I made the decking planks 5 mm wide instead of the 4 mm. Tree nail pattern added, using same tool as described earlier in the log. Decking Stained and Sealed When adding the trim around the edges of the decking, I followed the design from the "Fleur de Lis". The Corel plans have me using just 1 mm by 4 mm wide trim pieces around the deck. The "Fleur de Lis" plan for the trim is more robust around the front and outside edges. This made more sense to me because the railing posts will be attached to these pieces. "Fleur de Lis" trim molding design I used Trim Pieces painted and installed. The green arrows show where the railing posts will be attached to the upper deck trim. The blue arrows show the plain 1 mm by 4 mm trim that is on both plans. Side View Now onto closing up the port and starboard side of the upper deck. Thank you for the "likes" from my previous post and for stopping by. Frank

- 510 replies
-
- 6
-

-
- reale de france
- corel
- (and 1 more)
-
I agree OC. Very nice indeed!! Frank
-
Hi Mark, Nice job. Did you prime the barrels or just apply the satin black right on the metal? They look nice with all the detail still there after adding paint. Thanks, Frank
-
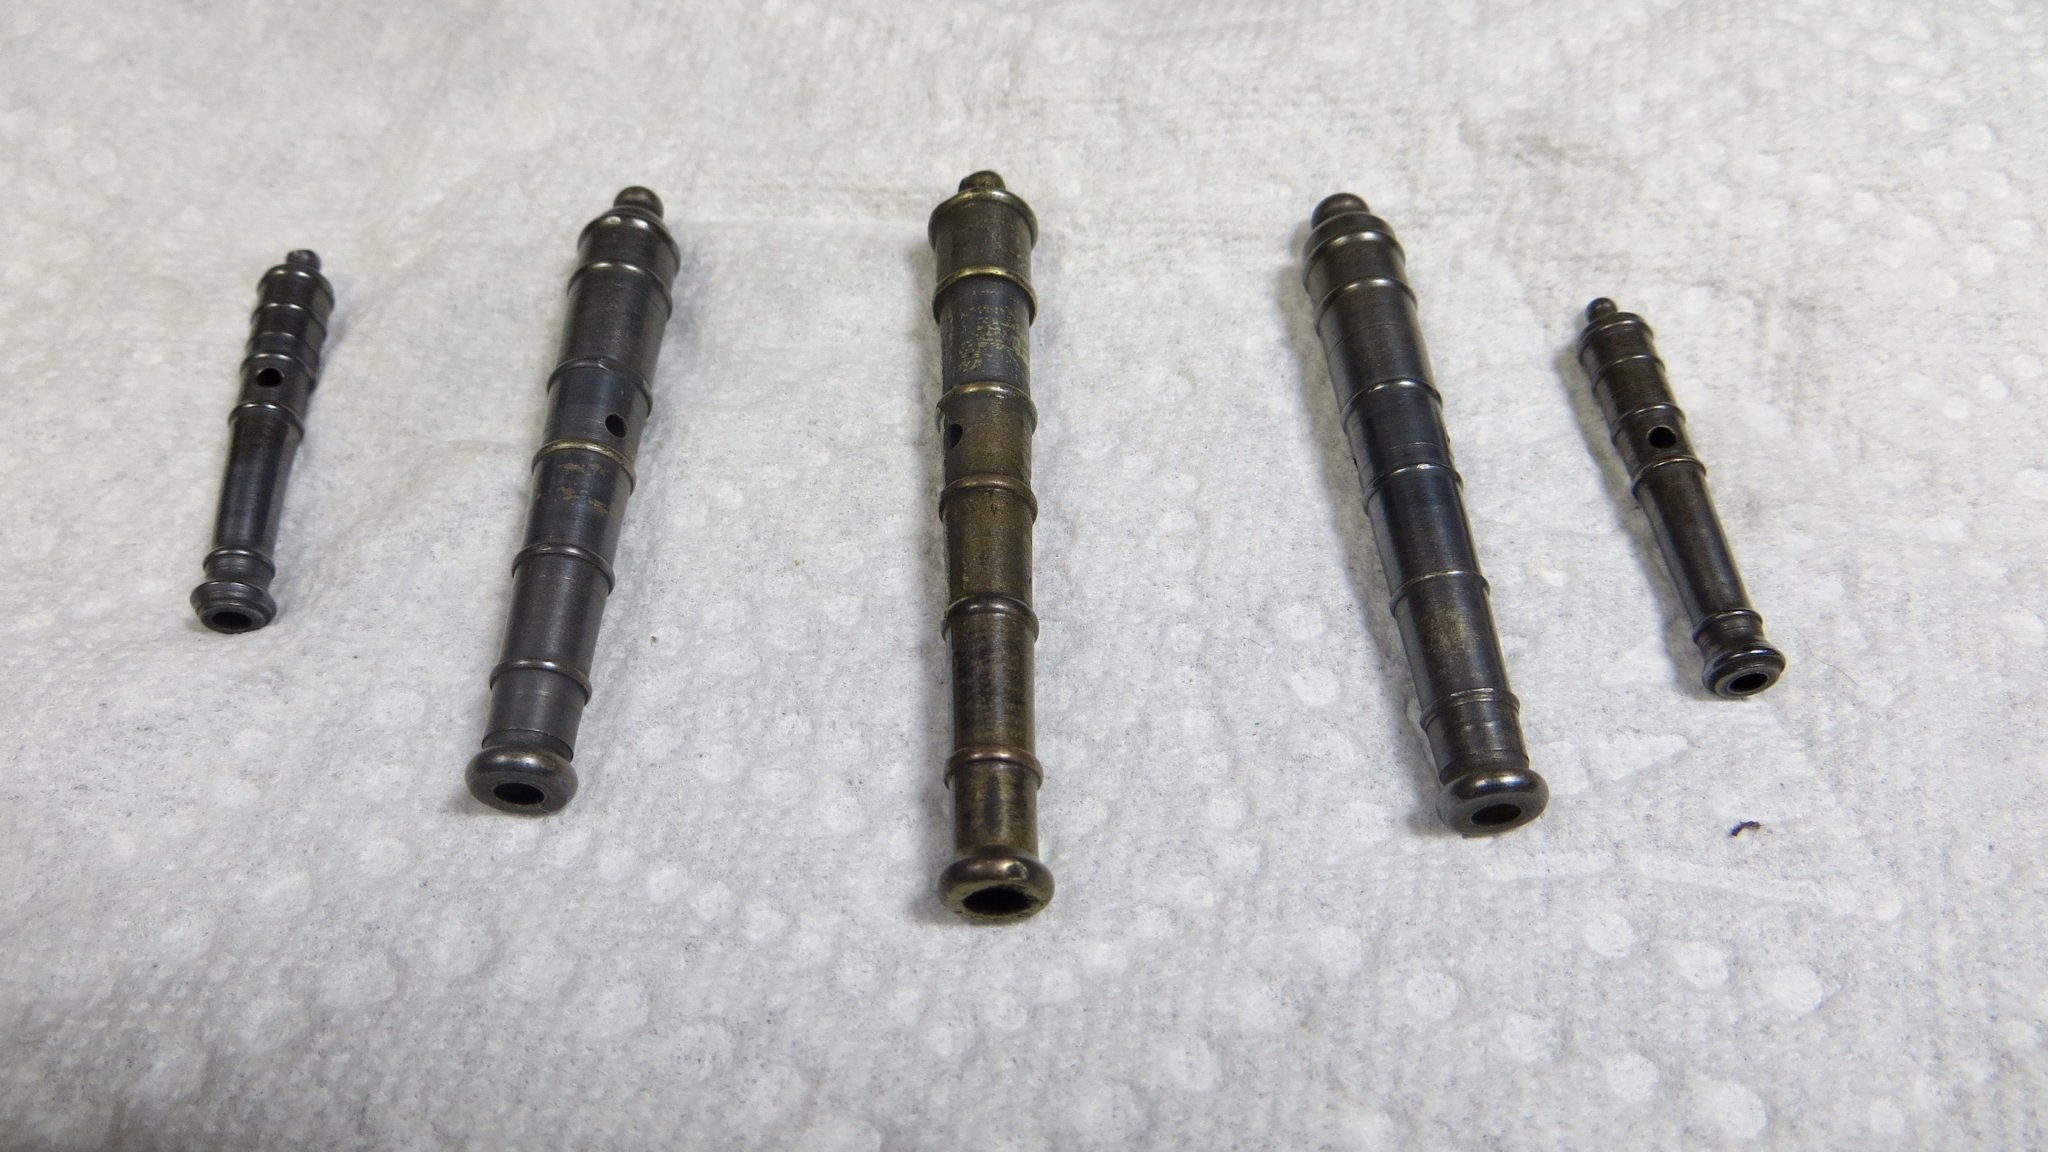
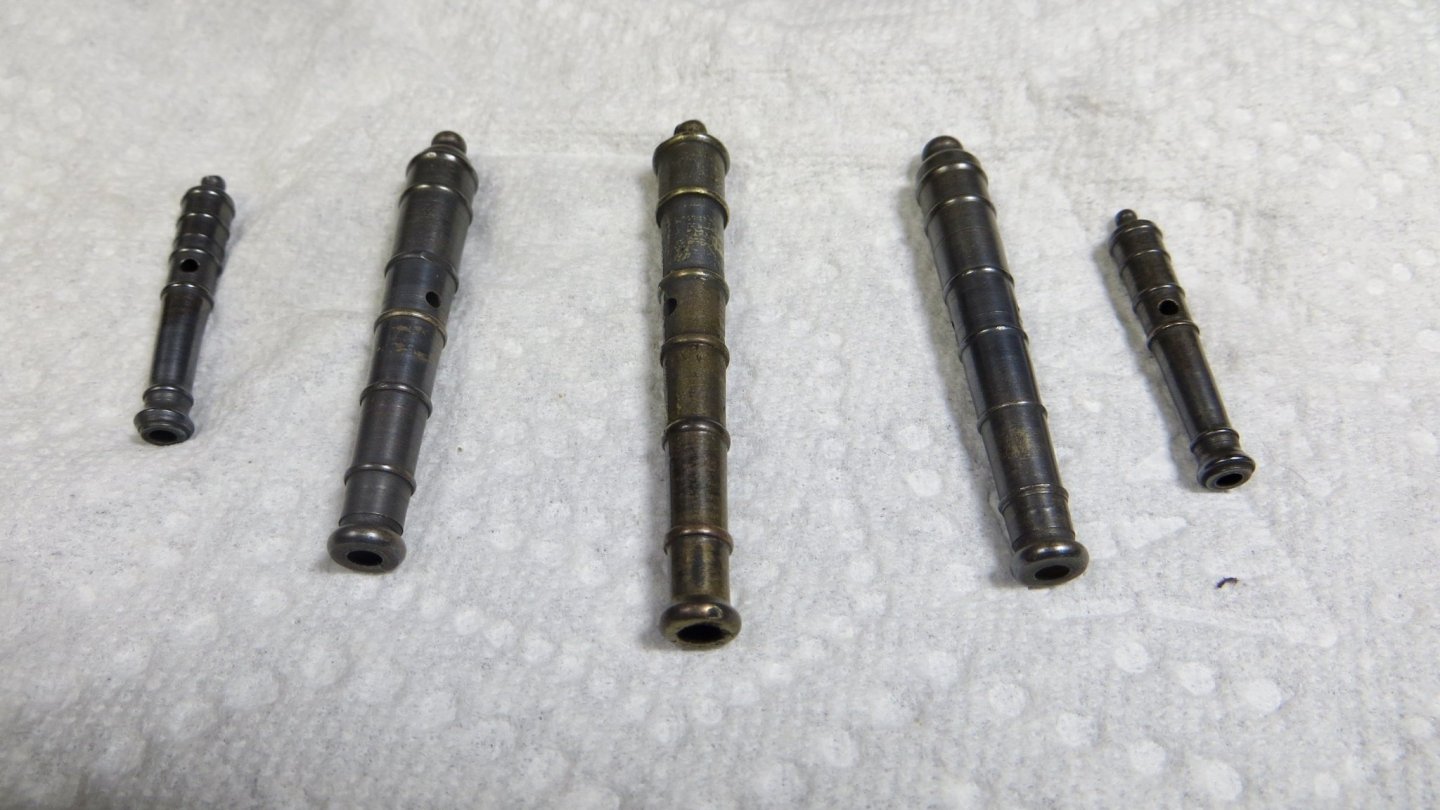
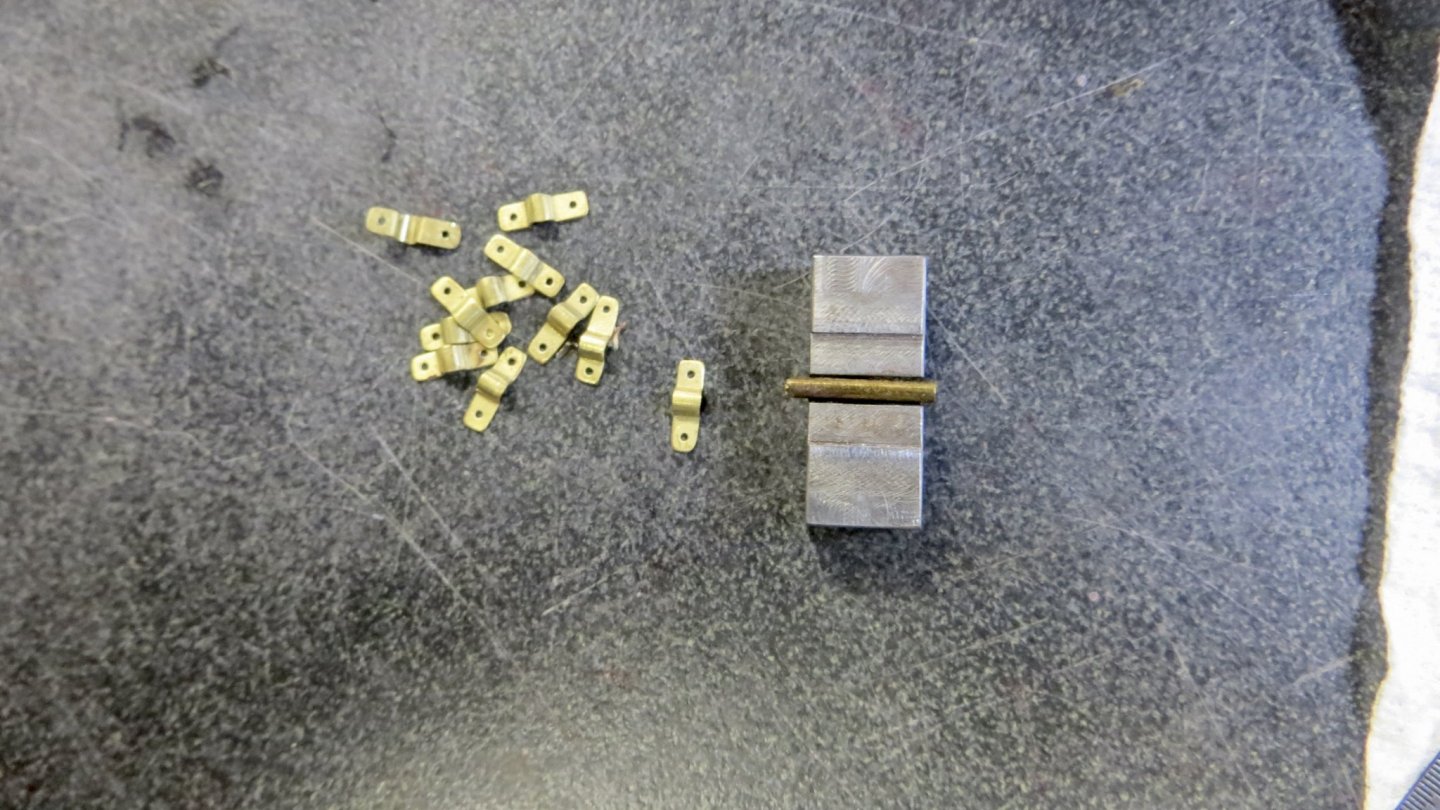
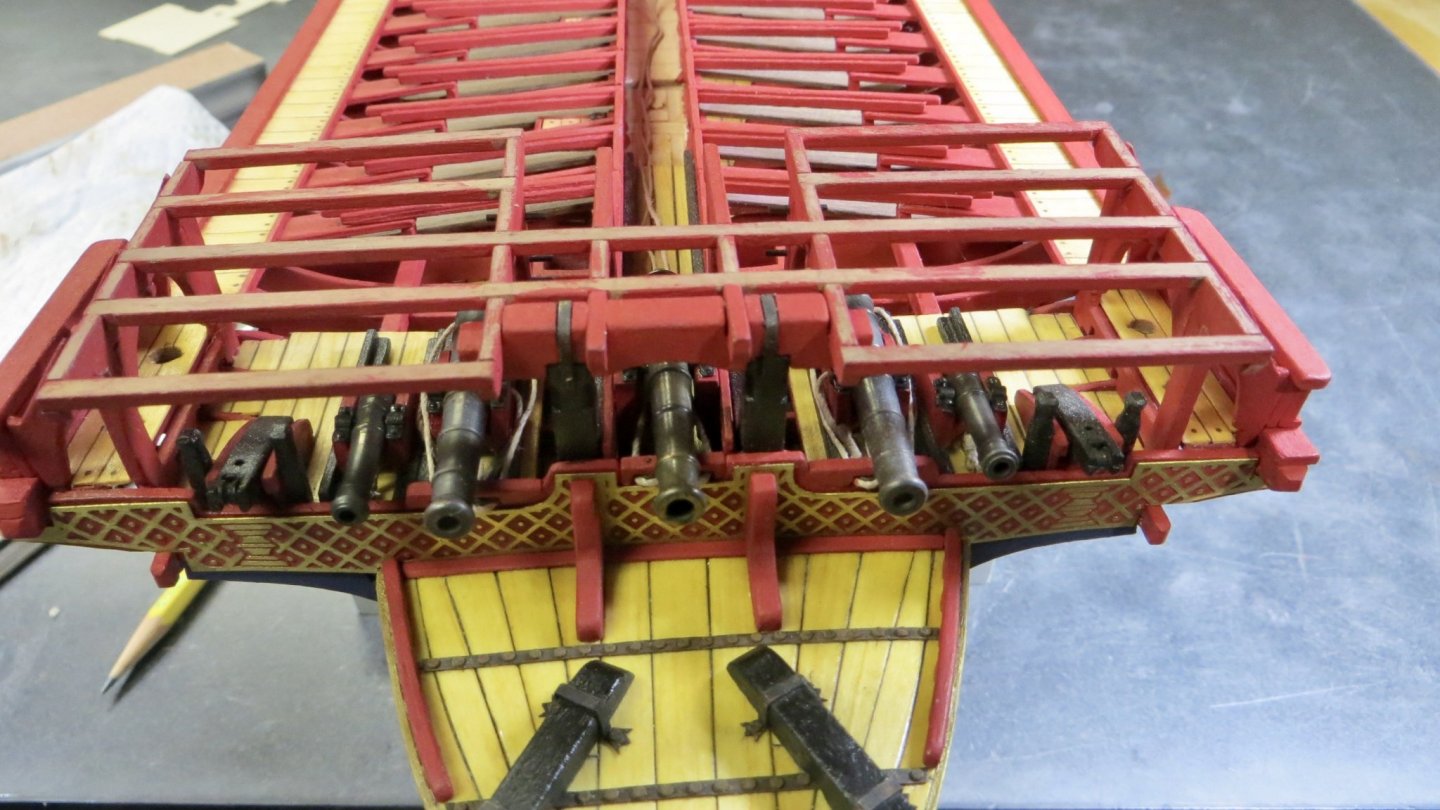
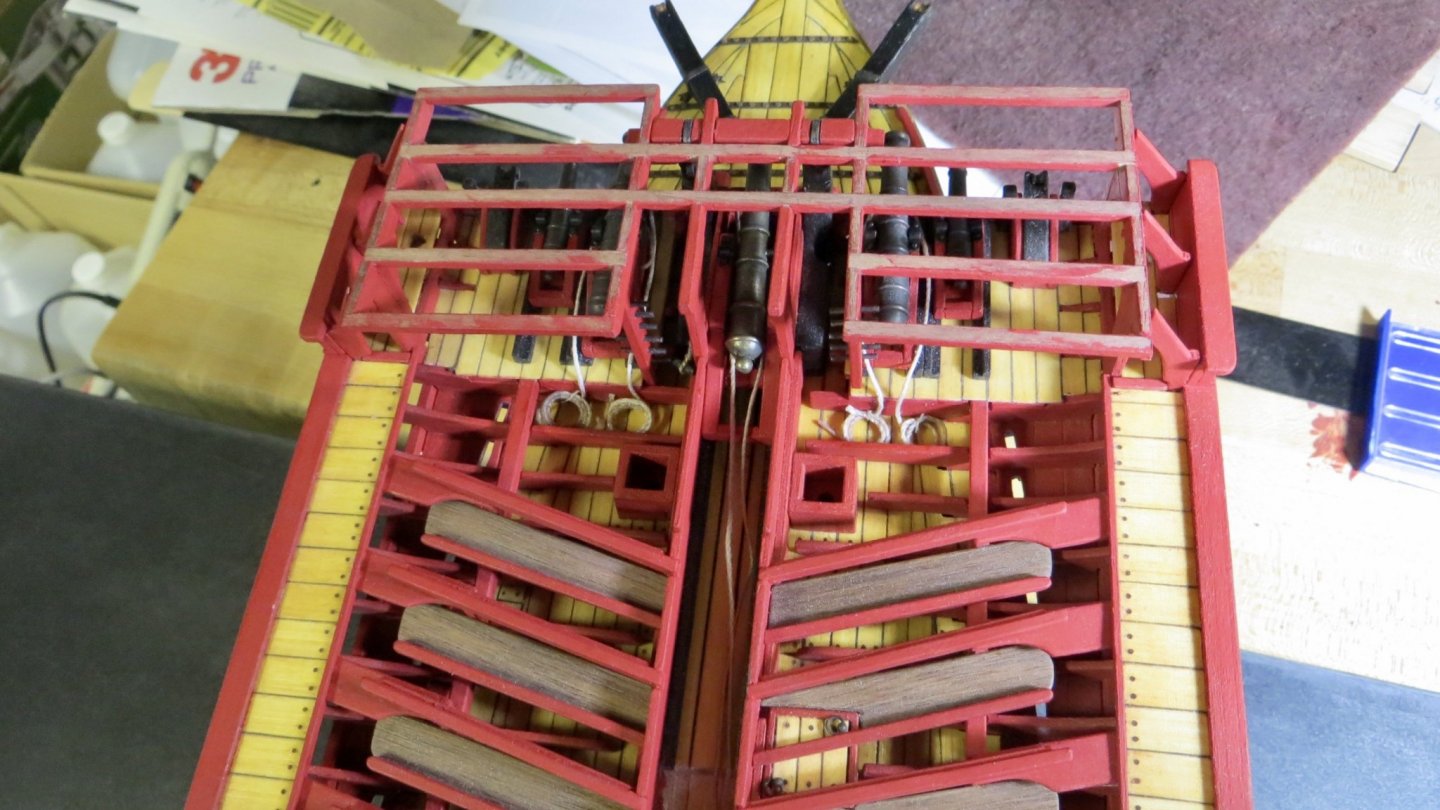
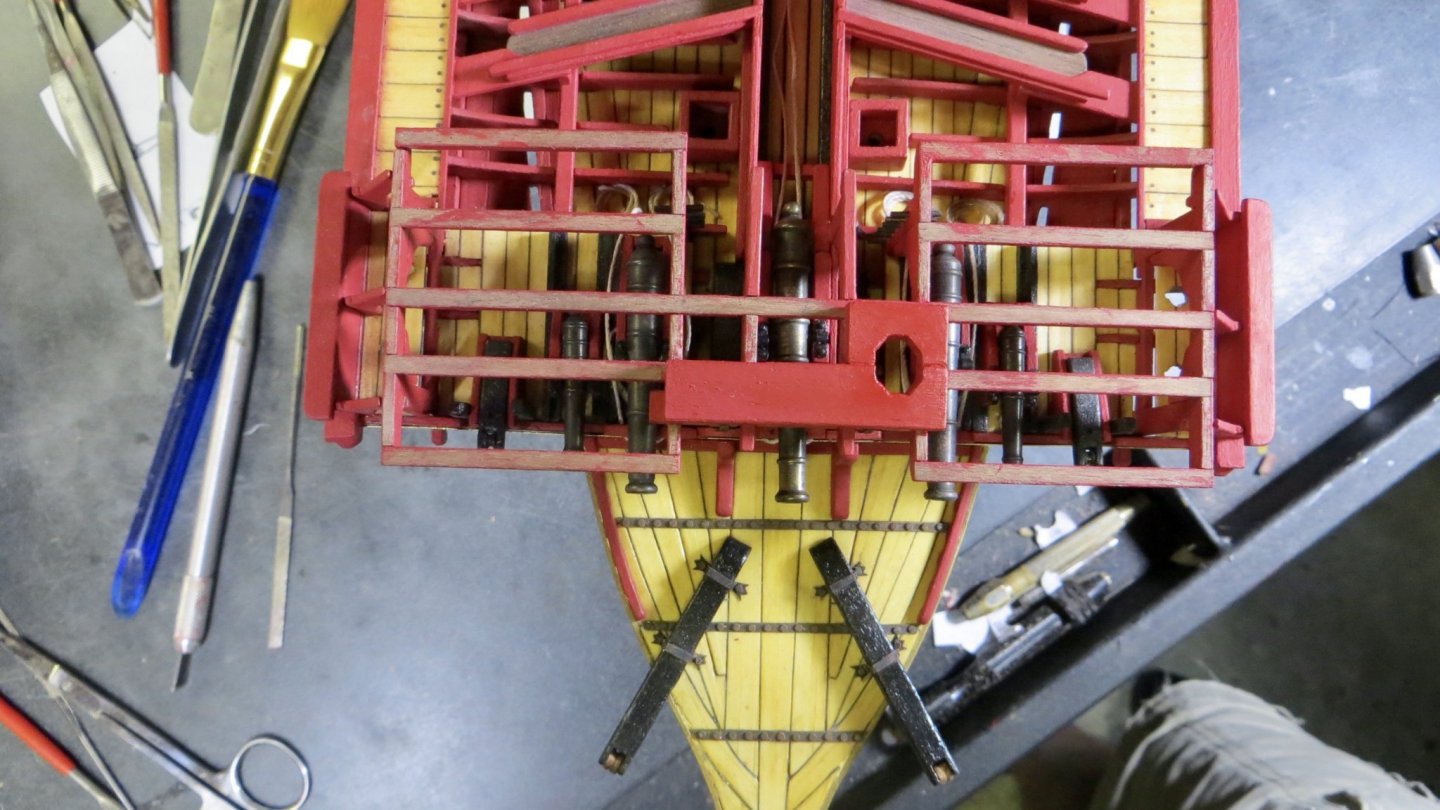
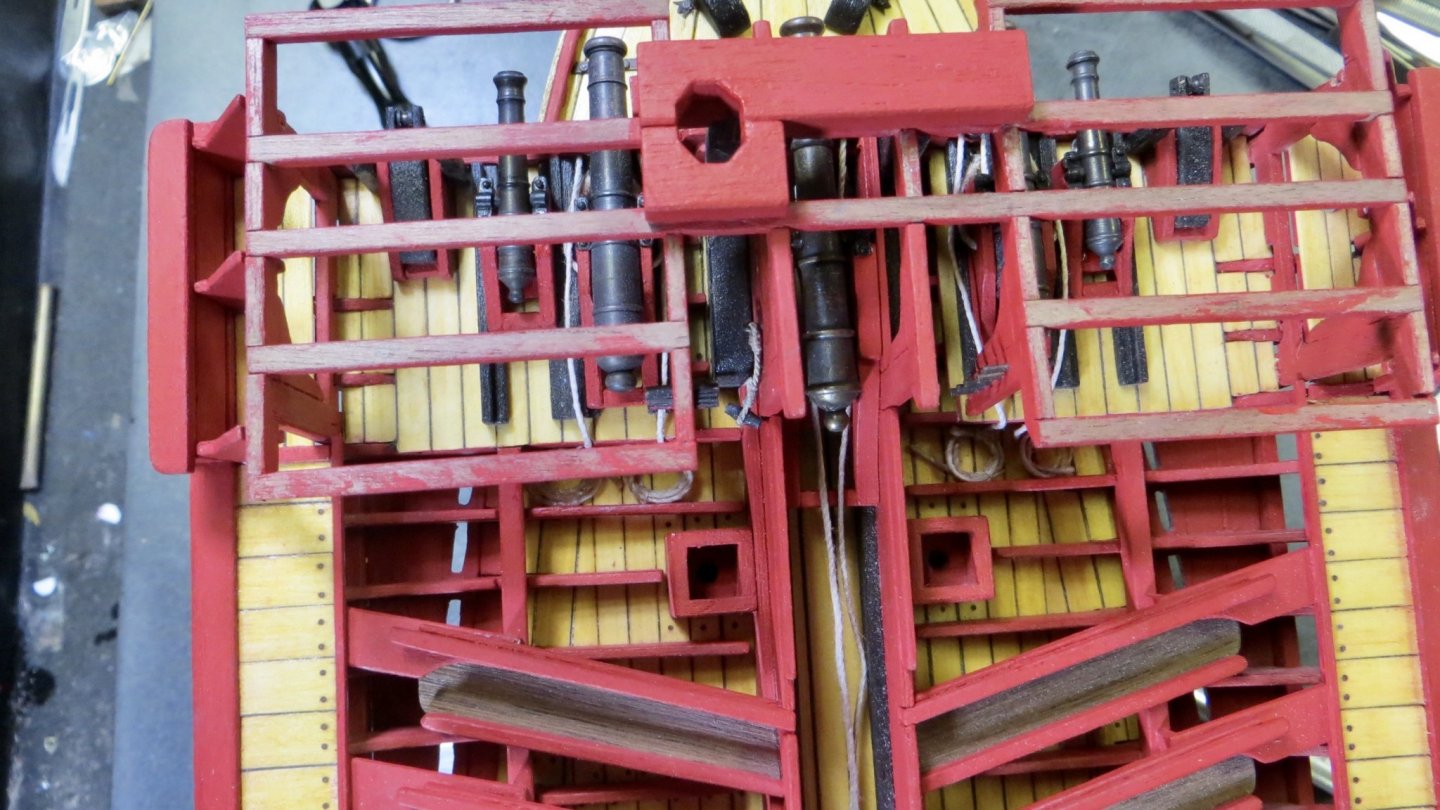
Hello, I finally made it to the stage in my project where the cannons are to be installed. The first step I did was to darken the canon a little, using a blackening product. My friend made me a small jig, in his basement metal working shop. I put the canon pin on the jig and I was able to shape the canon caps using some brass sheet metal. Using the same product, I blackened the pins and brass caps. Cannons Installed. As I mentioned earlier in the build, I should have installed the canon before the cross beams of the upper deck were installed. I had a hard time nailing the caps (20 nails total) with the beams in the way. View from the stern with the lines coiled. The Corel kit calls for 2 openings on the upper deck for the foremast. One to the port side of centerline and one to the starboard side. I decided to have some fun and deviate from this and try to follow some of the design of the "Fleur de Lis" plans, which call for only one opening on the port side. Installation of the beam to support the mast. The "Fleur de Lis" plan also shows a large knee to support the beam for the foremast. Next step is to plank the upper decks and add the trim moldings around the planking. Thanks for stopping by! Frank


- 510 replies
-
- 5
-
-
- reale de france
- corel
- (and 1 more)
-
Great start Michael. Looking forward to following this log! Frank
-
I agree. Beautiful model Michael! I look forward to following your new build. congrats! Frank
-
Very nice! do agree with the others. Syren rope is the best that I’ve found! frank
-
Michael and Mark (Hubac's Historian), Thank you both for visiting and your kind words. Appreciated. Metal working is not my strong point. Much prefer working with wood! Glad I tackled this section now. Frank
-
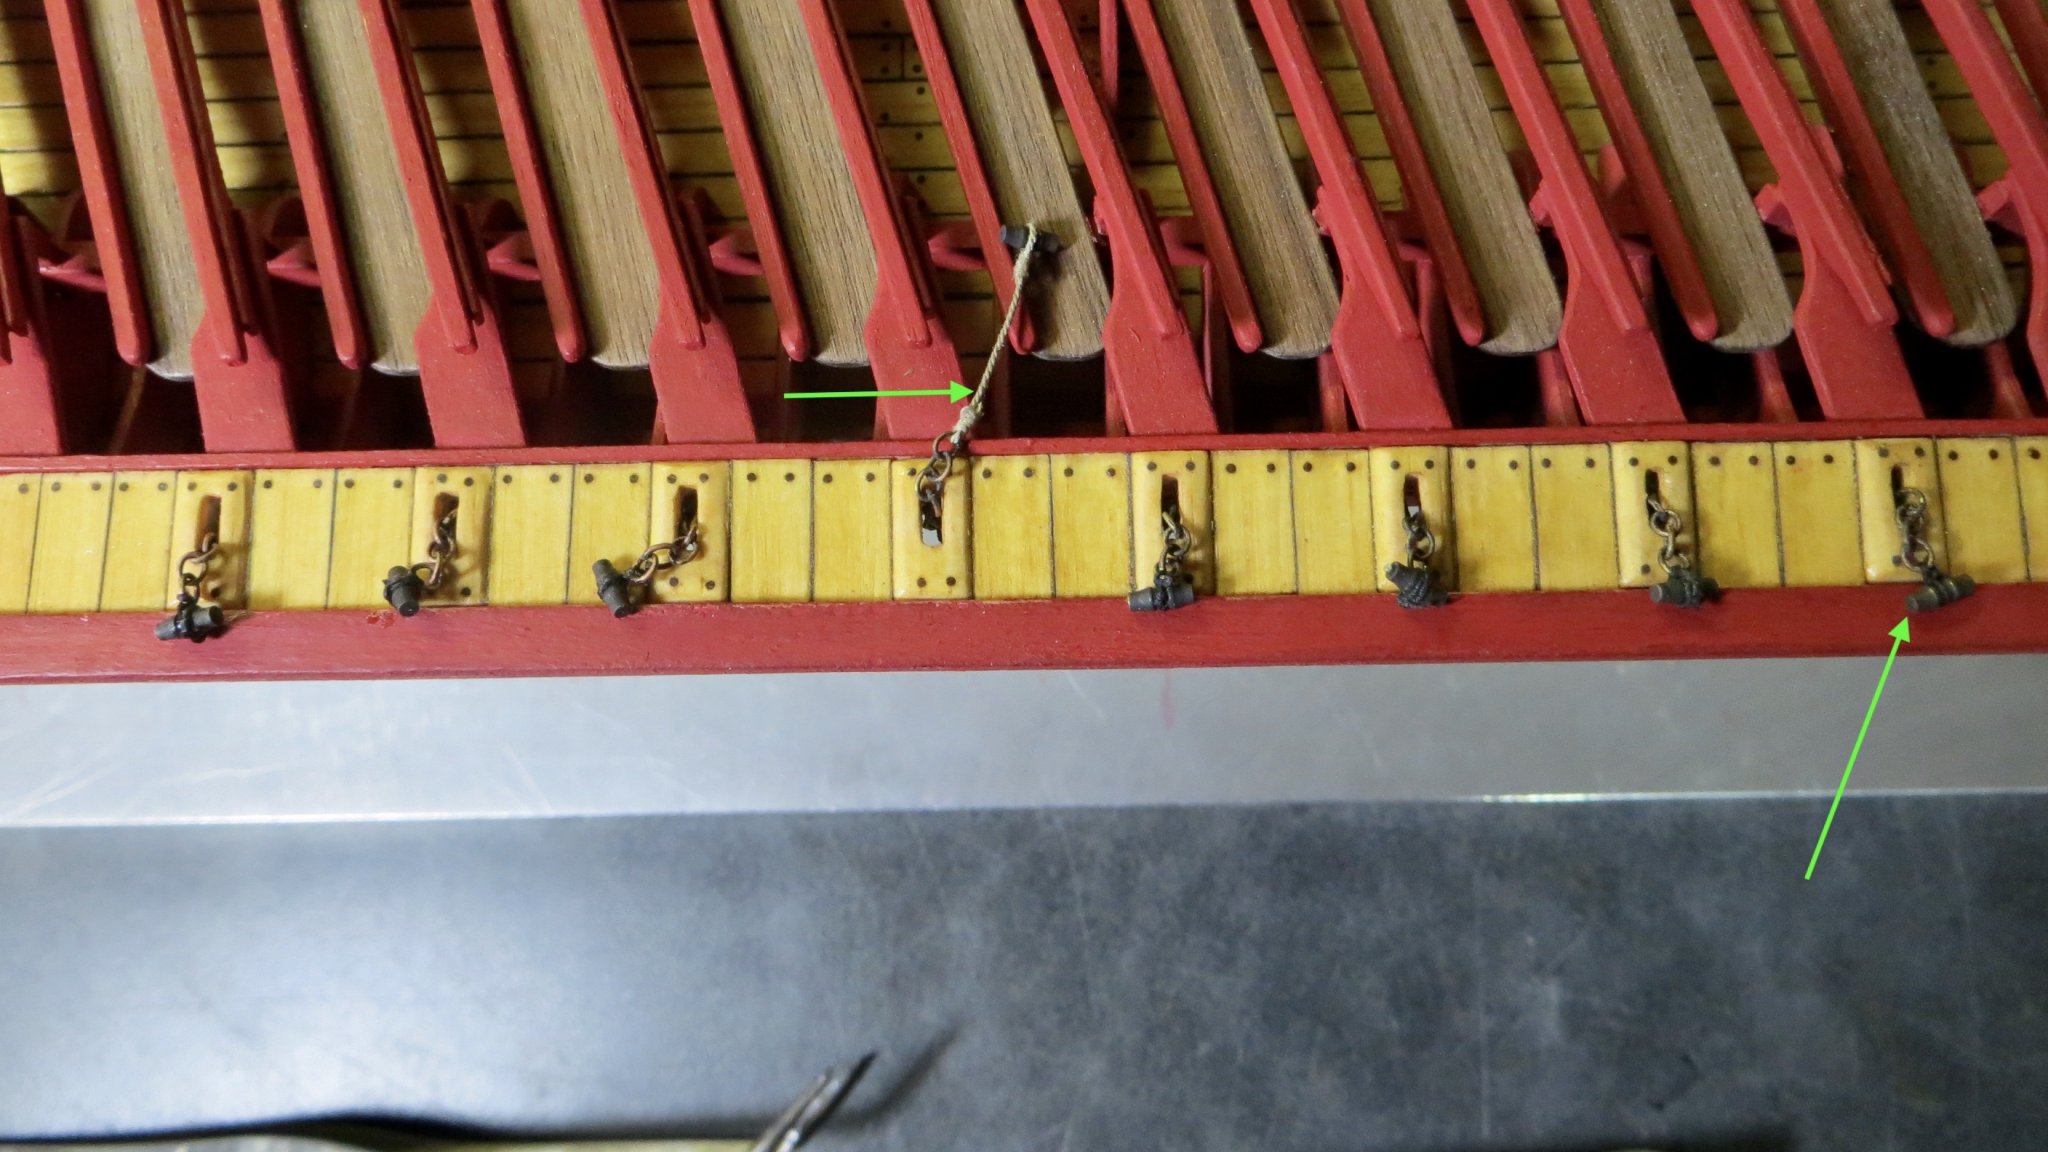
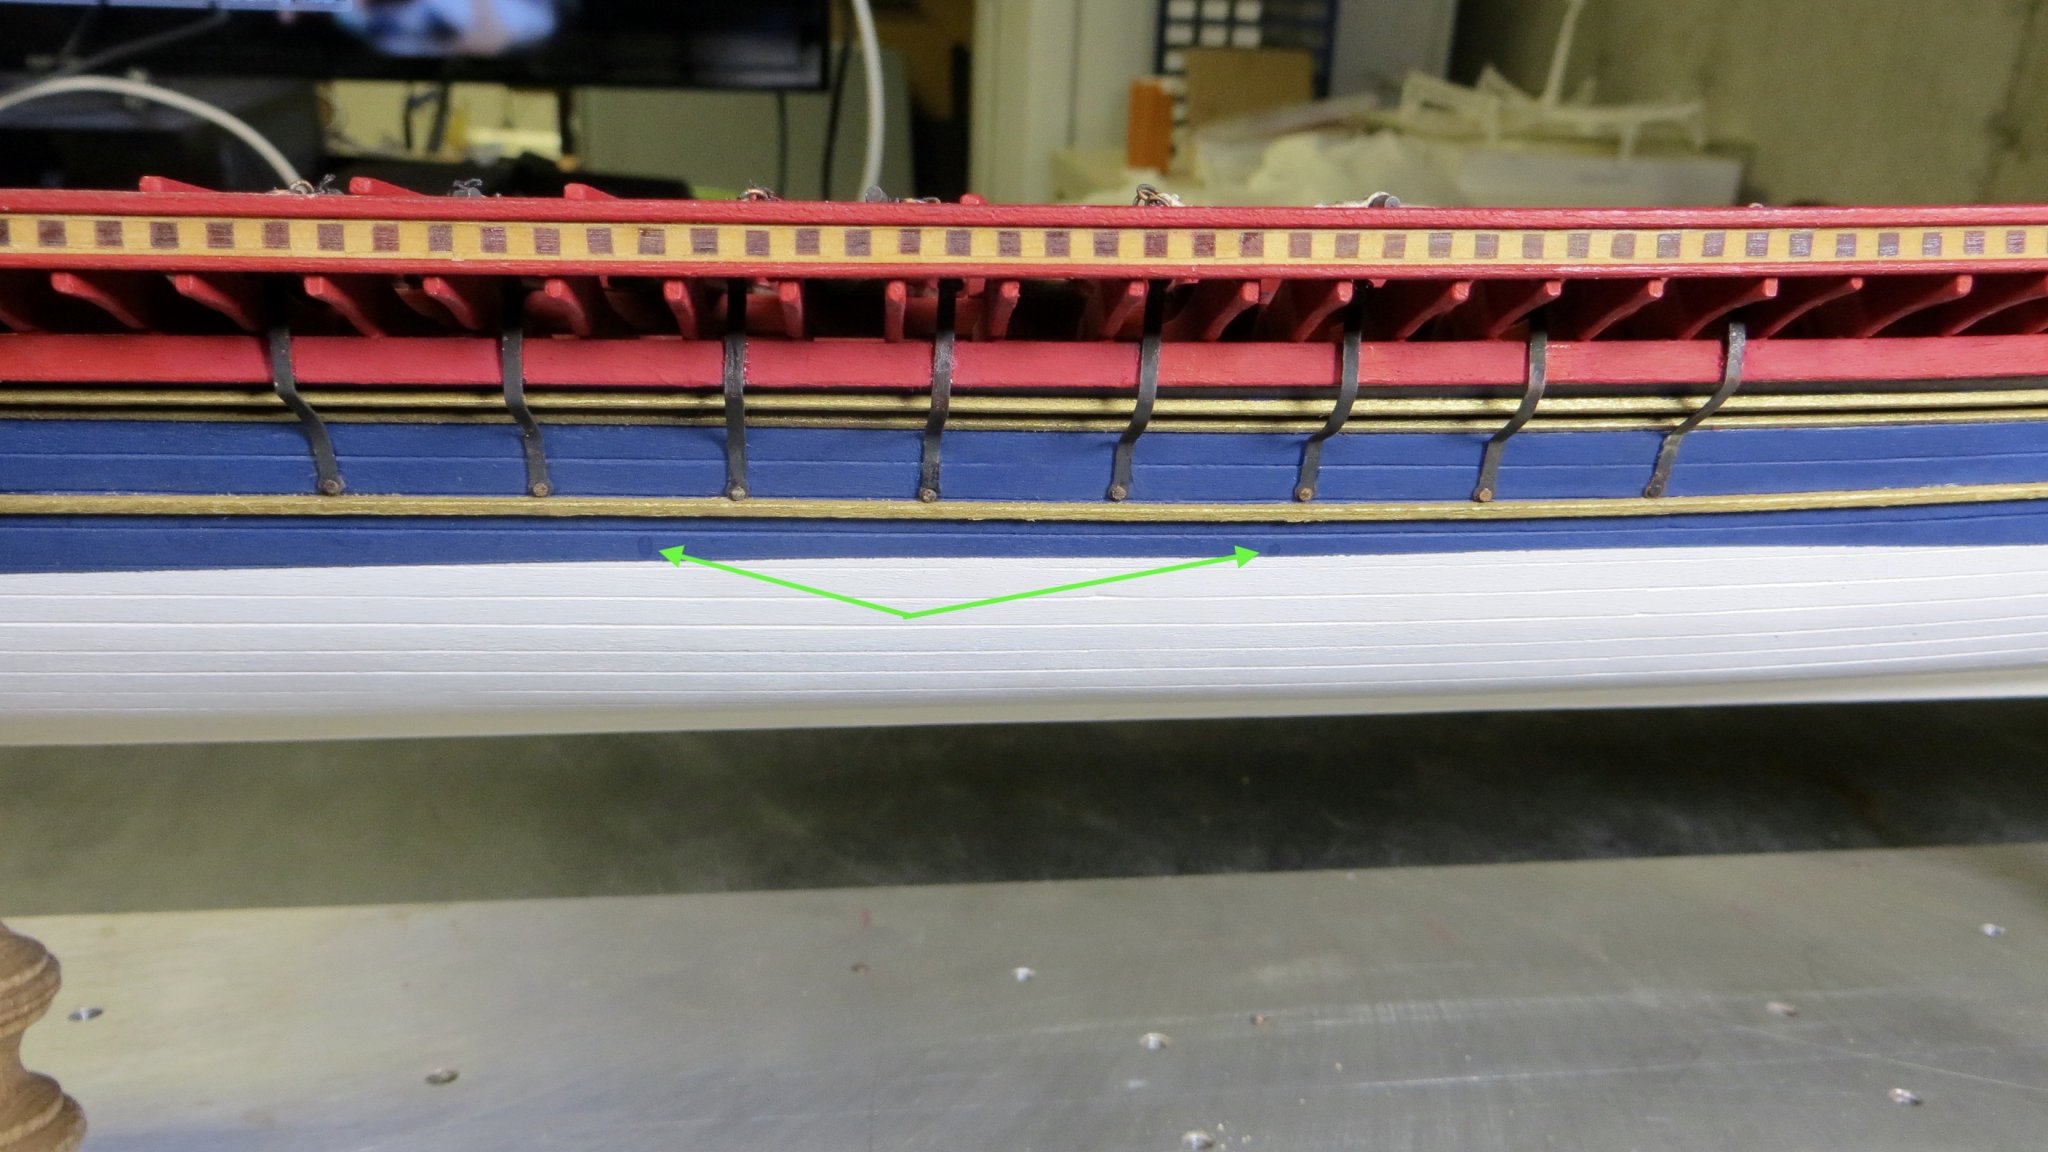
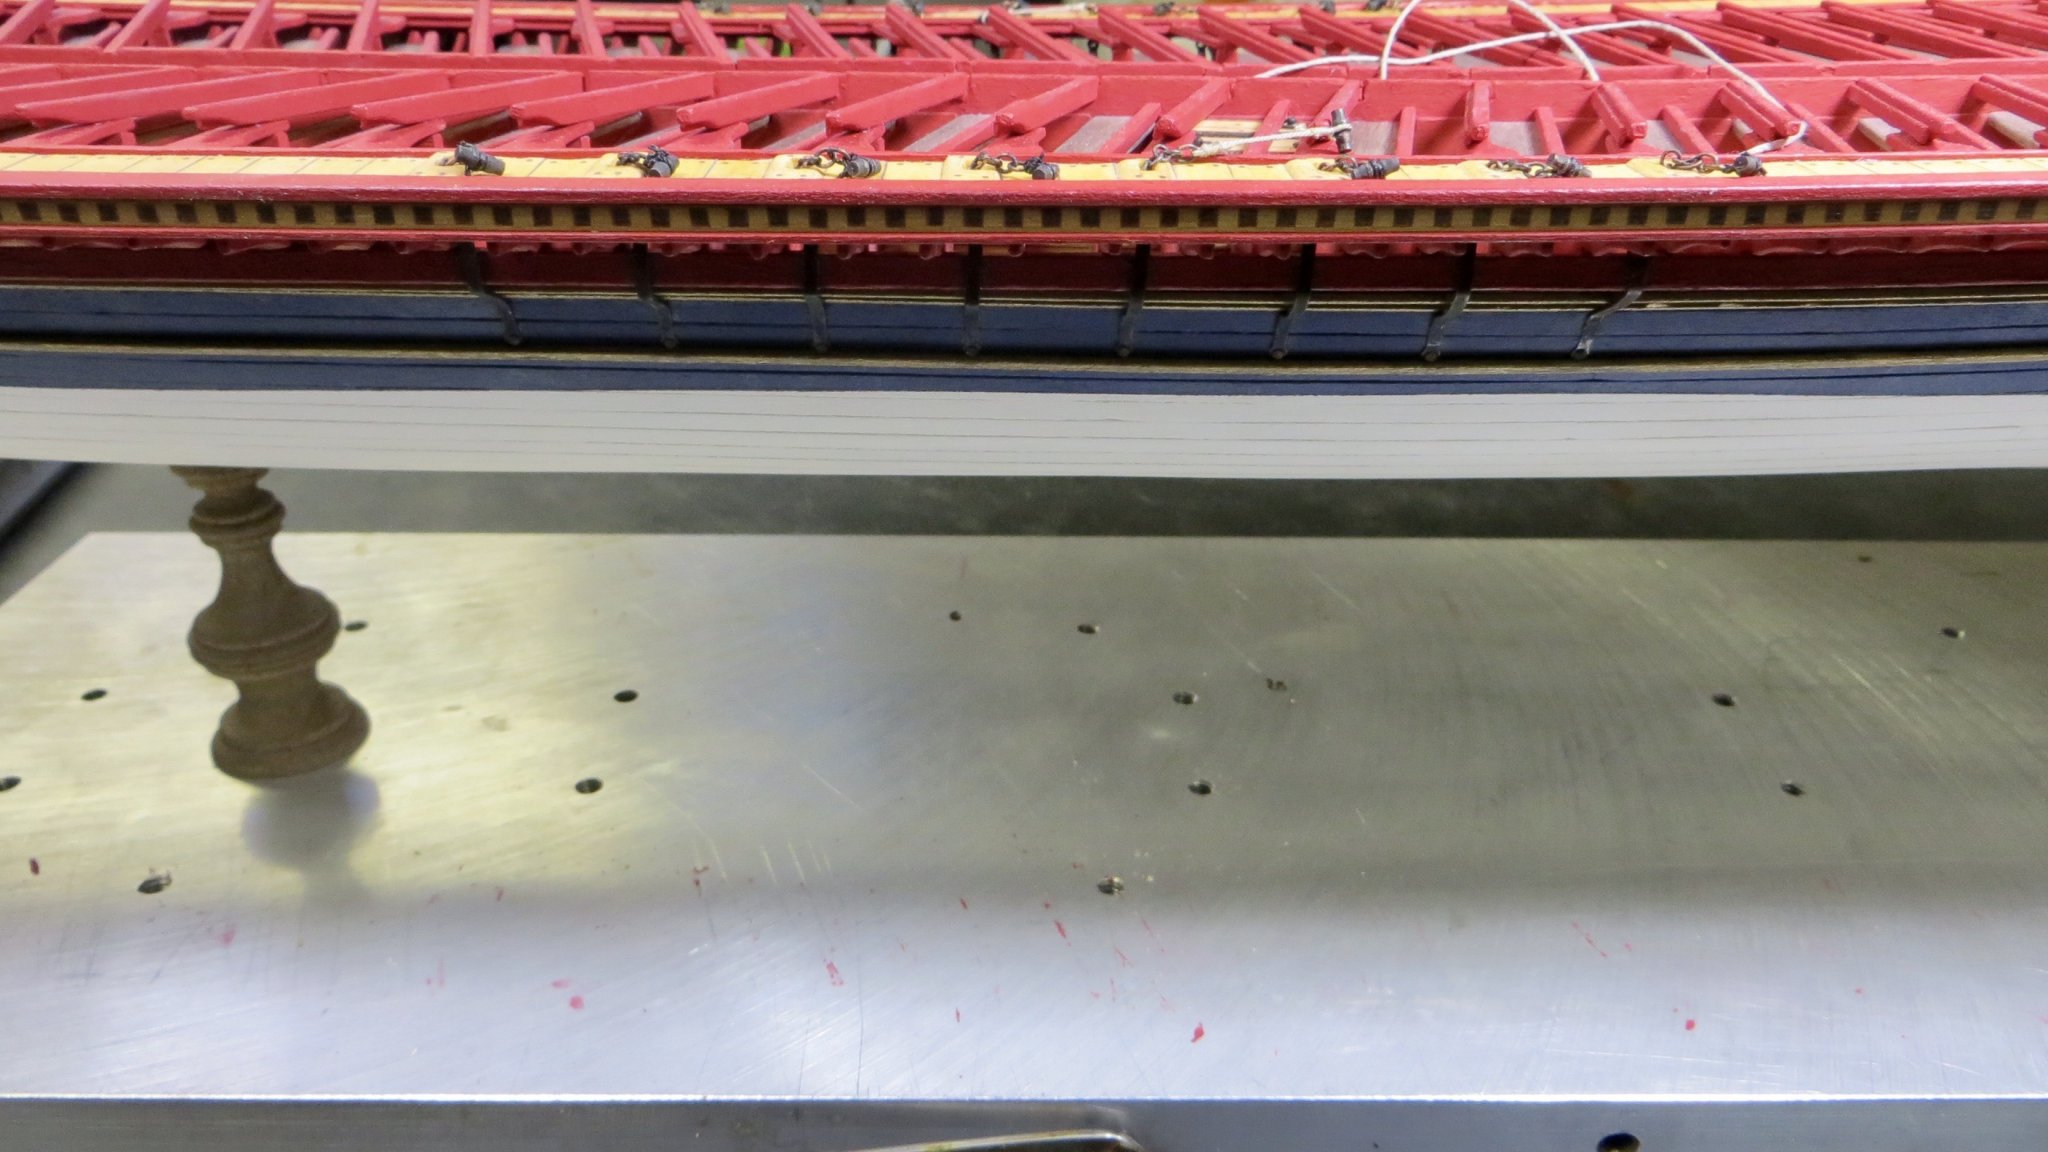
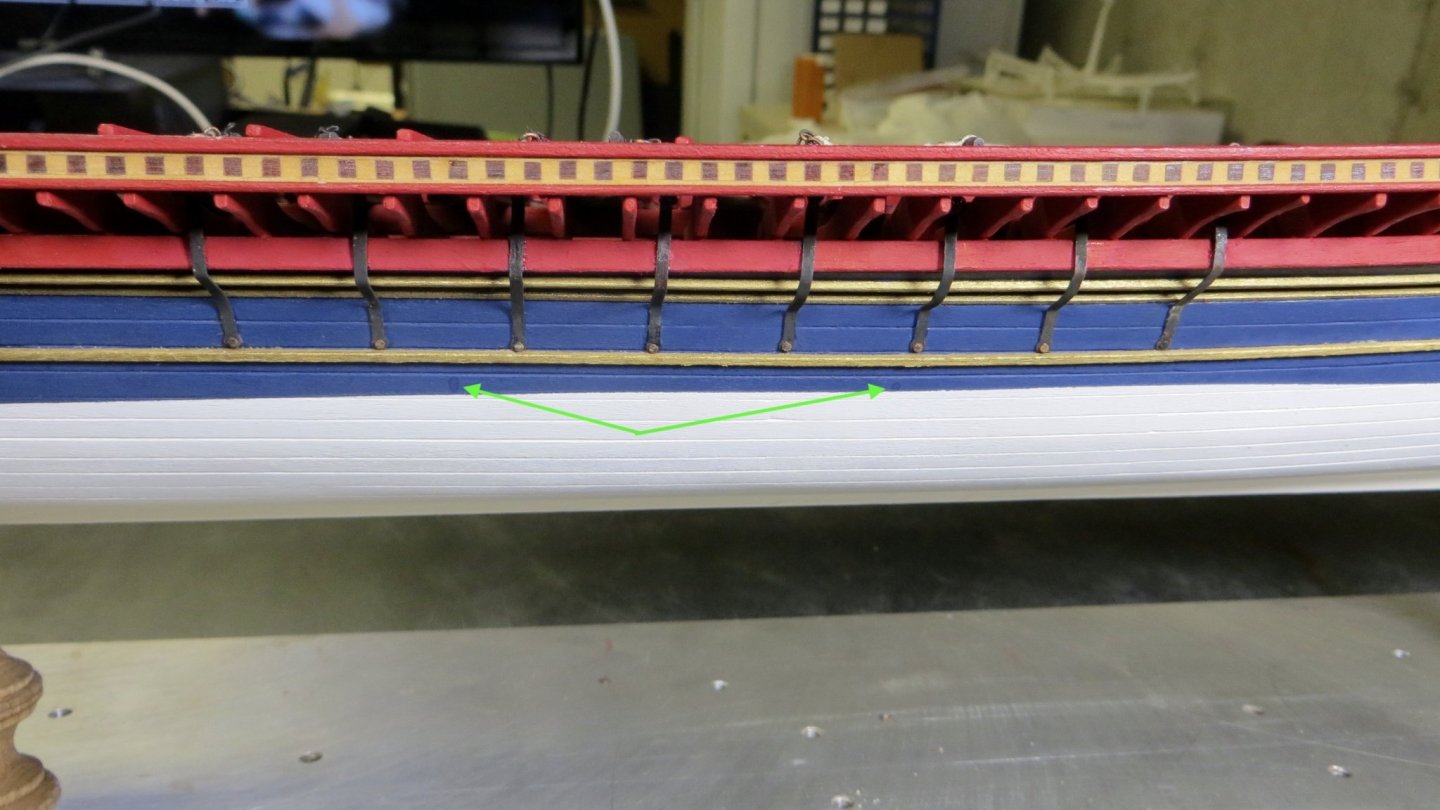
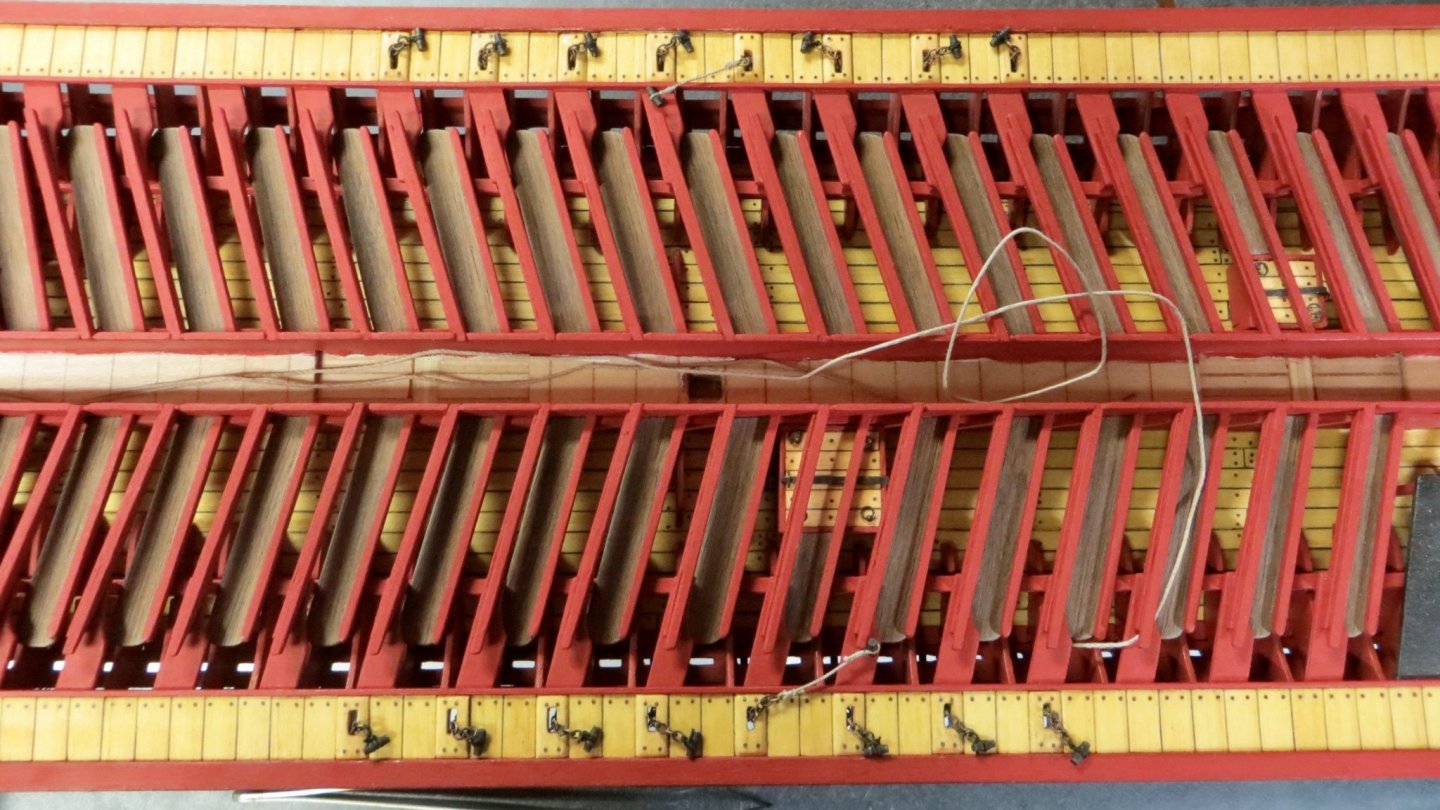
Hello, Moving on from the bow area for a while, I decided to tackle the placement of the chain plates for the main mast shrouds. First step was to take the brass etched pieces for the plates and bend them to the contour of the lower section of the hull. Next, I blackened or antiqued the brass chain plates, the ring on top, the chain, and the toggles. The chain plates are nailed to the hull. A larger ring is attached to the top of the formed chain plate and the chain links are attached to this ring. Then the chain passes thru the deck slots made earlier and finally fastened to the toggles. So, note to myself! Next time I cutout slots for chain links to pass thru, it would be a good idea to make sure the slots are wide enough for the chain links! LOL! I can't believe I never checked. Luckily, the slots were just wide enough. There are six shroud lines on each side that are rigged to the mainmast. There are 8 slots and toggles. The 4th slot from the left is rigged much longer and goes up to other areas of the mainmast yard. The last slot to the right is the same length as the rest, but is for other rigging lines. View of Chain plates under deck. I noticed from this photo that I have some touch up blue and red painting to do. See green arrows. View of finished assembly Now, I will be moving back to installing the 5 cannon and finishing the upper deck above the cannon. Thanks again for the "Likes" and for stopping by. Frank


- 510 replies
-
- 6
-
-
- reale de france
- corel
- (and 1 more)
-
Hi Clark, Thanks for stopping by. Yes, in my opinion, if I installed the canon before the bow planking, I would probably have knocked them off while sanding, staining, and adding the fittings of my latest post. That is why I waited. I am now free to install the cannon, before finishing the upper platform above the canon. I will be installing them soon. Thanks, Frank
- 510 replies
-
- 1
-
-
- reale de france
- corel
- (and 1 more)
-
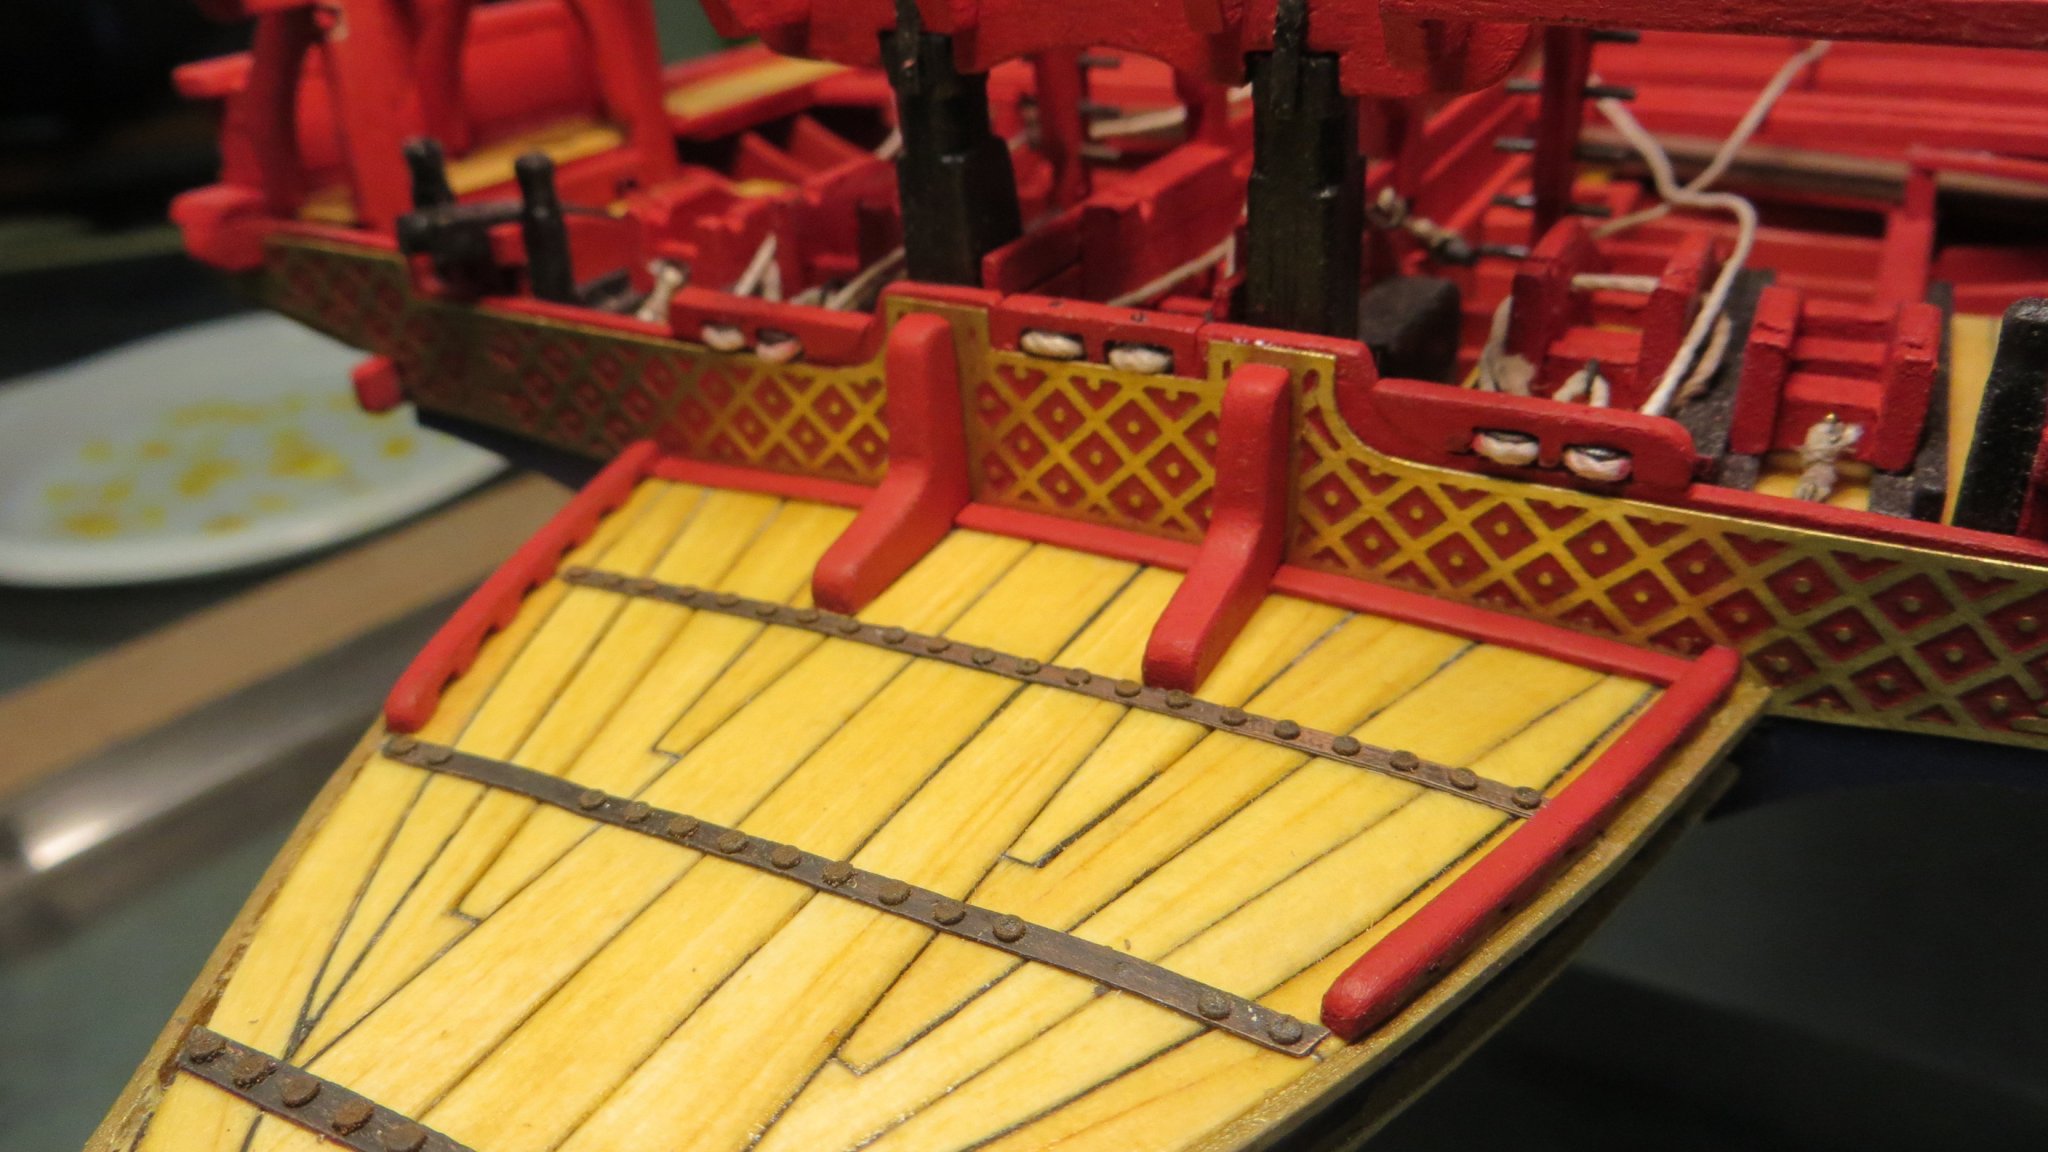
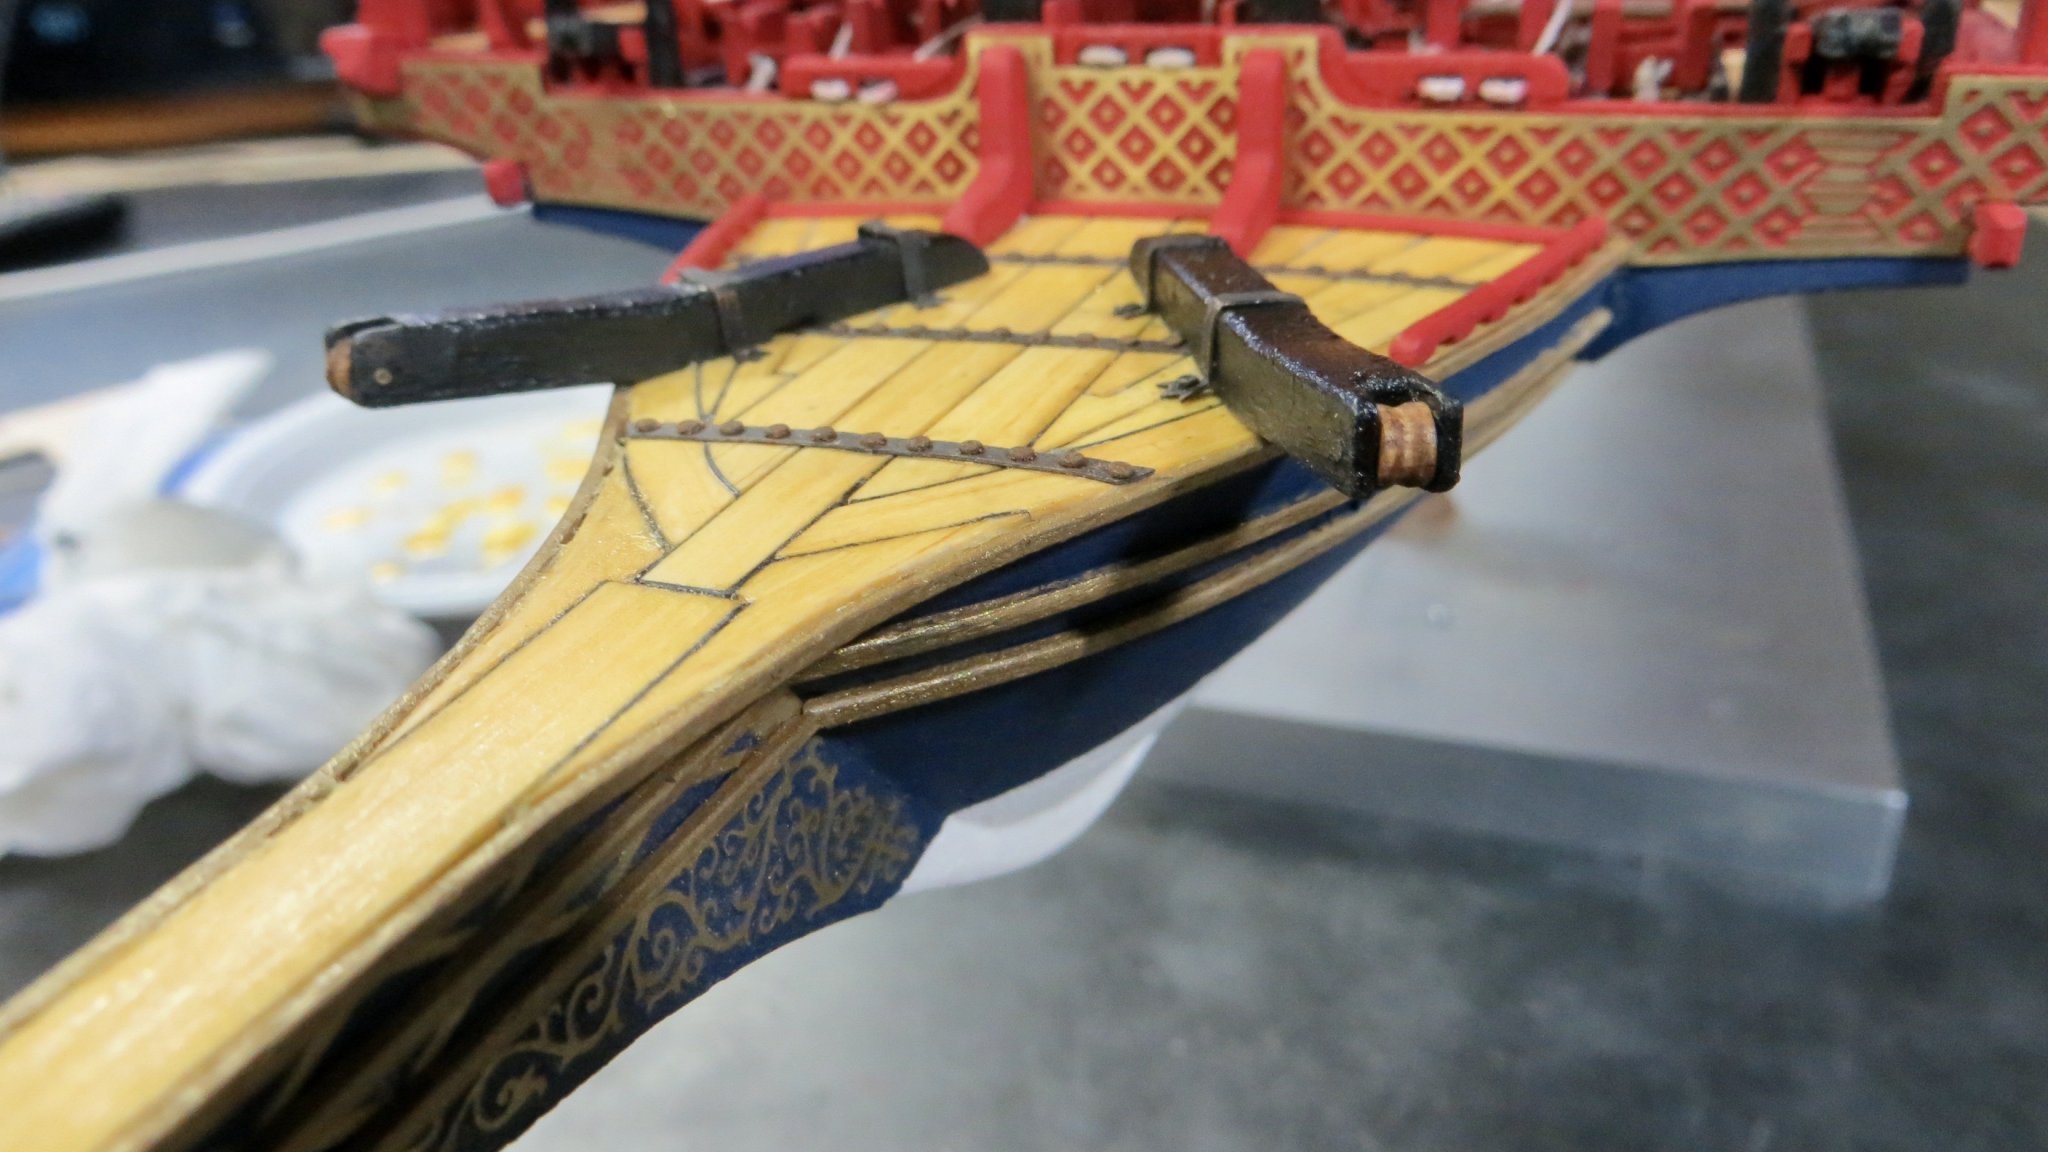
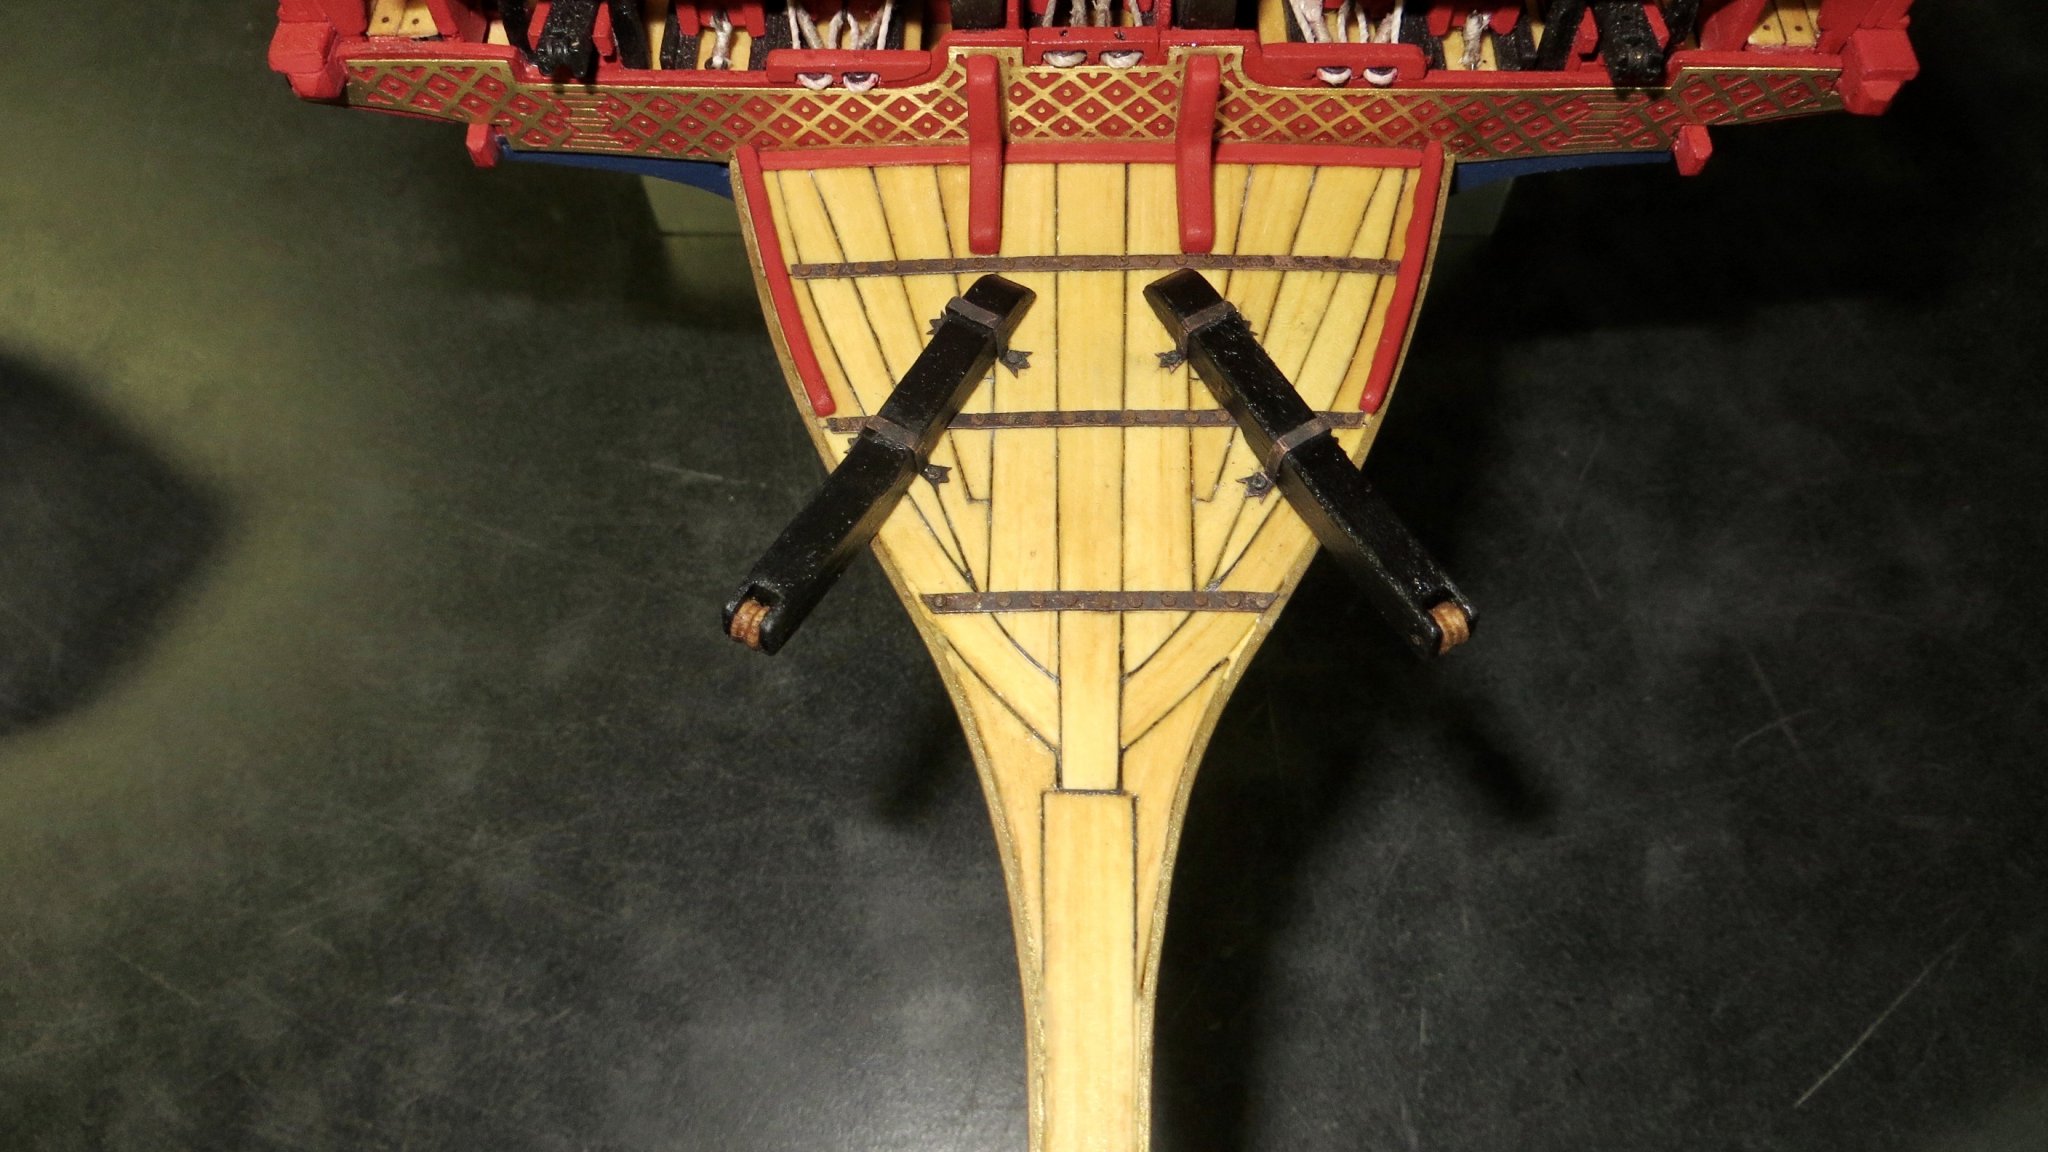
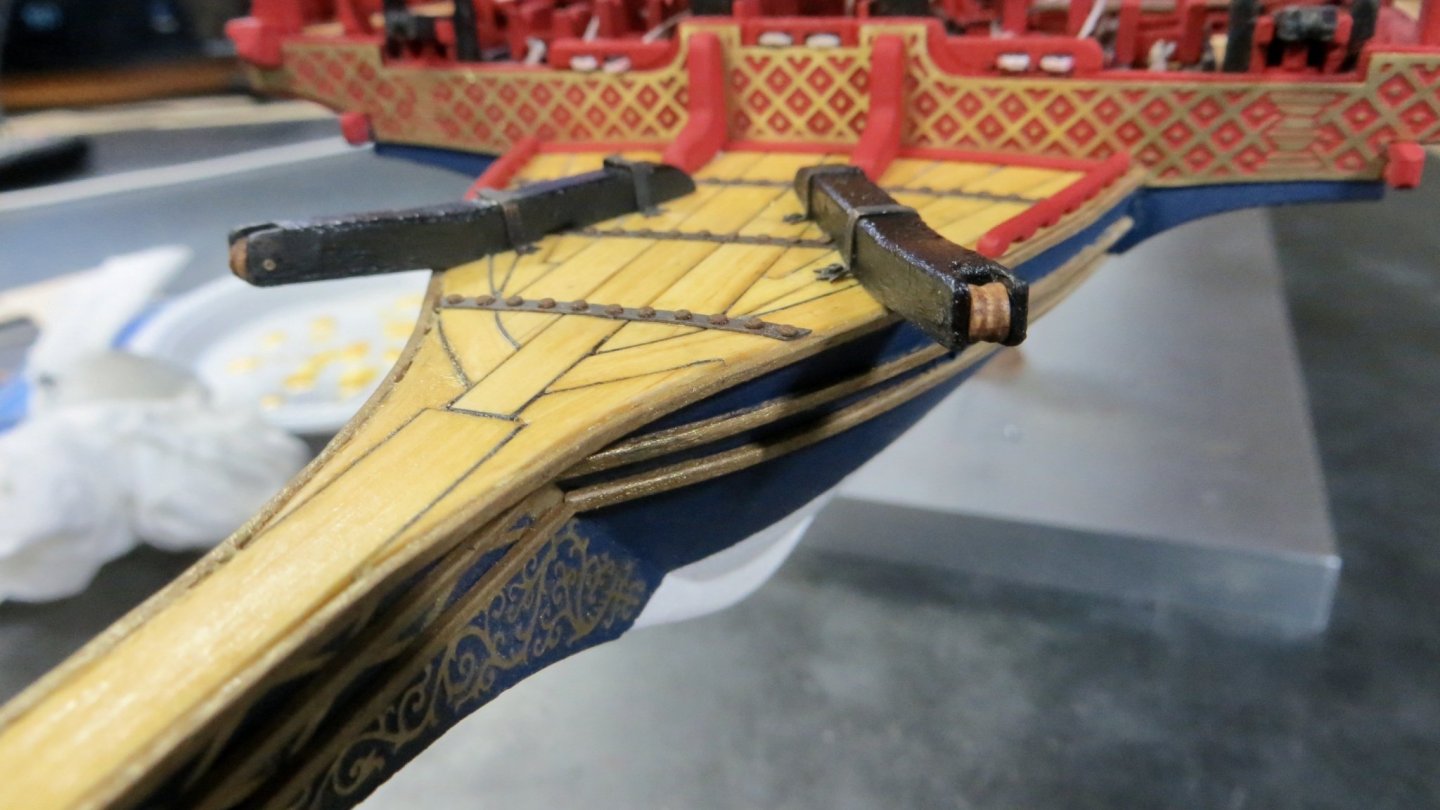
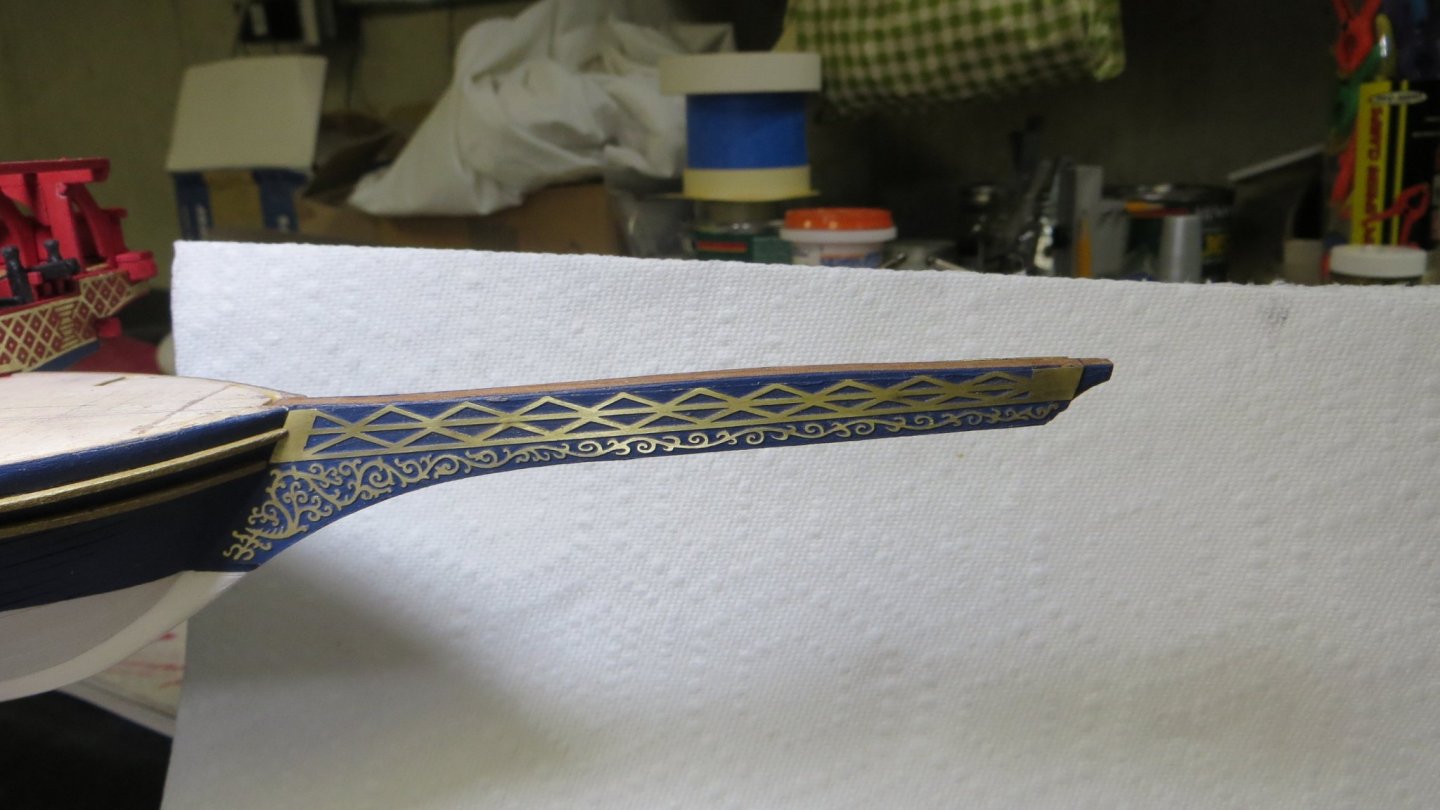
Hello, I continued on with some more work in the bow area. First I installed the long curved trim piece on each side of the bow planking. It was a pain trying to get the curves right from the tip of the bow all the way back to the cannon face. I was able to soak the wood and then heat it up with a curling iron for help on the bends. On both sides of the bow stem, where I installed the photo etch pieces, I had to add 2 strips of 1mm by 1mm wood to continue forward the trim pieces I had added earlier in the build. Next was adding the iron bands to the deck and adding the nails. I antiqued the bands and nails, which were supplied in the kit as brass photo etched pieces. Small railings are added to each side. First the slots were milled then the pieces were soaked and heated to create a slight curve, in order to follow the curve of the deck Railings attached to the deck A small 1 mm by 2 mm trim strip added to the back edge Followed by 2 knee pieces, cut and painted Finally, 2 catheads are made, along with the sheaves, and added to the deck with metal bands. Now to move on to other parts of the ship model! Thanks for visiting, Frank


- 510 replies
-
- 7
-
-
- reale de france
- corel
- (and 1 more)
-
Only one side left to do! Lol! From the first photo, it looks like you got the curve of the supports perfectly. Nice job Clark! Frank
- 112 replies
-
- 1
-
-
- corel
- reale de france
- (and 1 more)
-
Hi Michael, Thanks for stopping by! The Corel plan bow patterns were very accurate. So cutting the planks to the patterns had me doing very little tweaking. The hard part was gluing tiny strips of black construction paper to the edges of the different shapes! Glad that section is over! Frank
- 510 replies
-
- 2
-
-
- reale de france
- corel
- (and 1 more)
-
The next step will be to add the edge trim pieces to the deck sides and begin to add the deck fittings. Thanks for stopping by, Frank


- 510 replies
-
- 6
-
-
- reale de france
- corel
- (and 1 more)
-
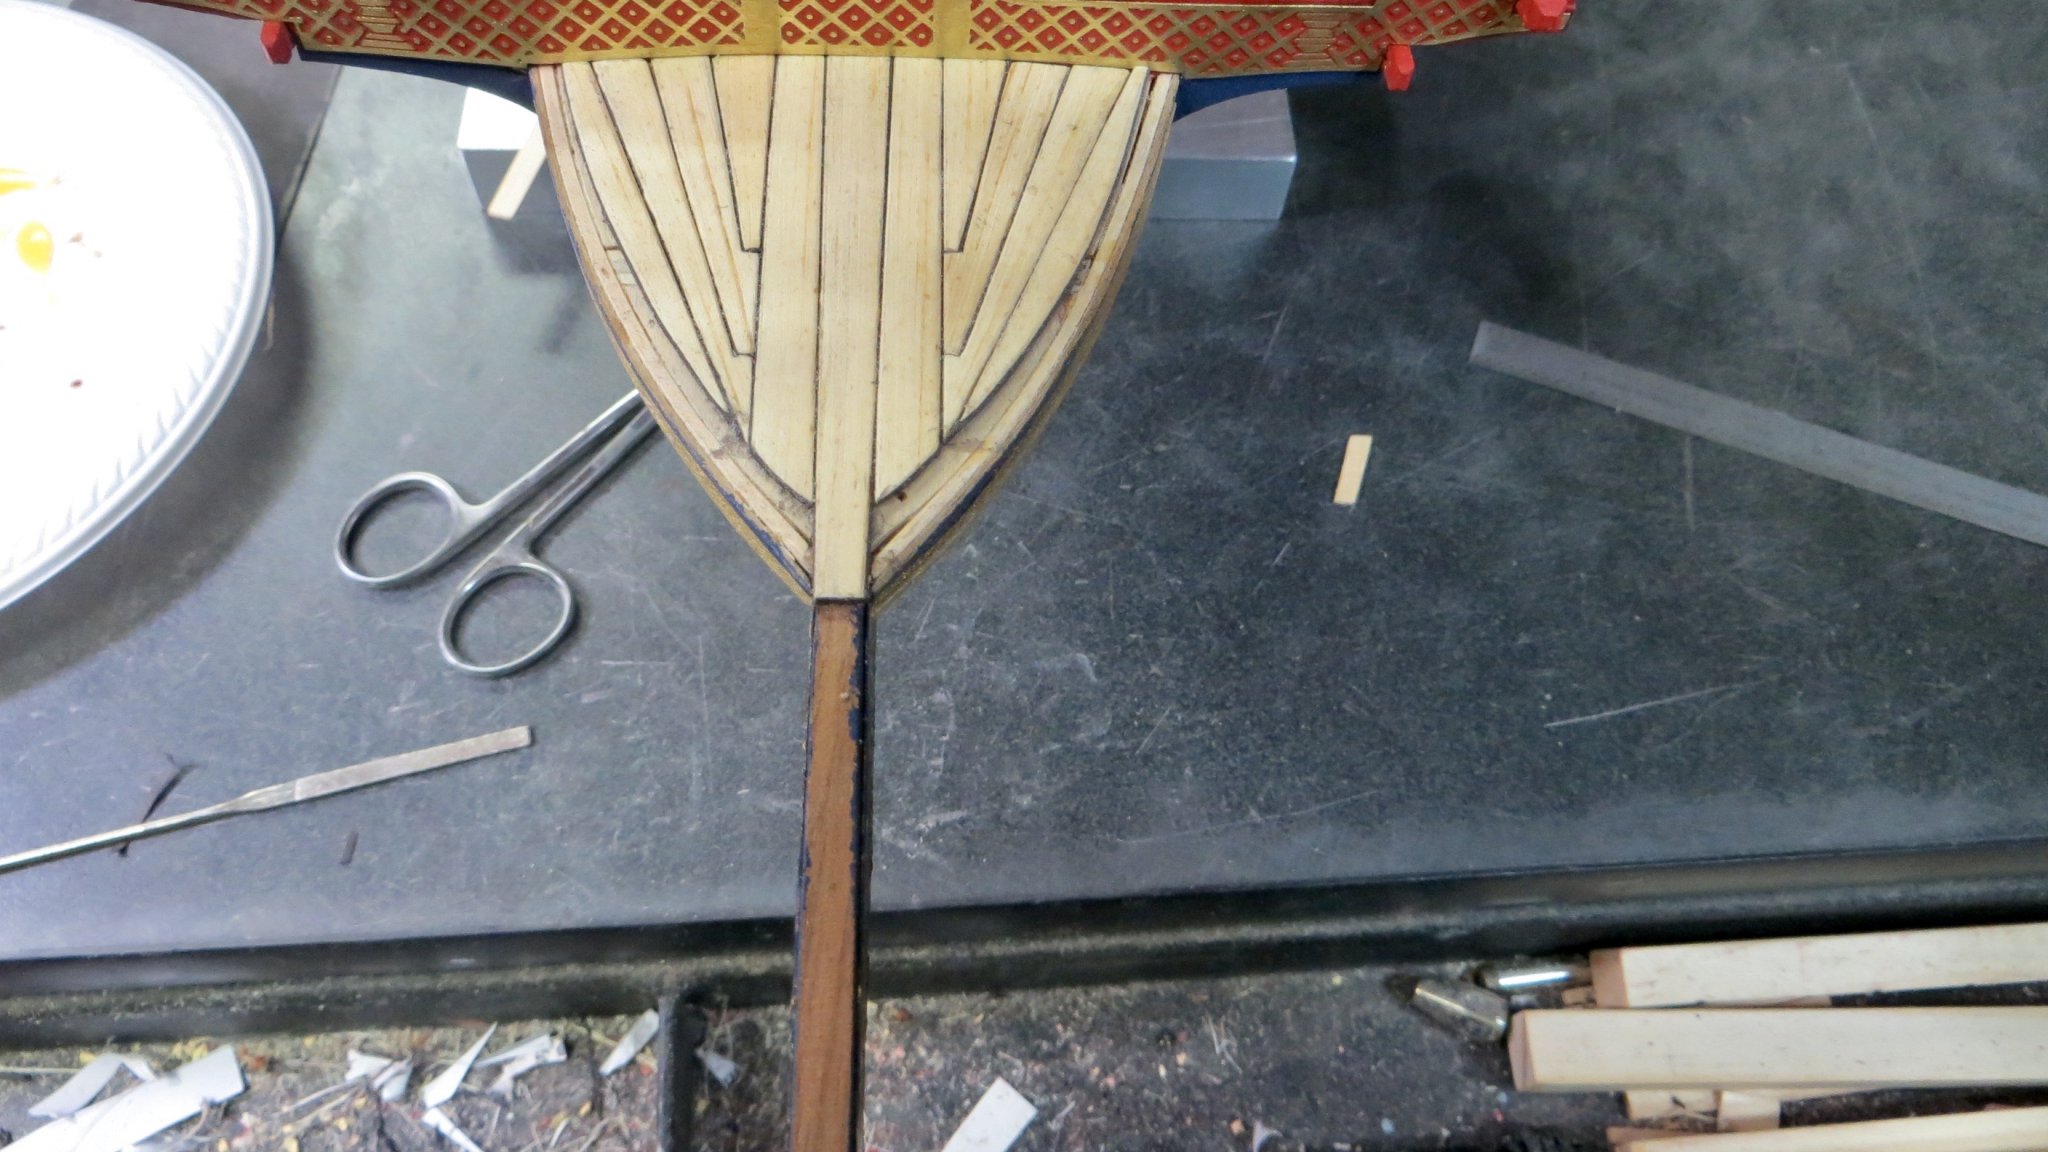
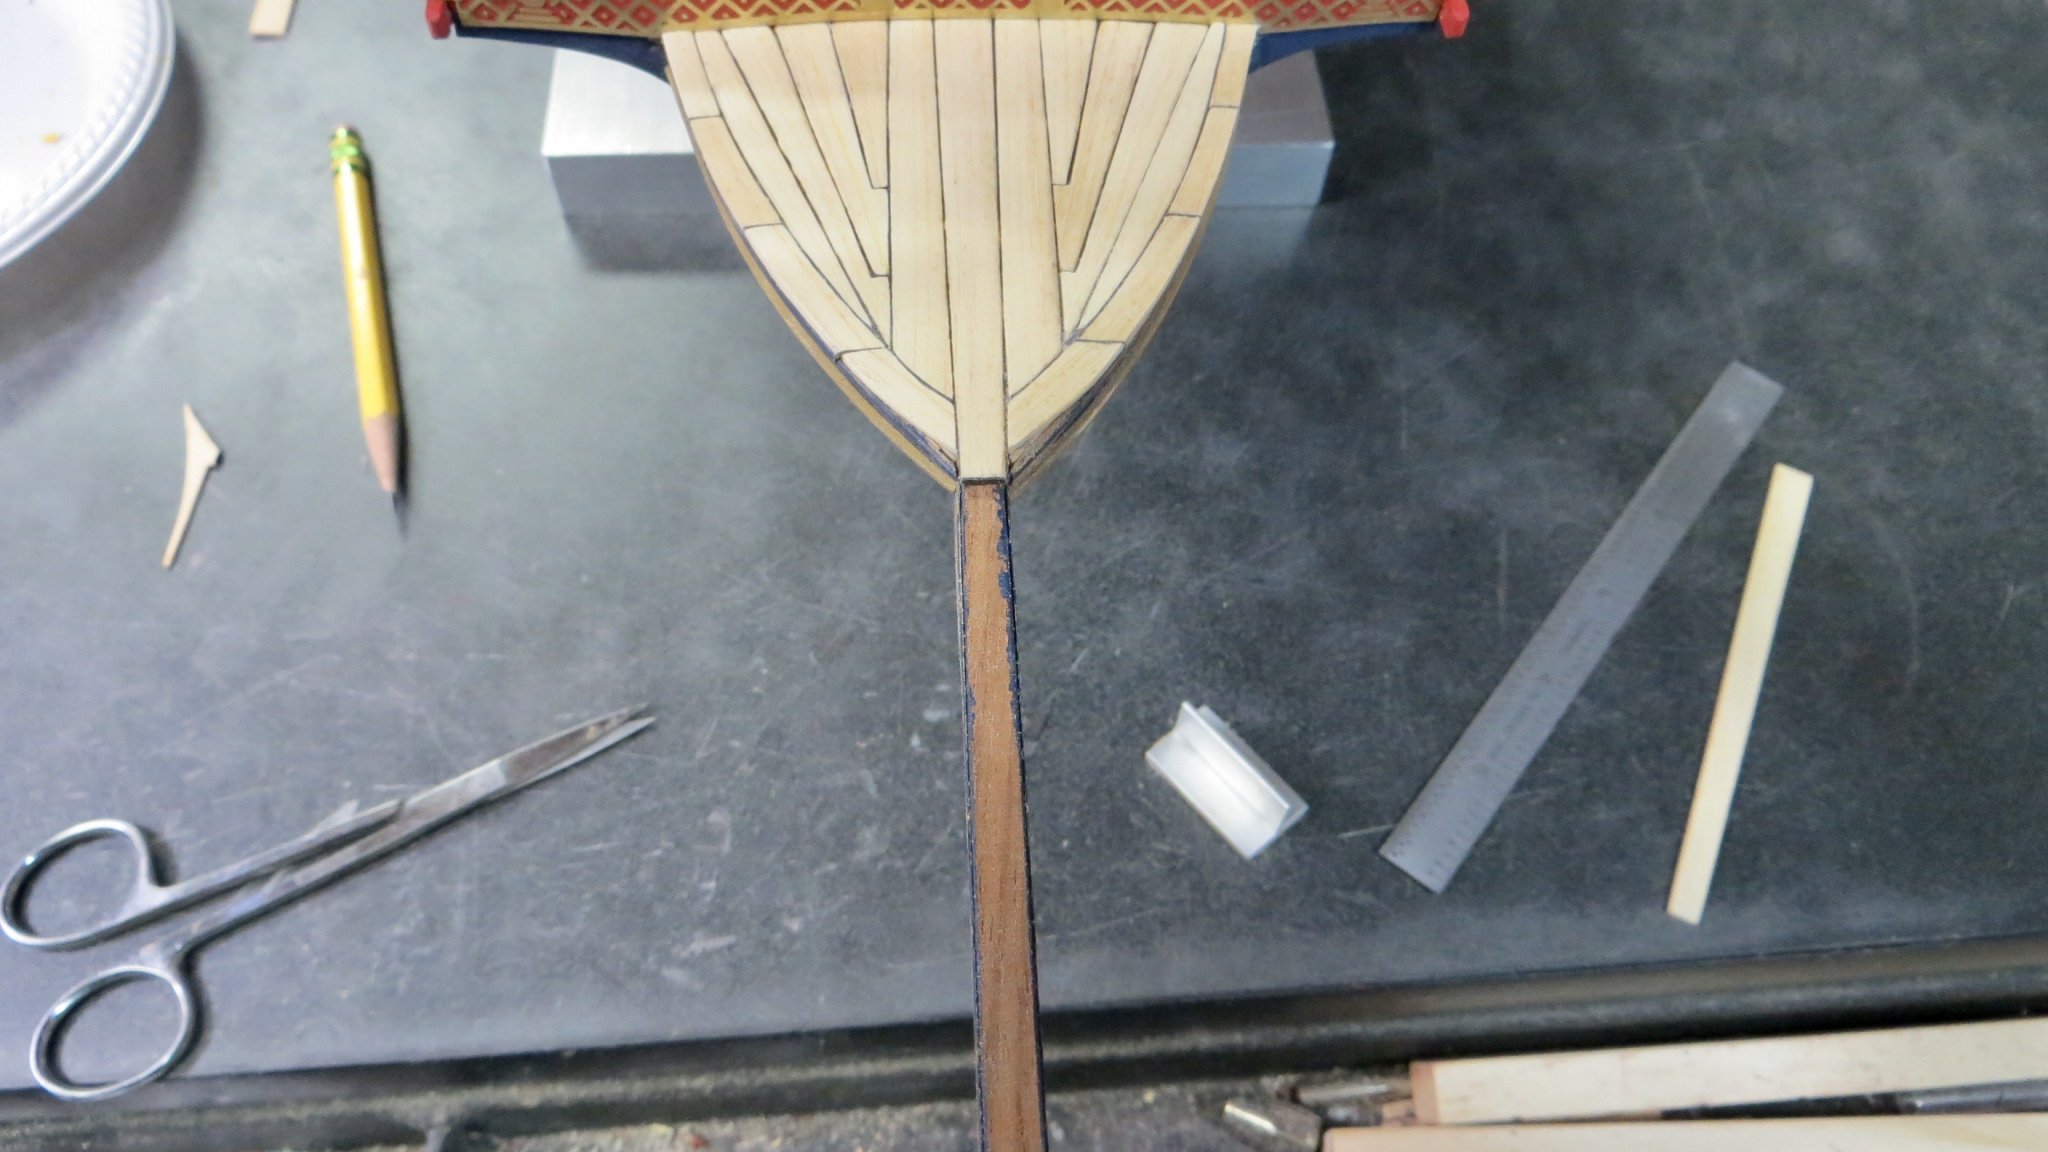
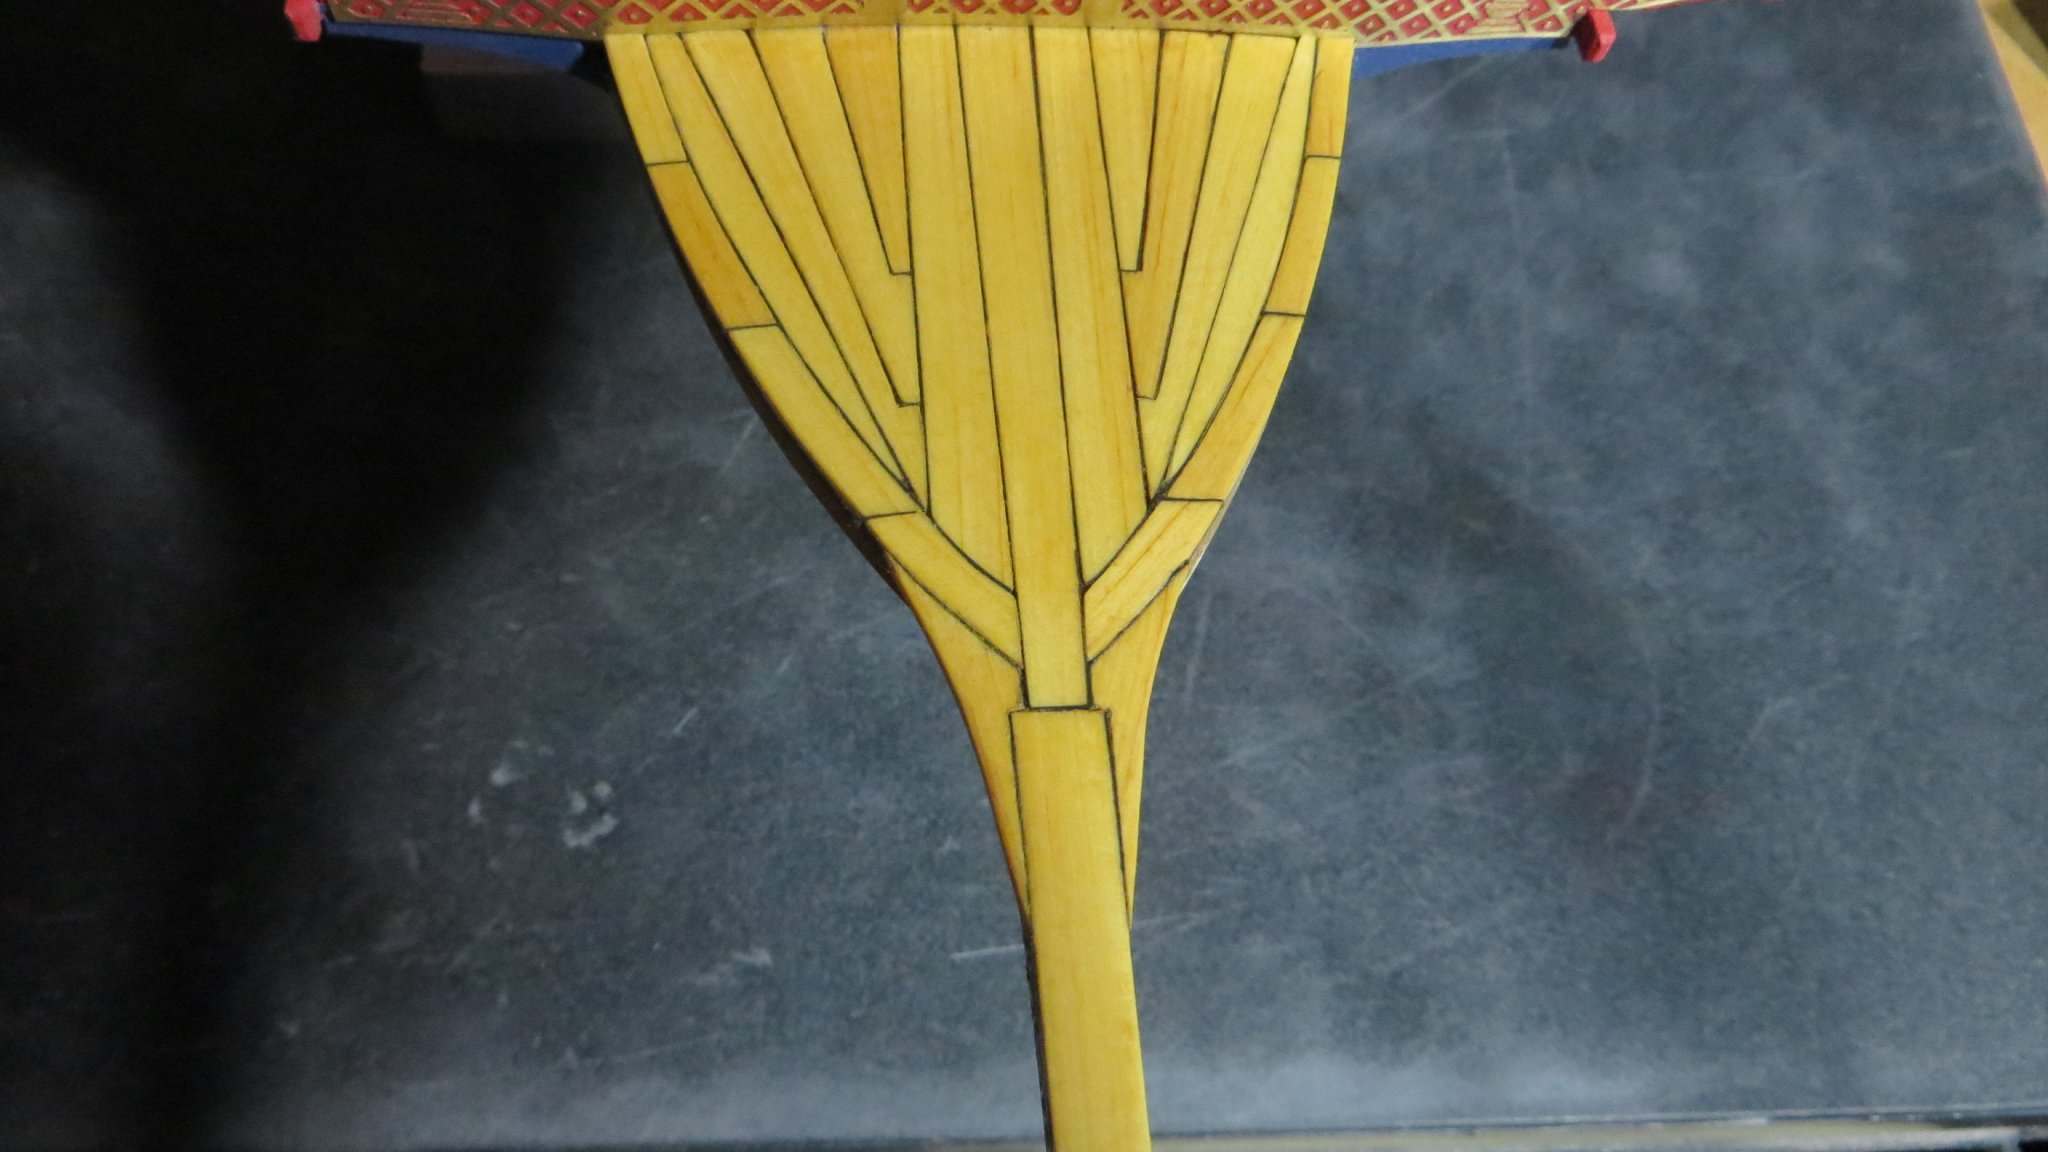
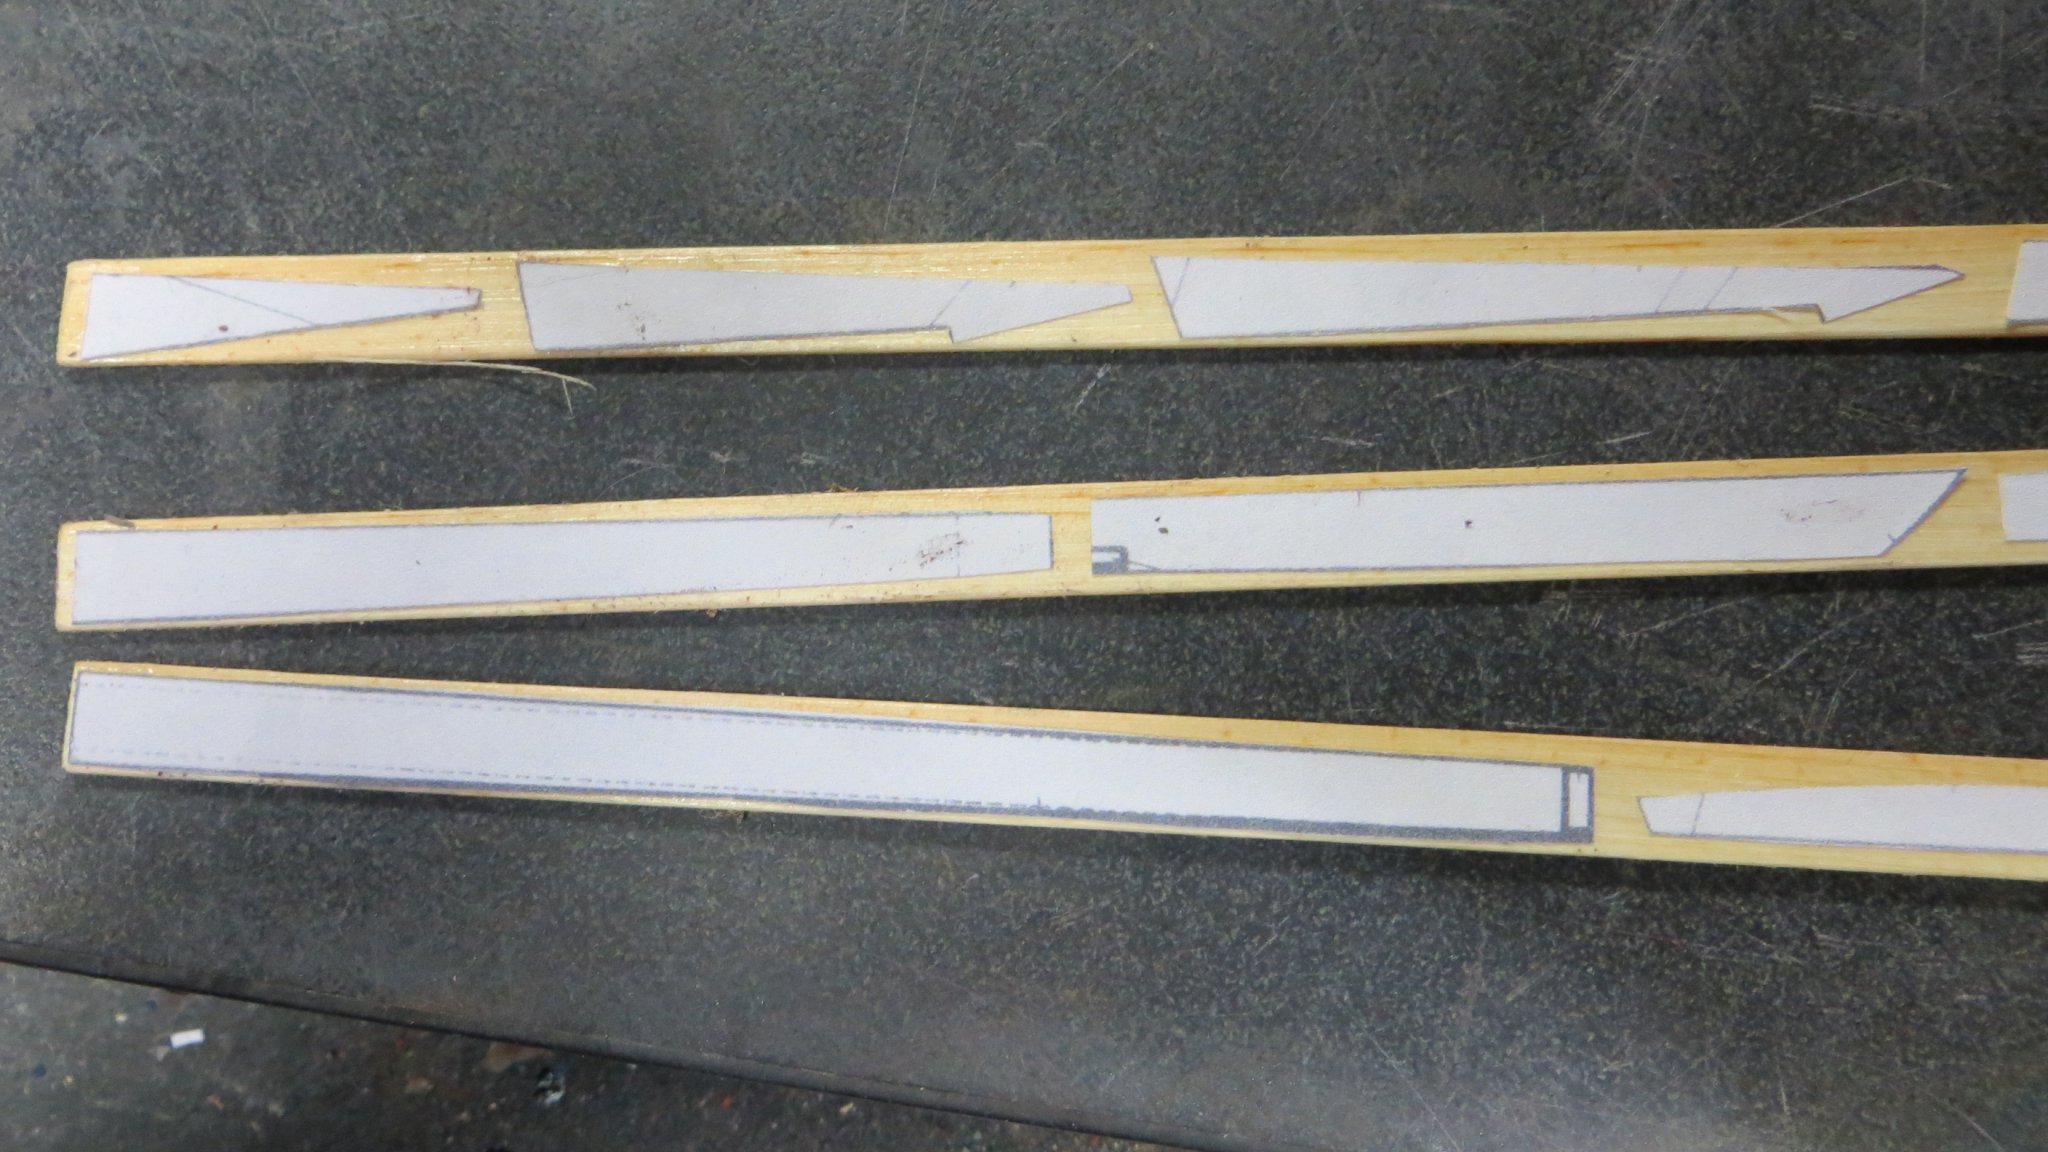
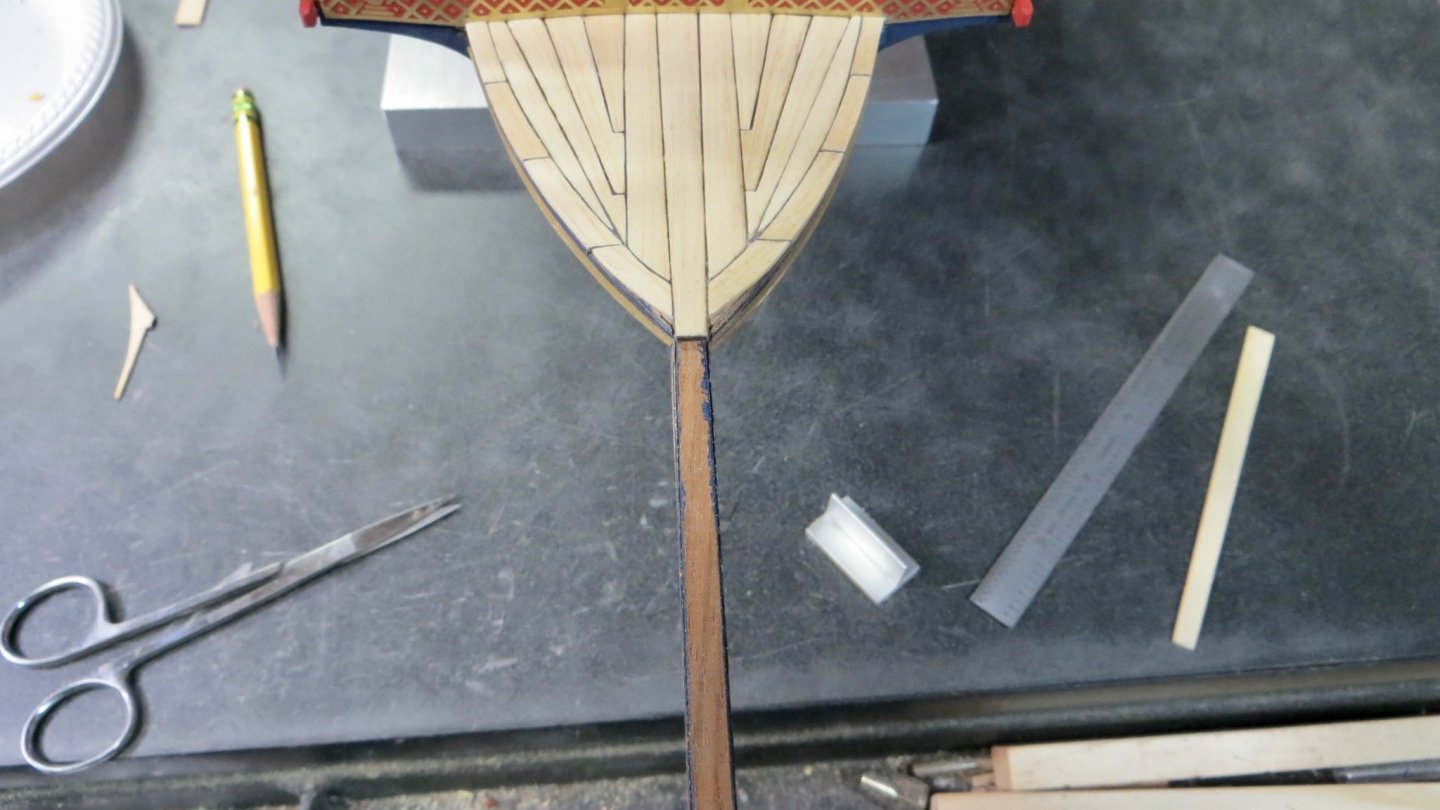
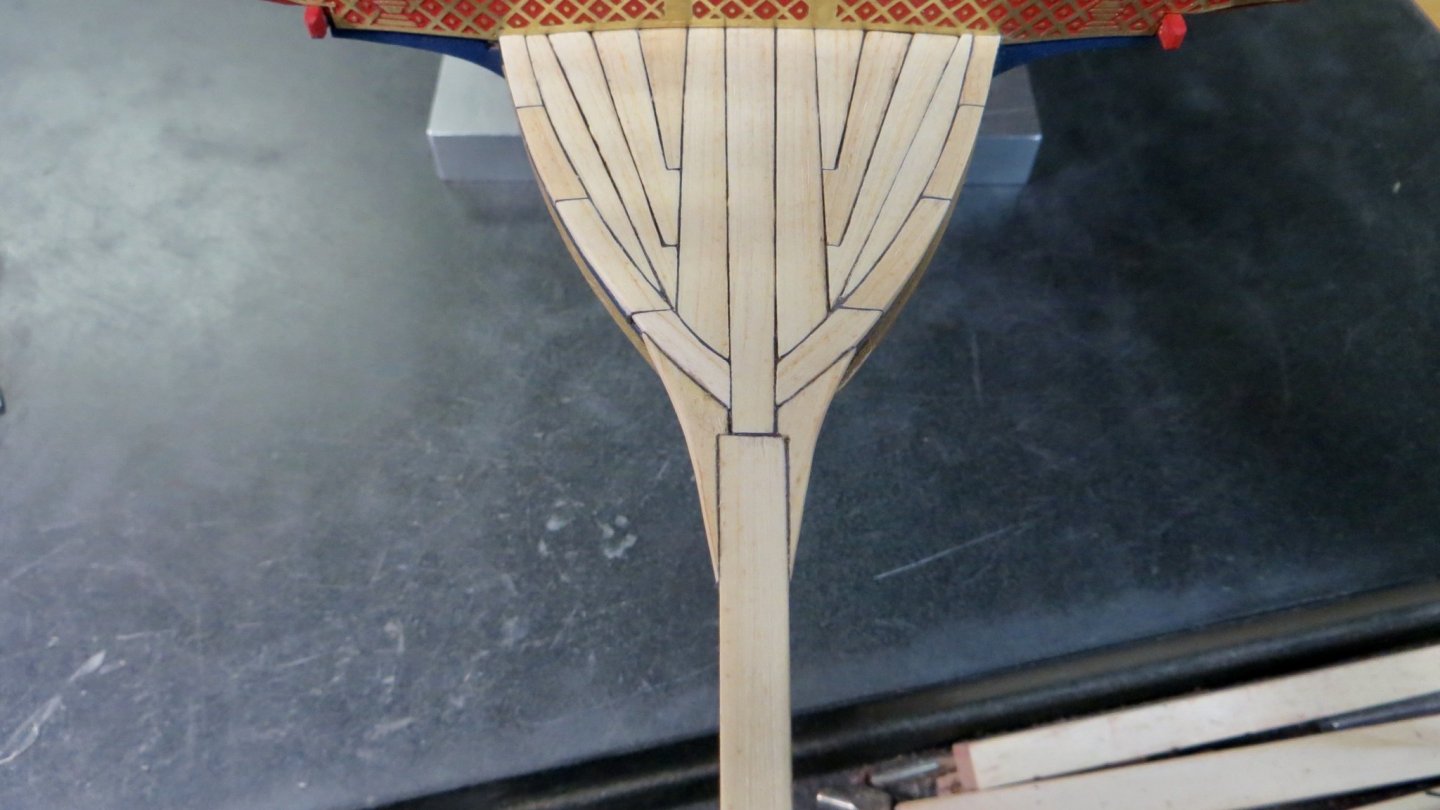
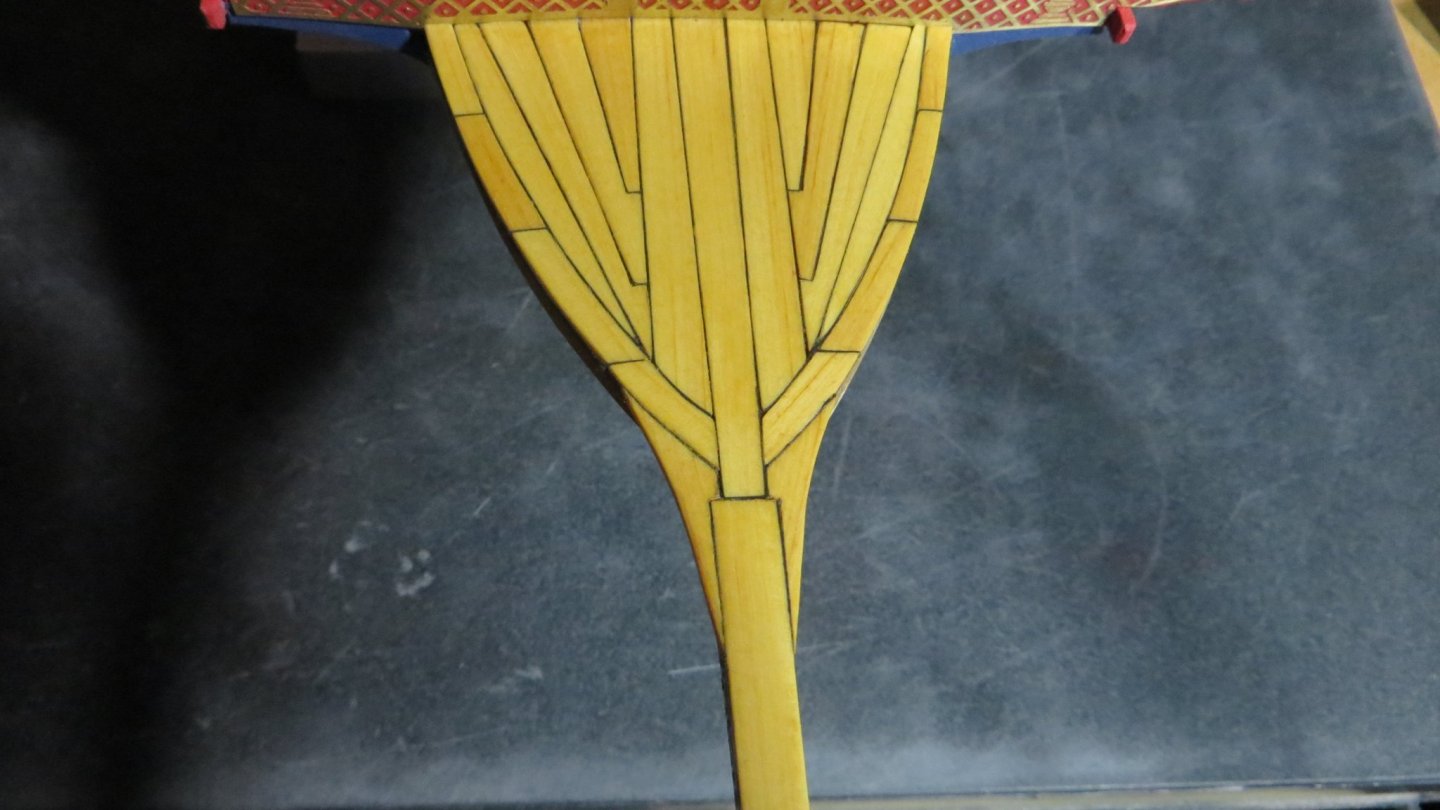
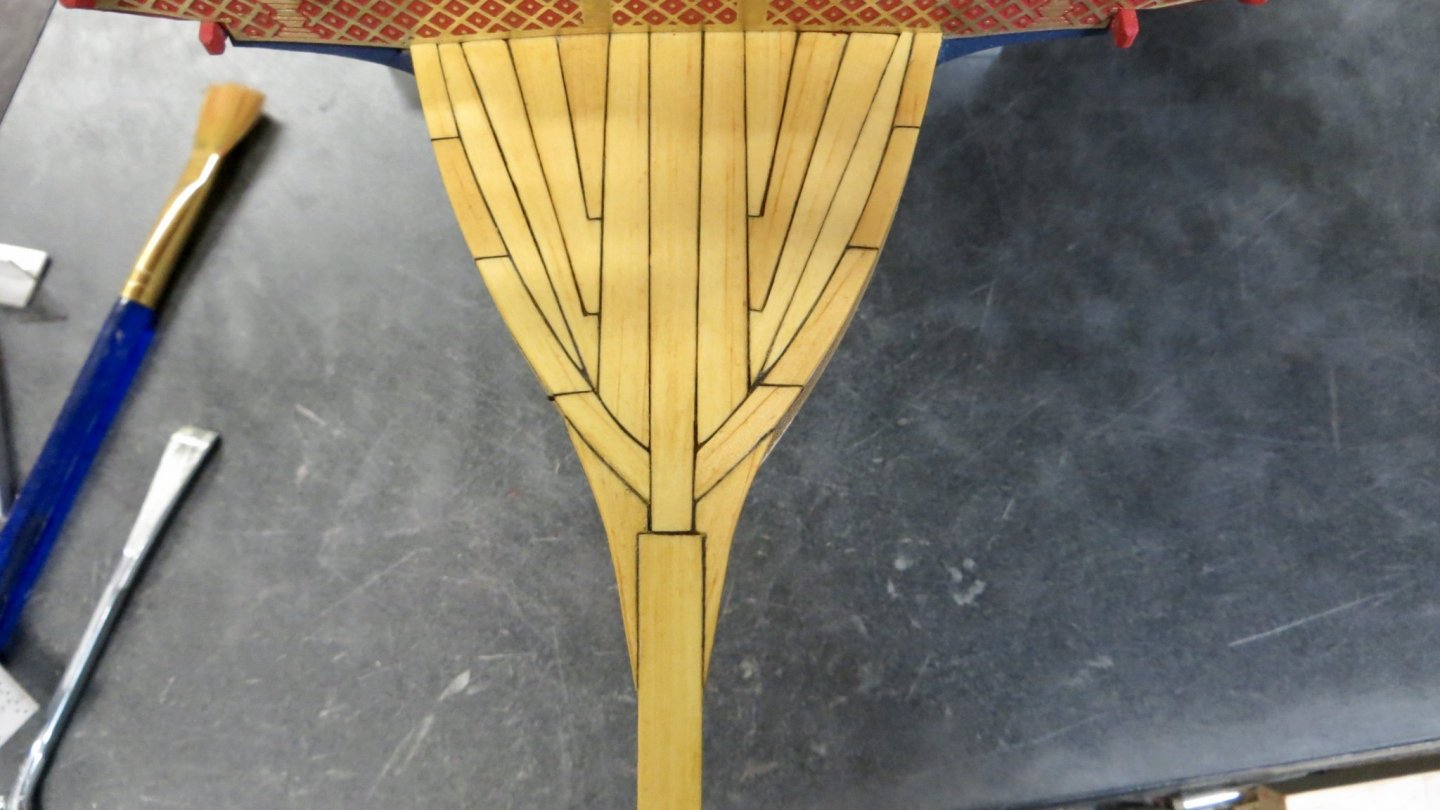
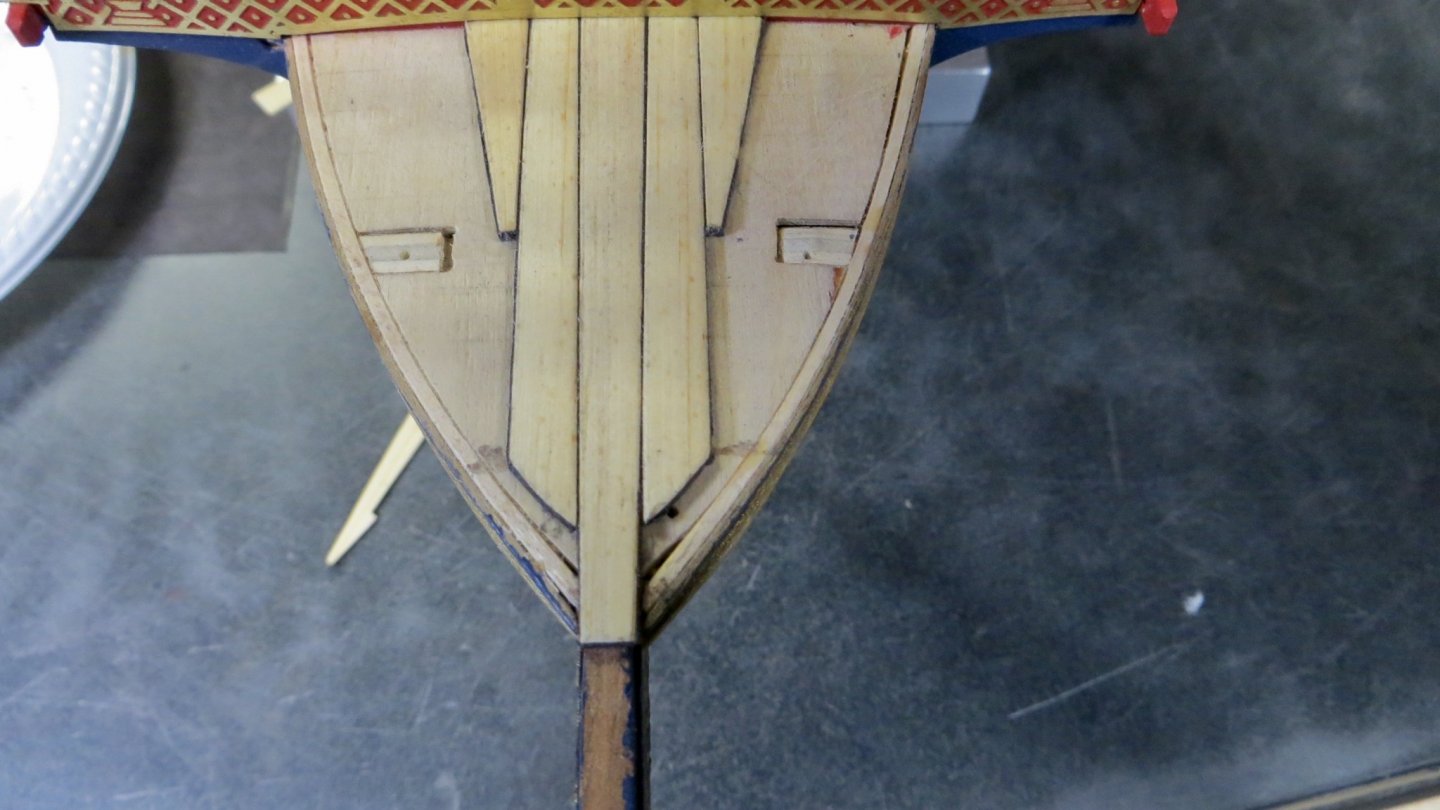
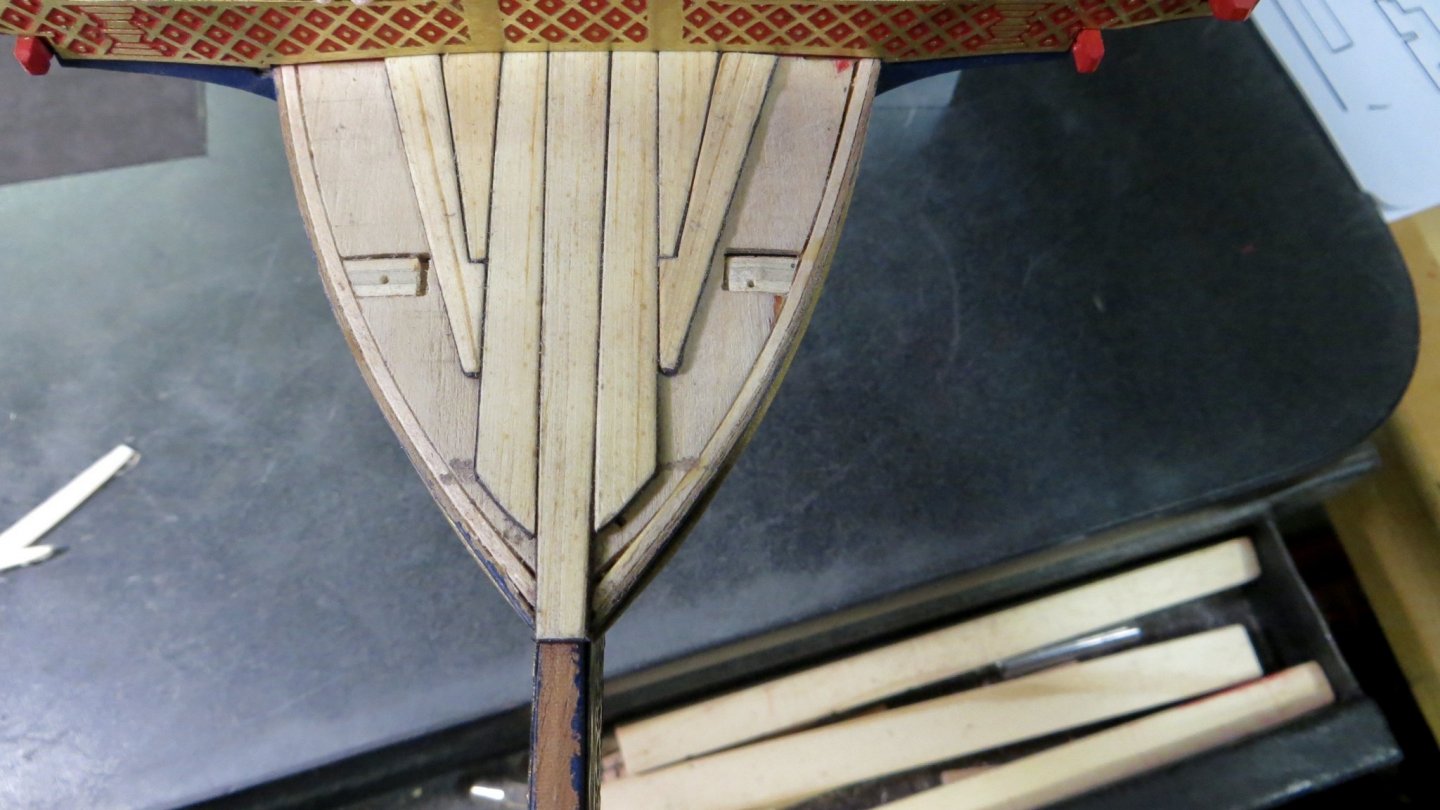
Starting work on the bow area. I worked on the dry brushing, following the suggestions of grandpa Phil, (thank you!!) and I was able to remove some of the shine from the etchings. It went pretty well, with only a couple of tiny areas of the gold getting on the colored background. The first etching attached to the front face The etchings attached to both sides of the bow stem Here is a photo of the completed bow area deck planking (stained, but not sealed yet). After this photo, I will show how I ended up here. I cutout the forms from the plans and glued them to strips of the Eastern White Pine (the same wood I have been using for the other decks). I ground the strips to 1 MM thick. After cutting and shaping each piece, I had to individually glue thin strips of black paper to simulate the caulking. Center piece ready to attach to deck I worked from the center towards the edges


- 510 replies
-
- 4
-
-
- reale de france
- corel
- (and 1 more)
-
Nice fixture for the most critical part of the build!! Frank
- 112 replies
-
- 1
-
-
- corel
- reale de france
- (and 1 more)
-
Thanks for the kind words! Very helpful people in this forum. So, you have your next project picked out? Is it the Viking model? Frank
- 510 replies
-
- 1
-
-
- reale de france
- corel
- (and 1 more)
-
Grandpa Phil, Thank you very much for the detailed instructions. Appreciated! I will give this a try using the “Imperial Gold” I have. My goal is to remove the shinyness of the brass. I will post my results soon. Thanks again. This is all new to me! Frank
- 510 replies
-
- 1
-
-
- reale de france
- corel
- (and 1 more)
-
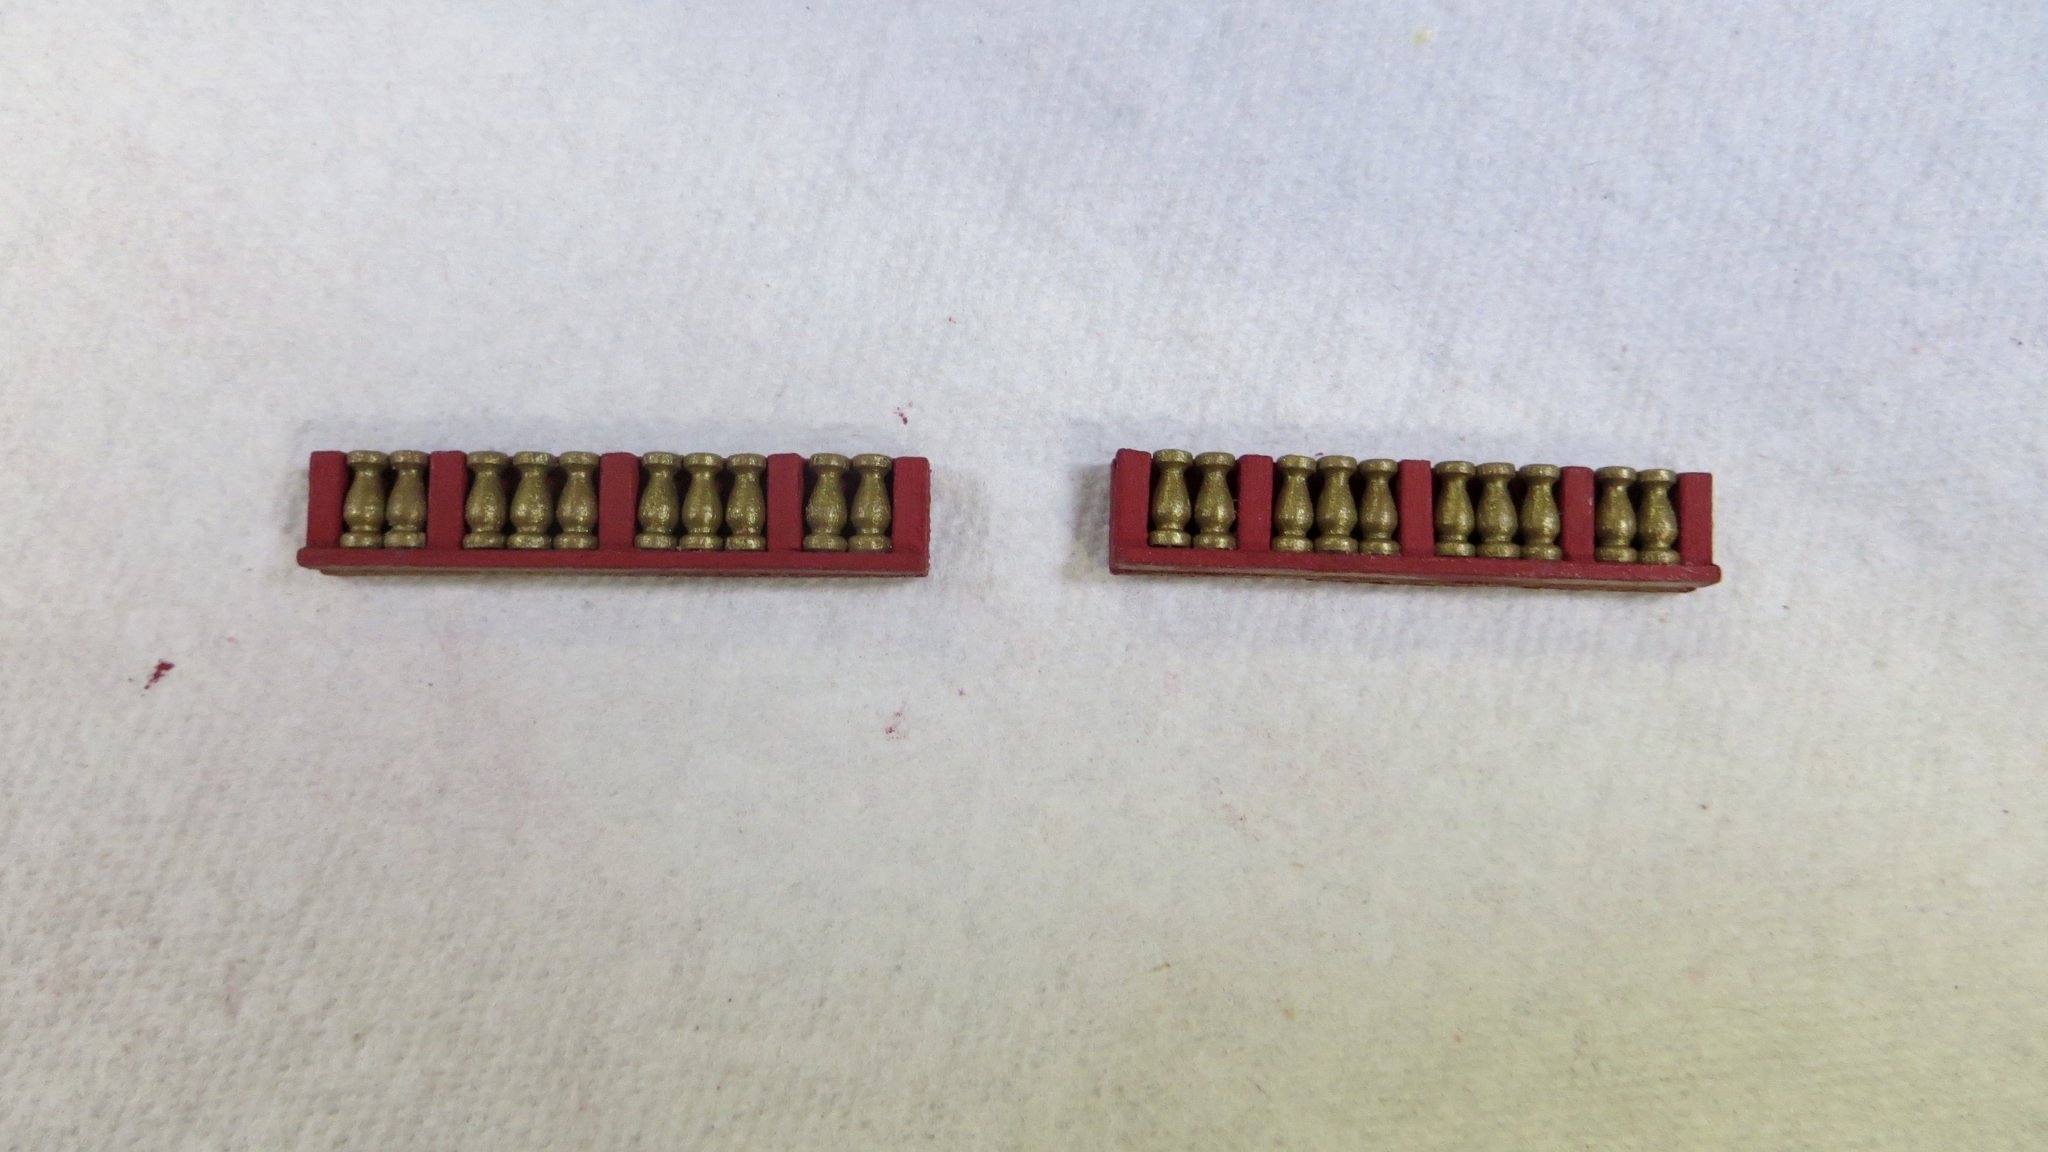
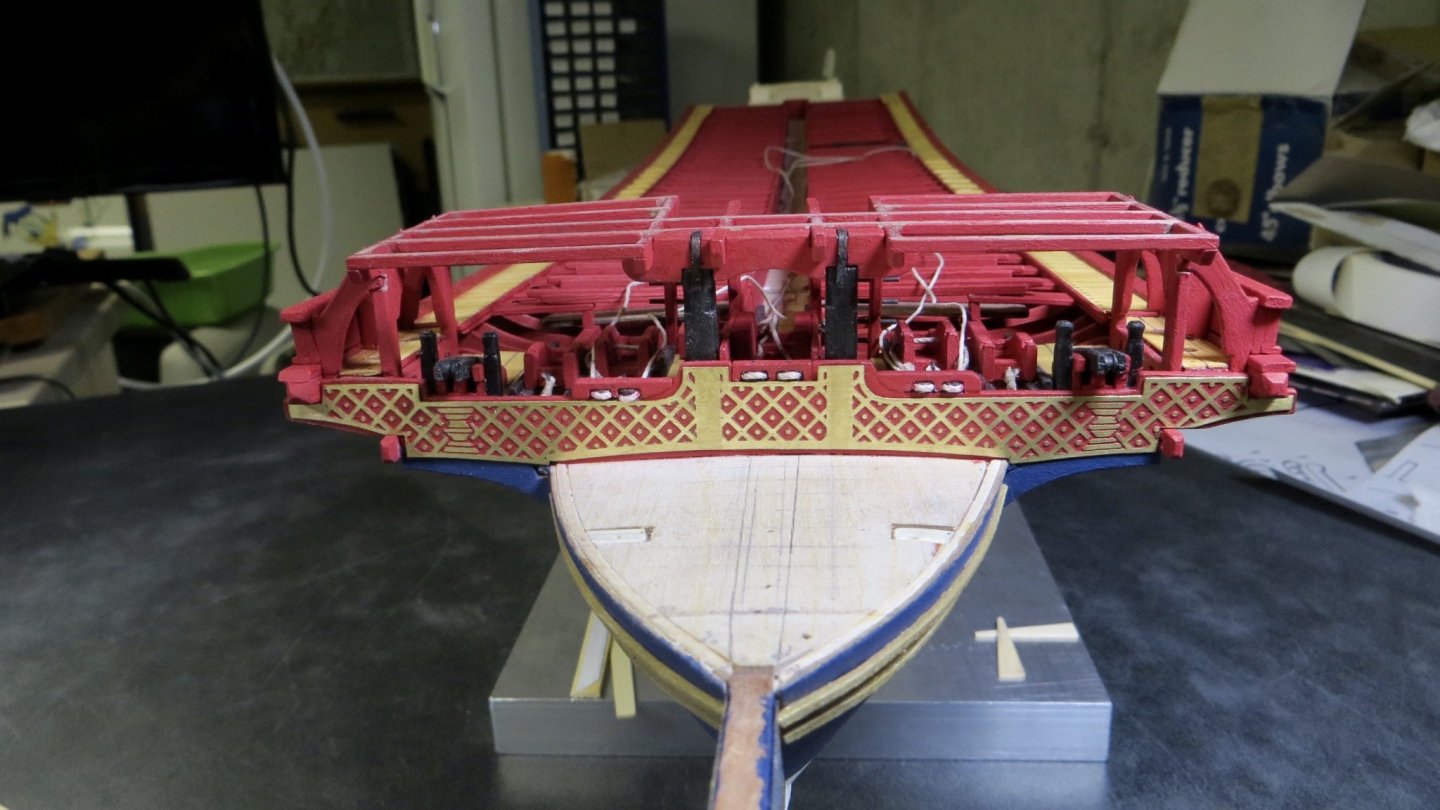
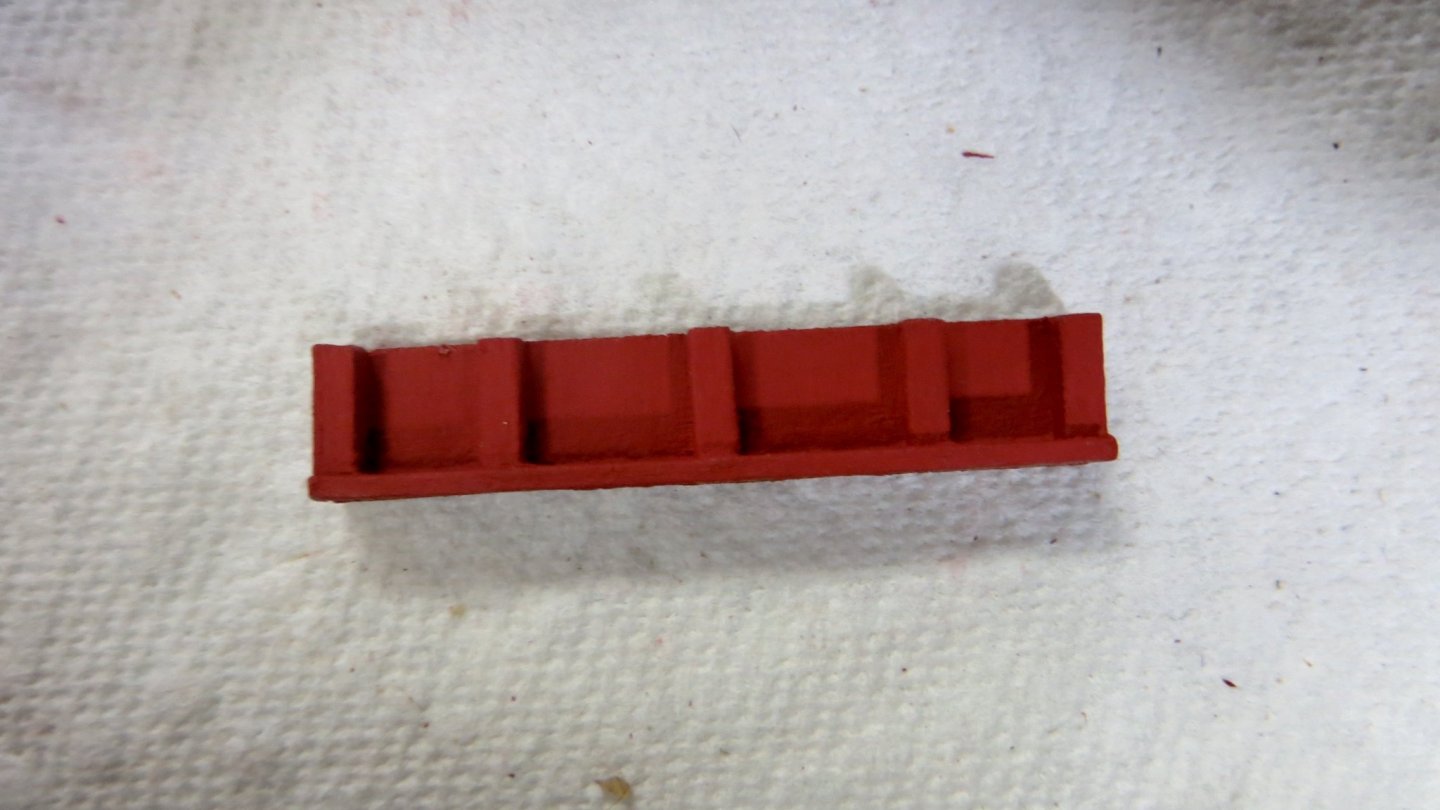
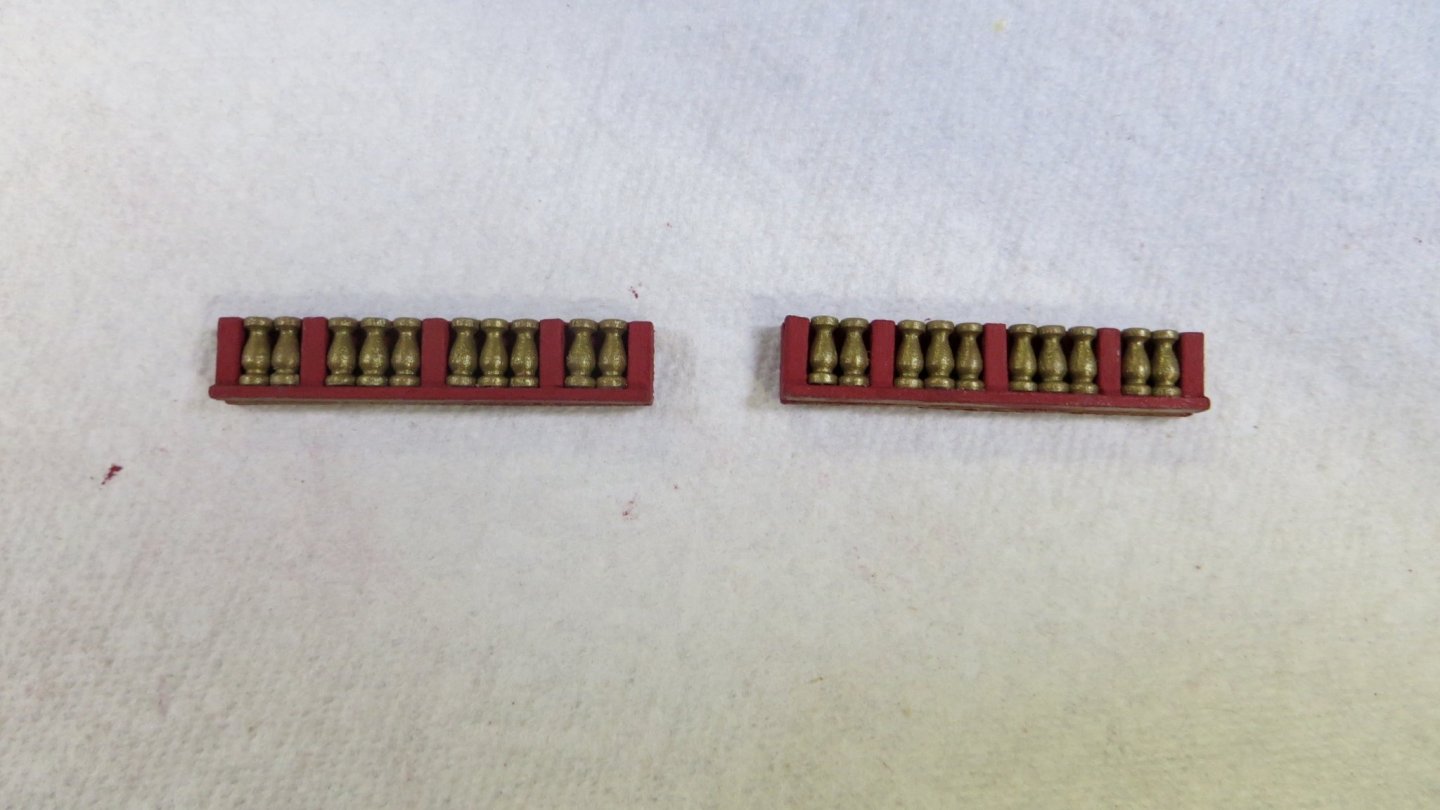
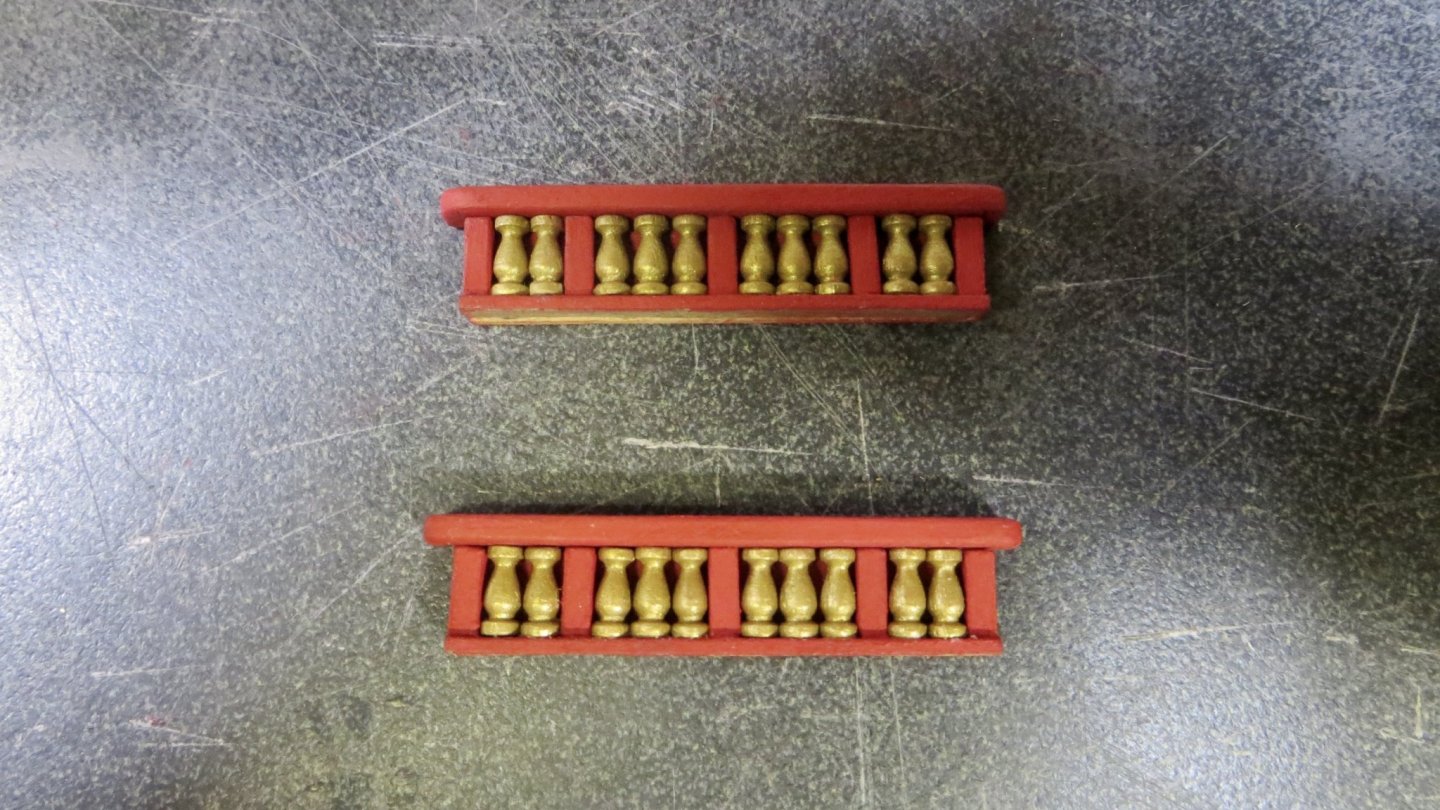
Hello, Thanks for the "likes" and for stopping by! Continuing on, I did some work on the decorative sides of the upper platform. Working on the stanchions, I noticed that the plans call for 4 sets of three stanchions. If I did this, however, the assembly would have been too wide. So, I only mapped out 2 sets of three and 2 sets of two stanchions. Go figure! Cut the backing to the correctheight and painted red. Painted the stanchions "Imperial Gold" and glued to backing Added the top cap So, when attaching the assembly to the ends of the platform, the assembly follows the curve of the deck and beam. (this is the way the plans call for it to be).So when it is time to plank above, the first plank will be wider on one end than the other because the planks are parallel to the upper deck beams. Assembly glued to starboard side Assembly on port side My next step should be to finish the upper platform decking, per the plan instructions. However if I do this, I will have a hard time installing the canon and canon hardware. I wanted to wait on the cannons until I plank the bow deck, because they will get in the way of sanding and finishing. So I am starting work on the bow area first. Thank you to Mark and Michael for showing me the way to paint the background of the photo etched piece. I started with the 600 grit, as suggested by Michael and finished with the 1000 grit suggested by Mark. Thanks again. The brass finish is a little shiny for my taste, but I can live with it if I have to. Grandpa Phil suggested "dry brushing" the brass. How do I accomplish this without getting it on the red area?? I will try to do some research on this!! Thanks, Frank
- 510 replies
-
- 4
-
-
- reale de france
- corel
- (and 1 more)
-
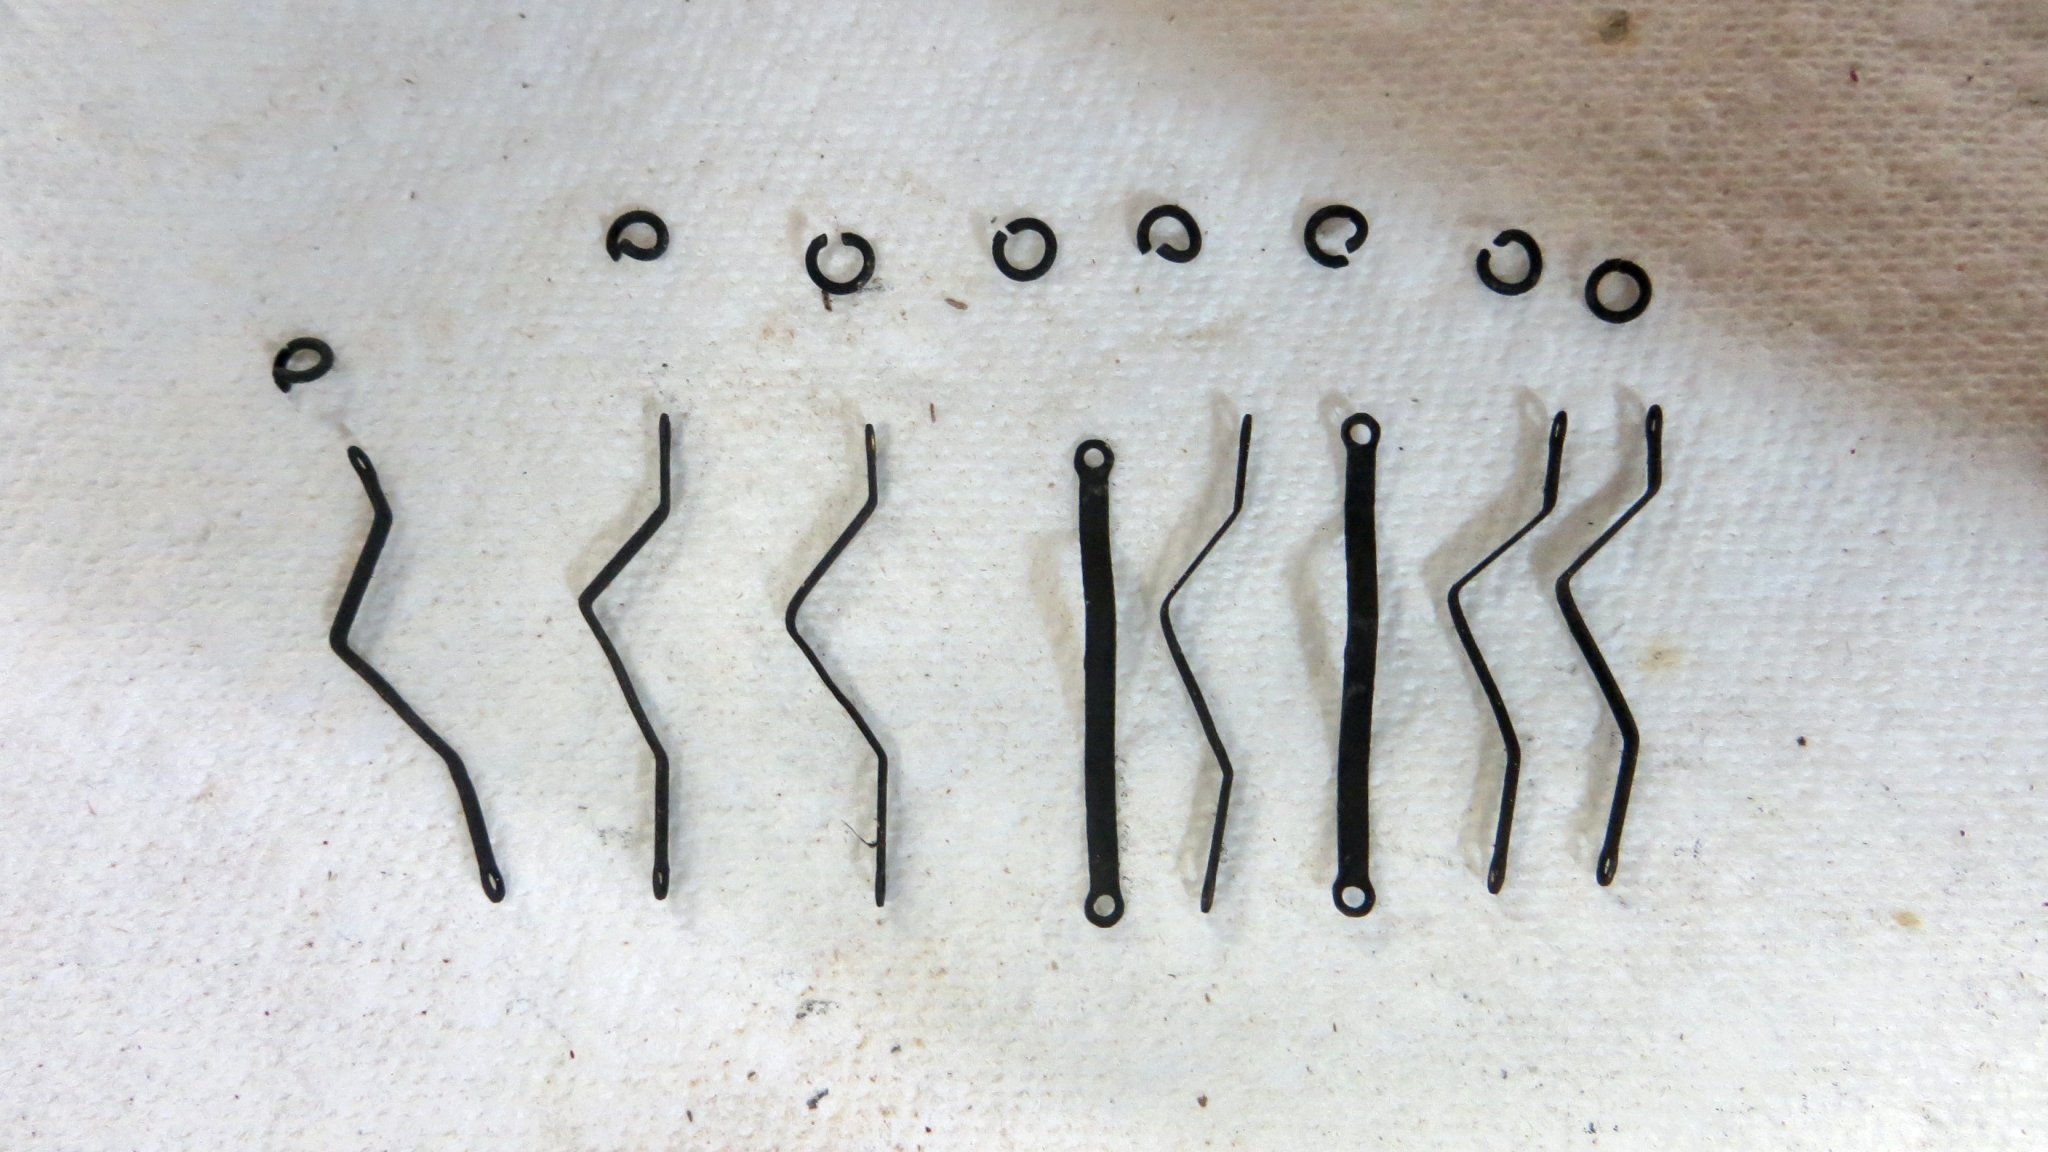
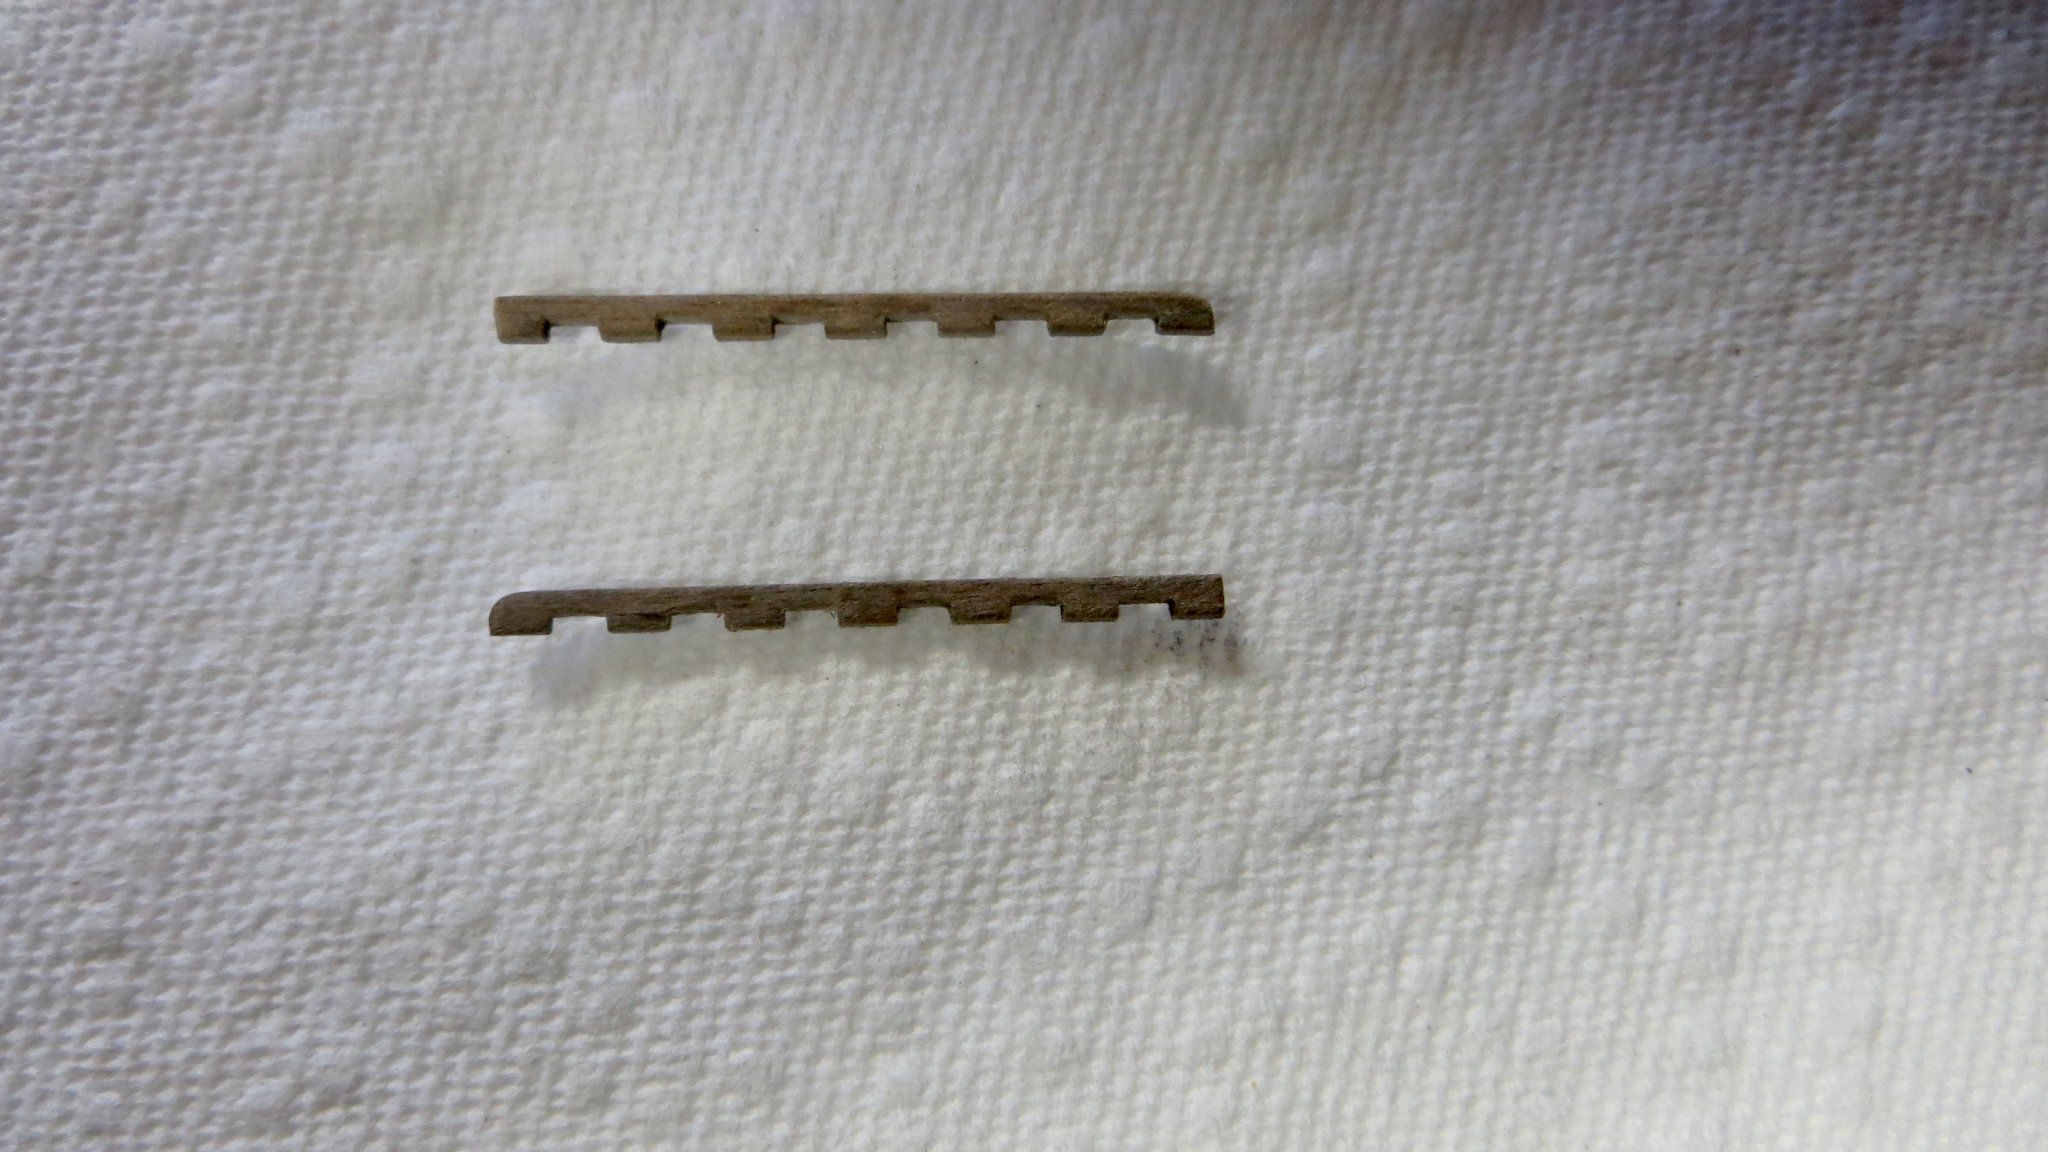
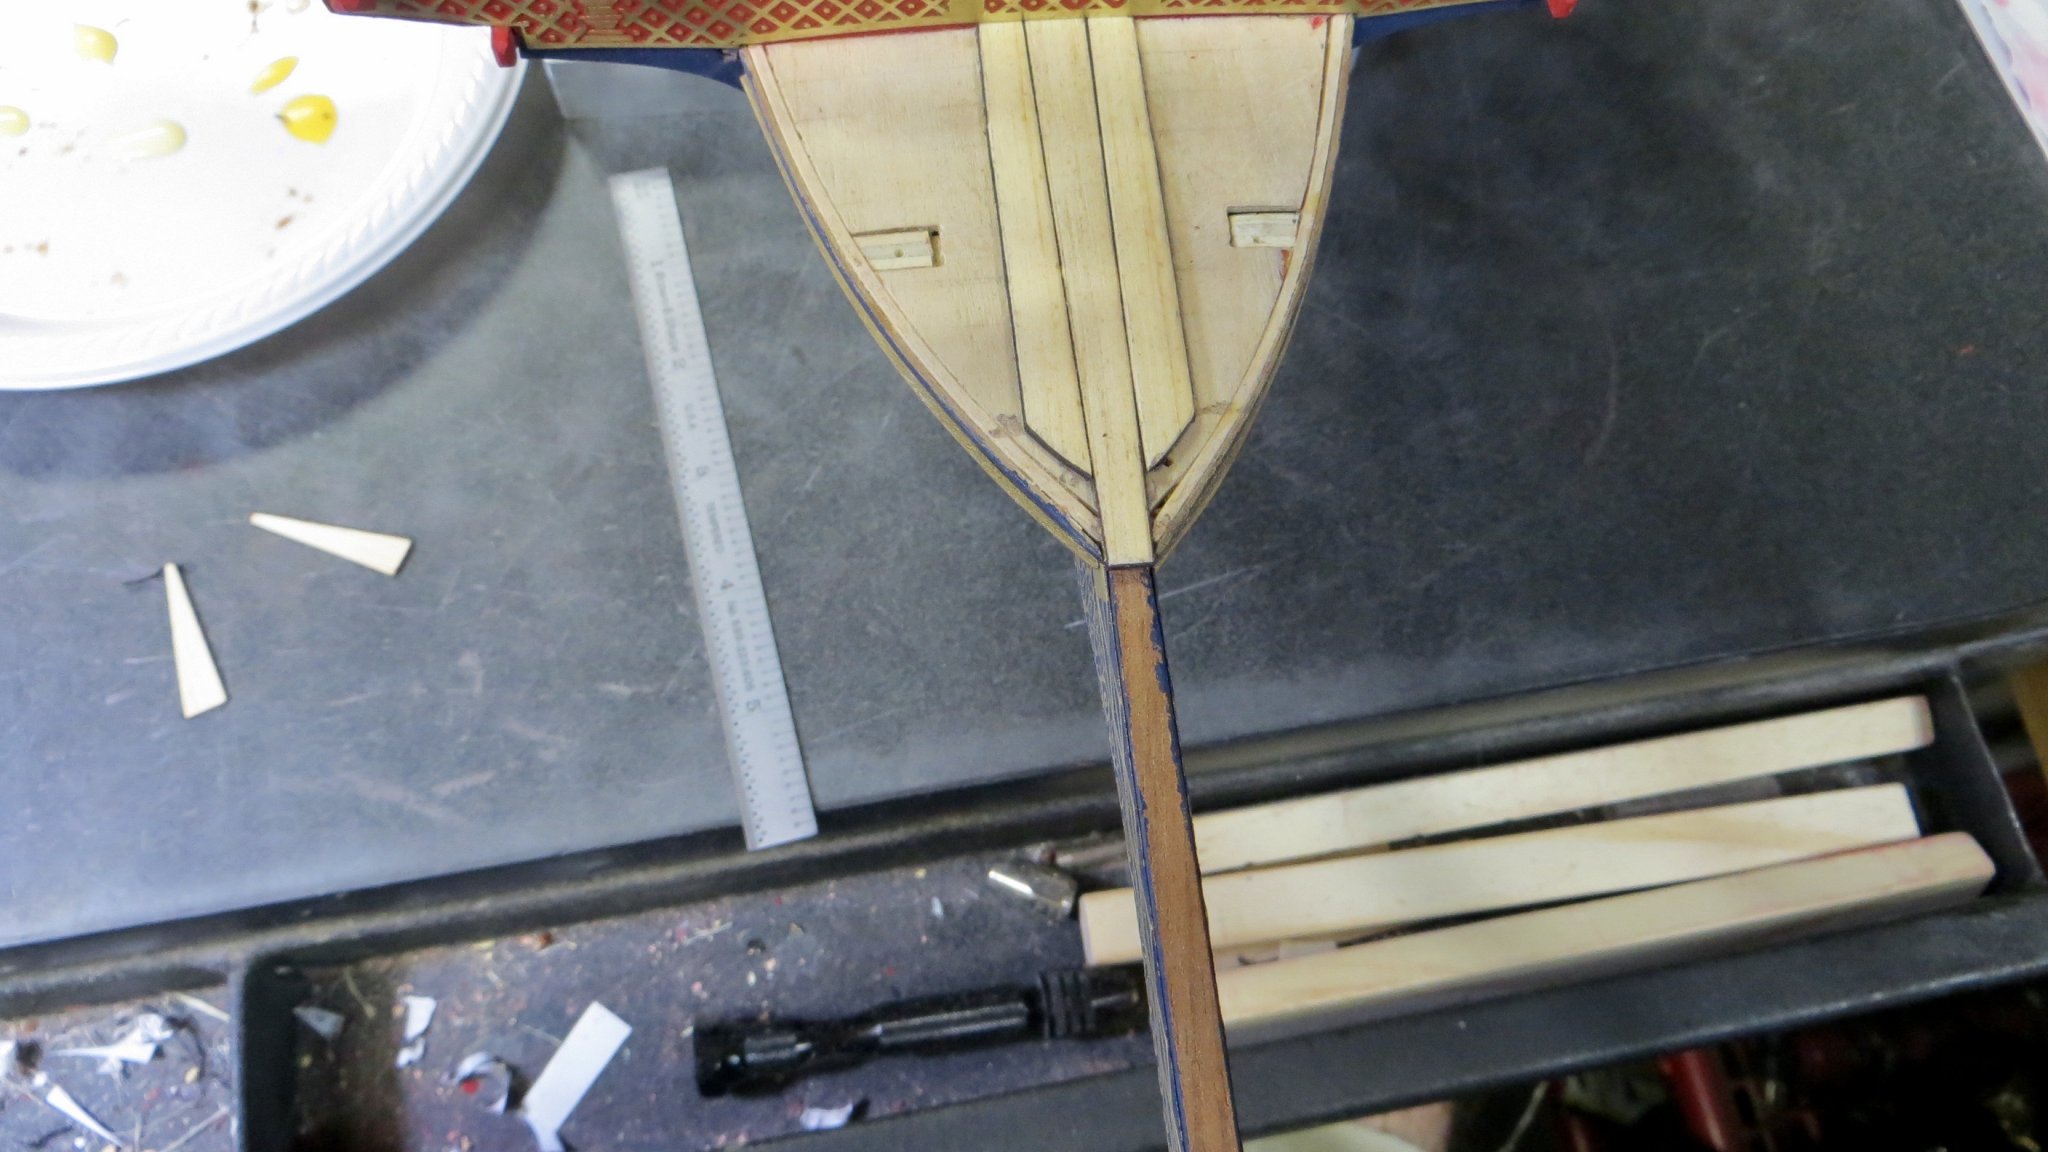
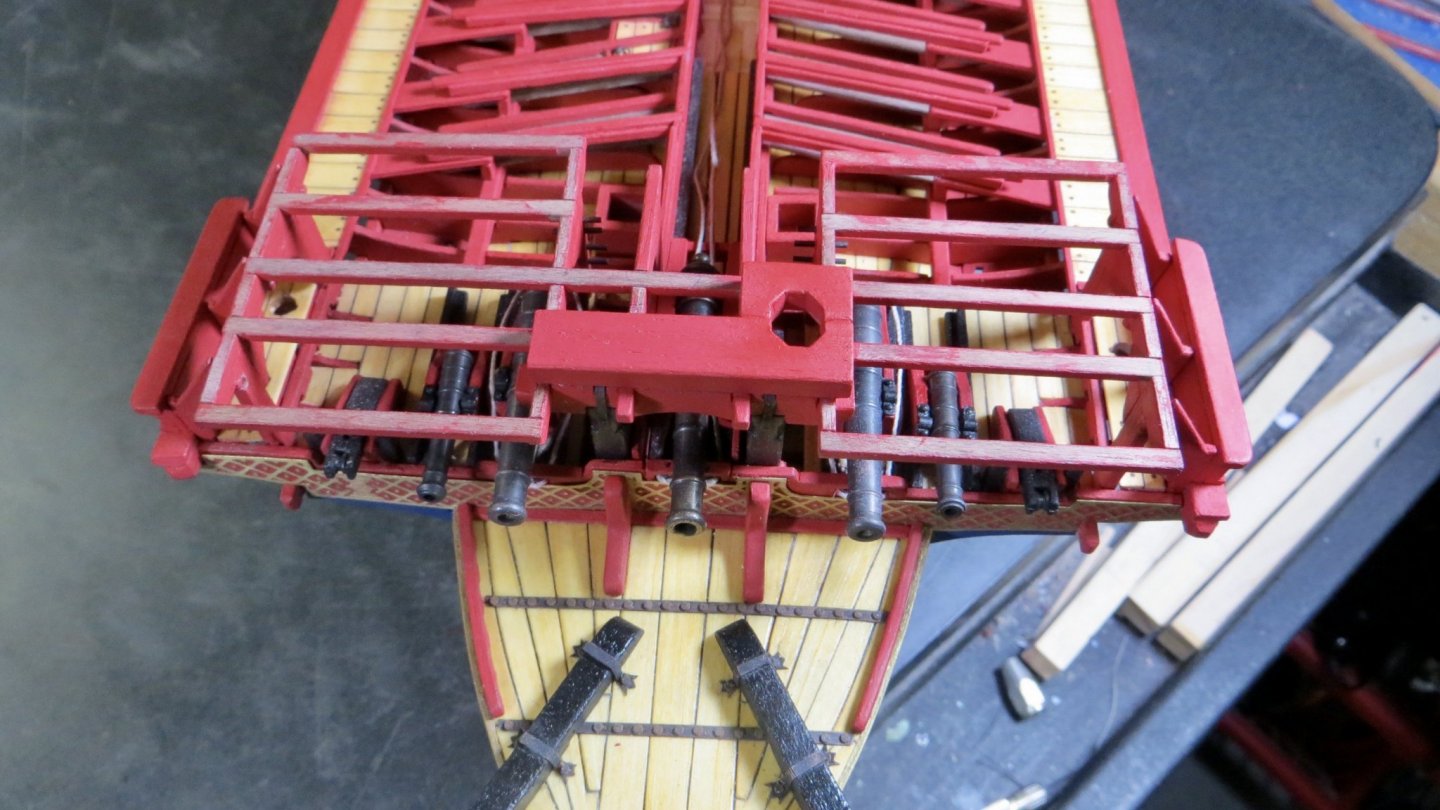
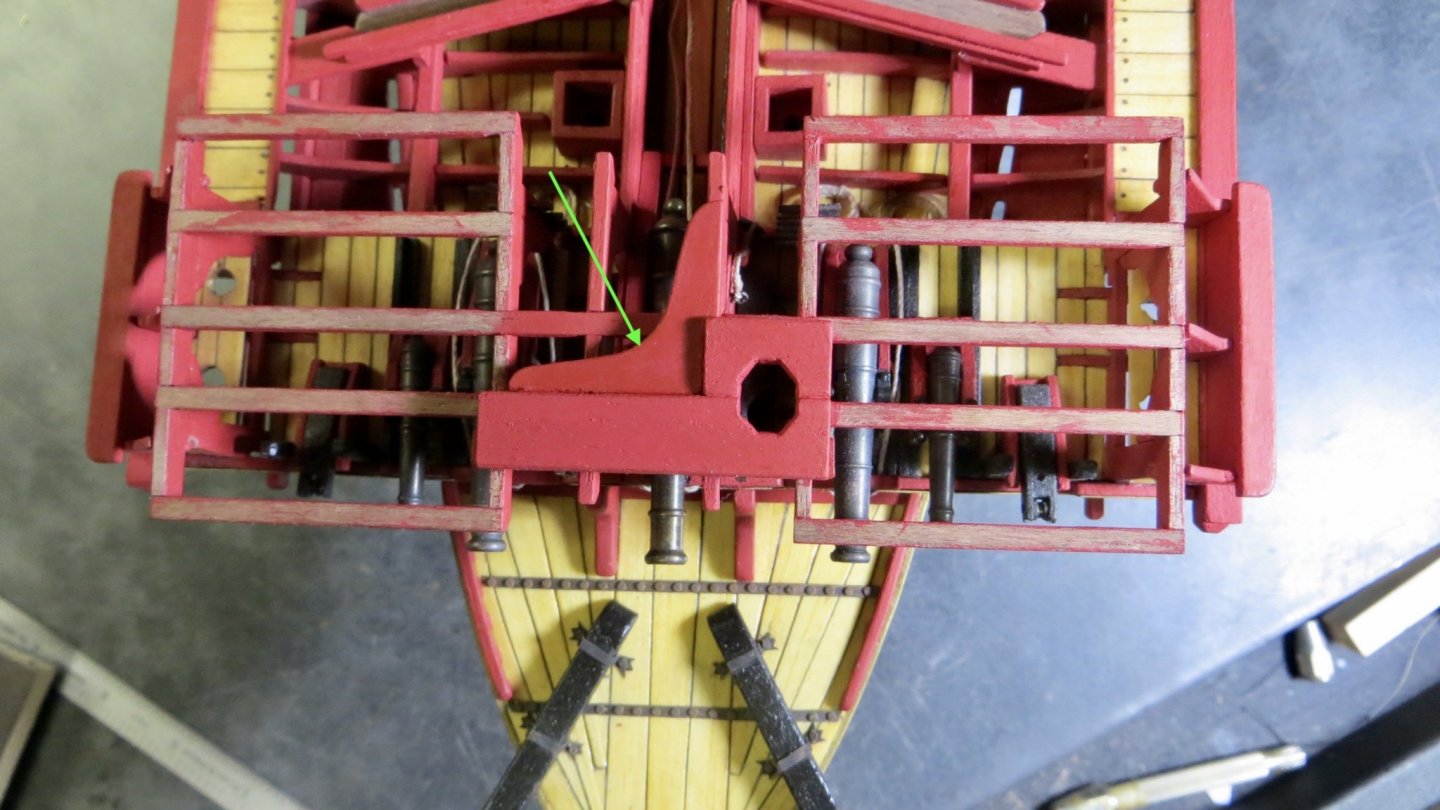
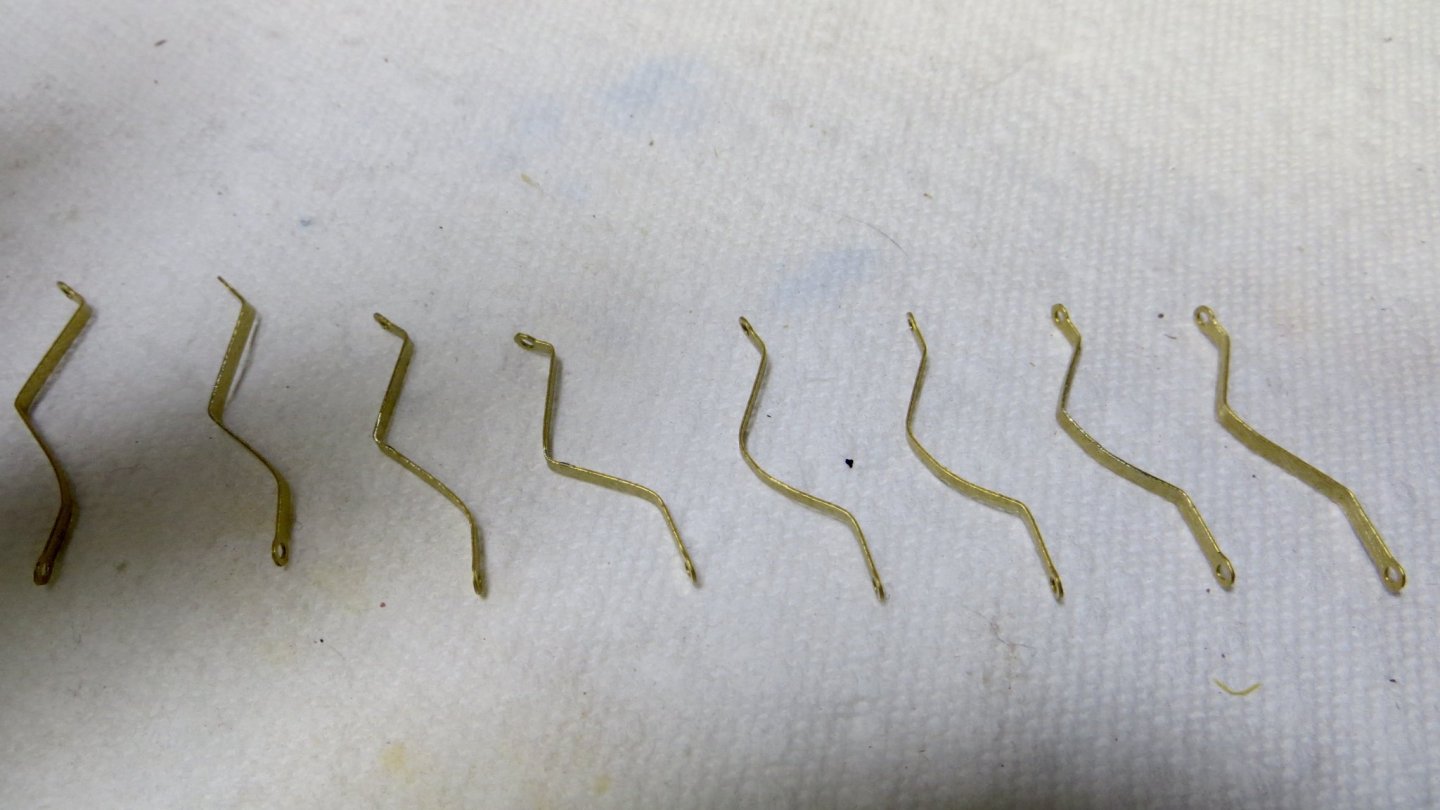
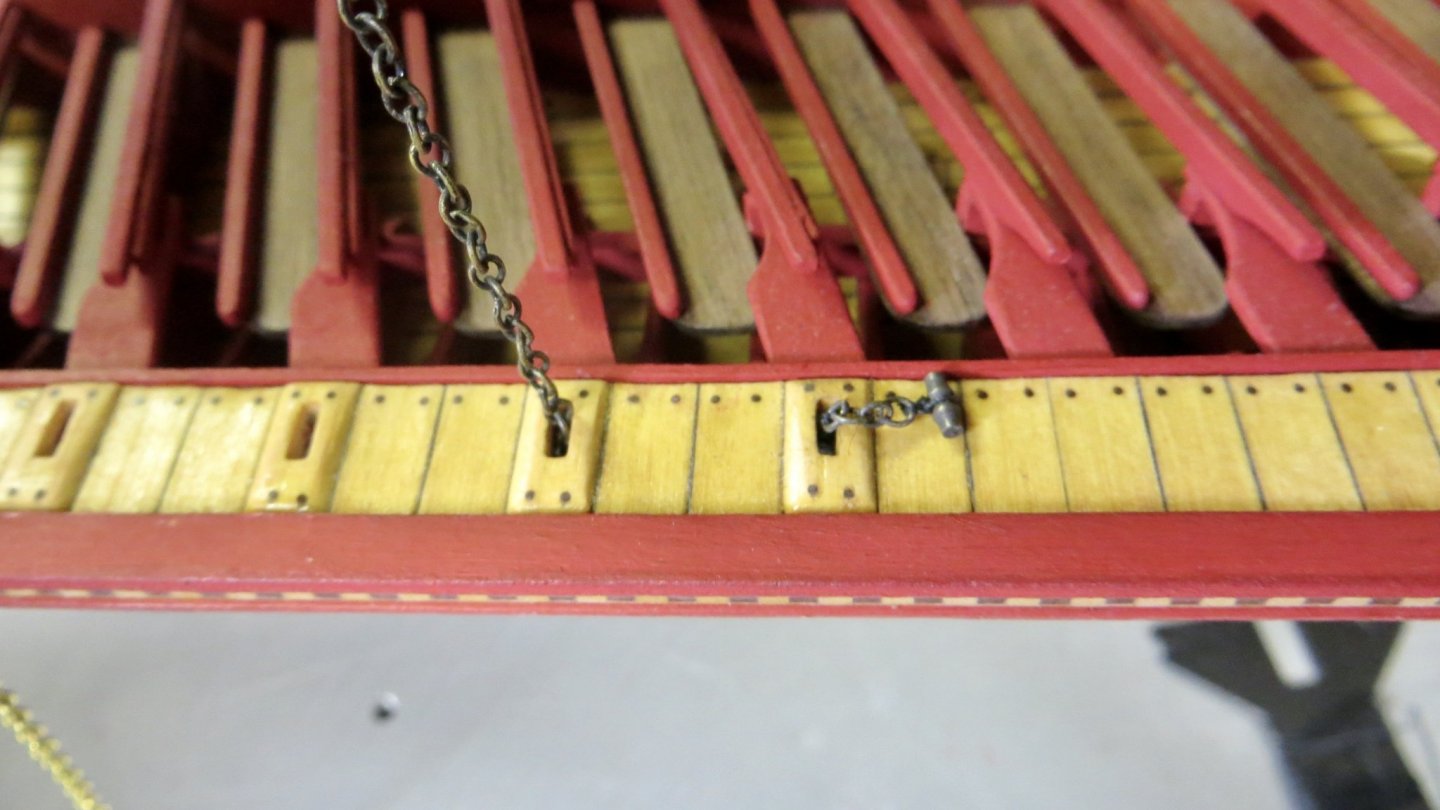
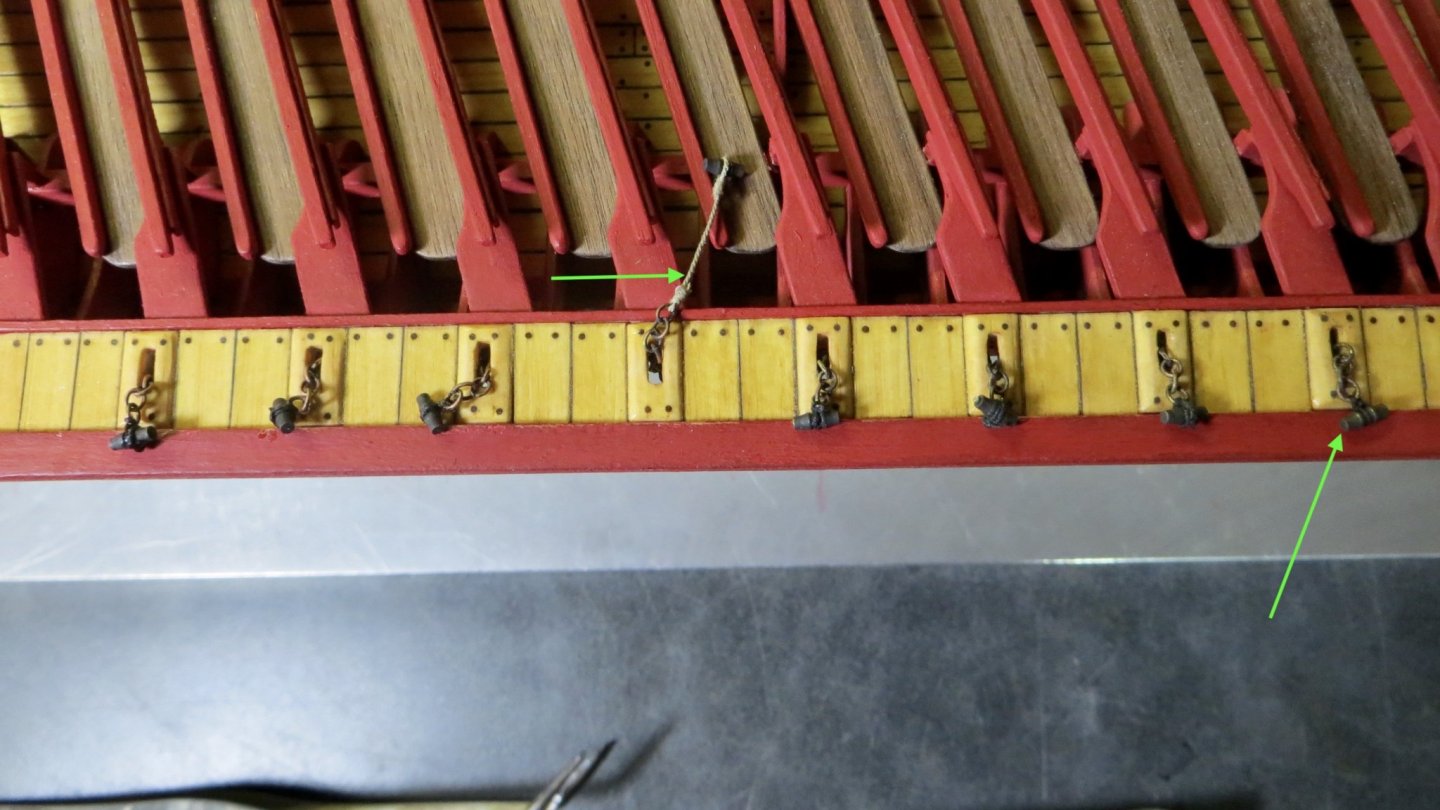
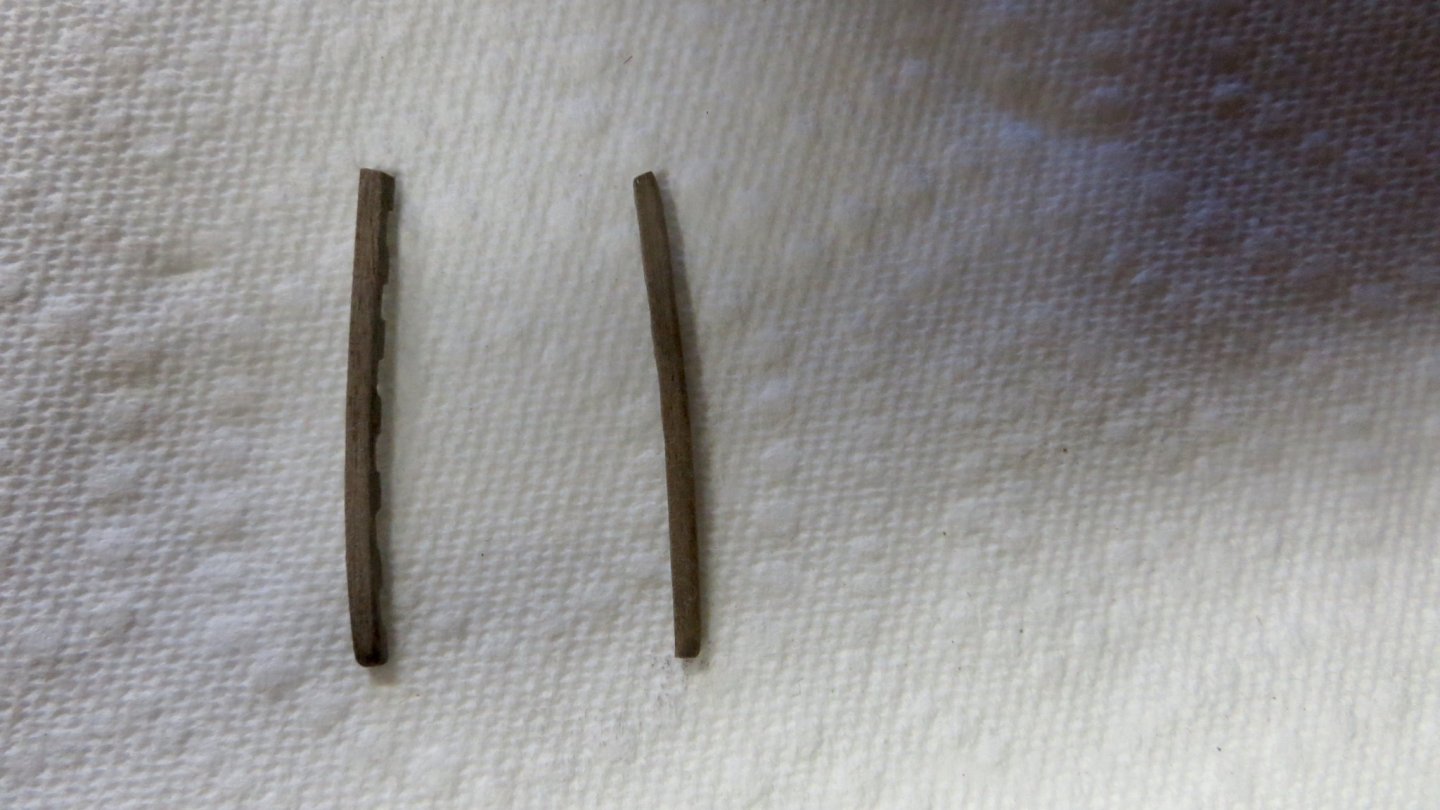
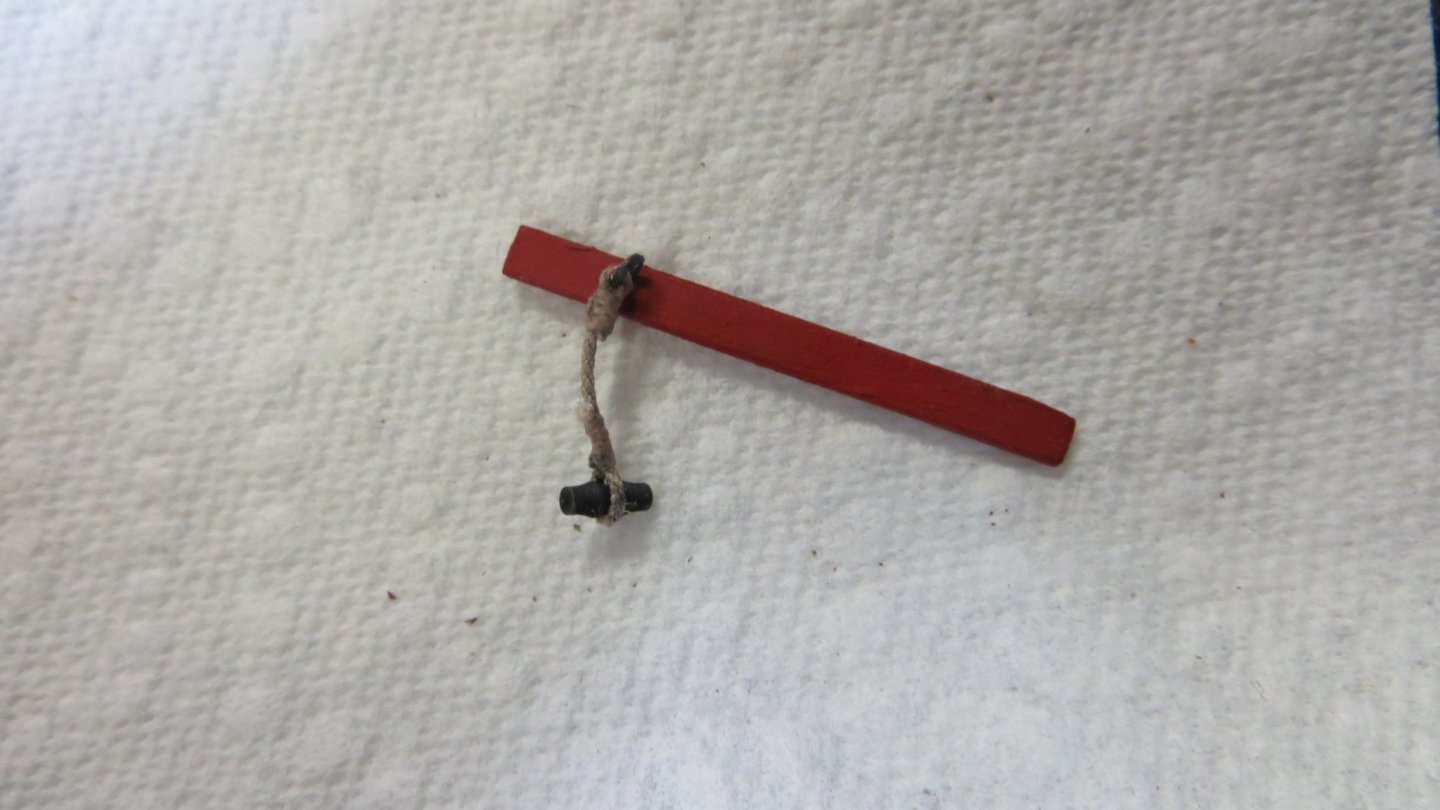
Minor update: I am starting to work on both sides of the upper platform around the cannon area. As I mentioned earlier in the log, I should have waited a little before I installed the framing of the upper deck. There were a couple of things I needed to do first. I had to make 4 ribs that sit on top the long center beams that run the length of the ship. The Corel kit plans called for 2 of these ribs to have toggles rigged into them for future rigging of the foremast. The reason for 2 toggles is because the Corel plans show that the foremast could be moved to either the left of the centerline or to the right of the centerline. The Fleur di Lis plans show the foremast station only to the left, or port side of the centerline of the ship. This is the plan I will be following, so I only had to rig up one toggle. Photo of 4 ribs and toggle Toggle Inserted into rib Green arrows showing location of 4 ribs under the upper platform with the toggle on port side I fabricated stanchions from the plans that will go on both the port and starboard side of the upper platform. Installed stanchions. The Corel plans only call for 2 stanchions on each side, but I decided early on to add a 3rd one in the middle. The reason for this is that I hope to not install a false deck on top of these stanchions with thin planking on top of the false deck, as is instructed by Corel. I will install thicker planks right on top of the stanchions, with no false deck underneath. thus the addition of the middle piece for more support. I hope this makes sense. Lol! Thanks for stopping by, Frank


- 510 replies
-
- 6
-
-
- reale de france
- corel
- (and 1 more)
-
Yes, that is my worry also. Once I sand the raised section, will I like the finish of the brass. I would prefer a painted metallic (the same paint I used for the tiny trim pieces I installed earlier along the length of the ship). I am not familiar with dry brushing, so I will do some reading on how that works and how NOT to get any of the painted metallic on the other painted surface. Thanks again for pointing me in the right direction. Frank
- 510 replies
-
- 2
-
-
- reale de france
- corel
- (and 1 more)
-
Clark, Thanks for your input. I am stuck using acrylics. I have to match the red and the blue that I am already using on my model. I will give it a try using the techniques shown to me from Michael, Mark and Grandpa Phil. Thanks, Frank
- 510 replies
-
- 2
-
-
- reale de france
- corel
- (and 1 more)
-
Michael and Mark, Thank you very much for your ideas. I will do some experimenting with very fine sandpapered see how it goes. Thanks again, Frank
-
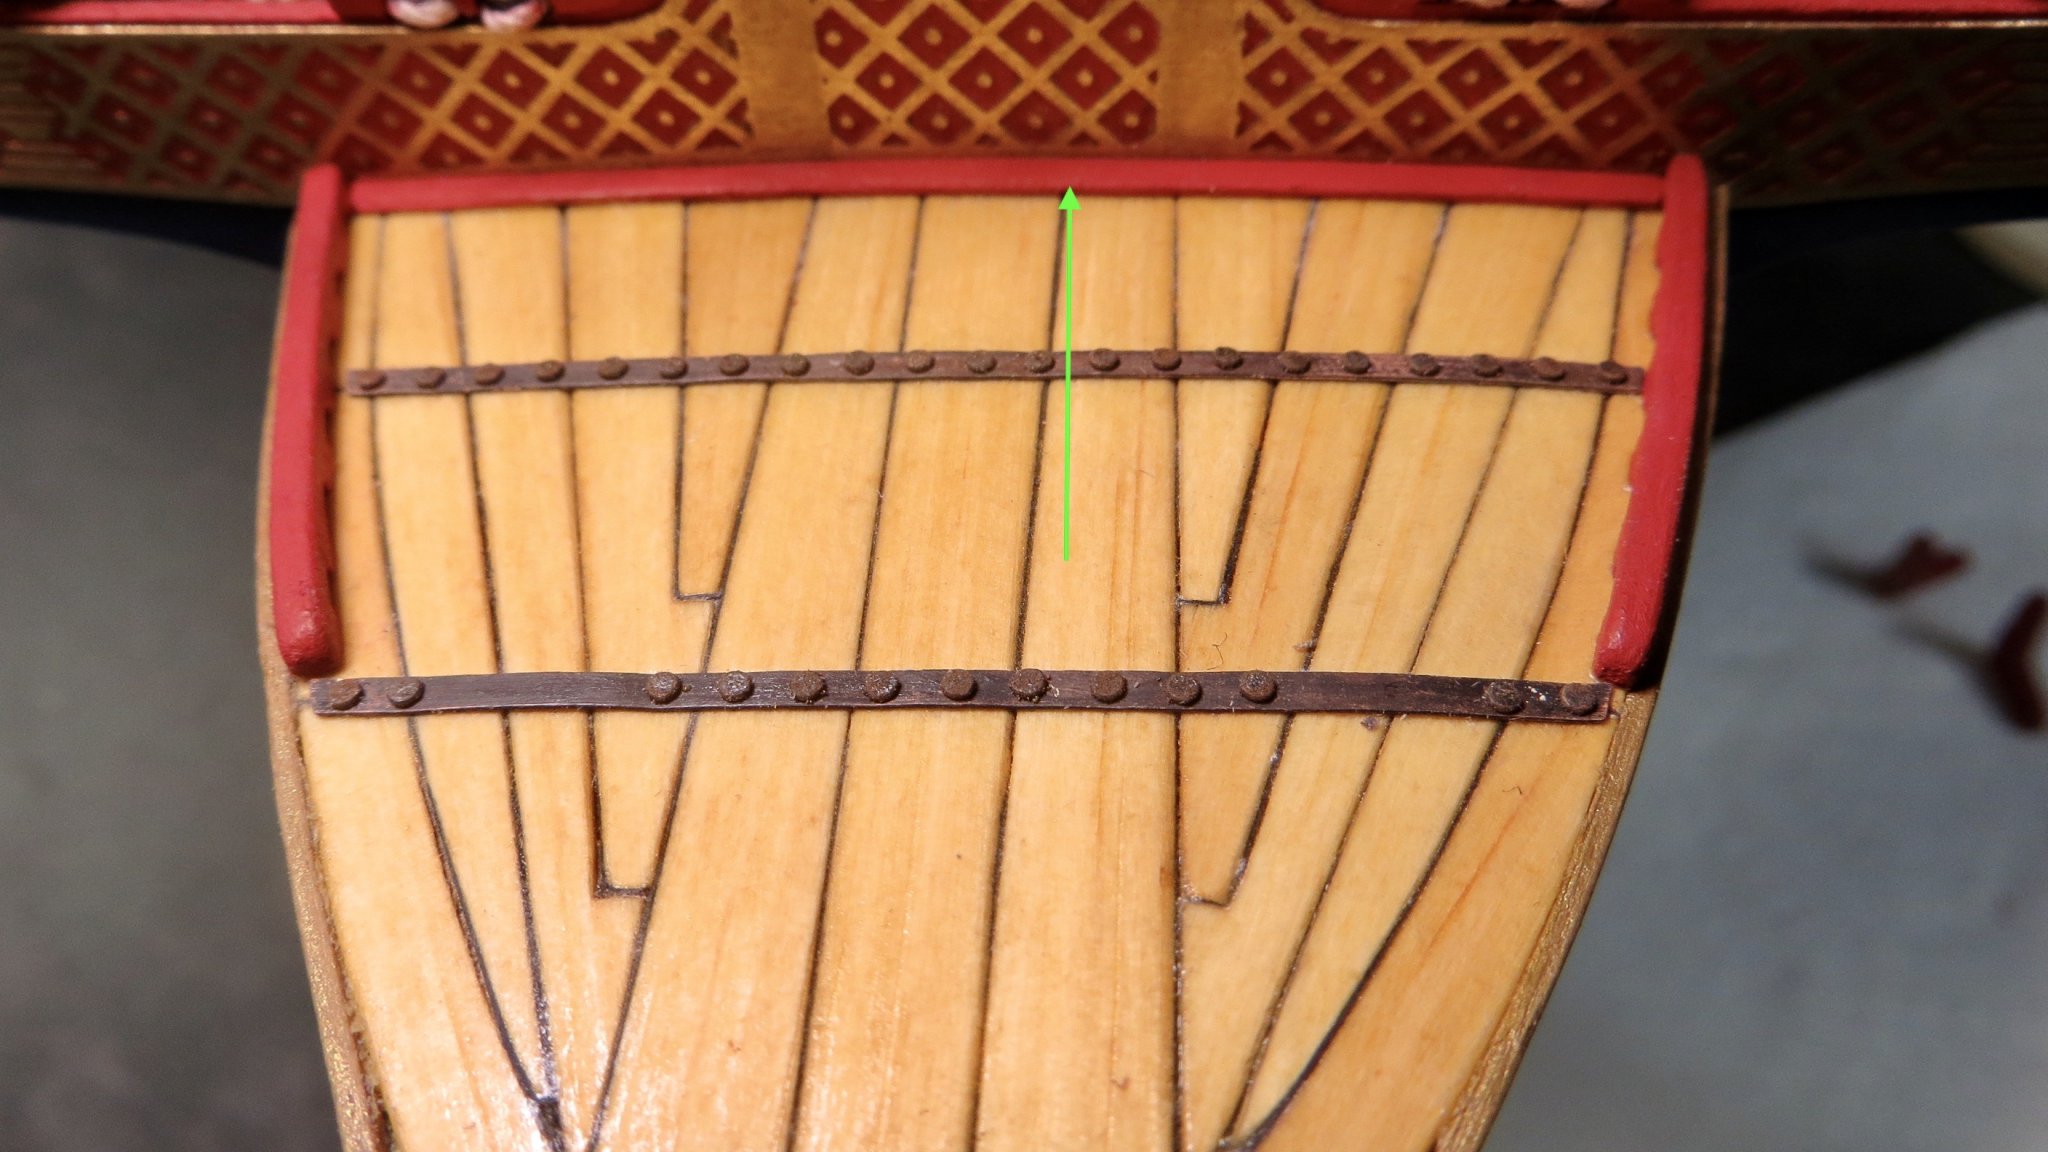
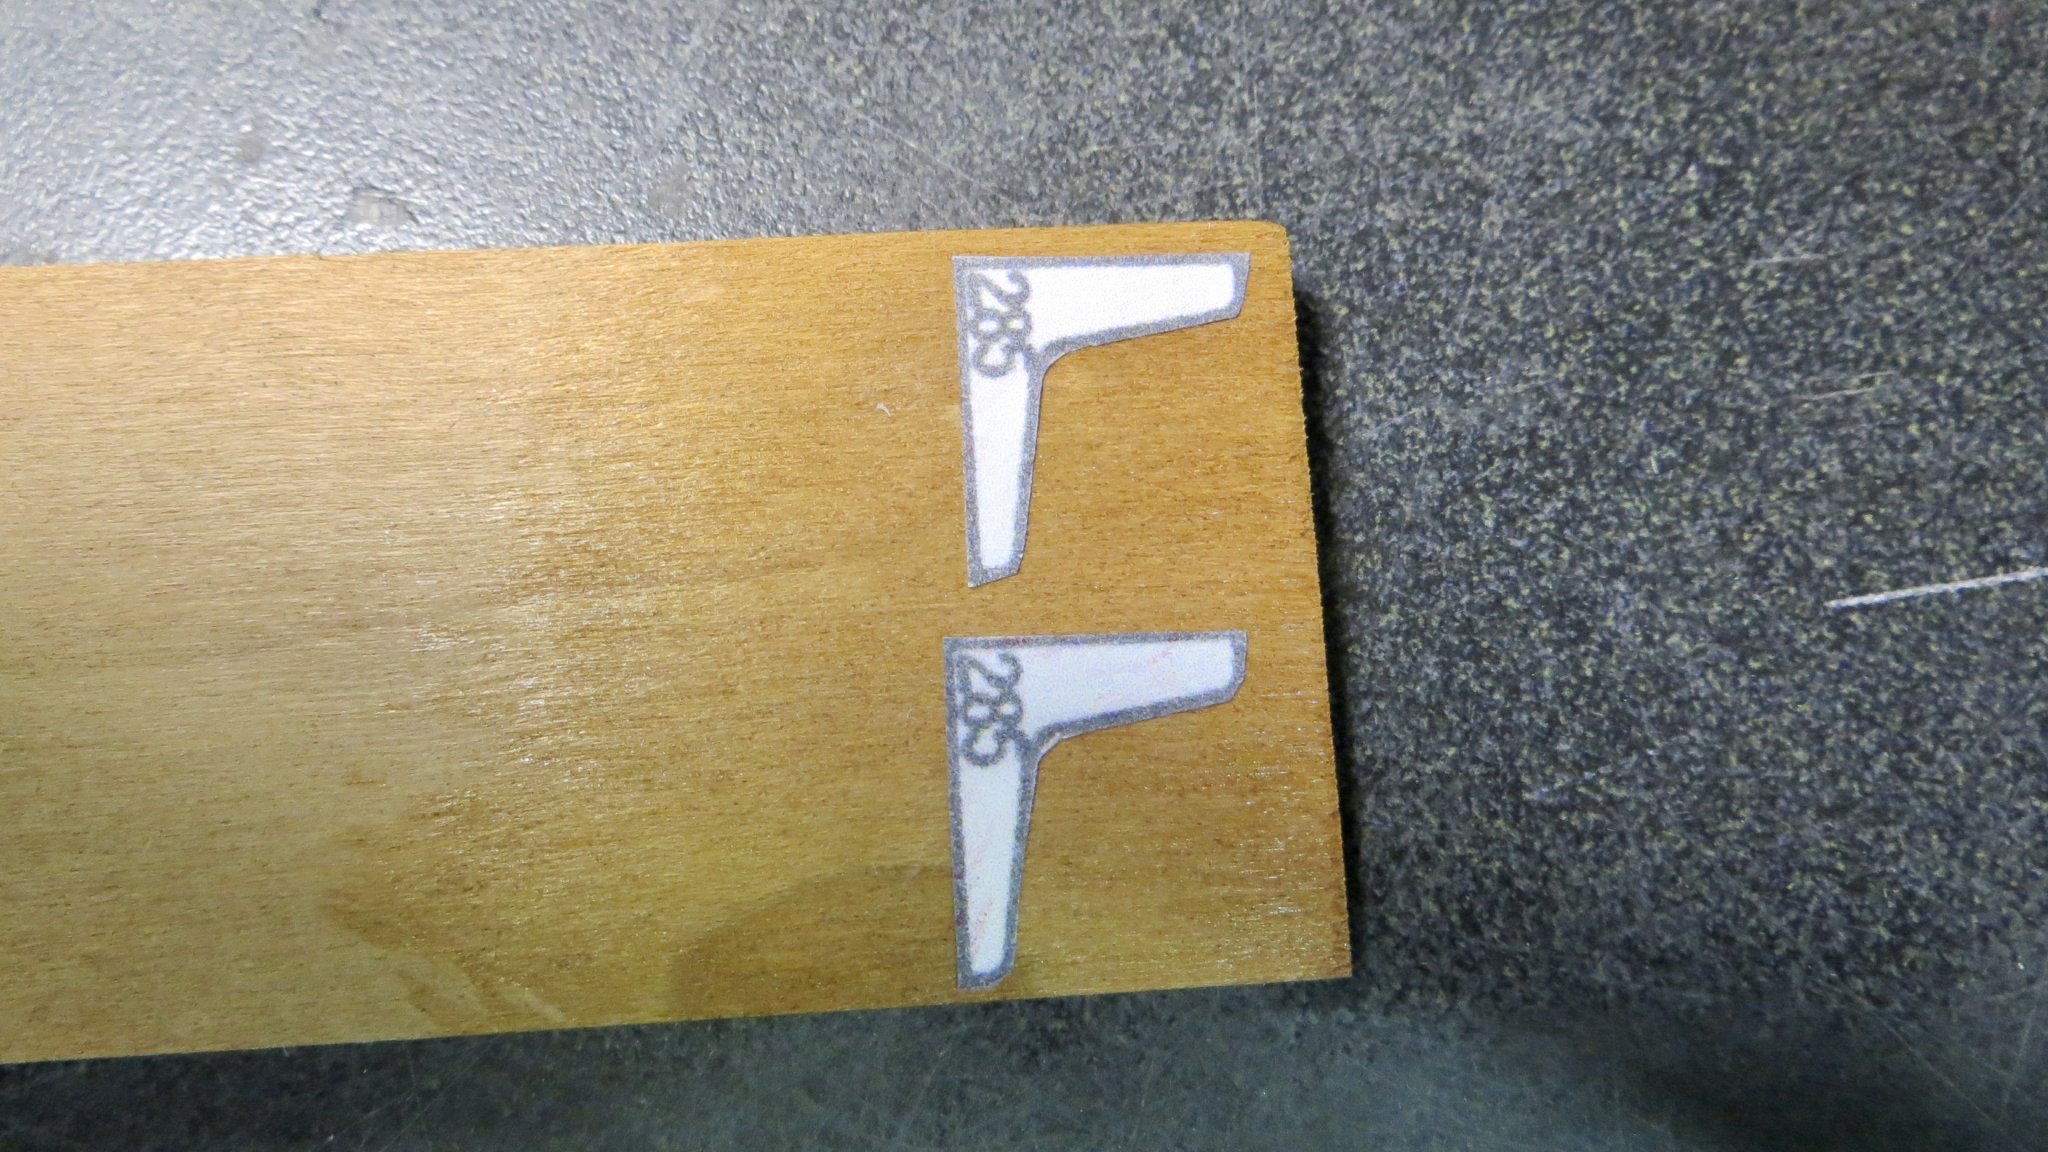
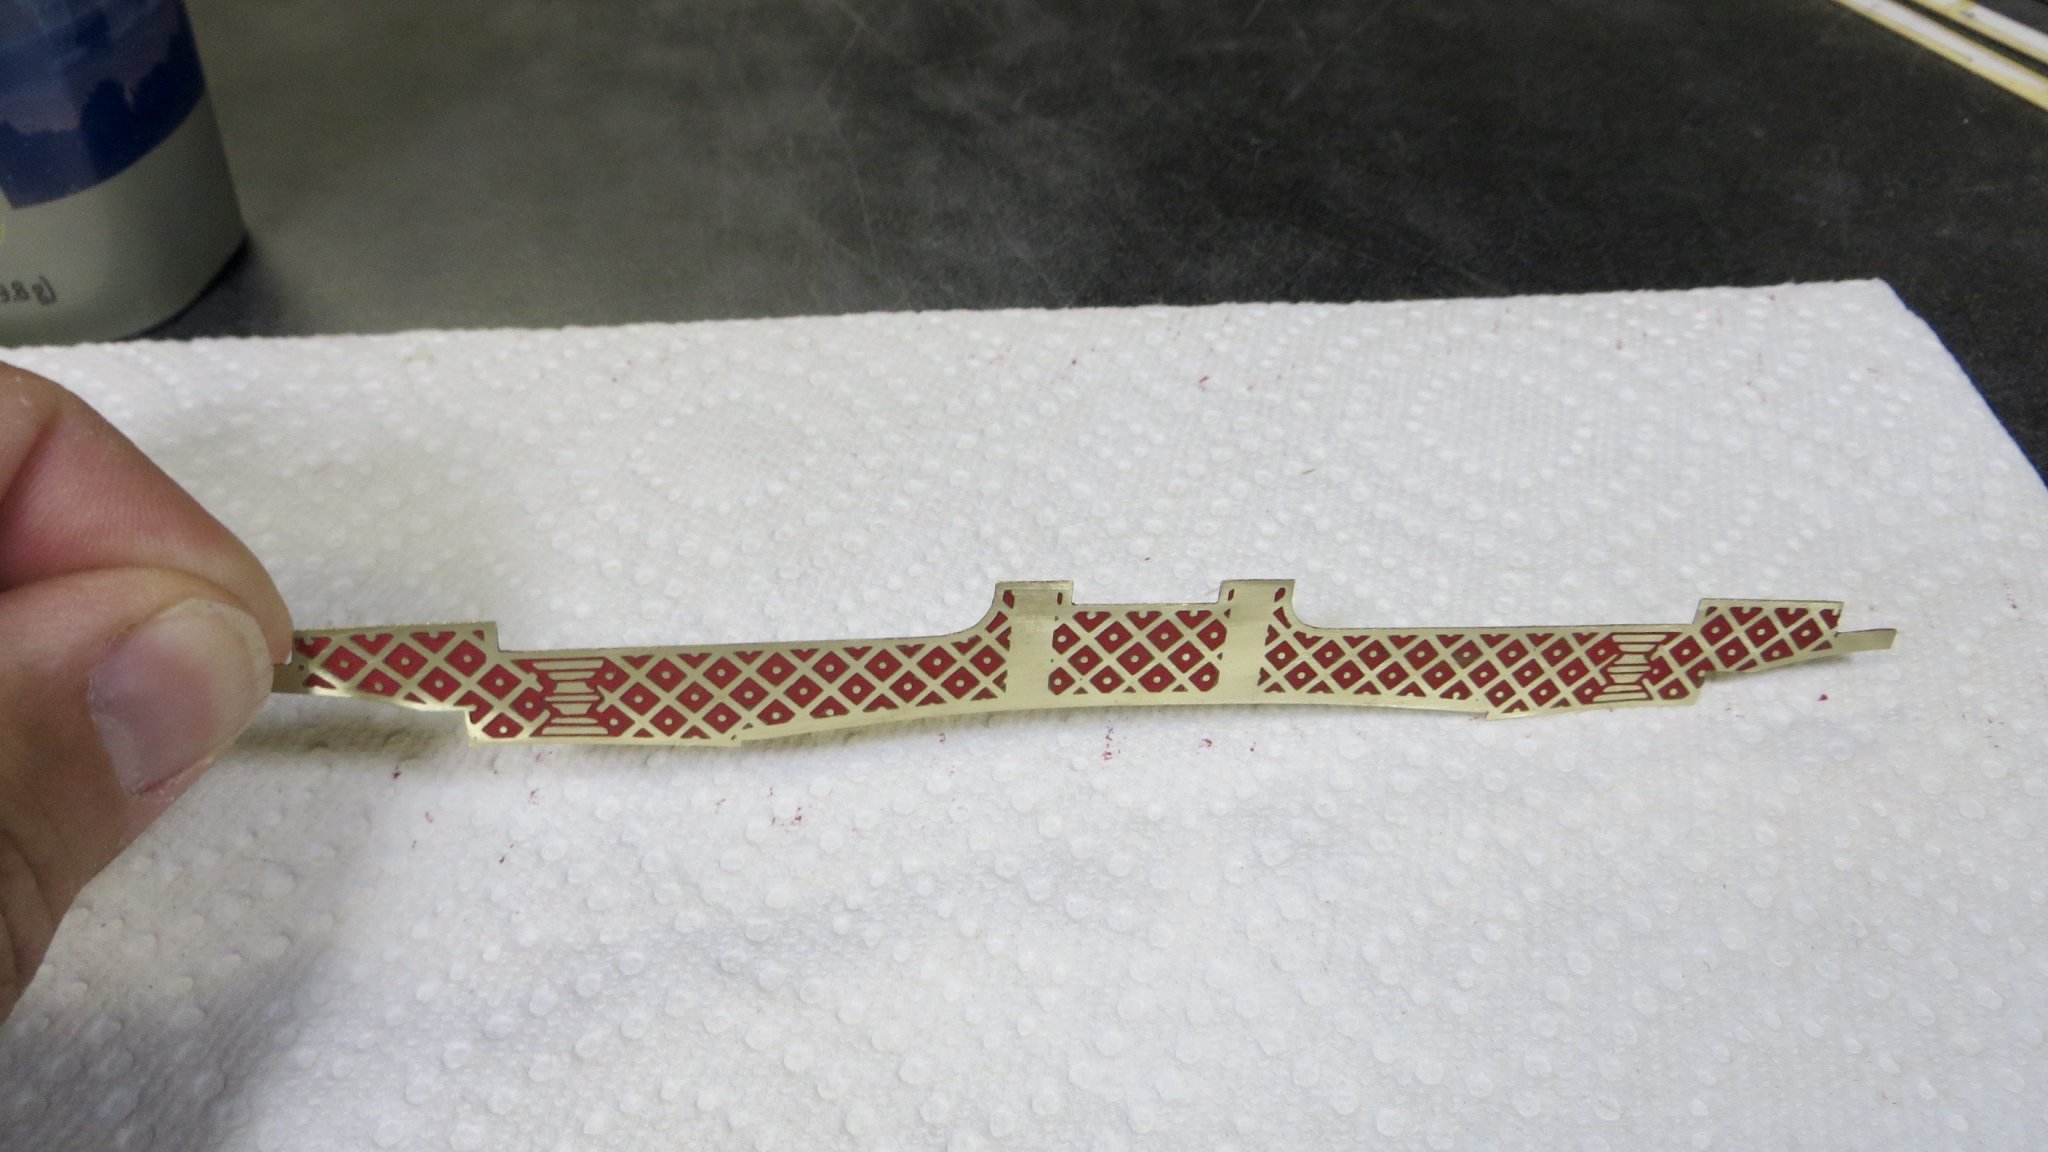
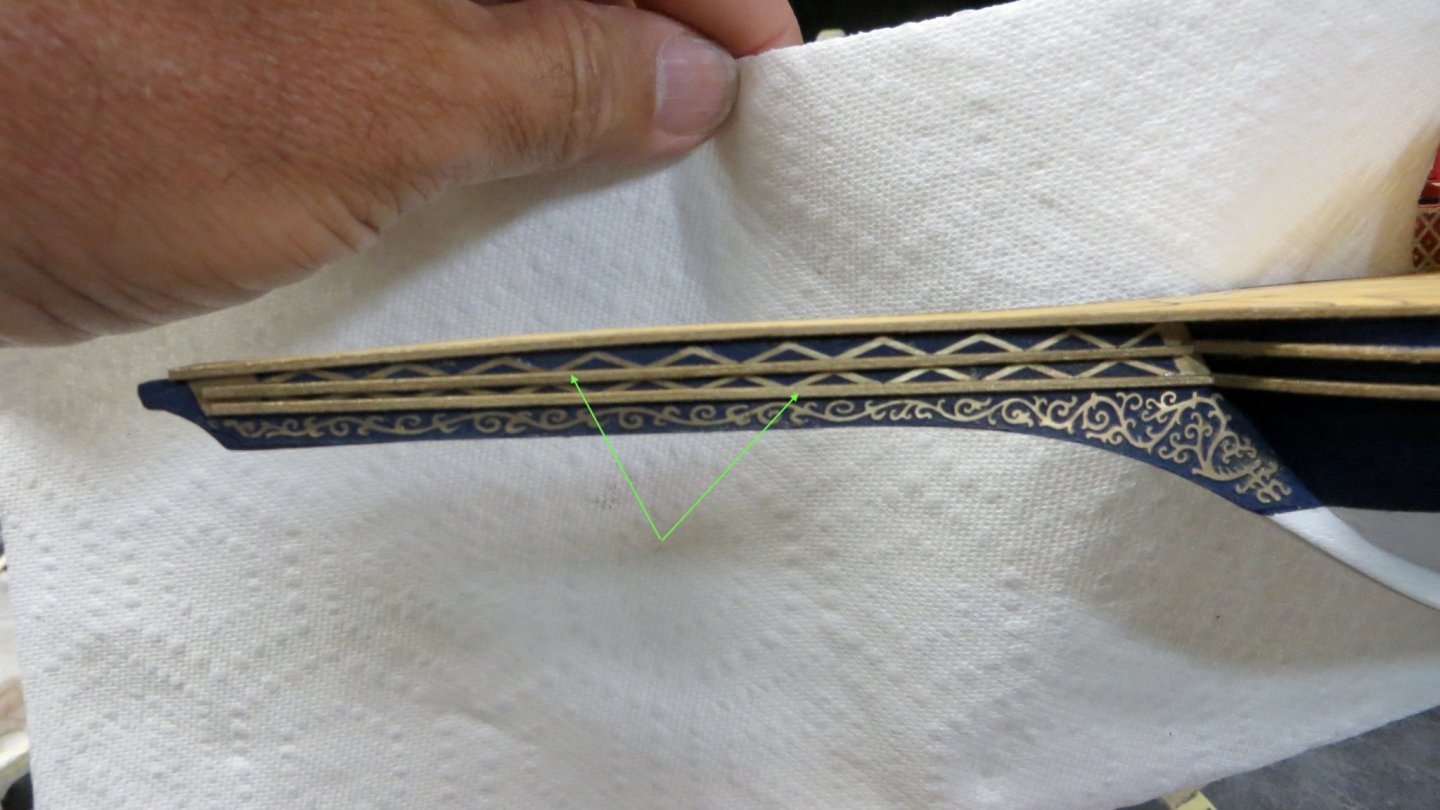
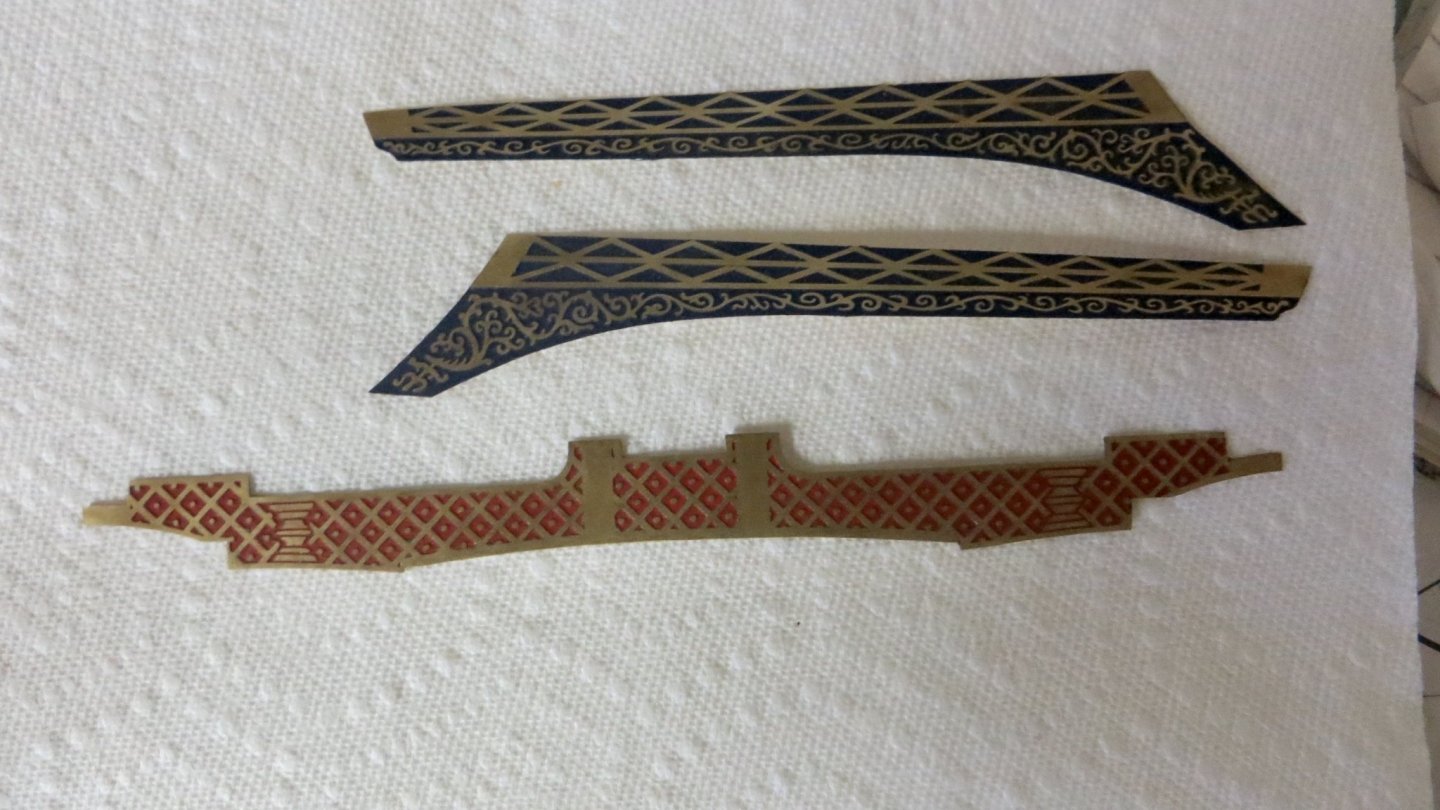
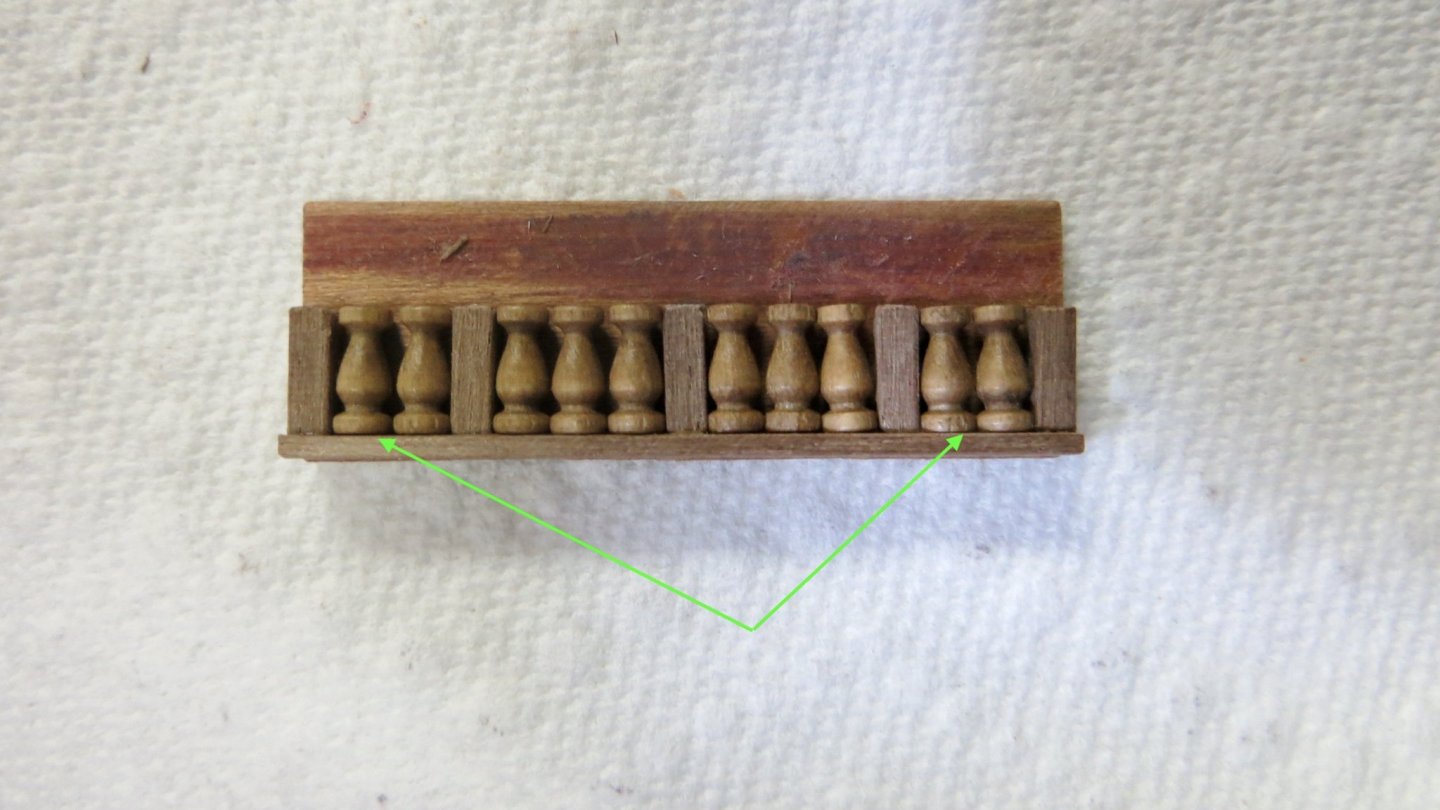
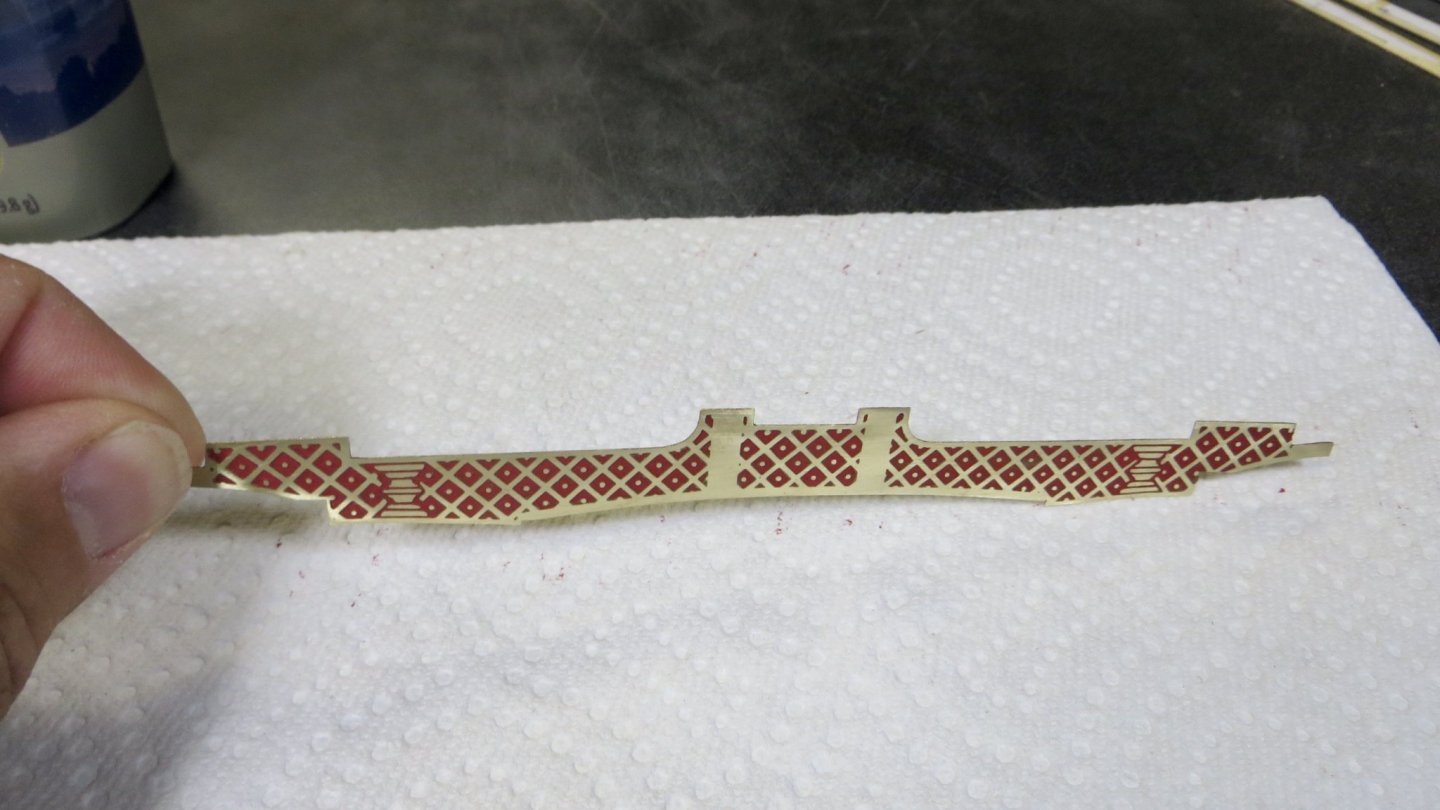
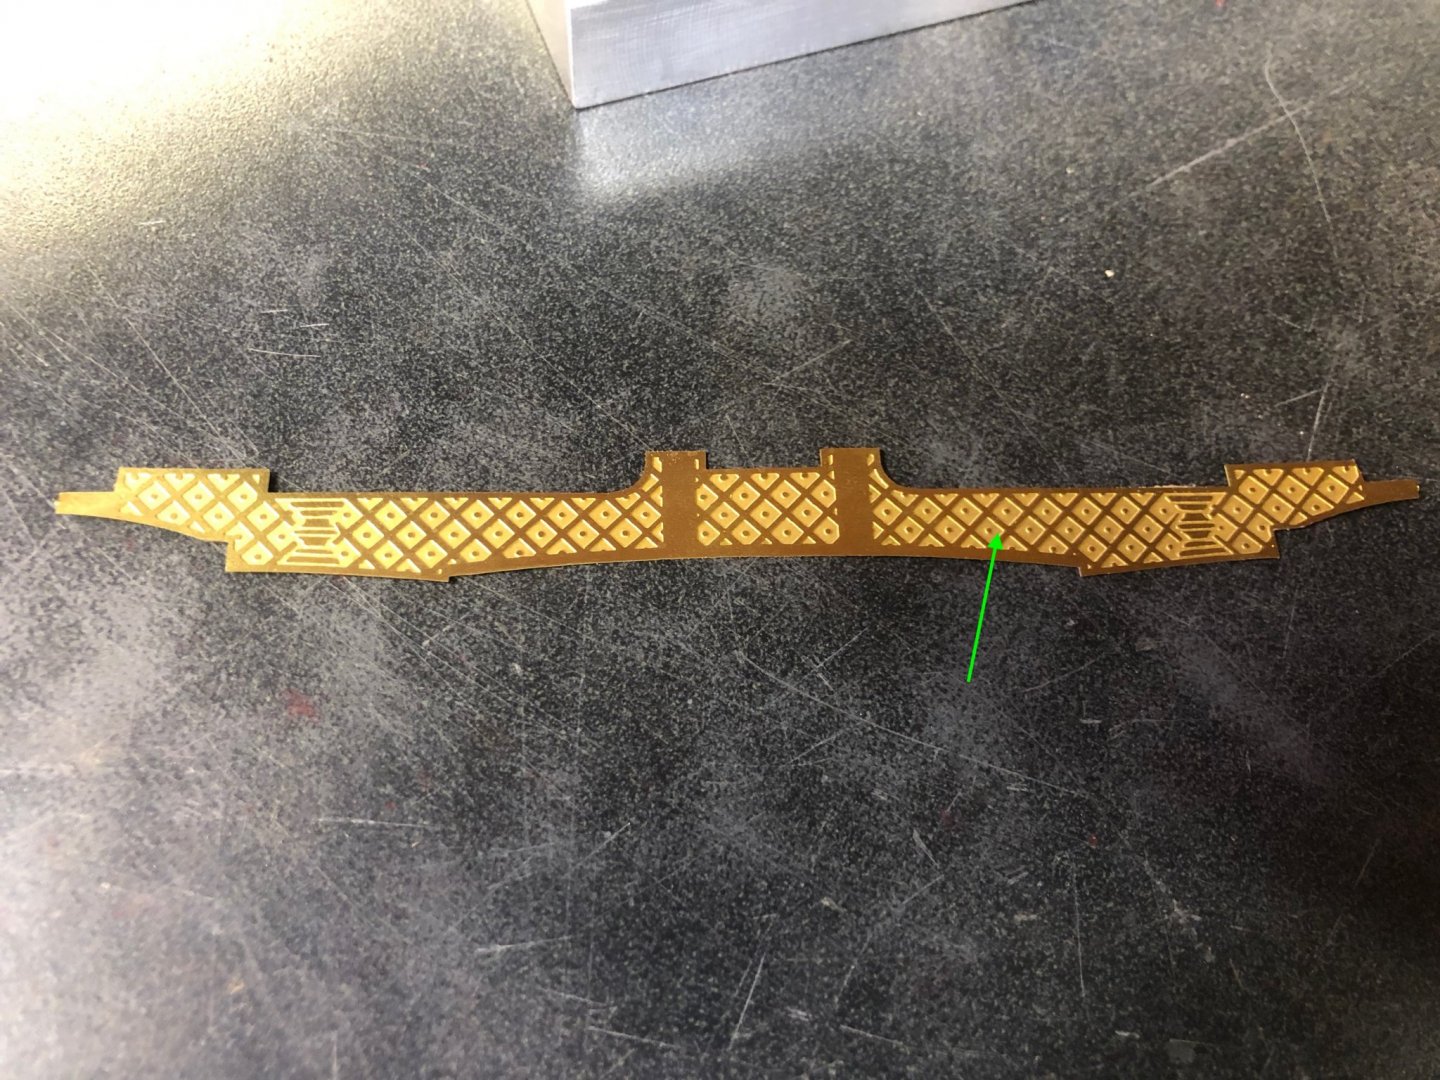
Thanks for visiting and for the "Likes"! Appreciated. So, I'm looking ahead at what I want to accomplish in the next couple of weeks, on the model. With this in mind, I will be working with a few pieces of the brass photo etch pieces. On these pieces, I will need to paint the indented, or background areas, while leaving the raised section as the brass. I've seen this accomplished on other models, but I'm not sure how to go about this, so I was hoping for some assistance from this group. Here is an example photo of one of the photo etched pieces. I want to paint all the background of this piece red, (see the green arrow) while leaving the raised portion with the brass or gold look. Any help or pointers would be appreciated. Thanks, Frank
- 510 replies
-
- 2
-
-
- reale de france
- corel
- (and 1 more)