HOLIDAY DONATION DRIVE - SUPPORT MSW - DO YOUR PART TO KEEP THIS GREAT FORUM GOING!
×


fmodajr
-
Posts
868 -
Joined
-
Last visited
Content Type
Profiles
Forums
Gallery
Events
Everything posted by fmodajr
-
 Thank you very much Michael!
 -
Thank You!!!!
-
Michael, Looking very nice! I like the small details, like the radius trim you put on the top of the railing, with that milling machine! Frank
-
Hi Michael, Thanks for your comments! I hope the slight rise at the center of your build is not noticeable I'll be glad to get thru this phase of the build soon! Frank
-
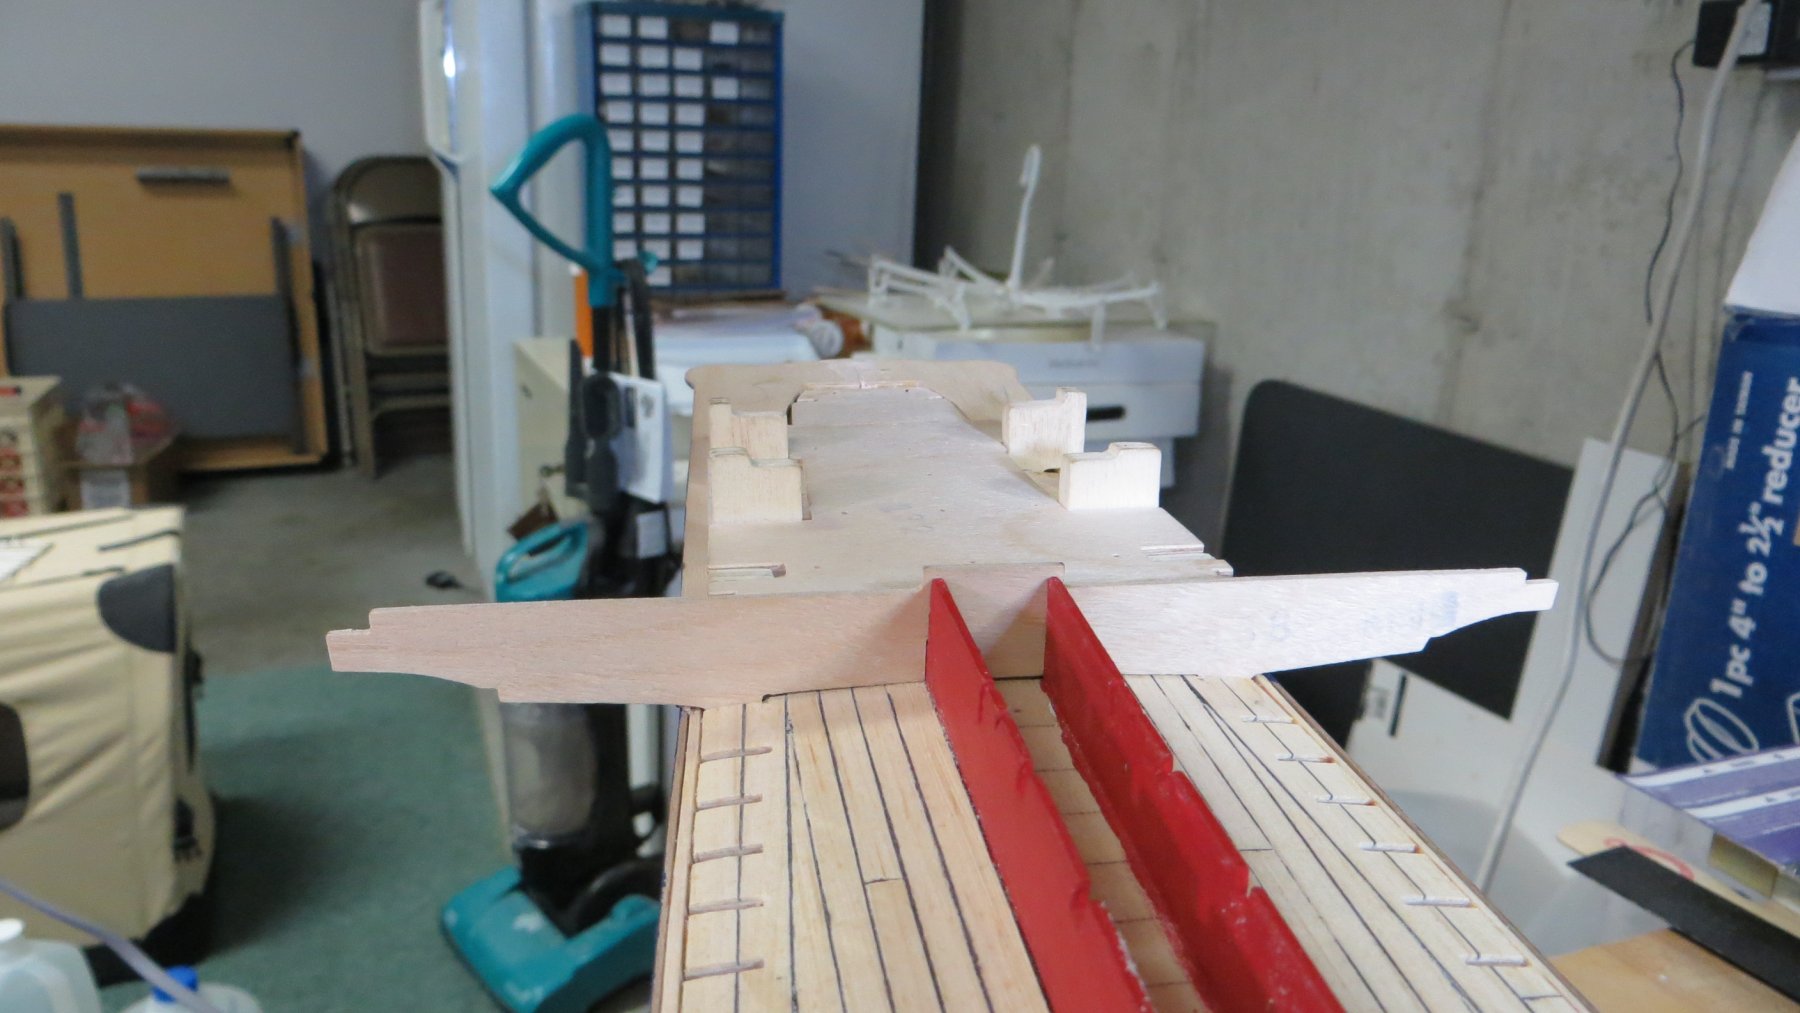
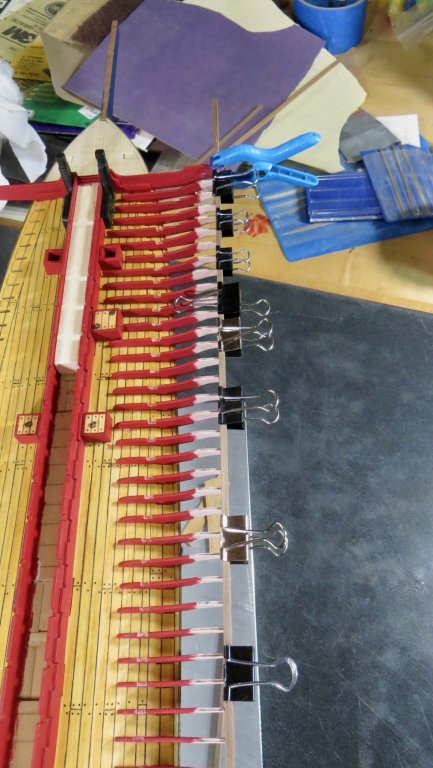
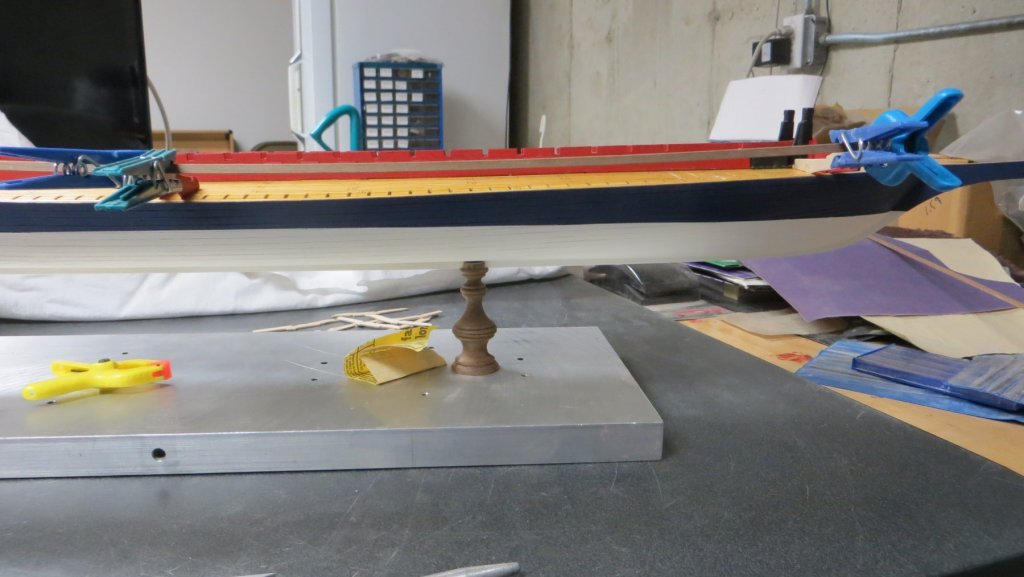
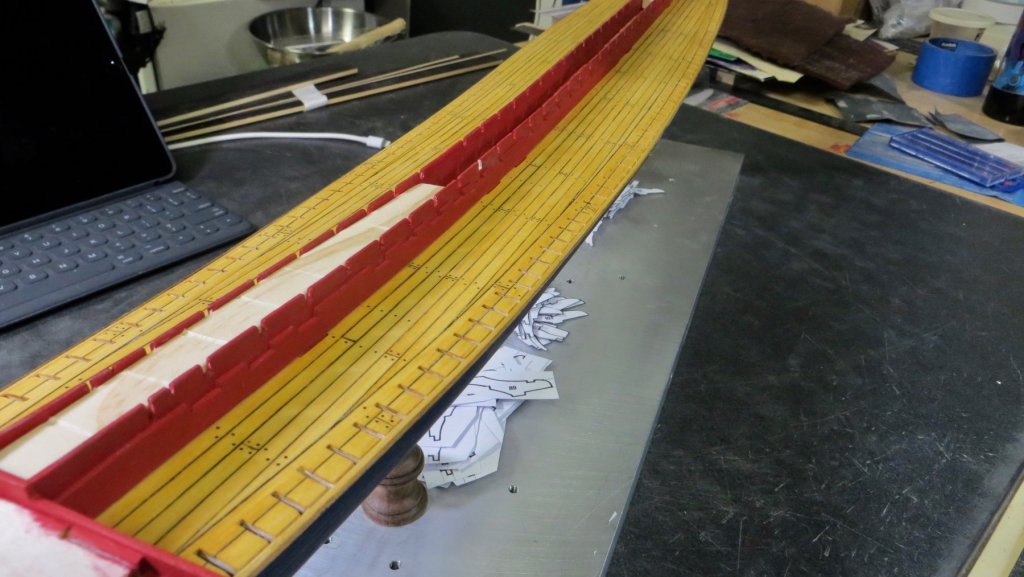
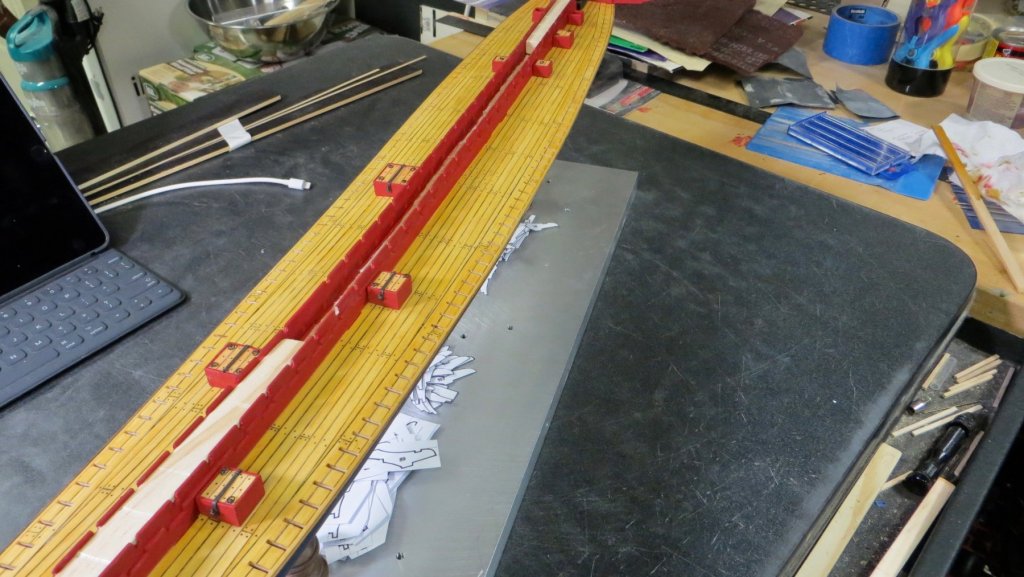
Hello, I'm sure this post will be a little repetitive, but I do feel that the upper deck supports on the port side is going a little bit smoother. I did learn a few lessons from the first side. As on the starboard side, I cutout and finished the 70 supports for the port side. Then I trimmed the fwd yoke and aft yoke to set the distance from the center line to be the same and I lowered the height of the step on the aft yoke to match the work I did on the starboard side. As on the first side, and per the instructions, I fitted and glued the two supports in the middle, but this time I also placed a support halfway in-between the aft yoke and center and a support half way in-between the fwd yoke and center, in order to help set the curve of the beam to more accurately follow the contour of the deck. This photo shows the curve of the beam I'm now on my way to finishing the rest of the supports. I'm about halfway done. I hope to be done fitting the supports in the next couple of weeks. (Having limited time on the work bench due to wedding responsibilities in the next week ) Thanks for stopping by, Frank


- 510 replies
-
- 7
-

-
- reale de france
- corel
- (and 1 more)
-
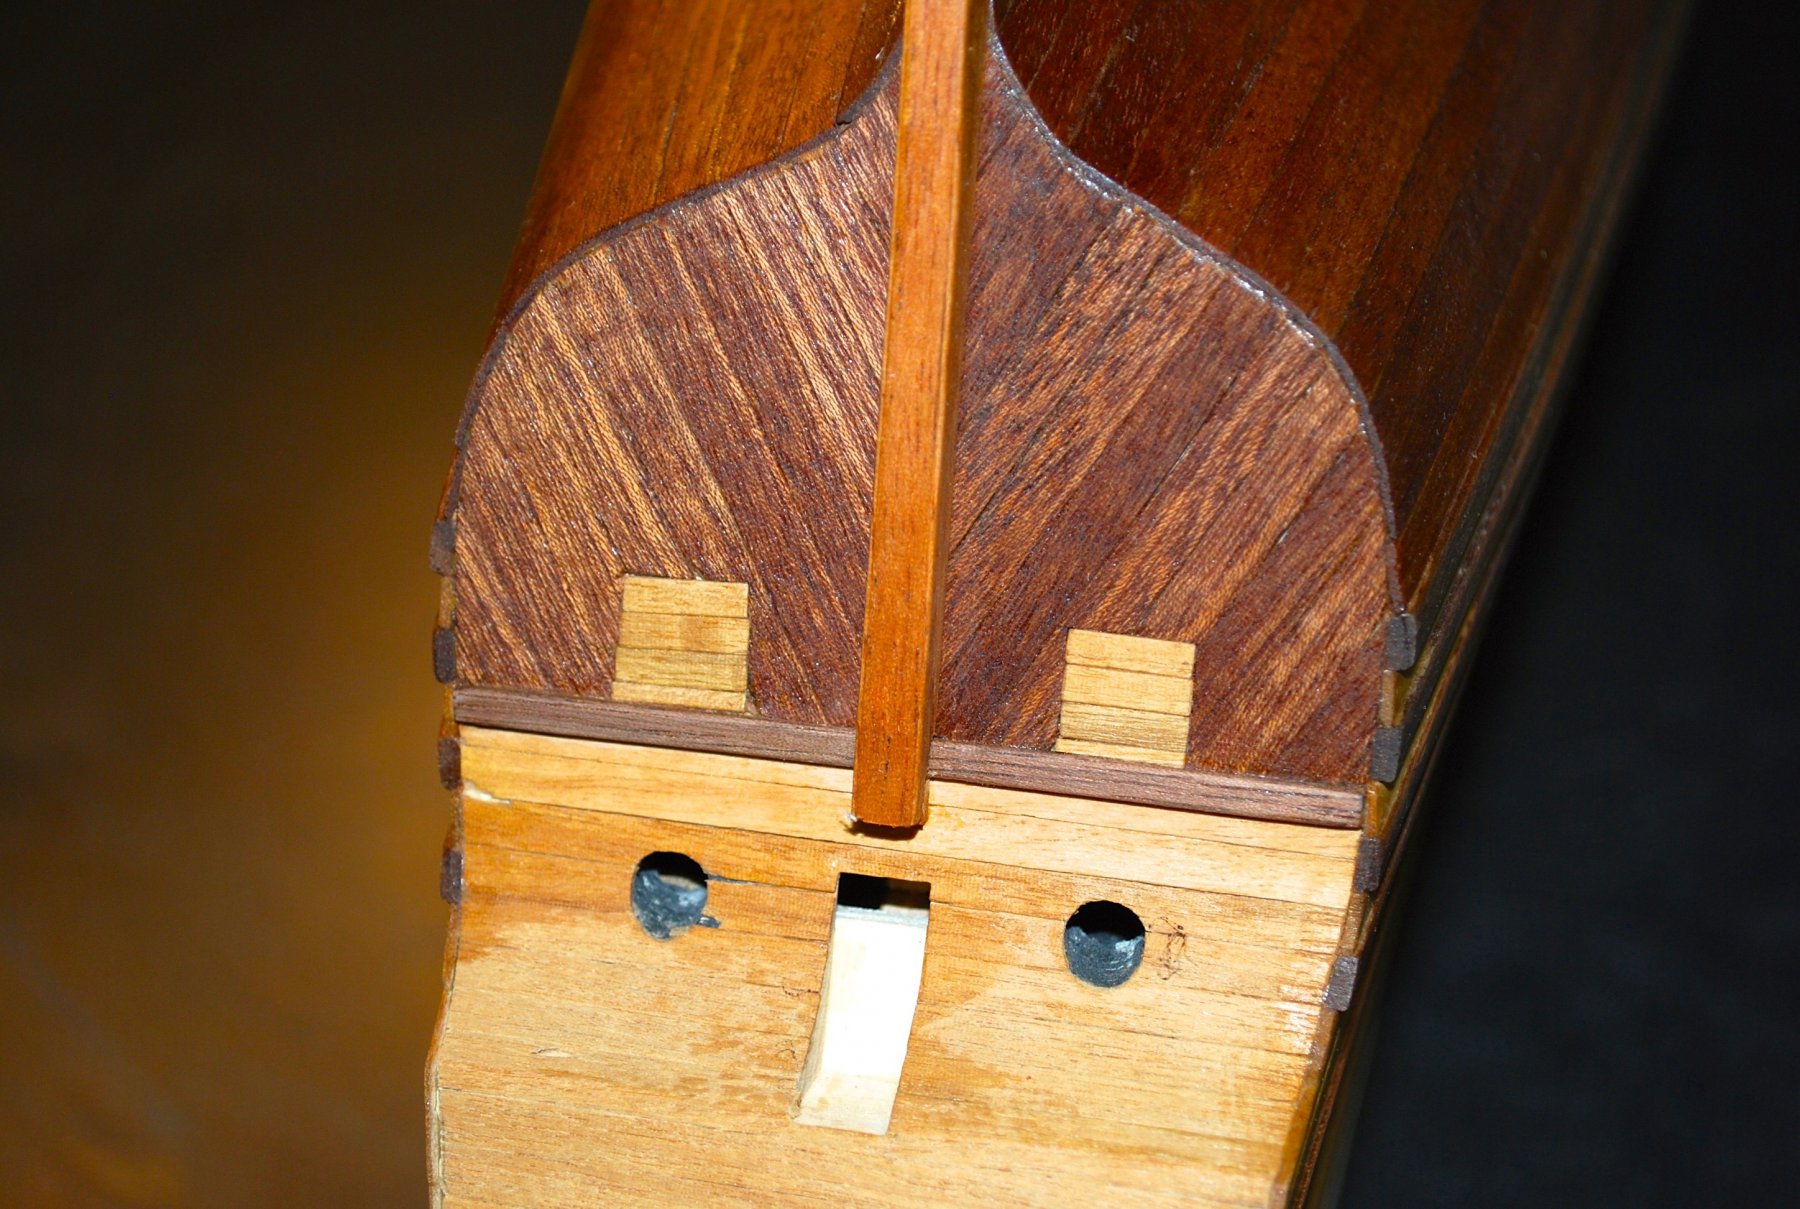
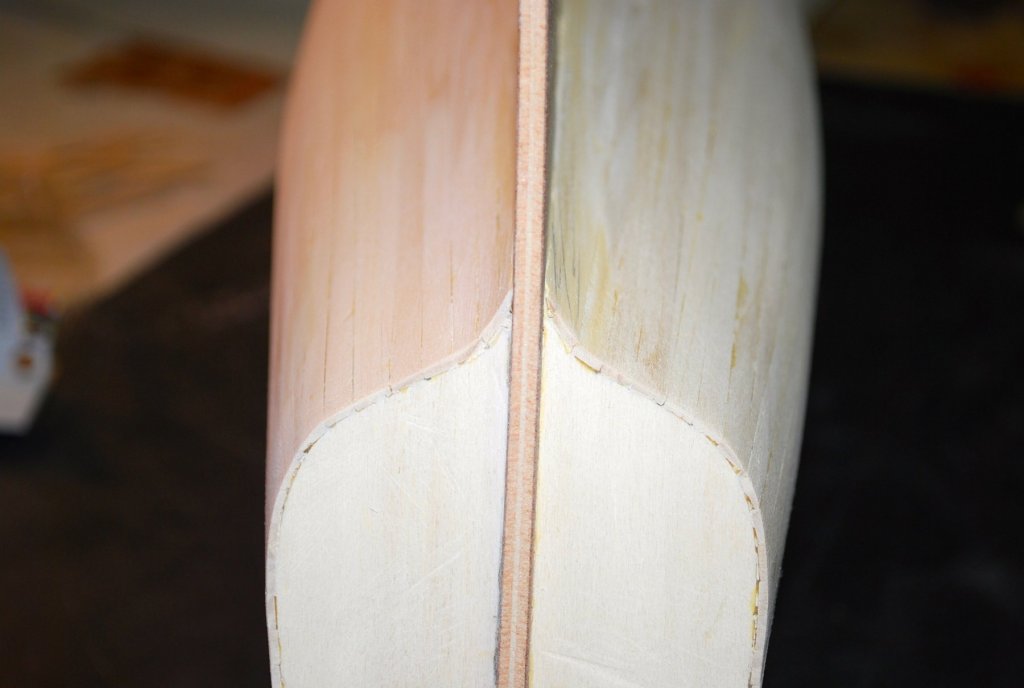
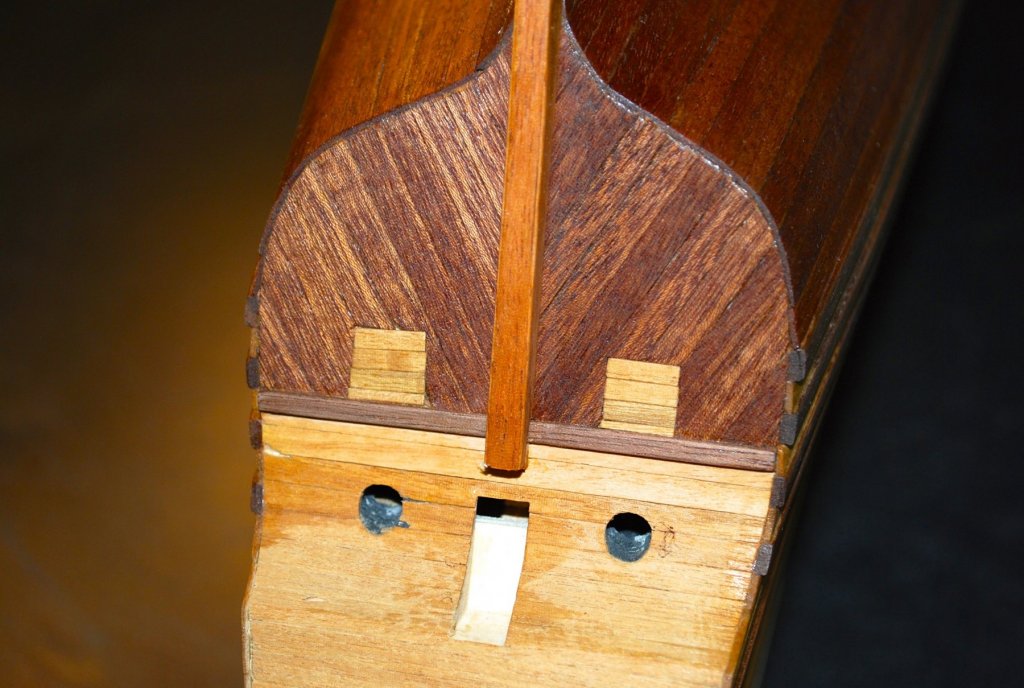
Hi Clark, Thank you for your post and kind comments! I am enjoying this build and I hope you will too. I think you figured out the problem with my stern yoke. I lowered the notch by 2 mm on the right side. I went about 1mm too far. (I noticed this as I was installing the supports near the yoke.) The forward yoke was perfect. So I am off about 1mm. I went back to some of my photos after I read your post. Sure enough, The yoke near the bow sits on the false deck, not on my deck planking (see photo below) While the stern yoke sits on my planking My planking is about .75 mm thick, which must have been the difference. The stern yoke is sitting higher by about the same amount I filed down!! So, in hind site, I should have installed the yoke first and then planked up to the yoke. Good catch Clark. The more worrisome aspect to me was that the distance of the notches from the center of the ship, on both the stern and bow yokes and on both sides, were further out than all the supports. Anyway, it all was easy to fix, and so far so good! I am moving slowly and trying to think things through as a go. Thanks again for your thoughts and also to everyone for the "likes" Frank

- 510 replies
-
- 2
-
-
- reale de france
- corel
- (and 1 more)
-
Thank you! That's what's nice to work with wood Frank
-
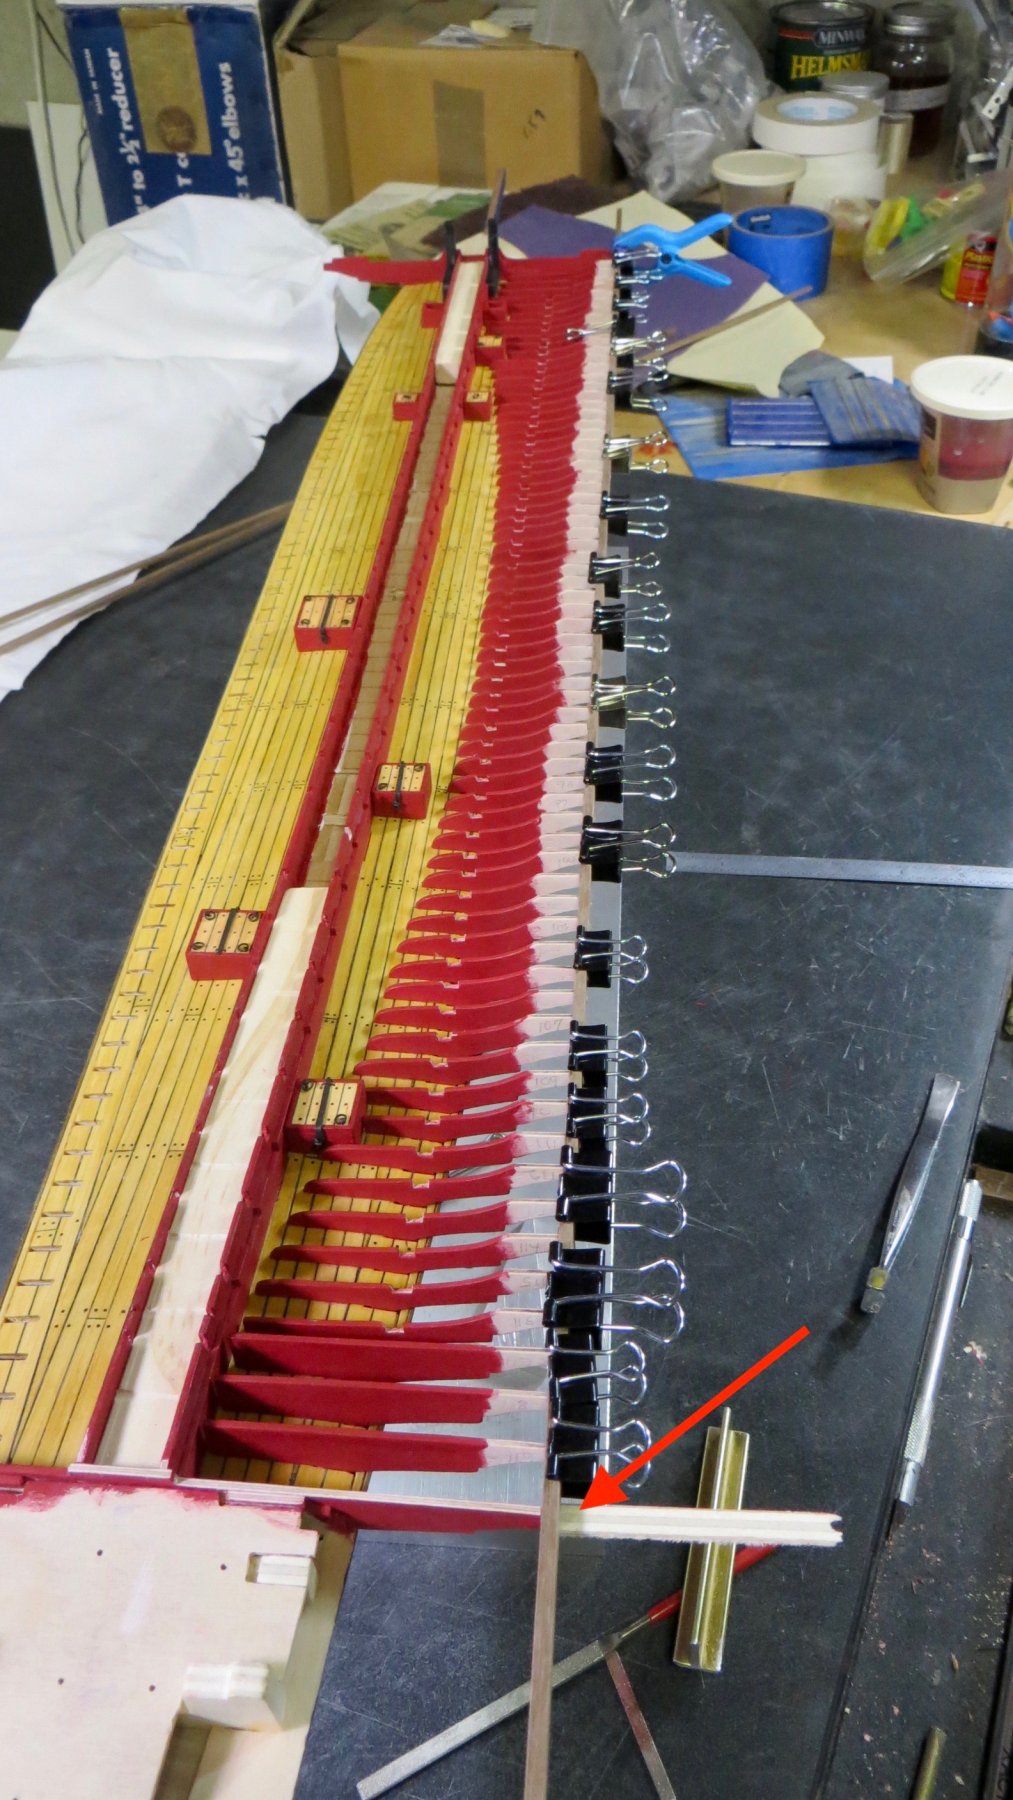
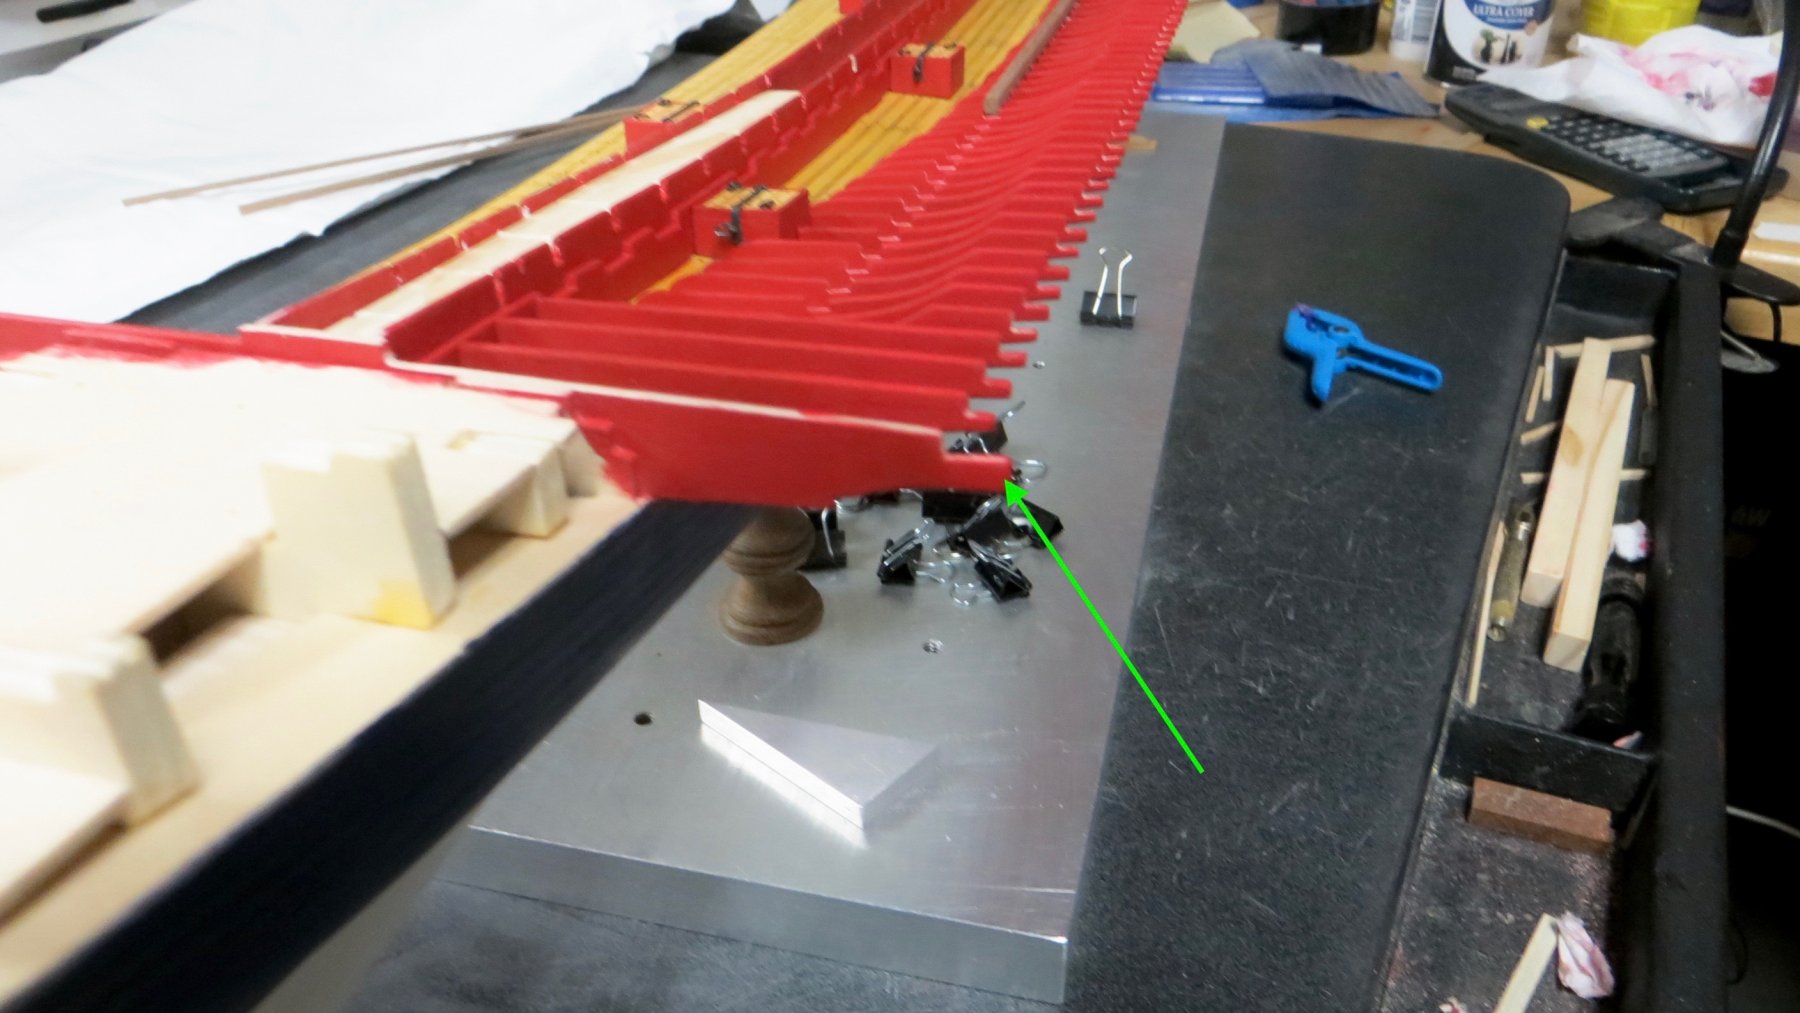
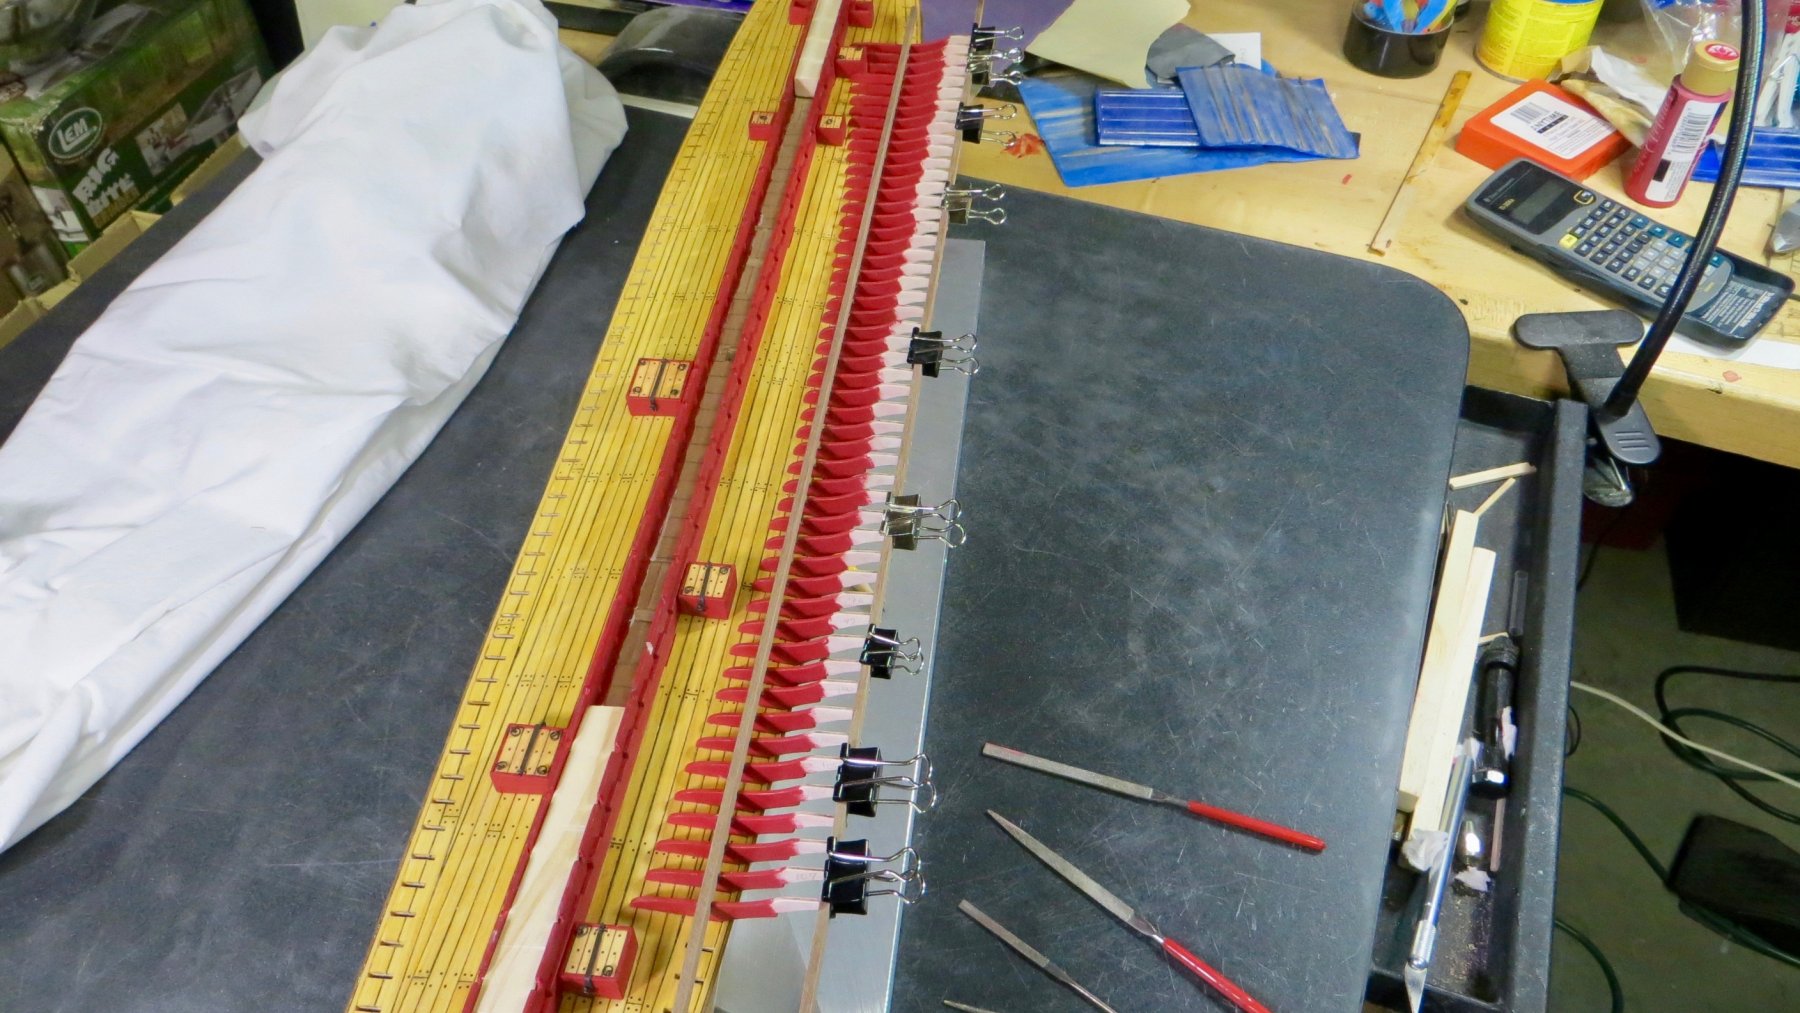
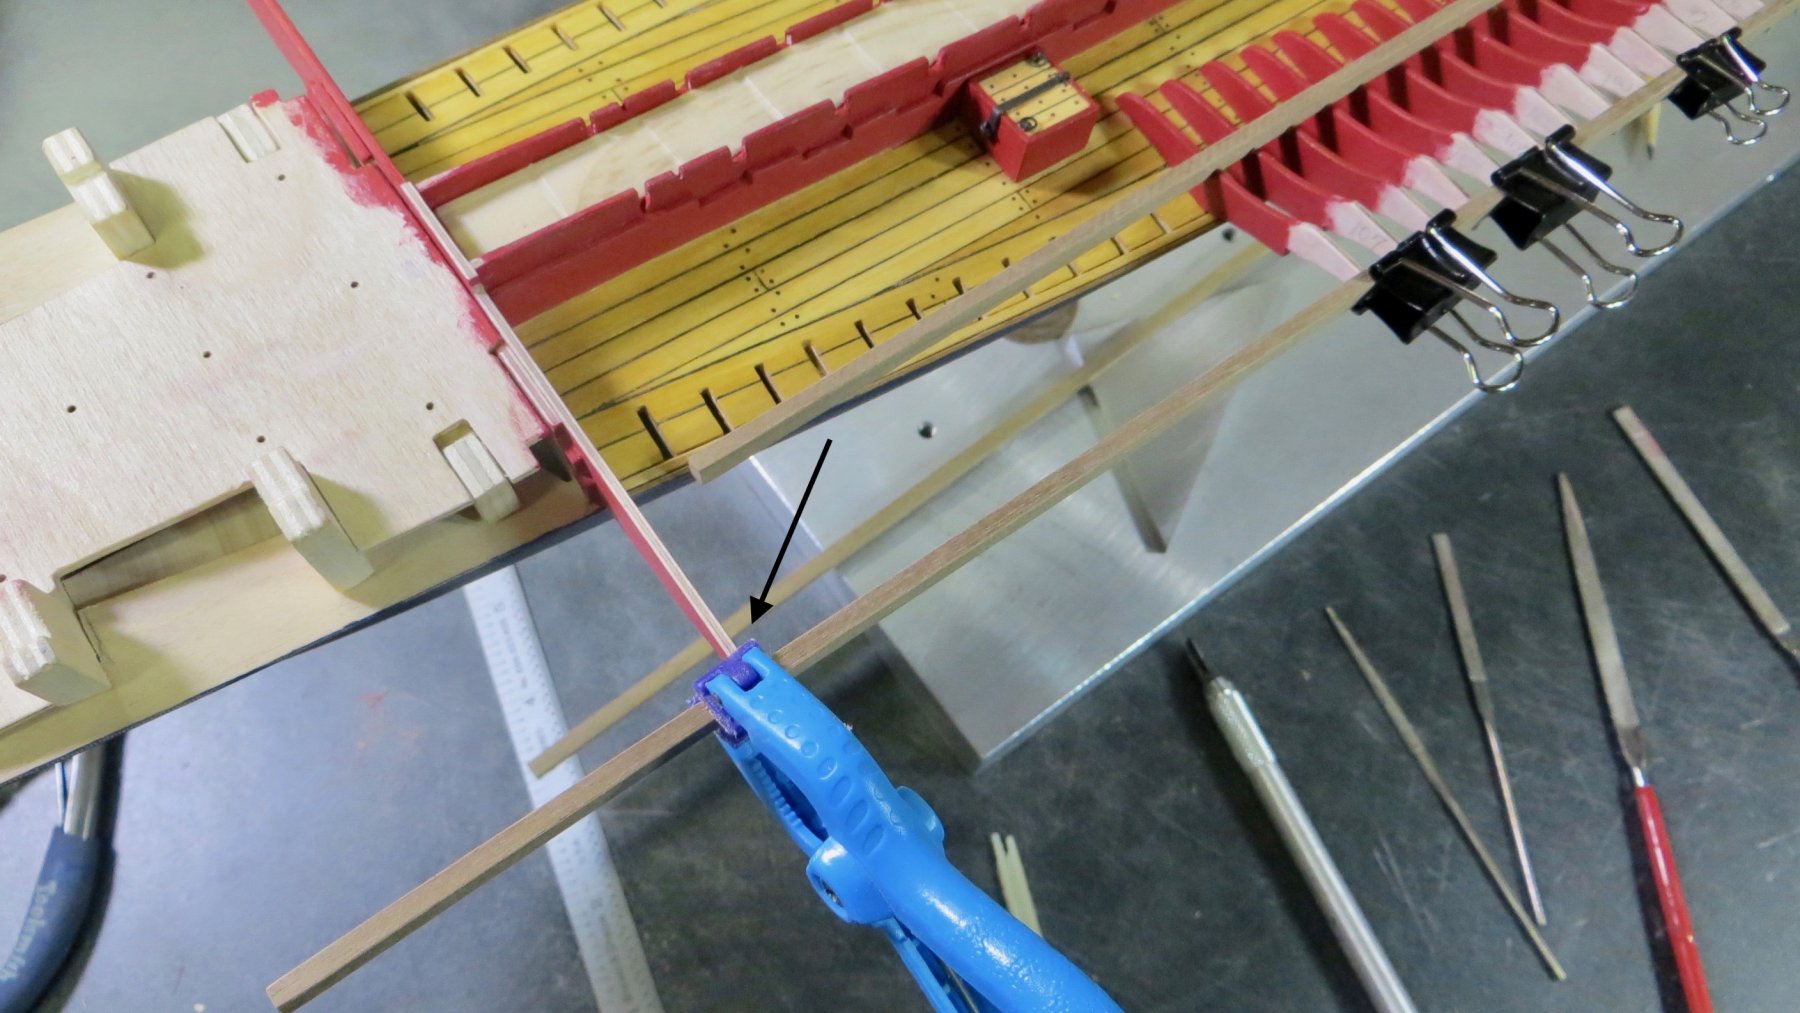
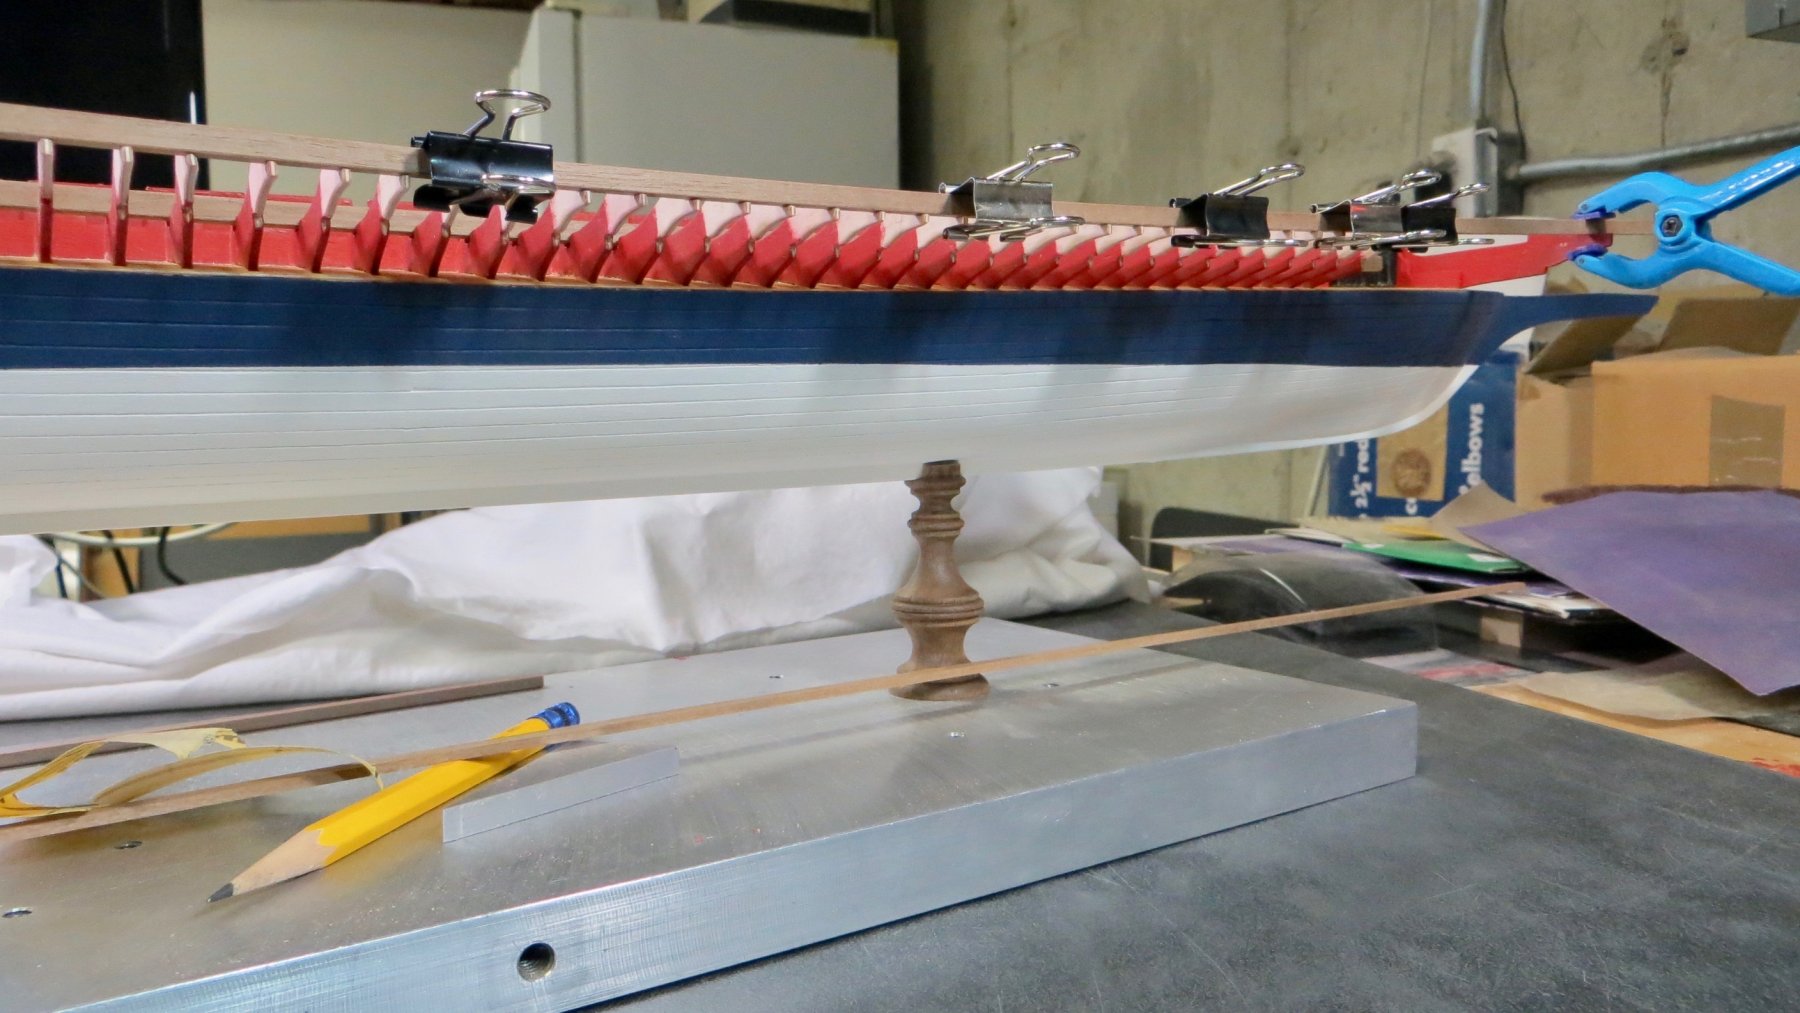
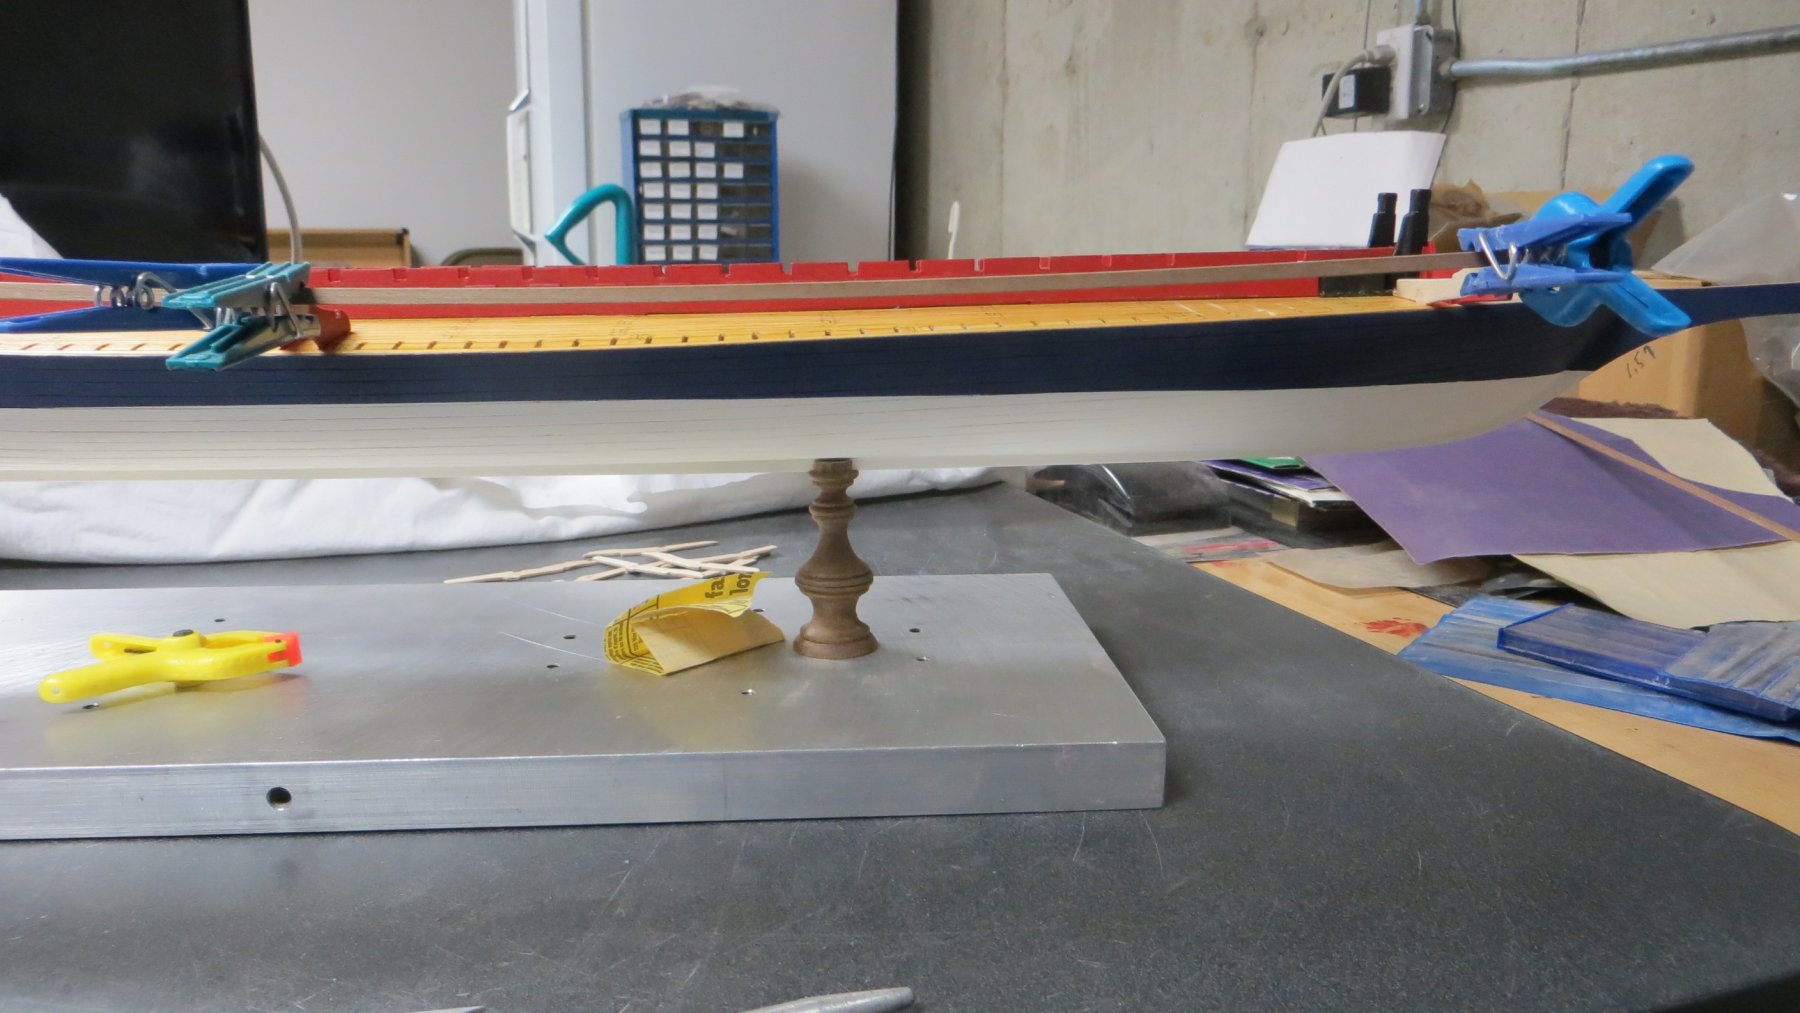
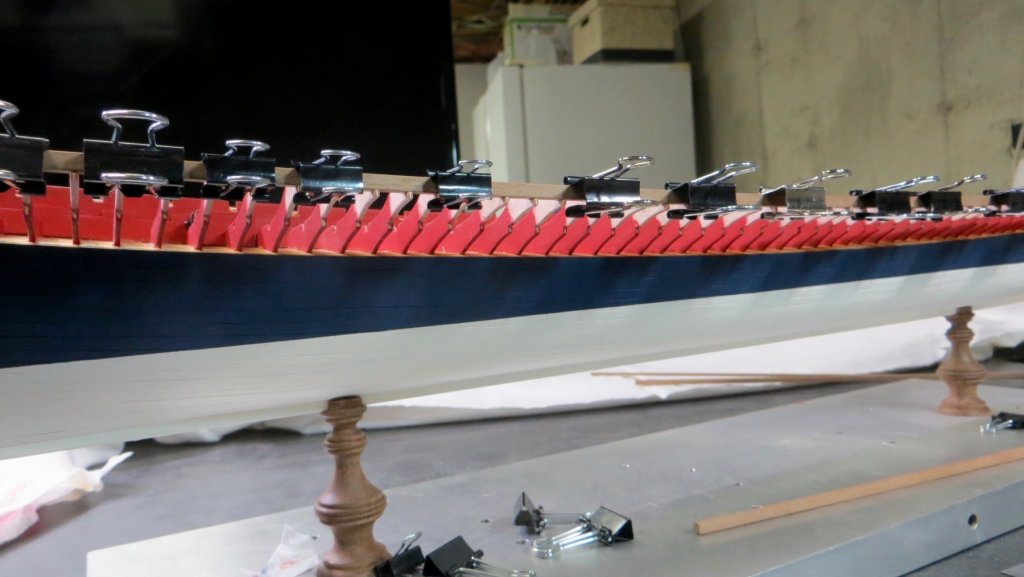
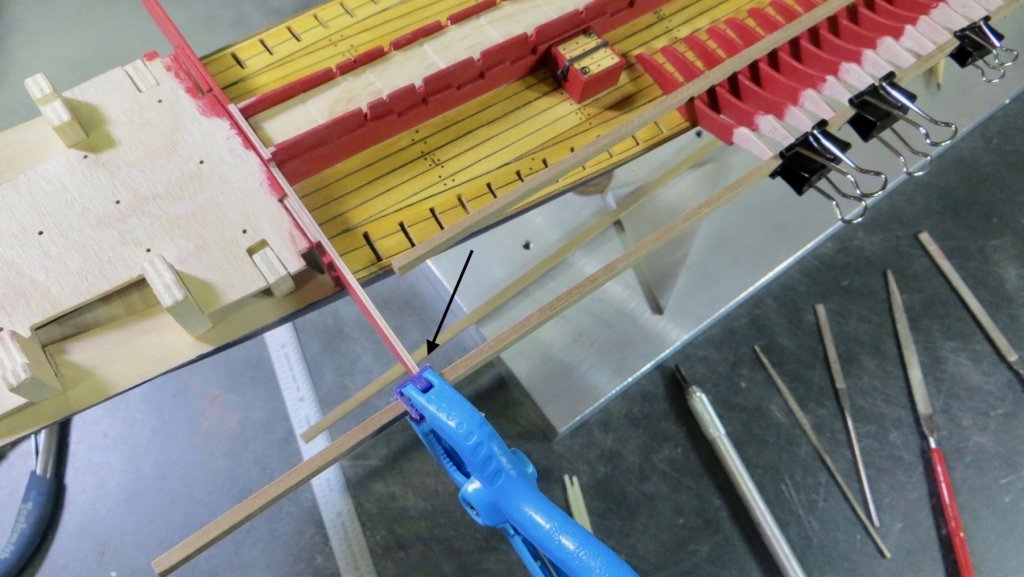
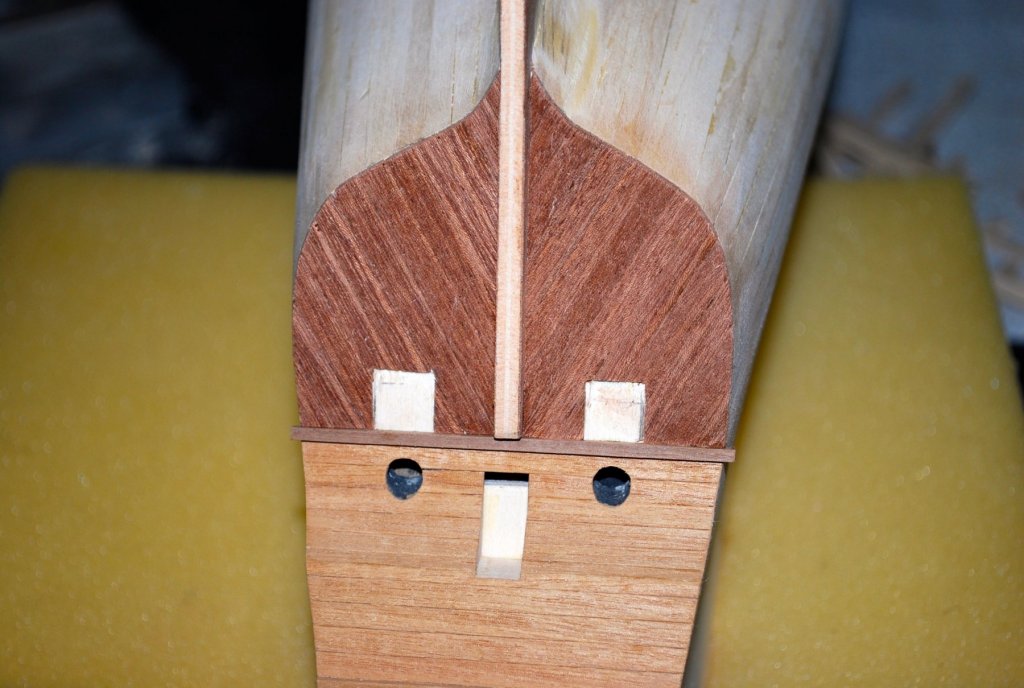
Hello, After taking a couple of weeks off for other matters, I was finally able to get back to the model and finish the right (starboard) side of the supports. In previous posts I mentioned that I had to lower the height of the stern yoke. Well, I lowered it too far! I had to put a temporary shim of about 1MM under the beam in order to properly finish installing the supports and have the correct curve of the beam. See this photo with the arrow on the stern yoke all the supports are installed Now I finished cleaning up and painted the ends of the supports and did some touch up. On this photo below, I show the green arrow pointing to the stern yoke. I added filler wood and raised up the height of the slot (made the depth of the slot smaller) and then sanded and repainted So now I will start repeating the whole process of making the supports and installing them on the left (port) side. Hopefully, I learned a few things and I will have less issues. Thanks for visiting and for the likes!! Frank


- 510 replies
-
- 5
-
-
- reale de france
- corel
- (and 1 more)
-
Hi Michael, Very nice job on your Heller kit! What is the scale you are working with? Thanks for sharing your photos! I look forward to following your progress. Thanks, Frank
-
Michael, Your cross section model is really looking nice! I like your idea of having the case mounted on the wall. Very interesting! I look forward to seeing the mast and rigging on this beautiful build. Frank
-
Thank you for your comments and for checking out this log. I agree that it must have been a beautiful galley. Hopefully I can do it justice! Do you have a log or photos of your Heller build? Thanks, Frank
-
Jonathan, Likewise, thanks for your kind words and for checking in! Frank
- 510 replies
-
- 1
-
-
- reale de france
- corel
- (and 1 more)
-
Thank you for your comments and thanks for visiting the log!! Frank
- 510 replies
-
- 1
-
-
- reale de france
- corel
- (and 1 more)
-
Hi Mark, Yes it is!! I'd be pulling my hair out if I had any Thanks for stopping by
- 510 replies
-
- 2
-
-
- reale de france
- corel
- (and 1 more)
-
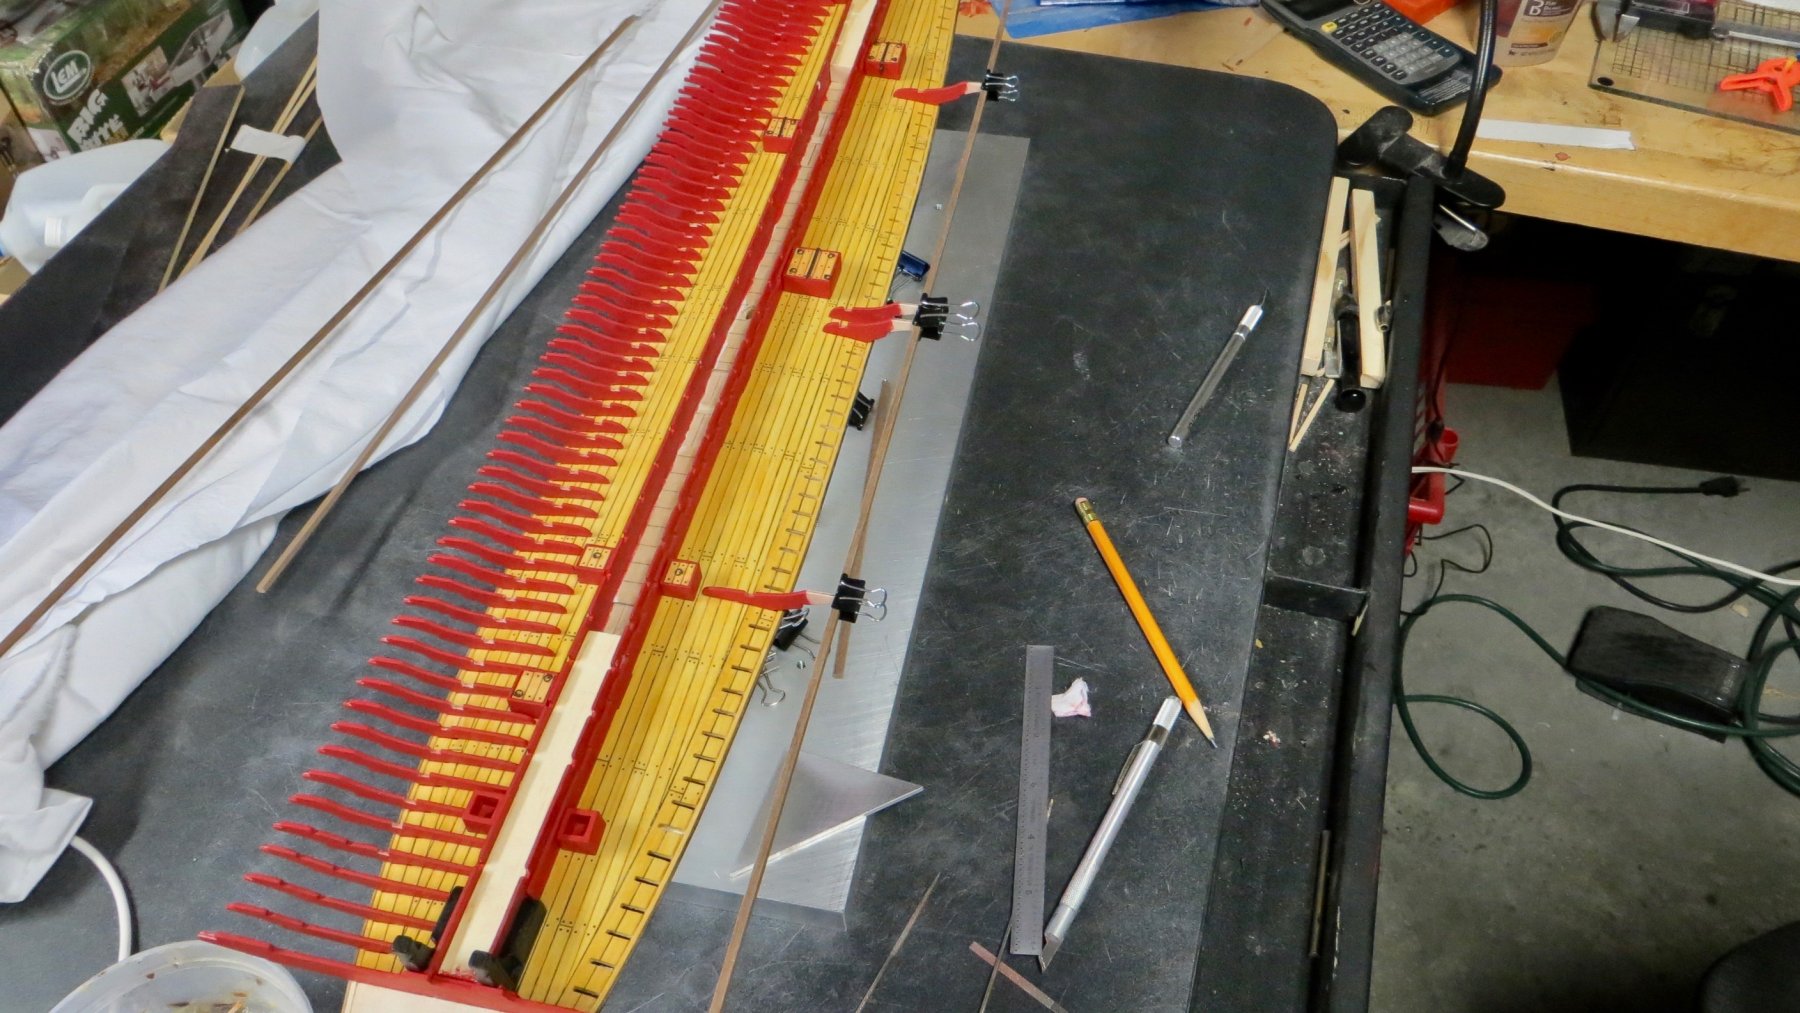
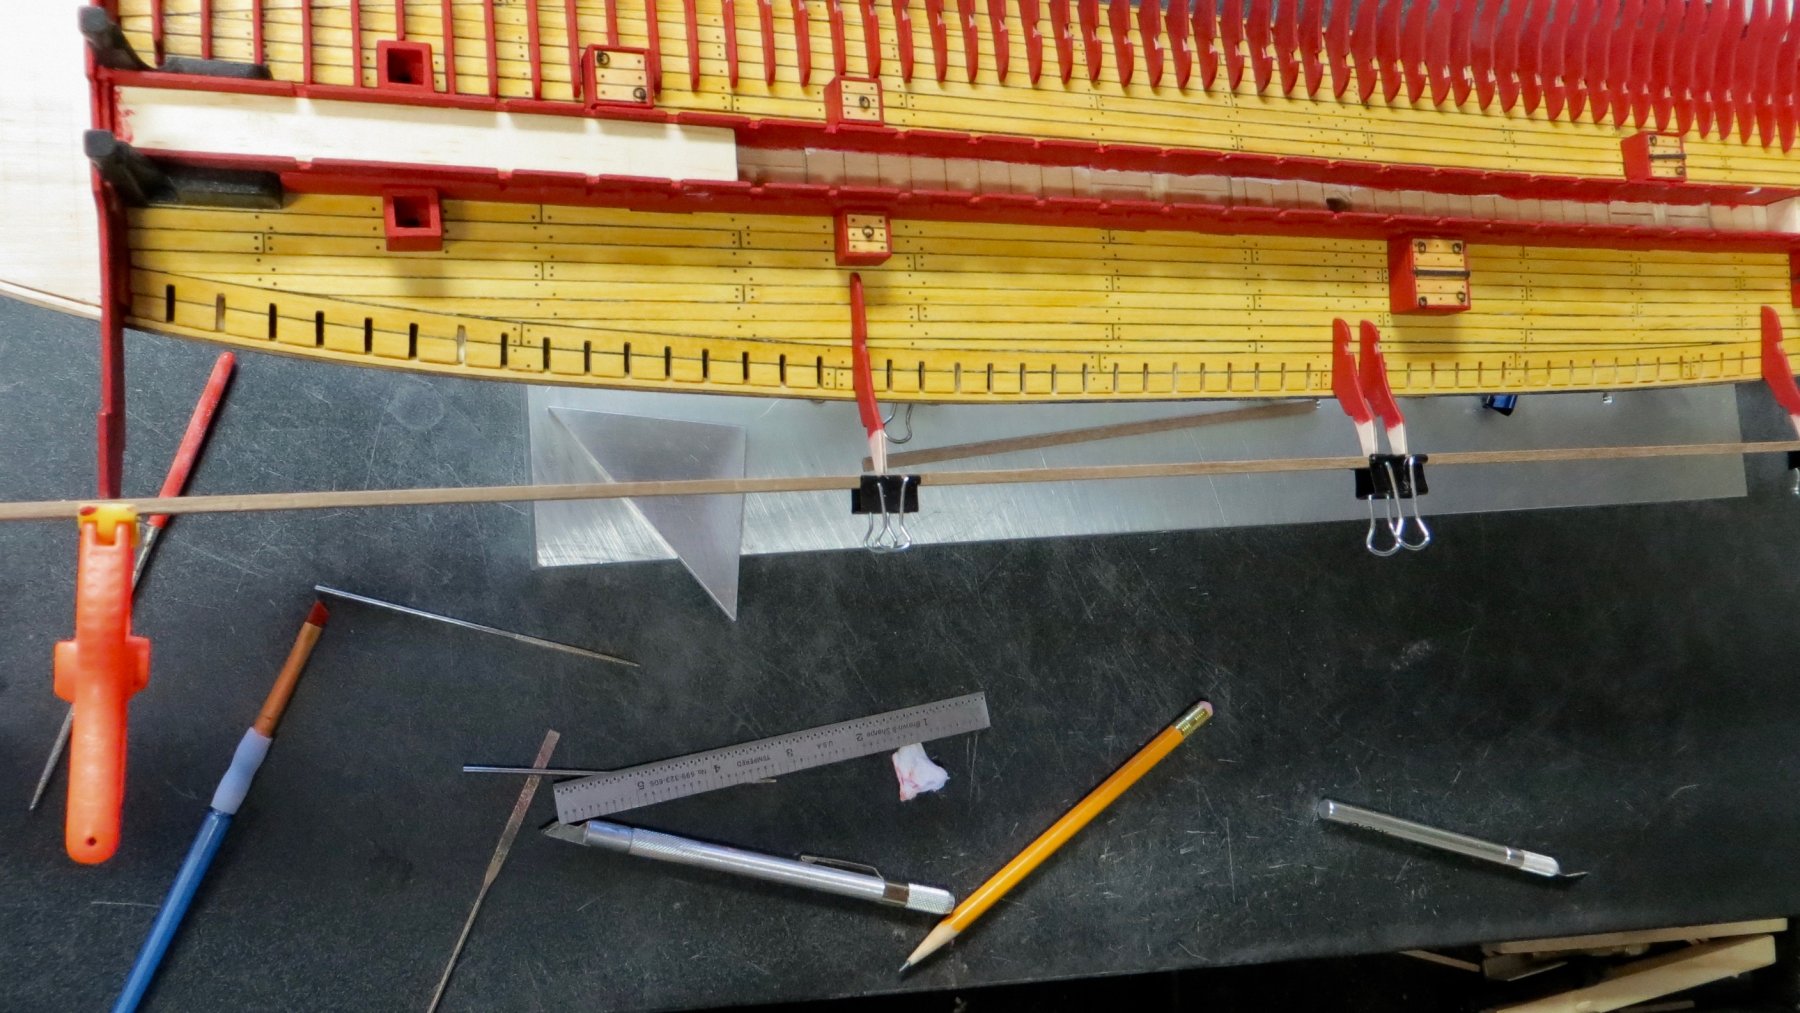
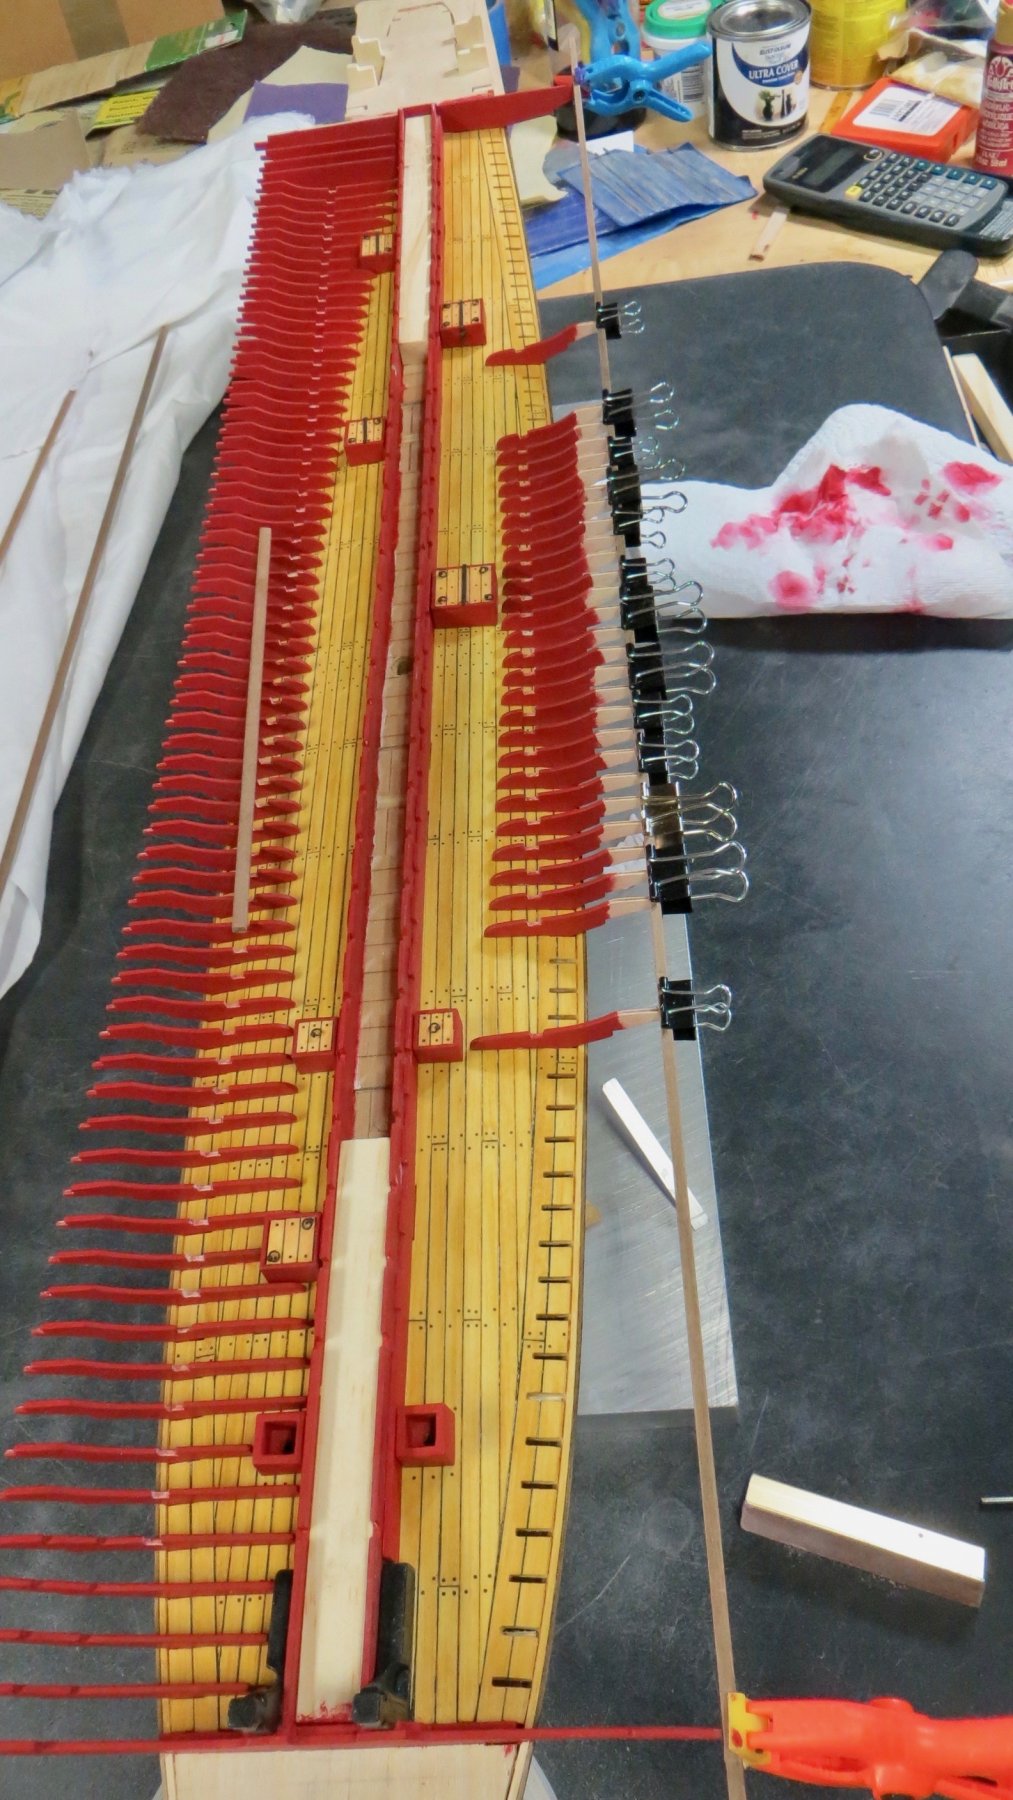
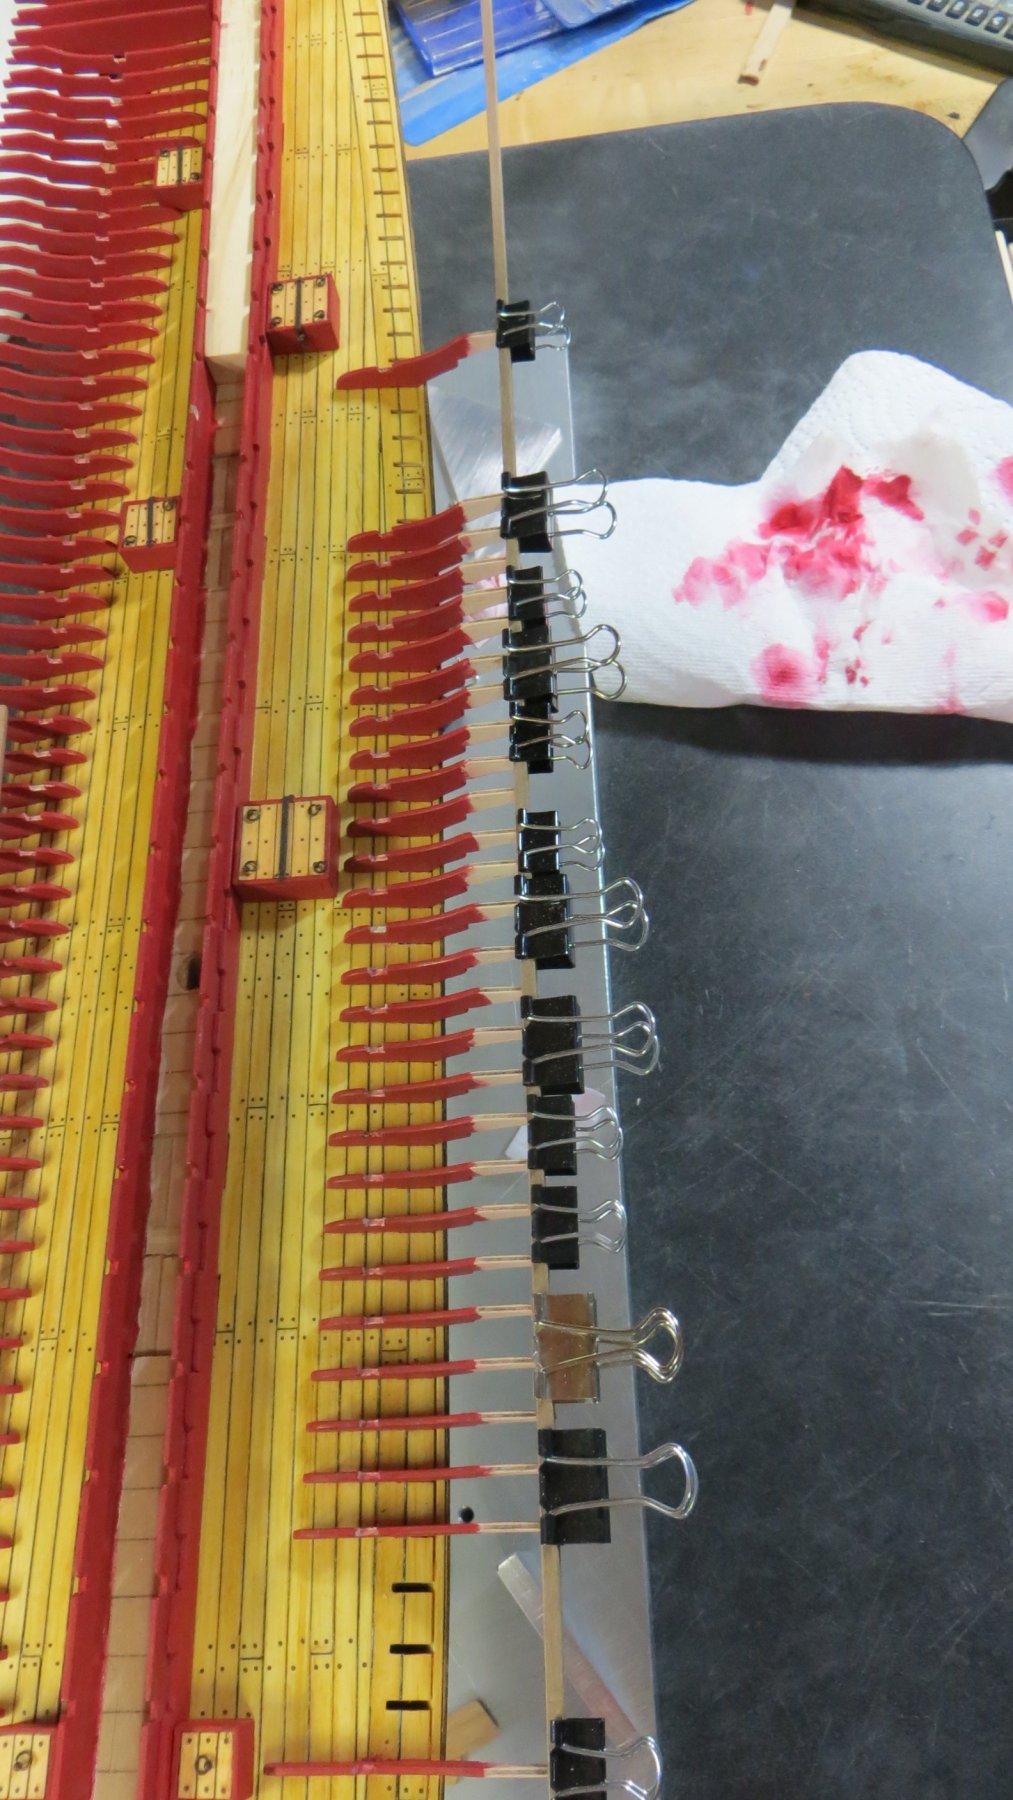
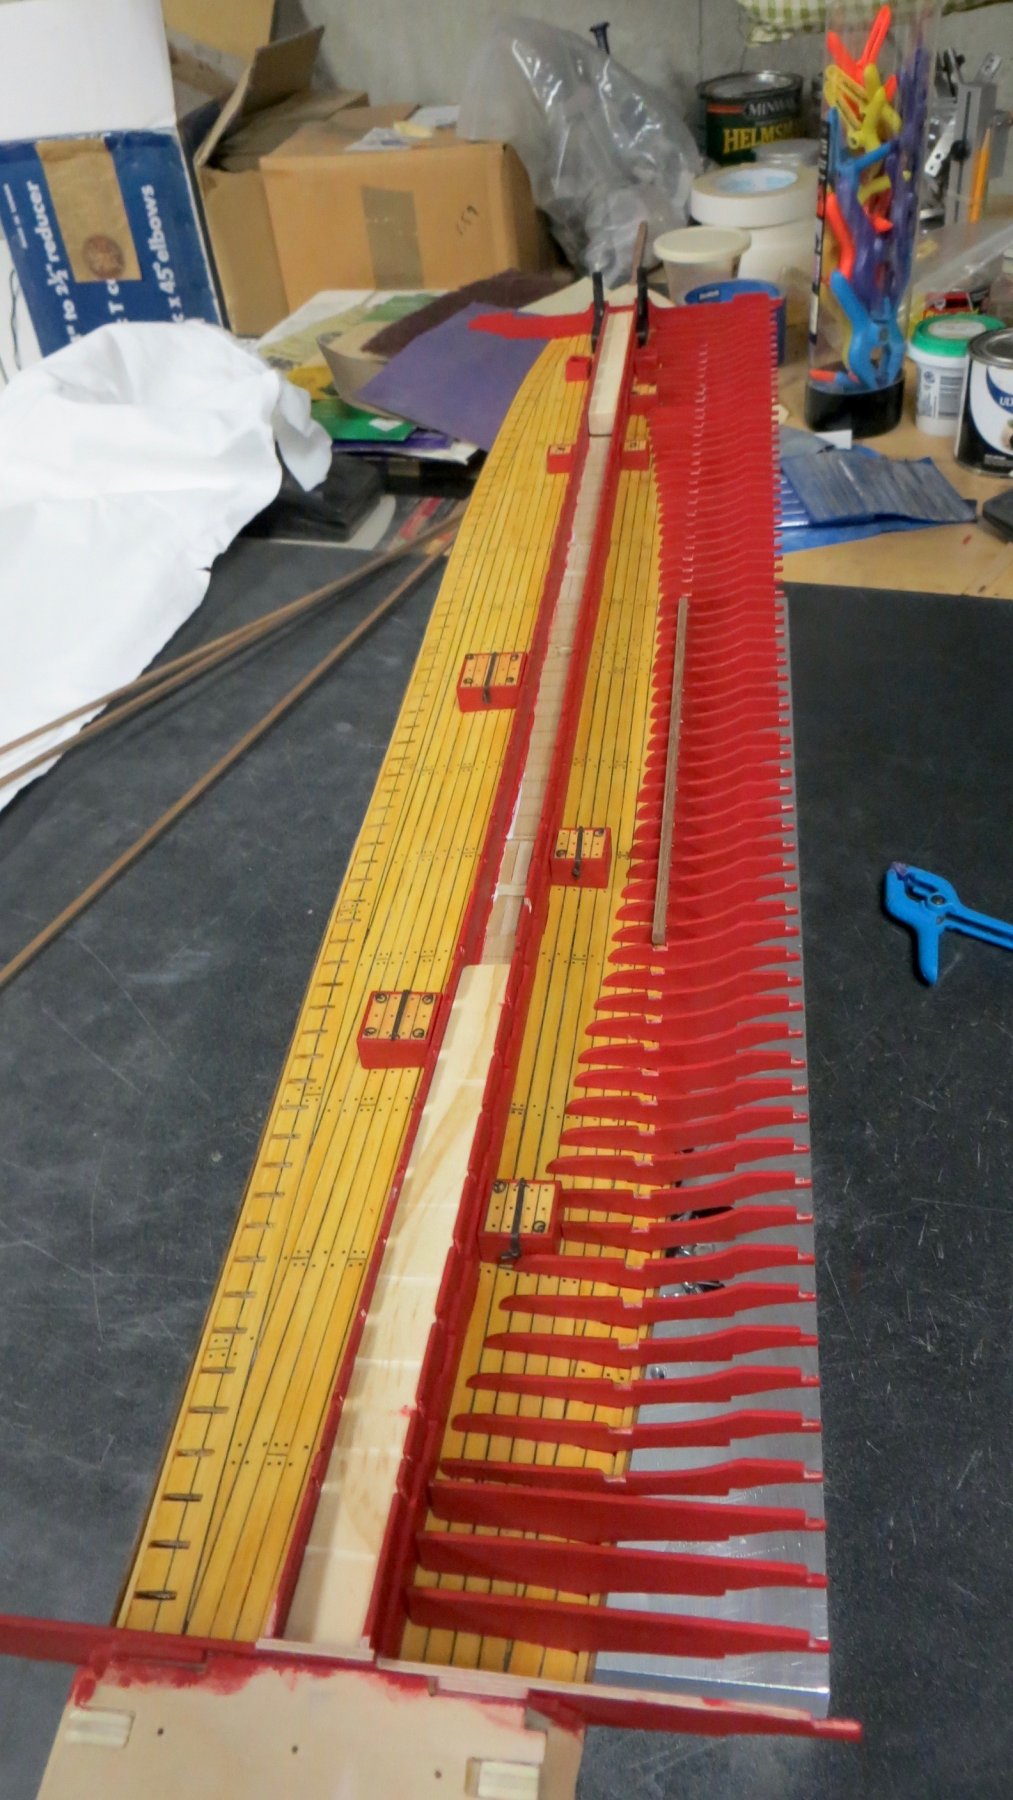
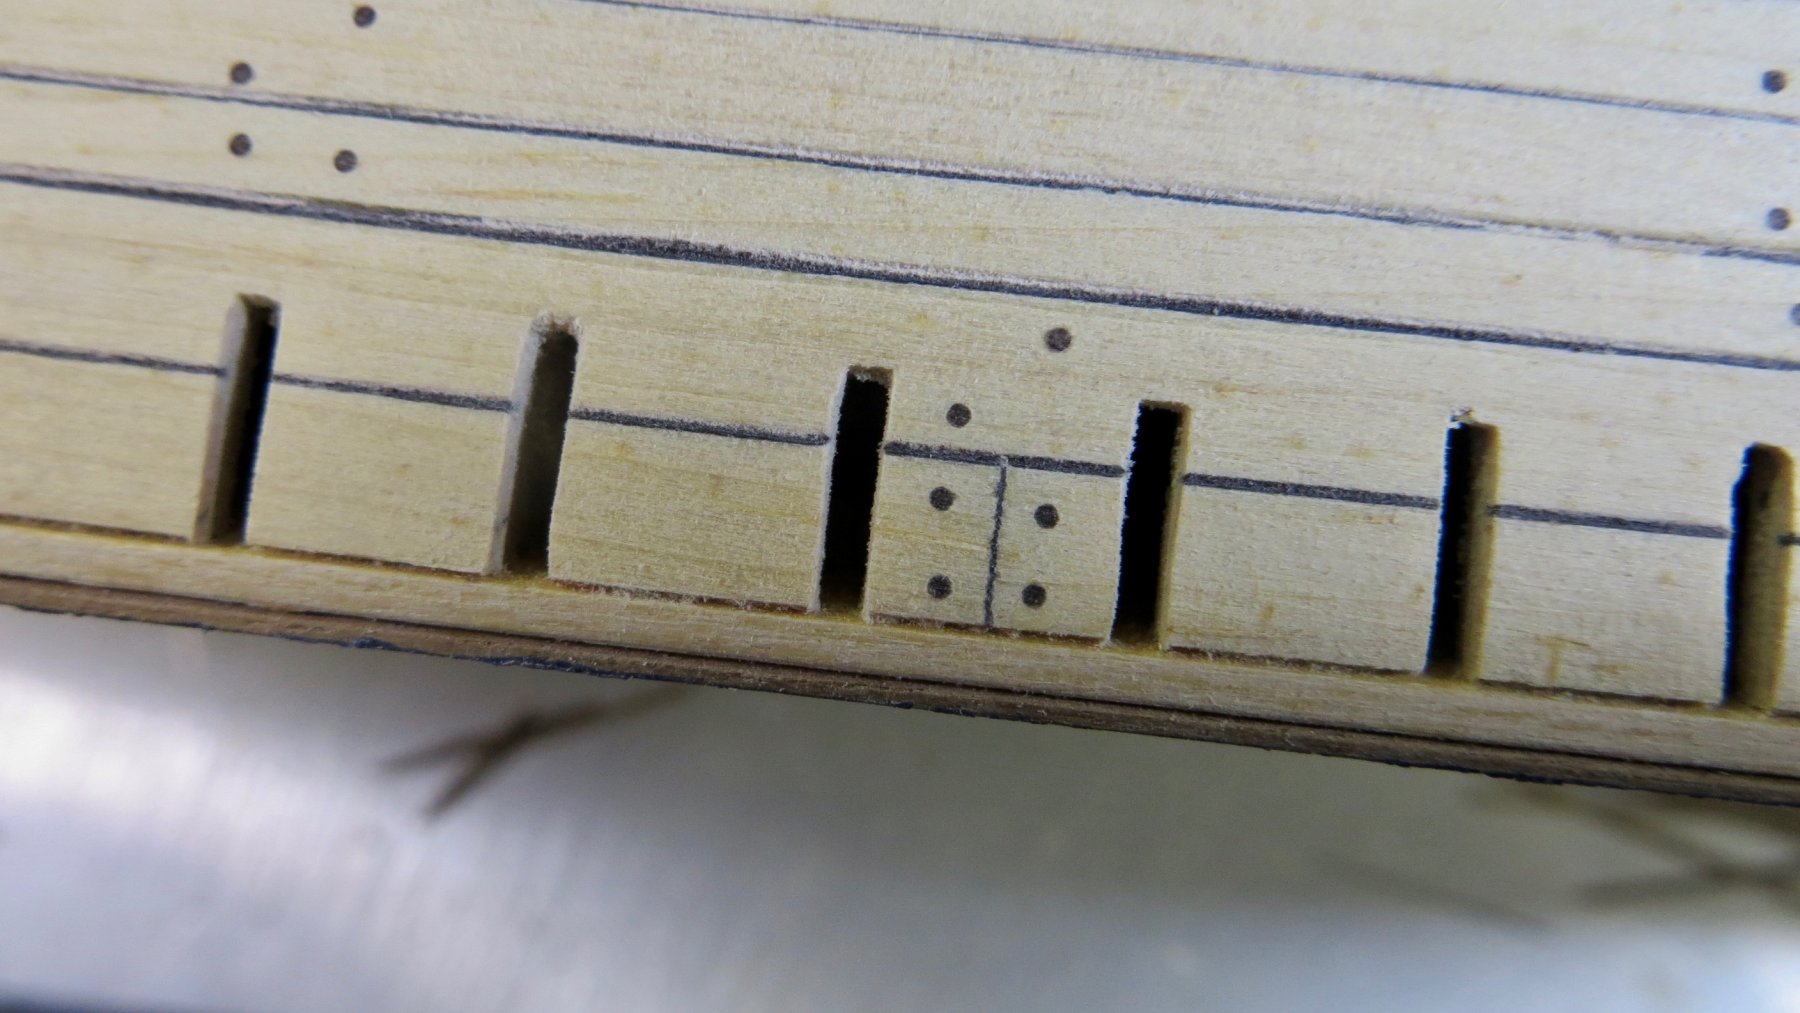
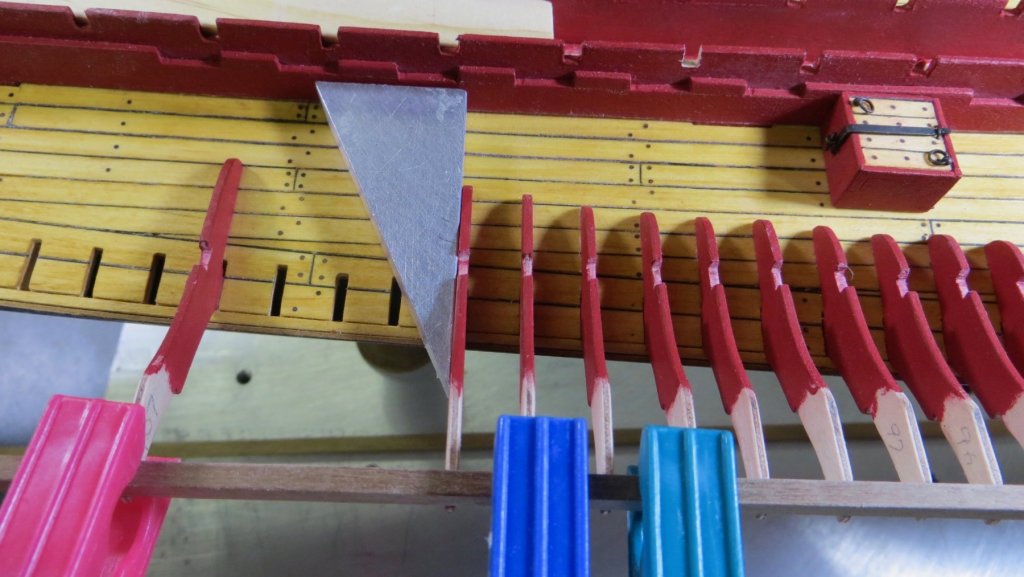
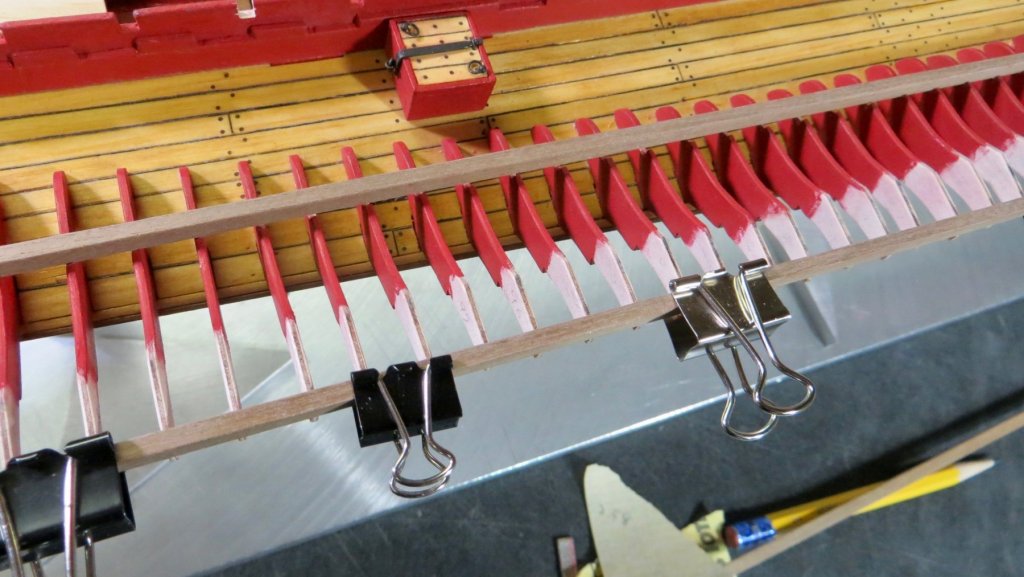
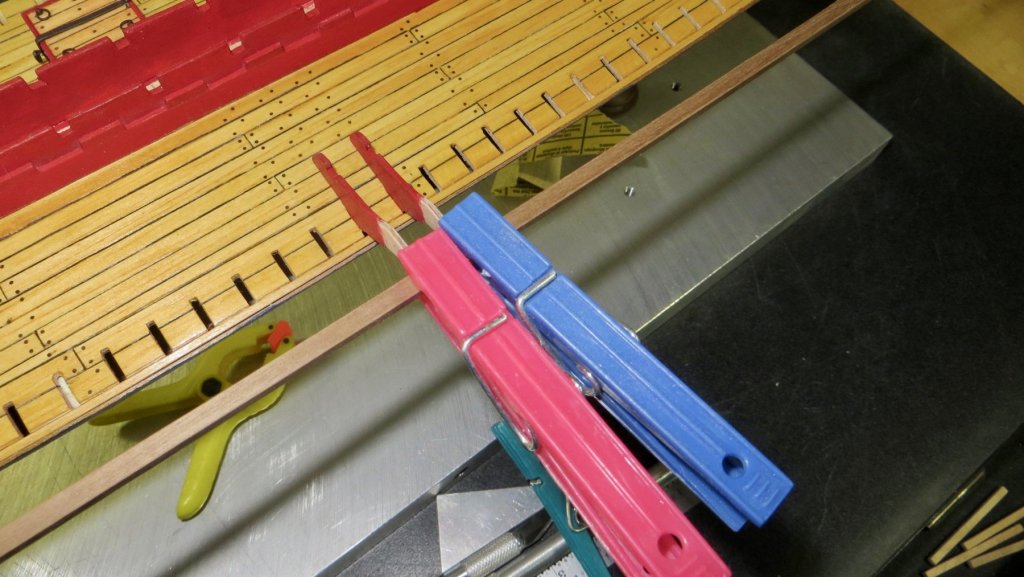
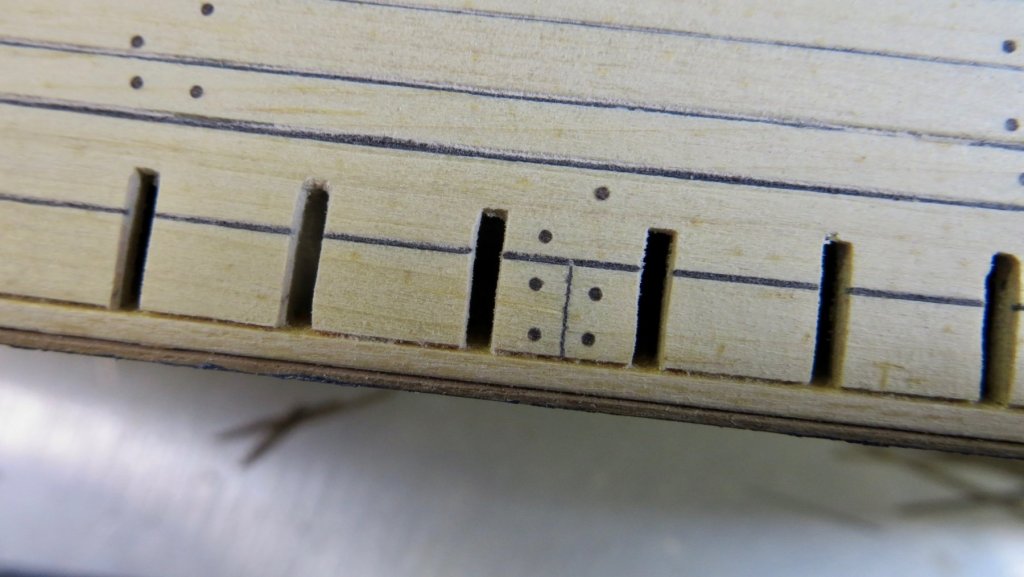
Thank you all for the "likes" and for checking in!! I've been slowly working thru installing the upper deck supports, or as Fabio calls them "baccalari". This section of the built has been going very slowly and has been harder than I thought it would be. I have to make sure the supports are perpendicular to the center line of the model. At the same time I have to adjust each support to fit the camber of the deck, bow to stern, and also middle to outside edge. Lastly I also have to make sure the slots for the middle beam in the photo below are in line. After I trial fit for all of the above, I then paint a couple of coats of the red on the parts of the support near the deck (so I won't have to mask off the deck), wait until it dries and then glue in place. I'm lucky to do 4 supports in an evening of work. Making sure the supports are square (perpendicular) to the center line Making sure the beam in the middle of the supports fit into the slots and also up against the end beam. One of the problems I'm working thru is it seems that the stern Yoke (see arrow) slot for the end beam is about 2mm (.080) too high. I don't understand why, so for now, I lowered the slot and as I work towards the stern with the supports, I can always add a thin piece of wood if I went too low. Photos of supports I've finish so far. When I'm done, I will finish painting them and clean everything up A close-up view of the middle beam and end beam I'm trying to keep in line That's where I am at for now! I will be taking a week or so off from the build, in order to help my wife with some spring projects and to give myself a little break from these supports. (When I'm done with the right side, I have to go and start all over for the left side!!) Thanks again for visiting, Frank


- 510 replies
-
- 9
-
-
- reale de france
- corel
- (and 1 more)
-
Hello Fabio! Good to hear from you! Thank you for your kind post. Good to know that those supports are called "baccalari" and what their purpose is. Right now I have a few other choice words for these supports, but I better not say them here I am plodding along getting them installed. I will be posting my progress later today. Thanks for visiting!! Frank
-
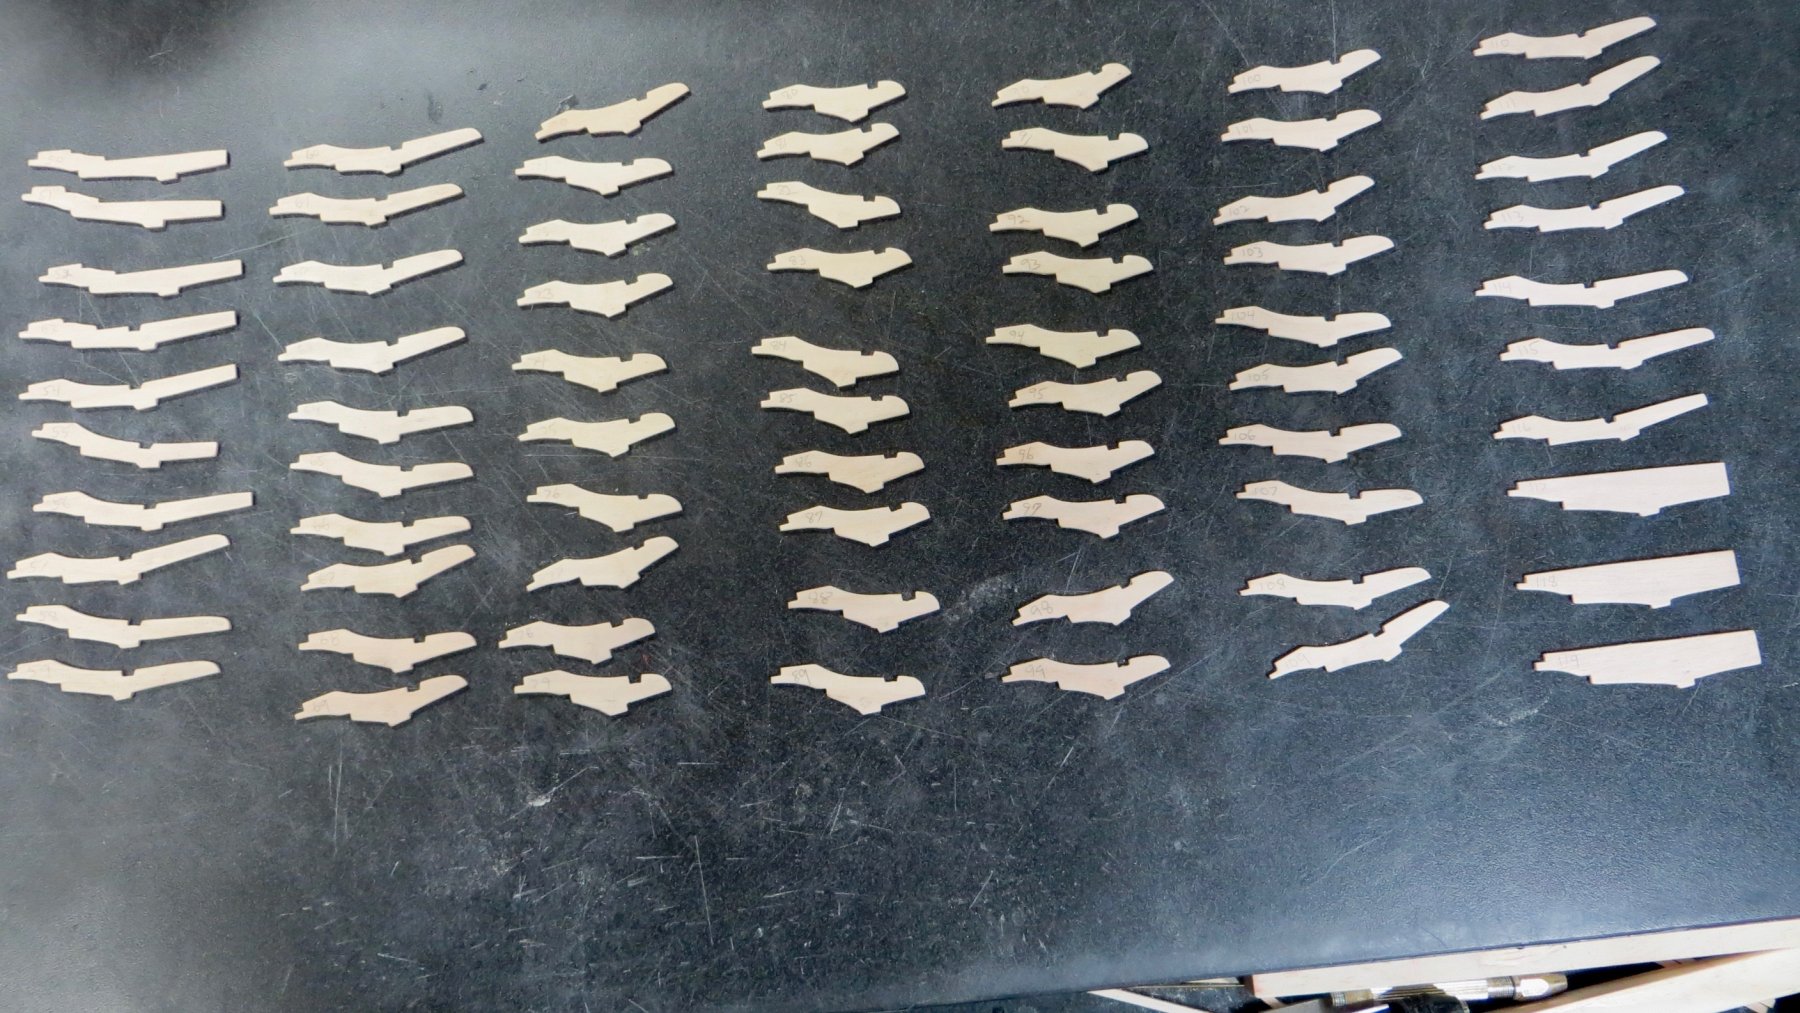
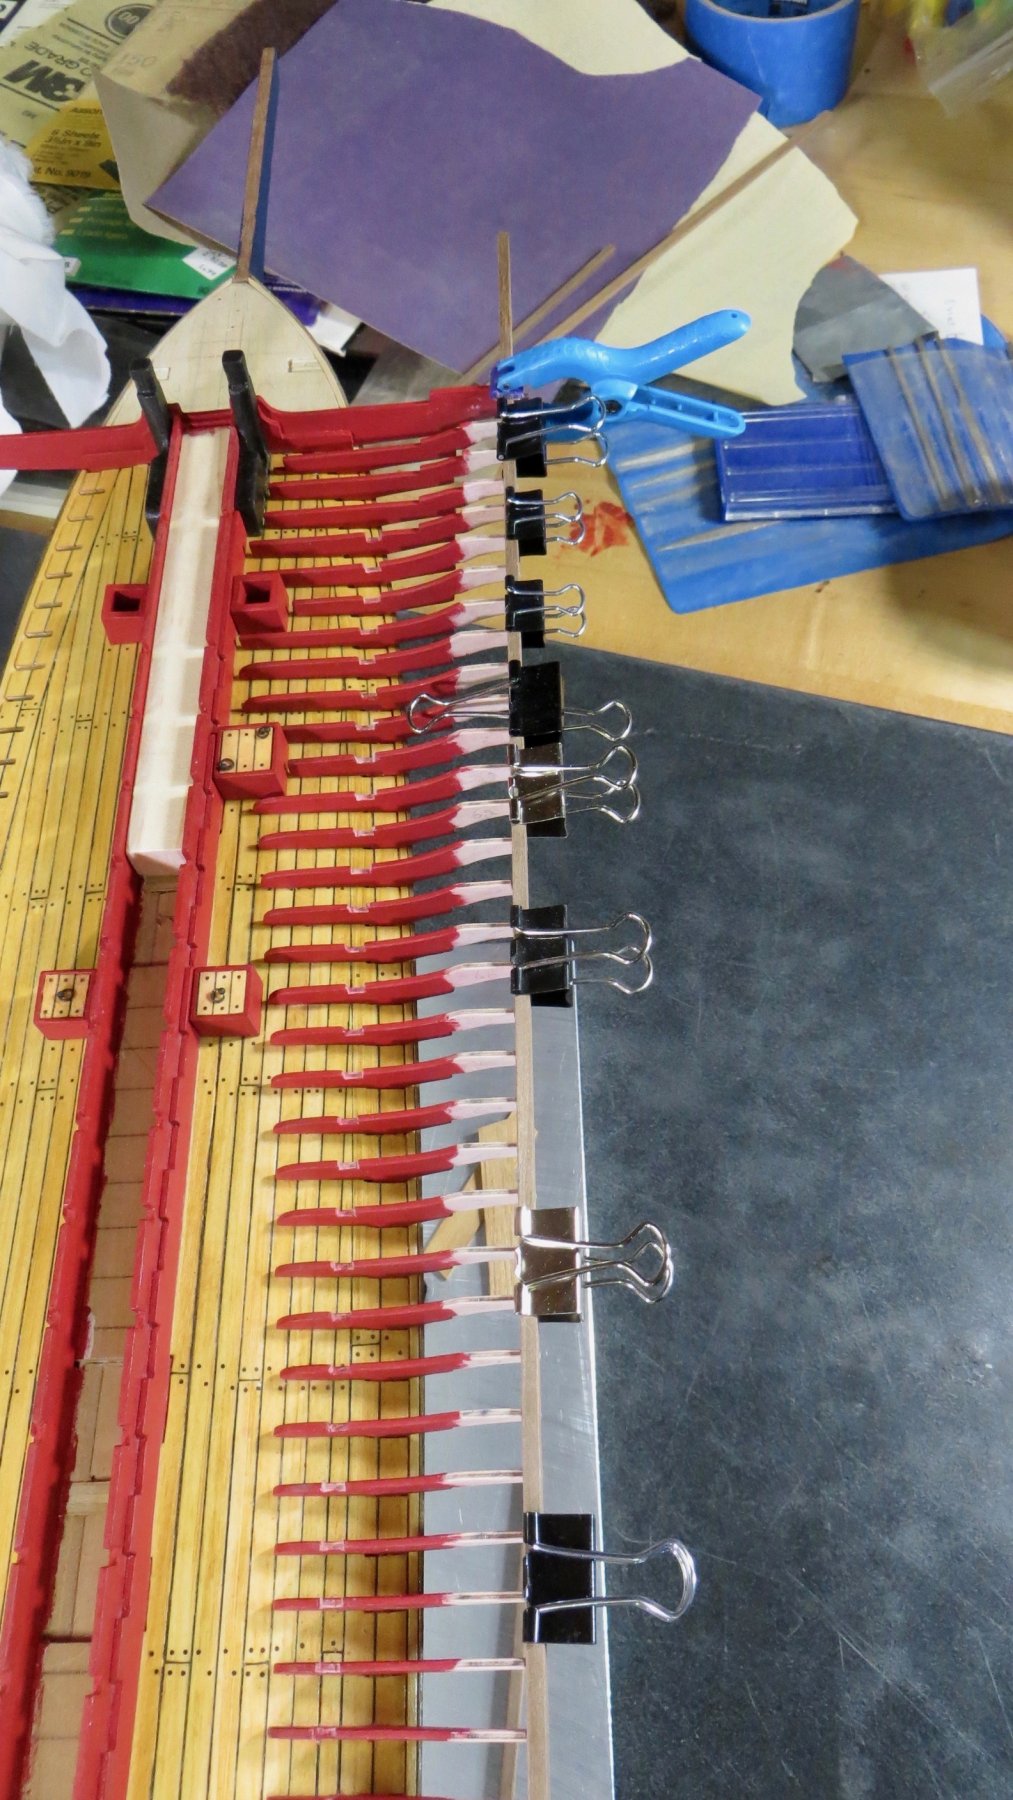
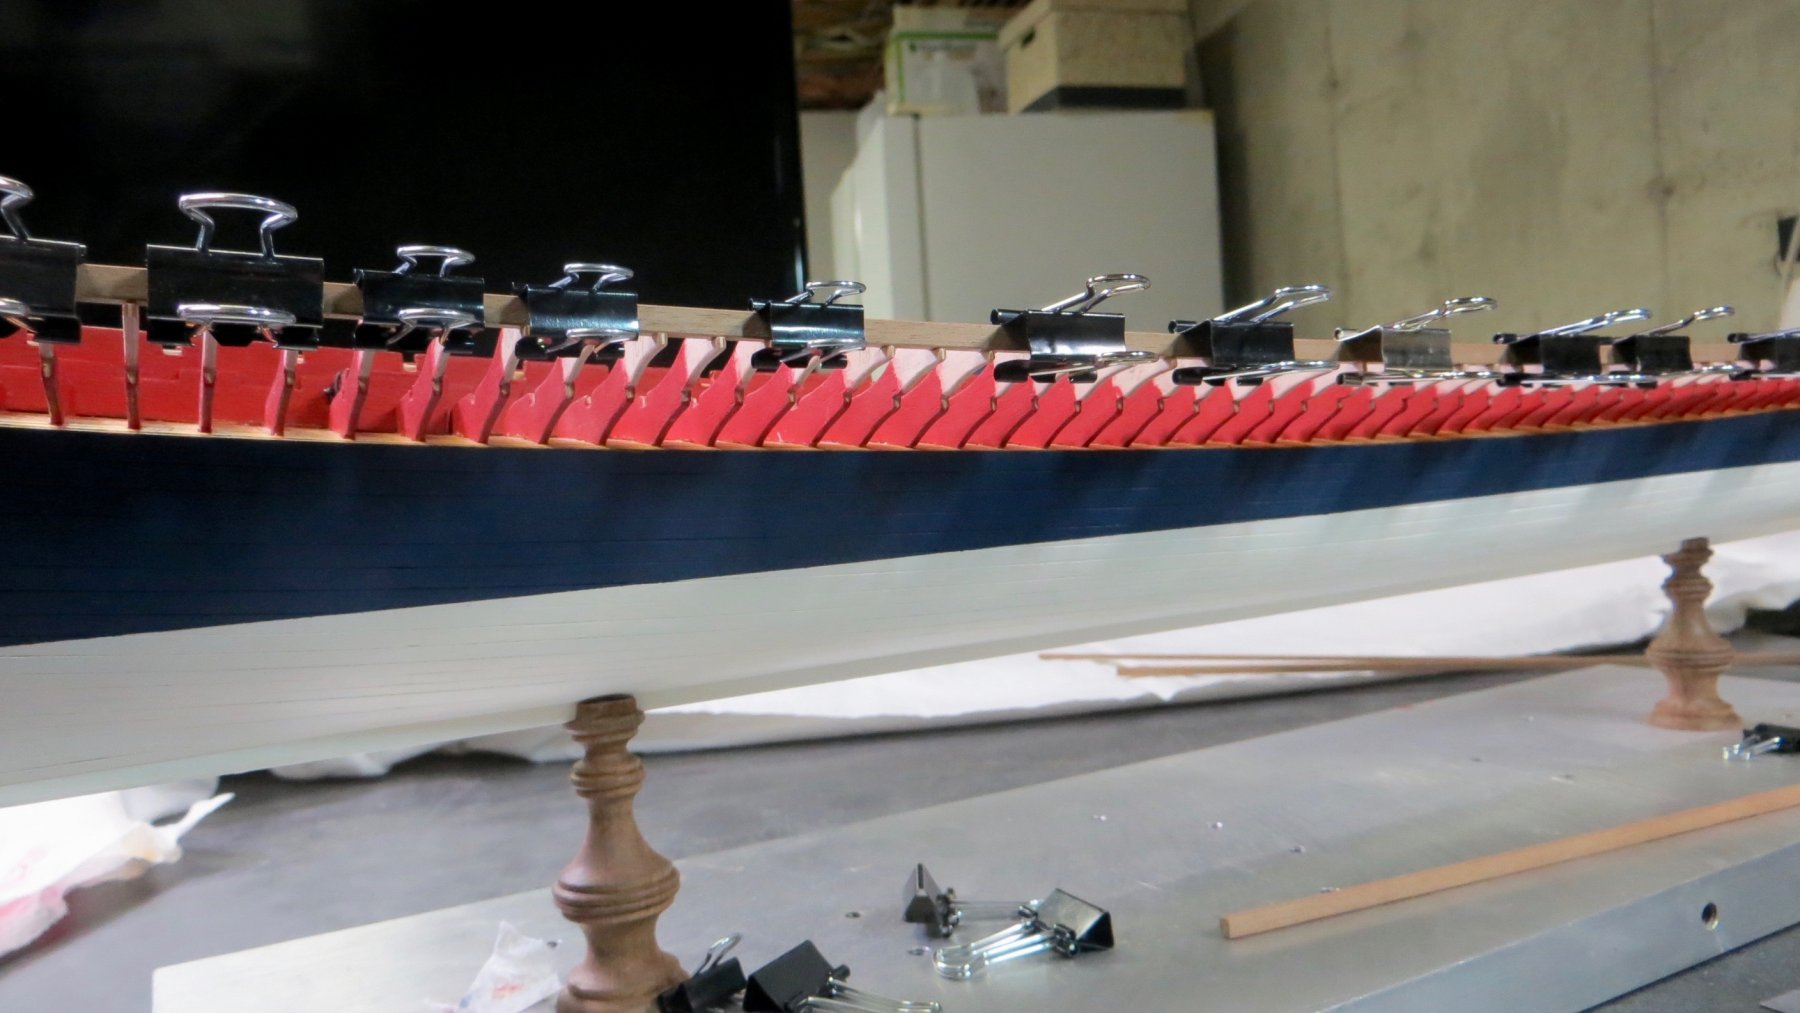
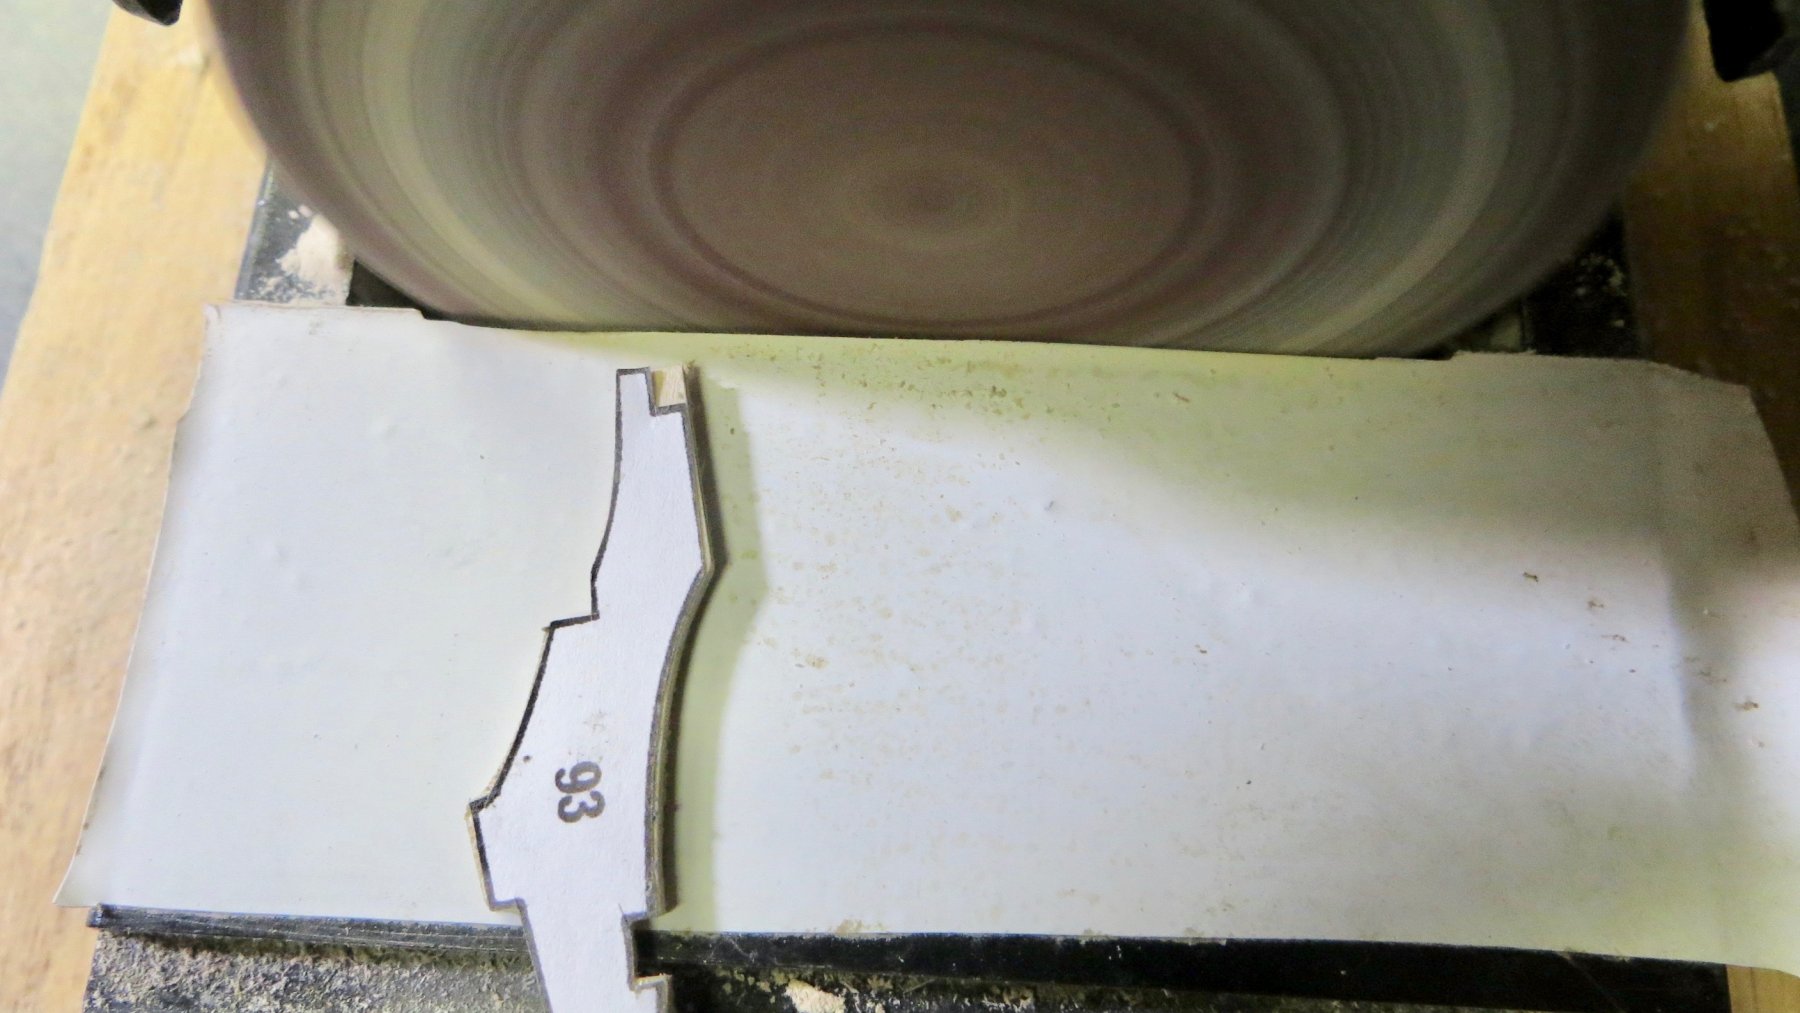
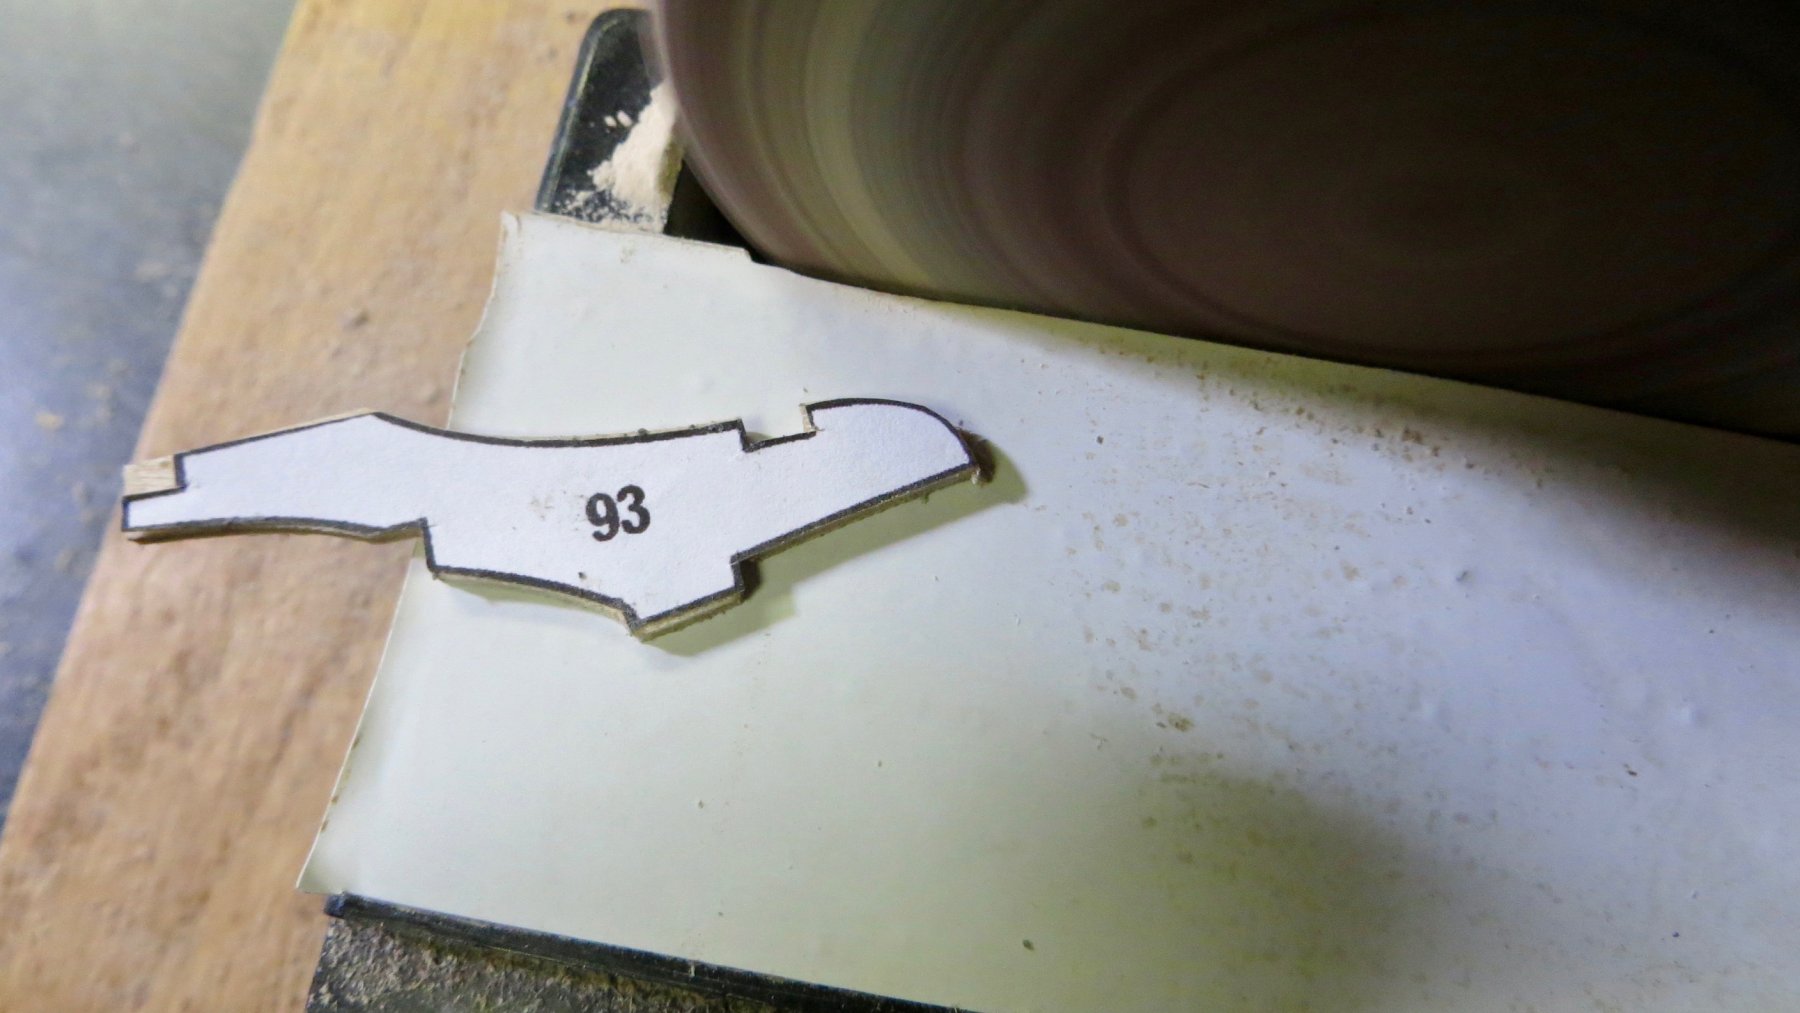
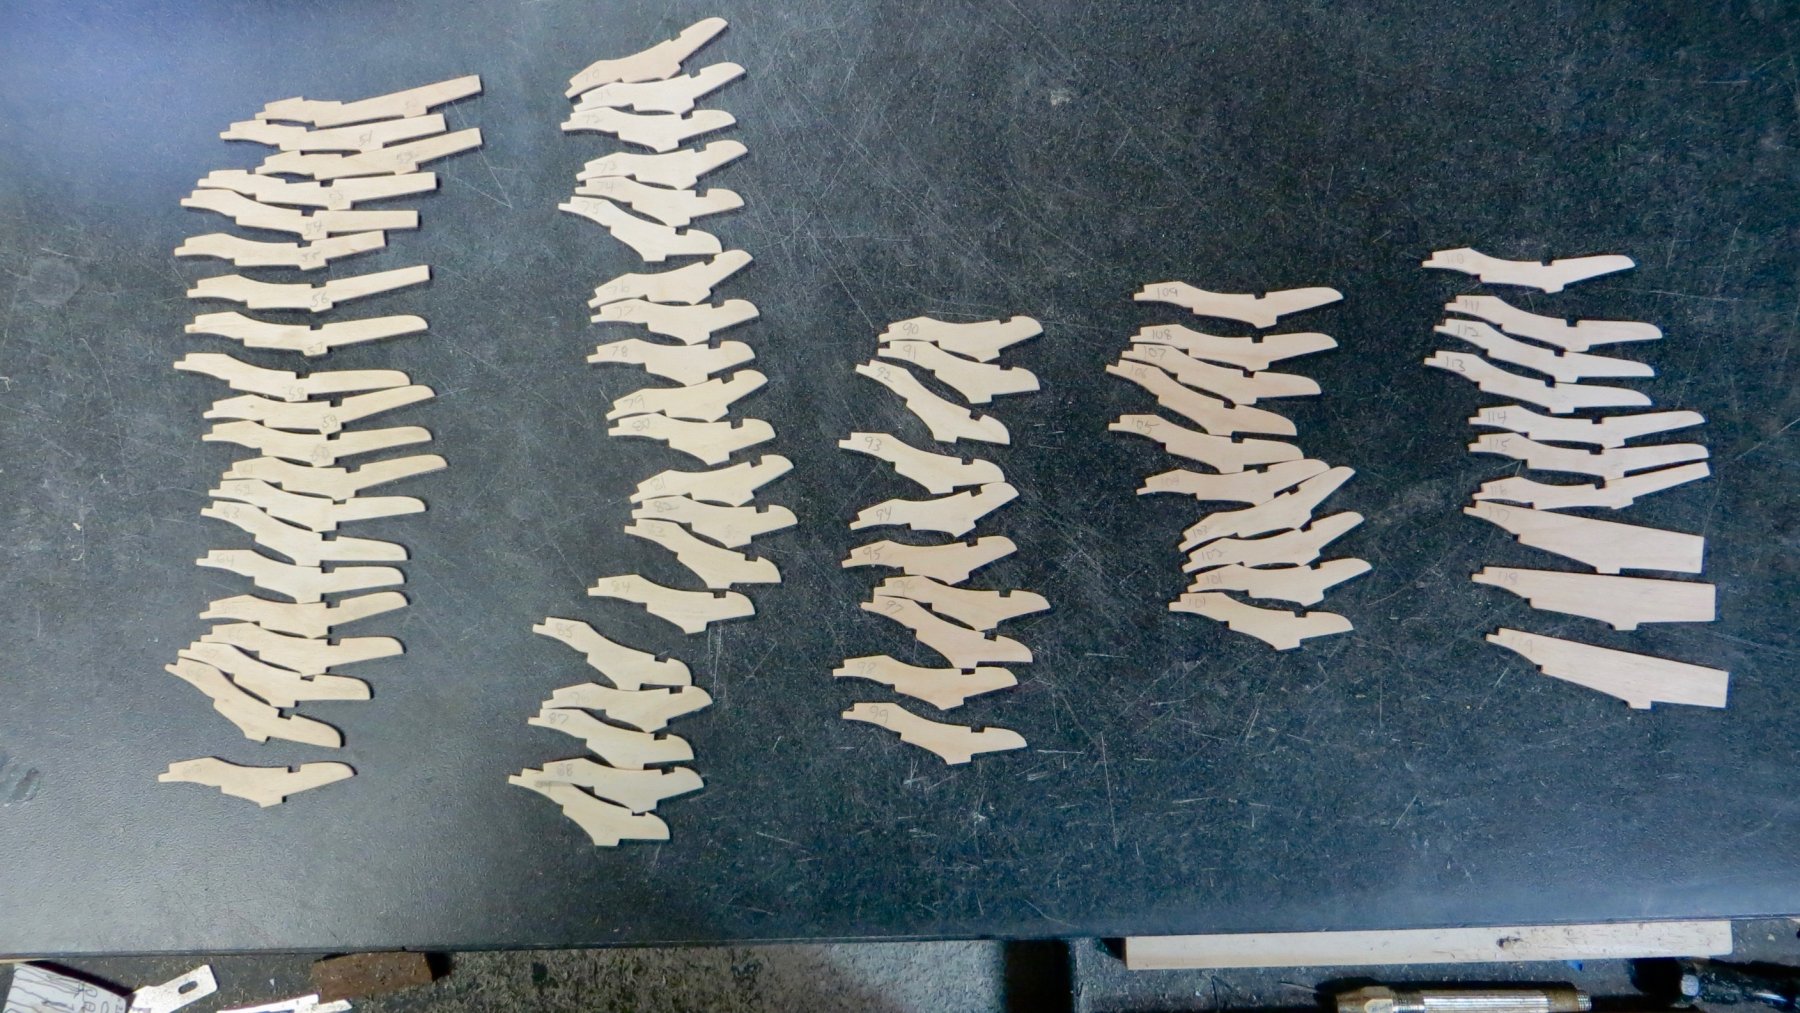
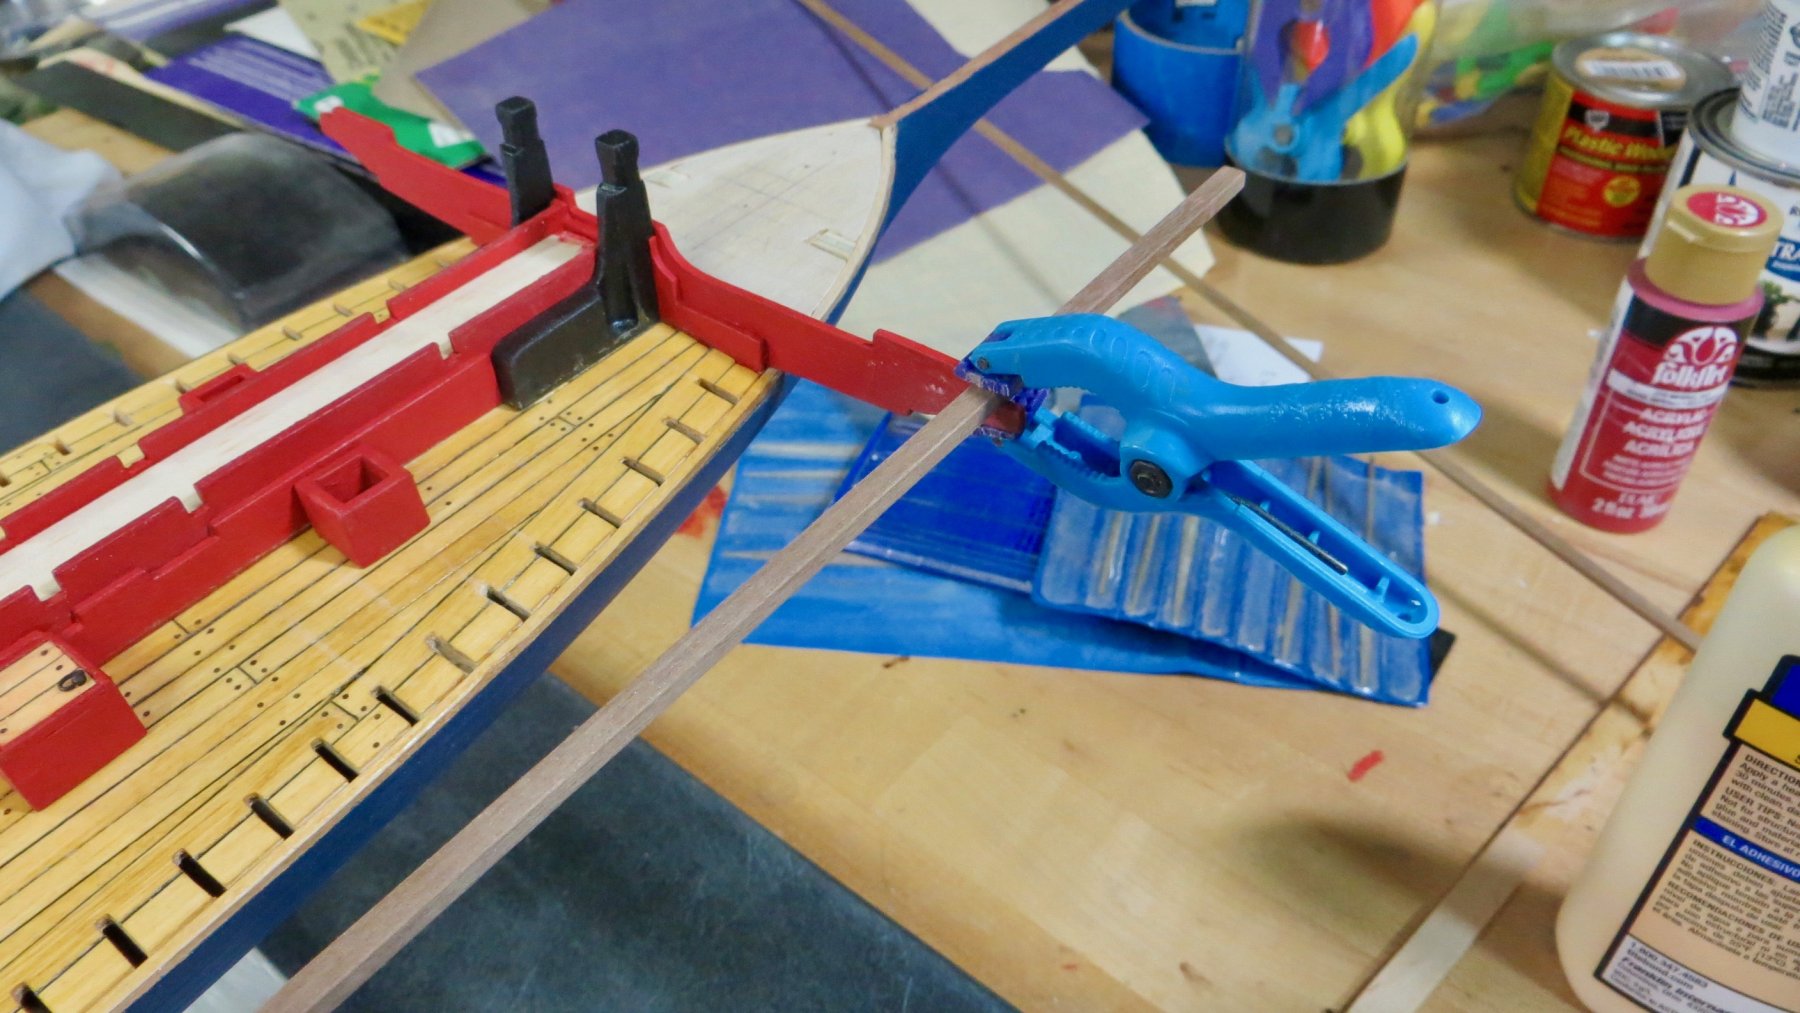
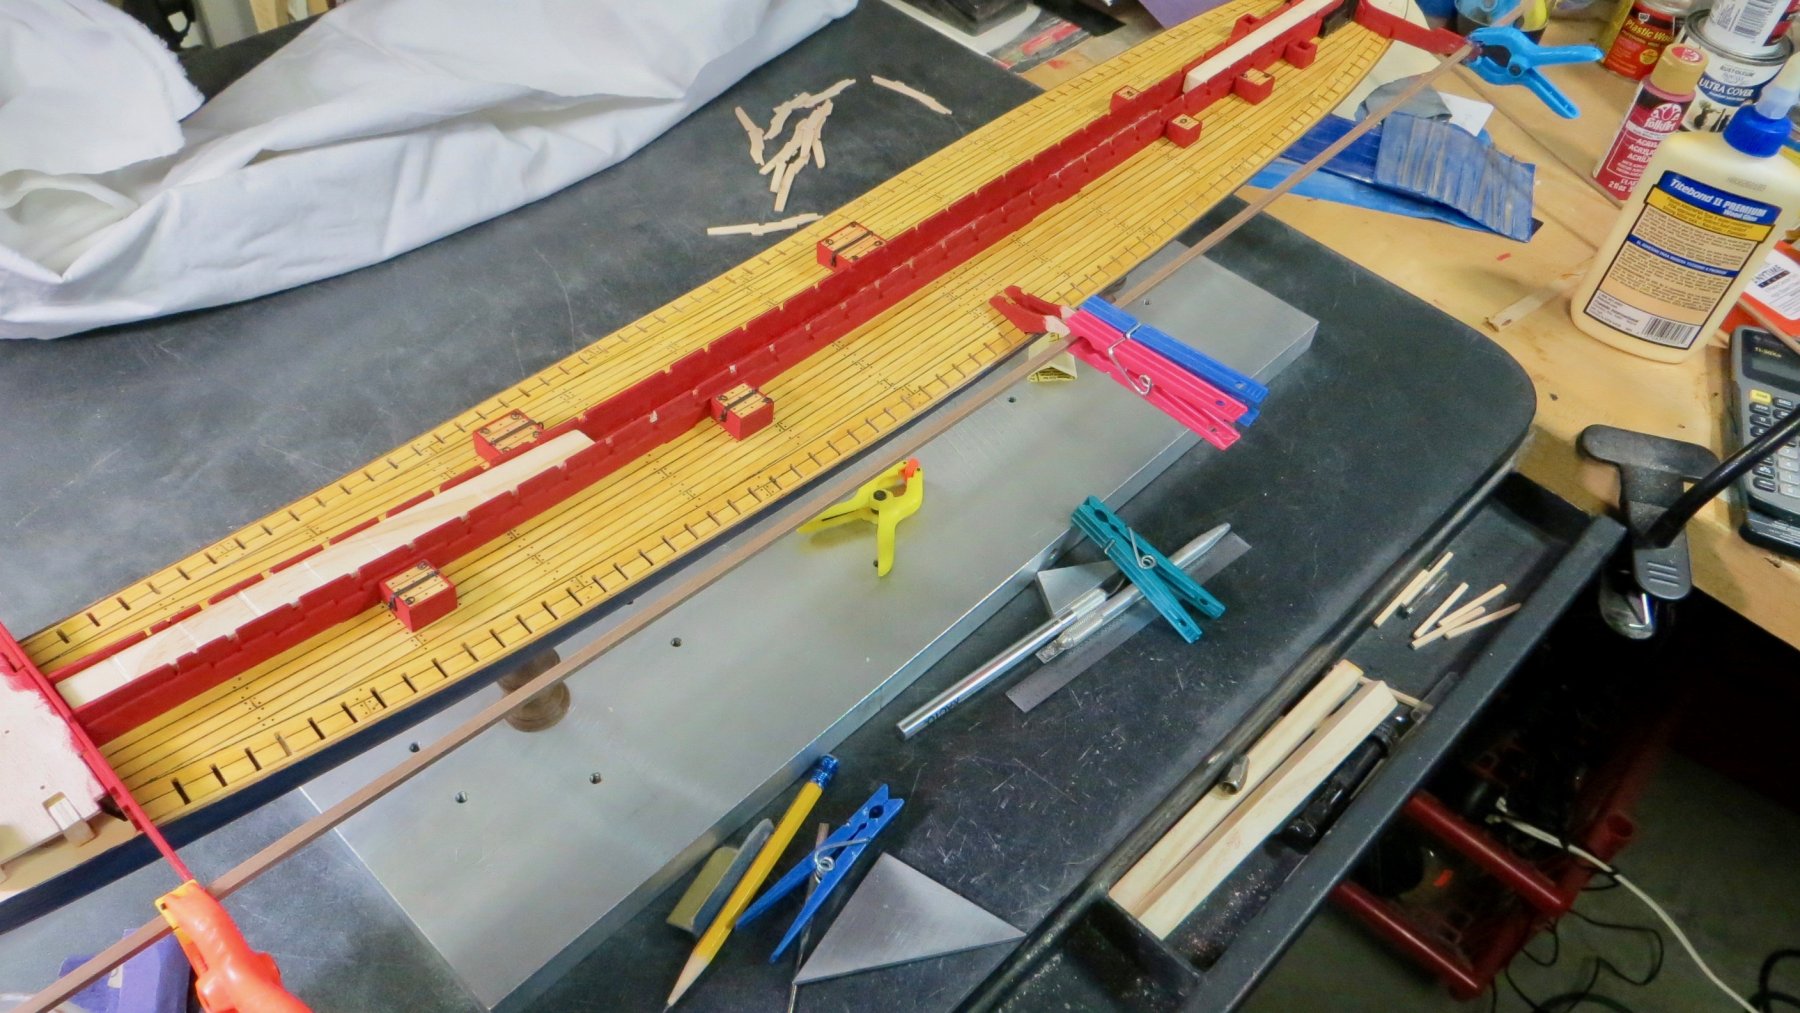
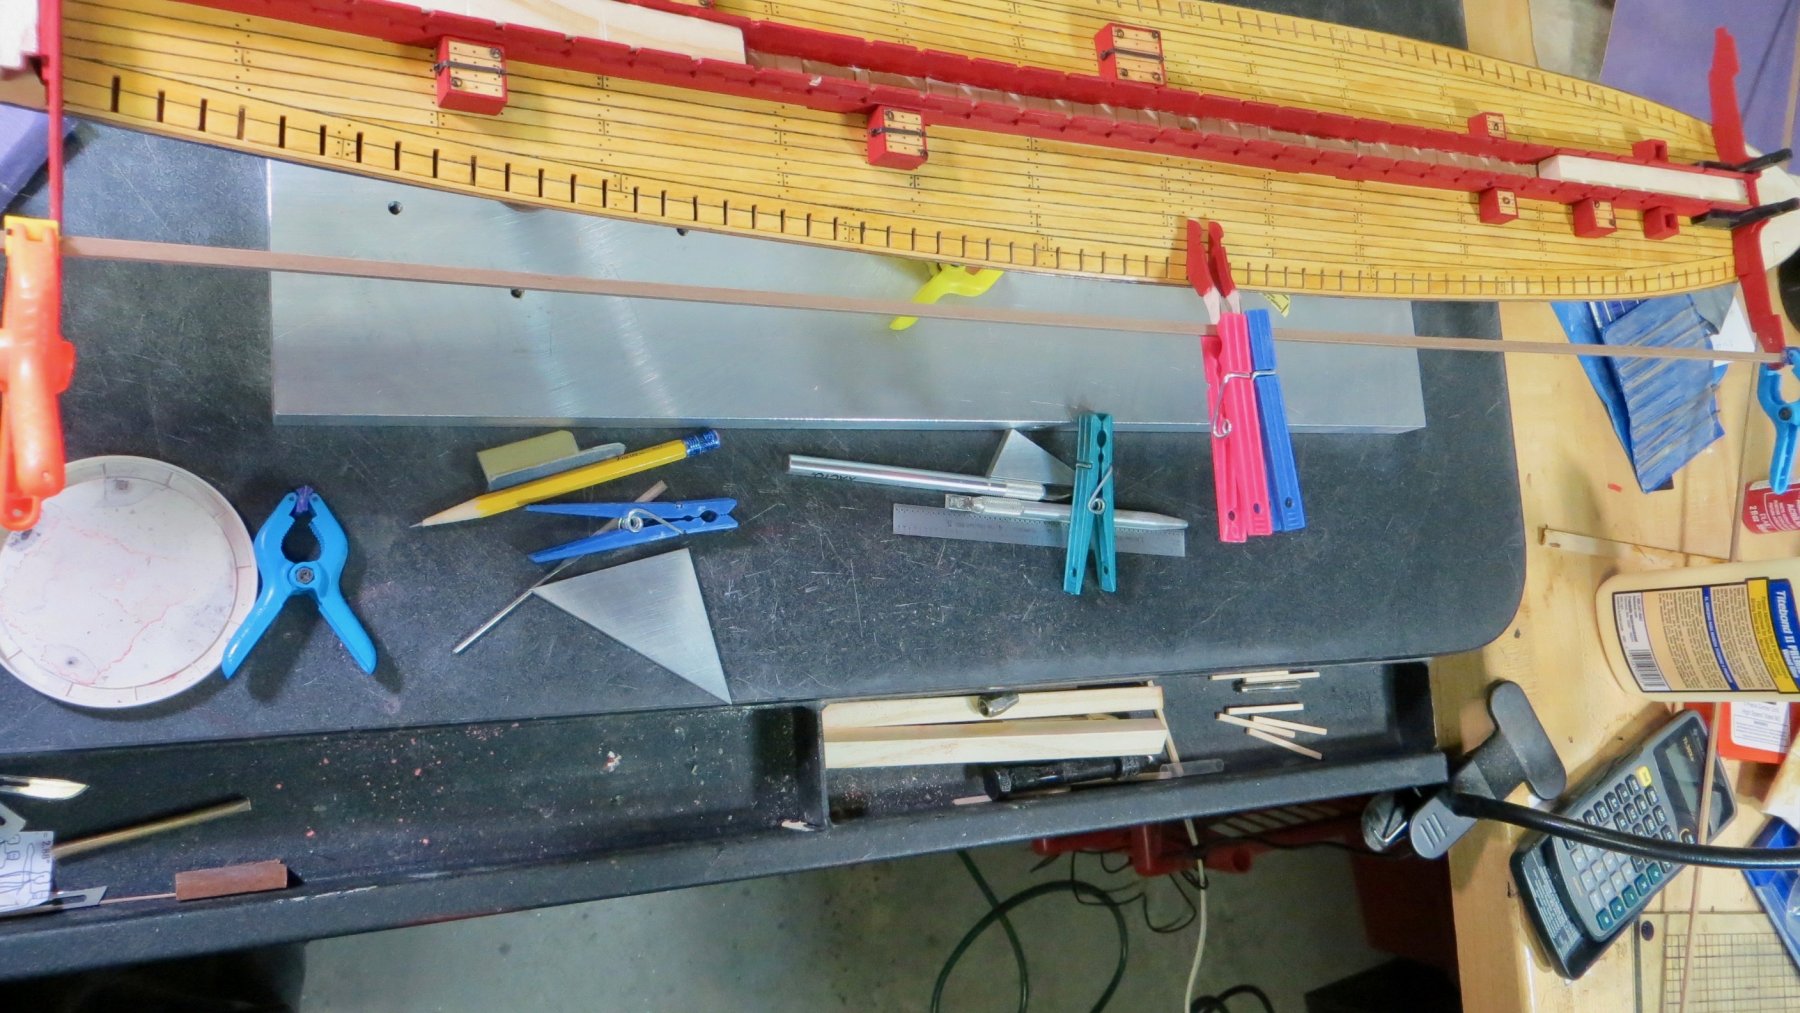
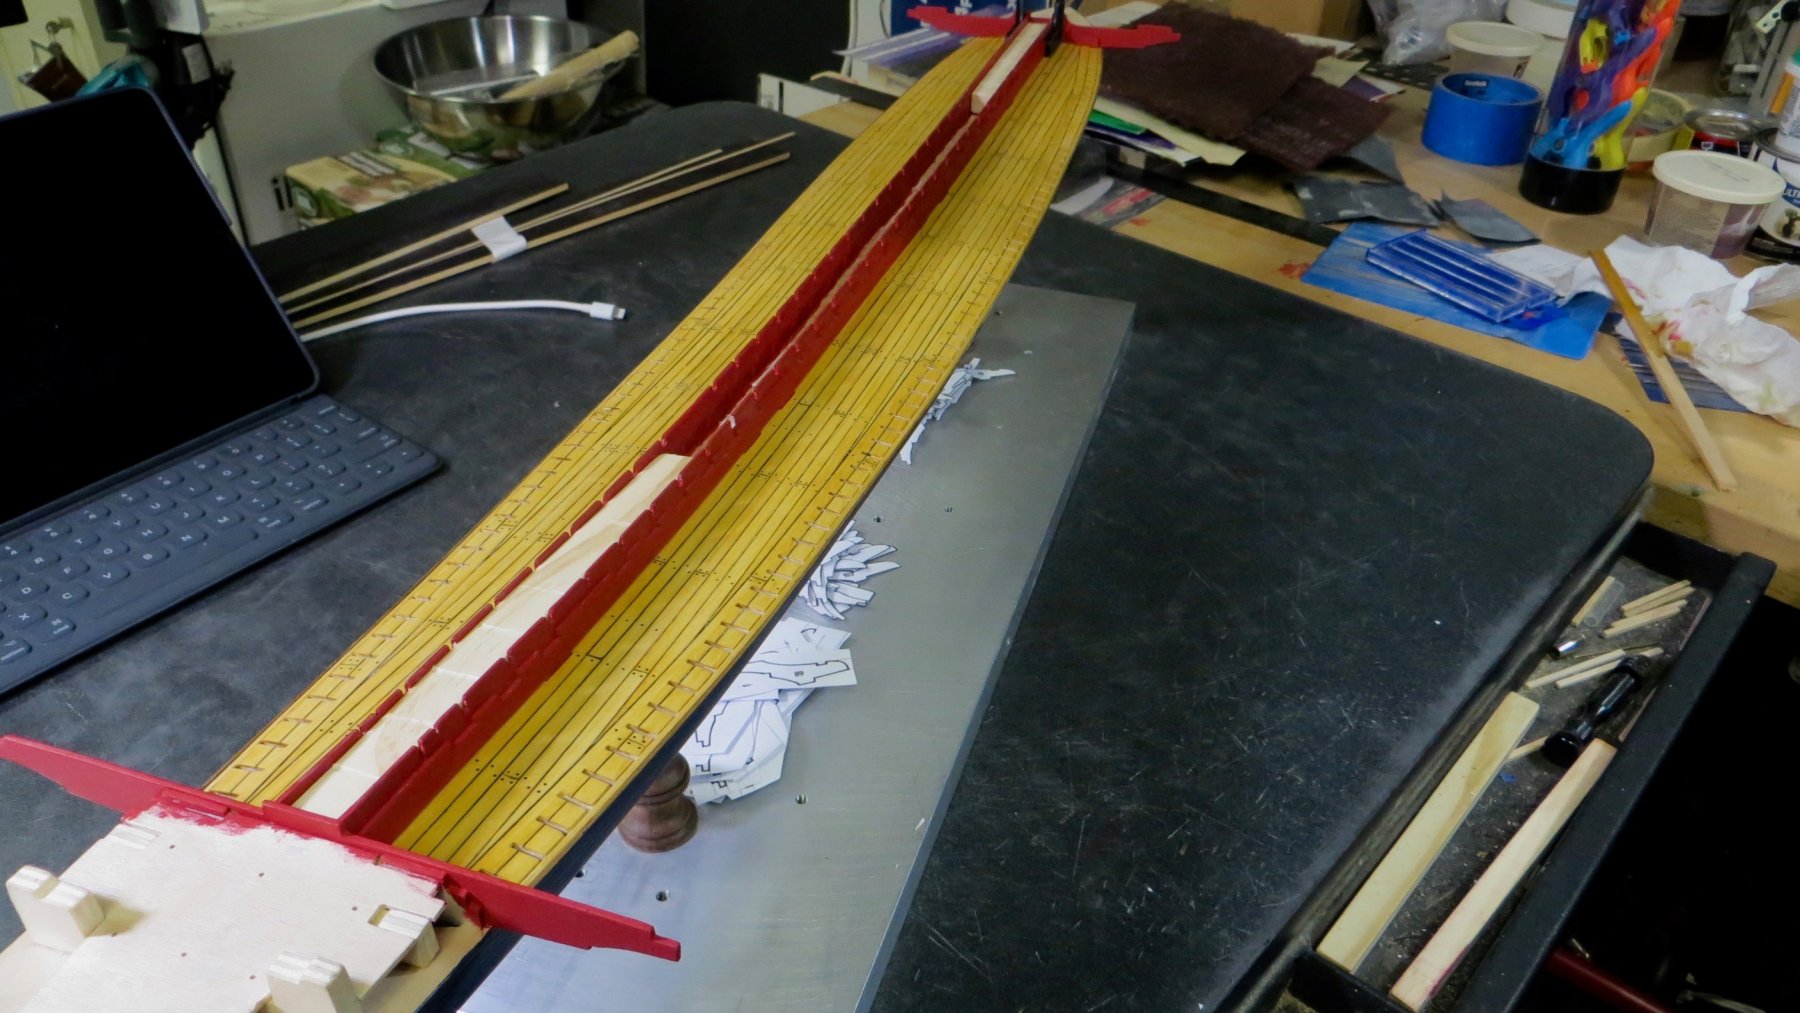
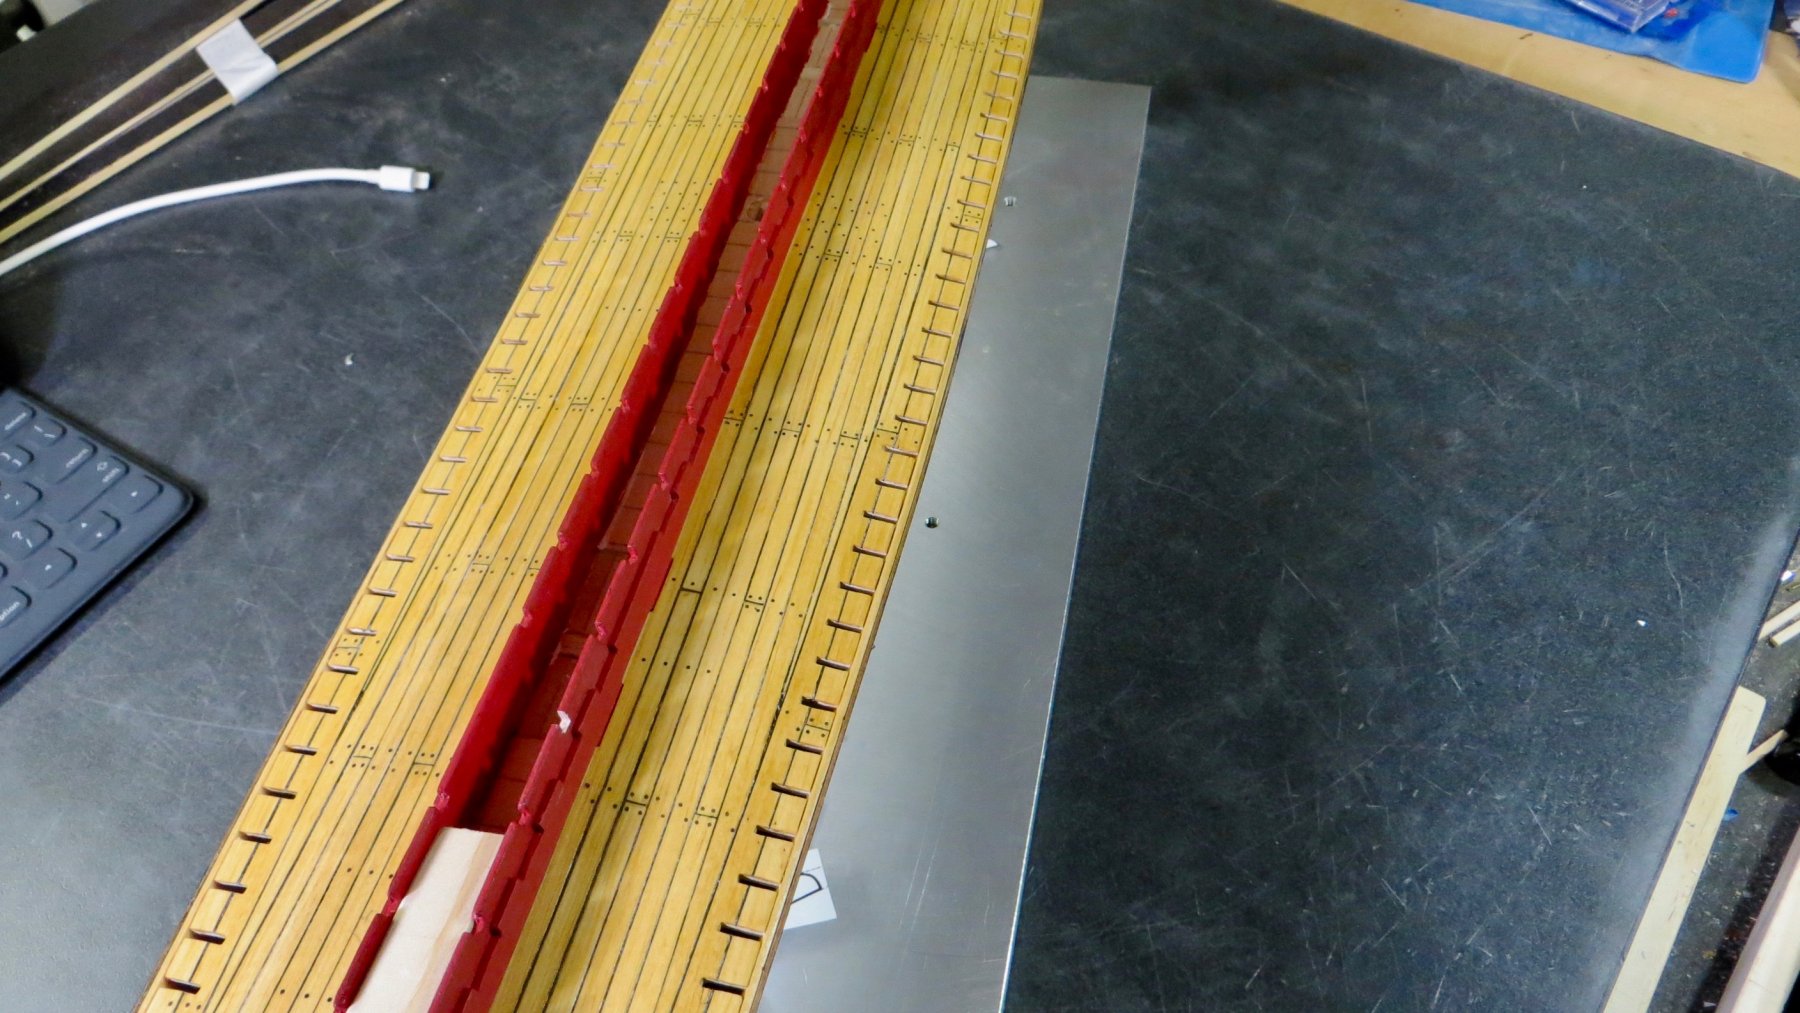
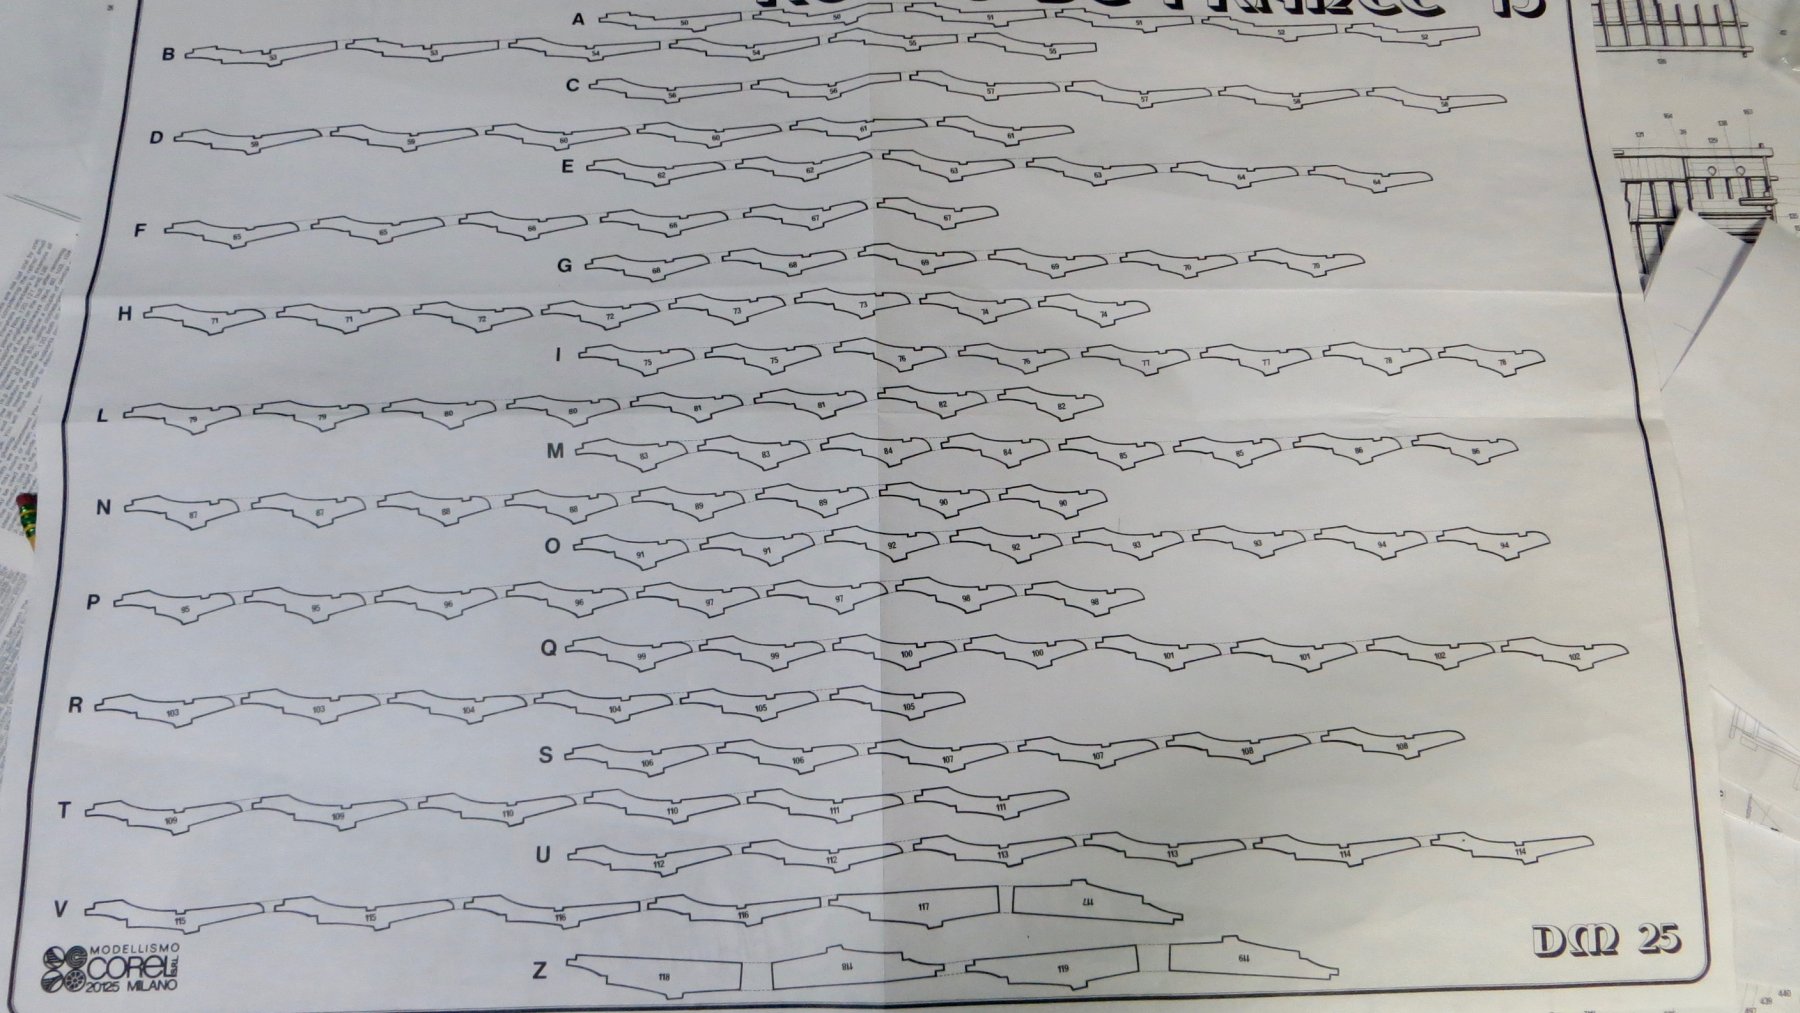
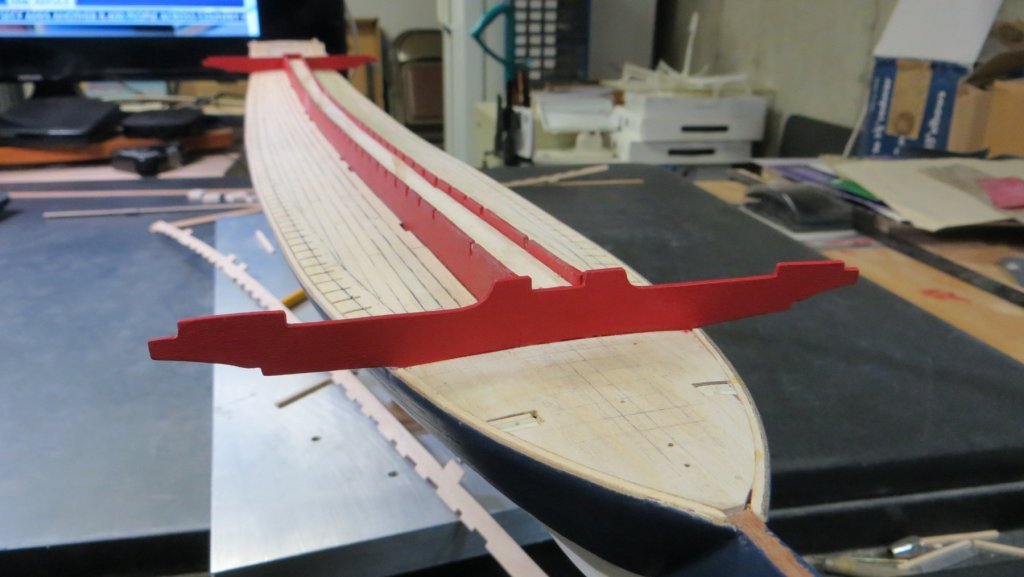
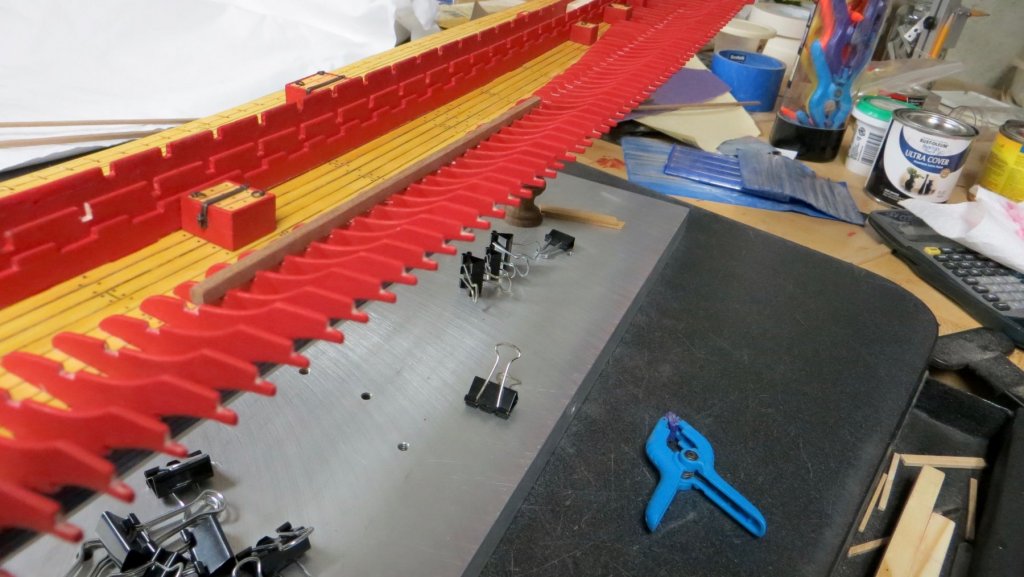
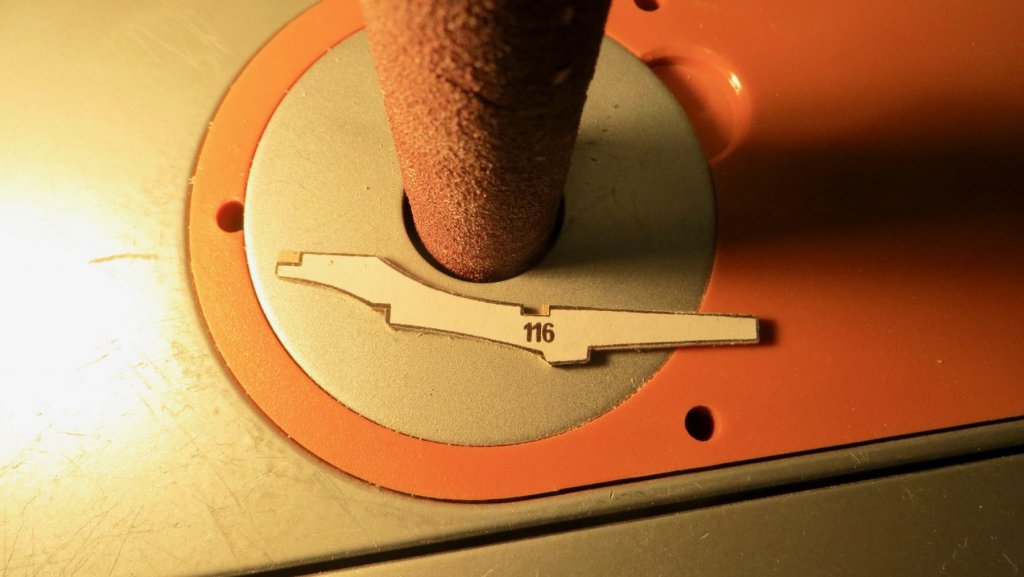
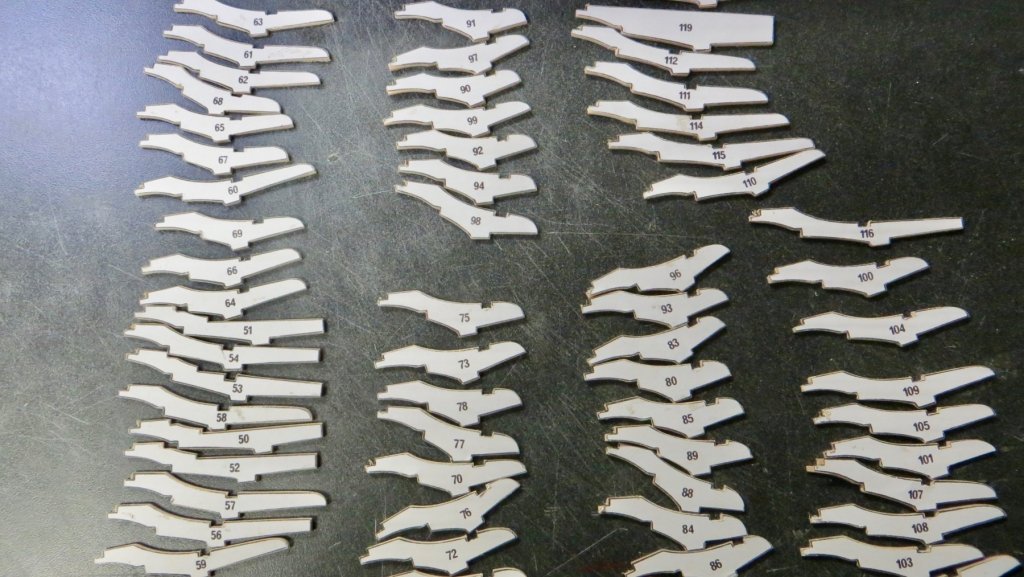
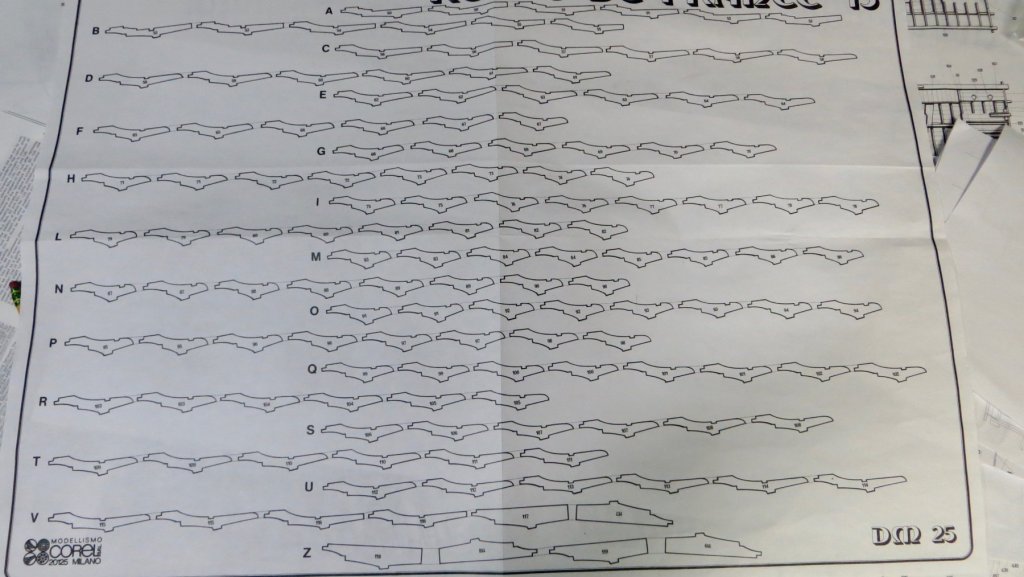
Hi, I have started to make the upper deck supports for the Reale. There are 70 supports on each side of the model. (140 pieces total). So, in order to keep my sanity I decided to work only on the right side of the model for now. (70 pieces). I cutout the patterns from the plans and glued them onto the board. Then I cut and shaped them using a saw, disk sander, oscillating sander and table saw. Here are the 70 pieces made for the starboard side of the model. After the removal of the pattern, glue, and final sanding I ran into a problem right away. The slots on the fwd support (shown here) and the rear support on the stern were both too far from the centerline of the model (by about 2mm). So I had to file down the end slots to the correct distance. This photo shows the the beam running from the stern to the bow at the correct distance from the center line of the model I was having a hard time trying to decide where to begin fitting the slots, from the front to back or from the stern to the front, so I figured it would be a good idea to look at the plan directions The plan instructions state the best way would be to start with the center supports and then work my way towards the stern and the bow at the same time. By installing the center supports first, the curve of the beam would be set, making it easier to fit the other pieces. The center supports glued to the deck (I painted half of the supports, for now, before installing, saving me the time of having to mask the deck) View from the top In this photo, the curve of the beam, that is supposed to be following the curve of the deck, can start to be seen I will slowly continue to do the trial fit, paint, and install of the other supports, working my way towards the bow and stern. Thanks for visiting, Frank


- 510 replies
-
- 8
-
-
- reale de france
- corel
- (and 1 more)
-
Hi Michael, Now you have me worried So I went back to see how I did the Wales on my Vasa. Lol!! I found some photos First Layer of planking installed Then I planked the stern section covering the first planking Then I installed the second planking and the Wales So I don't see the first planking at all. With a cross section build as you are doing now, I'm not sure how you would cover up the first planking. Thanks, Frank
-
Hi Michael, I really like the look of the lighted lanterns in your photo! I'm trying to understand what you feel you did wrong with the wales installation? They look fine to me I must be missing something? Thanks, Frank
-
Mark, Nice job on the sails. I like the curve you shaped on that lower sail. Also, liked the nice neat job on the coils! Frank
- 331 replies
-
- 4
-
-
- nuestra senora del pilar
- occre
- (and 1 more)
-
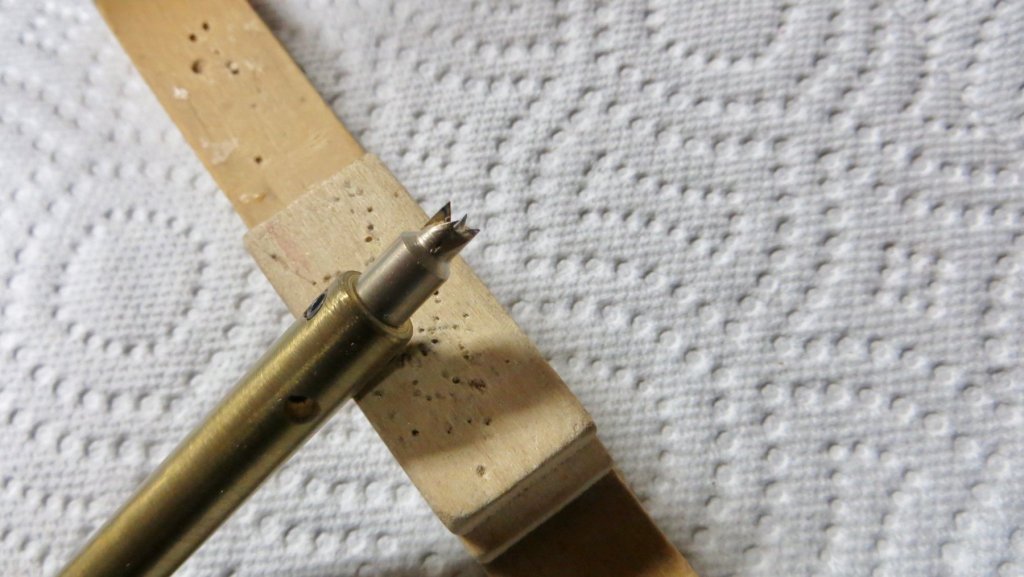
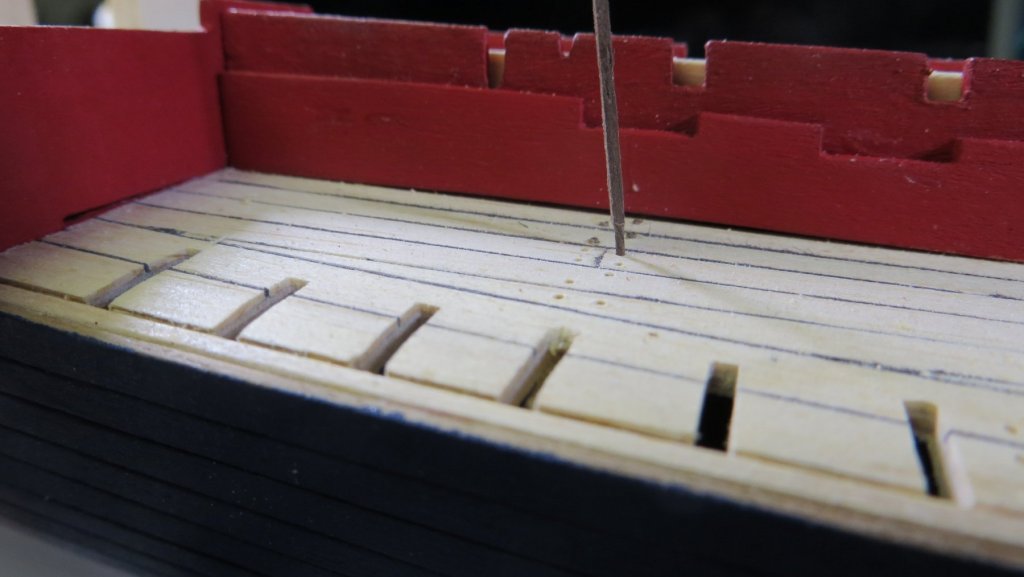
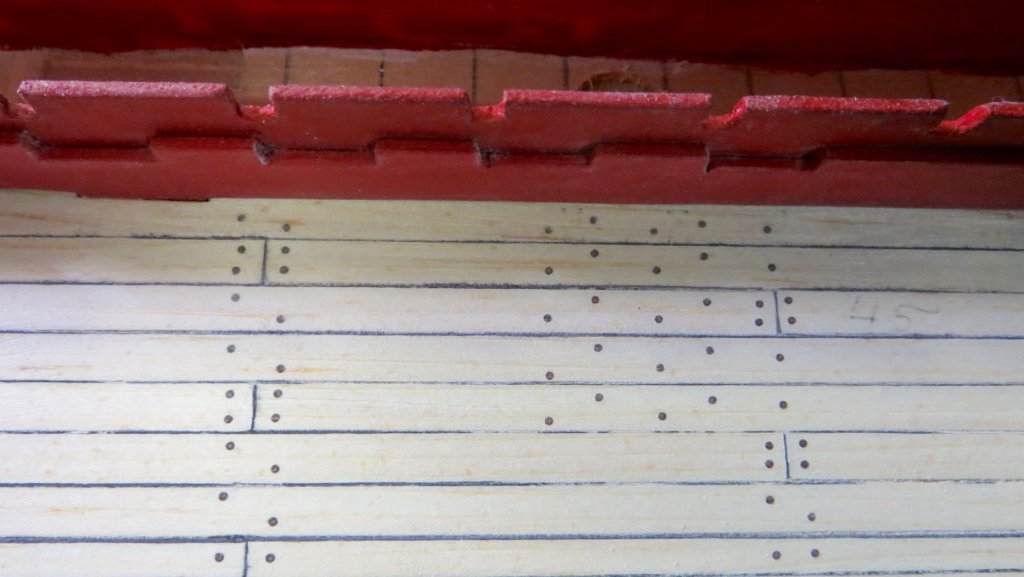
Hello, I lost a week due to a bout of the flu. Seems to be going around up here in the Northeast! Anyway, I was able to make more progress on my model. I added some tree nails to the deck. I decided not to go crazy in adding them. 90% of the tree nails will not be visible due to all the upper deck fittings and platforms blocking the view. I added some at the joint areas, around the hatches, and around some other fittings that will be added later. I used the same tool I used on the hatches in a previous post. The cutter Gluing the tree nails after pre-drilling Tree nails after some sanding Added some tree nails around fittings that will be added later After finishing the nails, I stained the deck with 2 coats of light oak stain, followed by a satin polyurethane sealer Attached the hatches (made earlier) to the deck My next step is long process of cutting, shaping, and fitting all the upper platform supports that will fit into the slots on the deck. (70 pieces on each side, each a little different from each other) Thanks for the "Likes" and for visiting, Frank


- 510 replies
-
- 5
-
-
- reale de france
- corel
- (and 1 more)
-
Good luck with the sails Mark! For the future, I know there are some youtube videos on making sails from silk span, with Tom Lauria, if you have no interest in learning how to sew Luckily for me my wife is handy with the sewing machine and is a good teacher!! Frank
- 331 replies
-
- 3
-
-
- nuestra senora del pilar
- occre
- (and 1 more)
-
Martyn, I totally agree with Michael! Excellent work and I wish I built the ship using this kit! Frank
- 91 replies
-
- 4
-
-
- deagostini
- vasa
- (and 1 more)
-
Michael, Nice job on the barrels. They certainly add nice detail to your model. I like how you modified them to look more realistic. Question, (for my education )what are the slots that you added to the ends of the barrels for? Thanks, Frank