HOLIDAY DONATION DRIVE - SUPPORT MSW - DO YOUR PART TO KEEP THIS GREAT FORUM GOING! (Only 13 donations so far - C'mon guys!)
×


fmodajr
-
Posts
868 -
Joined
-
Last visited
Content Type
Profiles
Forums
Gallery
Events
Everything posted by fmodajr
-
 Thanks Mark! Took me a couple of days to re-organize my thoughts on what areas to commence work on. Before I took some time off from the model, I should have kept a journal with some kind with notes on what my thoughts were. I hope all is well. Frank
- 510 replies
-
- 1
-

-
- reale de france
- corel
- (and 1 more)
-
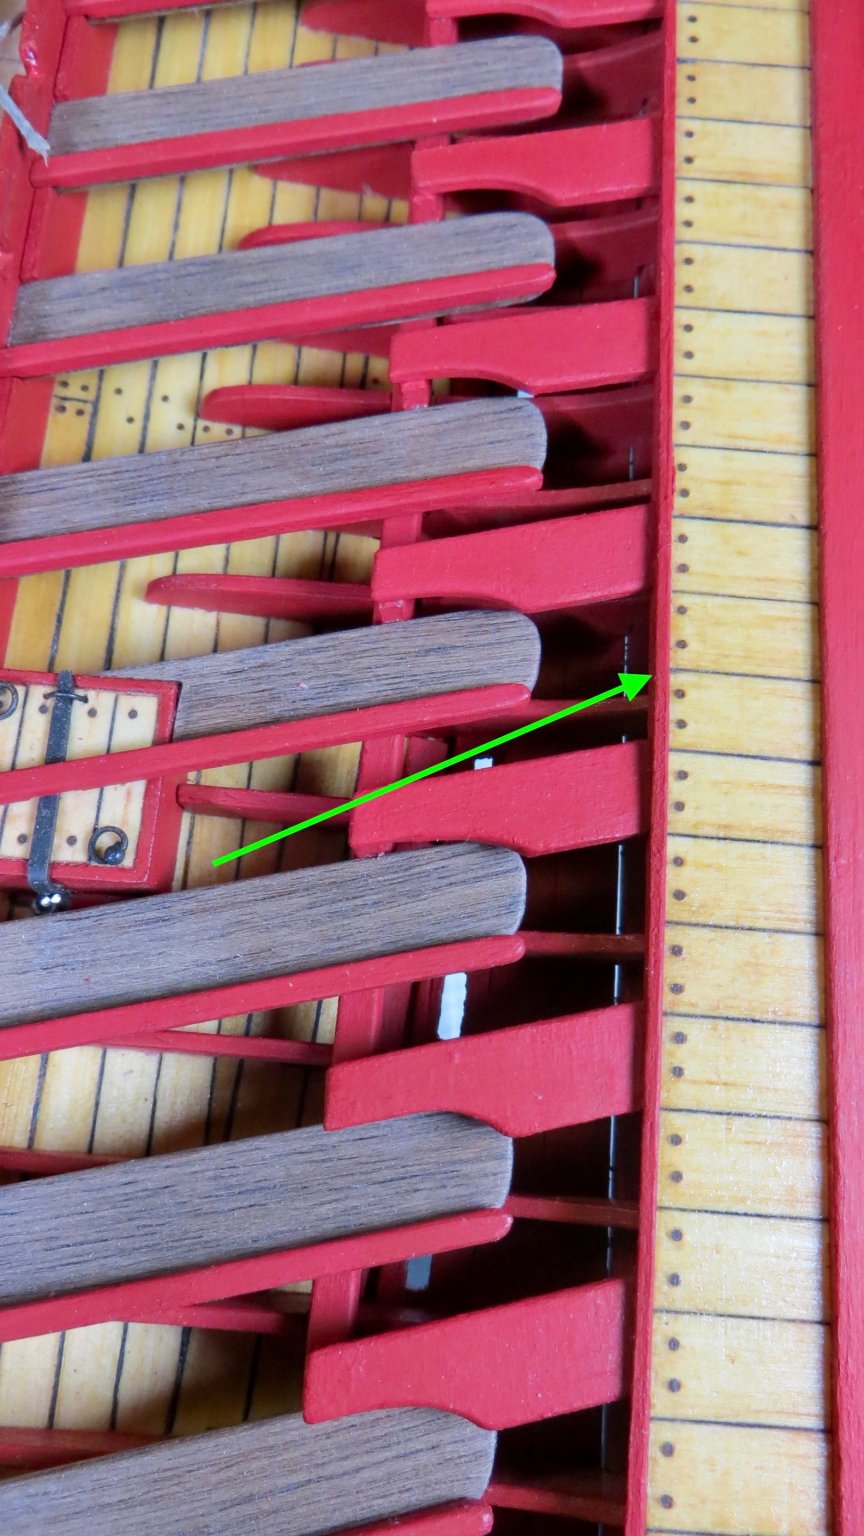
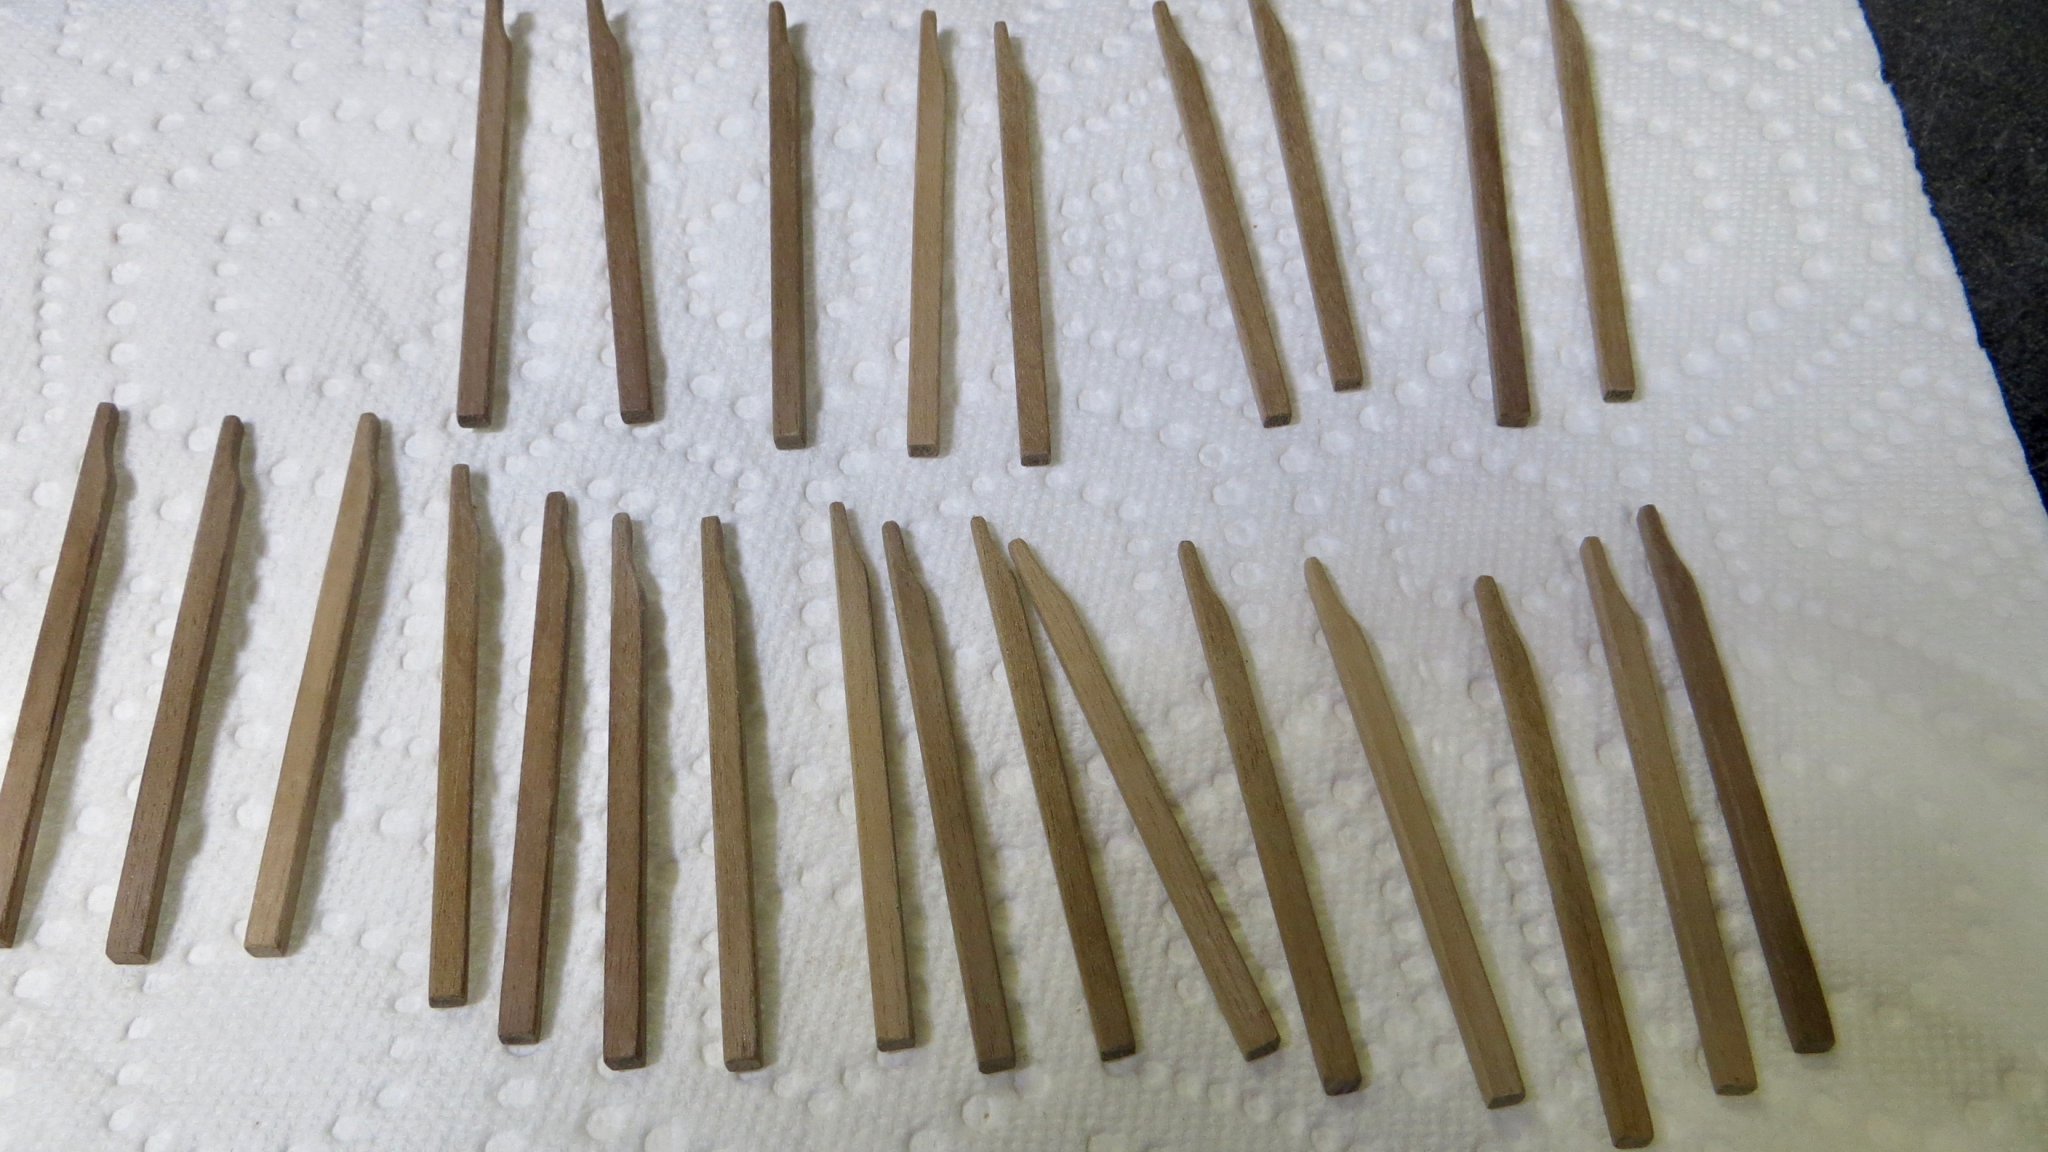
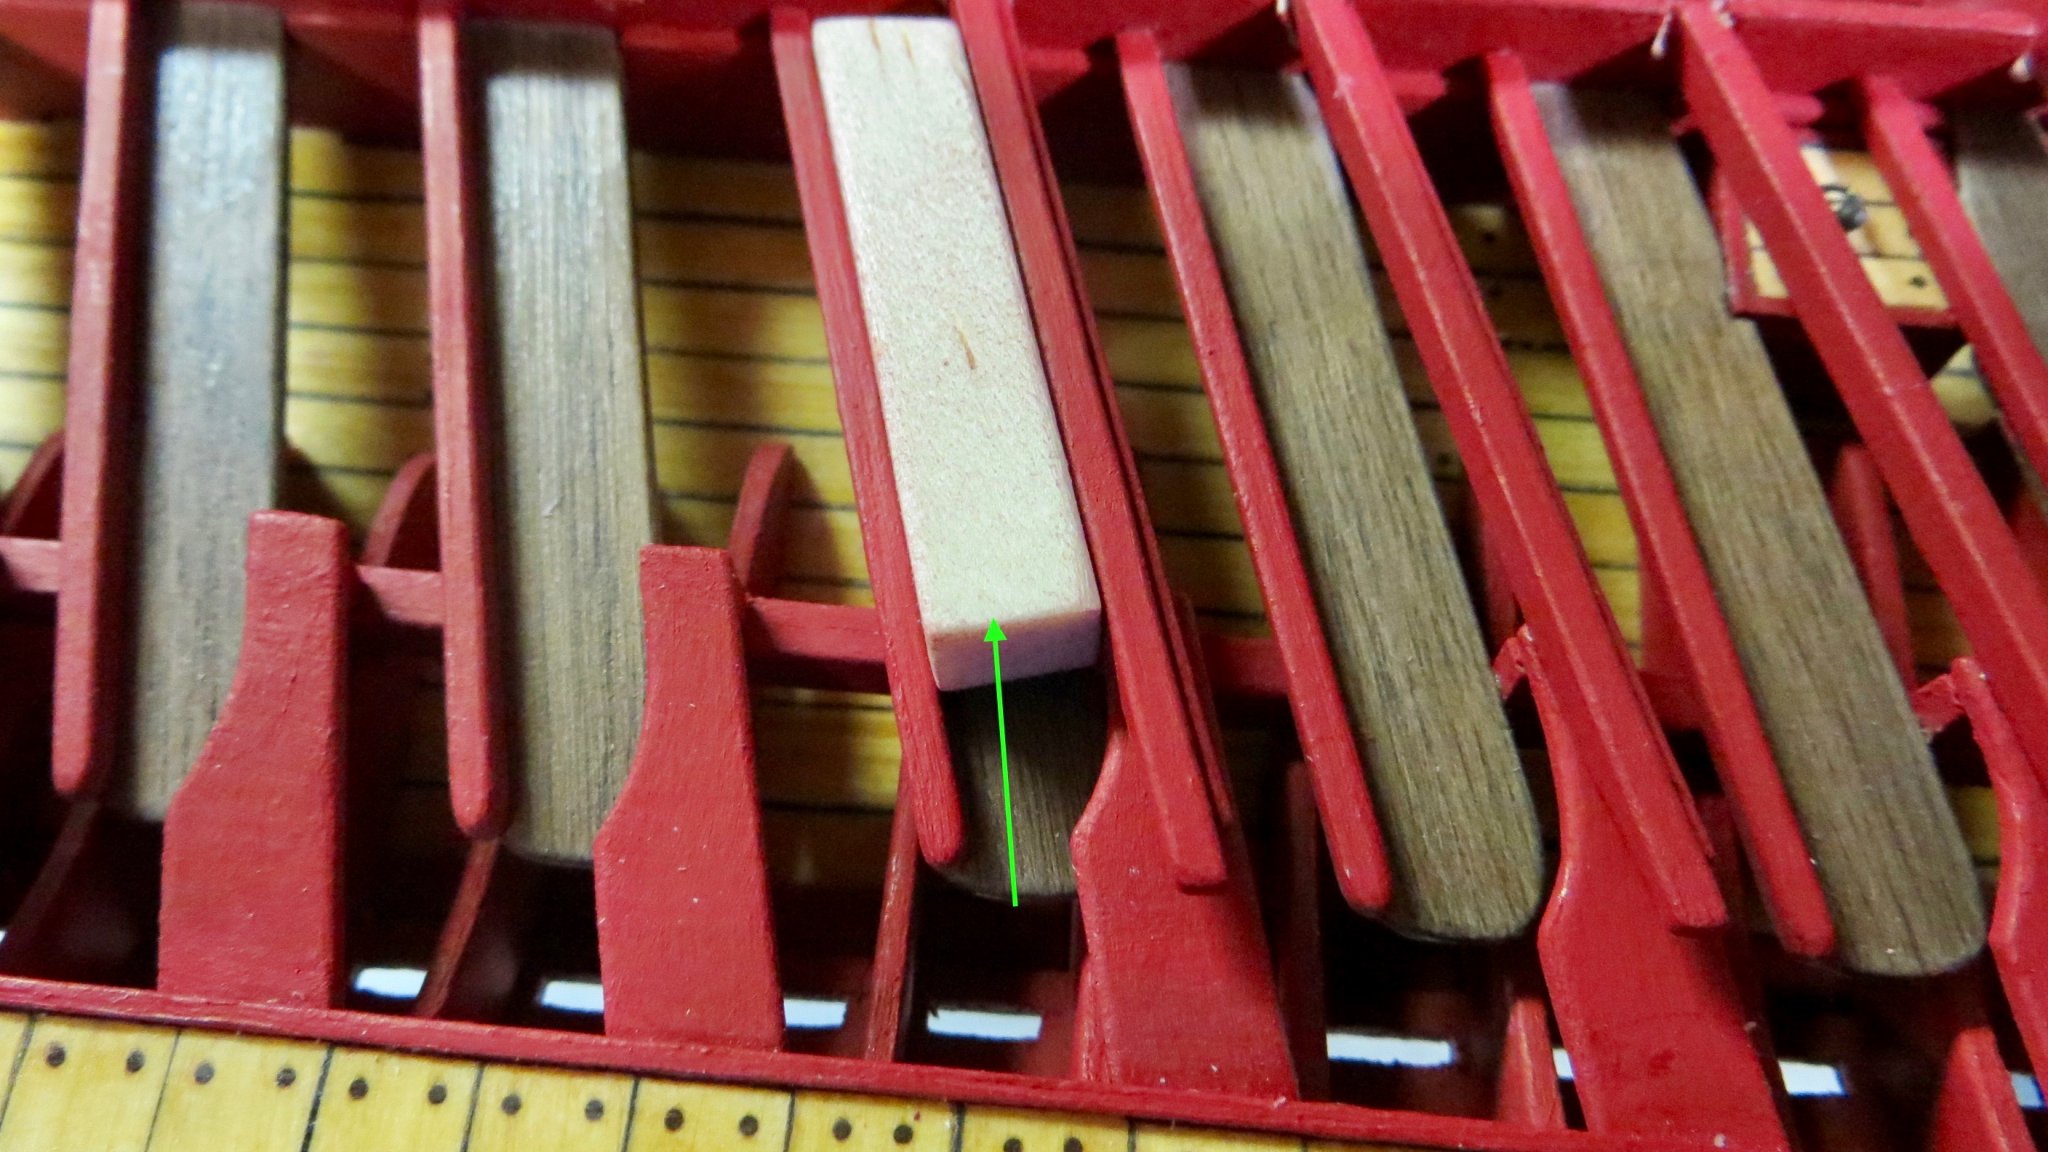
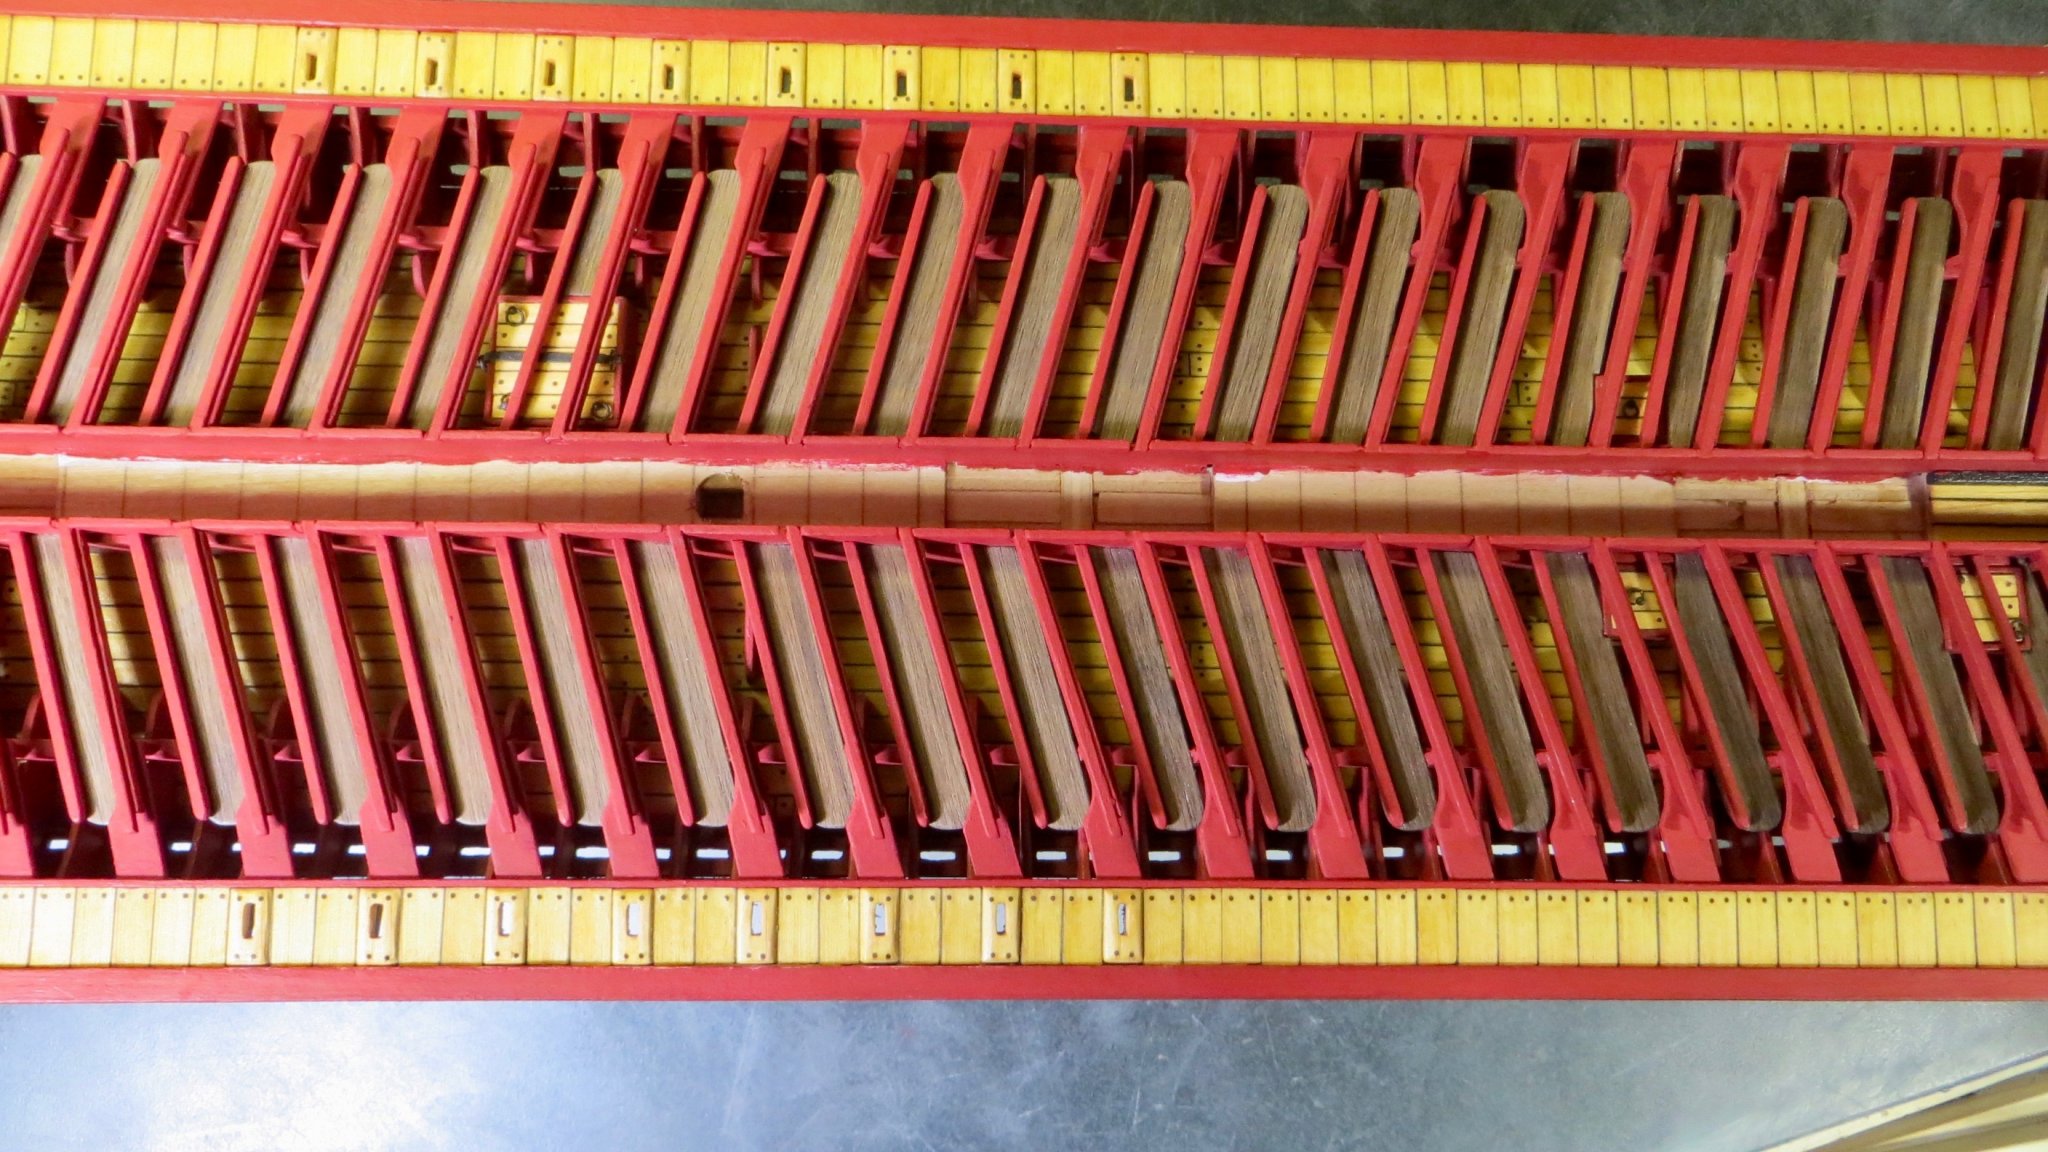
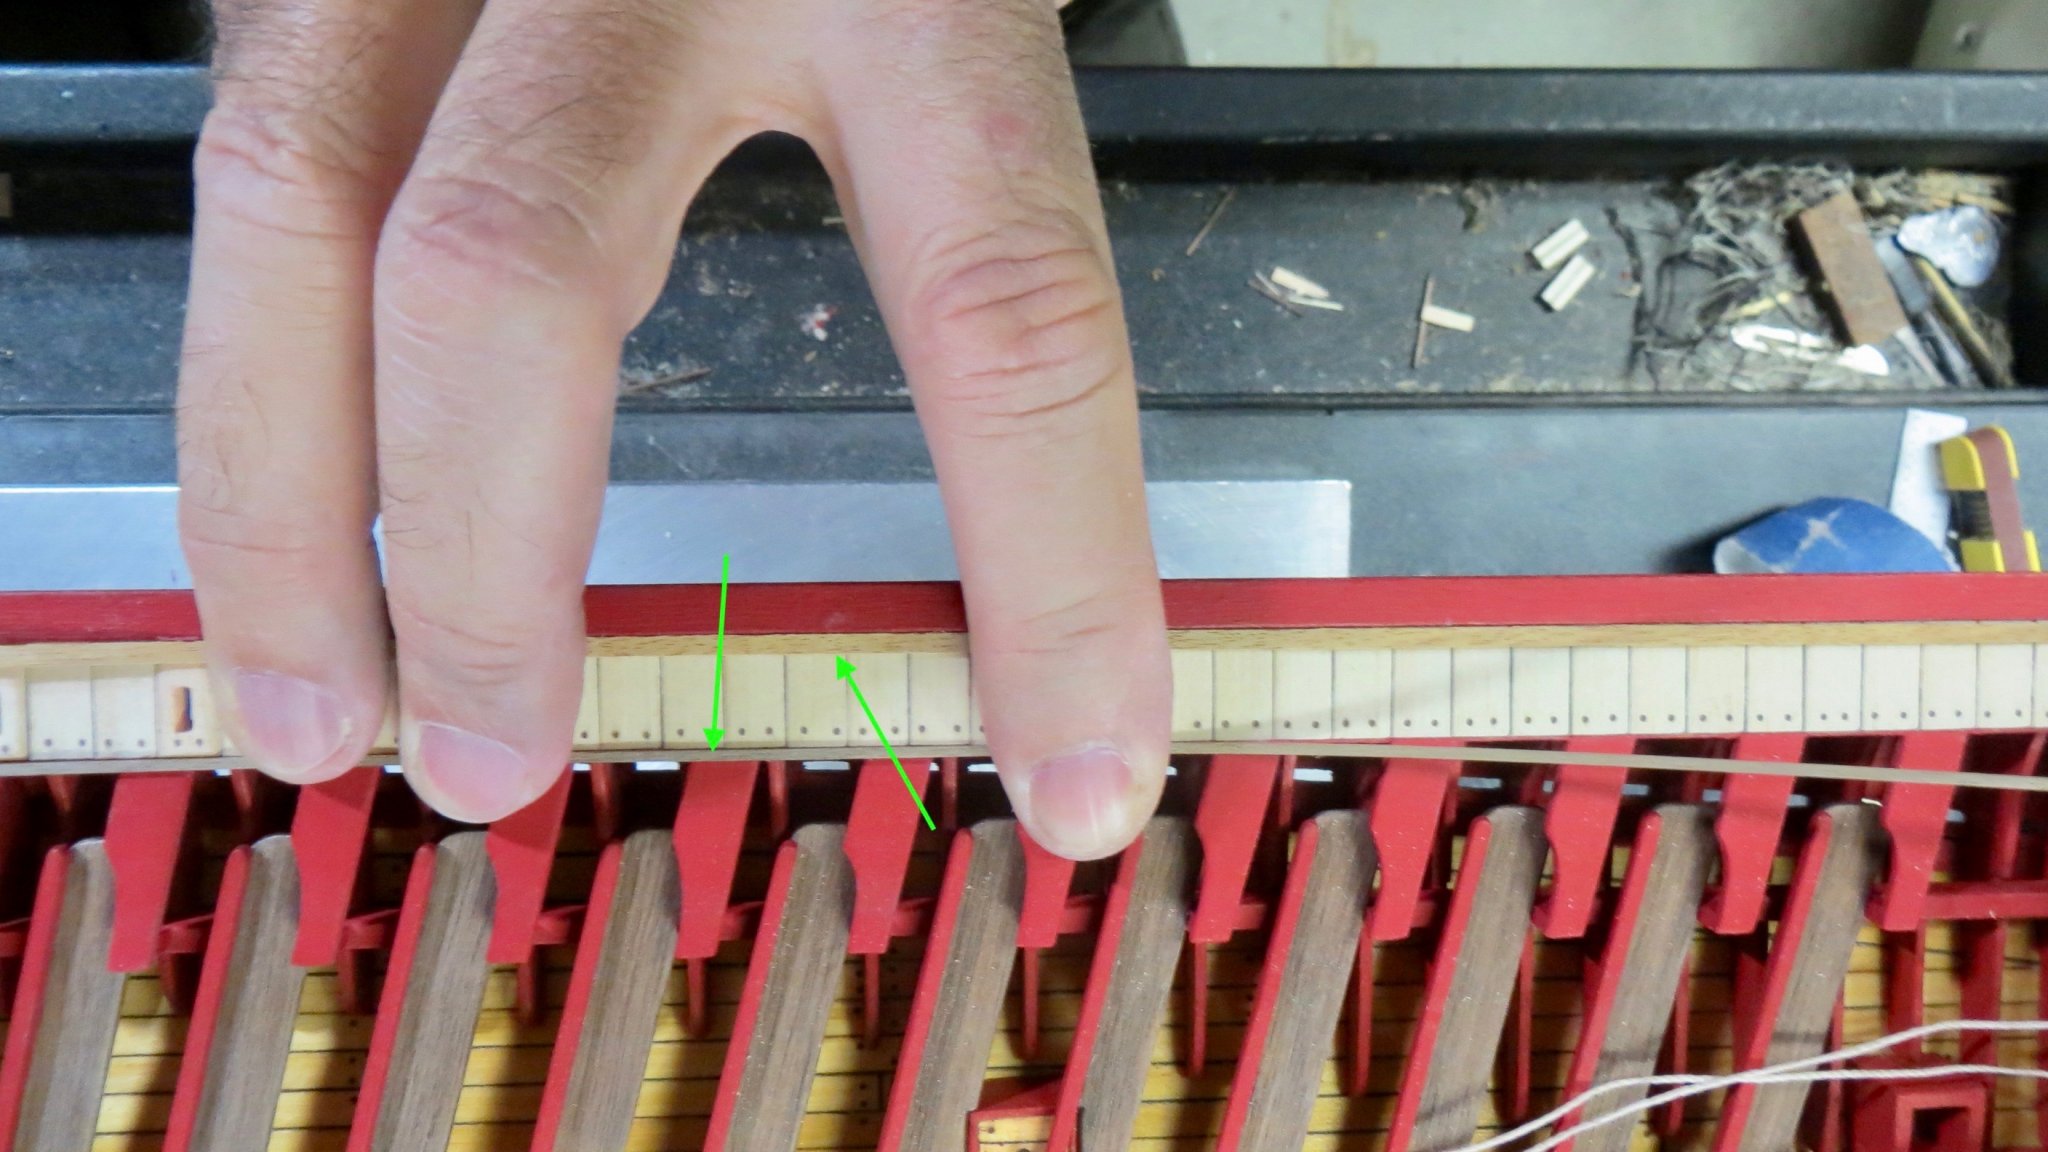
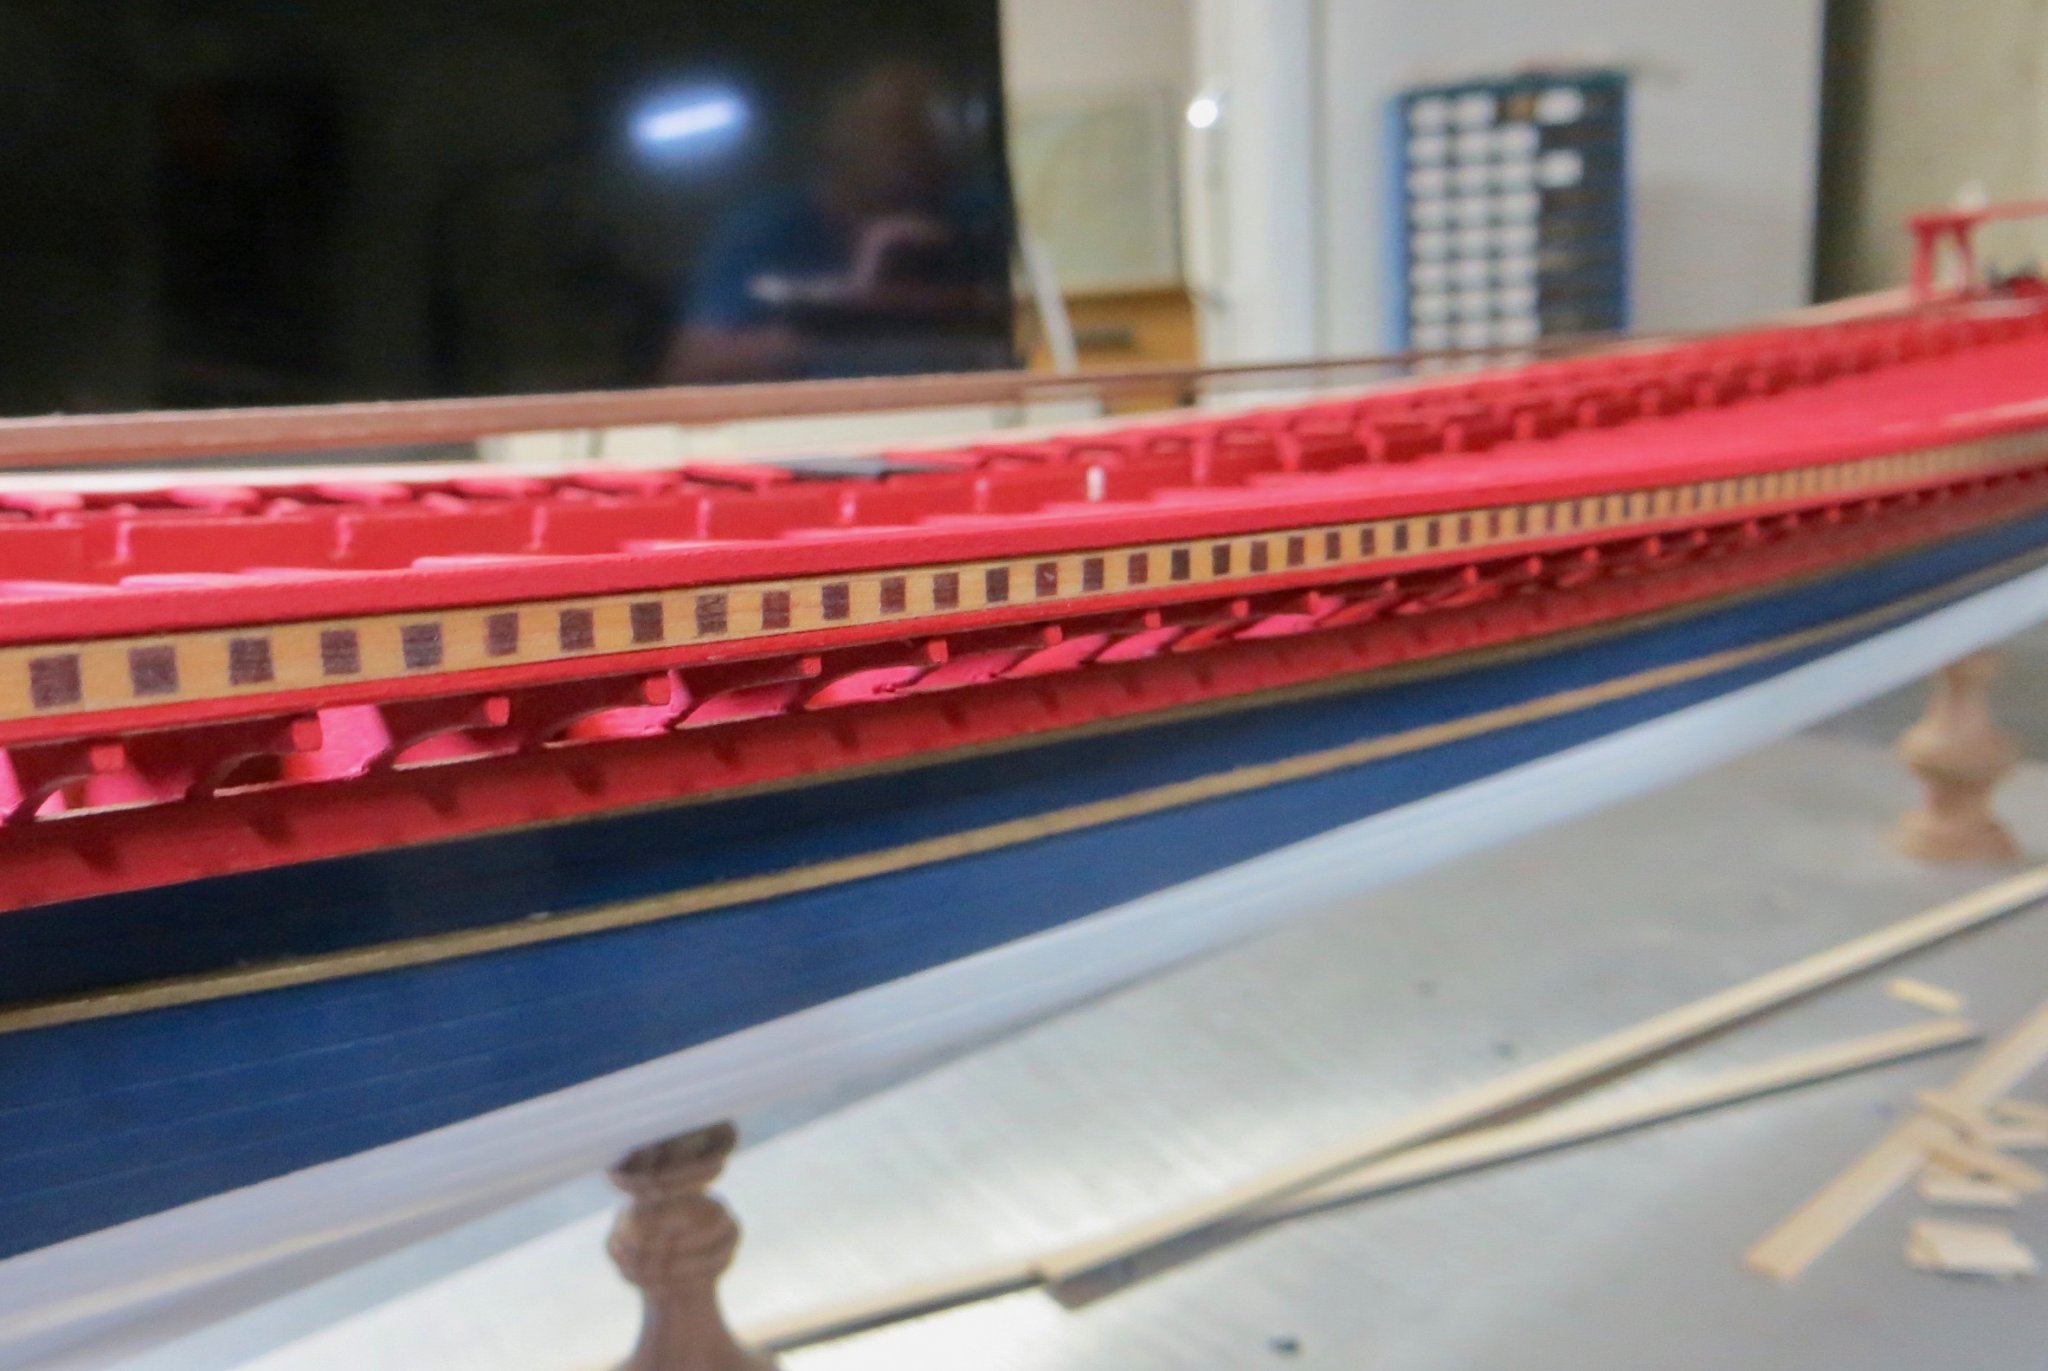
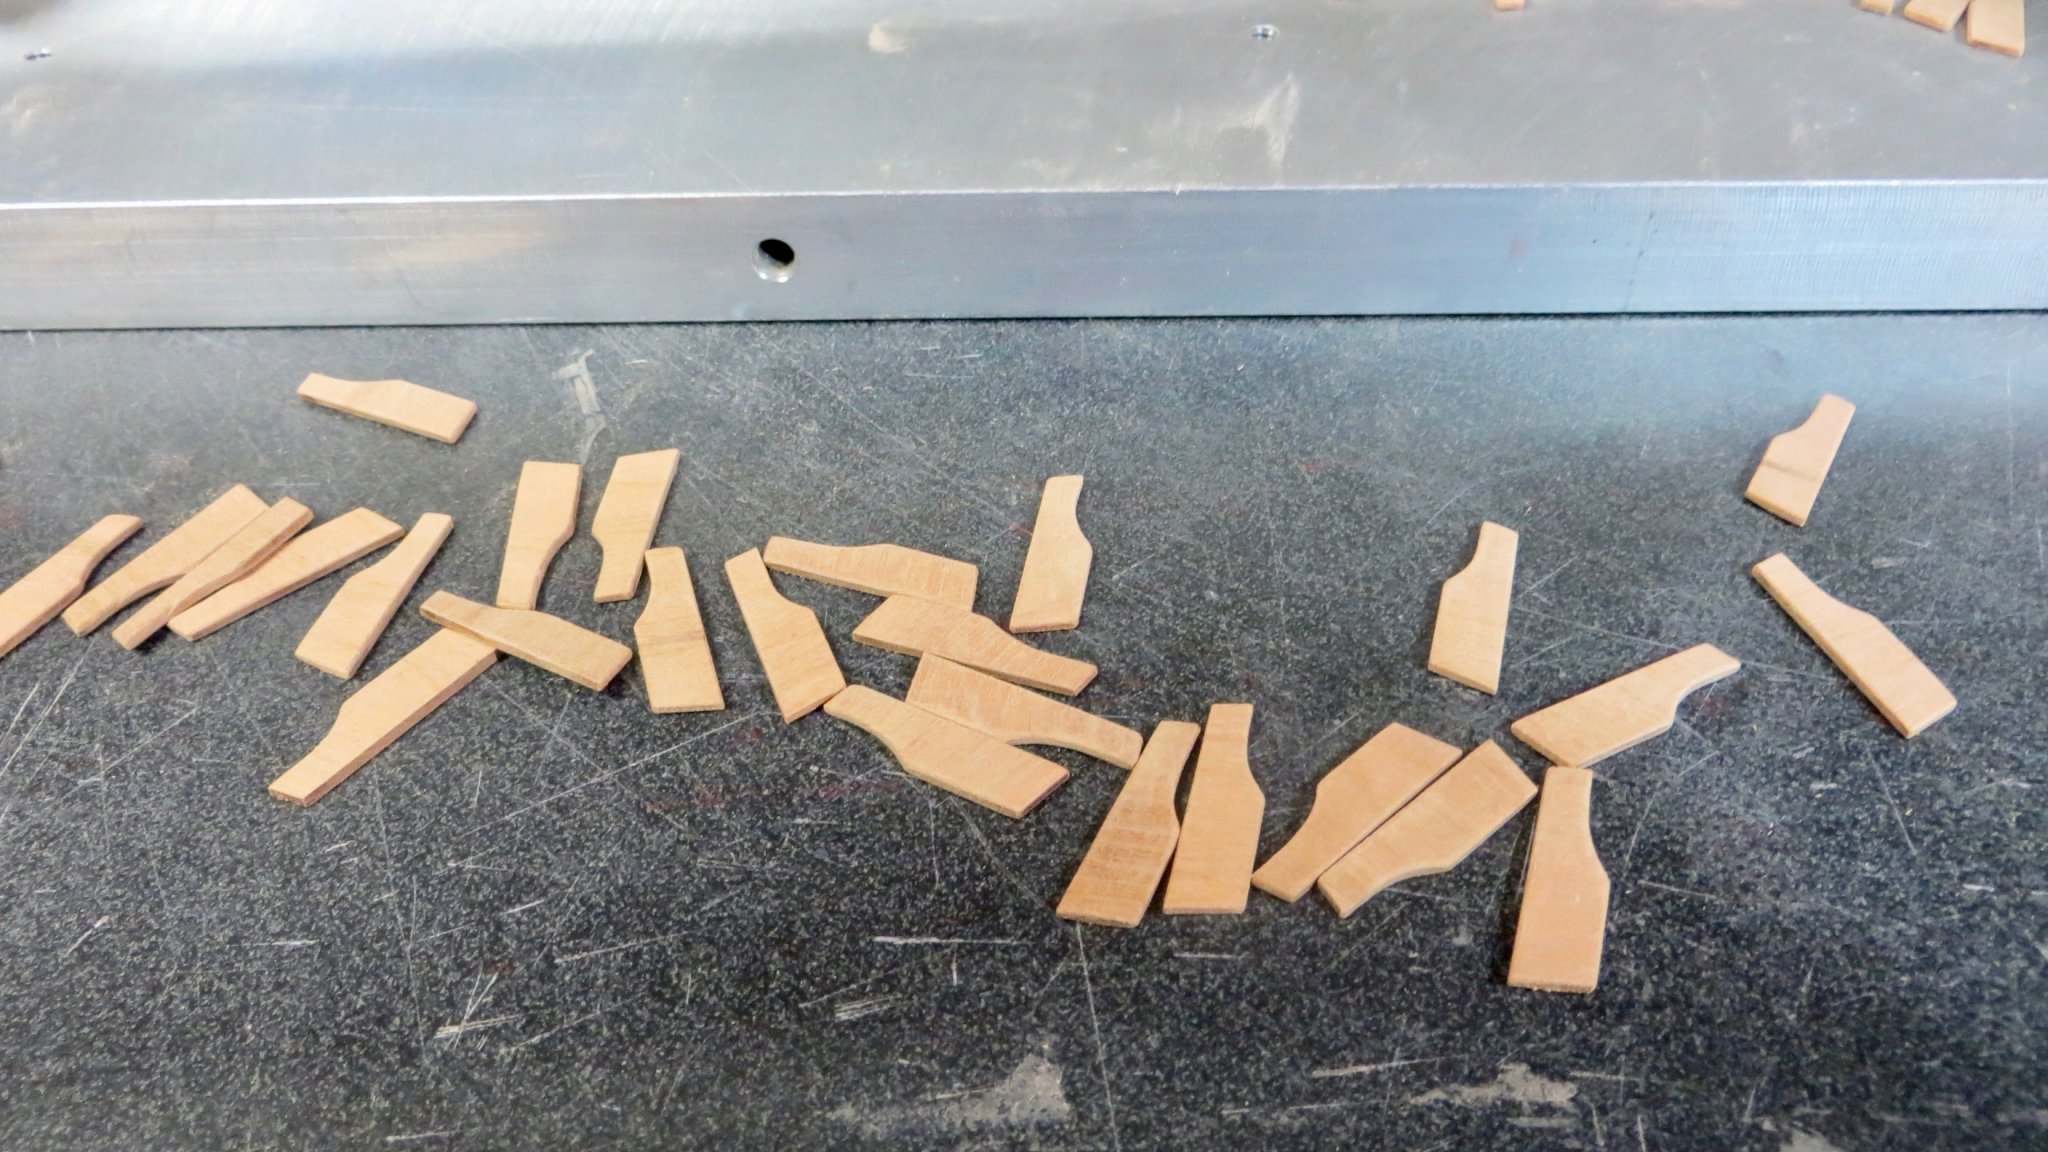
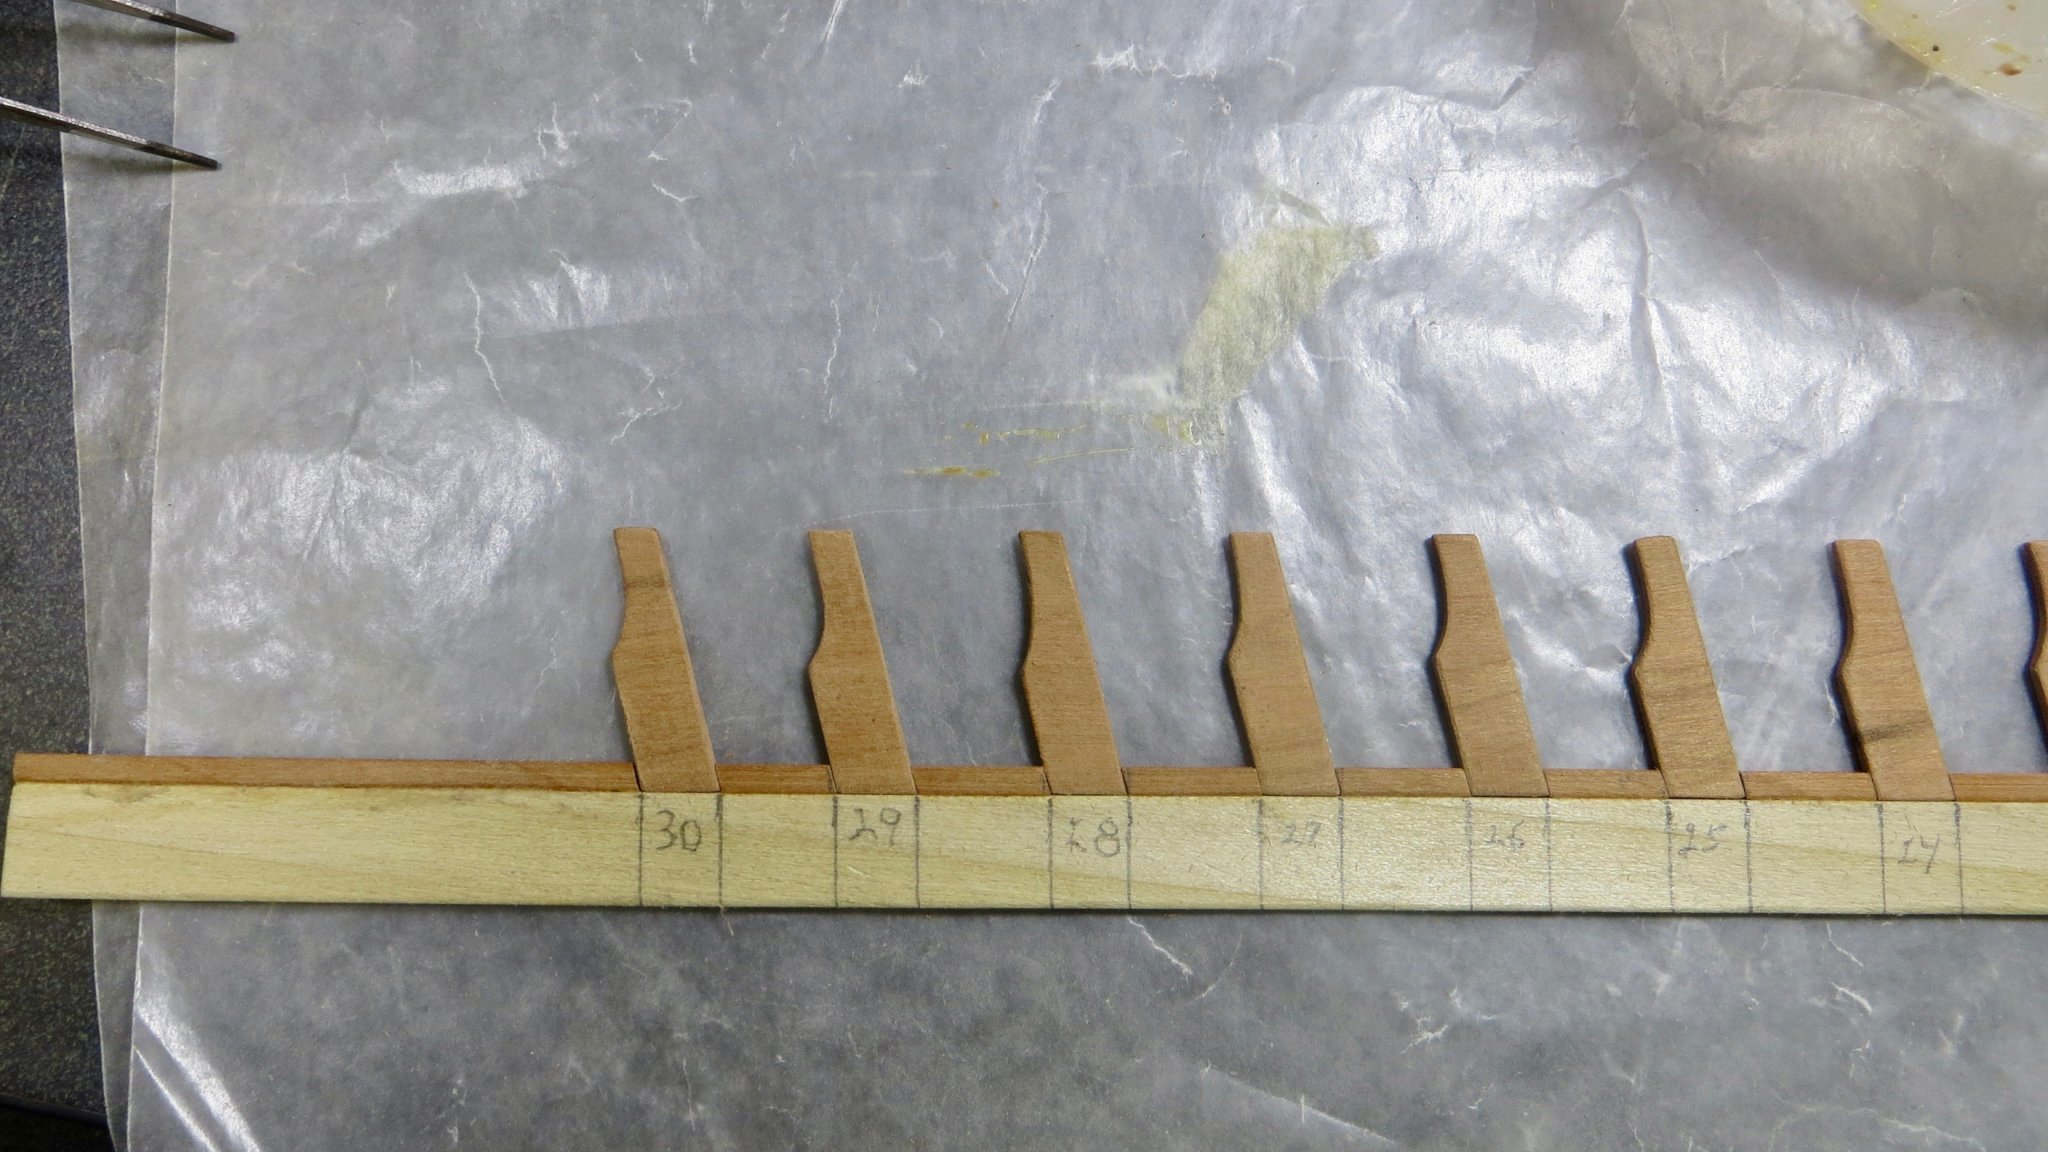
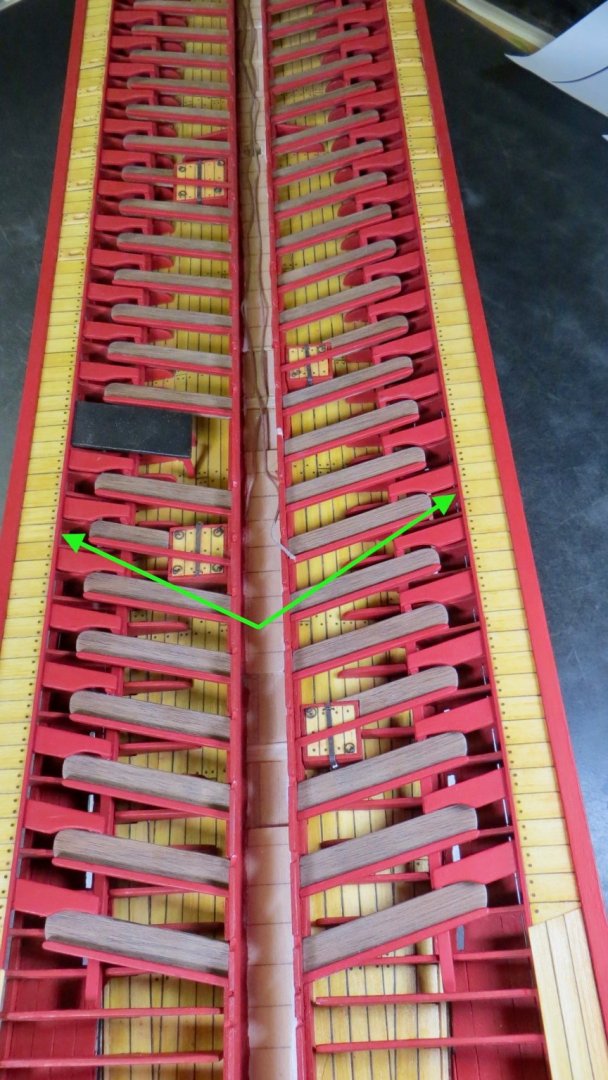
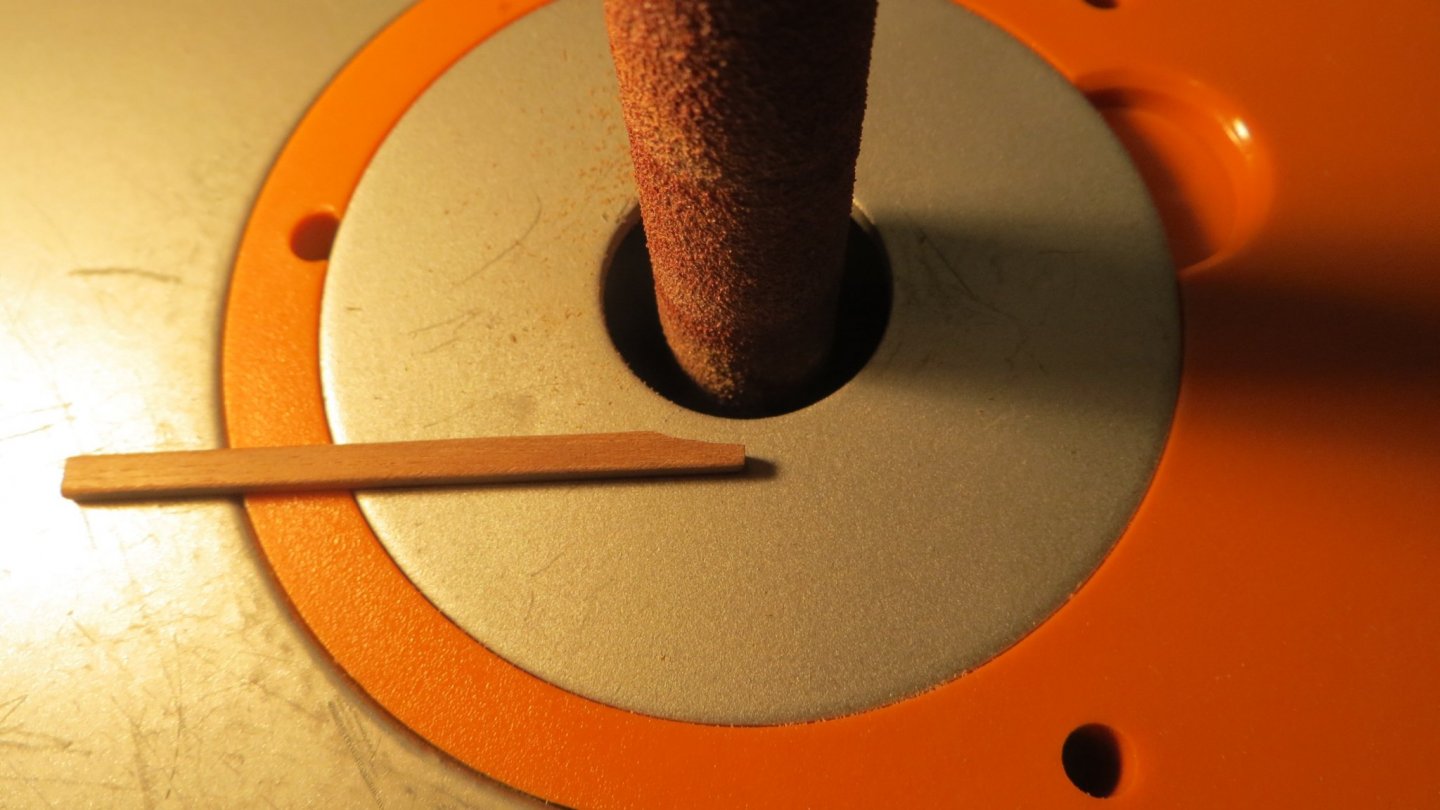
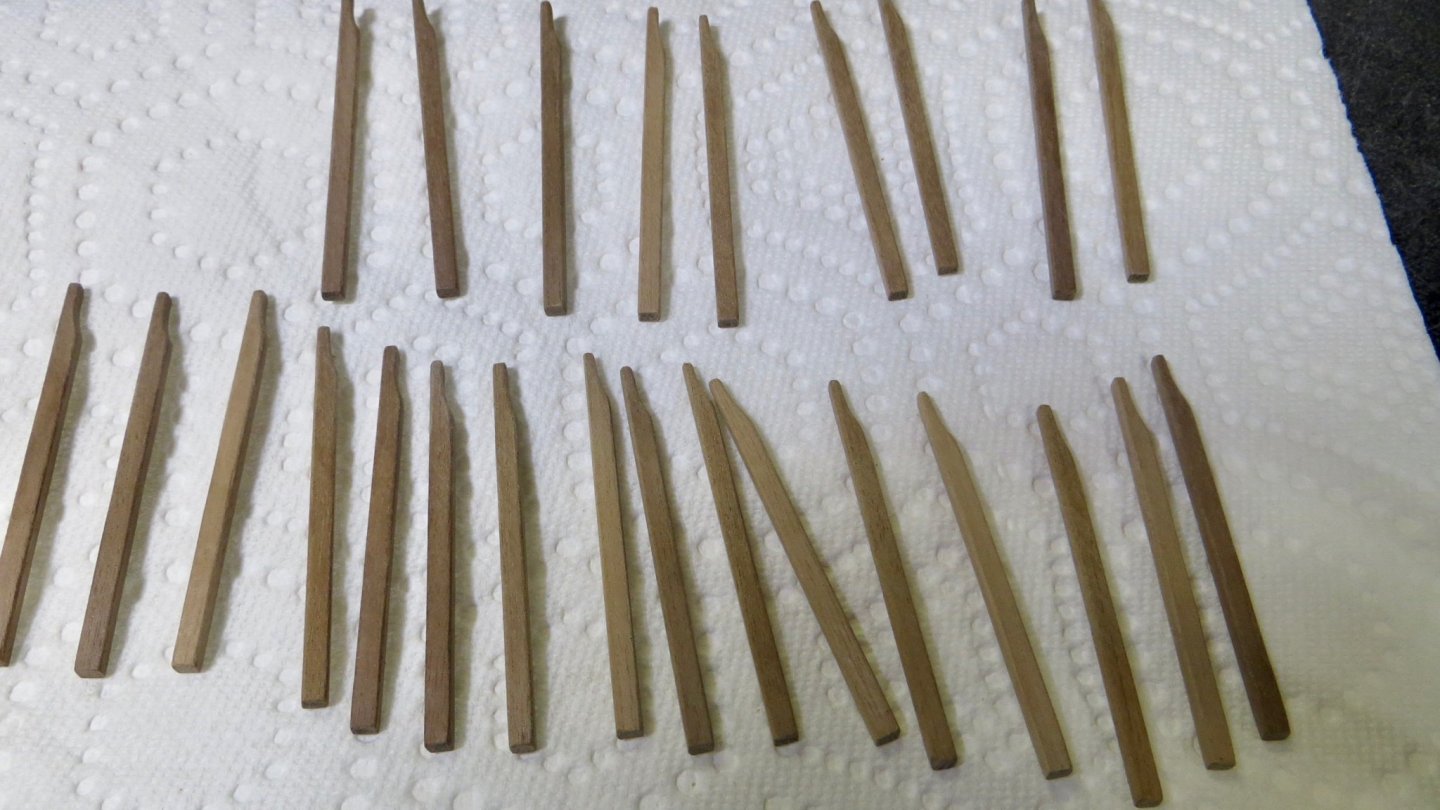
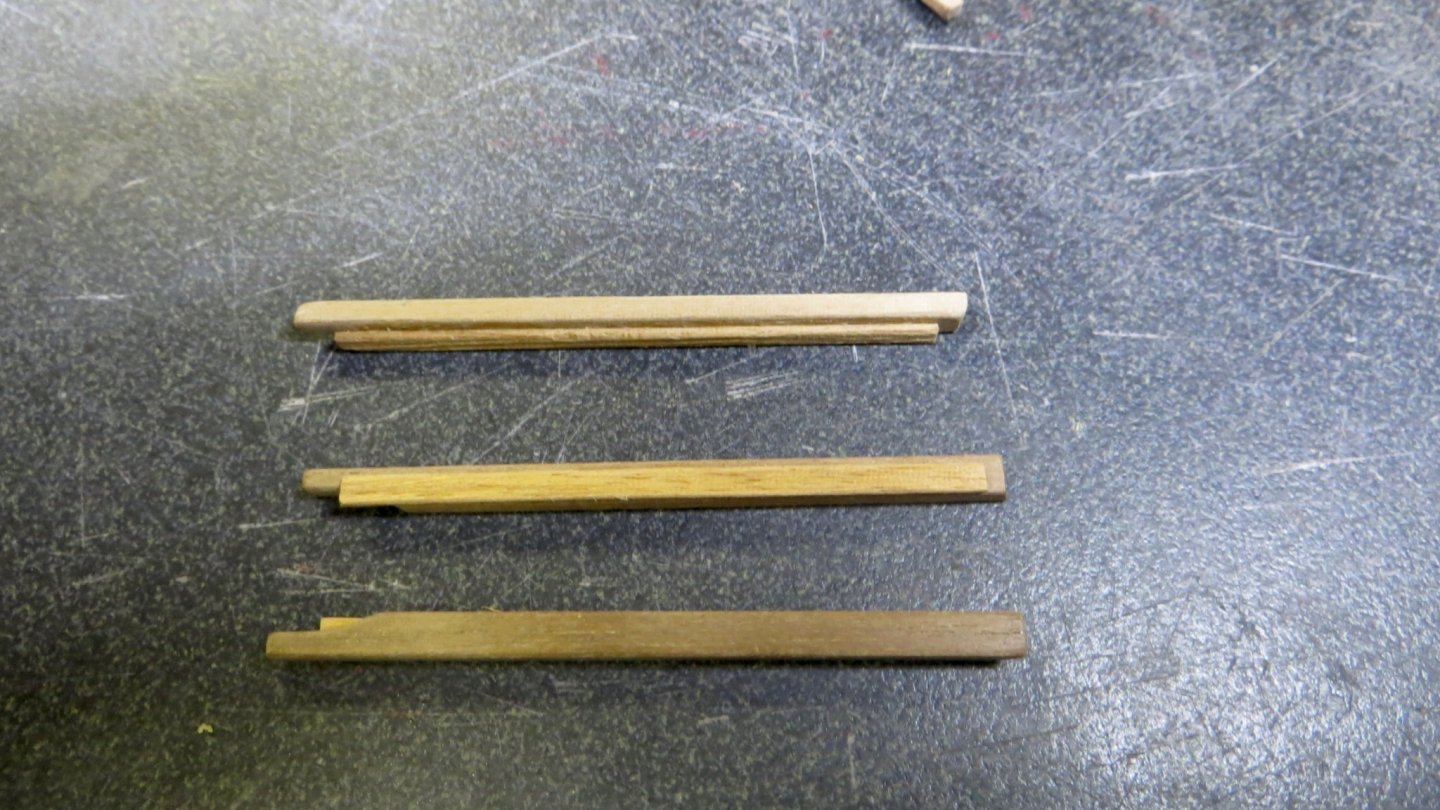
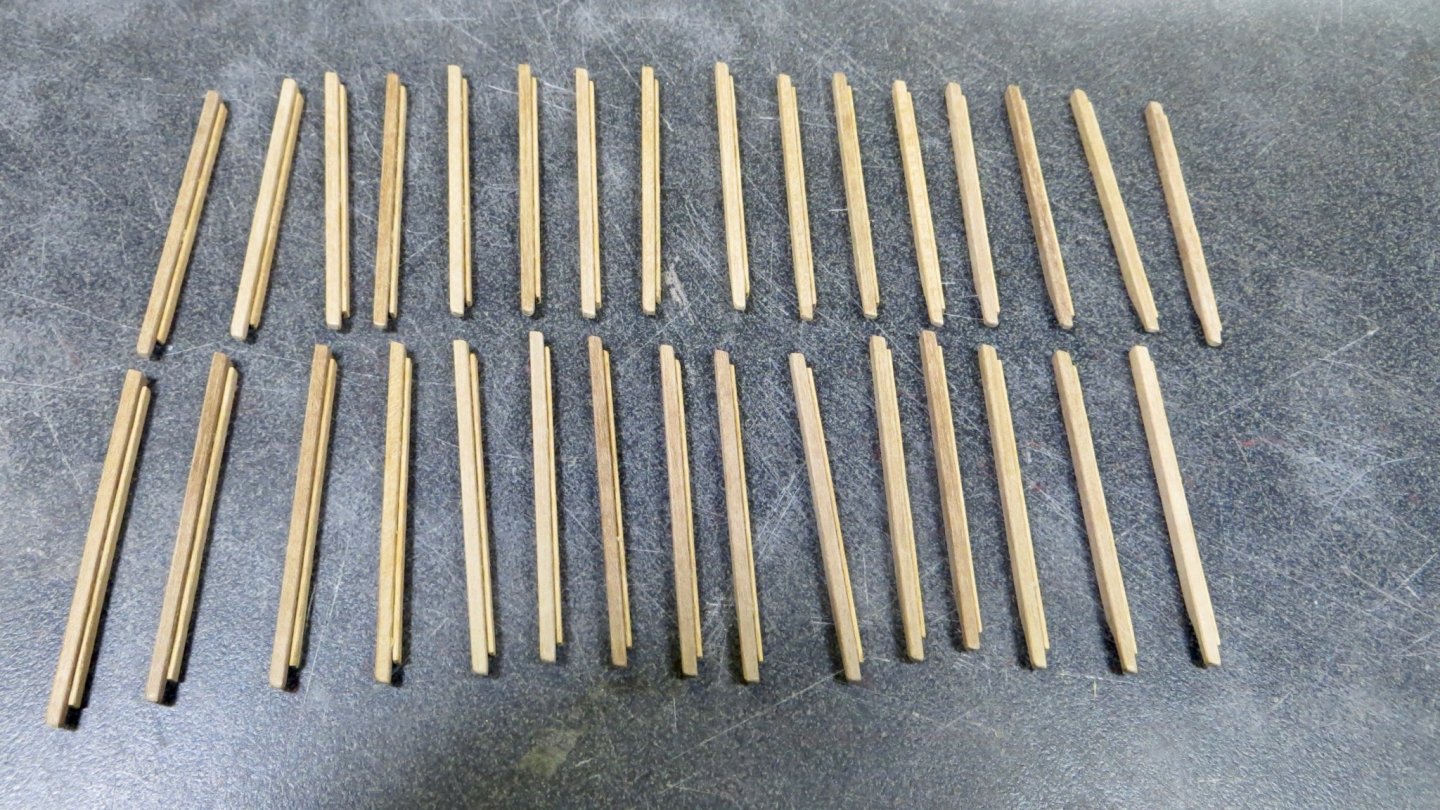
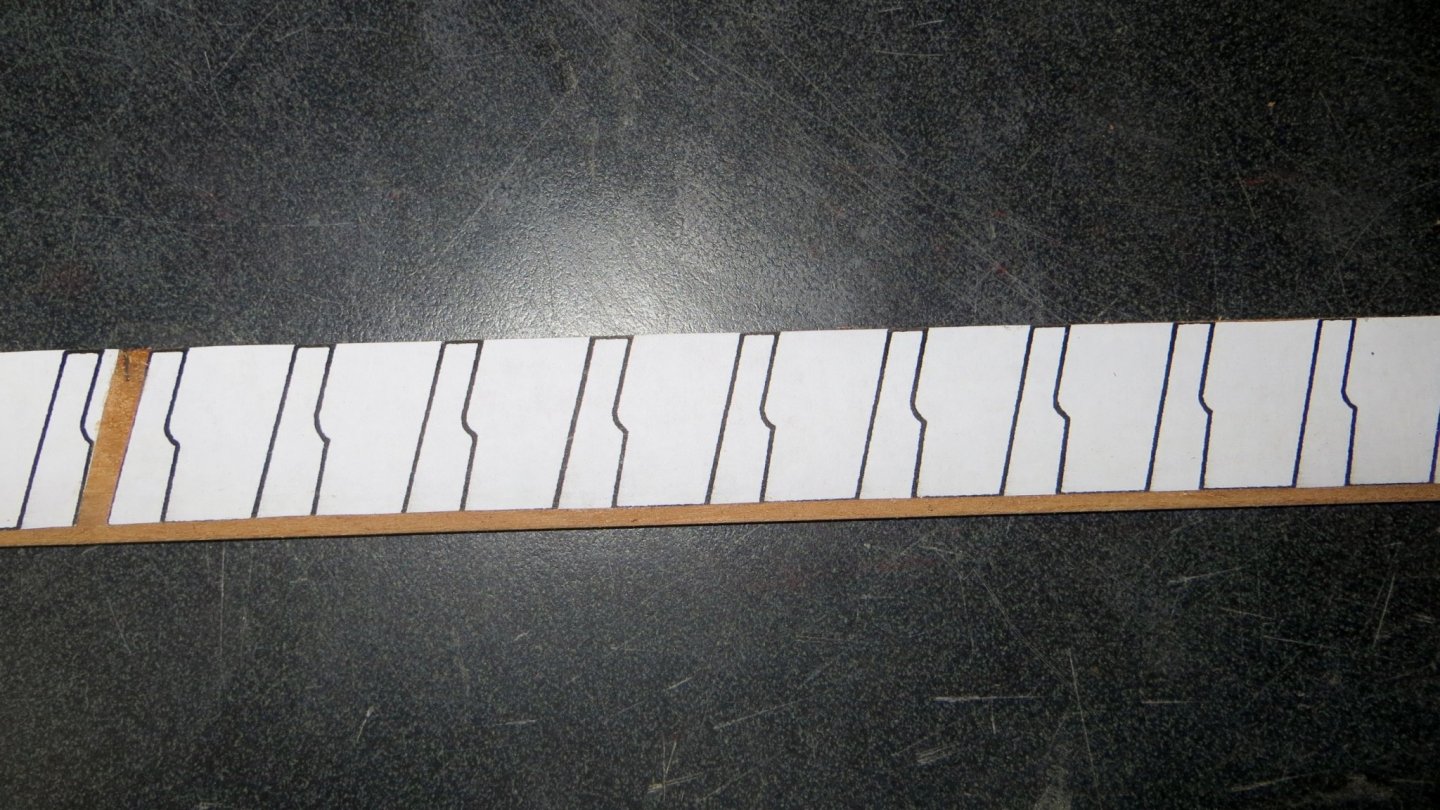
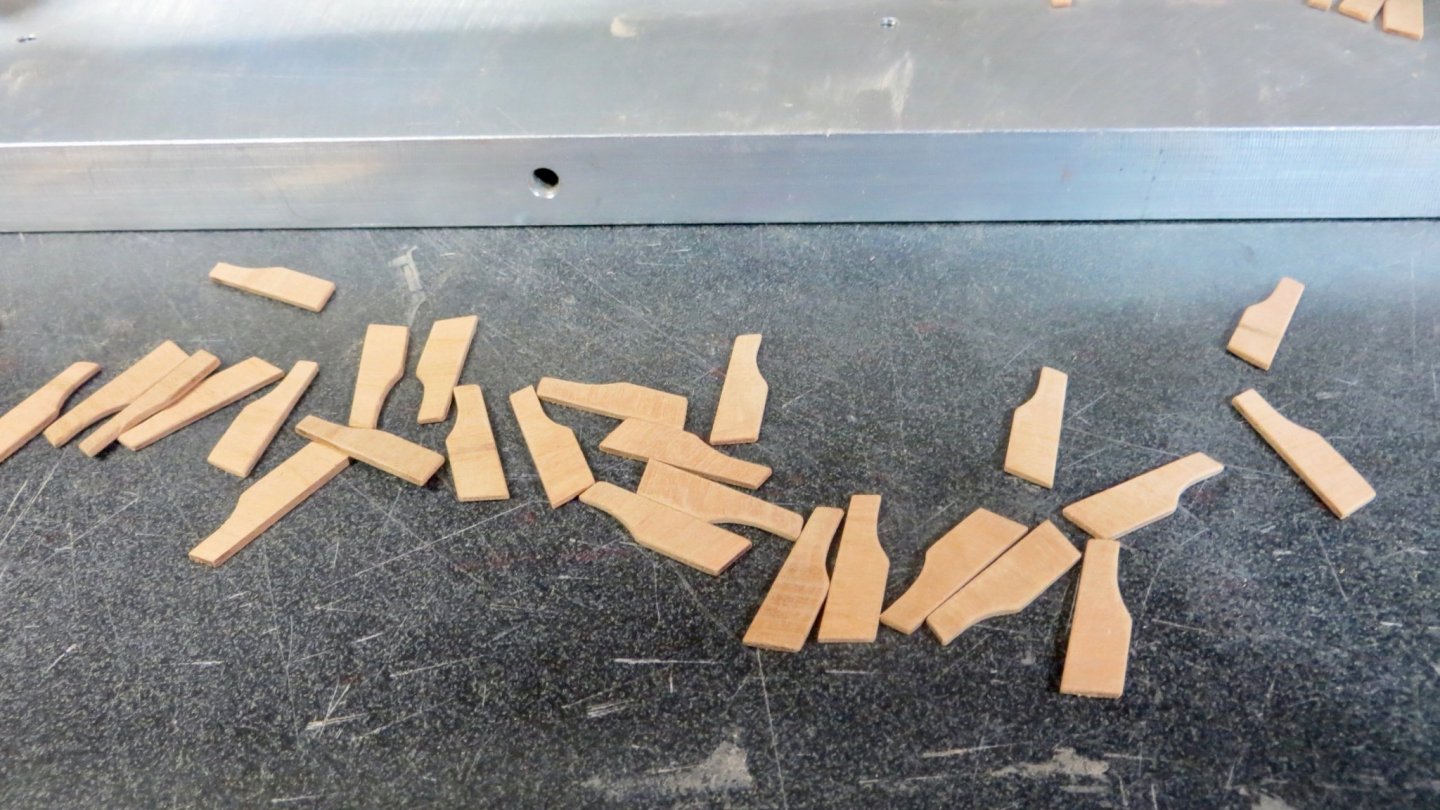
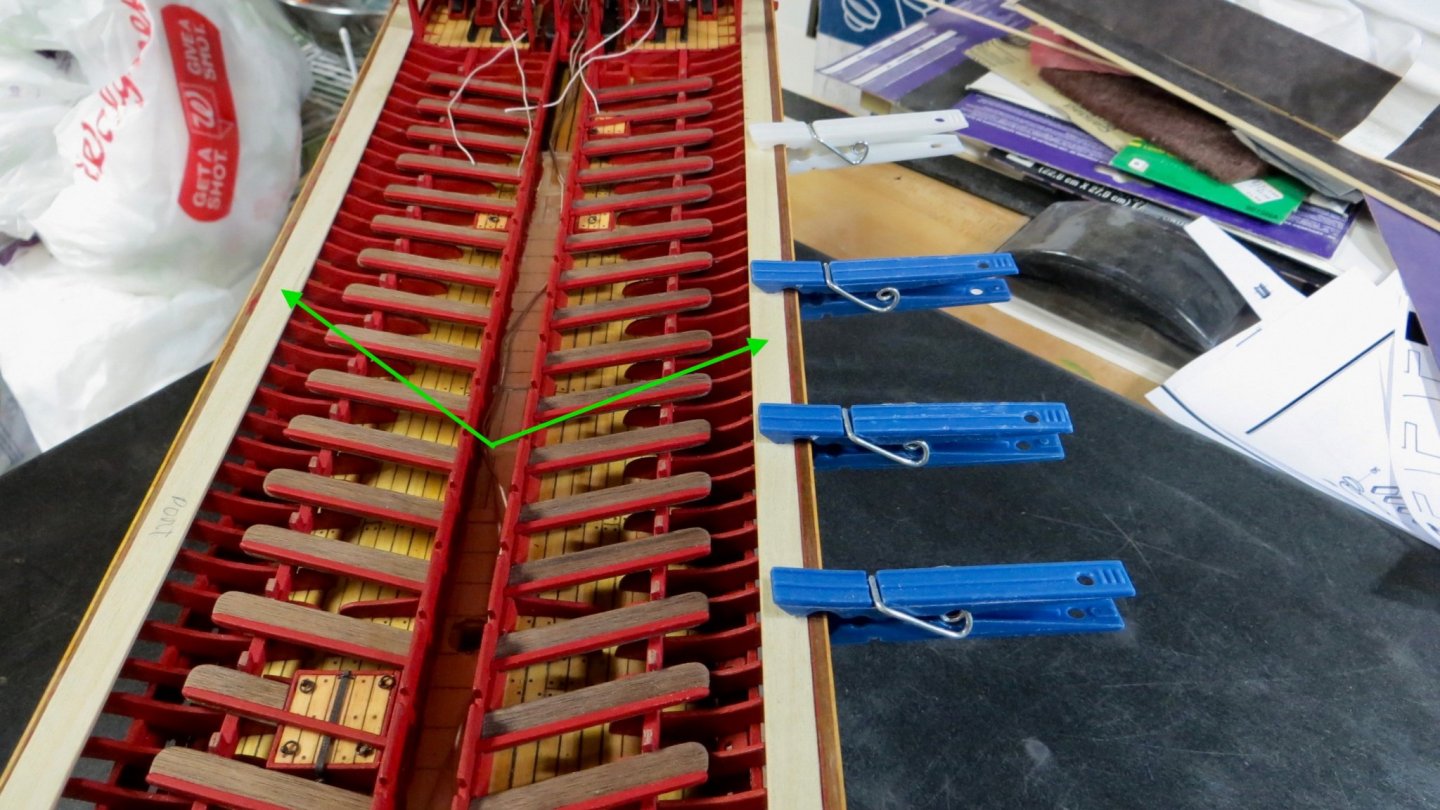
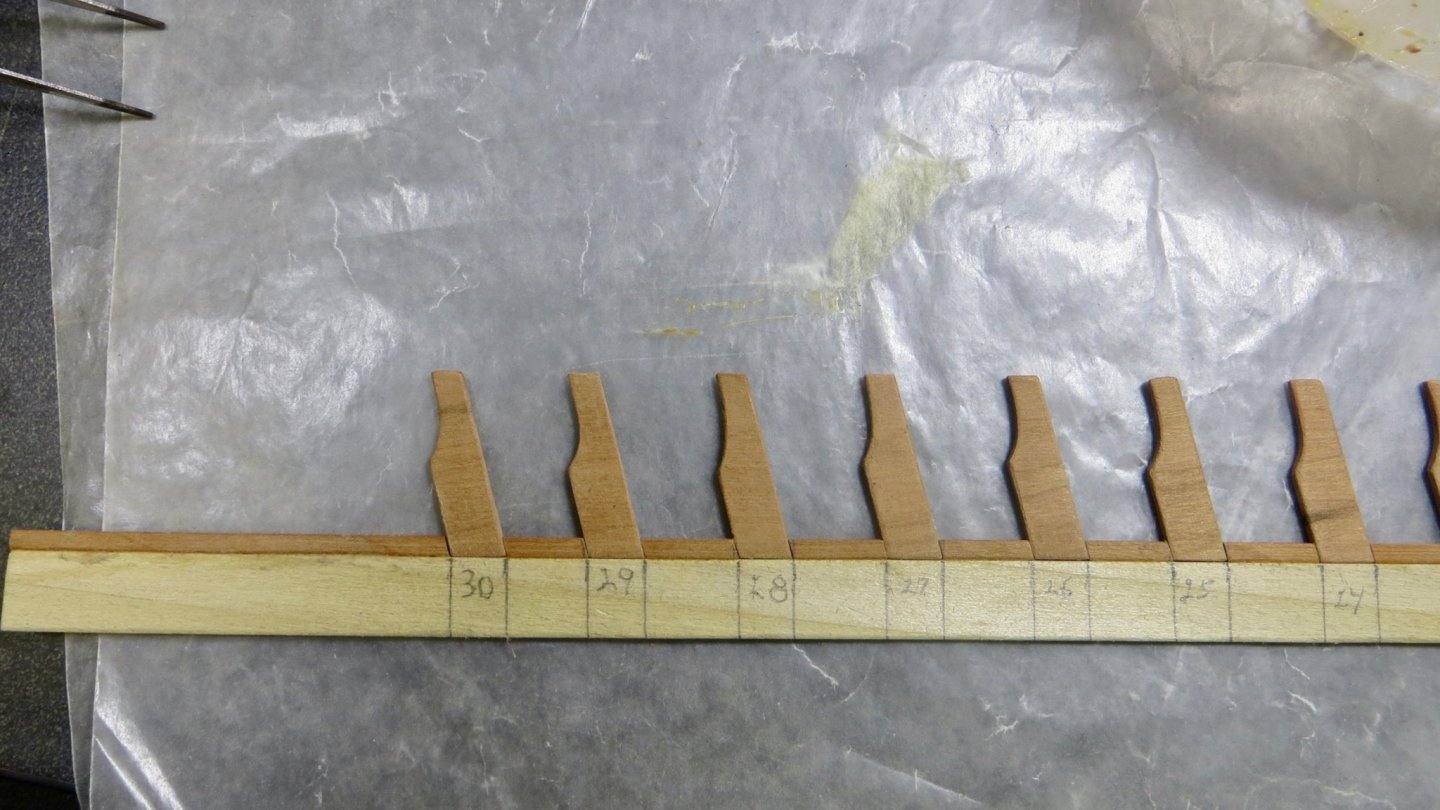
Hello, I hope everyone is well. I was able to resume work on my model, which sadly was collecting dust for a few weeks! I cut up and painted a tiny (1mm x 1mm) trim strip of wood for an edge border of the upper planking. The trim piece ends where the upper planking changes at the stern. (See green arrows in next 2 photos) The next step was to make the "Thwarts and Counter-Footboards" that rest on top of the benches. There are 29 on the port side and 30 on the starboard side. After cutting the strips to size, a relief radius was added to one end. A bunch of finished "Thwarts" The "Counter-Footboards" are just thin strips of wood glued onto the "Thwart" piece. The Footboard extends into the relief radius. View from 3 sides Finished assemblies and then painted When attaching and gluing the assemblies to the model, I made up a spacer to keep the distance and angle consistent. One end attaches to the slots of the board that runs across the entire length of the mid ships (added at the very beginning of the build) and the other end with the radius sits on top of the upper platforms All assemblies installed Now I turn my attention back to doing some more work around the platform area where the cannon are located. Thanks for visiting! Frank


- 510 replies
-
- 8
-
-
- reale de france
- corel
- (and 1 more)
-
Thanks Clark! Yes, I'm back at it with the model, finally! I should be posting some photos in a week or so. Thanks for asking. Frank
- 112 replies
-
- 2
-
-
- corel
- reale de france
- (and 1 more)
-
Hi Clark, You are making some nice progress. Model looks terrific so far! Frank
- 112 replies
-
- 1
-
-
- corel
- reale de france
- (and 1 more)
-
Hello Friends! Just a quick note to let you know I am taking a month off from the work bench. My daughter gave us our first grandson, "Luca" last month!! We are so excited, especially after the tough Autumn we had with my dad. I will be spending the next month helping her and enjoying my grandson. I've tried to work on the model the last couple of weeks, but have had many starts and stops. I'm worried that i'll mess something up, so I will give it a break until April!! Thanks for visiting, Frank
- 510 replies
-
- 3
-
-
- reale de france
- corel
- (and 1 more)
-
Michael, great job on that lantern! Looking at your Vasa brings back lots of memories of both our Vasa builds Lol!! Frank
-
Hi Mark, great job! Can you give me a little more information on the laser level you have? Looks like a very nice tool to have in the workroom. thanks, Frank
-
Hello Clark, I am away on a trip this week. When I return, I will send you some photos of the Shroud assembly plan from the Corel plan. Basically, however, here is how Corel shows it being done. Just above the waterline of the ship and below (underneath) the slots are 8 chain plates that are nailed to the side of the ship. (Eight on each side). Attached to the tops of the chain plates will be chain links (supplied in the kit). These links go from the top of the chain plates, thru the slots. At the top end of the chain links, above the slots, you attach what Corel calls toggles. These toggles are what the shrouds will be fastened to. It is quite simple really, but a picture is worth a thousand words as they say and I will post some as soon as I make it back home early next week. I hope this helps and makes sense. Thank you everyone for the "likes" and for visiting. It is appreciated! Frank
- 510 replies
-
- 1
-
-
- reale de france
- corel
- (and 1 more)
-
Hi Michael, Love your plan for the wall mount! The sectional looks beautiful! Enjoy the rum Frank
-
Forgot to mention that I did scratch up some of the red trim strips on the edges, while I was carving out the slots. So I spent some time again with the red paint touching things up!! Frank
- 510 replies
-
- 1
-
-
- reale de france
- corel
- (and 1 more)
-
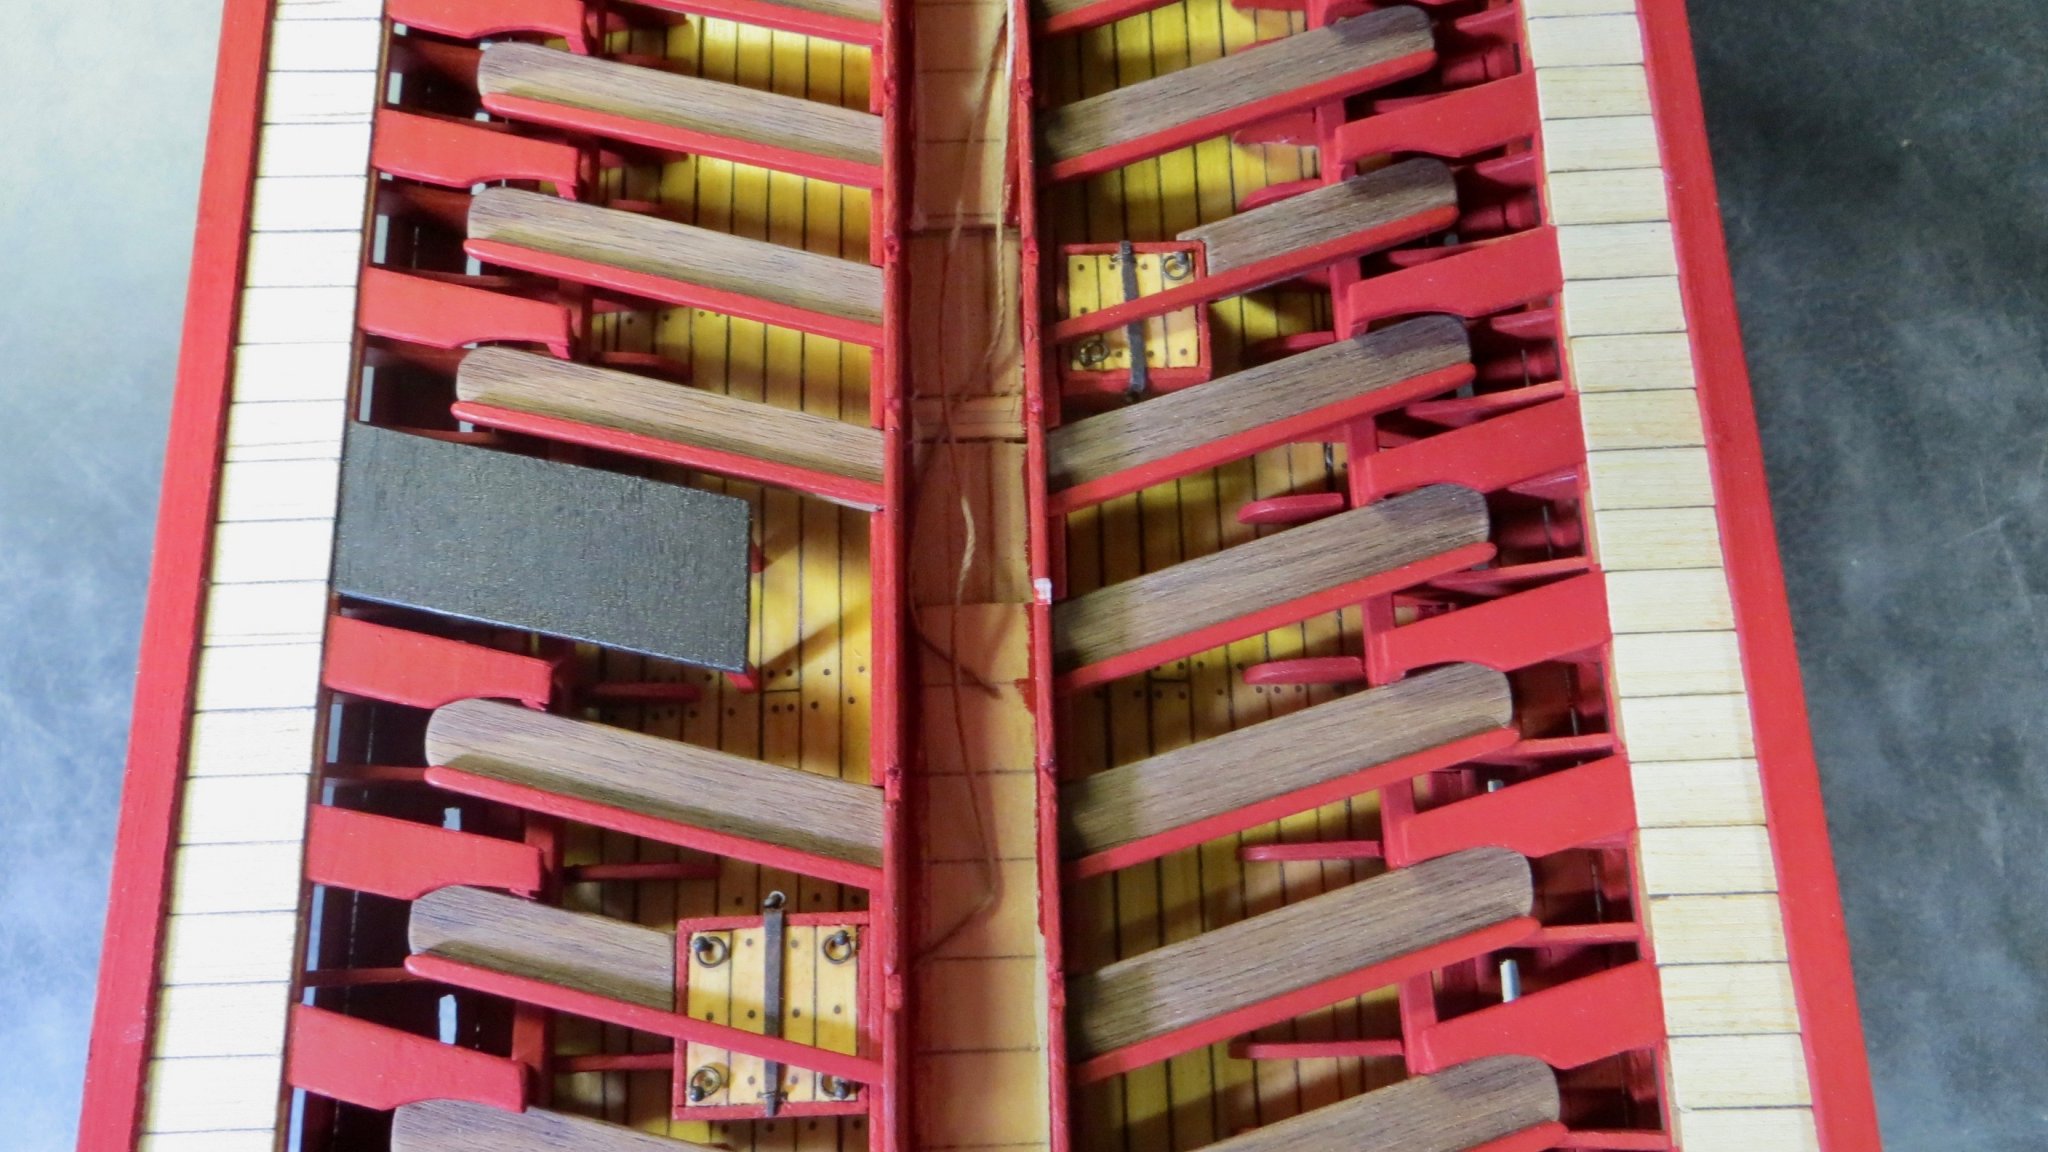
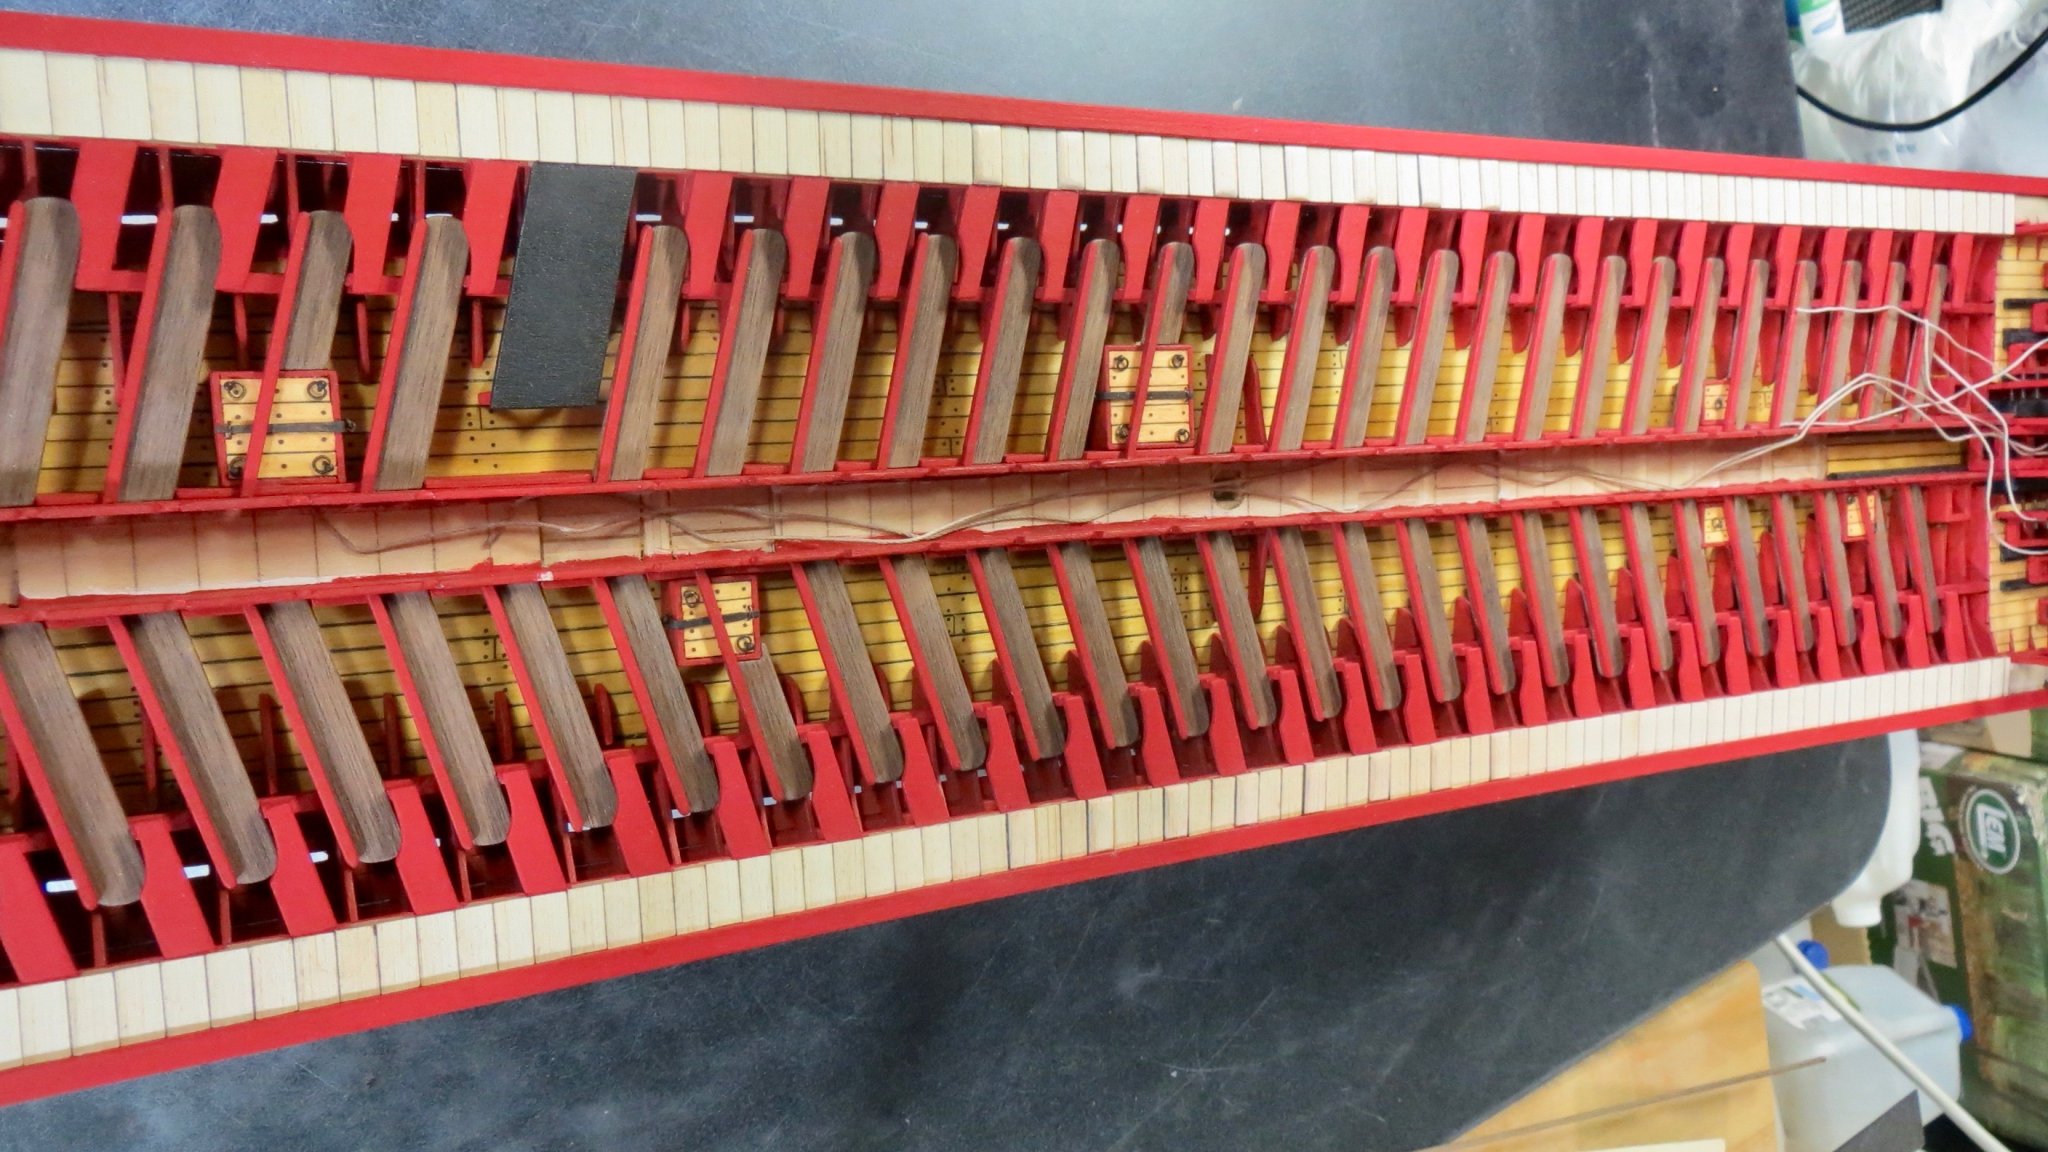
So I made it thru the section that I was dreading. I had to create 8 slots on each side. These slots allow the chains to pass thru down onto the chain plates on one end and the mainmast shrouds on the upper side. I think they came out pretty well. (Tough holding my hand steady!!) Next was drilling for the "Seat of Ease" on both sides Port and starboard. Finally staining and sealing with the same light oak stain and sealer as on the lower decking. Next step is to add the trim strips shown on the last post. Thanks for visiting, Frank


- 510 replies
-
- 9
-
-
- reale de france
- corel
- (and 1 more)
-
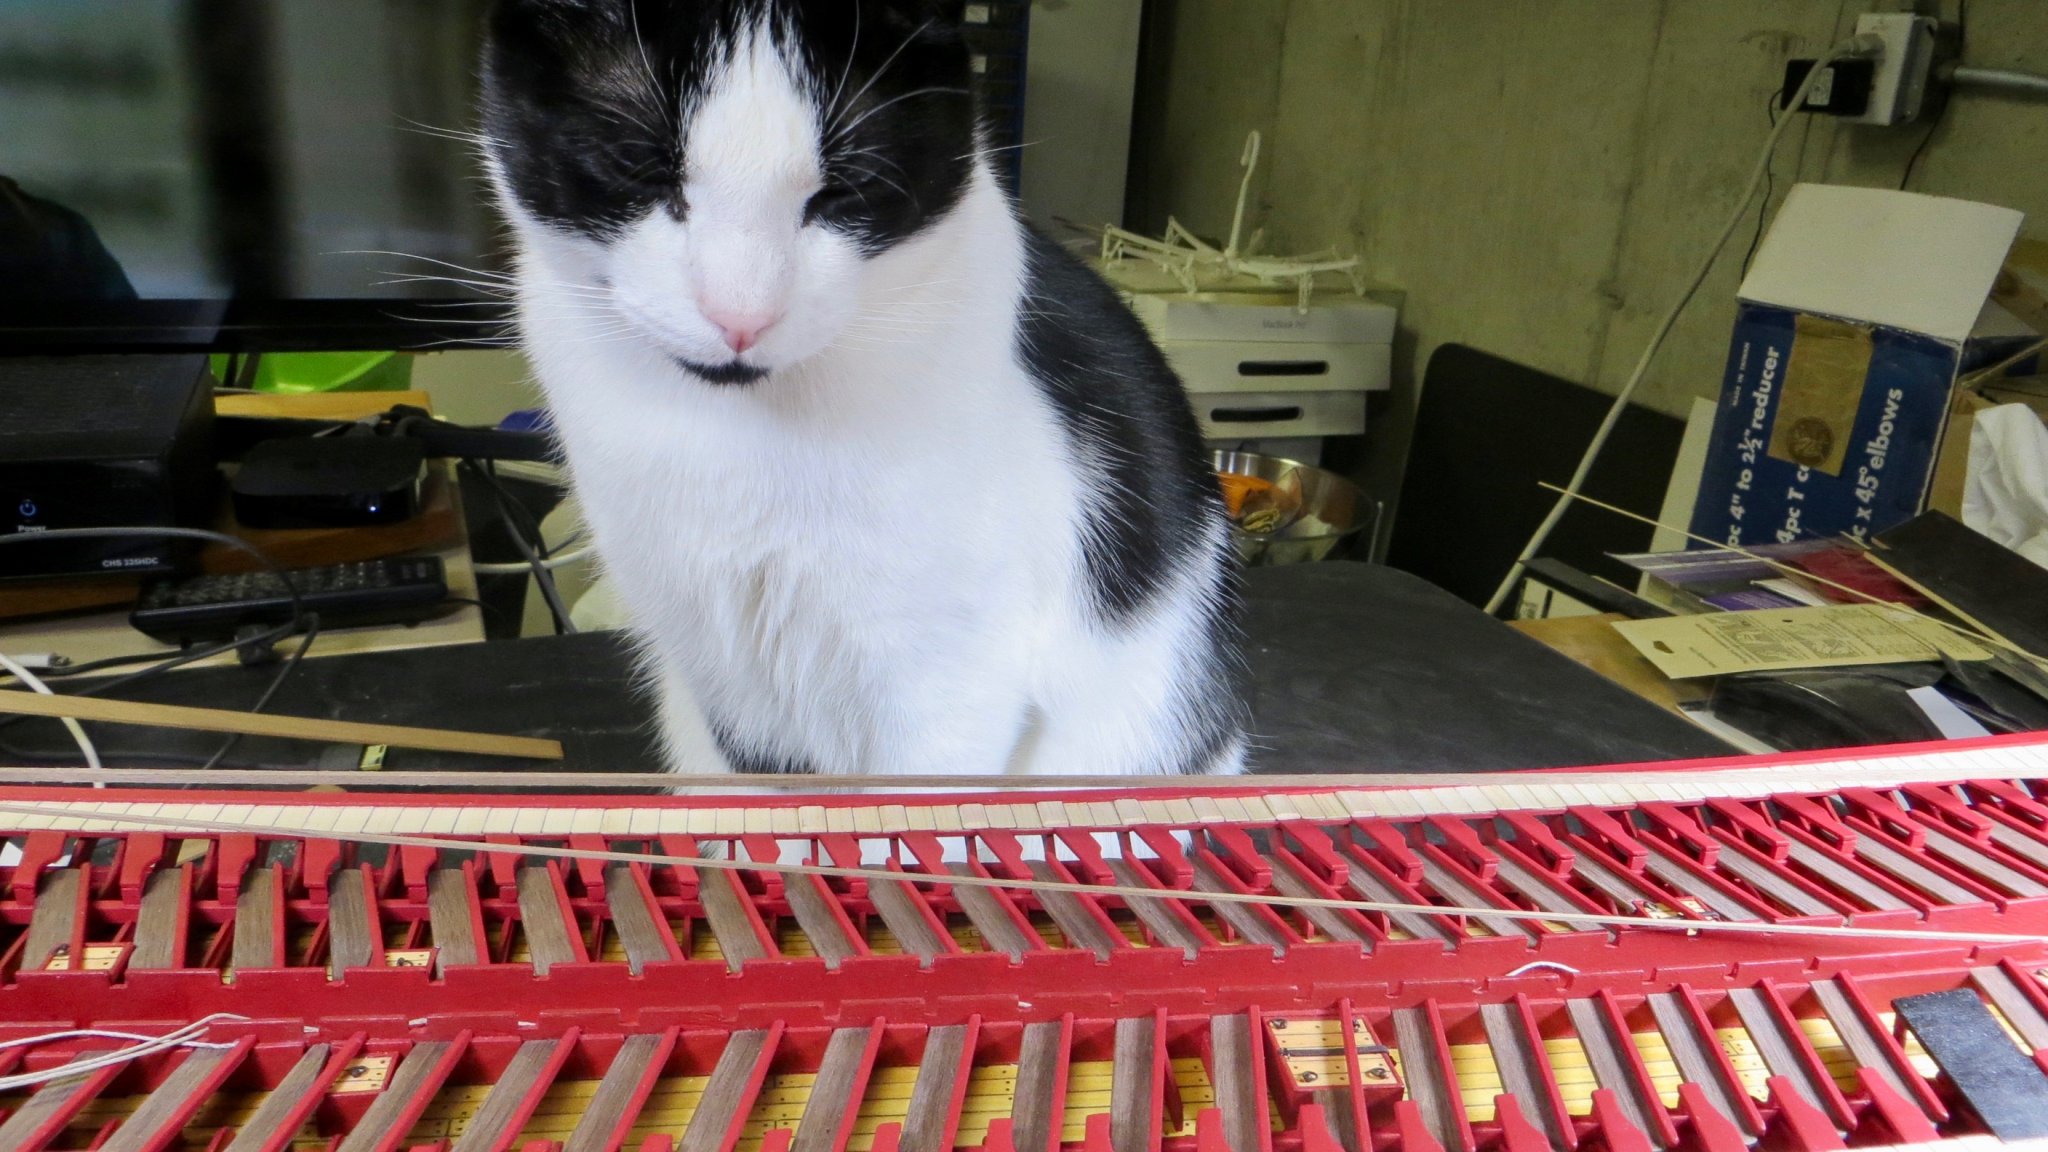
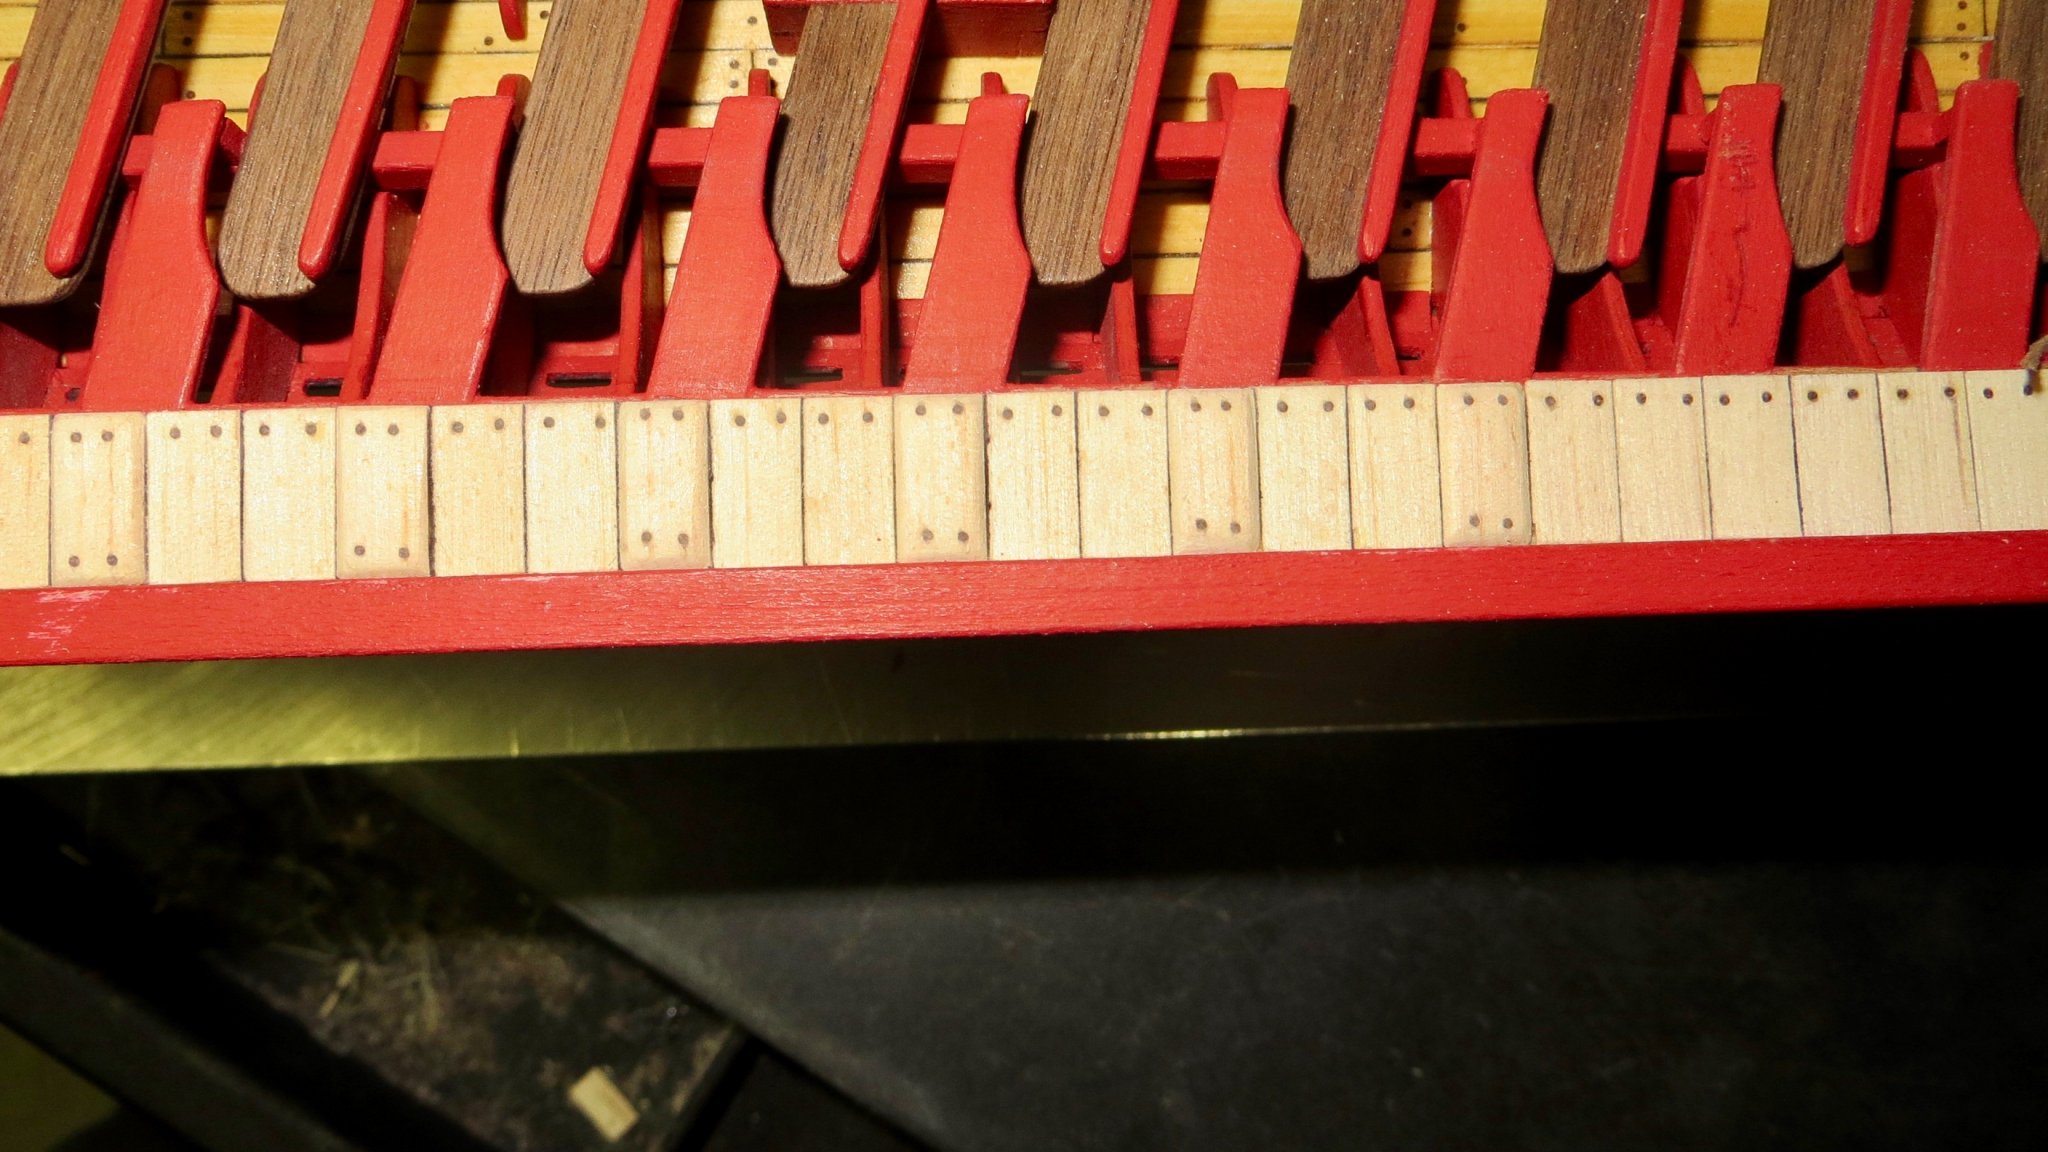
Hello, Back at work finishing up the upper deck planking. Han Solo, as usual, helping me keep on track! Finished laying in the planks Planks at the stern end, port and starboard side Planking at the bow end, port and starboard Drilled and Inserted the tree nails using the same method I did on the lower decking in earlier posts. I only put in tree nails where they will be visible. There is molding pieces, which will be painted and installed, that would have covered the tree nails on the outside section of the planks. See green arrows Thanks, Frank


- 510 replies
-
- 7
-
-
- reale de france
- corel
- (and 1 more)
-
Well done Clark! I think all the effort you are putting in to the planking will be well worth it! Frank
- 112 replies
-
- 1
-
-
- corel
- reale de france
- (and 1 more)
-
Hubac, thank you very much for passing along the photo's. very interesting and useful, especially the closeup ones. It is appreciated! Frank
- 510 replies
-
- 3
-
-
- reale de france
- corel
- (and 1 more)
-
Thanks for stopping by Mark! Yes, repetitive, but my equipment makes things easier, once they are set up for mass production! I'm going thru lots of red paint also. Lol! Frank
- 510 replies
-
- 2
-
-
- reale de france
- corel
- (and 1 more)
-
Hi Mark, Looking very nice! With regard to those yellow painted arches at the bow, over the doors, are they made of wood from the kit or metal or did you make them? They look perfect!! Frank
-
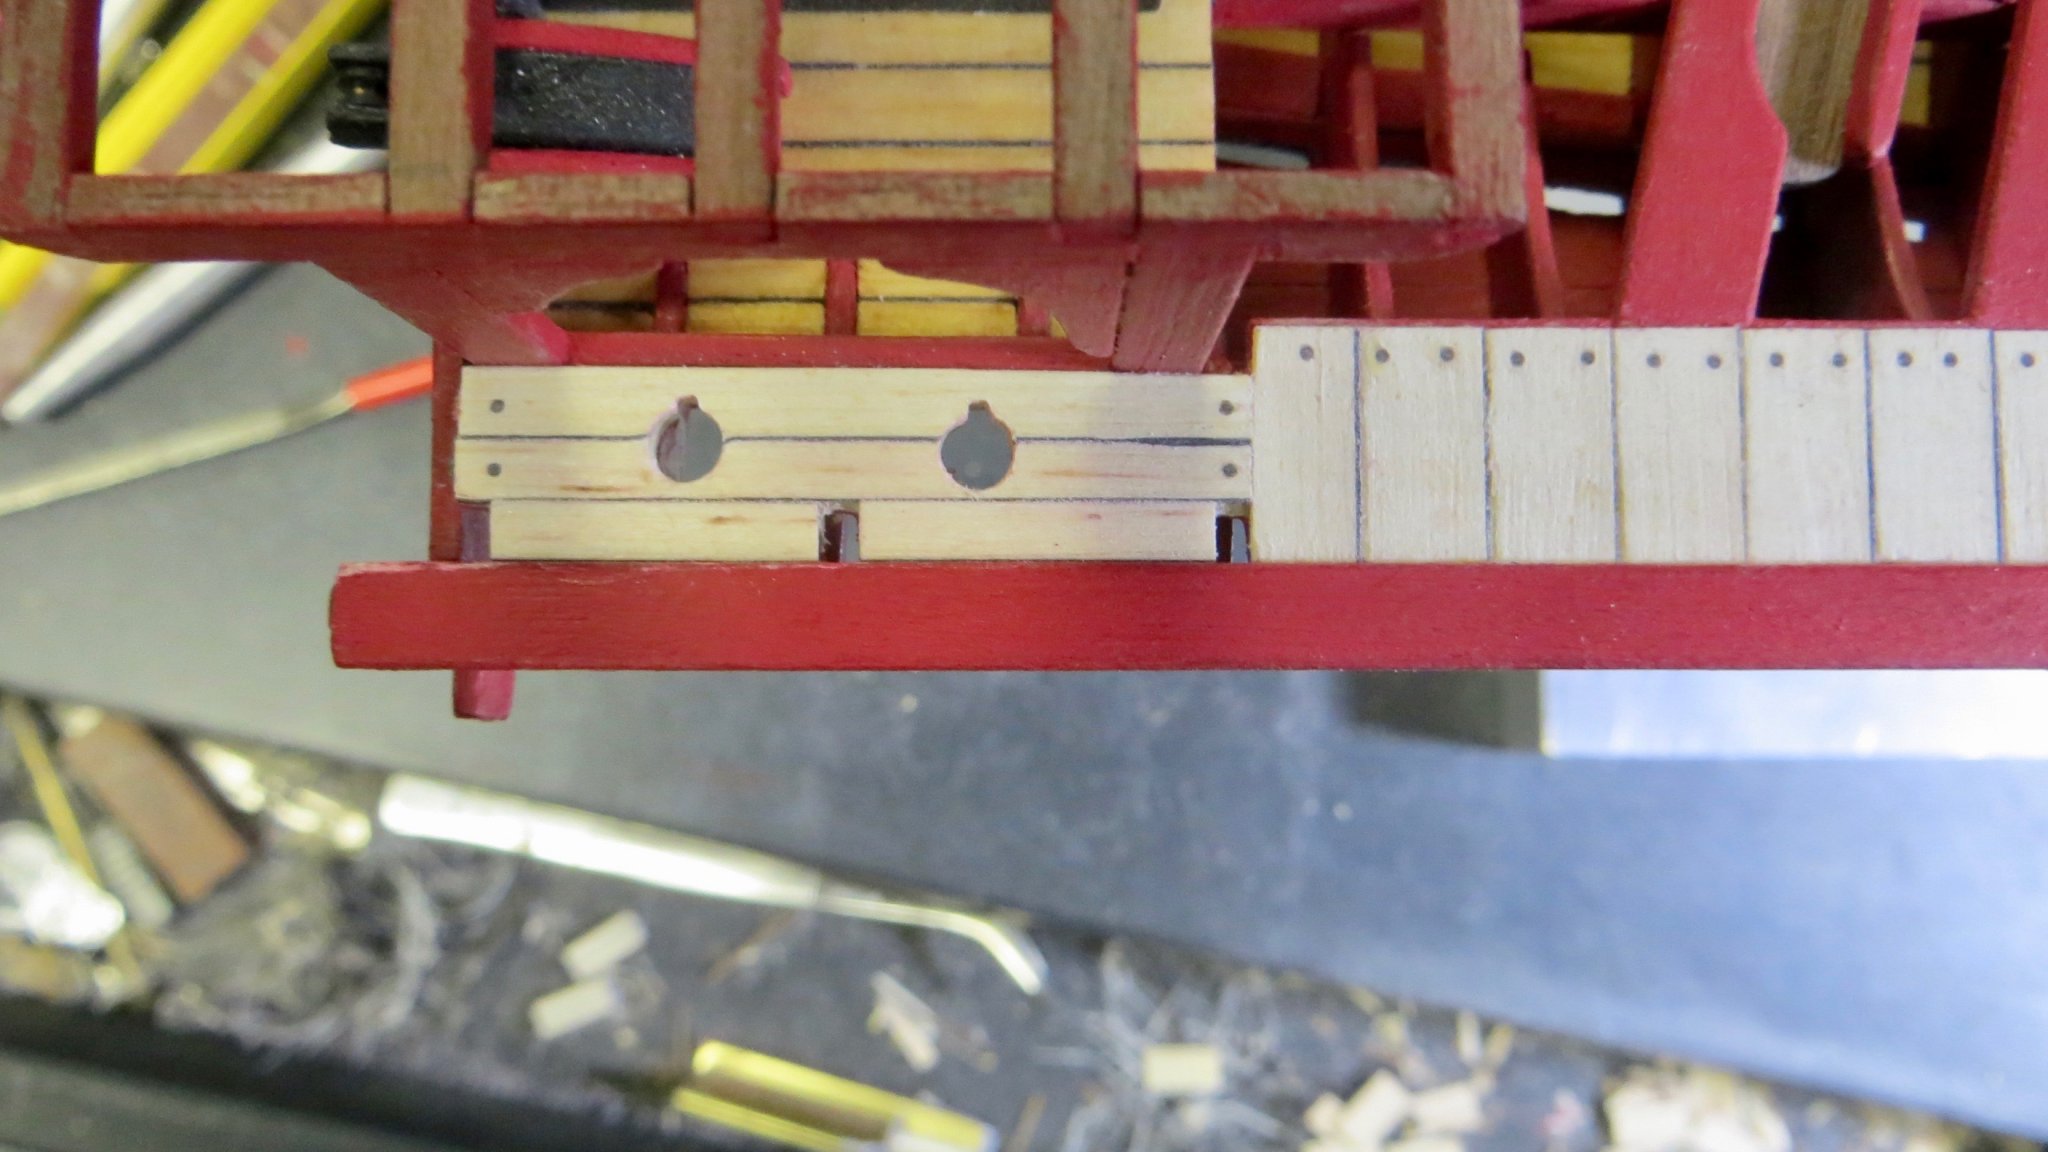
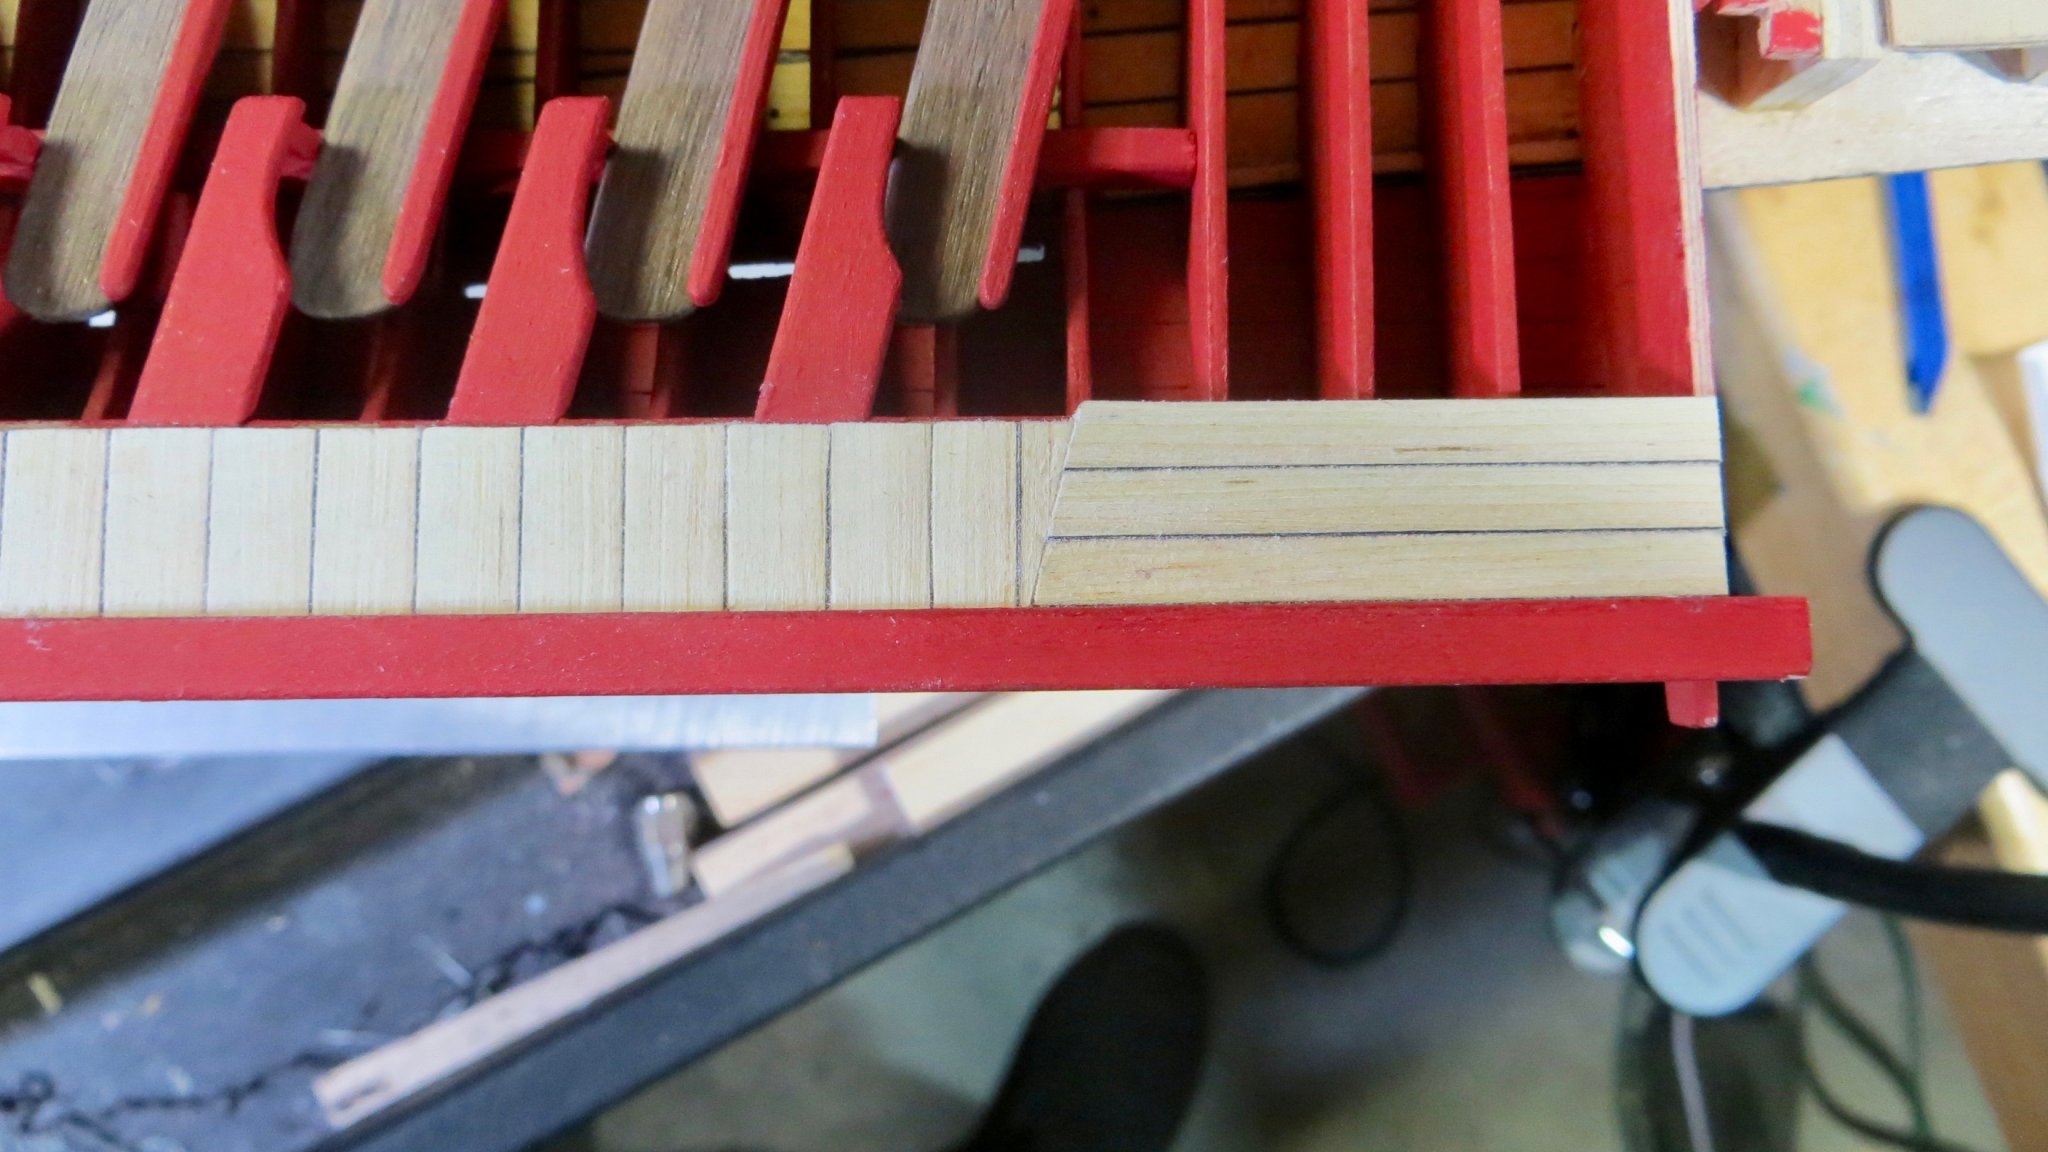
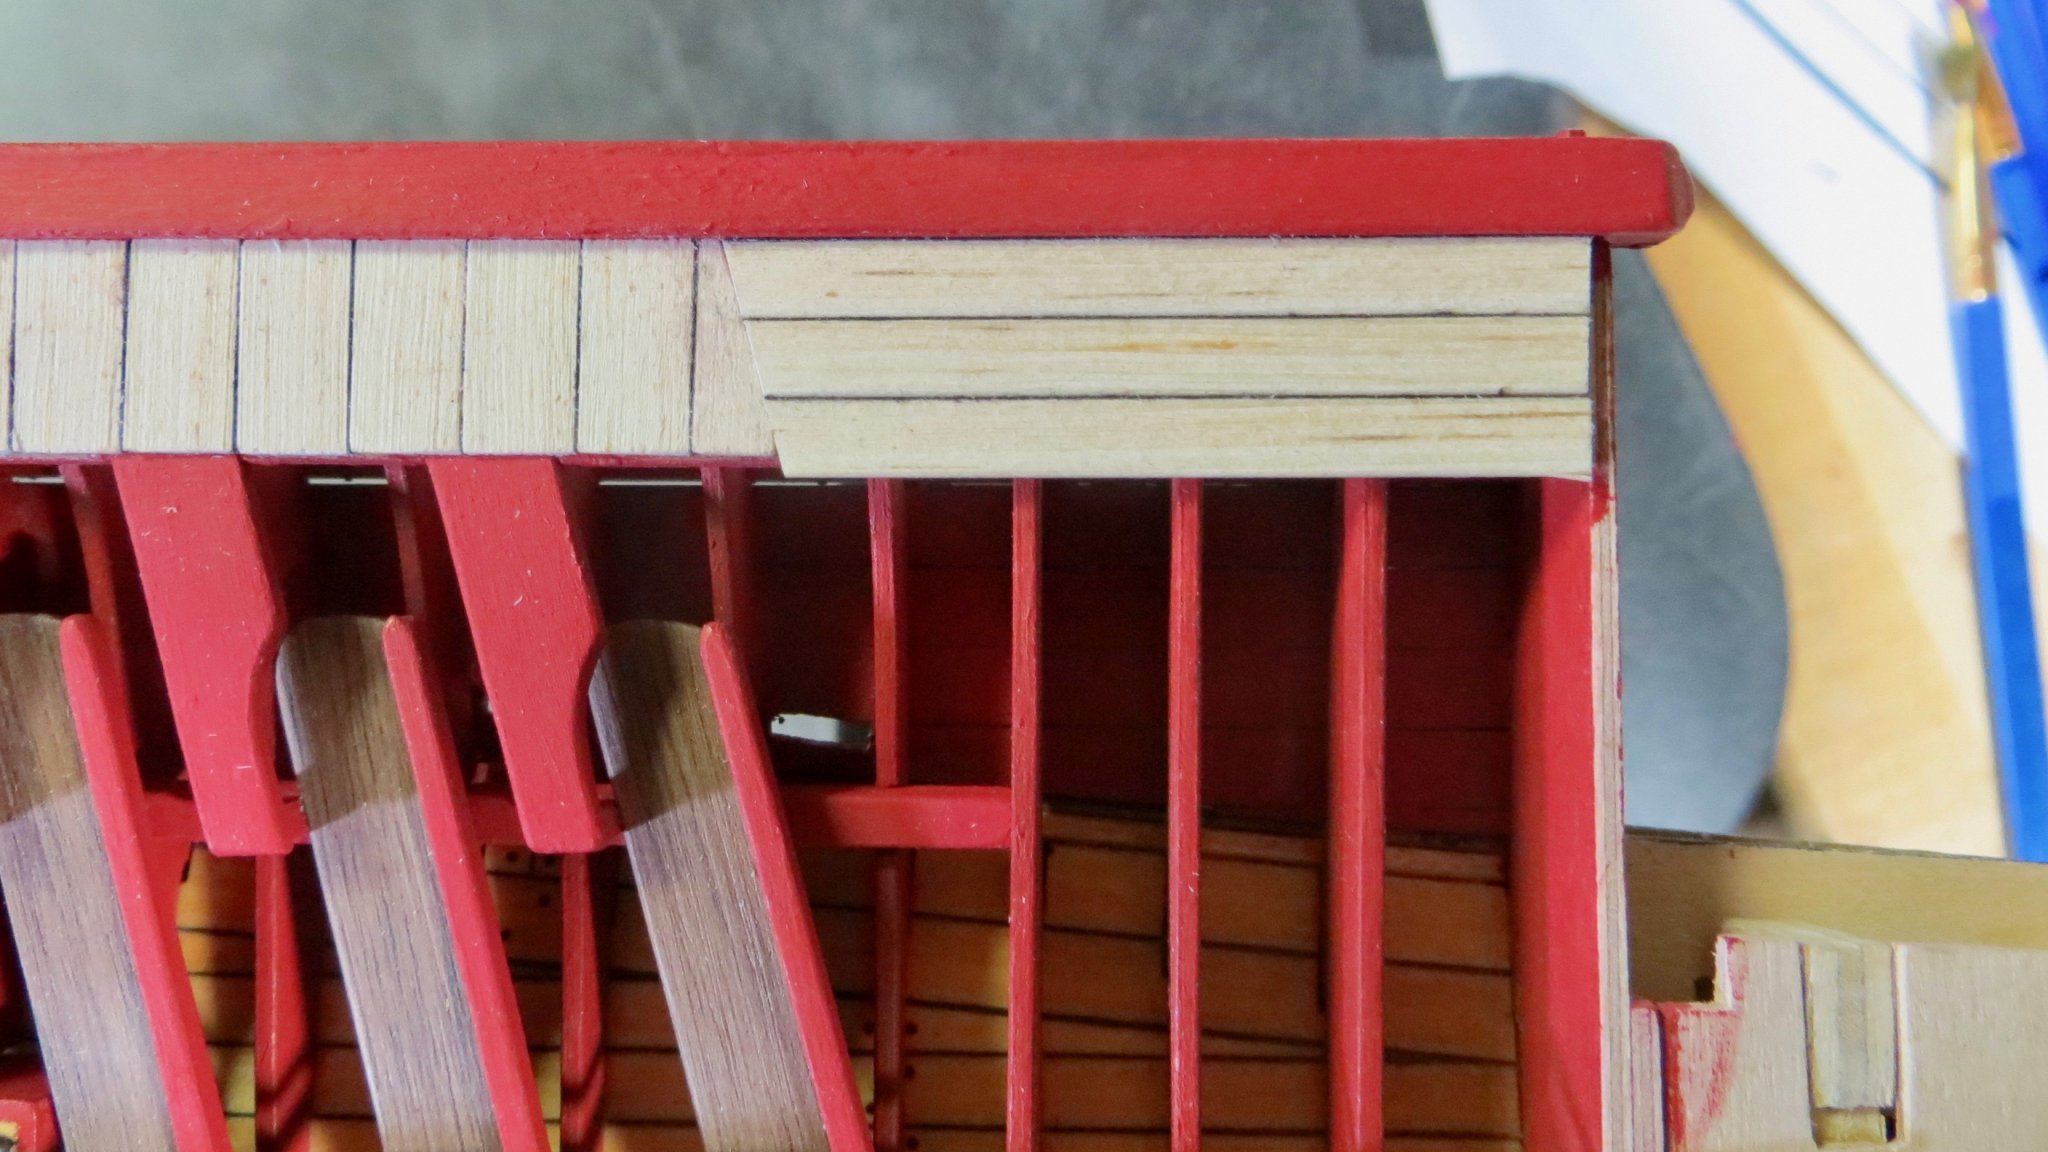
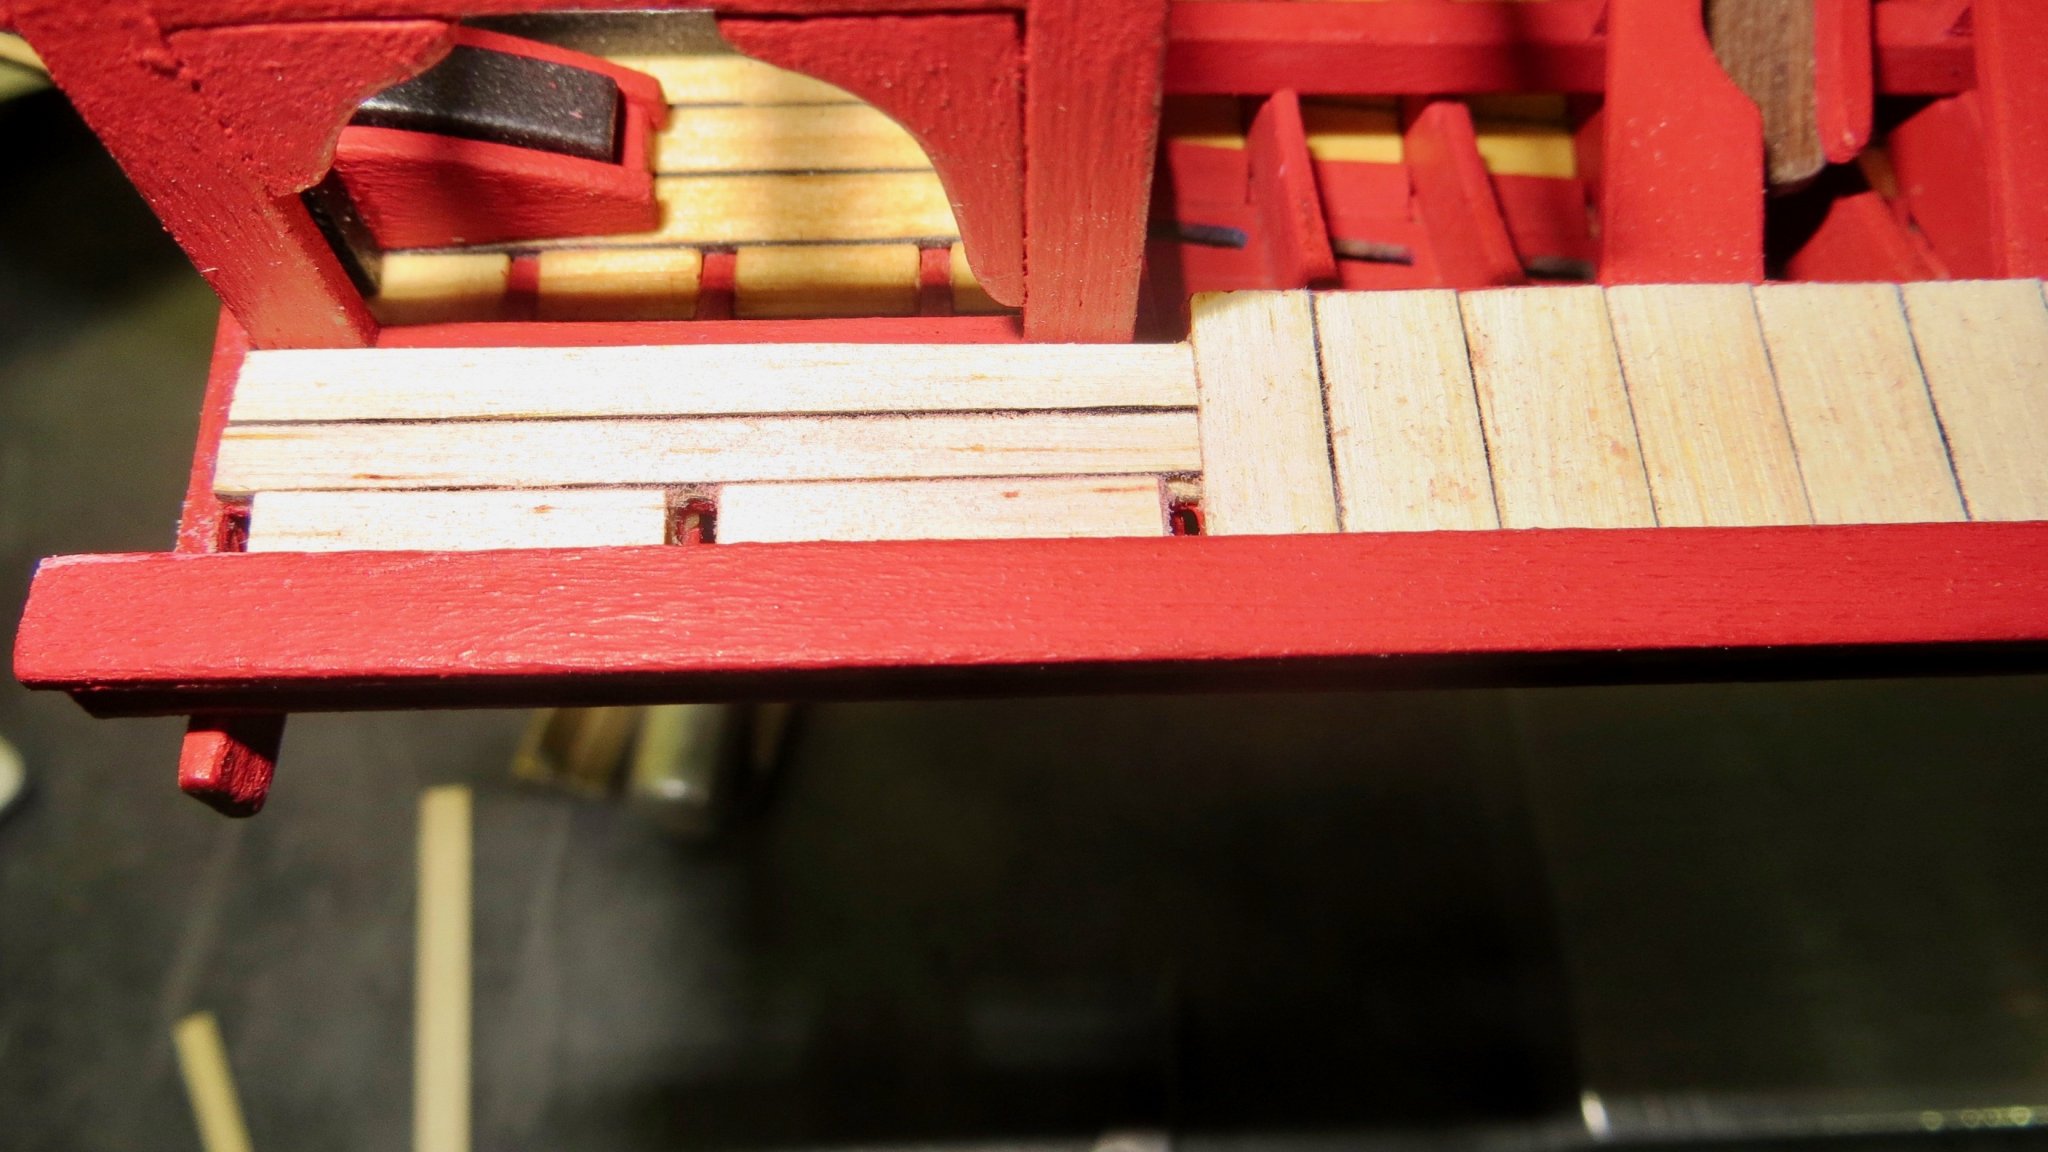
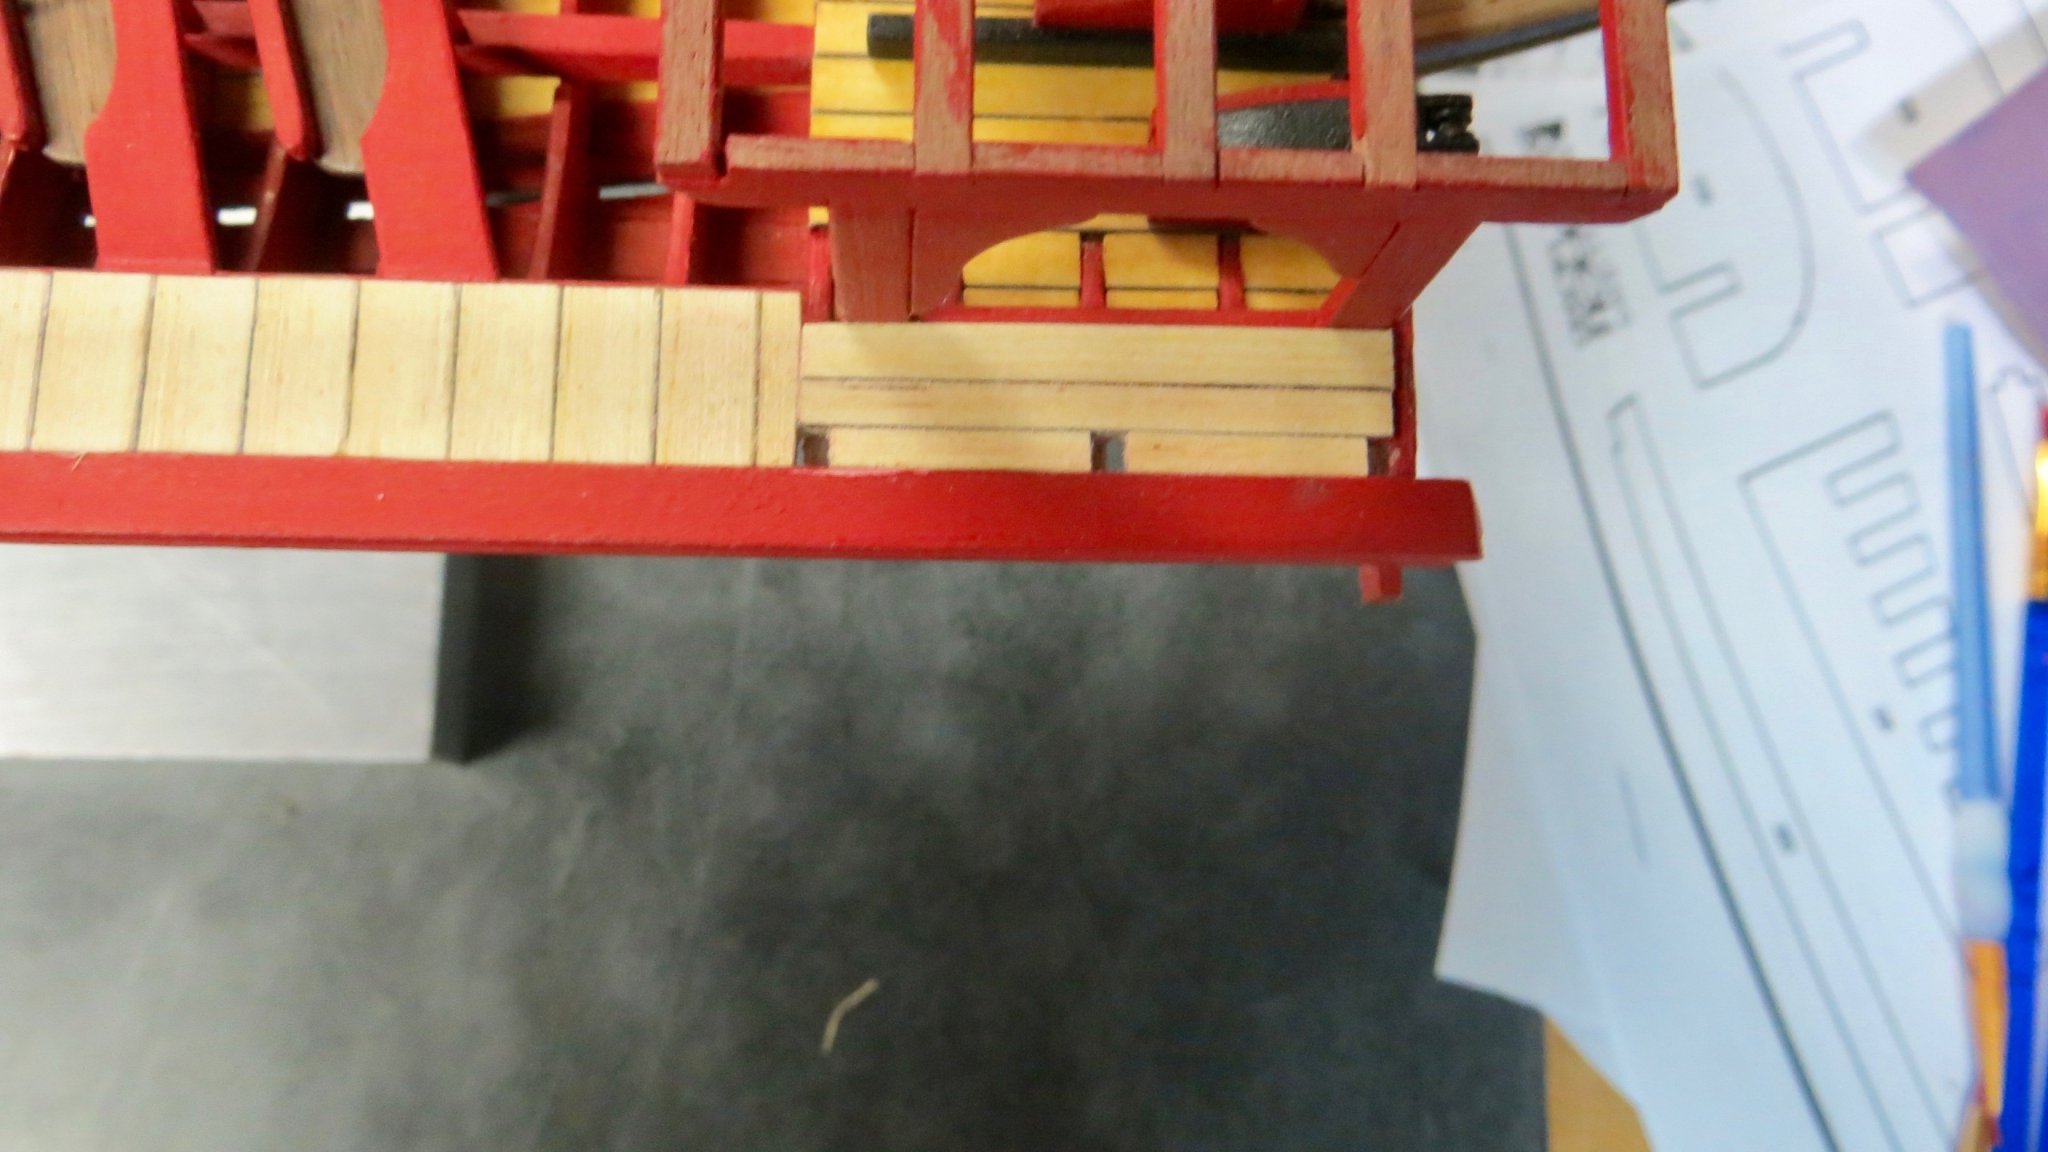
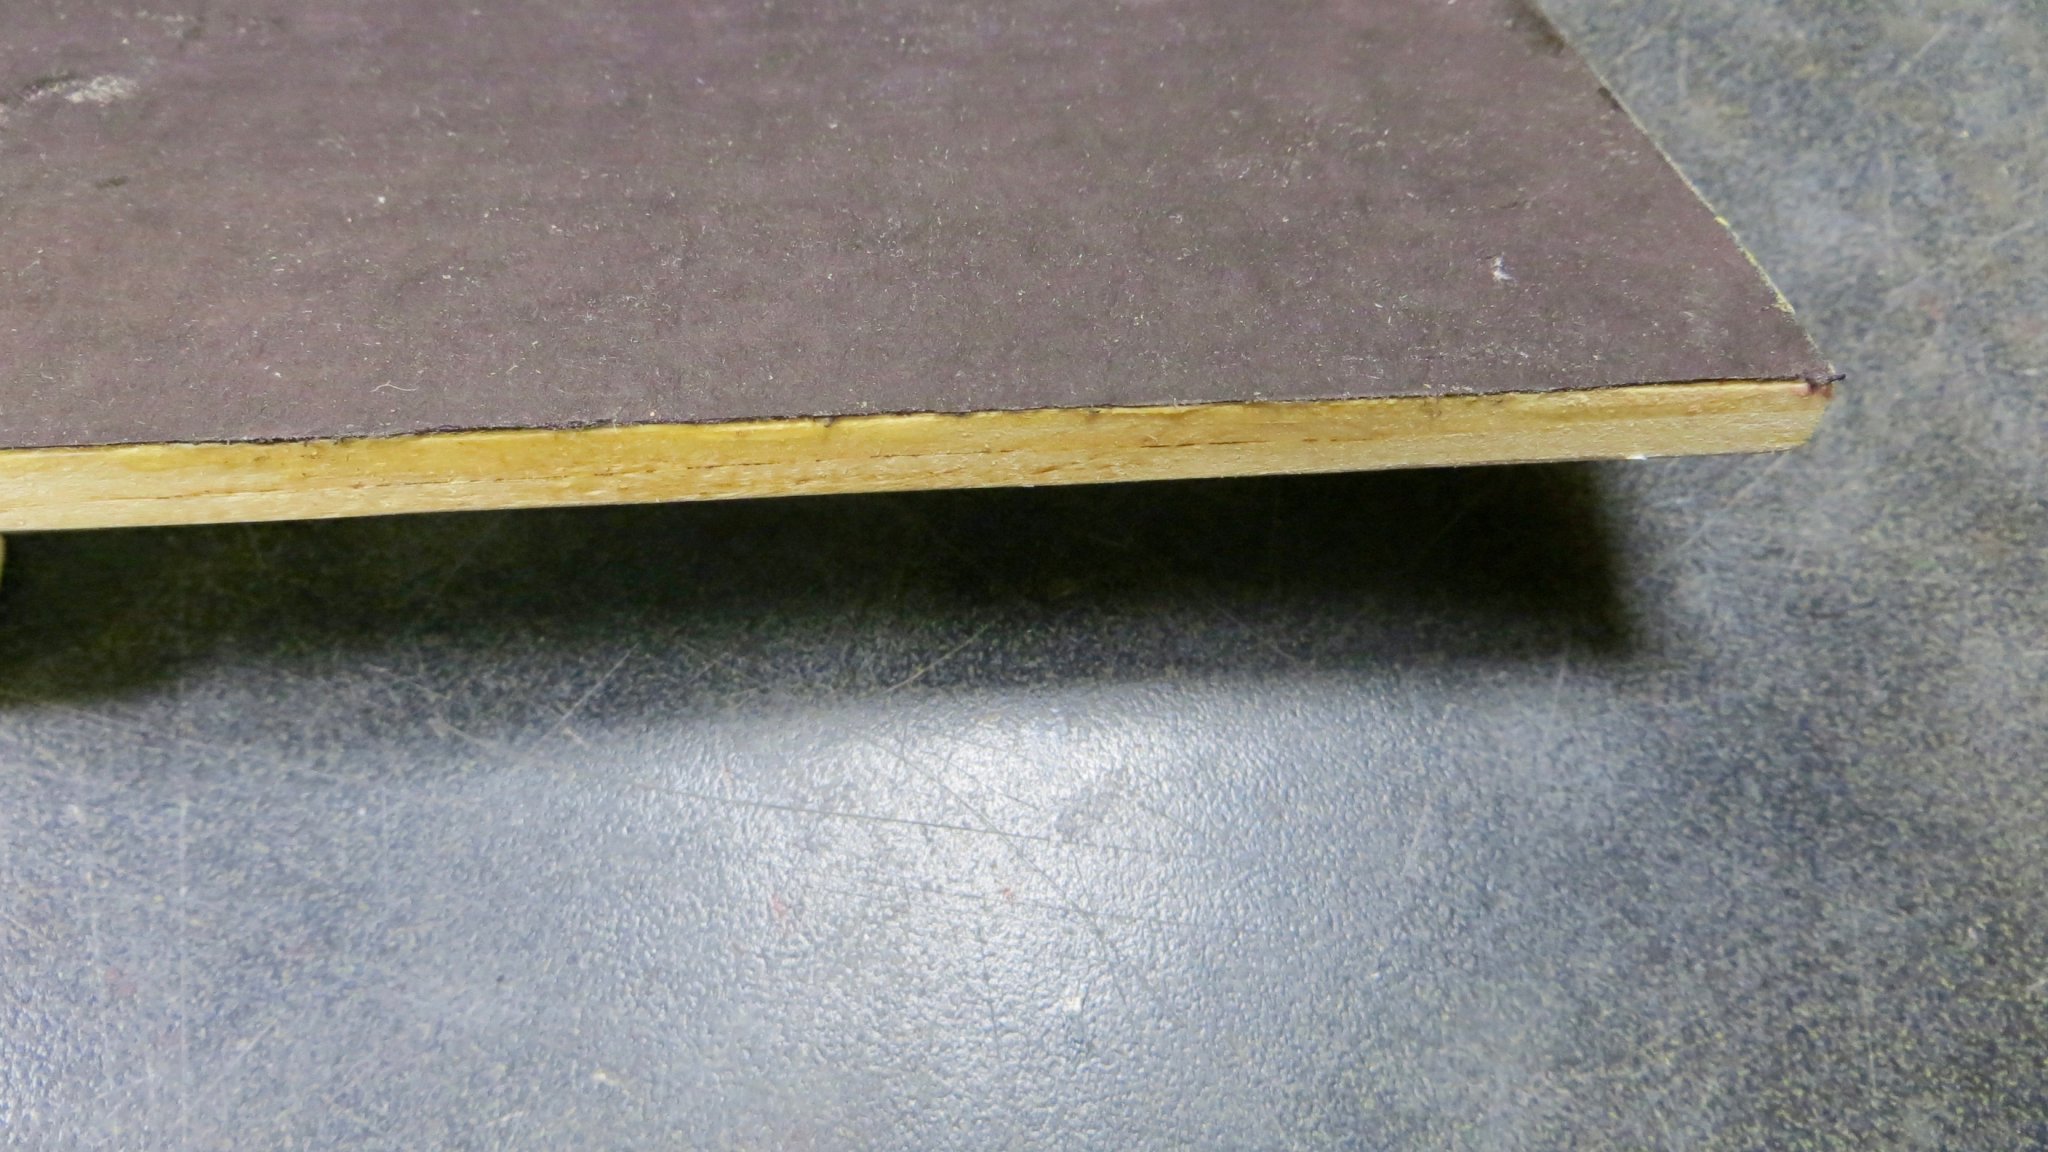
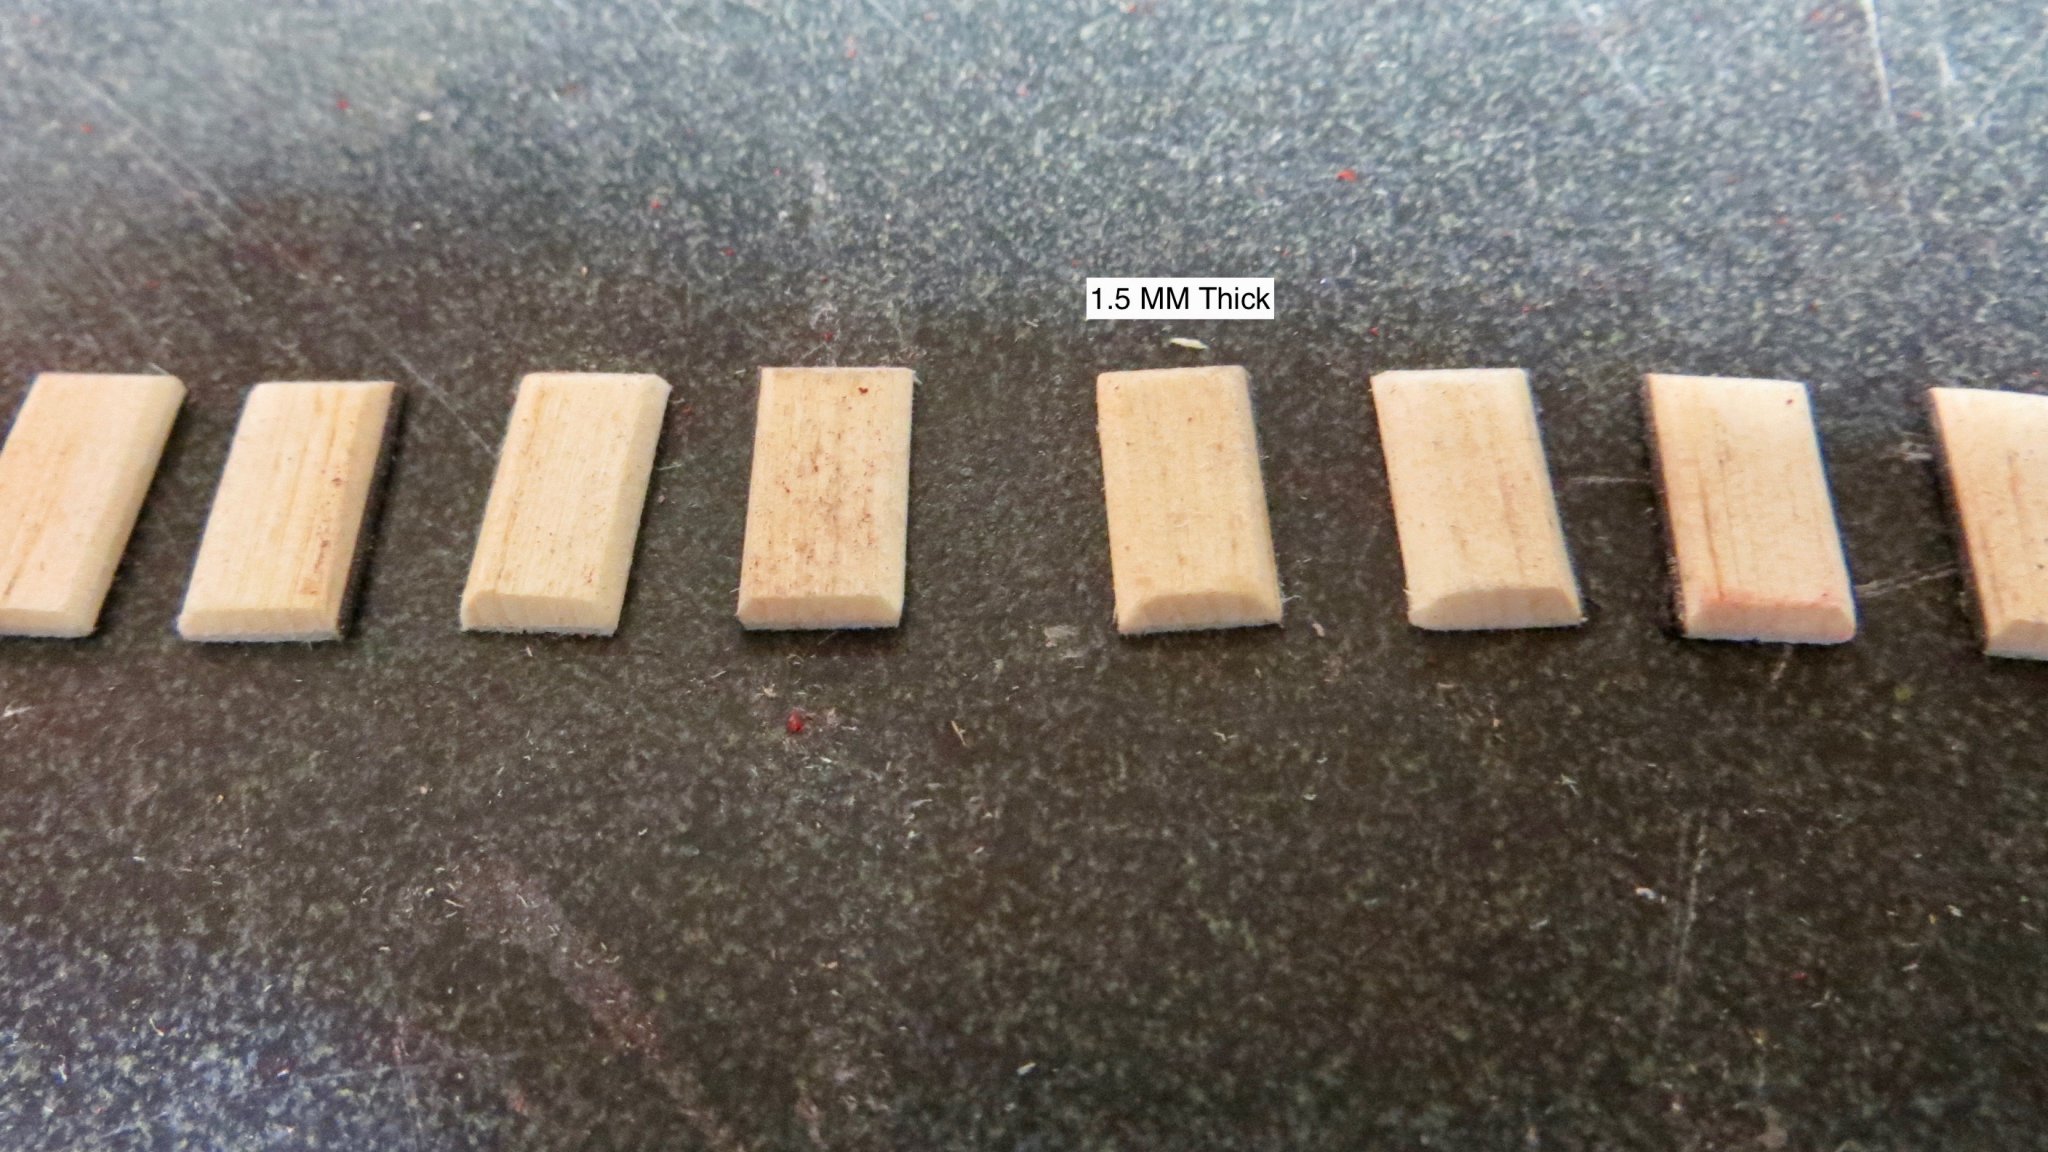
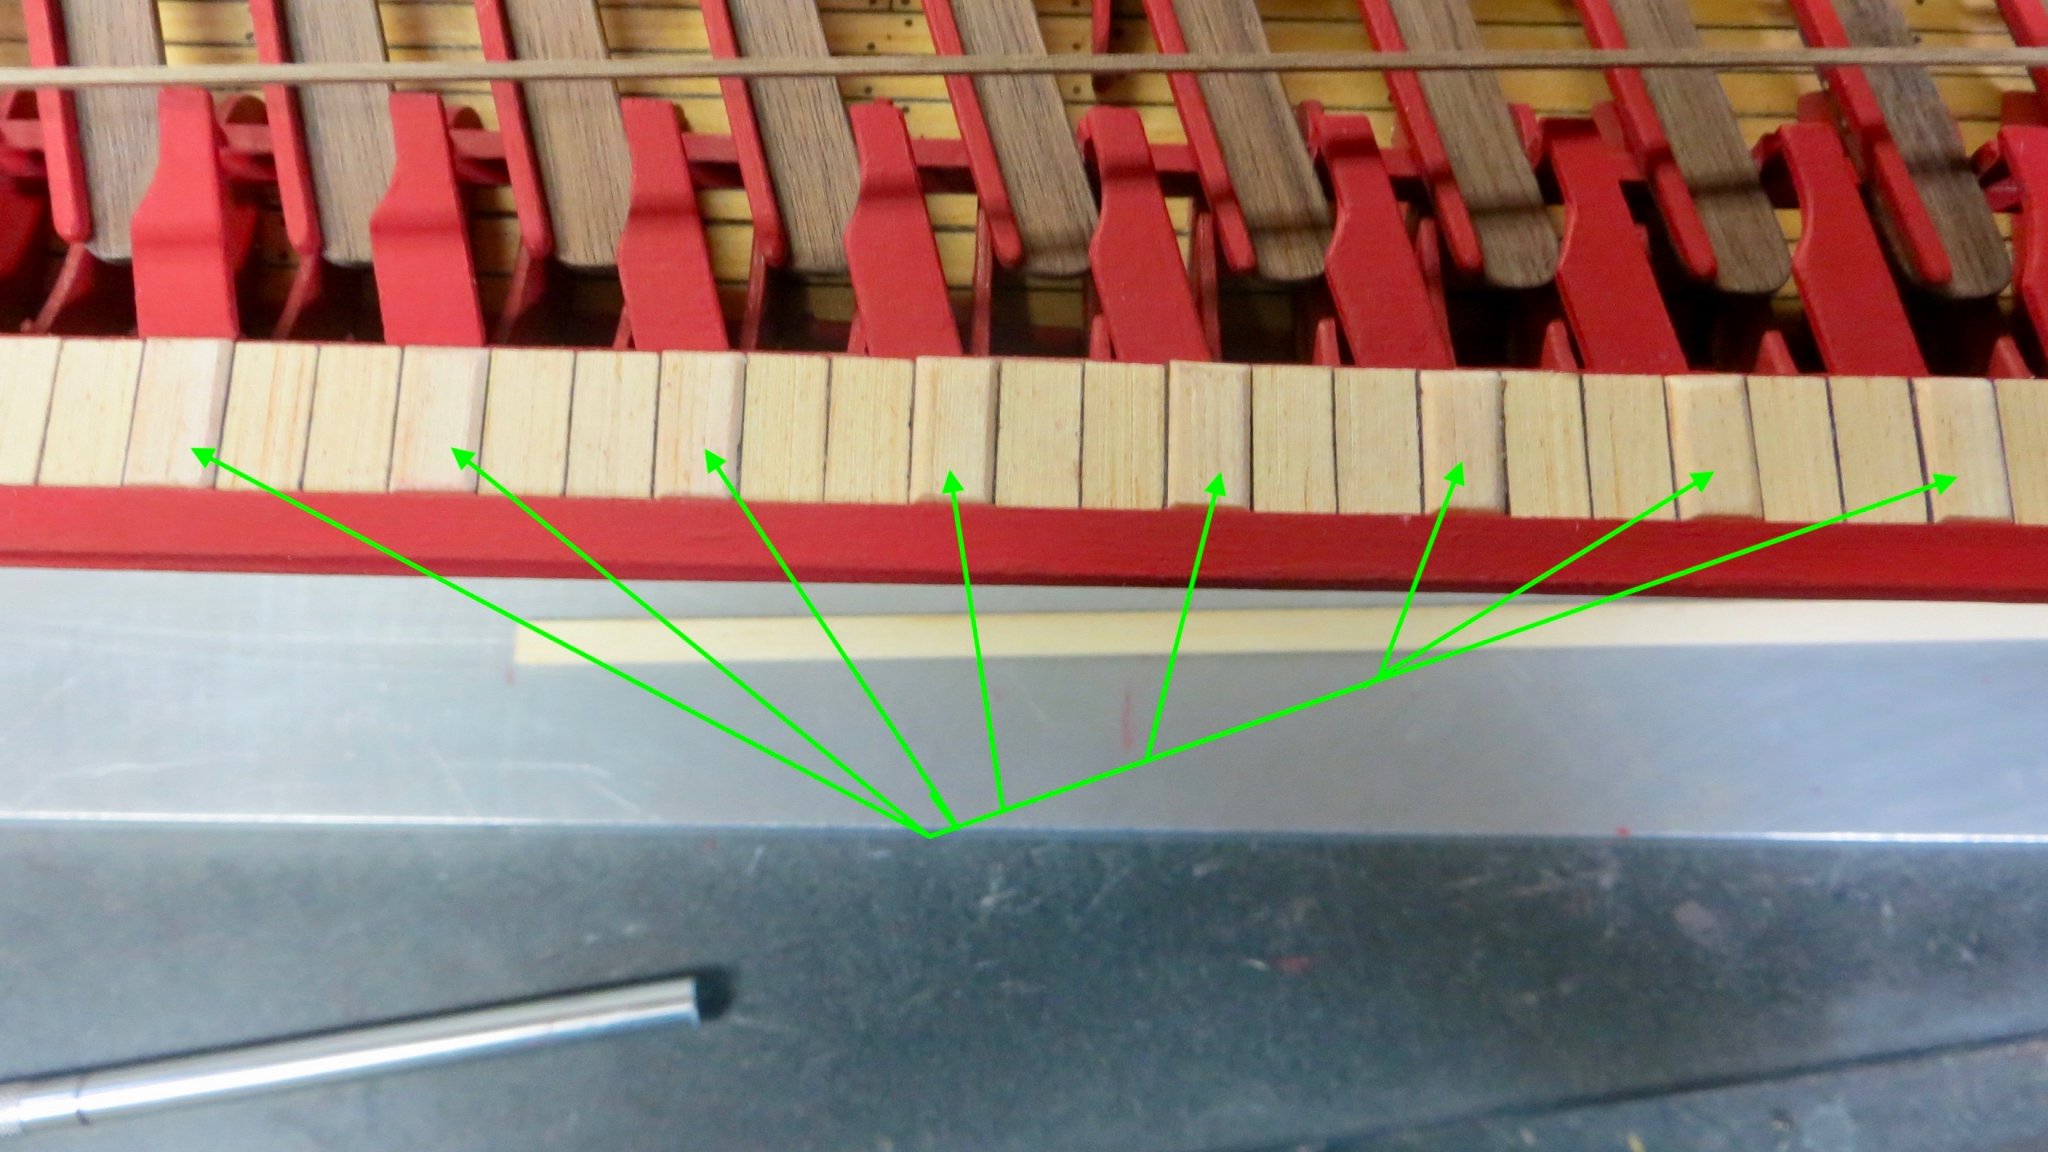
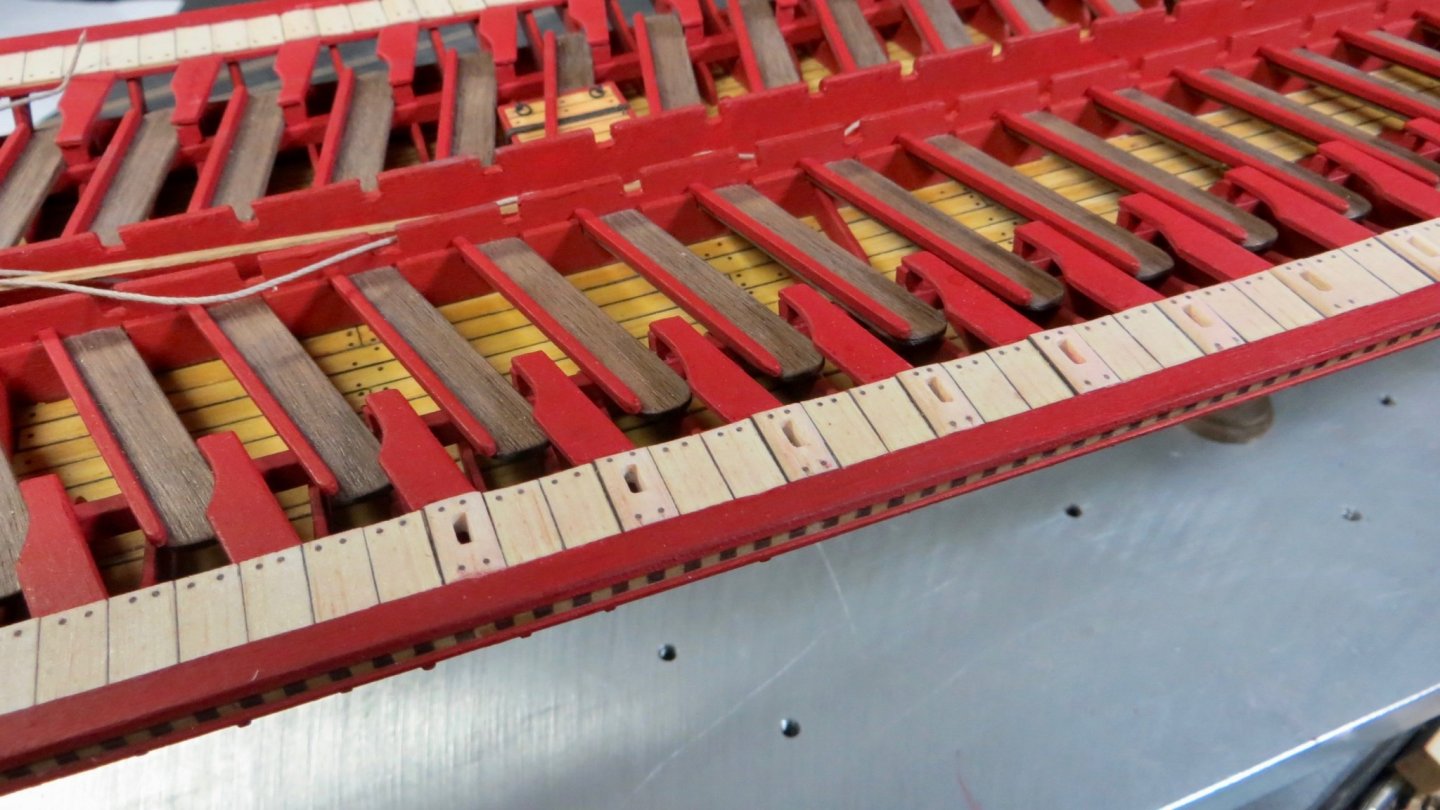
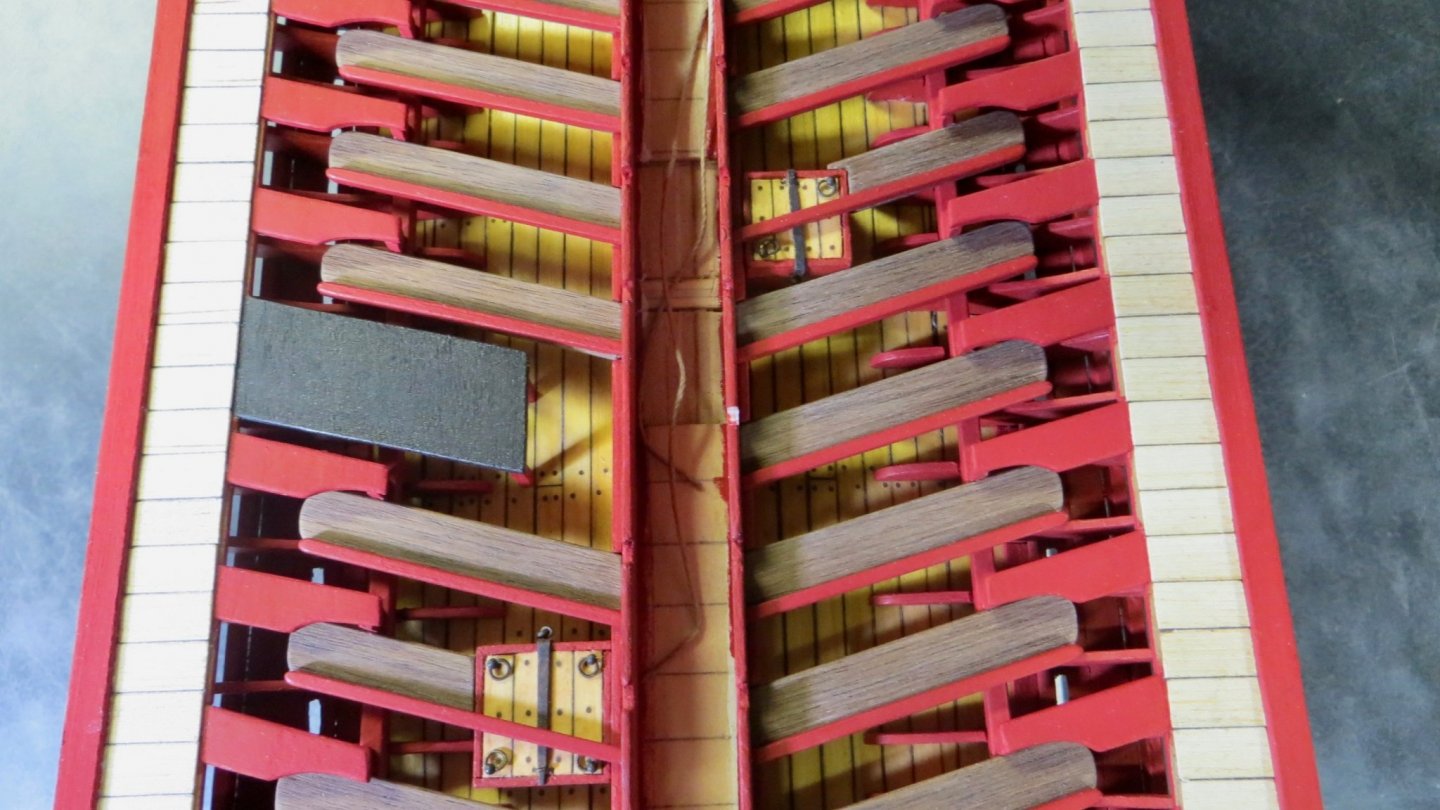
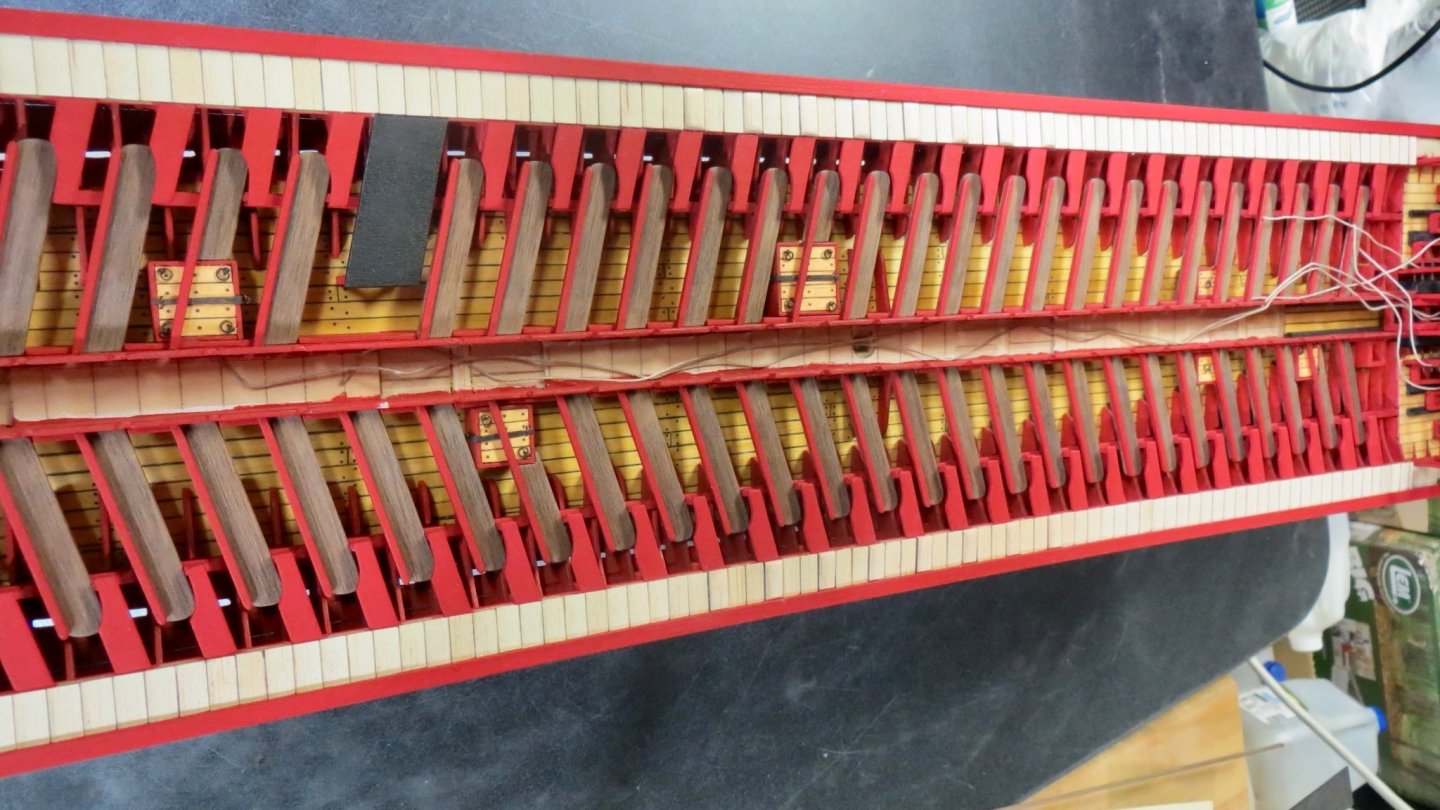
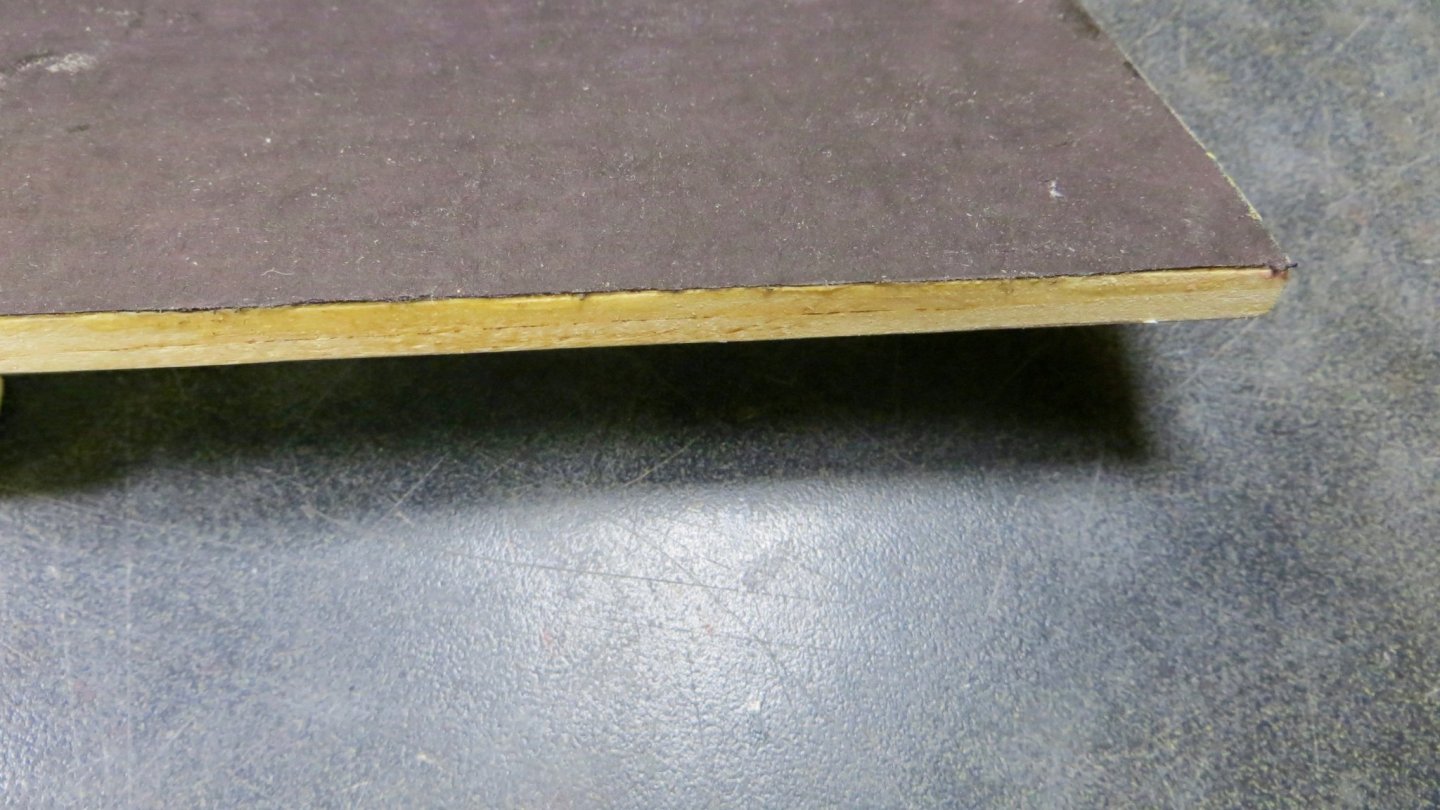
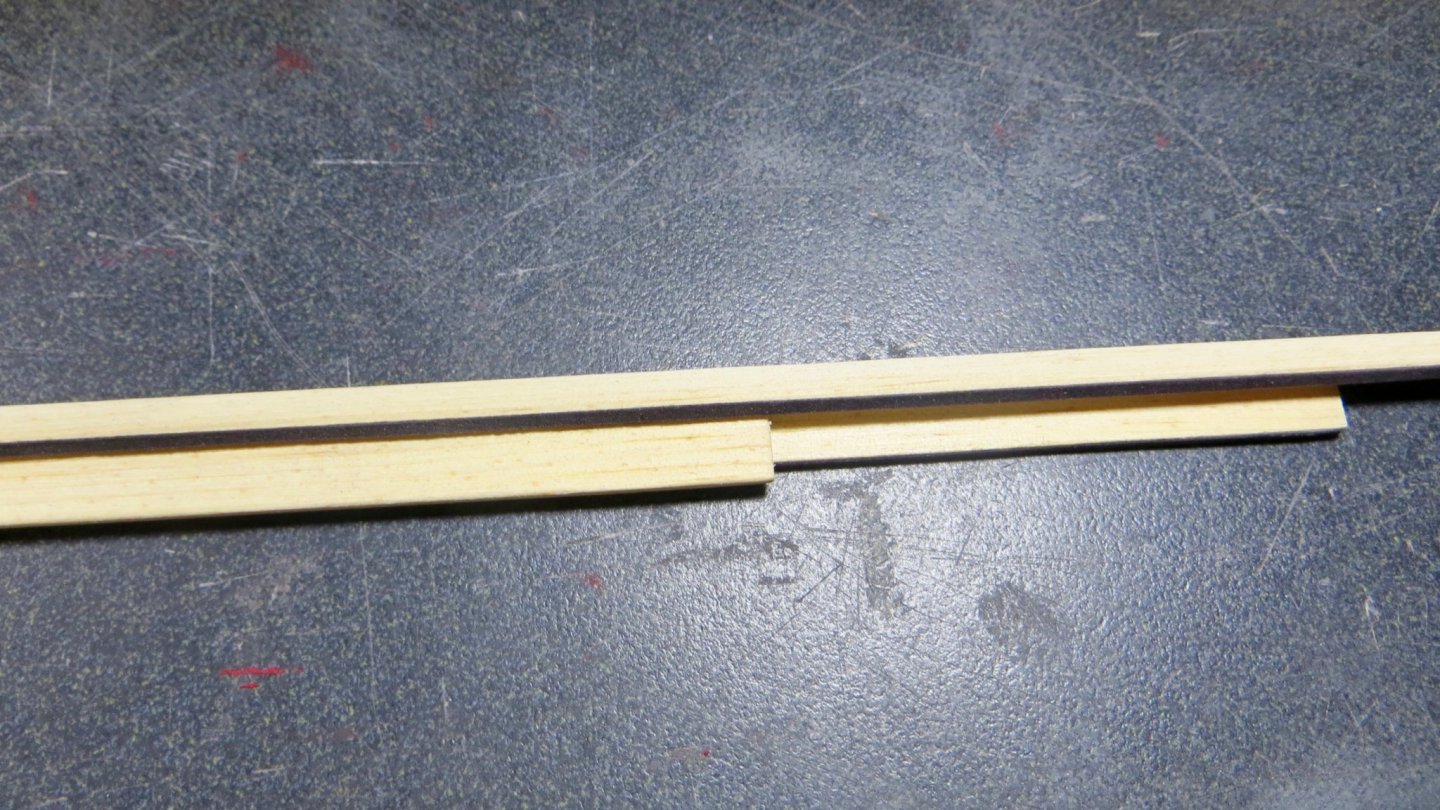
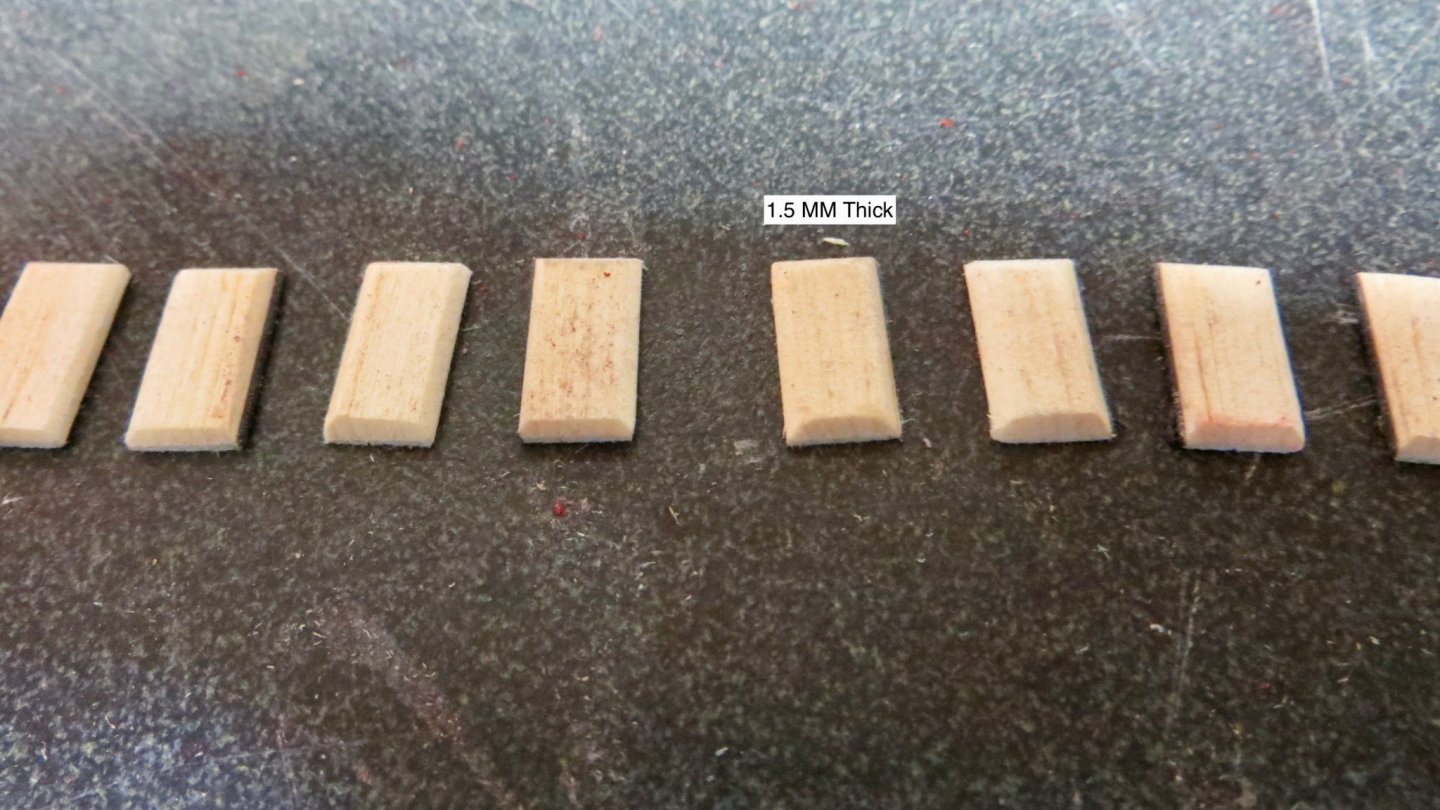
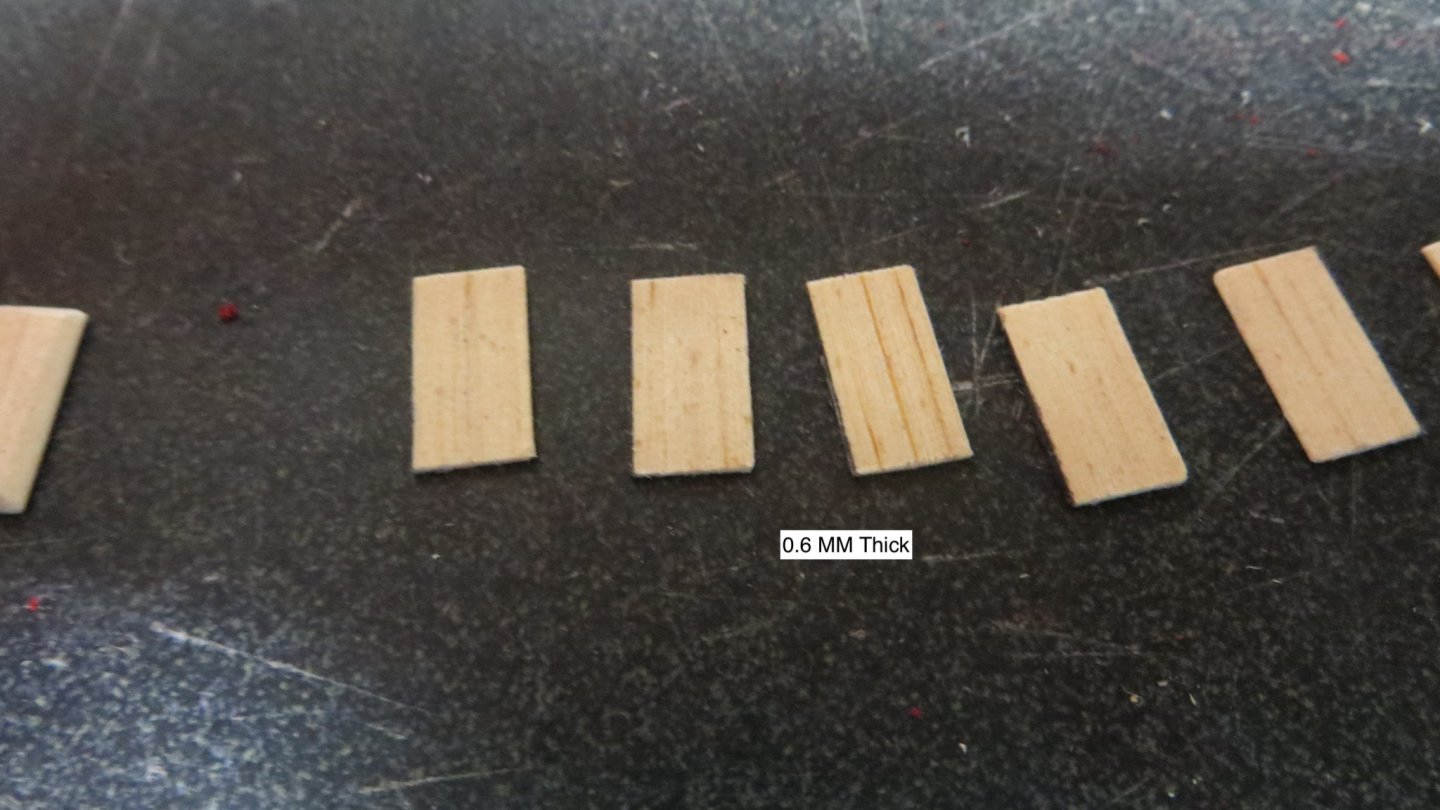
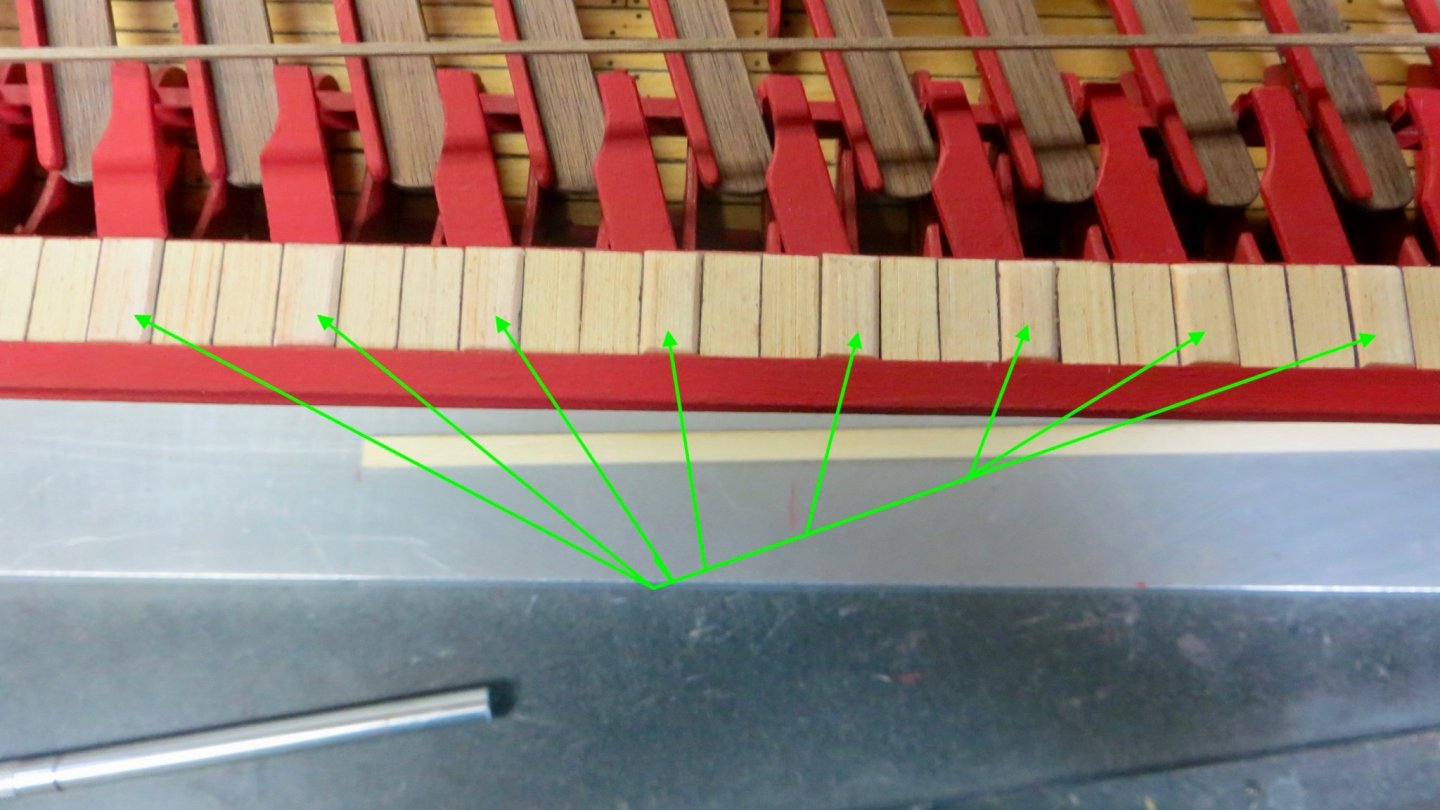
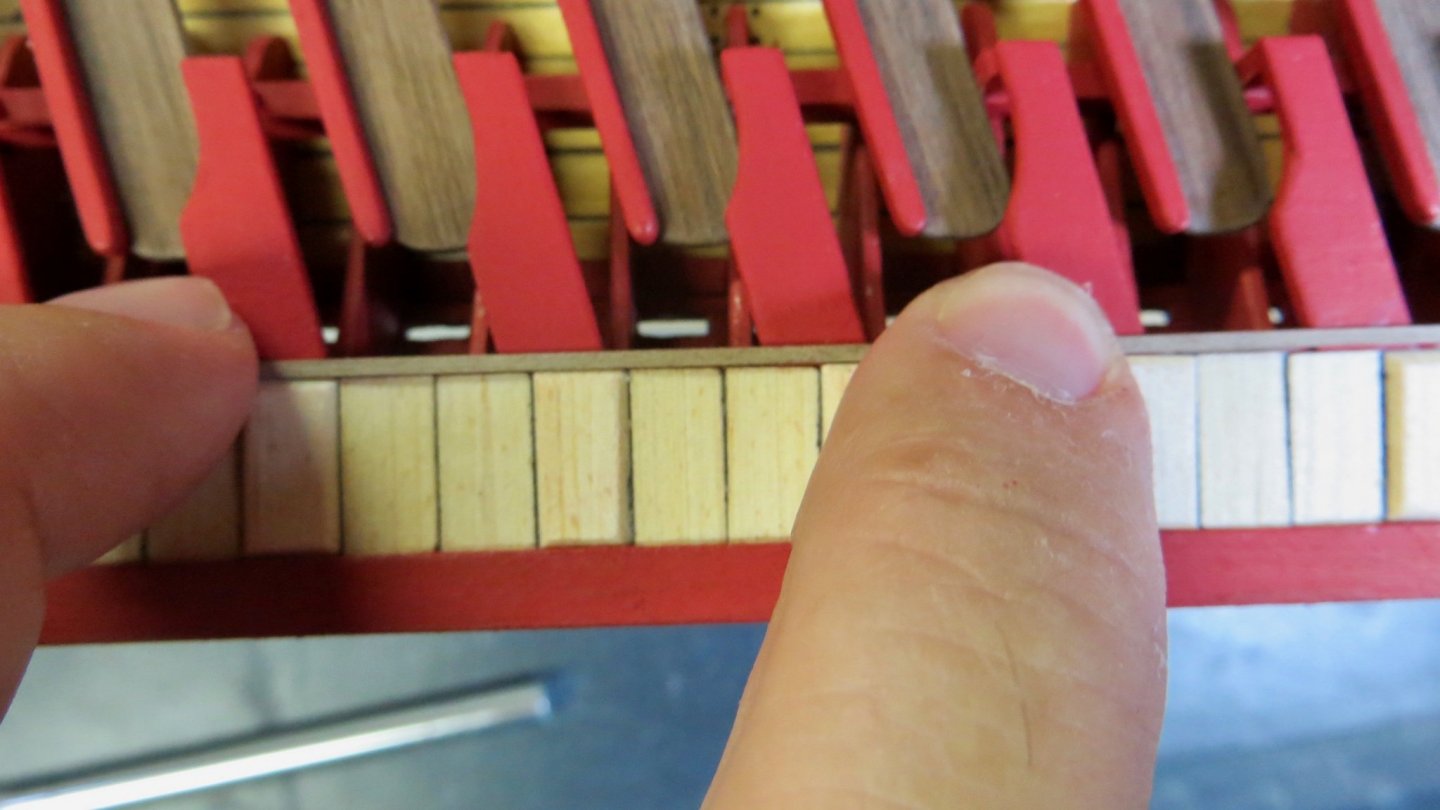
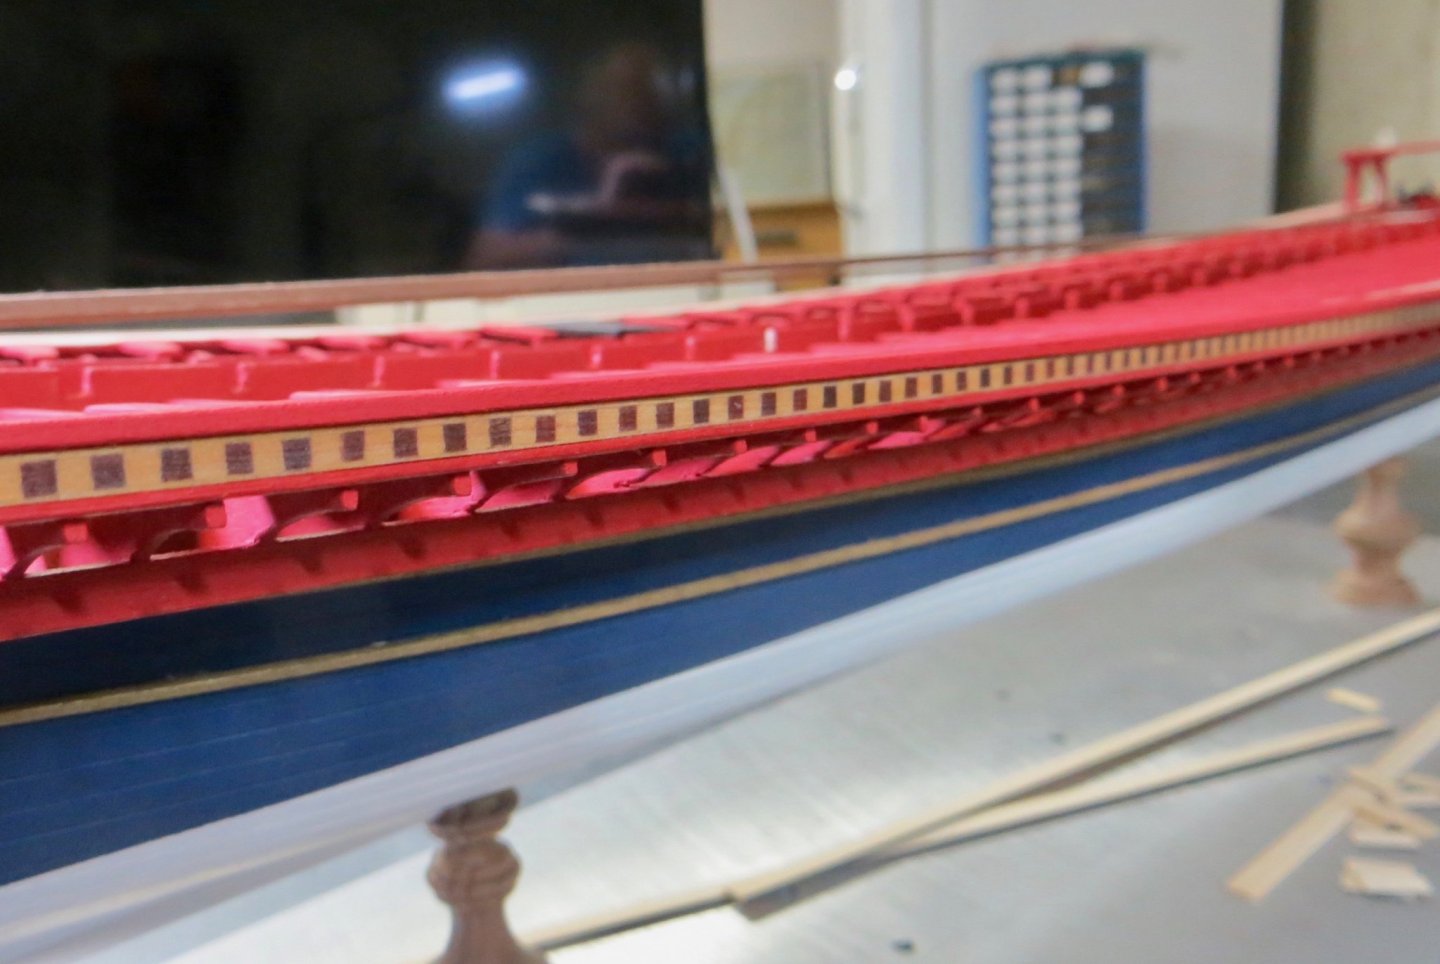
As stated above, I am modifying the Corel Kit instructions for the decking and will try to follow the "Fleur de Lis" plans. The Corel kit calls for the deck planks to be 4mm wide. I scaled the "Fleur de Lis" plans and it comes out to about 6.35 mm wide or 1/4 inch. So wider deck planks. I first cut out the same Eastern White Pine that I used for the lower decks and ran it thru my thickness sander to 1/4 inch thick. Next I glued some black construction paper to one side. I then cut several strips and ground them into two different thicknesses. One Strip of wood I ground to 1.5 MM thick and cut and chamfered 8 pieces. These 8 pieces are thicker than the rest of the deck planks. They will have a slot cutout in the middle, from which the chainplate and chain will pass through for the shroud rigging for the main mast. The Corel plans also show the slots, but have the planks the same thickness as all the other planks, with no chamfering. The extra thickness of these 8 deck planks is why I made the end beam, that they will butt up against, a little thicker (From the last post) Eight Deck pieces 1.5 MM Thick The rest of the deck planks much thinner The green arrows show the eight raised deck planks that will be slotted for the shroud rigging. In-between them are the thinner deck planks Once I am finished working on the deck planks, there will be a red painted trim strip fastened to the outer edge of the deck pieces. Before I add that trim strip, however, I have to first finish laying in all of the deck pieces, cutout the 8 slots on each side, add some tree nails, sand, stain and finish with a top coat, so the deck will match the coloring of the lower decks. Thanks for stopping by, Frank

- 510 replies
-
- 6
-
-
- reale de france
- corel
- (and 1 more)
-
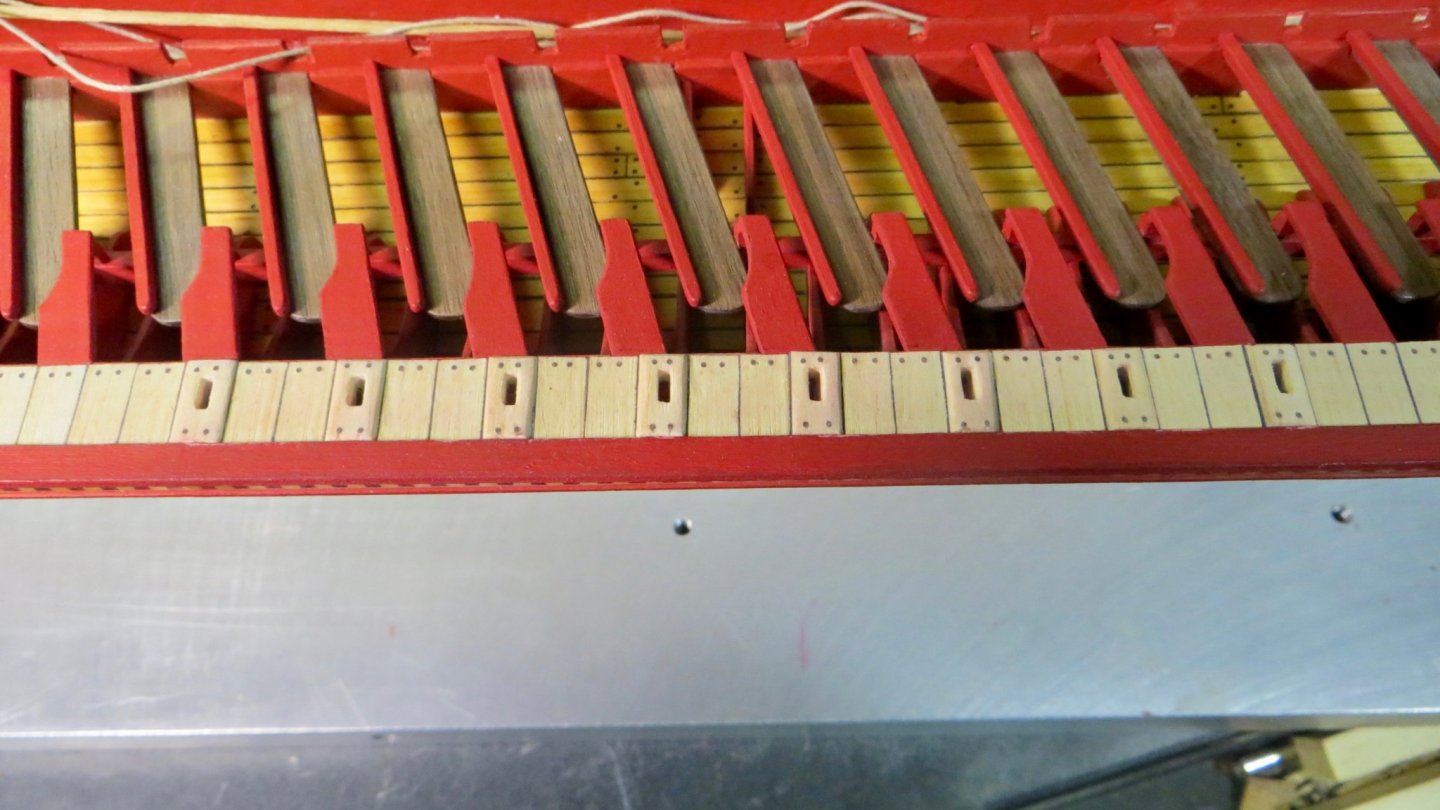
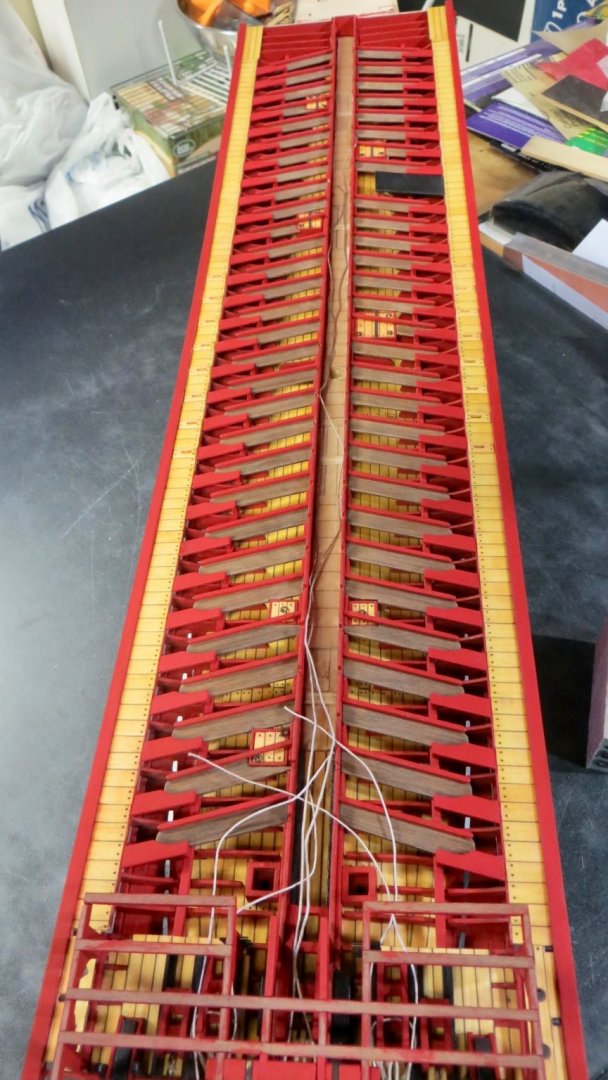
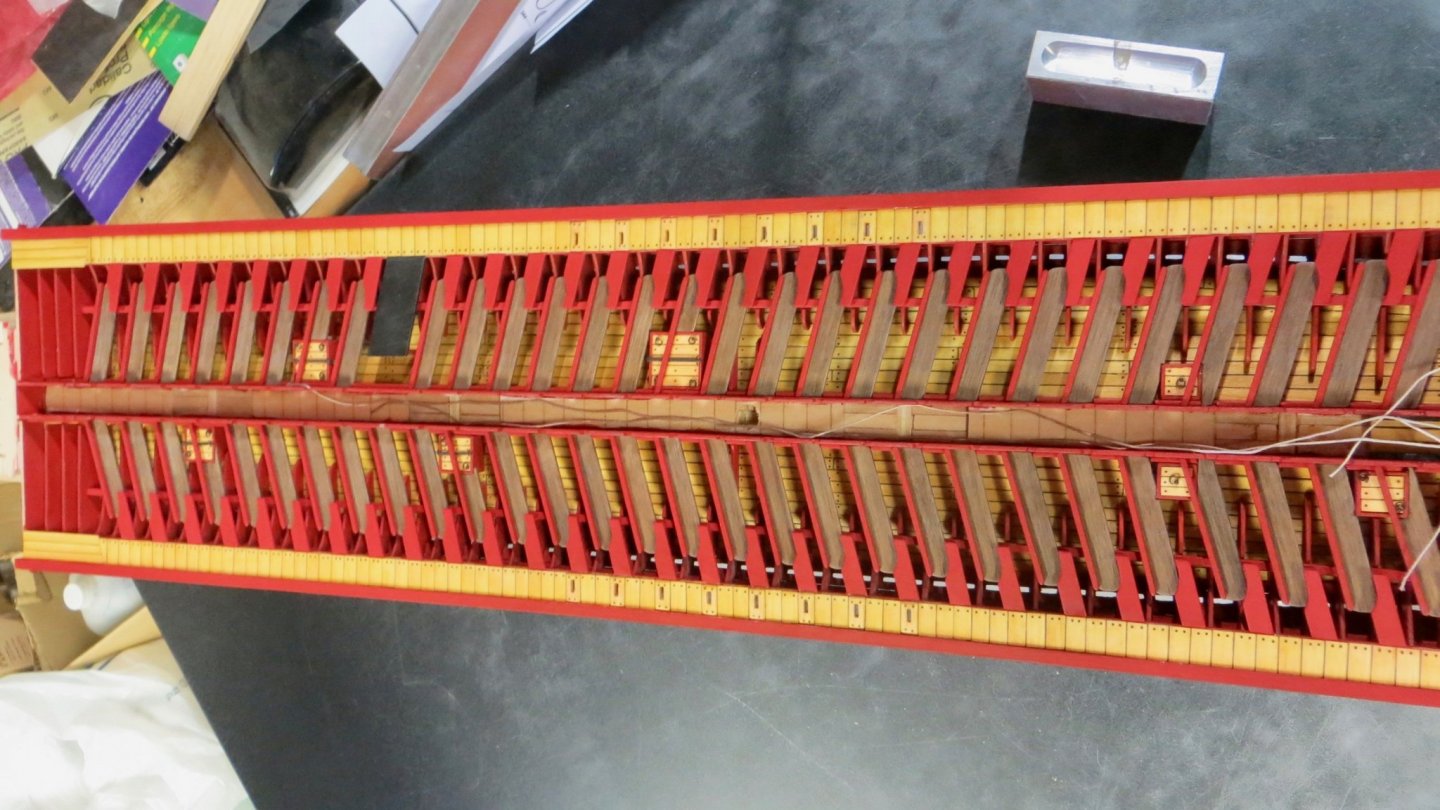
Hello Thank you all for visiting and the "likes". Appreciated! After finishing the upper deck supports on the starboard side, I then repeated everything for the port side, with a minor difference. The port side only has 29 upper platforms, whereas the starboard side has 30. This is because there is a row removed to allow for the cooking station. Gluing of the main upper deck support. Attaching the platform and finish painting View of the base of the cooking station. I painted this black for now and will worry about how the cooking area will be finished at a later point Completed upper platforms on both sides. Before I start to plank these platforms, I had to make the upper beam for the decorative face that I made earlier in the build. The planks will butt up against this beam. I had to make the thickness of this beam a little thicker than I wanted to because I will follow the planking plan from the "Fleur de Lis". (I will explain in the next post) The beam sticks out further than the decorative face. (Same distance as the lower beam) Next step is to make up the deck planks. Thanks, Frank


- 510 replies
-
- 5
-
-
- reale de france
- corel
- (and 1 more)
-
Thank you Michael. This kit is deceptive. On the surface, it doesn't seem that hard of a build, but the ship has many layers on top of layers (from deck up) and I have to be very careful to build in the correct order or layer. For instance, the plans call for building the upper bow platform over the cannon (in which I completed the framing). As I mentioned previously, I spotted blocks that needed to be added (later according to the plans). But how would I have gotten in there if I had planked over the frames I built? Before I plank the finished frames above the carriages, I should install the cannon and the metal caps over the cannon pins. But if I install the cannon now, it will be much more difficult to place the intricate bow planking in front of the cannon because the front of the cannons would overhang, so i'll have to do the bow planking first. etc. etc. I am slowly realizing that I can't just follow the order of the build that the kit instructions tell you to. Having to keep thinking things through. But that's also the FUN part of the build Thanks for visiting, Frank
- 510 replies
-
- 3
-
-
- reale de france
- corel
- (and 1 more)
-
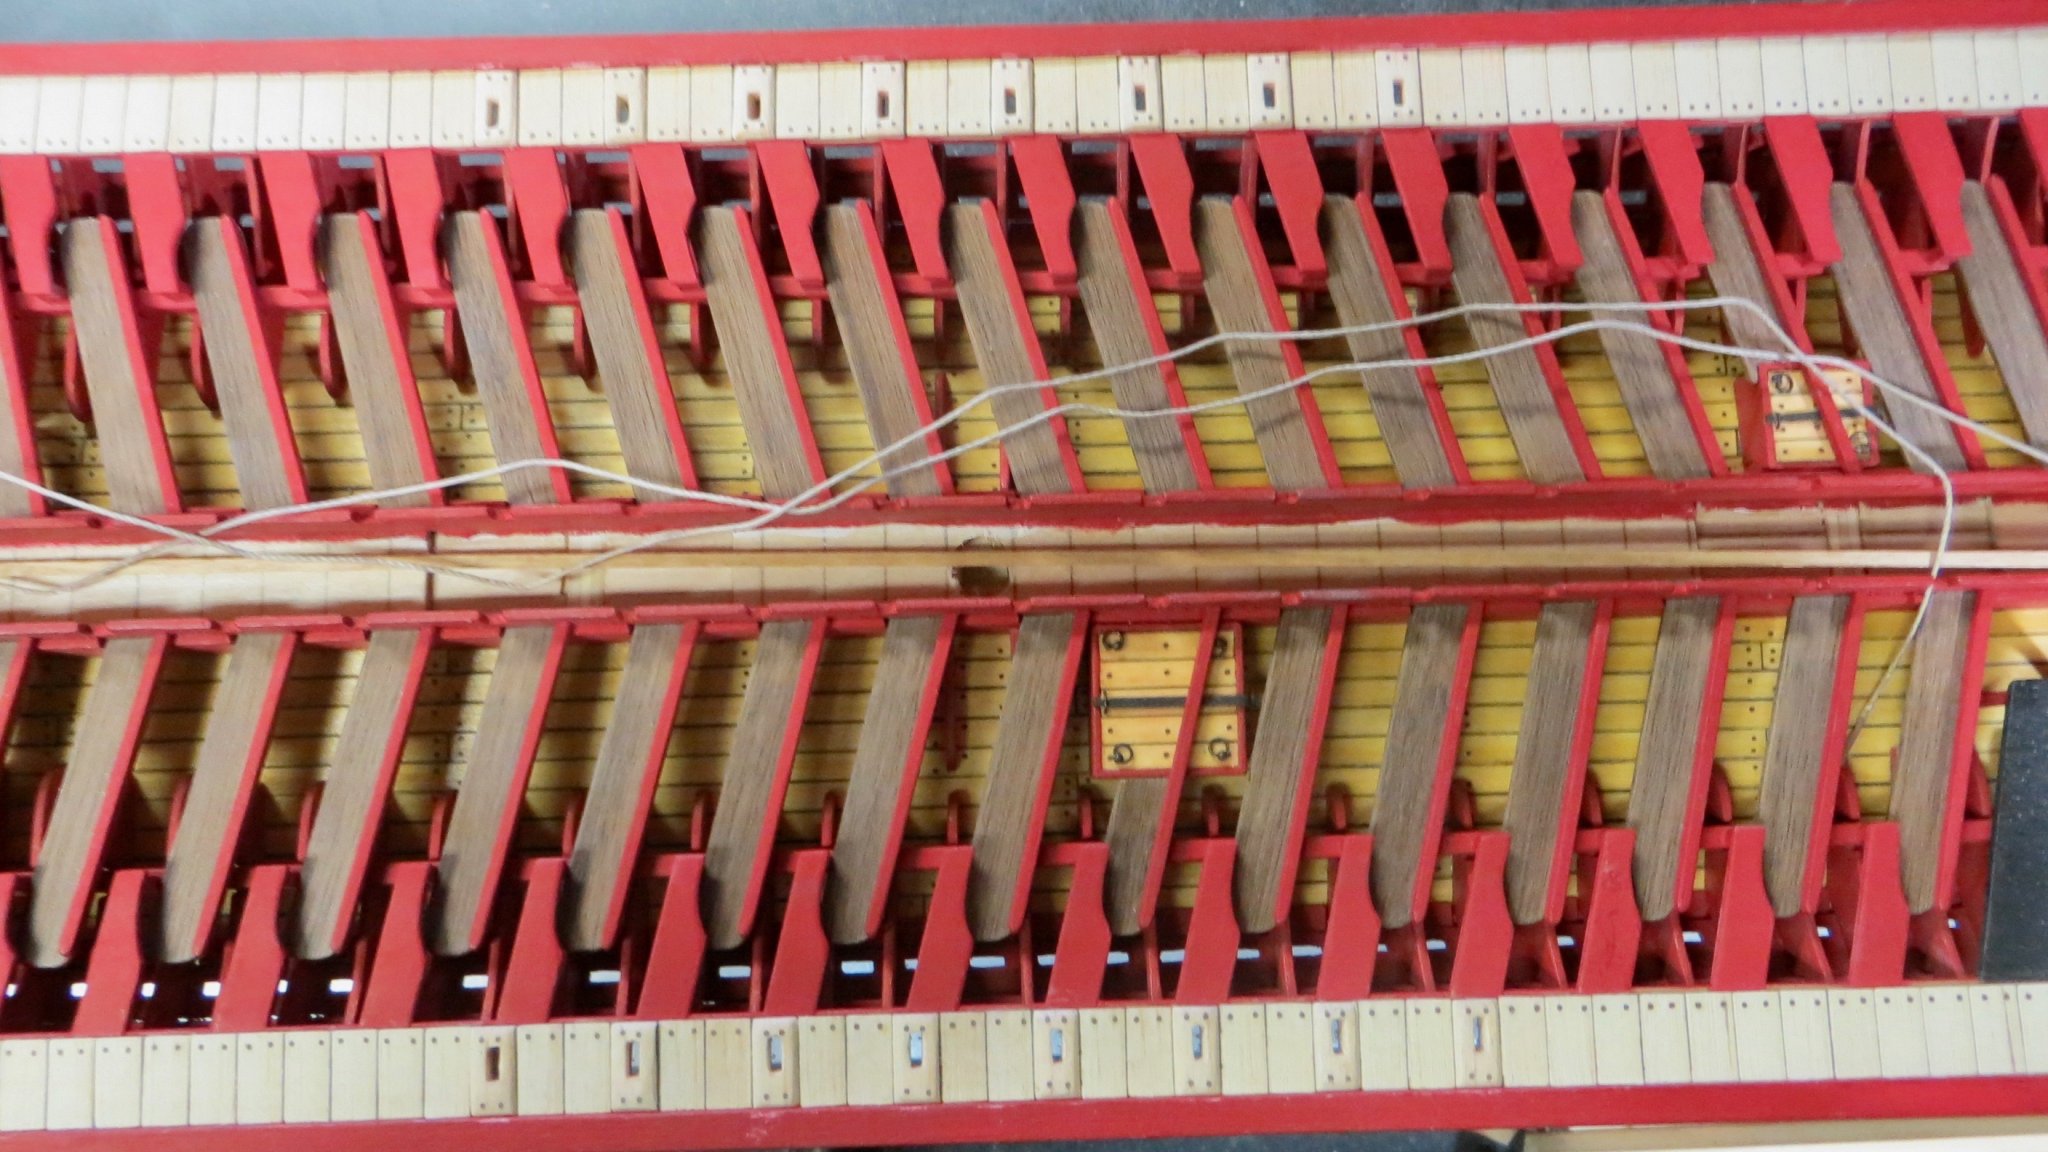
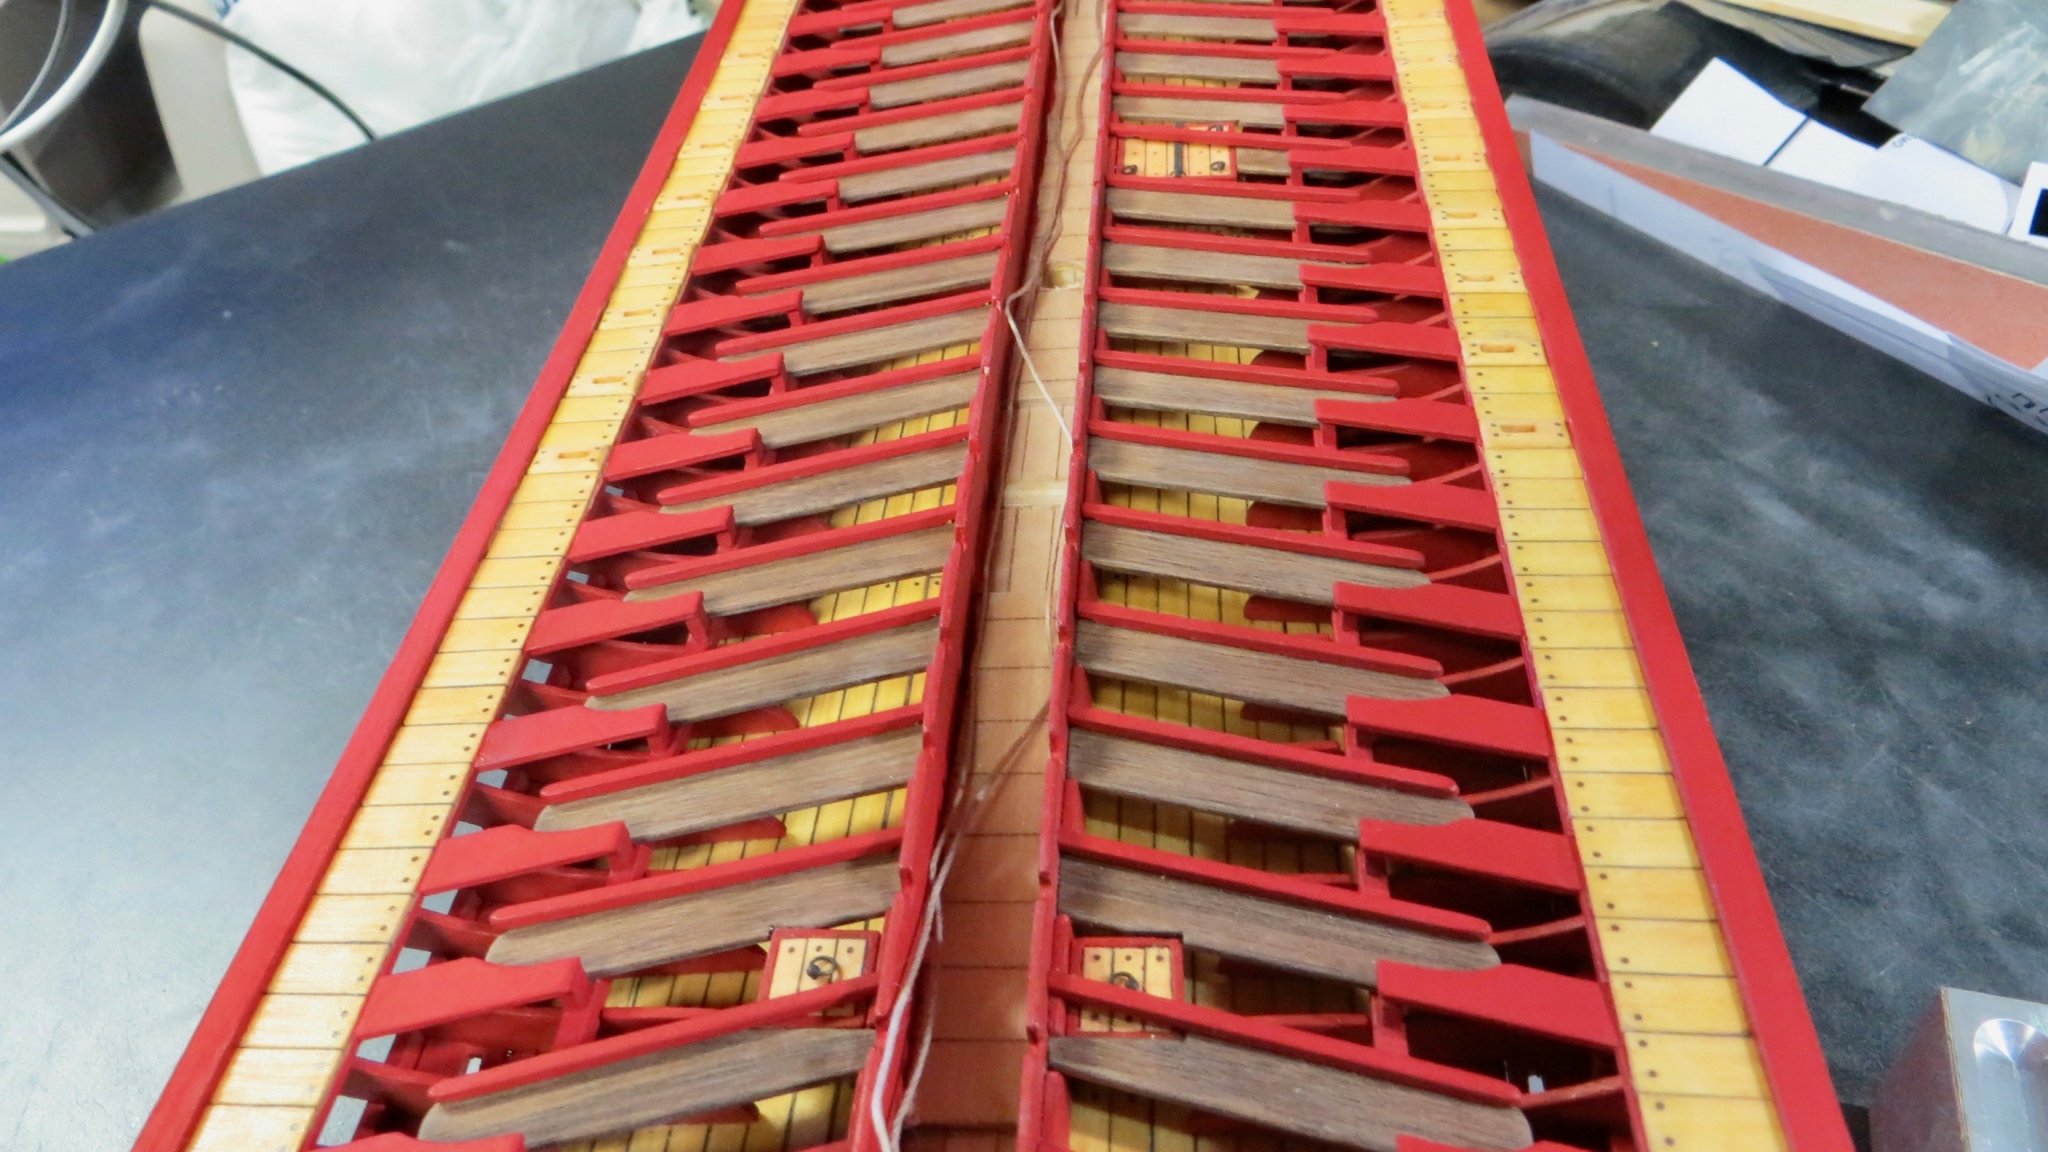
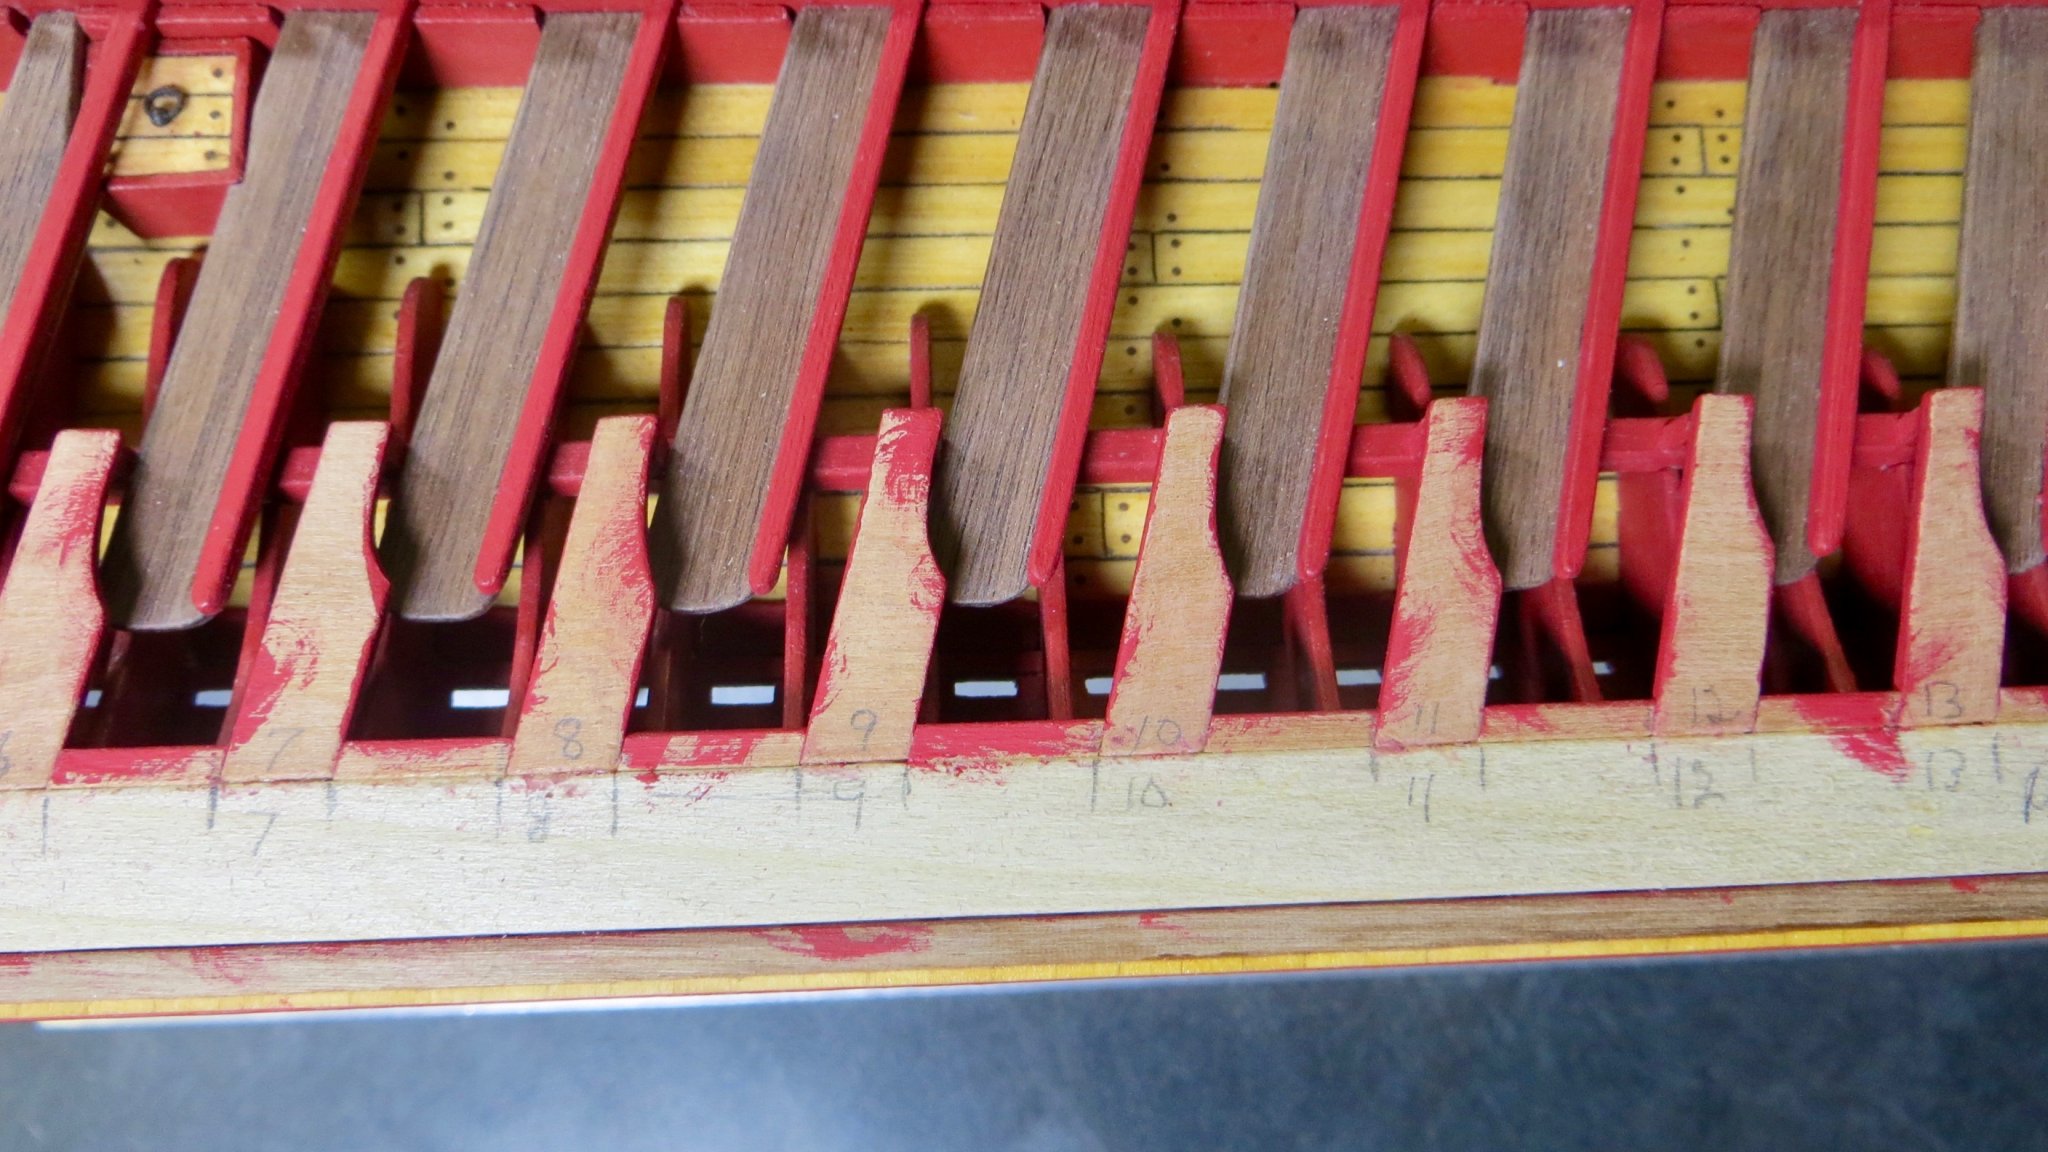
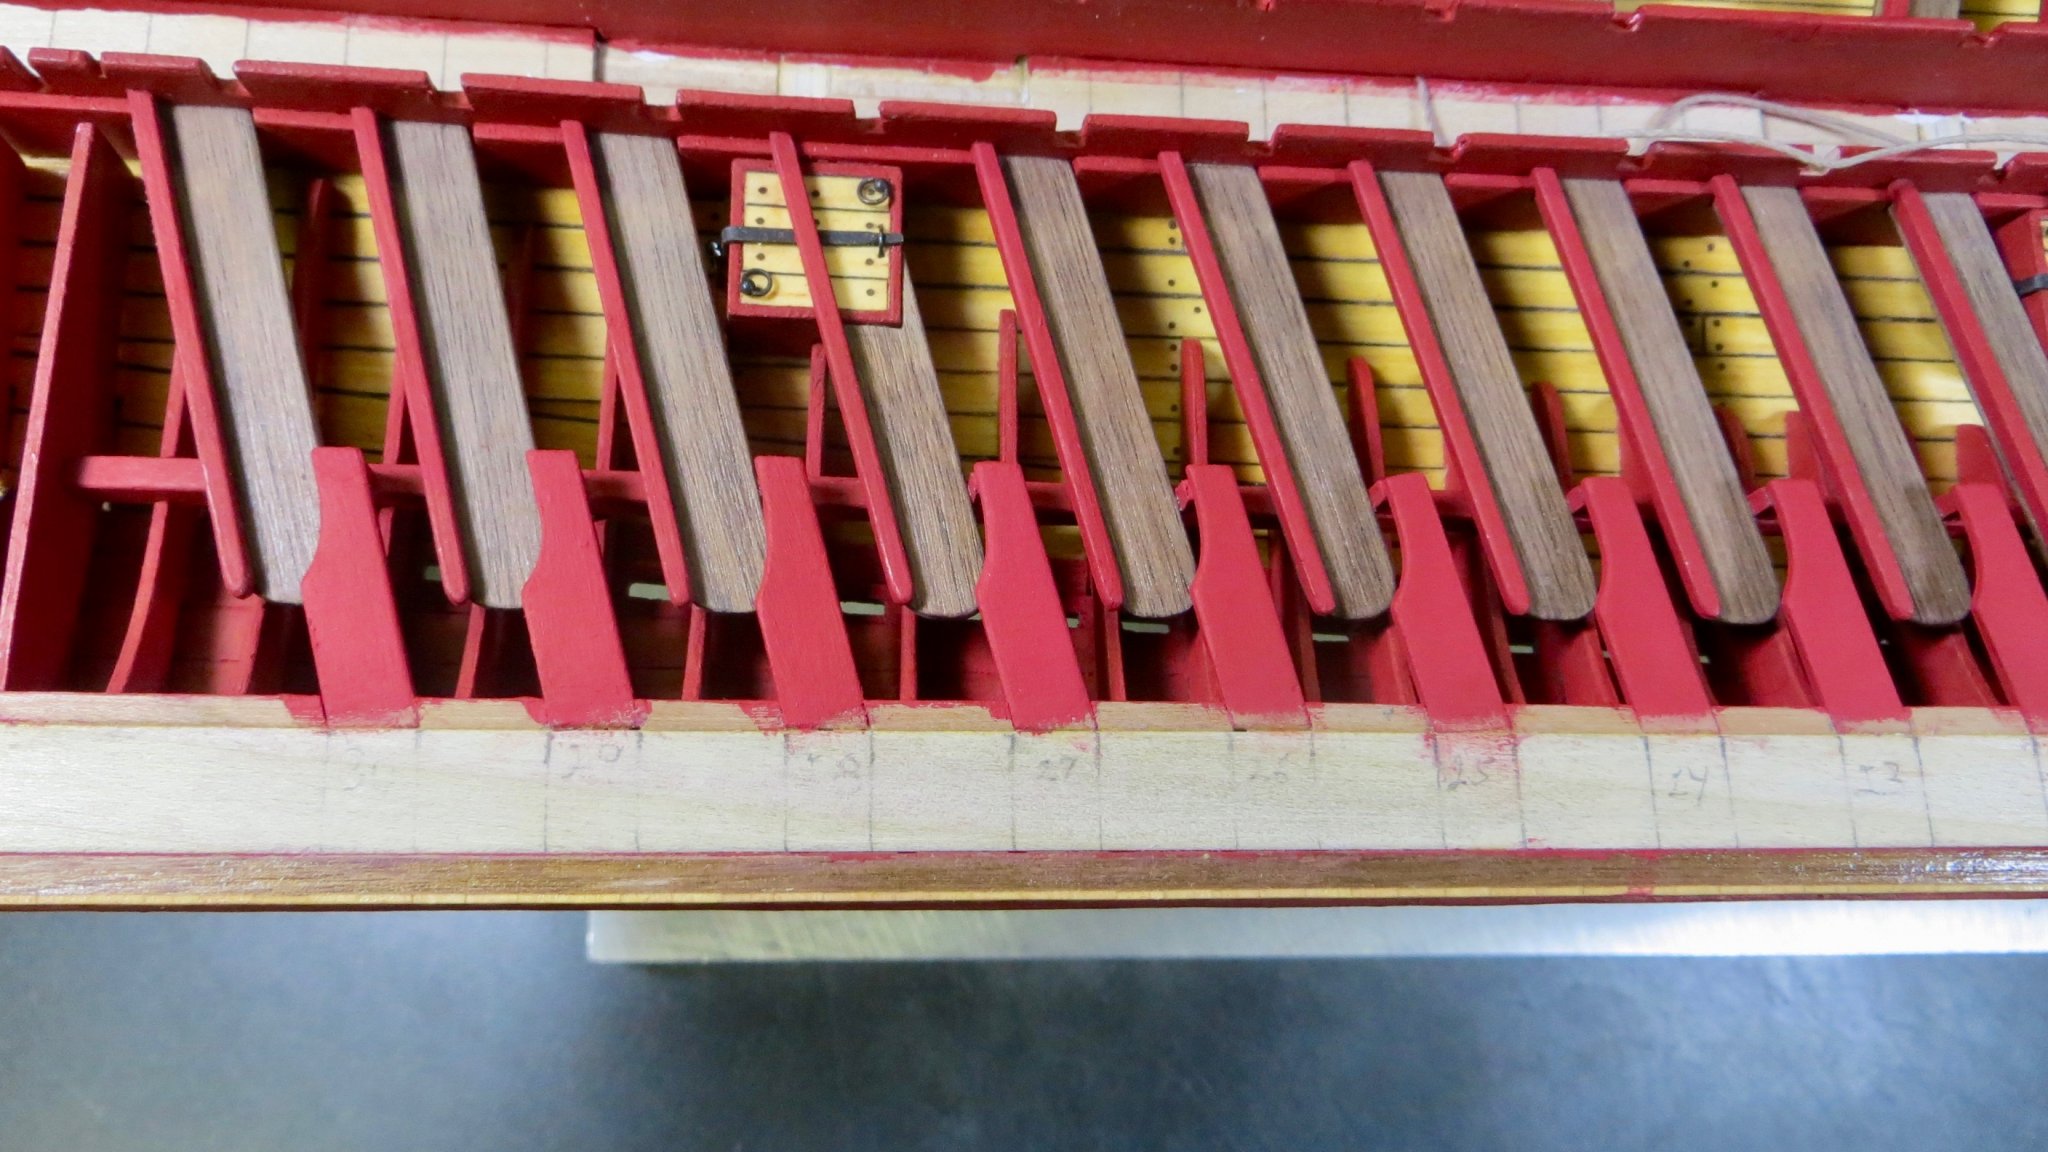
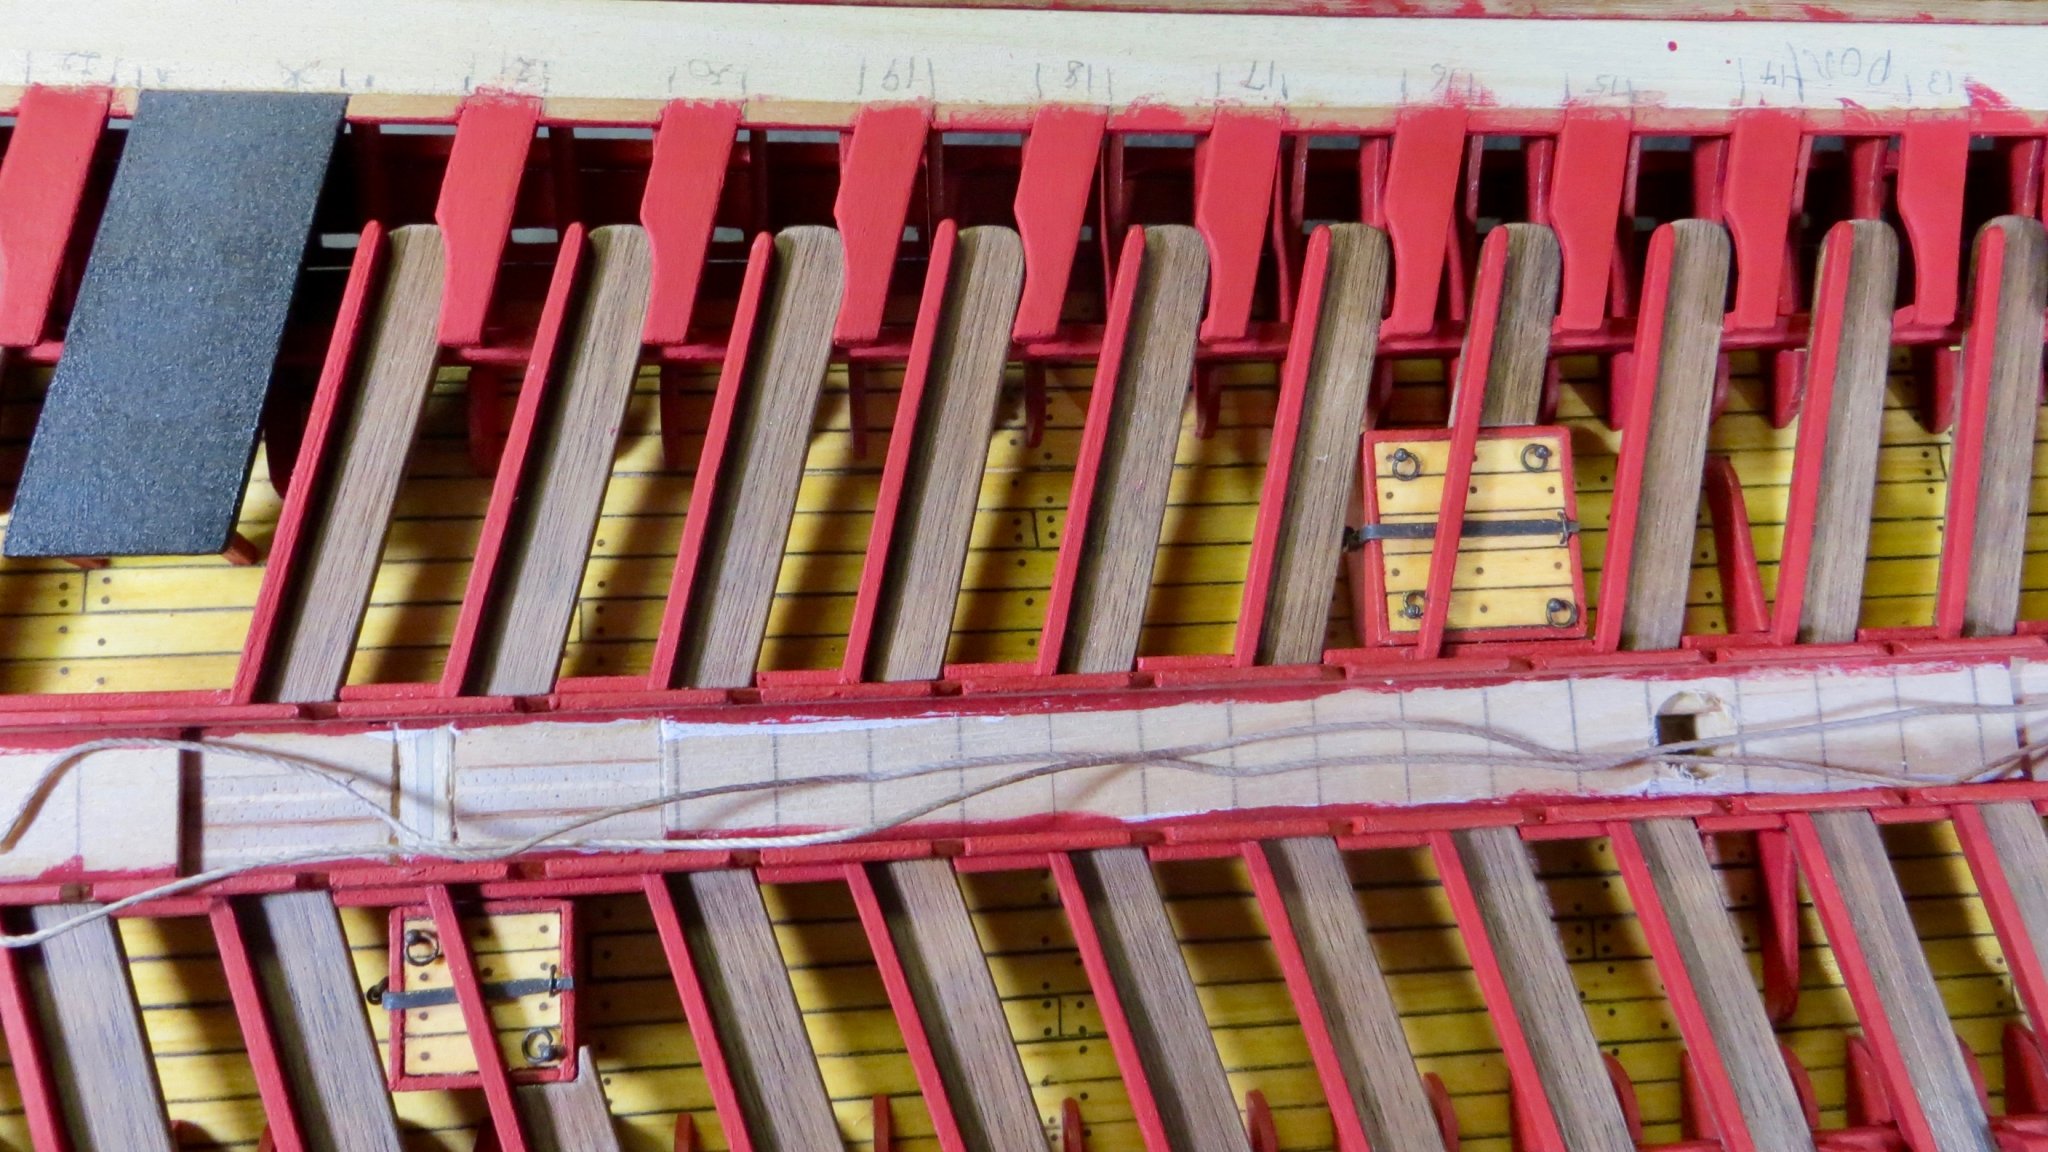
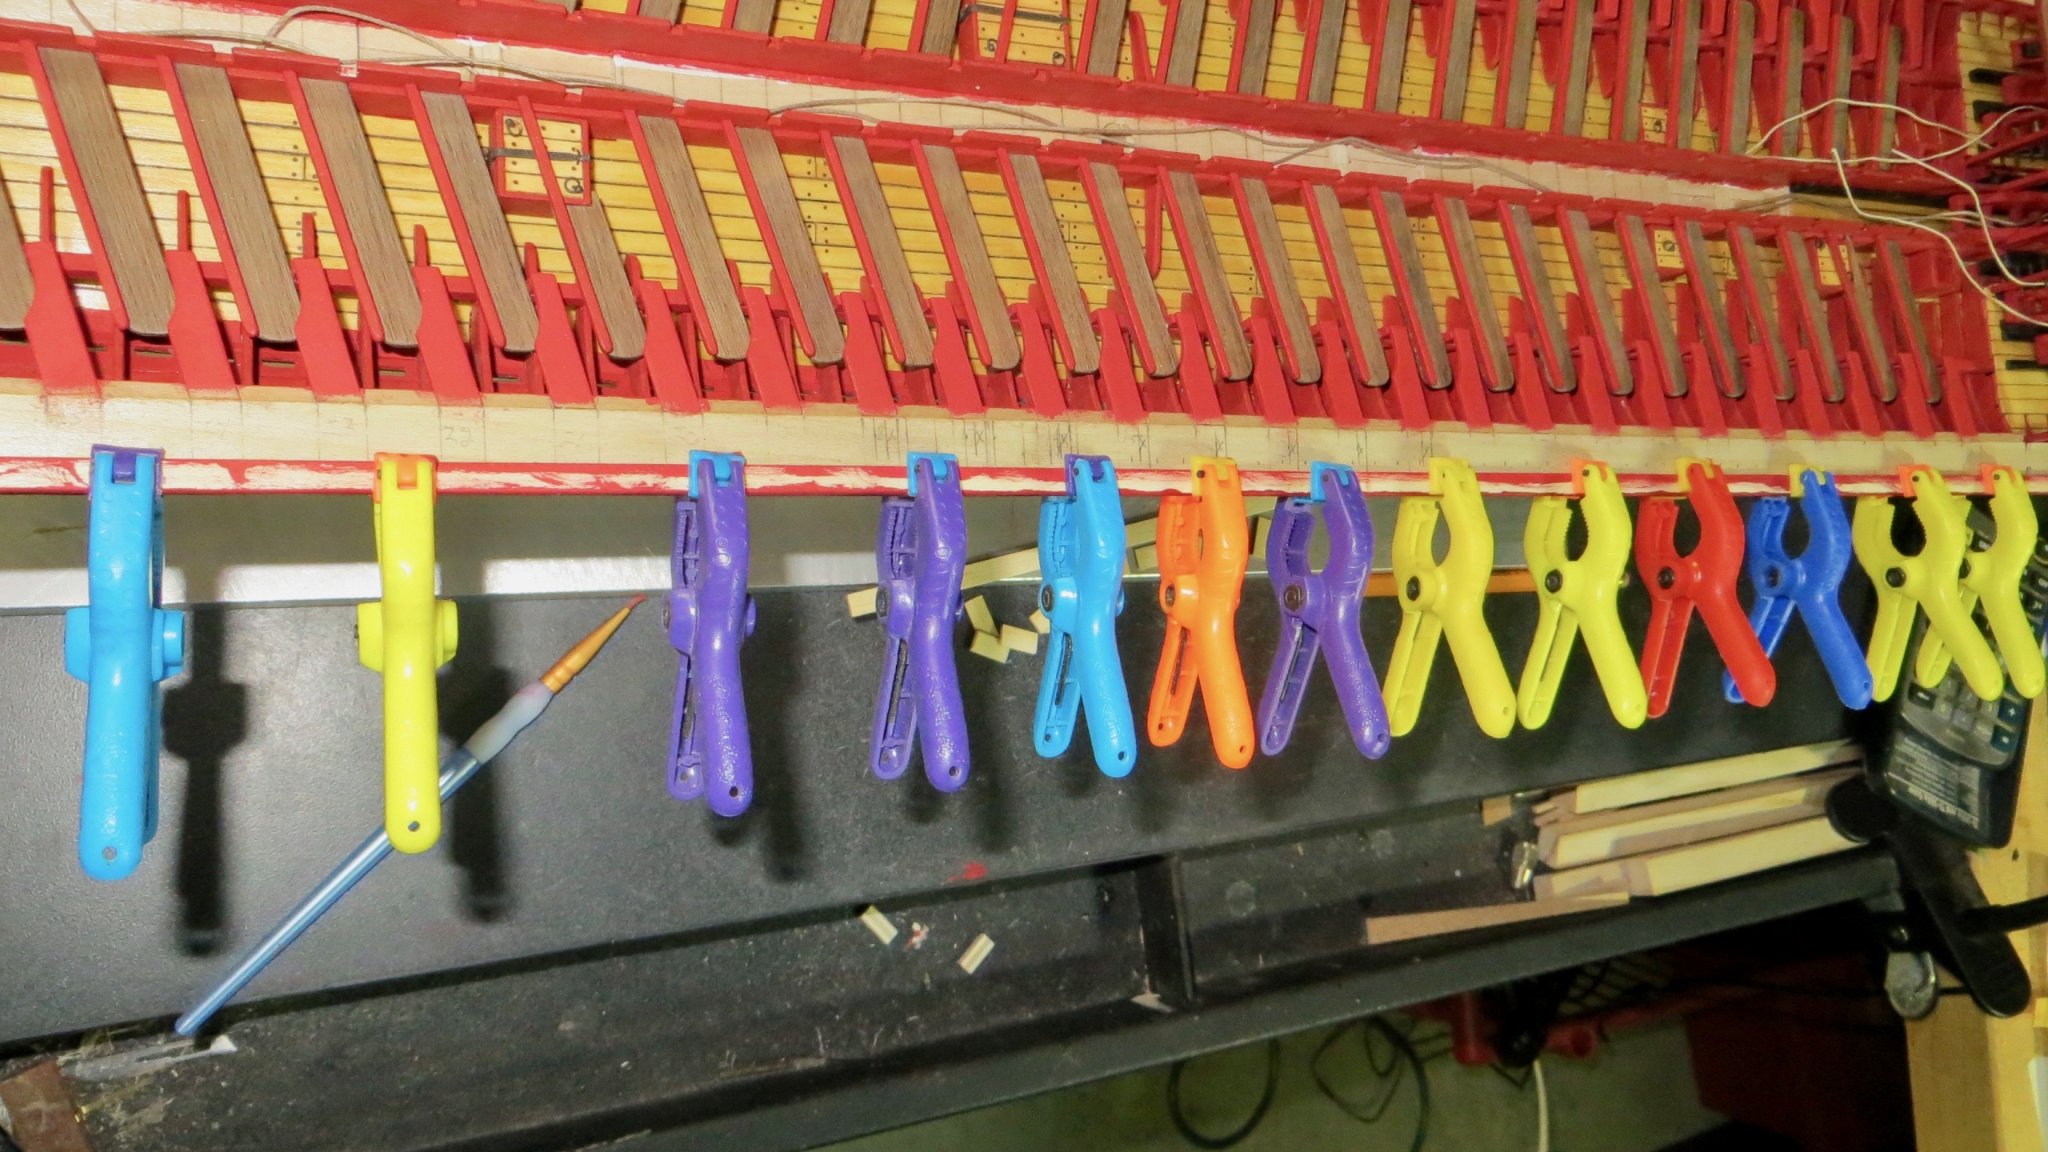
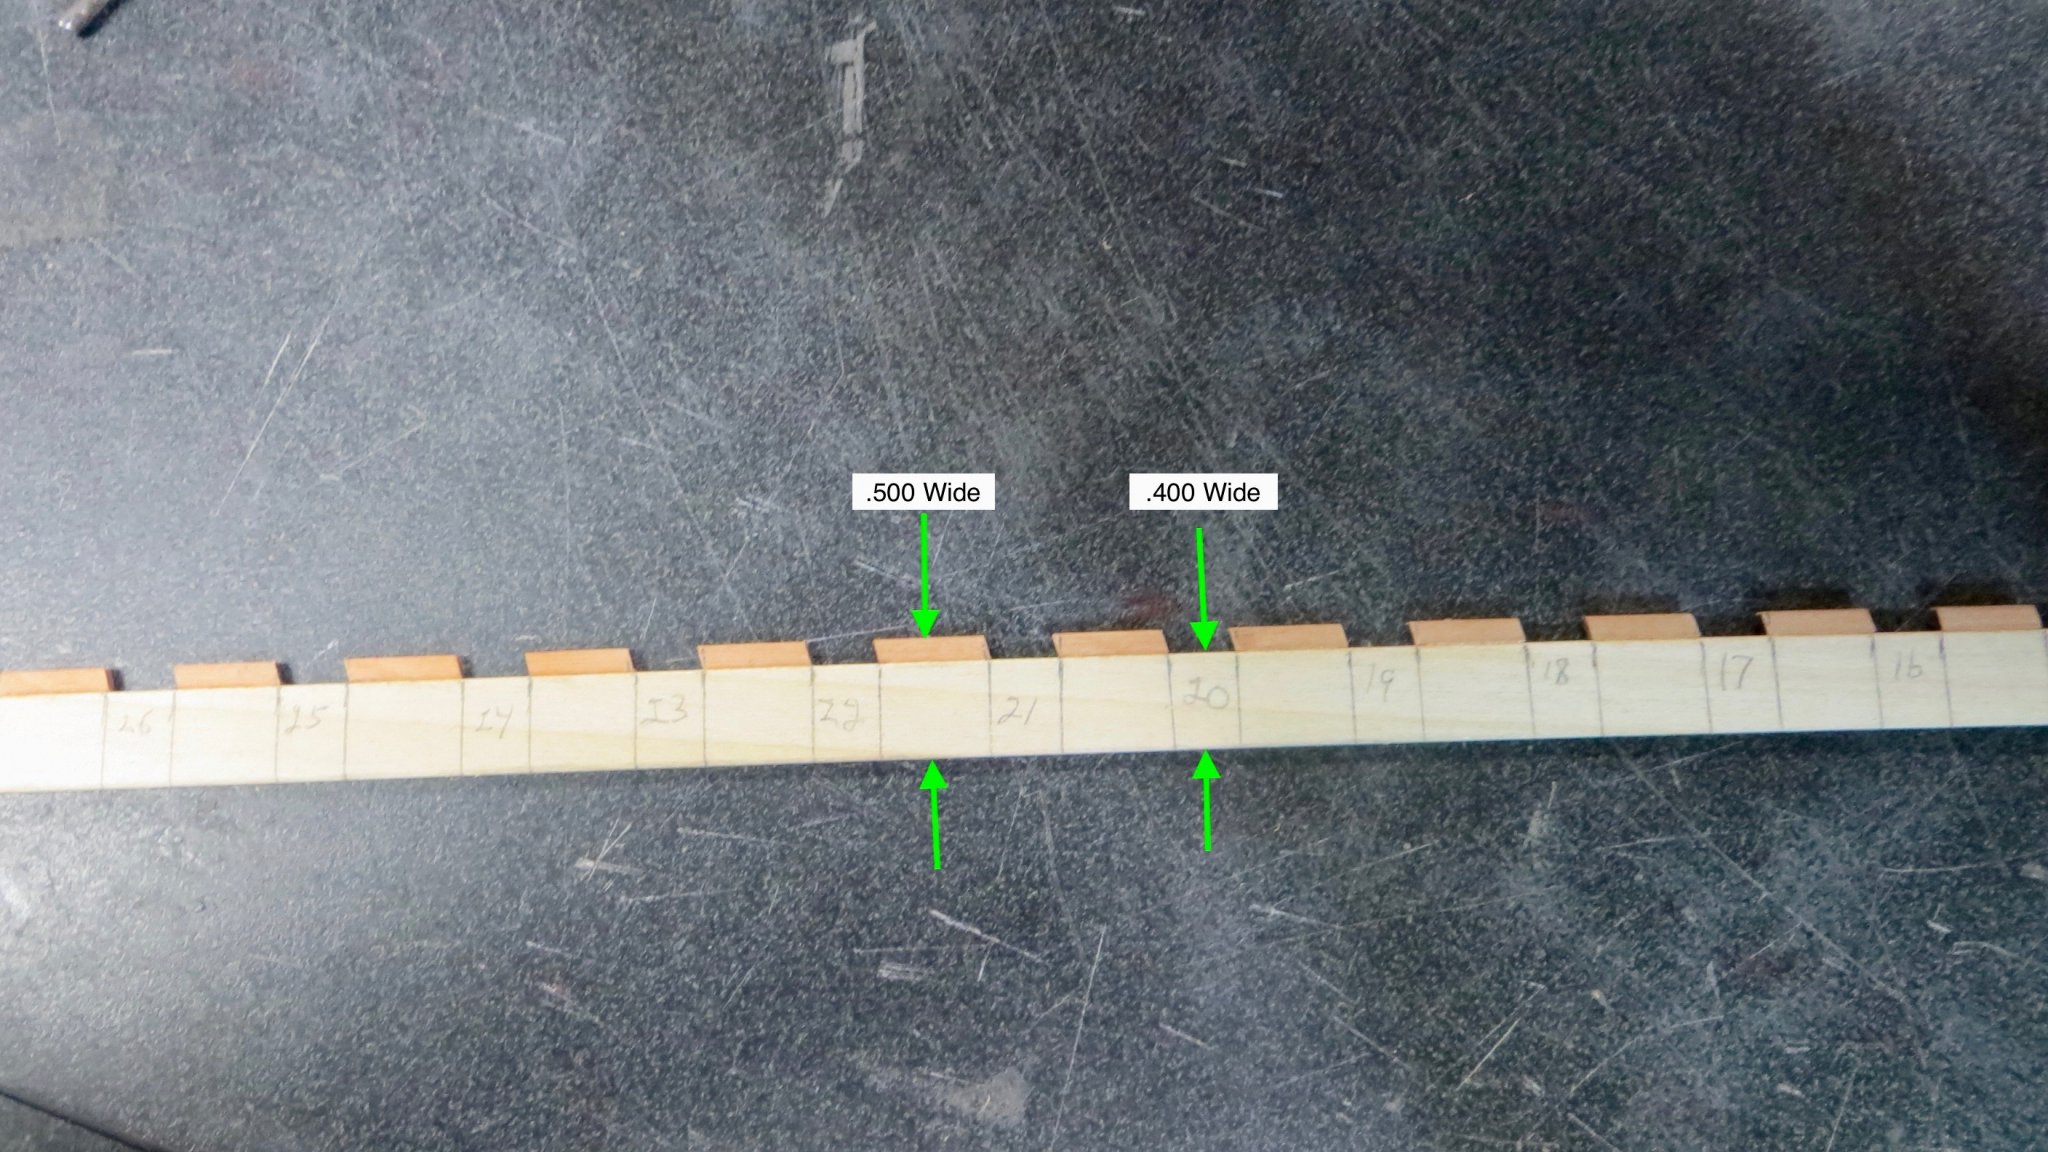
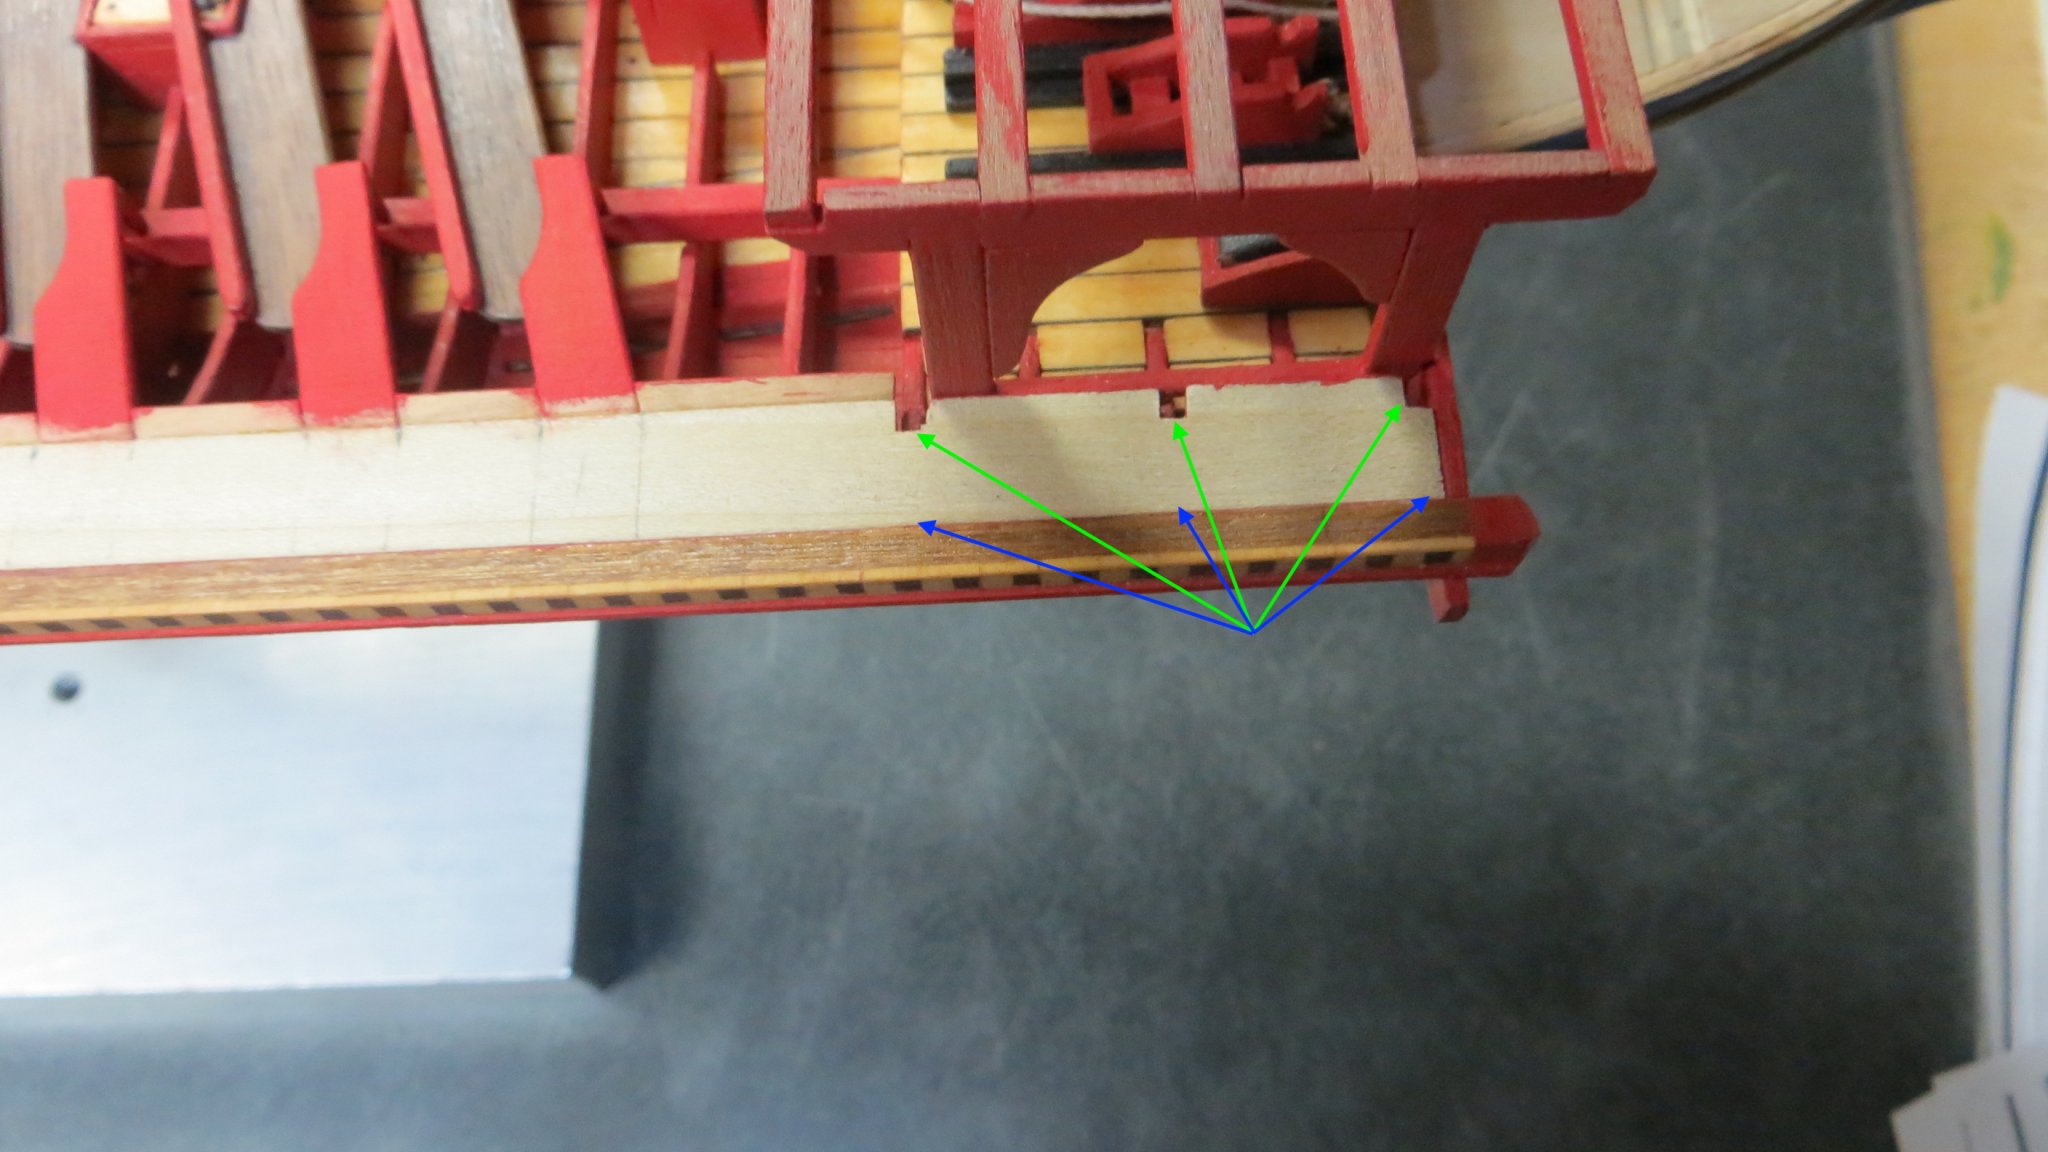
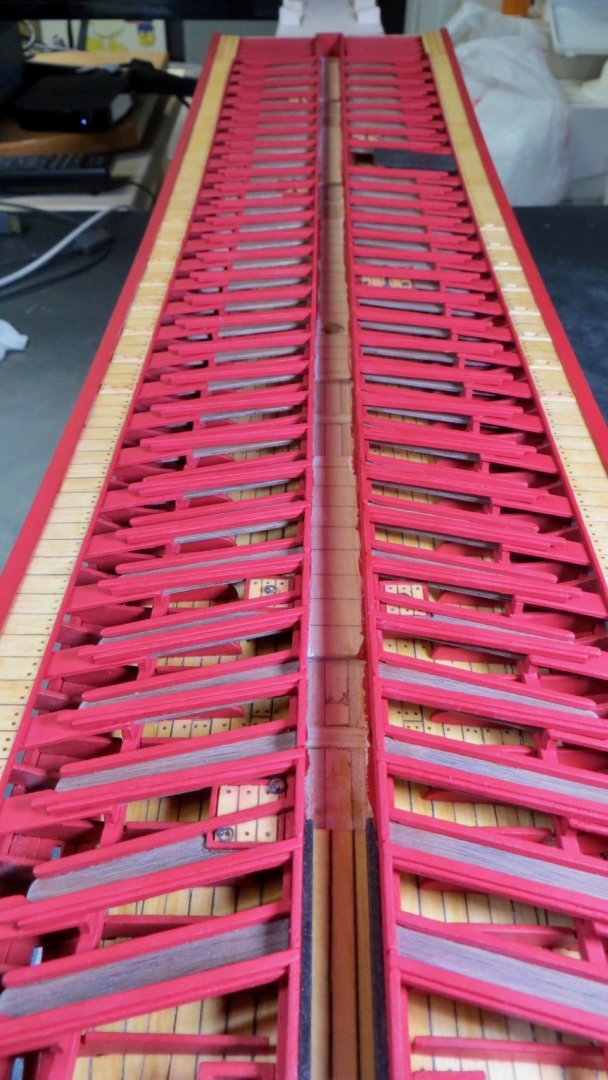
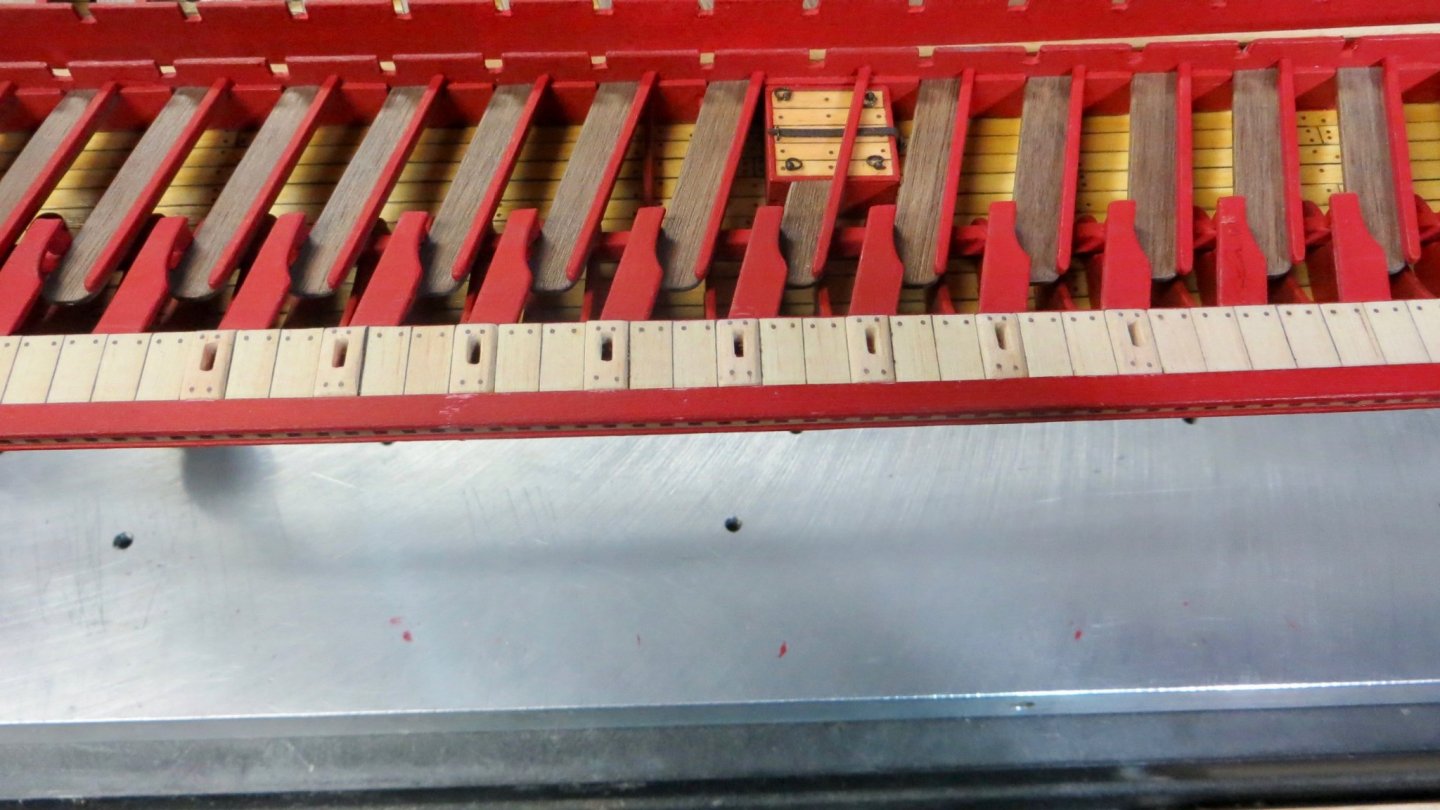
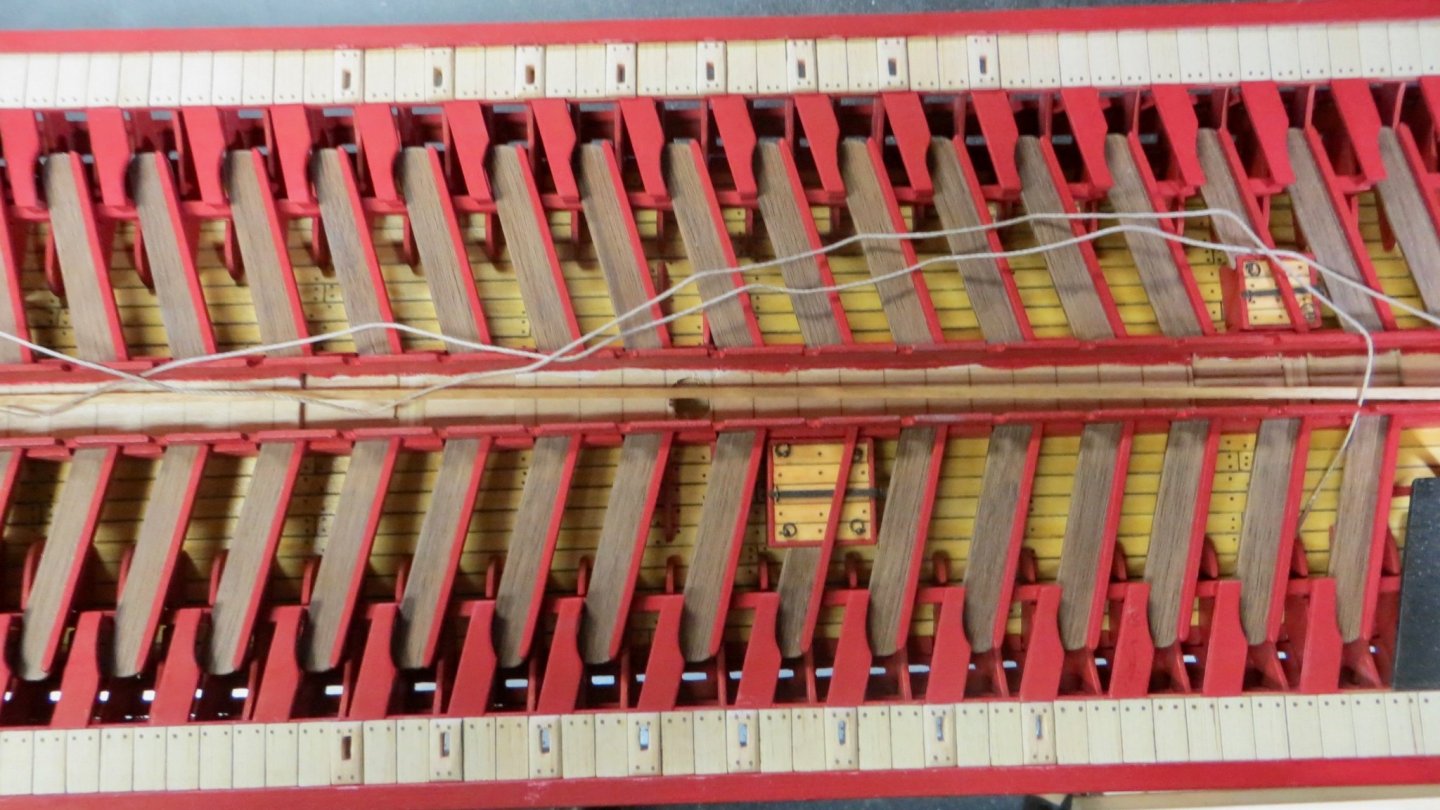
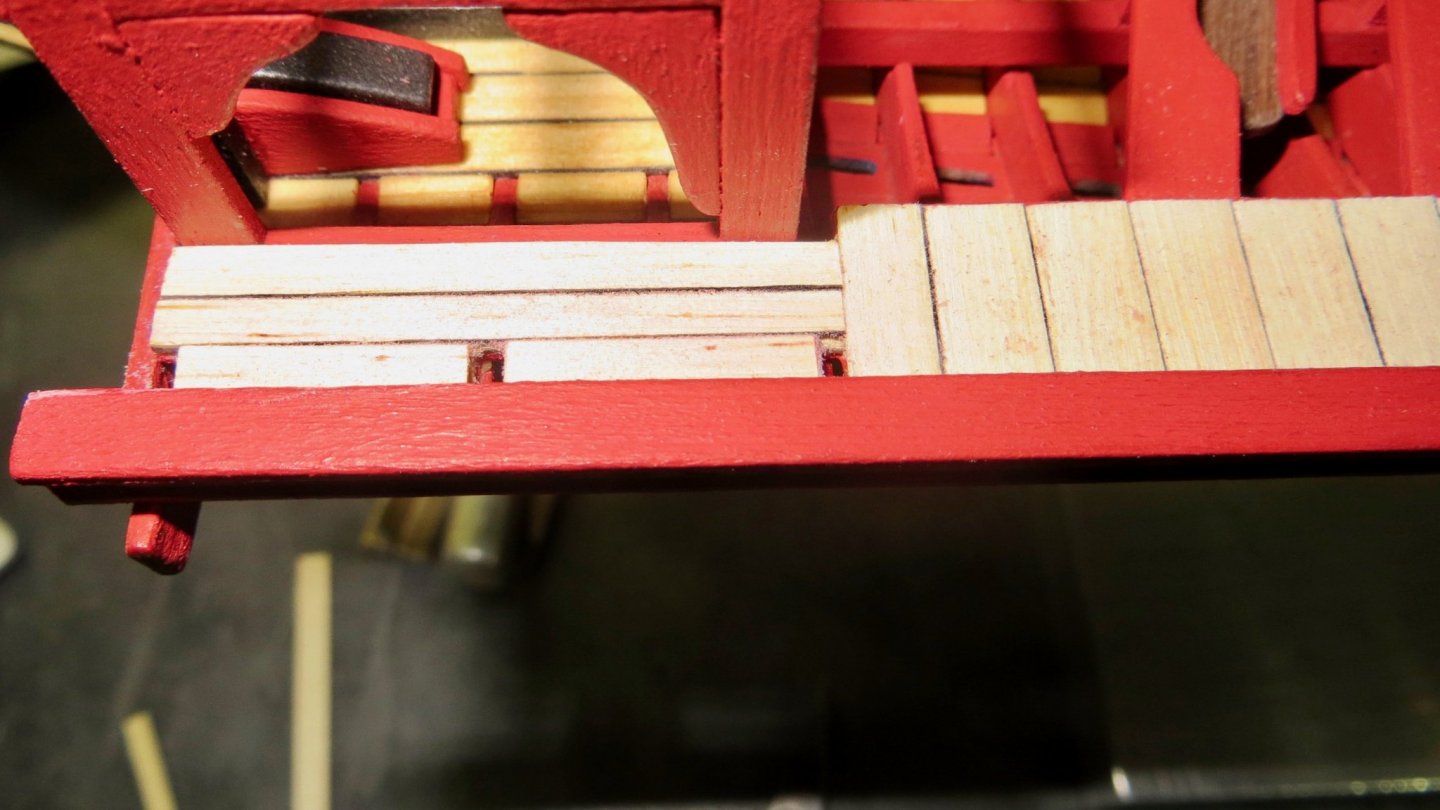
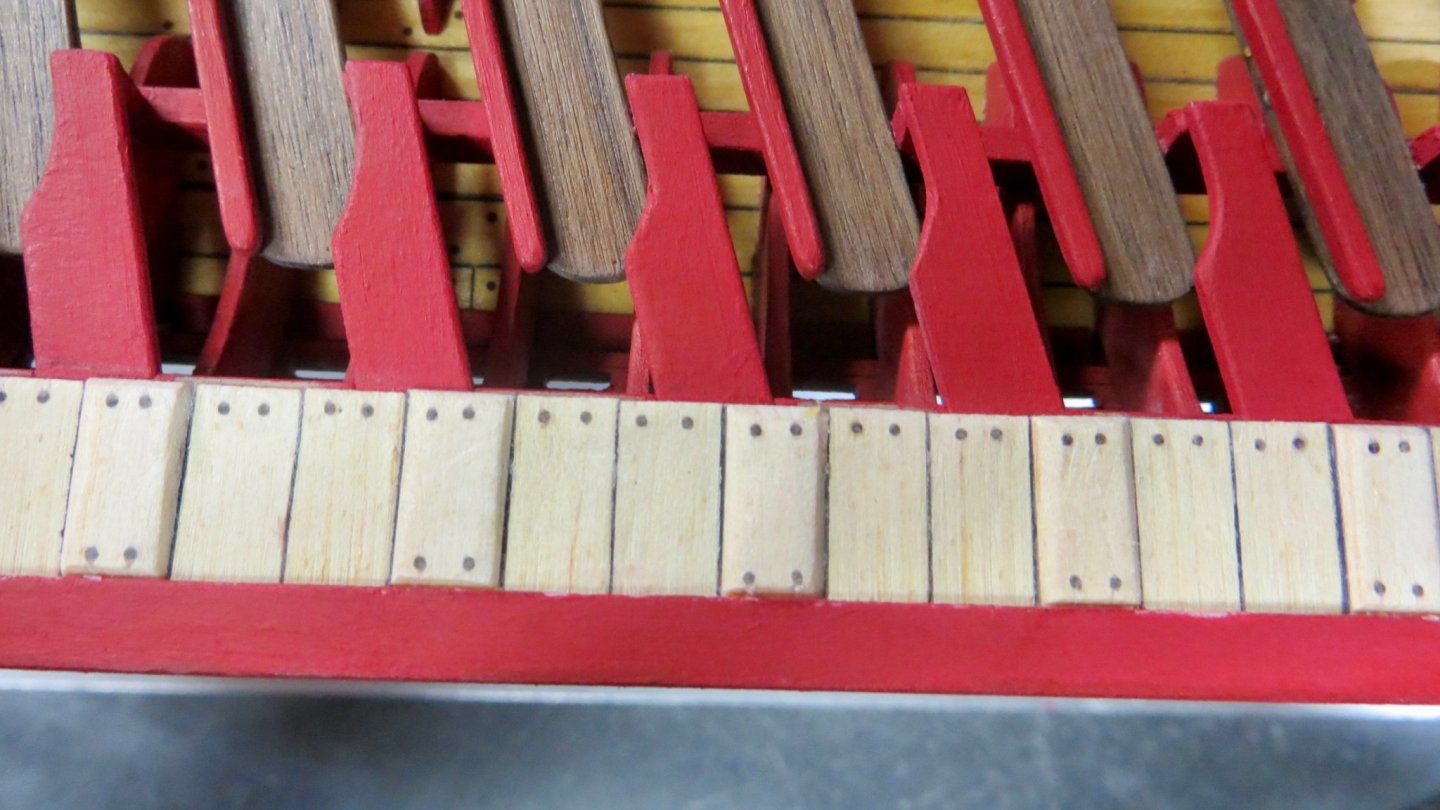
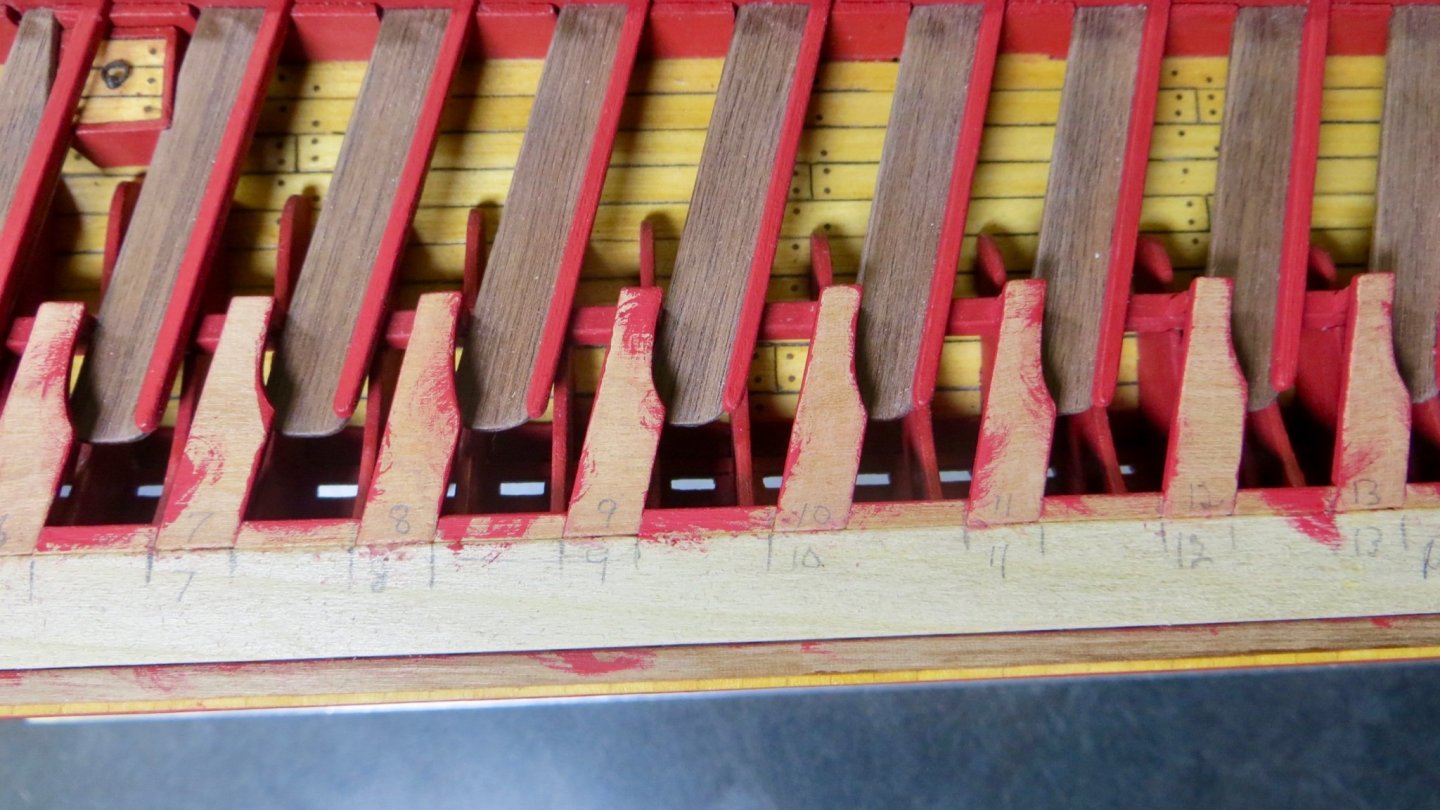
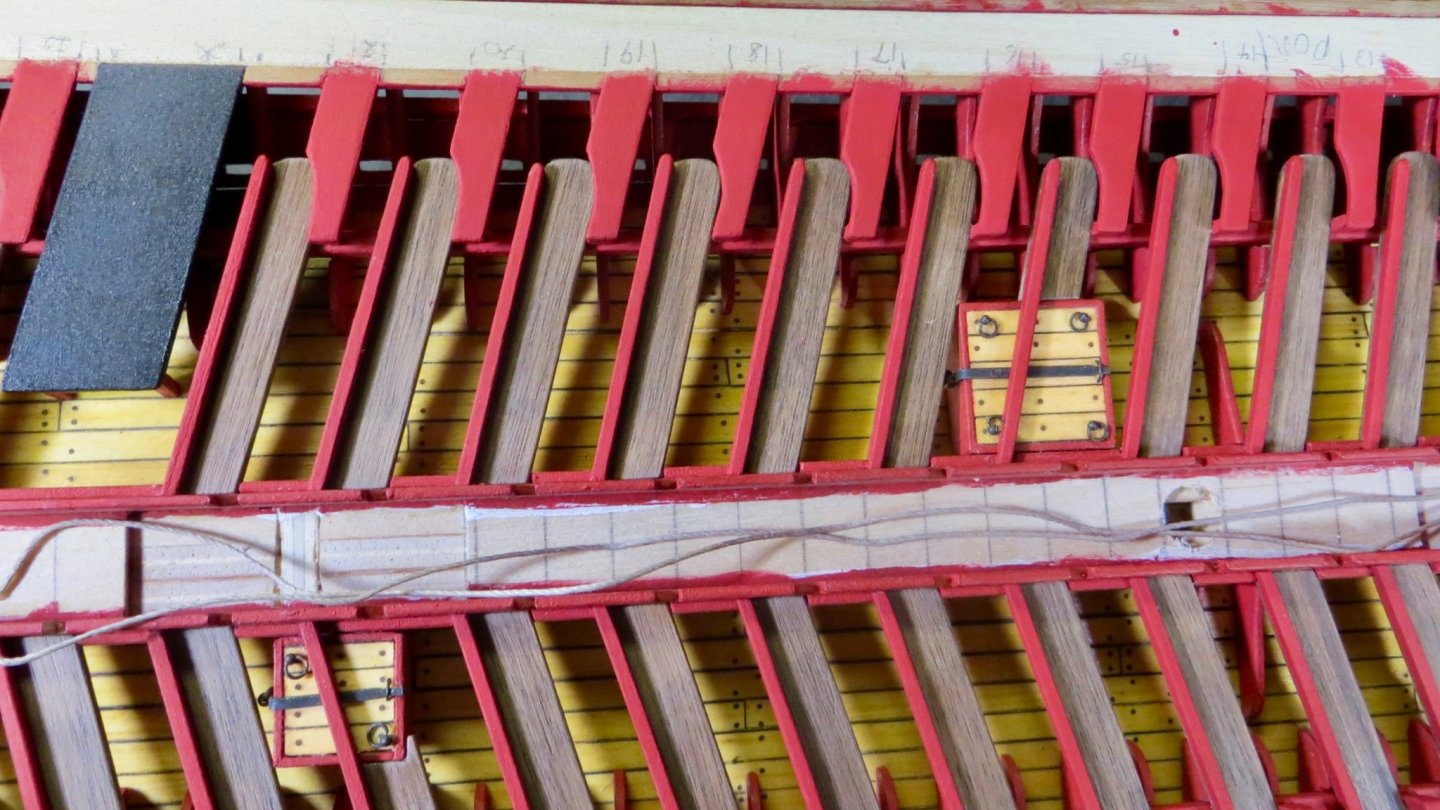
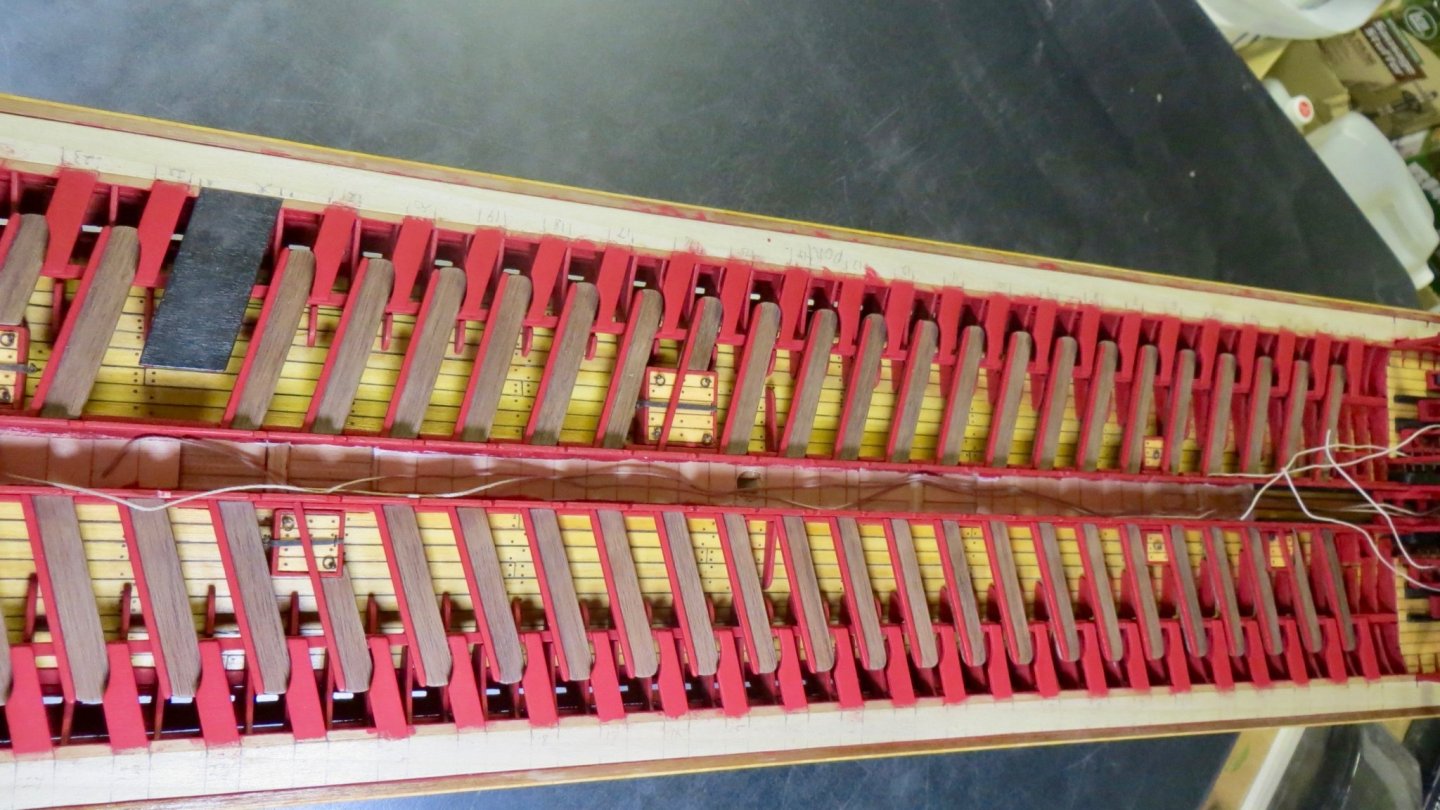
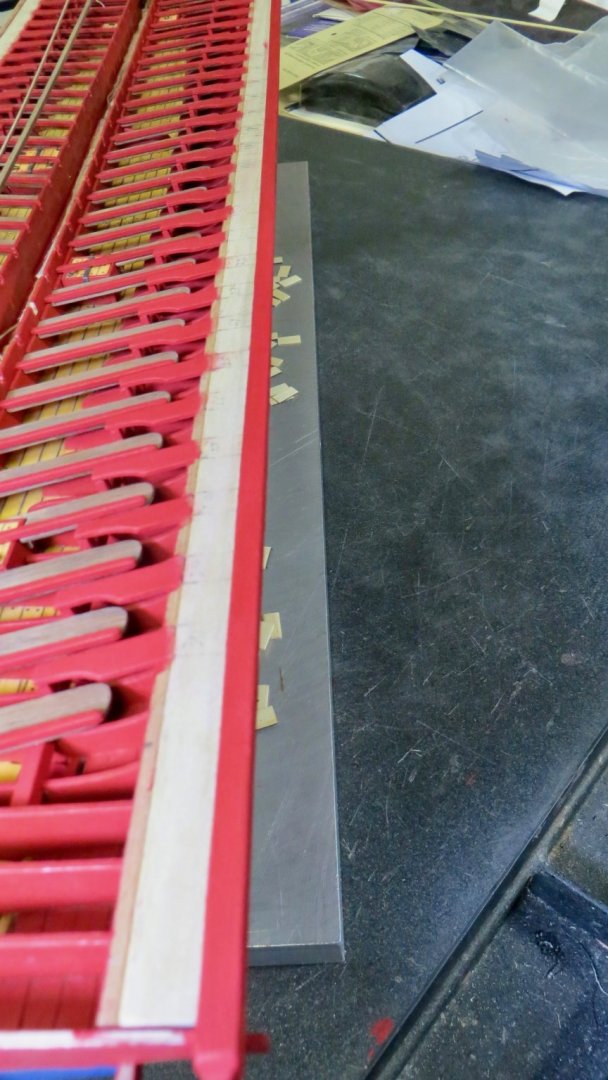
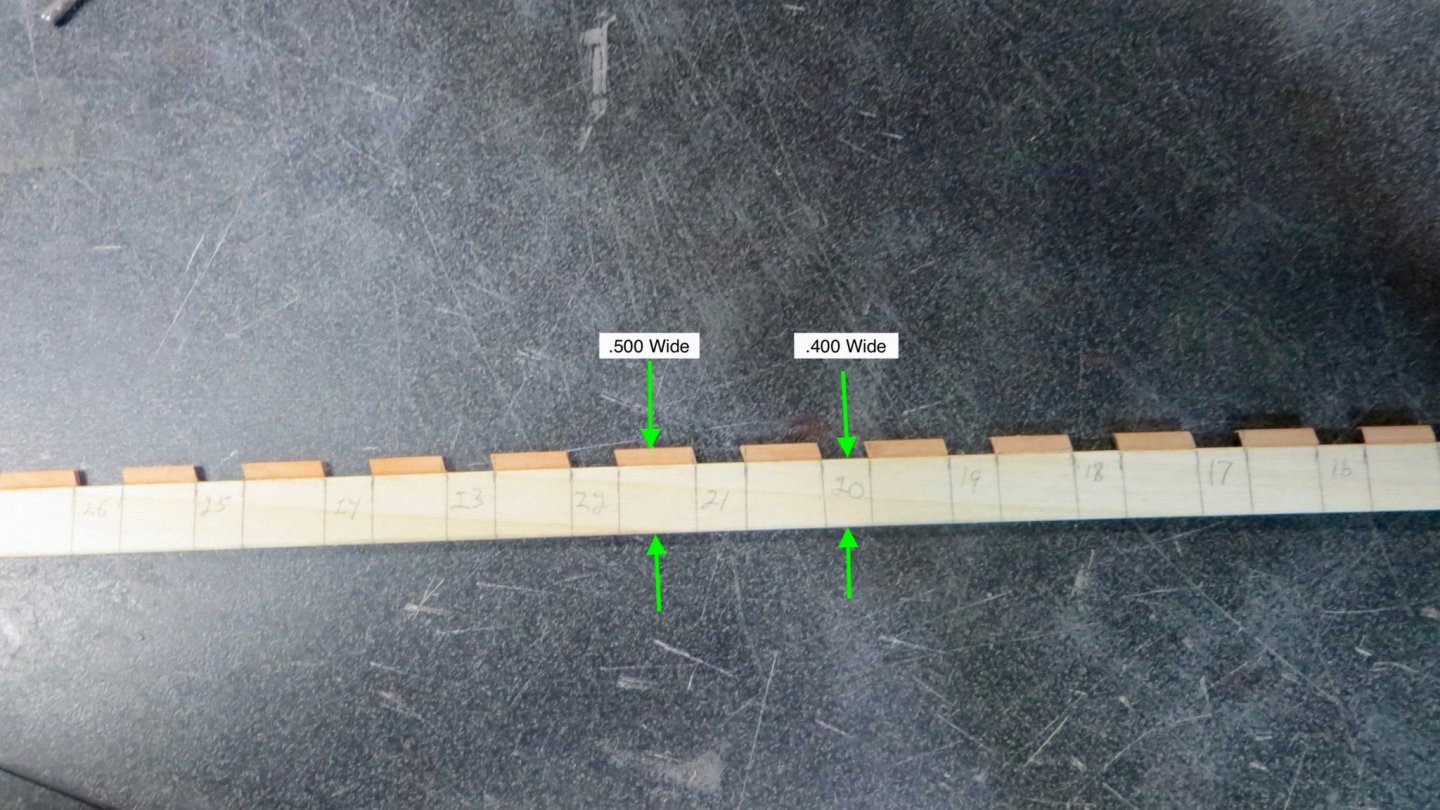
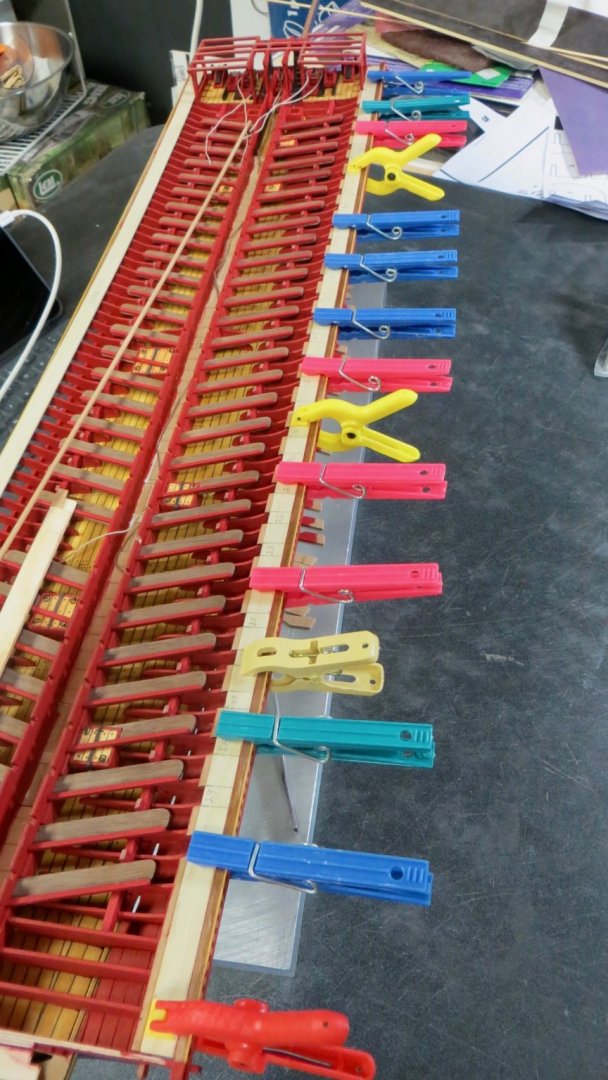
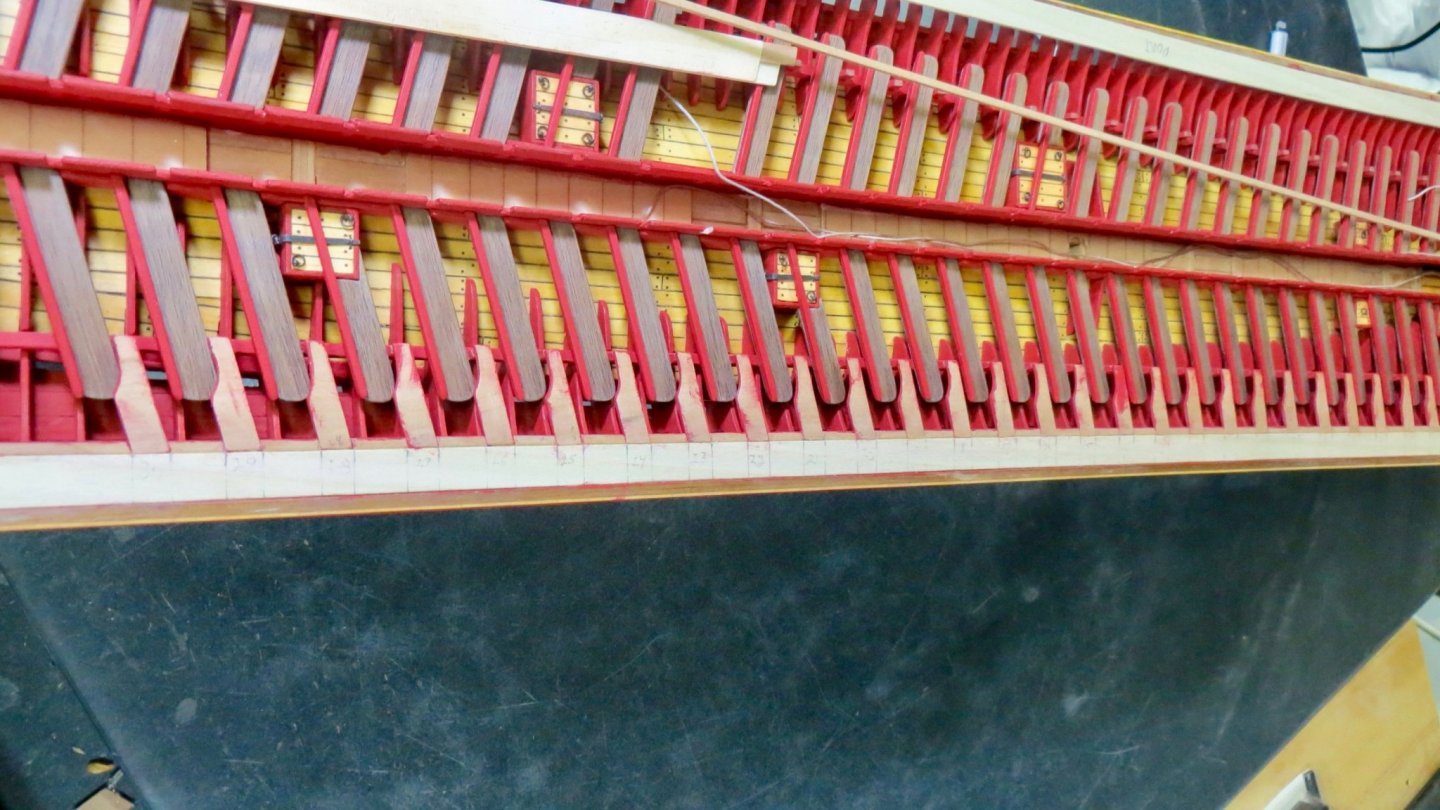
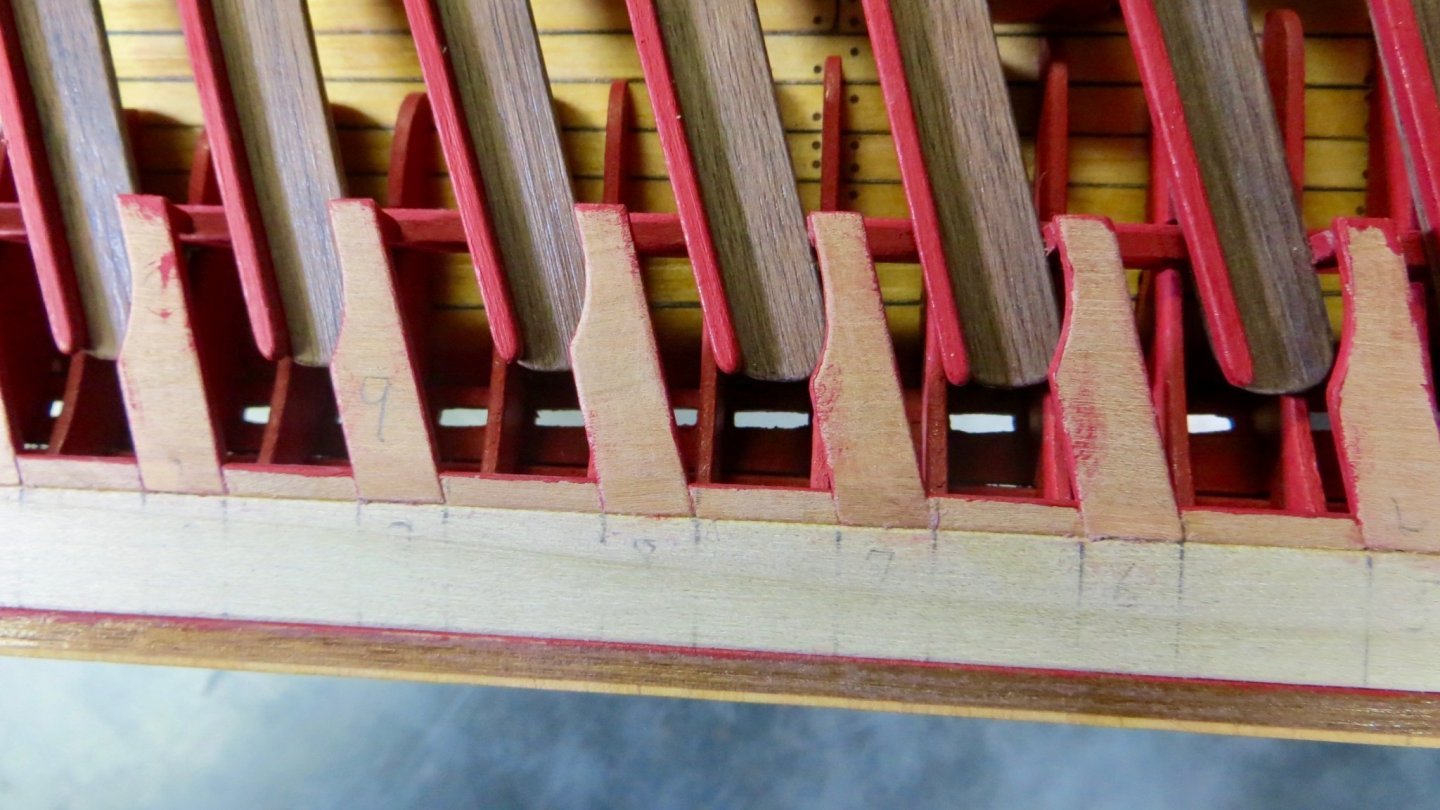
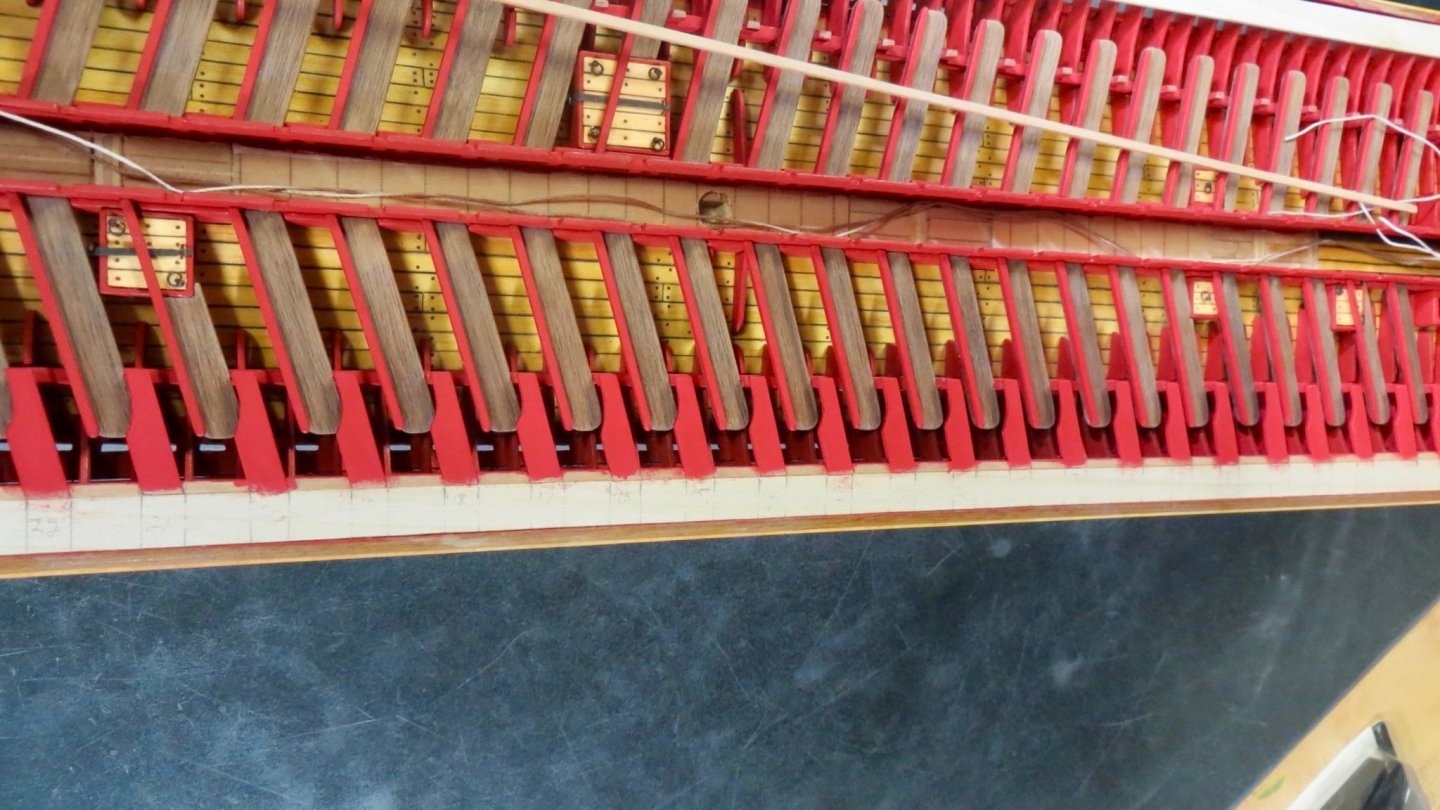
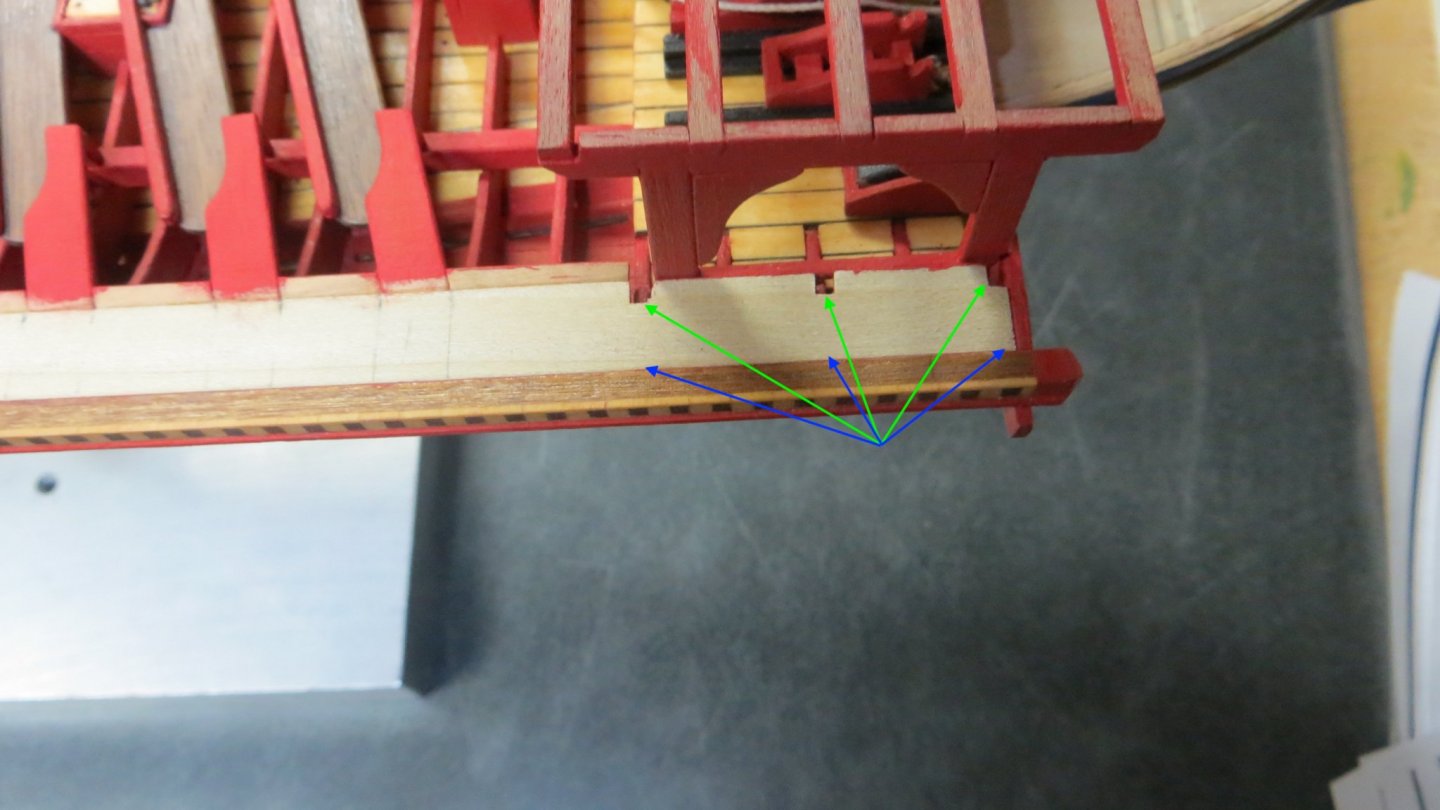
Hello, In trying to figure out how to construct the upper platforms mid ship, I borrowed some techniques of other fine logs of the Reale. Thank you all! First I cut out and finished the 59 upper supports from the plan pattern. As you can see in this photo, I made these pieces .100 (2 1/2 mm) longer than the pattern shows. Next I cut 2 long pieces of wood that will serve as the base for the upper deck planks. The base pieces are supposed to be .500 (1/2 inch) wide, but I made them only .400 wide (10 mm) I will show why. Now I attached a strip of wood, the same thickness as the board above, but only .100 wide (2 1/2 mm). I did this so the 59 upper platform pieces will have an edge to set in with some glue. I marked and cutout where each platform piece will sit. The total width will end up at .500 wide. Test fitted the pieces. Now I painted the underside of the 59 pieces and the long strip. (Painted the underside just in case 20 years from now, my grandson (Due to be born in 2 weeks) decides to have a look from the underside of the ship lol!) Long strip glued to the model 30 pieces of the upper platforms added to the starboard side. Finished painted. The unpainted area is where the upper deck planking will go. Just noticed a mistake that is easy to correct. The 3 slots on the strip of wood at the green arrows should be where the blue arrows are. The outer edge. I will correct before applying the deck planks. Oh well!! Now to repeat the same on the port side of the model. There will be 1 less support on the port side, so the cooking platform can be installed. Thanks, Frank
- 510 replies
-
- 9
-
-
- reale de france
- corel
- (and 1 more)
-
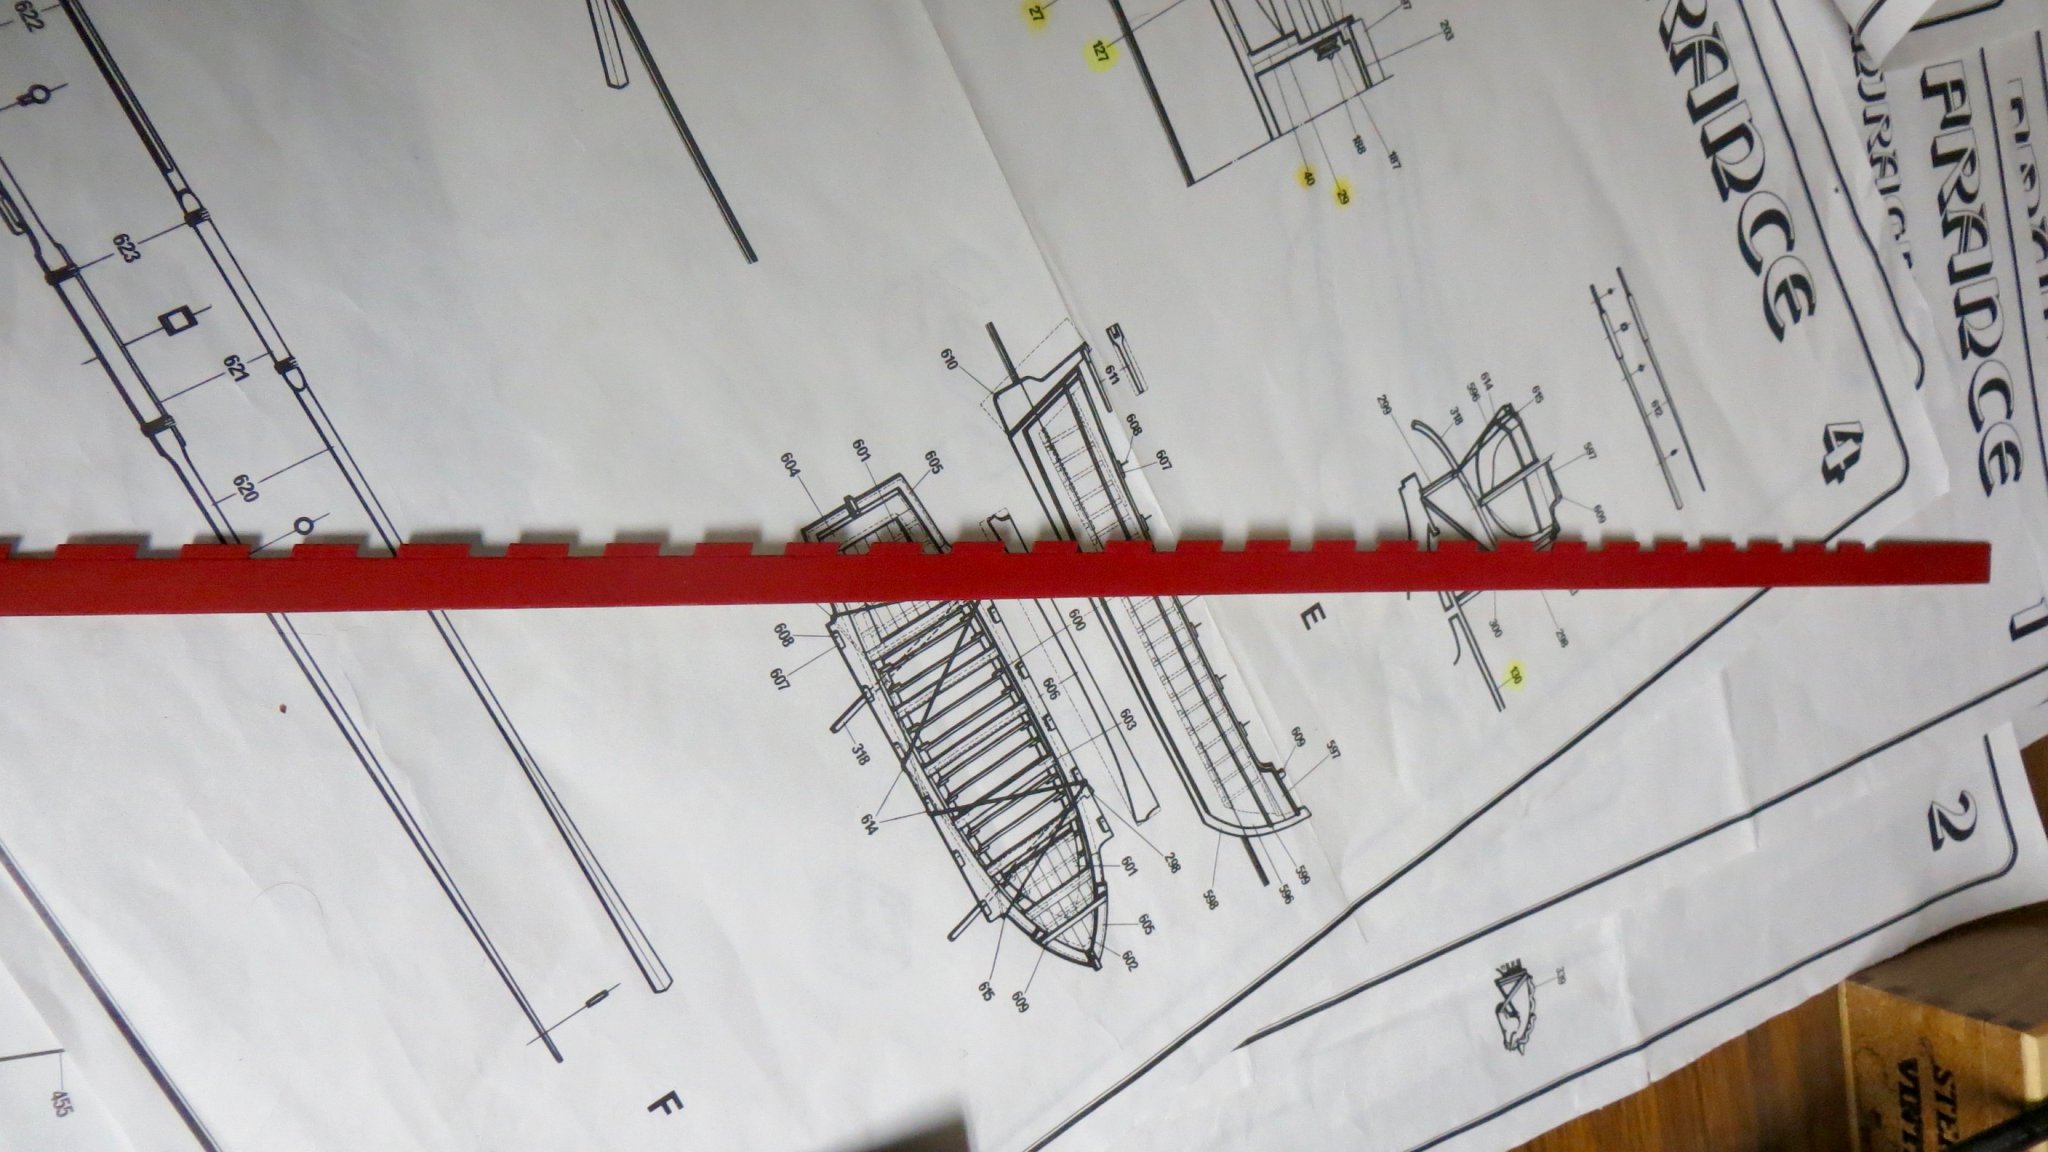
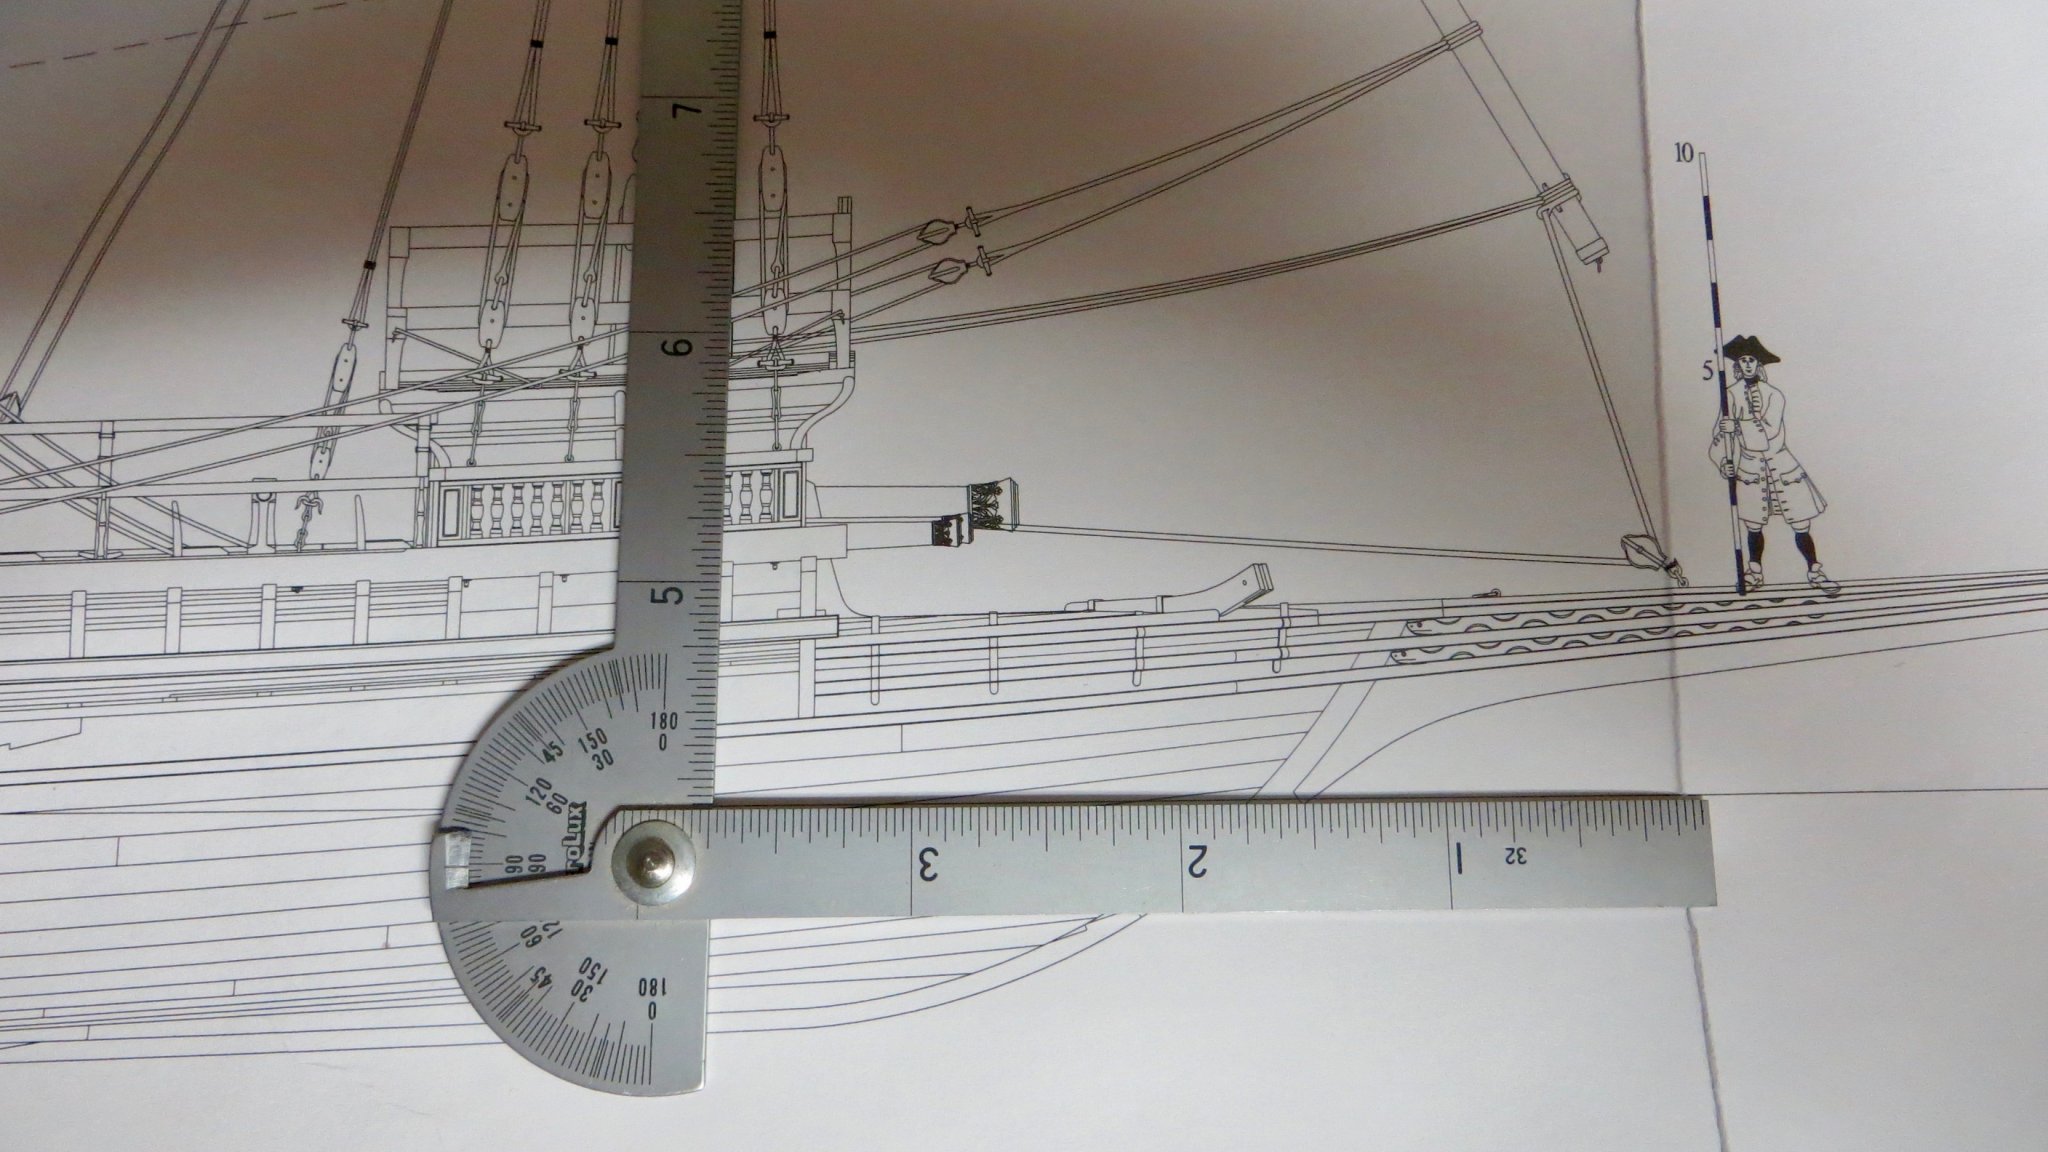
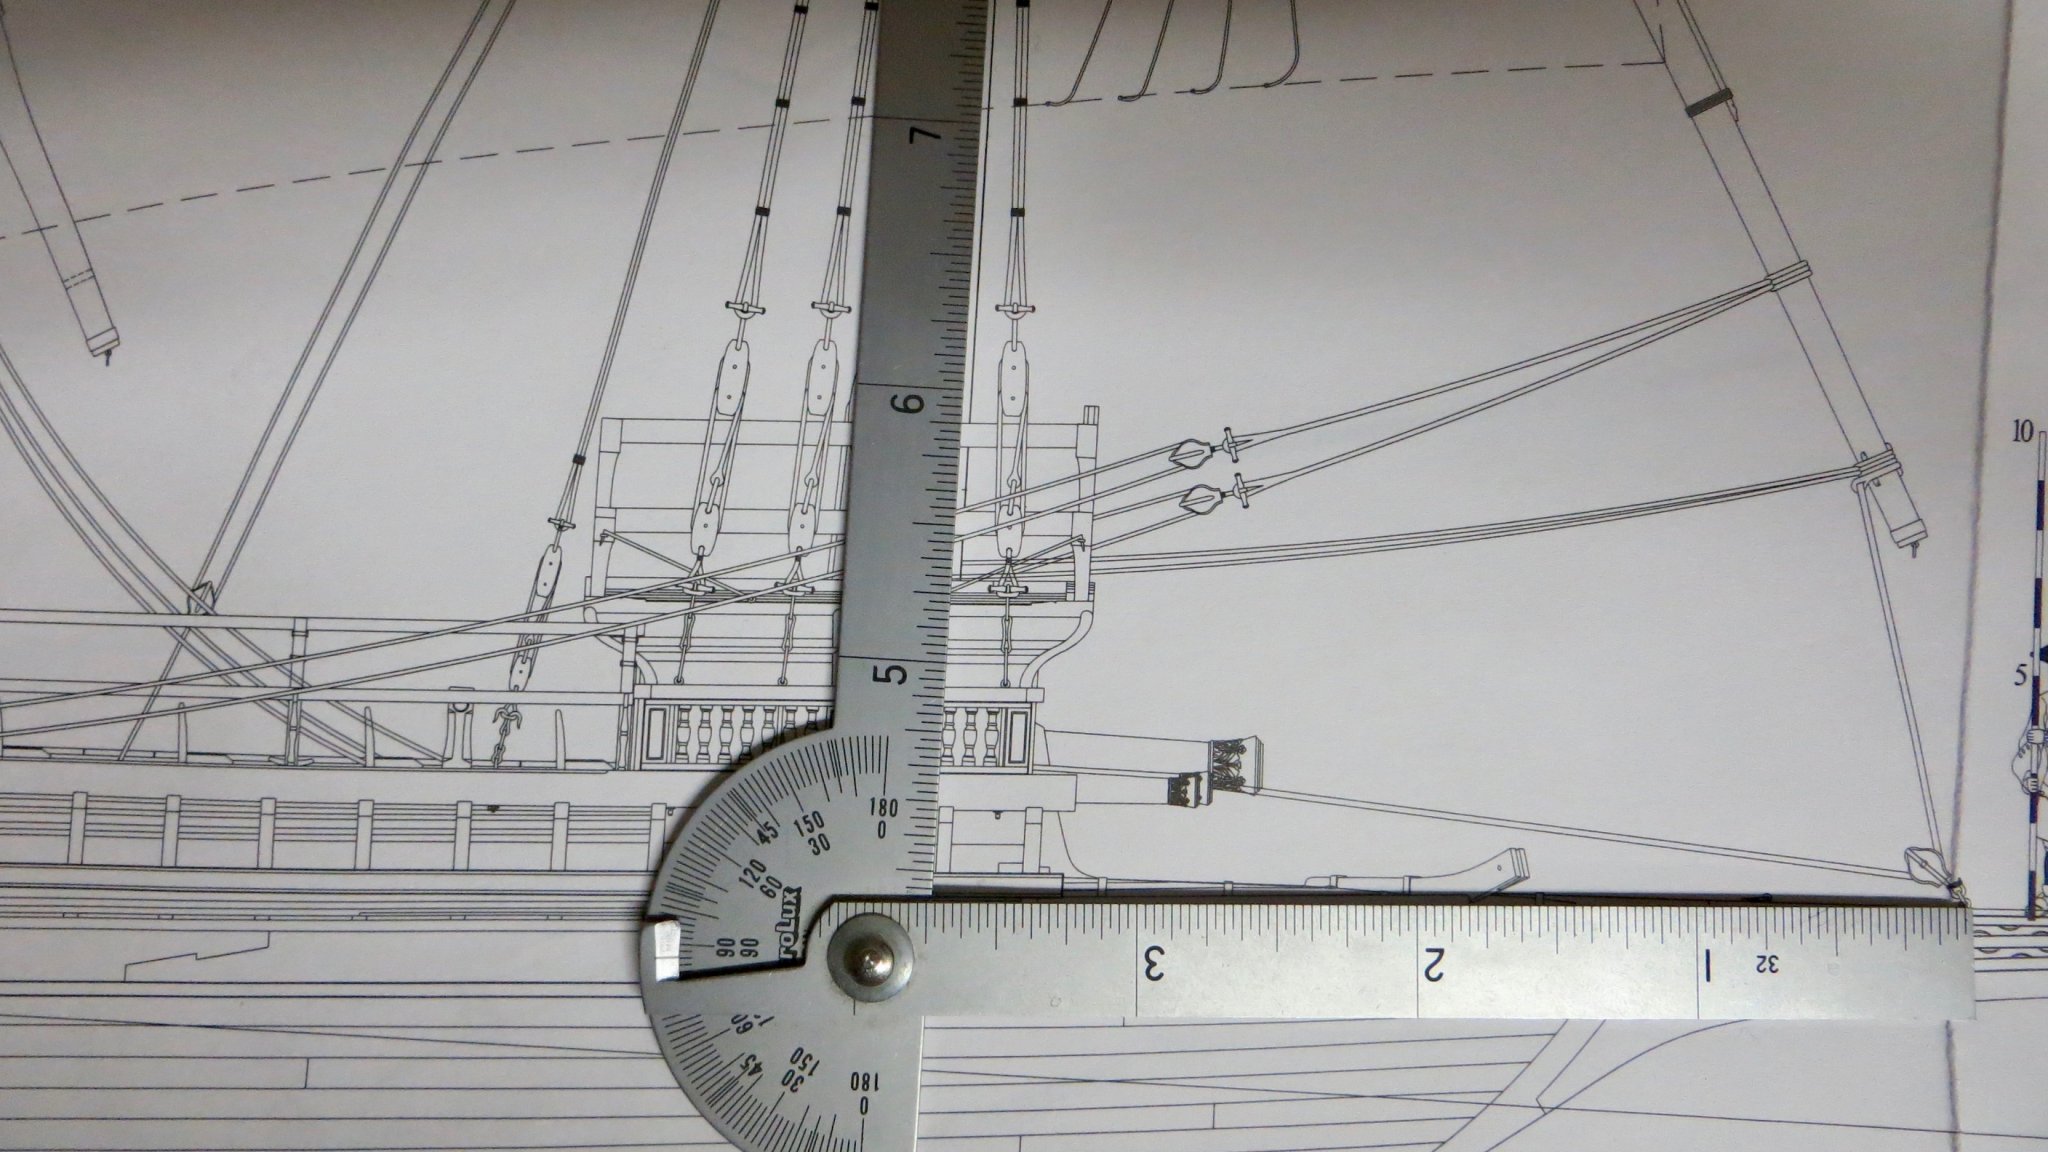
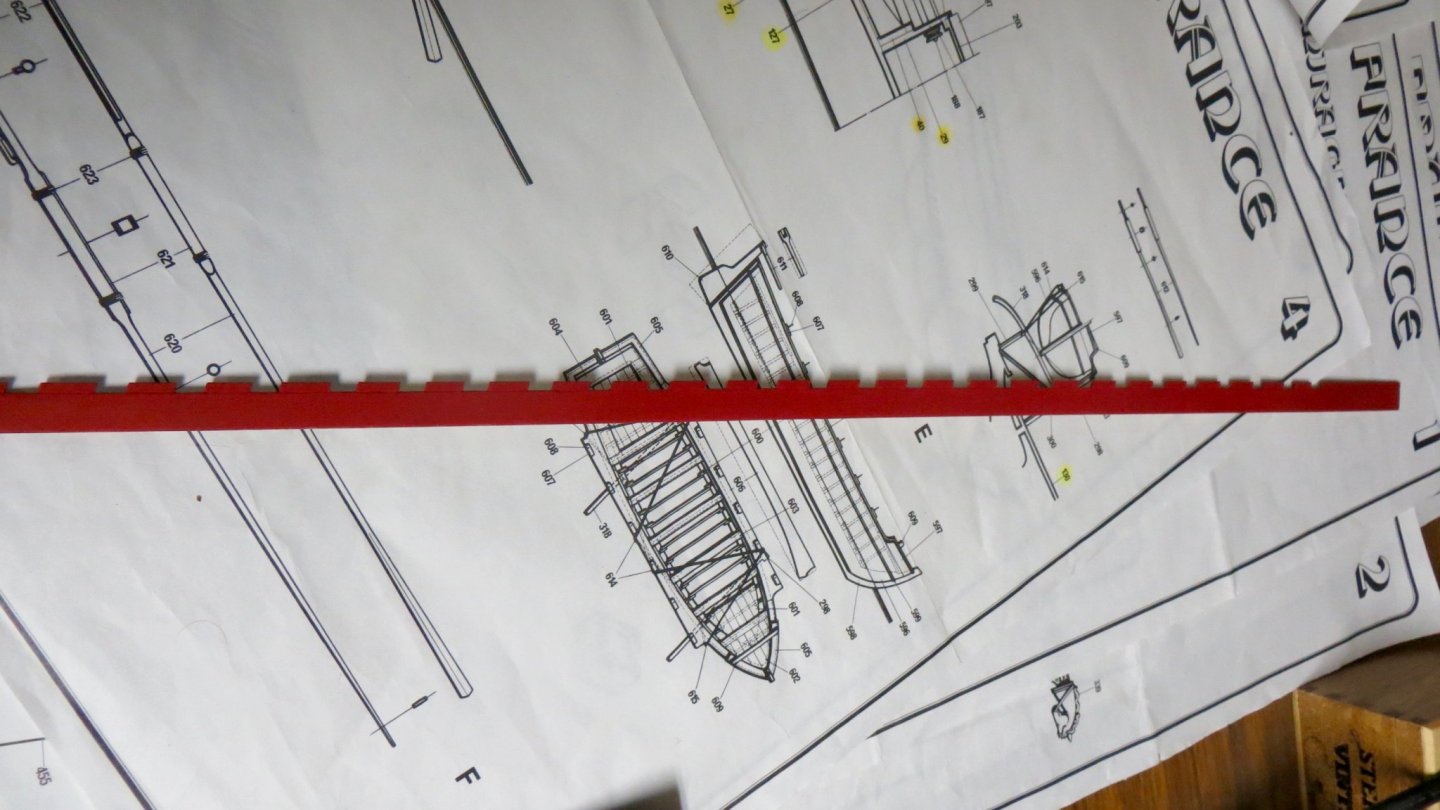
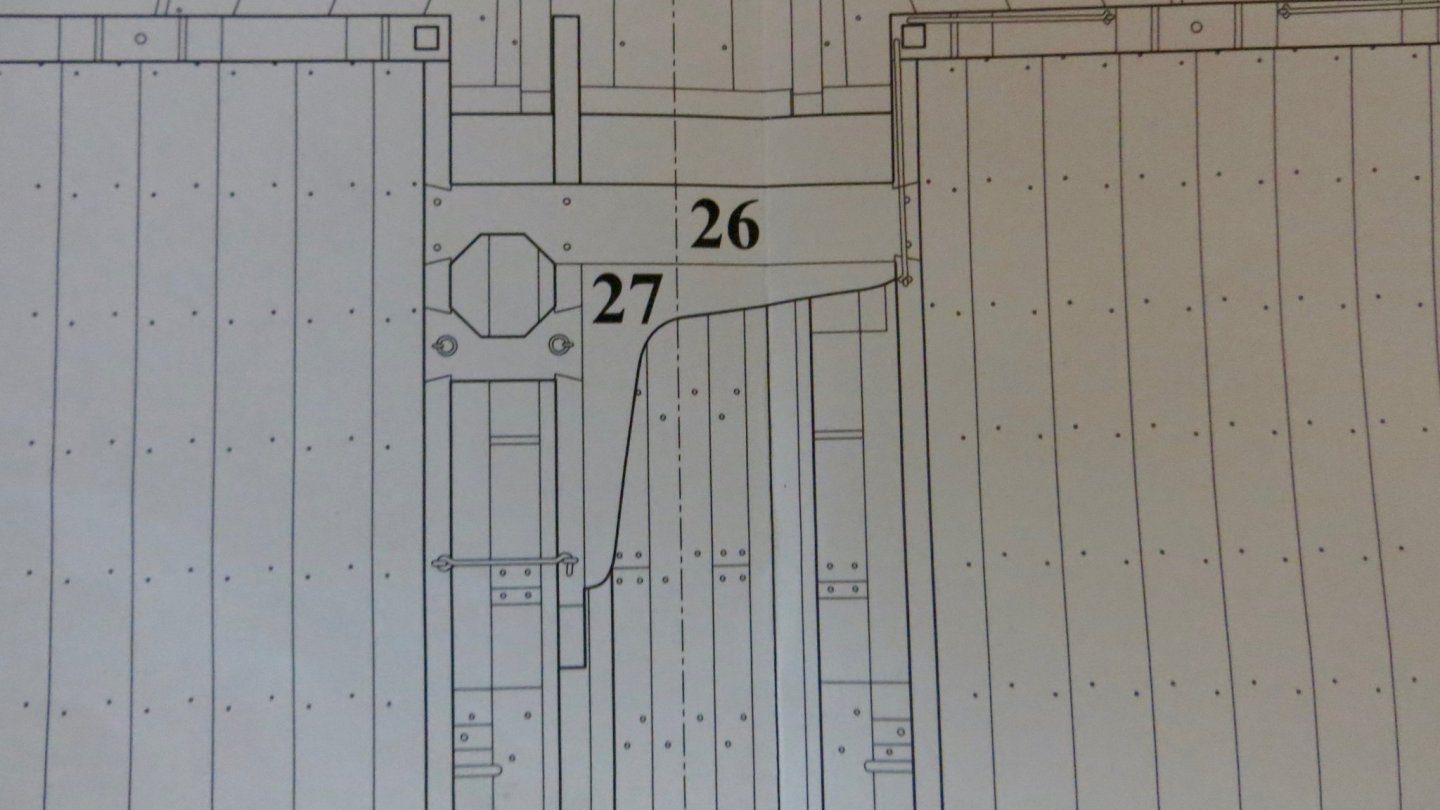
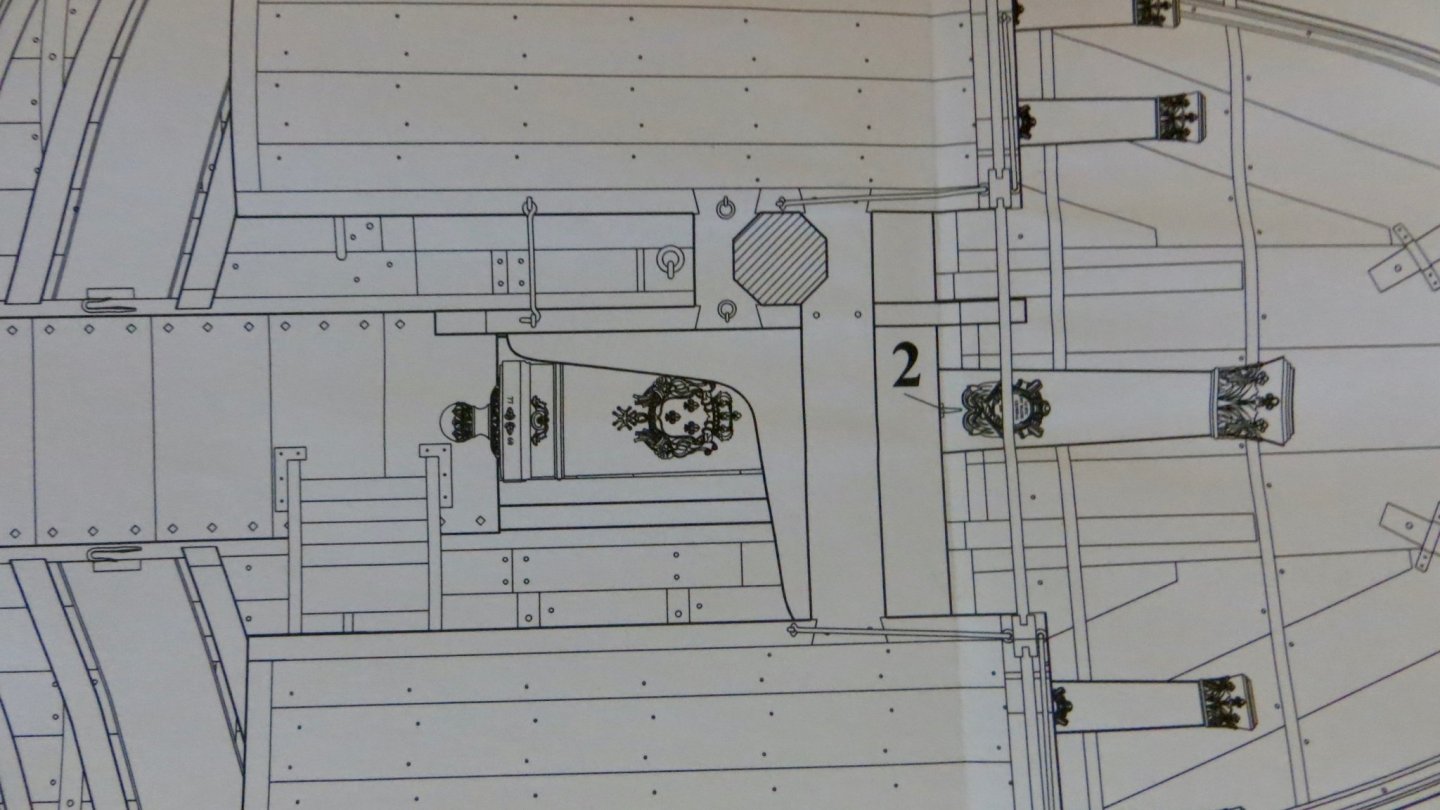
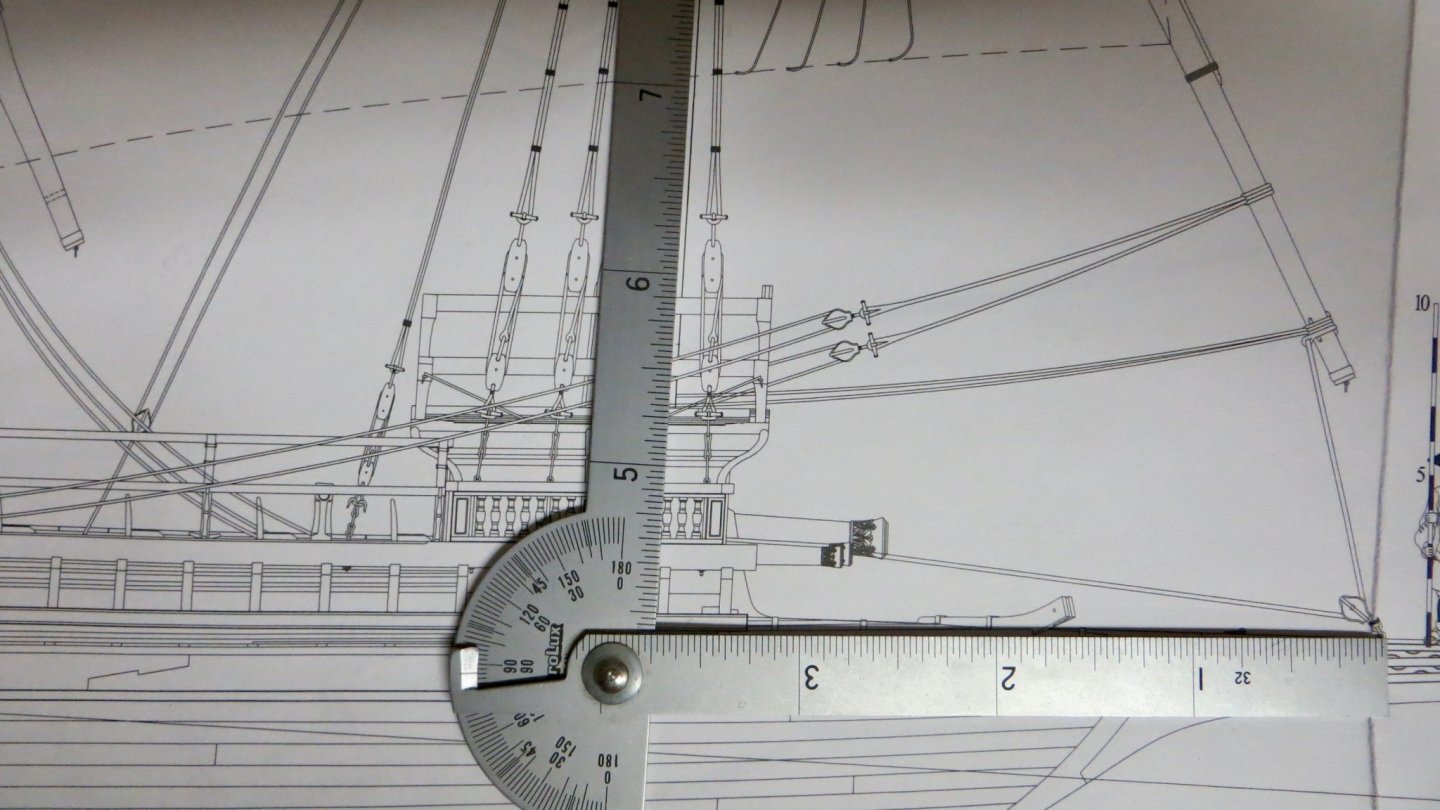
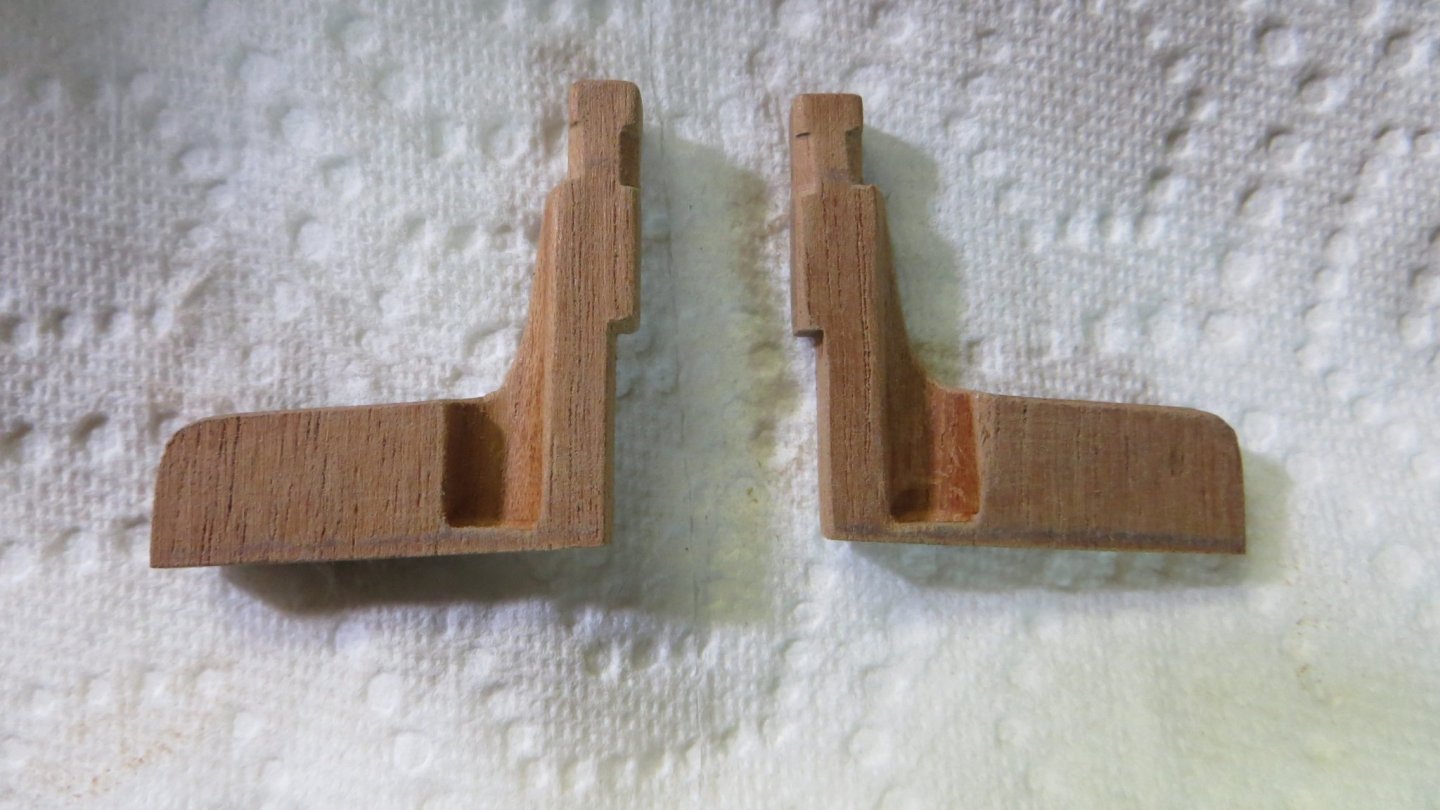
Hello Clark, Sorry it has took me a while to get back to you. I have been away. So, looking at the plans for the "Fleur de Lis", you will see that they show the foremast dropping in on the left side of the centerline only. The mast opening is supported by a large horizontal knee (Item 27 in the photo). This makes a lot of sense to me. There must have been a lot of stress on the foremast at this spot, thus requiring a large knee. The Reale de France shows openings on both sides of the centerline, with NO knee. I think I will follow the "Fleur de Lis" plans for this area. As for the foremast angle placement, the "Fleur de Lis" plans show the mast just about perpendicular to the waterline (maybe a half degree forward) If you follow the curve of the main deck towards the bow of the ship, the foremast shows about 4 degrees forward from the deck curve. I will try to follow these plans. (Fleur de Lis). If you look closely at my black painted posts, you will see that the c'bore is made slightly off (foreword of the bottom surface (the deck camber) and is parallel to the vertical edge. This should accommodate the 4 degree pitch the the mast just fine. Thanks, Frank

- 510 replies
-
- 4
-
-
- reale de france
- corel
- (and 1 more)
-
Hi Clark, I am away this week. When I get home next week I will send you a photo of the foremast layout of the "Fleur de Lis" monograph. It shows the foremast mounted on the left or port side of the centerline. I will do the same. The Fleur de Lis plans shows only 1 hole going thru the upper deck. (The port side) NOT two openings as on the Corel plans. The opening is supported by a large knee built into the upper deck. It will be easier to explain once you see the detailed sheet. I have left room on the upper deck beams to be able to locate the hole where the foremast will go with a slight angle. I will figure the exact placement before I finish planking that upper deck.We'll discuss next week. Thanks, Frank
- 510 replies
-
- 1
-
-
- reale de france
- corel
- (and 1 more)