HOLIDAY DONATION DRIVE - SUPPORT MSW - DO YOUR PART TO KEEP THIS GREAT FORUM GOING! (Only 13 donations so far - C'mon guys!)
×


fmodajr
-
Posts
868 -
Joined
-
Last visited
Content Type
Profiles
Forums
Gallery
Events
Everything posted by fmodajr
-
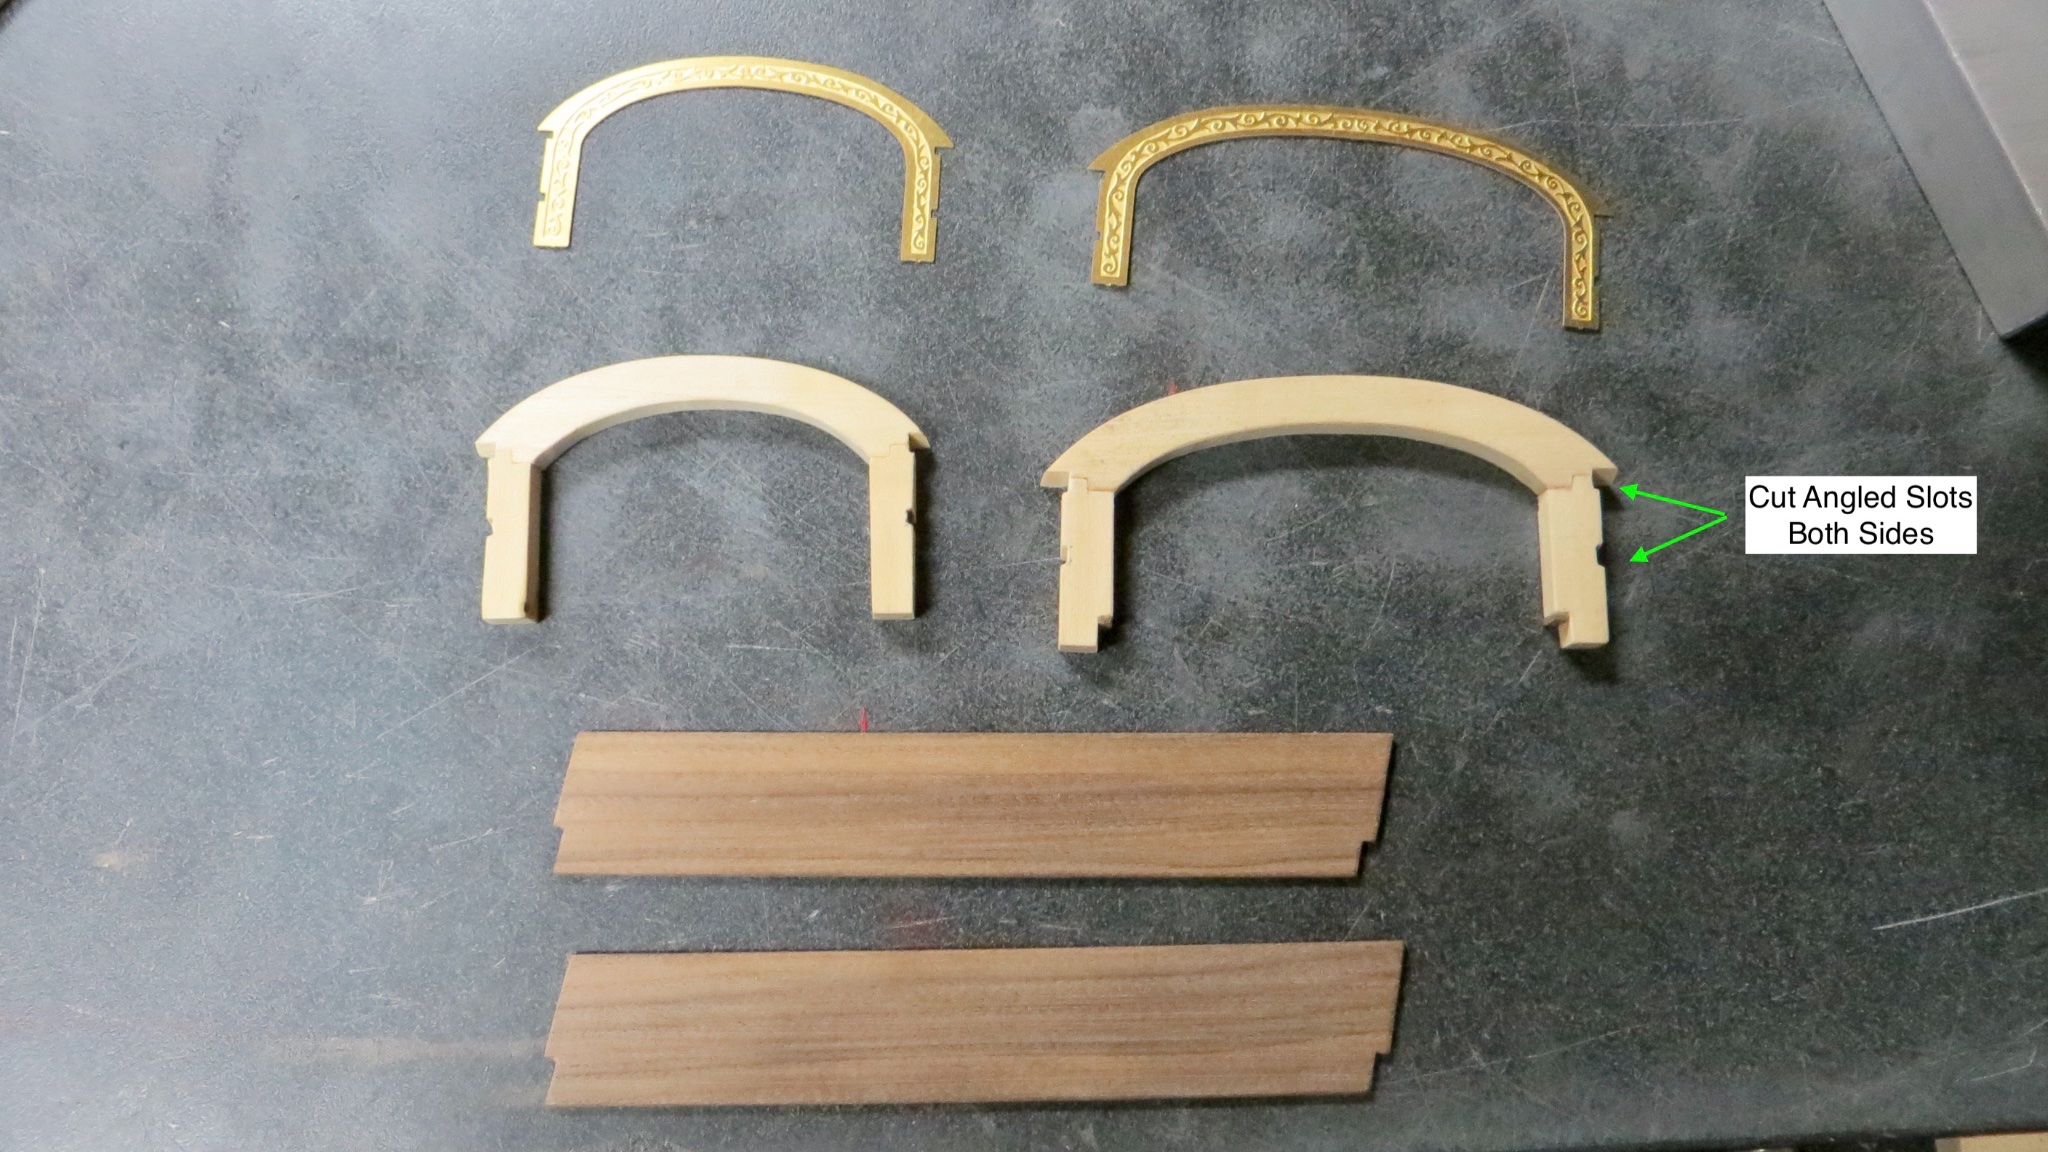
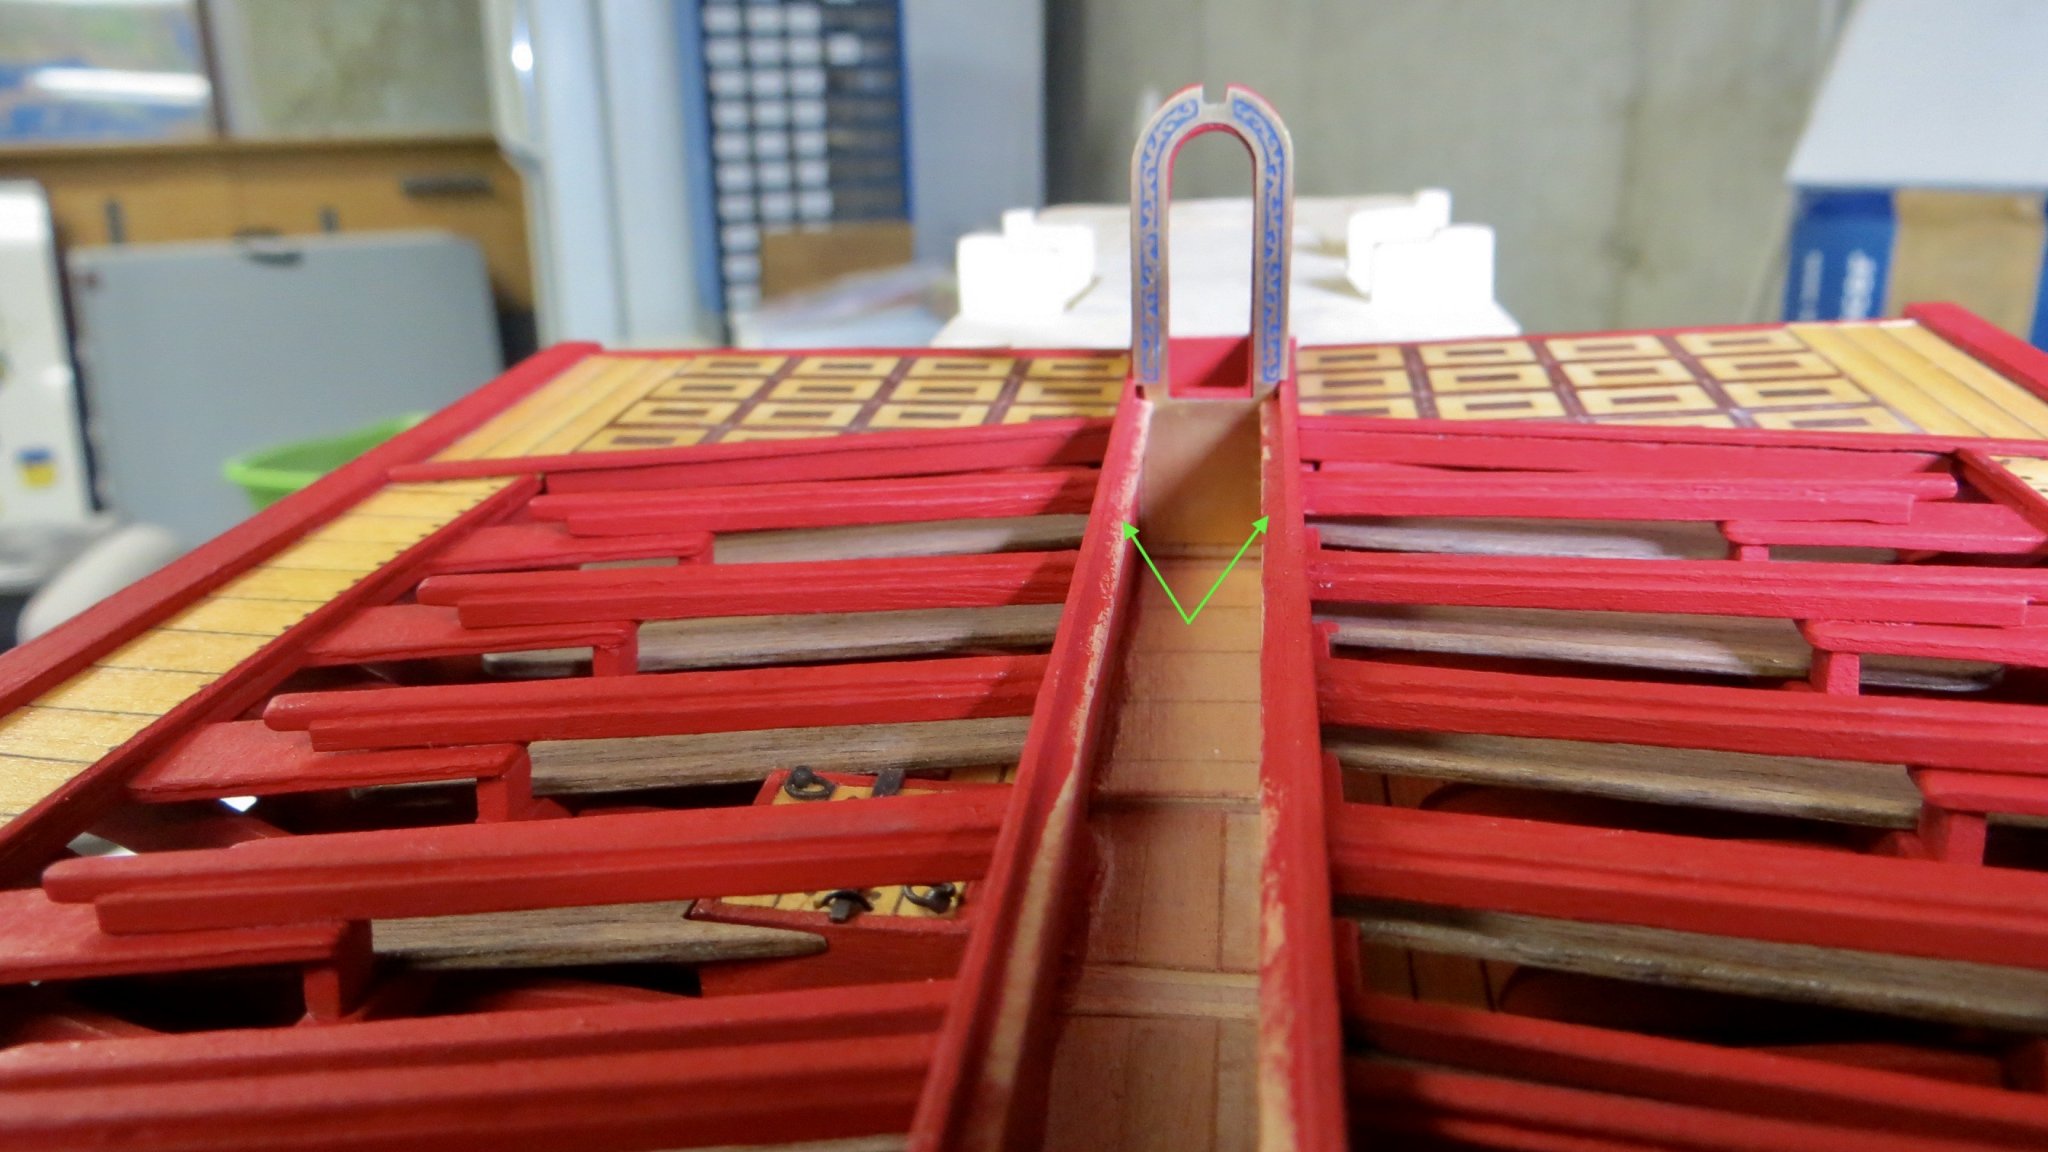
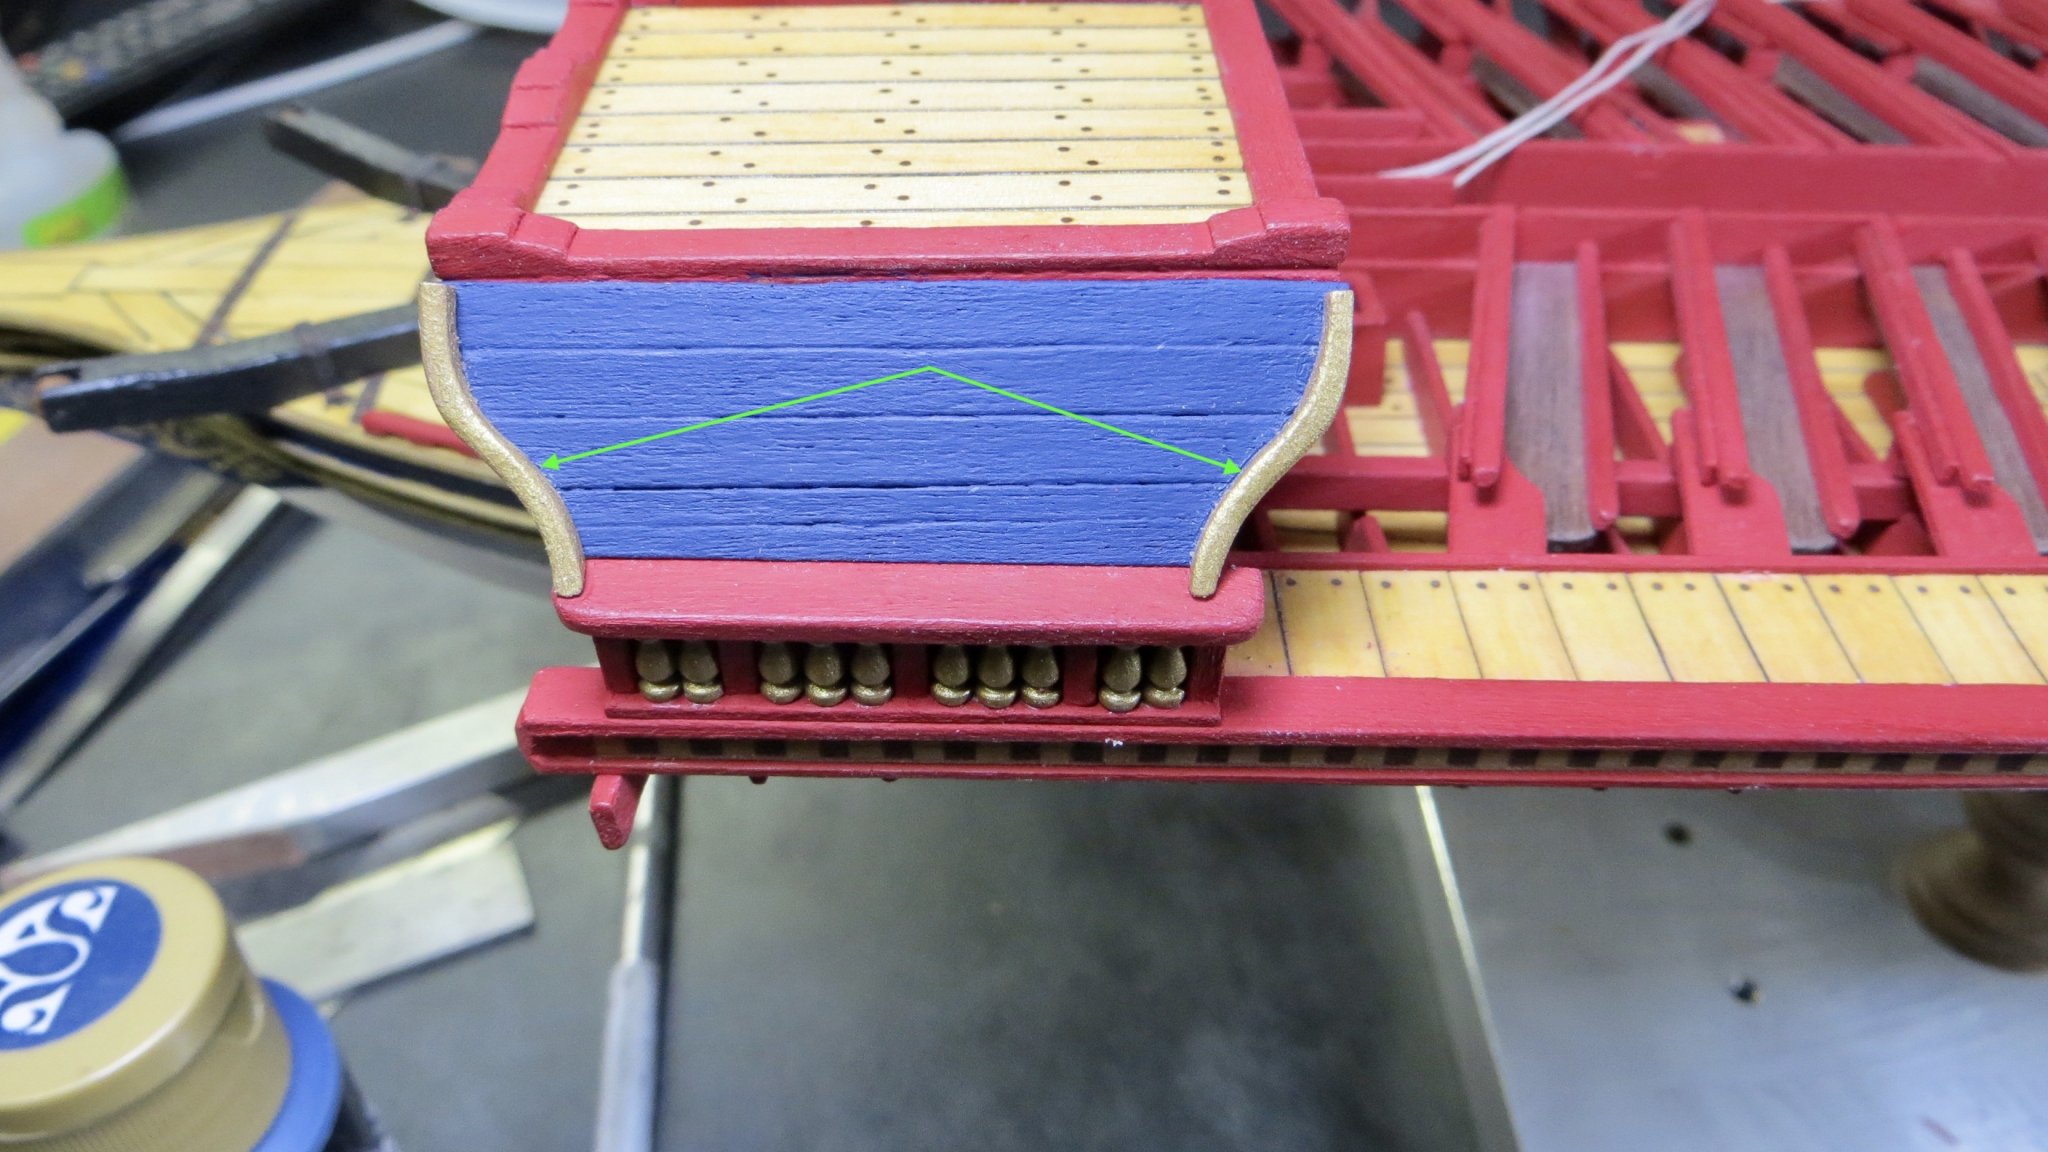
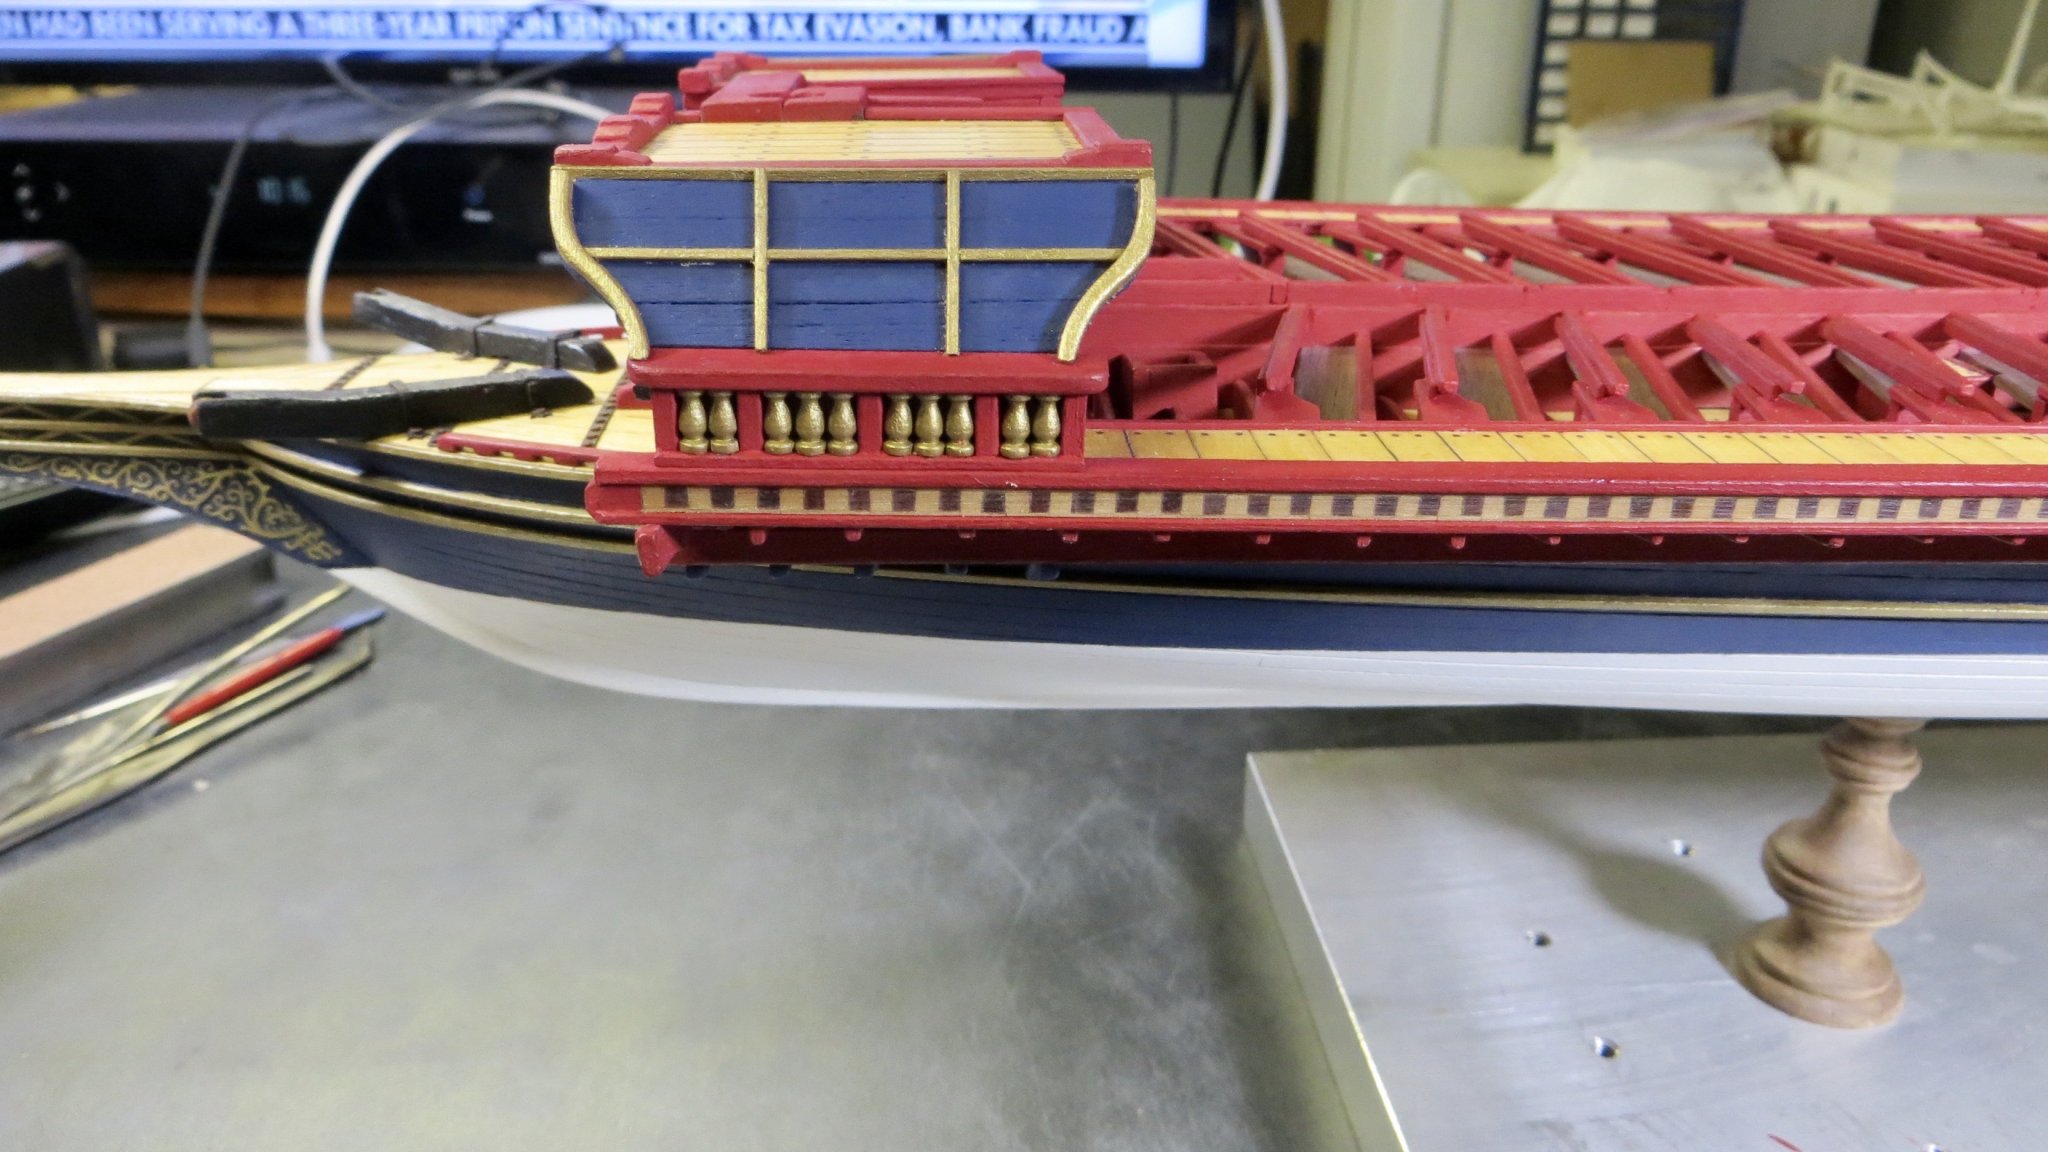
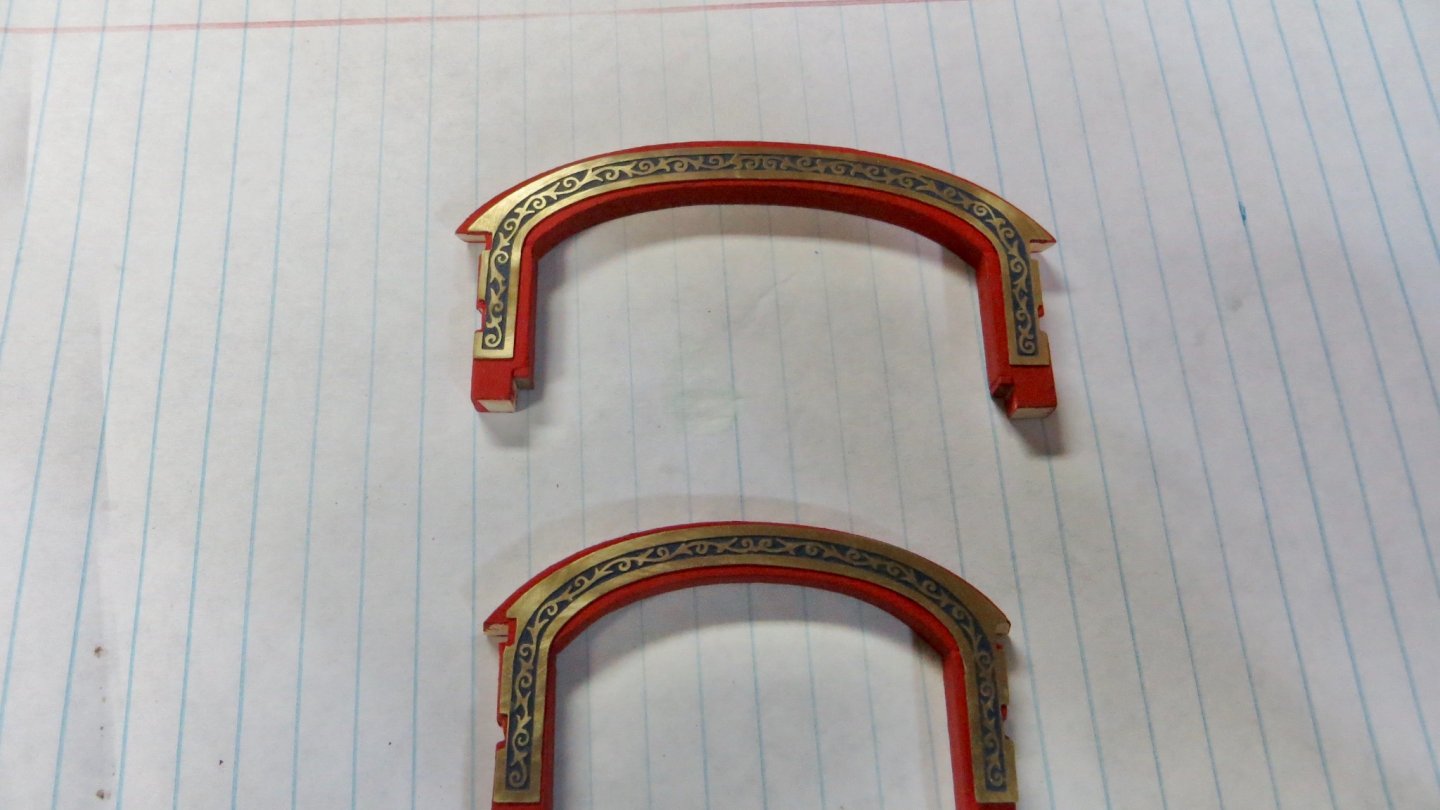
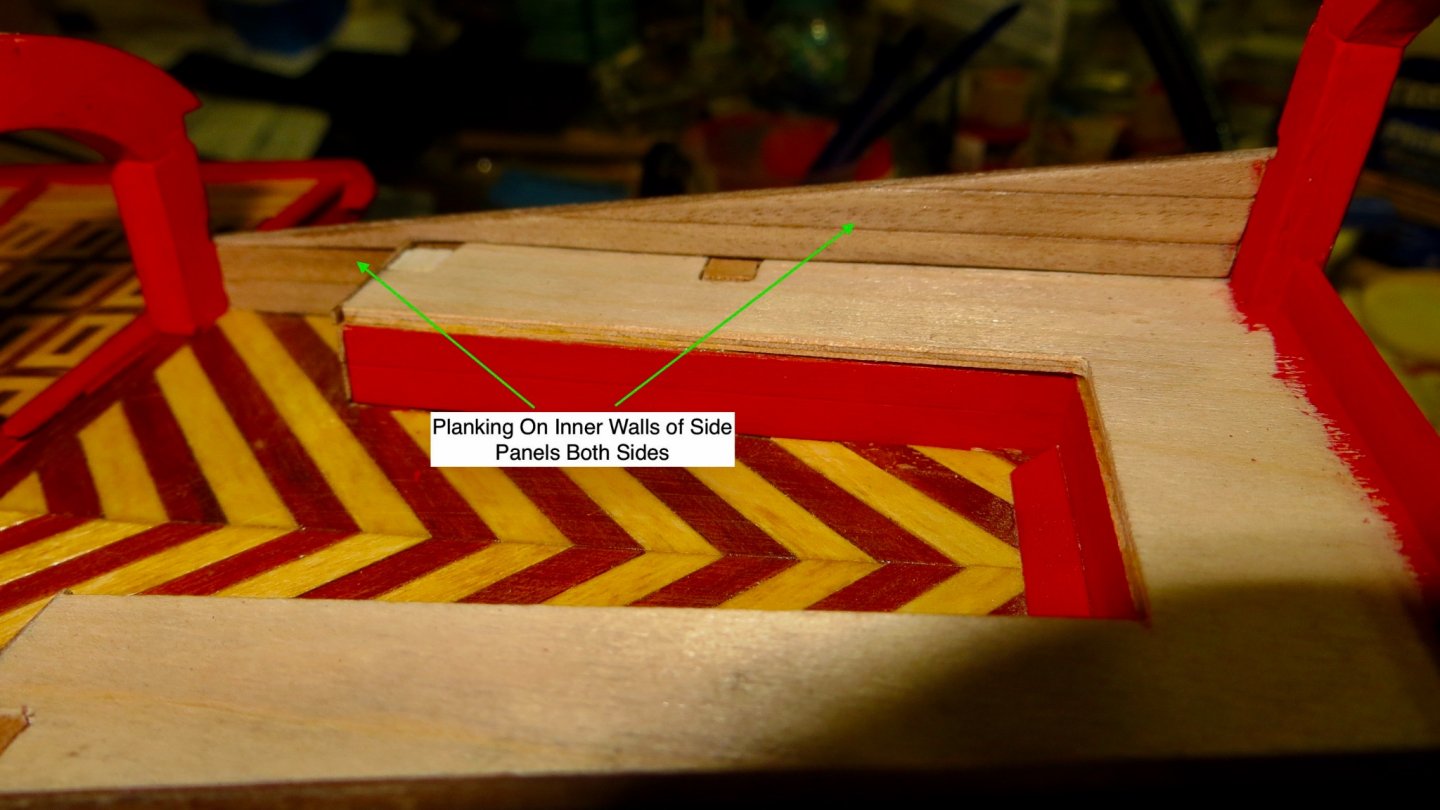
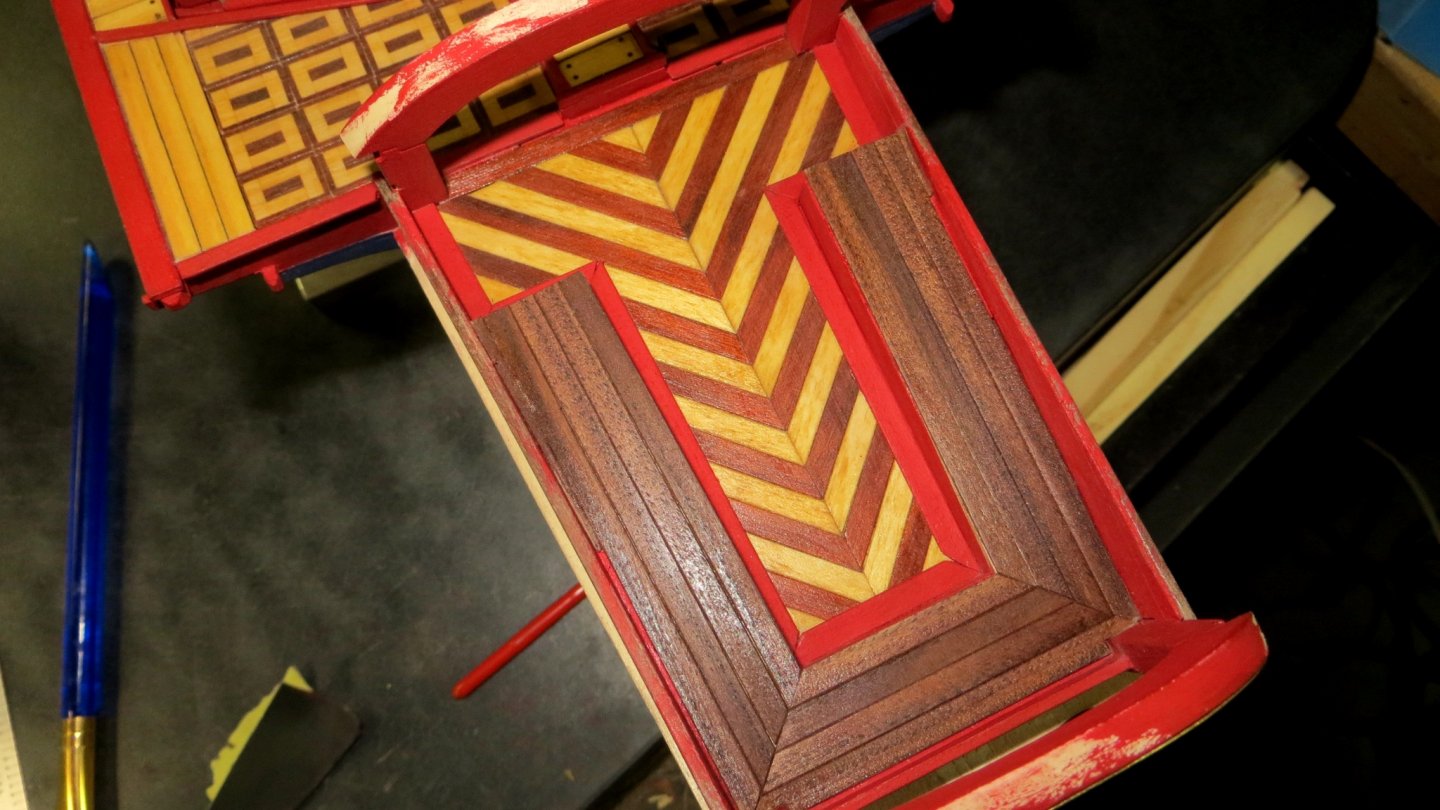
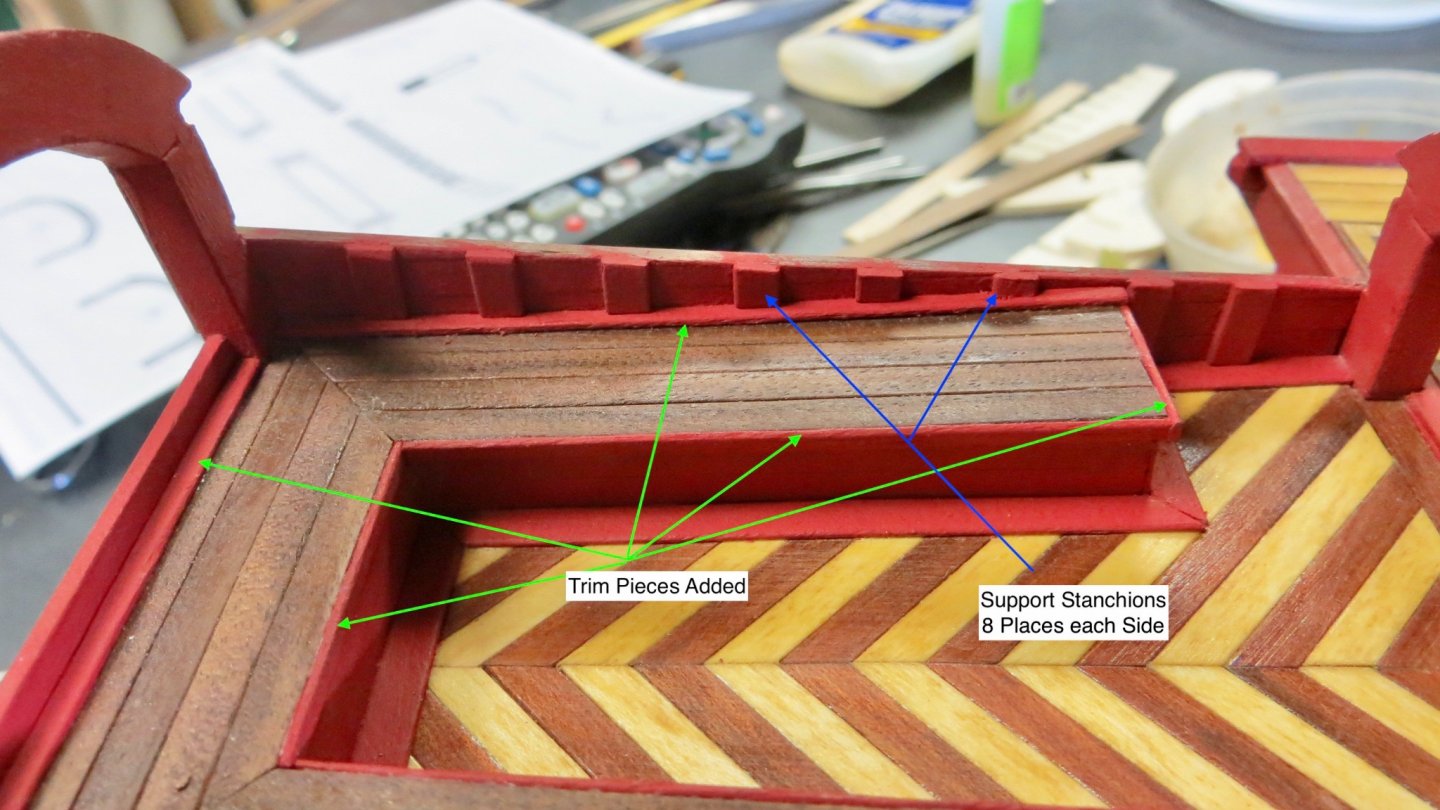
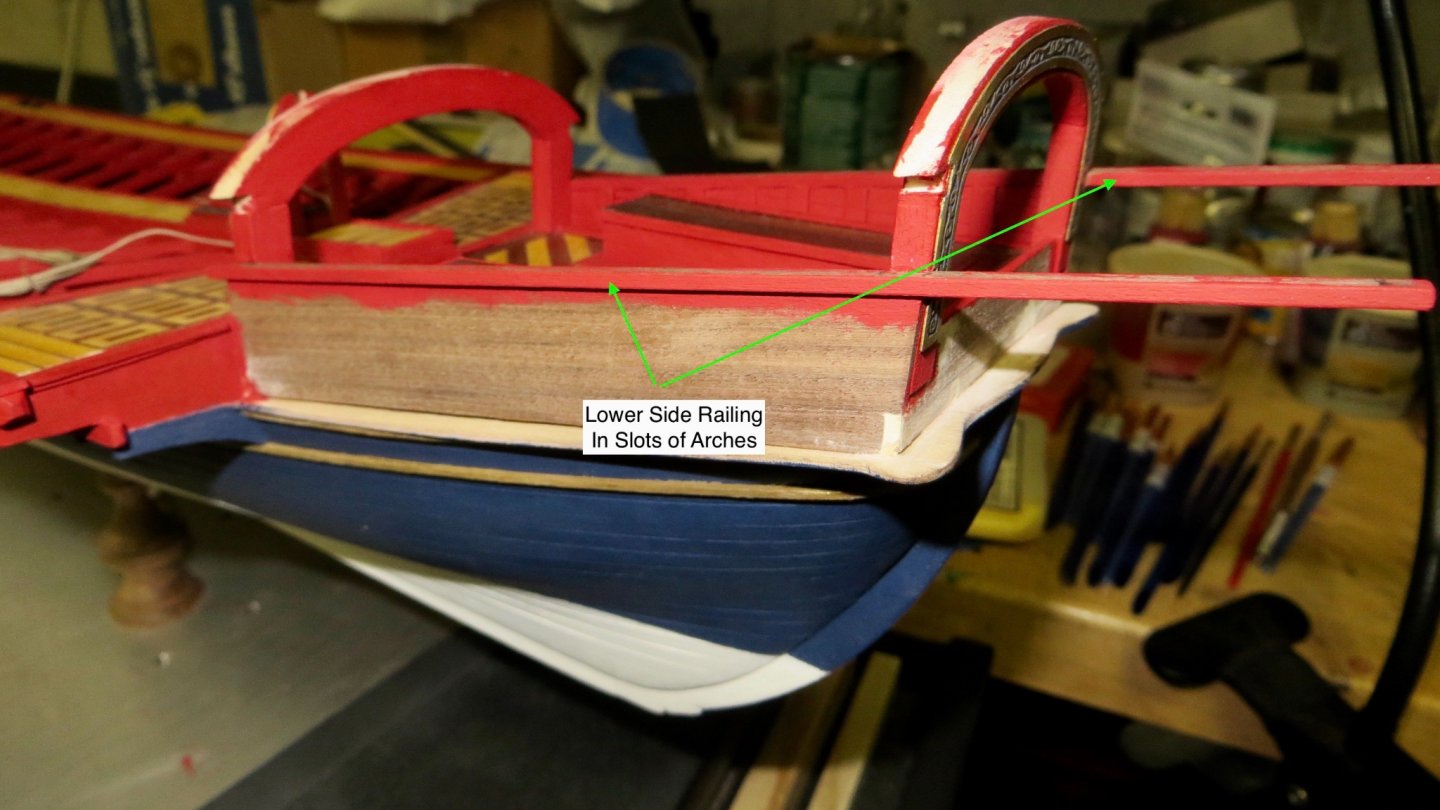
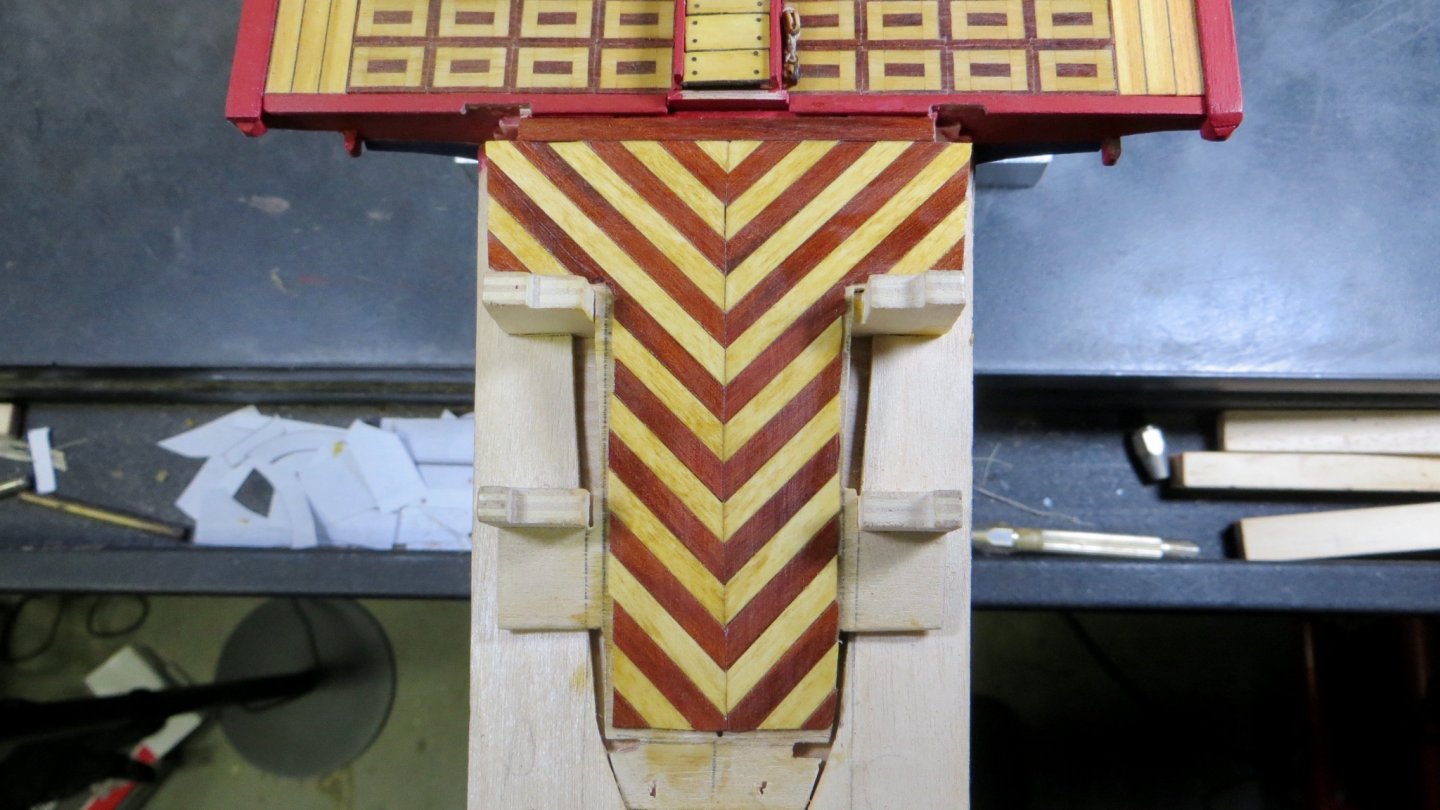
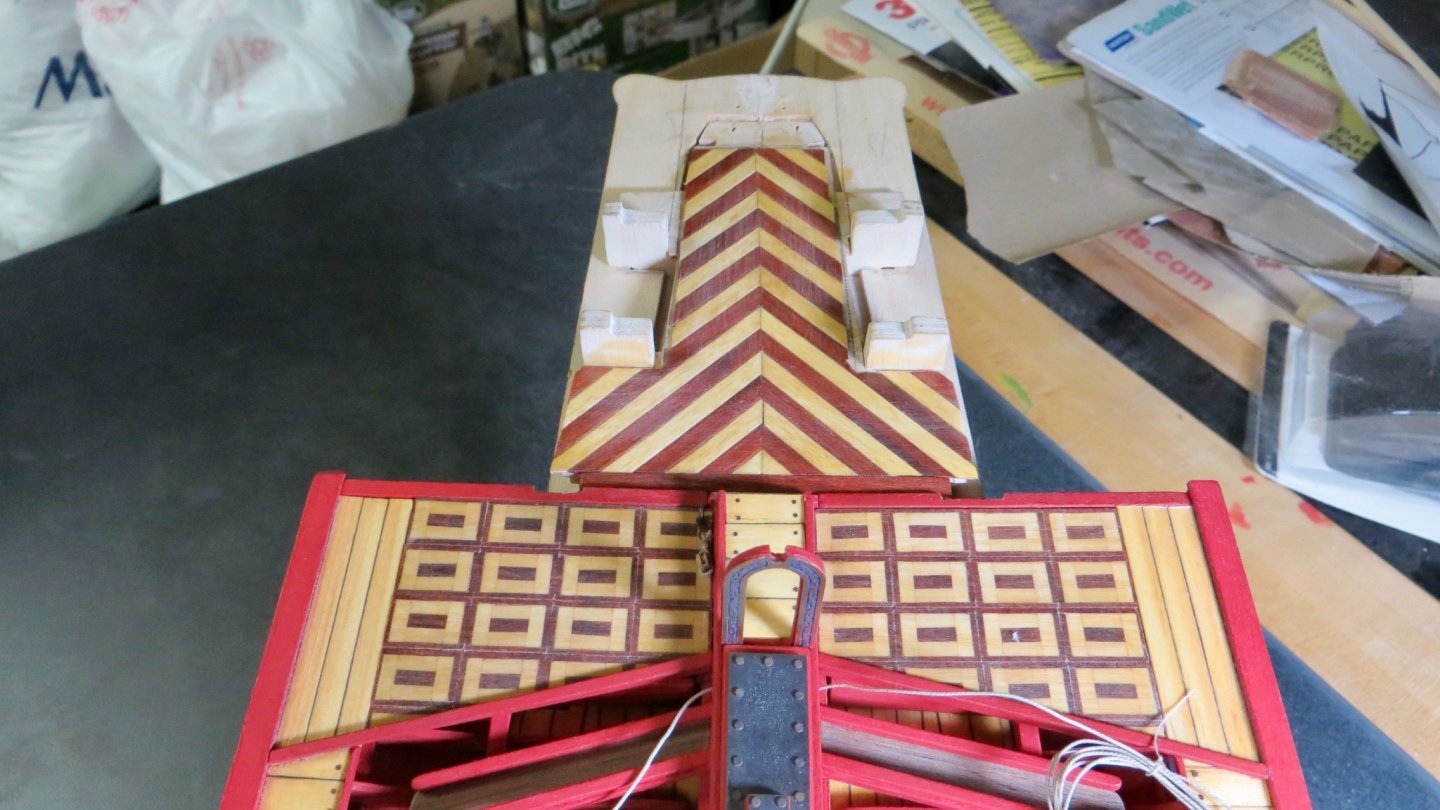
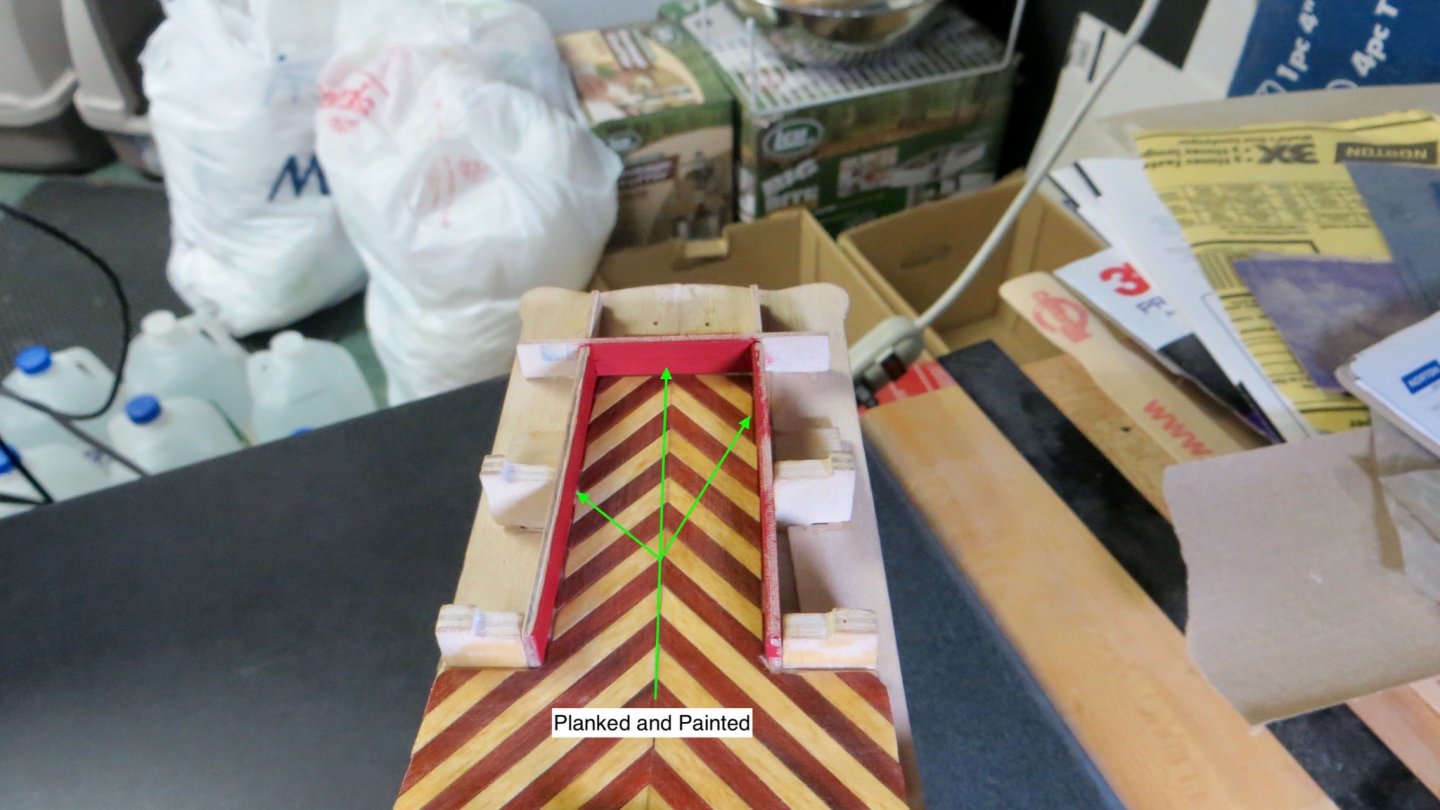
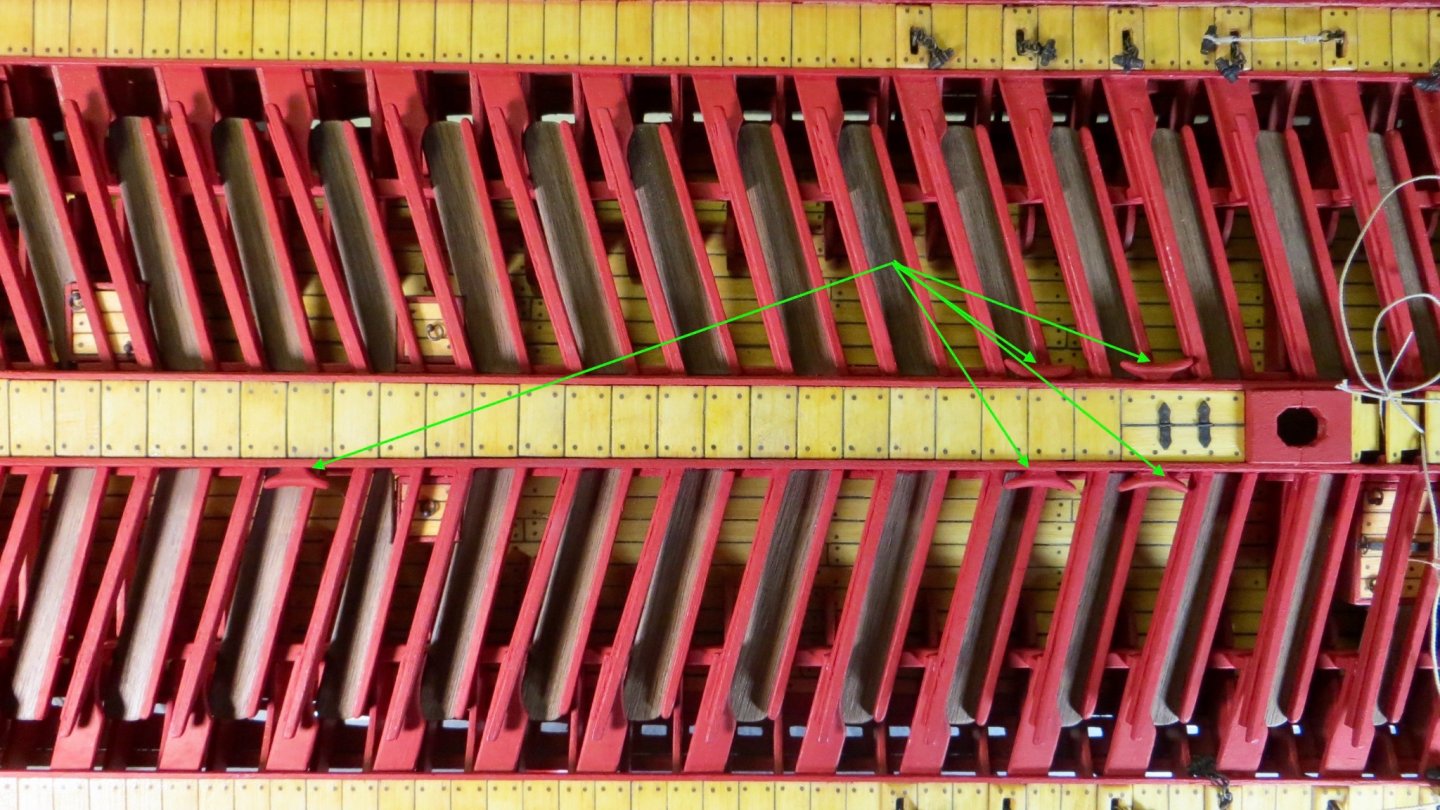
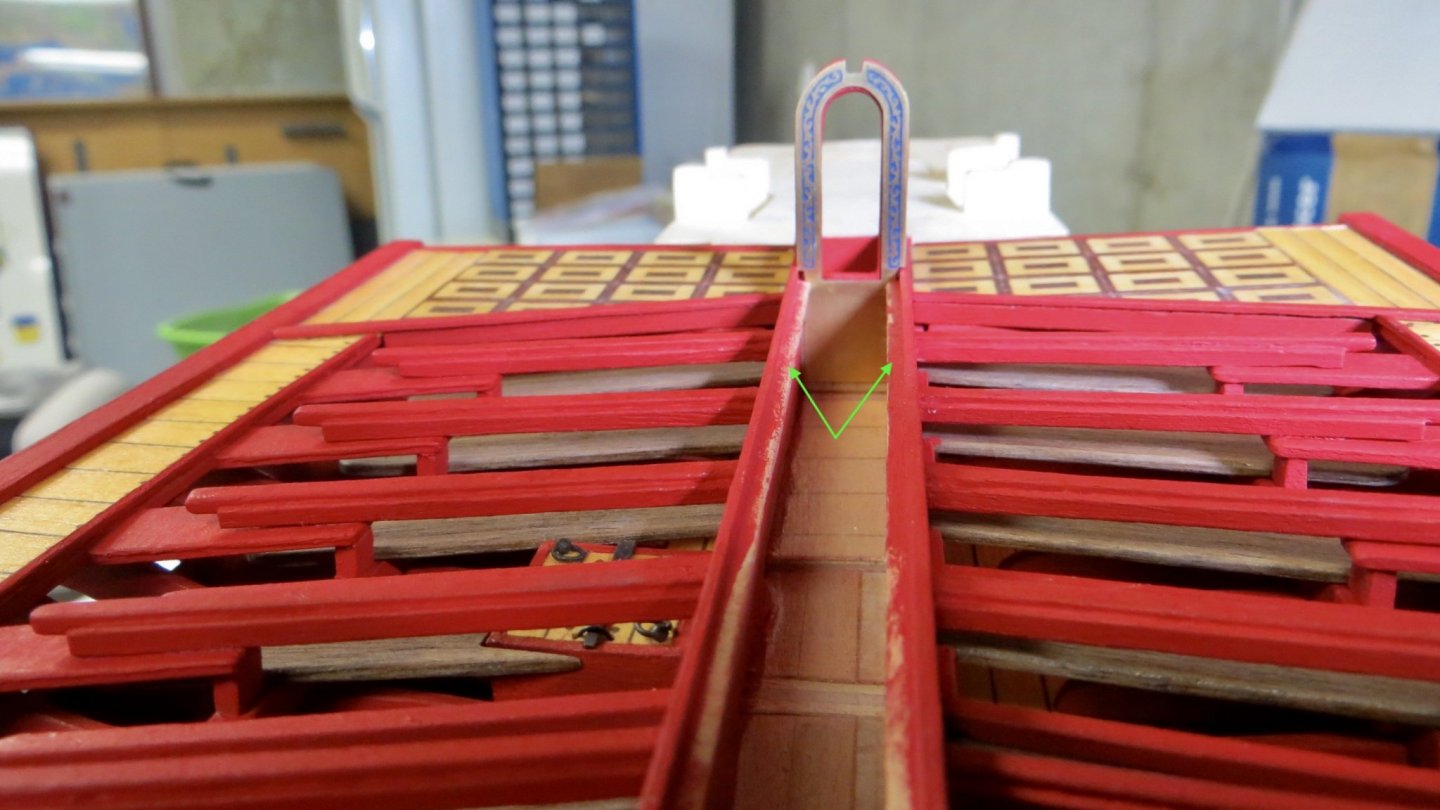
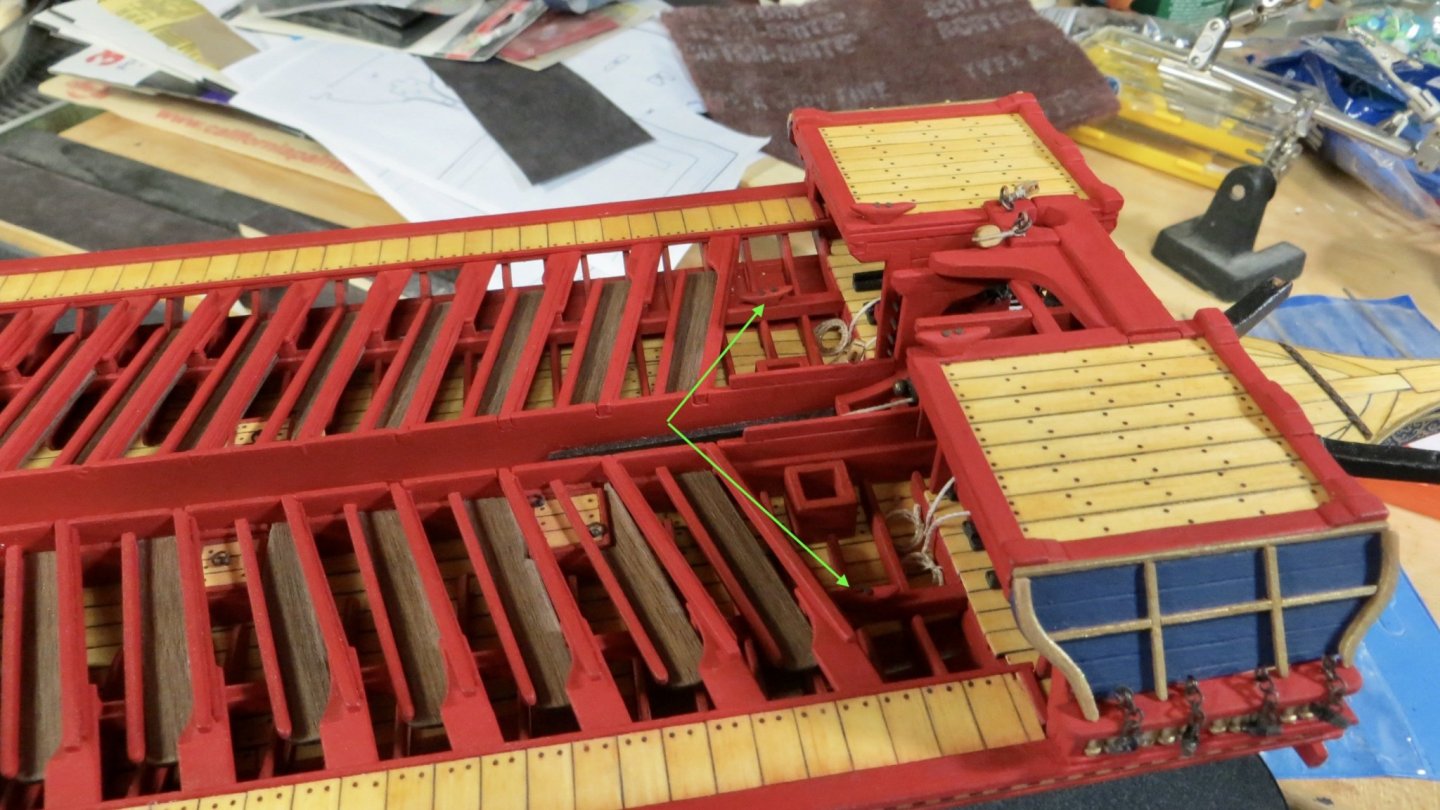
 Michael, Clark, Mark and Gimo, thanks all for the Likes on my last post!! I was able to continue working on the stern construction. I have been concentrating on the interior of the canopy area. The false deck for the seating (chest) area is now installed and ready for planking. I finished the arches, then painted and attached the decorative brass. The tops of the arches are left unpainted so I can sand the correct angle after installation. The arches are fastened and glued then the side panels are added. The top of the panels sit flush with the bottom of the lower arch slots. The attached panels make the assembly very stable and strong. Planks are added to the inside of the side panels and painted the ship's red. Painted panel walls The sitting area (Top of the chest) is done with walnut strips that I cut to size and sealed with a satin based sealant. Trim strips (all painted red and shown with green arrows) are added around the walnut seating area. Stanchions (shown with the blue arrows) are fixed to the inside of the side panels and sanded flush to the top of the panel. The location (placement and spacing) of the stanchions are at the points where the 8 canopy arches will be located later in the build. At this point, the lower stern railing is added. The railing slides into both lower arch slots. This ship model is starting to get really long from bow to stern!! lol! Thanks, Frank
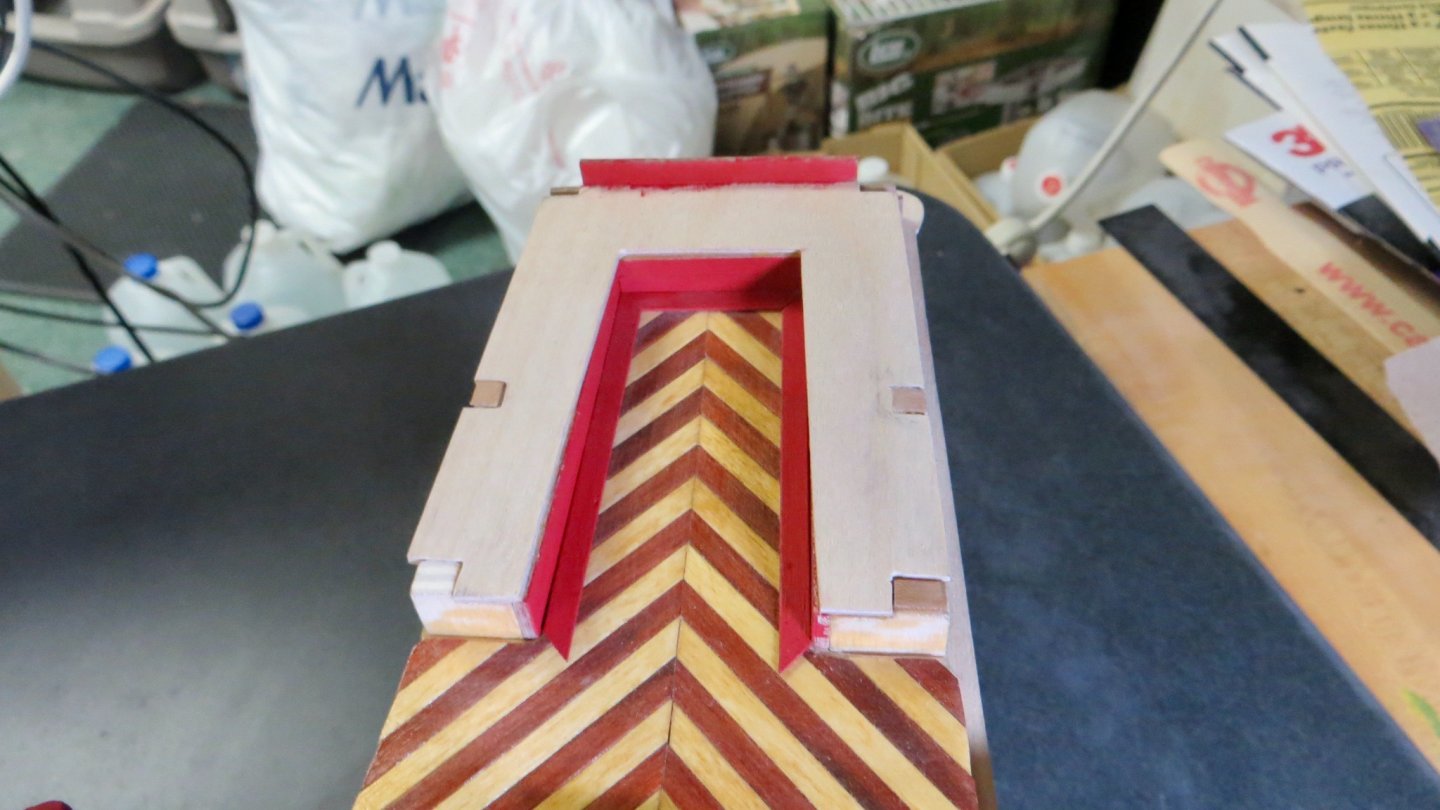


- 510 replies
-
- 8
-

-
- reale de france
- corel
- (and 1 more)
-
Nice work with the mahogany! Great for the contrast you are looking for. Frank
-
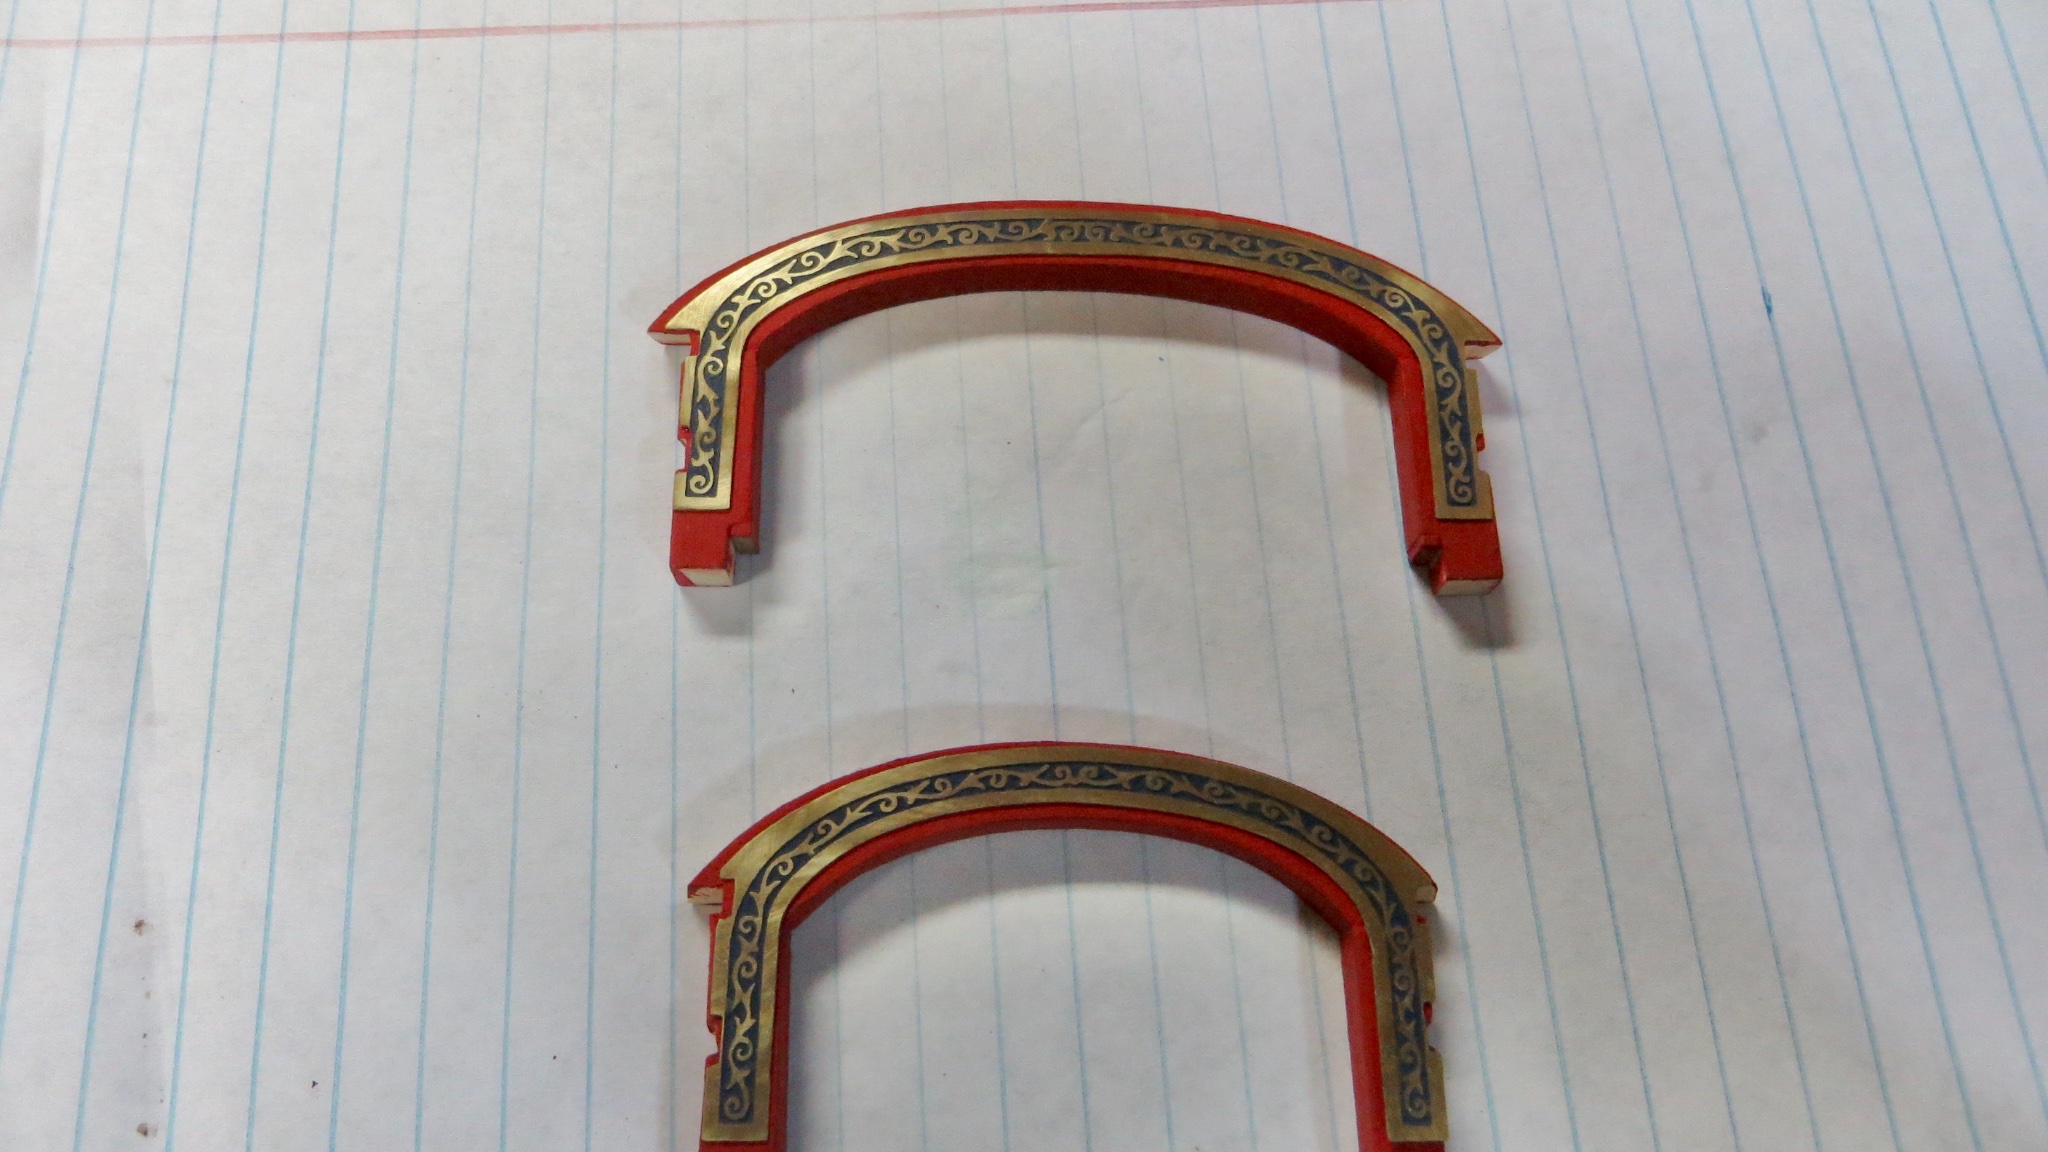
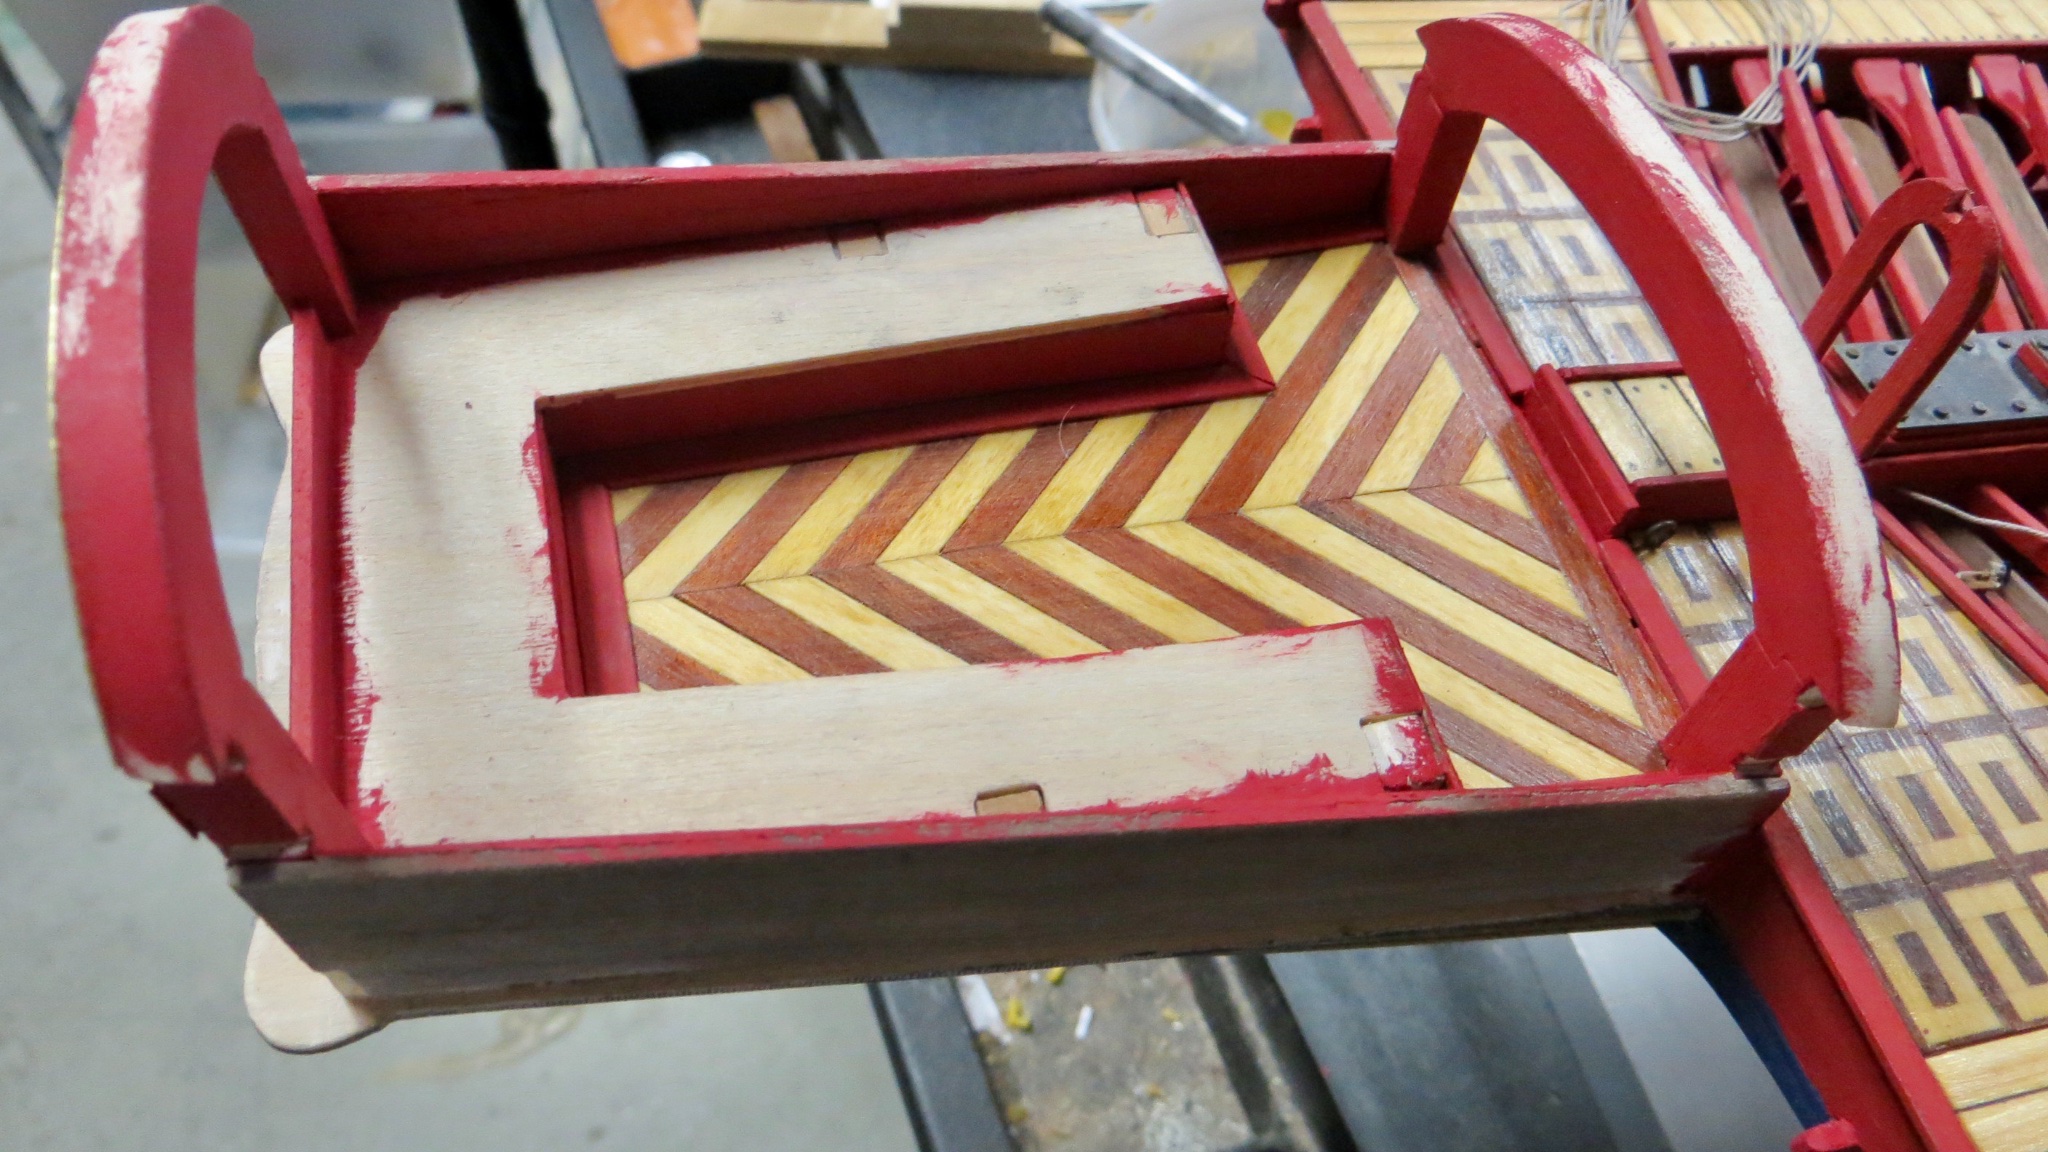
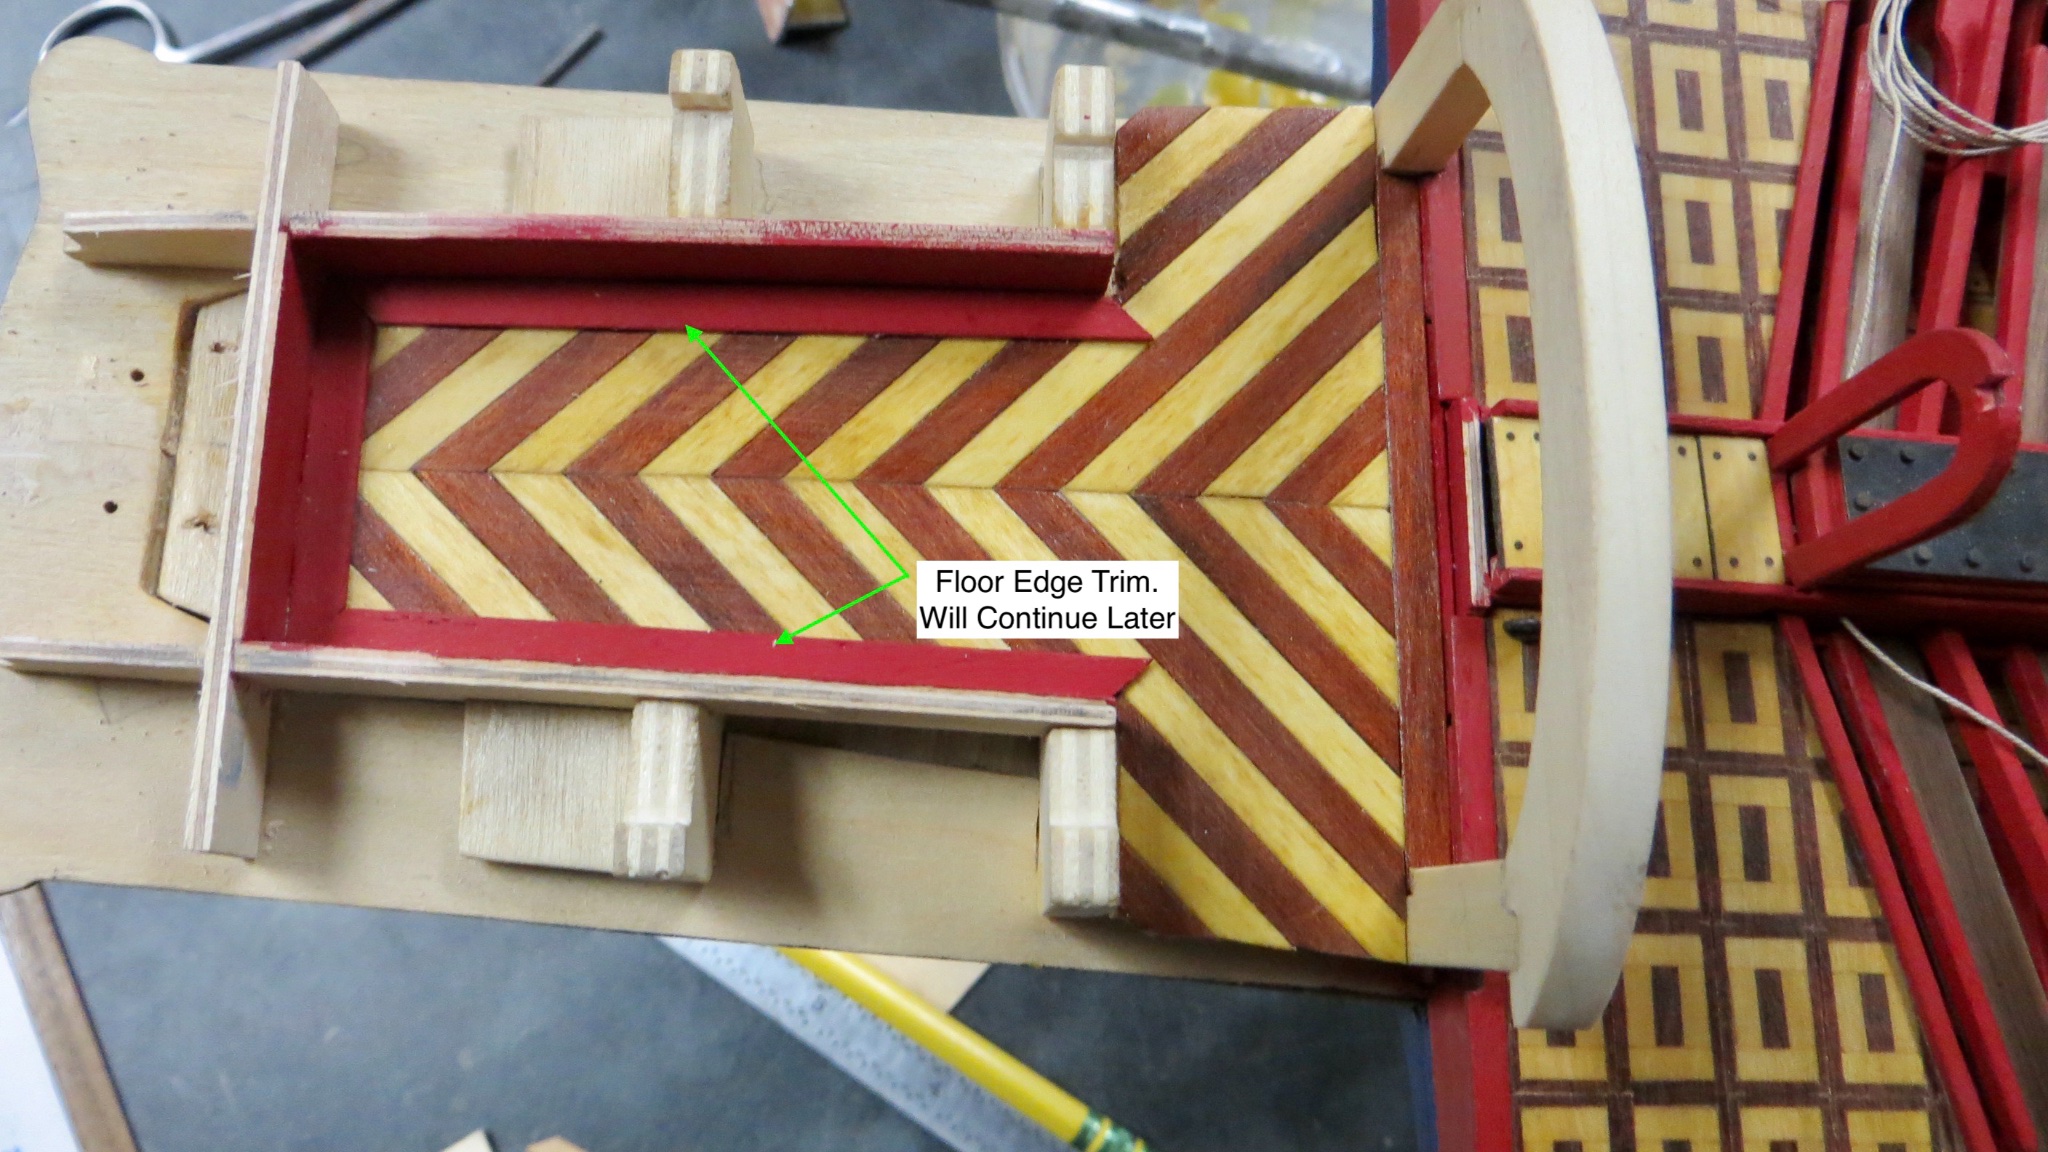
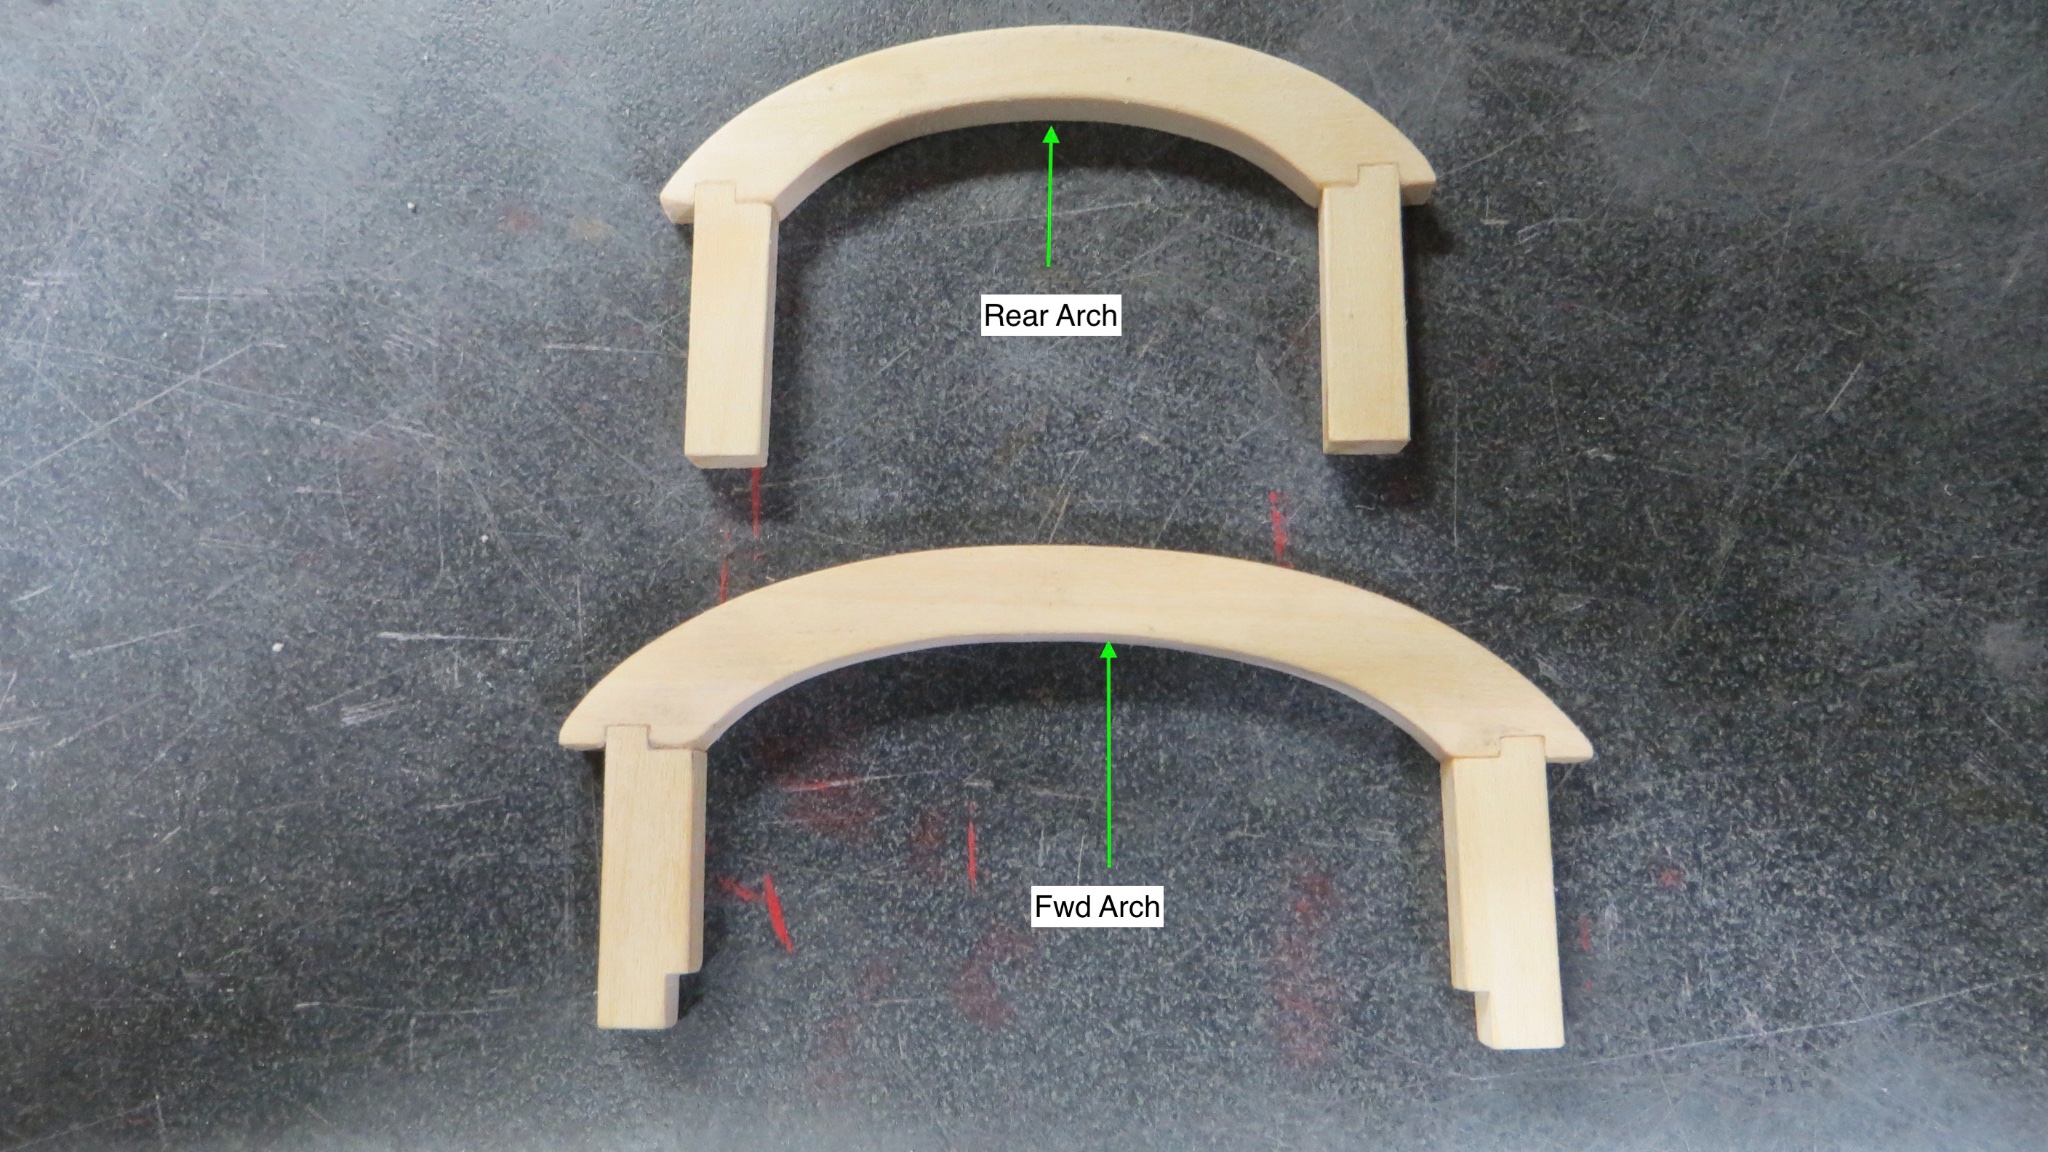
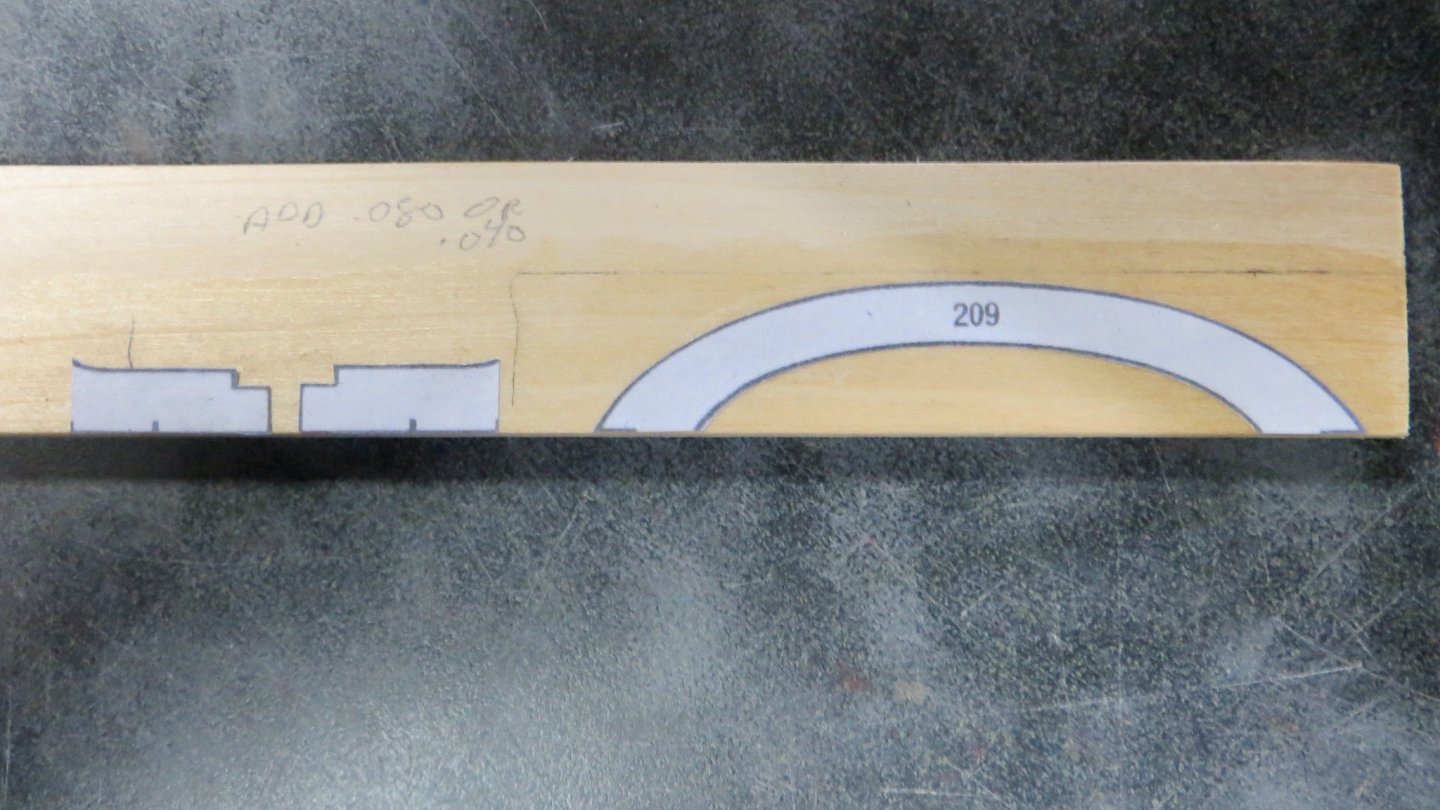
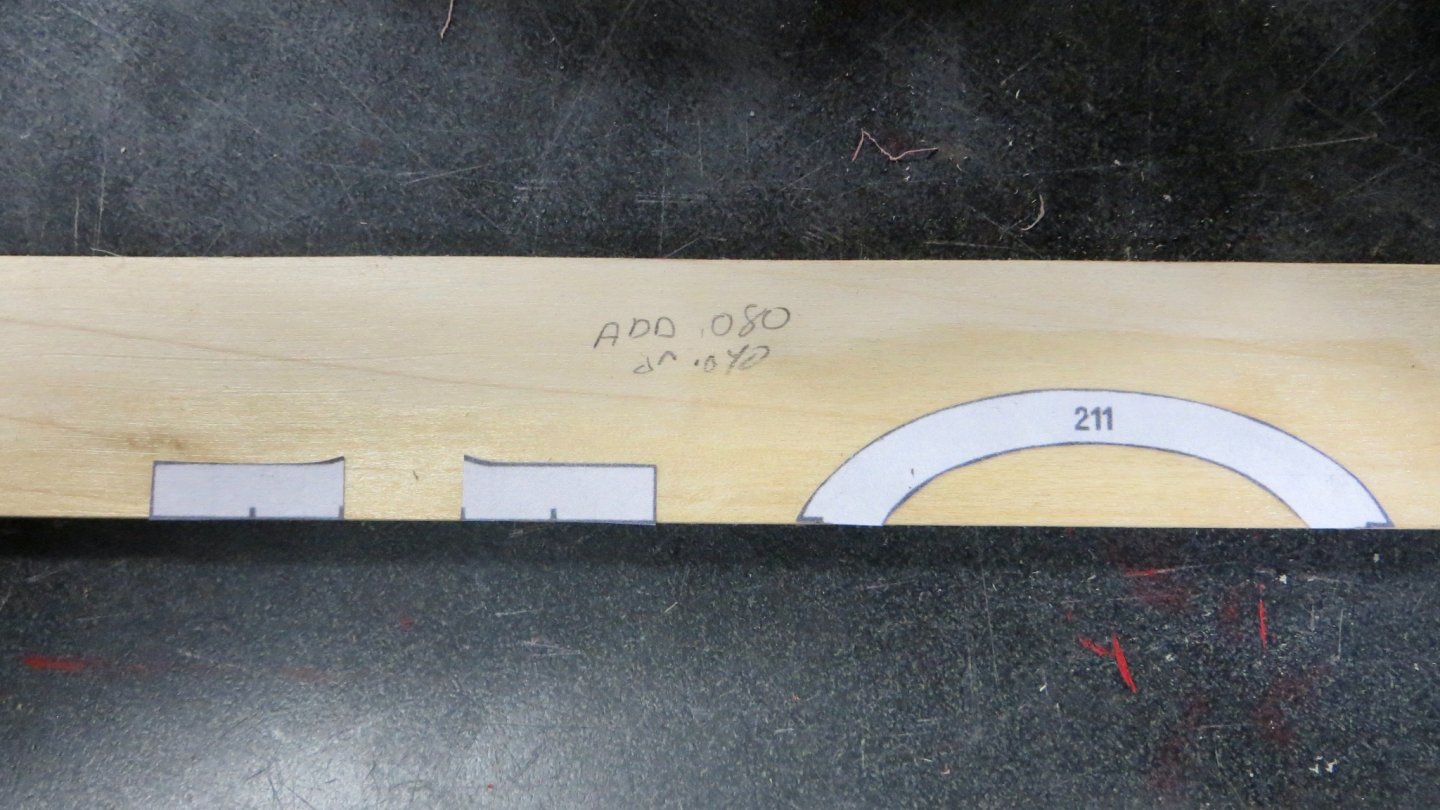
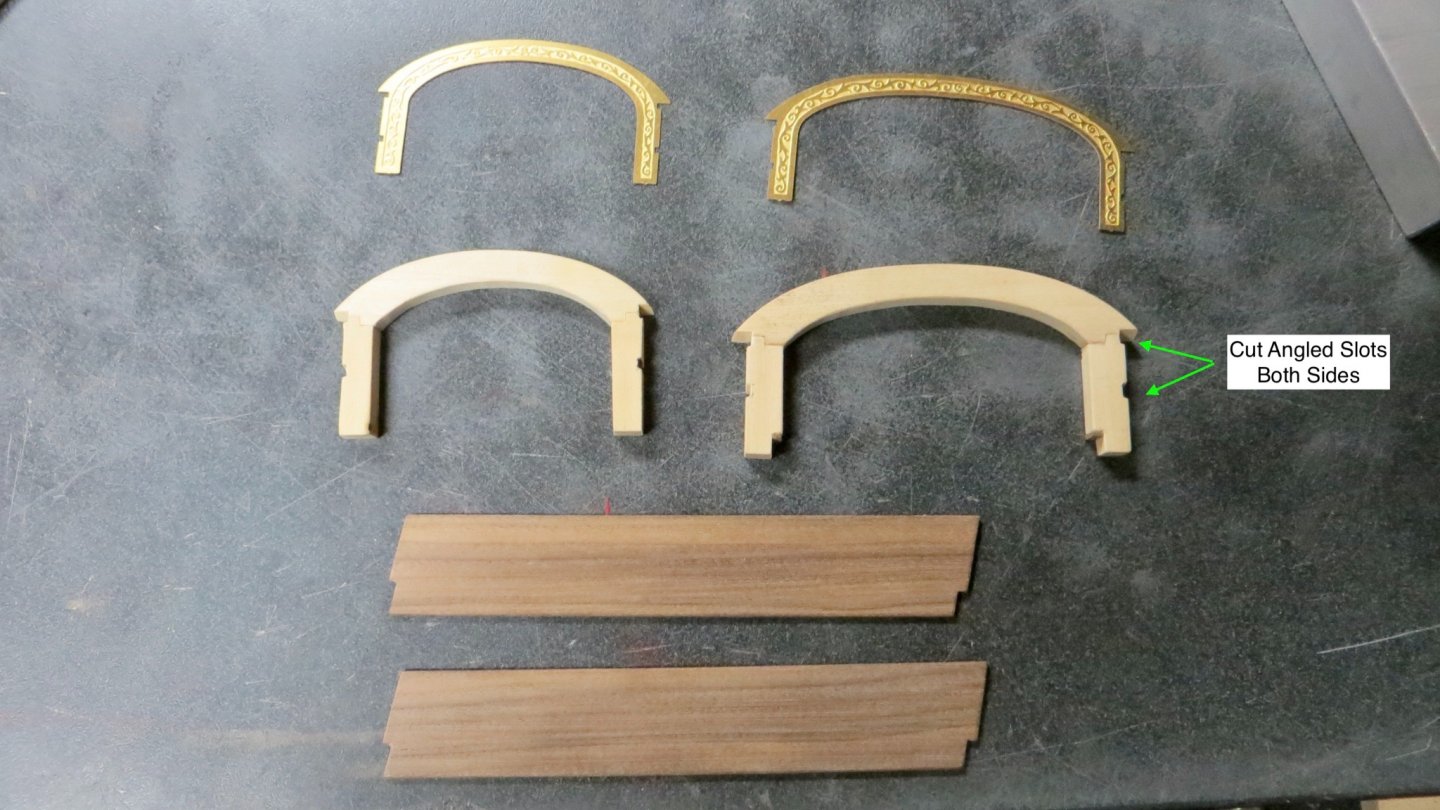
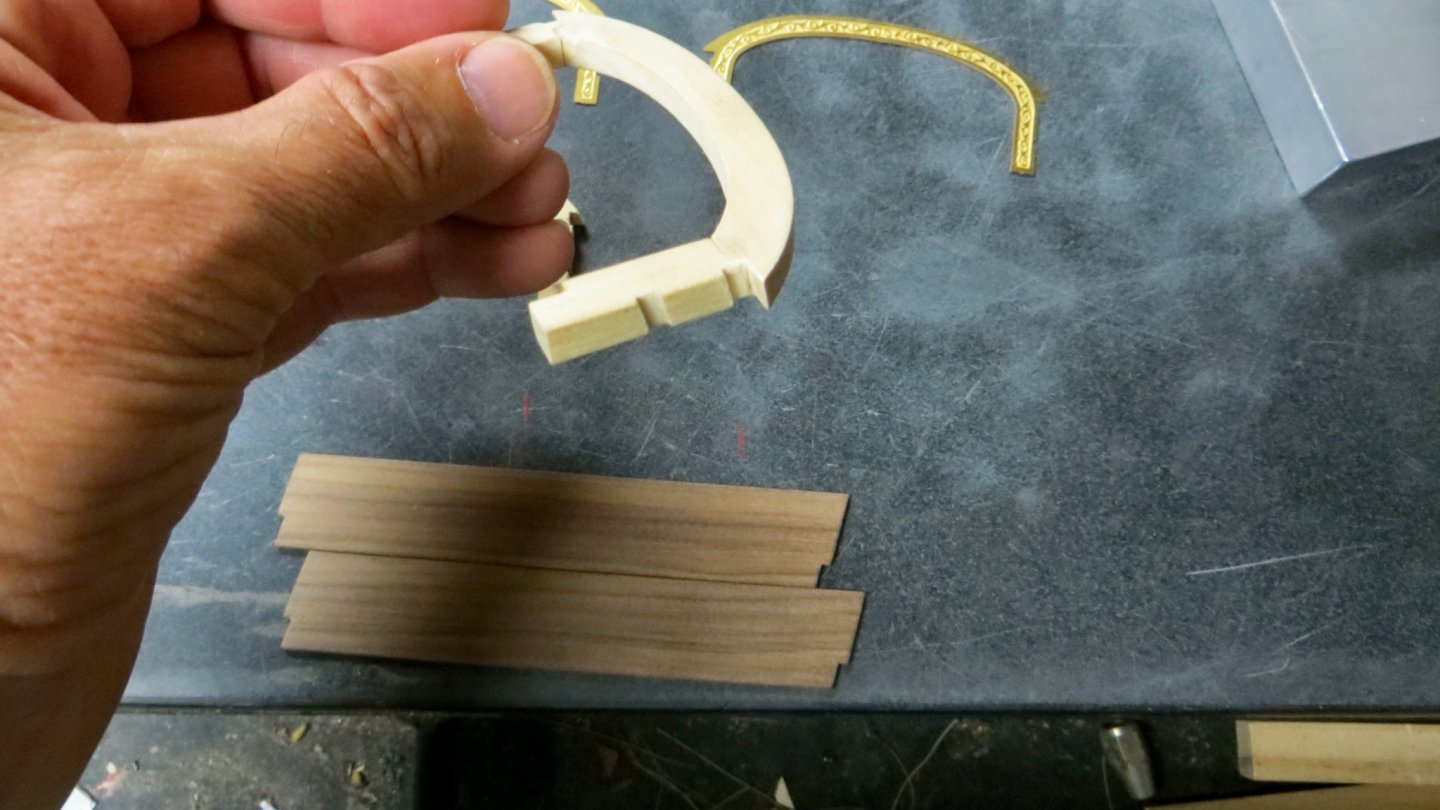
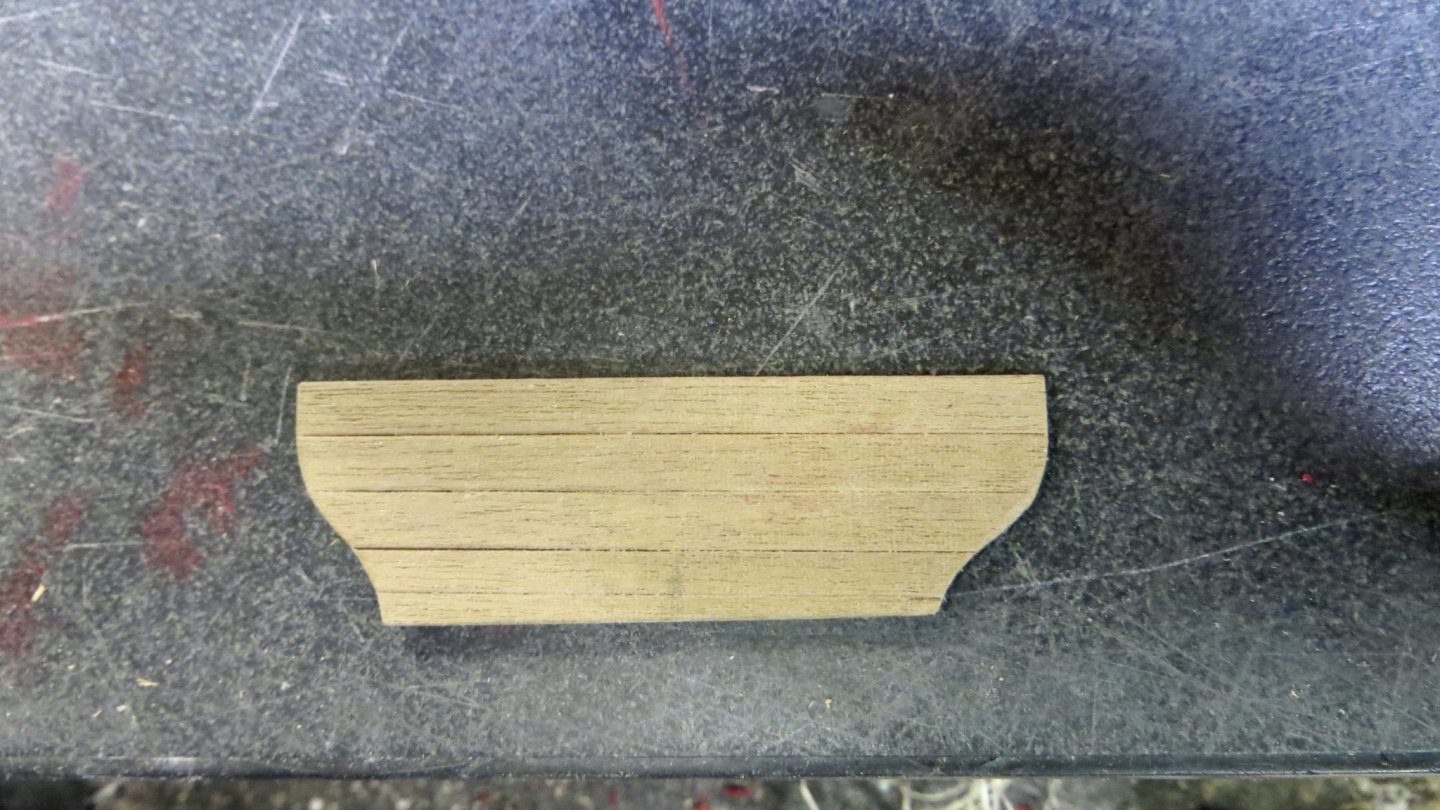
I now turn my attention to the stern of the ship. Before beginning the build of the stern canopy, I needed to plank the deck. I decided to use the same "Red Heart" wood for the darker planks, as I did on the checkered pattern in front of this deck. I also chose a pattern similar to one I used a few years ago on my Italian Xebec build. Next is the installation for the sides of the bench surface. The sides were planked and painted. The floor trim was added around this area. I will finish the floor trim after the installation of the arches and side walls. The building of the stern canopy and arches require the fitting and alignment of quite a few parts. On top of that issue is the fact that the canopy angles upward towards the stern. I decided to fabricate a few of the parts and get them just right, before beginning the installation. Pattern for the Fwd canopy arch. I made the arches using Poplar wood that I had. (Will be painted) Pattern for the stern canopy arch Pattern for the side wall, made from Walnut Arches Assembled The sides of the arches had to have 2 slots machined into them at the angle of the canopy slope for the side railings. To get the right height and angle I clamped all the pieces together and marked the positions and cut. Next step is to paint the arches and brass inlays and assemble onto the ship, along with the side walls. This will then allow me to finish the trim along the deck edge. Thanks for stopping by, Frank


- 510 replies
-
- 6
-
-
- reale de france
- corel
- (and 1 more)
-
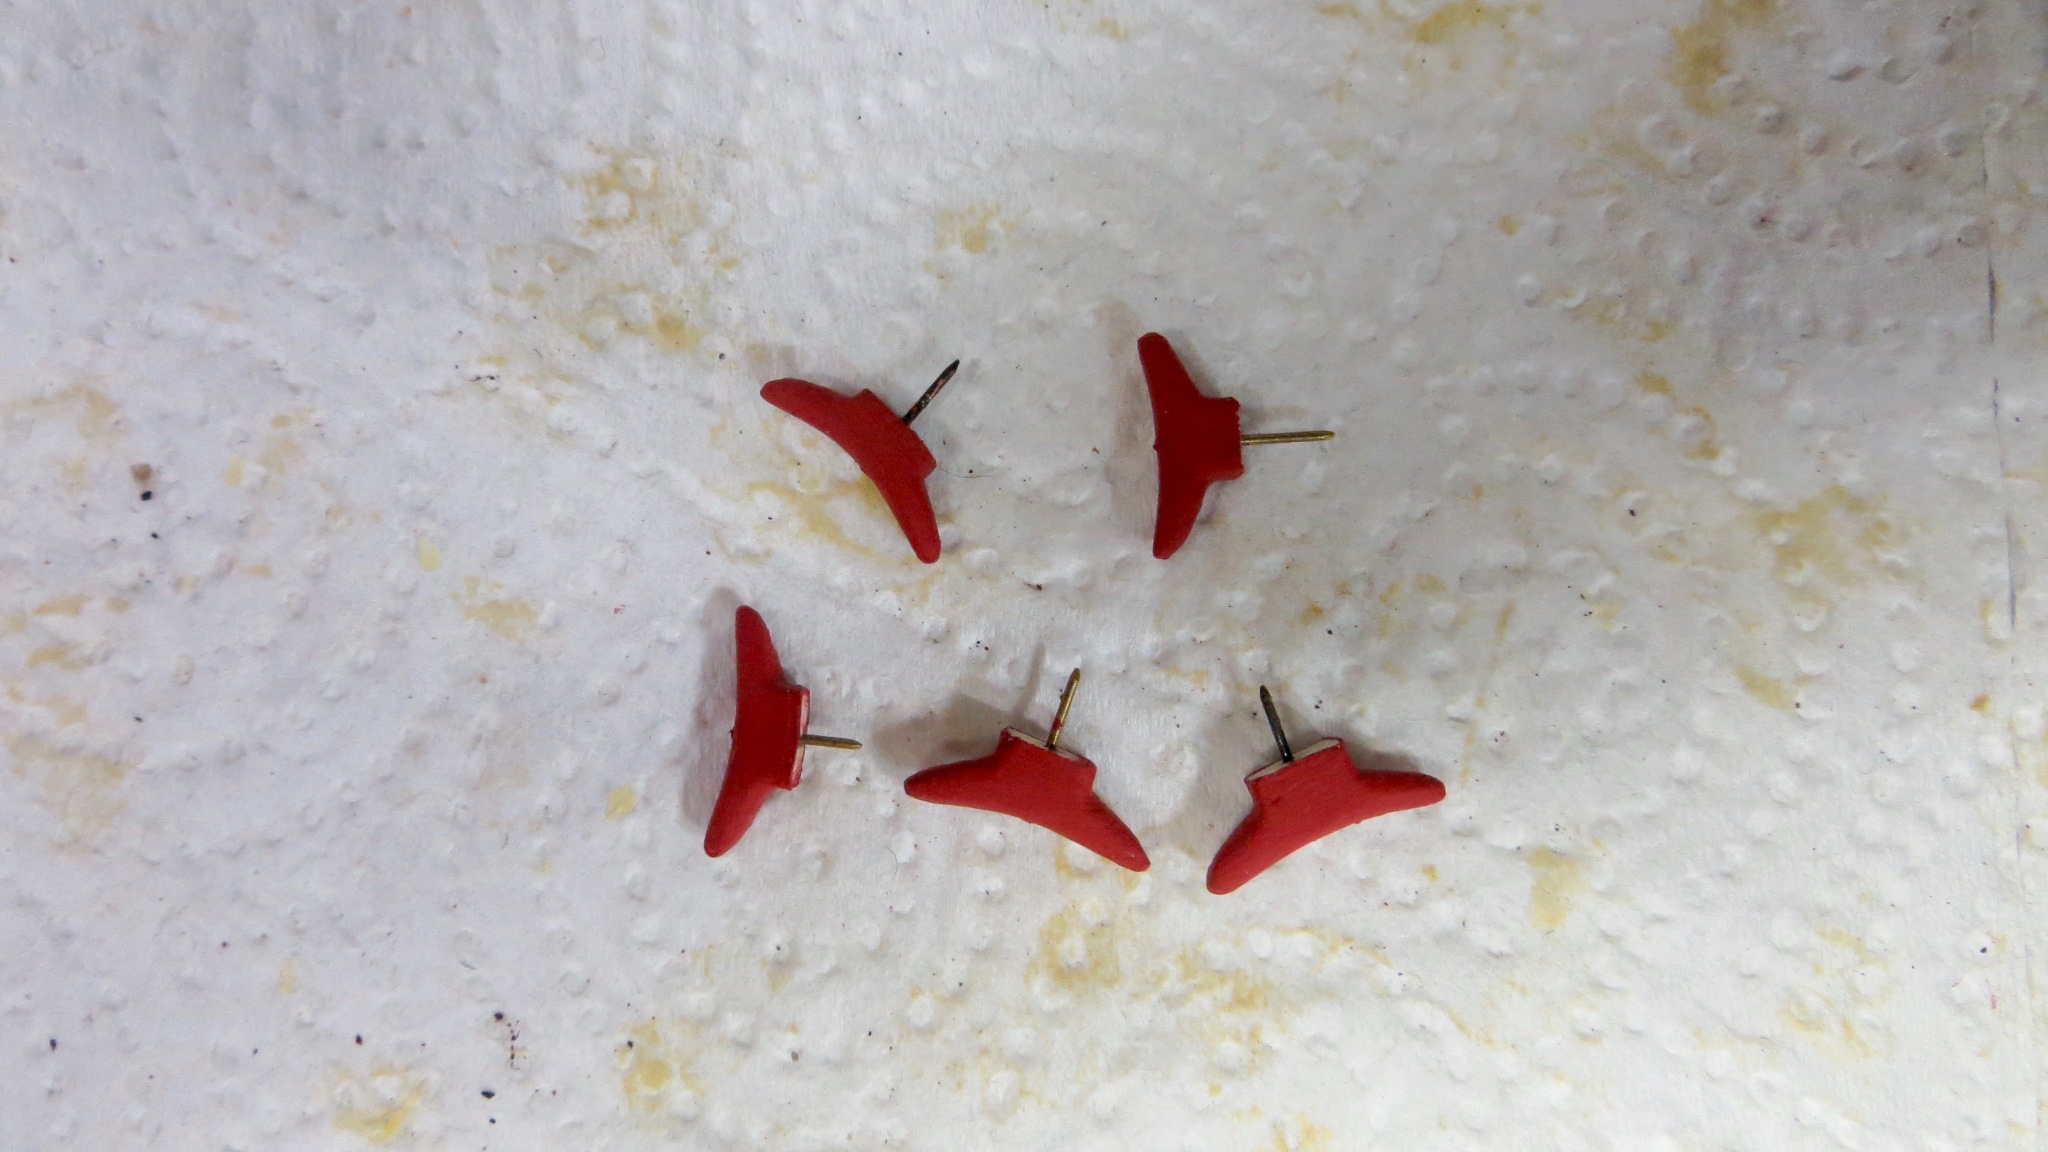
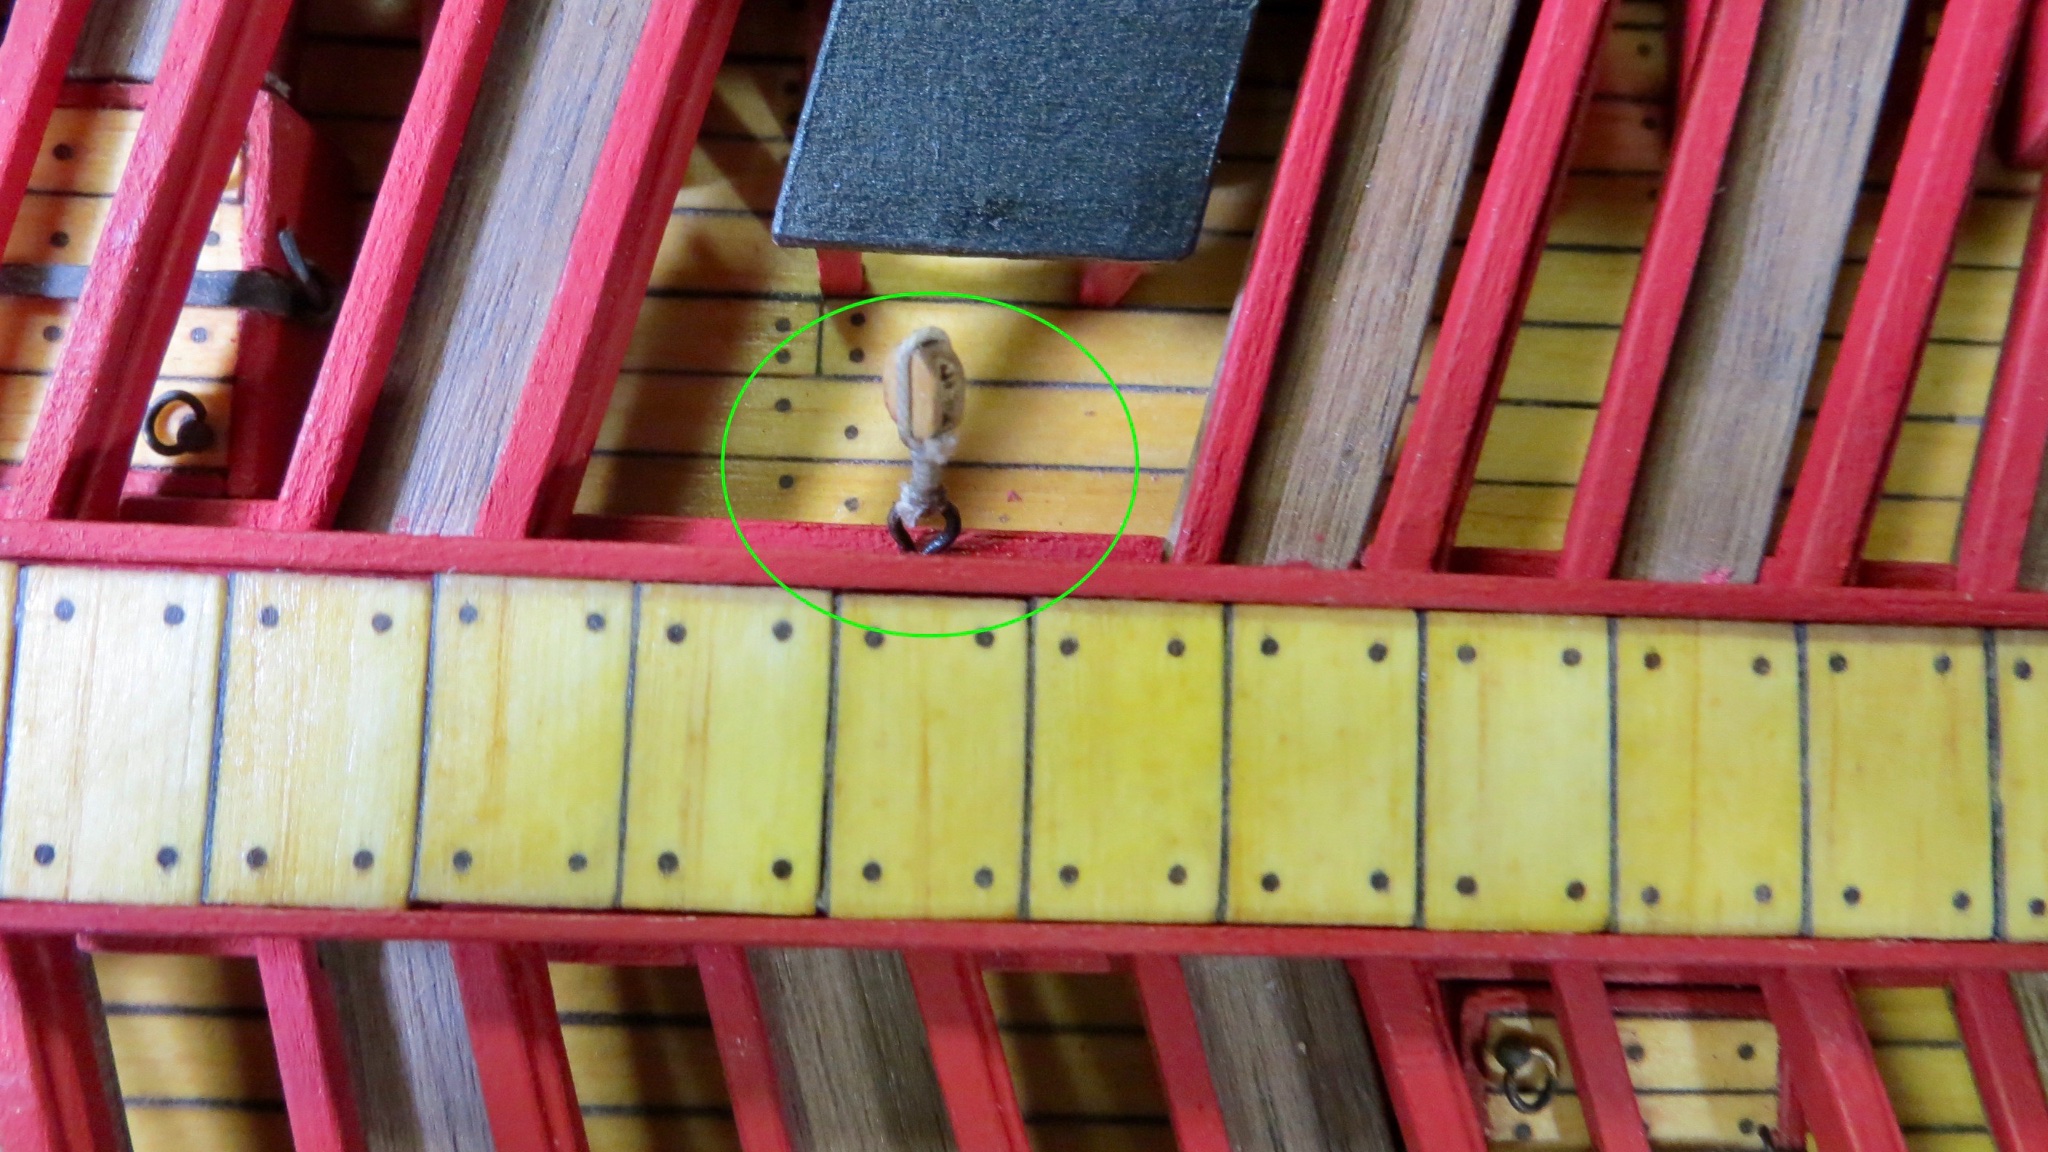
Hello, I finished up a few small items before moving on to the stern of the ship. There are 5 cleats on the sides of the main center structure, which are now installed. All fwd of the main mast. Two blocks with eyelets installed behind the main mast hole. One block and eyelet near where the cooking platform will be. An eyebolt and chain for future rigging and another with a block attached on the starboard side of the center structure. And finally a block with a hook attached to an eyebolt near the stern. Now onto the stern area. Thanks for visiting and for the "likes" Appreciated. Frank


- 510 replies
-
- 5
-
-
- reale de france
- corel
- (and 1 more)
-
Thank you Gimo! I often refer to your beautiful log as a guide to assist me. Frank
- 510 replies
-
- 2
-
-
- reale de france
- corel
- (and 1 more)
-
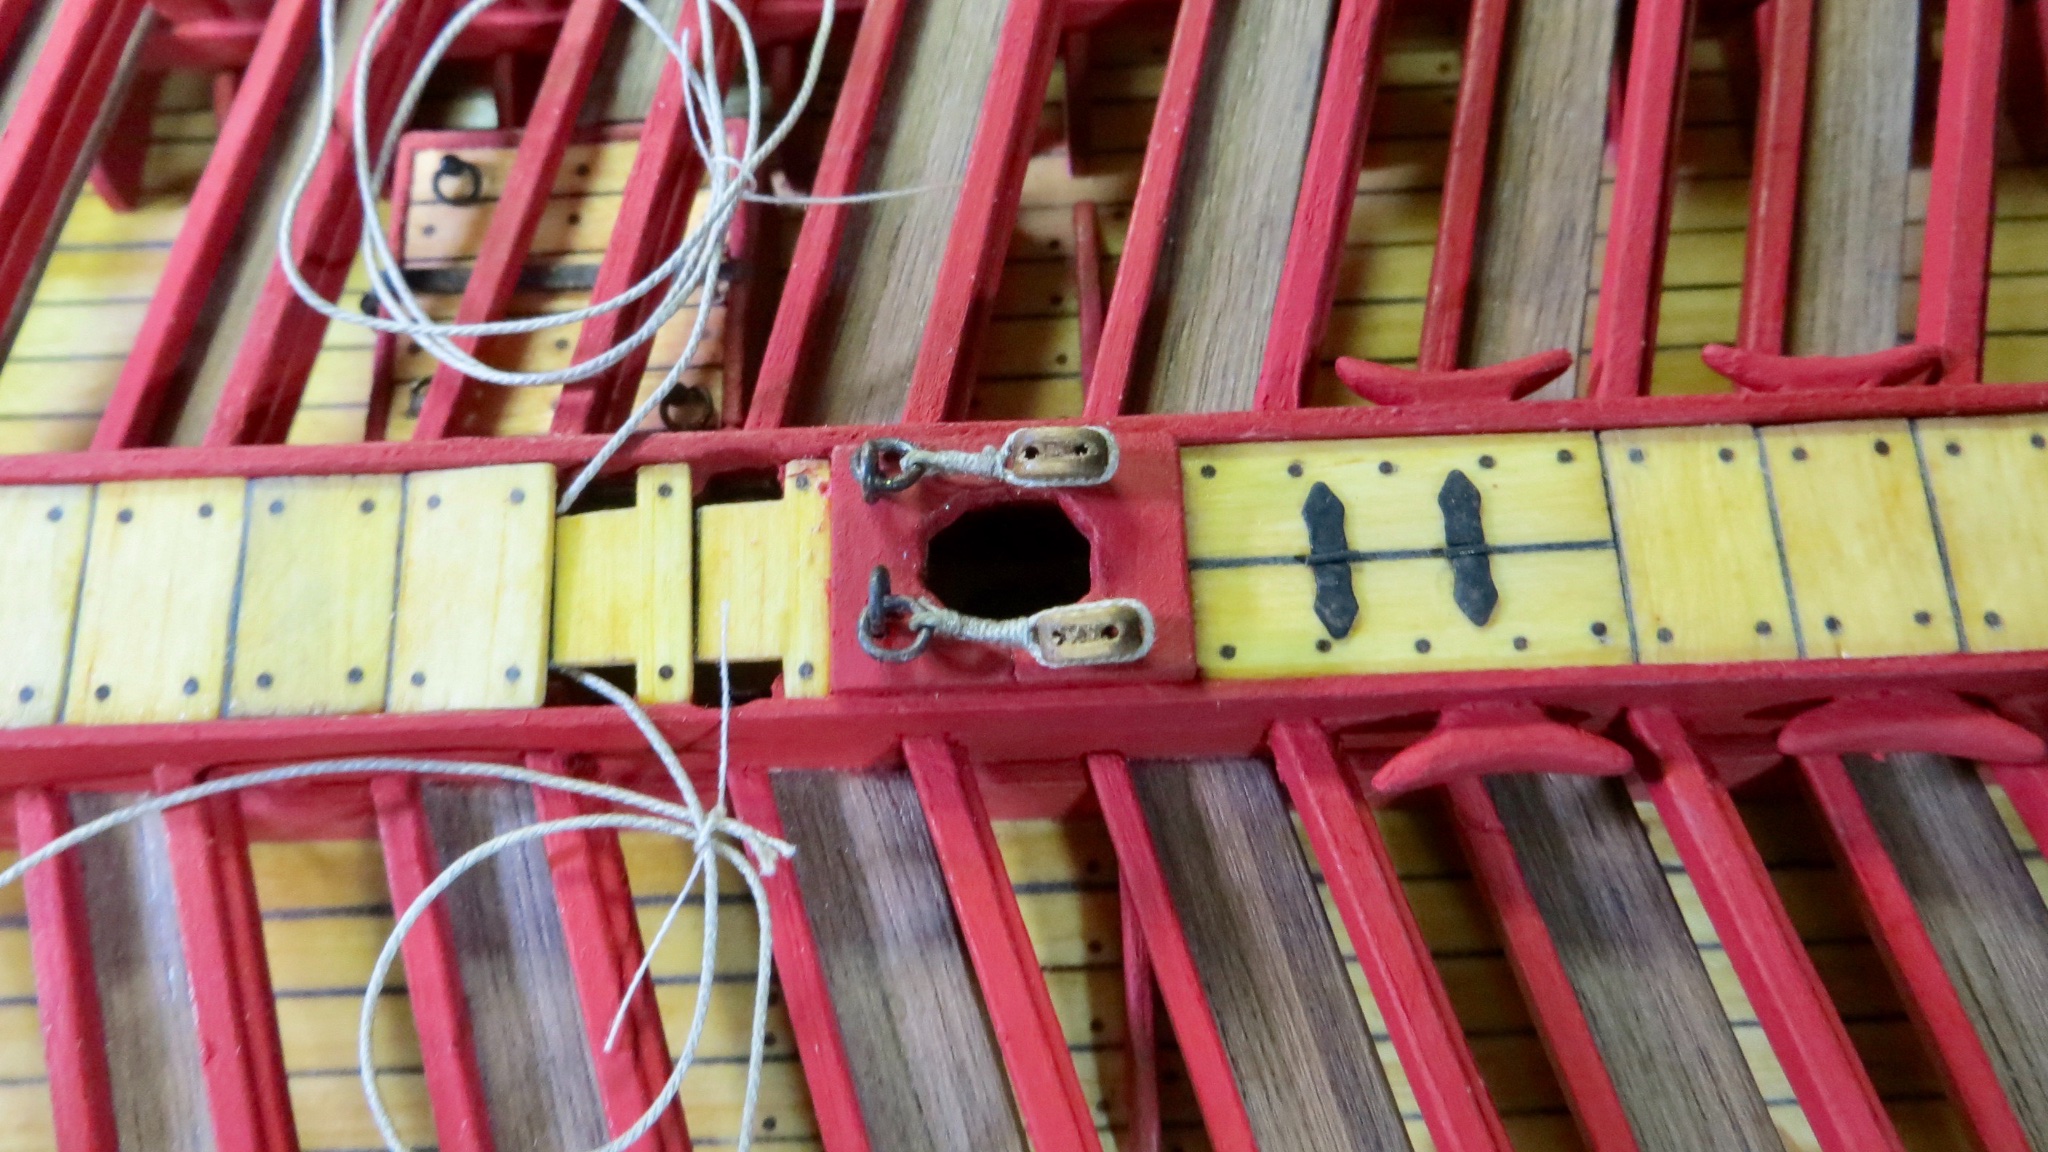
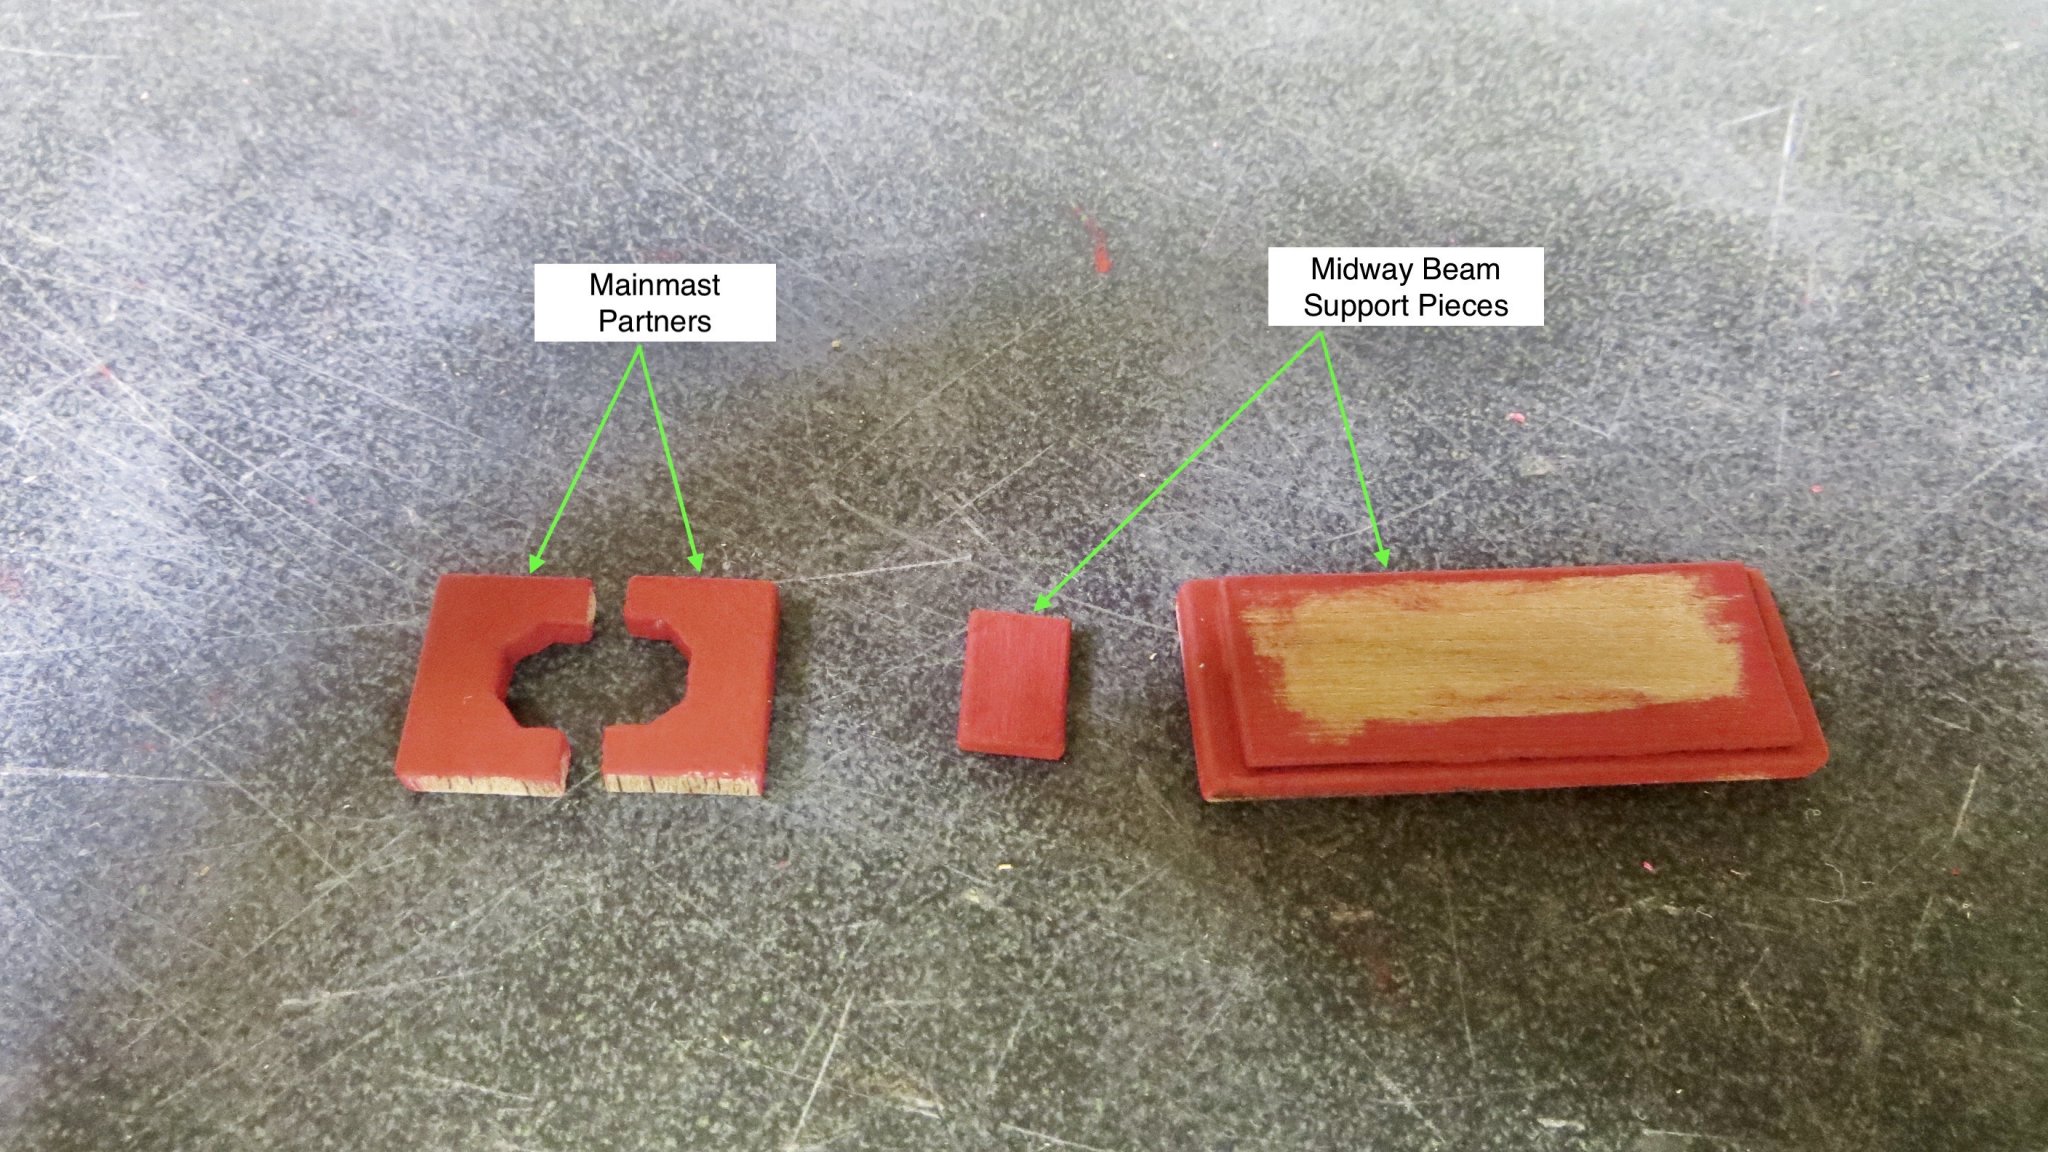
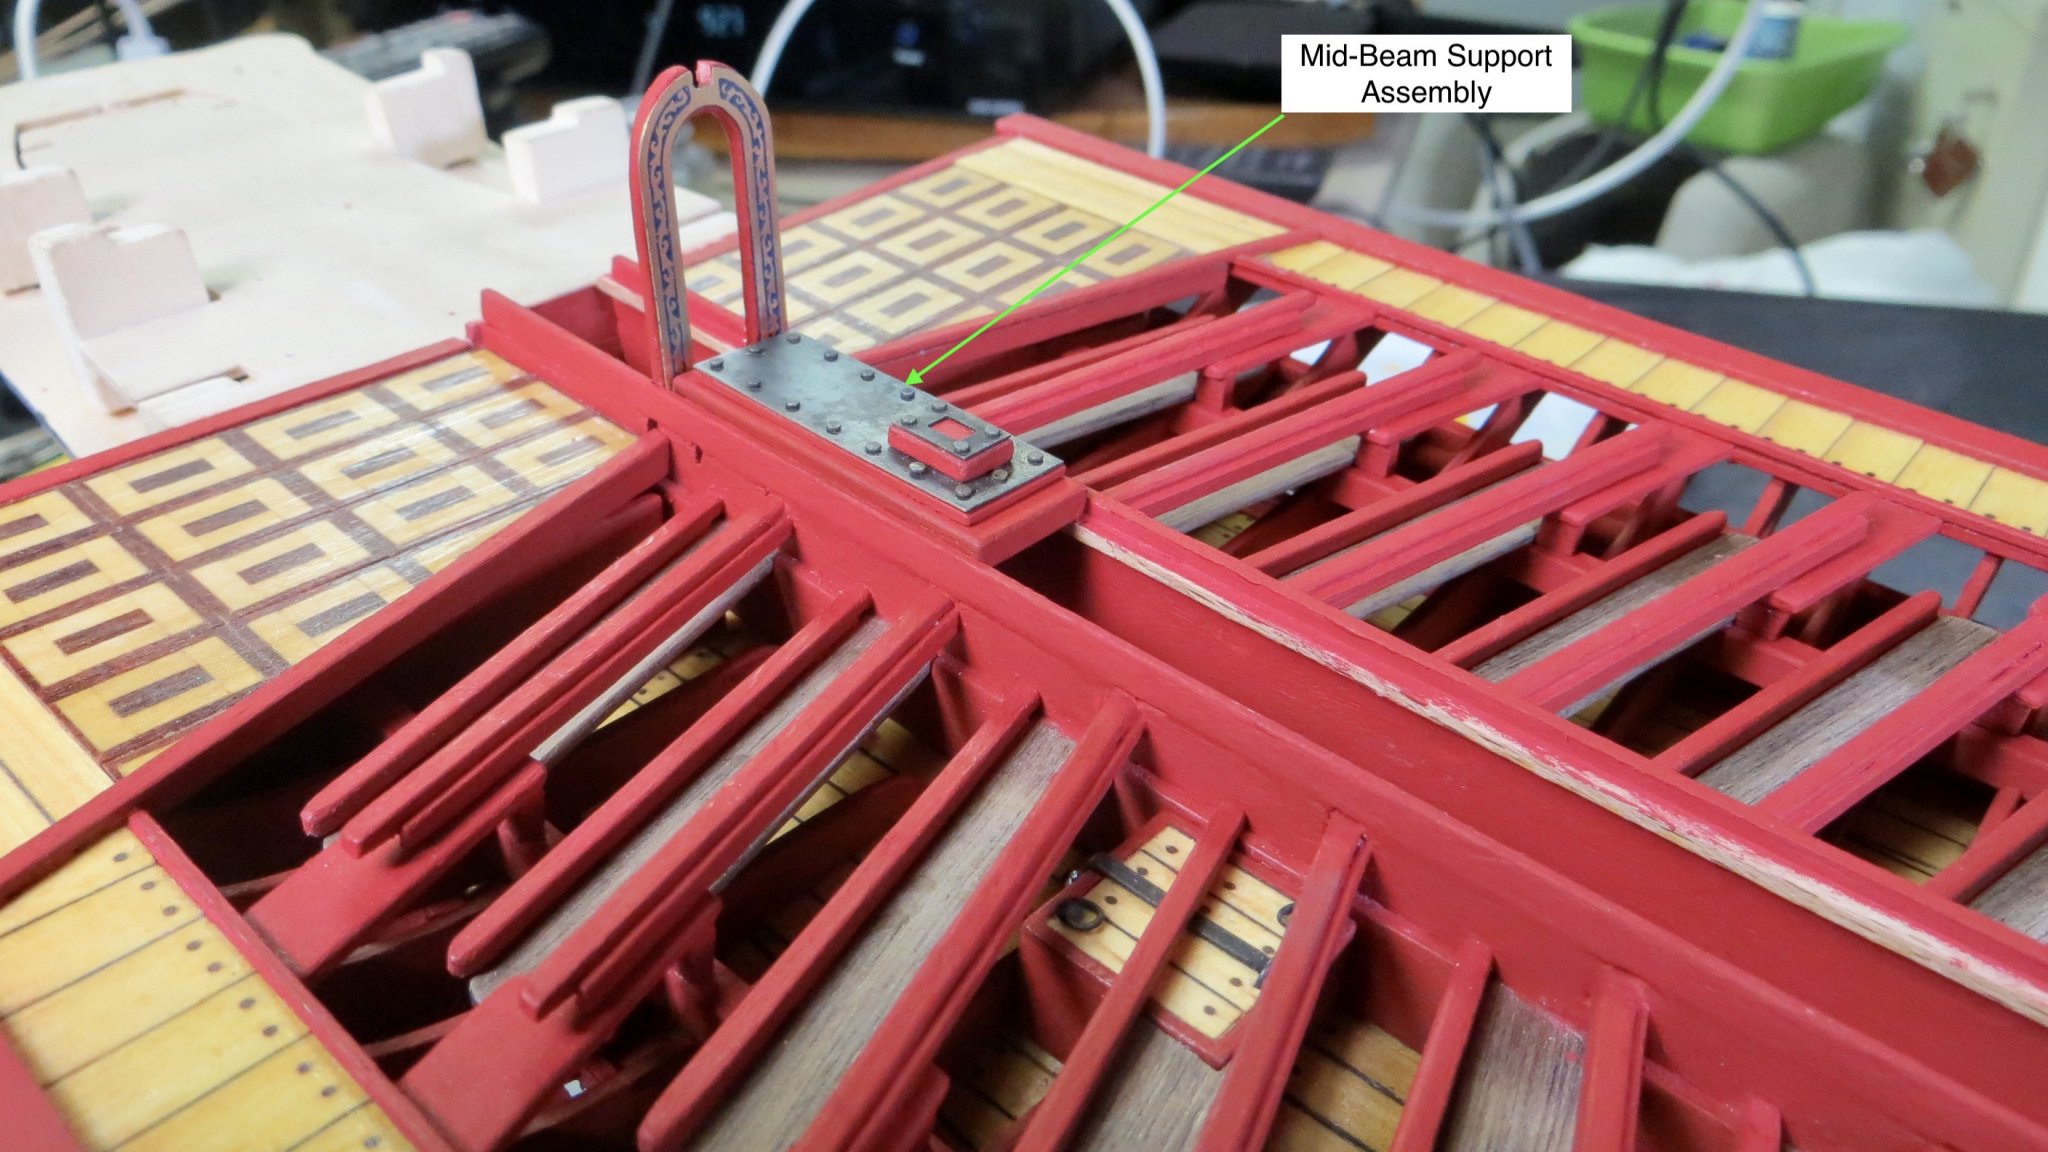
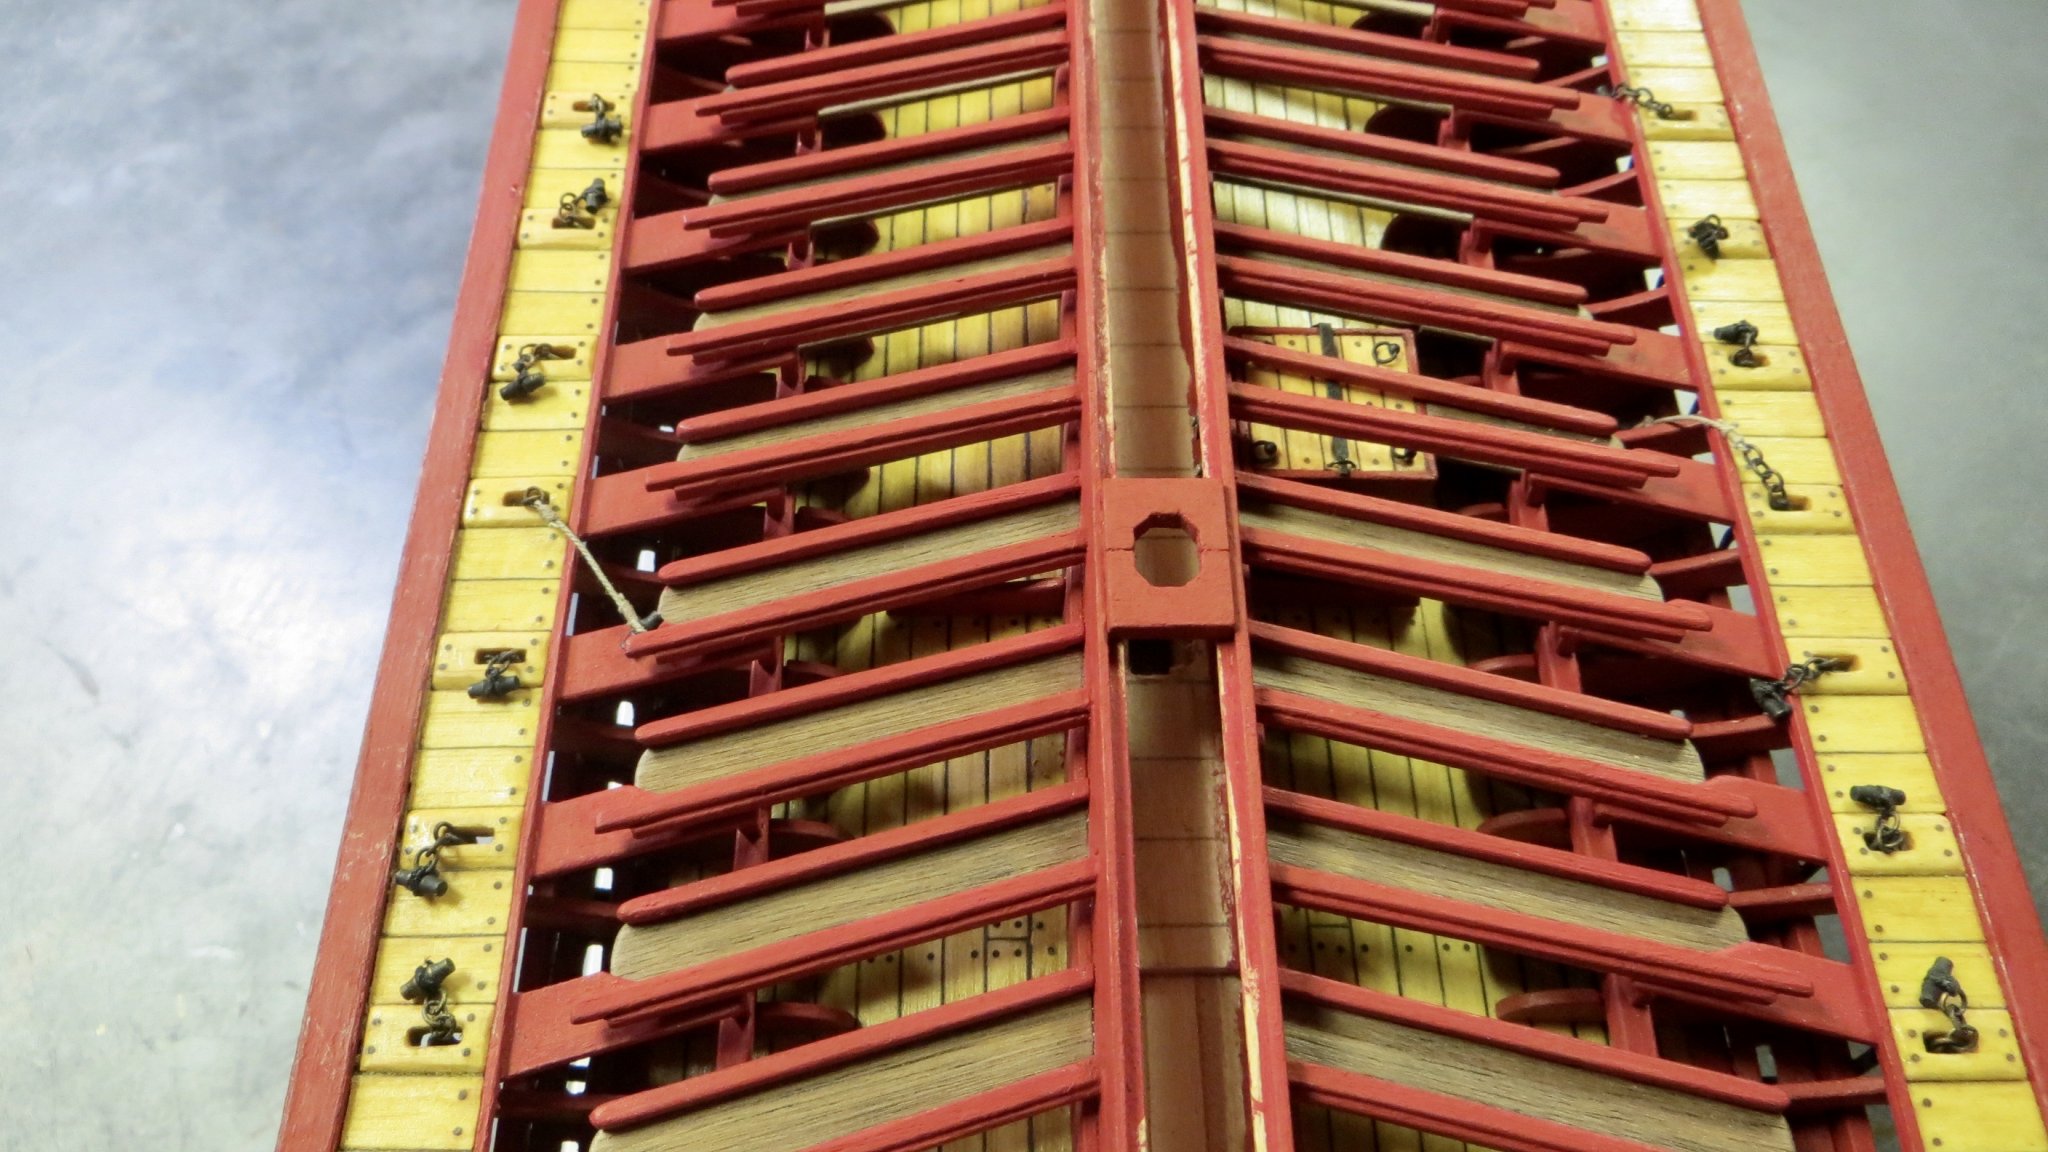
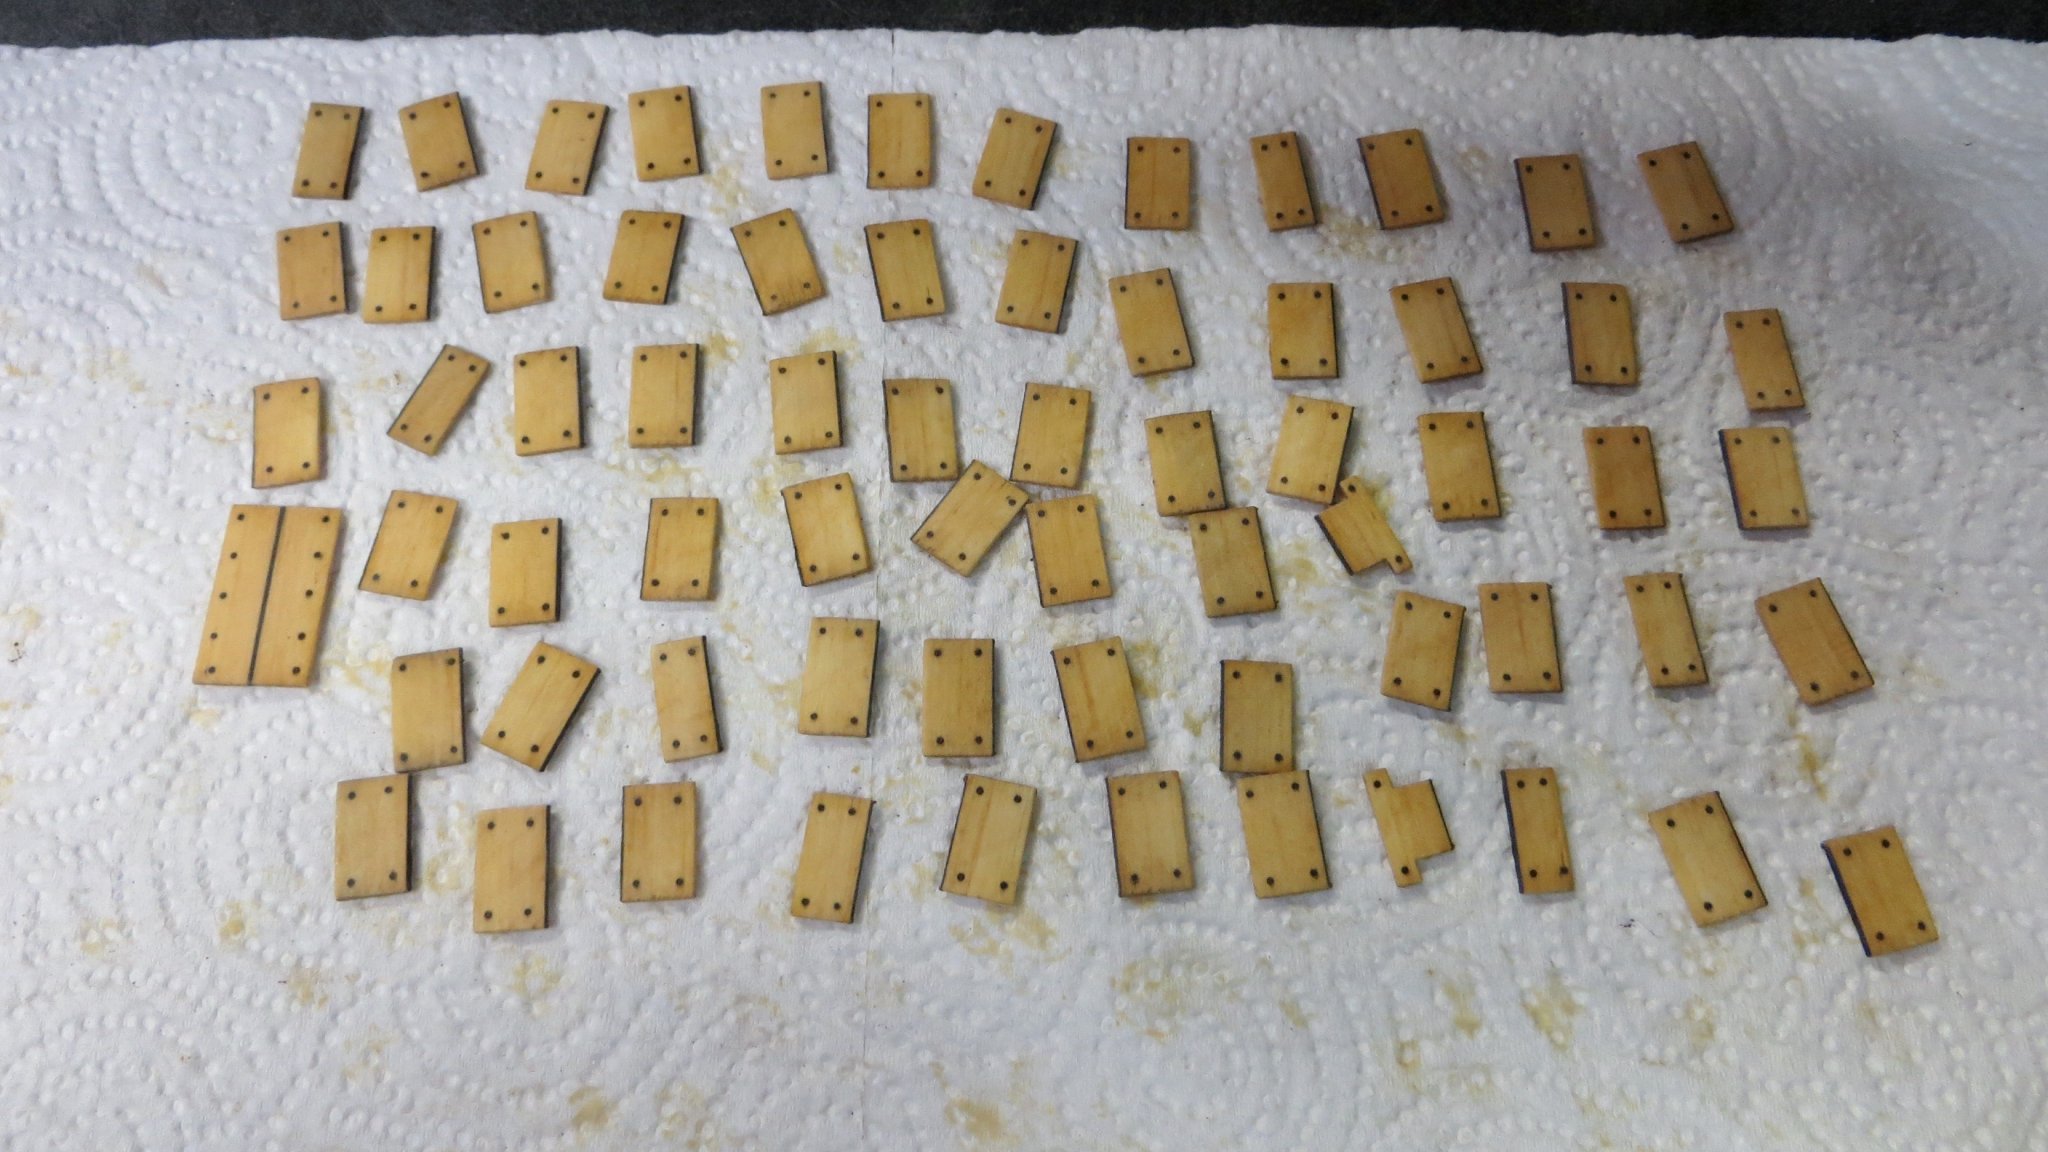
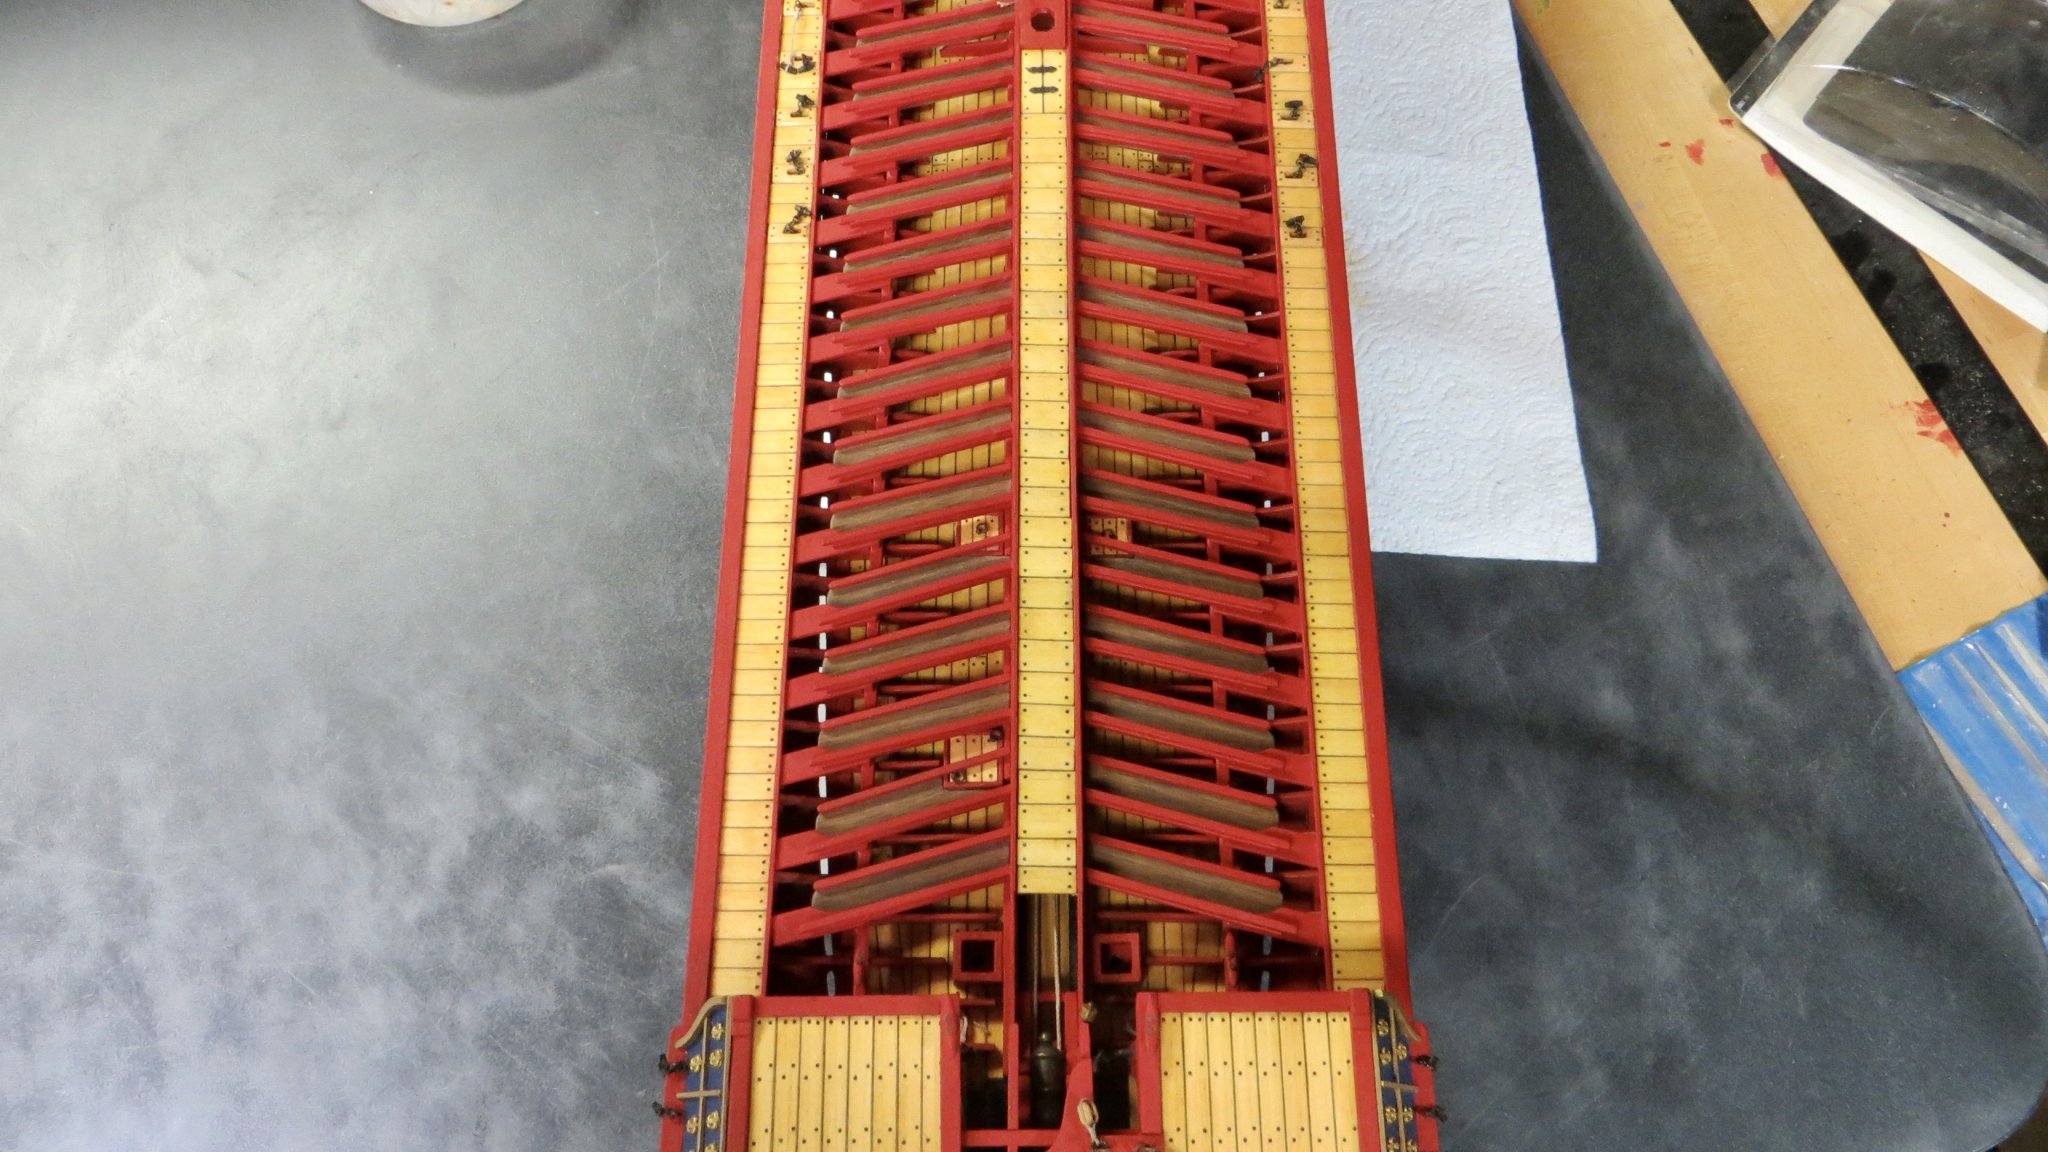
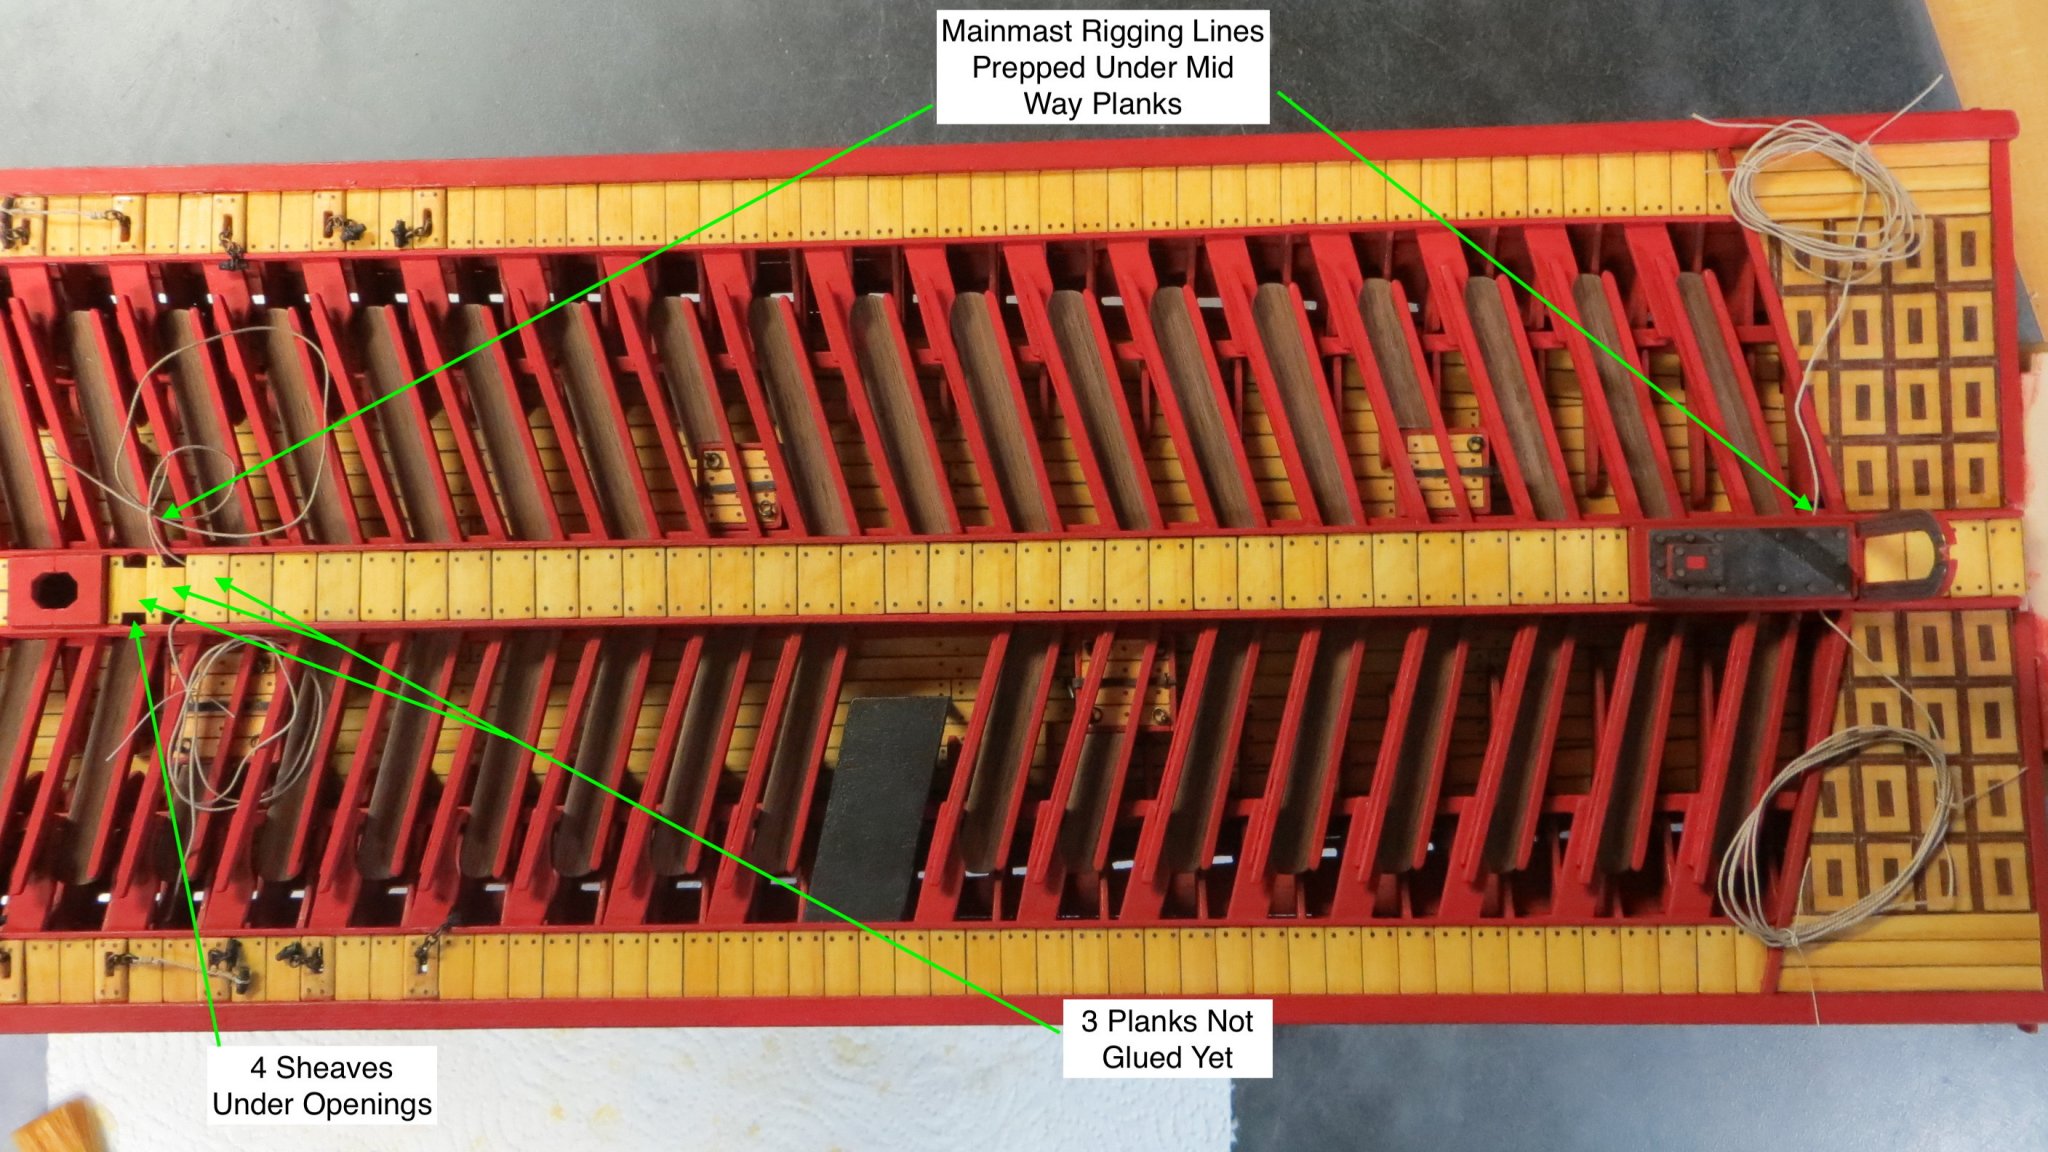
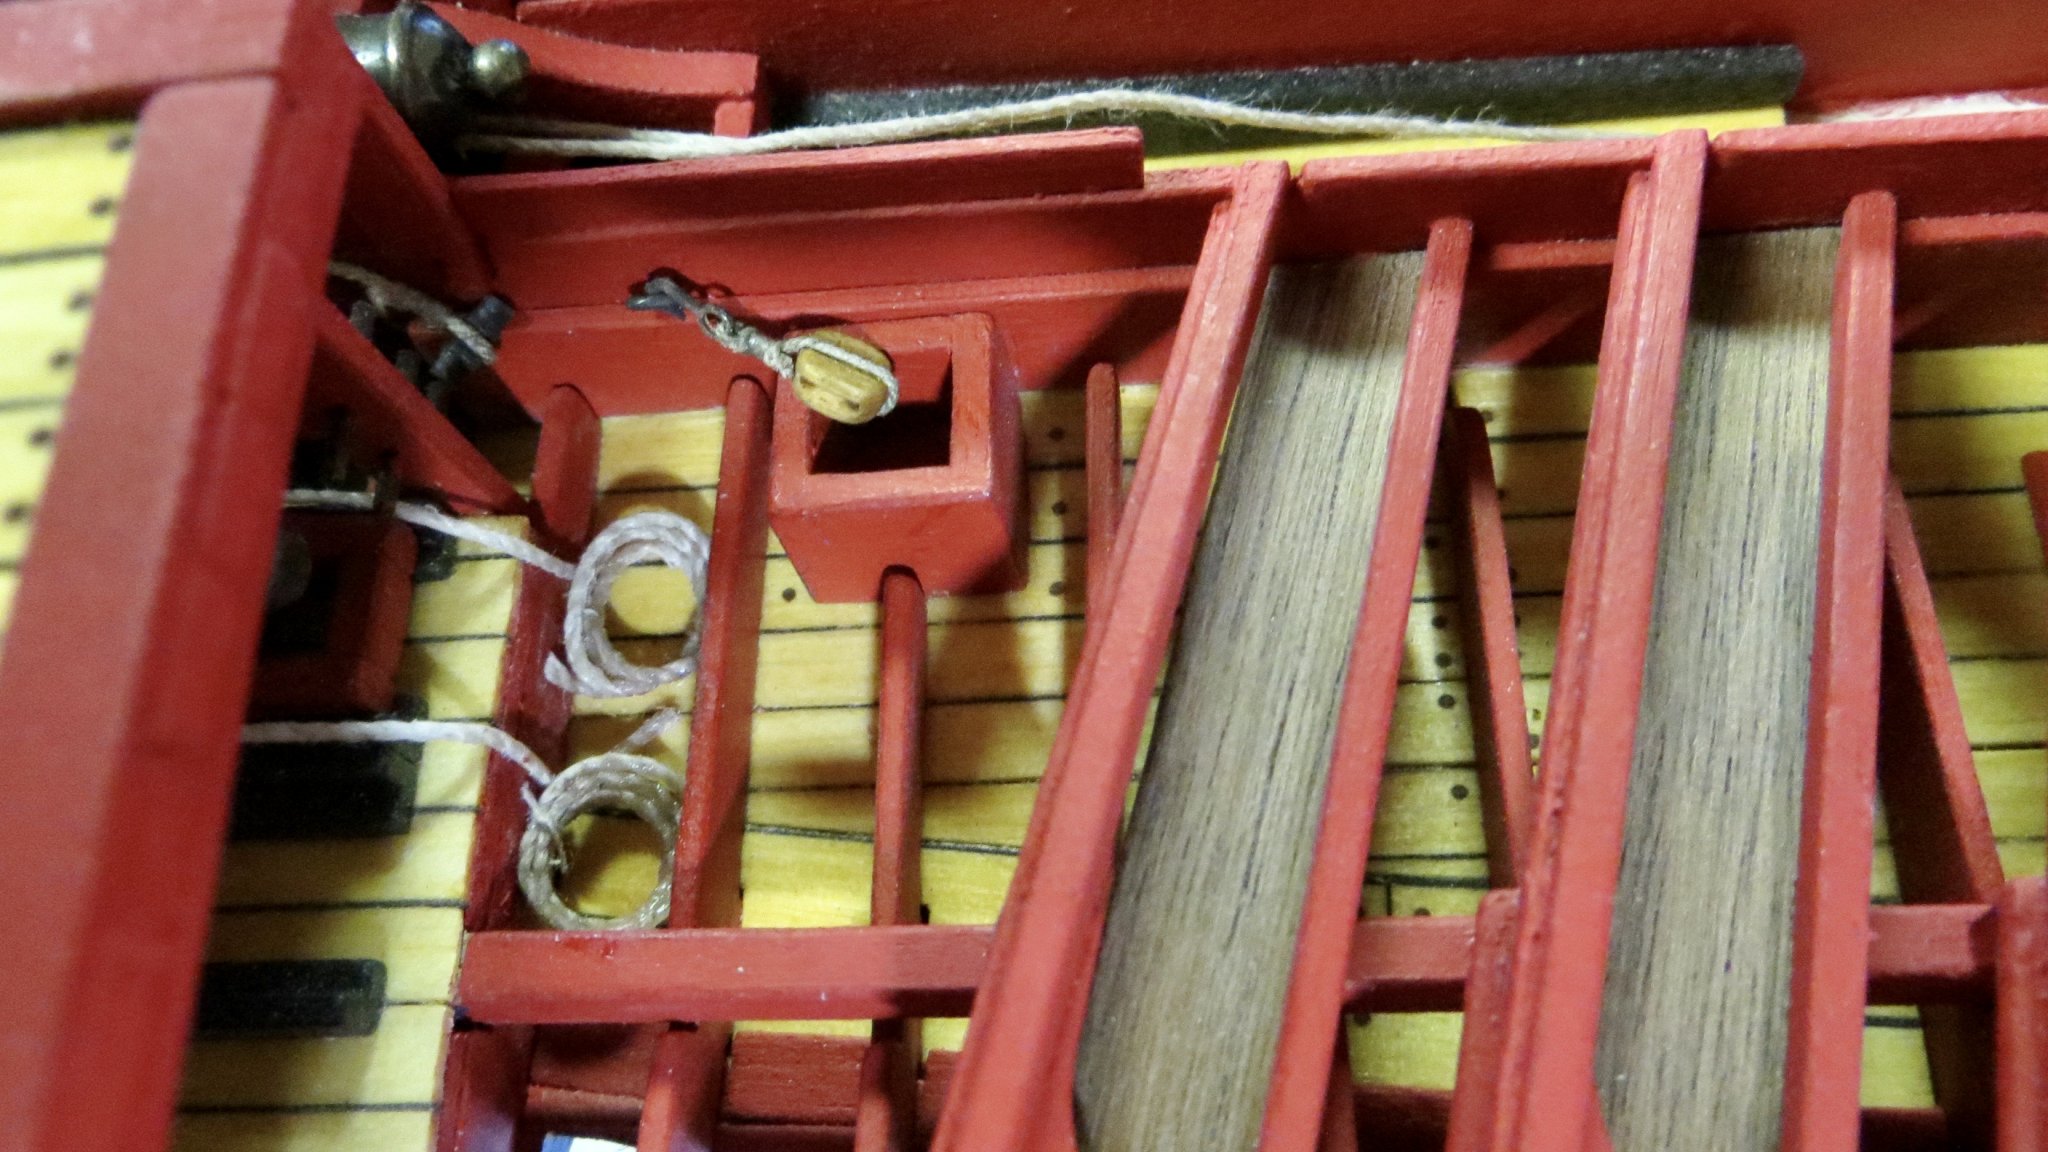
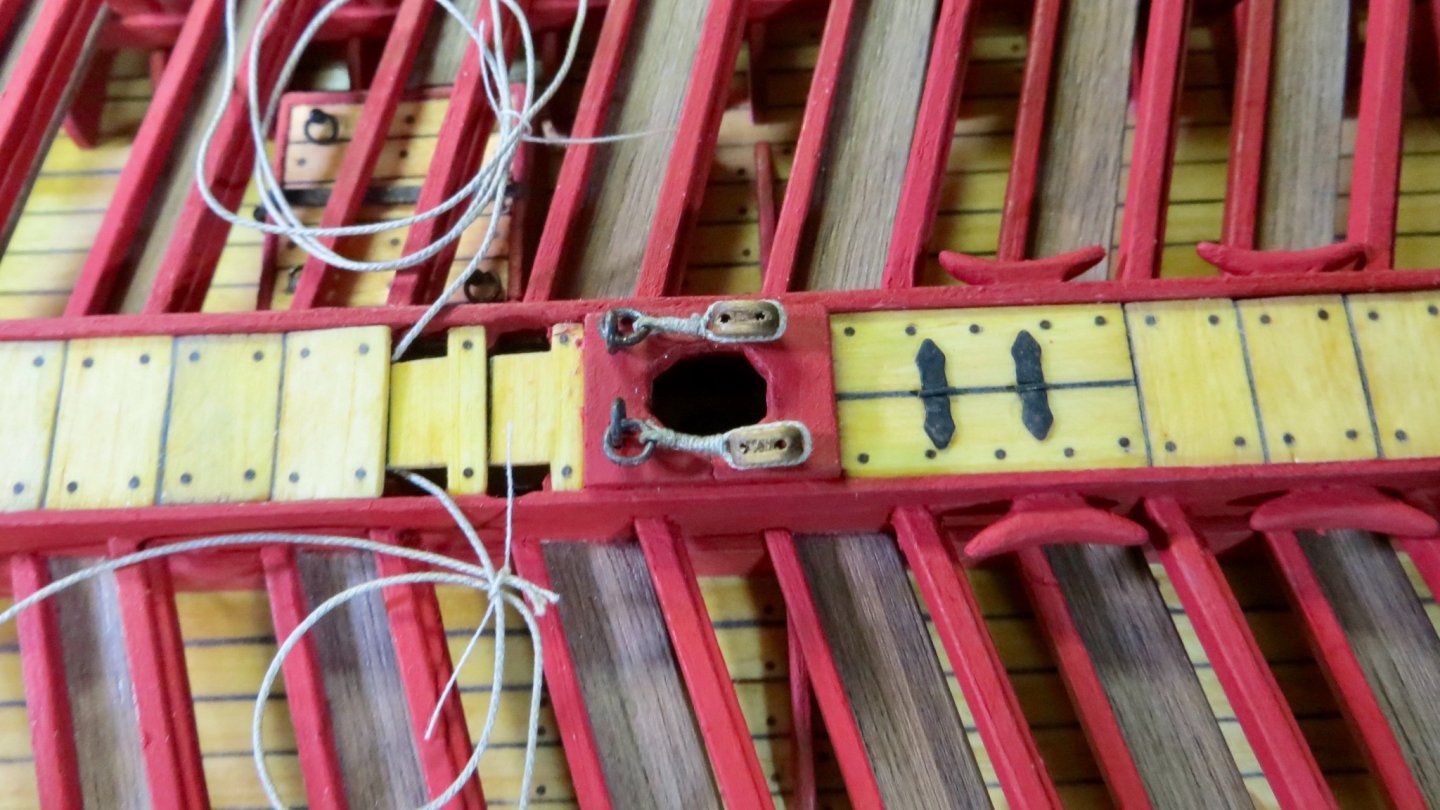
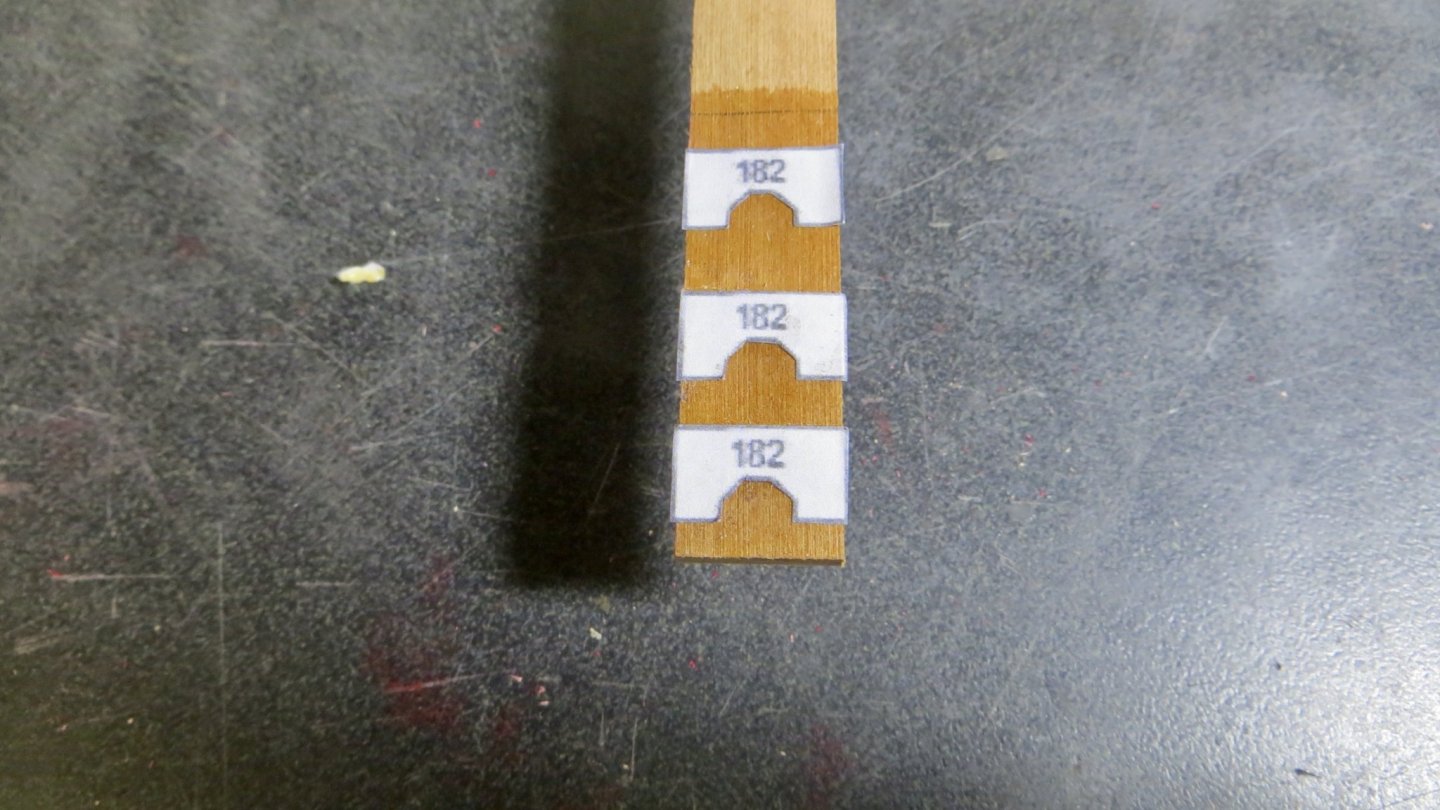
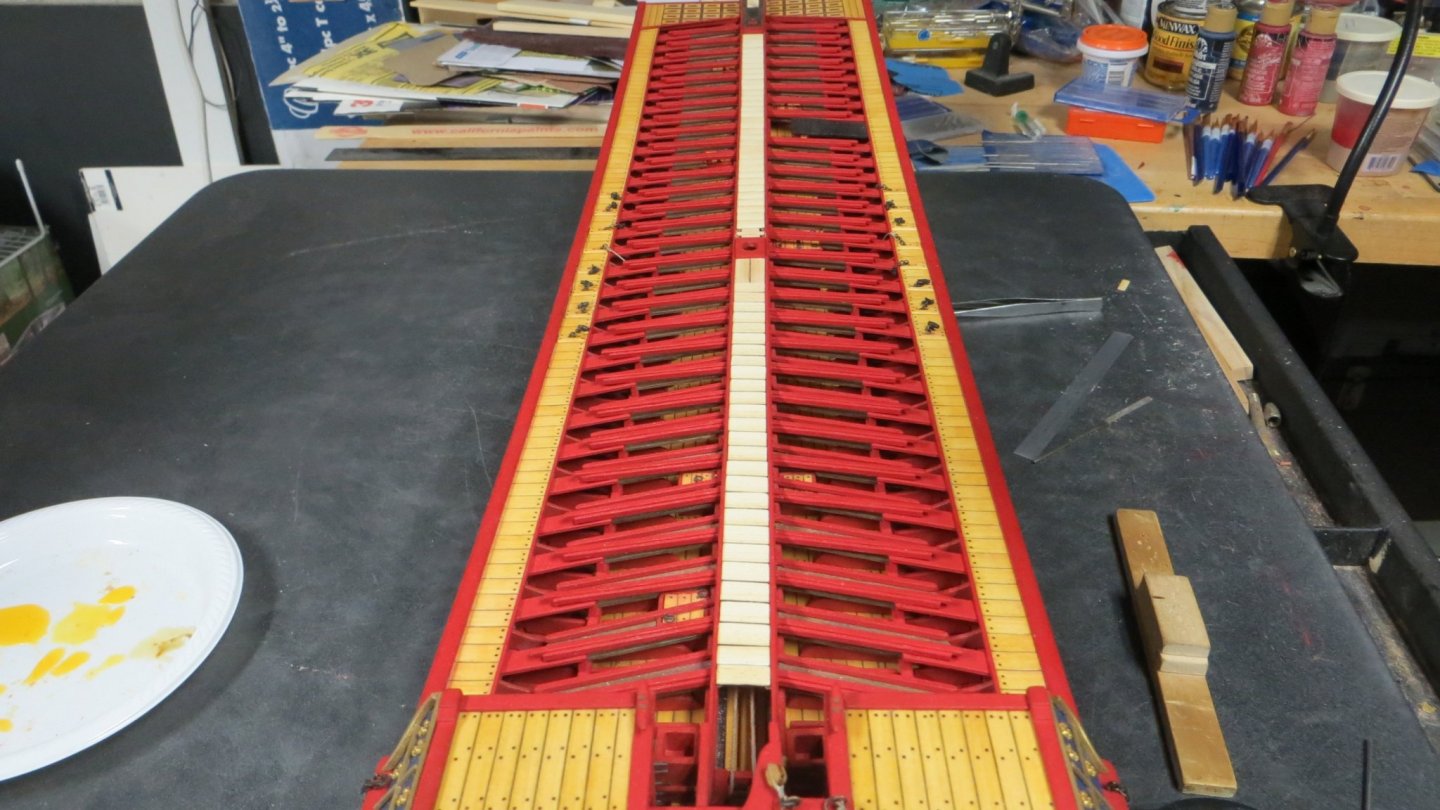
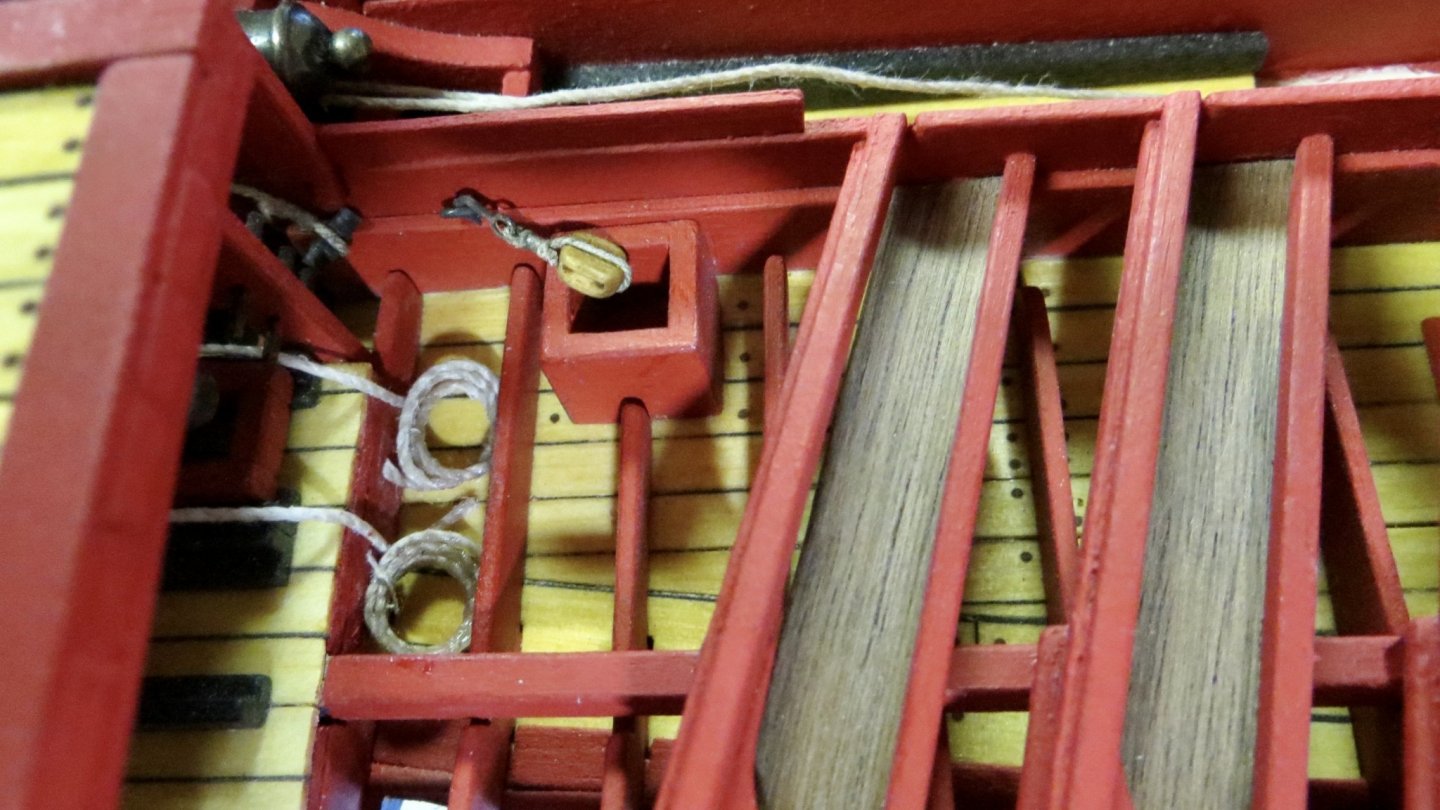
Hello, I made some progress with the midway section of the model. First step was to fabricate the mainmast partners(Support). Mainmast Partners made and ready to assemble. I also constructed the wood portion of what is called the "midway beam support". The finished Mid Beam support Assembly installed. The brass plates and nails are blackened. The assembly will later support a beam attached to the stern roof assembly. You will notice a hole under the assembly, roughly below the second nail from the stern (I forgot to add an arrow to the hole!) This hole is where rigging line that runs under the platform will come out. Mainmast Partners Installed. I had to "trial and error" move the partners forward and aft until I found the correct angle for the mainmast to fit. The midway planks were cut from the same Eastern White Pine wood with black construction paper. The planks cut to the correct width and trial fitted in the mid section. Then all the pieces were numbered on the backside and removed. All the pieces had tree nails installed followed by staining of the same light oak and finally sealed. In comparing the Reale de France plans and La Fleur de Lis plans, there were some differences. The width of the planks are wider on the "Fleur de Lis" (which I Followed) and the "Fleur de Lis" plan also shows a hatch just forward of the mainmast partners. I added this hatch, which is hinged in the middle and opens on each end. View of finished midway planks forward of the mainmast. Looking at the next photo, I had to do a few things. Sheaves (rollers) are installed just behind the mainmast (2 on each side) under the first 2 planks. The first two planks have notches cut into them for some mainmast rigging lines to pass thru and around the sheaves. Using the rigging plans, I estimated the length of line that runs under the midway planking and prepped the line under the planks before attaching the planks. Finally I glued all the planks to the deck, except for the first 3 planks behind the mainmast. I will have to remove these in order to run the lines around the sheaves and back up the mainmast later in the build. I will glue them down later. Finish midway photo Thanks for stopping by for a visit. Frank


- 510 replies
-
- 5
-
-
- reale de france
- corel
- (and 1 more)
-
Beautiful paint job on the castings! Frank
-
Hi Michael, I like your new table saw! one thing you might consider is to remove the green piece surrounding the blade. then lower the blade below the table level. Insert a new piece of solid plexiglass or plastic in the space where the green piece was. Screw it down. Turn on the blade and slowly raise the blade cutting the plexiglass as you raise the blade. Now if your cutting thin small pieces of wood, there will be less chance of the piece getting sucked into the gap. just a thought! excellent work, Frank
-
Michael, Stern planking looks nice! The added tree nails are a nice finishing touch! best, Frank
-
Michael, Nice to hear from you and thanks for your kind thoughts. Starting from you previous Vasa build and now onto your current build, following and meeting you has opened me up to "thinking outside the box" and investing more time into research and alternative methods. All is well here thanks, and hopefully you are all healthy and safe! Frank
- 510 replies
-
- 1
-
-
- reale de france
- corel
- (and 1 more)
-
Thank you! Totally agree about the under appreciated beauty of these galleys. I never considered building the Reale until I accidentally ran across a fellow builders beautiful log here at Model Ship World. Frank
-
Hi Clark, Thanks for stopping by. Yes, rigging runs under the midway planks. I will estimate the amount of rigging line I will need and run it thru now, before I glue the midway planks in this area. I will install, but not glue, a couple of planks where the rigging runs around the 4 sheaves that are installed just behind the mainmast (under the planks). After the rigging in this area is finished, I will glue these planks down. I will show more detail about this issue and how i'm planning to handle this in my next progress posts, in a couple of weeks. Thanks, Frank
- 510 replies
-
- 1
-
-
- reale de france
- corel
- (and 1 more)
-
Thank you Mark! Appreciated. thanks for stopping by for a look. Frank
- 510 replies
-
- 1
-
-
- reale de france
- corel
- (and 1 more)
-
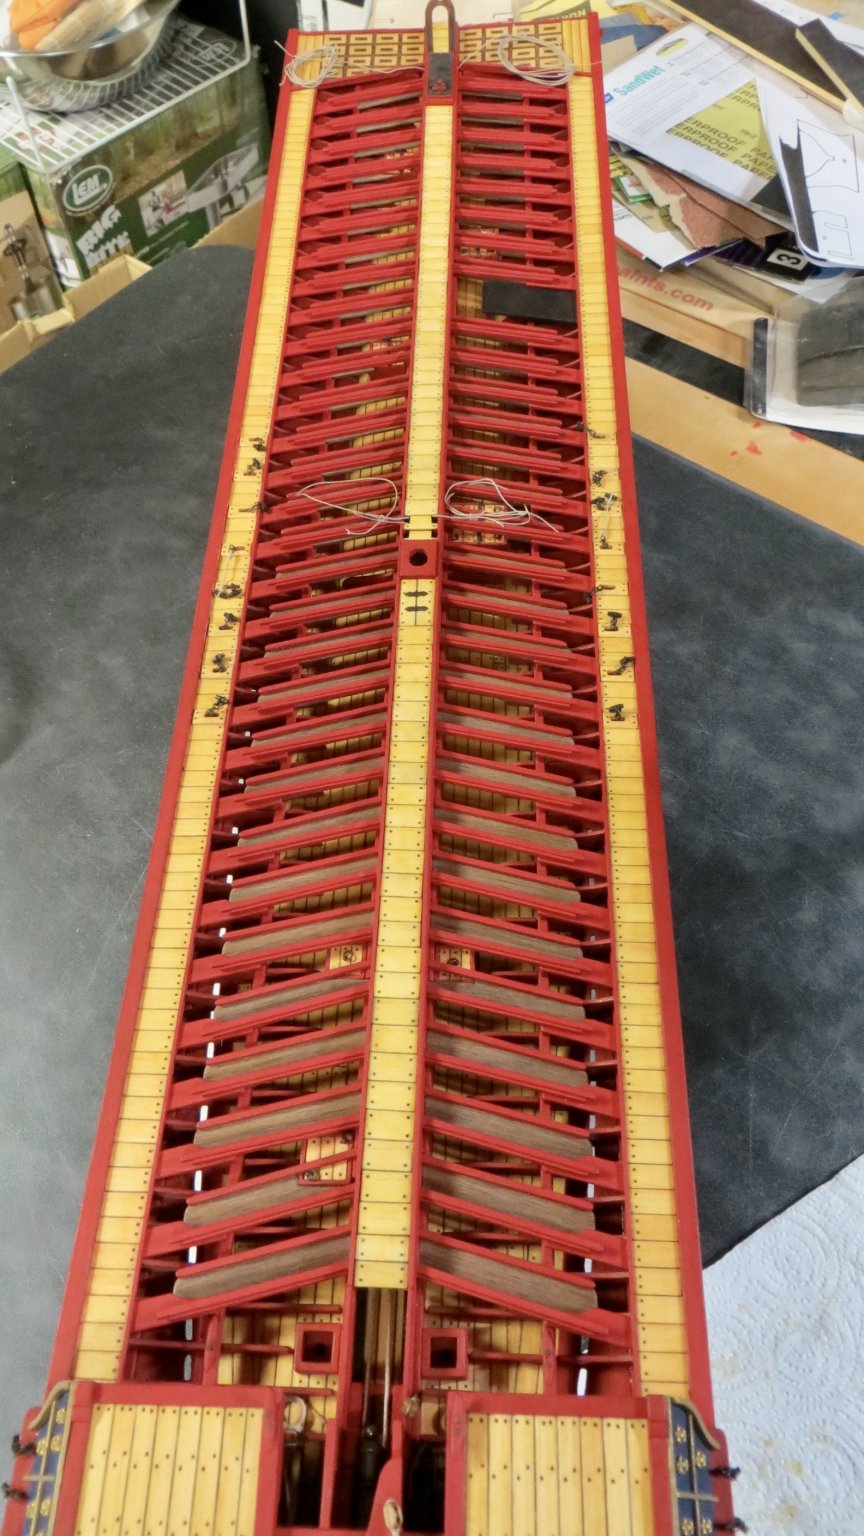
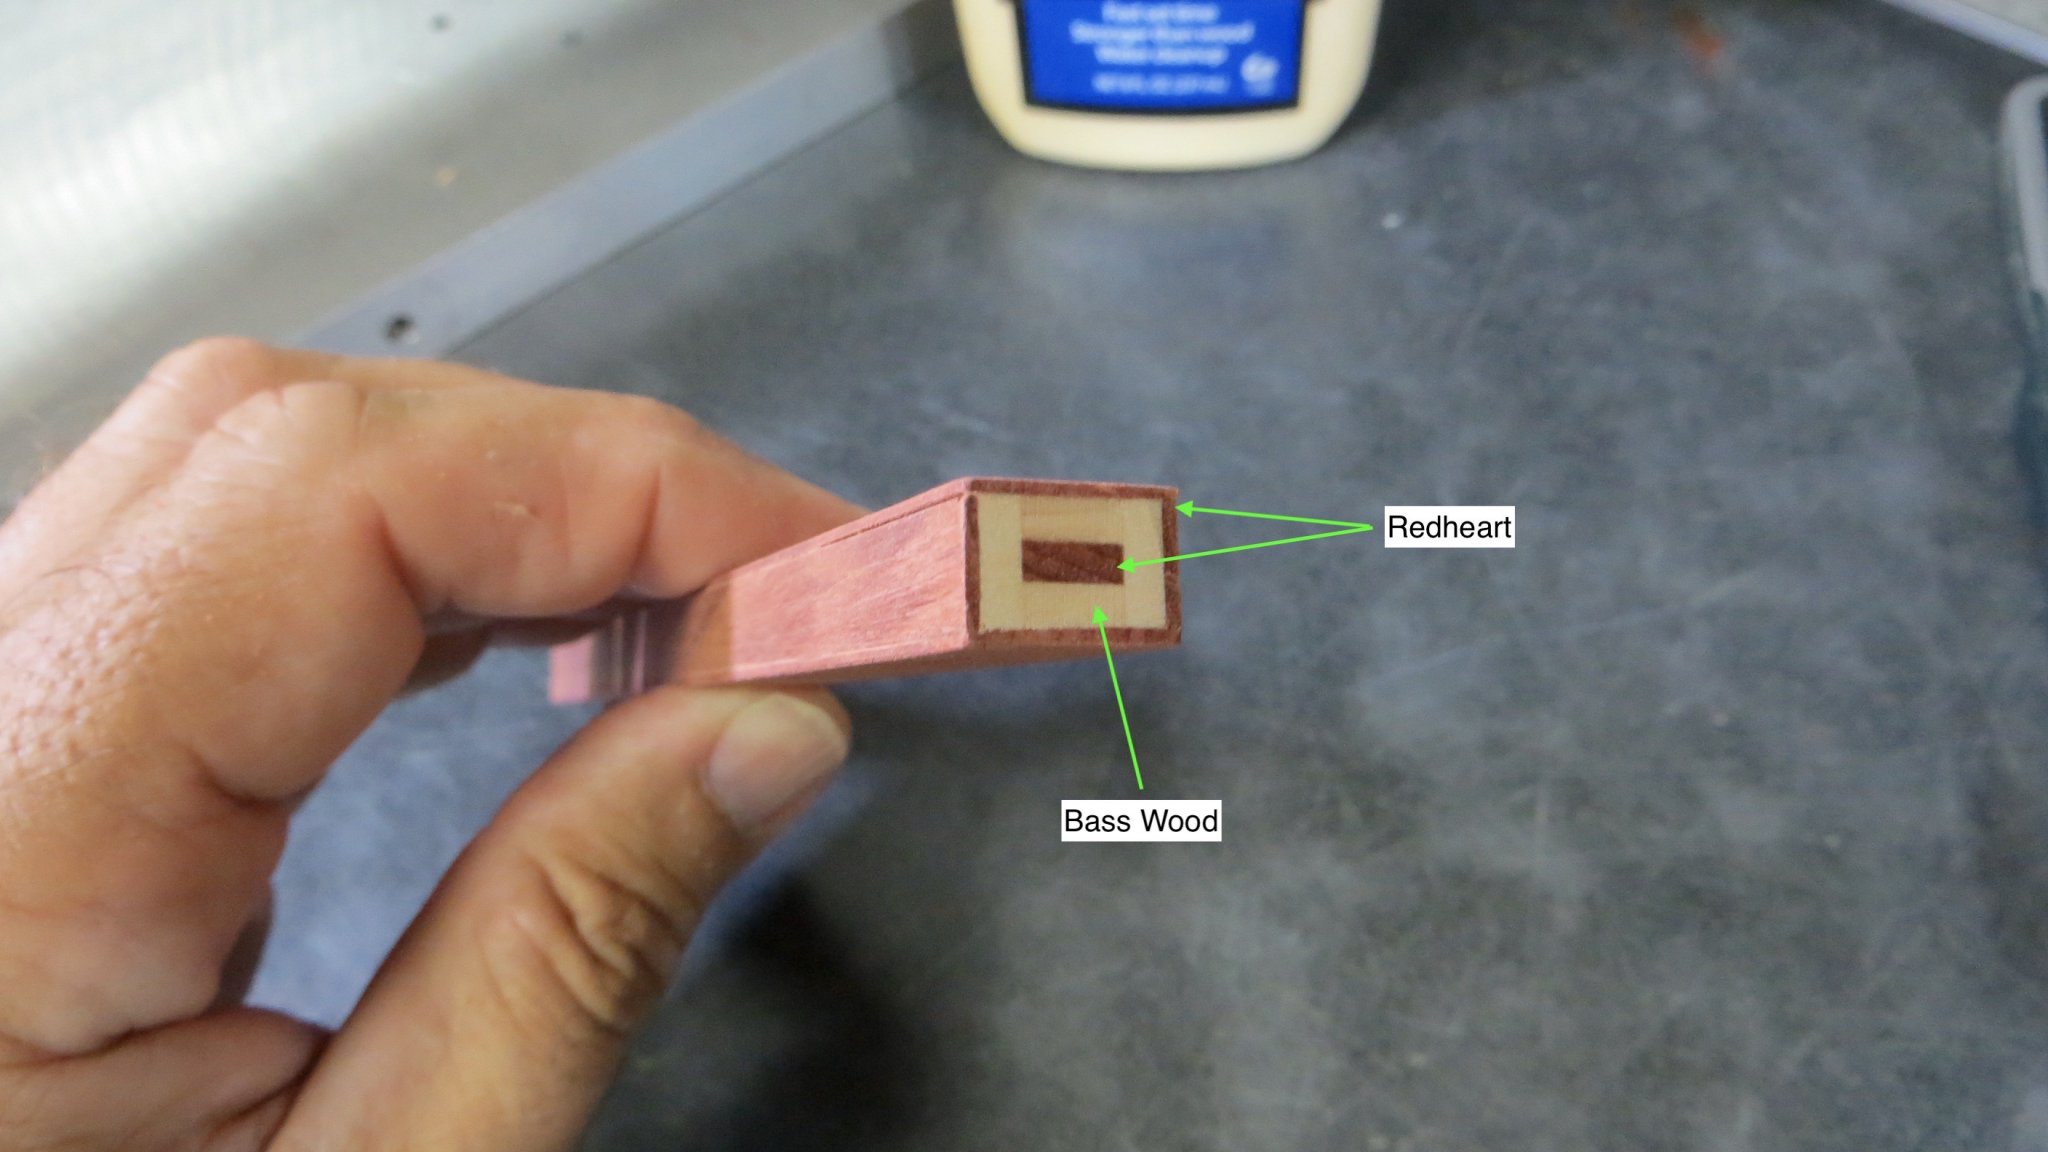
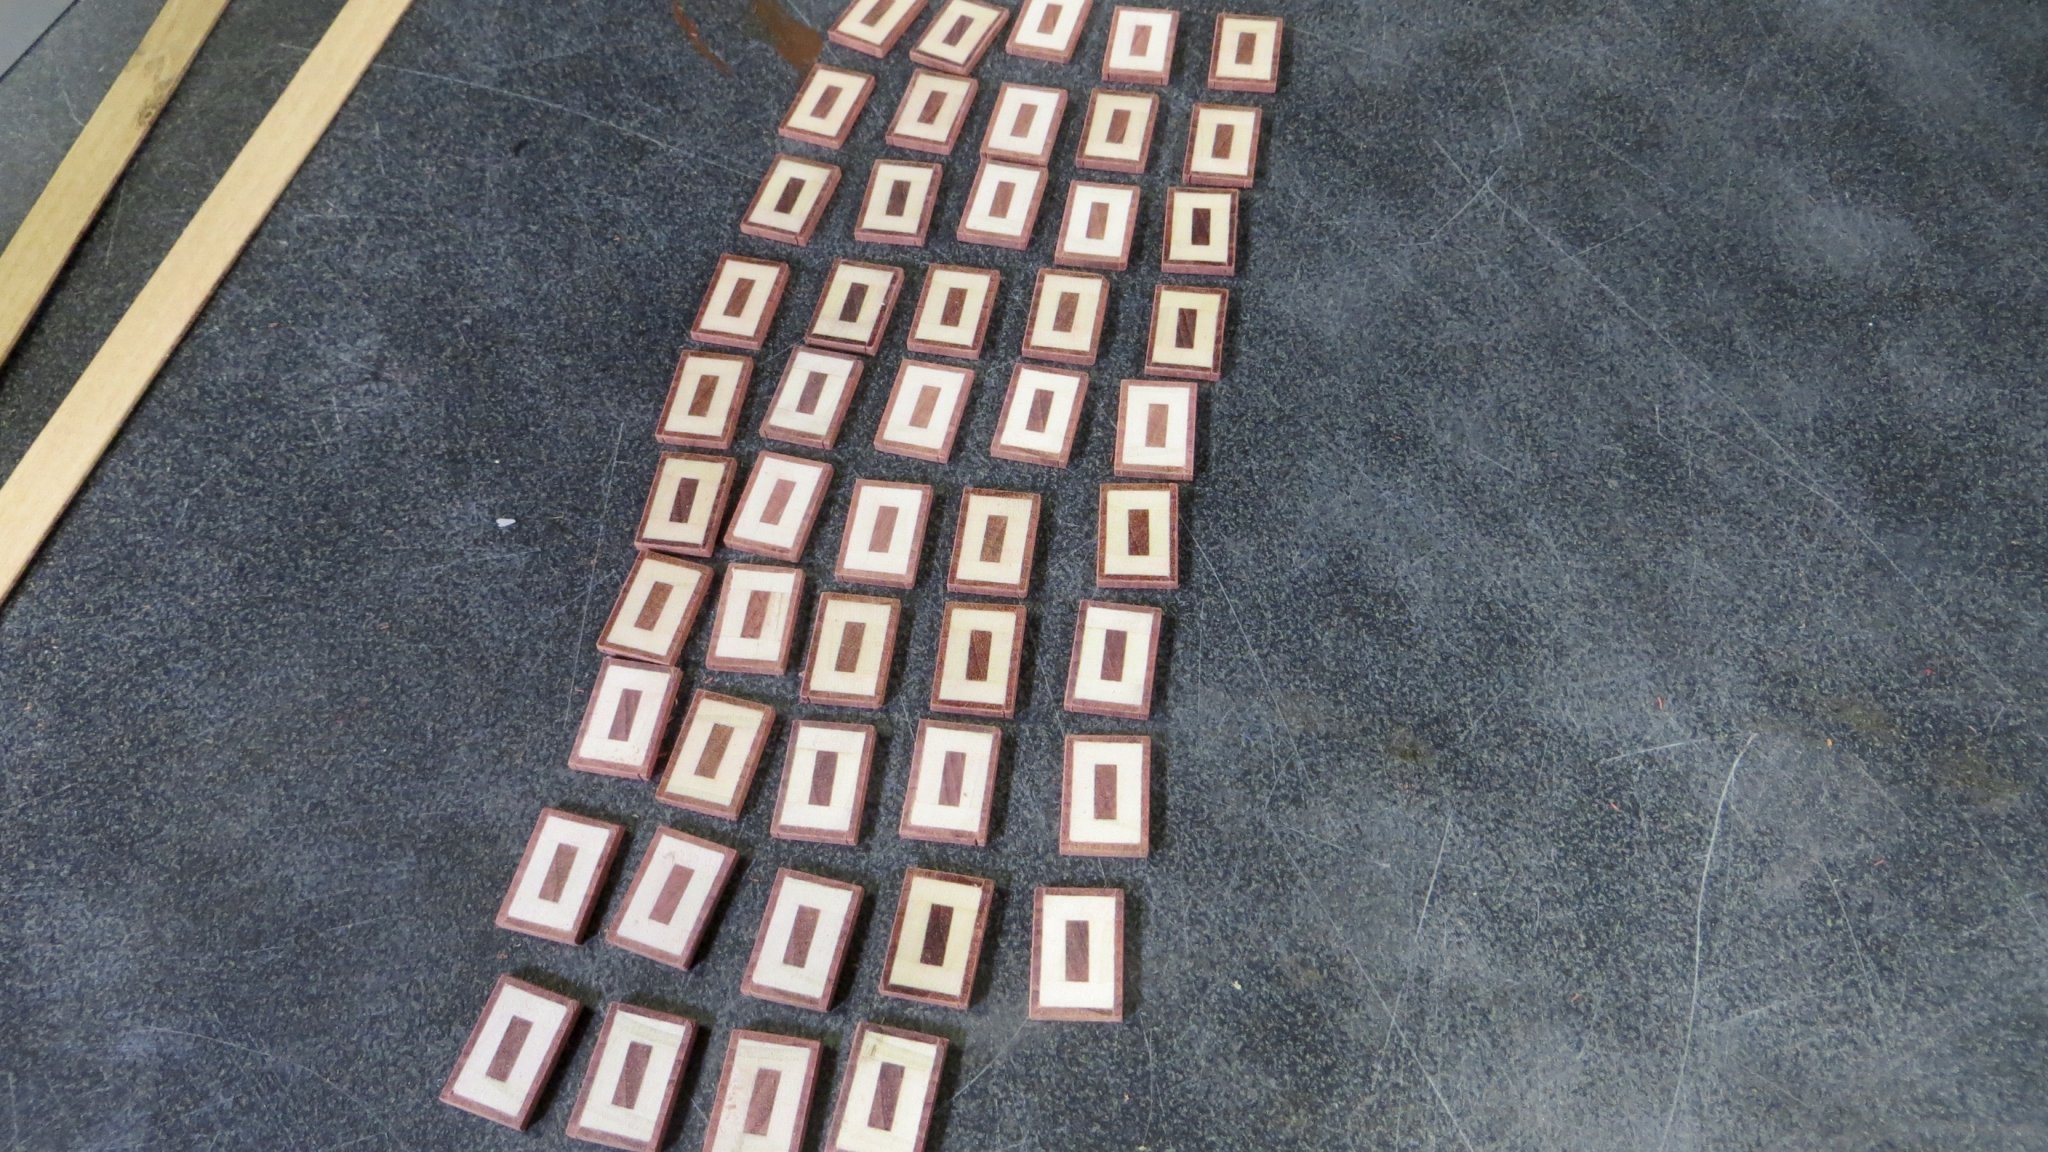
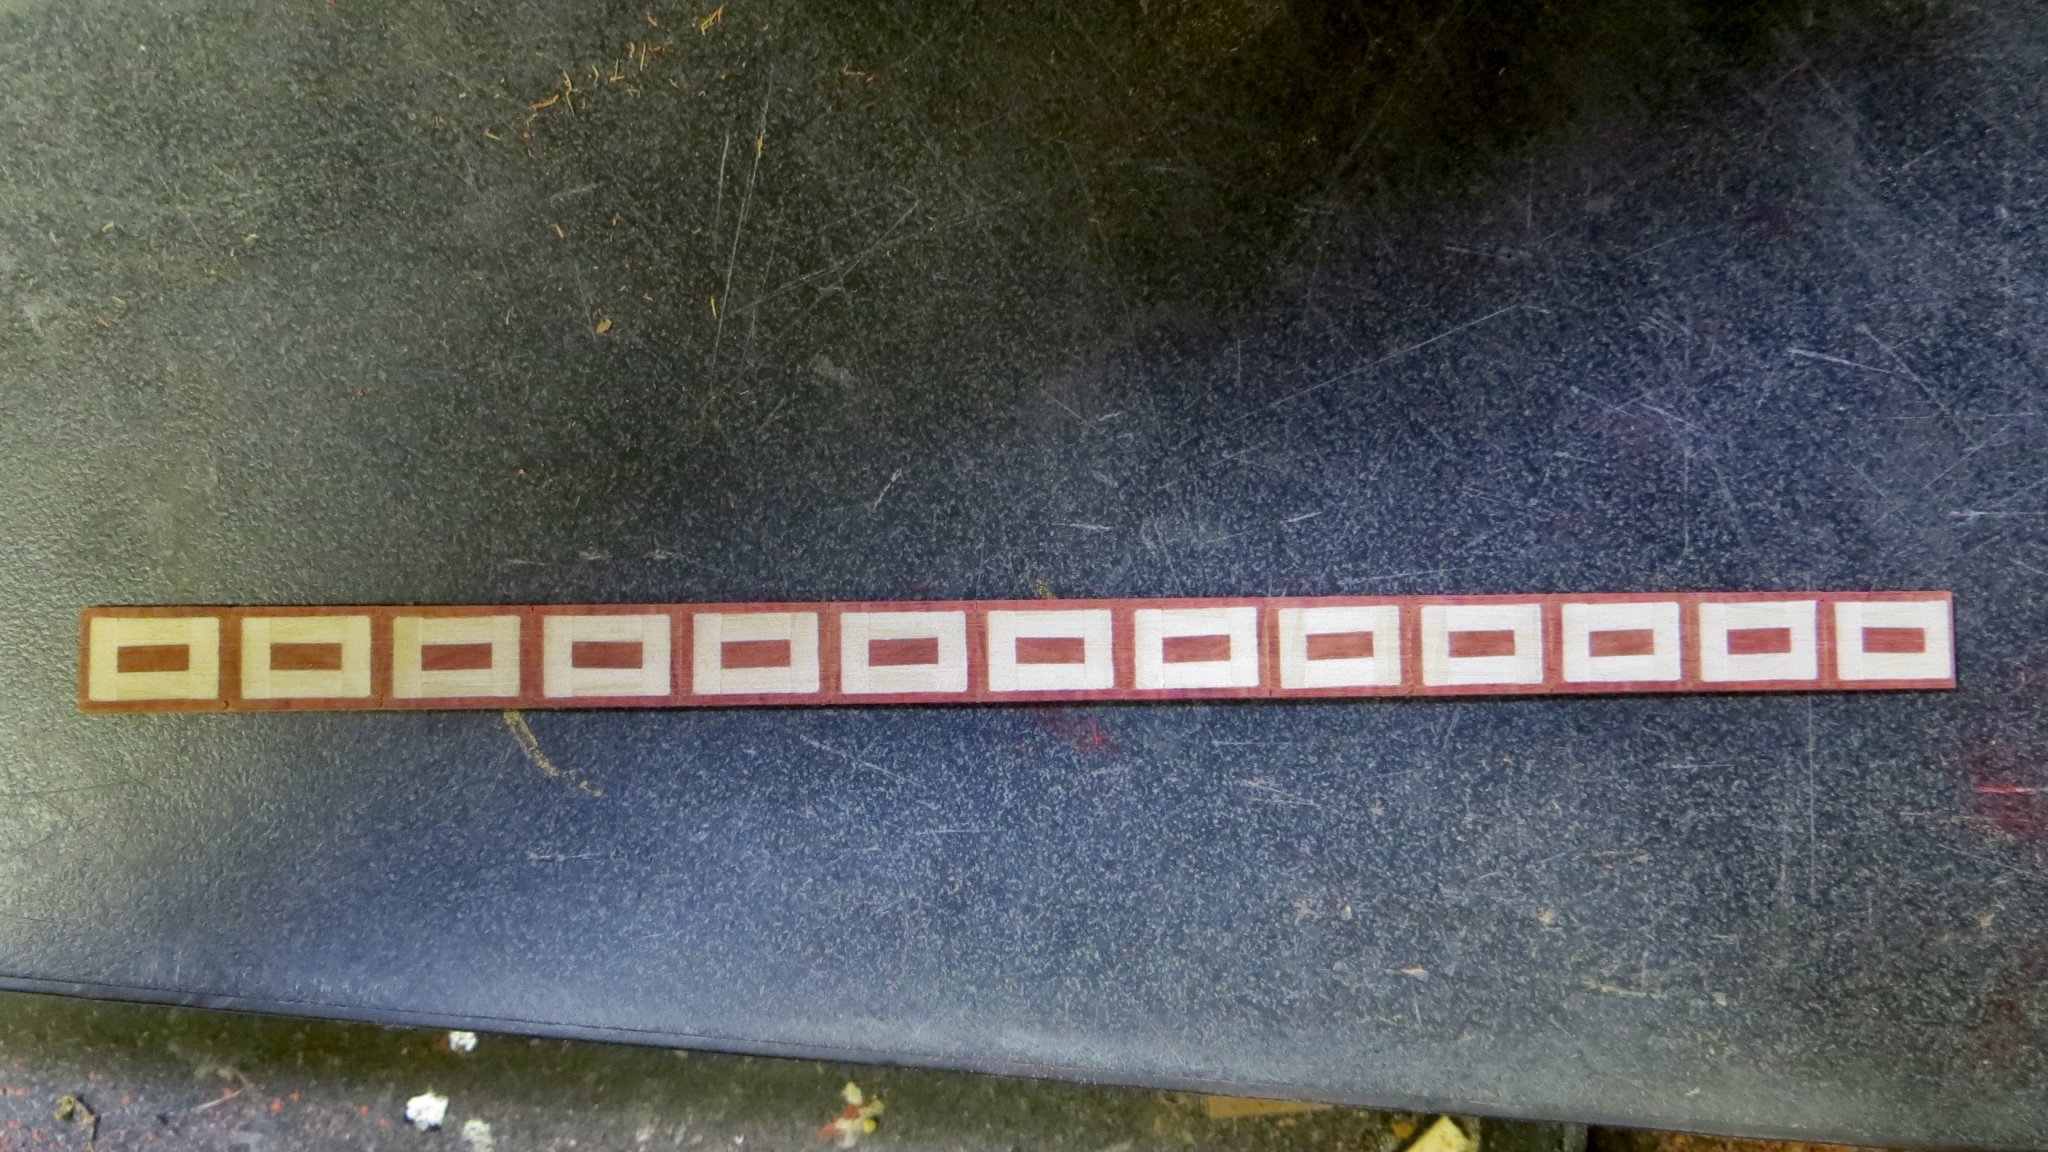
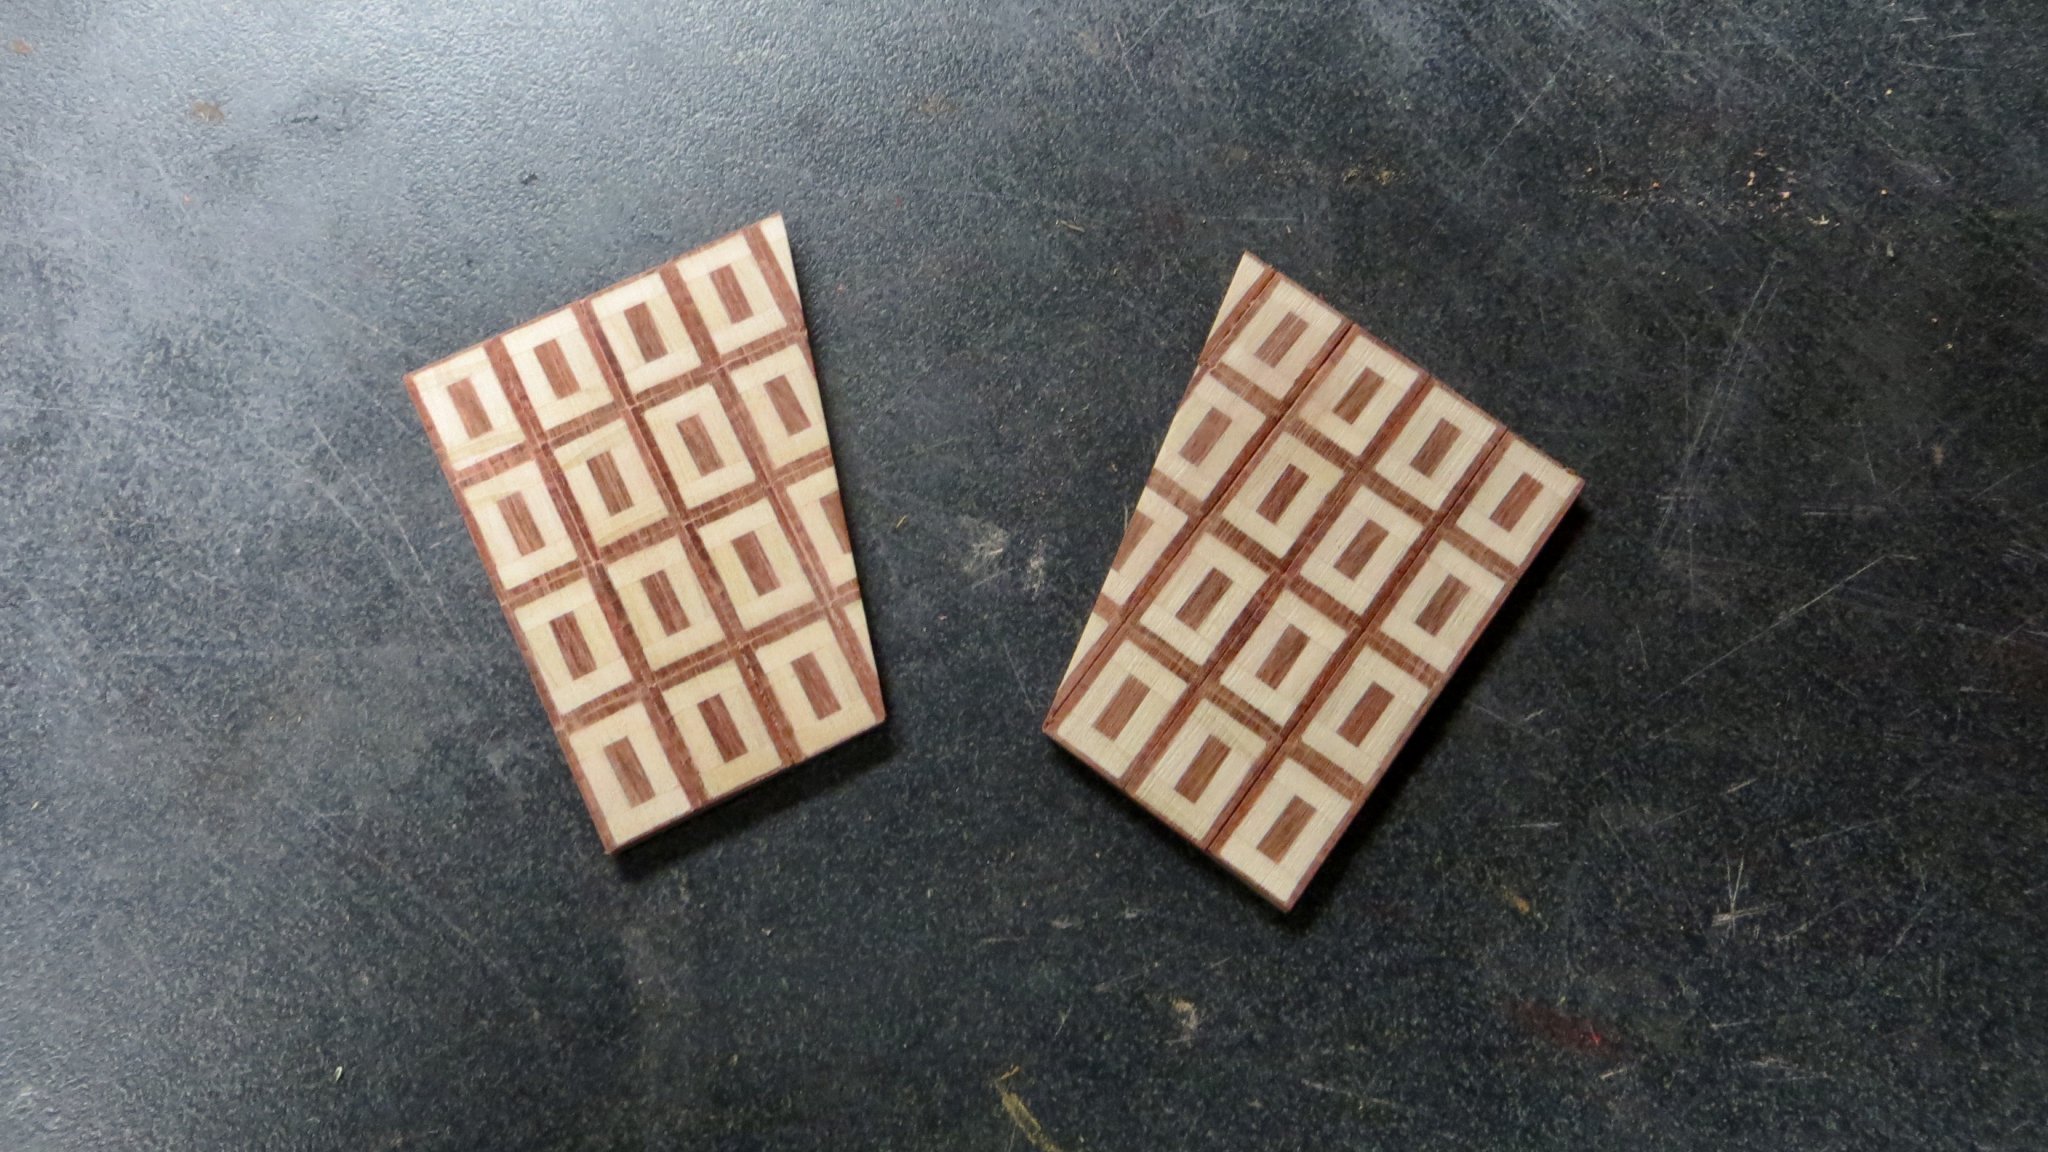
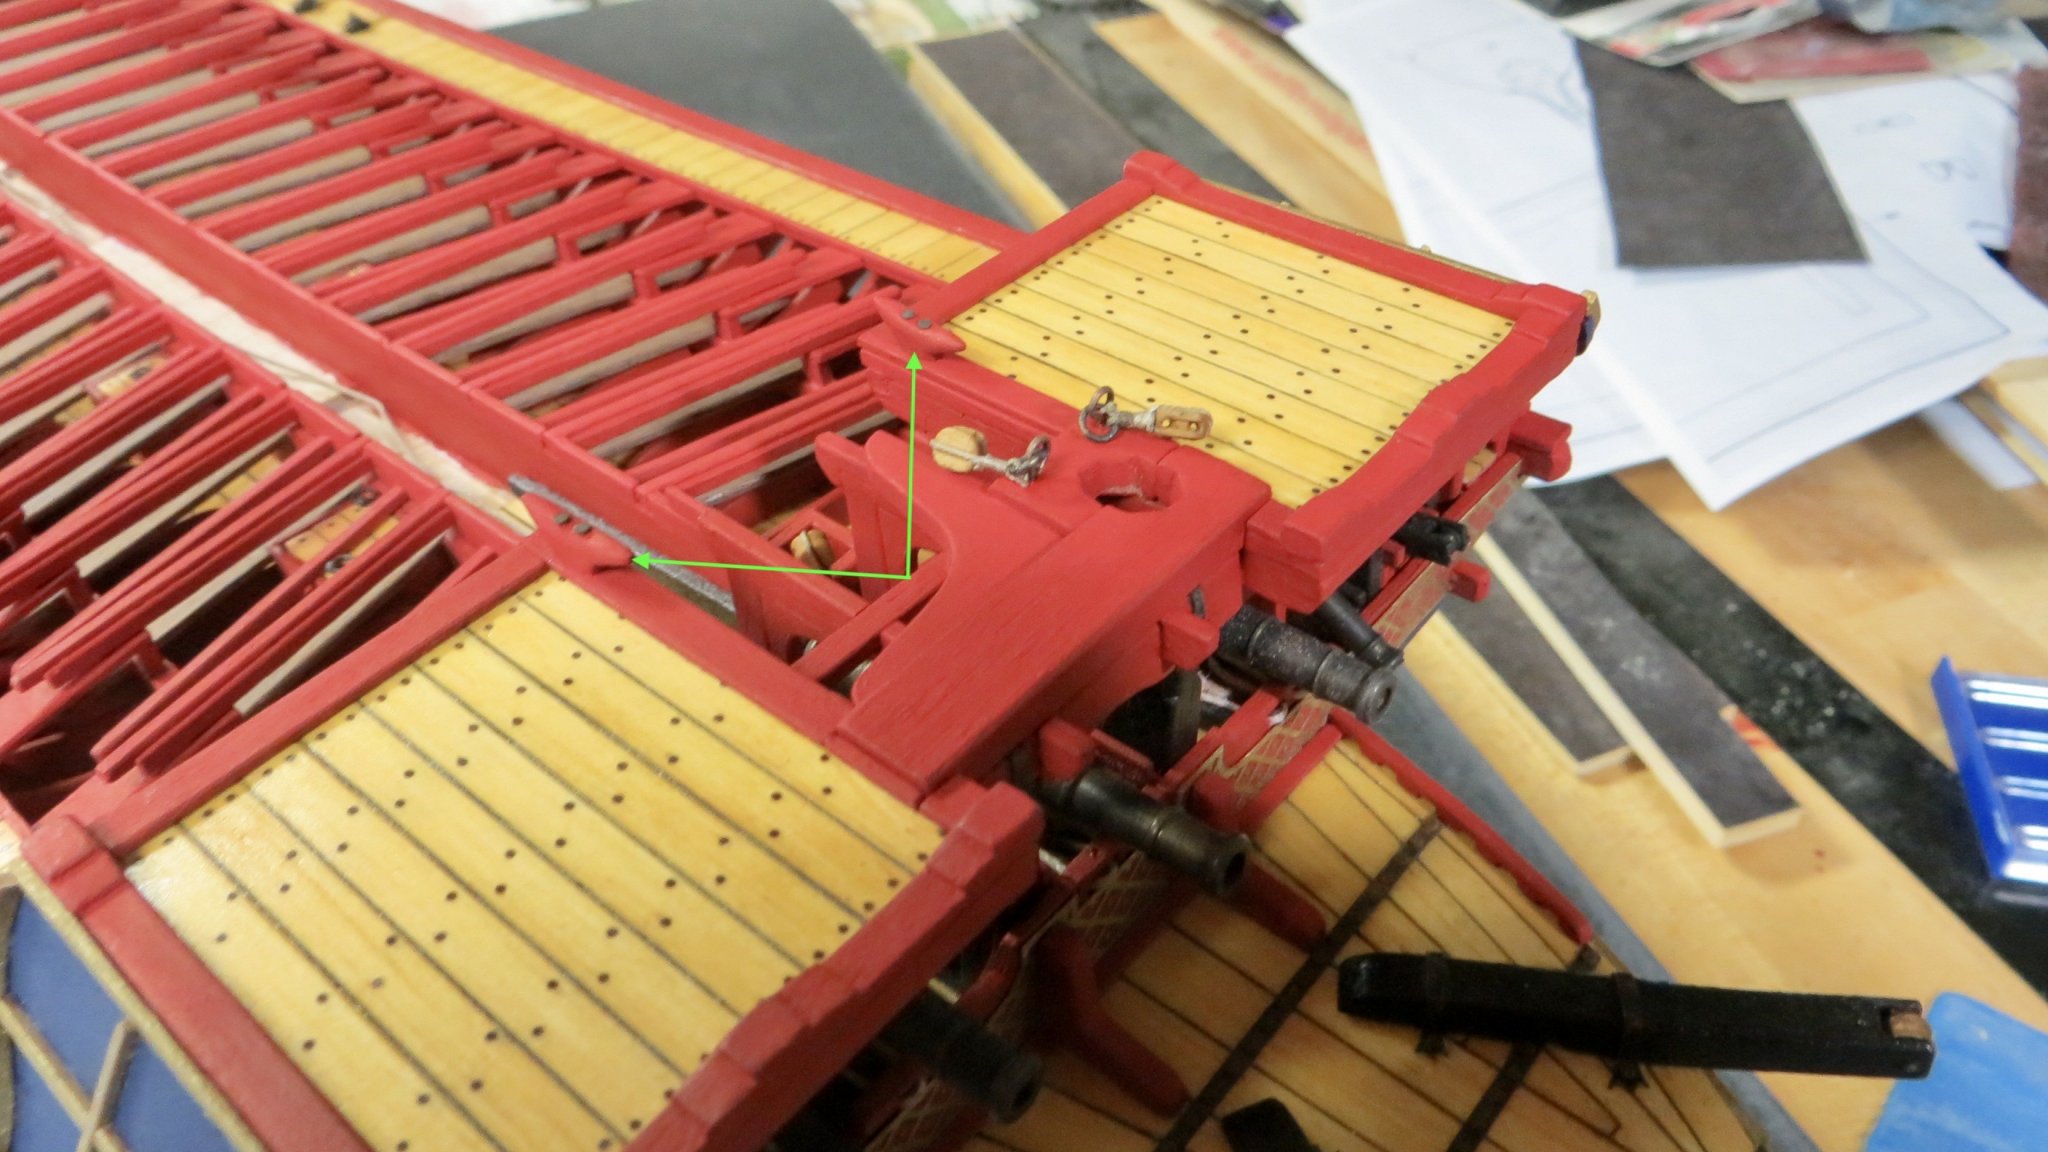
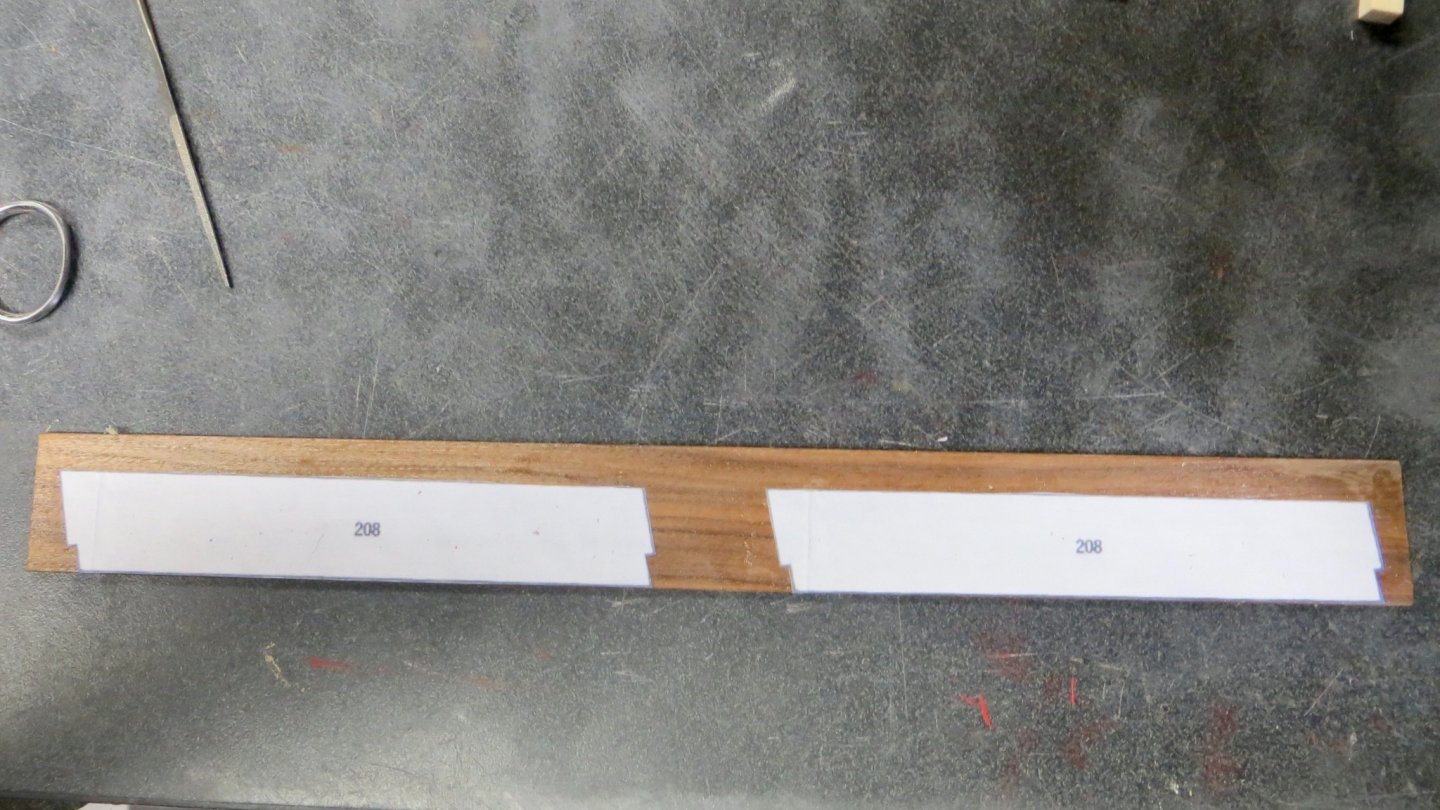
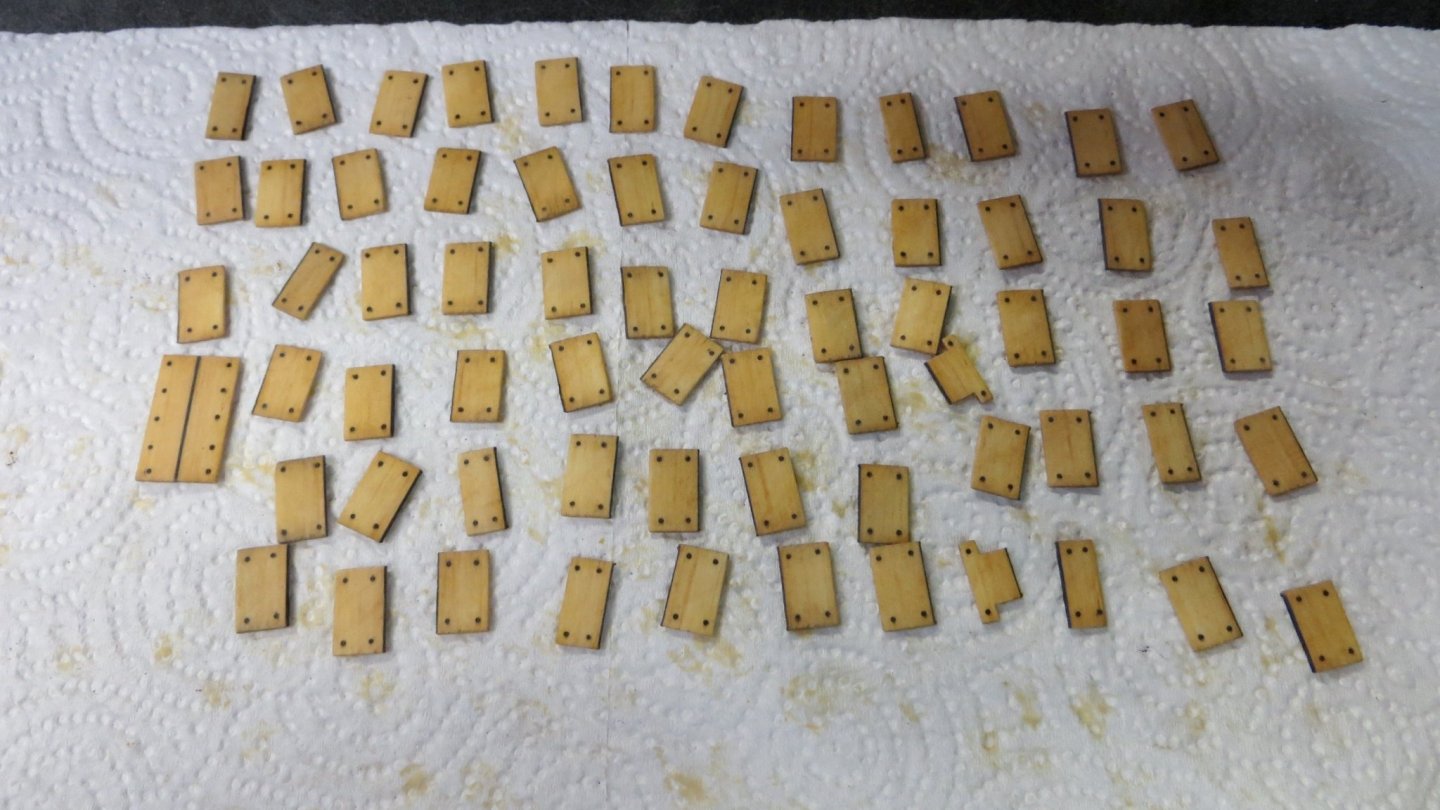
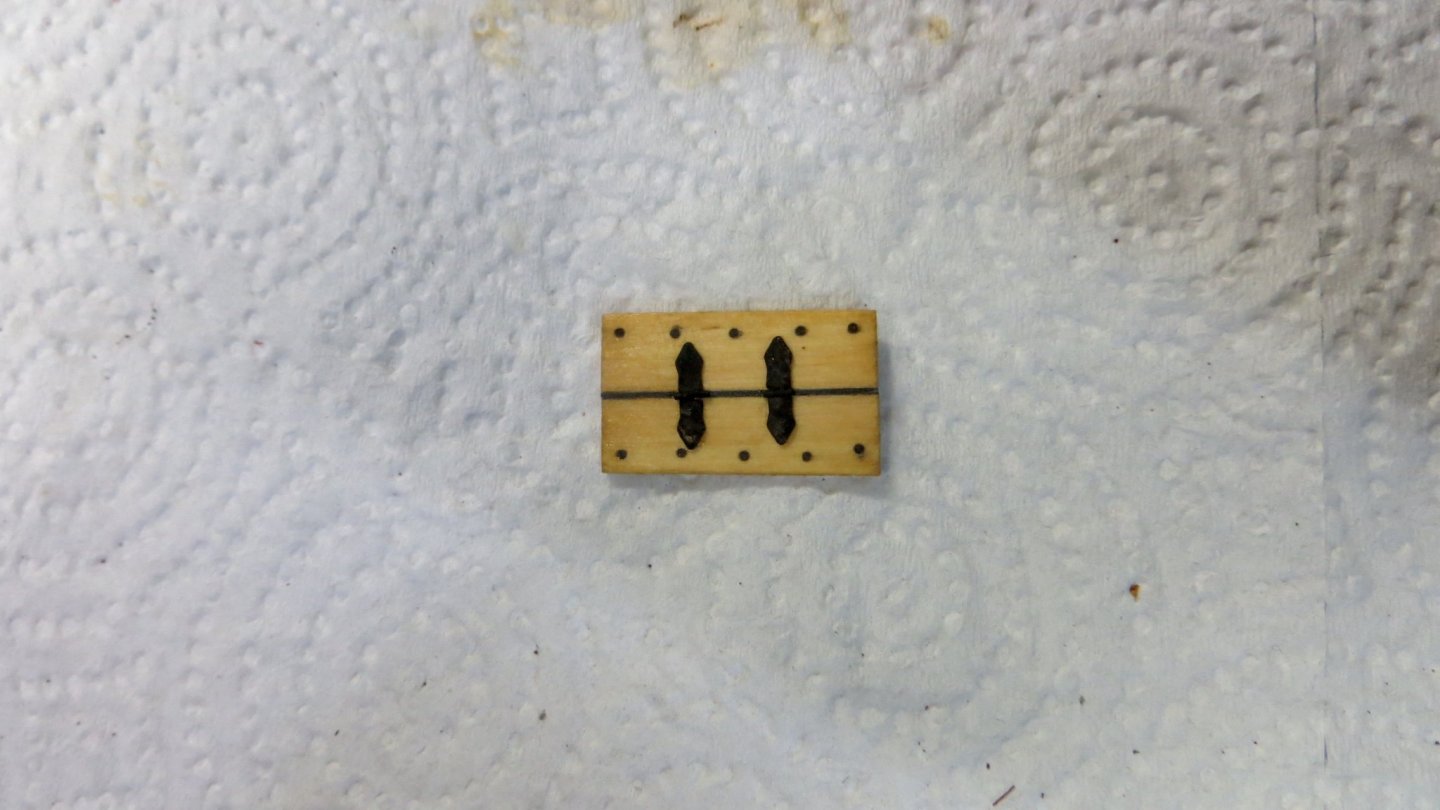
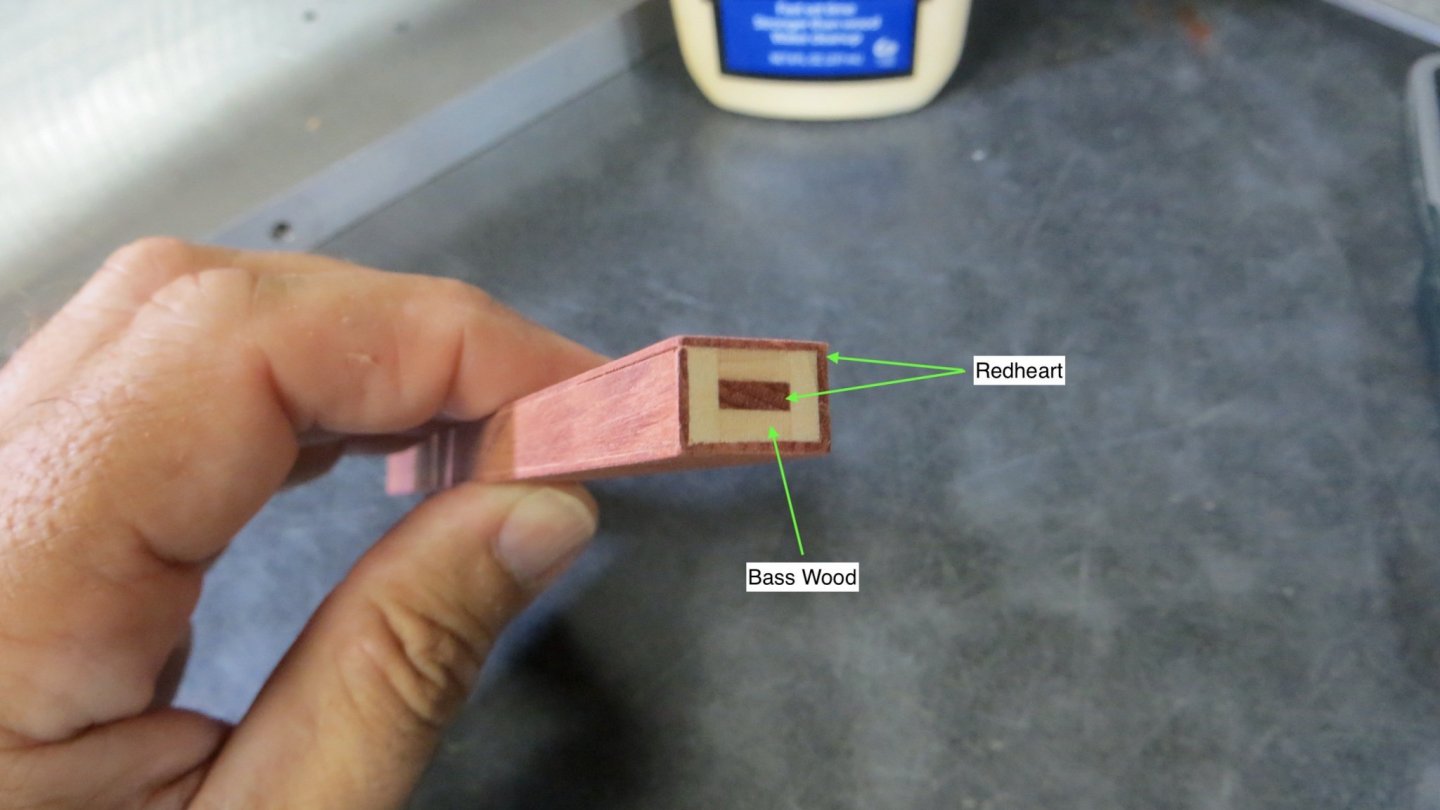
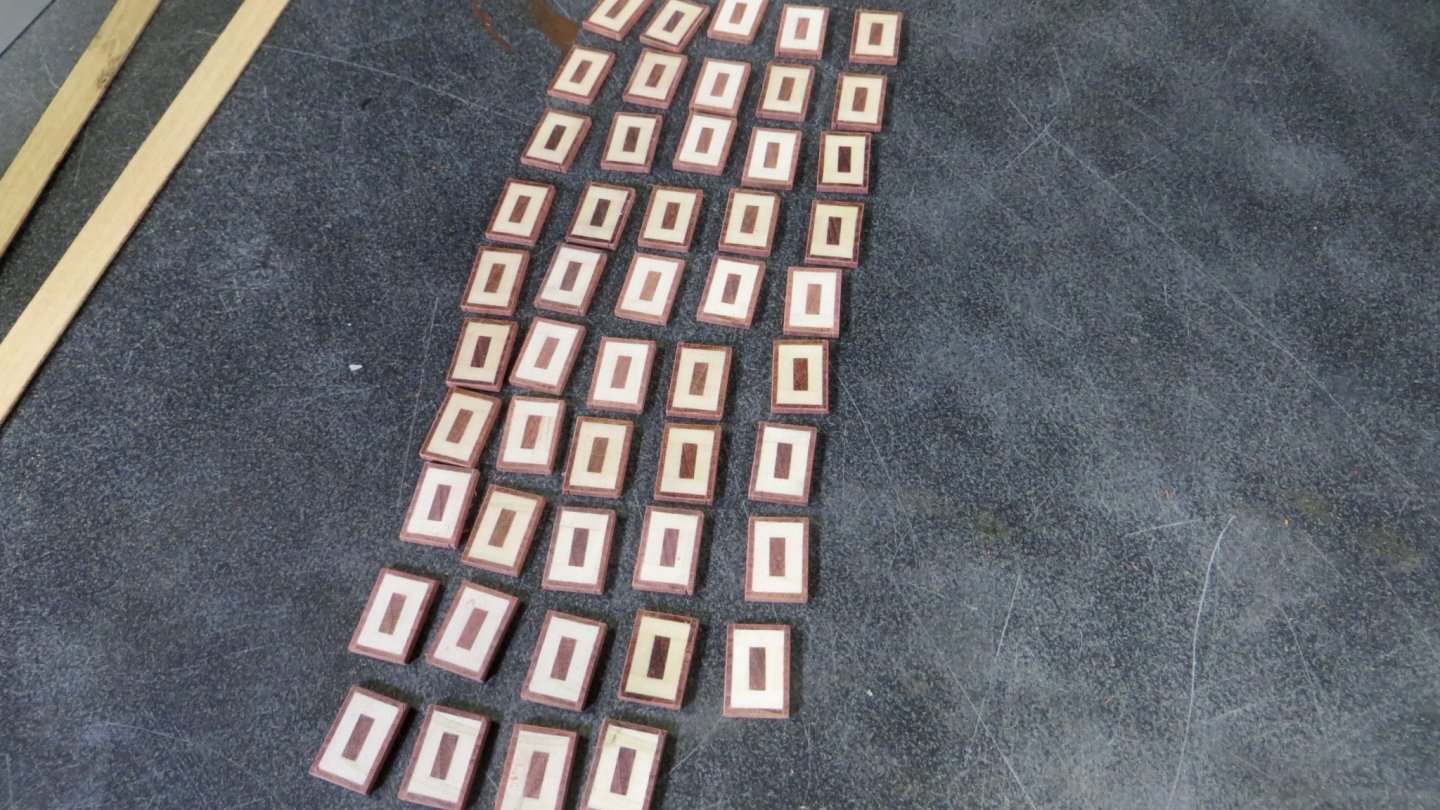
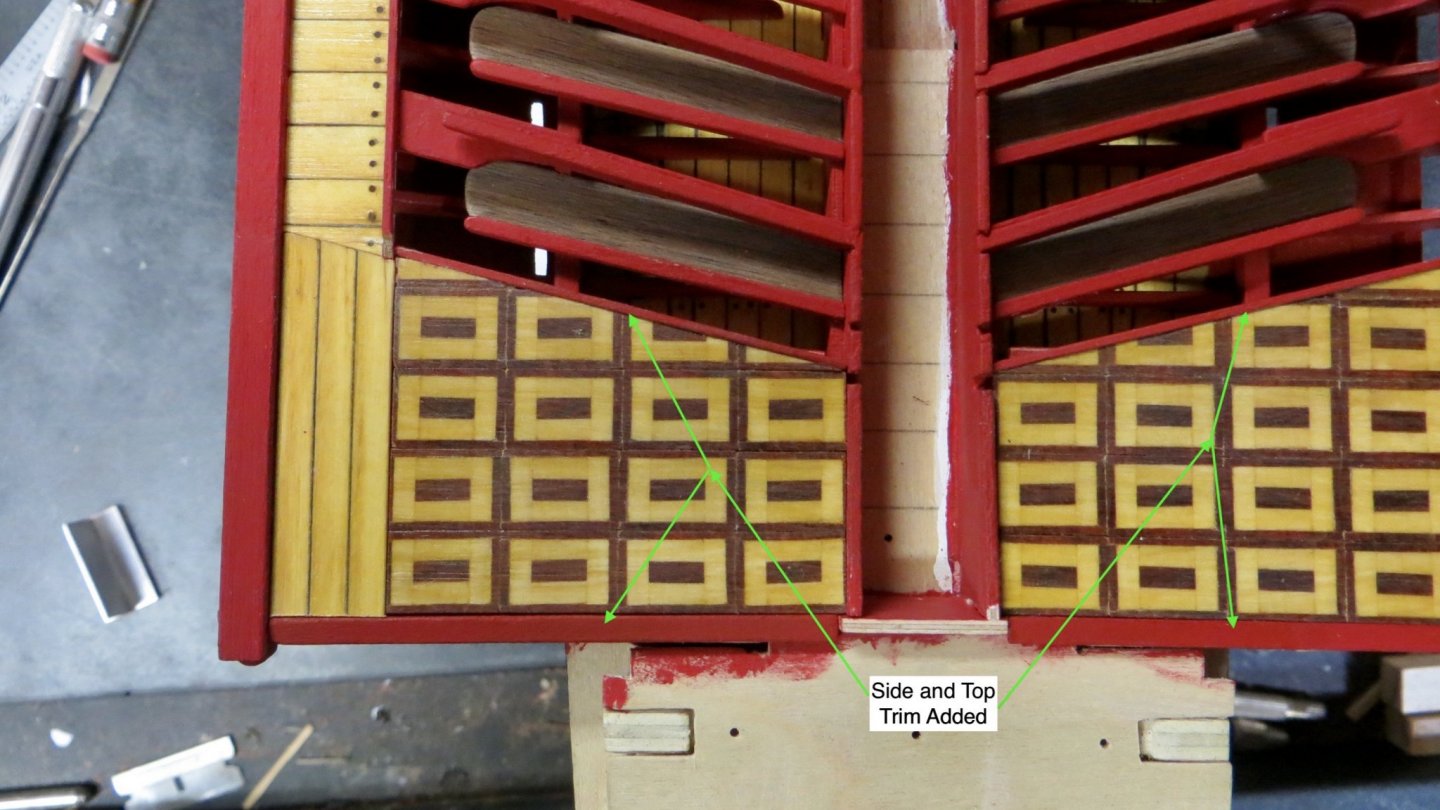
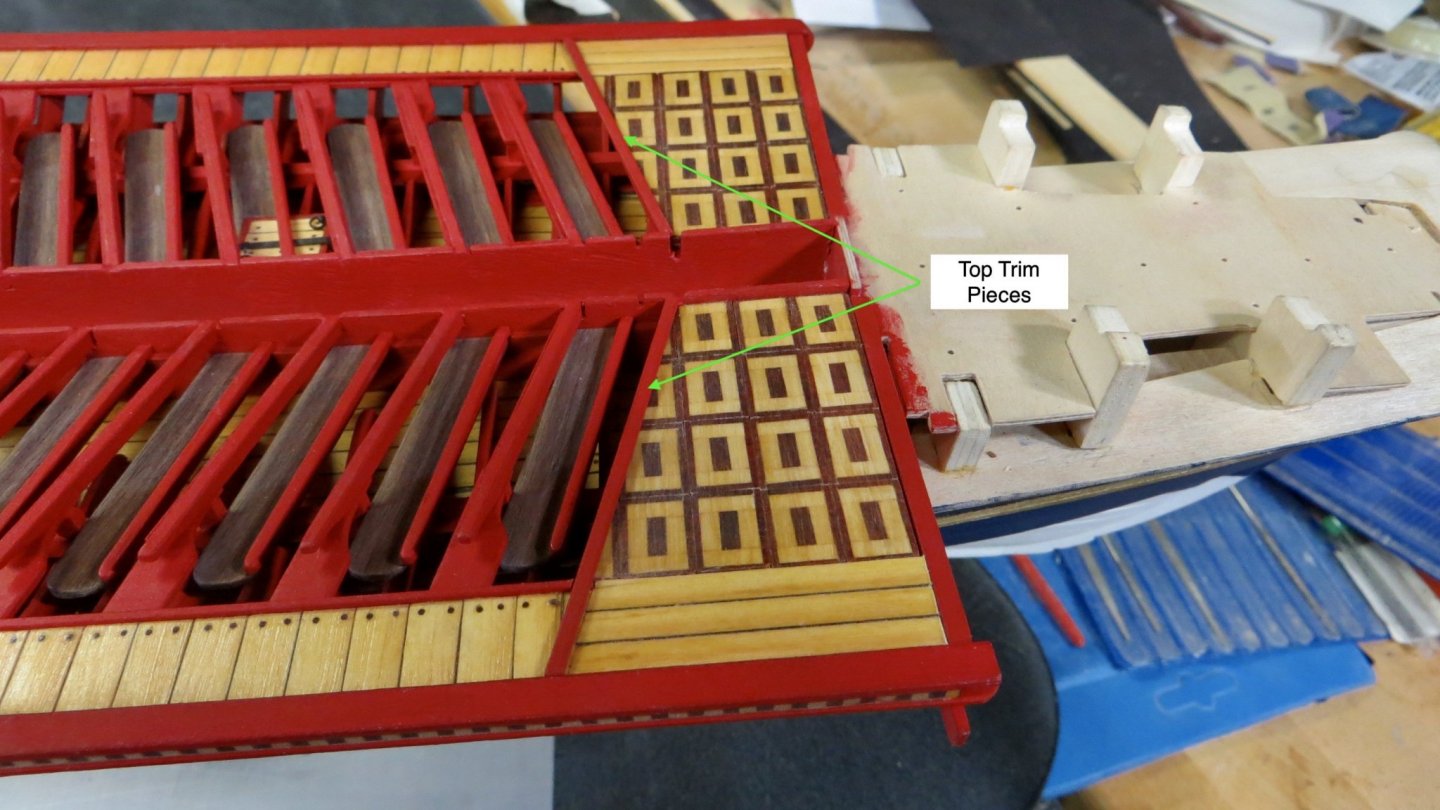
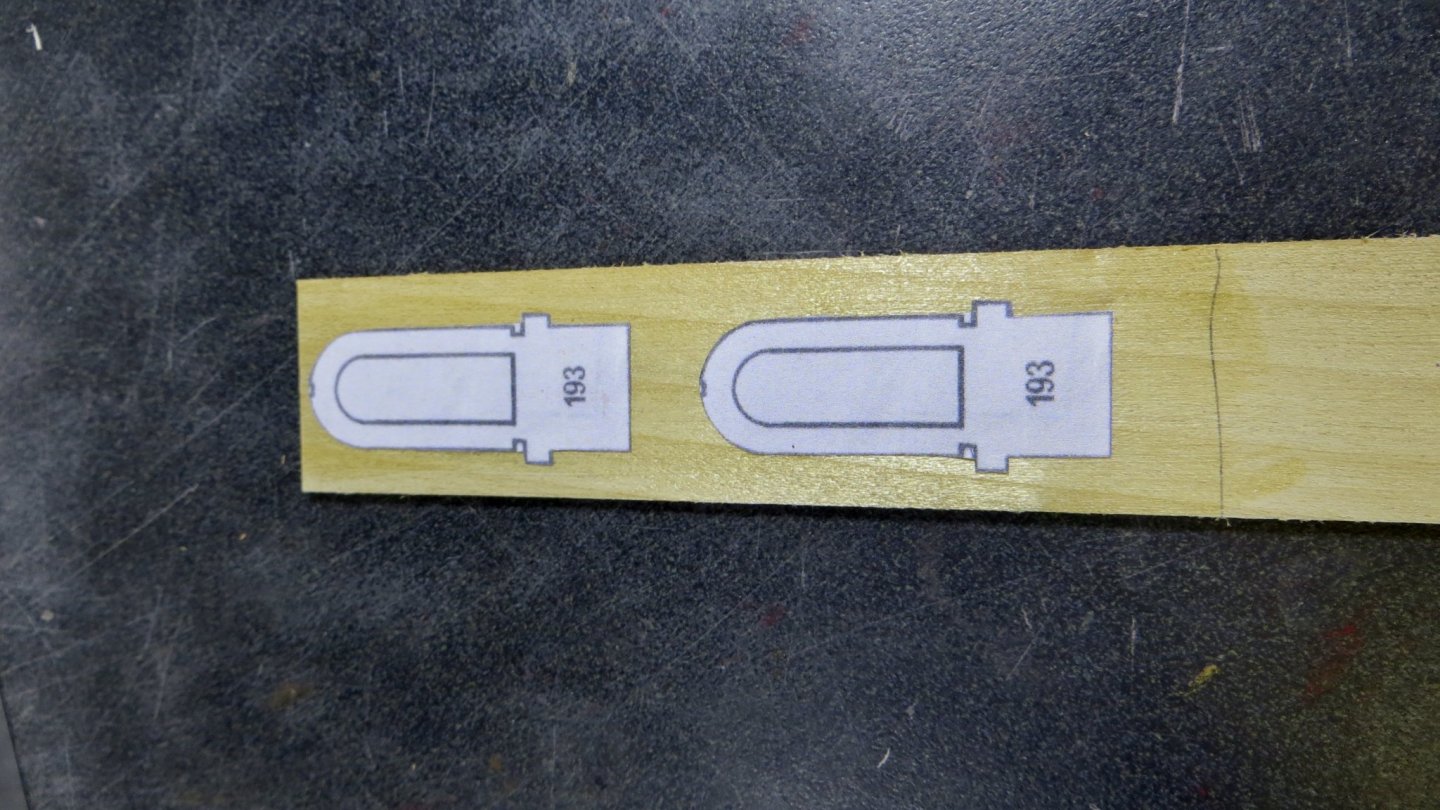
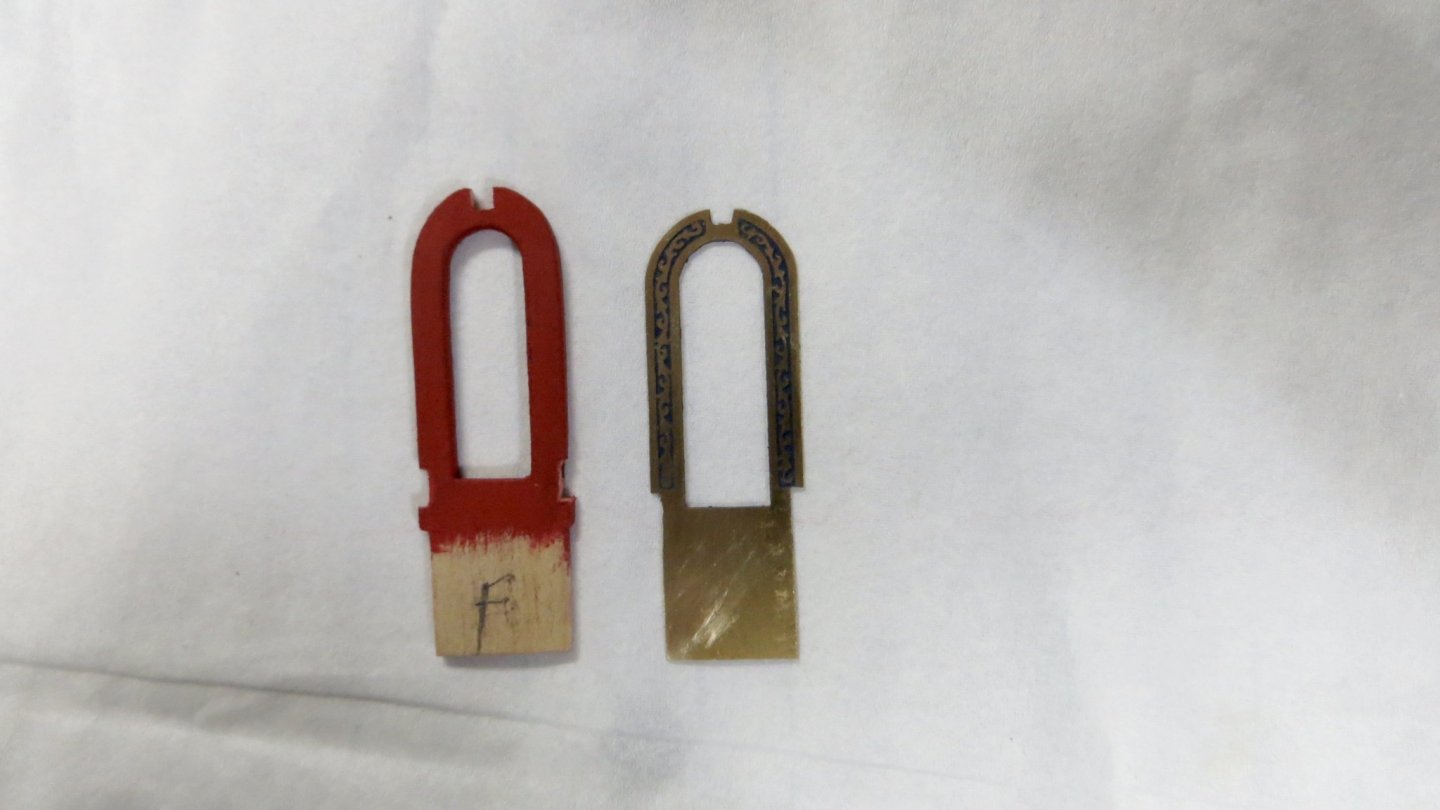
Working my way towards the stern of the model. There is a decorative platform near the stern. To simulate the pattern, I cut a piece of Redheart wood (the same red wood used earlier in the build). Surrounded it with basswood and then the redheart again. The pattern was cut into slivers about 1 mm thick. The pieces were glued to a backing piece of wood also about 1 mm thick. Then I ran the wood thru a thickness sander and took it from 2 mm to 1 mm thick. Attached and glued the strips together into the required shape The assembly is now glued to both the port and starboard sides, followed by adding finishing side trim and stern top trim. The basswood and red heart was then sanded, stained with light oak stain and sealed A top trim piece now added to finish the area. Next was to make and install a midway arch and arch brass decoration. The arch will support some roofing beams later in the build. The archway seems to be the entrance to the more elaborate area of the stern. Archway pattern. Finished archway and brass decoration piece (painted the ships blue). Only the top half will be visible Archway assembled and installed. Yes, I know I will damage this by hitting it while working on the stern lol!! The archway is fitted onto slots cut into 2 long strips of wood that I made (see green arrows) These L-shaped strips of wood run all the way along the ship on both sides of the center, on top of the bench supports beams. The inside of the L-shape strips will support the center decking planks that I will begin to work on. Thanks for stopping by, Frank


- 510 replies
-
- 8
-
-
- reale de france
- corel
- (and 1 more)
-
Hi Michael, Nice job on the first planking layer. A long tough process i'm sure!! Frank
-
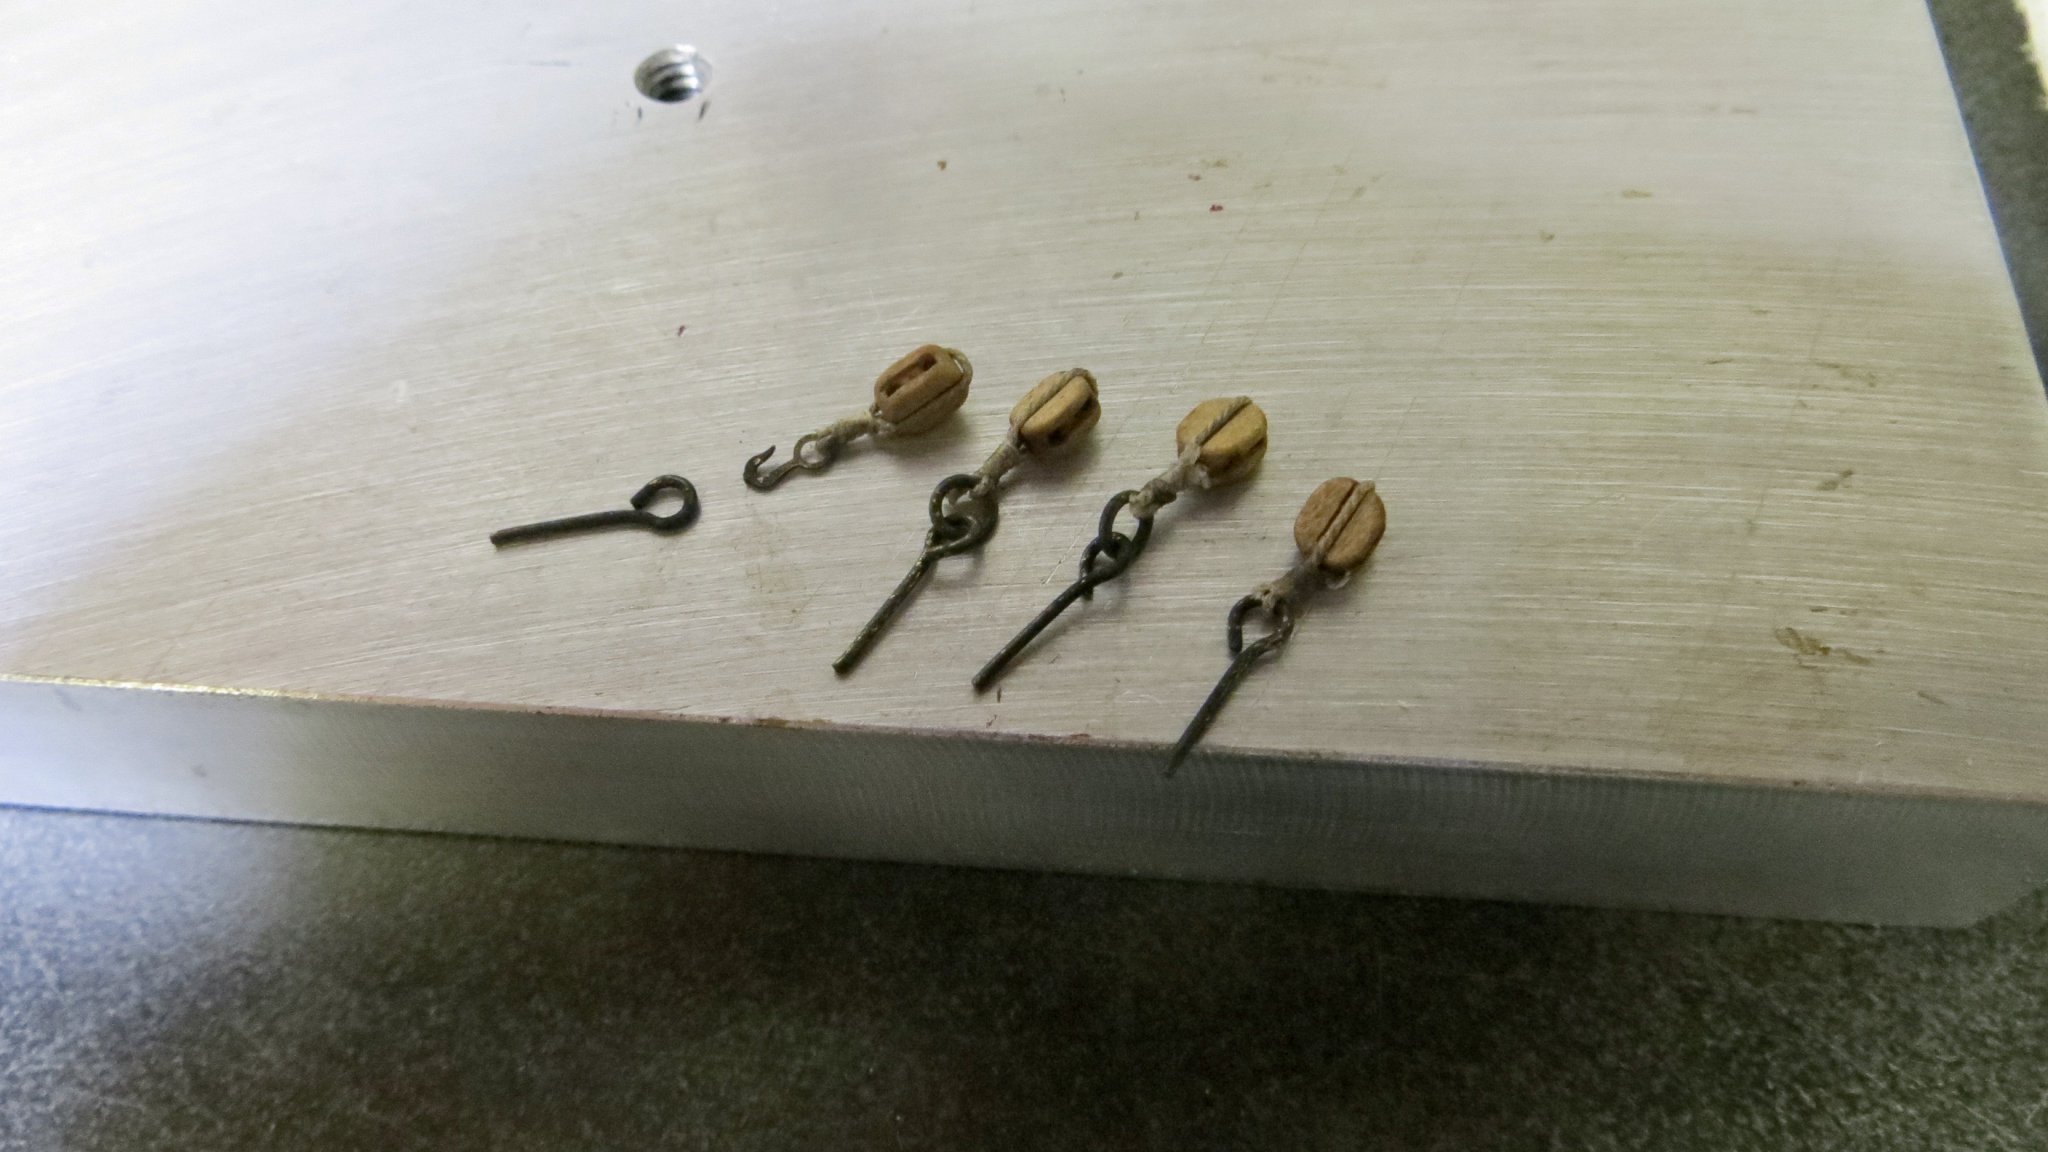
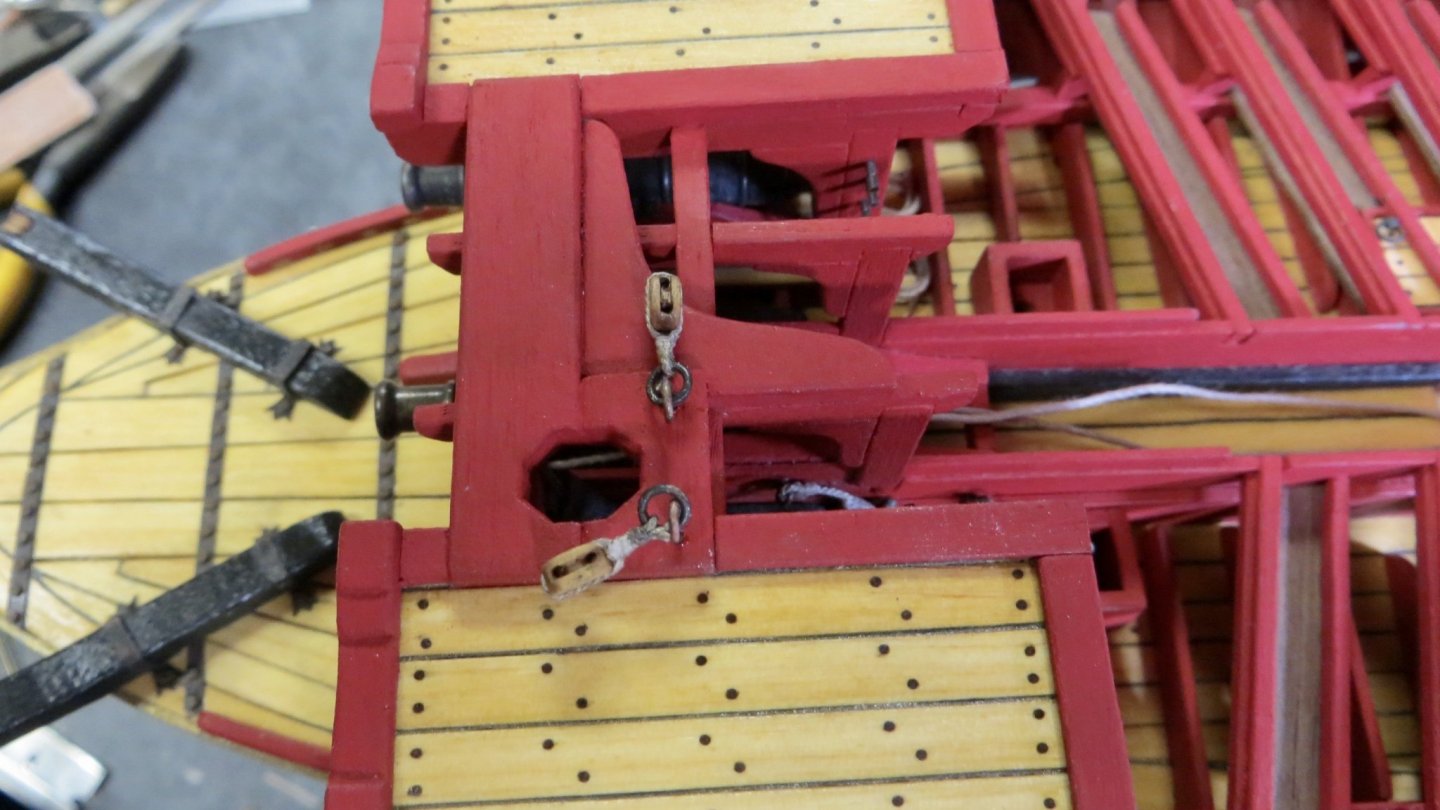
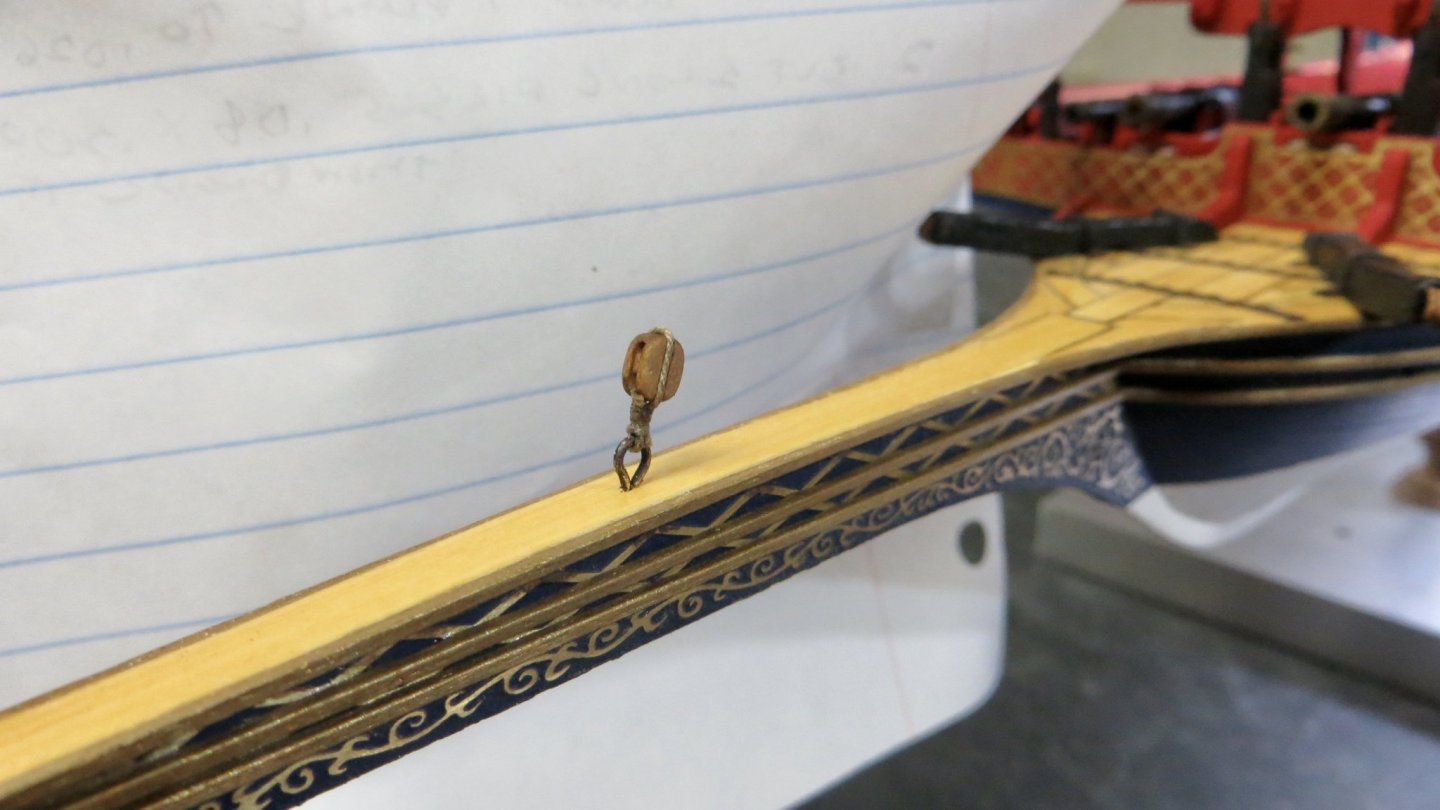
Added some final pieces before I move my attention to the stern of the model. Made up some block assemblies. Blocks are from Syren Company and they are so much nicer than the blocks that came with the kit. I stained the blocks with a chestnut stain. The first block (to the right) is attached to an eyelet. The middle 2 blocks have a ring between the blocks and eyelet. The block to the left, is attached with a removable hook. Blocks fastened to the ship Added some cleats And finally some ornamentation on each side. The pieces were painted with the antique gold. The railing system on the upper platform will be added later. Shifting my focus now to the stern of the ship! Thanks, Frank


- 510 replies
-
- 5
-
-
- reale de france
- corel
- (and 1 more)
-
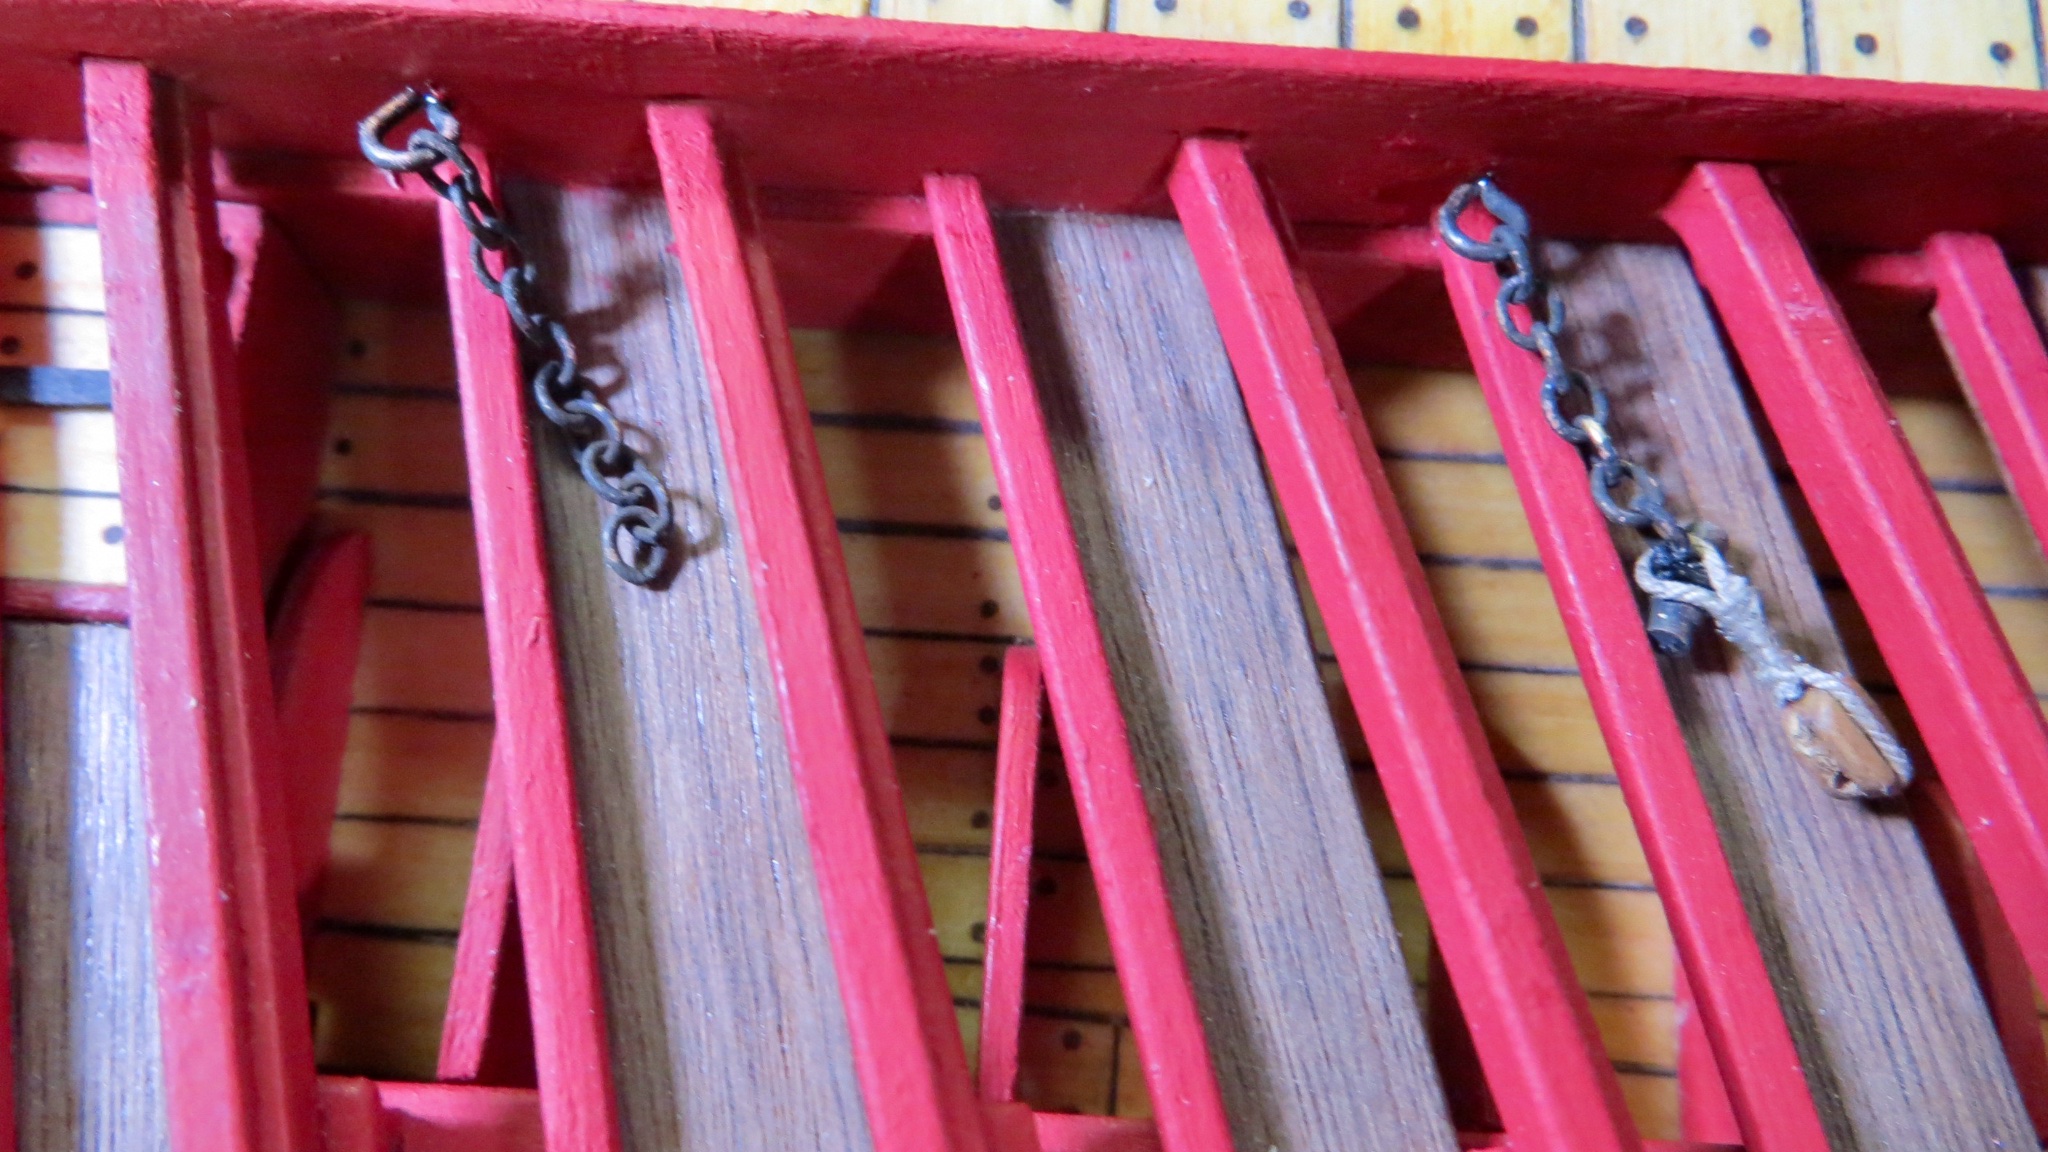
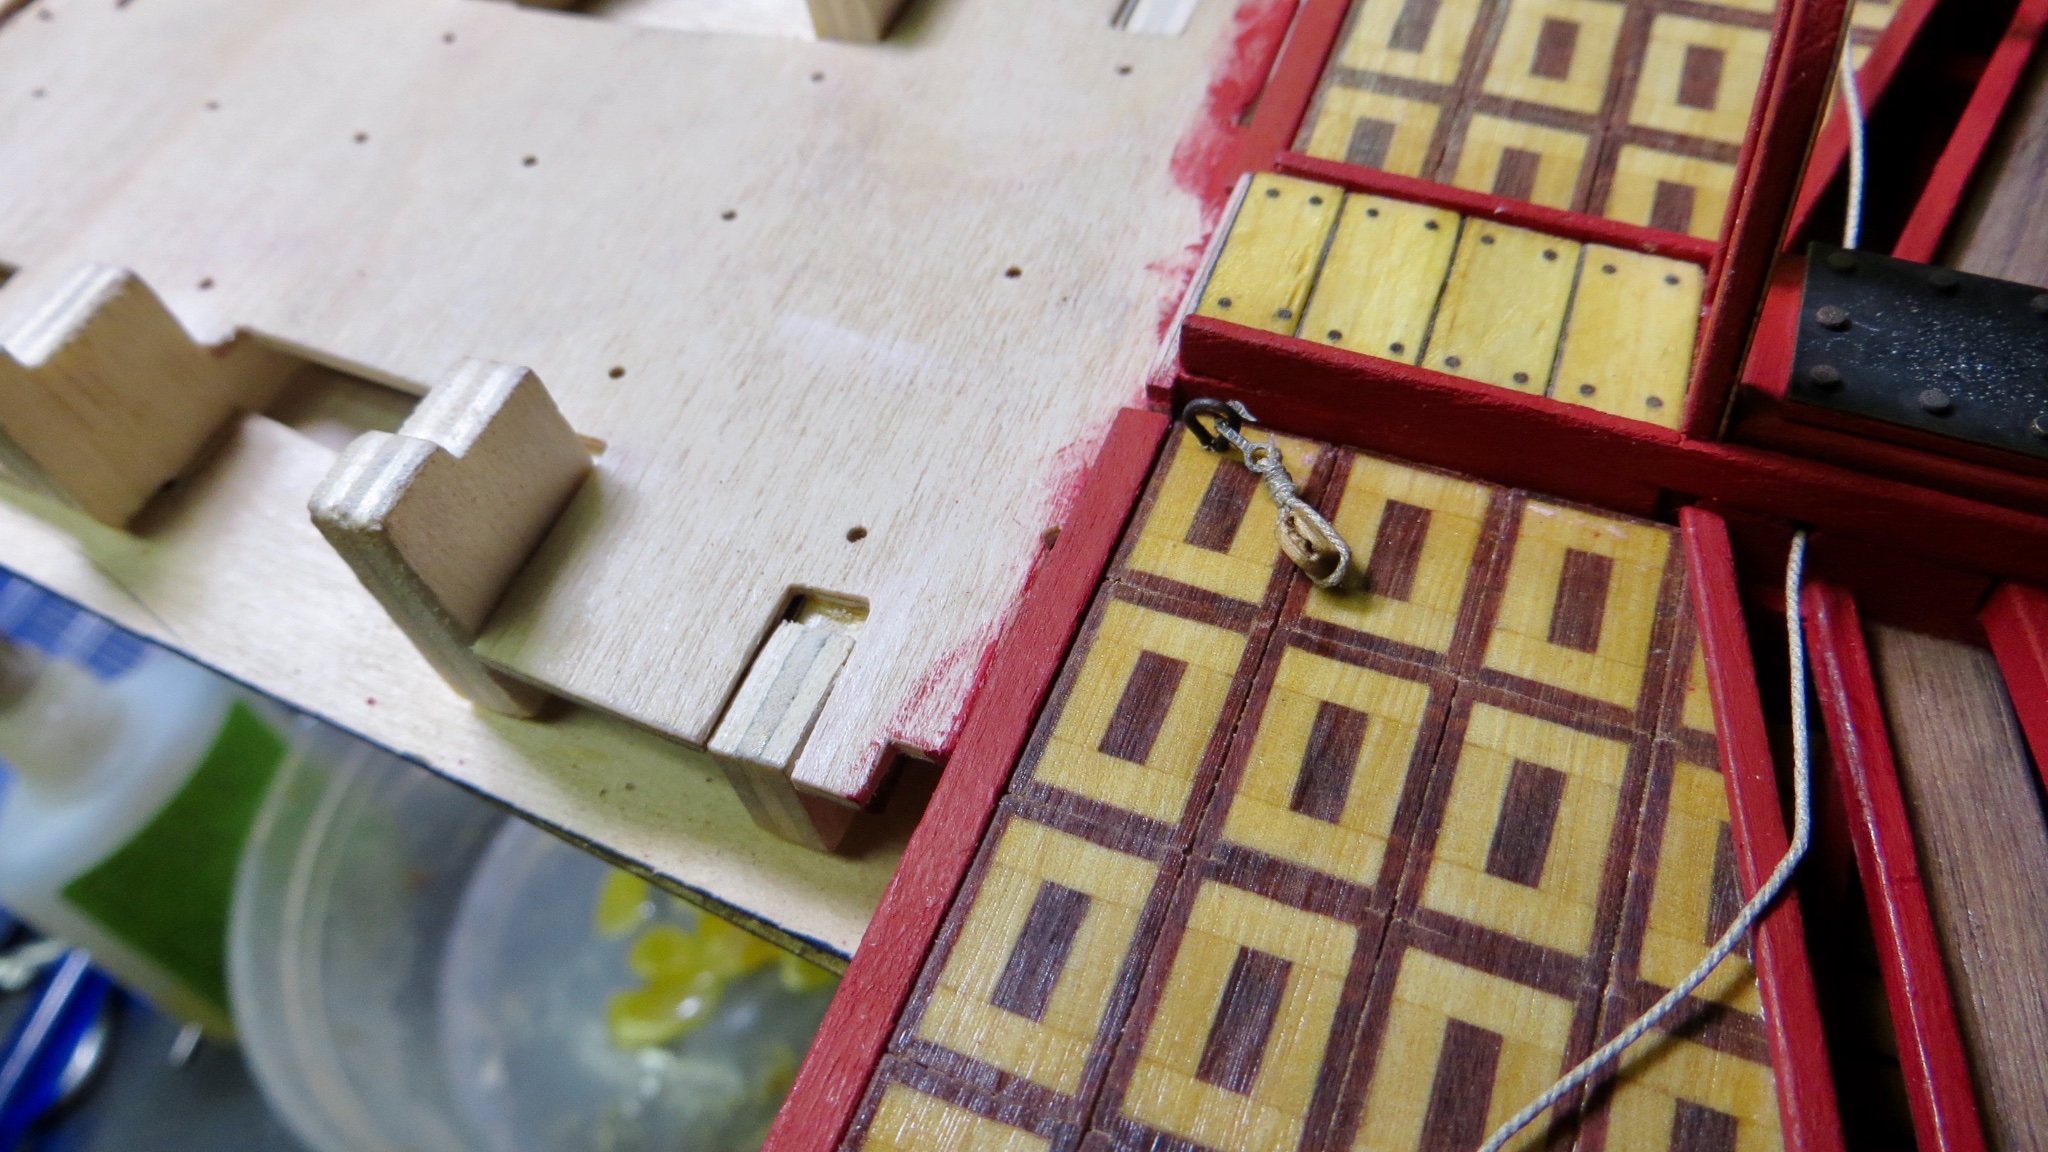
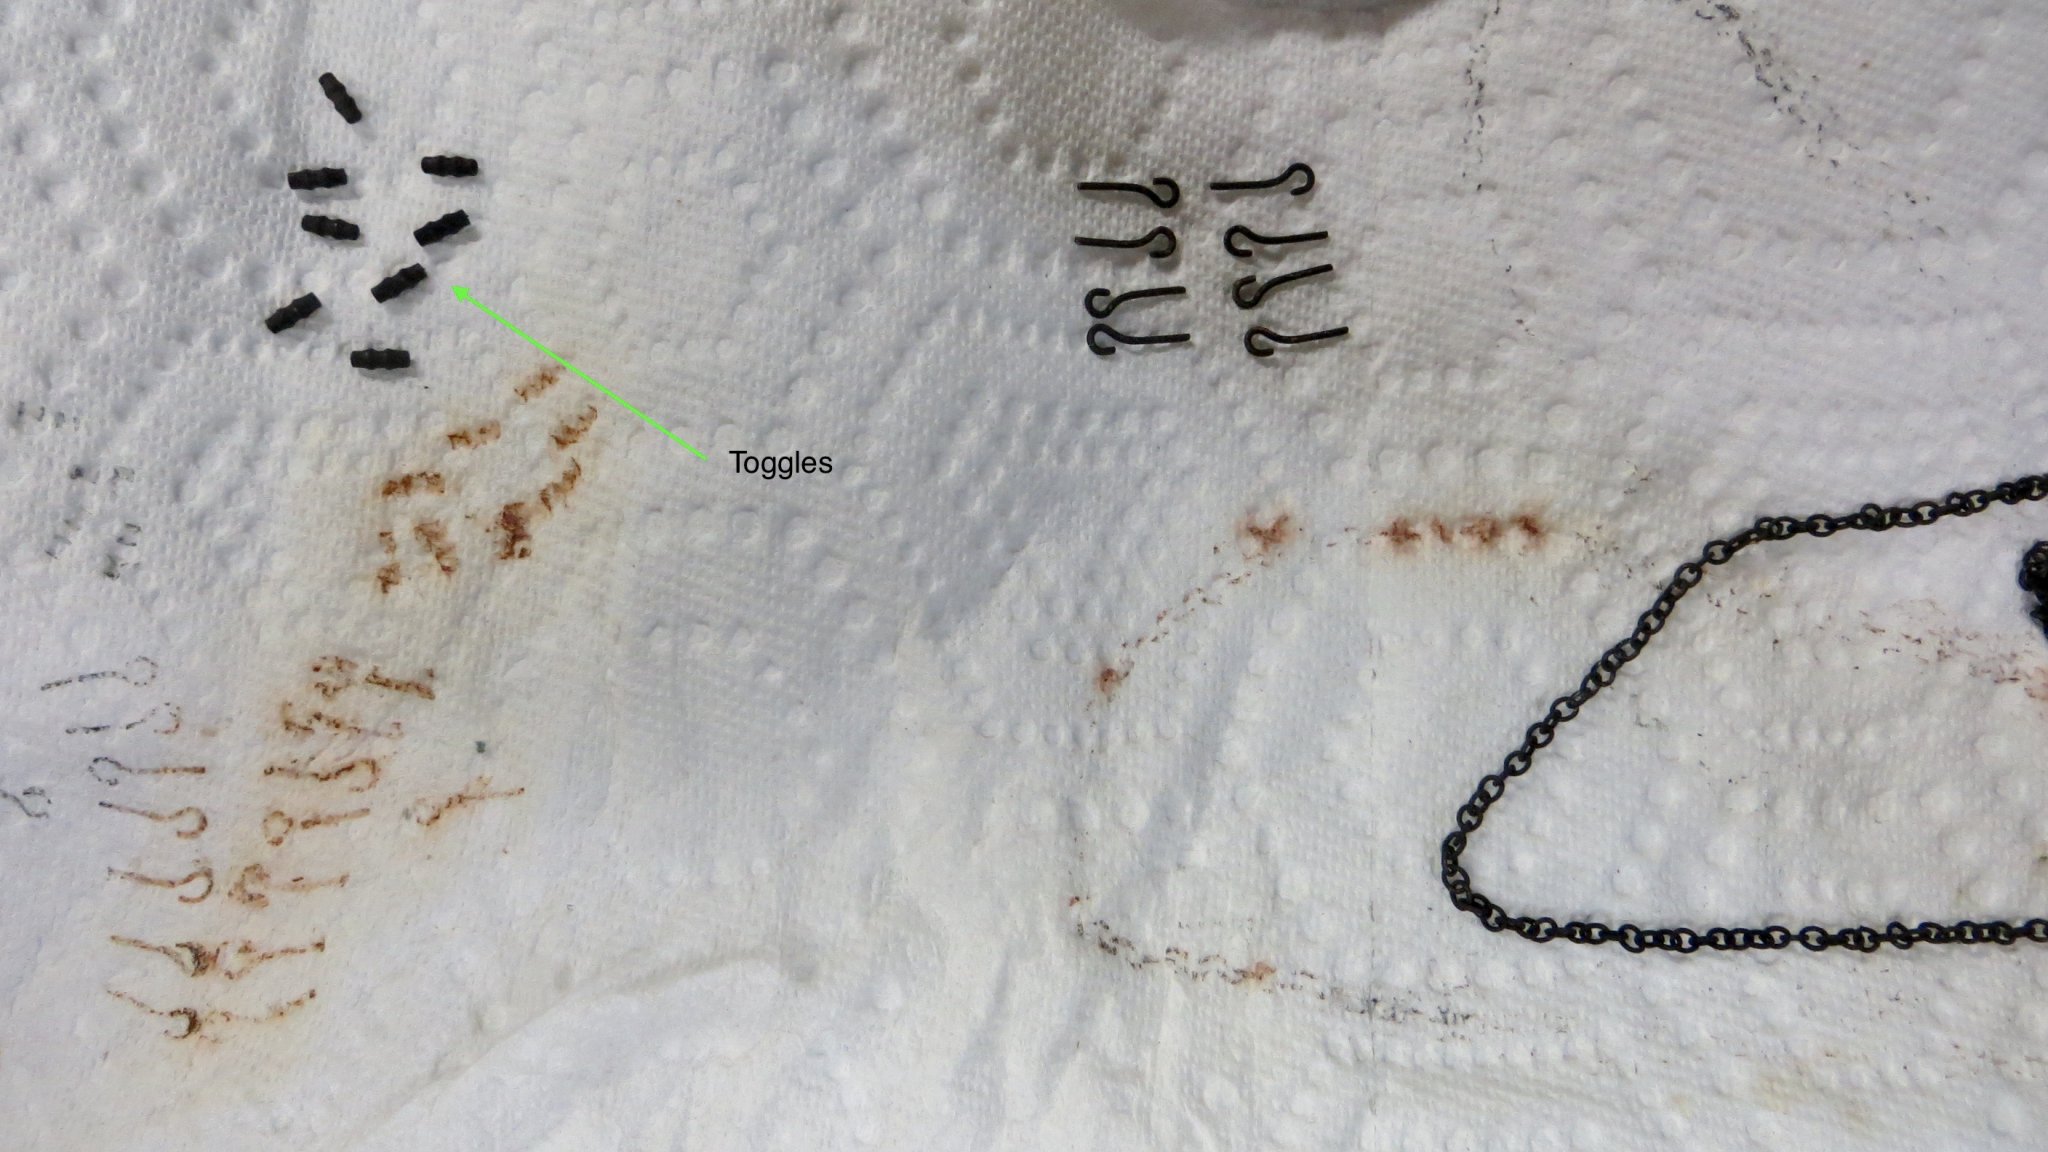
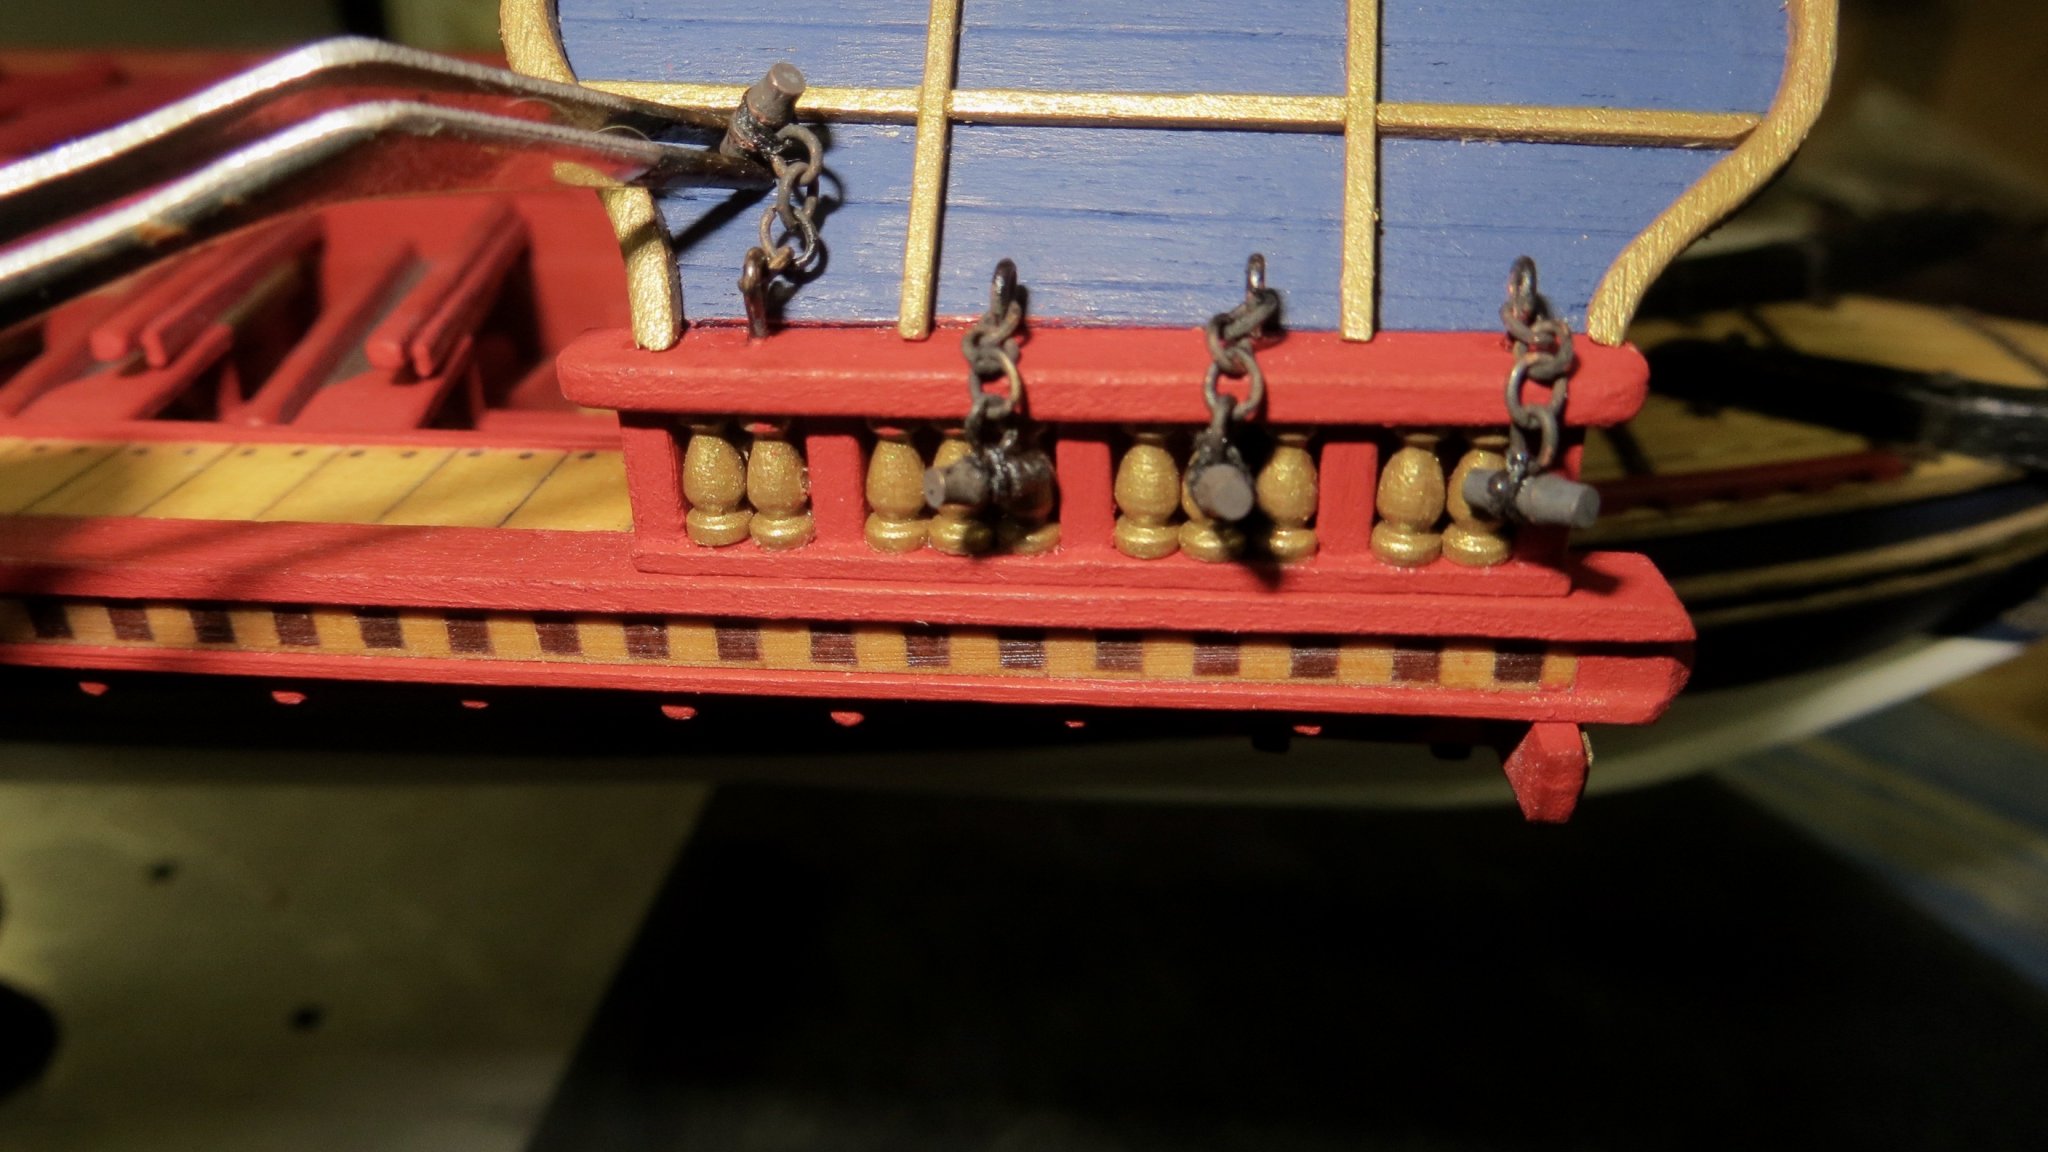
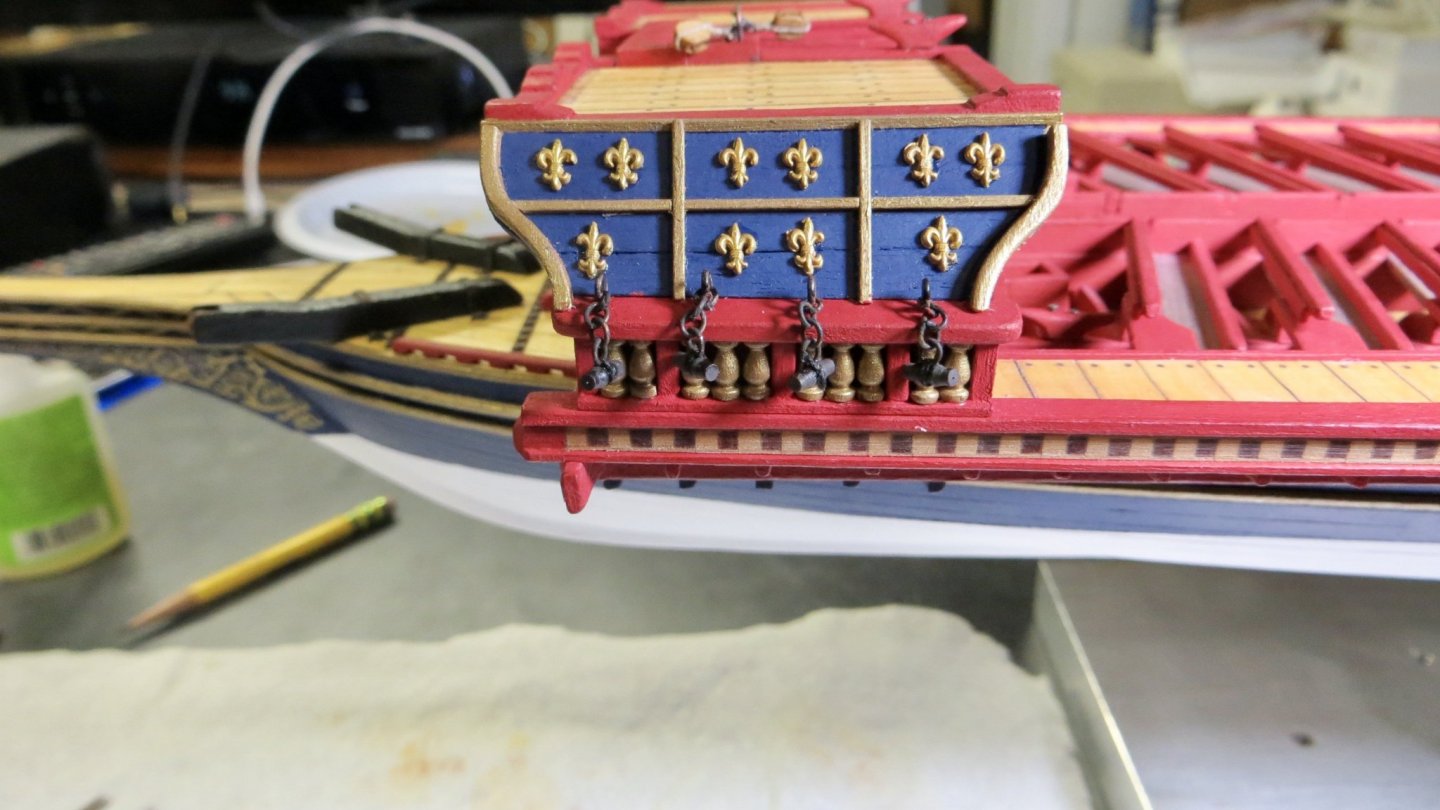
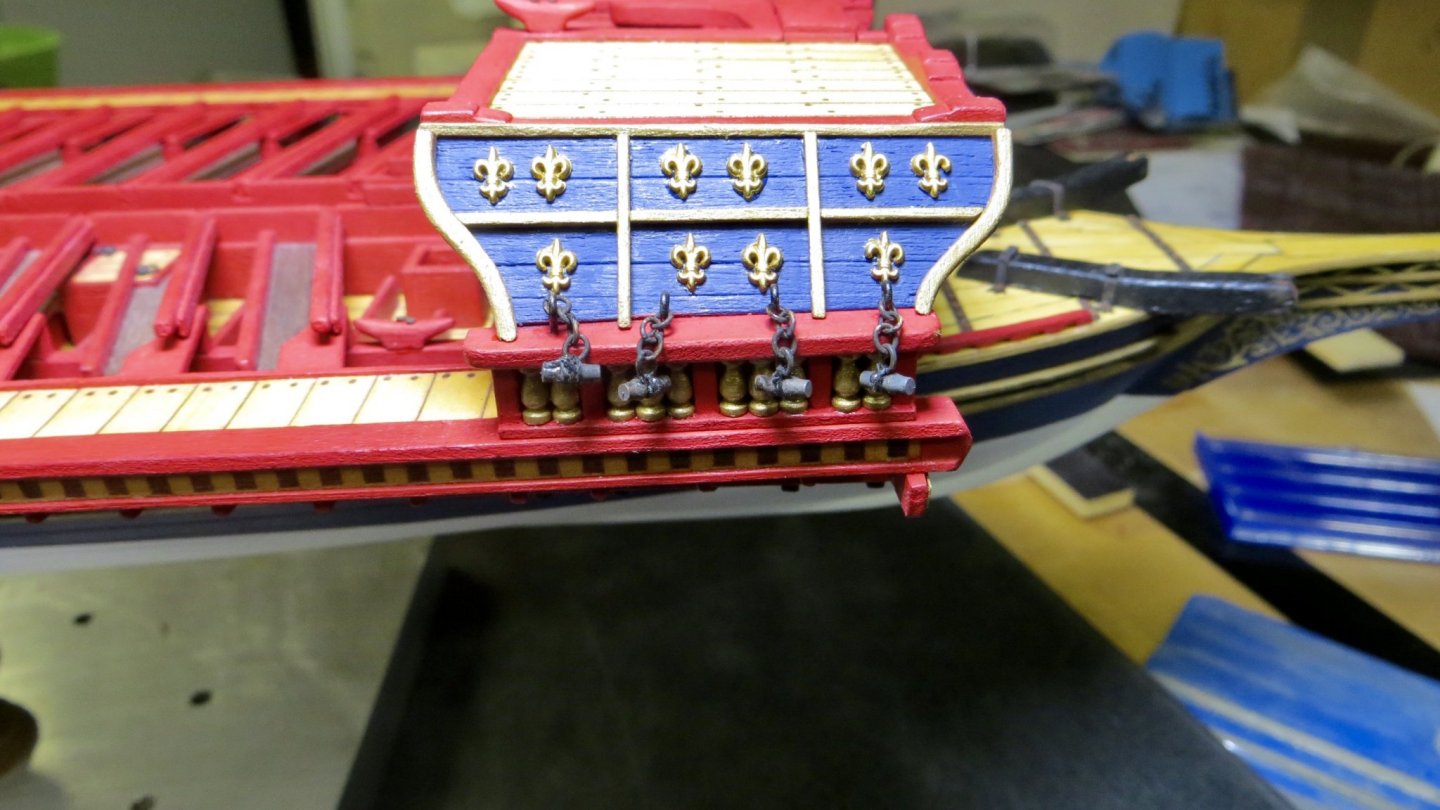
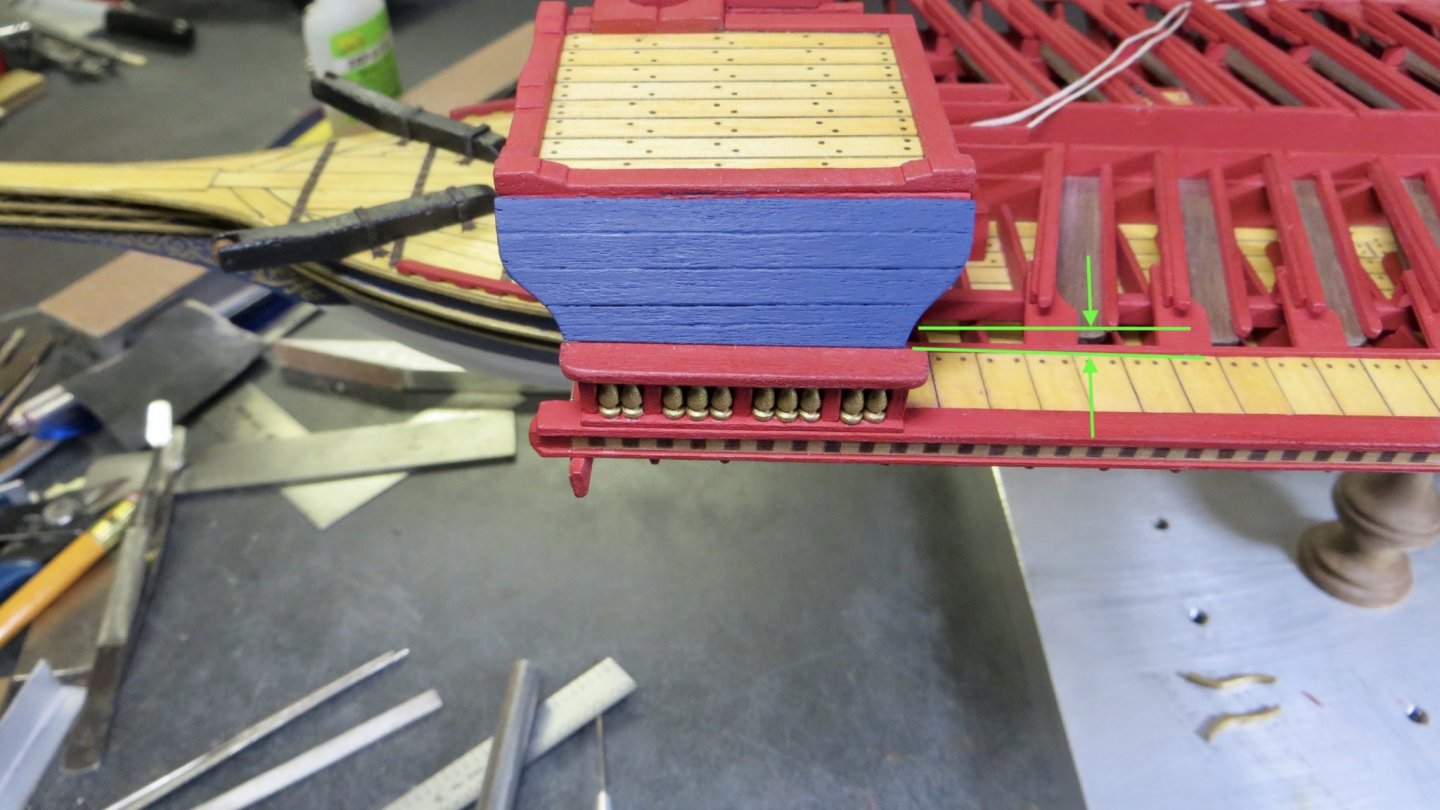
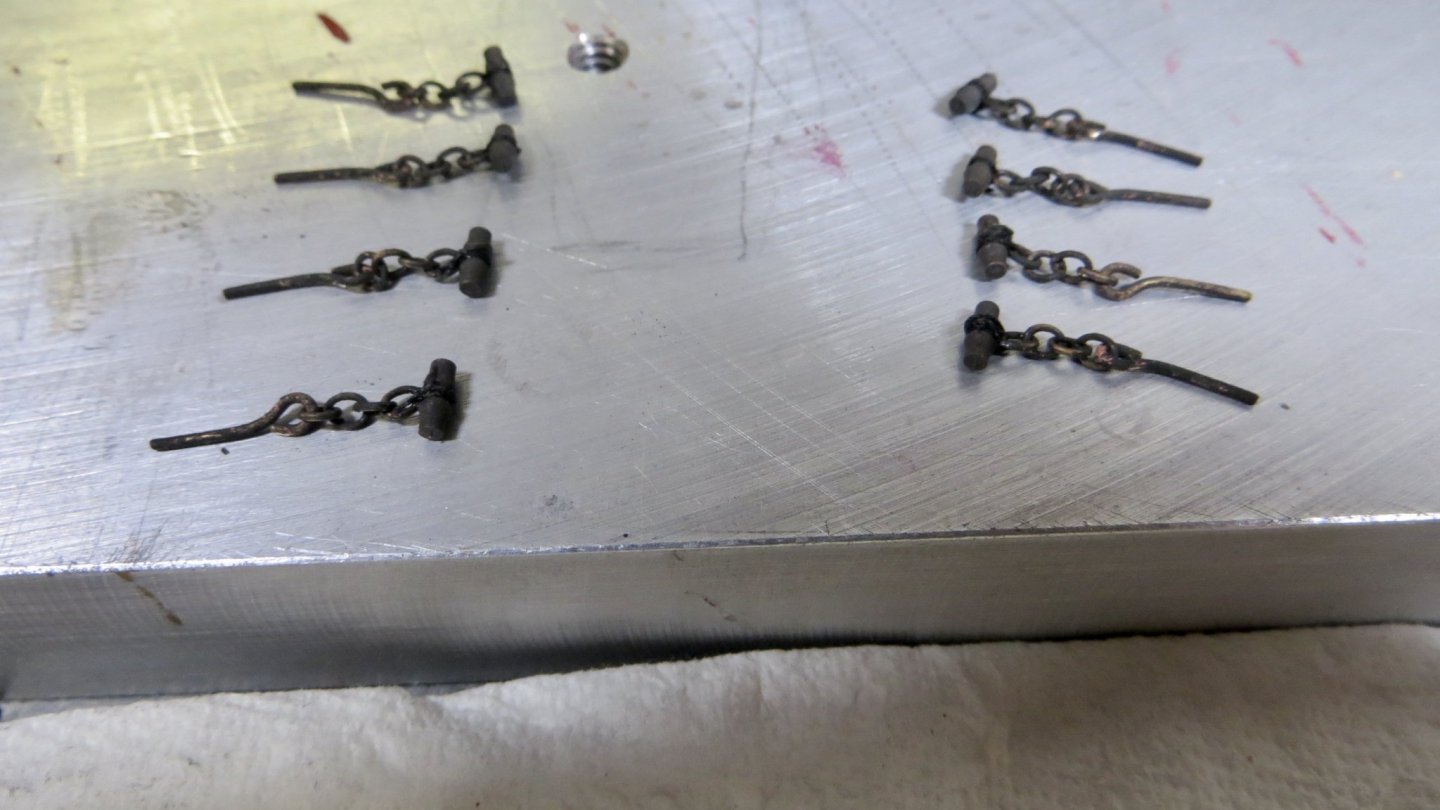
Hello, Finishing up the sides of the upper deck platform. Made up the planks for each side. Painted blue and installed. The planks are parallel to the upper deck, but tapered at the bottom to follow the curve of the deck. Shaped and installed the trim pieces, which were painted antique gold Blackened the eyelets, chain and toggles for the foremast shrouds. Chain attached to the eyelets and toggles and installed on each side of the platform. Will add the blocks when the foremast is installed.


- 510 replies
-
- 3
-
-
- reale de france
- corel
- (and 1 more)
-
Thanks Clark, That's what makes it fun. Everyone can make their model a little different. Trying to work off of 2 different plans might get me in trouble at some point, but for me, it makes it more fun and interesting! Frank
- 510 replies
-
- 2
-
-
- reale de france
- corel
- (and 1 more)
-
Hi Clark, Sorry for the confusion! I should have been more clear! Your water outlet slots and the tool you used came out so nice, that my mind jumped to the slots for the shroud chain plates. I should have waited until you reached that point for those slots, before I made my comments! Frank
- 112 replies
-
- 1
-
-
- corel
- reale de france
- (and 1 more)
-
Nice work on the slots. Make sure the chain for the shrouds fit thru the slots! I didn’t check mine and later found that the chain barely fit.. Frank
- 112 replies
-
- 1
-
-
- corel
- reale de france
- (and 1 more)
-
Michael, Nice modification! Just to confirm, the mast stays offset all the way to the tip? Also, for my education, lol, why were masts offset like this to begin with? Frank