HOLIDAY DONATION DRIVE - SUPPORT MSW - DO YOUR PART TO KEEP THIS GREAT FORUM GOING! (Only 13 donations so far - C'mon guys!)
×


fmodajr
-
Posts
868 -
Joined
-
Last visited
Content Type
Profiles
Forums
Gallery
Events
Everything posted by fmodajr
-
 Hi Michael, Nice job! Interesting to note that the eyelets and rigging to close the gun lids (on the inside) were off to the side. Was that specific to this ship? Or have I been wrong to be putting the eyelet in the center on my past builds? Love the look with the lights! Congrats, Frank
 -
Thanks for stopping by Michael!!!
-
Thank you for your kind comments! It is appreciated! I got a good chuckle from your photo! Thanks for stopping by, Frank
-
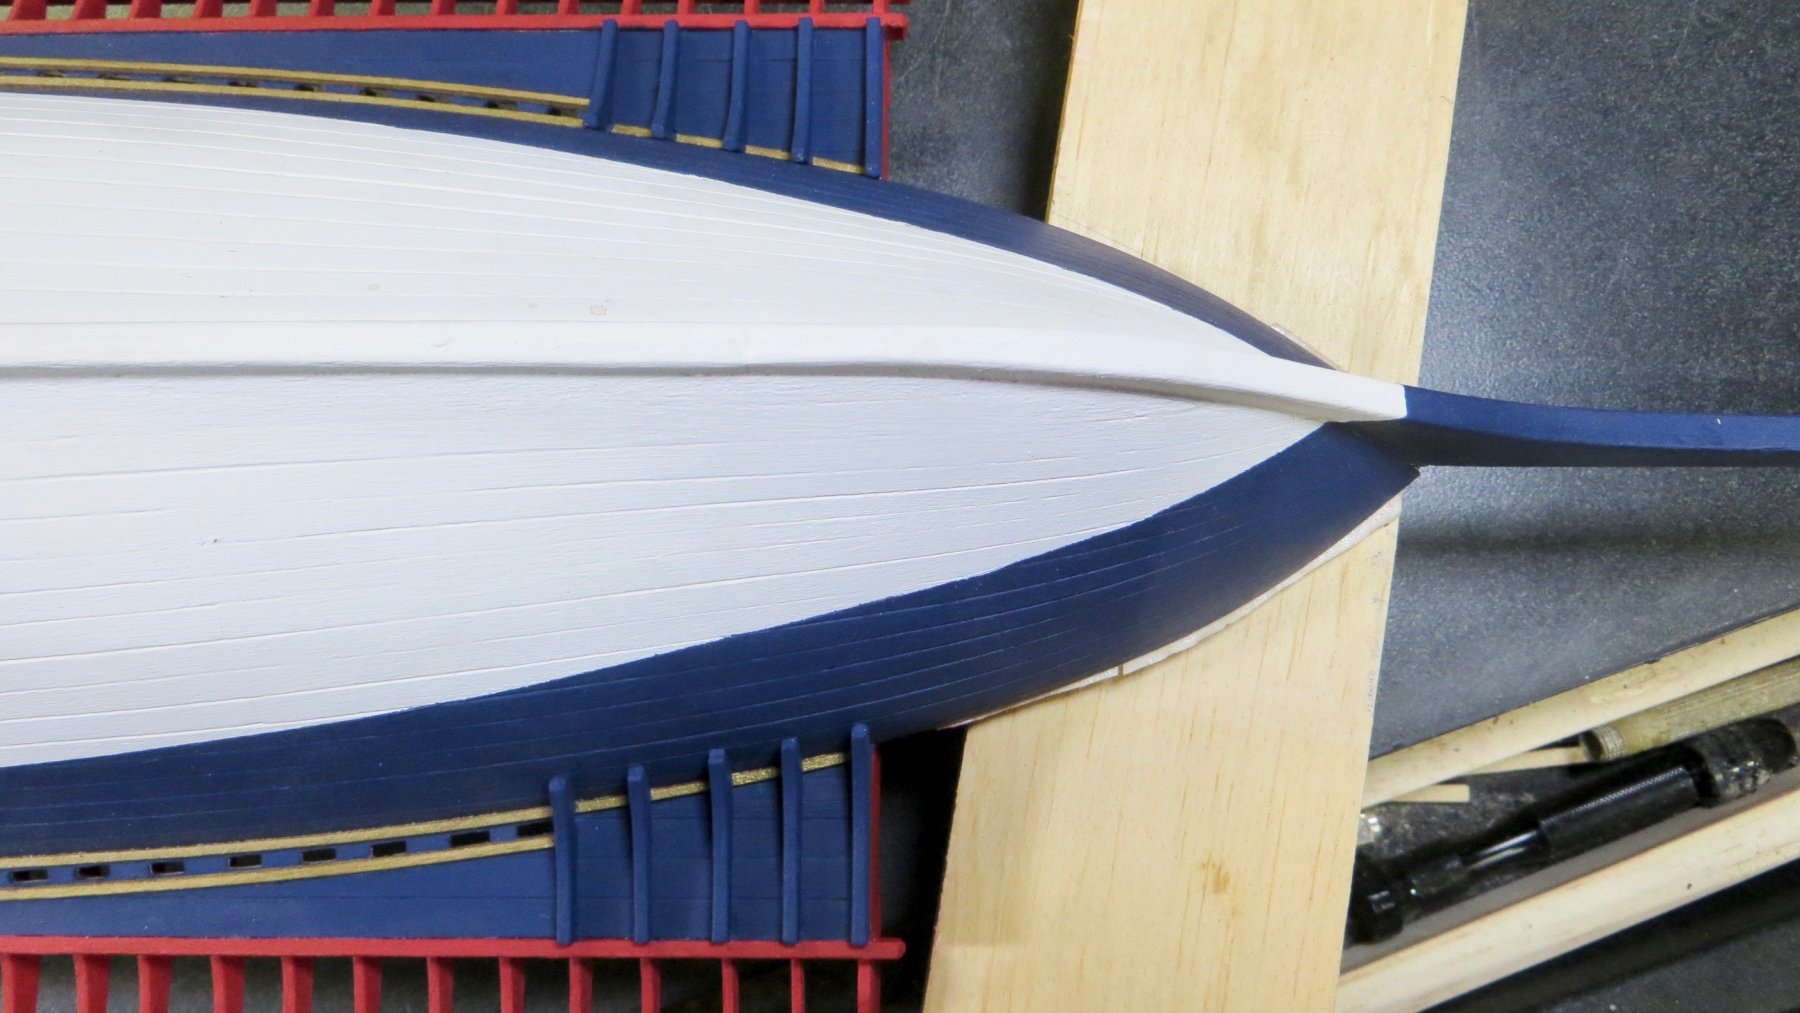
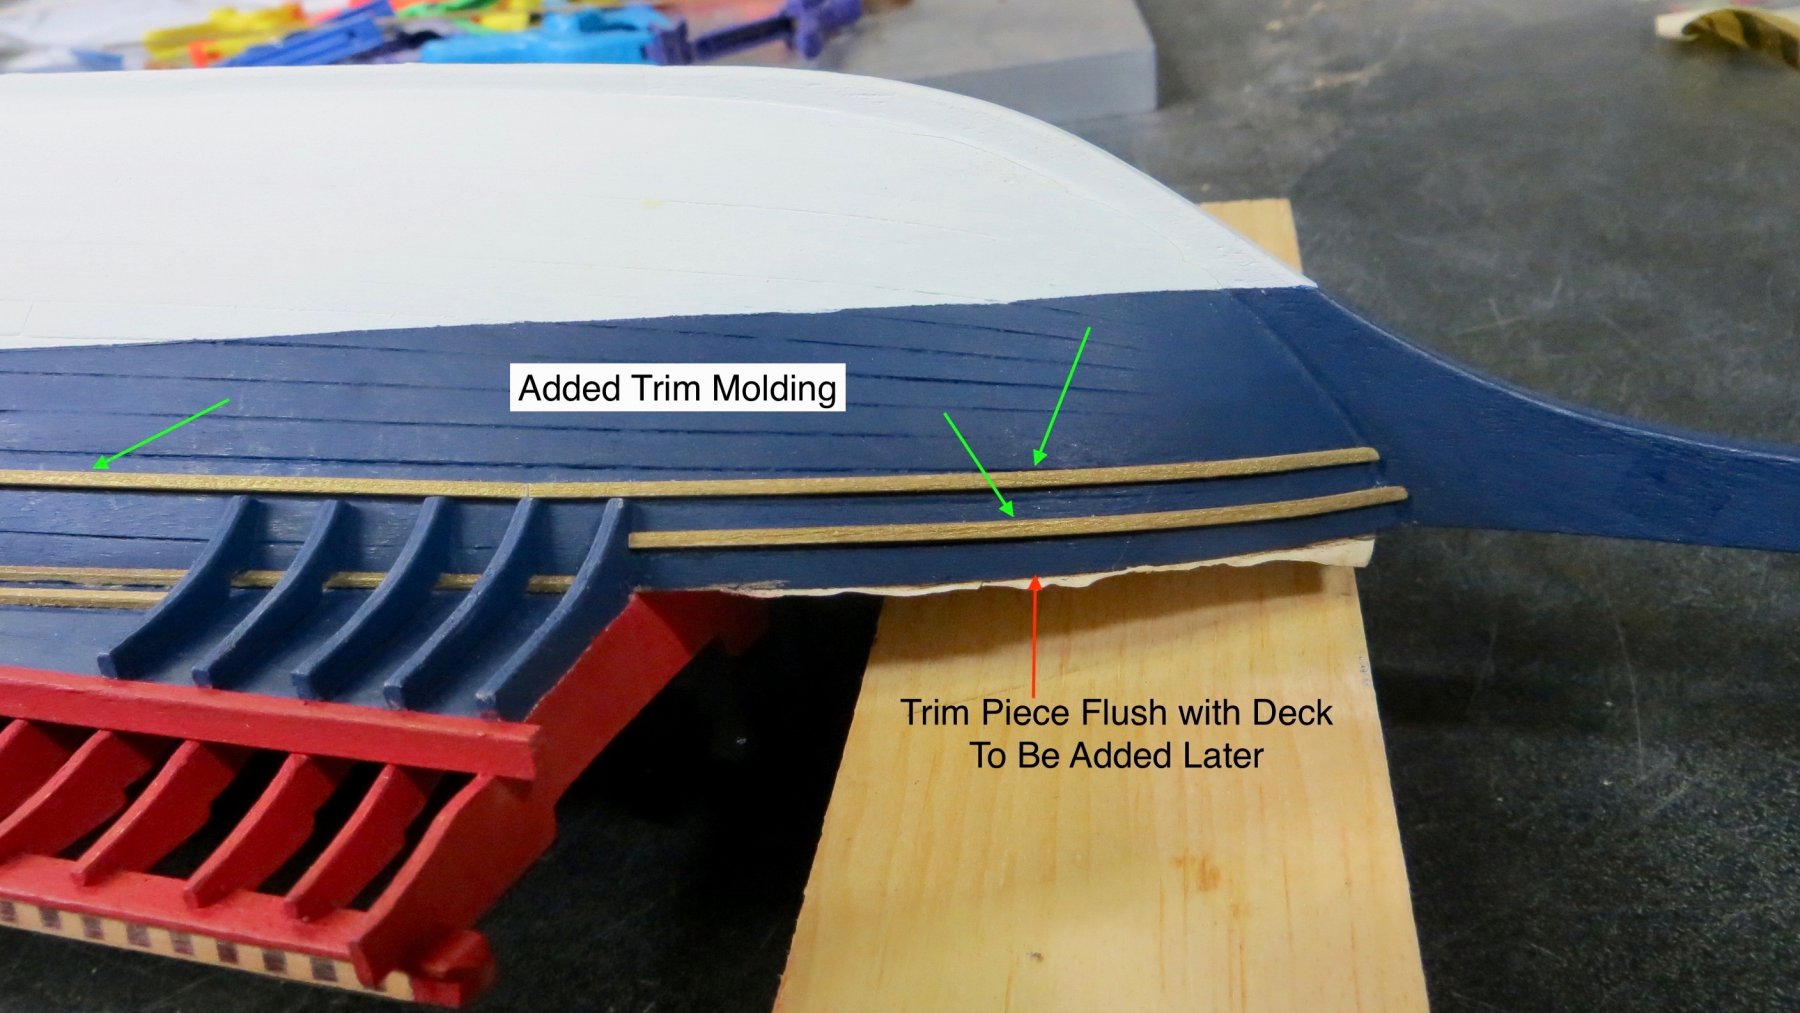
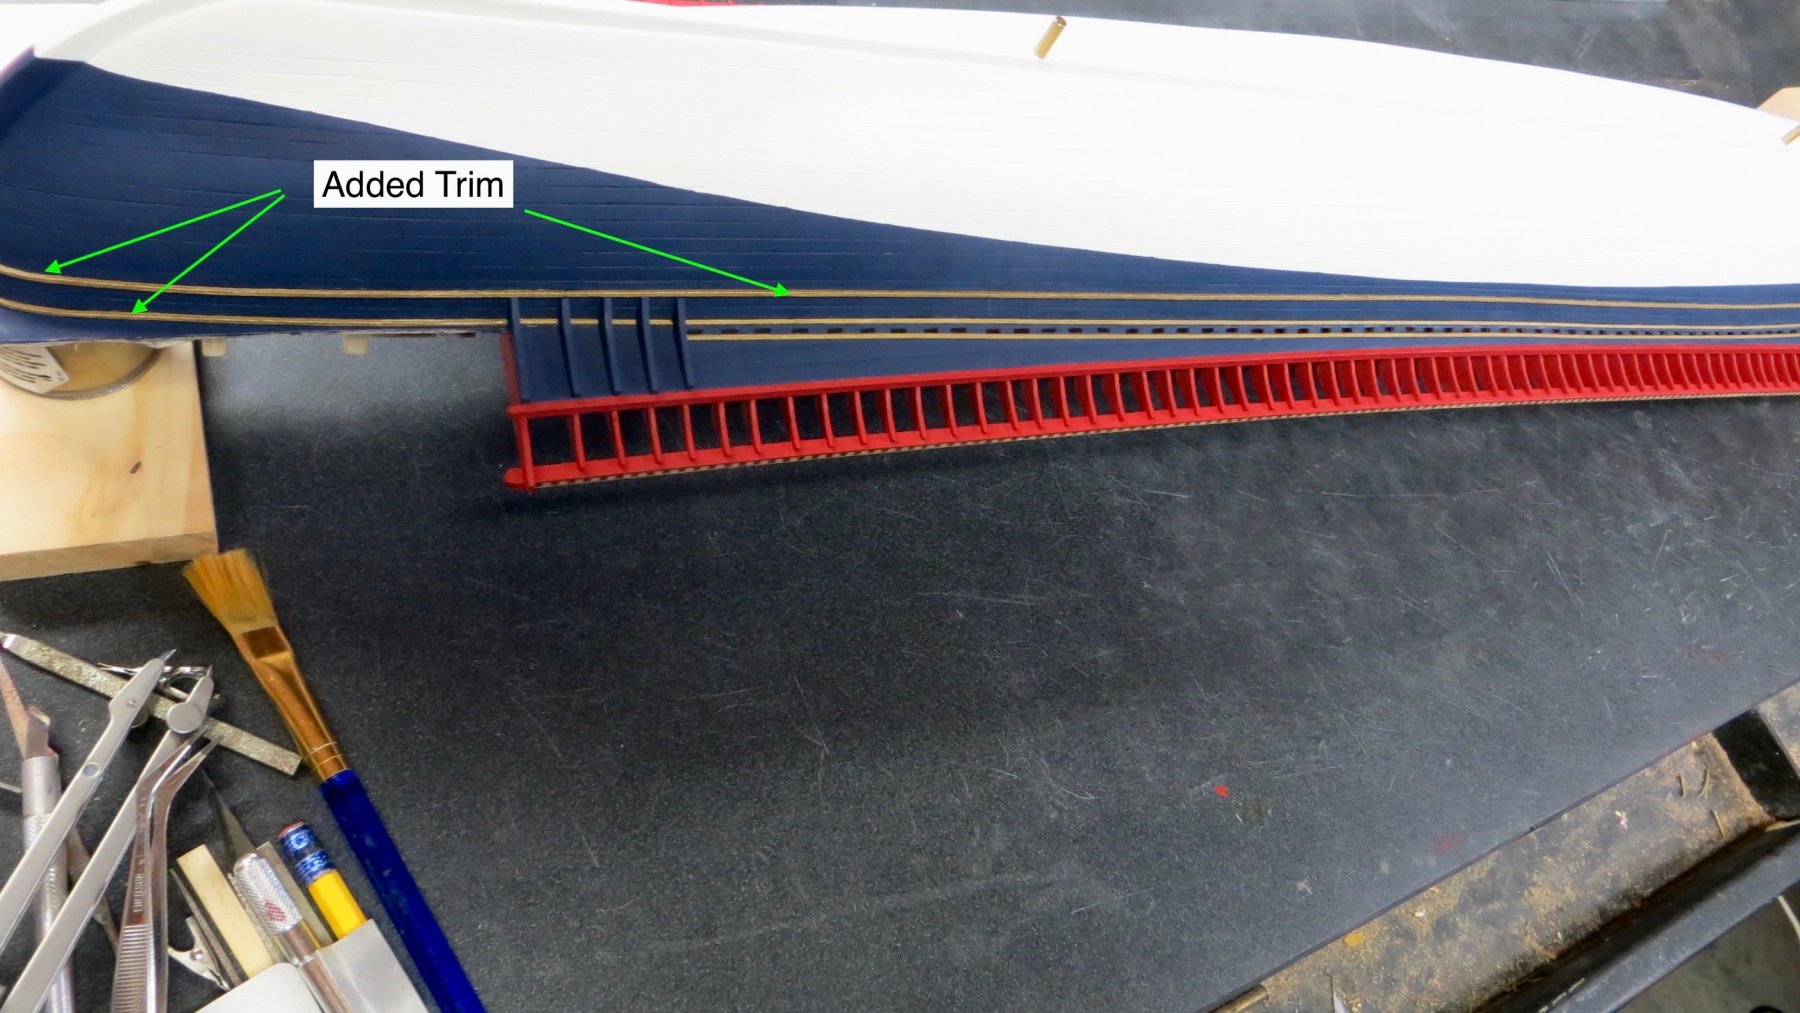
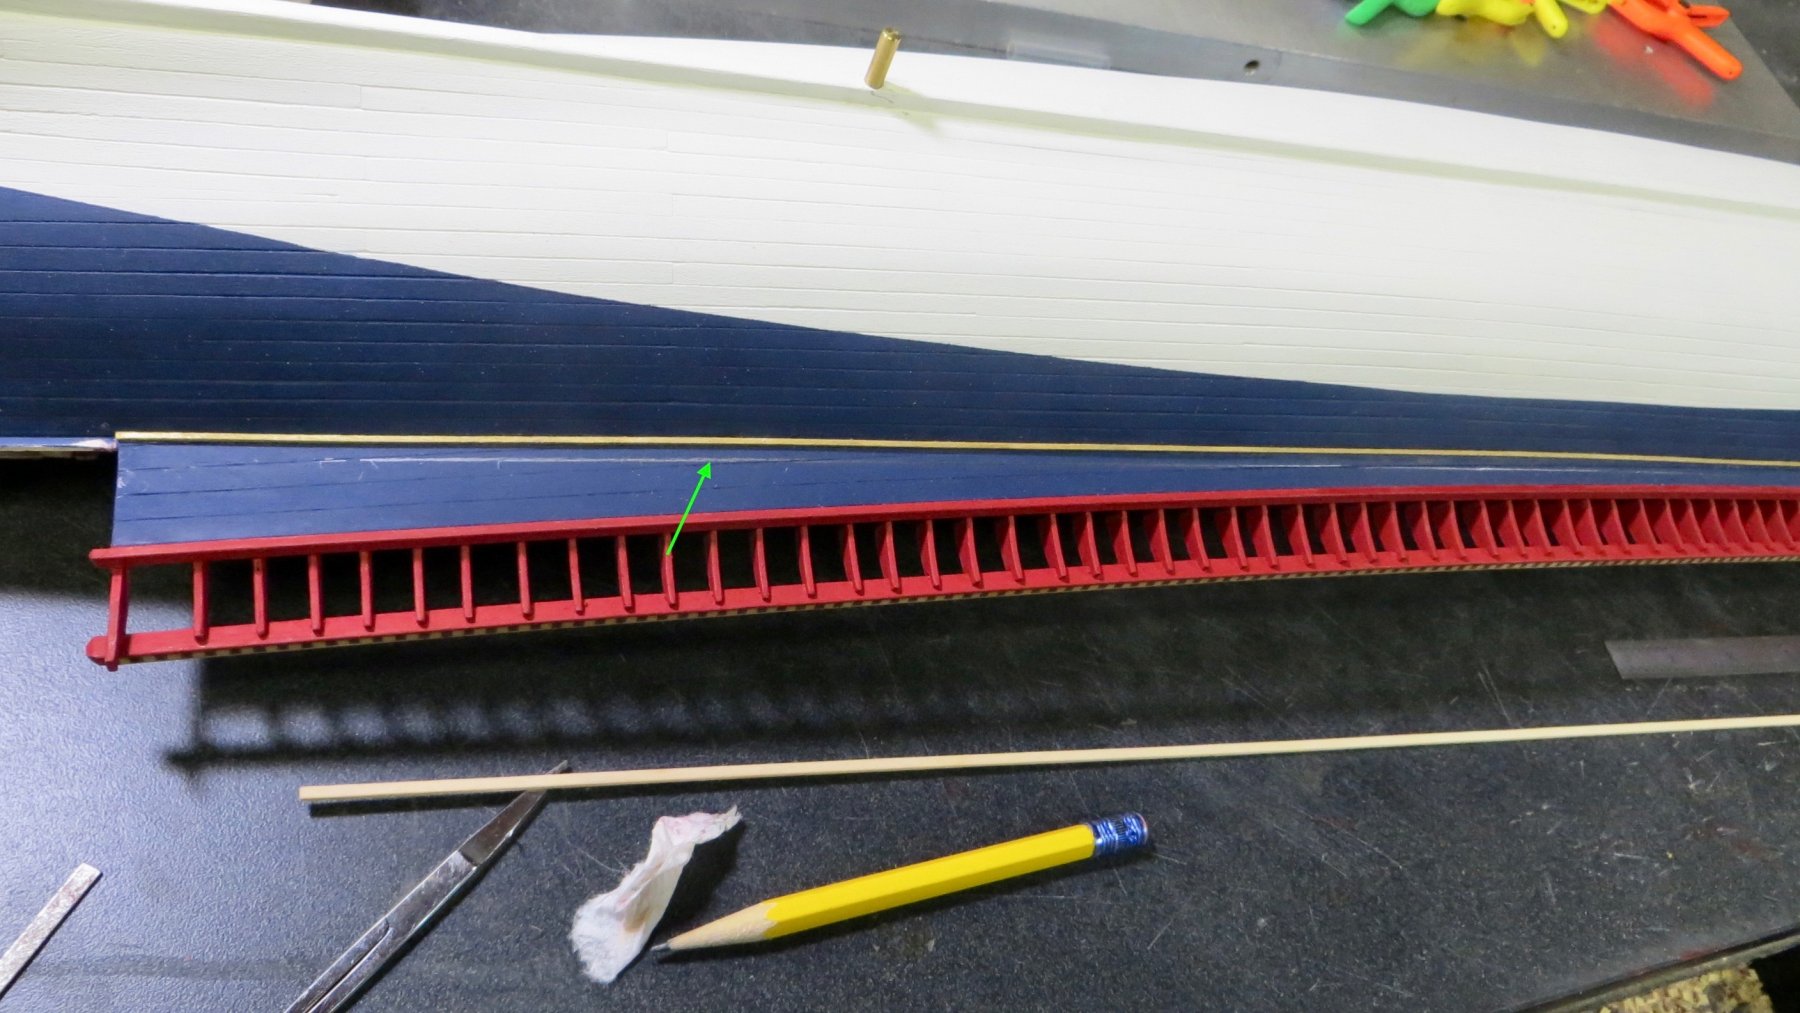
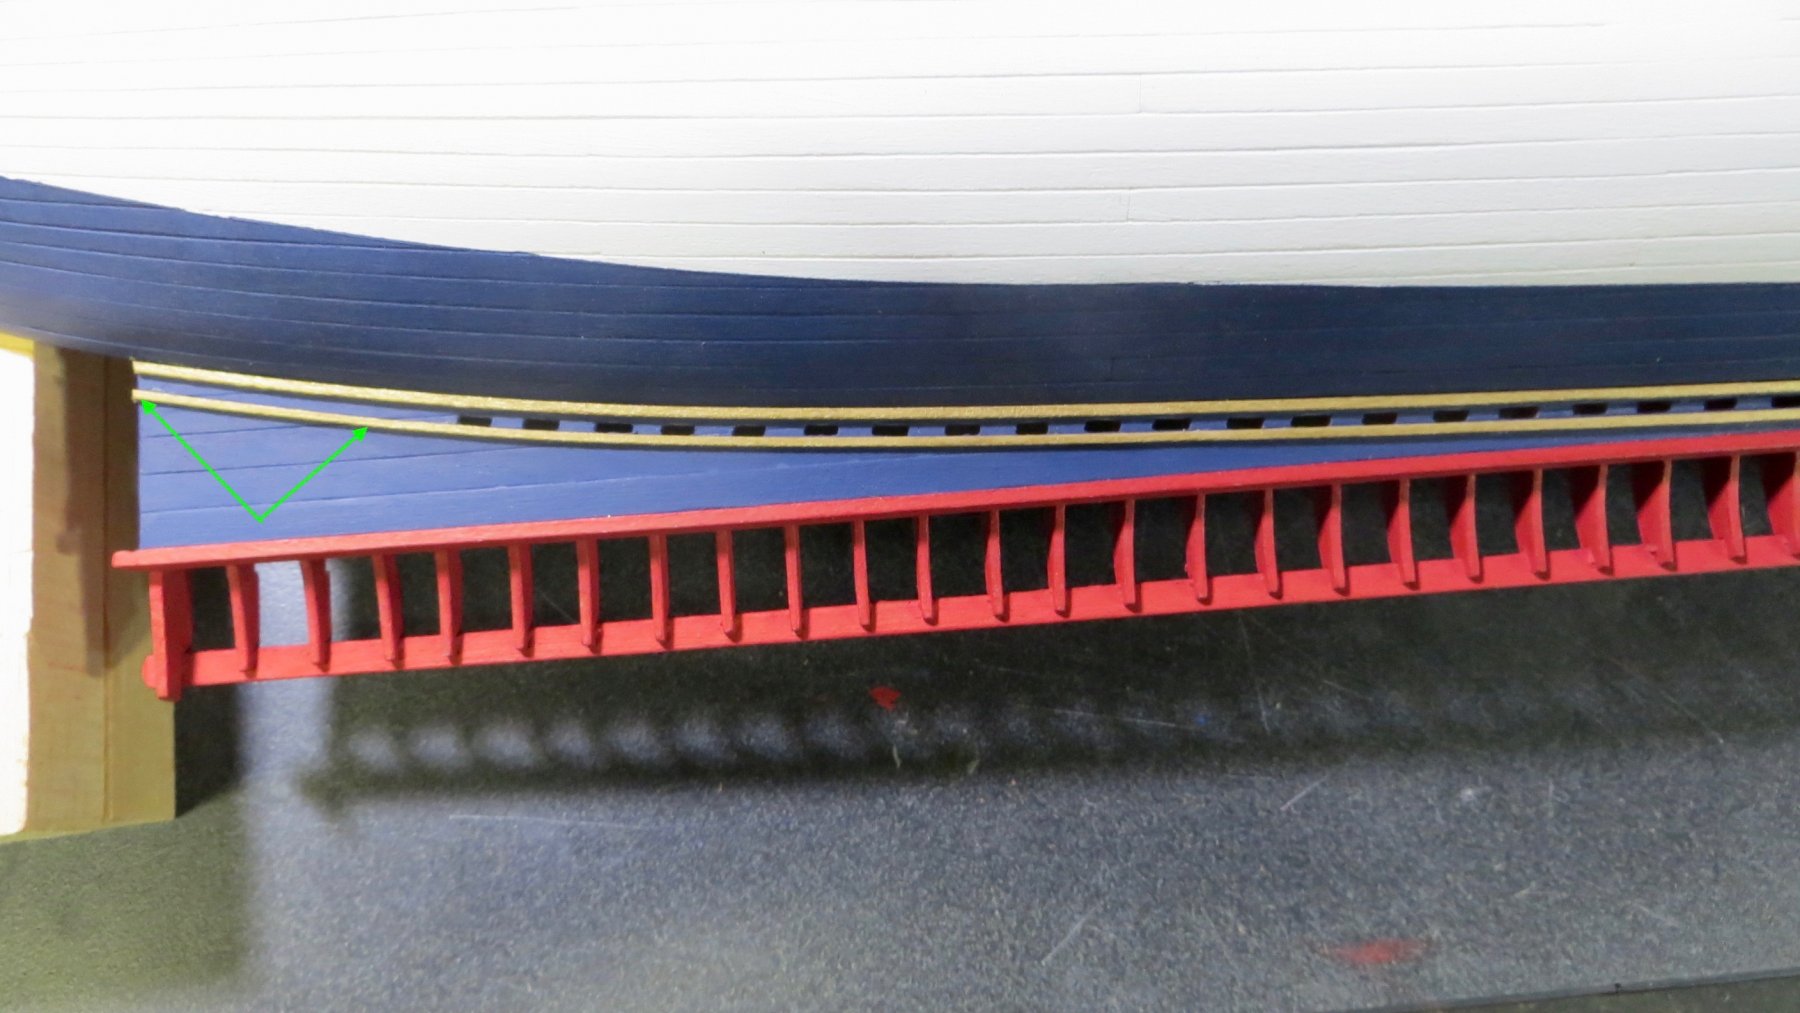
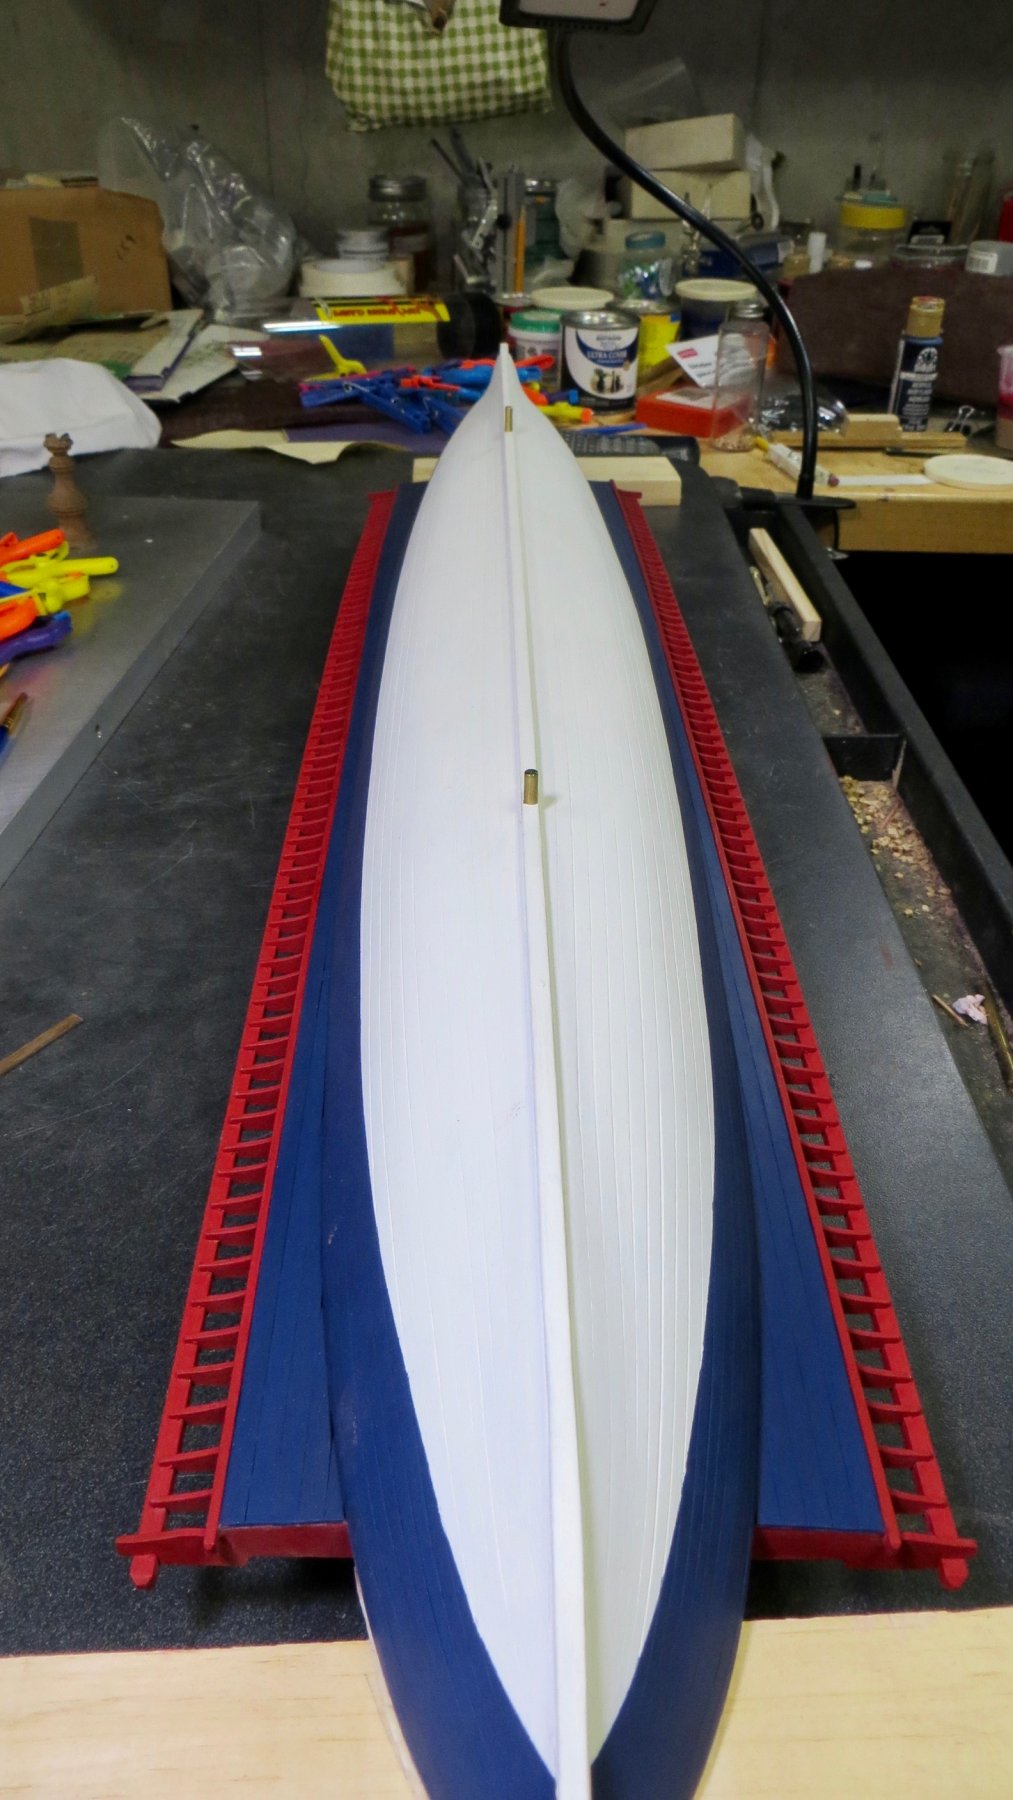
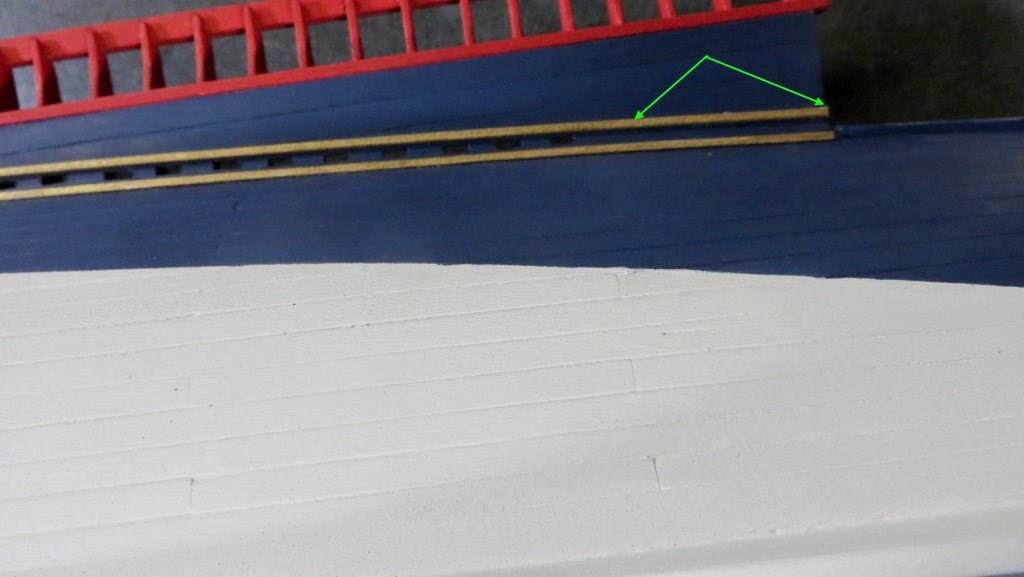
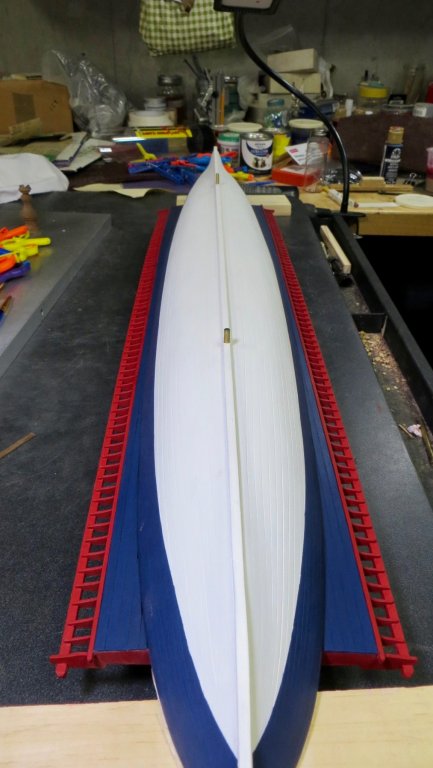
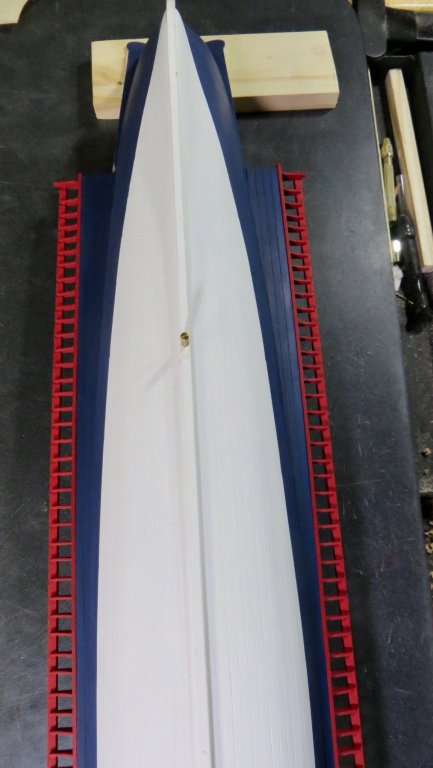
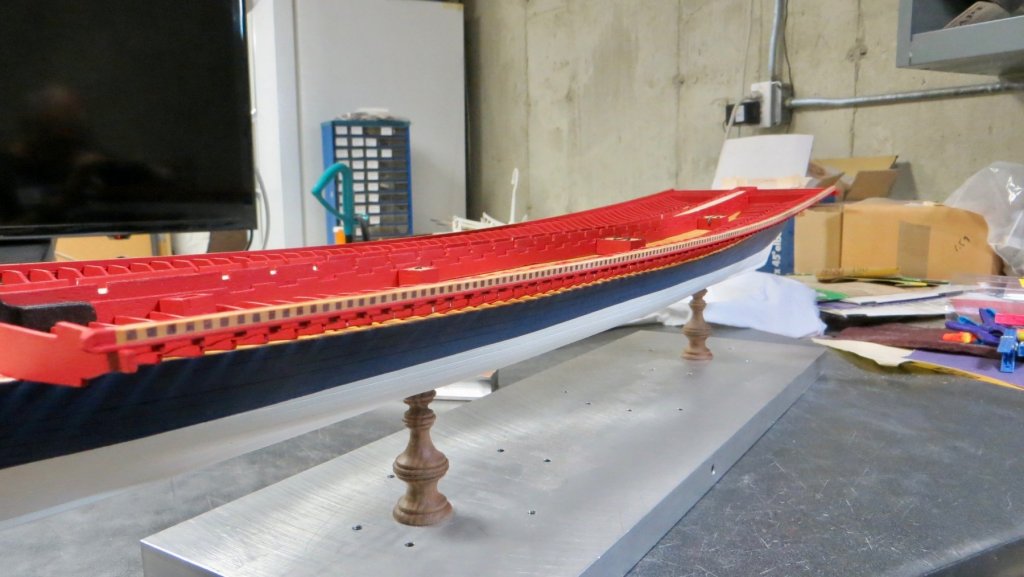
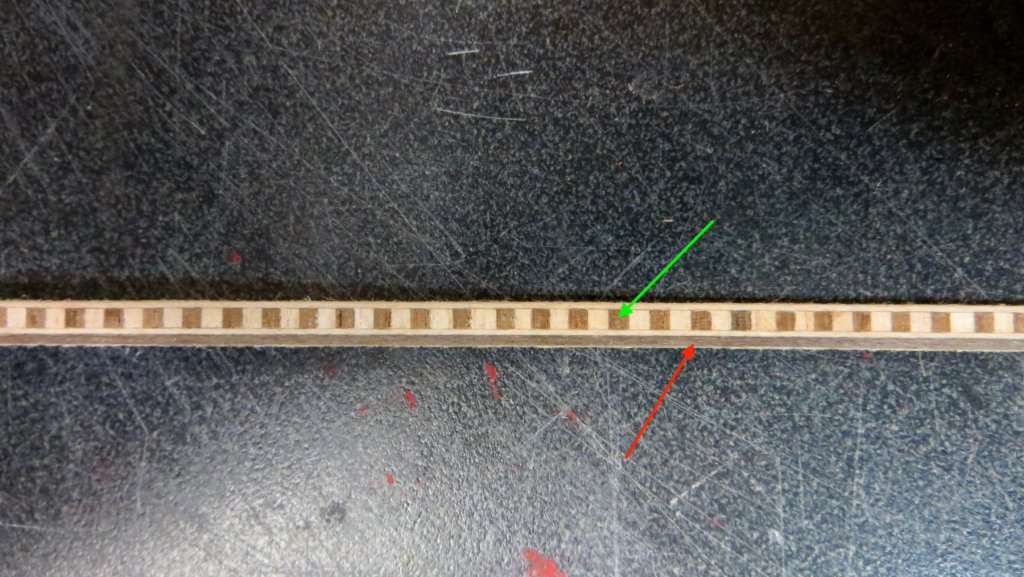
Hello, I have added some more detail to the underside of the model, while I had the ship still flipped over. I cutout and shaped the knees that sit under the underside planking. Each knee was a different length and the end against the hull had to be contoured to the hull curve. Also, as you can see in this photo, I had to remove the trim piece that I mistakenly glued to the edge. (See last post) Painted knees near the bow Knees finished on both sides near the stern Knees finished both sides near the bow I added more of the 1mm by 1mm gold painted trim or molding. (See green arrows). This was easier to do with the model upside down. The plans call for another trim piece to be added flush with the forward deck planking (see red arrow), but I decided to wait until I finish planking the bow area later in the build. The molding extended all the way to the keel at the stern. (See green arrows). I soaked the 1mm wood and then heated it with a curling iron so that it would bend around the stern area. I will check for touch up painting where necessary and then put the model back on the stand to continue working on the topsides. Thanks for visiting and for the "likes" It is always appreciated! Frank


- 510 replies
-
- 5
-

-
- reale de france
- corel
- (and 1 more)
-
Thank you Phil! I hope you enjoy building La Reale as I am!! Frank
- 510 replies
-
- 1
-
-
- reale de france
- corel
- (and 1 more)
-
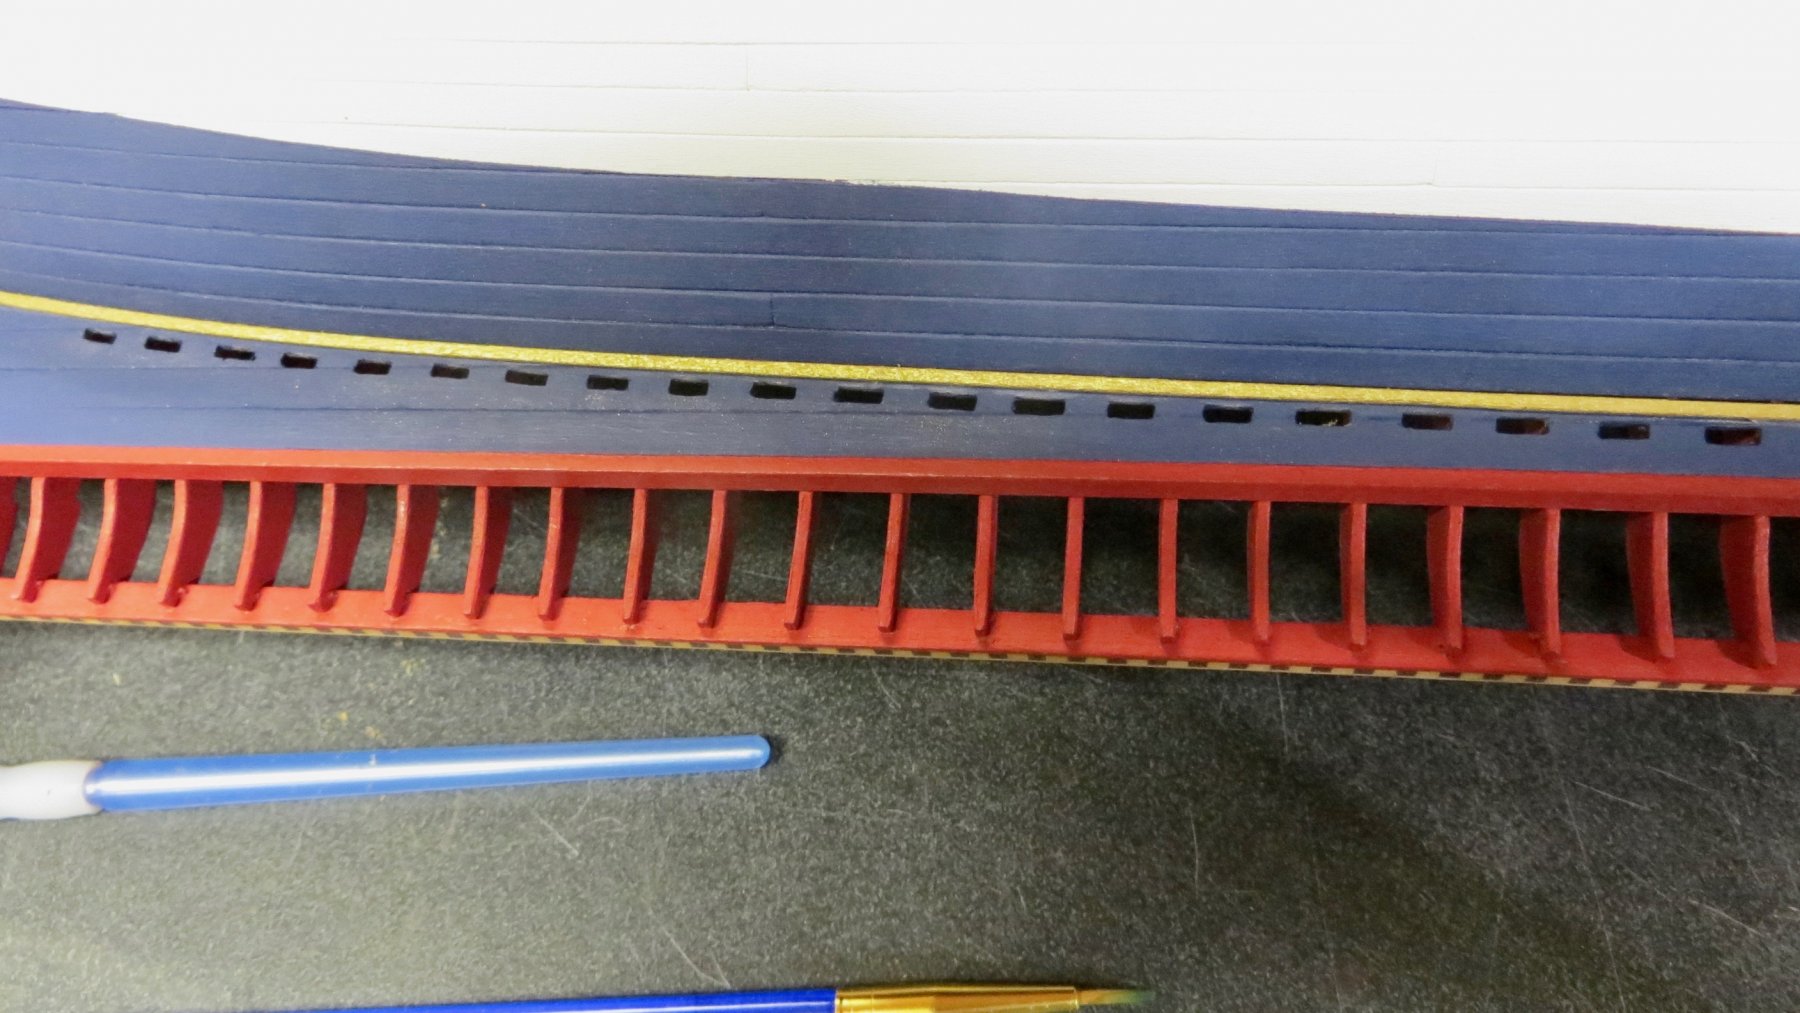
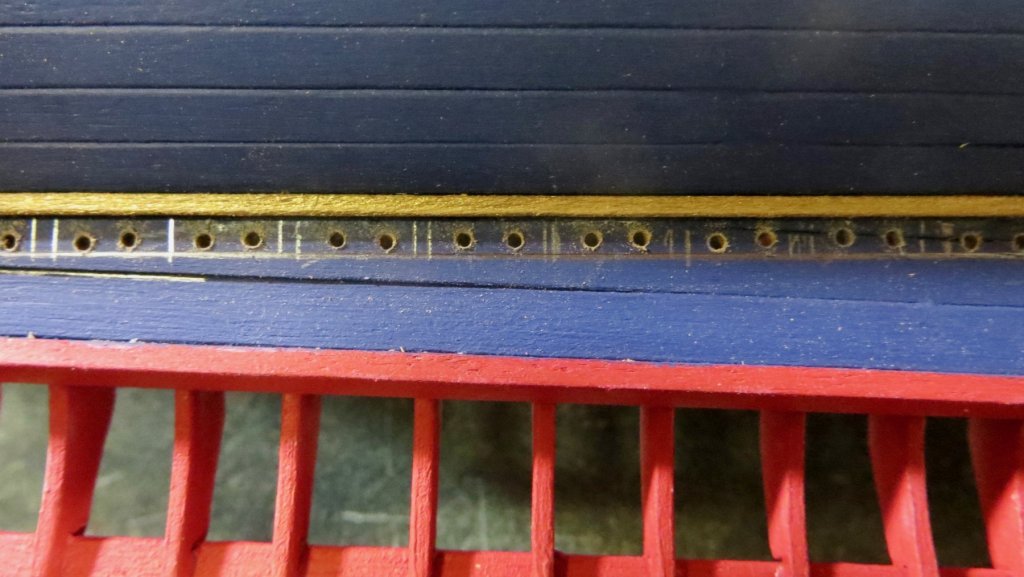
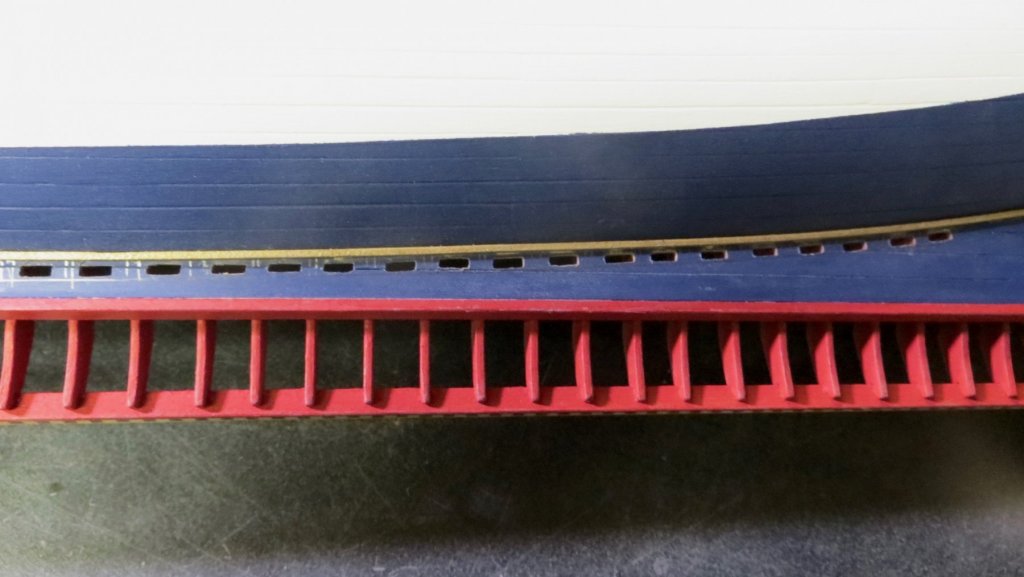
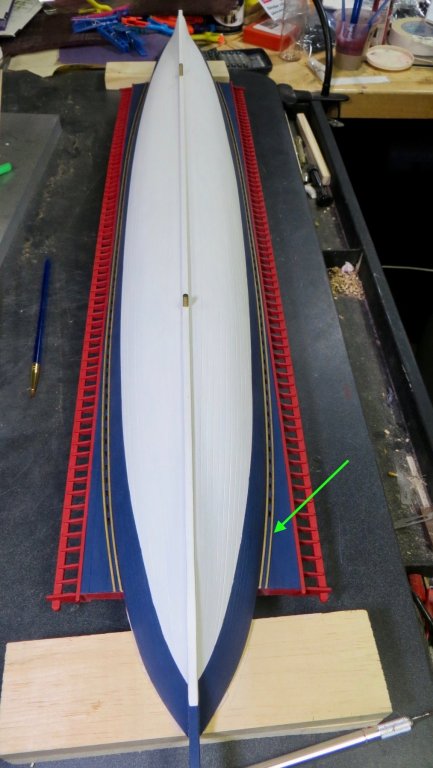
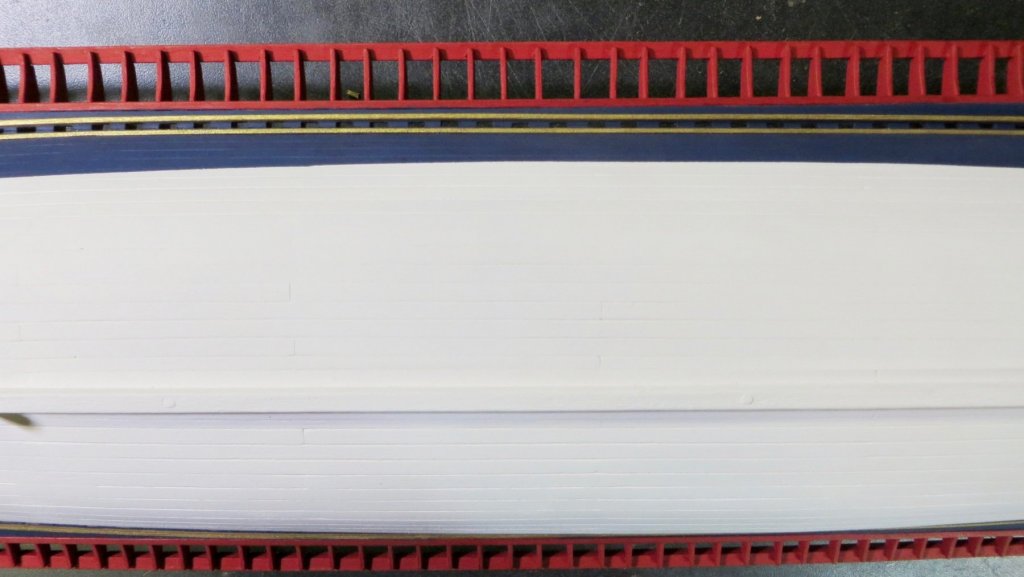
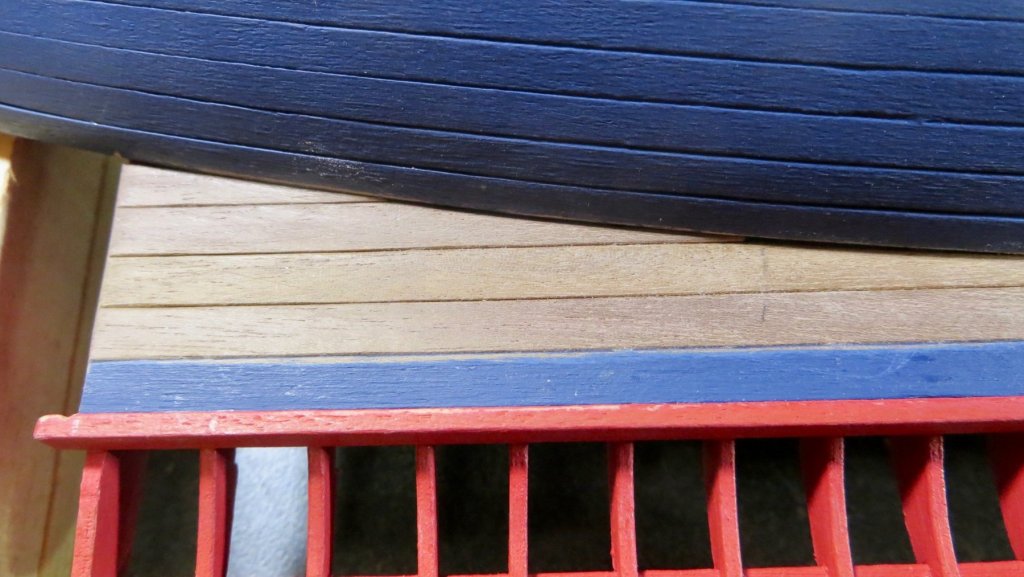
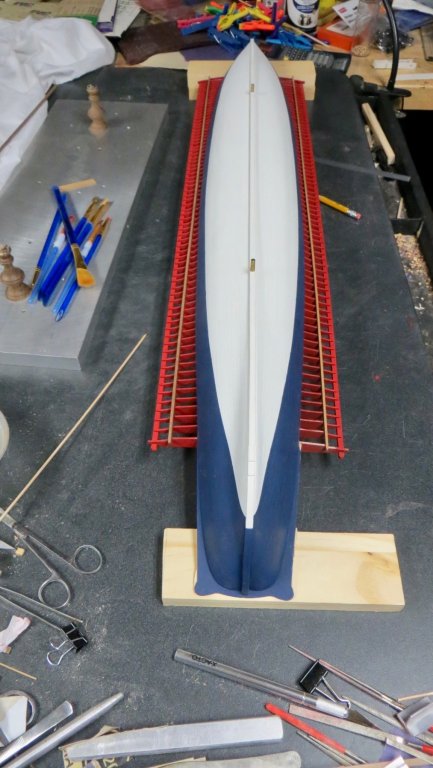
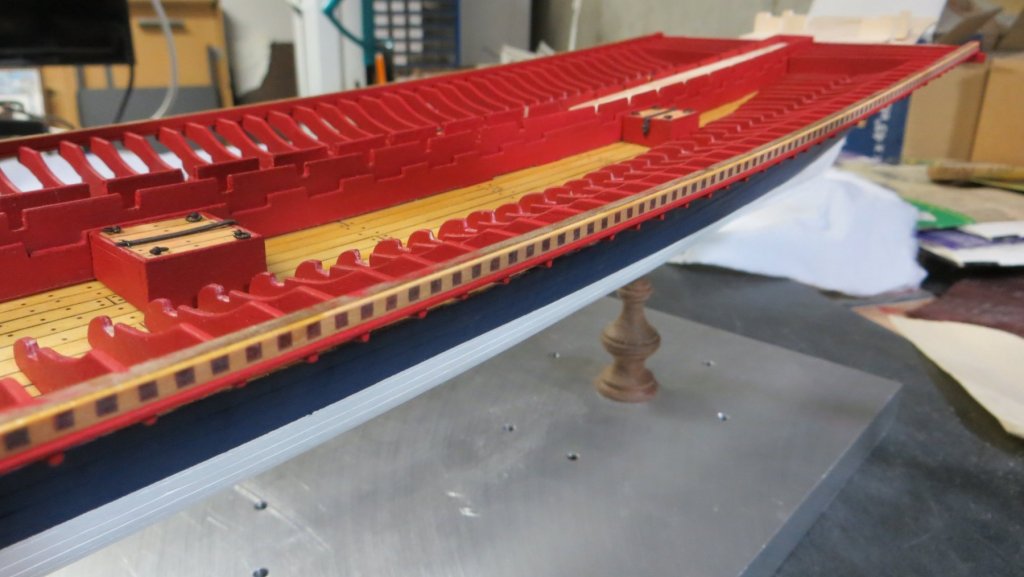
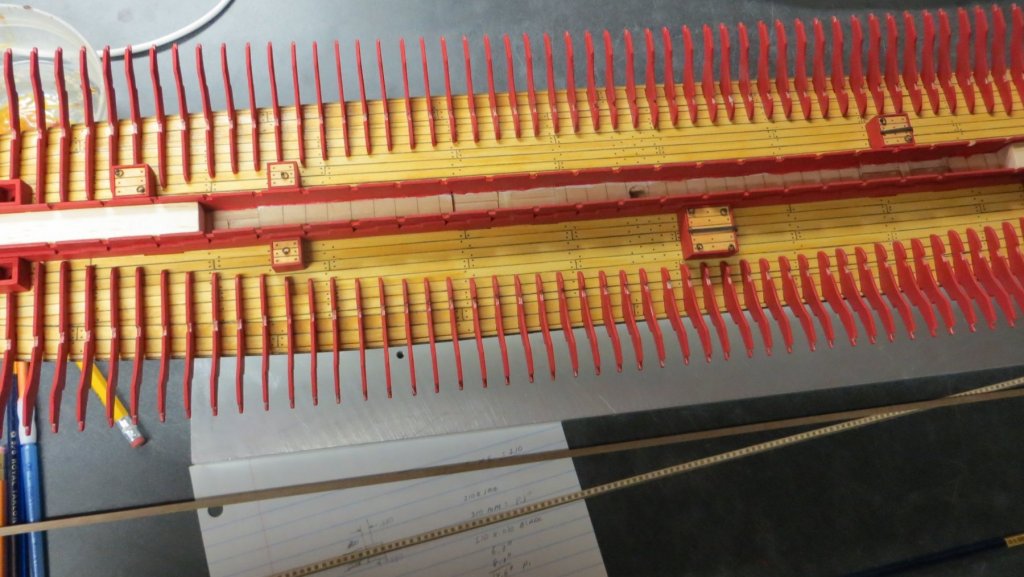
Hello, It's been a while since my last post. I was able to get back to the model and make some more progress! First, I cut some long trim pieces, 1mm by 1mm, and painted them an antique gold. They were attached to the underside where the under planking meets the hull. Now I had to layout the cutting of 63 slots, that was there for water runoff of the deck. I marked the width and length of where the slots would go. My first step was to drill small holes to give me an opening to start filing for the slots. 63 slots had to be shaped on each side of the ship. Slots finished Added another trim piece, 1mm by 1mm, on the outer border of the slots The outer trim piece will be trimmed between the arrows on the fwd and aft side when I attach the lower support knees. I still have the lower support knees to install and some more trim pieces, before I can turn the ship back over to work on the top side. Thanks for visiting, Frank


- 510 replies
-
- 6
-
-
- reale de france
- corel
- (and 1 more)
-
A real beautiful model! Did the sails come with the kit? Or did you sew them? Congrats, Frank
- 146 replies
-
- 1
-
-
- deagostini
- vasa
- (and 1 more)
-
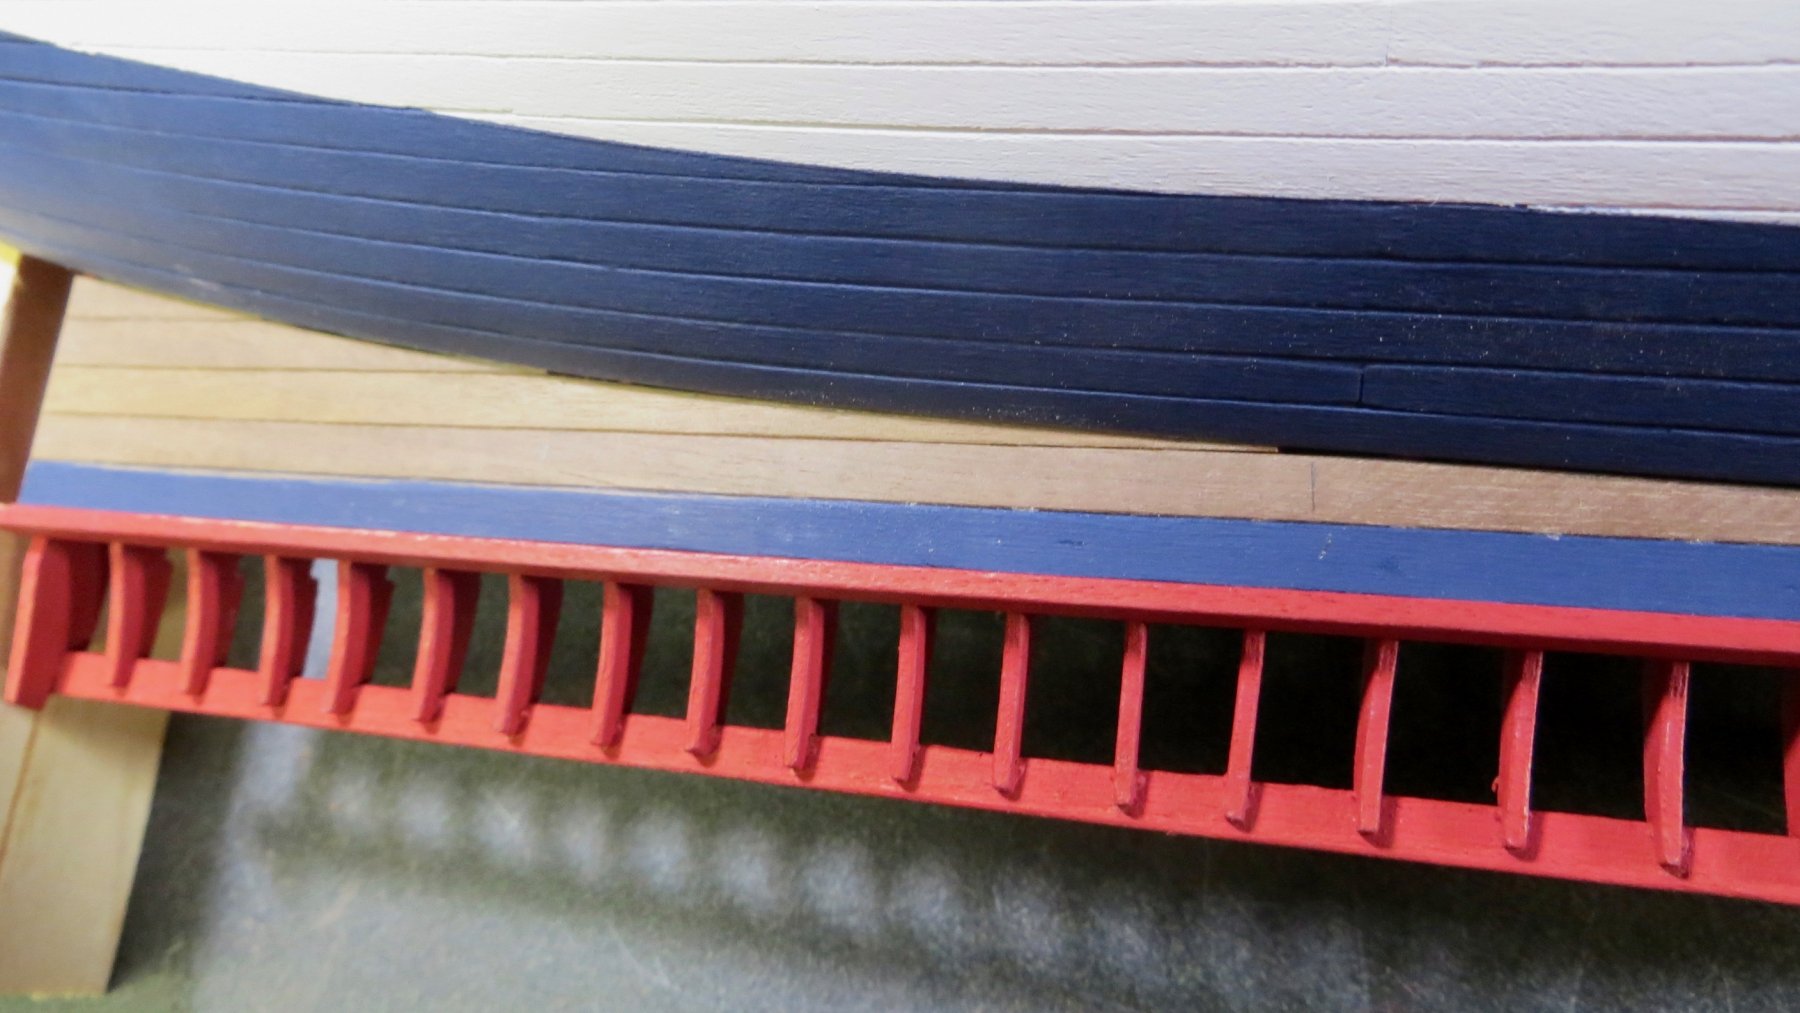
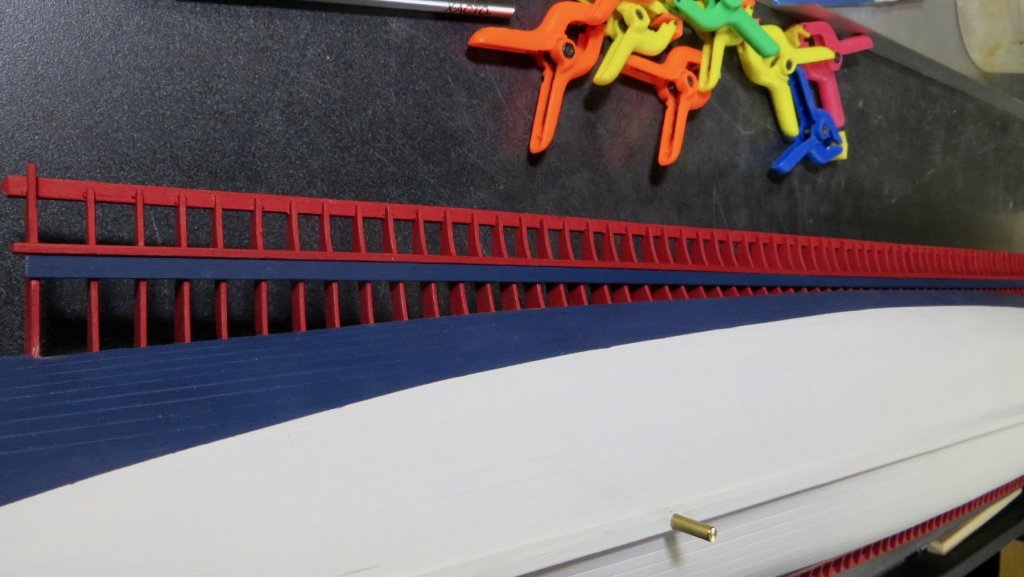
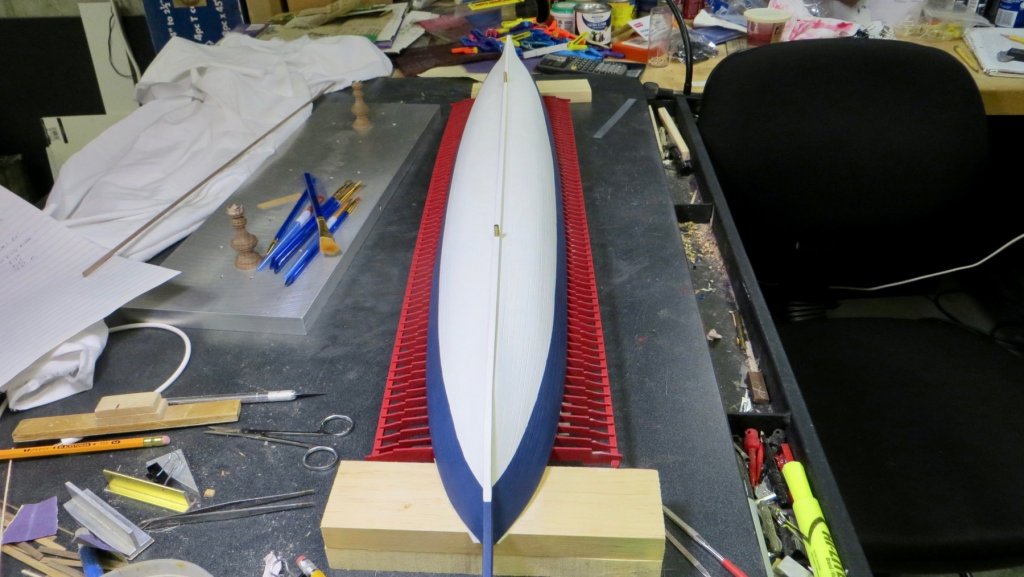
Thanks again for the "Likes"!!! My next step was to finish planking between the middle underside beam and the hull of the model. For the first plank, I gave it a couple of coats of the blue paint, so that I wouldn't have to mask the middle beam (which is painted red). First plank glued to the supports. Finished planking both sides of the underside. Finished painted planks on underside. My next steps are to place a molding piece between the hull and the planks above. Then I have to lay out and file slots onto the underside planking that were used to drain water from the upper deck. Thanks for visiting Frank

- 510 replies
-
- 5
-
-
- reale de france
- corel
- (and 1 more)
-
Wow! So many little details really separate this build from other cross sections! Nice work Michael. Frank
-
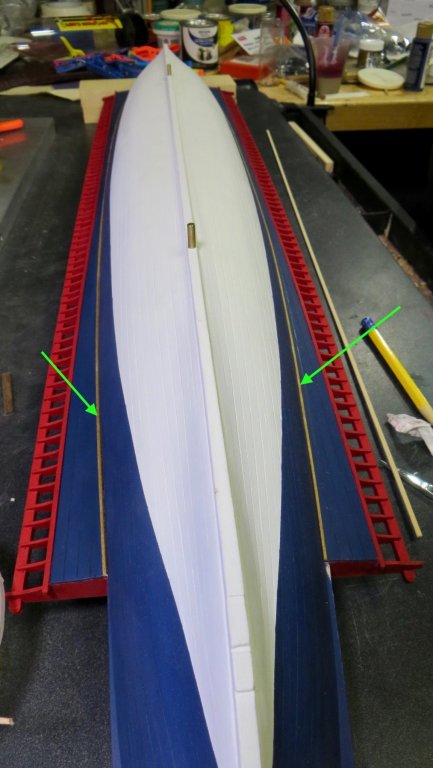
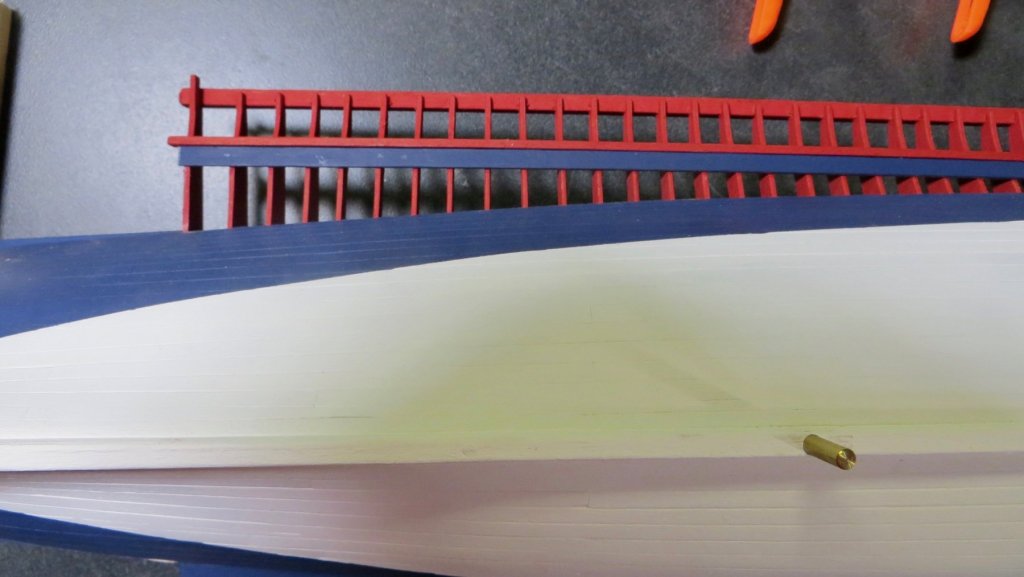
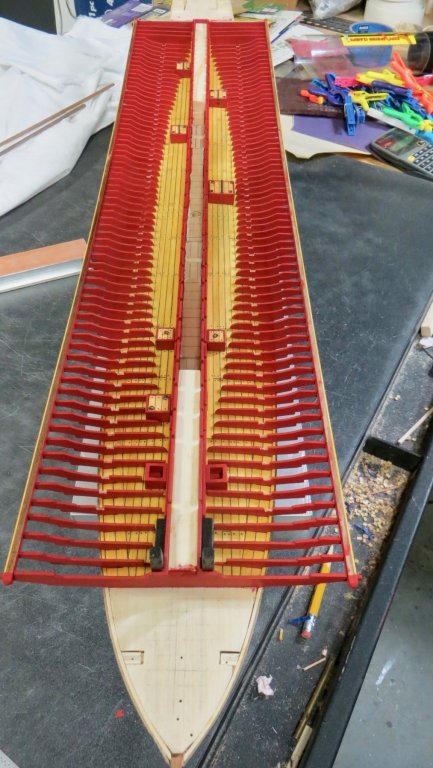
Hello, Thanks to all for the "Likes"!! Small update: I took the model off the stand and I flipped it carefully onto some blocks, in order to work on the undersides. The first step was to install a 2mm by 4mm beam on the mid section of the underside of the upper supports. Installing this beam on both sides made the upper deck supports very strong and stable. Of course, a little work was needed to get the beam to sit correctly. On both the fwd end yoke and stern yoke, I had to file down a little bit to seat the beam. Before beginning the underside planking, (which will be painted blue), I painted the beam the red I have been using. My next step will be to plank between the beam that was just installed, and the hull of the ship on both sides. (See arrows in next photo) Thanks for stopping by!! Frank


- 510 replies
-
- 6
-
-
- reale de france
- corel
- (and 1 more)
-
Hi Michael, Looks nice. How did you go from the gray color on the starboard side to the nice looking wood effect on the port side? Frank
-
Phil and Michael (md1400cs) Thank you both for your kind words! Michael D. Thank you! my project tomorrow night will be to figure out the best way to work underneath. (I'll give it a try rolling it on its side) My time working on this model has slowed, due the the unfortunate failing health of my father. (More important). Shuttling him back and forth to doctors appointments and tests etc. etc. I continue, however, to be very excited about working on the Reale model, and I look forward to getting to the work room as often as I can. She must have been an amazing ship in her time!! Thanks, Frank
- 510 replies
-
- 1
-
-
- reale de france
- corel
- (and 1 more)
-
thanks Mark!!
-
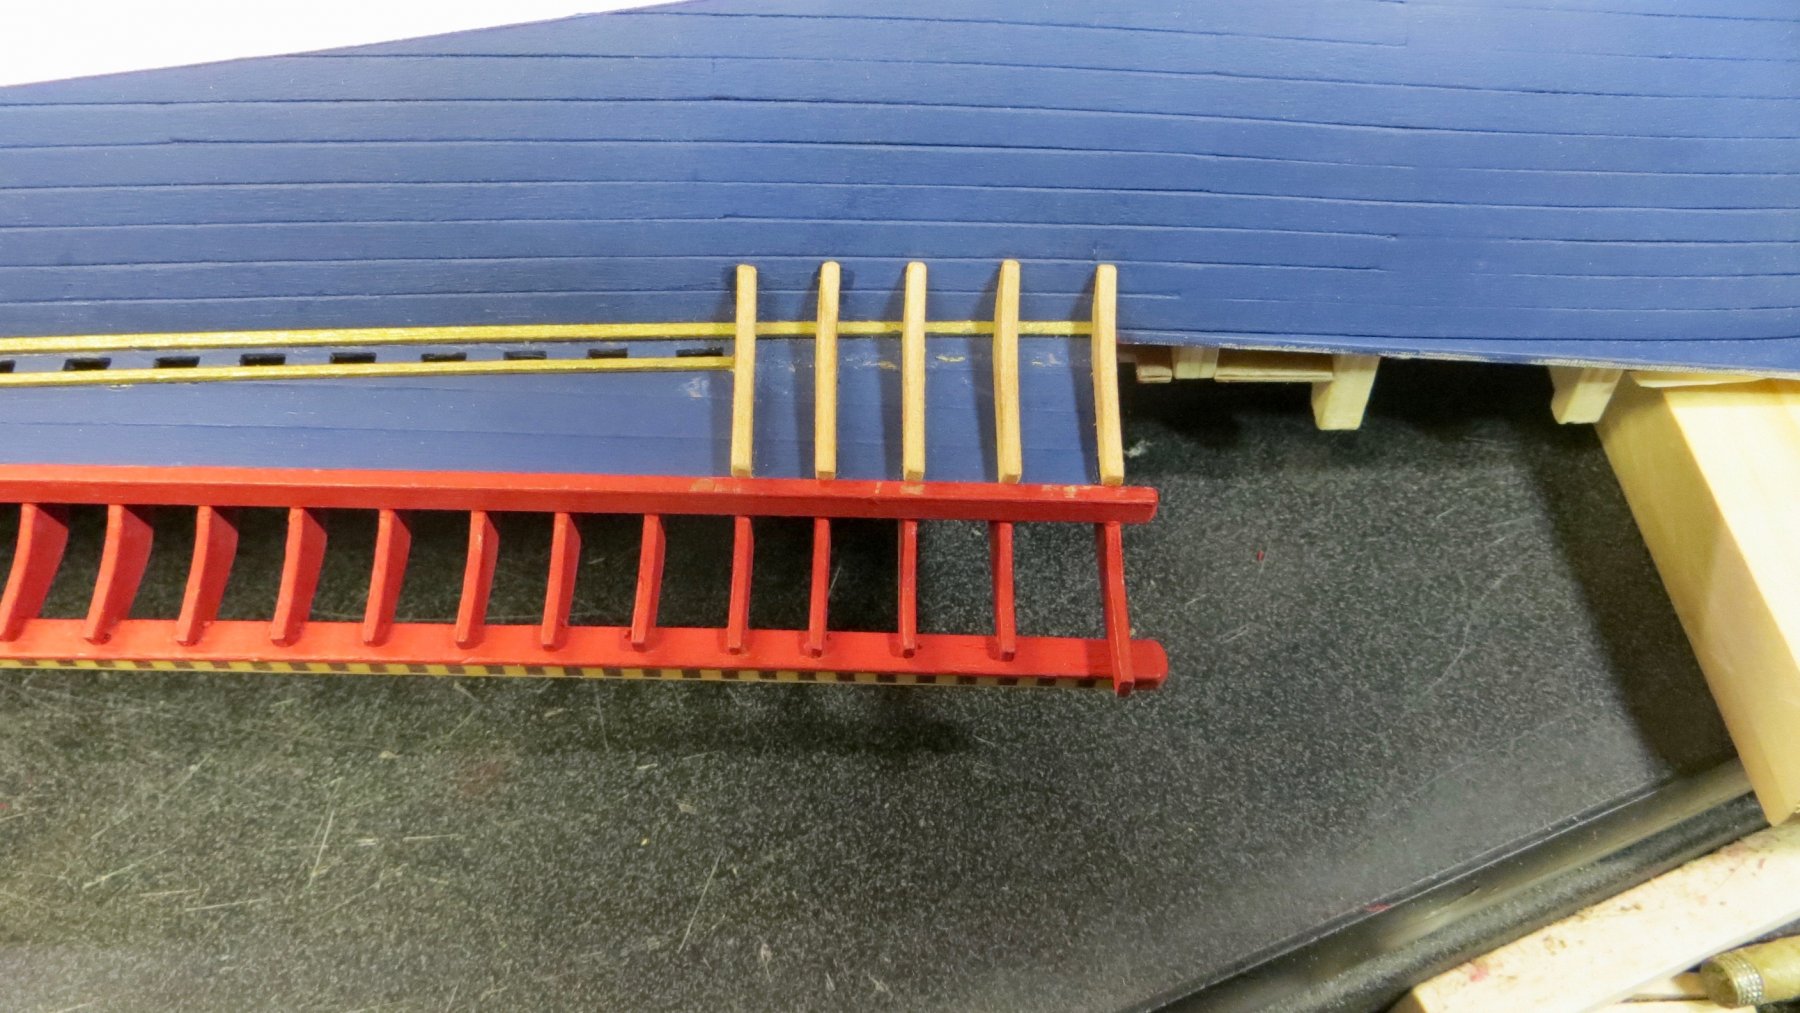
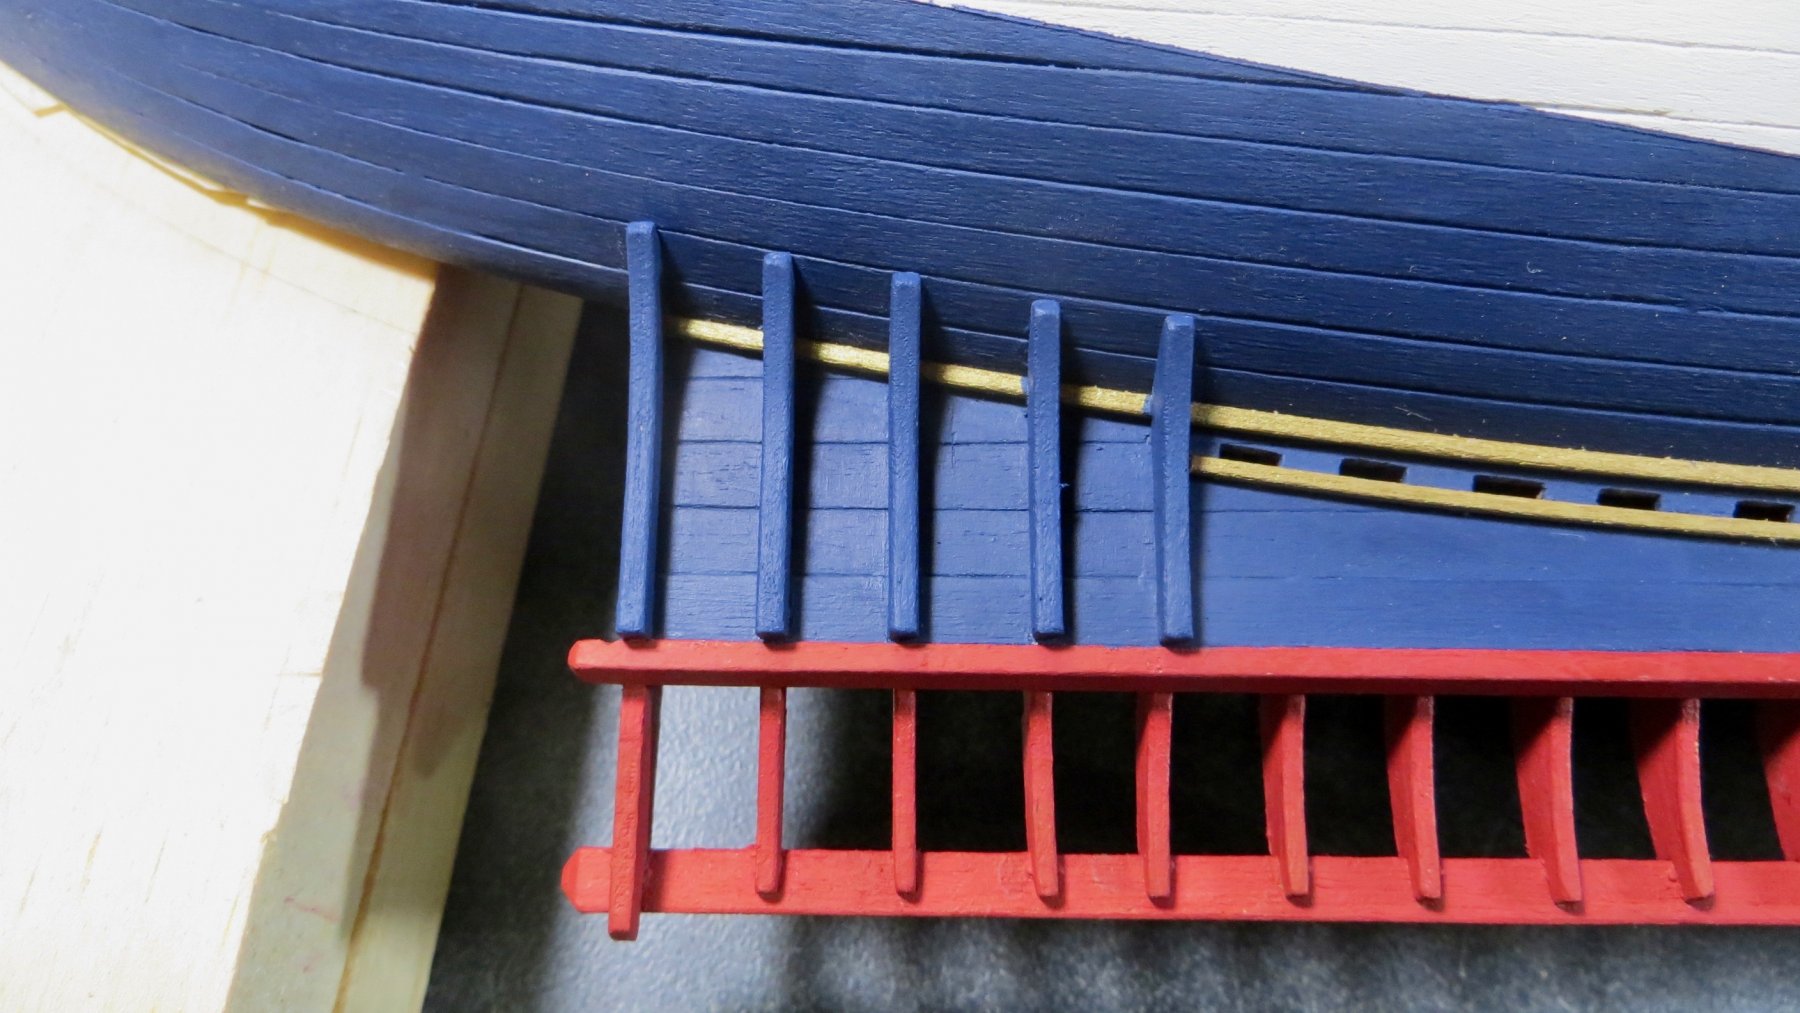
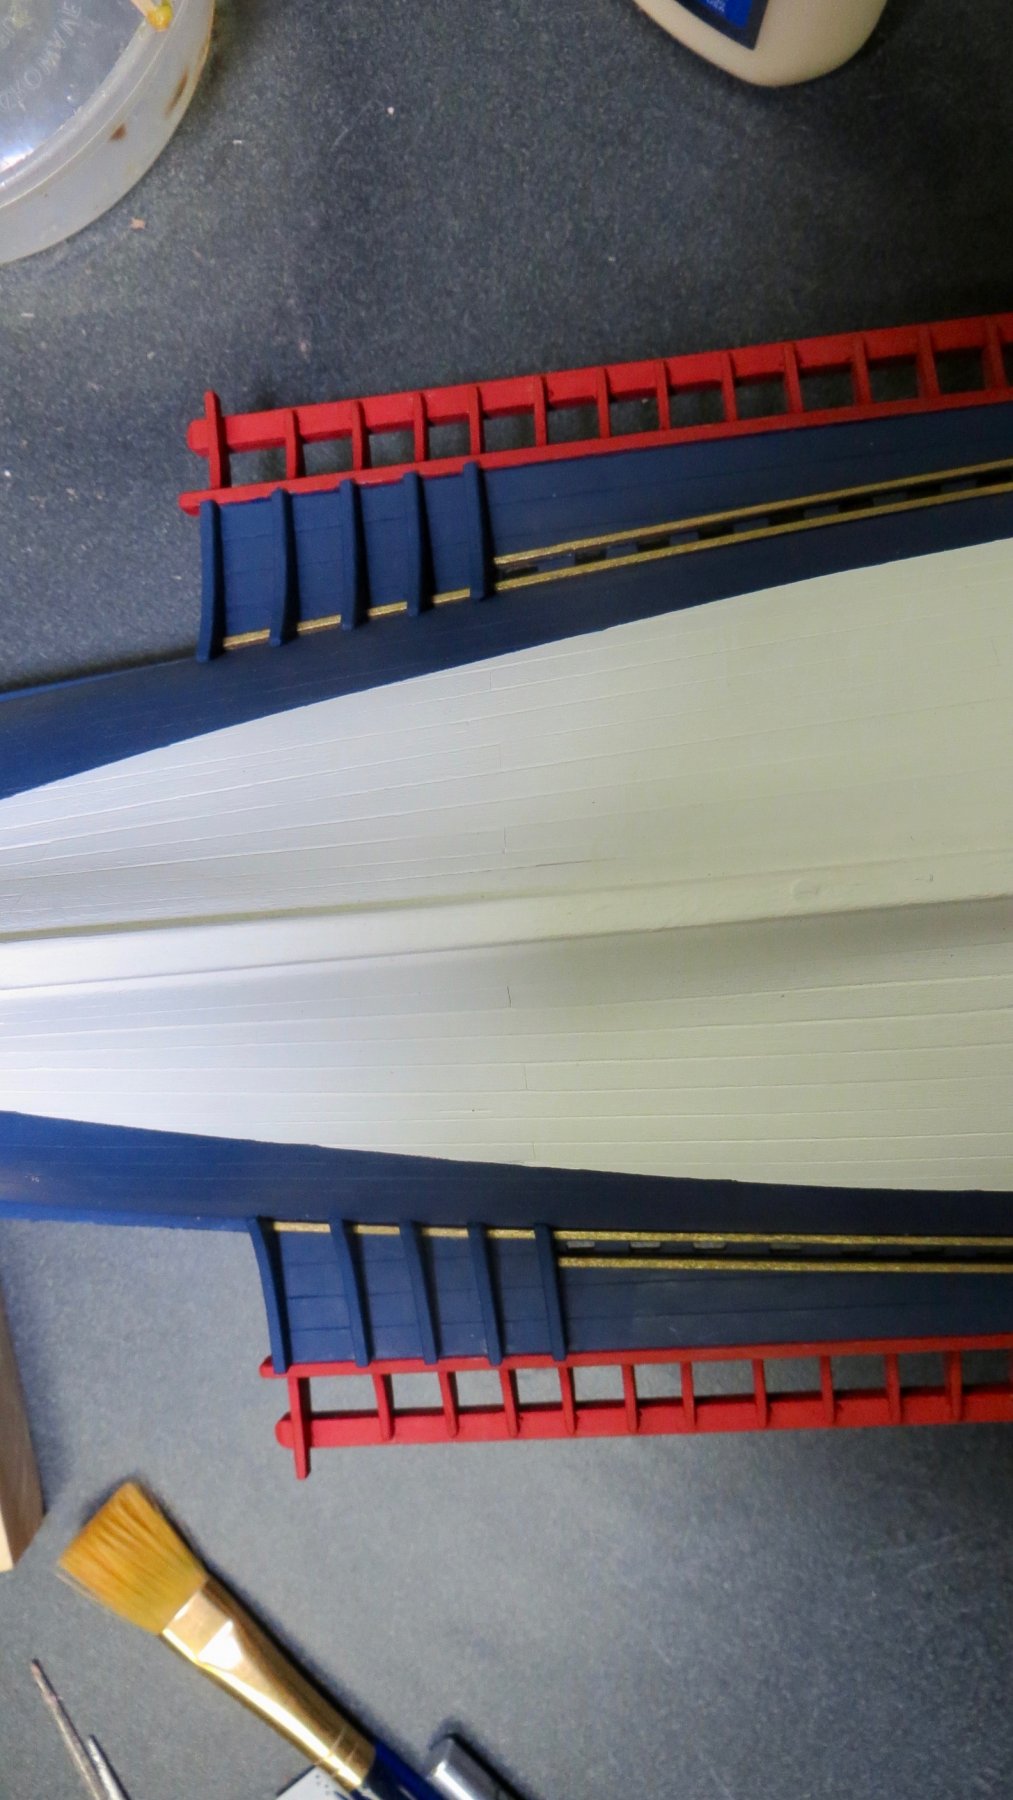
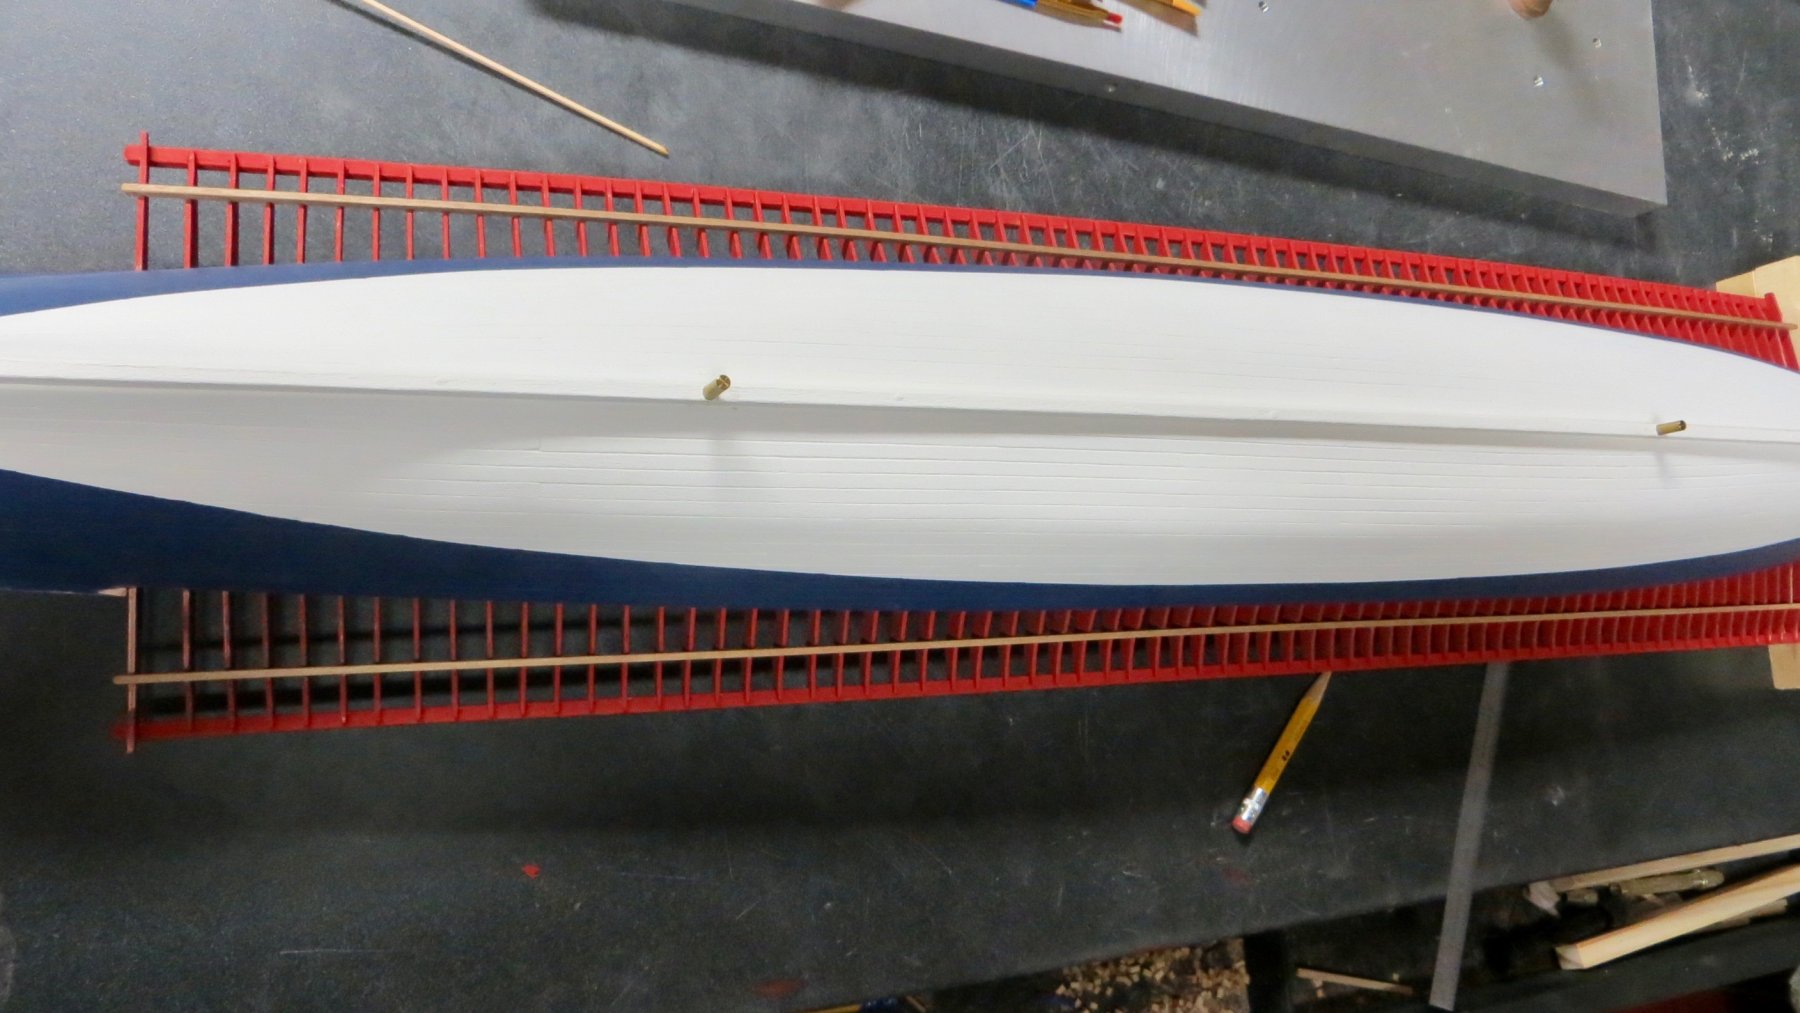
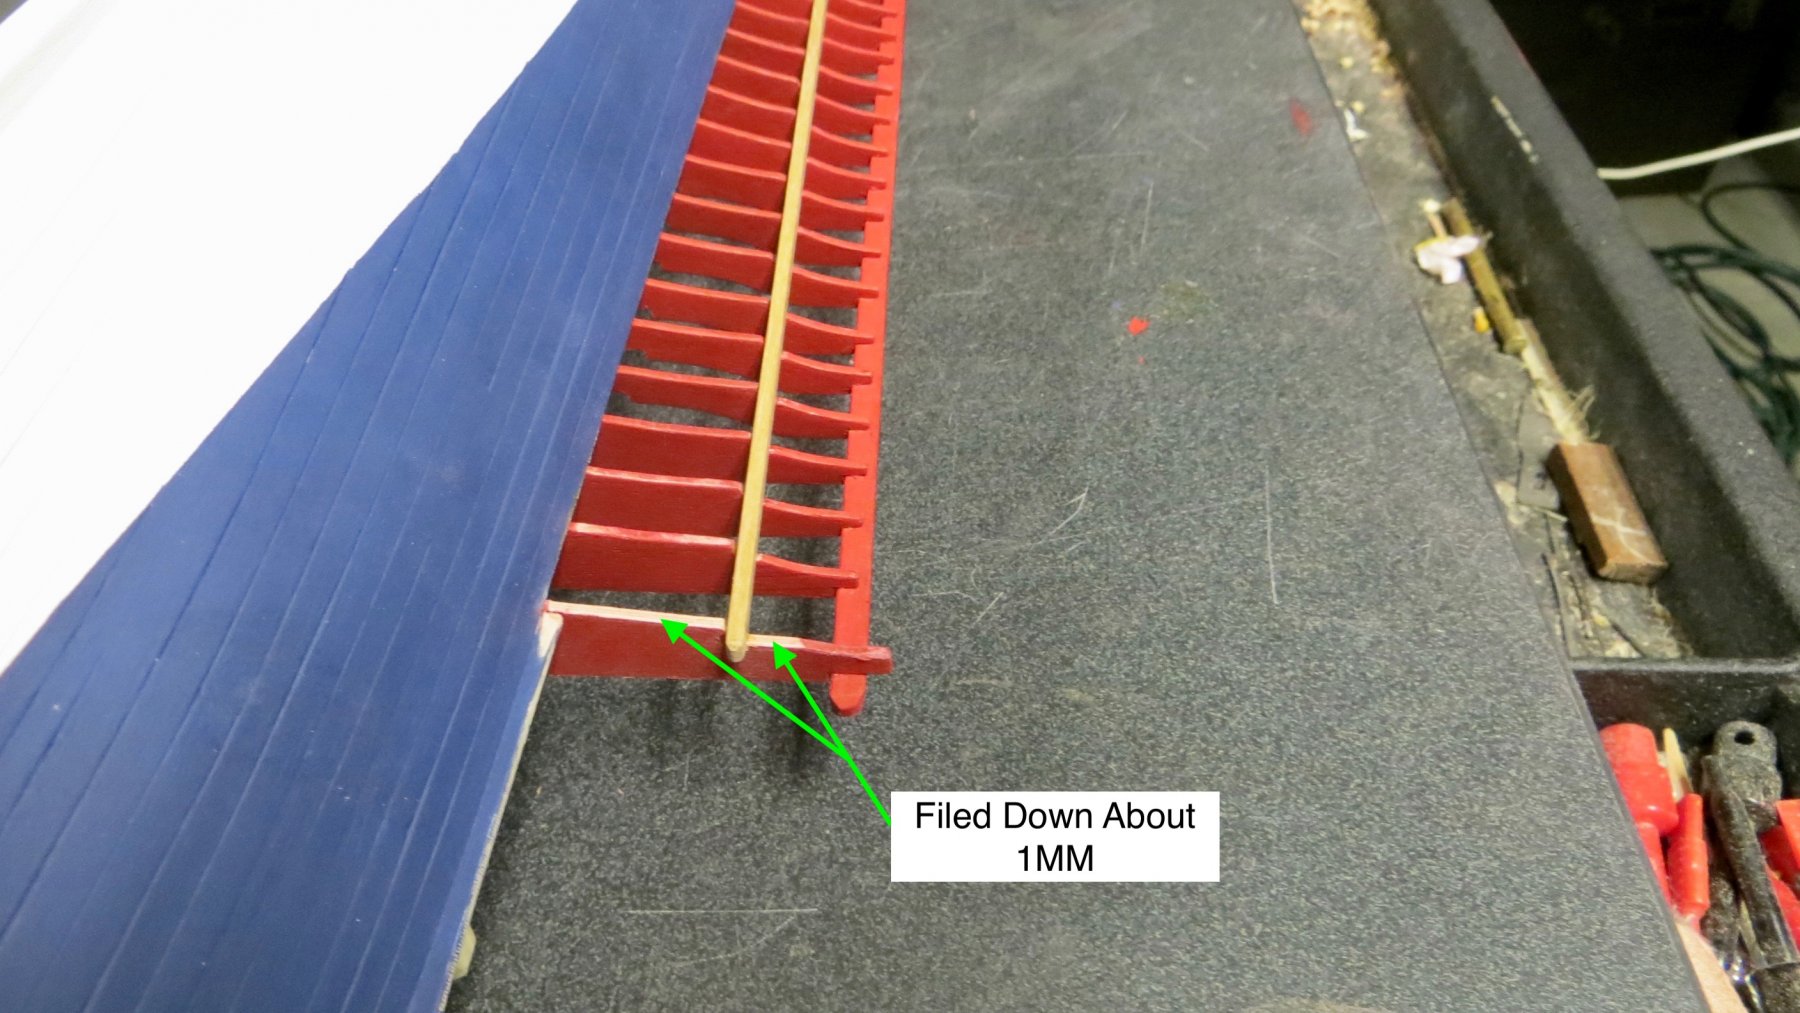
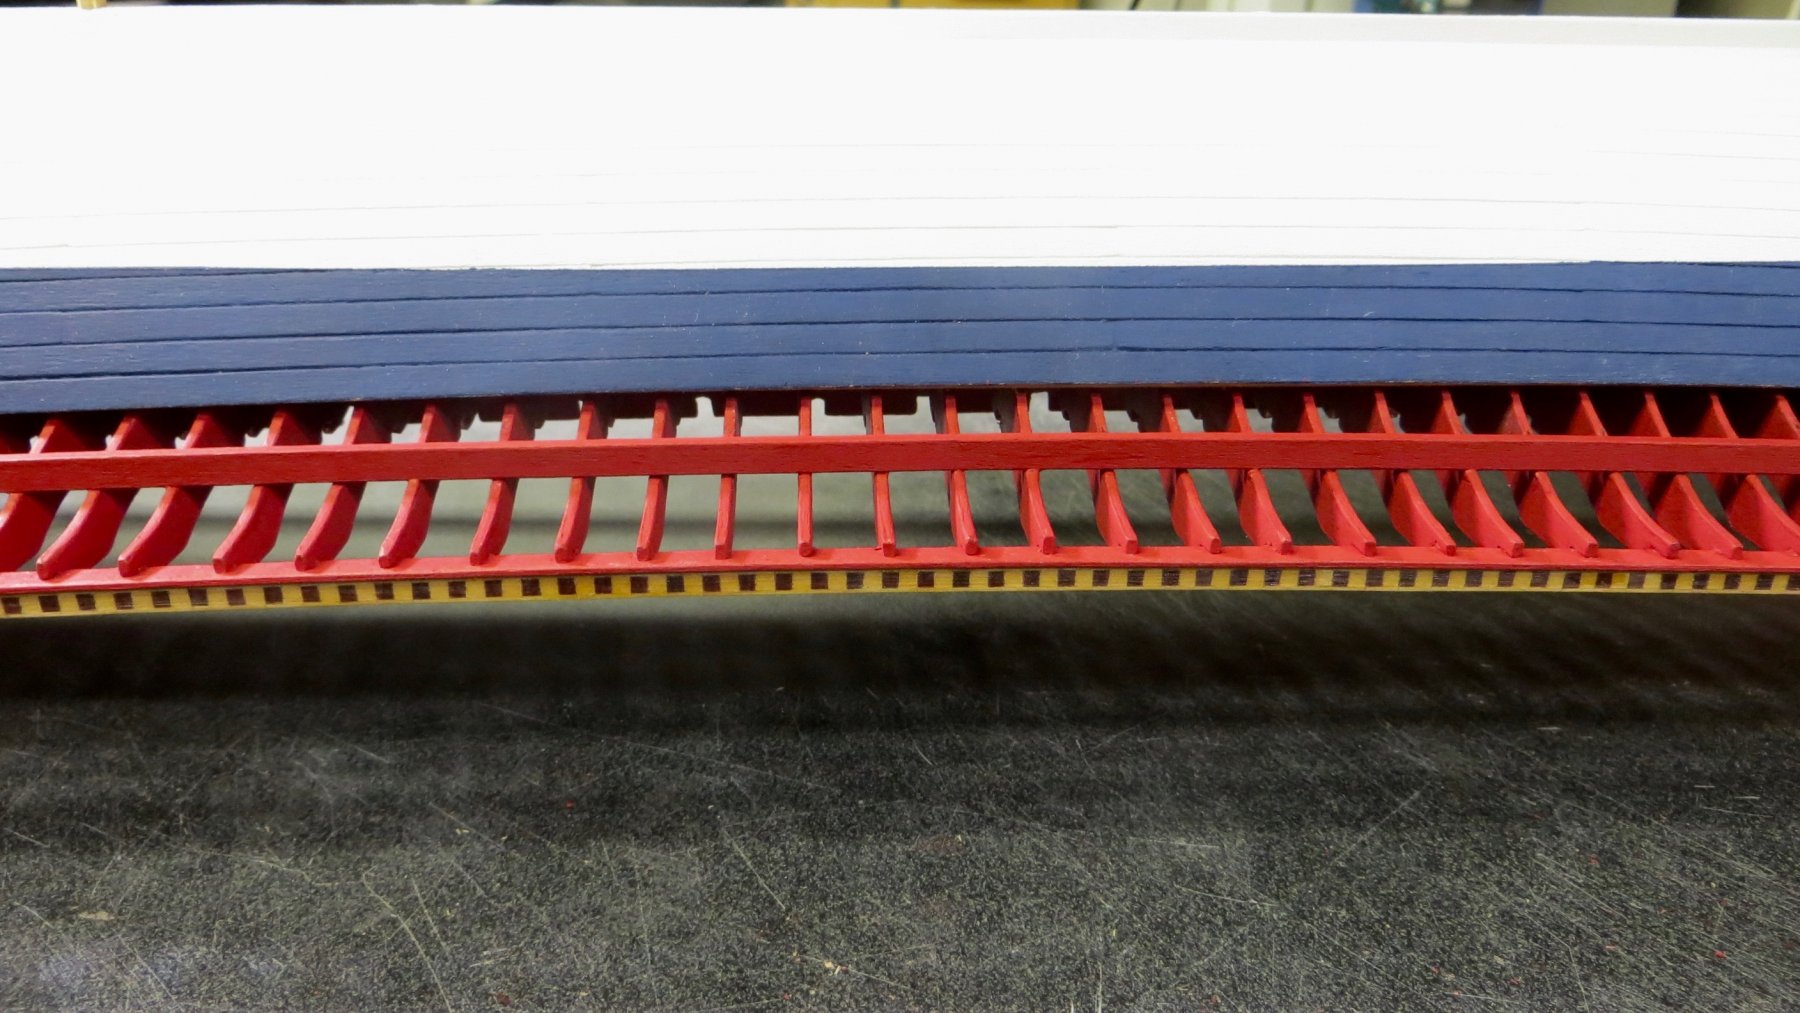
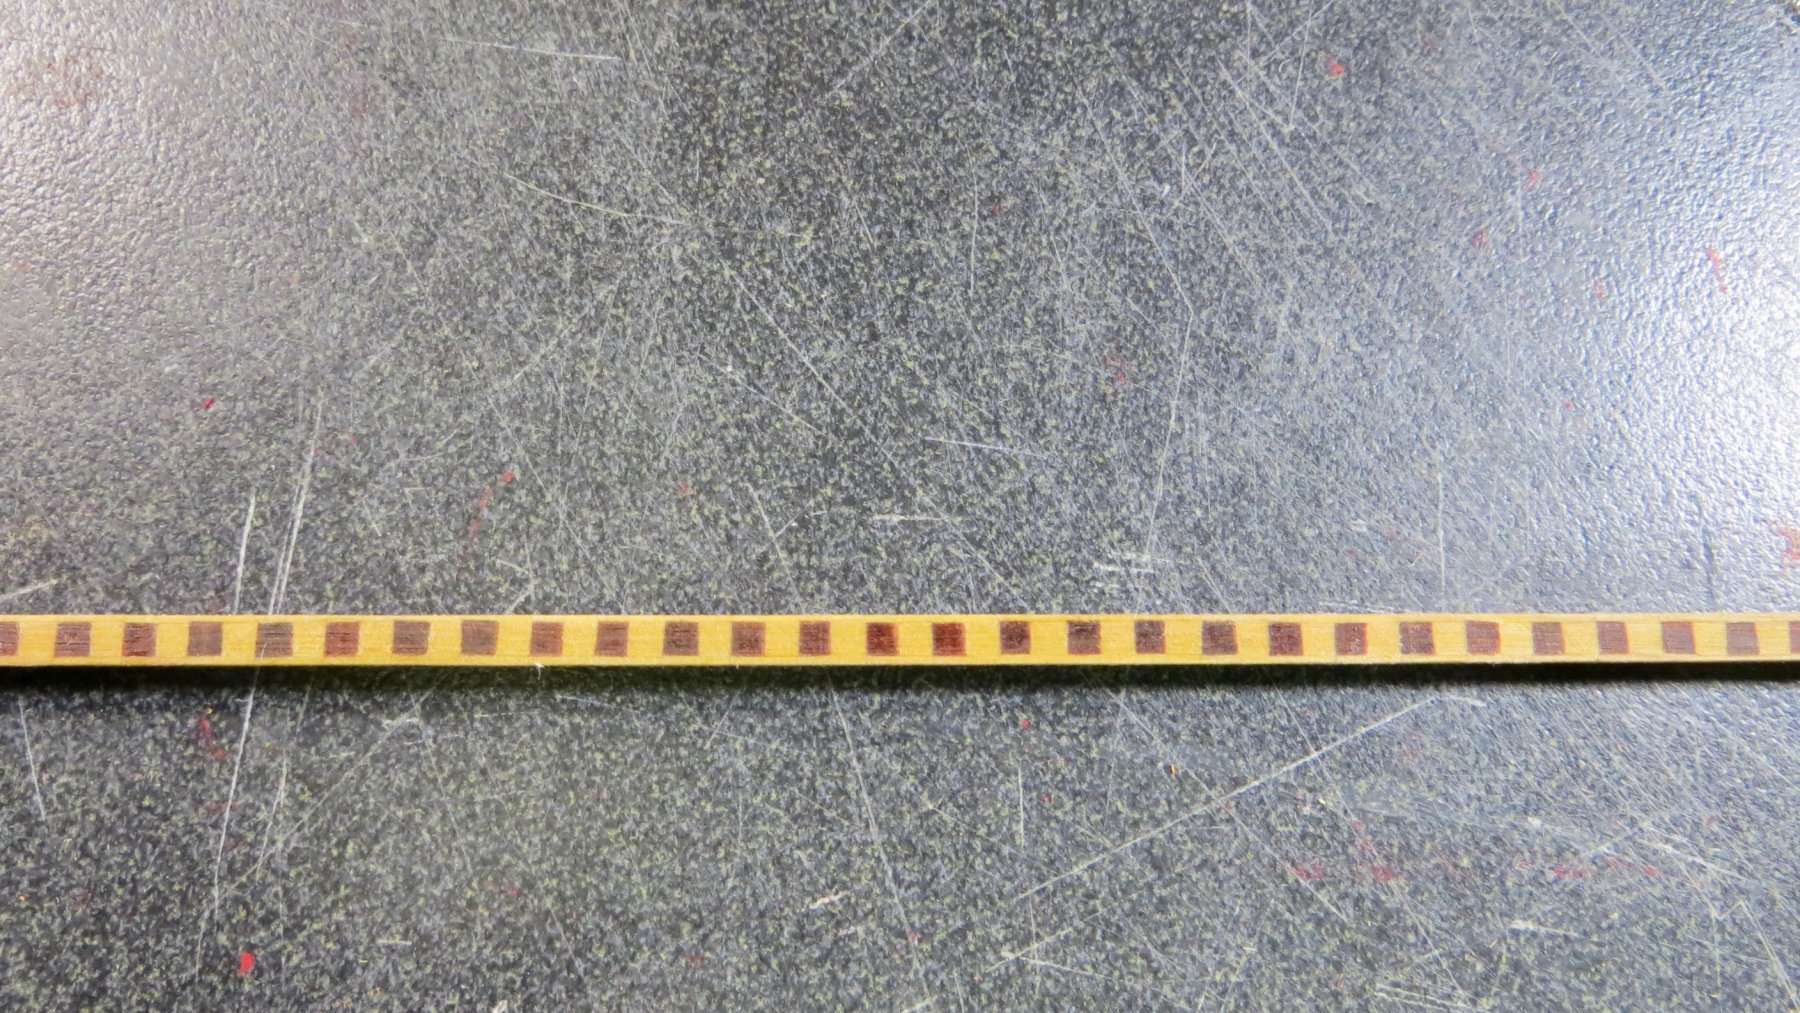
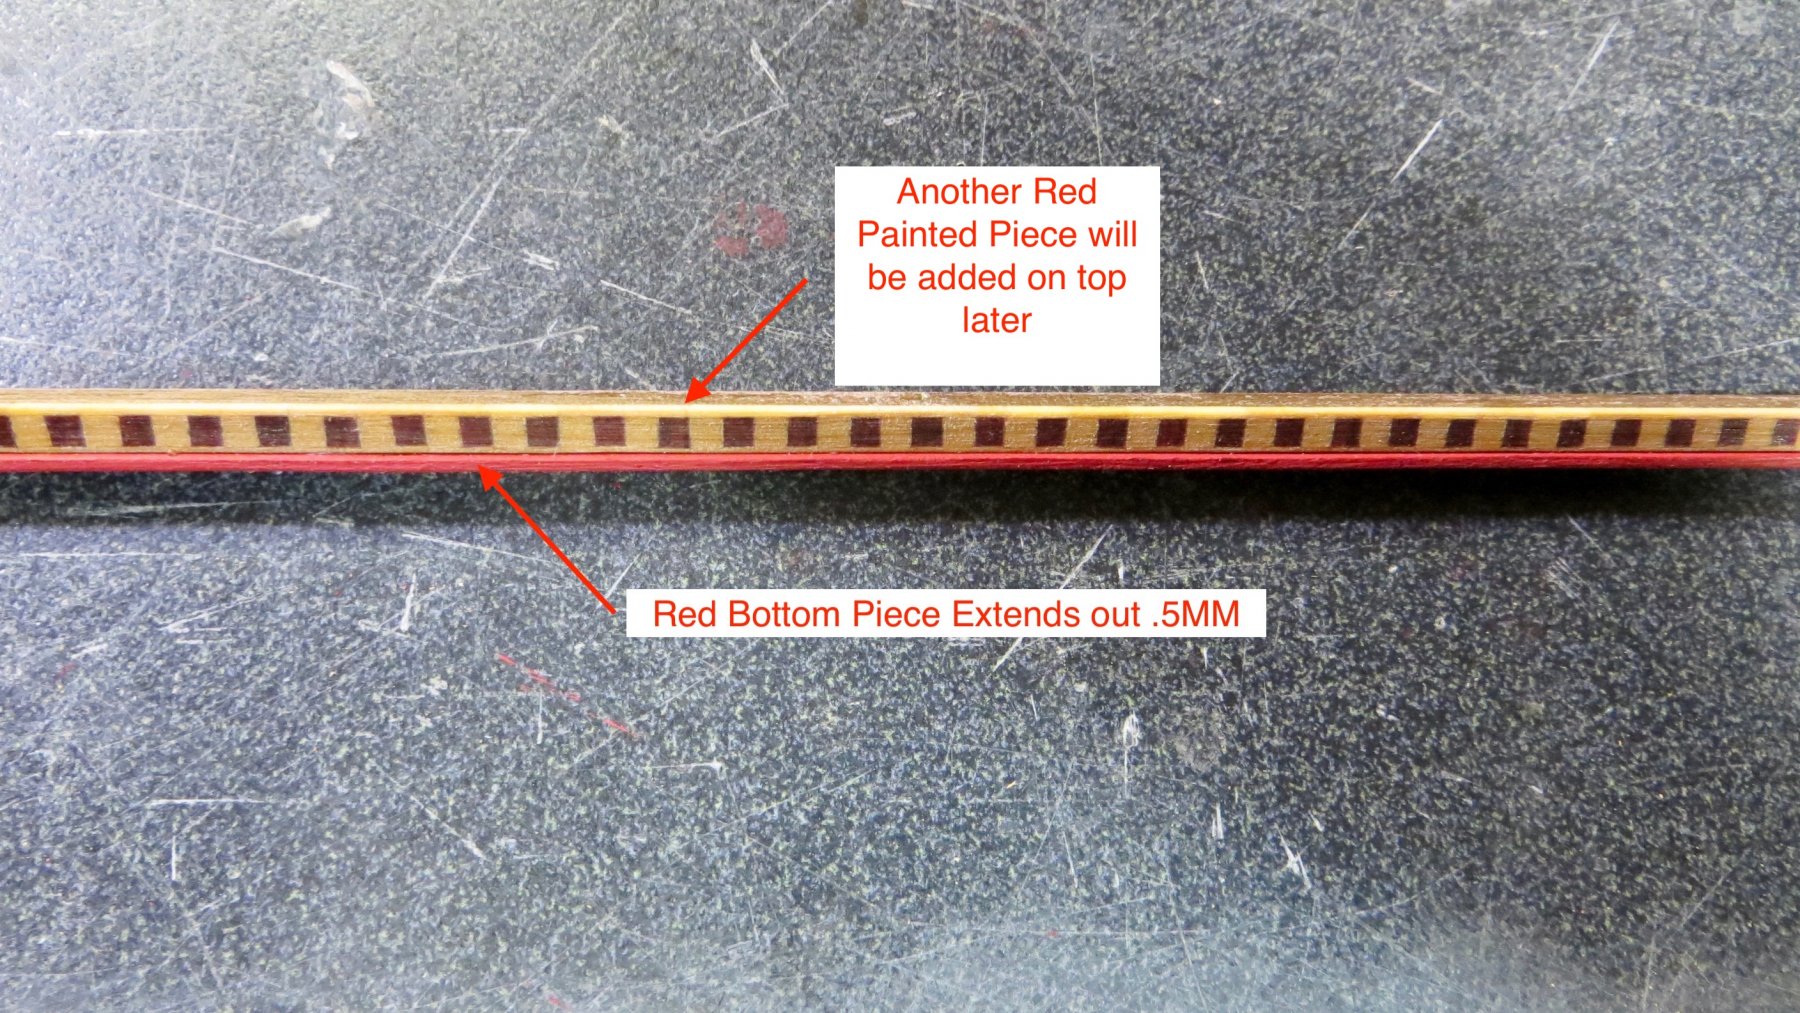
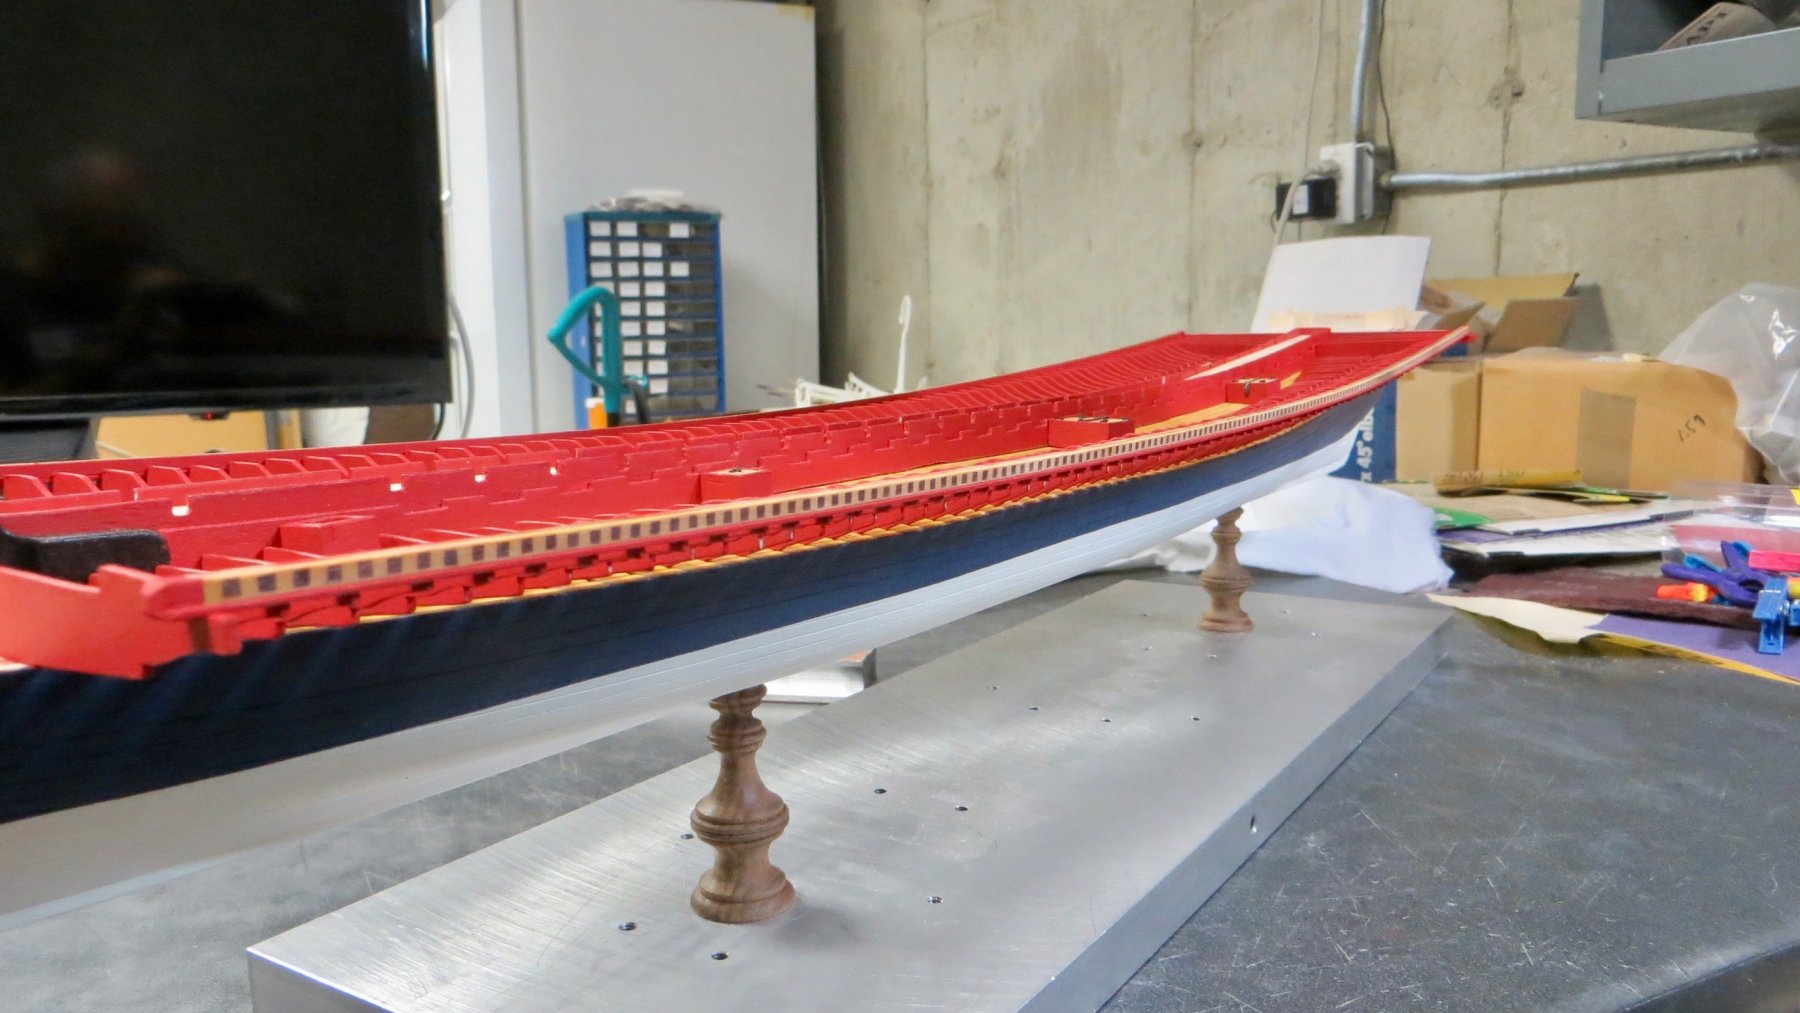
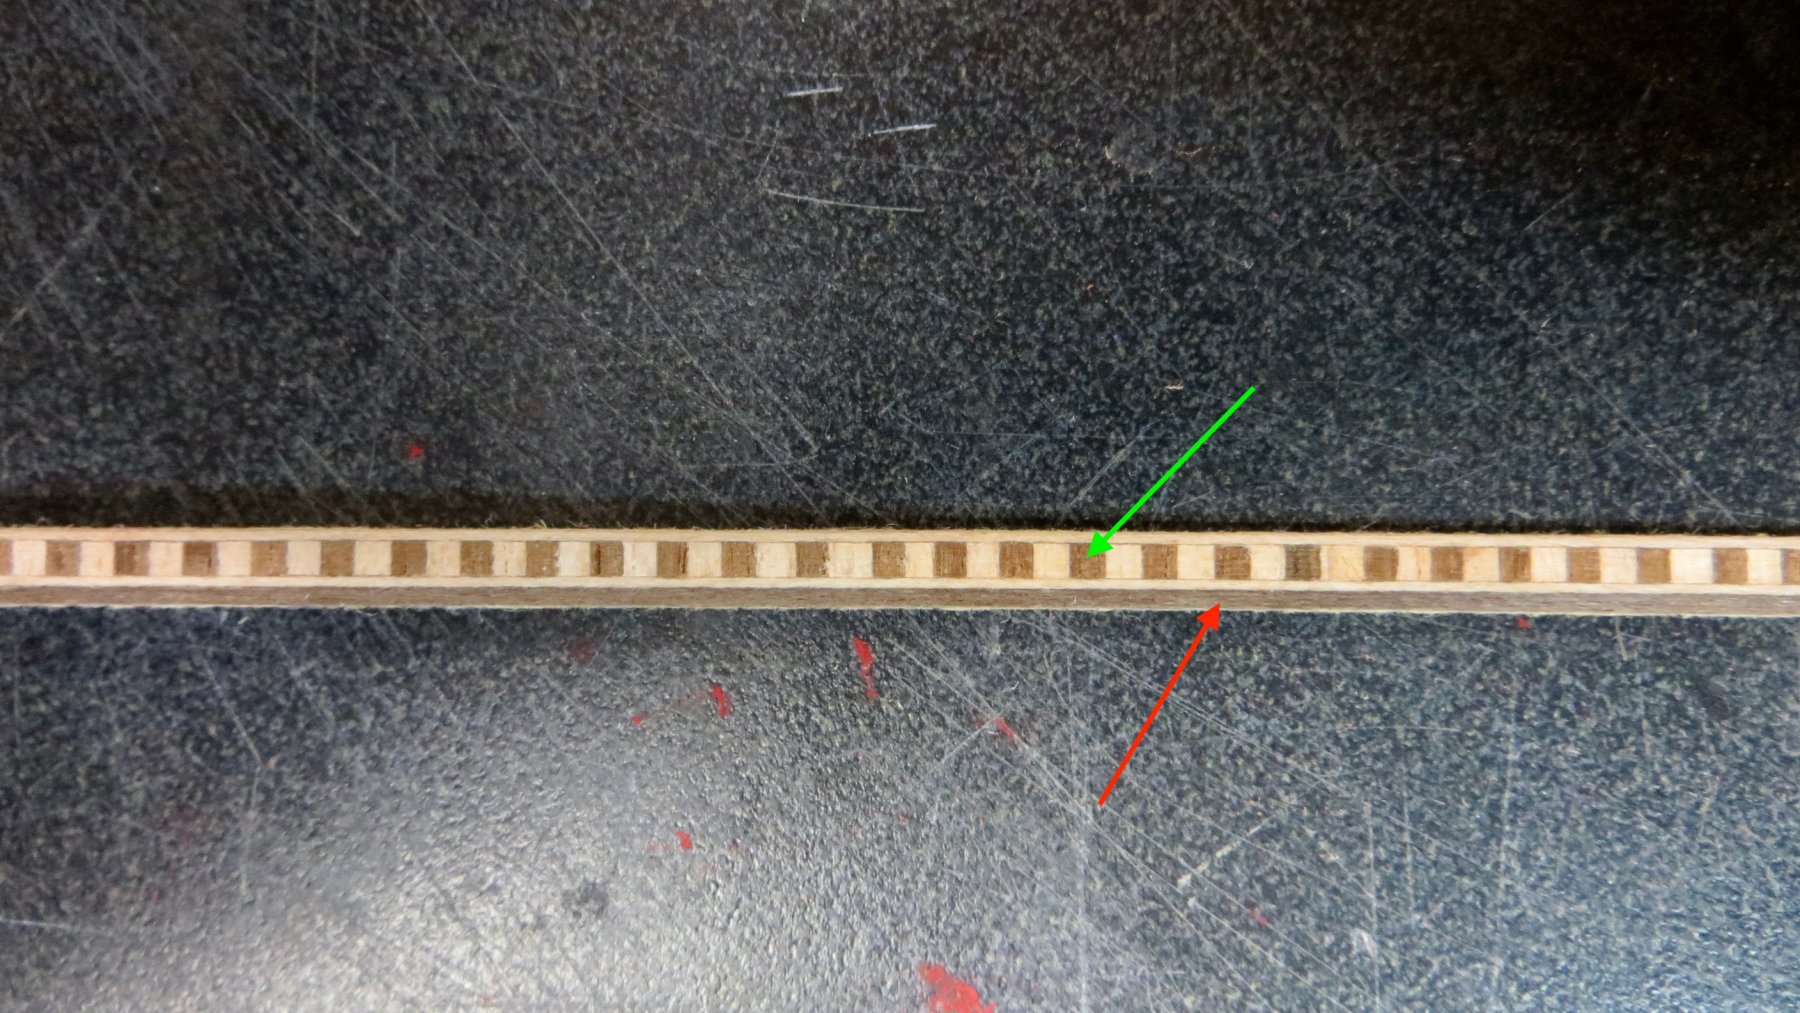
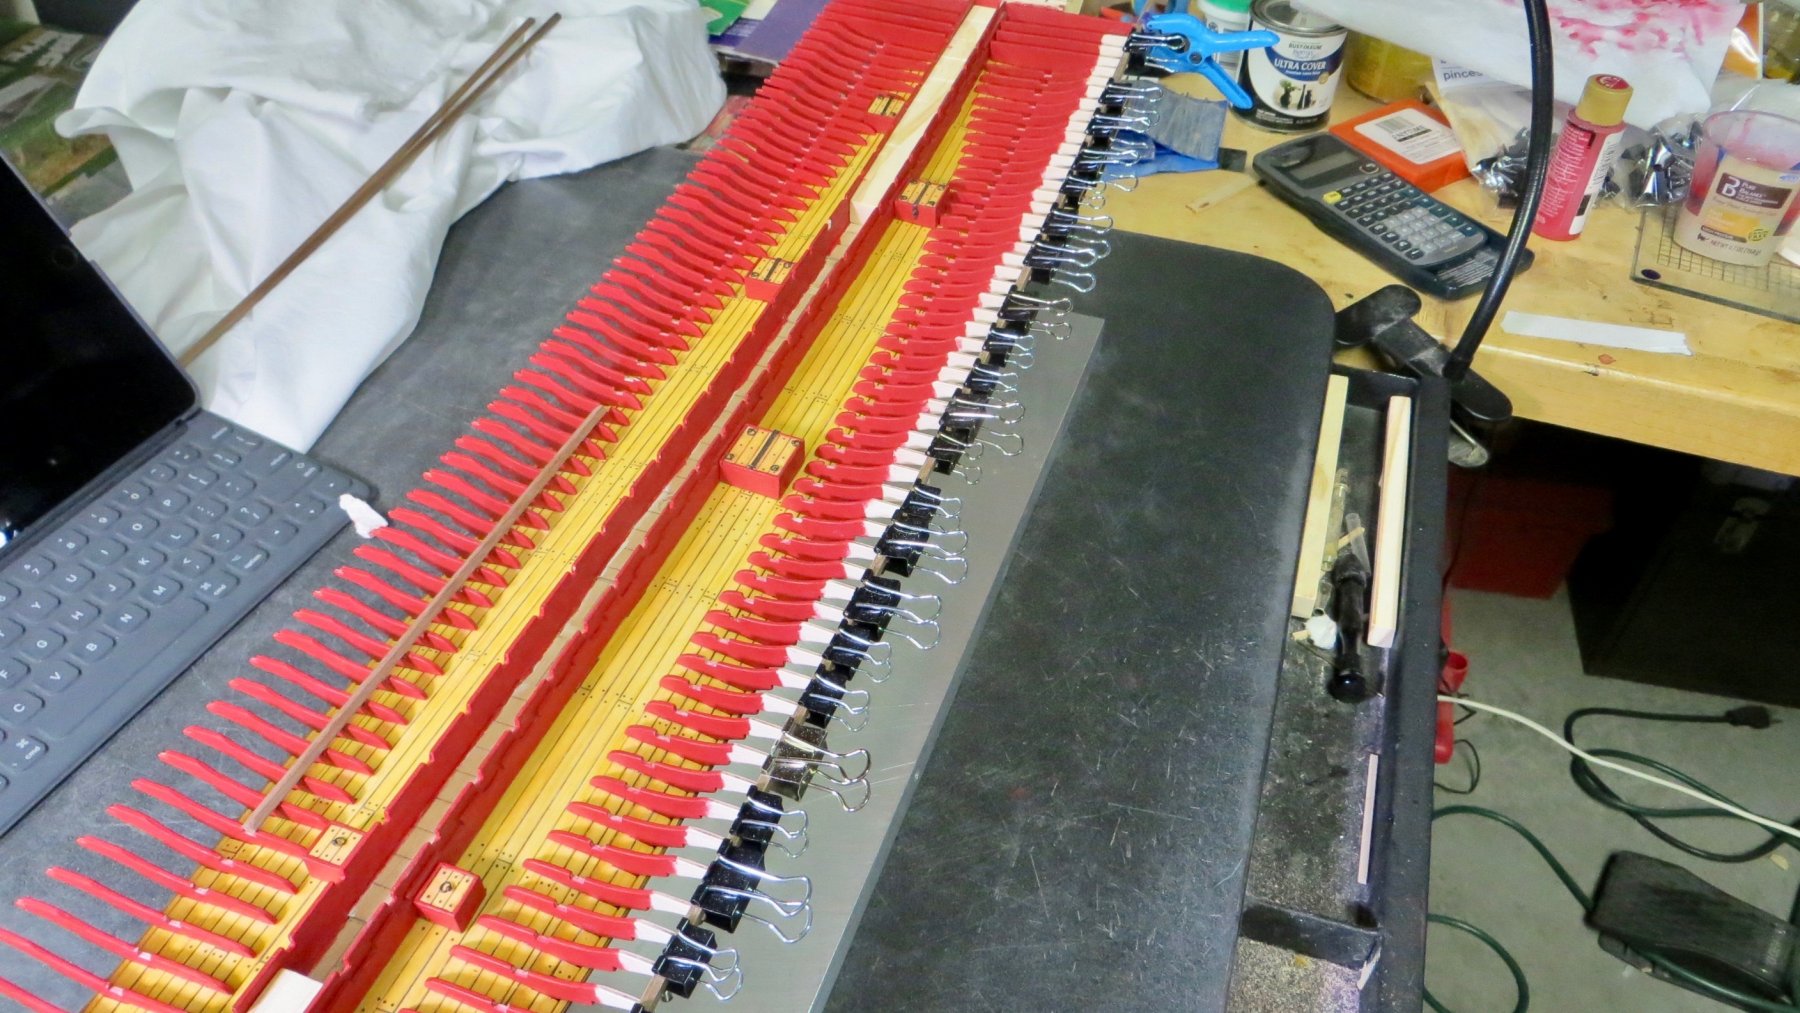
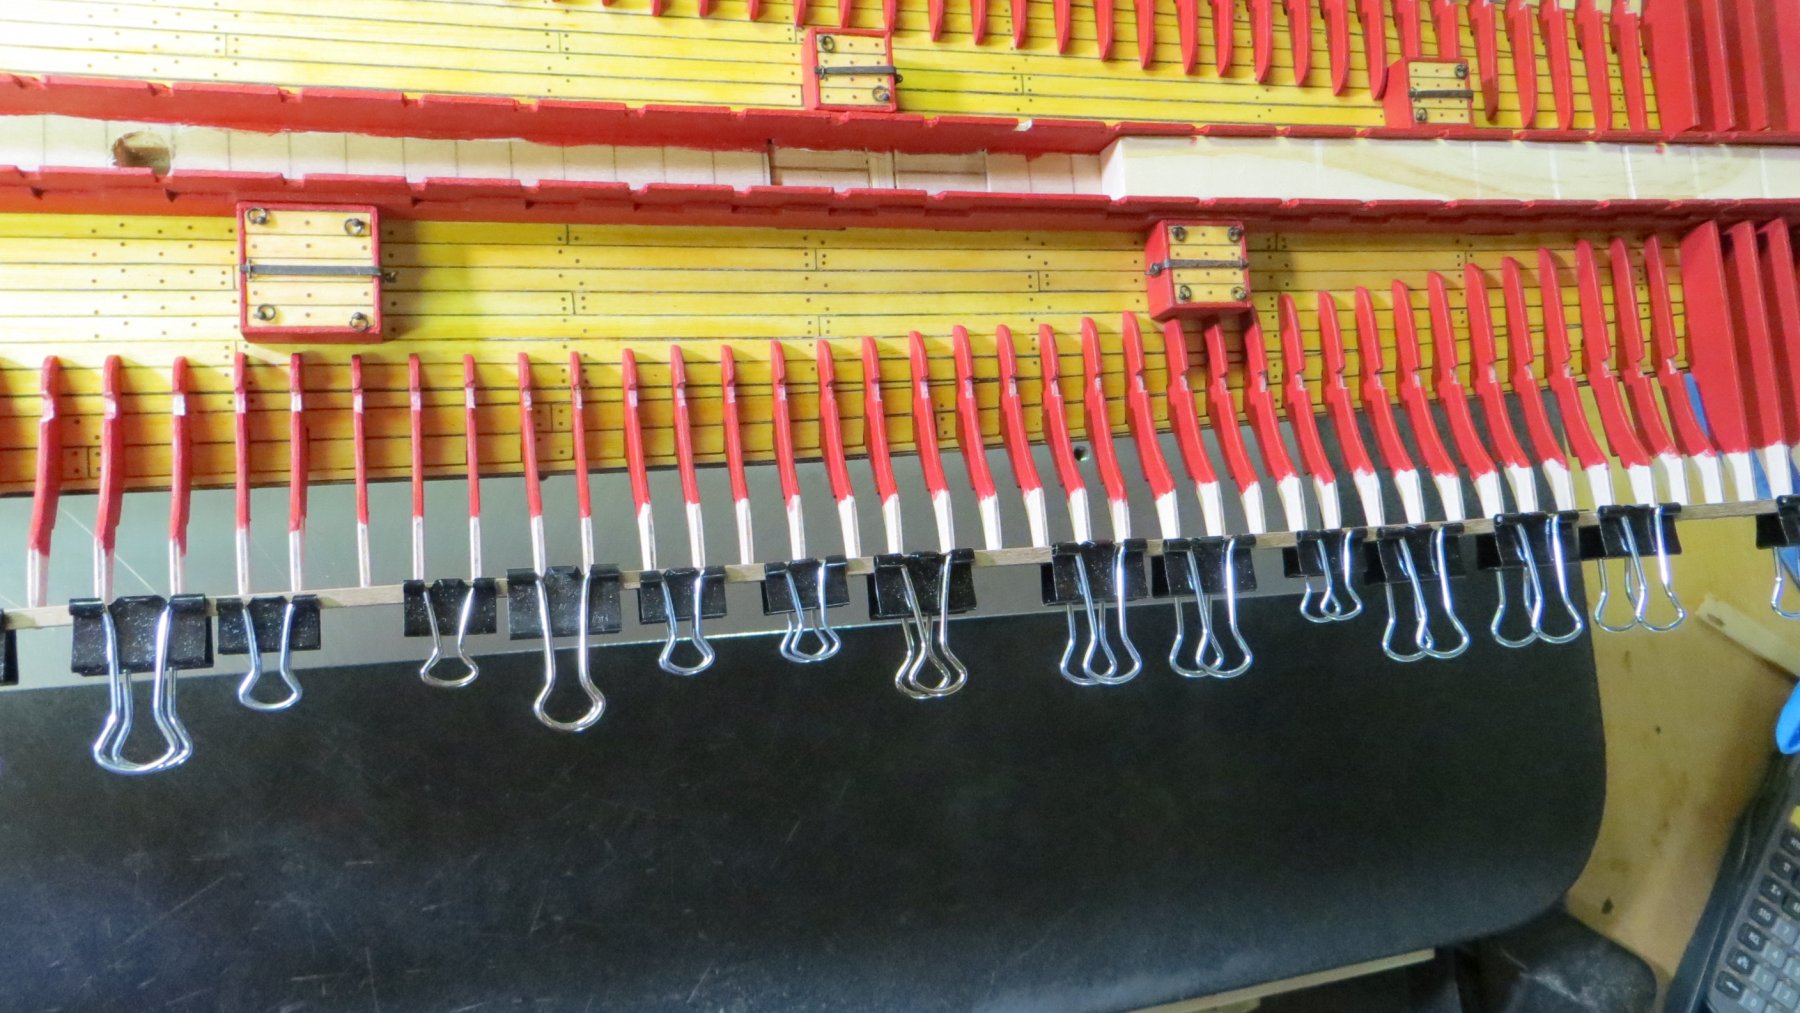
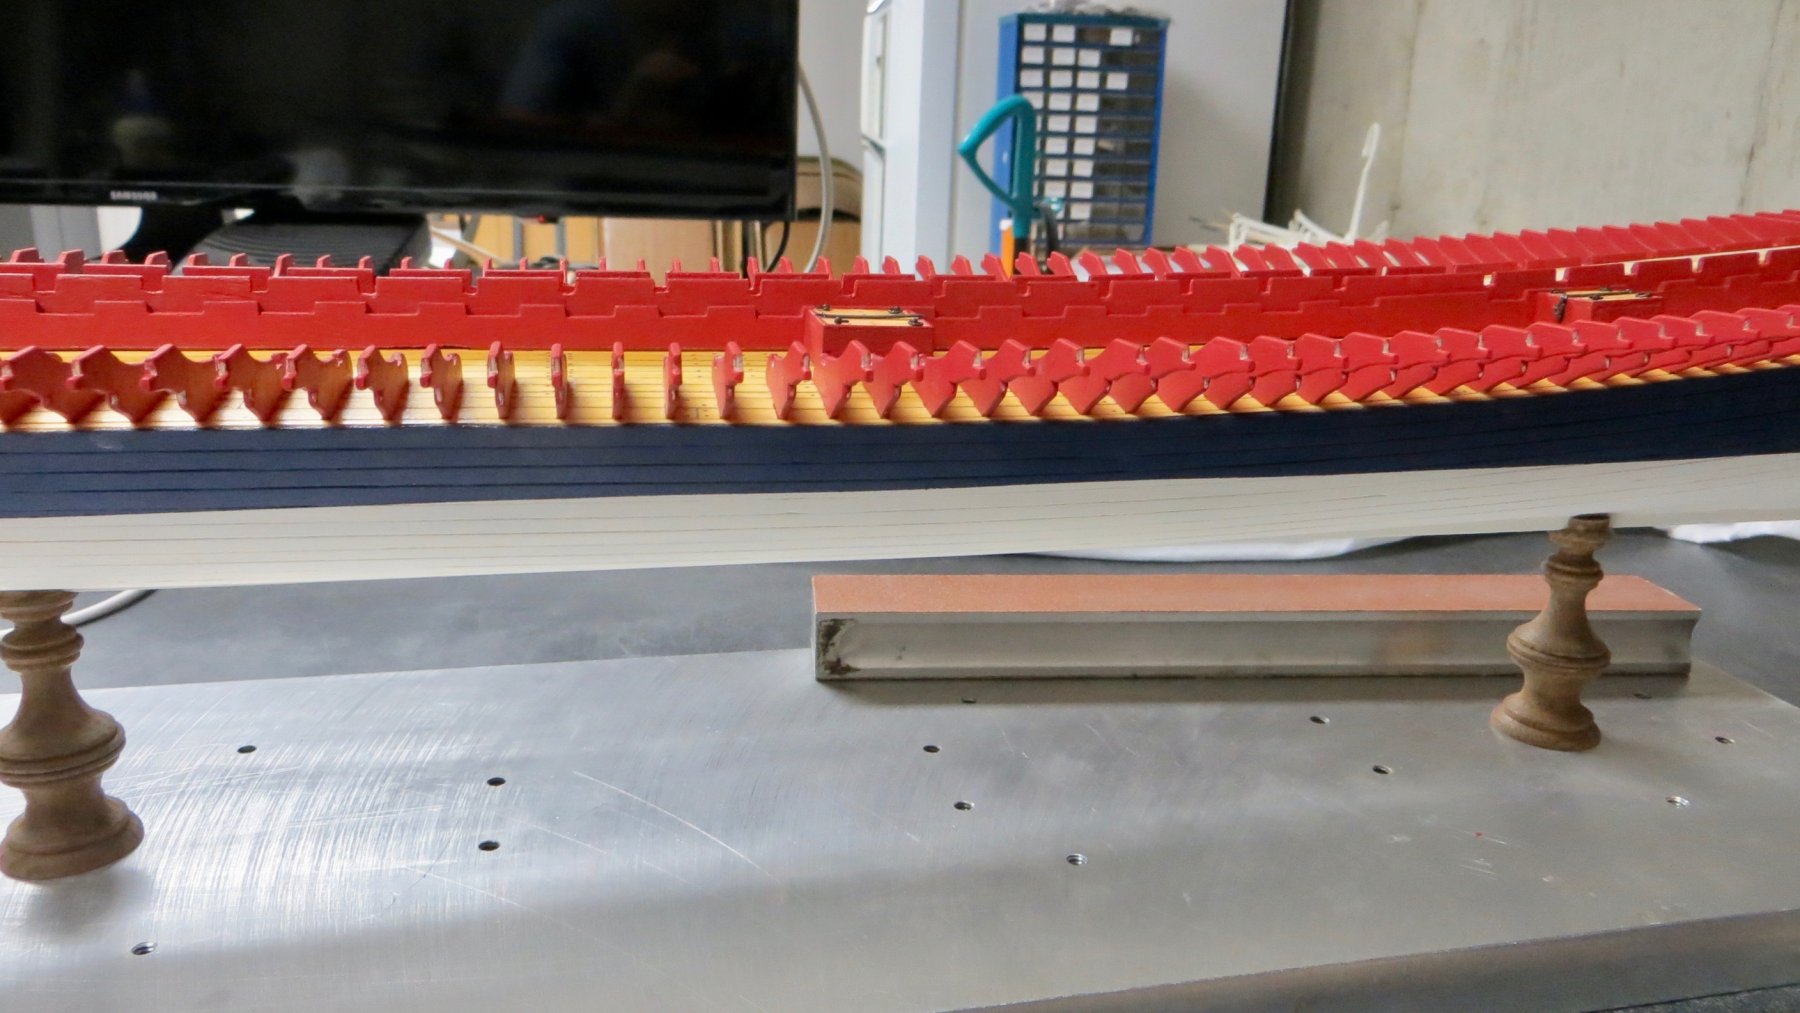
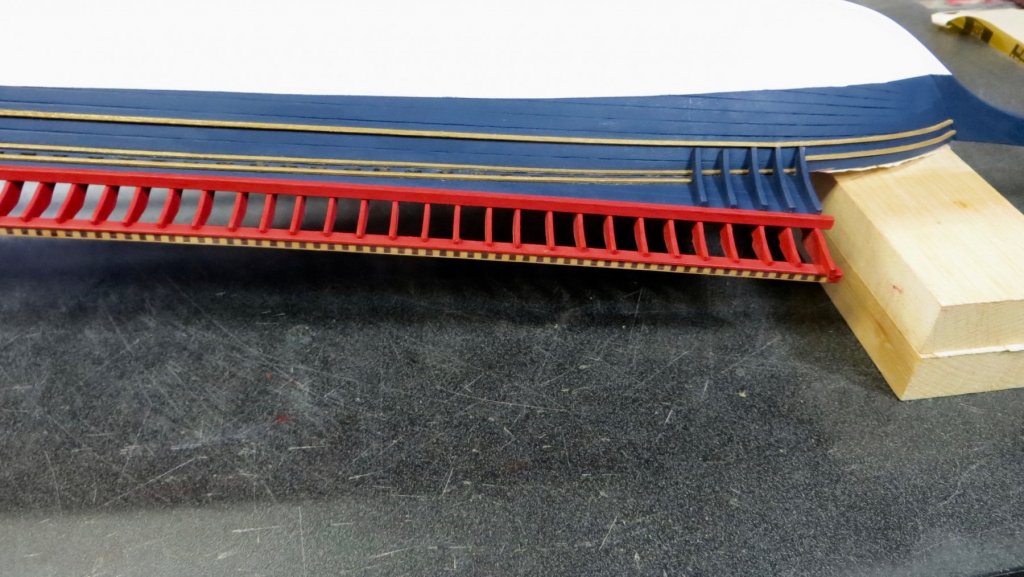
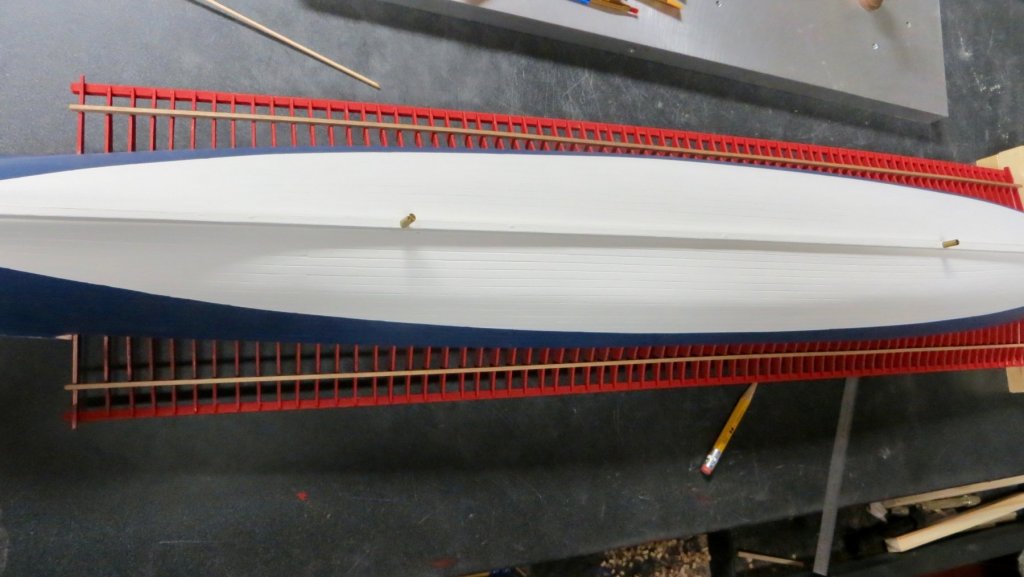
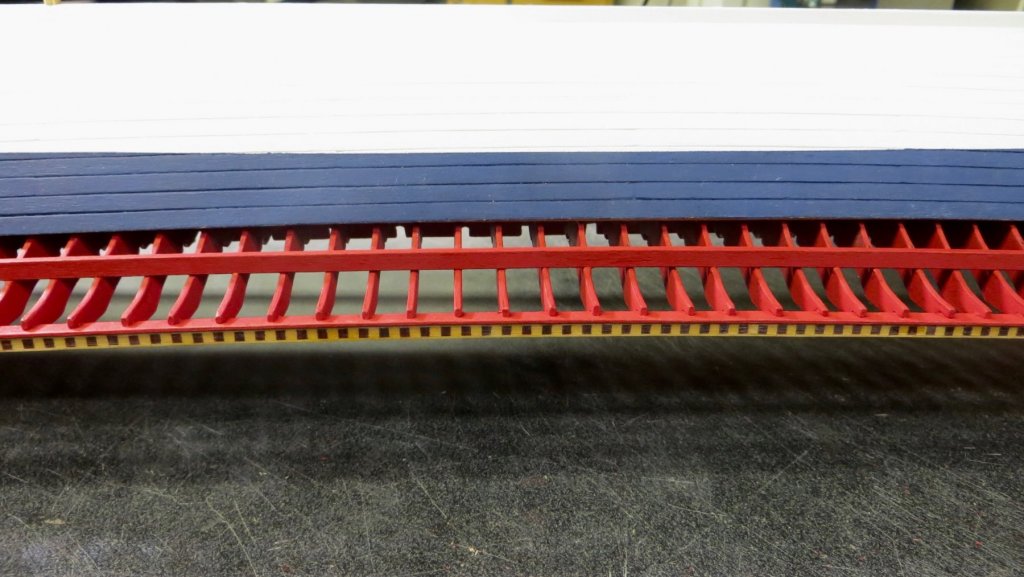
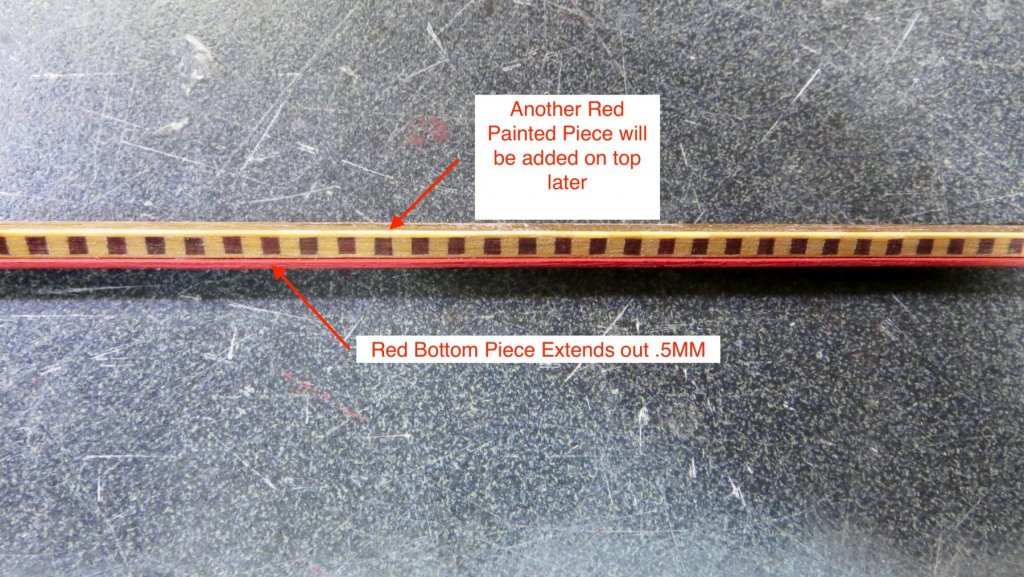
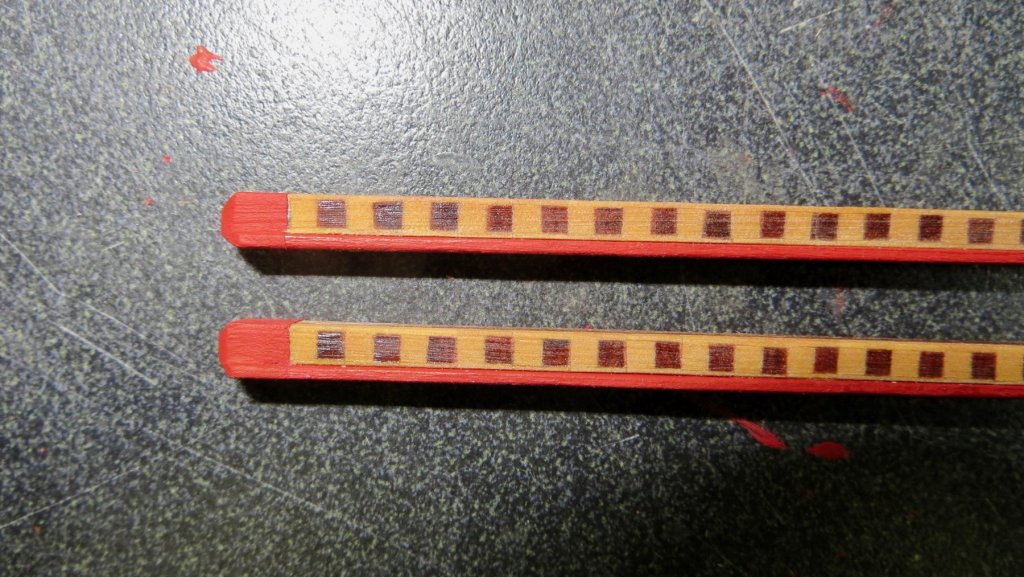
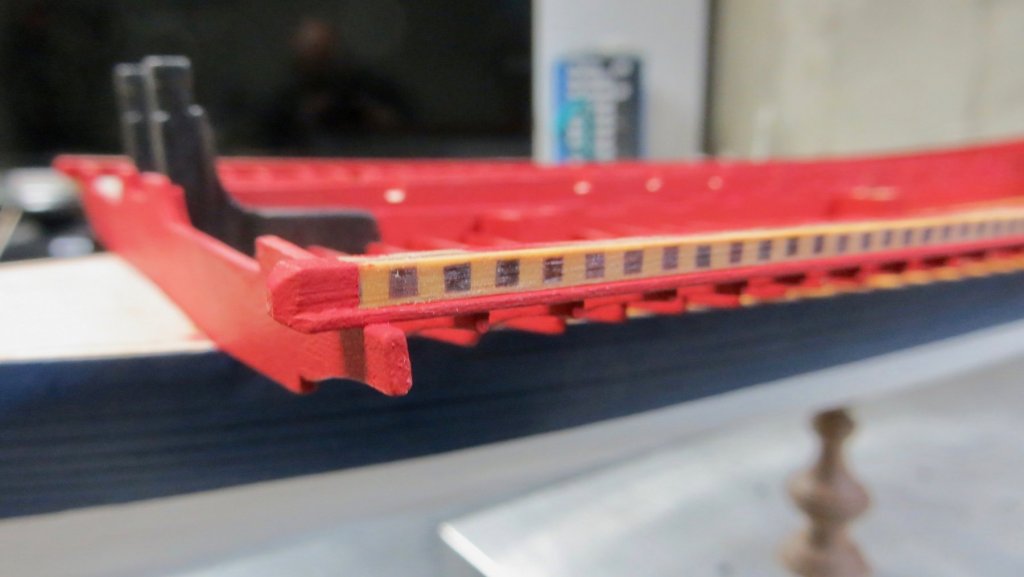
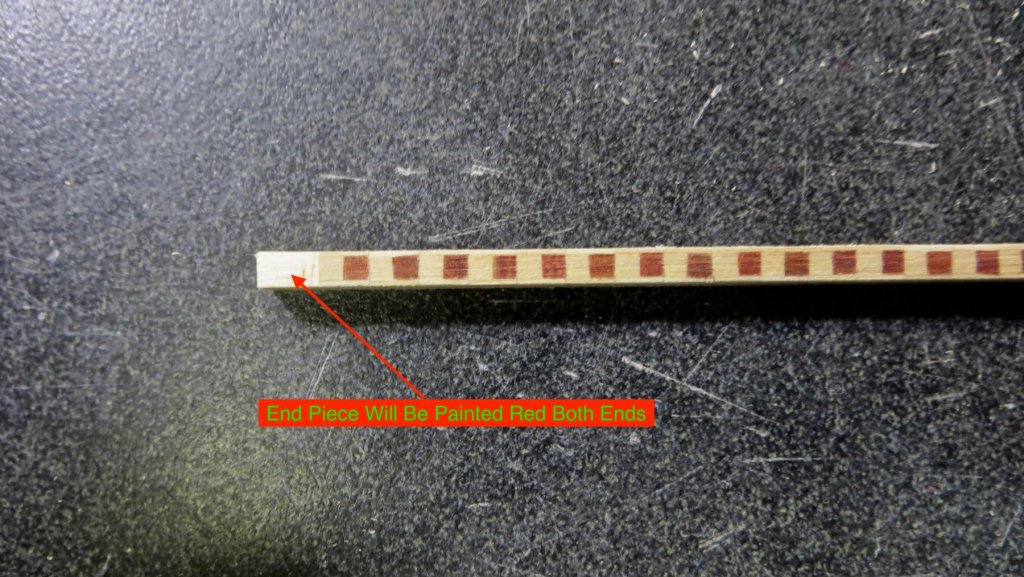
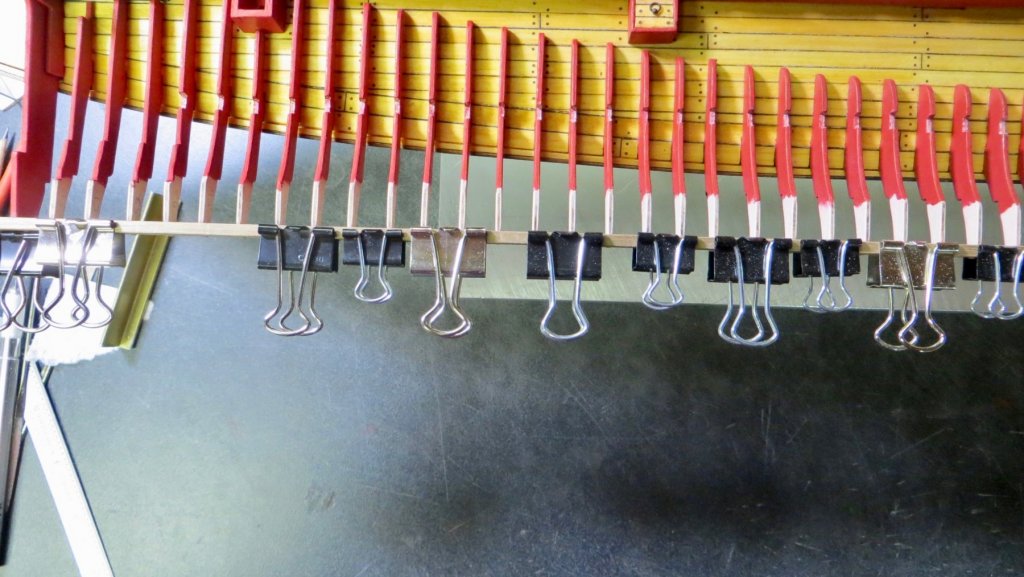
Finishing up the end beams. I had three goals in mind when I decided to make the end beam decoration from scratch. I think I accomplished 2 of them The first goal was to make the checkered pieces out of a red wood to highlight the red. I succeeded until I applied a light stain to darken up the light wood to match the deck. While the light oak stain did not change the red on a sample piece I applied it to, it did darken the red on the trim I made. I think this was because when i cut the red wood, I used the ends for the squares and it must have absorbed the stain more. Anyway, I still like the result, since the light wood was darkened a bit. Mu second goal was to add a finished red painted piece to the bottom, making the beam a 4mm by 4mm piece. I extended the red painted piece another .5 mm out from the decorative piece. I think this will look better than having it flush, as was the decorative piece supplied with the kit (shown in my previous post) Later in the build, a red painted top piece will be added, extending out the same amount. My third goal was to not have the decorative squares run out to each end, but to frame it with painted red sections on each end. I also chamfered the ends. The Beams attached to the model Next I have to remove the model from the base and flip it over to work on the underside. I have to figure out a way to safely support the model, while it is flipped. Thanks, Frank

- 510 replies
-
- 6
-
-
- reale de france
- corel
- (and 1 more)
-
Hi Michael, Glad I visited your log today. Looking at the photos, I forgot that I had one of those contour metal thingy. I had it hidden away, and I pulled it out for future use. I know it will come in handy sooner or later on my build Your cross section is looking excellent! Frank
-
Thank you Gimo! and thanks for sharing your log photos! Frank
-
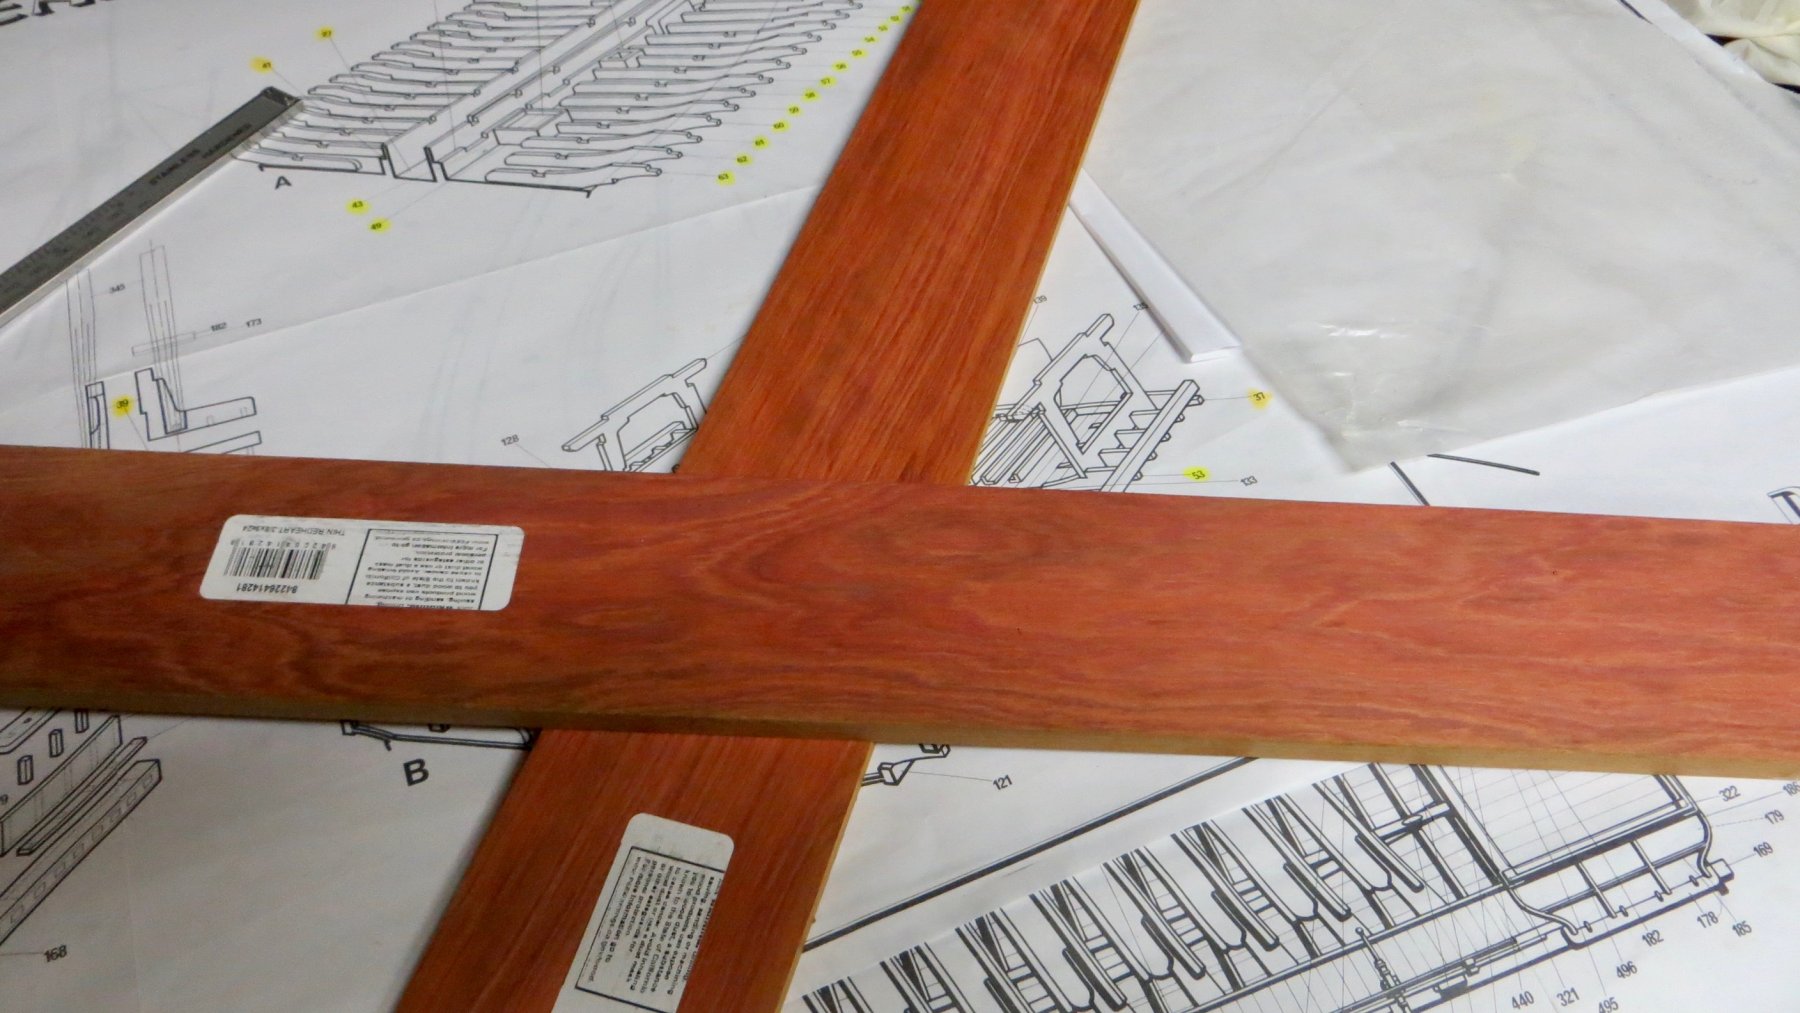
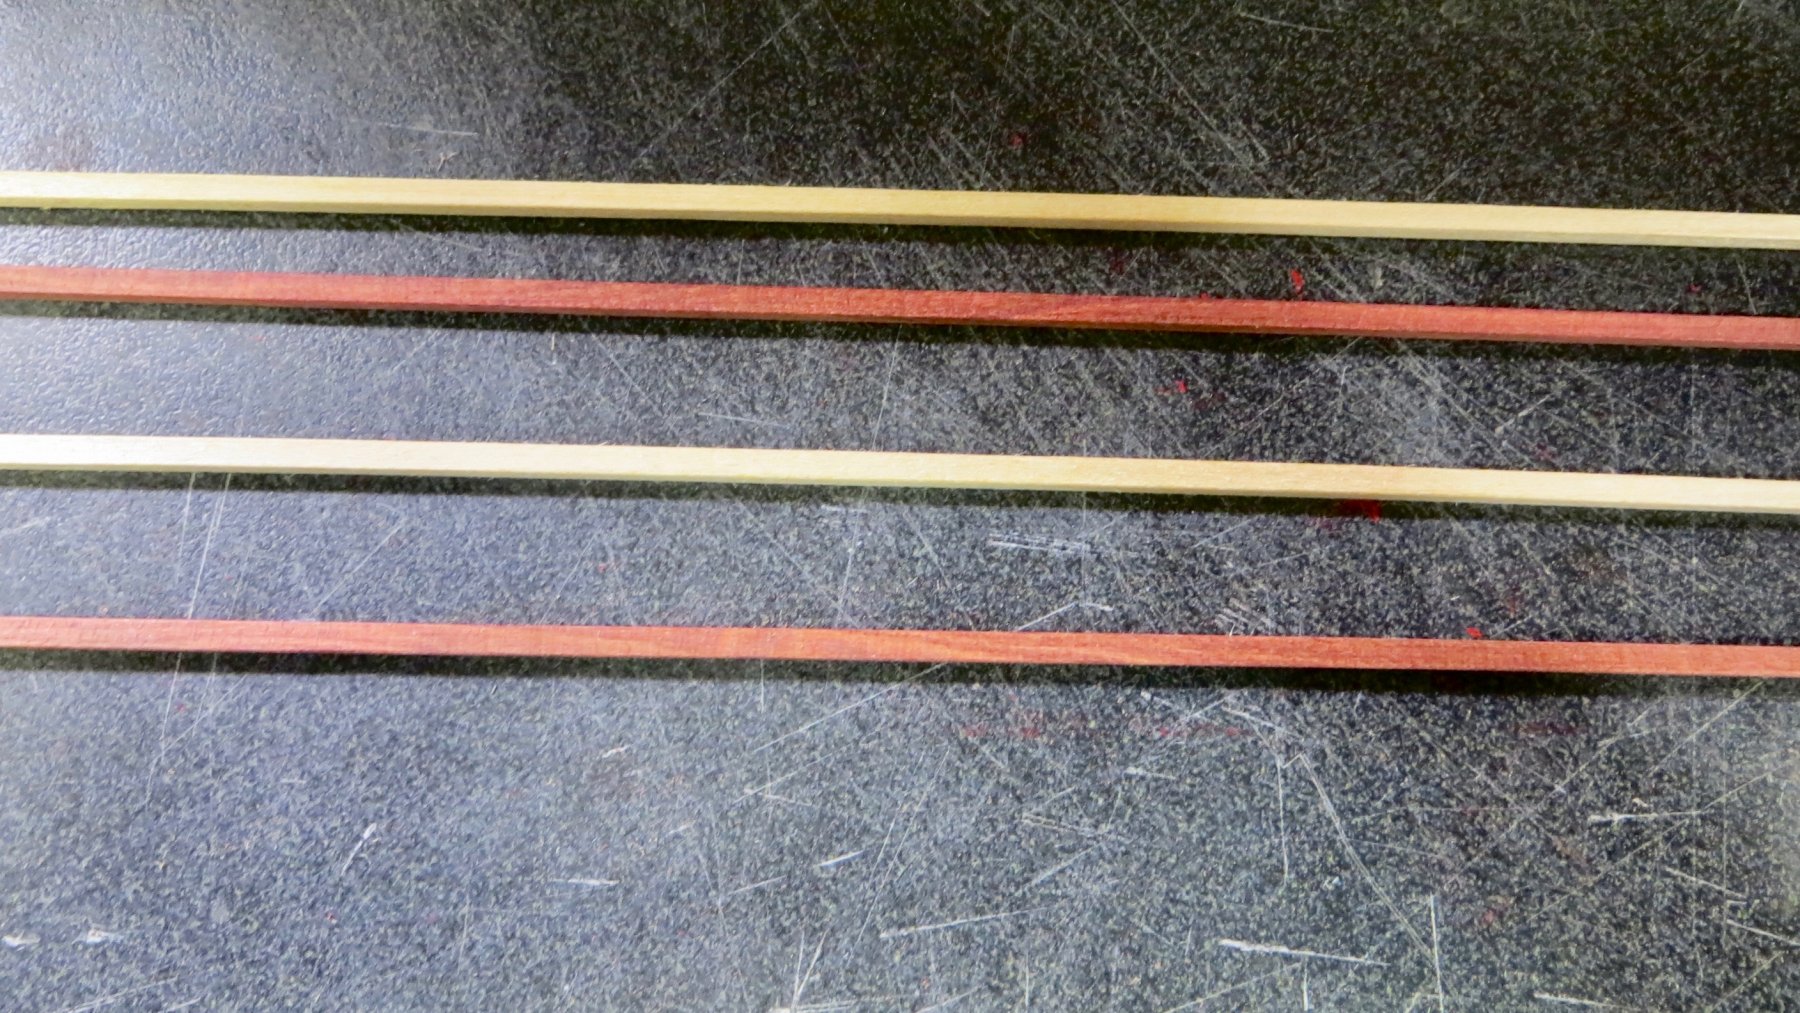
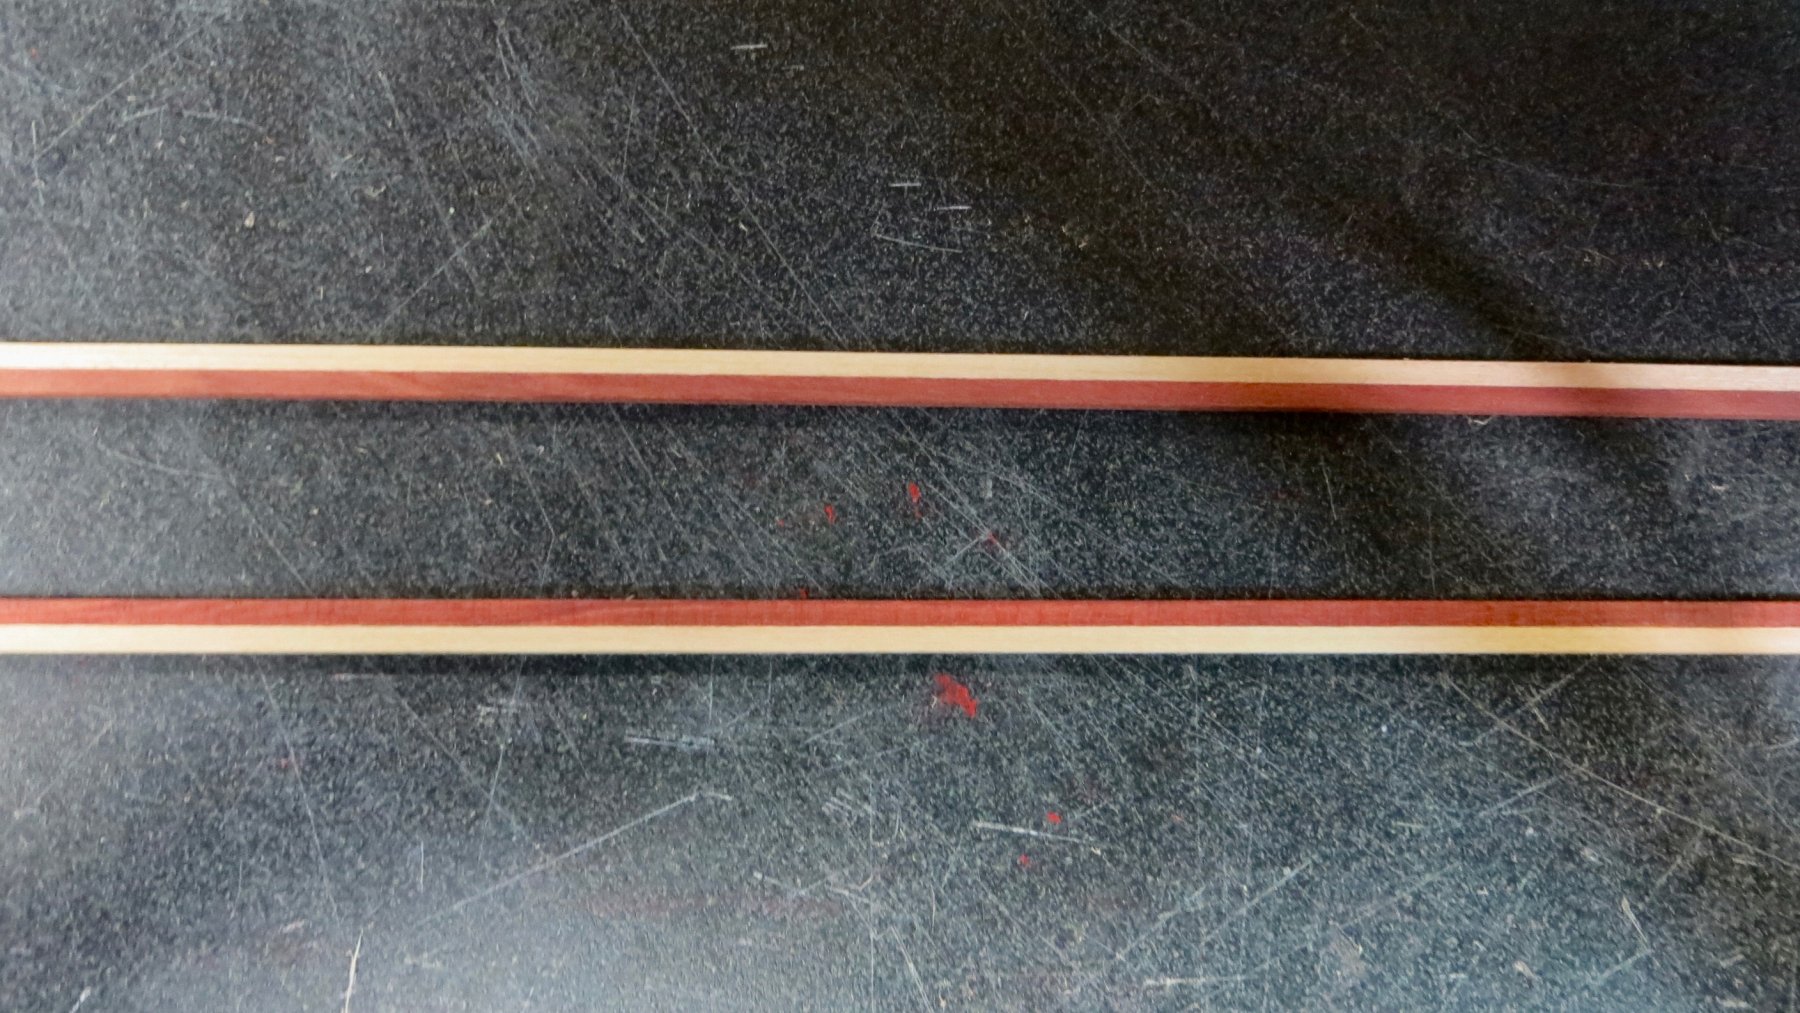
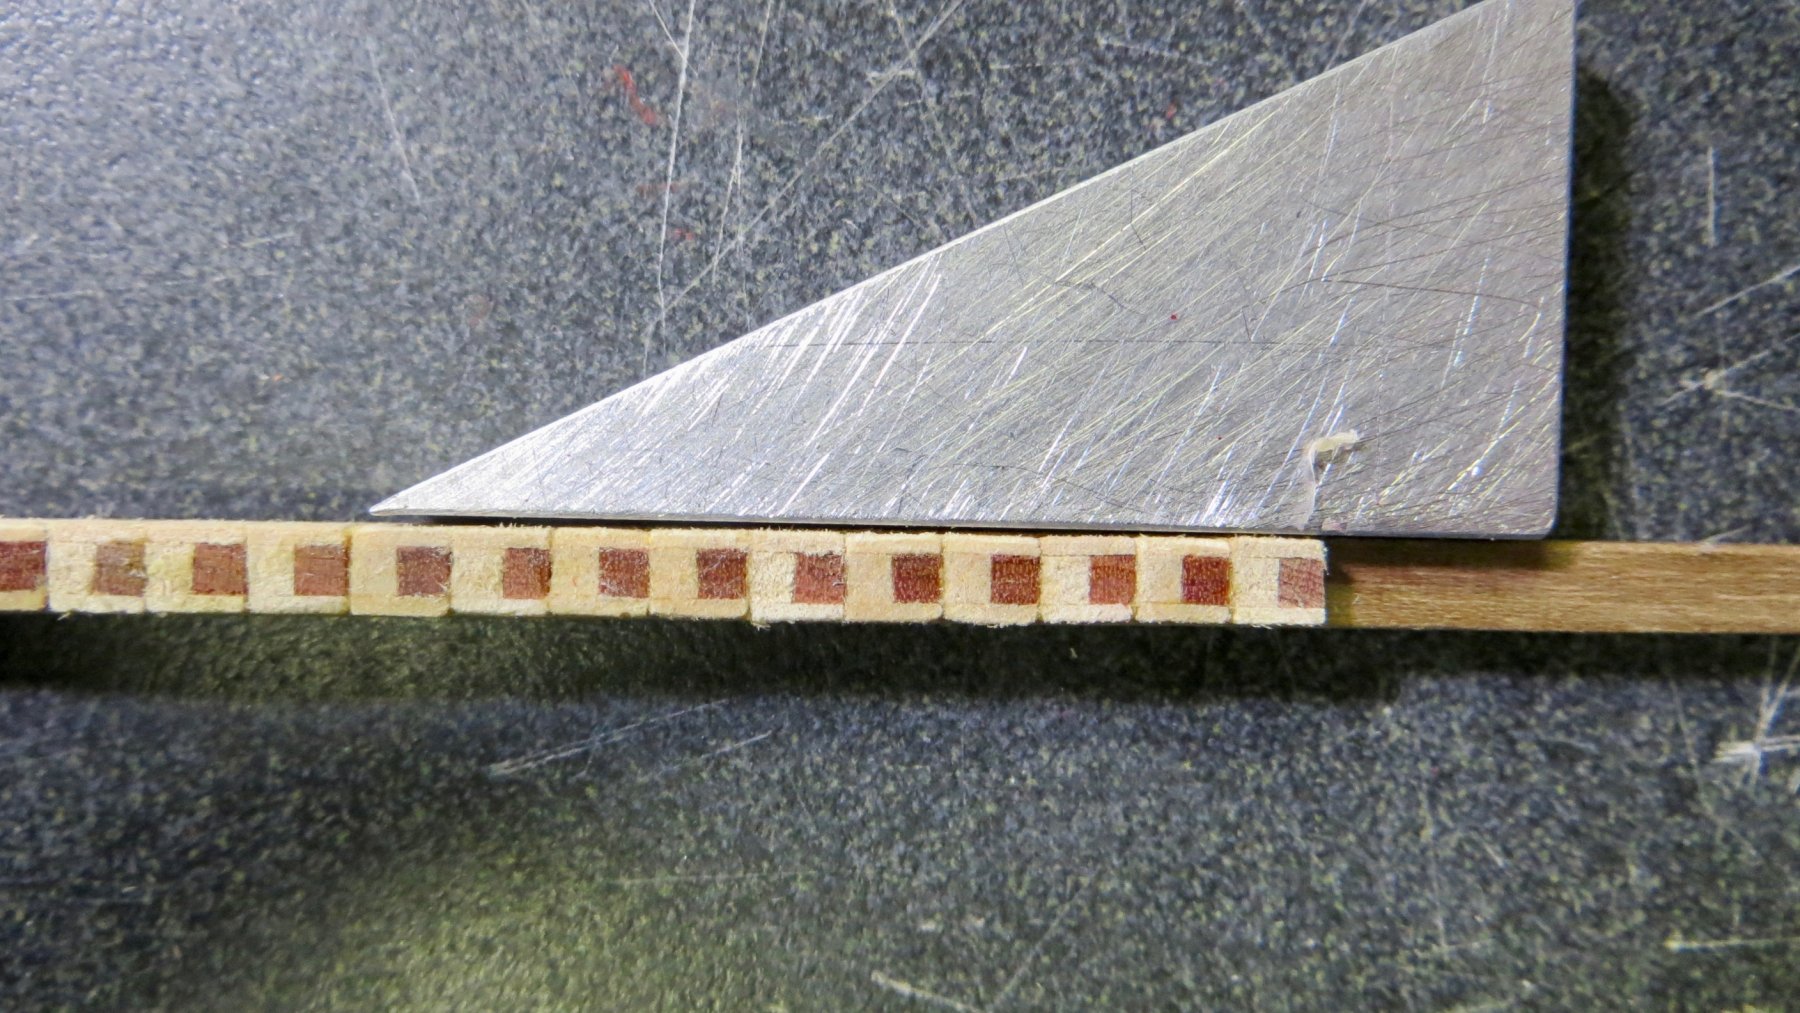
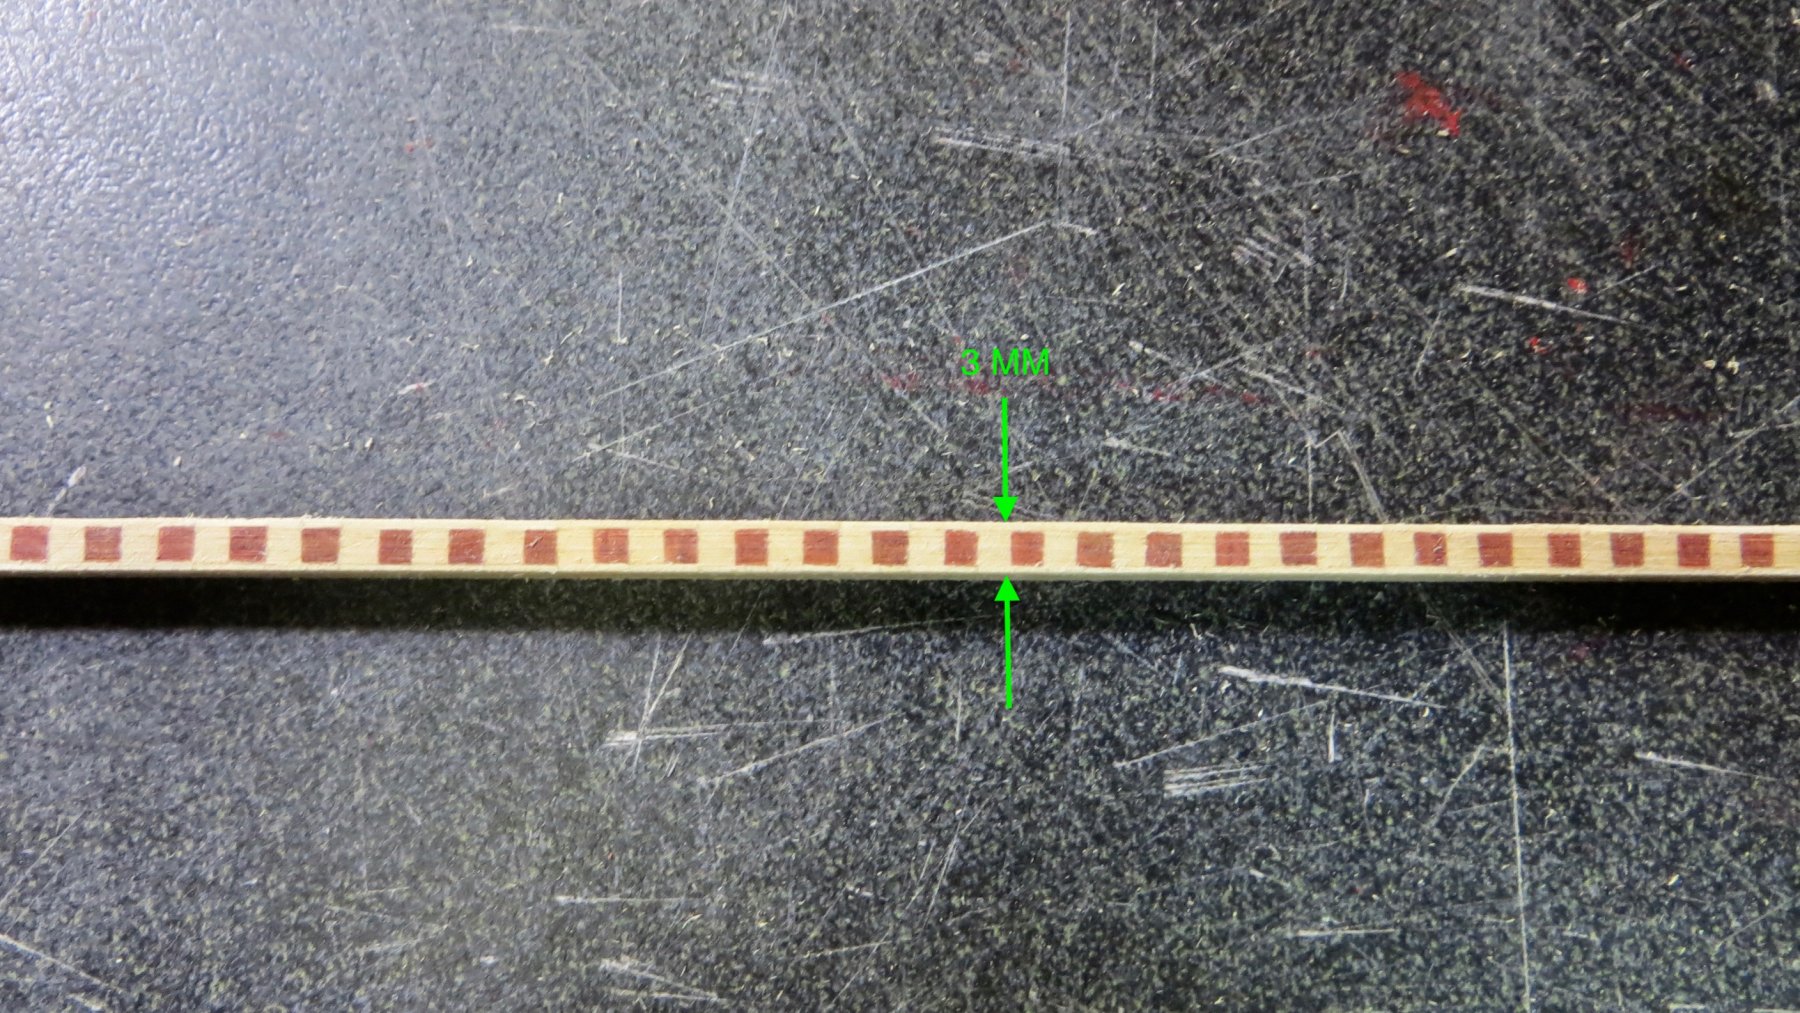
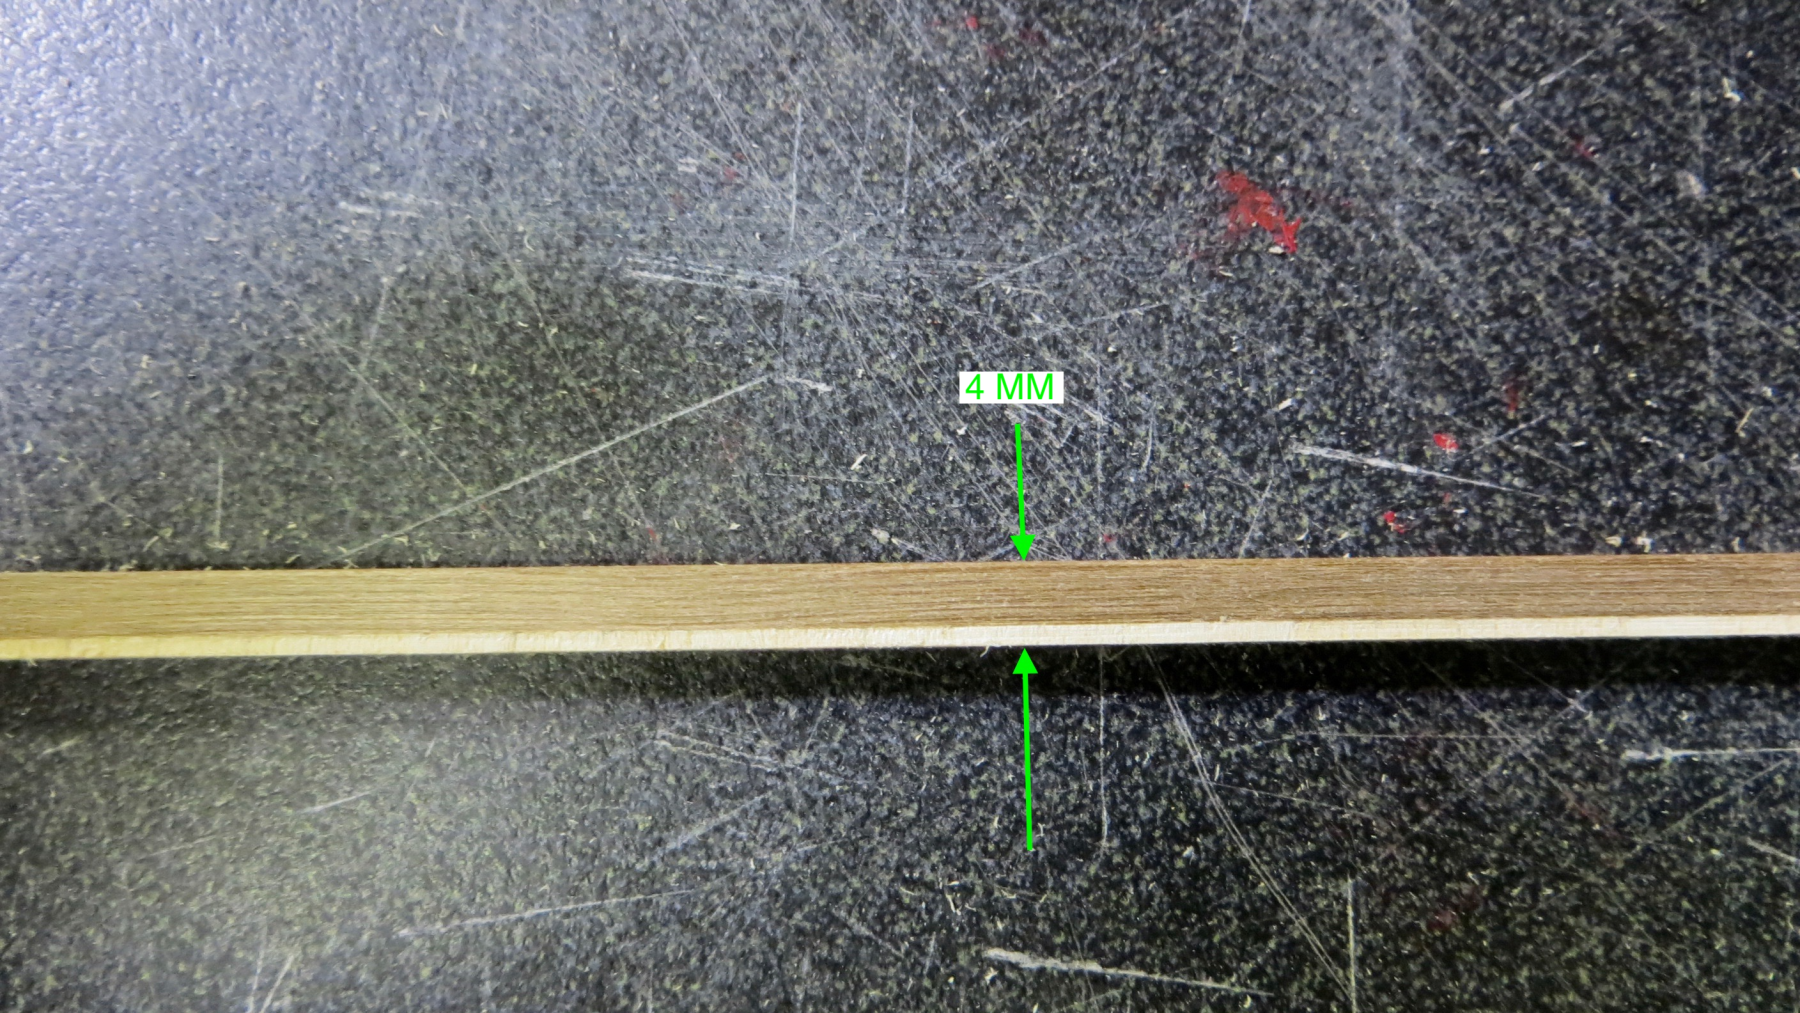
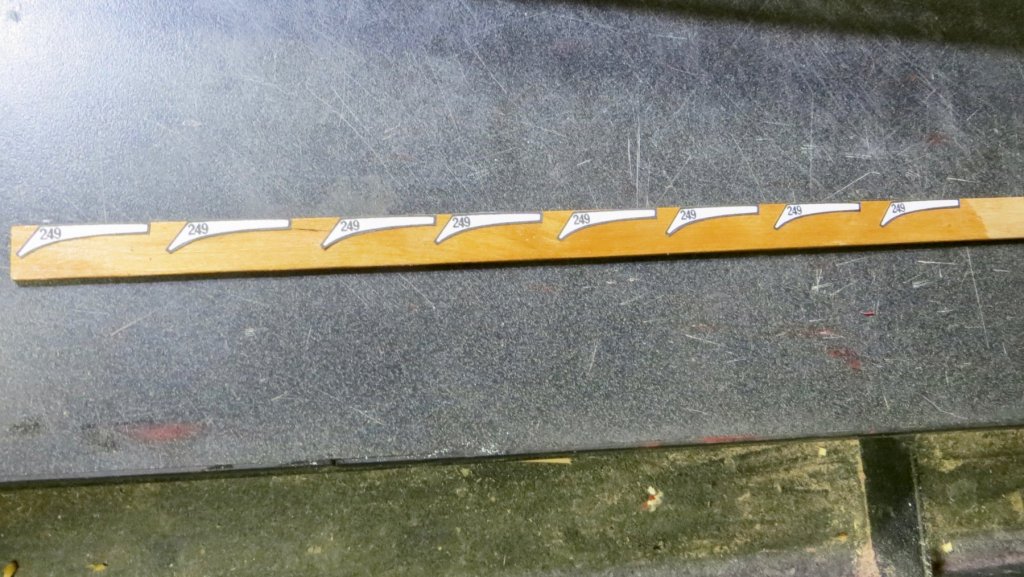
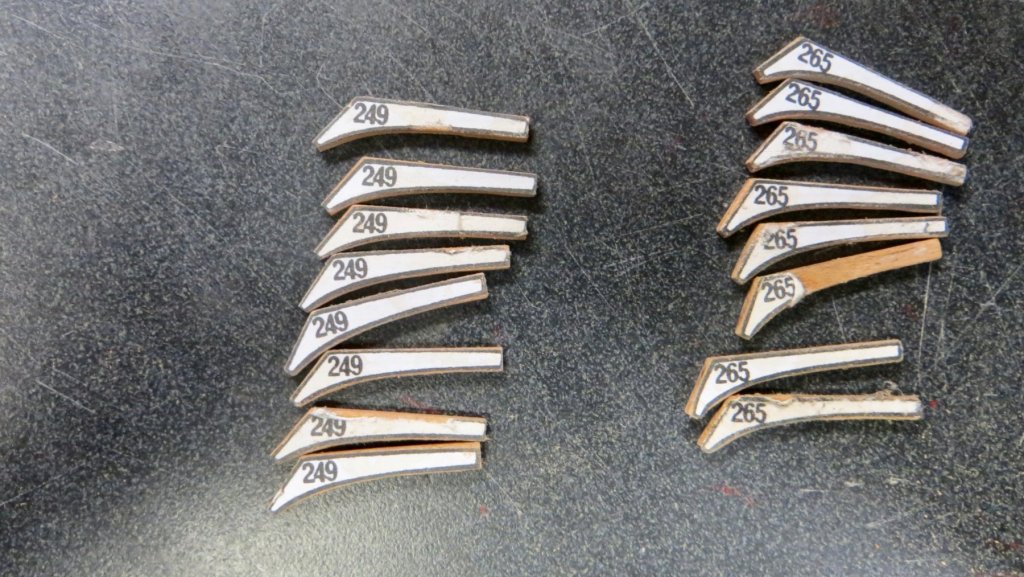
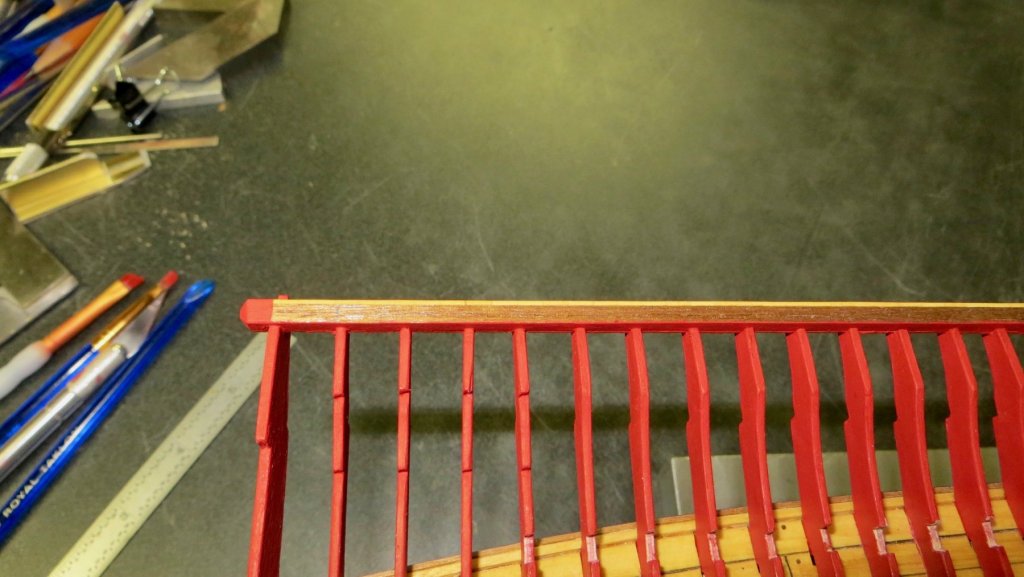
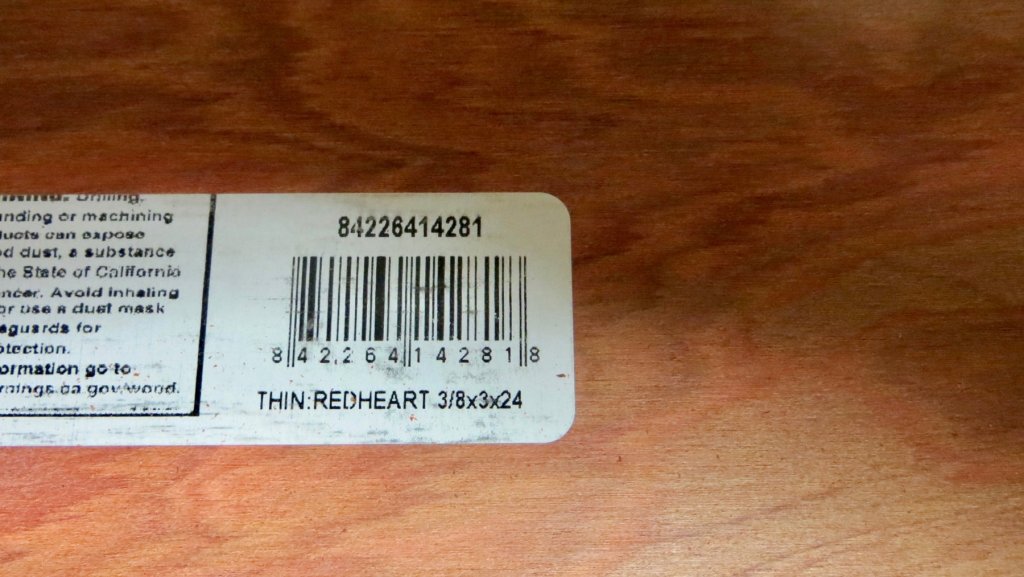
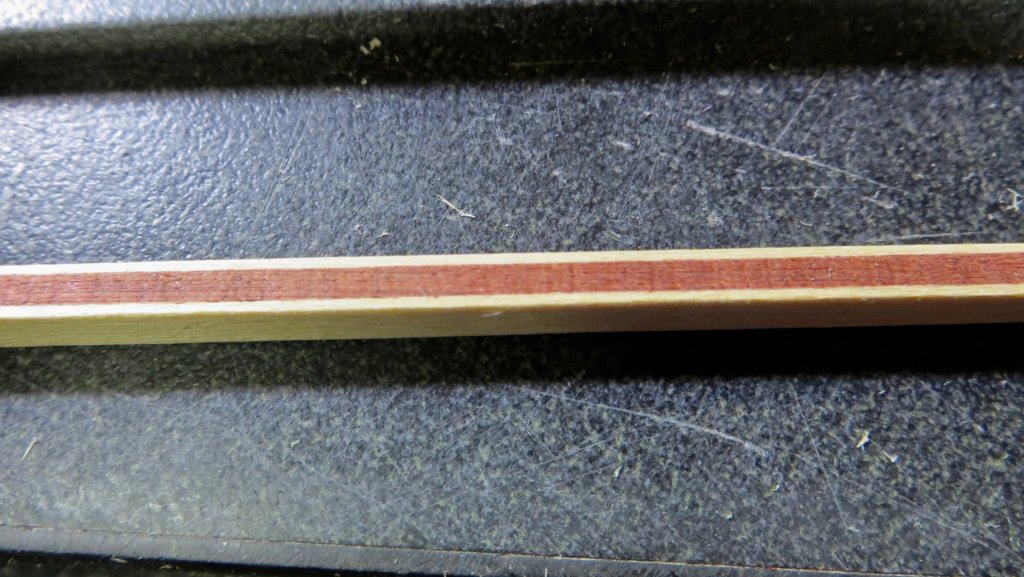
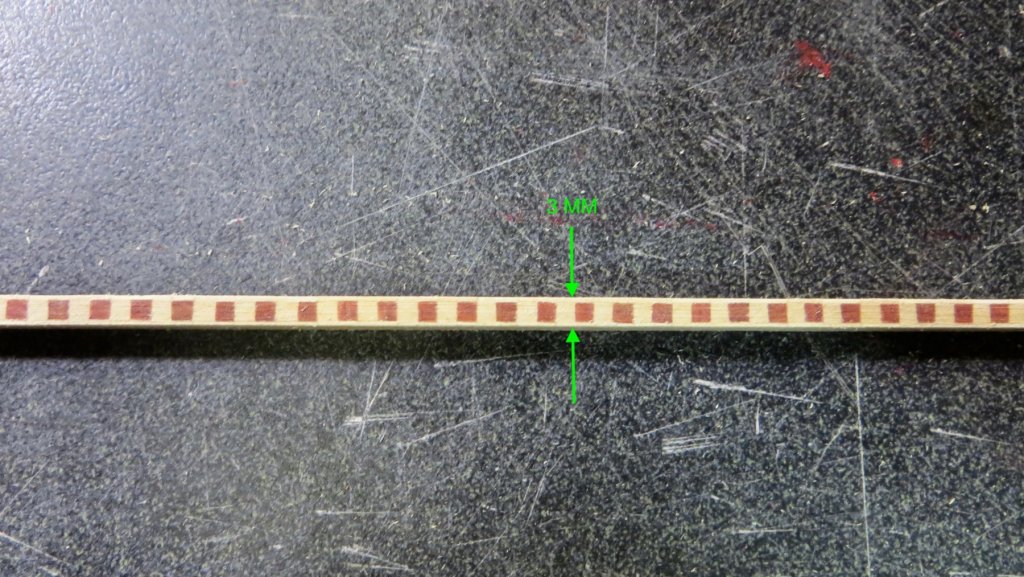
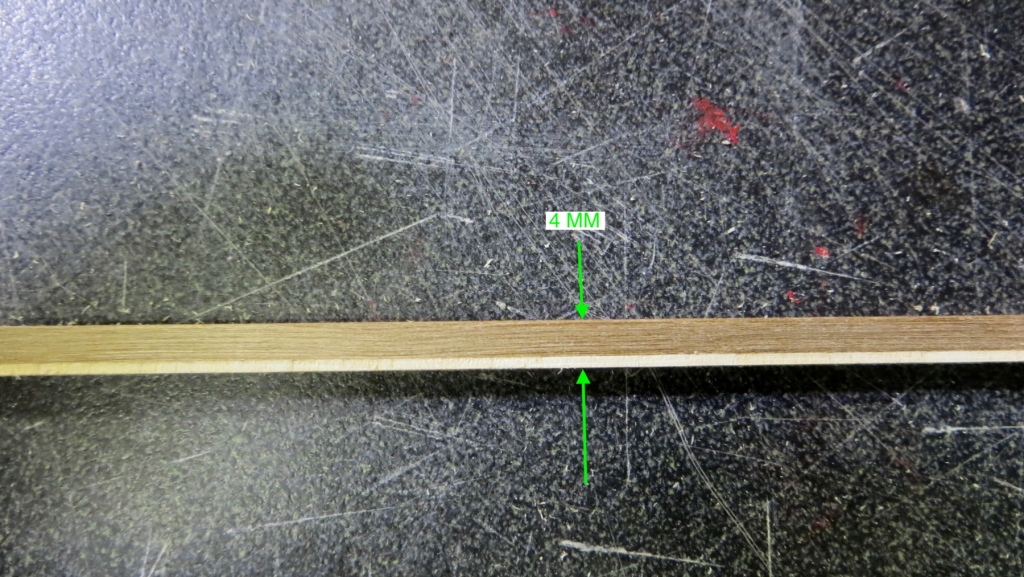
Hello, I've been back at it working on the 2 end beams (port and starboard) that the upper supports I just finished above are attached to. The instructions call for a 4mm high by 3mm wide piece of wood. Then, later in the build, i'm supposed to add a 1mm thick piece of decorative wood supplied that would make the beam a 4mm by 4mm square. Looking at this next photo of the decorative piece supplied, I thought it was a well done strip. There are a few things I wanted to change, however, so I decided to make the decorative strips from scratch. The green arrow points to the walnut squares. I wanted to make these squares, using some type of red wood. The red arrow shows a walnut piece along the bottom edge. I wanted to make this piece a painted red piece. Earlier in my log, I was introduced to Gimo and he showed me his wonderful scratch built Reale. I modified some of his steps he used in making this decorative strip. Thank you Gimo for helping me with your log photos!! I was able to buy a couple of pieces of a wood called "Redheart" to see if this would work for the project. I cut some of the red heart and also some bass wood into strips and ran them through my thickness sander and glued them together. The next step was to cut some more bass wood and glue them to the sides Using a small table saw, I cut the assembled strips into small pieces and glued them onto the walnut beam from the kit wood. Next I ran the long strip through the thickness sander and made it 3 MM wide Then I fed it through the thickness sander again and thinned down the width to 4MM So now I have a 4mm wide by 3mm high assembled piece. I will make a 1mm piece to paint red and glue to the bottom, making it a 4mm by 4mm piece. Also, I didn't want the decorative strip going all the way to each end, so I added a piece of white wood that will be painted red on each end. So, now I have to make the strip for the opposite side of the model, then do some light staining and sealing for the above piece. After this, I will add that 1mm thick red painted strip and glue the beams to the end of the supports. Thanks for visiting and for all the "likes" Frank


- 510 replies
-
- 6
-
-
- reale de france
- corel
- (and 1 more)
-
Hello! After a couple of weeks of distractions (fun- Wedding, not so fun - Sick father), I was finally able to finish the upper supports on the left, or port side. Things went a little smoother. As I mentioned before, I learned a few tricks from the first side. Some photos of the port side Now I will turn my attention to working on the beams that I had the supports clamped to. Thanks for visiting, Frank


- 510 replies
-
- 5
-
-
- reale de france
- corel
- (and 1 more)
-
Mark, I know you are not happy with the sail material, but the photos you posted show it all working nicely together. Congrats, Frank
- 331 replies
-
- 3
-
-
- nuestra senora del pilar
- occre
- (and 1 more)
-
Nice Michael! How far down into the lower decks do the pin rails go? Or do they end under that top deck? Frank
-
Andre, Very nice looking build! Congrats! Frank
-
Very nice work! I love the blue color you chose. I feel your pain about going blind Congrats! Frank