Javlin
-
Posts
1,681 -
Joined
-
Last visited
Content Type
Profiles
Forums
Gallery
Events
Everything posted by Javlin
-
Tim canopy or not that looks like a Spit Kevin
-
Sasweeett!!
-
De Havilland Mosquito by Javlin - FINISHED - HK Models - 1/32
Javlin replied to Javlin's topic in Non-ship/categorised builds
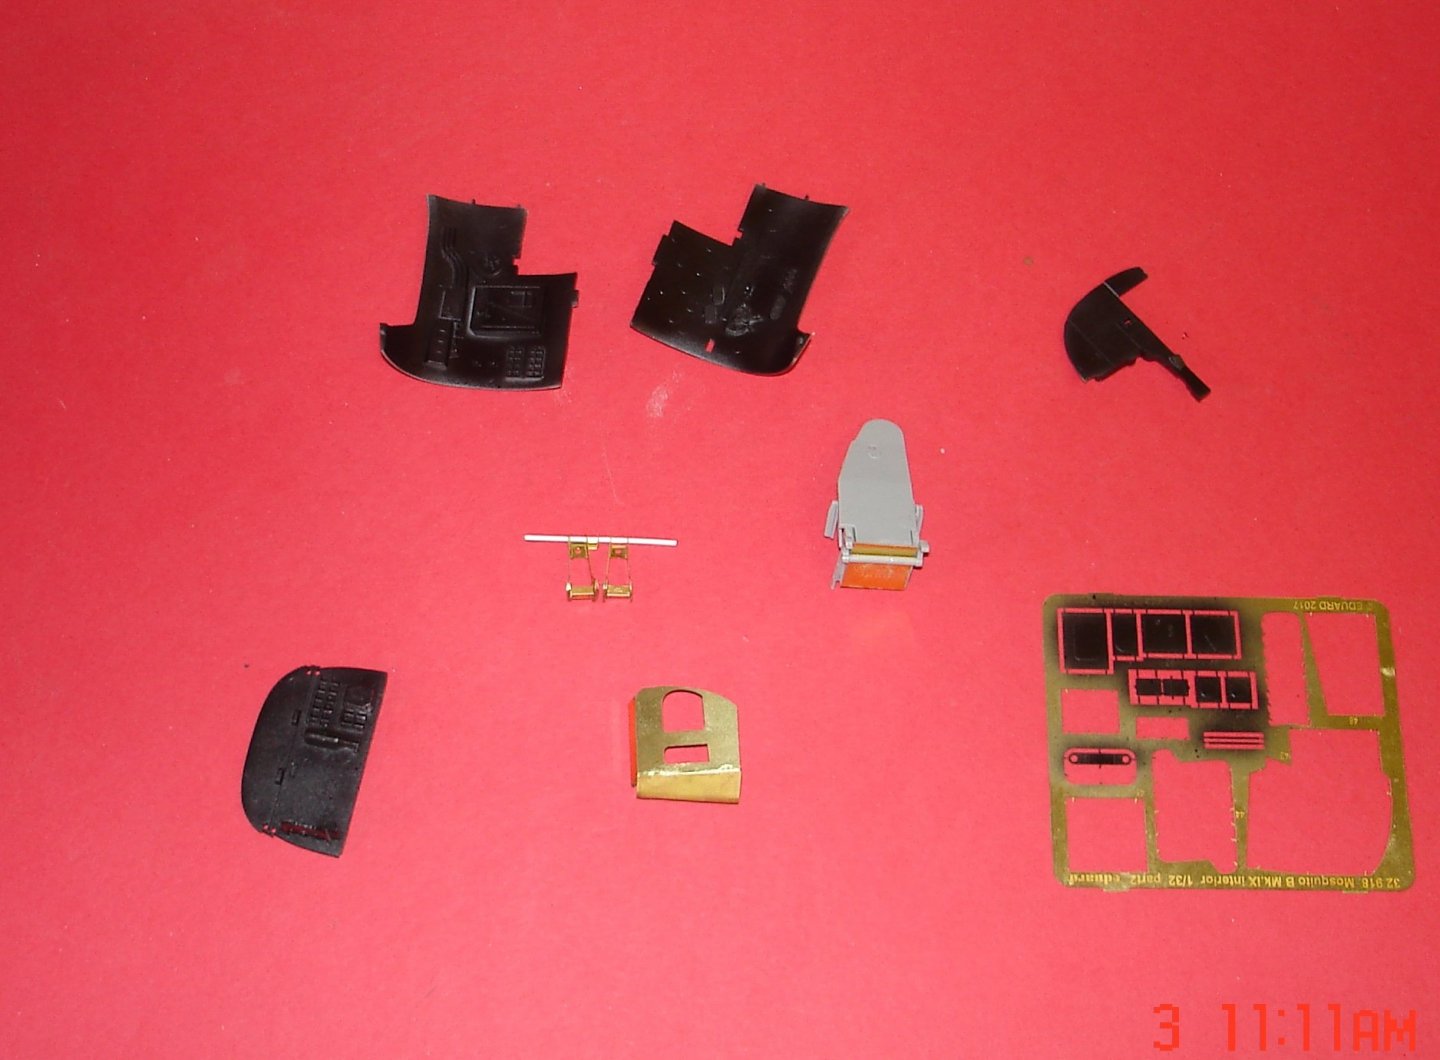
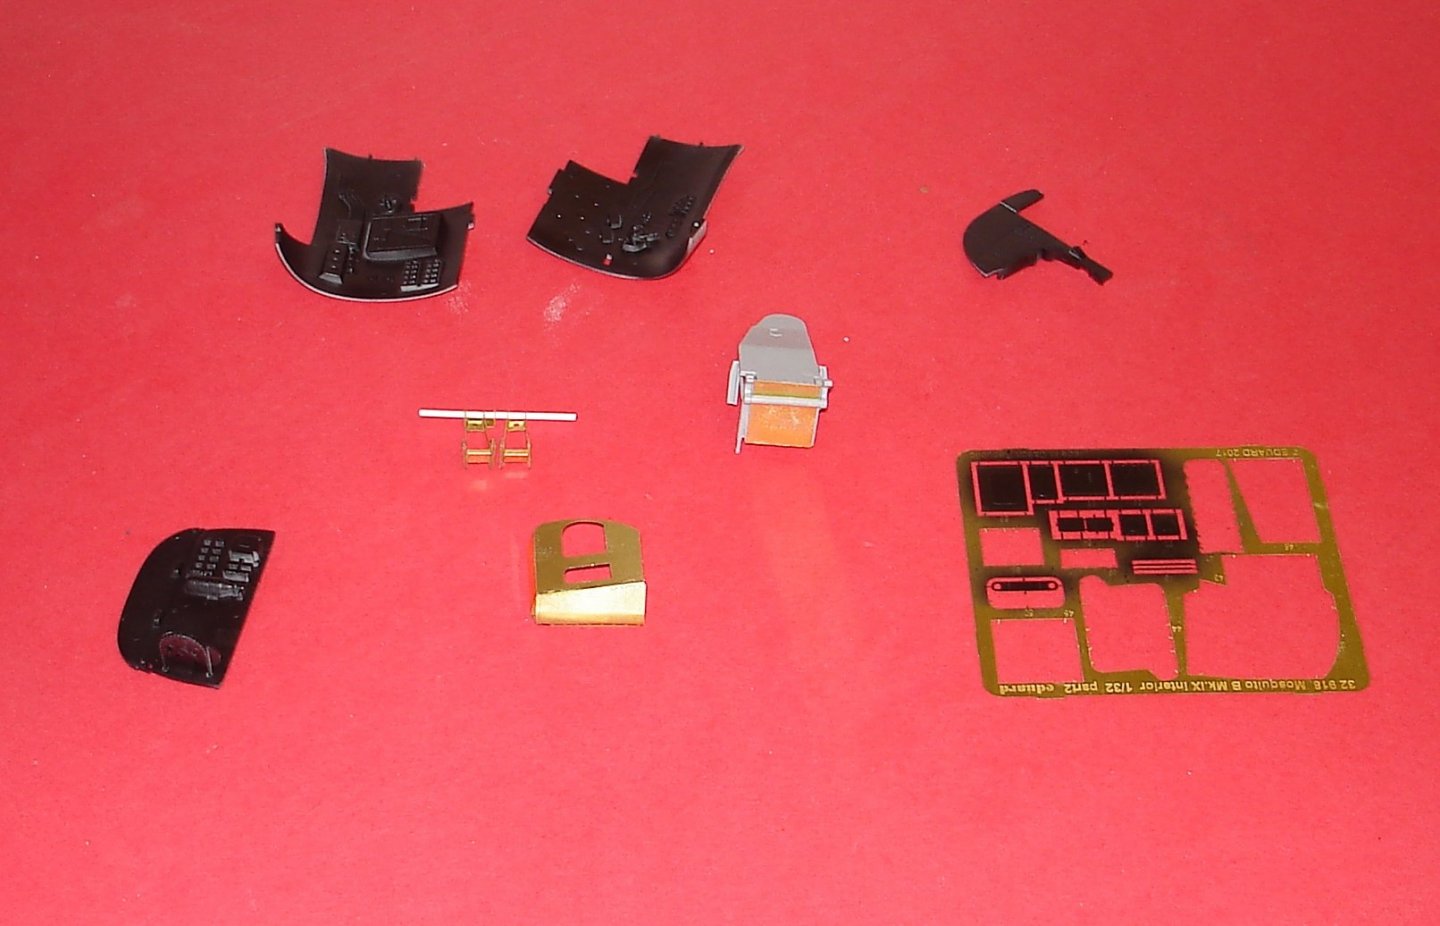
Not alot to show just sub-assemblies I also have the engines painted black only ATTM.The straps on the tanks black/silver?This is one tight fitting kit so much almost scares you and you have to look at the instructions more than twice been lucky to back out more than once.Have you ever heard the story of the Dragon instructions for the Scharnhorst..............?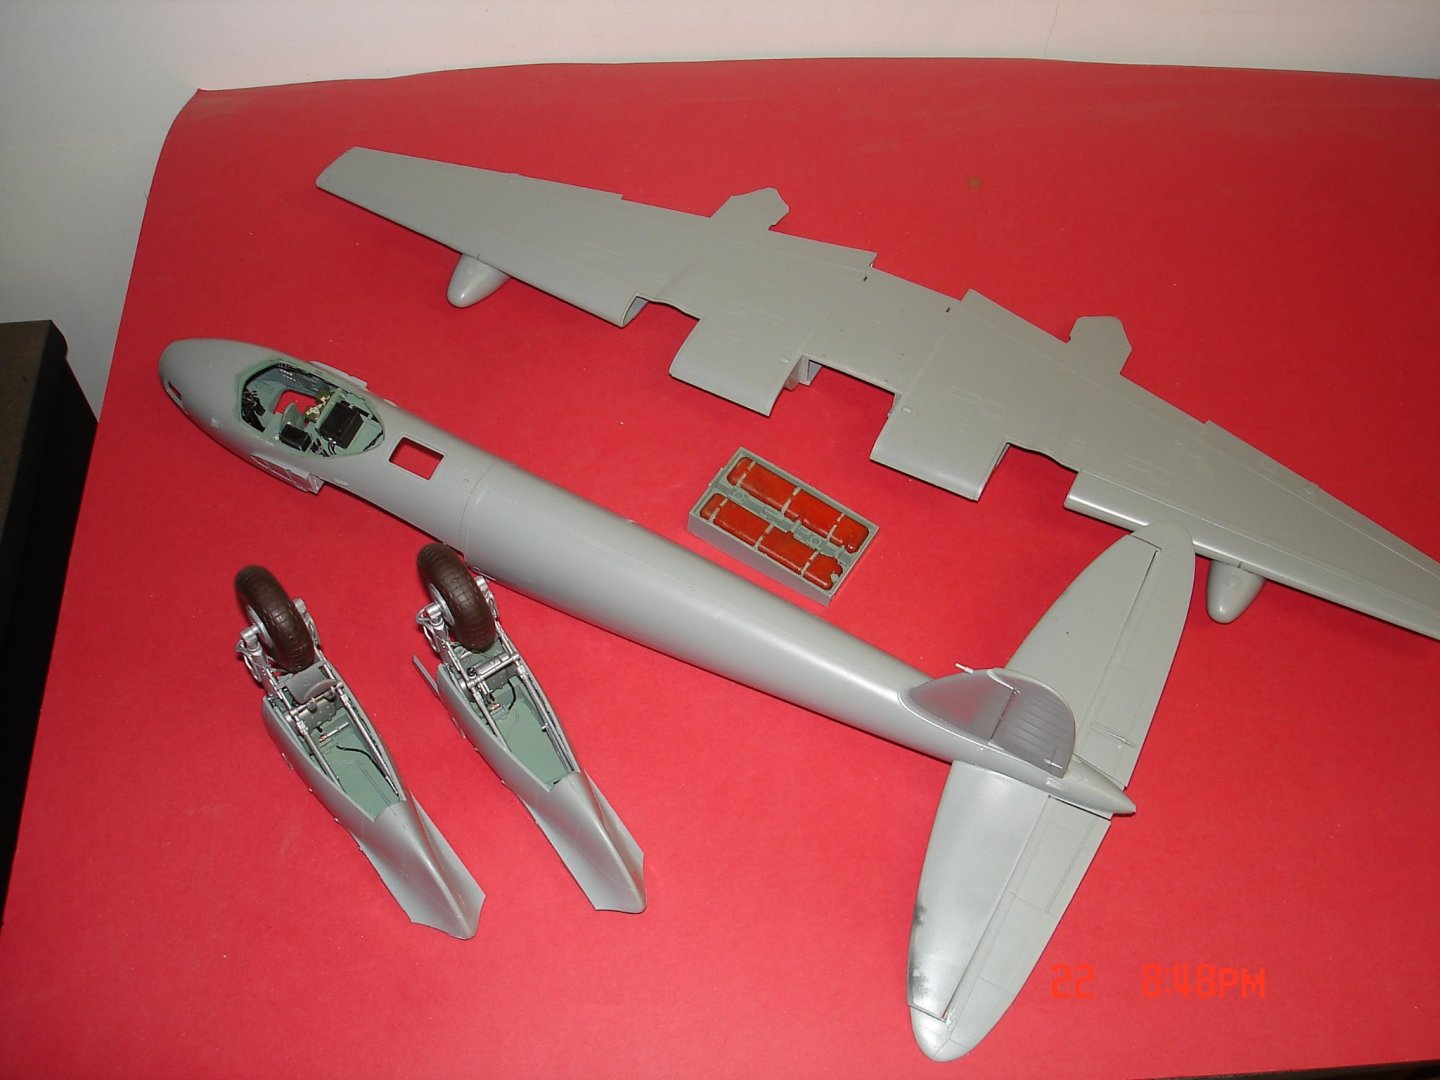
- 99 replies
-
- 10
-

-
De Havilland Mosquito by Javlin - FINISHED - HK Models - 1/32
Javlin replied to Javlin's topic in Non-ship/categorised builds
I did not see were else this would be appropriate so clutter this one up but it is pretty coll a Type VII sub 1/48 with forward firing tubes RC take a look. -
That came out Very Nice Denis your skills are getting honed in plastic and quickly and again very Nice!! Kevin
-
De Havilland Mosquito by Javlin - FINISHED - HK Models - 1/32
Javlin replied to Javlin's topic in Non-ship/categorised builds
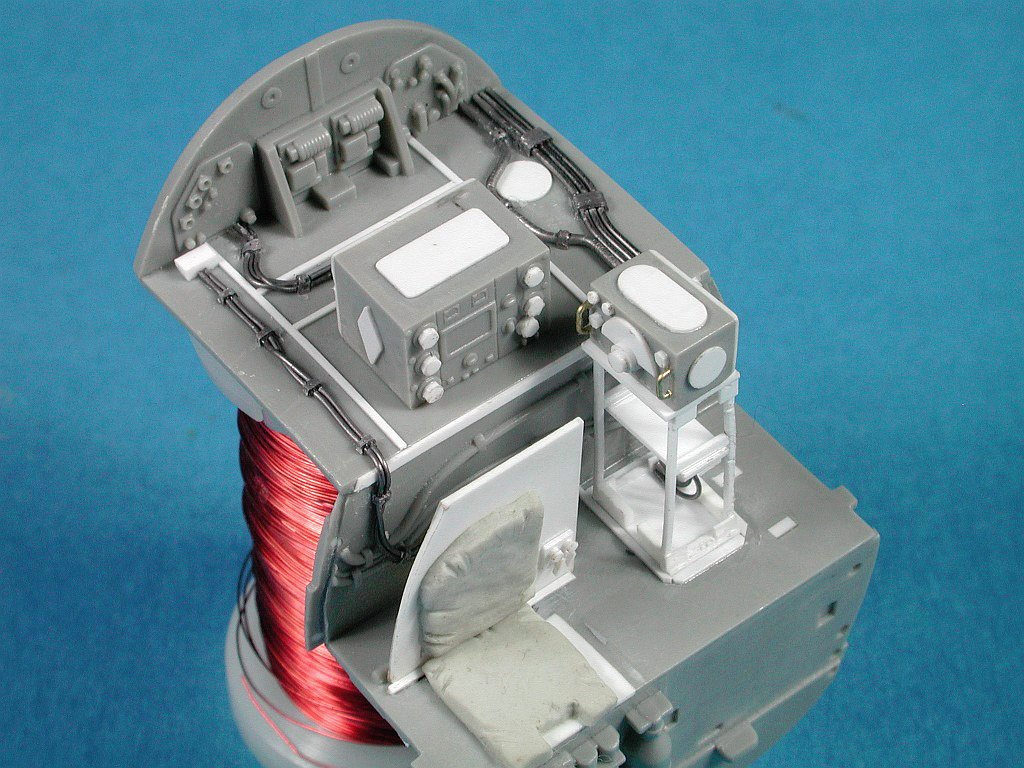
The copit is basically finished I did make the frames for the back of the seat on the radio operator.I just took some .020" square stryene put needle nose to the stryene and channel locks to the needle nose and got a flat spot then cut the angles to the back of the seat worked well.I am not reaL fond of the pilots belts but think the radio seat looks a little more animated.The bomb sight was the last thing I did tonight it was testing the patience. Kevin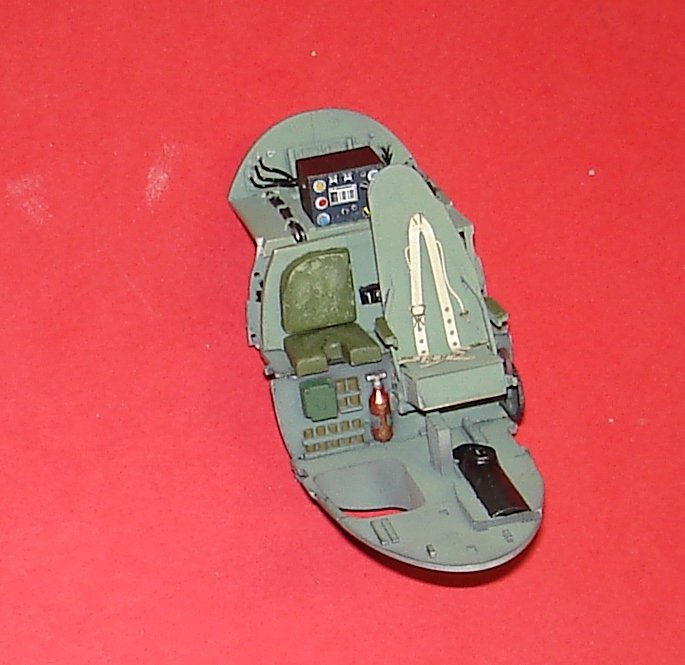


- 99 replies
-
- 15
-
-
You do some Nice work Bob and I really like the Idea on the antenna attachment stored/filed.My eyes are starting to have a problem even in 1/32 up close hence the reason 1/48 are relegated to OOB anymore.Looking forward to the foil and paint think I have the an idea of what's going on sure the evolution will provide the details. Kevin
-
Nice Build!! It's a shame that Guillows could not get a better canopy form but it was intended to fly.looking forward to the finished product Kevin
-
De Havilland Mosquito by Javlin - FINISHED - HK Models - 1/32
Javlin replied to Javlin's topic in Non-ship/categorised builds
I had a question about the attachment of the harness for the radio ops guy got this in response from the guy in Canada working on one one could enhance that seat quite abit ,,,,,,,,,,,,
-
De Havilland Mosquito by Javlin - FINISHED - HK Models - 1/32
Javlin replied to Javlin's topic in Non-ship/categorised builds
EG Yellow Zinc is the color I am going with the L/side cables.I got some paint laid and being that the pilot sat on his parachute I cut the seat up removed the unwanted cushions and made her bar.I still need to hit the the fire ext with a little more copper the right color and add cushions to the arm rest and green. kevin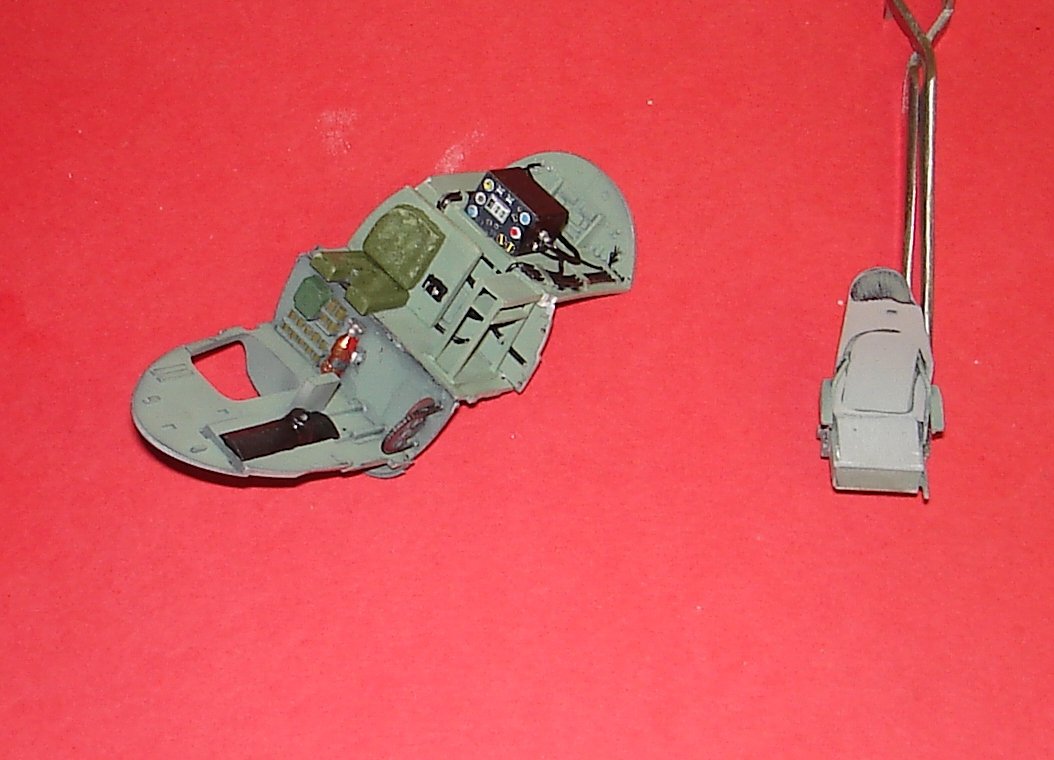
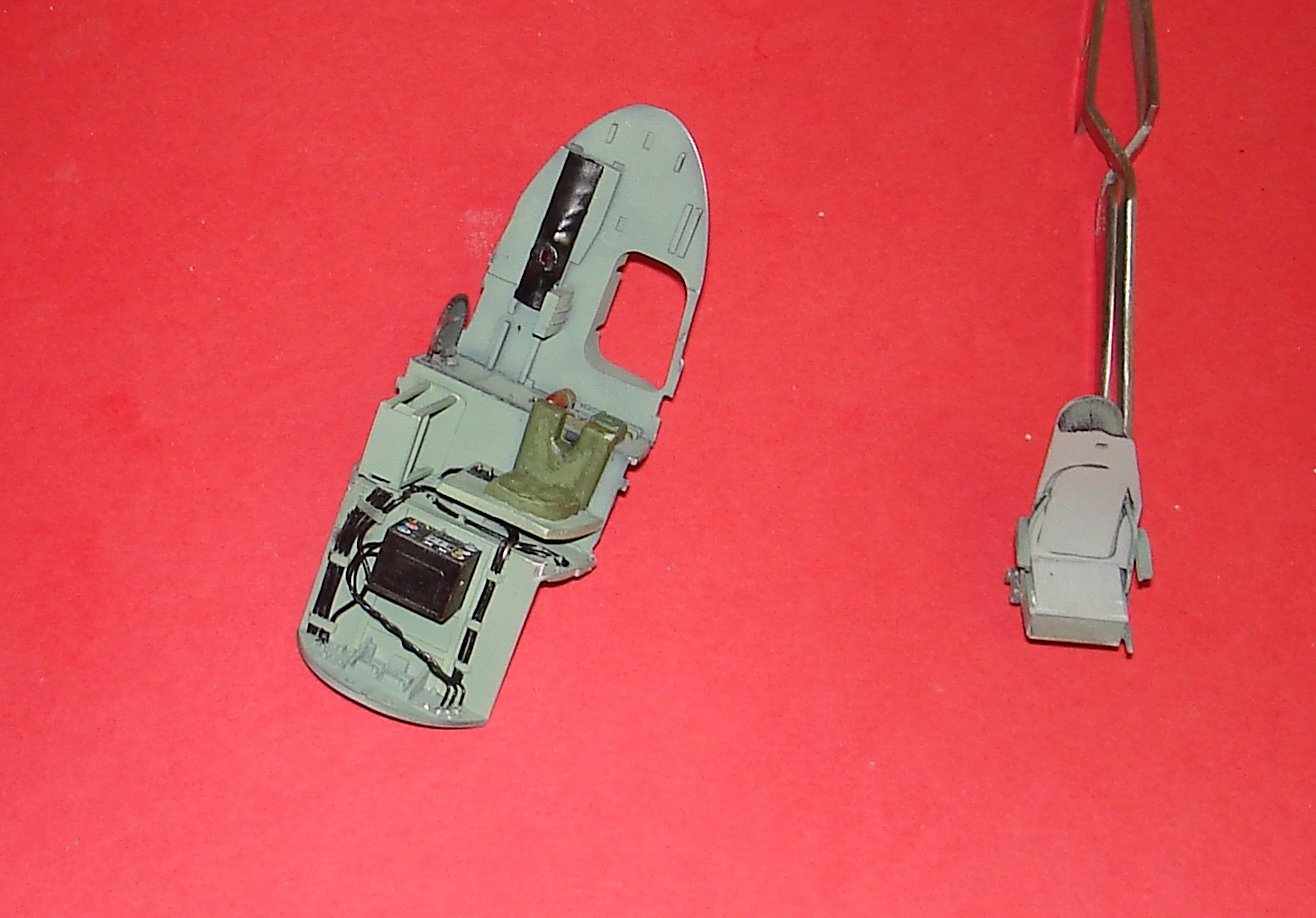
- 99 replies
-
- 11
-
-
De Havilland Mosquito by Javlin - FINISHED - HK Models - 1/32
Javlin replied to Javlin's topic in Non-ship/categorised builds
I got that report from a fella in Canada working on the restoration of a crate up there.thks for the input guys! Kevin Also EG he mentioned the pale yellow which I see represented on the right side of the fuse so another color on my part in that area is coming.He also mentioned the transmitter stand was a possibility. -
De Havilland Mosquito by Javlin - FINISHED - HK Models - 1/32
Javlin replied to Javlin's topic in Non-ship/categorised builds
I have been working on it OC but it has been like 1hr clips any idea on the wiring colors? Kevin -
De Havilland Mosquito by Javlin - FINISHED - HK Models - 1/32
Javlin replied to Javlin's topic in Non-ship/categorised builds
First of all the Nationality of the crate will be Brit the radio compartment and some of the IP are totally different I will have pics of the crate I intend to do at a later date it's colorful red/white striped tail .OC and EG I do not know if you fellas have any ideas on the cable/wire in these crates?I have four books now and it's all black/white I am thinking white and yellow just a guess.I have a bit more to do on the stand for the transmitter and some more wires coming out of the side of the transmitter behind the seat and PRU seats were cut in half.I added a switch panel down the lower L/side of the seat with two PE toggles and some punch stock which the PE came from the B-25 kit looks the part.I figures out the that piece on the side of the IP leg it goes flat no map shoot had to look at Kermit Weeks PRU video same riveting and all. Kevin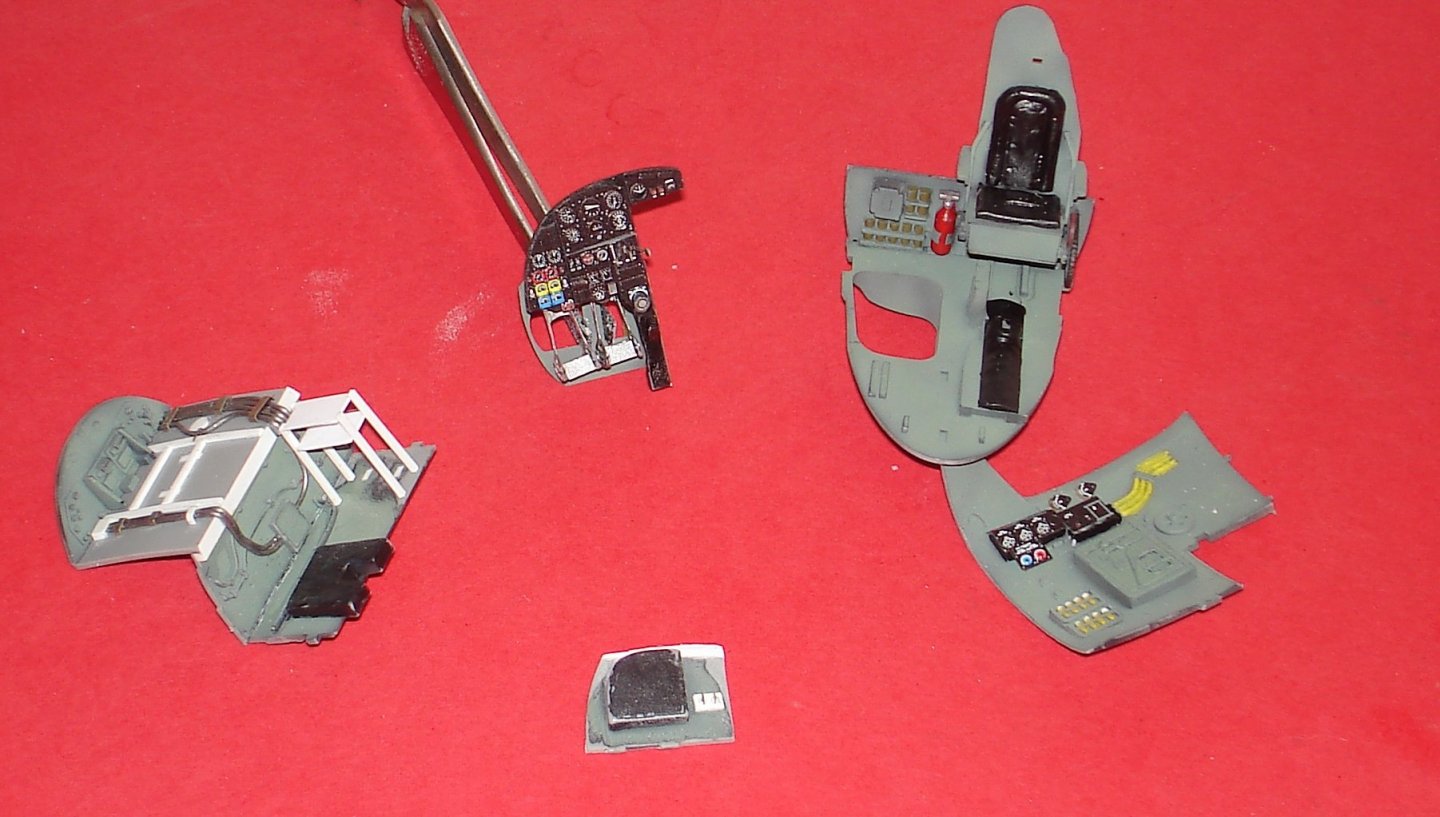
- 99 replies
-
- 13
-
-
Very Nice Craig!! Kevin
-
Encountered something like that with water which technically so is air.I was sailing a 17' cat with a buddy had one pontoon started to rise but not out were moving a good clip channel marker coming up heading right for it the tiller would not move it took both of us. No No No!The fumes make the experience lets say more levitated You are doing great work on the build and research stuck on research on mine now but have a guy on another forum who is actually part of the team rebuilding a PRU in Canada to get me some help.The guys and you have stared a great conversation on the wing folds Lou,EG and Dan great work! Kevin
-
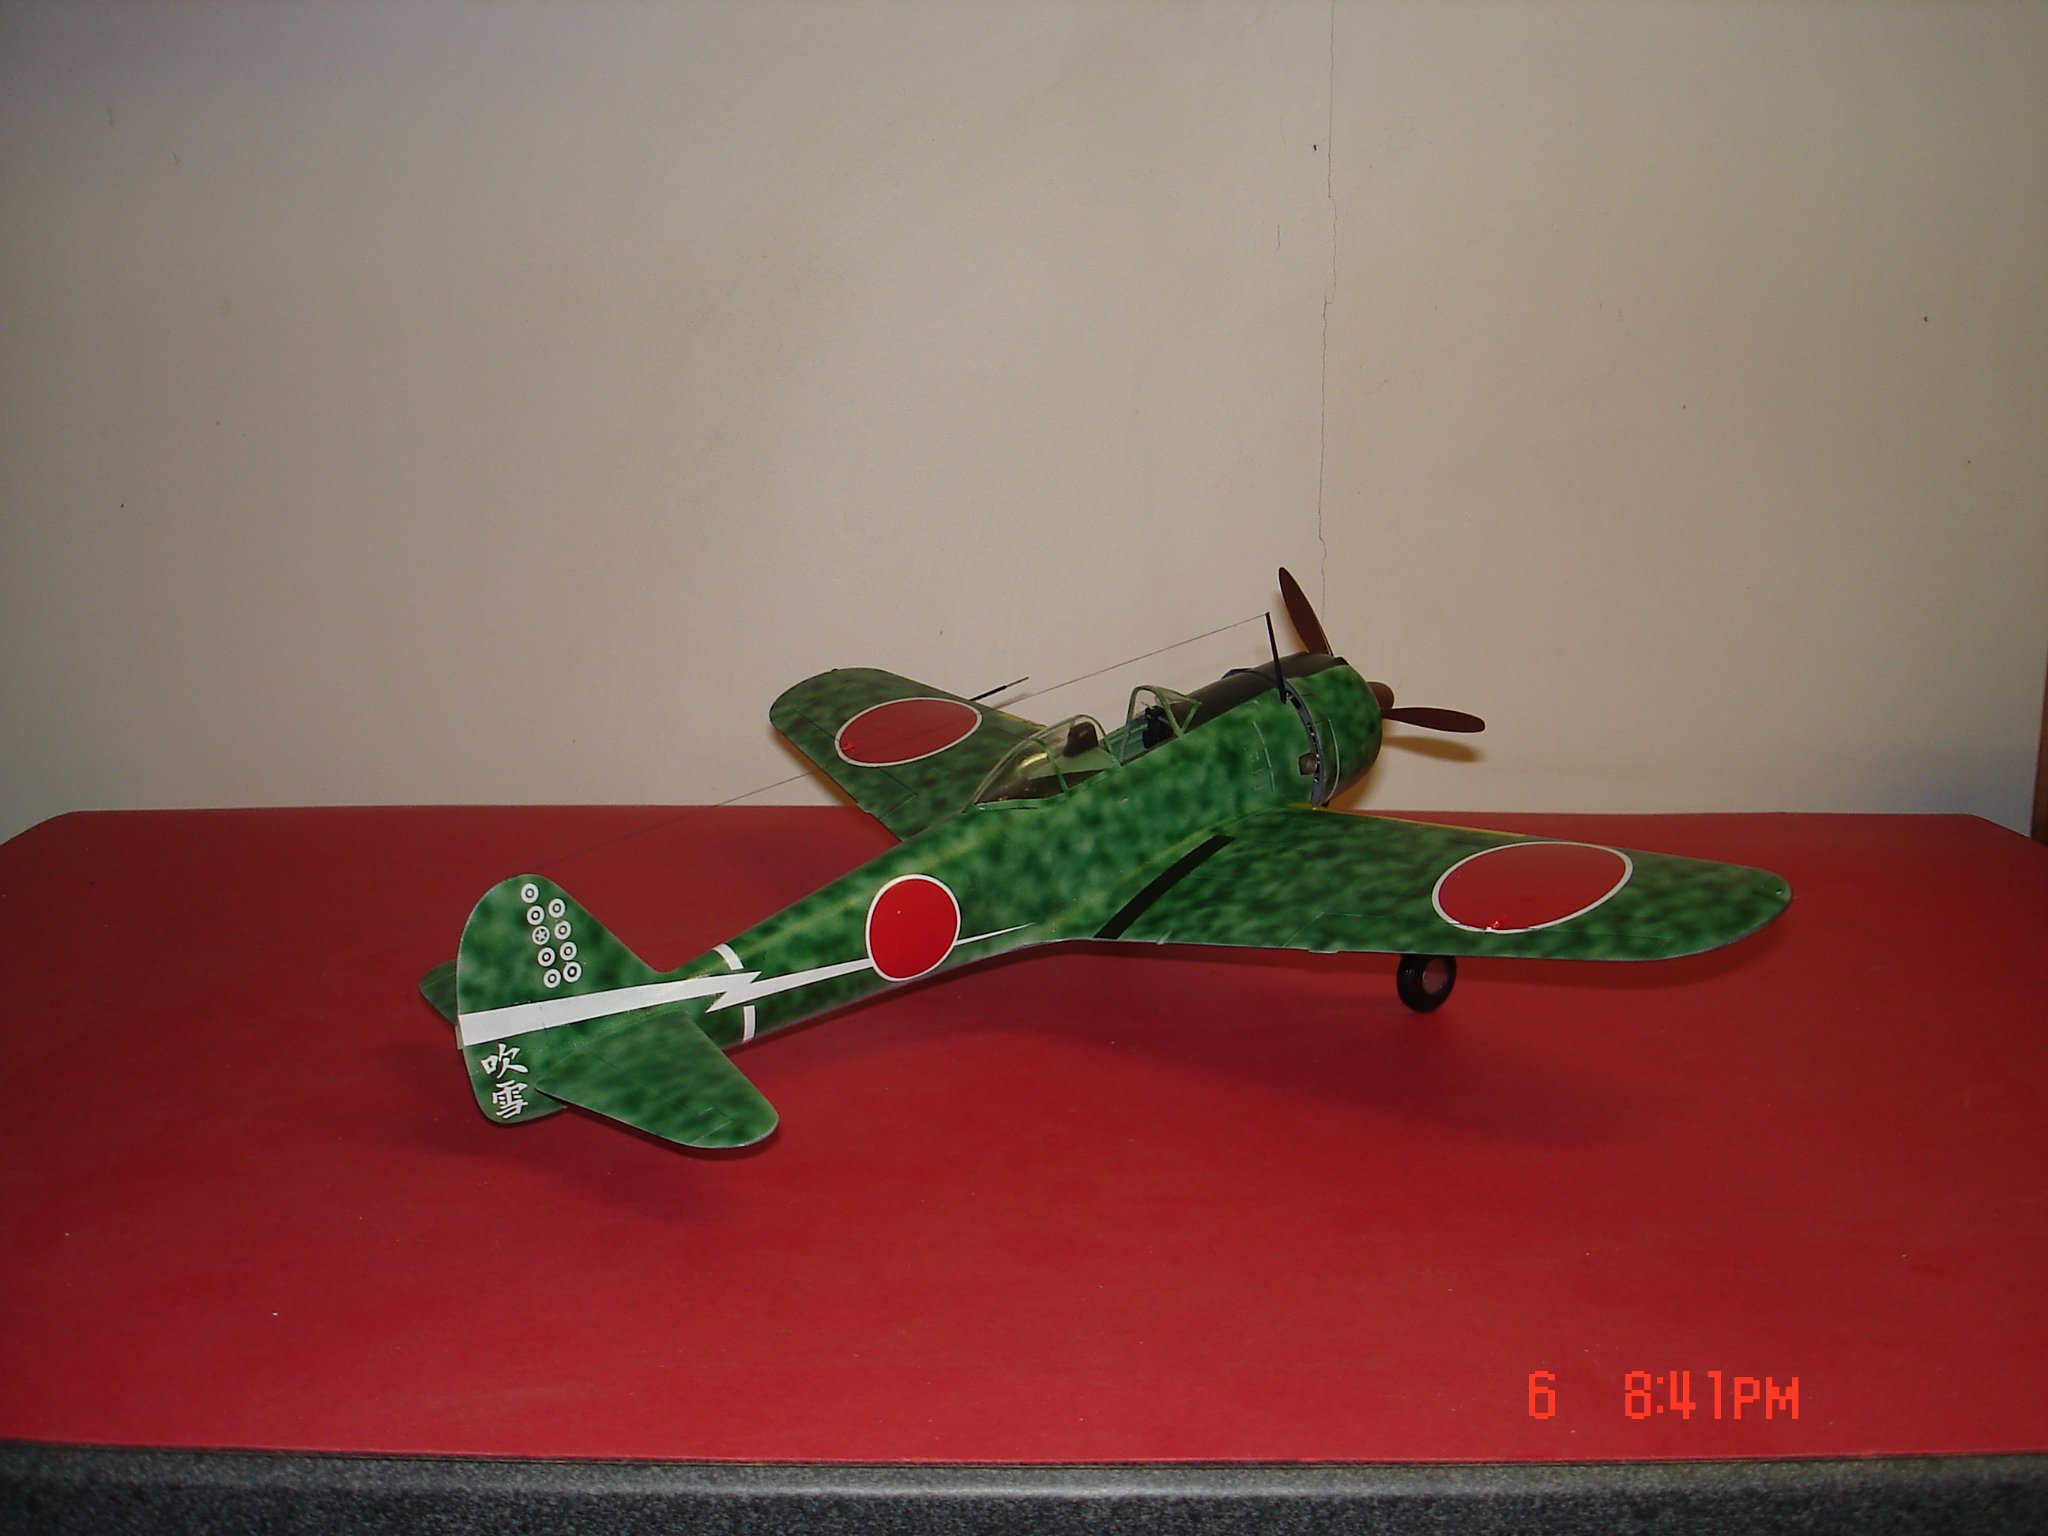
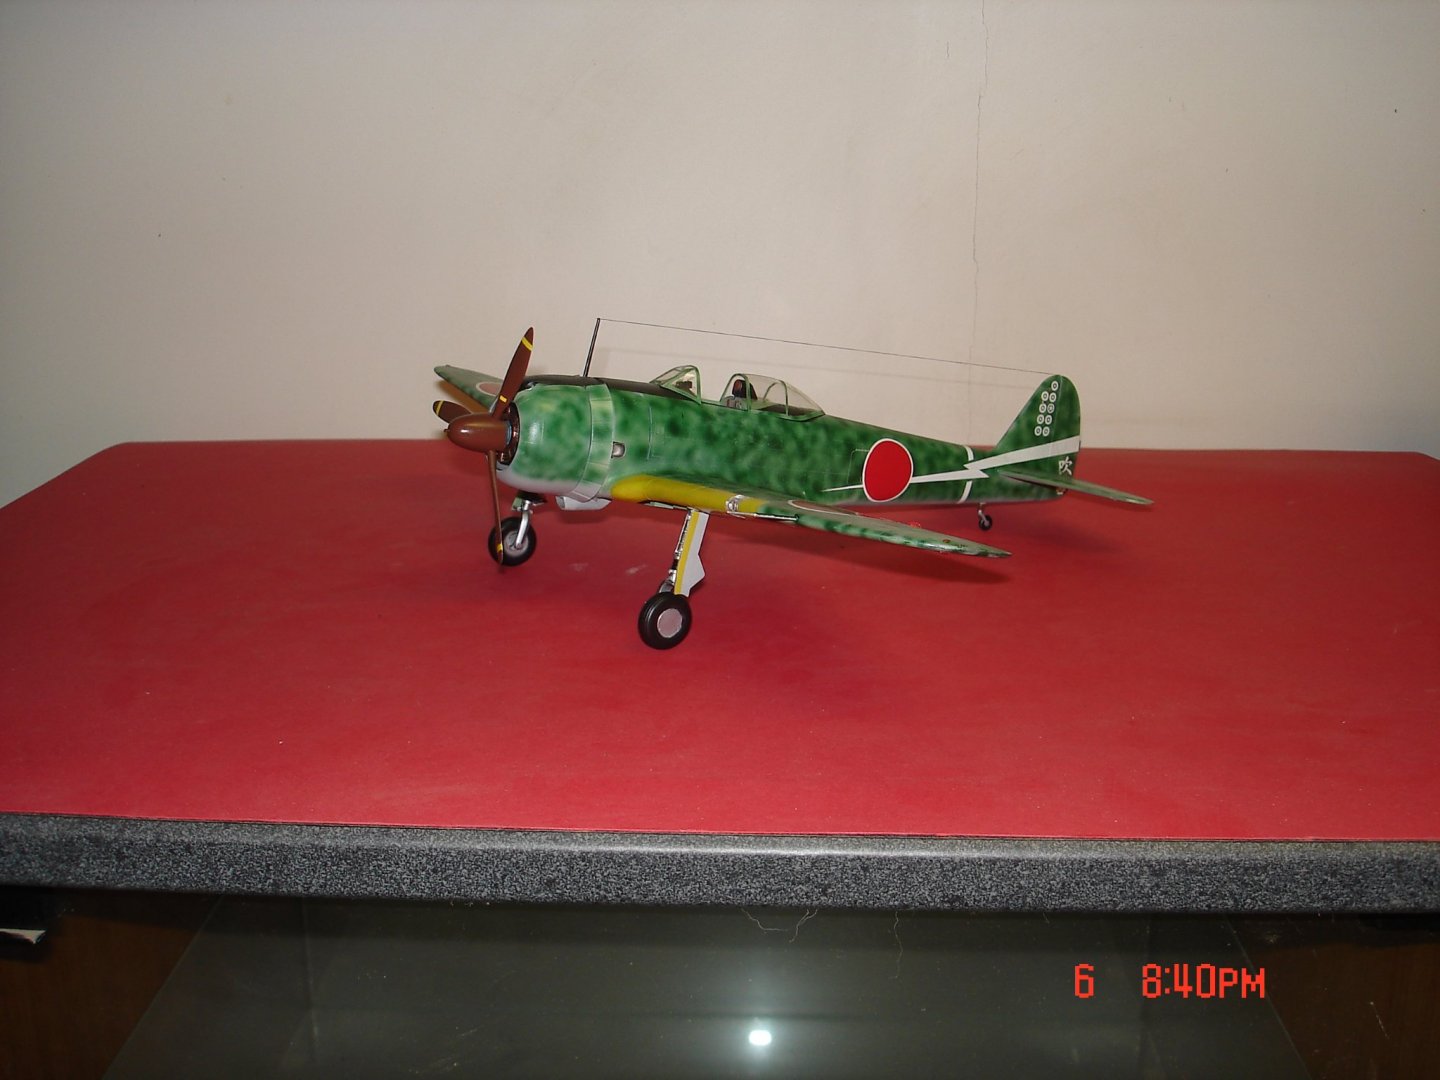
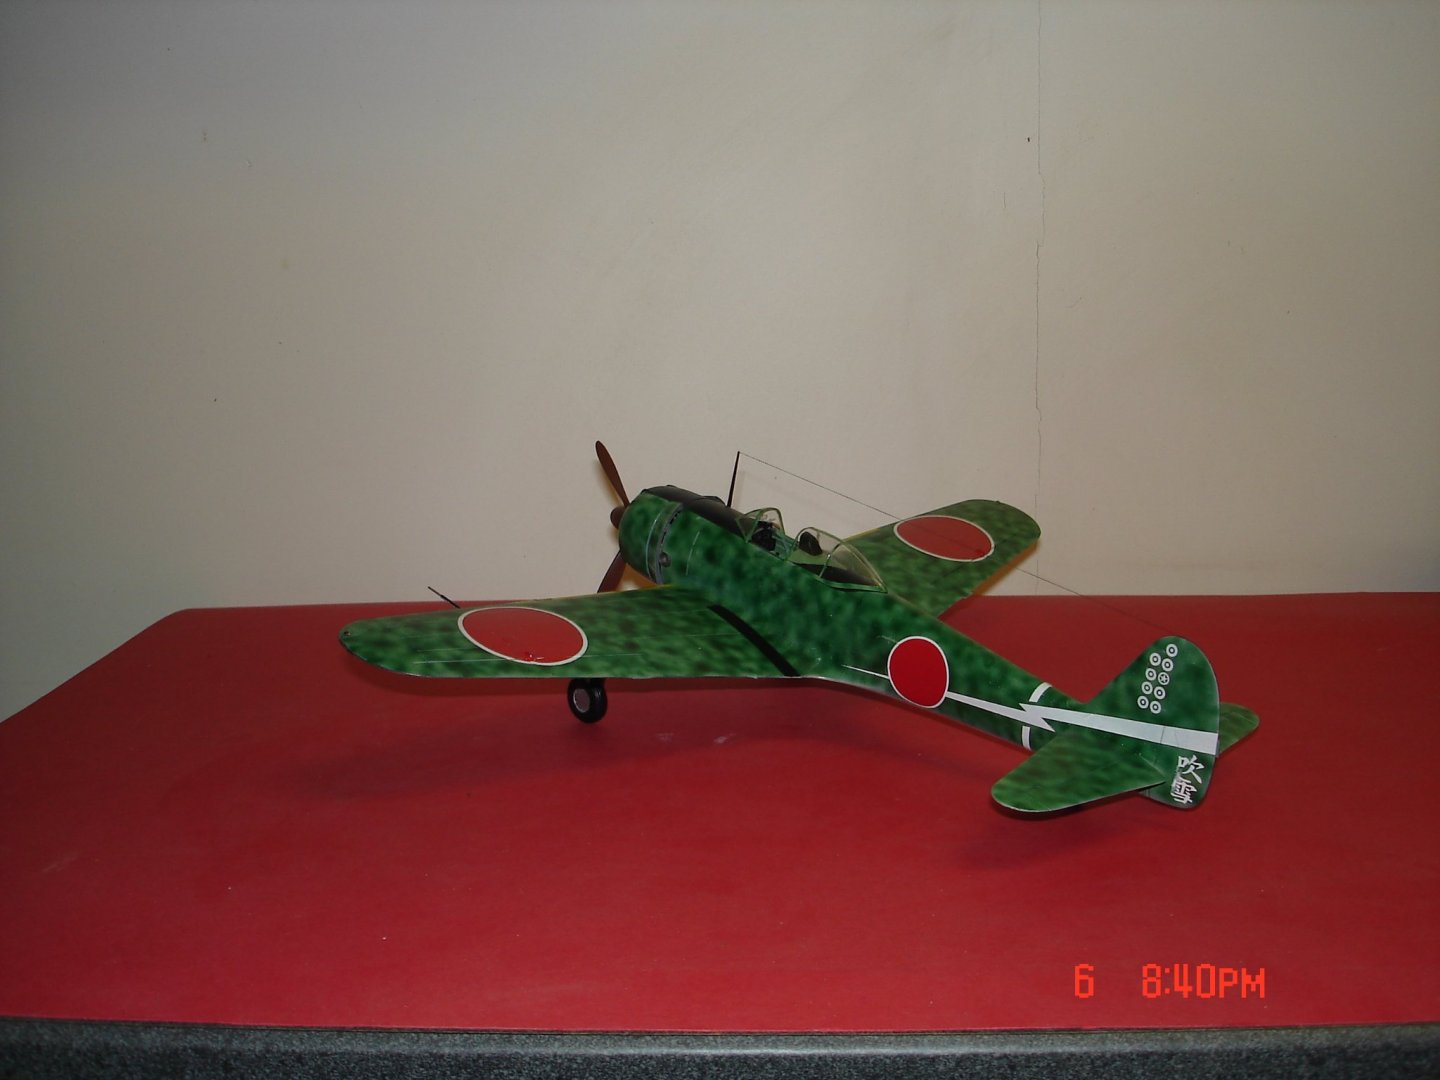
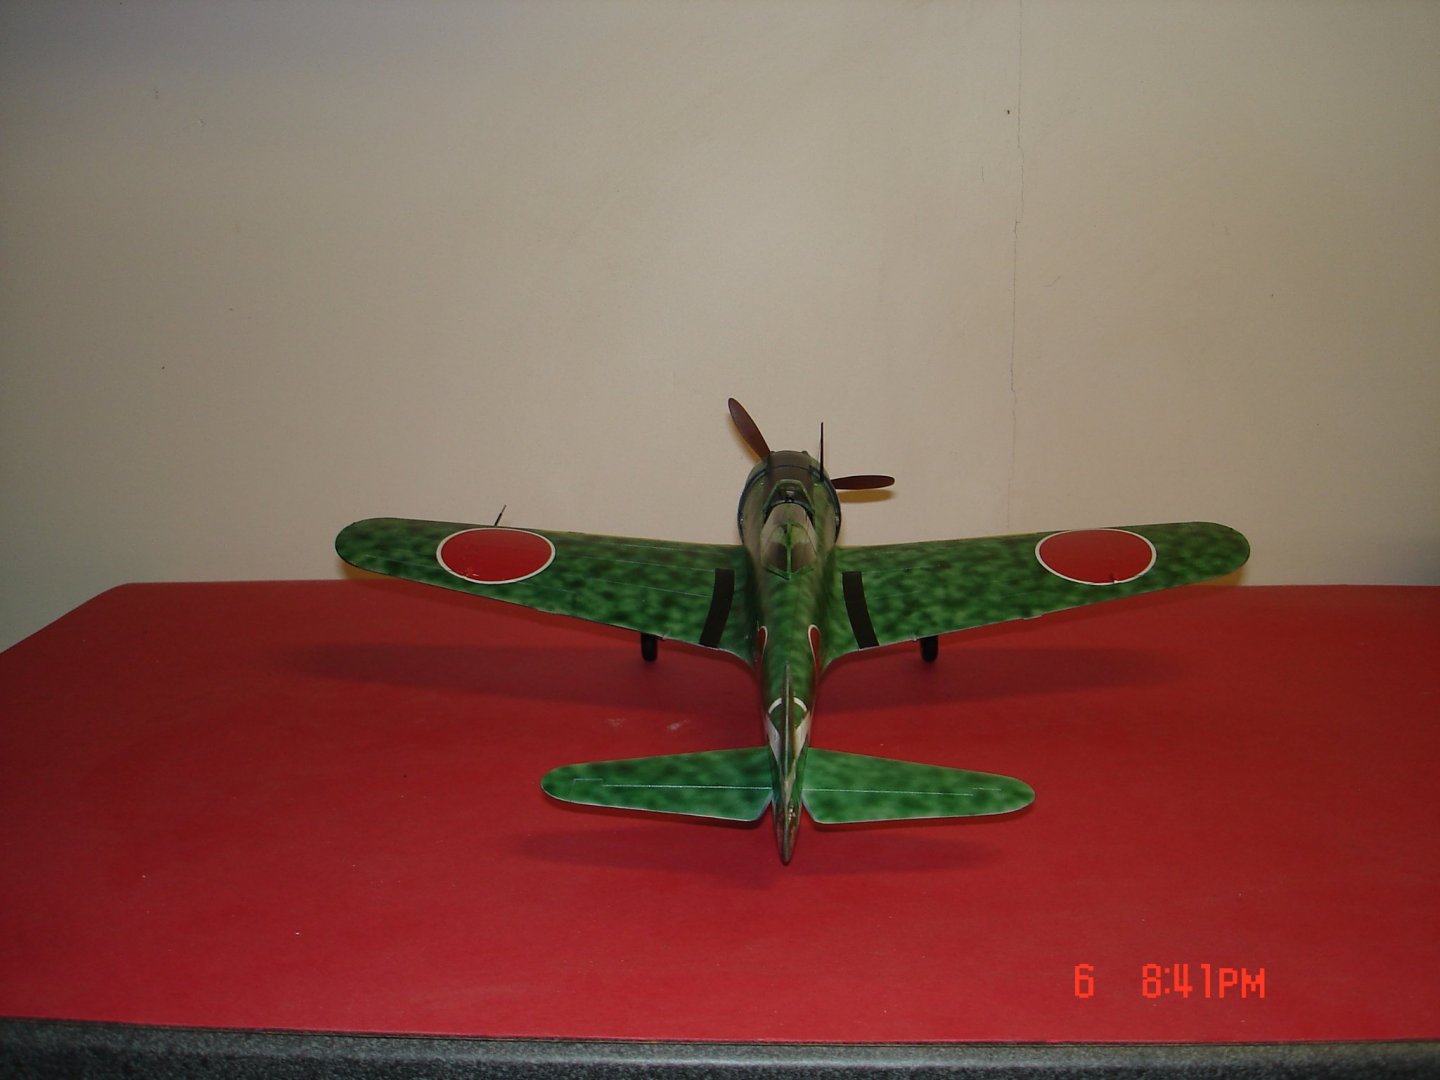
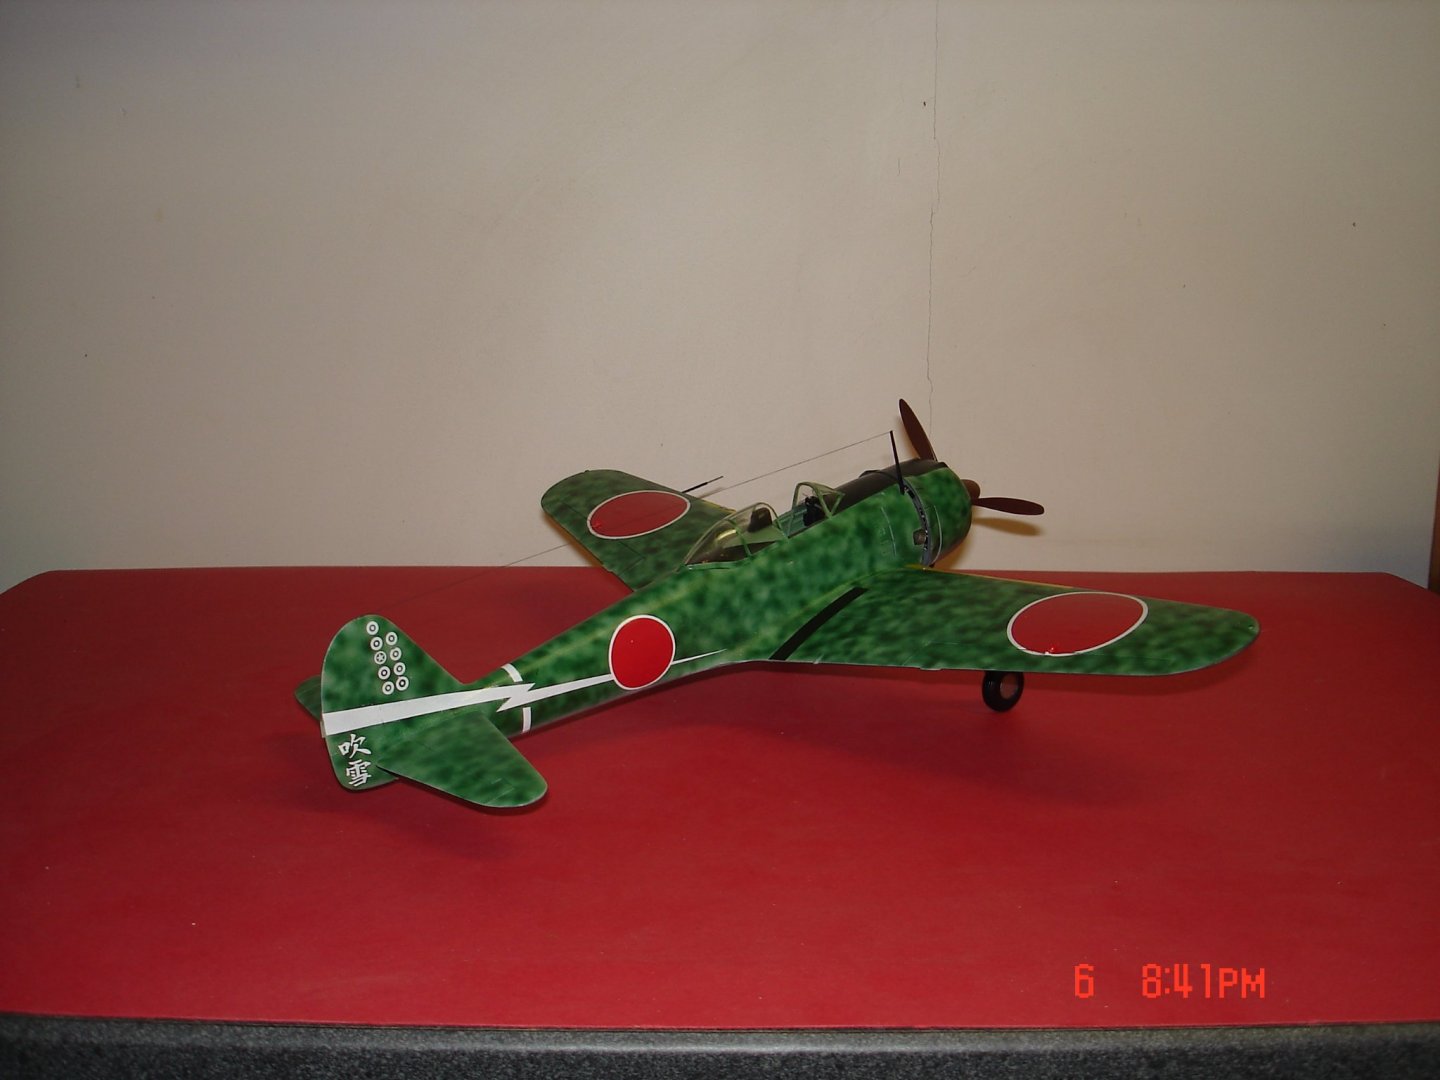
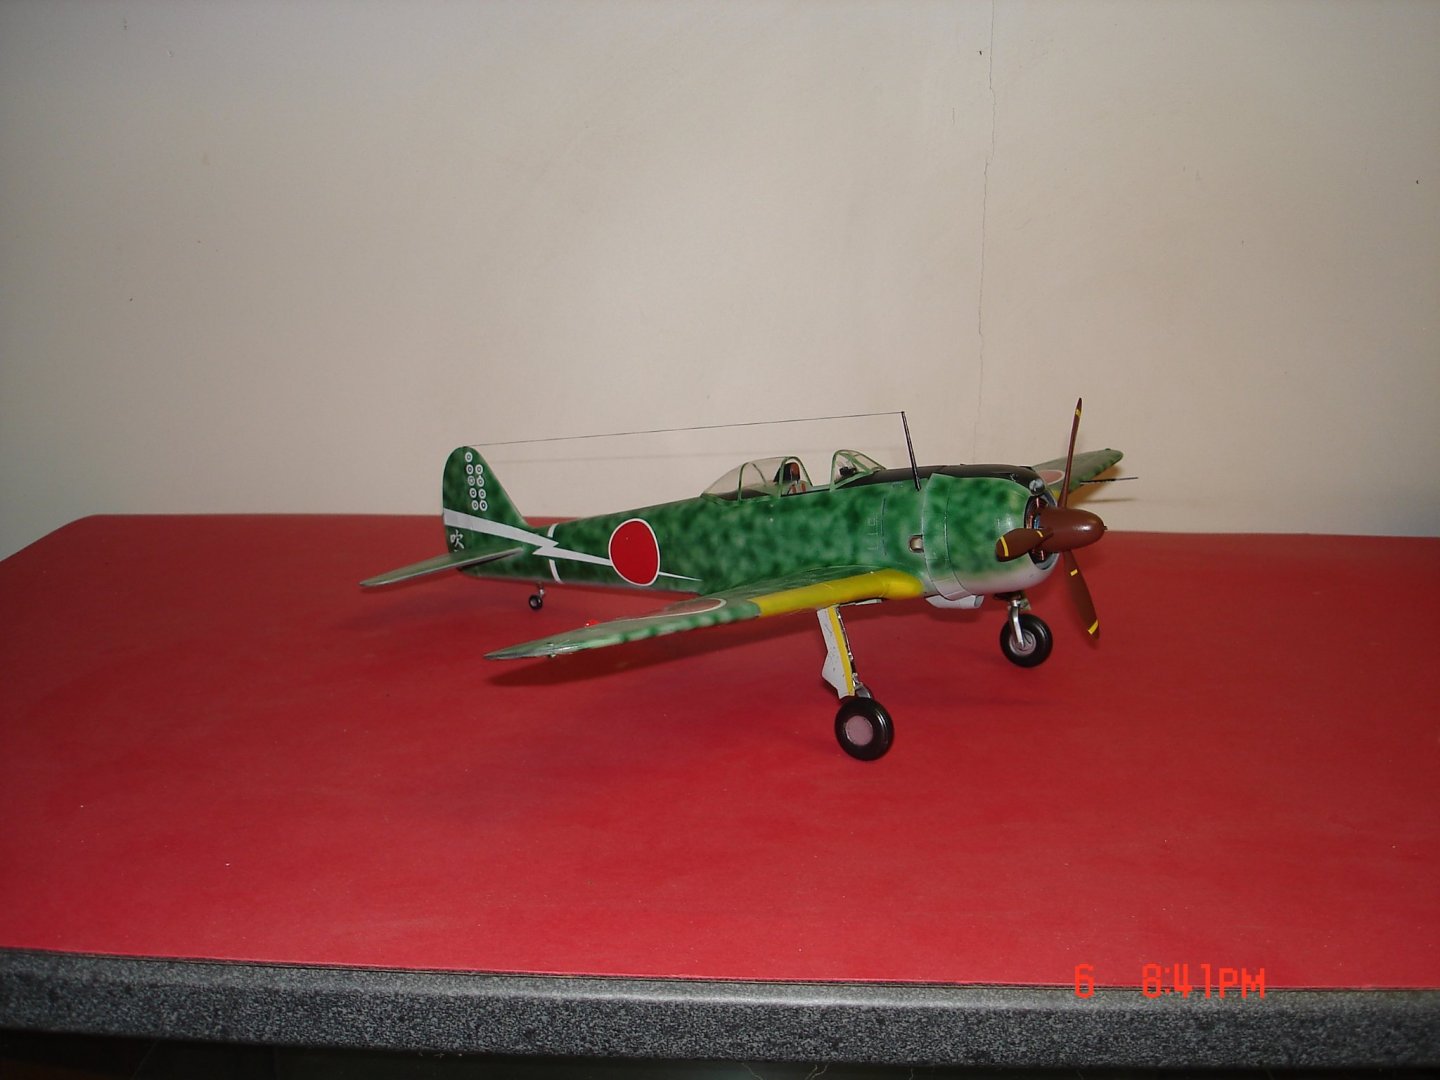
KI-43 Oscar by Javlin - FINISHED - Hasegawa - 1/32 - PLASTIC
Javlin replied to Javlin's topic in Non-ship/categorised builds
Thank You Gentleman!I use that term loosely with some you. Kevin -
KI-43 Oscar by Javlin - FINISHED - Hasegawa - 1/32 - PLASTIC
Javlin replied to Javlin's topic in Non-ship/categorised builds
Calling this one done gave up on the wash since most of the kit is raised about 95% leave well enough alone she still looks good.Thks for looking in and following along guys. Kevin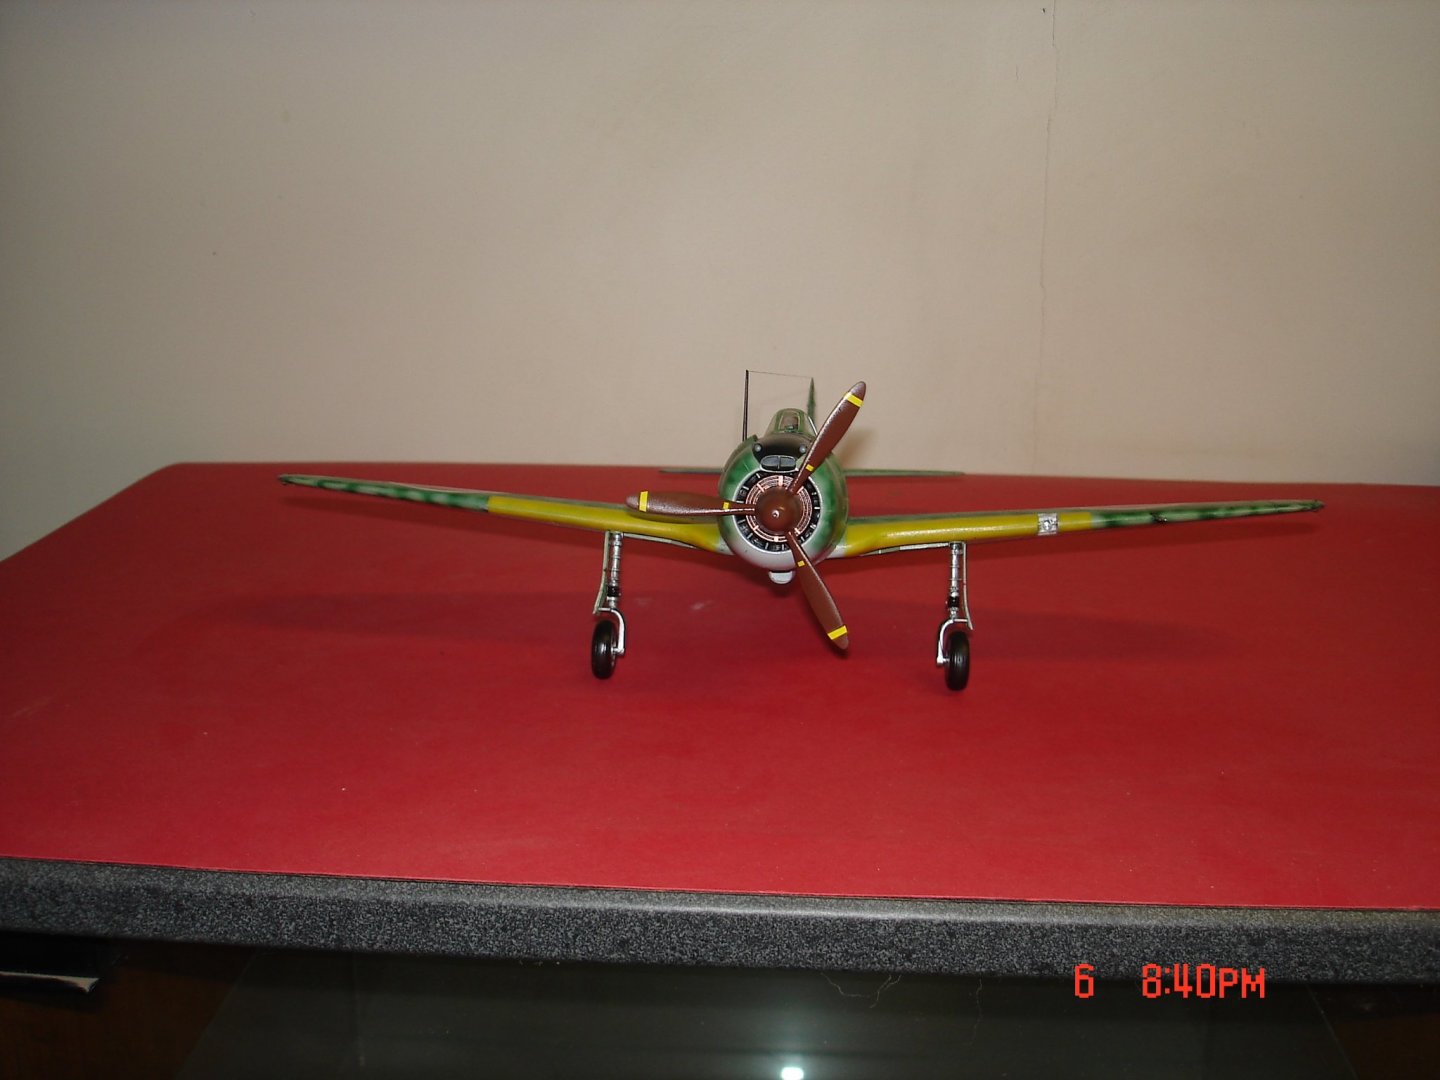
- 48 replies
-
- 13
-
-
De Havilland Mosquito by Javlin - FINISHED - HK Models - 1/32
Javlin replied to Javlin's topic in Non-ship/categorised builds
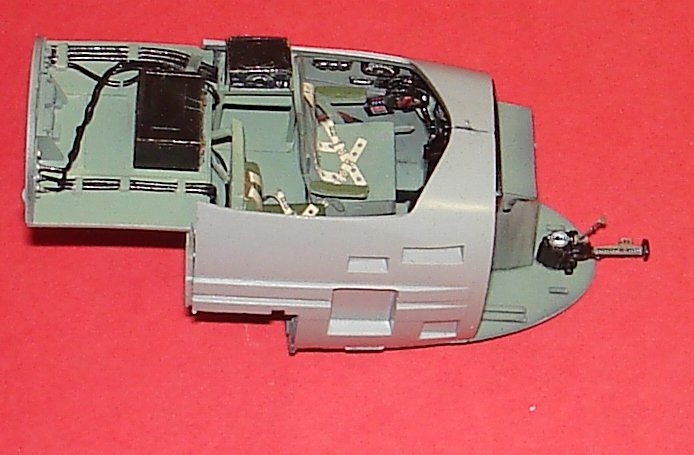
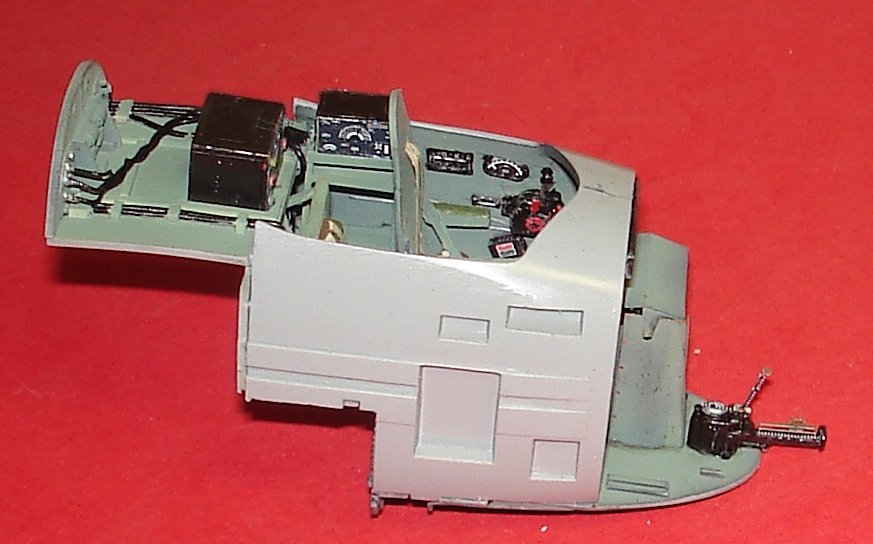
The IP continues to move forward this is the last of the work till Tuesday get some more done then.Cheers Kevin Still crappy pics my hands just not steady enough
- 99 replies
-
- 10
-
-
De Havilland Mosquito by Javlin - FINISHED - HK Models - 1/32
Javlin replied to Javlin's topic in Non-ship/categorised builds
I see the pad on the floor in that area makes alot of sense. -
De Havilland Mosquito by Javlin - FINISHED - HK Models - 1/32
Javlin replied to Javlin's topic in Non-ship/categorised builds
So Interior green would be the guess? -
De Havilland Mosquito by Javlin - FINISHED - HK Models - 1/32
Javlin replied to Javlin's topic in Non-ship/categorised builds
OC it's not on that IP but you can see the area were it would go on the R/side I took another pic a little blurry not even 18' away .
-
De Havilland Mosquito by Javlin - FINISHED - HK Models - 1/32
Javlin replied to Javlin's topic in Non-ship/categorised builds
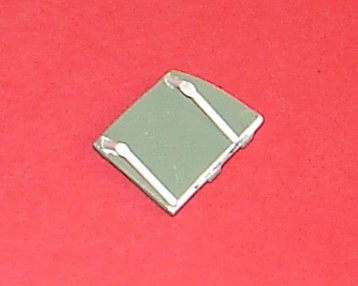
It's going to be the circled area.I find when the company goes through the process of changing the texture of the metal it usually represent canvas or leather and not shown in the pic is a line of rivets that attach the material to the leg of the IP.I have a new book coming might have a pic and description kinda reminds me of a map log possibly storage can?Would be about 2' tall 8" at the mouth could be for that umbrella you guys need certain times of the year Kevin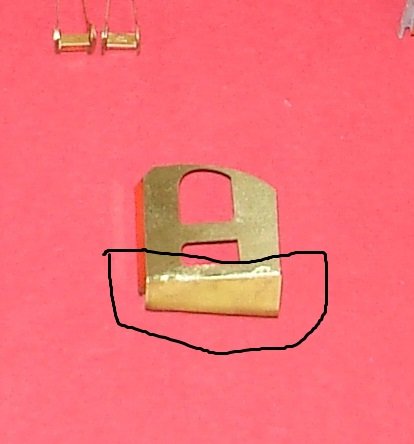
-
De Havilland Mosquito by Javlin - FINISHED - HK Models - 1/32
Javlin replied to Javlin's topic in Non-ship/categorised builds
This is the piece in question I have a new book coming next week from Osprey to help out on some details. Kevin
-
De Havilland Mosquito by Javlin - FINISHED - HK Models - 1/32
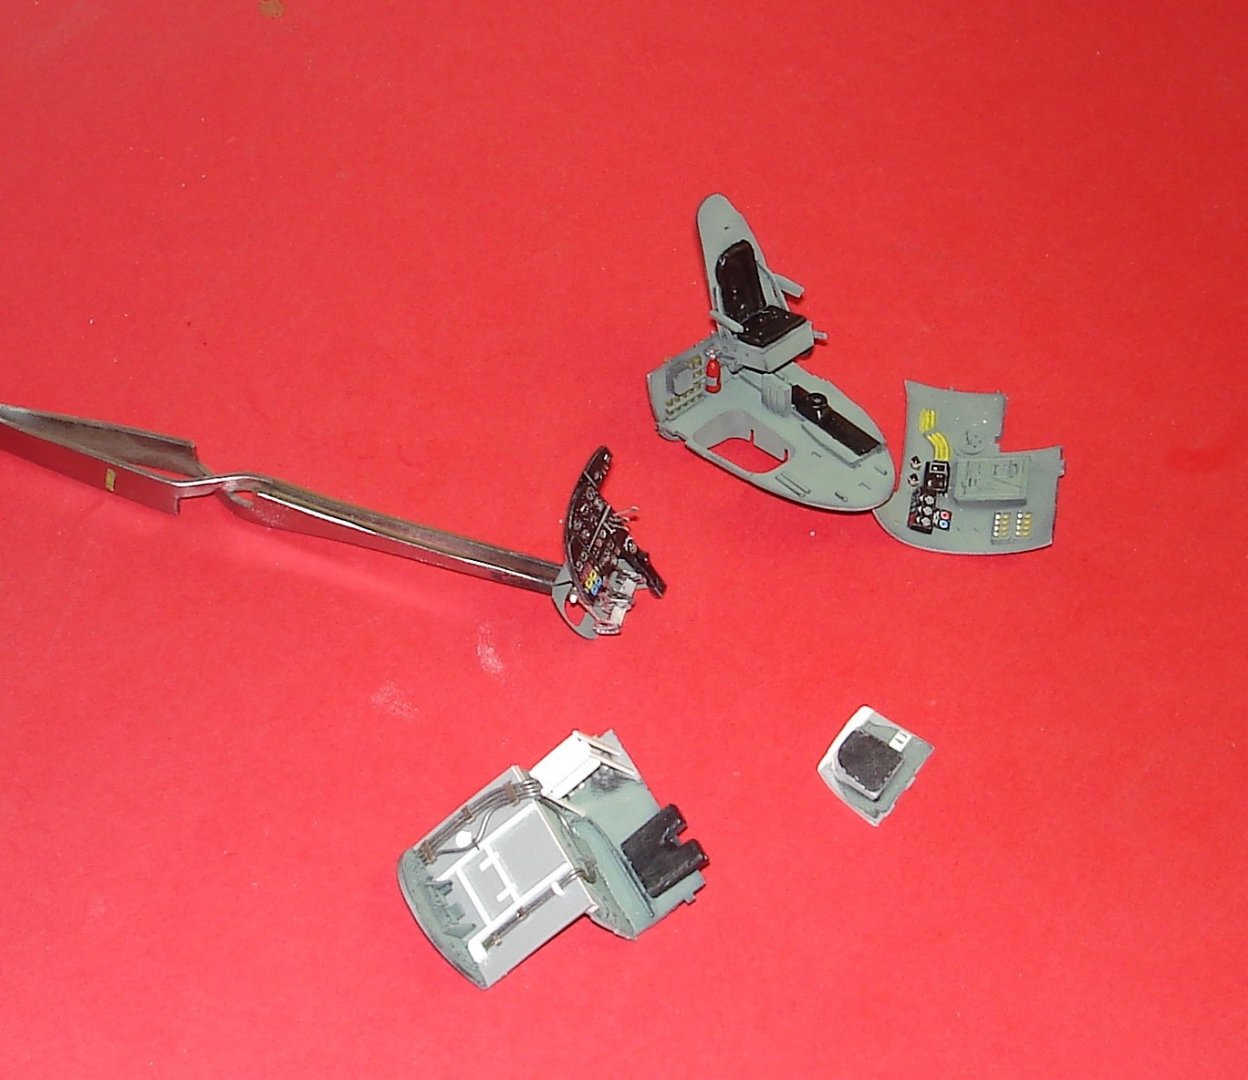
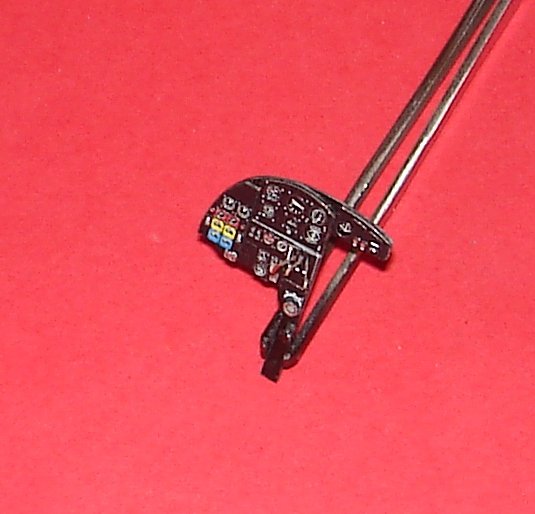
Javlin replied to Javlin's topic in Non-ship/categorised builds
Well I cut off the pedals once I built the PE ones not to bad don't play with the PE like I use too.I have also started black basing the interior with some semi-gloss black enamel.I have a couple things I am looking to add to the pit area thing that are readily seen around the radio equipment a pic of what I will try to replicate from another build which HK did not do the tower. Kevin OC:the shroud for the pedals is that a leather/canvas bag on the right side of the IP? Looks like some kind of storage unit?