


jablackwell
-
Posts
304 -
Joined
-
Last visited
Content Type
Profiles
Forums
Gallery
Events
Posts posted by jablackwell
-
-
Lots of hard work there: good going!
~j
-
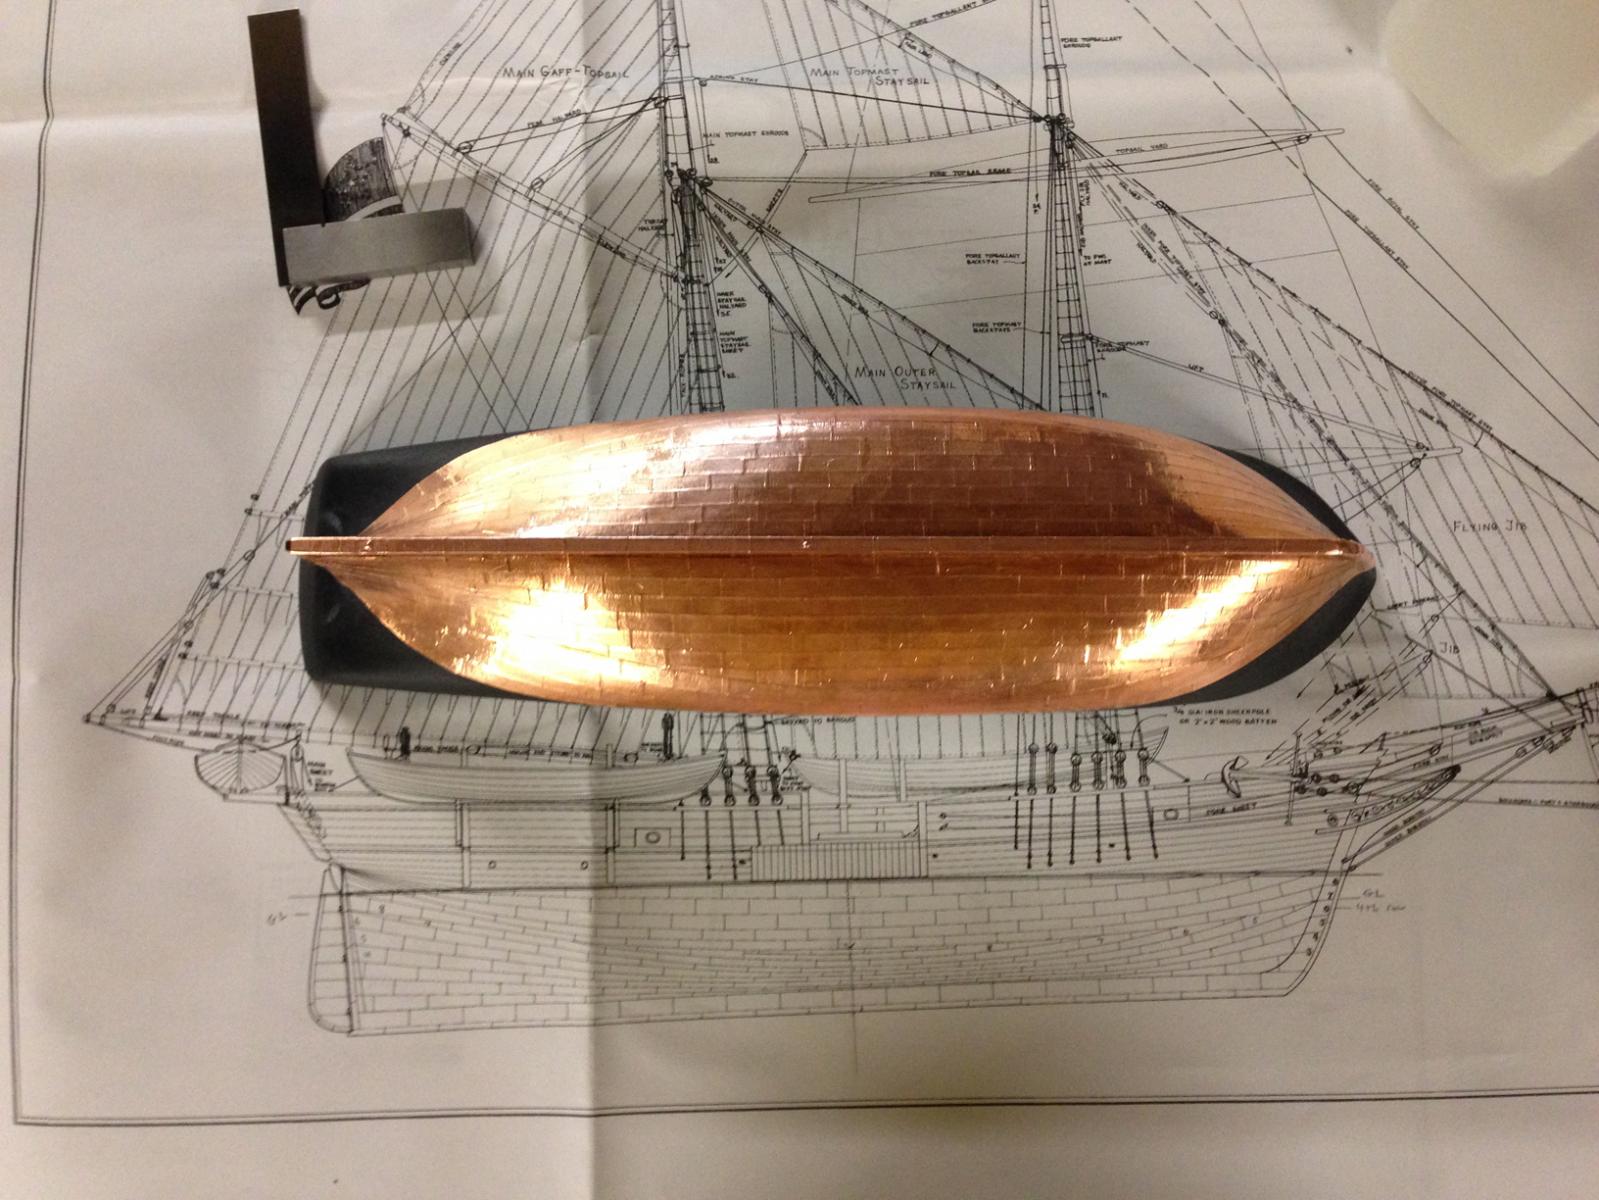
Thank you for the kind words all. I have completed the hull coppering, which, surprisingly looks very mirror-imaged from port to starboard. I am happy with it.
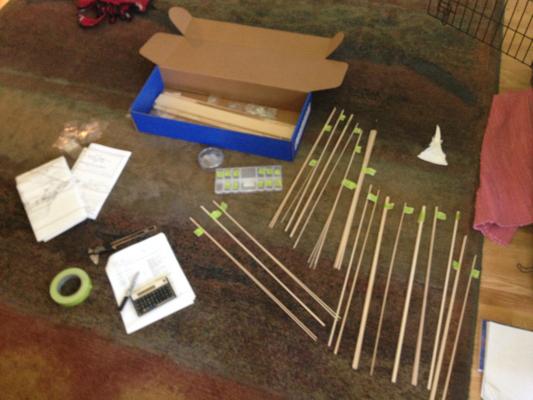
I spent the free time today getting all the other parts organized for the remaining build. I also ordered some Testors grey primer for the Britannia Metal parts that I'll use. I still haven't decided upon scratch building some, most or all of them yet. I think I'll wait and see as the build progresses. To get things organized, I am using a small plastic glass bead holder (found in the art store jewelry making section) for the blocks and other many small parts. I then gather and labeled all the wood with masking tape tags. Here we go!

and sorry this is a little blurry. You can see the VERY useful calculator and calipers for measuring the wood.
~john
- Overworked724, hexnut, Elia and 1 other
-
 4
4
-
This has been a productive week. Half of the hull is now coppered. There were some interesting moments, but there is one piece of wisdom here to make it all easier: it's just tape. Pull it off and start again if needed. ;-)
Now to see if I can get the other side to look as good and in mirror image!
~john
- avsjerome2003, ccoyle, schooner and 6 others
-
9
-
Thank you, Clare. Much appreciated. I suspected that the copper would always tarnish with time, no matter what is done.
~john
-
All,
I have been watching this thread with great care, as I am just starting out on the coppering of my kit build of the Kate Cory. I am now two rows into the copper plating process which is going smoothly. I do have a question though, and wondering if anyone here might throw out some suggestions for me:
Post-coppering, the metal will just be hanging out there on the model, unprotected. I imagine that people have been coating their copper with something or another.... the question is what? I would also imagine that the coating would depend on what the craftsman is looking to accomplish for a finished product appearance, yes? Some might want the copper looking brand spanking new and shiny, while others would want a more weathered appearance.
What coatings should be used to protect and keep copper shiny and new looking?
What would be the best coating for a weathered look, and also protection?
Thanks,
~john
-
Started to copper the hull today after a few clean layers of poly were polished on. This process is a little tedious though not even 1% as difficult as I thought it would be. As with many things in life, the anticipation makes it seem so much more difficult. I finished with two completed rows:
~John


- dgbot, Duanelaker, yvesvidal and 4 others
-
7
-
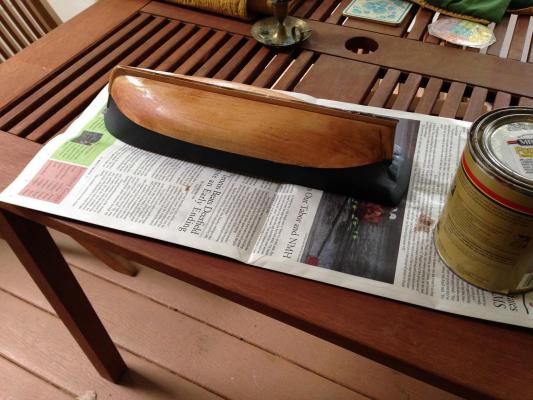
OK - Today I painted the hull above the waterline black, two coats, and then poly'ed the hull below the waterline to prep for coppering. It's beginning to look a lot like a ship now.
I am now thinking about the planksheers and wales and how I need to build a jig to bend them properly.
Anyone reading this: Looking ahead, I have to get the name of the ship on the transom in some way. How are people doing this these days? I doubt free-hand painting, but maybe some of you do that. Decals? Rub-ons?
~john
- avsjerome2003, Aussie048 and tasmanian
-
3
-
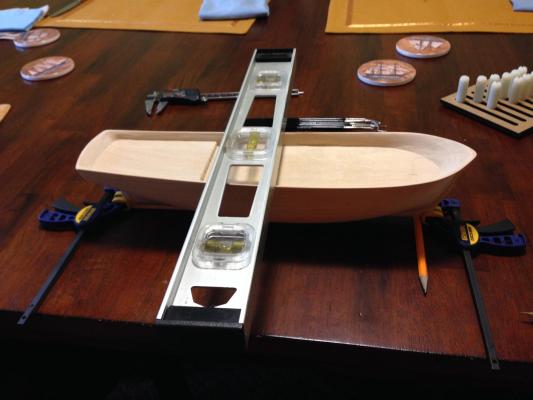
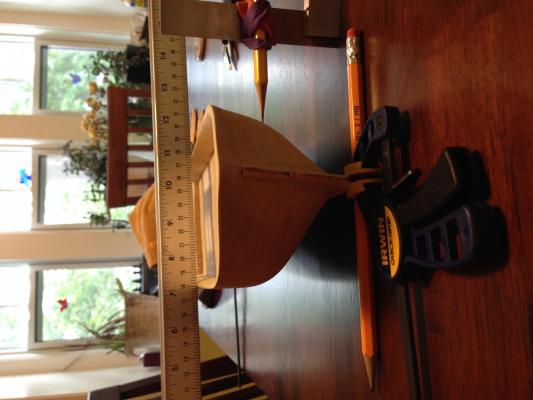
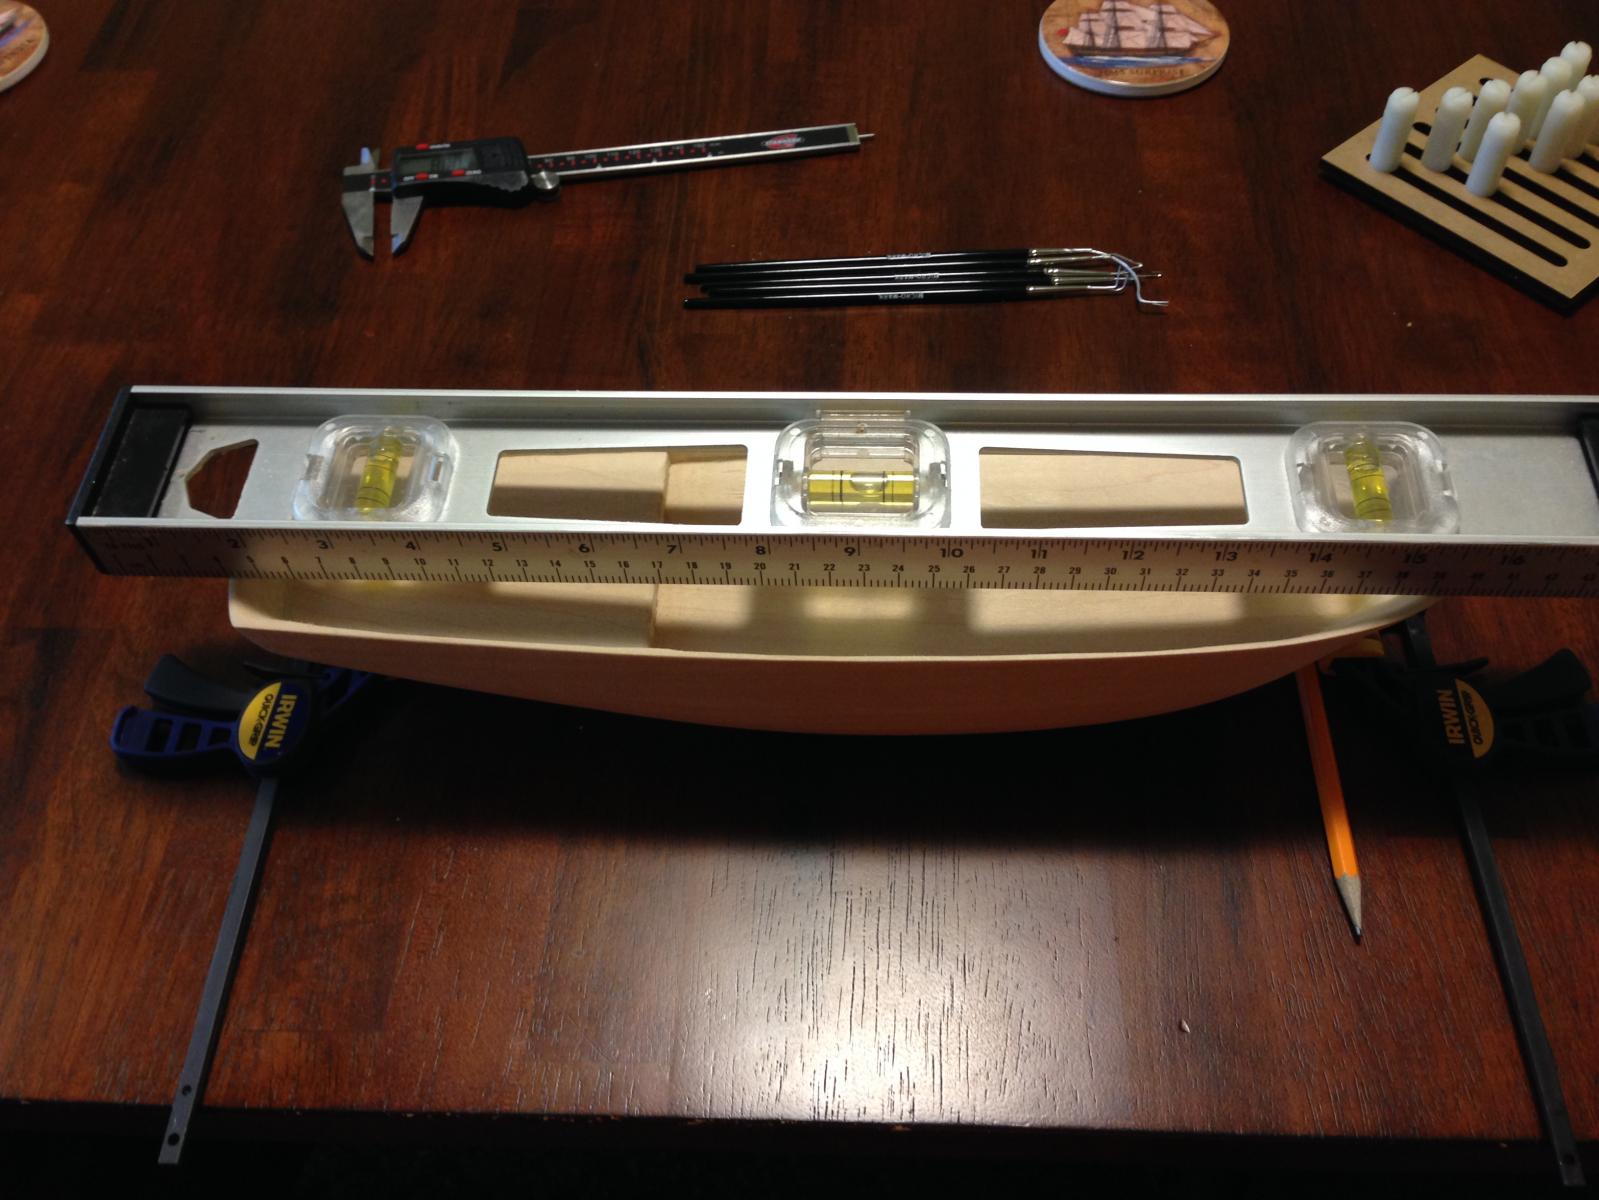
Worked on establishing the water line today. It turns out that a old fashioned #2 pencil is a perfect object to lift the bow to the right angle to make drawing the WL an easy task. I used a level table as a base, then a level on the hull to make sure things were aligned properly. First try? No - that was not quite right. Second try? Yes indeed. All is well. A pencil strapped to a machinist square was my drawing jig, and it worked just fine. Keeping things simple around here ;-)
The next phase will be to paint down to the waterline black and from the waterline down use a poly to smooth out the wood and get it ready for coppering. Once painted, I'll add the planksheer and wales, then onto coppering.
~john

- avsjerome2003, Tim H., hamilton and 2 others
-
5
-
Update:
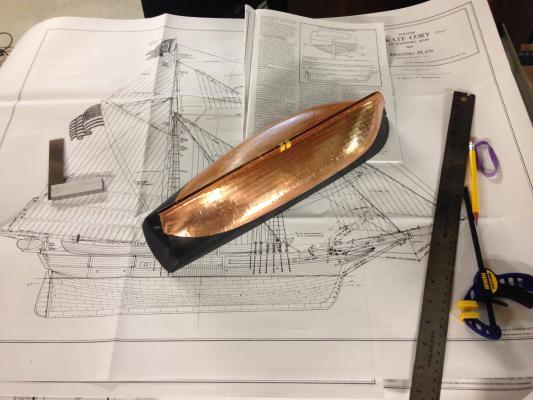
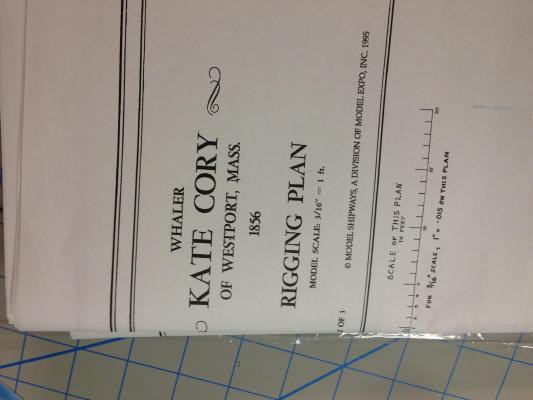
As hoped for, the plans from the Maritime Museum has a couple of verticals with the copper plating well detailed and easily measurable with a set of calipers and scale. This eases the mind a little, for sure. Now... to get some time to place some varnish onto the hull and get that process going.
~john
-
Hi Pete,
Nice work on the Eagle there. The gore line is quite evident there and in the sheet that you image with it. I got the museum sheets in the mail today (read: excited!) and right there on the first sheet is the coppering detail. I am thrilled by that, as it has allowed me to relax a bit and focus more on finishing the wood smoothly and planning for the coatings before coppering. I think I should be all set at this stage, but like all ship models, I am sure to run into more challenges as I work along. It is a little surprising that the gore line and coppering detail is not mentioned in the kit instructions or on the plans. You have to love archival plans!
Best to you,
~john
-
Hello Pete,
I had hoped that the gore line would have been marked, but it is not. No indication whatsoever on the plans. I have a healthy idea of the "point" of the gore line... that there is a transition from the plates applied from the keel up... eventually they become "too diagonal" to the waterline, so a new row must be formed that is parallel to the waterline at some point. The jagged triangles must be lopped off, etc... I am just not able to tell where that point is or should be. I am hoping that plans from the museum will help out here.
~john
-
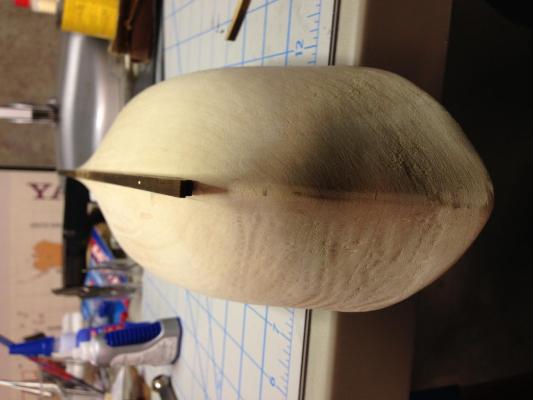
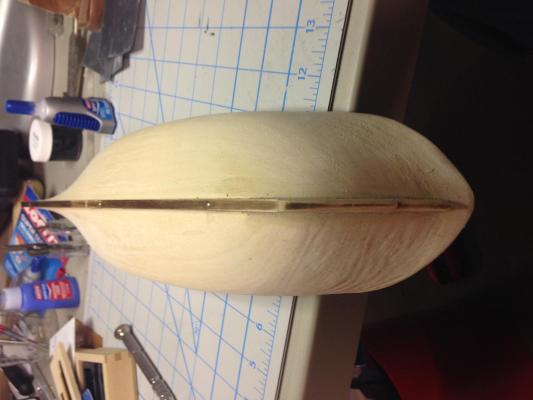
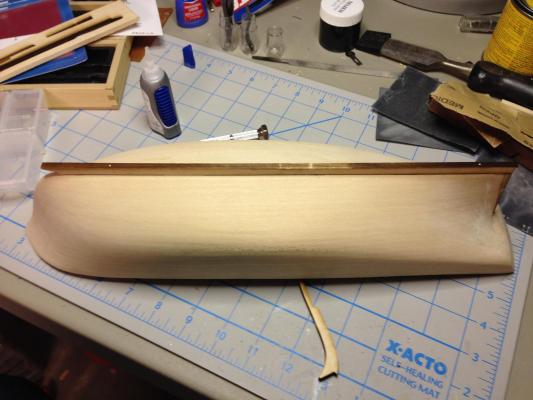
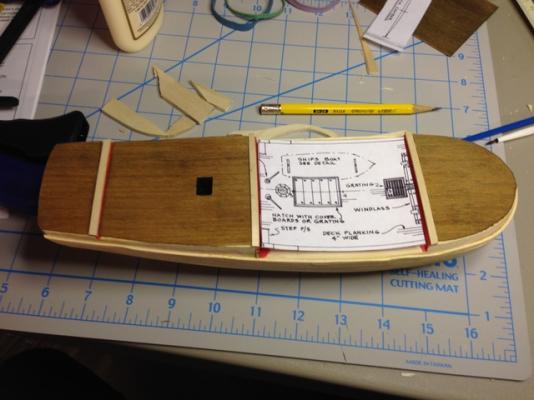
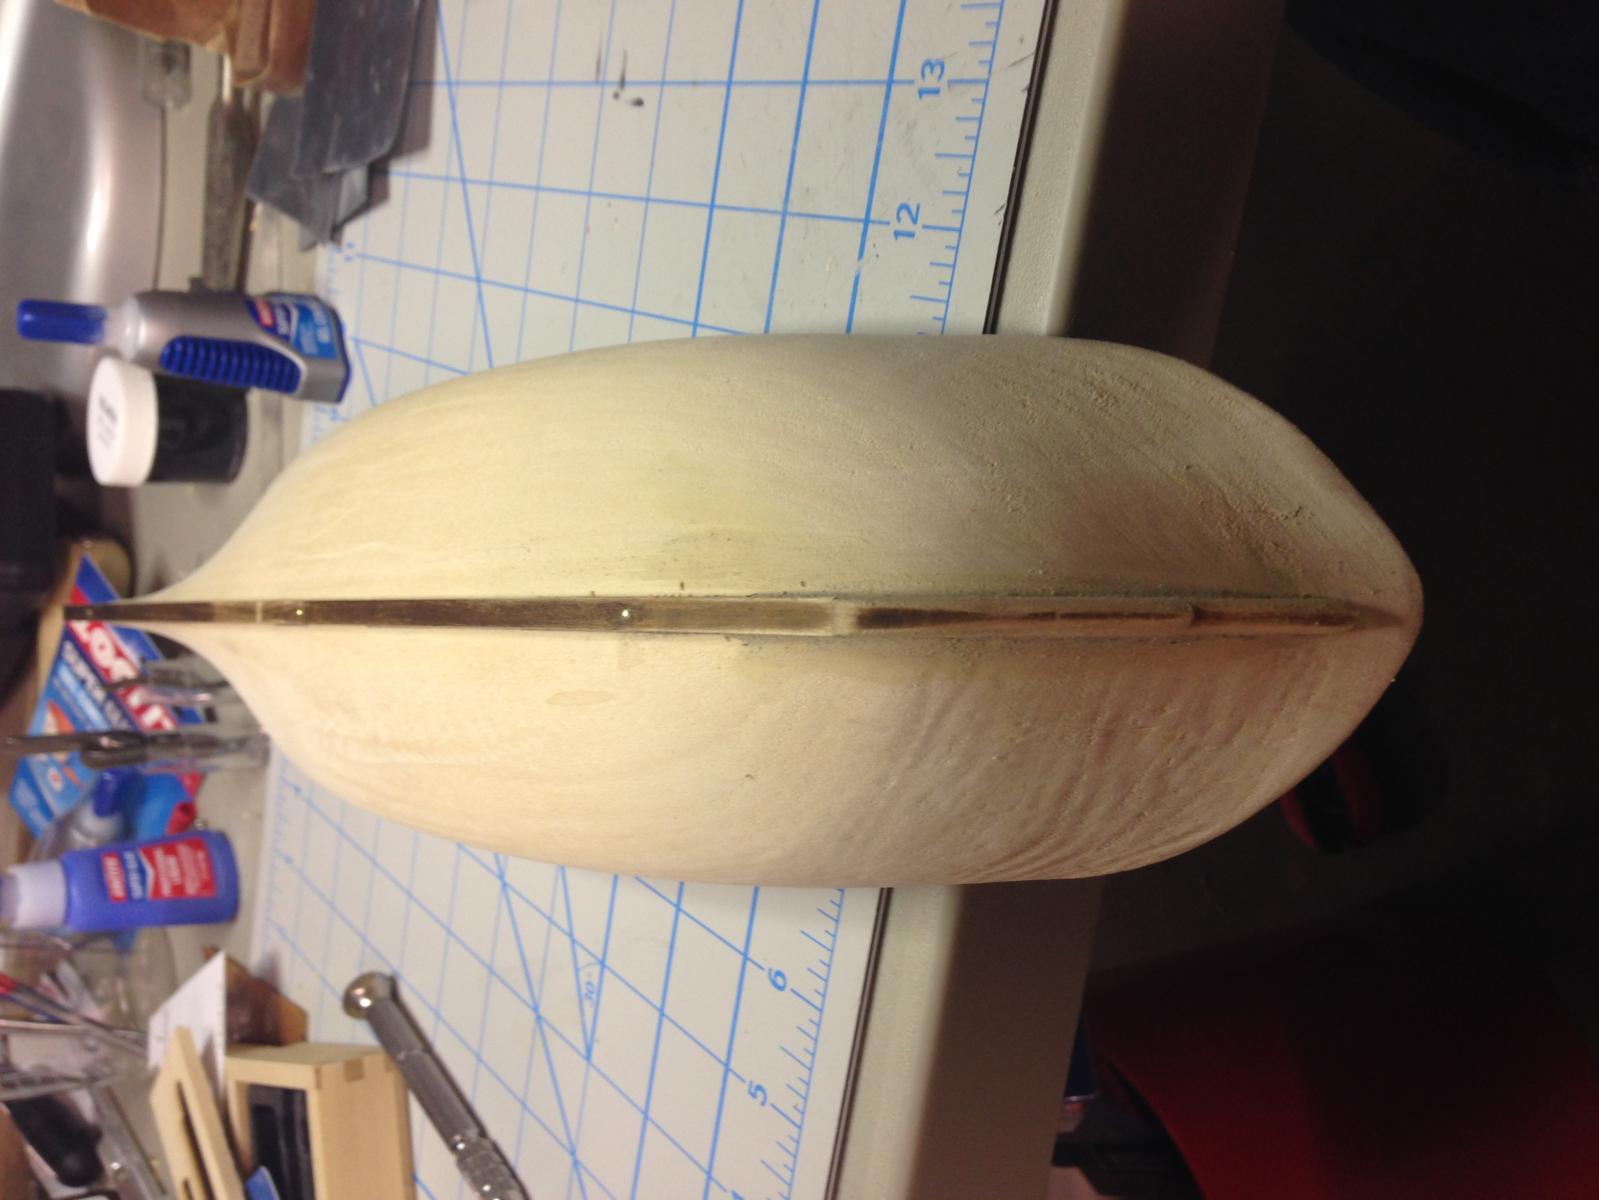
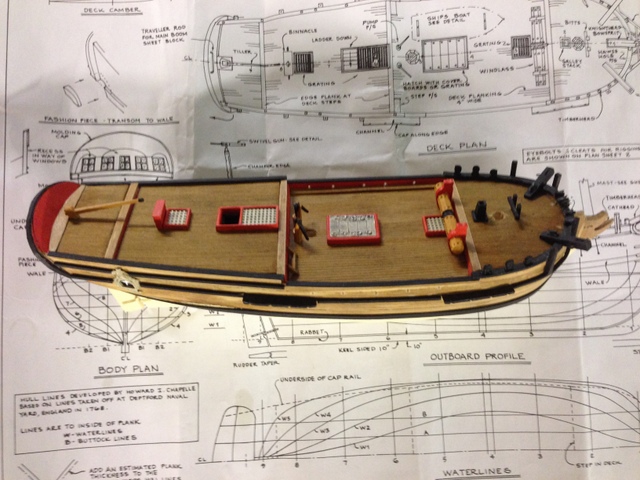
Hull shaping is complete and keel in place. Now to mark the water line, add the outboard planksheer, and copper the hull.
I have been scouring the web a little and found a couple of good references to hull coppering (here, in fact!) and then found myself needing to reconsider the order of building:
I am going to mark the waterline now.
Next, paint the region above the waterline black.
Add the outboard planksheer, which is pre-painted white.
Then copper up to the waterline.
One thing that has me a little stumped is the location of the gore line. Copper plates are added from stern to stem, bottom to the gore line, then added in a second belt from the gore line to the water line. This all looks very nice in the hand sketches, but I can't find "gore line" defined or described in enough detail.... more web hunting, unless one of you marvelous readers knows the answer
 Here's where she is as of this afternoon....
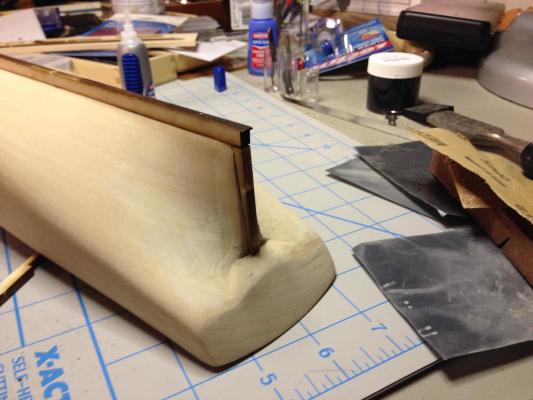
- tasmanian, augie, avsjerome2003 and 4 others
-
7
-
Sam,
Thank you for the information on the museum plan copies: I thoroughly intend to grab a set. The museum is perhaps a couple of hours south of me, so it sounds like there's a journey in store for us some time this summer ;-) On the magazine issues: It took me a while to sort out the meaning of SiS (Ships in Scale)... they are still in print. The best part is that they also have many of their back issues on CD. Love that! Thanks for helping this newbie out. I appreciate it,
~john
John,
I built the KC about 20 years ago. Still one of my favorite ships/kits. Did you get the expanded set of plans from the New Bedford Museum. Also there is a series of articles from Eric Ronenburg (sp?) from the old SIS magazine called Whale Craft that are excellent. They follow along his build of the KC.
Also take a look at this site. It's an outstanding version of the Kate.
Good luck!
Sam
-
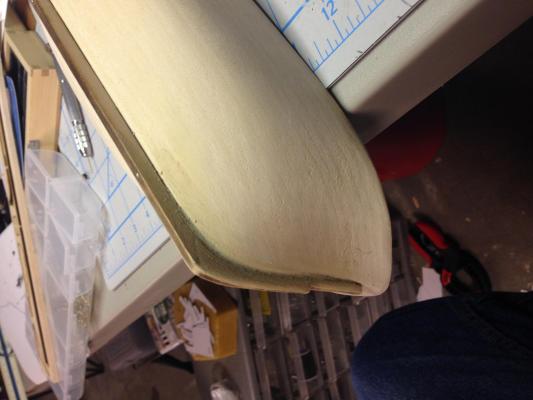
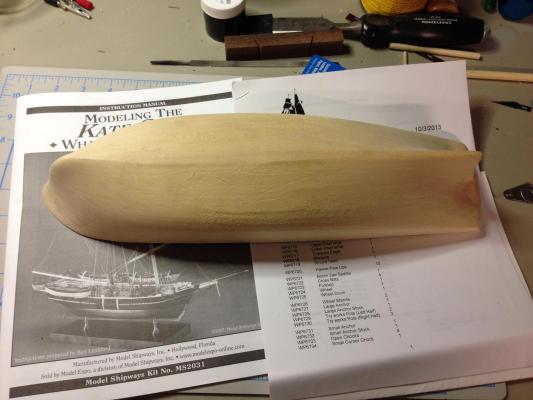
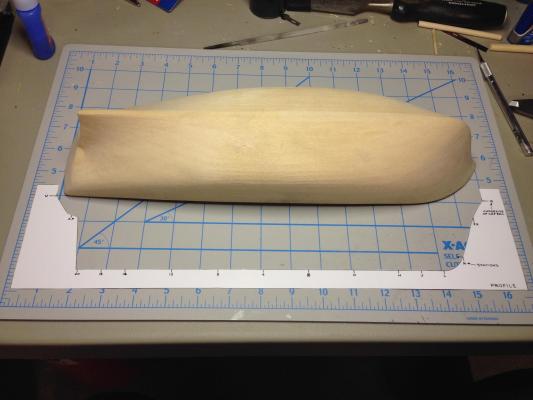
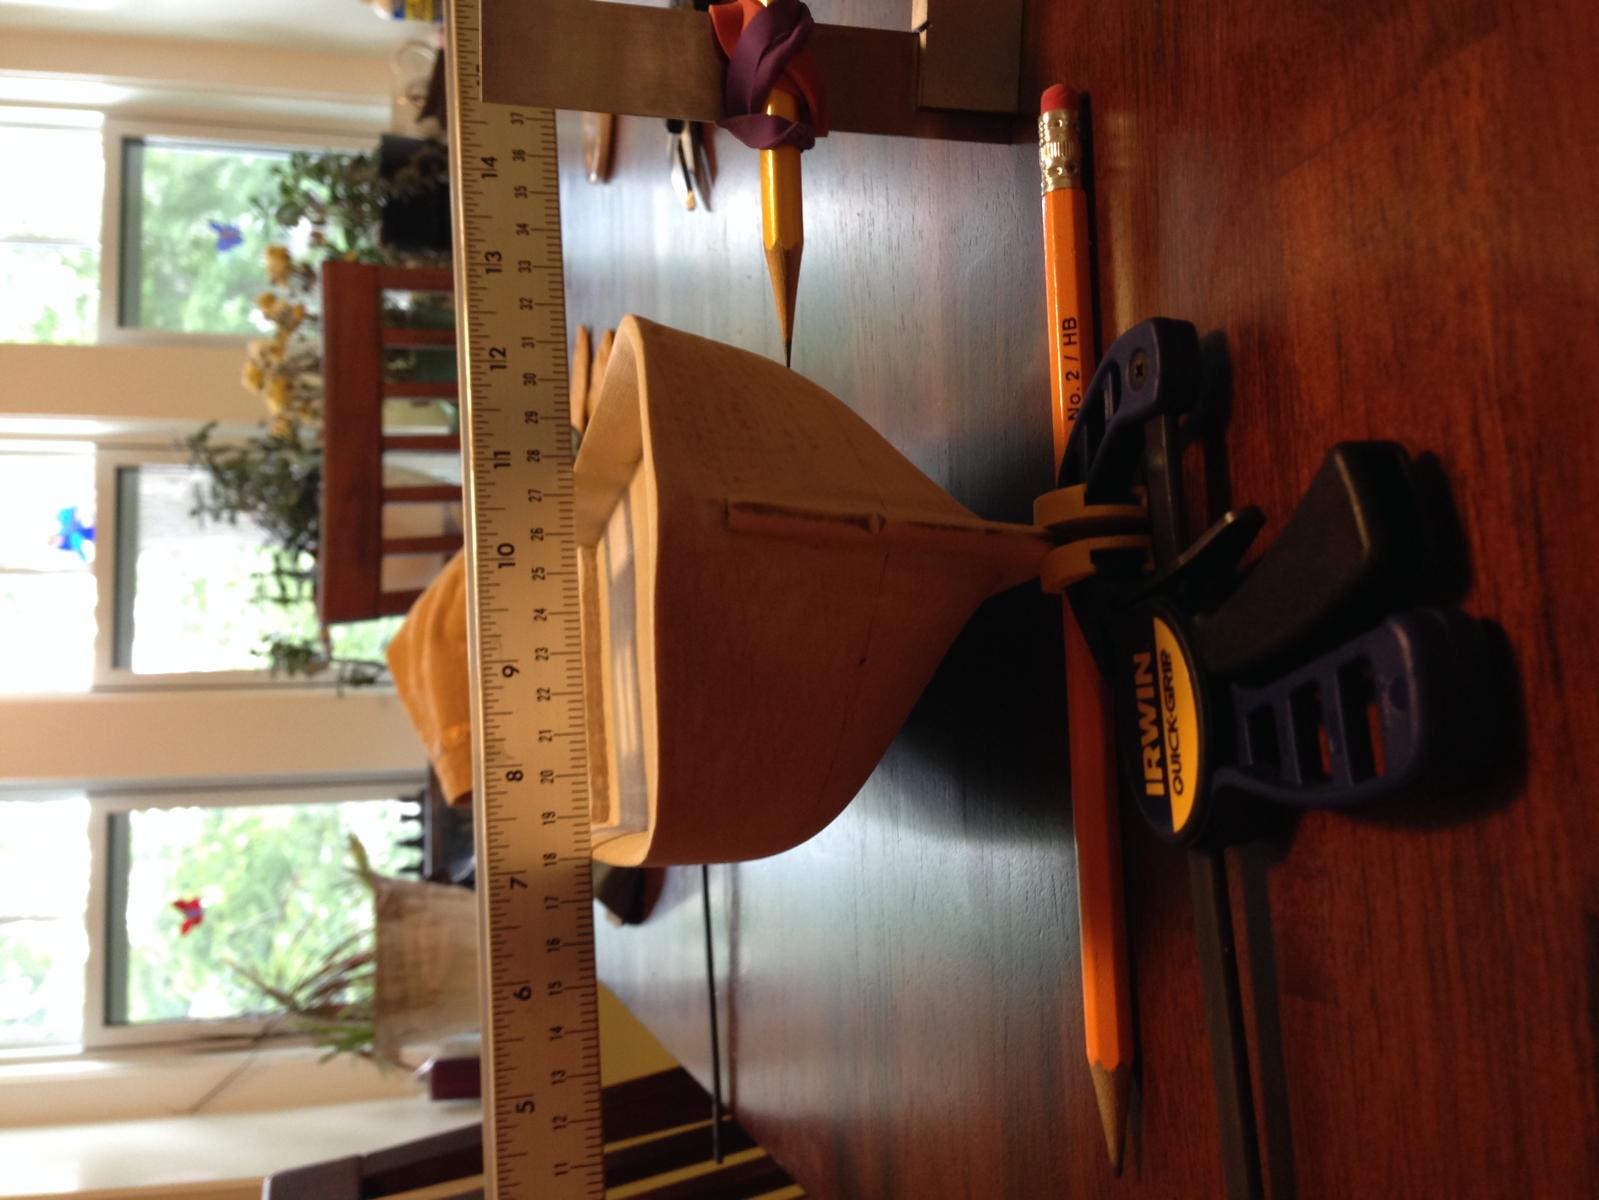
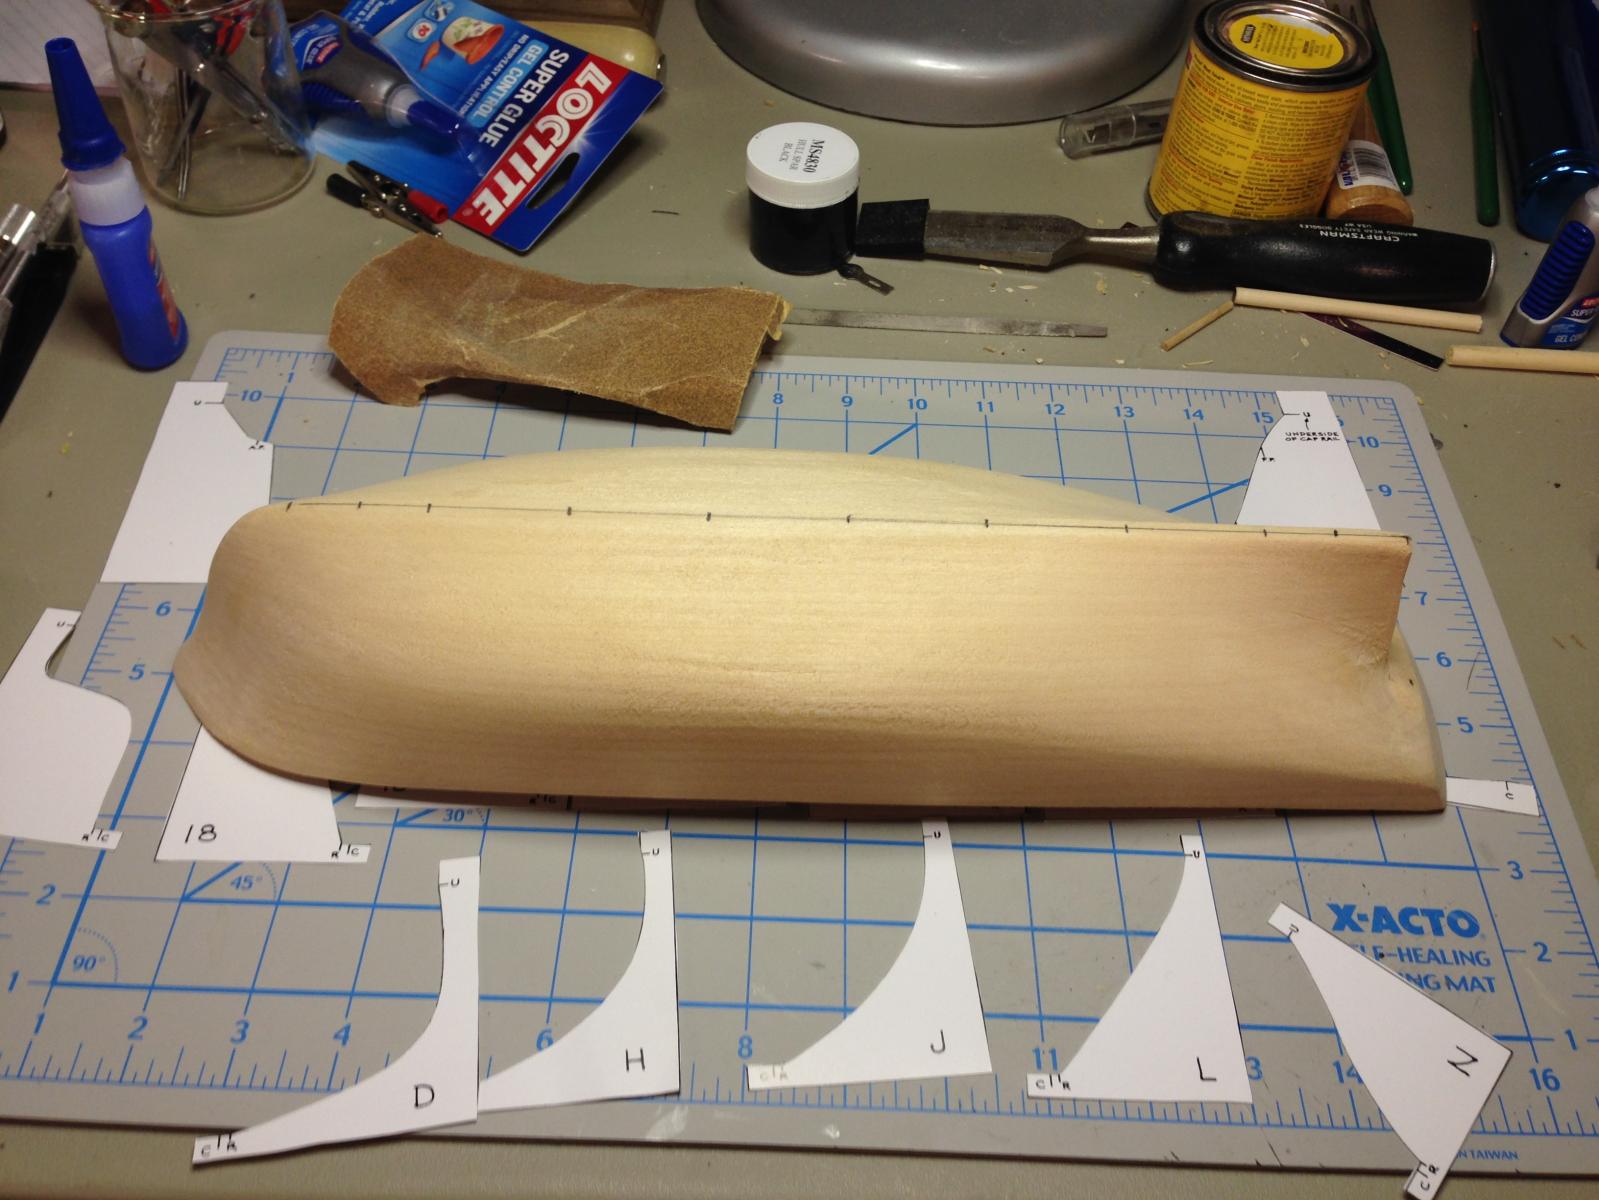
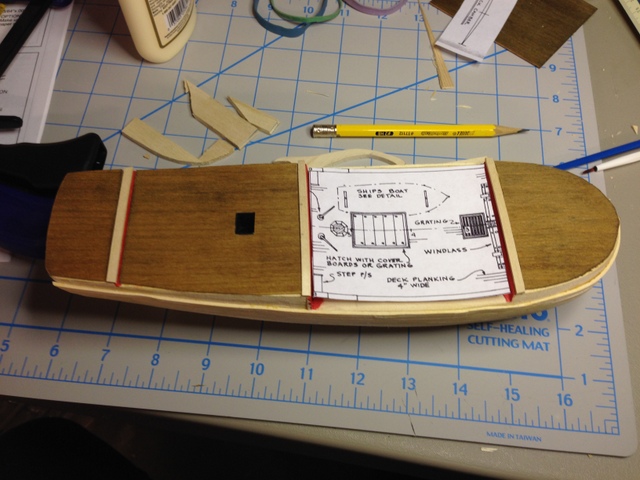
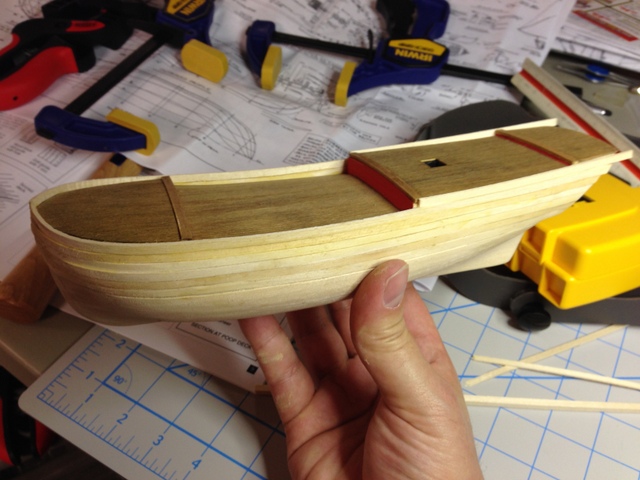
Here's to a new log! I am starting the Kate Cory now, a solid hull 1:64 scale model from Model Shipways. The hull came in excellent shape with only minor re-shaping to get down to the final measure. The hardest part was the bulwark thinning, which they recommend a chisel to carve down. I used a Dremel Tool.... Wear a mask if you try this, as basswood in the lungs is a bit unhealthy ;-)
The sterm of the ship needed the most wood removal and reshaping. That also prompted me to use a Dremel sanding drum, which worked swiftly. With some hand sanding afterwards, the whole thing is coming along nicely. I used a smaller chisel to square off the deck levels and trim the bulwarks closer to the deck.
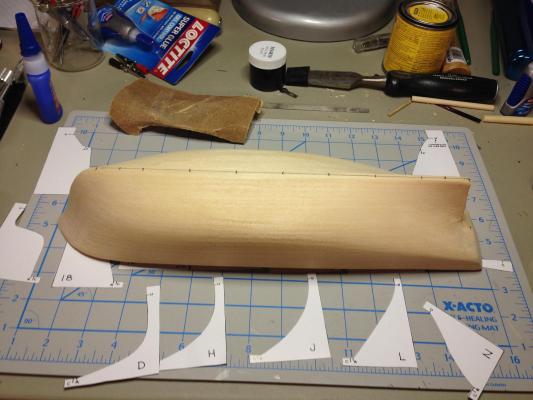
Next I am going to work on the deck bevel and do some fine sanding to the exterior. I want to add a shiny coat of varnish or something to make the coppered portion stick better... raw wood is a no-go for self adhesive copper tapes it turns out, as a simple experiment shows that smooth wood just lets the tape peel off. Testing is good.
~johnb
- avsjerome2003, Tim H., samueljr and 1 other
-
4
-
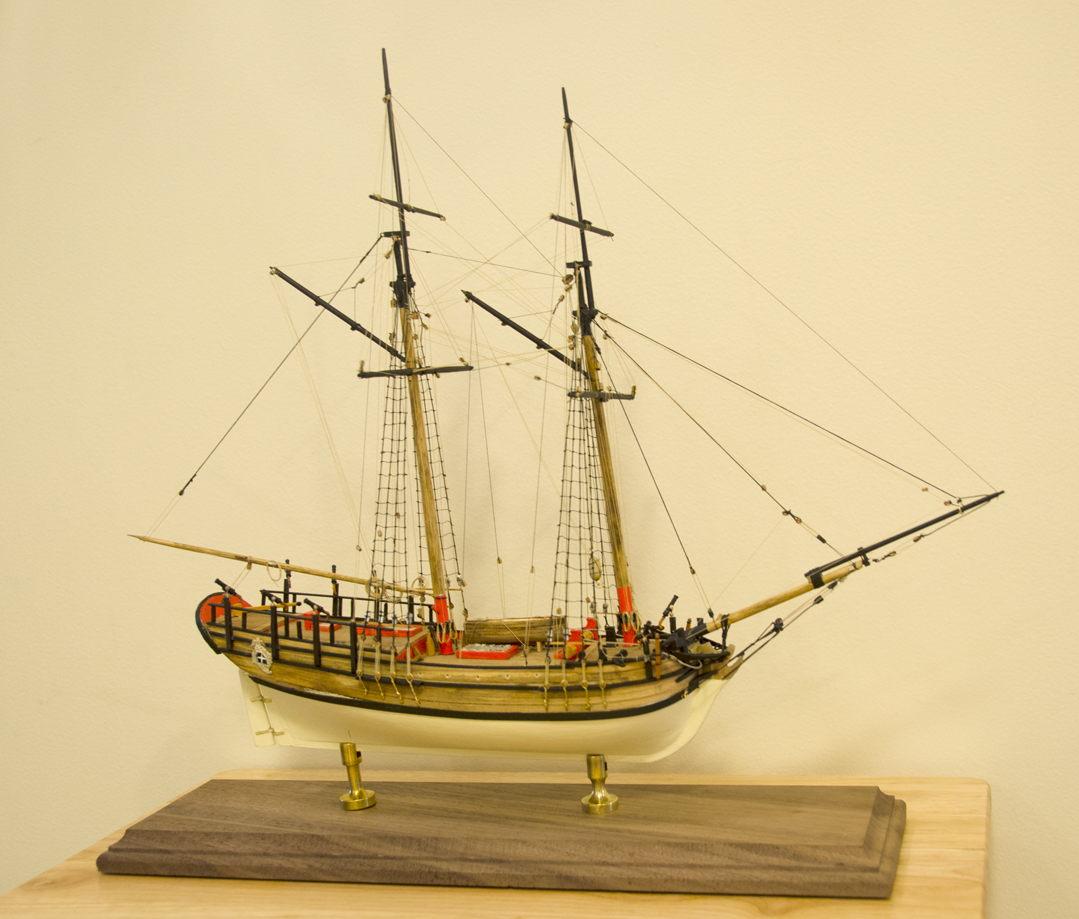
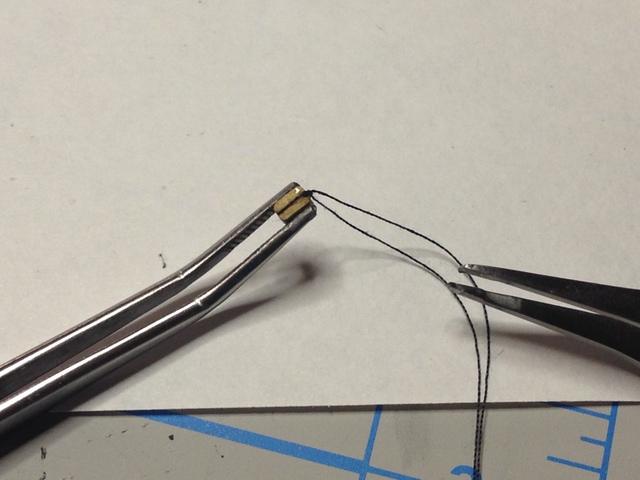
The model is almost complete now. I have some finishing touches to add: some coils here and there and some black paint dabs to cover up some shiny glue spots. All in all, I am pretty happy with the whole thing with exception of the stern. That part kept me in trouble for most of the project, but I am very happy with wood filler and its ability to mask some pretty tremendous errors. The rigging was a lot easier than I had anticipated. I am still looking for a good pair of long reach tweezers with flat grabs which can get the threads from a distance. I have found that most tweezer makers have pointy tips and a very small region that will grab thread well. I am not even sure how to describe what I am looking for,,,,,
So, some images....


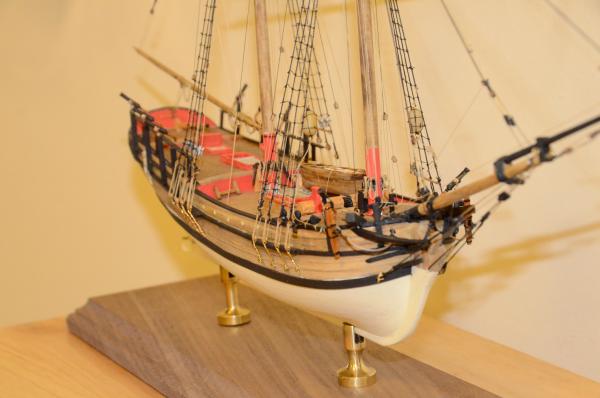
I want to thank all of you for helping out so much, some directly and some without even knowing it. Your posts and information shared on this site have been a real wealth of input and knowledge. It is greatly appreciated!
My next project is already on the bench: the Kate Cory brig. This is a little larger and more detailed. I am looking forward to the added detail work, and this time, a coppered hull. I will try to post more than I did with this model... now that I know this site exists! The Cory will be the last solid hull work for me. I am planning to go to plank builds next and want to get through a build of the Surprise. We'll see.
~johnb
- ccoyle, GrandpaPhil, CharlieZardoz and 5 others
-
8
-
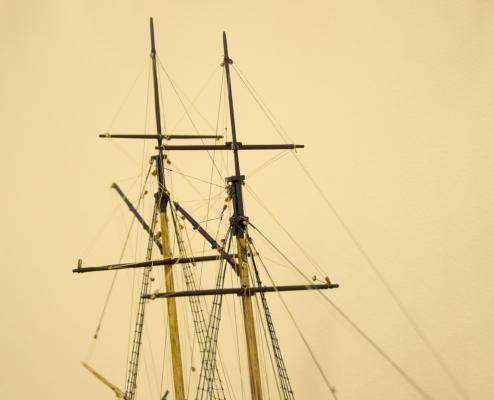
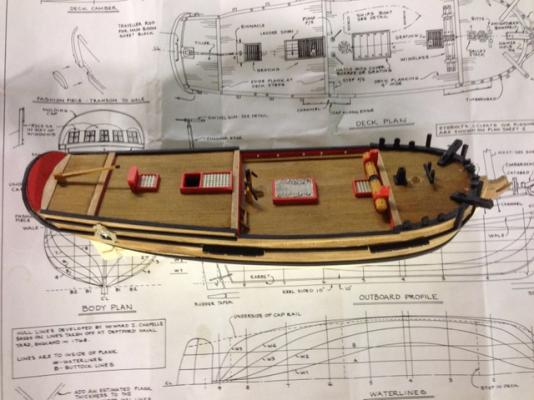
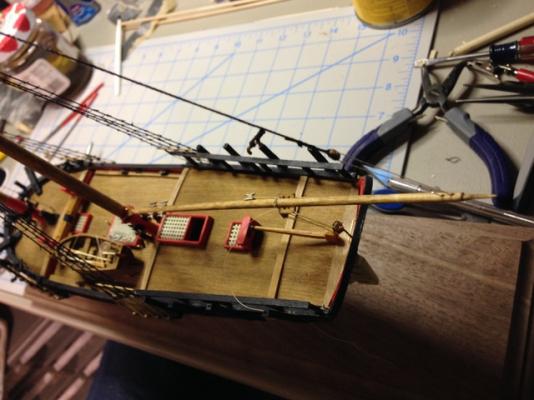
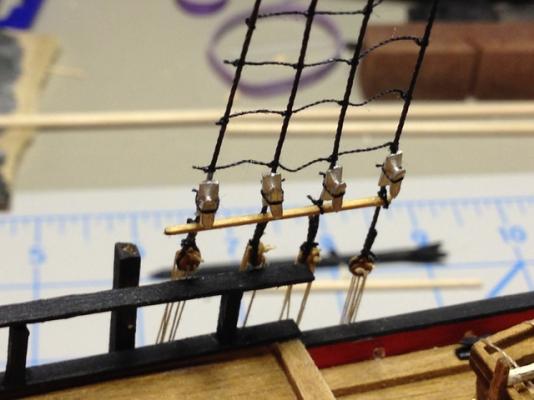
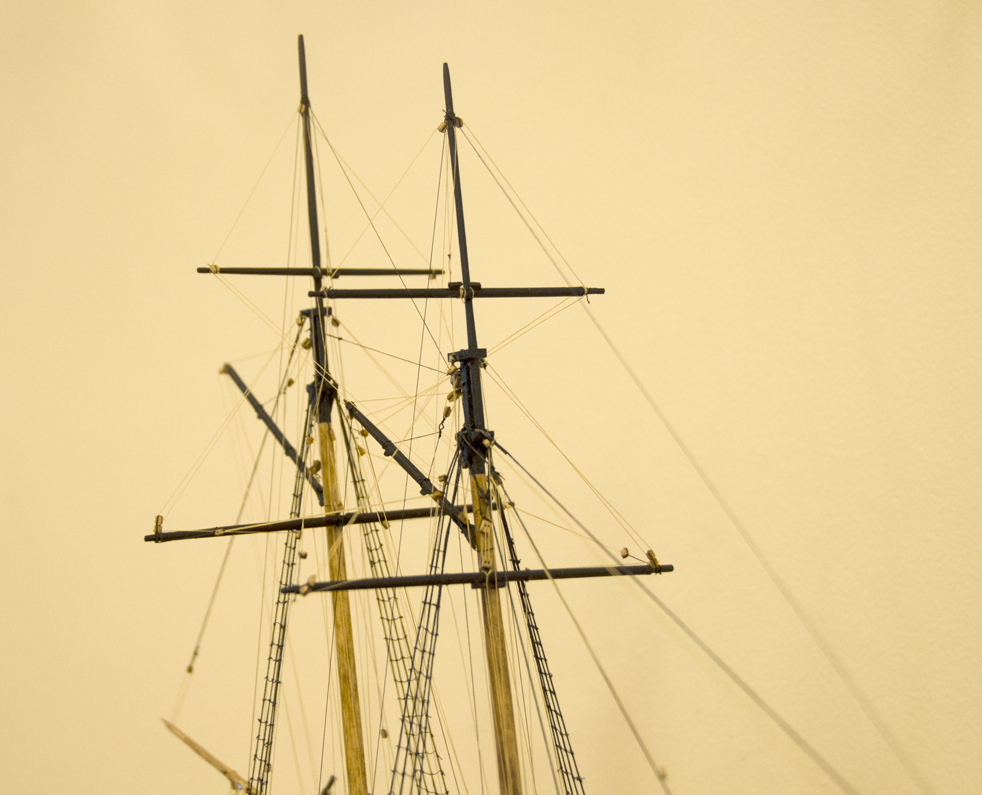
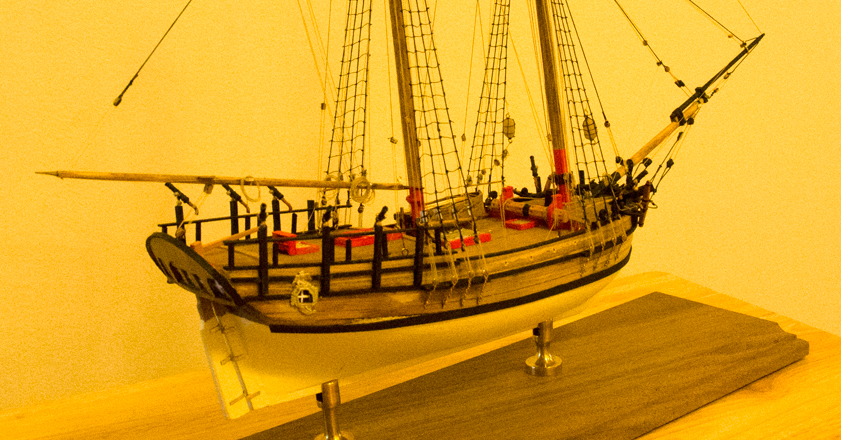
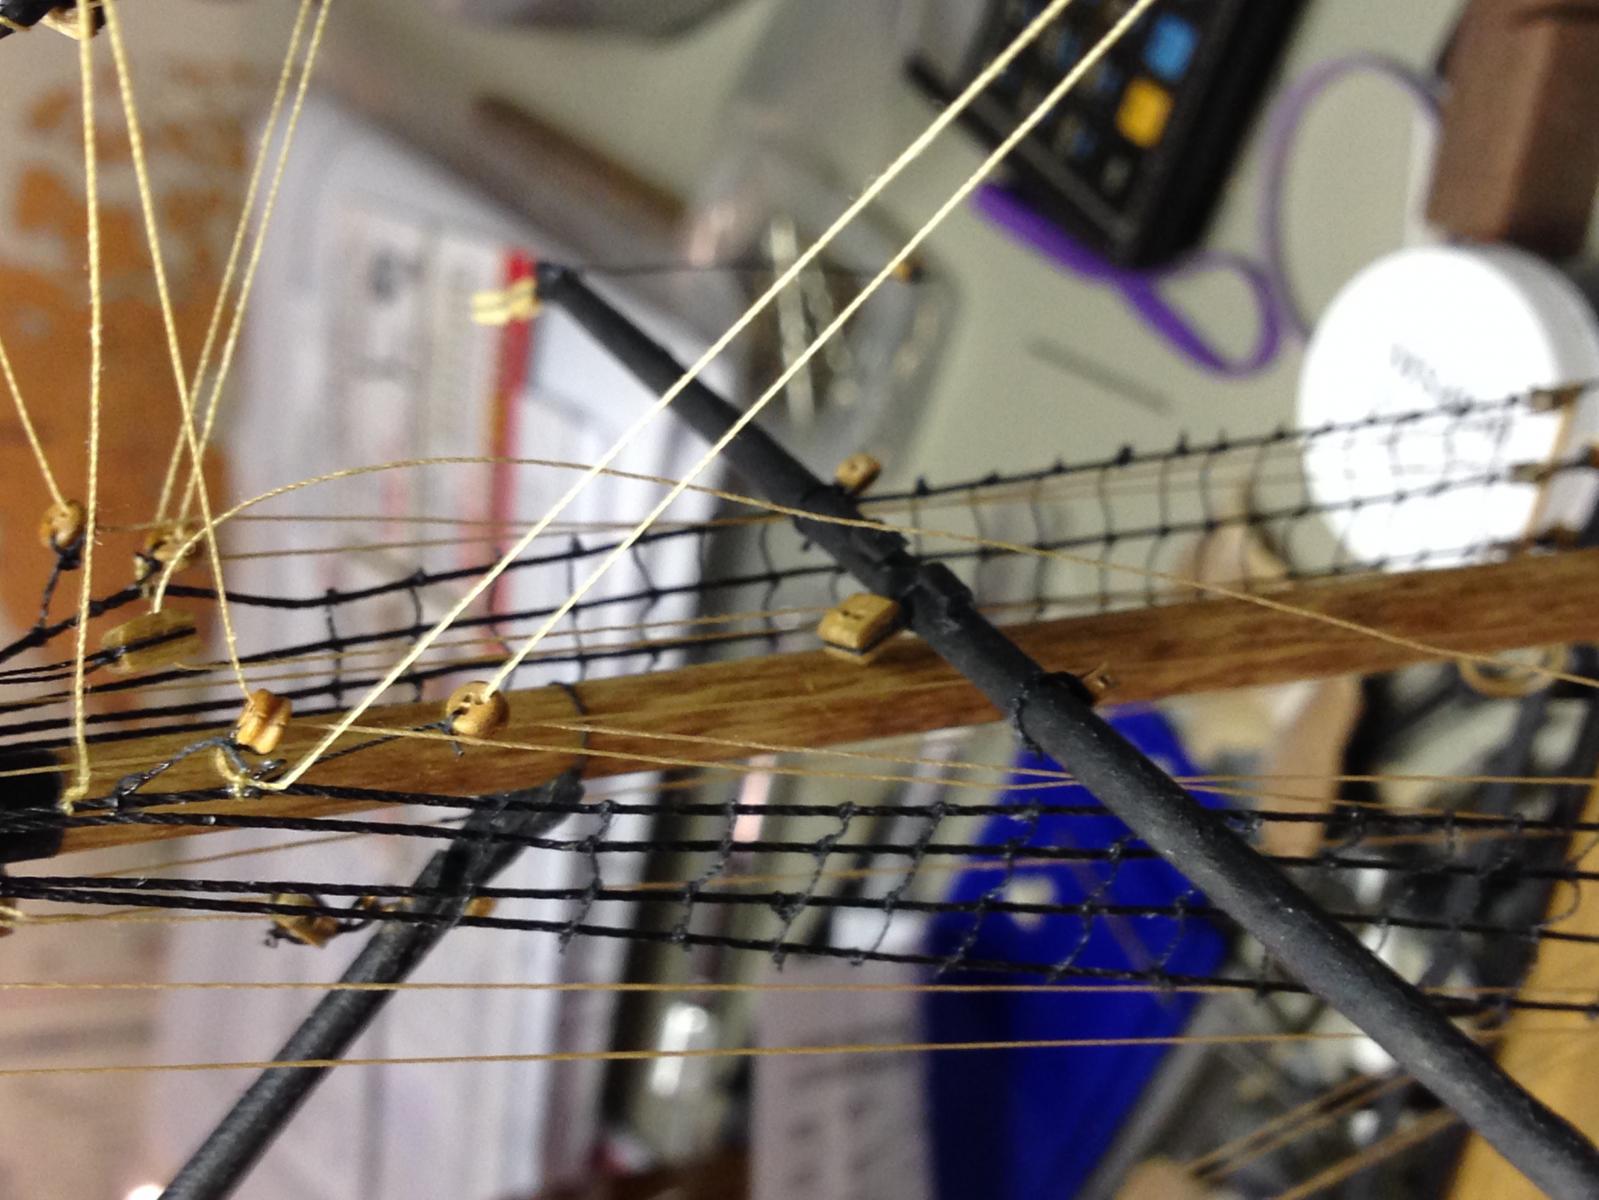
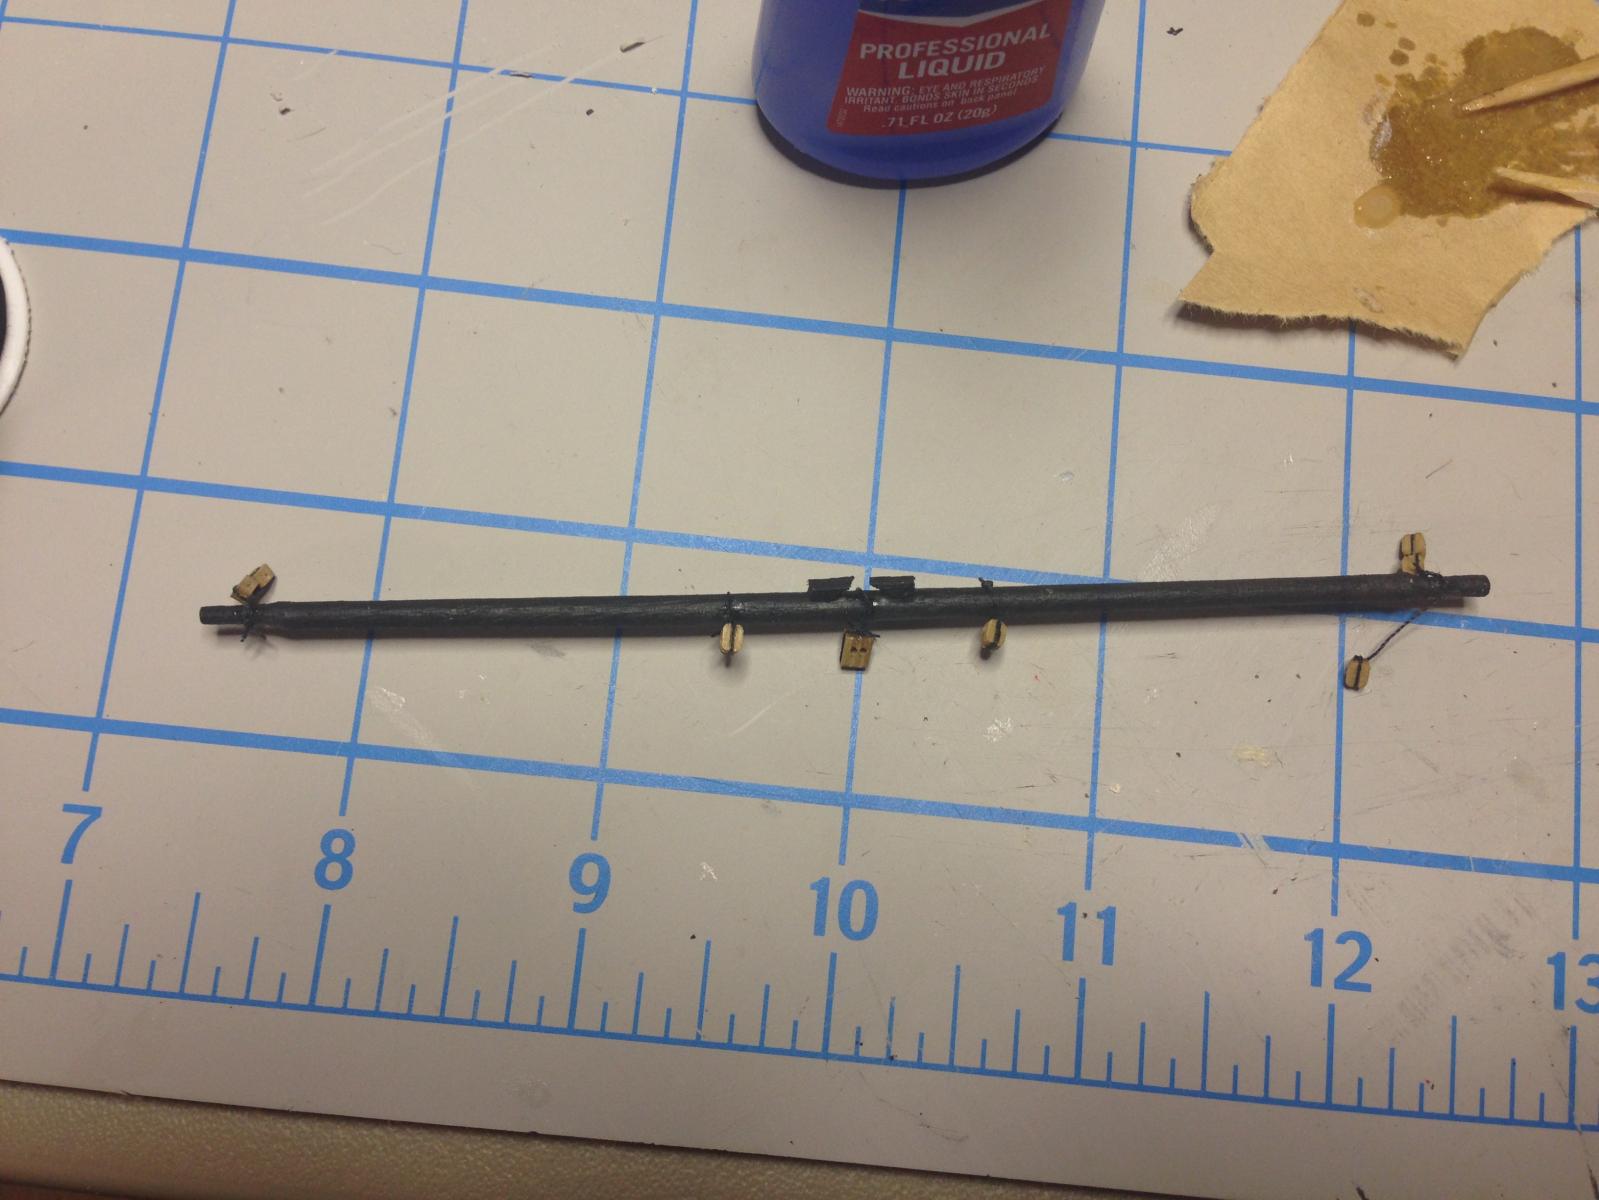
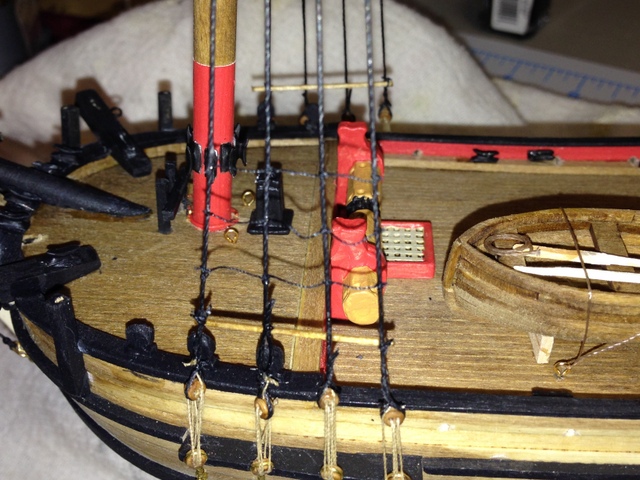
On the home stretch here. I have to finish the main mast lower yard installation then work on the vangs and back stays. After that the forward jib rigging needs to be installed. That will sum up the rigging. Wow. After that the remaining tasks will be to do some paint touch ups and install the cannons. I kept them off the model for now, as they were constantly getting in the way of long rigging threads.
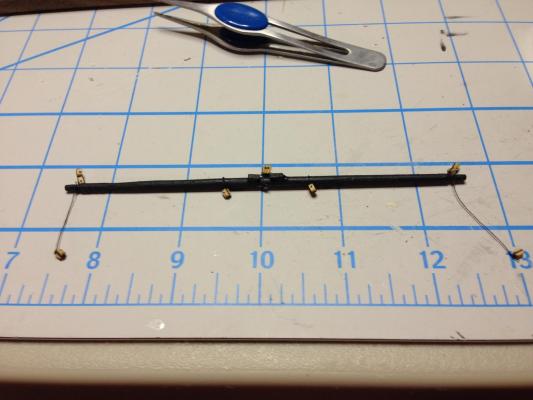
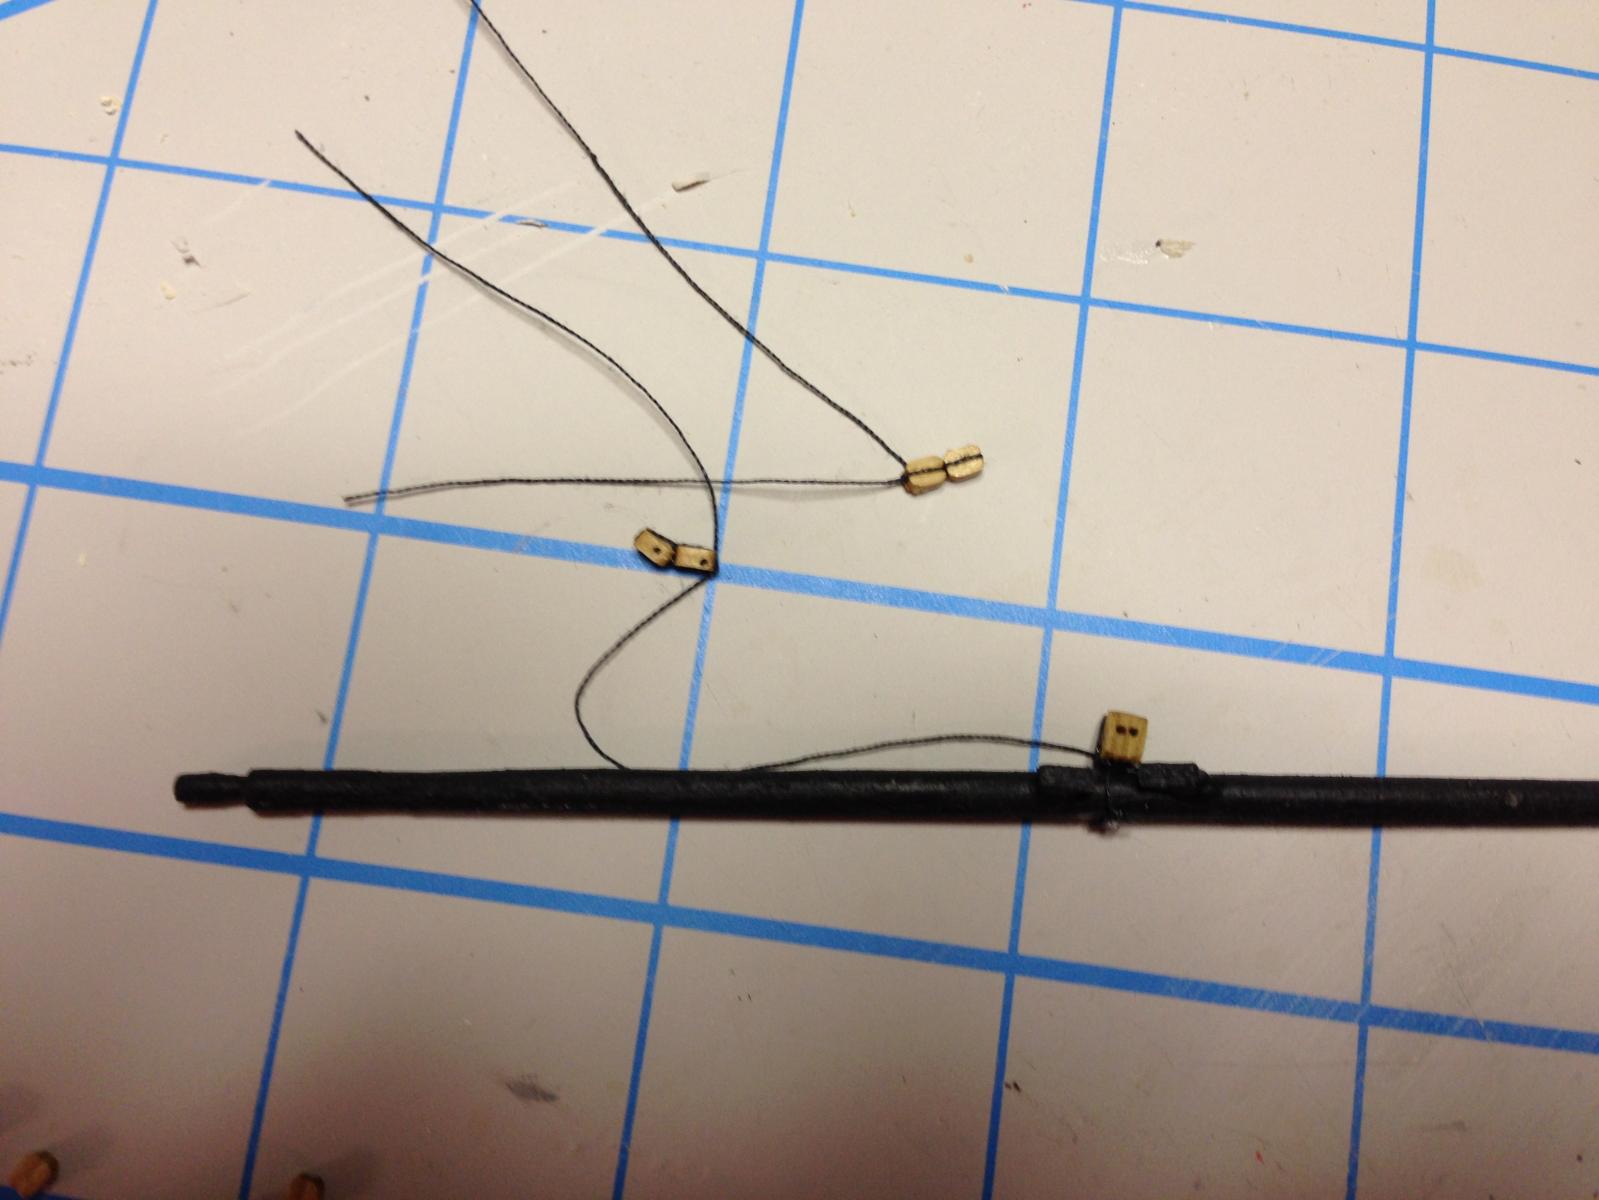
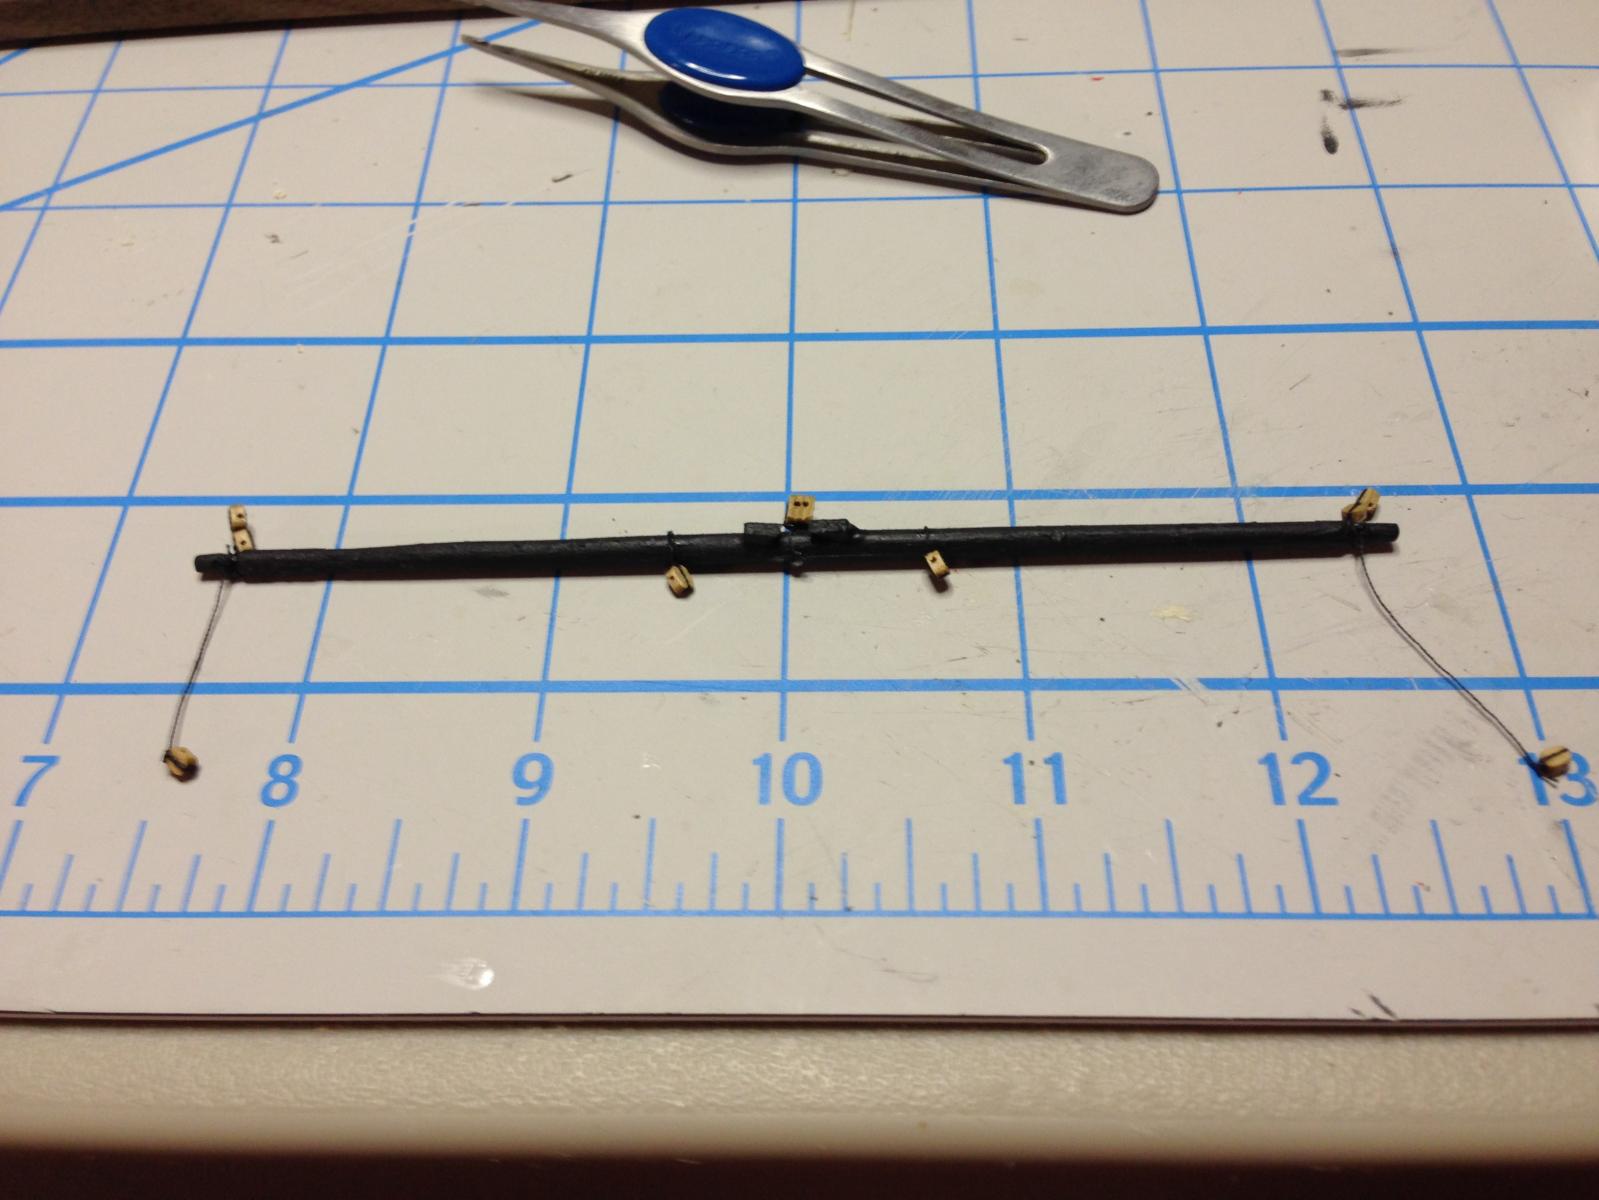
Here is the main mast lower yard under construction. There is a slightly tricky part on the ends in which two blocks need to be attached to each other. The one closest to the yard will be for the topsail sheets while the top most block will be for the lower yard lifts. They need to be flexible enough to rotate a little in their positions.
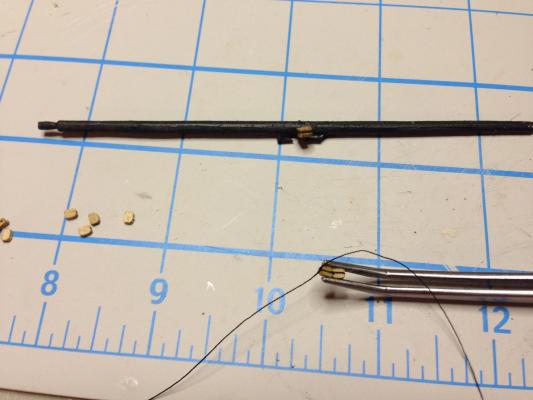
I then started seizing the (day) rest of the blocks to black threads for their attaching to the yard. Do this all before installing the yard. DO as much as possible before installation, in fact. There is a lot of rigging in there now, and it can be a trick getting in there with long tweezers to thread anything.
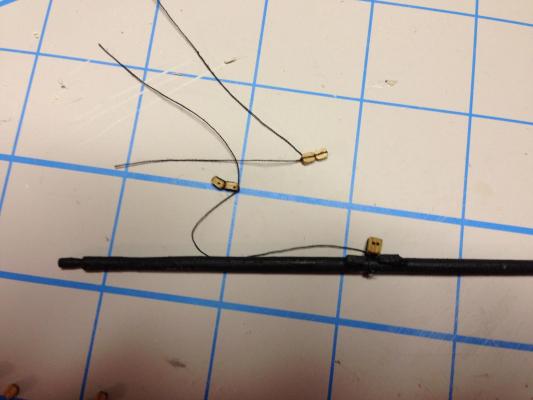
Here are all the seized blocks, all ready to go. It's best to have some music playing in the background to keep the pace up.
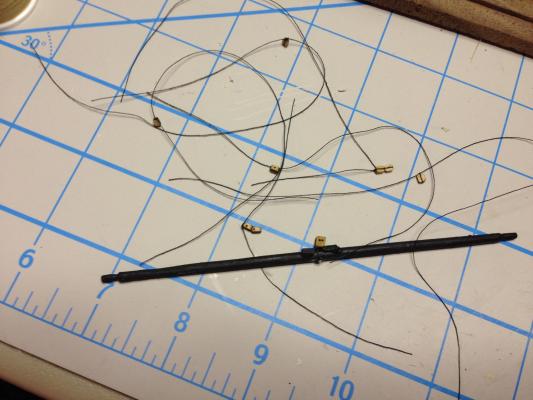
Here is the completed yard ready for installation. There are nine total blocks in this. It takes quite a bit of time and the use of a handy head-mounted magnifying set! I got one recently that has white LEDs which help a lot to illuminate the work in progress.
Lastly the yard being hoisted into place.... below. I really have been enjoying making all the rigging in such a way that it actually works as it would in real life... at least to the best of my abilities. Heave!

-
Hello Yves,
Happy to post what I am doing, what I am having issues with, and what works. I am by no means an expert at this - this is my first attempt at a wooden model, and I am having a lot of fun with the challenges. I must say, the very best part is that it slows me down a lot. I am forced to think and work on solutions to things that puzzle me. Sometimes I come here to these forums and search for solutions, and.... find them, which is a marvelous revelation for me. This place is great, very supportive.
~john
-
-
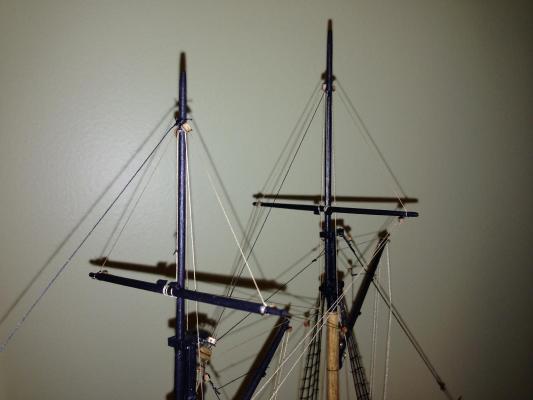
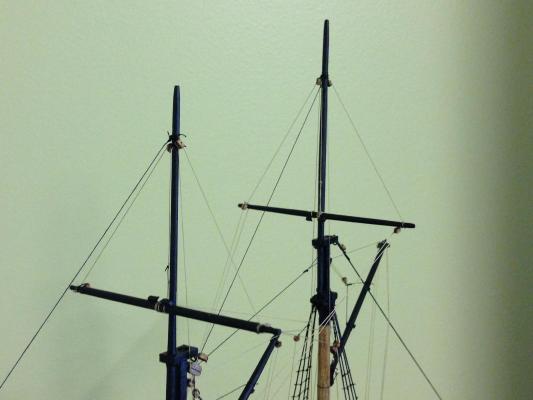
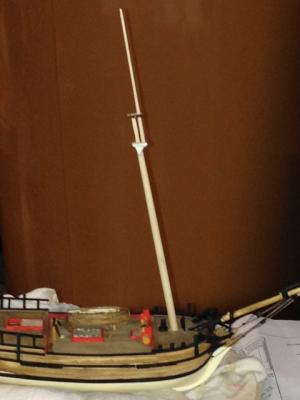
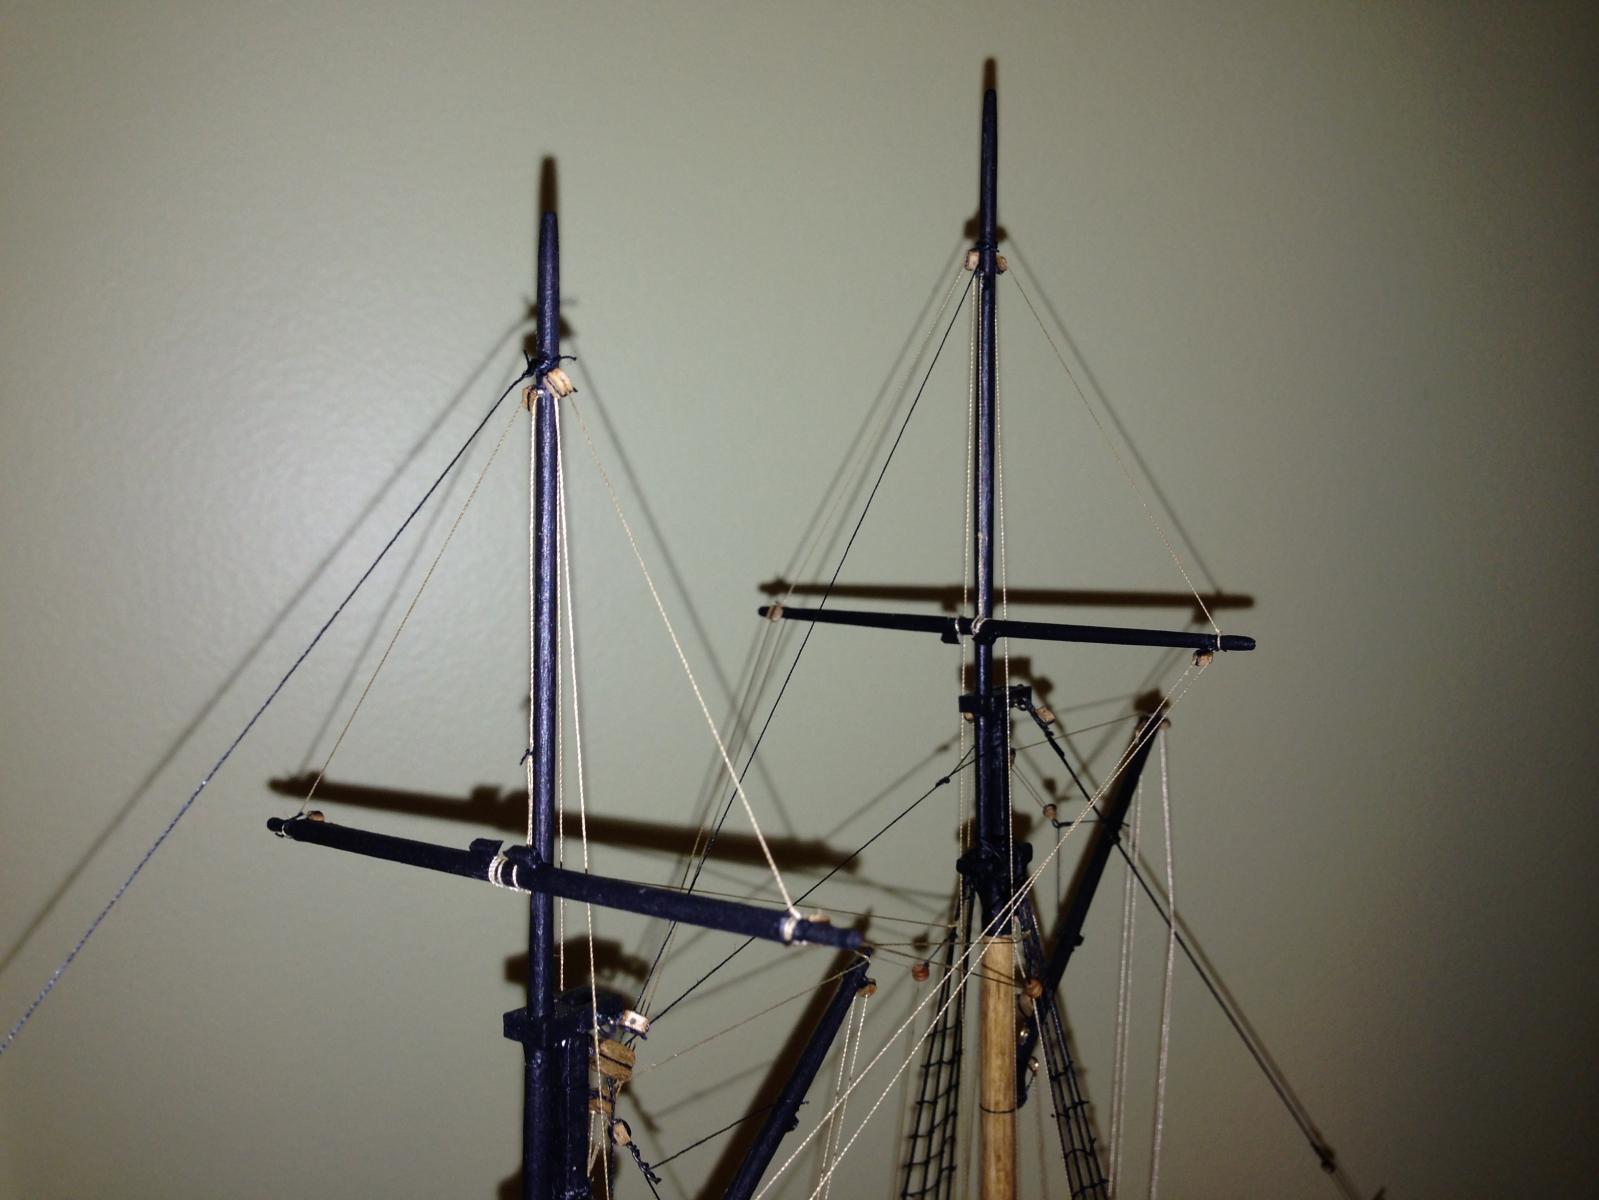
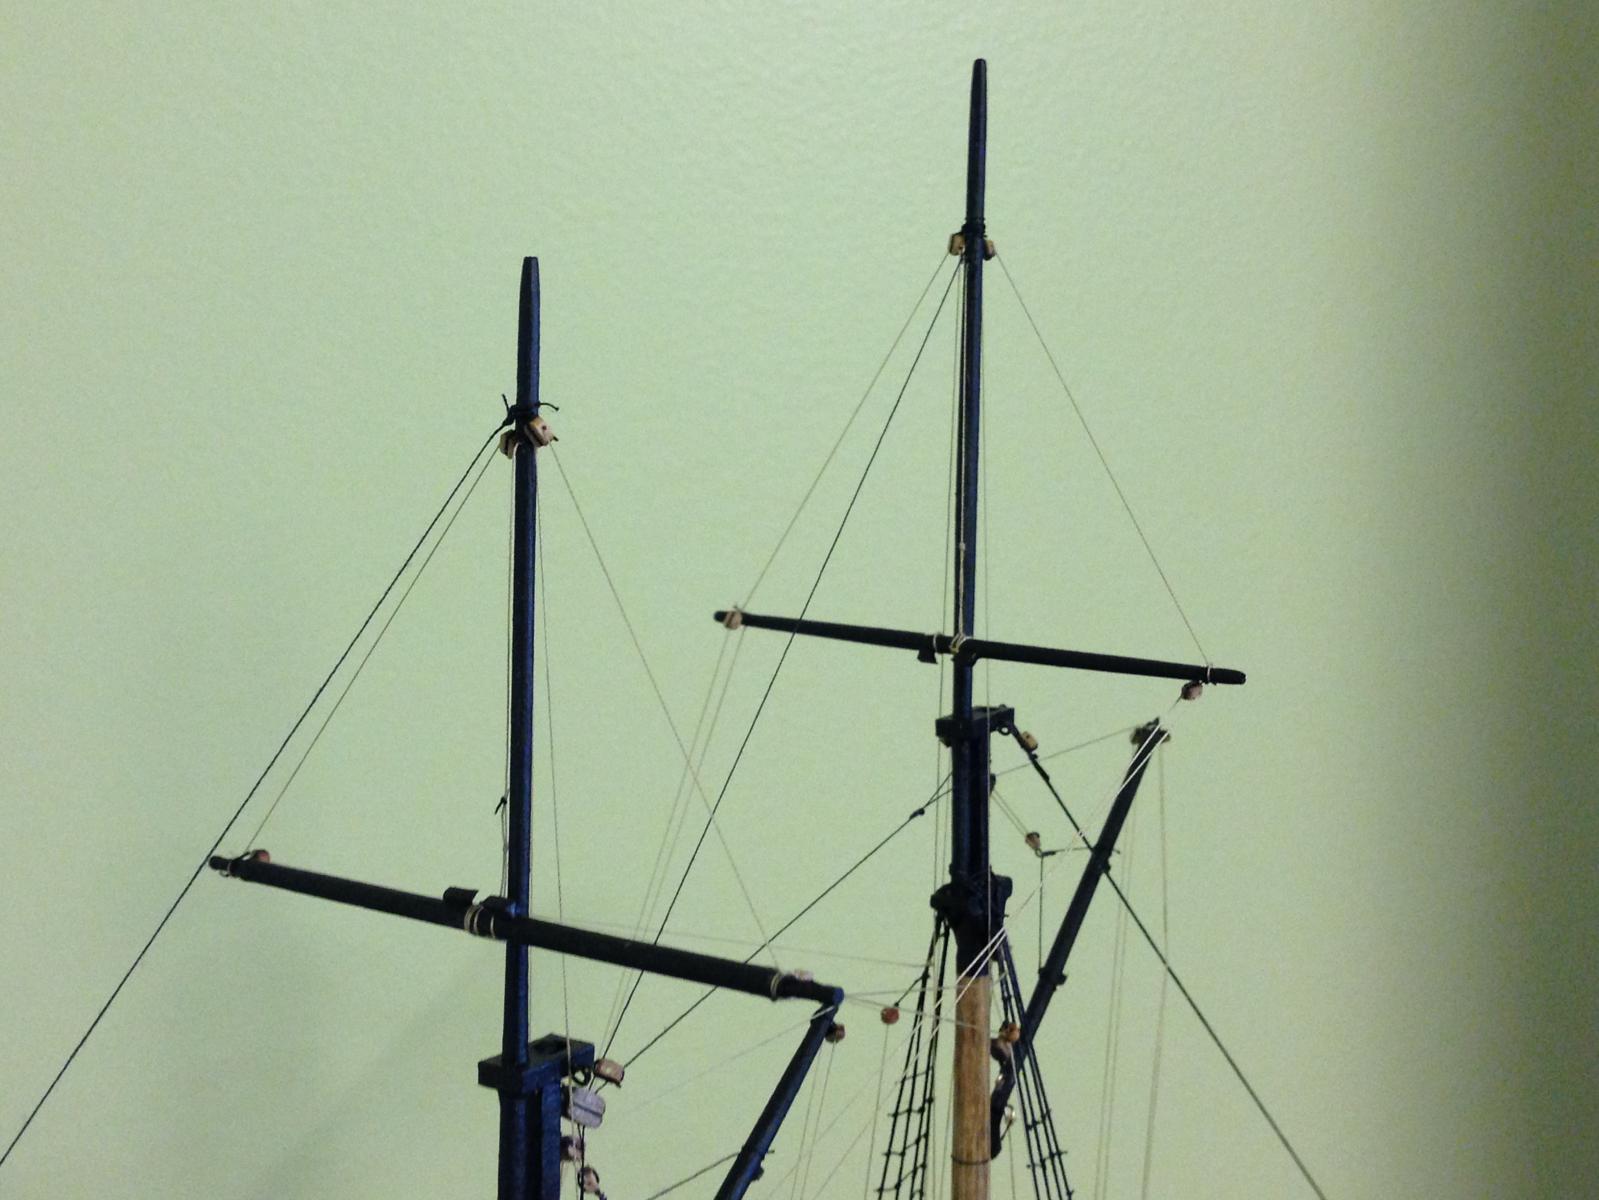
Happy Sunday! The topsail yards are completed on both masts. I get to go back to the basement and work on the lathe one last time for this project and build the lower spars. It was fun making the spars parallel and level. Here are two shots from today's work, one with flash and one without. I still have to trim some knots and twist the spars to their proper orientation.
~john
- yvesvidal, Overworked724 and Aussie048
-
3
-
I've been working on the yards now, starting with the topsail foremast yard. The mini lathe was a real help in getting the shape quickly and evenly. Once the cleats were glued on and the blocks seized onto the tips, rigging the yard was a real challenge! A couple of hours later, the results are in. I am pretty happy about it overall. Now.... three more to go!
~john


-
Thanks for the kind words all. I am happy to report that I am enjoying this a lot, although I am far from a woodworker ;-)
Here is the Sultana as of March 27th. I have taken a little break to work on the booms and spars to complete the wooden pieces. The rigging is the major drama now. I am enjoying it a lot. It's like a meditation, really - so much focus. I am loving my magnifying headset. I am looking constantly for tools, and making some, that allow me to get into the mass of rigging lines without damage. I admit, I would be lost without the various available tutorials on the Sultana. It is an art to understand the model plans.... so with the combination of tutorials and the reading of old ship rigging books, I am making good headway. The devil is in the details, as they say. Every little thread counts.
~john
- yvesvidal, Aussie048, Doreltomin and 1 other
-
4
-
I started a couple of months ago on the Sultana as my first wood ship model build and have been lurking about these forums for quite some time. I must admit, there is a HUGE wealth of knowledge here, and for that I am most thankful to you all. Thank you! I probably would have hung up my tools for another year without this place.
My background: I love to work with my hands, but I am not a woodworker historically. I have build lots of airplane models, starting from plastic kits decades ago, to balsa, to remote control and such. I got really good at that, and still have many hanging around the house. I also got into HO and N scale railroad modeling with two large layouts in the basement. Thinking that now was the time to take on the dream of building some wooden ships, I researched a bit and decided to take the plunge. I must admit, there have been some stumbles along the way.
Errors along the way: how does one really do a good job of curve-fitting a solid wood hull? I need to see this one in action to really "get it". I almost think that planking would be easier. 😉 I messed up the stern a bit and have found the joys of using wood filler as a patch solution. It has saved me at least twice.
Current status: I am rigging. I really like this part.... so ... here are some images of along the way... the last are the most recent. I promise to be better about logging my work as it is in progress. I should have joined the group earlier!
~johnb


- Doreltomin, sawdust, yvesvidal and 4 others
-
7


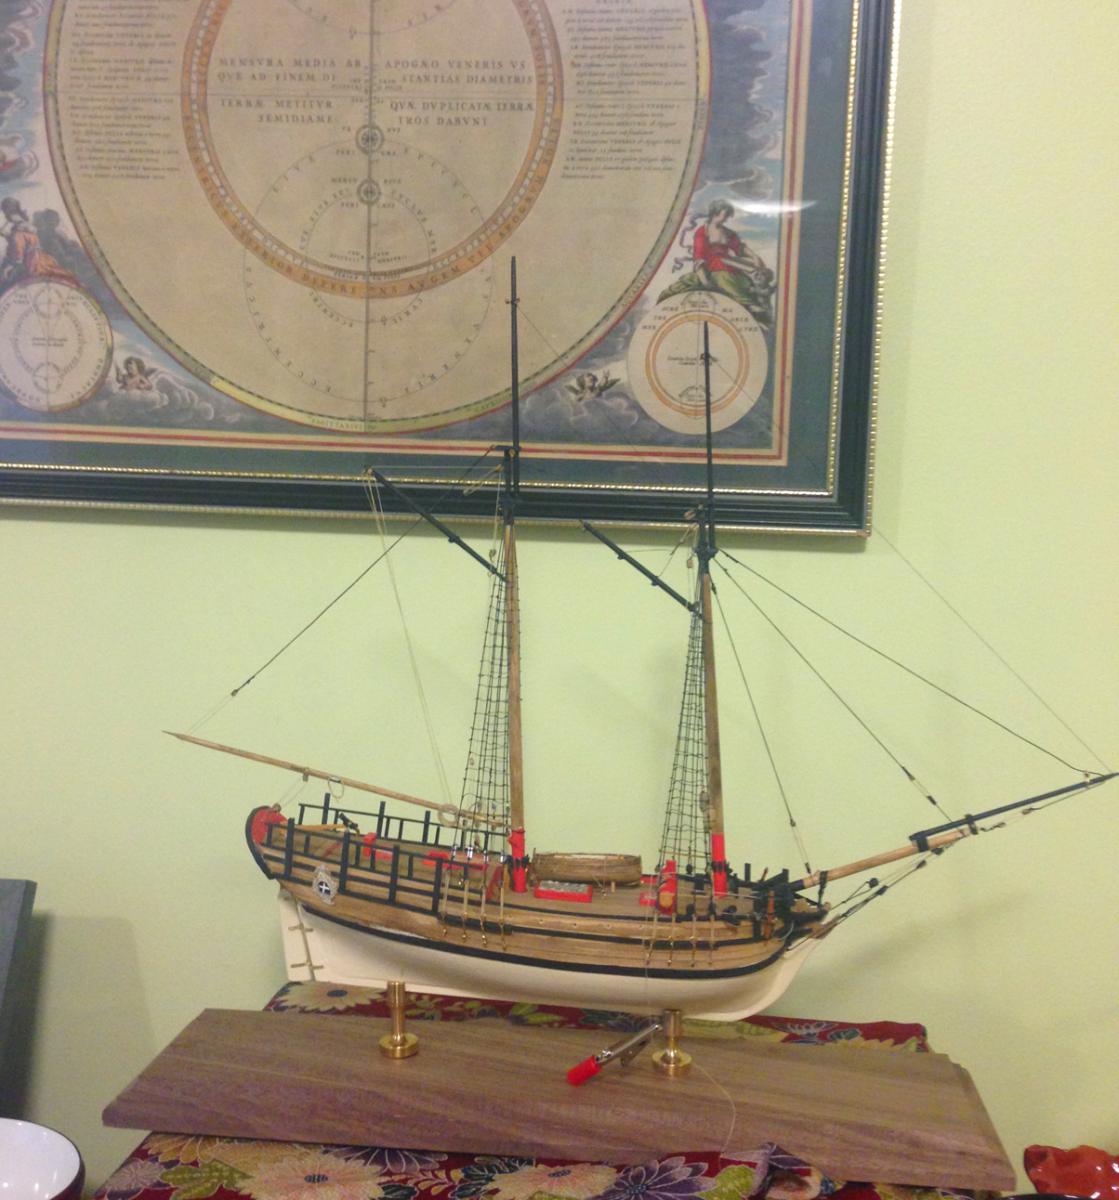

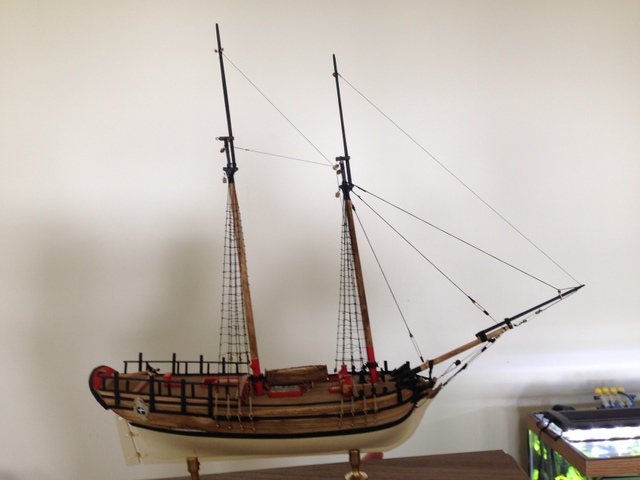

Kate Cory by jablackwell - FINISHED - Model Shipways - Scale 1:64
in - Kit build logs for subjects built from 1851 - 1900
Posted
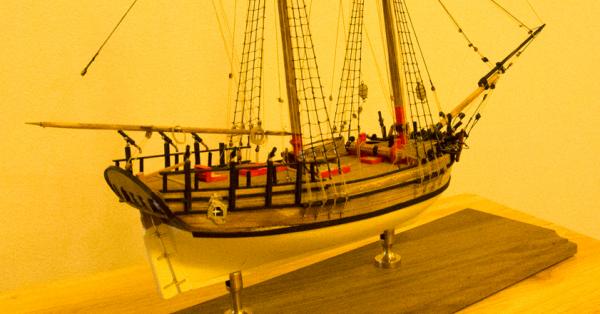
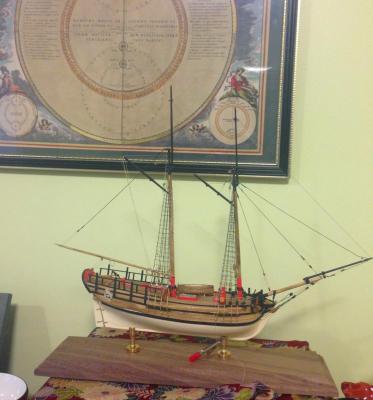
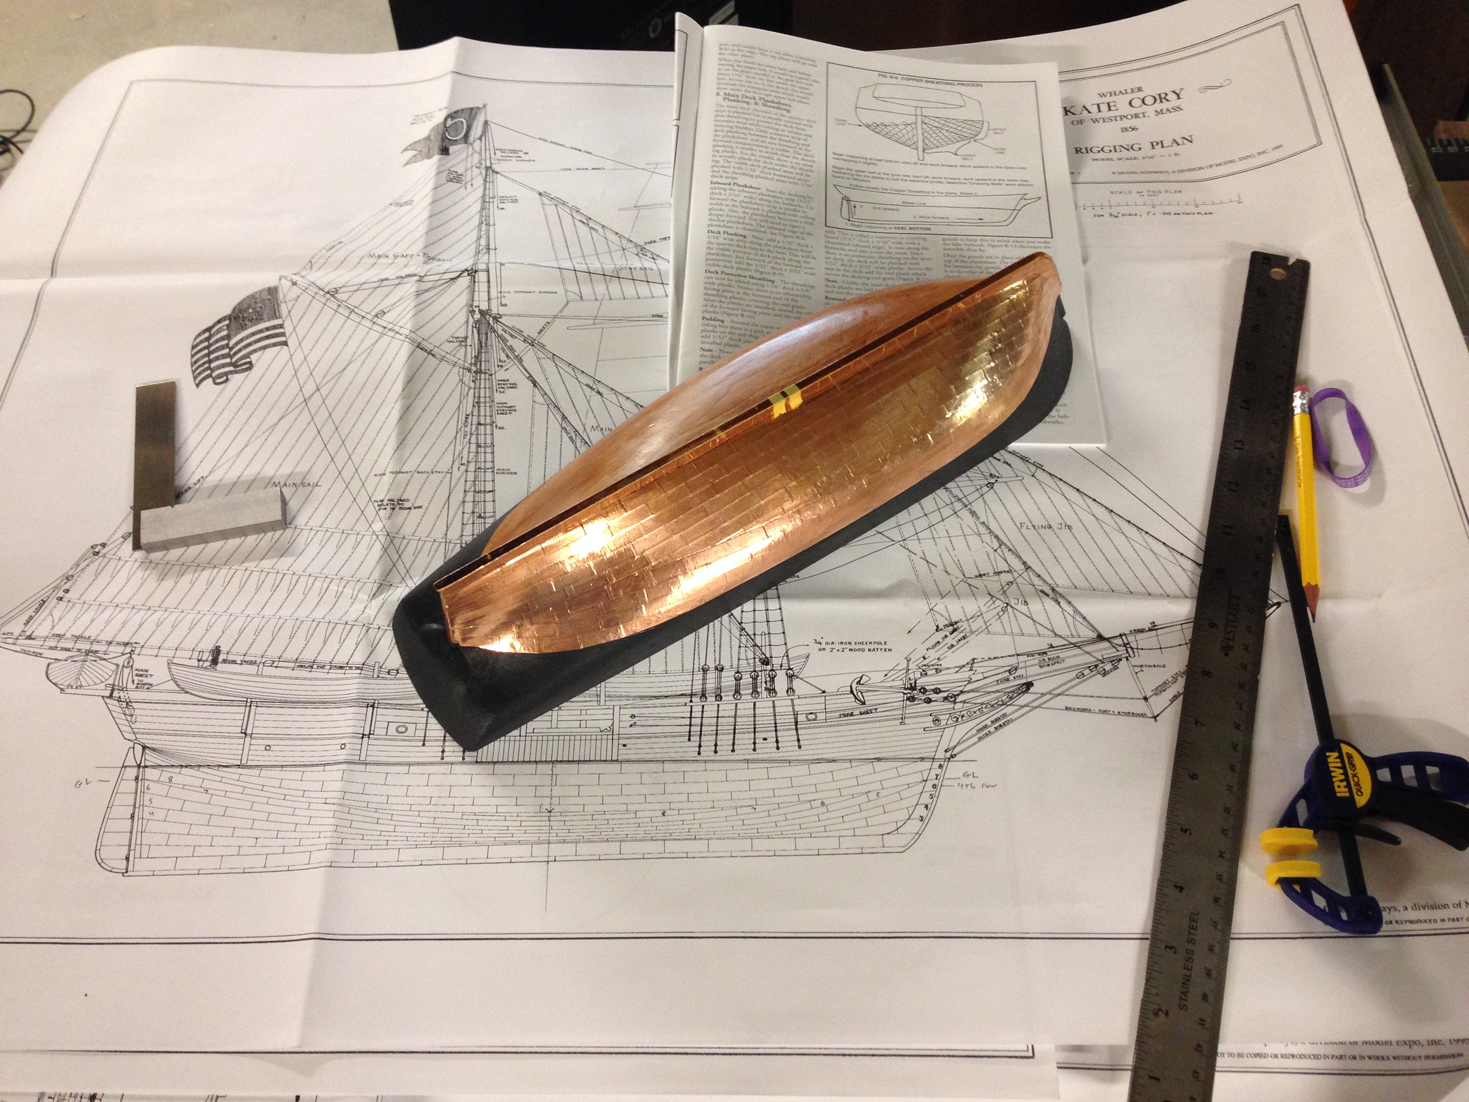
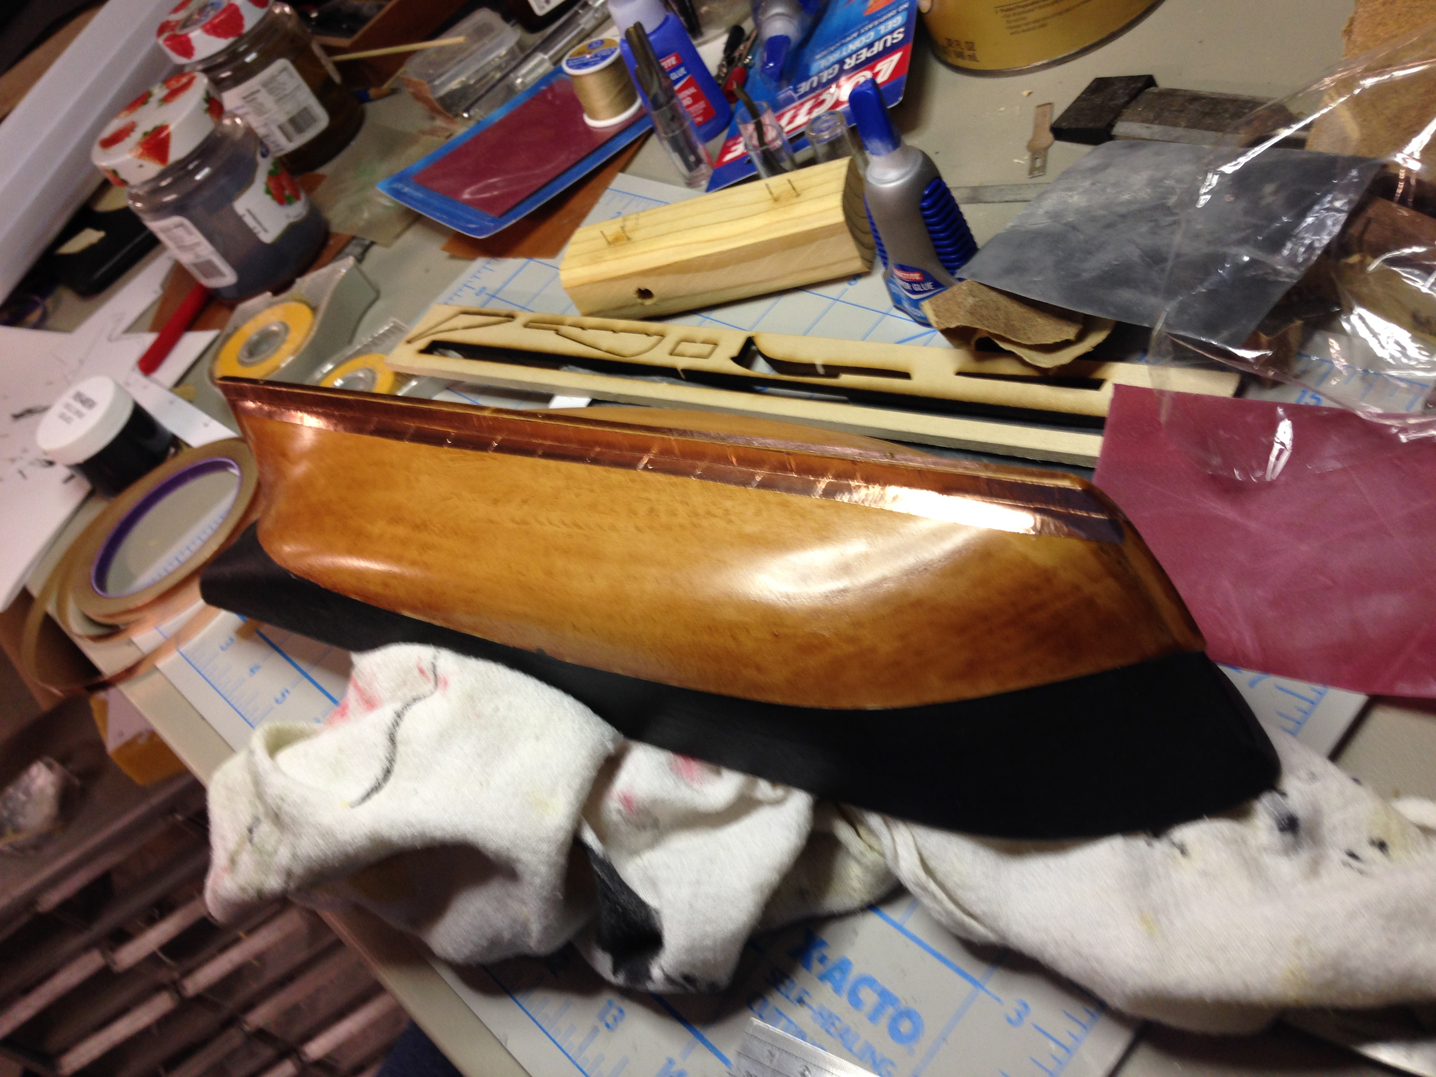
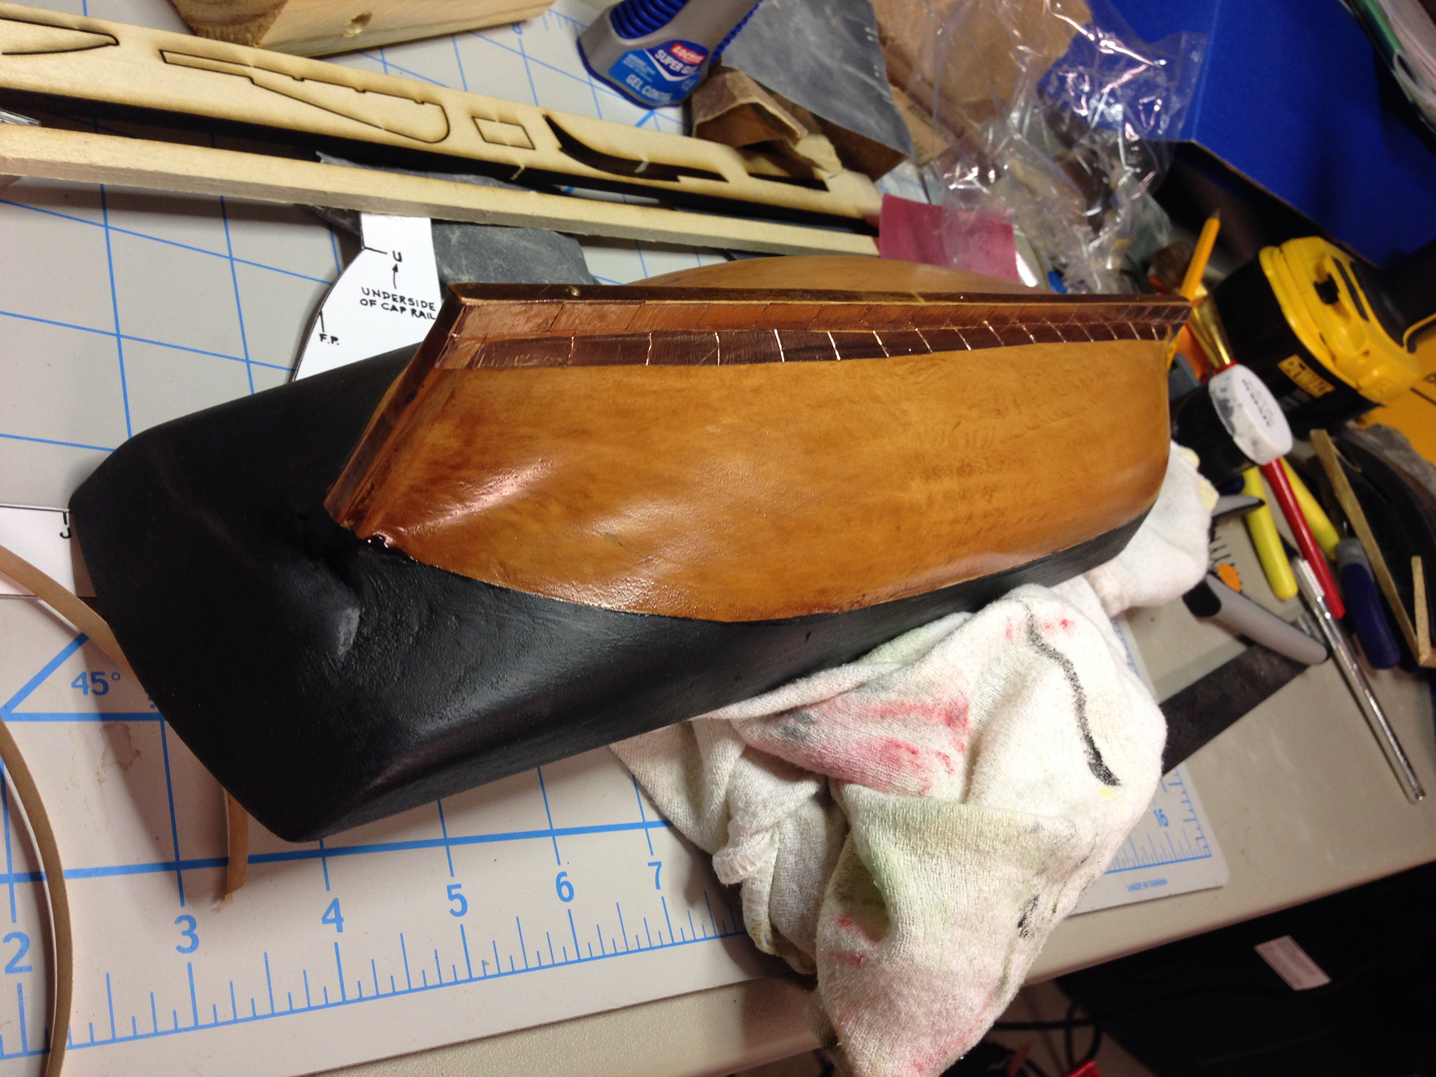
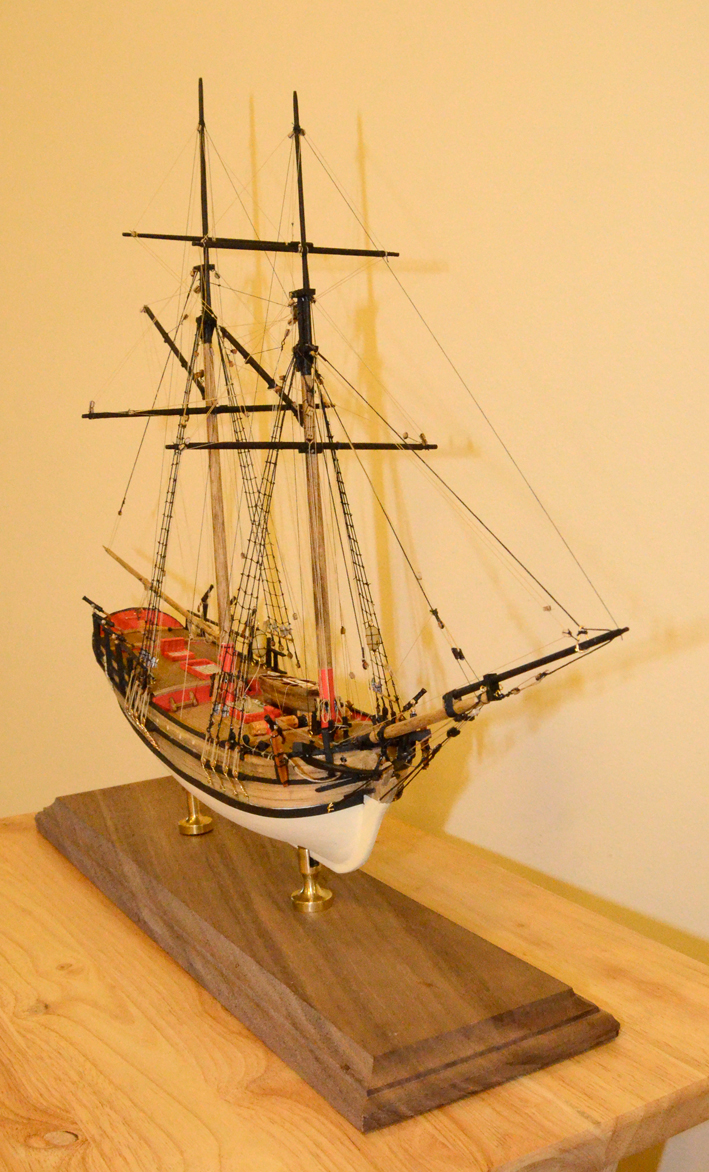
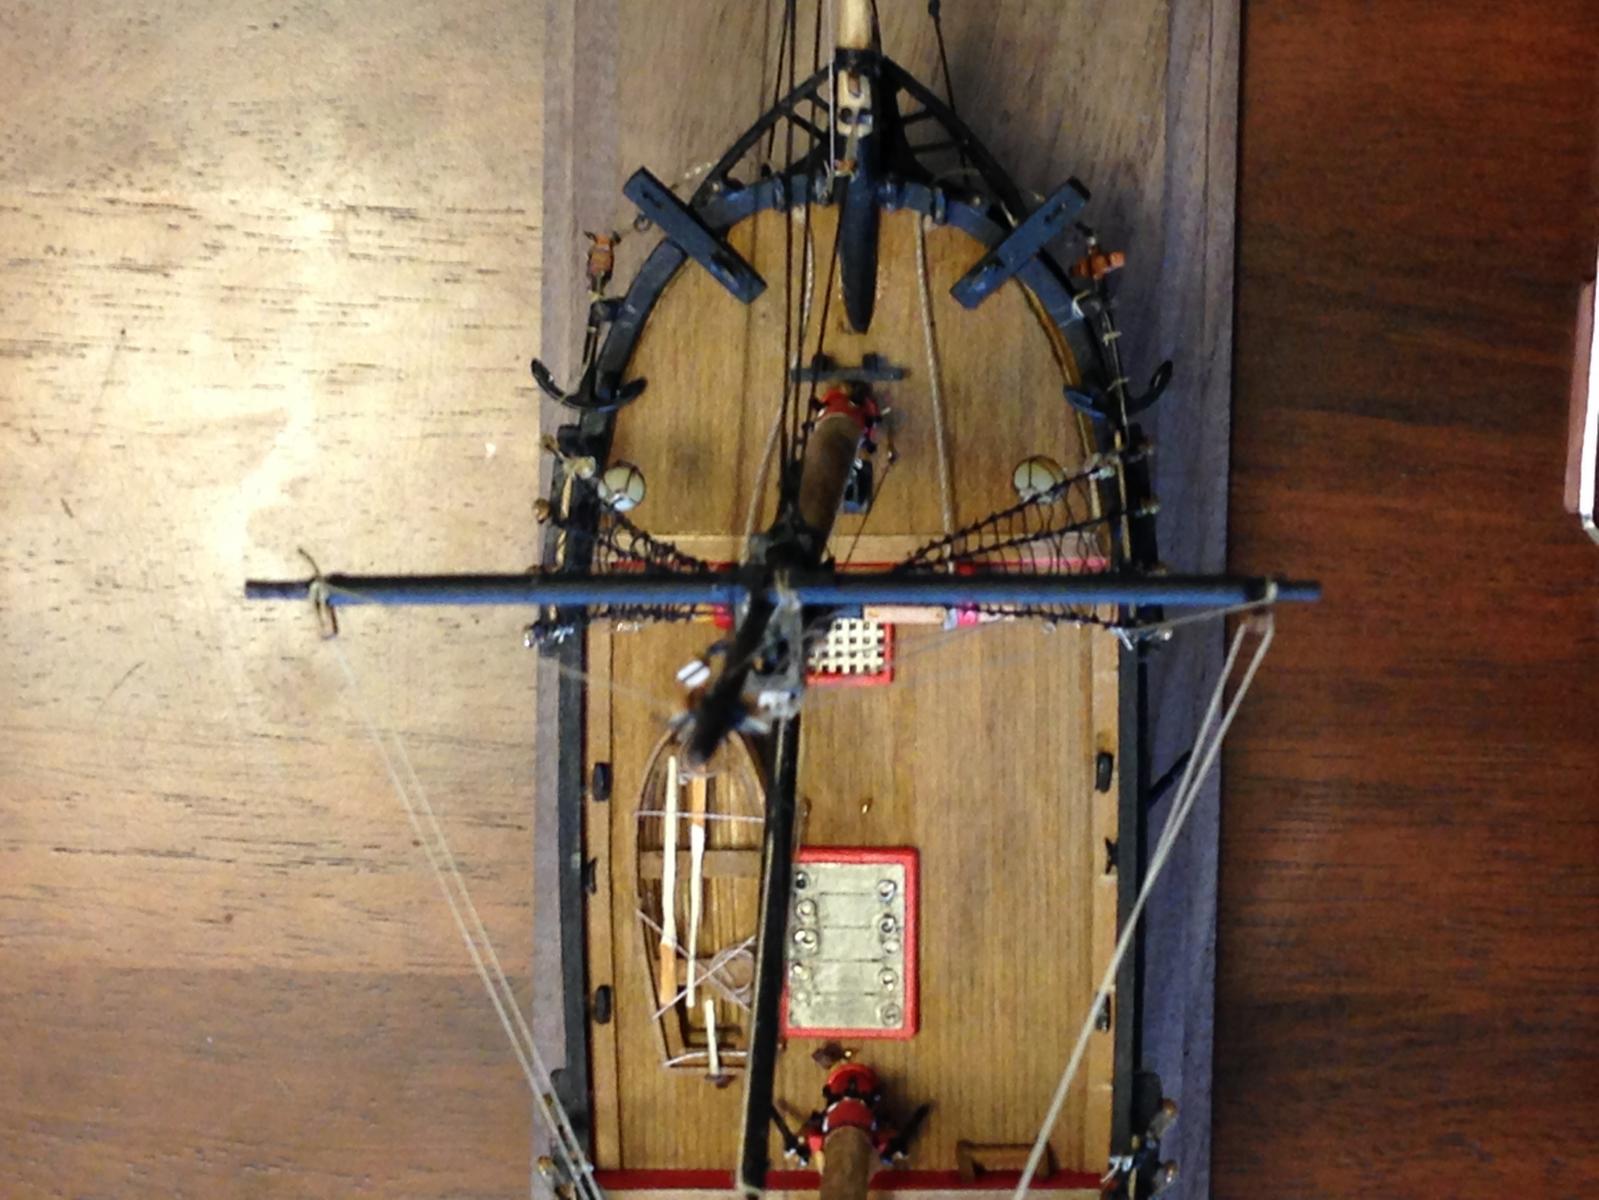
A busy weekend has proved fruitful. I went forward with adding the whales, outboard planksheer and rudder. The copper has been coated with Testors Dullcoat Varnish (spray). I like the dull matt finish it created. The whole thing is starting to come together rather nicely. I am really pleased with the fortunate mirror-image from starboard to port... not at all like my first build! A little careful measuring makes the difference.
Now to work on the stern with some details.
~john