HOLIDAY DONATION DRIVE - SUPPORT MSW - DO YOUR PART TO KEEP THIS GREAT FORUM GOING! (Only 20 donations so far - C'mon guys!)
×


Ulises Victoria
-
Posts
1,790 -
Joined
-
Last visited
Content Type
Profiles
Forums
Gallery
Events
Everything posted by Ulises Victoria
-
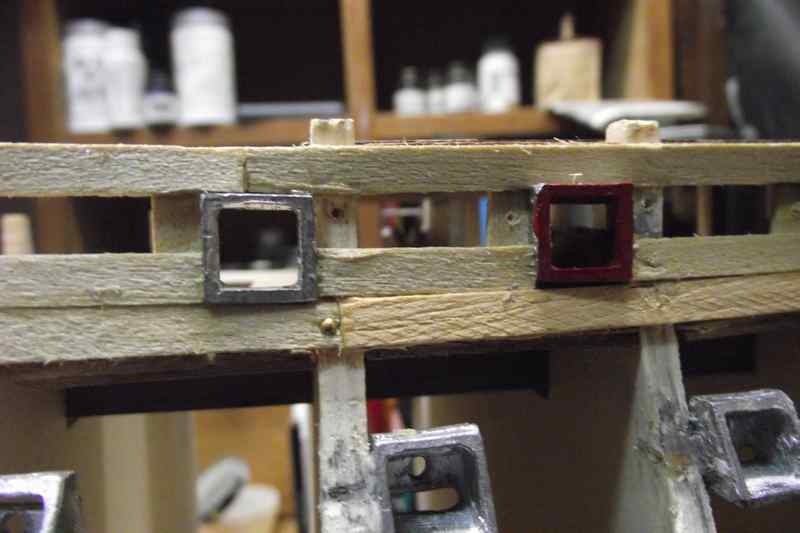
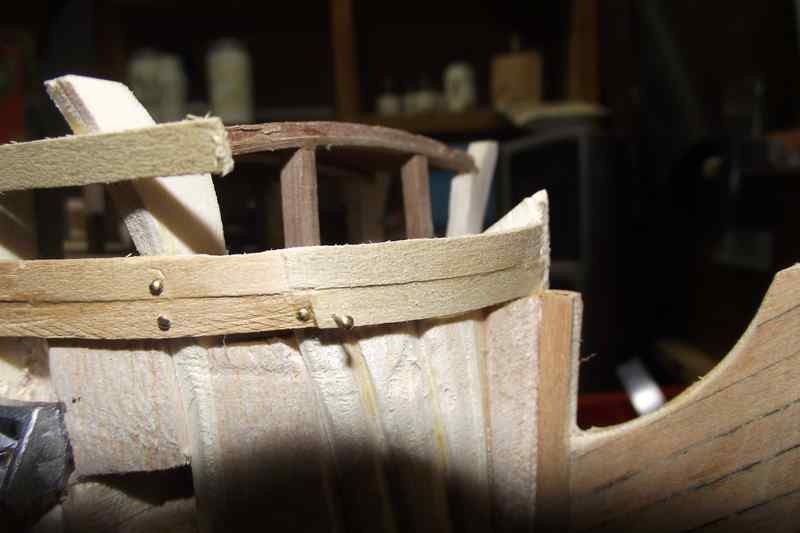
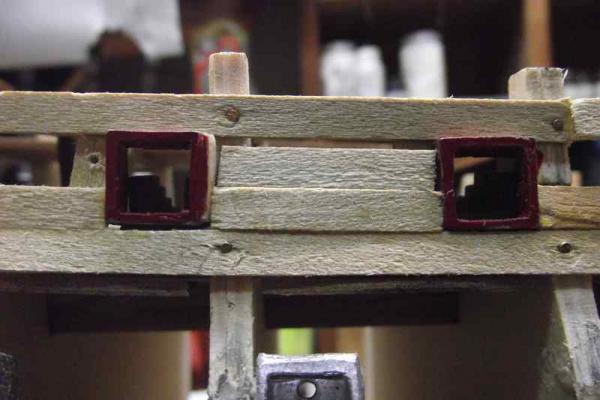
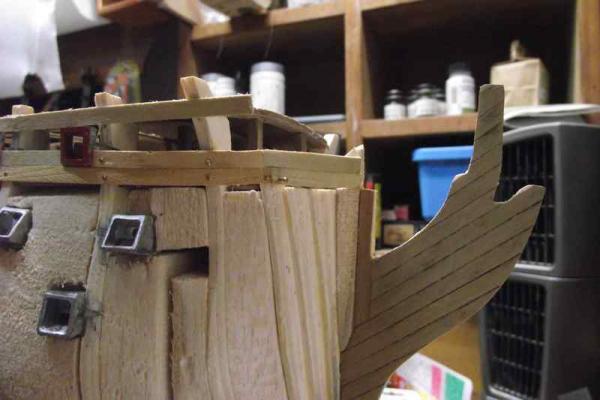
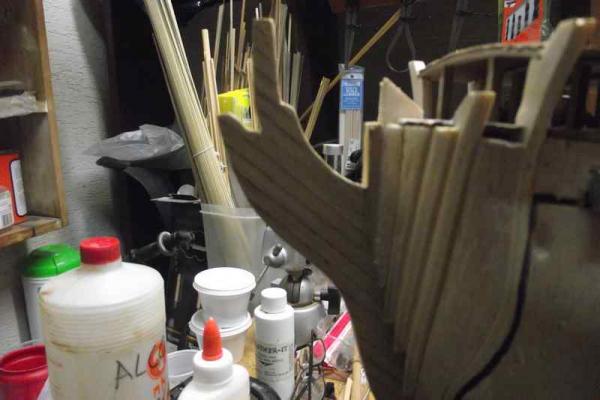
 OK Some photos of the fix suggested by Sjors and Nigel above. Thank you guys!!! You can see some of the small vertical planks I added as suggested. (This wood splinters so bad.) Also, here is a photo of a plank I just place momentarily there for the purpose of showing the other problem I mentioned before: the gap that is going to be between the top and the next plank. I'm thinking to fill with with planks put sideways.
- 786 replies
-
- 4
-

-
- Royal Louis
- Finished
- (and 1 more)
-
I definitely see this one as my next project. Good thing is, I already have it, and I got it really cheap.
- 71 replies
-
- 1
-
-
- panart
- san felipe
- (and 1 more)
-
Thanks Sjors. I just placed the vertical supports behind the planks I already have. Photos to follow pro'lly tomorrow. Thanks David. My problem will be to fill the gap that certainly will be between the top and next plank. I'll post some photos later. Thank you Mark. I think I will have more trouble with your approach. It may be more work, but I think that filing the metal frames after the first planking is laid, will allow me for a smoother finish. I sincerely thank all and every response. Ulises
- 786 replies
-
- 2
-
-
- Royal Louis
- Finished
- (and 1 more)
-
Nigel. Indeed. What you say about the vertical planks is something mentioned in the instructions. I did not do it because I felt the frames were epoxied and very firmly placed that I though there was no need to reinforce them, BUT... you are quite right regarding the support for the in-between planks. I may not be too late to start doing that. Thanks for your comment.
- 786 replies
-
- 3
-
-
- Royal Louis
- Finished
- (and 1 more)
-
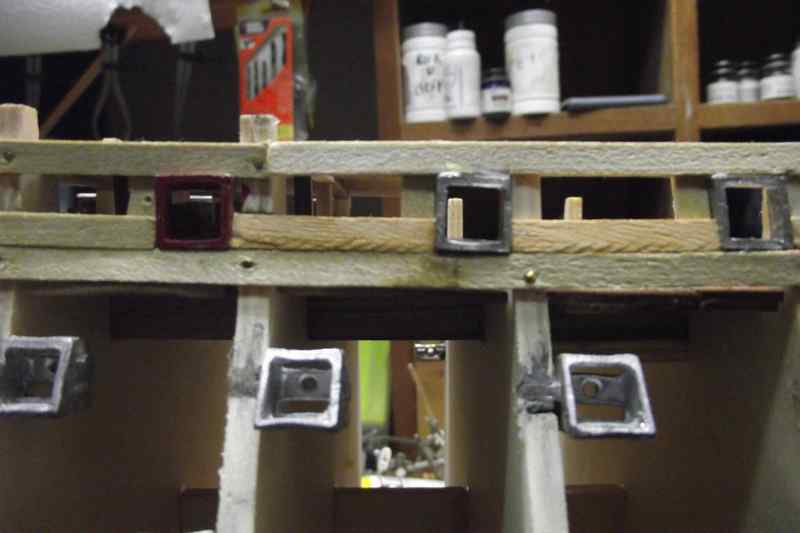
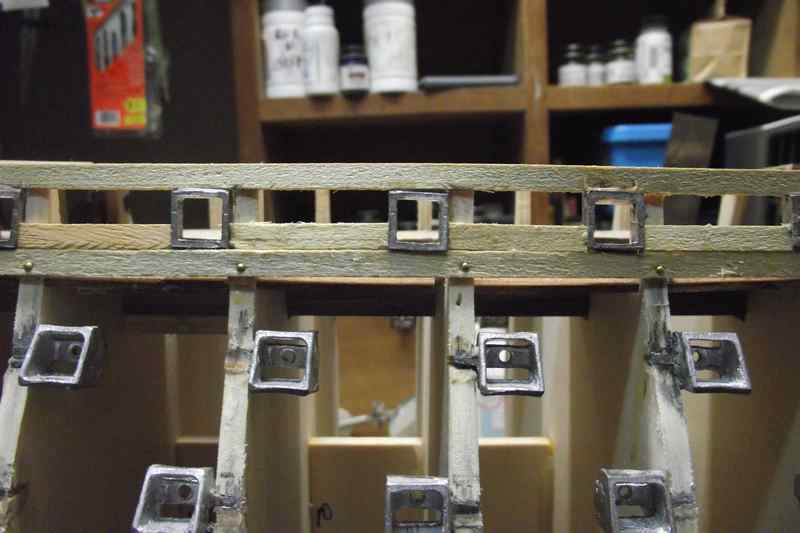
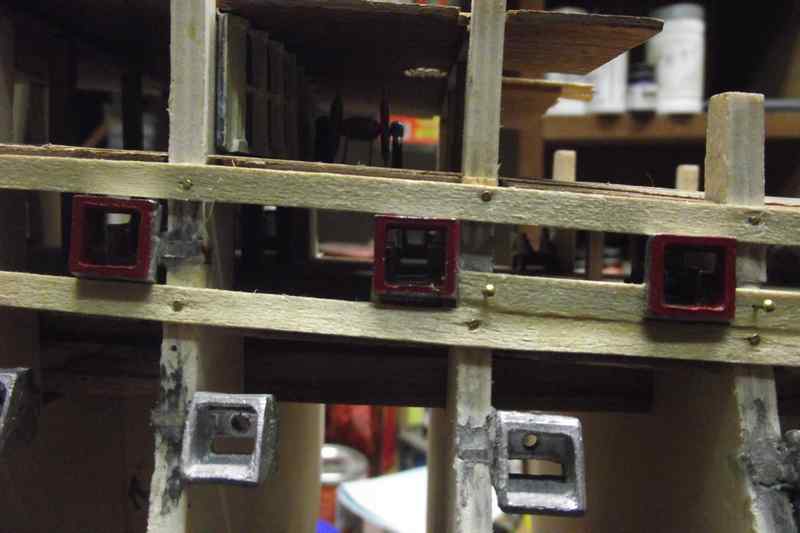
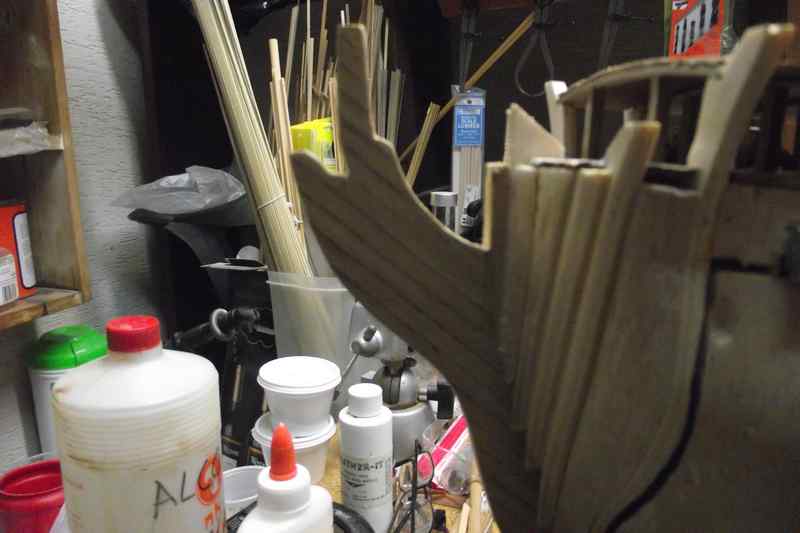
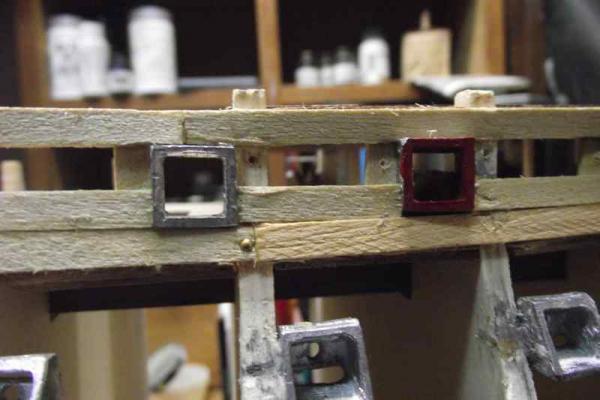
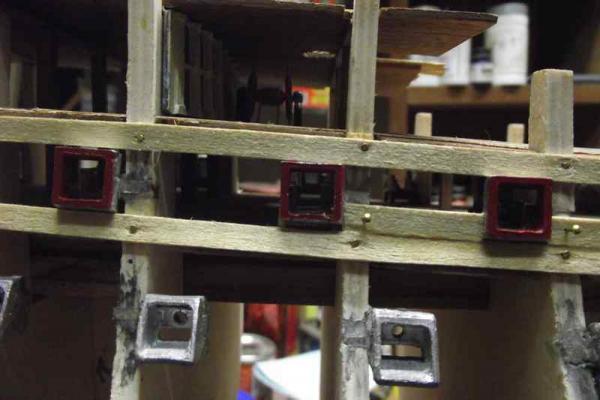
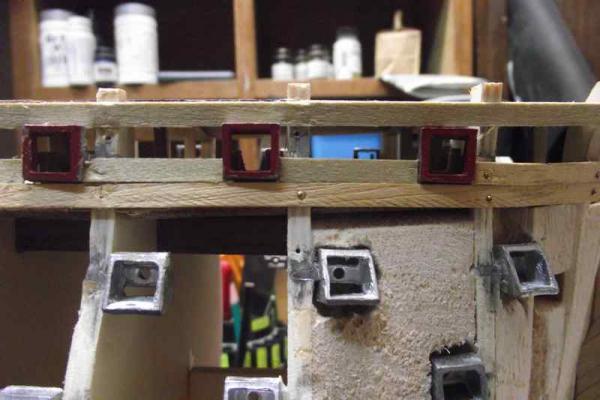
Sjors: I just don't understand the instructions, so I'm working just following my gut. I had to tear apart a few planks of my first attempt. In my second try, I placed the plank that goes over the frames (painted red), then the one that goes under, and then 6 frames that go in-between those, which you can see in the second photo and are unpainted. Then I started cutting pieces of wood to the precise length to fit between frames. A snug fit to make the frames more stable, and glued side to side of the bottom plank . The metal frames will have to be sanded/filed down later to make them flush with the first planking. The problem I am seeing now is that the vertical distance between the top and bottom planks is not exactly the width of 2 of the planks, so a gap is going to happen between the upper plank and the next. I foresee a lot of wood filler to be used here. (sigh) I hope this makes sense!!! Thanks for your comment.
- 786 replies
-
- 1
-
-
- Royal Louis
- Finished
- (and 1 more)
-
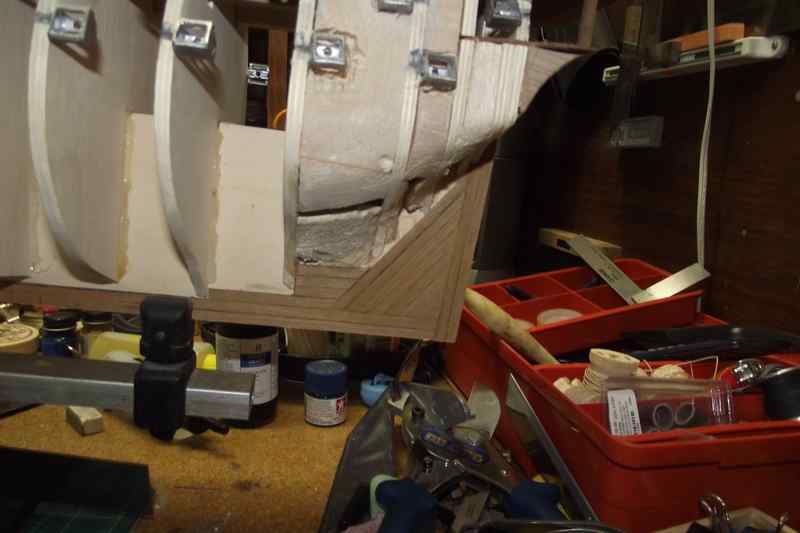
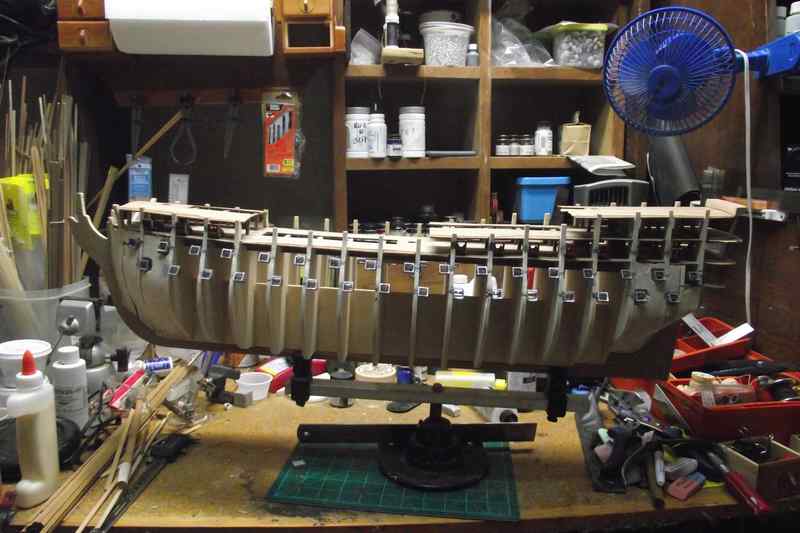
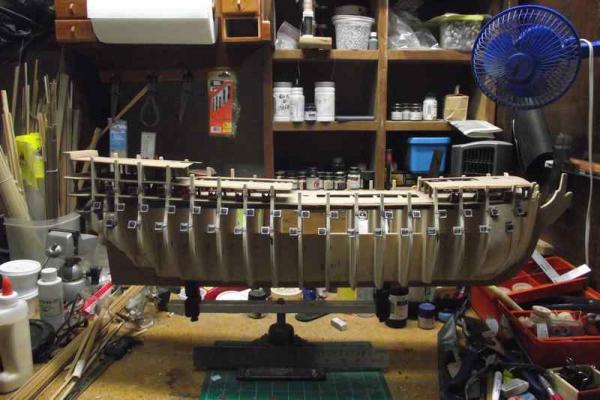
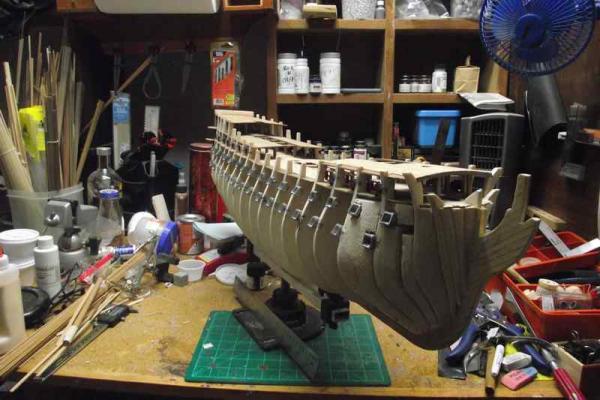
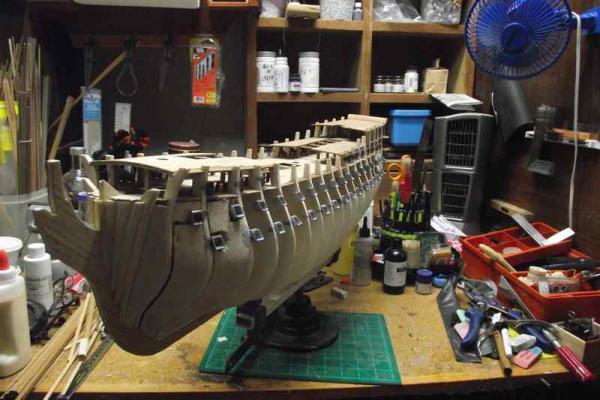
Update Sept 12 2014 On Tuesday 9th started with the first planking. You will see not much progress in 4 days, but this has been a real challenge for me. I definitely don't like this system of the metallic gun port frames. It makes things harder instead of easier, *in my opinion*. You are forced to plank the hull in segments between frames, and it's harder to do an even planking job. I prefer the method of "cut your own". Anyway, I thought before starting that this was going to be a nice challenge, and I wasn't wrong. However, if I manage to do it right, the sense of accomplishment will be equally big. I keep telling myself that first planking is some sort of "training field", so things are easily patched and fixed. Thanks for visiting.

- 786 replies
-
- 5
-
-
- Royal Louis
- Finished
- (and 1 more)
-
Hello Bill. Make sure you have PLENTY of room to build this kit. I have it in my stash, but I can not build it at the moment due to its size. This animal is BIG. 1.34 mts. long.
-
I thank you for your words Duff, but where did you see my carvings? I haven't carved a thing in my life, unless there is another meaning to the word "carving" that I don´t know?
-
Very sound advise, Bill. I thank you!
-
Thank you all. I may be too skeptic, but I have never heard of somebody receiving an answer from any manufacturer of ship kits.
-
latino nail nailer
Ulises Victoria replied to djs's topic in Building, Framing, Planking and plating a ships hull and deck
Hello. If it's like the one I'm using, it accepts a wide variety of nails. The inner rod, the part that pushes the nail is magnetic, so that you can insert a nail and drive it vertically without it falling out of the tool. Obviously, nails made of non ferrous materials will not be attracted to the magnet. Hope this helps -
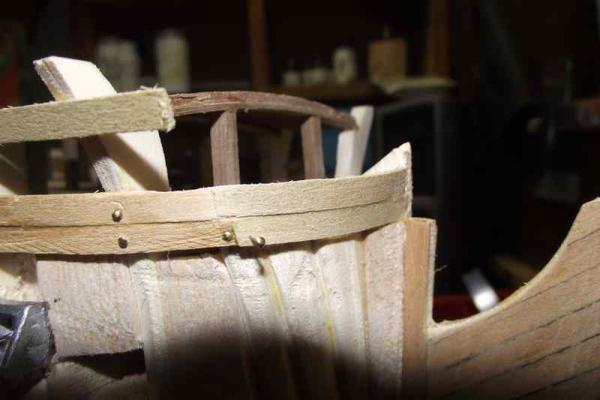
Update Sept. 7. Finished planking the keel of my Royal Louis. I will start first hull planking next.


- 786 replies
-
- 14
-
-
- Royal Louis
- Finished
- (and 1 more)
-
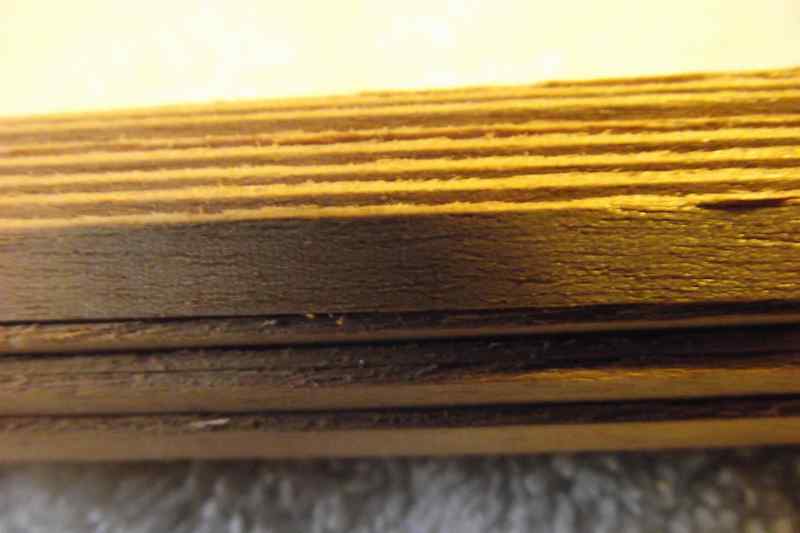
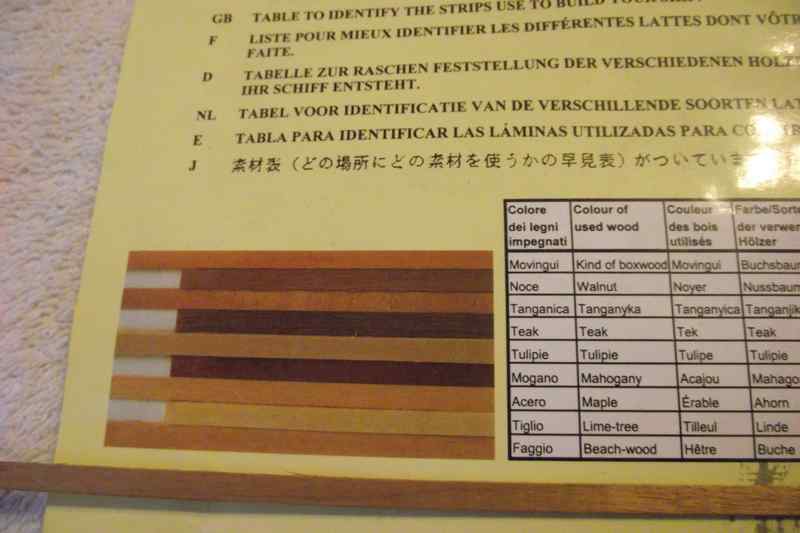
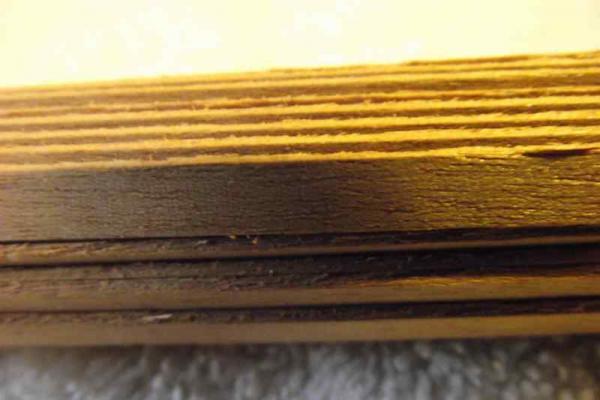
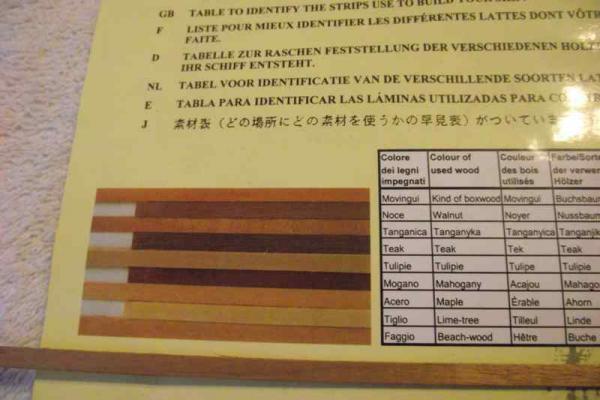
Mark. Here are some closer photos. Also, comparing the piece of wood with the sheet of paper included in the kit with different colors, the wood looks close to what they call "Beach wood" which I think they mean beech wood. Unfortunately my photographic skills are not top notch and the color in the photos may not be very accurate. I'm still confused. Thanks all for your input.
-
Hola linda. Excellent work. Every new photo is a discovery of your ingenuity. My congratulations, linda.
-
Why are ships of the same size and configuration rigged different? If two ships have 3 masts with 3 yards on each, why they are rigged different? Let's say I want to use Victory rigging plans to rig my Royal Louis, just because I like Vic's rigging better: Is it possible? What problems could I encounter? How many people could tell? Would that be a Capital Sin? Is this a dumb question?
-
Wow. Thanks guys. I have a few walnut blanks I use to turn pens, and that wood is a lot darker. Will keep checking. Thanks again.
-
Hello Testazyk. I will be following this build really close. I have this kit in my stash and will most likely be my next project, as I love this ship. Still a long way to go, though, as I am in the beginning stages of the Mamoli Royal Louis. Please keep adding photos and advice to your log. Best of lucks. Ulises
-
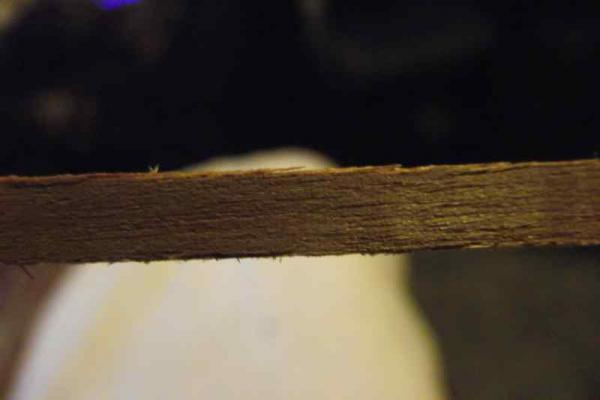
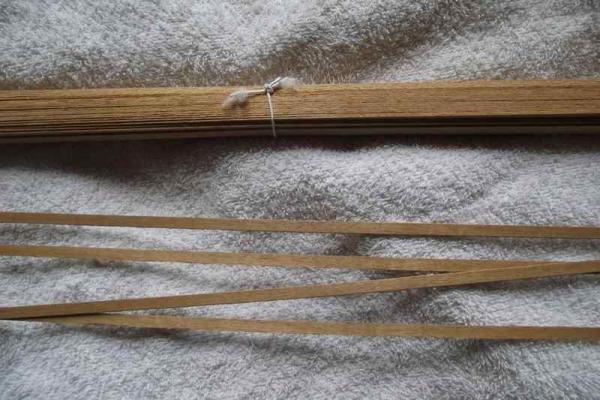
I will really appreciate someone tell me what wood this is. It is used in my Mamoli Royal Louis to second plank the hull in the area below the main whales. Previous builders of this kit may have a clue??? Information in the kit is very confusing. In some places it says it is walnut and another some strange names. I'm sure walnut it is not! If not certain, at least tell me please a close match. I am a bit worried that the material included in my kit will not be enough to finish the intended plank job, as some other people has said already. So I want to buy if not exactly, at least a batch of a close match. I'm sure a few planks scattered in a different shade will not look bad. It may be the opposite. Thanks in advance for any input . Ulises
-
Make sure the ends are perfectly glued and try to use only downward movement with the sand paper, preferably mounted on a wooden block for support.
-
Hola linda! Haven't visited your log in a while. Your build is truly an inspiration. Hard to believe it is your first.You are doing a job that I'm sure some of the experts here admire and envy! I know I do although I'm not one of the "experts" Felicidades linda!
-
The "balls" usually have a hole on them, so you have to file the upper part of the mast to a diameter such that it would insert into the ball hole. A drop of glue is all that's needed, and there is only one "ball" per mast at the very top. Not sure if the parts in the last photo are the 116 parts in your diagram, but in my opinion, not likely. 116 parts are more like... well... balls. Hope this helps
-
The planking in the Soleil Royale photo is top notch. I would expect to do something like that after a few ( 4-5) easier kits under my belt, not before. As said before, planking is an art that you master by doing. Best of lucks.
-
The "balls" usually have a hole on them, so you have to file the upper part of the mast to a diameter such that it would insert into the ball hole. A drop of glue is all that's needed, and there is only one "ball" per mast at the very top. Not sure if the parts in the last photo are the 116 parts in your diagram, but in my opinion, not likely. 116 parts are more like... well... balls. Hope this helps