

Navis Factorem
-
Posts
240 -
Joined
-
Last visited
Content Type
Profiles
Forums
Gallery
Events
Posts posted by Navis Factorem
-
-
-
Looking great Dan, I have been following your build from the beginning on the old site.
I have decided to launch into scratch building, attempting the HMS Surprise.
Cheers,
David.
-
Preparation of drawings is going well, I have the hull profiles and long section at 1:64. The hull is almost exactly 600mm long.

The work bench is getting a bit busy.
Cheers,
David.
- Wishmaster and klimi
-
 2
2
-
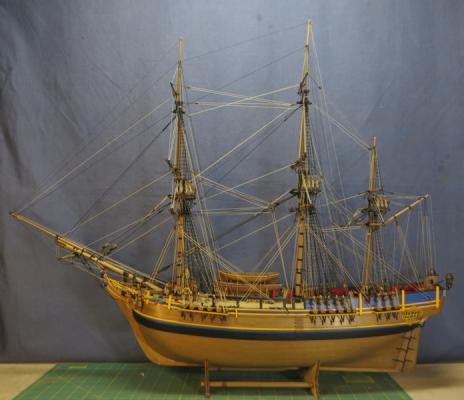
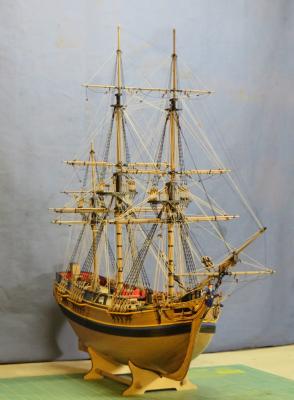
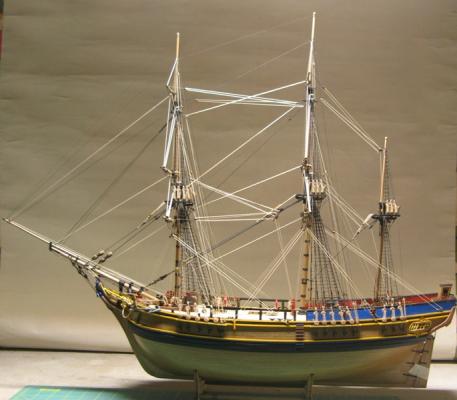
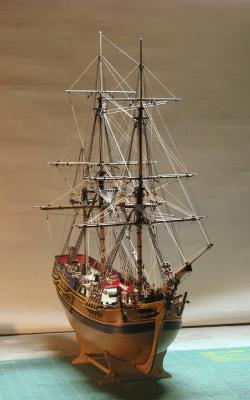
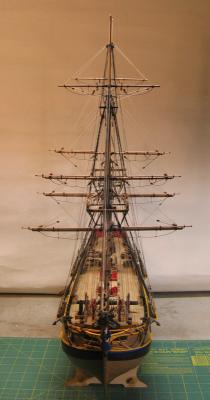
Finally added some pics to the finished model gallery.
-
Thanks for the encouragement. I hope that I can provide some entertainment, some of the more experienced builders may find my antics hilarious.
I think "scratch build" is just that, start off with a bunch of drawings and some ideas as to how to go about the process and learn lots on the way.
I thought about the "plank on frame" approach but I like my models to look like ships so, as i will be fully planking the hull, all the work associated with the frames would be a bit lost.
I have started scanning hull profile drawings so I can enlarge them to the right size for my build.

Overall hull profile drawing.

Cross section profiles.
(Drawings from "The Frigate Surprise" Lavery & Hunt)
Cheers,
David.
- aykutansin, mtaylor, WackoWolf and 3 others
-
6
-
Enough of the thinking, time for some doing!
My son came good at Christmas with a copy of the Brian Lavery/Geoff Hunt book "The Frigate Surprise", number 165 of the limited edition of 250 which includes the signed Geoff Hunt print, marvellous.
I have purchased a Scheppach Deco Flex scroll saw to cut out all those curvey bits.
The book includes lots of line drawings including the all important hull profiles which I will scan and enlarge to the right scale then transfer to ply for the internal framing. I intend a double plank on bulkhead method for the hull. I have built 2 hulls this way and like that the 2 layers gives a bit more scope for modification (fixing mistakes!).
Next will be creation of a list of timber needed to start.
Cheers.
David.


- mtaylor, AndyHall, Wishmaster and 1 other
-
4
-
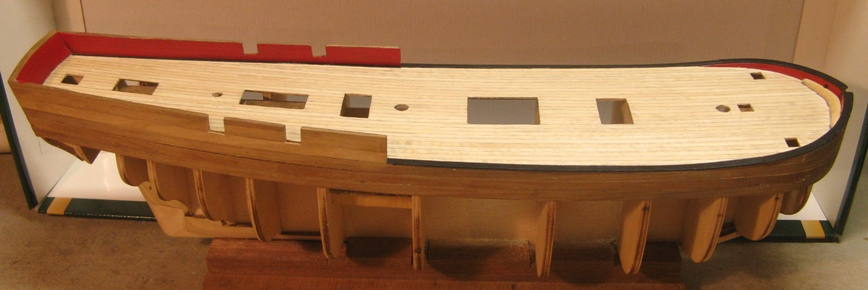
The bits and pieces for the start of the next build are starting to come together. Scratch built HMS Surprise it will be.
For Christmas I received the HMS Surprise book by Brian Lavery illustrated by Geoff Hunt which includes hull profiles for the main hull and all ship's boats as well as many detail drawings.
I recently bought a scroll saw to cut hull profiles for the false keel and bulkheads for the hull core.
Next will be a difficult decision, what scale? The Bounty is 1:60 which is a good scale for me, big enough to achieve a reasonable level of detail but not a too big finished product. Surprise is bigger ship than Bounty but not hugely so and it would be nice to have the 2 the same scale.
The other option is 1:72 for Surprise which may make sourcing bits and pieces easier but I'm not sure if there is much difference in availability of things like carronade barrels which I don't think I can make myself.
Any thoughts that any of you out there in MSW land may have on these things would be greatly appreciated.
Cheers and happy new year to all,
David.
-
-
I have just finished reading through your log, most interesting and informative and looking really promising.
I have just completed a 1:60 Bounty which started life as an Amati kit but once I had acquired McKay "Anatomy of the Ship" things got a bit more complicated. They got more interesting still when I got Lennarth Petersen frigate rigging book and used that as a basis for much of the rig. Needless to say I have ended up with a bit of a hybrid but I am happy with the finished result. Colours were a big part of my build and I did lots of research in an attempt at some authenticity.
I am now contemplating what to build next and, more importantly, HOW to build it. The current favorite is HMS Surprise of Master and Commander fame. There are various kits about but none of them really suit. The 1:48 builds are just too big as a finished model and the only smaller one I can find is a 1:72 Mamoli which looks pretty basic and would involve lots of scratch building to end up being a respectable build. So the scratch build option is looking more and more possible, especially when I see what you are achieving.
I shall follow your build and your log is quite inspirational.
Thanks and cheers,
David.
-
Thanks for your thoughts Alistair. We are in a relatively safe part of Sydney, about 8 km north of the city centre. If we are threatened then the city is in serious trouble.
The smoke blowing over us was really aweful, horrible brown grey, pale yellow/red sun disc trying to penetrate and black soot and dead embers falling out of the sky, and we are 60 km to the east of the fires themselves. My thoughts really go out to those poor souls who are in the middle of it and particularly to those who have lost everything.
Cheers,
David.

Looking to the west from near our home.
4 pm semi darkness.
-
Now to decide what to build next.
HMS Surprise of "Master and Commander" fame is the emotional favourite, I have just started re-reading the books. This time around I am taking more time digesting the fine nuances. I read with the trusty smart phone by my side with google readily available to look up all those obscure terms and to translate the Latin bits to English, all very entertaining.
Still not sure how to approach the Surprise build.
The big 1:48 kits don't appeal, they're just too big as a finished product. The 1:72 Mamoli is attractive, big enough to include plenty of detail and should lend itself to plenty of scratch building to bring up the detail. I will have a look at this kit before I finally decide.
Cheers.
-
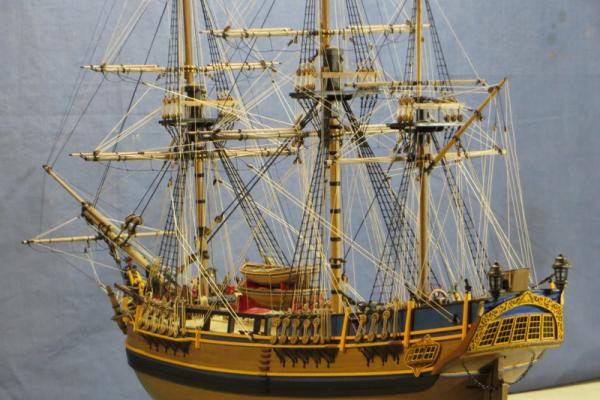
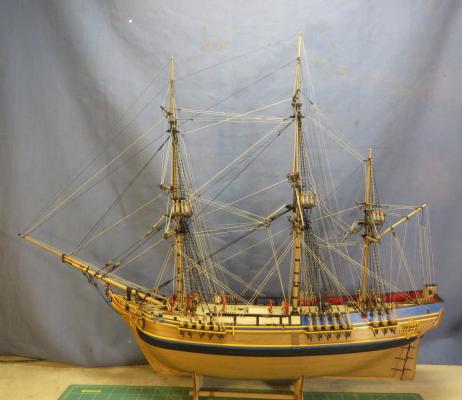
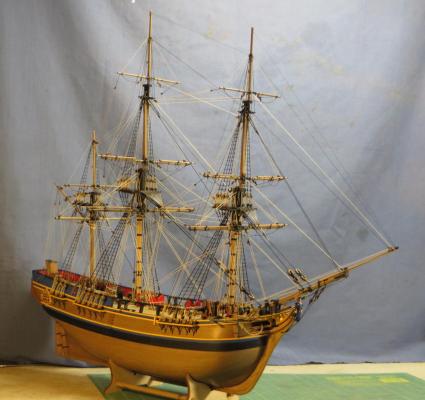
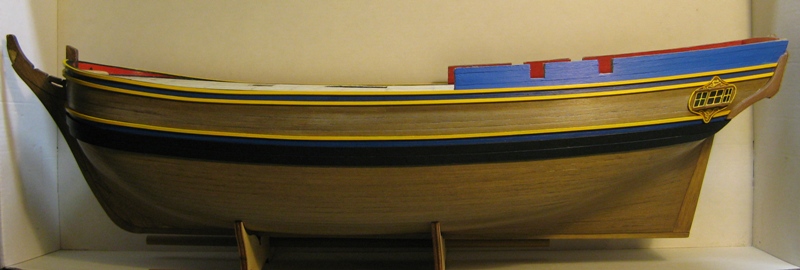
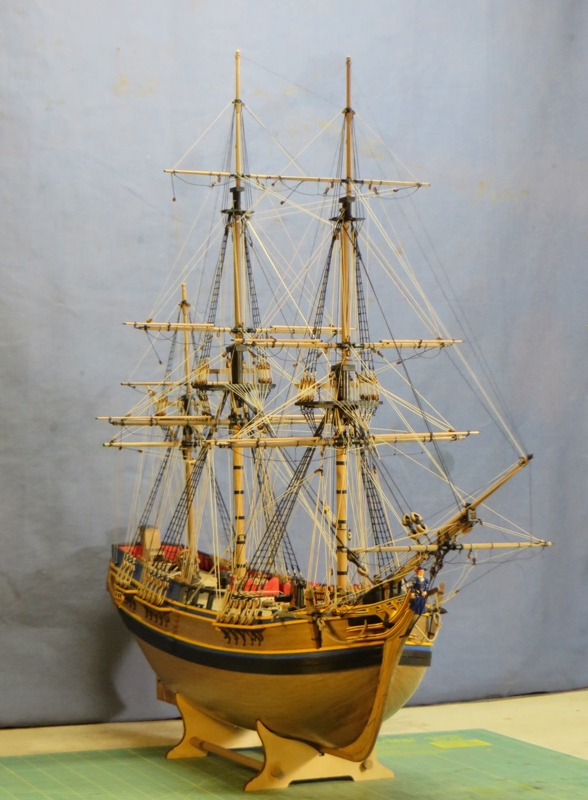
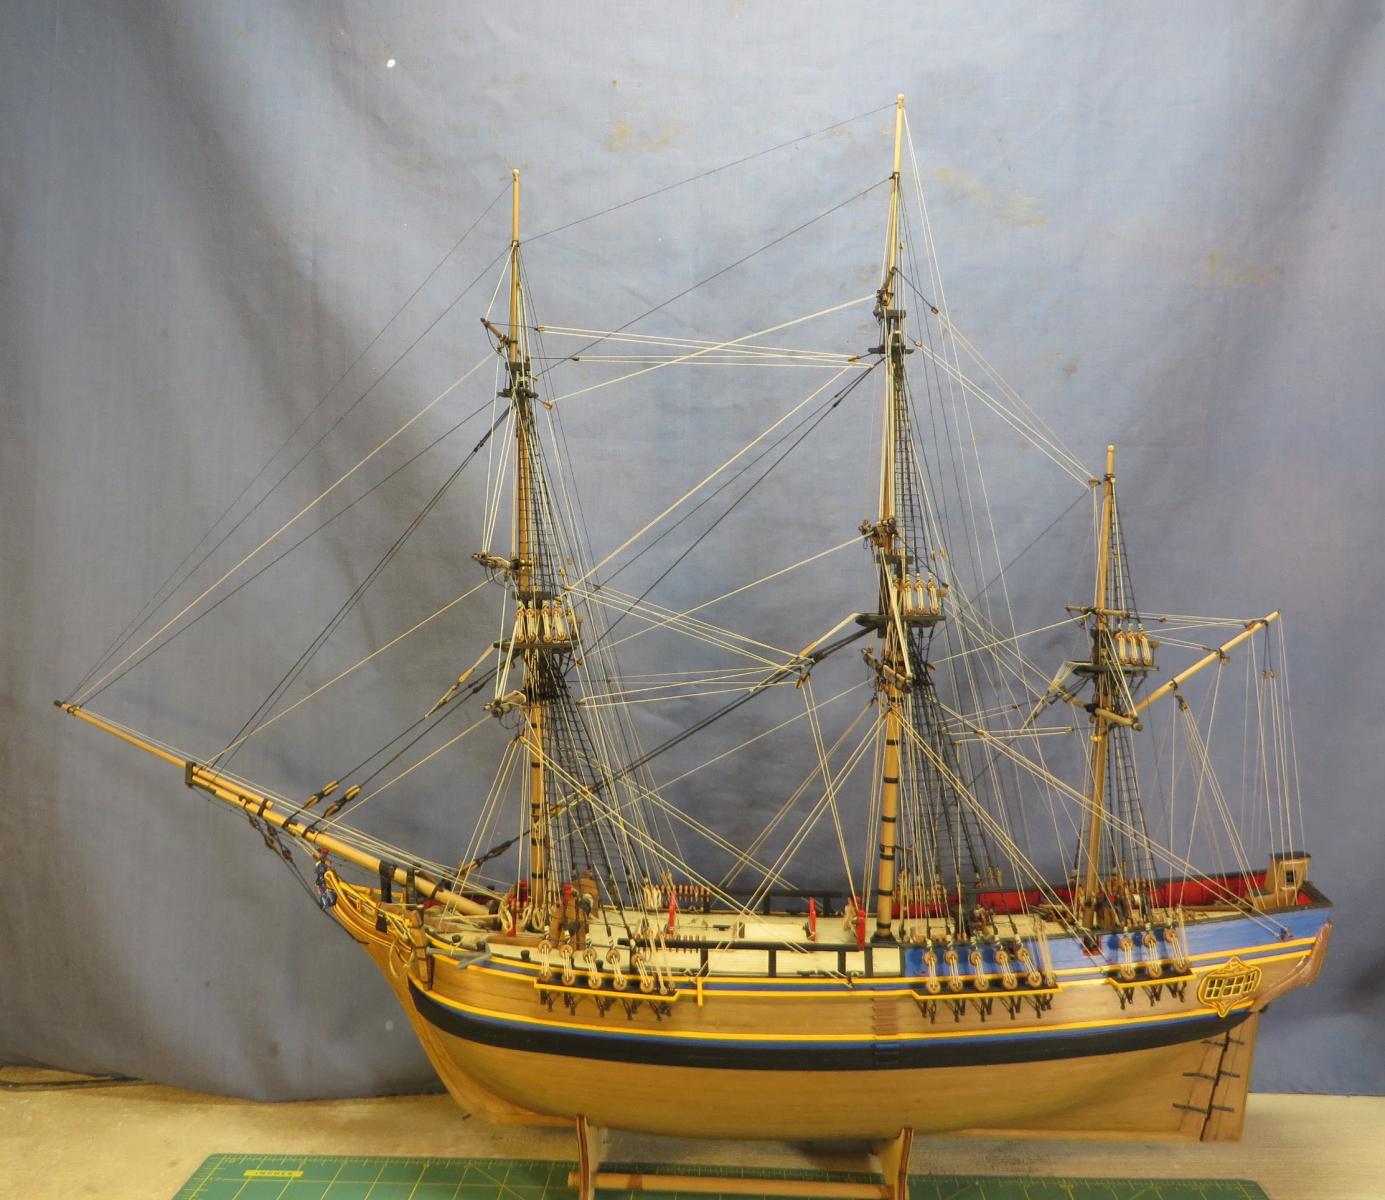
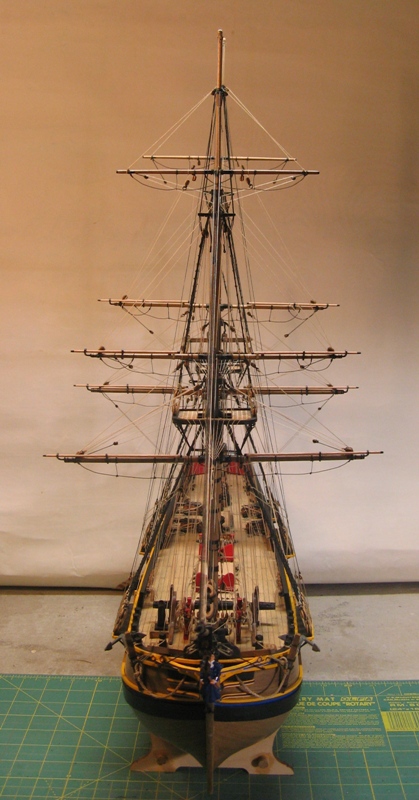
Construction took a break over winter as some travelling occurred but back into some finishing touches over the last few weeks and now pretty much complete.
Next is a base and a perspex case.


-
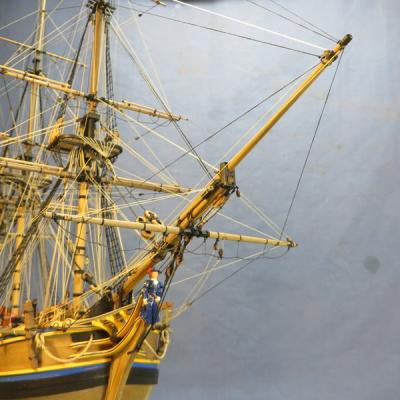
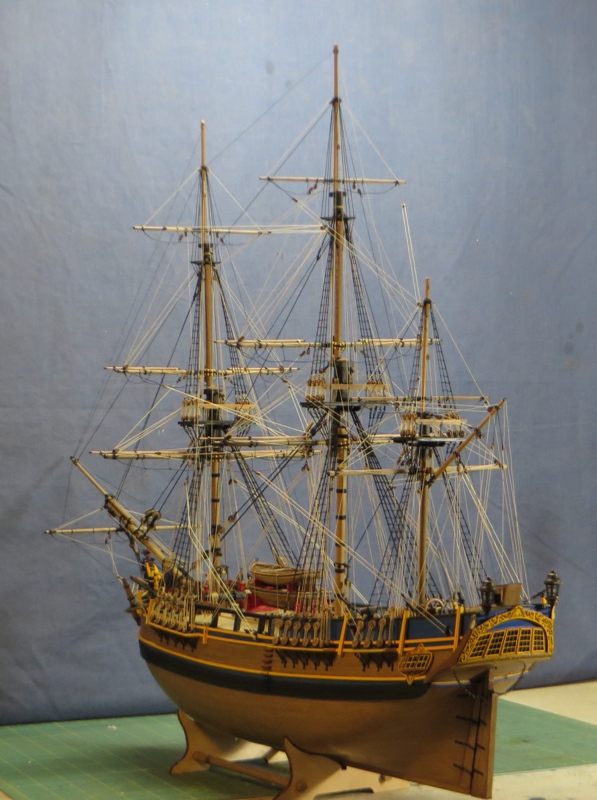
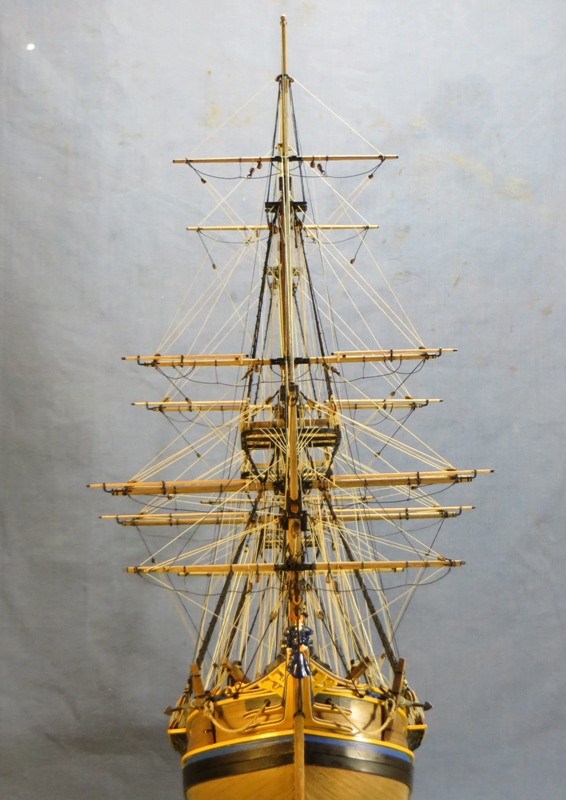
Running rig update.
With the spritsail yard fitted and rigged the spars are now all in place.
Now for the staysail running rigging, The Amati kit describes some of the rigging for the foreward stay sails on the bowsprit and jibboom but doesn't mention the other staysails between the masts. Details for these can be found in McKay and Lennarth Peterssen but I have a bit of a problem with where the ropes are going to land on the deck. I have just about run out of belaying pins and rack space. The pin racks were installed fairly early in the build and I hadn't done enough forward planning to pick up the problem.
Not too sure what to do!
I think i will fit the rigging for the foreward staysails where I have available belaying pins and give the rest a miss.
A more complete rig is something to look forward to in the next build.
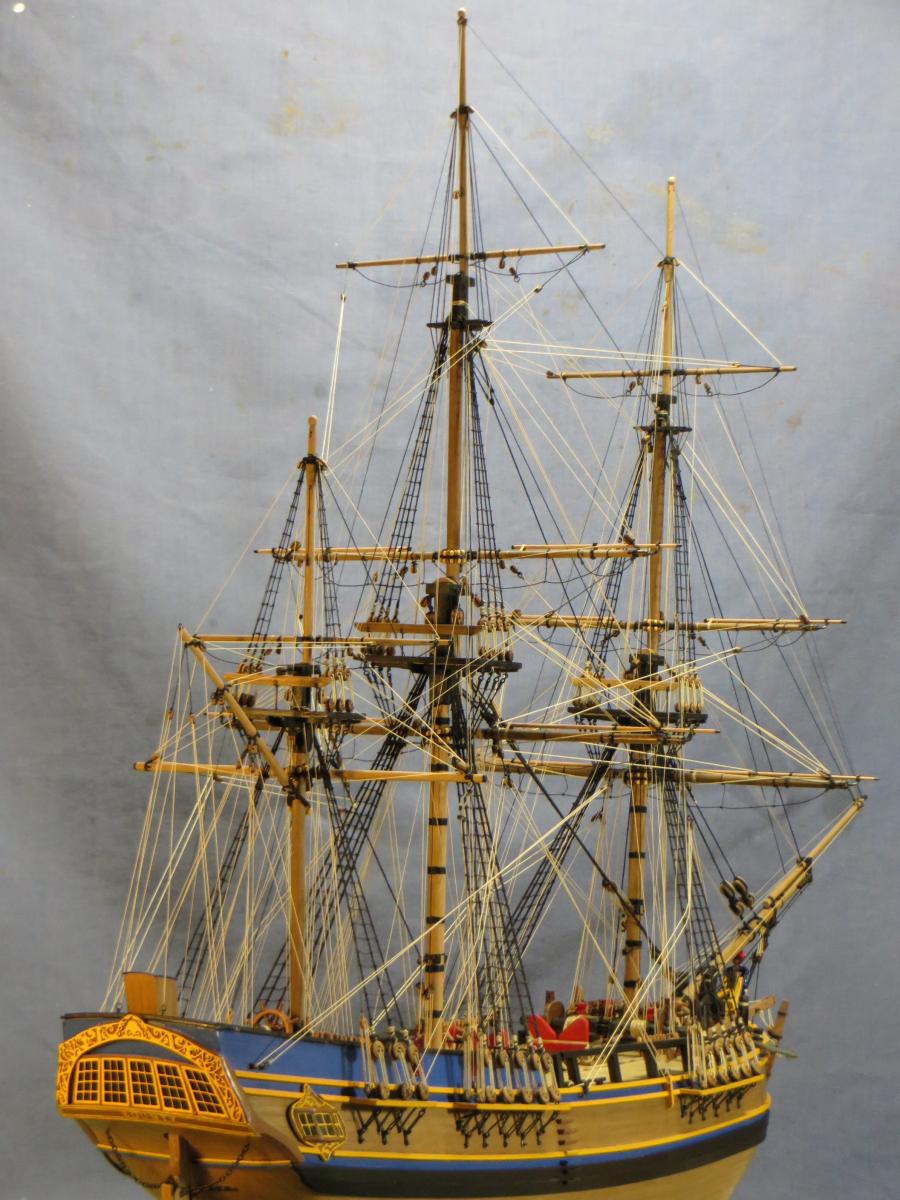
I still have a few small details to complete such as the stern lanterns.
I am going on holiday next week so there will be a bit of a gap in progress for about 5 weeks.
Cheers,
David.

- canoe21, hamilton, popeye the sailor and 1 other
-
4
-
Hi,
It sounds like you are well prepared for your build. I started my Bounty before I had acquired the McKay AoTS and other material and am now suffering a bit from not planning ahead far enough. My main problem is with the rig. I installed the belaying pin racks pretty much according to the Amati kit and have now reached the point in the running rig where I am running out of pins to belay ropes long before I have run out of ropes to belay! I have already had to start running 2 lines to some of the pins.
I am basing much of the rig on McKay which has some pretty good, however small, diagrams which do make it a bit difficult to work out what goes where. I am also finding Lennarth Petersson's "Rigging Period Ship Models" very helpful. Although based on a frigate the basic principles of the rig are much the same.
I don't think I am going to be able to include all the running rigging for the stay sails on the Bounty as I have not pre-fitted the connection points at the masts and, as mentioned above, I certainly don't have eough belaying points for these additional ropes.
This level of detail will have to keep for my next build which is looking like a late 18C frigate. HMS Surprise is looking like the emotional favourite at the moment and I am thinking of getting the Mamoli kit which, at 1:72 will end up a manageable size but should still be big enough to do a complete rig. From the research I have done this kit looks to be a bit on the basic side, for example, I don't think the main gun deck is fully detailed as it looks like it has gun muzzles only on a backing bulkhead. This should create plenty of scope for scratch building to bring up the detail, I will have to find a source for the correct guns and all the other bits and pieces I will need. To me this is a significant part of the build.
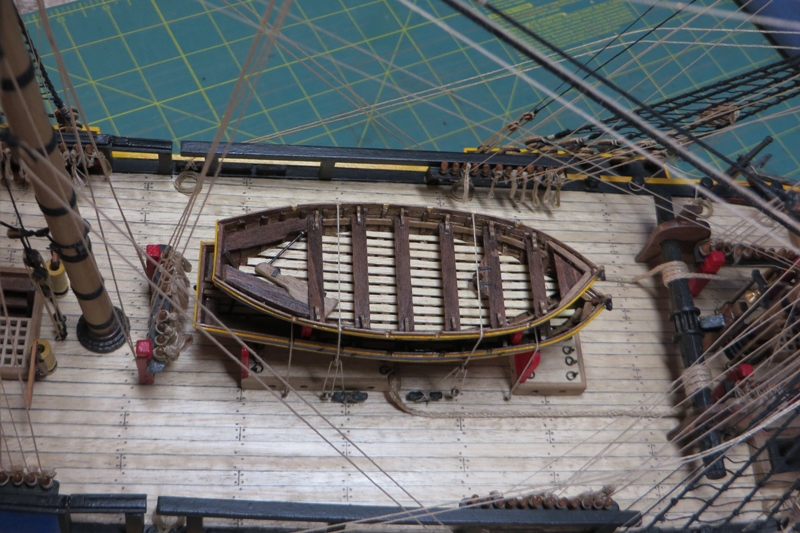
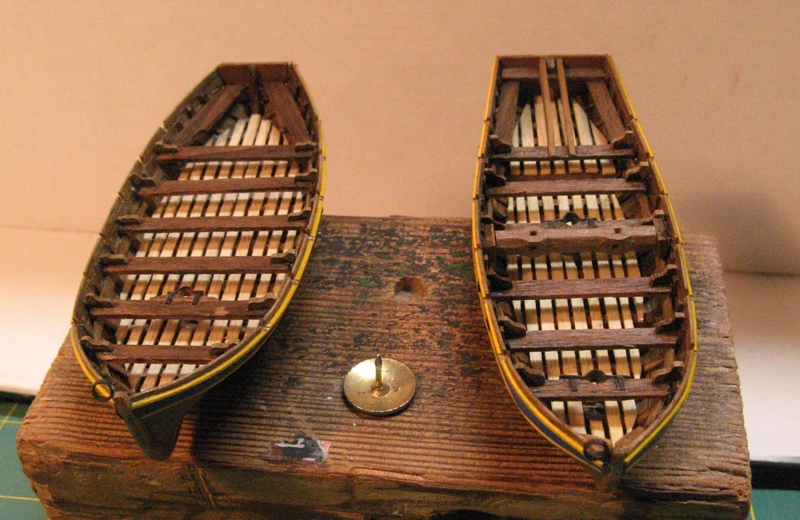
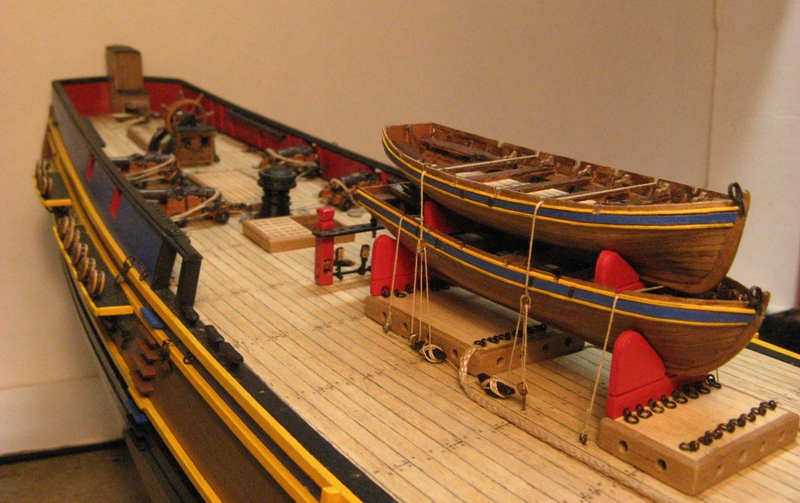
Another comment on the Amati Bounty. My kit included a single generic metal hull ship's boat which is neither of the boats the Bounty carried. As a bit of a diversion from the main build I scratch built the 2 boats from the drawings in McKay. It took about 30 hours each but I think the result is worth the effort. I have yet to make up the oars and spars. If you also have the single metal boat you may find this additional detail worth achieving.
Cheers,
David L.


- Mirabell61 and Blueskippy
-
2
-
Hi David,
Thanks for the coment on my Bounty build, you are where I was 2 1/2 years ago. Amazing how time flies when your'e having fun. My kit also had the one piece false keel and my kit was a few years old when I acquired it.
If your kit is the same as mine there are a couple of things to attend to fairly early in the build if you want to avoid problems later on.
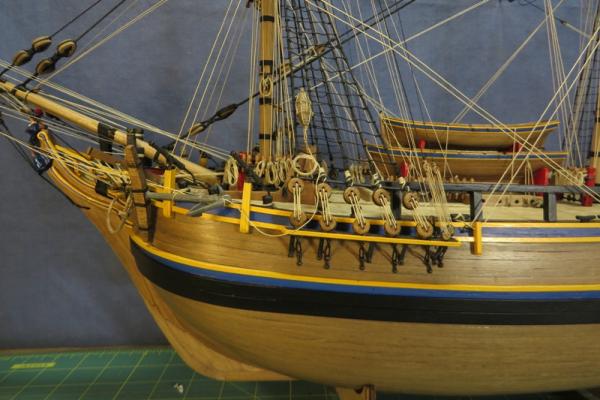
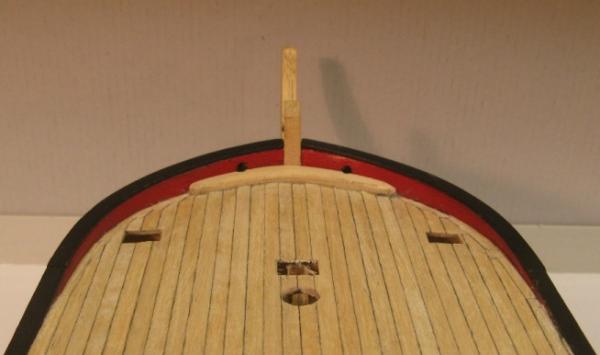
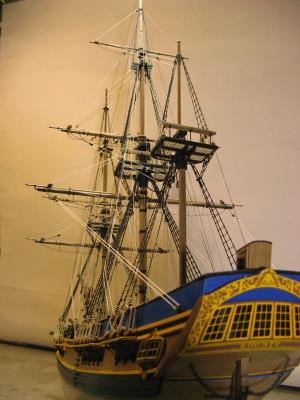
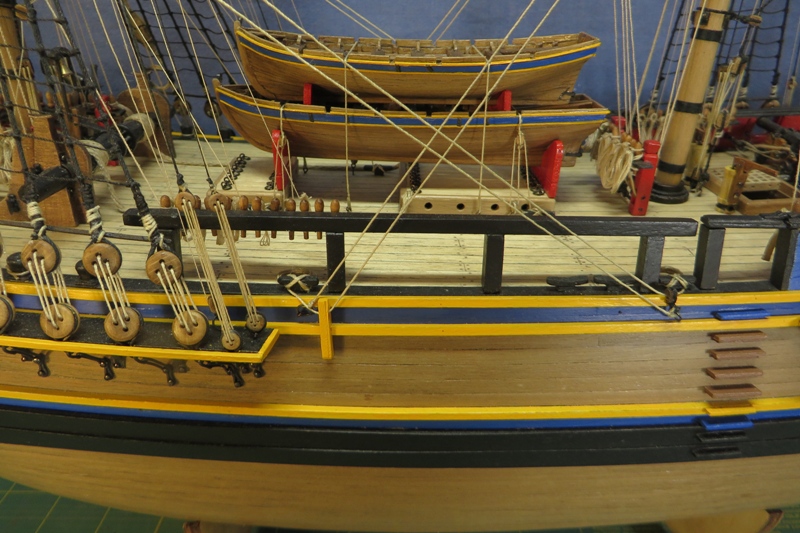
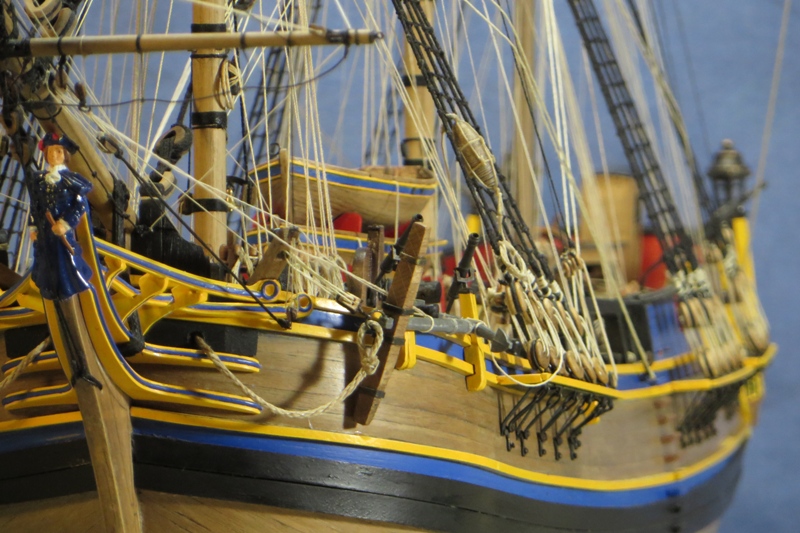
The most significant is the height of the gun ports. The kit includes chunky metal cast items which are nothing like the simple holes in the bulwarks that the ship actually had, and the holes for the kit items are much too low. If fitted as the instructions the gun barrels simply do not fit through the ports without the guns pointing down at about 30 degrees. I lifted the ports 6mm (1/4in) and all that is above the ports is the rail.
The entire bow treatment in the kit is a bit strange. The anchor cables disappearing down through the deck and then re-emerging at the hawse holes is incorrect and is a result of the kit bow line above the deck at the bow being several mms too low. I lifted the bow bulwarks about 6mm also to achieve a more accurate detail and to enable the anchor cables to run above the deck as they should.
To discover how the Bounty really looked I bought the book John McKay's "Anatomy of the Ship The Armed Transport BOUNTY" which is based on the original drawings. Most of my build hs been based on this including the colour scheme which is on the cover.
The now defunct MSW version 1 covered all the early parts of my build including all the things I described above. I still have all the pics and would be happy to communicate with you if you think my input would be of any assistance. The pics below are how my modified gun port and bow details worked.
I hope this helps and doesn't confuse the issue too much. How much scratch building you include in your build is obviously up to you. I tend to be a bit keen on detail and accuracy and am prepared to spend lots of time researching. Probably not everyone's "cup of tea".
I look farward to following your build.
Cheers,
David L.
-
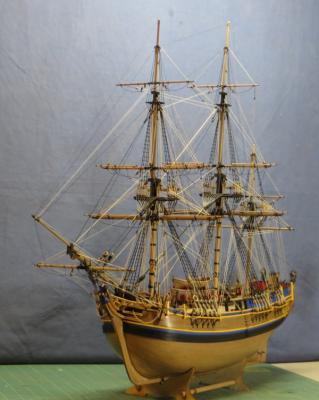
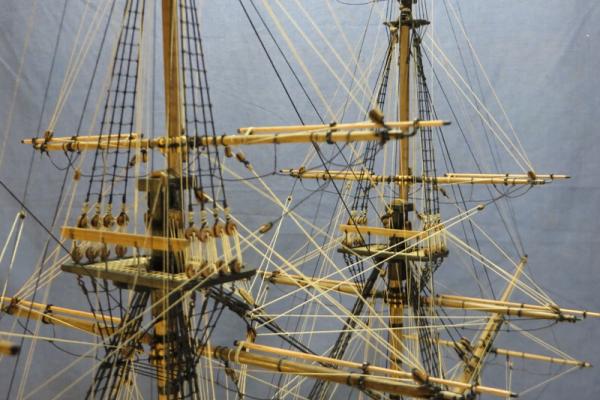
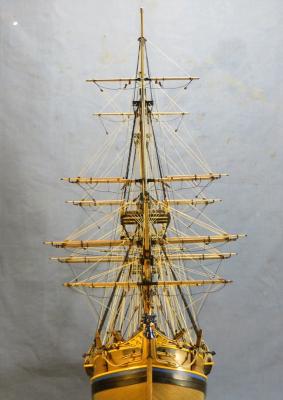
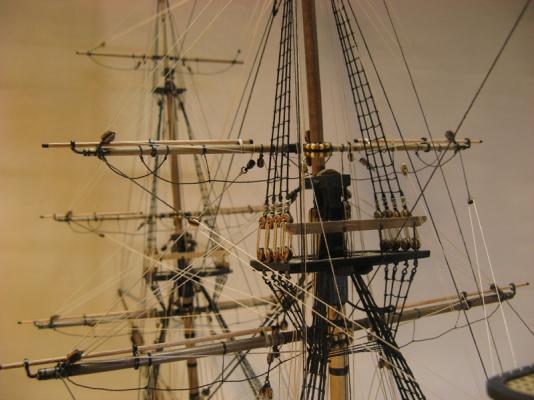
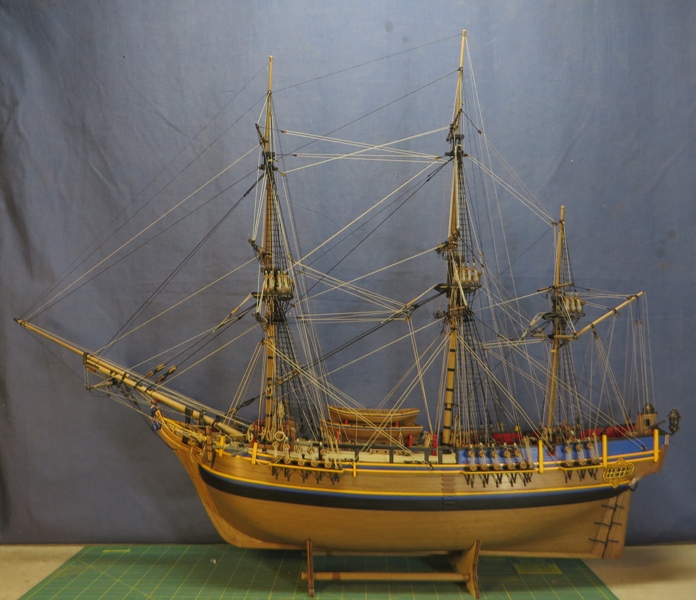
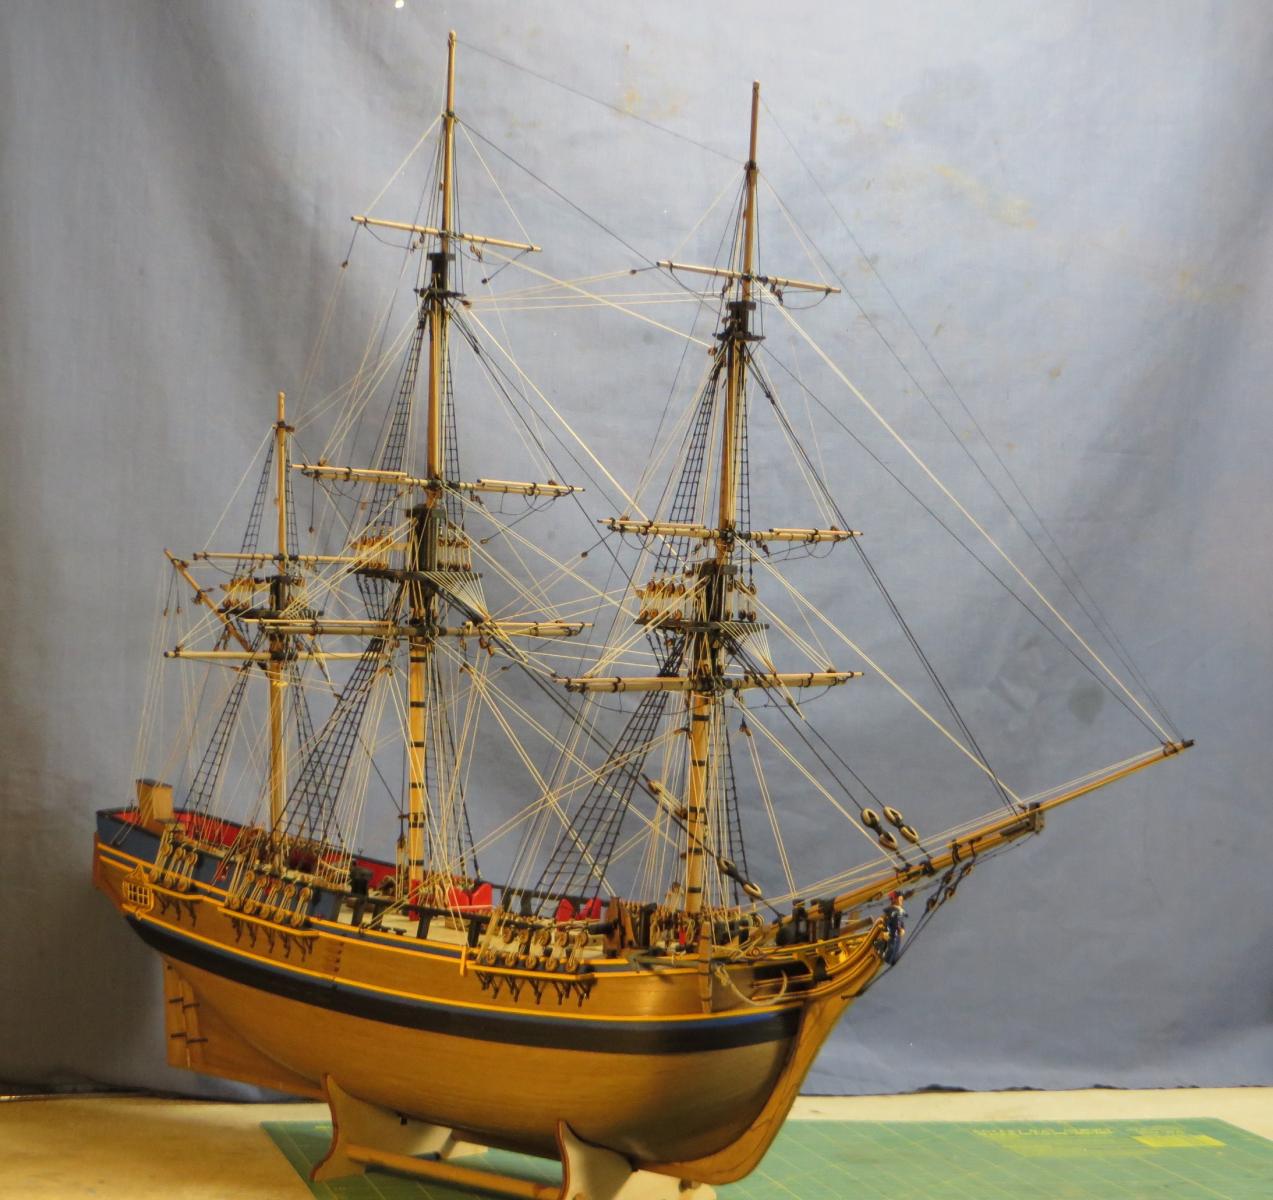
Rigging progress.
Mizzen running rig complete, now for the sprit sail.
Almost done.
After a bit of a shaky start I have really enjoyed the rigging process.
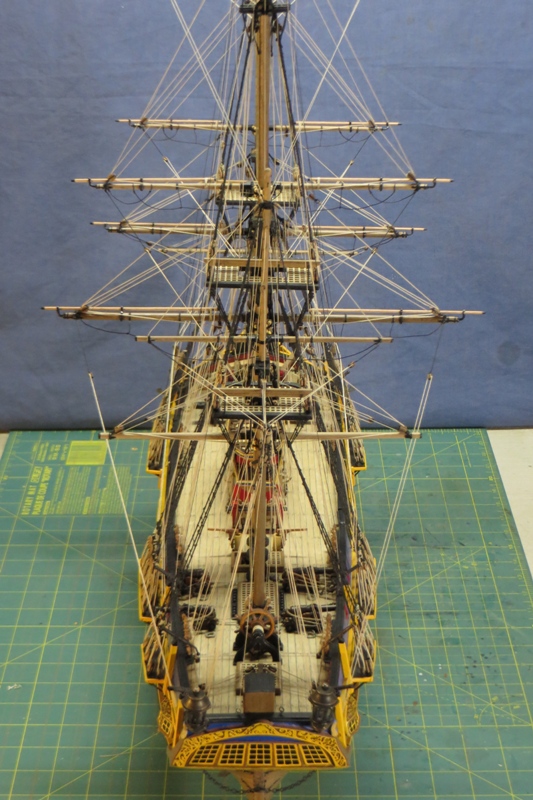
I am trying photographing against a blue background, I think it reduces the contrast and makes the different coloured cords easier to see.
Cheers,
David.

-
Hi Ray,
I have just about finished construction of the Amati Bounty and am now seriously thinking about what to do next.
A late 18C frigate is looking good and I have been thinking about the mamoli Surprise with a bit of scratch improvement but your Diana build is a real inspiration. Tempting.
Another factor is the size of the finished model. The Diana is pretty big, maybe too big.
Decisions, decisions!
Cheers,
David.
-
Hi Augie,
Our builds proceed in parallel still, I am about to do the mizzen running rigging. In principle you should finish well ahead of me, one less mast!
Navigating your log was a bit frustrating, I had to trawl back through 4 pages to find 2 pics than another 6 pages to see 4 more.
I can appreciate some folks need to chat but I think this is getting a bit excessive, I think this may discourage some folk from using our logs as reference for their own builds. I thought this was one of the major aspects of our forum.
Cheers,
David.
-
It is a piece of tape on the rudder, well spotted. The rudder is hung on pin and pintol hinges which means that it falls off when bumped from below. Something which happens pretty regularly when moving the model around to get at all those hard to reach places where knots have to be tied.
I keep forgetting to remove it when taking photos.
Cheers,
David.
-
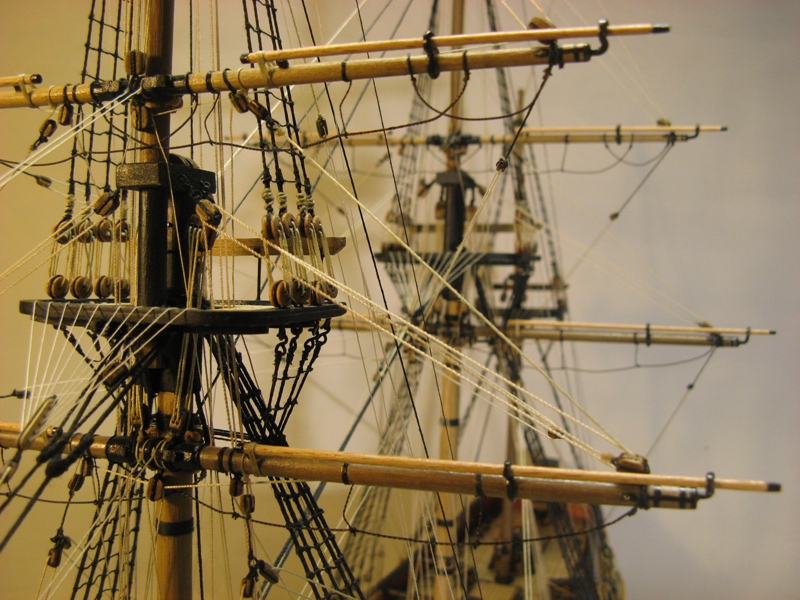
Still quite a bit of the rig to go. So far I have rigged 6 spars on the fore and main masts leaving the spritsail yard, and all the mizzen spars, topsail and spanker, 4 more spars in all. Then all the finishing bits. Rope coils. stern lanterns, and I must have a go at the stern decorations, sometimes called "hair curlers". The Amati kit doesn't mention these so some research will be needed. Perhaps i should sub-contract them out to Janos, he would certainly do them justice.
Thanks for the feedback.
Cheers,
David.
-
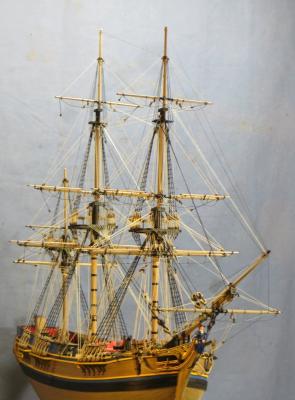
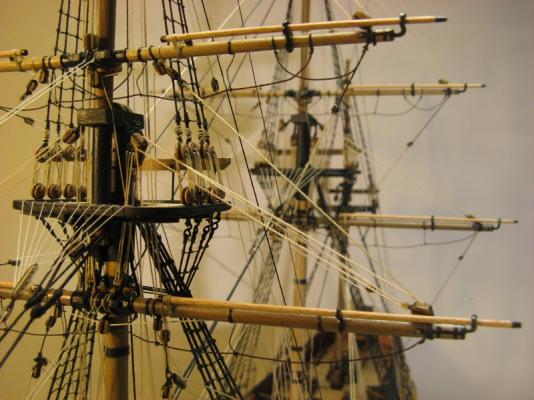
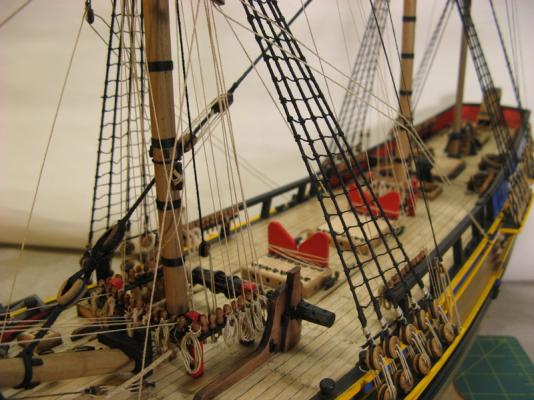
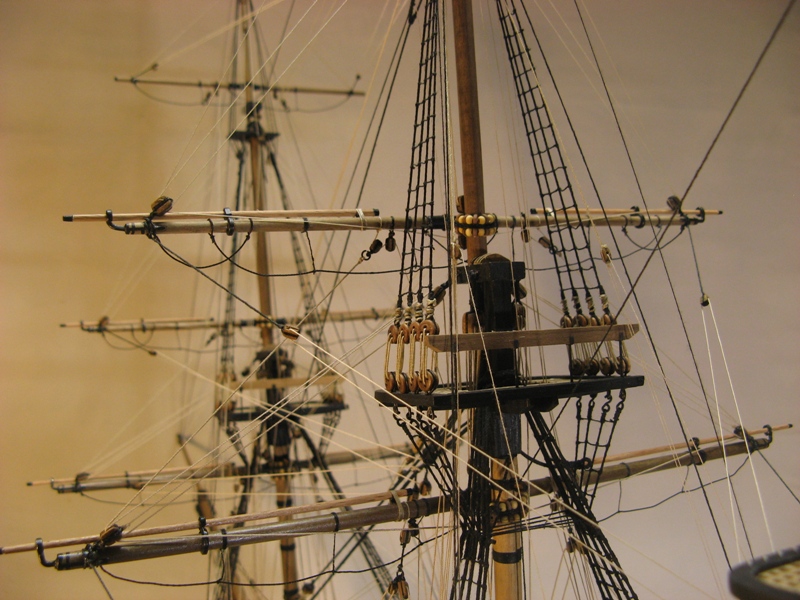
Time for an update on the running rig progress. It's been 5 weeks since I posted pics of the foremast rig done and I have now completed the main mast rig.
When I started the running rig I had no idea how long it was going to take and I am quite surprised at how long it is taking. Good fun though, there's been quite a learning curve as to what the ropes do and where they go. As for other aspects of the build, by the time I'm finished I might have worked it out.
I have been thinkig more about my next build and a late 18th century British frigate is looking good. The rig looks to be a larger version of the Bounty so I should be able to put into practice what I've learnt and do a better job of it.
HMS Surprise is still the emotional favourite. I rather like the idea of starting off with the Mamoli kit which looks fairly basic and should give plenty of opportunity for creativity. It's also a good size being smaller than the AL or Caldercraft frigates which I find a bit too big. Almost 1,200mm long is way too big for my modest abode and the spaces I have to display in.
- popeye the sailor, ZyXuz and canoe21
-
3
-
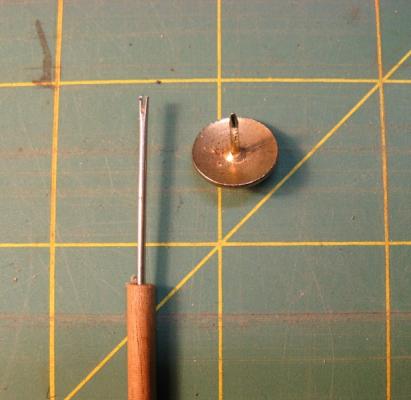
Rigging tool.
At some point in the rigging process I guess all modellers wonder if there is a better way than poking around with a couple of pairs of long nose tweezers of threading cord around belaying pins, particularly the bit of the pin below the rack. I found the tweezer approach very frustrating so had a think about the problem and realized what was needed was a gadget to push the cord into place and control where it went.
I use cut off sewing needles on a dowel to place CA where I want it, 2 different needle sizes for different amounts of glue. I cut off the eye of the needle leaving only a small "V". I find this works very well.
I'm sure many of you use similar methods but maybe this little bit of info may help someone who, like me, is still learning some basic techniques.
The Bounty is the first bit of serious rigging that I have done so I am learning a lot and still have lots to find out.
So the rigging tool. Almost the same as the CA tool but with the eye of a largish needle cut off leaving a bit longer of a "V". Fixed into the end of a bit of 4mm dowel about 200mm long it works a treat. Hold the end of the thread somewhere near where the tying is to occur, catch the thread in the tool and push it around the belaying pin. I wish I thought of this one many pins ago! Better late than never.
Cheers.
Rigging tool.
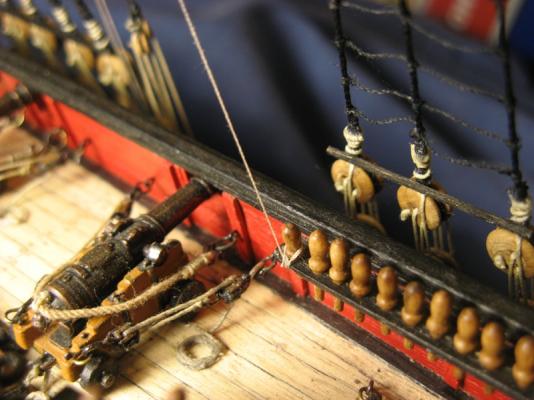
Makes tying these much easier.
-
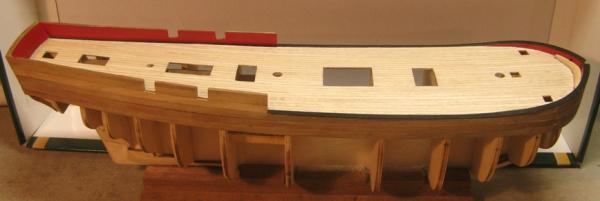
The capping piece is quite thin so I shaped it out of some of the left over ply from the laser cut parts. The piece that surrounded the false deck had almost the right curve.
Cheers.
-
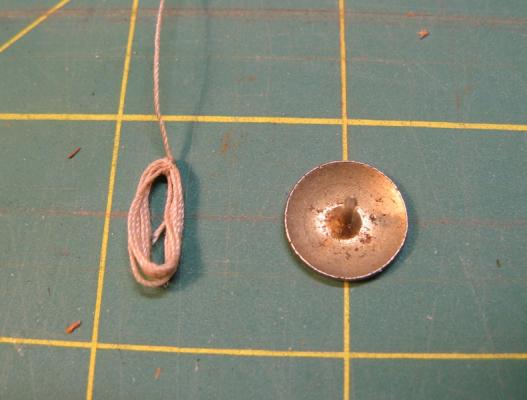
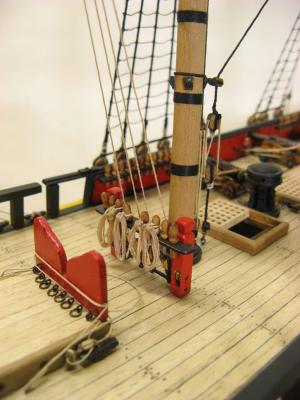
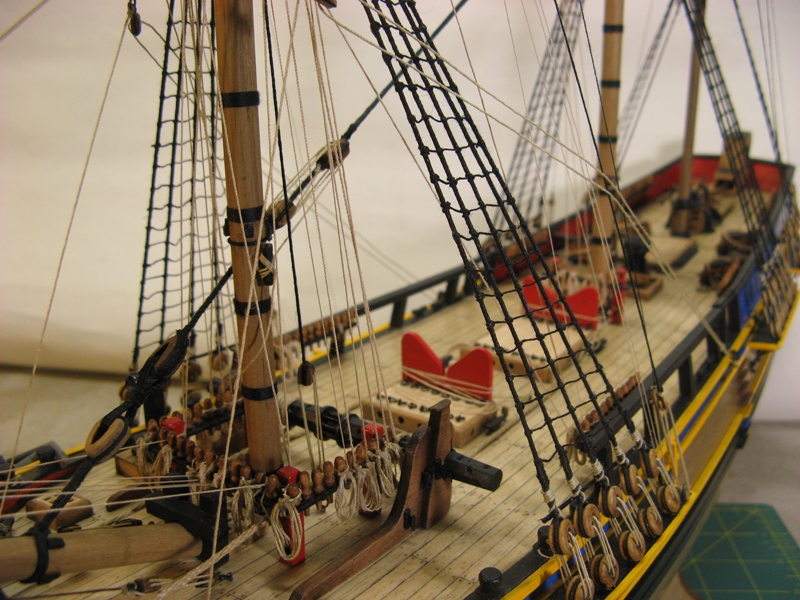
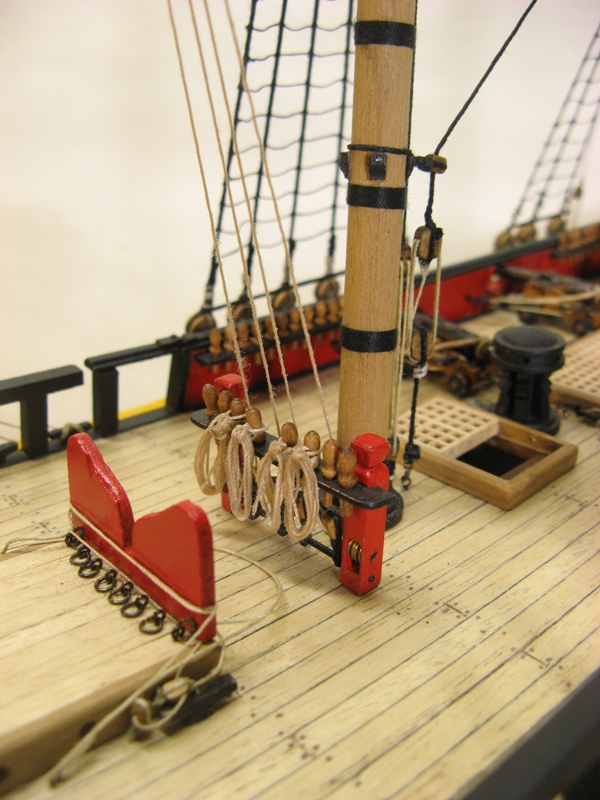
Rope coils.
First try at making up and installing coils like those I saw on the James Craig.
Those for the fore sail and fore topsail braces at the base of the main mast are the last to be done, I think they are looking more convincing the more I do.
Like most things, by the time I've finished, I might be reasonably good at it!
Cheers, David.


HMS Surprise by Navis Factorem - FINISHED - 1:75
in - Build logs for subjects built 1751 - 1800
Posted
Thanks for the comments, I think you may need a very comfy chair and a large serve of popcorn! And a lot of patience.
I picked up some 6mm ply for the false keel and bulkheads today, must be getting close to some scroll sawing.
Cheers.