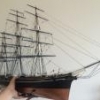
baskerbosse Posted May 20, 2015 Author Share #31 Posted May 20, 2015 (edited) Maybe helps? cuttysark06.jpg I just noticed that comparing this picture to the Billings name board. And then Campbell's name board, that the Campbell name board agrees with Billings. I.e. is also wrong. Something like this: Caution. Edited May 21, 2015 by Peter Jenssen popeye the sailor 1 Quote Link to comment Share on other sites More sharing options...
baskerbosse Posted June 3, 2015 Author Share #32 Posted June 3, 2015 Update; Cleaned up the deck a bit. More paint touch up. Installed windlass handles. Started putting the yards up. No photos yet. Workspace needs serious cleanup.. I realised that the Billings CS does not have catheads. Instead some kind of deck crane for the anchor. Not fixing that one. In the meantime I have had some issues in that I had to fix. Number one, It would have appeared that I had the 'brilliant' idea when I built this model first, to simulate small blocks by using small copper rings that were then given a drop of glue to give it rounded appearance. Not very cooperative solution when you are re-rigging and need to tension lines up a bit. This was mostly on sheets and associated yard blocks. End result: had to cut most of it off. Now waiting for a drill chuck I ordered for my Dremel. Going to attempt making some small blocks, but my usual pin vise drilling is not something I'd like to try here... Number two, Work had been started on rigging stunsail yards, but no stunsail yards were ever made, nor provided in the kit. Made four so far, using bamboo skewers. (10 needed) She's starting to look alright now, with some yards up. Rather big too! :-) /Peter popeye the sailor 1 Quote Link to comment Share on other sites More sharing options...
NenadM Posted June 3, 2015 Share #33 Posted June 3, 2015 Photos ... where are photos? I am inpatient! Quote In progress: CUTTY SARK - Tehnodidakta => scratch => Campbell plans http://modelshipworld.com/index.php/topic/2501-cutty-sark-by-nenad-tehnodidakta-scratched-campbells-plans/page-1#entry64653 Content of log : http://modelshipworld.com/index.php/topic/2501-cutty-sark-by-nenad-tehnodidakta-scratched-campbells-plans/page-62#entry217381 Past build: Stella, Heller kit, plastic, Santa Maria, Tehnodidakta kit, wood, Jolly Roger Heller kit, plastic Link to comment Share on other sites More sharing options...
popeye the sailor Posted June 3, 2015 Share #34 Posted June 3, 2015 she had them.....so your not spinning your wheels she look even bigger for it baskerbosse 1 Quote I yam wot I yam! finished builds: Billings Nordkap 476 / Billings Cux 87 / Billings Mary Ann / Billings AmericA - reissue Billings Regina - bashed into the Susan A / Andrea Gail 1:20 - semi scratch w/ Billing instructions M&M Fun Ship - semi scratch build / Gundalow - scratch build / Jeanne D'Arc - Heller Phylly C & Denny-Zen - the Lobsie twins - bashed & semi scratch dual build Billing T78 Norden in dry dock: Billing's Gothenborg 1:100 / Billing's Boulogne Etaples 1:20 Billing's Half Moon 1:40 - some scratch required Revell U.S.S. United States 1:96 - plastic/ wood modified / Academy Titanic 1:400 Trawler Syborn - semi scratch / Holiday Harbor dual build - semi scratch Link to comment Share on other sites More sharing options...
baskerbosse Posted June 4, 2015 Author Share #35 Posted June 4, 2015 Ok, well then. Warning was issued.Excuse the mess:Billings strange idea of anchor hoist: (windlass handles visible in the background)Fake 'blocks' I'm now getting rid of: Stunsail yards in progress (I know CS used to carry these, I might have been a bit unclear. What I meant to say was that lazy teenage me never made any, just parts of the attachment irons) Cheers, /Peter dgbot and ScottRC 2 Quote Link to comment Share on other sites More sharing options...
popeye the sailor Posted June 4, 2015 Share #36 Posted June 4, 2015 gotcha Pete........so, now she will have them. your progress has been very good. she looks great! at least they got the design work on the cabins right Quote I yam wot I yam! finished builds: Billings Nordkap 476 / Billings Cux 87 / Billings Mary Ann / Billings AmericA - reissue Billings Regina - bashed into the Susan A / Andrea Gail 1:20 - semi scratch w/ Billing instructions M&M Fun Ship - semi scratch build / Gundalow - scratch build / Jeanne D'Arc - Heller Phylly C & Denny-Zen - the Lobsie twins - bashed & semi scratch dual build Billing T78 Norden in dry dock: Billing's Gothenborg 1:100 / Billing's Boulogne Etaples 1:20 Billing's Half Moon 1:40 - some scratch required Revell U.S.S. United States 1:96 - plastic/ wood modified / Academy Titanic 1:400 Trawler Syborn - semi scratch / Holiday Harbor dual build - semi scratch Link to comment Share on other sites More sharing options...
baskerbosse Posted June 5, 2015 Author Share #37 Posted June 5, 2015 Received the drill chuck, which turned out to be a dud and more suited to draw circles with.The jaws were off center:https://goo.gl/photos/VvEPQvkaCTmJkbKj6Credit to My Tool Store in Brisbane, responding straight away and sending a new one!(Will probably spend until well into next week in the care of Australia Post though.. :-) ) In the meantime, doing an experiment in small boat building:"Salslup #3" from FH af Chapman's Architectura, Plate 47:Scale? -Scaled to fit an A4 printout.. :-) Cheers, Peter popeye the sailor 1 Quote Link to comment Share on other sites More sharing options...
keelhauled Posted June 10, 2015 Share #38 Posted June 10, 2015 Looking good. It's always a challenge when different plans don't agree with one another. Sometimes you have to just make command decisons Marc Quote Currently building the Cutty Sark http://modelshipworld.com/index.php?/topic/1000-cutty-sark-by-keelhauled-mantua-kit-bashed-first-wooden-ship-build/ Link to comment Share on other sites More sharing options...
clearway Posted June 11, 2015 Share #39 Posted June 11, 2015 as regards stunsail booms she did not carry them when she had her rig cut down for the wool trade to Australia so there is precedence for leaving them off Keith Quote Link to comment Share on other sites More sharing options...
baskerbosse Posted June 12, 2015 Author Share #40 Posted June 12, 2015 Thanks Keith, Interesting, I hadn't noticed. I looked up some pictures, -for example:http://blogs.rmg.co.uk/cuttysark/wp-content/uploads/sites/13/2015/01/Cutty-Sark-at-Circular-Quay-discharging-cargo-in-Sydney-1890-%C2%A9-Cutty-Sark-Trust.jpgThe Cutty Sark at Circular Quay. She also has fewer yards then unfortunately.Interesting how they take the bowsprit in when at port. (I've seen it on more than one picture of her at docks..)/Peter Quote Link to comment Share on other sites More sharing options...
baskerbosse Posted June 12, 2015 Author Share #41 Posted June 12, 2015 Got drill chuck replacement, Much better (new one to the left).Spins perfectly true, even at Dremel speeds! :-) The right one, not so much.. Time for an attempt at miniature block making. Cheers! /Peter Quote Link to comment Share on other sites More sharing options...
baskerbosse Posted August 4, 2015 Author Share #42 Posted August 4, 2015 Sorry for the lack of updates,Not much going on here throughout July.I started making some blocks, using toothpicks. Needed to re-do the sheet rigging that was done using copper rings with a dab of glue on them.Needless to say, the rope does not run well through these blobs of glue which makes the re-rigging of these near impossible.New toothpick blocks (copper ring blob visible above):Other than that, fore yards now have blocks attached as well as footropes and halyard chains.Fore yards are hanging in their lowered position, will be hoisted when done. (easier to rig the lifts in this position)Cheers!/Peter dgbot, clearway, ScottRC and 4 others 7 Quote Link to comment Share on other sites More sharing options...
NenadM Posted August 4, 2015 Share #43 Posted August 4, 2015 W O O O W !!!! Amazing. Just amazing baskerbosse 1 Quote In progress: CUTTY SARK - Tehnodidakta => scratch => Campbell plans http://modelshipworld.com/index.php/topic/2501-cutty-sark-by-nenad-tehnodidakta-scratched-campbells-plans/page-1#entry64653 Content of log : http://modelshipworld.com/index.php/topic/2501-cutty-sark-by-nenad-tehnodidakta-scratched-campbells-plans/page-62#entry217381 Past build: Stella, Heller kit, plastic, Santa Maria, Tehnodidakta kit, wood, Jolly Roger Heller kit, plastic Link to comment Share on other sites More sharing options...
popeye the sailor Posted August 5, 2015 Share #44 Posted August 5, 2015 what Nenad said........... baskerbosse 1 Quote I yam wot I yam! finished builds: Billings Nordkap 476 / Billings Cux 87 / Billings Mary Ann / Billings AmericA - reissue Billings Regina - bashed into the Susan A / Andrea Gail 1:20 - semi scratch w/ Billing instructions M&M Fun Ship - semi scratch build / Gundalow - scratch build / Jeanne D'Arc - Heller Phylly C & Denny-Zen - the Lobsie twins - bashed & semi scratch dual build Billing T78 Norden in dry dock: Billing's Gothenborg 1:100 / Billing's Boulogne Etaples 1:20 Billing's Half Moon 1:40 - some scratch required Revell U.S.S. United States 1:96 - plastic/ wood modified / Academy Titanic 1:400 Trawler Syborn - semi scratch / Holiday Harbor dual build - semi scratch Link to comment Share on other sites More sharing options...
baskerbosse Posted August 6, 2015 Author Share #45 Posted August 6, 2015 Thanks guys, Quite a few of these little ones will be required.I had rigged the sheets, -up and downhaul- (I believe based on a photo I had seen of the real ship in the drydock having them rigged) That's about 30 of these little things to make. Production line toothpick blocks: popeye the sailor and NenadM 2 Quote Link to comment Share on other sites More sharing options...
popeye the sailor Posted August 6, 2015 Share #46 Posted August 6, 2015 sounds like your going to have some fun you may want to make a few extra. Quote I yam wot I yam! finished builds: Billings Nordkap 476 / Billings Cux 87 / Billings Mary Ann / Billings AmericA - reissue Billings Regina - bashed into the Susan A / Andrea Gail 1:20 - semi scratch w/ Billing instructions M&M Fun Ship - semi scratch build / Gundalow - scratch build / Jeanne D'Arc - Heller Phylly C & Denny-Zen - the Lobsie twins - bashed & semi scratch dual build Billing T78 Norden in dry dock: Billing's Gothenborg 1:100 / Billing's Boulogne Etaples 1:20 Billing's Half Moon 1:40 - some scratch required Revell U.S.S. United States 1:96 - plastic/ wood modified / Academy Titanic 1:400 Trawler Syborn - semi scratch / Holiday Harbor dual build - semi scratch Link to comment Share on other sites More sharing options...
baskerbosse Posted August 8, 2015 Author Share #47 Posted August 8, 2015 Probably the wrong time to drill these holes: ;-) NenadM and popeye the sailor 2 Quote Link to comment Share on other sites More sharing options...
baskerbosse Posted August 18, 2015 Author Share #48 Posted August 18, 2015 Using the recently made small blocks to rig sheets on the mizzen.Mizzen pretty much done, except for the braces.View from stern getting to look rather busy. Currently working on halliards for the yards on the main mast. Only one to go actually.For reasons of access to the belaying of the halliards, I need to do these before I can do the mizzen braces../Peter cristikc, clearway, ScottRC and 3 others 6 Quote Link to comment Share on other sites More sharing options...
baskerbosse Posted August 20, 2015 Author Share #49 Posted August 20, 2015 Main mast halliards done.So now the fife rails (where some mizzen braces are belayed) can be installed without being in the way of rigging in that rather busy area of the deck.So I'm now moving on to mizzen braces, main sheets and fore halliards. Then I'm going to do main braces and fore sheets, followed by fore braces. Tighten and square up everything before installing ships boats and cranes and call it done. :-) /Peter popeye the sailor and NenadM 2 Quote Link to comment Share on other sites More sharing options...
baskerbosse Posted August 20, 2015 Author Share #50 Posted August 20, 2015 Billings special style fife rails installed: popeye the sailor, cristikc, ScottRC and 6 others 9 Quote Link to comment Share on other sites More sharing options...
thomaslambo Posted August 21, 2015 Share #51 Posted August 21, 2015 Hi Peter, Just beautiful work...I'm a big Cutty Sark fan so I'll be following the log with great interest baskerbosse 1 Quote Boyd Current Build - HMS Bounty - Artesania Latina - Scale1:48 Link to comment Share on other sites More sharing options...
popeye the sailor Posted August 21, 2015 Share #52 Posted August 21, 2015 looks nice........well done on the rigging baskerbosse 1 Quote I yam wot I yam! finished builds: Billings Nordkap 476 / Billings Cux 87 / Billings Mary Ann / Billings AmericA - reissue Billings Regina - bashed into the Susan A / Andrea Gail 1:20 - semi scratch w/ Billing instructions M&M Fun Ship - semi scratch build / Gundalow - scratch build / Jeanne D'Arc - Heller Phylly C & Denny-Zen - the Lobsie twins - bashed & semi scratch dual build Billing T78 Norden in dry dock: Billing's Gothenborg 1:100 / Billing's Boulogne Etaples 1:20 Billing's Half Moon 1:40 - some scratch required Revell U.S.S. United States 1:96 - plastic/ wood modified / Academy Titanic 1:400 Trawler Syborn - semi scratch / Holiday Harbor dual build - semi scratch Link to comment Share on other sites More sharing options...
baskerbosse Posted August 30, 2015 Author Share #53 Posted August 30, 2015 (edited) Rigged the halliards on the fore mast. Had to move the attachment points on the deck aft, as the Billings position means the halliards push outwards on the shrouds.Also done most of the braces between the mizzen and the main mast.Main topsail braces cannot be correct as on Billings plan, as they would go straight through the mizzen course.. Edited August 31, 2015 by Peter Jenssen dgbot, popeye the sailor, thomaslambo and 1 other 4 Quote Link to comment Share on other sites More sharing options...
NenadM Posted August 30, 2015 Share #54 Posted August 30, 2015 Wow !!!! Keep on ! baskerbosse 1 Quote In progress: CUTTY SARK - Tehnodidakta => scratch => Campbell plans http://modelshipworld.com/index.php/topic/2501-cutty-sark-by-nenad-tehnodidakta-scratched-campbells-plans/page-1#entry64653 Content of log : http://modelshipworld.com/index.php/topic/2501-cutty-sark-by-nenad-tehnodidakta-scratched-campbells-plans/page-62#entry217381 Past build: Stella, Heller kit, plastic, Santa Maria, Tehnodidakta kit, wood, Jolly Roger Heller kit, plastic Link to comment Share on other sites More sharing options...
baskerbosse Posted August 30, 2015 Author Share #55 Posted August 30, 2015 Thanks! Sorry about the flipped image. Looks fine on the iPhone, once uploaded, it flips. Only happens on Apple devices for some reasons. (I'll see if I can redo it later when I can get to a computer..) thomaslambo 1 Quote Link to comment Share on other sites More sharing options...
baskerbosse Posted September 1, 2015 Author Share #56 Posted September 1, 2015 (edited) Fixed it! (download, rotate, -repost :-) )I'm having some trouble with belaying the mizzen braces. Billings pinrails are just plain wrong.Looking at Campbell did not help either, as he suggests the royal and topgallant mizzen braces should go through fairleads at the bottom of the main backstays, and then belay on the fife rails(!) I'm just going to belay where it seams reasonable for now.. :-) /Peter Edited September 1, 2015 by Peter Jenssen thomaslambo 1 Quote Link to comment Share on other sites More sharing options...
baskerbosse Posted September 2, 2015 Author Share #57 Posted September 2, 2015 Has anyone tried rigging the tacks the same as the real ship? I.e. held out by the reef tackles. On Campbell's plans the reef tackles are not used for this at all, as well as most models I can find.. Peter Quote Link to comment Share on other sites More sharing options...
hof00 Posted September 6, 2015 Share #58 Posted September 6, 2015 (edited) Hi Peter, The Mizzen Royal and Top Gallant Braces reeve through a Double Block, (Port and Starboard), just below the Mainmast Cross Tree Spreader. The Royal Brace is on the inboard side of the Double Block and The Top Gallant Brace is on the Outboard side of the Double Block. They both drop down from here and Belay to the Aft Mainmast Fife Rail. (There may have been a Fair Lead involved rut I personally didn't find it.) There is no Pendant on the Mizzen Royal Yard but the Top Gallant has a Pendant for the Brace, the Standing part for this terminates on two Eye bolts in the center of the Mainmast Cross Tree Spreader. Well, that was the information that I gleaned from the Cutty Sark Society's Plans. With my build, I omitted Blocks that would have been used for Sails as mine does not have them and I believe that these Blocks were "UInshipped" when in port for any length of time. Braces/Pendants are a real "Cats Cradle" if you know wot I mean.... I guess you already know, Top down and Aft to Bow. Goes against the "Aft and Up" rule of thumb. More than happy to assist if I can, I've had a couple of sleeps since my Cutty build but something that's still very close to the Heart. :Looking good Chap!! Any help? Edited September 6, 2015 by hof00 baskerbosse and thomaslambo 2 Quote Completed Builds: A/L Bluenose II A/L Mare Nostrum Sergal/Mantua Cutty Sark A/L Pen Duick A/L Fulgaro Amati/Partworks 1/200 Bismarck A/L Sanson Link to comment Share on other sites More sharing options...
baskerbosse Posted September 7, 2015 Author Share #59 Posted September 7, 2015 Yes I know what you mean by Cat's Cradle. I kind of get it why Billings decided to omit most pendants.(The Billings plans only have pendants on the lower yards, plus for and main topsail yards.)I'm adding them for the mizzen topsail yards and the fore and main topgallant yards. Also, Billings have all the mizzen braces going through blocks in the pinrail next to the main shrouds, so I can't belay these on the fife rail anyway. I will probably belay all the main mast sheets on the fife rail.From what I have learnt, best sequence is probably, -first standing rigging, each step aft to front; Step the masts install lower stays install shrouds install topmast stays and corresponding backstaysinstall topmast stays and corresponding backstaysRig the bowsprit (tensioning this rigging improves tension in the whole rig)Then running rigging, remember, installing lower braces makes access to the pinrails harder. As does adding the ships boats; Starting with mizzen; halyards first, followed by lifts then sheets, -if installed (leave the lowest til later, they need to be held in place with the tacks, which again will block big hands from reaching the deck)Do the same for the main mast, because main and mizzen braces need to be rigged together.Start rigging main and mizzen braces from the top down, the lines for these go innermost, so it's easier that way. Lower sail sheets and tacks for mizzen and main go next followed by braces. (Probably time to install the boats now) Fore mast halyards can really go on at any time during running rigging of main and mizzen, but needs to be complete now. Lifts, sheets and braces go on, -same as for main and mizzen, top to bottom. Last thing to go on is probably fore tacks, tensioning the bowsprit if necessary. Anchors, details on the fore deck and anything else that may have been left off to protect it from being knocked during rigging.. /Peter thomaslambo 1 Quote Link to comment Share on other sites More sharing options...
hof00 Posted September 7, 2015 Share #60 Posted September 7, 2015 (edited) Hi Peter, In my opinion, Rig "Aft and Up" Standing/Running rigging but leave the Braces to very last. I found that the Braces were easiest "Aft to Stem" and top down. I started with all shrouds in place, Fore/Backstays installed, (Inc. Forestays on the Jib Boom), Halyards, Gaff topping Lifts, Vangs. Braces and Pendants very last. You will also probably discover that Billings have omitted Cap Stays for the Fore and Main and a few others as well. I can try and assist you further if you wish, happy to send you a little more "Hi Def" Photos, PM with your E-Mail. Are you still having an issue with the Halyards? Tell you what, your Fife Rails are pretty good!! (Mine only had eight holes, so had to double up on some Brace Belaying stuff.) I'll be having a look at your continued progress with interest. Cheers....HOF. Edited September 8, 2015 by hof00 Quote Completed Builds: A/L Bluenose II A/L Mare Nostrum Sergal/Mantua Cutty Sark A/L Pen Duick A/L Fulgaro Amati/Partworks 1/200 Bismarck A/L Sanson Link to comment Share on other sites More sharing options...

Recommended Posts
Join the conversation
You can post now and register later. If you have an account, sign in now to post with your account.