MBerg Posted July 3, 2024 #1 Posted July 3, 2024 (edited) On to my second build, and the second in the progressive Shipwright series by David Antscherl. I spent some time looking into this one a bit more first, and I find it particularly exciting. First, I have a designated spot to display it, and secondly, it's based on a boat with prints. As mentioned in my previous build, this hobby has given me the drive to build a full-sized boat. I bought the plans which will help in building the model, but is also something I think would be nice to build with my daughter when she's older. Having both a full sized and a scale model of the same boat makes this build all the more interesting! (Even if it's the better part of a decade before I start). I'm not too deep into the build, and I don't expect either my work or personal schedule to lighten up much until after September so progress won't be quick. On a positive note, I seem to be done with medical tests and appointments for the foreseeable future and have successfully navigated the slow recovery from my most recent procedure. Of course I hurt my neck and back on the weekend working in the yard which has been ruining my sleep. I seem to be having a rough few months. Log #1 The full plans designed by Simon Watts were only $30 (USD) and have already helped quickly clarify things 2 or 3 times before barely getting started. I have them up on a room divider close to my workstation. Three of the drawings were E sized and so far those are the only ones I've printed. After cleaning up the transom parts I needed a sturdy way to bevel the edges. I find the bevel guide a great idea and a very helpful addition to the kit. I used the build board from the dory, and some rubber cement to attach a piece of sandpaper to it. The biggest thing to note here was the incorrect instructions that specified to face the etch marks away when beveling the lower aft transom. However, pictures and other build logs (as well as the full sized drawings) determined this was wrong. This worked very well for the bow and lower aft transom; however, I was getting a rolling bevel on the upper aft transom so I switched to a sturdier block. This was possibly due to it's larger size and I also noticed a slight curve in the build board I was using to sand. Center-lines are marked and knees are glued. Another thing that the drawings helped clarify was the orientation of the transom knees. I also needed verification that the lower aft transom knee was going on the right piece since it appears shorter and doesn't appear to reach the top of that piece in the instruction pictures. The next time I get back to it, the glue will be dried, I will drill out the transom hole, bevel all the edges and complete the aft transom by attaching both pieces. Then it's just a matter of assembling the building board and planking will be right around the corner. The only thing confusing me tonight was the note on making two angled razor saw cuts in the lower transom. It's kind of just glossed over, but after looking at it about three times I think they're trying to tell me to make it the same angle as the bevel. The sole purpose being to separate the side bevels from the center tab. This makes far more sense than some of my first thoughts. I'll double check some other logs or comments here before going ahead with that to be sure. Thanks for looking, Matt Edited July 3, 2024 by MBerg Random photos placements fixed JacquesCousteau, tlevine, Paul Le Wol and 1 other 4 On the slip: On the drafting table: OcCre Polaris, Muscongus Bay lobster smack Completed: Lowell Grand Banks Dory, Norwegian sailing pram
Dan Poirier Posted July 3, 2024 #2 Posted July 3, 2024 I'm looking forward to seeing how this goes, especially when you have the plans for the real boat the model is based on. I'm just a little ahead of you on this model. Paul Le Wol and MBerg 2 Current projects: HM Armed Cutter Sherbourne Completed projects: Lowell Grand Banks Dory, Norwegian Sailing Pram, Muscongus Bay Lobster Smack
MBerg Posted July 6, 2024 Author #3 Posted July 6, 2024 (edited) Thanks Dan, I'll definitely be following yours along as I progress. It will be kind of neat to follow a current build log at the same time. So far I haven't looked at the full pram instructions, have just referred to the large drawings. I don't think they're helping me build any differently, but they're definitely quickening up the time when something needs clarified. I'm less so needing to use build logs to search through for small answers. I'm starting to really understand the appeal of scratch builds as well. I wish I had a nice way to bevel based on specific angles instead of using the etch lines because the drawings show the different degrees of each bevel along the transom edges. Log #2 Not enough progress for a full log I would say, but there are some things to mention and I'm fully ready to start planking so I figure it's a good 'break' in the steps having the next log start there. Due to my limited workspace and the need for the vice, I ended up clamping it to a table that we don't care about. It's not ideal, but is only about 10 feet from where I'm working so not terrible. Hole drilled in the bow transom/knee, and beveled. One thing that screwed me up a bit was the transom etch lines were fairly deep so I had to be careful. At times, it was hard to tell if I had gone past the line or not since it was still visible even when sanding it off at surface level (3rd picture down). Bevel lines still visible after sanding beyond them. I struggled with the aft transom a bit. I think the grain on the lower portion was throwing me off. It did not look straight when I glued it to the upper portion. I ended up taking it apart and re-gluing it, but again, It didn't look right. I ended up checking each side with calipers and only saw a difference of around 0.2 - 0.3 mm if I remember correctly. I could do this all day, I don't think I'm going to get better than that. Glued the transom knee and started beveling. I realized I couldn't quite get the right bevel because the knee was sitting a little too high on the transom. Unfortunately the glue had cured by the time I noticed. I contemplated whether or not it needed fixing, or if I could just fill the gap that will be there between the knee and keel plank when I get that far. And then @druxey's voice from my dory build popped into my head "if you aren't happy with something now, you won't be happy with it later!". Okay fine, I'll re-glue it, at least I get more de-bonding experience. After taking it off, I noticed the edge where it meets the transom was at a very slight angle. I re-sanded it flat and re-attached. I guess one of my lines on the transom was slightly off and it ended up crooked (I think it was slightly crooked the first time too) so I removed it for a second time! Since I had already beveled the top, I used the table to line up the bevel on the transom to the angle on the knee. This time it looked much better. Not perfect, but again - I could do this all day. I did think about leaving it off until after planking and then gluing it flat to the transom and keel board at the same time, but figured I better stick with the correct order. Now onto the build board. First I cut the forms out, but looks like I had the same laser cut issue that I had on the dory. The cuts don't line up on each side of the tab. Both forms has the same issue. Most logs comment on some intervention to improve or stabilize the build board. There are issues to overcome and some 'making it work' to do, but nothing too big and having a build board is far more useful than not having one! The transom holder slots are too loose, the form slots are way to tight. I filed down the slots, lightly sanded the forms, used tape to hold the aft transom, used some paper to tighten up the bow transom and got it all in working order without too much effort. Of course I got so focused on making everything fit solidly, I ended up gluing the bow holder in backwards. Best to fix that or may end up with a funny looking boat. The odd cuts on the bottom of the form leaves a weird gap, but it's consistent between both. I don't think it will be large enough to cause any issues. I just don't know if they're sitting at the right height, or if they should be a bit lower. Here's the board with seated transoms, ready for planking. I started messing around when I was taking pictures of the bow transom because I was amazed at how much detail it was picking up - like a digital magnifying glass (it turns on macro mode or something). Eventually it refocused right through the hole! I was amazed - the next picture is looking straight through it! 😅 Alright, that's enough screwing around. I'm excited for the hull to take shape as I begin planking, as well as nervous about it... I wonder if that ever goes away. Thanks for following. Matt Edited July 6, 2024 by MBerg Image keeps popping up at the end of the post. SiriusVoyager and JacquesCousteau 2 On the slip: On the drafting table: OcCre Polaris, Muscongus Bay lobster smack Completed: Lowell Grand Banks Dory, Norwegian sailing pram
JacquesCousteau Posted July 6, 2024 #4 Posted July 6, 2024 Very nice start, looking forward to following this build! Current Builds: Bateau de Lanveoc (1:32) [Scratch]; Muscongus Bay Lobster Smack (1:32) [Rescaled and modified from kit]; NRG Capstan (1:32) [Scratch] Completed Kit Builds: Model Shipways Dory (1:24); NRG Half-Hull (1:48); Midwest Peapod (1:14) Completed Scratch Builds: Xochimilco Trajinera (1:32); Juana y José Cross-Section (1:32); Chapala Canoa de Rancho (1:32); Lancha Chilota (1:32)
MBerg Posted July 21, 2024 Author #5 Posted July 21, 2024 Log #3 I've been working away as time allows, which I can't say is much at the moment. I was planning on posted a log after planking, but I'm running into issues, and will need to work through them or figure out whats going on before I continue. Bottom planks and the keel plank were worked at the same time. Wet bending them similar to how it was done on the dory. This worked okay, but made it difficult to over-bend to help keep things flat on the forms. When bending the keel plank, I added spacers underneath to help it over form. After gluing the bottom planks, I noticed quite a twist between the bow transom and the first form. I found it a little odd that this happened since everything should be sitting fairly flat. Now that I'm thinking about it, the bow ends of both bottom planks needed to be pinched together to touch. Something might be slightly off with these planks... or the forms. When gluing the keel plank, I used clamps to remove the twist. I also applied some water to assist. This worked quite well. I remembered that the notch for the keel plank on the aft transom seemed slightly short, and I figured the knee wouldn't be sitting flush against the keel plank. Other build logs confirmed the same issue. Also, the aft transom was bending down with the clamping pressure which made it drift even further away. I wedged a block while gluing to encourage it not to drop too far. Once planking is done, I'll either remove the knee and lower it or close the gap in with some filler or scrap. Likely the latter. When Assembling the transom, I had a mind to leave the knee off and apply it flush with the transom and keep plank after gluing those together. I feel like I should have done that. The best scenario would be to have it sit at the right spot off the bat - being able to glue it to the keel plank now would help support the transom to resist the weight of bands and clamping. Almost 2 weeks passed until I really started tackling the garboard planks. JacquesCousteau and Ryland Craze 2 On the slip: On the drafting table: OcCre Polaris, Muscongus Bay lobster smack Completed: Lowell Grand Banks Dory, Norwegian sailing pram
MBerg Posted July 21, 2024 Author #6 Posted July 21, 2024 (edited) I've been checking a lot of build logs this week and trying to get some detailed pictures of the planking on the bow end. Unfortunately, most build logs seem to fly through the planking before posting pictures and don't have many step-by-step photos. The first thing I'm noticing and has been bugging me since I needed to pinch the bottom planks together is that they don't go all the way to the edges of the flat spot on the transom. There are three more planks, and exactly three more flat planes/angles for those planks to attach. I know there's an overlap on the bevel, but I'm a little confused about how the garboard will cover that flat space, fill the void on the top and overlap the bottom plank. Ignore the twist in the planks. I though I screwed that up when looking at the picture afterwards, but the transom isn't fully seated in this pic. I get super confused at this point since when I took the bottom boards off, I marked the sheets they came from as "Port" and "Starboard". When I take the garboard planks off, the laser etching is on the wrong side. I scour through more build logs trying to make sense of it. Maybe the sheets don't follow the same side? Maybe the etch lines are on the wrong side? I come to the conclusion that I shouldn't have marked each sheet and the bottom planks are on opposite sheets. From now on I'll just follow the bevel etching to determine which side they should go on. All the while I'm thinking through this, I keep checking the garboard planks by dry bending them slightly. No matter which way I put them on, they don't seem like they're going to sit right. It appears like I'm going to end up with a huge gap at the aft end since they taper away from the bottom plank. I push my concerns aside - Once I finish prepping them I can wet bend and see where we stand. I finish beveling and get some rabbet practice in with a chisel blade: I thought I had a picture of it from the side. This didn't go too great, it ended up more wavy than sloping. The chisel just kept wanting to bite deeper at some spots. One attempt and I was sold. Scraping, filing and sanding is the way to go. Finishing the gains, I soak one plank and wet bend it over the hull. I add loads of clamps to keep it at the correct overlap while working my way aft. Not surprised, there's a gap at the transom. I spend some time forcing, reclamping, rebending. It looks good, then I notice the middle section overlaps way more than it should, and whenever I try to hold it all in the right place, the whole plank twists and bows to keep the correct overlaps which lifts it right off the bottom planks and creates huge gaps. After messing with this for a bit, and starting from the aft working towards the bow, I realize the bow end kind of sits where it looks like it should on the bow transom. Maybe my earlier concern had some merit, but I'm not sold this is the problem yet. To give myself an idea, I overlap the middle to where its supposed to be and let the fore and aft ends lay naturally without forcing anything. Big gaps on both ends. Now I need to spend some time thinking, and double checking everything. Did I do something wrong? Is there an issue with the kit? Is the bad laser cut on the forms causing an issue? Am I just supposed to force this all together and clamp everything down hoping the glue hold well enough? Up until now, I've been avoiding posting not to use what little time I have, but now I need to take a step back. Hopefully this is something simple. If anyone is familiar with this kit, I'd appreciate some input. Whether on if you came across a similar issue, or noticed planks were etched on the wrong side, did the bottom planks cover the whole top of the bow transom? Edited July 21, 2024 by MBerg robert952, Dan Poirier, JacquesCousteau and 2 others 5 On the slip: On the drafting table: OcCre Polaris, Muscongus Bay lobster smack Completed: Lowell Grand Banks Dory, Norwegian sailing pram
Dan Poirier Posted July 21, 2024 #7 Posted July 21, 2024 (edited) I wish I had paid as much detailed attention during the planking on this model as you are doing! Mainly to keep the two sides symmetrical. Would more heating and prebending maybe help the planks fit better? Edited July 21, 2024 by Dan Poirier Typo robert952, MBerg and SiriusVoyager 3 Current projects: HM Armed Cutter Sherbourne Completed projects: Lowell Grand Banks Dory, Norwegian Sailing Pram, Muscongus Bay Lobster Smack
SiriusVoyager Posted July 21, 2024 #8 Posted July 21, 2024 I didn’t make a build log for the pram unfortunately and it’s been over 9 months since I would have been at this step. I seem to recall having a similar issue with the planks not quite fitting on the bow. My thinking is this. The planks can’t really be made larger, but the bow transom can be made smaller. I would fine tune the edges of the bow transom to fix the planks. As far as the glue, it should hold. When you use water to bend the wood, do you use hot water? My technique was to lay the planks in a glass baking sheet pour boiling water of them. After a 5-10 minutes I would clamp them across large sauce pan to get a nice permanent bend in them prior to attaching to the rest of the build. MBerg, robert952 and Ryland Craze 3 - Eric Current build: Occre Cala Esmerelda (as the Santa Eulalia) Finished: MS Norwegian Sailing Pram, MS Lowell Grand Banks Dory, MS Muscongus bay lobster smack, OcCre Palamos, AL San Francisco Cross Section, AL Sultan Arab Dhow
MBerg Posted July 21, 2024 Author #9 Posted July 21, 2024 4 hours ago, Dan Poirier said: Would more heating and prebending maybe help the planks fit better? It very well may, and is worth a shot. I couldn't try a few other bending methods. Thanks for the suggestion. @SiriusVoyager interesting idea about modifying the bow transom a bit. I did think of flattening that one joint between the top plane and the garboard plank plane. Something like that may help. I did realize the instructions say to refine the bottom plank bevels to match the forms before adding the garboard, but taking off more material sounds counter productive at this point and even so, wouldn't solve the problem. I do use hot water, not boiling but I soak for five minutes or so in the hottest tap water, it's worked fine until now. It wouldn't hurt to try something a bit more aggressive before trying to bend on the forms. Since I already tried bending on them, I should have the general shape. I may have to give the sauce pan idea a try. Thank you both. SiriusVoyager, Ryland Craze and Knocklouder 3 On the slip: On the drafting table: OcCre Polaris, Muscongus Bay lobster smack Completed: Lowell Grand Banks Dory, Norwegian sailing pram
druxey Posted July 21, 2024 #10 Posted July 21, 2024 Please check if you have the correct plank for that situation first! MBerg, Ryland Craze and SiriusVoyager 3 Be sure to sign up for an epic Nelson/Trafalgar project if you would like to see it made into a TV series http://trafalgar.tv
MBerg Posted July 22, 2024 Author #11 Posted July 22, 2024 7 hours ago, druxey said: Please check if you have the correct plank for that situation first! Sage advice! I am most definitely not rushing it at this point. Putting in lots of thought before I move ahead. I've triple confirmed that this is the plank labelled garboard. As an experiment I checked the fitting if I was to swap the ones labeled 'garboard' and 'second'. It seems like the second plank would fit farm better now, but the garboard would fit even worse next. I'm 98% sure this is the right plank on the right side. I had a bit of fun tonight. Before going ahead with planking, I thought of debonding the aft transom knee and shifting it to make tight contact with the keel plank now, instead of later. I hadn't decided yet, but I did notice the bow transom kept lifting out of the holder partially. As per instructions, I wet the planks and clamped them down again to help maintain the overall shape. I guess after the pressure of my messing around with the garboard earlier, aft transom knee not being glued on, and some bad angles on the aft transom not sitting fully flush with the bottom planks, the whole thing popped right off the planks! An opportunity has presented itself! After staring at it for a minute and noticing the bad angle on the transom, I slid it out the side, cleaned off the old glue, sanded the angle a bit better, and decided it was a perfect time to add a filler to bridge the gap between the knee and keel plank. I glued a small strip I had laying around onto the knee and slid it back in then glued the whole thing back together. Ignore all the frayed bits of wood - you can clearly see the gap, the strip of wood is in the center and runs from the end of the transom to the far end of the knee. It's slightly visible from this angle, but mostly in the shadows since it's a bit thinner than the knee - you can see it best at the tip on the right side. The quality of the close up pictures seems to be far worse on my phone after a camera update a while back. Similar to when gluing the planks on the first time, I stuck a block underneath to support it while it dries. I'm glad this happened. This fix will vastly improve the strength of this whole section while I continue working on planking. I knew this needed to be addressed, but I didn't realize how bad the angle of the transom was. I suspect it bent while gluing the first time causing it to come apart slightly on the inner side. Once the planking is finished I will use filler around the knee and remaining gap between the keel plank and transom. SiriusVoyager, druxey, Ryland Craze and 1 other 4 On the slip: On the drafting table: OcCre Polaris, Muscongus Bay lobster smack Completed: Lowell Grand Banks Dory, Norwegian sailing pram
MBerg Posted July 22, 2024 Author #12 Posted July 22, 2024 (edited) I might be on to something. Laying the plank at a greater angle looks like it will fit better. I can't confirm this right now because the current assembly is all banded, clamped and drying. I noticed the port side bottom plank doesn't come as far out on the aft-most form as it does on the starboard side. I think I will leave the port side for now, and switch gears to the starboard side. If that side fits better, then maybe I can figure out a slight modification to the port side that will help. 🤞 Edited July 22, 2024 by MBerg Ryland Craze 1 On the slip: On the drafting table: OcCre Polaris, Muscongus Bay lobster smack Completed: Lowell Grand Banks Dory, Norwegian sailing pram
MBerg Posted July 25, 2024 Author #13 Posted July 25, 2024 Alright, I basically got it figured out. I chalked it up to just a very weird fit and maybe not the best shape for these planks. It was easier to fit the starboard side than the port. I found that when I held the bow and stern ends in the correct positions, the middle section was lifted up quite high, but I could sort of fold it over onto the bottom planks. I still found that it overlapped the bottom planks in the middle a little more than it should, but it was manageable. Before adding the garboard planks, the instructions have you bevel the bottom planks to match the angle on the forms. I found this odd since the planks are laser etched with specific instructions on how to bevel them. Going back and changing the bevel sounds counter intuitive. This is what I did: Adjusted the bottom plank bevel a little bit more which also widened the bevel in the middle. Cleaned up the angles on the bow transom slightly. Once I sort of figured out what I needed to do, I encouraged the bending and dry fit them about 600 times before I was confident enough I could start gluing without too much trouble. Instructions say to glue it in sections starting at the bow, use each form as a stopping point and let it cure. I didn't want to risk losing that flexibility. I spent some time planning out how I could glue this. Ultimately, I glued from the bow to the first form, and then once it had a couple minutes to cure and was clamped very tightly, I glued from the stern all the way to the first form. This let me control where the board would end up on the ends, which I feel is more important than the middle. I'm convinced that my perfectionism played a significant role in my struggle here, but in the end I'm glad I took the extra time to work through it and I'll be much happier with the result than had I just tried to power through it immediately. Hopefully the rest of the planking goes much smoother. I'll be on a business trip next week so we'll see how far I get. SiriusVoyager, Ryland Craze, MajorChaos and 3 others 6 On the slip: On the drafting table: OcCre Polaris, Muscongus Bay lobster smack Completed: Lowell Grand Banks Dory, Norwegian sailing pram
MBerg Posted August 11, 2024 Author #14 Posted August 11, 2024 (edited) Log #4 (yes, I'm still here) I'm just getting over a bout of covid that I picked up on my business trip. I figured it was a good time for an update while I wait for the port sheer strake to set. There aren't many build logs that show much in the way of planking. Since this is still a beginner series, I'll do my best to incorporate detail and reference photos with what I've done in the hopes that it helps others. I didn't mention this earlier, but I encountered the same issue with the laser cutting on the port/starboard plank sheets as I did with the dory. The problem is small but still requires attention. The planks weren't exactly the same wide, and I noticed that the laser marks for the bevel were off by quite a bit when placed back to back. Since these marks act as angle guides, it caused some misalignment until I realized the issue. I'm uncertain whether to follow the steeper or flatter bevel, but in the end, I found it best to give the planks a rough bevel and then refine each side's bevel on the build board after attaching. The instructions suggested specific scale sizes for the rabbets, but I found it best to ignore those and instead dry fit the pieces, then mark and sand/cut as necessary. After marking for the rabbets, I made slight cuts with a sharp blade, did some minor cutting with the knife, and used a heavier-duty X-Acto knife as a scraper. The majority of the rabbet shaping was then done with a metal file. After getting the rough shape, I started with the corner of the file to make a ledge length-wise, filed the edge of the plank to gauge the depth, then went to town with the file with various finger pressure. Starting the first file mark. (Increased angle for clarity) For the majority of the planking I used all my metal clamps and some clothes pins in tight spots. Elastics and clamps worked well at the transoms. I spent a lot of time dry fitting, sometimes even holding a plank in place then holding the next one. All the while keeping in mind where I want the final plank to lines to end up. For all the bending, I soaked the planks for 5 minutes in plastic container of hot water with the lid closed. Afterward, I clamped them to the forms and left them to dry for a day. This worked well and when a twist was needed, the planks conformed as required. I used tape to hold the transoms down and level. I was constantly checking for twists, rocks and for the hull raising off the forms: Some rough marks for where my planks will likely fall: It's shaping up nicely: Bending the sheer planks: The final planking line is going to be a bit high on the stern. It's not a huge issue, as others have done, I will draw a new cut line. The only slightly annoying part is that the current laser cut is a bit deep, so I might need to use some filler to avoid a visible line on the finished hull. As Skibee mentioned in his log, a note regarding the final plank-to-lines alignment would be helpful since it’s not immediately clear when starting. I also feel that the plank shapes and maybe the laser cut bevels could use a revision to be a little more beginner friendly. The glue is drying now. This plank was by far the trickiest to clamp down. I started by gluing from the bow to the first form section as I did before, using finger clamps for about 5 minutes before adding the elastic and clamp. Then, I continued gluing along to the second form, aligning the stern end to guide the plank. This was the only spot where the clamps could be used easily. Once clamped, I applied glue down the rest of the plank and used another 5 minutes of finger pressure before securing it with a couple of clamps and adding the elastic. The overlap between the two planks is looking really good in all areas except between the bow and first form. The plank is running a little high in that spot which is creating a cavity. I'm contemplating whether or not to stick a bit of filler in there to close it up before painting. To be clear, this isn't a gap between the boards, they are contacting across the whole bevel, the final plank is just a little wide in this area and sticks out 'below' the other. Three options I'm considering - opinions appreciated. Leave it alone - it's not that bad, though it does look a little odd, it won't be noticeable on the display stand. Fill it with a bit of filler prior to painting. Sand it down narrowing the plank in that region. On another note, a handy tip I read elsewhere is to use a sculpting tool or dental tools to scrape away the rubbery glue after it has cured for a couple of minutes. It comes off nicely and makes cleanup afterward much easier—a trick I wish I had used on my dory. It's rewarding to see the improvement in quality as my skills increase. I haven't removed it from the build board so once I get the starboard side plank on, I'm excited to do that and check out the full shape. Thanks for following Matt Edited August 11, 2024 by MBerg Clarity & grammar JacquesCousteau, Ryland Craze, yvesvidal and 5 others 8 On the slip: On the drafting table: OcCre Polaris, Muscongus Bay lobster smack Completed: Lowell Grand Banks Dory, Norwegian sailing pram
MBerg Posted August 15, 2024 Author #15 Posted August 15, 2024 (edited) Log #5 I'll start posting as a I get the chance, as opposed to waiting for logical breaks in the project. This may increase the number of logs, but it'll be easier on my end. The planking is complete, the outside of the hull looked clean from removing glue as I planked, but the inside of the hull had a few spots to pay clean up. As usual, some water to soften and scraping it off worked wonders. I found this a lot easier than when working on the dory. I was a little skeptical and inpatient when trying to clean glue on the dory, but this time I took the time and waiting until it got nice and soft in order to be scraped off. Having sculpting and dental tools now was a huge help as well. Sanded and cleaned up both transoms, added filler, and sanded again. There are some glue spots which hopefully don't show through the paint job too badly. When I ordered this and the smack I got the 3 boat combo which came with some primer, I didn't prime the dory at all so if I use it here, it'll be interesting to see the differences. In the previous log I noticed the final planking will be a little high. Regardless, I'm happy that they ended up being even which I feel is far more important. The instructions state to sand the outer edges of the bilge keels, checking the full size print out of the Simon Watts plans shows the edges and bottoms smoothed before adding on brass strips. I tried to replicate something similar. I may need to also attempt painting on some rub strips. On to the daggerboard case. I started by cleaning up the edges, but I shouldn't have done this, as it caused some of them to go slightly out of square. In hindsight, I should have assembled it first and then cleaned up the edges. Fortunately, this didn't create any major issues as I was able to assemble the case and clean it up afterward. I plan to either make or buy something that will help me sand bevels and square profiles more accurately. Two issues came up here: The case was slightly too small for the daggerboard. I'm not sure if this is intended and am supposed to sand down the daggerboard, but this is likely what will need to happen. The instructions say nothing about test fitting at this stage. The slot in the keel plank is far too large. I checked measurements on the full pram blueprints and none of them seemed to add up properly so I'm not sure what happened with the design here. Skibee mentioned a similar problem In his log. I went with the same fix - add some strips of wood to fill the gap. I cut some small pieces off of 1/32" x 1/16" strips, ended up needing to sand one slightly thinner, glued them in and slid the case while they dry. A magnifier with light that I received the same day made working with these tiny pieces far easier. Next, I'll slide the daggerboard out, carefully sand down the inside edges of the filler pieces, then glue the daggerboard down and sand all the bottom pieces flush at once. Edited August 15, 2024 by MBerg yvesvidal, robert952, druxey and 4 others 7 On the slip: On the drafting table: OcCre Polaris, Muscongus Bay lobster smack Completed: Lowell Grand Banks Dory, Norwegian sailing pram
Dan Poirier Posted August 16, 2024 #16 Posted August 16, 2024 I had the same issue with the slot being longer than it needed to be for the daggerboard. I also had to sand the daggerboard thinner before it would slip easily up and down in the box. I think I even did a little sanding inside the box (with a long thin sanding stick) to make a little more room. MBerg 1 Current projects: HM Armed Cutter Sherbourne Completed projects: Lowell Grand Banks Dory, Norwegian Sailing Pram, Muscongus Bay Lobster Smack
SiriusVoyager Posted August 16, 2024 #17 Posted August 16, 2024 An issue to consider down the road. You may sand to the point that the dagger board fits into the case, but after a couple coats of paint it will once again be just a bit too thick. I had to repaint my dagger board after putting it in the box because the paint became very scuffed. It is essentially permanently installed now. robert952 and MBerg 2 - Eric Current build: Occre Cala Esmerelda (as the Santa Eulalia) Finished: MS Norwegian Sailing Pram, MS Lowell Grand Banks Dory, MS Muscongus bay lobster smack, OcCre Palamos, AL San Francisco Cross Section, AL Sultan Arab Dhow
MBerg Posted August 16, 2024 Author #18 Posted August 16, 2024 16 hours ago, SiriusVoyager said: after a couple coats of paint it will once again be just a bit too thick Ah! great point. I'll keep this in mind when the time comes to fit. Thinking it would be best to shape the board, and give it a loose fit, paint it and then make the final adjustments inside the case to allow room. Thanks for mentioning this, I may have completely overlooked it otherwise. robert952 and SiriusVoyager 2 On the slip: On the drafting table: OcCre Polaris, Muscongus Bay lobster smack Completed: Lowell Grand Banks Dory, Norwegian sailing pram
yvesvidal Posted August 16, 2024 #19 Posted August 16, 2024 Very, very clean build. You are a perfectionist. A pleasure to watch. Yves robert952 and MBerg 2
MBerg Posted August 27, 2024 Author #20 Posted August 27, 2024 Appreciate the comments. Log #6 Frames, gunwales, quarter knees. Progress has be slow, but it's been progress. After cleaning up the fillers for the dagger box, I glued it in place and checked the center with the thwart. Installed the frames. This was fairly straight forward, though a bit tedious. Needing to bevel them at the correct angles to ensure they sit vertical as well as making sure they conform to the hull shape. I mainly used a piece of 220 grit cemented to a flat board on the desk. Held the angle and sanded it down, checking often. Gunwales went in next. I wet them and clamped on the outside to bend. After drying I let the aft end stick out a bit and sanded it at the correct angle using the transom as a guide. Then I removed the clamps and set it inside the hull, only needing to make minor tweaks to the bevel. The first one went on per the instructions - Glued the first inch then meticulously shaped the bow end until it fit snug. Then glued the rest. This has been recommended before, and although it's sometimes necessary, I'm not a big fan of gluing bits at a time since it leaves gaps where there is no glue. It doesn't cause any visual or structural issue, but it bugs me for whatever reason. The second went went on a bit differently. Instead of gluing the first bit, I clamped it in placed, trimmed and sanded the bow end down, then applied an even continuous layer of glue across the whole gunwale at once and clamped it in place. Like a glove The quarter knees were straightforward, however after placing them, I do wish I had've marked the bow knees to ensure they lined up better. I just eyeballed each one separately. In the end, they weren't quite even. Finally, I've started on the thwart supports... I'm finding the instructions not particularly clear, and after seating the first pair, I'm thinking they may have been supplied oversized and need to be cut down. The instructions only state, these may need to be 'trimmed to fit your model' - that to mean isn't particularly clear as they need sanding and beveling to fit the hull like the frames did. After gluing them on, I went to install the second pair (the aft pair for the forward thwart) and they seem like the supports will be far to high in comparison to where the first set sits. Before working on them, I checked the full sized pram drawings (which I should have done even earlier) and noticed they supports generally sit above the bottom of the sheer. I checked other build logs as well and it seems there's a range of where these fall, but in general it seems the second pair end up getting place higher than the first pair, giving the forward thwart a forward slant. Checking the drawings, this is actually opposite that the boats designer intended. The drawings show an aft slant on the forward thwart. Below is a cross section view of the forward thwart and supports. Here is where mine is currently sitting. The thwart is probably a little high, but not too far off from where it should be. However, it has a ways to go before contacting the support. A cross section of the hull clearly showing where the forward thwart should fall. It took some time and patience to figure out what was going on here, but in the end, I'm pretty certain I was meant to trim the top of the support in order to raise it. I feel the instructions should be far clearer what's expected here. I won't be removing the first set and reshaping them as I would have to reshape the entire thing to contour the hull and I fear I'd be taking too much material off. Also, I don't think it will affect the look of the finished model. Had the first pair been higher, I likely would've had the backward lean on the thwart shown in the blueprints, but since it's already so low in the front, I'll aim for level. Once I get the rest of these in, and the floor board cleats, I will happily finish shaping the transoms to make this look a little less ridiculous, and a lot more like a usual boat. Thanks for looking. SiriusVoyager, JacquesCousteau, druxey and 5 others 8 On the slip: On the drafting table: OcCre Polaris, Muscongus Bay lobster smack Completed: Lowell Grand Banks Dory, Norwegian sailing pram
Dan Poirier Posted August 27, 2024 #21 Posted August 27, 2024 That hull looks so good! It took me two tries to get my hull even mostly straight. As I recall, I had to make some adjustments too in order to get the thwarts to sit properly. robert952 and MBerg 2 Current projects: HM Armed Cutter Sherbourne Completed projects: Lowell Grand Banks Dory, Norwegian Sailing Pram, Muscongus Bay Lobster Smack
MBerg Posted August 27, 2024 Author #22 Posted August 27, 2024 (edited) Thank you! Yes, it looks like the thwarts will need quite a bit of sanding to fit as well. Especially the forward thwart I'll have sitting lower than normal. I was thinking of maybe fitting a small filler or 'rail' across the supports to raise the thwart a little bit. I may cut some pieces out and see how this looks. Luckily I had a range of smile metal files show up a week or two ago and one of them pretty sell fits perfectly into the notch for the forward support so filing that down has been simple. P.S. The hull on your smack looks fantastic. I'm looking forward to seeing how a pob will differ from the pof these last two have been. Edited August 27, 2024 by MBerg Bryan Woods 1 On the slip: On the drafting table: OcCre Polaris, Muscongus Bay lobster smack Completed: Lowell Grand Banks Dory, Norwegian sailing pram
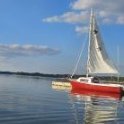
MBerg Posted September 6, 2024 Author #23 Posted September 6, 2024 Log #7 After some thought, I decided to place the second set of forward supports quite a bit higher than the first set. It was time to get a little creative, even at the risk of things looking a bit messy. However, since the end result would be hidden under a thwart, I felt it was worth the risk. I needed to get the first and second set of supports on the same level. First, I had to raise the supporting area on the first set of frames. I carefully cut and glued in some small pieces. Once the glue dried, I used some wood filler to blend them in with the existing support. After the filler dried, I sanded it down as best I could to make the two pieces look like one. I think it worked out quite well, and once the paint is applied, it may not even be noticeable. In the meantime, I cleaned up and reshaped the rest of the supports. Aside from all the other distractions that summer brings, I hit a bit of a mental block with these thwart frames, which took me a while to get through. They were perfectly shaped to the hull, but only in a position that left them far too high, so I ended up needing to reshape every contour. I feel it would've been better to make these from scratch, but my wood supply, skills, tools, and 'workshop' aren't at that level yet. Nevertheless, I worked through it and completed this portion. I also spent some extra time rough-shaping some of the thwarts to help line up the height and evenness. This took quite a bit of time but will save me a ton of time once I'm ready for the final fitting. The floorboard cleats are bending as I type this. Once I trim and fit them, I'll start shaping the transoms. While I was pulling the wood for these, I realized I hadn't done an inventory. So, I took the extra time to inventory both the pram and the smack. I'm missing both of the 3/32" square pieces from the pram. I'll order some from ME; worst-case scenario, if I need them before they show up, I can steal them from the smack. P.S. I decided to learn how to sail and bought a cheap, old boat - I'll post a picture in a more appropriate area. 🙃 yvesvidal, SiriusVoyager, GGibson and 6 others 9 On the slip: On the drafting table: OcCre Polaris, Muscongus Bay lobster smack Completed: Lowell Grand Banks Dory, Norwegian sailing pram
Dan Poirier Posted September 6, 2024 #24 Posted September 6, 2024 If you contact support at ME and let them know parts were missing from your kit, they'll send them to you. I like how you're working out how to make things work. GGibson, robert952 and MBerg 3 Current projects: HM Armed Cutter Sherbourne Completed projects: Lowell Grand Banks Dory, Norwegian Sailing Pram, Muscongus Bay Lobster Smack
GGibson Posted September 6, 2024 #25 Posted September 6, 2024 3 hours ago, MBerg said: P.S. I decided to learn how to sail and bought a cheap, old boat - I'll post a picture in a more appropriate area. 🙃 Nice work on your Sailing Pram, and some good adjustments on the fly. And... this is your build log, and your new actual sailing vessel has a lot to do with your understanding of what you have in your model shipyard. Post your picture here! 👍🏆 Carry on! Doreltomin and robert952 2 Gregg Current Projects: Completed Projects: Waiting for Shipyard Clearance: USS Constitution 1:76.8 - Model Shipways Norwegian Sailing Pram 1:12 - Model Shipways Yacht America Schooner 1851 1:64 - Model Shipways Muscongus Bay Lobster Smack 1:24 - Model Shipways RMS Titanic 1:300 - OcCre (May now never get to it) H.M. Schooner Ballahoo 1:64 - Caldercraft Bluenose 1921 1:64 - Model Shipways Santa Maria Caravelle 1:48 - Ships of Pavel Nikitin
MBerg Posted September 6, 2024 Author #26 Posted September 6, 2024 7 hours ago, GGibson said: Post your picture here! Well when you put it that way! 1975 Siren 17 Needs a bit of cleaning up, but in good shape. Now my need to learn rigging and nautical terms has accelerated - Good thing I have two hobbies revolving around the same! Altduck, GGibson, Bryan Woods and 3 others 5 1 On the slip: On the drafting table: OcCre Polaris, Muscongus Bay lobster smack Completed: Lowell Grand Banks Dory, Norwegian sailing pram
Jim M Posted September 6, 2024 #27 Posted September 6, 2024 Wow thank you for explaining that rabbet. I read the documentation two nights ago and i was confused. Secondly I really like your idea using that block as a brace. Great build... MBerg and robert952 2 In progress Lady Eleanor by JIm M - Vanguard Models - 1:64 On hold Norwegian Sailing Pram - Model Shipways 18th Century Merchant half hull planking - NRG On the shelf Muscongus Bay Lobster Smack - Model Shipways Peterborough Canoe - Midwest Products/Model Shipways Batelina - MarisStella Junco China - Disarmodel Completed Model Shipways Lowell Grand Banks Grand Bank Dory - Midwest Products/Model Shipways
MBerg Posted September 6, 2024 Author #28 Posted September 6, 2024 3 hours ago, Jim M said: I read the documentation two nights ago and i was confused. Not the clearest instructions for a beginner build. Sometimes takes trial and error or a lot of pondering face until the ah ha moment. I'm glad it's been helpful, and happy to do my best to answer any other questions. robert952 1 On the slip: On the drafting table: OcCre Polaris, Muscongus Bay lobster smack Completed: Lowell Grand Banks Dory, Norwegian sailing pram
Jim M Posted September 6, 2024 #29 Posted September 6, 2024 Agreed, I am found that same issue with the Dory. I am currently working on another Dory by Midwest, and it is much more clear. Things are making more sense now. MBerg and robert952 2 In progress Lady Eleanor by JIm M - Vanguard Models - 1:64 On hold Norwegian Sailing Pram - Model Shipways 18th Century Merchant half hull planking - NRG On the shelf Muscongus Bay Lobster Smack - Model Shipways Peterborough Canoe - Midwest Products/Model Shipways Batelina - MarisStella Junco China - Disarmodel Completed Model Shipways Lowell Grand Banks Grand Bank Dory - Midwest Products/Model Shipways
MBerg Posted October 15, 2024 Author #30 Posted October 15, 2024 (edited) It's been a while so I figure I might as well post an update on where I am. It kind of looks like I bought a sailboat and took off! That is not the case. I ended up spraining my thumb at a golf tournament (who said golf wasn't a sport?), while waiting for that to heal, I had a week long business trip, and now that it's slowly getting better, we were just slapped with a nasty bug for the past week and a half. I'm still battling with some serious chest congestion so needless to say I don't want to wear a respirator or do anything that conjures up sawdust to be inhaled. I have made a small amount of progress both before I injured my thumb and before I got sick. The thumb is still not 100%, but it's close enough I should be able to keep moving along carefully once these lungs clear up. This will be a short log, but will bring up to where I am today. Log #8 - Floor cleats, mast step, chainplate slots Floors cleats are pretty straightforward. Wet them, bent, cut down, then glued in place: Next, the mast step. It seems people are receiving different version of this, but mine had a hole in one piece, with the second being solid (which is what the instructions call for). I was incredibly careless when gluing it together. I clamped the sides to even them out, and then clamped it long ways to achieve the same. This was a bad idea. The force of the clamp snapped both pieces right in half. It wasn't dry at all yet so I quickly added a bit of glue on the broken ends and fit it back together clamping it to the table so it dries flat. The instructions say to glue it in place and then sand the ends down. I couldn't do this since it was shorter than the frames. Either: 1. The piece as provided is short, or 2. The frames aren't in the right spot. I did not use the instruction book since I already know it's printed out of scale, but I used the PDF download and printed scale from that to place them. So they should be correct. In any case, I don't see that either problem will affect the end result too much. Chainplate slots weren't too bad, but they were tedious. I marked out the location, drilled a hole as per instructions, but I couldn't simply 'poke' the saw blade through as the instructions imply. I had to kind of repeatedly attack it with the saw, a brooch and an X-Acto. Eventually I got the saw through and wow, those blades I got are super dull, they only cut on one stroke and not very well. Got it done eventually. That's all for the build now. I have a driveway dumpster coming this week and will be doing a serious garage and workshop clean out. I may take a 'break' to move the shipyard out into one of those spaces as a larger, more permanent setup. That, or I'll wait until I finish this thing and start fresh out there with the smack. Here's some shots of the lovely aurora we had the other evening: Edited October 15, 2024 by MBerg robert952, yvesvidal, Altduck and 3 others 6 On the slip: On the drafting table: OcCre Polaris, Muscongus Bay lobster smack Completed: Lowell Grand Banks Dory, Norwegian sailing pram

Recommended Posts
Create an account or sign in to comment
You need to be a member in order to leave a comment
Create an account
Sign up for a new account in our community. It's easy!
Register a new accountSign in
Already have an account? Sign in here.
Sign In Now