Search the Community
Showing results for tags 'Echo'.
Found 18 results
-
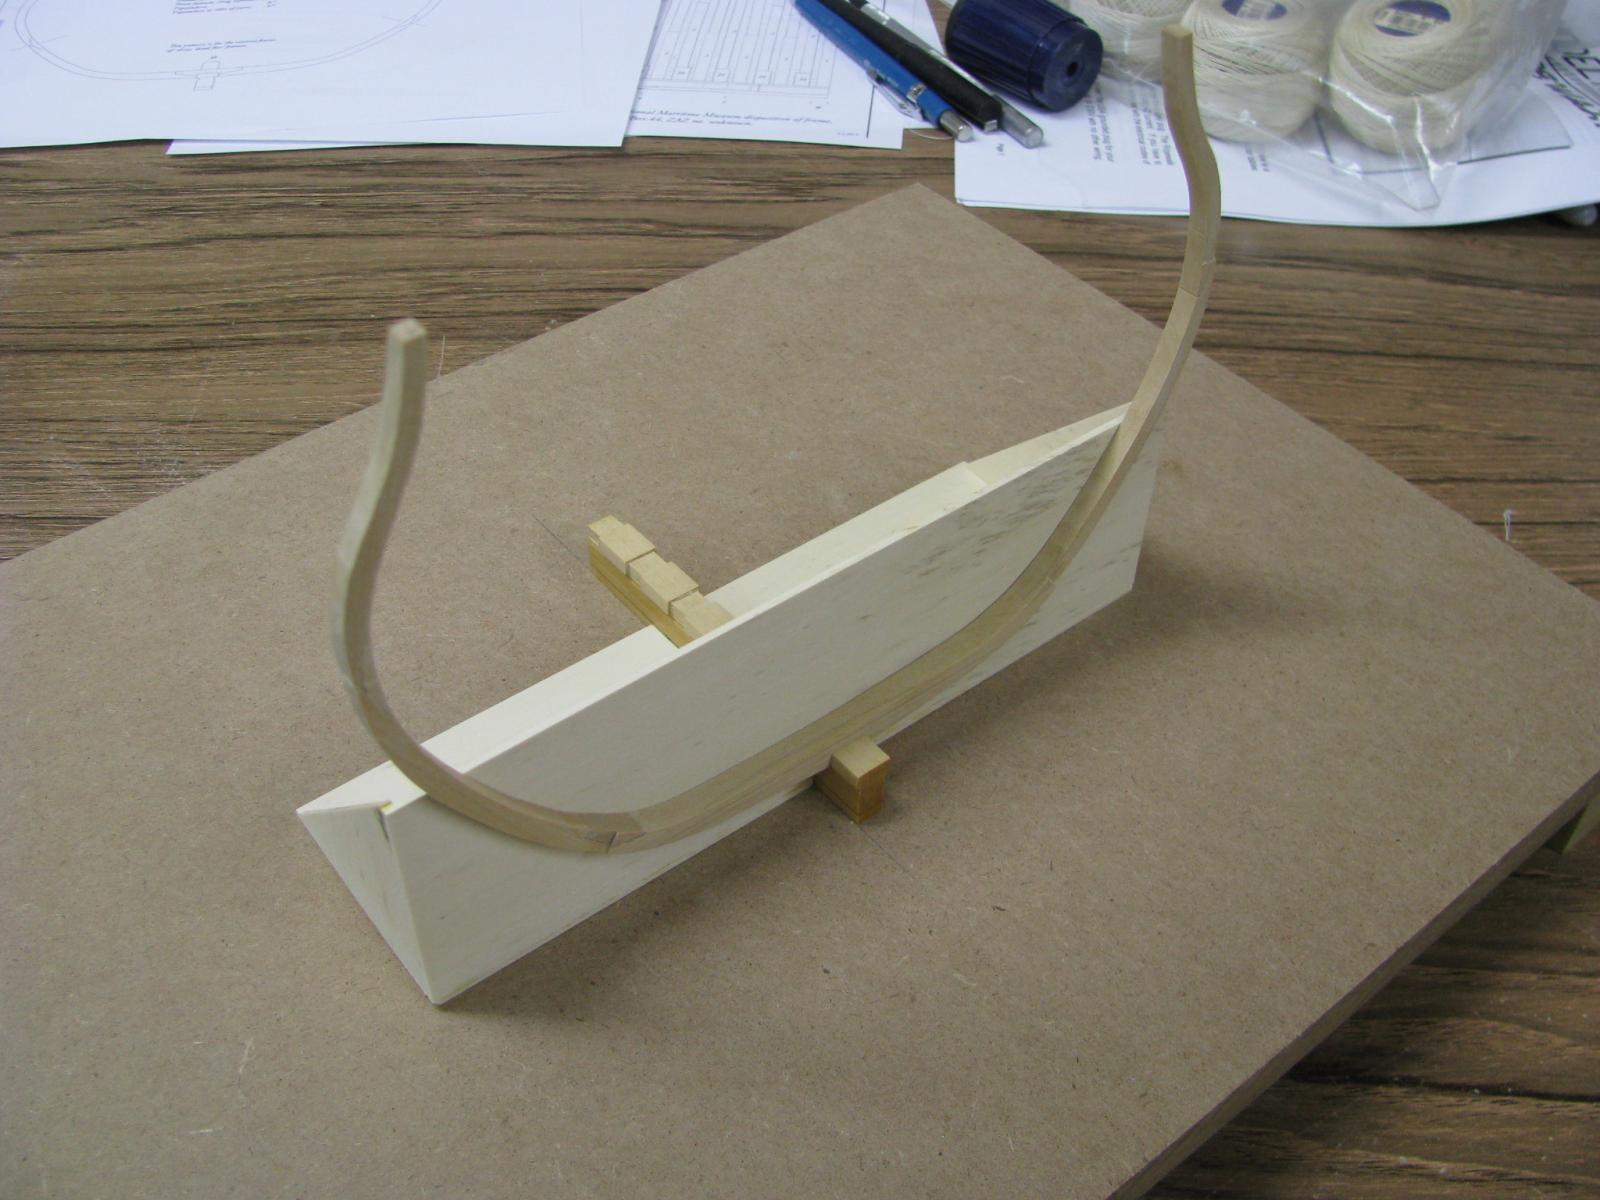
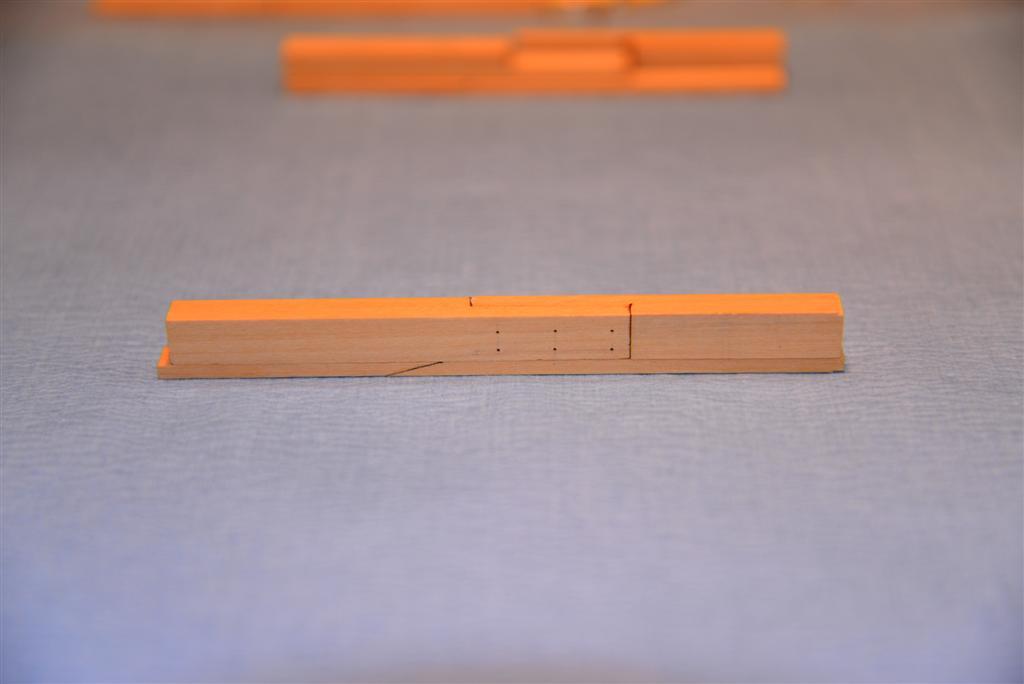
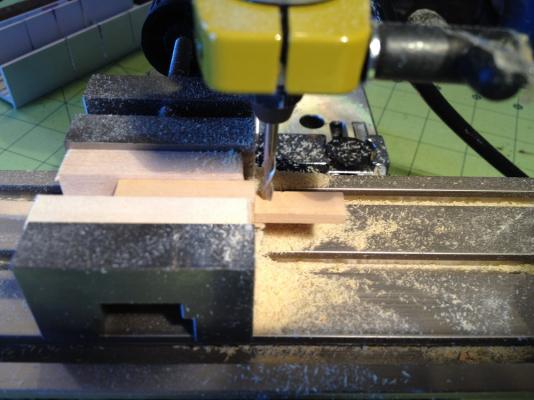
 Well this is probably ill-advised, but I've decided to start on the Admiralty Models HMS Echo cross-section (1:48). I actually ordered the framing package for this kit from Crown Timberyard way back in....I can't even remember when....a long enough while ago....and in fact a number of years ago I put together the keel, false keel & rising wood for this build - getting a feel for my then newly purchased mini table saw and disc sander. But since then I haven't done anything, taking some time off modelling and then finishing both the Bluenose and my little Off Center sailing skiff and commencing on Corel's HMS Bellona. Bellona is currently at the stage of the second layer of lower planking - a time when I frequently tire of the slow and repetitive work of planking and try to build momentum by breaking it up not with other work, but by starting a totally different model! This is why I say "ill-advised"....but.... I also sometimes use new model builds as excuses to expand the workshop - this is one of those times. Because I absolutely needed a drill press to drill out the mounting holes in the keel/rising wood assembly, right? Plus the numerous other uses that this tool will see in the shop....right? In any case, I feel that with the drill press my tool complement is complete so at least I can close that chapter....for now. So here are a couple of images of the keel/rising wood assembly - the rabbet still needs a bit of cleaning up on both sides, but otherwise, I'm pretty happy with the results. Next I'll be making a building board, drilling out the mounting holes & then starting on the framing - my first time at this, unless you count a couple of test futtocks I cut out several years ago as a trial....in any case, not sure how quickly this will go, but I'm looking forward to this one as a new type of challenge. Bye for now hamilton
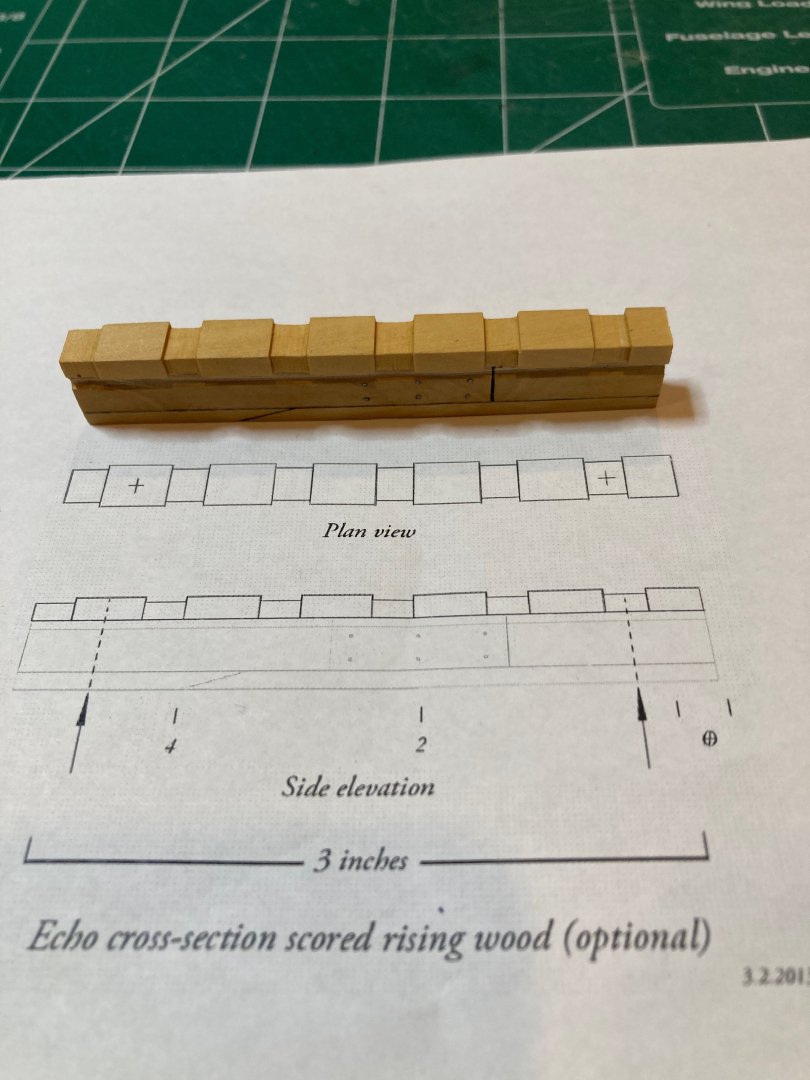

-
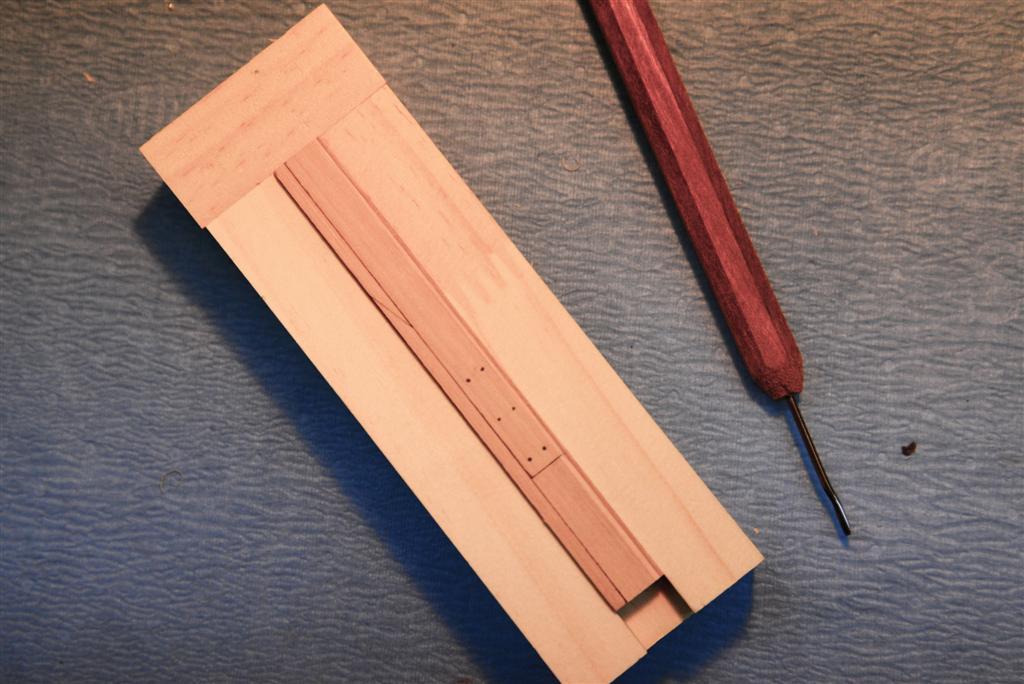
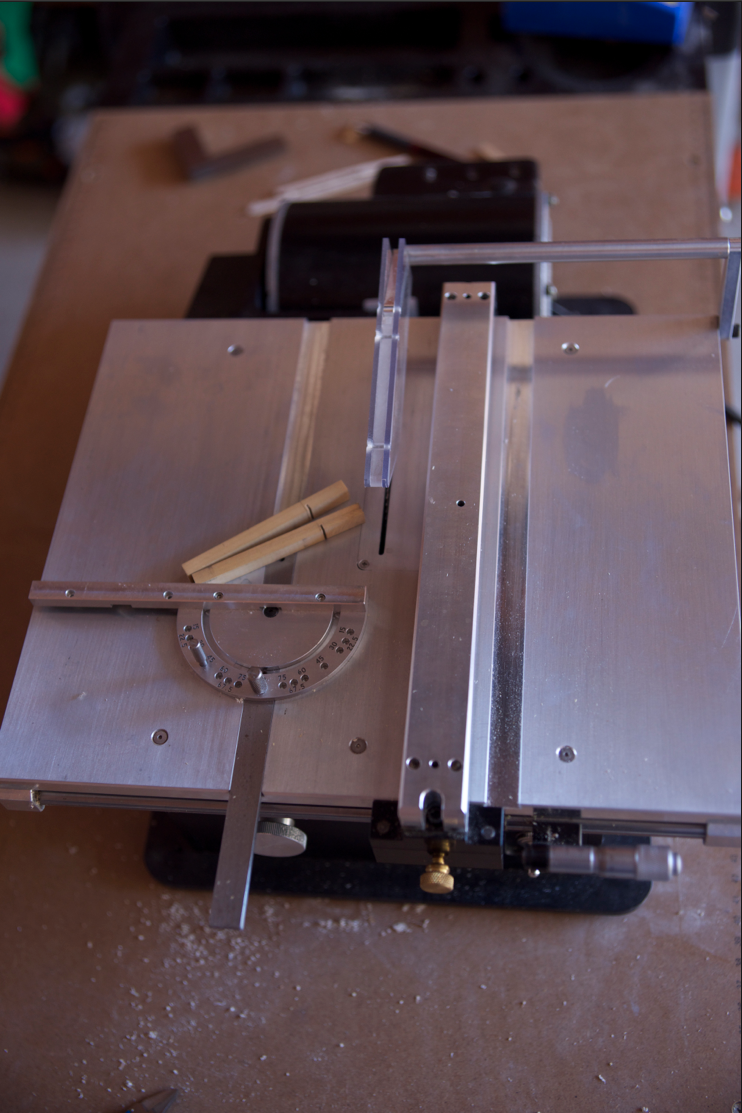
 I've long been interested in attempting a scratch build but I was simultaneously hesitant because I over analyze everything and couldn't get past finding lumber of the correct dimensions - enter Modeler's Sawmill. I finally threw caution the the wind and inquired if @Joe V could put together an Echo framing package for me in Alaskan Yellow Cedar - The smell is incredible. I choose the Echo cross section (tricky framing and all) because my end goal is to attempt an admiralty style fully framed hull and I thought the skills developed in this build "should" put me on a path towards that goal. I have picked up the TFFM series to help me along though the first volume is most applicable for the initial framing portion of the build. If this goes well I plan on fully fitting out the build, but we'll make that final call when I get there. My power tools are limited (Byrnes Saw and Disc sander...I can see the usefulness of a spindle sander for touching up the frames but workshop space is limited so I'll see what I can do without one) so this build will progress at a leisurely pace (that pace is also do to the fact that I have no idea what I'm doing so please, any tips pointers and corrections are welcomed). I have printed out the keel plans and away we go (I see some mention of using a table saw to cut out the keel joint - I assume this is done by taking slow swipes and creating the joint through the blade's kerf? I can't envision a safe way to accomplish this otherwise). Wish me luck! PS - If I can remember I'll try to include some pictures of my failed attempts at parts so that anyone following along can see that if I can do this then you can too.
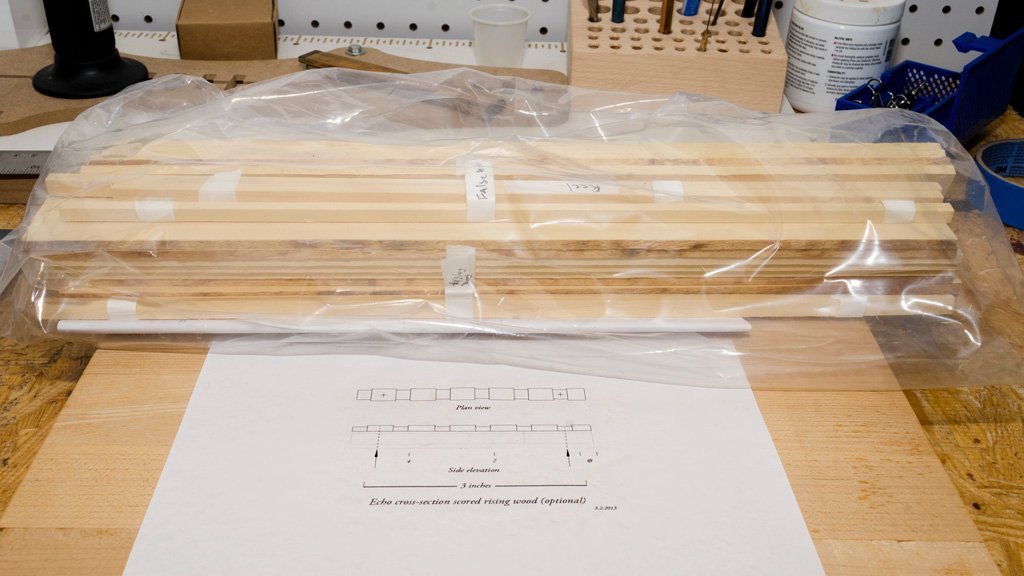
-
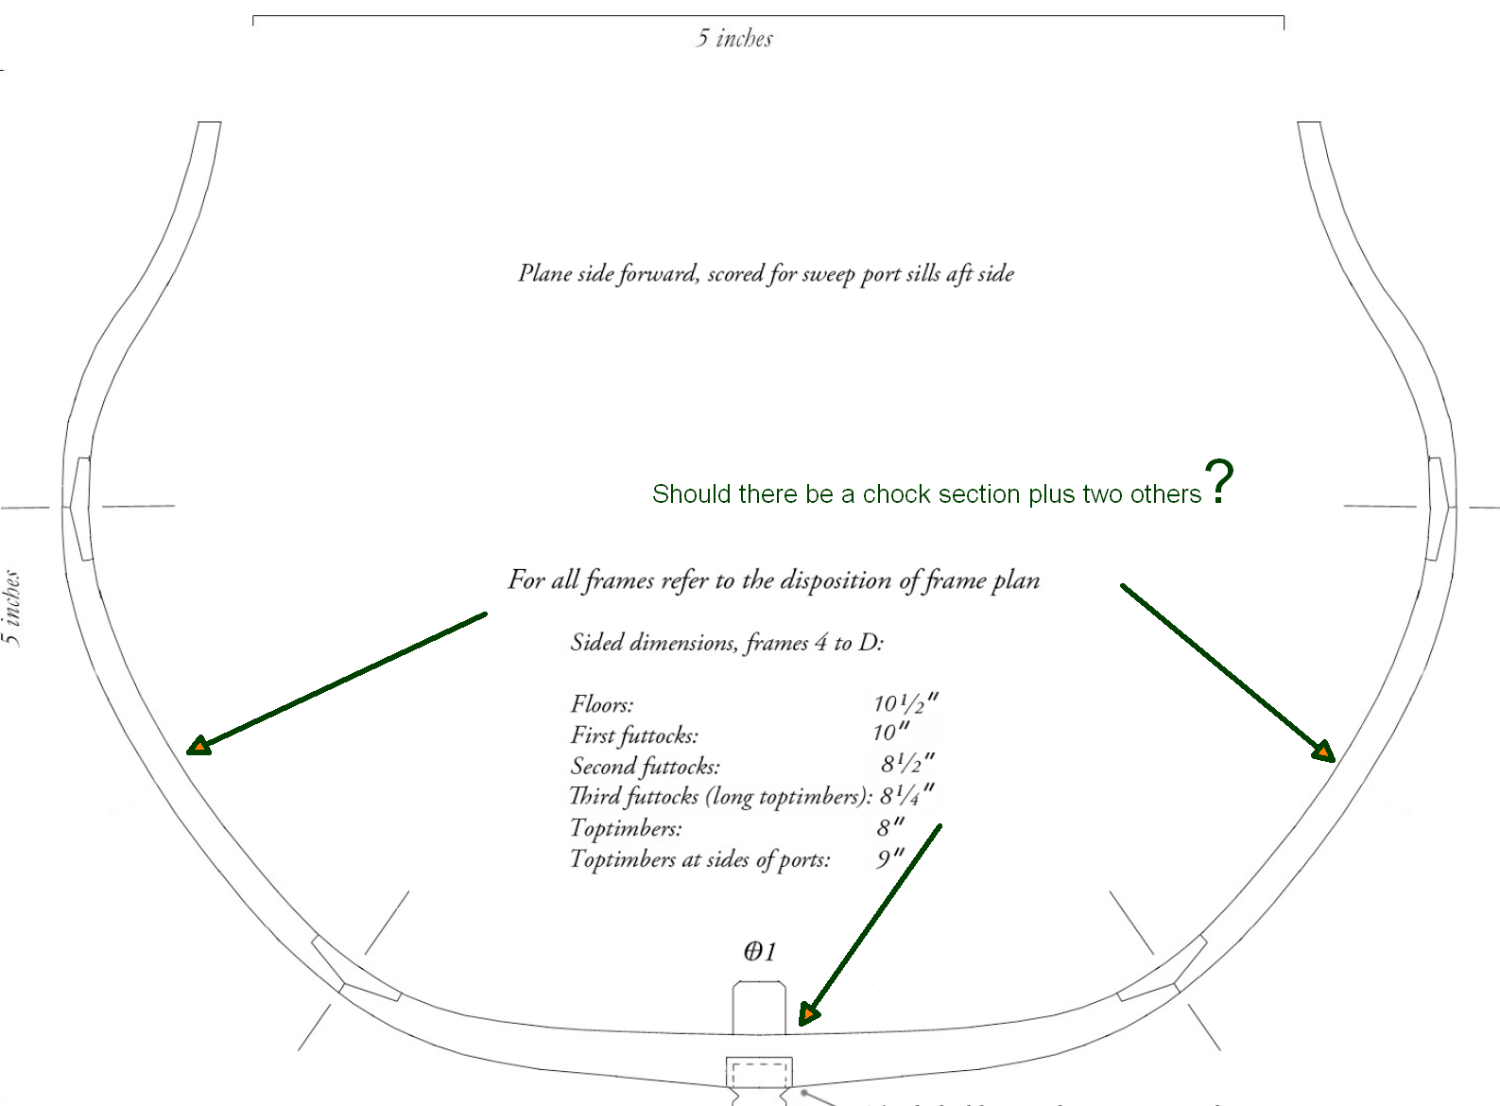
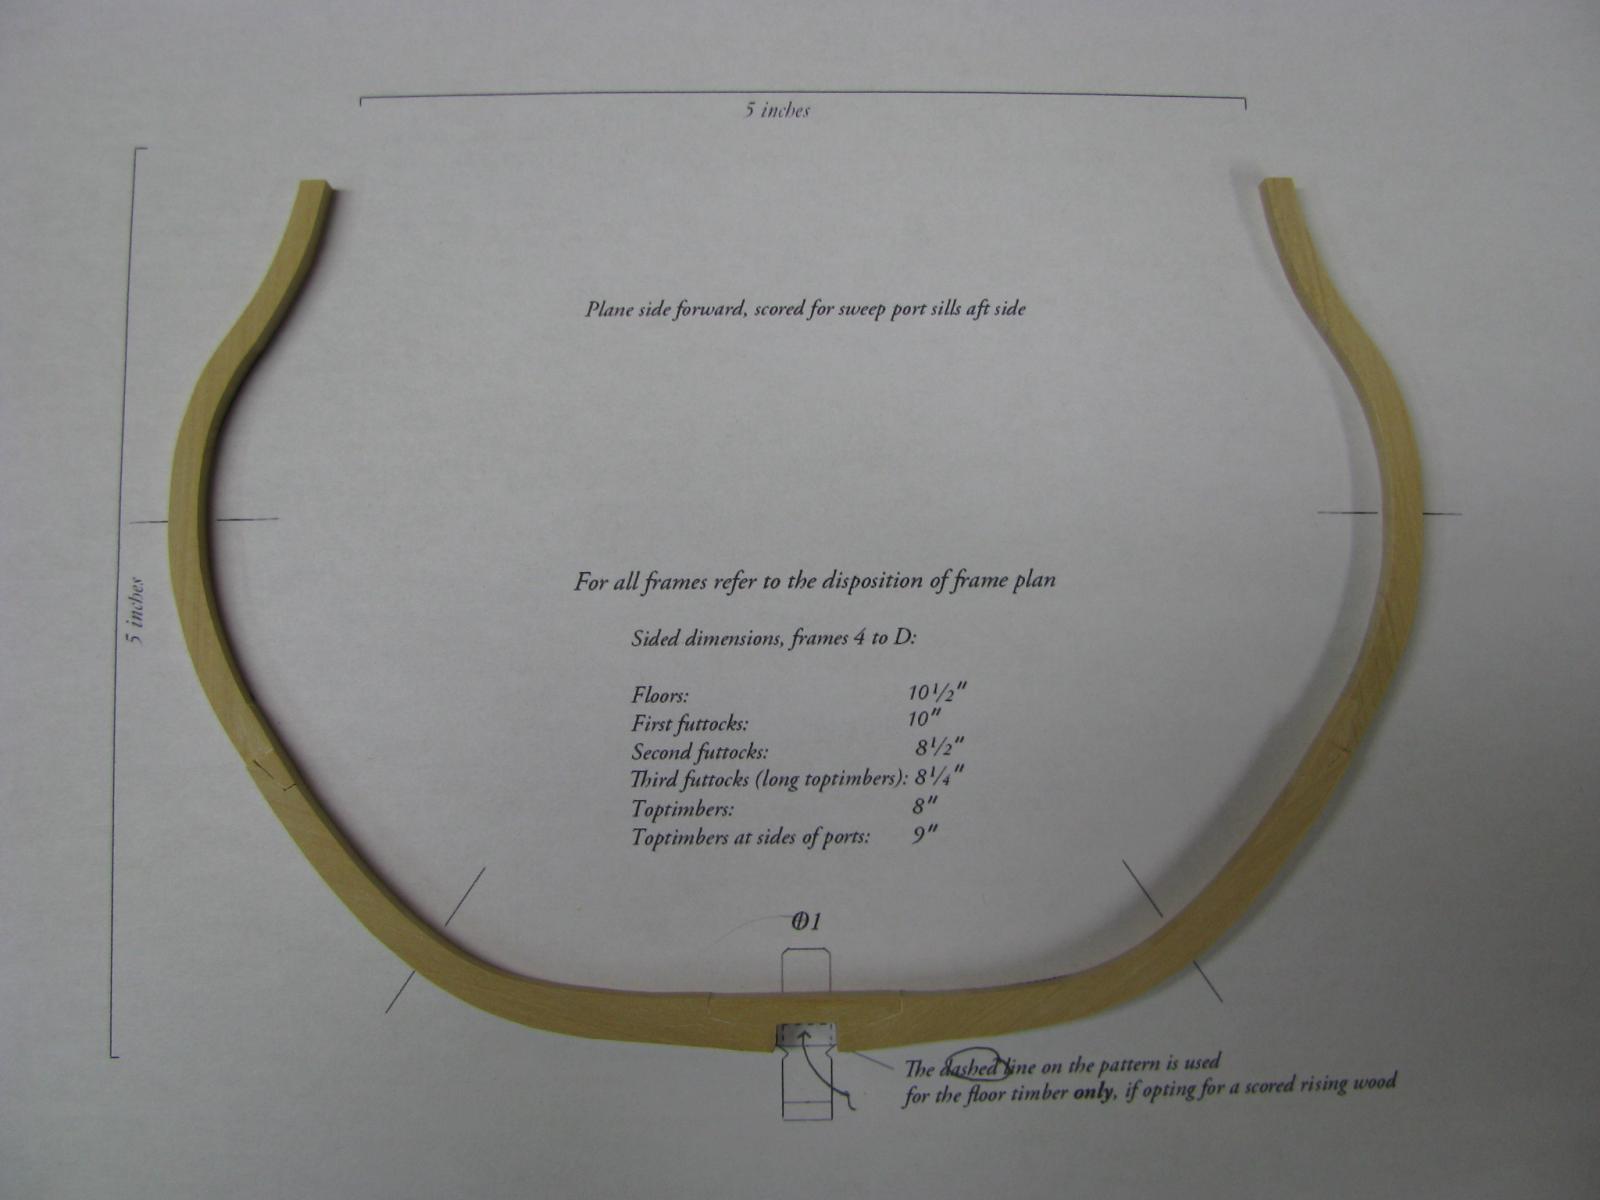
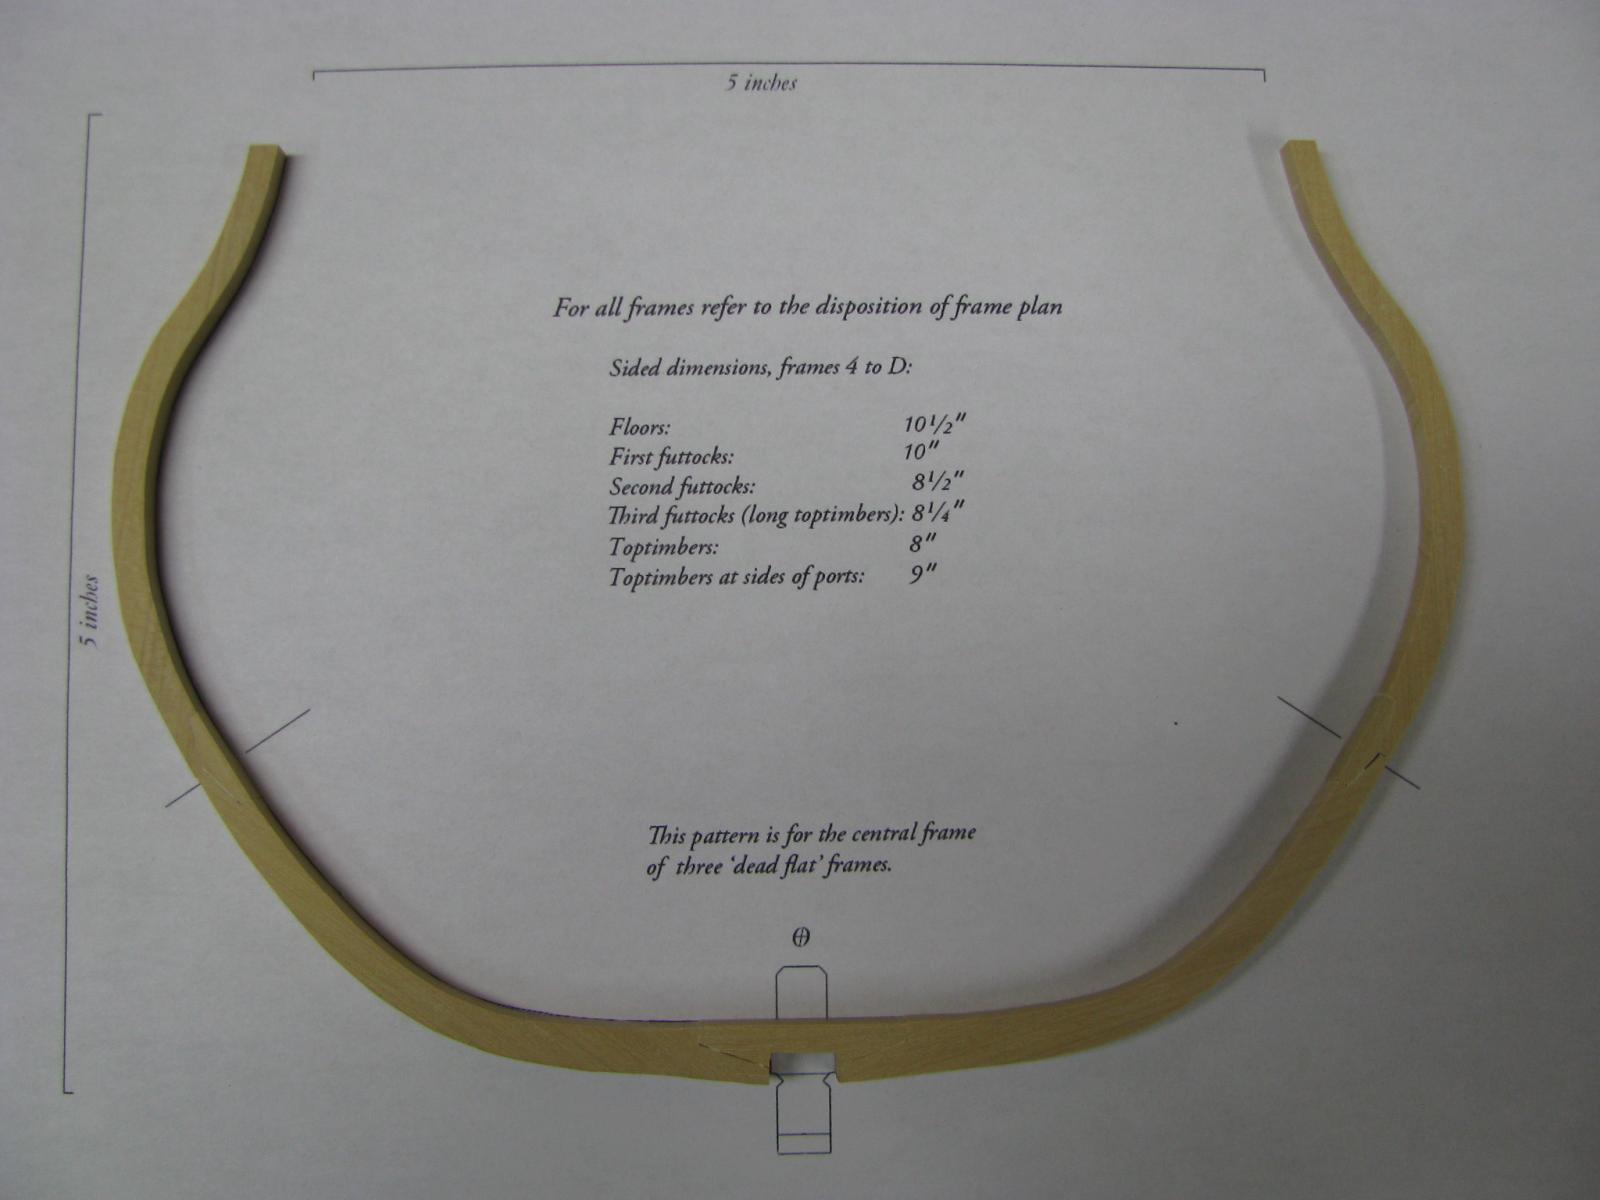
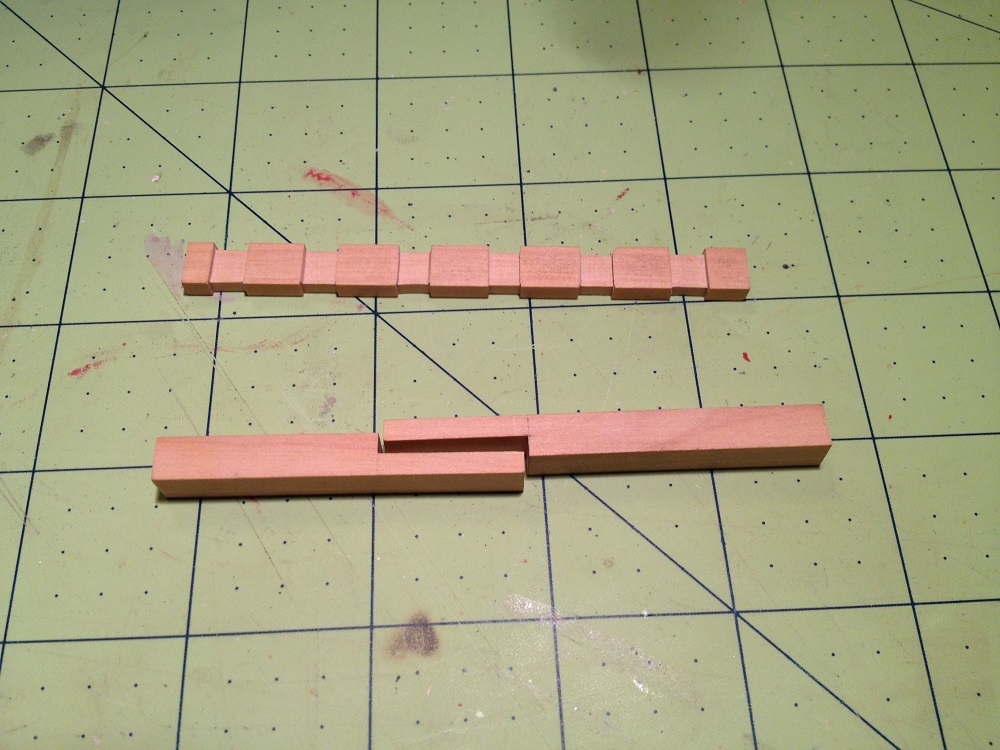
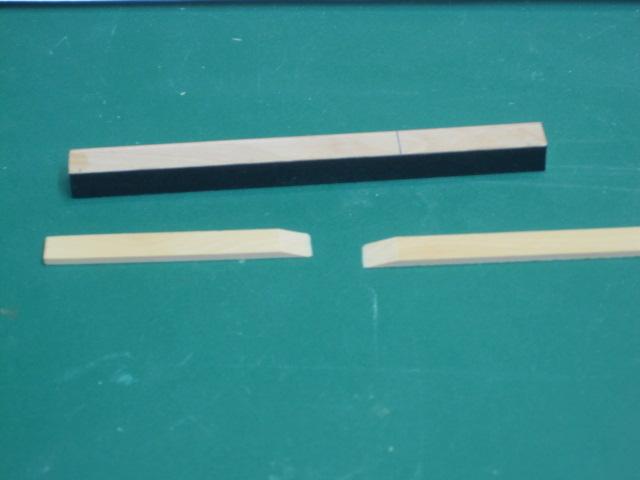
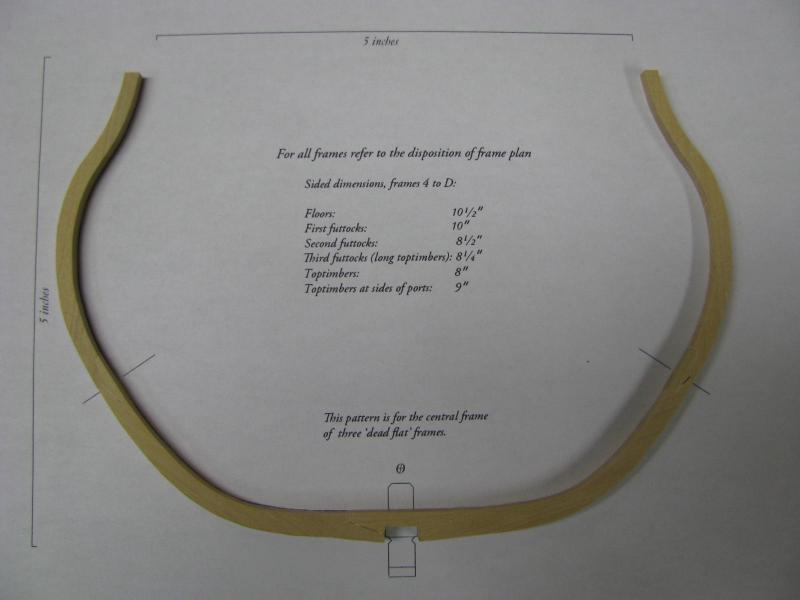
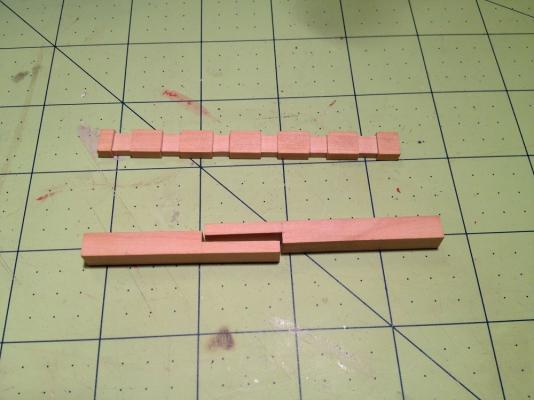
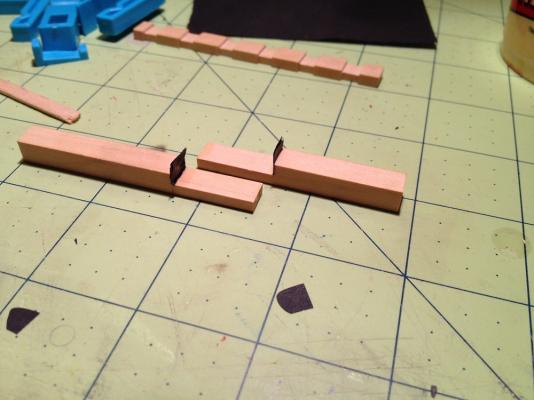
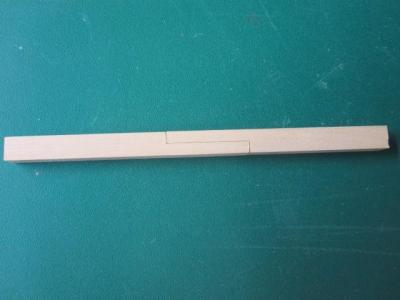
 Last yr I made a trial keel of the HMS Echo cross section available at http://www.admiraltymodels.com/Tips.html I had life intervene but I want to start building the cross section. The last few days I have spent building another copy of the keel. It came out ok. Thinking about the completed keel I realise a few ways I could speed up the process as well as make it a bit more accurate in cutting the slots of the rising keel. Last yrs keel on the left, the new keel on the right. I have a question now that I am ready to start on the frames. The instructions call for starting on the dead flat available at http://www.admiraltymodels.com/Echo_frame__dead_flat__1.pdf My reading is that each frame comprises two sections, a fore and aft frame. All of the frame numbers have fore and aft indicated on the pdf except the Dead Flat. Yet, It seems that there are two distinct sets of futtocks for the 2 dead flats as shown in http://www.admiraltymodels.com/Sided_frame_dimensions.pdf I am not understanding this obviously so can someone point me in the right direction thanks?


-
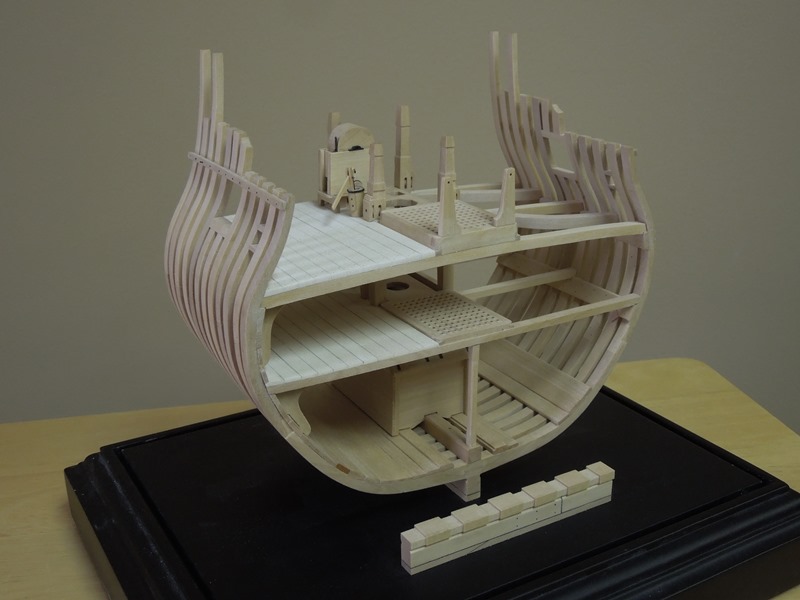
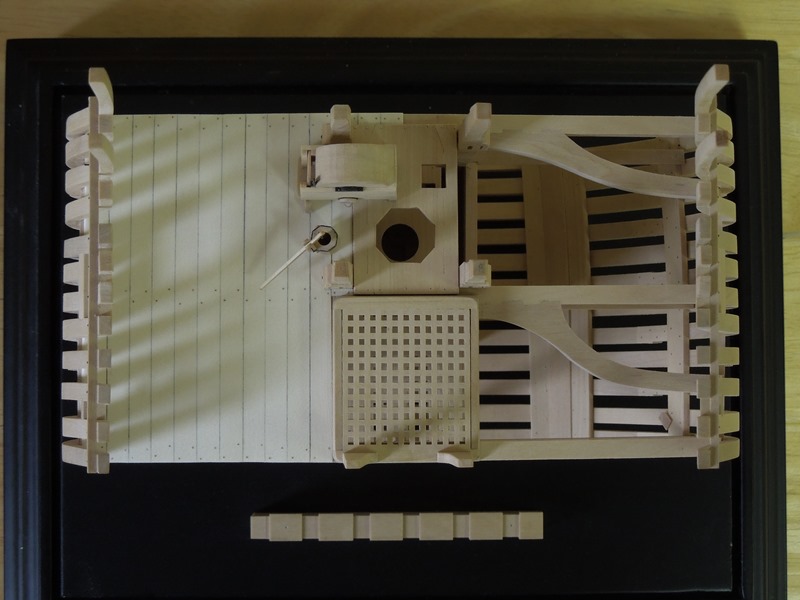
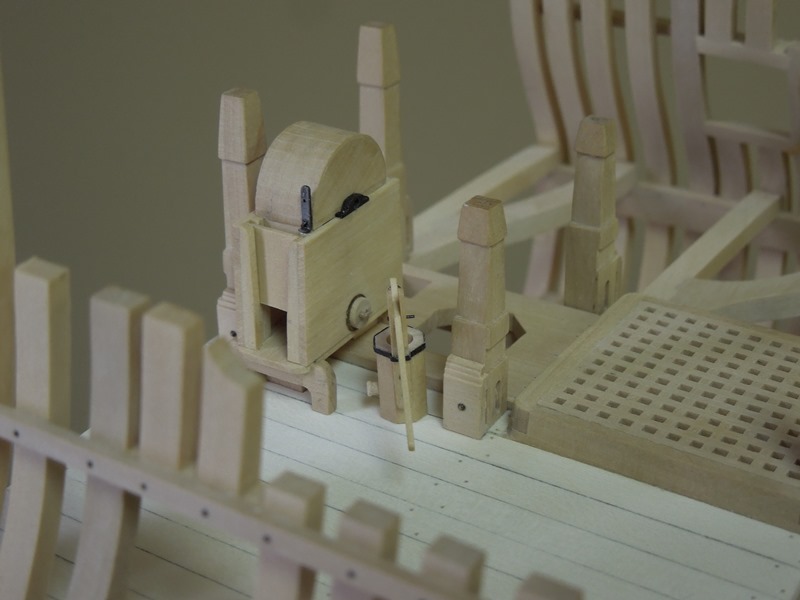
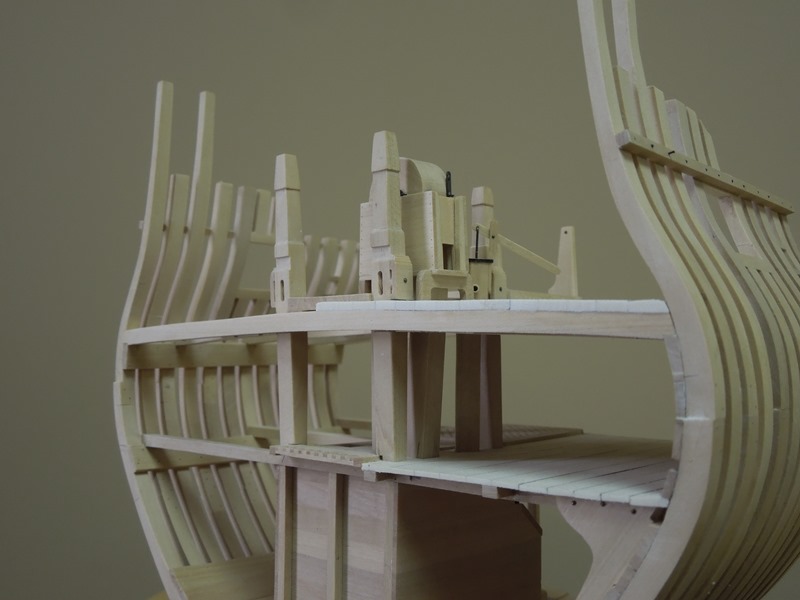
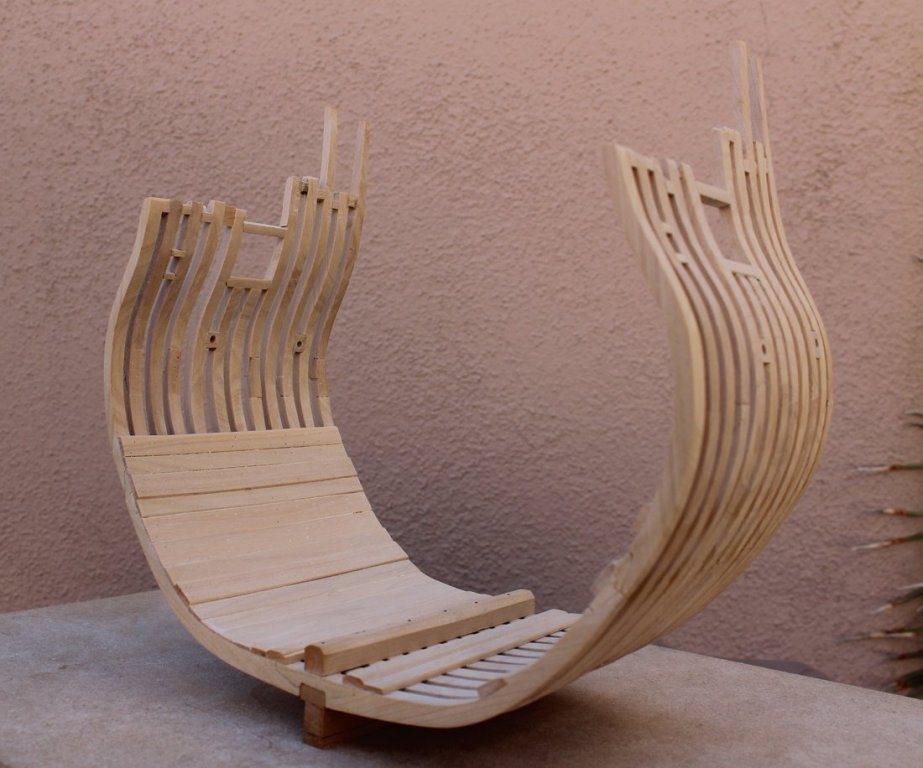
 I hesitated starting this topic in the Echo Cross Section area because it will not really be a build log and it will probably take a long time for me to complete. In 2012 I had the pleasure of taking the Echo course presented by David and Greg. Over that weekend I was able to raise two frames and purchased the completion kit which included necessary wood, armament and a CD with the plans. Atalanta has taken me longer than anticipated to complete and Echo has been ignored. I knew I would be traveling this month and did not want to risk injuring Atalanta but when I considered a month without sawdust but when the thought precipitated anxiety attack and I picked up Echo. My eventual plan is to completely plank the starboard side and leave the port side open. The primary wood will be costello boxwood with the lower hull planking in holly. All my frame components were rough cut prior to leaving home since the only power tools traveling with me would be a Dremel and my little Preac saw. Those two frames I built in 2012 could not be used in the actual model because the actual scantlings were different than those used in the course. Let me describe some of the highlights of the hull. There is one gun port, a sweep port and two scupper ports. The sills of the gun and sweep ports are parallel to the water line but the scupper ports angle upwards to facilitate drainage. There are two cast frames that help form the gun port. The top of frames 4-aft and 5-aft are tapered in preparation to forming them into stanchions. The keelson was installed and bolted to every other frame. The starboard ceiling planks and lower deck clamps have been installed. On the port side I installed the limber strake and the thick stuff over the floor and first futtock head joints. Everything has been treenailed with bamboo.

- 52 replies
-
- 25
-

-
 My old log was lost, as was the Hannah one. After a lot of thought, I have decided to just restart both where I left off. I didn’t save them, and given the choice between spending time on the computer and spending time in the workshop, it was an easy choice. I’m looking forward to the workshop in 2 weeks. I redid my keel (pictures below are the fifth redo). I had originally planned to use the previous one, but had made that with the dimensions from the contract, which are slightly different than the plans. When I made the framing jig and it was loose on the keel, I realized I might have other problems down the road, so I made another keel using the wood Greg sent. I have also made the dead flat and dead flat one frames. I’m going to hold for now and play with my new ropewalk. I don’t want to make any more frames until after the workshop as I think they will be a lot better after. Dave

-
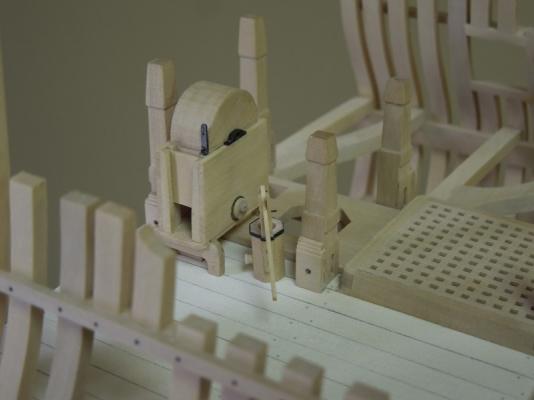
 I have had some requests for our discontinued photoetched sheets over the past few years. The sheet is depicted below and was designed for those building a Swan class model at the classic 1:48 scale. They are difficult and expensive to produce but I would be willing to do it one last time if ten individuals commit. They cost $60, plus postage. Included are door hinges, lantern brass housings, horseshoe and dovetail plates and gunport straps. In addition (and the main reason we designed the sheet) included are all the components necessary to build the complicated metal chain pumps (except the brass tubing) that reside within the pump housings. Those of you building a Swan, Echo, Triton or Chuck's new Pegasus cross section may consider purchasing one of these sheets as nothing similar is on the market. If you would like one (or more) of these sheets please send me an e-mail at dvm27@comcast.net. Please do not respond to this post here. This will be the last time these sheets will be produced! It is my impression that Chuck will not be including details of the pump mechanism in his new Pegasus cross-section in order to keep the cost managable.
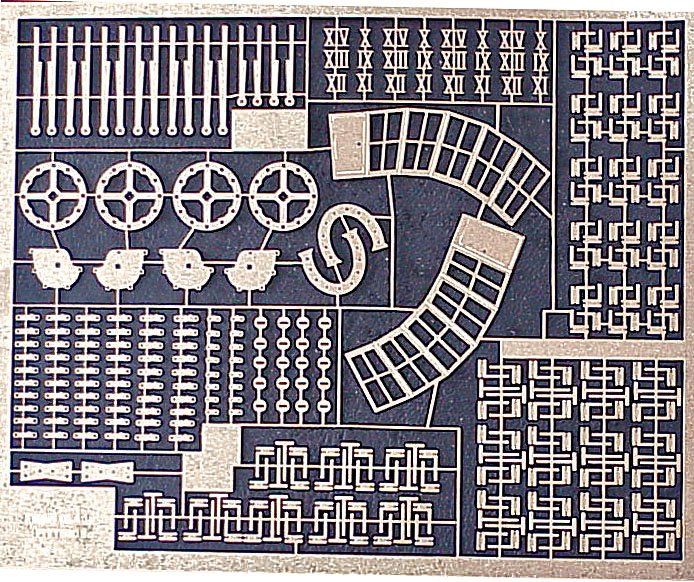
- 6 replies
-
- 9
-
-
- swan
- sixth rate
- (and 4 more)
-
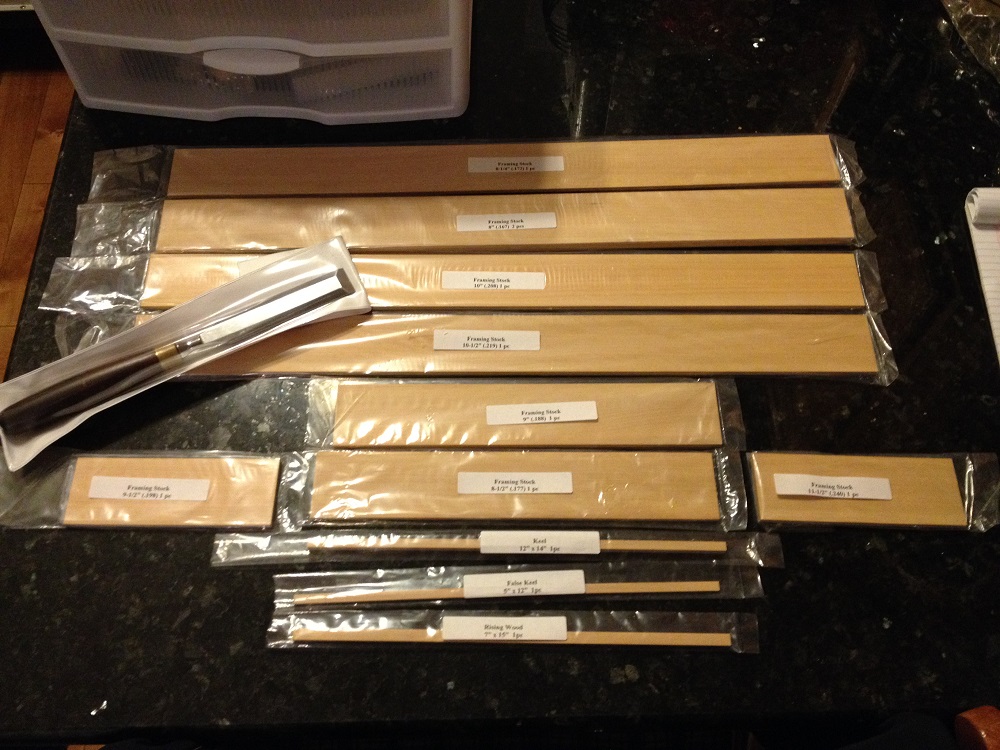
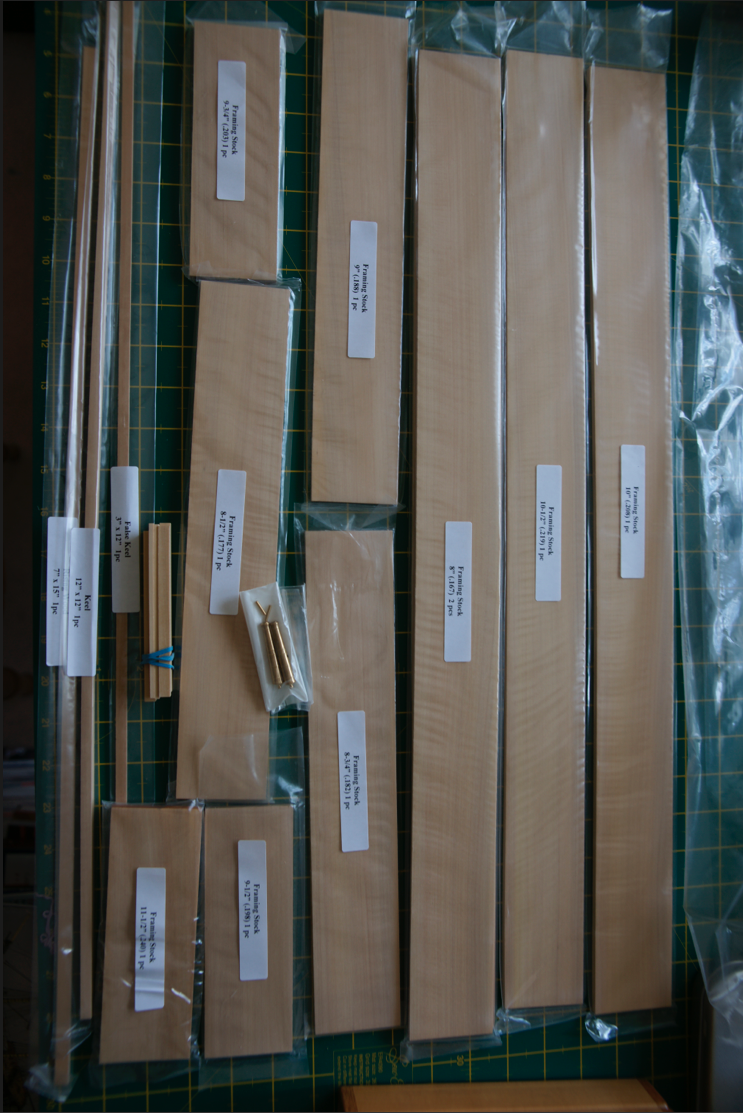
 Thanks to everyone here on the forum for the warm welcome since joining NRG and MSW last month. I've enjoyed getting to know folks and have had a great time pondering how to make a serious start in the model shipbuilding hobby. After much contemplation, I decided to tackle an Echo Cross Section for my first POF build. Much of that decision came from wonderful feedback received by members of the MSW forum...thank you to all for your candid and helpful comments. I also decided on the Echo Cross Section because of David and Greg's excellent series of books on building the Swan class Sloop. Between the instructions obtained from Greg when I bought the Echo Framing kit and those books, I believe I'll have what I need to start a successful build. I am confident other members here on the forum will help me fill in the gaps as I improve my skill set and knowledge base. First was purchase of the Admiralty Models Echo Cross Section framing kit which came with a full set of framing wood from Crown Timberyard along with a thumb drive of instructions and plans. I printed out the instructions and plan sheets and had them spiral bound for easy use on the bench. Wood is on a shelf in my workshop getting acclimated before I start cutting parts. Unfortunately Greg has run out of Fitting Out kits and he advised not being able to obtain wood for more kits....he was nice enough to send the complete instructions for the fitting out kit which will allow me to cut my own wood and be able to fully finish out the interior of the Echo Cross Section. I've got a table saw for resawing billets and will be ordering some Castello and Holly to make the fitting out wood...but I have a quandary...namely what are the details of the wood in the fitting out kit? Greg did not have a Wood List for the fitting out kit so could not help me with the details. In the photo below, you can see the wood list of the framing package...I'm looking for the same thing related to the fitting out kit. Is there someone here who purchased an Echo Cross Section Fitting Out kit who could send me a scan of the wood list from their kit so I could have a guide to know what wood quantities and sized to cut?...I would certainly appreciate the assistance. Next step for me will be setting up a building board for this project. Since I'm trying to use this as a test project for a full ship build in the future, I'll be making a building board same as if I was doing a full ship...probably overkill, but should be a good learning lesson. Let the project begin!...
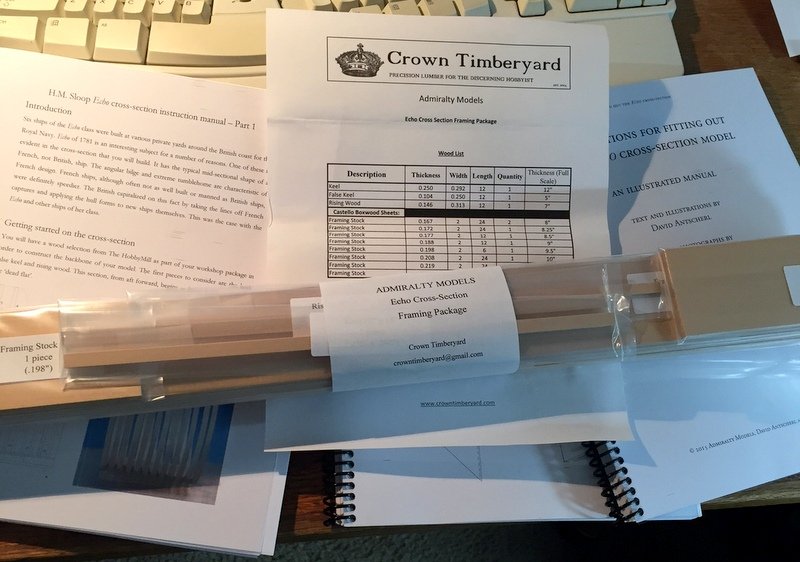
-
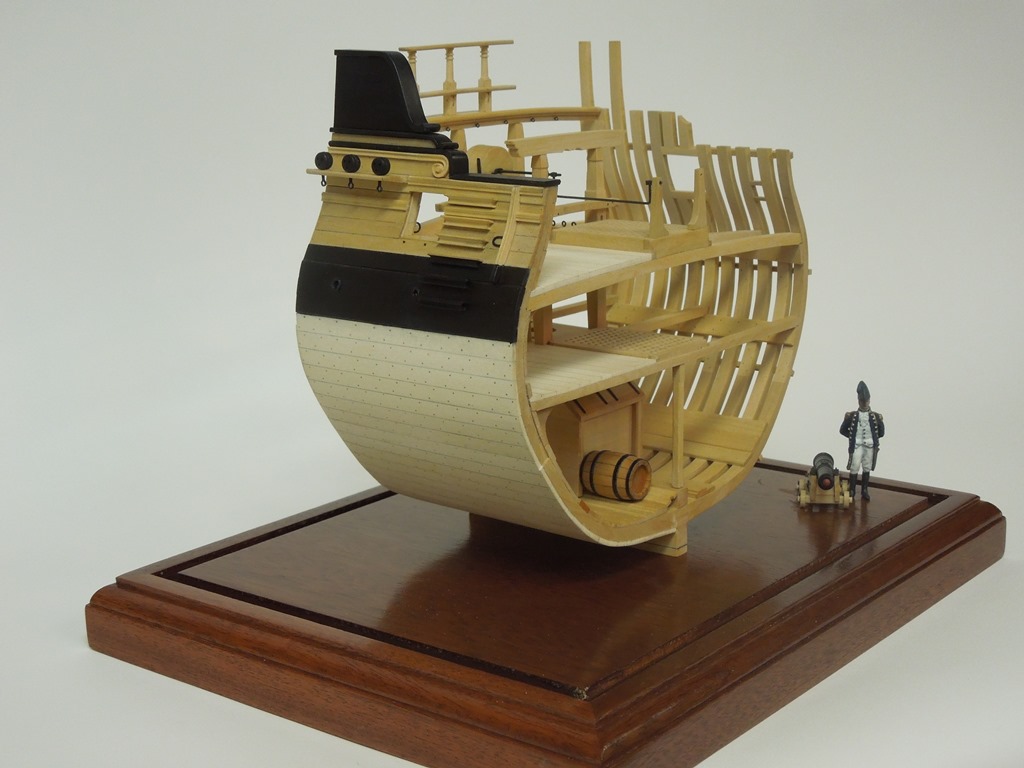
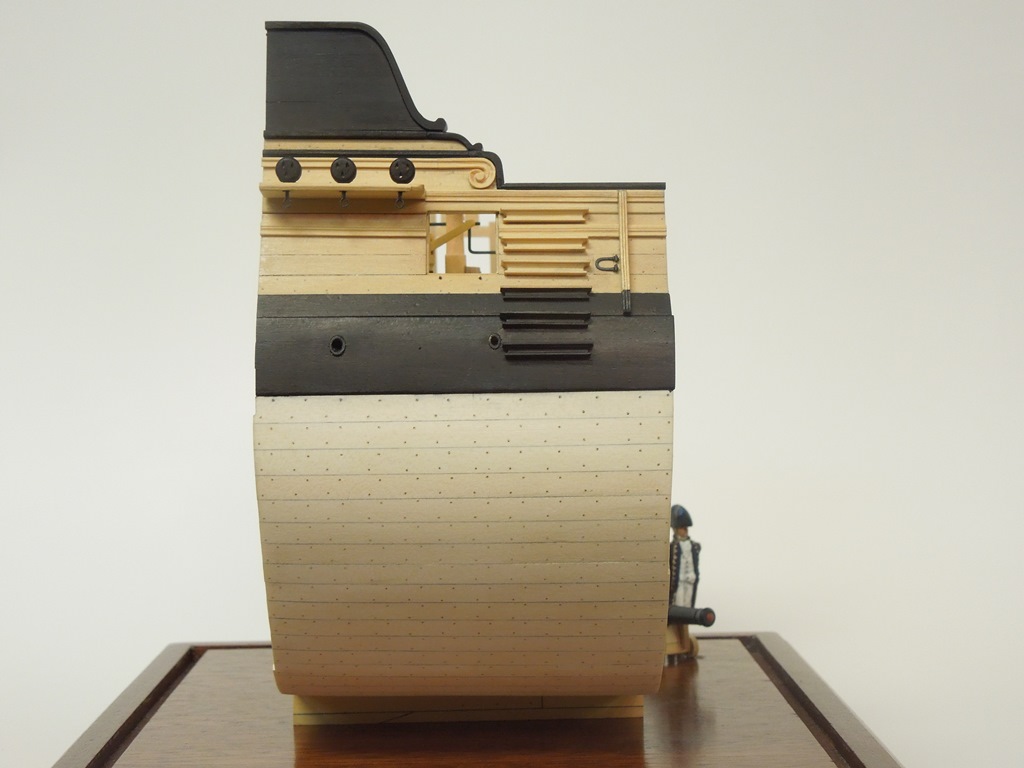
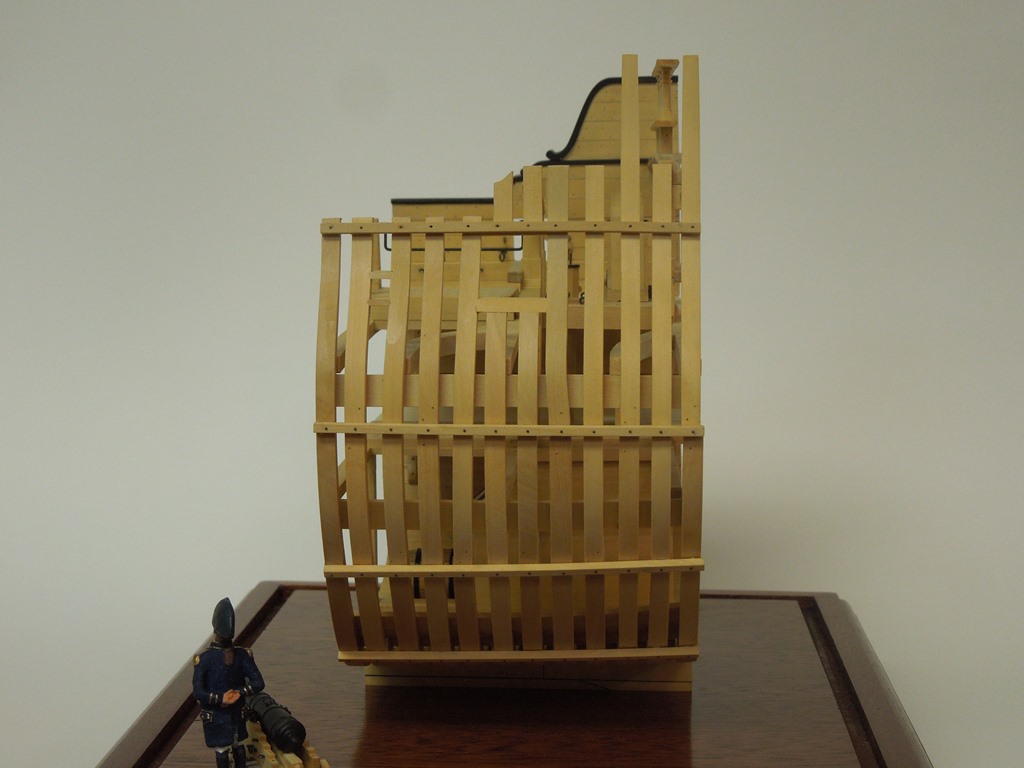
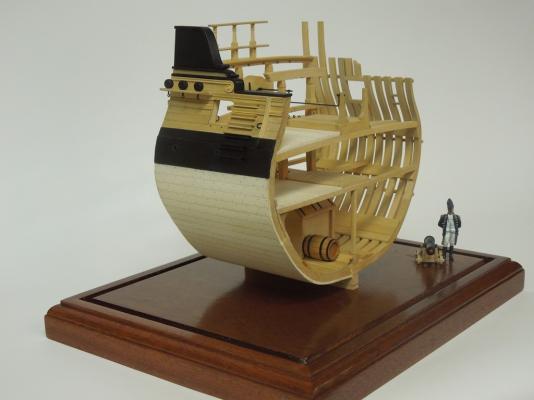
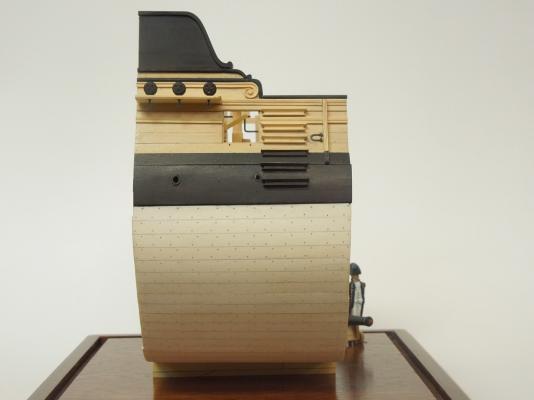
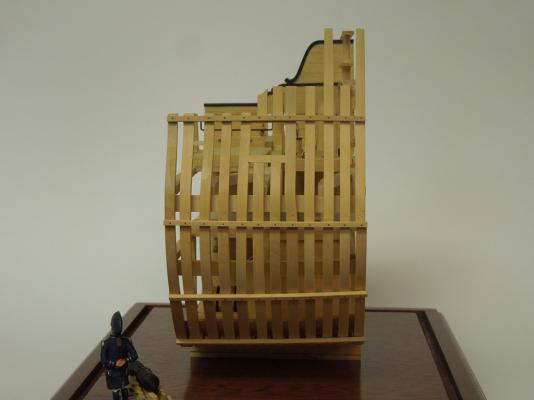
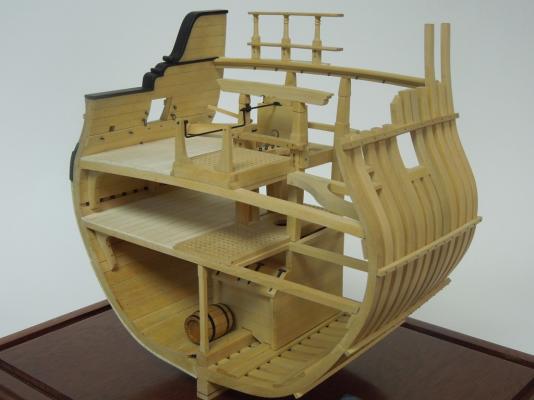
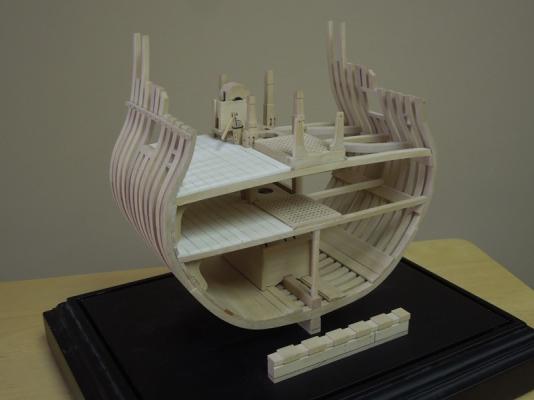
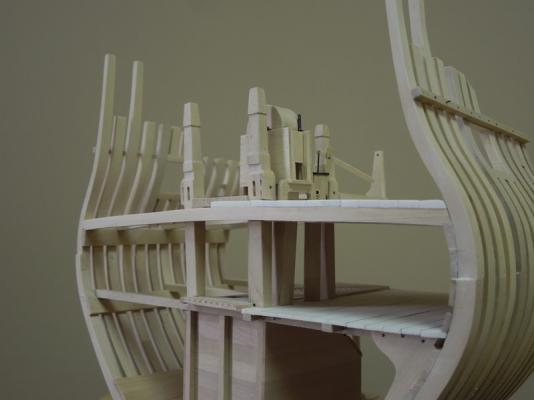
Our Echo cross-section is now complete. I have modeled her with the port side in frame and the starboard side completely fitted out. Finish is dilute sanding sealer. She is made of boxwood and holly. Dyed holly is used for the black portions. Conveniently, Admiralty Models sells both a framing package and a fitting out package so that you may choose your own style of display. The new fitting out package, milled by MSW vendor Crown Timberyard, includes sufficient boxwood and holly to finish the entire hull with plenty of extra for redo's. The price will be $275, postage additional. if you would like to reserve an Echo fitting out timbering package please send an email to me at dvm27@comcast.net.

- 29 replies
-
- 43
-
-
 I will re-post some pictures of progress when I get to my home computer. I did not save the comments from earlier posts. I read about some cache recovery techniques that I assume the Administrators have evaluated. Maury
 -
 Hi Guys, Well I'm back and feeling better. I will post my photos back up soon. Just thought I would leave an FYI that I did not leave like the Ol MSW site did. So give me a bit and I will re-post my pictures some time this week.... cheers Mario
 -
 This will be my second Echo cross section. After raising all the frames on my earlier attempt I was not satisfied with the quality of my work and decided not to take it any further. The Echo makes a very nice looking model as is evidenced by build logs like Maury's and others and I contemplated a second effort. I am a member of the Ship Model Society of New Jersey and I brought my Echo with me to a meeting after the last of the frames was raised. There was so much interest that the club voted to make it a "group project" where everyone builds their own version of the same model. 12 of us have signed on for this project. We placed a bulk order for wood with Jeff Hayes at Hobby Mill which arrived last month. We meet once a month to discuss progress and group problem solving. I hope others from the club will start build logs as well. Build logs help the builder and the modeling community so it is a win-win in my opinion. I haven't started work yet but that should happen this weekend. The goal of this project is to build and fit out the model according to the plans posted by David and Greg. The first effort was a great learning experience and I'm sure this one will be as well. Can't wait to get started.
 -
Echo update #8 is completed and posted on our website http://www.admiraltymodels.com. My version below shows the stock framing package on the port side and the fully fitted out version in progress on the starboard side.. Please keep in mind when ordering the framing package that it is the complete framing only. The fitting out instructions are free of charge and posted on our website every few months. We are hoping to develop and sell a fitting out package in the near future complete with laser cut deck beams, gun carriage and other details. Stay tuned.

-
 Well All - Here is the beginning of my Scratch Building career, I chose the ECHO cross section from Admiralty Models because of the work by Greg & David in the TFFM books that I own and intend to build a Swan class one day but needed something easier than a full model to start with. This is going to be very slow to begin with as I am working on my Confederacy which is about half way completed and will be taking most of my limited modelling time. Also I am still building up my collection of tools, I have plenty of hand tools and a beautiful Dewalt scroll saw, but I still wish to get a JimSaw and thickness sander - however I will start with hand tools for most of the work. The first pic is the wood framing package from AM which is supplied to them by Jeff @ Hobbymill, Its Boxwood and machined to the sizes that are called for in the plans, there seems to be quite a bit of material supplied above what would be needed to actually frame the model for those Opps moments which Im sure I will have plenty of in my learning curve. I have been watching the great starts that others here have made on this and hope that I can acheive something close to them. BTW the first version I make will be just the hull framing, no planking or internal framing, then I will make a second version which will be the full Monty. And here we go!! ben
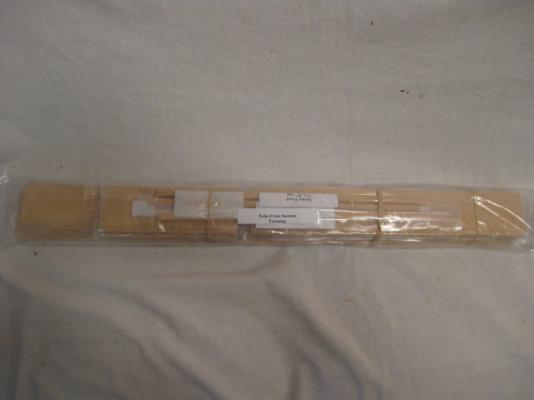
-
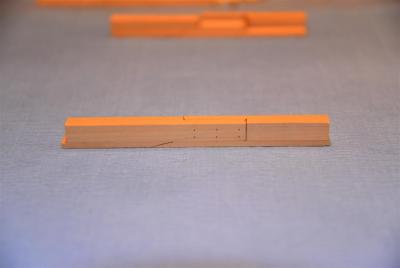
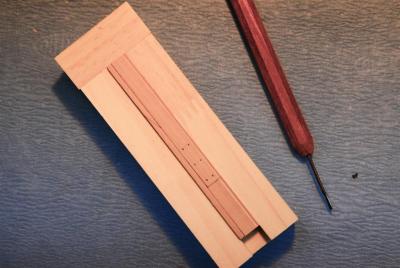
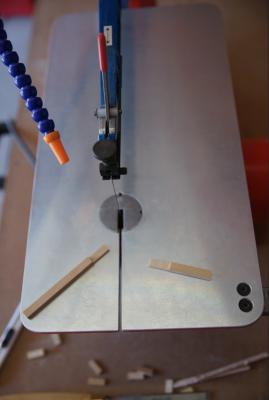
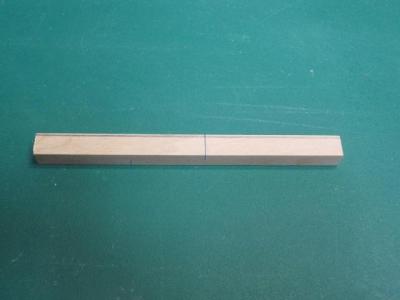
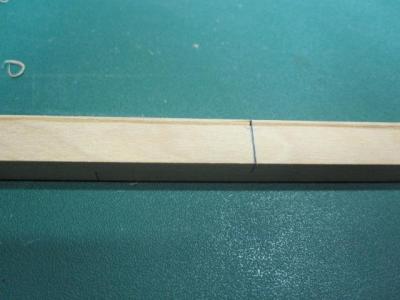
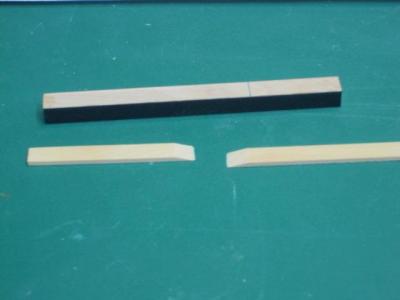
 Hello Everyone, I will be attending the upcoming Admiralty Models Workshop on the Echo Class Cross Section given by David and Greg. I'll start by saying I messed up the parts Greg sent by using a black construction paper that was too thick. No shop in my area had any of the correct paper. So I sawed up some boxwood I had on hand from Hobby Mill and started over. What I came up with was some tissue paper that I colored with a brown 'Sharpie'. This seems to work ok. The False Keel The Keel and False Keel And the jig made for holding the keel for the carving of the Rabbet More later, Bob W
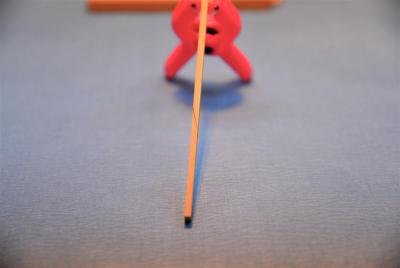
-
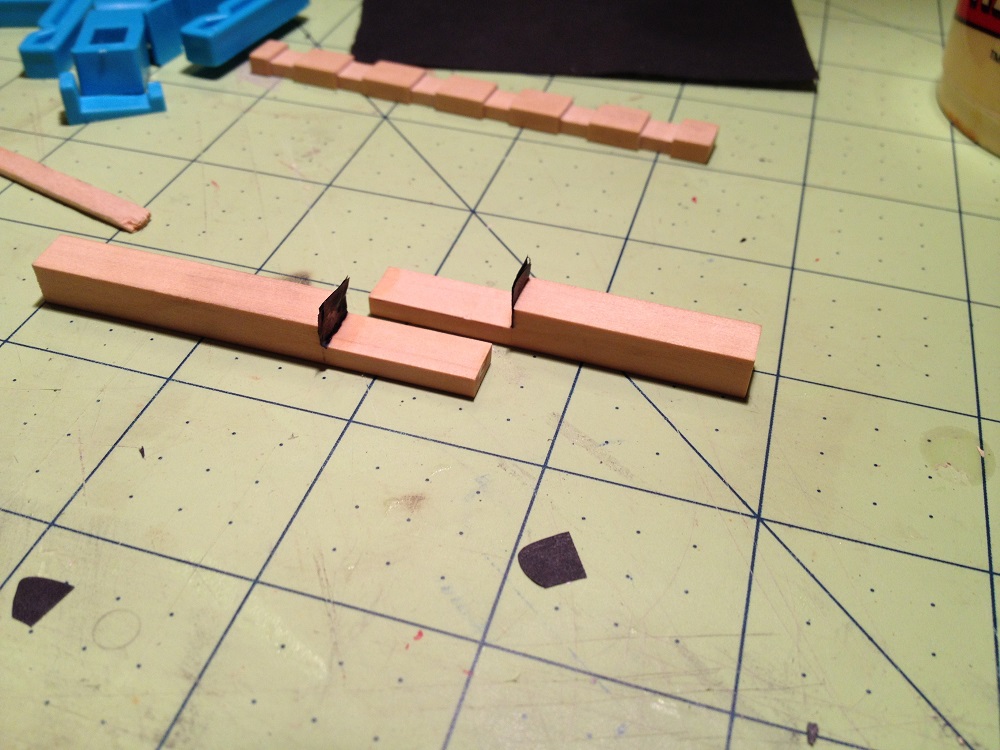
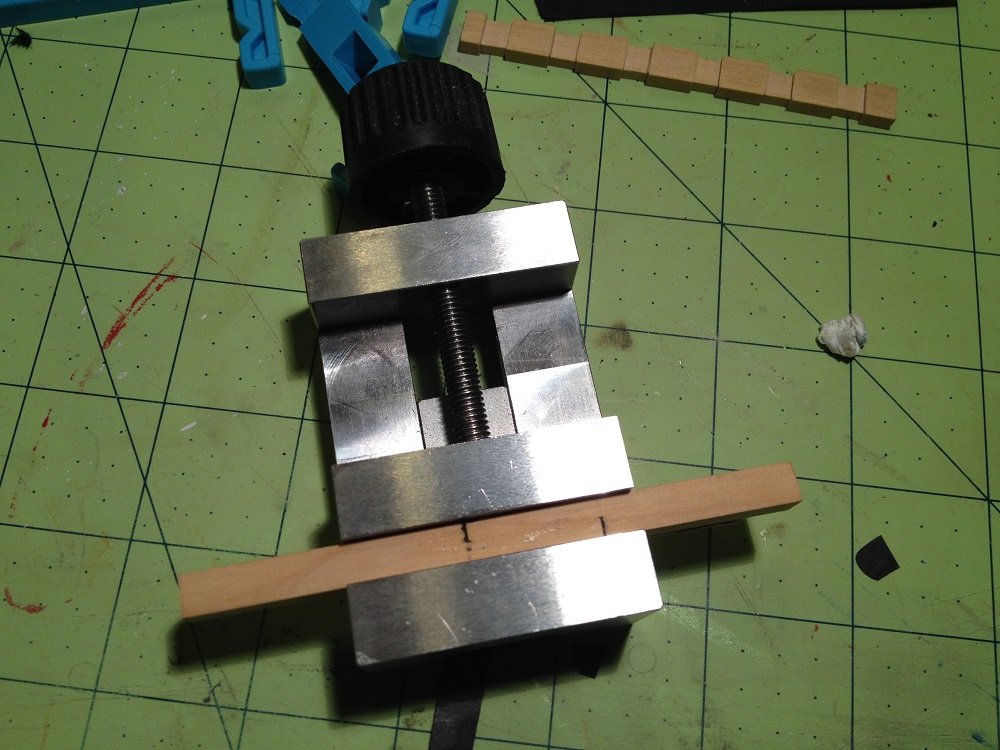
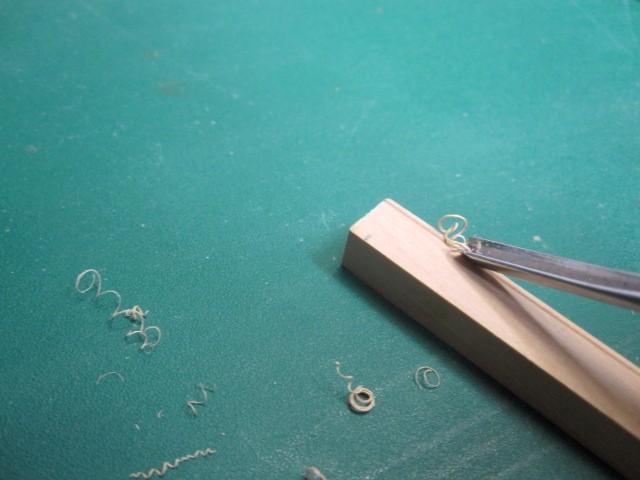
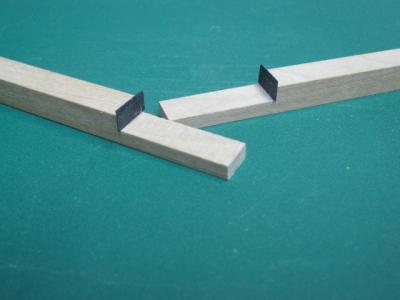
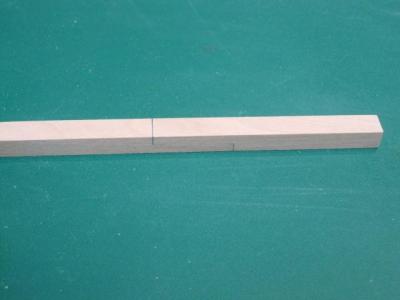
 It has come to pass that I am to join the august company of the scratch builders on this forum. I stand in amazement of the skill and craftsmanship here. Humbly I begin my maiden scratch building adventure. Please give me truthful feedback on this adventure, I hope to improve my skills along the way. This build is associated with the group build project of the Ship Model Society of New Jersey. I have been keeping my eye on this project since I joined MSW, and I am very excited to participate. First, let us see the beautiful timbering package from Hobby Mill: Now on to the build! The first attempt on the keel ended in disaster. This was owing to the fact that all of my workshop is packed up in boxes in up to three different locations at the moment, as I am in the middle of a move. So I tried to start with as few tools as possible, a chisel, a hand saw and some files. Unfortunately, the very first half lap joint ended in asymmetrical folly. Luckily, the supplied wood provided almost three opportunities to create modern art from boxwood. Rather than waste anymore of the precious stuff to cabin fever induced exuberance, I decided to hunt for my milling setup. Once that was found, so also was symmetry in the lap joint. Once the pieces were finished to a near Palladian symmetry, I used three layers of black tissue paper to simulate the tarred flannel. After the glue dried, I placed the two keel pieces, glued together in a vice to set. After removal from the vice, I trimmed the excess "flannel" with a new #11 blade. Hopefully, I will be able to add another post tomorrow. Best Regards,

-
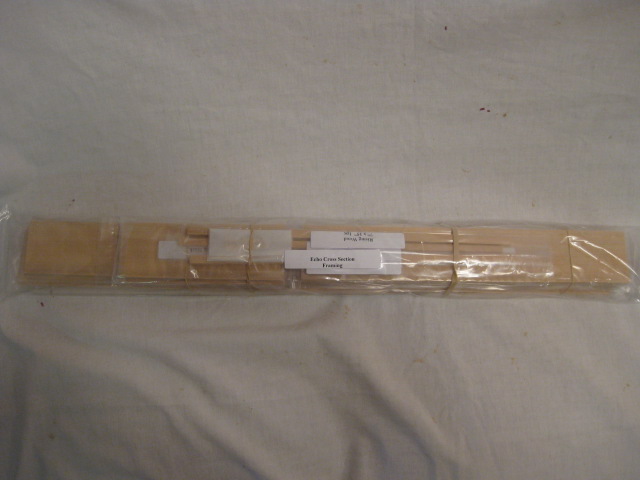
 This build was supposed to happen with my grand-son on my knee but alas it is not to be. Eight weeks early, he was with us for just a moment. So this is for him. For those in Australia who are looking for a good wood supplier you need go no further than Hobby Mill in the US. The quality of the wood is fantastic and as you can see from the pic it arrives well sign posted and packaged. A testament to Jeff and Greg. Importantly the wood sailed through Australian quarantine requirements. Never an easy exercise! The build started somewhat inauspiciously with yours truly having a couple of attempts at the keel before getting it right. Fortunately Jeff and Greg foresaw the problems that one from down under might have and included plenty of spare timber for just such an eventuality. I must say though, I was cutting it a bit fine! Not sure I could have squeezed another keel attempt from the remaining stock! Lesson 1: If one gets updates and revised PDFs it is worth opening them up and reading them closely. For those who are interested, the keel is 14 inches x 12 inches. The pics below show the initial work performed. Next stage the making and fixing of the keel bolts and cutting the rabbet. Alan G


-
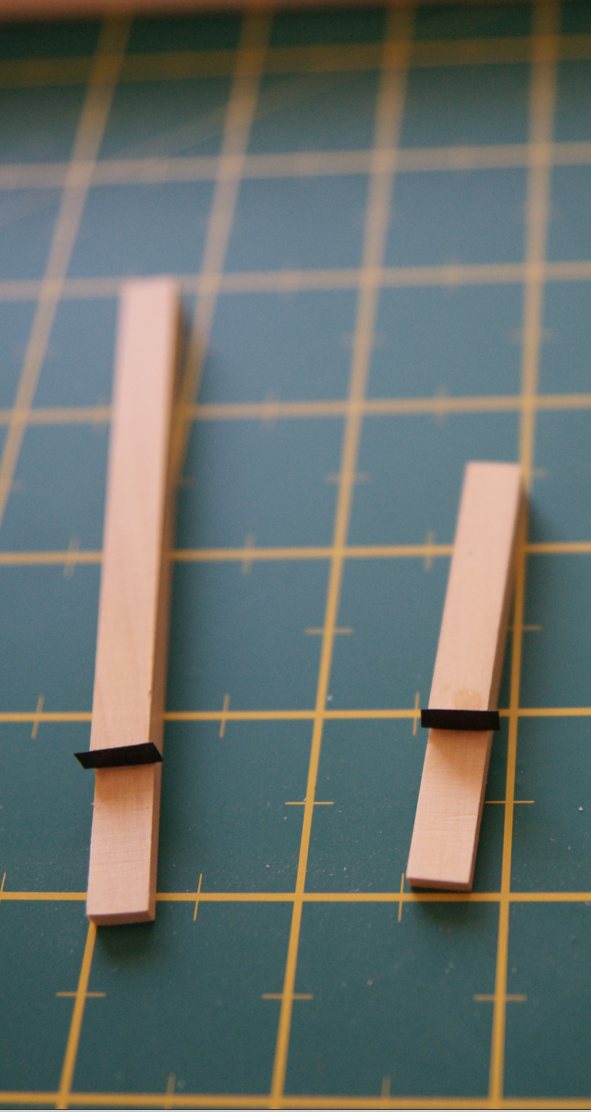
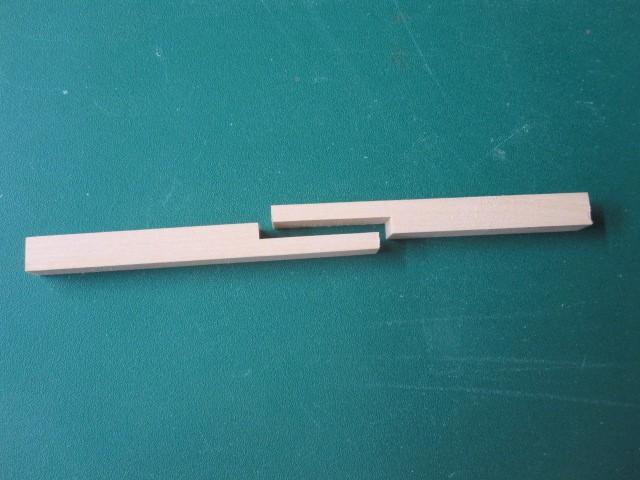
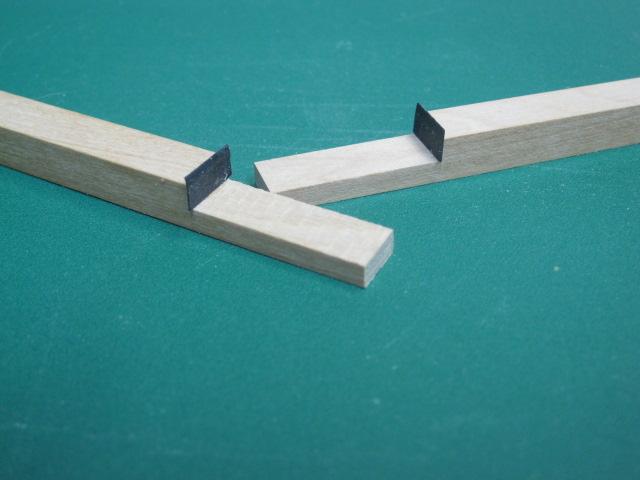
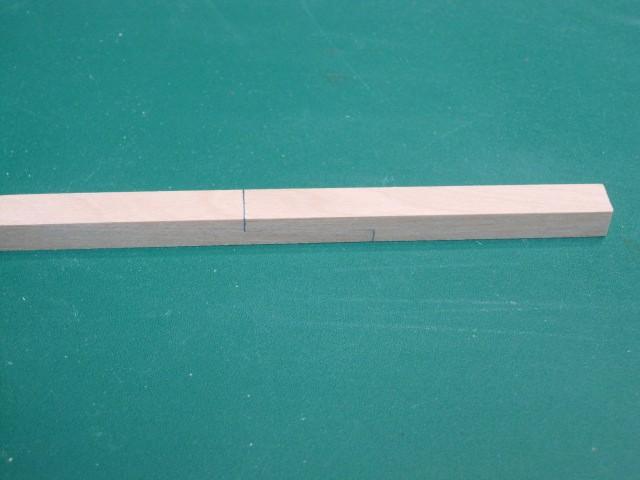
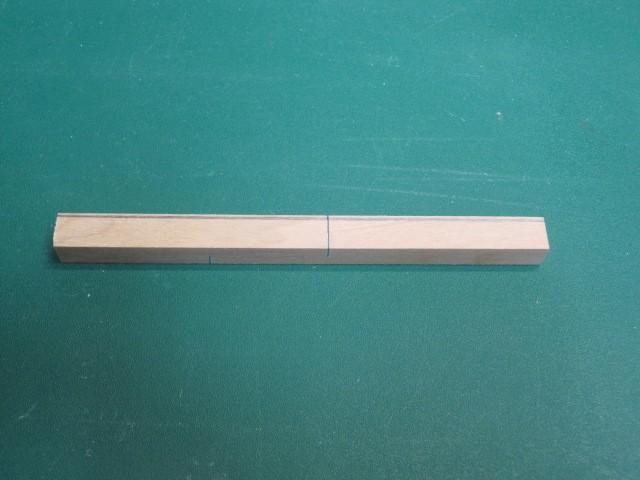
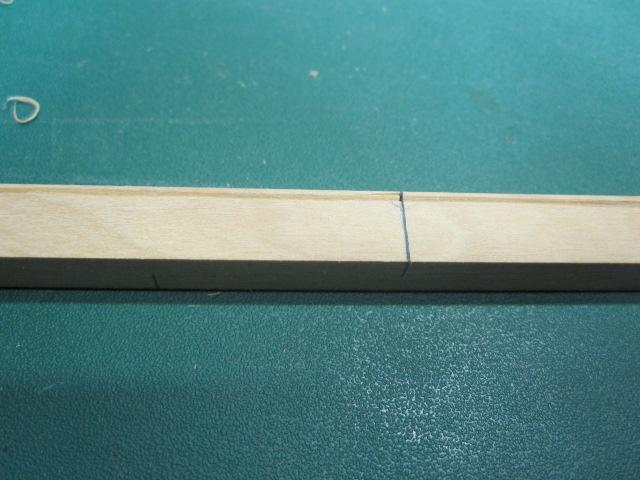
 Hi All, I'm reposting my old pictures. Here are the the pics of the keel being assembled. Here is the Keel marked for the rabitt and it being cut out. Here is the false keel.
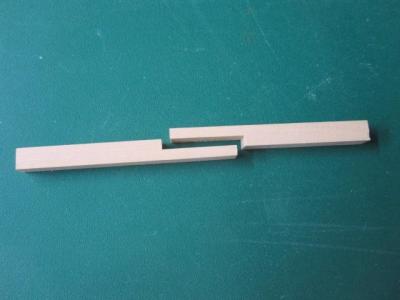

-
Hi All, I wil be attending David's and Greg's upcoming workshop in Baltimore. As the most inexperienced person who has ever attended one of these workshops (seriously) I'm counting on the great build logs that used to reside here being reposted. In anticipation of the workshop I had started to check out the build logs that were here and they were a great help in understanding what needed to be done. Earlier this week I received the wood for the keel from Greg and this weekend will be busy down in the shop doing my "homework". I'll start posting as soon as I have some work to show. Thanks in advance!