Search the Community
Showing results for tags 'Ships Boat'.
Found 14 results
-
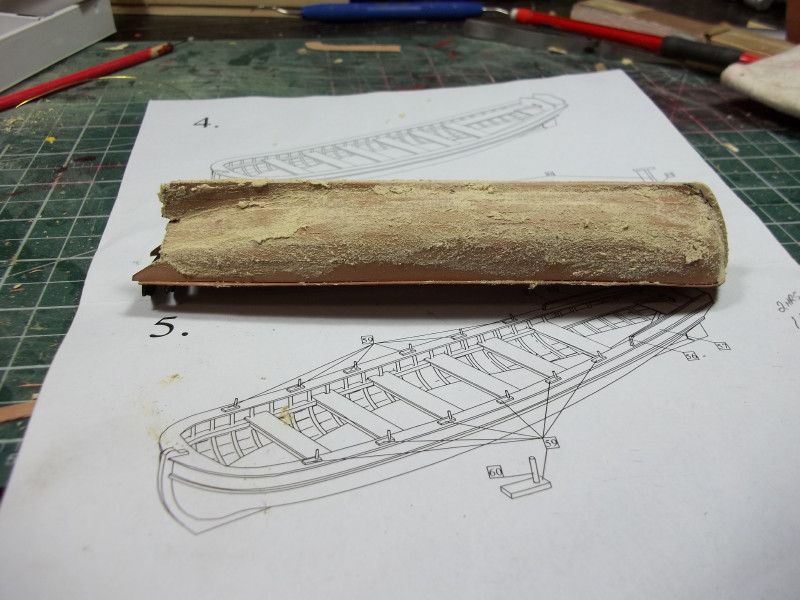
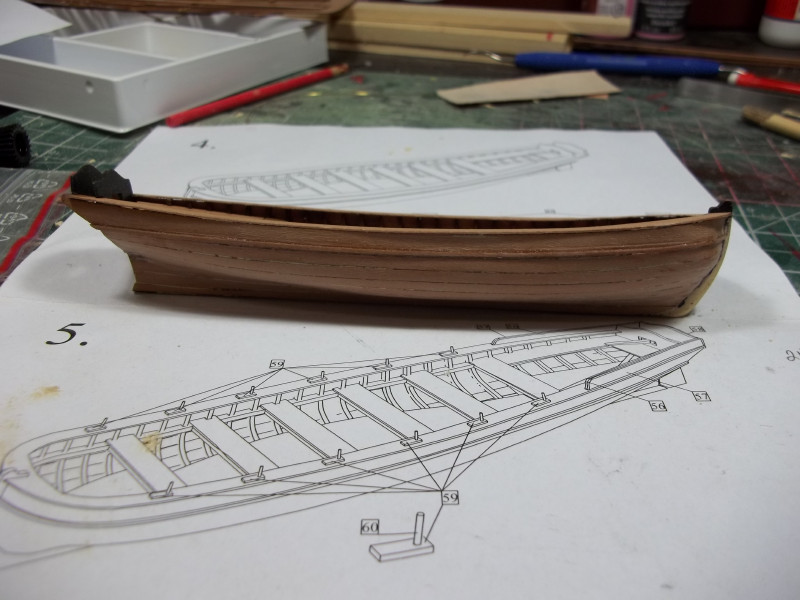
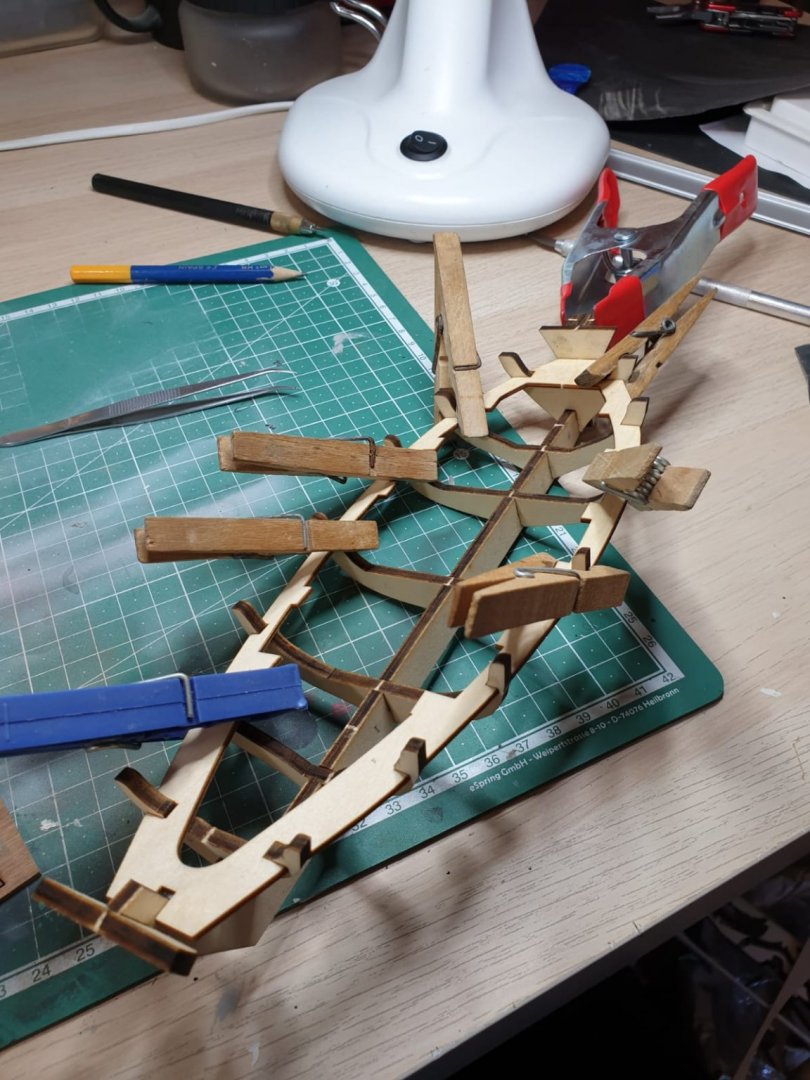
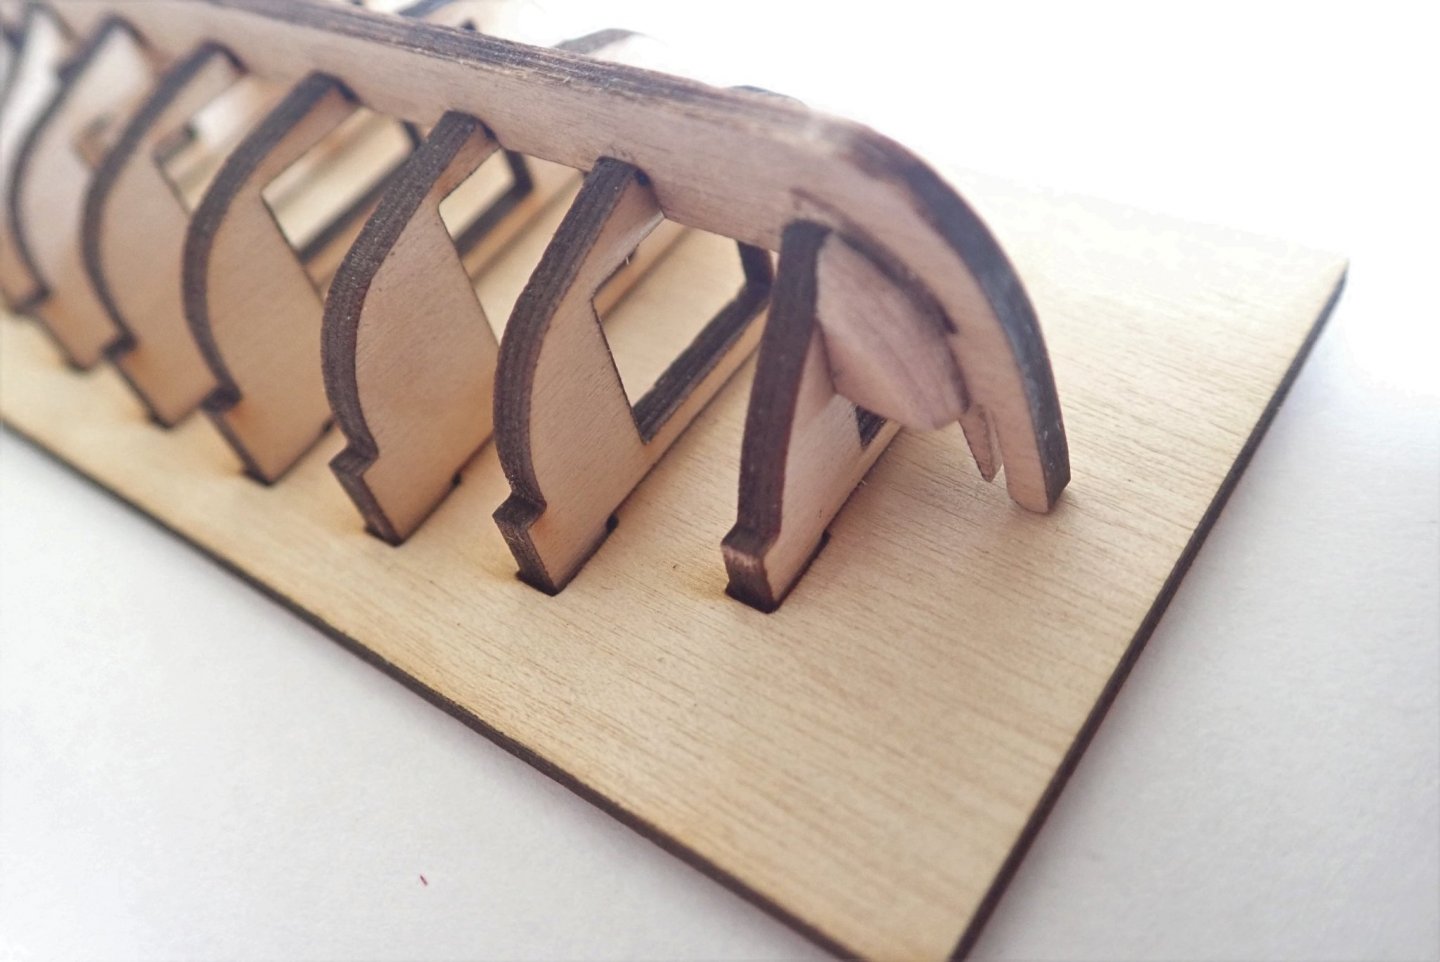
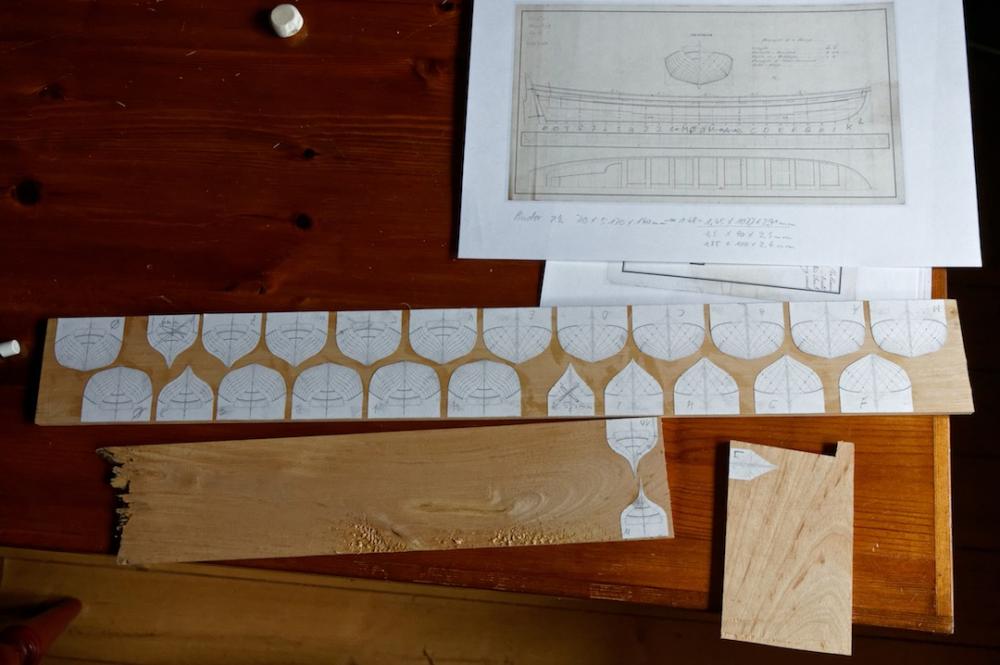
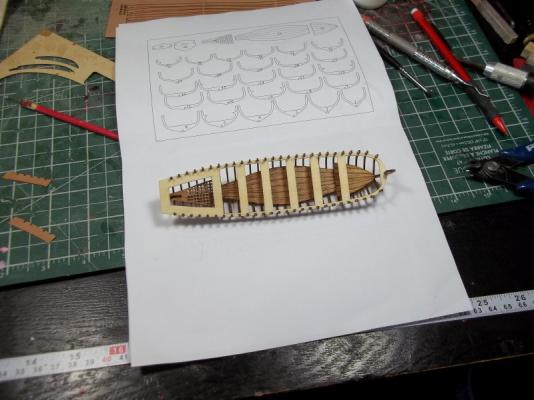
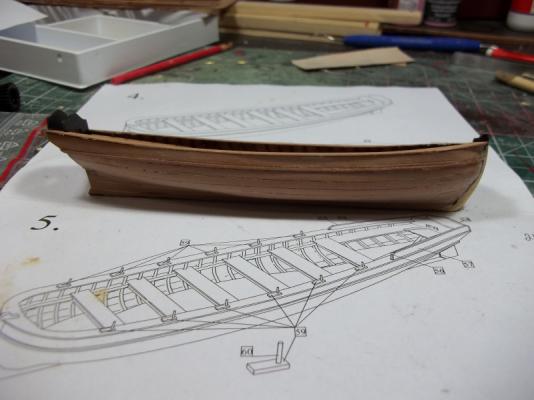
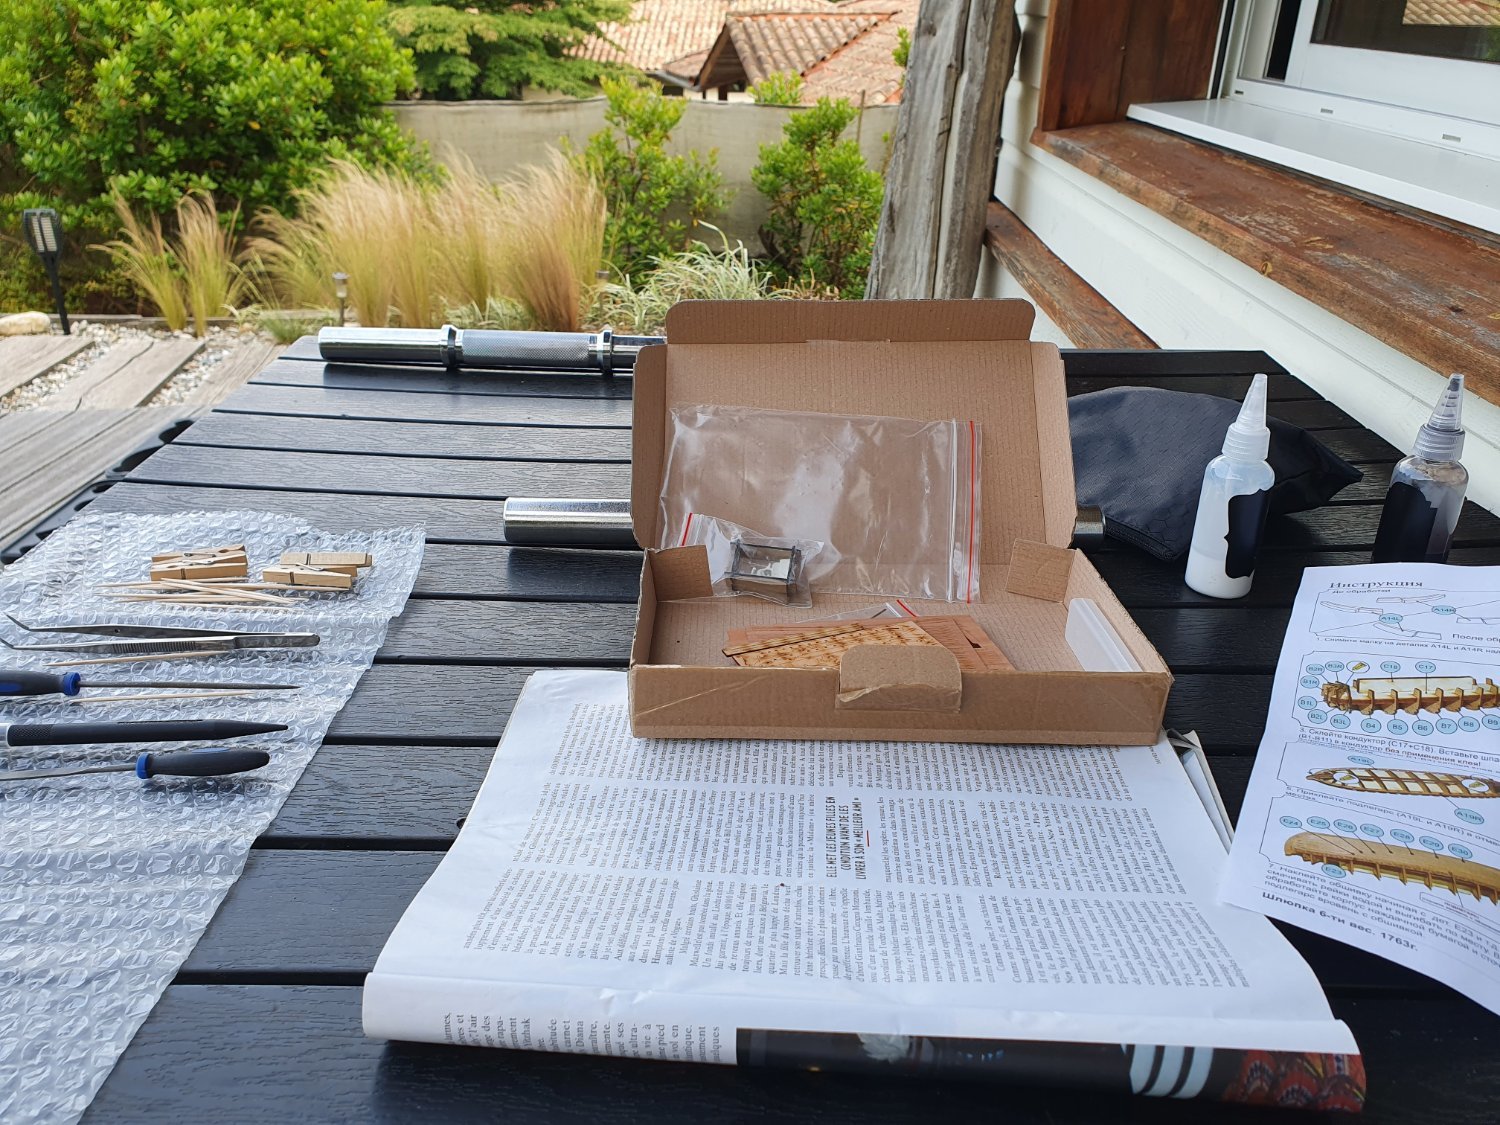
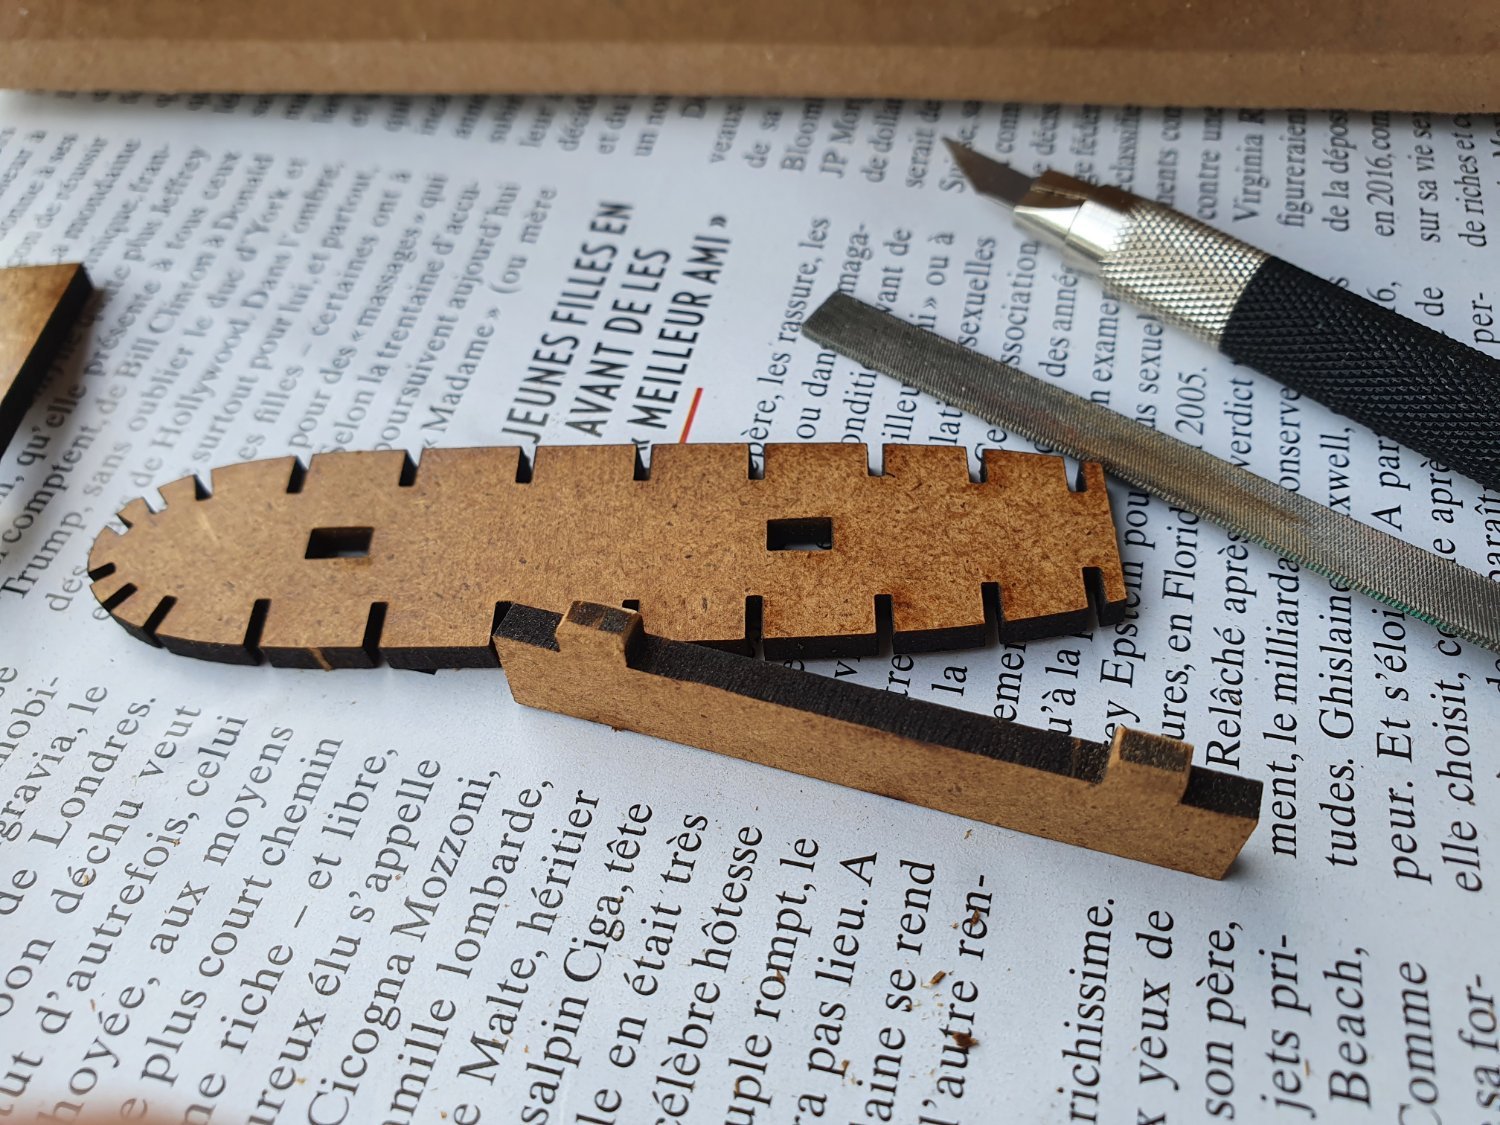
 This will be my first wooden boat build, so lots of learning ahead. Please correct my errors in terminology. The build is of a 15th C rowing boat, kit by Pavel Nikitin, originally marketed as a "Santa Maria boat". References to Santa Maria have been dropped from the maker's website, though the packaging is unchanged. If you'd like to see the box contents, Ron Thibault has an unboxing thread, here: Construction has started. The first stages were to assemble the keel, skeleton jig (?), and display base. When in the jig, the boat will need support under the keel This is about 3mm thick, suspect we'll need more than that, much more A question. I get that we remove the char from the edges of laser cut parts, but, are we supposed to thin the frames too? I ask, because the transom (?) comes two parts, a thick support, and a thinner decorative face. I have several options here, Open up the keel slot to accommodate both parts Split the decorative face to pass either side of the stern post Omit the decorative face - this will leave a part number exposed Other? FWIW, the part numbers are burnt into the boat's frames along with the bevelling guides (?) Thinning these frames to hide the part number will lose the bevelling guides; part numbers will be unsightly if not removed.

- 24 replies
-
- 6
-

-
- Ships boat
- Ships of Pavel Nikitin
- (and 1 more)
-
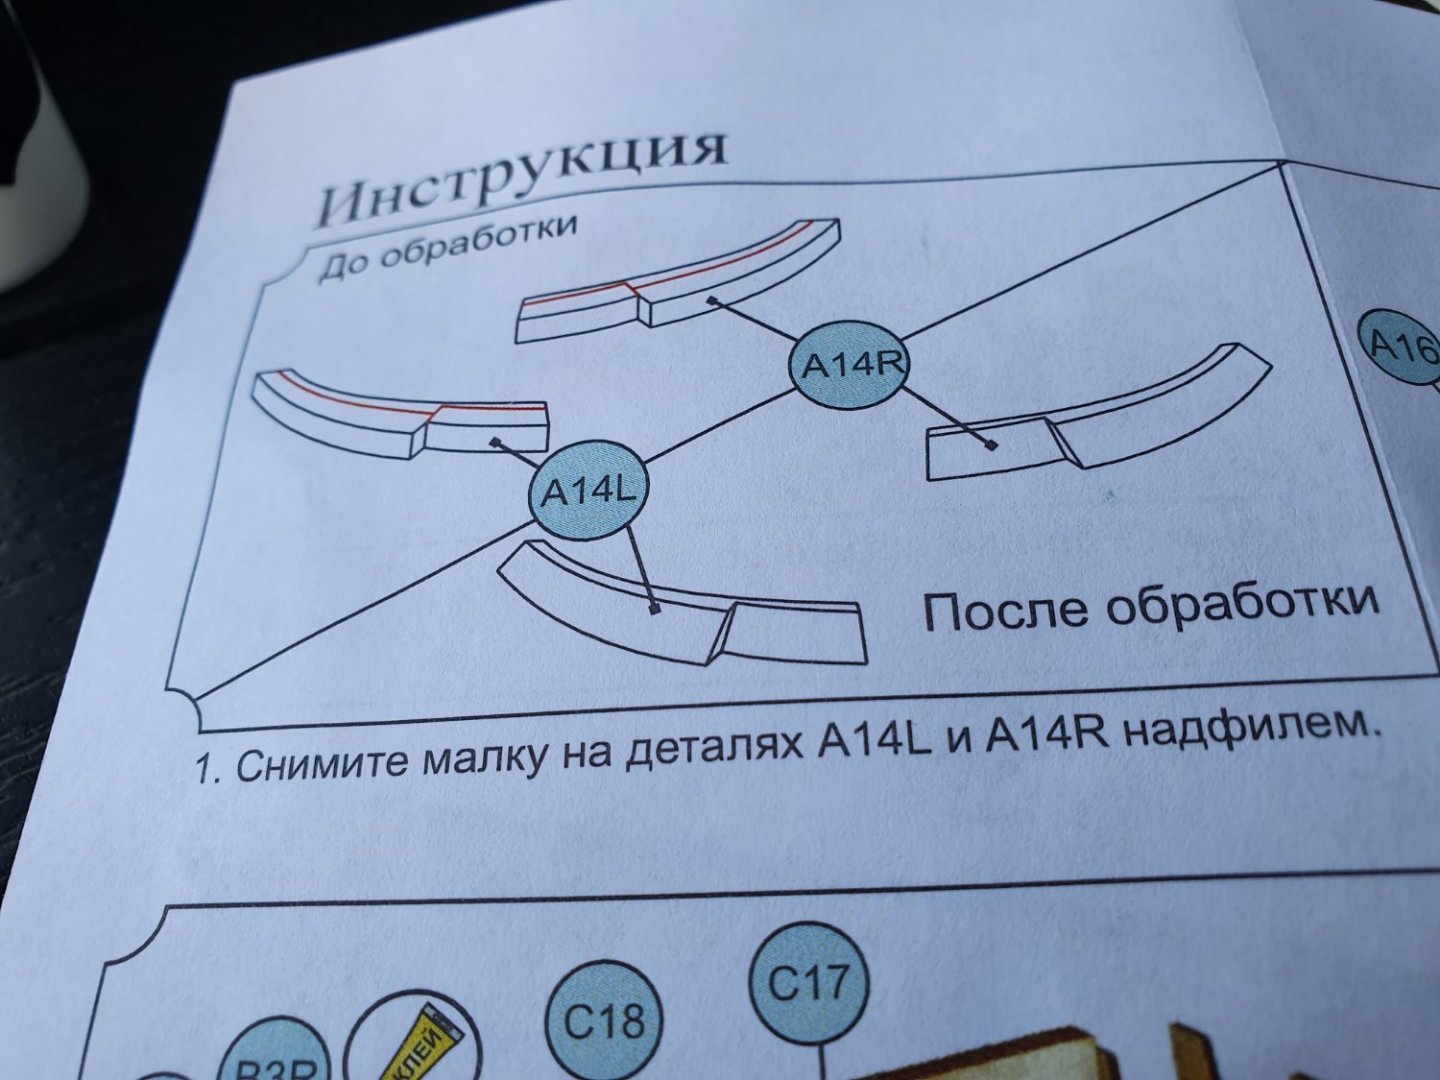
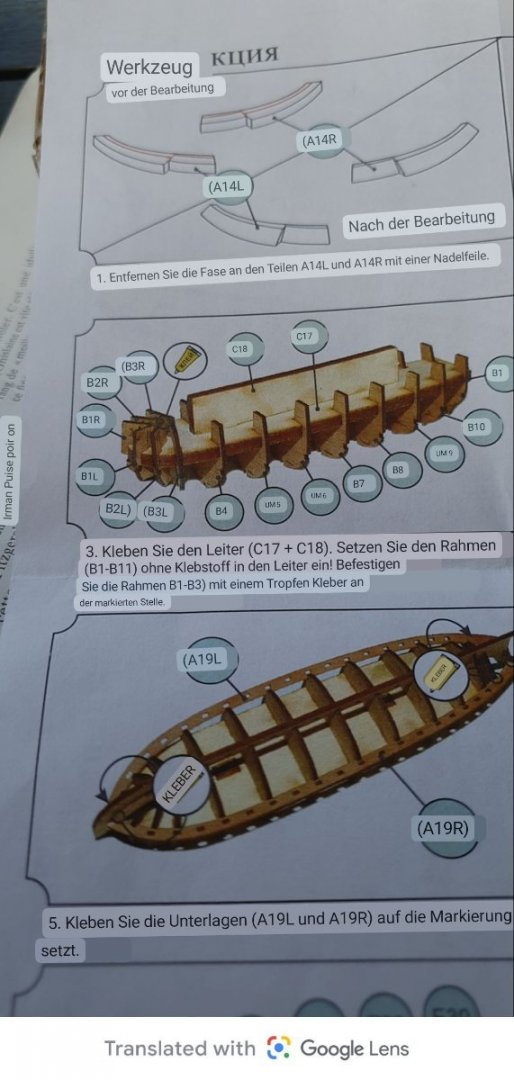
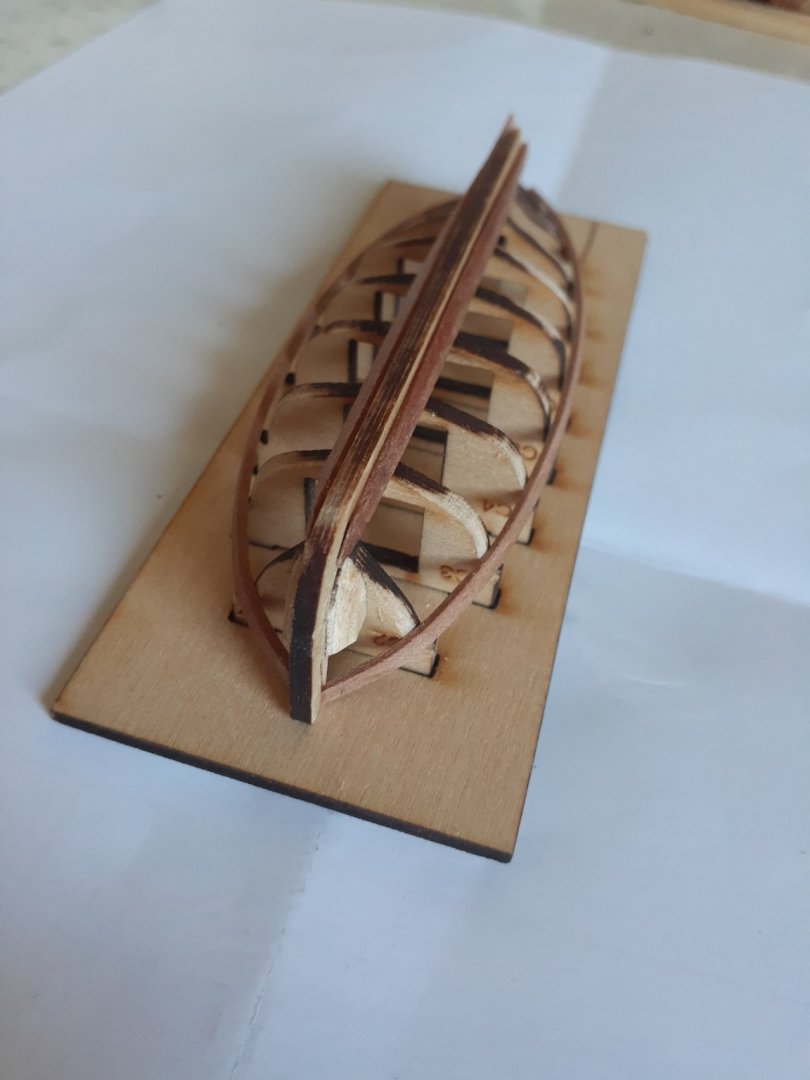
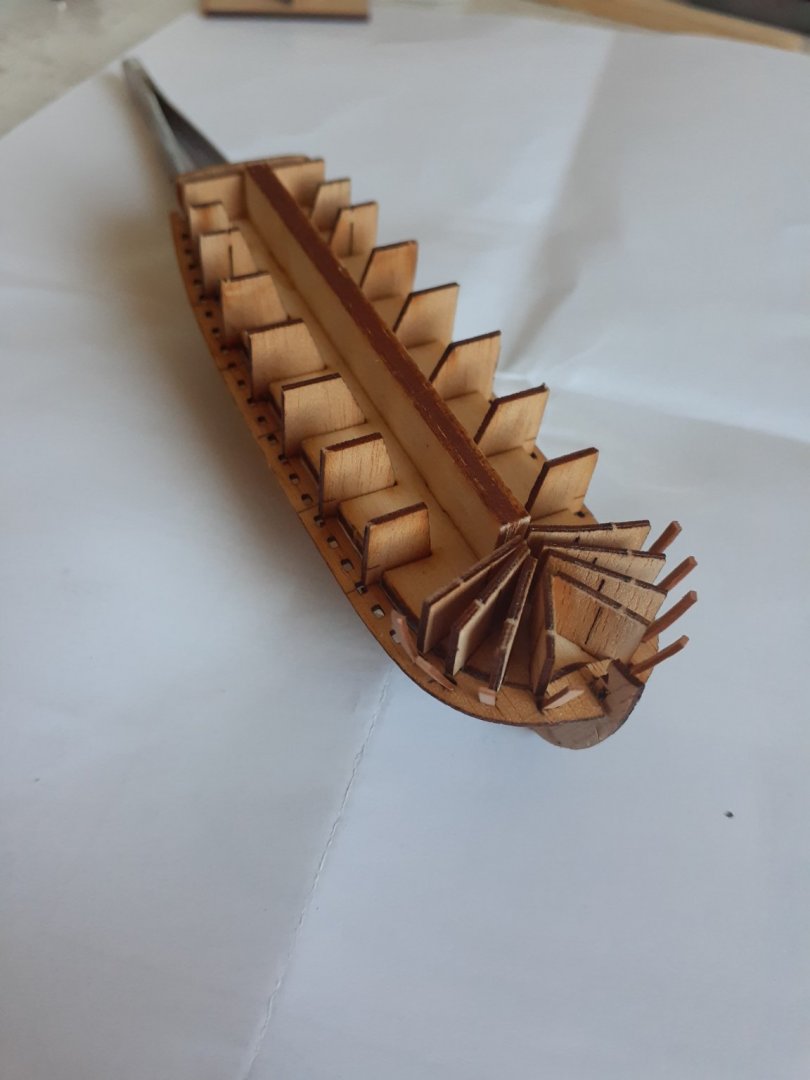
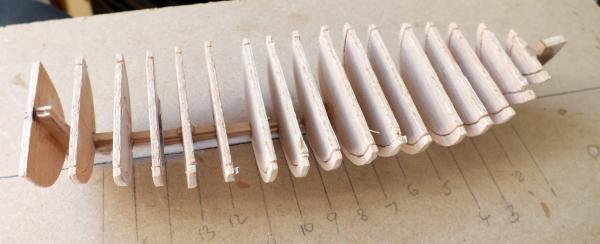
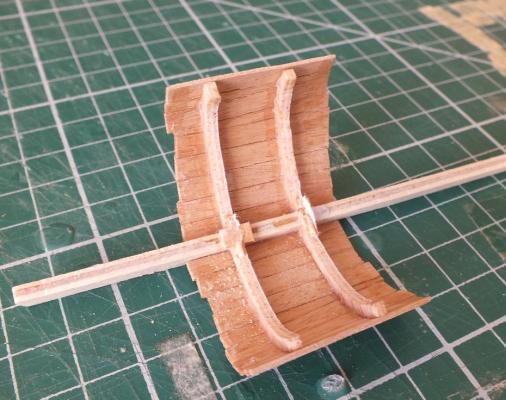
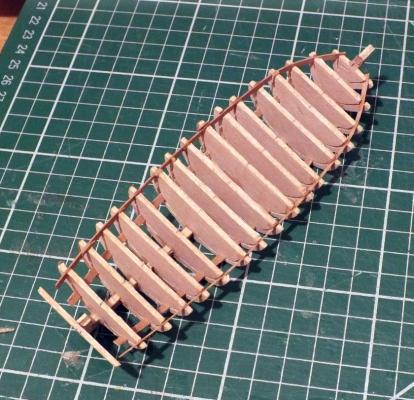
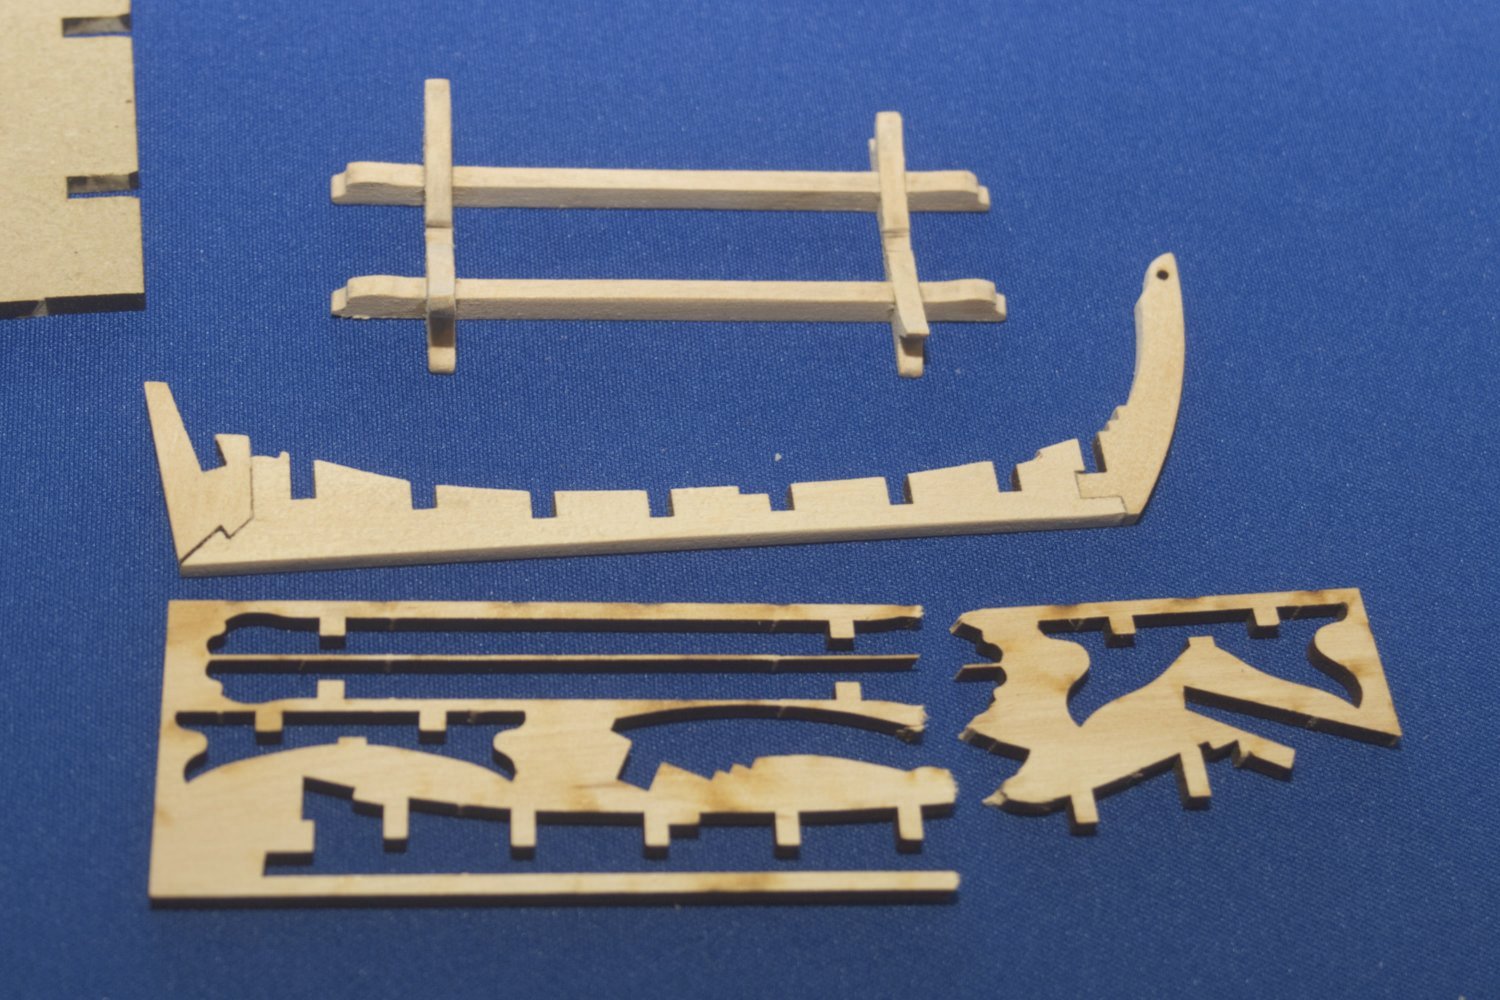
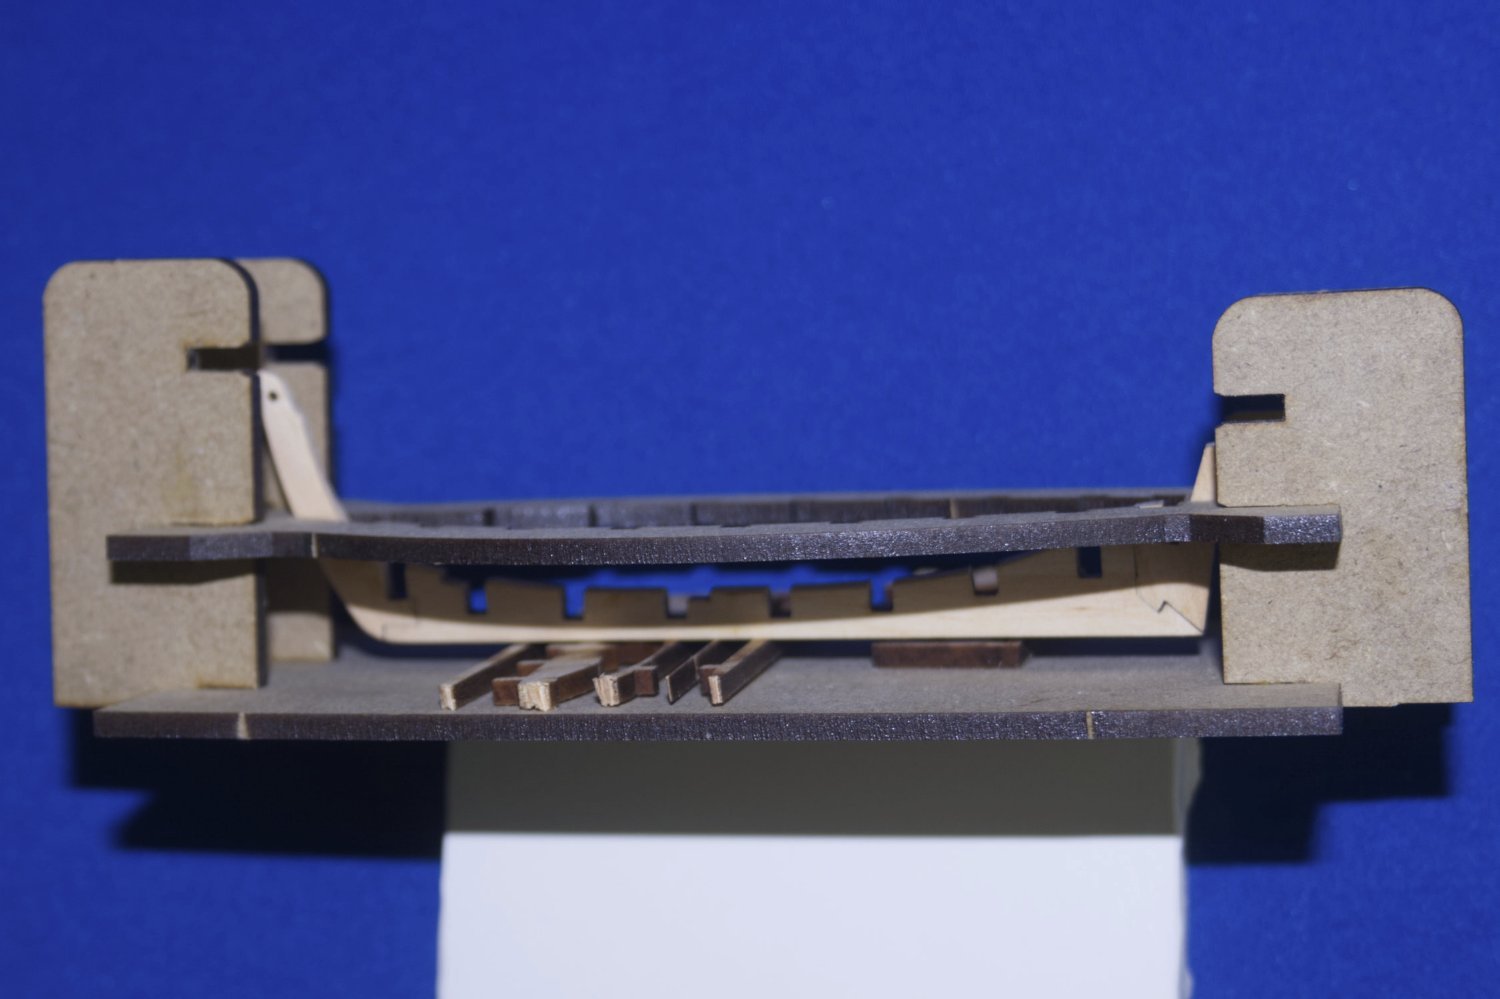
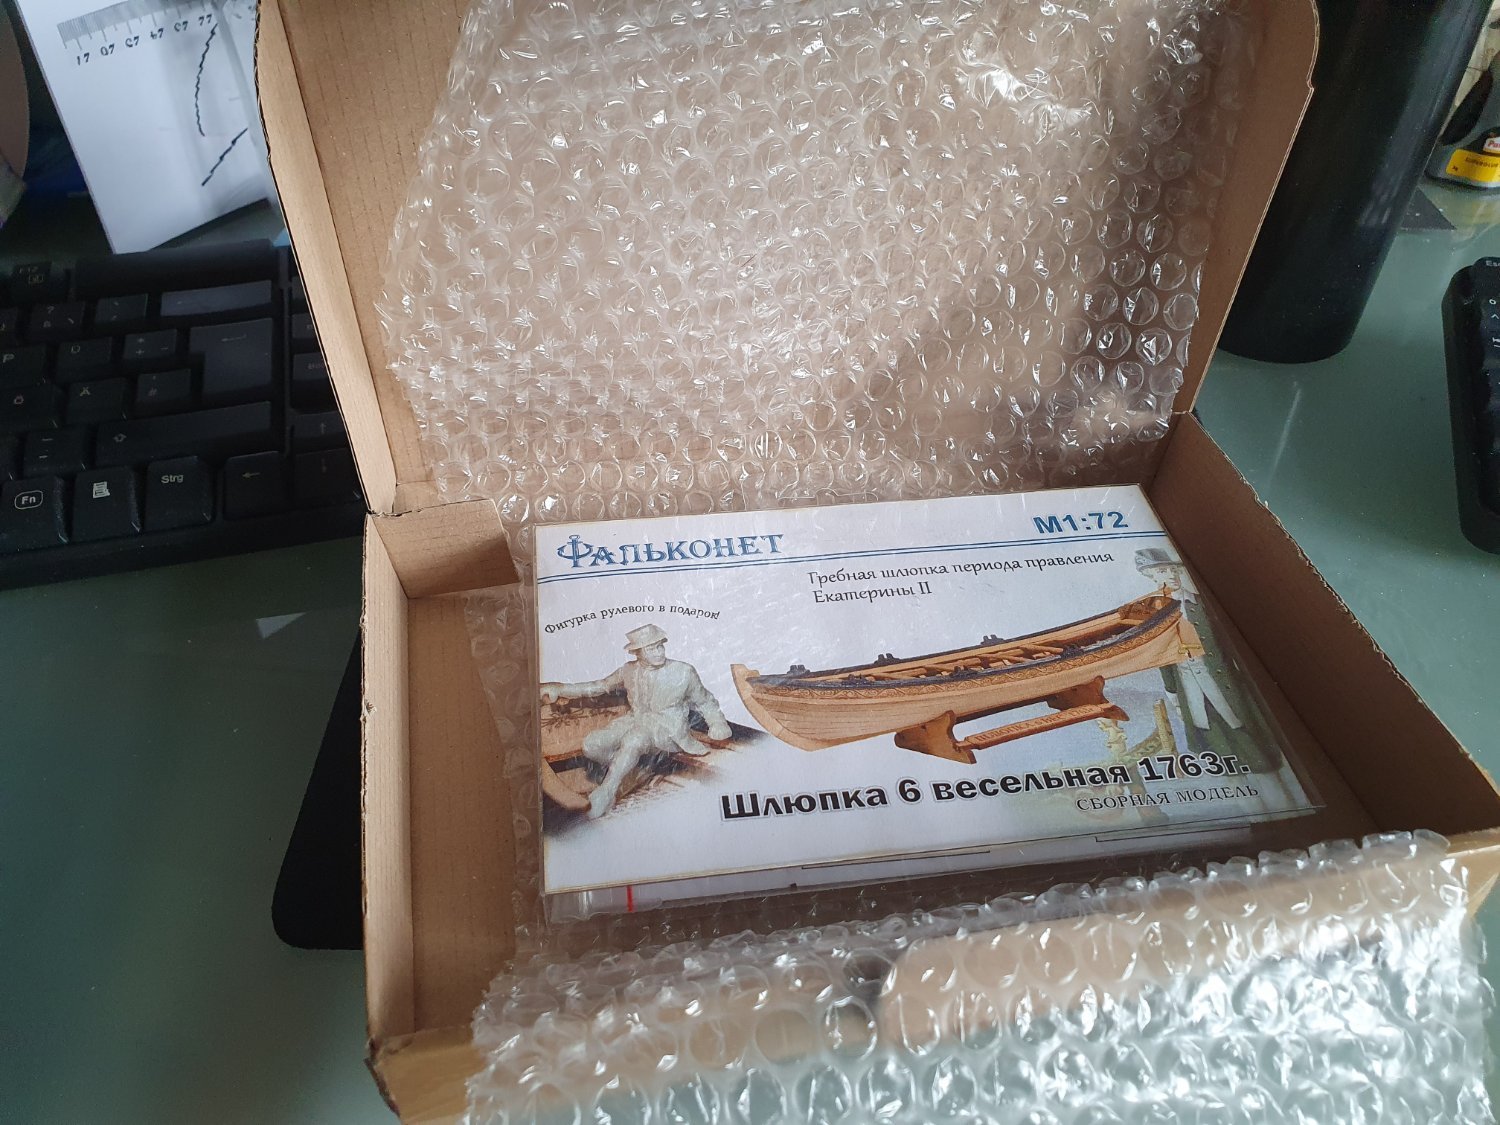
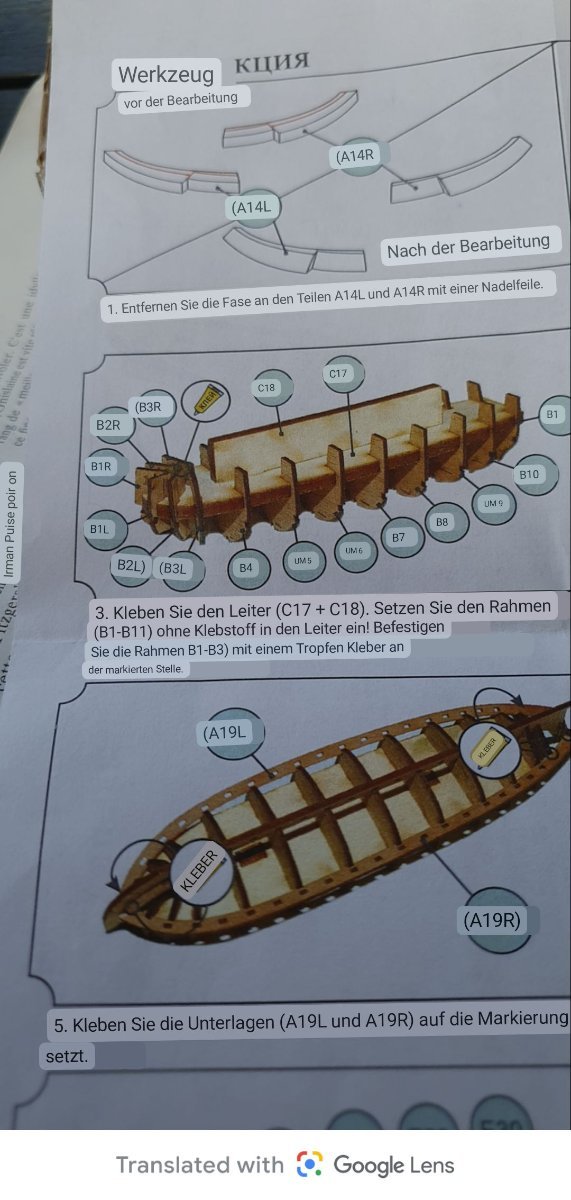
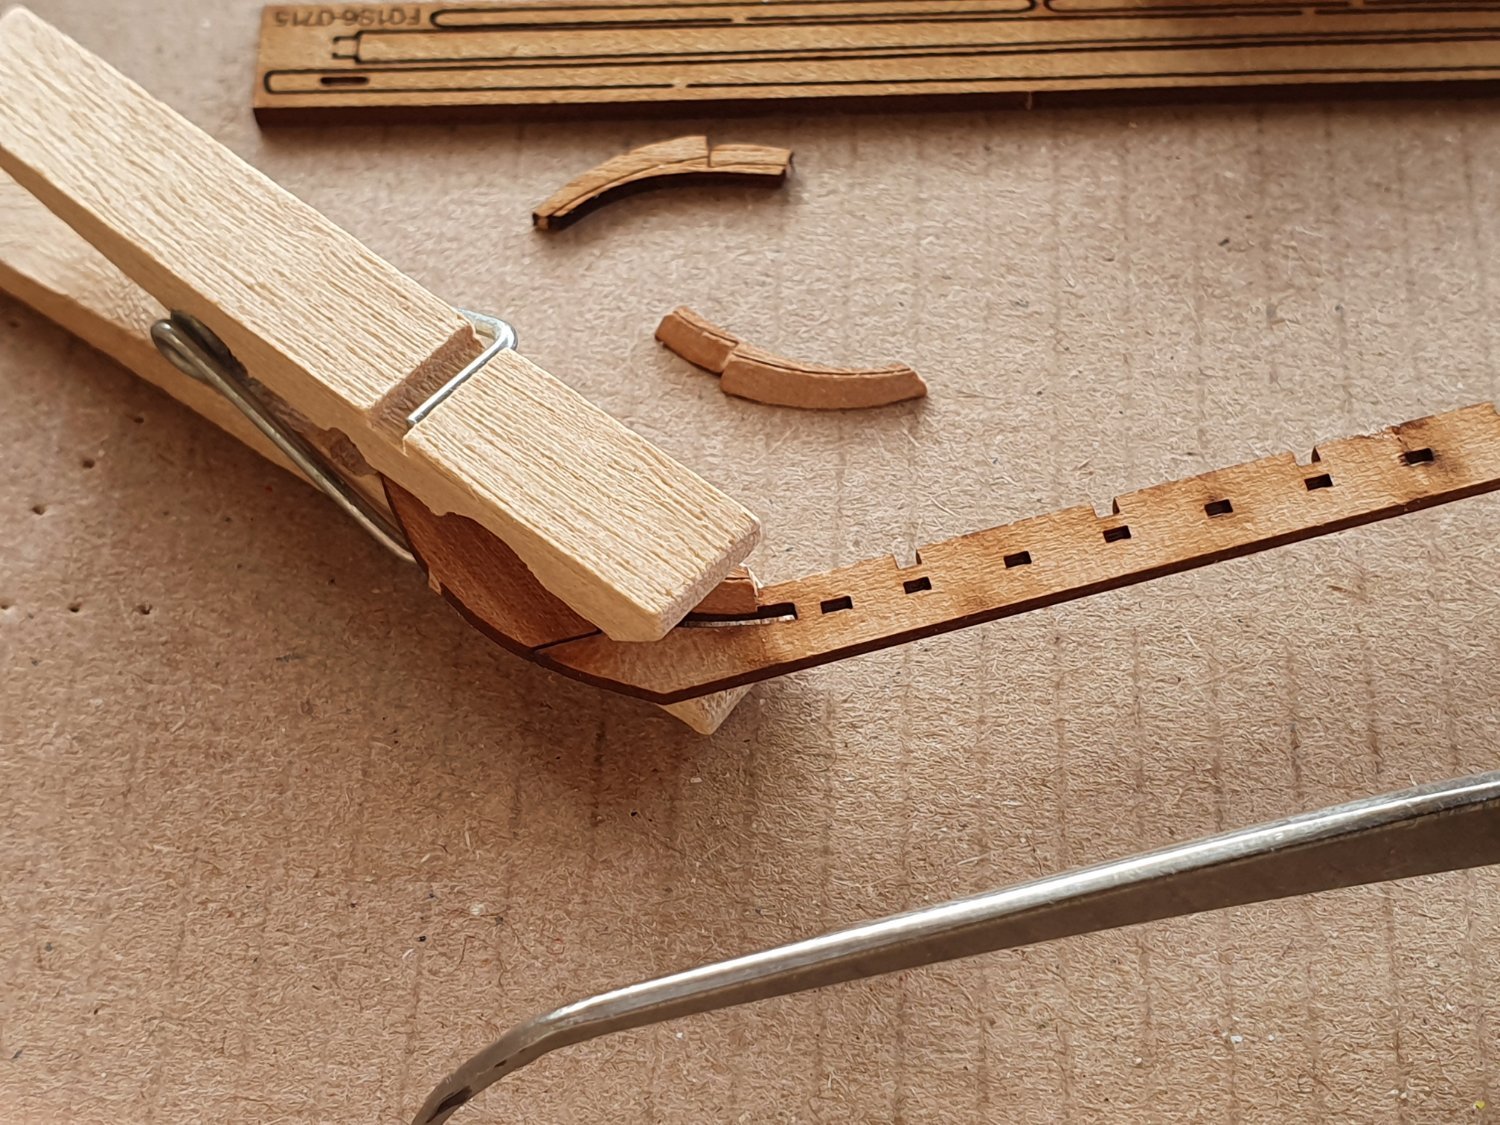
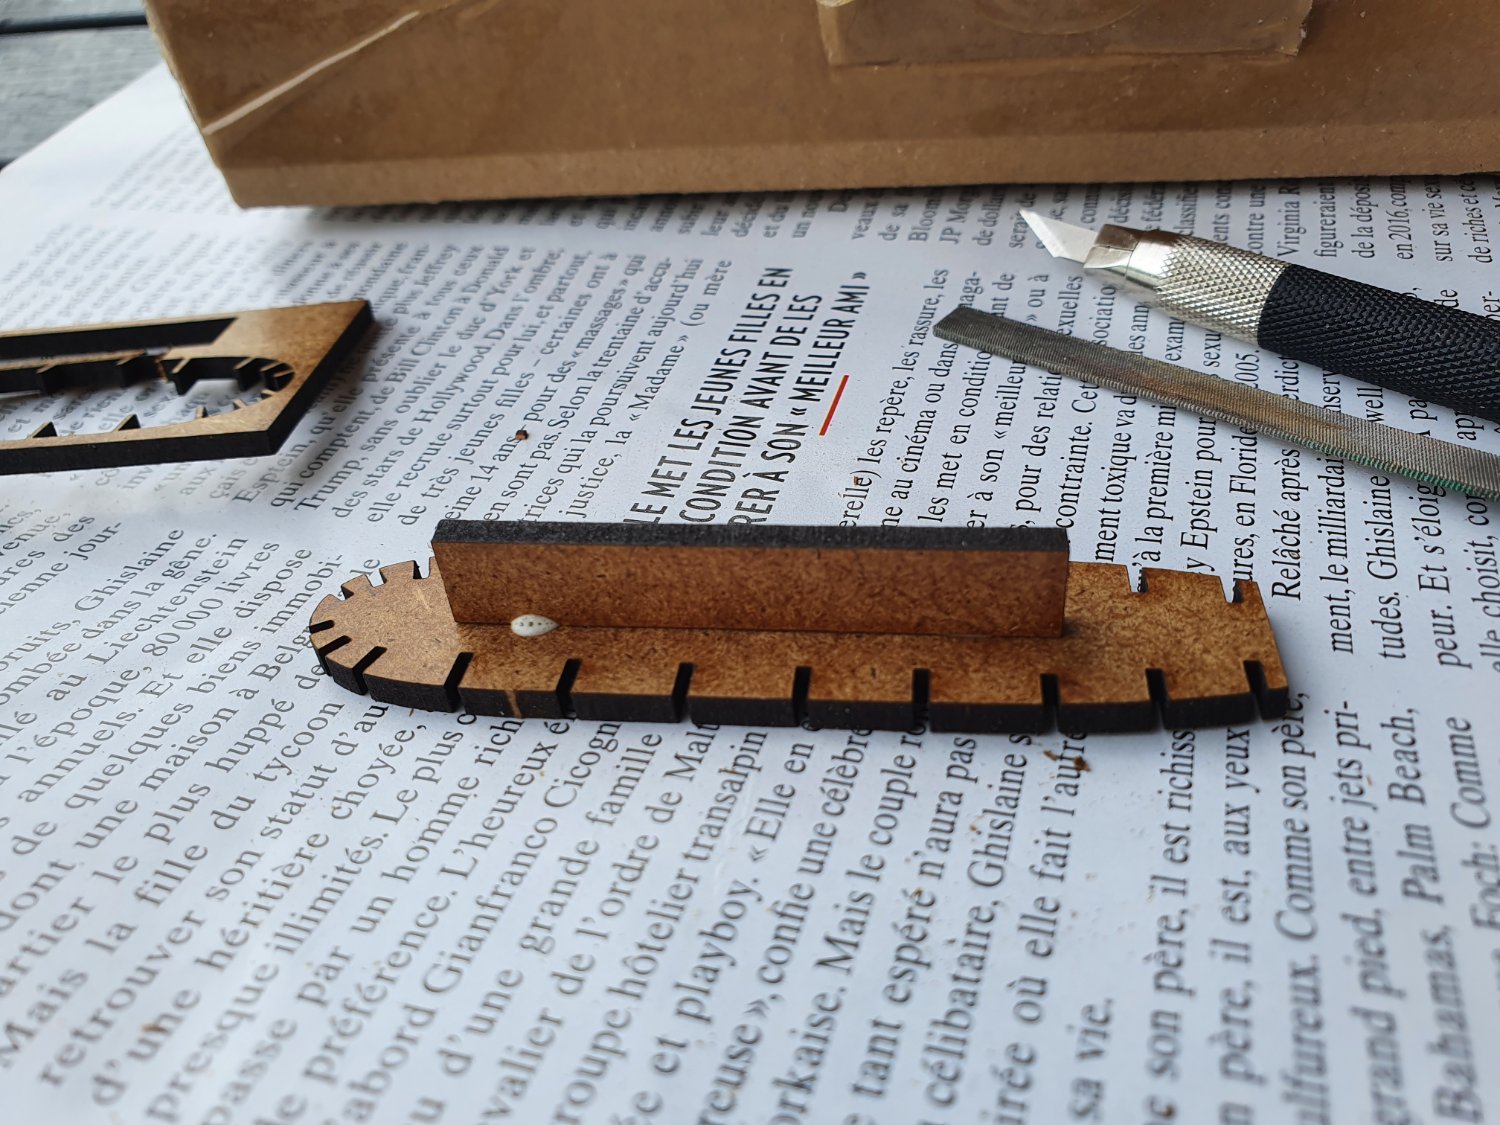
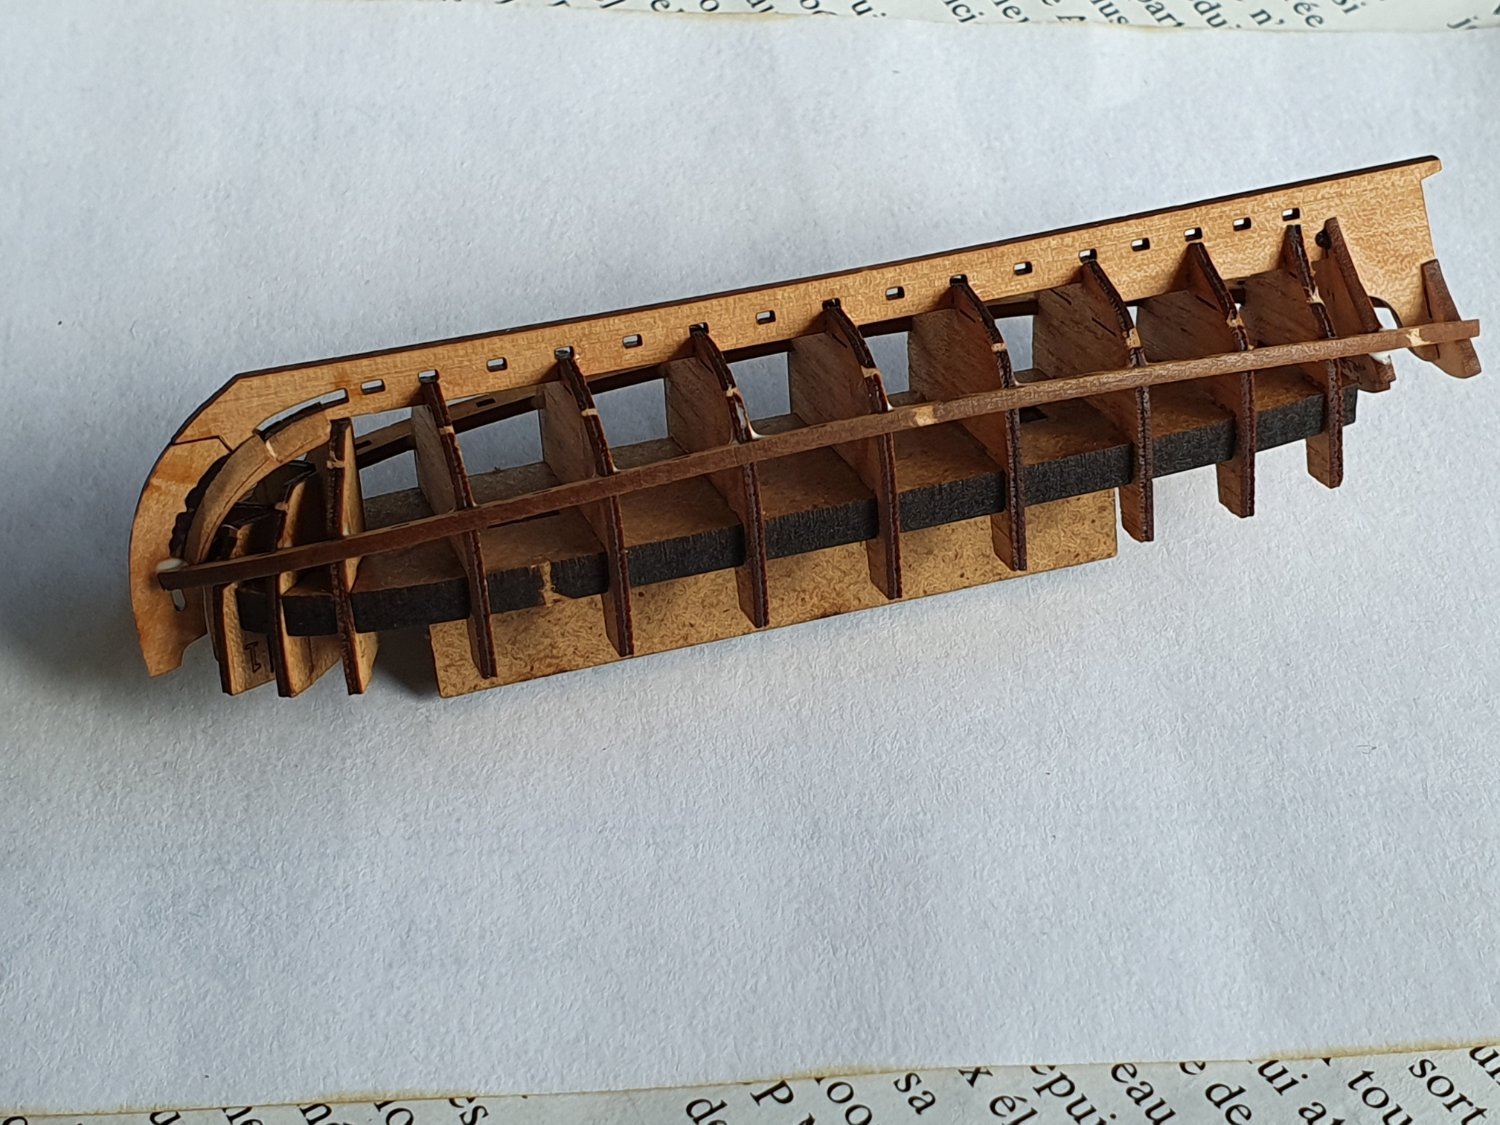
 Ahoy there! What´s up, doc? Vacation with my family. My kids all in the age of puperty used to sleep until the first half of MY day is wasted. So I decided to make use of this quiet time and take a kit with me: the Falkonet 6-oared boat. Its a very nice kit and due to recent experience with a Shipyard Alert with klinkered hull I dared to try this one. My working place was like this: Southern France, Atlantik Coast (Biskaya), you could hear the sea crashing into the beaches (a surfer-paradise nothern Biarritz and Capbreton) - a cool breeze even when the sun burned hot. The start was more tricky than I expected. The plan showed this: But the part A14R uand A14L was available 2 times each!!??? And my russian is not good enought to understand the text. And even the sketch confused me, since the direction of the milling seems not plausible!? It was clear: those two filling pieces support the connection of stem post and keel - and also provide gluing surface for the planking in the bow area. But .. why then a step there? .. and why two pairs of them in the set? An Englisch Pool-technician (thanks Willliam!) gave me the hint: use your smartphones google-browser to translate. You can even translate graphics via hte smartphones camera!!! .. and you can "share" and save that picture: Ups.. sorry, now this translation is in German - which fits well for me.. But although its just a google translation its getting clearer than cyrillic russian texts for me. But still it left me with the question: why in heaven are the two sets of this filling pieces - and even on different thick sheets? I decided to ignore this question and just start with the thicker ones! Milled them in shape according to the lines (ignoring the misunderstandable sketch in the plan - et voila! The filling pieces in place beside the division line of keel and stem post. Aligned so the slot beneth it would not be covered by the step of the filling pieces. Next step is preparing the slade (correct wording?): These where the first parts I needed to file a a bit so that the tongues fitted into the openings. But in general there is not much rework to be done in this laser cut set. Just sanding the cutting area.. and maybe getting rid of the burned edge if you don´t like the dark appearance (which I did not do). Then the frames had to be set loosly into the slade. Only the 4 front ones were allowed to glue together to each other so they don´t get lost. Added the Keel (onto which I already glued the transom and the rear bulkhead) .. Those two rails had to be added too .. And the small kit slowly became looking like a boat ...
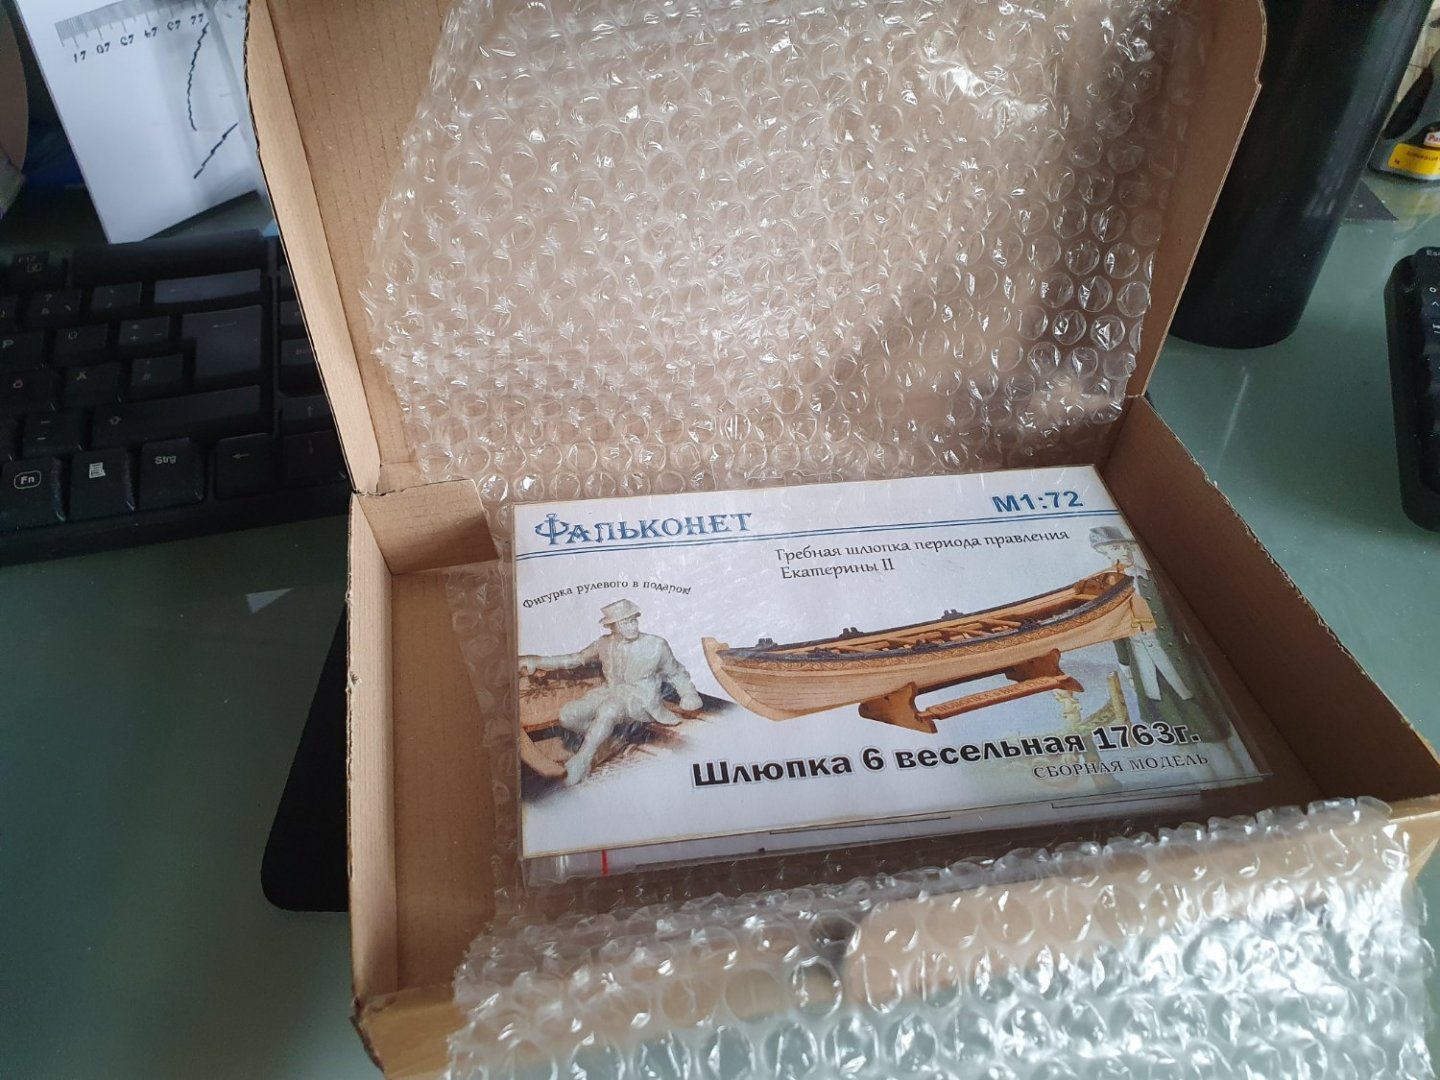


- 6 replies
-
- 8
-
-
- ships boat
- Falkonet
- (and 1 more)
-
 Hi First build. Going slowly and try to think thru all the steps.
-
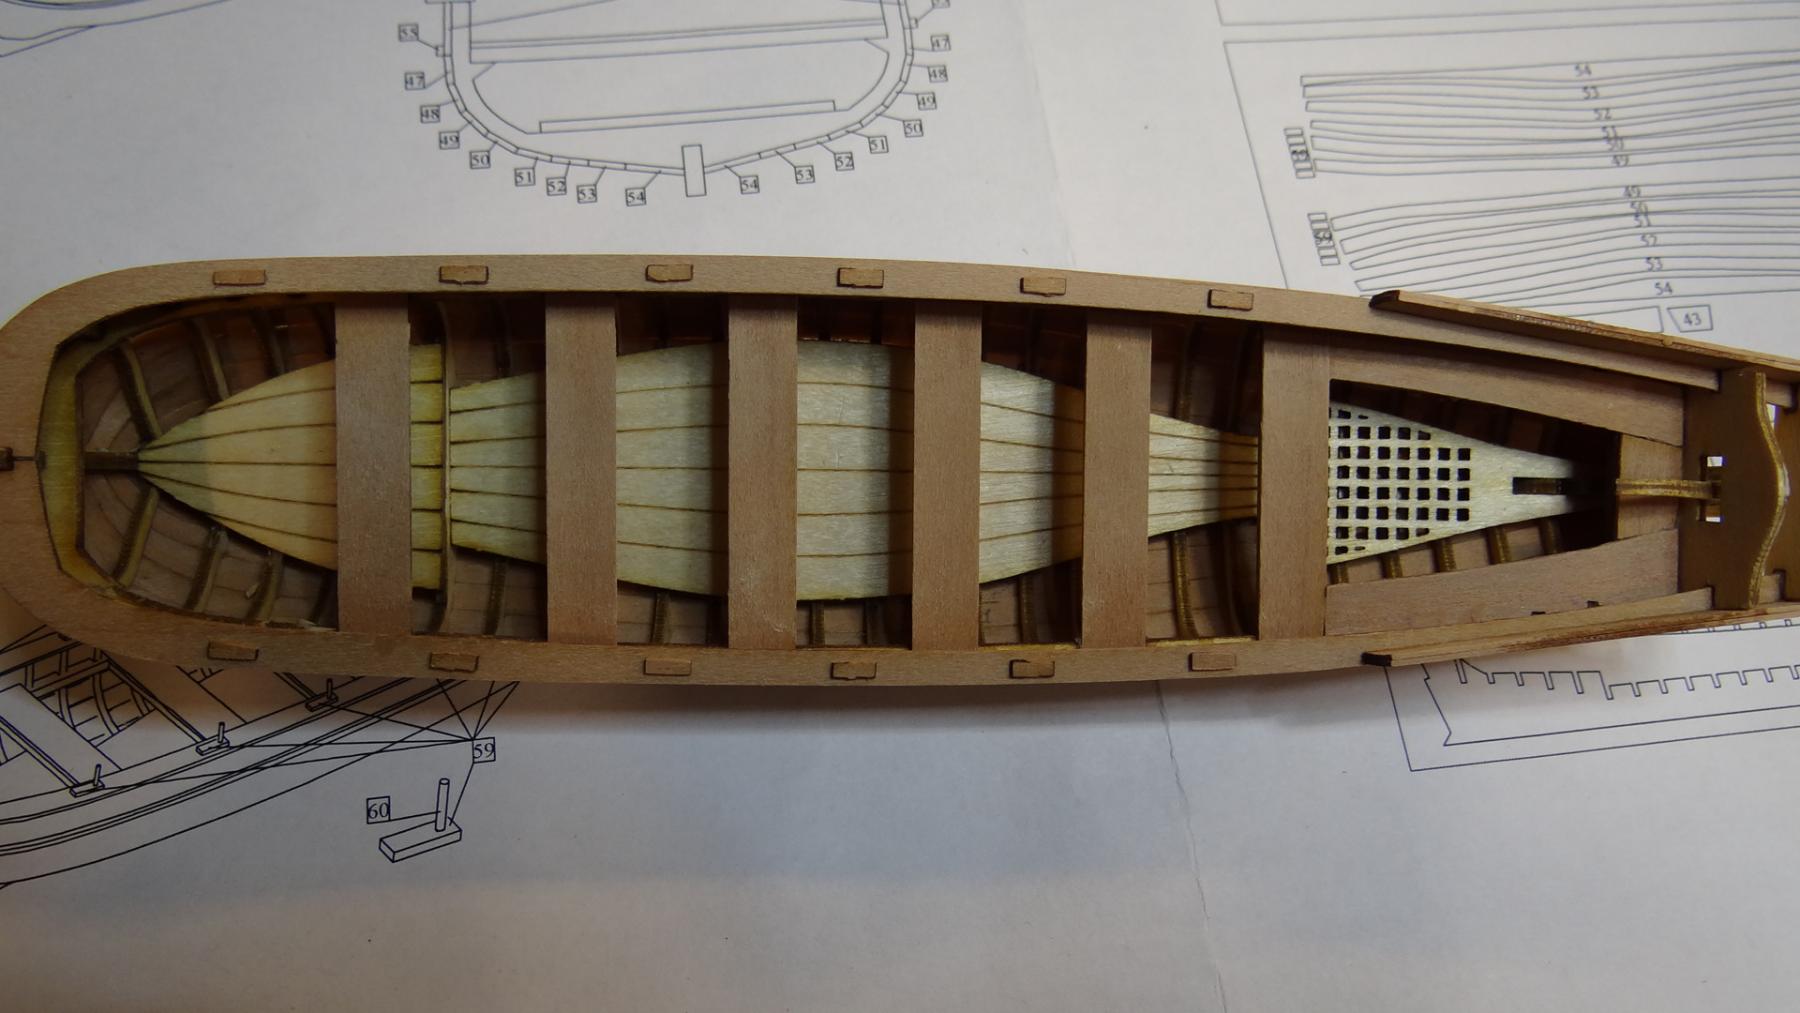
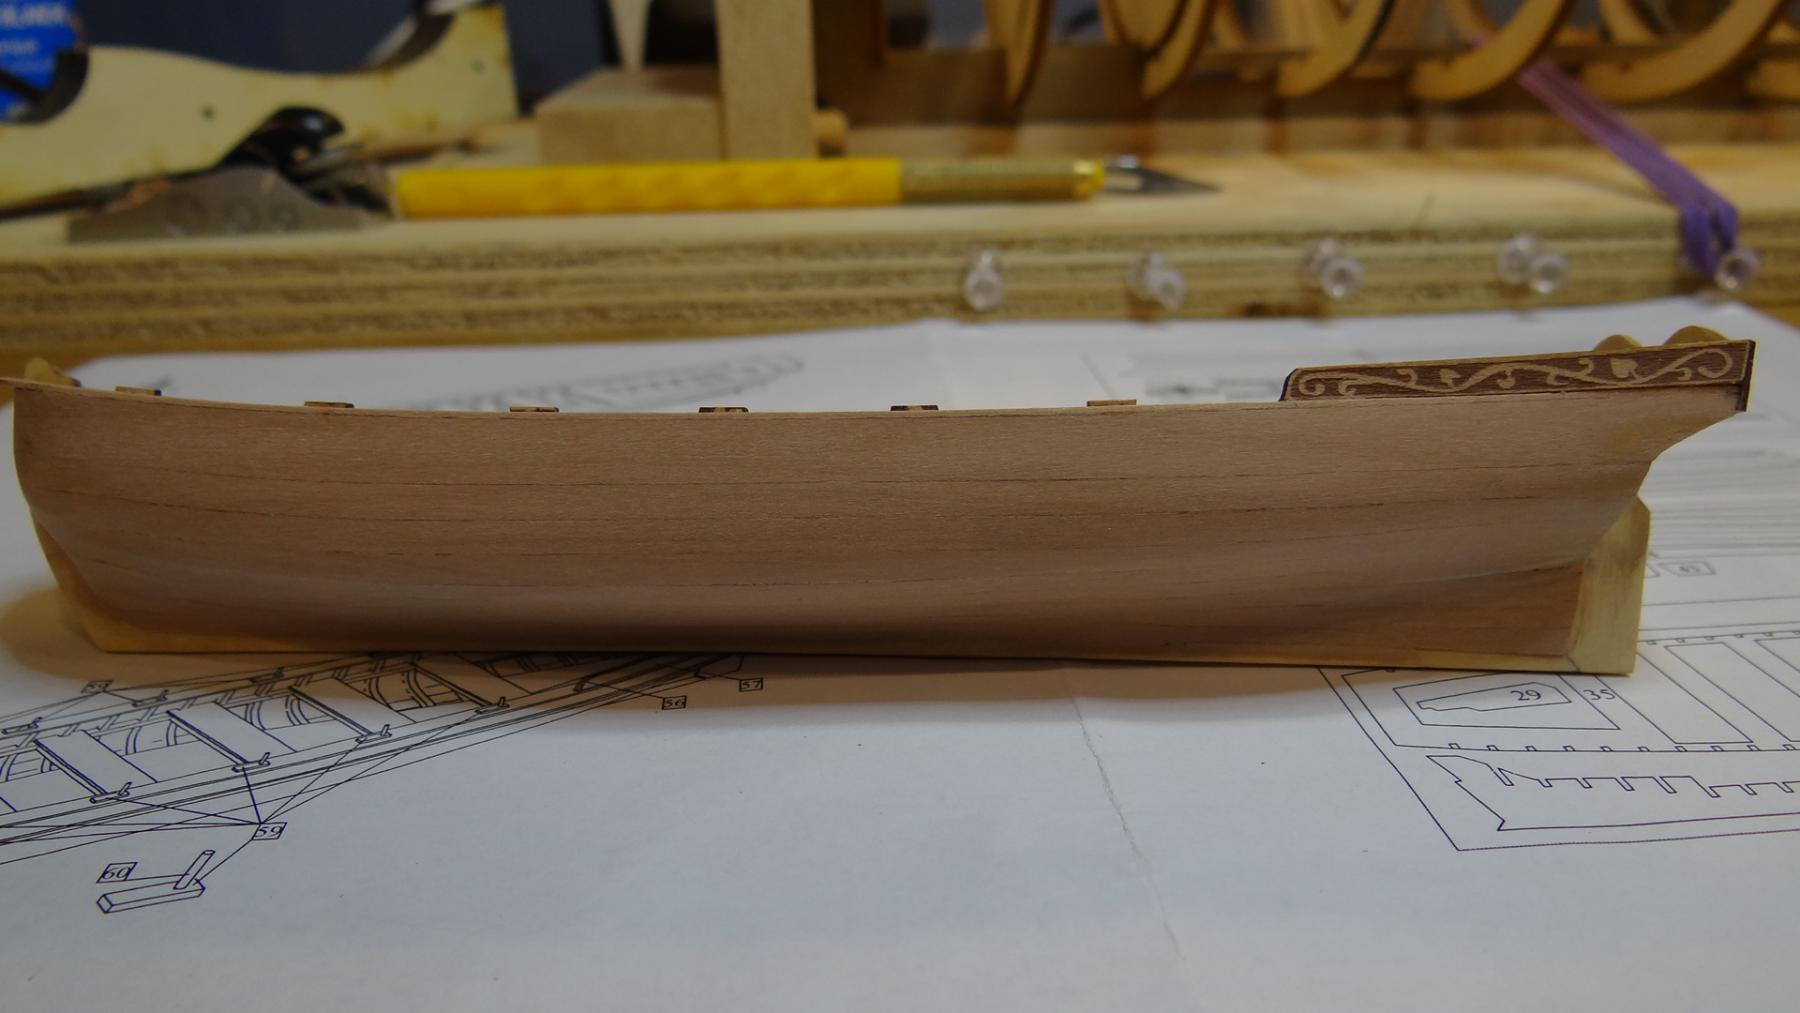
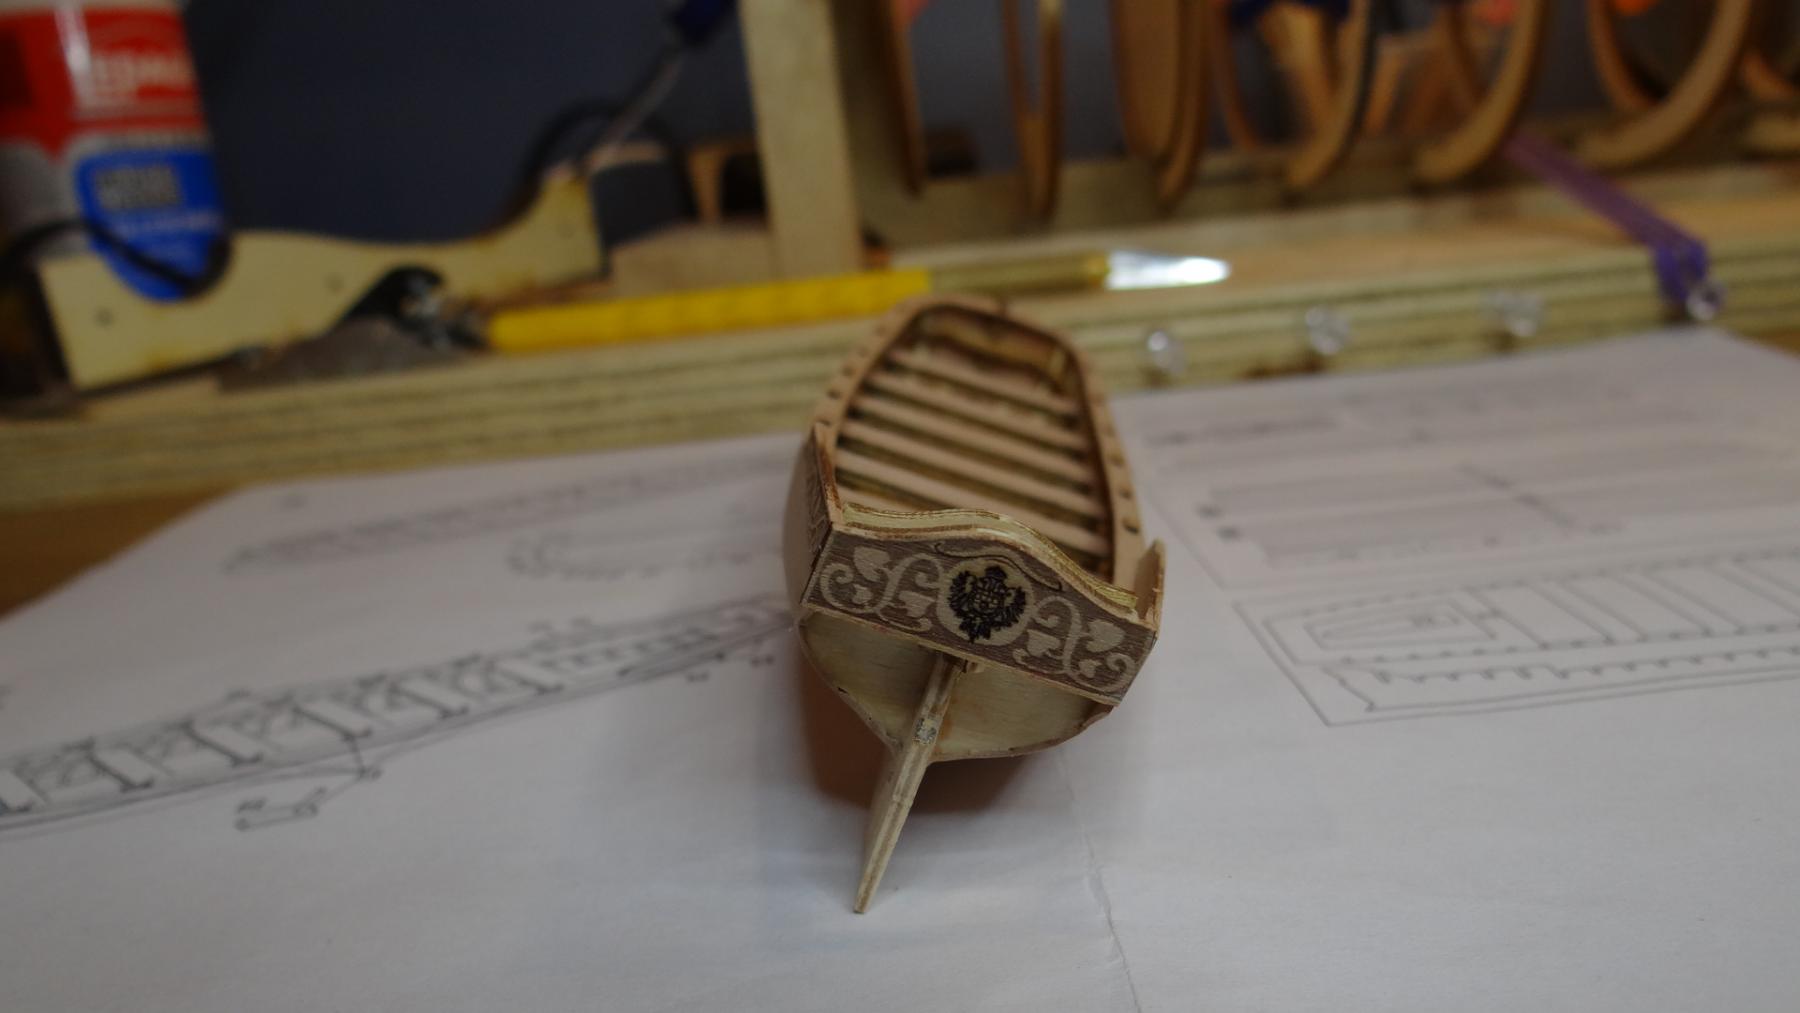
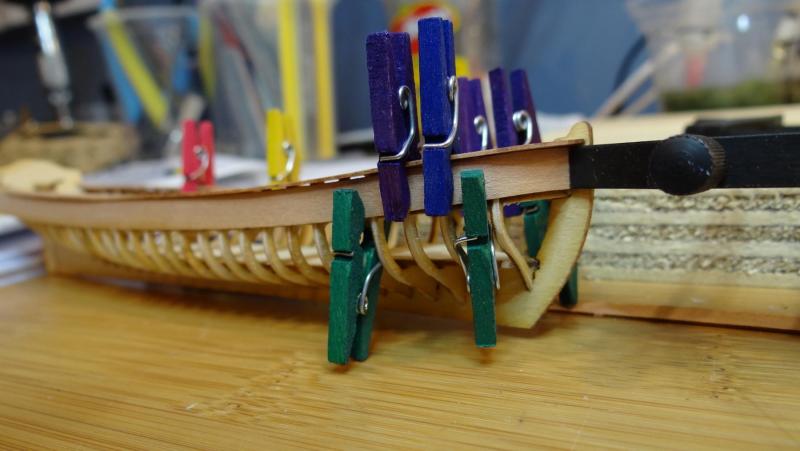
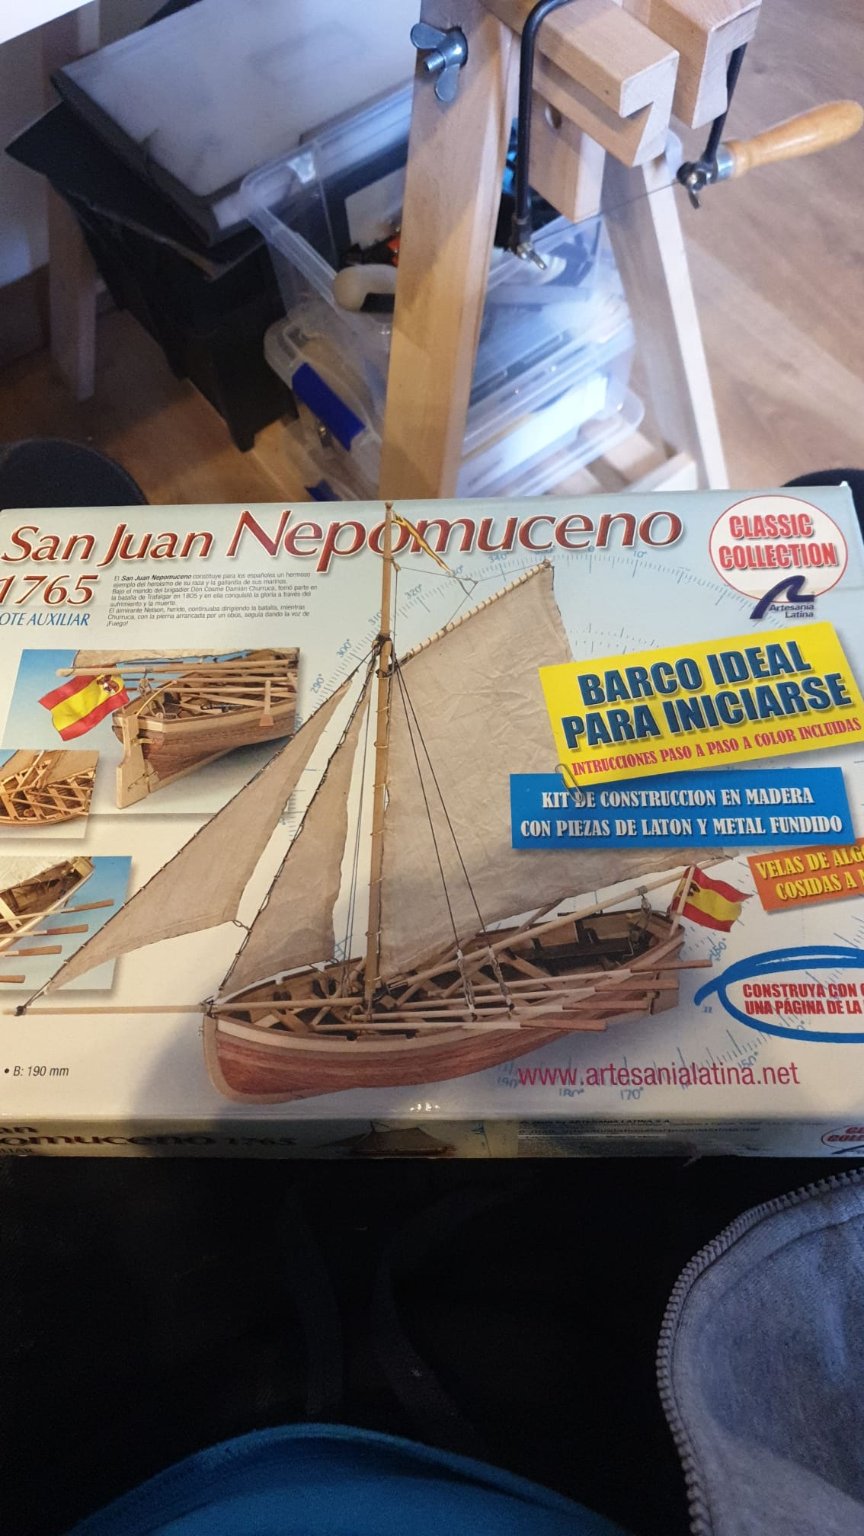
.thumb.jpg.5a33ce11c7bd2c0f448734dd2e7ea95b.jpg) Hi everyone! Been a few months since i posted anything. Landed an internship while finishing my career, so its been quite busy. Anyway, i managed to spend any spare time i had left on this model boat i got in a second hand website. Its the San Juan Nepomuceno's Captain's Boat. I've looked around and it seems that this one is going to be one of the first completed build logs of this particular model, so i am quite honored. So, i got this kit after i finished my Bon Retour. I read about the original Man' O War, named after the Saint, patron of the spanish Marine Corps, its captain and its heroic stand at the battle of Trafalgar, being one of the last remaining ships to wave the white flag, and its captain Cosme Damián Churruca, who died at said battle, when a british canonball took his leg. During the battle he faced, alone, 6 british ships, and died still shouting to his men to keep on firing. The british, admiring his courage, had the ship in Gibraltar exposed to visitors, with the name of Churruca in gold letters written on his cabin. He was appointed Admiral posthumously, and in his memory his nephew received the title of Count of Churruca. Sadly, the ship served then under british colors, until it was sold and scrapped for materials in 1818. I really recommend giving this topic a good read, it is really interesting. One day i hope i will build the actual San Juan Nepomuceno, not just the little boat. Anyways, lets get on to the build log! Here is the box it came in. Its an old kit, the original owner seemed to have had it for a long time. That means the wood is not quite as strong, as well as (being an Artesania Latina model), the wood is not of the highest quality. I had to fill with wood potty some holes in the frames, and actually broke some parts, but i managed to glue them back together like nothing happened. The first thing i have to comment, aside from the really low quality wood from the kit, its actually its instructions. I suppose, since this is a beginners kit, they put a little bit more effort in making the instructions, and it shows. So, pros: good and somewhat clear instructions; cons: wood quality. First step was to assemble the frame. One thing that stood out was that the "deck" (Not the planks you stand on, but the little wood frame that goes arround touching all the frames) is not actually well cut. Some frames touched it just perfect, some others had a small gap. So i wet them, and fastened them with clothes peg, and it ended up bending just enough to fit perfectly. Since this is a second hand kit, some pieces were missing. I talked to the seller, a really nice guy, and he discounted from the prize the cost of a plank i could make the missing parts of. Real friendly guy. Also some of the parts that were not missing did not fit perfectly into the model, so i made my own from that same plank. More work, but better results, just like in every other thing in life Hugo Bosque Arenas Beginner Modeller 20/12/2020
Hi everyone! Been a few months since i posted anything. Landed an internship while finishing my career, so its been quite busy. Anyway, i managed to spend any spare time i had left on this model boat i got in a second hand website. Its the San Juan Nepomuceno's Captain's Boat. I've looked around and it seems that this one is going to be one of the first completed build logs of this particular model, so i am quite honored. So, i got this kit after i finished my Bon Retour. I read about the original Man' O War, named after the Saint, patron of the spanish Marine Corps, its captain and its heroic stand at the battle of Trafalgar, being one of the last remaining ships to wave the white flag, and its captain Cosme Damián Churruca, who died at said battle, when a british canonball took his leg. During the battle he faced, alone, 6 british ships, and died still shouting to his men to keep on firing. The british, admiring his courage, had the ship in Gibraltar exposed to visitors, with the name of Churruca in gold letters written on his cabin. He was appointed Admiral posthumously, and in his memory his nephew received the title of Count of Churruca. Sadly, the ship served then under british colors, until it was sold and scrapped for materials in 1818. I really recommend giving this topic a good read, it is really interesting. One day i hope i will build the actual San Juan Nepomuceno, not just the little boat. Anyways, lets get on to the build log! Here is the box it came in. Its an old kit, the original owner seemed to have had it for a long time. That means the wood is not quite as strong, as well as (being an Artesania Latina model), the wood is not of the highest quality. I had to fill with wood potty some holes in the frames, and actually broke some parts, but i managed to glue them back together like nothing happened. The first thing i have to comment, aside from the really low quality wood from the kit, its actually its instructions. I suppose, since this is a beginners kit, they put a little bit more effort in making the instructions, and it shows. So, pros: good and somewhat clear instructions; cons: wood quality. First step was to assemble the frame. One thing that stood out was that the "deck" (Not the planks you stand on, but the little wood frame that goes arround touching all the frames) is not actually well cut. Some frames touched it just perfect, some others had a small gap. So i wet them, and fastened them with clothes peg, and it ended up bending just enough to fit perfectly. Since this is a second hand kit, some pieces were missing. I talked to the seller, a really nice guy, and he discounted from the prize the cost of a plank i could make the missing parts of. Real friendly guy. Also some of the parts that were not missing did not fit perfectly into the model, so i made my own from that same plank. More work, but better results, just like in every other thing in life Hugo Bosque Arenas Beginner Modeller 20/12/2020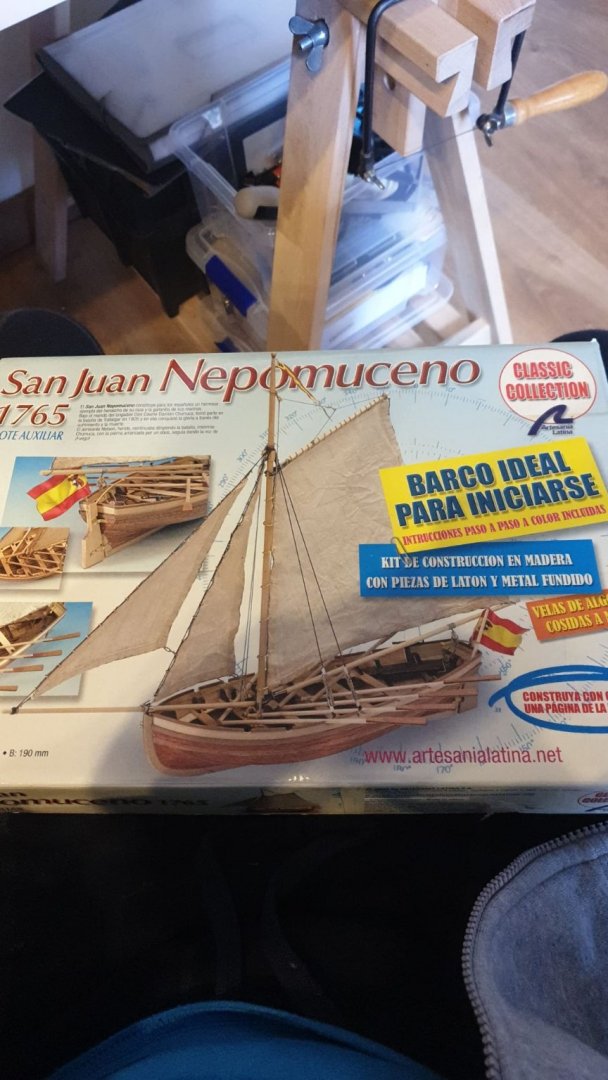
.thumb.jpeg.25c1729fa96122b1e098a60a3cf663a6.jpeg)
.thumb.jpeg.8b7ac0505071cc2a0933c00f65f63a82.jpeg)
- 7 replies
-
- 3
-
-
- ships boat
- Artesania Latina
- (and 2 more)
-
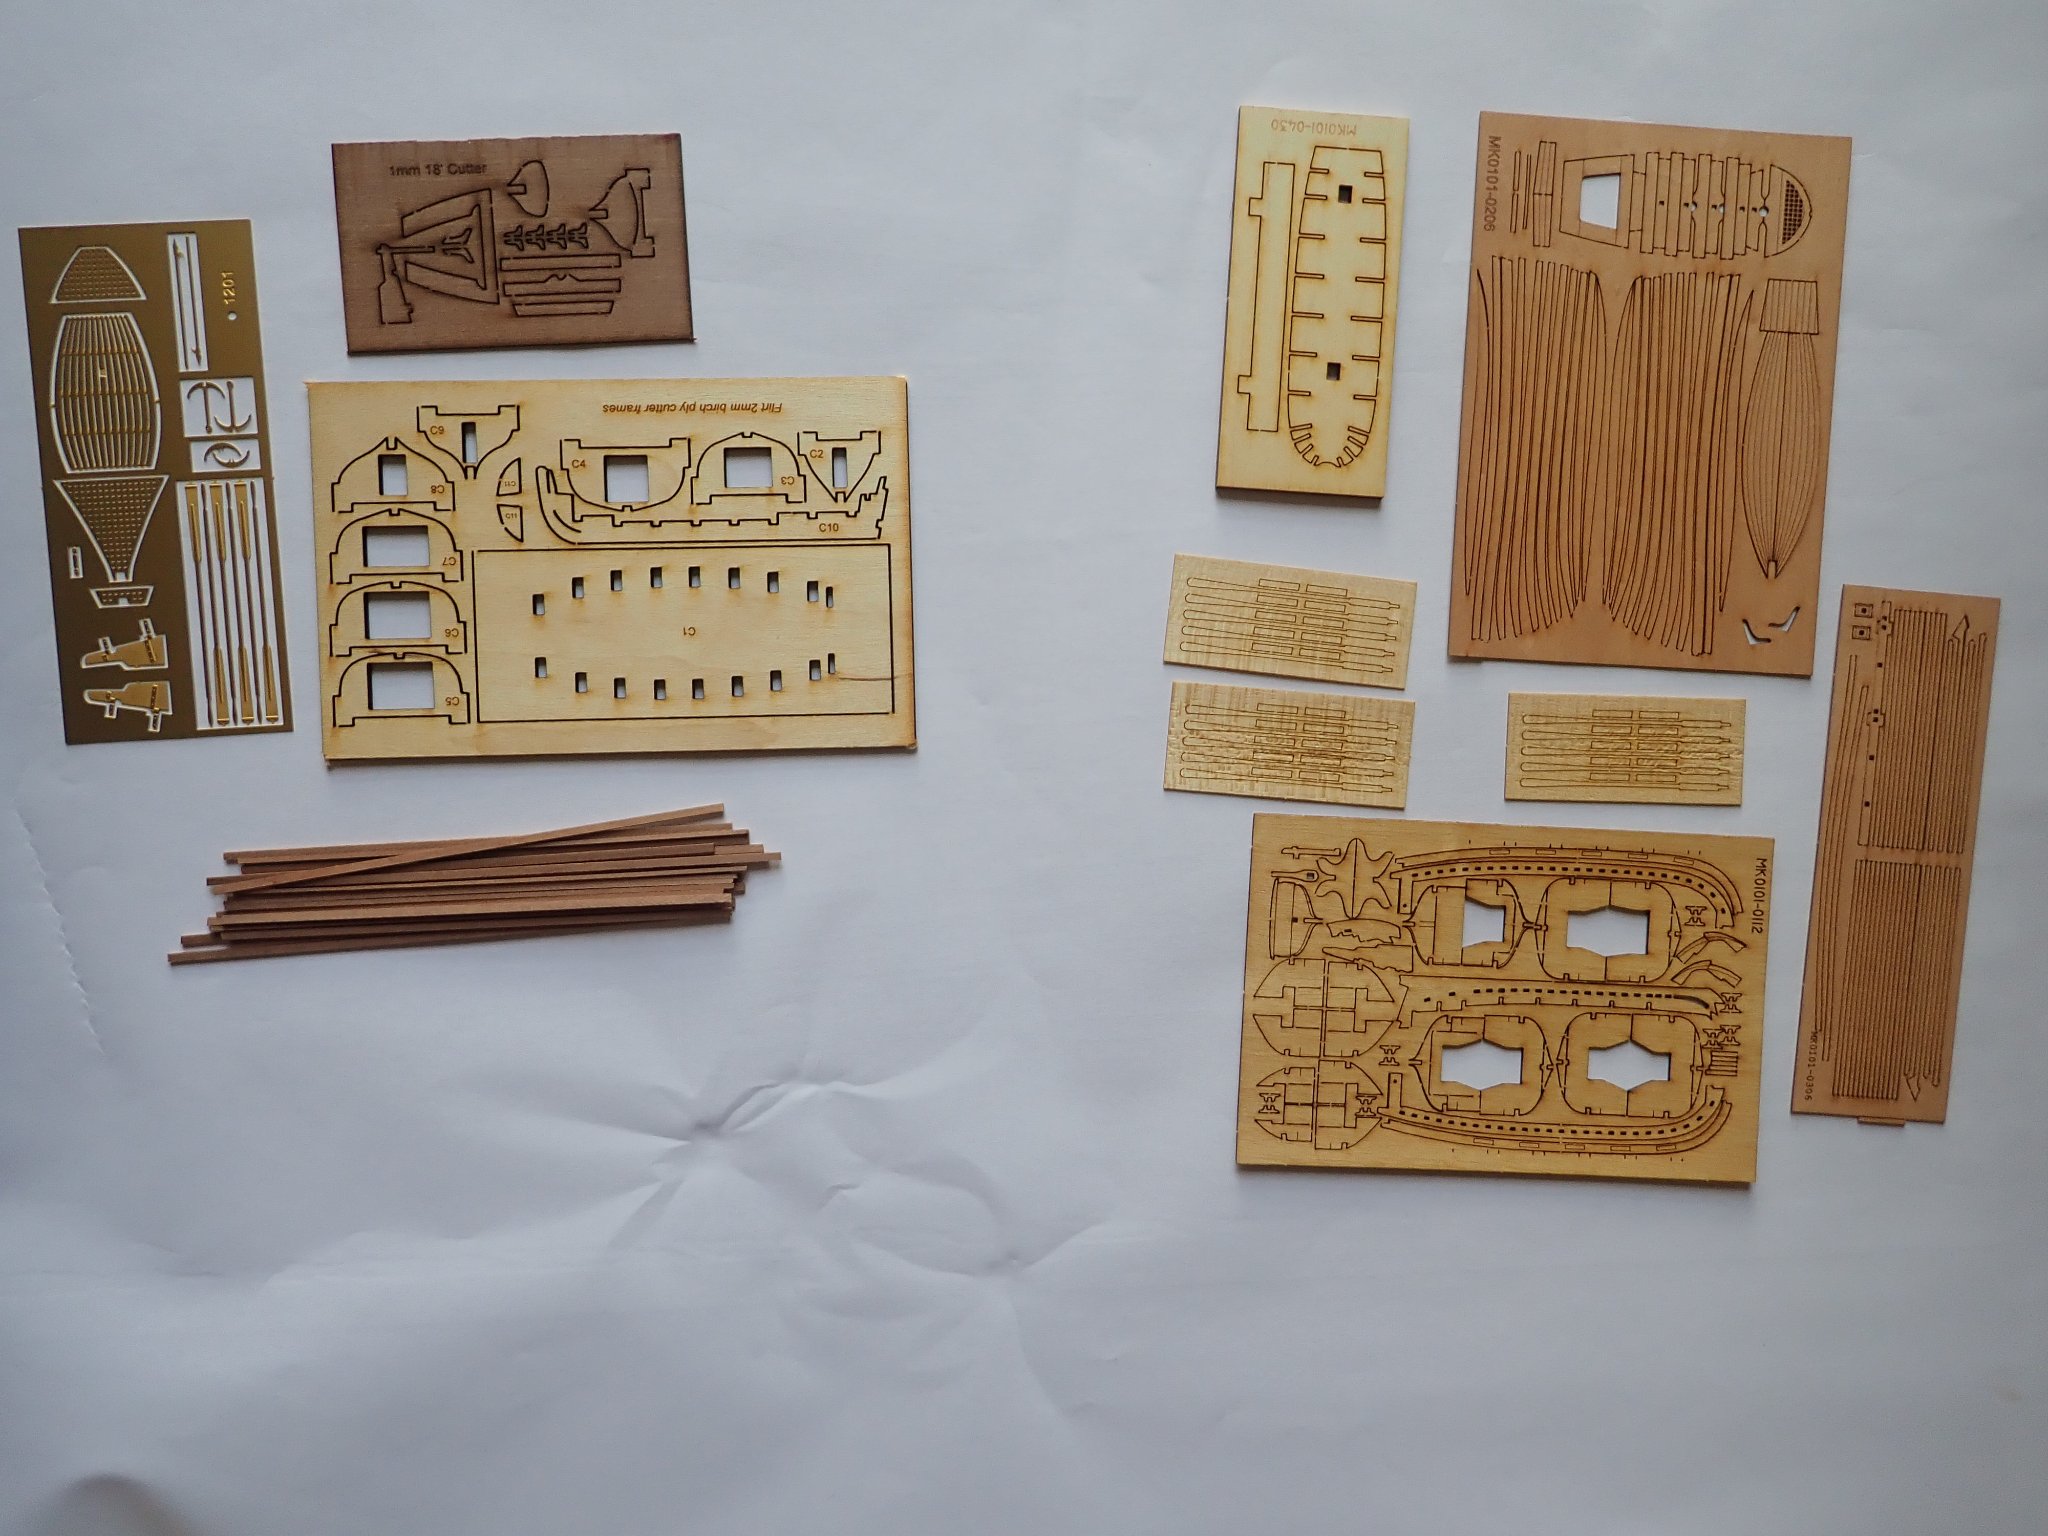
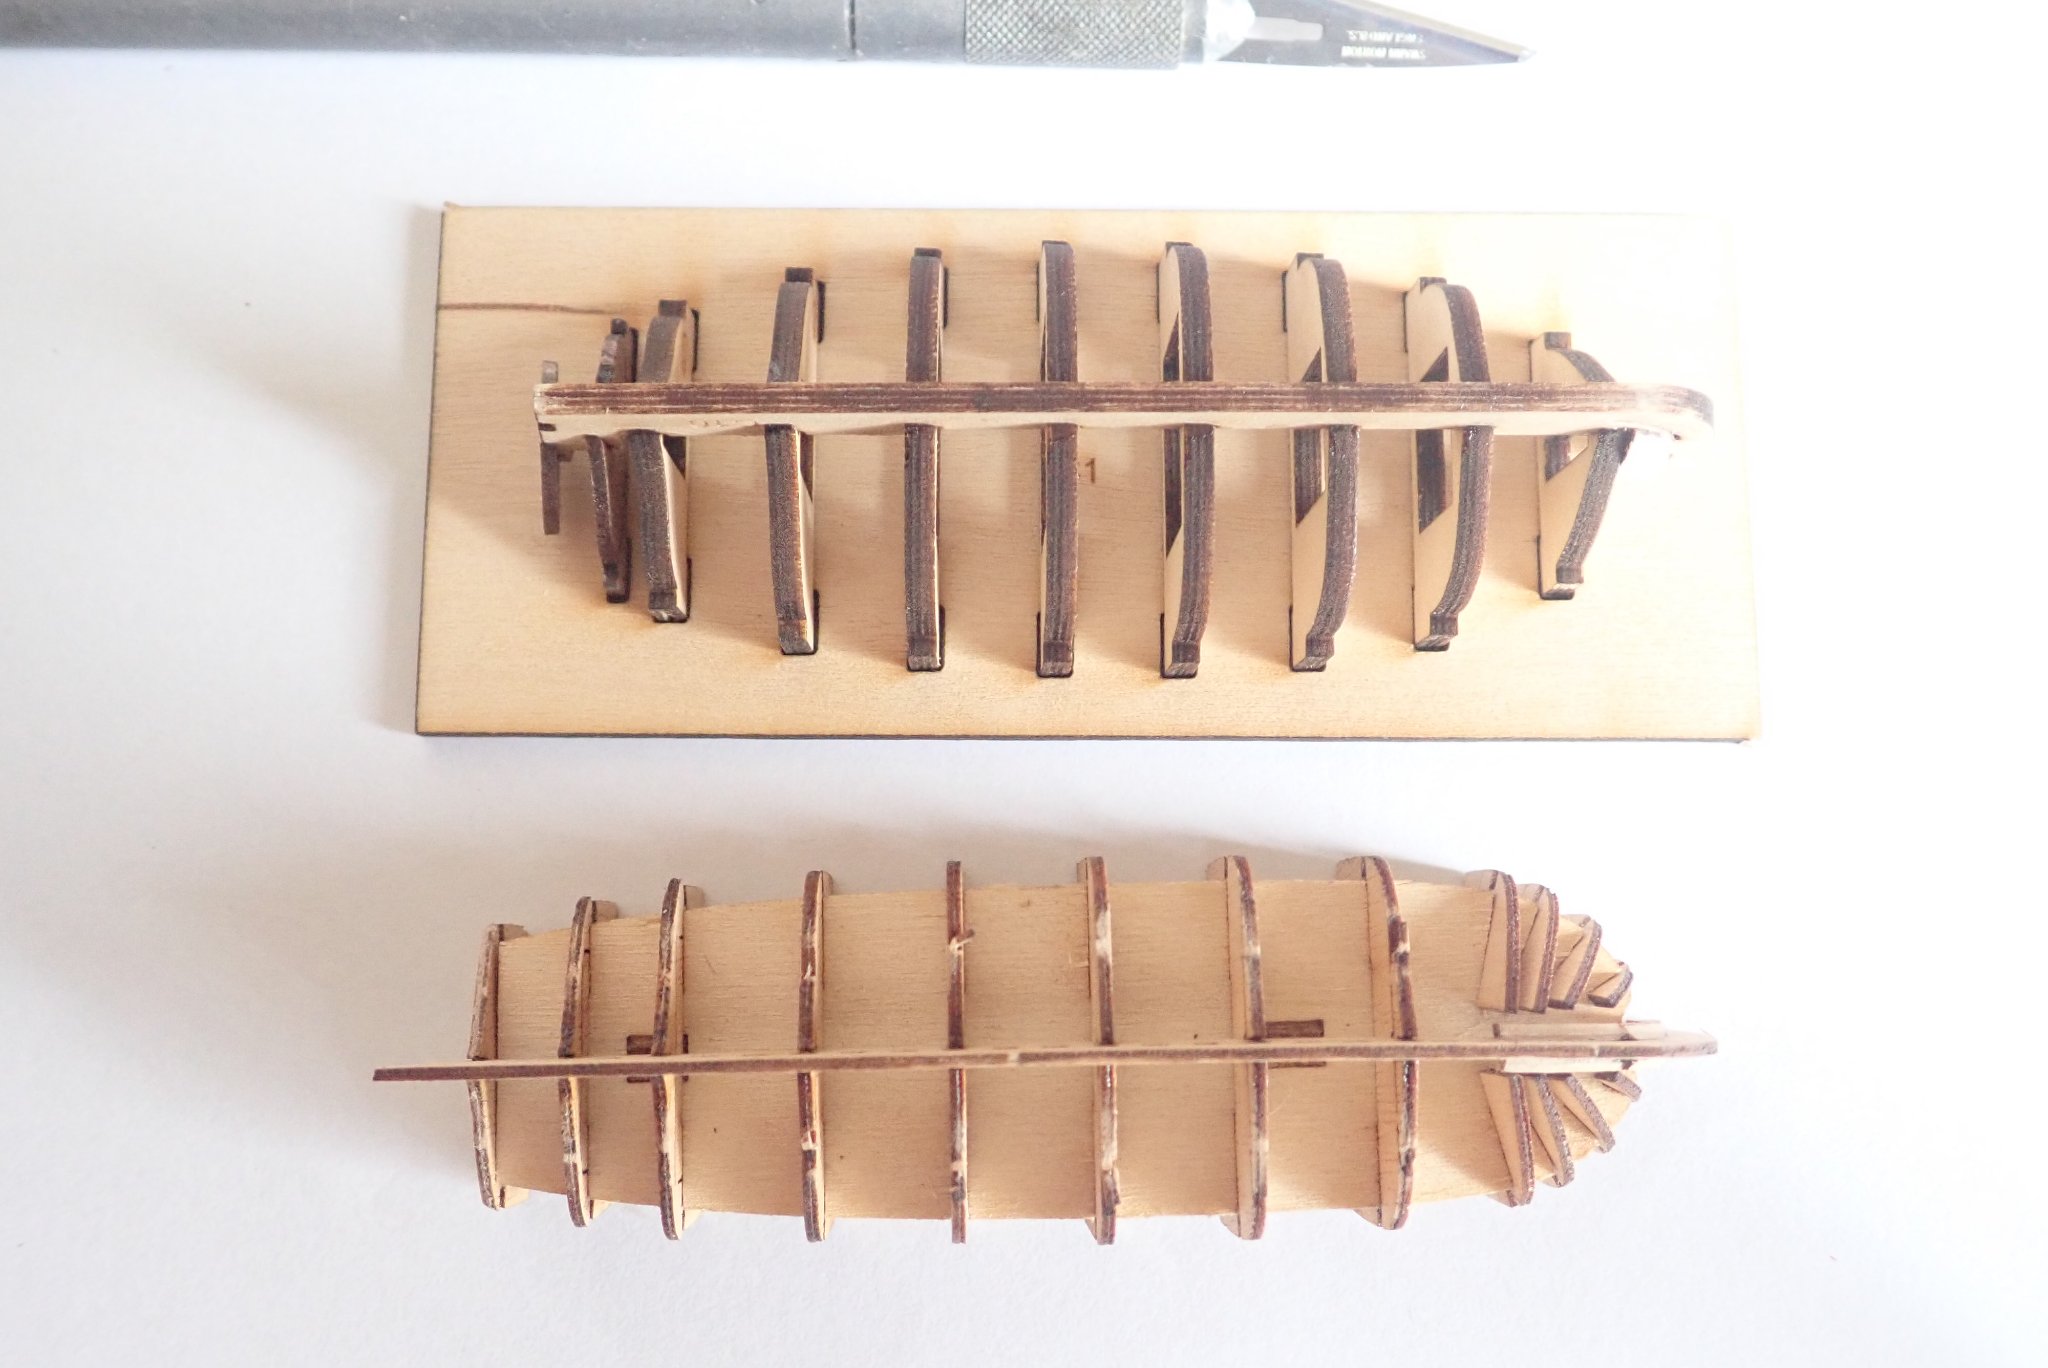
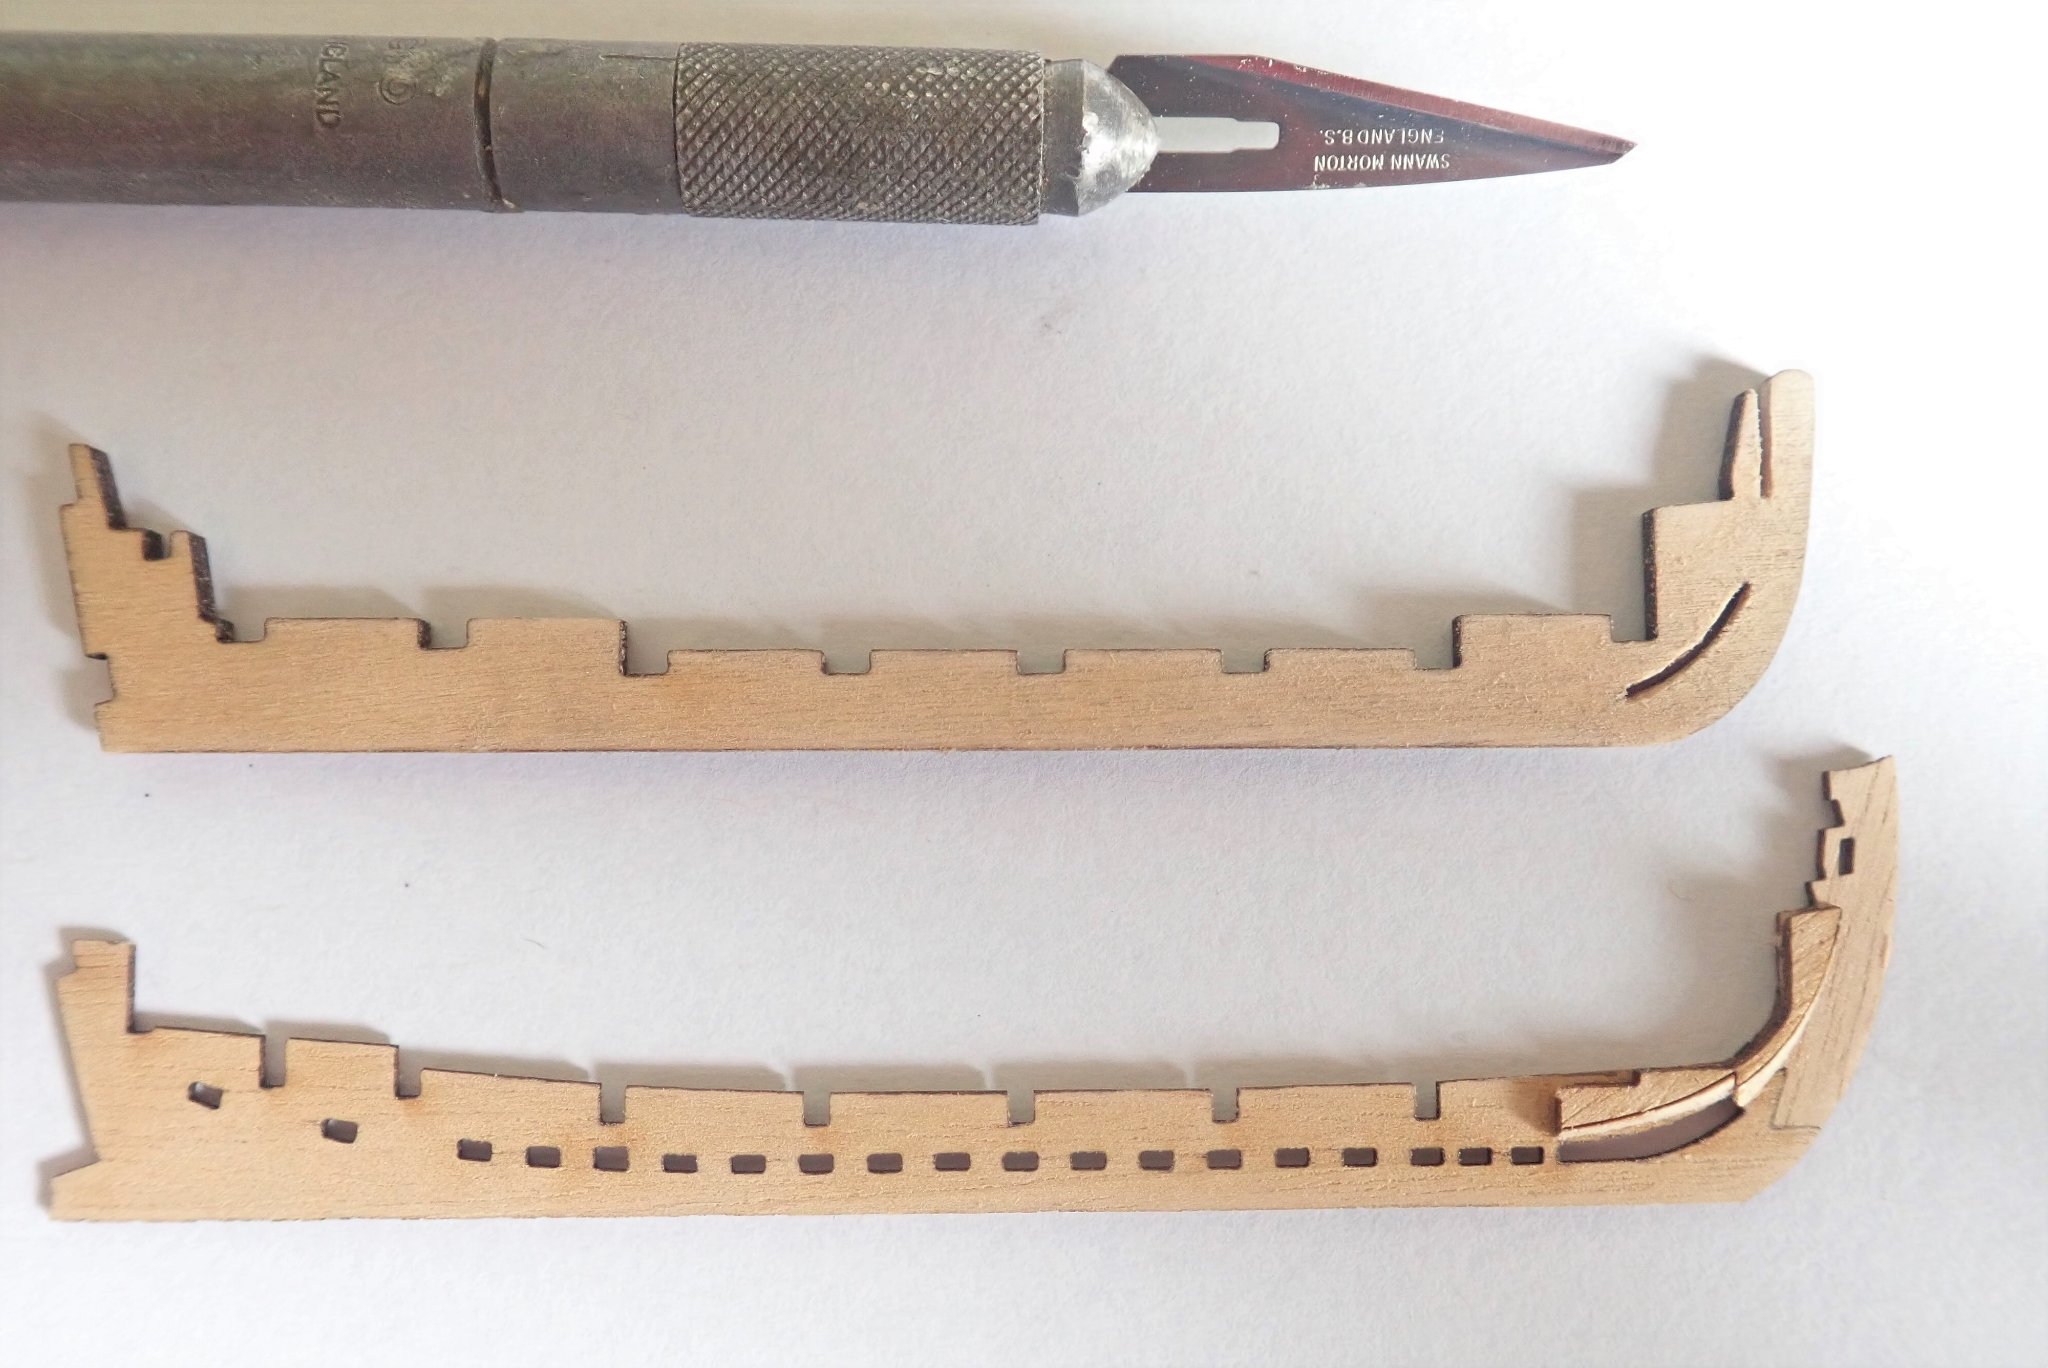
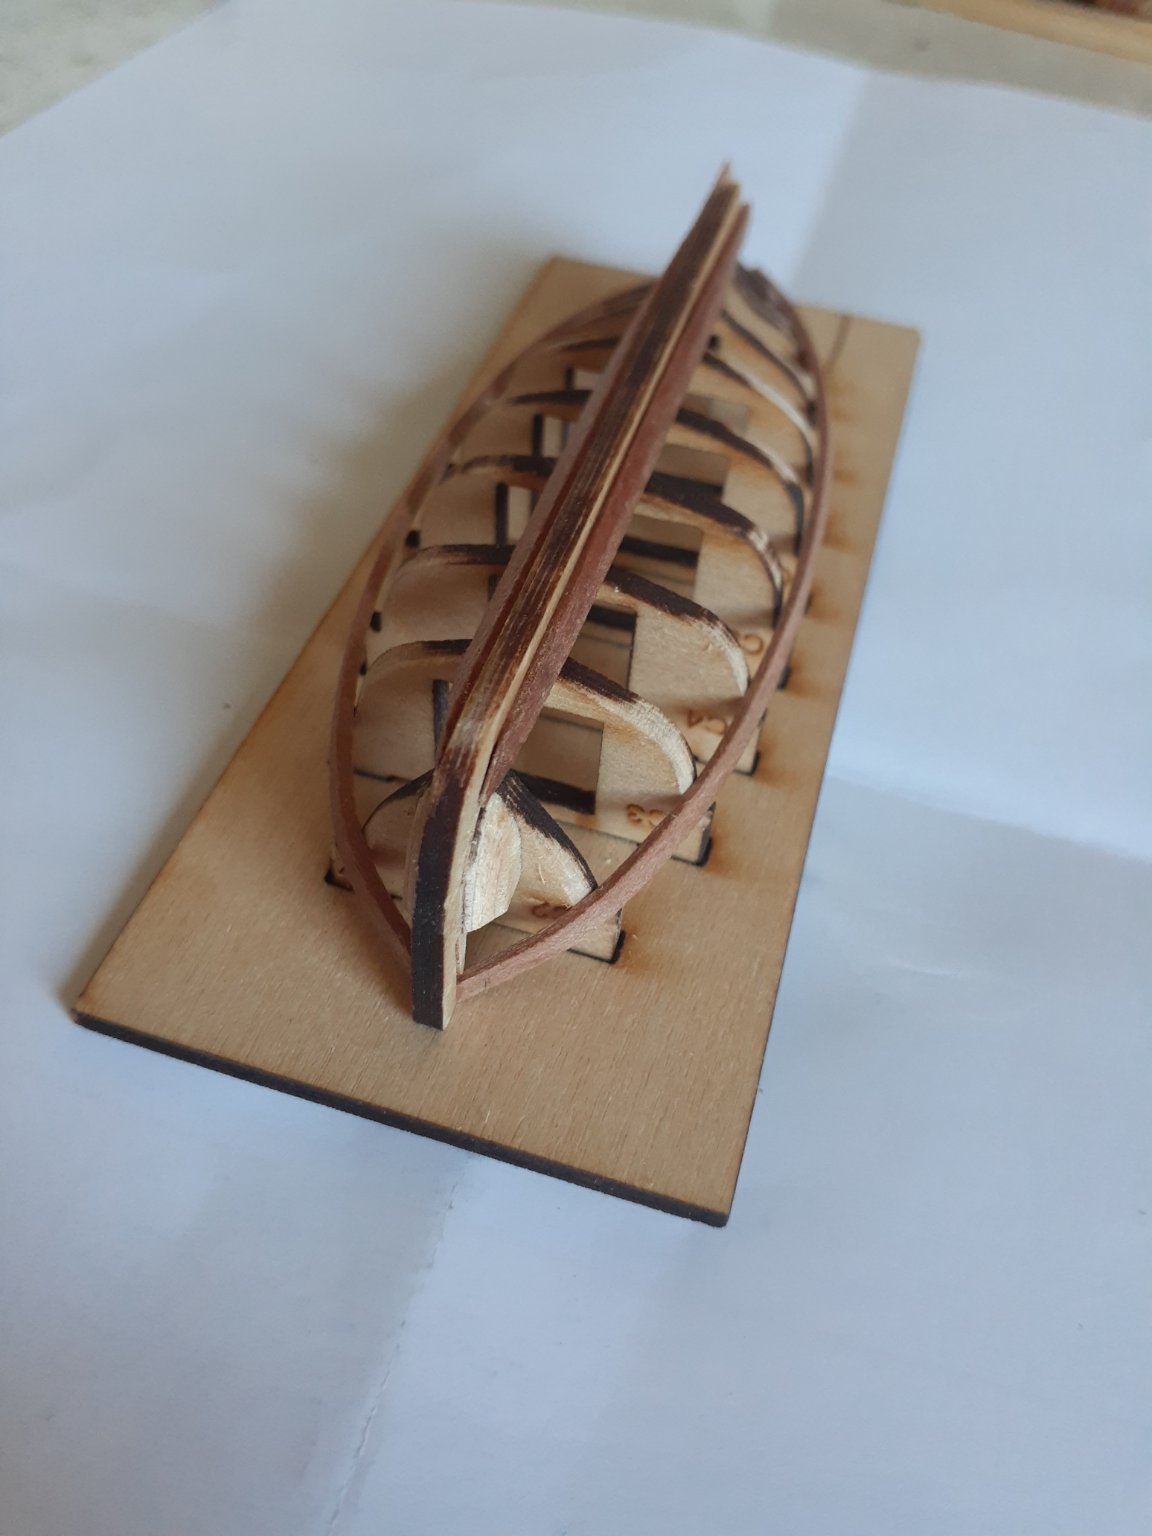
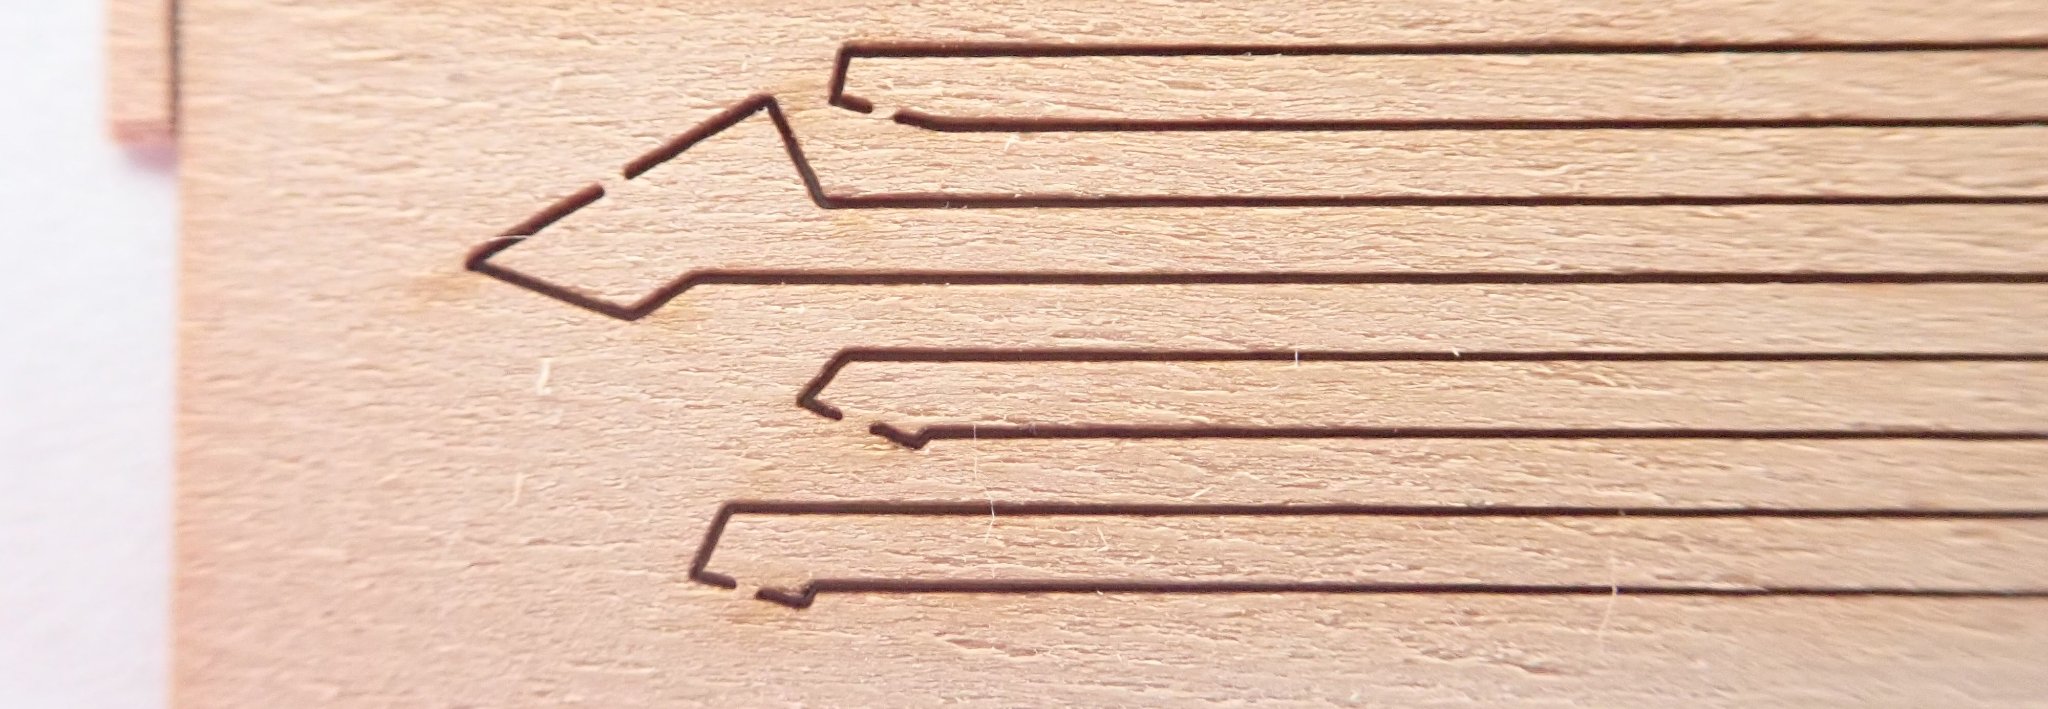
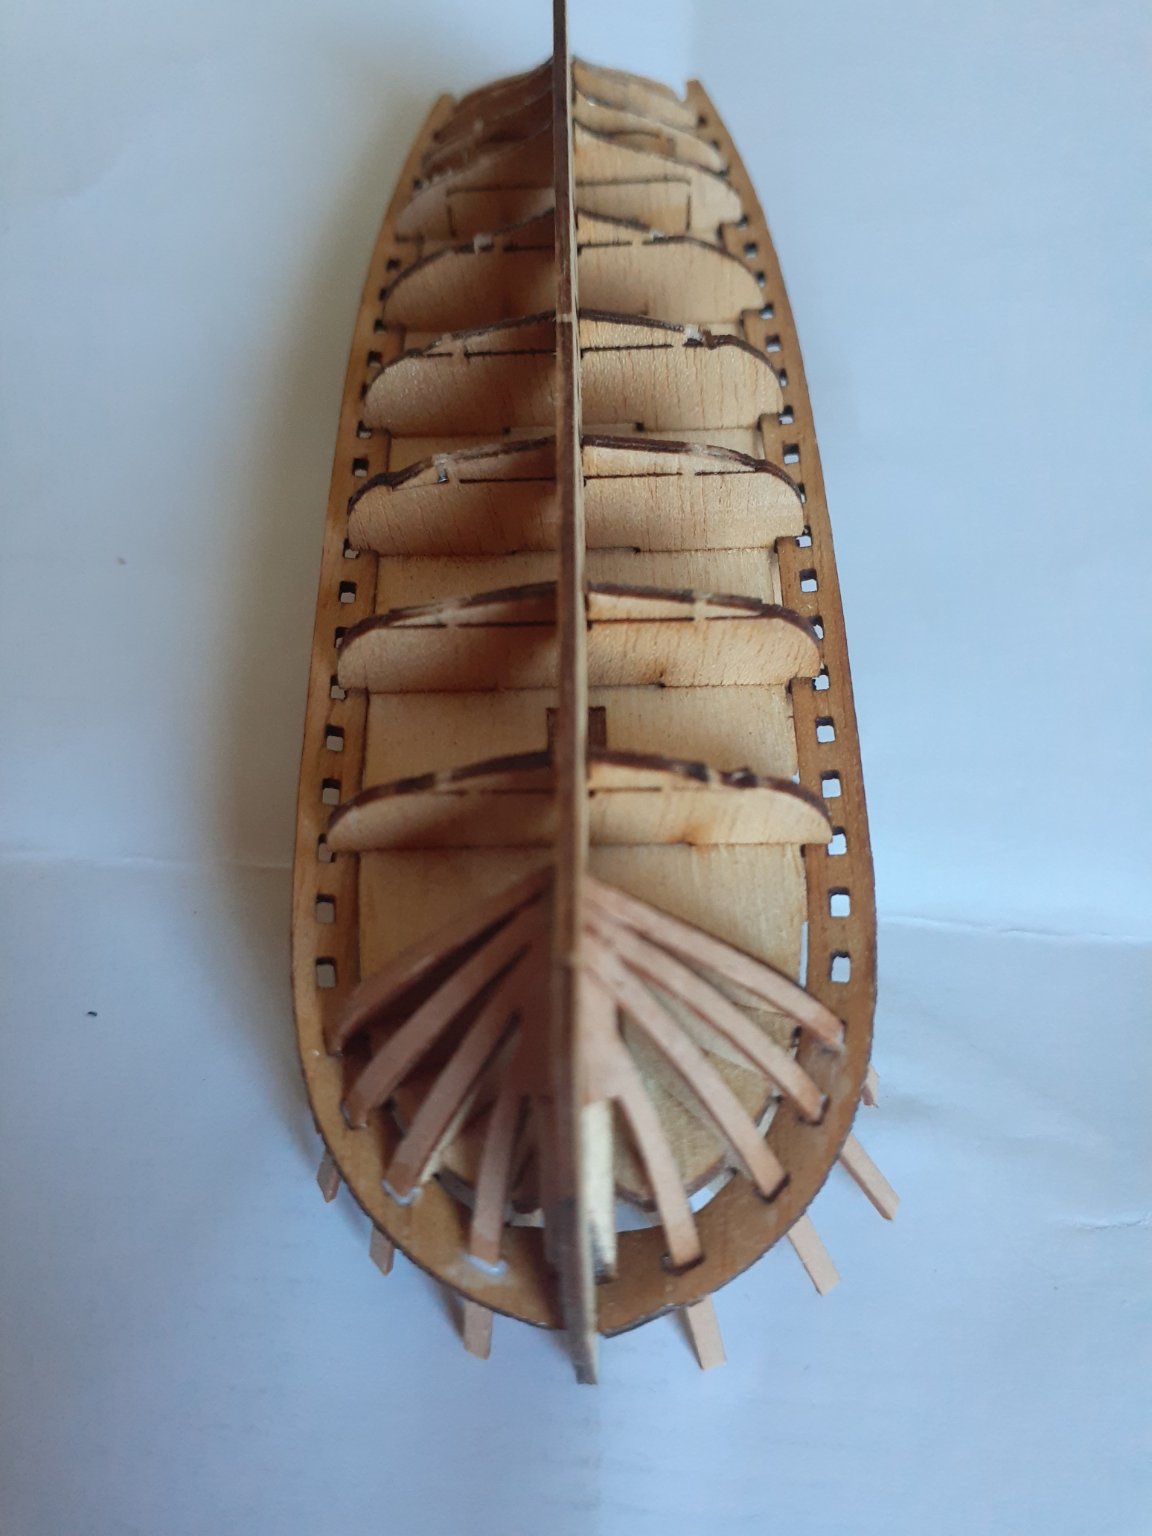
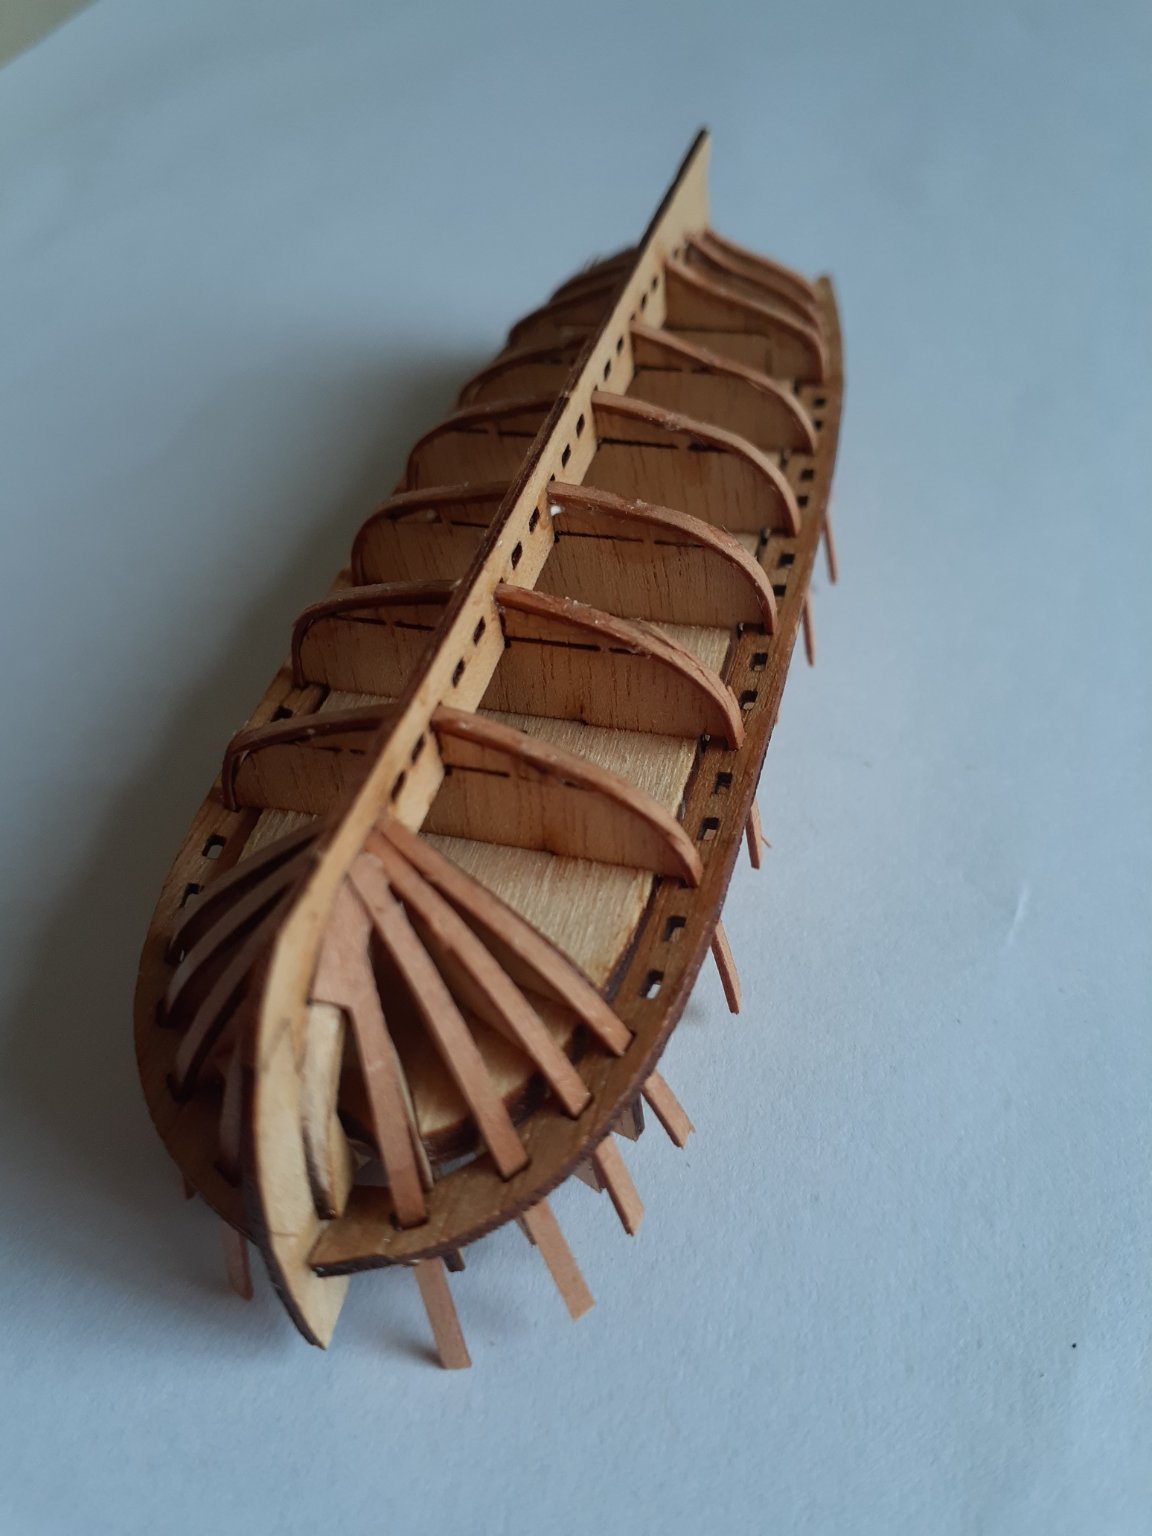
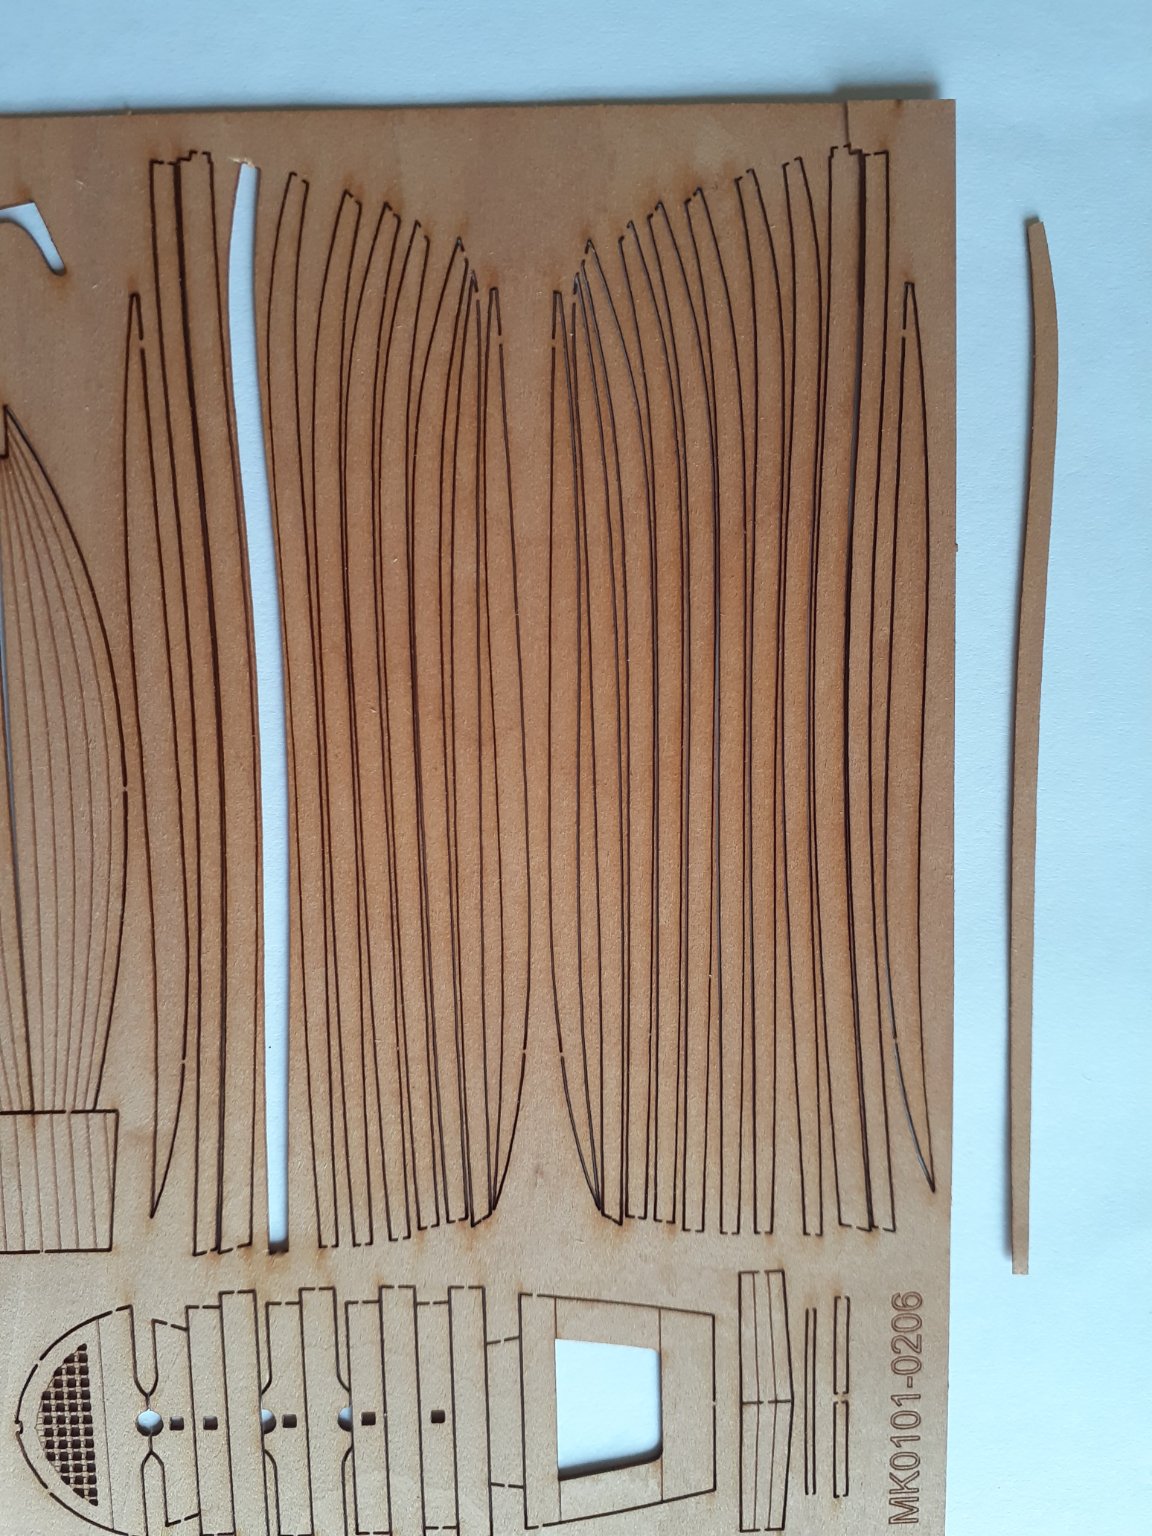
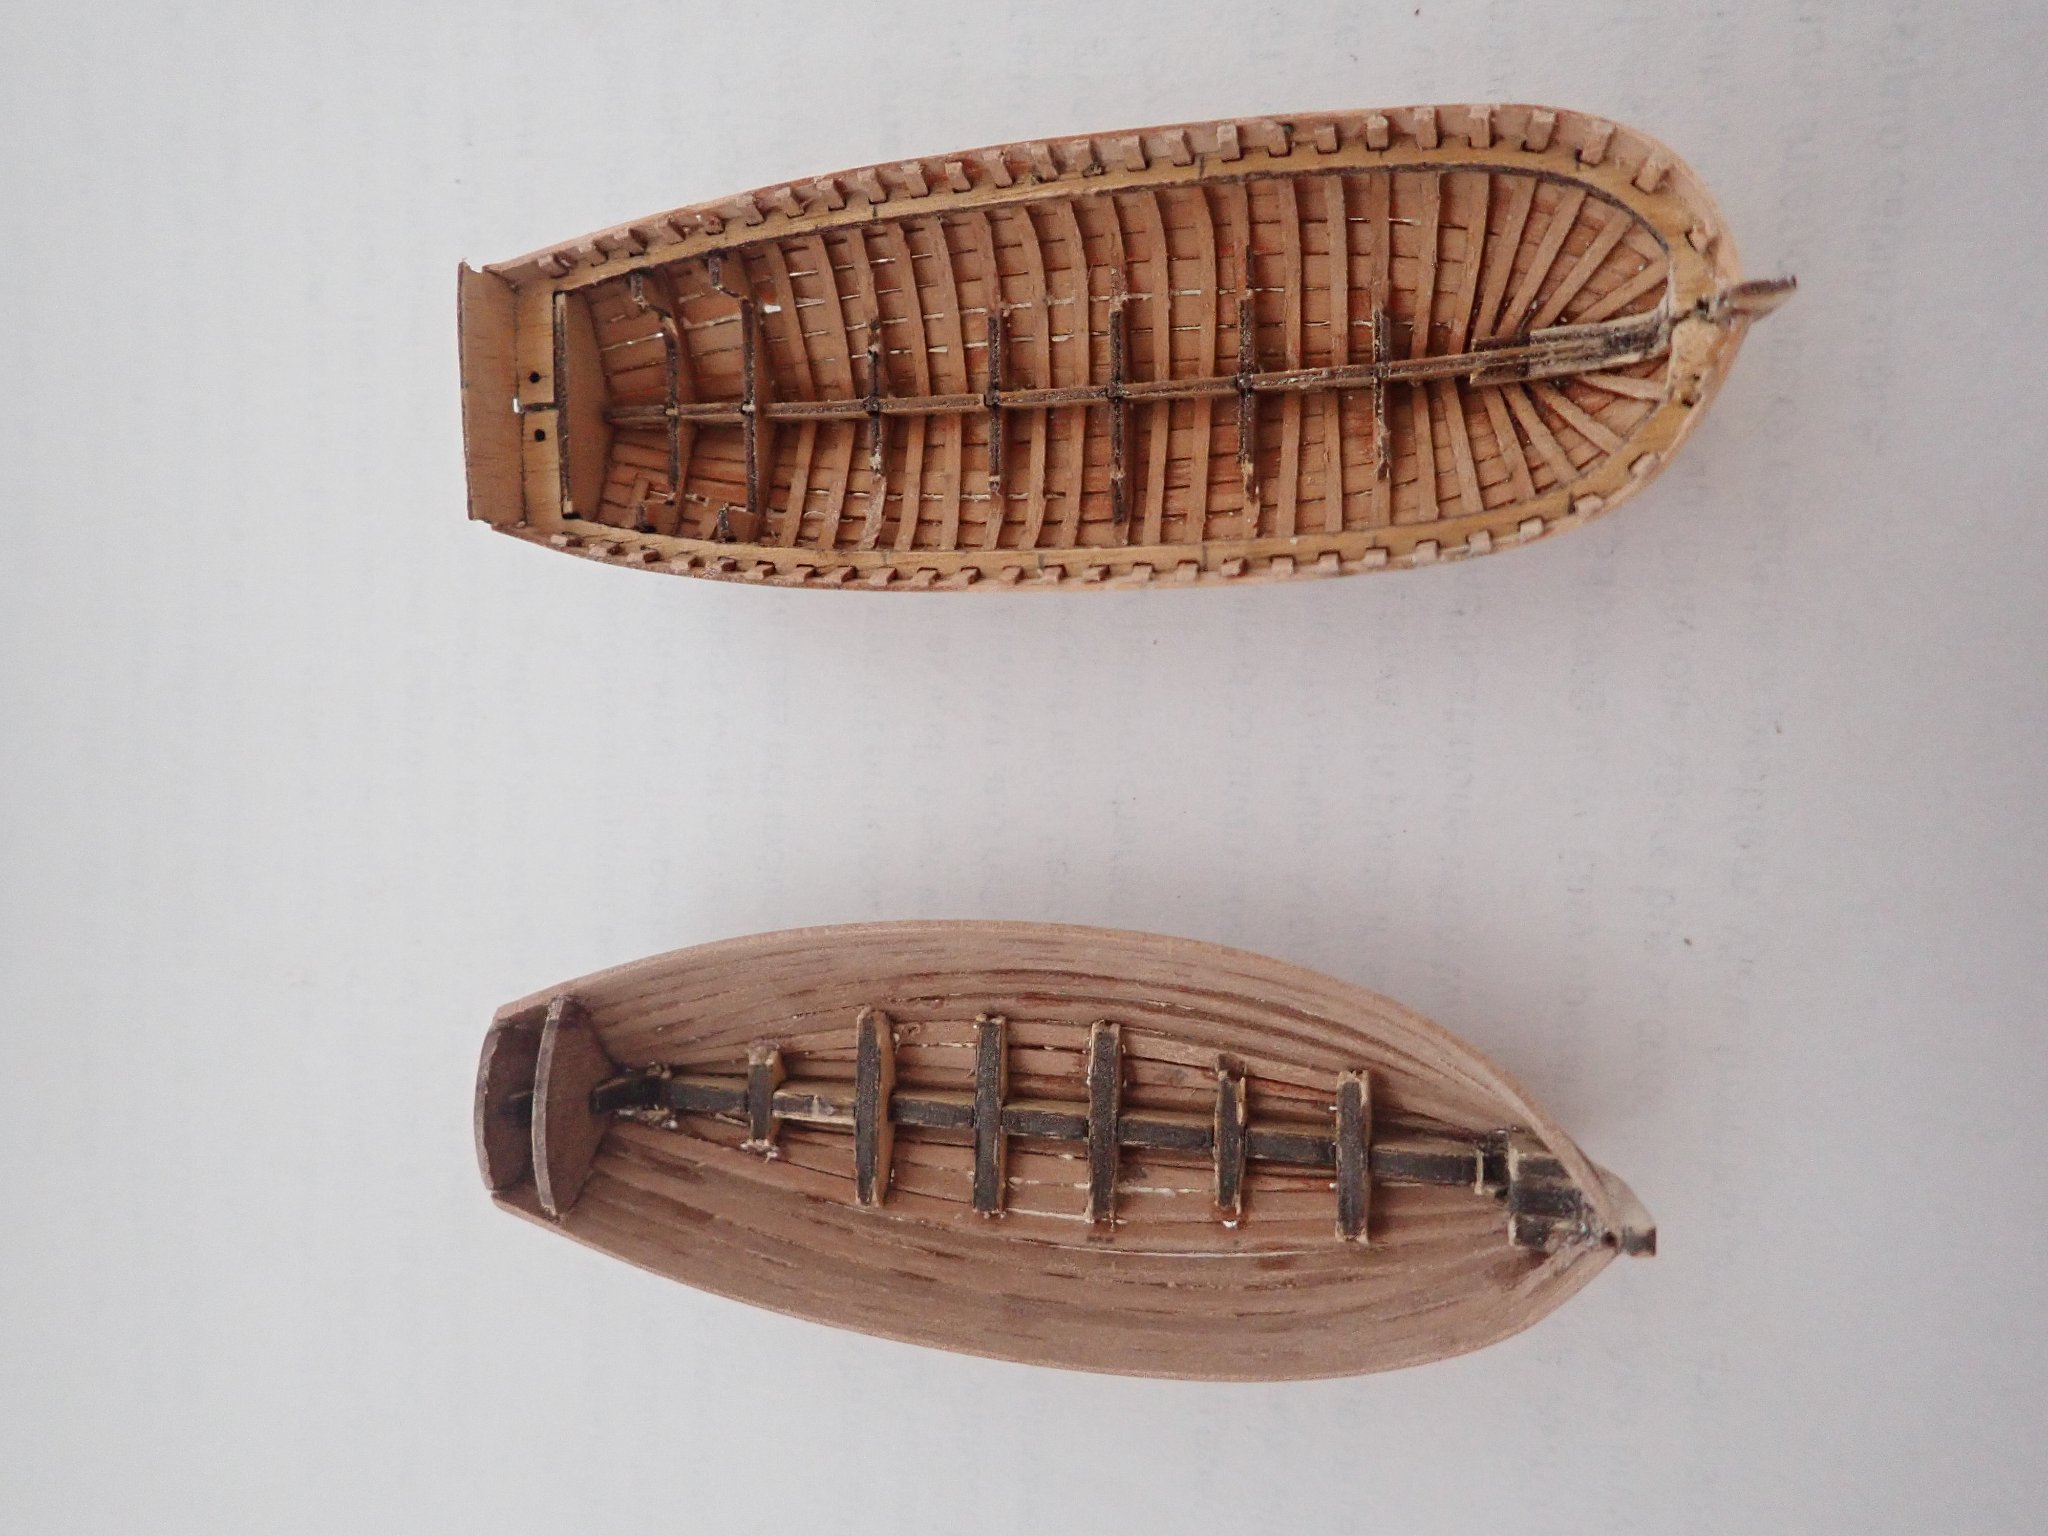
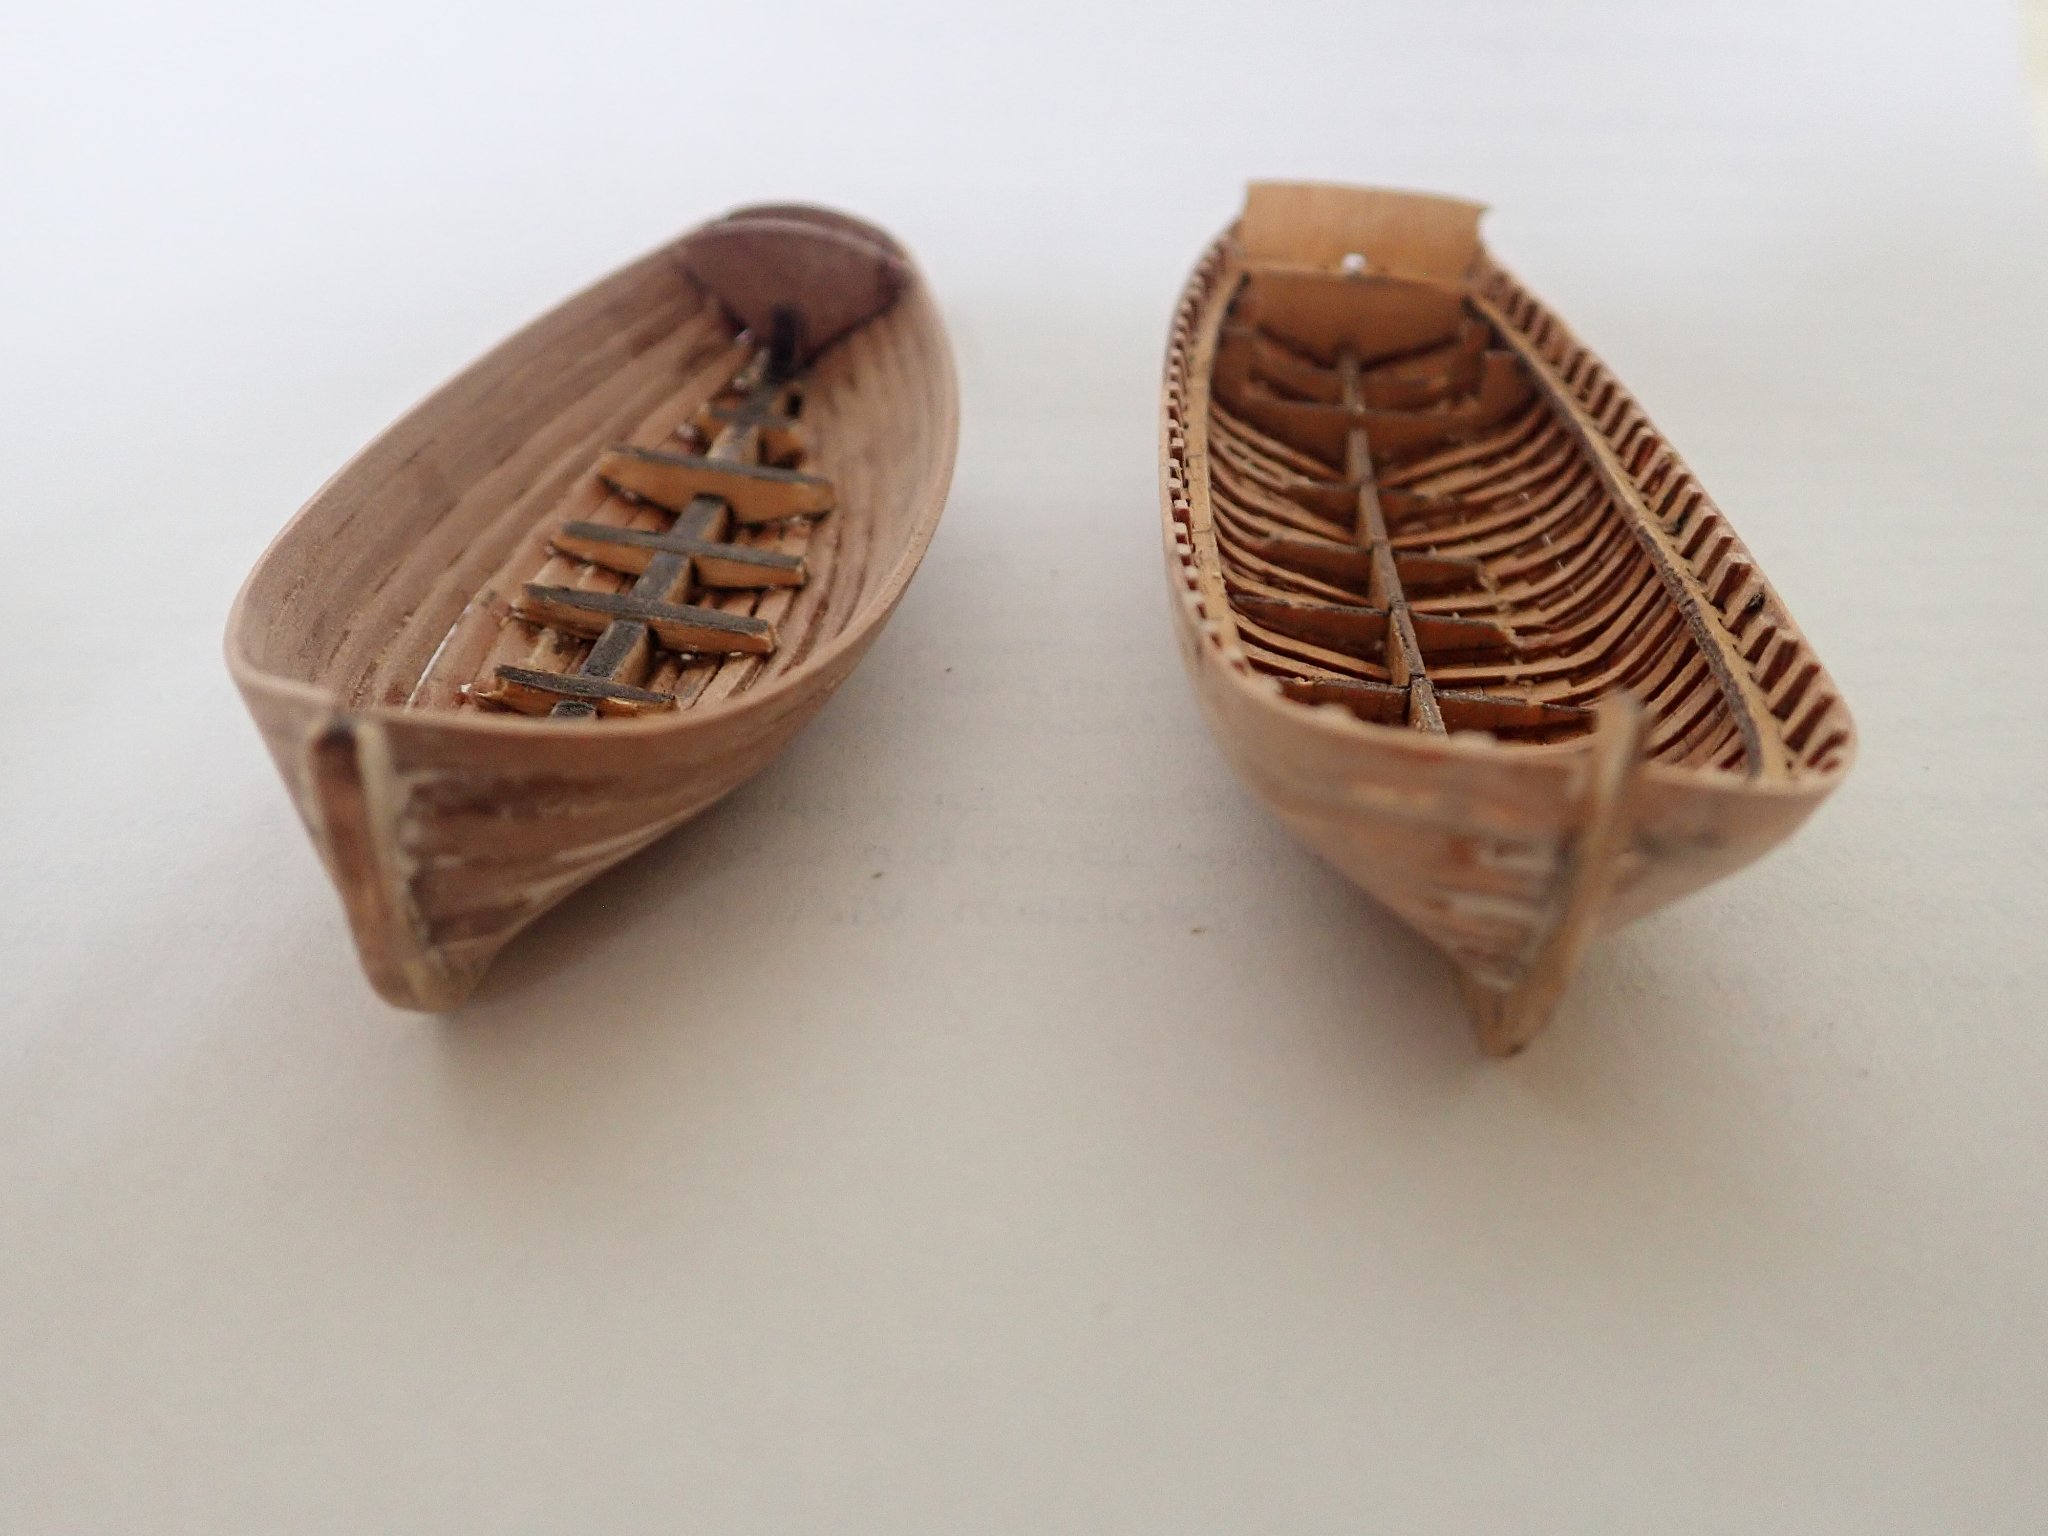
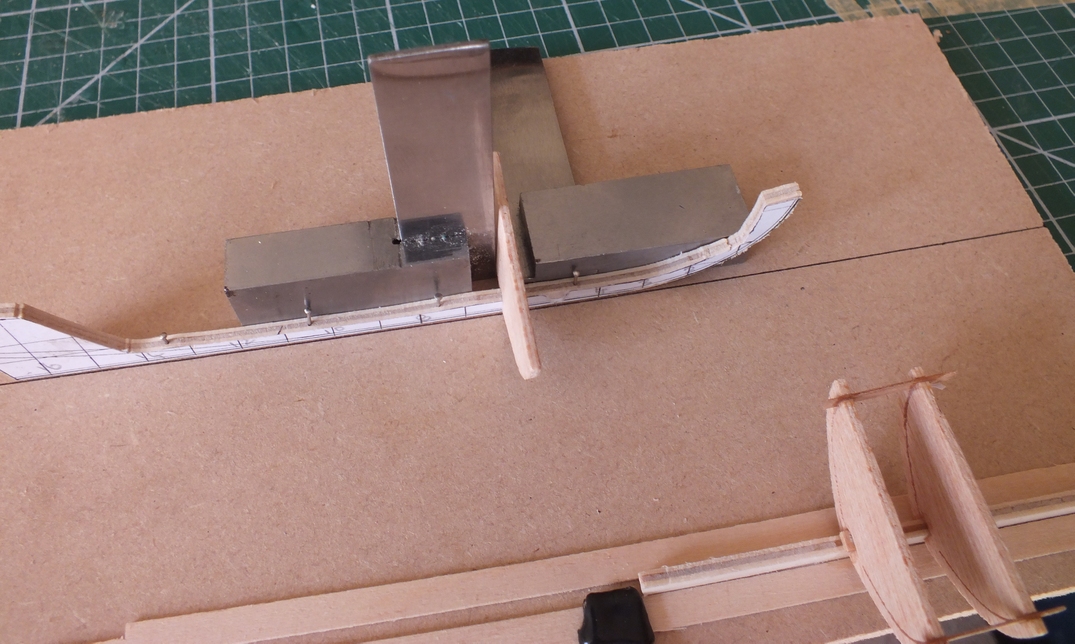
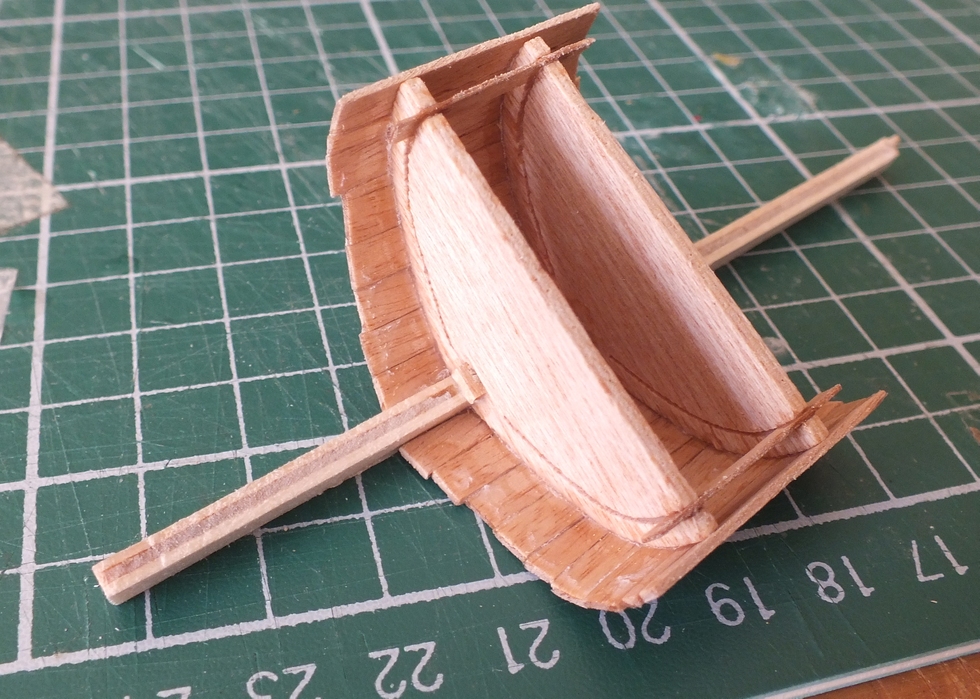
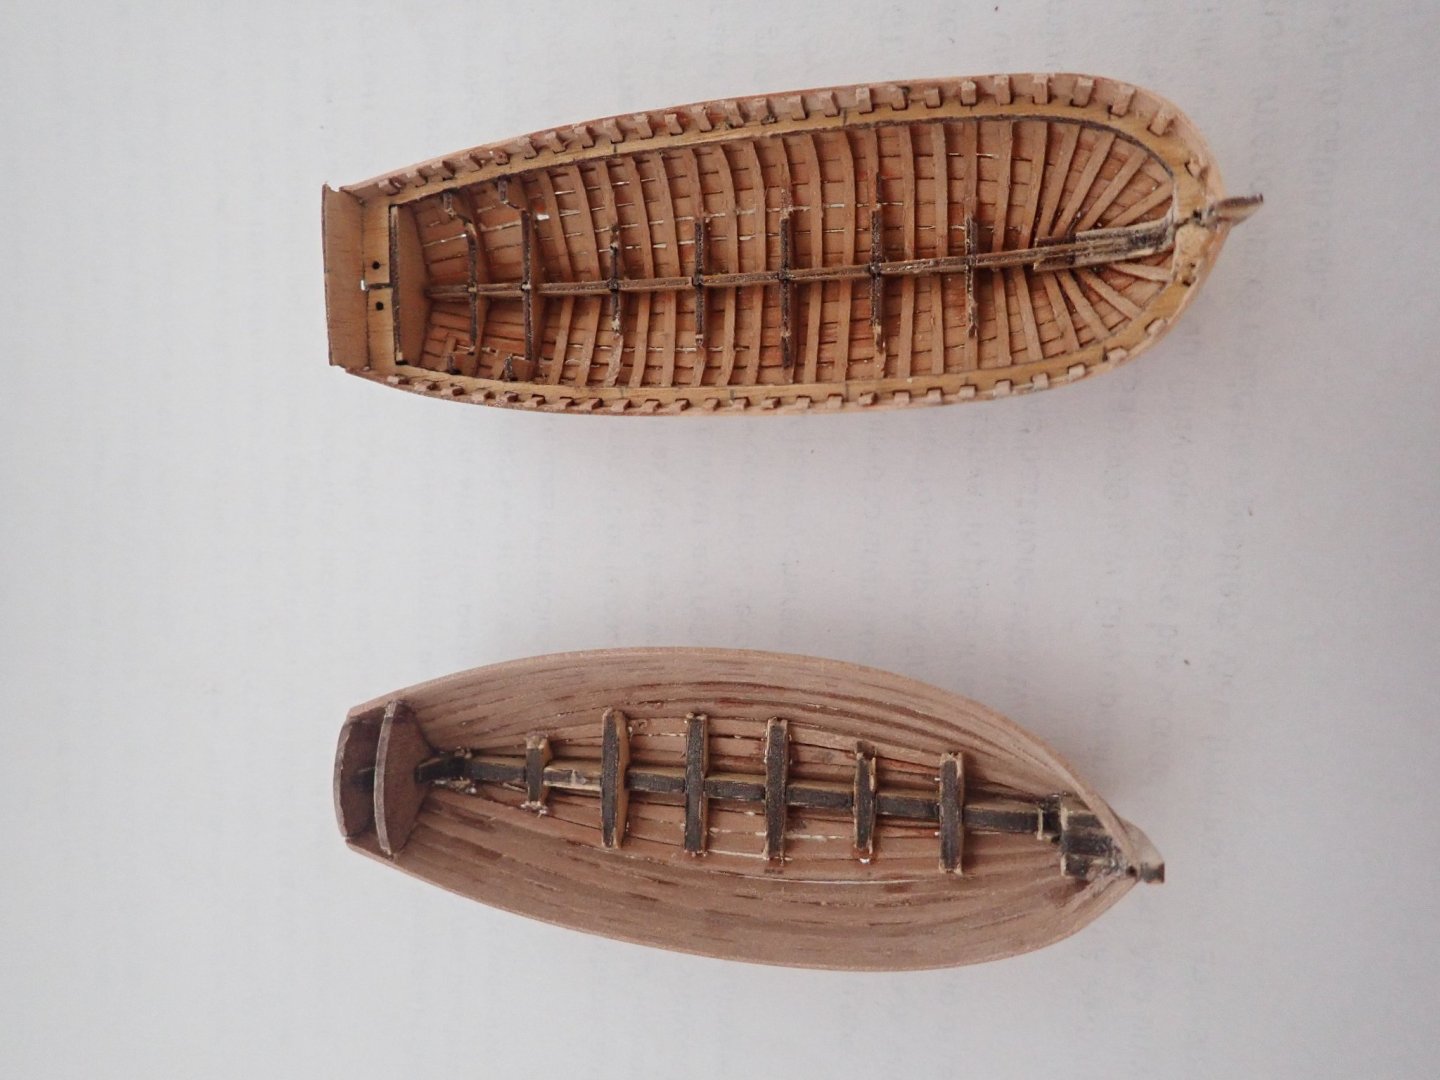
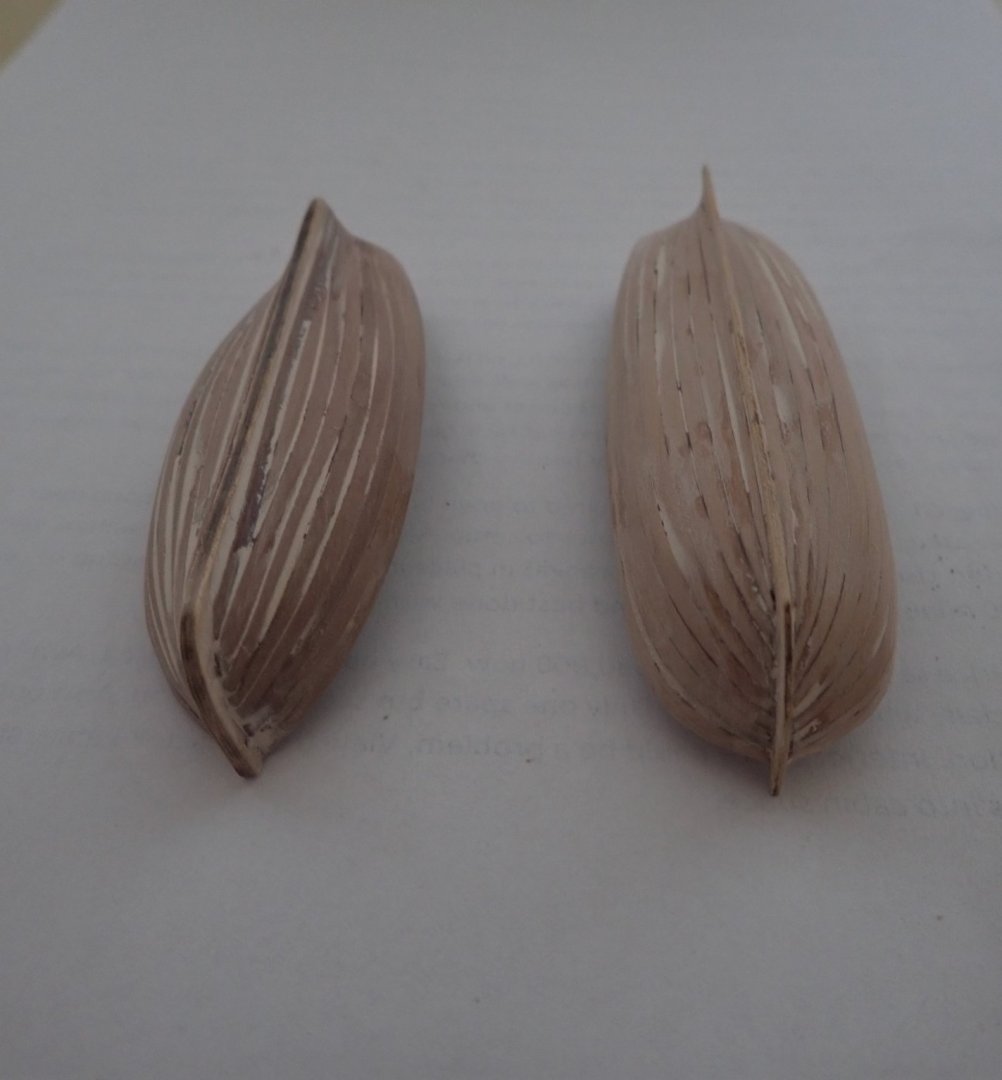
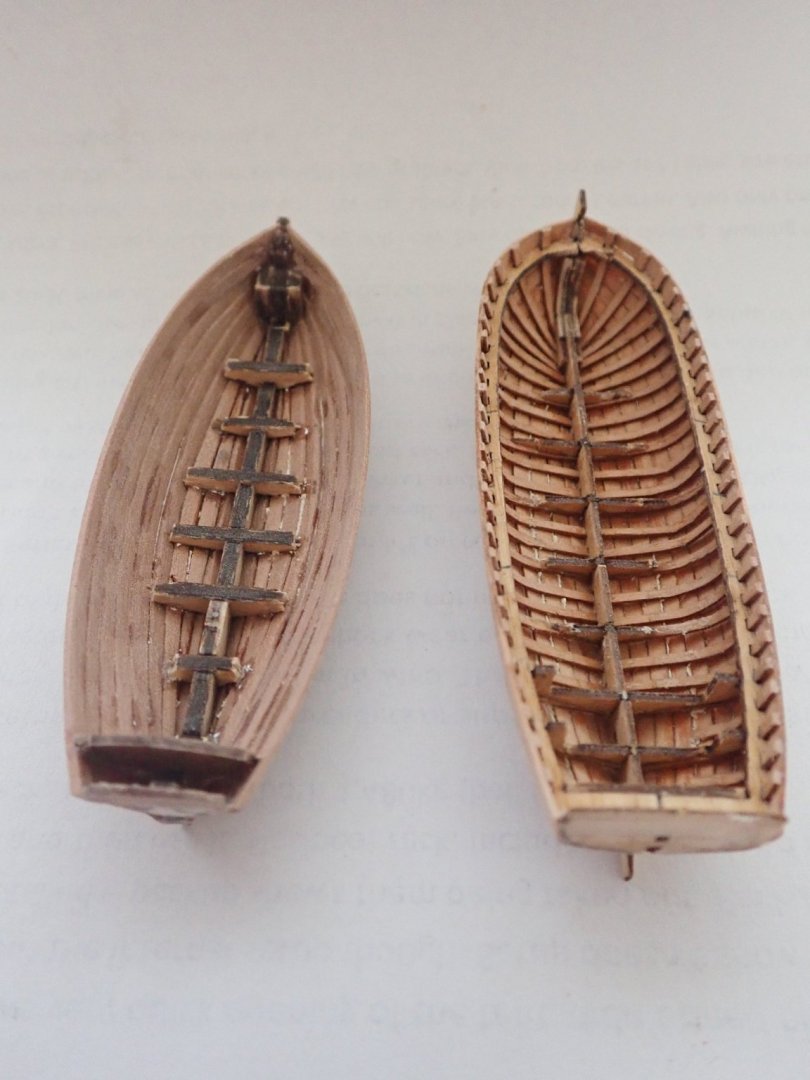
 Many months ago, I ordered the Master Korabel (MK) kit, but pandemic struck and delivery was delayed. Meanwhile, Chris (Vanguard Models, VM) released his cutter as a standalone kit, so I also ordered this. Both kits arrived within a week or so of each other, so I thought that I would do a comparison build log rather than two separate logs. The log lacks a little as I somehow managed to lose some photos and couldn’t recover them. Although the VM model is to a scale of 1:64 while the MK one is 1:72, I think they are close enough to stand comparisons. I have put this build log into the 1751-1800 time slot, as is my Pegasus build, though the boats could easily belong to other periods. The two kits. The VM is on the left and has two laser cut sheets, a sheet of PE and a bundle of 1x2mm pearwood strips. Instructions need to be downloaded from the VM website. When the kit contents are compared to the instructions, it seems that something is missing. There are only 1x2mm strips in the kit yet the instructions mention 1x3mm strips in a few places. I checked this with Chris and he told me that he re-considered the 1x3mm strips as he thought that they were over-scale and replaced them with 1x2mm. The MK kit contains only seven laser cut sheets of various thicknesses - no PE. Instructions are included - a sheet of photos at various construction stages, a sheet showing all the laser cut pieces with each identified, and a double sided sheet of written instructions in English, though the terminology takes a bit of getting used to. Both kits start out the same - make up the jigs which are used until planking is complete. The keels with the VM one on top. The MK one has small slots along it through which ribs are inserted, and has small fairing blocks glued at the stem. These have laser etch marks to show how much bevelling is required before gluing in place. The two jigs, the VM one on the top. Formers are glued to the keel, and the formers in both kits are partly cut to allow removal from the shell of the boat once planking is finished. Fairing blocks are in place at the stem of the VM model. The VM kit is relatively simple, and planking starts immediately. I started by gluing in place the garboard strake, then continued as per the instructions. Tapering of the strips is required, I did this by eye, and finished up by only needing one stealer strip next to the garboard strake. The MK kit requires you to glue ribs in place first, with the first four at the bow being pre-cut to allow them to fit together. The first four glued in place. There is a horizontal former (I guess you’d call it) slotted to let the ribs be fed through it, then through the keel slots and back up the other side. A few minutes soaking allowed this to happen relatively easily. With care no breakages should occur. The next set of ribs are positioned over the formers glued to the keel, and can be carefully glued to the very bottom of the formers, but not the tops. The dark lines on the formers show where they will be broken to allow the tops to be removed later Once those ribs are in place, planking starts. All the planks in the MK kit are laser cut and spiled. Once planking is complete, the shells are carefully removed from the jigs and the formers broken away. At this time the remainder of the ribs in the MK kit are fitted. MK boat on the top. VM's cutter on the left and the MK boat on the right. As I intend to paint both boats, putty was liberally applied to the hulls to cover the places where adjacent planks didn’t quite meet (ie the gaps). The VM boat is on the left. Next will be the interiors. Cheers.


- 6 replies
-
- 6
-
-
- master korabel
- Finished
- (and 2 more)
-
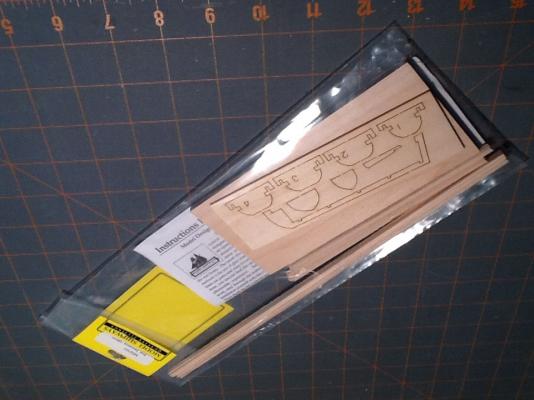
 Here I go with my first build log. I am hoping that this little $9 POF kit will help me get my feet wet with planking. I've had trouble deciphering the instruction sheet and have complained about the poor quality photos included. I sent a copy of the instructions to MSW member Mahuna and he got me started. I am creating this log on my iPad so I hope the photos are OK. Here we go...

-
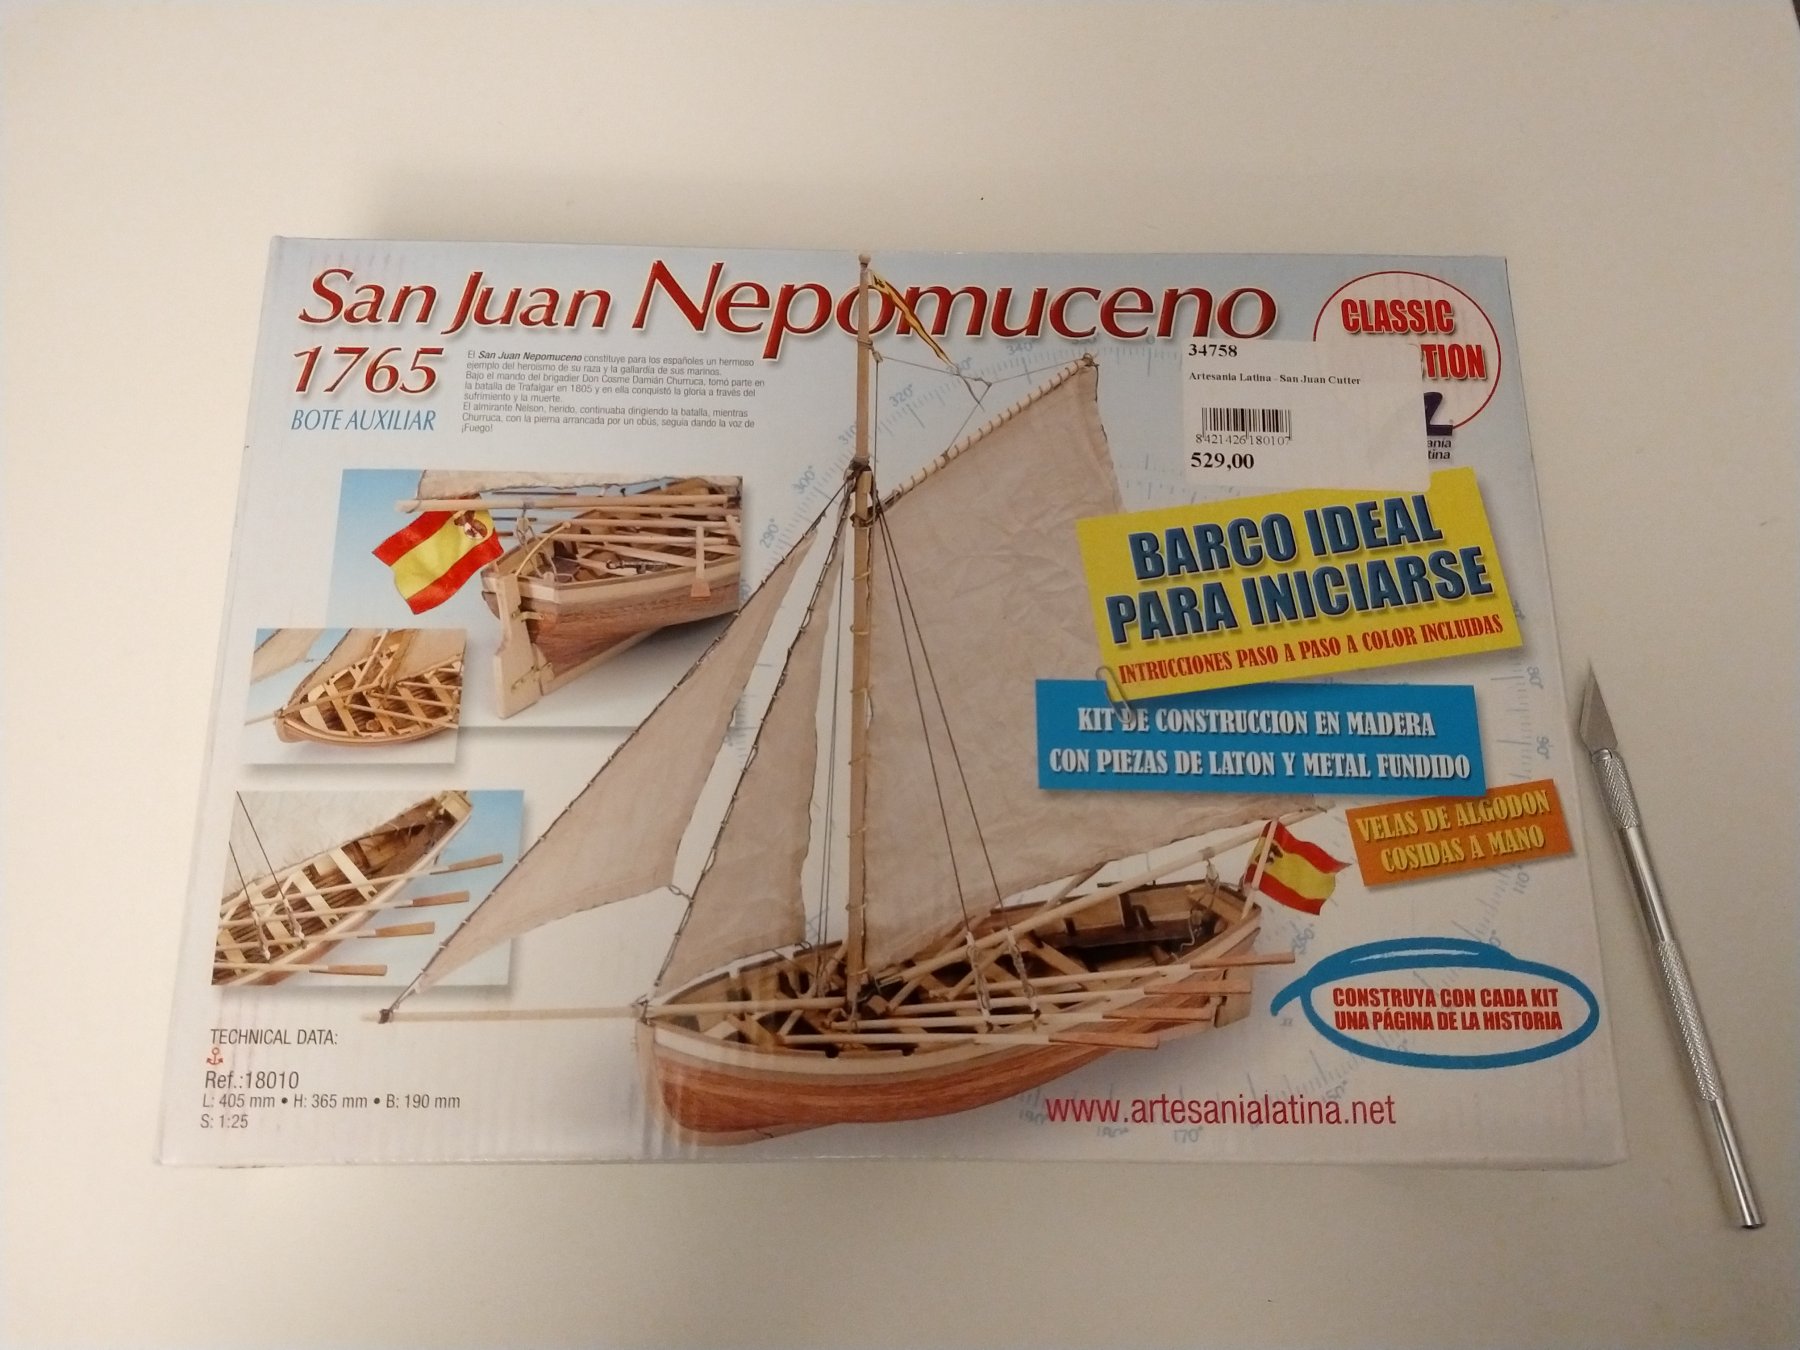
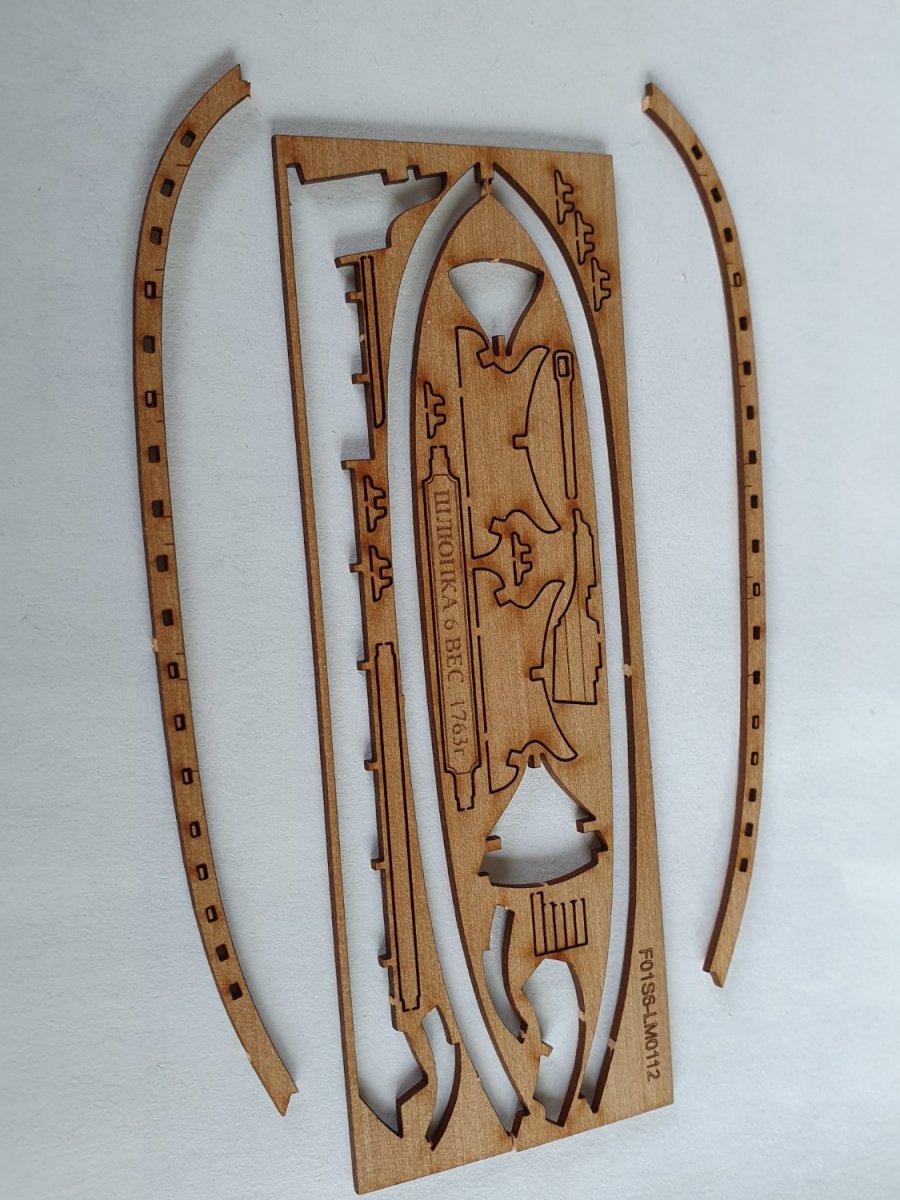
 It's my time to try and keep regular updates on this build. I believe the kit I selected is a great start for someone who has never built model ships, and I really want to give as much documentation as I can. Maybe I can help someone! I can't find much information about this boat. According to Artesania Latina it's the captains boat of the San Juan Nepomuceno. I would appreciate if anyone knows more about it. I'm sorry about my poor english in advance. Let's get going! I attached a picture of the model kit.

- 11 replies
-
- 3
-
-
- San Juan Nepomuceno
- ships boat
- (and 1 more)
-
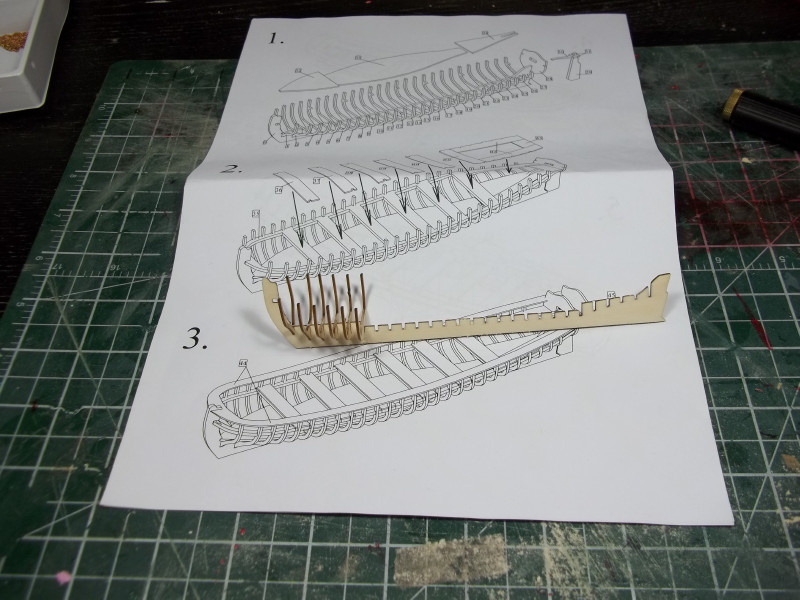
 Good Day Shipmates, This is my one post build log of Daniel Dusek's Ship's Boat. This kit costs 5 Euros and is an incredibly worthwhile, fun build that takes somewhere in the vicinity of 20 to 30 hours to complete. I will hold off painting it until I decide which ship I decide to pair it with. Best, Ian
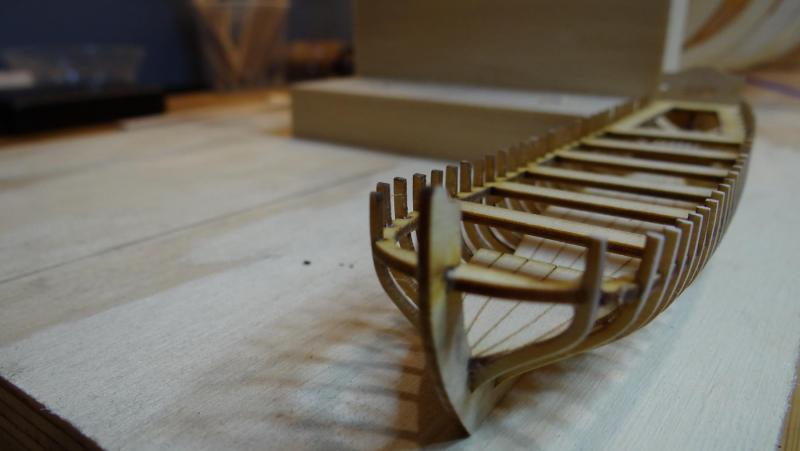


- 4 replies
-
- 7
-
-
- ships boat
- dusek
- (and 1 more)
-
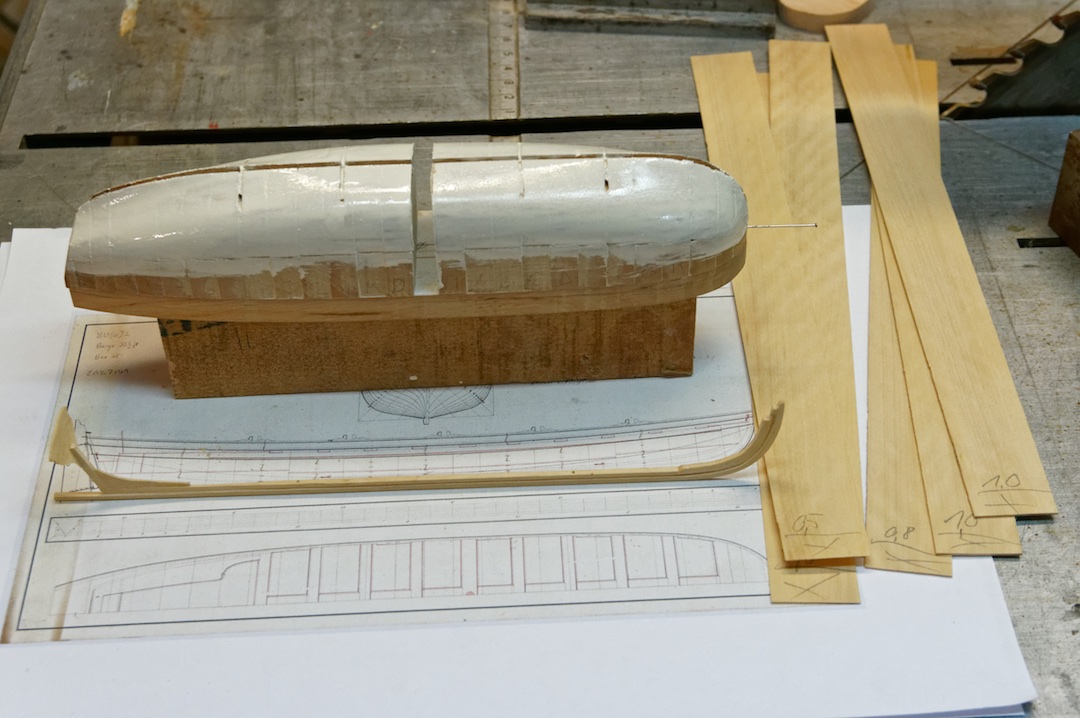
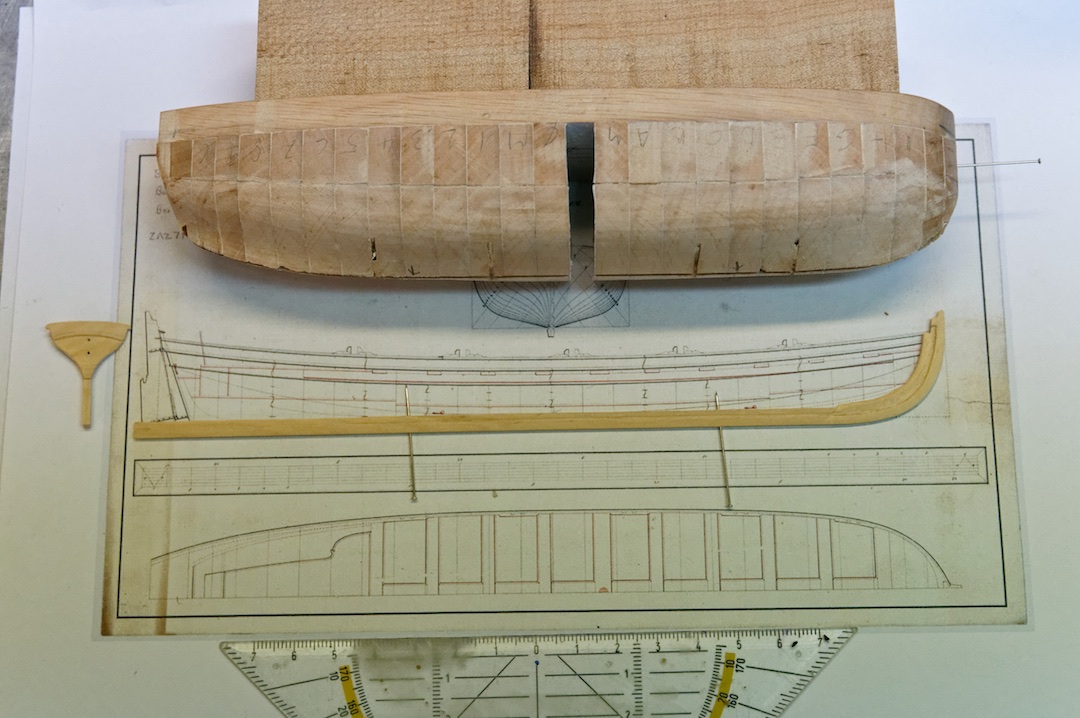
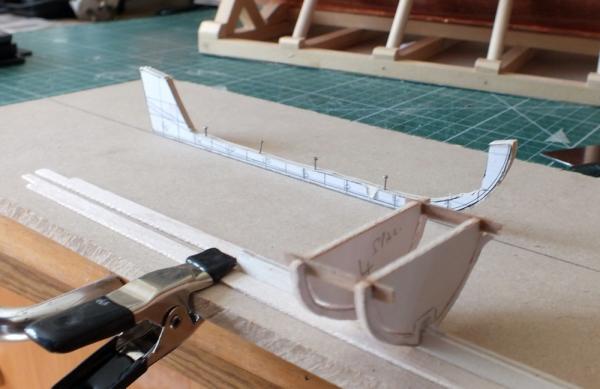
 Hello, first I would start this project the next fall, but things come often in an other way as you expect. During the building of the Dragon I often had a look at the model of the Victory from 1765. This model has such a beautiful barge on board, that I decided to build one when I'm ready with my Dragon. A plan was easily found and now I'm building. This is a barge with 10 oars and I think it will by right for a captain of a 74 gunner. I will build this barge in the same way Druxey has build his Greenwich barge. I will not explain so much, because of my english and hope that the pictures explain enough. Here I have painted the block white, so that I could see later better the pencil lines for the planking. The wood is Castello box wood. For the planks I have cut 0,5 and 0,8 mm strips.


- 58 replies
-
- 22
-
-
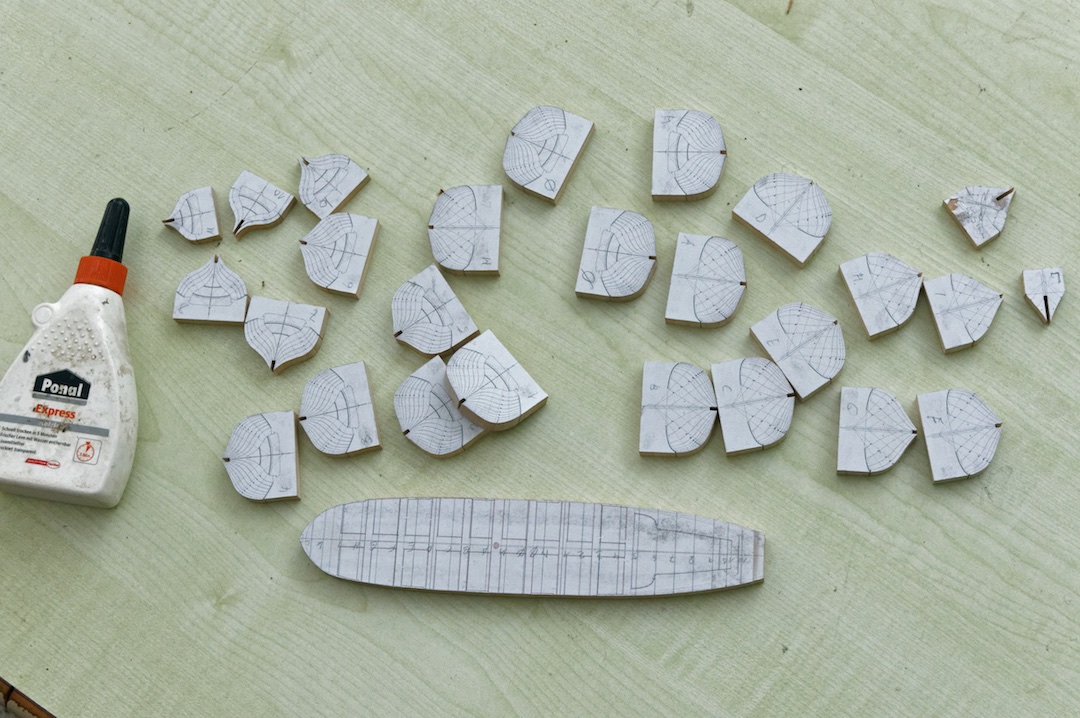
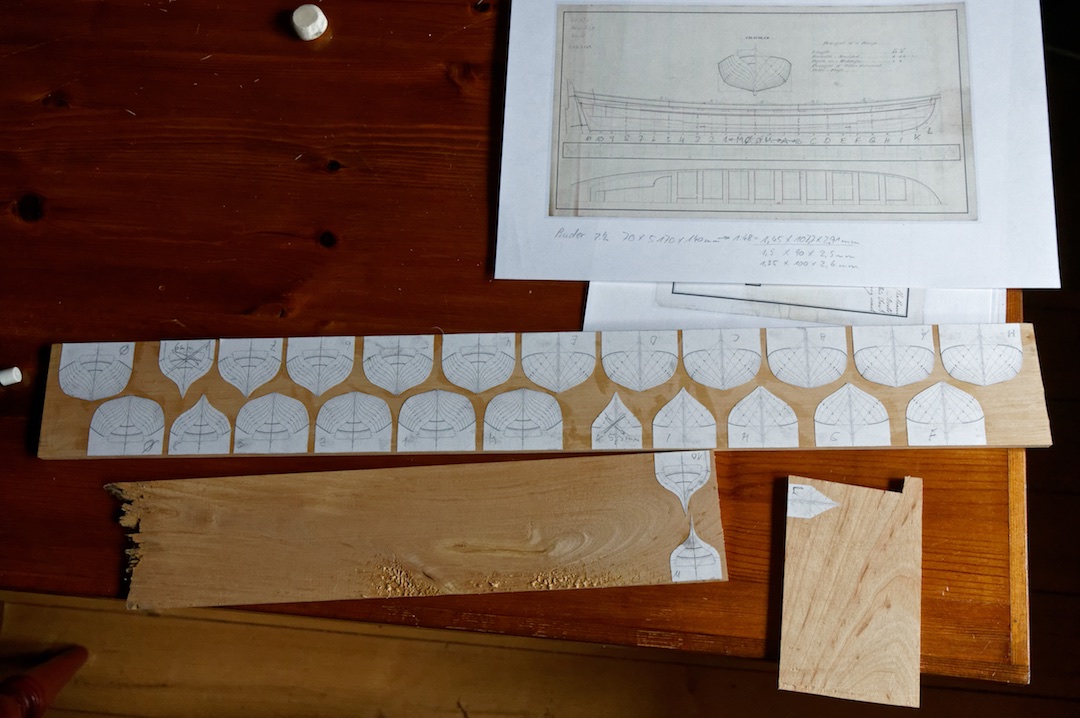
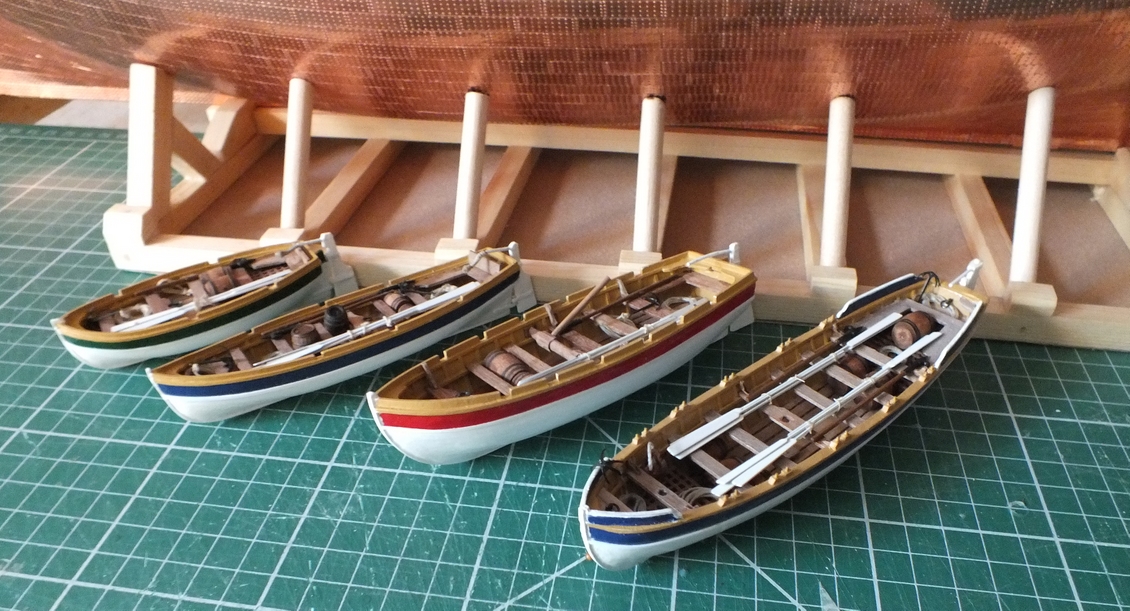
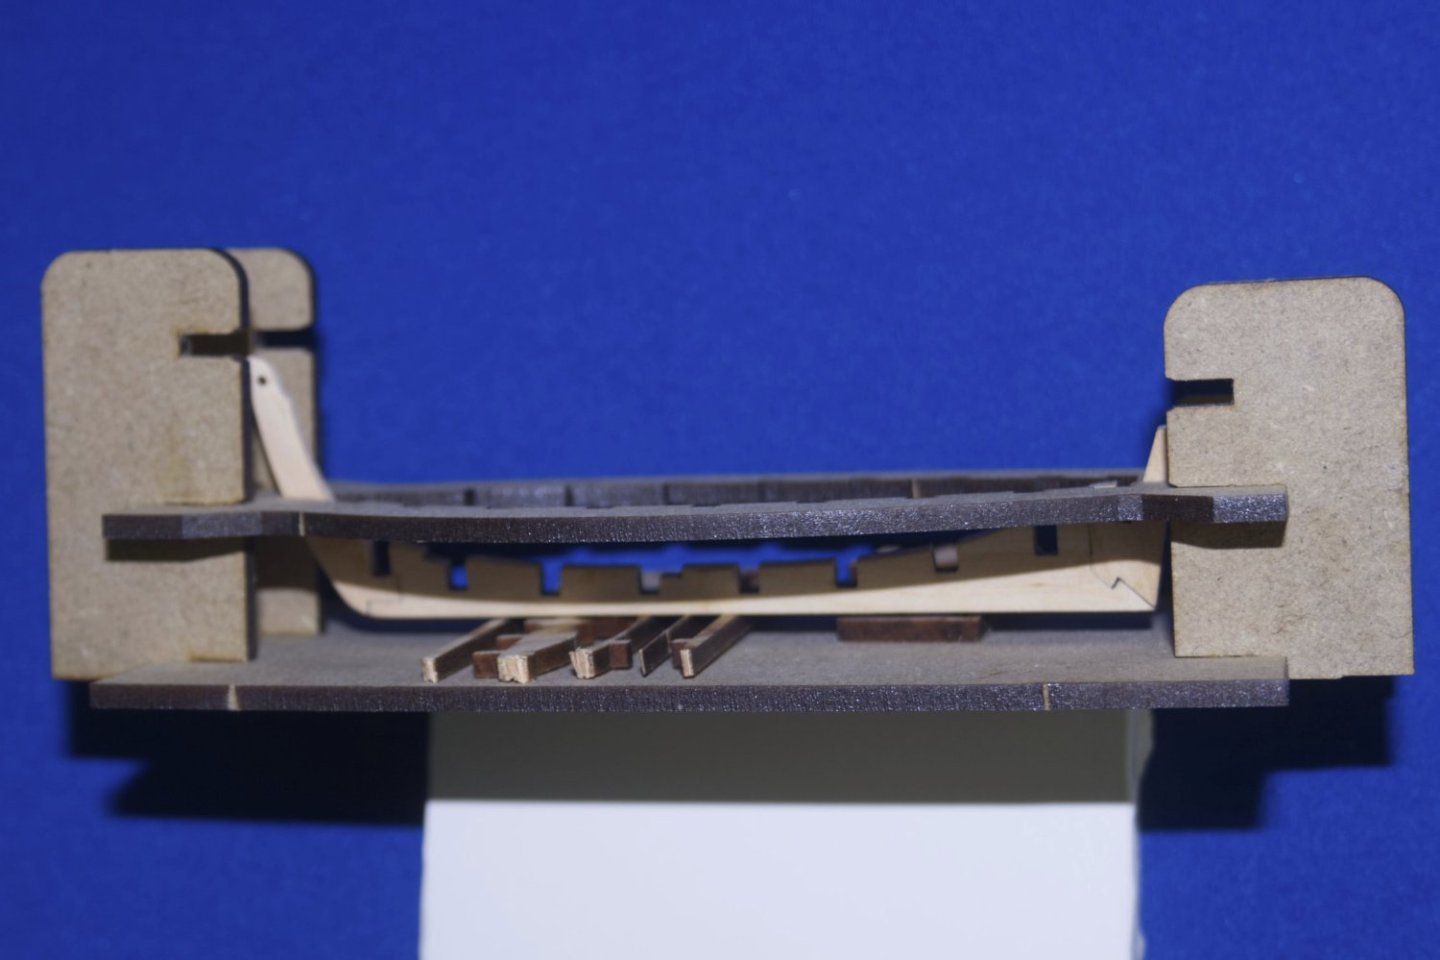
 Scratch build Dana’s boats @1/48 a 26ft Launch,18ft Cutter,24ft Cutter and a 32ft Pinace After building a set of much modified ships boats for my HMS Diana which I really enjoyed doing, I decided to scratch build a set at 1/48 scale, using the plans in A O S Diana and include masts and rigging, the builds will run along side my deans marine kit build of the WW2 military class trawler HMS Royal Marine (bought on ebay for less than half price) as practice build before building the Hunt Class Destroyer HMS Tanatside my father served on her at the time of the d-day landings on Omaha. The boats will not be woodworking master builds, leaving the outside hull showing bare planking, they will be painted as they would have been in service,which gave them protection, when stored on-board ship, for weeks or months at a time,I will build them depicting carvel built hulls which according to Ships Boats by q e may they would have been for foreign service,as the clinker built boats were for English Channel use. So they will be a mixture of wood and styrene and I will use grating and anchor kits and possibly oars. First photos show the set of boats on my model of HMS Diana,these were virtually scratch built. The first boat a 26ft launch. The frame plans used, were from The Anatomy of the ship HMS Diana, copies of the half frames were doubled, and then glued to 2mm ply,and the keel plan to 3mm ply,I then did a mock up of a section to see how the planking would look with the first planking with .5mm timber and the second with 1mm. The frame were cut out with my £25 jigsaw buy from good old ebay, I cut the frame centres so they could be broken out and this would leave the ribs in the hull, but added some strips to hold everything together whilst planking. I hope the frames left in the hull will be OK and look like a nice set of ribs, but I do have a contingency plan if they are to rough I will remove them and replace them with dummy ribs made from plastic strip which I know will look nice and sharp and after all they will be painted.
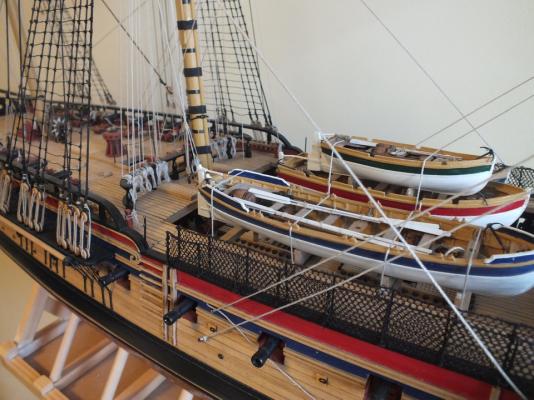


- 8 replies
-
- 10
-
-
- diana
- ships boat
- (and 1 more)
-
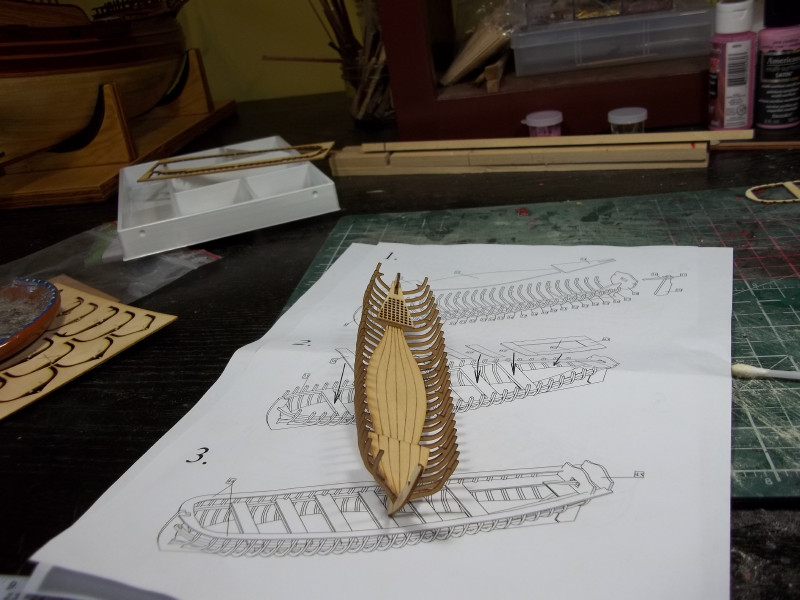
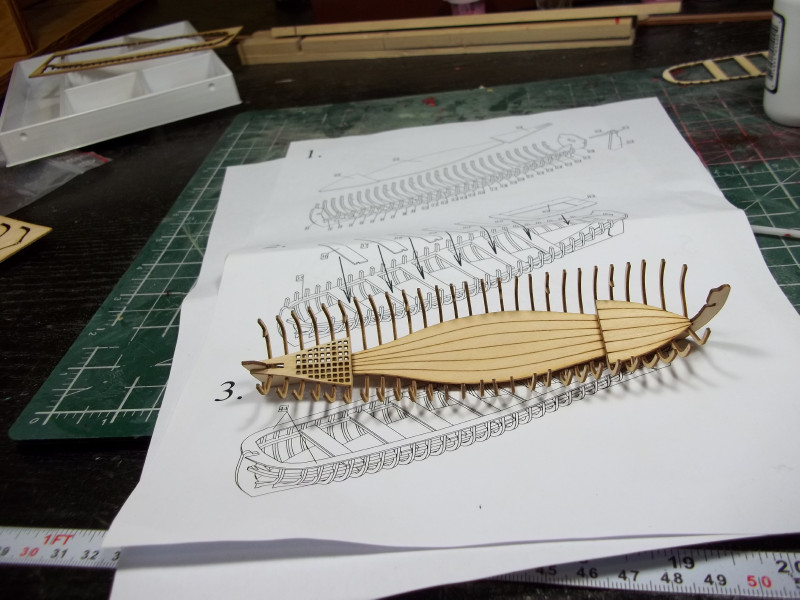
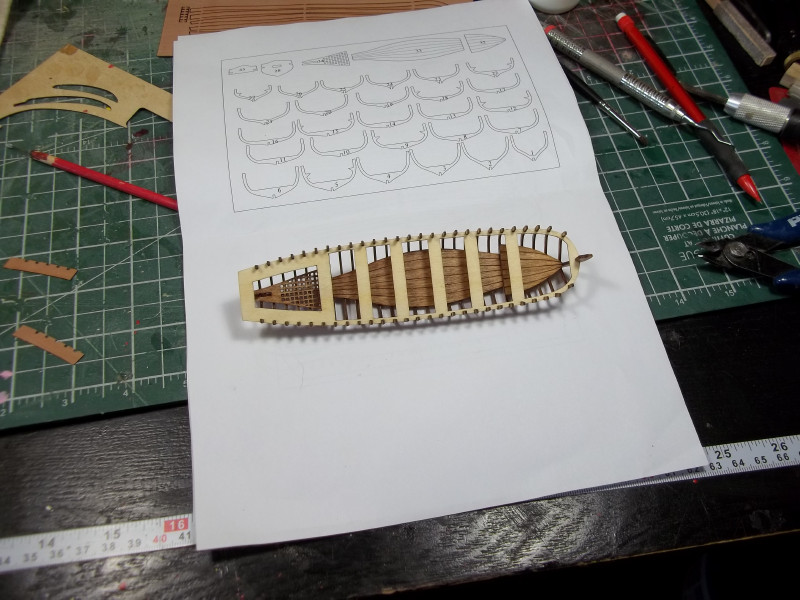
 Here is a fun little kit to build. It is the ships boat by Dusek, the kit as you can see comes complete with pre-cut planks and frames. This kit is amazing as to how it all fits so well, I had no problems assembling, the instructions were clear and the wood was extremely good. Total build time including stand was approximately 22 hours. I would easily give this kit a two thumbs up and would recommend it to all. It is priced at 5 euros, making it even more attractive. After building this I defiantly am putting a full sized Dusek kit on my list. Enjoy
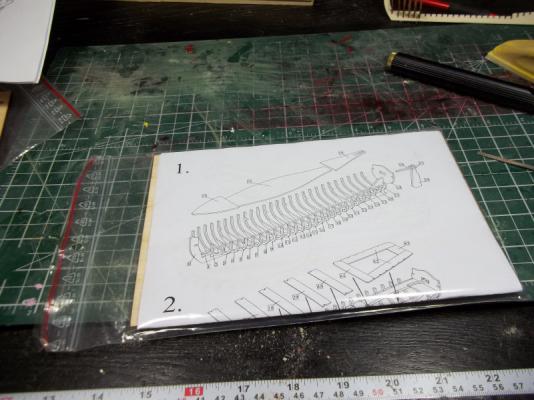


- 3 replies
-
- 9
-
-
- finished
- ships boat
- (and 1 more)
-
 Hi all! Decided to help out Sawdust Dave with his venture and am challenging the rest of the MSW scratch builders in the U.S. to help out too. I have put the Triton model aside while I do these five little boats. My recent progress over the weekend using materials on hand:

- 4 replies
-
- 3
-
-
- lifeboat
- ships boat
- (and 1 more)
-
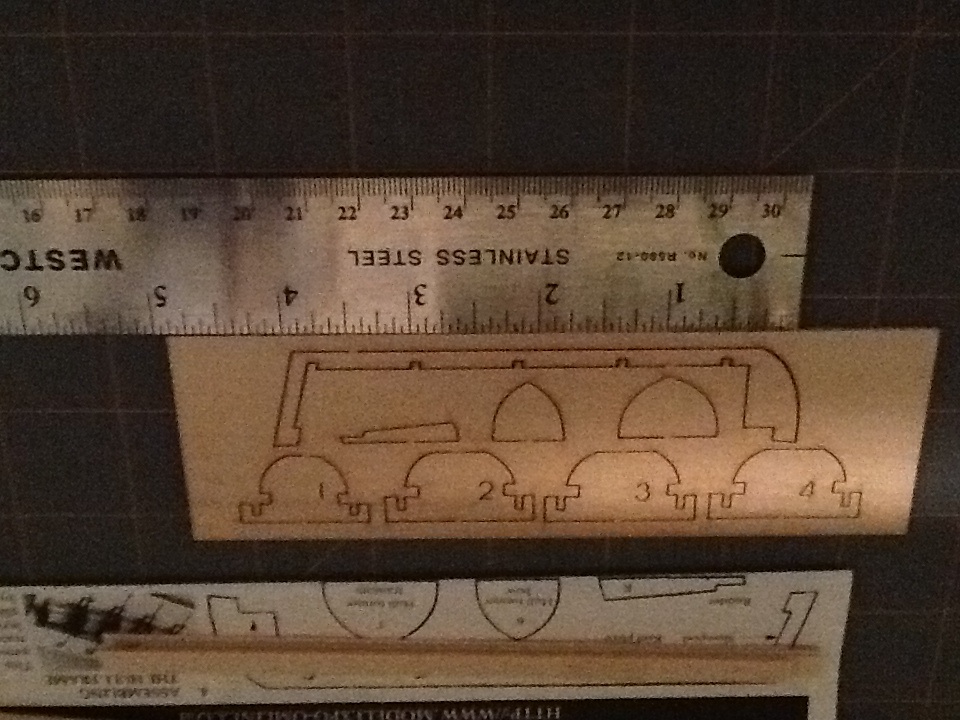
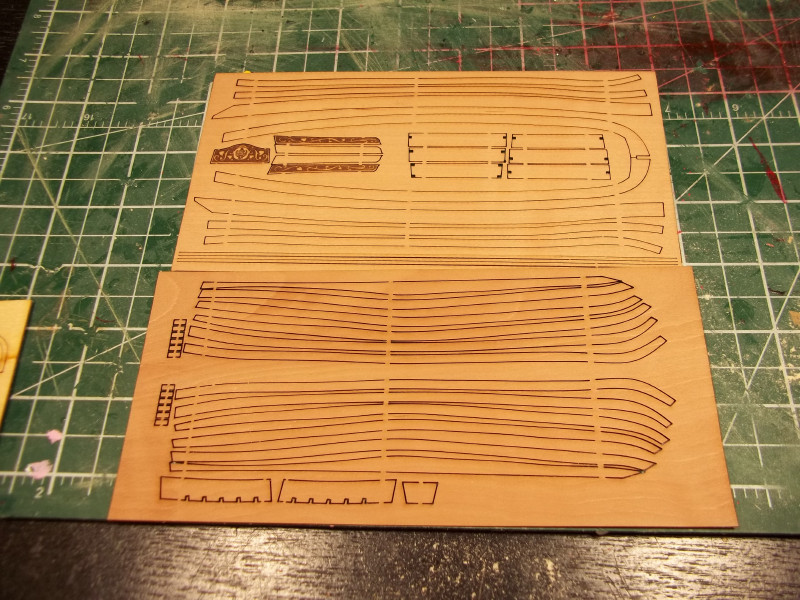
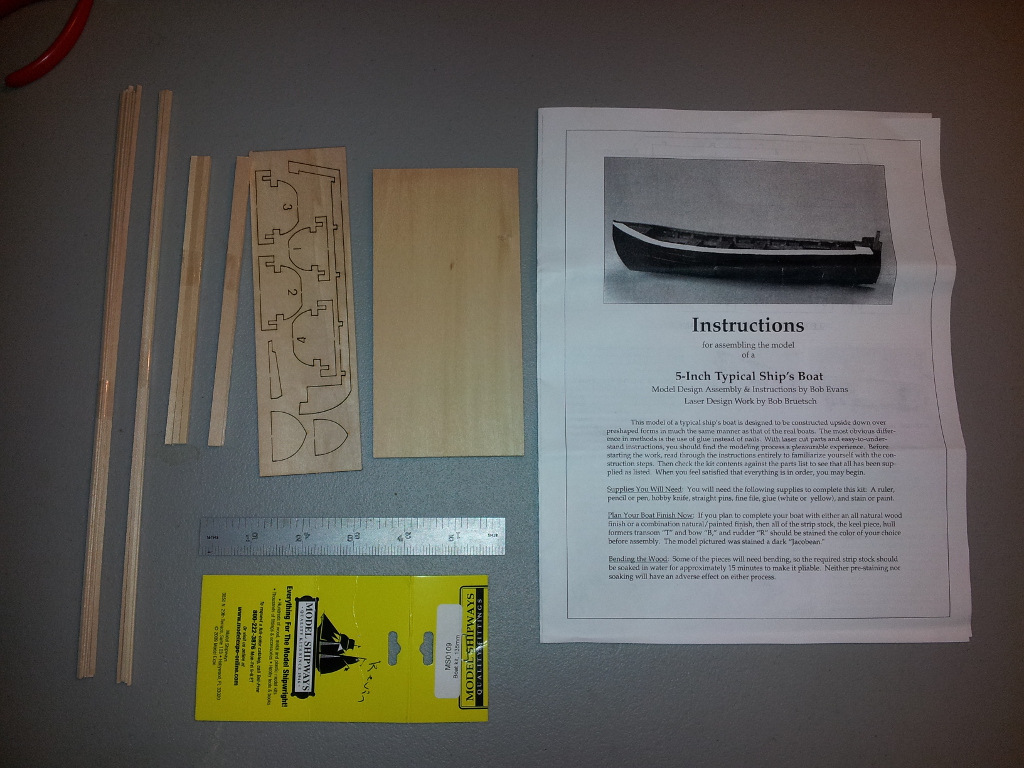
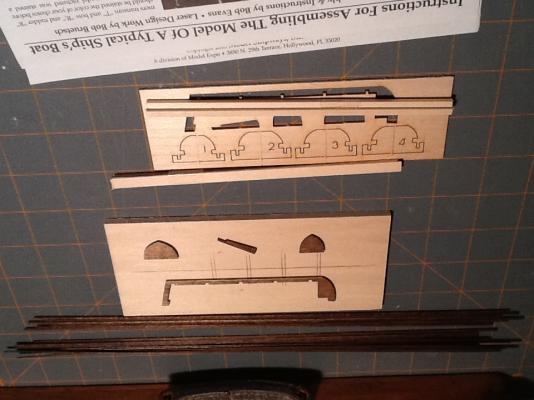
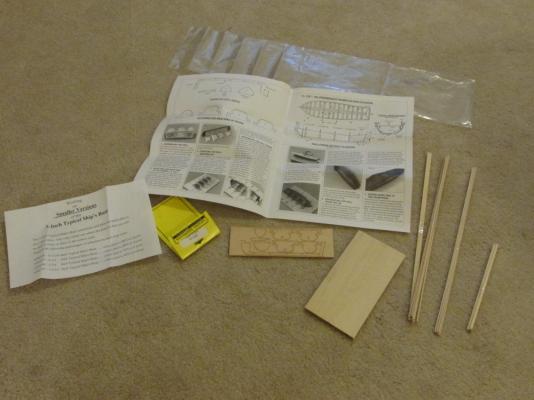
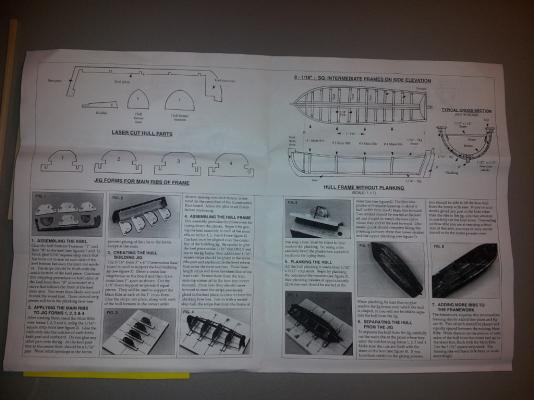
 Model Shipways Typical Ship’s Boat* (SMALL) *As labelled on the kit. On the website it’s called: Plank-on-Frame Lifeboat Kit I am building the Mamoli 1:64 scale 1781 American Privateer Rattlesnake with the help of Robert Hunt’s Practicum. In the process of building the Rattlesnake, I had to make the ship’s boat. The Mamoli kit provided the model builder with a pre-cut wooden shell for the hull from which the builder could then create a completed model (which the Practicum addresses). If I had built the Model Shipways’ version of the Rattlesnake, I would have had to make the ship’s boat “bread and butter” style. Somehow neither option satisfied me. So I decided to go all out and build a ship’s boat from the keel up or as the case turn out, from the keel down. Model Shipways makes 5 sizes of kits; I purchased the Typical Ship Boat No. MS0108, a Plank-on-Frame construction kit (POF). Model No.: Size MS0105 3-3/16'' (81mm) MS0106 3-3/4'' (95mm) MS0107 4-1/4'' (108mm) MS0108 4-3/4'' (122mm) MS0109 5-3/16'' (135mm) This is my first POF as well as my first small boat build, so this will be all new territory for me. Not only that, I won’t have the Practicum to hold my hand until the hull is built. The kit is fairly simple, one laser cut sheet provided the keel, the bow bulkhead, the transom, and the frames to create the bot’s ribs. A bunch of stock wood pieces which I believe to be Basswood as it is fairly soft was also included. The instructions are straight forward but not overly detailed so a lot of the skills and nuances of model building must be brought with the builder. Unfortunately the resolution of the photo images in the instructions is low and therefore hard to see detail.
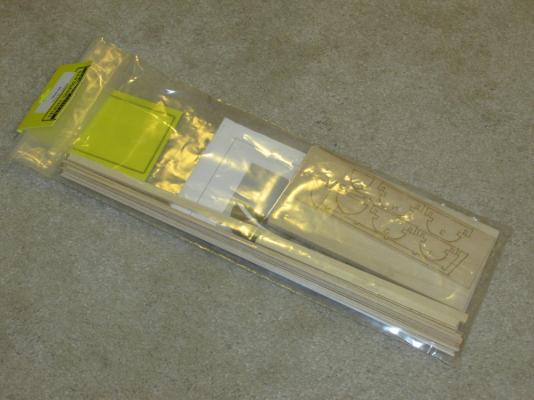
- 91 replies
-
- 3
-
-
- ships boat
- model shipways
- (and 1 more)
-
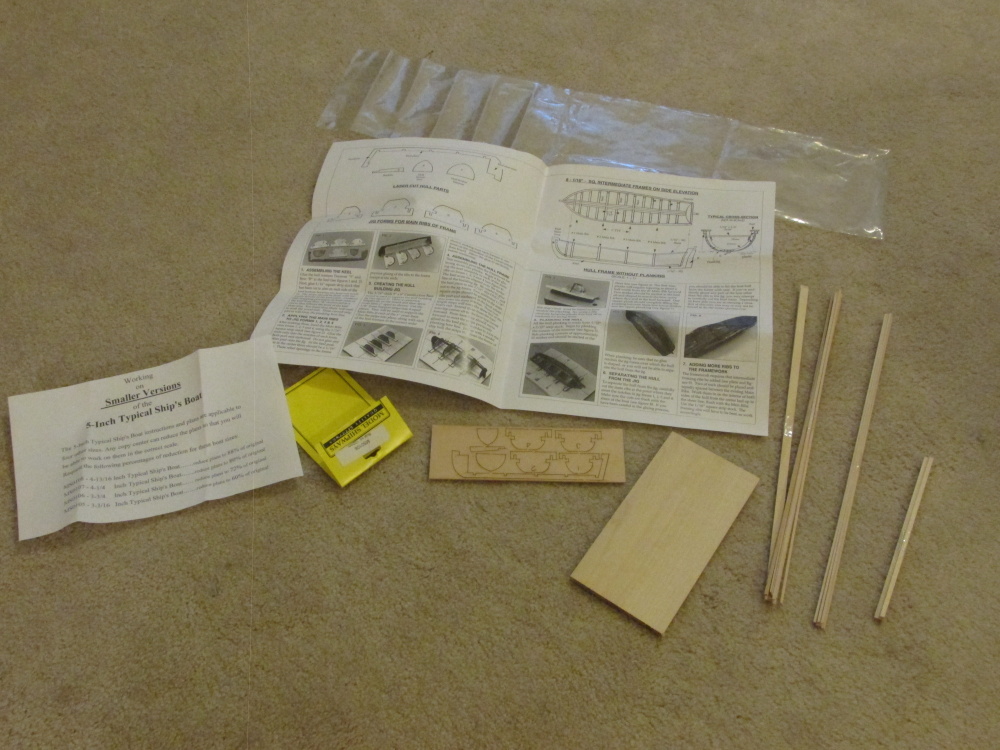
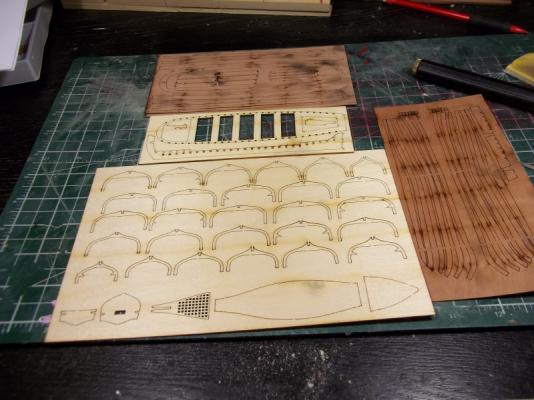
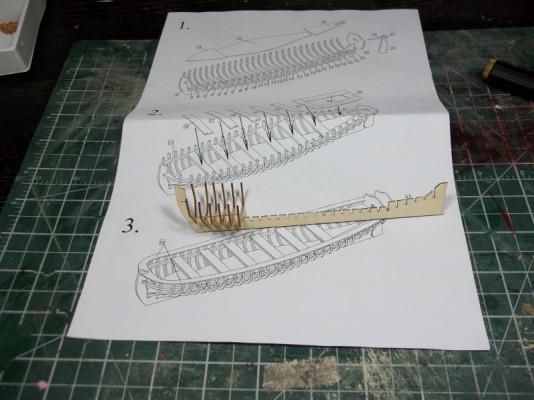
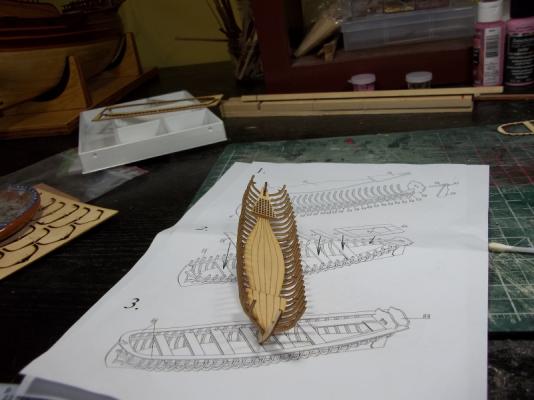
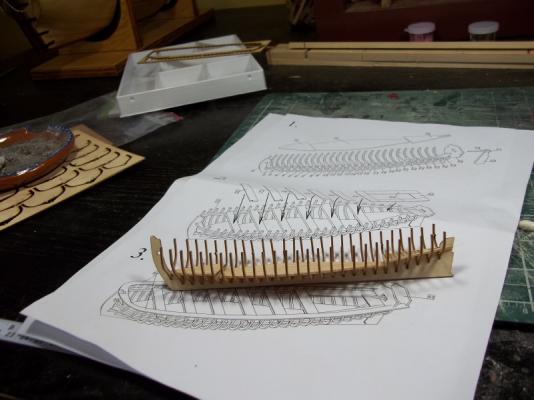
 Hi everyone. This is my first Build log. I have built several plastic models over the years but this is my first planked model. I chose this model because it was cheap and small. I figured it would be a good project to learn on. If I screw it up I would only be out $5. Here is what was in the kit. Not much to see. I cannot see any details in the images so they are no help. If it was not for the line drawings I believe I would be lost. My first step is to stain the parts. At this point I have not decided whether to paint it or leave it natural. I have a feeling that I will paint it to hide my mistakes. (Edited to fix images)
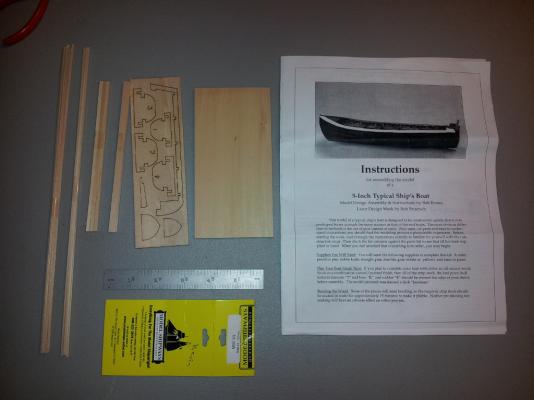

- 55 replies
-
- 1
-
-
- ships boat
- model shipways
- (and 1 more)


.jpeg.270f65d5e049f68474113981f4ade7d6.jpeg)
.jpeg.37bcdb48e7e7ebc47e15c4d17ebba30d.jpeg)