HOLIDAY DONATION DRIVE - SUPPORT MSW - DO YOUR PART TO KEEP THIS GREAT FORUM GOING! (Only 20 donations so far - C'mon guys!)
×


James H
-
Posts
6,067 -
Joined
-
Last visited
Content Type
Profiles
Forums
Gallery
Events
Everything posted by James H
-
 I have one here and it is amazing! I'll try too get some photos this weekend.
 -
Watching along!
-
Posted in general site help. Moving to correct area.
-
Plank Bender....
James H replied to dvlp47's topic in Building, Framing, Planking and plating a ships hull and deck
How about this one? -
...ain't that the truth! 🔨 Watching this build with interest.
- 315 replies
-
- 1
-

-
- master korabel
- avos
- (and 1 more)
-
Welcome to MSW! That should be a nice intro without too much complication. Remember to start a build log
-
Arrived safely in Lancashire! I'll do a write up in the next days.

-
I presume both damaged kit boxes were in the US? Did UPS deliver the last mile or was it a USPS delivery? Absolutely disgraceful that you should have anything delivered in that state.
-
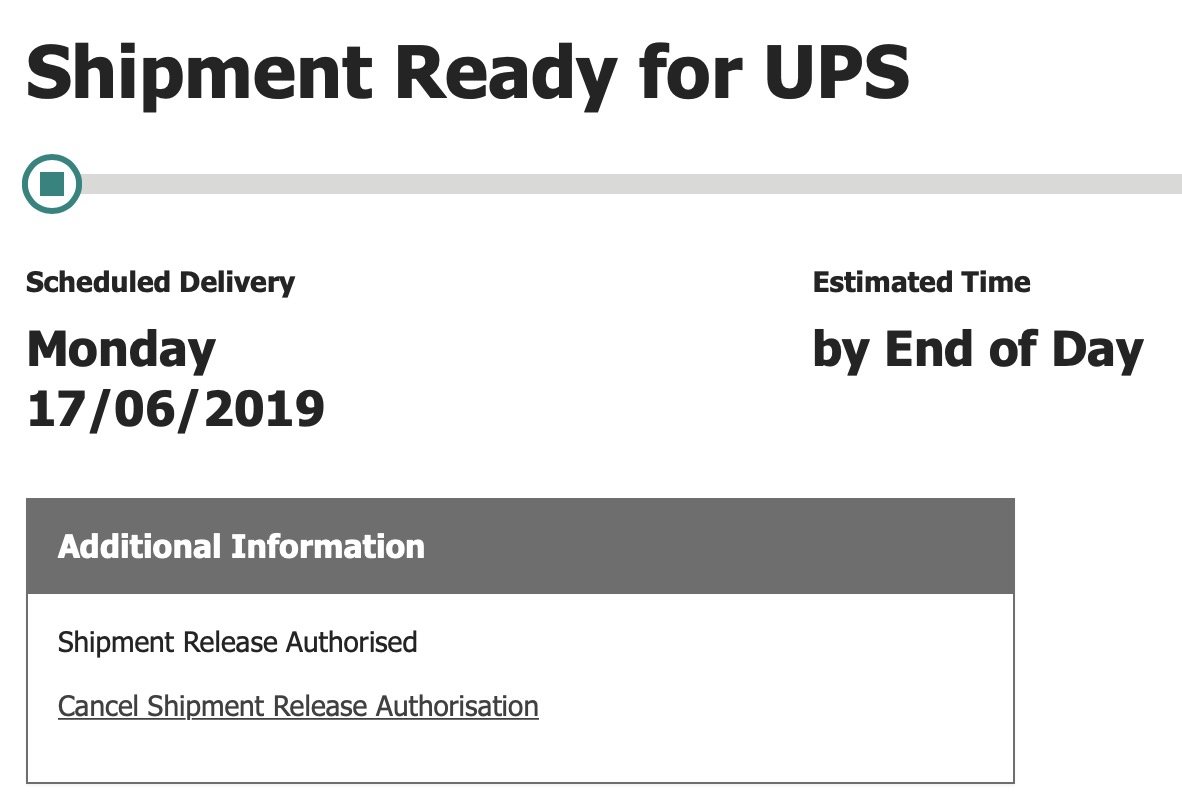
Damn, my delivery has changed to tomorrow now!
-
Now THAT is service! 👍
-
Maybe there should be an Alert Group Build here if we get enough interested parties?
-
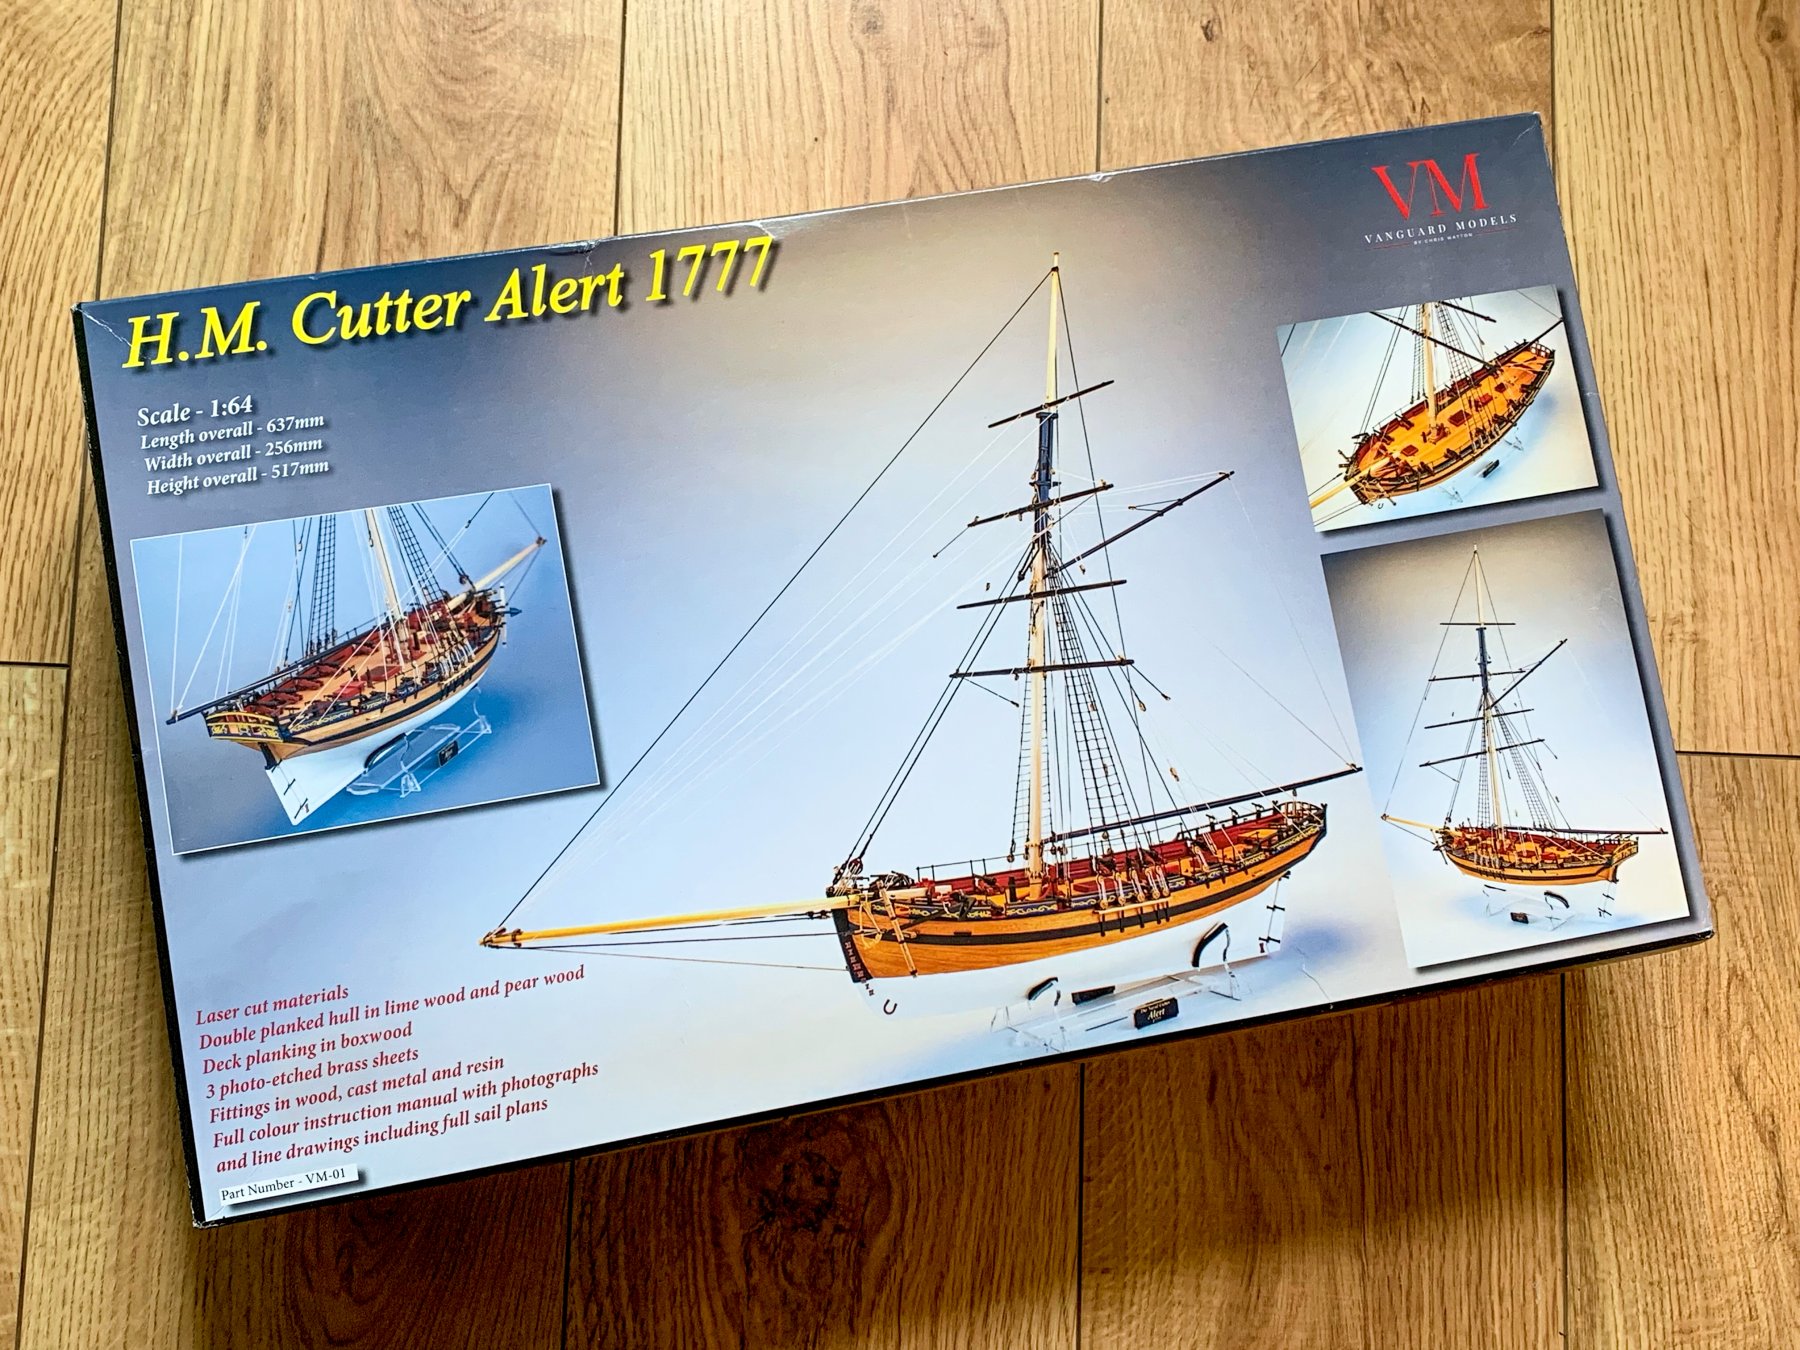
Ahead of schedule, my Alert kit is due here tomorrow!

-
Stunning! 🤩
-
I think they are shipping tomorrow for UK, so I would think Tues/Wed latest.
-
I should have a review and kit contents posted next week for you all.
-
Sometimes, yes.
-
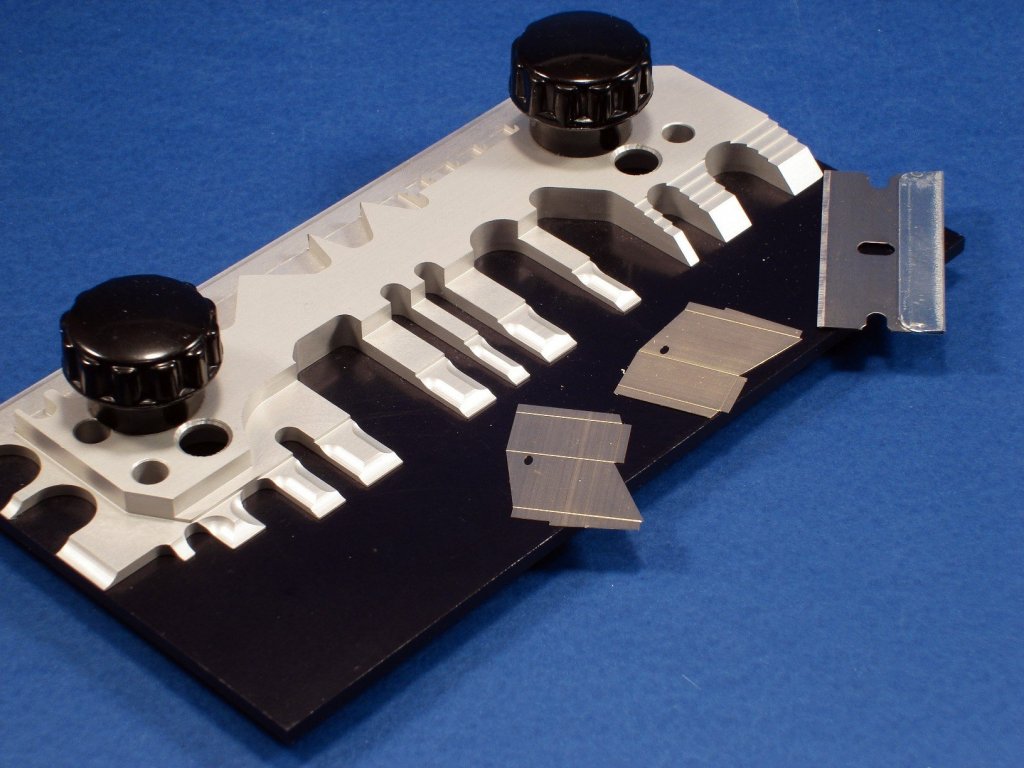
If you pop me your address via PM, I'll send you my 5.5inch Hold 'n Fold. I have two, so don't need another. It's not new but is perfectly ok. It's high quality machined aluminium and very precise. All I ask is postage.
-
That looks superb. Very impressed to see some stunning originality coming from China. I'd love to see a few of these built here, and hopefully more original subjects from Trident too.
-
Mine is on the way!
-
kit review 1/72 HMS Vanguard 1787 - Victory Models/Amati
James H replied to James H's topic in REVIEWS: Model kits
You know you want to 😉- 18 replies
-
- 2
-
-

-
- victory models
- elephant
- (and 3 more)
-
kit review 1:72 Tender ‘Avos’ (XS Edition) - Master Korabel
James H posted a topic in REVIEWS: Model kits
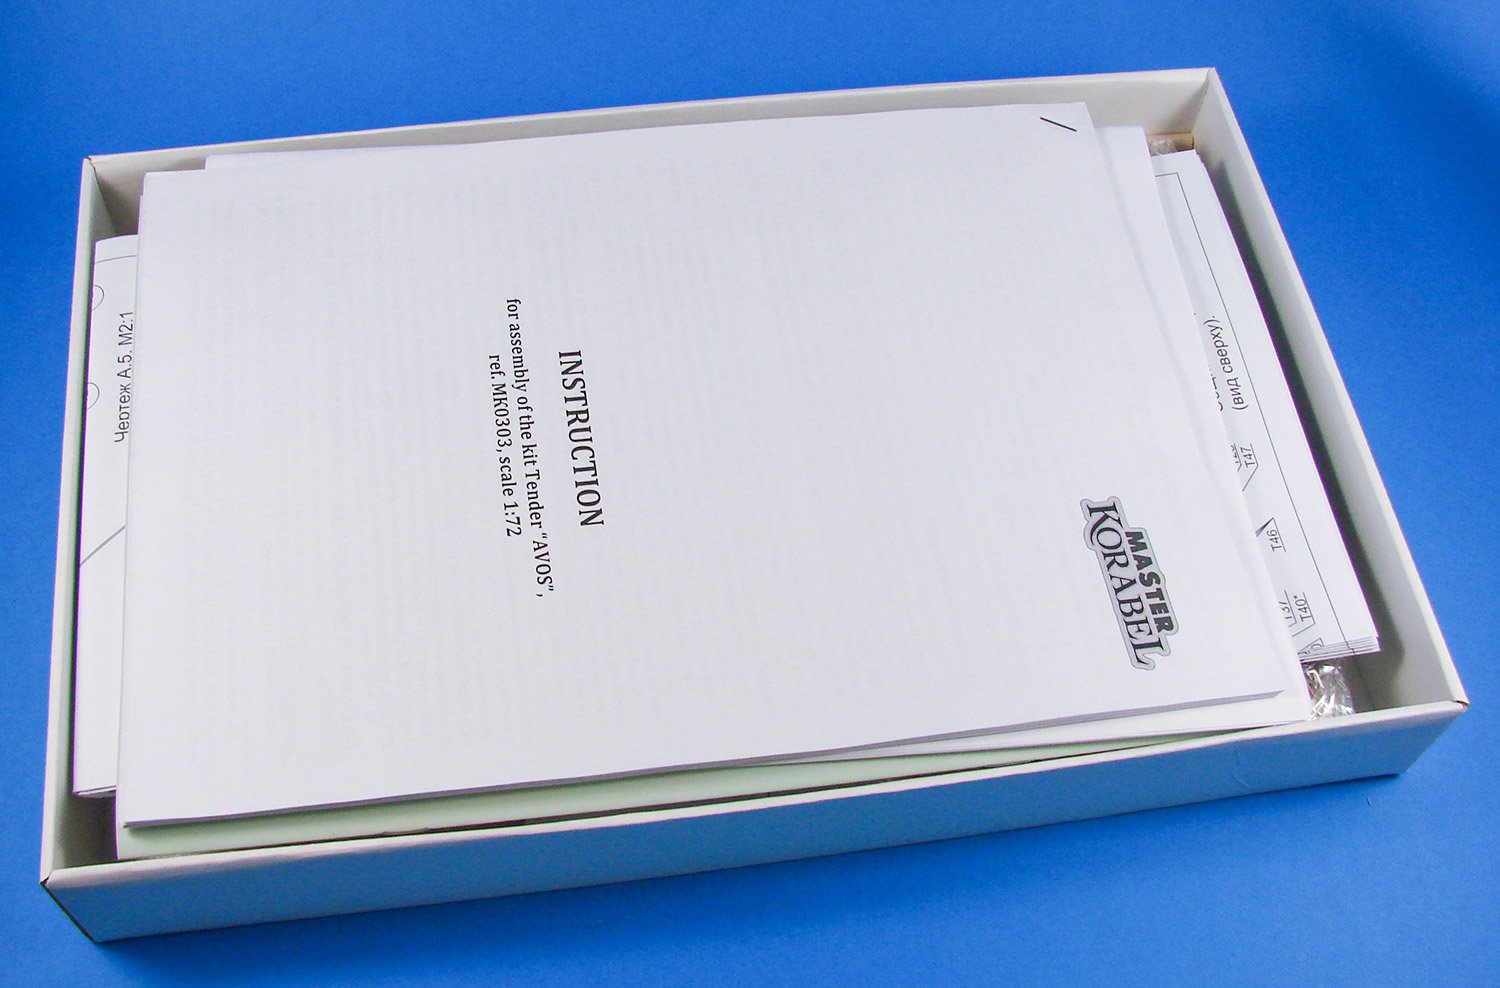
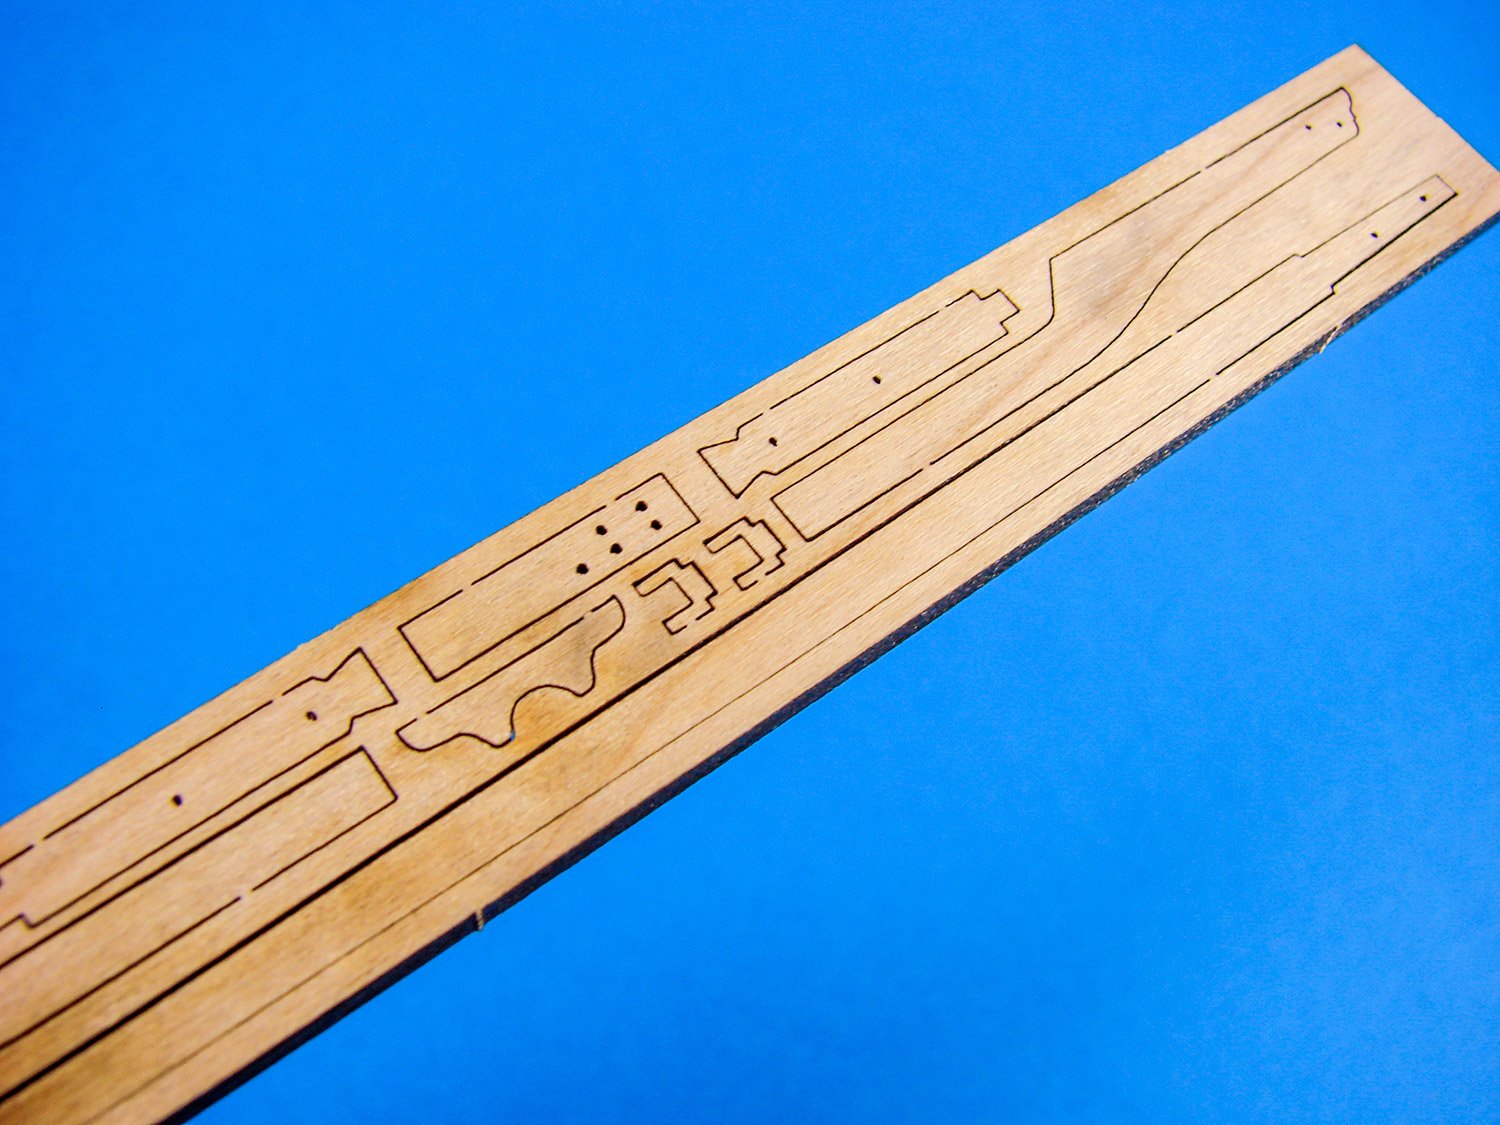
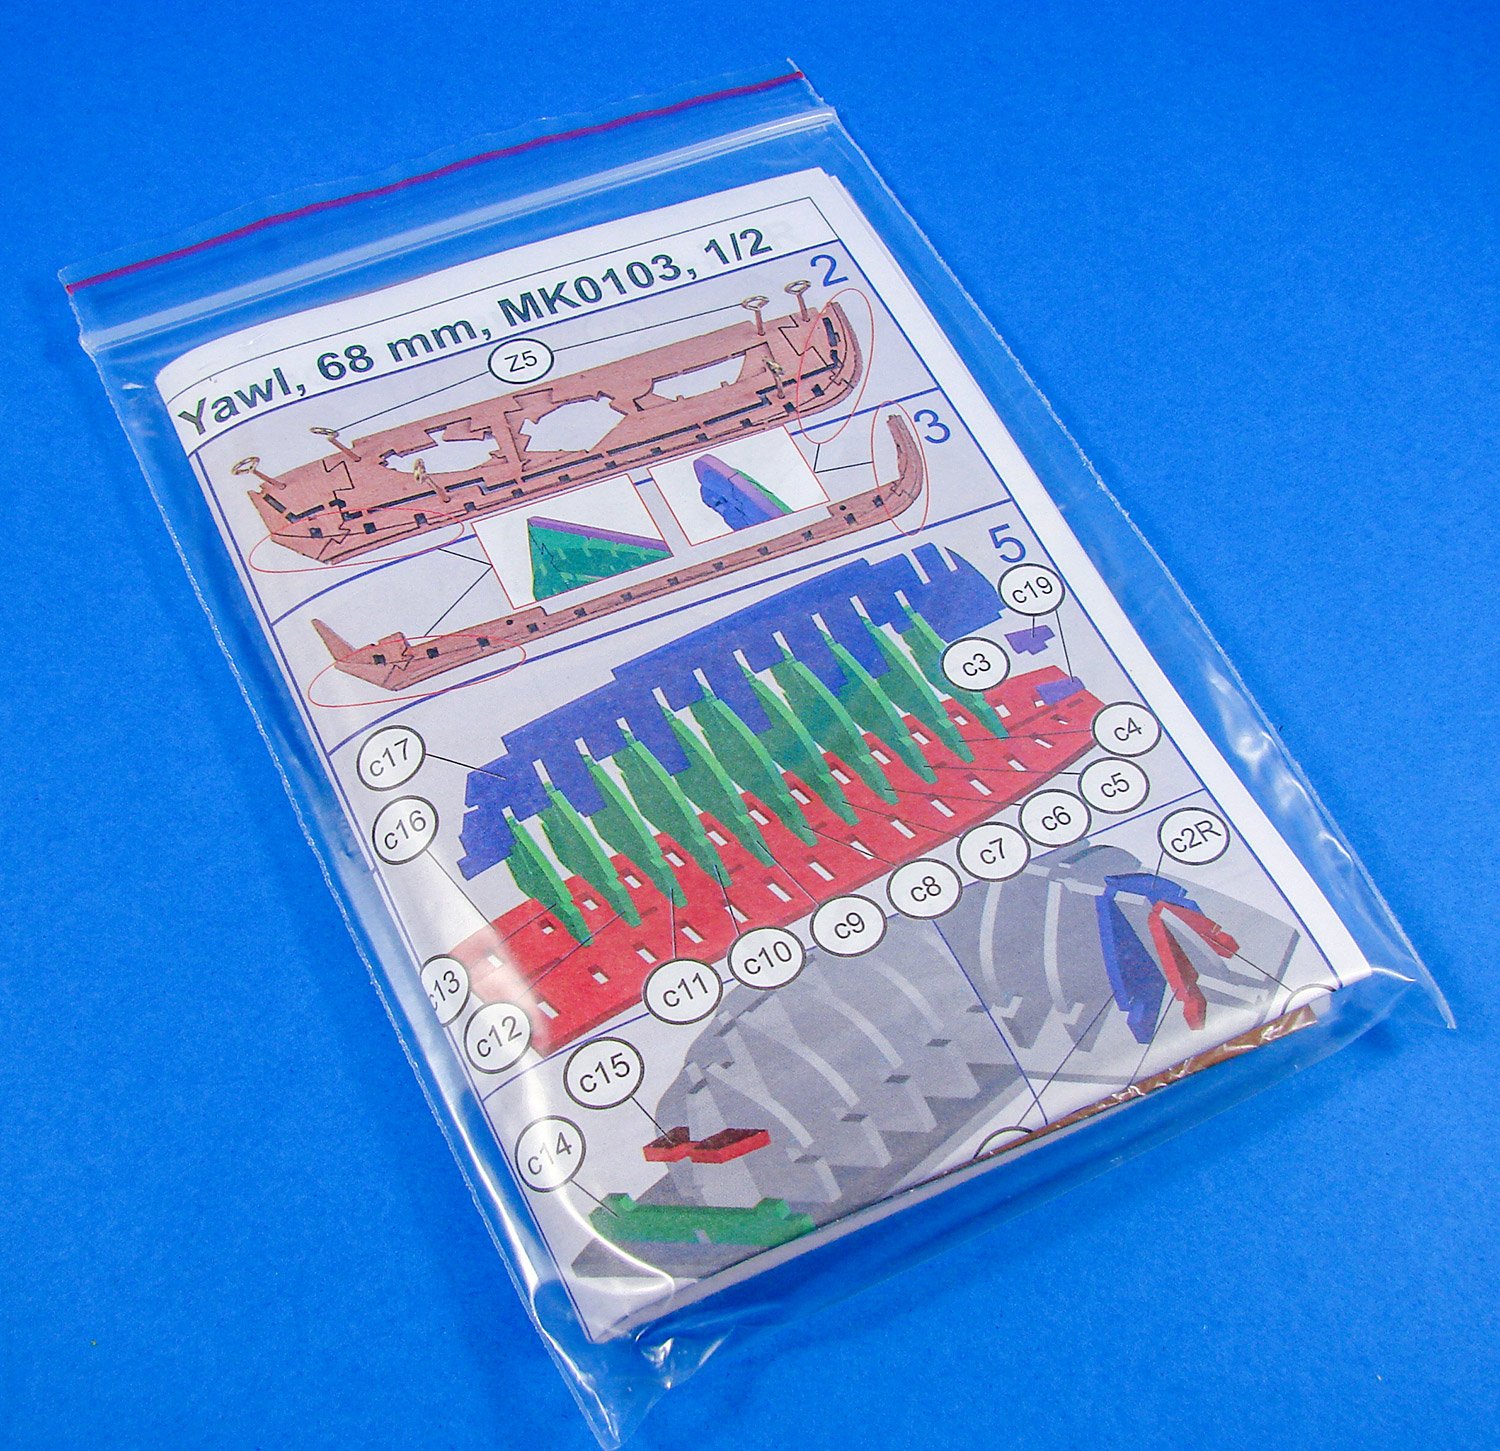
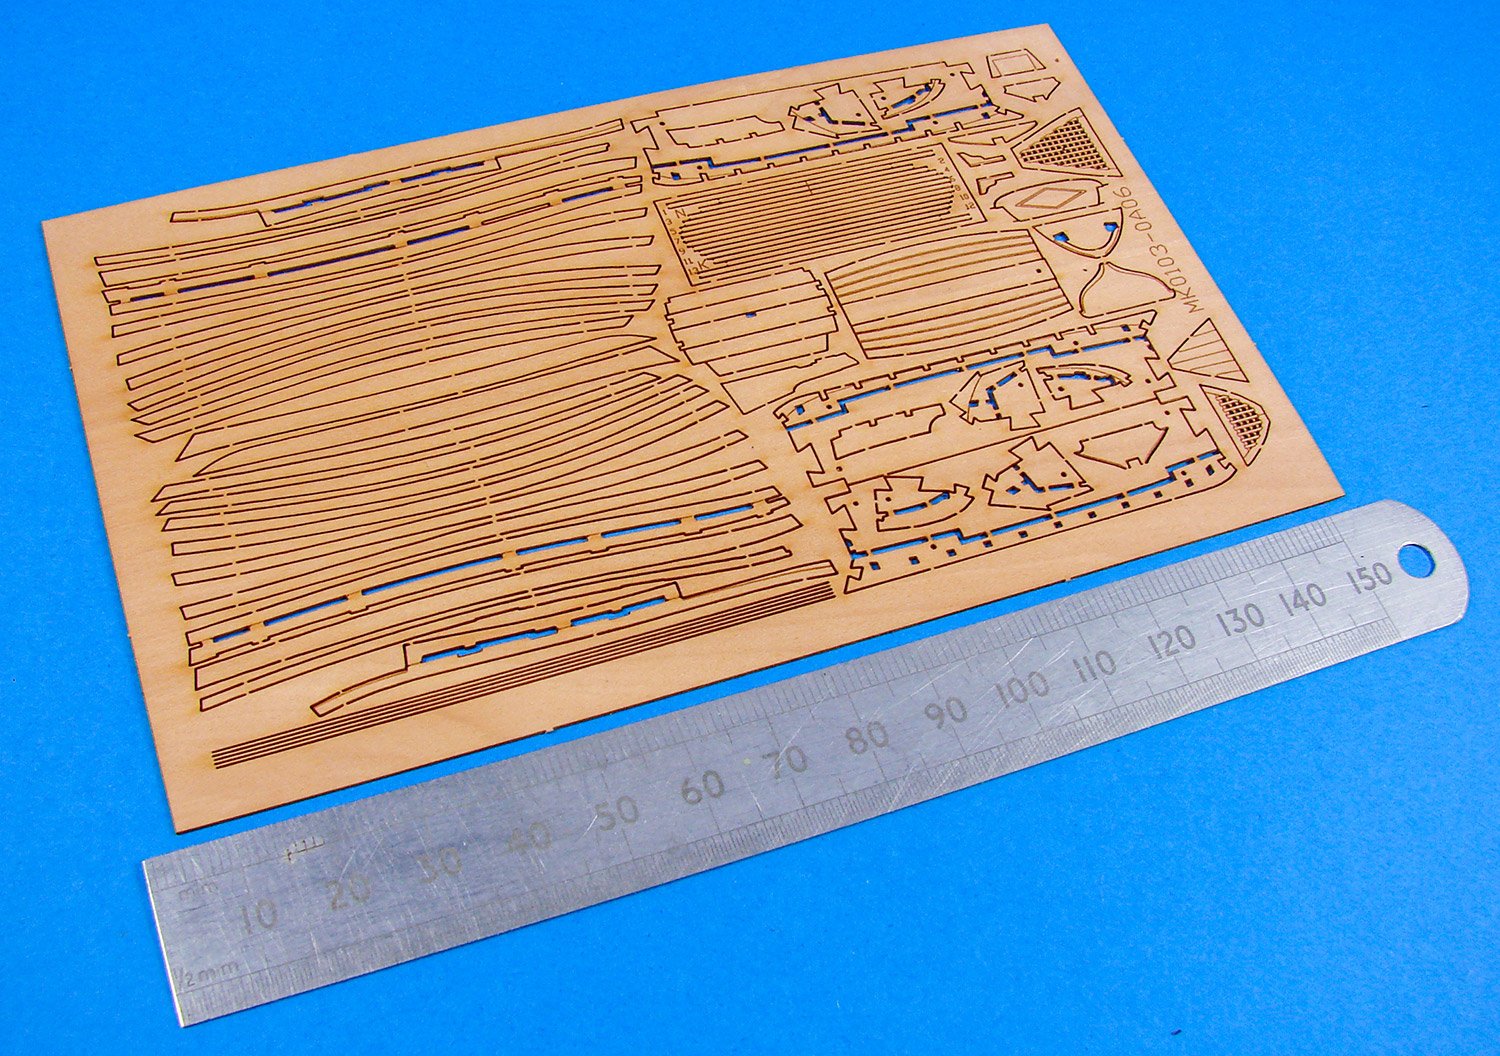
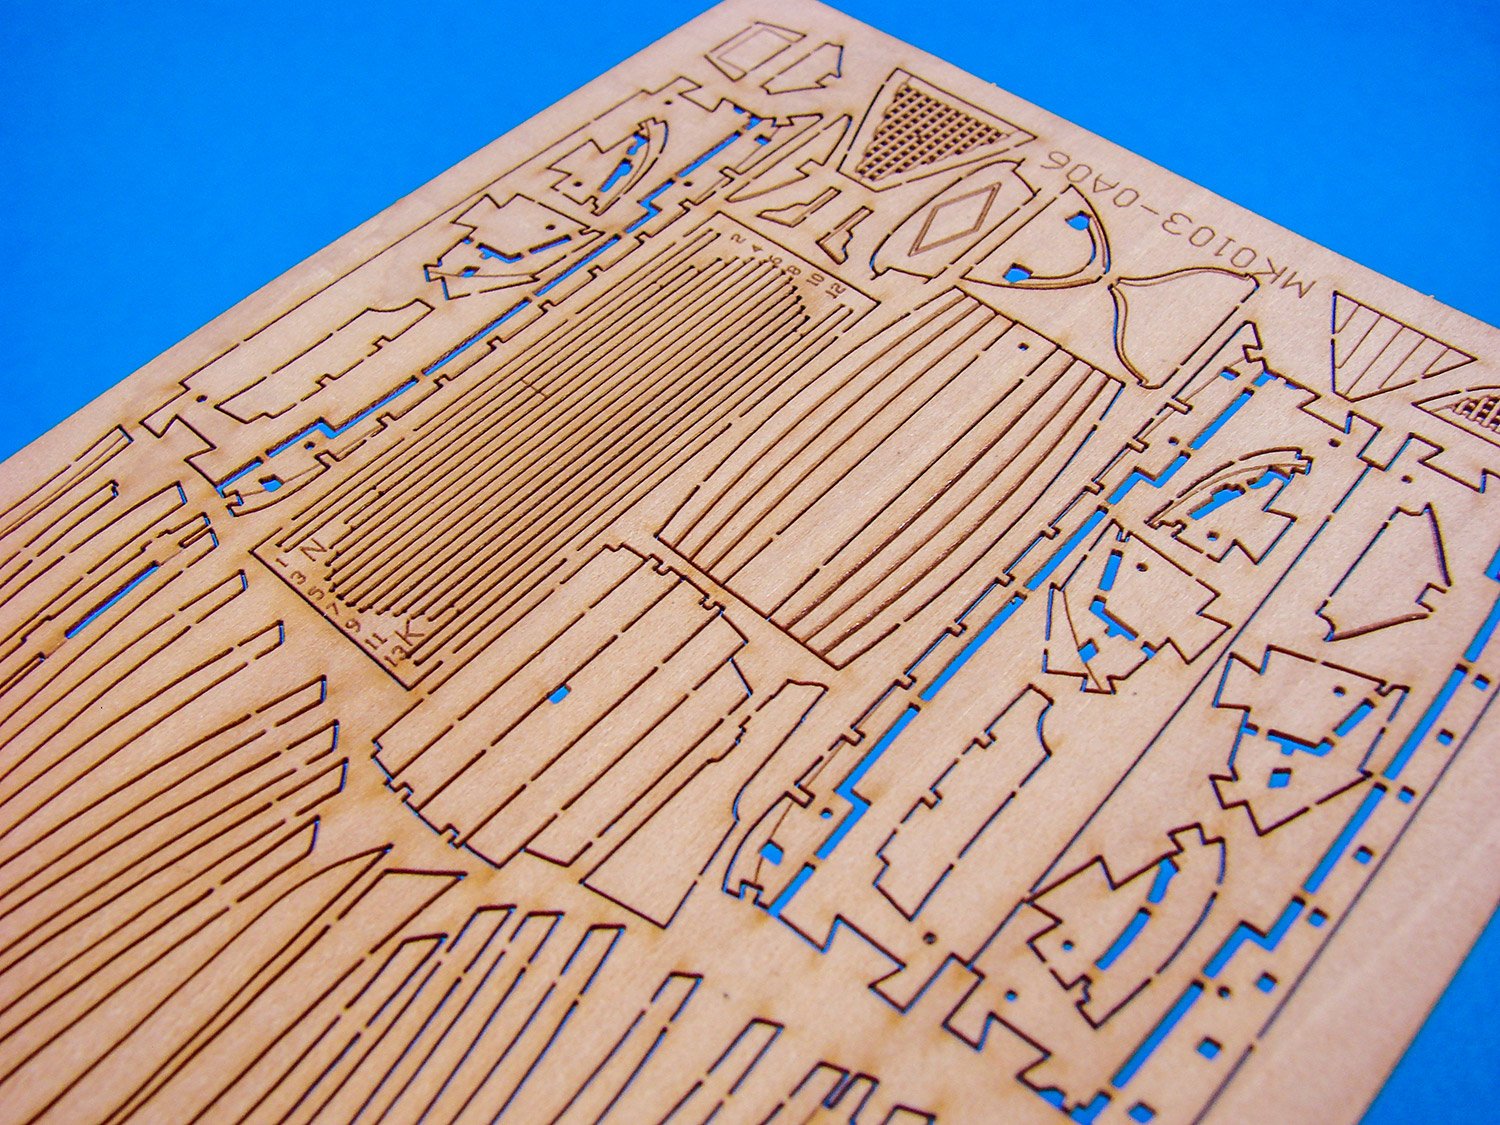
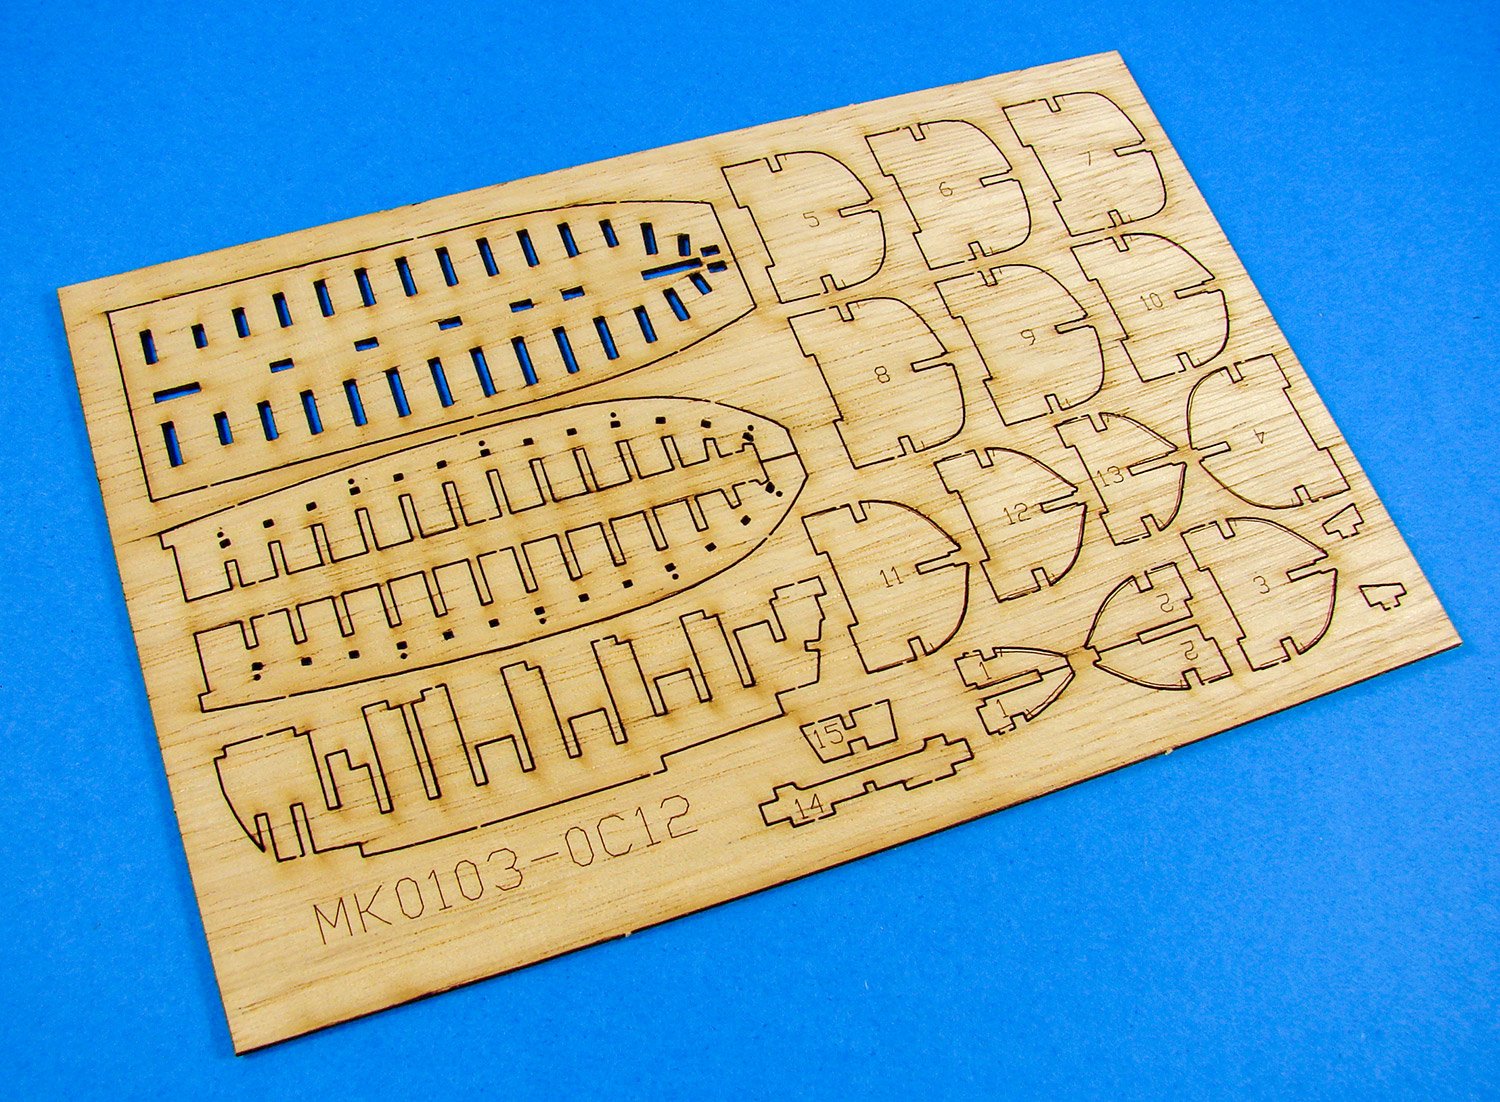
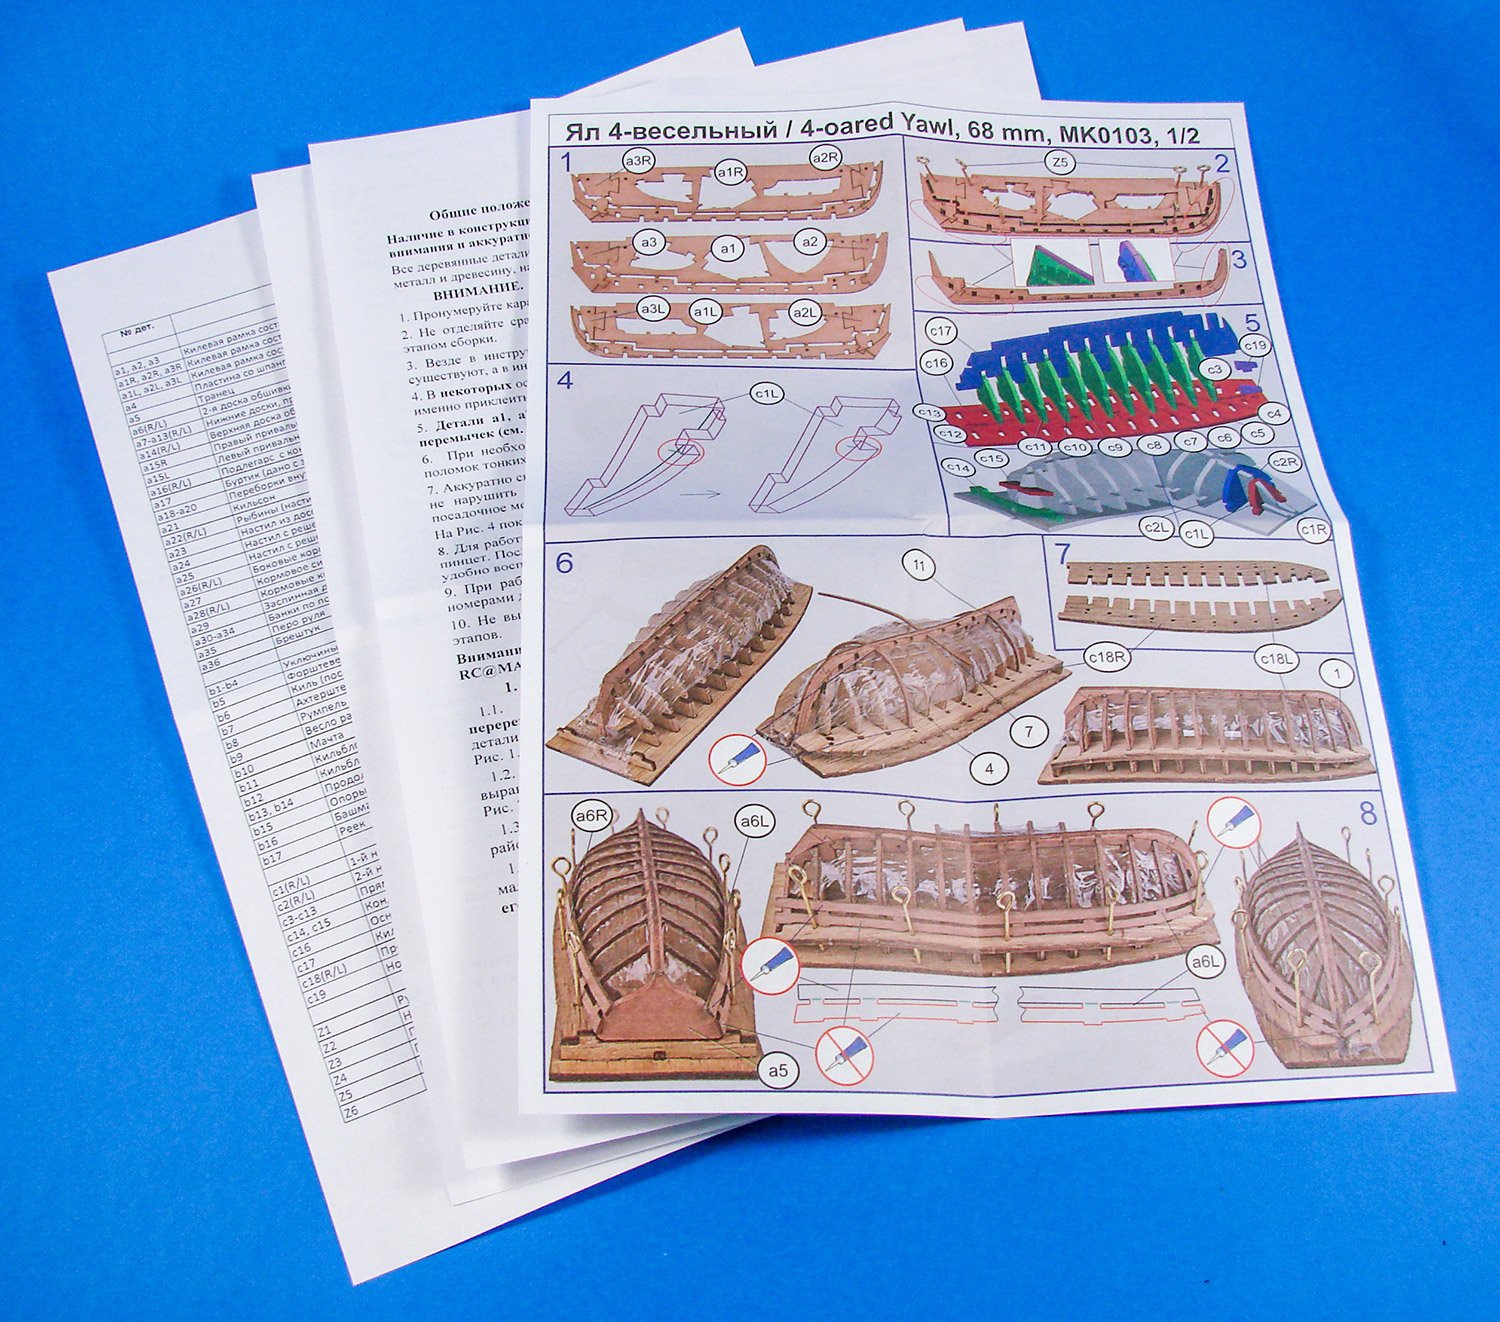
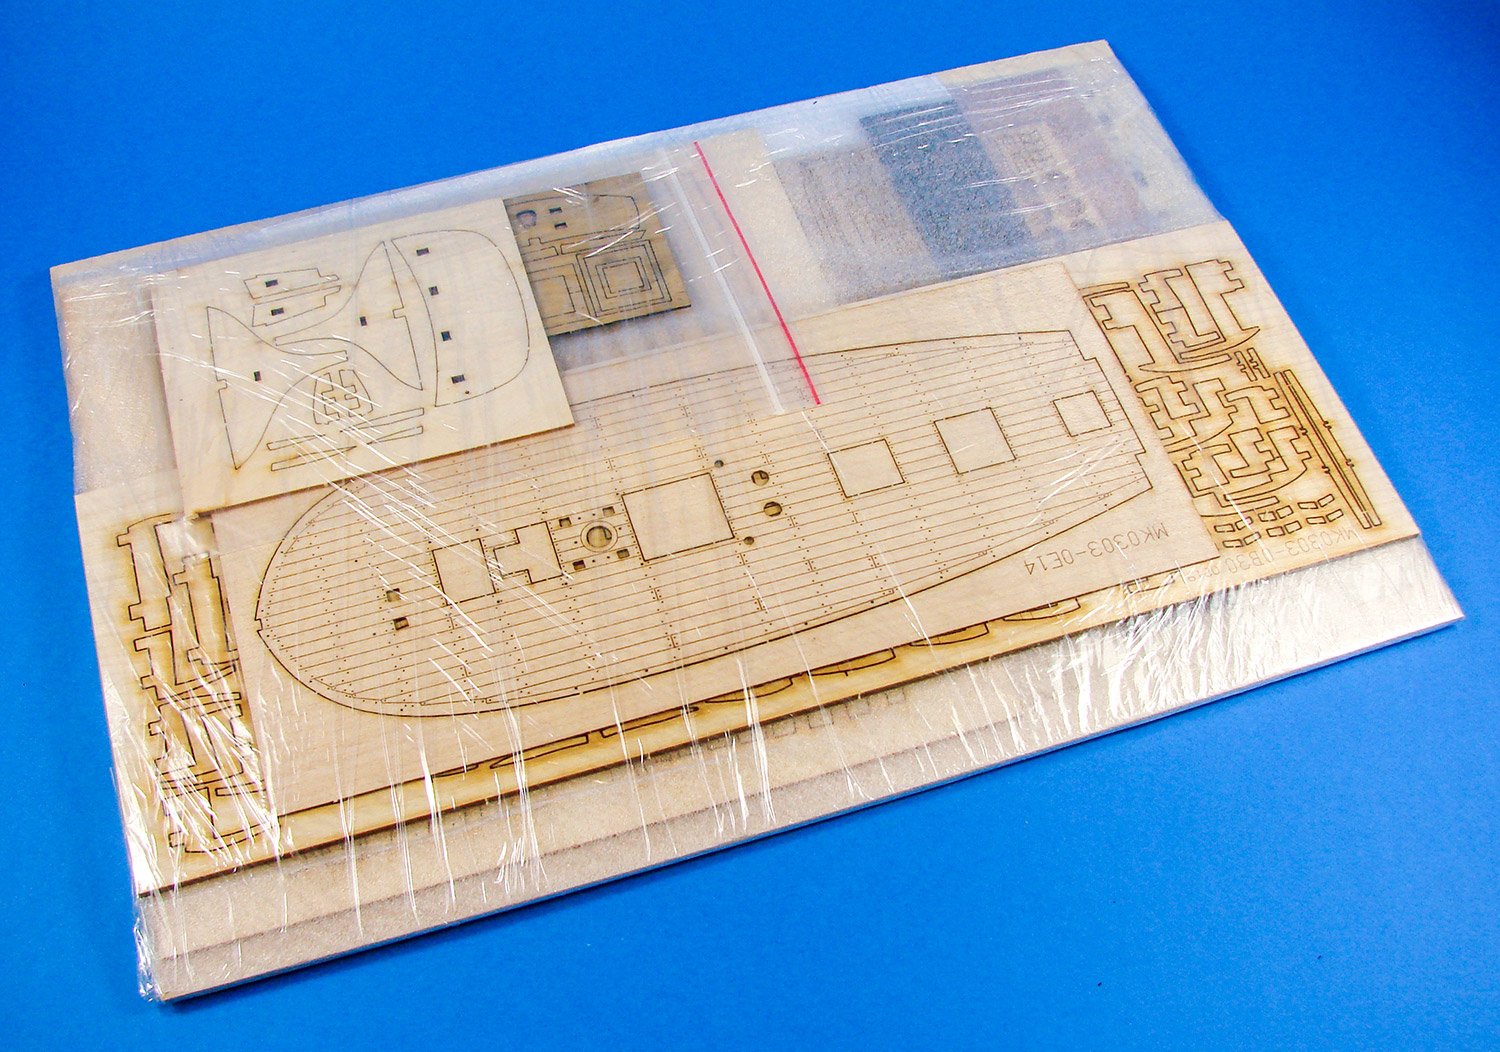
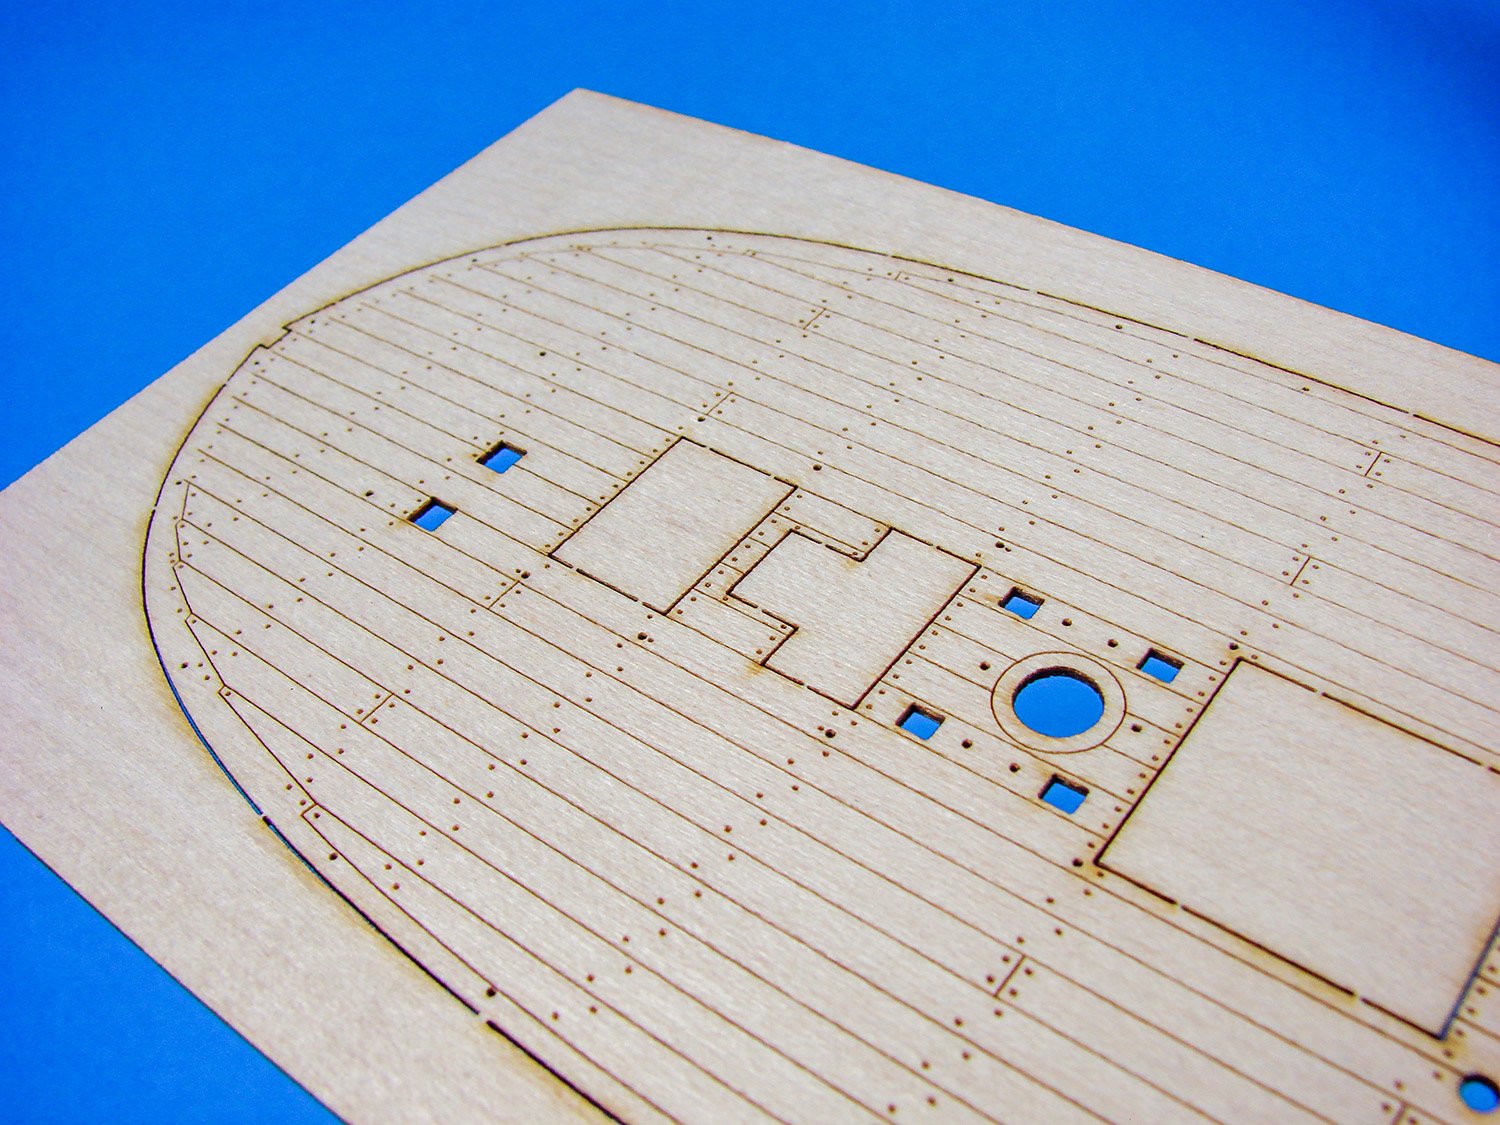
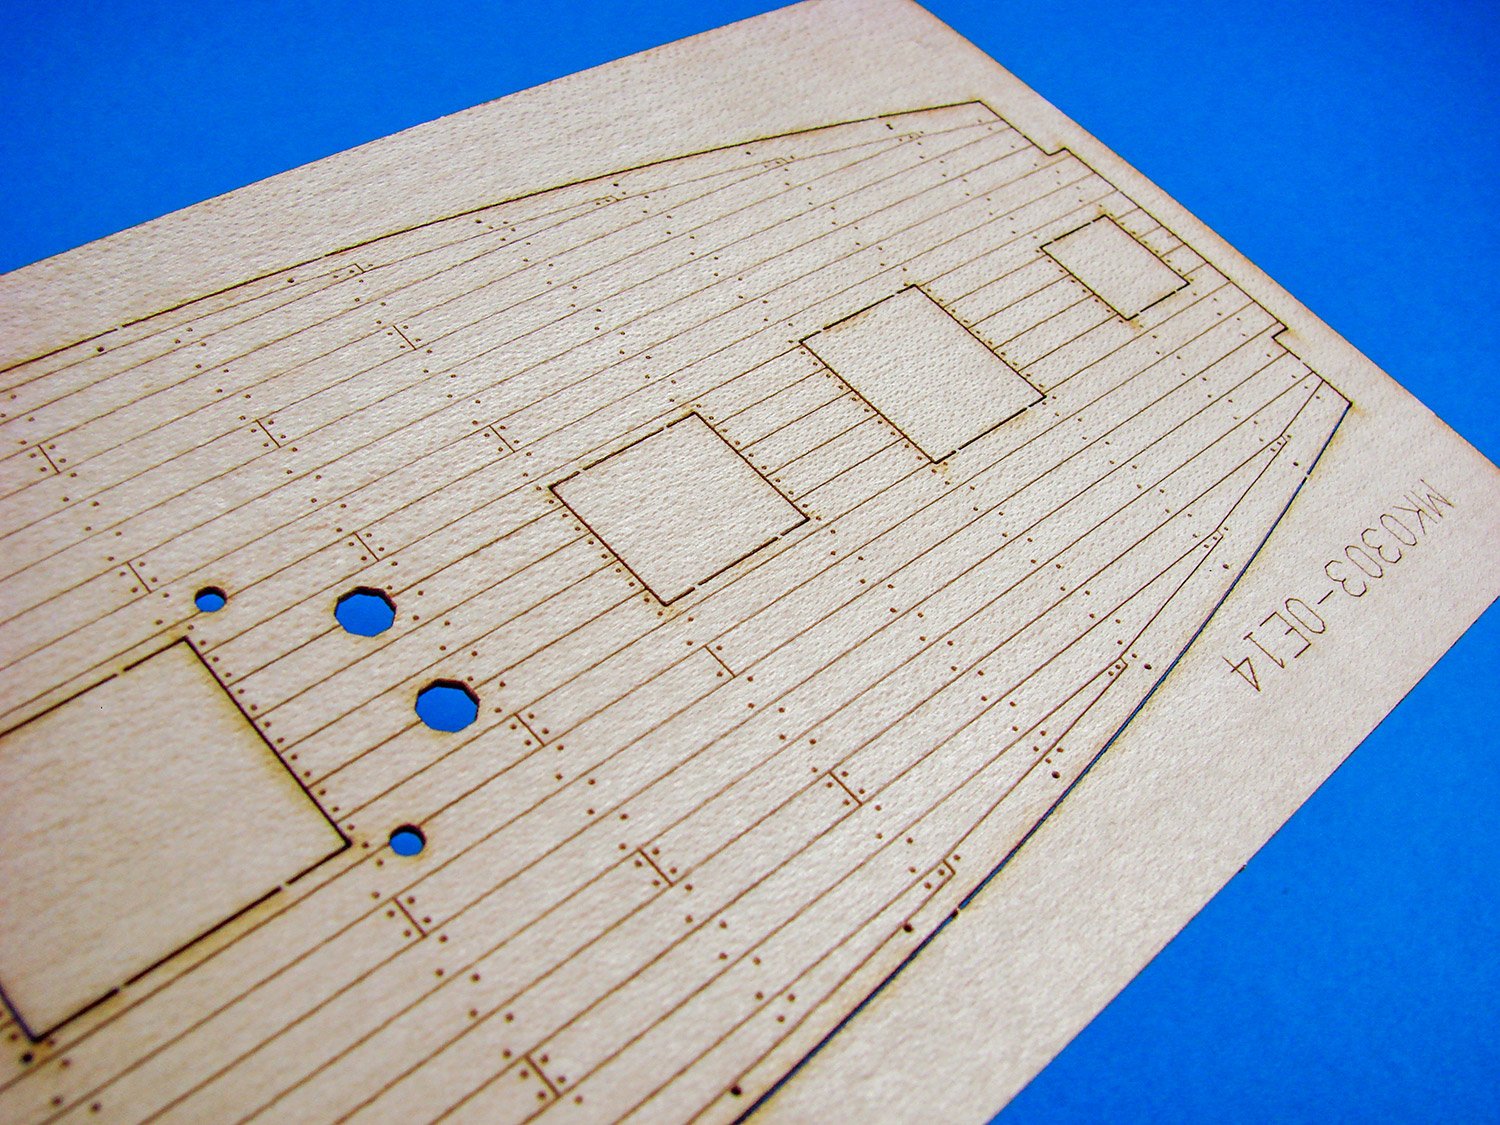
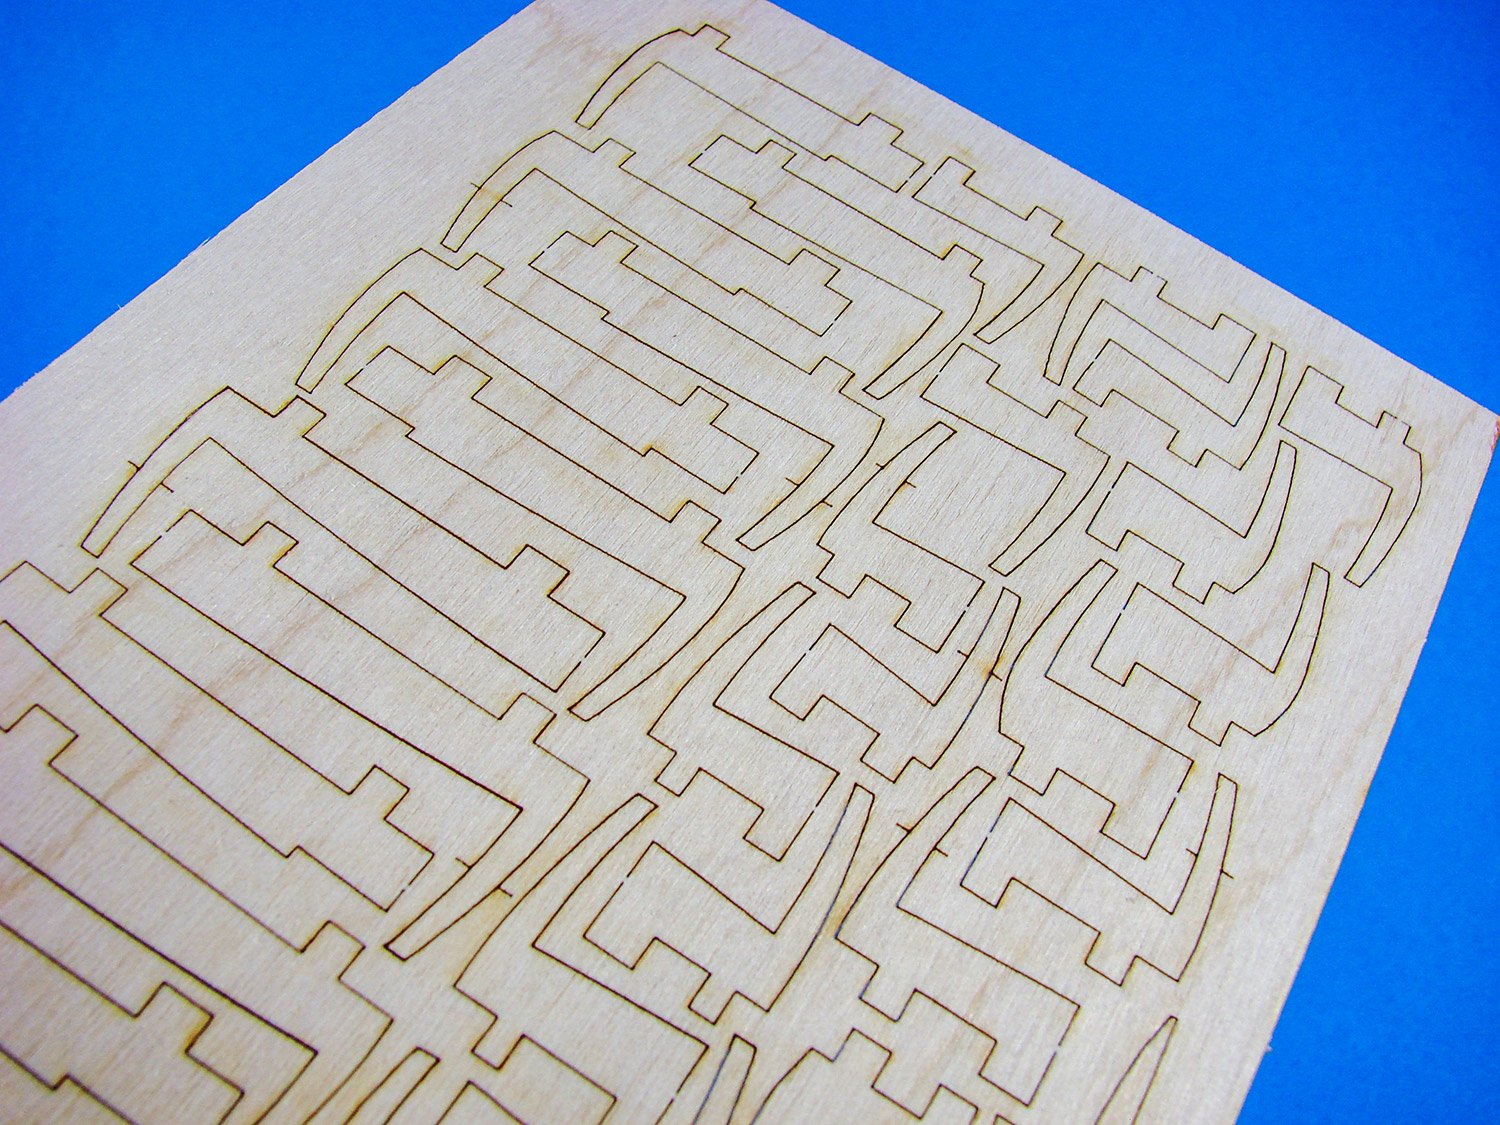
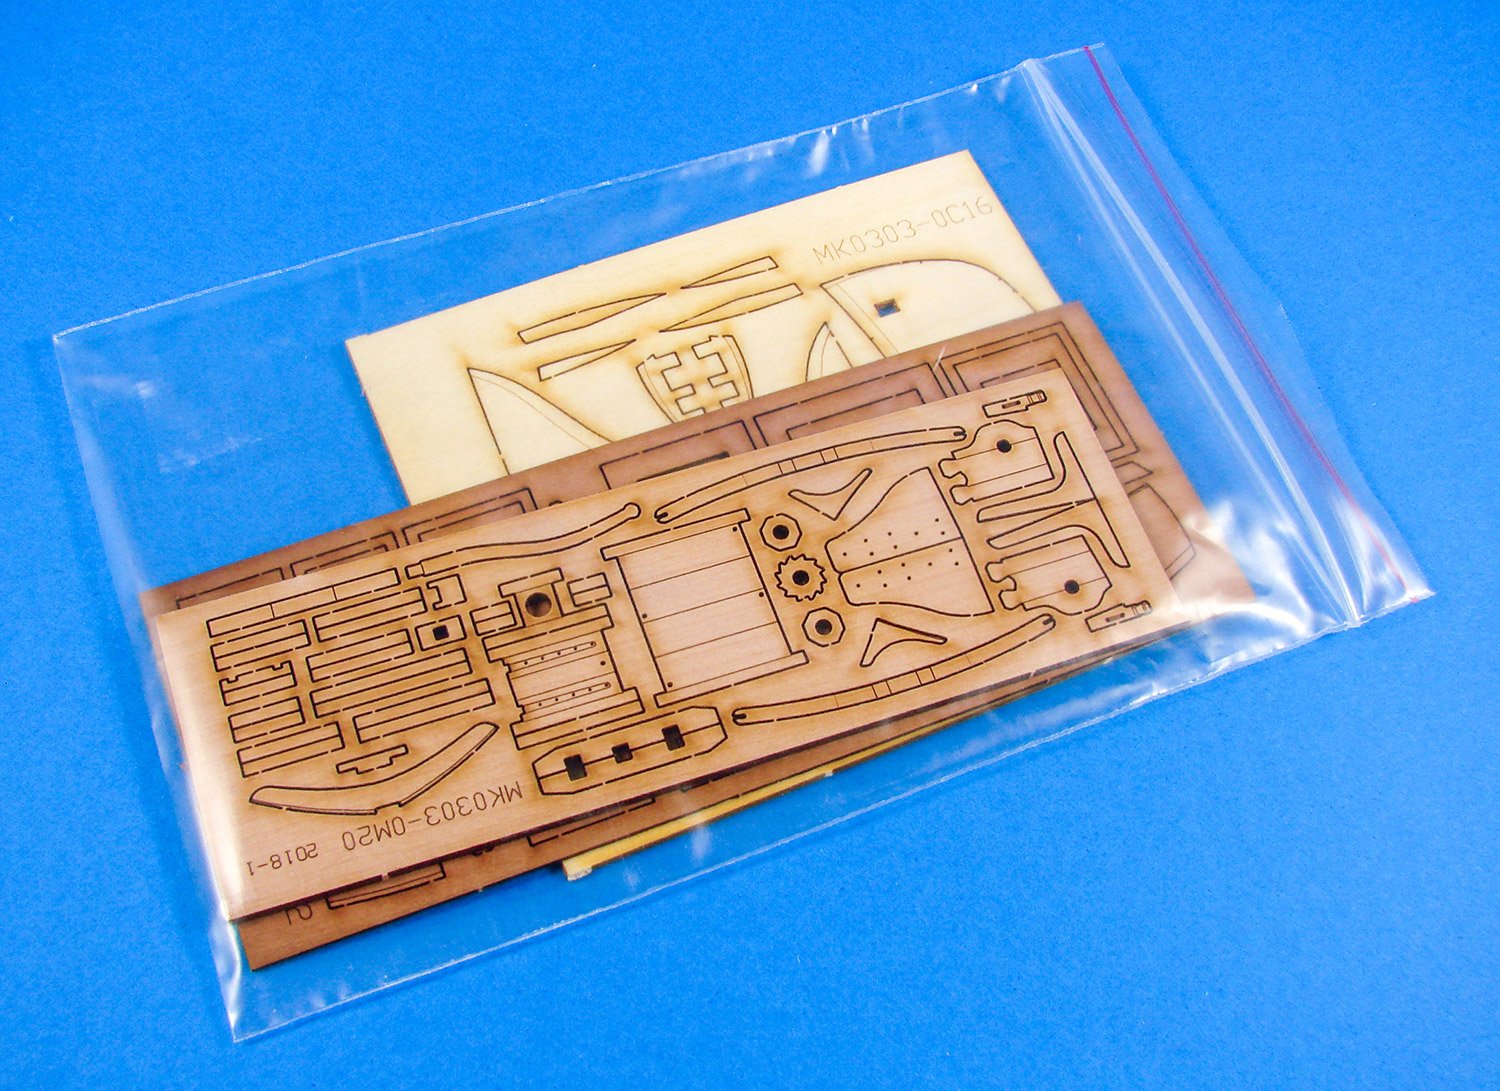
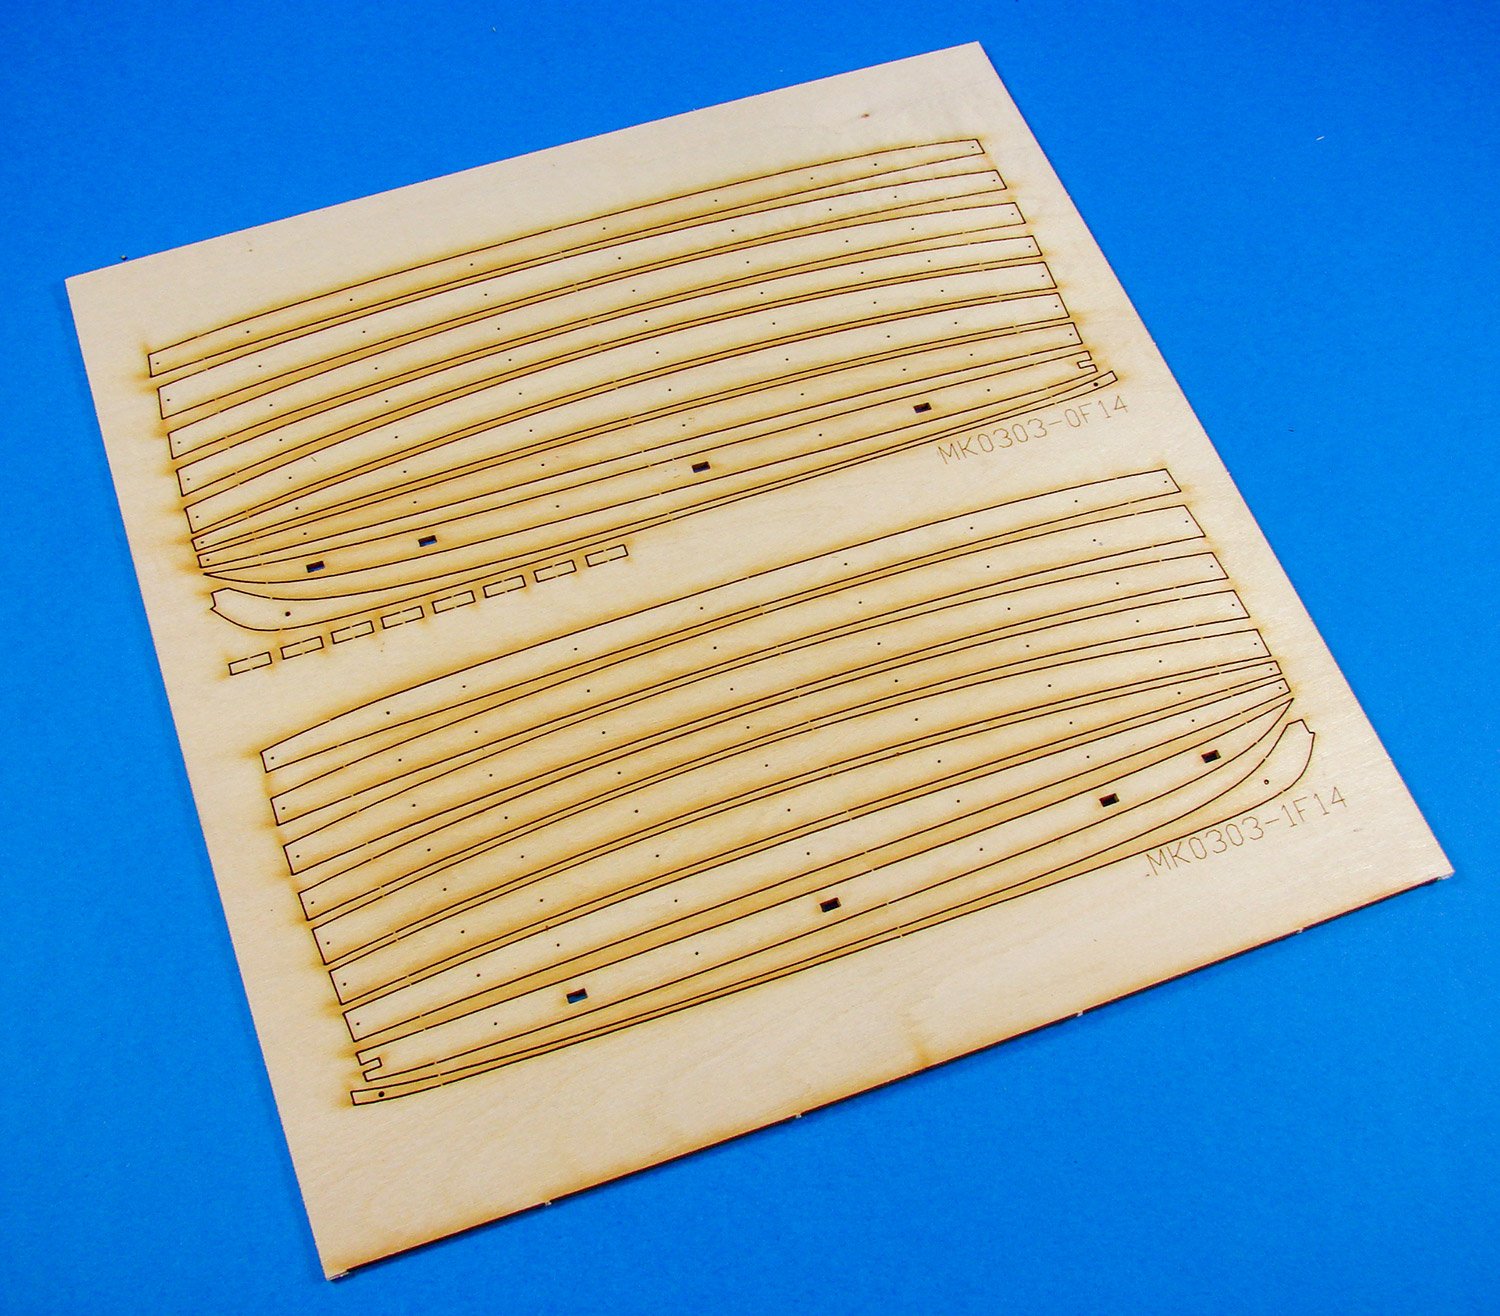
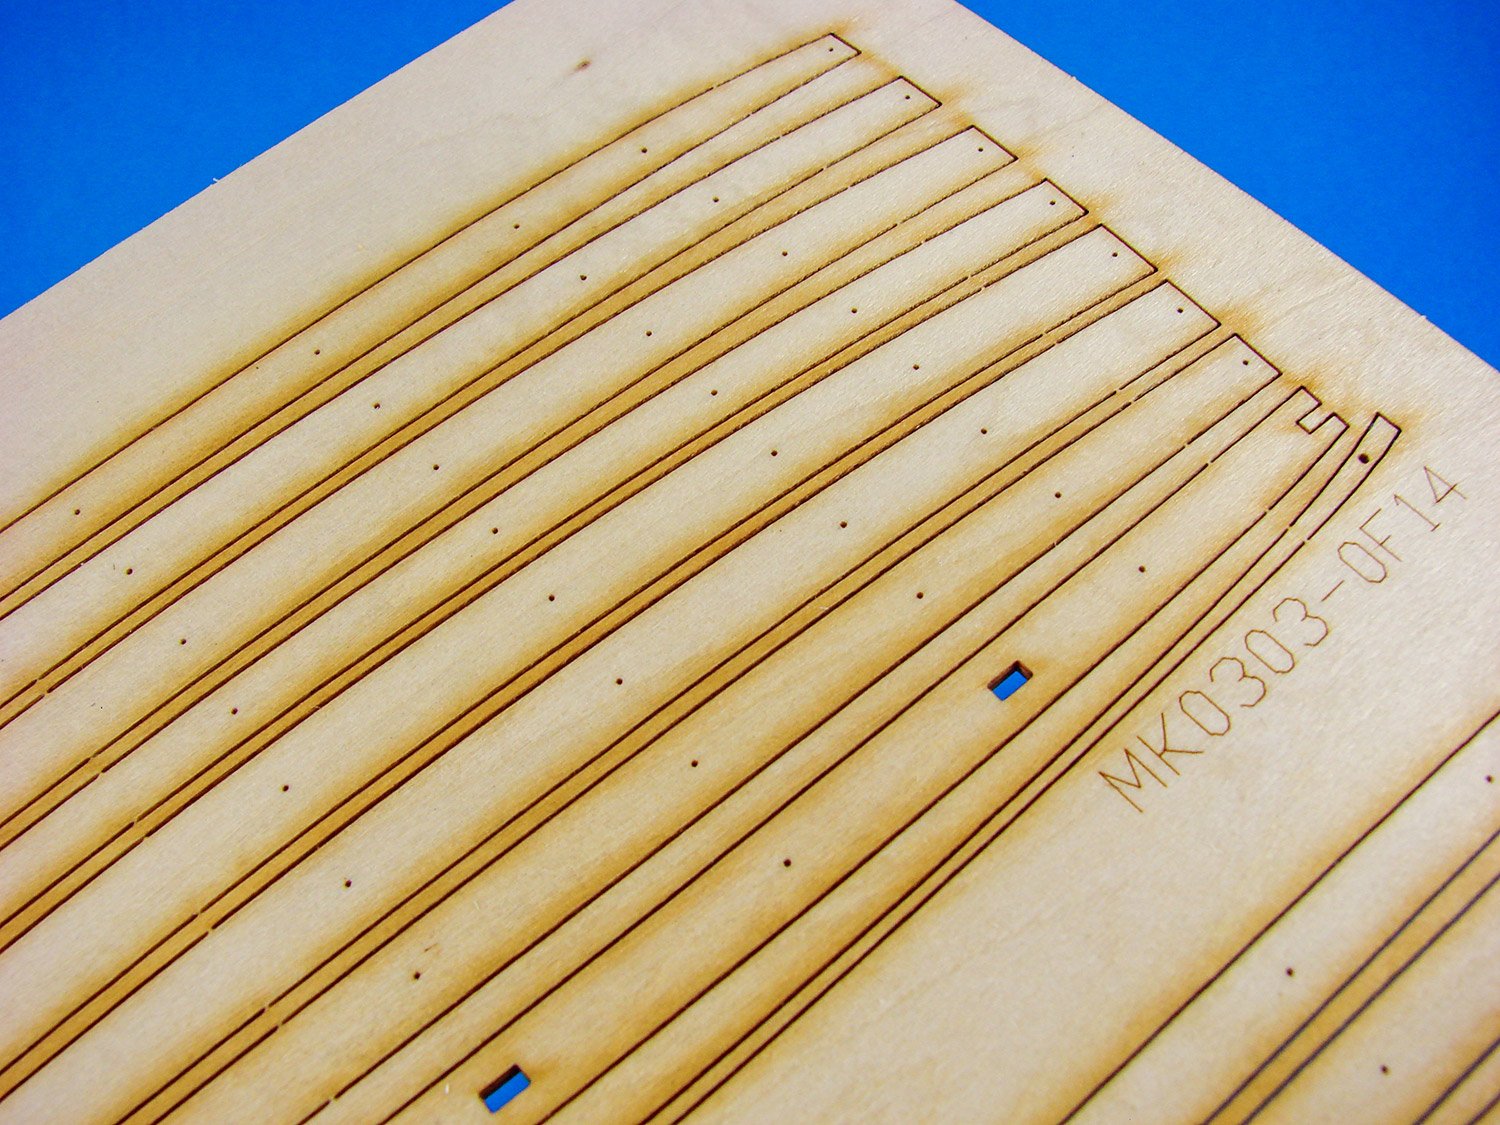
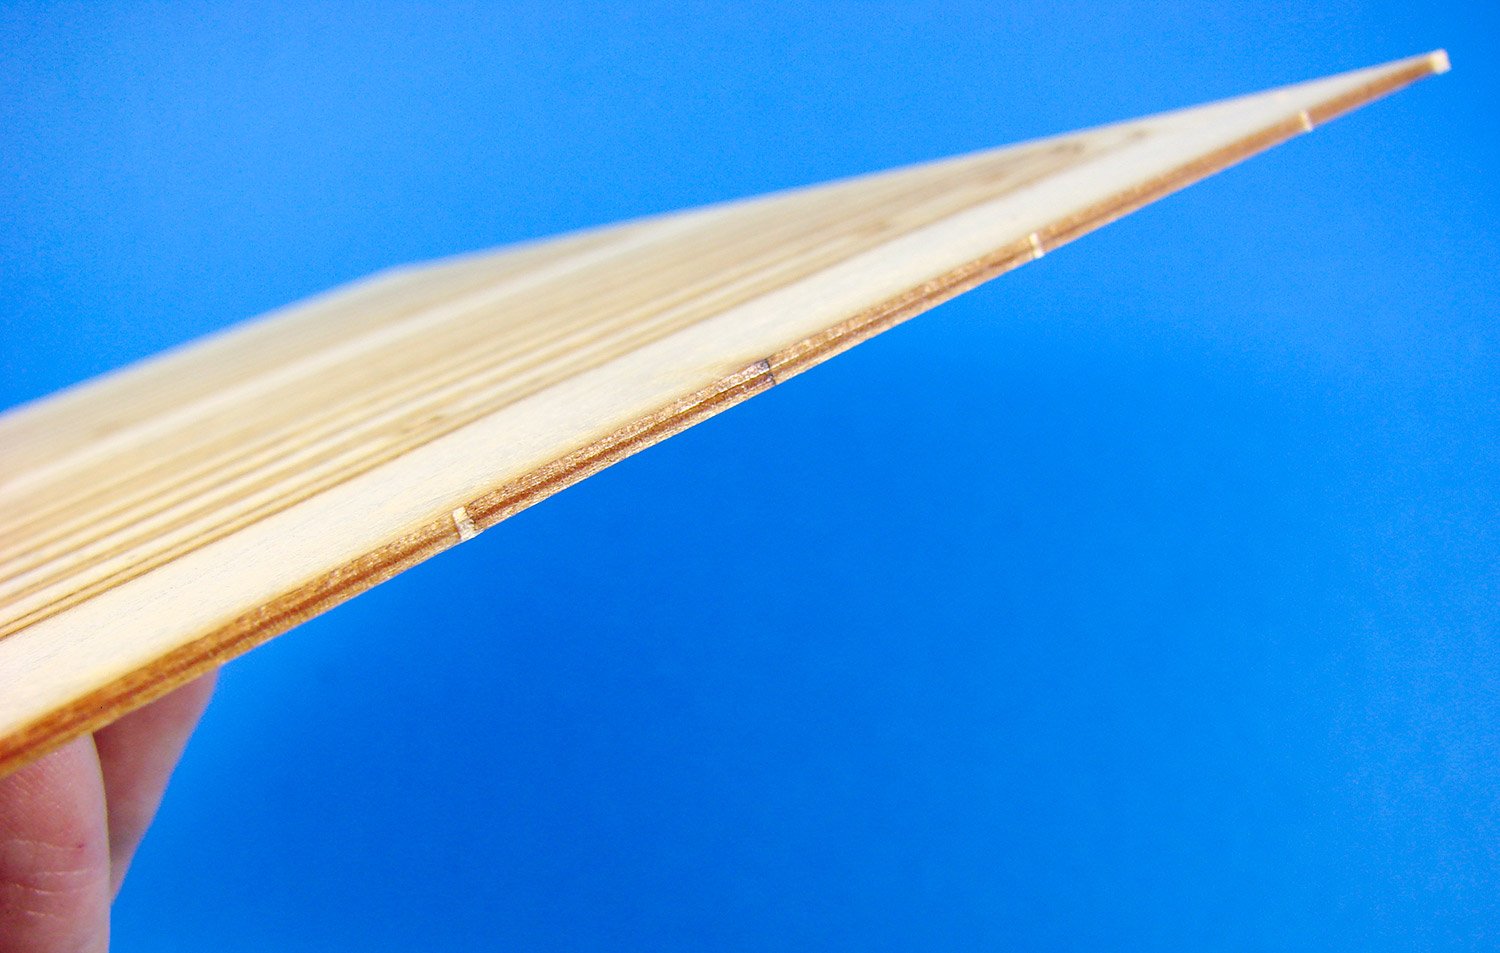
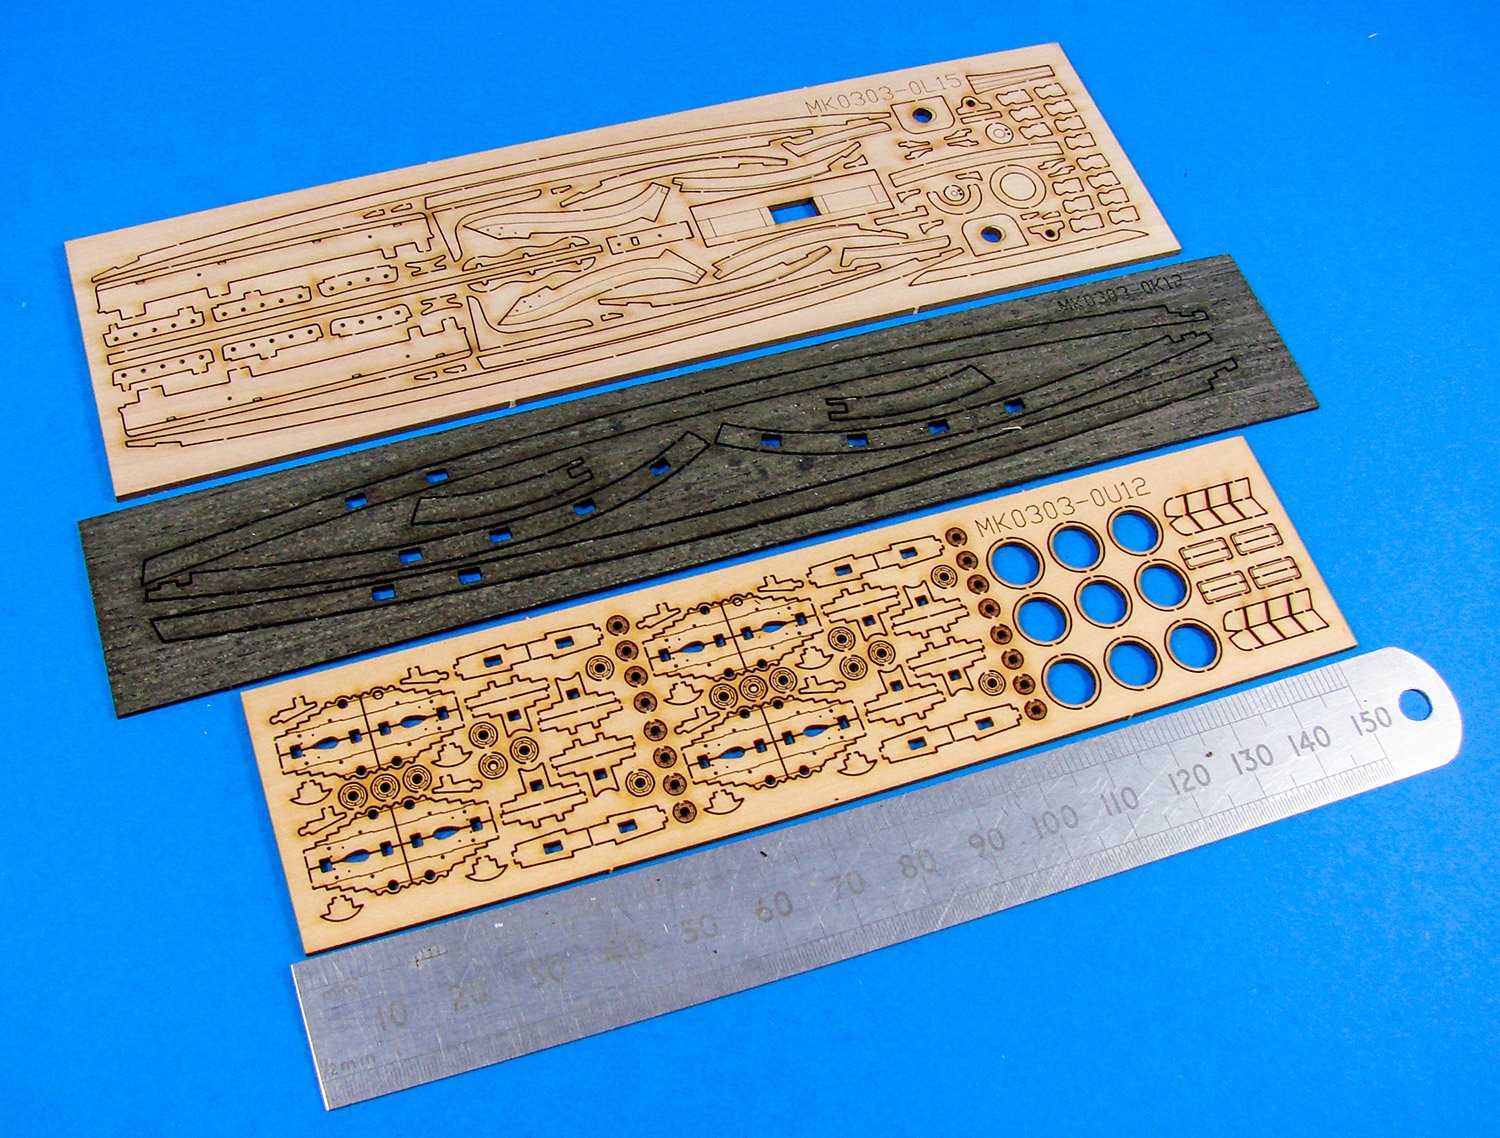
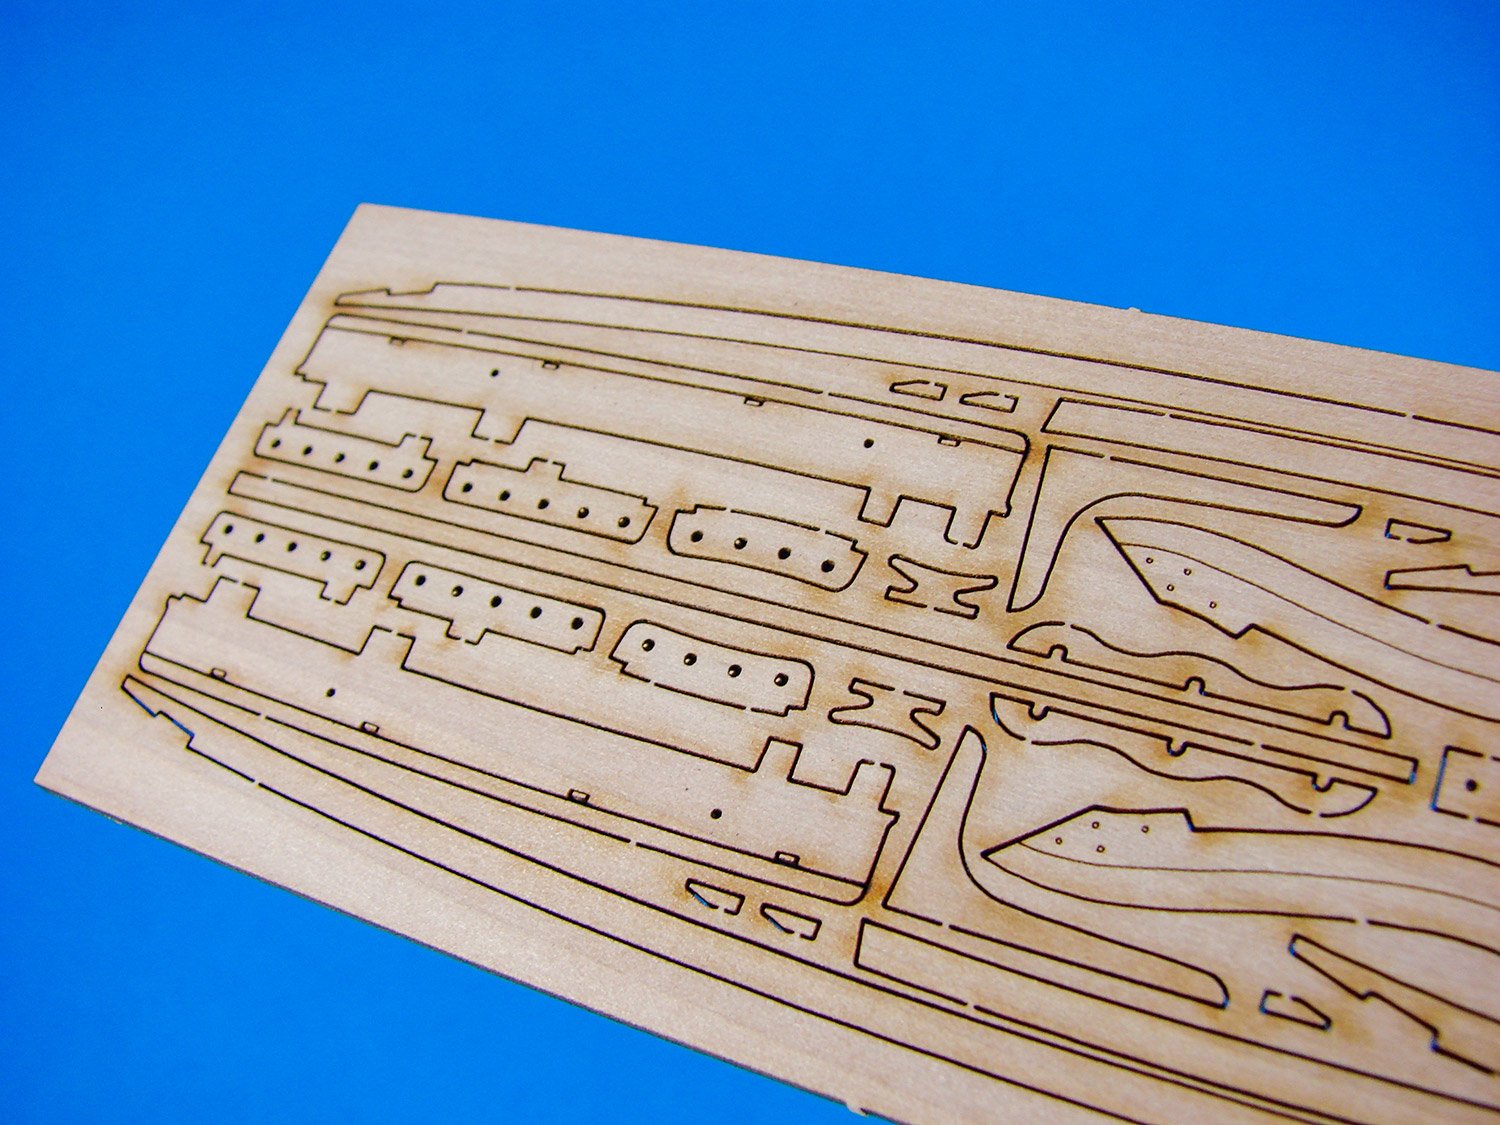
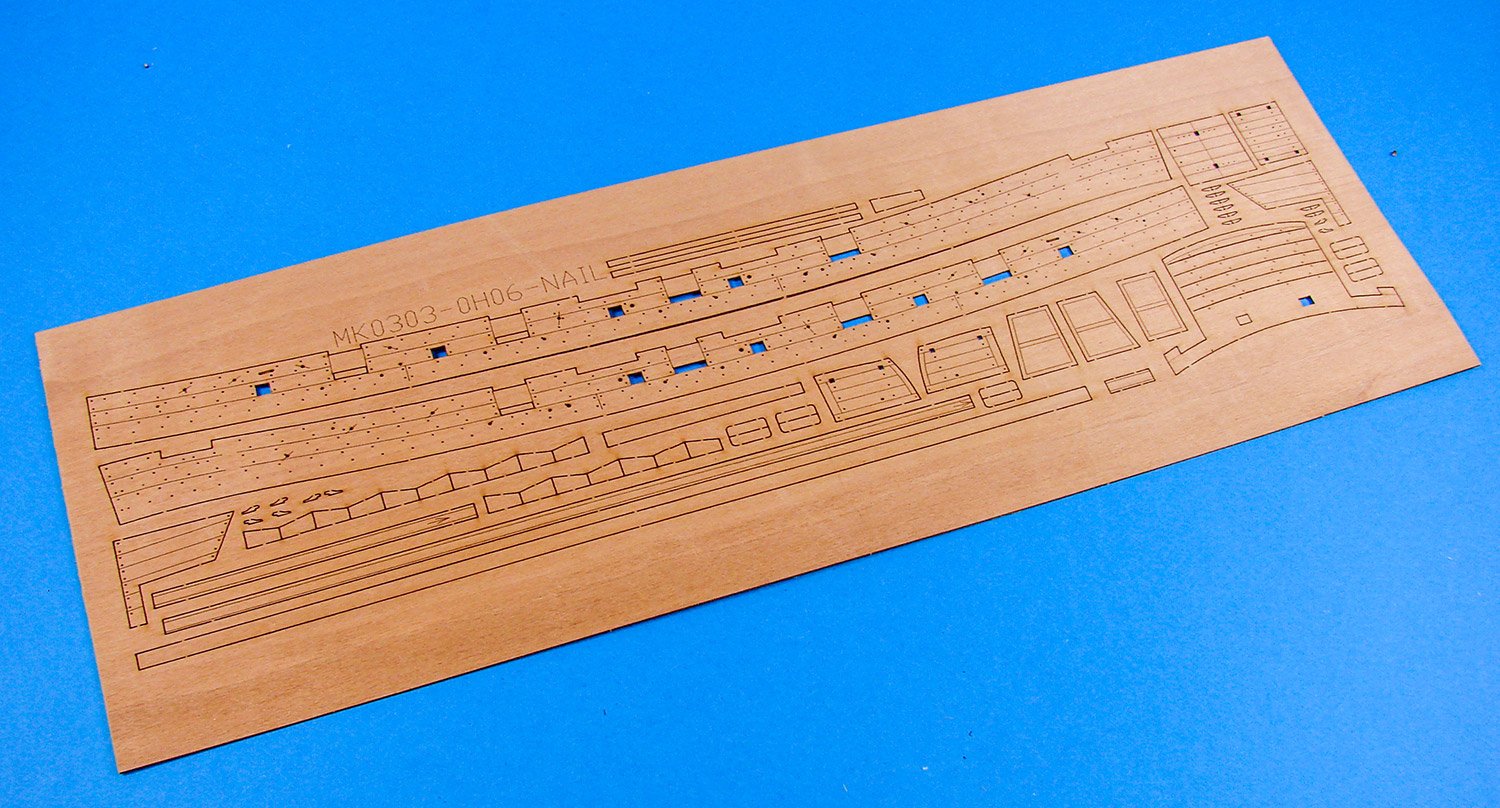
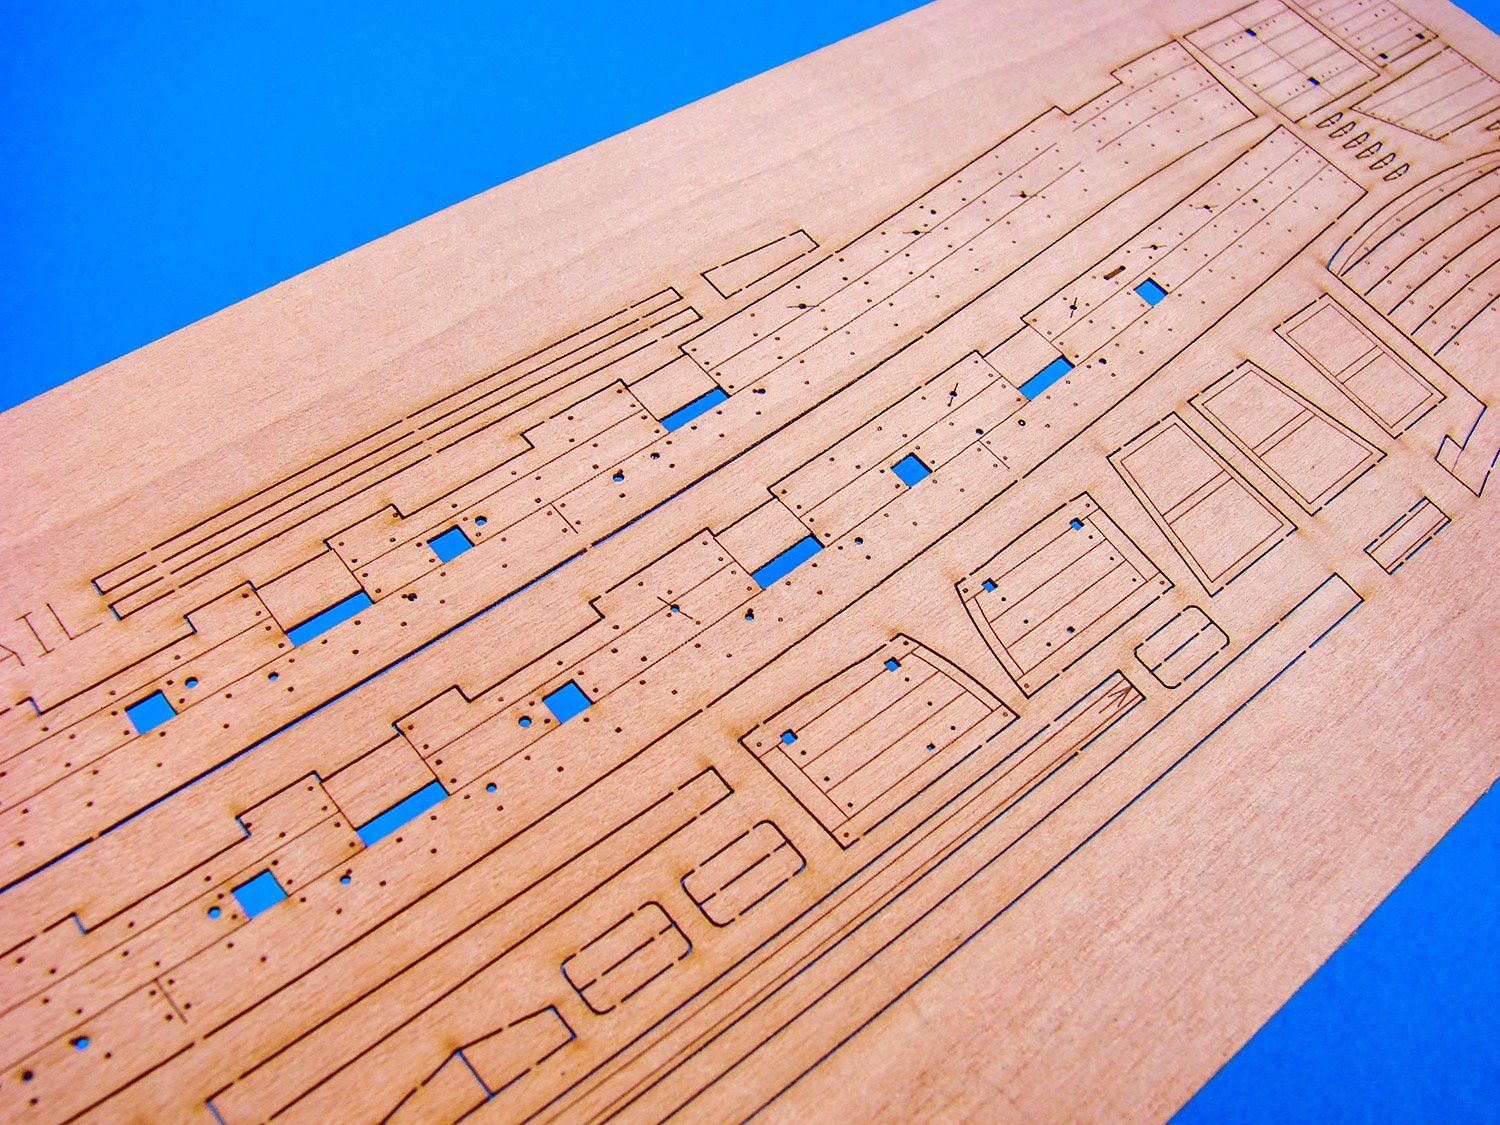
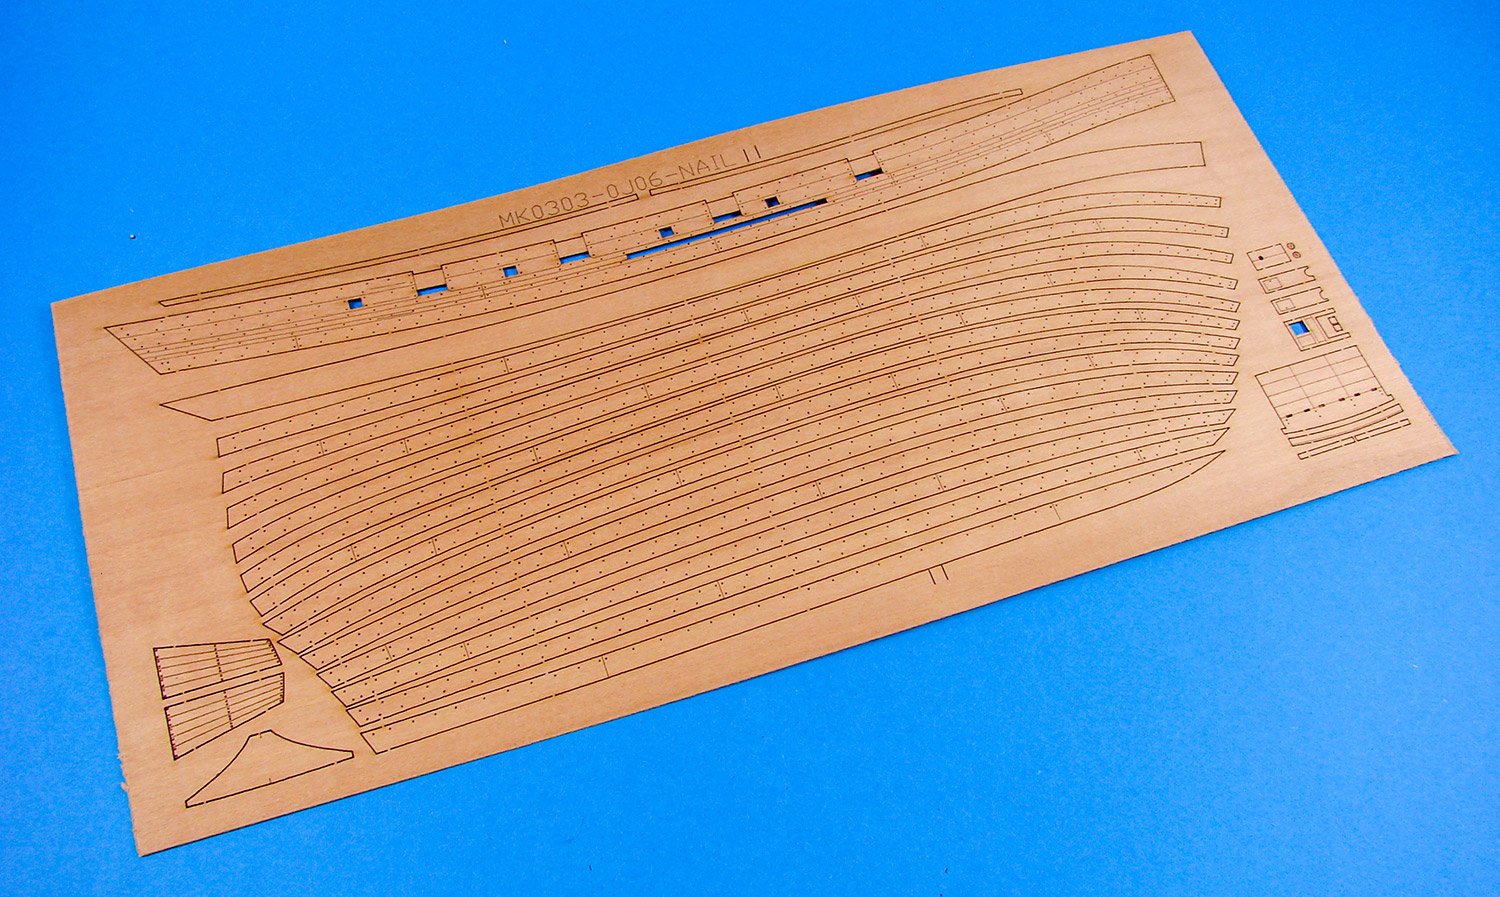
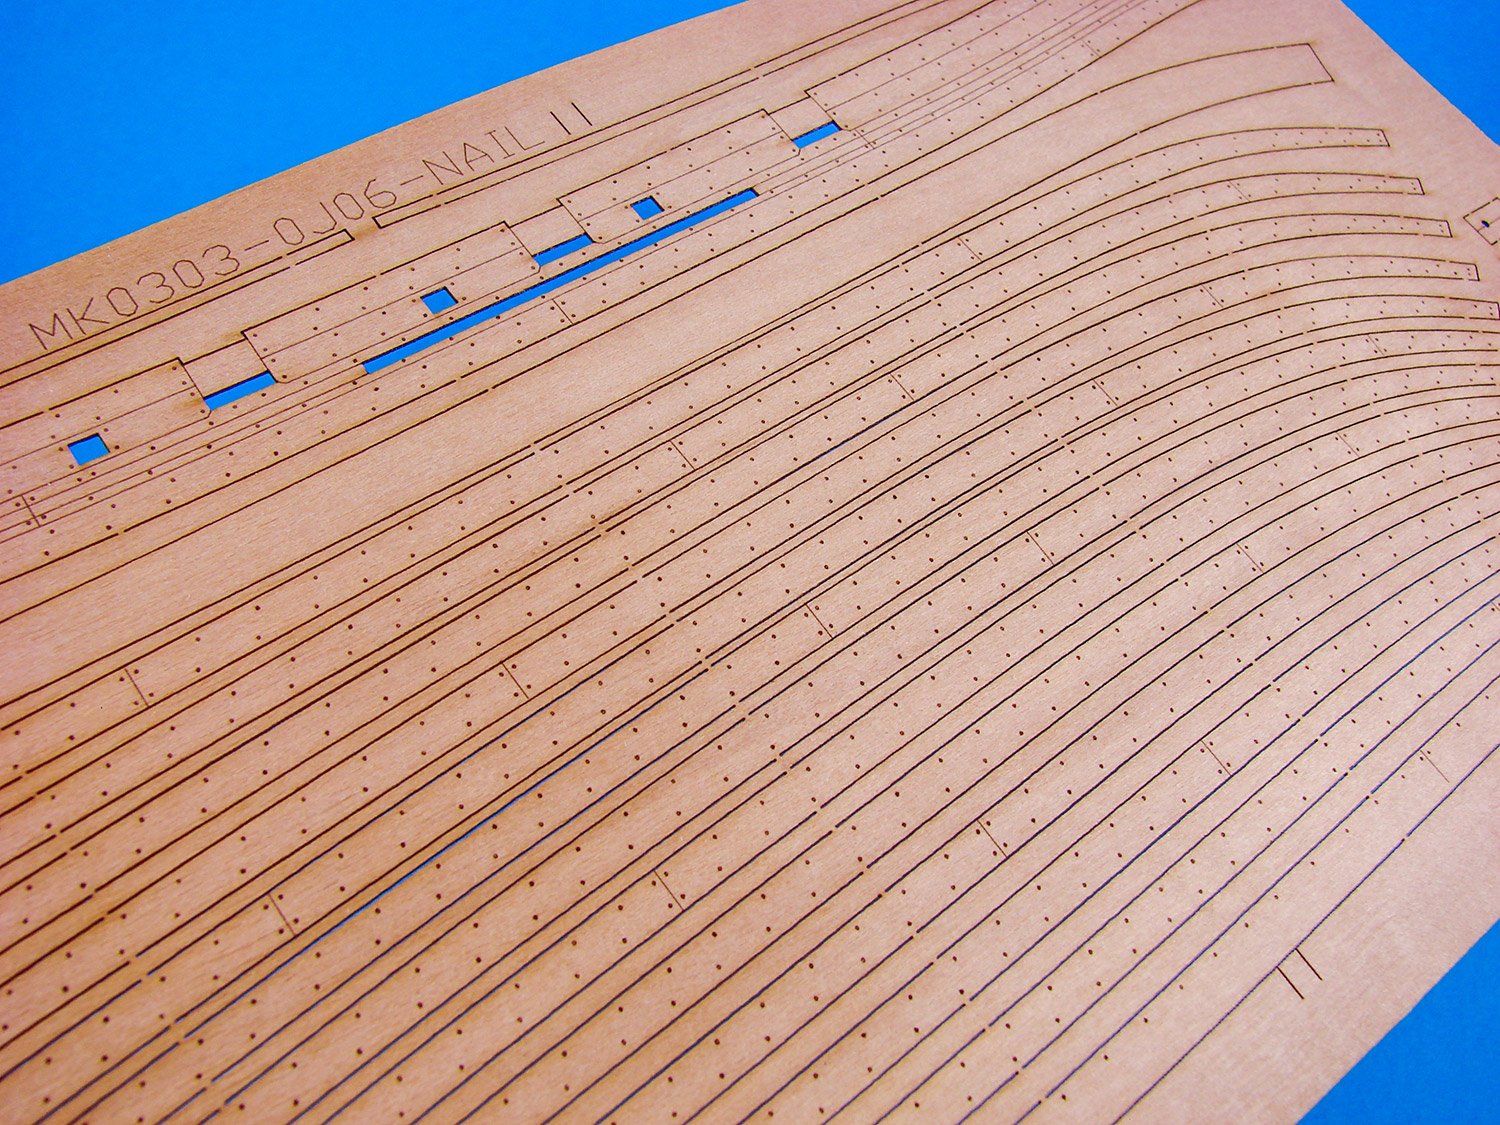
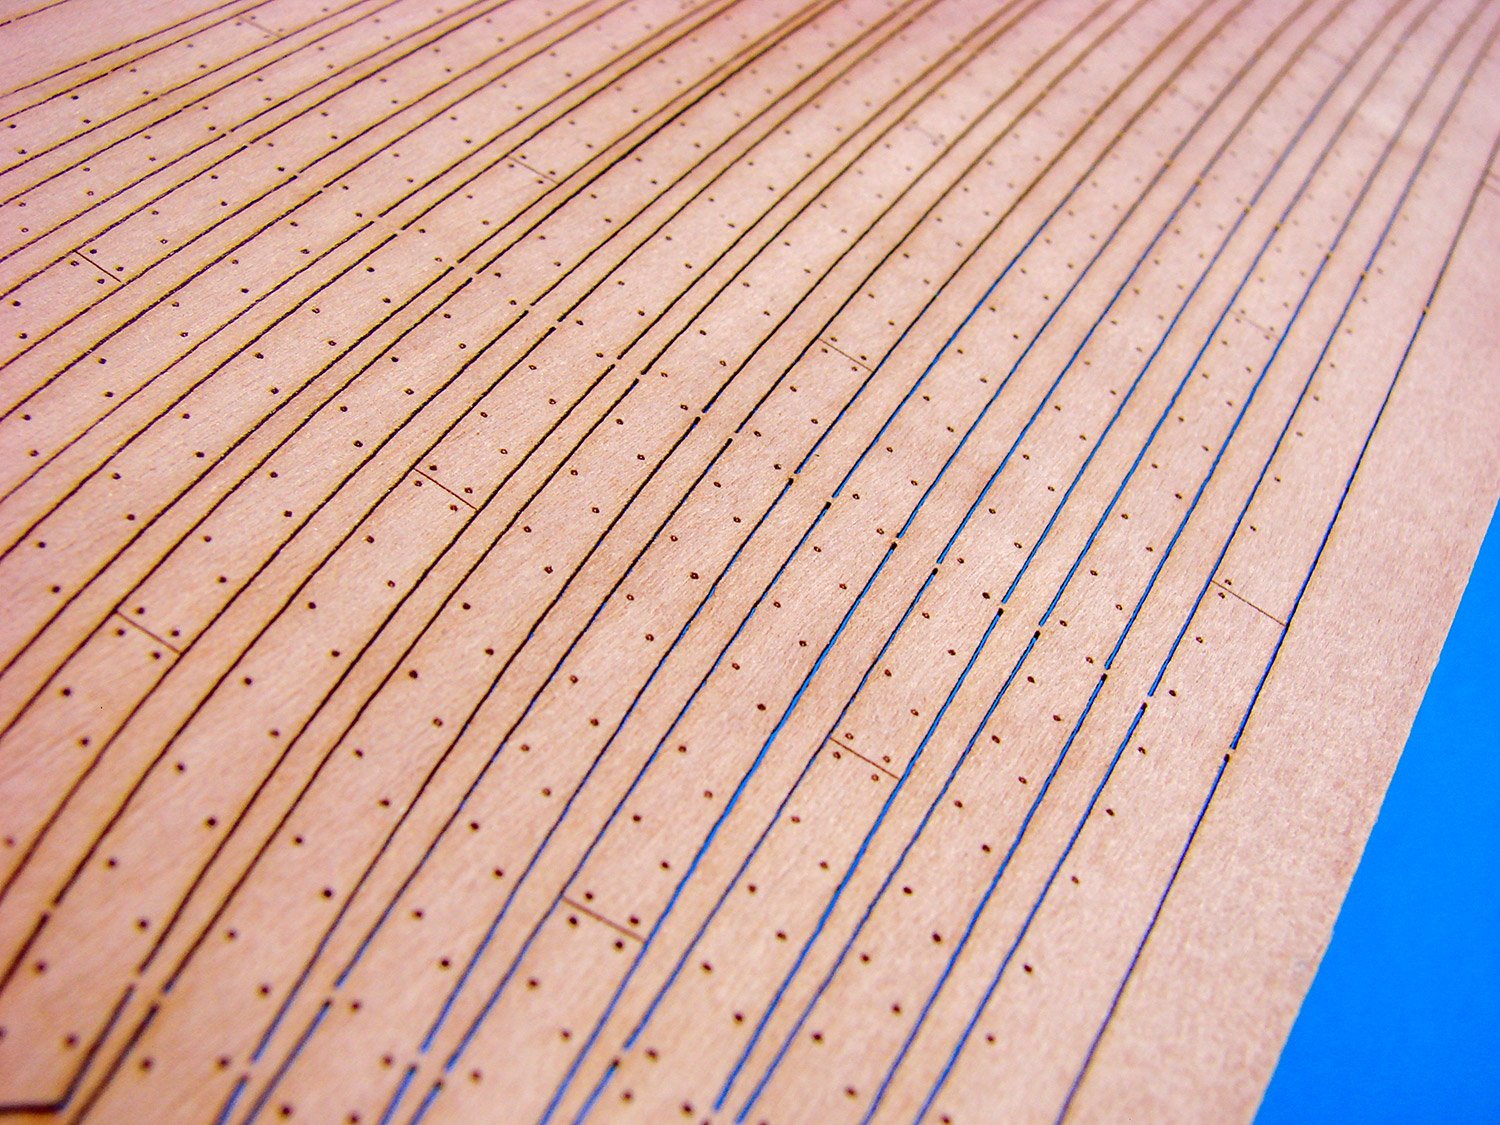
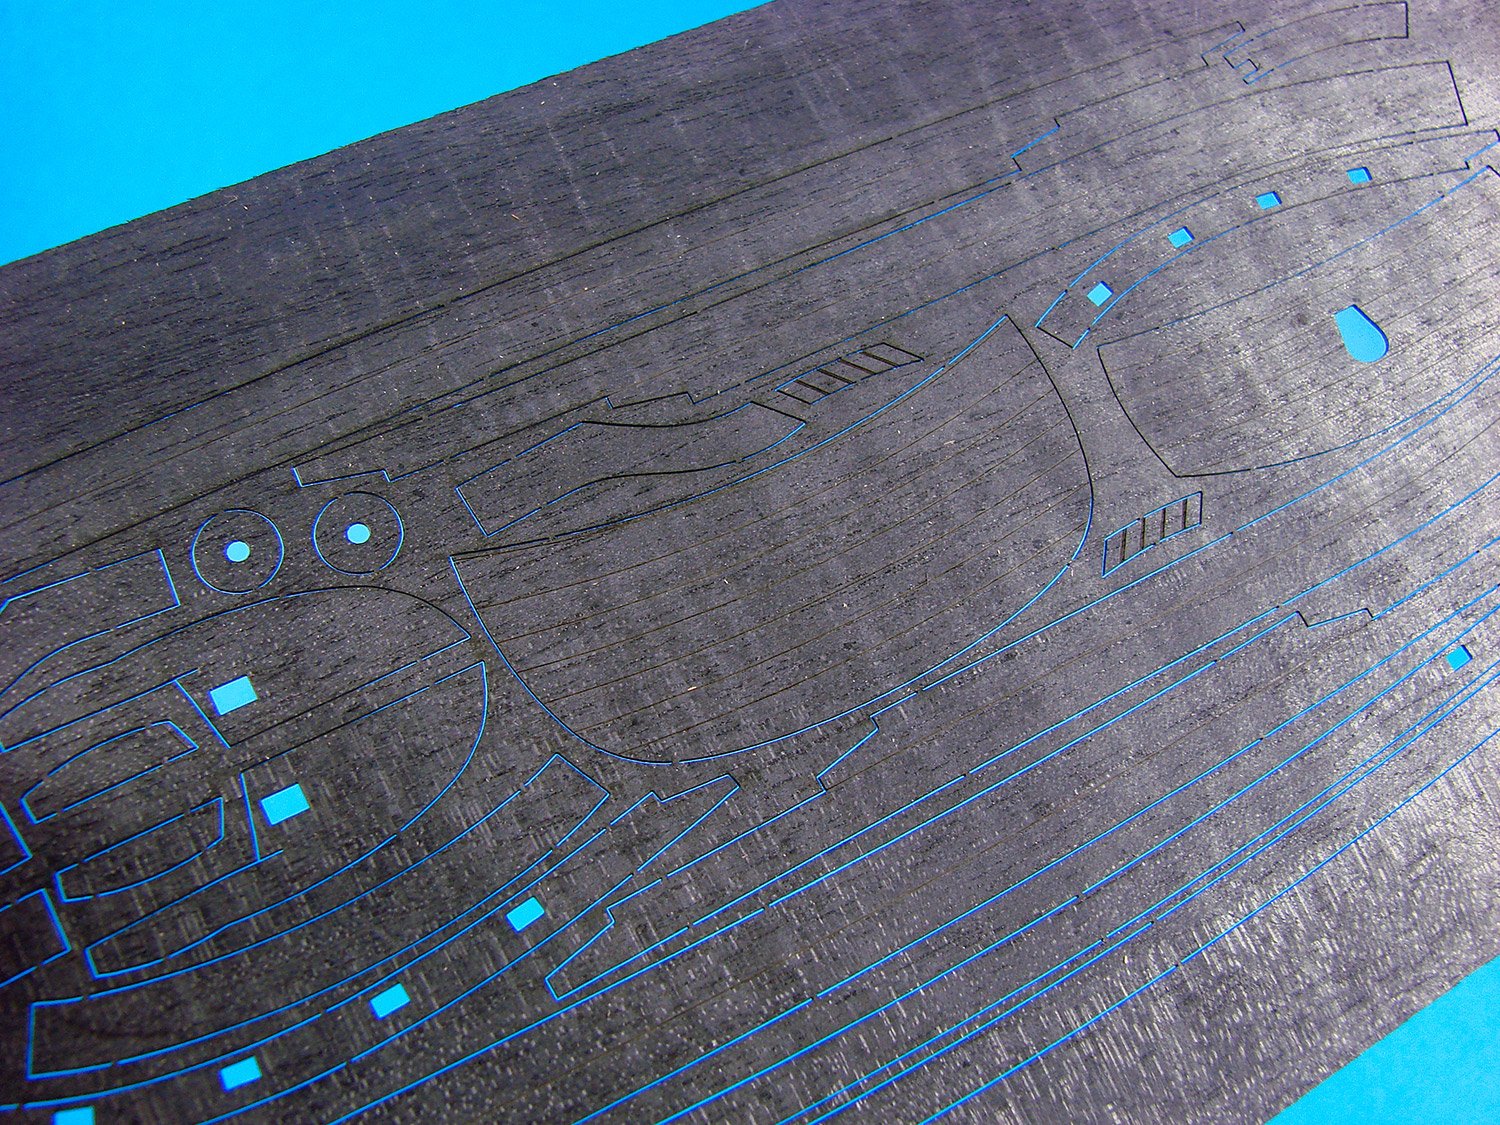
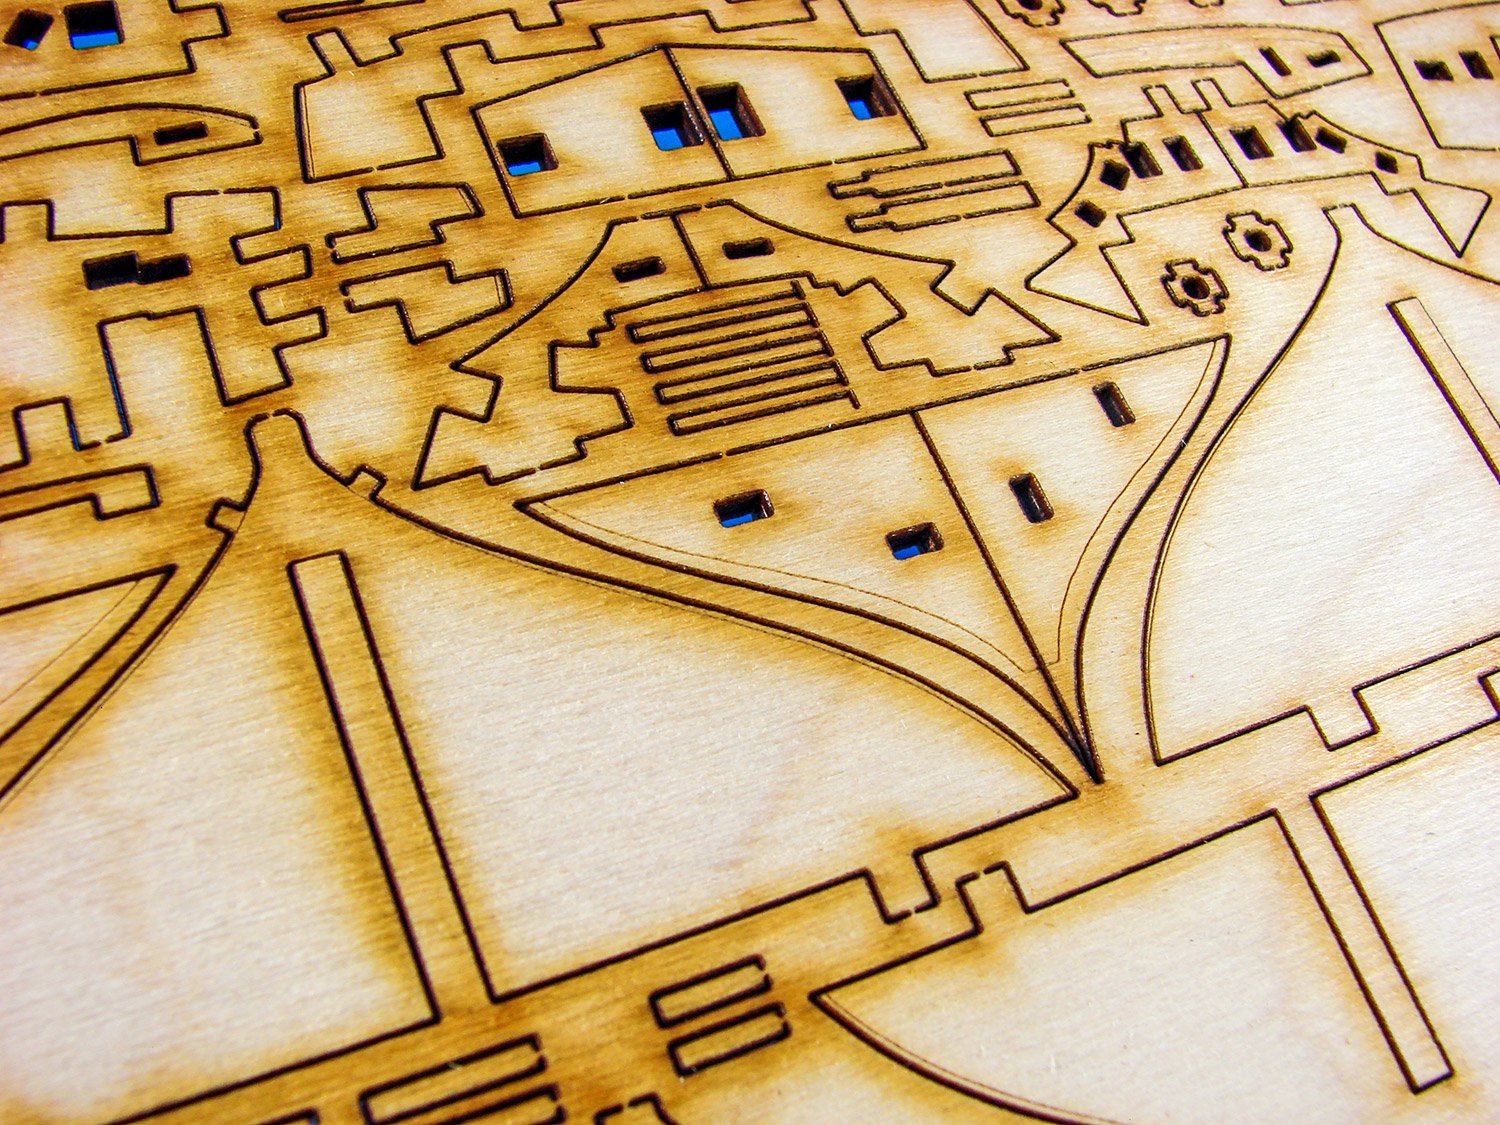
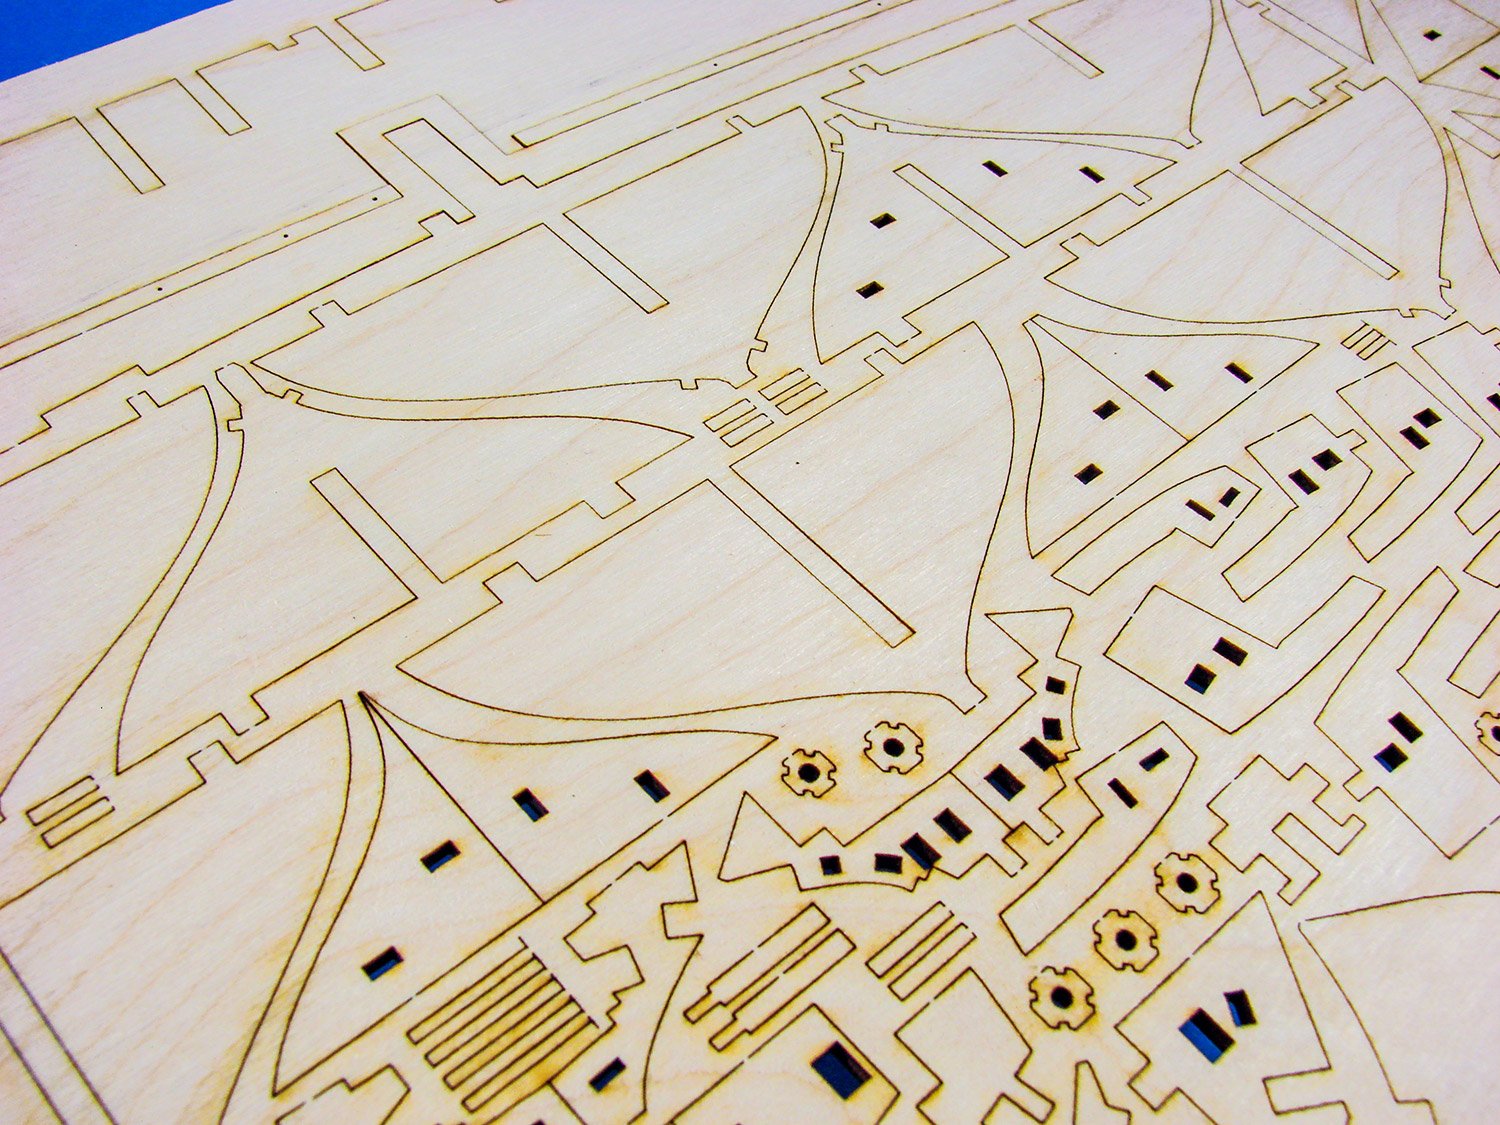
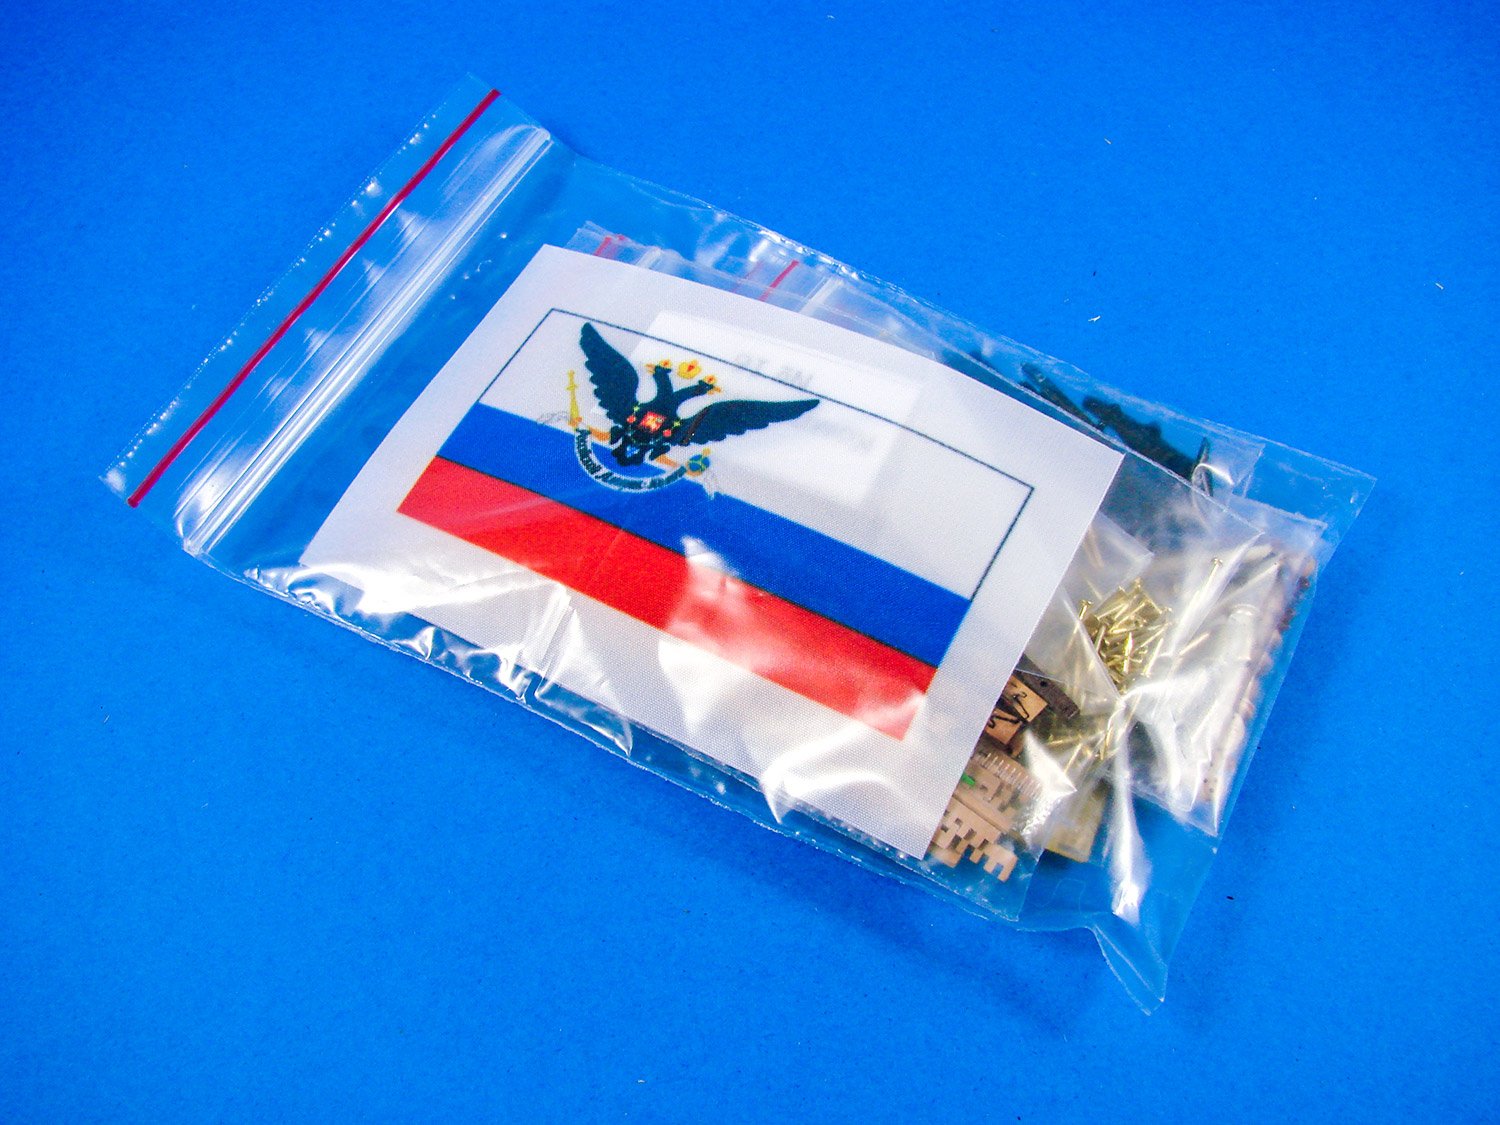
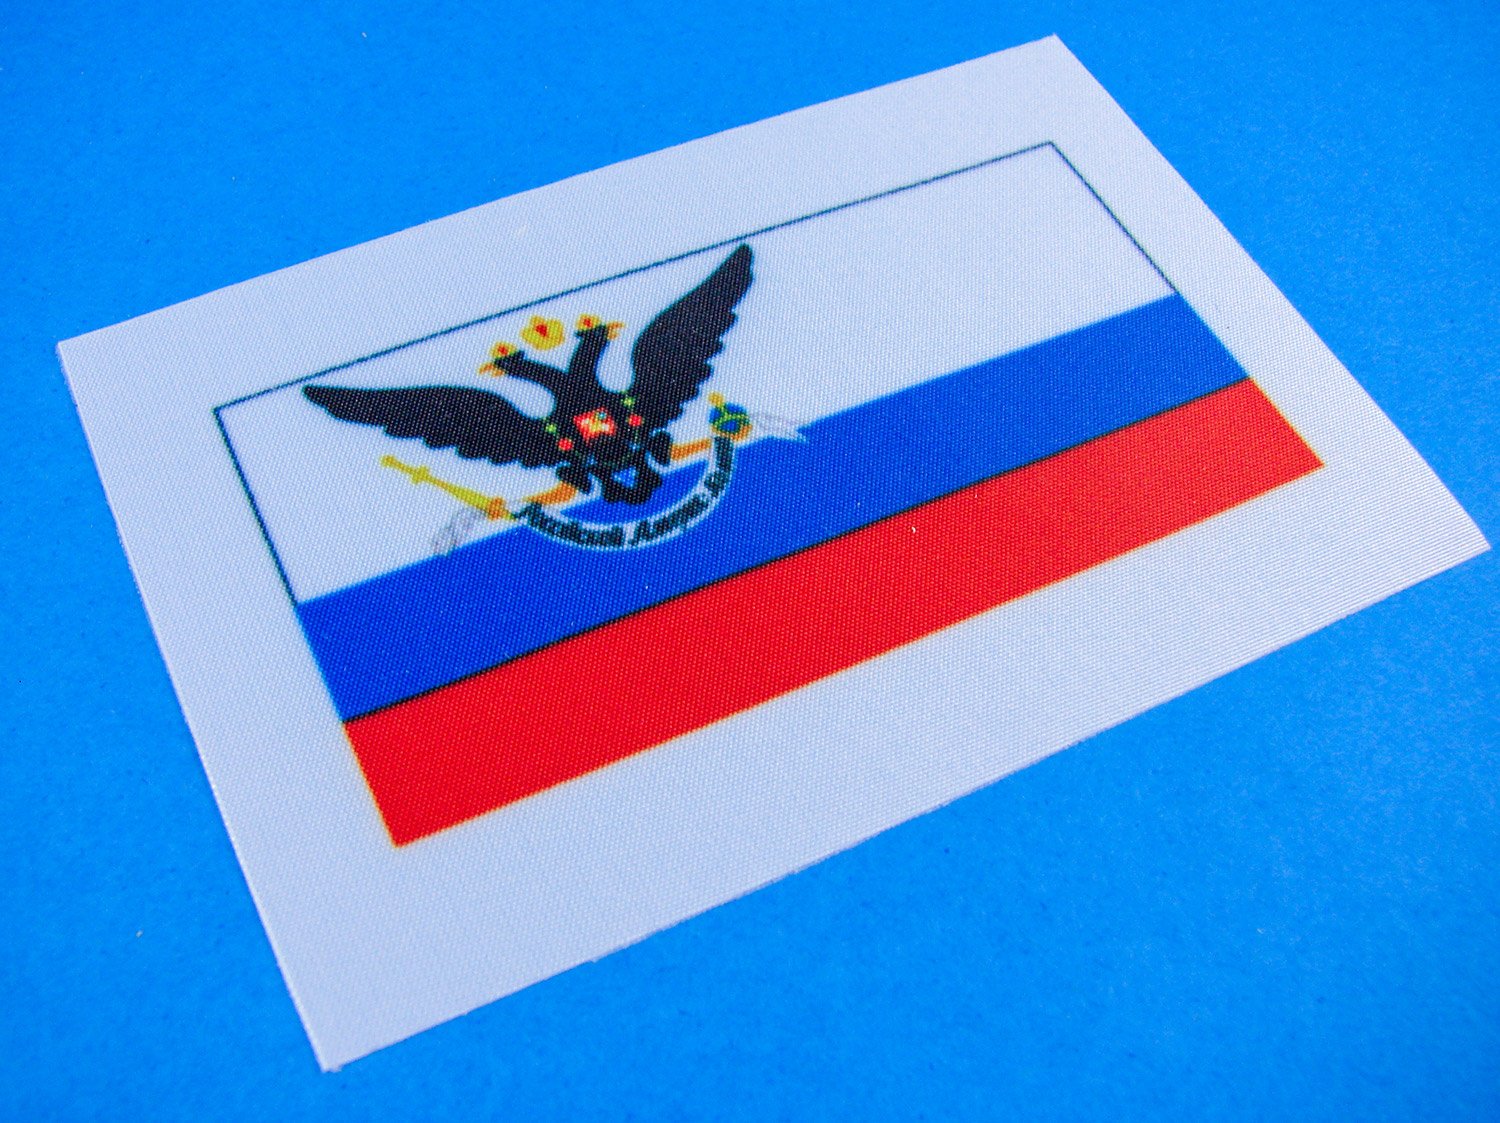
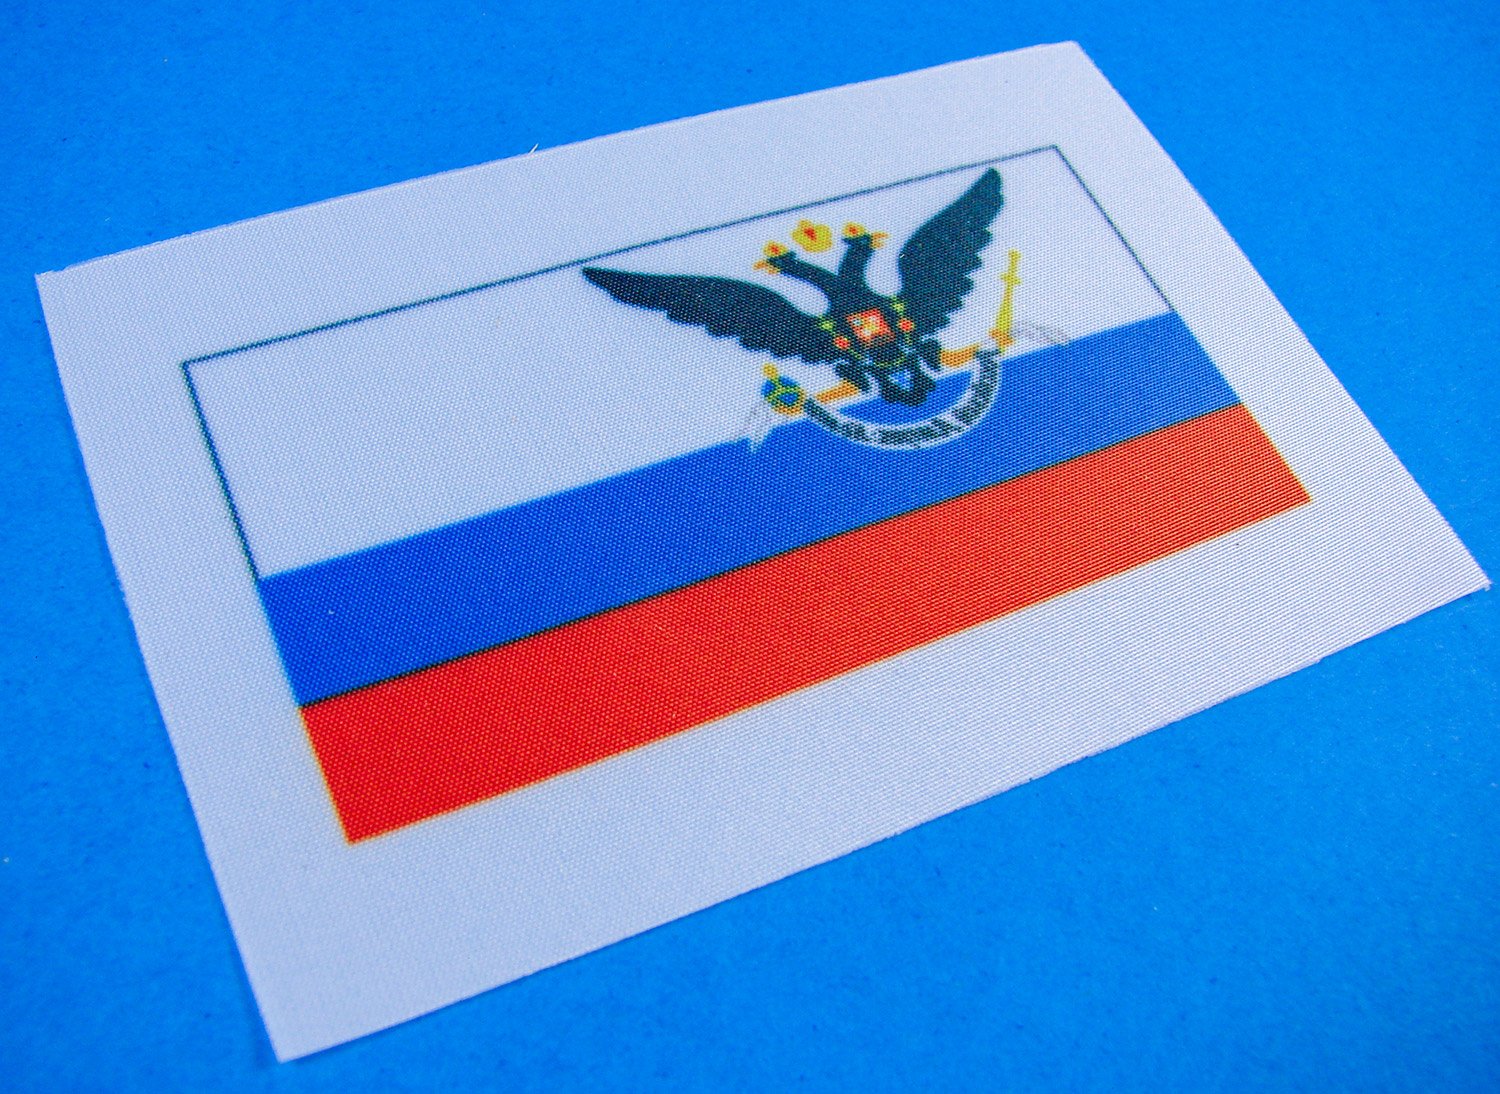
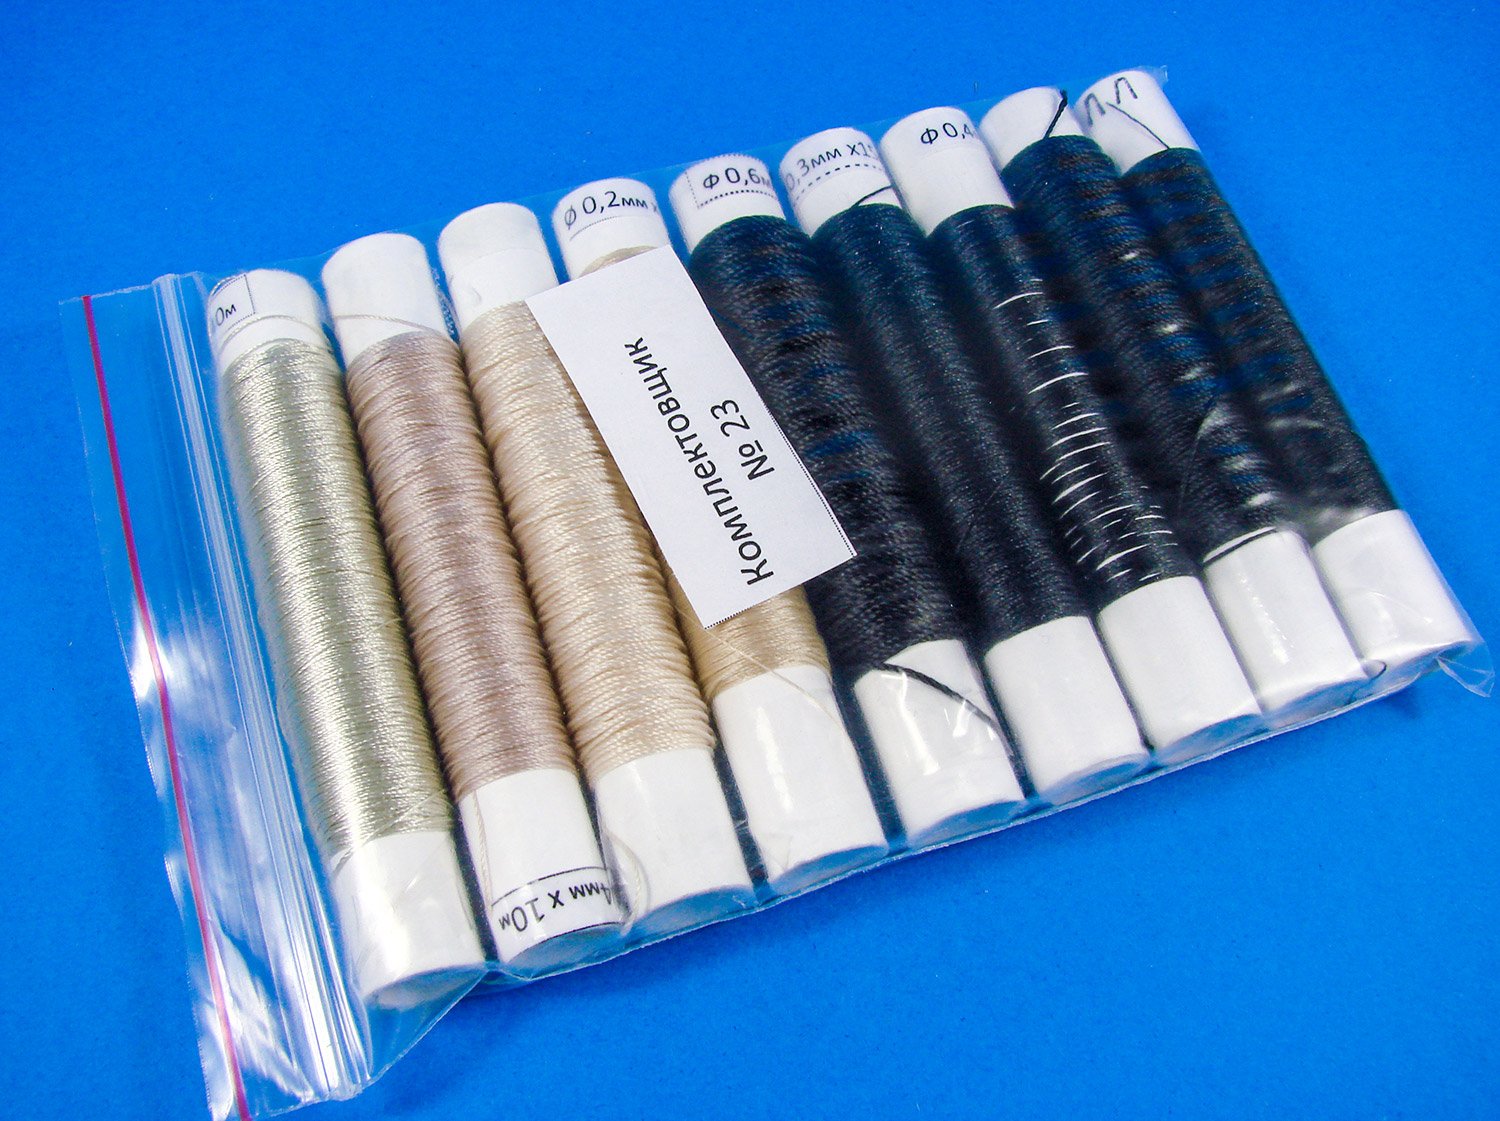
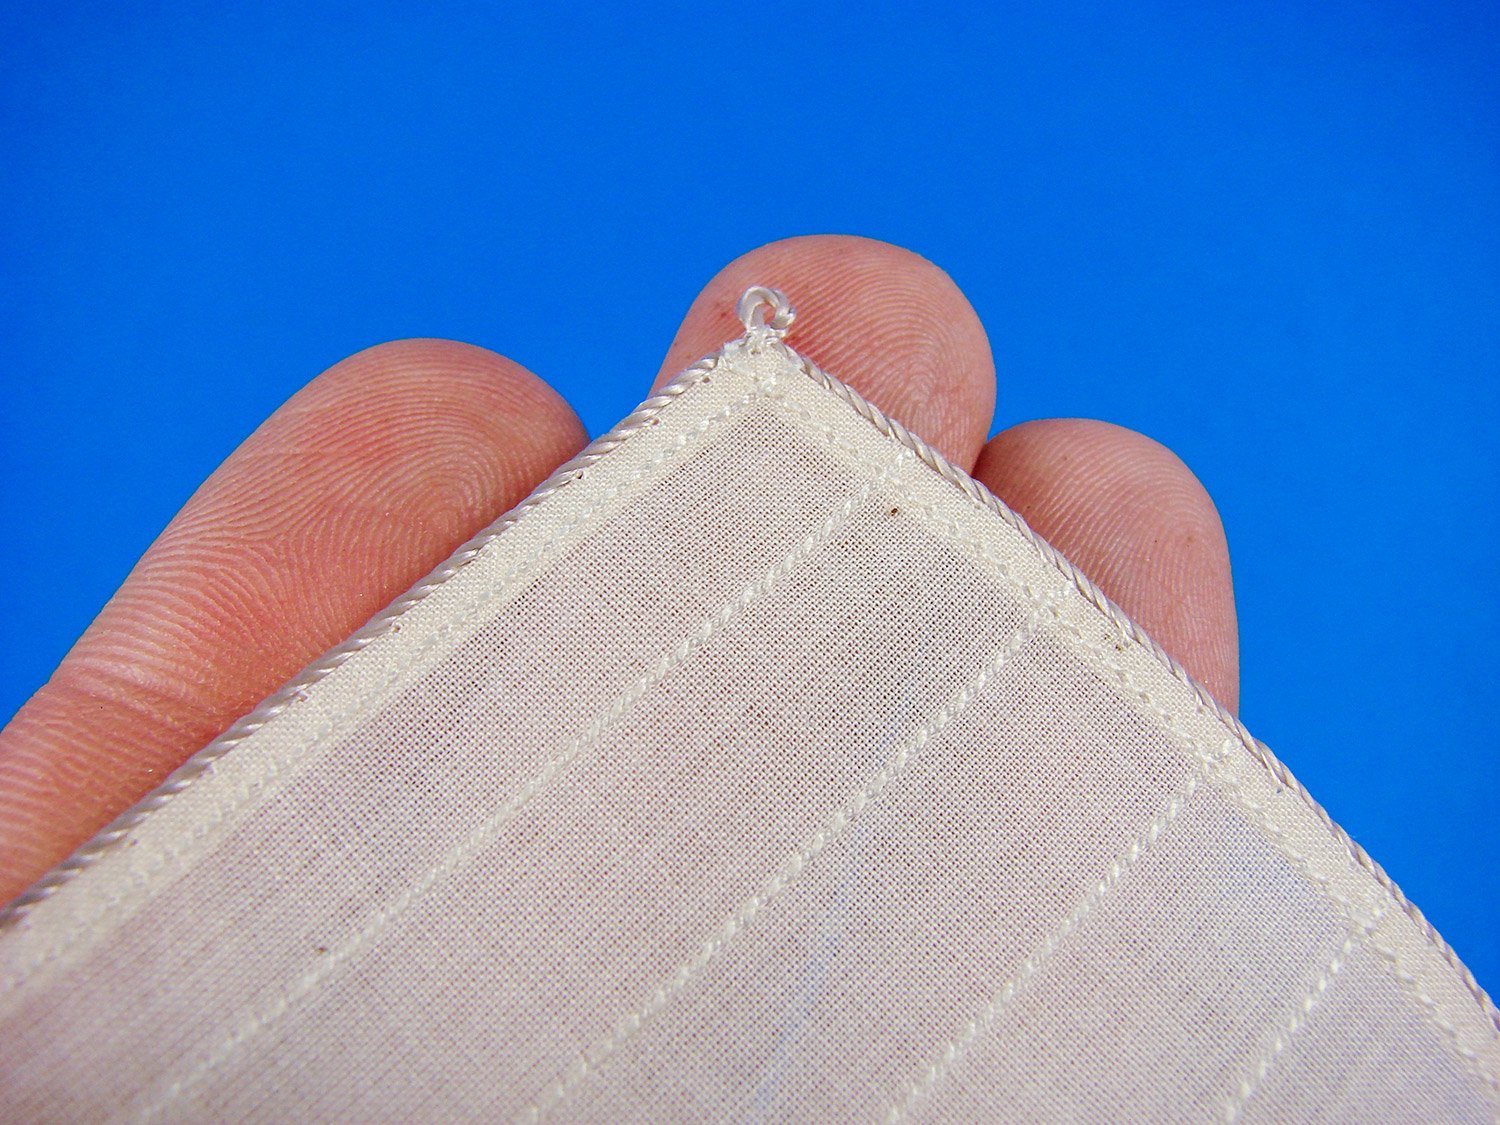
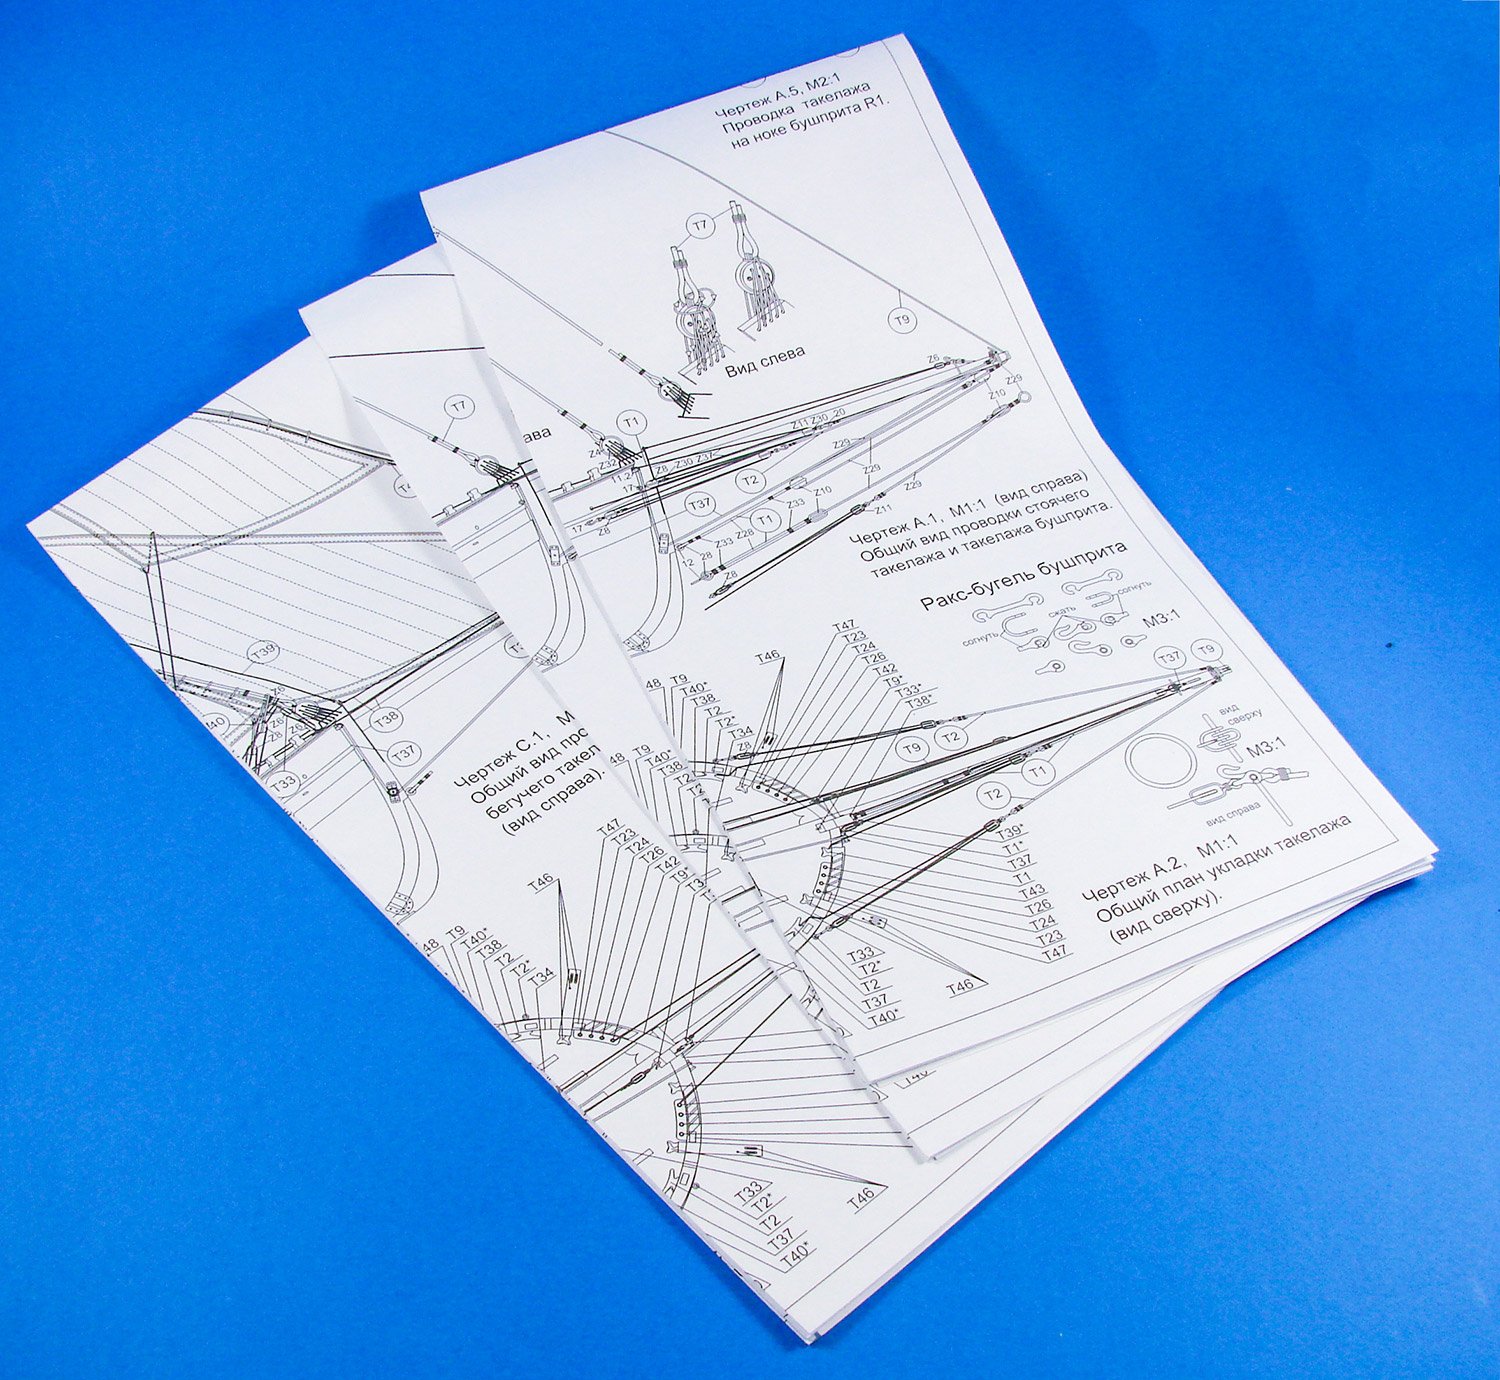
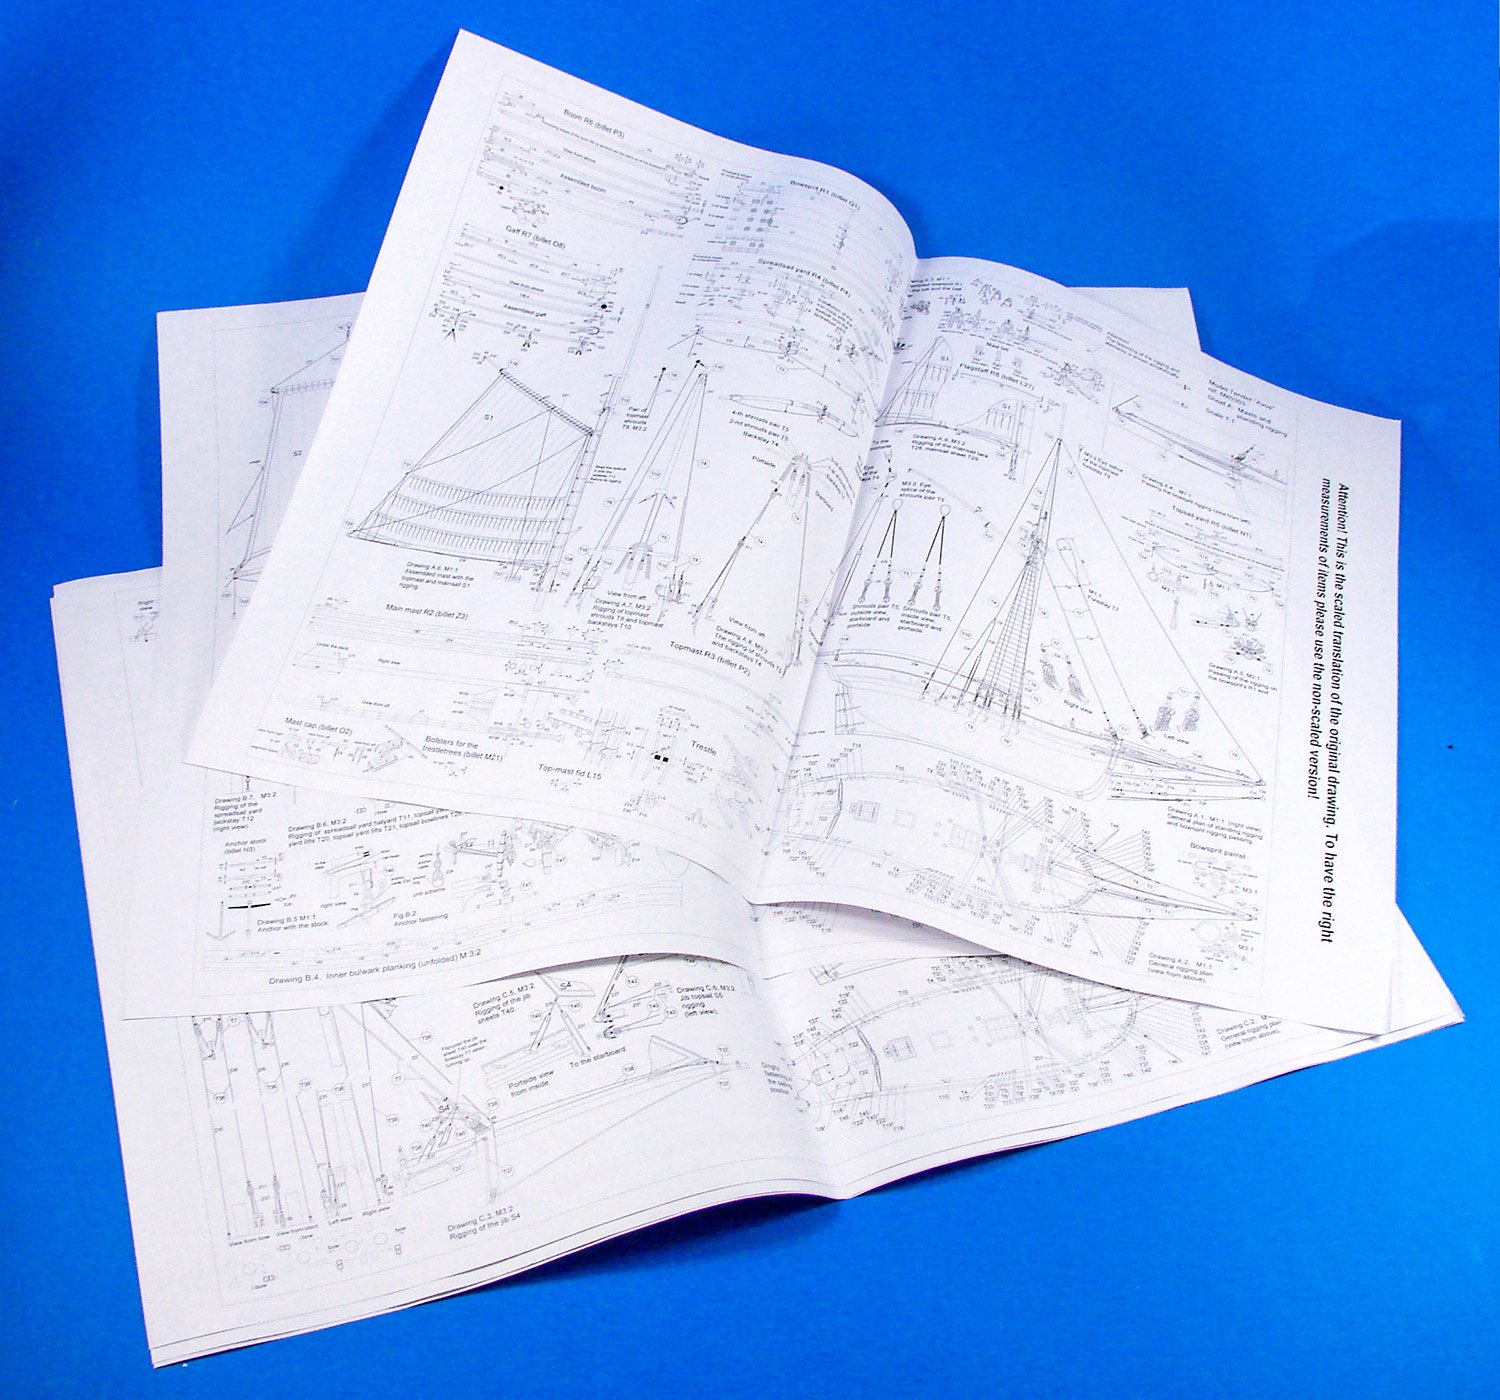
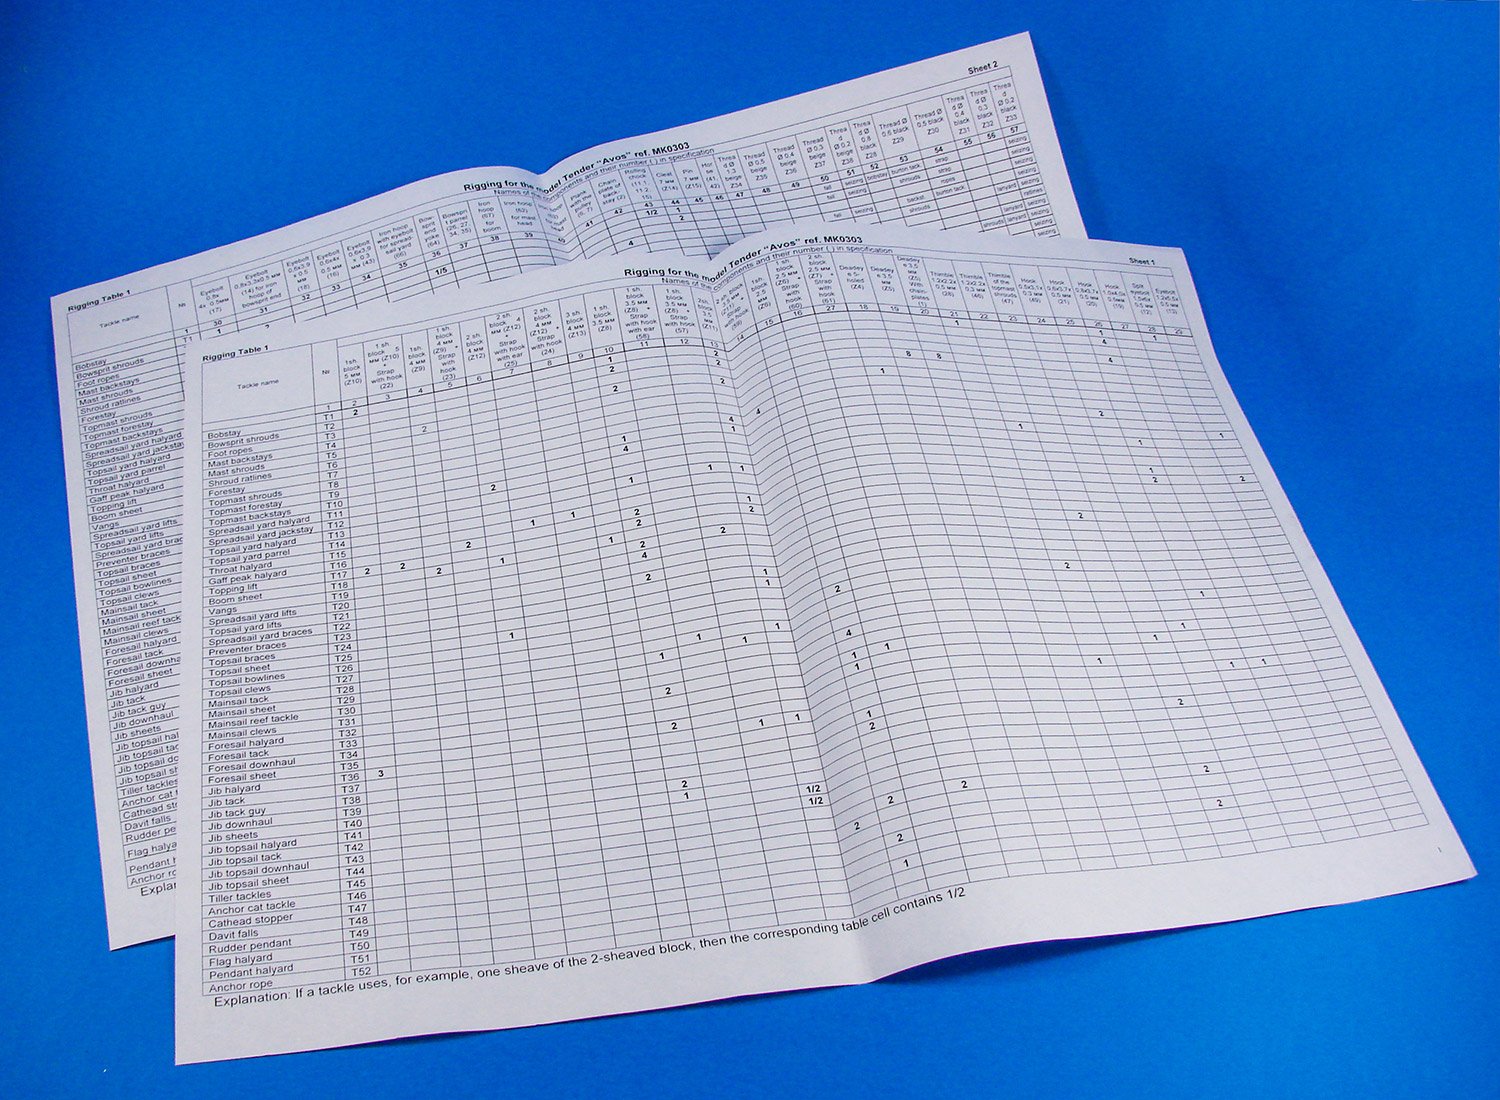
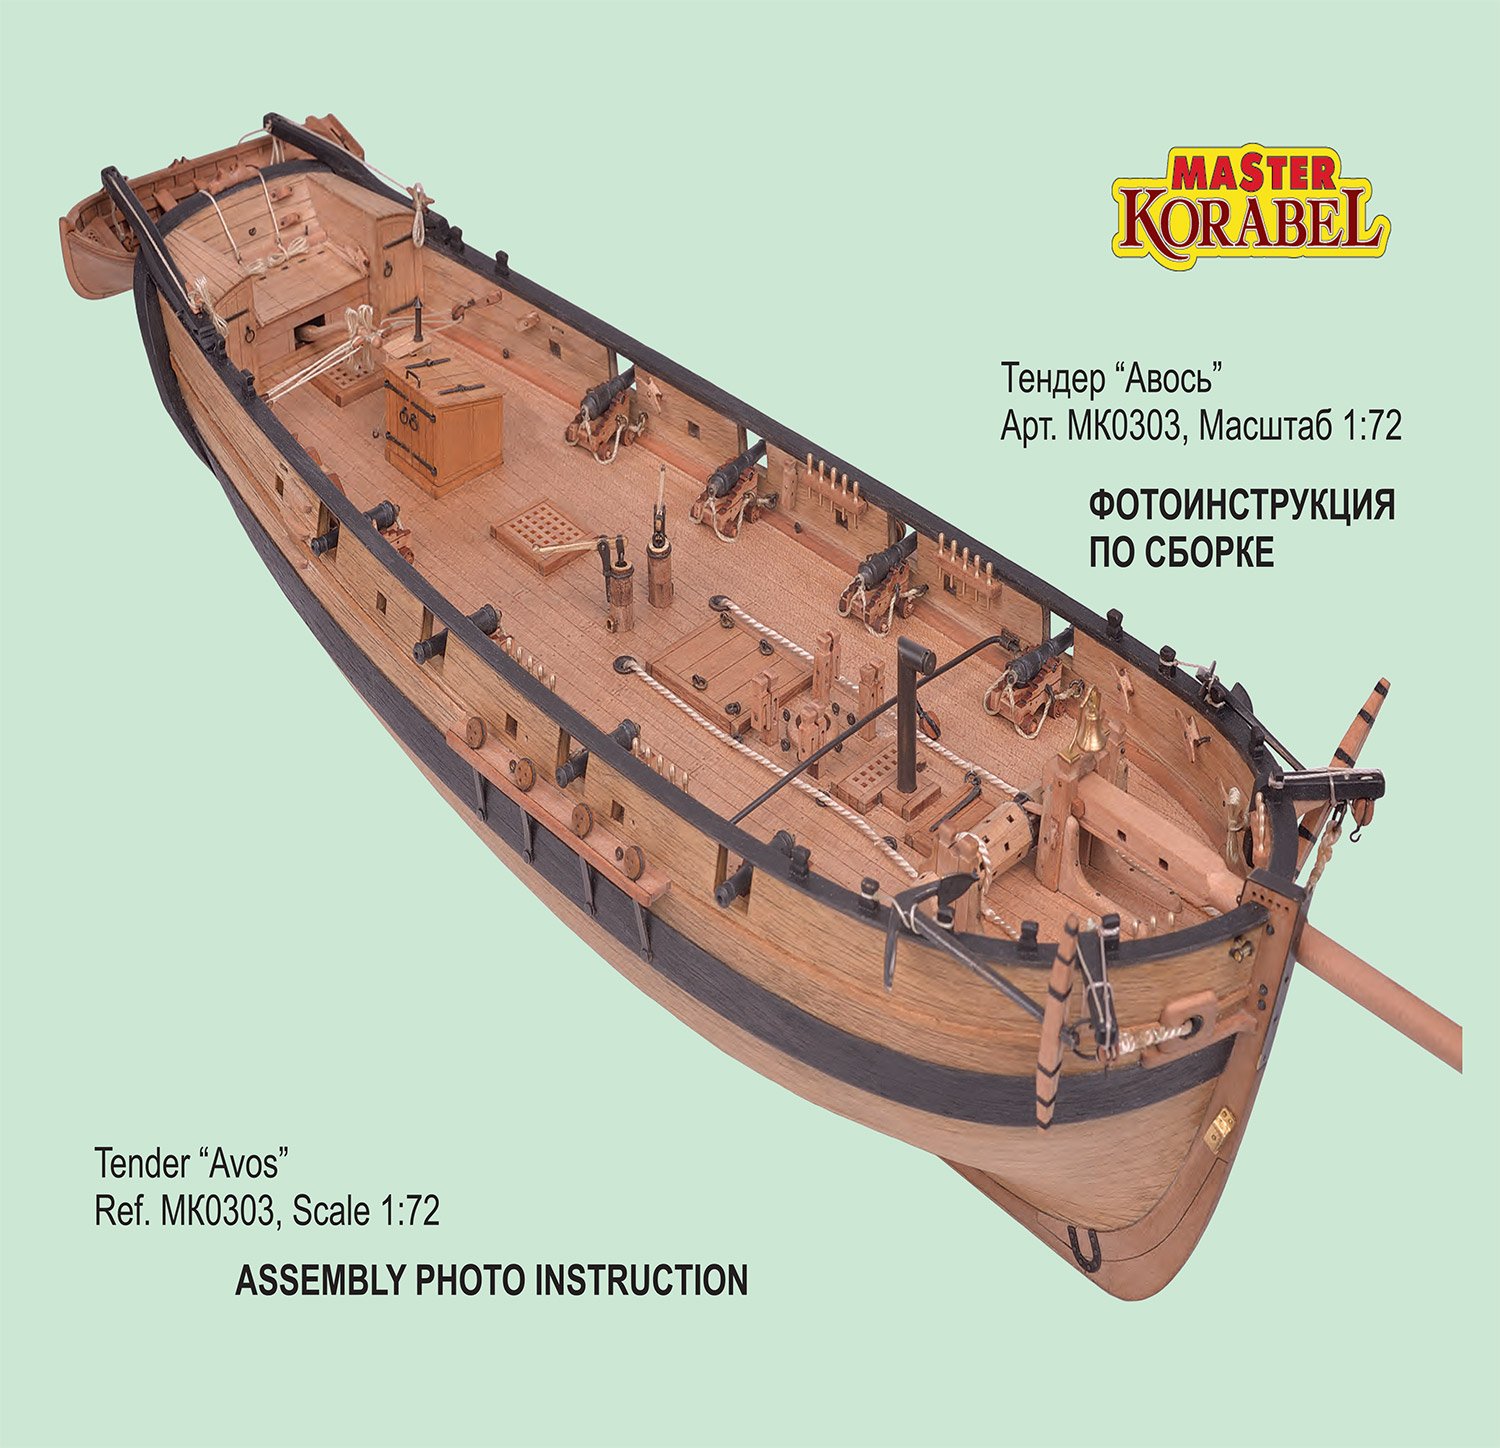
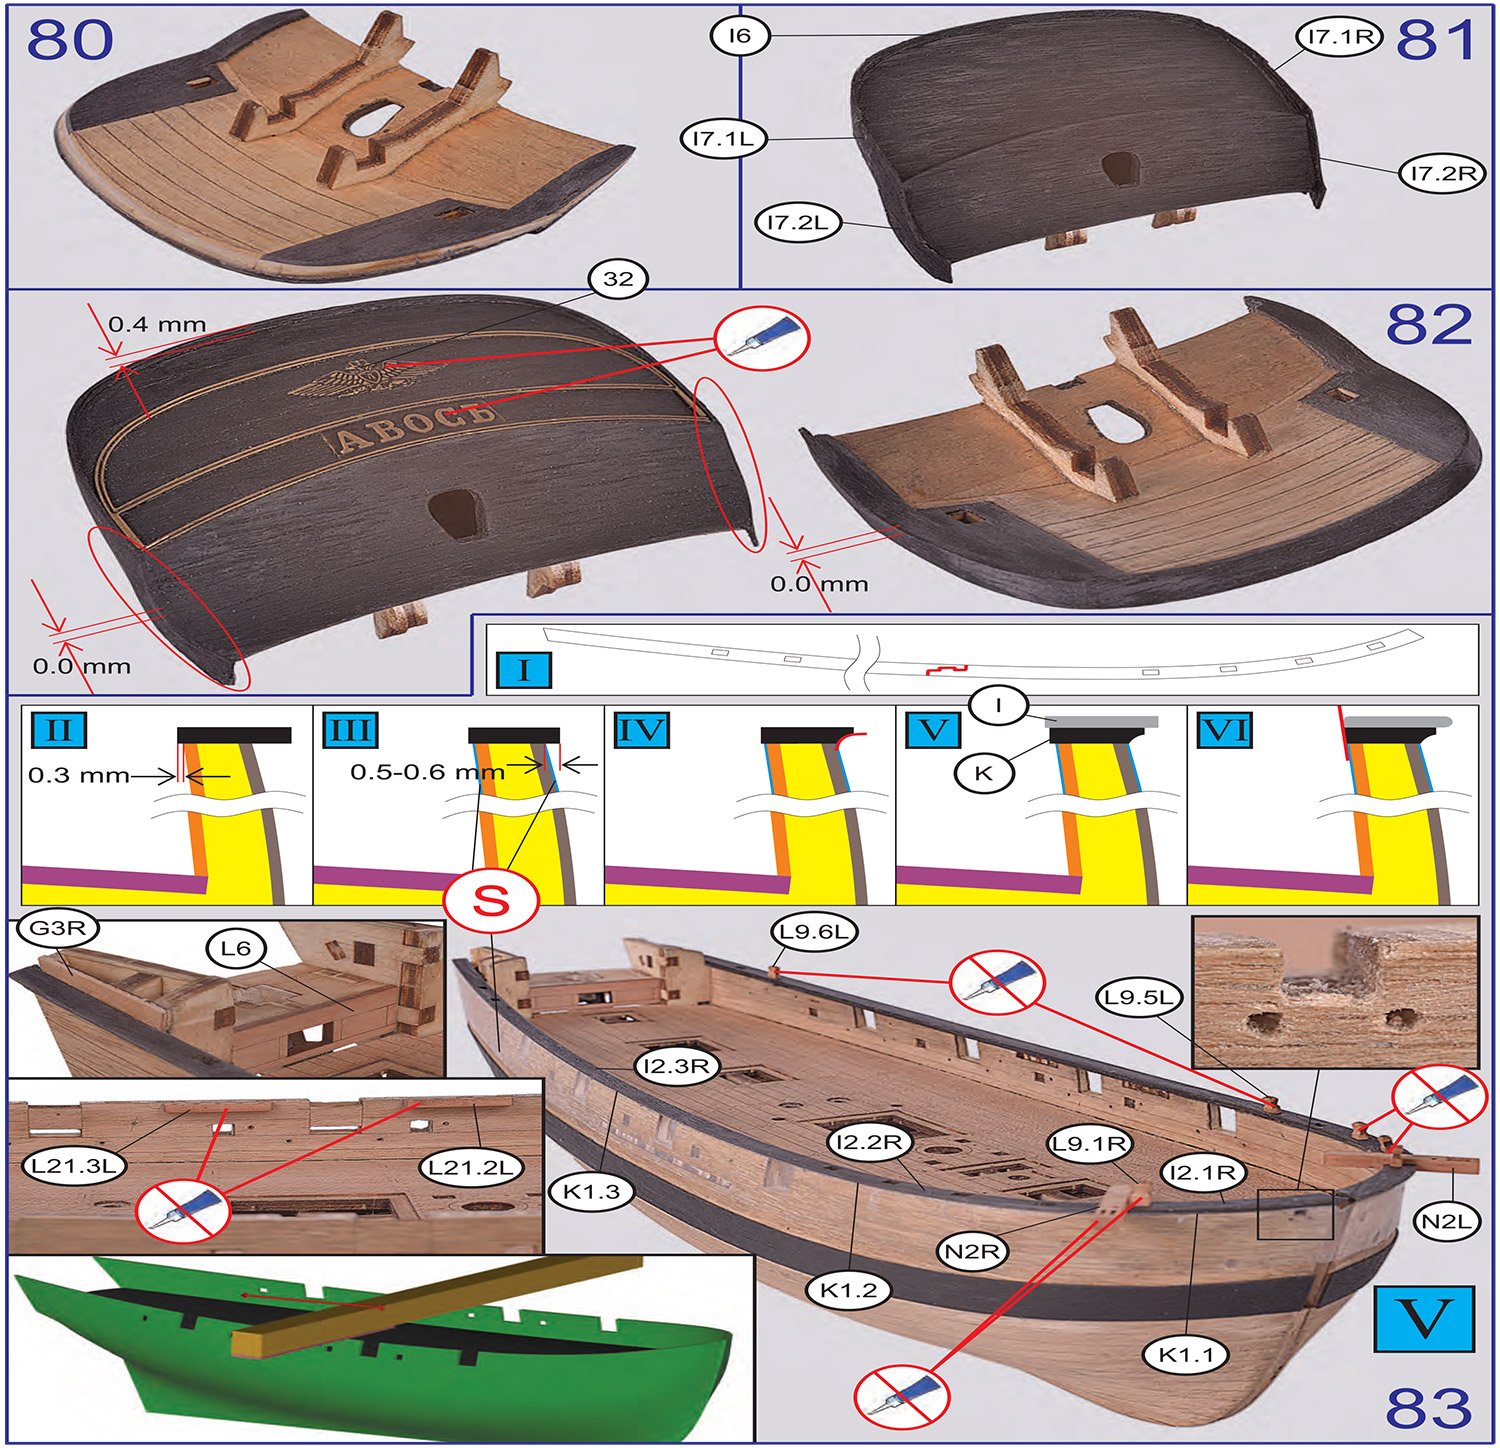
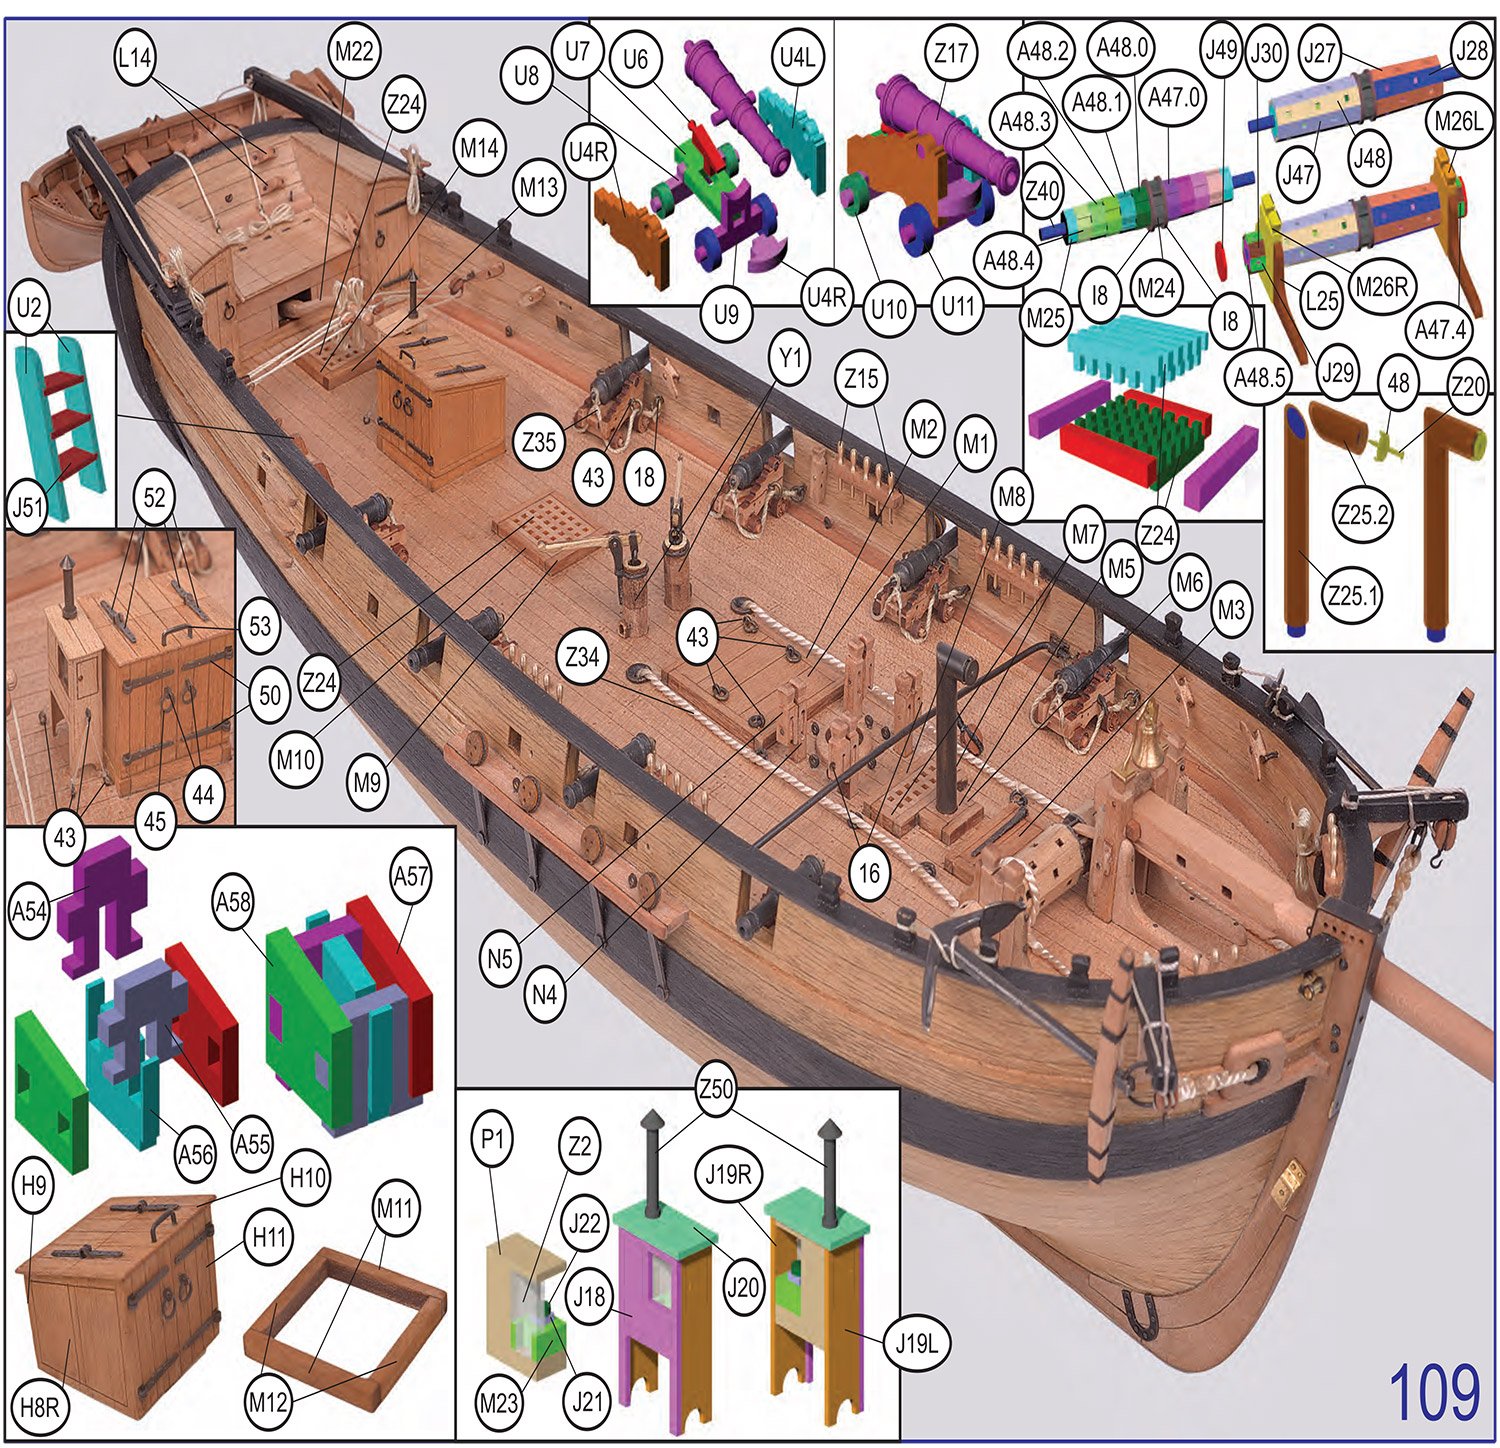
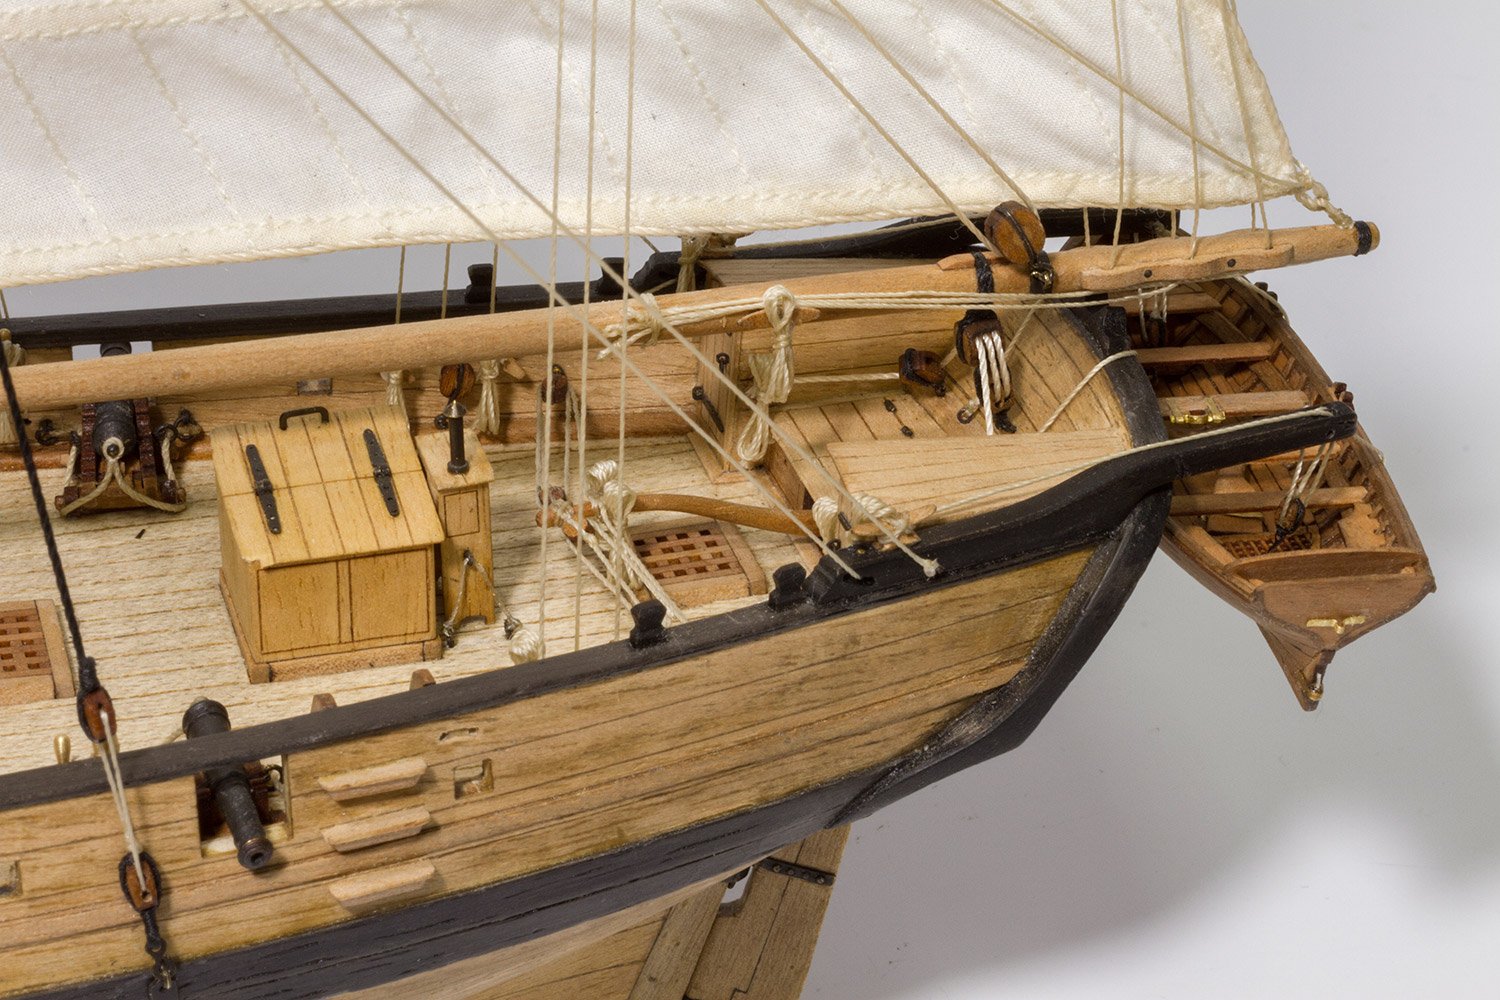
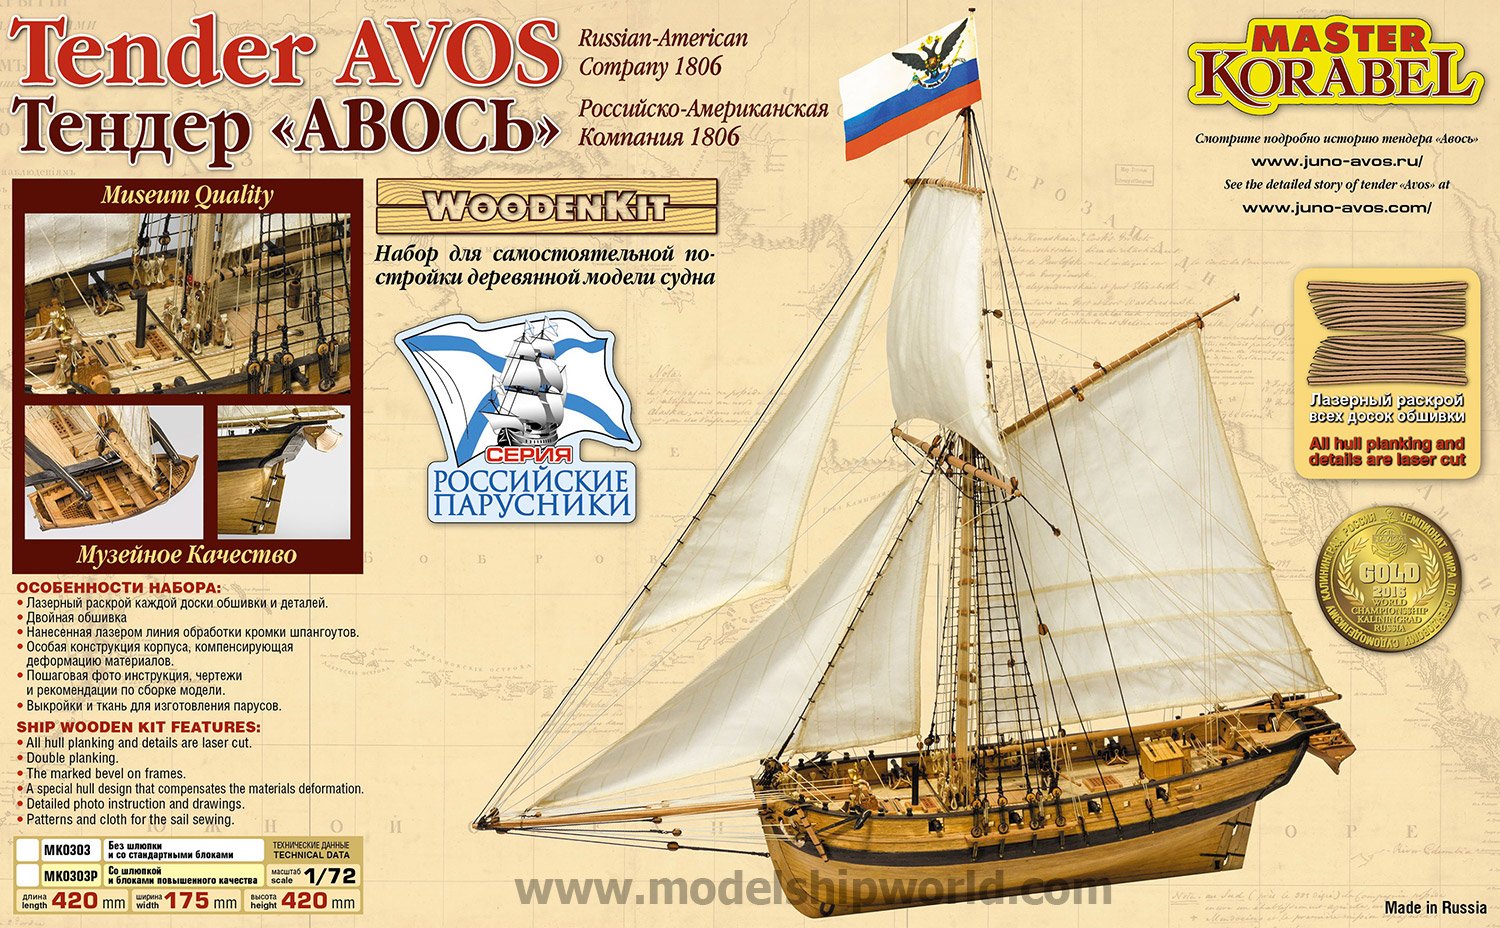
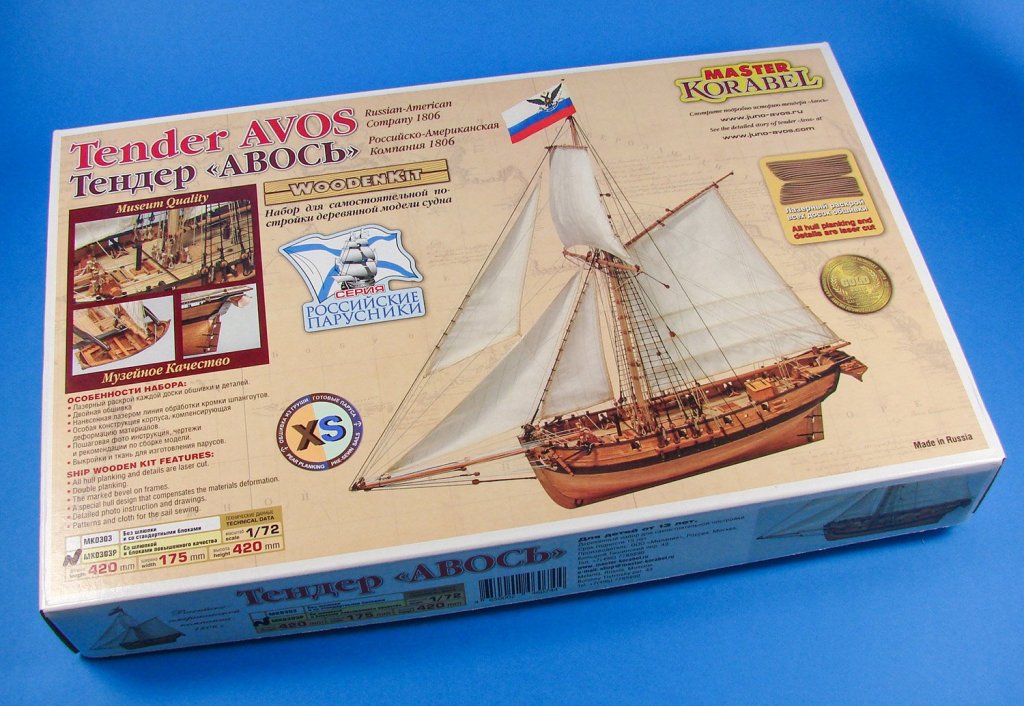
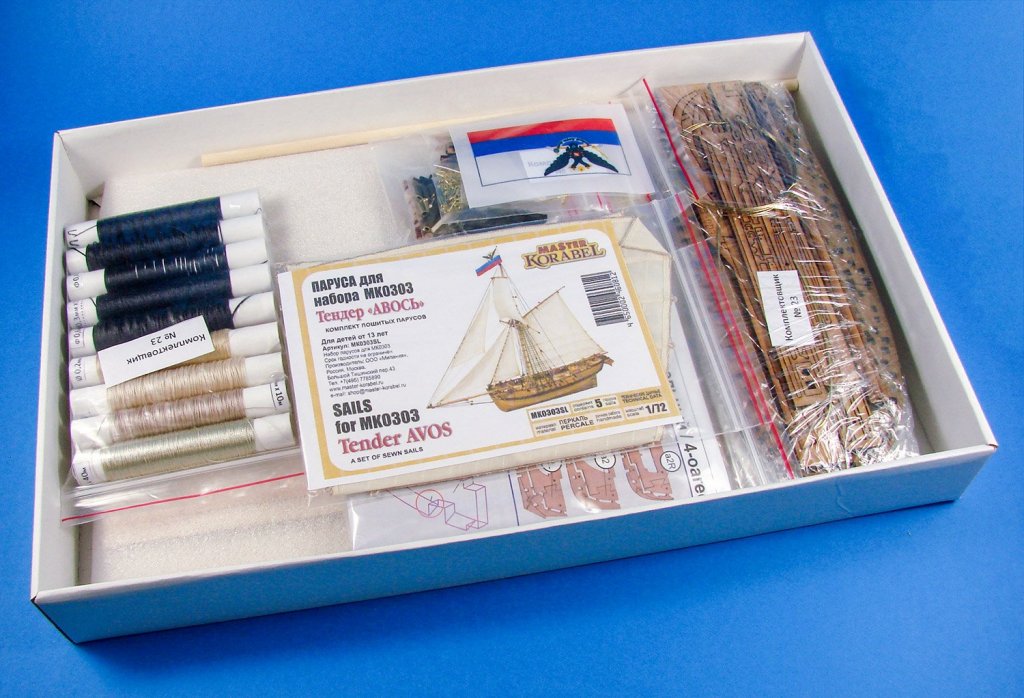
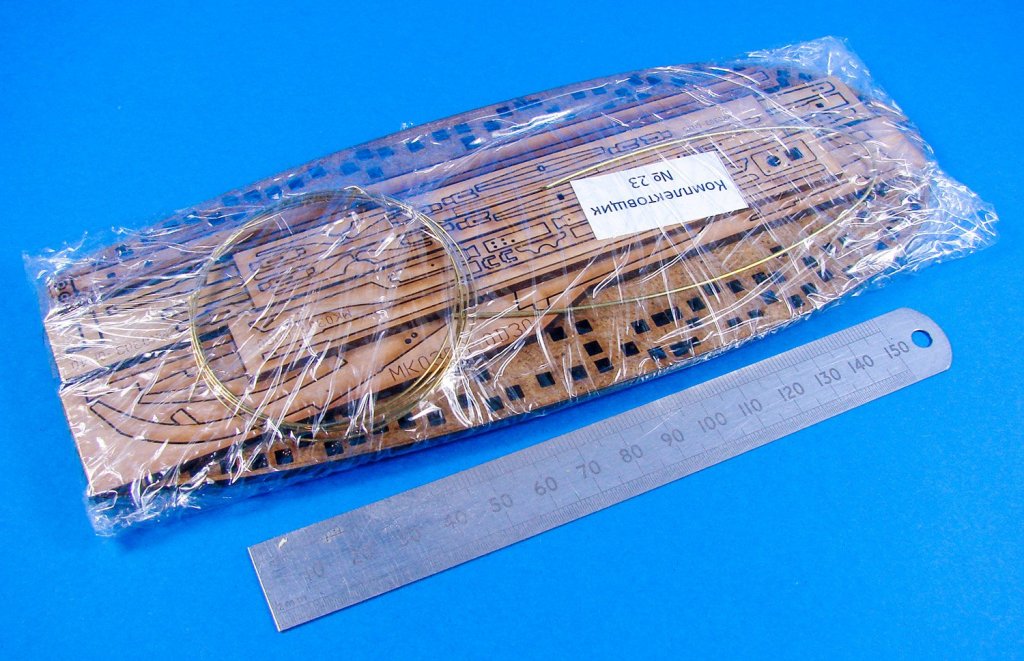
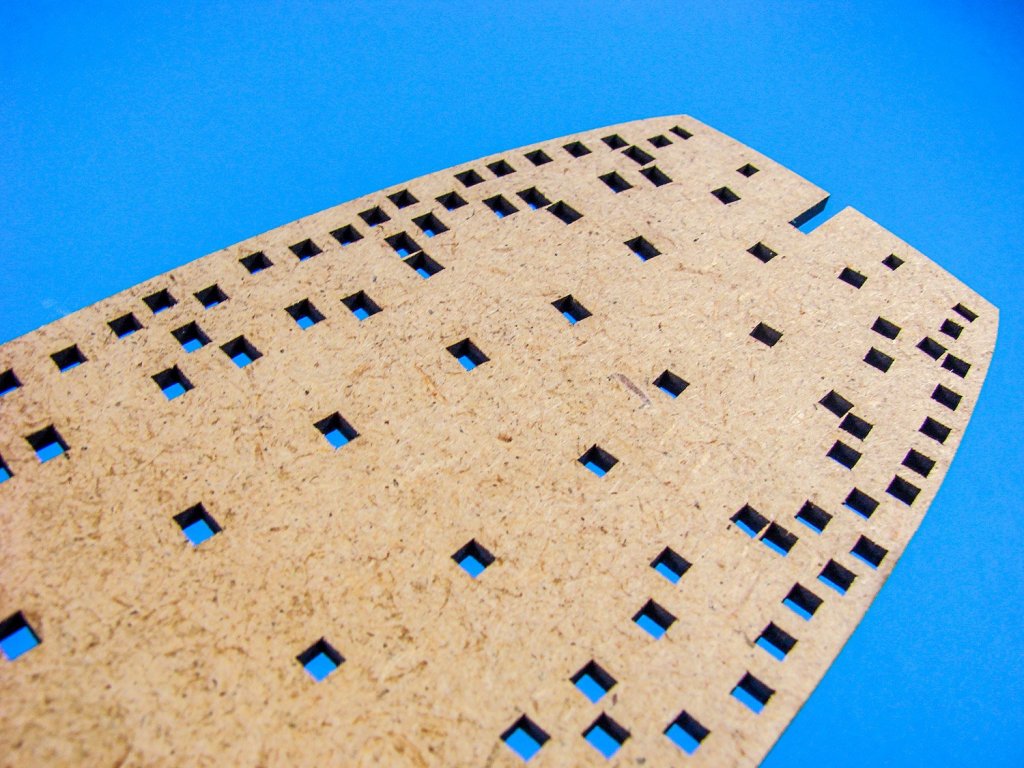
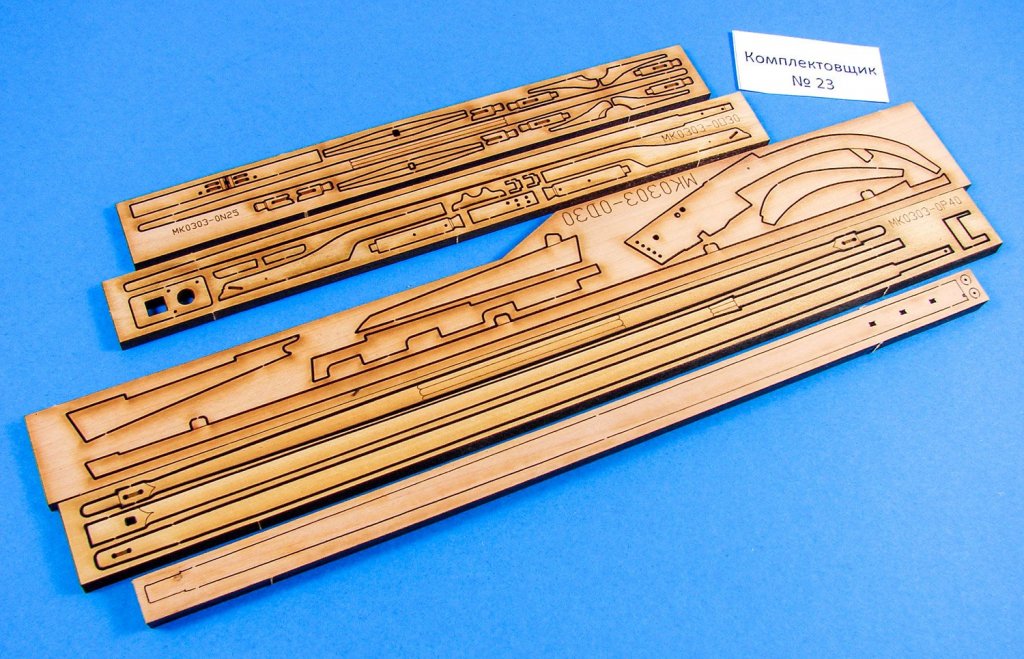
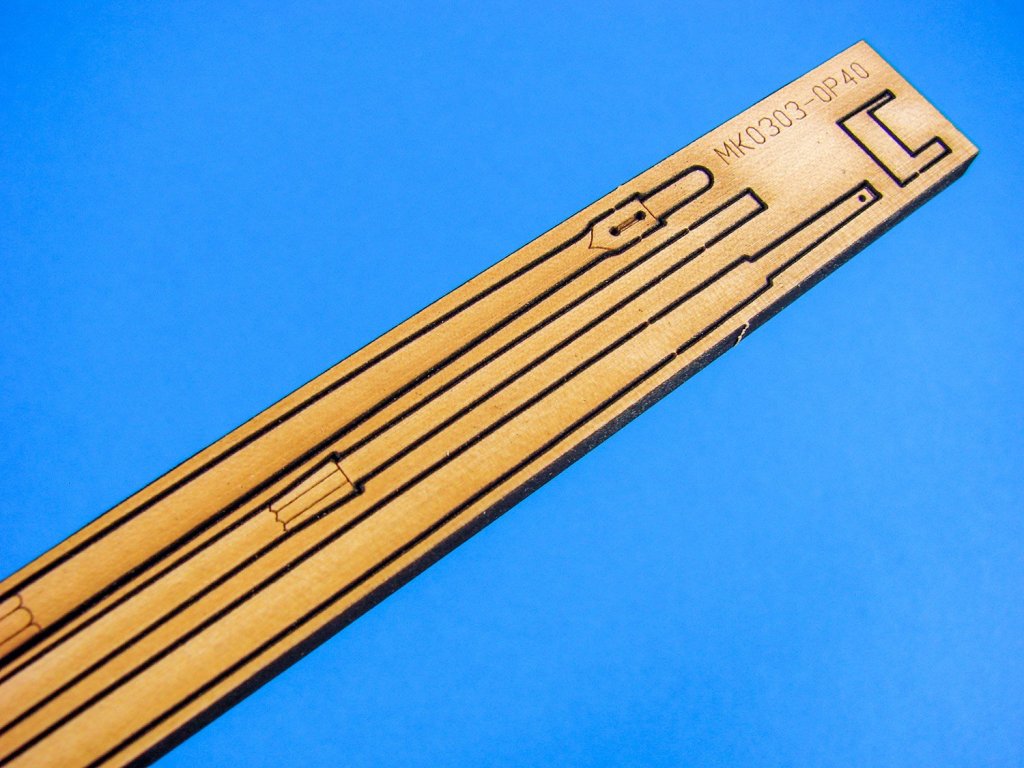
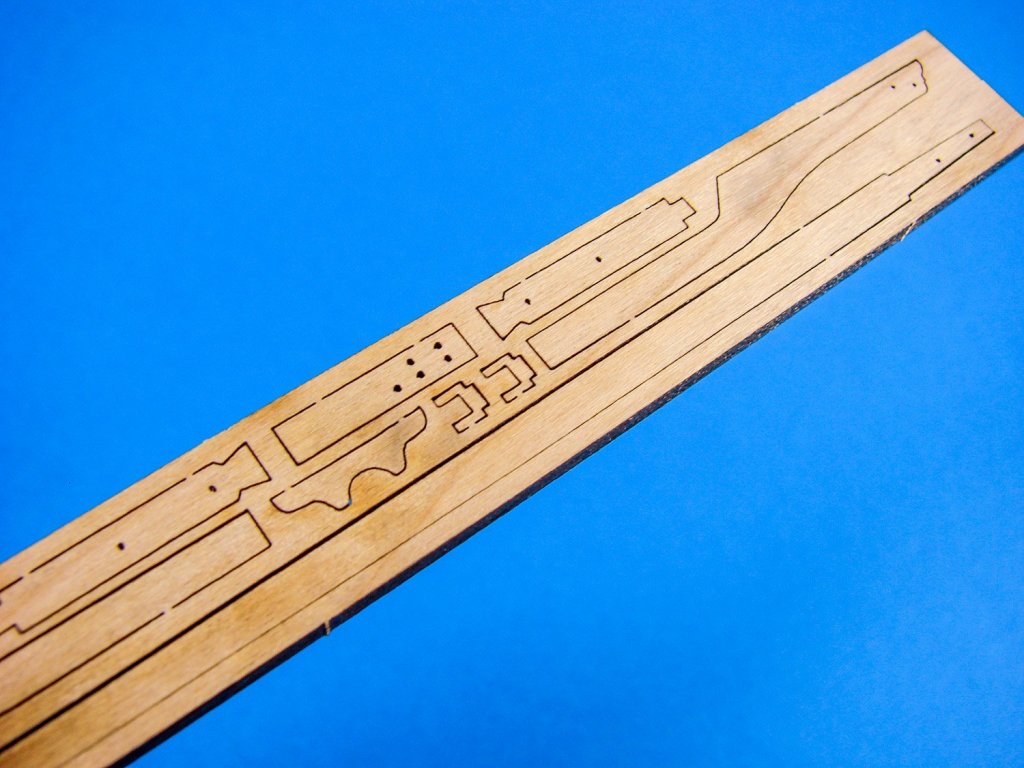
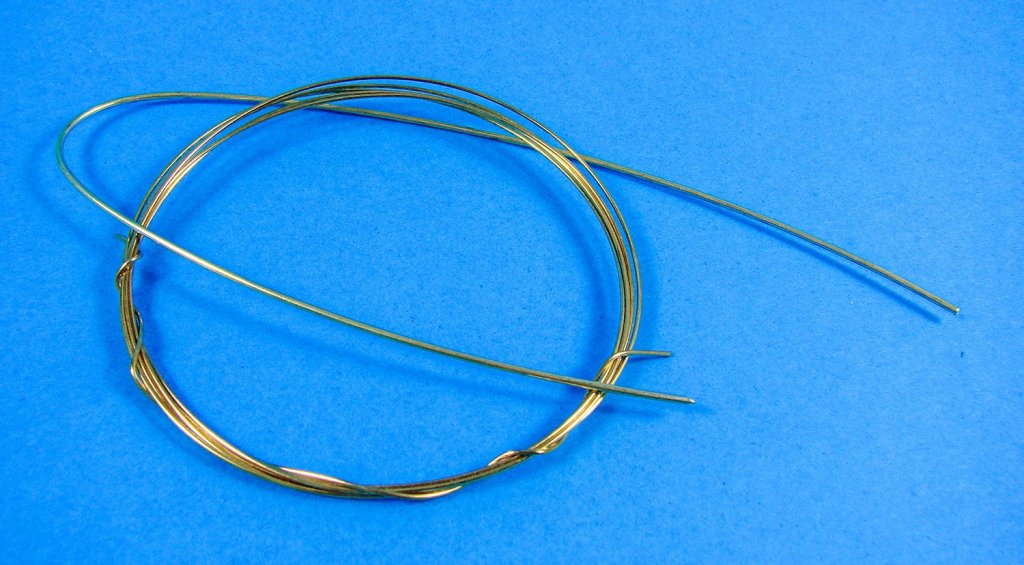
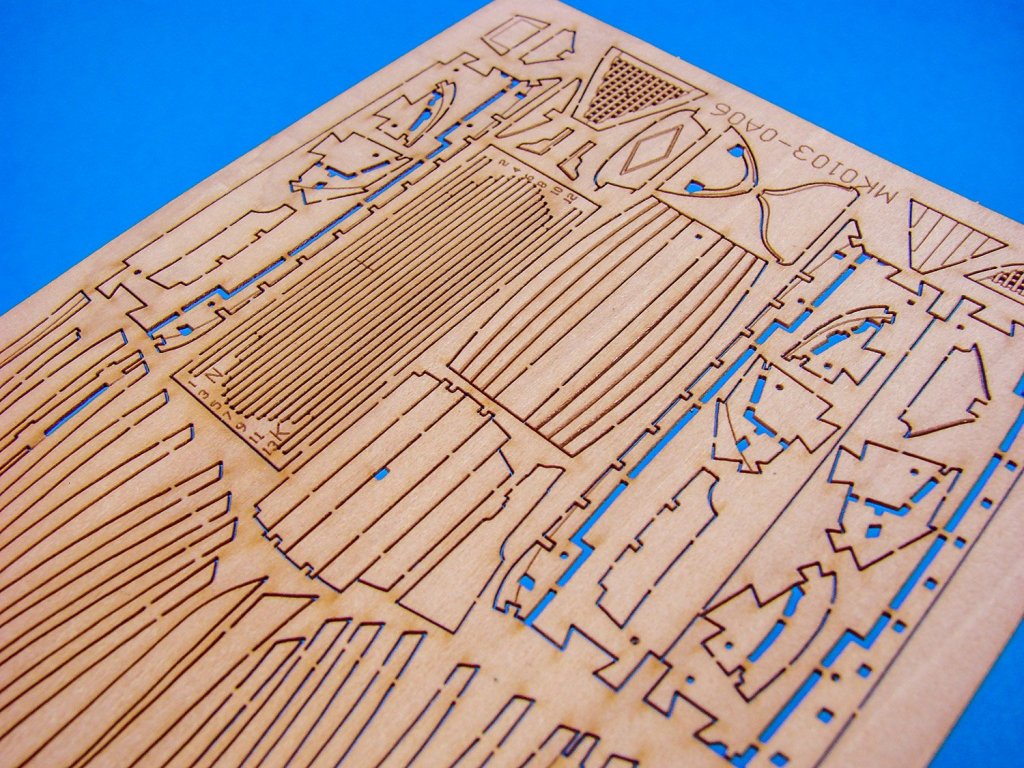
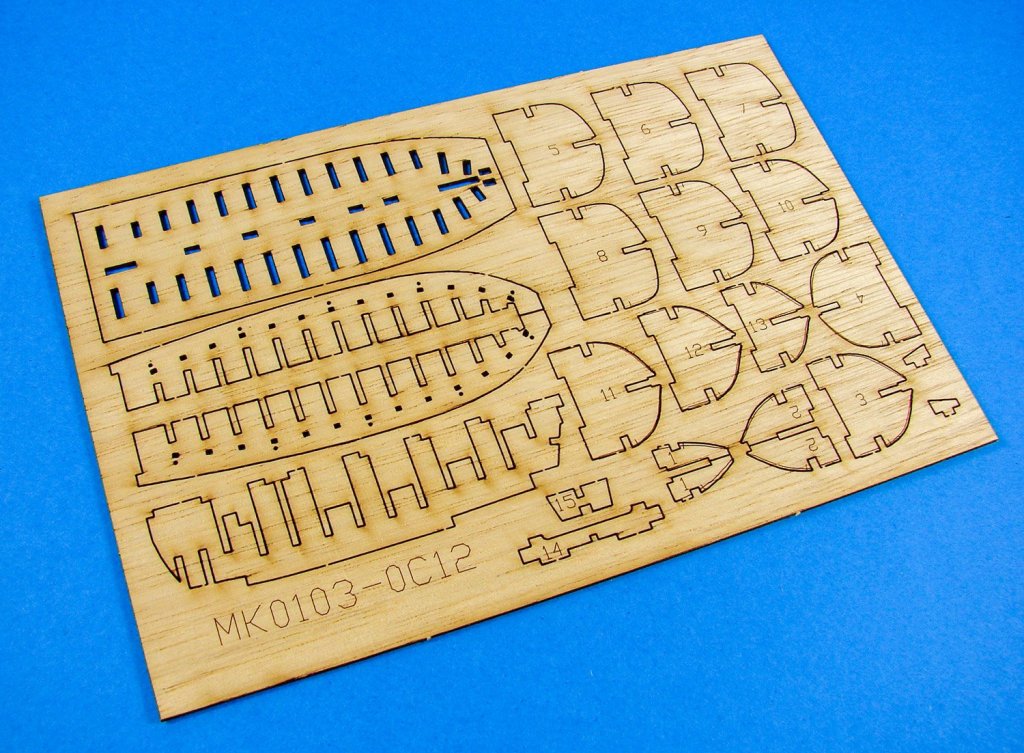
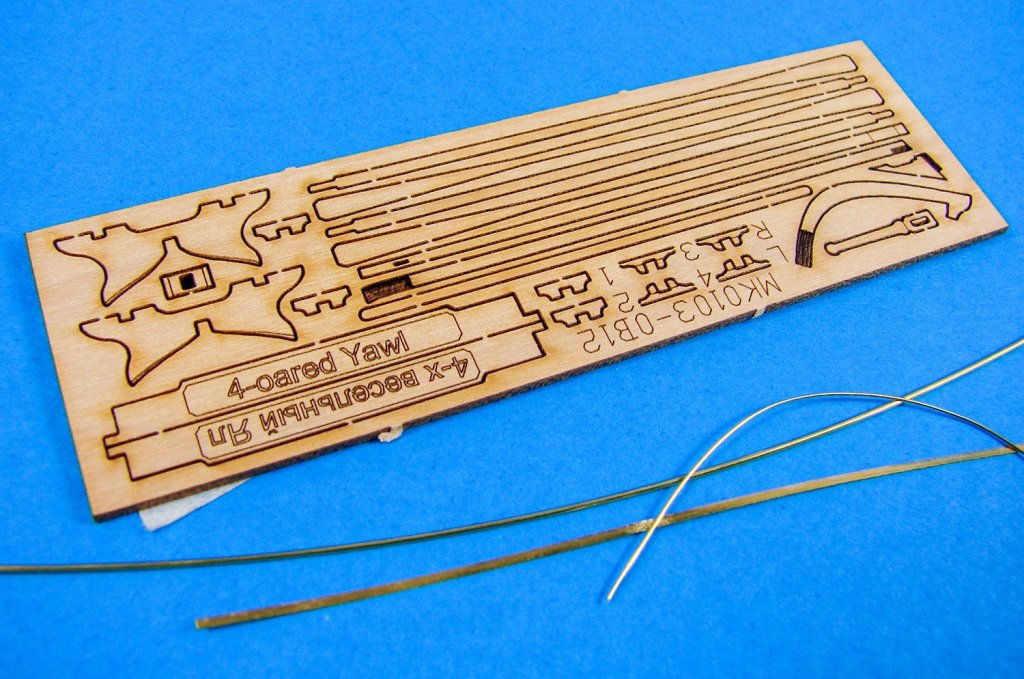
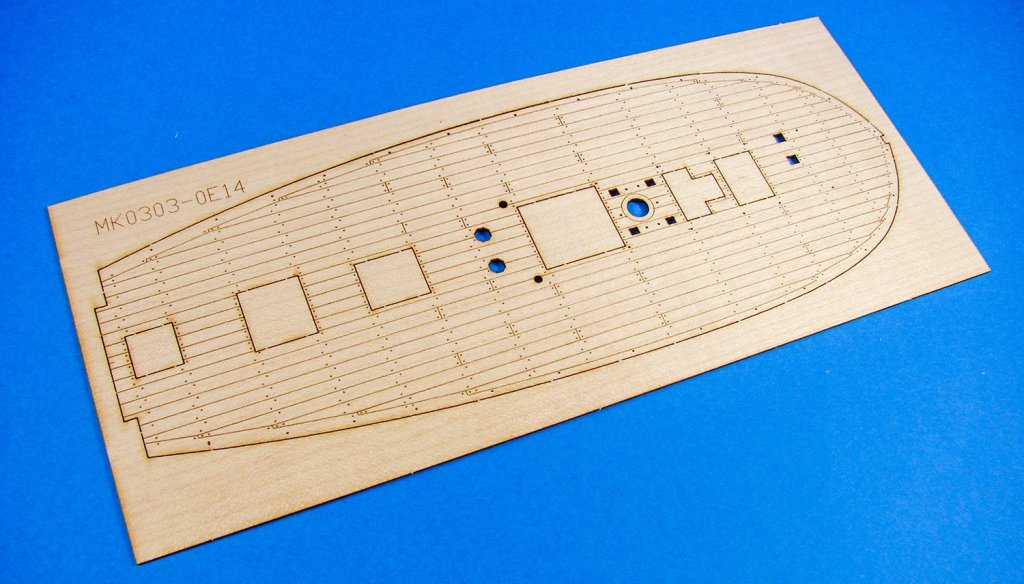
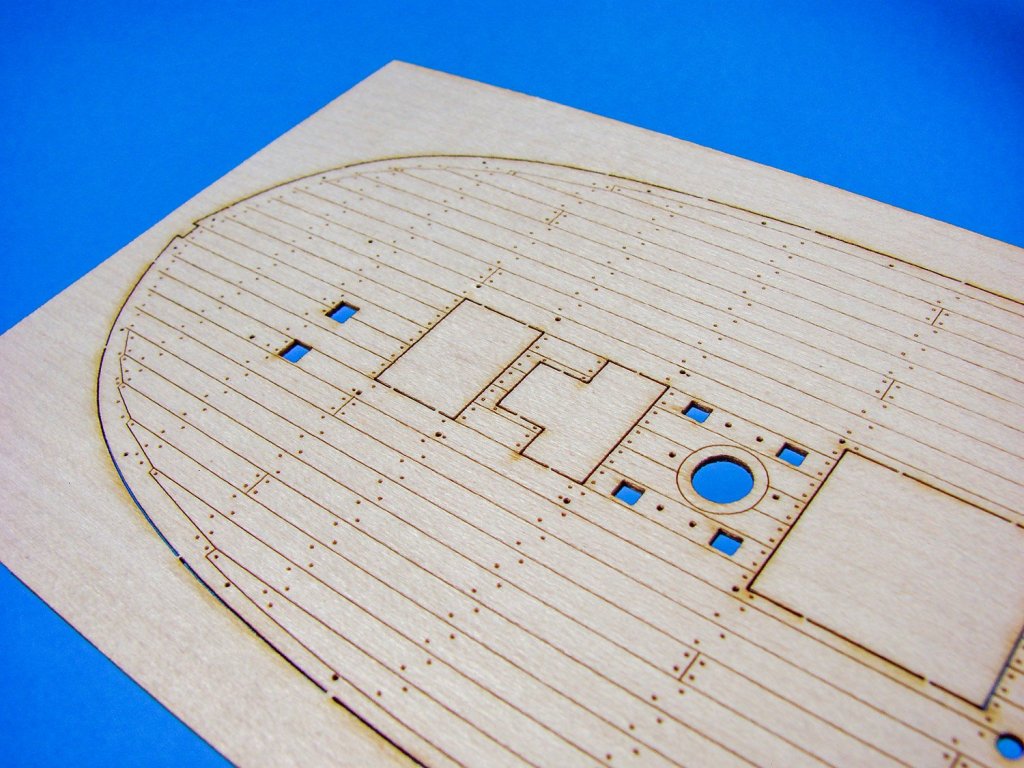
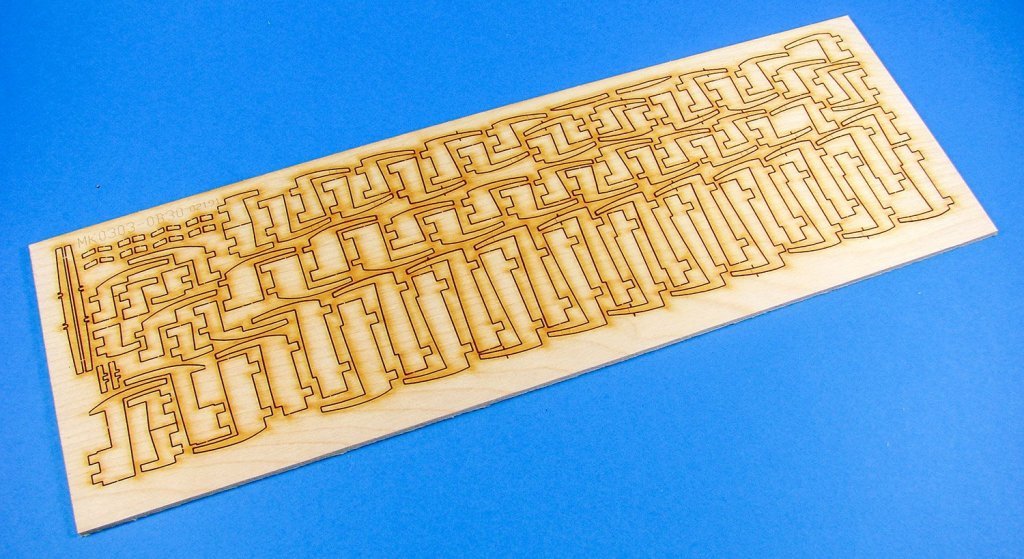
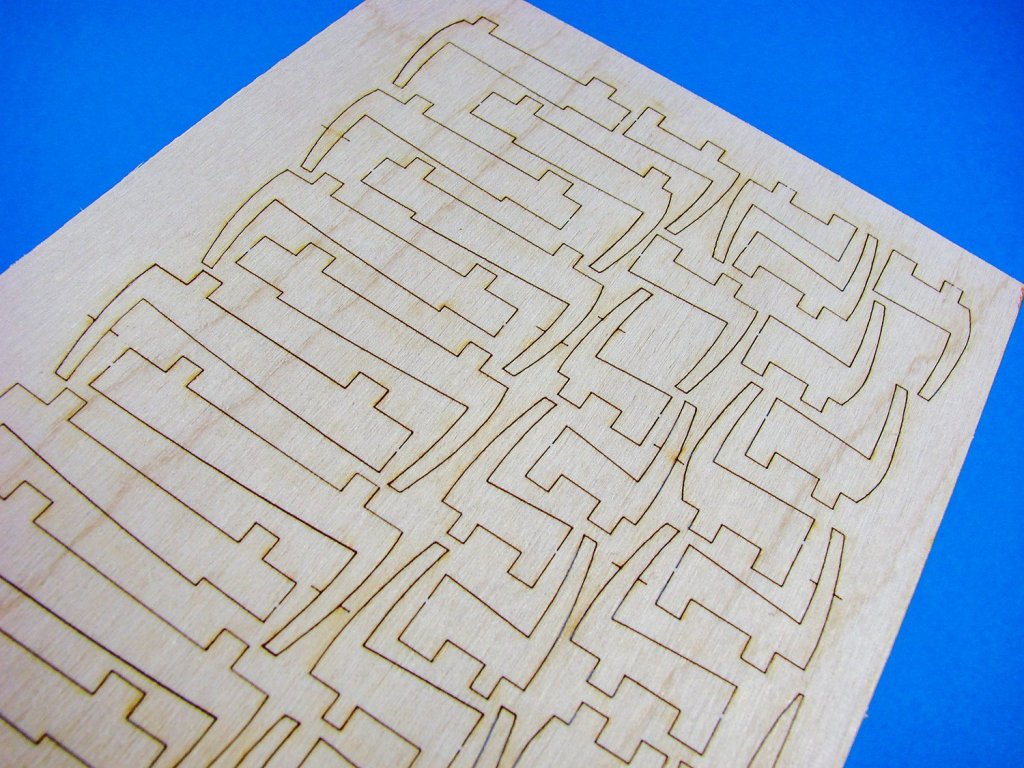
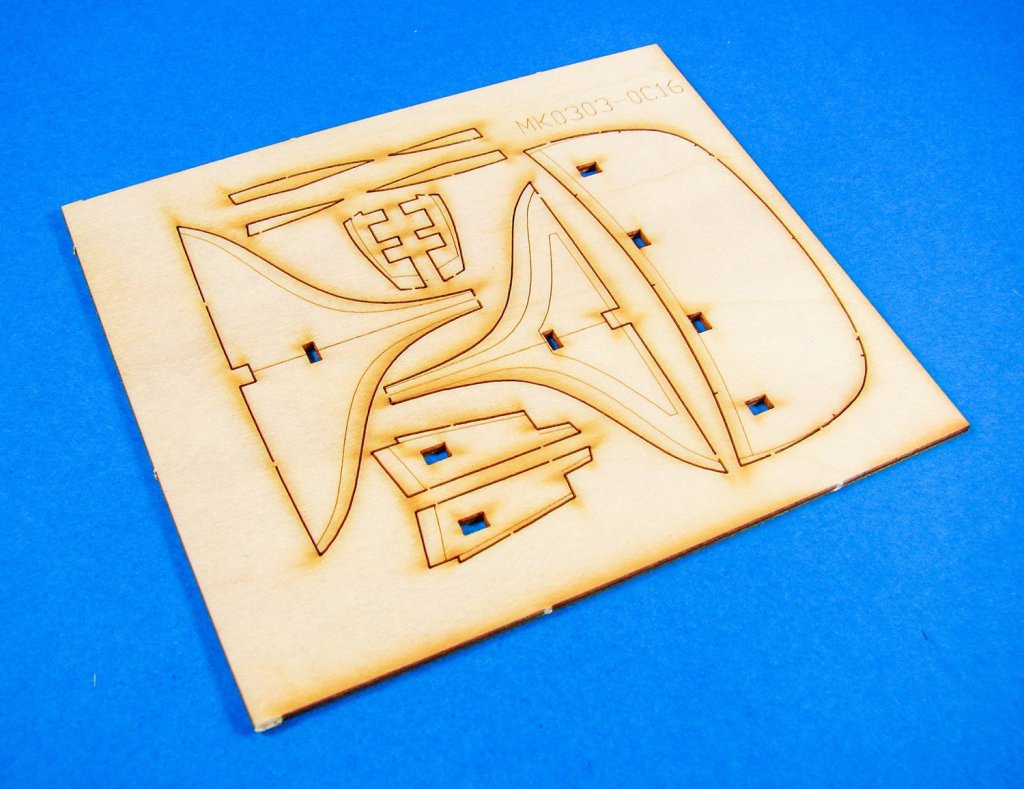
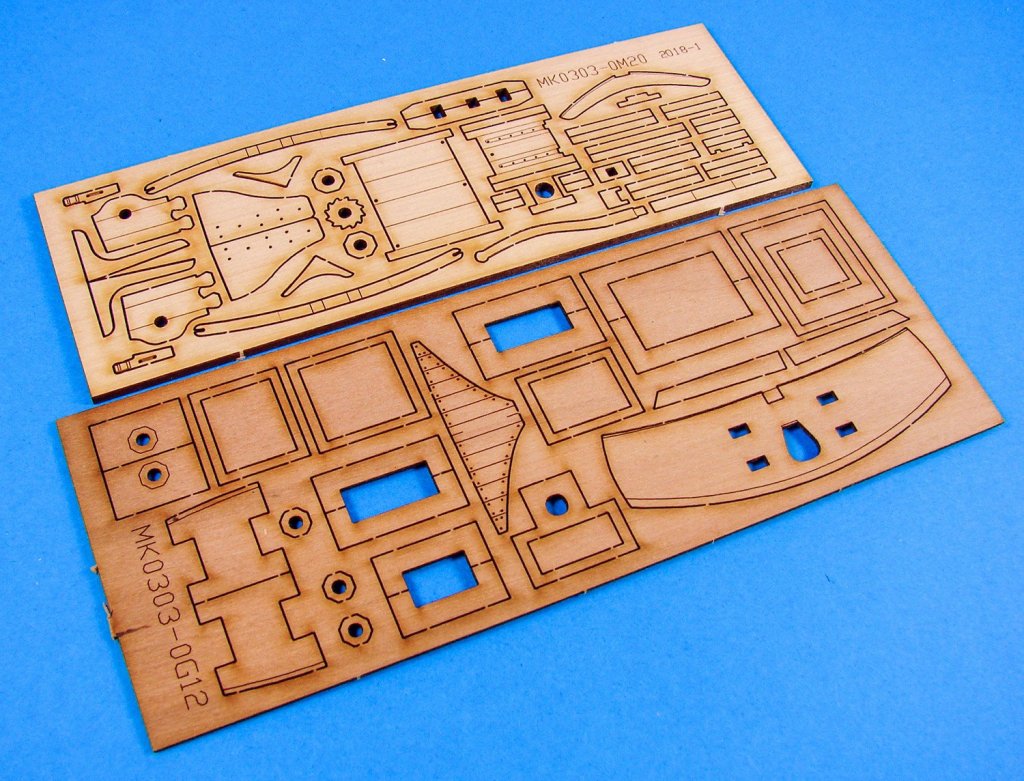
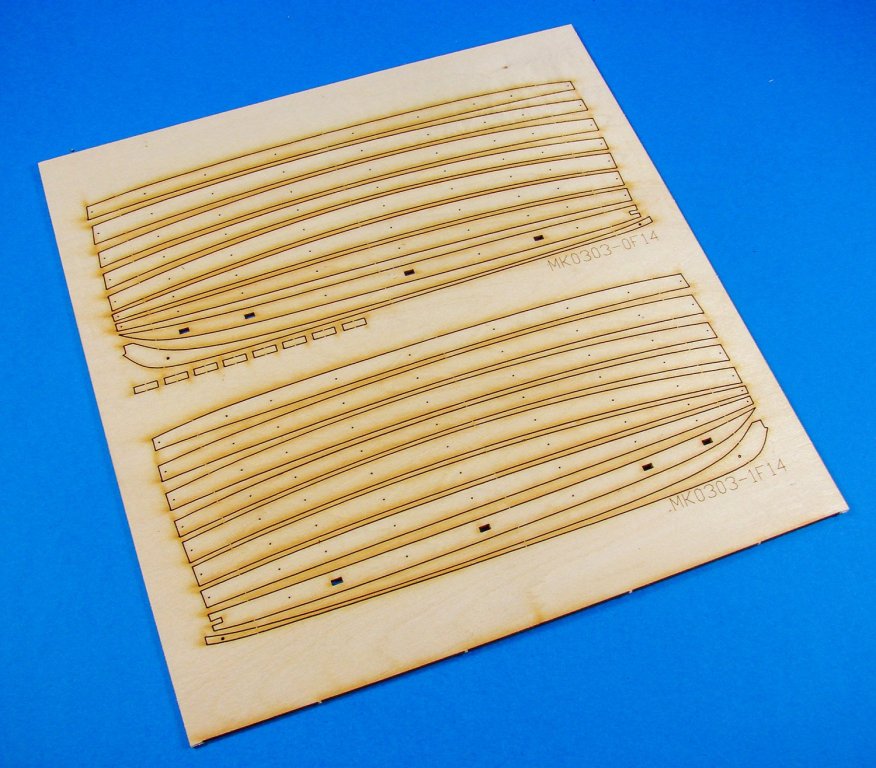
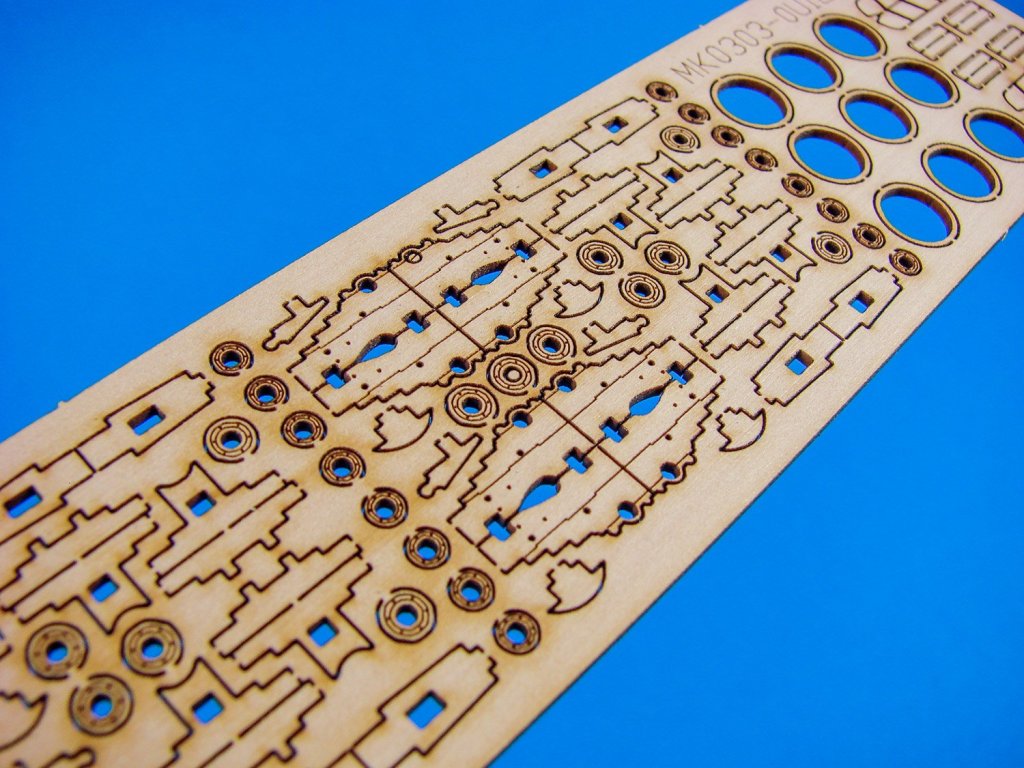
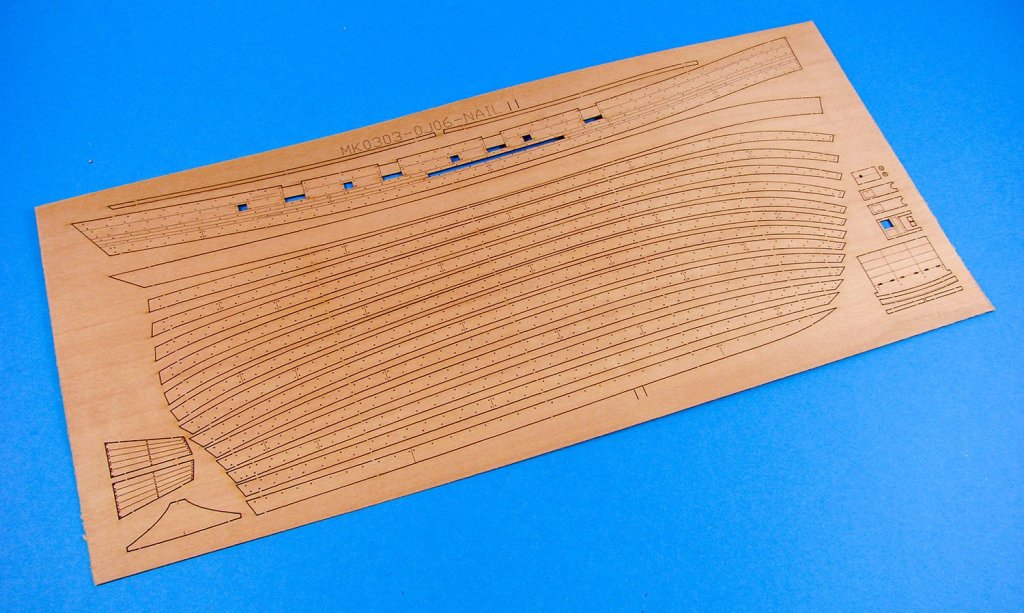
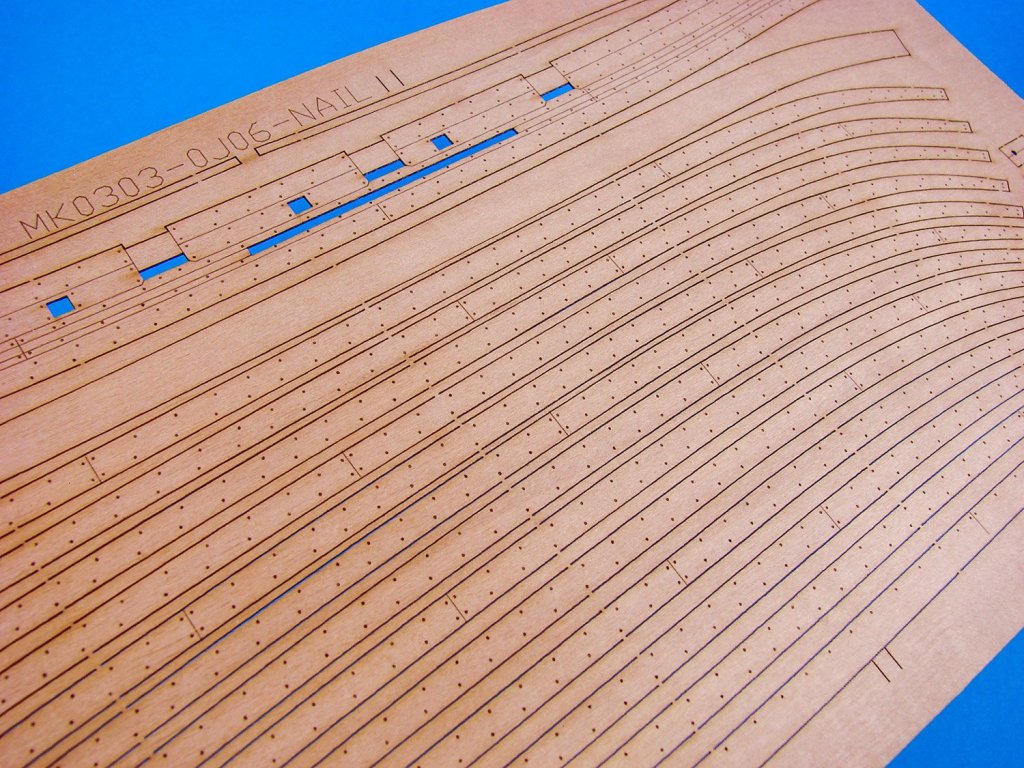
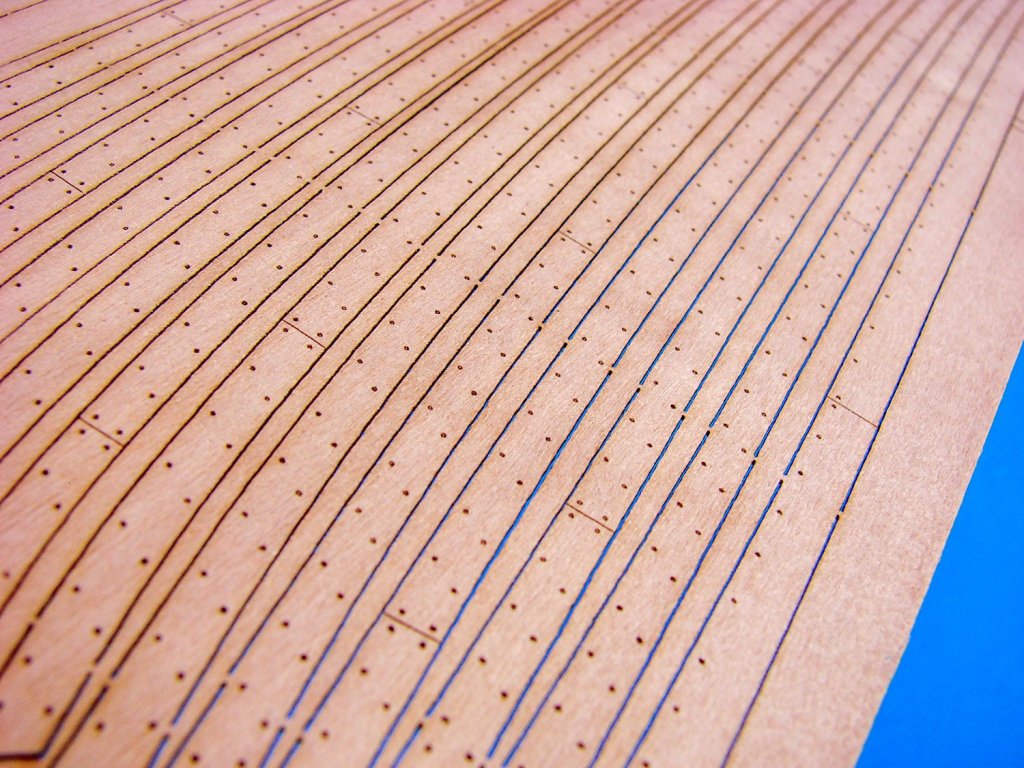
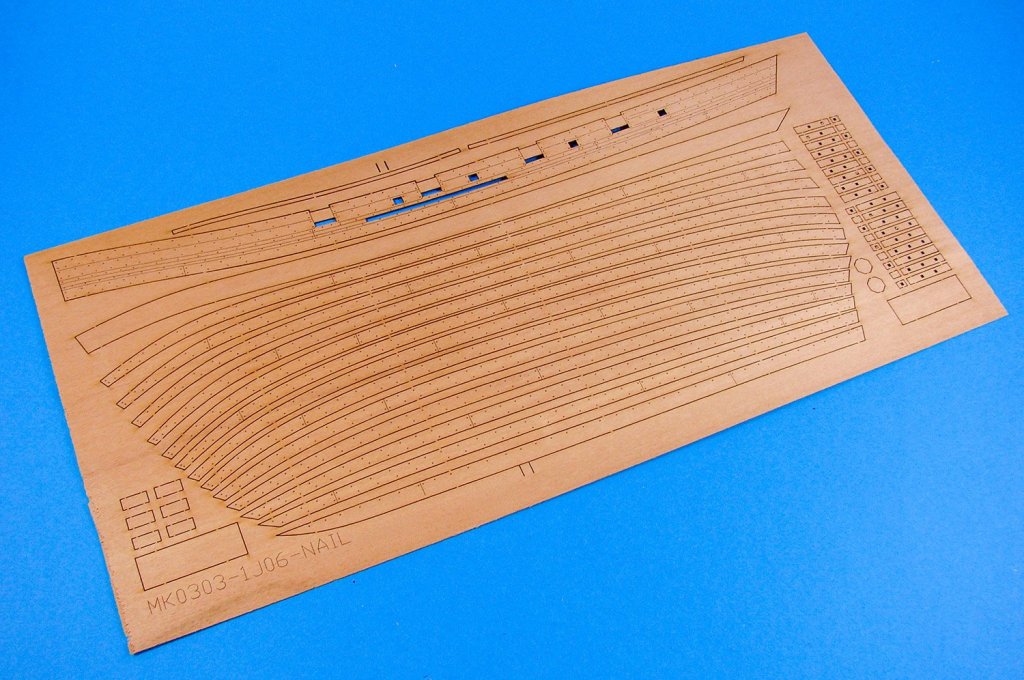
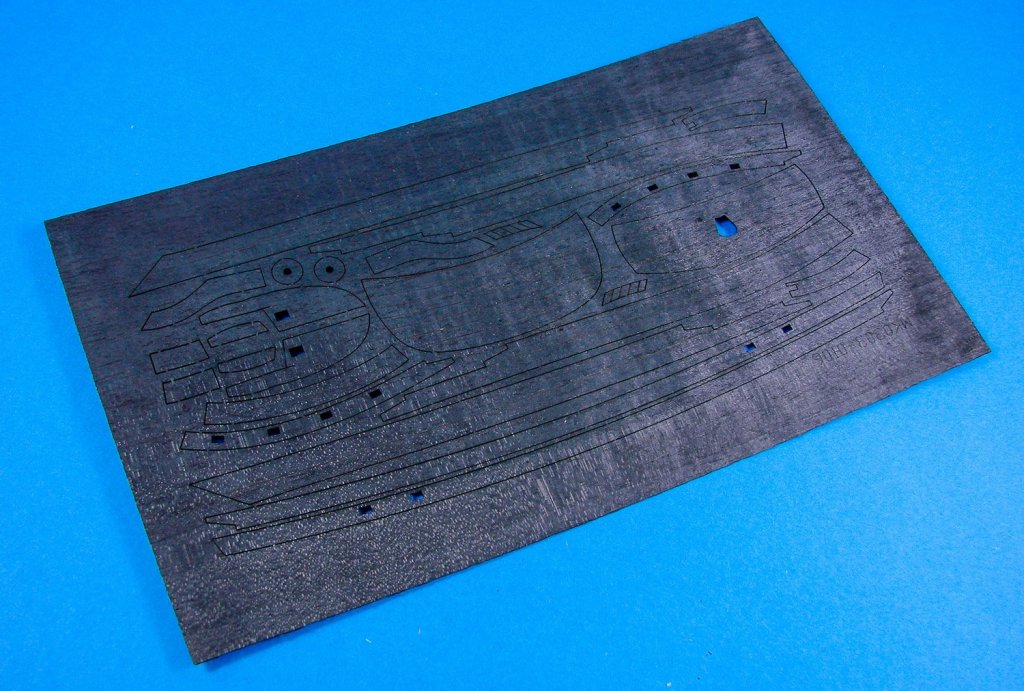
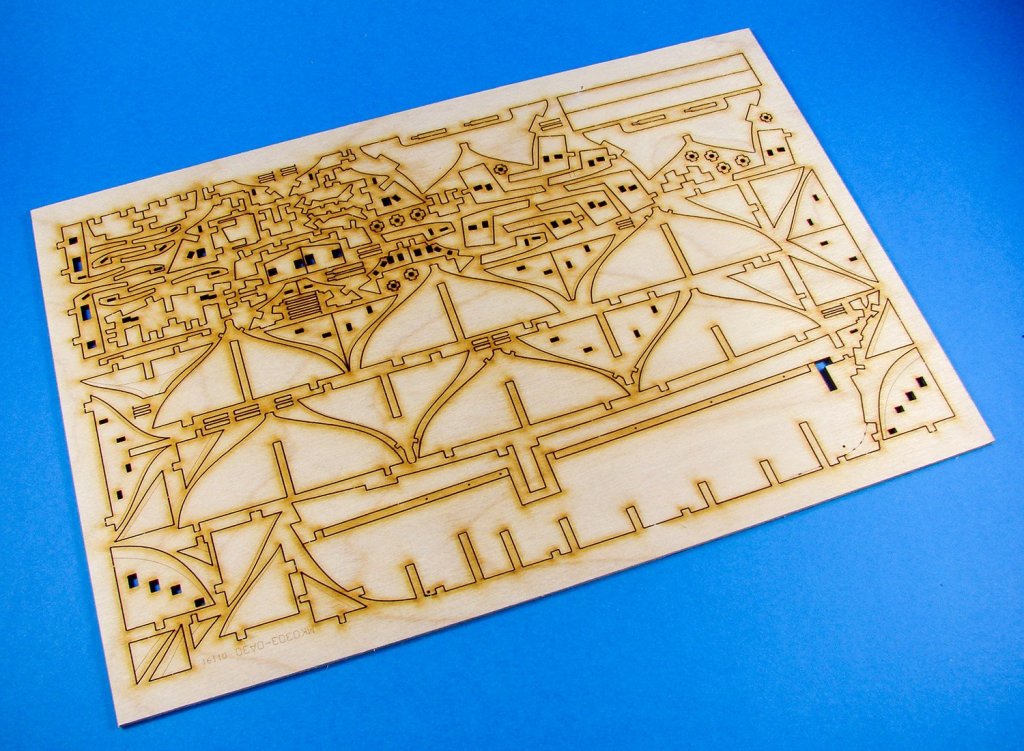
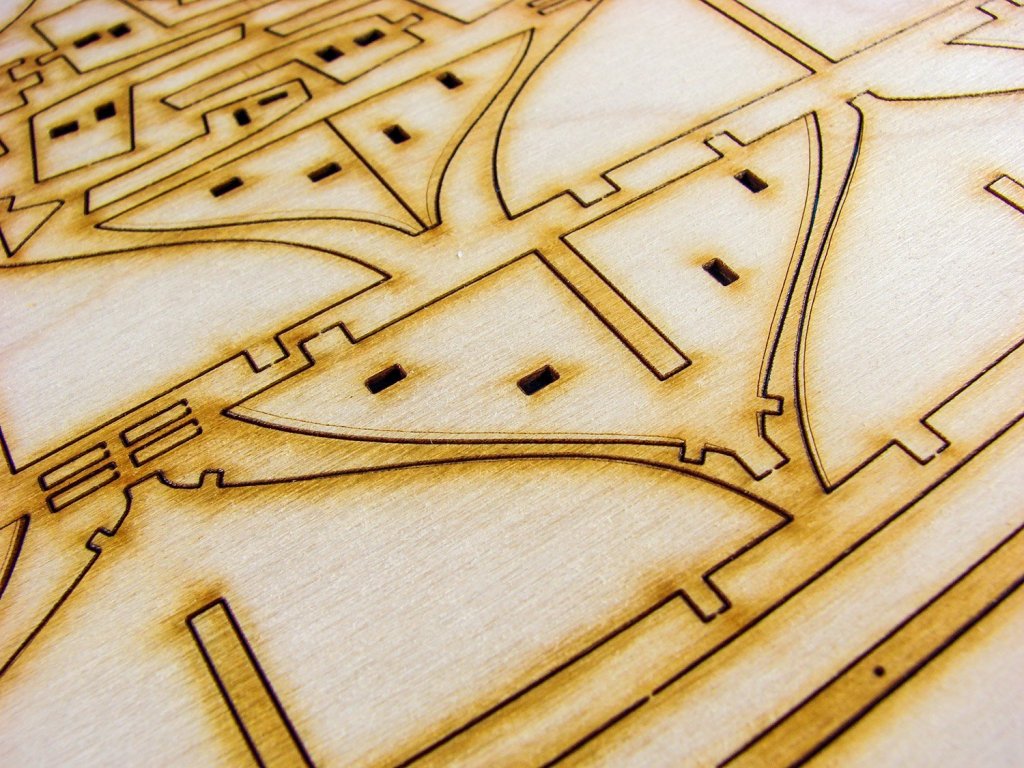
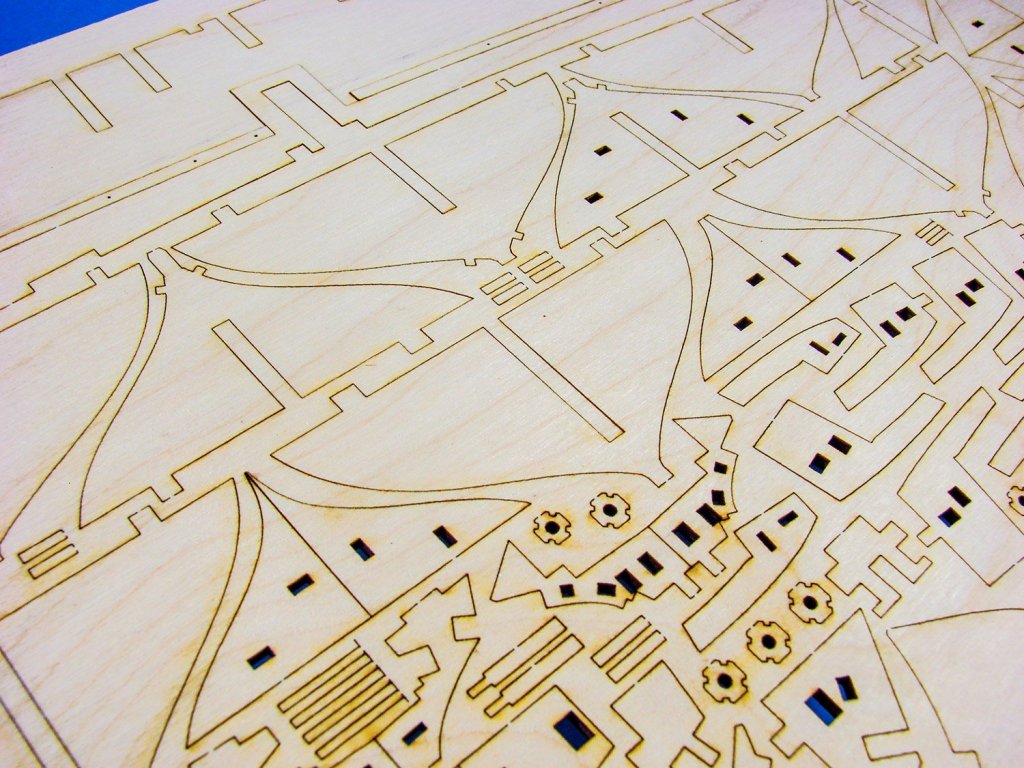
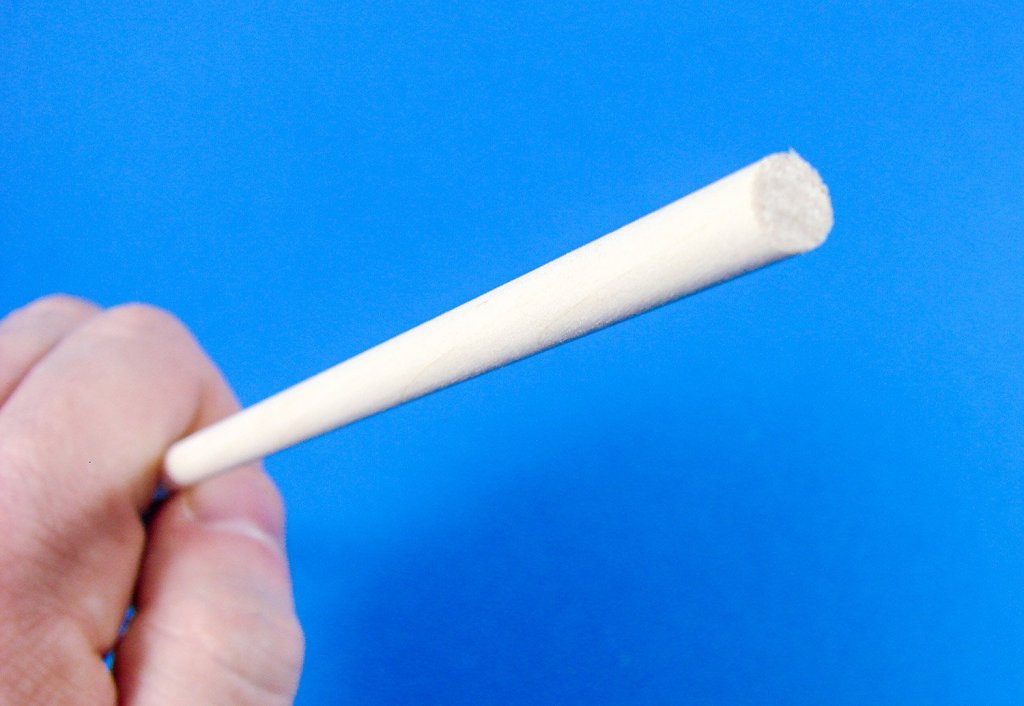
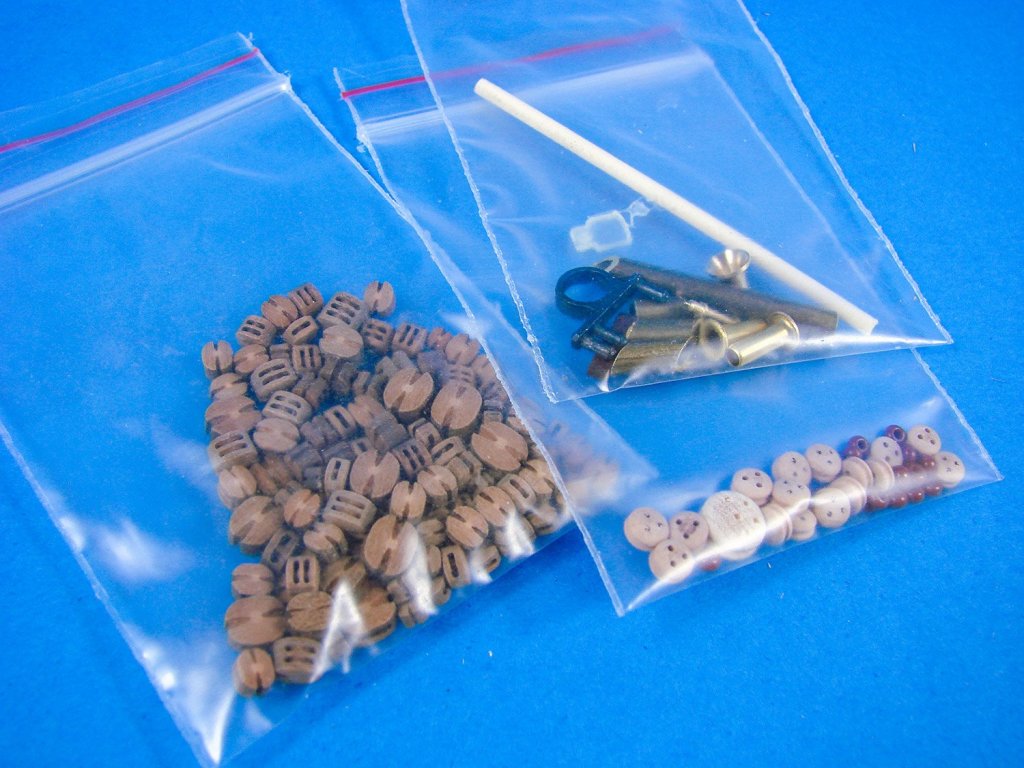
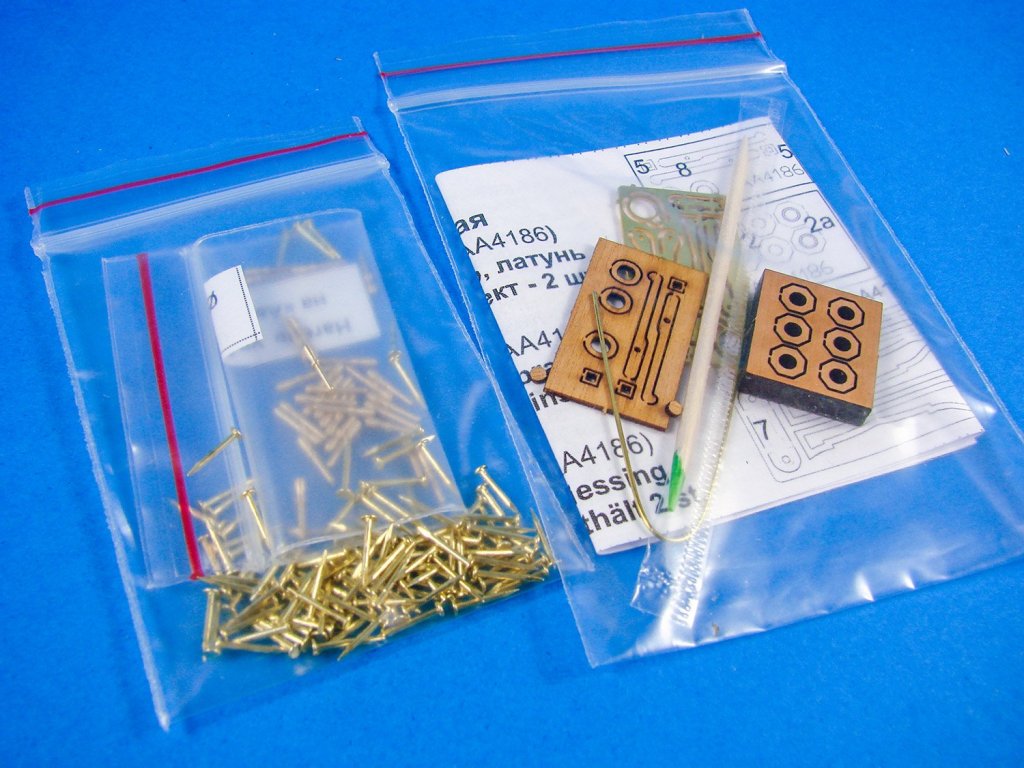
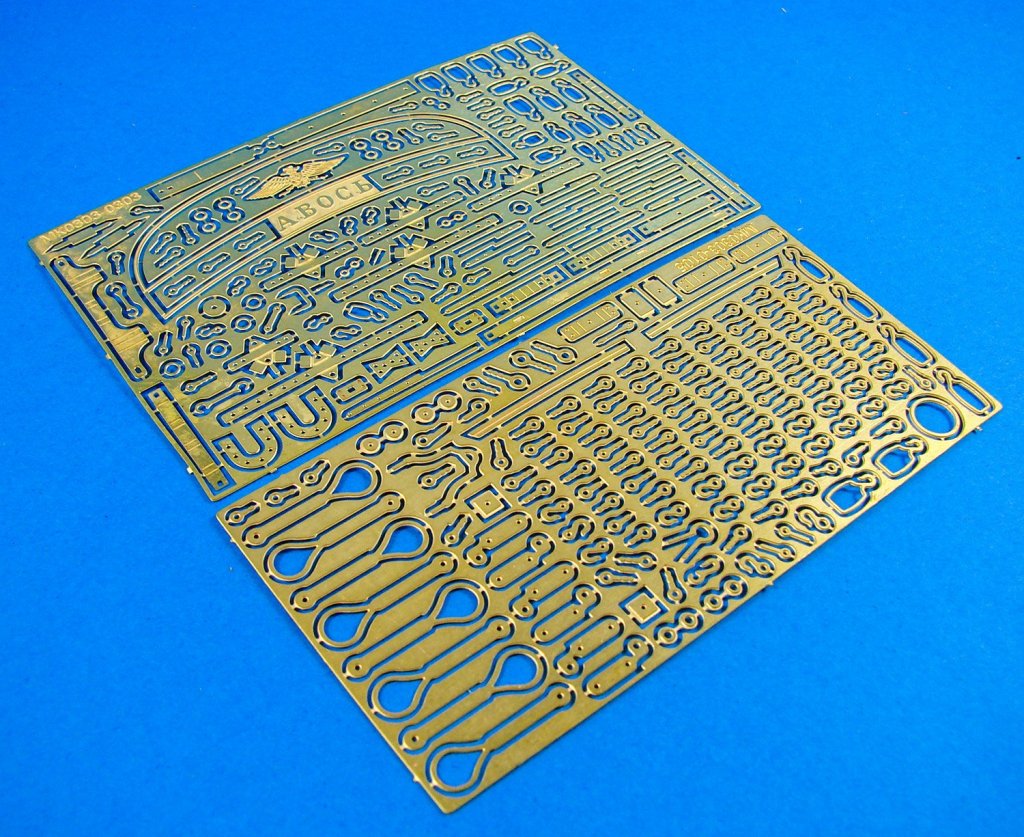
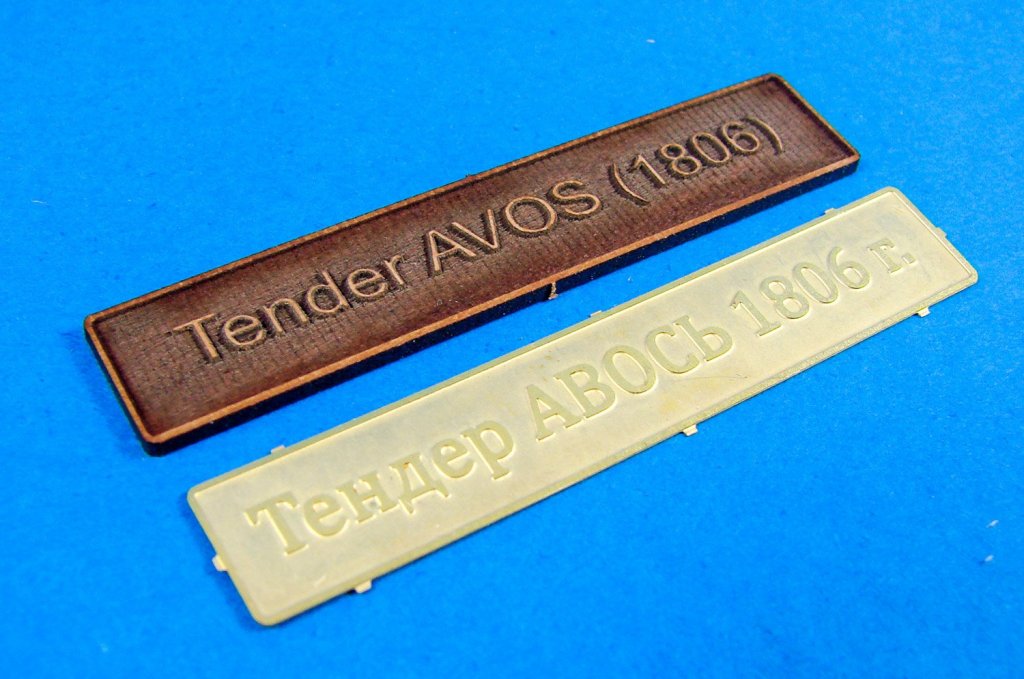
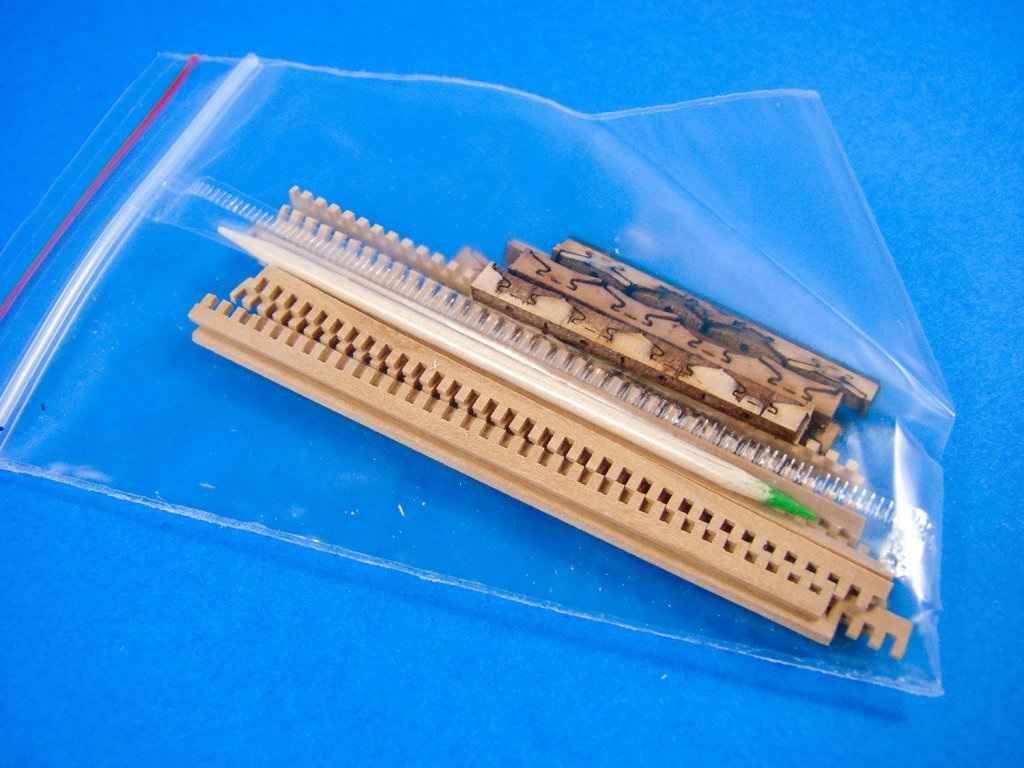
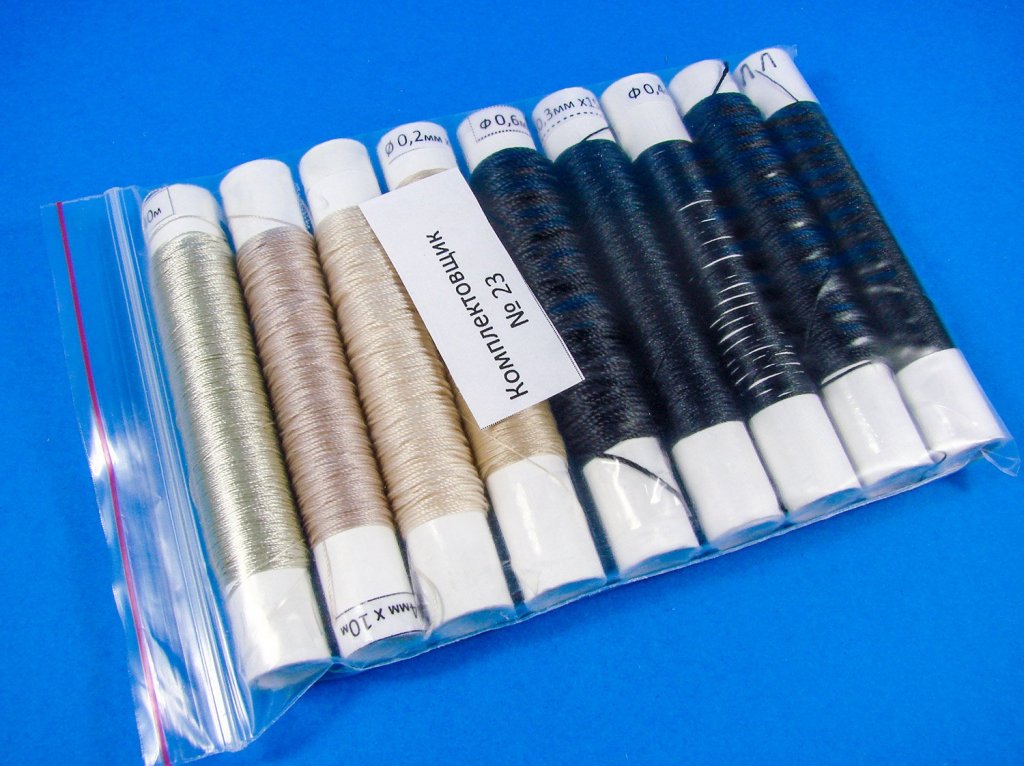
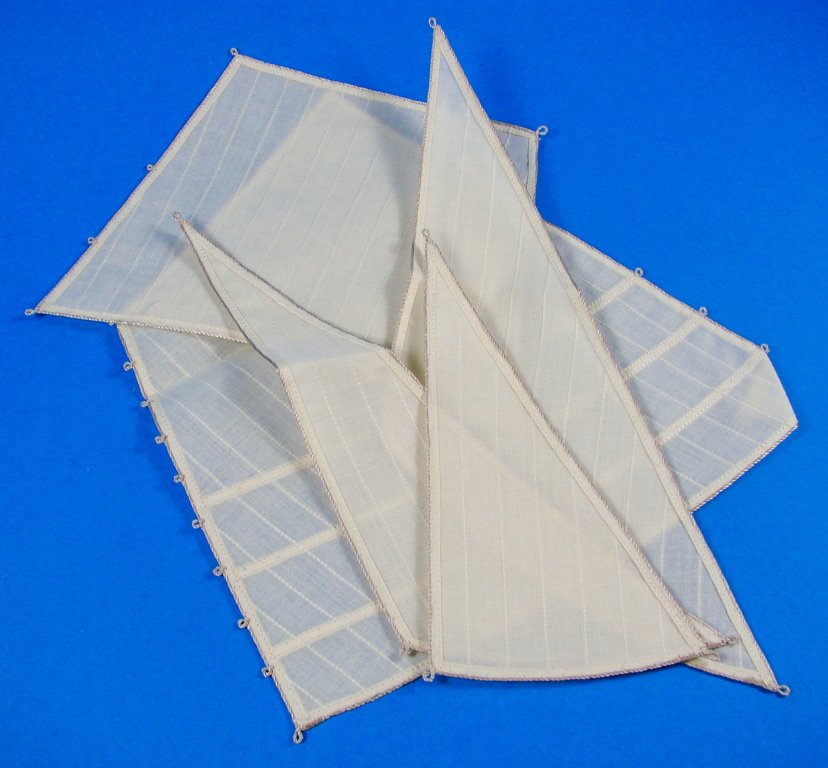
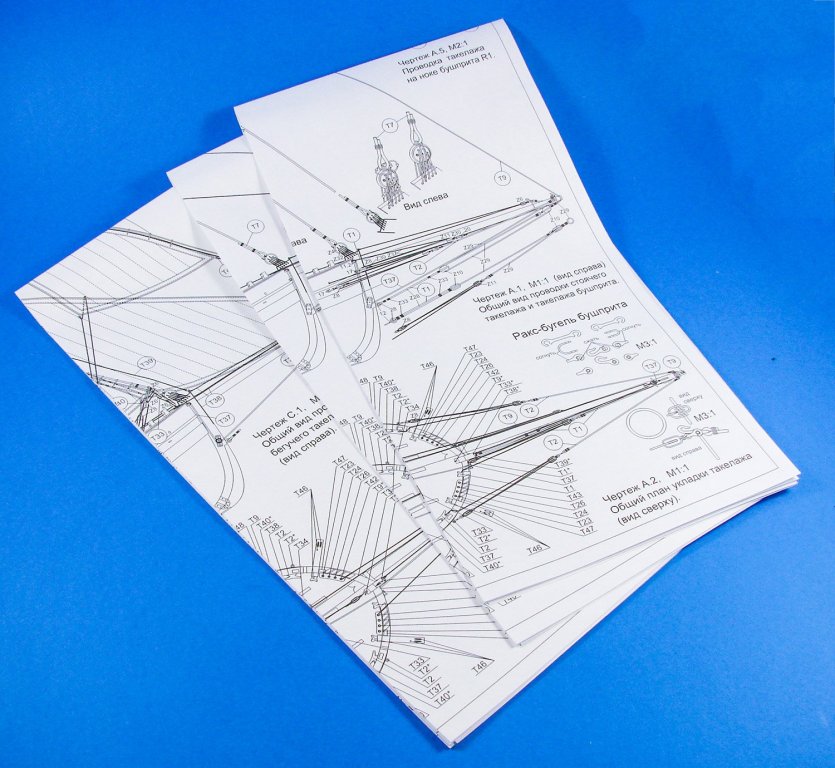
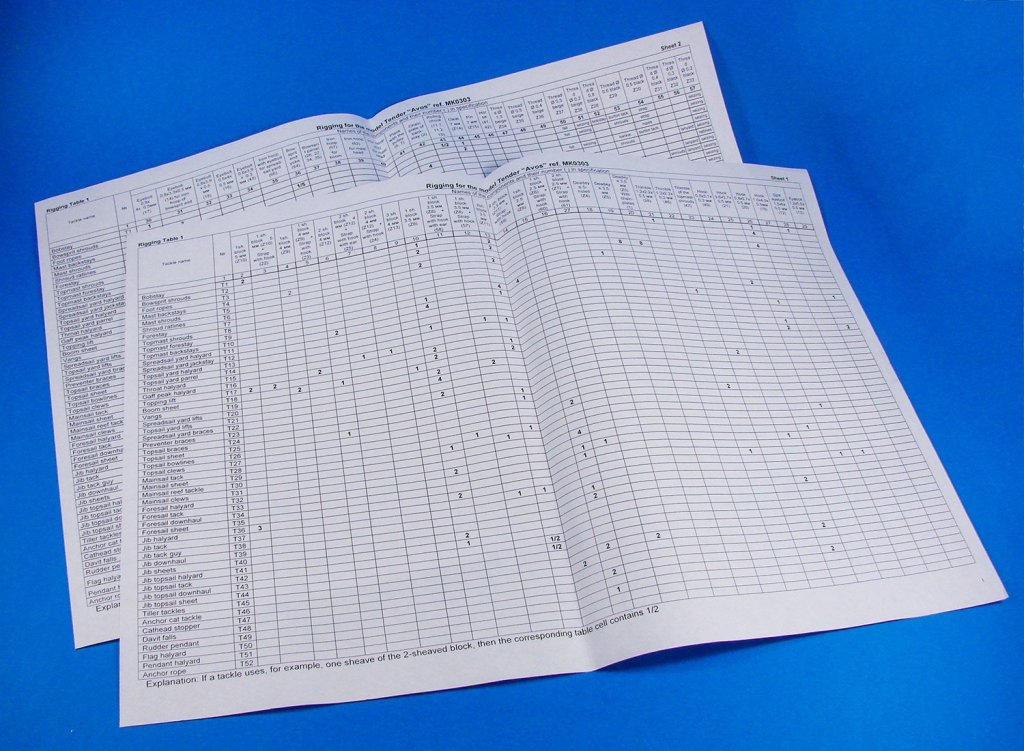
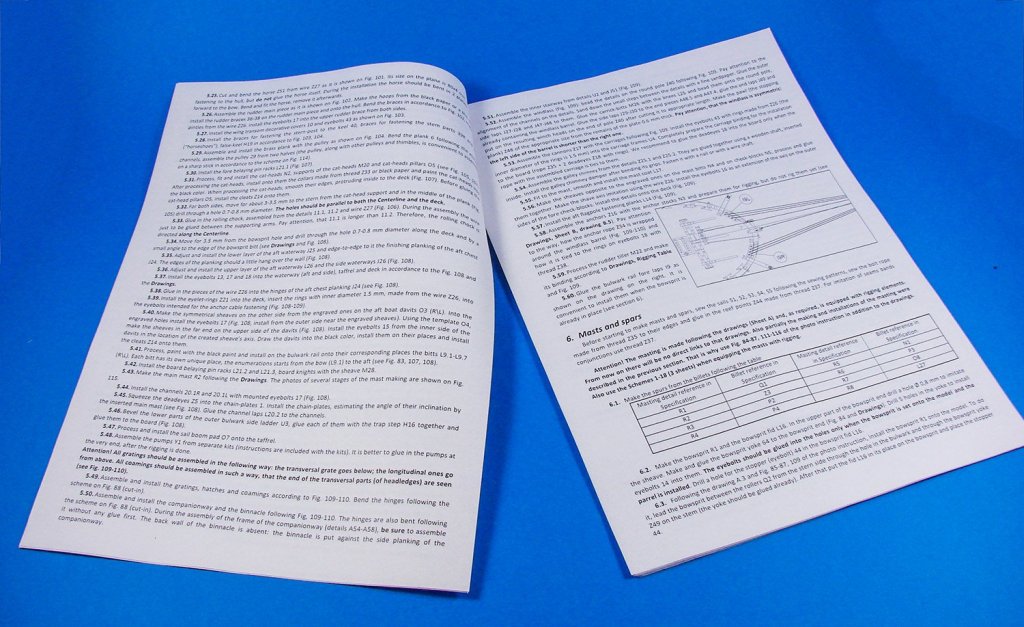
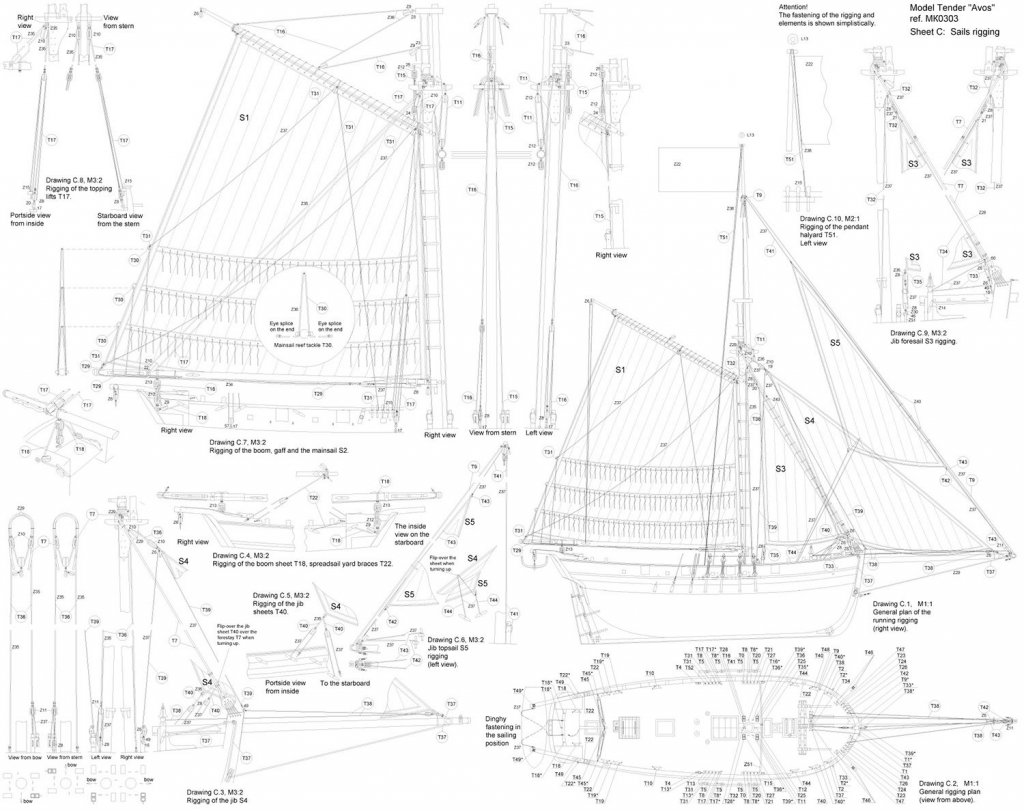
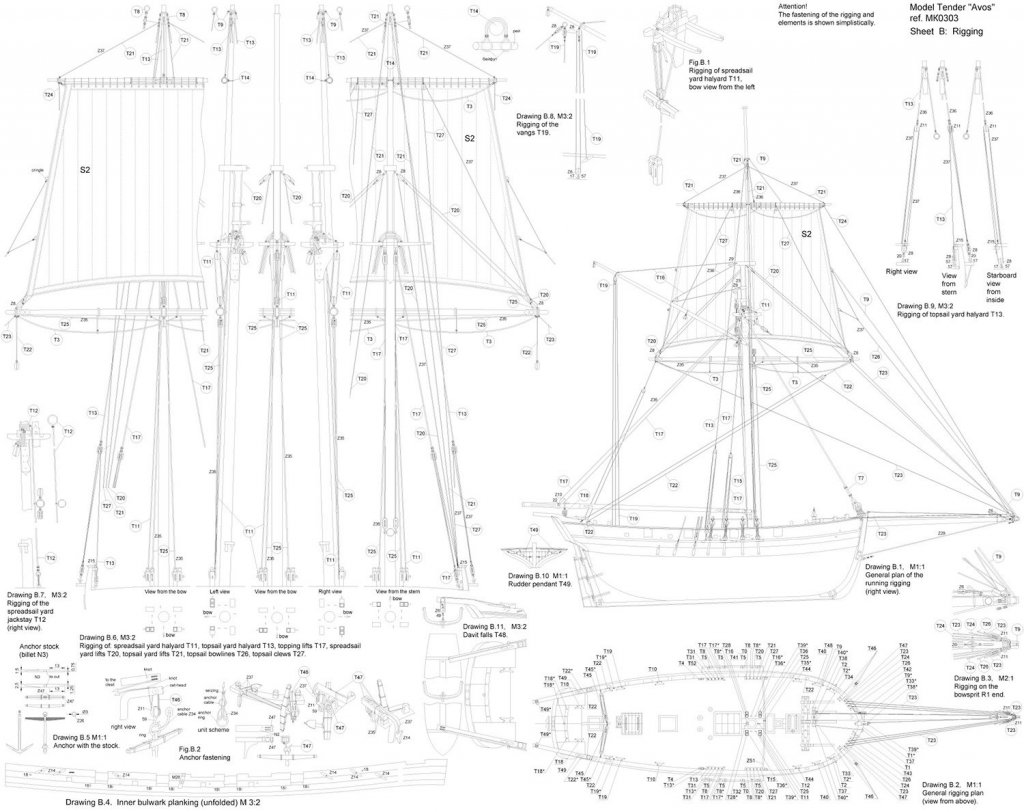
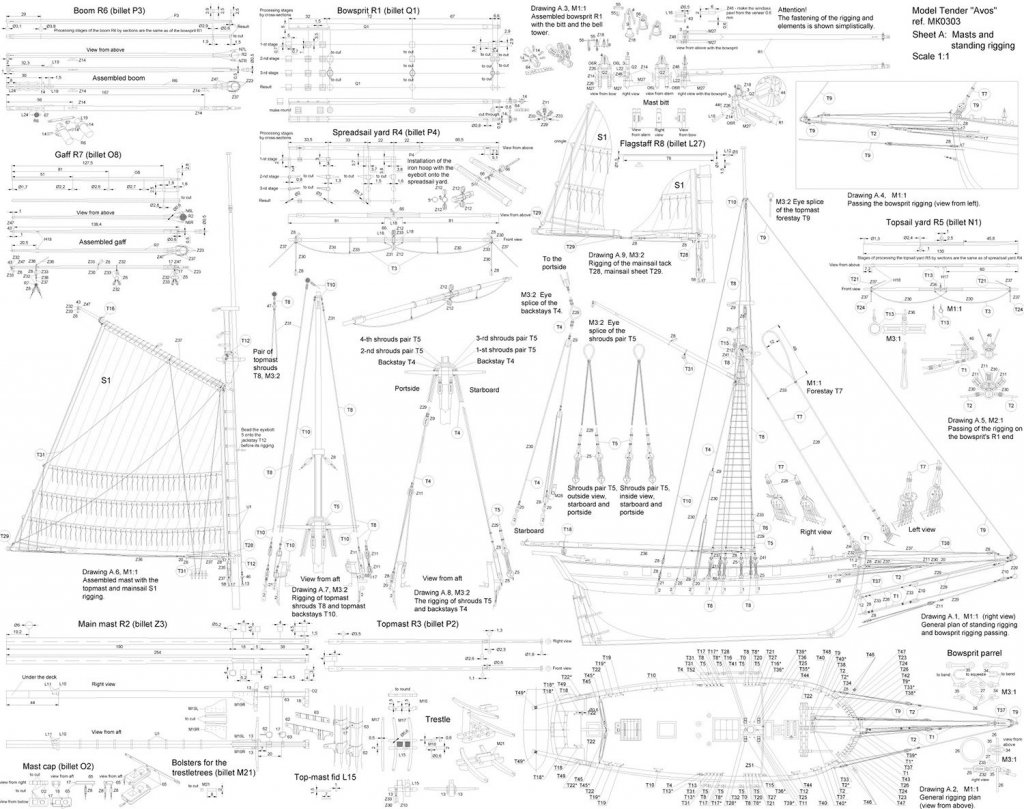
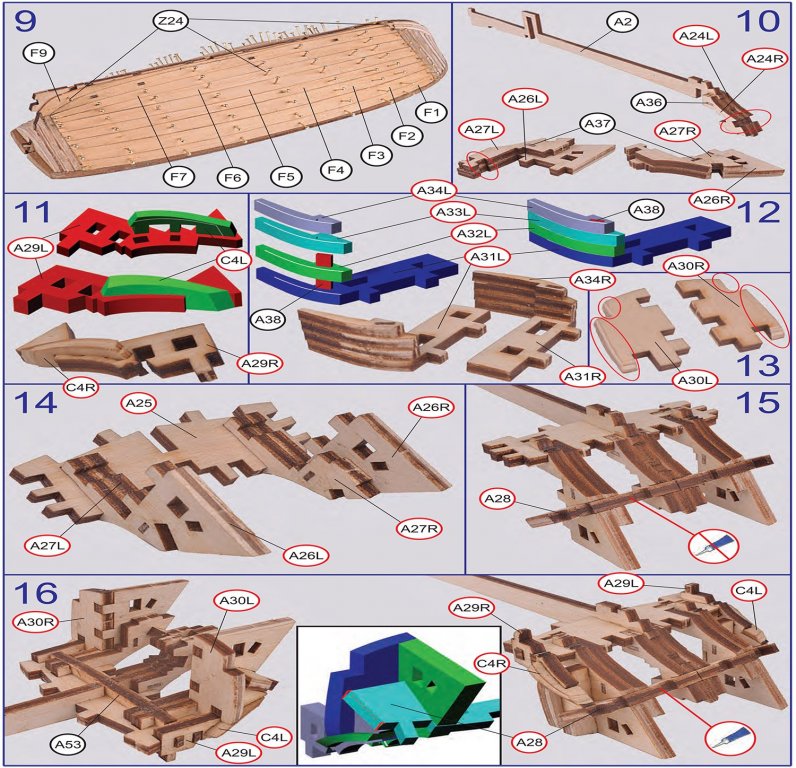
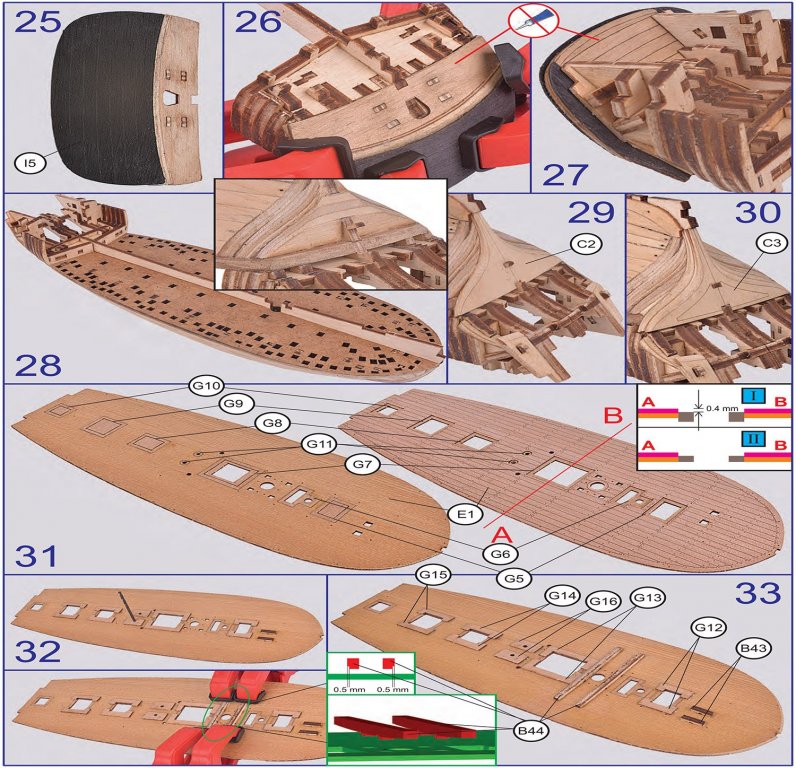
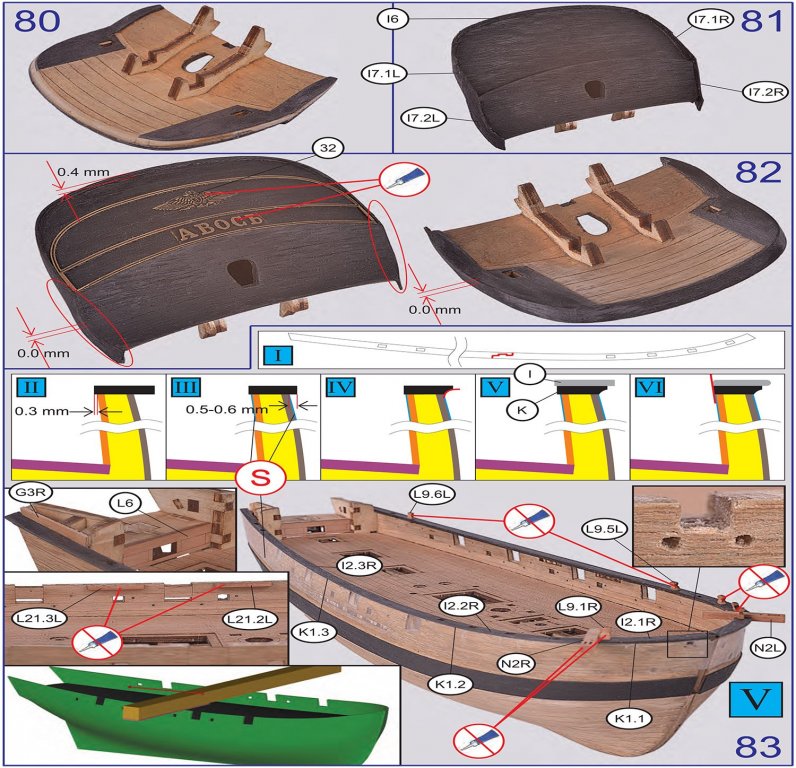
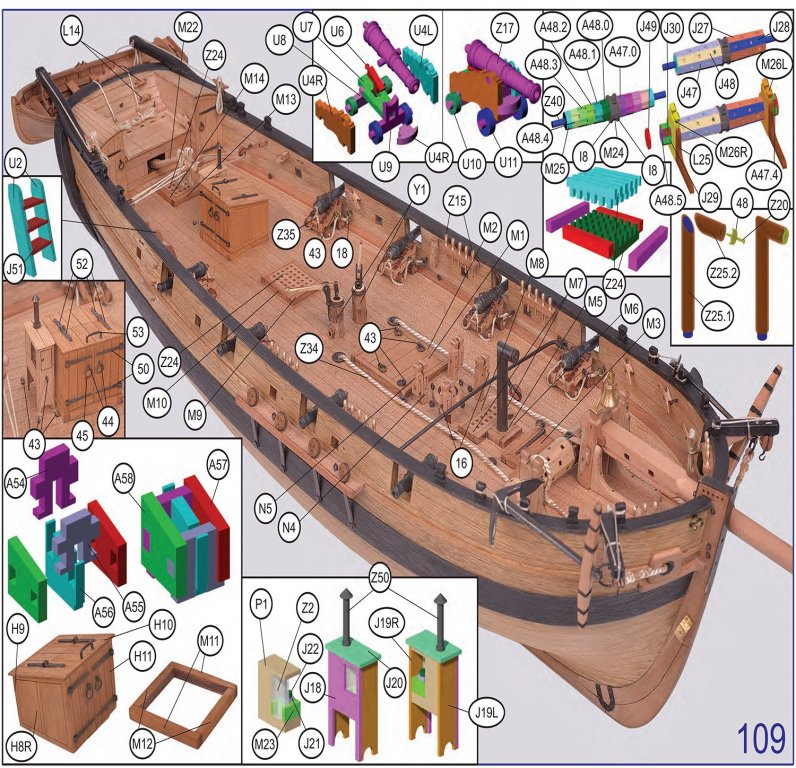
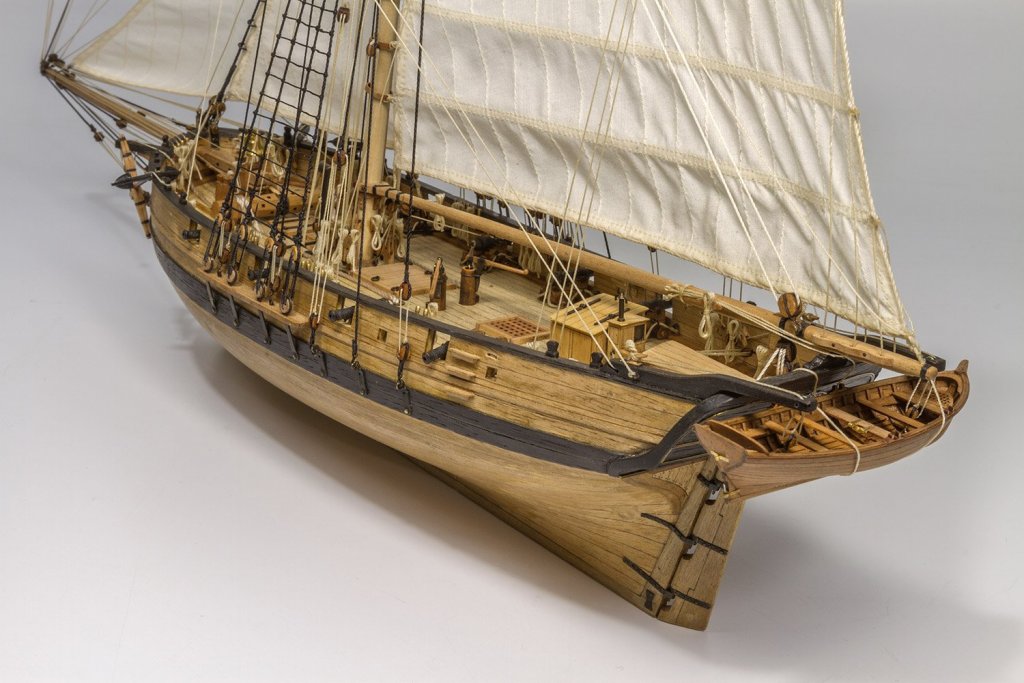
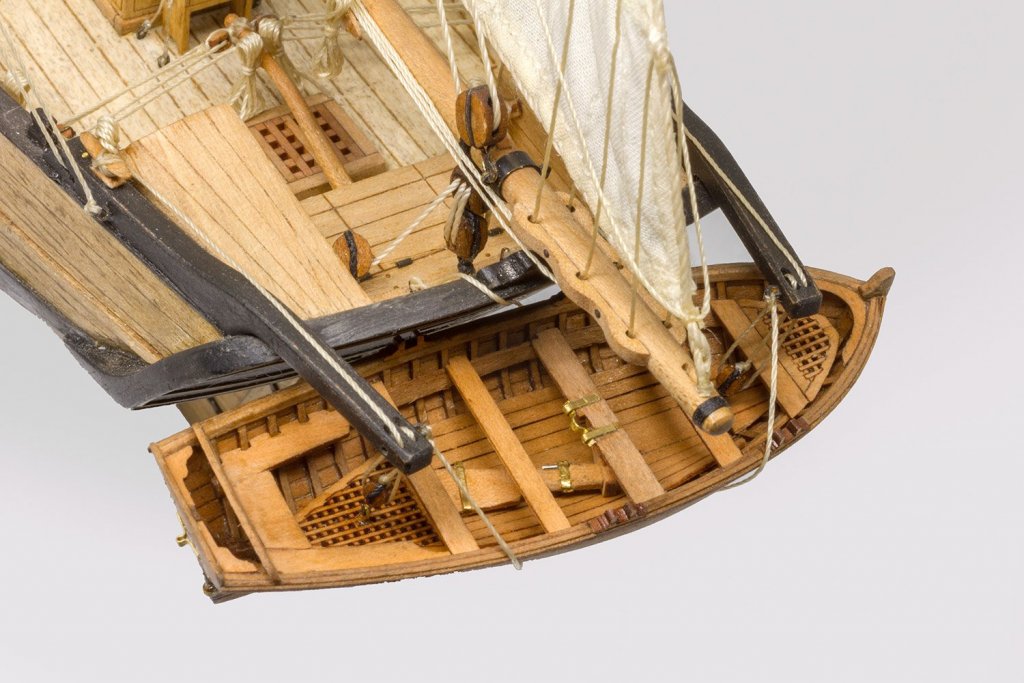
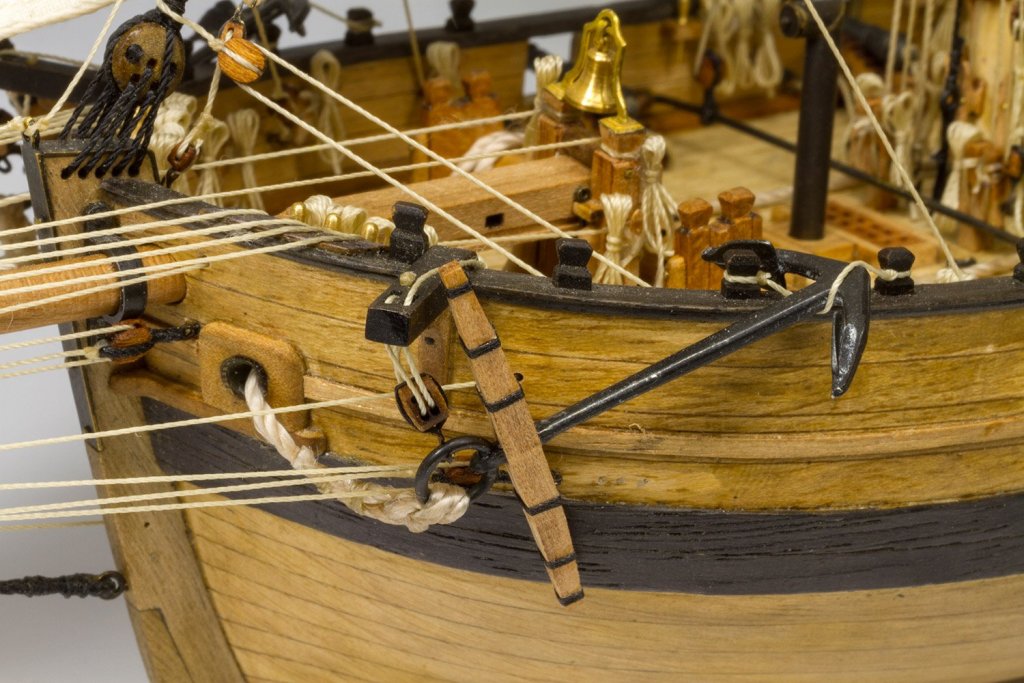
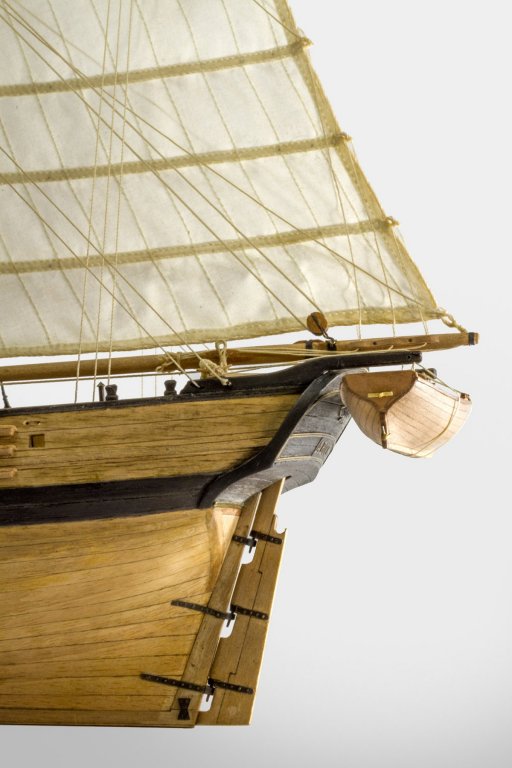
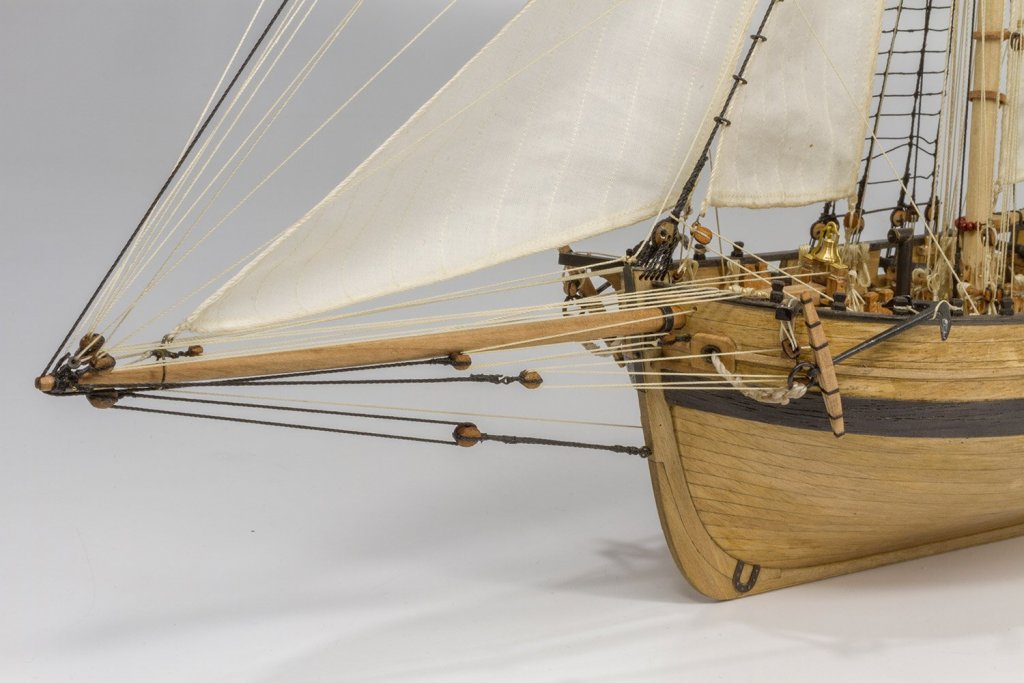
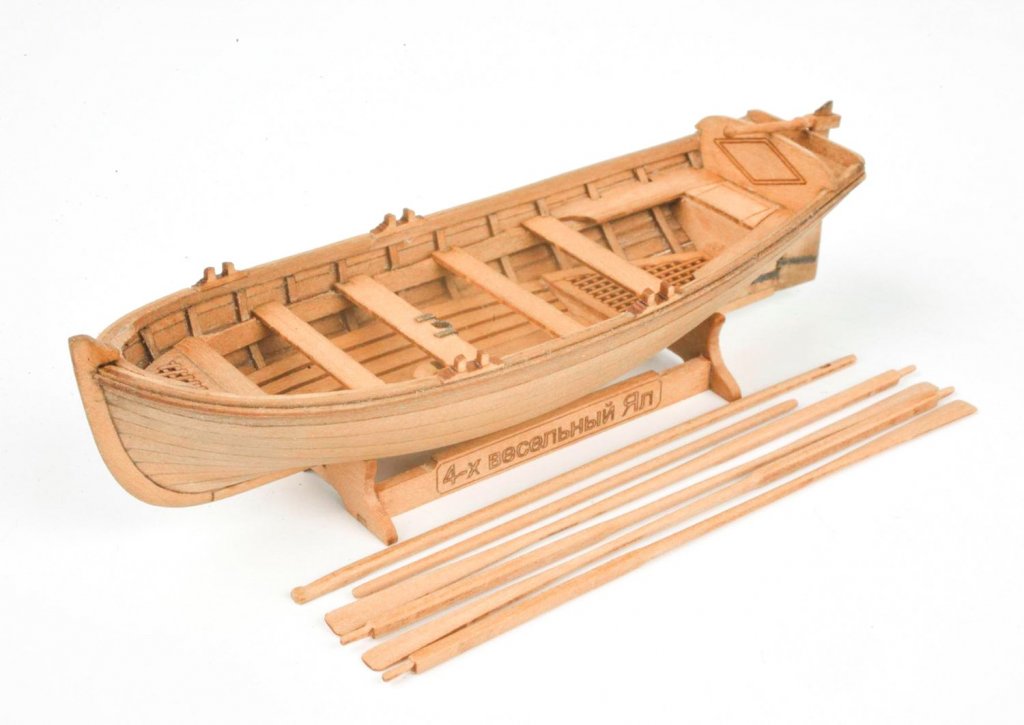
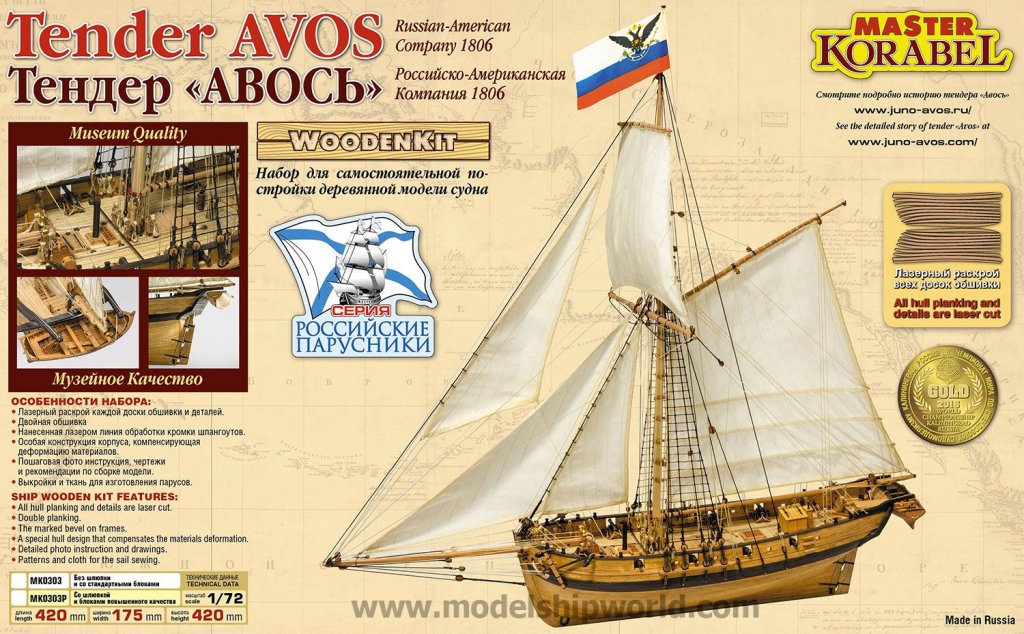
1:72 Tender ‘Avos’ (XS Edition) Master Korabel Catalogue # MK0303PSN Available from G.K. Modellbau for €225.00 "Avos" was an eight-gun tender which in was built in 1806 in Novo-Arkhangelsk, Russian America (now Sitka, Alaska). With a crew of 12 men, Avos was part of an expedition under the direction of Nikolai Rezanov. During the voyage along the Aleutian ridge to the port of St. Peter and Paul, the crew survived many storms, forcing them to stop at Fox islands for repair, and also save a mysterious “native” from the Attu island. To secure the Kuril Islands and Sakhalin, bring the local natives under Russian allegiance, and to force Japan to conclude trading relations with Russia, in 1807 the ships “Avos” and “Juno” conducted many military raids along the Kuril Islands coast. Here they raided the illegal Japanese settlements, which were originally those belonging to the previously banished Russian settlers. During the expedition, the tender “Avos”, using its 4-oared yawl, conducted many boardings of Japanese ships and several landing operations. Each time they forced large numbers of Japanese to flee, whilst burning and sinking their ships as scare tactics. During the 1808 shipping season, the tender “Avos”, under command of Lieutenant Sukin, was shipping goods to America. On 11th of October 1808, while sailing from Kadiak to Novo-Arkhangelsk, “Avos” was wrecked during a storm, near the coast of Chichagov island, near the Alexander archipelago. The kit We’ve been fortunate enough to watch the development of this kit unfold here on MSW, plus we also have a gallery for the completed model. The kit itself was released last year and has been available with instructions written in Russian, as befits the manufacturer. Now though, the kit has been issued with English instructions and is available for sale via various retailers. I have linked German website G.K. Modellbau at the top of this article as one such outlet to buy this kit. Offered in 1:72 scale, the completed length of the model is 420mm, with a beam of 175mm. The height is also a tidy 420mm, so the result will be a beautifully compact and highly detailed model that won’t take up too much of your bench space. First of all, there are numerous variants of this kit, with differing prices, aimed at giving the modeller exactly what he/she wants to work with. The options are as follows: Standard kit- MK0303P Pear - MK0303PX (no nails) Pear with nails - MK0303PXN Pear with nails and sails - MK0303PSN The kit we have been sent for review here is the XS release, which has the pear planking with laser-engraved nails, and a complete set of sails. Avos is supplied in a very attractive and yet relatively small box with nice, glossy artwork featuring images of the finished vessel, and details showing the pre-spiled planking that is included as standard. Other features are listed, such as the double-planked hull, laser-etched bevel marks on bulkheads etc. One thing that struck me about the box is the weight of it. It’s actually quite heavy and there’s certainly nothing left to rattle about inside it. Lifting the lid reveals a whole swathe of paperwork, in the form of plans, manual, inventory sheet, English instruction sheet to use in conjunction with the manual, and also the inclusion of the original inventory and instructions in Russian. These were put aside as I have no need for them. Kit contents are very neatly presented within. Parts are either supplied in bags, and/or wrapped in clear clingfilm or thin foam sheet. The only part not wrapped is the single length of dowel that sits at the edge of the box. It is also noted that Master Korabel’s earlier release of the 4-oared Yawl is included as this hangs from the behind the ship’s transom. This little 68mm long vessel is a kit in its own right, and we’ll look at it soon. The first pack of contents that I look at includes the hidden deck around which the model itself is constructed. This pack of parts is neatly wrapped in clingfilm, and there is an identifying number slip in the pack. As you can see from the image, Avos is quite small, but of a size which I imagine will make it quite tactile and also a nice side project if you want some respite from a larger vessel. Unwrapping everything, I’m of course drawn to the largest component which is what I call the hidden under-deck. This deck-shaped item is laser cut to shape and is of course deck-shaped, with it being a slice from a little lower than the actual deck part. Made from a form of MDF, you can’t help but notice all the square holes which are cut into it. This is the key to Master Korabel’s kit engineering and provides the key positions for all frames and bulkheads, both below and above this part. It’s almost like the Lego equivalent of kit building at this point, in the very loosest of terms. A series of parts are also included in this wrap, spread across five small pieces of timber. Lastly, a couple of lengths of brass wire are found here, in two different gauges. Now we come to the 4-oared Yawl which is also available as a separate item. This mini kit is presented in a clear zip-lock wallet with a set of colour-printed instructions which follow the Avos format, and other illustrations and inventories. Master Korabel have produced the main parts for this from a sheet of very thin, laser-cut pearwood. Despite how thin this is, the laser has made a surprisingly small amount of scorch when cutting. Looking at the parts, you’ll see that a complete set of pre-spiled planks are supplied, saving the modeller a whole load of time and enabling an accurate and authentic appearance to this little gem. You’ll find pretty much all the constructiona parts here except for the oars and keel parts which are on a separate pearwood sheet, along with a nice display stand for the model…should you not wish to hang it from the transom of Avos. Again, we are also supplied with some brass wire and shim for such things as hanging the rudder and making the mast clamp etc. The whole yawl is built upon a jig which comes on a separate sheet of ply. None of these jig elements will become a part of the finished model, so everything will be in pear. That will certainly complement the pear exterior of the Avos hull, if you purchase that option. Once assembled, the jog is then covered with clingfilm and the multipart inner keel is inserted, followed by the ribs and then the pre-shaped planks. This is then removed from the jig and fitted out. The results are very impressive, as can be seen here. To find the English language version of the Yawl instructions, these are located at the end of the text instructions for the main Avos vessel. Wrapped in both clingfilm and thin foam sheet, the remainder of the timber sheets are located at the very bottom of the box. Now we can see the actual deck which sits atop a series of frames that raise it from the hidden under-deck and form the actual ship frames onto which you will plank the hull. No deck planking to be done though as this part is entirely laser-etched, and it looks VERY good! Note also the etched treenails. If you’re concerned about too much uniformity, you can also mask this in several stages and apply a finishing varnish in two or three slightly varying colours. That would look quite impressive. Of course, the laser reproduction planks are shown to notch into the edge plank, as they would. Various cut-outs are included for deck fittings and main mast. A plywood sheet contains all of the frame elements that plug into the upper side of the hidden under-deck part. None of these parts have numbers, and they need to be checked against the drawings which show the sheets and their respective numbered parts. There is more scorching on the cut side, as is to be expected, but remember, all of the frames will be hidden anyway. Another zip-lock bag holds a small number of sheets comprising ply and pearwood. Note the ply sheet holds thee stern frames, and that these are engraved so you can accurately bevel them. Transom parts are also included here. Here we have a sheet of wood, one of 2mm and one of 1.2mm. On the 2mm sheet, you’ll be able to identify hatches, breasthooks, knees, bibs, trestletrees, rudder tiller etc. The 1.2mm sheet contains parts such as transom finishing plate, pump supports, various coamings. Etch and cutting quality is first rate. This model is of course double-planked. The first layer is manufactured in 1.4mm plywood and these are laser-cut as pre-shaped components. You’ll also note the etched dots which line up with the frames and are to be used for nailing positions. The garboard plank also has locating holes which align with the formers to ensure absolute placement, and then of course, all other planks after it should be perfectly positioned. Three more timber sheets are now supplied. These are in regular timber, 1.5mm ply and 1.2mm stained black ply. A quick glance across these will easily identify the cannon carriages, bulwark rails, mast hoops, channels, bowsprit parts, yardarm cleats, windlass knees, etc. One thing to mention here is that the black stained ply is actually quite a dense colour, and not as grainy as my photography makes it out. If you have any concerns, you can always mask and paint the parts black anyway, but it shouldn’t be necessary. Now we come to our first sheet of thin pearwood planking, but this time, for the inner bulwarks. These are provided as single port/starboard items, with the actual planking runs and nails laser etched into the surface. This thin 0.6mm timber also provides parts for taffrail inner planking, toilet/latrine doors, rudder lap plate, false keel etc. We now see more of that lovely coloured pearwood with these next two sheets which contain mirrored sets of planks for port and starboard hull sides. As with the inner bulwark, these are also engraved with nail holes, plus the plank lengths. They are also all pre-spiled and ready to fit directly to the hull. Of course, outer bulwarks are supplied as per the inner ones. Other parts on these sheets include latrine roof, transom lap, compass case, aft chest parts, windlass barrel etc. We still aren’t done with black plywood yet as this 0.6mm sheet testifies to. Here, you will find things such as wales, bulwark rails, taffrail finishing planks, plus numerous other elements. Our last sheet of timber is this sheet of 3mm ply. It’s also the largest sheet in the Avos kit. A lot of the element here are quite obvious, such as the bevel-engraved lower hull bulkheads and keel frame. There are a good number of other parts here that pertain to various other structures, such as the stern, and these are designed to lock into each other and then into the false under-deck as per the rest of the various structure frames. It’s also good to see that we are also supplied with a stand onto which to mount our finished model. Coming away from the sheet timber materials, we now come to the packets which contain various deck fittings and other detail parts. These tend to be sorted into bags of differing components. The blocks and deadeyes look to be of exceptional quality with nothing mis-made as I’ve seen in some previous model ship kits. In 1:72, the cannon are tiny, but they look really great! Two metal anchors are also supplied. A whitish powder exists on the anchors, but this is easily wiped away with a damp cloth. Here we have some brass plank pins for the hull first planking, and a small kit which contains parts for the two deck bilge pumps. Two photo-etch frets are included in this release, of 0.3mm and 0.5mm thickness, respectively. Various items such as chain plates, mast details, ships bell mounting, latrine door fittings, rudder metalwork, block hooks and transom details are to be found here. There’s quite a lot of PE to attach and all of it is superbly made. I deal with photo-etch a lot for my magazine work, and I know this to be high quality and with reasonably small tags holding things in place. A fine razor saw would be ideal for removing parts, followed by clean-up with a jeweller’s file. Two name plates are included for the display base; a brass one in Russian and an English one made from a small piece of laser-engraved pearwood. A last packet of parts includes items to build the deck gratings and cleats. There’s also a toothpick in a little sleeve. One end is green, and I presume this is for applying small quantities of PVA or superglue during assembly. A screen-printed flag is included. Of course, we need some cord to rig this model and nine spools of this are included in various colours. Cord quality is high with no fuzziness. This particular version of the Avos kit contains a full set of sails. There are five linen-coloured sails, all cut to size, sewn and fitted with bolt ropes. These really are excellent. Master Korabel also sells this set separately, in case you purchased one version that didn’t have them, and you decided you did want sails after all! A set of three large plan sheets are included with this release, although the annotation is in Russian. However, three smaller sheets have English labelling and will provide all you need to reference your build. This allows you to use the larger drawings still, but you have the translations on the smaller sheets. A complete rigging inventory is also included. The instructions for Avos are driven by photo-led manual with each step of hull construction clearly shown with all parts clearly referenced. Some CAD illustration accompanies these photos, fully clarifying any areas you may be unsure about. The photo instructions are designed to be used in conjunction with a set of printed instructions. Together, these should make Avos assembly as straightforward as is possible to get. A whole series of drawings are also included in this publication, showing the various rigging and seizing details that you’ll need. This is a very nice touch. Conclusion This is my first time with a Master Korabel kit, and I very much like their entire approach, from packaging, through to kit design, timber quality, instructions and plans etc. It’s very much a quality product and you can tell that the company have taken real pride in their product. Being able to buy different options to suit your wallet or approach, is also a nice idea. When finished, Avos isn’t a big model, but she is thoroughly detailed with quality parts. Some contemporary European manufacturers could learn a thing or two from this Russian manufacturer. Highly recommended! My sincere thanks to Master Korabel for the review sample seen in this article. Master Korabel has distributors in the USA, Canada, Australia, Europe and is now looking for partners in England. PHOTOS OF FINISHED MODEL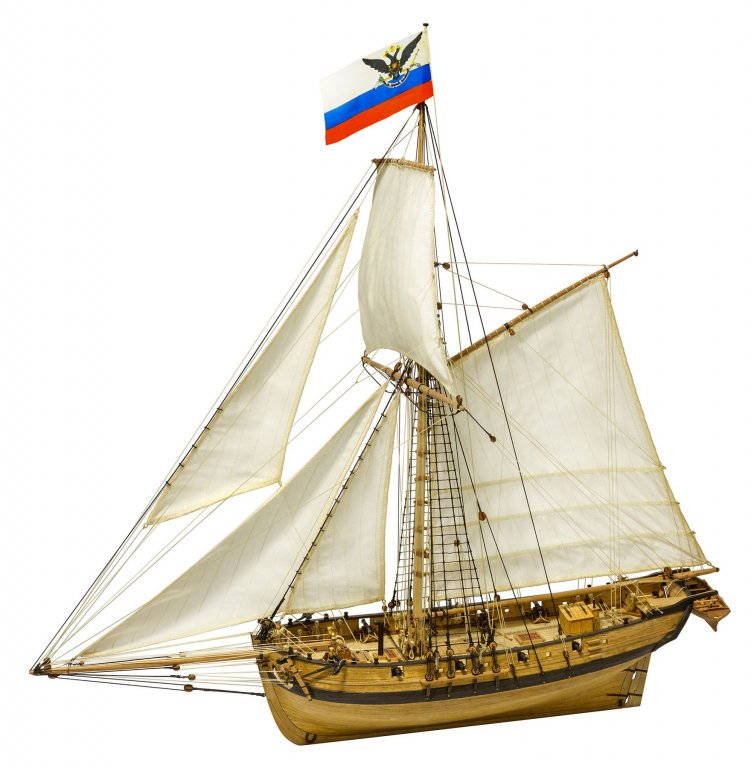


-
You build in card better than some guys I know who work in scale plastic! Can't wait to see this come together 👍
-
I'd be seriously proud of that end-product! Looks total quality.