


Ray
-
Posts
404 -
Joined
-
Last visited
Content Type
Profiles
Forums
Gallery
Events
Posts posted by Ray
-
-
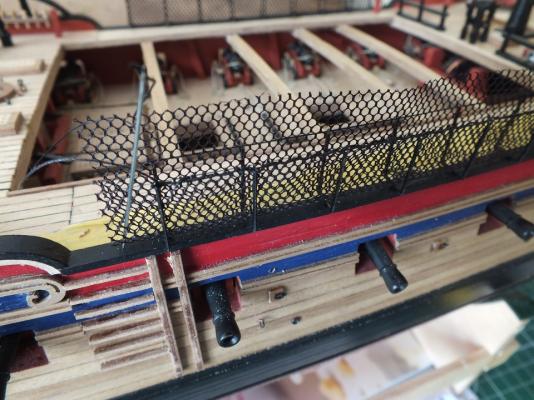
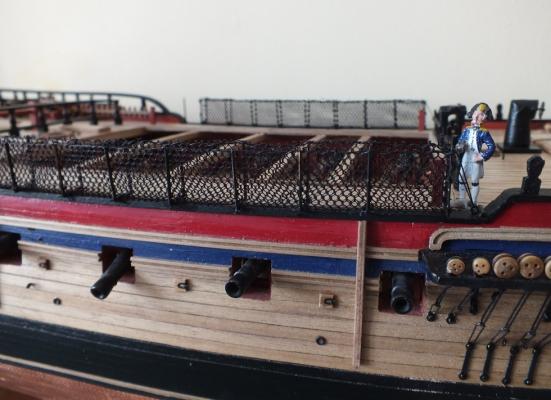
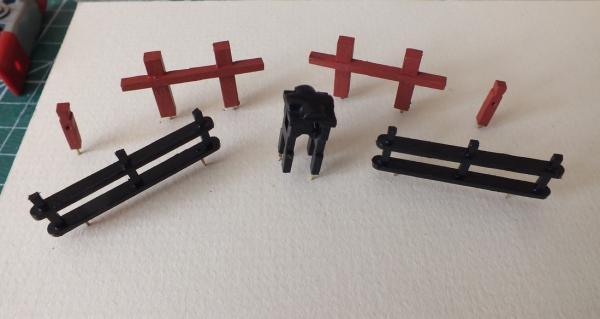
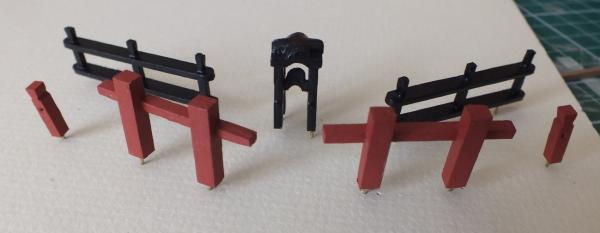
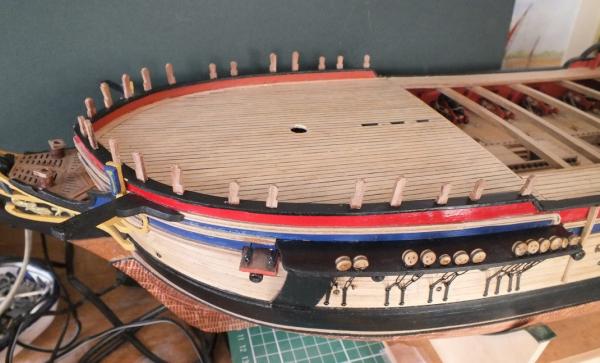
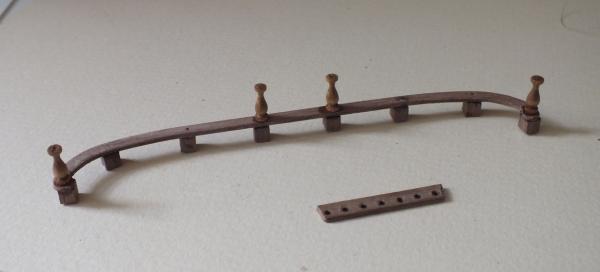
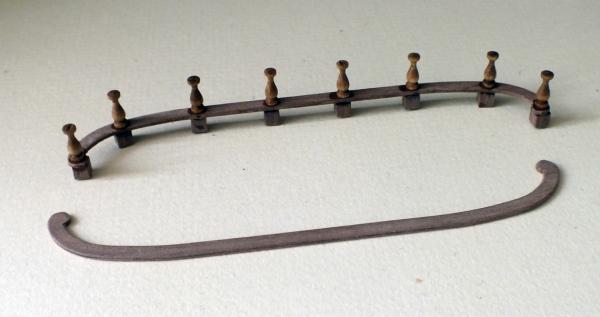
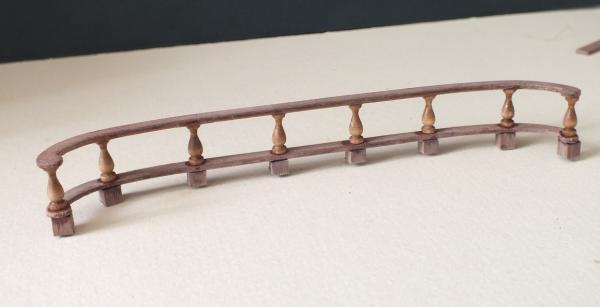
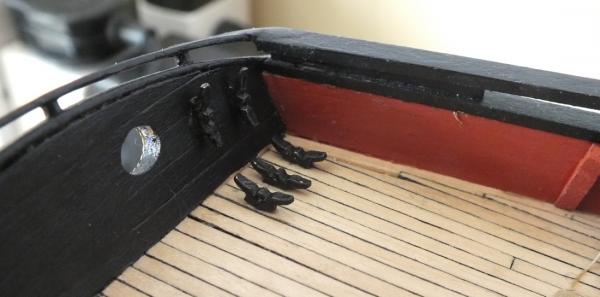
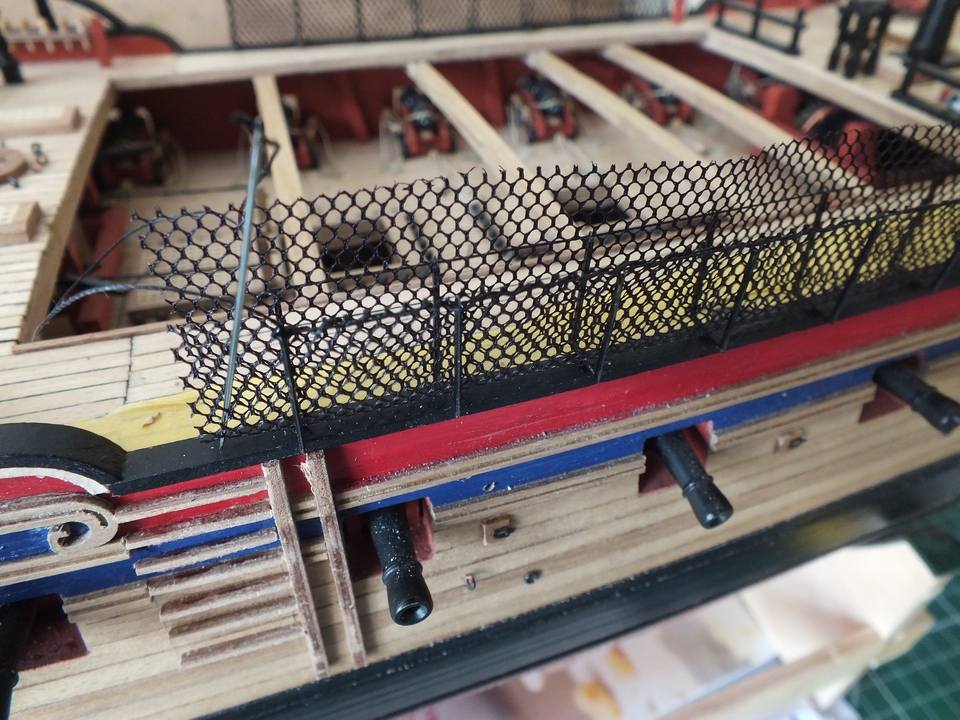
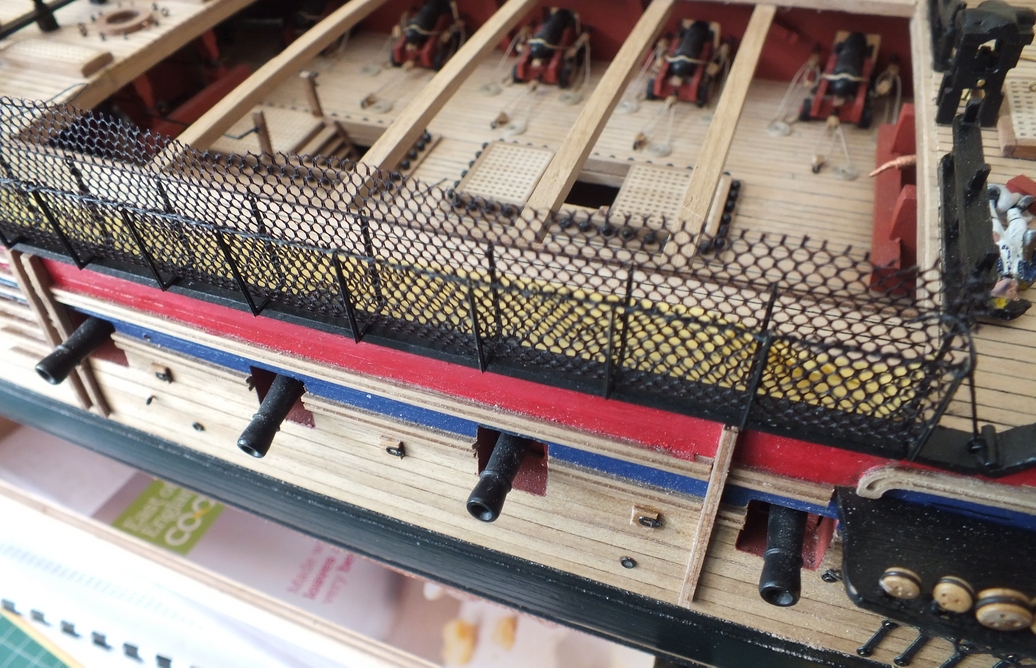
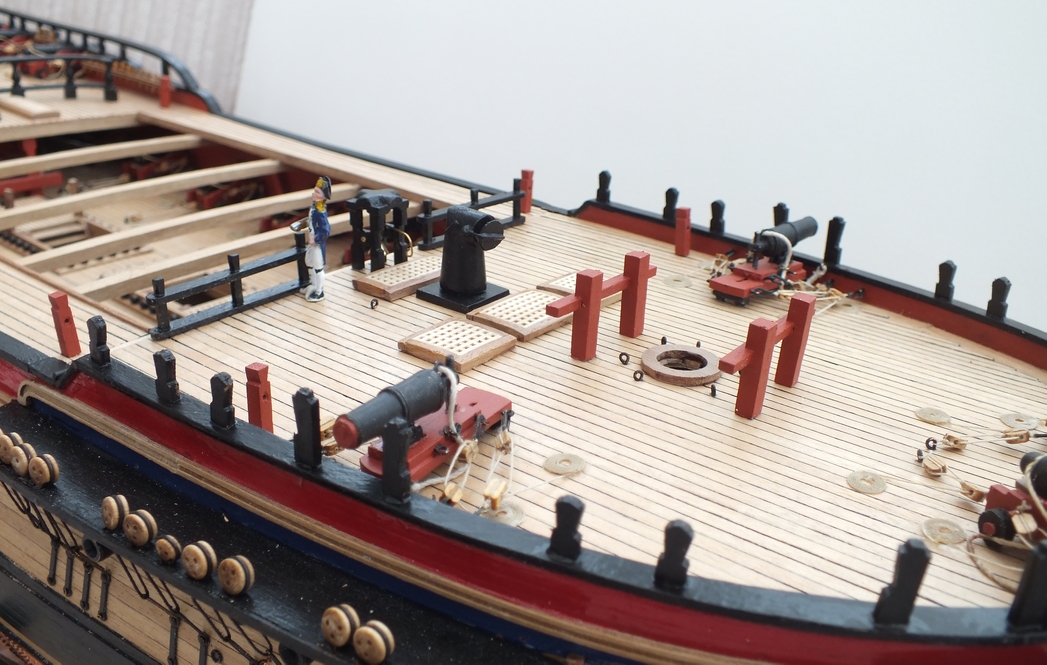
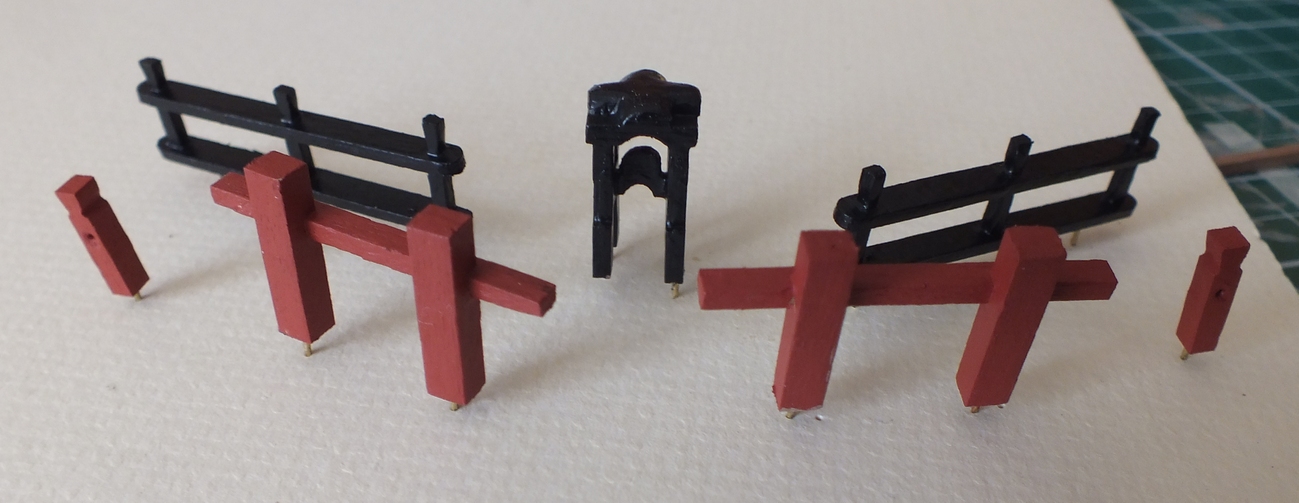
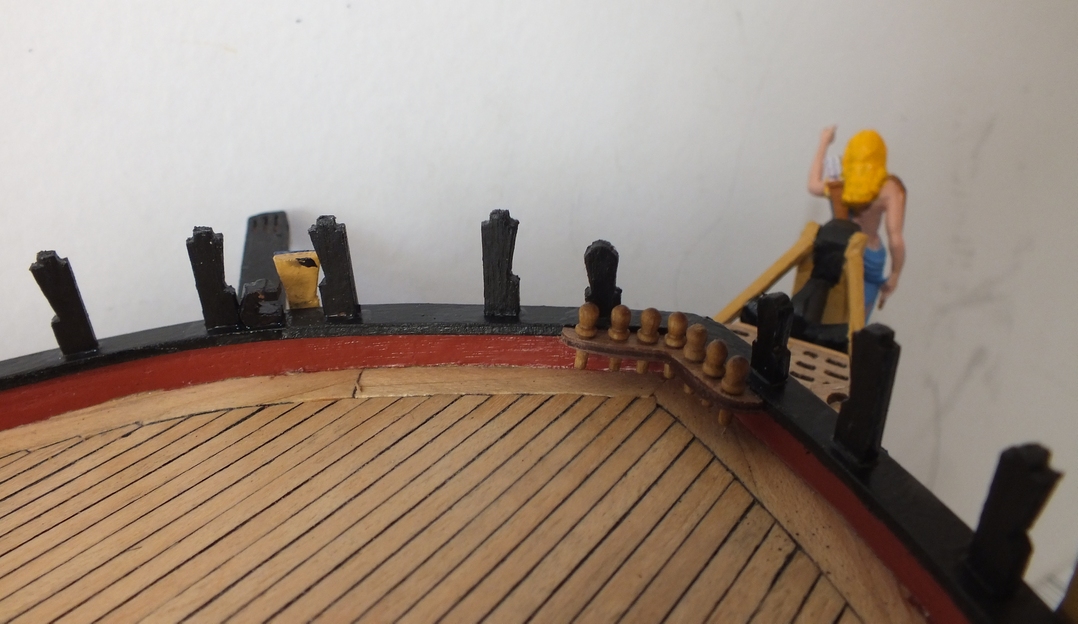
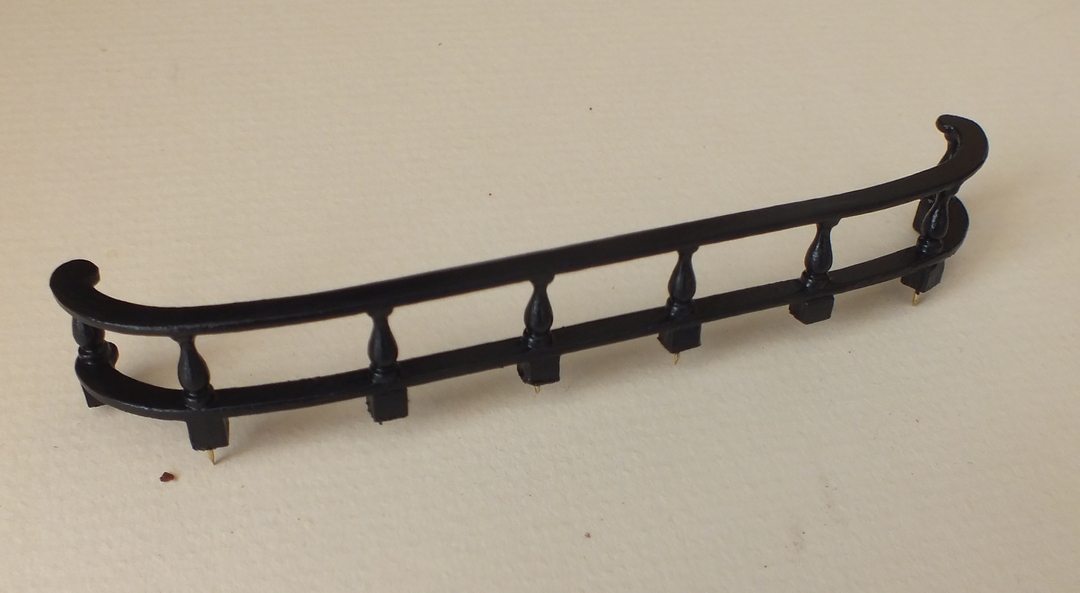
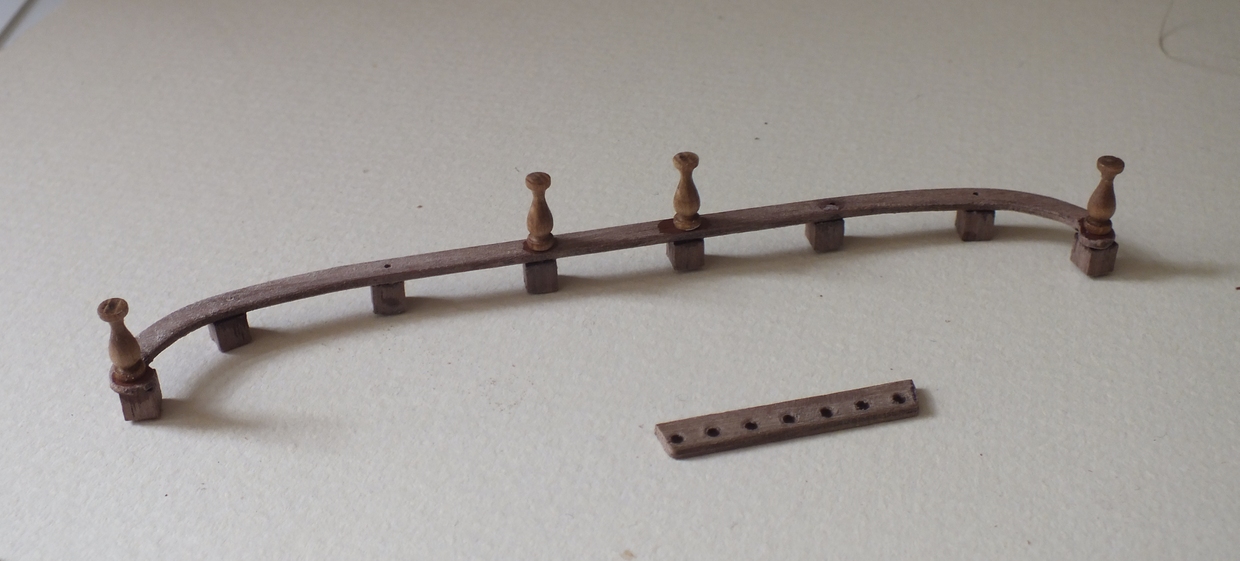
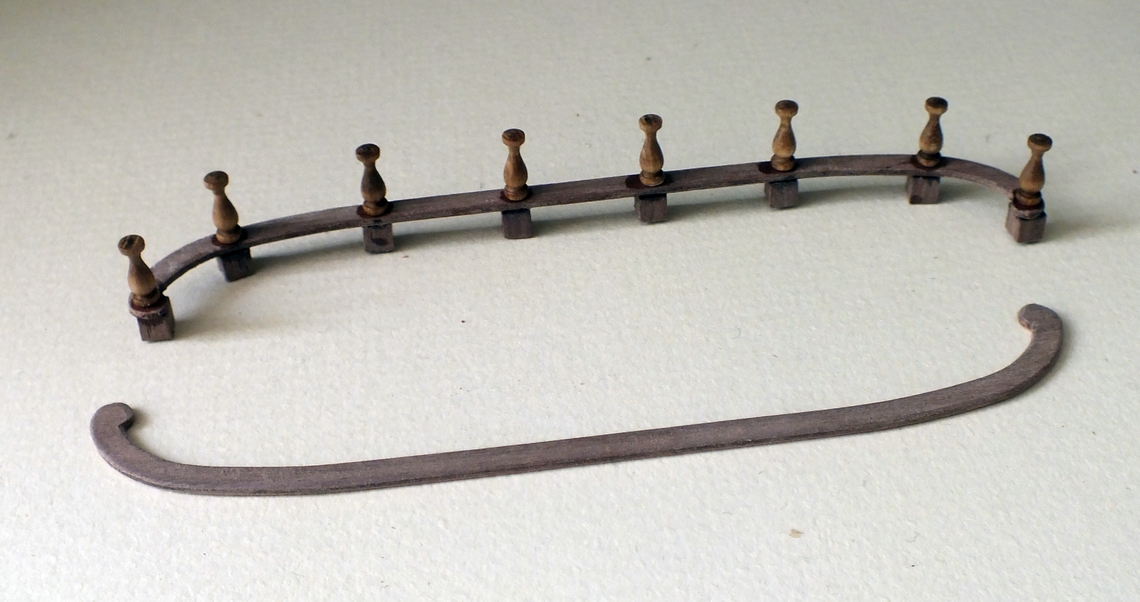
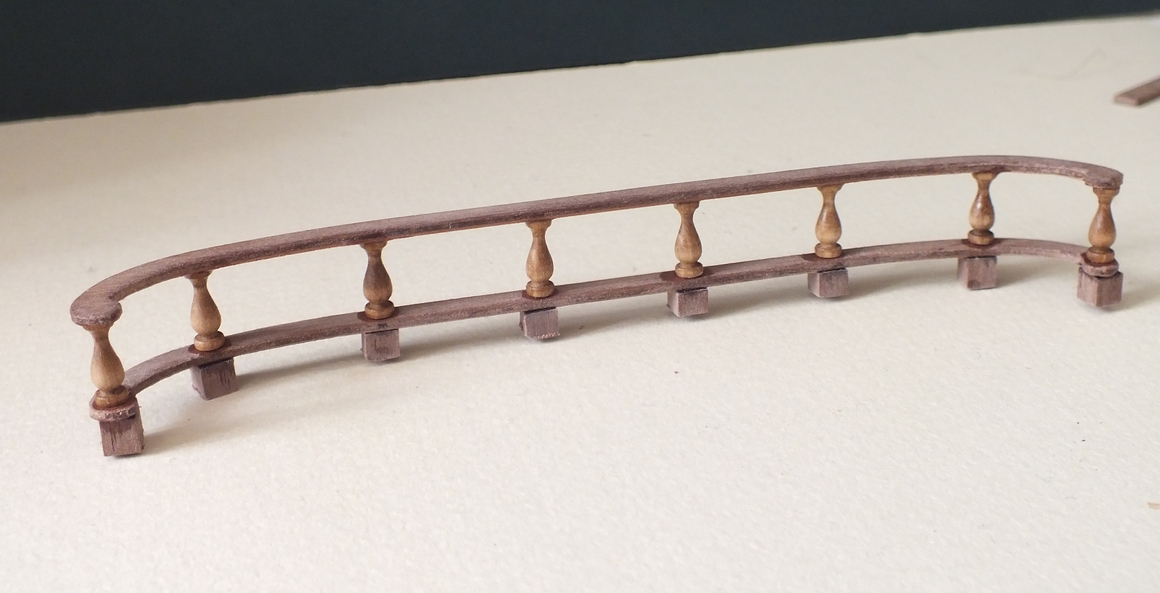
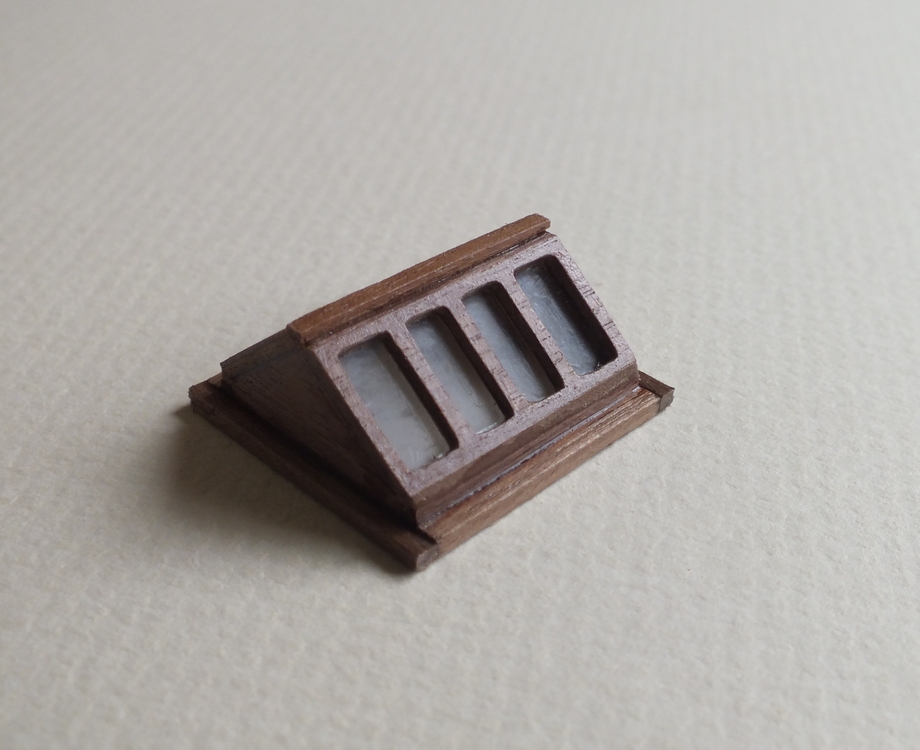
Hammock rails and netting
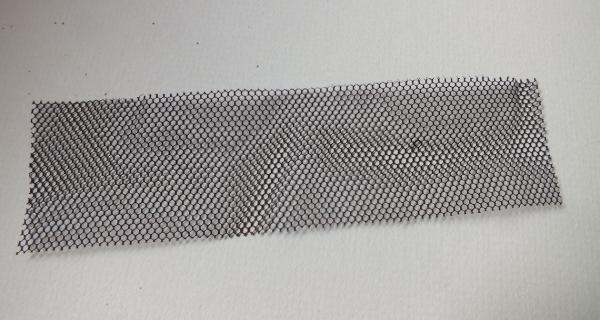
The hammock rails were added, and .5mm thread threaded through the holes, the netting I used on my Pegasus build looked to small and fine, I did have some other netting that I had from the Pegasus build, the problem being it was red, but looked a better size, so I painted it mat black and it came out ok, so I decided to use it. My method for fixing the netting, is to line up the netting to the top edge and sew it to the rail thread as it the photos, then tie the netting into the bottom corners of the cranes, and then trim to to hight of the other crane upright and sew as the first side, and then just trim up and tie in any bits that need it, and final touch up the paint.
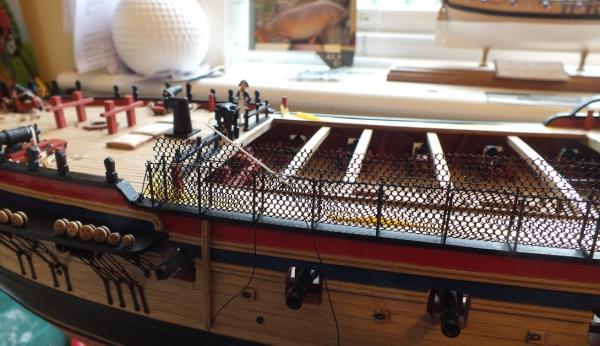
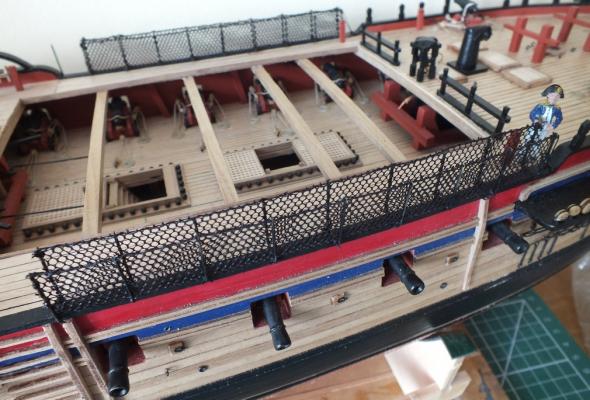
The hull is now completed with just a few touch ups required I will take some photos and add them soon.
netting
cranes added

sewing on netting
attachment=161383:sewing to top thread.jpg]
netting finished


-
Hi I did not know any pics were missing they all went on when the posts were added I will try and go through the log this week and have a look ( like now I quite often look in using my phone) and edit reload if I can. Does anyone now how plcs could go missing, that were ok when the post was first made ???
-
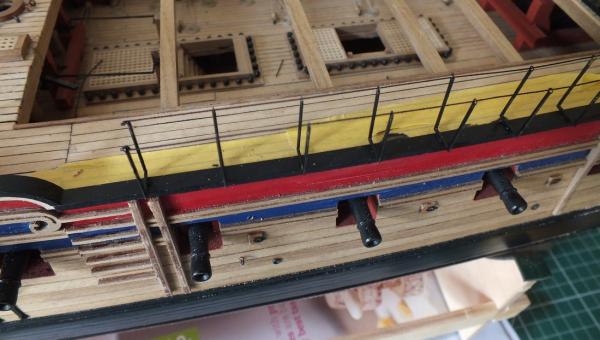
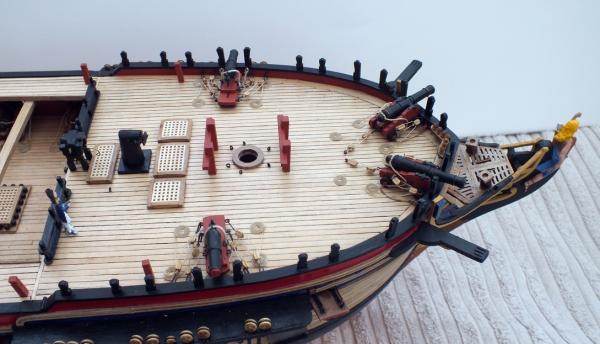
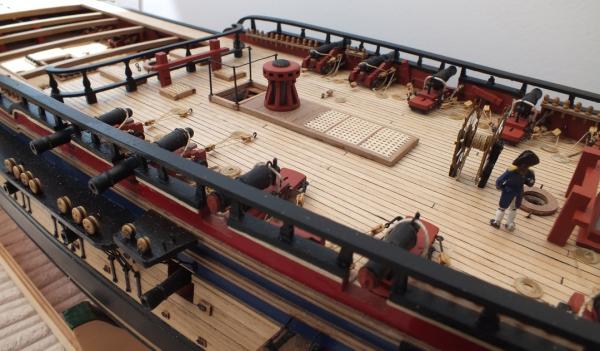
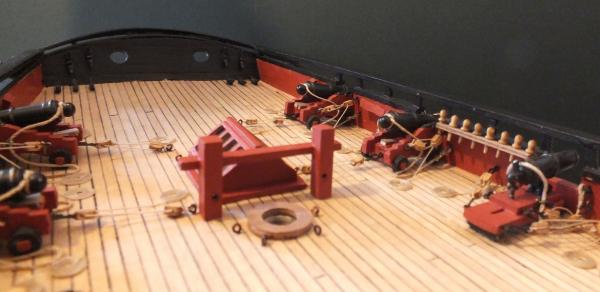
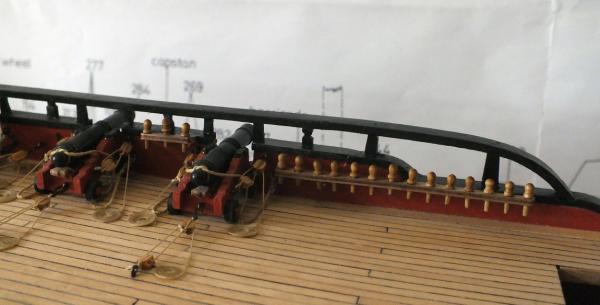
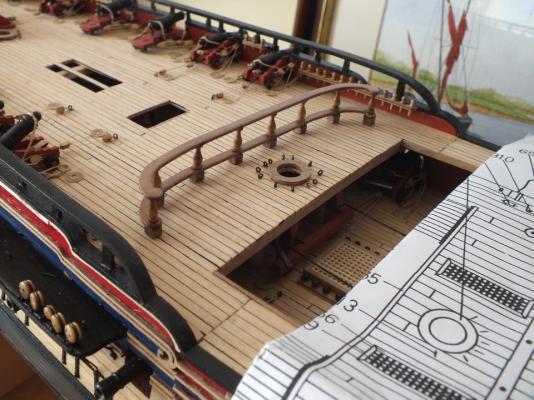
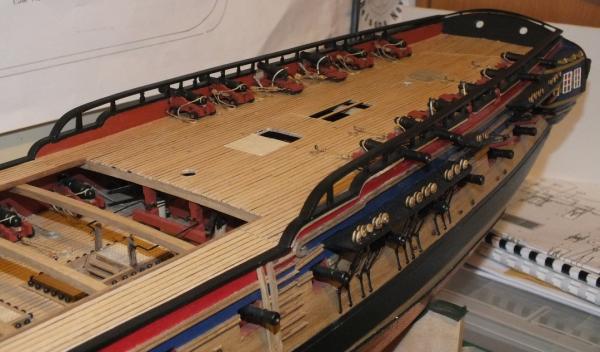
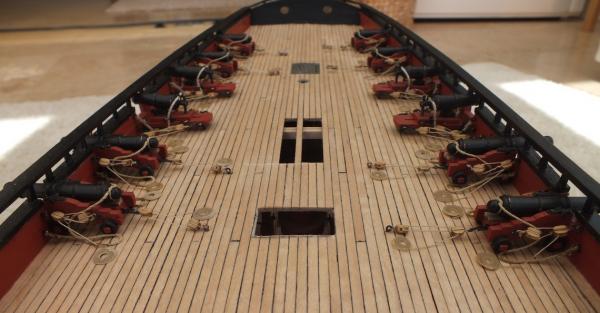
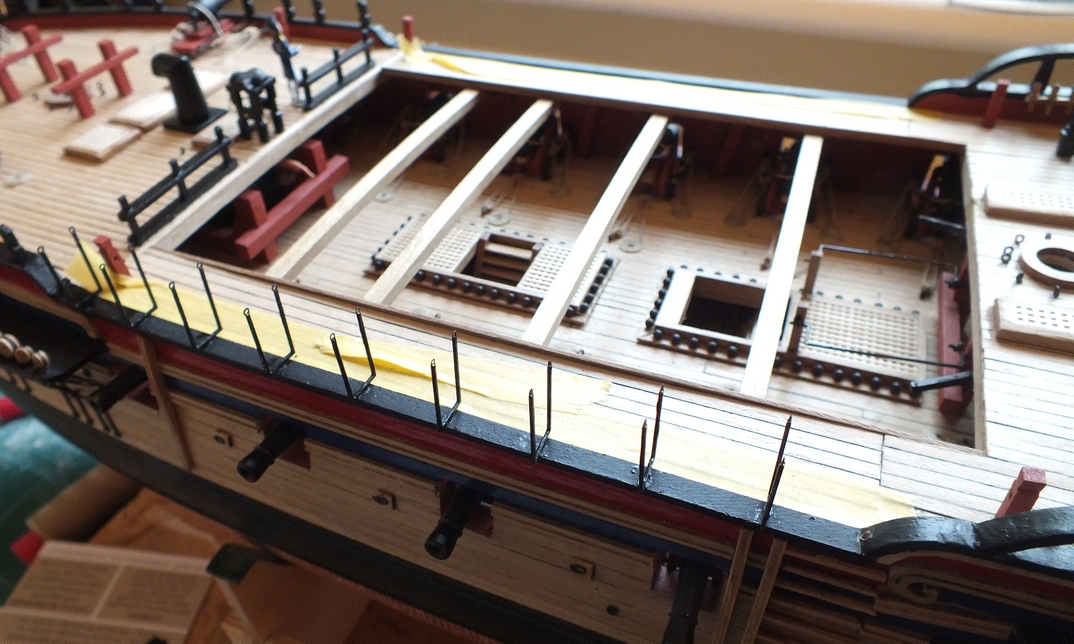
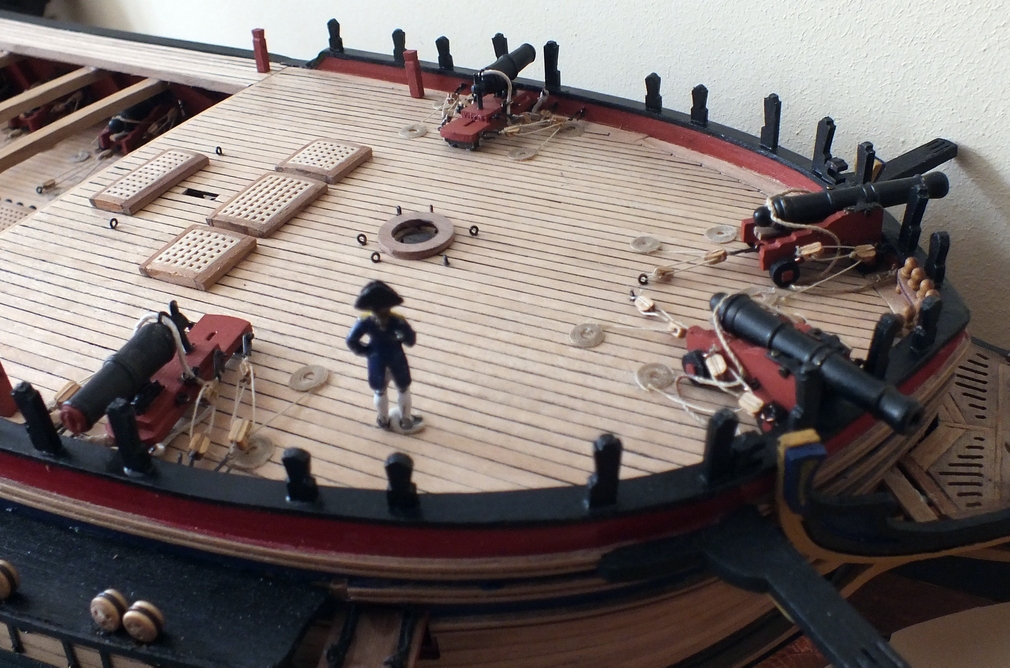
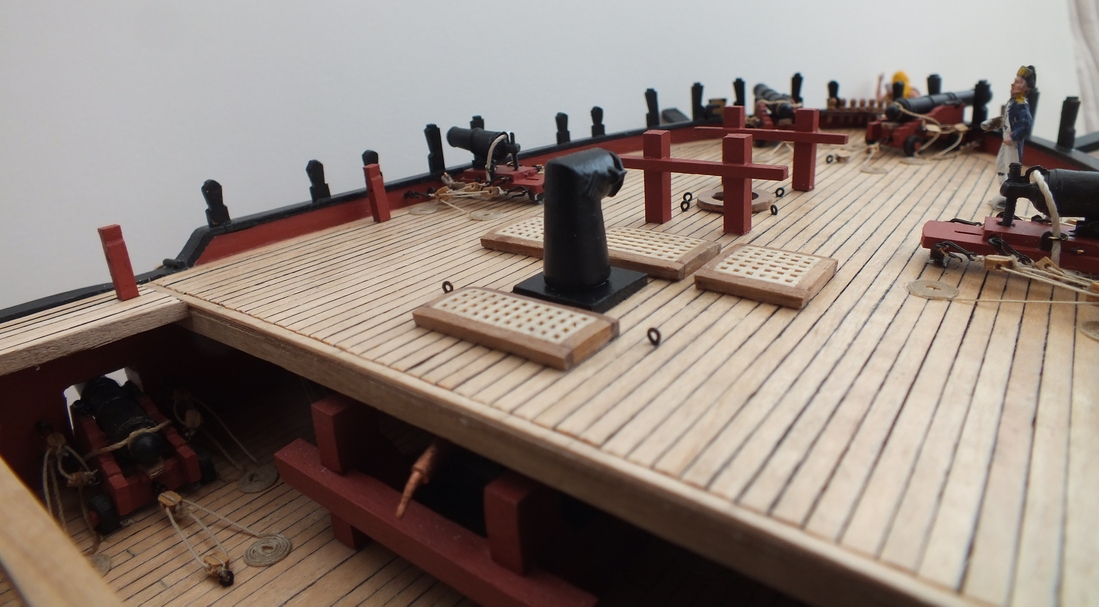
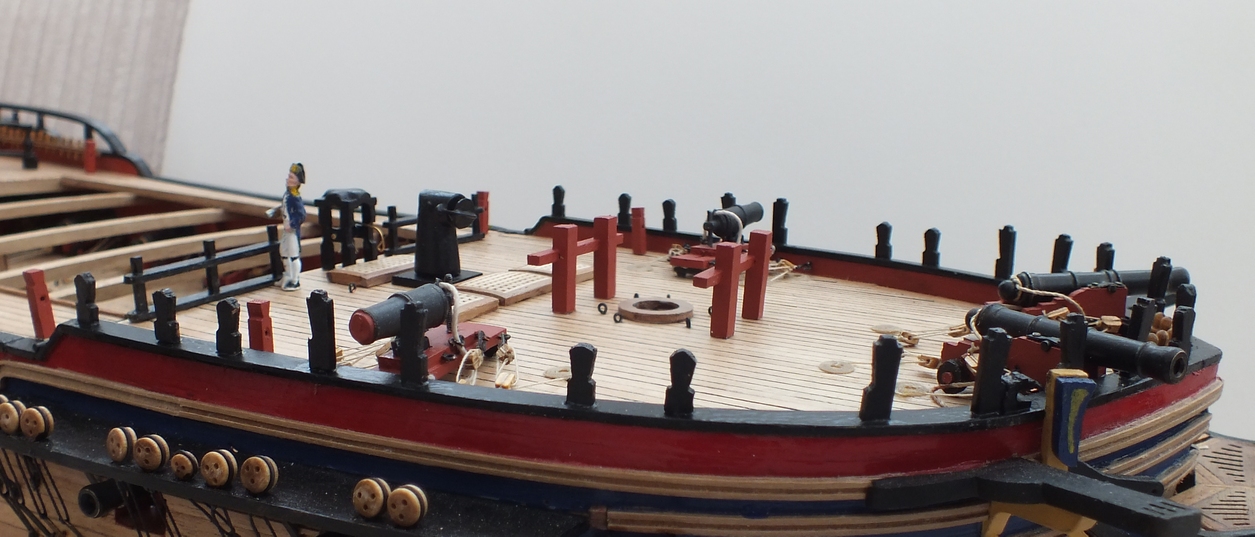
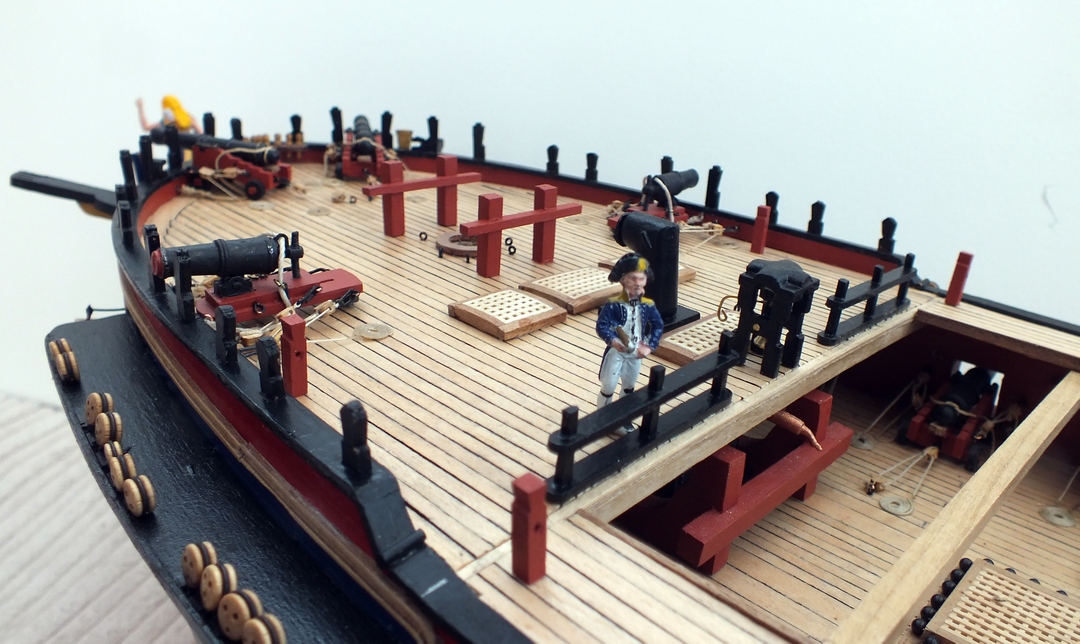
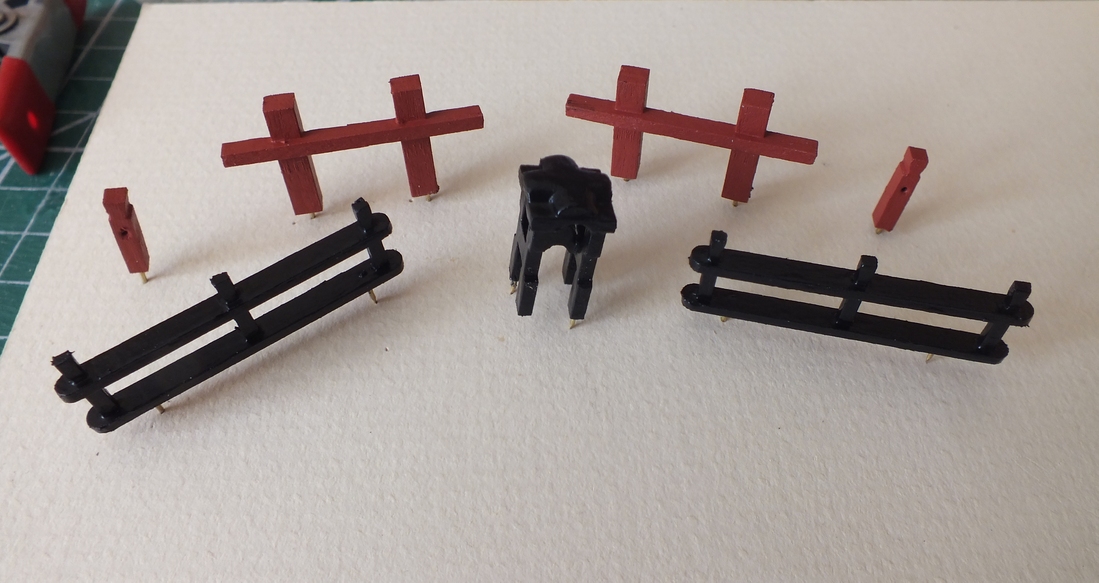
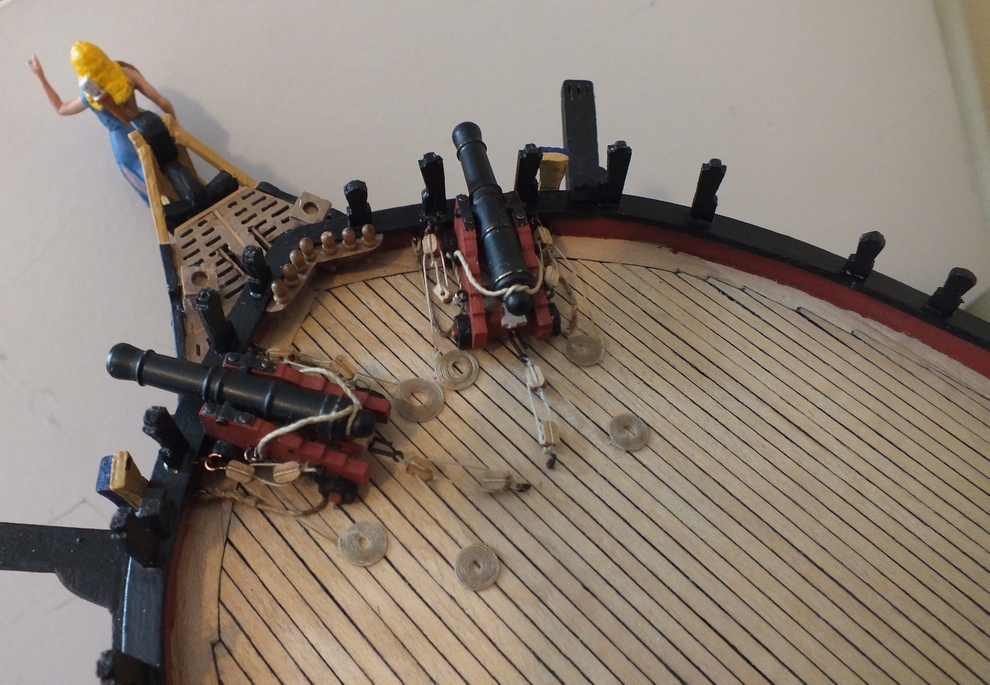
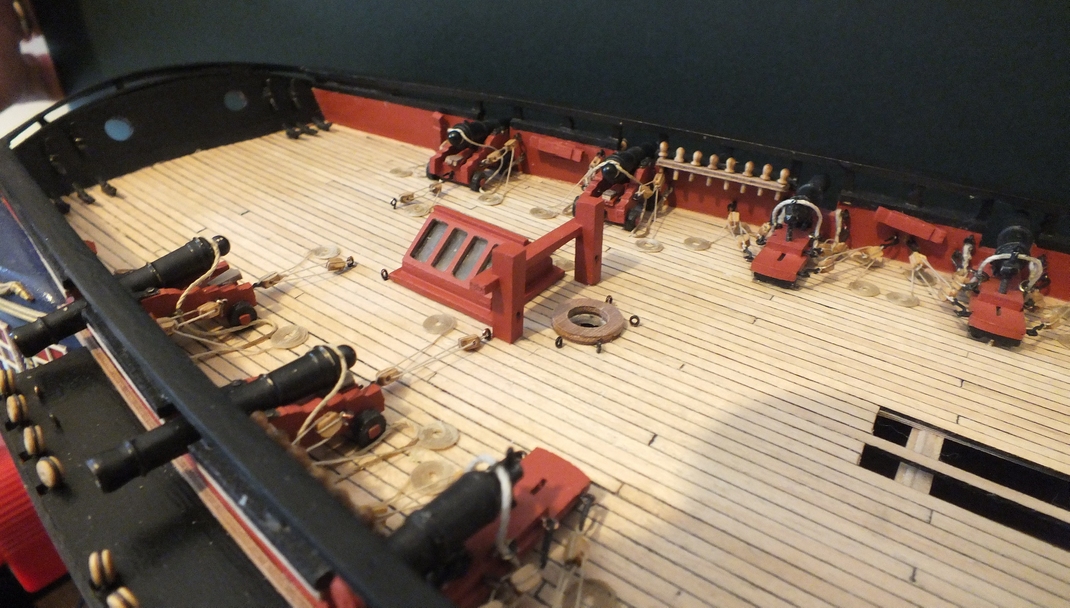
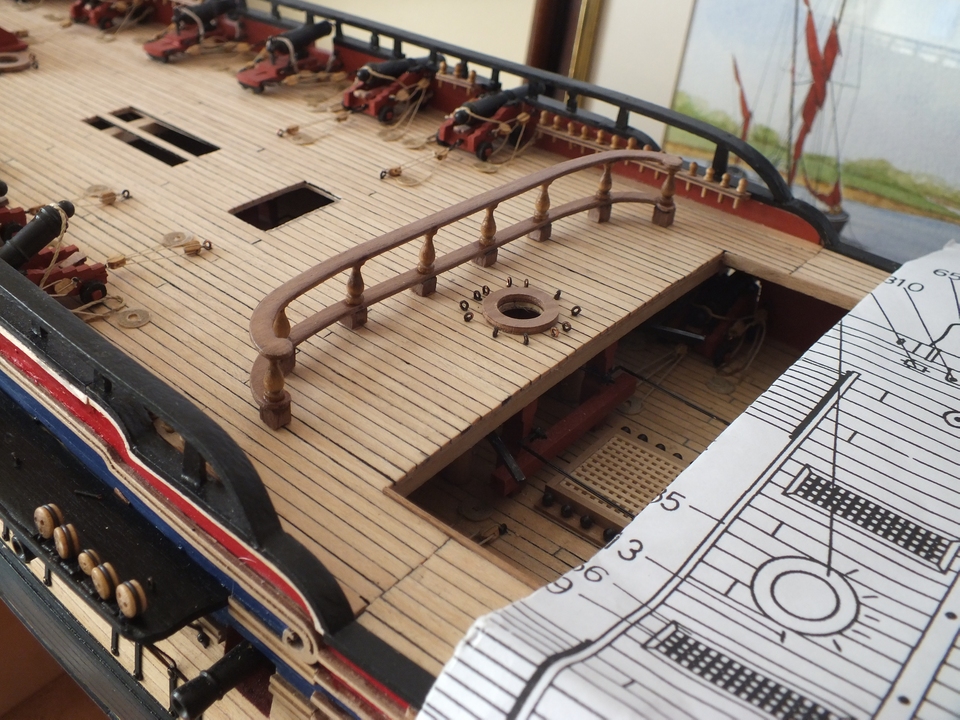
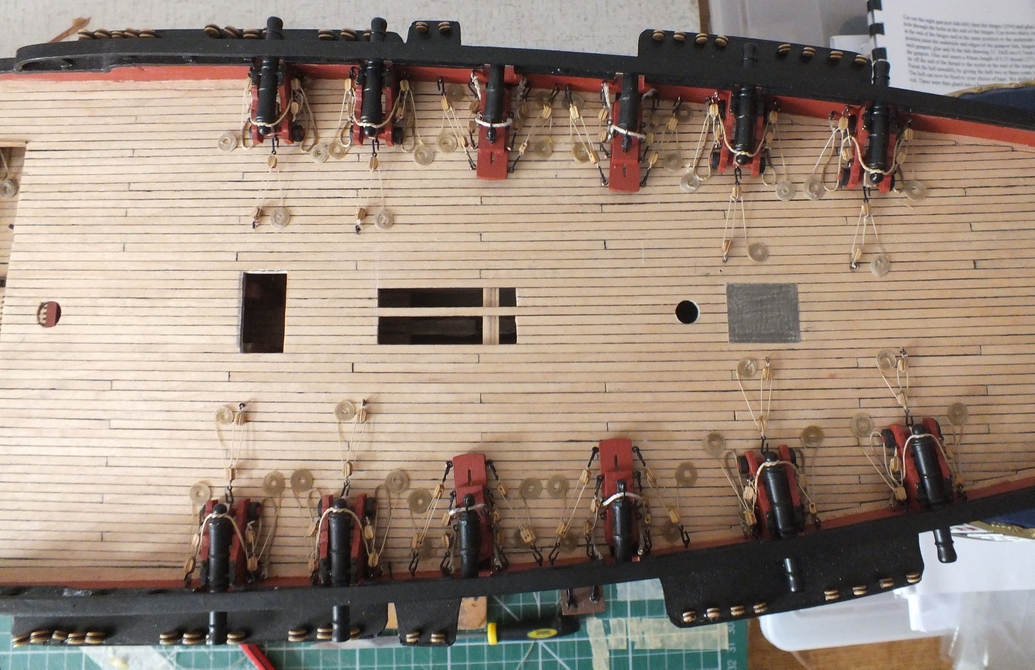
All the fore deck fittings have been added to the ship, getting close to the hull completion, only the hamock cranes and netting to do.
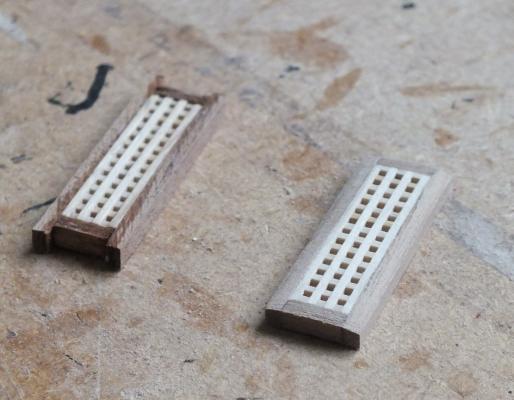
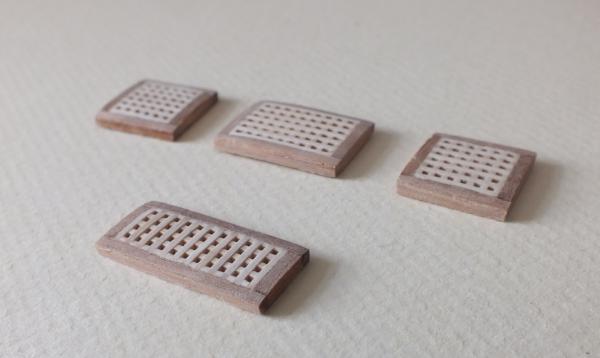
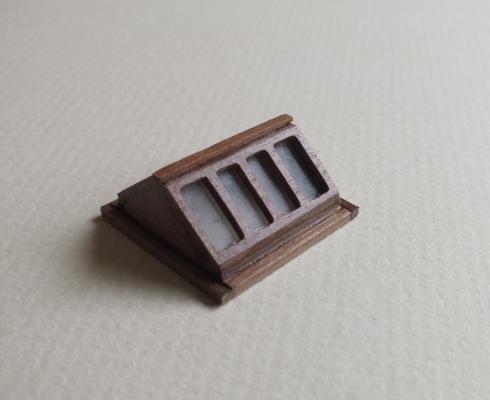
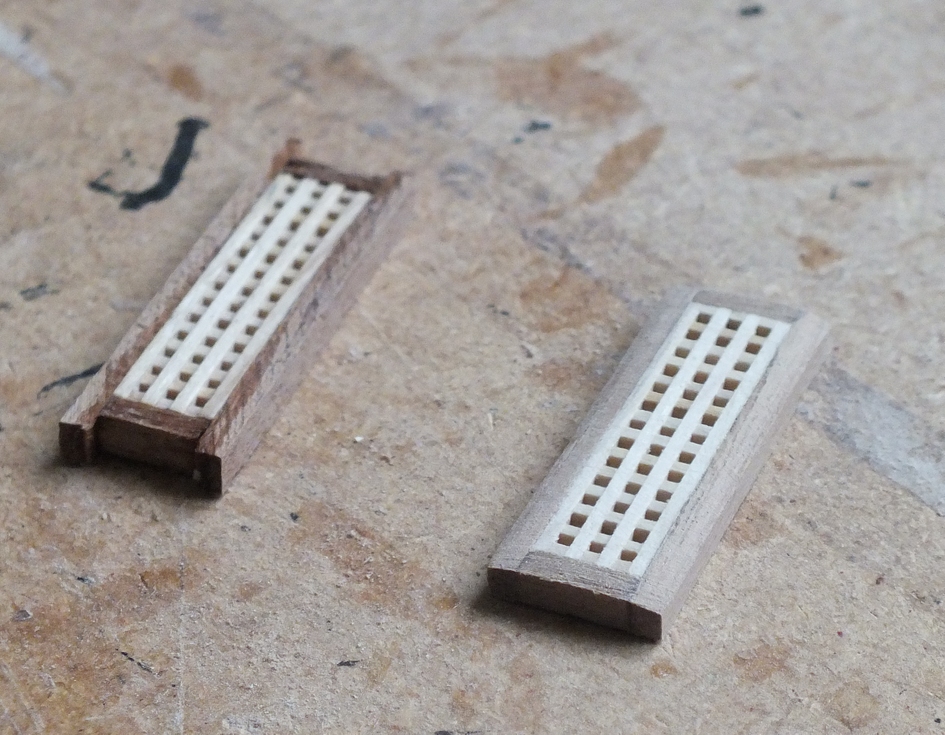
Gratings added
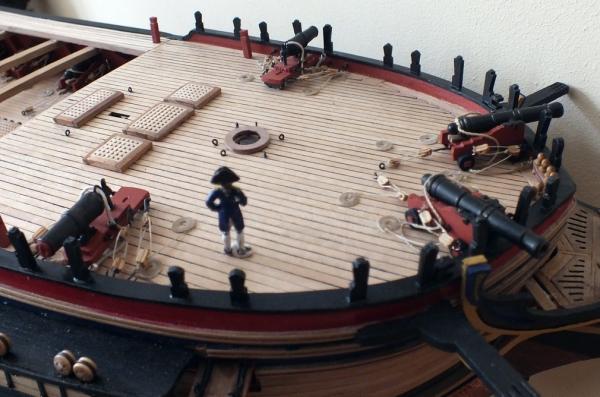
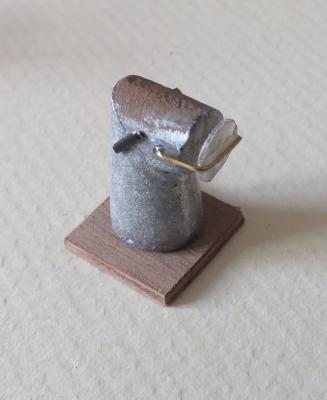
Plus bitts and stove pipe
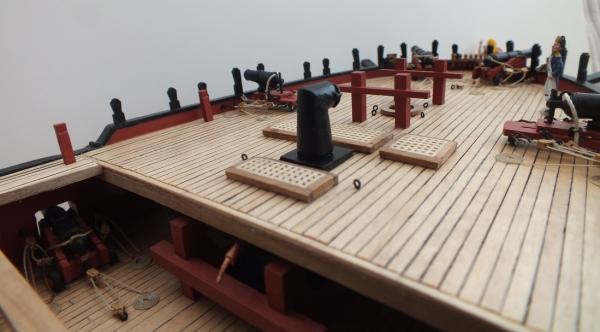
Completed fore deck


-
Thanks for the comments and ticks guys.
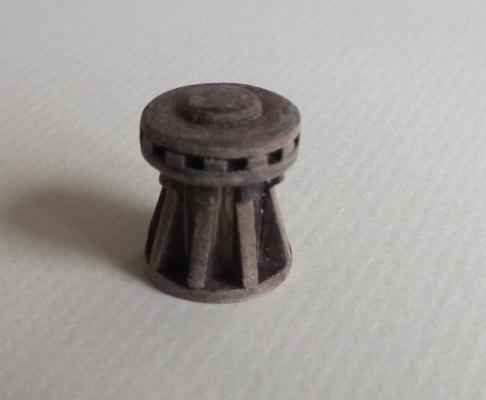
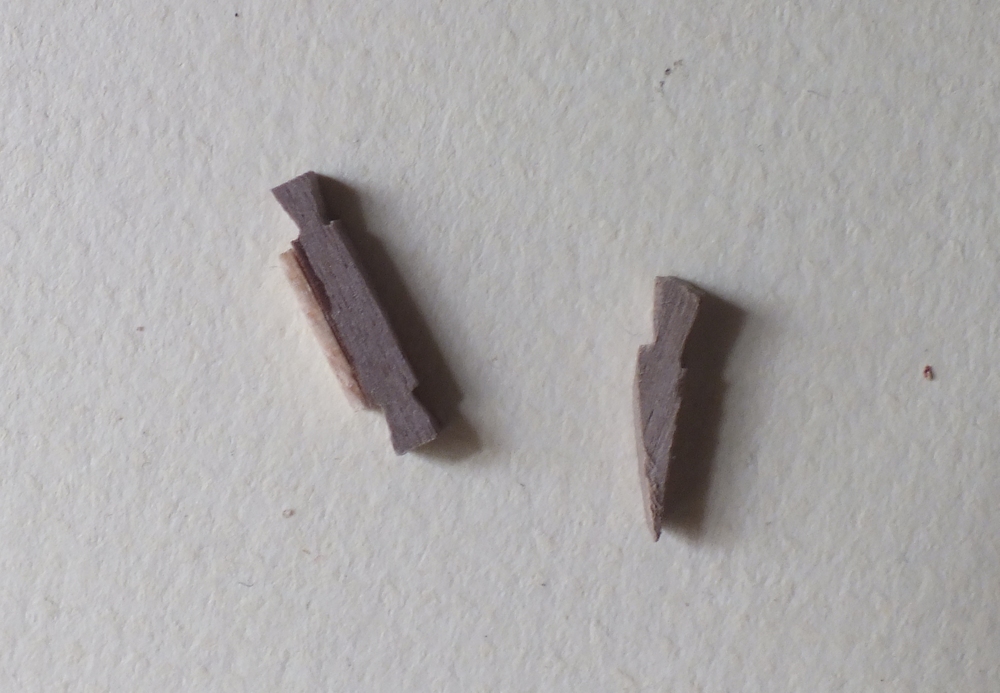
Floyd I will add the only photo I have off a grating being made up it is made from the standard kit parts with a walnut 2x3mm frame it is then just sanded to give a slight convex profile.
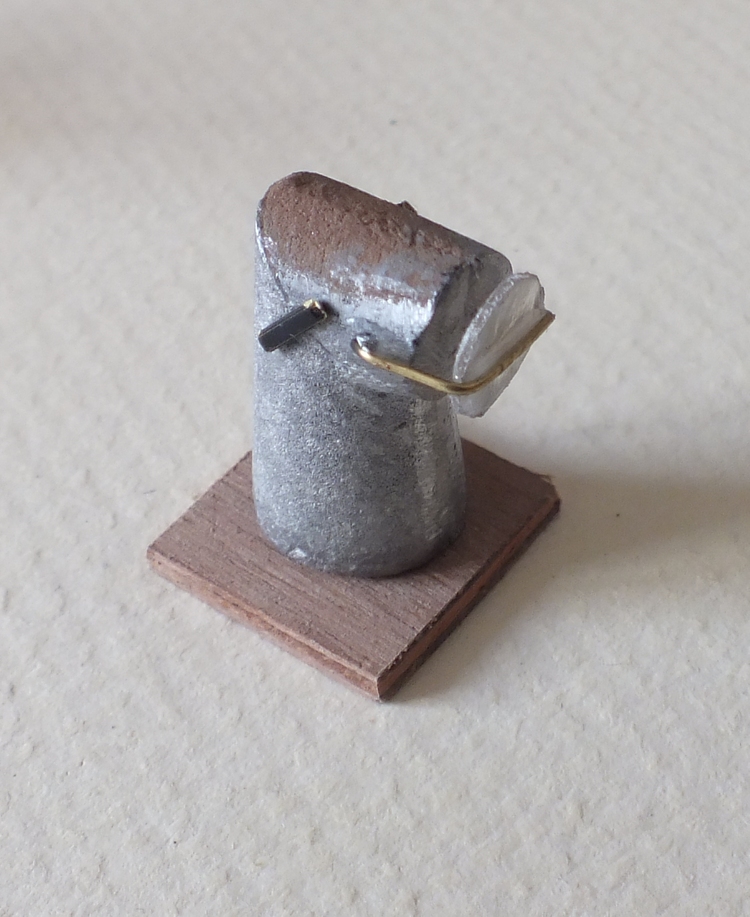
Mort the ships bell is a 6mm Amati one which cost 0.82 pence sterling from Cornwall model boats.
much better than the horrid cast one that came with the kit.
- Barbossa, fnkershner and Brian Oates
-
 3
3
-
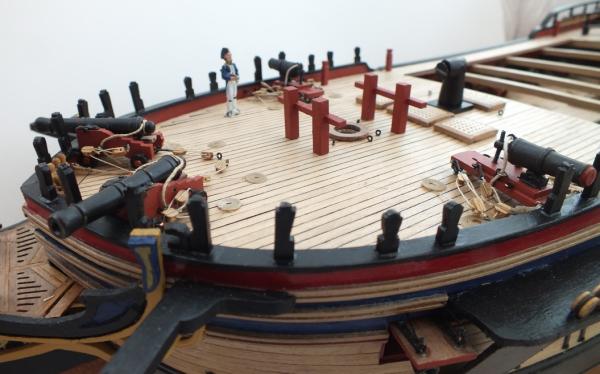
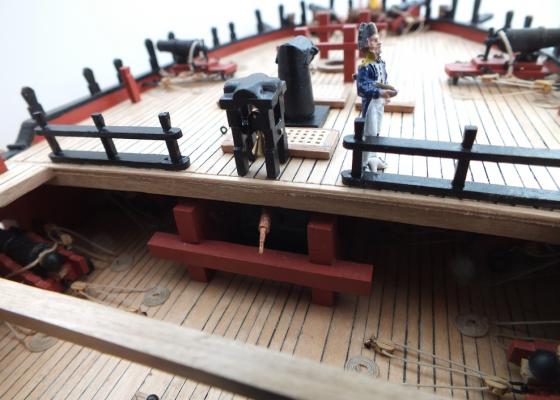
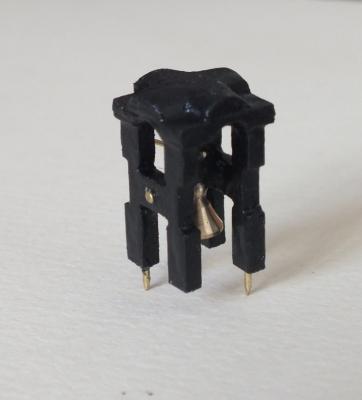
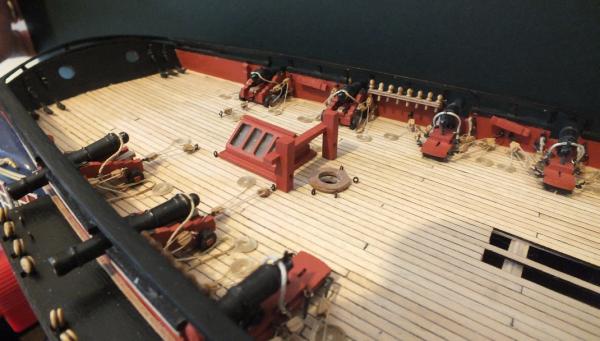
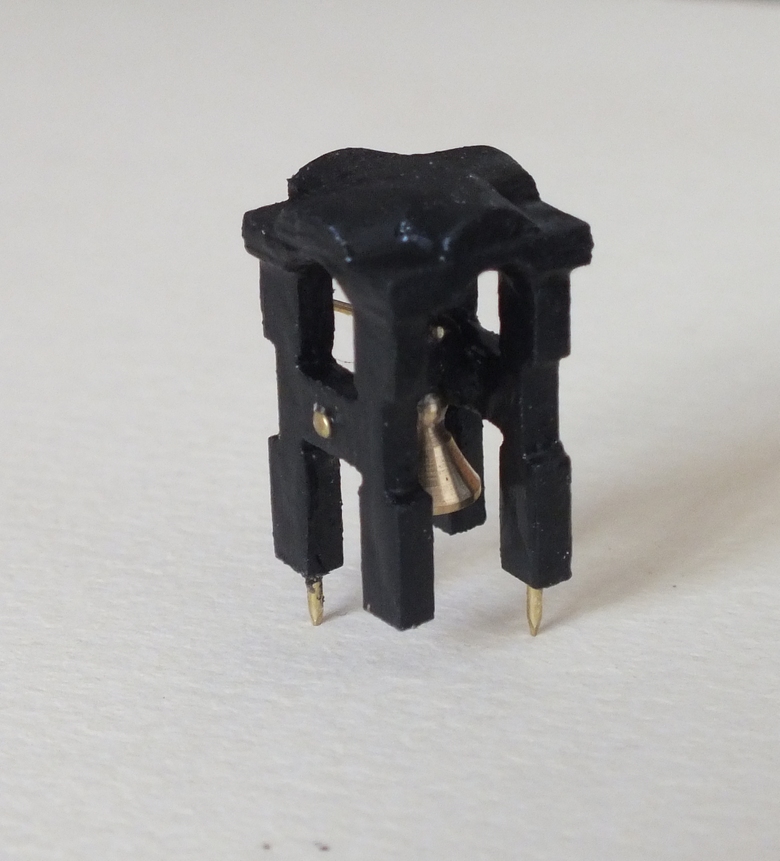
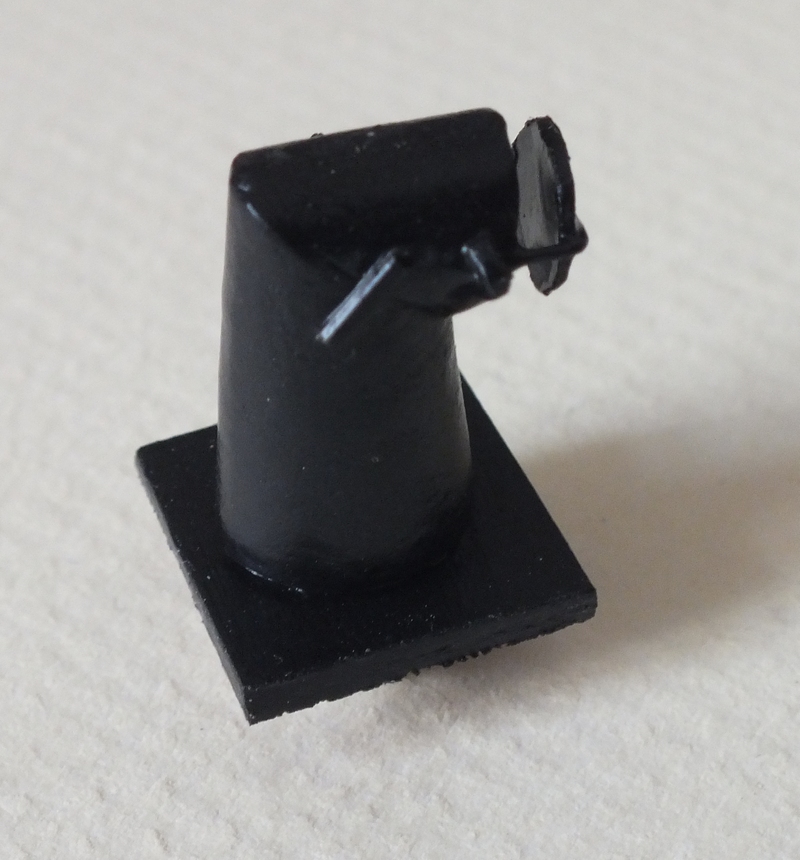
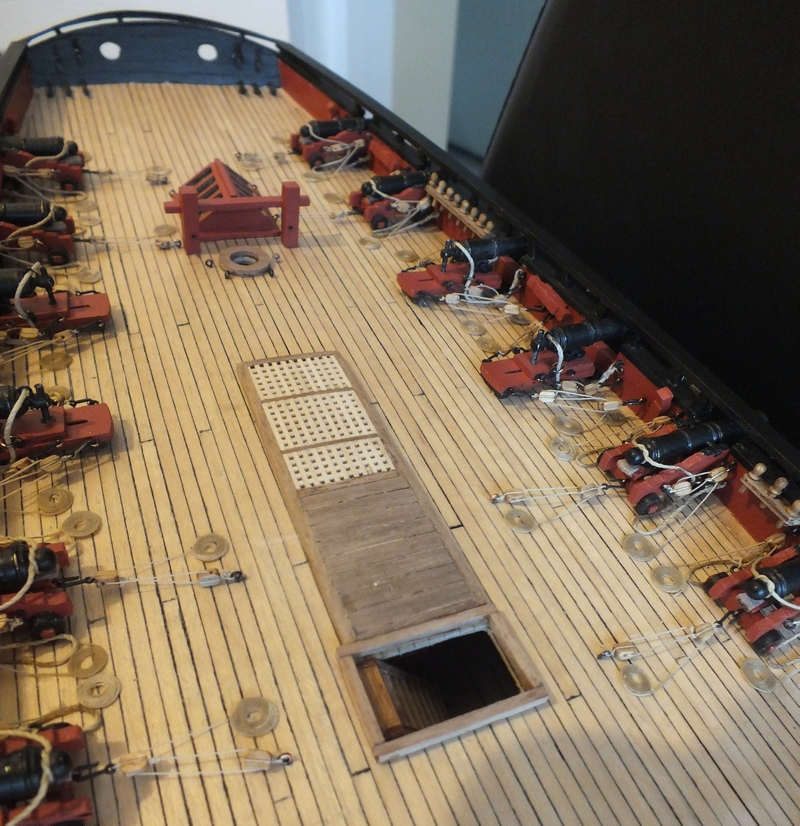
Next job has been making up the remainder of the fore deck fittings. Firstly the belfry to which I fitted a non kit brass bell, the bitts, and gratings, plus the stove chimney with added smoke deflector and hinges, and lastly the breast beam rails.
Belfry
bitts and breast beam rails
gratings
stove pipe with mods

- fake johnbull, mort stoll, mobbsie and 9 others
-
12
-
Hi thanks for the ticks guys
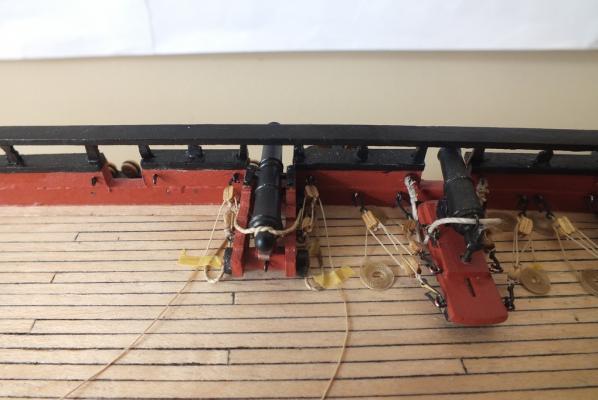
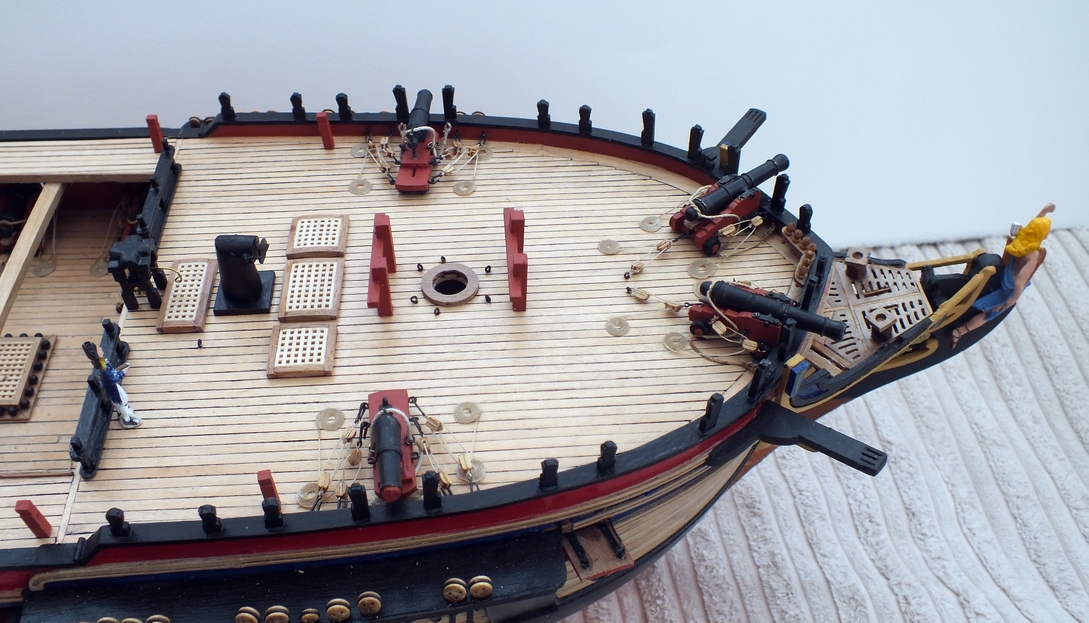
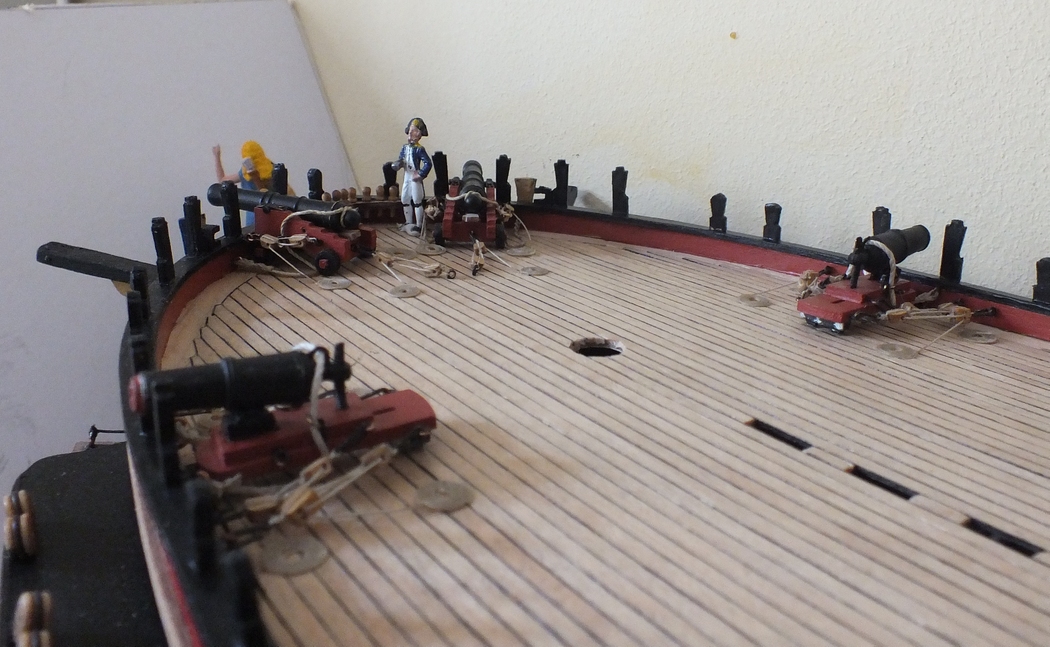
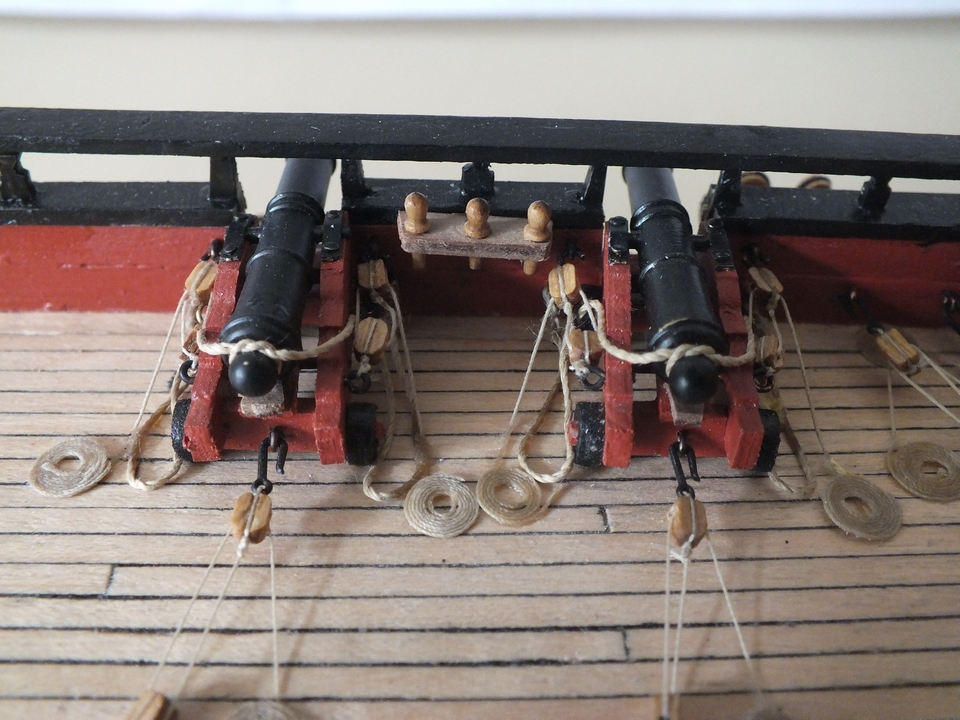
Floyd I would think that the ship would be on a slight tack to either port or starboard (as they would be used as warning shots or when chasing another ship down)so only one gun would be able to track and fire on a target at any tlme, so I both guns would never need to fire together, and if the ship went into action broadside on, 9the gun position would be changed.
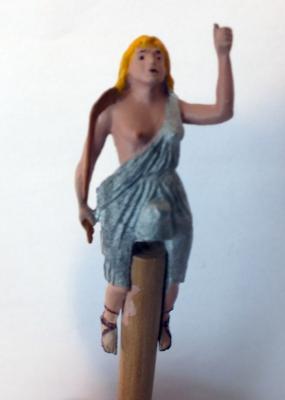
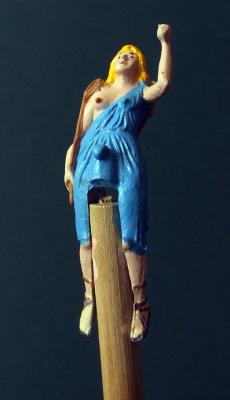
I do paint watercolours so have some good quality small brushes and a few acrylic artist paints which I used, a few more crew members may soon be onboard.
-
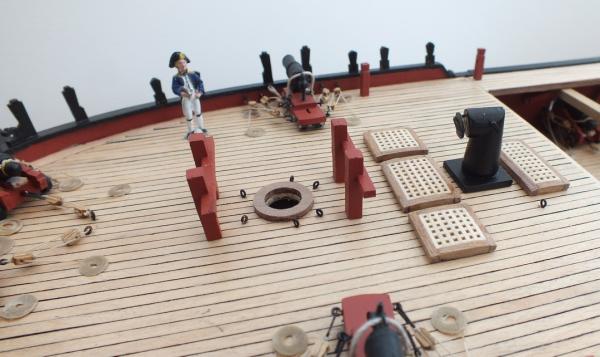
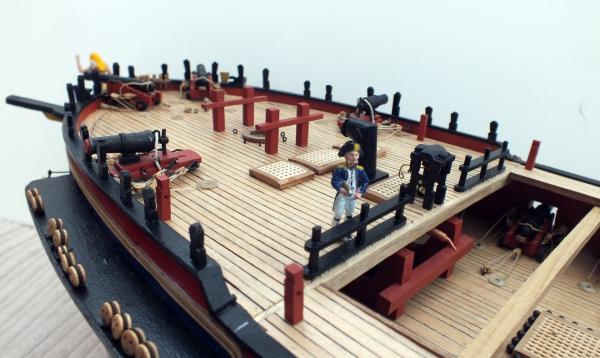
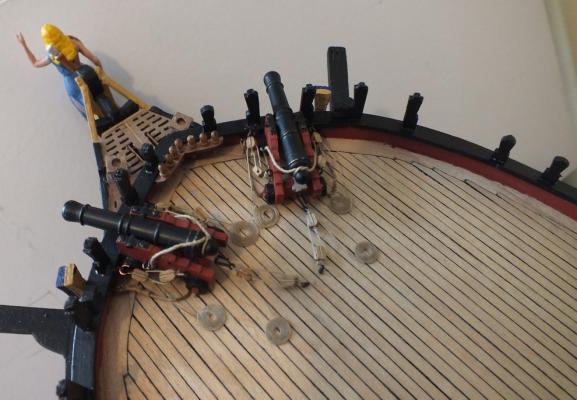
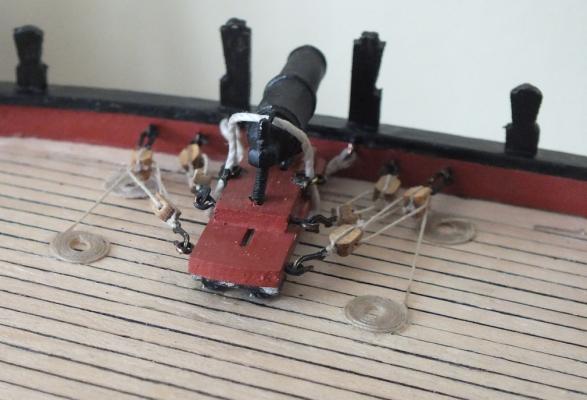
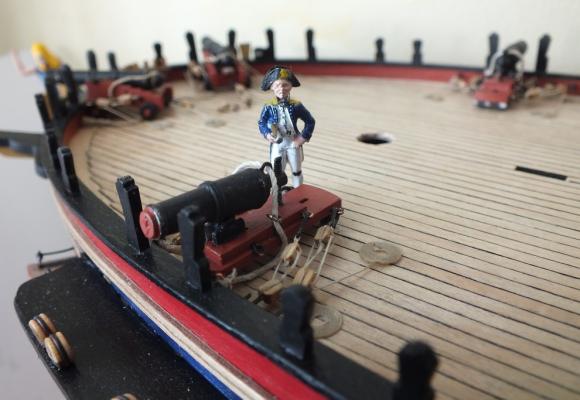
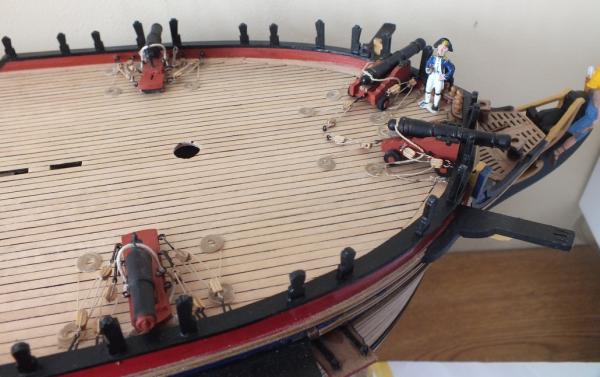
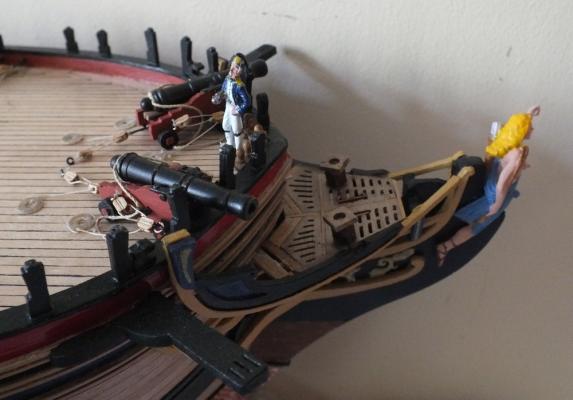
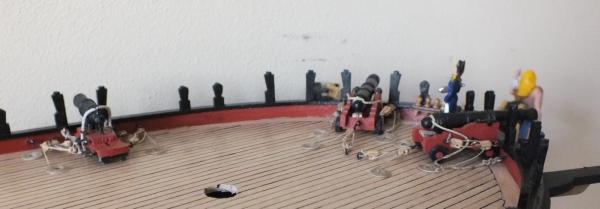
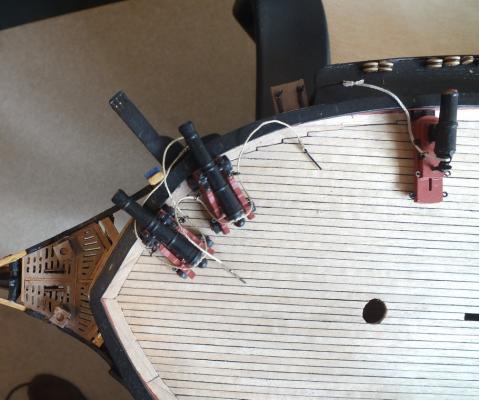
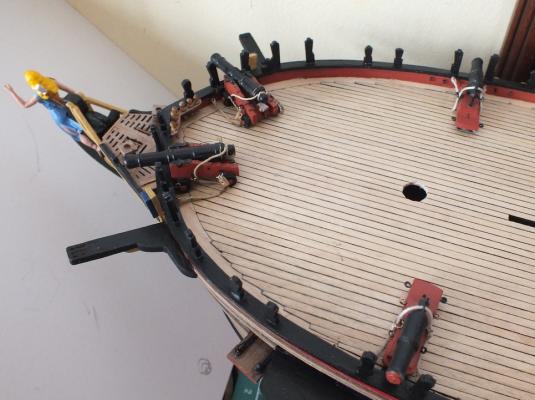
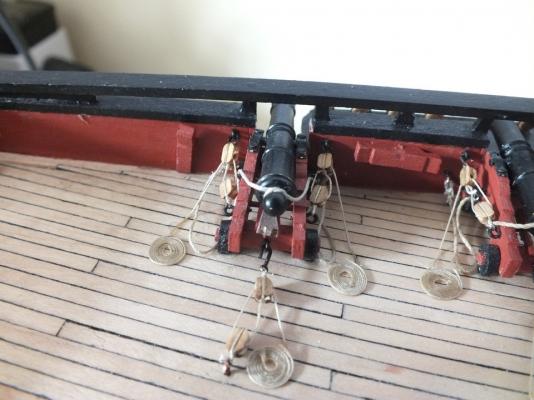
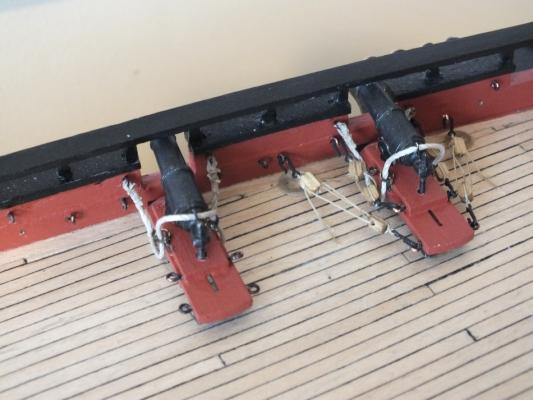
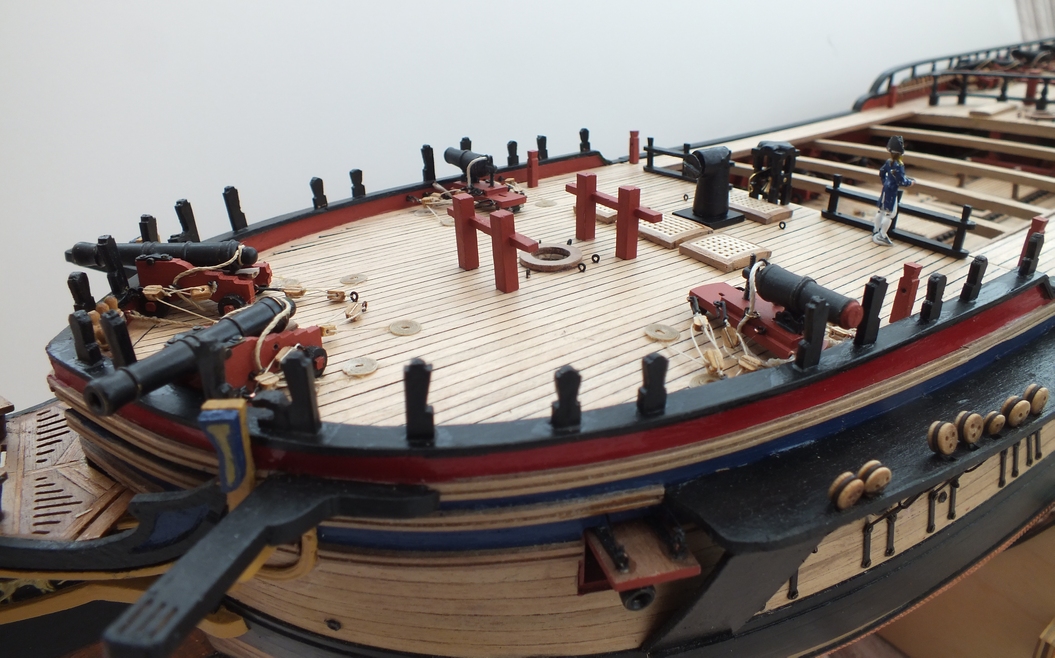
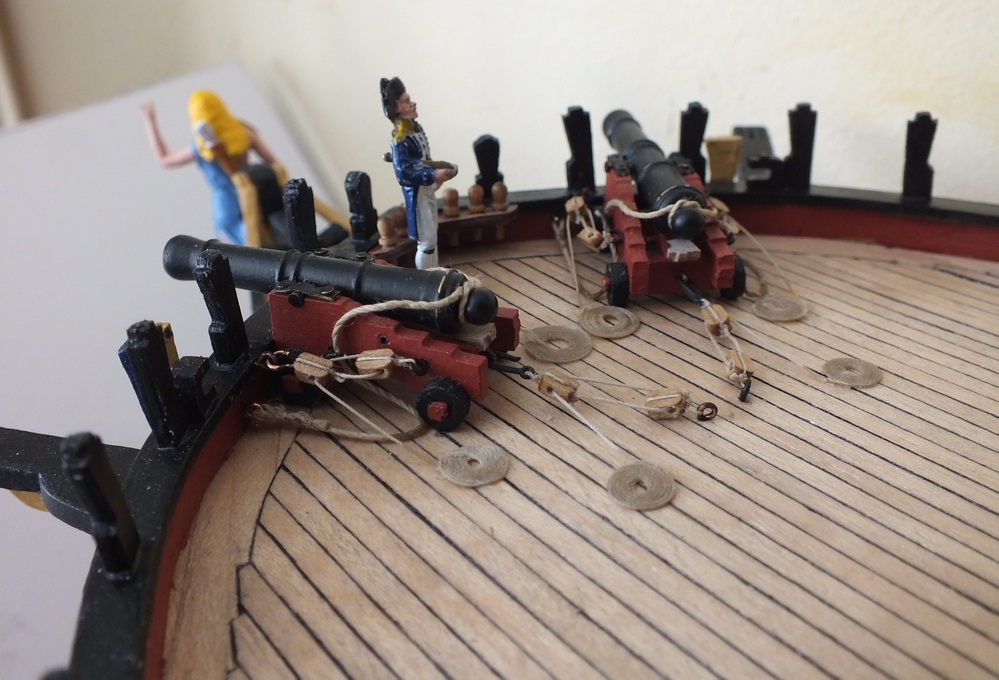
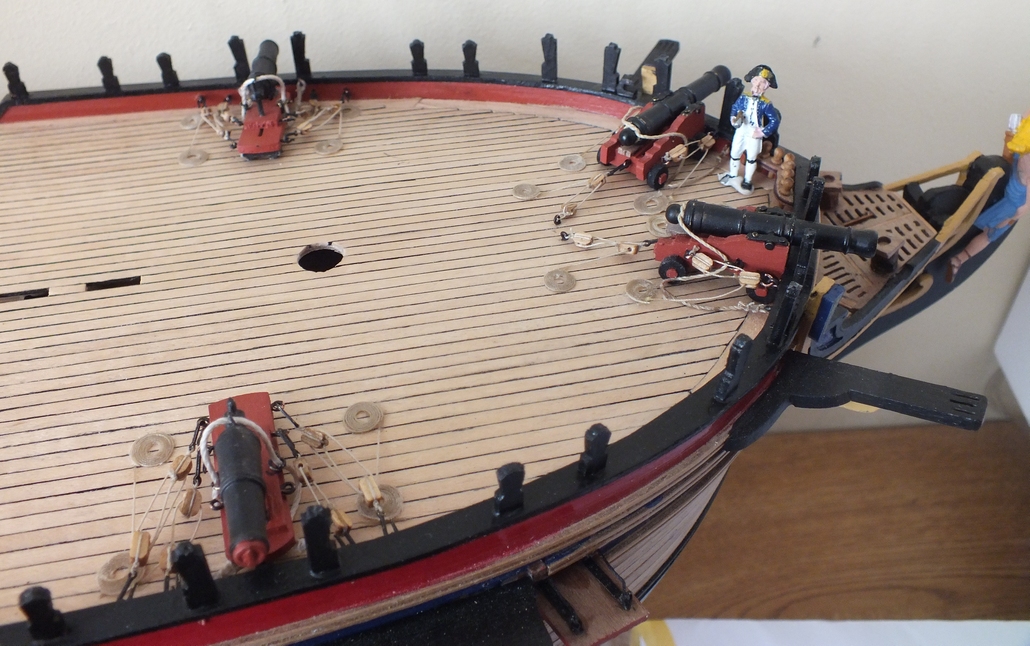
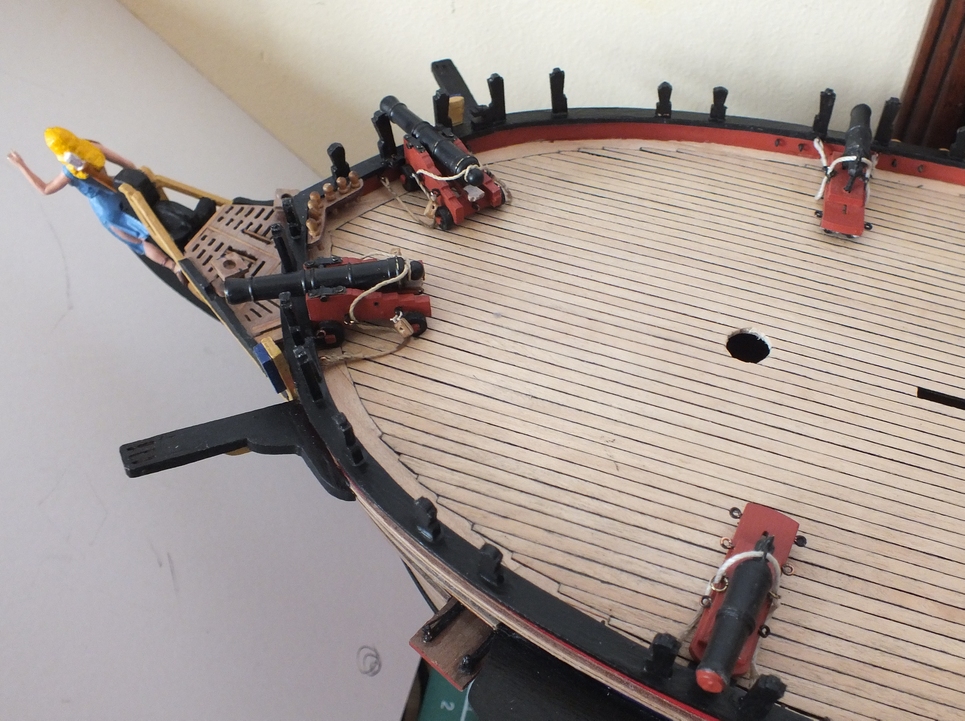
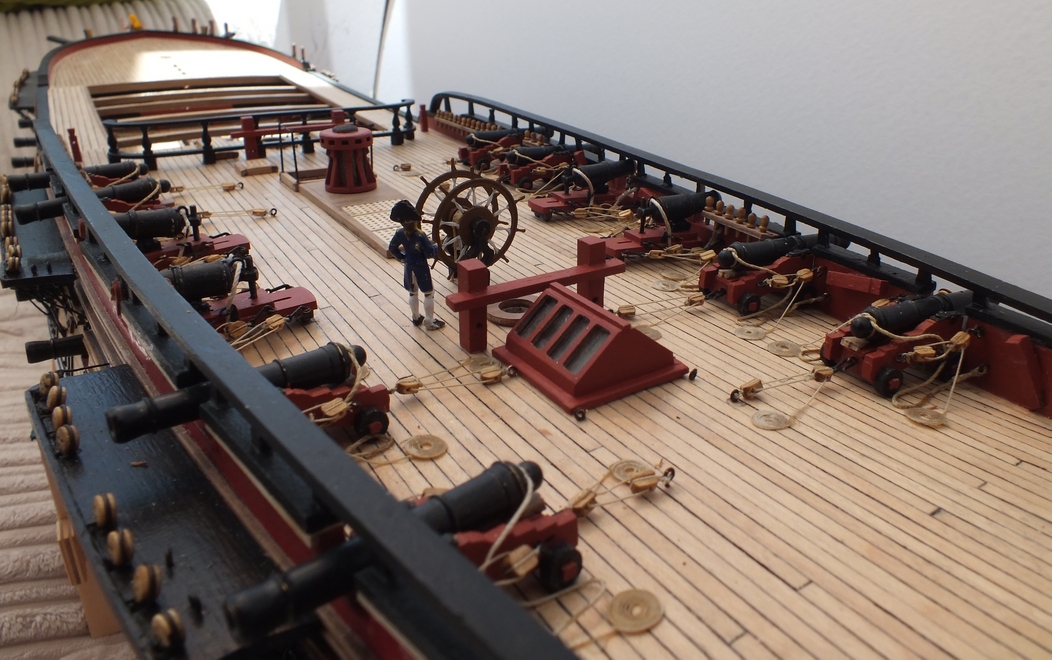
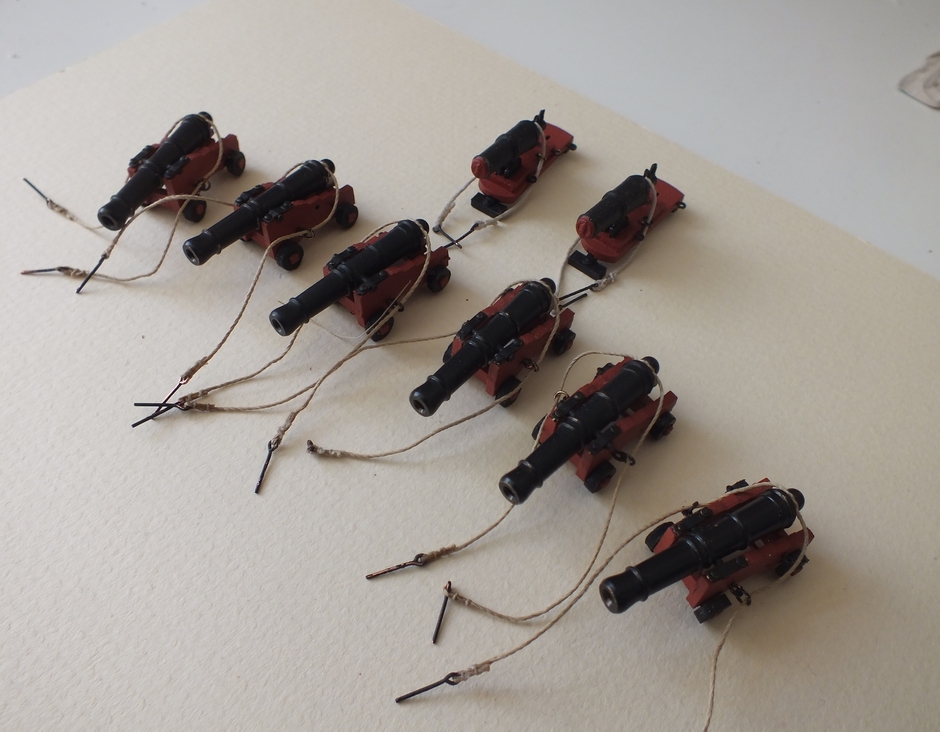
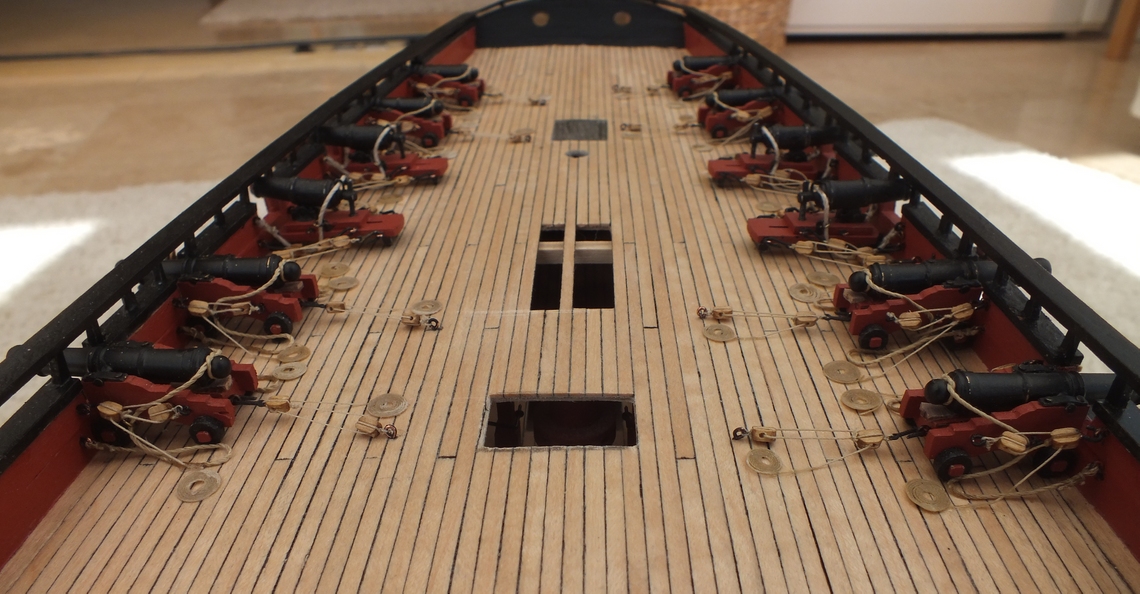
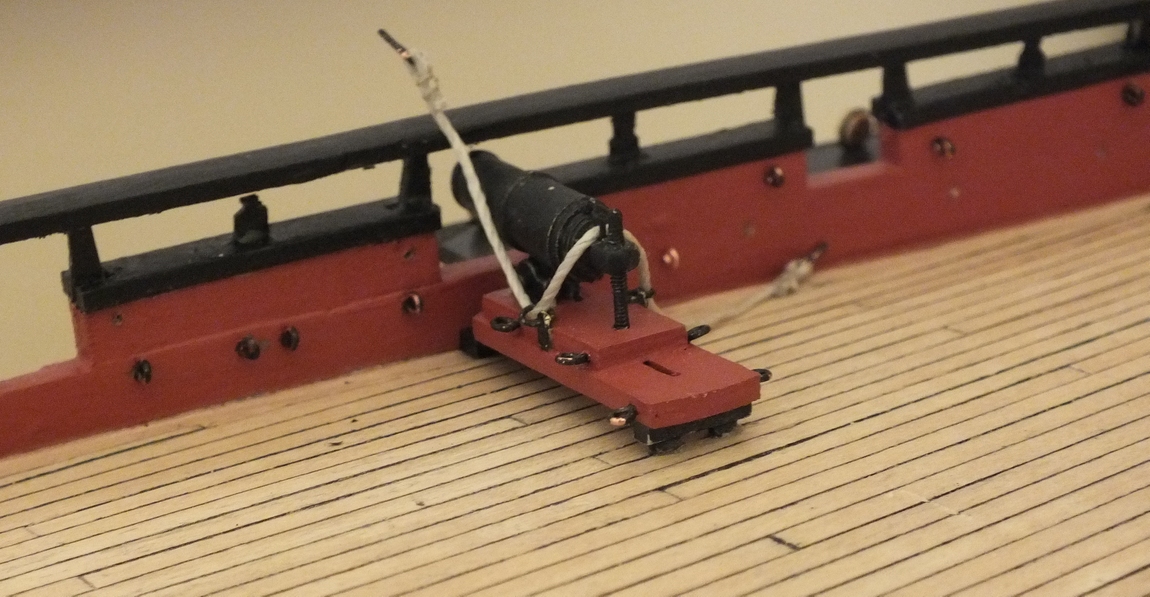
The last of the ships guns have now been added and fully rigged with the carriage guns set in the most forward bow chaser position, as can be seen the new captain has arrived and is overseeing the fitting out.
I did order walnut dowel to replace the birch dowel in the kit except the 10mm dowel which will be painted and is not warped, it came today and it is of much better quality plus some .25mm black thread for the ratlines all from Cornwall model boats who are also very quick to send out any orders.
Bow chasers rigged

Carronade rigging
Captain in charge
All ships guns now fully rigged

-
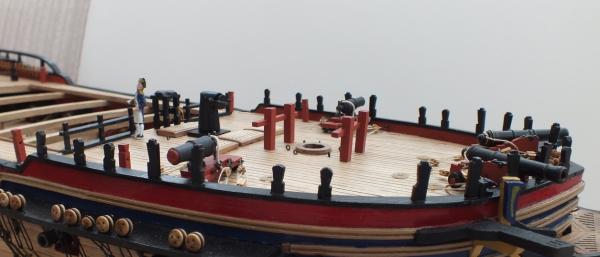
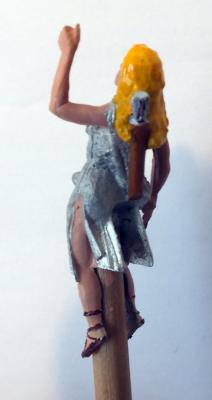
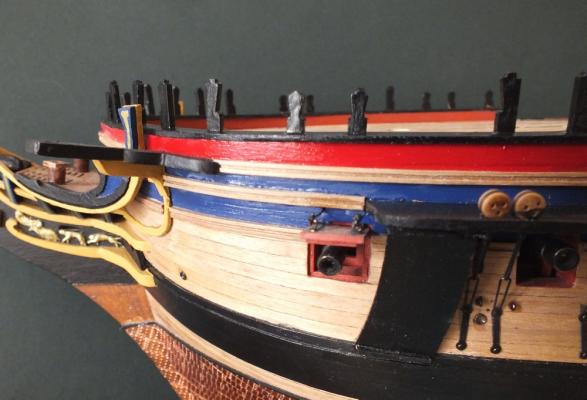
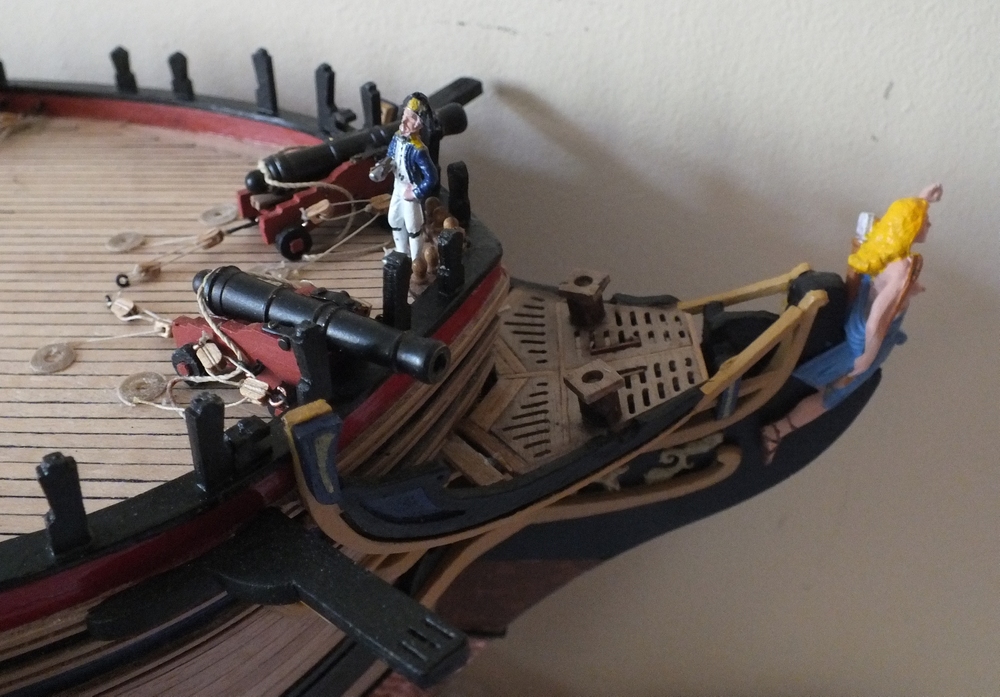
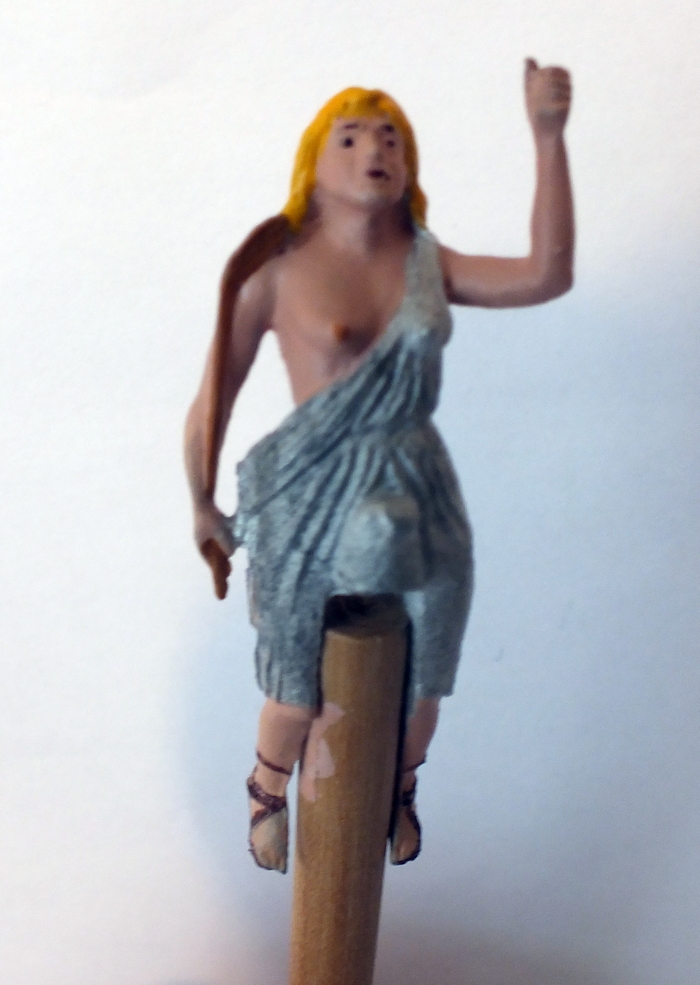
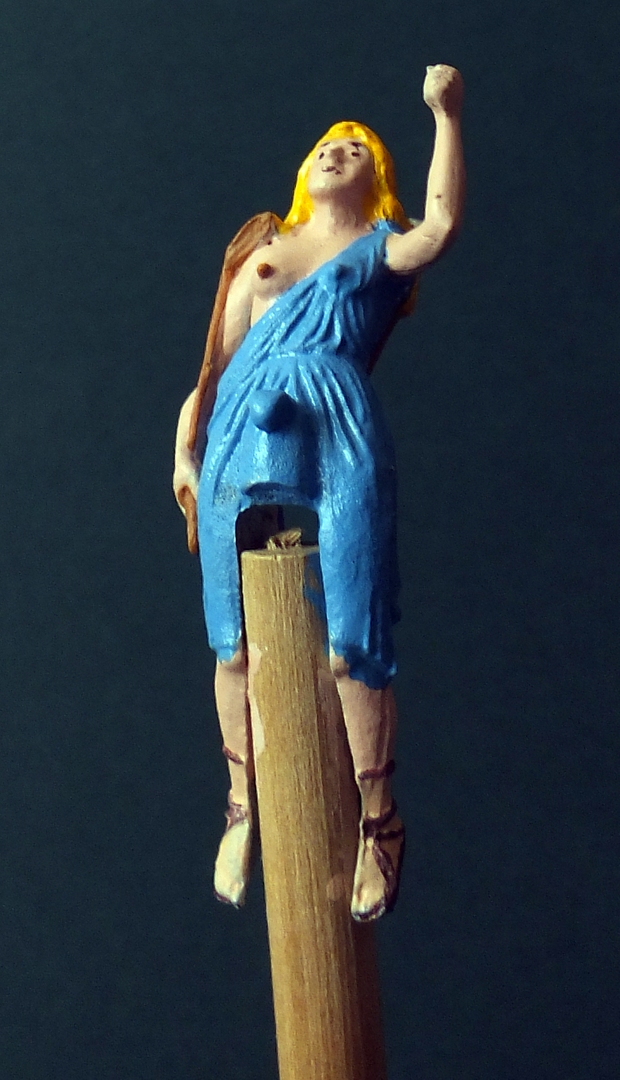
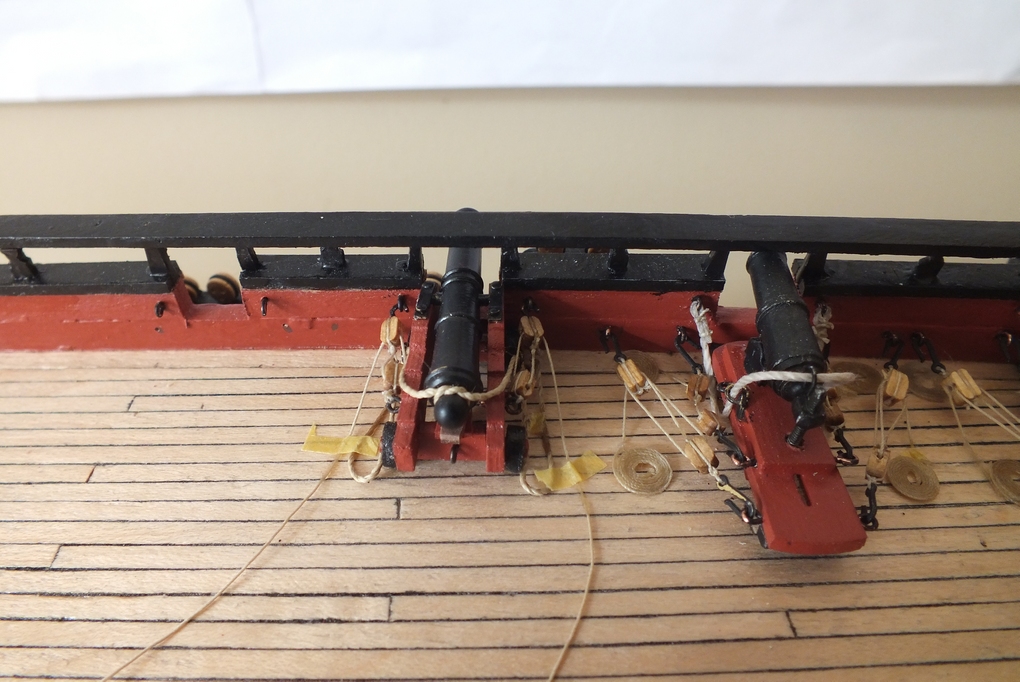
The Diana figure head has now been painted and in place but not permently fixed, and the fore deck guns have had the rigging started.
The bow pin rail has also been added although this was remade as the one with the kit could not have the holes opened out to allow the pins to fit.
Bow pin rail

Diana
Both bow chaser options
ready to be rigged

rigging started
-
Thanks Mobbsie & Jason
Thanks guys I did think the Ochre would be right for the lower masts and will go that way.
I will also replace the kit dowel with walnut except for the lower mast dowel, firstly the walnut (as on the Pegasus) will just need a coat of varnish and secondly most of the birch dowel is quite badly warped,even the yard dowel could do with replacing, so I might as well order it all in one go, I must say, this is another part of the kit which could do with upgrading ?
-
Hi guys help needed
I am getting close to making the masts, I have a question on Pegasus and on the builds of Vanguard and a Agamemnon the lower masts are painted ochre and on the few Diana photos I can find they are not , I am inclined to paint them ochre as well,the dowel supplied is very light possibly ramin so it would need to stained to some wood colour anyway, so the bottom line is, would ochre lower mast be correct ?
-
Hi Guys thanks for the many ticks.
Timmo I have been working on the black plank edge and it is now ok-ish the deck cross beam will need a light sanding, although it looks much better in natural light than in the photo.
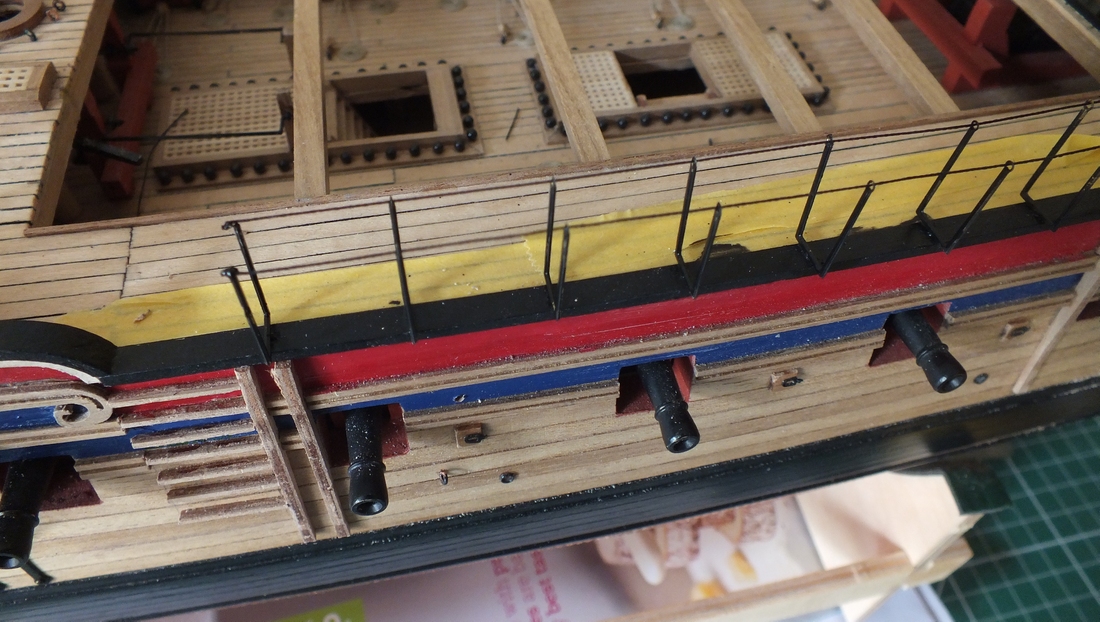
The timber-heads have now been added to the fore deck rails, they have been positioned to allow the last two carriage guns to be used as bow chasers, in two positions, I will rig them in the most forward firing position, the last to caronades will be set in a standard position.
Deck edge

Timber-heads
- fake johnbull, mort stoll, aliluke and 9 others
-
12
-
Again mainly a photo update.
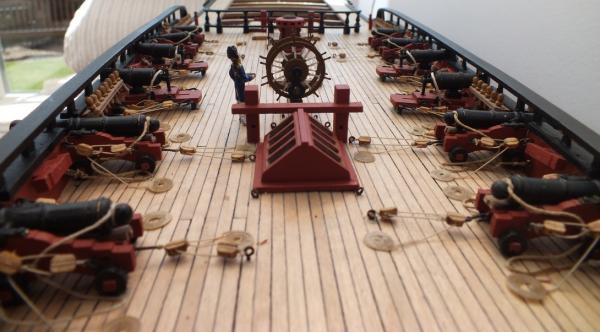
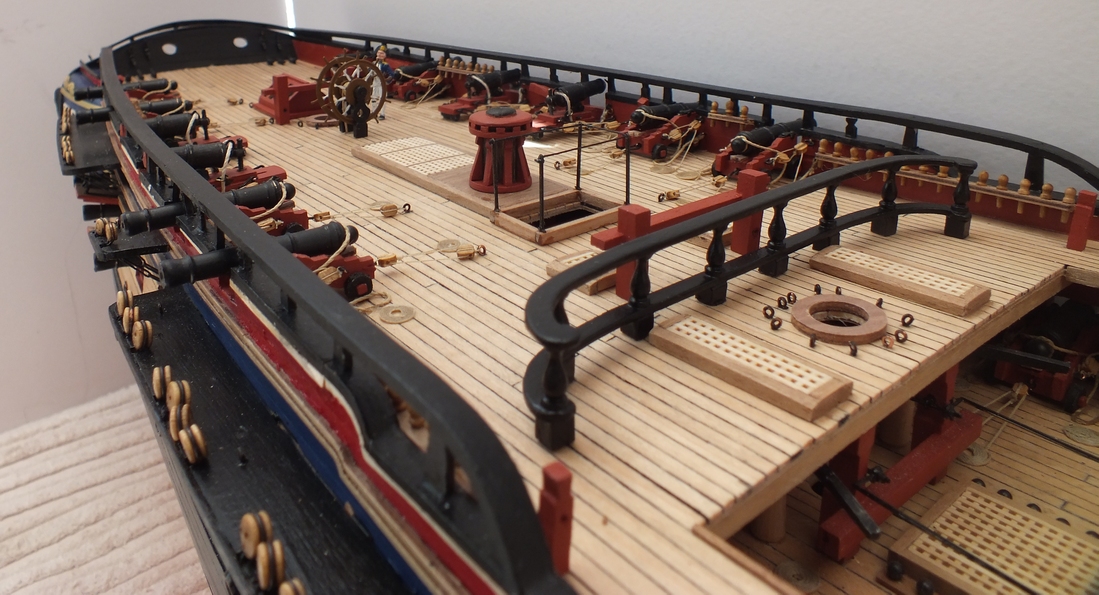
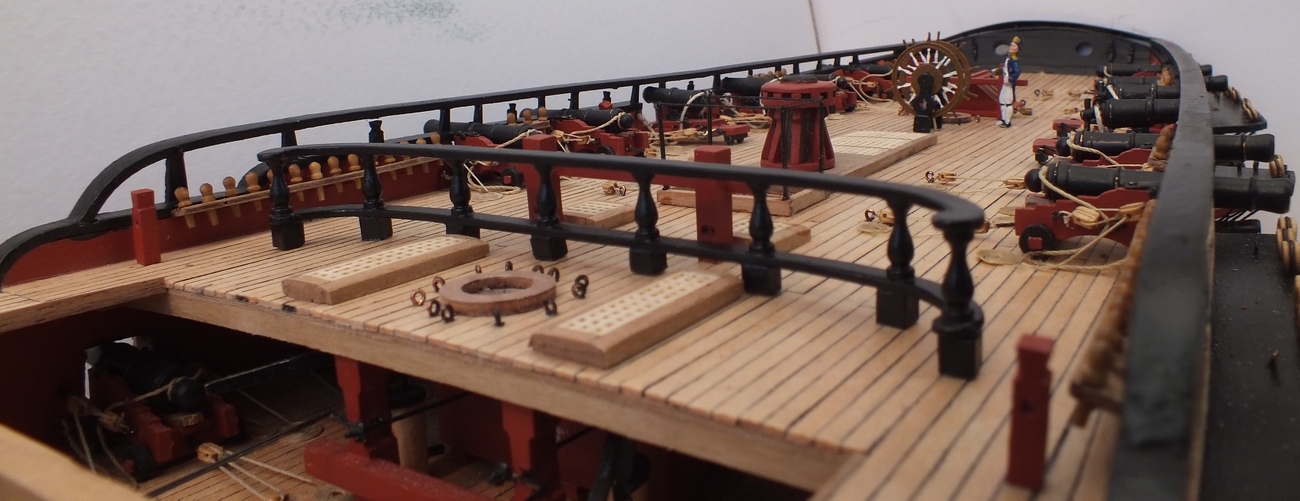
The Quater deck is now completed just a paint touch up on some of the eye bolts and rigging hooks, next the fore deck.
The barricade

Rear view
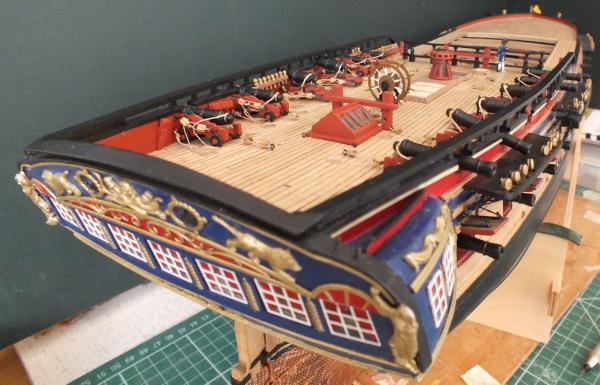
Finished Quarter deck


- Mirabell61, fnkershner, mtaylor and 15 others
-
18
-
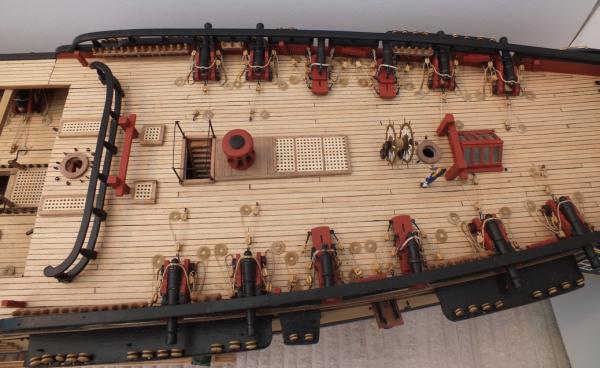
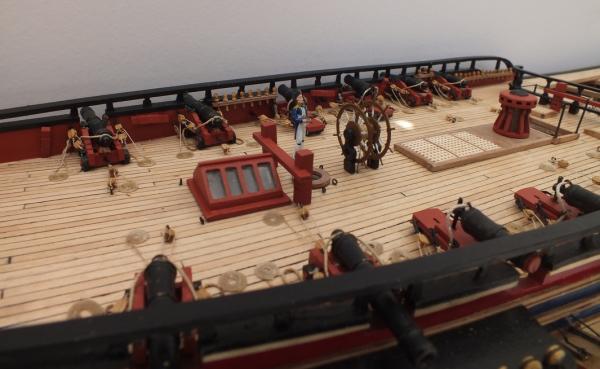
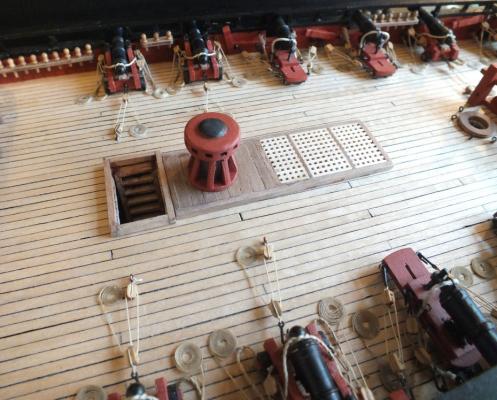
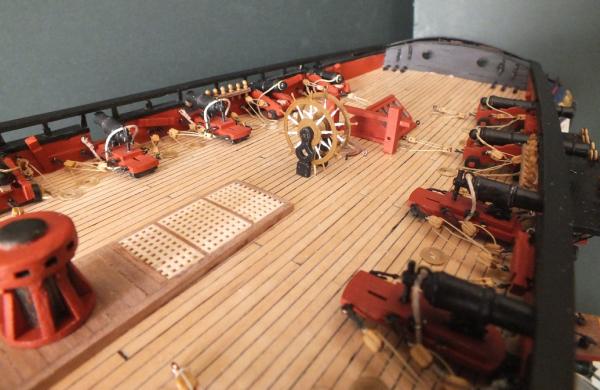
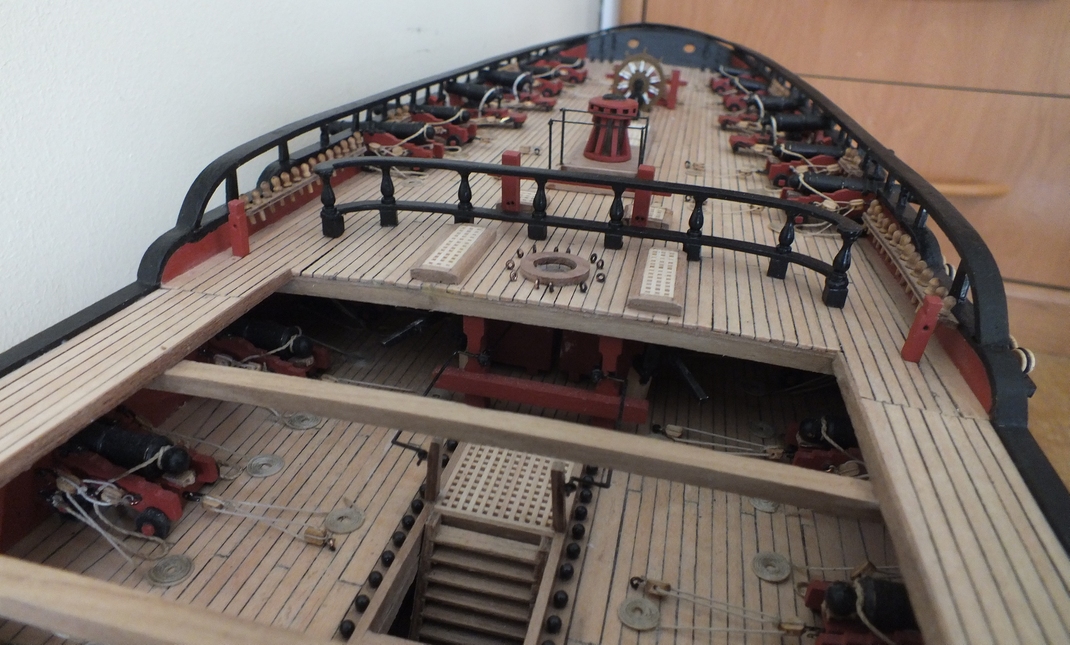
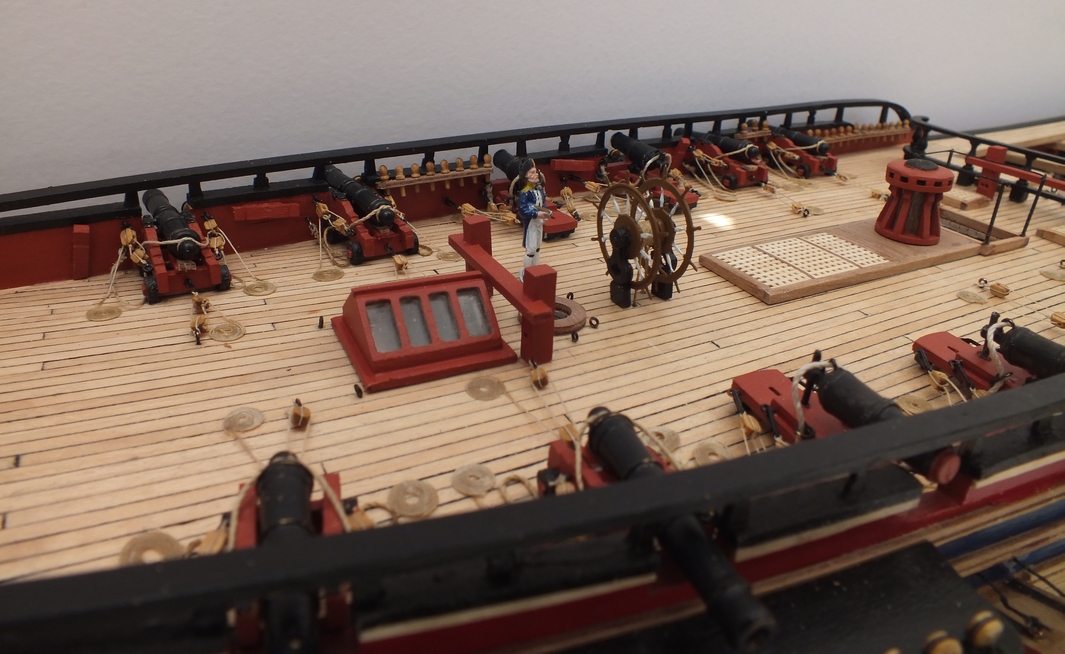
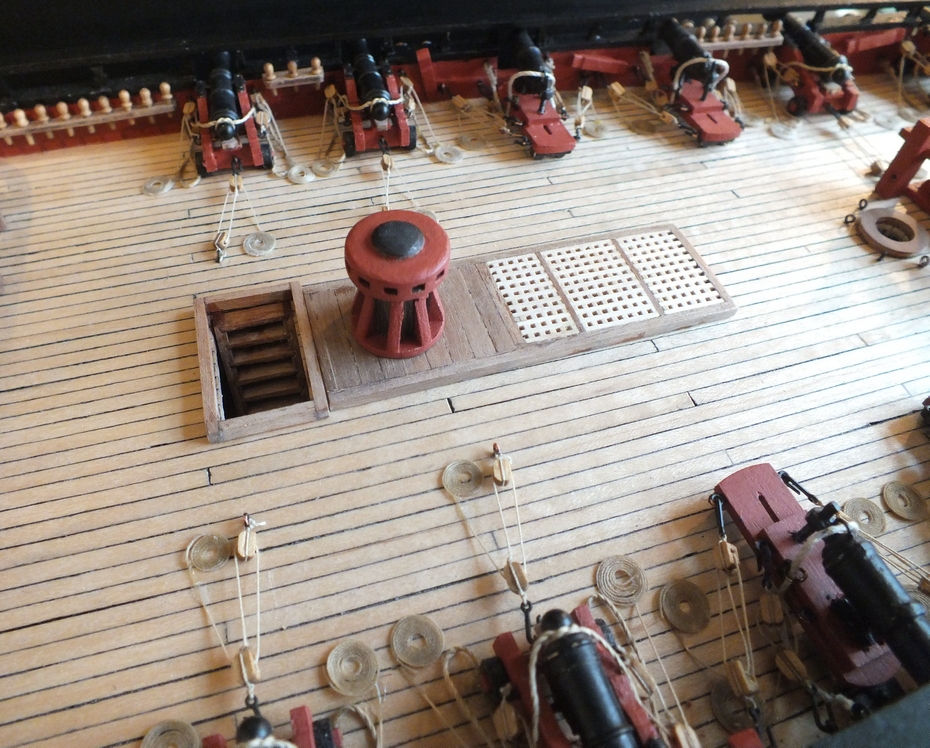
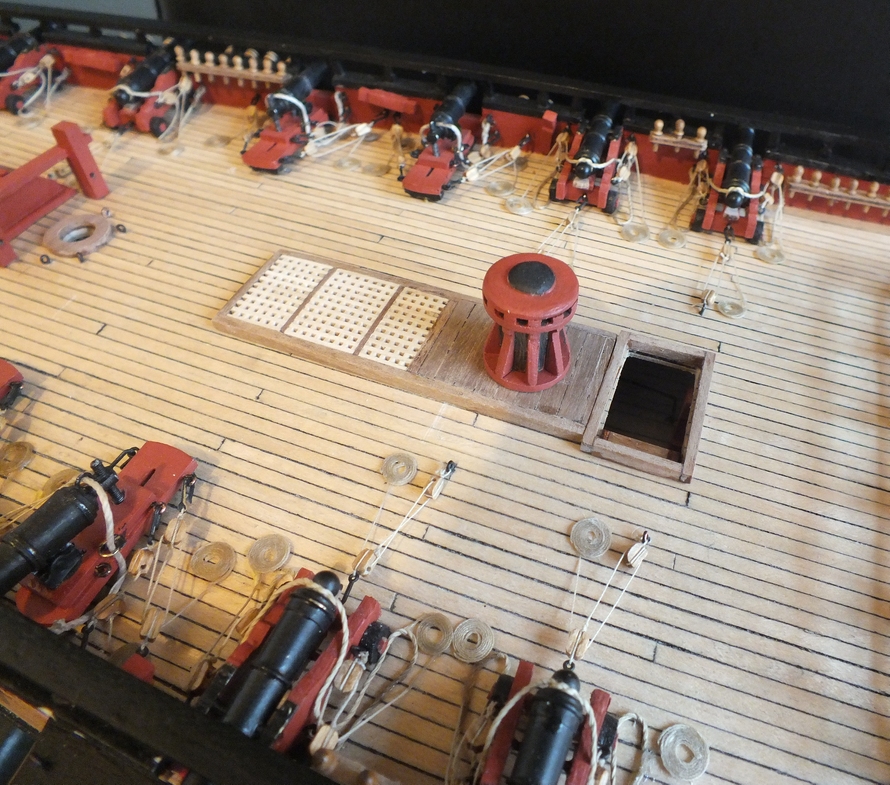
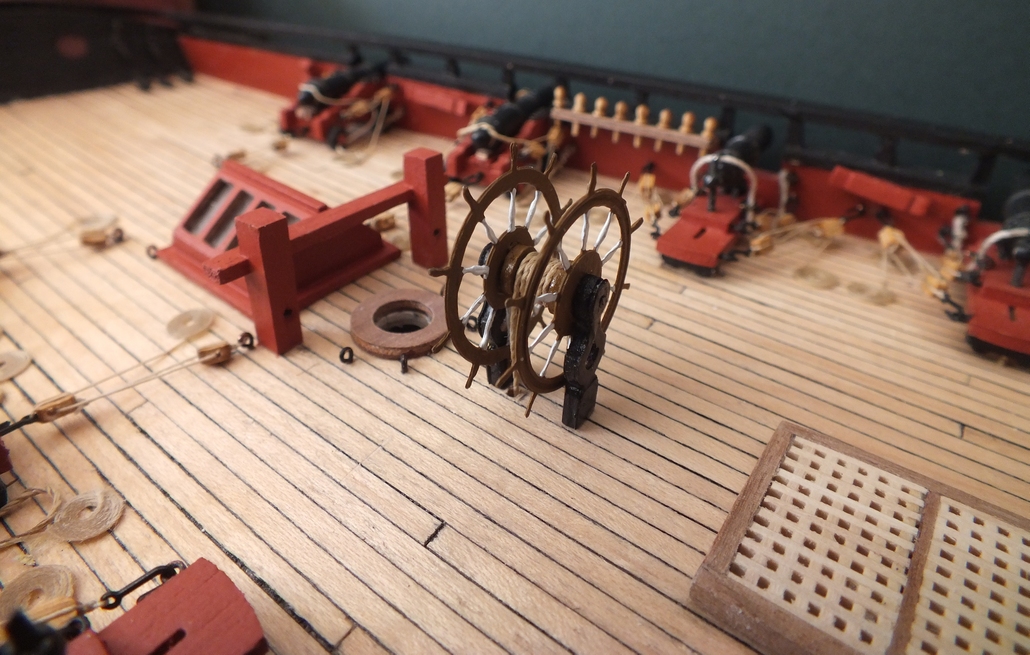
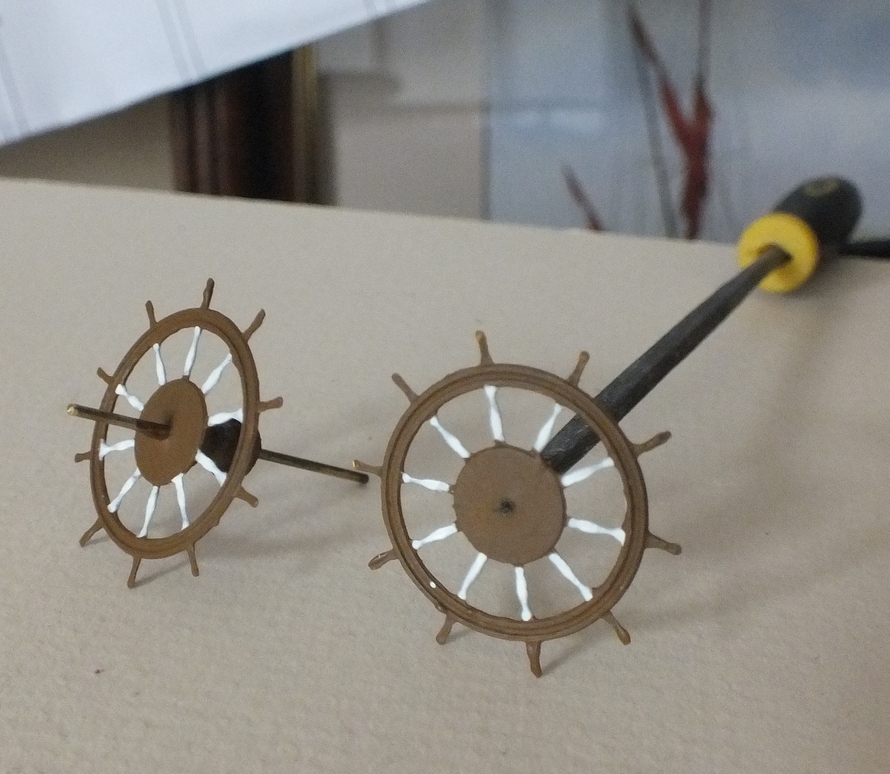
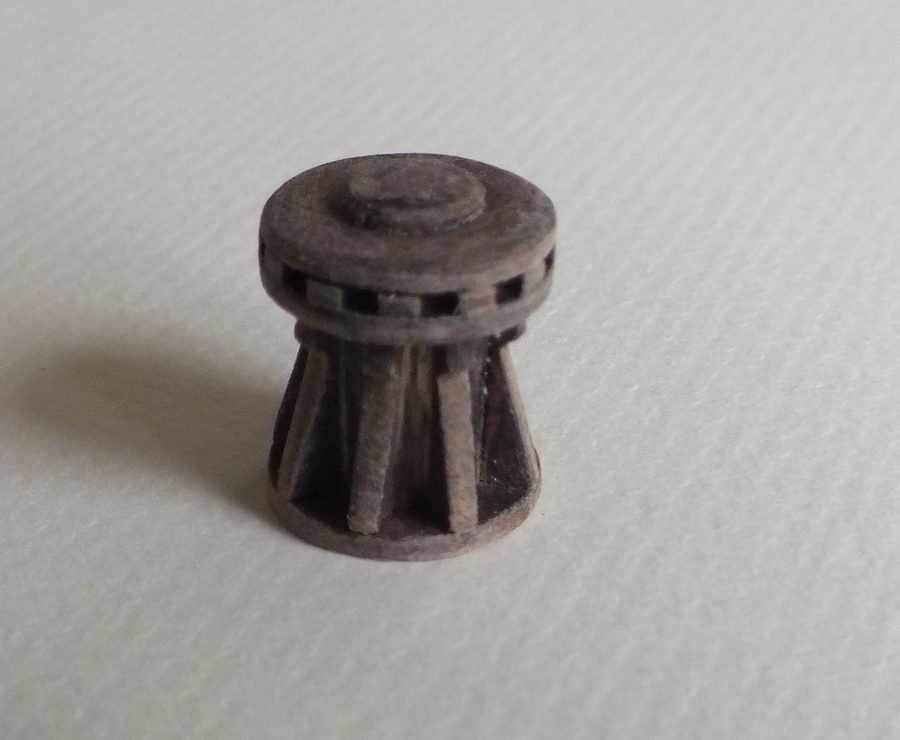
Mainly a photo update of the quarter deck. The skylight, mizzen timber bitt, ships wheel, main grating with the capstan platform and hatch and ladder have now all been made up and added.
Skylight and mizzen bitt
Grating

Capstan

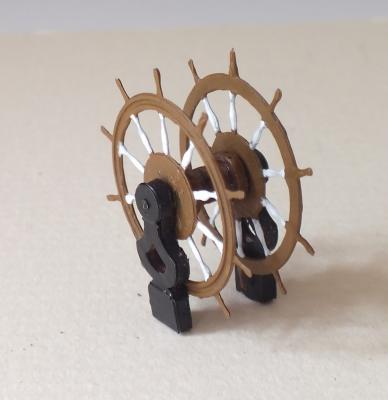
Ships Wheel
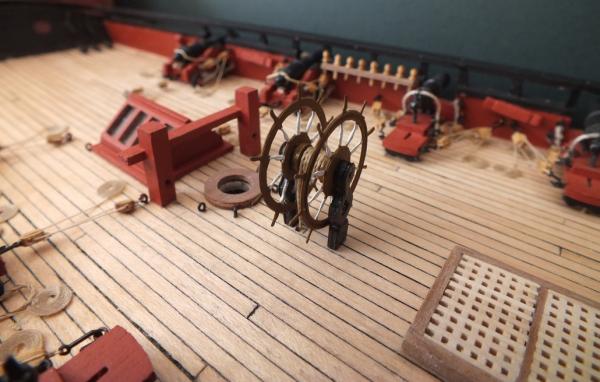
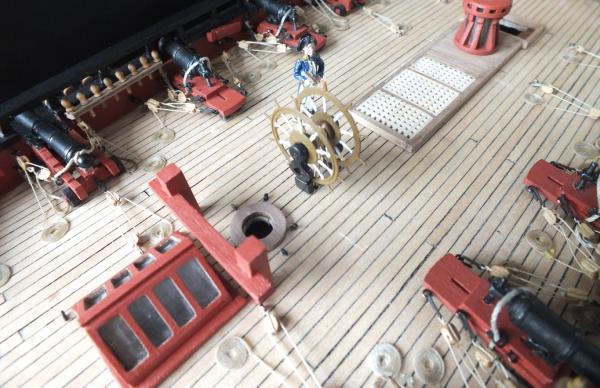
Quarter deck so far
-
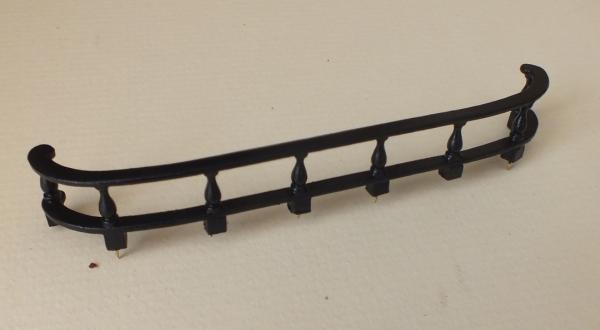
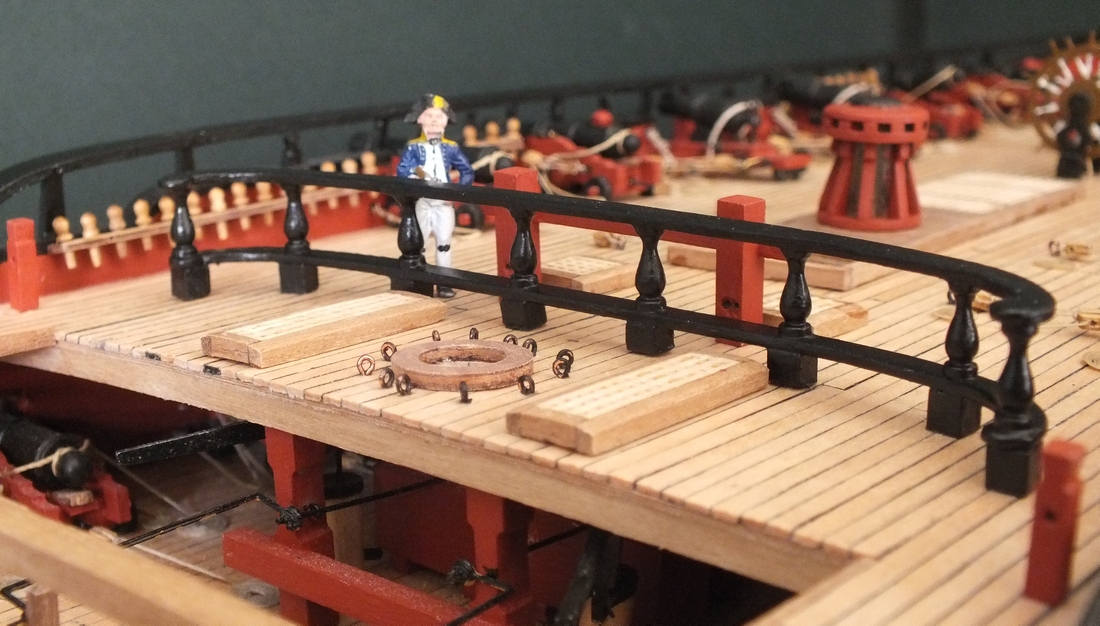
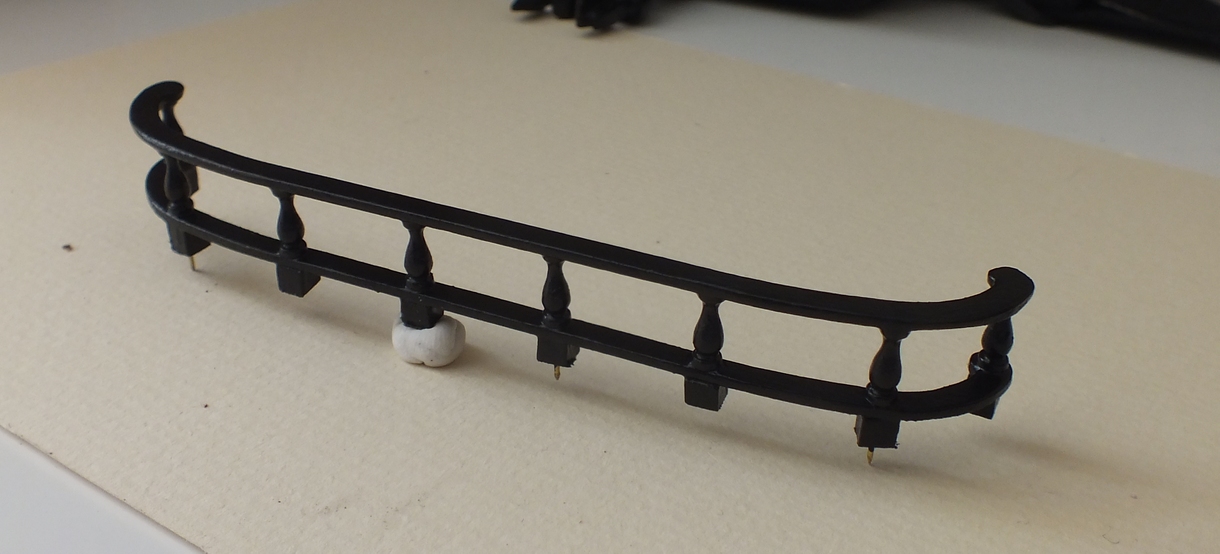
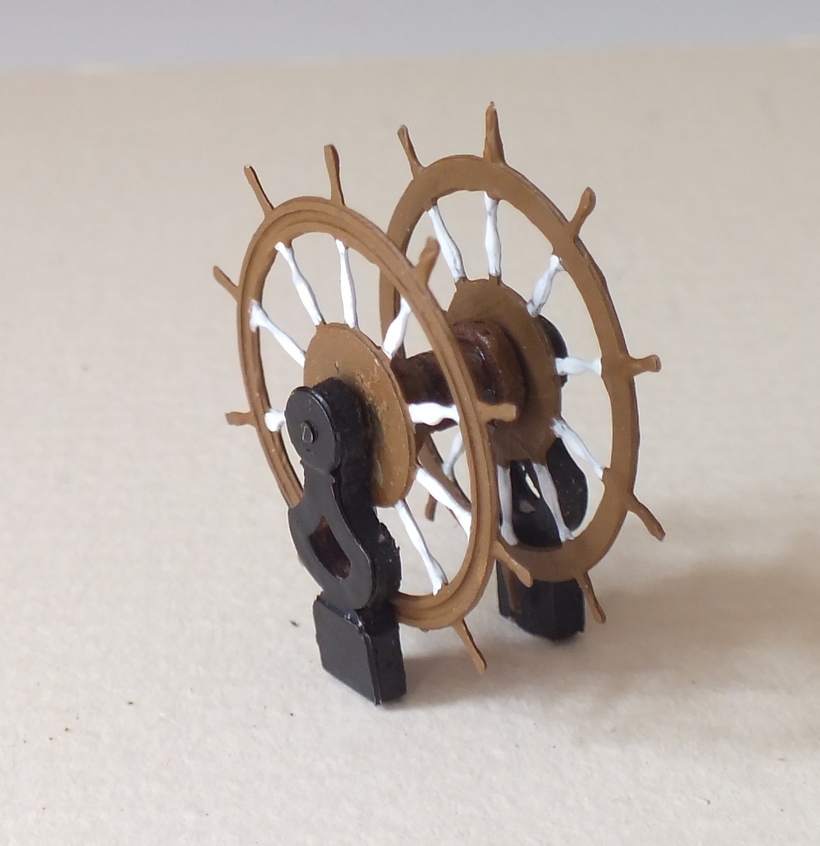
The barricade has now been painted black and I think looks better for it, the ships wheel has also be painted and made up, and the rail on the great cabin roof has been fixed on.
Black barricade
Ships wheel

Cabin roof rail

-
Many thanks for all the ticks and comments.The barricade will turn black later today, it is black on my Pegasus and on a lot off other models and I think it is the way to go.
-
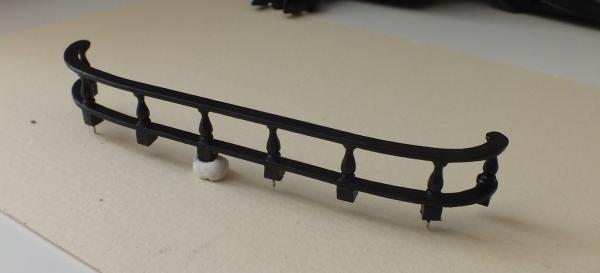
Time to complete making up the quarter deck fittings and add them the the model, I first added the pin rails all of which had the holes opened up to take the belaying pins, next came the deck cleats (which were drilled and pins added) then I added the eye bolts to the deck and the channels, here I did make a boo boo and drilled the holes the wrong side of the main mast hole, so now there are eye bolts right around the mast hole. Next the cavil blocks were modified to bring the top away from the side of the bulwark this will allow ropes to be tied to them see photos, if not altered you could not tie off on them. I made up the barricade a bit fiddly but not to bad at the moment I am undecided as to whether to leave it unpainted or paint it black.
Pin rails

The barricade
Barricade dry fitted
Cleats
Cavil blocks
-
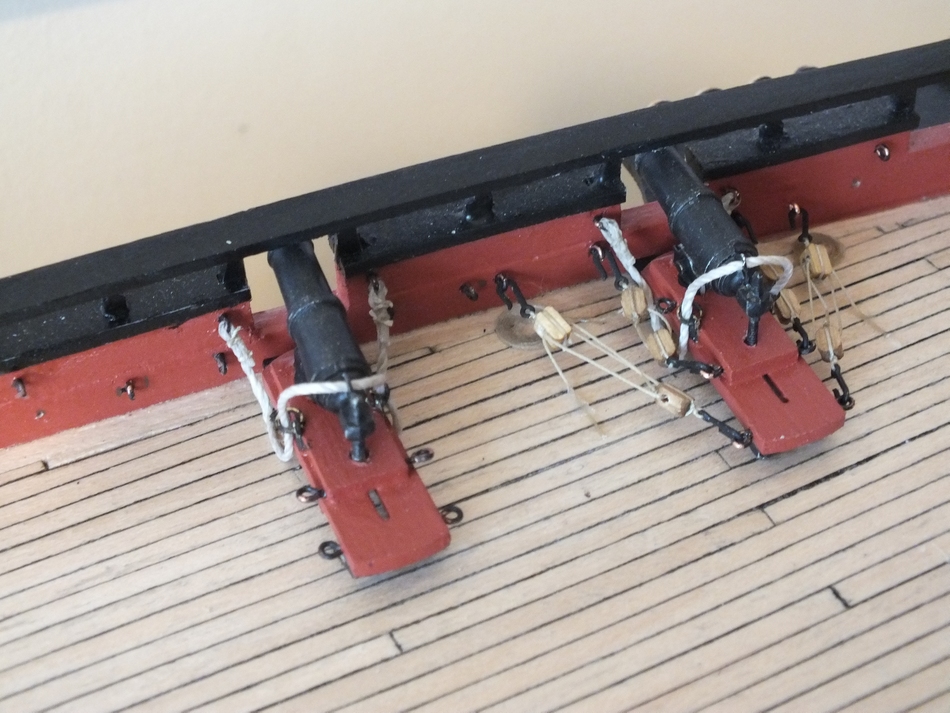
All the quarter deck guns have now been rigged slow progress due to other comittments and a bout of flu, the only other work has been on some of the deck fittings. I will update on the fitting soon, I will also add the pin-rails, I think they will be fixed to the top of the bulwark below the open rail,I will also fit the cleats plus the eye’s to the rear half of the ship, at this moment I am also thinking the sky light will be painted red ochre and the barricade black as all the wooden components in its construction are different colours.


All the quarter deck guns rigged

-
Great extra details super build.
-
-
Hi Mort
I might yet still paint the sky-light I just made up a couple of the deck fittings until I could get back to the guns, I will most likely place all the deck fittings dry in place and then decide on the final paint or varnish finish.
-
Hi all
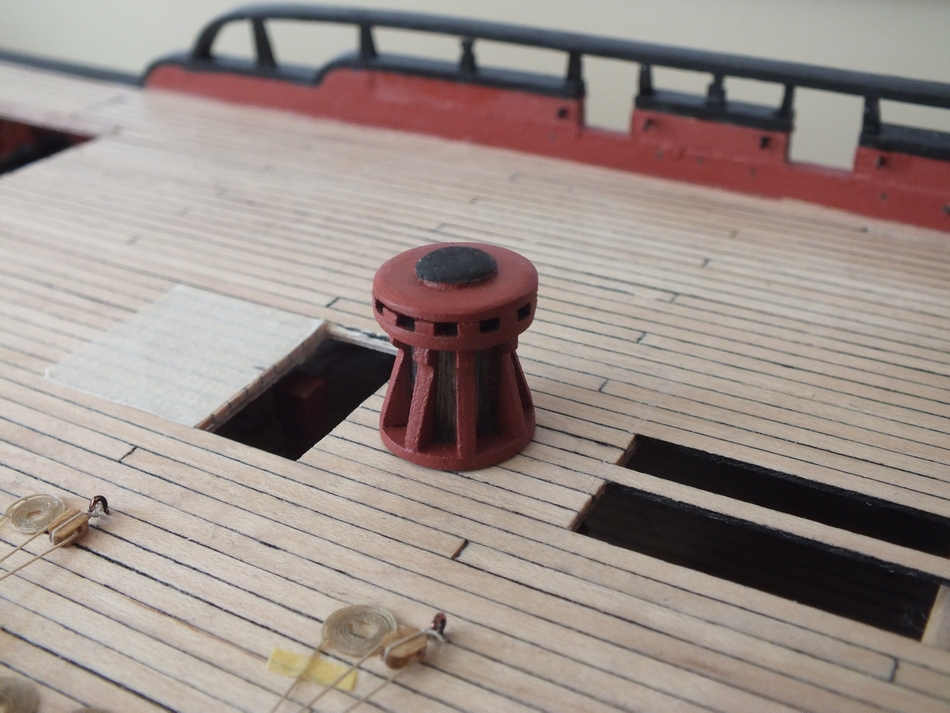
I have had a bit of a building break, mainly due to refitting our bathroom, which included a new bath and new sink & loo vanity units. We also had a week looking after two of our granddaughters. I did make up a couple of the deck fittings the capstan and the quarter deck sky-light.
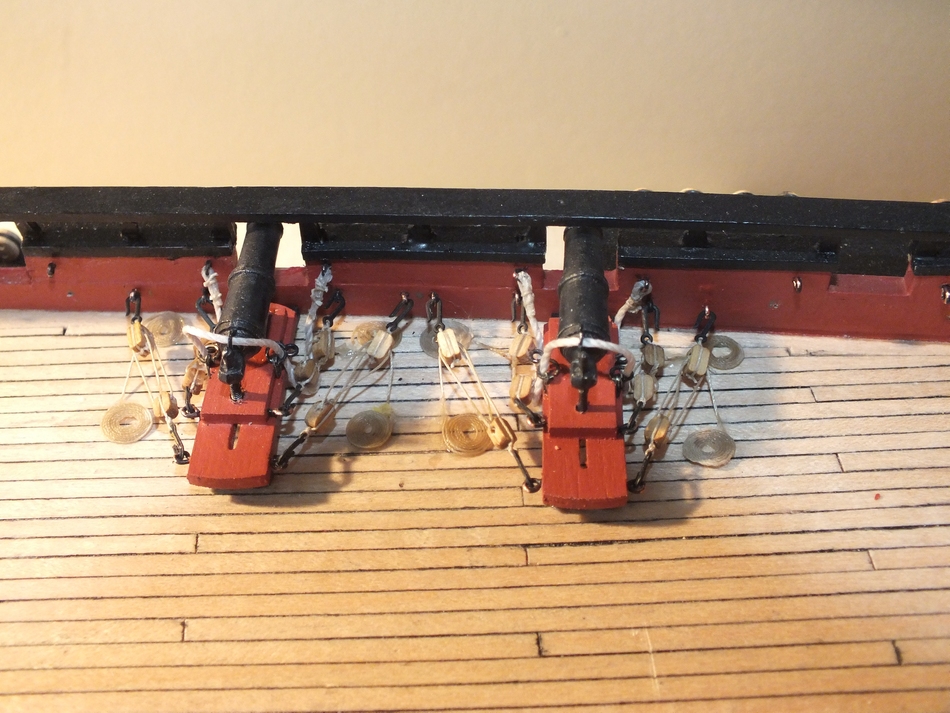
Now back to adding the guns to the other side of the quarter deck, two carronades so far.Capstan

Quarter deck sky-light
Second side Carronades


- jaerschen, mtaylor, mort stoll and 10 others
-
13
-
Great work Len when its time to move on best to do it, all the best for any future builds.
-
Looking good and the jigsaw gun port ply seems to fit very well as this can be difficult, well done.
-


HMS Diana 1794 by Ray - FINISHED - Caldercraft - A 38 gun Heavy Frigate
in - Kit build logs for subjects built from 1751 - 1800
Posted
Mort
The Kit
In my opinion the kit could do with a bit of an update, as I believe Diana is a very early Caldercraft kit,I don’t know if the later ones are better, it is, not as good as Victory models Pegasus or The Lady Nelson that I have previously built,but it is not a bad kit, and upgrading some of the parts is not that expensive, I have just replaced the birch dowel with walnut for about £18, I am just starting the masts and comparing the plans to the drawings in The Anatomy of Ships “Diana” they do differ so I am going with the masts in the book which are more likely to be correct ?I have found there customer service very good,they replaced a couple of missing items quickly and with no fuss.
If you want to build a big Frigate this is still a great option but not for the beginner.
The ships wheels
You are right the wheels are two thin and should be twice as thick,they are very nice wheels spoilt by the thickness.
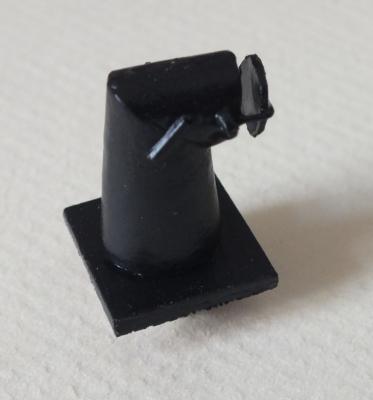
Swivel guns I might add some but if I do it will be towards the end of the build I fitted them last on Pegasus so they did not snag up when rigging