robnbill
-
Posts
841 -
Joined
-
Last visited
Content Type
Profiles
Forums
Gallery
Events
Everything posted by robnbill
-
I narrowed my searches down to the Dewalt or the Excalibur. I too was looking for a saw to assist in scratch building my next ship. The Excalibur has such high reviews and the table was steel and larger than the Dewalt. The other factor was the tilting head rather than table. Since holding the work against the table with it flat is easier than with the table tilted. I am still finishing the Connie so I have not had much of a chance to work with the saw. However, what little chance I have had to work with it has been great. I really like the saw and would recommend it. I know it is a lot of money, but good tools last forever.
-
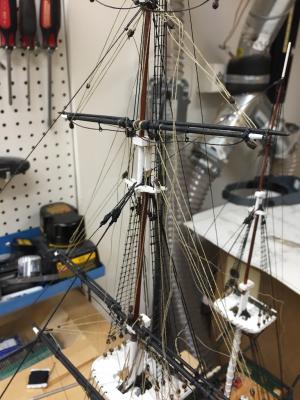
 I understand completely. I am at 1:93 and Mamoli also did not include them in their plans. It is crowded on deck. I have attached photos showing the shrouds for my main mast. The Bentinck shrouds are only on the fore and main masts since the mizzen has the spanker mast that would preclude it's rigging. I have also attached a pdf from the thread that discussed this with photos from Popeye2sea that are from the current ship's configuration. I used these when coming up with my solution. The rings on the deck fit in open areas so they were not too terribly bad in getting access to them to rig them once installed. I also decided to fully serve the shrouds since I thought they would look better (they did). If you need more photos or have questions on how I did it let me know. Futtock-Bentnick Details.pdf
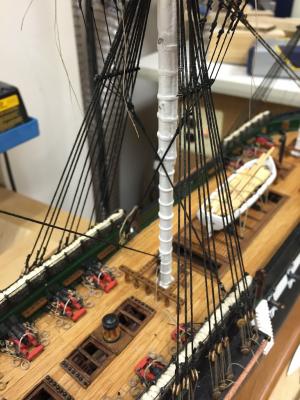
-
You're looking great AND you didn't break your davits off! I have purposely not installed mine because I knew without a doubt I would break them off putting the rigging on. Your ship is looking very proper.
- 1,756 replies
-
- 2
-

-
- constitution
- constructo
- (and 1 more)
-
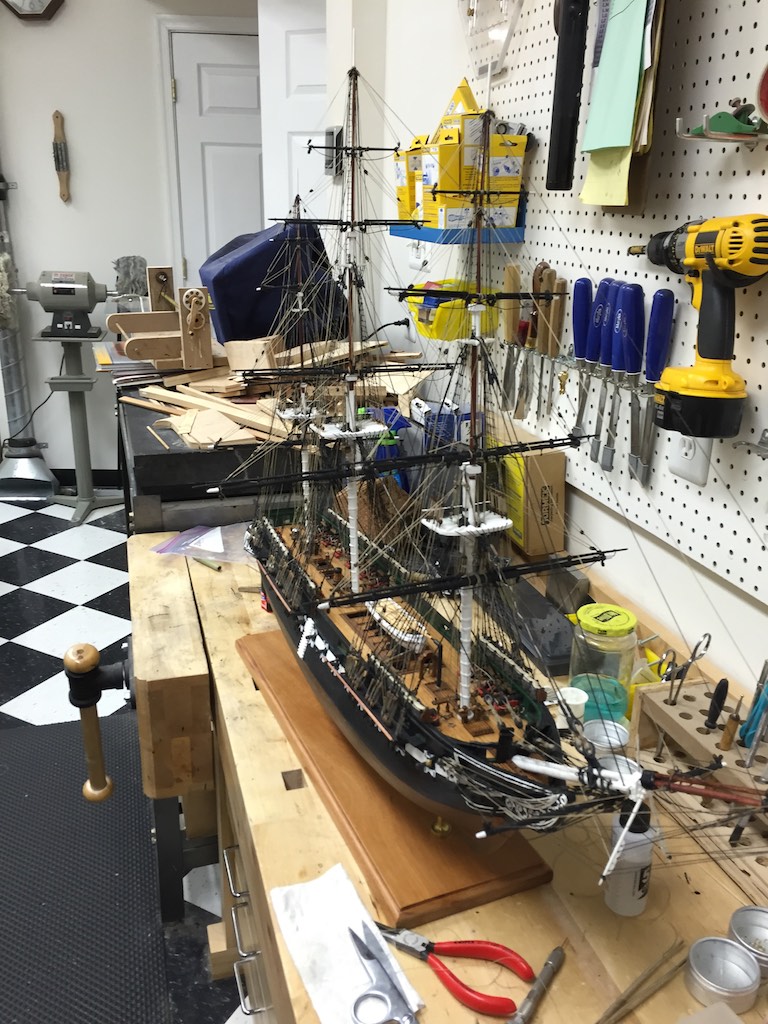
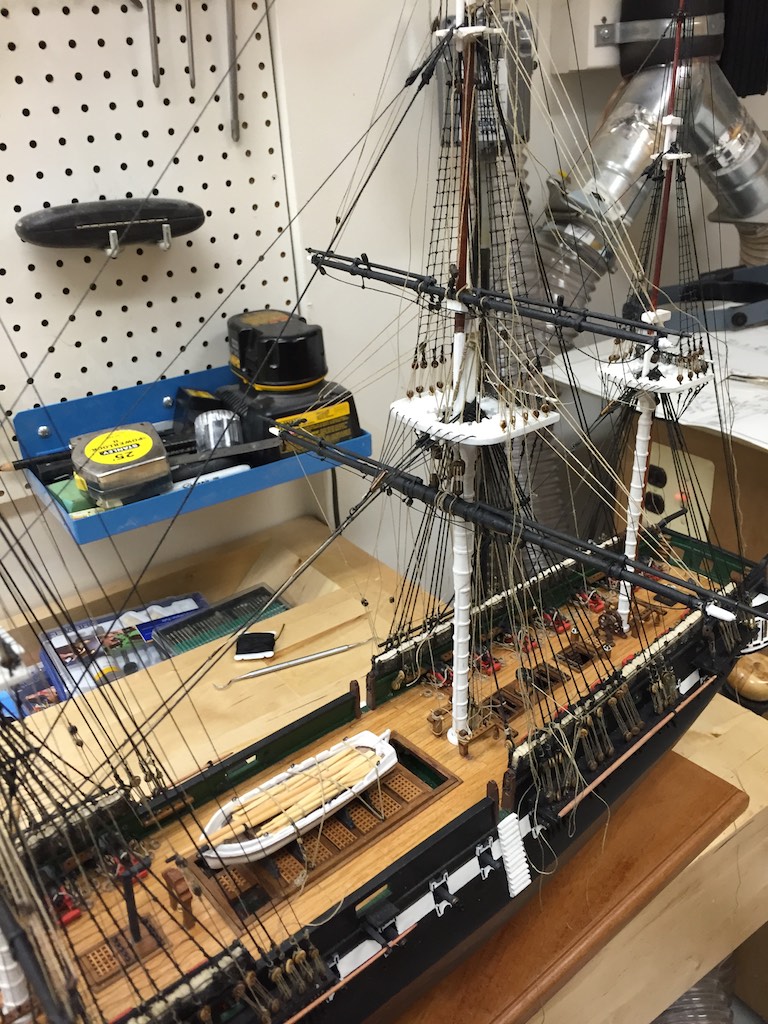
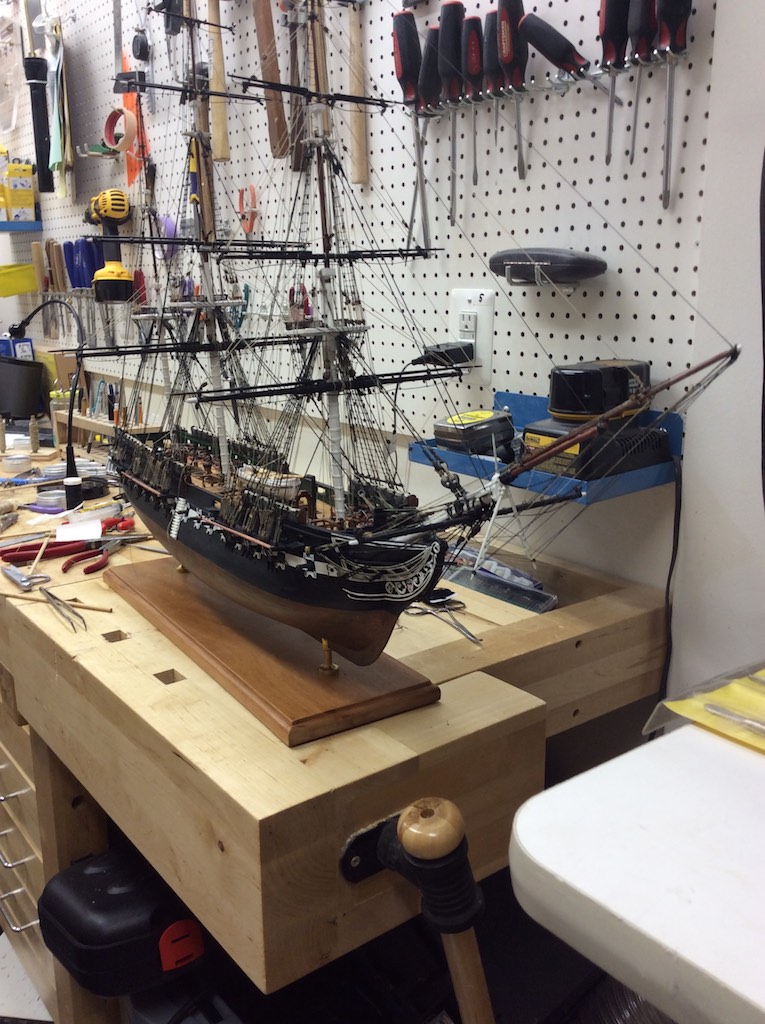
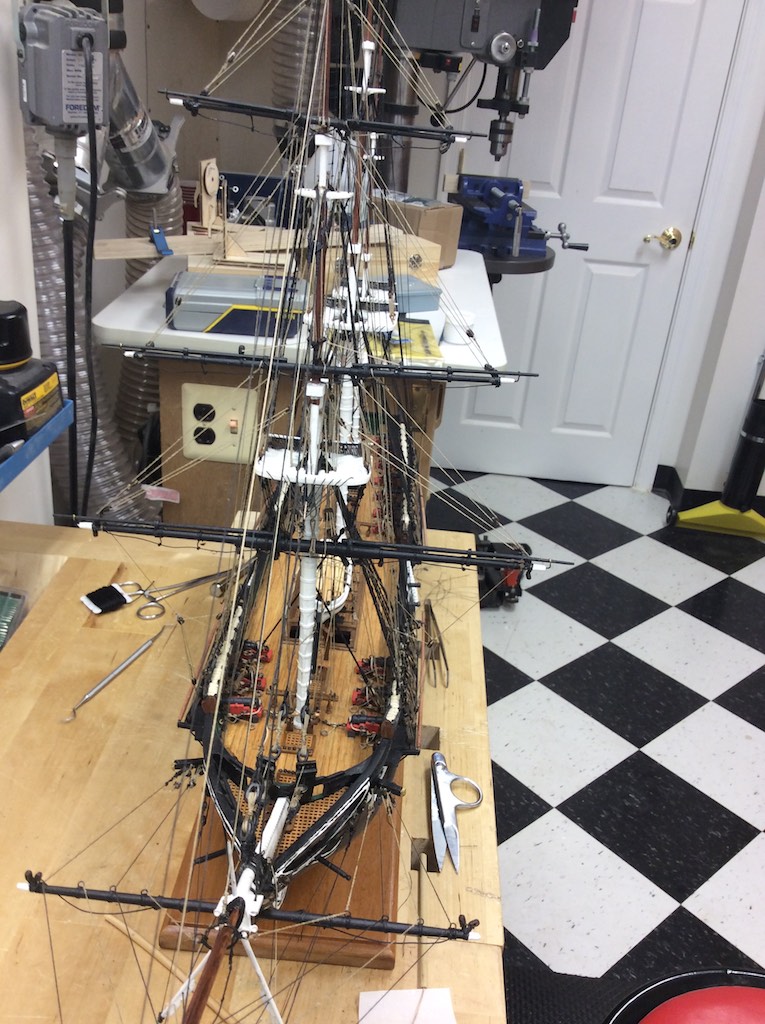
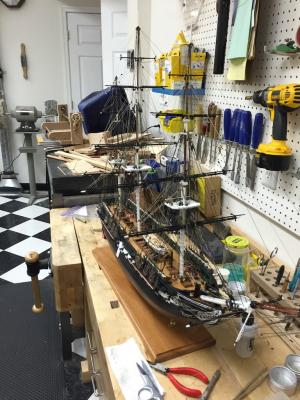
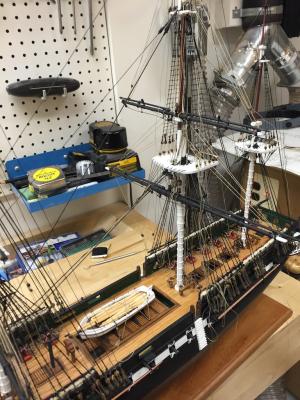
I completed a milestone today. All of the spars are now attached to the ship and rigged. The last layer of rigging, those going to control the angle of the spars still has to be added. I also need to run the lower mizzen ratlines. I plan on doing the ratlines and starting the remaining rigging tomorrow. Once this is done, then I need to install the side davits for the two rear side lifeboats and build the three lifeboats. Then I need to add the many coils to the rigging to complete the ship! Here is a quick photo I took of the ship as it sits tonight.

- 335 replies
-
- 8
-
-
- Constitution
- Mamoli
- (and 3 more)
-
Thanks you all for your likes and comments. I have made much progress yesterday by attaching the control rigging to the Bowsprit Spar as well as creating and rigging the ships handling lines running from the main and fore masts. This is all in accordance with the Mamoli plans. I will continue the rigging today with the spanker booms and their associated rigging. I also noticed I forgot one of the mizzen spar lifts when reviewing the work last night. SO I will fix that first thing this morning. I will take some photos of the work tonight once I complete it.
- 335 replies
-
- 1
-
-
- Constitution
- Mamoli
- (and 3 more)
-
I completed rigging the mizzen today. Tomorrow I will start working the spar control rigging (fore to aft). This starts with the spritsail yard and moves aft ending with the spanker booms. This will include the rigging for the main hatch ship’s boat. Once these are complete I will rig the lower mizzen shroud ratlines. Given the interior rigging remaining holding off on the ratlines seems to make sense. Remaining work will be the control lines running fore and aft in the spars then the three ships boats.

- 335 replies
-
- 12
-
-
- Constitution
- Mamoli
- (and 3 more)
-
I used a Bentinck Shroud configuration. All of the upoer shoruds tie into a ring and the ring then crosses to the opposite side of the deck and anchor to a hook set tied to a ring attached to the lower bulkhead. This follows the rigging on the current ship as well as what probably was on the ship during the 1812 period. Only the fore and main masts are like this. The mizzen all come down to a single catharpin.
- 335 replies
-
- 1
-
-
- Constitution
- Mamoli
- (and 3 more)
-
Part of the last upgrade. It was causing so much angst among some users they decided it wasn't worth the heartburn.
- 1,756 replies
-
- 2
-
-
- constitution
- constructo
- (and 1 more)
-
However, if they did that the laser cut bulkheads would be symmetrical.
-
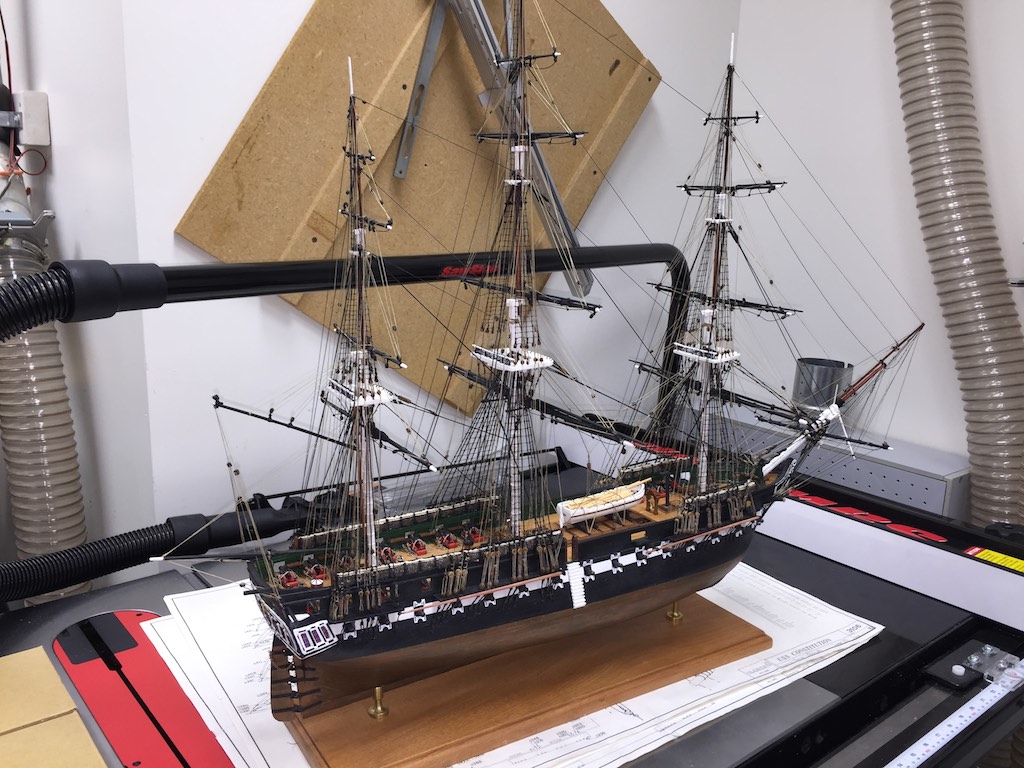
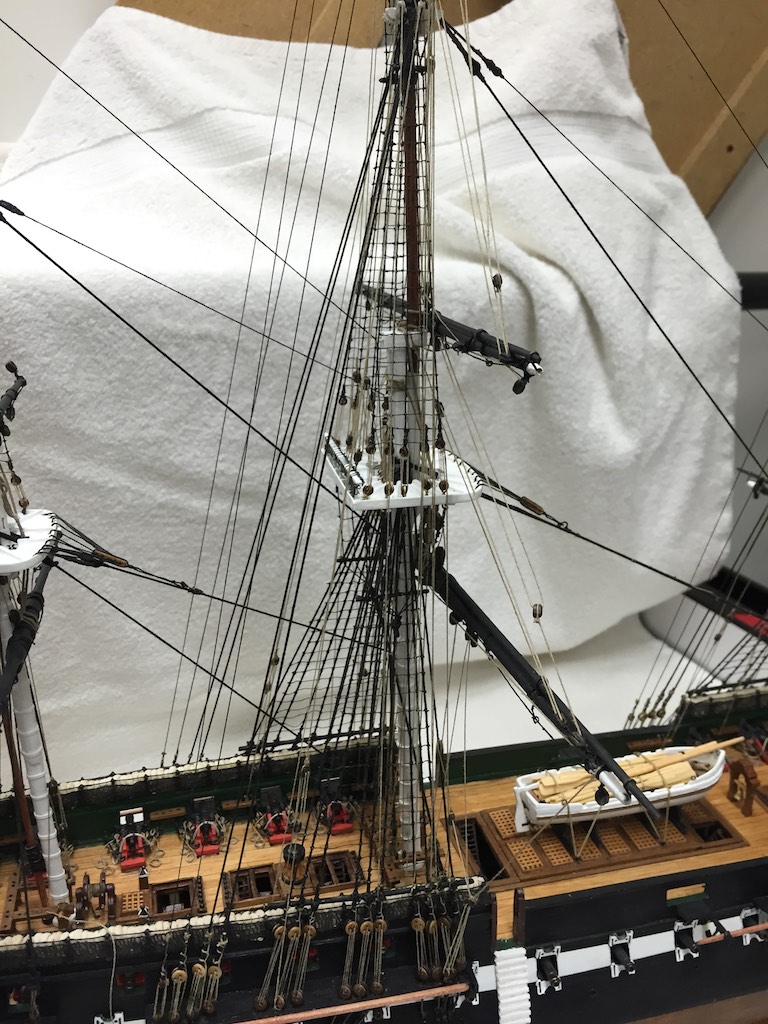
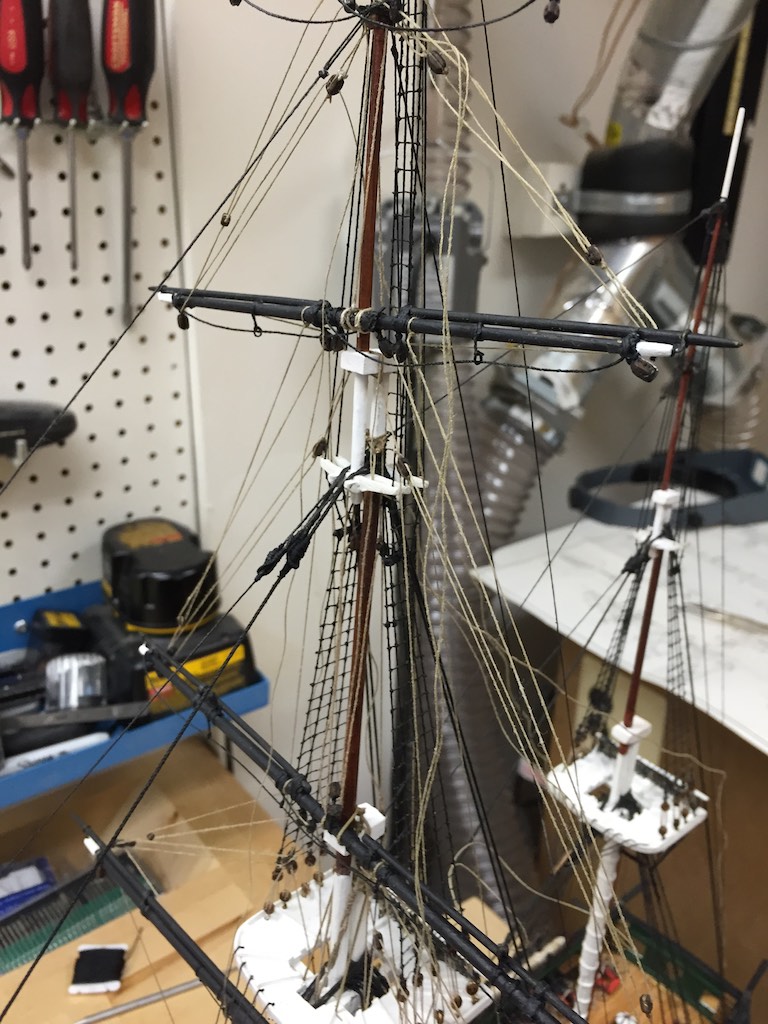
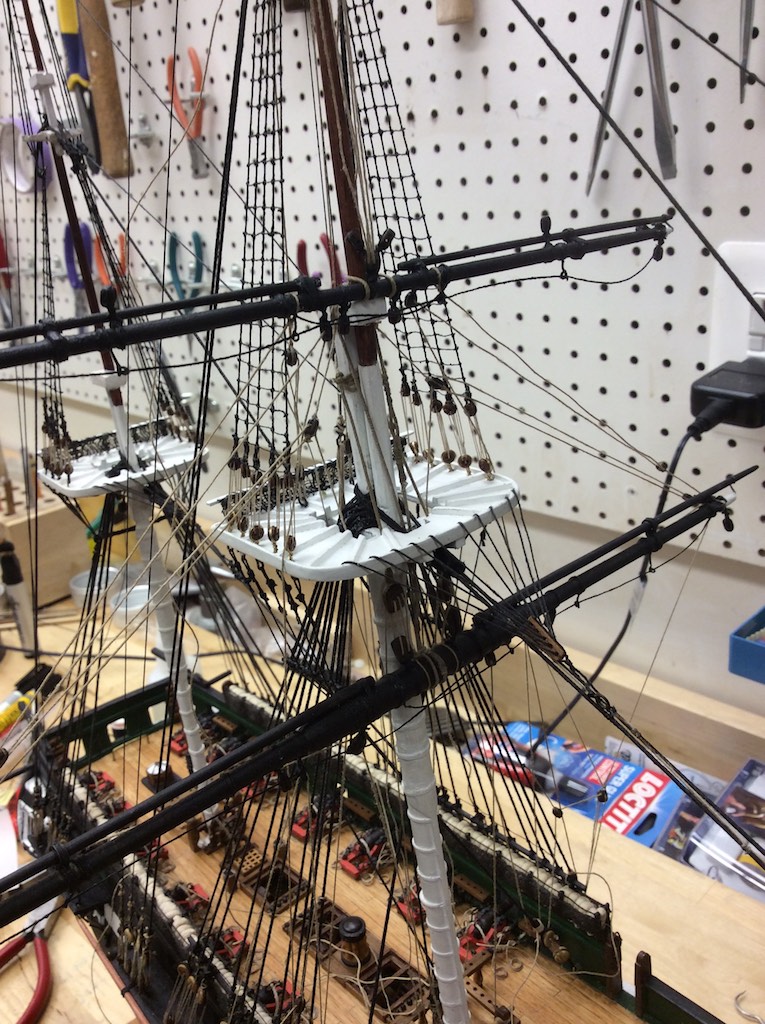
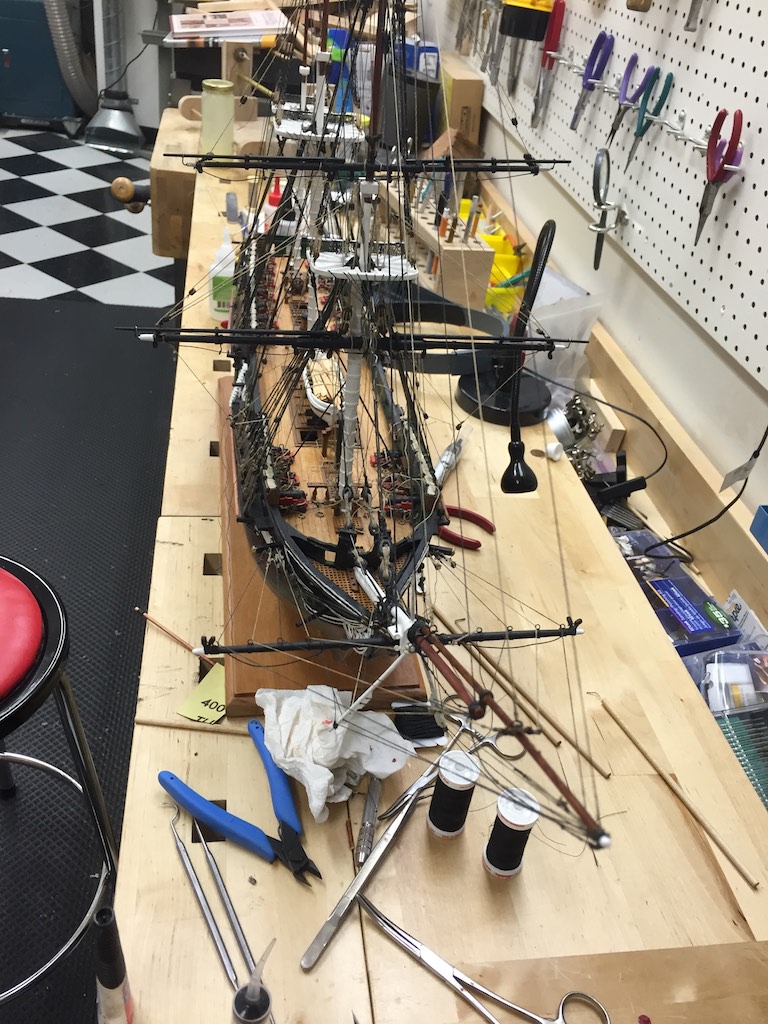
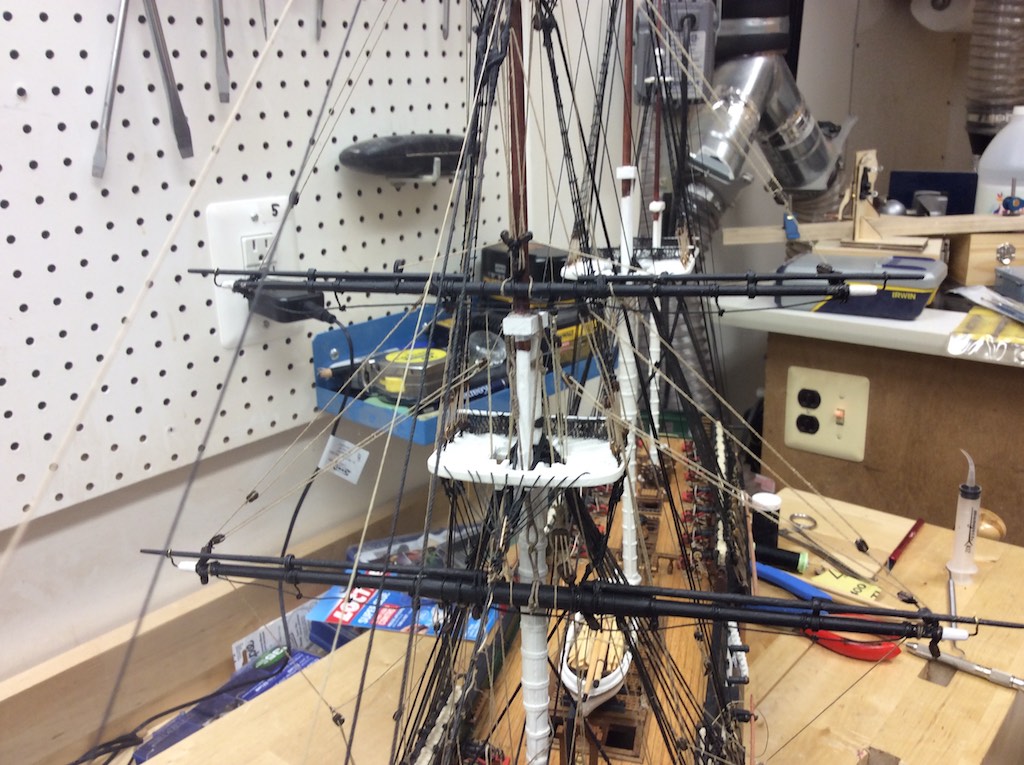
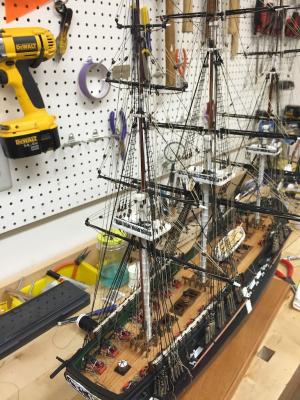
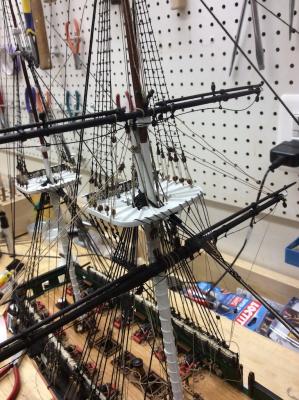
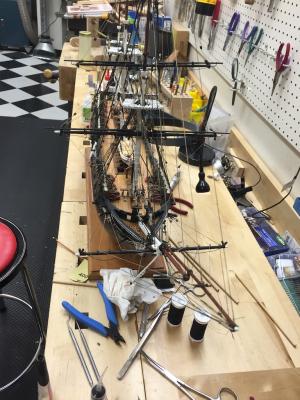
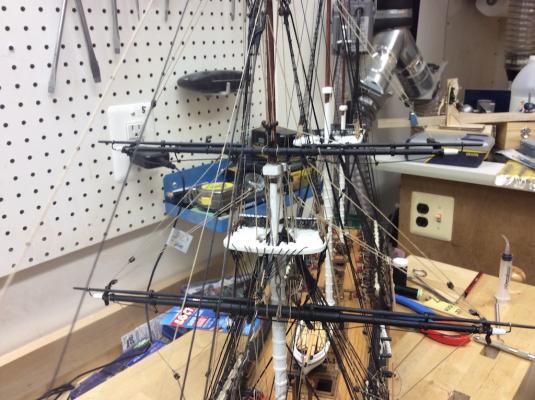
Over the last couple of days, I have been able to complete the rigging of the main mast, including the ratlines. I have also attached the spars to the mizzen and have begun the rigging on those. I was able to add the jeers and the block set that goes below the spar to the lower mast. This is unique to the mizzen. I did not have room to add a ring between the mizzen mast and the ship's wheel, so I added the ring to the lower part of the mast. Tomorrow I will continue to work on the mizzen rigging. I did notice that the top spar has the blocks reversed, but that will be an easy fix. Once these spars are rigged, I will add the spanker booms and the ship will be fully grown. Then I will complete the rigging with the lines running fore to aft to control the spars. So the end is in sight. Given the remaining work, including building and mounting the three POF whale/ships boats from scratch, I believe I might be able to complete the ship by the end of February. We shall see how good my prognostication is. I moved the ship over to the table saw and hung a white towel behind it to help in seeing the rigging. I do promise to get better shots once the rigging is complete.


- 335 replies
-
- 11
-
-
- Constitution
- Mamoli
- (and 3 more)
-
Model Expo also has some nice Walnut ones. They matched the ones I received in the Mamoli kit.
- 1,756 replies
-
- 1
-
-
- constitution
- constructo
- (and 1 more)
-
Us ratliners have to stick together. I am working on my main mast lower shrouds now. Of course I decided to break them up into parts. All of my upper shrouds are done. Then as I complete the running rigging on a mast, I do the lower shrouds. So I finished the rigging on the main and am working on those now. Then it is off to the mizzen.
- 1,756 replies
-
- 2
-
-
- constitution
- constructo
- (and 1 more)
-
RIch, I find using a pair of bent tweezers works best for me when tying the ratlines. Also, depending on what glue you are using, use the appropriate solvent right on the knot and trim the line flush with the shroud on one side. You should be able to pull the remaining thread out of the knot and off the shroud. At least that has worked for me. Then you can redo the ratline with a new thread.
- 1,756 replies
-
- 2
-
-
- constitution
- constructo
- (and 1 more)
-
Thanks Fletch. I plan on having the lighting on during the evening hours as a normal mode. The plan is to install the case in our foyer. It really must have lights since there are no task lights that would directly be over the case where it would be placed. I have a full wood shop so making the case is no issue. I would need to route slots on the underside of the top frame for the lights as well as provide a channel in one of the corners to take the power up from the bottom. I have a pretty good idea on how to do all of that. I ordered a book on case construction as well as having done a bit of research on the web. There are a number of vendors that offer cases with LED lighting but none of them, at least that I have found, describe the LED lighting in any detail other than offering it as an option. The color of the lights can really affect what the model will look like. Some LED lights are really bright, but the light is a blue white that I would think would not look very good on the Connie. LED is really the way I want to go since it does not introduce much heat into the case and it lasts a very long time, thus reducing the need to open the case for light maintenance. So I was hoping there were others on the forum that have used LED in their cases that could tell me what specific lights they used and how they liked them.
-
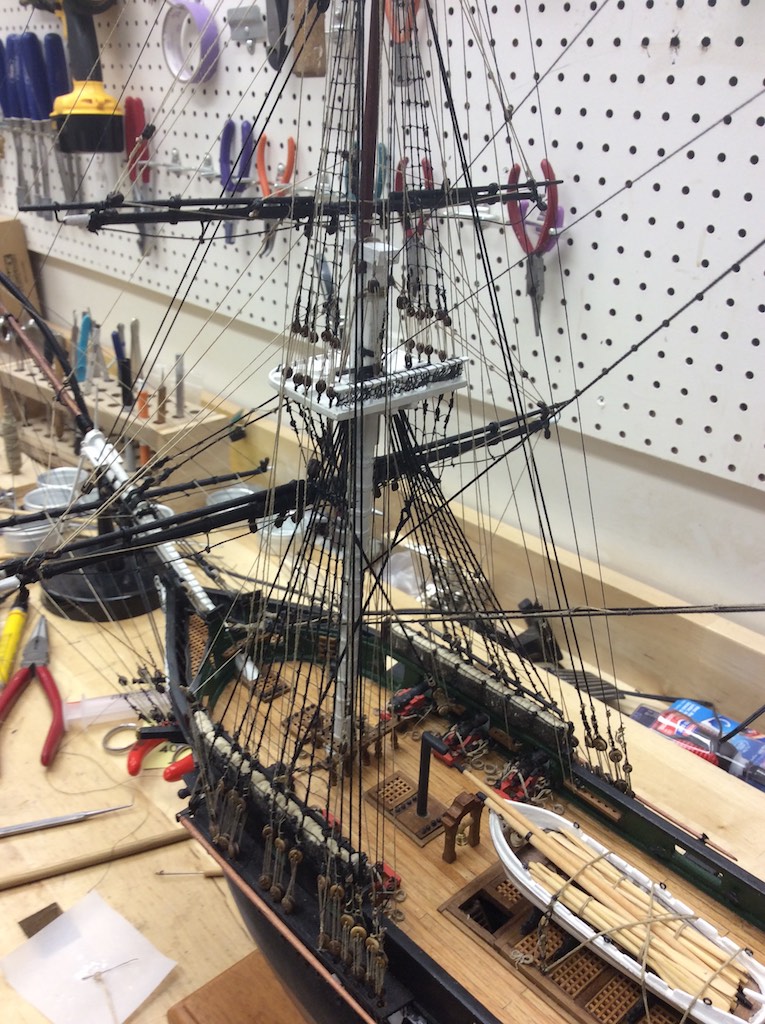
Today I rigged much of the main mast. However, the lines are mostly not terminated. I started working on the terminations this afternoon, but started seeing double. The lines have to be threaded down through the existing rigging in a manner that does not wrap around other rigging or obstruct anything. Tracing these lines is sometimes difficult given the number of lines running up and down the masts. This is what I really needed fresh eyes to do. So tomorrow morning that will be my project. This is still quite fun to do. I will post more photos tomorrow once the main is complete. Once I finish the current set of rigging I will tie the ratlines like I did on the fore mast. Then it will be off to the Mizzen and spanker booms. I added some additional rigging to the spanker booms based upon the AOS. So I will have to account for these as well as the Mamoli rigging. After the mizzen is installed and those ratlines done, I will need to evaluate the timing of installing the davits. I have held off installing the starboard and port davits since I know I would have knocked them loose on a number of occasions. This way, I hope to only have to install them once. I may do this before or after the remaining rigging. That is why I need to review the drawings to see what would be the best option. Once the remaining rigging and davit are installed, I will start the building of the the remaining ship's boats. These will be small projects themselves since I will be building them POF like I built the boat over the main hatches. The end is in sight. Still a ways off, but within sight. I have started looking at case designs. I will build the case to fit the ship. Anyone have ideas on the best LED lighting for the case?
- 335 replies
-
- 2
-
-
- Constitution
- Mamoli
- (and 3 more)
-
Try http://modelshipbuilder.com/page.php?183 and you will find Gene Bodnar's practicum on building the Eagle from scratch as a Plank on Frame ship. The practicum walk step by step through using the plans to construct your frames. How and where to take the measurements off each one and how to plot those measurements onto a framing grid. Even if you aren't interested in building the Eagle, the practicum is free and is a very good read.
-
USS Constitution by galf
robnbill replied to galf's topic in - Kit build logs for subjects built from 1751 - 1800
Galf, You are looking great. One note of caution with the sharpies. Another experienced builder on the MSB forum found that the sharpie colors both faded and bled. He had used some in his rigging and the black really faded badly. It also bled into the spars. So the colors of the sharpies are not always stable. -
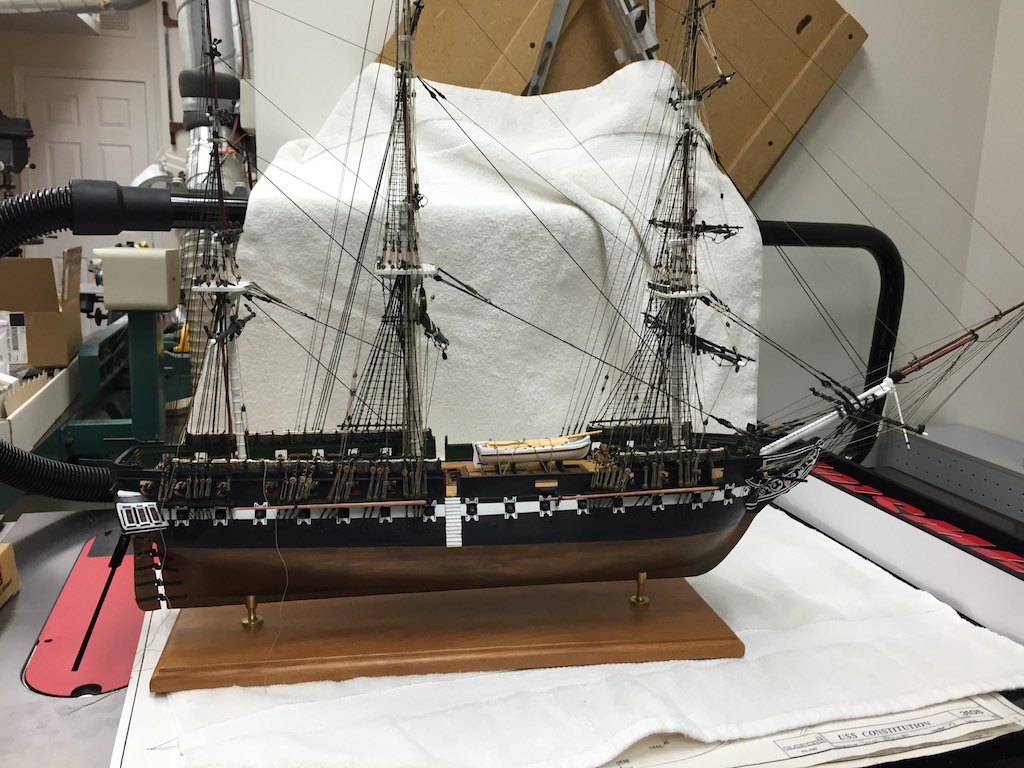
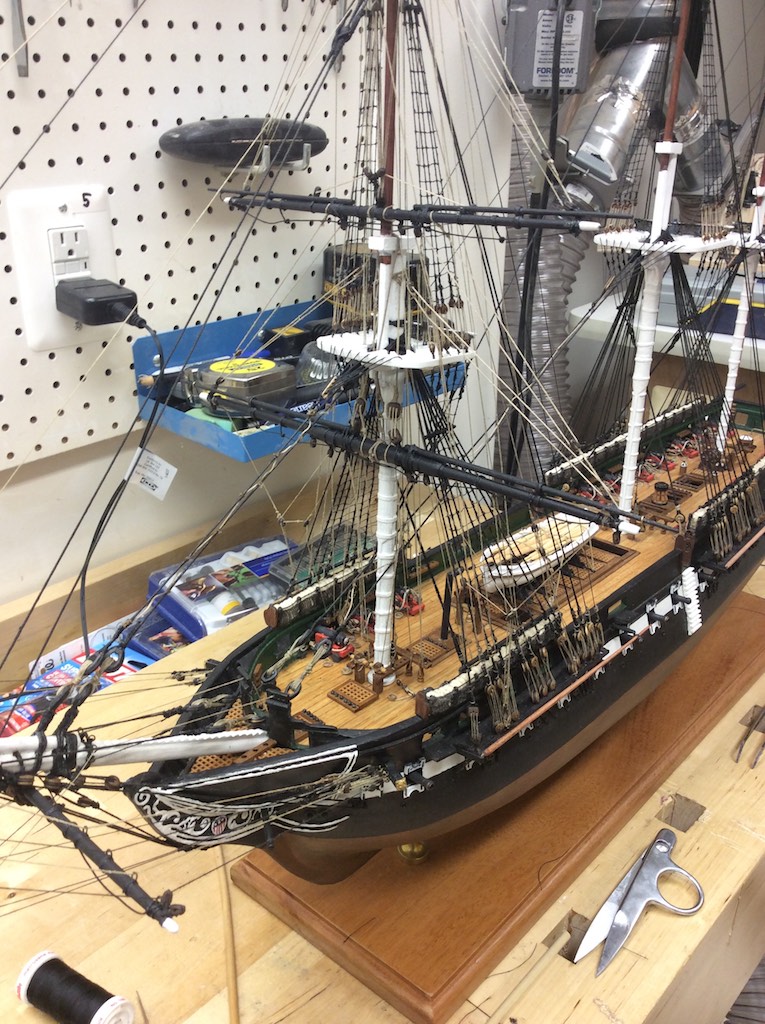
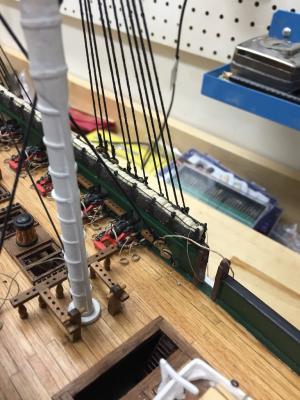
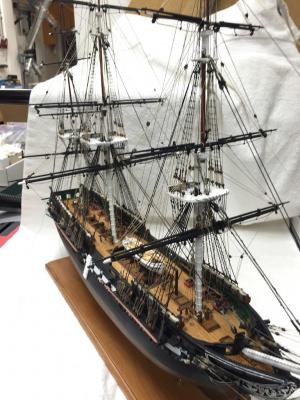
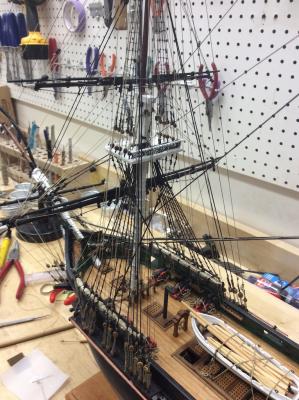
I continued work on the Main Mast running rigging today. The first thing I did was to run the lowest Ratline across both sides of the lower shrouds. This is to allow me to attach the lines over the ratlines. Unlike the fore mast rigging, now that I know how the rigging is working, I am terminating rigging once I get a spar rigged. This way, The lower spars are static as I adjust the upper spar rigging. Last night I did notice that the starboard aft channel that I had moved was not holding perpendicular to the hull. Since this has a number of stays from the mizzen that attach to the aft end of the channel, it was pulling the channel up. To solve this, I pulled the channel back down to it's position and put glue in the holes where the chain plates came through. This fixed the issue since the chain plates are now holding the channel down. I am happy with the progress so far. I am worried that I will run out of .4mm line before I am finished. As I get toward the end, I expect to run low on the various fittings. I have additional .4 line that I will use but it is a slightly different color than the current line (light beige vrs light gray. If I can get all of the fore and mizzen rigging done with this set, then I can use the new line in the fore and aft lines. This would look okay. Anyway, below is a closeup of the lower main spar rigging. I also have a shot slightly off the bow showing the ship as she is looking now.

- 335 replies
-
- 4
-
-
- Constitution
- Mamoli
- (and 3 more)
-
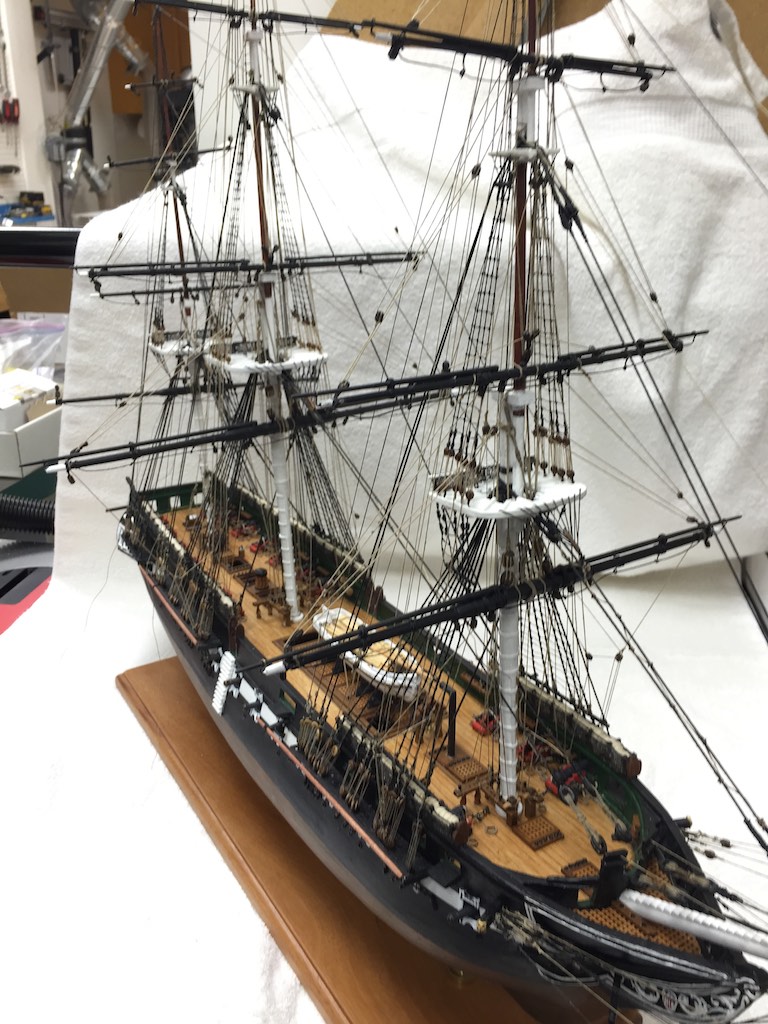
I continued with the running rigging today on the Main Mast. The first thing I did was to run the first set of ratlines across the bottom since a number of lines get tied off over them. Then I served and made the lower boom hangers and rigged the Jeers. Next I attached the remaining spars and rigged the topsail yards and ties. None of these are terminated on deck yet. I added the rings to the fighting top and will complete the rigging for these tomorrow. I spent a bit of time reviewing the rigging for the stern boomkins. The Mamoli plans do not show any bracing to the hull. The Connie actually has two, so I will add rings and tie these in before adding the rigging to the boomkins. Otherwise, since they are just glued on their ends to the hull, they would pull out if anything touched the lines. The forward boomkins are more substantially tied into the bow and will not have the same issue. No photos today. I will get some tomorrow as the Main gets rigged.
-
USS Constitution by galf
robnbill replied to galf's topic in - Kit build logs for subjects built from 1751 - 1800
Your looking great! -
With lots and lots of sauce! Thanks Rich. Looks like there are two Connies getting dressed right now.
- 335 replies
-
- 1
-
-
- Constitution
- Mamoli
- (and 3 more)
-
Thanks. She is beginning to take shape now. Tomorrow I plan on starting the rigging on the Main Mast spars. At that point she will be at her widest. The rigging has been fun so far, even the rat lines. Each set is different enough to keep it interesting. Unlike rigging the cannons where it was so repetitive that I wanted to stand in front of one before I finished. There are a number of notations that Mamoli uses without explanation that I had to figure out. Once I did it was a piece of cake.
- 335 replies
-
- 2
-
-
- Constitution
- Mamoli
- (and 3 more)
-
Today I completed the rigging of the fore mast. There will still be a number of lines that will be run from the other masts and to the bow, but the main running rigging is completed and the spars are all in place. I was able to complete the ratlines as well. Breaking them up by mast is keeping this from being such an onerous task. I need to check on the main and mizzen mast rigging. If there are lines that tie off to the shrouds like on the fore mast, I plan on running at least one possibly two of the lower ratlines since these should be under the rigging.


- 335 replies
-
- 6
-
-
- Constitution
- Mamoli
- (and 3 more)
-
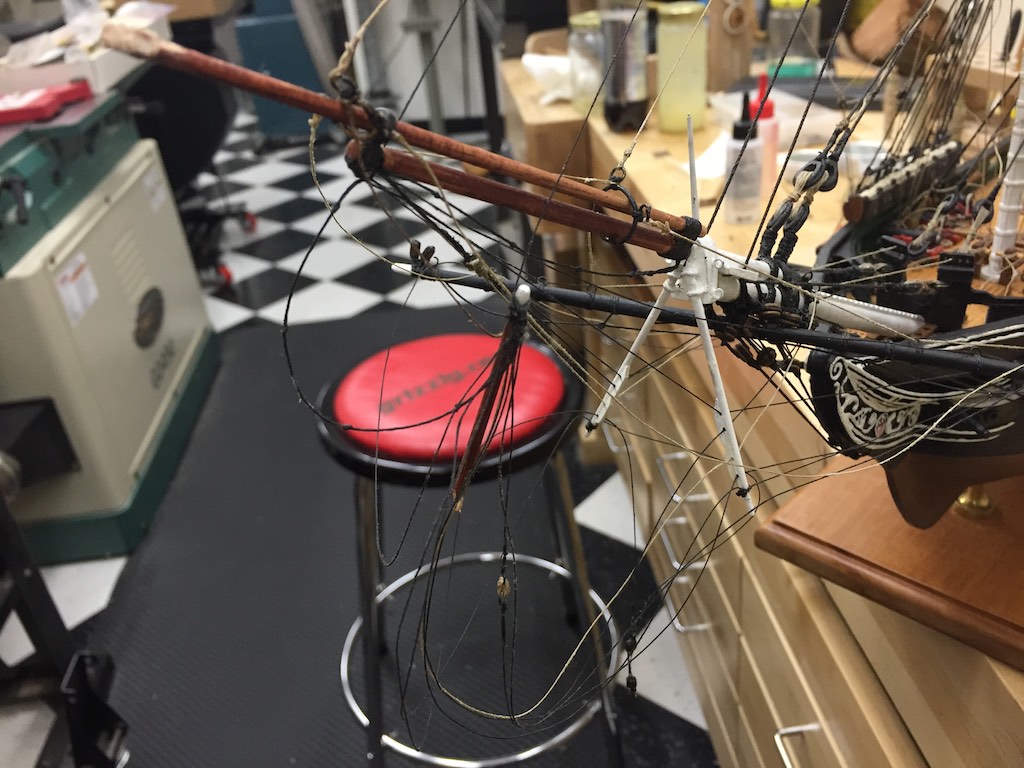
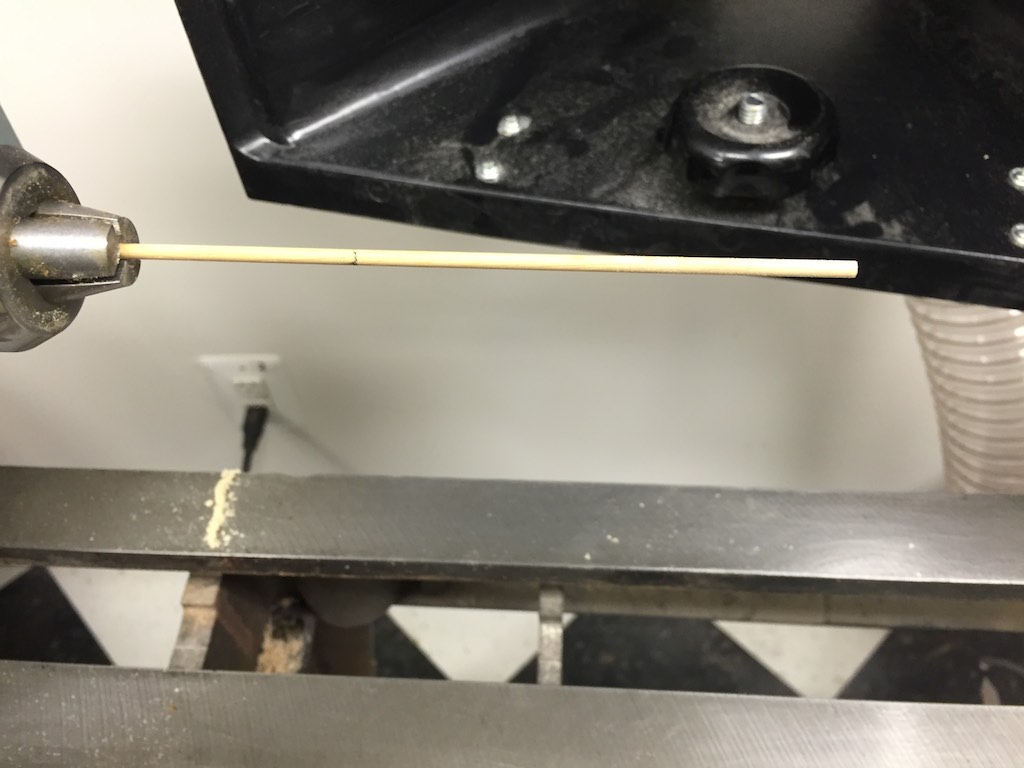
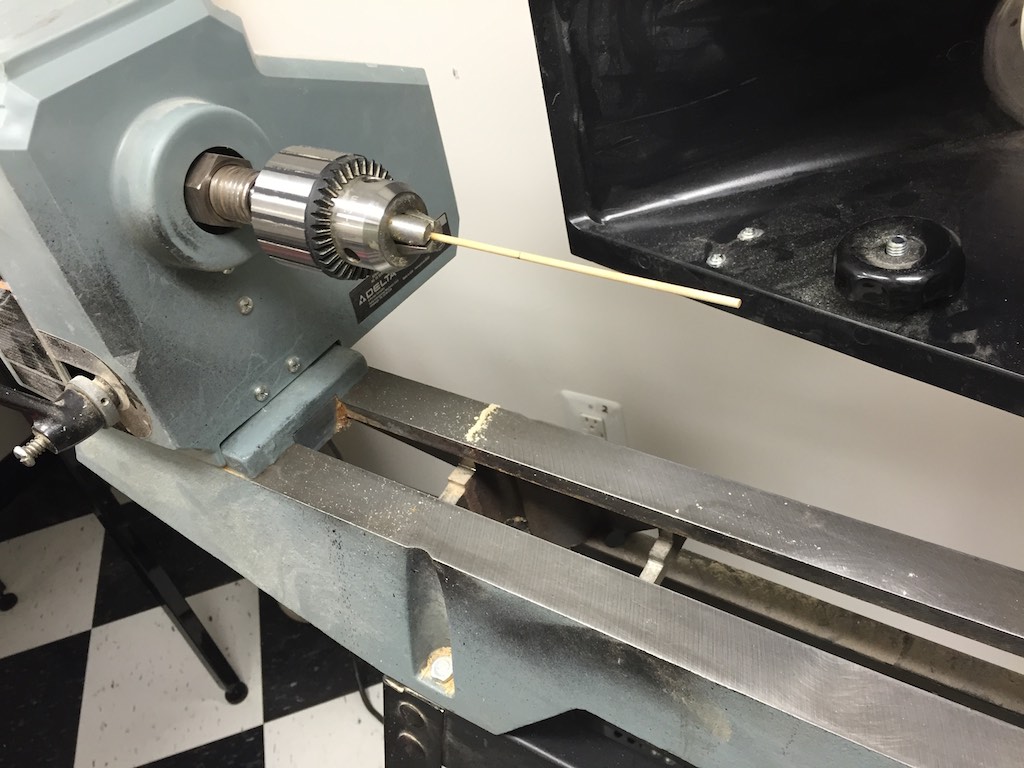
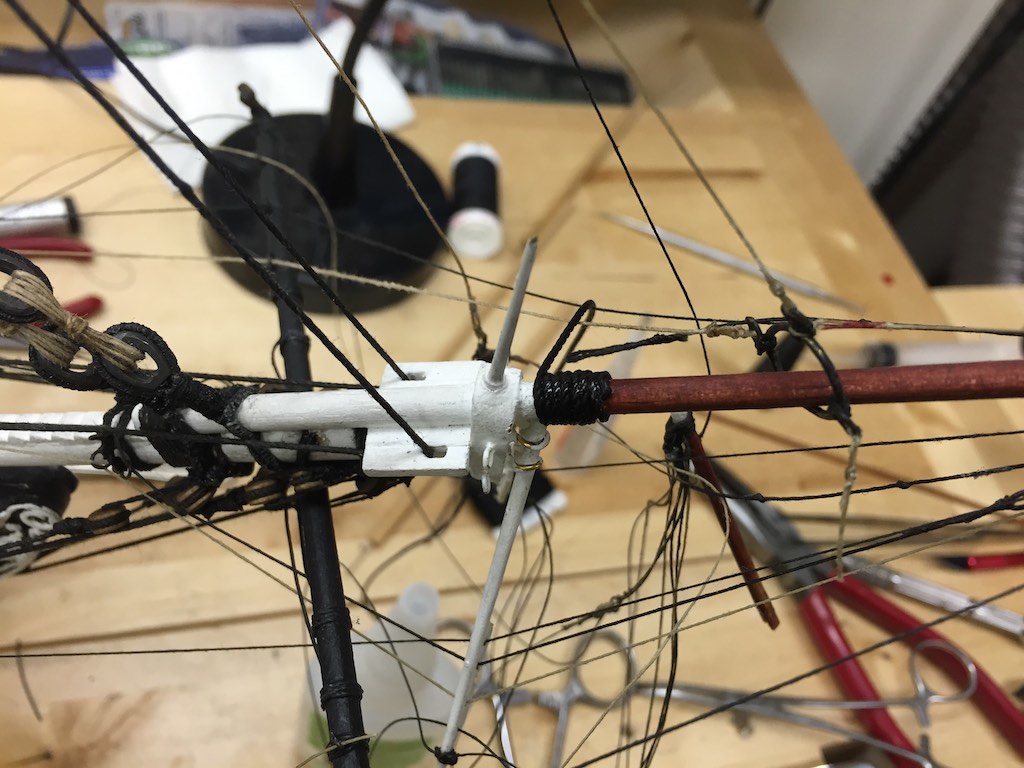
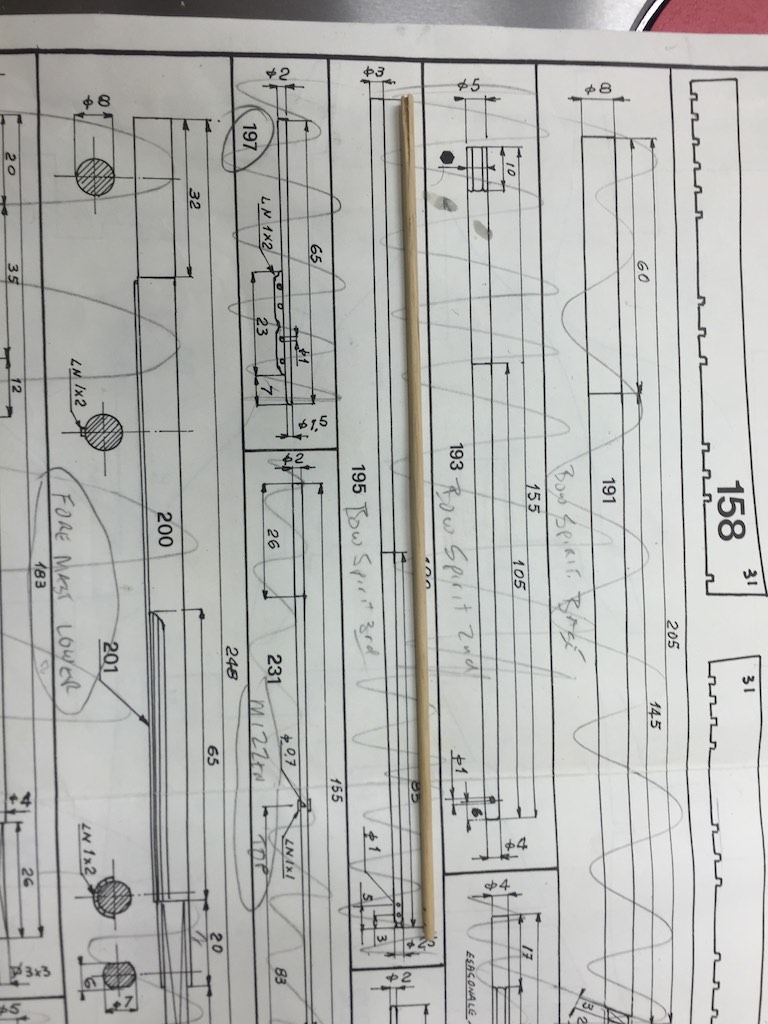
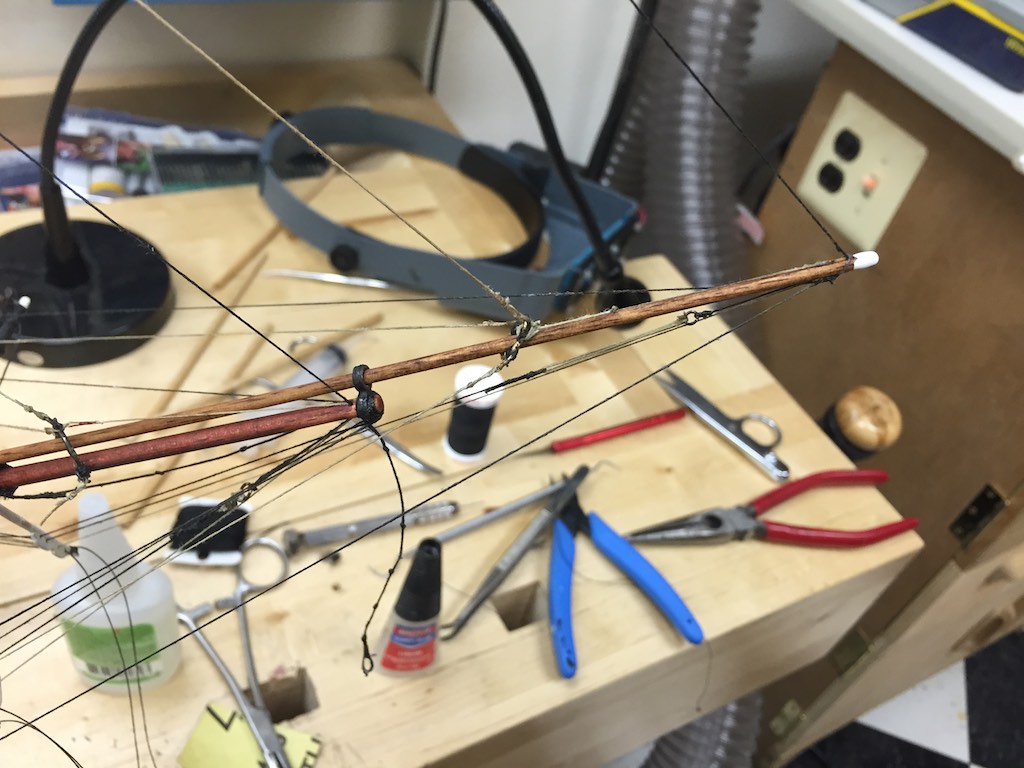
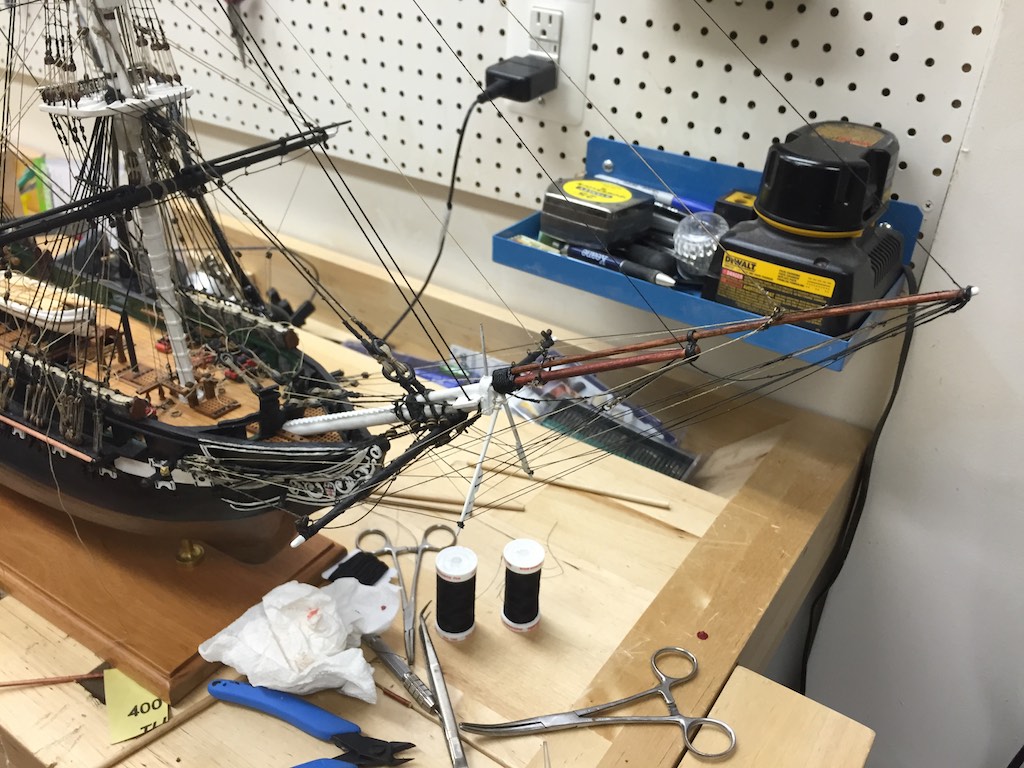
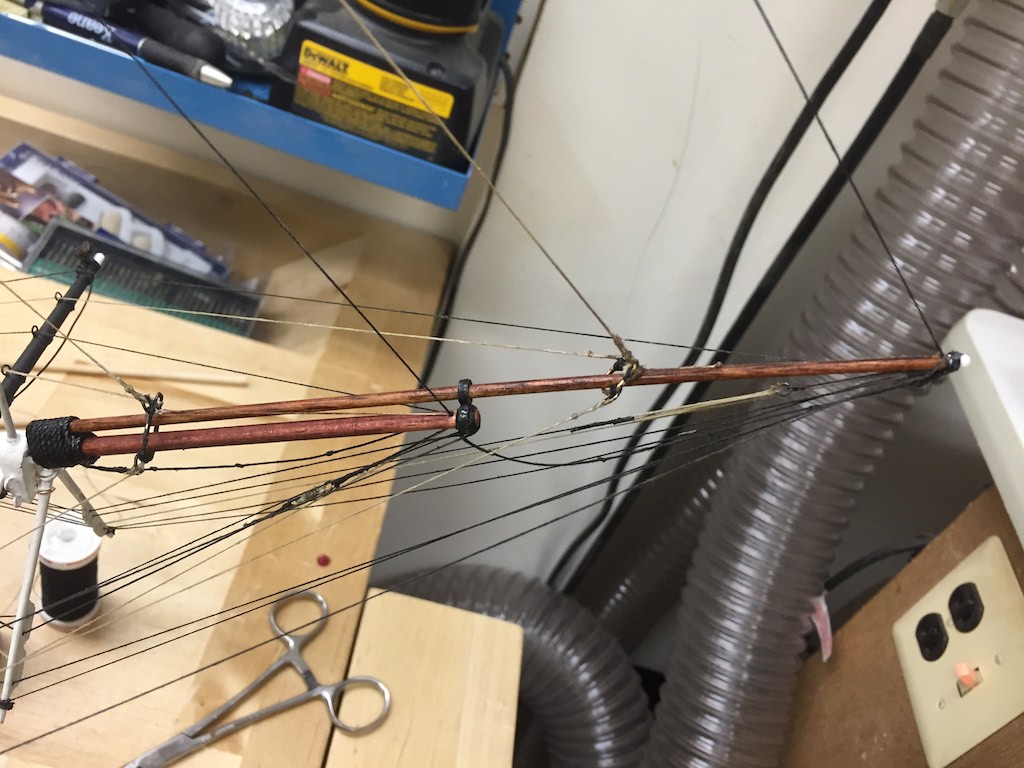
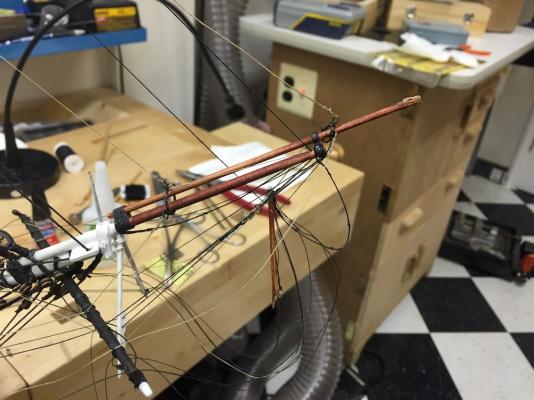
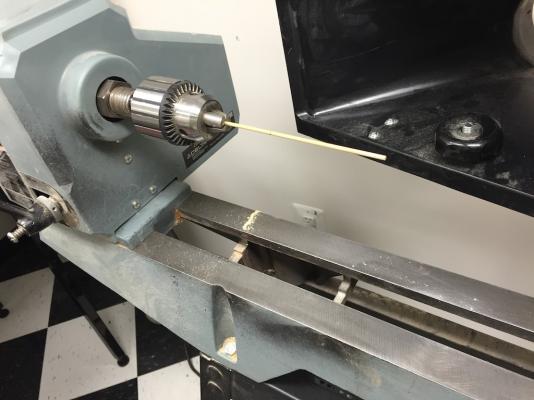
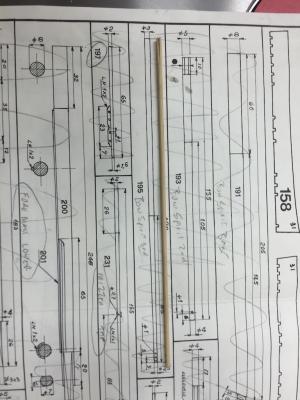
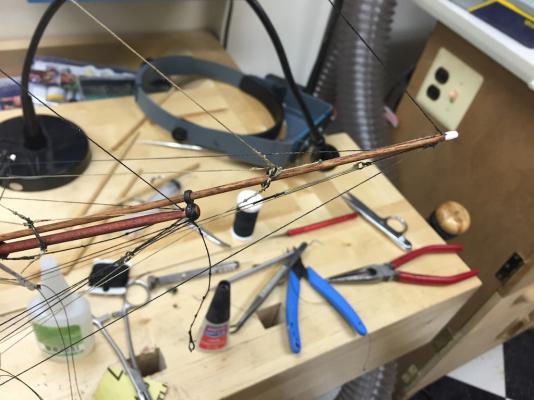
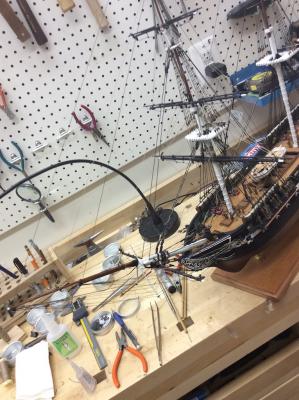
I spent the morning repairing the Bowsprit. I cut the bindings at the base to the spar, then cut the spar on each side of the forward metal hoop. I soaked some acetone around the hoop then used a small drill to drill holes in the wood through the hoop. This allowed me to remove the remaining spar piece from the hoop. I used an exact blade and cleaned up the mid spar on the bowsprit in preparation of mounting the new one. Then I cut a pice of 3mm dowel to the length required for the replacement. I marked the taper point on the dowel. I put the dowel into the lathe and turned it and used sandpaper to taper it according to the drawings. I then drilled the two 1mm holes in the end of the spar first by drilling .6mm holes followed by the 1mm drill. I sanded and stained the spar. I took a heavy black line and dropped it around the end of the mid spar. This would be underneath the new spar and retain the spacing between the two spars. Once I was happy with the, I used CA to lock it in place. Then I continued to wrap the spar but this time including the but end of the new spar. I continued until I achieved the necessary wraps then locked everything with CA. Next I started restringing the spar. I rethreaded the two lines going through the holes and replaced the rings between them. Then I related the remaining lines taking care to insure they were not tangled. I touched up the end of the spar with white paint. and moved on to the fore mast to continue the rigging. I spent a bit of time reviewing the Mamoli plans to understand exactly how they were notating the end points of each line. Most of the lines I had installed were not locked in place yet. I then cleaned up the lines locking them with CA and trimming the loose ends off per the plans. I will have to go back to these later and add all the requisite coils. The I continued working up the mast . I will continue with the fore mast tomorrow. Hopefully with the majority of that mast completed. I have attached photos of the spar repair before and after.


- 335 replies
-
- 11
-
-
- Constitution
- Mamoli
- (and 3 more)