robnbill
-
Posts
841 -
Joined
-
Last visited
Content Type
Profiles
Forums
Gallery
Events
Everything posted by robnbill
-

Need a realistic belaying plan for the USS Constitution
robnbill replied to Modeler12's topic in Masting, rigging and sails
I also have the one that Tom has. I found an attribution that this come from the NRG's Ship Modelers Notes (the original) I do not hVe copy of this book but I am sure others do. There is a note at the bottom that it was from the notes of Col. W.F. Spicer. There is a pretty interesting discussion of this on CS Fine Scales site here. As you said there are a number of belaying plans. Given the lack of solid knowledge of exactly what she looked like in 1812, and the fact that each captain had control of how she was rigged, any one you choose would be correct for your model. -
Need a realistic belaying plan for the USS Constitution
robnbill replied to Modeler12's topic in Masting, rigging and sails
Pages 118-119. Under running rigging. -
Need a realistic belaying plan for the USS Constitution
robnbill replied to Modeler12's topic in Masting, rigging and sails
Sorry, The 44-Gun Frigate USS Constitution, "Old Ironsides" (Anatomy of the Ship) Karl Heinz Marquardt (Author) -
Rich, also there is a harness that holds each of the spars to the mast. If you do that one first, then you can adjust the height of it as you go. I found that to be sufficient. I have also seen other use pins to hold the spar to the mast if you want something more solid.
- 1,756 replies
-
- 2
-

-
- constitution
- constructo
- (and 1 more)
-
Need a realistic belaying plan for the USS Constitution
robnbill replied to Modeler12's topic in Masting, rigging and sails
There is a belaying plan in the AOS. -
Chopping block work table
robnbill replied to qwerty2008's topic in Modeling tools and Workshop Equipment
I think Michael's solution would be the optimum without buying any pipe clamps. However, be sure you follow his instructions to clean off the old glue before you try to glue it. You also might plan on using more than two of the clamp/wedge assemblies. Three might be the ticket. Also do not squeeze them so hard you squeeze out all the glue in the joints. -
Sequence of Rigging and Attaching Sails to Yardarms
robnbill replied to fxitgood's topic in Masting, rigging and sails
Welcome to the forum. Who is the model manufacturer's you are building? The davits look like it might be the Constructo? Each model has it's own strong and weak points. If we know the manufacturer it narrows things down a bit. -
Yes. That is why I went with ¼" tempered glass. It should be safe from alll sides. I hope! The biggest expense was getting the low iron glass. I am on hold till later this week when my hardwood provider gets in a new shipment. So i have to live gratuitously watching you!
- 732 replies
-
- 1
-
-
- constitution
- model shipways
- (and 1 more)
-
She is coming together. It is difficult to pace yourself when you can see the finish line!
- 732 replies
-
- 3
-
-
- constitution
- model shipways
- (and 1 more)
-
If you are going to look at shrink tape, you could also use the line/chart tape. It comes in very small sizes and is adhesive. You can find it in arts and crafts store, or Amazon.
-
I would still try paper strips. Once you cut them to near length, and soak them in somewhat diluted white glue, then they would be pliable and moldable in wrapping around the barrel. Card stock would be thick enough. Once cut into the tiny strips you would need, they would soak up the glue pretty quickly. They almost work like paper mache at that point. Once the glue dries, you can do any final shaping with xacto blades and rifflers.
-
Looking good. Be careful with the use of Sharpies, if those are the ones you are using. They do not hold their colors and have been a source of angst for any of us who have used them. Also the stanchions would probably be alighned more closely along the vertical. You are doing a great job on this and are setting yhe benchmark for future buillders!
- 113 replies
-
- 1
-
-
- constitution
- mamoli
- (and 1 more)
-
Yeah that would be a challenge. Perhaps breaking out the old solid geometry formulas. When I did the masts, I used the Xacto knife to slice the ends at an angle thickness wise, so instead of starting or ending with an abrupt end wheich had to be matched, it ended with a taper. This allowed me to easily come back with sand paper after it was dry to do a bit of final shaping and it showed no ends once done.
- 113 replies
-
- 1
-
-
- constitution
- mamoli
- (and 1 more)
-
Everything is looking great. For the small hoops have you thought about paper or card stock? I used glued up card stock for the mast hoops on the Connie. I started with brass, and did not like it, string would have been bumpy. Mort Stohl suggested card stock. It worked like a charm. Anyway, you are doing a fantastic job on her. Bill
-
Thanks Geoff. I am looking forward to watching your build as it progresses. There are not many of us Mamoli Connie builders.
- 335 replies
-
- 1
-
-
- Constitution
- Mamoli
- (and 3 more)
-
Gosh Rich, you make me think the Mamoli plans were not so bad. Once I learned how to read them, their rigging diagrams were great. Of course, no sails, but they were never in my plans.
- 1,756 replies
-
- 2
-
-
- constitution
- constructo
- (and 1 more)
-
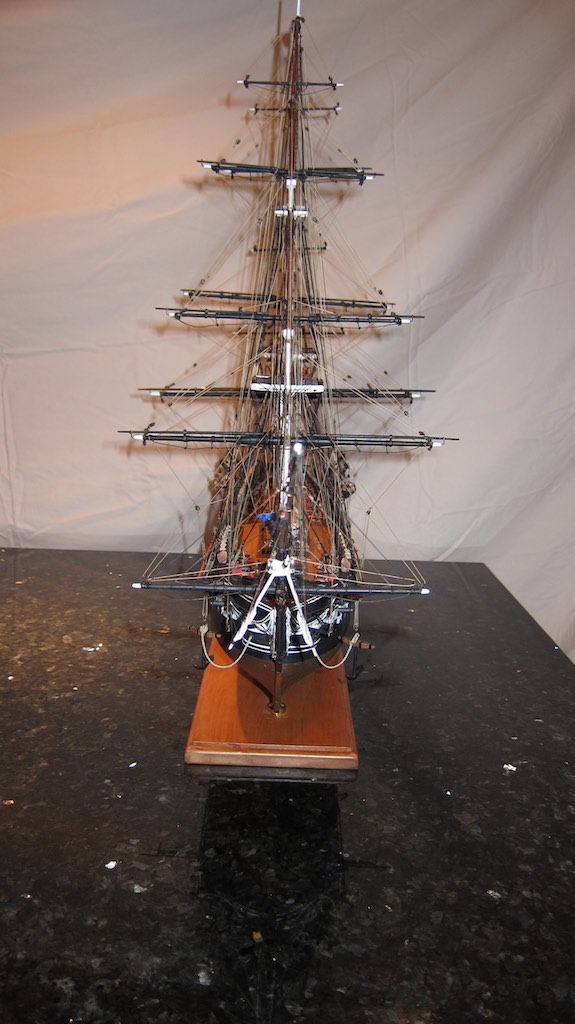
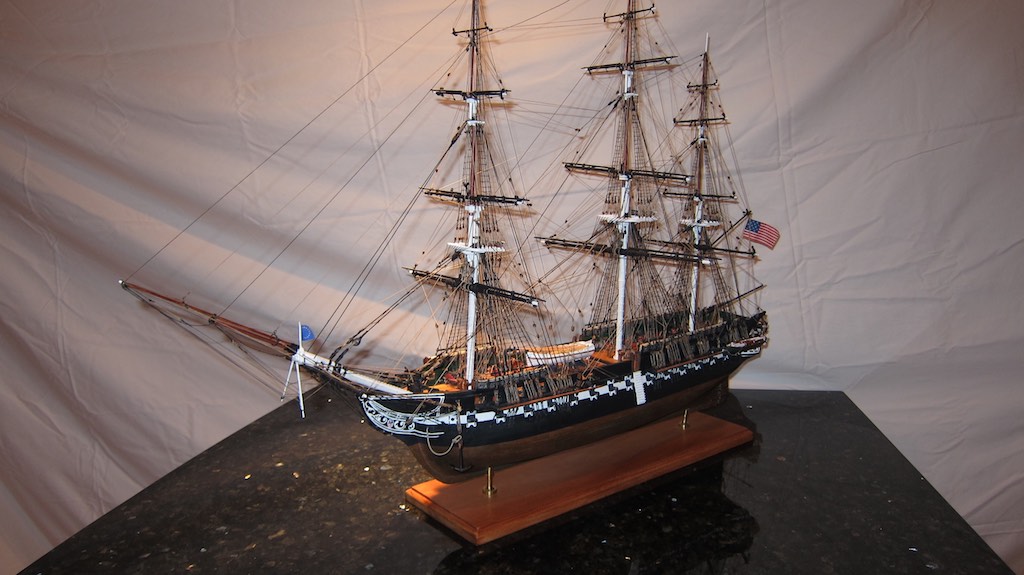
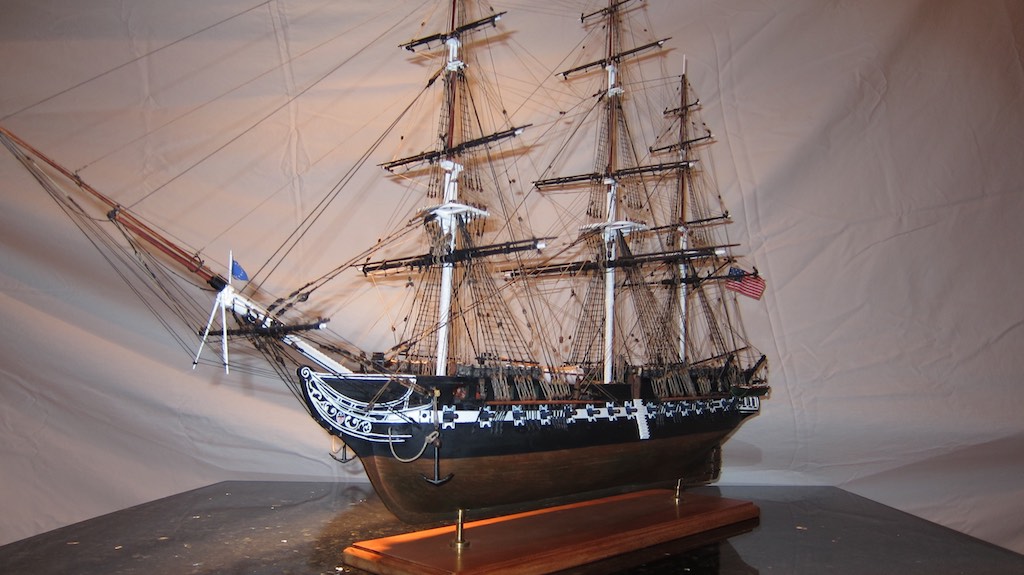
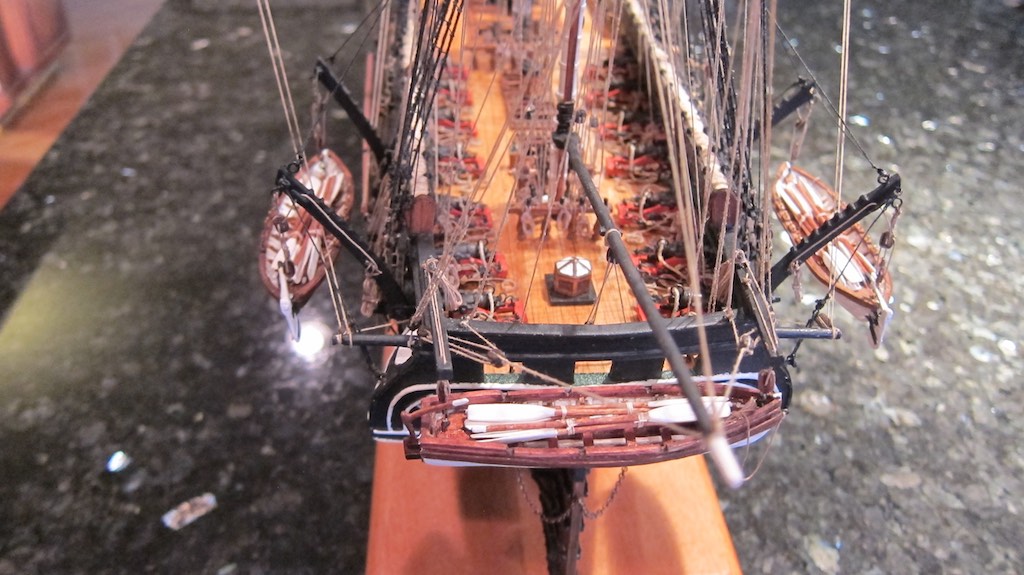
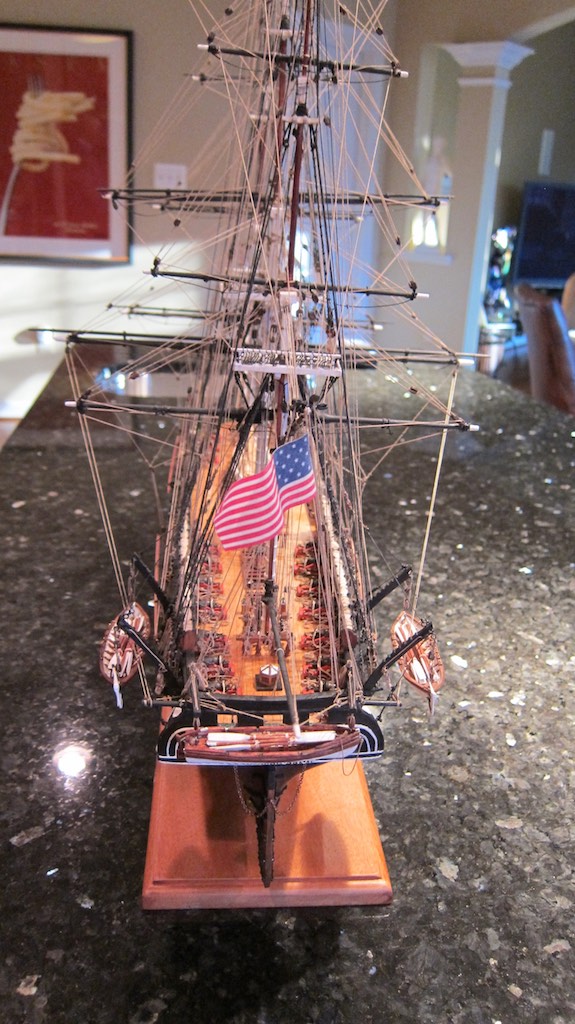
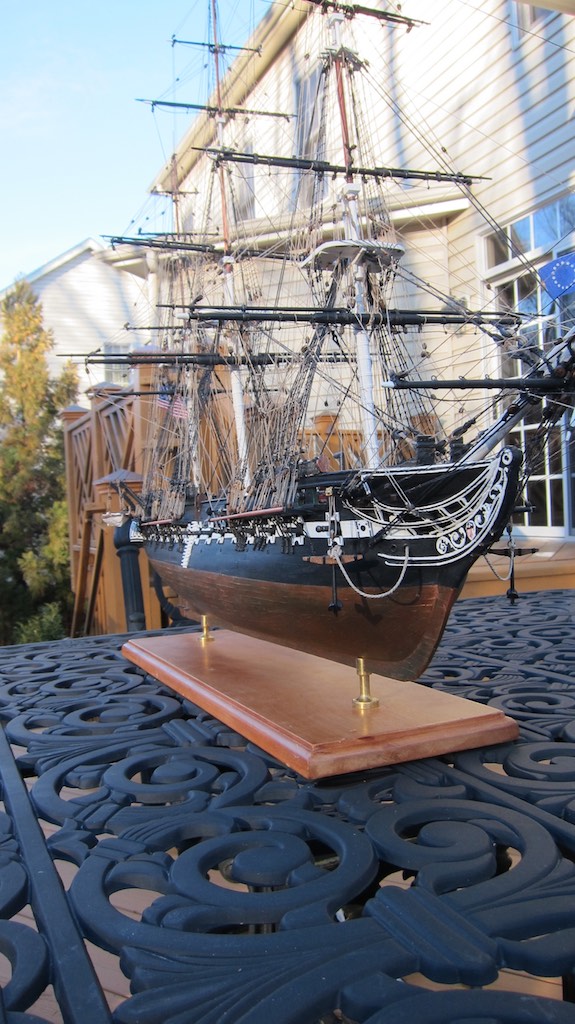
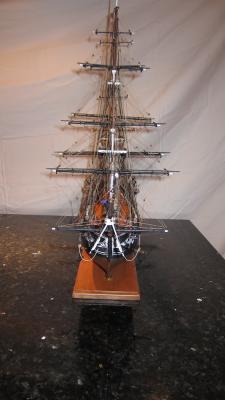
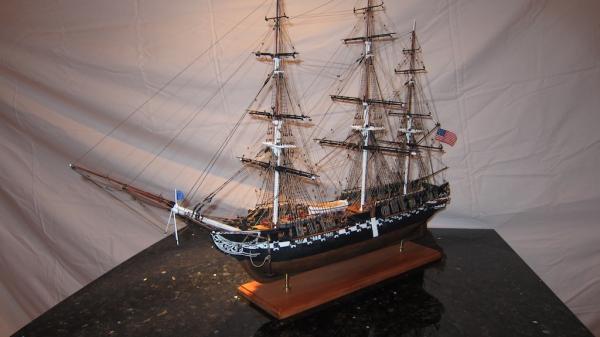
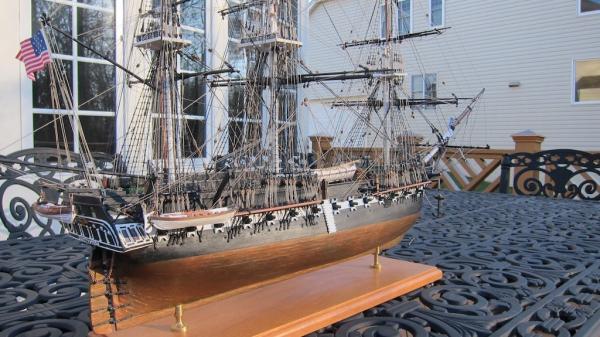
Today I completed the ship! Almost a year to the day of when I restarted the project begun in January 1992. It has ben a lovely ride and could not have been done with out the great help and inspiration this board has given me. Now I have to put her safe and secure into her new dry dock - but it is still to be constructed. Hopefully in a few weeks she will be safe in her new home. I will feel better once she is behind glass so I can't accidentally catch a spar as I go by. Her Bowsprit seems to grow longer. Anyway, here are a few photos. I will wait to close this build log out until she is in her new case.


- 335 replies
-
- 16
-
-
- Constitution
- Mamoli
- (and 3 more)
-
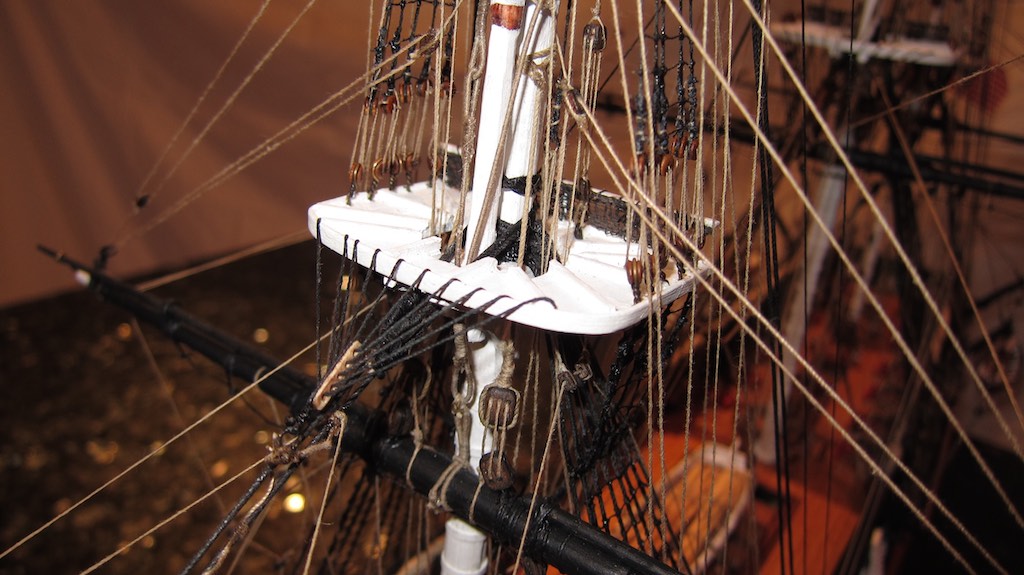
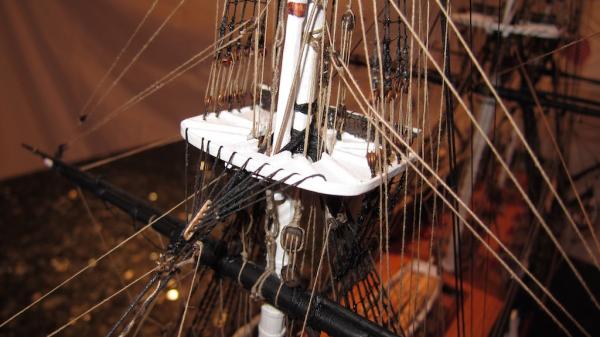
My Mamoli Connie did not have any rings at the base of the mast. So I cut rings out of wood and painted it white.Then glued them down to the deck as I placed the masts. FYI, the masts are not glued in. I did place the end of a needle into the base of the masts so they would stick in one place inside the hull, then used the rigging to hold the masts in their correct rake and side to side. I held off gluing the rings until the masts were in position.
-
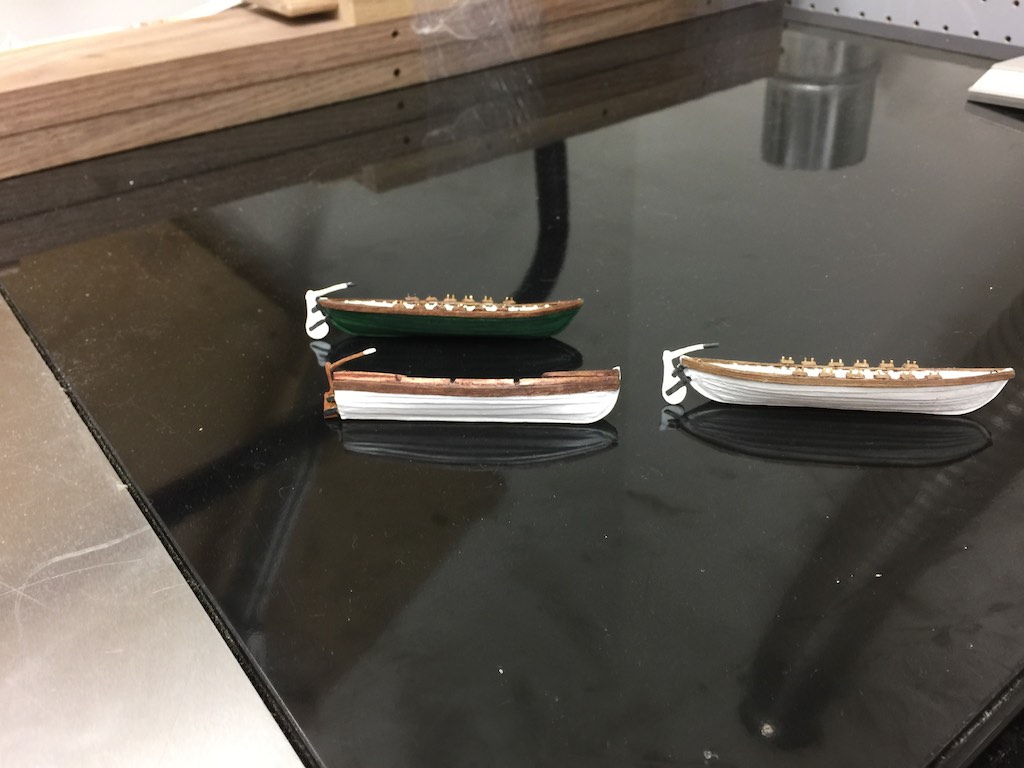
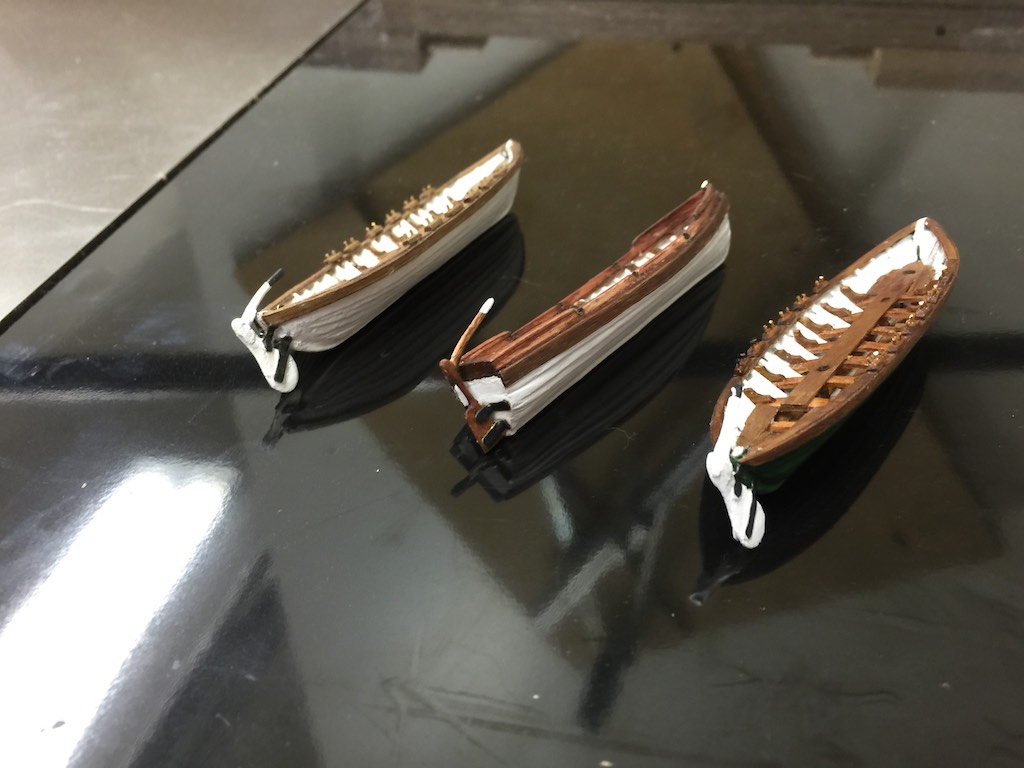
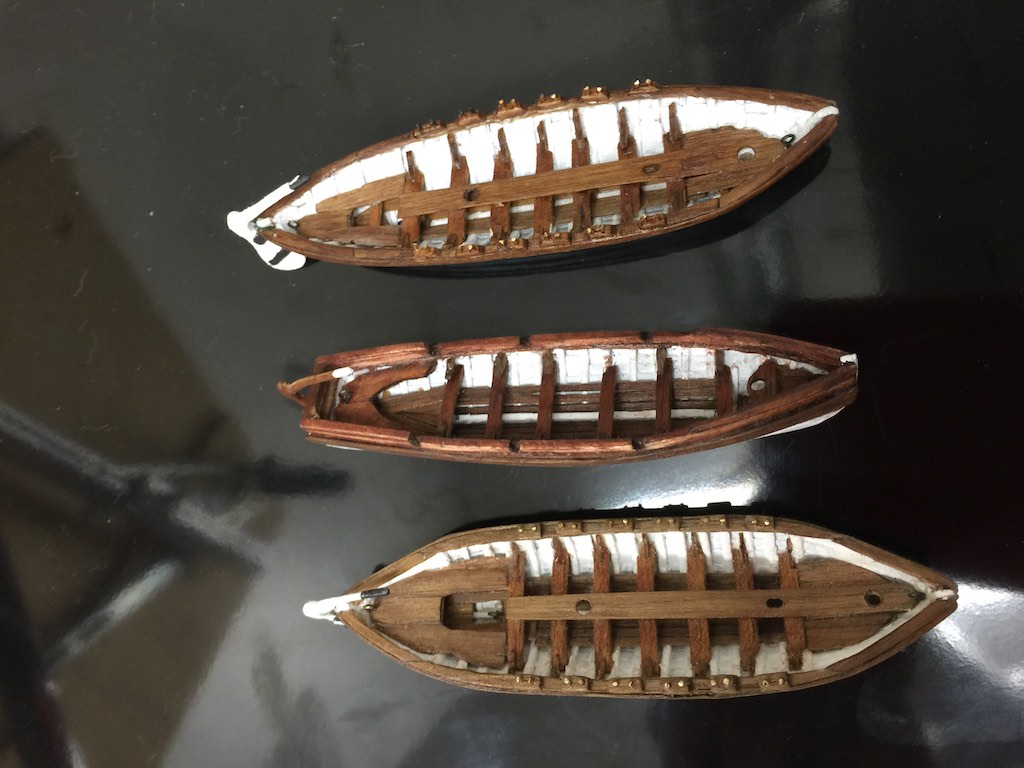
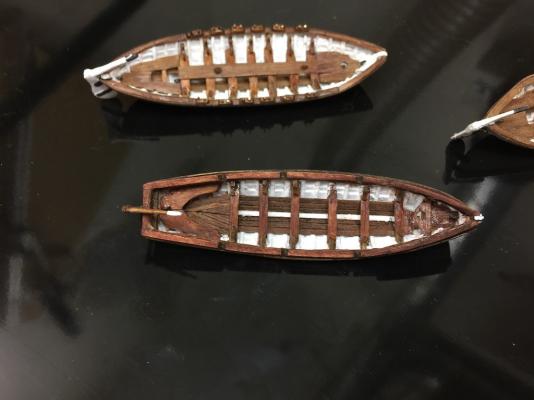
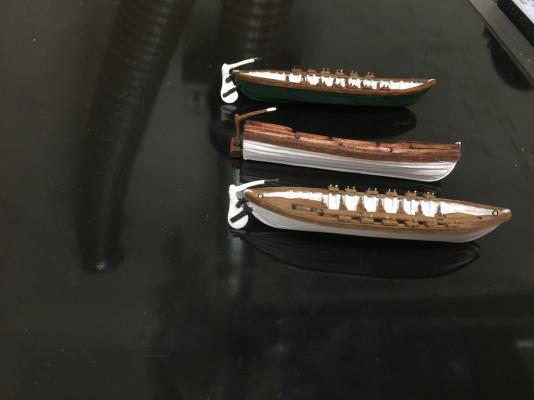
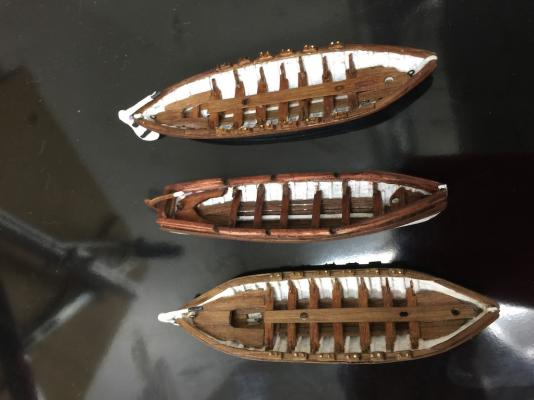
I completed the ship's boats today. This concludes the major builds of the Connie. I say these were major since each was a scratch POF that ended up with approximately 160 pieces each. These were a fun project in themselves. I pulled the boats lines from the AOS, then did the scaled drawings based on those in DeltaCAD. So tomorrow I will be an oar making factory. I need 6 - 19mm oars and 24 - 20mm ones. I will make these like I did last time. Here are some photos of the fleet, minus the 34 foot launch which is on it's cradle over the main hatch.


- 335 replies
-
- 10
-
-
- Constitution
- Mamoli
- (and 3 more)
-
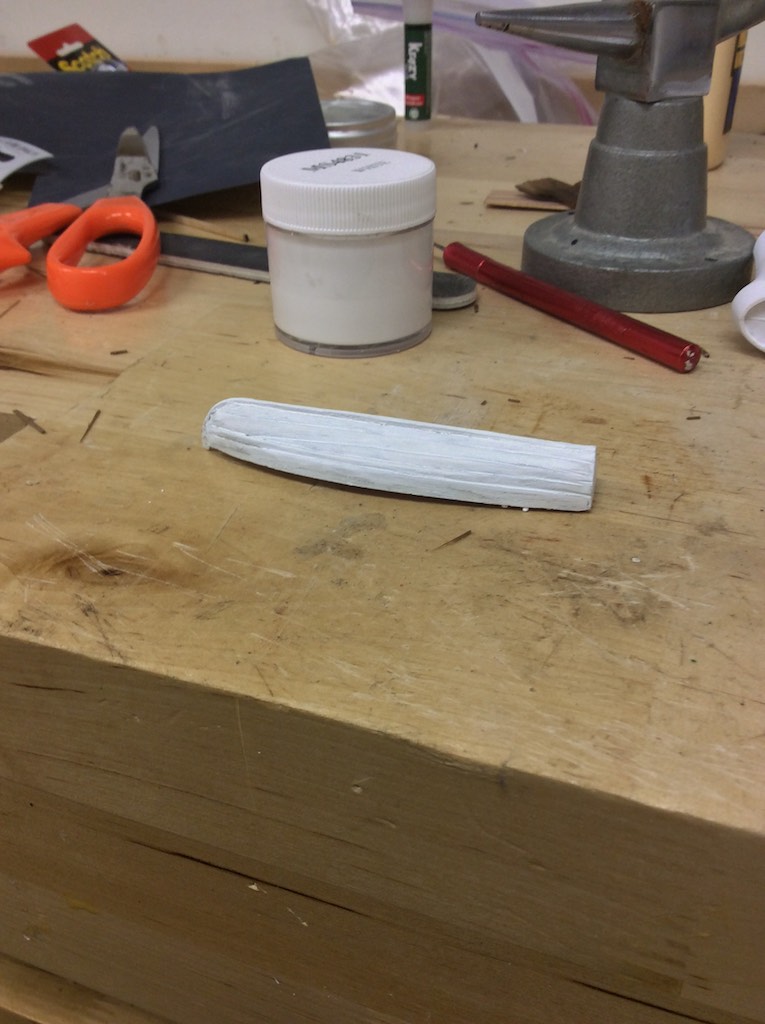
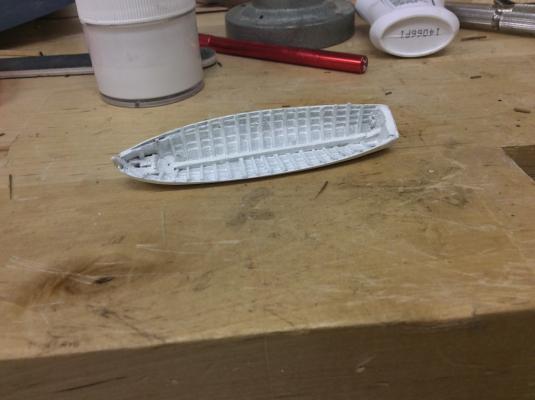
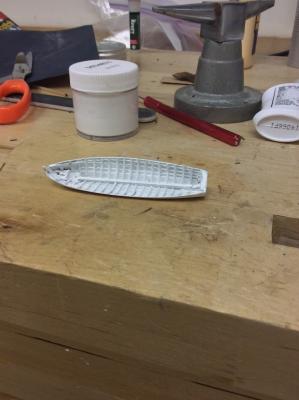
I was able to get a good start on the 25 foot captain's gig today. As I did on the previous whaleboats, using the mold I made yesterday I created the keel assembly and planked the hull. This boat is slightly narrower than the whaleboats and the stern curves into the transom. Once it was planked, I inverted it to glue the ribs into the hull. I used walnut strips to make the ribs. I found the easiest method was to cut the strip a bit longer than the required ribs, Then use the Xacto blade to cut the thin ribs. Then I used the handle of the blade to press the thin rib into the workbench and curve it slightly. This curve allowed me to add thick CA then press the rib into position along the keelson, then press it in place with the bent tweezers without breaking it. Once all the ribs were in place I sprayed the hull inside and out with primer then coated it with white paint. Tomorrow I will start working on layering the decking and assorted fittings into the hull. While the ribs were drying in the hull, I was able to take a thicker strip of walnut and make single blocks out of them. These will be required to rig the boats to the ship. I also pulled together the bamboo forks and skewers that will be made into the oars. I still need to decide how many oars I want to add to the boats. I know from the 34 foot boat, a full set of oars will obscure the interior of the boats. So I might put fewer oars than the full sets. I will make them and decide how many to use.

- 335 replies
-
- 3
-
-
- Constitution
- Mamoli
- (and 3 more)
-
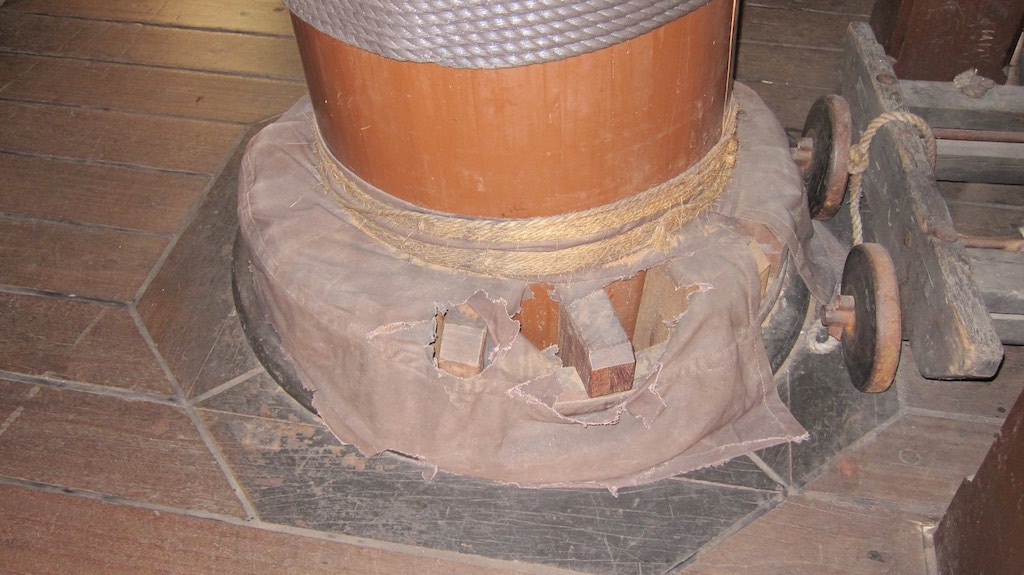
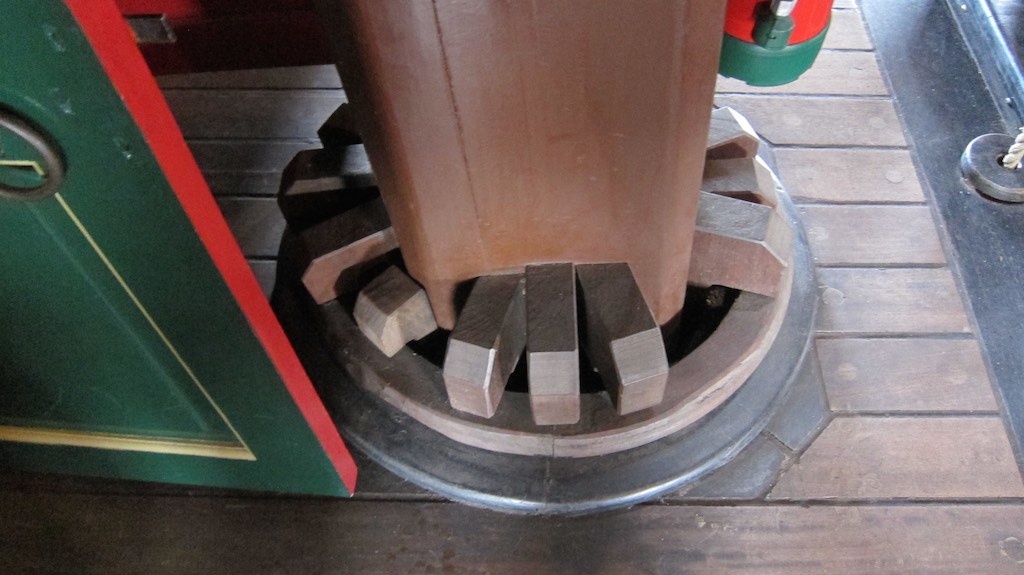
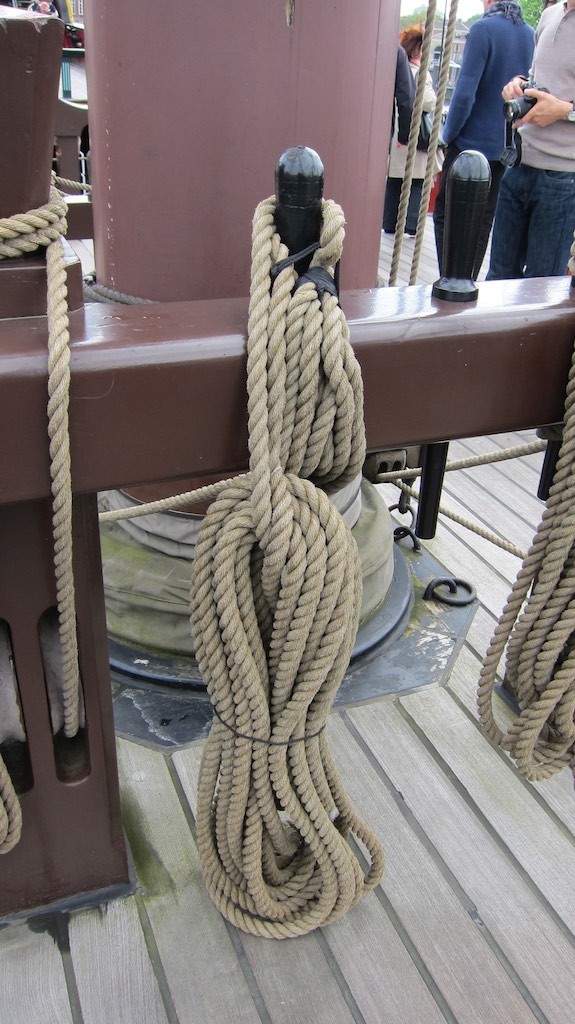
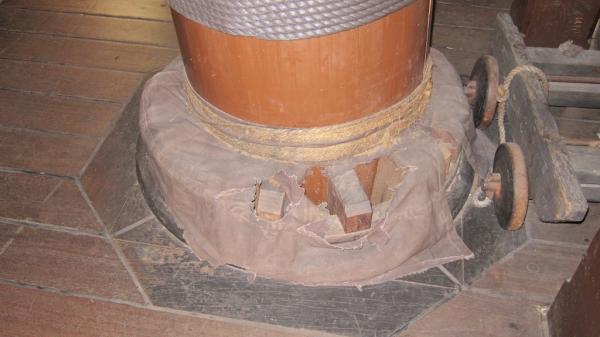
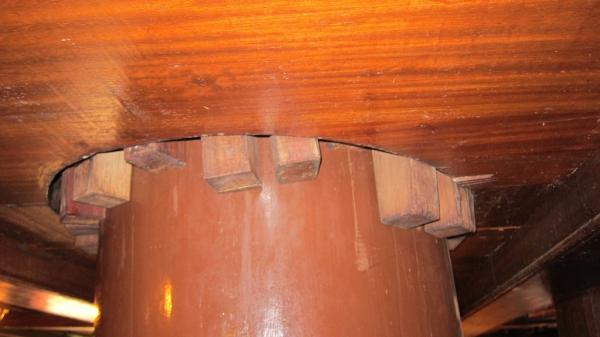
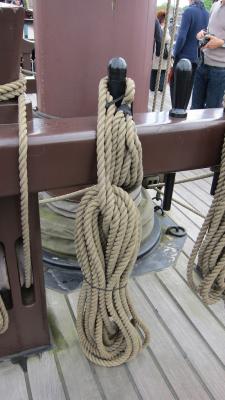
Here are a few more photos of the Amsterdam's seals as well as what it looks like below decks.

-
You are welcome. FYI, the ones on the Connie look like they are metal. It has been several decades since I was on her. I did see a number of these on a replica ship in Amsterdam and they were canvas.
-
Thanks. Enjoy sticking the plates. It really makes the hull pop.
- 1,354 replies
-
- 1
-
-
- constitution
- model shipways
- (and 1 more)
-
I have a couple of questions. Is this the same copper tape used in stain glass? Do you use anything other than the adhesive back on the tape? Is there a danger of the adhesive not adhering long term? I ask because my kit used green boards. Individually cut to represent the copper. So my questions are for my future builds.
- 1,354 replies
-
- 2
-
-
- constitution
- model shipways
- (and 1 more)