robnbill
-
Posts
841 -
Joined
-
Last visited
Content Type
Profiles
Forums
Gallery
Events
Everything posted by robnbill
-
 One of the biggest challenges was installing all of the rings on the masts and deck. I thought I had been pretty thorough in combing through the drawings to install all of them prior to the rigging, but there were still a number that I missed. Primarily because the Mamoli plans did not have them all in once place. I would start to install a bit of rigging that I would find there needed to be a ring. I debated back and forth (primarily with myself) over the best course/order for installing the rigging. Everyone does it differently and your right way is up to you. I did all the upper ratlines first. Then the standing rigging I did fore to aft. For the Fore and Back stays I did it in levels dividing it along the mast levels. So the lower stays were all done first, then the mid, then the upper. In that manner I was able to keep tension on the rig even and notice when or if a mast was getting mis-aligned. For the running rigging, I pretty much followed the Mamoli plans starting forward and working aft. Completing all of the rigging on each mast starting with the the lower spar and working up. As I completed a mast I did the lower ratlines. The lines controlling the tips of the spars back and forth which run from another mast or deck area were the last to be installed. I know you have already run your rats.
- 1,756 replies
-
- 2
-

-
- constitution
- constructo
- (and 1 more)
-
As a follow on, I looked at the receipt for the cotton cloth I used and it was listed as Lawn Cotton. I measured it as well as weighing it on an extremely accurate scale and it calculated to be 1.9 oz per sq yard. This is very light, very fine, and somewhat transparent so light will show through the flag once made. I am sure there are many fabrics and papers out there that can work. This was just readily available from the local fabric store.
-
The original flags in the Mamoli kit were silk screened (I am betting). The feel when cutting that cloth out and the feel when cutting the very light cotton cloth out once it had the transfer done on both sides were equitable. The cloth without printing was actually difficult to cut it was so thin. It required very sharp scissors. Once the transfer was done, it was easier to cut since it had stiffness from the transfers. It took the PVA/water mixture well and I was able to shape it. I think the key is the type of cloth you use. I was lucky I guess. However, the minimum I could by was a ¼ yard. I could make flags for the fleet and still have cloth left!
-
Thanks George. Rest assured with an iPhone and Macs, everything is pretty automatic.
- 335 replies
-
- 1
-
-
- Constitution
- Mamoli
- (and 3 more)
-
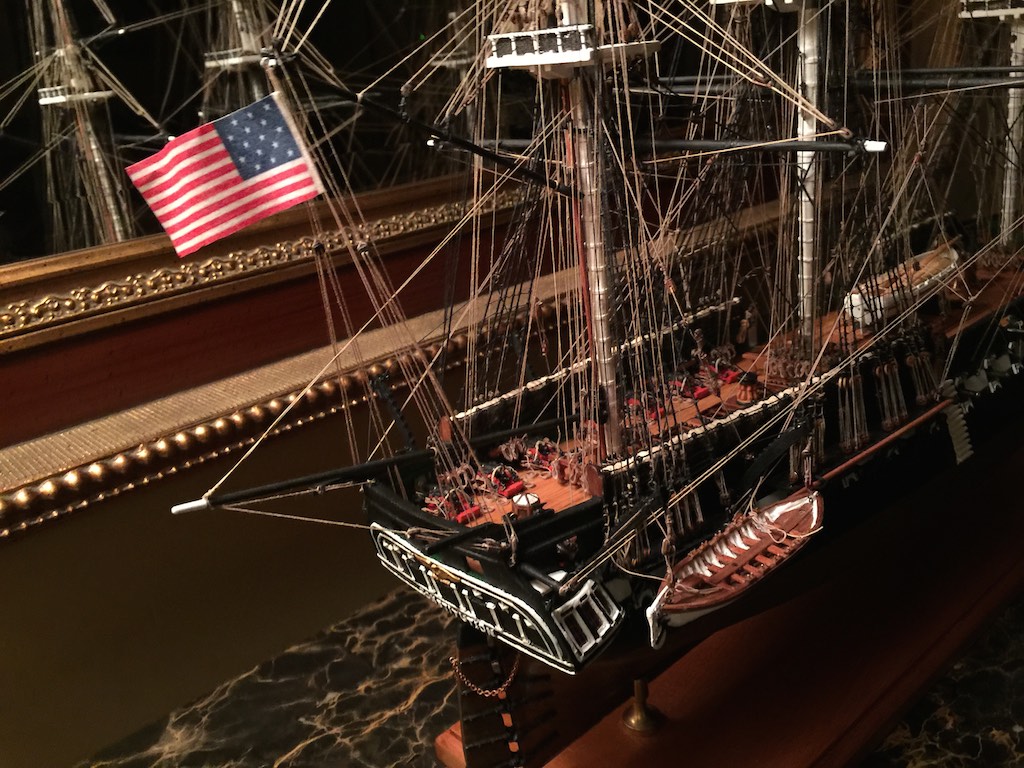
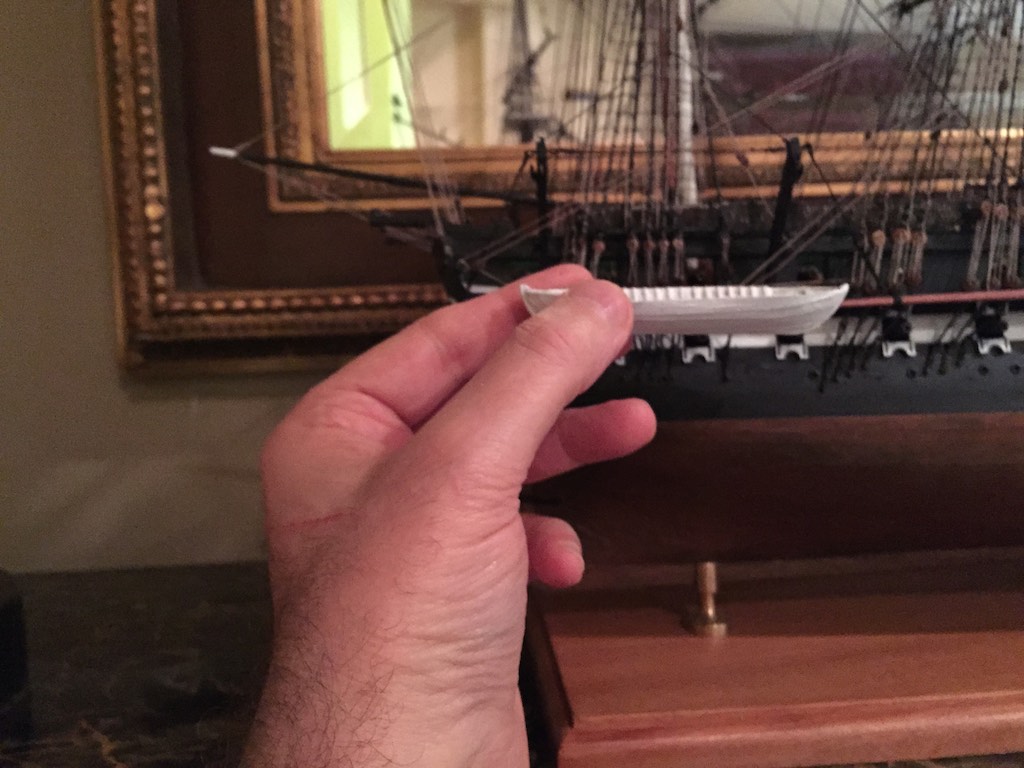
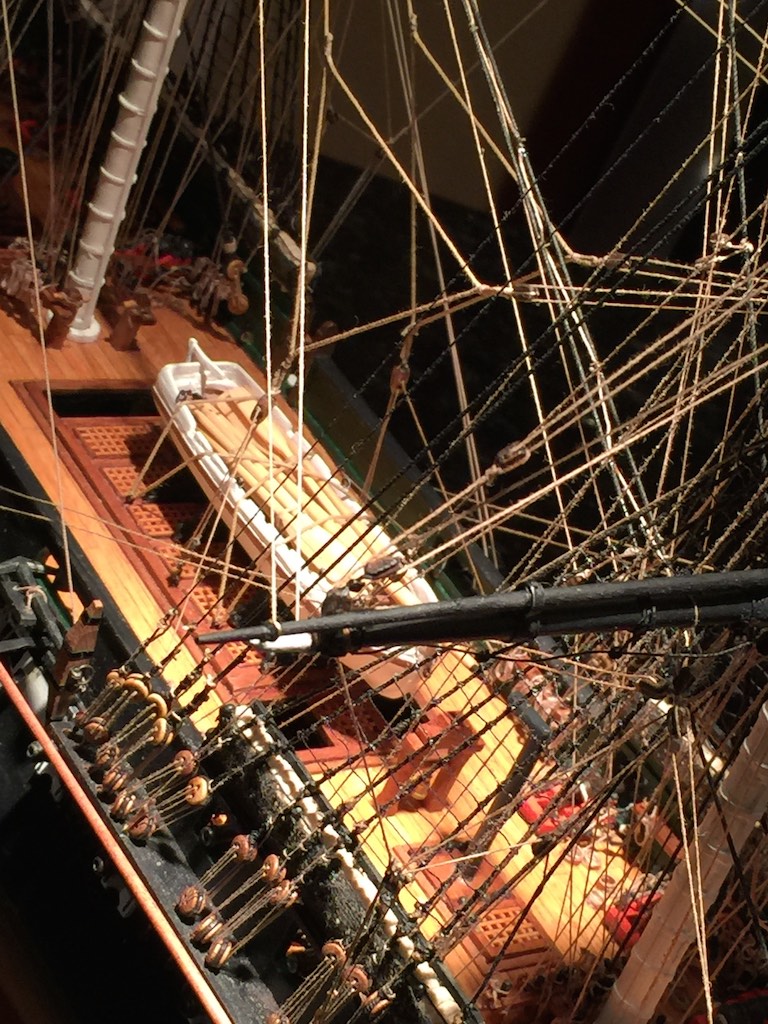
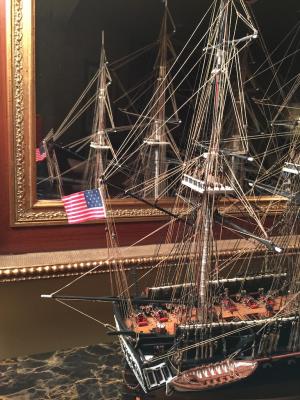
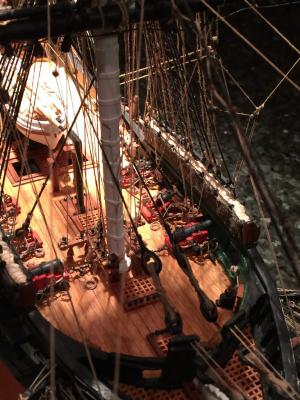
I finished the starboard ship's boat today. I will not create the accessories until the remaining two boats are completed. Soldering the hinges was an interesting task. I did these like I had made other fittings out of brass sheet. However since these were so small when I hit it with the micro torch, the solder pulled the hinge strips all sorts of ways but not the correct way. I figured what was happening was once the torch melted the flux and the solder, the brass and the solder were attracted to each other. Since the fittings were so small their mass was much less than the small amount of solder so they came to it. What I ended up doing was cutting new strips with one long leg. I put these in the helping hands and placed the two parts in position. Then it was easy to get the solder in the correct place. After trimming the legs and some sharpening with the rotary tool, I blacken these even though I figured I would still want to paint them. I think the blackening makes the paint stick easier since it has more "tooth". I cut the rudder out with the scroll saw then shaped it and it's handle with the rotary tool. After painting and adding the hinges I mounted it to the whaleboat. While the rudder paint was drying I decided to tackle the flags. I used a 50/50 PVA and water mixture to soak the flags and shaped them by laying them out on aluminum foil. This worked great for the two ensigns (??) but when I pulled the US flag off I left several of the white stripes on the foil. Obviously the fabric did not fare well over the last two decades. So I looked up Modelr12's thread on how to make flags and was off to the stores to pick up the necessary supplies. I put a detailed description of how I did it in Jay's thread here - http://modelshipworld.com/index.php/topic/89-making-cloth-flags/. It worked like a charm. I used the opportunity to change from the 1797 flag to the 1812 flag. I used a combination of DeltaCad and Preview to create the necessary transfer. By the time I got the new flag mounted on the ship, I was able to temporarily hang the starboard whaleboat. Currently the lifts are just bundled and sitting in the boat's cockpit. I will start working on the remaining boats tomorrow. I do not plan on working on the accessories until all the boats are completed since they all have many of the same ones. Here are a few photos of the ship sitting in it's temporary berth. The parts have started to arrive for the case with the LED channels arriving today. Hopefully soon, the ship will be sitting safe and sound in her new home.

- 335 replies
-
- 8
-
-
- Constitution
- Mamoli
- (and 3 more)
-
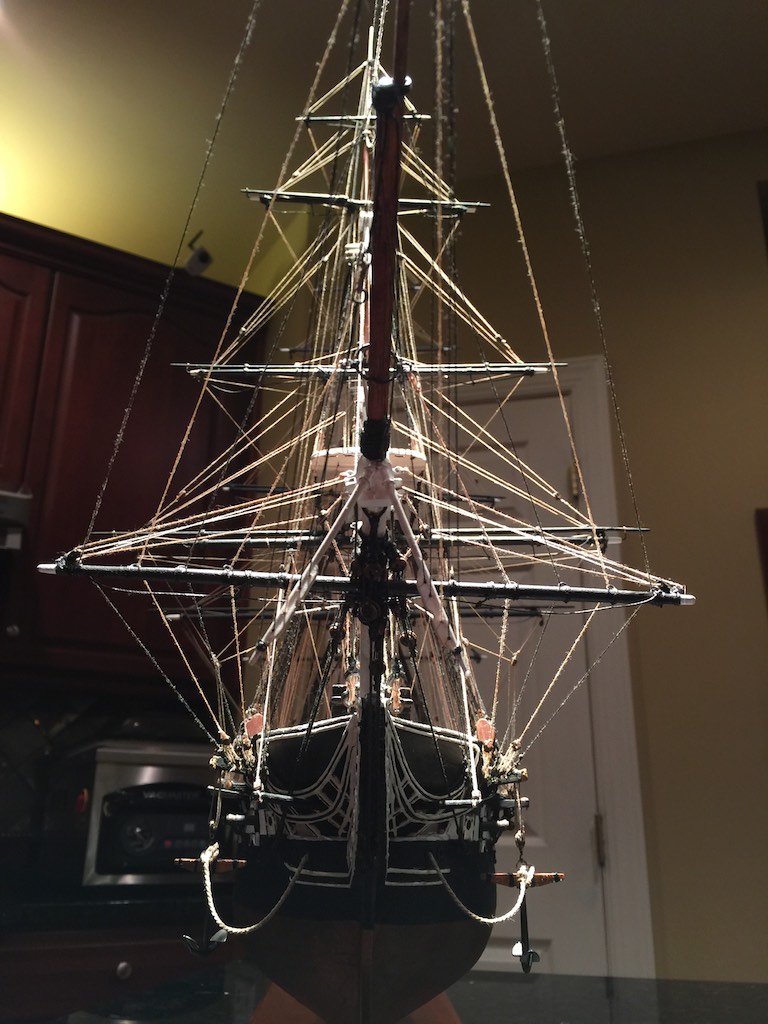
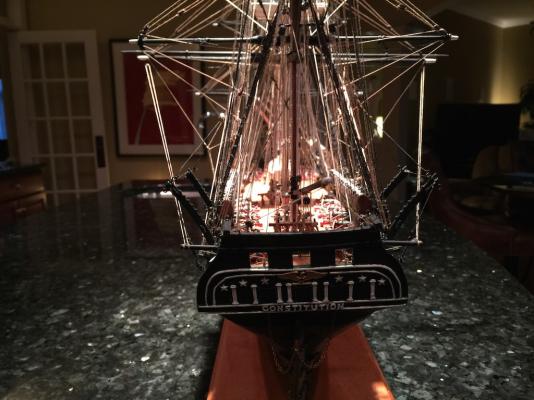
Jay you saved me! I tackled the flags on my Connie today. I used thinned PVA and aluminum foil to shape the flags. Unfortunately, the flag material did not fare over the last two decades as well as the wood did. The first two (Ensigns?) cam off without a hitch. However, when I removed the US Flag, it left a number of the white stripes on the foil. So I looked online on how to make flags and found your thread. So off to Staples and the fabric store. The lady at the fabric store was great. She pointed me toward a really thin cotton fabric. Looking on line for a flag to print I realized that the flag supplied y Mamoli was the 1797 flag. In 1812, it was actually the 15 stars and stripes flag. The Smithsonian had a great copy of this flag whoever it was a short. It looked stocky, especially given the length of the original flag. So I used a combination of DeltaCad and Preview to make the flag longer, sized correctly, mirrored, and duplicated to fill a standard letter size paper. I printed the flags on one o the transfer sheets and started to try the transfer per your great instructions. The first one was a bit off and made my eyes cross sided, but the second and third trued out great. The first one I used the instructions from the transfer and left a bit of white around the flag. On the subsequent attempts I found it was much easier to align the flags when there was no boarder. This made it easy to see if it was aligned or not. So the flag is installed AND I have the perfect flag pattern and process to print the flag for my next ship, the Brig Eagle. Thanks Jay. You are a life saver. Here is a copy of the new flag proudly flying above the ship. The ships boat is temporarily hung, I still need to finish building the remaining two boats and accessorize them.


-
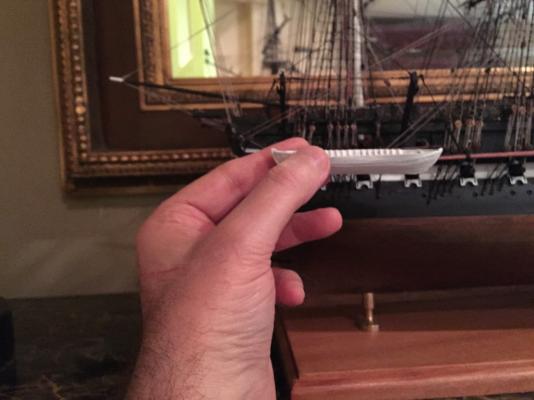
Today I completed the hull of the fist whaleboat. I still need to make the rudder, oars, and various items to be placed in the boat. The next one should be easier since I was forging ground on this one (at least for me). One lesson learned it to add the shear planks after the rail and oarlocks are done. They are easy to fit into the boat where they mount and FAR to easy to break when focused on shaping the rail.


- 335 replies
-
- 9
-
-
- Constitution
- Mamoli
- (and 3 more)
-
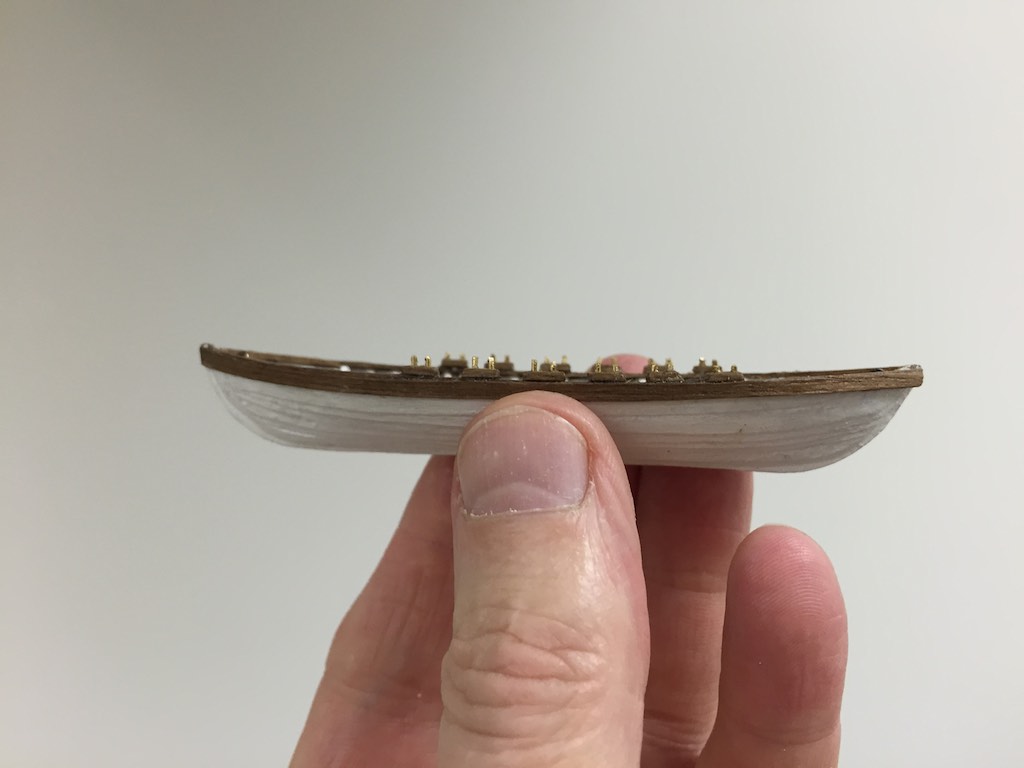
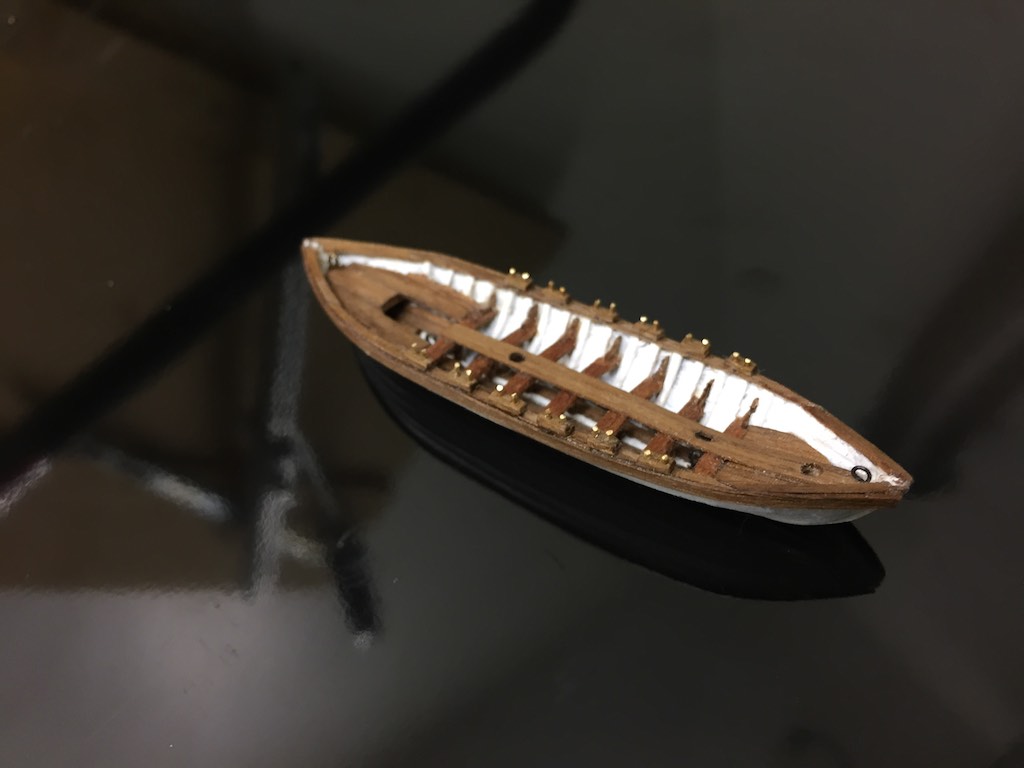
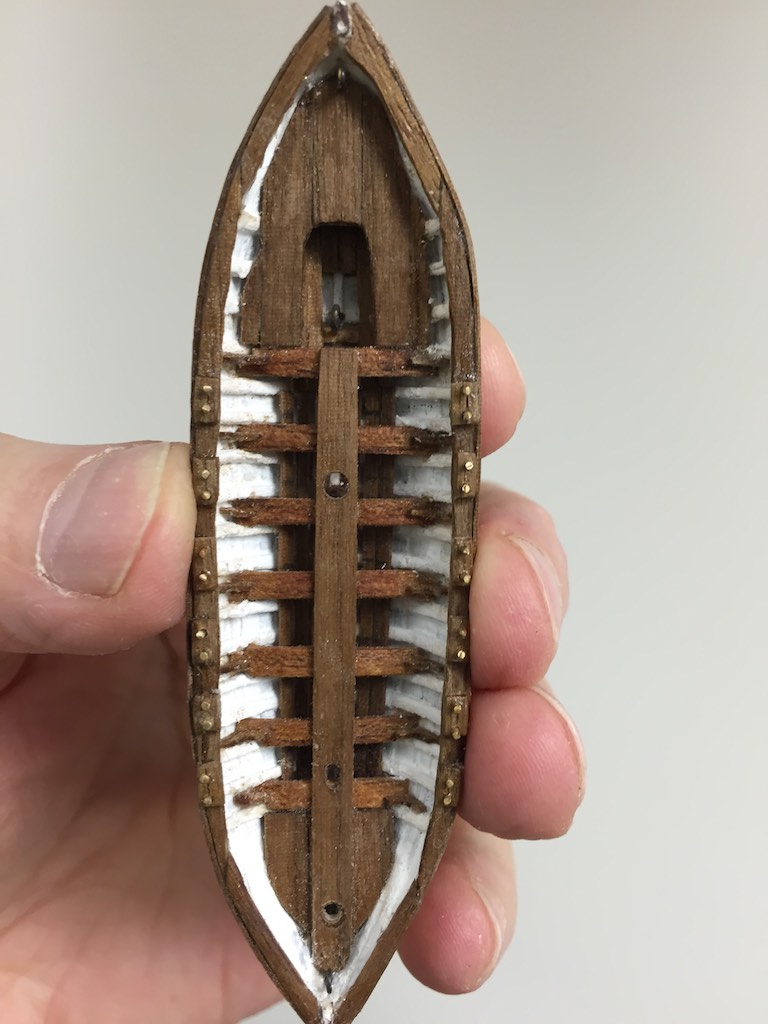
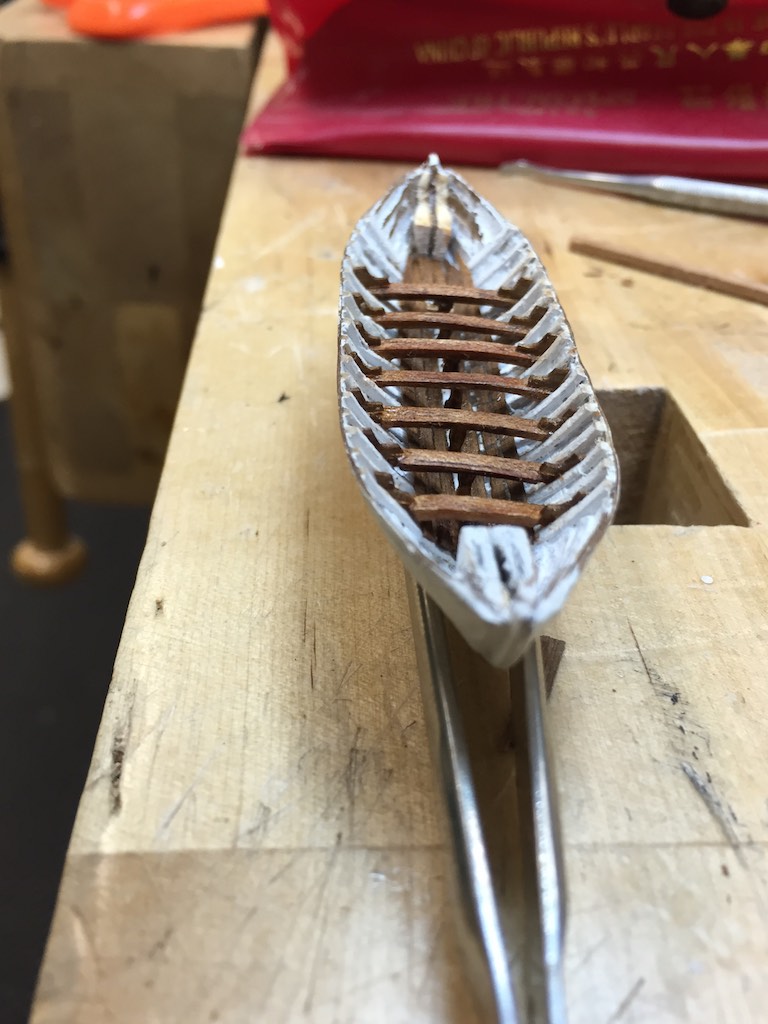
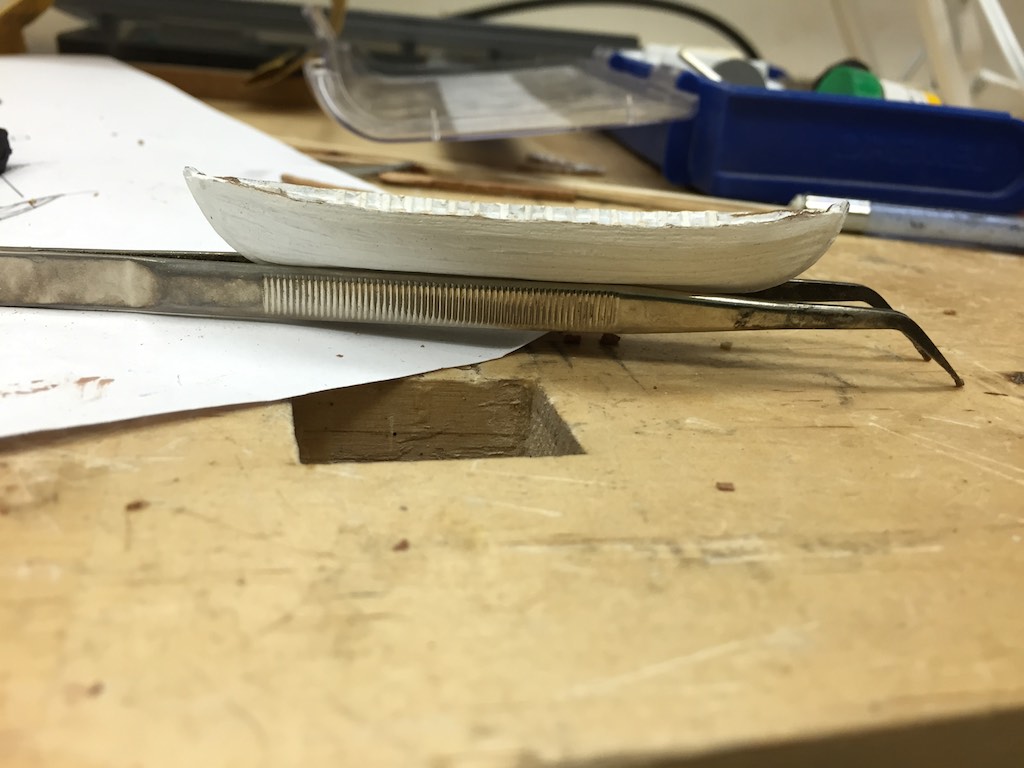
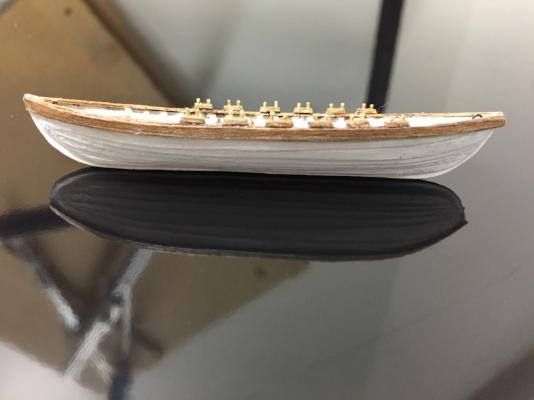
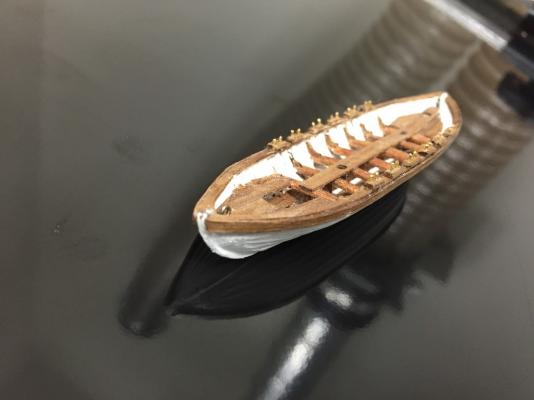
I completed painting the hull white. I will have to retouch once the boat is completed. The interior must be painted prior to installing the deck stringers since I want the deck to be stained. After it dried, I glued the deck stringers into the hull. The seats are arched. To do this, I took 3mm strips and carved the seats arch with the rotary tool and a dancing cylinder. I fitted each seat into the hull notching as necessary for the ribs. After the seat was glued I added the center support post. I made the posts using a 2x2mm square strip and rounded the middle of the post before cutting it and staining it. Then I glued it between the middle of the seat and the top of the keel. Next I took a .5mm strip of walnut and filed round radius into the end and created the shear planks I added these then the two rings that are glued directly to the keel. Tomorrow I will add the fore deck and stern decks as well as the deck rail.

- 335 replies
-
- 6
-
-
- Constitution
- Mamoli
- (and 3 more)
-
Thanks Mike. I am enjoying building the boats. Adding the details even though I know most of these things will never be seen. These boats are teaching me to build on a smaller scale. The second boat will be faster than the first. I hope to have more photos to post tonight. On another note, I have ordered the glass and LED lights for the case. So I should have everything I need to build the case and table except the hinges and the wood. Since I have ordered the legs, I will wait to get them to match the walnut at the hardwood shop. I debated on glass or acrylic and finally decided on tempered low iron glass. I will have a hinge built into the back side to gain access to the ship so weight is not an issue. With the low iron glass it is really optically clear.
- 335 replies
-
- 2
-
-
- Constitution
- Mamoli
- (and 3 more)
-
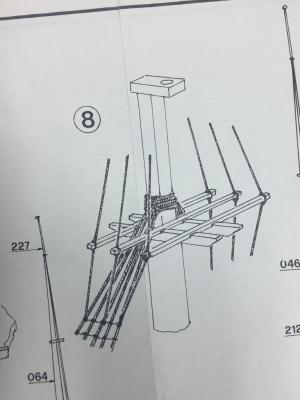
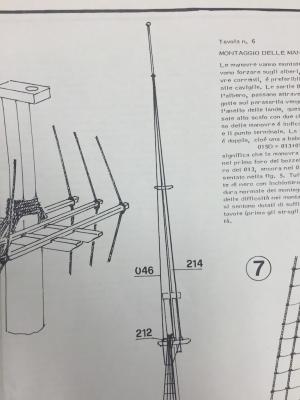
On the Mamoli plans the detailed drawings of the spars were labeled with a part number. I had to cross reference this part with the full ship diagram to see which spar went where. I labeled the details as I found them.
- 1,756 replies
-
- 2
-
-
- constitution
- constructo
- (and 1 more)
-
It is looking good Rich. The ratlines was one of the areas where I opted to go plan and go with almost the smallest line I could find. I say almost because I do have Fly tying line but that would have been nearly invisible.
- 1,756 replies
-
- 1
-
-
- constitution
- constructo
- (and 1 more)
-
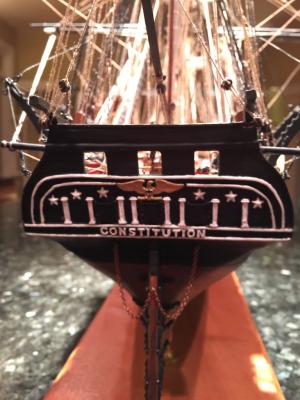
Now their statement "The Ship is shown in its probable 1797 appearance (copper plates omitted) with details which were later removed or altered." is beginning to make sense!
-
Interesting the large model you found earlier has Hercules on the bow. If my memory is correct, this was lost during it's first forays with the Barbary pirates. A collision with the President that resulted in it going into Malta and receiving it's scroll work bow.
-
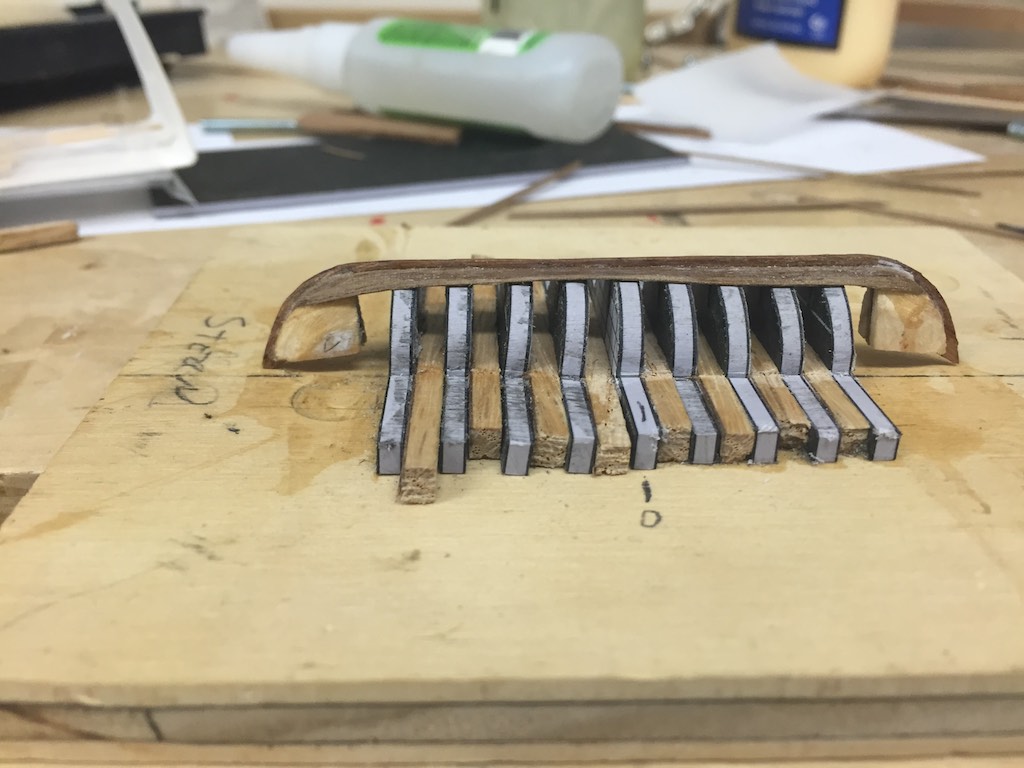
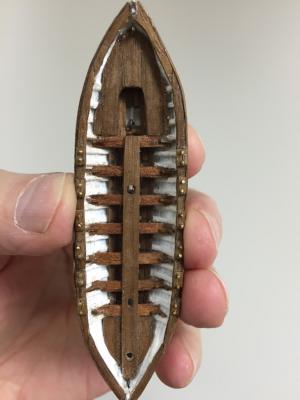
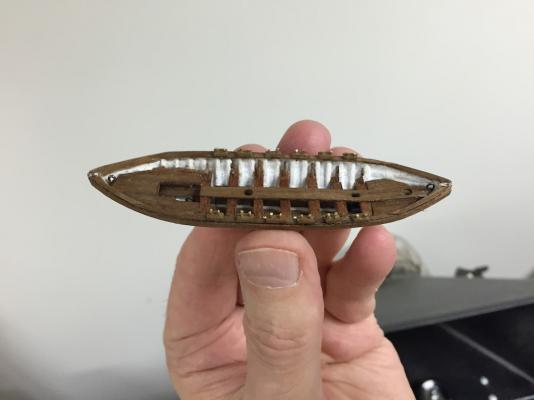
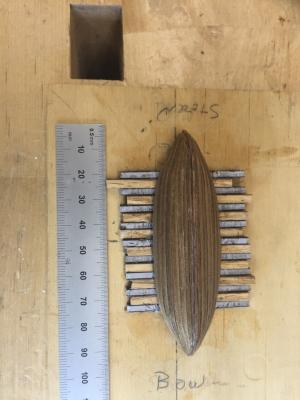
Today I completed the planking for the first of the whaleboats. I cut the strips of walnut, then applied a thin bead of thick CA and used the bending iron to bend and stick the plank to the hull. I would alternate sides as I applied strips. After gluing all the strips in place, I used rifflers, the Xacto #11 blade, and wood chisels to clean up the glue squeeze out. The wood chisels worked really well getting into the corners of the planks and the rifflers cleaned up the keel assembly. These boats are painted. I took a 2x2 strip of Basswood and cut lengths that would fit the ribs. Then used a wide chisel to split it twice. Usually I could get two sometimes three pieces of usable rib material with this method. I used thick CA to glue the ribs into the stations (every other rib). Then used the Facto blade to clean up and trim the ribs to be consistent. The planking bowed the sides out quite a bit more than they should be so I have the boat in a clamp overnight pulling in the sides. Then tomorrow I will add the remaining ribs, clean that up, then paint the interior white. Since the decking and much of the boat furniture will be stained or a different color, now is the time to get to the interior sides and ribs. Below are some photos after the planking was finished, but before the cleanup.
- 335 replies
-
- 8
-
-
- Constitution
- Mamoli
- (and 3 more)
-
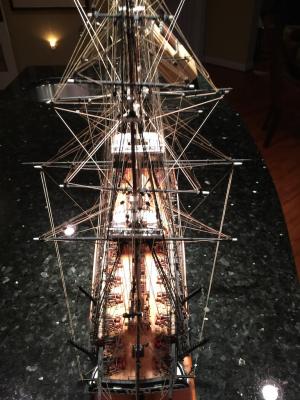
It is amazing the amount of detail you can put in a model nearly 7 feet long!
-
There are many threads here with discussions on what source has wht bonifides. When i asked one of my questions to the Connie historian she referred back to the Hull model. My understanding of the model, second hand, is there are inconsistan ies within the model. Levels of detail changing depending where you look. What others have surmised, is the model ws built by a number of different sailors and somewhat rushed at the end when they learned Hull was leaving the ship. I don't know. It would ge great if there were actually detailed phots of the Hull model, but i have never found any.
-
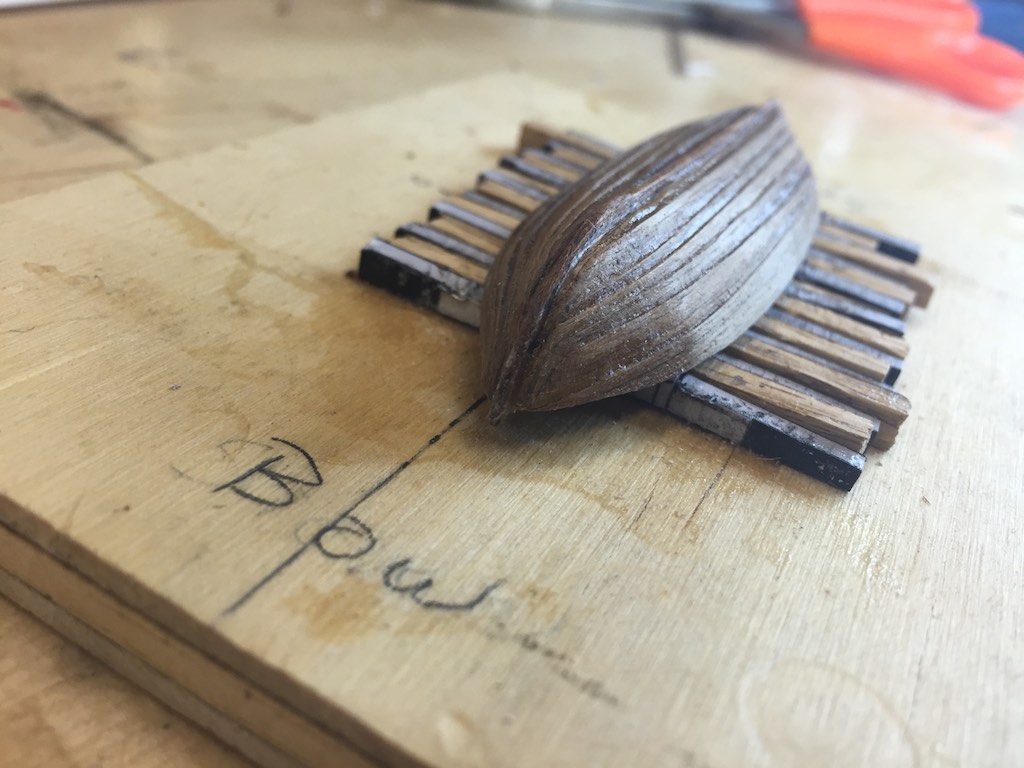
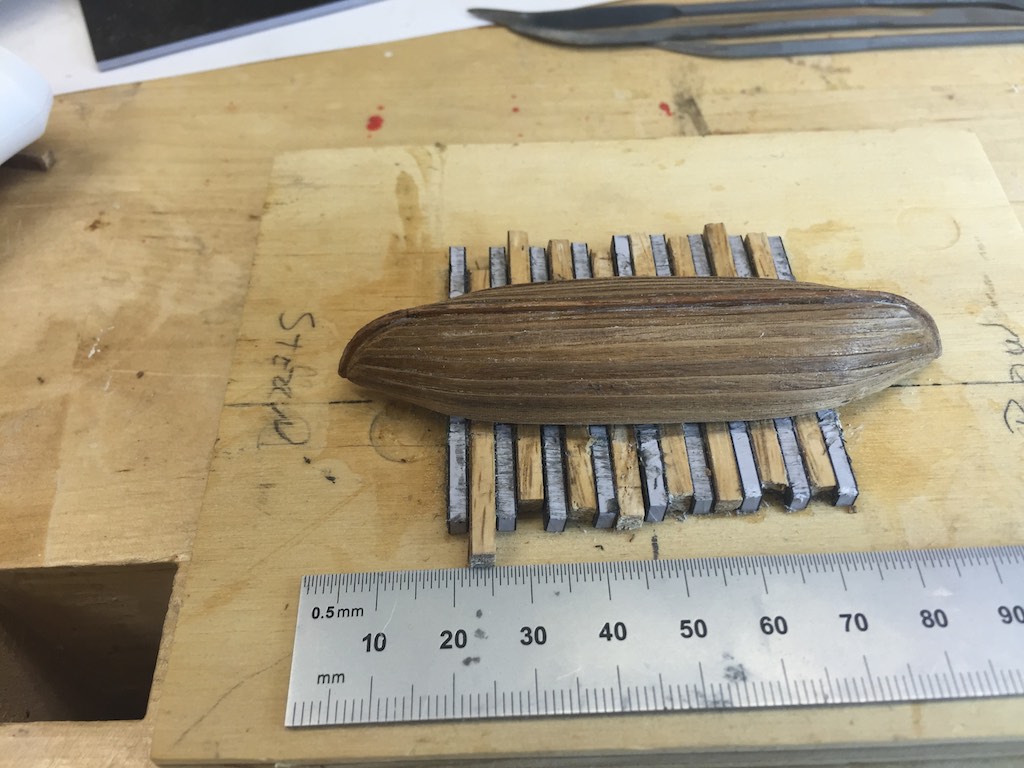
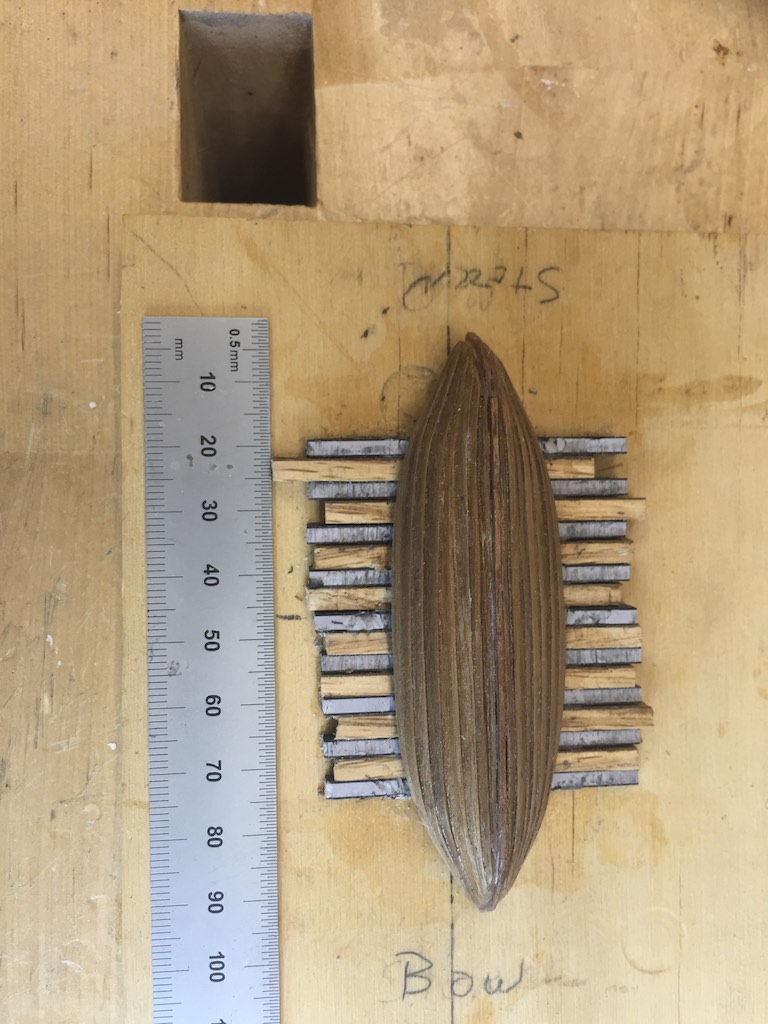
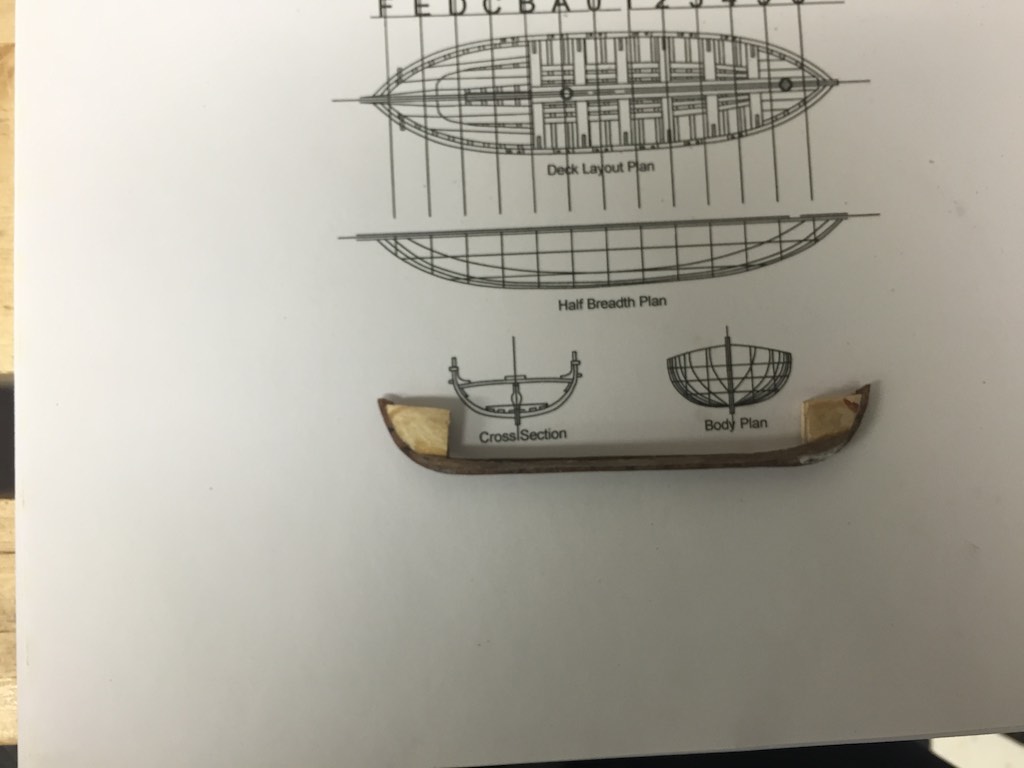
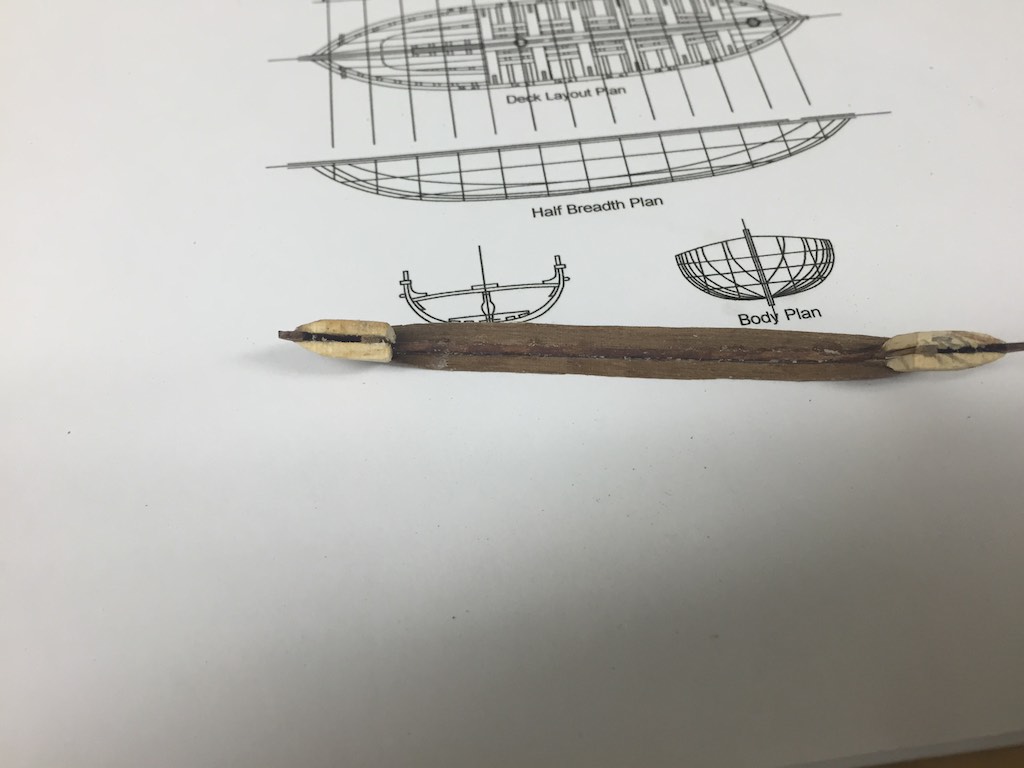
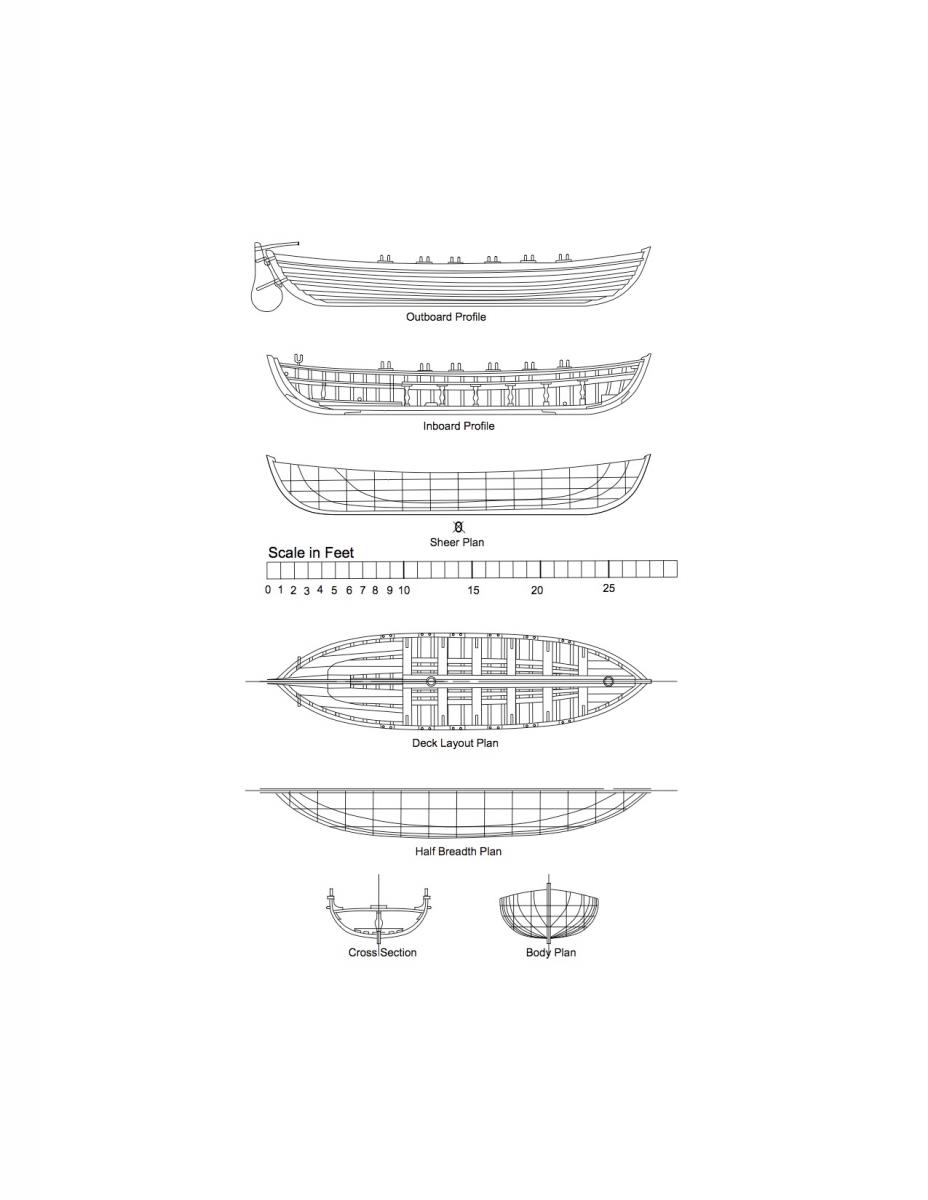
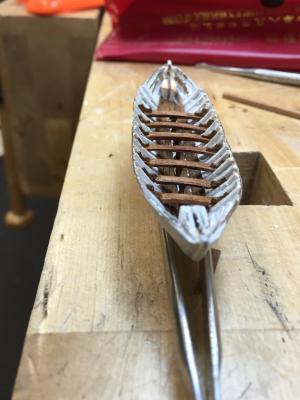
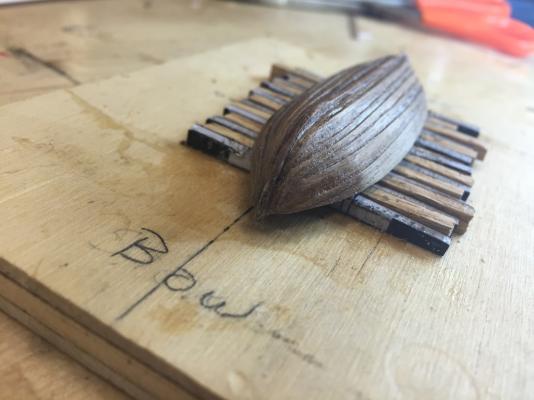
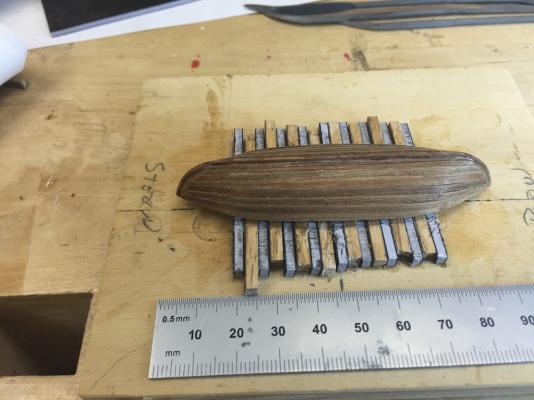
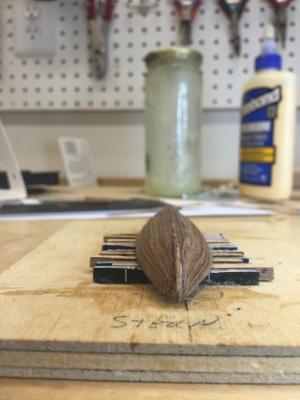
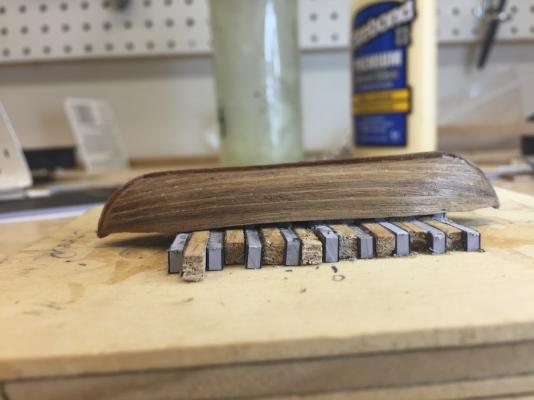
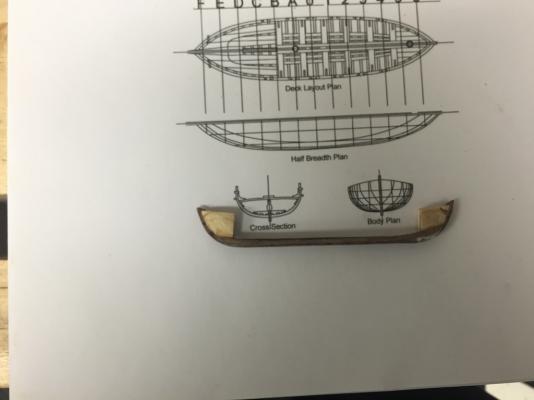
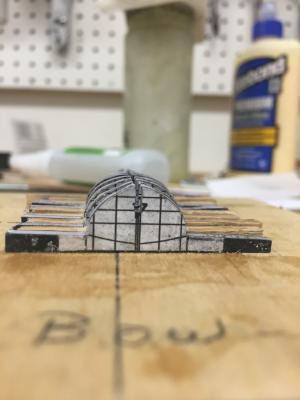
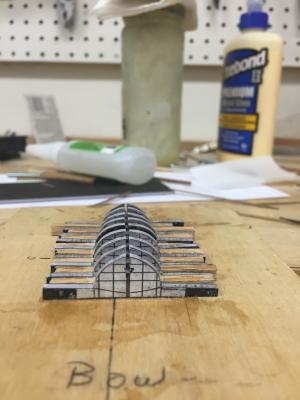
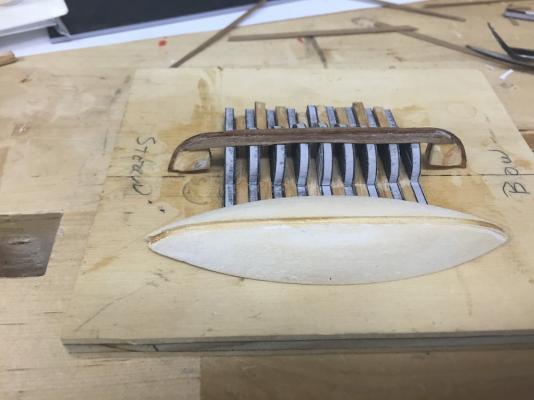
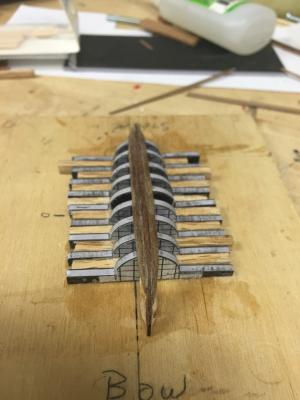
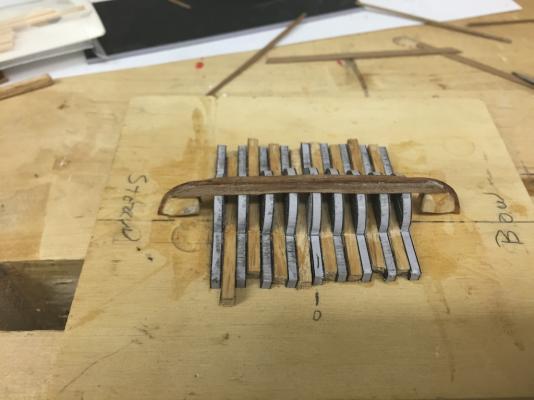
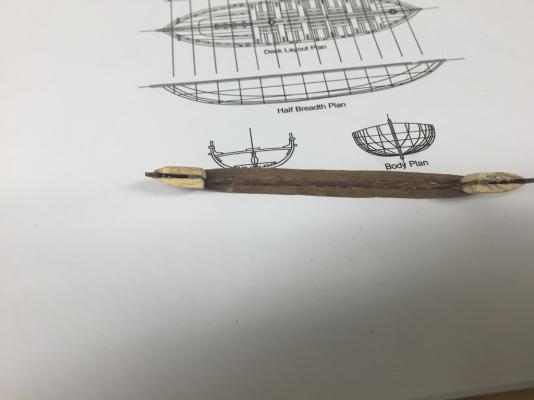
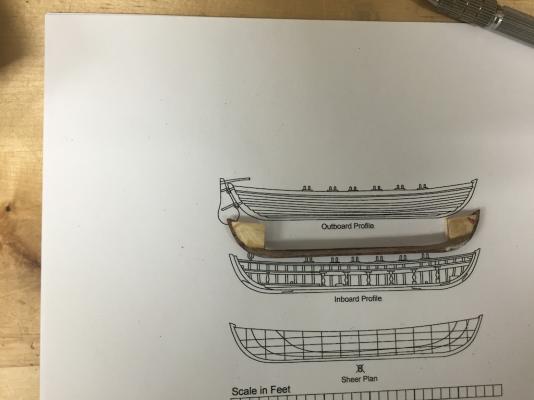
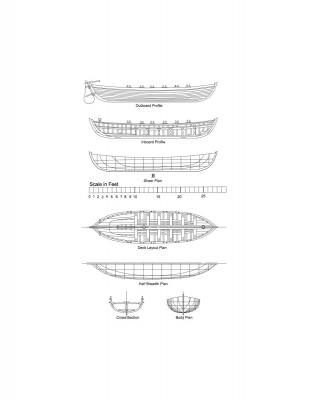
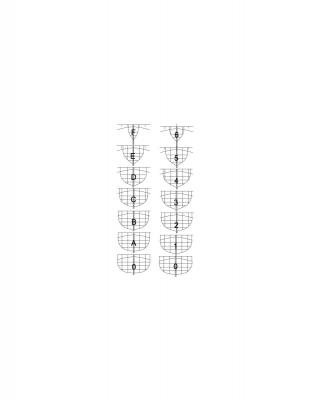
For the three ships boats in the quarter gallery and stern, I am building three whaleboats. I may opt to build the third boat as a gig (with a flat stern) but I need to build at least two boats to start. I pulled the drawings from the AOS into CAD and reconciled them and cleaned them up to use in the construction. I took a plastic cutting board from an Xacto set, and after roughing up the sides with sandpaper, I used superglue to attach the form lines on the sheet to the plastic. Then I carefully cut these out on the scroll saw. I added extensions to raise the forms and allowed me to have a flat surface for the base of the forms. Here is a copy of the plans and the form layouts. The layouts print on 8.5 x 11 and are to scale for the 1:93 ship. Once the forms were cut out and sanded smooth I placed them on the plans to see what the thickness of spacers were required. I took strips of walnut and oak and made laminated strips slightly larger than I needed. These I placed between the frames over the plan and gradually sanded each down until the correct thickness was achieved. I removed the endmost two frames from each end and glued the remainder to a block.I assured the alignment of the forms by placing a 1mm strip (the thickness of the keel) through the keel slots on each form. Once the glue was set I sanded and trued the forms in place. This beveled the forms correctly. After the mold was correctly beveled I moved to the keel assembly. I cut the keel form from the plans. I also cut the rough keel stem and stern pieces from a 1mm strip of walnut. These were glued together. To enforce the joint between the stern, stem and keel pieces I glues small strips of paper on each side right over the joint. I glued the keel plans to the rough keel assembly and sanded it down to the correct shape. I sandwiched two thick strips together with a paper between and cut the bow and stern shapes per the plans. I sanded these into the rough bevels required before gluing each to the assembly. After a trial fit into the mold, I completed truing each of the ends to the hull. I tested adding the ribs to the mold forms before planking. However the connection between the ribs and the keel were too weak to support the planking. So I went to plan B. I was very concerned the planks would adhere to the forms so I removed the keel and coated the mold with the beeswax mixture I used in the rigging. I shaped and glued the garboard planks on each side. Since the hull will be clinker, I cleaned the planks and keel assembly with sanding paper and rifflers. After each garboard plank was attached I carefully pried the keel out of the form. You can see below the result of the garboard strakes being attached. I also have a photo of my current mold with the Mamoli blank in front of it. Given how poorly the Mamoli plans follow the outline of the whaleboats these look more like canoe blanks. This is all I completed today. Tomorrow I will continue to plank the hull. I am happy with the form so far. I know I could complete the boat with the planks butted. However, I really want to do this clinker style. I will know tomorrow whether I will have the skills to do this. If not, they will be butted. The inlay strips for the case arrived today as well. These will be simply black white black striping that will be inlayed around the base of the ship.


- 335 replies
-
- 5
-
-
- Constitution
- Mamoli
- (and 3 more)
-
This is looking great. I could not tell from your log. On the Connie the pumps were set up so the water removed from the bilge could be used to flood, or really wet the gun deck prior to a battle. Is that how you are plumbing it?
-
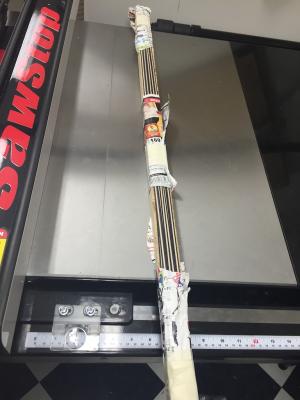
You might want to tell him you are looking for hardwood. I received a large piece, it was a spar. So I will be using it in the three ships boats and the name plate support.
-
You could serve it around the mast top, but, these will all be covered by all the other lines attached at that point. Also keep in mind too much bulk will cause the other lines attached over it to fall oddly. Your call.
- 335 replies
-
- 1
-
-
- Constitution
- Mamoli
- (and 3 more)
-
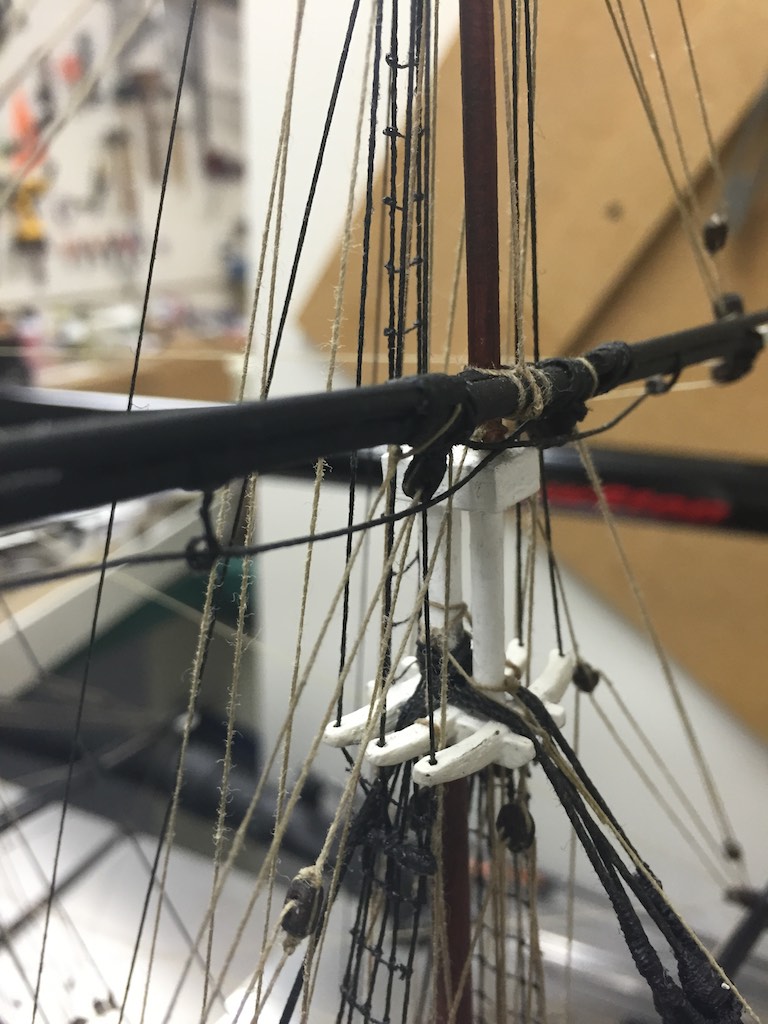
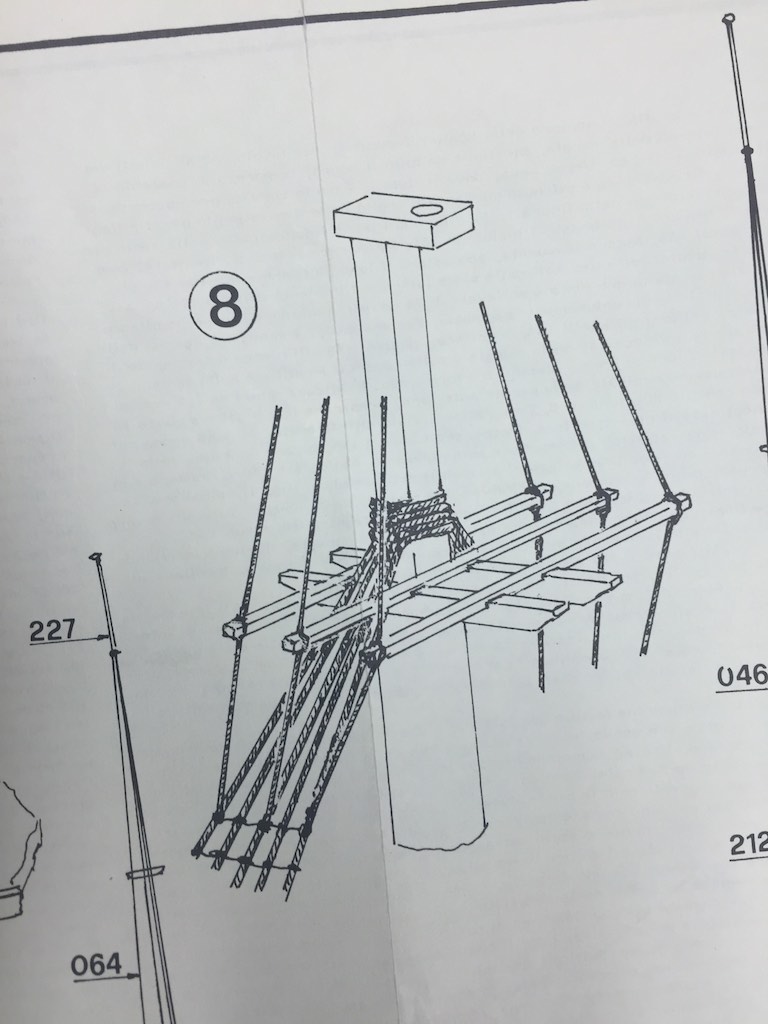
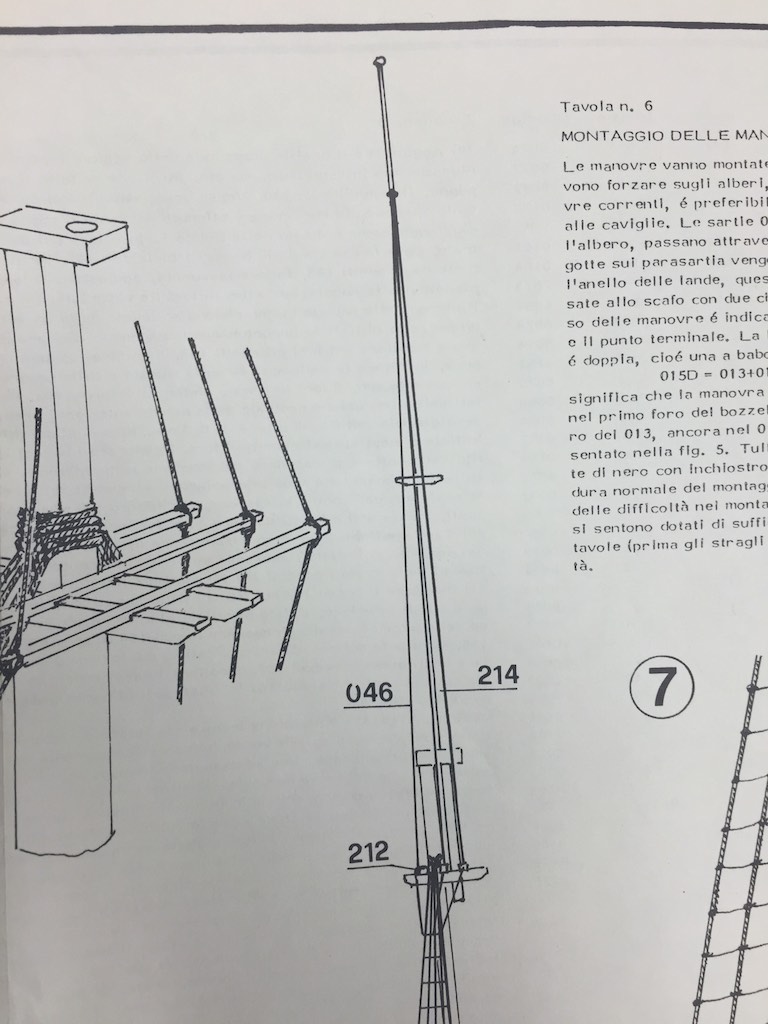
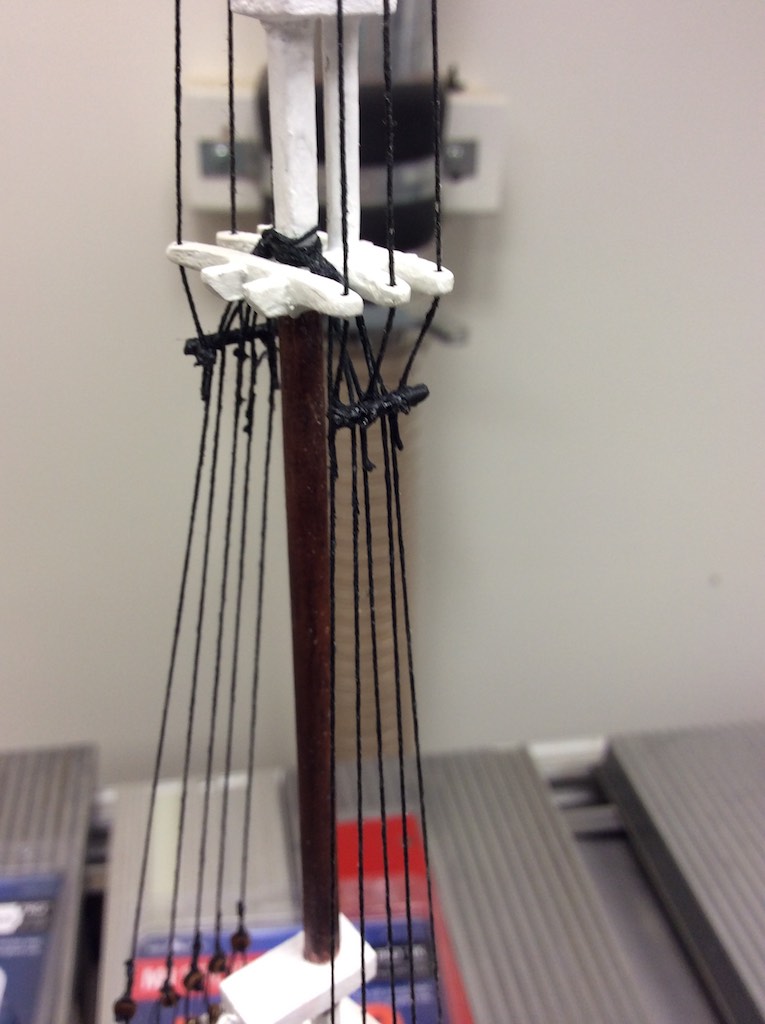
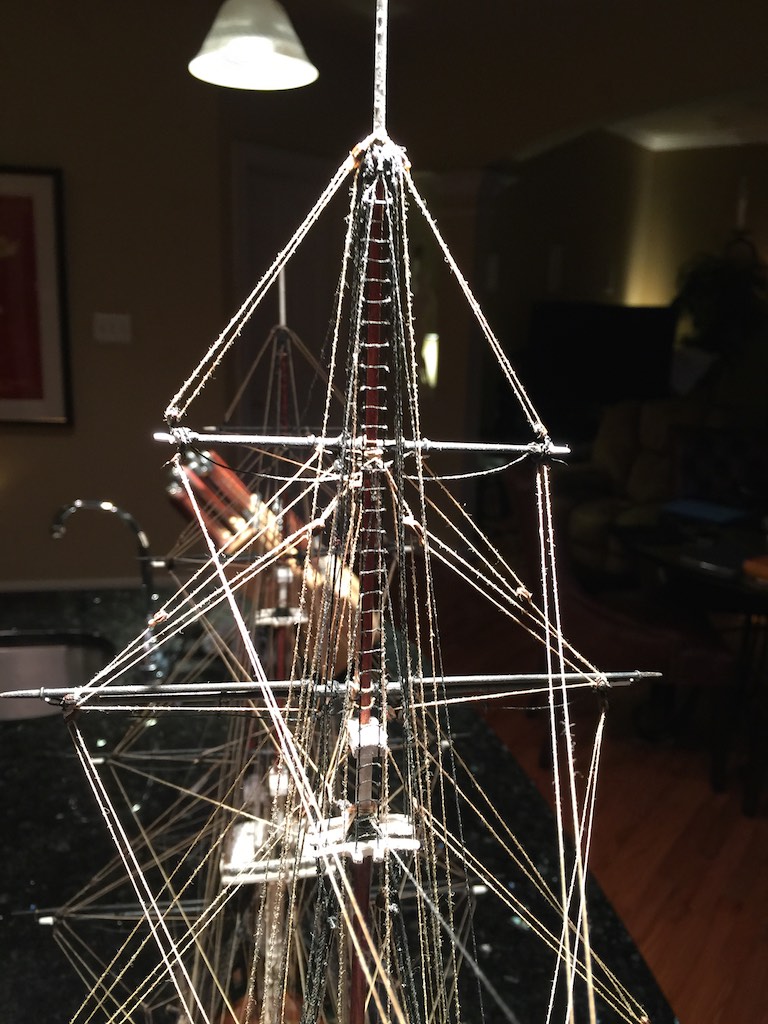
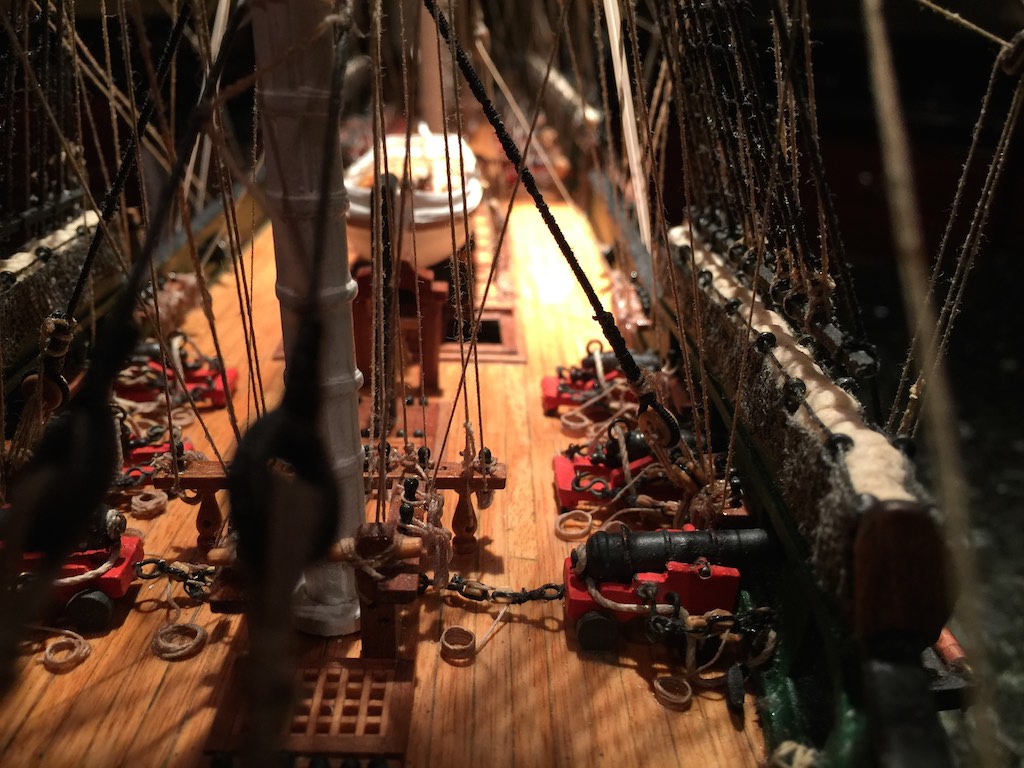
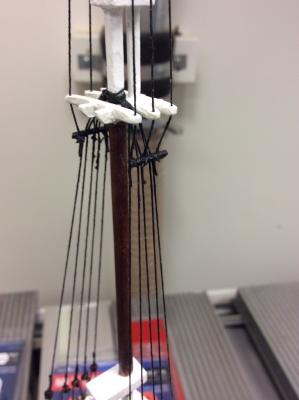
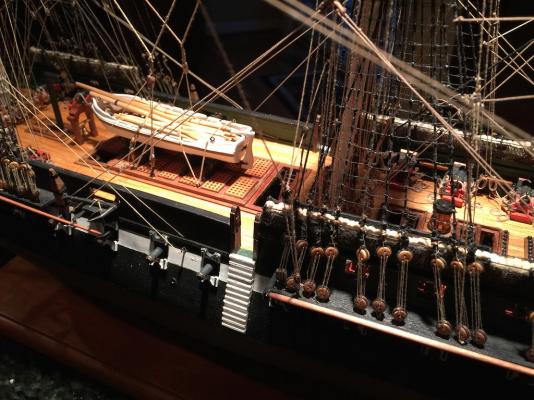
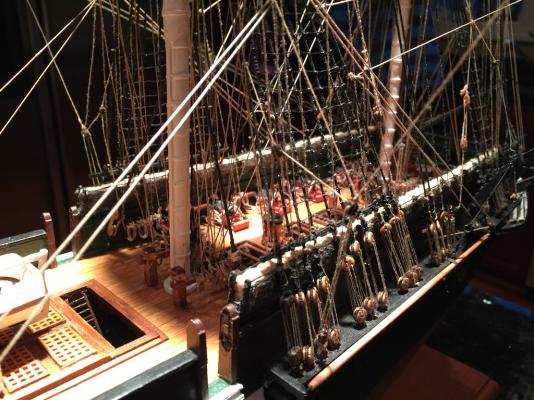
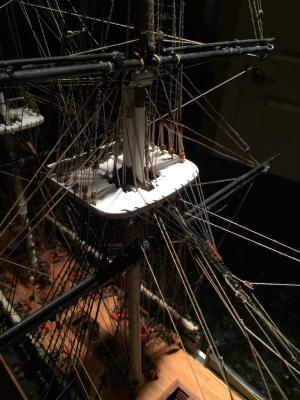
The Mamoli plans have some detail drawings on how they attach on the lower end, but I was left to my own on the upper attachment. Since there are three upper shrouds, I opted to double one my cinching it in the middle with a small knot, and the aft mot just a small loop to attach it to the mast. These are stopped by blocks attached near the top of the mast. I chose knowing here because there was a plethora of lines that terminate on the upper mast and it is a small area so I did not want to bulk it up with serving lines.The lower ends are run through the cross tree and attached to the futtock shrouds. The plans showed their lower ends terminating on the shores. I added a stave across then terminated them there. I also ran the rat liners up the sides similar to that done on the lower shrouds. The two photos show the lower shrouds after the shrouds were installed and once again after the remaining rigging was installed. You can also see in the after photo the jacobs ladder I installed since this was the only access the crew had to the upper spars. These were not part of the Mamoli plans. Ip hope this helps. If you have nay other questions, don't hesitate to ask.

- 335 replies
-
- 1
-
-
- Constitution
- Mamoli
- (and 3 more)
-
Great idea.
-
Thanks. As far as the next ship. that is already decided. I will be doing a scratch build of the Brig Eagle. I have already developed the plans in DeltaCAD and actually was able to get input from the professor at Texas A&M on them. It will still be a bit since I need to scratch build the ships boats then build the case. Probably February before I start her.
- 335 replies
-
- 1
-
-
- Constitution
- Mamoli
- (and 3 more)
-
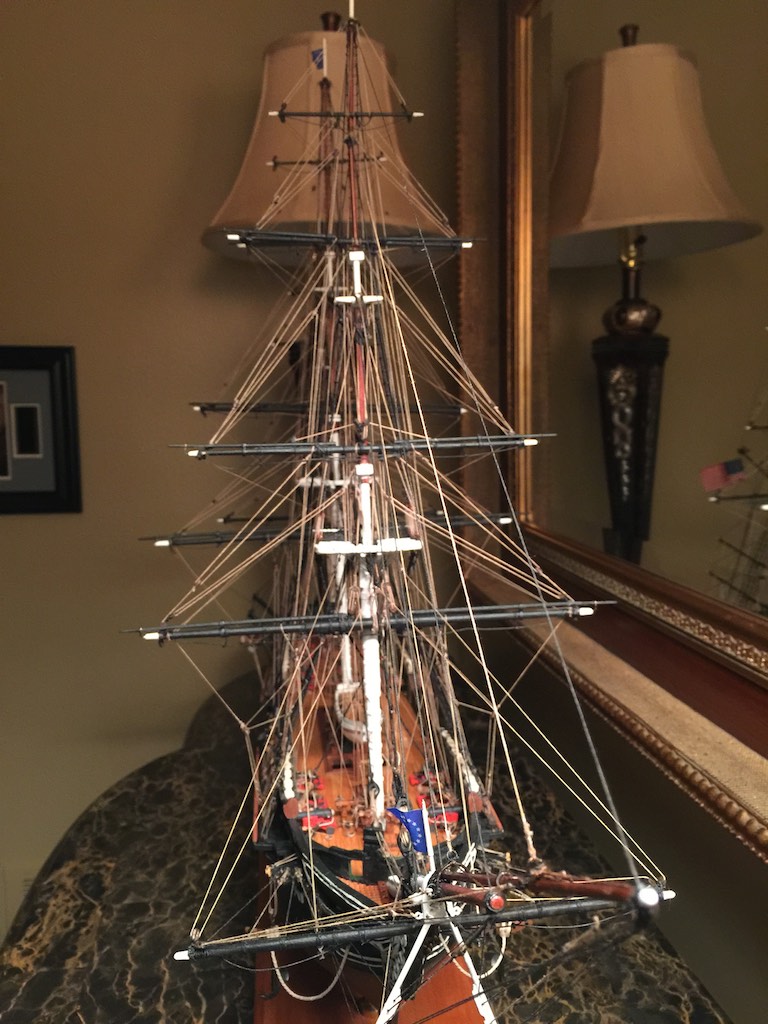
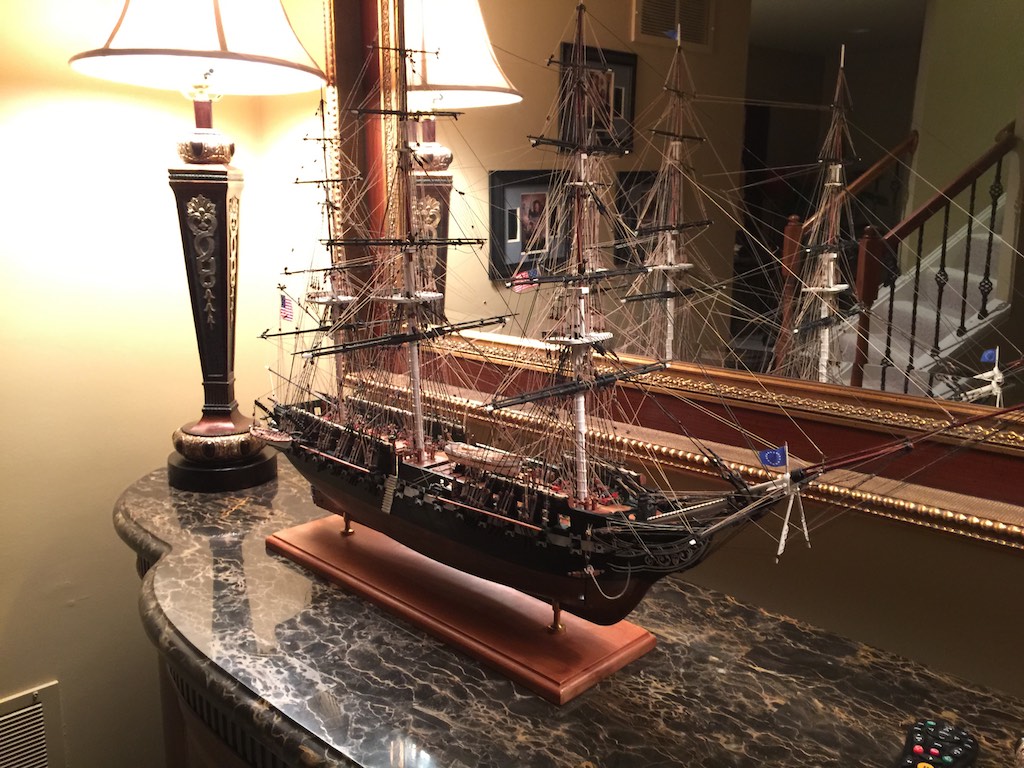
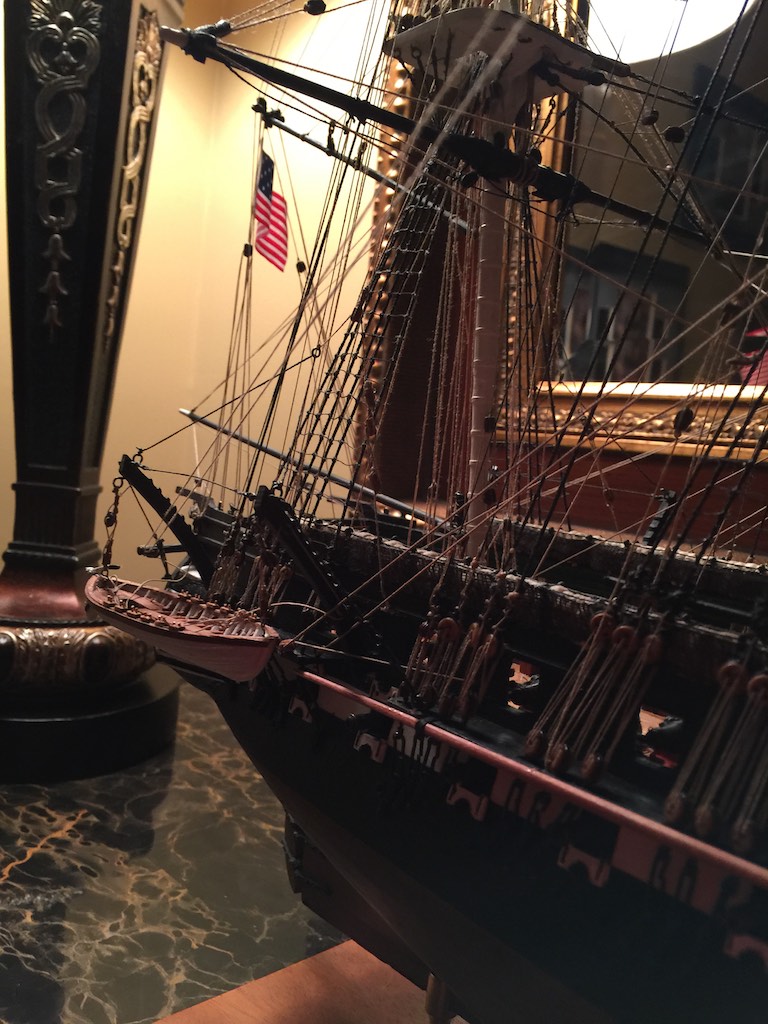
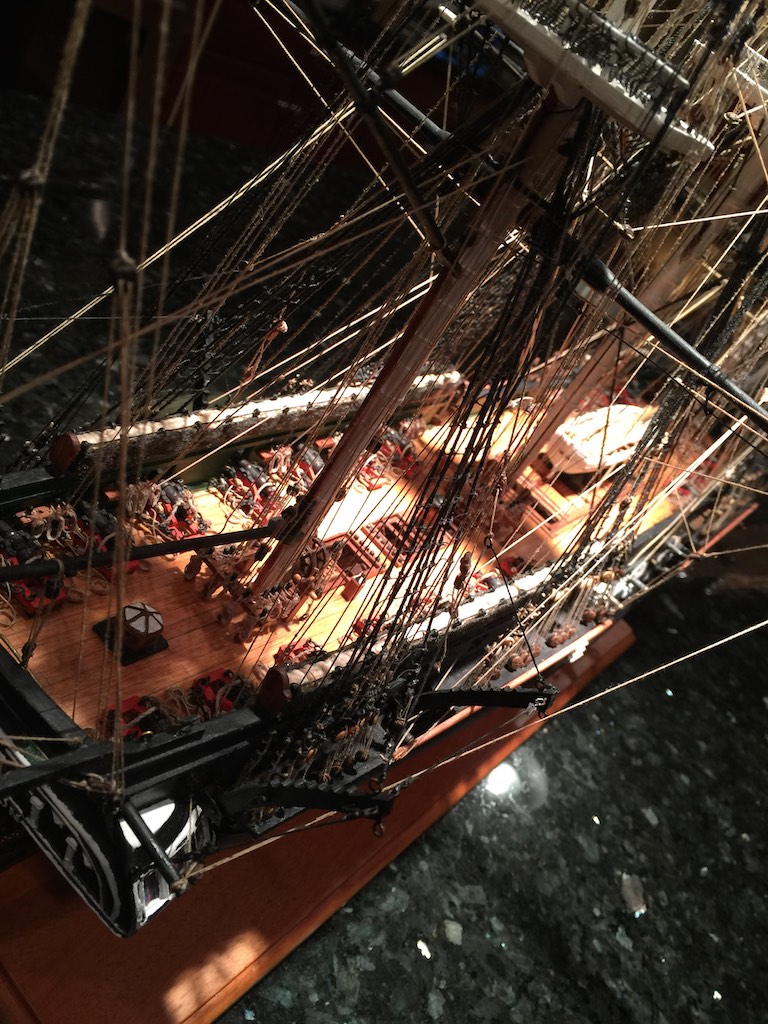
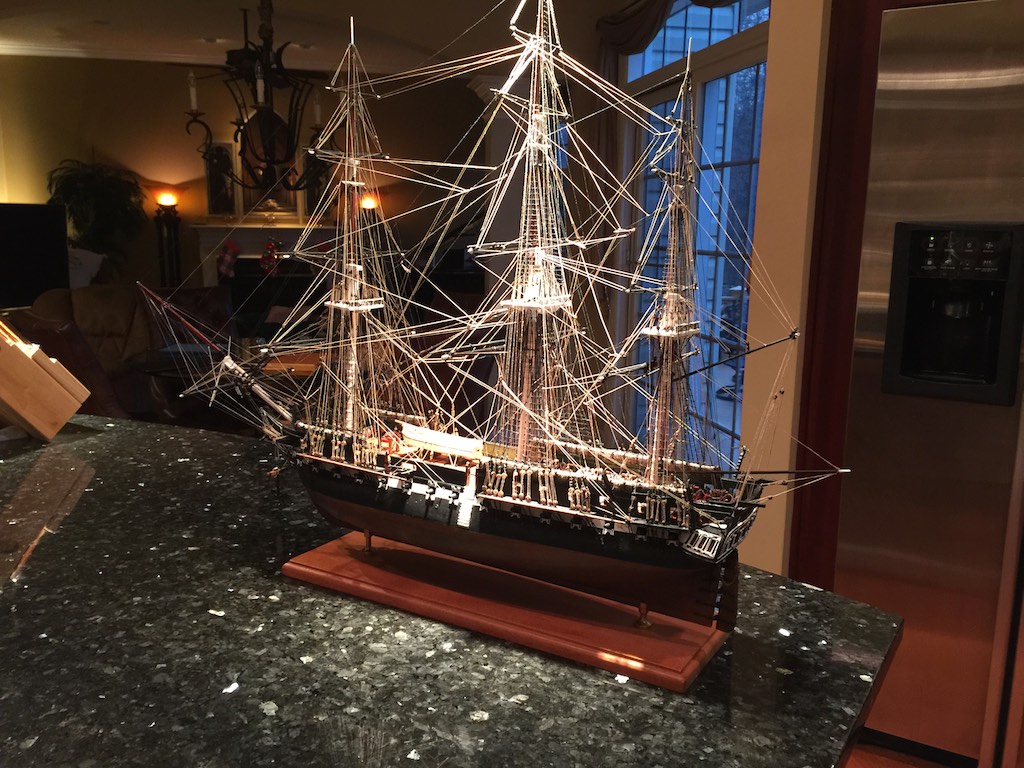
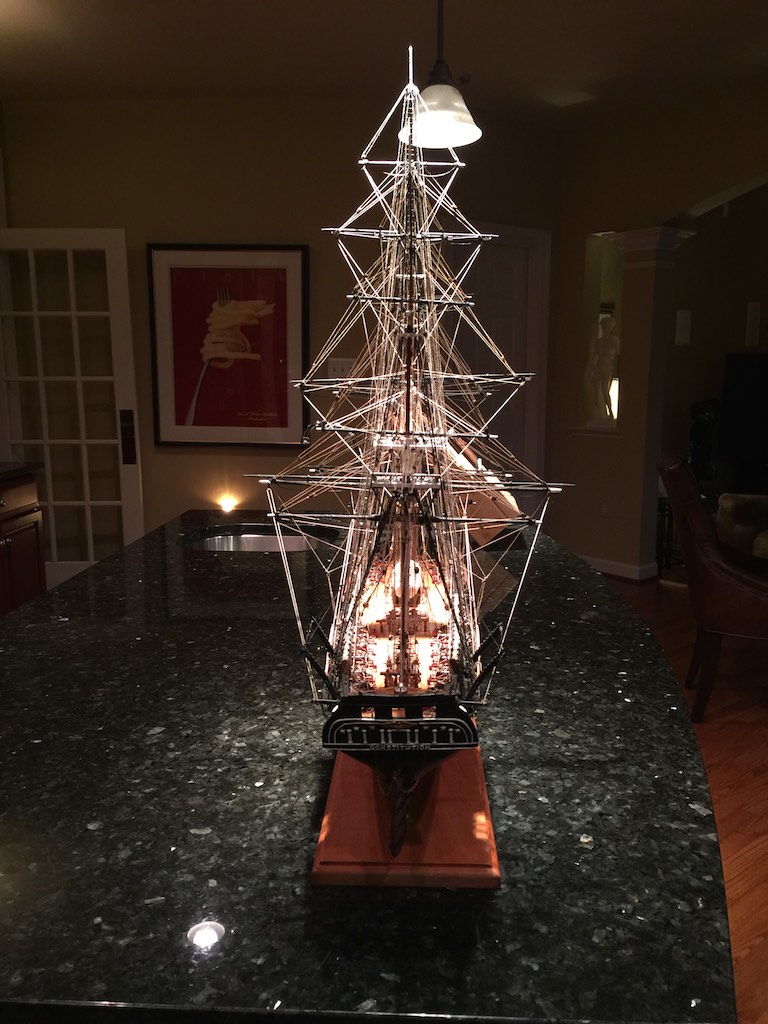
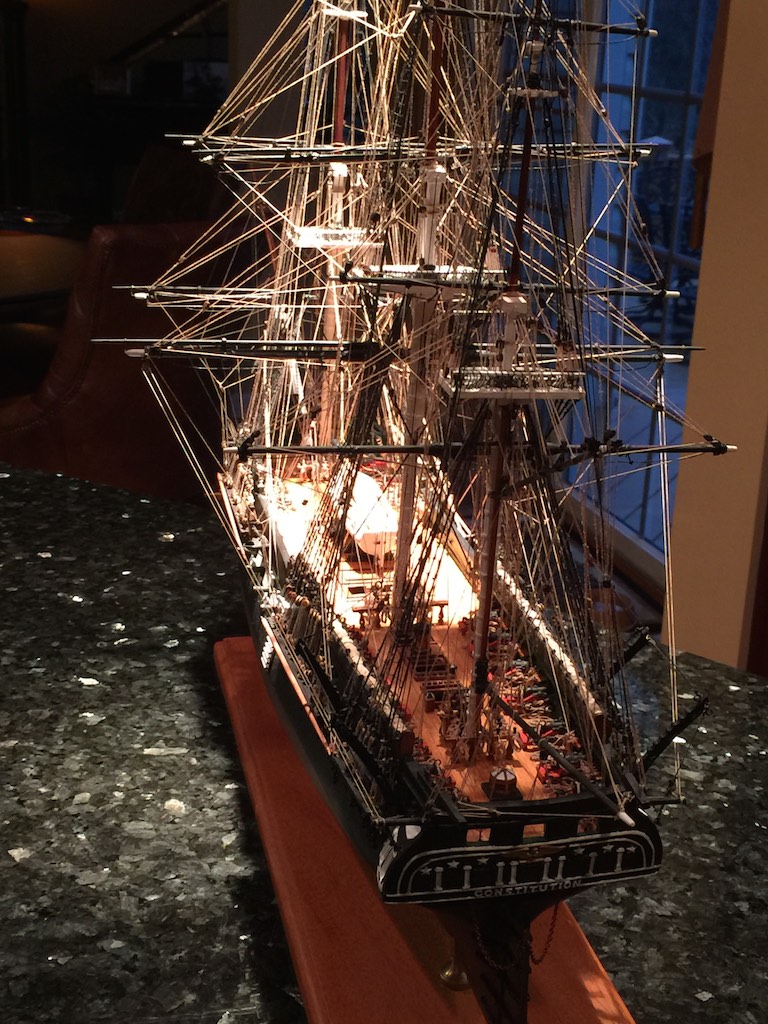
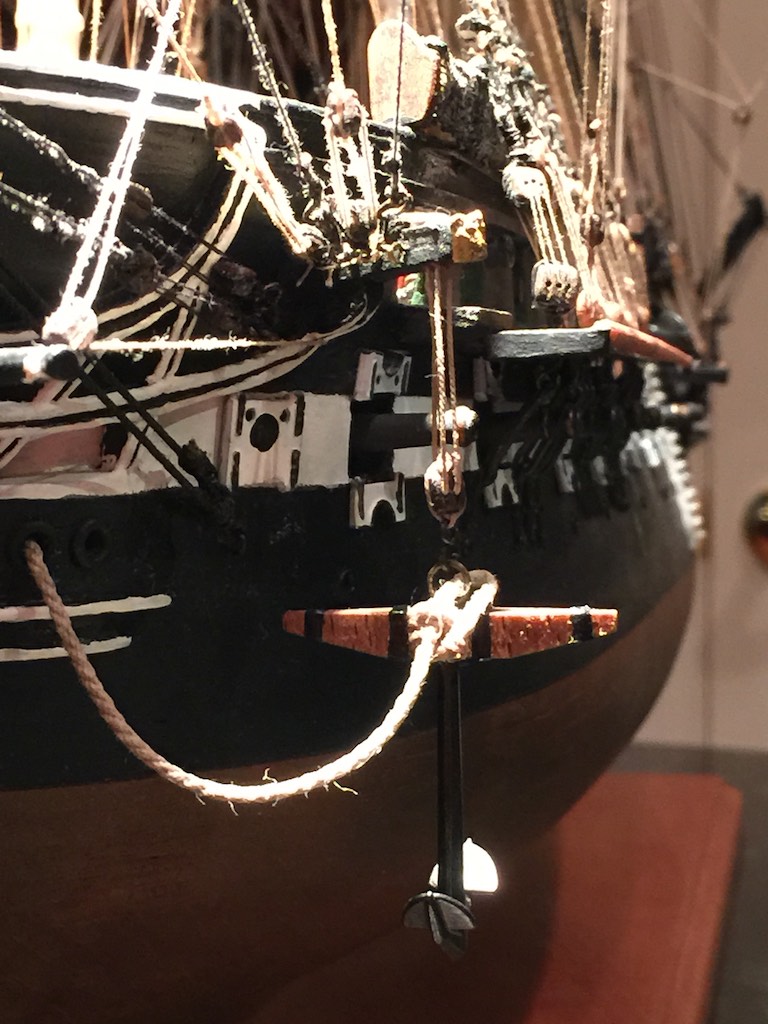
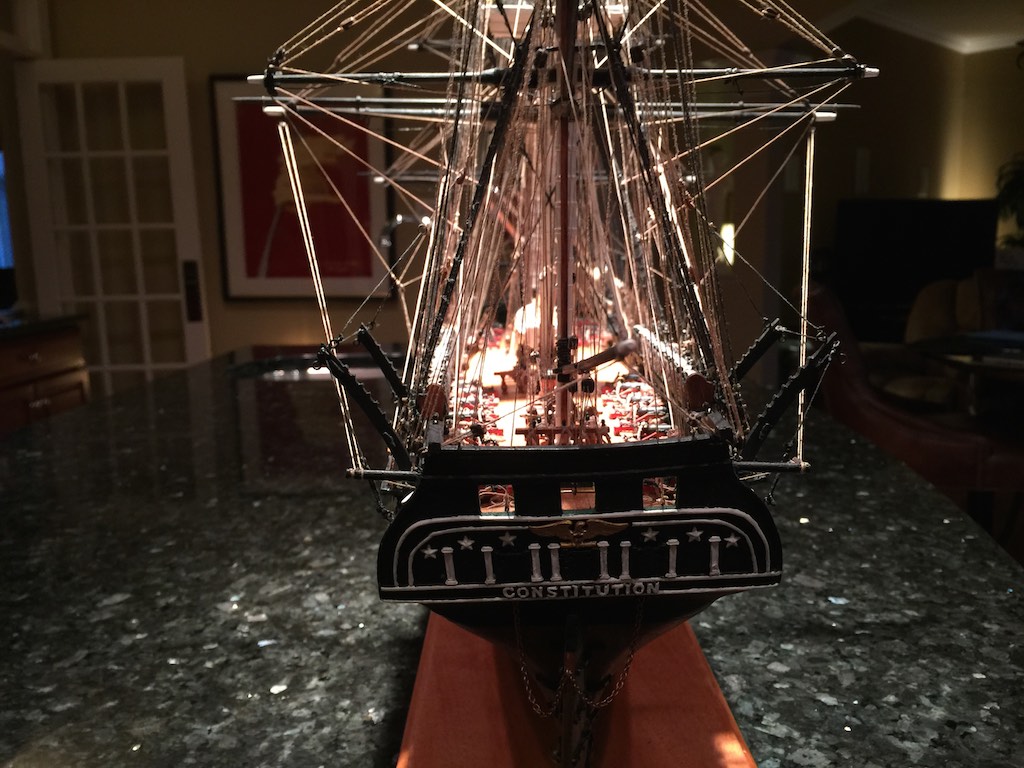
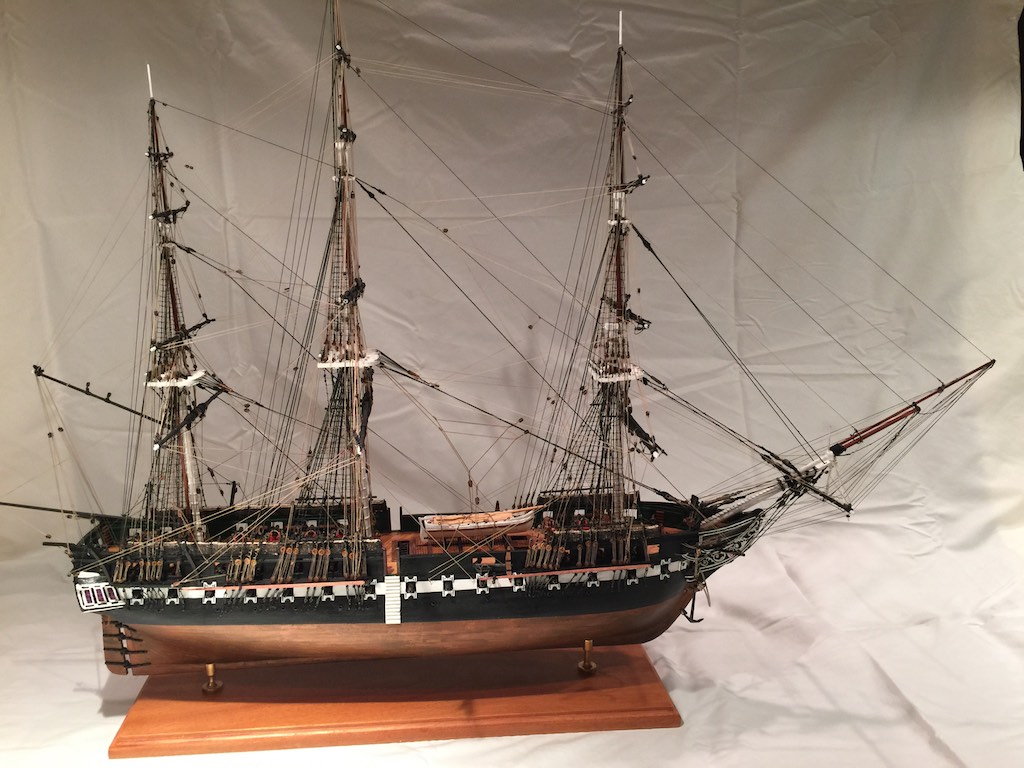
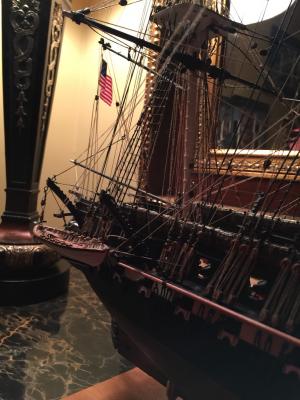
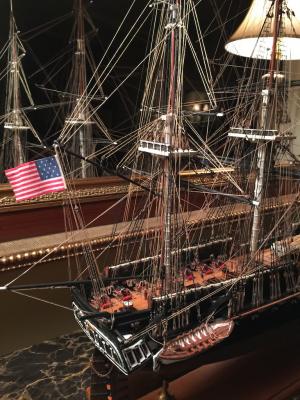
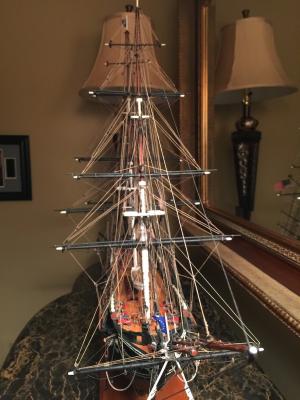
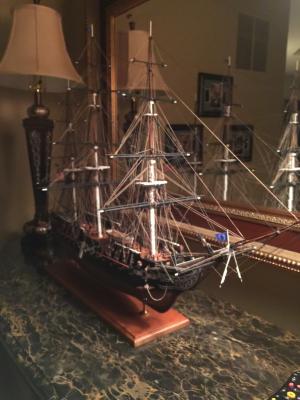
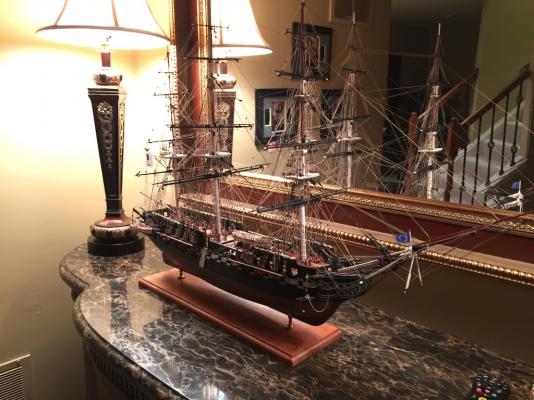
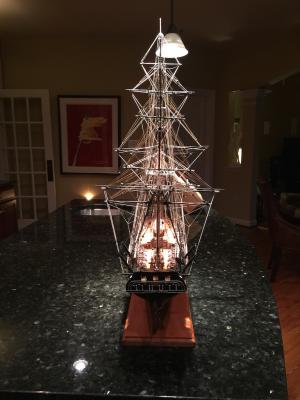
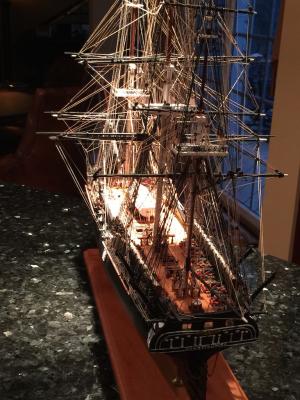
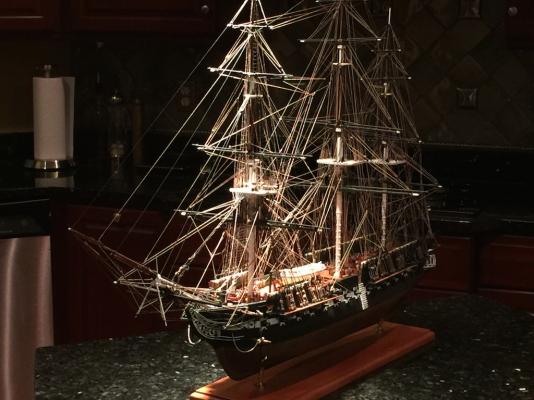
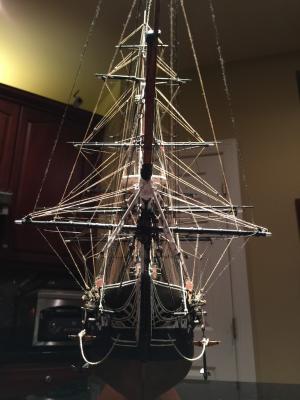
Today I finished adding the quarter davits to the ship. This means that nothing else needs to be attached to it other than hanging the three ships boats. I hung the davits by pinning the bottom to a bracket I made out of brass. Once I marked where the bracket would be I carefully scrapped all the paint off down to the bare hull. I roughened up the back of the brackets with course sandpaper, then used thick CA to attach them to the hull. I strung the davit lifts per the AOS. At least my interpretation of the AOS. Overall I am pretty happy with the way they came out. I ordered the legs and inlays for the case. It will take a few weeks to arrive so hopefully, I will be done with the ships boats and ready for them. As promised, once I completed adding the davits to the hull, I brought the ship upstairs to get some photos in a better light. Here they are. I will do this once agin once I build and hang the ships boats. Sorry to post so many. She is a proud ship.


- 335 replies
-
- 10
-
-
- Constitution
- Mamoli
- (and 3 more)
-
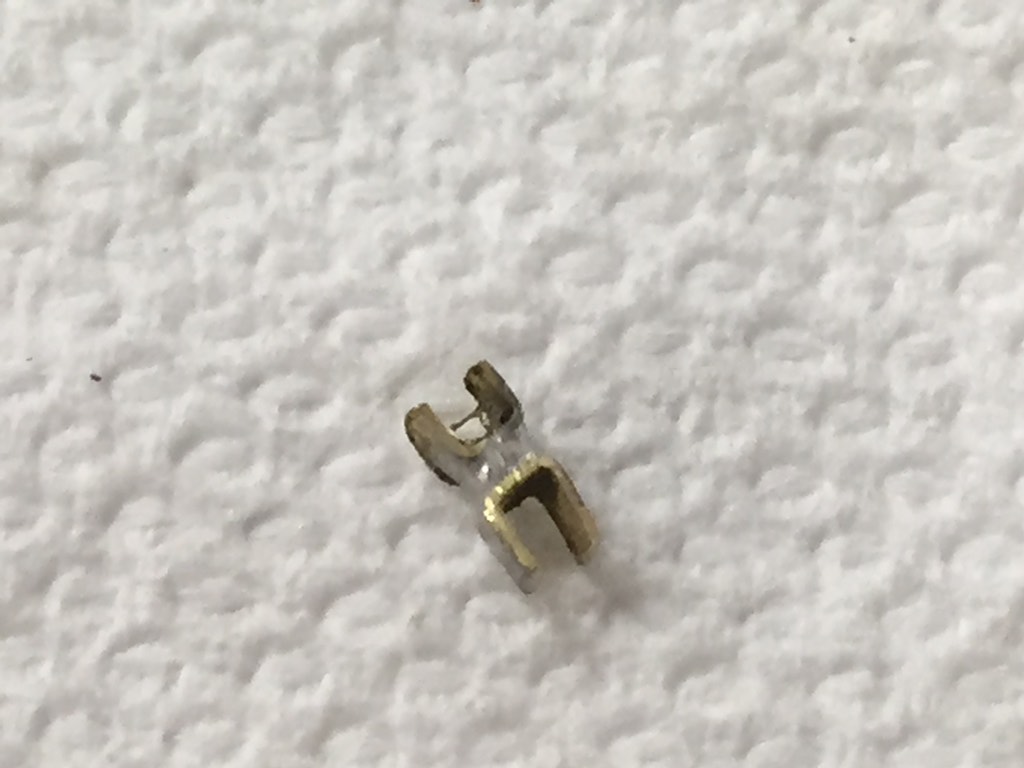
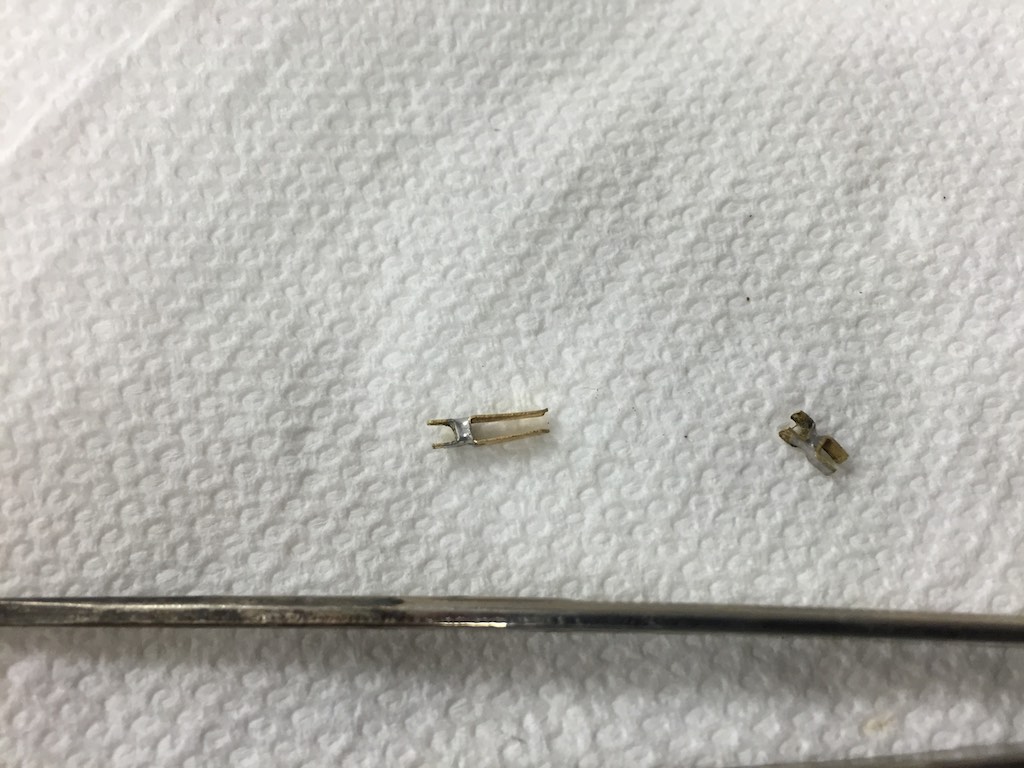
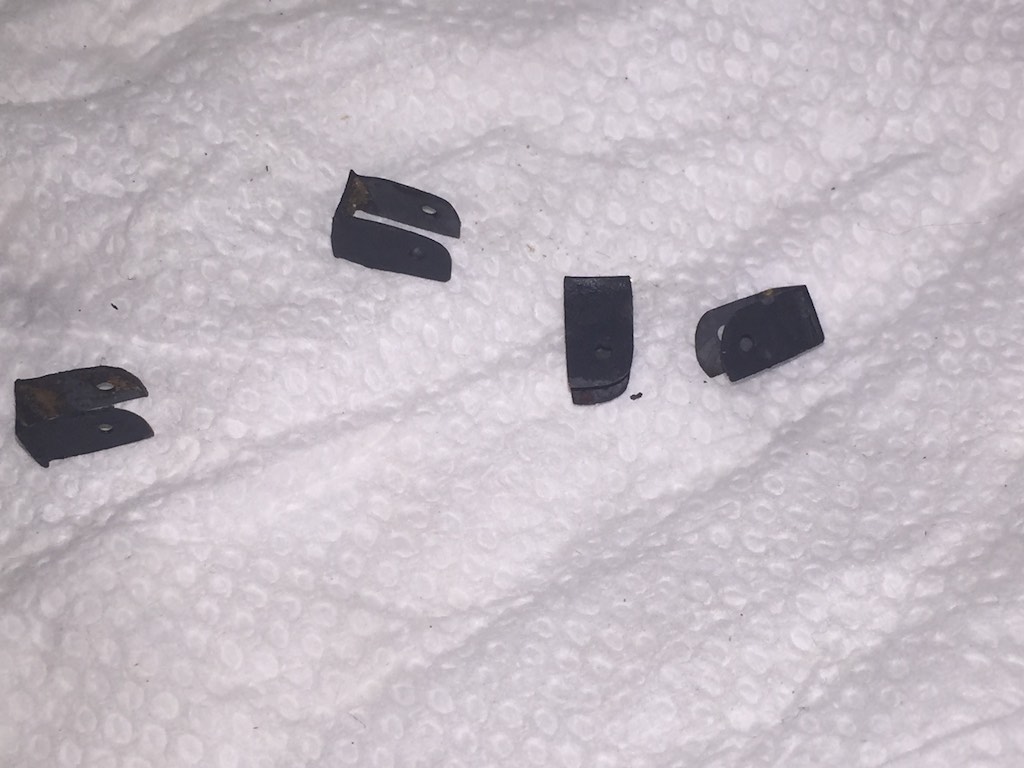
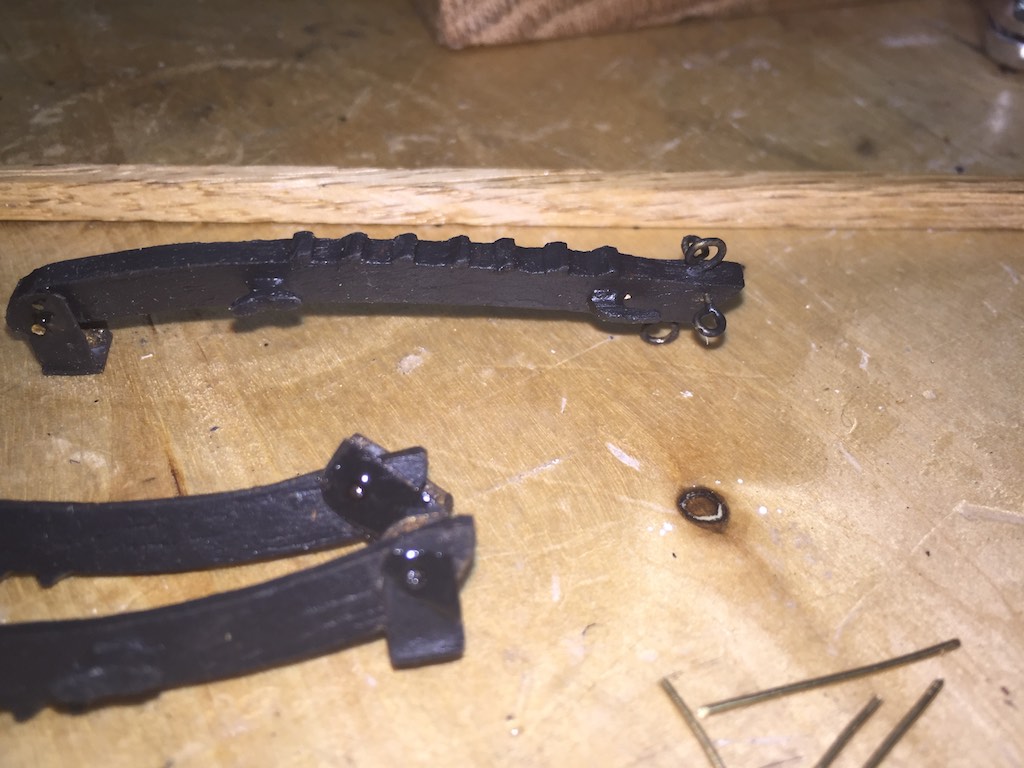
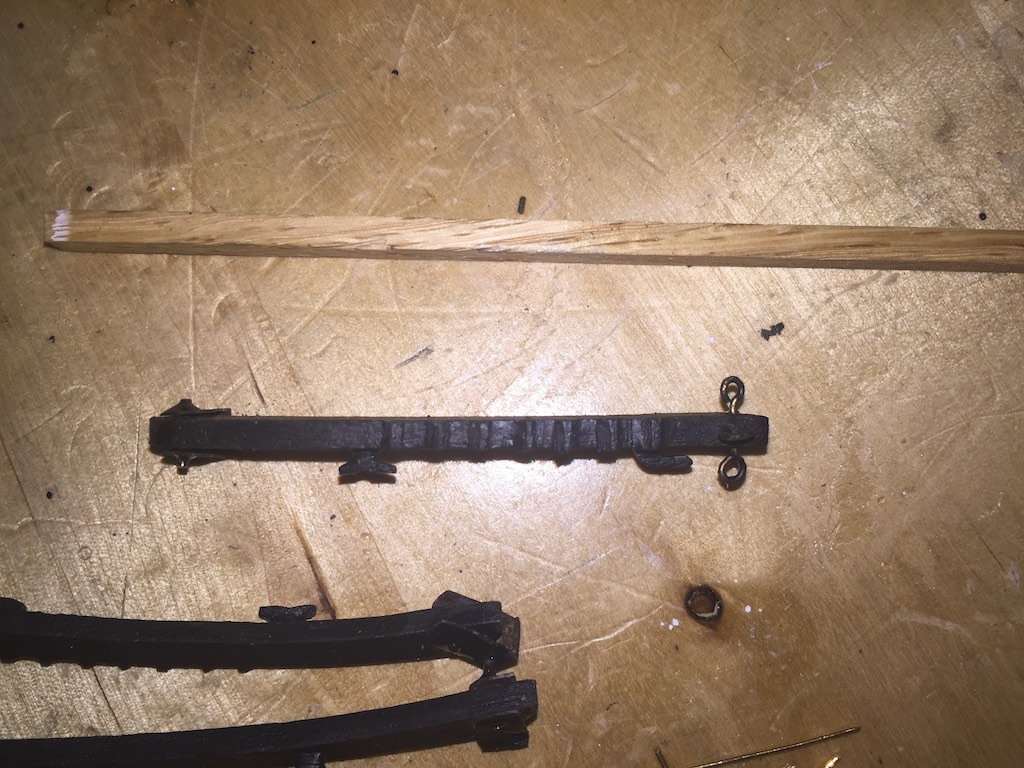
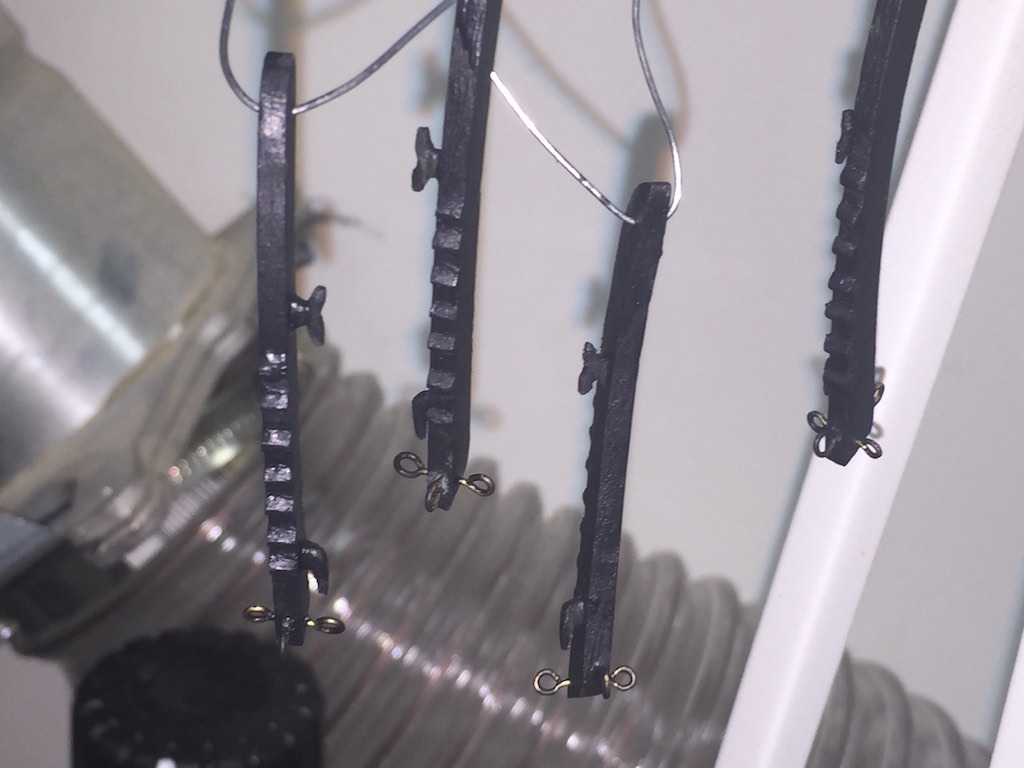
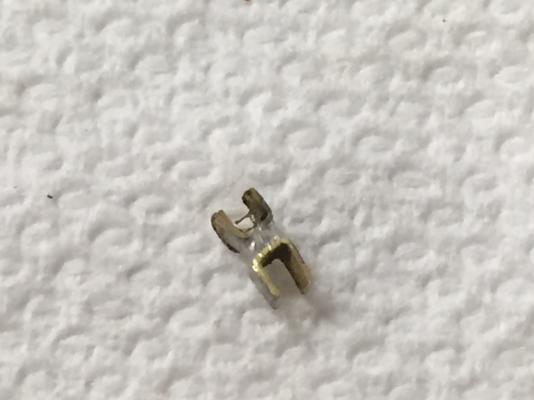
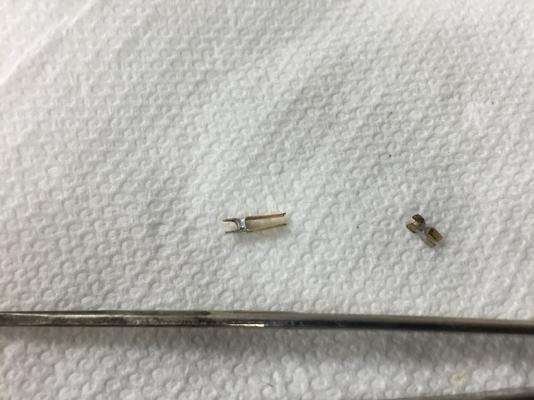
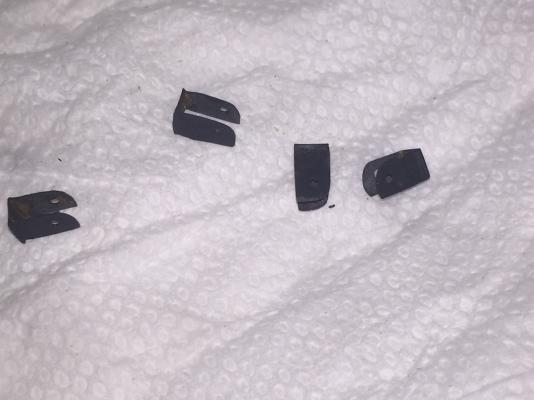
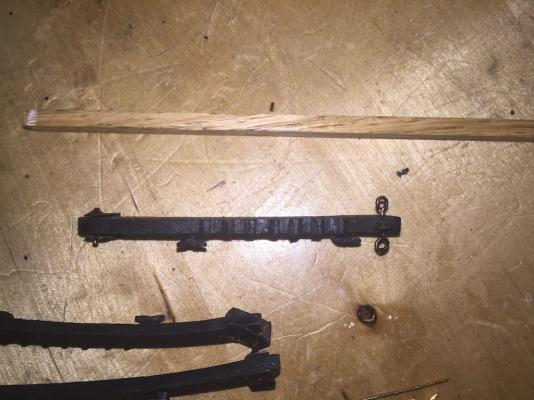
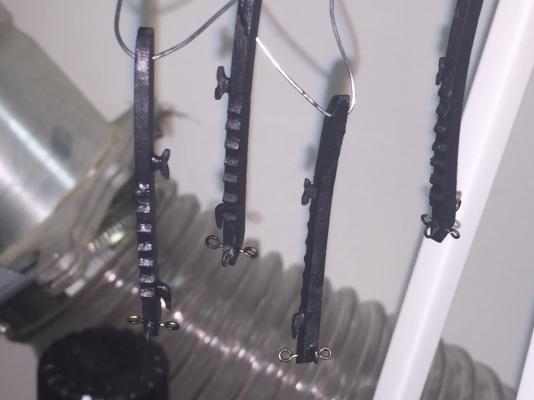
I spent the day fashioning the new davits. I cut the 4 davits out of a piece of mahogany I had and after shaping them to match each other I started fashioning the attachments to each. These were the stairs up the top, and the two cleats as well as 4 rings for the end. You can see in this first photo, the broken metal davit, davit and cleat blanks, two of the roughly assembled davits. To fashion the stairs I glued short lengths of a small square strip. These extended over each side of the davits. Once the glue dried, I sanded these flush to the side and reduced the height of them to the stair depth, then cut the angles for the treads. For the cleats I glued the strips together then did a rough shaping before gluing them to the blank. Once the glue dried, I did the final shaping of the cleats. To mount the davits I created brackets from brass sheets and soldered them together. Prior to soldering them I drilled the holes for the davit mounting pins. Once soldered I cleaned them up with a file and did the final shaping with needle nose pliers. I washed them all in acetone to remove the soldering oils, then stained them in a blackening solution. Once dry I also covered the sides with a light coat of the black paint to even the color. Then I inserted a pin through the brackets and davits and epoxied the pin ends on the brackets. Tomorrow I will mount the brackets to the ship. Instead of the are bar that the Mamoli plans have between each pair of davits, I plan on rigging a line per the AOS. This line mounts to rings forward and aft of the brackets along the same elevation as the brackets. Then it runs to the outboard rings of each davit. Another line mounts to the inboard rings of the davits and ties them together. This should create a firm frame. The upper rings will be rigged to a black set holding the entire assembly at the proper height. The full davit would have sheaves built into the end but given the scale, I decided to attach a double block to a ring underneath each of the davits. These will be rigged to single blocks with hooks to attach the ships boats to.


- 335 replies
-
- 10
-
-
- Constitution
- Mamoli
- (and 3 more)