robnbill
-
Posts
841 -
Joined
-
Last visited
Content Type
Profiles
Forums
Gallery
Events
Everything posted by robnbill
-
 Thanks. I have the luxury of a pretty well built out woodshop in my basement. I am really enjoying it now that I am retired and don't have to trek to DC everyday.
- 335 replies
-
- 2
-

-
- Constitution
- Mamoli
- (and 3 more)
-
I thought the same. In fact I tried putting it inside first just because I thought it made more sense. However, with the Mamoli brackets, the space inside ended up being way too small to put anything, much less the hammocks. However, the photos that JSGerson posted above from his recent trip to the Connie show the netting laced to the each of the outsides of the frame. THis was also haw the Mamoli plans showed it being done, but they certainly are not an authority. However, they are ships and the Connie's history, if nothing else, teaches us that almost everything was changed time and again based upon the times, and the captain's whim. What I know is based on your builds, however you do it, it will look beautiful!
- 732 replies
-
- 3
-
-
- constitution
- model shipways
- (and 1 more)
-
Jay, When I was getting ready to install my netting I reviewed tons of photos on how ships did this. The primary reason was I wanted to know if they should be installed inside or outside the stanchions. I ended up installing them on the outside. However, if you look at the photos above (which I did not have at the time), you can see the Connie's are outside.
- 732 replies
-
- 2
-
-
- constitution
- model shipways
- (and 1 more)
-
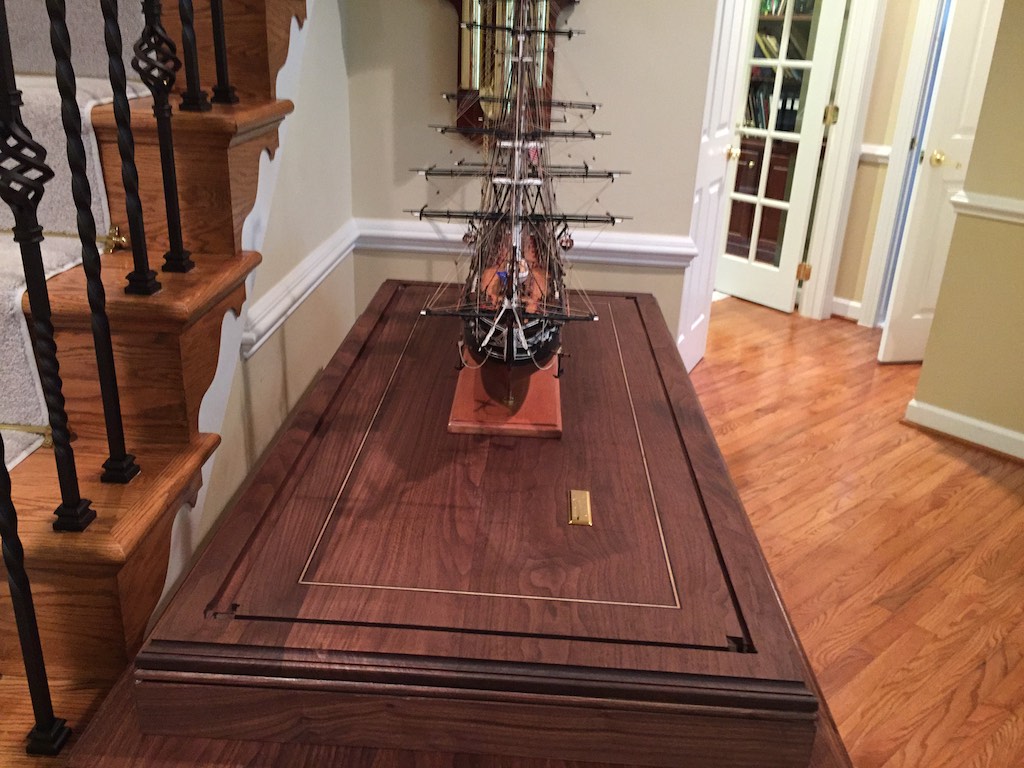
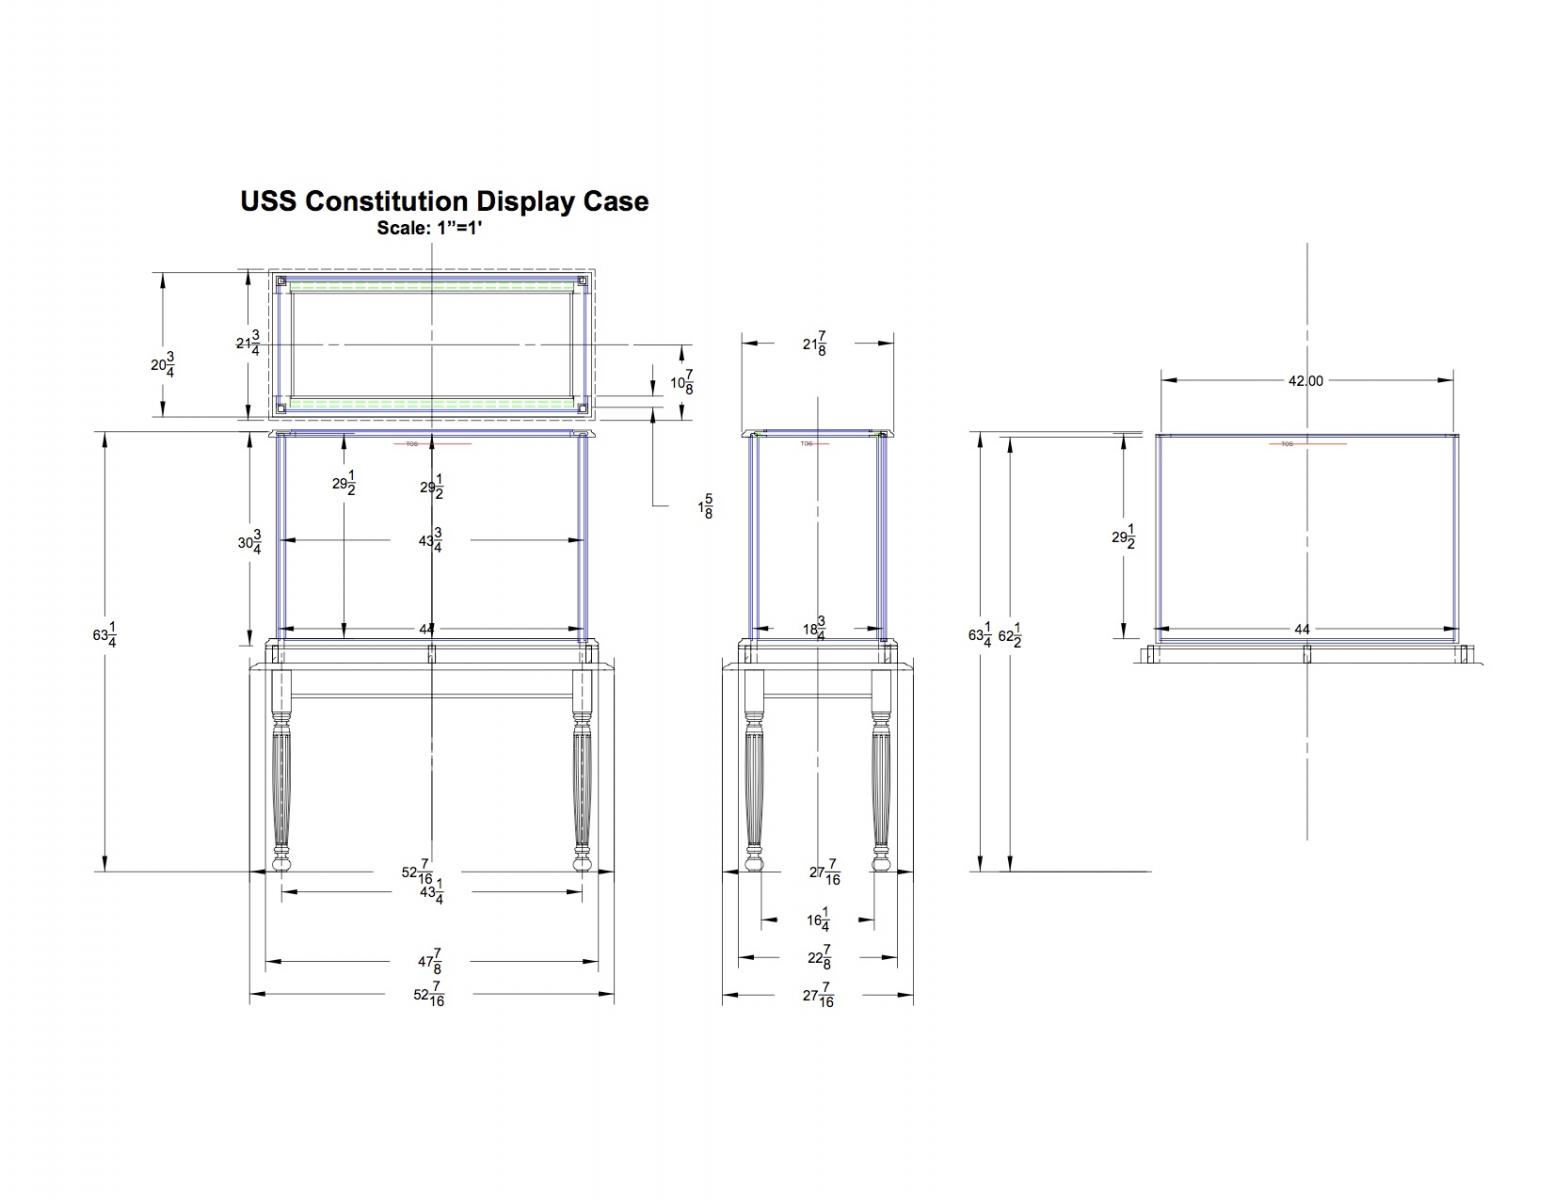
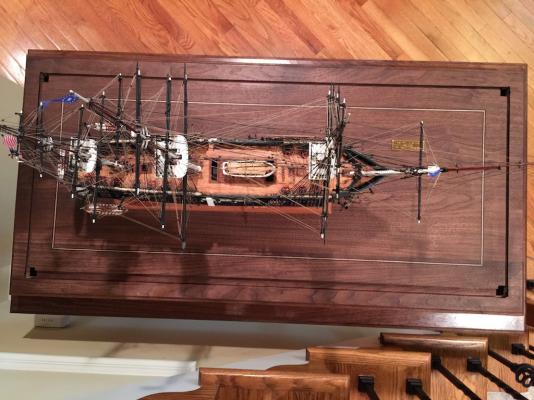
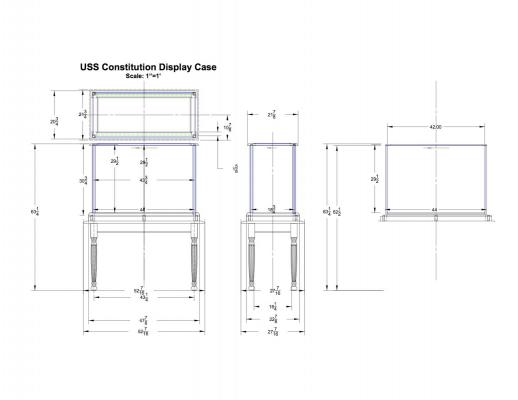
So I have completed the base of the case. It has all of the slots for the glass and the back routed into it. I also have the inlay completed on it. It looks a bit heavy but should not once the sides and top are on it. I have the corner stiles cut but not yet shaped. You can see on the base where the square holes are for the corners to be inserted into the base. These holes are ⅞" square. The corners will be 1 ⅜" square with the holes in the base being centered on the stiles. I designed it so there is no apparent frame around the bottom or top of the case. The glass sits in a slot on the base. I wanted it to feel more open when looking at the ship. While the base is stained it has no finish on it. I will finish it and the rest of the case at the same time. I needed to stain the base before I routed for the inlay. Here again are the plans for the completed case. You can see the routed slots for the glass and inlay in this photo. The thicker slot towards the bottom of the frame will be for the door frames to rest in. Once the door is in place the glass will look like the other sides in that the surrounding door frame will be no larger than the surrounds on the other sides. Since the glass is ¼ tempered, I will cut the small frame and glue it to the glass. My hope is the door will almost be invisible once it is in place. It should look just like the other sides. The name plate will actually be affixed to a hunk of the Real Connie. I just have it laying on the base right now. The inlay is a ¼" wide consisting of three stripes of equal size, black, white, black.
- 335 replies
-
- 11
-
-
- Constitution
- Mamoli
- (and 3 more)
-
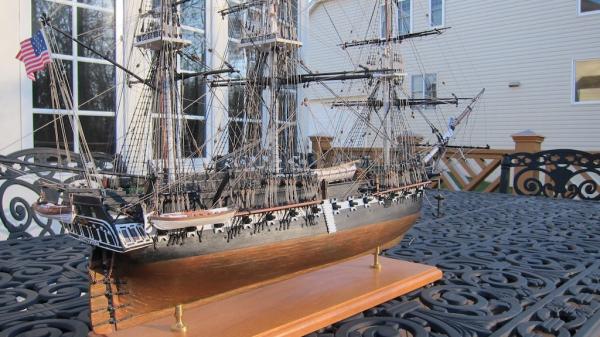
The Mamoli Connie has both the Fore and Main Studding sail booms attached to the side of the hull. There was no mizzen studding sail (at least on my plans). Here is a photo of mine with the studding sail booms in place.
- 732 replies
-
- 5
-
-
- constitution
- model shipways
- (and 1 more)
-
Has anyone got or used headband magnifiers?
robnbill replied to vossy's topic in Modeling tools and Workshop Equipment
I have a set and have used them a great deal. I also have magnifying lights, one on my workbench and one over my scroll saw. I used both extensively until I started rigging. As soon as my masts went on, I removed the one from the workbench and only used my headband magnifier. With the bench mounted magnifier I found it too easy to forget it had arms attached and sweep it accidentally across a spar or mast. It is easy to remove it since it just mounts in a hole I drilled into my bench. -
Renaissance wax for finish
robnbill replied to vaddoc's topic in Painting, finishing and weathering products and techniques
I use that wax on my cast iron workshop tables. I am also thinking about using it on my Connie's display case. I have liked it in the shop. Very hard wax. -
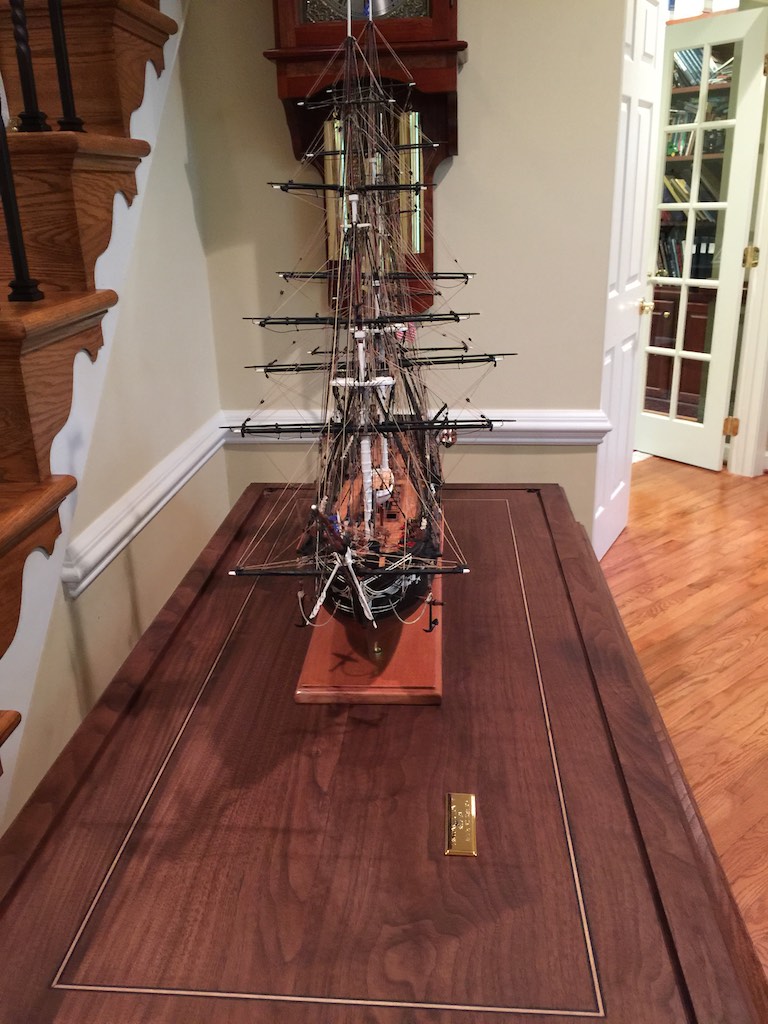
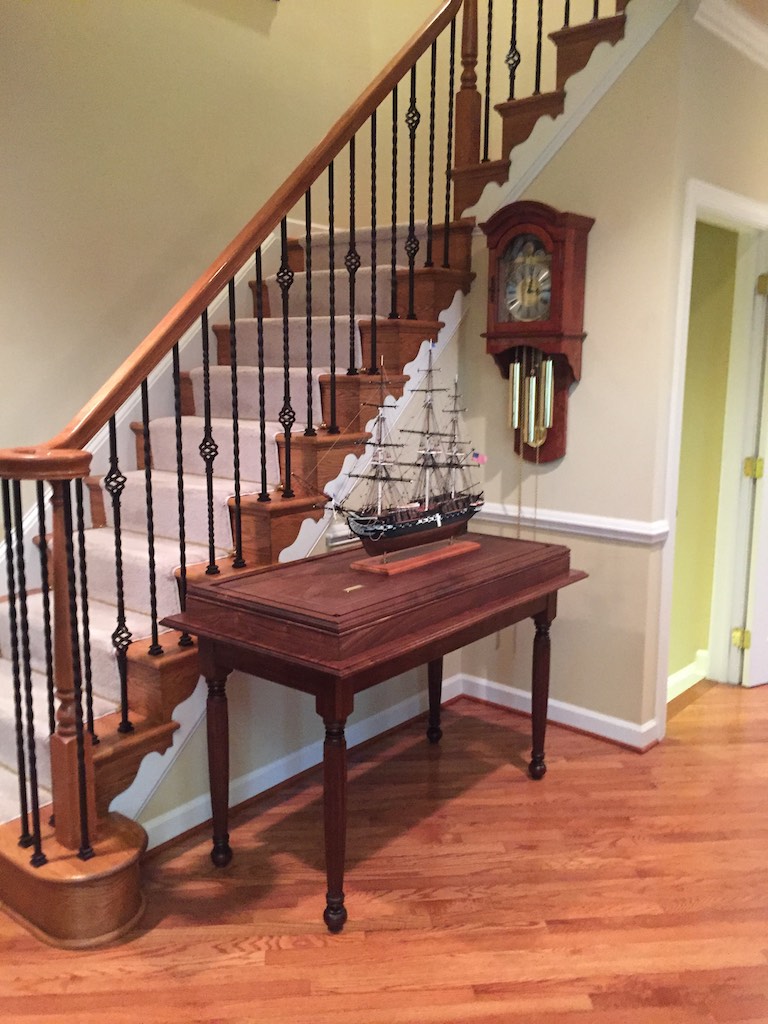
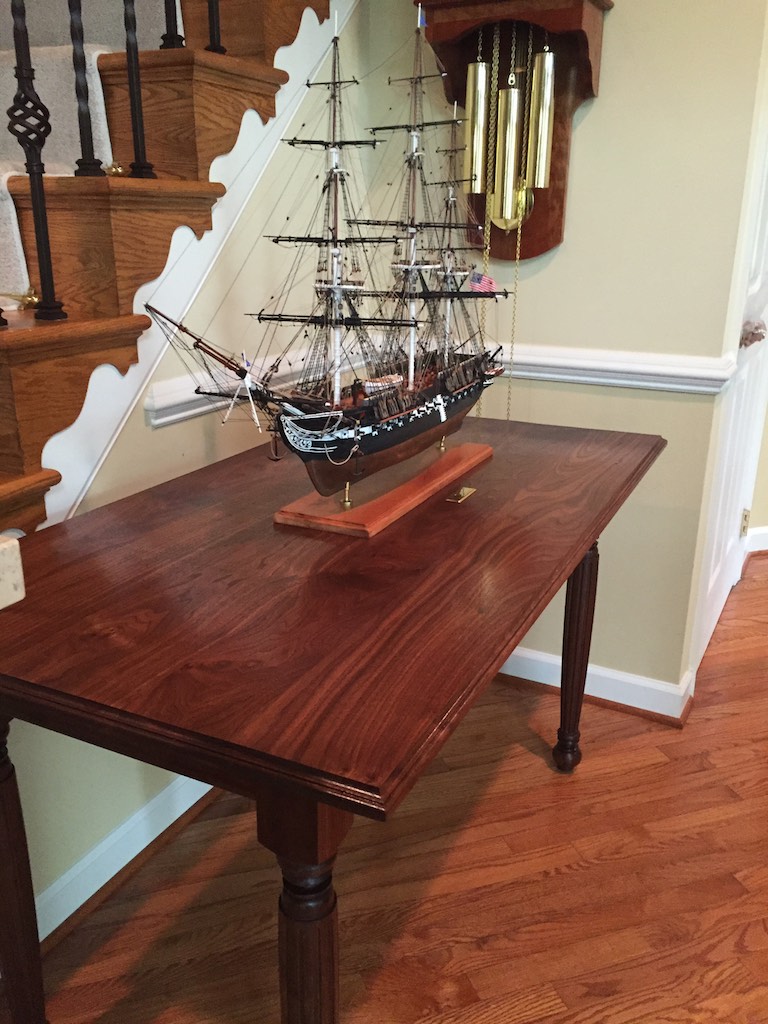
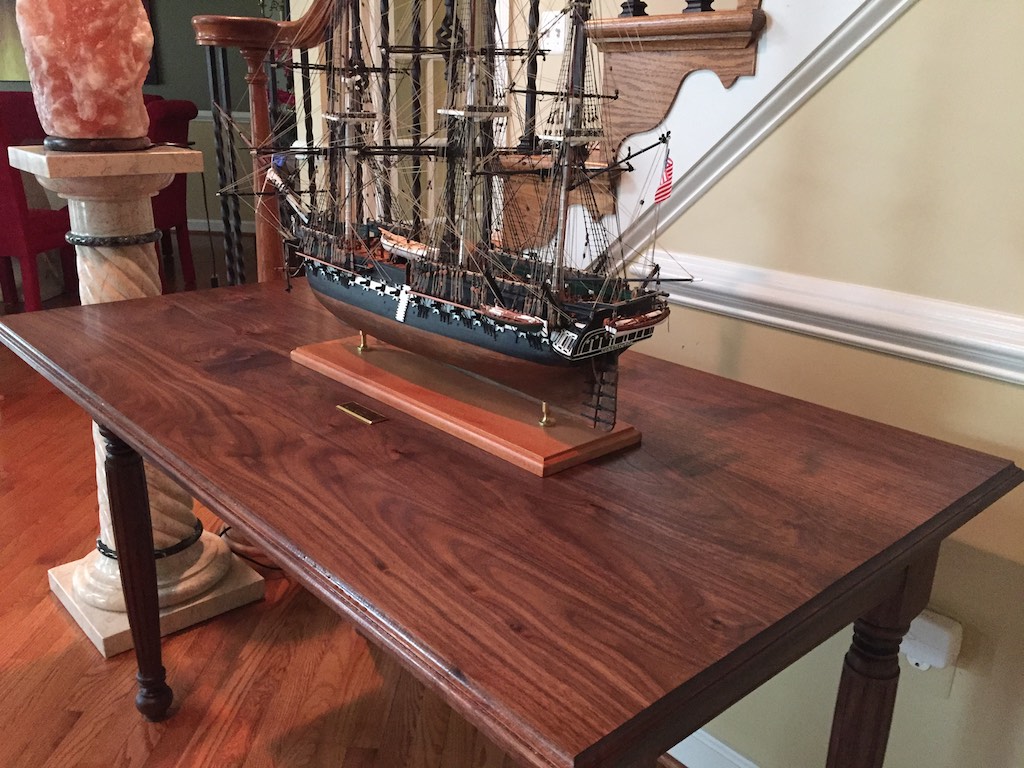
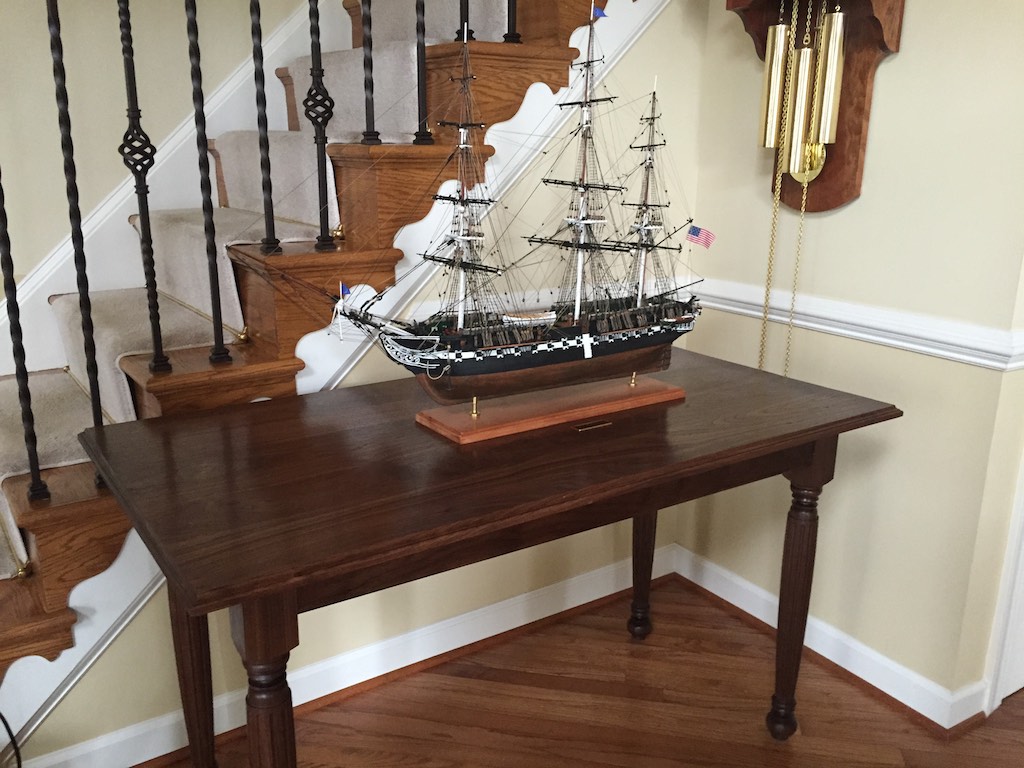
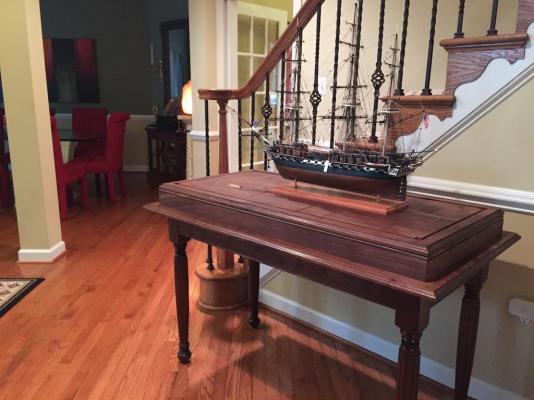
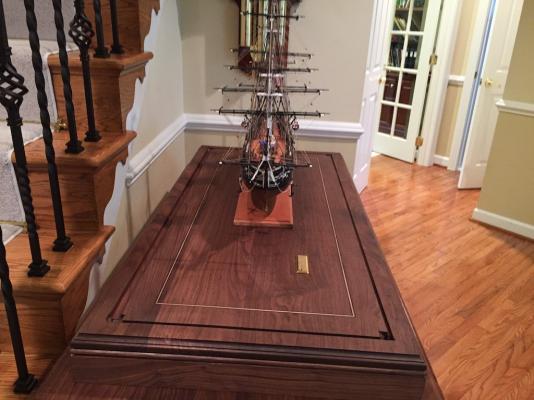
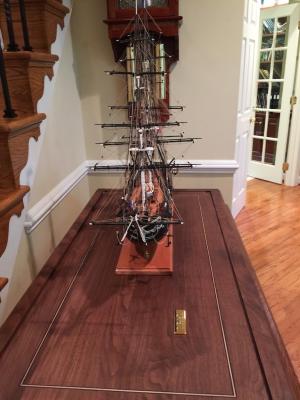
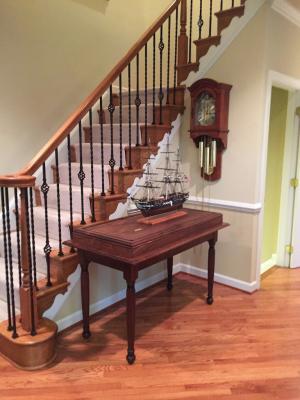
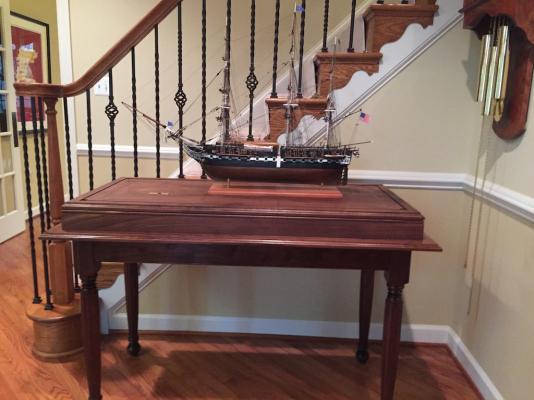
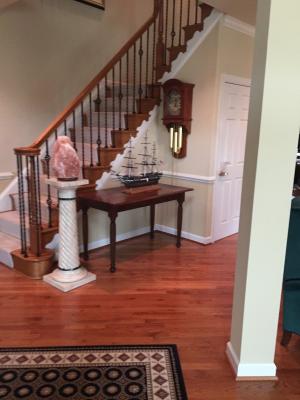
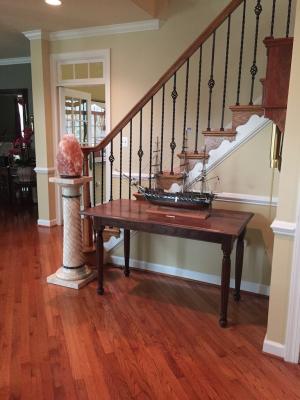
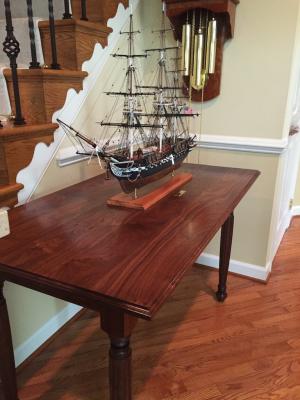
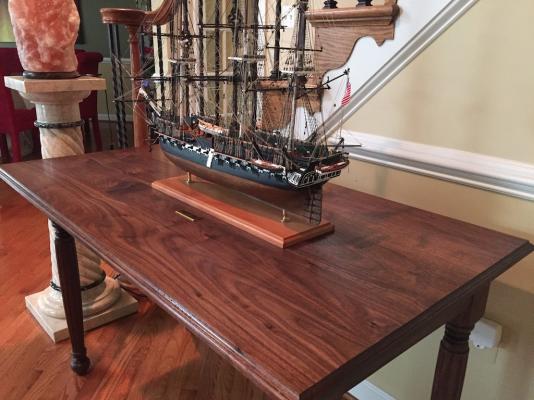
The table is done. I still have to actually screw the top to the base, but that will be easy. I placed the table where it is going to go today and tried the Connie out on it. As I expected the base that she is mounted to will definitely need to be changed. It does not go well with the walnut. While the table looks a bit bit, the base of the case will step in about 2" all around. We also need to move the column with the salt block somewhere else. So other than being better lit, much better protected and about 4 " higher, this will be the view of her in her new berth. Now to start on the case!

- 335 replies
-
- 12
-
-
- Constitution
- Mamoli
- (and 3 more)
-
Thanks George and Tom. I have to say I have fallen in love with the Sam Maloof finish. I know you can make your own if you have the time to experiment, but I opted just to buy the prepared finish and it goes on very well. One of the coolest things about the rub/wipe on finish is since you wipe it dry each time you apply it, there are no problems with dust sticking to the finish creating all the nubs. I like to finish in my shop and it is certainly not the clean room needed to apply delicate finishes. If it feels sticky after applying it, then you haven't rubbed it enough. For me, that is a lifesaver. Now I can't wait to get to the case proper!
- 335 replies
-
- 3
-
-
- Constitution
- Mamoli
- (and 3 more)
-
If you can get to all your pins to tie them that way it is great. I used the method a number of others on this site used. I would fish the end of the line through the appropriate belaying pin hole in top of the rail. Once I was satisfied with the line, checking where it ran down through the rigging and I could sufficiently tension it, I would put a small amount of Thick CA on the end of a belaying pin and push it down through the hole. This would lock the line into the rail. Once the glue was set, I would snip the line off as close as possible to the pin rail. Later I would come back and add the coils over the top of the belaying pin. These were made off ship and could be set so they looked good. Then I would loop these over the pin and glue the back of them to the rail. This was what worked for me. I tried loping the lines over the pins like they actually do on a ship, but I could not do it and make it look as good as the above method. Bill
- 1,756 replies
-
- 3
-
-
- constitution
- constructo
- (and 1 more)
-
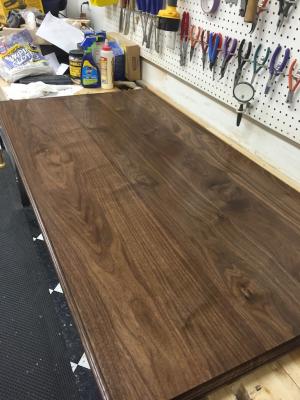
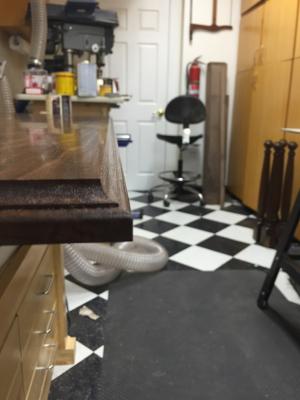
I have completed 4 coats of the Poly/Oil and will be starting the Oil/Wax tomorrow. I believe the finish recommend two coats (or more) of the Oil/Wax. We shall see. The Apron and Legs are also ready for the coats of Oil/Wax. Once the table has the requisite coats of finish, I will glue it up. Then I will start on the case itself. Doing it this way allowed me to test the finish I wanted before I started with the more complex joinery required by the case. I think I wil be ready to glue the table up by the weekend. Here are a couple photos of the table top. The finish is close to what it will be once the oil/wax is applied. It will be a bit deeper but doubtful the photos would show that.
- 335 replies
-
- 4
-
-
- Constitution
- Mamoli
- (and 3 more)
-
Nevertheless it is a wonderful model you are building.
-
I was tempted from time to time to pick this up since it is the same scale as my Connie. It would look great as a set, but I decided to move on to another boat. I will just live vicariously through your build.
-
Very cool. That will be a very interesting model. I will be following this with interest.
-
I too used the white primer and liked it.
-
Your model is looking great. Your extra detail really sets it off. Will you also be adding any of the ballast? Sorry if you have addressed and I missed it.
-
Tom it is coming together. That is always exciting. One thing I found to be very useful in touching up here or there for the brightwork were the stain pens available form Minwax. I used those for the small areas, or if i needed to touch up something. I found their red oak to be right for many of the things I needed.
- 1,354 replies
-
- 2
-
-
- constitution
- model shipways
- (and 1 more)
-
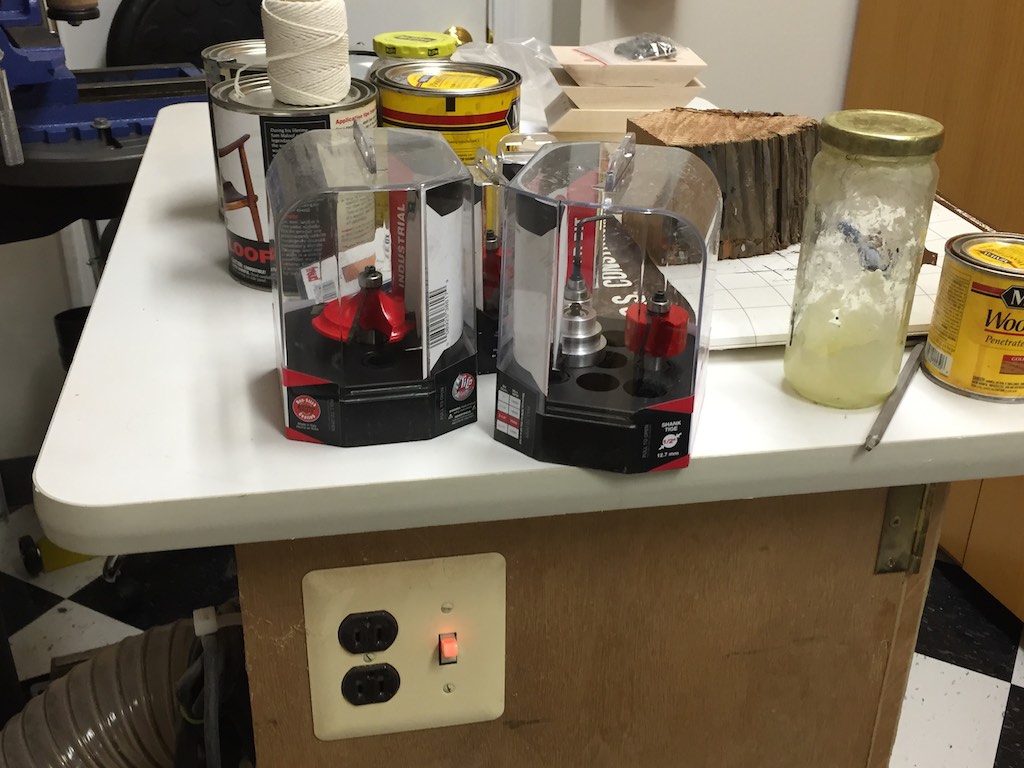
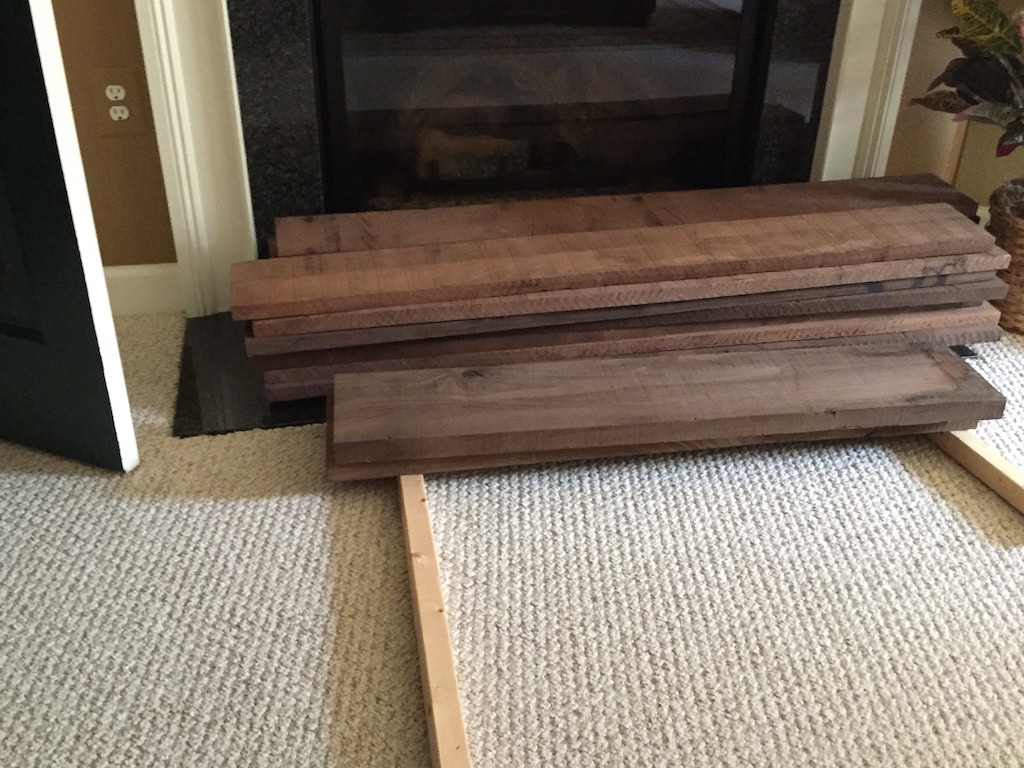
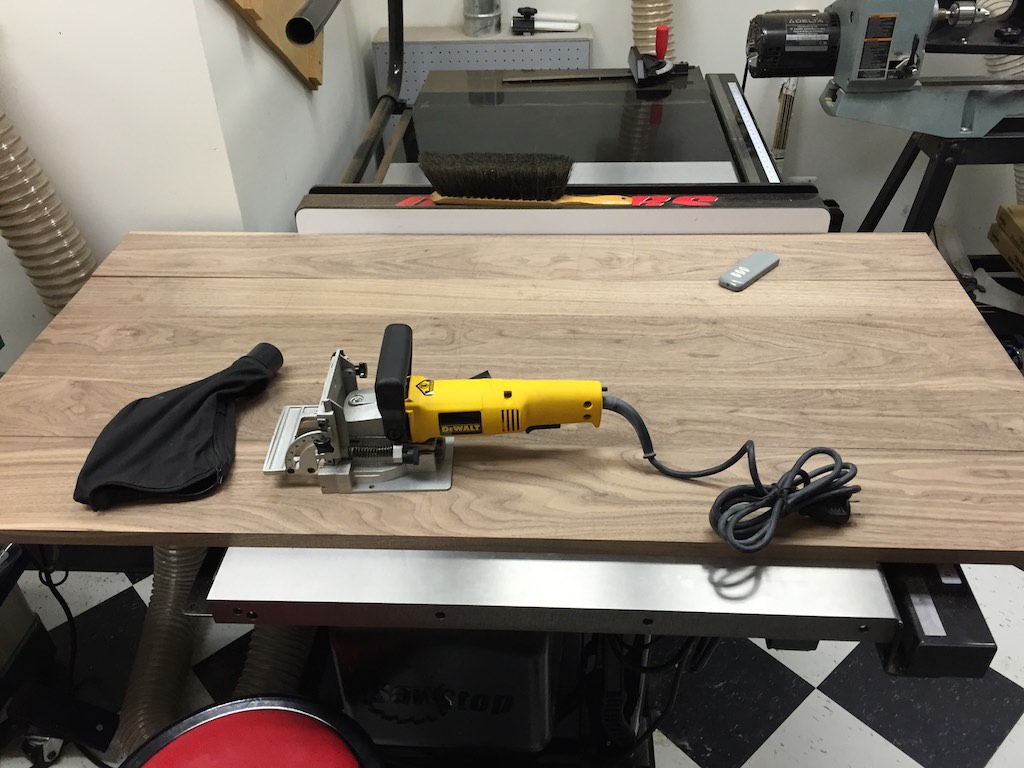
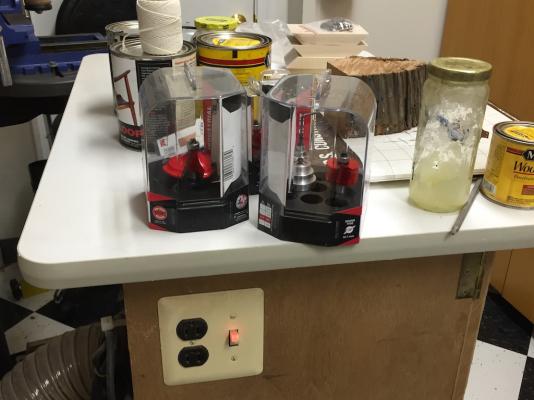
So I started the display case today. I milled all the rough walnut and started on the table top. They are cut to length and width and ready for cutting the biscuit slots and glue up tomorrow. The biscuits add very little strength to the joints, but they help massively in aligning and keeping the boards aligned during glue-up. My current plans are to glue the table top up then cut the profiles into it on the router table. Then it will be ready for sanding and finishing along with the rest of the table. I have attached photos of the milled boards along with the table top ready for the biscuit cutter (it is sitting on the top). The router table right now is being used for storage of the various bits and assorted ship making fittings. I need to move those into the cabinets. I just haven't gotten to that yet. TH4e chunk of wood in the background (on the table) is a part of a Connie Spar. I used pieces of this in the ship's boats and I will carve the stand for the name plate from it as well. The real Connie is permanently a part of my Connie. I still have to work out how to slot the corners for the LED lighting. I have a number of ideas such as deepening the slots for the glass, or possibly even drilling a hole though it. I will work that out. I have tested the LED lighting and can;t wait for it to shine on the model. I think it will really set it off. Anyway, I took a much needed night off for the National Symphony and the Tchaikovsky Violin Concerto. Here are before and after shots of the walnut. A photo of the top ready for biscuits and glue up. The new router bits waiting on their chance to bite into the walnut!.


- 335 replies
-
- 6
-
-
- Constitution
- Mamoli
- (and 3 more)
-
You might look at tablelegs.com for legs and aprons. They have many designs and have quite a few different woods you can get each one from. They were a delight to work with on my table and the product I received was fantastic. I decided to go with them since I wanted turned and fluted legs. While I probably could have done that, it would have taken a ling time and really is not my forte. There is a low iron type of glass that is optically transparent. I used ¼ tempered in mine. I ditched the hinged door to opt for a lift in. My plans are for it to be almost invisible once it is closed. It will be impossible to get the door off without using the suction handles on the glass. otherwise, no access! I raised the bottom of the platform because I wanted the line of sight to be higher since it will be displayed in our foyer so everyone will be standing when they look at it. So the base of the case will be 3 ½ inches above the table top with the table top being 30" off the floor. Raising the bottom of the case itself allows clear line of sight from the top of the mainmast to a viewer 5' from the case (5'8" to the eyes). I did not want anyone from having to duck to see the top.
-
Thanks Tim and Evan, It is quite a pile of wood. However, I just finished my cut list. It is amazing how fast it goes. Sam Maloof was (and still is) an icon in furniture making. I really like the way the finish goes on. There is a number of issues this technique covers. One the differences in tones with the sapwood common in Walnut, but also the shift in color towards yellow as it ages. I am looking forward to start making sawdust on a larger scale than what I have been working on over the last year. I will post photos as I make progress. Thanks for following my Connie on her journey.
- 335 replies
-
- 1
-
-
- Constitution
- Mamoli
- (and 3 more)
-
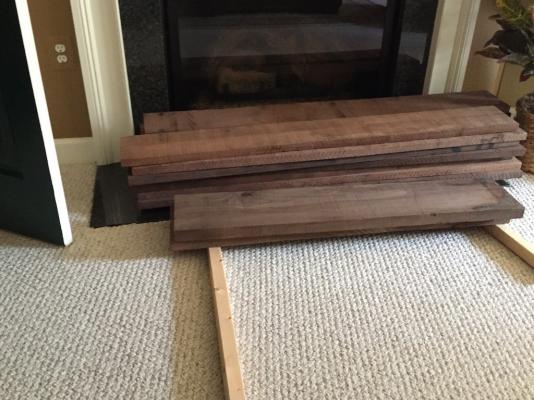
Woo Hoo! The wood is here for the display case. It is all stacked up in the club room outside the shop getting warm, although the wood supplier shop was indoors and not very cold. So progress is being made. First for the ship itself, I had followed the Mamoli instructions for attaching the flag to the main mast. This was simply gluing it to the mast. I relaly did not like that. I felt it did not rise to the level of the rest of the ship. So this morning I carefully cut the flag off and reglued it to the smallest line I had. I threaded this through a tiny single block I had left over from rigging the cannon. I attached the block to the top of the mast then threaded the flag halyard down through the fighting top and terminated it on the fife rail. I added another small coil of line to the rail where it terminated. I like this better. The case is being made from solid walnut. I decided to stain the walnut to bring out the grain and also to equalize the wood tone across the various pieces since they are coming from different sources. The table legs and apron were already sanded to 220. So for these wiped them with water to raise any grain, the sanded them smooth with a fine sanding sponge. Then I stained them. After the stain dried I started to apply the finish. I decided to use the Sam Maloof finish on the case. The aprons were wiped with the poly/oil liberally, then sanded it in with 320 grits wet/dry paper. For the legs I just wiped it on. This is a rubbed finish that is wiped on, let soak in a few minutes, then buffed till dry. Then is rested over night and another coat is put on until four or so coats are one and you like the finish. I will continue to apply the finish with sand paper progressing through 0000 steel wool for burnishing. These are very thin coats that build on the wood to provide a real depth in the finish while still being a "Close to the Wood" finish. Once four coats are applied, then a few coats of poly/wax are applied in the same manner. Since this is a very thin finish, I can apply it to the various pieces before they are all assembled. Here is a photo of the new walnut waiting for milling and shaping. I will let it acclimatize a few days before I start working on them.
- 335 replies
-
- 3
-
-
- Constitution
- Mamoli
- (and 3 more)
-
I used Jay's process when making my replacement flags for the Connie. They worked really well. I printed them on the transfer paper then ironed them to the lightest cotton I could get. Worked like a charm! Once they were made, I soaked them in a thinned mix of PVA glue and dried them on aluminum foil shaped in the waving pattern I was looking for.
-
Rich, Mort recommended this to me along with the AOS. This is a step by step guide with really clear illustrations on the rigging. I think it you would find it very useful in regards to the sails and how the other rigging inter-reacts. Unlike the AOS, this is a general book on how the period ships were rigged so it has a wider applicability but also less specificity than the AOS. Rigging Period Ship Models: A Step-by-Step Guide to the Intracacies of Square-Rig Hardcover – November, 2000 by Lennarth Peterson (Author) Bill
- 1,756 replies
-
- 3
-
-
- constitution
- constructo
- (and 1 more)
-
Sequence of Rigging and Attaching Sails to Yardarms
robnbill replied to fxitgood's topic in Masting, rigging and sails
You and Rich (Hipexec) are building the same model. I just finished the Mamoli version. Most people here are building the Model Shipways version. However, if you follow the logs you will see that everyone has a slightly different take on how they like to do the rigging. I would read the logs and see which way you want to do it. There are also a number of good books on the subject. Tadeuz listed most of them. I would also add "The 44-Gun Frigate USS Constitution, "Old Ironsides" (Anatomy of the Ship)" by Karl Heinz Marquardt. There are a number of mistakes and inconsistencies in the AOS but it makes a good reference point along with all the other references on the ship. Of course the Navy site and the museum website are also great sources of information. She is a fun ship with a great history and the first one that I really rigged. Luckily for me the Mamoli plans walked me step by step through most of it.